Embed Size (px)
Citation preview
crypto isakmp aggressive-mode disable
SEC-635April 2011
crypto isakmp aggressive-mode disableTo block all Internet Security Association and Key Management Protocol (ISAKMP) aggressive mode requests to and from a device, use the crypto isakmp aggressive-mode disable command in global configuration mode. To disable the blocking, use the no form of this command.
crypto isakmp aggressive-mode disable
no crypto isakmp aggressive-mode disable
Syntax Description This command has no arguments or keywords.
Defaults If this command is not configured, Cisco IOS software will attempt to process all incoming ISAKMP aggressive mode security association (SA) connections. In addition, if the device has been configured with the crypto isakmp peer address and the set aggressive-mode password or set aggressive-mode client-endpoint commands, the device will initiate aggressive mode if this command is not configured.
Command Modes Global configuration
Command History
Usage Guidelines If you configure this command, all aggressive mode requests to the device and all aggressive mode requests made by the device are blocked, regardless of the ISAKMP authentication type (preshared keys or Rivest, Shamir, and Adelman [RSA] signatures).
If a request is made by or to the device for aggressive mode, the following syslog notification is sent:
Unable to initiate or respond to Aggressive Mode while disabled
Note This command will prevent Easy Virtual Private Network (Easy VPN) clients from connecting if they are using preshared keys because Easy VPN clients (hardware and software) use aggressive mode.
Examples The following example shows that all aggressive mode requests to and from a device are blocked:
Router (config)# crypto isakmp aggressive-mode disable
Release Modification
12.3(1) This command was introduced on all Cisco IOS platforms that support IP Security (IPSec).
crypto isakmp client configuration address-pool local
SEC-636April 2011
crypto isakmp client configuration address-pool localTo configure the IP address local pool to reference Internet Key Exchange (IKE) on your router, use the crypto isakmp client configuration address-pool local command in global configuration mode. To restore the default value, use the no form of this command.
crypto isakmp client configuration address-pool local pool-name
no crypto isakmp client configuration address-pool local
Syntax Description
Defaults IP address local pools do not reference IKE.
Command Modes Global configuration
Command History
Examples The following example references IP address local pools to IKE on your router, with “ire” as the pool-name:
crypto isakmp client configuration address-pool local ire
Related Commands
pool-name Specifies the name of a local address pool.
Release Modification
12.0(4)XE This command was introduced.
12.0(7)T This command was integrated into Cisco IOS release 12.0(7)T.
12.2(33)SRA This command was integrated into Cisco IOS Release 12.2(33)SRA.
12.2SX This command is supported in the Cisco IOS Release 12.2SX train. Support in a specific 12.2SX release of this train depends on your feature set, platform, and platform hardware.
Command Description
ip local pool Configures a local pool of IP addresses to be used when a remote peer connects to a point-to-point interface.
crypto isakmp client configuration browser-proxy
SEC-637April 2011
crypto isakmp client configuration browser-proxyTo configure browser-proxy parameters for an Easy VPN remote device and to enter ISAKMP browser proxy configuration mode, use the crypto isakmp client configuration browser-proxy command in global configuration mode. To disable the browser-proxy parameters, use the no form of this command.
crypto isakmp client configuration browser-proxy {browser-proxy-name}
no crypto isakmp client configuration browser-proxy {browser-proxy-name}
Syntax Description
Command Default Browser-proxy parameters are not set.
Command Modes Global configuration (config)
Command History
Usage Guidelines While specifying the proxy server, the proxy IP address and port number are separated with a colon. The proxy exception list is a semicolon-delimited string of IP addresses.
After enabling this command, you may specify the following subcommand:
• proxy—Configures proxy parameters for your Easy VPN remote device (see the proxy command for more information about this command and the acceptable parameters).
Examples The following example shows various browser-proxy parameter settings for a browser proxy named “bproxy”:
crypto isakmp client configuration browser-proxy bproxyproxy auto-detect
crypto isakmp client configuration browser-proxy bproxyproxy none
crypto isakmp client configuration browser-proxy bproxyproxy server 10.1.1.1:2000proxy exception-list 10.2.2.*,www.*orgproxy by-pass-local
browser-proxy-name Name of the browser proxy.
Release Modification
12.4(2)T This command was introduced.
12.2(33)SRA This command was integrated into Cisco IOS Release 12.2(33)SRA.
12.2SX This command is supported in the Cisco IOS 12.2SX family of releases. Support in a specific 12.2SX release is dependent on your feature set, platform, and platform hardware.

crypto isakmp client configuration browser-proxy
SEC-638April 2011
Related Commands Command Description
proxy Configures proxy parameters for an Easy VPN remote device.
crypto isakmp client configuration group
SEC-639April 2011
crypto isakmp client configuration groupTo specify to which group a policy profile will be defined and to enter crypto ISAKMP group configuration mode, use the crypto isakmp client configuration group command in global configuration mode. To remove this command and all associated subcommands from your configuration, use the no form of this command.
crypto isakmp client configuration group {group-name | default}
no crypto isakmp client configuration group
Syntax Description
Defaults No default behavior or values
Command Modes Global configuration (config)
Command History
Usage Guidelines Use the crypto isakmp client configuration group command to specify group policy information that needs to be defined or changed. You may wish to change the group policy on your router if you decide to connect to the client using a group ID that does not match the group-name argument.
group-name Group definition that identifies which policy is enforced for users.
default Policy that is enforced for all users who do not offer a group name that matches a group-name argument. The default keyword can only be configured locally.
Release Modification
12.2(8)T This command was introduced.
12.3(2)T The access-restrict, firewall are-u-there, group-lock, include-local-lan, and save-password commands were added. These commands are added during Mode Configuration. In addition, this command was modified so that output for this command will show that the preshared key is either encrypted or unencrypted.
12.3(4)T The backup-gateway, max-logins, max-users, and pfs commands were added.
12.2(18)SXD This command was integrated into Cisco IOS Release 12.2(18)SXD.
12.4(2)T The browser-proxy command was added.
12.4(6)T The firewall policy command was added.
12.2(33)SRA This command was integrated into Cisco IOS Release 12.2(33)SRA.
12.4(9)T The crypto aaa attribute list, dhcp server, and dhcp timeout commands were added.
12.4(11)T The dhcp giaddr command was added.
crypto isakmp client configuration group
SEC-640April 2011
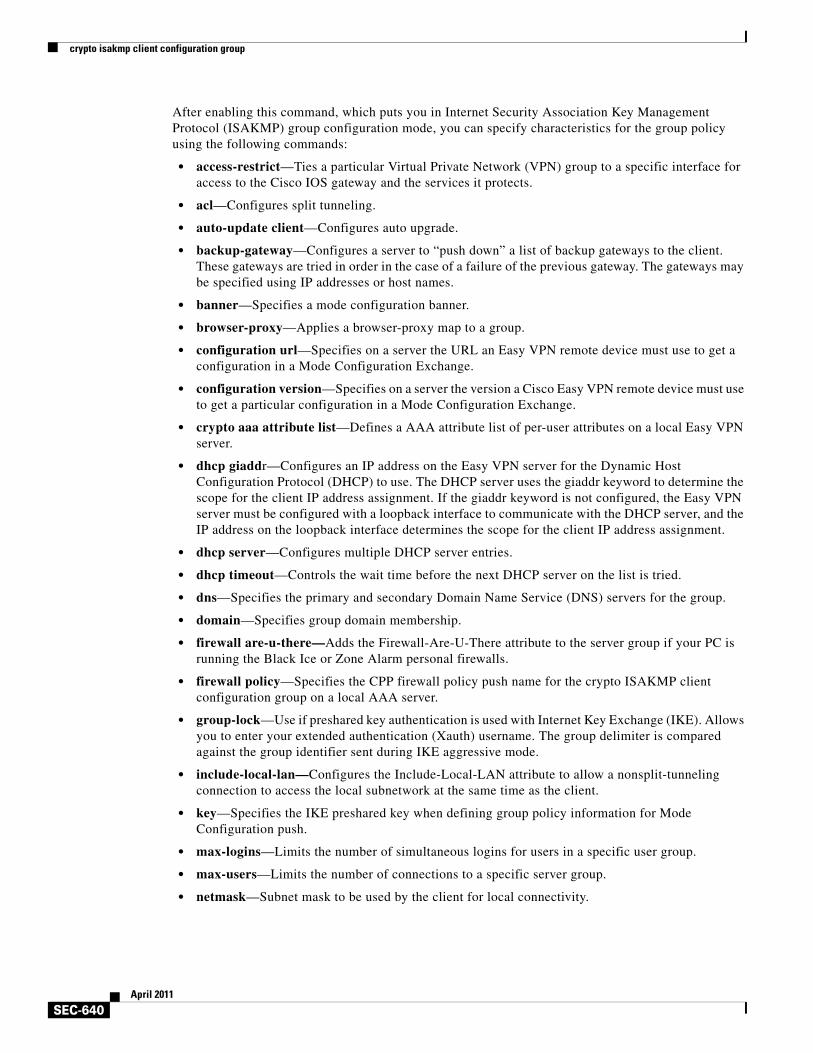
After enabling this command, which puts you in Internet Security Association Key Management Protocol (ISAKMP) group configuration mode, you can specify characteristics for the group policy using the following commands:
• access-restrict—Ties a particular Virtual Private Network (VPN) group to a specific interface for access to the Cisco IOS gateway and the services it protects.
• acl—Configures split tunneling.
• auto-update client—Configures auto upgrade.
• backup-gateway—Configures a server to “push down” a list of backup gateways to the client. These gateways are tried in order in the case of a failure of the previous gateway. The gateways may be specified using IP addresses or host names.
• banner—Specifies a mode configuration banner.
• browser-proxy—Applies a browser-proxy map to a group.
• configuration url—Specifies on a server the URL an Easy VPN remote device must use to get a configuration in a Mode Configuration Exchange.
• configuration version—Specifies on a server the version a Cisco Easy VPN remote device must use to get a particular configuration in a Mode Configuration Exchange.
• crypto aaa attribute list—Defines a AAA attribute list of per-user attributes on a local Easy VPN server.
• dhcp giaddr—Configures an IP address on the Easy VPN server for the Dynamic Host Configuration Protocol (DHCP) to use. The DHCP server uses the giaddr keyword to determine the scope for the client IP address assignment. If the giaddr keyword is not configured, the Easy VPN server must be configured with a loopback interface to communicate with the DHCP server, and the IP address on the loopback interface determines the scope for the client IP address assignment.
• dhcp server—Configures multiple DHCP server entries.
• dhcp timeout—Controls the wait time before the next DHCP server on the list is tried.
• dns—Specifies the primary and secondary Domain Name Service (DNS) servers for the group.
• domain—Specifies group domain membership.
• firewall are-u-there—Adds the Firewall-Are-U-There attribute to the server group if your PC is running the Black Ice or Zone Alarm personal firewalls.
• firewall policy—Specifies the CPP firewall policy push name for the crypto ISAKMP client configuration group on a local AAA server.
• group-lock—Use if preshared key authentication is used with Internet Key Exchange (IKE). Allows you to enter your extended authentication (Xauth) username. The group delimiter is compared against the group identifier sent during IKE aggressive mode.
• include-local-lan—Configures the Include-Local-LAN attribute to allow a nonsplit-tunneling connection to access the local subnetwork at the same time as the client.
• key—Specifies the IKE preshared key when defining group policy information for Mode Configuration push.
• max-logins—Limits the number of simultaneous logins for users in a specific user group.
• max-users—Limits the number of connections to a specific server group.
• netmask—Subnet mask to be used by the client for local connectivity.

crypto isakmp client configuration group
SEC-641April 2011
• pfs—Configures a server to notify the client of the central-site policy regarding whether PFS is required for any IPsec SA. Because the client device does not have a user interface option to enable or disable PFS negotiation, the server will notify the client device of the central site policy via this parameter. The Diffie-Hellman (D-H) group that is proposed for PFS will be the same that was negotiated in Phase 1 of the IKE negotiation.
• pool—Refers to the IP local pool address used to allocate internal IP addresses to clients.
• save-password—Saves your Xauth password locally on your PC.
• split-dns—Specifies a list of domain names that must be tunneled or resolved to the private network.
• wins—Specifies the primary and secondary Windows Internet Naming Service (WINS) servers for the group.
Output for the crypto isakmp client configuration group command (using the key subcommand) will show that the preshared key is either encrypted or unencrypted. An output example for an unencrypted preshared key would be as follows:
crypto isakmp client configuration group key test
An output example for a type 6 encrypted preshared key would be as follows:
crypto isakmp client configuration group
key 6 JK_JHZPeJV_XFZTKCQFYAAB
Session Monitoring and Limiting for Easy VPN Clients
It is possible to mimic the functionality provided by some RADIUS servers for limiting the number of connections to a specific server group and also for limiting the number of simultaneous logins for users in that group.
To limit the number of connections to a specific server group, use the max-users subcommand. To limit the number of simultaneous logins for users in the server group, use the max-logins subcommand.
The following example shows the RADIUS attribute-value (AV) pairs for the maximum users and maximum logins parameters:
ipsec:max-users=1000ipsec:max-logins=1
The max-users and max-logins commands can be enabled together or individually to control the usage of resources by any groups or individuals.
If you use a RADIUS server, such as a CiscoSecure access control server (ACS), it is recommended that you enable this session control on the RADIUS server if the functionality is provided. In this way, usage can be controlled across a number of servers by one central repository. When enabling this feature on the router itself, only connections to groups on that specific device are monitored, and load-sharing scenarios are not accurately accounted for.
Examples The following example shows how to define group policy information for Mode Configuration push. In this example, the first group name is “cisco” and the second group name is “default.” Thus, the default policy will be enforced for all users who do not offer a group name that matches “cisco.”
crypto isakmp client configuration group cisco key cisco dns 10.2.2.2 10.2.2.3 wins 10.6.6.6 domain cisco.com pool fred acl 199
crypto isakmp client configuration group
SEC-642April 2011
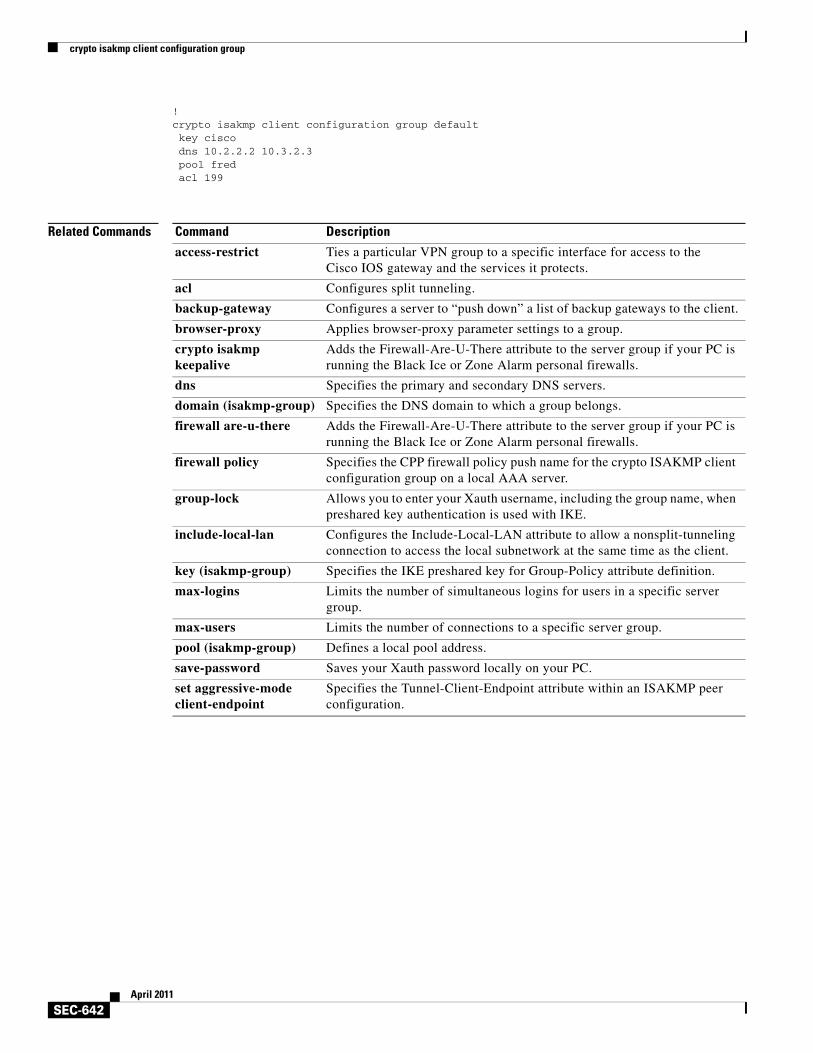
!crypto isakmp client configuration group default key cisco dns 10.2.2.2 10.3.2.3 pool fred acl 199
Related Commands Command Description
access-restrict Ties a particular VPN group to a specific interface for access to the Cisco IOS gateway and the services it protects.
acl Configures split tunneling.
backup-gateway Configures a server to “push down” a list of backup gateways to the client.
browser-proxy Applies browser-proxy parameter settings to a group.
crypto isakmp keepalive
Adds the Firewall-Are-U-There attribute to the server group if your PC is running the Black Ice or Zone Alarm personal firewalls.
dns Specifies the primary and secondary DNS servers.
domain (isakmp-group) Specifies the DNS domain to which a group belongs.
firewall are-u-there Adds the Firewall-Are-U-There attribute to the server group if your PC is running the Black Ice or Zone Alarm personal firewalls.
firewall policy Specifies the CPP firewall policy push name for the crypto ISAKMP client configuration group on a local AAA server.
group-lock Allows you to enter your Xauth username, including the group name, when preshared key authentication is used with IKE.
include-local-lan Configures the Include-Local-LAN attribute to allow a nonsplit-tunneling connection to access the local subnetwork at the same time as the client.
key (isakmp-group) Specifies the IKE preshared key for Group-Policy attribute definition.
max-logins Limits the number of simultaneous logins for users in a specific server group.
max-users Limits the number of connections to a specific server group.
pool (isakmp-group) Defines a local pool address.
save-password Saves your Xauth password locally on your PC.
set aggressive-mode client-endpoint
Specifies the Tunnel-Client-Endpoint attribute within an ISAKMP peer configuration.
crypto isakmp client firewall
SEC-643April 2011
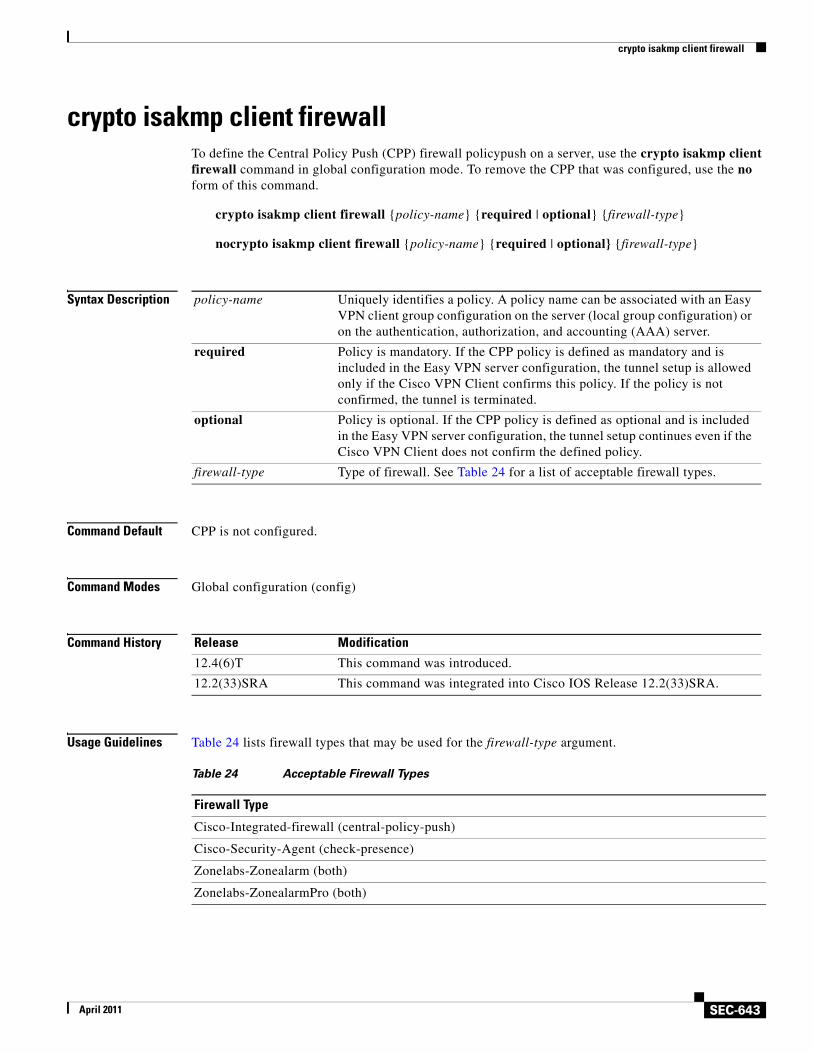
crypto isakmp client firewallTo define the Central Policy Push (CPP) firewall policypush on a server, use the crypto isakmp client firewall command in global configuration mode. To remove the CPP that was configured, use the no form of this command.
crypto isakmp client firewall {policy-name} {required | optional} {firewall-type}
nocrypto isakmp client firewall {policy-name} {required | optional} {firewall-type}
Syntax Description
Command Default CPP is not configured.
Command Modes Global configuration (config)
Command History
Usage Guidelines Table 24 lists firewall types that may be used for the firewall-type argument.
policy-name Uniquely identifies a policy. A policy name can be associated with an Easy VPN client group configuration on the server (local group configuration) or on the authentication, authorization, and accounting (AAA) server.
required Policy is mandatory. If the CPP policy is defined as mandatory and is included in the Easy VPN server configuration, the tunnel setup is allowed only if the Cisco VPN Client confirms this policy. If the policy is not confirmed, the tunnel is terminated.
optional Policy is optional. If the CPP policy is defined as optional and is included in the Easy VPN server configuration, the tunnel setup continues even if the Cisco VPN Client does not confirm the defined policy.
firewall-type Type of firewall. See Table 24 for a list of acceptable firewall types.
Release Modification
12.4(6)T This command was introduced.
12.2(33)SRA This command was integrated into Cisco IOS Release 12.2(33)SRA.
Table 24 Acceptable Firewall Types
Firewall Type
Cisco-Integrated-firewall (central-policy-push)
Cisco-Security-Agent (check-presence)
Zonelabs-Zonealarm (both)
Zonelabs-ZonealarmPro (both)
crypto isakmp client firewall
SEC-644April 2011
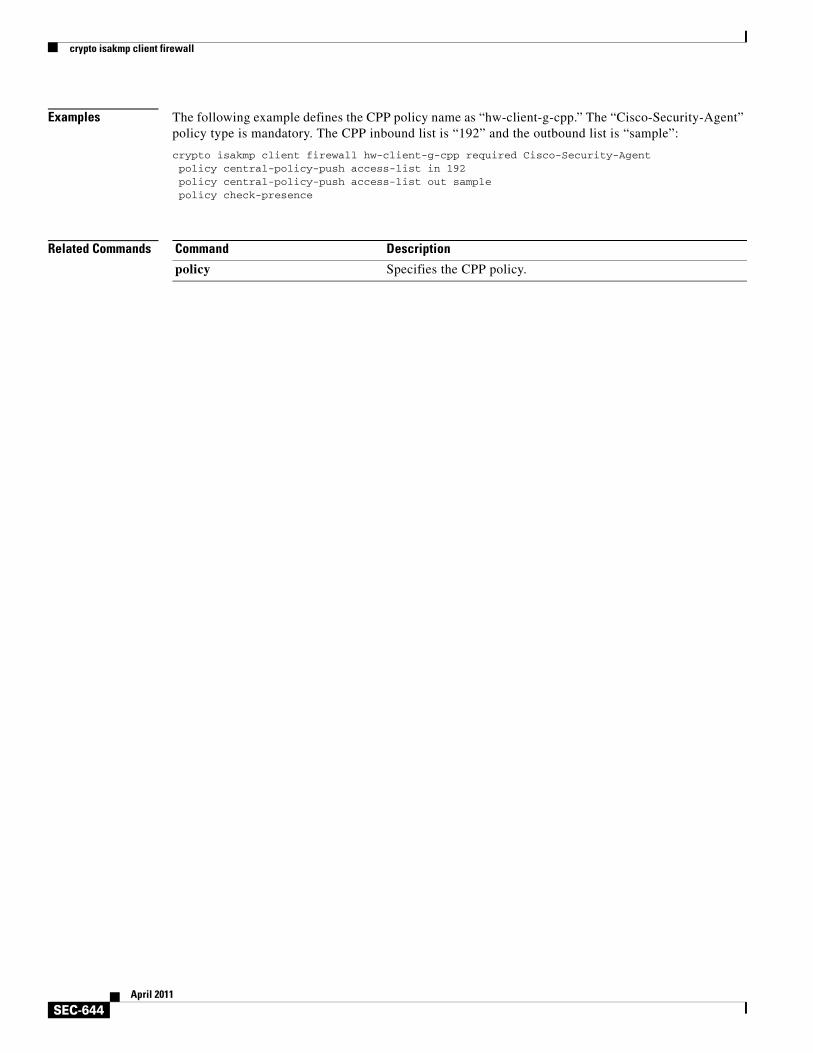
Examples The following example defines the CPP policy name as “hw-client-g-cpp.” The “Cisco-Security-Agent” policy type is mandatory. The CPP inbound list is “192” and the outbound list is “sample”:
crypto isakmp client firewall hw-client-g-cpp required Cisco-Security-Agentpolicy central-policy-push access-list in 192policy central-policy-push access-list out samplepolicy check-presence
Related Commands Command Description
policy Specifies the CPP policy.
crypto isakmp default policy
SEC-645April 2011
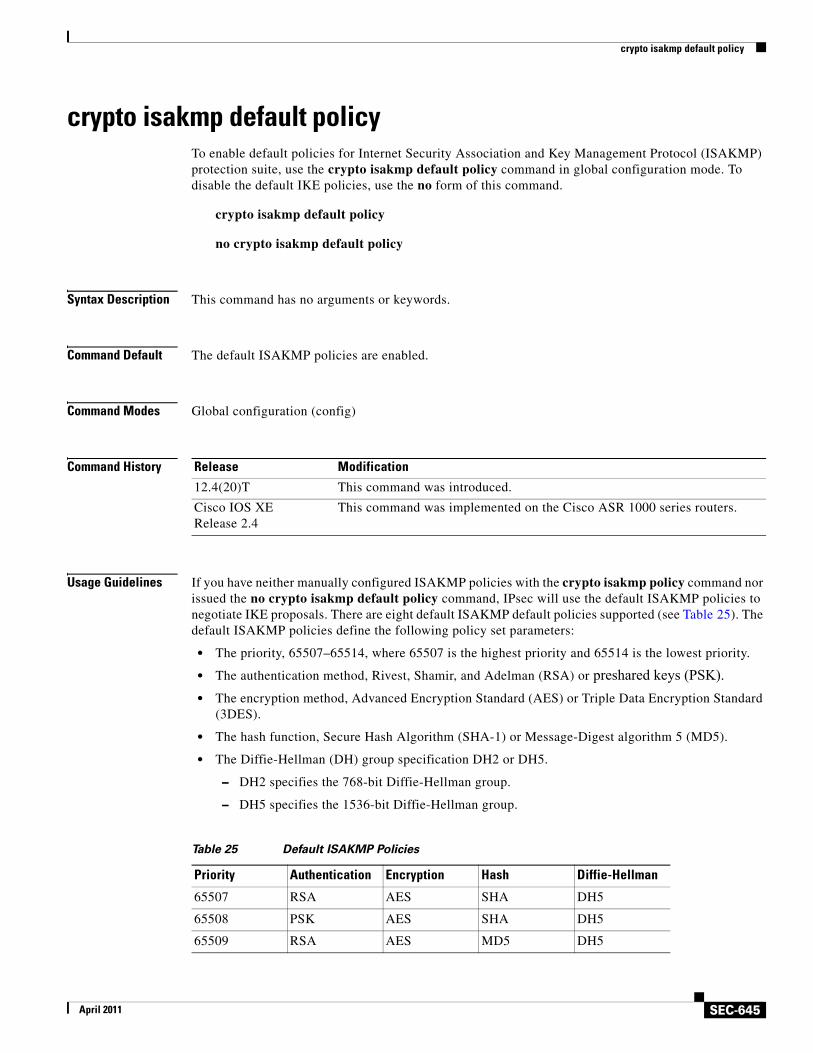
crypto isakmp default policyTo enable default policies for Internet Security Association and Key Management Protocol (ISAKMP) protection suite, use the crypto isakmp default policy command in global configuration mode. To disable the default IKE policies, use the no form of this command.
crypto isakmp default policy
no crypto isakmp default policy
Syntax Description This command has no arguments or keywords.
Command Default The default ISAKMP policies are enabled.
Command Modes Global configuration (config)
Command History
Usage Guidelines If you have neither manually configured ISAKMP policies with the crypto isakmp policy command nor issued the no crypto isakmp default policy command, IPsec will use the default ISAKMP policies to negotiate IKE proposals. There are eight default ISAKMP default policies supported (see Table 25). The default ISAKMP policies define the following policy set parameters:
• The priority, 65507–65514, where 65507 is the highest priority and 65514 is the lowest priority.
• The authentication method, Rivest, Shamir, and Adelman (RSA) or preshared keys (PSK).• The encryption method, Advanced Encryption Standard (AES) or Triple Data Encryption Standard
(3DES).
• The hash function, Secure Hash Algorithm (SHA-1) or Message-Digest algorithm 5 (MD5).
• The Diffie-Hellman (DH) group specification DH2 or DH5.
– DH2 specifies the 768-bit Diffie-Hellman group.
– DH5 specifies the 1536-bit Diffie-Hellman group.
Release Modification
12.4(20)T This command was introduced.
Cisco IOS XE Release 2.4
This command was implemented on the Cisco ASR 1000 series routers.
Table 25 Default ISAKMP Policies
Priority Authentication Encryption Hash Diffie-Hellman
65507 RSA AES SHA DH5
65508 PSK AES SHA DH5
65509 RSA AES MD5 DH5
crypto isakmp default policy
SEC-646April 2011
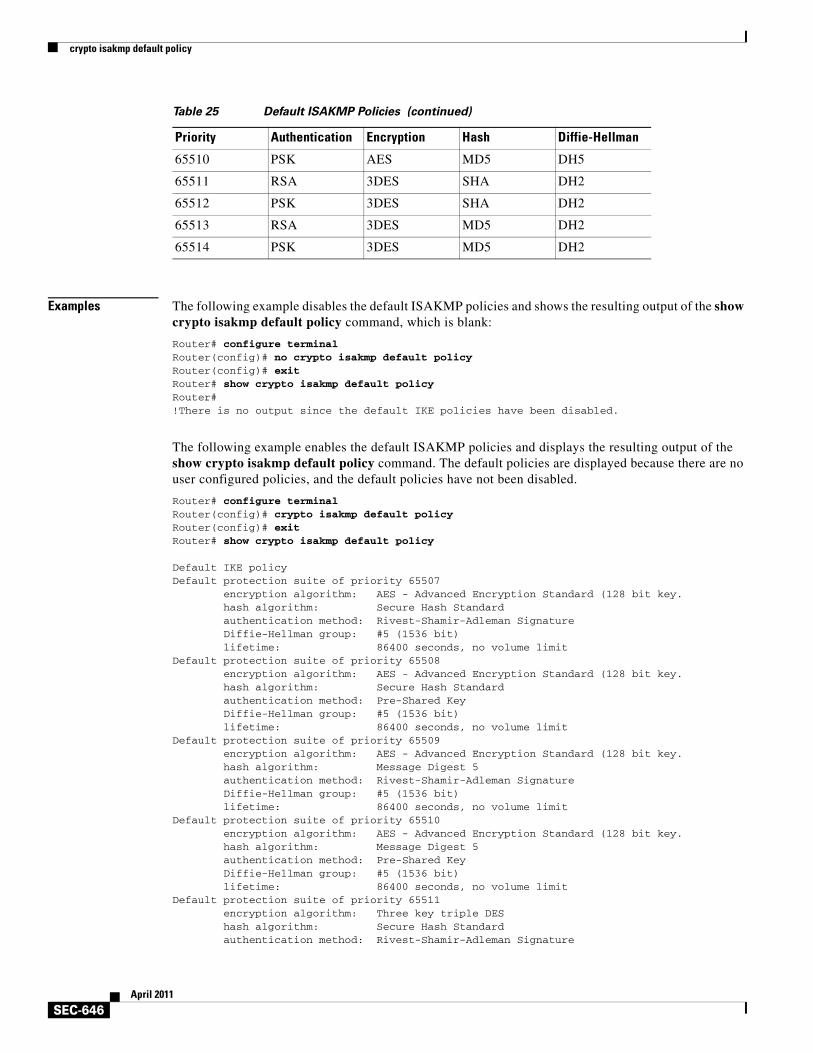
Examples The following example disables the default ISAKMP policies and shows the resulting output of the show crypto isakmp default policy command, which is blank:
Router# configure terminalRouter(config)# no crypto isakmp default policyRouter(config)# exitRouter# show crypto isakmp default policyRouter#!There is no output since the default IKE policies have been disabled.
The following example enables the default ISAKMP policies and displays the resulting output of the show crypto isakmp default policy command. The default policies are displayed because there are no user configured policies, and the default policies have not been disabled.
Router# configure terminalRouter(config)# crypto isakmp default policyRouter(config)# exitRouter# show crypto isakmp default policy
Default IKE policyDefault protection suite of priority 65507 encryption algorithm: AES - Advanced Encryption Standard (128 bit key. hash algorithm: Secure Hash Standard authentication method: Rivest-Shamir-Adleman Signature Diffie-Hellman group: #5 (1536 bit) lifetime: 86400 seconds, no volume limitDefault protection suite of priority 65508 encryption algorithm: AES - Advanced Encryption Standard (128 bit key. hash algorithm: Secure Hash Standard authentication method: Pre-Shared Key Diffie-Hellman group: #5 (1536 bit) lifetime: 86400 seconds, no volume limitDefault protection suite of priority 65509 encryption algorithm: AES - Advanced Encryption Standard (128 bit key. hash algorithm: Message Digest 5 authentication method: Rivest-Shamir-Adleman Signature Diffie-Hellman group: #5 (1536 bit) lifetime: 86400 seconds, no volume limitDefault protection suite of priority 65510 encryption algorithm: AES - Advanced Encryption Standard (128 bit key. hash algorithm: Message Digest 5 authentication method: Pre-Shared Key Diffie-Hellman group: #5 (1536 bit) lifetime: 86400 seconds, no volume limitDefault protection suite of priority 65511 encryption algorithm: Three key triple DES hash algorithm: Secure Hash Standard authentication method: Rivest-Shamir-Adleman Signature
65510 PSK AES MD5 DH5
65511 RSA 3DES SHA DH2
65512 PSK 3DES SHA DH2
65513 RSA 3DES MD5 DH2
65514 PSK 3DES MD5 DH2
Table 25 Default ISAKMP Policies (continued)
Priority Authentication Encryption Hash Diffie-Hellman
crypto isakmp default policy
SEC-647April 2011
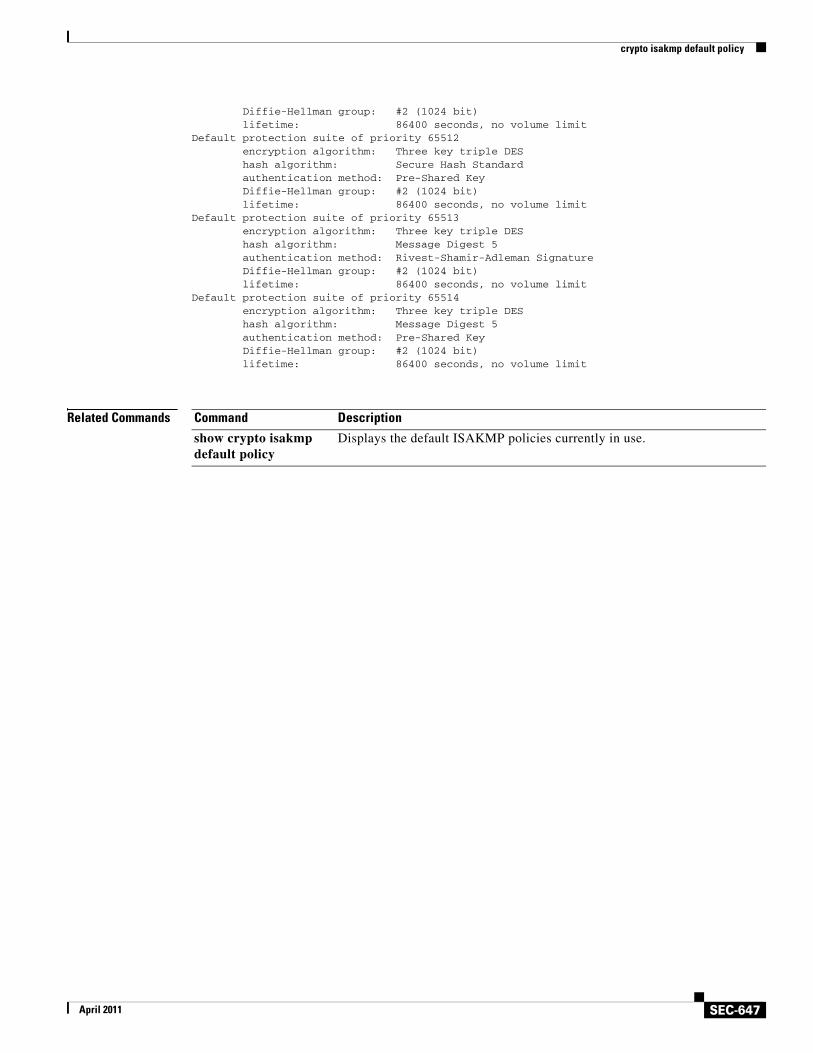
Diffie-Hellman group: #2 (1024 bit) lifetime: 86400 seconds, no volume limitDefault protection suite of priority 65512 encryption algorithm: Three key triple DES hash algorithm: Secure Hash Standard authentication method: Pre-Shared Key Diffie-Hellman group: #2 (1024 bit) lifetime: 86400 seconds, no volume limitDefault protection suite of priority 65513 encryption algorithm: Three key triple DES hash algorithm: Message Digest 5 authentication method: Rivest-Shamir-Adleman Signature Diffie-Hellman group: #2 (1024 bit) lifetime: 86400 seconds, no volume limitDefault protection suite of priority 65514 encryption algorithm: Three key triple DES hash algorithm: Message Digest 5 authentication method: Pre-Shared Key Diffie-Hellman group: #2 (1024 bit) lifetime: 86400 seconds, no volume limit
Related Commands Command Description
show crypto isakmp default policy
Displays the default ISAKMP policies currently in use.
crypto isakmp enable
SEC-648April 2011
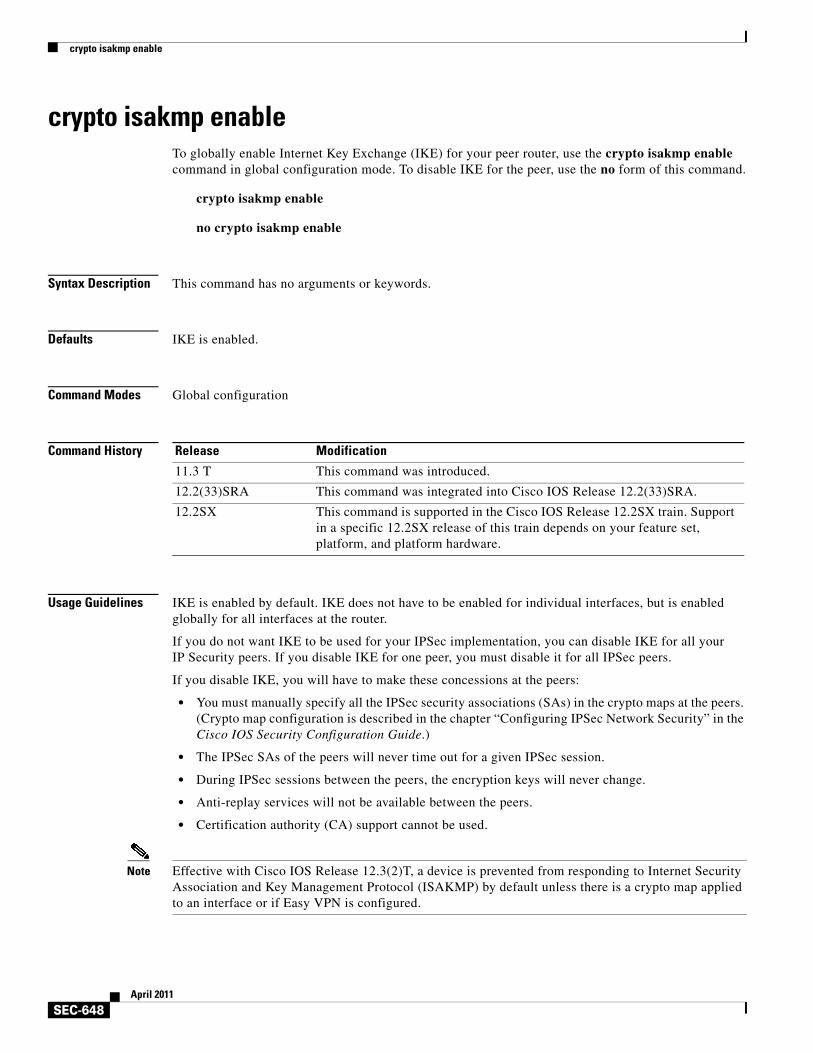
crypto isakmp enableTo globally enable Internet Key Exchange (IKE) for your peer router, use the crypto isakmp enable command in global configuration mode. To disable IKE for the peer, use the no form of this command.
crypto isakmp enable
no crypto isakmp enable
Syntax Description This command has no arguments or keywords.
Defaults IKE is enabled.
Command Modes Global configuration
Command History
Usage Guidelines IKE is enabled by default. IKE does not have to be enabled for individual interfaces, but is enabled globally for all interfaces at the router.
If you do not want IKE to be used for your IPSec implementation, you can disable IKE for all your IP Security peers. If you disable IKE for one peer, you must disable it for all IPSec peers.
If you disable IKE, you will have to make these concessions at the peers:
• You must manually specify all the IPSec security associations (SAs) in the crypto maps at the peers. (Crypto map configuration is described in the chapter “Configuring IPSec Network Security” in the Cisco IOS Security Configuration Guide.)
• The IPSec SAs of the peers will never time out for a given IPSec session.
• During IPSec sessions between the peers, the encryption keys will never change.
• Anti-replay services will not be available between the peers.
• Certification authority (CA) support cannot be used.
Note Effective with Cisco IOS Release 12.3(2)T, a device is prevented from responding to Internet Security Association and Key Management Protocol (ISAKMP) by default unless there is a crypto map applied to an interface or if Easy VPN is configured.
Release Modification
11.3 T This command was introduced.
12.2(33)SRA This command was integrated into Cisco IOS Release 12.2(33)SRA.
12.2SX This command is supported in the Cisco IOS Release 12.2SX train. Support in a specific 12.2SX release of this train depends on your feature set, platform, and platform hardware.

crypto isakmp enable
SEC-649April 2011
Examples The following example disables IKE at one peer. (The same command should be issued for all remote peers.)
no crypto isakmp enable
crypto isakmp fragmentation
SEC-650April 2011
crypto isakmp fragmentationTo enable fragmentation of large Internet Key Exchange (IKE) packets into a series of smaller IKE packets to avoid fragmentation at the User Datagram Protocol (UDP) layer, use the crypto isakmp fragmentation command in global configuration mode. To disable fragmentation, use the no form of this command.
crypto isakmp fragmentation
no crypto isakmp fragmentation
Syntax Description This command has no arguments or keywords.
Command Default Fragmentation is not allowed.
Command Modes Global configuration (config)
Command History
Usage Guidelines Do not configure IKE fragmentation on a Cisco IOS router with Cisco Easy VPN Client versions 5.01 through 5.03. Versions earlier than version 5.01 and version 5.04 or a later release should be all right.
Note The crypto isakmp fragmentation command is only applicable when the IOS Router is acting as an Easy VPN server and the remote peer is a Cisco IPsec VPN client.
Examples The following example shows that fragmentation has been enabled:
crypto isakmp fragmentation
crypto isakmp policy 1 encryption 3descrypto isakmp profile ezvpn-SW match group frag-clients vrf frags
Release Modification
12.4(15)T7 This command was introduced.
crypto isakmp identity
SEC-651April 2011
crypto isakmp identityTo define the ISAKMP identity used by the router when participating in the Internet Key Exchange (IKE) protocol, use the crypto isakmp identity command in global configuration mode. To reset the ISAKMP identity to the default value (address), use the no form of this command.
crypto isakmp identity {address | dn | hostname}
no crypto isakmp identity
Syntax Description
Command Default The IP address is used for the ISAKMP identity.
Command Modes Global configuration
Command History
Usage Guidelines Use this command to specify an ISAKMP identity either by IP address, DN or host name. An ISAKMP identity is set whenever you specify preshared keys or RSA signature authentication.
The address keyword is typically used when only one interface (and therefore only one IP address) will be used by the peer for IKE negotiations, and the IP address is known.
The dn keyword should be used if the DN of a router certificate is to be specified and chosen as the ISAKMP identity during IKE processing. The dn keyword is used only for certificate-based authentication.
The hostname keyword should be used if more than one interface on the peer might be used for IKE negotiations, or if the interface’s IP address is unknown (such as with dynamically assigned IP addresses).
As a general rule, you should set all peers’ identities in the same way, either by IP address or by host name.
address Sets the ISAKMP identity to the IP address of the interface that is used to communicate to the remote peer during IKE negotiations.
dn Sets the ISAKMP identity to the distinguished name (DN) of the router certificate.
hostname Sets the ISAKMP identity to the host name concatenated with the domain name (for example, myhost.example.com).
Release Modification
11.3T This command was introduced.
12.4(4)T Support for IPv6 was added.
12.2SX This command is supported in the Cisco IOS Release 12.2SX train. Support in a specific 12.2SX release of this train depends on your feature set, platform, and platform hardware.

crypto isakmp identity
SEC-652April 2011
Examples The following example uses preshared keys at two peers and sets both their ISAKMP identities to the IP address.
At the local peer (at 10.0.0.1) the ISAKMP identity is set and the preshared key is specified:
crypto isakmp identity addresscrypto isakmp key sharedkeystring address 192.168.1.33
At the remote peer (at 192.168.1.33) the ISAKMP identity is set and the same preshared key is specified:
crypto isakmp identity addresscrypto isakmp key sharedkeystring address 10.0.0.1
Note In the preceding example if the crypto isakmp identity command had not been performed, the ISAKMP identities would have still been set to IP address, the default identity.
The following example uses preshared keys at two peers and sets both their ISAKMP identities to the hostname.
At the local peer the ISAKMP identity is set and the preshared key is specified:
crypto isakmp identity hostnamecrypto isakmp key sharedkeystring hostname RemoteRouter.example.comip host RemoteRouter.example.com 192.168.0.1
At the remote peer the ISAKMP identity is set and the same preshared key is specified:
crypto isakmp identity hostnamecrypto isakmp key sharedkeystring hostname LocalRouter.example.comip host LocalRouter.example.com 10.0.0.1 10.0.0.2
In the example, hostnames are used for the peers’ identities because the local peer has two interfaces that might be used during an IKE negotiation.
In the example the IP addresses are also mapped to the hostnames; this mapping is not necessary if the routers’ hostnames are already mapped in DNS.
Related Commands Command Description
crypto ipsec security-association lifetime
Specifies the authentication method within an IKE policy.
crypto isakmp key Configures a preshared authentication key.
crypto isakmp invalid-spi-recovery
SEC-653April 2011
crypto isakmp invalid-spi-recoveryTo initiate the Internet Key Exchange (IKE) security association (SA) to notify the receiving IP Security (IPSec) peer that there is an “Invalid SPI” error, use the crypto isakmp invalid-spi-recovery command in global configuration mode. To disable the notification process, use the no form of this command.
crypto isakmp invalid-spi-recovery
no crypto isakmp invalid-spi-recovery
Syntax Description This command has no arguments or keywords.
Defaults The IKE notification process is not enabled.
Command Modes Global configuration
Command History
Usage Guidelines This command allows you to configure your router so that when an invalid security parameter index error (shown as “Invalid SPI”) occurs, an IKE SA is initiated. The “IKE” module, which serves as a checkpoint in the IPSec session, recognizes the “Invalid SPI” situation. The IKE module then sends an “Invalid Error” message to the packet-receiving peer so that synchronization of the security association databases (SADBs) of the two peers can be attempted. As soon as the SADBs are resynchronized, packets are no longer dropped.
Note SPI recovery initiates a new IKE SA only for static peers.
Caution Using this command to initiate an IKE SA to notify an IPSec peer of an “Invalid SPI” error can result in a denial-of-service (DoS) attack.
Examples The following example shows that the IKE module process has been initiated to notify the receiving peer that there is an “Invalid SPI” error:
Router (config)# crypto isakmp invalid-spi-recovery
Release Modification
12.3(2)T This command was introduced.
12.2(33)SRA This command was integrated into Cisco IOS Release 12.2(33)SRA.
12.2(33)SXH This command was integrated into Cisco IOS Release 12.2(33)SXH.
crypto isakmp keepalive
SEC-654April 2011
crypto isakmp keepaliveTo allow the gateway to send dead peer detection (DPD) keepalive messages to the peer, use the crypto isakmp keepalive command in global configuration mode. To disable keepalives, use the no form of this command.
crypto isakmp keepalive seconds [retry-seconds] [periodic | on-demand]
no crypto isakmp keepalive seconds [retry-seconds] [periodic | on-demand]
Syntax Description
Command Default No DPD messages are sent.
Command Modes Global configuration (config)
Command History
seconds When the periodic keyword is used, this argument is the number of seconds between DPD messages; the range is from 10 to 3600 seconds.
When the on-demand keyword is used, this argument is the number of seconds during which traffic is not received from the peer before DPD retry messages are sent if there is data (IPSec) traffic to send; the range is from 10 to 3600 seconds.
Note If you do not specify a time interval, an error message appears.
retry-seconds (Optional) Number of seconds between DPD retry messages if the DPD retry message is missed by the peer; the range is from 2 to 60 seconds.
Once 1 DPD message is missed by the peer, the router moves to a more aggressive state and sends the DPD retry message at the faster retry interval, which is the number of seconds between DPD retries if the DPD message is missed by the peer. The default DPD retry message is sent every 2 seconds. Five aggressive DPD retry messages can be missed before the tunnel is marked as down.
Note To configure DPD with IPsec High Availability (HA), the recommendation is to use a value other than the default (which is 2 seconds). A keepalive timer of 10 seconds with 5 retries seems to work well with HA because of the time that it takes for the router to get into active mode.
periodic (Optional) DPD messages are sent at regular intervals.
on-demand (Optional) The default behavior. DPD retries are sent on demand.
Note Because this option is the default, the on-demand keyword does not appear in configuration output.
Release Modification
12.2(8)T This command was introduced.
12.3(7)T The periodic and on-demand keywords were added.
crypto isakmp keepalive
SEC-655April 2011
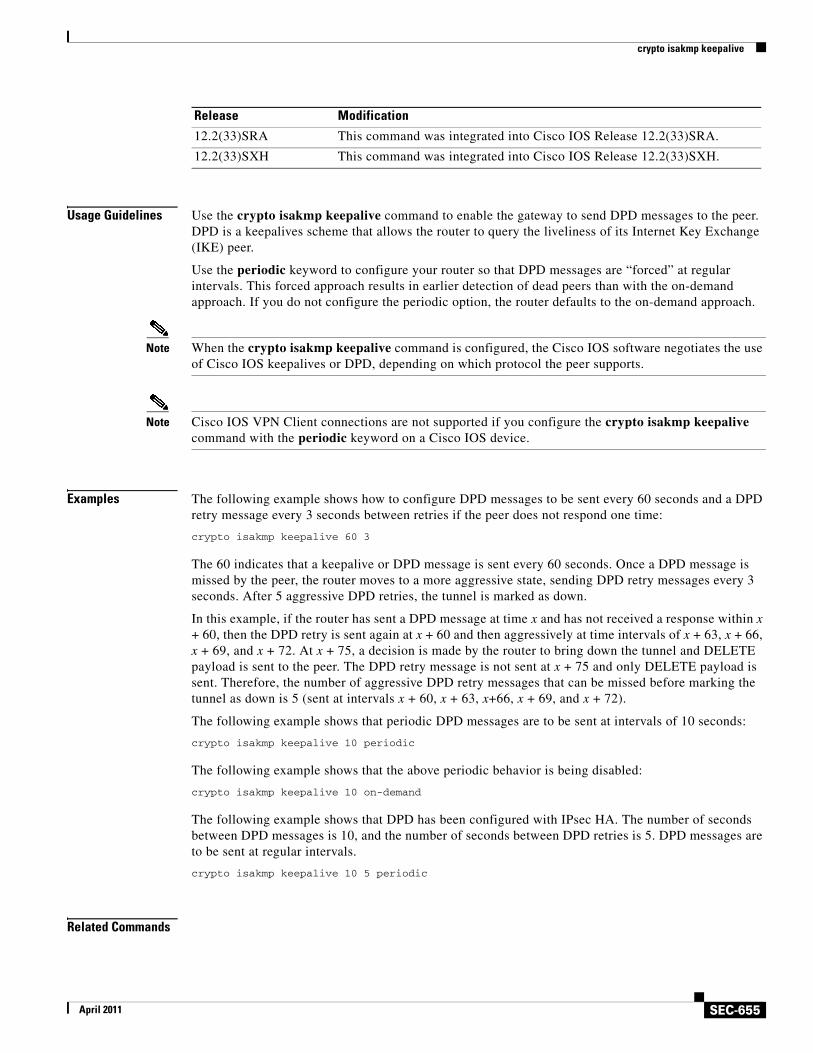
Usage Guidelines Use the crypto isakmp keepalive command to enable the gateway to send DPD messages to the peer. DPD is a keepalives scheme that allows the router to query the liveliness of its Internet Key Exchange (IKE) peer.
Use the periodic keyword to configure your router so that DPD messages are “forced” at regular intervals. This forced approach results in earlier detection of dead peers than with the on-demand approach. If you do not configure the periodic option, the router defaults to the on-demand approach.
Note When the crypto isakmp keepalive command is configured, the Cisco IOS software negotiates the use of Cisco IOS keepalives or DPD, depending on which protocol the peer supports.
Note Cisco IOS VPN Client connections are not supported if you configure the crypto isakmp keepalive command with the periodic keyword on a Cisco IOS device.
Examples The following example shows how to configure DPD messages to be sent every 60 seconds and a DPD retry message every 3 seconds between retries if the peer does not respond one time:
crypto isakmp keepalive 60 3
The 60 indicates that a keepalive or DPD message is sent every 60 seconds. Once a DPD message is missed by the peer, the router moves to a more aggressive state, sending DPD retry messages every 3 seconds. After 5 aggressive DPD retries, the tunnel is marked as down.
In this example, if the router has sent a DPD message at time x and has not received a response within x + 60, then the DPD retry is sent again at x + 60 and then aggressively at time intervals of x + 63, x + 66, x + 69, and x + 72. At x + 75, a decision is made by the router to bring down the tunnel and DELETE payload is sent to the peer. The DPD retry message is not sent at x + 75 and only DELETE payload is sent. Therefore, the number of aggressive DPD retry messages that can be missed before marking the tunnel as down is 5 (sent at intervals x + 60, x + 63, x+66, x + 69, and x + 72).
The following example shows that periodic DPD messages are to be sent at intervals of 10 seconds:
crypto isakmp keepalive 10 periodic
The following example shows that the above periodic behavior is being disabled:
crypto isakmp keepalive 10 on-demand
The following example shows that DPD has been configured with IPsec HA. The number of seconds between DPD messages is 10, and the number of seconds between DPD retries is 5. DPD messages are to be sent at regular intervals.
crypto isakmp keepalive 10 5 periodic
Related Commands
12.2(33)SRA This command was integrated into Cisco IOS Release 12.2(33)SRA.
12.2(33)SXH This command was integrated into Cisco IOS Release 12.2(33)SXH.
Release Modification

crypto isakmp keepalive
SEC-656April 2011
Command Description
acl Configures split tunneling.
crypto isakmp key
SEC-657April 2011
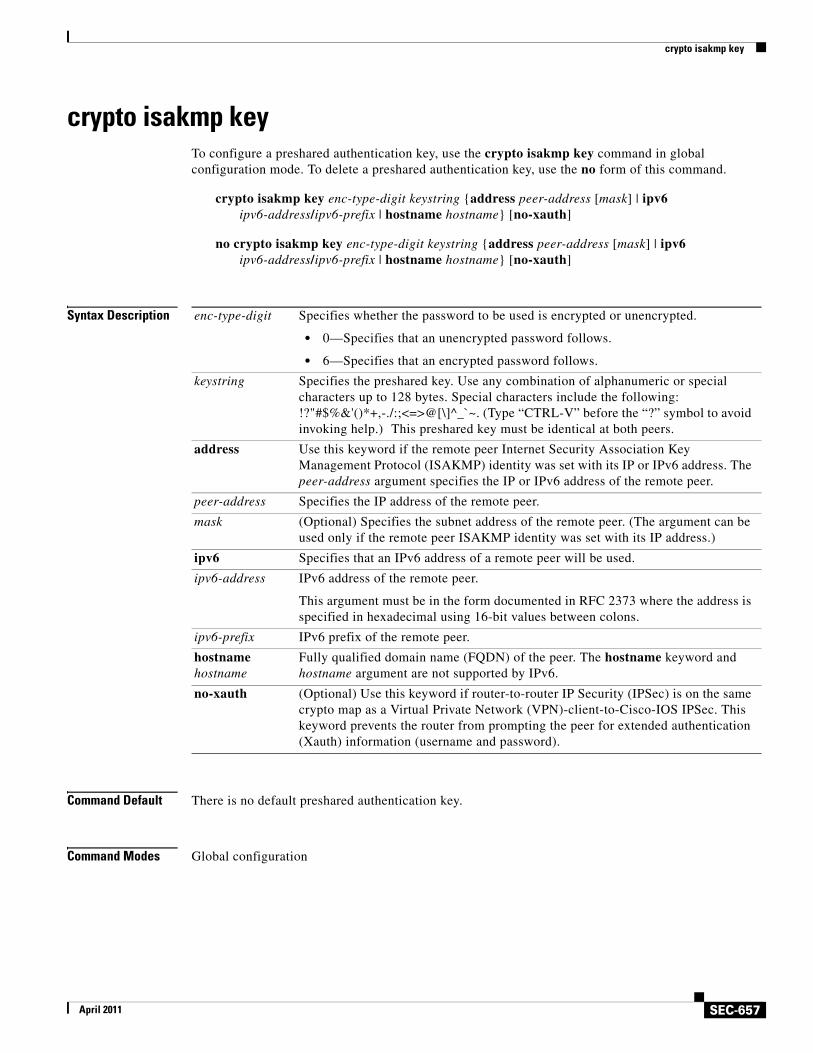
crypto isakmp keyTo configure a preshared authentication key, use the crypto isakmp key command in global configuration mode. To delete a preshared authentication key, use the no form of this command.
crypto isakmp key enc-type-digit keystring {address peer-address [mask] | ipv6 ipv6-address/ipv6-prefix | hostname hostname} [no-xauth]
no crypto isakmp key enc-type-digit keystring {address peer-address [mask] | ipv6 ipv6-address/ipv6-prefix | hostname hostname} [no-xauth]
Syntax Description
Command Default There is no default preshared authentication key.
Command Modes Global configuration
enc-type-digit Specifies whether the password to be used is encrypted or unencrypted.
• 0—Specifies that an unencrypted password follows.
• 6—Specifies that an encrypted password follows.
keystring Specifies the preshared key. Use any combination of alphanumeric or special characters up to 128 bytes. Special characters include the following: !?"#$%&'()*+,-./:;<=>@[\]^_`~. (Type “CTRL-V” before the “?” symbol to avoid invoking help.) This preshared key must be identical at both peers.
address Use this keyword if the remote peer Internet Security Association Key Management Protocol (ISAKMP) identity was set with its IP or IPv6 address. The peer-address argument specifies the IP or IPv6 address of the remote peer.
peer-address Specifies the IP address of the remote peer.
mask (Optional) Specifies the subnet address of the remote peer. (The argument can be used only if the remote peer ISAKMP identity was set with its IP address.)
ipv6 Specifies that an IPv6 address of a remote peer will be used.
ipv6-address IPv6 address of the remote peer.
This argument must be in the form documented in RFC 2373 where the address is specified in hexadecimal using 16-bit values between colons.
ipv6-prefix IPv6 prefix of the remote peer.
hostname hostname
Fully qualified domain name (FQDN) of the peer. The hostname keyword and hostname argument are not supported by IPv6.
no-xauth (Optional) Use this keyword if router-to-router IP Security (IPSec) is on the same crypto map as a Virtual Private Network (VPN)-client-to-Cisco-IOS IPSec. This keyword prevents the router from prompting the peer for extended authentication (Xauth) information (username and password).
crypto isakmp key
SEC-658April 2011
Command History
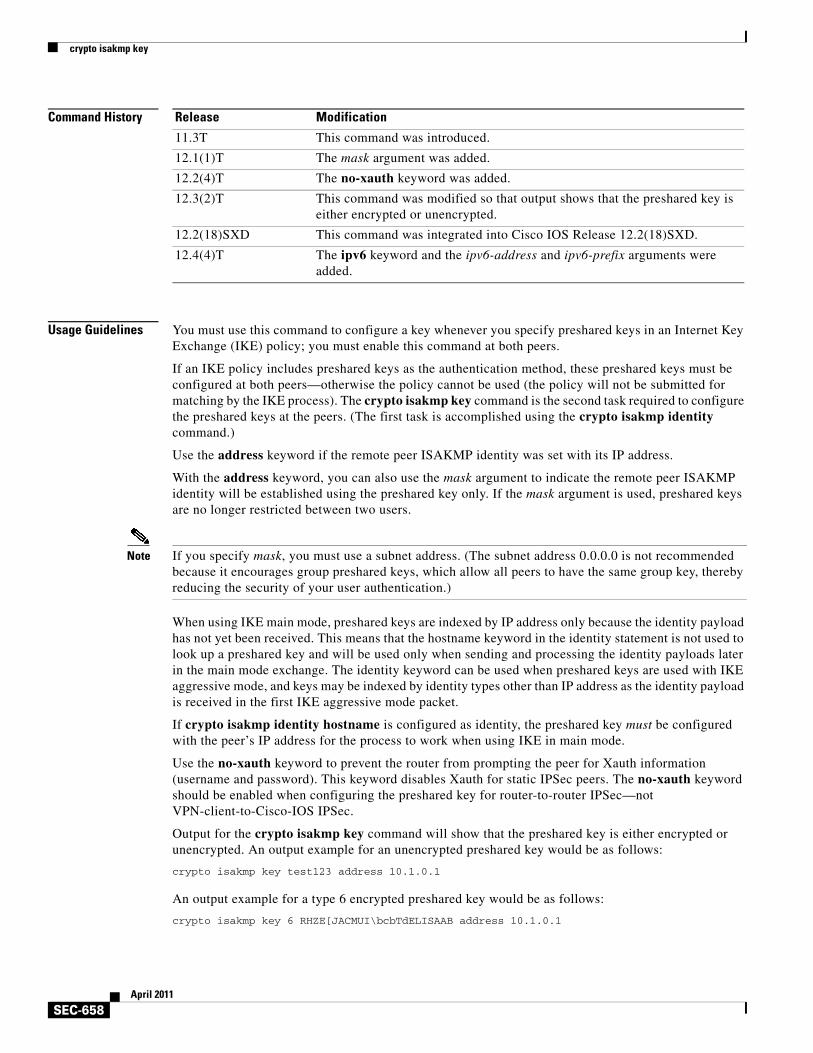
Usage Guidelines You must use this command to configure a key whenever you specify preshared keys in an Internet Key Exchange (IKE) policy; you must enable this command at both peers.
If an IKE policy includes preshared keys as the authentication method, these preshared keys must be configured at both peers—otherwise the policy cannot be used (the policy will not be submitted for matching by the IKE process). The crypto isakmp key command is the second task required to configure the preshared keys at the peers. (The first task is accomplished using the crypto isakmp identity command.)
Use the address keyword if the remote peer ISAKMP identity was set with its IP address.
With the address keyword, you can also use the mask argument to indicate the remote peer ISAKMP identity will be established using the preshared key only. If the mask argument is used, preshared keys are no longer restricted between two users.
Note If you specify mask, you must use a subnet address. (The subnet address 0.0.0.0 is not recommended because it encourages group preshared keys, which allow all peers to have the same group key, thereby reducing the security of your user authentication.)
When using IKE main mode, preshared keys are indexed by IP address only because the identity payload has not yet been received. This means that the hostname keyword in the identity statement is not used to look up a preshared key and will be used only when sending and processing the identity payloads later in the main mode exchange. The identity keyword can be used when preshared keys are used with IKE aggressive mode, and keys may be indexed by identity types other than IP address as the identity payload is received in the first IKE aggressive mode packet.
If crypto isakmp identity hostname is configured as identity, the preshared key must be configured with the peer’s IP address for the process to work when using IKE in main mode.
Use the no-xauth keyword to prevent the router from prompting the peer for Xauth information (username and password). This keyword disables Xauth for static IPSec peers. The no-xauth keyword should be enabled when configuring the preshared key for router-to-router IPSec—not VPN-client-to-Cisco-IOS IPSec.
Output for the crypto isakmp key command will show that the preshared key is either encrypted or unencrypted. An output example for an unencrypted preshared key would be as follows:
crypto isakmp key test123 address 10.1.0.1
An output example for a type 6 encrypted preshared key would be as follows:
crypto isakmp key 6 RHZE[JACMUI\bcbTdELISAAB address 10.1.0.1
Release Modification
11.3T This command was introduced.
12.1(1)T The mask argument was added.
12.2(4)T The no-xauth keyword was added.
12.3(2)T This command was modified so that output shows that the preshared key is either encrypted or unencrypted.
12.2(18)SXD This command was integrated into Cisco IOS Release 12.2(18)SXD.
12.4(4)T The ipv6 keyword and the ipv6-address and ipv6-prefix arguments were added.
crypto isakmp key
SEC-659April 2011
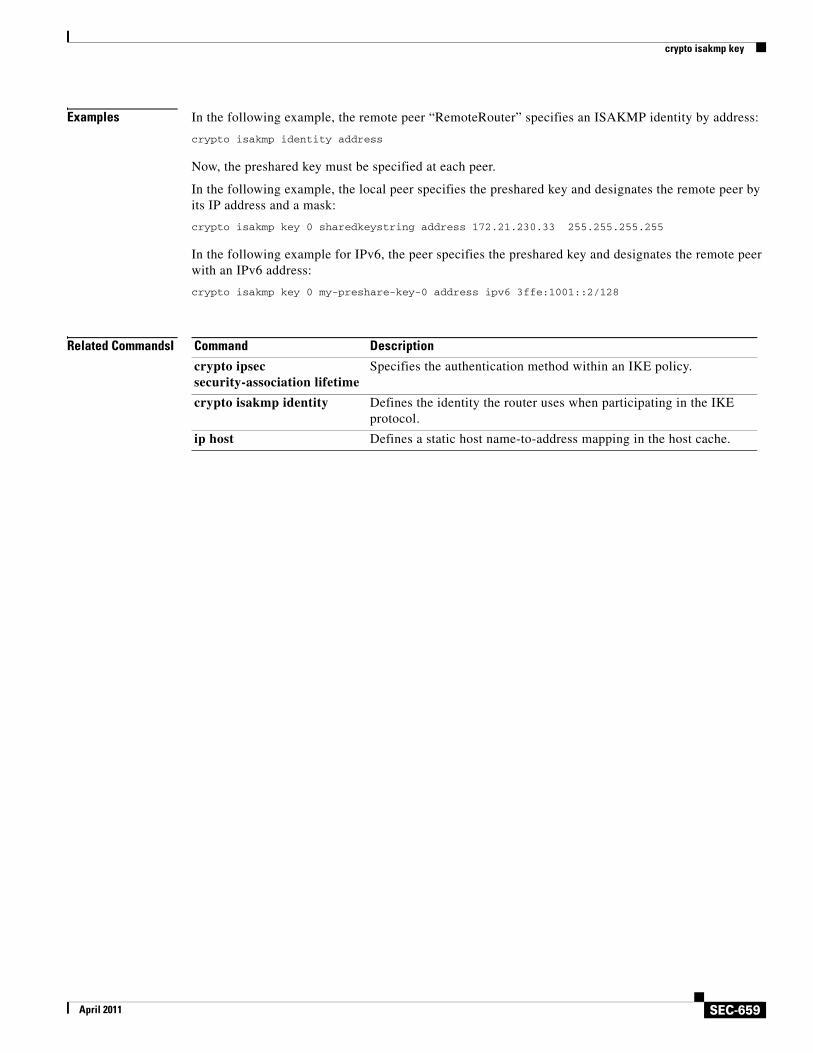
Examples In the following example, the remote peer “RemoteRouter” specifies an ISAKMP identity by address:
crypto isakmp identity address
Now, the preshared key must be specified at each peer.
In the following example, the local peer specifies the preshared key and designates the remote peer by its IP address and a mask:
crypto isakmp key 0 sharedkeystring address 172.21.230.33 255.255.255.255
In the following example for IPv6, the peer specifies the preshared key and designates the remote peer with an IPv6 address:
crypto isakmp key 0 my-preshare-key-0 address ipv6 3ffe:1001::2/128
Related CommandsI Command Description
crypto ipsec security-association lifetime
Specifies the authentication method within an IKE policy.
crypto isakmp identity Defines the identity the router uses when participating in the IKE protocol.
ip host Defines a static host name-to-address mapping in the host cache.
crypto isakmp nat keepalive
SEC-660April 2011
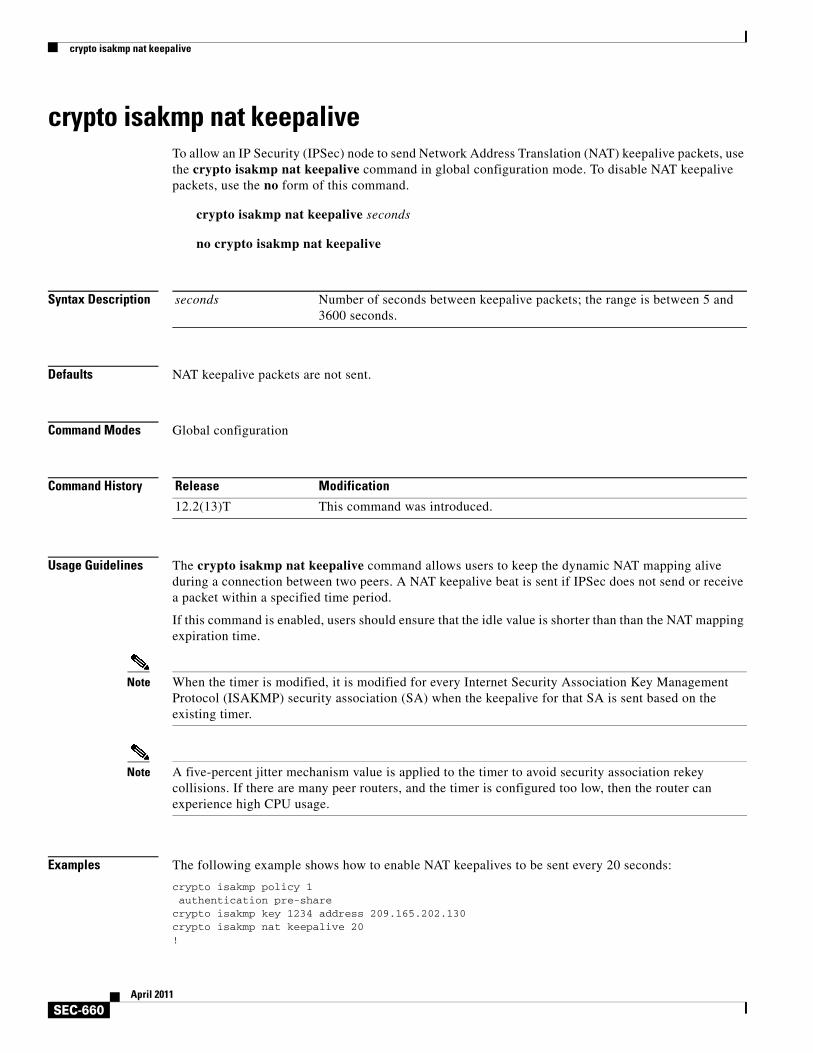
crypto isakmp nat keepaliveTo allow an IP Security (IPSec) node to send Network Address Translation (NAT) keepalive packets, use the crypto isakmp nat keepalive command in global configuration mode. To disable NAT keepalive packets, use the no form of this command.
crypto isakmp nat keepalive seconds
no crypto isakmp nat keepalive
Syntax Description
Defaults NAT keepalive packets are not sent.
Command Modes Global configuration
Command History
Usage Guidelines The crypto isakmp nat keepalive command allows users to keep the dynamic NAT mapping alive during a connection between two peers. A NAT keepalive beat is sent if IPSec does not send or receive a packet within a specified time period.
If this command is enabled, users should ensure that the idle value is shorter than than the NAT mapping expiration time.
Note When the timer is modified, it is modified for every Internet Security Association Key Management Protocol (ISAKMP) security association (SA) when the keepalive for that SA is sent based on the existing timer.
Note A five-percent jitter mechanism value is applied to the timer to avoid security association rekey collisions. If there are many peer routers, and the timer is configured too low, then the router can experience high CPU usage.
Examples The following example shows how to enable NAT keepalives to be sent every 20 seconds:
crypto isakmp policy 1 authentication pre-sharecrypto isakmp key 1234 address 209.165.202.130crypto isakmp nat keepalive 20!
seconds Number of seconds between keepalive packets; the range is between 5 and 3600 seconds.
Release Modification
12.2(13)T This command was introduced.

crypto isakmp nat keepalive
SEC-661April 2011
crypto ipsec transform-set t2 esp-des esp-sha-hmacno crypto engine accelerator!crypto map test2 10 ipsec-isakmp set peer 209.165.202.130 set transform-set t2 match address 101
crypto isakmp peer
SEC-662April 2011
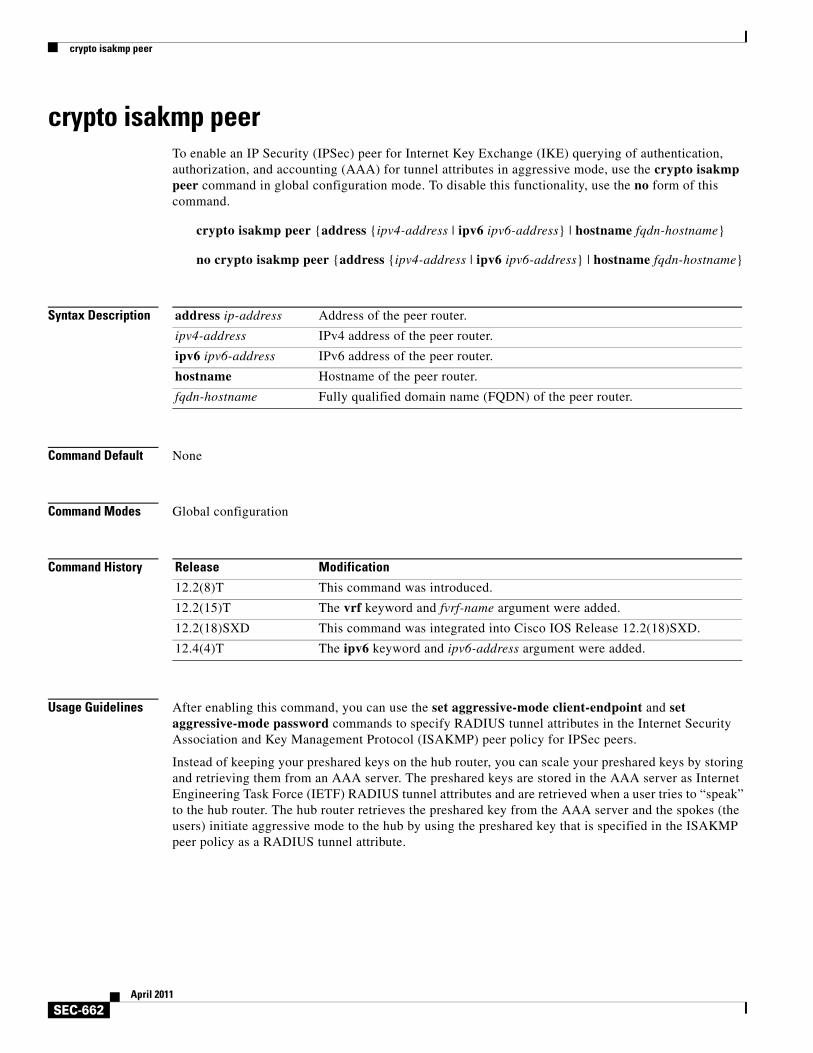
crypto isakmp peerTo enable an IP Security (IPSec) peer for Internet Key Exchange (IKE) querying of authentication, authorization, and accounting (AAA) for tunnel attributes in aggressive mode, use the crypto isakmp peer command in global configuration mode. To disable this functionality, use the no form of this command.
crypto isakmp peer {address {ipv4-address | ipv6 ipv6-address} | hostname fqdn-hostname}
no crypto isakmp peer {address {ipv4-address | ipv6 ipv6-address} | hostname fqdn-hostname}
Syntax Description
Command Default None
Command Modes Global configuration
Command History
Usage Guidelines After enabling this command, you can use the set aggressive-mode client-endpoint and set aggressive-mode password commands to specify RADIUS tunnel attributes in the Internet Security Association and Key Management Protocol (ISAKMP) peer policy for IPSec peers.
Instead of keeping your preshared keys on the hub router, you can scale your preshared keys by storing and retrieving them from an AAA server. The preshared keys are stored in the AAA server as Internet Engineering Task Force (IETF) RADIUS tunnel attributes and are retrieved when a user tries to “speak” to the hub router. The hub router retrieves the preshared key from the AAA server and the spokes (the users) initiate aggressive mode to the hub by using the preshared key that is specified in the ISAKMP peer policy as a RADIUS tunnel attribute.
address ip-address Address of the peer router.
ipv4-address IPv4 address of the peer router.
ipv6 ipv6-address IPv6 address of the peer router.
hostname Hostname of the peer router.
fqdn-hostname Fully qualified domain name (FQDN) of the peer router.
Release Modification
12.2(8)T This command was introduced.
12.2(15)T The vrf keyword and fvrf-name argument were added.
12.2(18)SXD This command was integrated into Cisco IOS Release 12.2(18)SXD.
12.4(4)T The ipv6 keyword and ipv6-address argument were added.
crypto isakmp peer
SEC-663April 2011
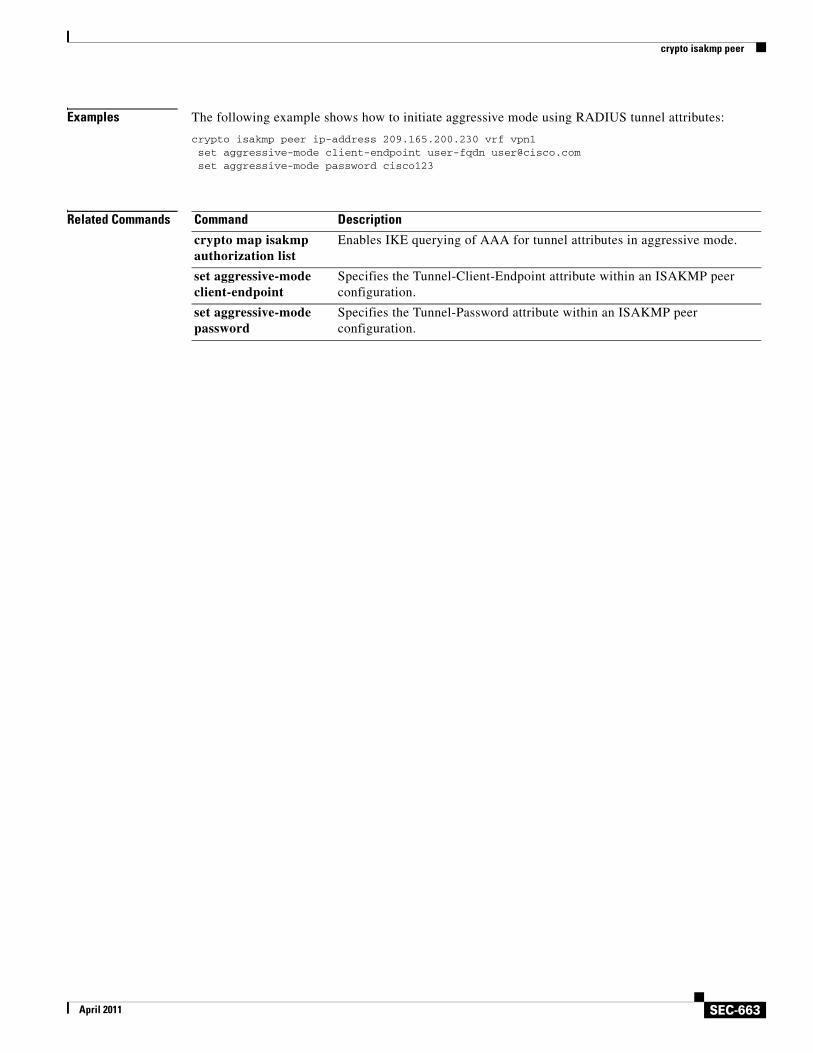
Examples The following example shows how to initiate aggressive mode using RADIUS tunnel attributes:
crypto isakmp peer ip-address 209.165.200.230 vrf vpn1set aggressive-mode client-endpoint user-fqdn [email protected] aggressive-mode password cisco123
Related Commands Command Description
crypto map isakmp authorization list
Enables IKE querying of AAA for tunnel attributes in aggressive mode.
set aggressive-mode client-endpoint
Specifies the Tunnel-Client-Endpoint attribute within an ISAKMP peer configuration.
set aggressive-mode password
Specifies the Tunnel-Password attribute within an ISAKMP peer configuration.
crypto isakmp policy
SEC-664April 2011
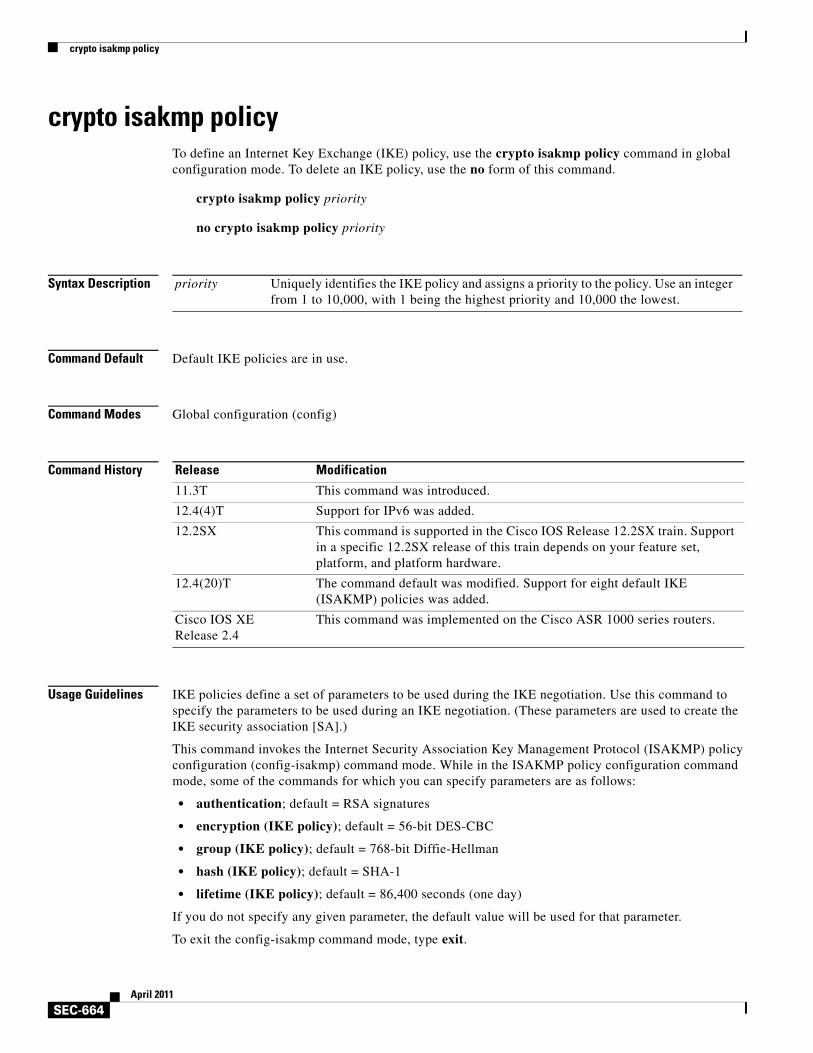
crypto isakmp policyTo define an Internet Key Exchange (IKE) policy, use the crypto isakmp policy command in global configuration mode. To delete an IKE policy, use the no form of this command.
crypto isakmp policy priority
no crypto isakmp policy priority
Syntax Description
Command Default Default IKE policies are in use.
Command Modes Global configuration (config)
Command History
Usage Guidelines IKE policies define a set of parameters to be used during the IKE negotiation. Use this command to specify the parameters to be used during an IKE negotiation. (These parameters are used to create the IKE security association [SA].)
This command invokes the Internet Security Association Key Management Protocol (ISAKMP) policy configuration (config-isakmp) command mode. While in the ISAKMP policy configuration command mode, some of the commands for which you can specify parameters are as follows:
• authentication; default = RSA signatures
• encryption (IKE policy); default = 56-bit DES-CBC
• group (IKE policy); default = 768-bit Diffie-Hellman
• hash (IKE policy); default = SHA-1
• lifetime (IKE policy); default = 86,400 seconds (one day)
If you do not specify any given parameter, the default value will be used for that parameter.
To exit the config-isakmp command mode, type exit.
priority Uniquely identifies the IKE policy and assigns a priority to the policy. Use an integer from 1 to 10,000, with 1 being the highest priority and 10,000 the lowest.
Release Modification
11.3T This command was introduced.
12.4(4)T Support for IPv6 was added.
12.2SX This command is supported in the Cisco IOS Release 12.2SX train. Support in a specific 12.2SX release of this train depends on your feature set, platform, and platform hardware.
12.4(20)T The command default was modified. Support for eight default IKE (ISAKMP) policies was added.
Cisco IOS XE Release 2.4
This command was implemented on the Cisco ASR 1000 series routers.
crypto isakmp policy
SEC-665April 2011
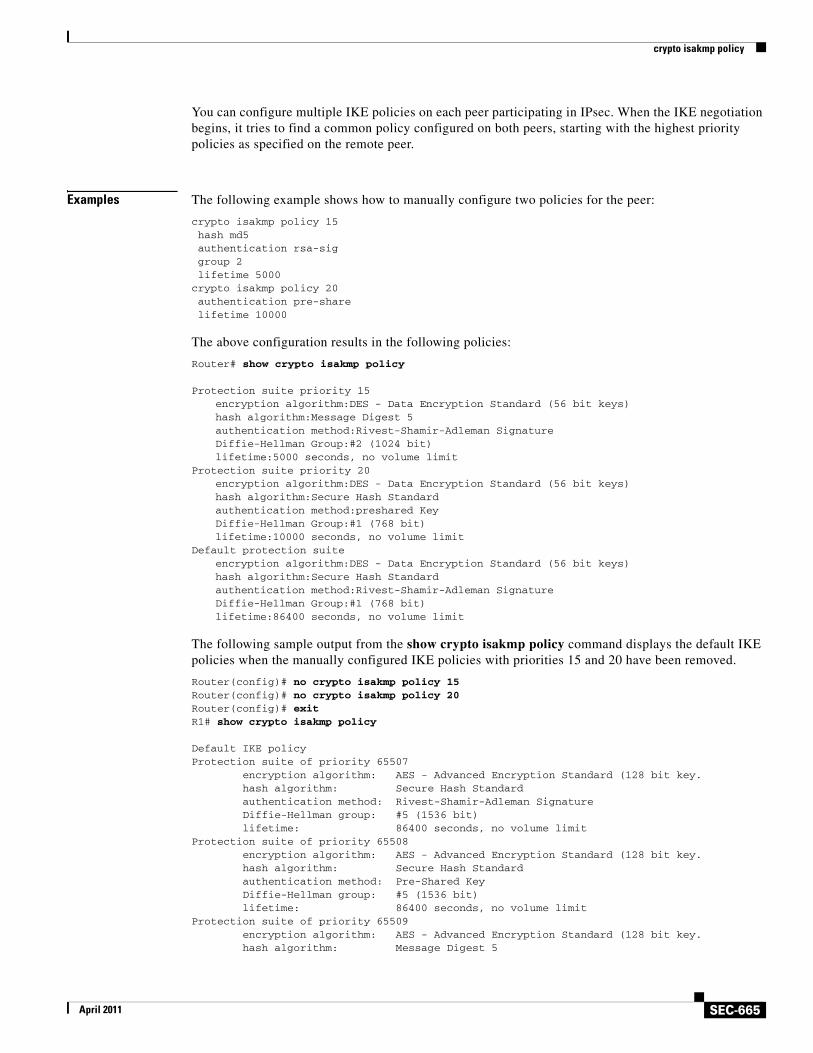
You can configure multiple IKE policies on each peer participating in IPsec. When the IKE negotiation begins, it tries to find a common policy configured on both peers, starting with the highest priority policies as specified on the remote peer.
Examples The following example shows how to manually configure two policies for the peer:
crypto isakmp policy 15hash md5authentication rsa-siggroup 2lifetime 5000
crypto isakmp policy 20authentication pre-sharelifetime 10000
The above configuration results in the following policies:
Router# show crypto isakmp policy
Protection suite priority 15encryption algorithm:DES - Data Encryption Standard (56 bit keys)hash algorithm:Message Digest 5authentication method:Rivest-Shamir-Adleman SignatureDiffie-Hellman Group:#2 (1024 bit)lifetime:5000 seconds, no volume limit
Protection suite priority 20encryption algorithm:DES - Data Encryption Standard (56 bit keys)hash algorithm:Secure Hash Standardauthentication method:preshared KeyDiffie-Hellman Group:#1 (768 bit)lifetime:10000 seconds, no volume limit
Default protection suiteencryption algorithm:DES - Data Encryption Standard (56 bit keys)hash algorithm:Secure Hash Standardauthentication method:Rivest-Shamir-Adleman SignatureDiffie-Hellman Group:#1 (768 bit)lifetime:86400 seconds, no volume limit
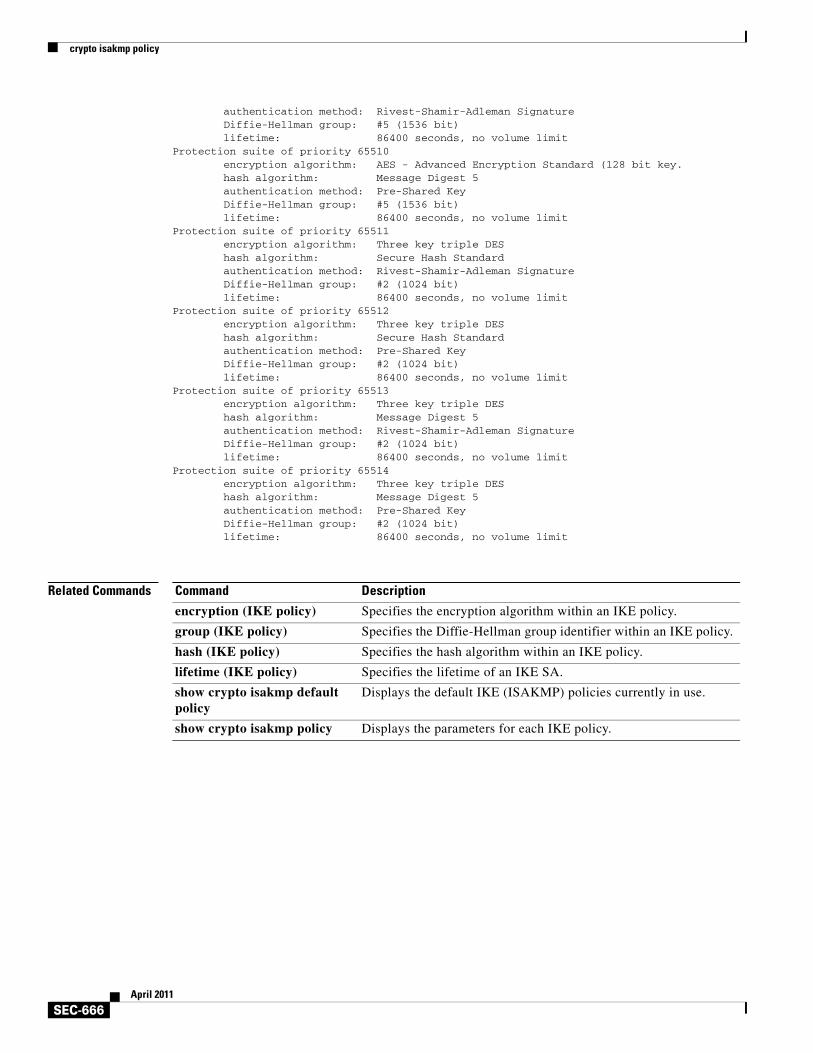
The following sample output from the show crypto isakmp policy command displays the default IKE policies when the manually configured IKE policies with priorities 15 and 20 have been removed.
Router(config)# no crypto isakmp policy 15Router(config)# no crypto isakmp policy 20Router(config)# exitR1# show crypto isakmp policy
Default IKE policyProtection suite of priority 65507 encryption algorithm: AES - Advanced Encryption Standard (128 bit key. hash algorithm: Secure Hash Standard authentication method: Rivest-Shamir-Adleman Signature Diffie-Hellman group: #5 (1536 bit) lifetime: 86400 seconds, no volume limitProtection suite of priority 65508 encryption algorithm: AES - Advanced Encryption Standard (128 bit key. hash algorithm: Secure Hash Standard authentication method: Pre-Shared Key Diffie-Hellman group: #5 (1536 bit) lifetime: 86400 seconds, no volume limitProtection suite of priority 65509 encryption algorithm: AES - Advanced Encryption Standard (128 bit key. hash algorithm: Message Digest 5
crypto isakmp policy
SEC-666April 2011
authentication method: Rivest-Shamir-Adleman Signature Diffie-Hellman group: #5 (1536 bit) lifetime: 86400 seconds, no volume limitProtection suite of priority 65510 encryption algorithm: AES - Advanced Encryption Standard (128 bit key. hash algorithm: Message Digest 5 authentication method: Pre-Shared Key Diffie-Hellman group: #5 (1536 bit) lifetime: 86400 seconds, no volume limitProtection suite of priority 65511 encryption algorithm: Three key triple DES hash algorithm: Secure Hash Standard authentication method: Rivest-Shamir-Adleman Signature Diffie-Hellman group: #2 (1024 bit) lifetime: 86400 seconds, no volume limitProtection suite of priority 65512 encryption algorithm: Three key triple DES hash algorithm: Secure Hash Standard authentication method: Pre-Shared Key Diffie-Hellman group: #2 (1024 bit) lifetime: 86400 seconds, no volume limitProtection suite of priority 65513 encryption algorithm: Three key triple DES hash algorithm: Message Digest 5 authentication method: Rivest-Shamir-Adleman Signature Diffie-Hellman group: #2 (1024 bit) lifetime: 86400 seconds, no volume limitProtection suite of priority 65514 encryption algorithm: Three key triple DES hash algorithm: Message Digest 5 authentication method: Pre-Shared Key Diffie-Hellman group: #2 (1024 bit) lifetime: 86400 seconds, no volume limit
Related Commands Command Description
encryption (IKE policy) Specifies the encryption algorithm within an IKE policy.
group (IKE policy) Specifies the Diffie-Hellman group identifier within an IKE policy.
hash (IKE policy) Specifies the hash algorithm within an IKE policy.
lifetime (IKE policy) Specifies the lifetime of an IKE SA.
show crypto isakmp default policy
Displays the default IKE (ISAKMP) policies currently in use.
show crypto isakmp policy Displays the parameters for each IKE policy.
crypto isakmp profile
SEC-667April 2011
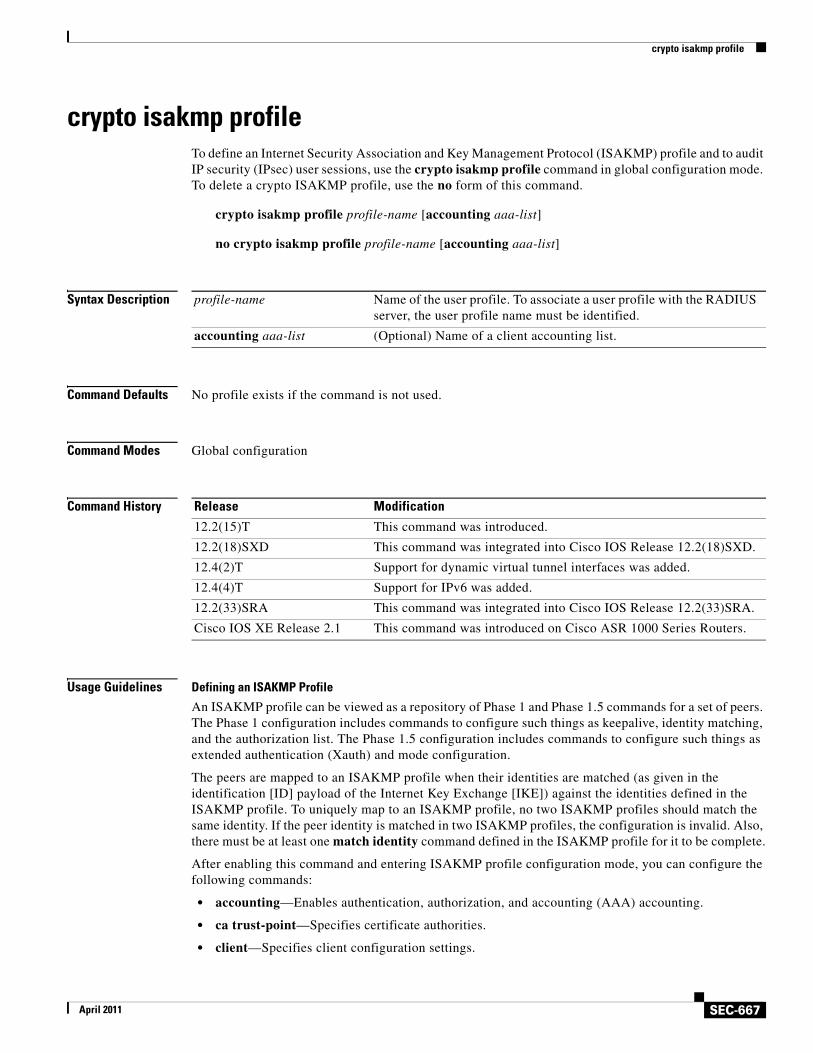
crypto isakmp profileTo define an Internet Security Association and Key Management Protocol (ISAKMP) profile and to audit IP security (IPsec) user sessions, use the crypto isakmp profile command in global configuration mode. To delete a crypto ISAKMP profile, use the no form of this command.
crypto isakmp profile profile-name [accounting aaa-list]
no crypto isakmp profile profile-name [accounting aaa-list]
Syntax Description
Command Defaults No profile exists if the command is not used.
Command Modes Global configuration
Command History
Usage Guidelines Defining an ISAKMP Profile
An ISAKMP profile can be viewed as a repository of Phase 1 and Phase 1.5 commands for a set of peers. The Phase 1 configuration includes commands to configure such things as keepalive, identity matching, and the authorization list. The Phase 1.5 configuration includes commands to configure such things as extended authentication (Xauth) and mode configuration.
The peers are mapped to an ISAKMP profile when their identities are matched (as given in the identification [ID] payload of the Internet Key Exchange [IKE]) against the identities defined in the ISAKMP profile. To uniquely map to an ISAKMP profile, no two ISAKMP profiles should match the same identity. If the peer identity is matched in two ISAKMP profiles, the configuration is invalid. Also, there must be at least one match identity command defined in the ISAKMP profile for it to be complete.
After enabling this command and entering ISAKMP profile configuration mode, you can configure the following commands:
• accounting—Enables authentication, authorization, and accounting (AAA) accounting.
• ca trust-point—Specifies certificate authorities.
• client—Specifies client configuration settings.
profile-name Name of the user profile. To associate a user profile with the RADIUS server, the user profile name must be identified.
accounting aaa-list (Optional) Name of a client accounting list.
Release Modification
12.2(15)T This command was introduced.
12.2(18)SXD This command was integrated into Cisco IOS Release 12.2(18)SXD.
12.4(2)T Support for dynamic virtual tunnel interfaces was added.
12.4(4)T Support for IPv6 was added.
12.2(33)SRA This command was integrated into Cisco IOS Release 12.2(33)SRA.
Cisco IOS XE Release 2.1 This command was introduced on Cisco ASR 1000 Series Routers.
crypto isakmp profile
SEC-668April 2011
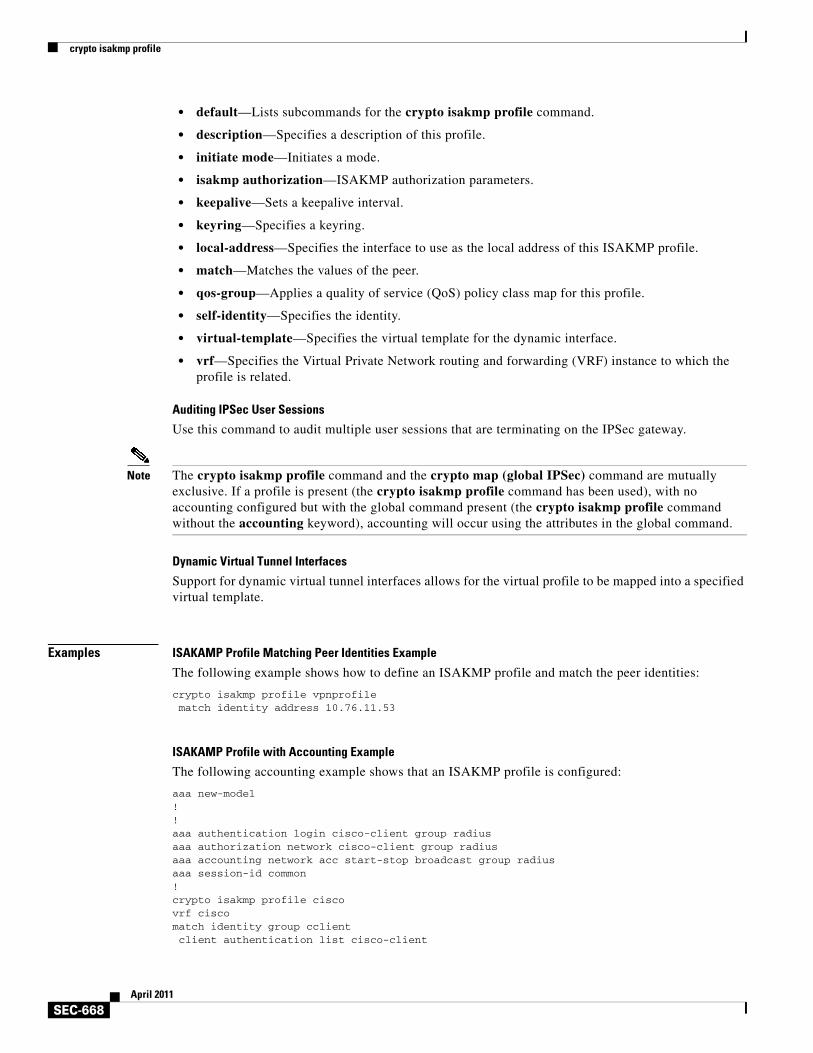
• default—Lists subcommands for the crypto isakmp profile command.
• description—Specifies a description of this profile.
• initiate mode—Initiates a mode.
• isakmp authorization—ISAKMP authorization parameters.
• keepalive—Sets a keepalive interval.
• keyring—Specifies a keyring.
• local-address—Specifies the interface to use as the local address of this ISAKMP profile.
• match—Matches the values of the peer.
• qos-group—Applies a quality of service (QoS) policy class map for this profile.
• self-identity—Specifies the identity.
• virtual-template—Specifies the virtual template for the dynamic interface.
• vrf—Specifies the Virtual Private Network routing and forwarding (VRF) instance to which the profile is related.
Auditing IPSec User Sessions
Use this command to audit multiple user sessions that are terminating on the IPSec gateway.
Note The crypto isakmp profile command and the crypto map (global IPSec) command are mutually exclusive. If a profile is present (the crypto isakmp profile command has been used), with no accounting configured but with the global command present (the crypto isakmp profile command without the accounting keyword), accounting will occur using the attributes in the global command.
Dynamic Virtual Tunnel Interfaces
Support for dynamic virtual tunnel interfaces allows for the virtual profile to be mapped into a specified virtual template.
Examples ISAKAMP Profile Matching Peer Identities Example
The following example shows how to define an ISAKMP profile and match the peer identities:
crypto isakmp profile vpnprofile match identity address 10.76.11.53
ISAKAMP Profile with Accounting Example
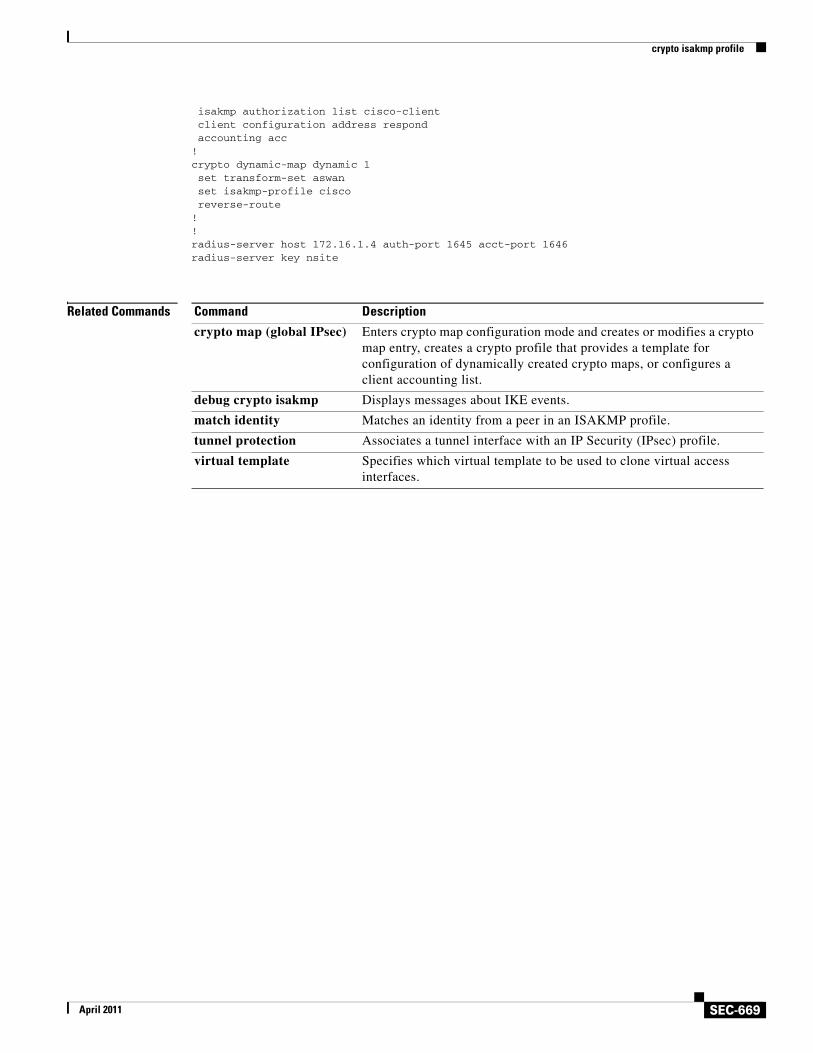
The following accounting example shows that an ISAKMP profile is configured:
aaa new-model!!aaa authentication login cisco-client group radiusaaa authorization network cisco-client group radius aaa accounting network acc start-stop broadcast group radiusaaa session-id common!crypto isakmp profile ciscovrf ciscomatch identity group cclientclient authentication list cisco-client
crypto isakmp profile
SEC-669April 2011
isakmp authorization list cisco-clientclient configuration address respondaccounting acc
!crypto dynamic-map dynamic 1 set transform-set aswan set isakmp-profile cisco reverse-route!!radius-server host 172.16.1.4 auth-port 1645 acct-port 1646radius-server key nsite
Related Commands Command Description
crypto map (global IPsec) Enters crypto map configuration mode and creates or modifies a crypto map entry, creates a crypto profile that provides a template for configuration of dynamically created crypto maps, or configures a client accounting list.
debug crypto isakmp Displays messages about IKE events.
match identity Matches an identity from a peer in an ISAKMP profile.
tunnel protection Associates a tunnel interface with an IP Security (IPsec) profile.
virtual template Specifies which virtual template to be used to clone virtual access interfaces.
crypto key decrypt rsa
SEC-670April 2011
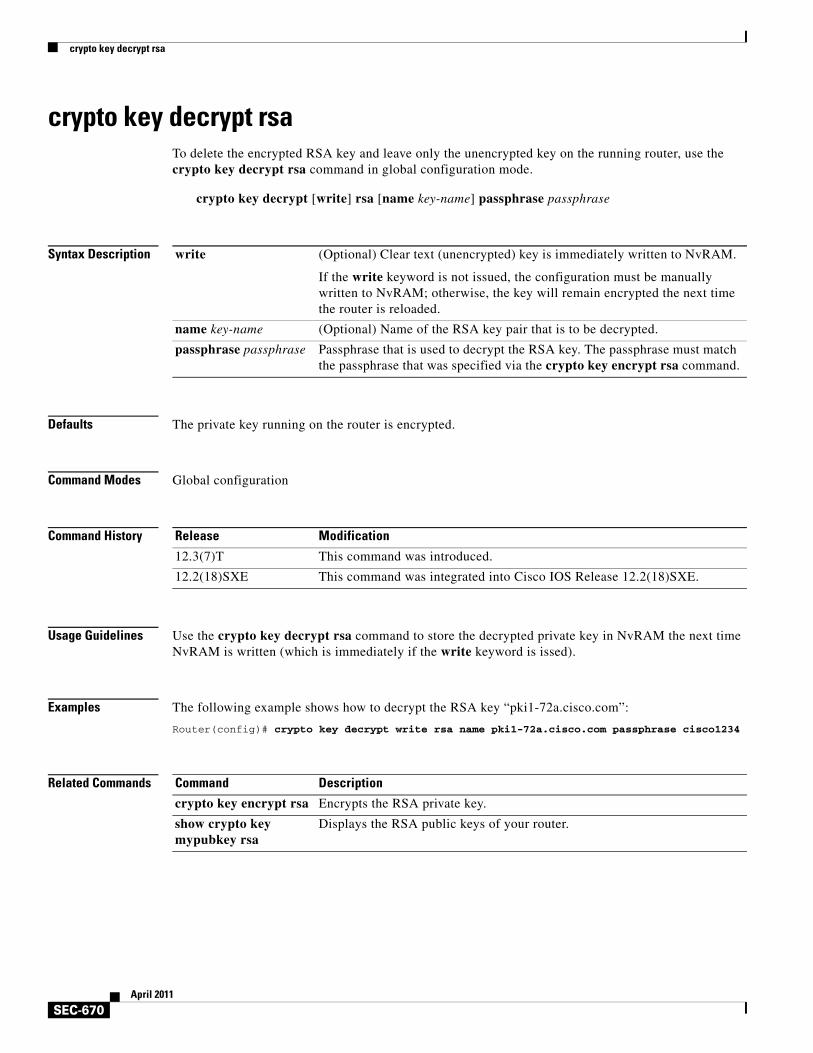
crypto key decrypt rsaTo delete the encrypted RSA key and leave only the unencrypted key on the running router, use the crypto key decrypt rsa command in global configuration mode.
crypto key decrypt [write] rsa [name key-name] passphrase passphrase
Syntax Description
Defaults The private key running on the router is encrypted.
Command Modes Global configuration
Command History
Usage Guidelines Use the crypto key decrypt rsa command to store the decrypted private key in NvRAM the next time NvRAM is written (which is immediately if the write keyword is issed).
Examples The following example shows how to decrypt the RSA key “pki1-72a.cisco.com”:
Router(config)# crypto key decrypt write rsa name pki1-72a.cisco.com passphrase cisco1234
Related Commands
write (Optional) Clear text (unencrypted) key is immediately written to NvRAM.
If the write keyword is not issued, the configuration must be manually written to NvRAM; otherwise, the key will remain encrypted the next time the router is reloaded.
name key-name (Optional) Name of the RSA key pair that is to be decrypted.
passphrase passphrase Passphrase that is used to decrypt the RSA key. The passphrase must match the passphrase that was specified via the crypto key encrypt rsa command.
Release Modification
12.3(7)T This command was introduced.
12.2(18)SXE This command was integrated into Cisco IOS Release 12.2(18)SXE.
Command Description
crypto key encrypt rsa Encrypts the RSA private key.
show crypto key mypubkey rsa
Displays the RSA public keys of your router.
crypto key encrypt rsa
SEC-671April 2011
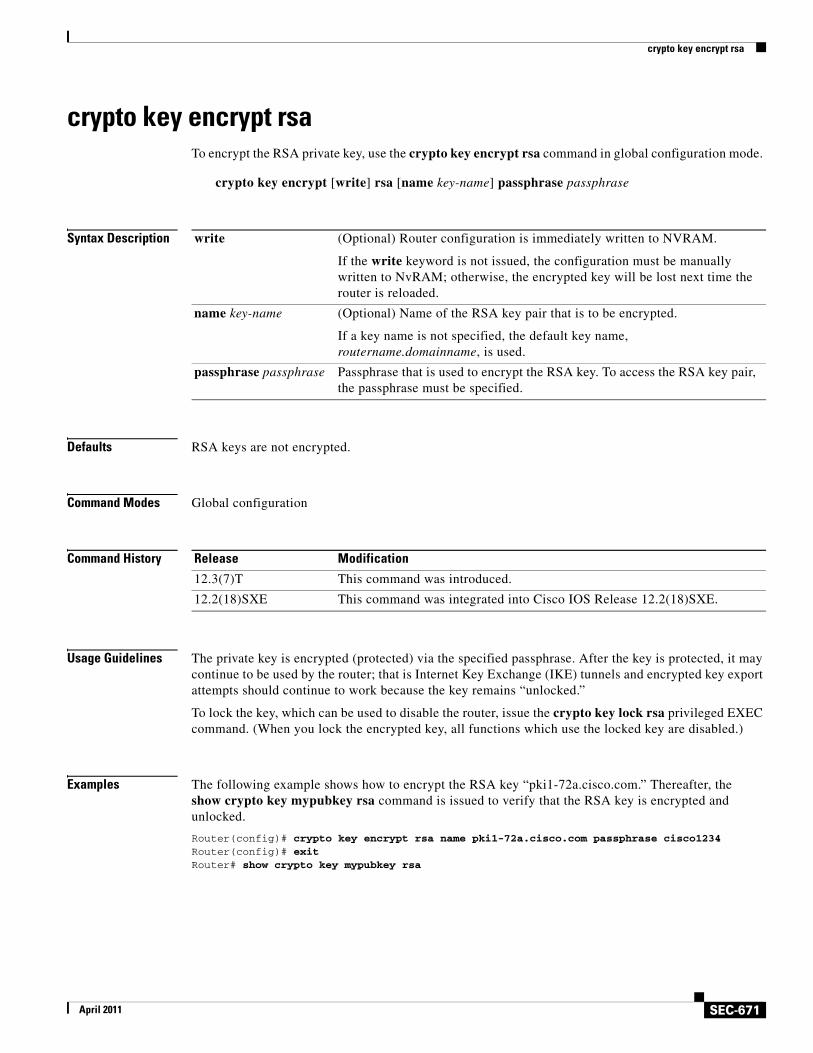
crypto key encrypt rsaTo encrypt the RSA private key, use the crypto key encrypt rsa command in global configuration mode.
crypto key encrypt [write] rsa [name key-name] passphrase passphrase
Syntax Description
Defaults RSA keys are not encrypted.
Command Modes Global configuration
Command History
Usage Guidelines The private key is encrypted (protected) via the specified passphrase. After the key is protected, it may continue to be used by the router; that is Internet Key Exchange (IKE) tunnels and encrypted key export attempts should continue to work because the key remains “unlocked.”
To lock the key, which can be used to disable the router, issue the crypto key lock rsa privileged EXEC command. (When you lock the encrypted key, all functions which use the locked key are disabled.)
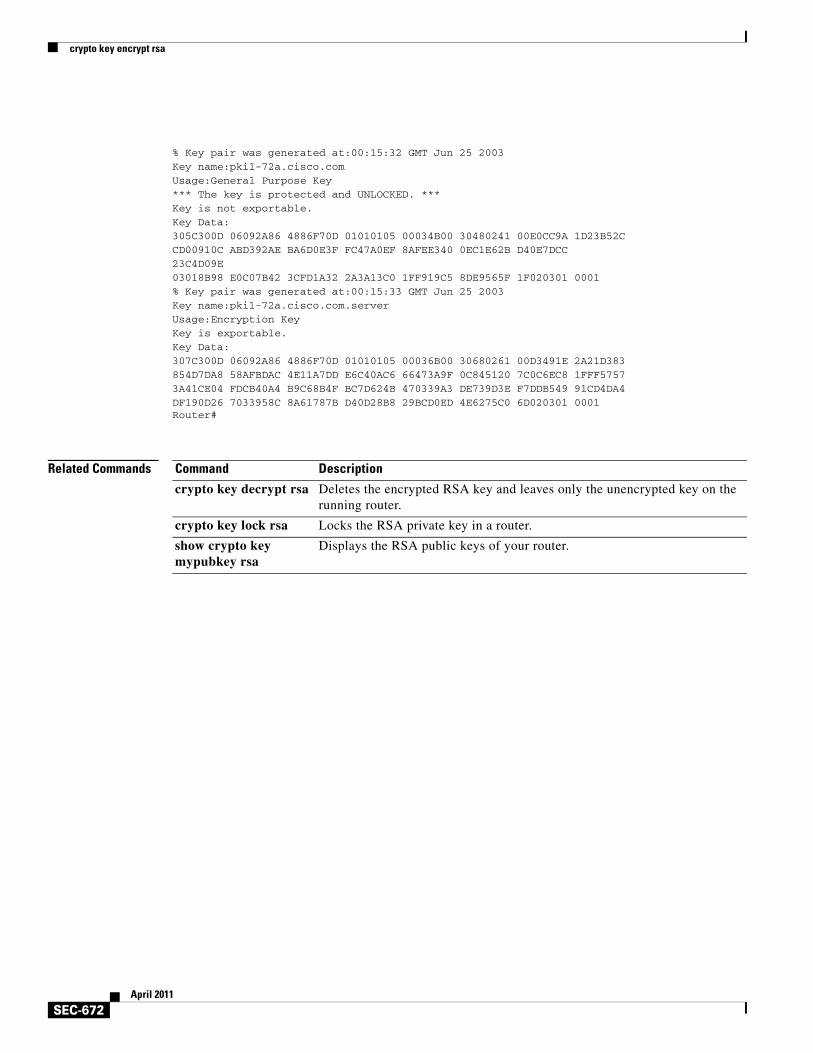
Examples The following example shows how to encrypt the RSA key “pki1-72a.cisco.com.” Thereafter, the show crypto key mypubkey rsa command is issued to verify that the RSA key is encrypted and unlocked.
Router(config)# crypto key encrypt rsa name pki1-72a.cisco.com passphrase cisco1234Router(config)# exitRouter# show crypto key mypubkey rsa
write (Optional) Router configuration is immediately written to NVRAM.
If the write keyword is not issued, the configuration must be manually written to NvRAM; otherwise, the encrypted key will be lost next time the router is reloaded.
name key-name (Optional) Name of the RSA key pair that is to be encrypted.
If a key name is not specified, the default key name, routername.domainname, is used.
passphrase passphrase Passphrase that is used to encrypt the RSA key. To access the RSA key pair, the passphrase must be specified.
Release Modification
12.3(7)T This command was introduced.
12.2(18)SXE This command was integrated into Cisco IOS Release 12.2(18)SXE.
crypto key encrypt rsa
SEC-672April 2011
% Key pair was generated at:00:15:32 GMT Jun 25 2003Key name:pki1-72a.cisco.comUsage:General Purpose Key*** The key is protected and UNLOCKED. ***Key is not exportable.Key Data:305C300D 06092A86 4886F70D 01010105 00034B00 30480241 00E0CC9A 1D23B52CCD00910C ABD392AE BA6D0E3F FC47A0EF 8AFEE340 0EC1E62B D40E7DCC23C4D09E03018B98 E0C07B42 3CFD1A32 2A3A13C0 1FF919C5 8DE9565F 1F020301 0001% Key pair was generated at:00:15:33 GMT Jun 25 2003Key name:pki1-72a.cisco.com.serverUsage:Encryption KeyKey is exportable.Key Data:307C300D 06092A86 4886F70D 01010105 00036B00 30680261 00D3491E 2A21D383854D7DA8 58AFBDAC 4E11A7DD E6C40AC6 66473A9F 0C845120 7C0C6EC8 1FFF57573A41CE04 FDCB40A4 B9C68B4F BC7D624B 470339A3 DE739D3E F7DDB549 91CD4DA4DF190D26 7033958C 8A61787B D40D28B8 29BCD0ED 4E6275C0 6D020301 0001Router#
Related Commands Command Description
crypto key decrypt rsa Deletes the encrypted RSA key and leaves only the unencrypted key on the running router.
crypto key lock rsa Locks the RSA private key in a router.
show crypto key mypubkey rsa
Displays the RSA public keys of your router.
crypto key export rsa pem
SEC-673April 2011
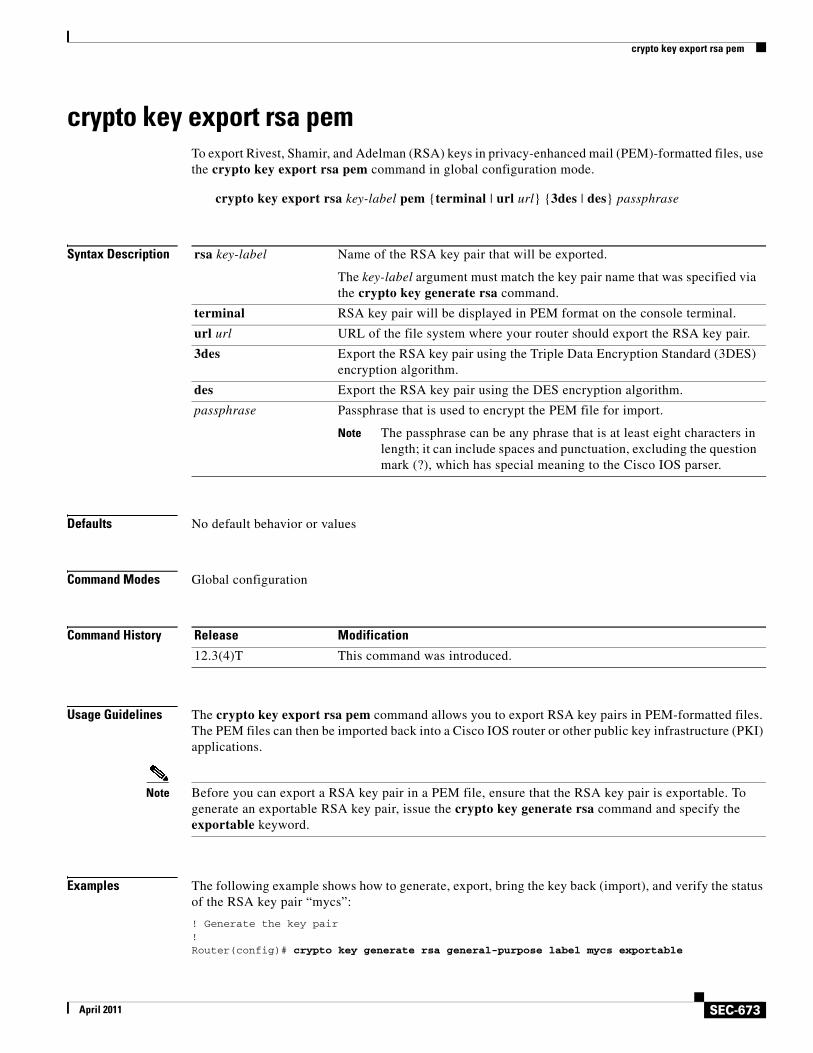
crypto key export rsa pemTo export Rivest, Shamir, and Adelman (RSA) keys in privacy-enhanced mail (PEM)-formatted files, use the crypto key export rsa pem command in global configuration mode.
crypto key export rsa key-label pem {terminal | url url} {3des | des} passphrase
Syntax Description
Defaults No default behavior or values
Command Modes Global configuration
Command History
Usage Guidelines The crypto key export rsa pem command allows you to export RSA key pairs in PEM-formatted files. The PEM files can then be imported back into a Cisco IOS router or other public key infrastructure (PKI) applications.
Note Before you can export a RSA key pair in a PEM file, ensure that the RSA key pair is exportable. To generate an exportable RSA key pair, issue the crypto key generate rsa command and specify the exportable keyword.
Examples The following example shows how to generate, export, bring the key back (import), and verify the status of the RSA key pair “mycs”:
! Generate the key pair !Router(config)# crypto key generate rsa general-purpose label mycs exportable
rsa key-label Name of the RSA key pair that will be exported.
The key-label argument must match the key pair name that was specified via the crypto key generate rsa command.
terminal RSA key pair will be displayed in PEM format on the console terminal.
url url URL of the file system where your router should export the RSA key pair.
3des Export the RSA key pair using the Triple Data Encryption Standard (3DES) encryption algorithm.
des Export the RSA key pair using the DES encryption algorithm.
passphrase Passphrase that is used to encrypt the PEM file for import.
Note The passphrase can be any phrase that is at least eight characters in length; it can include spaces and punctuation, excluding the question mark (?), which has special meaning to the Cisco IOS parser.
Release Modification
12.3(4)T This command was introduced.
crypto key export rsa pem
SEC-674April 2011
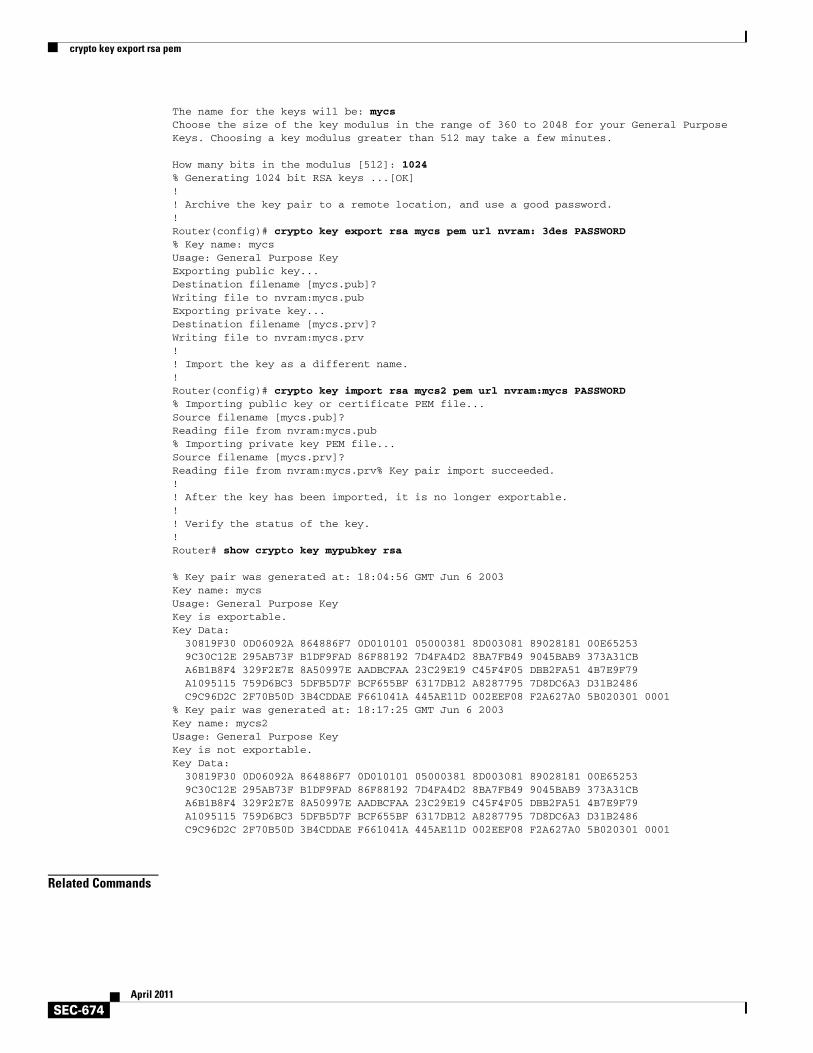
The name for the keys will be: mycsChoose the size of the key modulus in the range of 360 to 2048 for your General Purpose Keys. Choosing a key modulus greater than 512 may take a few minutes.
How many bits in the modulus [512]: 1024% Generating 1024 bit RSA keys ...[OK]!! Archive the key pair to a remote location, and use a good password.!Router(config)# crypto key export rsa mycs pem url nvram: 3des PASSWORD% Key name: mycsUsage: General Purpose KeyExporting public key...Destination filename [mycs.pub]? Writing file to nvram:mycs.pubExporting private key...Destination filename [mycs.prv]? Writing file to nvram:mycs.prv!! Import the key as a different name.!Router(config)# crypto key import rsa mycs2 pem url nvram:mycs PASSWORD% Importing public key or certificate PEM file...Source filename [mycs.pub]? Reading file from nvram:mycs.pub% Importing private key PEM file...Source filename [mycs.prv]? Reading file from nvram:mycs.prv% Key pair import succeeded.!! After the key has been imported, it is no longer exportable.!! Verify the status of the key.!Router# show crypto key mypubkey rsa
% Key pair was generated at: 18:04:56 GMT Jun 6 2003Key name: mycsUsage: General Purpose KeyKey is exportable.Key Data: 30819F30 0D06092A 864886F7 0D010101 05000381 8D003081 89028181 00E65253 9C30C12E 295AB73F B1DF9FAD 86F88192 7D4FA4D2 8BA7FB49 9045BAB9 373A31CB A6B1B8F4 329F2E7E 8A50997E AADBCFAA 23C29E19 C45F4F05 DBB2FA51 4B7E9F79 A1095115 759D6BC3 5DFB5D7F BCF655BF 6317DB12 A8287795 7D8DC6A3 D31B2486 C9C96D2C 2F70B50D 3B4CDDAE F661041A 445AE11D 002EEF08 F2A627A0 5B020301 0001% Key pair was generated at: 18:17:25 GMT Jun 6 2003Key name: mycs2Usage: General Purpose KeyKey is not exportable.Key Data: 30819F30 0D06092A 864886F7 0D010101 05000381 8D003081 89028181 00E65253 9C30C12E 295AB73F B1DF9FAD 86F88192 7D4FA4D2 8BA7FB49 9045BAB9 373A31CB A6B1B8F4 329F2E7E 8A50997E AADBCFAA 23C29E19 C45F4F05 DBB2FA51 4B7E9F79 A1095115 759D6BC3 5DFB5D7F BCF655BF 6317DB12 A8287795 7D8DC6A3 D31B2486
C9C96D2C 2F70B50D 3B4CDDAE F661041A 445AE11D 002EEF08 F2A627A0 5B020301 0001
Related Commands

crypto key export rsa pem
SEC-675April 2011
Command Description
crypto key generate rsa
Generates RSA key pairs.
crypto key import rsa pem
Imports RSA keys in PEM-formatted files.
crypto key generate ec keysize
SEC-676April 2011
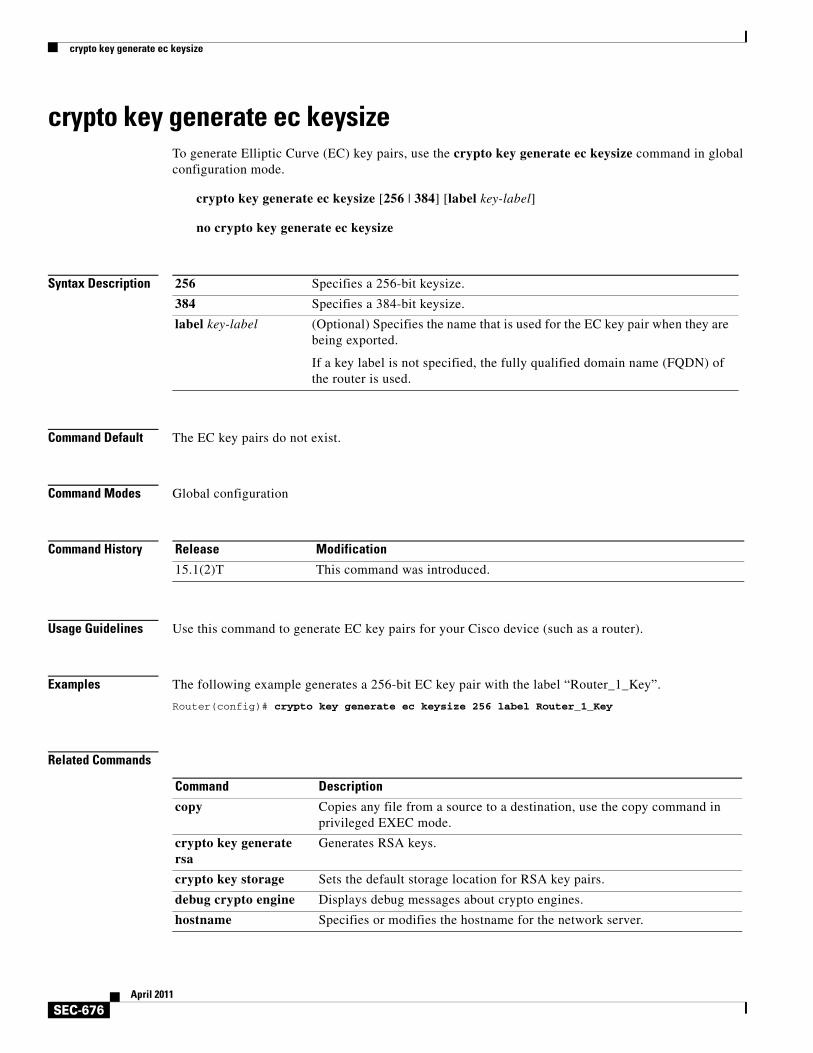
crypto key generate ec keysizeTo generate Elliptic Curve (EC) key pairs, use the crypto key generate ec keysize command in global configuration mode.
crypto key generate ec keysize [256 | 384] [label key-label]
no crypto key generate ec keysize
Syntax Description
Command Default The EC key pairs do not exist.
Command Modes Global configuration
Command History
Usage Guidelines Use this command to generate EC key pairs for your Cisco device (such as a router).
Examples The following example generates a 256-bit EC key pair with the label “Router_1_Key”.
Router(config)# crypto key generate ec keysize 256 label Router_1_Key
Related Commands
256 Specifies a 256-bit keysize.
384 Specifies a 384-bit keysize.
label key-label (Optional) Specifies the name that is used for the EC key pair when they are being exported.
If a key label is not specified, the fully qualified domain name (FQDN) of the router is used.
Release Modification
15.1(2)T This command was introduced.
Command Description
copy Copies any file from a source to a destination, use the copy command in privileged EXEC mode.
crypto key generate rsa
Generates RSA keys.
crypto key storage Sets the default storage location for RSA key pairs.
debug crypto engine Displays debug messages about crypto engines.
hostname Specifies or modifies the hostname for the network server.

crypto key generate ec keysize
SEC-677April 2011
ip domain-name Defines a default domain name to complete unqualified hostnames (names without a dotted-decimal domain name).
show crypto key mypubkey rsa
Displays the RSA public keys of your router.
show crypto pki certificates
Displays information about your PKI certificate, certification authority, and any registration authority certificates.
Command Description
crypto key generate rsa
SEC-678April 2011
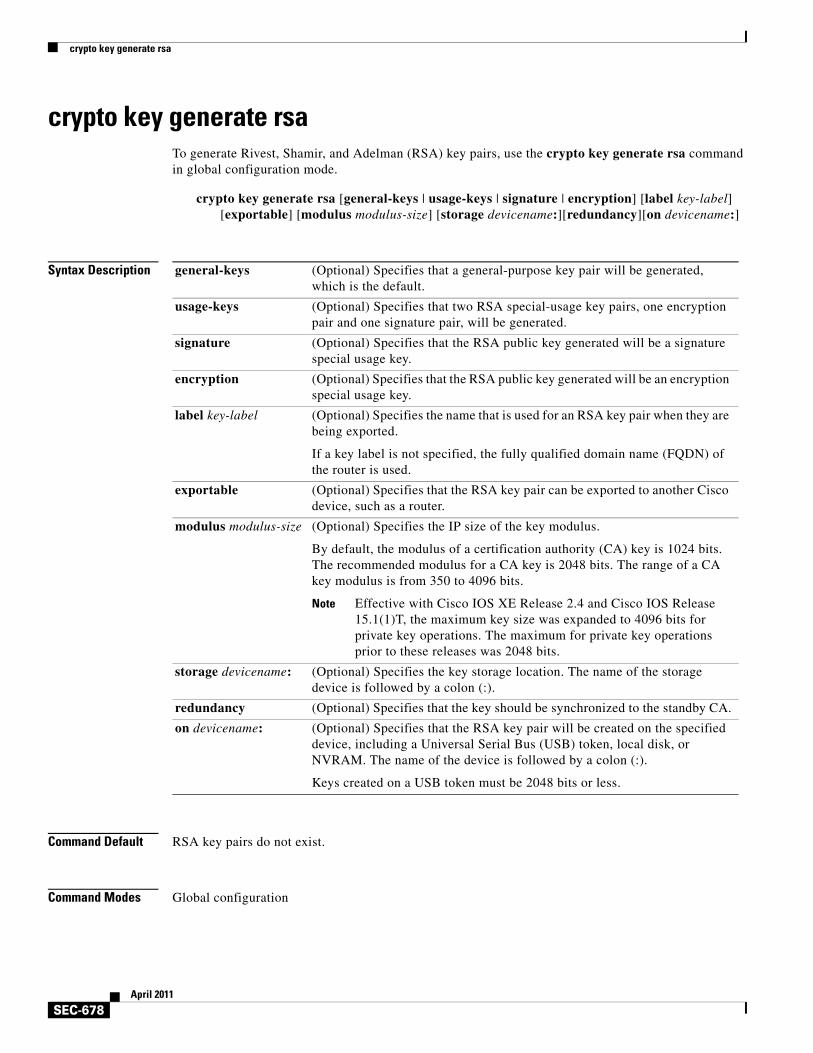
crypto key generate rsaTo generate Rivest, Shamir, and Adelman (RSA) key pairs, use the crypto key generate rsa command in global configuration mode.
crypto key generate rsa [general-keys | usage-keys | signature | encryption] [label key-label] [exportable] [modulus modulus-size] [storage devicename:][redundancy][on devicename:]
Syntax Description
Command Default RSA key pairs do not exist.
Command Modes Global configuration
general-keys (Optional) Specifies that a general-purpose key pair will be generated, which is the default.
usage-keys (Optional) Specifies that two RSA special-usage key pairs, one encryption pair and one signature pair, will be generated.
signature (Optional) Specifies that the RSA public key generated will be a signature special usage key.
encryption (Optional) Specifies that the RSA public key generated will be an encryption special usage key.
label key-label (Optional) Specifies the name that is used for an RSA key pair when they are being exported.
If a key label is not specified, the fully qualified domain name (FQDN) of the router is used.
exportable (Optional) Specifies that the RSA key pair can be exported to another Cisco device, such as a router.
modulus modulus-size (Optional) Specifies the IP size of the key modulus.
By default, the modulus of a certification authority (CA) key is 1024 bits. The recommended modulus for a CA key is 2048 bits. The range of a CA key modulus is from 350 to 4096 bits.
Note Effective with Cisco IOS XE Release 2.4 and Cisco IOS Release 15.1(1)T, the maximum key size was expanded to 4096 bits for private key operations. The maximum for private key operations prior to these releases was 2048 bits.
storage devicename: (Optional) Specifies the key storage location. The name of the storage device is followed by a colon (:).
redundancy (Optional) Specifies that the key should be synchronized to the standby CA.
on devicename: (Optional) Specifies that the RSA key pair will be created on the specified device, including a Universal Serial Bus (USB) token, local disk, or NVRAM. The name of the device is followed by a colon (:).
Keys created on a USB token must be 2048 bits or less.
crypto key generate rsa
SEC-679April 2011
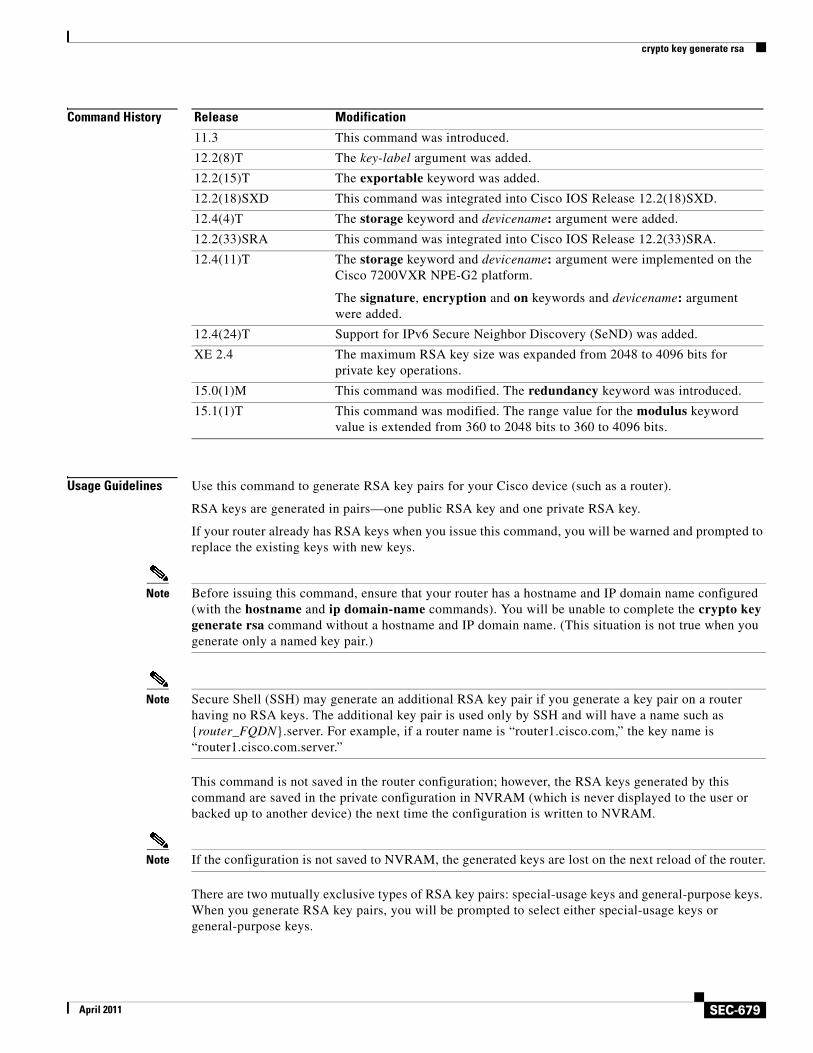
Command History
Usage Guidelines Use this command to generate RSA key pairs for your Cisco device (such as a router).
RSA keys are generated in pairs—one public RSA key and one private RSA key.
If your router already has RSA keys when you issue this command, you will be warned and prompted to replace the existing keys with new keys.
Note Before issuing this command, ensure that your router has a hostname and IP domain name configured (with the hostname and ip domain-name commands). You will be unable to complete the crypto key generate rsa command without a hostname and IP domain name. (This situation is not true when you generate only a named key pair.)
Note Secure Shell (SSH) may generate an additional RSA key pair if you generate a key pair on a router having no RSA keys. The additional key pair is used only by SSH and will have a name such as {router_FQDN}.server. For example, if a router name is “router1.cisco.com,” the key name is “router1.cisco.com.server.”
This command is not saved in the router configuration; however, the RSA keys generated by this command are saved in the private configuration in NVRAM (which is never displayed to the user or backed up to another device) the next time the configuration is written to NVRAM.
Note If the configuration is not saved to NVRAM, the generated keys are lost on the next reload of the router.
There are two mutually exclusive types of RSA key pairs: special-usage keys and general-purpose keys. When you generate RSA key pairs, you will be prompted to select either special-usage keys or general-purpose keys.
Release Modification
11.3 This command was introduced.
12.2(8)T The key-label argument was added.
12.2(15)T The exportable keyword was added.
12.2(18)SXD This command was integrated into Cisco IOS Release 12.2(18)SXD.
12.4(4)T The storage keyword and devicename: argument were added.
12.2(33)SRA This command was integrated into Cisco IOS Release 12.2(33)SRA.
12.4(11)T The storage keyword and devicename: argument were implemented on the Cisco 7200VXR NPE-G2 platform.
The signature, encryption and on keywords and devicename: argument were added.
12.4(24)T Support for IPv6 Secure Neighbor Discovery (SeND) was added.
XE 2.4 The maximum RSA key size was expanded from 2048 to 4096 bits for private key operations.
15.0(1)M This command was modified. The redundancy keyword was introduced.
15.1(1)T This command was modified. The range value for the modulus keyword value is extended from 360 to 2048 bits to 360 to 4096 bits.
crypto key generate rsa
SEC-680April 2011
Special-Usage Keys
If you generate special-usage keys, two pairs of RSA keys will be generated. One pair will be used with any Internet Key Exchange (IKE) policy that specifies RSA signatures as the authentication method, and the other pair will be used with any IKE policy that specifies RSA encrypted keys as the authentication method.
A CA is used only with IKE policies specifying RSA signatures, not with IKE policies specifying RSA-encrypted nonces. (However, you could specify more than one IKE policy and have RSA signatures specified in one policy and RSA-encrypted nonces in another policy.)
If you plan to have both types of RSA authentication methods in your IKE policies, you may prefer to generate special-usage keys. With special-usage keys, each key is not unnecessarily exposed. (Without special-usage keys, one key is used for both authentication methods, increasing the exposure of that key.)
General-Purpose Keys
If you generate general-purpose keys, only one pair of RSA keys will be generated. This pair will be used with IKE policies specifying either RSA signatures or RSA encrypted keys. Therefore, a general-purpose key pair might get used more frequently than a special-usage key pair.
Named Key Pairs
If you generate a named key pair using the key-label argument, you must also specify the usage-keys keyword or the general-keys keyword. Named key pairs allow you to have multiple RSA key pairs, enabling the Cisco IOS software to maintain a different key pair for each identity certificate.
Modulus Length
When you generate RSA keys, you will be prompted to enter a modulus length. The longer the modulus, the stronger the security. However a longer modules takes longer to generate (see Table 26 for sample times) and takes longer to use.
Cisco IOS software does not support a modulus greater than 4096 bits. A length of less than 512 bits is normally not recommended. In certain situations, the shorter modulus may not function properly with IKE, so we recommend using a minimum modulus of 2048 bits.
Note As of Cisco IOS Release 12.4(11)T, peer public RSA key modulus values up to 4096 bits are automatically supported.
The largest private RSA key modulus is 4096 bits. Therefore, the largest RSA private key a router may generate or import is 4096 bits. However, RFC 2409 restricts the private key size to 2048 bits or less for RSA encryption.
The recommended modulus for a CA is 2048 bits; the recommended modulus for a client is 2048 bits.
Table 26 Sample Times by Modulus Length to Generate RSA Keys
Router 360 bits 512 bits 1024 bits 2048 bits (maximum)
Cisco 2500 11 seconds 20 seconds 4 minutes, 38 seconds More than 1 hour
Cisco 4700 Less than 1 second
1 second 4 seconds 50 seconds
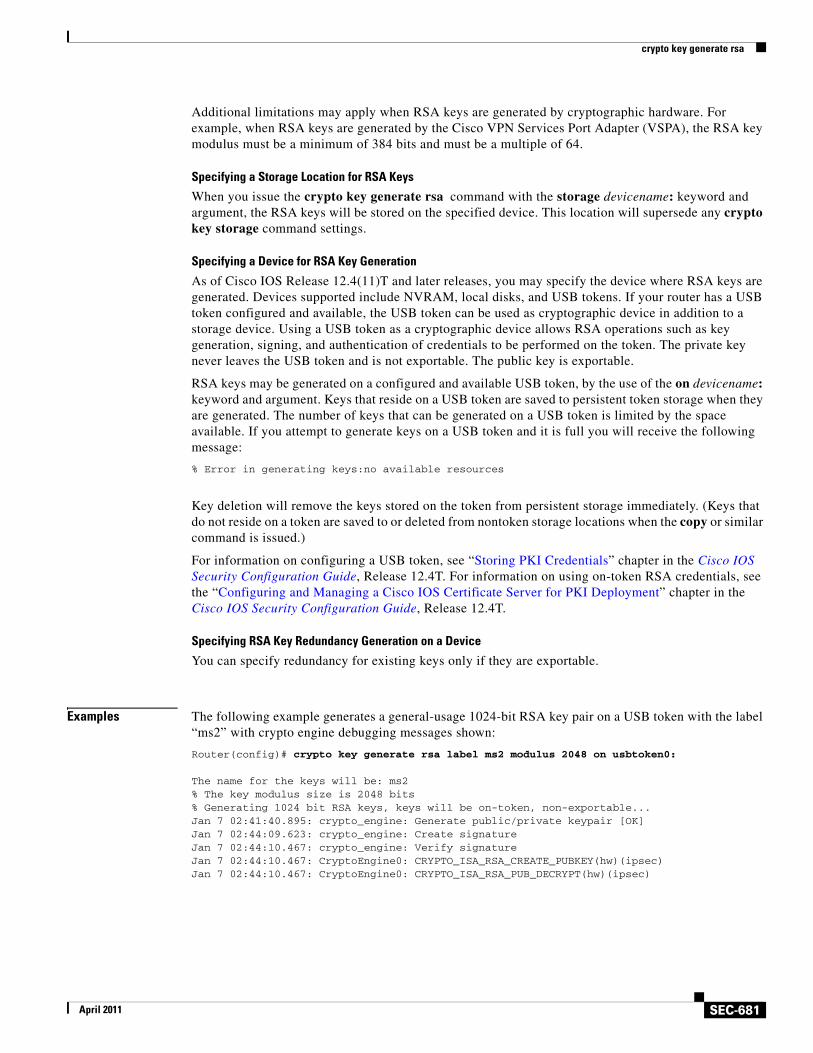
crypto key generate rsa
SEC-681April 2011
Additional limitations may apply when RSA keys are generated by cryptographic hardware. For example, when RSA keys are generated by the Cisco VPN Services Port Adapter (VSPA), the RSA key modulus must be a minimum of 384 bits and must be a multiple of 64.
Specifying a Storage Location for RSA Keys
When you issue the crypto key generate rsa command with the storage devicename: keyword and argument, the RSA keys will be stored on the specified device. This location will supersede any crypto key storage command settings.
Specifying a Device for RSA Key Generation
As of Cisco IOS Release 12.4(11)T and later releases, you may specify the device where RSA keys are generated. Devices supported include NVRAM, local disks, and USB tokens. If your router has a USB token configured and available, the USB token can be used as cryptographic device in addition to a storage device. Using a USB token as a cryptographic device allows RSA operations such as key generation, signing, and authentication of credentials to be performed on the token. The private key never leaves the USB token and is not exportable. The public key is exportable.
RSA keys may be generated on a configured and available USB token, by the use of the on devicename: keyword and argument. Keys that reside on a USB token are saved to persistent token storage when they are generated. The number of keys that can be generated on a USB token is limited by the space available. If you attempt to generate keys on a USB token and it is full you will receive the following message:
% Error in generating keys:no available resources
Key deletion will remove the keys stored on the token from persistent storage immediately. (Keys that do not reside on a token are saved to or deleted from nontoken storage locations when the copy or similar command is issued.)
For information on configuring a USB token, see “Storing PKI Credentials” chapter in the Cisco IOS Security Configuration Guide, Release 12.4T. For information on using on-token RSA credentials, see the “Configuring and Managing a Cisco IOS Certificate Server for PKI Deployment” chapter in the Cisco IOS Security Configuration Guide, Release 12.4T.
Specifying RSA Key Redundancy Generation on a Device
You can specify redundancy for existing keys only if they are exportable.
Examples The following example generates a general-usage 1024-bit RSA key pair on a USB token with the label “ms2” with crypto engine debugging messages shown:
Router(config)# crypto key generate rsa label ms2 modulus 2048 on usbtoken0:
The name for the keys will be: ms2 % The key modulus size is 2048 bits % Generating 1024 bit RSA keys, keys will be on-token, non-exportable... Jan 7 02:41:40.895: crypto_engine: Generate public/private keypair [OK] Jan 7 02:44:09.623: crypto_engine: Create signature Jan 7 02:44:10.467: crypto_engine: Verify signature Jan 7 02:44:10.467: CryptoEngine0: CRYPTO_ISA_RSA_CREATE_PUBKEY(hw)(ipsec) Jan 7 02:44:10.467: CryptoEngine0: CRYPTO_ISA_RSA_PUB_DECRYPT(hw)(ipsec)
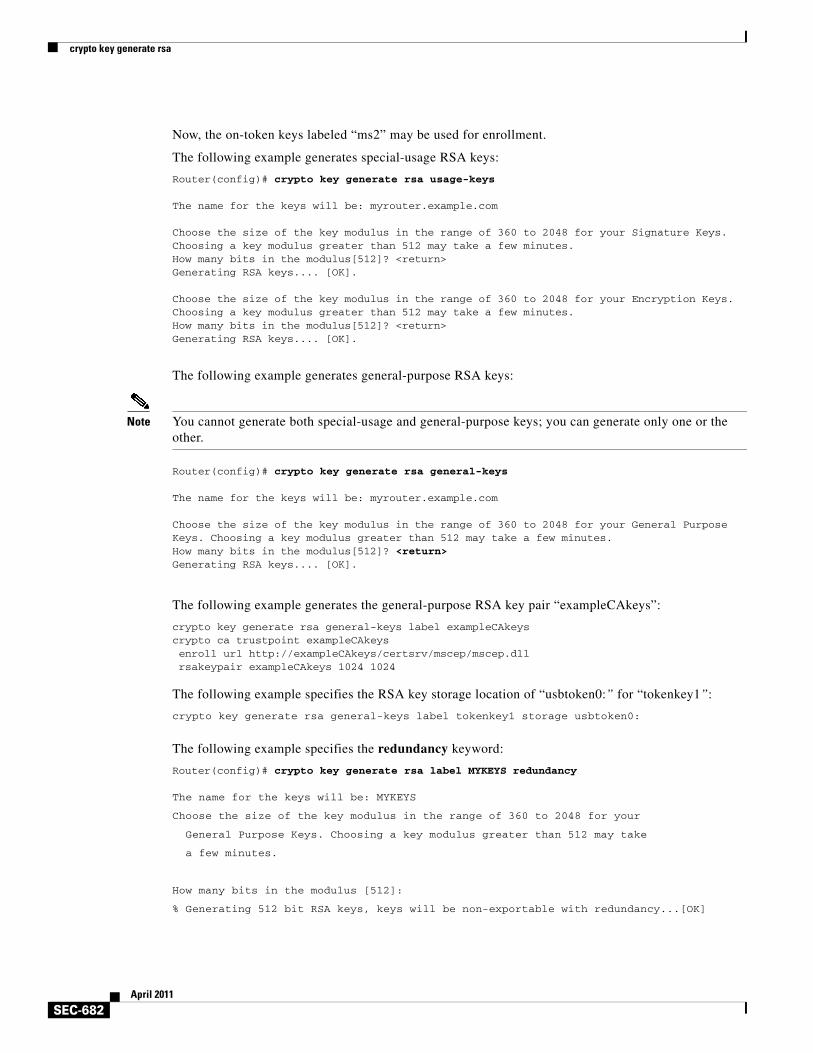
crypto key generate rsa
SEC-682April 2011
Now, the on-token keys labeled “ms2” may be used for enrollment.
The following example generates special-usage RSA keys:
Router(config)# crypto key generate rsa usage-keys
The name for the keys will be: myrouter.example.com
Choose the size of the key modulus in the range of 360 to 2048 for your Signature Keys. Choosing a key modulus greater than 512 may take a few minutes.How many bits in the modulus[512]? <return>Generating RSA keys.... [OK].
Choose the size of the key modulus in the range of 360 to 2048 for your Encryption Keys. Choosing a key modulus greater than 512 may take a few minutes.How many bits in the modulus[512]? <return>Generating RSA keys.... [OK].
The following example generates general-purpose RSA keys:
Note You cannot generate both special-usage and general-purpose keys; you can generate only one or the other.
Router(config)# crypto key generate rsa general-keys
The name for the keys will be: myrouter.example.com
Choose the size of the key modulus in the range of 360 to 2048 for your General Purpose Keys. Choosing a key modulus greater than 512 may take a few minutes.How many bits in the modulus[512]? <return>Generating RSA keys.... [OK].
The following example generates the general-purpose RSA key pair “exampleCAkeys”:
crypto key generate rsa general-keys label exampleCAkeyscrypto ca trustpoint exampleCAkeysenroll url http://exampleCAkeys/certsrv/mscep/mscep.dllrsakeypair exampleCAkeys 1024 1024
The following example specifies the RSA key storage location of “usbtoken0:” for “tokenkey1”:
crypto key generate rsa general-keys label tokenkey1 storage usbtoken0:
The following example specifies the redundancy keyword:
Router(config)# crypto key generate rsa label MYKEYS redundancy
The name for the keys will be: MYKEYS
Choose the size of the key modulus in the range of 360 to 2048 for your
General Purpose Keys. Choosing a key modulus greater than 512 may take
a few minutes.
How many bits in the modulus [512]:
% Generating 512 bit RSA keys, keys will be non-exportable with redundancy...[OK]
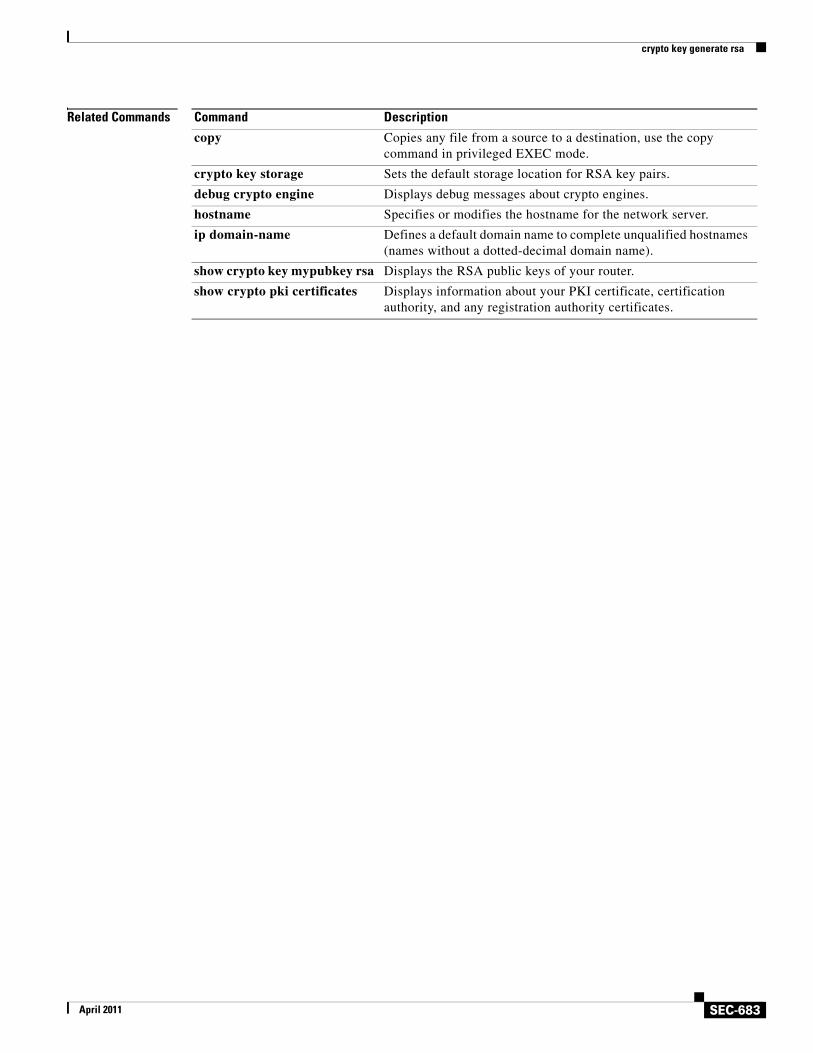
crypto key generate rsa
SEC-683April 2011
Related Commands Command Description
copy Copies any file from a source to a destination, use the copy command in privileged EXEC mode.
crypto key storage Sets the default storage location for RSA key pairs.
debug crypto engine Displays debug messages about crypto engines.
hostname Specifies or modifies the hostname for the network server.
ip domain-name Defines a default domain name to complete unqualified hostnames (names without a dotted-decimal domain name).
show crypto key mypubkey rsa Displays the RSA public keys of your router.
show crypto pki certificates Displays information about your PKI certificate, certification authority, and any registration authority certificates.

crypto key import rsa pem
SEC-684April 2011
crypto key import rsa pemTo import Rivest, Shamir, and Adelman (RSA) keys in privacy-enhanced mail (PEM)-formatted files, use the crypto key import rsa pem command in global configuration mode.
crypto key import rsa key-label pem [usage-keys | signature | encryption | general-purpose] {storage | terminal [passphrase] | url url} [exportable] [on devicename:]
Syntax Description
Command Default RSA general-purpose key pair type is expected for import.
Command Modes Global configuration (config)
Command History
key-label Name of the RSA key pair that is imported to the device.
The key-label argument must match the key pair name that was specified through the crypto key generate rsa command.
usage-keys (Optional) Specifies that two RSA special usage key pairs, one encryption pair and one signature pair, are imported.
signature (Optional) Specifies that RSA signature keys are imported.
encryption (Optional) Specifies that RSA encryption keys are imported.
general-purpose (Optional) Specifies a General Purpose Key.
storage Stores the key on the specified device.
terminal Specifies the certificates and RSA key pairs are manually imported to the console terminal.
passphrase Passphrase that is used to encrypt the PEM file for import.
Note The passphrase can be any phrase that is at least eight characters in length; it can include spaces and punctuation, excluding the question mark (?), which has special meaning to the Cisco IOS parser.
url url URL of the file system where the router should import certificates and RSA key pairs.
exportable (Optional) Specifies that the imported RSA key pair can be exported to another Cisco device such as a router.
on devicename: (Optional) Specifies that the imported RSA key pair is created on the specified device. Devices supported include local disks, NVRAM, and USB tokens. The name of the device is followed by a colon (:).
Keys created on a USB token have a maximum size of 1024-bits.
Release Modification
12.3(4)T This command was introduced.
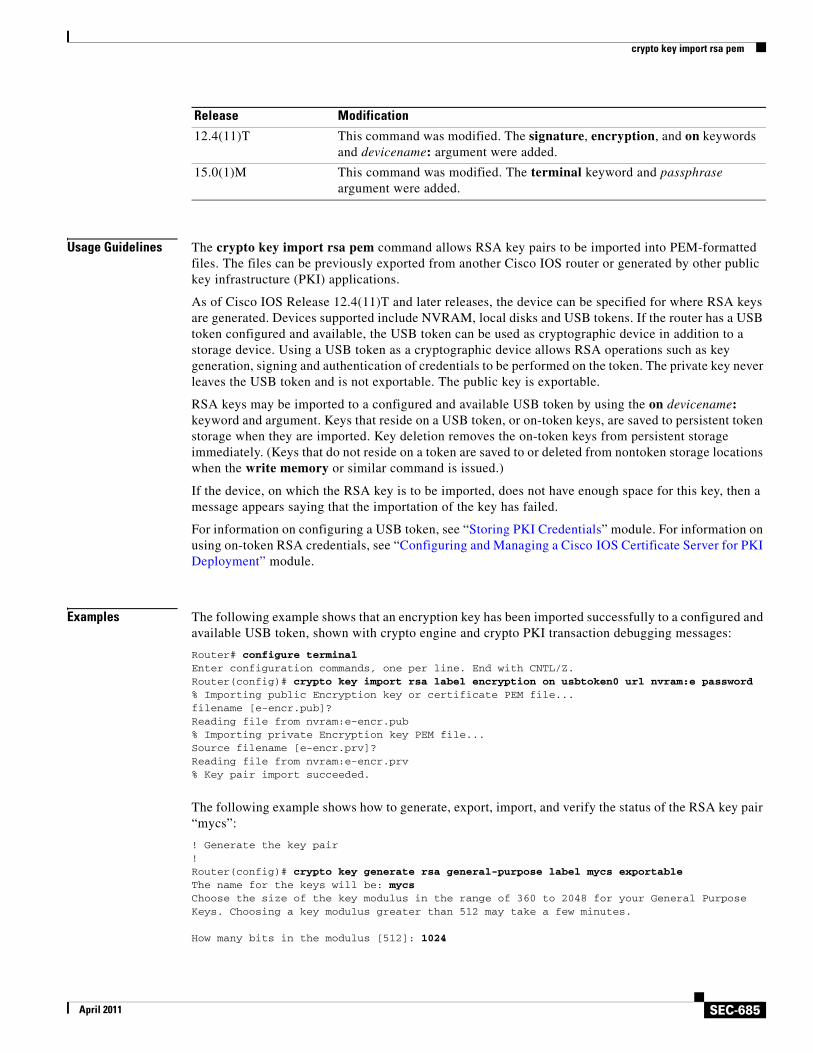
crypto key import rsa pem
SEC-685April 2011
Usage Guidelines The crypto key import rsa pem command allows RSA key pairs to be imported into PEM-formatted files. The files can be previously exported from another Cisco IOS router or generated by other public key infrastructure (PKI) applications.
As of Cisco IOS Release 12.4(11)T and later releases, the device can be specified for where RSA keys are generated. Devices supported include NVRAM, local disks and USB tokens. If the router has a USB token configured and available, the USB token can be used as cryptographic device in addition to a storage device. Using a USB token as a cryptographic device allows RSA operations such as key generation, signing and authentication of credentials to be performed on the token. The private key never leaves the USB token and is not exportable. The public key is exportable.
RSA keys may be imported to a configured and available USB token by using the on devicename: keyword and argument. Keys that reside on a USB token, or on-token keys, are saved to persistent token storage when they are imported. Key deletion removes the on-token keys from persistent storage immediately. (Keys that do not reside on a token are saved to or deleted from nontoken storage locations when the write memory or similar command is issued.)
If the device, on which the RSA key is to be imported, does not have enough space for this key, then a message appears saying that the importation of the key has failed.
For information on configuring a USB token, see “Storing PKI Credentials” module. For information on using on-token RSA credentials, see “Configuring and Managing a Cisco IOS Certificate Server for PKI Deployment” module.
Examples The following example shows that an encryption key has been imported successfully to a configured and available USB token, shown with crypto engine and crypto PKI transaction debugging messages:
Router# configure terminal Enter configuration commands, one per line. End with CNTL/Z. Router(config)# crypto key import rsa label encryption on usbtoken0 url nvram:e password % Importing public Encryption key or certificate PEM file... filename [e-encr.pub]? Reading file from nvram:e-encr.pub % Importing private Encryption key PEM file... Source filename [e-encr.prv]? Reading file from nvram:e-encr.prv % Key pair import succeeded.
The following example shows how to generate, export, import, and verify the status of the RSA key pair “mycs”:
! Generate the key pair !Router(config)# crypto key generate rsa general-purpose label mycs exportable The name for the keys will be: mycsChoose the size of the key modulus in the range of 360 to 2048 for your General Purpose Keys. Choosing a key modulus greater than 512 may take a few minutes.
How many bits in the modulus [512]: 1024
12.4(11)T This command was modified. The signature, encryption, and on keywords and devicename: argument were added.
15.0(1)M This command was modified. The terminal keyword and passphrase argument were added.
Release Modification
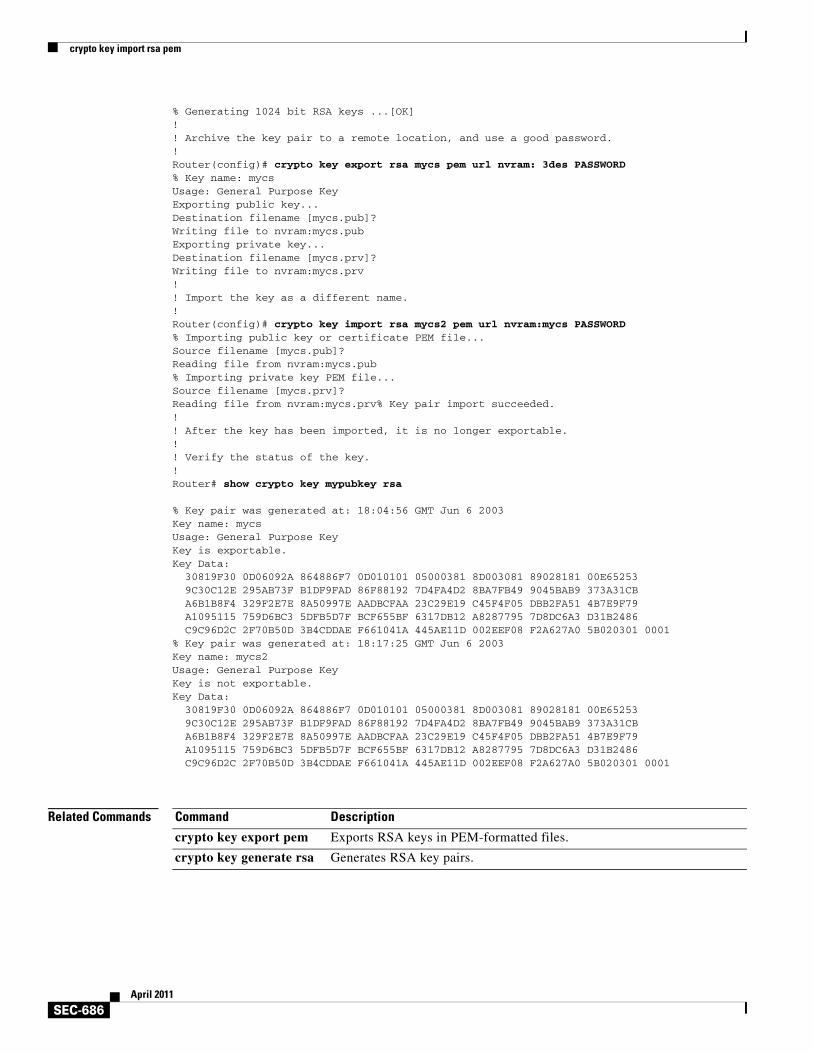
crypto key import rsa pem
SEC-686April 2011
% Generating 1024 bit RSA keys ...[OK]!! Archive the key pair to a remote location, and use a good password.!Router(config)# crypto key export rsa mycs pem url nvram: 3des PASSWORD% Key name: mycsUsage: General Purpose KeyExporting public key...Destination filename [mycs.pub]? Writing file to nvram:mycs.pubExporting private key...Destination filename [mycs.prv]? Writing file to nvram:mycs.prv!! Import the key as a different name.!Router(config)# crypto key import rsa mycs2 pem url nvram:mycs PASSWORD% Importing public key or certificate PEM file...Source filename [mycs.pub]? Reading file from nvram:mycs.pub% Importing private key PEM file...Source filename [mycs.prv]? Reading file from nvram:mycs.prv% Key pair import succeeded.!! After the key has been imported, it is no longer exportable.!! Verify the status of the key.!Router# show crypto key mypubkey rsa
% Key pair was generated at: 18:04:56 GMT Jun 6 2003Key name: mycsUsage: General Purpose KeyKey is exportable.Key Data: 30819F30 0D06092A 864886F7 0D010101 05000381 8D003081 89028181 00E65253 9C30C12E 295AB73F B1DF9FAD 86F88192 7D4FA4D2 8BA7FB49 9045BAB9 373A31CB A6B1B8F4 329F2E7E 8A50997E AADBCFAA 23C29E19 C45F4F05 DBB2FA51 4B7E9F79 A1095115 759D6BC3 5DFB5D7F BCF655BF 6317DB12 A8287795 7D8DC6A3 D31B2486 C9C96D2C 2F70B50D 3B4CDDAE F661041A 445AE11D 002EEF08 F2A627A0 5B020301 0001% Key pair was generated at: 18:17:25 GMT Jun 6 2003Key name: mycs2Usage: General Purpose KeyKey is not exportable.Key Data: 30819F30 0D06092A 864886F7 0D010101 05000381 8D003081 89028181 00E65253 9C30C12E 295AB73F B1DF9FAD 86F88192 7D4FA4D2 8BA7FB49 9045BAB9 373A31CB A6B1B8F4 329F2E7E 8A50997E AADBCFAA 23C29E19 C45F4F05 DBB2FA51 4B7E9F79 A1095115 759D6BC3 5DFB5D7F BCF655BF 6317DB12 A8287795 7D8DC6A3 D31B2486
C9C96D2C 2F70B50D 3B4CDDAE F661041A 445AE11D 002EEF08 F2A627A0 5B020301 0001
Related Commands Command Description
crypto key export pem Exports RSA keys in PEM-formatted files.
crypto key generate rsa Generates RSA key pairs.
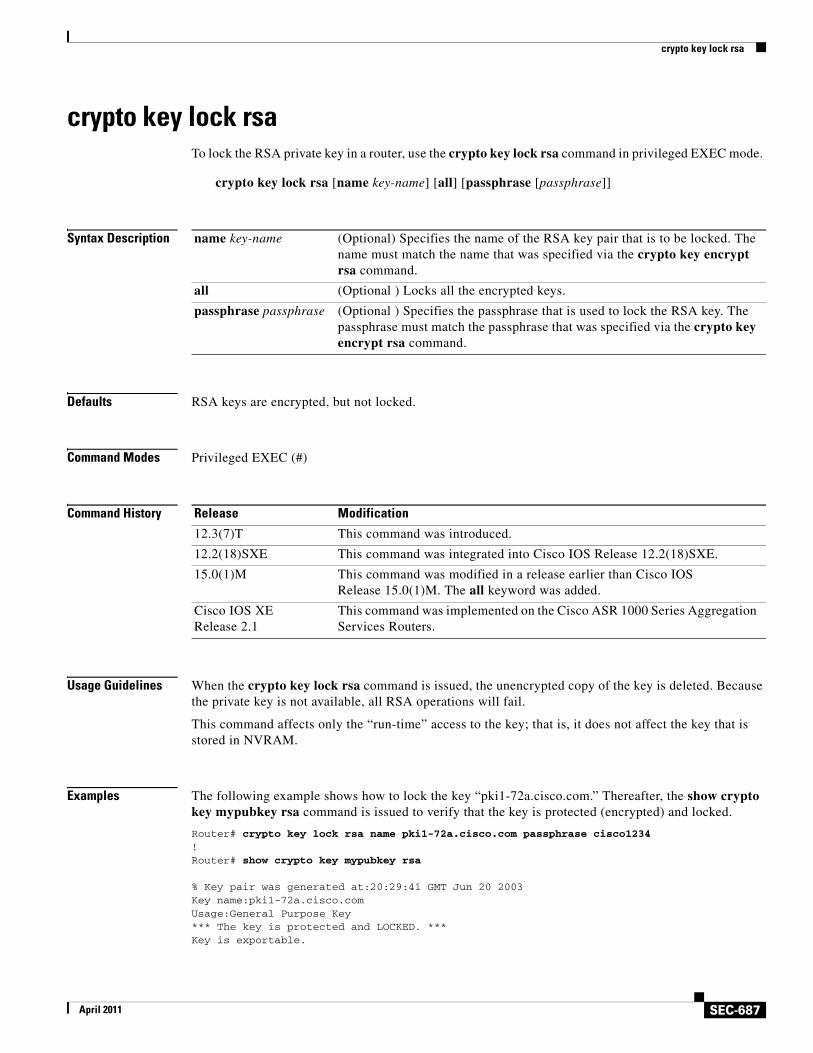
crypto key lock rsa
SEC-687April 2011
crypto key lock rsaTo lock the RSA private key in a router, use the crypto key lock rsa command in privileged EXEC mode.
crypto key lock rsa [name key-name] [all] [passphrase [passphrase]]
Syntax Description
Defaults RSA keys are encrypted, but not locked.
Command Modes Privileged EXEC (#)
Command History
Usage Guidelines When the crypto key lock rsa command is issued, the unencrypted copy of the key is deleted. Because the private key is not available, all RSA operations will fail.
This command affects only the “run-time” access to the key; that is, it does not affect the key that is stored in NVRAM.
Examples The following example shows how to lock the key “pki1-72a.cisco.com.” Thereafter, the show crypto key mypubkey rsa command is issued to verify that the key is protected (encrypted) and locked.
Router# crypto key lock rsa name pki1-72a.cisco.com passphrase cisco1234! Router# show crypto key mypubkey rsa
% Key pair was generated at:20:29:41 GMT Jun 20 2003Key name:pki1-72a.cisco.comUsage:General Purpose Key*** The key is protected and LOCKED. ***Key is exportable.
name key-name (Optional) Specifies the name of the RSA key pair that is to be locked. The name must match the name that was specified via the crypto key encrypt rsa command.
all (Optional ) Locks all the encrypted keys.
passphrase passphrase (Optional ) Specifies the passphrase that is used to lock the RSA key. The passphrase must match the passphrase that was specified via the crypto key encrypt rsa command.
Release Modification
12.3(7)T This command was introduced.
12.2(18)SXE This command was integrated into Cisco IOS Release 12.2(18)SXE.
15.0(1)M This command was modified in a release earlier than Cisco IOS Release 15.0(1)M. The all keyword was added.
Cisco IOS XE Release 2.1
This command was implemented on the Cisco ASR 1000 Series Aggregation Services Routers.
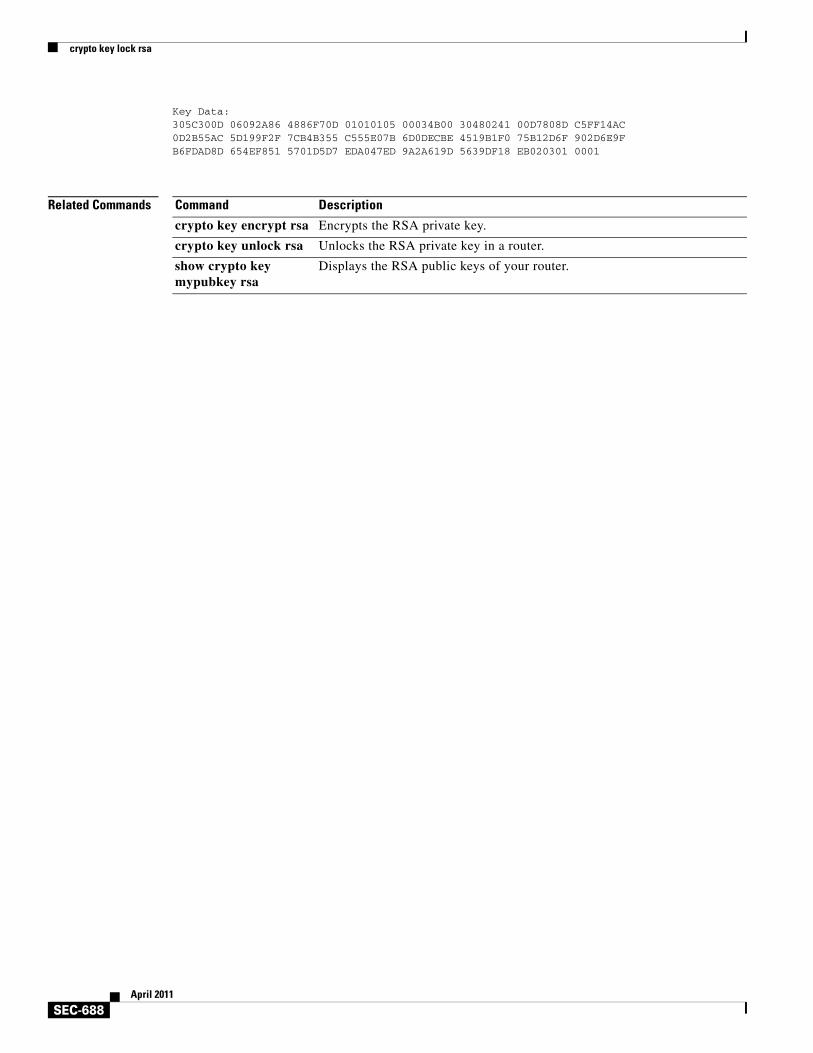
crypto key lock rsa
SEC-688April 2011
Key Data:305C300D 06092A86 4886F70D 01010105 00034B00 30480241 00D7808D C5FF14AC0D2B55AC 5D199F2F 7CB4B355 C555E07B 6D0DECBE 4519B1F0 75B12D6F 902D6E9FB6FDAD8D 654EF851 5701D5D7 EDA047ED 9A2A619D 5639DF18 EB020301 0001
Related Commands Command Description
crypto key encrypt rsa Encrypts the RSA private key.
crypto key unlock rsa Unlocks the RSA private key in a router.
show crypto key mypubkey rsa
Displays the RSA public keys of your router.
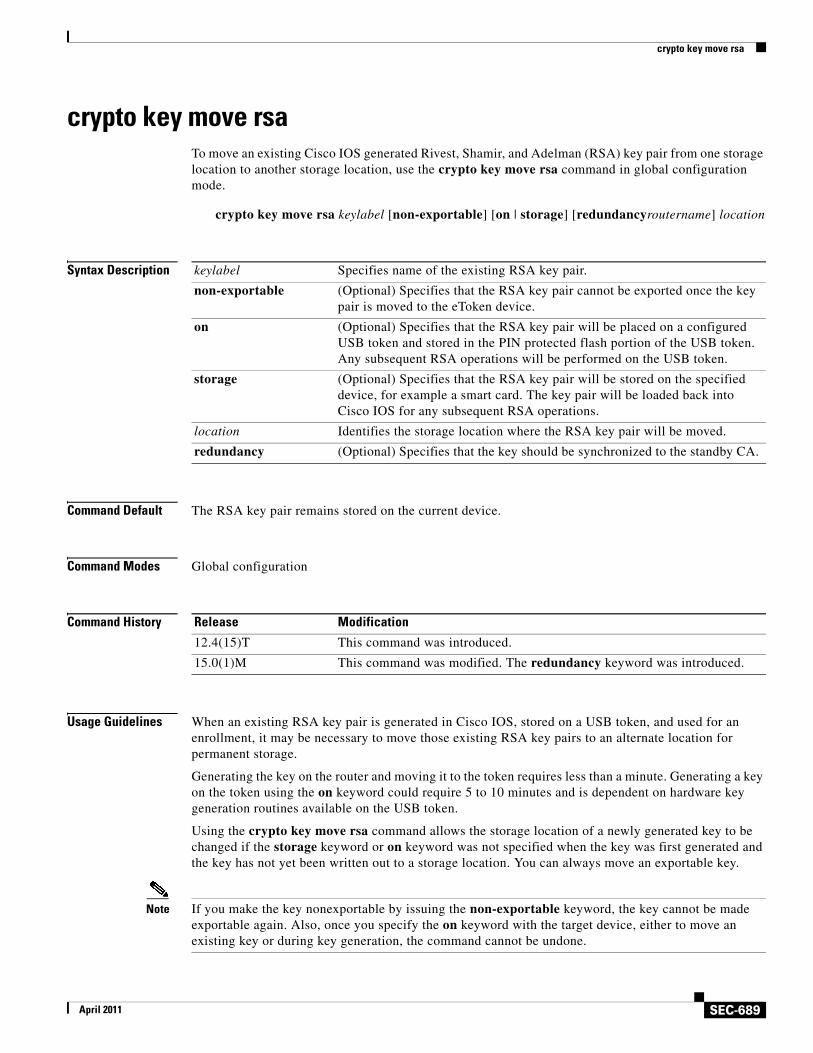
crypto key move rsa
SEC-689April 2011
crypto key move rsaTo move an existing Cisco IOS generated Rivest, Shamir, and Adelman (RSA) key pair from one storage location to another storage location, use the crypto key move rsa command in global configuration mode.
crypto key move rsa keylabel [non-exportable] [on | storage] [redundancyroutername] location
Syntax Description
Command Default The RSA key pair remains stored on the current device.
Command Modes Global configuration
Command History
Usage Guidelines When an existing RSA key pair is generated in Cisco IOS, stored on a USB token, and used for an enrollment, it may be necessary to move those existing RSA key pairs to an alternate location for permanent storage.
Generating the key on the router and moving it to the token requires less than a minute. Generating a key on the token using the on keyword could require 5 to 10 minutes and is dependent on hardware key generation routines available on the USB token.
Using the crypto key move rsa command allows the storage location of a newly generated key to be changed if the storage keyword or on keyword was not specified when the key was first generated and the key has not yet been written out to a storage location. You can always move an exportable key.
Note If you make the key nonexportable by issuing the non-exportable keyword, the key cannot be made exportable again. Also, once you specify the on keyword with the target device, either to move an existing key or during key generation, the command cannot be undone.
keylabel Specifies name of the existing RSA key pair.
non-exportable (Optional) Specifies that the RSA key pair cannot be exported once the key pair is moved to the eToken device.
on (Optional) Specifies that the RSA key pair will be placed on a configured USB token and stored in the PIN protected flash portion of the USB token. Any subsequent RSA operations will be performed on the USB token.
storage (Optional) Specifies that the RSA key pair will be stored on the specified device, for example a smart card. The key pair will be loaded back into Cisco IOS for any subsequent RSA operations.
location Identifies the storage location where the RSA key pair will be moved.
redundancy (Optional) Specifies that the key should be synchronized to the standby CA.
Release Modification
12.4(15)T This command was introduced.
15.0(1)M This command was modified. The redundancy keyword was introduced.
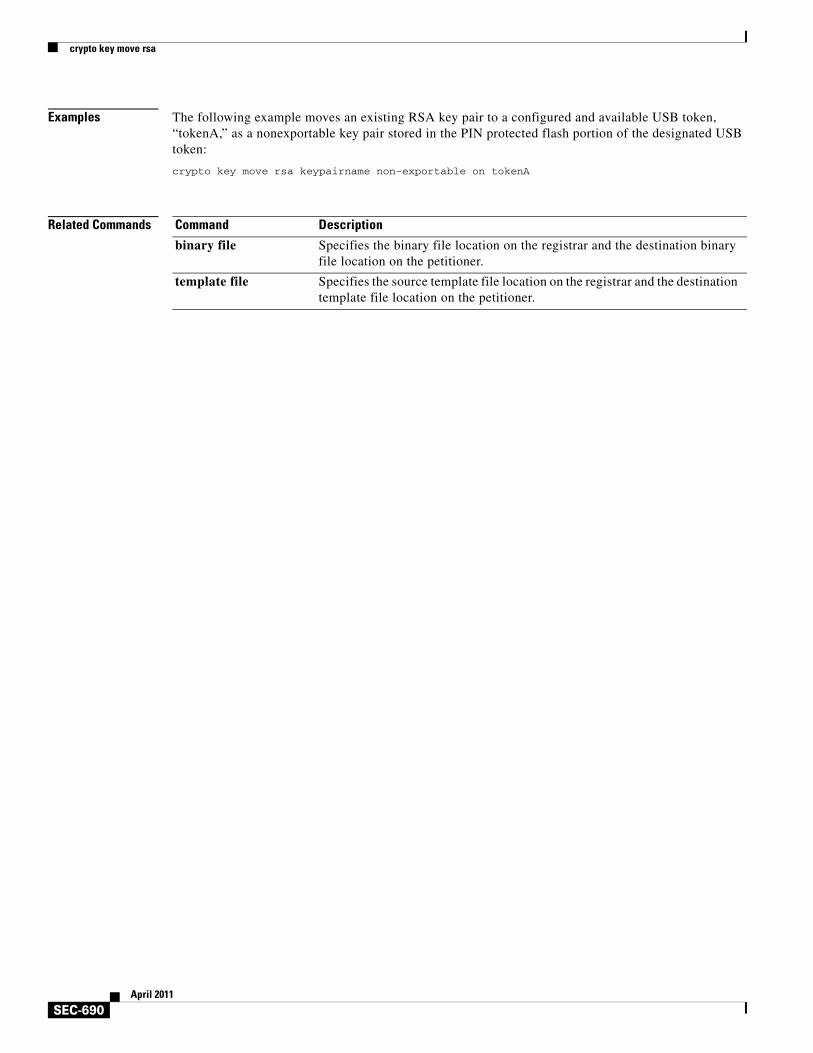
crypto key move rsa
SEC-690April 2011
Examples The following example moves an existing RSA key pair to a configured and available USB token, “tokenA,” as a nonexportable key pair stored in the PIN protected flash portion of the designated USB token:
crypto key move rsa keypairname non-exportable on tokenA
Related Commands Command Description
binary file Specifies the binary file location on the registrar and the destination binary file location on the petitioner.
template file Specifies the source template file location on the registrar and the destination template file location on the petitioner.
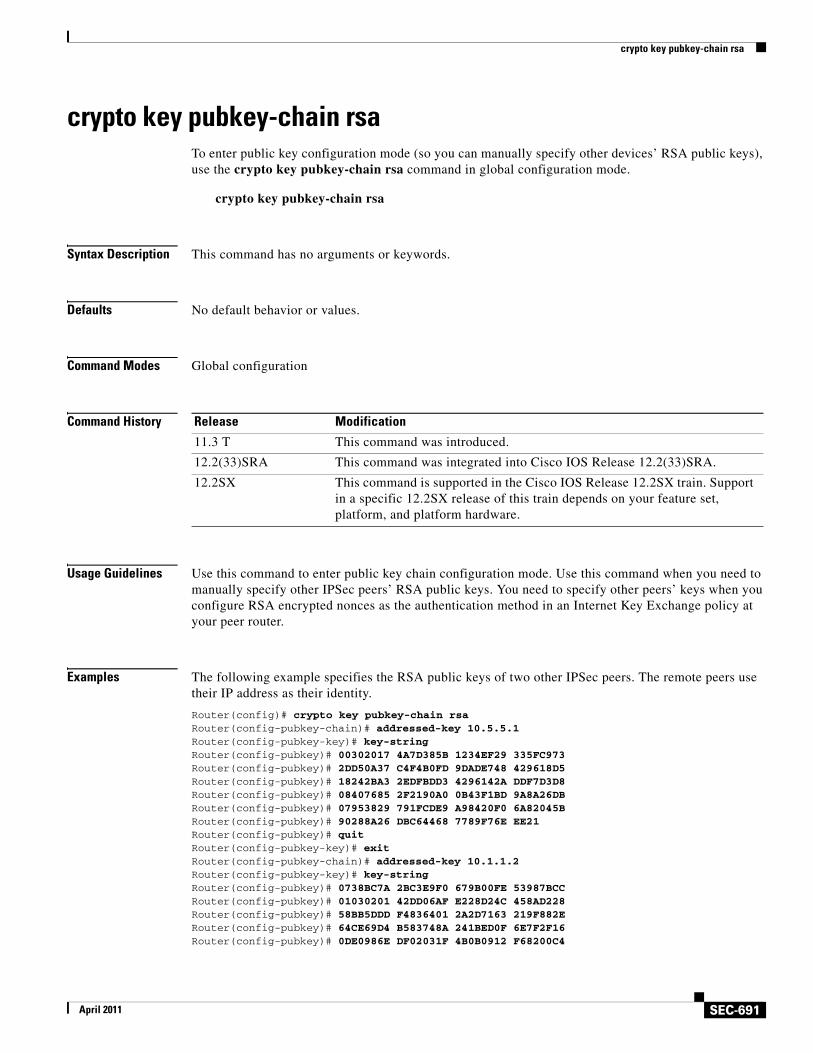
crypto key pubkey-chain rsa
SEC-691April 2011
crypto key pubkey-chain rsaTo enter public key configuration mode (so you can manually specify other devices’ RSA public keys), use the crypto key pubkey-chain rsa command in global configuration mode.
crypto key pubkey-chain rsa
Syntax Description This command has no arguments or keywords.
Defaults No default behavior or values.
Command Modes Global configuration
Command History
Usage Guidelines Use this command to enter public key chain configuration mode. Use this command when you need to manually specify other IPSec peers’ RSA public keys. You need to specify other peers’ keys when you configure RSA encrypted nonces as the authentication method in an Internet Key Exchange policy at your peer router.
Examples The following example specifies the RSA public keys of two other IPSec peers. The remote peers use their IP address as their identity.
Router(config)# crypto key pubkey-chain rsaRouter(config-pubkey-chain)# addressed-key 10.5.5.1Router(config-pubkey-key)# key-stringRouter(config-pubkey)# 00302017 4A7D385B 1234EF29 335FC973Router(config-pubkey)# 2DD50A37 C4F4B0FD 9DADE748 429618D5Router(config-pubkey)# 18242BA3 2EDFBDD3 4296142A DDF7D3D8Router(config-pubkey)# 08407685 2F2190A0 0B43F1BD 9A8A26DBRouter(config-pubkey)# 07953829 791FCDE9 A98420F0 6A82045BRouter(config-pubkey)# 90288A26 DBC64468 7789F76E EE21Router(config-pubkey)# quitRouter(config-pubkey-key)# exitRouter(config-pubkey-chain)# addressed-key 10.1.1.2Router(config-pubkey-key)# key-stringRouter(config-pubkey)# 0738BC7A 2BC3E9F0 679B00FE 53987BCCRouter(config-pubkey)# 01030201 42DD06AF E228D24C 458AD228Router(config-pubkey)# 58BB5DDD F4836401 2A2D7163 219F882ERouter(config-pubkey)# 64CE69D4 B583748A 241BED0F 6E7F2F16Router(config-pubkey)# 0DE0986E DF02031F 4B0B0912 F68200C4
Release Modification
11.3 T This command was introduced.
12.2(33)SRA This command was integrated into Cisco IOS Release 12.2(33)SRA.
12.2SX This command is supported in the Cisco IOS Release 12.2SX train. Support in a specific 12.2SX release of this train depends on your feature set, platform, and platform hardware.
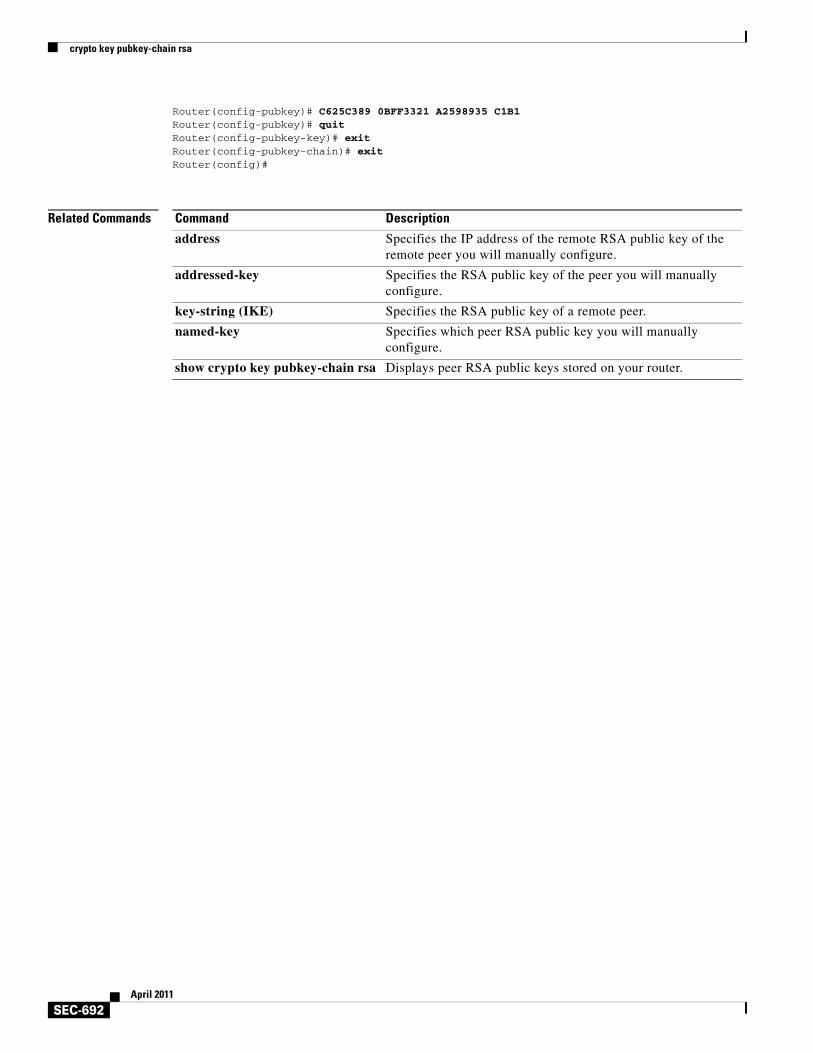
crypto key pubkey-chain rsa
SEC-692April 2011
Router(config-pubkey)# C625C389 0BFF3321 A2598935 C1B1Router(config-pubkey)# quitRouter(config-pubkey-key)# exitRouter(config-pubkey-chain)# exitRouter(config)#
Related Commands Command Description
address Specifies the IP address of the remote RSA public key of the remote peer you will manually configure.
addressed-key Specifies the RSA public key of the peer you will manually configure.
key-string (IKE) Specifies the RSA public key of a remote peer.
named-key Specifies which peer RSA public key you will manually configure.
show crypto key pubkey-chain rsa Displays peer RSA public keys stored on your router.
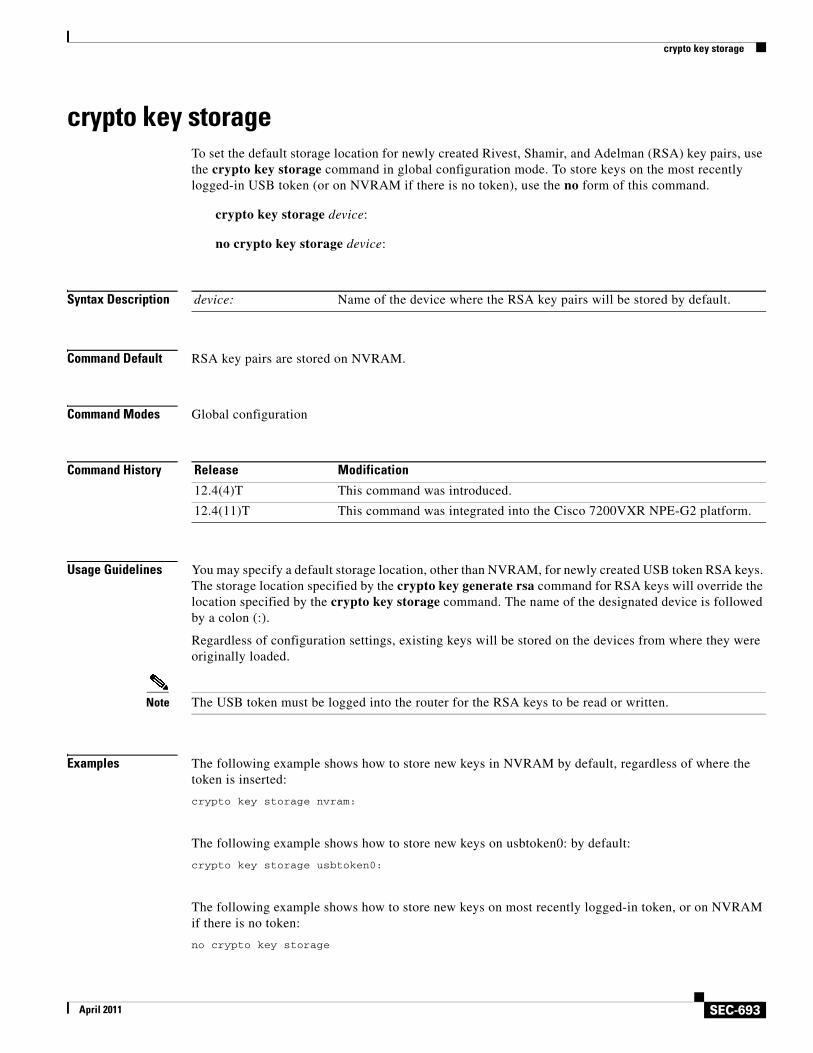
crypto key storage
SEC-693April 2011
crypto key storageTo set the default storage location for newly created Rivest, Shamir, and Adelman (RSA) key pairs, use the crypto key storage command in global configuration mode. To store keys on the most recently logged-in USB token (or on NVRAM if there is no token), use the no form of this command.
crypto key storage device:
no crypto key storage device:
Syntax Description
Command Default RSA key pairs are stored on NVRAM.
Command Modes Global configuration
Command History
Usage Guidelines You may specify a default storage location, other than NVRAM, for newly created USB token RSA keys. The storage location specified by the crypto key generate rsa command for RSA keys will override the location specified by the crypto key storage command. The name of the designated device is followed by a colon (:).
Regardless of configuration settings, existing keys will be stored on the devices from where they were originally loaded.
Note The USB token must be logged into the router for the RSA keys to be read or written.
Examples The following example shows how to store new keys in NVRAM by default, regardless of where the token is inserted:
crypto key storage nvram:
The following example shows how to store new keys on usbtoken0: by default:
crypto key storage usbtoken0:
The following example shows how to store new keys on most recently logged-in token, or on NVRAM if there is no token:
no crypto key storage
device: Name of the device where the RSA key pairs will be stored by default.
Release Modification
12.4(4)T This command was introduced.
12.4(11)T This command was integrated into the Cisco 7200VXR NPE-G2 platform.

crypto key storage
SEC-694April 2011
Related Commands Command Description
crypto key generate rsa
Generates RSA key pairs and specifies RSA key storage location (other than the default location).
crypto pki token user-pin
Creates a PIN that automatically allows the router to log into the USB token at router startup.
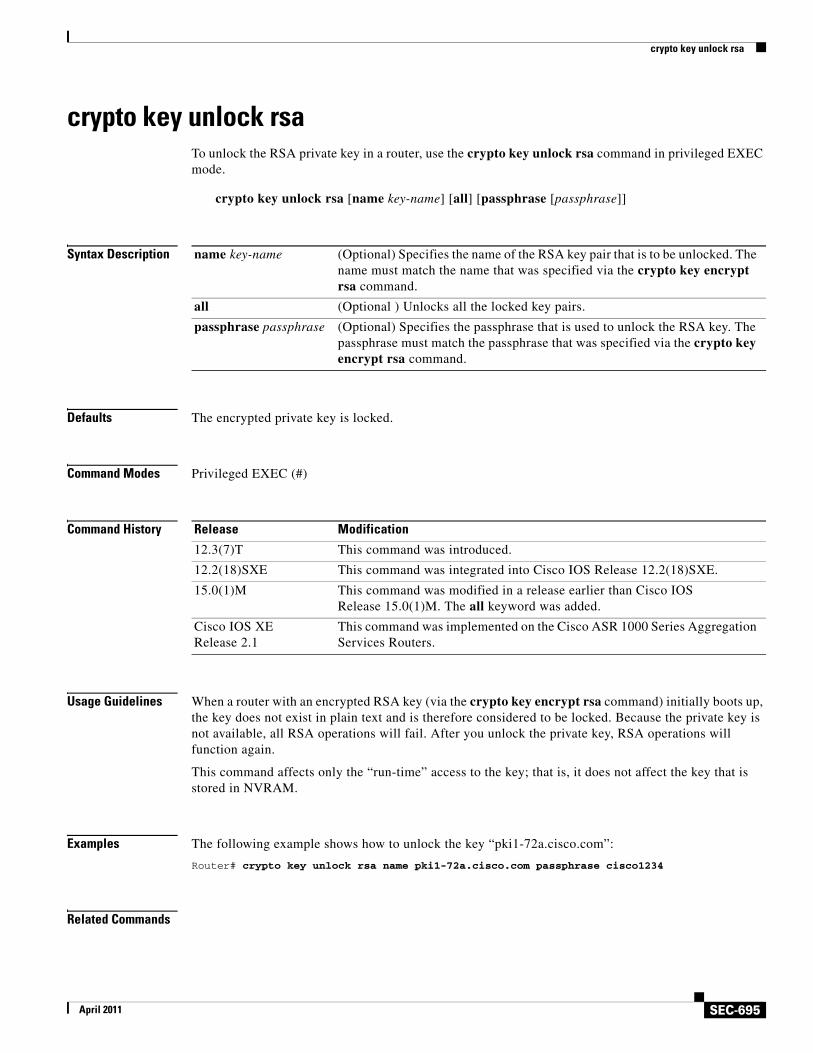
crypto key unlock rsa
SEC-695April 2011
crypto key unlock rsaTo unlock the RSA private key in a router, use the crypto key unlock rsa command in privileged EXEC mode.
crypto key unlock rsa [name key-name] [all] [passphrase [passphrase]]
Syntax Description
Defaults The encrypted private key is locked.
Command Modes Privileged EXEC (#)
Command History
Usage Guidelines When a router with an encrypted RSA key (via the crypto key encrypt rsa command) initially boots up, the key does not exist in plain text and is therefore considered to be locked. Because the private key is not available, all RSA operations will fail. After you unlock the private key, RSA operations will function again.
This command affects only the “run-time” access to the key; that is, it does not affect the key that is stored in NVRAM.
Examples The following example shows how to unlock the key “pki1-72a.cisco.com”:
Router# crypto key unlock rsa name pki1-72a.cisco.com passphrase cisco1234
Related Commands
name key-name (Optional) Specifies the name of the RSA key pair that is to be unlocked. The name must match the name that was specified via the crypto key encrypt rsa command.
all (Optional ) Unlocks all the locked key pairs.
passphrase passphrase (Optional) Specifies the passphrase that is used to unlock the RSA key. The passphrase must match the passphrase that was specified via the crypto key encrypt rsa command.
Release Modification
12.3(7)T This command was introduced.
12.2(18)SXE This command was integrated into Cisco IOS Release 12.2(18)SXE.
15.0(1)M This command was modified in a release earlier than Cisco IOS Release 15.0(1)M. The all keyword was added.
Cisco IOS XE Release 2.1
This command was implemented on the Cisco ASR 1000 Series Aggregation Services Routers.

crypto key unlock rsa
SEC-696April 2011
Command Description
crypto key encrypt rsa Encrypts the RSA private key.
crypto key lock rsa Locks the RSA private key in a router.
show crypto key mypubkey rsa
Displays the RSA public keys of your router.
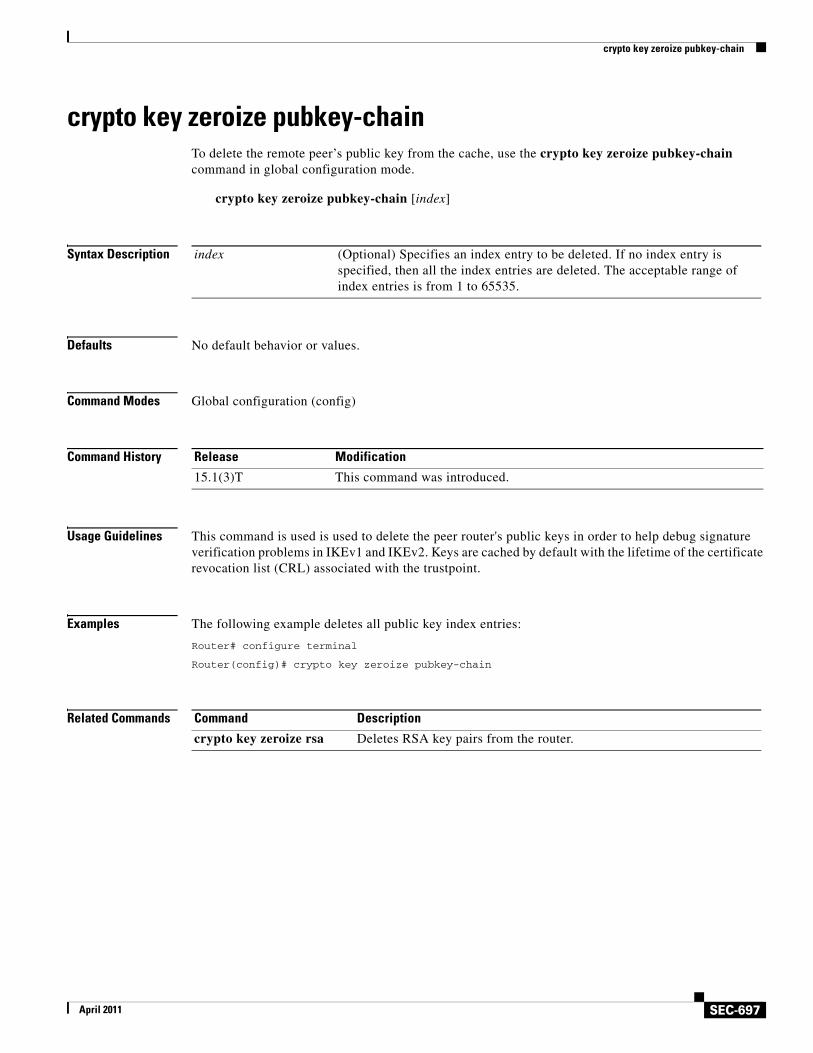
crypto key zeroize pubkey-chain
SEC-697April 2011
crypto key zeroize pubkey-chainTo delete the remote peer’s public key from the cache, use the crypto key zeroize pubkey-chain command in global configuration mode.
crypto key zeroize pubkey-chain [index]
Syntax Description
Defaults No default behavior or values.
Command Modes Global configuration (config)
Command History
Usage Guidelines This command is used is used to delete the peer router's public keys in order to help debug signature verification problems in IKEv1 and IKEv2. Keys are cached by default with the lifetime of the certificate revocation list (CRL) associated with the trustpoint.
Examples The following example deletes all public key index entries:
Router# configure terminal
Router(config)# crypto key zeroize pubkey-chain
Related Commands
index (Optional) Specifies an index entry to be deleted. If no index entry is specified, then all the index entries are deleted. The acceptable range of index entries is from 1 to 65535.
Release Modification
15.1(3)T This command was introduced.
Command Description
crypto key zeroize rsa Deletes RSA key pairs from the router.
crypto key zeroize rsa
SEC-698April 2011
crypto key zeroize rsaTo delete all RSA keys from your router, use the crypto key zeroize rsa command in global configuration mode.
crypto key zeroize rsa [key-pair-label]
Syntax Description
Defaults No default behavior or values.
Command Modes Global configuration
Command History
Usage Guidelines This command deletes all Rivest, Shamir, and Adelman (RSA) keys that were previously generated by your router unless you include the key-pair-label argument, which will delete only the specified RSA key pair. If you issue this command, you must also perform two additional tasks for each trustpoint that is associated with the key pair that was deleted:
• Ask the certification authority (CA) administrator to revoke your router’s certificates at the CA; you must supply the challenge password you created when you originally obtained the router’s certificates using the crypto ca enroll command.
• Manually remove the router’s certificates from the configuration by removing the configured trustpoint (using the no crypto ca trustpoint name command.)
Note This command cannot be undone (after you save your configuration), and after RSA keys have been deleted, you cannot use certificates or the CA or participate in certificate exchanges with other IP Security (IPSec) peers unless you reconfigure CA interoperability by regenerating RSA keys, getting the CA’s certificate, and requesting your own certificate again.
This command is not saved to the configuration.
key-pair-label (Optional) Specifies the name of the key pair that router will delete.
Release Modification
11.3 T This command was introduced.
12.2(8)T The key-pair-label argument was added.
12.2(18)SXD This command was integrated into Cisco IOS Release 12.2(18)SXD.
12.2(33)SRA This command was integrated into Cisco IOS Release 12.2(33)SRA.
crypto key zeroize rsa
SEC-699April 2011
Examples The following example deletes the general-purpose RSA key pair that was previously generated for the router. After deleting the RSA key pair, the administrator contacts the CA administrator and requests that the certificate of the router be revoked. The administrator then deletes the certificate of the router from the configuration.
crypto key zeroize rsacrypto ca certificate chainno certificate
Related Commands Command Description
certificate Adds certificates manually.
crypto ca certificate chain Enters the certificate chain configuration mode.
crypto ca trustpoint Declares the CA that your router should use.
show crypto ca timers Specifies which key pair to associate with the certificate.
crypto keyring
SEC-700April 2011
crypto keyringTo define a crypto keyring to be used during Internet Key Exchange (IKE) authentication, use the crypto keyring command in global configuration mode. To remove the keyring, use the no form of this command.
crypto keyring keyring-name [vrf fvrf-name]
no crypto keyring keyring-name [vrf fvrf-name]
Syntax Description
Command Default All the Internet Security Association and Key Management Protocol (ISAKMP) keys that were defined in the global configuration are part of the default global keyring.
Command Modes Global configuration (config)
Command History
Usage Guidelines A keyring is a repository of preshared and Rivest, Shamir, and Adelman (RSA) public keys. The keyring is used in the ISAKMP profile configuration mode. The ISAKMP profile successfully completes authentication of peers if the peer keys are defined in the keyring that is attached to this profile.
Examples The following example shows that a keyring and its usage have been defined:
crypto keyring vpnkeys pre-shared-key address 10.72.23.11 key vpnsecretcrypto isakmp profile vpnprofile keyring vpnkeys
Related Commands
keyring-name Name of the crypto keyring.
vrf fvrf-name (Optional) Front door virtual routing and forwarding (FVRF) name to which the keyring will be referenced. The fvrf-name must match the FVRF name that was defined during virtual routing and forwarding (VRF) configuration. The vrf keyword and fvrf-name argument are not supported by IPv6.
Release Modification
12.2(15)T This command was introduced.
12.4(4)T Support for IPv6 was added.
12.2(33)SXH This command was integrated into Cisco IOS Release 12.2(33)SXH.
Cisco IOS XE Release 2.1
This command was introduced on Cisco ASR 1000 Series Routers.
Command Description
pre-shared-key Defines a preshared key to be used for IKE authentication.
crypto logging ezvpn
SEC-701April 2011
crypto logging ezvpnTo enable Easy VPN syslog messages on a server, use the crypto logging ezvpn command in global configuration mode. To disable syslog messages on the server, use the no form of this command.
crypto logging ezvpn [group group-name]
no crypto logging ezvpn [group group-name]
Syntax Description
Command Default Syslog messages are not enabled.
Command Modes Global configuration (config)
Command History
Examples The following configuration shows that syslog messages are to be displayed for group_1.
crypto logging ezvpn group group_1
The following is an example of a typical Easy VPN syslog message:
timestamp: %CRYPTO-6-VPN_TUNNEL_STATUS: (Server) <event message> User=<username> Group=<groupname> Client_public_addr=<ip_addr> Server_public_addr=<ip addr>
The following is an example of an authentication-passed event Easy VPN syslog message:
Jul 25 23:33:06.847: %CRYPTO-6-VPN_TUNNEL_STATUS: (Server) Authentication PASSED User=blue Group=Cisco1760group Client_public_addr=10.20.20.1 Server_public_addr=10.20.20.2
The following is an example of a “Group does not exist” Easy VPN syslog message:
*Jun 30 18:02:58.107: %CRYPTO-6-VPN_TUNNEL_STATUS: Group: group_1 does not exist
group group-name (Optional) Group name. If a group name is not provided, syslog messages are enabled for all Easy VPN connections to the server. If a group name is provided, syslog messages are enabled only for that particular group.
Release Modification
12.4(4)T This command was introduced.
12.2(33)SRA This command was integrated into Cisco IOS Release 12.2(33)SRA.
12.2SX This command is supported in the Cisco IOS 12.2SX family of releases. Support in a specific 12.2SX release is dependent on your feature set, platform, and platform hardware.
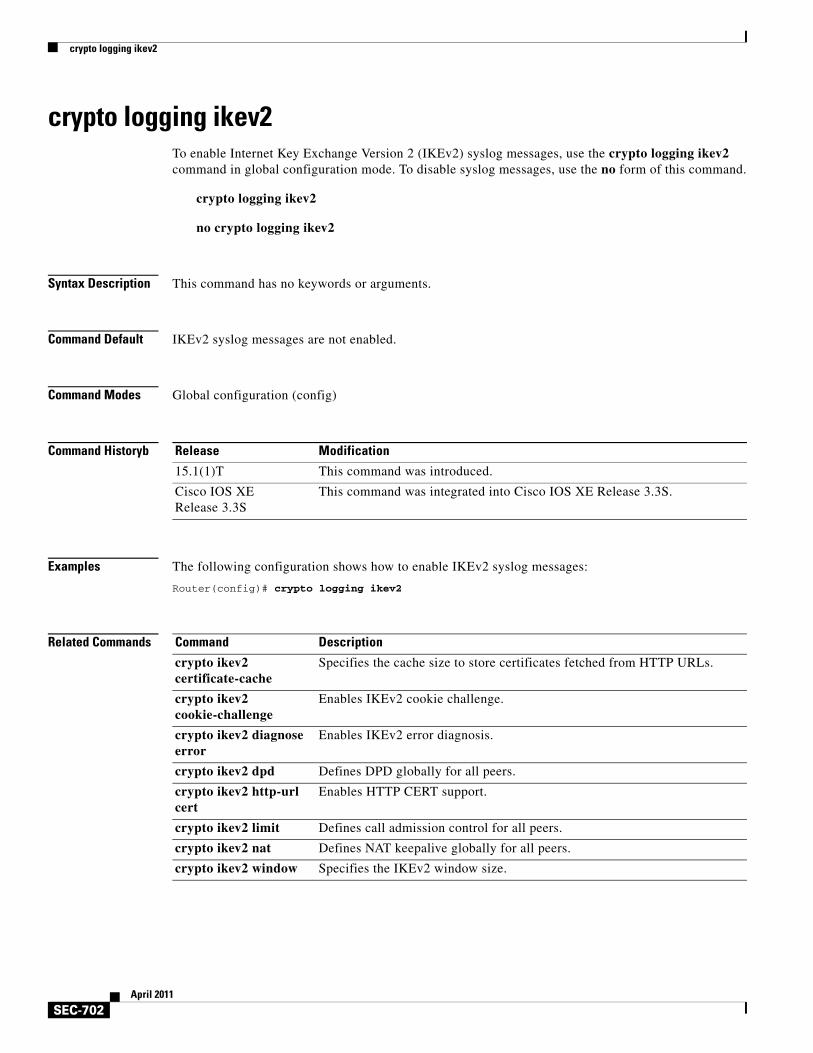
crypto logging ikev2
SEC-702April 2011
crypto logging ikev2To enable Internet Key Exchange Version 2 (IKEv2) syslog messages, use the crypto logging ikev2 command in global configuration mode. To disable syslog messages, use the no form of this command.
crypto logging ikev2
no crypto logging ikev2
Syntax Description This command has no keywords or arguments.
Command Default IKEv2 syslog messages are not enabled.
Command Modes Global configuration (config)
Command Historyb
Examples The following configuration shows how to enable IKEv2 syslog messages:
Router(config)# crypto logging ikev2
Related Commands
Release Modification
15.1(1)T This command was introduced.
Cisco IOS XE Release 3.3S
This command was integrated into Cisco IOS XE Release 3.3S.
Command Description
crypto ikev2 certificate-cache
Specifies the cache size to store certificates fetched from HTTP URLs.
crypto ikev2 cookie-challenge
Enables IKEv2 cookie challenge.
crypto ikev2 diagnose error
Enables IKEv2 error diagnosis.
crypto ikev2 dpd Defines DPD globally for all peers.
crypto ikev2 http-url cert
Enables HTTP CERT support.
crypto ikev2 limit Defines call admission control for all peers.
crypto ikev2 nat Defines NAT keepalive globally for all peers.
crypto ikev2 window Specifies the IKEv2 window size.
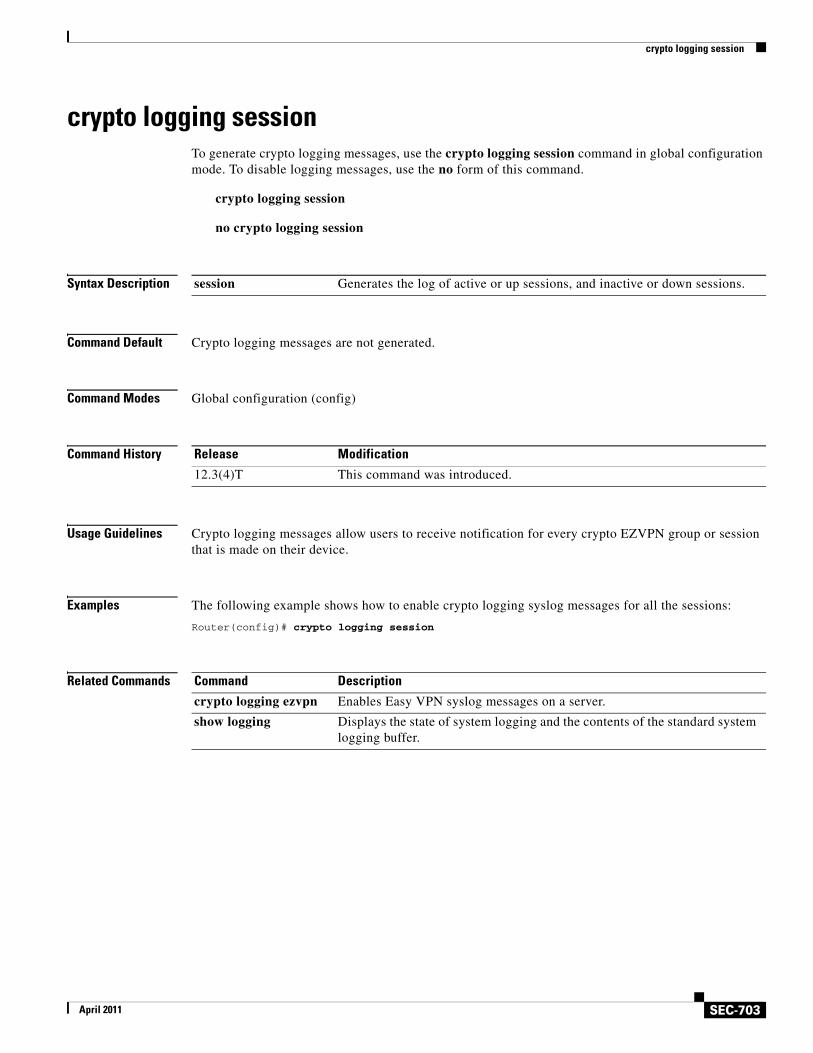
crypto logging session
SEC-703April 2011
crypto logging sessionTo generate crypto logging messages, use the crypto logging session command in global configuration mode. To disable logging messages, use the no form of this command.
crypto logging session
no crypto logging session
Syntax Description
Command Default Crypto logging messages are not generated.
Command Modes Global configuration (config)
Command History
Usage Guidelines Crypto logging messages allow users to receive notification for every crypto EZVPN group or session that is made on their device.
Examples The following example shows how to enable crypto logging syslog messages for all the sessions:
Router(config)# crypto logging session
Related Commands
session Generates the log of active or up sessions, and inactive or down sessions.
Release Modification
12.3(4)T This command was introduced.
Command Description
crypto logging ezvpn Enables Easy VPN syslog messages on a server.
show logging Displays the state of system logging and the contents of the standard system logging buffer.
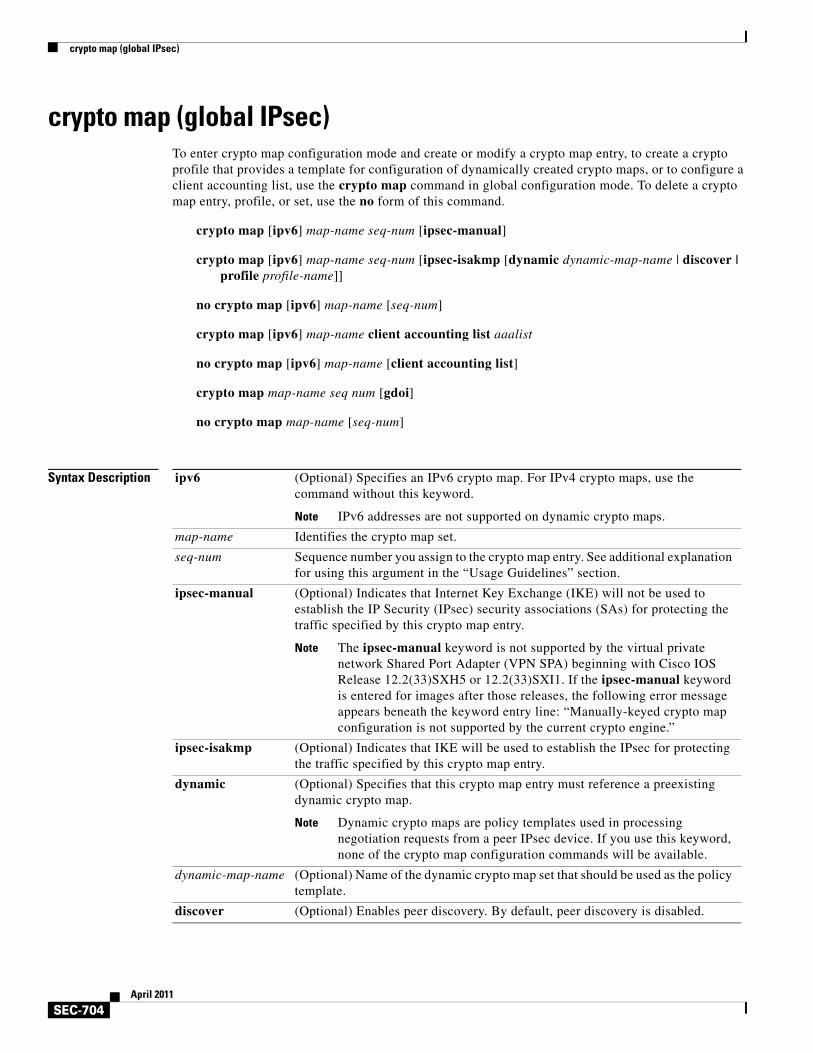
crypto map (global IPsec)
SEC-704April 2011
crypto map (global IPsec)To enter crypto map configuration mode and create or modify a crypto map entry, to create a crypto profile that provides a template for configuration of dynamically created crypto maps, or to configure a client accounting list, use the crypto map command in global configuration mode. To delete a crypto map entry, profile, or set, use the no form of this command.
crypto map [ipv6] map-name seq-num [ipsec-manual]
crypto map [ipv6] map-name seq-num [ipsec-isakmp [dynamic dynamic-map-name | discover | profile profile-name]]
no crypto map [ipv6] map-name [seq-num]
crypto map [ipv6] map-name client accounting list aaalist
no crypto map [ipv6] map-name [client accounting list]
crypto map map-name seq num [gdoi]
no crypto map map-name [seq-num]
Syntax Description ipv6 (Optional) Specifies an IPv6 crypto map. For IPv4 crypto maps, use the command without this keyword.
Note IPv6 addresses are not supported on dynamic crypto maps.
map-name Identifies the crypto map set.
seq-num Sequence number you assign to the crypto map entry. See additional explanation for using this argument in the “Usage Guidelines” section.
ipsec-manual (Optional) Indicates that Internet Key Exchange (IKE) will not be used to establish the IP Security (IPsec) security associations (SAs) for protecting the traffic specified by this crypto map entry.
Note The ipsec-manual keyword is not supported by the virtual private network Shared Port Adapter (VPN SPA) beginning with Cisco IOS Release 12.2(33)SXH5 or 12.2(33)SXI1. If the ipsec-manual keyword is entered for images after those releases, the following error message appears beneath the keyword entry line: “Manually-keyed crypto map configuration is not supported by the current crypto engine.”
ipsec-isakmp (Optional) Indicates that IKE will be used to establish the IPsec for protecting the traffic specified by this crypto map entry.
dynamic (Optional) Specifies that this crypto map entry must reference a preexisting dynamic crypto map.
Note Dynamic crypto maps are policy templates used in processing negotiation requests from a peer IPsec device. If you use this keyword, none of the crypto map configuration commands will be available.
dynamic-map-name (Optional) Name of the dynamic crypto map set that should be used as the policy template.
discover (Optional) Enables peer discovery. By default, peer discovery is disabled.
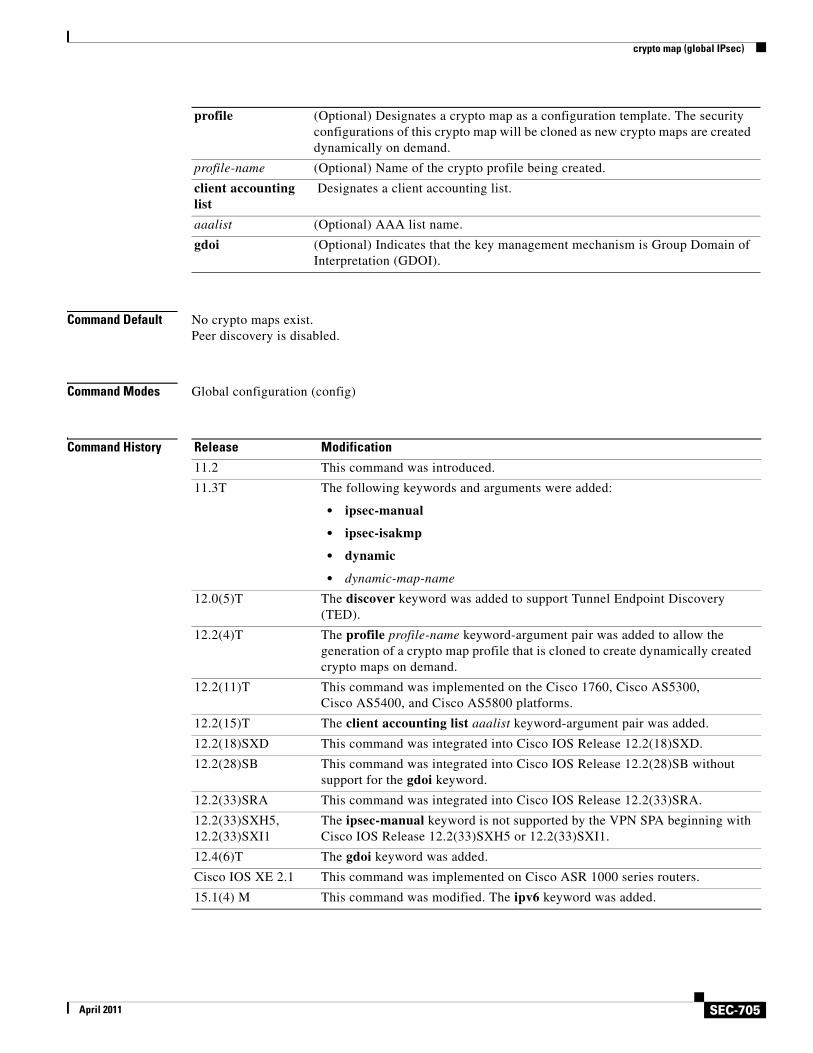
crypto map (global IPsec)
SEC-705April 2011
Command Default No crypto maps exist.Peer discovery is disabled.
Command Modes Global configuration (config)
Command History
profile (Optional) Designates a crypto map as a configuration template. The security configurations of this crypto map will be cloned as new crypto maps are created dynamically on demand.
profile-name (Optional) Name of the crypto profile being created.
client accounting list
Designates a client accounting list.
aaalist (Optional) AAA list name.
gdoi (Optional) Indicates that the key management mechanism is Group Domain of Interpretation (GDOI).
Release Modification
11.2 This command was introduced.
11.3T The following keywords and arguments were added:
• ipsec-manual
• ipsec-isakmp
• dynamic
• dynamic-map-name
12.0(5)T The discover keyword was added to support Tunnel Endpoint Discovery (TED).
12.2(4)T The profile profile-name keyword-argument pair was added to allow the generation of a crypto map profile that is cloned to create dynamically created crypto maps on demand.
12.2(11)T This command was implemented on the Cisco 1760, Cisco AS5300, Cisco AS5400, and Cisco AS5800 platforms.
12.2(15)T The client accounting list aaalist keyword-argument pair was added.
12.2(18)SXD This command was integrated into Cisco IOS Release 12.2(18)SXD.
12.2(28)SB This command was integrated into Cisco IOS Release 12.2(28)SB without support for the gdoi keyword.
12.2(33)SRA This command was integrated into Cisco IOS Release 12.2(33)SRA.
12.2(33)SXH5, 12.2(33)SXI1
The ipsec-manual keyword is not supported by the VPN SPA beginning with Cisco IOS Release 12.2(33)SXH5 or 12.2(33)SXI1.
12.4(6)T The gdoi keyword was added.
Cisco IOS XE 2.1 This command was implemented on Cisco ASR 1000 series routers.
15.1(4) M This command was modified. The ipv6 keyword was added.

crypto map (global IPsec)
SEC-706April 2011
Usage Guidelines Use this command to create a new crypto map entry or profile. Use the crypto map ipv6 map-name seq-num command without any keyword to modify an existing IPv6 crypto map entry or profile. For IPv4 crypto maps, use the crypto map map-name seq-num command without any keyword to modify the existing crypto map entry or profile.
After a crypto map entry is created, you cannot change the parameters specified at the global configuration level because these parameters determine the configuration commands that are valid at the crypto map level. For example, after a map entry has been created using the ipsec-isakmp keyword, you cannot change it to the option specified by the ipsec-manual keyword; you must delete and reenter the map entry.
After you define crypto map entries, you can assign the crypto map set to interfaces using the crypto map (interface IPsec) command.
Crypto Map Functions
Crypto maps provide two functions: filtering and classifying the traffic to be protected and defining the policy to be applied to that traffic. The first affects the flow of traffic on an interface; the second affects the negotiation performed (via IKE) on behalf of that traffic.
IPsec crypto maps define the following:
• What traffic should be protected
• To which IPsec peers the protected traffic can be forwarded—these are the peers with which an SA can be established
• Which transform sets are acceptable for use with the protected traffic
• How keys and SAs should be used or managed (or what the keys are, if IKE is not used)
Multiple Crypto Map Entries with the Same Map Name Form a Crypto Map Set
A crypto map set is a collection of crypto map entries, each with a different seq-num argument but the same map-name argument. Therefore, for an interface, you could have certain traffic forwarded to one IPsec peer with specified security applied to that traffic and other traffic forwarded to the same or different IPsec peer with different IPsec security applied. To accomplish differential forwarding, you would create two crypto maps, each with the same map-name argument but different seq-num argument. Crypto profiles must have unique names within a crypto map set.
Note If a deny statement (which specifies the conditions under which a packet cannot pass the access control list) in an access control list belongs to a crypto map in a crypto map set, the IPsec logic causes a jump to the next crypto map in the crypto map set, hoping for a better possible match. VPN Service Adapter (VSA) hardware has a restriction of 14 jumps.
Sequence Numbers
The number you assign to the seq-num argument should not be arbitrary. This number is used to rank multiple crypto map entries within a crypto map set. Within a crypto map set, a crypto map entry with a lower seq-num is evaluated before a map entry with a higher seq-num; that is, the map entry with the lower number has a higher priority.
For example, assume that a crypto map set contains three crypto map entries: mymap 10, mymap 20, and mymap 30. The crypto map set named “mymap” is applied to serial interface 0. When traffic passes through serial interface 0, traffic is evaluated first for mymap 10. If the traffic matches any access list permit statement entry in the extended access list in mymap 10, the traffic will be processed according to the information defined in mymap 10 (which includes establishing IPsec SAs when necessary). If the

crypto map (global IPsec)
SEC-707April 2011
traffic does not match the mymap 10 access list, the traffic will be evaluated for mymap 20, and then mymap 30, until the traffic matches a permit entry in a map entry. (If the traffic does not match a permit entry in any crypto map entry, it will be forwarded without any IPsec security.)
Dynamic Crypto Maps
Refer to the “Usage Guidelines” section of the crypto dynamic-map command for a discussion on dynamic crypto maps.
Crypto map entries that reference dynamic map sets should be the lowest priority map entries, allowing inbound SA negotiation requests to try to match the static maps first. If the request does not match any of the static maps, it will be evaluated against the dynamic map set.
If a crypto map entry references a dynamic crypto map set, make it the lowest priority map entry by giving it the highest seq-num value of all the map entries in a crypto map set.
Create dynamic crypto map entries using the crypto dynamic-map command. After you create a dynamic crypto map set, add the dynamic crypto map set to a static crypto map set with the crypto map (global IPsec) command using the dynamic keyword.
Note IPv6 keywords are not supported on dynamic crypto maps.
TED
Tunnel Endpoint Discovery (TED) is an enhancement to the IPsec feature. Defining a dynamic crypto map allows you to dynamically determine an IPsec peer; however, only the receiving router has this ability. With TED, the initiating router can dynamically determine an IPsec peer for secure IPsec communications.
Dynamic TED helps to simplify the IPsec configuration on individual routers within a large network. Each node has a simple configuration that defines the local network that the router is protecting and the IPsec transforms that are required.
Note TED helps only in discovering peers; otherwise, TED does not function any differently from normal IPsec. Thus, TED does not improve the scalability of IPsec (in terms of performance or the number of peers or tunnels).
Crypto Map Profiles
Crypto map profiles are created using the profile profile-name keyword and argument combination. Crypto map profiles are used as configuration templates for dynamically creating crypto maps on demand for use with the L2TP Security feature. The relevant SAs in the crypto map profile will be cloned and used to protect IP traffic on the L2TP tunnel.
Note The set peer and match address commands are ignored by crypto profiles and should not be configured in the crypto map definition.
Examples The following example shows the minimum required crypto map configuration when IKE will be used to establish the SAs:
crypto map mymap 10 ipsec-isakmpmatch address 101set transform-set my_t_set1
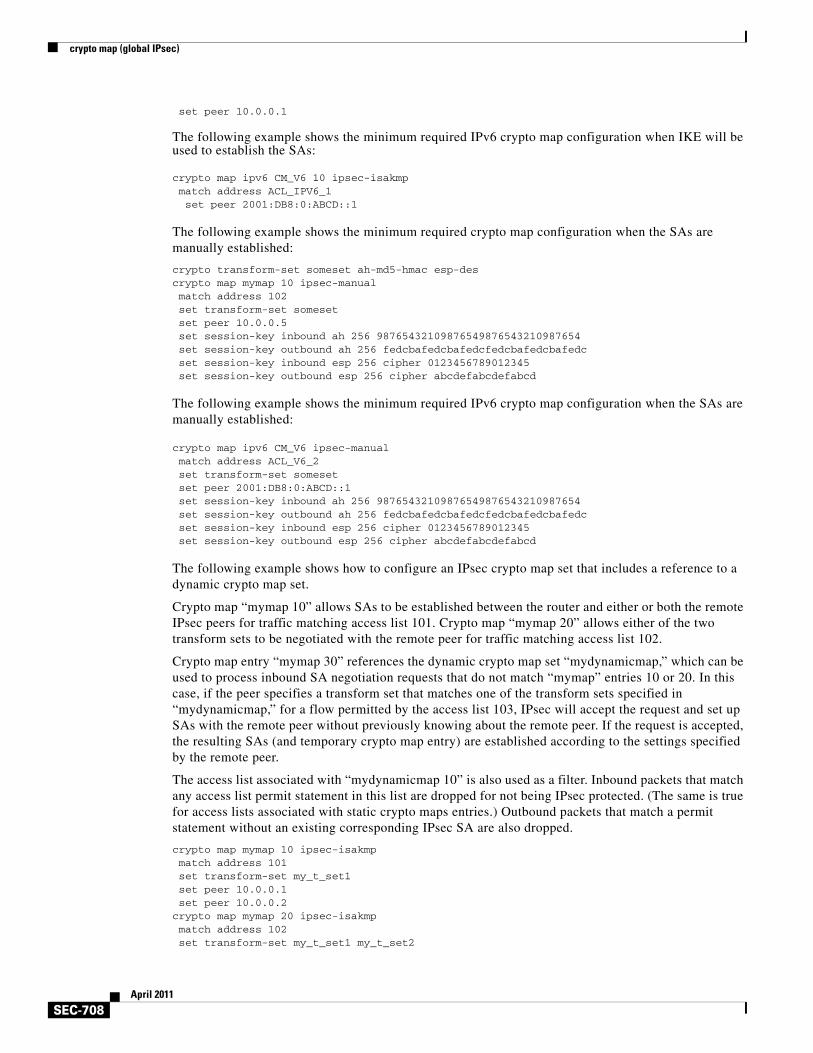
crypto map (global IPsec)
SEC-708April 2011
set peer 10.0.0.1
The following example shows the minimum required IPv6 crypto map configuration when IKE will be used to establish the SAs:
crypto map ipv6 CM_V6 10 ipsec-isakmpmatch address ACL_IPV6_1set peer 2001:DB8:0:ABCD::1
The following example shows the minimum required crypto map configuration when the SAs are manually established:
crypto transform-set someset ah-md5-hmac esp-descrypto map mymap 10 ipsec-manualmatch address 102set transform-set somesetset peer 10.0.0.5set session-key inbound ah 256 98765432109876549876543210987654set session-key outbound ah 256 fedcbafedcbafedcfedcbafedcbafedcset session-key inbound esp 256 cipher 0123456789012345set session-key outbound esp 256 cipher abcdefabcdefabcd
The following example shows the minimum required IPv6 crypto map configuration when the SAs are manually established:
crypto map ipv6 CM_V6 ipsec-manualmatch address ACL_V6_2set transform-set somesetset peer 2001:DB8:0:ABCD::1set session-key inbound ah 256 98765432109876549876543210987654set session-key outbound ah 256 fedcbafedcbafedcfedcbafedcbafedcset session-key inbound esp 256 cipher 0123456789012345set session-key outbound esp 256 cipher abcdefabcdefabcd
The following example shows how to configure an IPsec crypto map set that includes a reference to a dynamic crypto map set.
Crypto map “mymap 10” allows SAs to be established between the router and either or both the remote IPsec peers for traffic matching access list 101. Crypto map “mymap 20” allows either of the two transform sets to be negotiated with the remote peer for traffic matching access list 102.
Crypto map entry “mymap 30” references the dynamic crypto map set “mydynamicmap,” which can be used to process inbound SA negotiation requests that do not match “mymap” entries 10 or 20. In this case, if the peer specifies a transform set that matches one of the transform sets specified in “mydynamicmap,” for a flow permitted by the access list 103, IPsec will accept the request and set up SAs with the remote peer without previously knowing about the remote peer. If the request is accepted, the resulting SAs (and temporary crypto map entry) are established according to the settings specified by the remote peer.
The access list associated with “mydynamicmap 10” is also used as a filter. Inbound packets that match any access list permit statement in this list are dropped for not being IPsec protected. (The same is true for access lists associated with static crypto maps entries.) Outbound packets that match a permit statement without an existing corresponding IPsec SA are also dropped.
crypto map mymap 10 ipsec-isakmpmatch address 101set transform-set my_t_set1set peer 10.0.0.1set peer 10.0.0.2
crypto map mymap 20 ipsec-isakmpmatch address 102set transform-set my_t_set1 my_t_set2
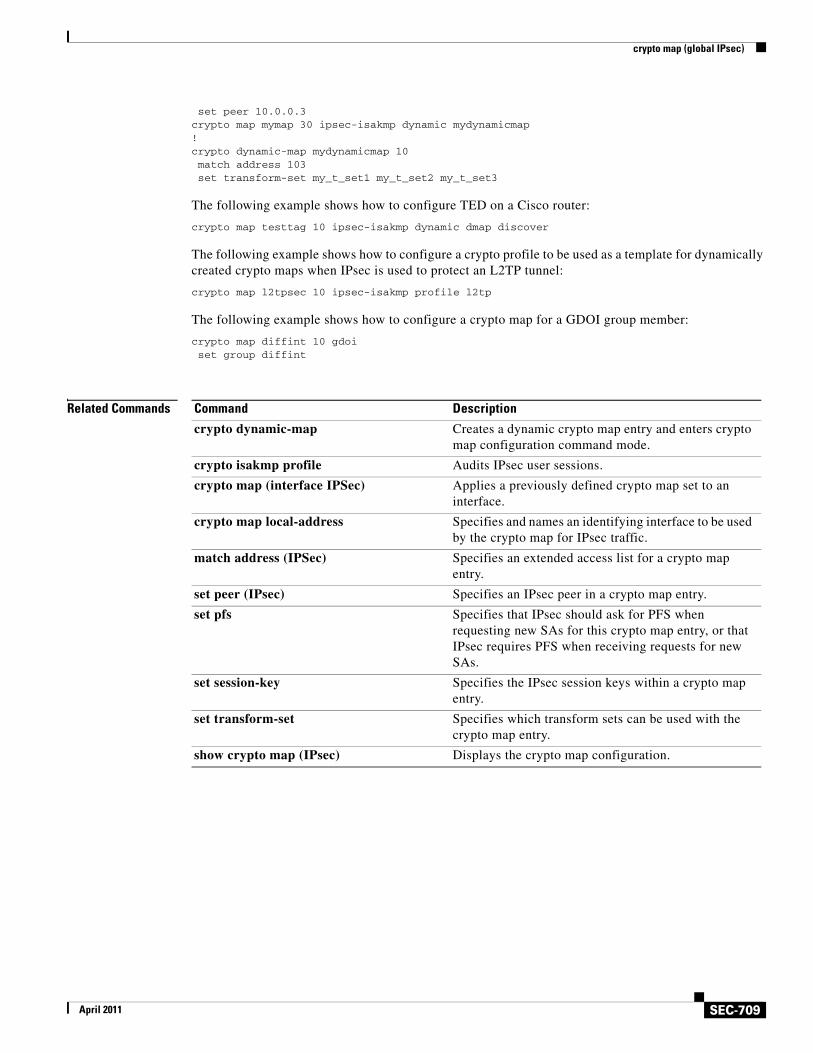
crypto map (global IPsec)
SEC-709April 2011
set peer 10.0.0.3crypto map mymap 30 ipsec-isakmp dynamic mydynamicmap!crypto dynamic-map mydynamicmap 10match address 103set transform-set my_t_set1 my_t_set2 my_t_set3
The following example shows how to configure TED on a Cisco router:
crypto map testtag 10 ipsec-isakmp dynamic dmap discover
The following example shows how to configure a crypto profile to be used as a template for dynamically created crypto maps when IPsec is used to protect an L2TP tunnel:
crypto map l2tpsec 10 ipsec-isakmp profile l2tp
The following example shows how to configure a crypto map for a GDOI group member:
crypto map diffint 10 gdoiset group diffint
Related Commands Command Description
crypto dynamic-map Creates a dynamic crypto map entry and enters crypto map configuration command mode.
crypto isakmp profile Audits IPsec user sessions.
crypto map (interface IPSec) Applies a previously defined crypto map set to an interface.
crypto map local-address Specifies and names an identifying interface to be used by the crypto map for IPsec traffic.
match address (IPSec) Specifies an extended access list for a crypto map entry.
set peer (IPsec) Specifies an IPsec peer in a crypto map entry.
set pfs Specifies that IPsec should ask for PFS when requesting new SAs for this crypto map entry, or that IPsec requires PFS when receiving requests for new SAs.
set session-key Specifies the IPsec session keys within a crypto map entry.
set transform-set Specifies which transform sets can be used with the crypto map entry.
show crypto map (IPsec) Displays the crypto map configuration.
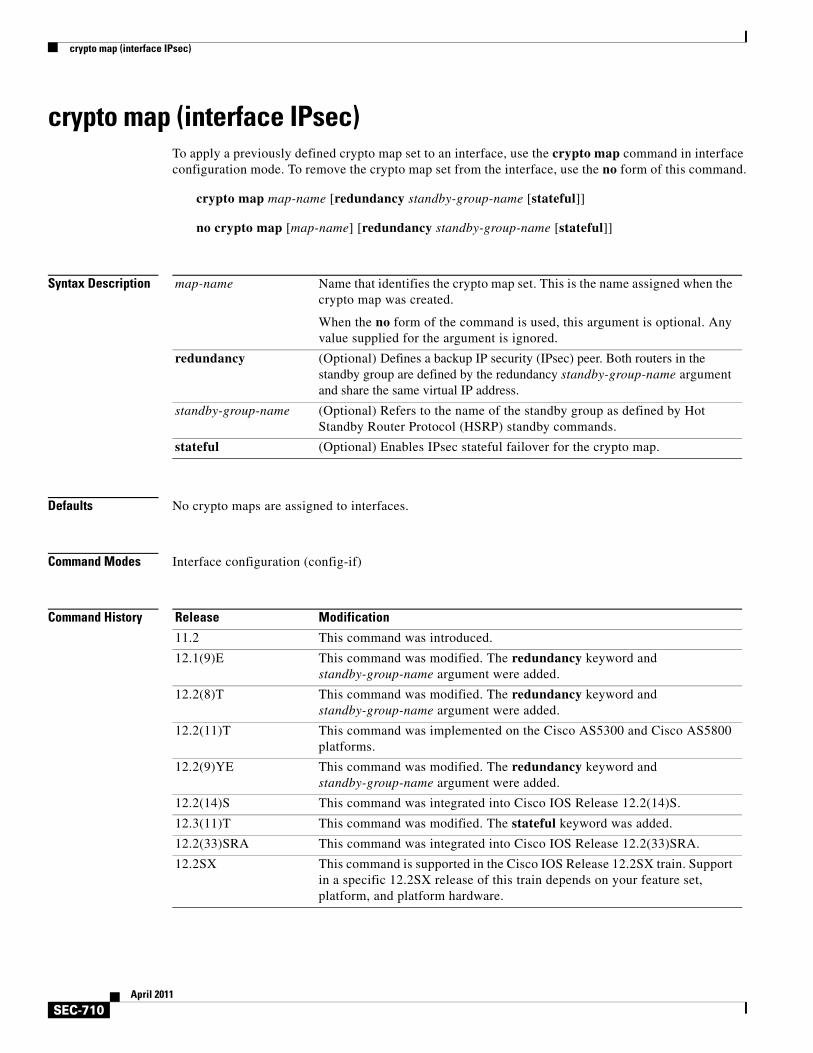
crypto map (interface IPsec)
SEC-710April 2011
crypto map (interface IPsec) To apply a previously defined crypto map set to an interface, use the crypto map command in interface configuration mode. To remove the crypto map set from the interface, use the no form of this command.
crypto map map-name [redundancy standby-group-name [stateful]]
no crypto map [map-name] [redundancy standby-group-name [stateful]]
Syntax Description
Defaults No crypto maps are assigned to interfaces.
Command Modes Interface configuration (config-if)
Command History
map-name Name that identifies the crypto map set. This is the name assigned when the crypto map was created.
When the no form of the command is used, this argument is optional. Any value supplied for the argument is ignored.
redundancy (Optional) Defines a backup IP security (IPsec) peer. Both routers in the standby group are defined by the redundancy standby-group-name argument and share the same virtual IP address.
standby-group-name (Optional) Refers to the name of the standby group as defined by Hot Standby Router Protocol (HSRP) standby commands.
stateful (Optional) Enables IPsec stateful failover for the crypto map.
Release Modification
11.2 This command was introduced.
12.1(9)E This command was modified. The redundancy keyword and standby-group-name argument were added.
12.2(8)T This command was modified. The redundancy keyword and standby-group-name argument were added.
12.2(11)T This command was implemented on the Cisco AS5300 and Cisco AS5800 platforms.
12.2(9)YE This command was modified. The redundancy keyword and standby-group-name argument were added.
12.2(14)S This command was integrated into Cisco IOS Release 12.2(14)S.
12.3(11)T This command was modified. The stateful keyword was added.
12.2(33)SRA This command was integrated into Cisco IOS Release 12.2(33)SRA.
12.2SX This command is supported in the Cisco IOS Release 12.2SX train. Support in a specific 12.2SX release of this train depends on your feature set, platform, and platform hardware.
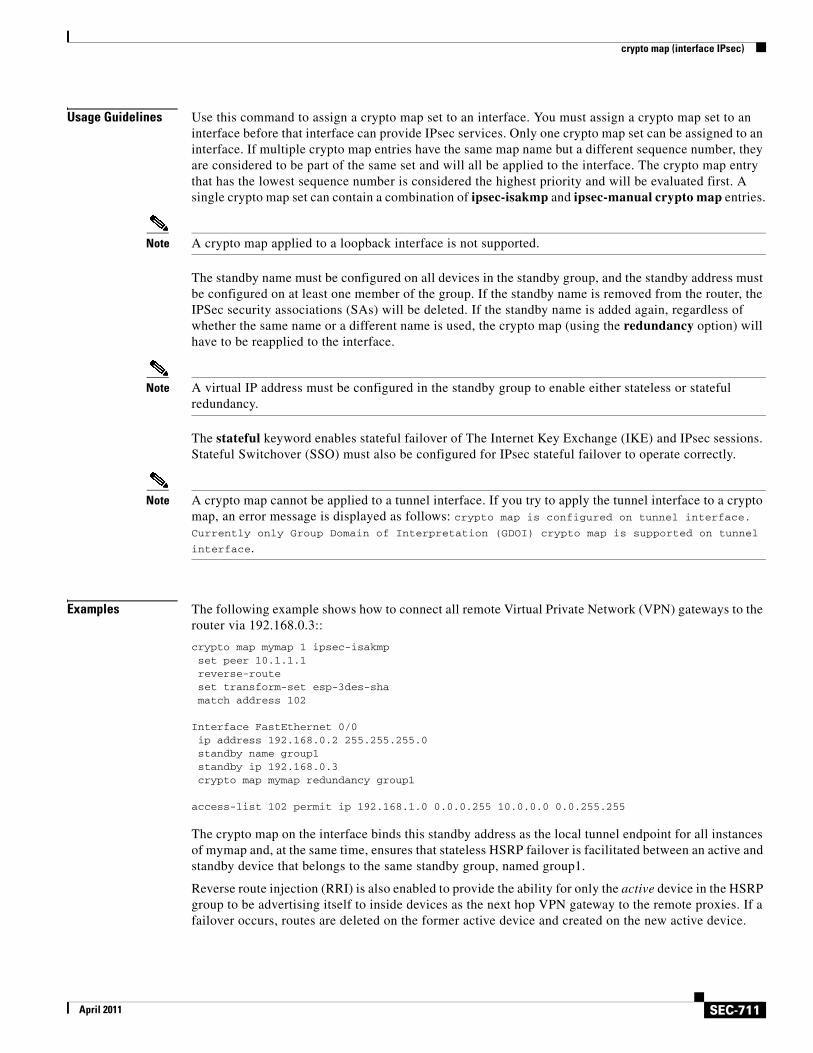
crypto map (interface IPsec)
SEC-711April 2011
Usage Guidelines Use this command to assign a crypto map set to an interface. You must assign a crypto map set to an interface before that interface can provide IPsec services. Only one crypto map set can be assigned to an interface. If multiple crypto map entries have the same map name but a different sequence number, they are considered to be part of the same set and will all be applied to the interface. The crypto map entry that has the lowest sequence number is considered the highest priority and will be evaluated first. A single crypto map set can contain a combination of ipsec-isakmp and ipsec-manual crypto map entries.
Note A crypto map applied to a loopback interface is not supported.
The standby name must be configured on all devices in the standby group, and the standby address must be configured on at least one member of the group. If the standby name is removed from the router, the IPSec security associations (SAs) will be deleted. If the standby name is added again, regardless of whether the same name or a different name is used, the crypto map (using the redundancy option) will have to be reapplied to the interface.
Note A virtual IP address must be configured in the standby group to enable either stateless or stateful redundancy.
The stateful keyword enables stateful failover of The Internet Key Exchange (IKE) and IPsec sessions. Stateful Switchover (SSO) must also be configured for IPsec stateful failover to operate correctly.
Note A crypto map cannot be applied to a tunnel interface. If you try to apply the tunnel interface to a crypto map, an error message is displayed as follows: crypto map is configured on tunnel interface. Currently only Group Domain of Interpretation (GDOI) crypto map is supported on tunnel
interface.
Examples The following example shows how to connect all remote Virtual Private Network (VPN) gateways to the router via 192.168.0.3::
crypto map mymap 1 ipsec-isakmpset peer 10.1.1.1reverse-routeset transform-set esp-3des-shamatch address 102
Interface FastEthernet 0/0ip address 192.168.0.2 255.255.255.0standby name group1standby ip 192.168.0.3crypto map mymap redundancy group1
access-list 102 permit ip 192.168.1.0 0.0.0.255 10.0.0.0 0.0.255.255
The crypto map on the interface binds this standby address as the local tunnel endpoint for all instances of mymap and, at the same time, ensures that stateless HSRP failover is facilitated between an active and standby device that belongs to the same standby group, named group1.
Reverse route injection (RRI) is also enabled to provide the ability for only the active device in the HSRP group to be advertising itself to inside devices as the next hop VPN gateway to the remote proxies. If a failover occurs, routes are deleted on the former active device and created on the new active device.
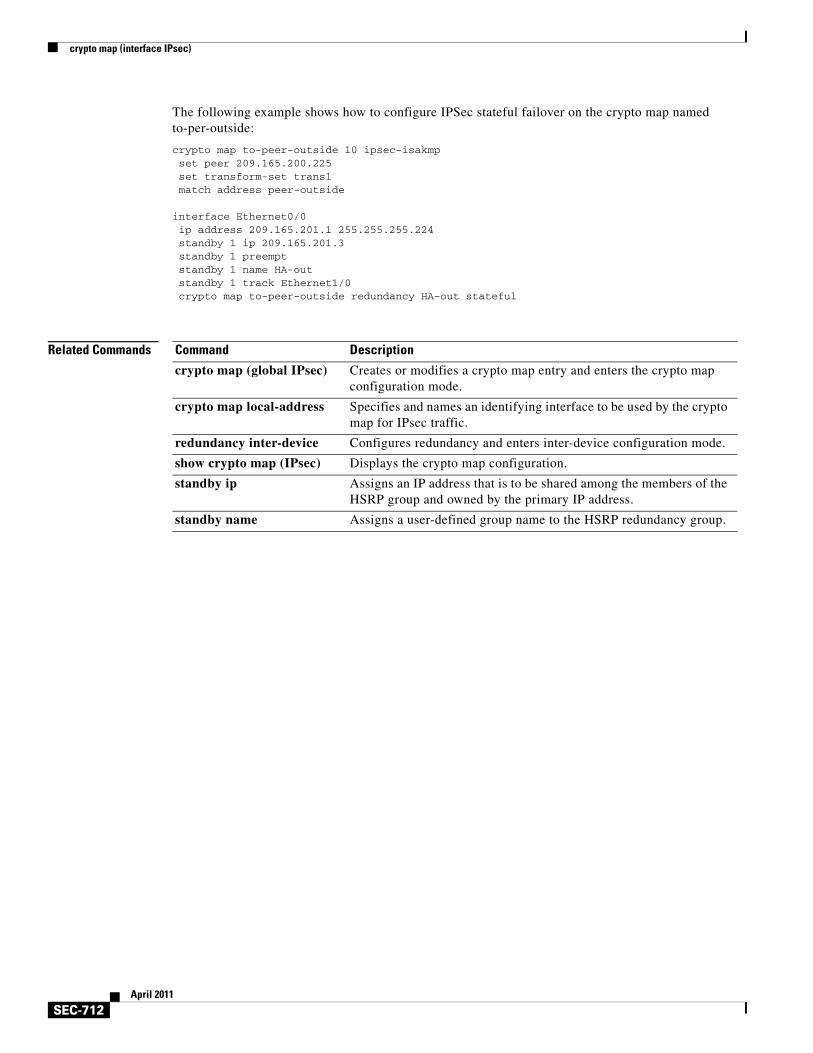
crypto map (interface IPsec)
SEC-712April 2011
The following example shows how to configure IPSec stateful failover on the crypto map named to-per-outside:
crypto map to-peer-outside 10 ipsec-isakmp set peer 209.165.200.225 set transform-set trans1 match address peer-outside
interface Ethernet0/0 ip address 209.165.201.1 255.255.255.224 standby 1 ip 209.165.201.3 standby 1 preempt standby 1 name HA-out standby 1 track Ethernet1/0 crypto map to-peer-outside redundancy HA-out stateful
Related Commands Command Description
crypto map (global IPsec) Creates or modifies a crypto map entry and enters the crypto map configuration mode.
crypto map local-address Specifies and names an identifying interface to be used by the crypto map for IPsec traffic.
redundancy inter-device Configures redundancy and enters inter-device configuration mode.
show crypto map (IPsec) Displays the crypto map configuration.
standby ip Assigns an IP address that is to be shared among the members of the HSRP group and owned by the primary IP address.
standby name Assigns a user-defined group name to the HSRP redundancy group.
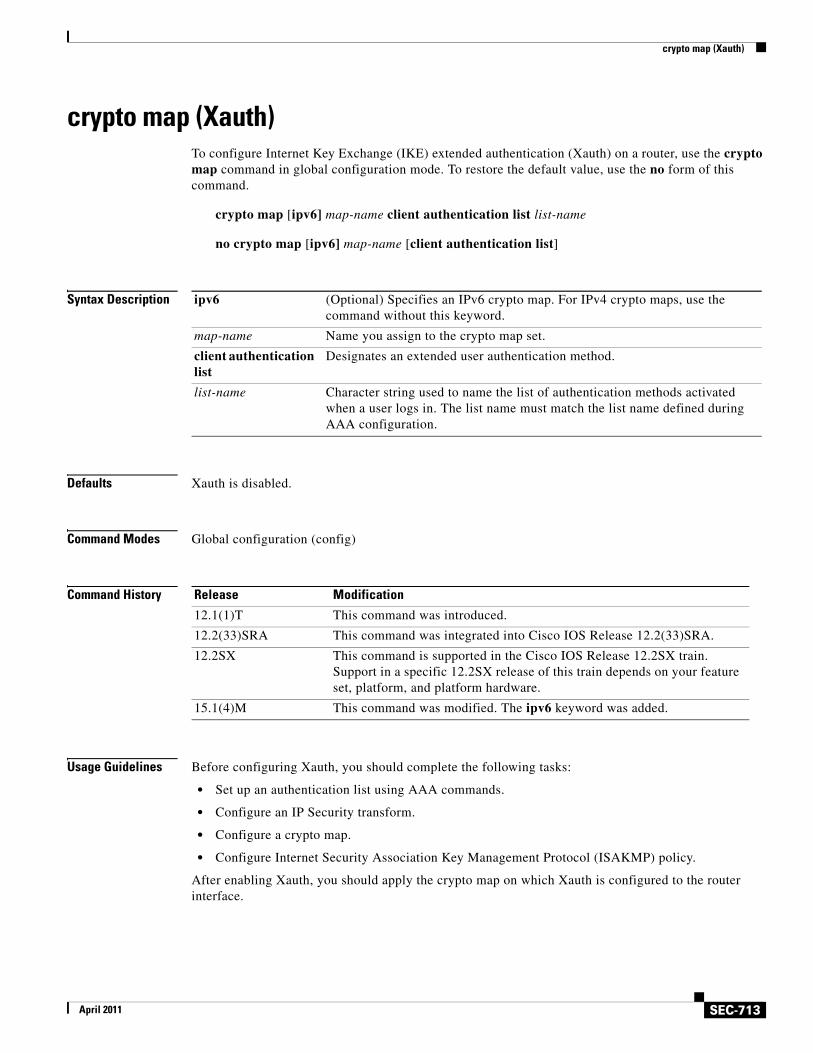
crypto map (Xauth)
SEC-713April 2011
crypto map (Xauth)To configure Internet Key Exchange (IKE) extended authentication (Xauth) on a router, use the crypto map command in global configuration mode. To restore the default value, use the no form of this command.
crypto map [ipv6] map-name client authentication list list-name
no crypto map [ipv6] map-name [client authentication list]
Syntax Description
Defaults Xauth is disabled.
Command Modes Global configuration (config)
Command History
Usage Guidelines Before configuring Xauth, you should complete the following tasks:
• Set up an authentication list using AAA commands.
• Configure an IP Security transform.
• Configure a crypto map.
• Configure Internet Security Association Key Management Protocol (ISAKMP) policy.
After enabling Xauth, you should apply the crypto map on which Xauth is configured to the router interface.
ipv6 (Optional) Specifies an IPv6 crypto map. For IPv4 crypto maps, use the command without this keyword.
map-name Name you assign to the crypto map set.
client authentication list
Designates an extended user authentication method.
list-name Character string used to name the list of authentication methods activated when a user logs in. The list name must match the list name defined during AAA configuration.
Release Modification
12.1(1)T This command was introduced.
12.2(33)SRA This command was integrated into Cisco IOS Release 12.2(33)SRA.
12.2SX This command is supported in the Cisco IOS Release 12.2SX train. Support in a specific 12.2SX release of this train depends on your feature set, platform, and platform hardware.
15.1(4)M This command was modified. The ipv6 keyword was added.

crypto map (Xauth)
SEC-714April 2011
Examples The following example shows how to configure user authentication (a list of authentication methods called xauthlist) on an existing static crypto map called xauthmap:
crypto map xauthmap client authentication list xauthlist
The following example shows how to configure user authentication (a list of authentication methods called CM_V6list) on an existing static IPv6 crypto map called CM_V6:
crypto map ipv6 CM_V6 client authentication list CM_V6list
The following example shows how to configure user authentication (a list of authentication methods called xauthlist) on a dynamic crypto map called xauthdynamic that has been applied to a static crypto map called xauthmap:
crypto map xauthmap client authentication list xauthlistcrypto map xauthmap 10 ipsec-isakmp dynamic xauthdynamic
Related Commands Command Description
aaa authentication login Sets AAA authentication at login.
crypto ipsec transform-set Defines a transform set, which is an acceptable combination of security protocols and algorithms, and enters crypto transform configuration mode.
crypto isakmp key Configures a preshared authentication key.
crypto isakmp policy Defines an IKE policy, and enters ISAKMP policy configuration mode.
crypto map (global configuration) Creates or modifies a crypto map entry, and enters the crypto map configuration mode.
interface Enters the interface configuration mode.
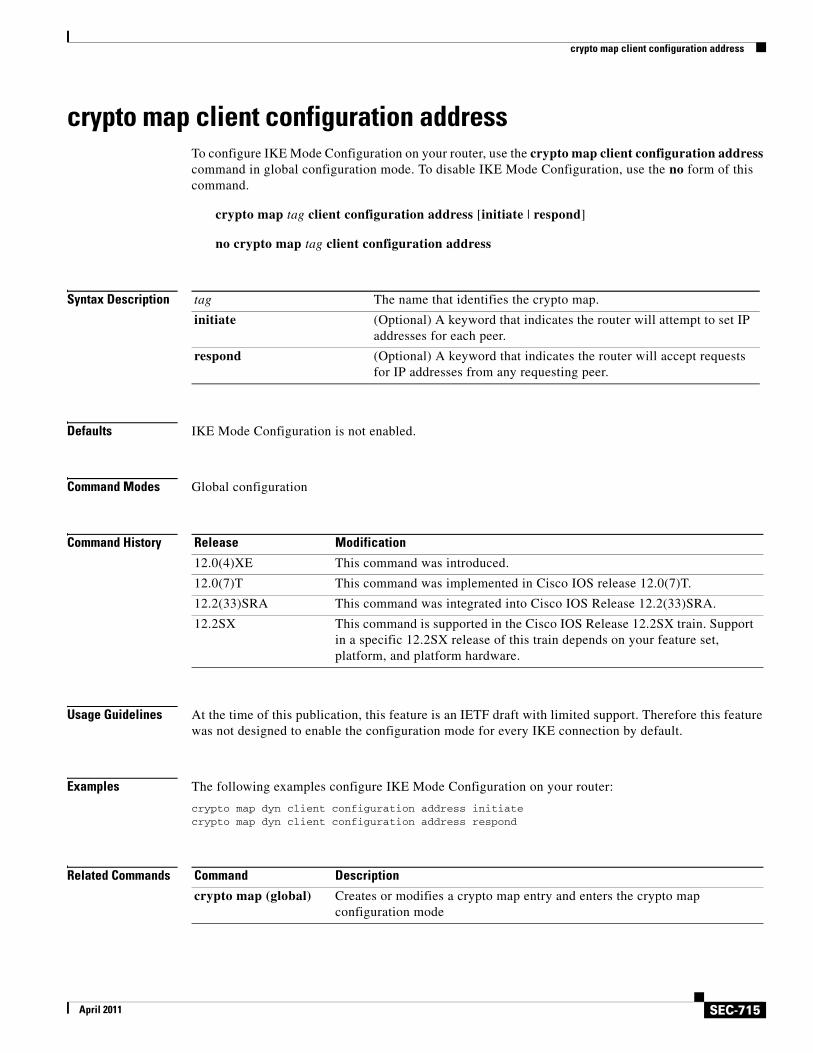
crypto map client configuration address
SEC-715April 2011
crypto map client configuration addressTo configure IKE Mode Configuration on your router, use the crypto map client configuration address command in global configuration mode. To disable IKE Mode Configuration, use the no form of this command.
crypto map tag client configuration address [initiate | respond]
no crypto map tag client configuration address
Syntax Description
Defaults IKE Mode Configuration is not enabled.
Command Modes Global configuration
Command History
Usage Guidelines At the time of this publication, this feature is an IETF draft with limited support. Therefore this feature was not designed to enable the configuration mode for every IKE connection by default.
Examples The following examples configure IKE Mode Configuration on your router:
crypto map dyn client configuration address initiatecrypto map dyn client configuration address respond
Related Commands
tag The name that identifies the crypto map.
initiate (Optional) A keyword that indicates the router will attempt to set IP addresses for each peer.
respond (Optional) A keyword that indicates the router will accept requests for IP addresses from any requesting peer.
Release Modification
12.0(4)XE This command was introduced.
12.0(7)T This command was implemented in Cisco IOS release 12.0(7)T.
12.2(33)SRA This command was integrated into Cisco IOS Release 12.2(33)SRA.
12.2SX This command is supported in the Cisco IOS Release 12.2SX train. Support in a specific 12.2SX release of this train depends on your feature set, platform, and platform hardware.
Command Description
crypto map (global) Creates or modifies a crypto map entry and enters the crypto map configuration mode
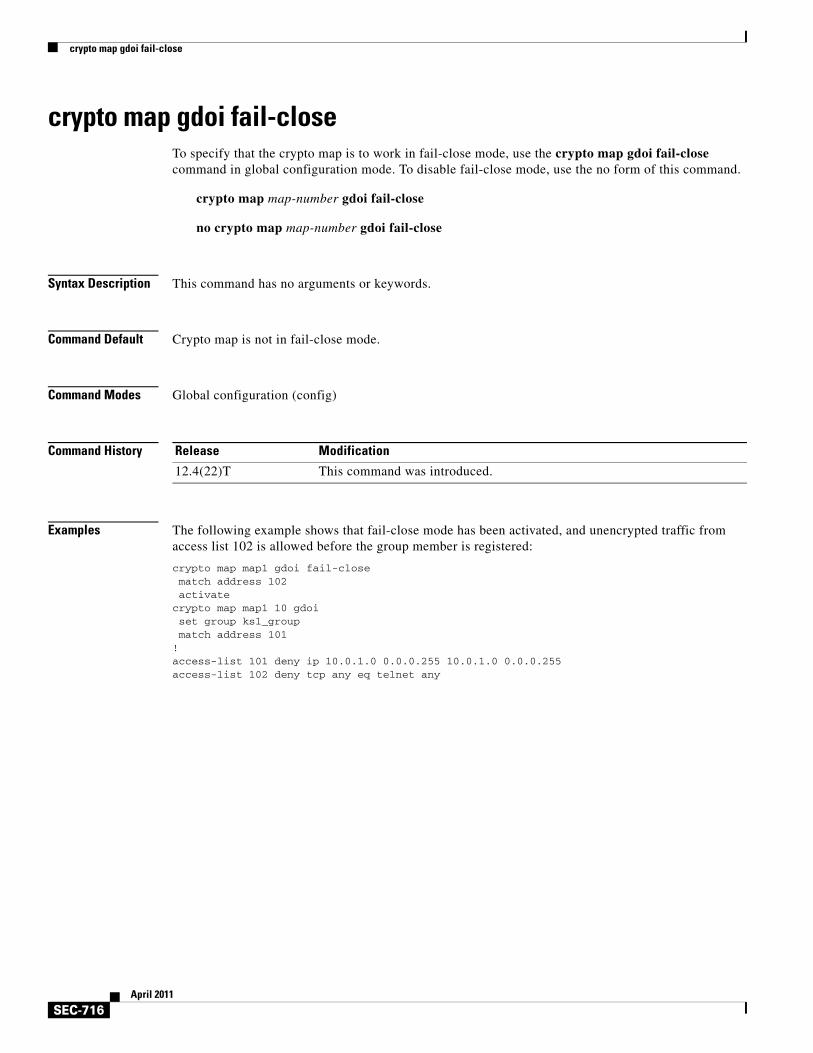
crypto map gdoi fail-close
SEC-716April 2011
crypto map gdoi fail-closeTo specify that the crypto map is to work in fail-close mode, use the crypto map gdoi fail-close command in global configuration mode. To disable fail-close mode, use the no form of this command.
crypto map map-number gdoi fail-close
no crypto map map-number gdoi fail-close
Syntax Description This command has no arguments or keywords.
Command Default Crypto map is not in fail-close mode.
Command Modes Global configuration (config)
Command History
Examples The following example shows that fail-close mode has been activated, and unencrypted traffic from access list 102 is allowed before the group member is registered:
crypto map map1 gdoi fail-closematch address 102activate
crypto map map1 10 gdoiset group ks1_groupmatch address 101
!access-list 101 deny ip 10.0.1.0 0.0.0.255 10.0.1.0 0.0.0.255access-list 102 deny tcp any eq telnet any
Release Modification
12.4(22)T This command was introduced.
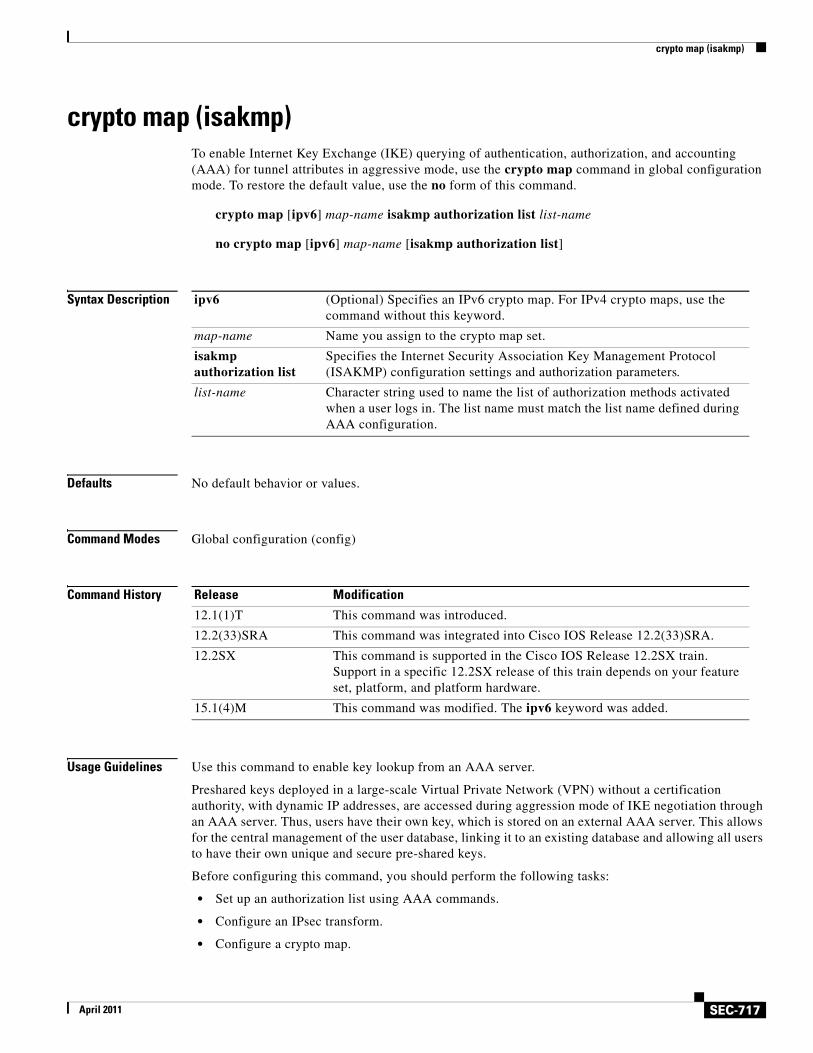
crypto map (isakmp)
SEC-717April 2011
crypto map (isakmp)To enable Internet Key Exchange (IKE) querying of authentication, authorization, and accounting (AAA) for tunnel attributes in aggressive mode, use the crypto map command in global configuration mode. To restore the default value, use the no form of this command.
crypto map [ipv6] map-name isakmp authorization list list-name
no crypto map [ipv6] map-name [isakmp authorization list]
Syntax Description
Defaults No default behavior or values.
Command Modes Global configuration (config)
Command History
Usage Guidelines Use this command to enable key lookup from an AAA server.
Preshared keys deployed in a large-scale Virtual Private Network (VPN) without a certification authority, with dynamic IP addresses, are accessed during aggression mode of IKE negotiation through an AAA server. Thus, users have their own key, which is stored on an external AAA server. This allows for the central management of the user database, linking it to an existing database and allowing all users to have their own unique and secure pre-shared keys.
Before configuring this command, you should perform the following tasks:
• Set up an authorization list using AAA commands.
• Configure an IPsec transform.
• Configure a crypto map.
ipv6 (Optional) Specifies an IPv6 crypto map. For IPv4 crypto maps, use the command without this keyword.
map-name Name you assign to the crypto map set.
isakmp authorization list
Specifies the Internet Security Association Key Management Protocol (ISAKMP) configuration settings and authorization parameters.
list-name Character string used to name the list of authorization methods activated when a user logs in. The list name must match the list name defined during AAA configuration.
Release Modification
12.1(1)T This command was introduced.
12.2(33)SRA This command was integrated into Cisco IOS Release 12.2(33)SRA.
12.2SX This command is supported in the Cisco IOS Release 12.2SX train. Support in a specific 12.2SX release of this train depends on your feature set, platform, and platform hardware.
15.1(4)M This command was modified. The ipv6 keyword was added.
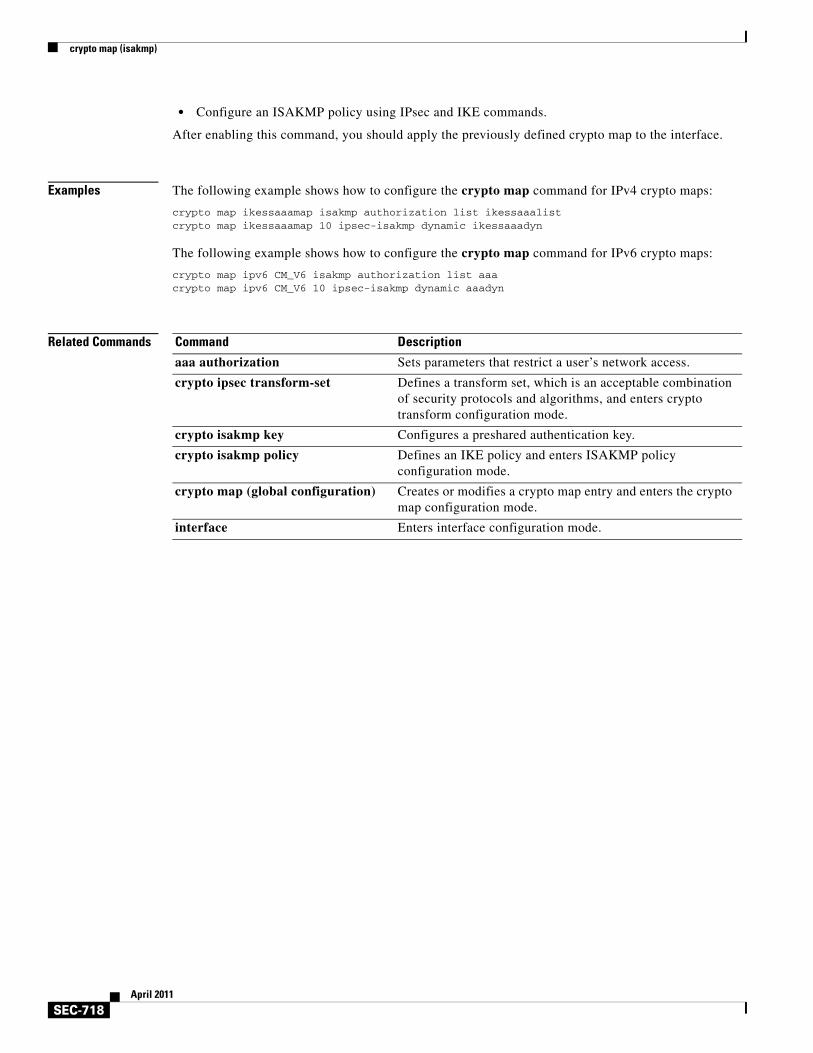
crypto map (isakmp)
SEC-718April 2011
• Configure an ISAKMP policy using IPsec and IKE commands.
After enabling this command, you should apply the previously defined crypto map to the interface.
Examples The following example shows how to configure the crypto map command for IPv4 crypto maps:
crypto map ikessaaamap isakmp authorization list ikessaaalistcrypto map ikessaaamap 10 ipsec-isakmp dynamic ikessaaadyn
The following example shows how to configure the crypto map command for IPv6 crypto maps:
crypto map ipv6 CM_V6 isakmp authorization list aaacrypto map ipv6 CM_V6 10 ipsec-isakmp dynamic aaadyn
Related Commands Command Description
aaa authorization Sets parameters that restrict a user’s network access.
crypto ipsec transform-set Defines a transform set, which is an acceptable combination of security protocols and algorithms, and enters crypto transform configuration mode.
crypto isakmp key Configures a preshared authentication key.
crypto isakmp policy Defines an IKE policy and enters ISAKMP policy configuration mode.
crypto map (global configuration) Creates or modifies a crypto map entry and enters the crypto map configuration mode.
interface Enters interface configuration mode.
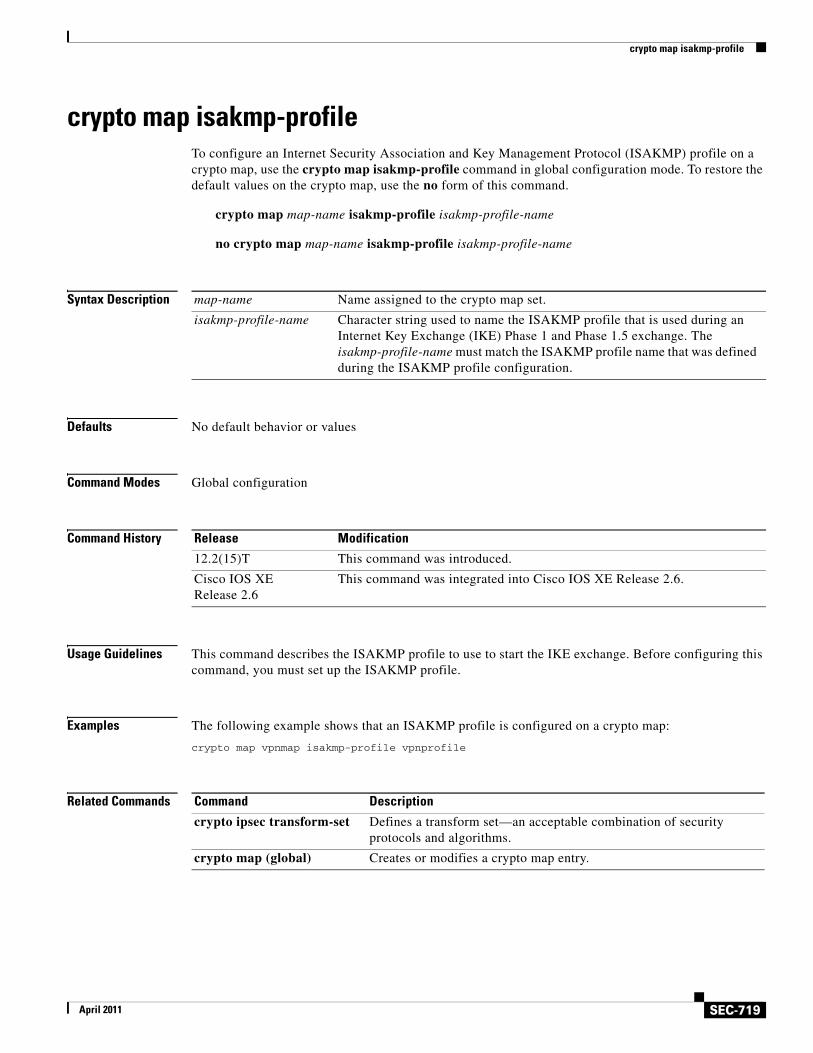
crypto map isakmp-profile
SEC-719April 2011
crypto map isakmp-profileTo configure an Internet Security Association and Key Management Protocol (ISAKMP) profile on a crypto map, use the crypto map isakmp-profile command in global configuration mode. To restore the default values on the crypto map, use the no form of this command.
crypto map map-name isakmp-profile isakmp-profile-name
no crypto map map-name isakmp-profile isakmp-profile-name
Syntax Description
Defaults No default behavior or values
Command Modes Global configuration
Command History
Usage Guidelines This command describes the ISAKMP profile to use to start the IKE exchange. Before configuring this command, you must set up the ISAKMP profile.
Examples The following example shows that an ISAKMP profile is configured on a crypto map:
crypto map vpnmap isakmp-profile vpnprofile
Related Commands
map-name Name assigned to the crypto map set.
isakmp-profile-name Character string used to name the ISAKMP profile that is used during an Internet Key Exchange (IKE) Phase 1 and Phase 1.5 exchange. The isakmp-profile-name must match the ISAKMP profile name that was defined during the ISAKMP profile configuration.
Release Modification
12.2(15)T This command was introduced.
Cisco IOS XE Release 2.6
This command was integrated into Cisco IOS XE Release 2.6.
Command Description
crypto ipsec transform-set Defines a transform set—an acceptable combination of security protocols and algorithms.
crypto map (global) Creates or modifies a crypto map entry.
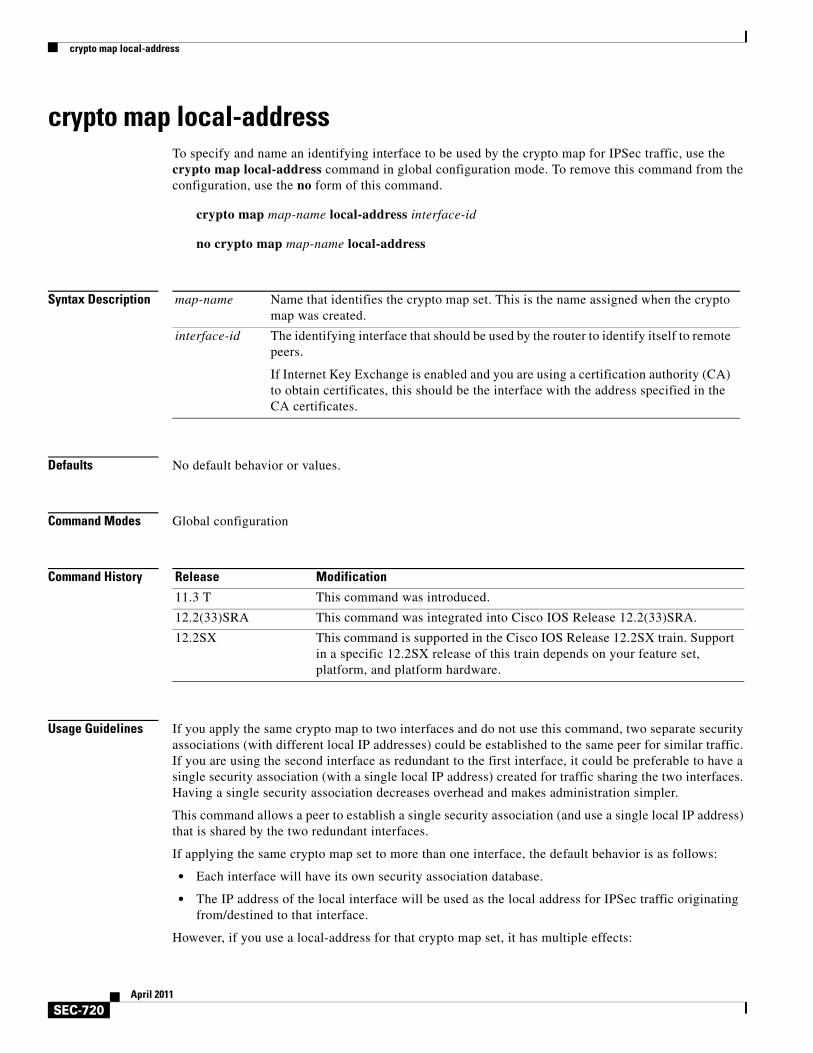
crypto map local-address
SEC-720April 2011
crypto map local-addressTo specify and name an identifying interface to be used by the crypto map for IPSec traffic, use the crypto map local-address command in global configuration mode. To remove this command from the configuration, use the no form of this command.
crypto map map-name local-address interface-id
no crypto map map-name local-address
Syntax Description
Defaults No default behavior or values.
Command Modes Global configuration
Command History
Usage Guidelines If you apply the same crypto map to two interfaces and do not use this command, two separate security associations (with different local IP addresses) could be established to the same peer for similar traffic. If you are using the second interface as redundant to the first interface, it could be preferable to have a single security association (with a single local IP address) created for traffic sharing the two interfaces. Having a single security association decreases overhead and makes administration simpler.
This command allows a peer to establish a single security association (and use a single local IP address) that is shared by the two redundant interfaces.
If applying the same crypto map set to more than one interface, the default behavior is as follows:
• Each interface will have its own security association database.
• The IP address of the local interface will be used as the local address for IPSec traffic originating from/destined to that interface.
However, if you use a local-address for that crypto map set, it has multiple effects:
map-name Name that identifies the crypto map set. This is the name assigned when the crypto map was created.
interface-id The identifying interface that should be used by the router to identify itself to remote peers.
If Internet Key Exchange is enabled and you are using a certification authority (CA) to obtain certificates, this should be the interface with the address specified in the CA certificates.
Release Modification
11.3 T This command was introduced.
12.2(33)SRA This command was integrated into Cisco IOS Release 12.2(33)SRA.
12.2SX This command is supported in the Cisco IOS Release 12.2SX train. Support in a specific 12.2SX release of this train depends on your feature set, platform, and platform hardware.

crypto map local-address
SEC-721April 2011
• Only one IPSec security association database will be established and shared for traffic through both interfaces.
• The IP address of the specified interface will be used as the local address for IPSec (and IKE) traffic originating from or destined to that interface.
One suggestion is to use a loopback interface as the referenced local address interface, because the loopback interface never goes down.
Examples The following example assigns crypto map set “mymap” to the S0 interface and to the S1 interface. When traffic passes through either S0 or S1, the traffic will be evaluated against the all the crypto maps in the “mymap” set. When traffic through either interface matches an access list in one of the “mymap” crypto maps, a security association will be established. This same security association will then apply to both S0 and S1 traffic that matches the originally matched IPSec access list. The local address that IPSec will use on both interfaces will be the IP address of interface loopback0.
interface S0crypto map mymap
interface S1crypto map mymap
crypto map mymap local-address loopback0
Related Commands Command Description
crypto map (interface IPSec) Applies a previously defined crypto map set to an interface.
crypto map redundancy replay-interval
SEC-722April 2011
crypto map redundancy replay-intervalTo modify the interval at which inbound and outbound replay updates are passed from an active device to a standby device, use the crypto map redundancy replay-interval command in global configuration mode. To return to the default functionality, use the no form of this command.
crypto map map-name redundancy replay-interval inbound in-value outbound out-value
no crypto map map-name redundancy replay-interval inbound in-value outbound out-value
Syntax Description
Defaults inbound in-value: one update every 1,000 packets
outbound out-value: one update every 100,000 packets
Command Modes Global configuration
Command History
Usage Guidelines
Note This command can be used only in conjunction with IPSec stateful failover on a crypto map.
Stateful failover enables a router to continue processing and forwarding packets after a planned or unplanned outage occurs; that is, a backup (secondary) router automatically takes over the tasks of the active (primary) router if the active router loses connectivity for any reason.
The crypto map redundancy replay-interval command allows you to modify the interval in which an IP redundancy-enabled crypto map sends anti-replay updates from the active router to the standby router.
Examples The following example shows how to enable replay checking for the crypto map “to-peer-outside” and enable IPSec stateful failover:
crypto map to-peer-outside redundancy replay-interval inbound 1000 outbound 10000crypto map to-peer-outside 10 ipsec-isakmp set peer 209.165.200.225 set transform-set trans1
map-name Name that identifies the crypto map set. This is the name assigned when the crypto map was created.
inbound in-value Number of inbound packets that are processed before an anti-replay update is sent from the active router to the standby router.
outbound out-value Number of outbound packets that are processed before an anti-replay update is sent from the active router to the standby router.
Release Modification
12.3(11)T This command was introduced.

crypto map redundancy replay-interval
SEC-723April 2011
match address peer-outside!interface Ethernet0/0 ip address 209.165.201.1 255.255.255.224 standby 1 ip 209.165.201.3 standby 1 preempt standby 1 name HA-out standby 1 track Ethernet1/0 crypto map to-peer-outside redundancy HA-out stateful

crypto mib ipsec flowmib history failure size
SEC-724April 2011
crypto mib ipsec flowmib history failure sizeTo change the size of the IP Security (IPSec) MIB failure history table, use the crypto mib ipsec flowmib history failure size command in global configuration mode.
crypto mib ipsec flowmib history failure size number
Syntax Description
Defaults If this command is not used, the default table size is 200.
Command Modes Global configuration
Command History
Usage Guidelines Use the crypto mib ipsec flowmib history failure size command to change the size of a failure history table. If you do not configure the size of a failure history table, the default of 200 will be implemented.
A failure history table stores the reason for tunnel failure and the time failure occurred. A failure history table can be used as a simple method to distinguish between a normal and an abnormal tunnel termination. That is, if a tunnel entry in the tunnel history table has no associated failure record, the tunnel must have terminated normally. However, every failure does not correspond to a tunnel. Supported setup failures are recorded in the failure table, but a history table is not associated because a tunnel was never set up.
Examples The following example shows the size of a failure history table configured to be 140:
crypto mib ipsec flowmib history failure size 140
Related Commands
number Size of the failure history table.
Release Modification
12.1(4)E This command was introduced.
12.2(4)T This command was integrated into Cisco IOS Release 12.2(4)T.
12.2(14)S This command was integrated into Cisco IOS Release 12.2(14)S.
12.2(33)SRA This command was integrated into Cisco IOS Release 12.2(33)SRA.
12.2SX This command is supported in the Cisco IOS Release 12.2SX train. Support in a specific 12.2SX release of this train depends on your feature set, platform, and platform hardware.
Command Description
crypto mib ipsec flowmib history tunnel size
Changes the size of the IPSec tunnel history table.
show crypto mib ipsec flowmib history failure size
Displays the size of the IPSec failure history table.
crypto mib ipsec flowmib history tunnel size
SEC-725April 2011
crypto mib ipsec flowmib history tunnel sizeTo change the size of the IP Security (IPSec) tunnel history table, use the crypto mib ipsec flowmib history tunnel size command in global configuration mode.
crypto mib ipsec flowmib history tunnel size number
Syntax Description
Defaults The default table size is 200.
Command Modes Global configuration
Command History
Usage Guidelines Use the crypto mib ipsec flowmib history tunnel size command to change the size of a tunnel history table. If you do not configure the size of a tunnel history table, the default of 200 will be implemented.
A tunnel history table stores the attribute and statistics records, which contain the attributes and the last snapshot of the traffic statistics of a given tunnel. A tunnel history table accompanies a failure table, so you can display the complete history of a given tunnel. However, a tunnel history table does not accompany every failure table because every failure does not correspond to a tunnel. Thus, supported setup failures are recorded in the failure table, but an associated history table is not recorded because a tunnel was never set up.
As an optimization, a tunnel endpoint table can be combined with a tunnel history table. However, if a tunnel endpoint table is combined, all three tables (the failure history table, tunnel history table, and the endpoint table) must remain the same size even though the MIB allows each table to be distinct.
Examples The following example shows the size of a tunnel history table configured to be 130:
crypto mib ipsec flowmib history tunnel size 130
number Size of the tunnel history table.
Release Modification
12.1(4)E This command was introduced.
12.2(4)T This command was integrated into Cisco IOS Release 12.2(4)T.
12.2(14)S This command was integrated into Cisco IOS Release 12.2(14)S.
12.2(33)SRA This command was integrated into Cisco IOS Release 12.2(33)SRA.
12.2SX This command is supported in the Cisco IOS Release 12.2SX train. Support in a specific 12.2SX release of this train depends on your feature set, platform, and platform hardware.

crypto mib ipsec flowmib history tunnel size
SEC-726April 2011
Related Commands Command Description
crypto mib ipsec flowmib history failure size
Changes the size of the IPSec failure history table.
show crypto mib ipsec flowmib history tunnel size
Displays the size of the IPSec tunnel history table.