Embed Size (px)
Citation preview
CRX Microdermabrasion
Assembly, Usage & Cleaning
Instructional Manual
Copyrightã 2018 Clarity Clinical Skin Care, Inc. All Rights Reserved.
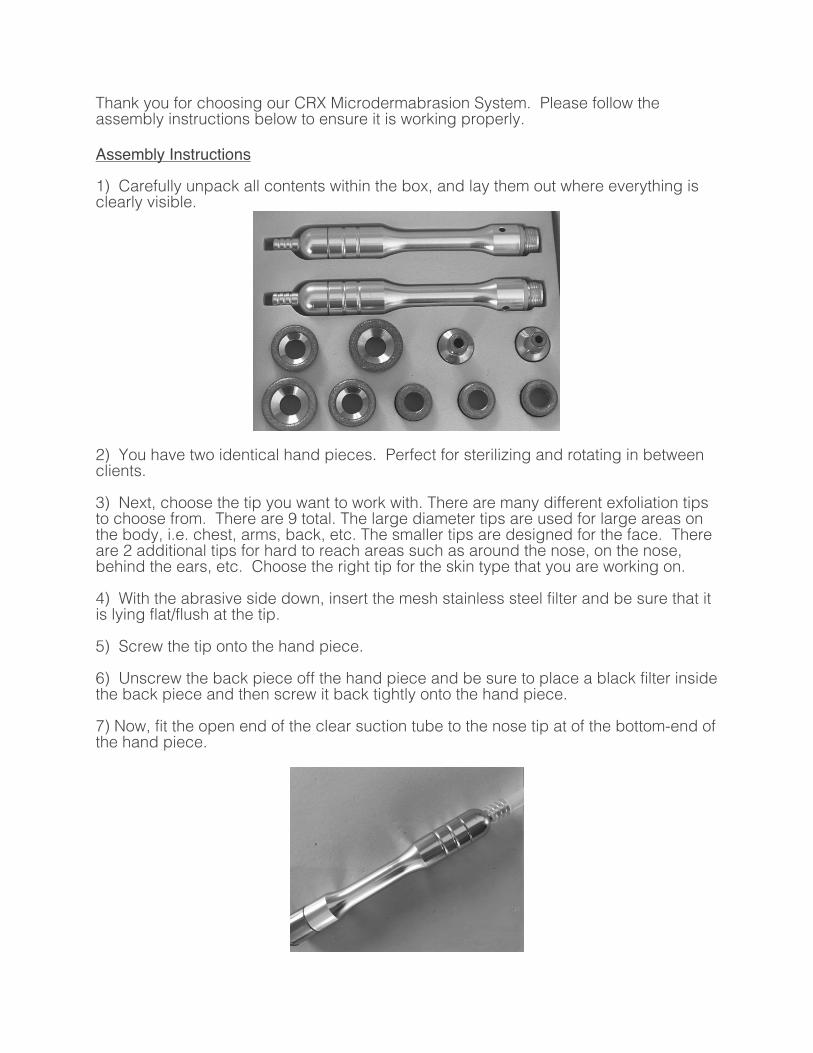
Thank you for choosing our CRX Microdermabrasion System. Please follow the assembly instructions below to ensure it is working properly. Assembly Instructions 1) Carefully unpack all contents within the box, and lay them out where everything is clearly visible.
2) You have two identical hand pieces. Perfect for sterilizing and rotating in between clients. 3) Next, choose the tip you want to work with. There are many different exfoliation tips to choose from. There are 9 total. The large diameter tips are used for large areas on the body, i.e. chest, arms, back, etc. The smaller tips are designed for the face. There are 2 additional tips for hard to reach areas such as around the nose, on the nose, behind the ears, etc. Choose the right tip for the skin type that you are working on. 4) With the abrasive side down, insert the mesh stainless steel filter and be sure that it is lying flat/flush at the tip. 5) Screw the tip onto the hand piece. 6) Unscrew the back piece off the hand piece and be sure to place a black filter inside the back piece and then screw it back tightly onto the hand piece. 7) Now, fit the open end of the clear suction tube to the nose tip at of the bottom-end of the hand piece.
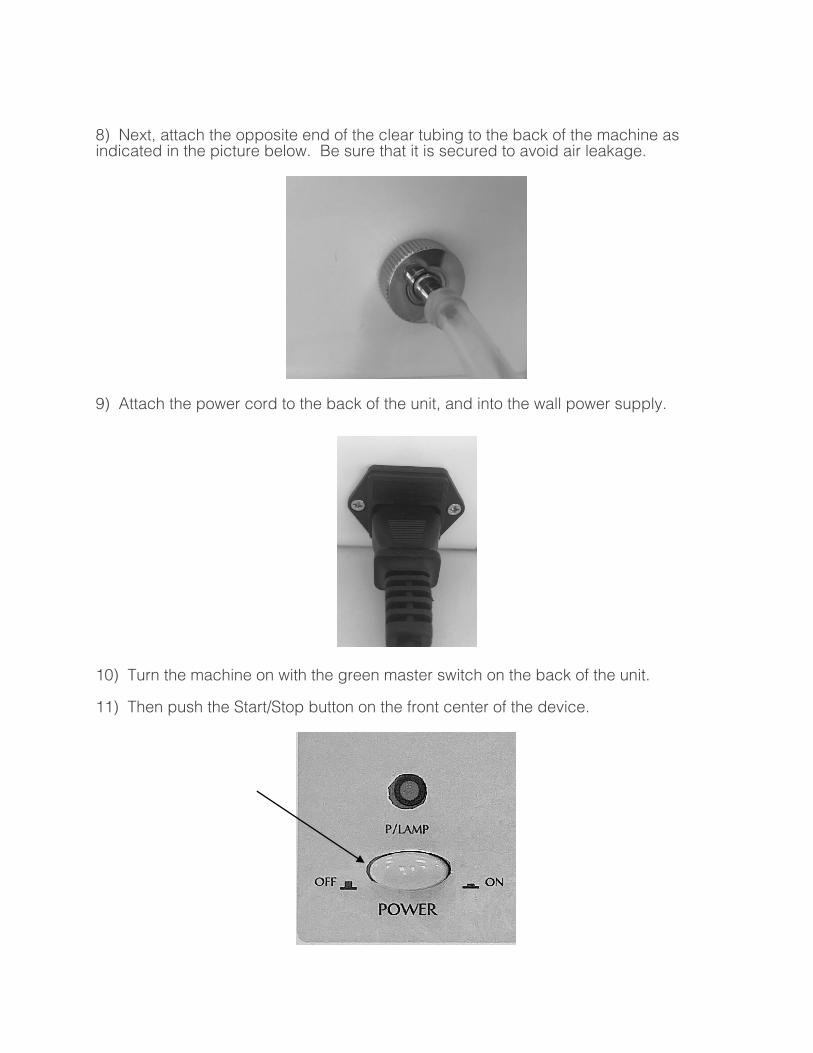
8) Next, attach the opposite end of the clear tubing to the back of the machine as indicated in the picture below. Be sure that it is secured to avoid air leakage.
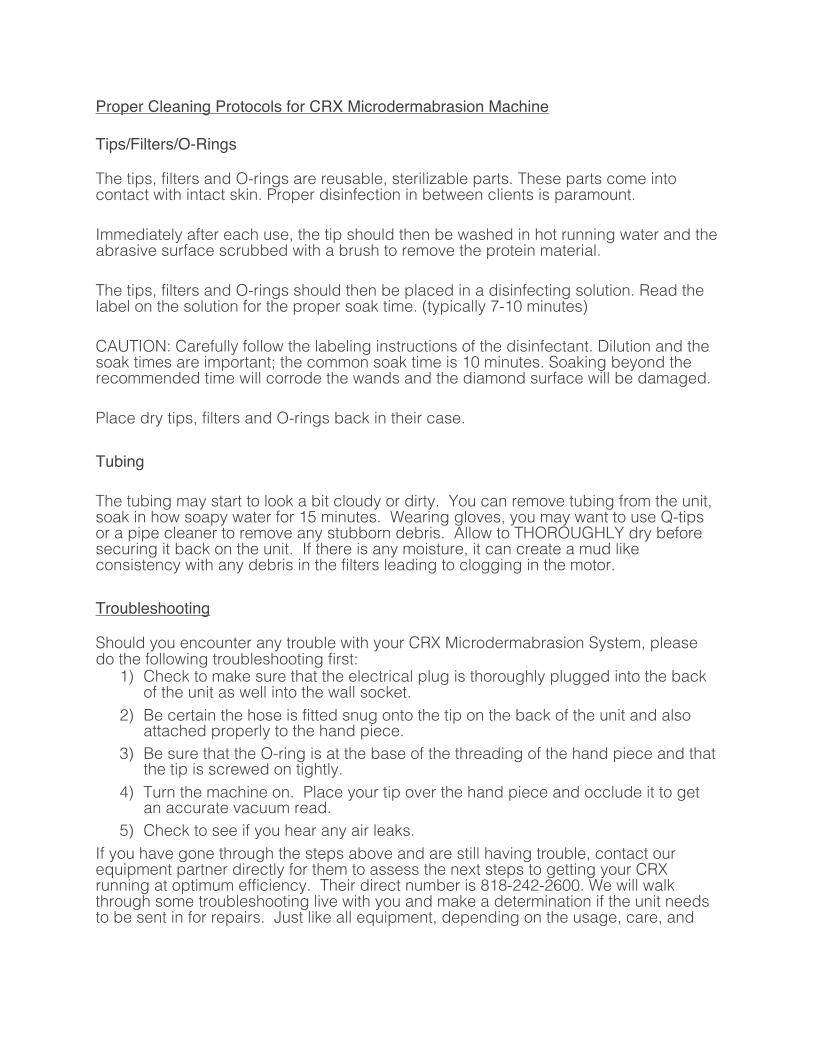
9) Attach the power cord to the back of the unit, and into the wall power supply.
10) Turn the machine on with the green master switch on the back of the unit. 11) Then push the Start/Stop button on the front center of the device.

12) Adjust the vacuum setting according to the client’s skin. 13) Before you begin the treatment, you will notice that there is a small carburetor on the hand piece. When treating the skin be sure to cover the carburetor hole. Before lifting the hand piece from the skin in between strokes, release your finger to ensure maximum comfort for the clients and to ensure that the skin is not being pulled.
14) When treatment is completed, simply shut off the machine by the green master on/off switch on the back of the machine.
Proper Cleaning Protocols for CRX Microdermabrasion Machine
Tips/Filters/O-Rings
The tips, filters and O-rings are reusable, sterilizable parts. These parts come into contact with intact skin. Proper disinfection in between clients is paramount.
Immediately after each use, the tip should then be washed in hot running water and the abrasive surface scrubbed with a brush to remove the protein material.
The tips, filters and O-rings should then be placed in a disinfecting solution. Read the label on the solution for the proper soak time. (typically 7-10 minutes)
CAUTION: Carefully follow the labeling instructions of the disinfectant. Dilution and the soak times are important; the common soak time is 10 minutes. Soaking beyond the recommended time will corrode the wands and the diamond surface will be damaged.
Place dry tips, filters and O-rings back in their case.
Tubing
The tubing may start to look a bit cloudy or dirty. You can remove tubing from the unit, soak in how soapy water for 15 minutes. Wearing gloves, you may want to use Q-tips or a pipe cleaner to remove any stubborn debris. Allow to THOROUGHLY dry before securing it back on the unit. If there is any moisture, it can create a mud like consistency with any debris in the filters leading to clogging in the motor.
Troubleshooting Should you encounter any trouble with your CRX Microdermabrasion System, please do the following troubleshooting first:
1) Check to make sure that the electrical plug is thoroughly plugged into the back of the unit as well into the wall socket.
2) Be certain the hose is fitted snug onto the tip on the back of the unit and also attached properly to the hand piece.
3) Be sure that the O-ring is at the base of the threading of the hand piece and that the tip is screwed on tightly.
4) Turn the machine on. Place your tip over the hand piece and occlude it to get an accurate vacuum read.
5) Check to see if you hear any air leaks. If you have gone through the steps above and are still having trouble, contact our equipment partner directly for them to assess the next steps to getting your CRX running at optimum efficiency. Their direct number is 818-242-2600. We will walk through some troubleshooting live with you and make a determination if the unit needs to be sent in for repairs. Just like all equipment, depending on the usage, care, and
maintenance, it is not uncommon for the equipment to need regular maintenance on occasion to keep it running efficiently. Loaners If possible and when necessary, we do have a minimum amount of loaners that we are able to send you while your unit may be in for maintenance or repairs. We will do our best to accommodate you when possible. Instructions on how to send it in for repairs:
Please note that this service is not covered under your warranty due to it being a requirement from time to time for the benefit of the units’ life span. Therefore, it may cost anywhere between $199-$299 + $65 return shipping (Labor cost depends on the actual service needs of the unit)
1. You will need to put a copy of your invoice or some type of reference paperwork inside the return box, along with a note explaining the issue at hand.
2. You will need to write the following code on TOP of the return box. (6 3 7 0 Z ) Without this code on top of the box our shipping department may refuse the box.
3. Pack the merchandise with at least 2" of packing material all around, and insure the shipment for the full amount of the original purchase price. Just in case there is shipping damage or if they lose your parcel. Merchandise that is returned to us in broken condition will be the responsibility of the shipper and will not qualify for further repairs. Or we may refuse to refund any amount due if a "shipping-damage" is the case. Hence the point to purchase insurance to cover any loss you may encounter due to miss-handling of your merchandise during the return trip.
4. Do NOT use USPS. FedEx and UPS only. Call us if you like us to help you to locate one around your area.
5. Make sure you have our correct return address, which is the following: 4412 San Fernando Rd, Glendale, CA 91204
Failure to follow any of these 5 steps may result in unexpected delays

Notes:

888-980-7770
Follow Us On Social Media
Instagram: @clarityclinicalskincare #clarityrx
Facebook: ClarityRx Clinical
You Tube: ClarityRx
www.clarityclinicalskincare.com


