Embed Size (px)
Citation preview

Create Basic 3D Objects
This tutorial outlines the procedures for creating three-dimensional objects by creating basic3D shapes known as solid primitives. You can also create 3D models by extruding 2D shapes.
Audience: Users new to 3D modeling with AutoCAD 2011
Prerequisites: Working knowledge of 2D drafting
Time to complete: 15 minutes
Objectives■ Create 3D solid primitives
■ Create 3D objects from 2D objects
1

Tutorial FilesAll necessary files for this tutorial are located athttp://www.autodesk.com/autocad-tutorials.
Recommended: Before starting the tutorials
1 Download the create_basic_3Dobjects.zip fromhttp://www.autodesk.com/autocad-tutorials.
2 Unzip create_basic_3Dobjects.zip to C:\My Documents\Tutorials.
Lesson 1: Create 3D Solid PrimitivesIn this lesson, you learn how to create 3D solid primitives in the 3D Modelingworkspace.
You can use standard 3D solid objects known as solid primitives to create abox, cone, cylinder, sphere, torus, wedge, and pyramid. To create these 3Dsolid primitives, switch the workspace to 3D Modeling, where the palettesand ribbon panel are customized to create and modify 3D solid models.
Switch to the 3D Modeling Workspace
1 On the status bar, at the bottom of the drawing area, click the WorkspaceSwitching button.
2 On the Workspace menu, click 3D Modeling.
The 3D Modeling workspace is displayed. In this workspace, you can accessthe various commands and tools needed for creating 3D drawings.
2 | Create Basic 3D Objects

NOTE For more information about switching workspaces, see the AutoCAD User’sGuide or refer to the AutoCAD 2009 tutorial: Switching Workspaces in AutoCAD2009.
Create a box
You can create a rectangular or cubical solid box. Box objects can form a basicstructure that you can resize or combine with other objects.
The following steps explain how to create a box.
1 On the ribbon, click Home tab ➤ View panel ➤ Visual Styles drop-down ➤ Conceptual.
2 On the ribbon, click Home tab ➤ Modeling panel ➤ Solid Primitivesdrop-down ➤ Box.
Lesson 1: Create 3D Solid Primitives | 3
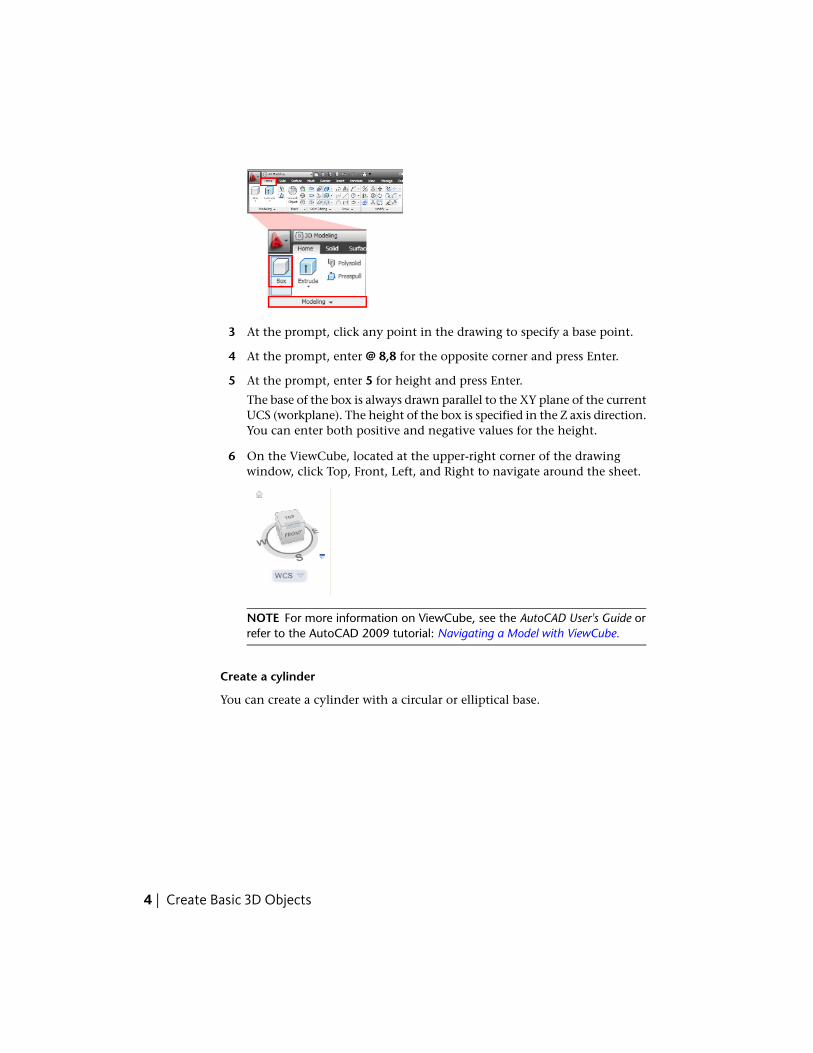
3 At the prompt, click any point in the drawing to specify a base point.
4 At the prompt, enter @ 8,8 for the opposite corner and press Enter.
5 At the prompt, enter 5 for height and press Enter.
The base of the box is always drawn parallel to the XY plane of the currentUCS (workplane). The height of the box is specified in the Z axis direction.You can enter both positive and negative values for the height.
6 On the ViewCube, located at the upper-right corner of the drawingwindow, click Top, Front, Left, and Right to navigate around the sheet.
NOTE For more information on ViewCube, see the AutoCAD User's Guide orrefer to the AutoCAD 2009 tutorial: Navigating a Model with ViewCube.
Create a cylinder
You can create a cylinder with a circular or elliptical base.
4 | Create Basic 3D Objects

The following steps explain how to create a cylinder.
1 On the ribbon, click Home tab ➤ Modeling panel ➤ Solid Primitives
drop-down ➤ Cylinder.
2 At the prompt, click any point in the drawing to specify a base point.
3 At the prompt, enter 5 for radius and press Enter.
4 At the prompt, enter 8 for height and press Enter.
Create a cone
You can create a pointed or frustum of a cone with a circular or elliptical base.
Lesson 1: Create 3D Solid Primitives | 5

The following steps explain how to create a cone.
1 On the ribbon, click Home tab ➤ Modeling panel ➤ Solid Primitives
drop-down ➤ Cone.
2 At the prompt, click any point in the drawing to specify a base point.
3 At the prompt, enter 7 for radius and press Enter.
4 At the prompt, enter 5 for height and press Enter.
Create a torus
You can create a ring-shaped basic 3D solid primitive that resembles the innertube of a tire. A torus has two radius values. One value defines the tube. Theother value defines the distance from the center of the torus to the center ofthe tube.
6 | Create Basic 3D Objects

The following steps explain how to create a torus.
1 On the ribbon, click Home tab ➤ Modeling panel ➤ Solid Primitives
drop-down ➤ Torus.
2 At the prompt, click any point in the drawing to specify a base point.
3 At the prompt, enter 8 for radius and press Enter.
4 At the prompt, enter 3 for tube radius and press Enter.
Summary: In this lesson, you learned how to:
■ Display the 3D Modeling workspace
■ Create simple 3D solid primitives
Lesson 2: Create Simple 3D Objects from 2DObjects
In this lesson, you create simple 3D objects from 2D objects.
You can create simple and complex objects by combining and modifying basic3D shapes. You can also extrude 2D objects to create solids and surfaces byadding height. If you extrude a closed object such as a circle, the result is a
Lesson 2: Create Simple 3D Objects from 2D Objects | 7

3D solid. If you extrude an open object such as an arc or a line, the result isa surface. A surface is a type of 3D object that has no thickness.
Draw a table stand with simple 3D solid primitives
1 Click ➤ Open.
2 In the Select File dialog box, browse to C:\My Documents\Tutorials. Opencreate_table.dwg.
3 On the ribbon, click Home tab ➤ View panel ➤ Visual Styles drop-downlist ➤ Conceptual.
TIP If you have trouble selecting objects, change the current visual style to3D Wireframe.
4 On the left half of the status bar, click the Object Snap button to enableobject snap mode. Right-click the Object Snap button.
5 On the shortcut menu, click Center to turn it on. The Center optionshould now have a box around its icon which indicates the object snapis enabled.
8 | Create Basic 3D Objects

6 On the ribbon, click Home tab ➤ Modeling panel ➤ Solid Primitives
drop-down ➤ Cone.
7 At the prompt, move the cursor over one of the smaller circles. The centerpoint of the circle is displayed. Click the center of the circle in thedrawing.
8 At the prompt, enter T for top radius and press Enter.
9 At the prompt, enter 0.5 for radius and press Enter.
10 At the prompt, enter -4 for height and press Enter.
11 Repeat the process on the other smaller circles in the drawing to createfour table legs.
Lesson 2: Create Simple 3D Objects from 2D Objects | 9

You have created four table legs.
Draw a table top with simple 3D solid primitives
In the same drawing file, do the following:
1 On the ribbon, click Home tab ➤ Modeling panel ➤ Solid Primitives drop-
down ➤ Cylinder.
2 At the prompt, select the center point of the circle that has a radius of 4.
10 | Create Basic 3D Objects

3 At the prompt, enter 4 for radius and press Enter.
4 At the prompt, enter 0.5 for height and press Enter.
You have created a table top.
Extrude an object to create the walls of a room
Lesson 2: Create Simple 3D Objects from 2D Objects | 11

1 Click ➤ Open.
2 In the Select File dialog box, browse to C:]Documents\Tutorials.
3 Open create_wall.dwg.
4 On the ribbon, click Home tab ➤ Modeling panel ➤ Solid Creationdrop-down ➤ Extrude.
5 At the prompt, select the three closed rectangles in the drawing window,and press Enter.
6 At the prompt, enter 96 for the height of extrusion and press Enter.
NOTE A 3D solid object (wall) is created because you have extruded a closedobject (rectangle). When you extrude an open object, a 3D surface is created.
7 Repeat the extrude process on the arc (open object) displayed in thedrawing to create a 3D surface.
12 | Create Basic 3D Objects
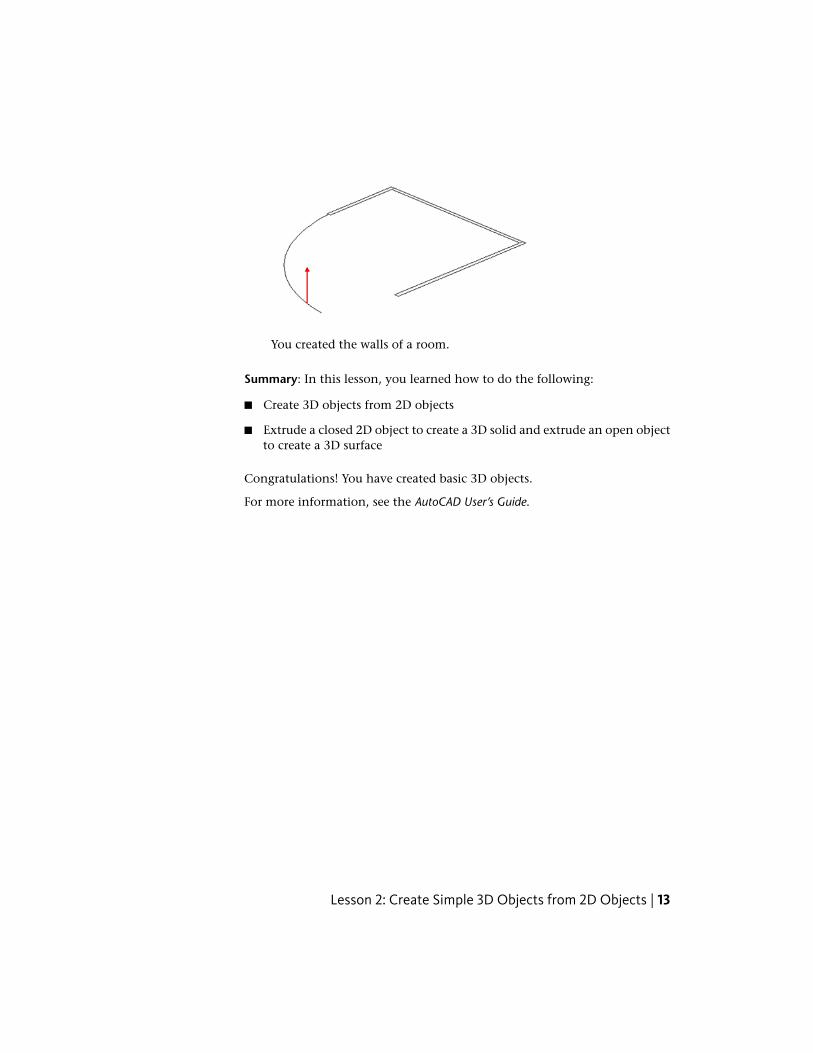
You created the walls of a room.
Summary: In this lesson, you learned how to do the following:
■ Create 3D objects from 2D objects
■ Extrude a closed 2D object to create a 3D solid and extrude an open objectto create a 3D surface
Congratulations! You have created basic 3D objects.
For more information, see the AutoCAD User’s Guide.
Lesson 2: Create Simple 3D Objects from 2D Objects | 13