Embed Size (px)
Citation preview

CRASH COURSE ON SOLARIS ADMINISTRATION
Duration : 20-08-2006 to 27-09-2006 Prepared by C.KARTHIKEYAN Senior Lecturer / SOC T.BALACHANDER Lecturer / SOC
Configuring Disks

Storing Data Before data can be written to a hard disk, the disk needs to be formatted and partitioned. Formatting and partitioning a disk involve three steps: 1. Physical formatting, also known as low-level formatting (LLF) 2. Partitioning 3. Logical formatting, also known as high-level formatting (HLF) During a low-level format, the disk is divided into tracks, and these tracks are further divided into a specific number of sectors. Each sector is filled with random or test data. Almost all new disks have already been low-level formatted, so you need not worry about this step. Partitioning divides the disk into areas, called partitions, or slices, which will hold the file systems. Each partition is made up of disk cylinders. Most of the time, one disk partition corresponds to one file system in Solaris. It’s important to remember that a partition or slice refers to an area on a disk where a file system can be created. Once a slice is defined and a file system is created, the file system will be mounted by Solaris to a specific mount point within the file tree, such as /var, /usr, or /export/home. When a high-level format is performed in Solaris, a disk slice is divided into cylinder groups, which contain several contiguous cylinders. The file system tries to spread its files and directories across the cylinder groups and to store data for a specific file within the same cylinder group. This arrangement minimizes the number of times the heads have to move, resulting in faster data transfers. Once the cylinders are put into cylinder groups, the slice is divided into blocks, which organize the structure of the files. On a Sun system, the default type of file system is the UNIX File System (UFS), which uses the following types of blocks, each of which stores specific bits of information: ■ Boot block Stores information used when the system is booted ■ Superblock Stores information about the file system ■ Inode Stores information about one file in the file system ■ Storage or data block Stores data for each file The Boot Block
The boot block stores the instructions used when a system is booted. The boot block appears only in the first cylinder group on the disk and is the first 8KB in a slice. The Superblock
The superblock includes the following information about the file system:
■ Number of blocks in the file system (file system size) ■ Number of data blocks in the file system ■ Number of inodes ■ Number of cylinder groups ■ Block size ■ Fragment size ■ Free block count ■ Free inode count
The superblock is so important to the file system that Solaris creates multiple backups of it for safekeeping. Occasionally, if the system is shut down incorrectly or if there is a disk problem, the primary superblock can become unreadable or out of sync with the backup superblocks. If this occurs, you need to restore the primary superblock, using one of the superblock backup copies in the file system. Inodes
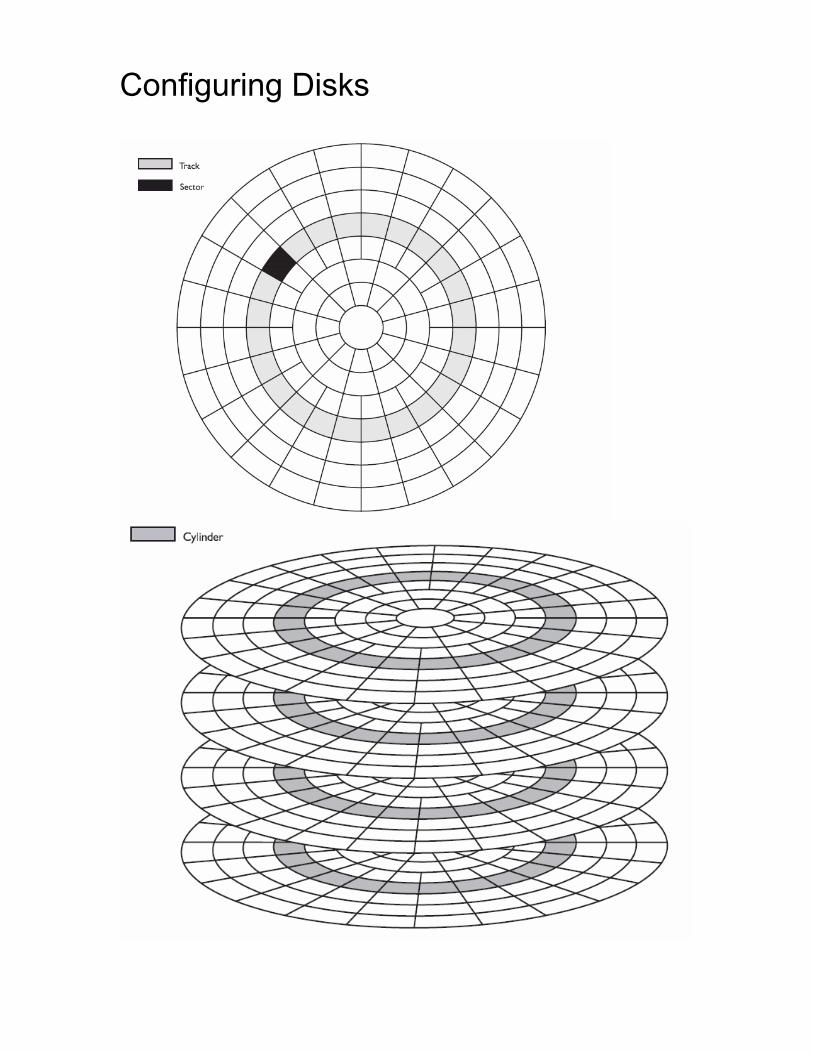
An inode contains all the information about a particular file except its name. An inode takes 128 bytes of disk space and contains the following information about a file:
■ The file type (regular, directory, block special, character, link, and so on) ■ The file mode (the set of read/write/execute permissions) ■ The number of hard links to the file ■ The file owner’s user ID ■ The group ID to which the file belongs ■ The number of bytes in the file ■ An array of 15 disk-block addresses ■ The date and time the file was last accessed ■ The date and time the file was last modified ■ The date and time the file was created When you create a file system, a fixed number of inodes are created in each cylinder group. Sometimes this number might not be enough. If you have an application that produces many small files, you might need to increase the number of inodes in your file system. You can use the df command in the /usr/ucb directory to see how many inodes have been used and how many are free. Following is an example of how to run this command. # /usr/ucb/df –i Filesystem iused ifree %iused Mounted on /dev/dsk/c0t0d0s0 1968 94864 2% / /dev/dsk/c0t0d0s6 41684 358700 10% /usr /dev/dsk/c0t0d0s1 2375 37497 6% /var /dev/dsk/c0t1d0s0 16131 1028605 2% /export
Utilizing Basic Command Syntax
Moving Between Specified Points in a Directory Tree
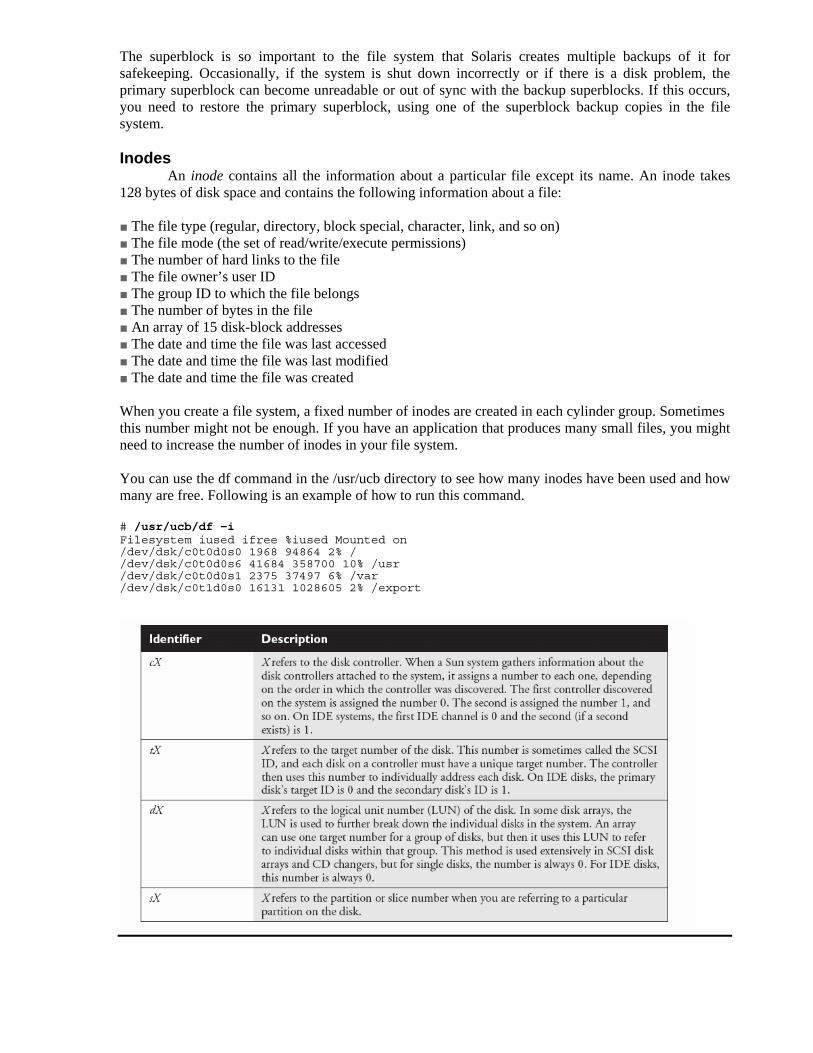
The Solaris file system is made up of directories, subdirectories, and files that are all related to each other. This relationship is commonly called a hierarchy or tree, and the terms hierarchical file system or tree file system are frequently used and interchangeable. A hierarchical file system can be described with a few simple rules:
■ A directory may contain zero or more files. ■ A directory may contain zero or more subdirectories. ■ A directory is always the subdirectory, or child, of only one parent directory. The only special case of this relationship is the first directory, called the root of the hierarchy. The root directory may contain zero or more files or subdirectories, but the special case is the parent directory of the root directory. To maintain the integrity of the file system rules, there must be a parent, but the root directory is the first directory. To overcome this inconsistency, the root directory is considered its own parent.
Exploring the Solaris File System This exercise gets you started by giving you a quick tour of the Solaris file system. 1. Determine your current directory: pwd

2. Change directory to root: cd / 3. Determine your current directory: pwd
4. Change directory back to your original directory using absolute addressing, for example, cd /export/home/john
5. Determine your current directory: pwd
6. Change directory up one in the file system using relative addressing: cd ..
7. Determine your current directory: pwd
8. Change directory back to your original directory, for example, cd john
9. Determine your current directory: pwd
1.
2.
3.
4.
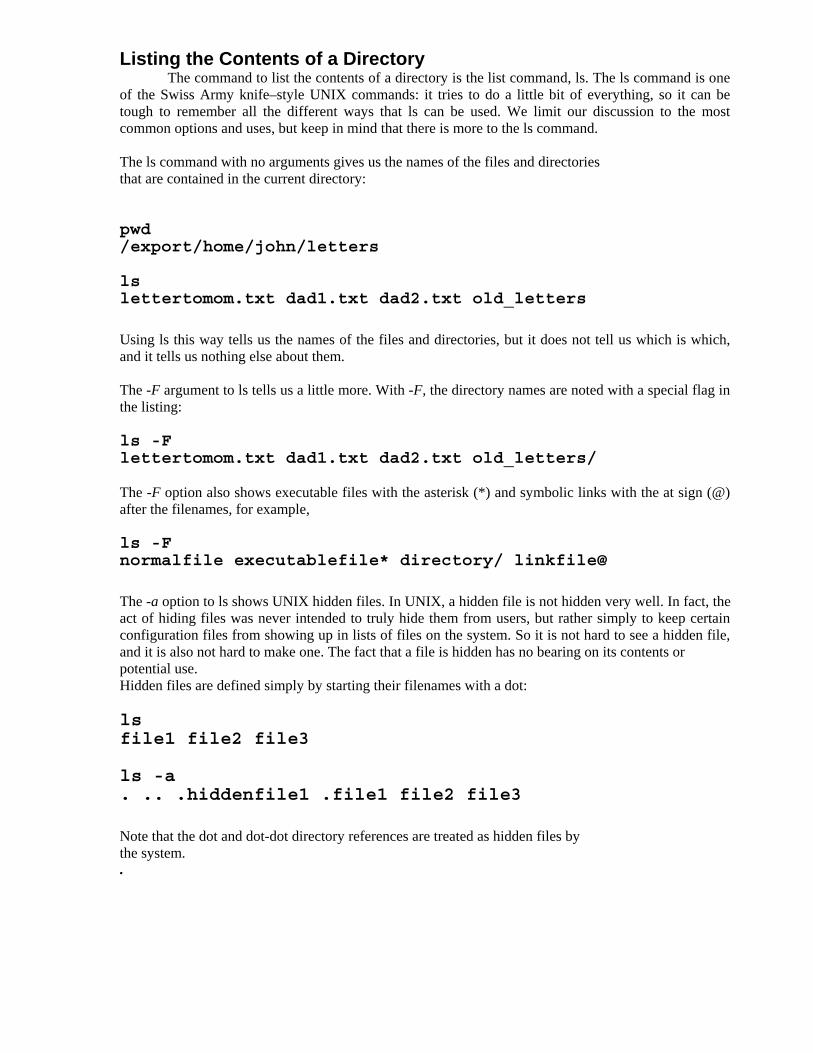
Listing the Contents of a Directory The command to list the contents of a directory is the list command, ls. The ls command is one
of the Swiss Army knife–style UNIX commands: it tries to do a little bit of everything, so it can be tough to remember all the different ways that ls can be used. We limit our discussion to the most common options and uses, but keep in mind that there is more to the ls command.
The ls command with no arguments gives us the names of the files and directories that are contained in the current directory: pwd /export/home/john/letters ls lettertomom.txt dad1.txt dad2.txt old_letters
Using ls this way tells us the names of the files and directories, but it does not tell us which is which, and it tells us nothing else about them. The -F argument to ls tells us a little more. With -F, the directory names are noted with a special flag in the listing: ls -F lettertomom.txt dad1.txt dad2.txt old_letters/ The -F option also shows executable files with the asterisk (*) and symbolic links with the at sign (@) after the filenames, for example, ls -F normalfile executablefile* directory/ linkfile@
The -a option to ls shows UNIX hidden files. In UNIX, a hidden file is not hidden very well. In fact, the act of hiding files was never intended to truly hide them from users, but rather simply to keep certain configuration files from showing up in lists of files on the system. So it is not hard to see a hidden file, and it is also not hard to make one. The fact that a file is hidden has no bearing on its contents or potential use. Hidden files are defined simply by starting their filenames with a dot: ls file1 file2 file3 ls -a . .. .hiddenfile1 .file1 file2 file3
Note that the dot and dot-dot directory references are treated as hidden files by the system. .
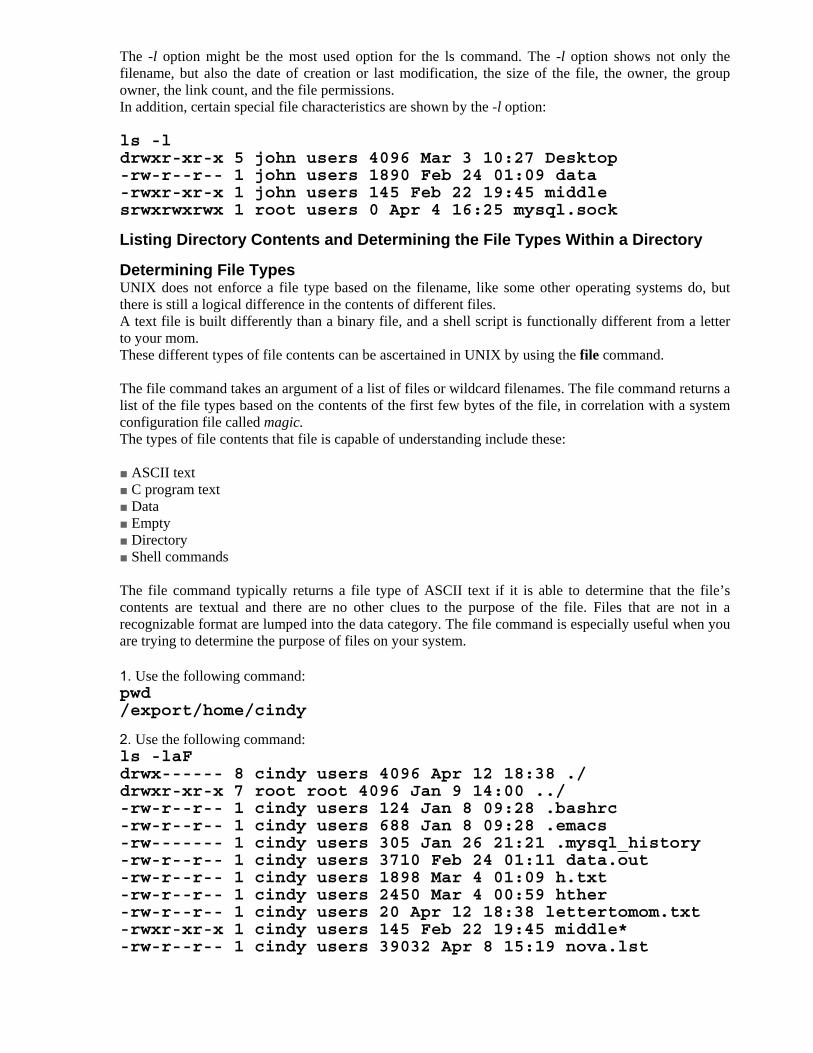
The -l option might be the most used option for the ls command. The -l option shows not only the filename, but also the date of creation or last modification, the size of the file, the owner, the group owner, the link count, and the file permissions. In addition, certain special file characteristics are shown by the -l option: ls -l drwxr-xr-x 5 john users 4096 Mar 3 10:27 Desktop -rw-r--r-- 1 john users 1890 Feb 24 01:09 data -rwxr-xr-x 1 john users 145 Feb 22 19:45 middle srwxrwxrwx 1 root users 0 Apr 4 16:25 mysql.sock
Listing Directory Contents and Determining the File Types Within a Directory
Determining File Types UNIX does not enforce a file type based on the filename, like some other operating systems do, but there is still a logical difference in the contents of different files. A text file is built differently than a binary file, and a shell script is functionally different from a letter to your mom. These different types of file contents can be ascertained in UNIX by using the file command. The file command takes an argument of a list of files or wildcard filenames. The file command returns a list of the file types based on the contents of the first few bytes of the file, in correlation with a system configuration file called magic. The types of file contents that file is capable of understanding include these: ■ ASCII text ■ C program text ■ Data ■ Empty ■ Directory ■ Shell commands The file command typically returns a file type of ASCII text if it is able to determine that the file’s contents are textual and there are no other clues to the purpose of the file. Files that are not in a recognizable format are lumped into the data category. The file command is especially useful when you are trying to determine the purpose of files on your system. EXERCISE 14-3 1. Use the following command: pwd /export/home/cindy
2. Use the following command: ls -laF drwx------ 8 cindy users 4096 Apr 12 18:38 ./ drwxr-xr-x 7 root root 4096 Jan 9 14:00 ../ -rw-r--r-- 1 cindy users 124 Jan 8 09:28 .bashrc -rw-r--r-- 1 cindy users 688 Jan 8 09:28 .emacs -rw------- 1 cindy users 305 Jan 26 21:21 .mysql_history -rw-r--r-- 1 cindy users 3710 Feb 24 01:11 data.out -rw-r--r-- 1 cindy users 1898 Mar 4 01:09 h.txt -rw-r--r-- 1 cindy users 2450 Mar 4 00:59 hther -rw-r--r-- 1 cindy users 20 Apr 12 18:38 lettertomom.txt -rwxr-xr-x 1 cindy users 145 Feb 22 19:45 middle* -rw-r--r-- 1 cindy users 39032 Apr 8 15:19 nova.lst
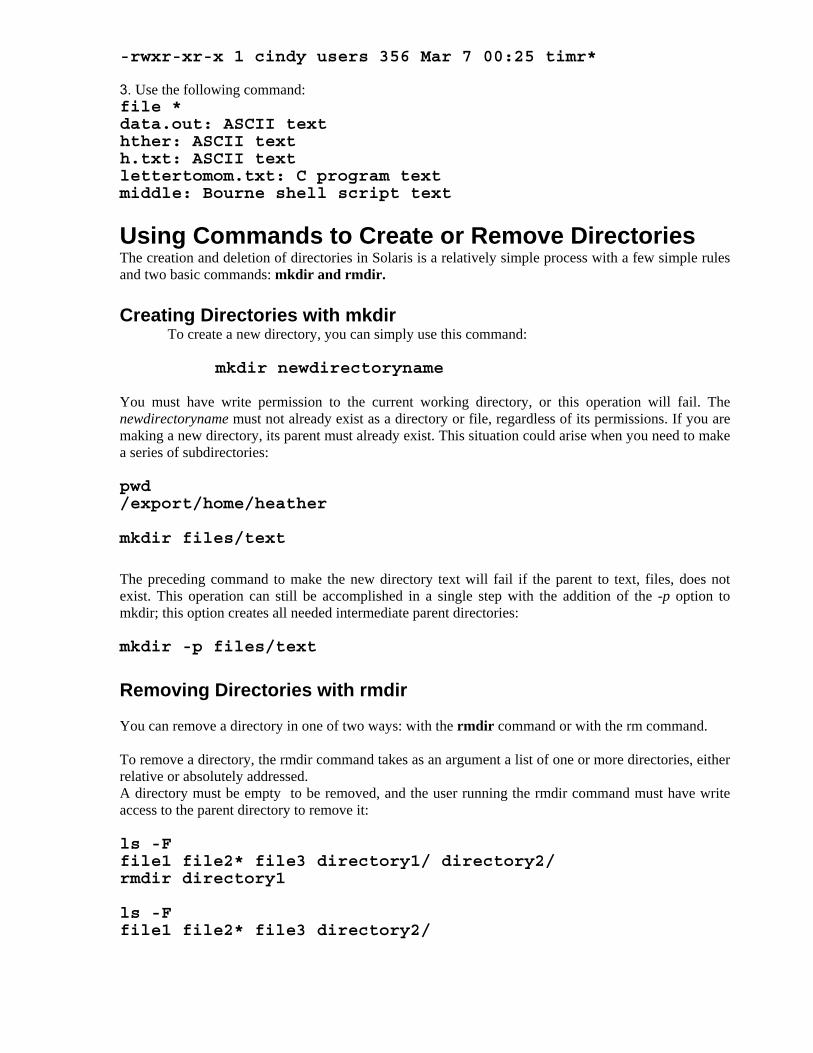
-rwxr-xr-x 1 cindy users 356 Mar 7 00:25 timr* 3. Use the following command: file * data.out: ASCII text hther: ASCII text h.txt: ASCII text lettertomom.txt: C program text middle: Bourne shell script text OBJECTIVE 14.04 Using Commands to Create or Remove Directories The creation and deletion of directories in Solaris is a relatively simple process with a few simple rules and two basic commands: mkdir and rmdir. Creating Directories with mkdir
To create a new directory, you can simply use this command:
mkdir newdirectoryname You must have write permission to the current working directory, or this operation will fail. The newdirectoryname must not already exist as a directory or file, regardless of its permissions. If you are making a new directory, its parent must already exist. This situation could arise when you need to make a series of subdirectories: pwd /export/home/heather mkdir files/text
The preceding command to make the new directory text will fail if the parent to text, files, does not exist. This operation can still be accomplished in a single step with the addition of the -p option to mkdir; this option creates all needed intermediate parent directories: mkdir -p files/text
Removing Directories with rmdir You can remove a directory in one of two ways: with the rmdir command or with the rm command. To remove a directory, the rmdir command takes as an argument a list of one or more directories, either relative or absolutely addressed. A directory must be empty to be removed, and the user running the rmdir command must have write access to the parent directory to remove it: ls -F file1 file2* file3 directory1/ directory2/ rmdir directory1 ls -F file1 file2* file3 directory2/
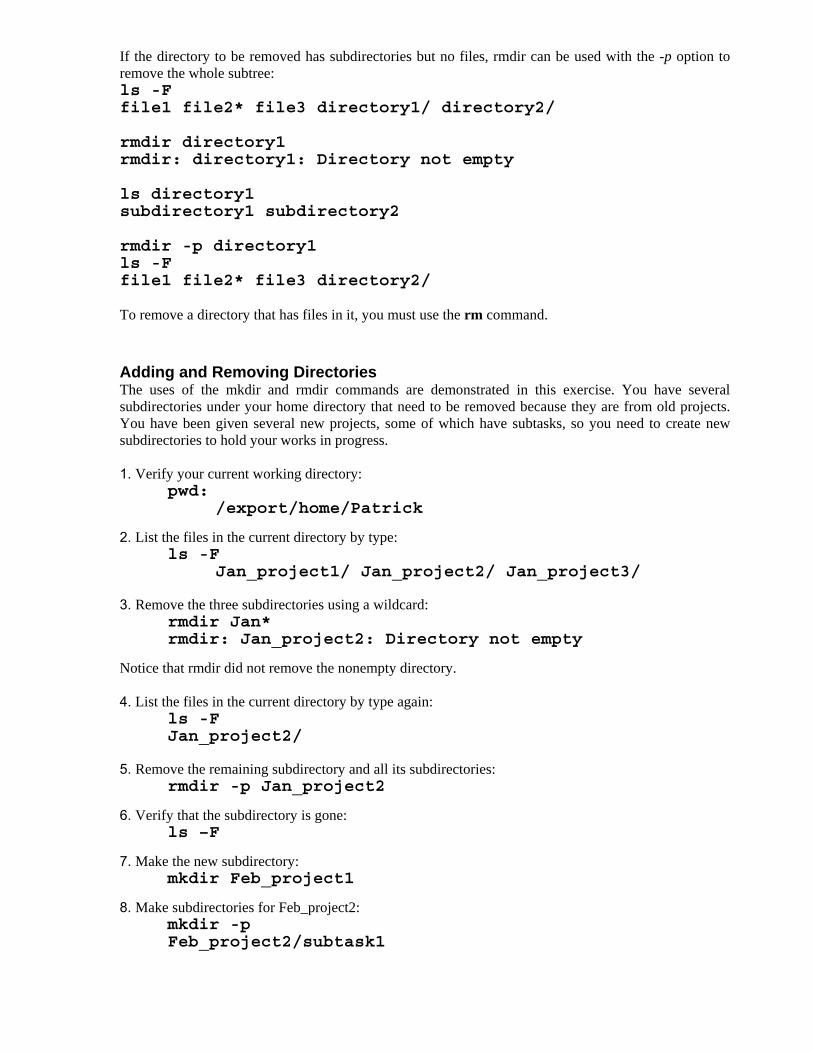
If the directory to be removed has subdirectories but no files, rmdir can be used with the -p option to remove the whole subtree: ls -F file1 file2* file3 directory1/ directory2/ rmdir directory1 rmdir: directory1: Directory not empty ls directory1 subdirectory1 subdirectory2 rmdir -p directory1 ls -F file1 file2* file3 directory2/ To remove a directory that has files in it, you must use the rm command. EXERCISE 14-4 Adding and Removing Directories The uses of the mkdir and rmdir commands are demonstrated in this exercise. You have several subdirectories under your home directory that need to be removed because they are from old projects. You have been given several new projects, some of which have subtasks, so you need to create new subdirectories to hold your works in progress. 1. Verify your current working directory:
pwd: /export/home/Patrick
2. List the files in the current directory by type: ls -F
Jan_project1/ Jan_project2/ Jan_project3/ 3. Remove the three subdirectories using a wildcard:
rmdir Jan* rmdir: Jan_project2: Directory not empty
Notice that rmdir did not remove the nonempty directory. 4. List the files in the current directory by type again:
ls -F Jan_project2/
5. Remove the remaining subdirectory and all its subdirectories:
rmdir -p Jan_project2
6. Verify that the subdirectory is gone: ls –F
7. Make the new subdirectory: mkdir Feb_project1
8. Make subdirectories for Feb_project2: mkdir -p Feb_project2/subtask1

9. Make subdirectories for Feb_project2: mkdir Feb_project2/subtask2
10. Make the final subdirectory:
mkdir Feb_project3 CERTIFICATION OBJECTIVE 14.05 Using Commands to Copy, Create, Rename, or Remove Files
Dealing with files, as you have seen throughout this chapter, is a common and essential part of Solaris system administration.
The ability to actually manipulate the files themselves is a daily task. Copying and renaming files that need to be shared or are no longer used, creating new files for any number of purposes, removing temporary or outdated files that are using valuable storage space—these actions are the bread and butter of the system administrator. Copying Files Using cp
The cp command is the basic tool used to make a copy of a file. In its simplest form, cp takes two arguments: the source filename and the destination or new filename. Provided that the user has read access to the source file and write access to the directory where the destination file will be created, cp creates an exact copy of the file: cp oldfile newfile
The destination file need not be in the same directory. For that matter, neither does the source file. Both arguments can be addressed with relative or absolute pathnames, and wildcards may be used for the source file to copy multiple files: cp /files/graphics/newcar.jpg /export/home/tim/car.jpg cp /files/graphics/*.jpg ./mygraphics/ cp ../lettertomom.txt ../oldfiles/
Notice that the second two examples have directories as the target files. The cp command simply creates the copied file in the target directory, maintaining the original filename. The middle example shows the use of a wildcard with the copy command; in this case, all files that end in .jpg are copied to a subdirectory of the current working directory. If the target file for cp is a file and the file already exists, the user must have write permission to the target file. The target will be overwritten and replaced by the source file. You may also use the cp command to make a copy of a whole subdirectory tree and all the files it contains. The -r option to cp is the recursive option and causes cp to begin copying in the file tree from the point of the specified source through every subdirectory and file. The target is created as a new directory with the name specified, but all files and subdirectories from the original are copied to the new directory with their original names. For example,
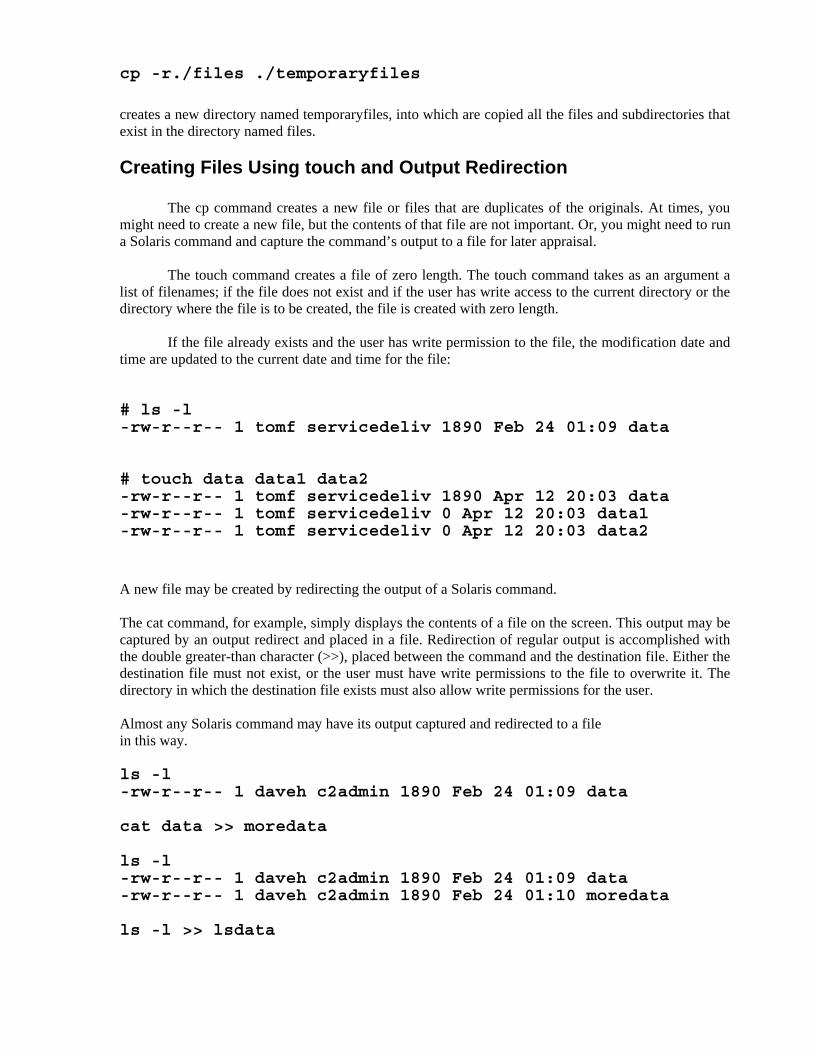
cp -r./files ./temporaryfiles
creates a new directory named temporaryfiles, into which are copied all the files and subdirectories that exist in the directory named files. Creating Files Using touch and Output Redirection
The cp command creates a new file or files that are duplicates of the originals. At times, you might need to create a new file, but the contents of that file are not important. Or, you might need to run a Solaris command and capture the command’s output to a file for later appraisal.
The touch command creates a file of zero length. The touch command takes as an argument a
list of filenames; if the file does not exist and if the user has write access to the current directory or the directory where the file is to be created, the file is created with zero length.
If the file already exists and the user has write permission to the file, the modification date and time are updated to the current date and time for the file: # ls -l -rw-r--r-- 1 tomf servicedeliv 1890 Feb 24 01:09 data # touch data data1 data2 -rw-r--r-- 1 tomf servicedeliv 1890 Apr 12 20:03 data -rw-r--r-- 1 tomf servicedeliv 0 Apr 12 20:03 data1 -rw-r--r-- 1 tomf servicedeliv 0 Apr 12 20:03 data2
A new file may be created by redirecting the output of a Solaris command. The cat command, for example, simply displays the contents of a file on the screen. This output may be captured by an output redirect and placed in a file. Redirection of regular output is accomplished with the double greater-than character (>>), placed between the command and the destination file. Either the destination file must not exist, or the user must have write permissions to the file to overwrite it. The directory in which the destination file exists must also allow write permissions for the user. Almost any Solaris command may have its output captured and redirected to a file in this way. ls -l -rw-r--r-- 1 daveh c2admin 1890 Feb 24 01:09 data cat data >> moredata ls -l -rw-r--r-- 1 daveh c2admin 1890 Feb 24 01:09 data -rw-r--r-- 1 daveh c2admin 1890 Feb 24 01:10 moredata ls -l >> lsdata

ls -l -rw-r--r-- 1 daveh c2admin 1890 Feb 24 01:09 data -rw-r--r-- 1 daveh c2admin 1890 Feb 24 01:10 moredata -rw-r--r-- 1 daveh c2admin 130 Feb 24 01:11 lsdata Renaming and Moving Files Using mv You can use the move command, typed mv, to rename files or directories. You can also use it to move files from one directory to another and to move whole directories to be located under other directories. Relative and absolute file and directory addressing may both be used, and wildcards extend the power of this command. The basic format of the mv command is mv source target
where the source can be a file, directory, or wildcard, and the target can be a file or directory. The target may contain wildcards, provided that the wildcards reduce to a single target; mv is happy to move multiple source files identified by a wildcard, but it is unable to move them into multiple targets identified by wildcards, for example, ls -l -rw-r--r-- 1 abshire users 0 Apr 12 20:21 chrism -rw-r--r-- 1 abshire users 0 Apr 12 20:21 donnah -rw-r--r-- 1 abshire users 0 Apr 12 20:21 jasonp -rw-r--r-- 1 abshire users 0 Apr 12 20:21 johnc drwxr-xr-x 2 abshire users 4096 Apr 12 20:23 special #mv chrism chris_m #mv j* special #mv donnah special/DonnaH #ls -l -rw-r--r-- 1 abshire users 0 Apr 12 20:21 chris_m drwxr-xr-x 2 abshire users 4096 Apr 12 20:25 special #ls -l special -rw-r--r-- 1 abshire users 0 Apr 12 20:21 DonnaH -rw-r--r-- 1 abshire users 0 Apr 12 20:21 jasonp -rw-r--r-- 1 abshire users 0 Apr 12 20:21 johnc
The most confusing aspect of the mv command is that it will do what you ask it to do, even if you did not formulate your command very well. The mv command moves your files into directories when you meant to say files, for example, and you might think you have lost them. The mv command is useful and powerful, but it demands some care when you use it. Removing Files Using rm
The rm command is the basic tool for removing objects from your file system. Unfortunately, rm is also the basic tool new system administrators use to damage their systems, so exercise caution when you use it.
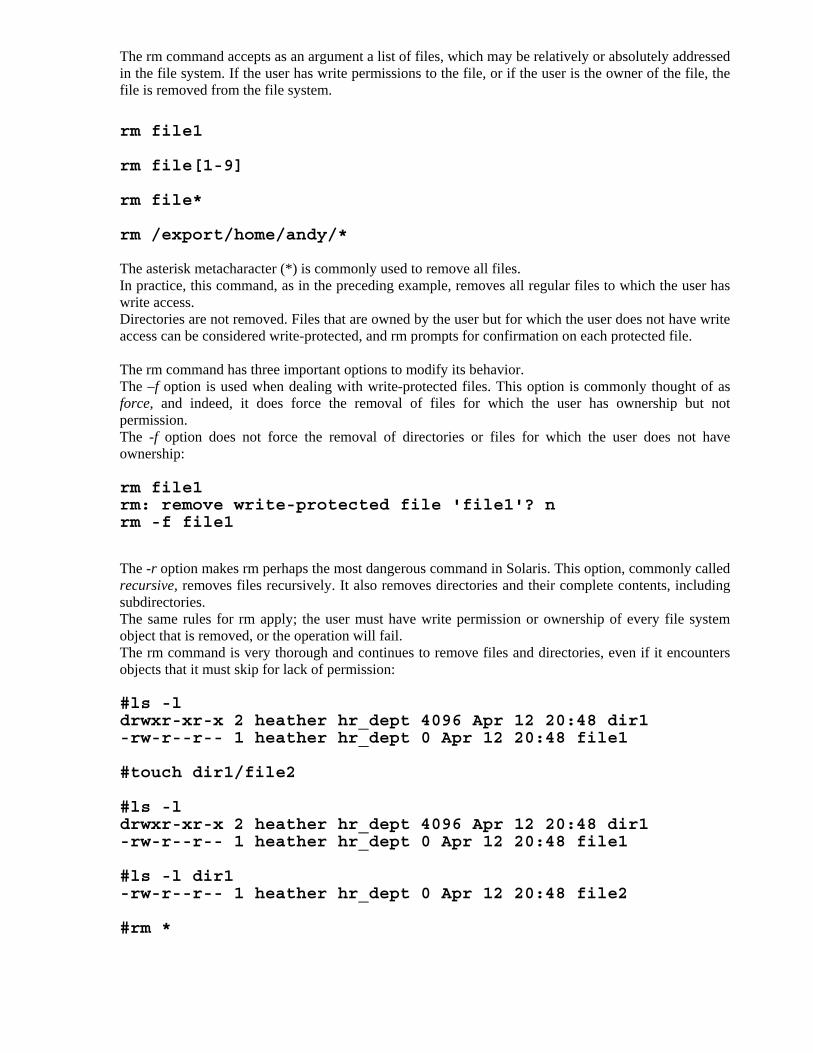
The rm command accepts as an argument a list of files, which may be relatively or absolutely addressed in the file system. If the user has write permissions to the file, or if the user is the owner of the file, the file is removed from the file system.
rm file1 rm file[1-9] rm file* rm /export/home/andy/* The asterisk metacharacter (*) is commonly used to remove all files. In practice, this command, as in the preceding example, removes all regular files to which the user has write access. Directories are not removed. Files that are owned by the user but for which the user does not have write access can be considered write-protected, and rm prompts for confirmation on each protected file. The rm command has three important options to modify its behavior. The –f option is used when dealing with write-protected files. This option is commonly thought of as force, and indeed, it does force the removal of files for which the user has ownership but not permission. The -f option does not force the removal of directories or files for which the user does not have ownership: rm file1 rm: remove write-protected file 'file1'? n rm -f file1
The -r option makes rm perhaps the most dangerous command in Solaris. This option, commonly called recursive, removes files recursively. It also removes directories and their complete contents, including subdirectories. The same rules for rm apply; the user must have write permission or ownership of every file system object that is removed, or the operation will fail. The rm command is very thorough and continues to remove files and directories, even if it encounters objects that it must skip for lack of permission: #ls -l drwxr-xr-x 2 heather hr_dept 4096 Apr 12 20:48 dir1 -rw-r--r-- 1 heather hr_dept 0 Apr 12 20:48 file1 #touch dir1/file2 #ls -l drwxr-xr-x 2 heather hr_dept 4096 Apr 12 20:48 dir1 -rw-r--r-- 1 heather hr_dept 0 Apr 12 20:48 file1 #ls -l dir1 -rw-r--r-- 1 heather hr_dept 0 Apr 12 20:48 file2 #rm *

#rm: 'dir1' is a directory #ls -l drwxr-xr-x 2 heather hr_dept 4096 Apr 12 20:48 dir1 #touch file1 #ls –l drwxr-xr-x 2 heather hr_dept 4096 Apr 12 20:48 dir1 -rw-r--r-- 1 heather hr_dept 0 Apr 12 20:48 file1 #rm -r * #ls -l total 0
RCISE 14-5
Working with the vi Editor
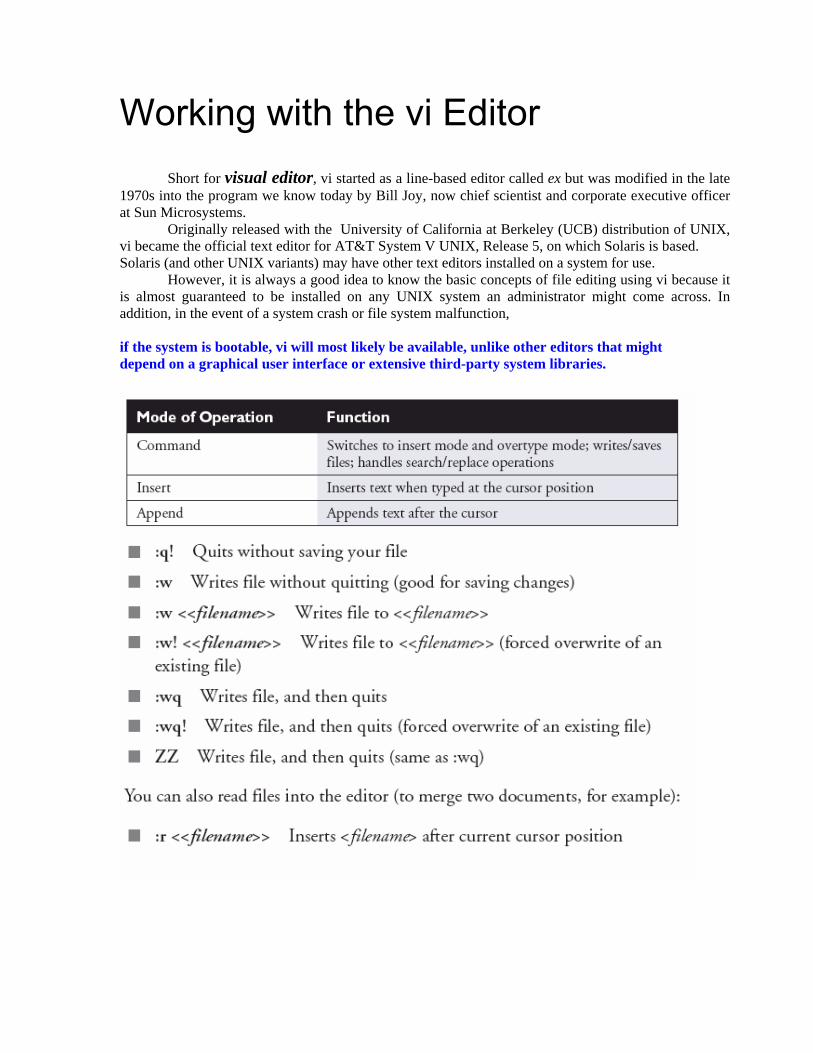
Short for visual editor, vi started as a line-based editor called ex but was modified in the late 1970s into the program we know today by Bill Joy, now chief scientist and corporate executive officer at Sun Microsystems.
Originally released with the University of California at Berkeley (UCB) distribution of UNIX, vi became the official text editor for AT&T System V UNIX, Release 5, on which Solaris is based. Solaris (and other UNIX variants) may have other text editors installed on a system for use.
However, it is always a good idea to know the basic concepts of file editing using vi because it is almost guaranteed to be installed on any UNIX system an administrator might come across. In addition, in the event of a system crash or file system malfunction,
if the system is bootable, vi will most likely be available, unlike other editors that might depend on a graphical user interface or extensive third-party system libraries.

Searching and Replacing Text If your document is very large, searching for each occurrence of a word or string and then manually retyping them can become tedious very quickly. Fortunately, vi provides a global search-and-replace function to automate such repetitive work. To search for the first occurrence of a string and replace it with another string, you first need to enter command mode, and then use the following syntax: :s/<< string1>>/<< string2>>/ [ENTER]
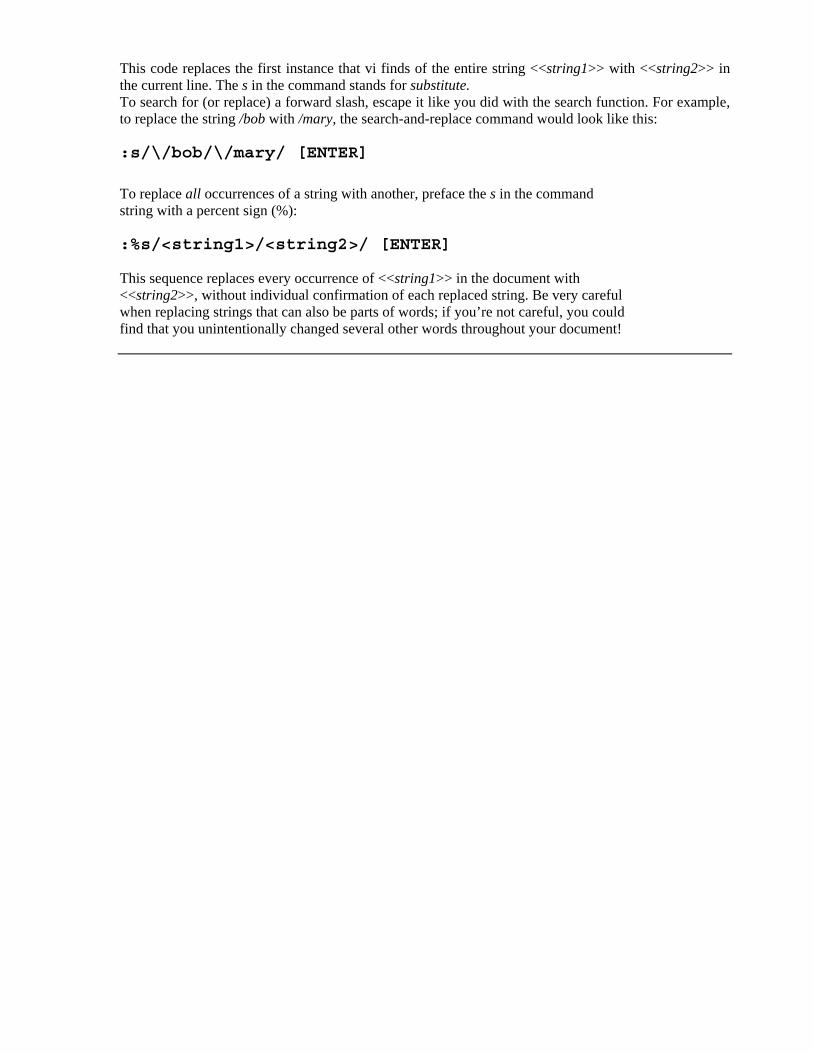
This code replaces the first instance that vi finds of the entire string <<string1>> with <<string2>> in the current line. The s in the command stands for substitute. To search for (or replace) a forward slash, escape it like you did with the search function. For example, to replace the string /bob with /mary, the search-and-replace command would look like this: :s/\/bob/\/mary/ [ENTER]
To replace all occurrences of a string with another, preface the s in the command string with a percent sign (%): :%s/<string1>/<string2>/ [ENTER] This sequence replaces every occurrence of <<string1>> in the document with <<string2>>, without individual confirmation of each replaced string. Be very careful when replacing strings that can also be parts of words; if you’re not careful, you could find that you unintentionally changed several other words throughout your document!
Working with Files and Directories
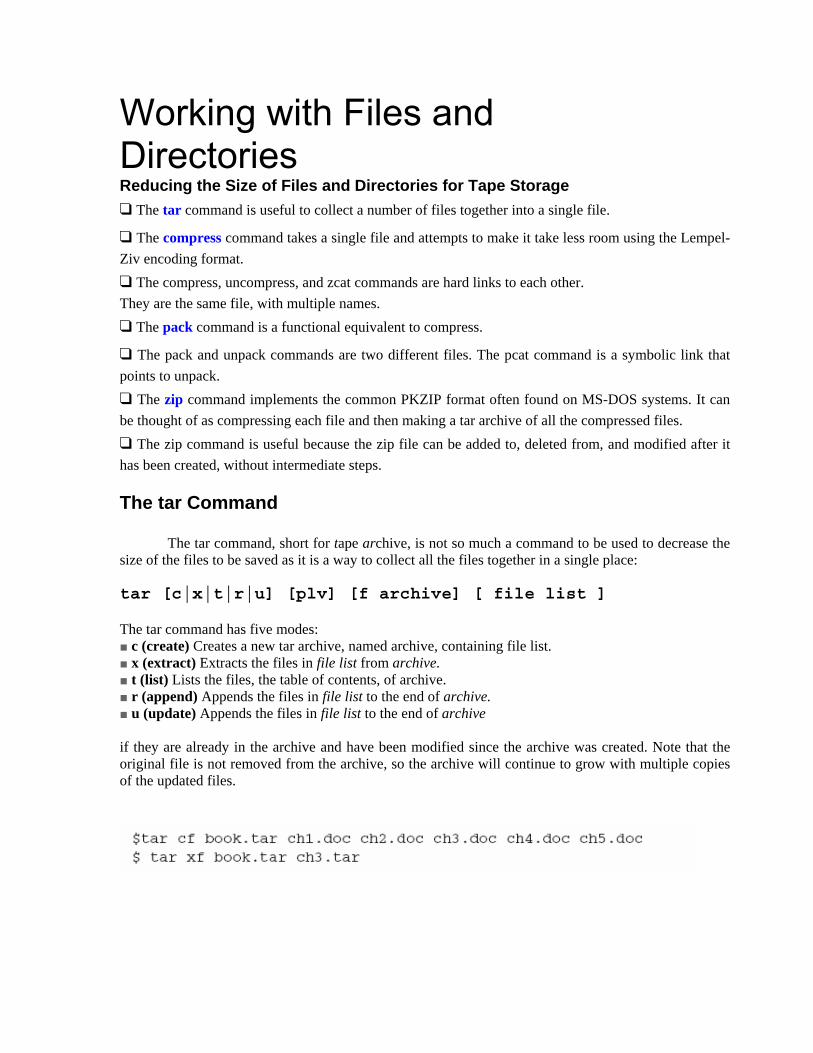
Reducing the Size of Files and Directories for Tape Storage ❑ The tar command is useful to collect a number of files together into a single file.
❑ The compress command takes a single file and attempts to make it take less room using the Lempel-Ziv encoding format. ❑ The compress, uncompress, and zcat commands are hard links to each other. They are the same file, with multiple names. ❑ The pack command is a functional equivalent to compress.
❑ The pack and unpack commands are two different files. The pcat command is a symbolic link that points to unpack. ❑ The zip command implements the common PKZIP format often found on MS-DOS systems. It can be thought of as compressing each file and then making a tar archive of all the compressed files. ❑ The zip command is useful because the zip file can be added to, deleted from, and modified after it has been created, without intermediate steps. The tar Command
The tar command, short for tape archive, is not so much a command to be used to decrease the size of the files to be saved as it is a way to collect all the files together in a single place: tar [c|x|t|r|u] [plv] [f archive] [ file list ] The tar command has five modes: ■ c (create) Creates a new tar archive, named archive, containing file list. ■ x (extract) Extracts the files in file list from archive. ■ t (list) Lists the files, the table of contents, of archive. ■ r (append) Appends the files in file list to the end of archive. ■ u (update) Appends the files in file list to the end of archive if they are already in the archive and have been modified since the archive was created. Note that the original file is not removed from the archive, so the archive will continue to grow with multiple copies of the updated files.

The compress, uncompress, and zcat Commands
compress [-cfv] [-b bits] file uncompress [-cfv] [-b bits] file zcat file $ compress -f README $ zcat README.Z $ uncompress README.Z
The pack, unpack, and pcat Commands pack [ -f ] file unpack file pcat file $ pack README pack: README: 39.9% Compression $ pcat README.z $ unpack README.z unpack: README: unpacked The zip Command
zip [ -dfmu ] [ -r ] file [ file list ] unzip [ -lt ] [ -fnou ] [ -d dir ] file [ file list ] $ zip part1.zip ch1.doc ch2.doc ch3.doc adding: ch1.doc (deflated 24%) adding: ch2.doc (deflated 31%) adding: ch3.doc (deflated 12%) $ unzip part1.zip ch3.doc Archive: part1.zip inflating: ch3.doc 1. Determine the files that you are going to use and the directory you will work in. It’s a good idea to copy the files in the /var/adm directory to another location, such as /var/tmp/Sol9_SG/ch9. 2. Use the du -sk command to determine how many disk blocks the files in the directory use: $ du -sk . 879 . 3. Using the tar command, create an archive file of all the files: $ tar cf ex91.tar *
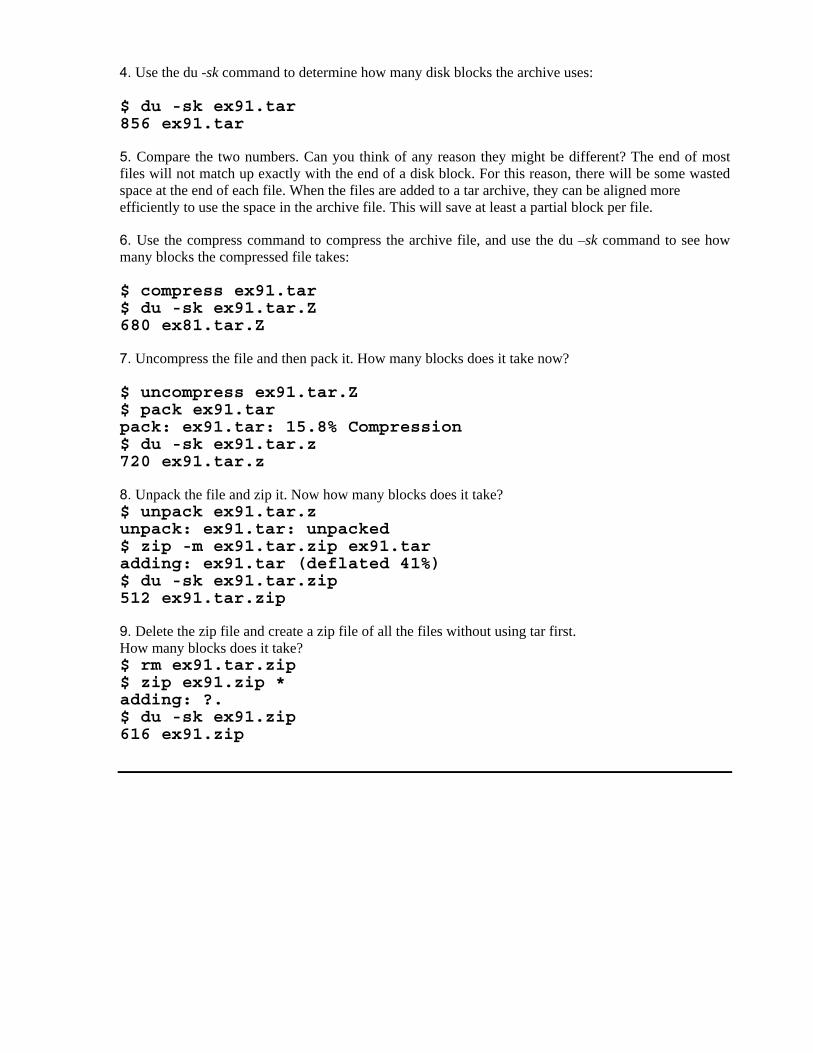
4. Use the du -sk command to determine how many disk blocks the archive uses: $ du -sk ex91.tar 856 ex91.tar 5. Compare the two numbers. Can you think of any reason they might be different? The end of most files will not match up exactly with the end of a disk block. For this reason, there will be some wasted space at the end of each file. When the files are added to a tar archive, they can be aligned more efficiently to use the space in the archive file. This will save at least a partial block per file. 6. Use the compress command to compress the archive file, and use the du –sk command to see how many blocks the compressed file takes: $ compress ex91.tar $ du -sk ex91.tar.Z 680 ex81.tar.Z 7. Uncompress the file and then pack it. How many blocks does it take now? $ uncompress ex91.tar.Z $ pack ex91.tar pack: ex91.tar: 15.8% Compression $ du -sk ex91.tar.z 720 ex91.tar.z 8. Unpack the file and zip it. Now how many blocks does it take? $ unpack ex91.tar.z unpack: ex91.tar: unpacked $ zip -m ex91.tar.zip ex91.tar adding: ex91.tar (deflated 41%) $ du -sk ex91.tar.zip 512 ex91.tar.zip 9. Delete the zip file and create a zip file of all the files without using tar first. How many blocks does it take? $ rm ex91.tar.zip $ zip ex91.zip * adding: ?. $ du -sk ex91.zip 616 ex91.zip

Working with File Systems

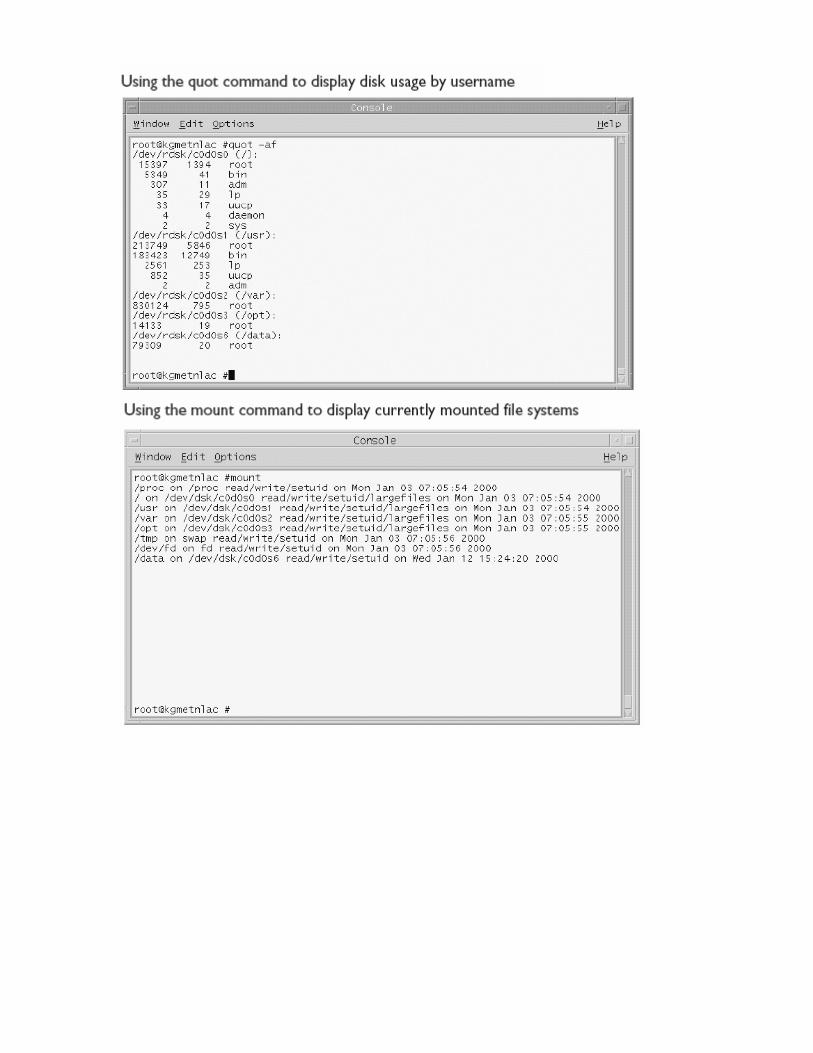
Displaying Disk Usage by Username The quot command has the following usage format: # quot [-a] [-f] [<file system name>] The options for this command are ■ -a Instructs quot to report on all mounted file systems. ■ -f Instructs quot to report the number of files.

The fdformat command The fdformat command is used to format floppy disks and accepts the following options: ■ -v Verifies proper formatting ■ -U Unmounts the disk (if it is mounted) ■ -D Formats at 720Kb instead of default 1.44Mb ■ -e Ejects the disk when formatting finishes ■ -f Forces format without confirmation ■ -b Labels the newly formatted disk with the provided name of eight characters or fewer ■ -z Lists all fdformat command options but does not actually format the disk
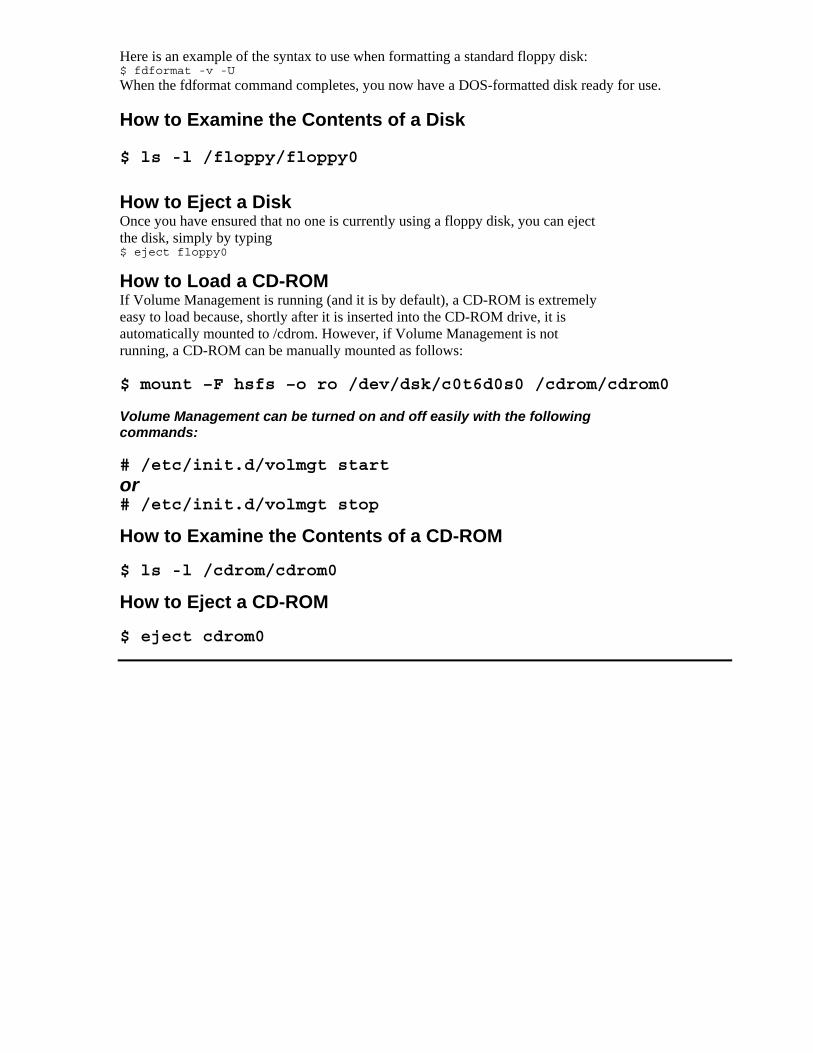
Here is an example of the syntax to use when formatting a standard floppy disk: $ fdformat -v -U
When the fdformat command completes, you now have a DOS-formatted disk ready for use. How to Examine the Contents of a Disk $ ls -l /floppy/floppy0
How to Eject a Disk Once you have ensured that no one is currently using a floppy disk, you can eject the disk, simply by typing $ eject floppy0
How to Load a CD-ROM If Volume Management is running (and it is by default), a CD-ROM is extremely easy to load because, shortly after it is inserted into the CD-ROM drive, it is automatically mounted to /cdrom. However, if Volume Management is not running, a CD-ROM can be manually mounted as follows: $ mount –F hsfs –o ro /dev/dsk/c0t6d0s0 /cdrom/cdrom0 Volume Management can be turned on and off easily with the following commands: # /etc/init.d/volmgt start or # /etc/init.d/volmgt stop
How to Examine the Contents of a CD-ROM $ ls -l /cdrom/cdrom0
How to Eject a CD-ROM $ eject cdrom0

Initialization and Shutdown The Boot Process When a system is powered on, it goes through several phases before the Solaris 9 operating environment is properly running and will accept any users. The four main phases of the boot process are ■ Boot PROM phase ■ Boot programs phase ■ Kernel phase ■ INIT phase Each of these phases is responsible for certain functions to ensure that the system is working correctly. Boot PROM Phase
The boot programmable read-only memory (PROM) phase is primarily concerned with ensuring that the hardware is working properly and beginning the process of starting the Solaris 9 operating environment. First, it runs the power-on self-test (POST).
POST scans the system to find the installed hardware, runs primary diagnostics on everything it finds, and builds a device tree.
Once POST is completed, the PROM displays the system banner. The banner consists of information such as the hardware type, processor type and speed, PROM version, the Ethernet (or MAC) address assigned to the system, the host ID assigned to the system, and the size of the installed memory.
PROM then runs a few more thorough diagnostics on the processor and memory. The final function of the boot PROM phase is to run the Boot command, if appropriate.
Boot Programs Phase
When the boot block executes, its sole function is to load the secondary boot program, UFSBOOT, and execute it.
The function of UFSBOOT is to locate and load the basic kernel, which controls the rest of the Solaris 9 operating environment. The location of UFSBOOT is encoded into the boot block. This location can change, so you might have to install a new boot block. You accomplish this task with the Installboot command. Kernel Phase
The kernel is the heart of the Solaris 9 operating environment. It is the process that remains running at all times and controls what happens on the system. It acts as the Boot Option Function -a Boots from an alternate /etc/system file -s Boots into single-user maintenance mode -r Reconfigures devices during boot -w Mounts the root file system as writeable for repair -i Boots interactively; the system requests answers to many questions that normally have defaults -v Prints verbose diagnostic messages during boot TABLE 4-1
INIT Phase Once the kernel is fully loaded and configured, it loads and executes the INIT process. The INIT phase is the last step before the system is fully functional. Once INIT is started, the system actually has all the requirements necessary to be functional, but none of the services has been started. INIT is the ancestor of all processes that run on the Solaris 9 operating environment. It is responsible for starting all the processes that prepare the system for use.

The INIT process is controlled by a configuration file called /etc/inittab. This file is used to
describe the run levels and set the default run level at which the system will operate. It defines the processes that are executed during the transition to a new run level. It is also used to define processes that should be started, monitored, and restarted if they fail. Because the run levels are defined by INIT, they are often referred to as INIT levels or INIT states.
Each noncommented line in the INITTAB is composed of four fields, separated by a colon (:).
Comment lines begin with a hash mark (#) and are ignored by the INIT process. They are there to help the administrator better understand the file. The four fields of the INITTAB file are as follows: ■ The ID field The ID is a unique string of one to four characters. It is used to identify the entry. Understanding the Solaris 9 Operating Environment Bootstrap Process ■ The RLEVEL field The RLEVEL field describes the run levels when the entry is valid. This field can be any combination of 0 through 6 to correspond to the various run levels. If it is blank, it is interpreted as 0123456, or valid at all run levels. It must not be blank for the INITDEFAULT action. ■ The ACTION field The ACTION field determines the action to be taken when this entry is activated. An entry is activated when INIT enters the appropriate run level and the INITTAB file is scanned. ■ SYSINIT A process with the SYSINIT action is run before a console login prompt is displayed. INIT pauses its execution until this process completes and terminates. ■ INITDEFAULT INITDEFAULT defines the default run level where the system will operate. This line is scanned only when INIT starts at boot time, and INIT will cycle through the run levels until it reaches this level. If the RLEVEL field is blank for this entry, it causes the system to continually reboot itself; as mentioned, it is interpreted as 0123456. If it is set to 0, the system immediately shuts itself down as soon as INIT is executed. If it is set to 5, the system immediately powers itself down when INIT is executed. If no INITDEFAULT entry is present in the INITTAB file, INIT prompts at the console during the boot. The default is 3. ■ RESPAWN RESPAWN defines a process that should be started, if it is not currently running, and monitored so that it will be restarted if it terminates for any reason. A RESPAWN process will not be waited for; INIT will continue processing the file. ■ WAIT A process that is a WAIT action will cause INIT to pause its scanning of the INITTAB file until this process completes and terminates. ■ ONCE When an entry is defined as ONCE, the process is started when this entry is activated, and INIT continues to the next entry. As with a RESPAWN, INIT does not wait for this process to finish. However, when the process does complete, it will not be restarted. ■ BOOT A BOOT entry is a process in which INIT first begins at boot time. It is not waited for, and when it completes, it is not restarted. ■ The PROCESS field The PROCESS field specifies the command or script that is to be run when this entry is activated. In particular, this is how the run-level scripts are started.

EXERCISE 4-1 Understanding and Working with Solaris Run Levels
A system running the Solaris 9 operating environment can be in one of several defined states, known as run levels.
A run level is a named operating state that defines the available resources and services. Run levels provide the system administrator with control over the uses of the system; the levels determine the number of users who can access the system and what is available to those users. By using different run levels, an administrator can disallow anyone else from accessing the system, allow multiple users to use the system without some networking services, allow full use of the system, or reboot the system.
Run levels are named with a single alphanumeric character, generally 0 through 6, s, or S. There is nothing particularly special about the predefined run levels other than that they are pre defined. New run levels could be added if needed, and not all defined run levels are currently used. Run Level Function
0 PROM mode. It is used to bring a running system to the OK prompt, either to turn the system off or to perform a PROM mode function.
S or s Single-user mode. If the system is booted into this mode, only the minimum number of file systems are mounted. Minimal services are started.
1 Single-user administrative mode. All file systems are accessible. Minimal services are started. TABLE 4-2
How Run Levels Work /sbin/rc# (Where # Falls in the Range of 0 to 6, s or S)
Each run level is controlled by a run control script, named /sbin/rc#, where the pound sign (#) is the level this script controls. These scripts can be thought of as metascripts : their major function is to run other scripts. The scripts that are run by the /sbin/rc# scripts are service control scripts. They are used to control various services, such as the mail service or the printing service. These service control scripts can be found in directories named /etc/rc#.d, where the pound sign (#) is the run level.
When the run control script starts, it first defines the environment it needs to operate. This could include setting variables, such as PATH. It could also include smaking sure that certain resources, such as mounting the /usr file system, are . Working with Run Levels
Several commands are available that deal with run levels. These commands include Init, Telinit, Shutdown, Halt, Reboot, and Poweroff.
The commands Init, Telinit, and Shutdown provide a general means for switching between run levels. The commands Halt, Reboot, and Poweroff are used to move from a specific run level to another specific run level. Init and Telinit
init [ rlevel ] telinit [ rlevel ] However, if it is called by something other than the kernel when it is already running, it is used to instruct the main INIT process to change to another run level. After it has instructed the original instance, it will terminate itself.
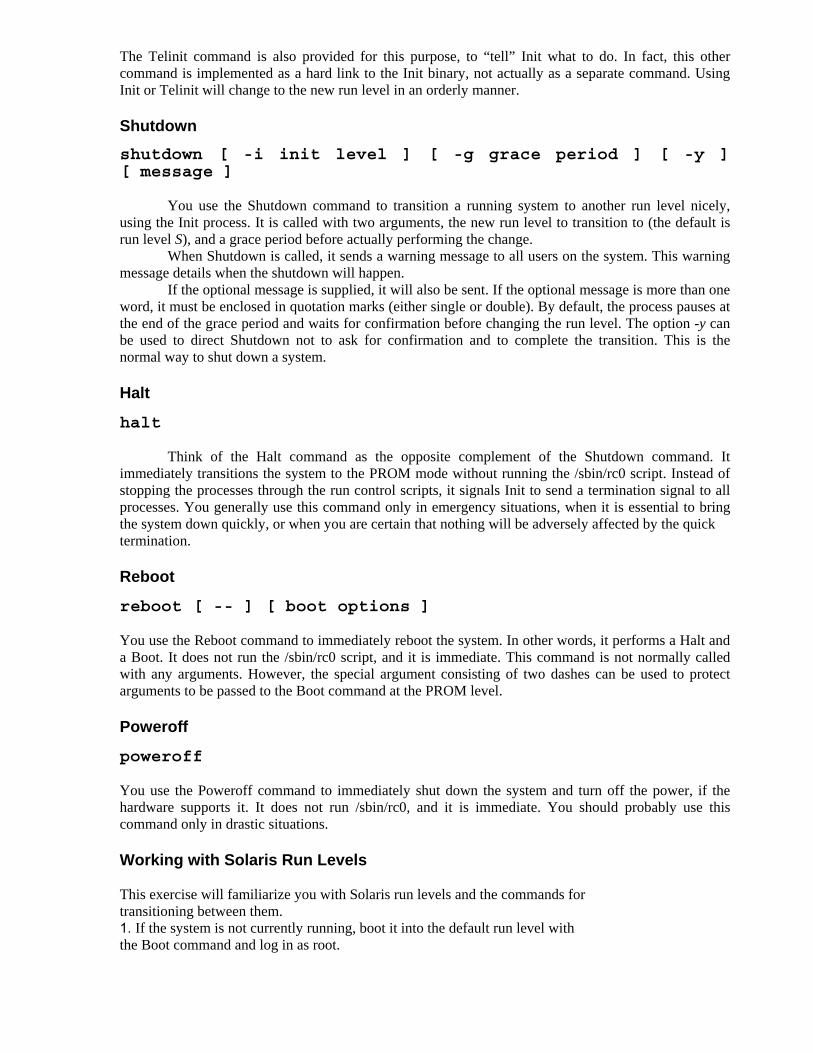
The Telinit command is also provided for this purpose, to “tell” Init what to do. In fact, this other command is implemented as a hard link to the Init binary, not actually as a separate command. Using Init or Telinit will change to the new run level in an orderly manner. Shutdown
shutdown [ -i init level ] [ -g grace period ] [ -y ] [ message ]
You use the Shutdown command to transition a running system to another run level nicely, using the Init process. It is called with two arguments, the new run level to transition to (the default is run level S), and a grace period before actually performing the change.
When Shutdown is called, it sends a warning message to all users on the system. This warning message details when the shutdown will happen.
If the optional message is supplied, it will also be sent. If the optional message is more than one word, it must be enclosed in quotation marks (either single or double). By default, the process pauses at the end of the grace period and waits for confirmation before changing the run level. The option -y can be used to direct Shutdown not to ask for confirmation and to complete the transition. This is the normal way to shut down a system. Halt
halt
Think of the Halt command as the opposite complement of the Shutdown command. It immediately transitions the system to the PROM mode without running the /sbin/rc0 script. Instead of stopping the processes through the run control scripts, it signals Init to send a termination signal to all processes. You generally use this command only in emergency situations, when it is essential to bring the system down quickly, or when you are certain that nothing will be adversely affected by the quick termination. Reboot
reboot [ -- ] [ boot options ] You use the Reboot command to immediately reboot the system. In other words, it performs a Halt and a Boot. It does not run the /sbin/rc0 script, and it is immediate. This command is not normally called with any arguments. However, the special argument consisting of two dashes can be used to protect arguments to be passed to the Boot command at the PROM level. Poweroff
poweroff You use the Poweroff command to immediately shut down the system and turn off the power, if the hardware supports it. It does not run /sbin/rc0, and it is immediate. You should probably use this command only in drastic situations. EXERCISE 4-2 Working with Solaris Run Levels This exercise will familiarize you with Solaris run levels and the commands for transitioning between them. 1. If the system is not currently running, boot it into the default run level with the Boot command and log in as root.

ok boot 2. Use the Telinit command to change from the default run level to run level 2. # telinit 2 You’ve modified the /etc/system file and need to reload it. Use Reboot -r to reboot the system and pass the reconfigure option to the Boot command. You’ve been informed of a physical environment emergency. The system needs to be shut down immediately. Use Halt to shut the system down as quickly as possible. The system is currently running in a multiuser mode and you need to bring it into single-user mode for maintenance. Use Init 1 or Telinit 1 to transition the system to the maintenance mode. You need to shut the system down gracefully to perform a hardware upgrade. Use Shutdown -i 0 -g 300 -y to shut the system down gracefully in 5 minutes (300 seconds) to give users a chance to log off. NARIO & S 3. Use the Reboot command to restart the system. # reboot What happened? You should see the system shut down all processes, enter the PROM mode, and then reboot to the default run level. 4. Use the Shutdown command to bring the system to the PROM mode. # shutdown -i 0 -g 30 –y
5. Boot the system using the -a flag. If you still have the /etc/system.bak file created in Exercise 4-1, use it to answer the question “Name of system file.” ok boot –a
6. Shut the system down using the Halt command. # halt 7. How did Halt differ from Shutdown? The Shutdown command was an orderly shutdown. It provided a warning message and a grace period before it shut down. The Halt command was a “dirty” shutdown. It was immediate with no warning, and the run control and service control scripts were not run.
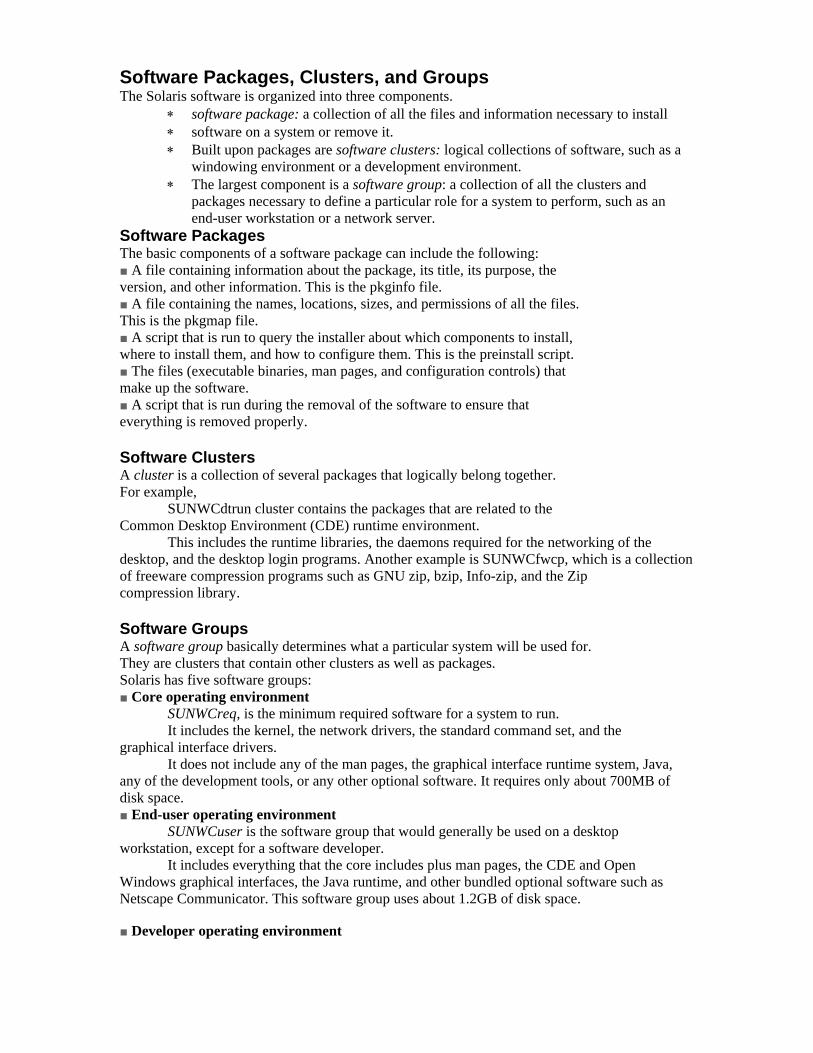
Software Packages, Clusters, and Groups The Solaris software is organized into three components.
∗ software package: a collection of all the files and information necessary to install ∗ software on a system or remove it. ∗ Built upon packages are software clusters: logical collections of software, such as a
windowing environment or a development environment. ∗ The largest component is a software group: a collection of all the clusters and
packages necessary to define a particular role for a system to perform, such as an end-user workstation or a network server.
Software Packages The basic components of a software package can include the following: ■ A file containing information about the package, its title, its purpose, the version, and other information. This is the pkginfo file. ■ A file containing the names, locations, sizes, and permissions of all the files. This is the pkgmap file. ■ A script that is run to query the installer about which components to install, where to install them, and how to configure them. This is the preinstall script. ■ The files (executable binaries, man pages, and configuration controls) that make up the software. ■ A script that is run during the removal of the software to ensure that everything is removed properly. Software Clusters A cluster is a collection of several packages that logically belong together. For example,
SUNWCdtrun cluster contains the packages that are related to the Common Desktop Environment (CDE) runtime environment.
This includes the runtime libraries, the daemons required for the networking of the desktop, and the desktop login programs. Another example is SUNWCfwcp, which is a collection of freeware compression programs such as GNU zip, bzip, Info-zip, and the Zip compression library. Software Groups A software group basically determines what a particular system will be used for. They are clusters that contain other clusters as well as packages. Solaris has five software groups: ■ Core operating environment
SUNWCreq, is the minimum required software for a system to run. It includes the kernel, the network drivers, the standard command set, and the
graphical interface drivers. It does not include any of the man pages, the graphical interface runtime system, Java,
any of the development tools, or any other optional software. It requires only about 700MB of disk space. ■ End-user operating environment
SUNWCuser is the software group that would generally be used on a desktop workstation, except for a software developer.
It includes everything that the core includes plus man pages, the CDE and Open Windows graphical interfaces, the Java runtime, and other bundled optional software such as Netscape Communicator. This software group uses about 1.2GB of disk space. ■ Developer operating environment
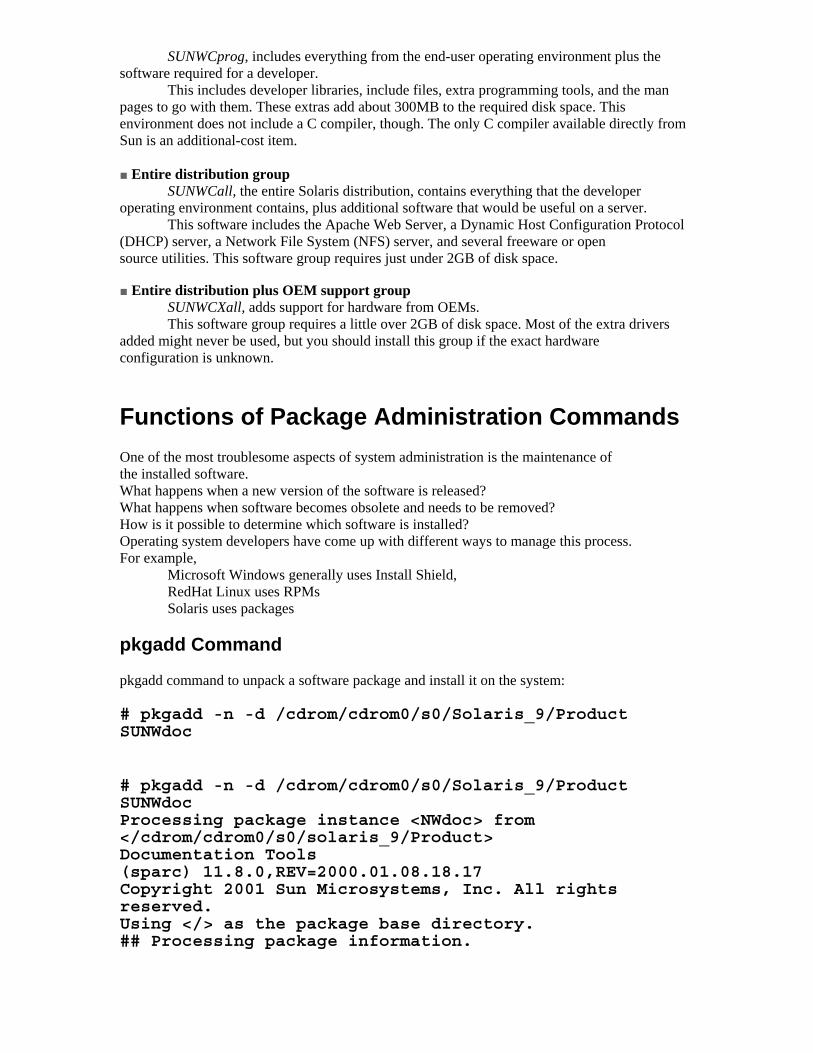
SUNWCprog, includes everything from the end-user operating environment plus the software required for a developer.
This includes developer libraries, include files, extra programming tools, and the man pages to go with them. These extras add about 300MB to the required disk space. This environment does not include a C compiler, though. The only C compiler available directly from Sun is an additional-cost item.
■ Entire distribution group
SUNWCall, the entire Solaris distribution, contains everything that the developer operating environment contains, plus additional software that would be useful on a server.
This software includes the Apache Web Server, a Dynamic Host Configuration Protocol (DHCP) server, a Network File System (NFS) server, and several freeware or open source utilities. This software group requires just under 2GB of disk space. ■ Entire distribution plus OEM support group
SUNWCXall, adds support for hardware from OEMs. This software group requires a little over 2GB of disk space. Most of the extra drivers
added might never be used, but you should install this group if the exact hardware configuration is unknown. Functions of Package Administration Commands One of the most troublesome aspects of system administration is the maintenance of the installed software. What happens when a new version of the software is released? What happens when software becomes obsolete and needs to be removed? How is it possible to determine which software is installed? Operating system developers have come up with different ways to manage this process. For example,
Microsoft Windows generally uses Install Shield, RedHat Linux uses RPMs Solaris uses packages
pkgadd Command pkgadd command to unpack a software package and install it on the system: # pkgadd -n -d /cdrom/cdrom0/s0/Solaris_9/Product SUNWdoc # pkgadd -n -d /cdrom/cdrom0/s0/Solaris_9/Product SUNWdoc Processing package instance <NWdoc> from </cdrom/cdrom0/s0/solaris_9/Product> Documentation Tools (sparc) 11.8.0,REV=2000.01.08.18.17 Copyright 2001 Sun Microsystems, Inc. All rights reserved. Using </> as the package base directory. ## Processing package information.
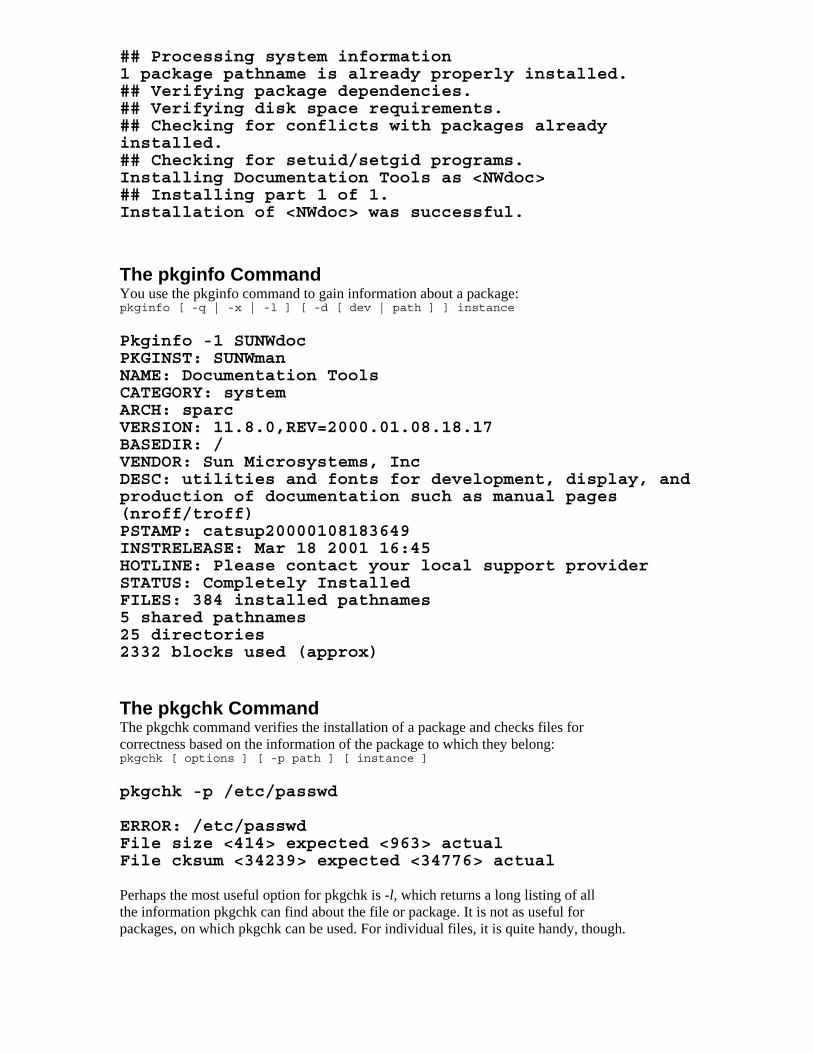
## Processing system information 1 package pathname is already properly installed. ## Verifying package dependencies. ## Verifying disk space requirements. ## Checking for conflicts with packages already installed. ## Checking for setuid/setgid programs. Installing Documentation Tools as <NWdoc> ## Installing part 1 of 1. Installation of <NWdoc> was successful. The pkginfo Command You use the pkginfo command to gain information about a package: pkginfo [ -q | -x | -l ] [ -d [ dev | path ] ] instance Pkginfo -1 SUNWdoc PKGINST: SUNWman NAME: Documentation Tools CATEGORY: system ARCH: sparc VERSION: 11.8.0,REV=2000.01.08.18.17 BASEDIR: / VENDOR: Sun Microsystems, Inc DESC: utilities and fonts for development, display, and production of documentation such as manual pages (nroff/troff) PSTAMP: catsup20000108183649 INSTRELEASE: Mar 18 2001 16:45 HOTLINE: Please contact your local support provider STATUS: Completely Installed FILES: 384 installed pathnames 5 shared pathnames 25 directories 2332 blocks used (approx) The pkgchk Command The pkgchk command verifies the installation of a package and checks files for correctness based on the information of the package to which they belong: pkgchk [ options ] [ -p path ] [ instance ] pkgchk -p /etc/passwd ERROR: /etc/passwd File size <414> expected <963> actual File cksum <34239> expected <34776> actual Perhaps the most useful option for pkgchk is -l, which returns a long listing of all the information pkgchk can find about the file or package. It is not as useful for packages, on which pkgchk can be used. For individual files, it is quite handy, though.
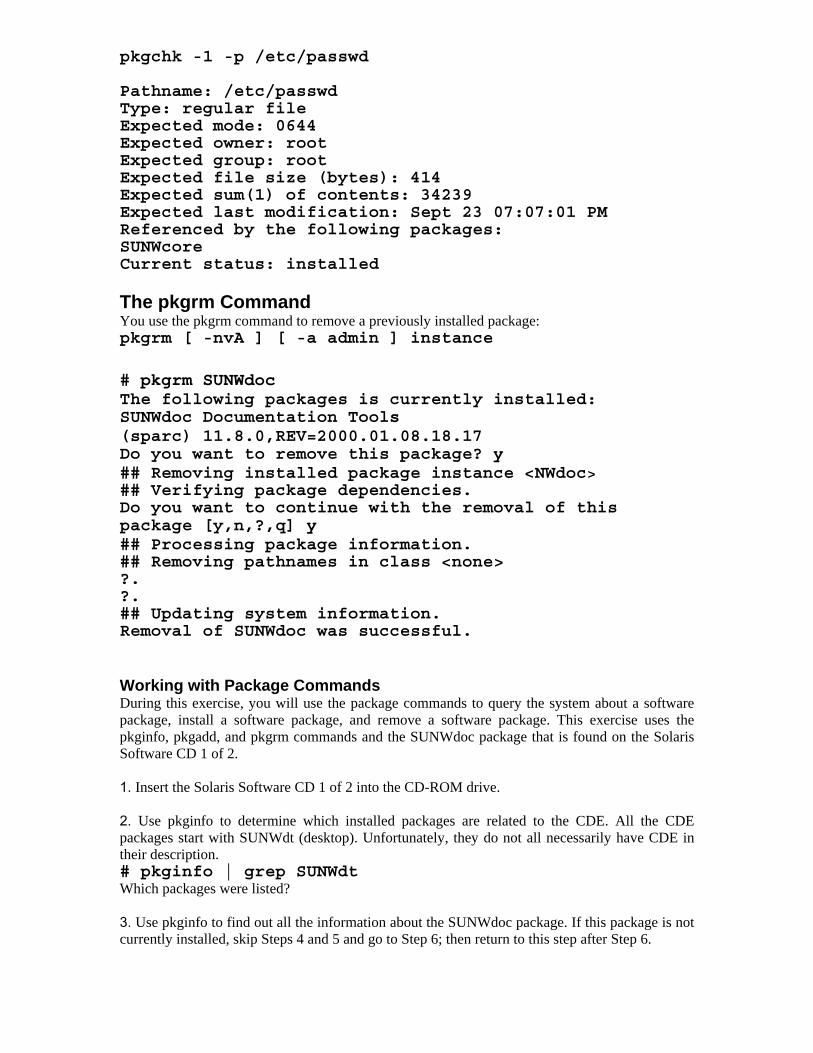
pkgchk -1 -p /etc/passwd Pathname: /etc/passwd Type: regular file Expected mode: 0644 Expected owner: root Expected group: root Expected file size (bytes): 414 Expected sum(1) of contents: 34239 Expected last modification: Sept 23 07:07:01 PM Referenced by the following packages: SUNWcore Current status: installed The pkgrm Command You use the pkgrm command to remove a previously installed package: pkgrm [ -nvA ] [ -a admin ] instance # pkgrm SUNWdoc The following packages is currently installed: SUNWdoc Documentation Tools (sparc) 11.8.0,REV=2000.01.08.18.17 Do you want to remove this package? y ## Removing installed package instance <NWdoc> ## Verifying package dependencies. Do you want to continue with the removal of this package [y,n,?,q] y ## Processing package information. ## Removing pathnames in class <none> ?. ?. ## Updating system information. Removal of SUNWdoc was successful. Working with Package Commands During this exercise, you will use the package commands to query the system about a software package, install a software package, and remove a software package. This exercise uses the pkginfo, pkgadd, and pkgrm commands and the SUNWdoc package that is found on the Solaris Software CD 1 of 2. 1. Insert the Solaris Software CD 1 of 2 into the CD-ROM drive. 2. Use pkginfo to determine which installed packages are related to the CDE. All the CDE packages start with SUNWdt (desktop). Unfortunately, they do not all necessarily have CDE in their description. # pkginfo | grep SUNWdt Which packages were listed? 3. Use pkginfo to find out all the information about the SUNWdoc package. If this package is not currently installed, skip Steps 4 and 5 and go to Step 6; then return to this step after Step 6.
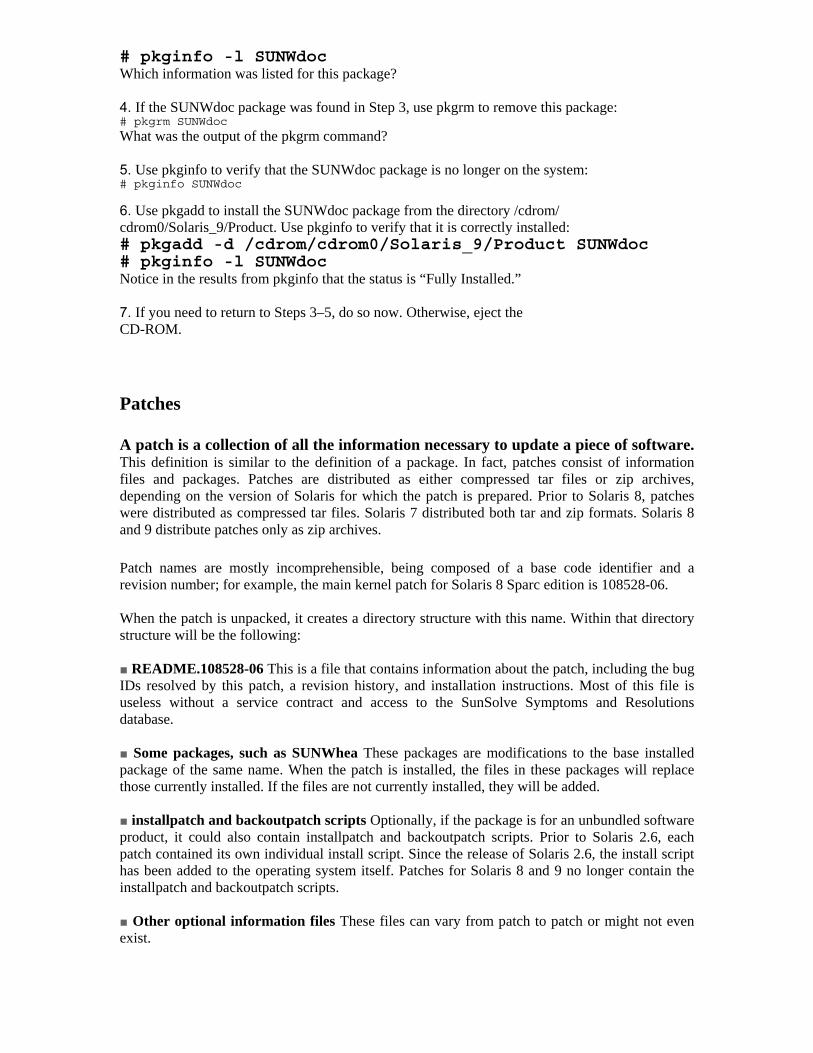
# pkginfo -l SUNWdoc Which information was listed for this package? 4. If the SUNWdoc package was found in Step 3, use pkgrm to remove this package: # pkgrm SUNWdoc
What was the output of the pkgrm command? 5. Use pkginfo to verify that the SUNWdoc package is no longer on the system: # pkginfo SUNWdoc
6. Use pkgadd to install the SUNWdoc package from the directory /cdrom/ cdrom0/Solaris_9/Product. Use pkginfo to verify that it is correctly installed: # pkgadd -d /cdrom/cdrom0/Solaris_9/Product SUNWdoc # pkginfo -l SUNWdoc Notice in the results from pkginfo that the status is “Fully Installed.” 7. If you need to return to Steps 3–5, do so now. Otherwise, eject the CD-ROM. Patches A patch is a collection of all the information necessary to update a piece of software. This definition is similar to the definition of a package. In fact, patches consist of information files and packages. Patches are distributed as either compressed tar files or zip archives, depending on the version of Solaris for which the patch is prepared. Prior to Solaris 8, patches were distributed as compressed tar files. Solaris 7 distributed both tar and zip formats. Solaris 8 and 9 distribute patches only as zip archives. Patch names are mostly incomprehensible, being composed of a base code identifier and a revision number; for example, the main kernel patch for Solaris 8 Sparc edition is 108528-06. When the patch is unpacked, it creates a directory structure with this name. Within that directory structure will be the following: ■ README.108528-06 This is a file that contains information about the patch, including the bug IDs resolved by this patch, a revision history, and installation instructions. Most of this file is useless without a service contract and access to the SunSolve Symptoms and Resolutions database. ■ Some packages, such as SUNWhea These packages are modifications to the base installed package of the same name. When the patch is installed, the files in these packages will replace those currently installed. If the files are not currently installed, they will be added. ■ installpatch and backoutpatch scripts Optionally, if the package is for an unbundled software product, it could also contain installpatch and backoutpatch scripts. Prior to Solaris 2.6, each patch contained its own individual install script. Since the release of Solaris 2.6, the install script has been added to the operating system itself. Patches for Solaris 8 and 9 no longer contain the installpatch and backoutpatch scripts. ■ Other optional information files These files can vary from patch to patch or might not even exist.
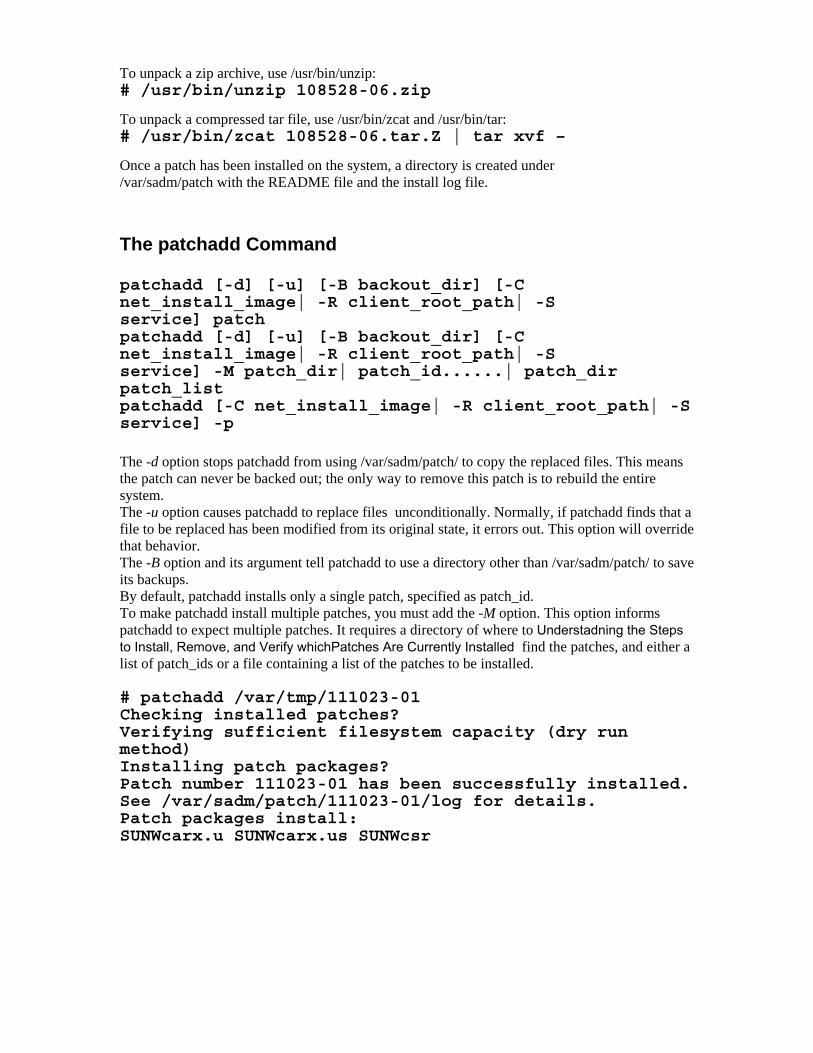
To unpack a zip archive, use /usr/bin/unzip: # /usr/bin/unzip 108528-06.zip
To unpack a compressed tar file, use /usr/bin/zcat and /usr/bin/tar: # /usr/bin/zcat 108528-06.tar.Z | tar xvf –
Once a patch has been installed on the system, a directory is created under /var/sadm/patch with the README file and the install log file. The patchadd Command patchadd [-d] [-u] [-B backout_dir] [-C net_install_image| -R client_root_path| -S service] patch patchadd [-d] [-u] [-B backout_dir] [-C net_install_image| -R client_root_path| -S service] -M patch_dir| patch_id......| patch_dir patch_list patchadd [-C net_install_image| -R client_root_path| -S service] -p The -d option stops patchadd from using /var/sadm/patch/ to copy the replaced files. This means the patch can never be backed out; the only way to remove this patch is to rebuild the entire system. The -u option causes patchadd to replace files unconditionally. Normally, if patchadd finds that a file to be replaced has been modified from its original state, it errors out. This option will override that behavior. The -B option and its argument tell patchadd to use a directory other than /var/sadm/patch/ to save its backups. By default, patchadd installs only a single patch, specified as patch_id. To make patchadd install multiple patches, you must add the -M option. This option informs patchadd to expect multiple patches. It requires a directory of where to Understadning the Steps to Install, Remove, and Verify whichPatches Are Currently Installed find the patches, and either a list of patch_ids or a file containing a list of the patches to be installed. # patchadd /var/tmp/111023-01 Checking installed patches? Verifying sufficient filesystem capacity (dry run method) Installing patch packages? Patch number 111023-01 has been successfully installed. See /var/sadm/patch/111023-01/log for details. Patch packages install: SUNWcarx.u SUNWcarx.us SUNWcsr
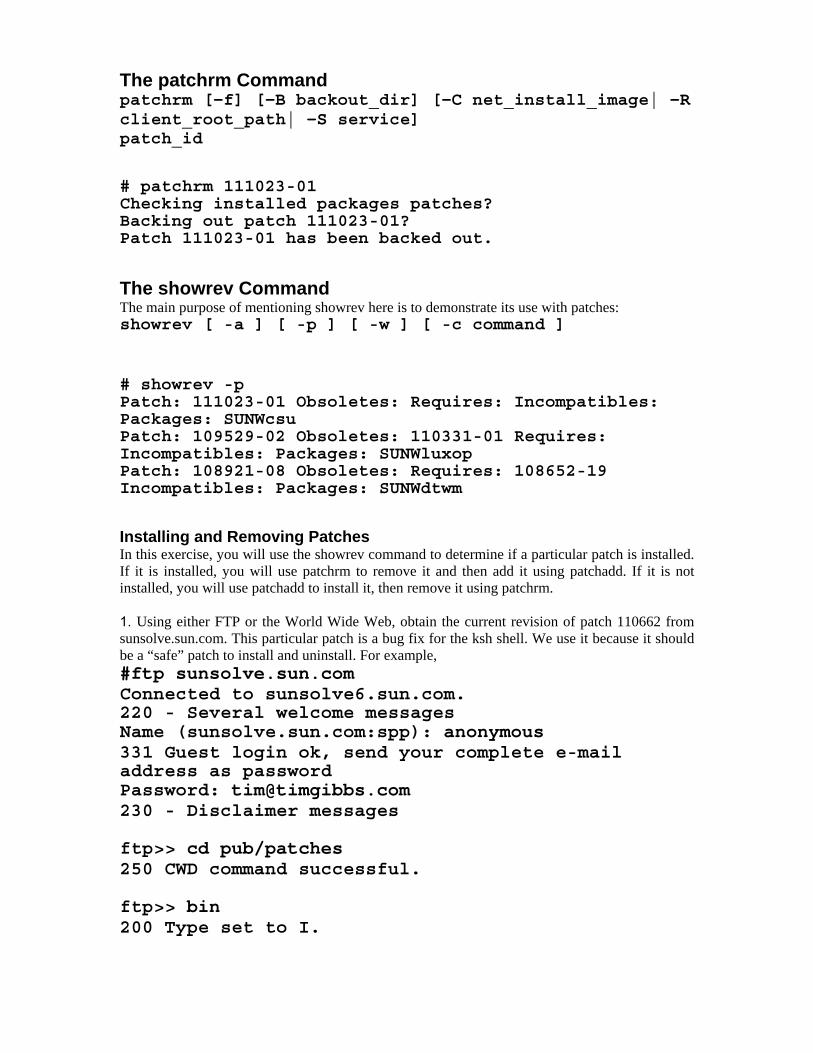
The patchrm Command patchrm [-f] [-B backout_dir] [-C net_install_image| -R client_root_path| -S service] patch_id # patchrm 111023-01 Checking installed packages patches? Backing out patch 111023-01? Patch 111023-01 has been backed out. The showrev Command The main purpose of mentioning showrev here is to demonstrate its use with patches: showrev [ -a ] [ -p ] [ -w ] [ -c command ] # showrev -p Patch: 111023-01 Obsoletes: Requires: Incompatibles: Packages: SUNWcsu Patch: 109529-02 Obsoletes: 110331-01 Requires: Incompatibles: Packages: SUNWluxop Patch: 108921-08 Obsoletes: Requires: 108652-19 Incompatibles: Packages: SUNWdtwm Installing and Removing Patches In this exercise, you will use the showrev command to determine if a particular patch is installed. If it is installed, you will use patchrm to remove it and then add it using patchadd. If it is not installed, you will use patchadd to install it, then remove it using patchrm. 1. Using either FTP or the World Wide Web, obtain the current revision of patch 110662 from sunsolve.sun.com. This particular patch is a bug fix for the ksh shell. We use it because it should be a “safe” patch to install and uninstall. For example, #ftp sunsolve.sun.com Connected to sunsolve6.sun.com. 220 - Several welcome messages Name (sunsolve.sun.com:spp): anonymous 331 Guest login ok, send your complete e-mail address as password Password: [email protected] 230 - Disclaimer messages ftp>> cd pub/patches 250 CWD command successful. ftp>> bin 200 Type set to I.
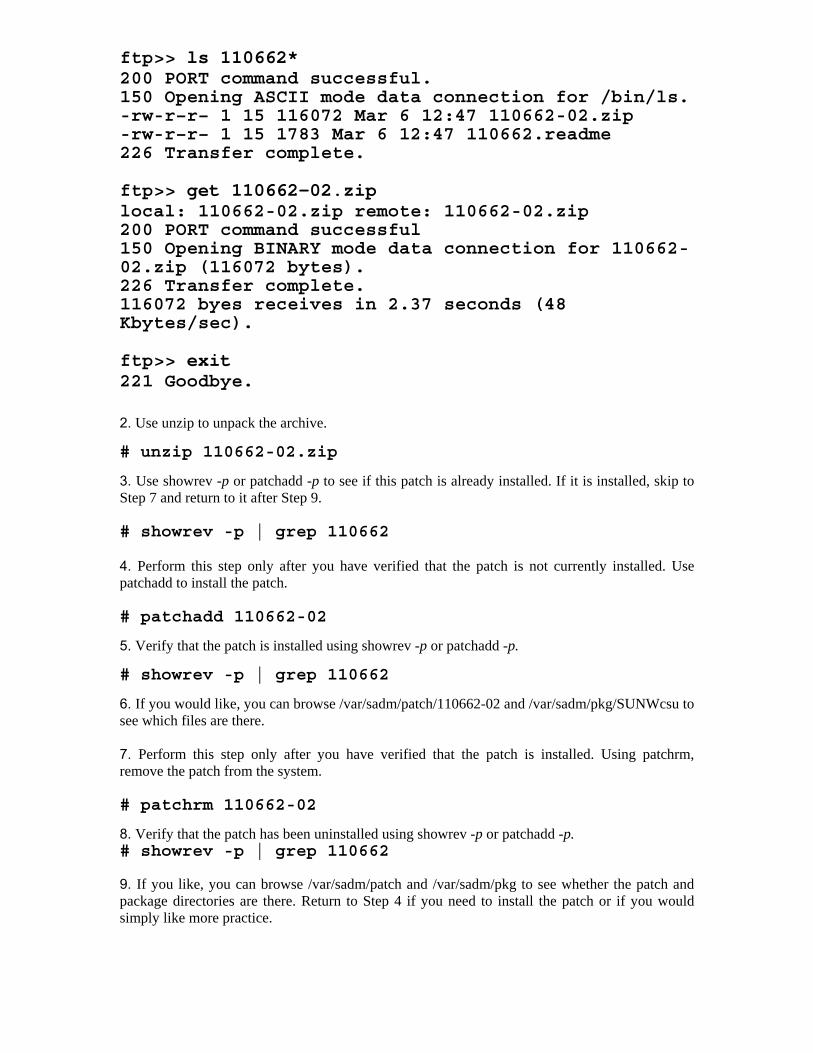
ftp>> ls 110662* 200 PORT command successful. 150 Opening ASCII mode data connection for /bin/ls. -rw-r–r– 1 15 116072 Mar 6 12:47 110662-02.zip -rw-r–r– 1 15 1783 Mar 6 12:47 110662.readme 226 Transfer complete. ftp>> get 110662-02.zip local: 110662-02.zip remote: 110662-02.zip 200 PORT command successful 150 Opening BINARY mode data connection for 110662-02.zip (116072 bytes). 226 Transfer complete. 116072 byes receives in 2.37 seconds (48 Kbytes/sec). ftp>> exit 221 Goodbye.
2. Use unzip to unpack the archive.
# unzip 110662-02.zip
3. Use showrev -p or patchadd -p to see if this patch is already installed. If it is installed, skip to Step 7 and return to it after Step 9. # showrev -p | grep 110662 4. Perform this step only after you have verified that the patch is not currently installed. Use patchadd to install the patch. # patchadd 110662-02
5. Verify that the patch is installed using showrev -p or patchadd -p.
# showrev -p | grep 110662
6. If you would like, you can browse /var/sadm/patch/110662-02 and /var/sadm/pkg/SUNWcsu to see which files are there. 7. Perform this step only after you have verified that the patch is installed. Using patchrm, remove the patch from the system. # patchrm 110662-02
8. Verify that the patch has been uninstalled using showrev -p or patchadd -p. # showrev -p | grep 110662 9. If you like, you can browse /var/sadm/patch and /var/sadm/pkg to see whether the patch and package directories are there. Return to Step 4 if you need to install the patch or if you would simply like more practice.