Embed Size (px)
Citation preview
COPD Program - Group session 1
Facilitator documents
May 2013
• This document supports the facilitator with respect to the contents of the Group Session 1 of the COPD program.
• When pertinent, a group education is preceded by a slide called « Facilitator notes », that can be identified by a title in yellow fonts.
• All the supporting documents (identified in red fonts) can be downloaded from the website www.livingwellwithcopd.com (password: copd) or from the RQAM website www.rqam.ca
Introduction to the facilitator documents
Facilitator notes (Introduction)
• Presentation of the Facilitator.
• Presentation of the participants.
• Introduction to the program « Living Well with
COPD ».
• Presentation of the session agenda.

- YOUR EXPECTATIONS - BEING HEALTHY WITH COPD - OBJECTIVES
The program Living Well with COPD
Facilitator notes (Your expectations) Assess participants’ expectations, goals and objectives with respect to the group education program.
Suggested question to start the discussion: • What are your expectations as a result of taking part in this group
education program?
Possible answers from the participants: • Remain stable • Become more active • Continue to be independent • Acquire knowledge about my illness • Feel in control

Your expectations
• What are your expectations as a result of taking part in this group education program?
Facilitator notes (Being healthy with COPD) 1. Explain that “disease” and “health” are separate concepts that can
coexist and influence each other. 2. Establish clearly that a person with a chronic illness can also be healthy. Suggested questions to start the discussion • Do you make time for leisure activities? Why? • How can friends and family help you to improve your health? • Do you think a healthcare professional can help you improve your health? Notes • Participant’s answers may vary from one group to another. • Bring out the emotions, thoughts, images and associated behaviours. • Give personal examples to facilitate and encourage discussion.
Being Healthy with COPD
• Even if you have COPD, a chronic illness, you can still be healthy.
• Knowing your disease and taking charge of it on a daily basis will help you live better with your COPD.
Being Healthy with COPD
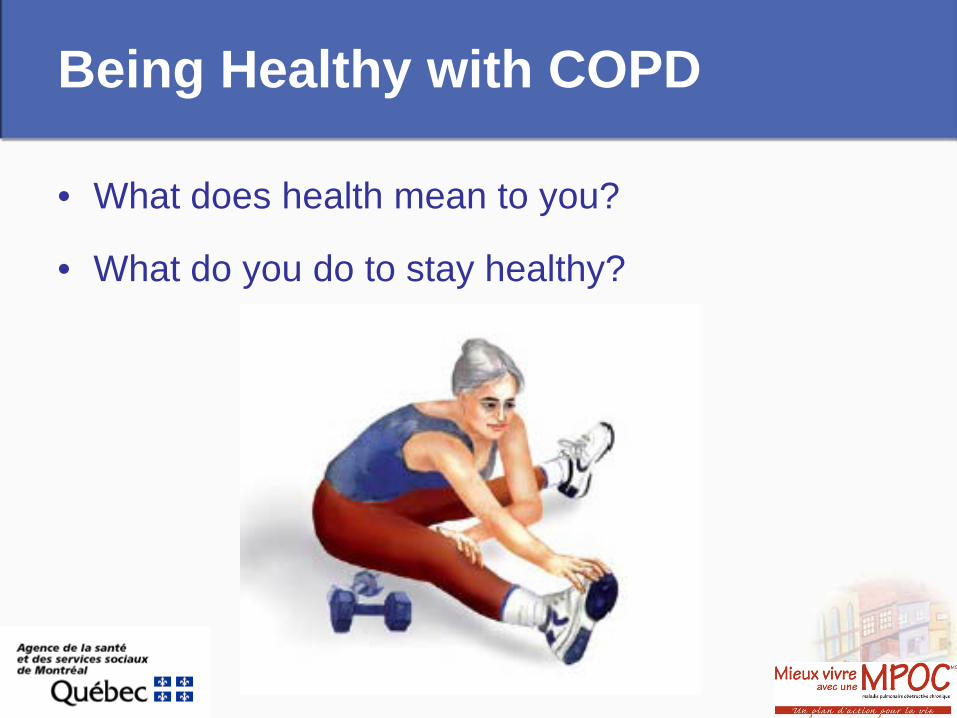
• What does health mean to you?
• What do you do to stay healthy?
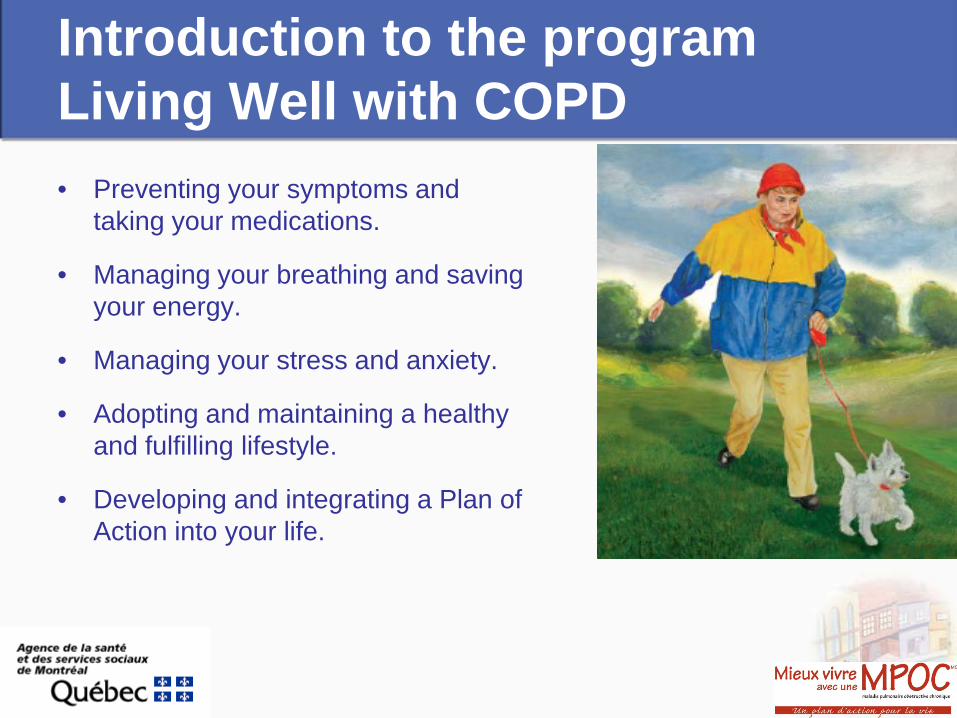
Introduction to the program Living Well with COPD • Preventing your symptoms and
taking your medications.
• Managing your breathing and saving your energy.
• Managing your stress and anxiety.
• Adopting and maintaining a healthy and fulfilling lifestyle.
• Developing and integrating a Plan of Action into your life.
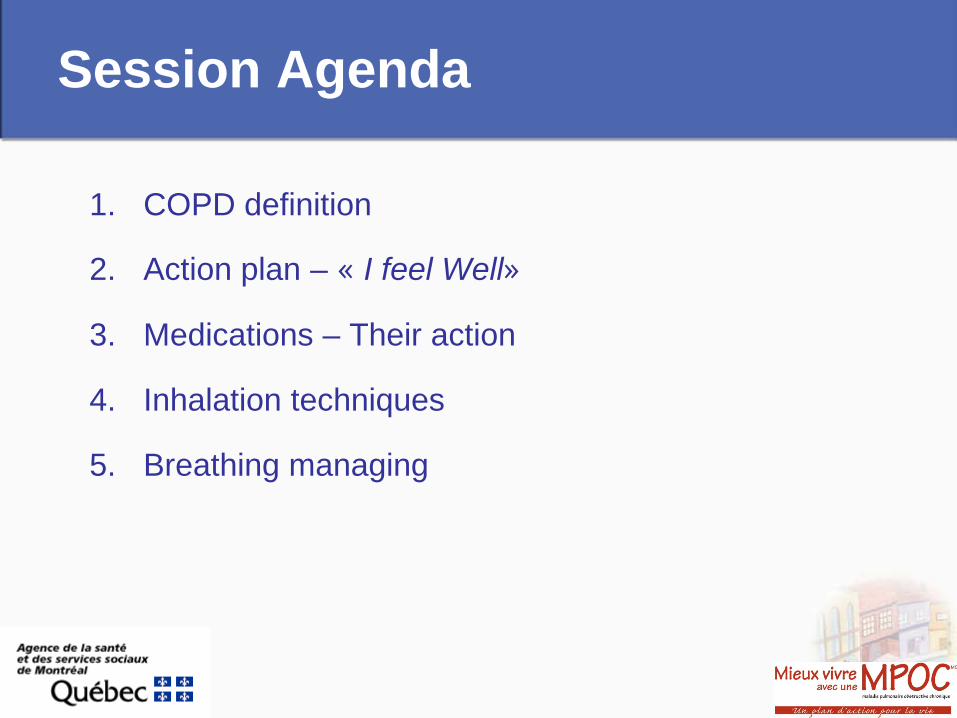
Session Agenda
1. COPD definition
2. Action plan – « I feel Well»
3. Medications – Their action
4. Inhalation techniques
5. Breathing managing
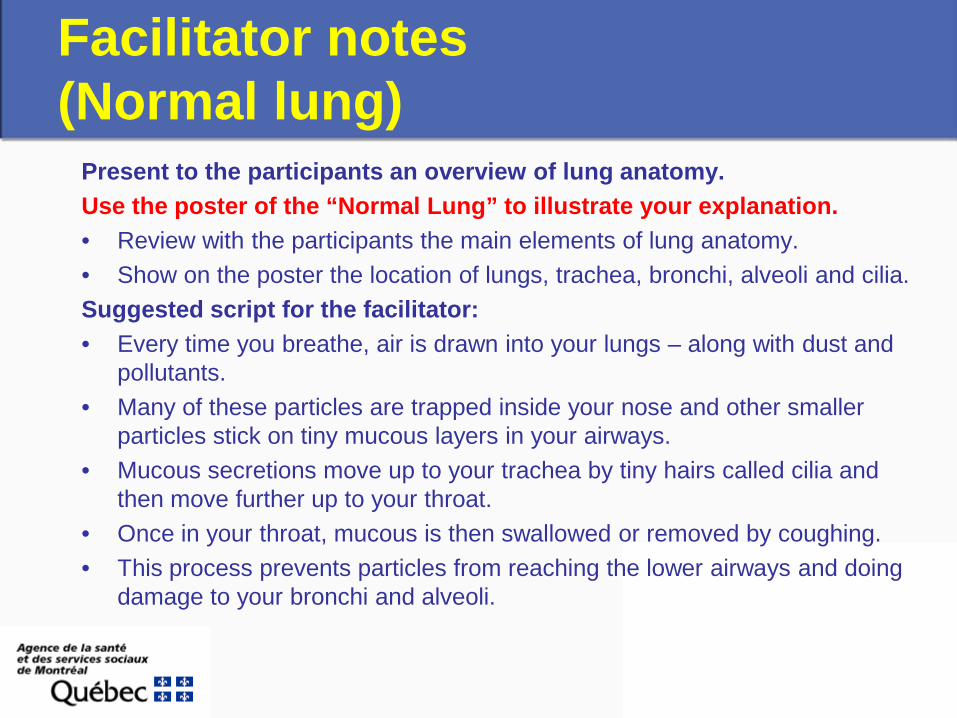
Facilitator notes (Normal lung)
Present to the participants an overview of lung anatomy. Use the poster of the “Normal Lung” to illustrate your explanation. • Review with the participants the main elements of lung anatomy. • Show on the poster the location of lungs, trachea, bronchi, alveoli and cilia. Suggested script for the facilitator: • Every time you breathe, air is drawn into your lungs – along with dust and
pollutants. • Many of these particles are trapped inside your nose and other smaller
particles stick on tiny mucous layers in your airways. • Mucous secretions move up to your trachea by tiny hairs called cilia and
then move further up to your throat. • Once in your throat, mucous is then swallowed or removed by coughing. • This process prevents particles from reaching the lower airways and doing
damage to your bronchi and alveoli.
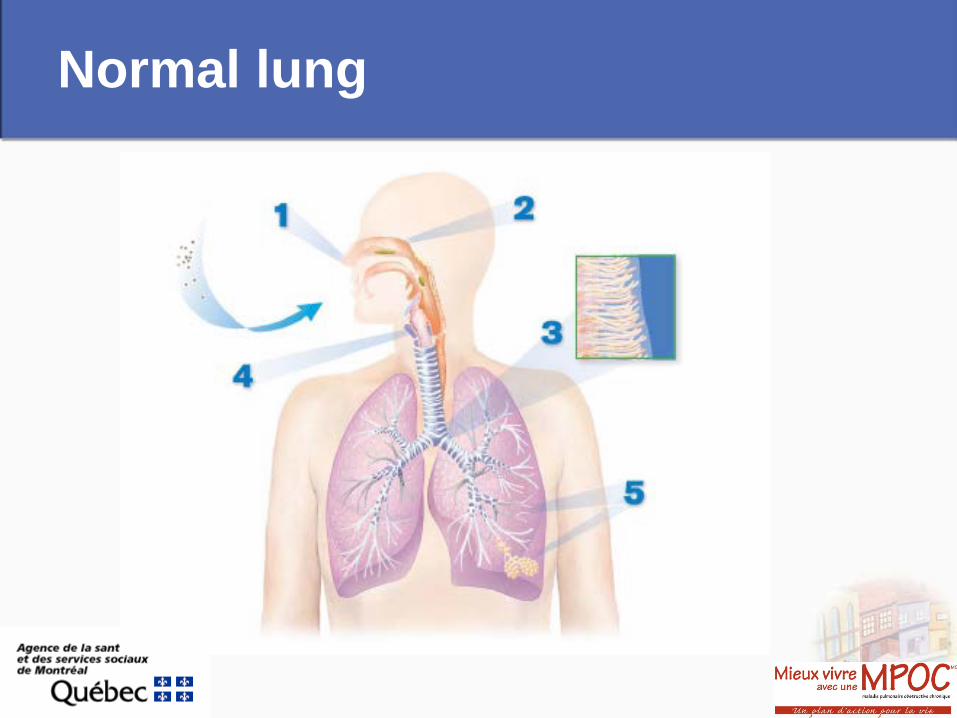
Normal lung
Facilitator Notes (COPD - definition) Ask the participants about the meaning of the acronym COPD. Explore within the group the existing knowledge regarding COPD main cause. Suggested question: • What does COPD mean? Answer expected from the participants: • COPD means “chronic obstructive pulmonary disease”.
COPD - definition
What does COPD mean?
• COPD means “chronic obstructive pulmonary disease”.

Facilitator Notes (What happens when someone has a COPD?)
Explain the relationship between COPD, obstructive chronic bronchitis and emphysema.
Use the poster “COPD Lung” to support your teaching.
Suggested script for the facilitator: • Obstructive chronic bronchitis and emphysema are major breathing
diseases that cause airways to become “obstructed” or blocked.
• They often occur together but they can also occur separately.
• They are also known as COPD.
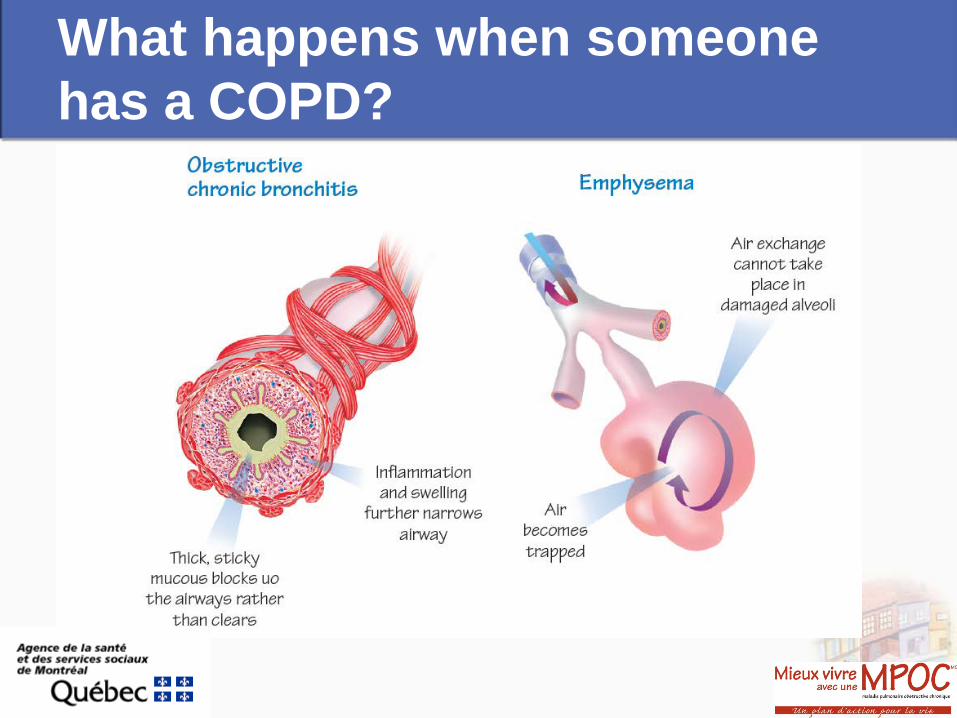
What happens when someone has a COPD?
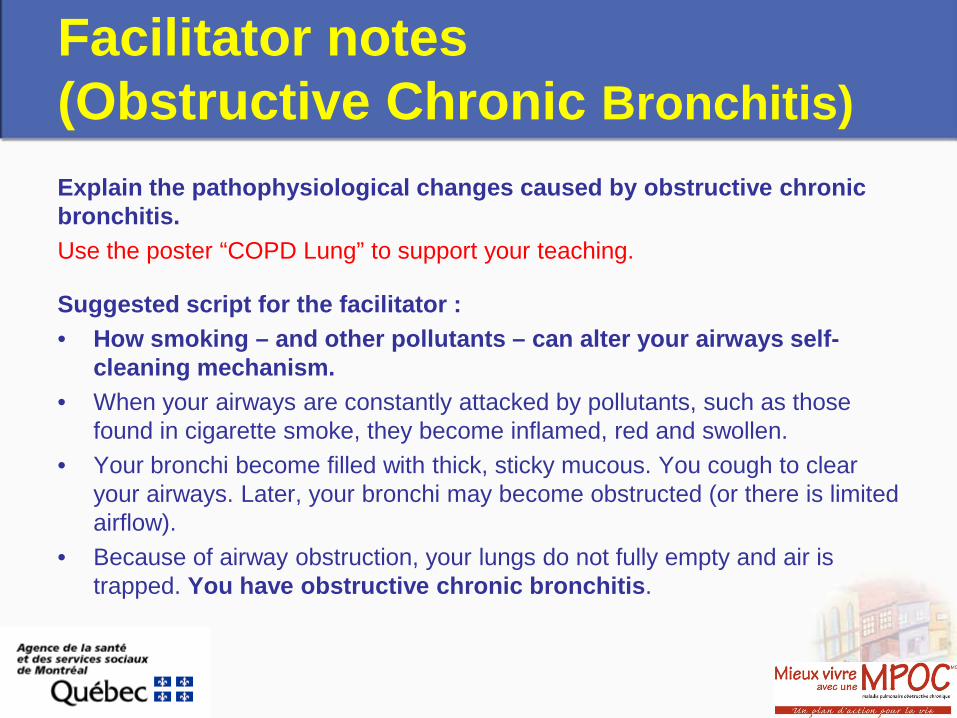
Facilitator notes (Obstructive Chronic Bronchitis) Explain the pathophysiological changes caused by obstructive chronic bronchitis. Use the poster “COPD Lung” to support your teaching.
Suggested script for the facilitator : • How smoking – and other pollutants – can alter your airways self-
cleaning mechanism. • When your airways are constantly attacked by pollutants, such as those
found in cigarette smoke, they become inflamed, red and swollen. • Your bronchi become filled with thick, sticky mucous. You cough to clear
your airways. Later, your bronchi may become obstructed (or there is limited airflow).
• Because of airway obstruction, your lungs do not fully empty and air is trapped. You have obstructive chronic bronchitis.

COPD - Obstructive Chronic Bronchitis
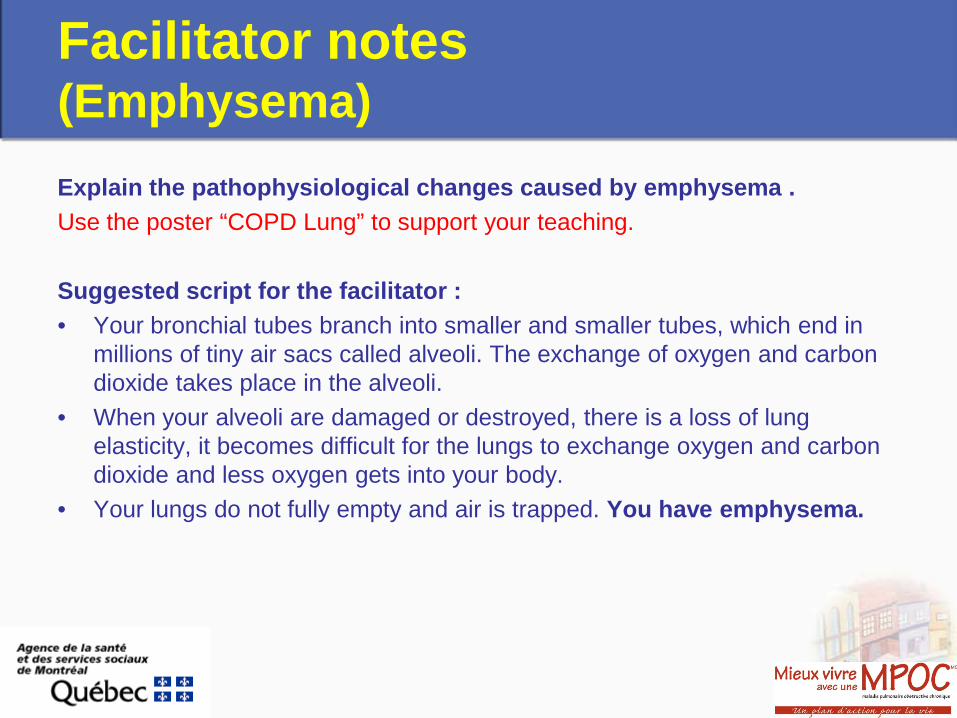
Facilitator notes (Emphysema) Explain the pathophysiological changes caused by emphysema . Use the poster “COPD Lung” to support your teaching. Suggested script for the facilitator : • Your bronchial tubes branch into smaller and smaller tubes, which end in
millions of tiny air sacs called alveoli. The exchange of oxygen and carbon dioxide takes place in the alveoli.
• When your alveoli are damaged or destroyed, there is a loss of lung elasticity, it becomes difficult for the lungs to exchange oxygen and carbon dioxide and less oxygen gets into your body.
• Your lungs do not fully empty and air is trapped. You have emphysema.
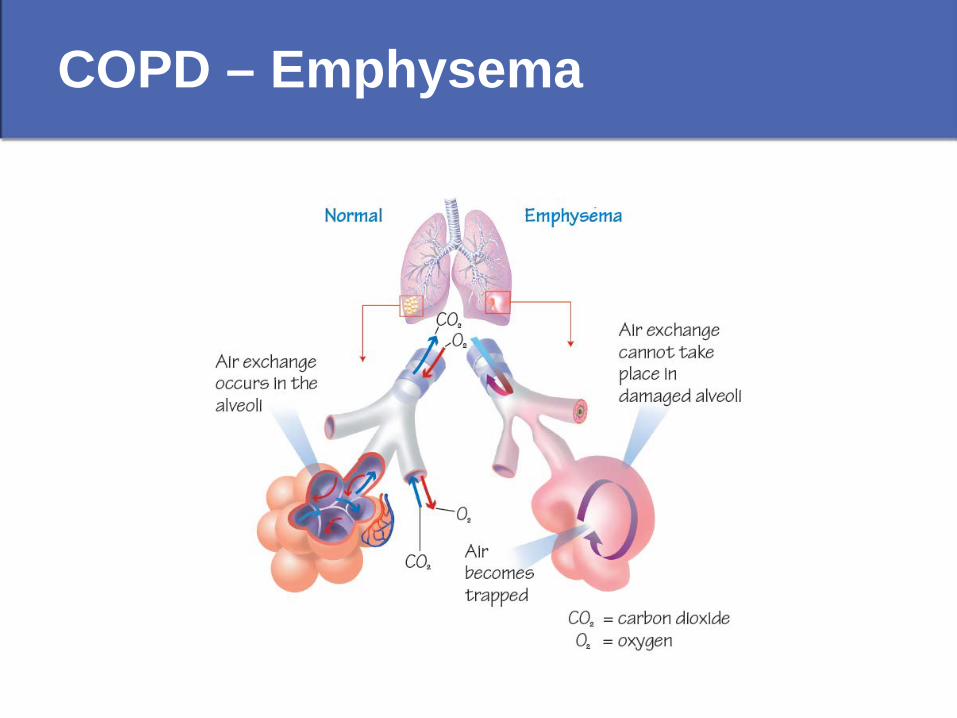
COPD – Emphysema
Facilitator notes (Signs and symptoms) 1. Invite the participants to describe their symptoms; complete
the explanation of the symptoms related to chronic obstructive pulmonary disease.
Suggested question: • What are the most common everyday symptoms of COPD?
Answers expected from the participants: • Shortness of breath • Wheezing / bronchospasm • Secretion production • Anxiety • Fatigue
Facilitator notes (Signs and symptoms) 2. Guide participants to identify their everyday respiratory
symptoms (baseline). Suggested questions: • Can you describe me your everyday respiratory symptoms? • How short of breath do you feel in a normal day? What type of activities would make
you feel short of breath (e.g. walking, climbing stairs, etc.)? The “MRC visual dyspnea scale” can be used to give an idea of the level of dyspnea in day-to-day life.
• Do you cough up sputum (phlegm) daily? • Could you describe the colour of your sputum? Do you have any idea about the
amount (volume) of sputum that you cough every day? Could you describe the consistency of your sputum?
• Do you cough regularly? What does regularly mean to you?
COPD – Signs and symptoms
What are the signs and symptoms of obstructive chronic bronchitis?
• Sputum every day • Frequent coughing • Wheezing • Shortness of breath when exercising or during daily activities.
What are the signs and symptoms of emphysema? • Shortness of breath when exercising or during daily activities.
Facilitator notes (COPD cause)
Explore within the group the existing knowledge regarding COPD main cause
Suggested Question: • Can you identify the main cause of COPD?
Answers expected from the participants: • Cigarette smoke is the leading cause of COPD.
Suggested script for the facilitator: • Many people who suffer from COPD are current or former smokers.
COPD – Main cause
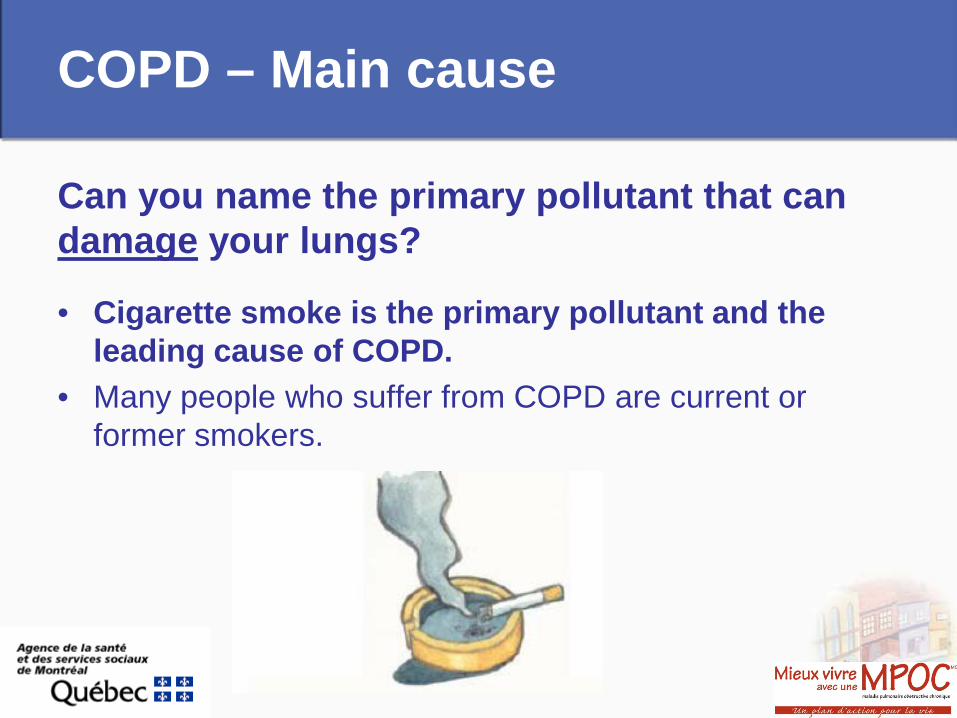
Can you name the primary pollutant that can damage your lungs?
• Cigarette smoke is the primary pollutant and the leading cause of COPD.
• Many people who suffer from COPD are current or former smokers.
- INTRODUCTION TO THE ACTION PLAN - ACTION PLAN SECTIONS - « I FEEL WELL»
Action plan
Facilitator notes (Action plan) Present this section in an interactive way. Provide a copy of the Written Plan of Action to the participants or ask them to use their own plan of action.
1. Describe the objectives of the action plan of “Living Well with COPD”.
2. Briefly describe the content of the different sections of an action plan.
Suggested script for the facilitator: • Your Plan of Action plays an important part in your life, as it will help you
make key decisions in treating COPD when your symptoms get worse. If you use your Plan of Action properly, you will become more independent and feel more in control when your symptoms get worse. Your Plan of Action may make the difference between a trip to the hospital and treatment at home!
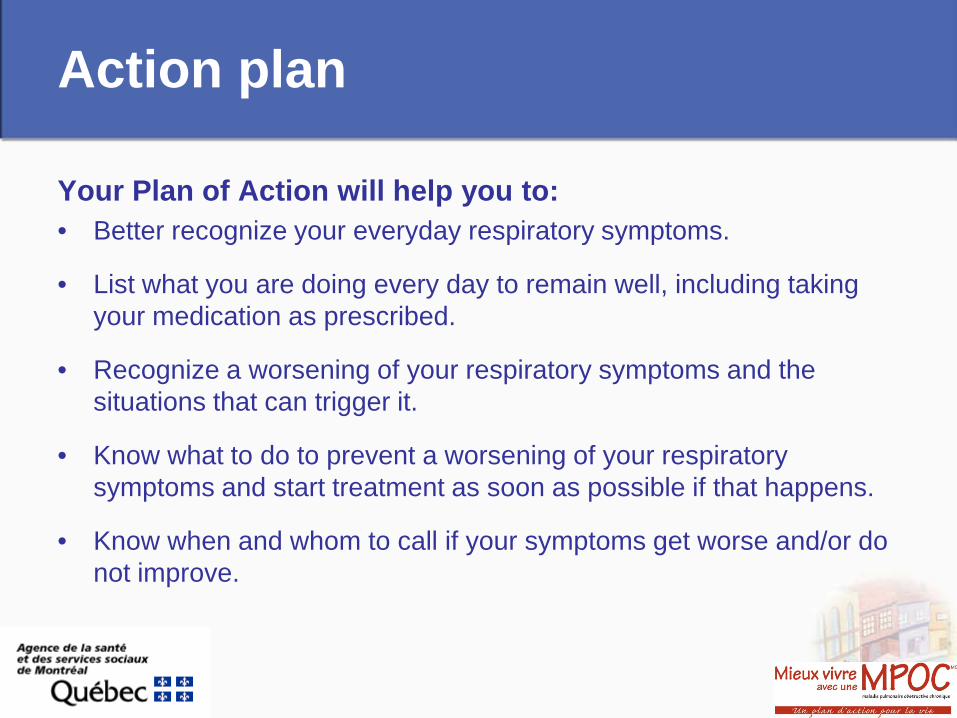
Action plan
Your Plan of Action will help you to: • Better recognize your everyday respiratory symptoms.
• List what you are doing every day to remain well, including taking your medication as prescribed.
• Recognize a worsening of your respiratory symptoms and the situations that can trigger it.
• Know what to do to prevent a worsening of your respiratory symptoms and start treatment as soon as possible if that happens.
• Know when and whom to call if your symptoms get worse and/or do not improve.
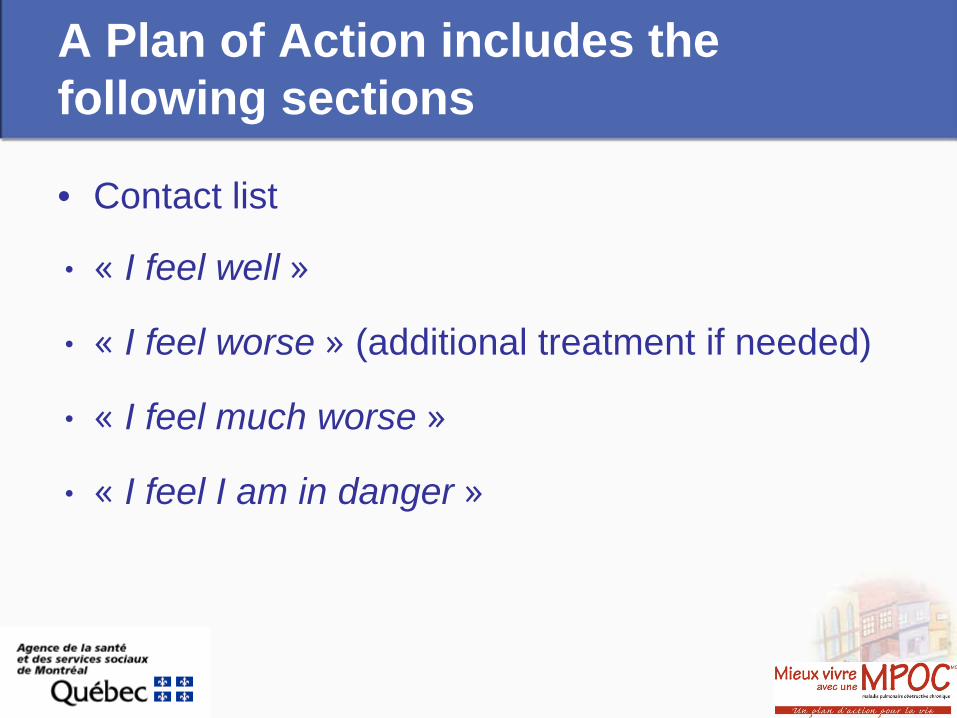
A Plan of Action includes the following sections
• Contact list
• « I feel well »
• « I feel worse » (additional treatment if needed)
• « I feel much worse »
• « I feel I am in danger »

Facilitator Notes (Contact list)
Review the section “Contact List” of the written action plan to guide the participants to identify their key resources.
Suggested script for the facilitator : • An essential part of your Plan of Action is to have the phone
numbers of your contacts close at hand. These are the key people you can call when you have a problem with your respiratory symptoms or treatment. Write their names and numbers in the spaces below.
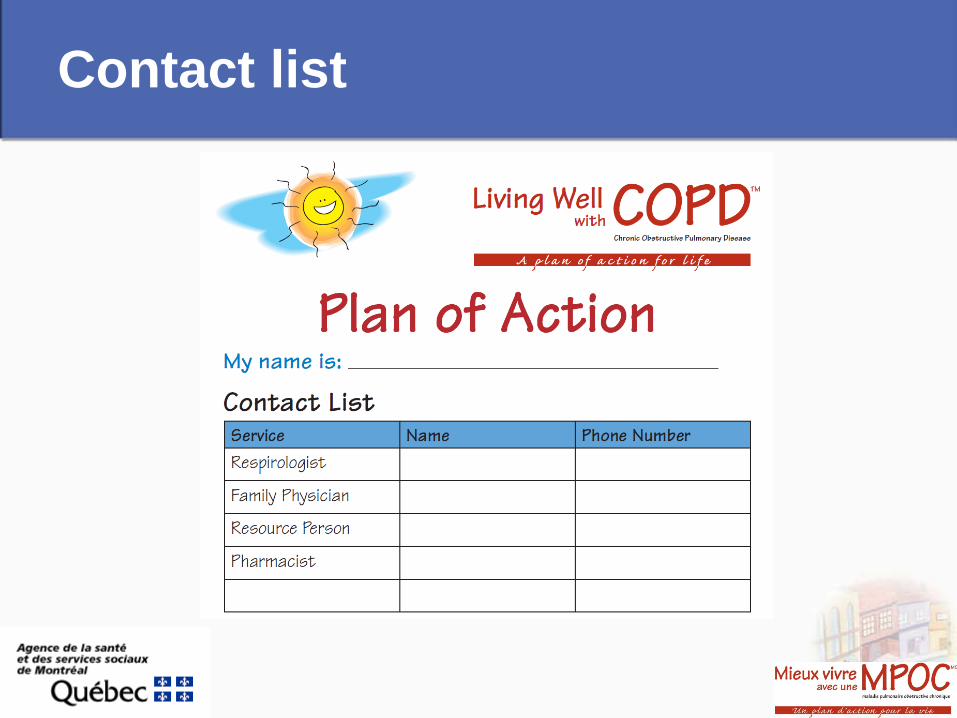
Contact list
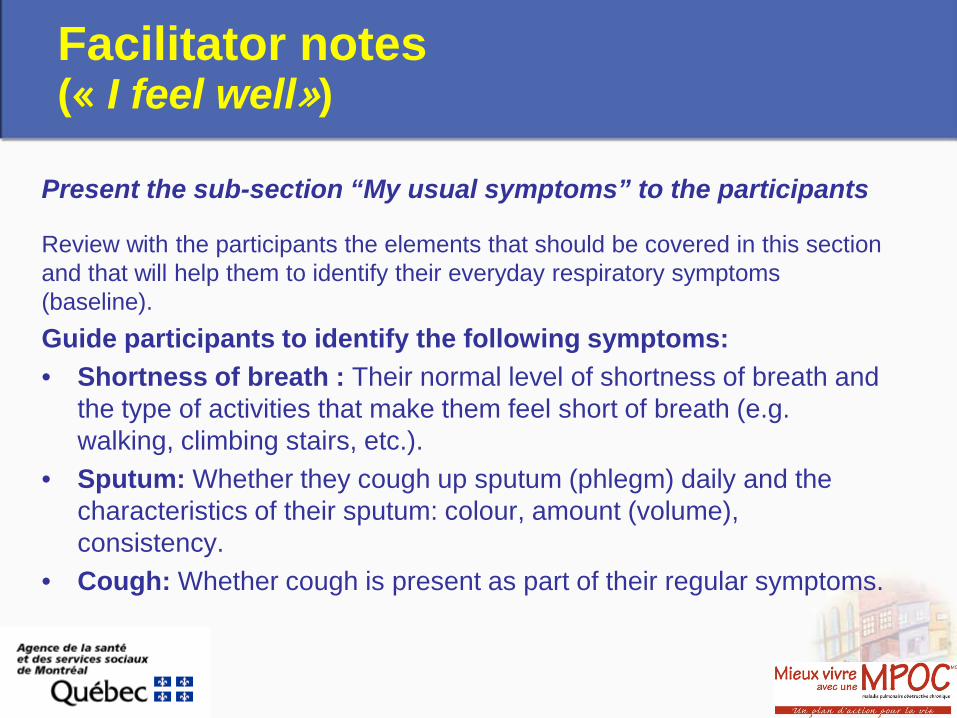
Facilitator notes (« I feel well»)
Present the sub-section “My usual symptoms” to the participants
Review with the participants the elements that should be covered in this section and that will help them to identify their everyday respiratory symptoms (baseline). Guide participants to identify the following symptoms: • Shortness of breath : Their normal level of shortness of breath and
the type of activities that make them feel short of breath (e.g. walking, climbing stairs, etc.).
• Sputum: Whether they cough up sputum (phlegm) daily and the characteristics of their sputum: colour, amount (volume), consistency.
• Cough: Whether cough is present as part of their regular symptoms.
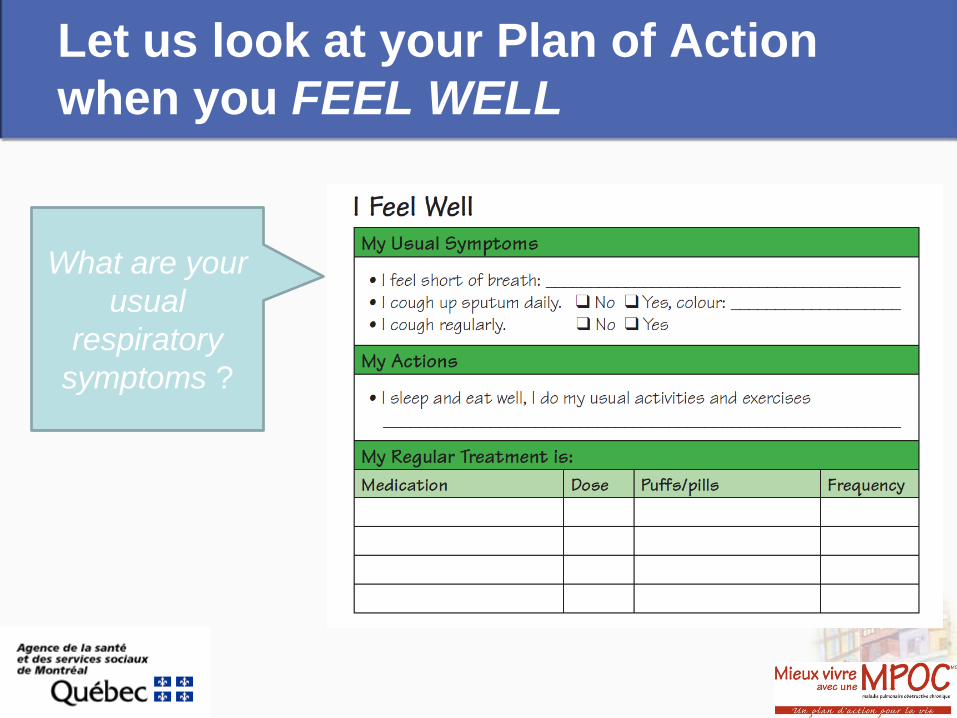
Let us look at your Plan of Action when you FEEL WELL
What are your usual
respiratory symptoms ?
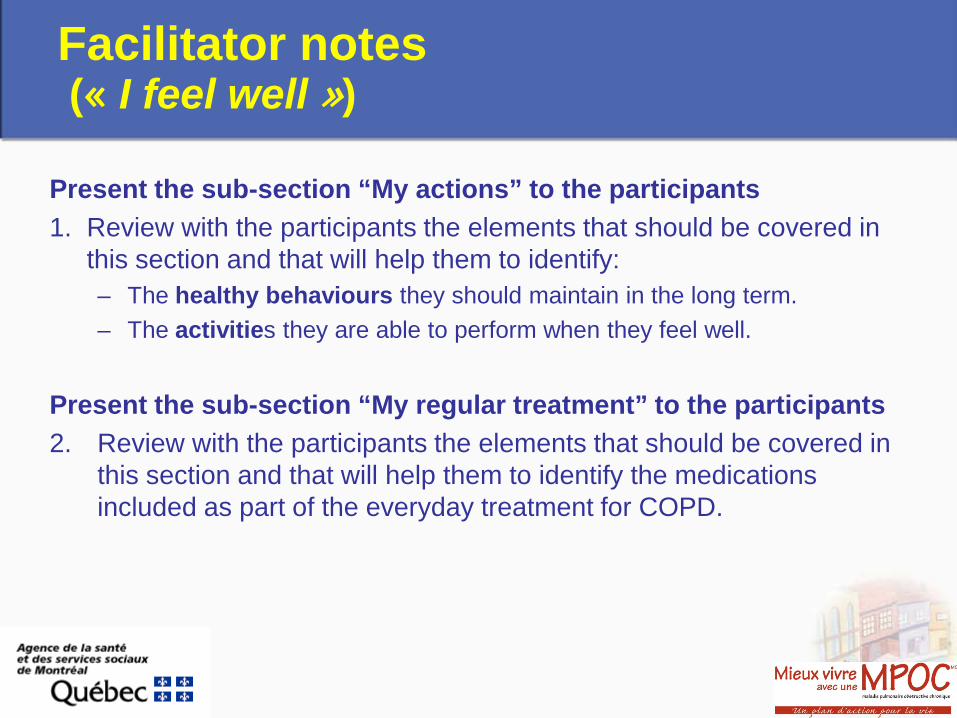
Facilitator notes (« I feel well »)
Present the sub-section “My actions” to the participants 1. Review with the participants the elements that should be covered in
this section and that will help them to identify: – The healthy behaviours they should maintain in the long term. – The activities they are able to perform when they feel well.
Present the sub-section “My regular treatment” to the participants 2. Review with the participants the elements that should be covered in
this section and that will help them to identify the medications included as part of the everyday treatment for COPD.
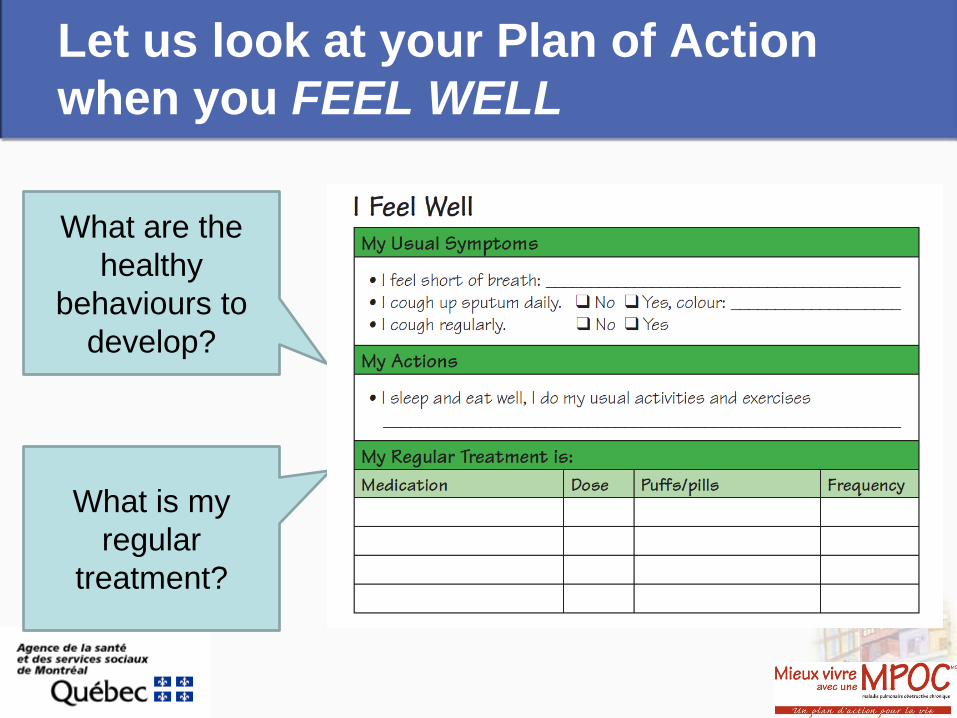
Let us look at your Plan of Action when you FEEL WELL
What are the healthy
behaviours to develop?
What is my regular
treatment?
- THEIR ACTION COPD medications
Facilitator notes (Taking your medication)
1. Evaluate participants’ knowledge about COPD medication.
2. Assess participants’ concerns that may affect
compliance. 3. Ask each of the participants and write the answers on
the board.
Taking your medication
• Which medications are used for the treatment of COPD (inhalers
and pills)?
• Which COPD medication must be used in case of emergency?
• Do you know how COPD medications act inside the lungs?
• Do you believe that the medication you take for COPD is effective? • Do you believe that it is necessary to take your COPD medication
regularly?
• What are the concerns you have in regards to the medications you take for your COPD?
Facilitator notes (Medications used to treat COPD)
• Use the posters of the Normal Lung and the COPD Lung to support your teaching. You can also use the Educational Flipchart (section medication, see facilitator notes) and COPD medication posters available in your region.
Present the role of each of the 3 groups of medication used in COPD treatment: – Bronchodilators
– Anti-inflammatories
– Antibiotics
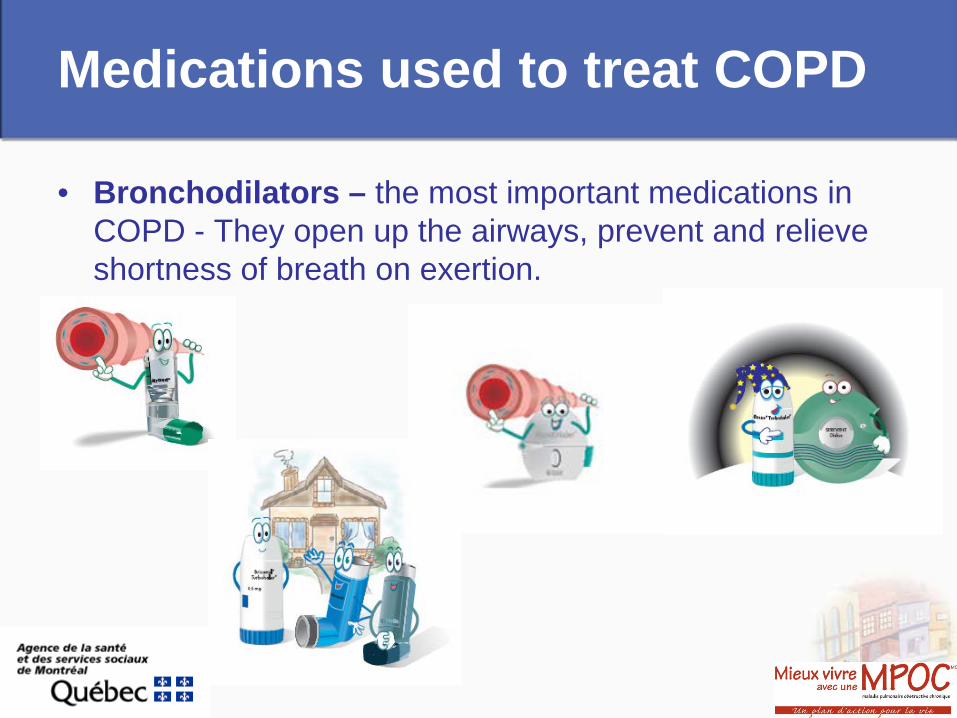
Medications used to treat COPD
• Bronchodilators – the most important medications in COPD - They open up the airways, prevent and relieve shortness of breath on exertion.
Medications used to treat COPD
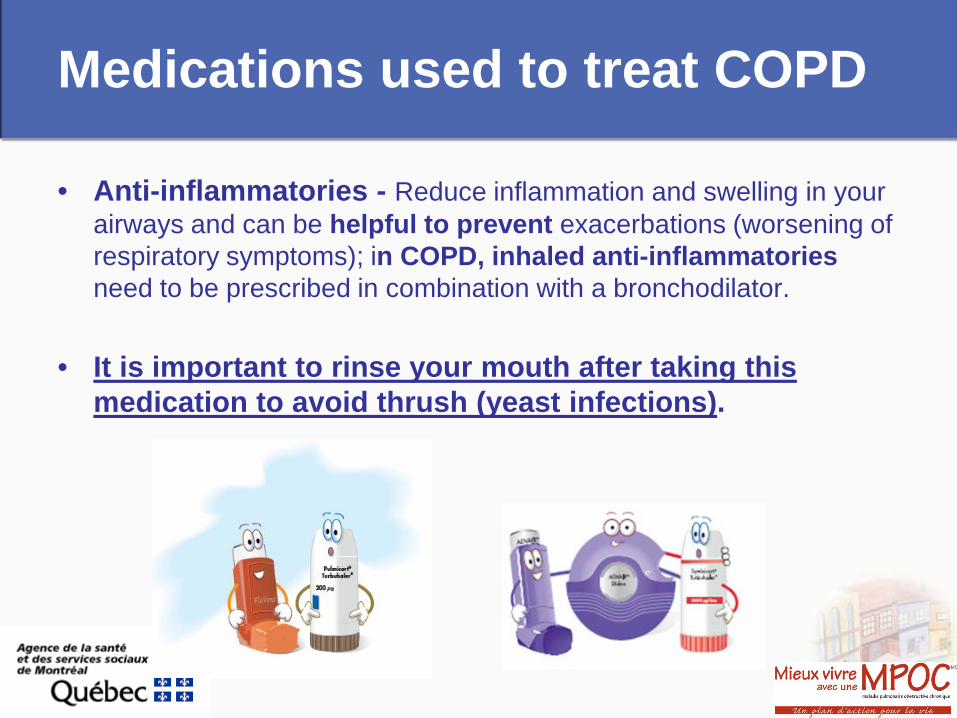
• Anti-inflammatories - Reduce inflammation and swelling in your airways and can be helpful to prevent exacerbations (worsening of respiratory symptoms); in COPD, inhaled anti-inflammatories need to be prescribed in combination with a bronchodilator.
• It is important to rinse your mouth after taking this medication to avoid thrush (yeast infections).
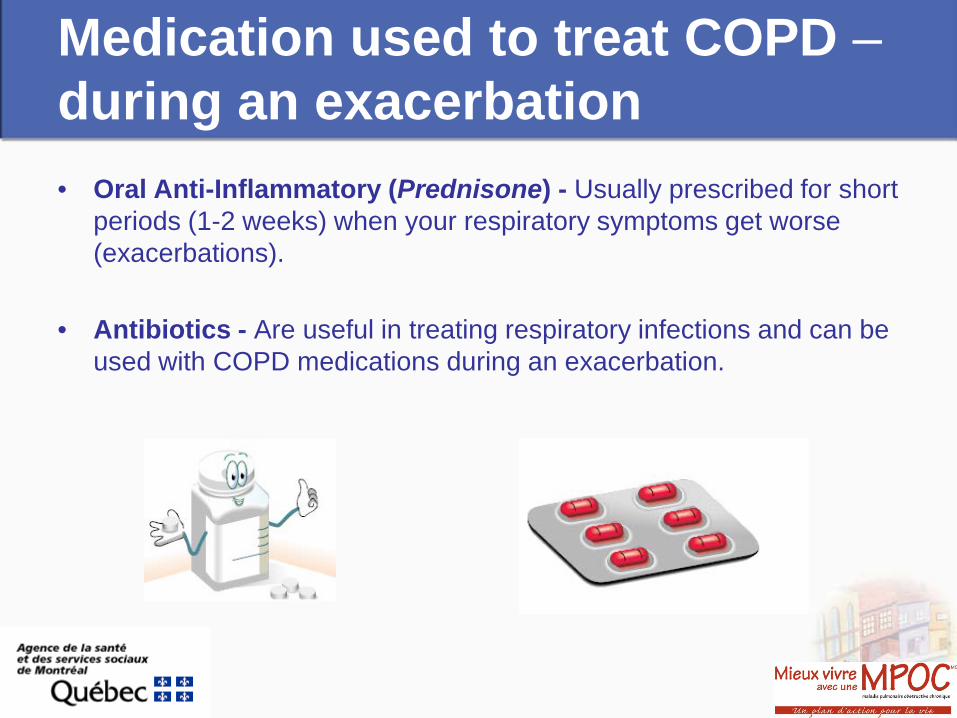
Medication used to treat COPD – during an exacerbation • Oral Anti-Inflammatory (Prednisone) - Usually prescribed for short
periods (1-2 weeks) when your respiratory symptoms get worse (exacerbations).
• Antibiotics - Are useful in treating respiratory infections and can be used with COPD medications during an exacerbation.
Facilitator notes (Summary)
1. Evaluate and reinforce participants’ understanding and compliance with respect to COPD medication.
2. Invite patients to ask questions.
3. Have each patient respond at least one of the questions. Write the answers on the board.
Summary
• What is the use of a bronchodilator?
• What is the use of an anti-inflammatory?
• Which medication should you use in case of emergency?
• Antibiotics and Prednisone are helpful to treat …? • Why is it important to take your COPD medication regularly
and as prescribed?
• What could help you to take your medication regularly?
- INHALATION TECHNIQUES COPD medications
Facilitator notes (Inhalation devices)
• Evaluate participants’ knowledge about inhalation devices.
• Assess participants’ concerns that may affect the use of inhalation devices.
• Ask each of the participants and write the answers on the board.

Inhalation devices
• Which inhalation devices are you using? Can you please show them to me?
• Do you find it difficult to use inhalation devices? Which one and why?
• Do you feel uncomfortable in taking your inhaled medication in public?
Facilitator notes (all devices) Present each inhalation device individually, in the following order:
– Describe its advantages and disadvantages.
– Demonstrate the inhalation technique and have participants practice in front of you. Correct and reinforce.
– Describe the maintenance technique required.
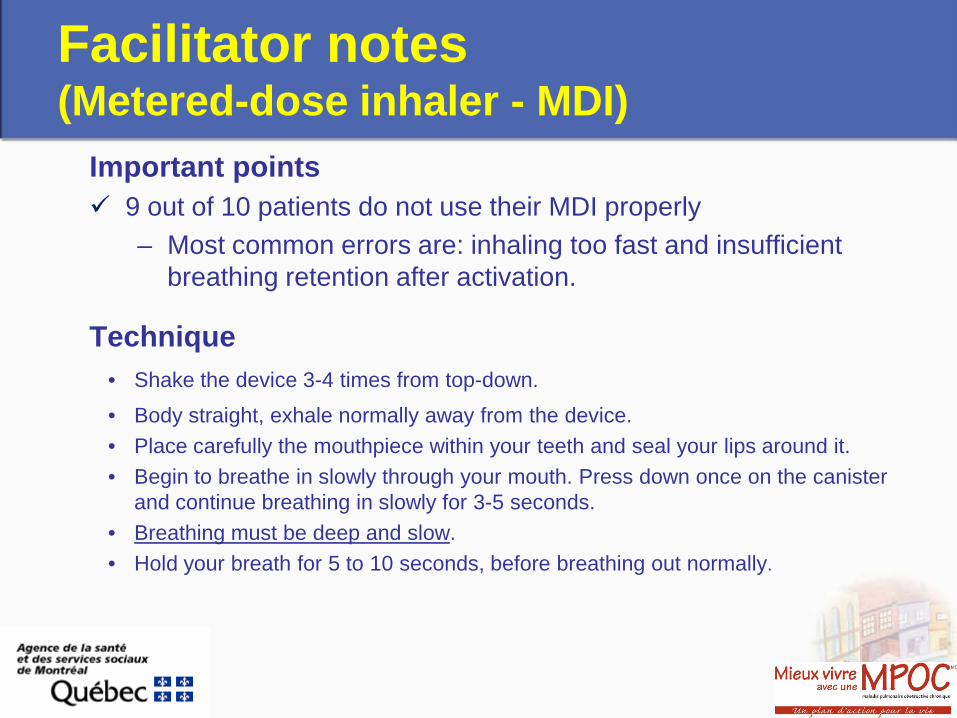
Facilitator notes (Metered-dose inhaler - MDI)
Important points 9 out of 10 patients do not use their MDI properly
– Most common errors are: inhaling too fast and insufficient breathing retention after activation.
Technique • Shake the device 3-4 times from top-down.
• Body straight, exhale normally away from the device. • Place carefully the mouthpiece within your teeth and seal your lips around it. • Begin to breathe in slowly through your mouth. Press down once on the canister
and continue breathing in slowly for 3-5 seconds. • Breathing must be deep and slow. • Hold your breath for 5 to 10 seconds, before breathing out normally.
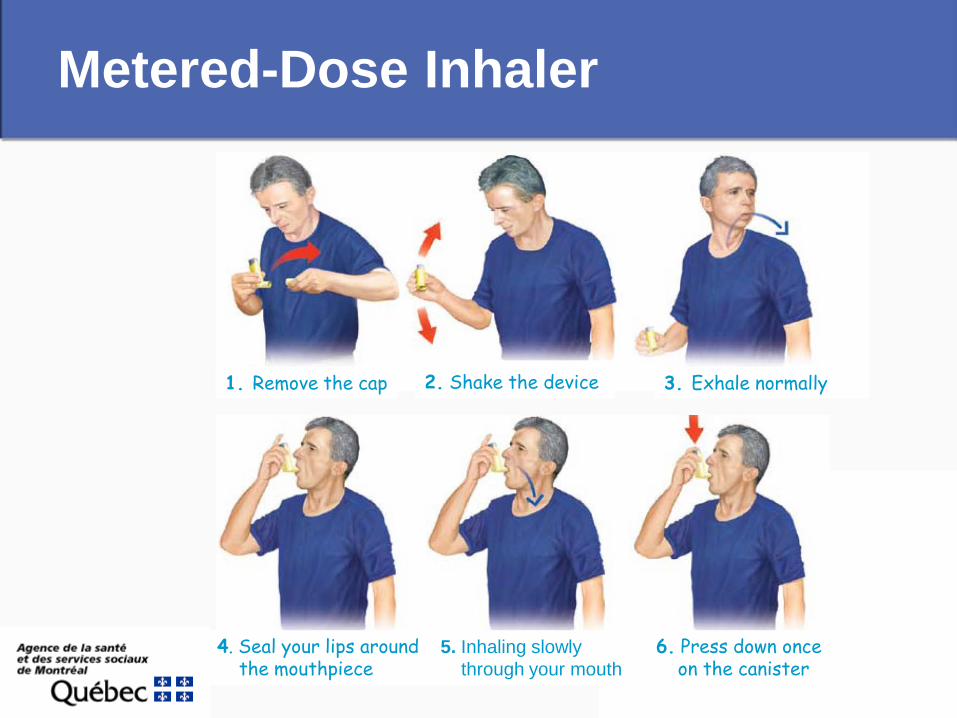
Metered-Dose Inhaler
1. Remove the cap 2. Shake the device 3. Exhale normally
4. Seal your lips around the mouthpiece
5. Inhaling slowly through your mouth
6. Press down once on the canister
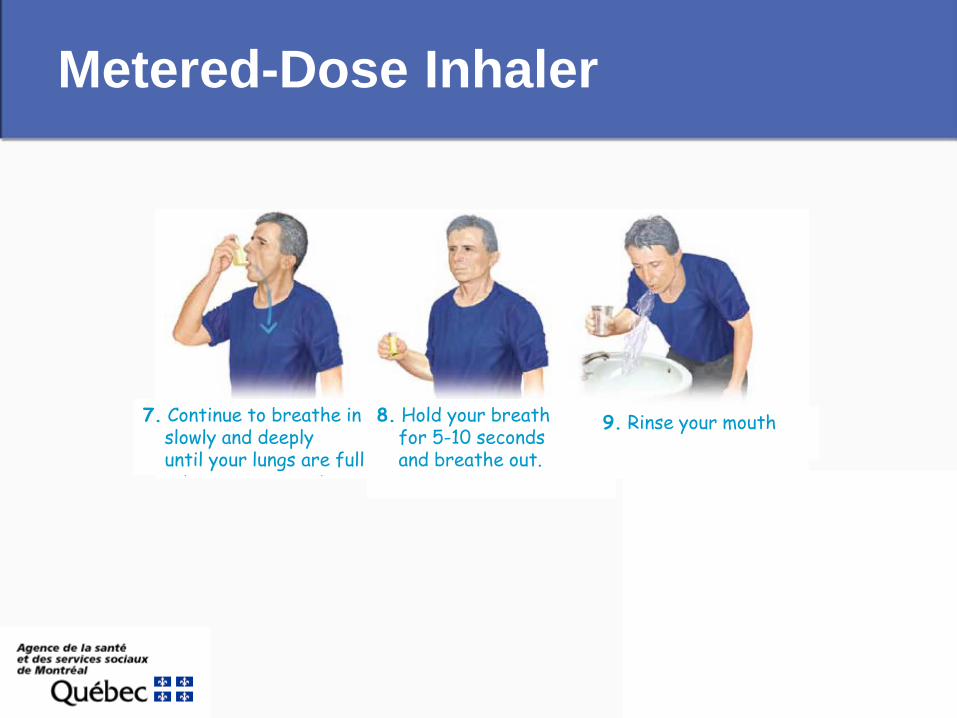
Metered-Dose Inhaler
7. Continue to breathe in slowly and deeply until your lungs are full
8. Hold your breath for 5-10 seconds and breathe out.
9. Rinse your mouth
Maintenance and Cleaning 1. Once a week, clean the cap and plastic container, without the
canister, by soaking them in warm, soapy water. 2. Rinse and allow to air-dry.
3. The canister should be kept away from heat sources and cold. Roll the canister between the palms of your hands to warm it up.
Estimate quantity left in the device 1. Shake the inhaler and listen for movement sounds.
2. Some MDI have a dose-counter.
MDI (Metered-dose inhaler)
Facilitator notes (Spacing device) Important points Compared to the MDI alone:
• medication deposition in the airways by 50%. • 4 times less medication deposition in the throat, hence less
secondary effects by corticosteroids. The spacing device has a whistle which indicates if inhalation
is too fast (faster than 45 L/min). The medication remains suspended in the device for up to 10
seconds. The MDI should only be activated once. No coordination is needed between the MDI activation and
the inhalation.
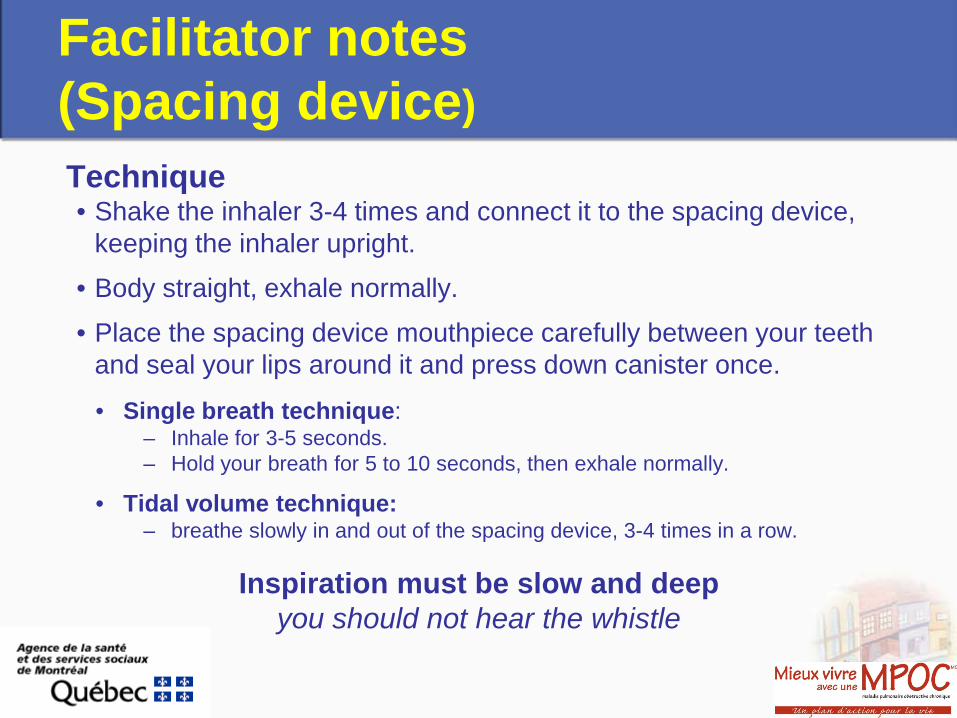
Facilitator notes (Spacing device) Technique • Shake the inhaler 3-4 times and connect it to the spacing device,
keeping the inhaler upright.
• Body straight, exhale normally.
• Place the spacing device mouthpiece carefully between your teeth and seal your lips around it and press down canister once.
• Single breath technique: – Inhale for 3-5 seconds. – Hold your breath for 5 to 10 seconds, then exhale normally.
• Tidal volume technique: – breathe slowly in and out of the spacing device, 3-4 times in a row.
Inspiration must be slow and deep you should not hear the whistle
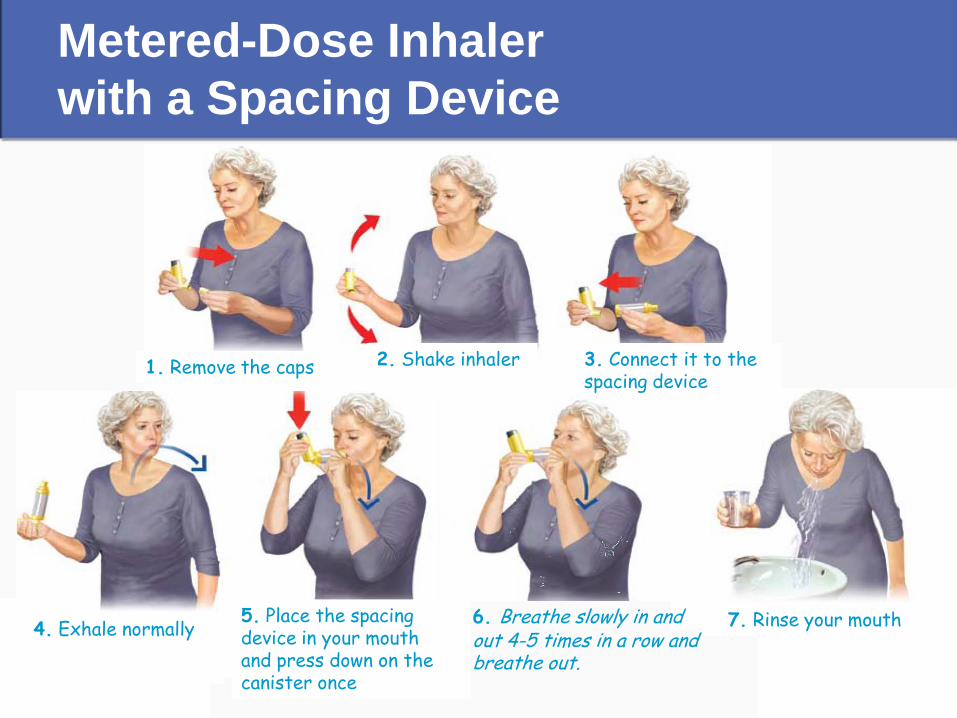
Metered-Dose Inhaler with a Spacing Device
1. Remove the caps 2. Shake inhaler
3. Connect it to the spacing device
4. Exhale normally
5. Place the spacing device in your mouth and press down on the canister once
6. Breathe slowly in and out 4-5 times in a row and breathe out.
7. Rinse your mouth
Facilitator notes (Spacing device) Maintenance and Cleaning Separate all the parts.
Method # 1: soap and water 1. Mix warm water with a few drops of mild detergent. Let the spacing device soak in
this mix for around15 min and carefully shake. 2. If needed clean with a soft cloth (if there were still some residues) 3. For the model «Aerochamber Plus Flow-Vu»: Rinse with clean water. 4. Let the spacing device air dry in a vertical position for a few hours (do not use a
cloth).
Method # 2: dishwasher Only for the model «Aerochamber Plus Flow-Vu »: place the parts in a vertical position on the upper level of the dishwasher (make sure that parts will not fall).
Frequency: 1/week or more often if the patient has an upper airway infection.
Spacing device
Maintenance and Cleaning
1. Clean the spacing device prior to the first use and once a week after as per the manufacturer instructions.
• If you have an infection, clean it more often.
2. If your spacing device has a good maintenance, it can last for one or two years depending on the type.
3. Keep the spacing device in a safe place to assure that no strange object will fall inside the chamber.
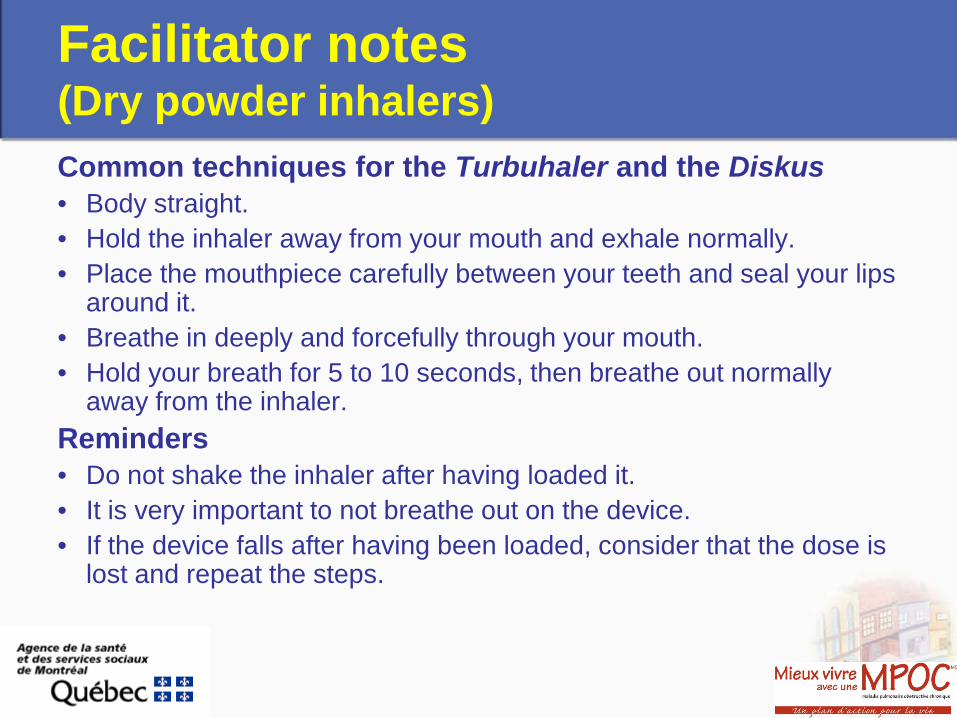
Facilitator notes (Dry powder inhalers) Common techniques for the Turbuhaler and the Diskus • Body straight. • Hold the inhaler away from your mouth and exhale normally. • Place the mouthpiece carefully between your teeth and seal your lips
around it. • Breathe in deeply and forcefully through your mouth. • Hold your breath for 5 to 10 seconds, then breathe out normally
away from the inhaler. Reminders • Do not shake the inhaler after having loaded it. • It is very important to not breathe out on the device. • If the device falls after having been loaded, consider that the dose is
lost and repeat the steps.
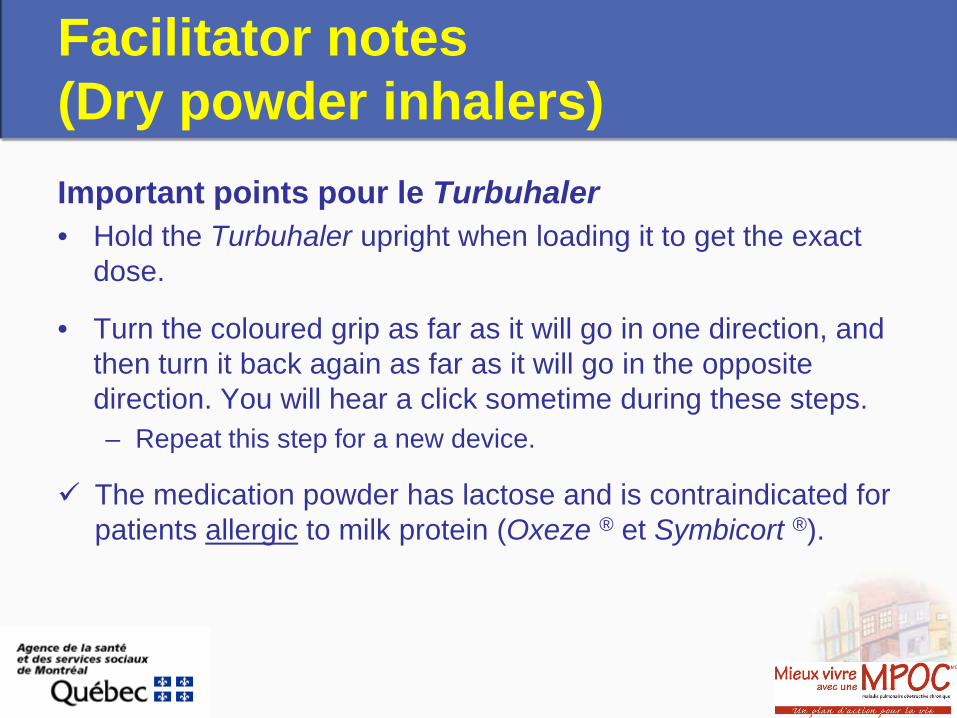
Facilitator notes (Dry powder inhalers) Important points pour le Turbuhaler • Hold the Turbuhaler upright when loading it to get the exact
dose.
• Turn the coloured grip as far as it will go in one direction, and then turn it back again as far as it will go in the opposite direction. You will hear a click sometime during these steps. – Repeat this step for a new device.
The medication powder has lactose and is contraindicated for patients allergic to milk protein (Oxeze ® et Symbicort ®).
Facilitator notes (Dry powder inhalers)
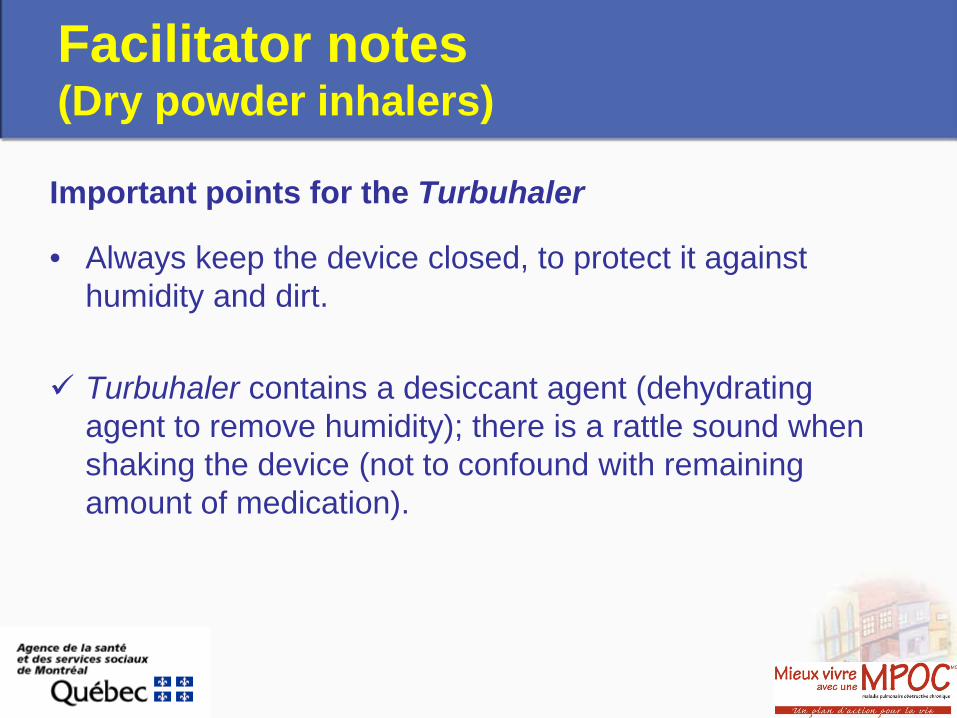
Important points for the Turbuhaler
• Always keep the device closed, to protect it against humidity and dirt.
Turbuhaler contains a desiccant agent (dehydrating
agent to remove humidity); there is a rattle sound when shaking the device (not to confound with remaining amount of medication).
Facilitator notes (Dry powder inhalers)
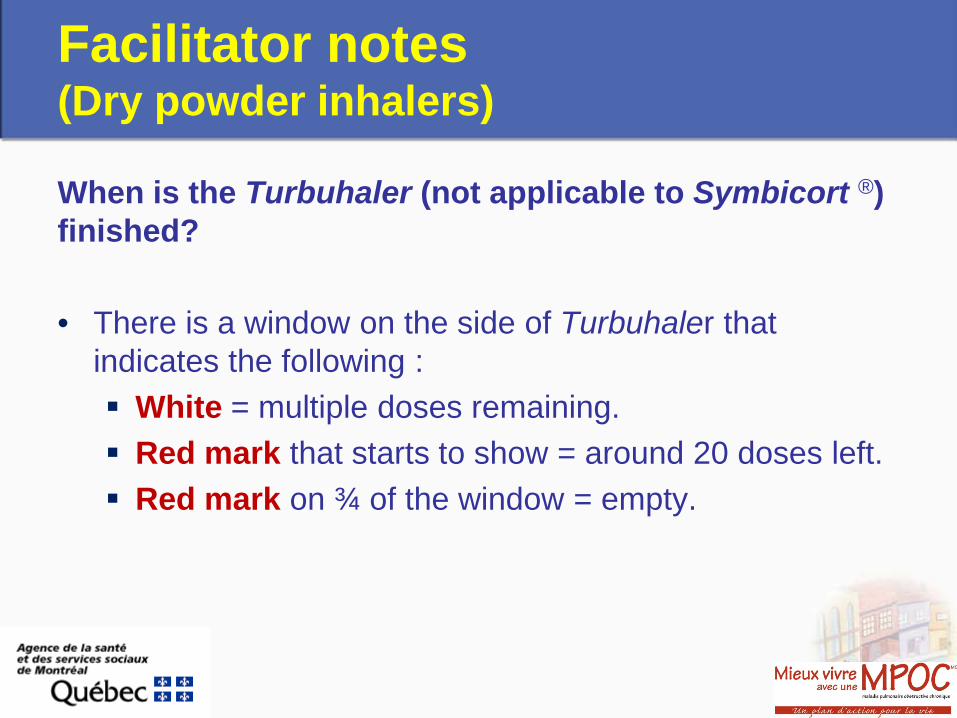
When is the Turbuhaler (not applicable to Symbicort ®) finished? • There is a window on the side of Turbuhaler that
indicates the following : White = multiple doses remaining. Red mark that starts to show = around 20 doses left. Red mark on ¾ of the window = empty.
Facilitator notes (Dry powder inhalers)
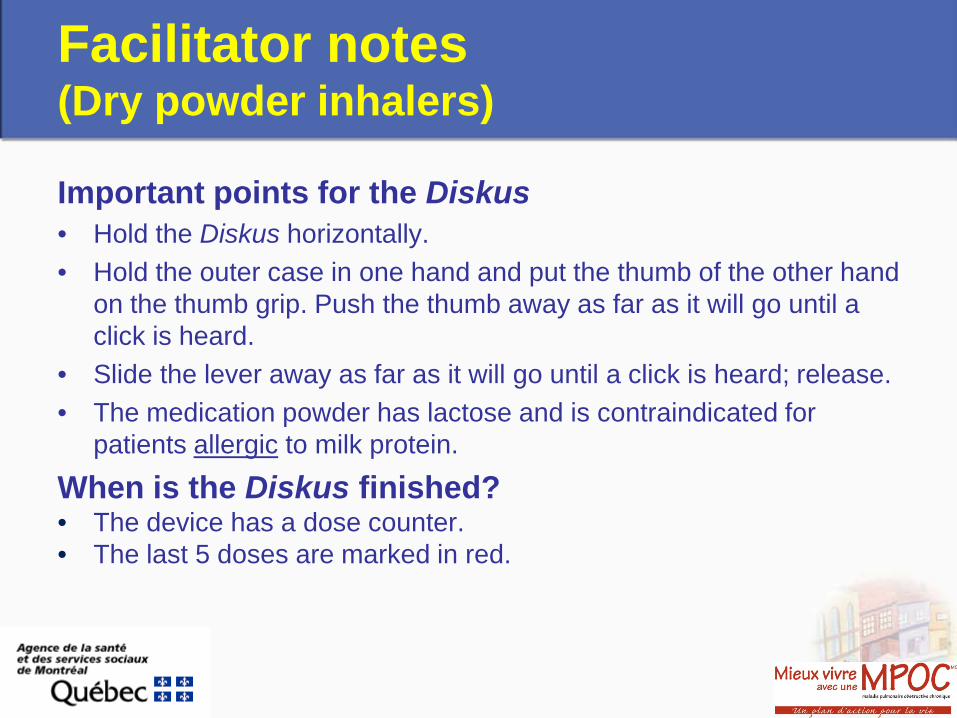
Important points for the Diskus • Hold the Diskus horizontally. • Hold the outer case in one hand and put the thumb of the other hand
on the thumb grip. Push the thumb away as far as it will go until a click is heard.
• Slide the lever away as far as it will go until a click is heard; release. • The medication powder has lactose and is contraindicated for
patients allergic to milk protein.
When is the Diskus finished? • The device has a dose counter. • The last 5 doses are marked in red.
Dry powder inhalers
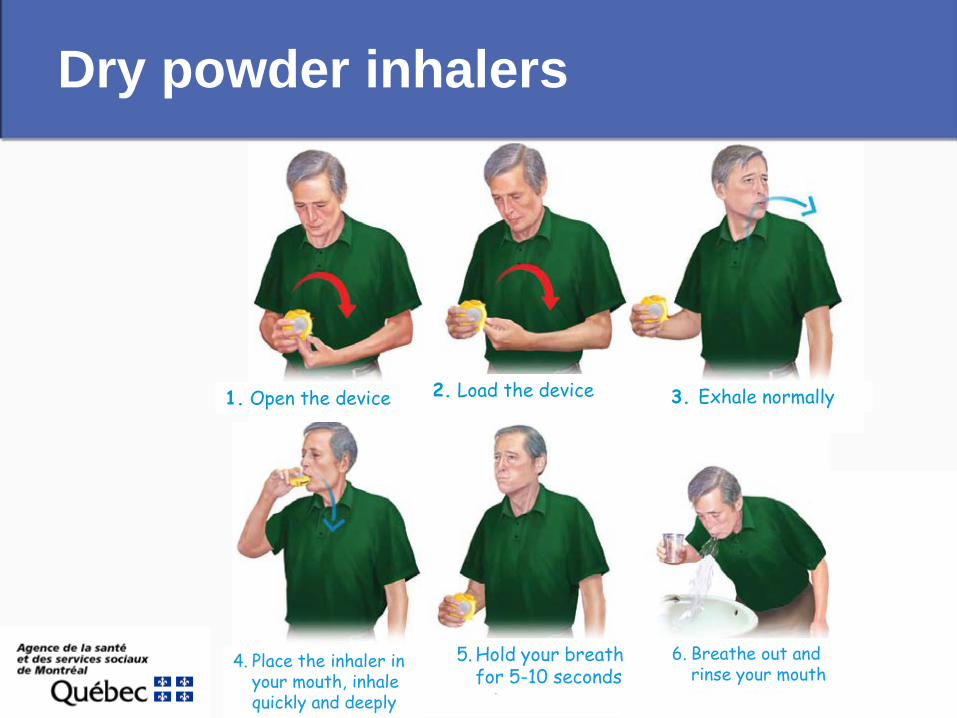
1. Open the device 2. Load the device
3. Exhale normally
4. Place the inhaler in your mouth, inhale quickly and deeply
5. Hold your breath for 5-10 seconds
6. Breathe out and rinse your mouth
Dry powder inhalers
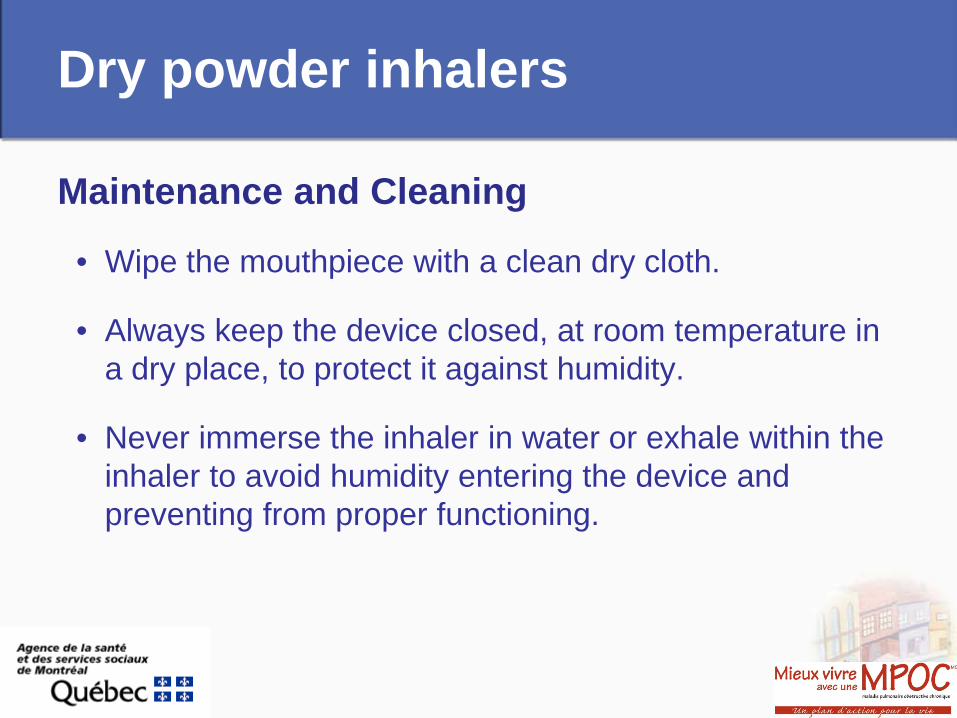
Maintenance and Cleaning
• Wipe the mouthpiece with a clean dry cloth.
• Always keep the device closed, at room temperature in a dry place, to protect it against humidity.
• Never immerse the inhaler in water or exhale within the inhaler to avoid humidity entering the device and preventing from proper functioning.
Facilitator notes (Dry powder inhalers with capsules) Common techniques for Handihaler & Breezhaler • Body straight. • Hold the inhaler away from your mouth and exhale normally. • Place the mouthpiece carefully between your teeth and seal your
lips around it. • Breathe in slowly and deeply to hear the capsule vibrate. • Hold your breath for 5 to 10 seconds, then breathe out normally
away from the inhaler.
Reminders • Do not store capsules inside the inhaler. • The medication powder has lactose and is contraindicated for
patients allergic to milk protein.
Facilitator notes (Dry powder inhalers with capsules)
Important Points on Spiriva (Diskus) • Risk of eye irritation (if touching eyes after touching the used
capsule).
Technique (Diskus) • Body straight, press the green button after inserting the
capsule. • Release the green button.
Technique (Breezhaler) • Body straight, press the buttons after inserting the capsule. • Release the buttons.
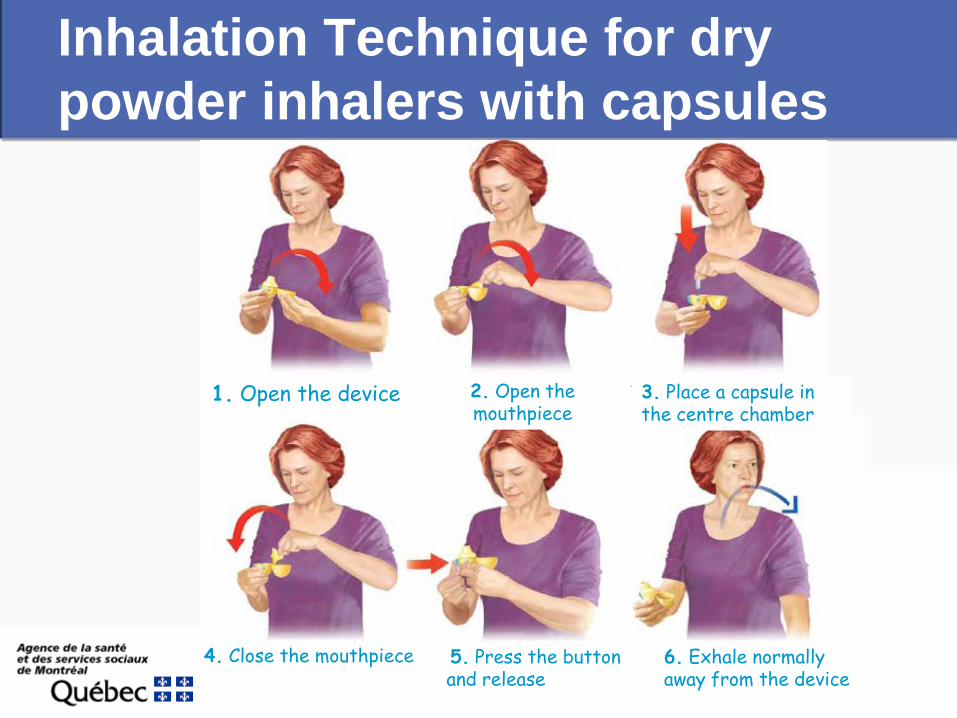
Inhalation Technique for dry powder inhalers with capsules
1. Open the device 2. Open the mouthpiece
3. Place a capsule in the centre chamber
4. Close the mouthpiece
5. Press the button and release
6. Exhale normally away from the device
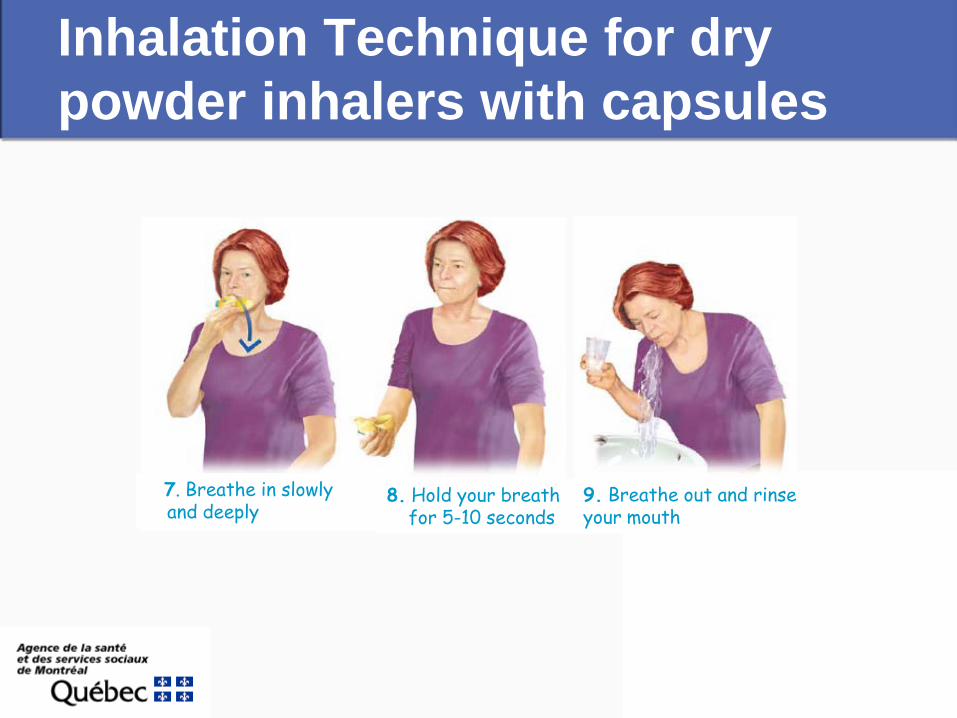
Inhalation Technique for dry powder inhalers with capsules
7. Breathe in slowly and deeply
8. Hold your breath for 5-10 seconds
9. Breathe out and rinse your mouth
Dry powder inhalers with capsules
Cleaning (Diskus)
• Clean once a month or as needed. • Open the dust cap and the mouthpiece in order to open
the base.
• Rinse the inhaler with warm water in order to eliminate powder residues (do not use soap).
• Allow the device to air dry thoroughly.
Cleaning (Breezhaler) • A new device is provided at each medication renewal.
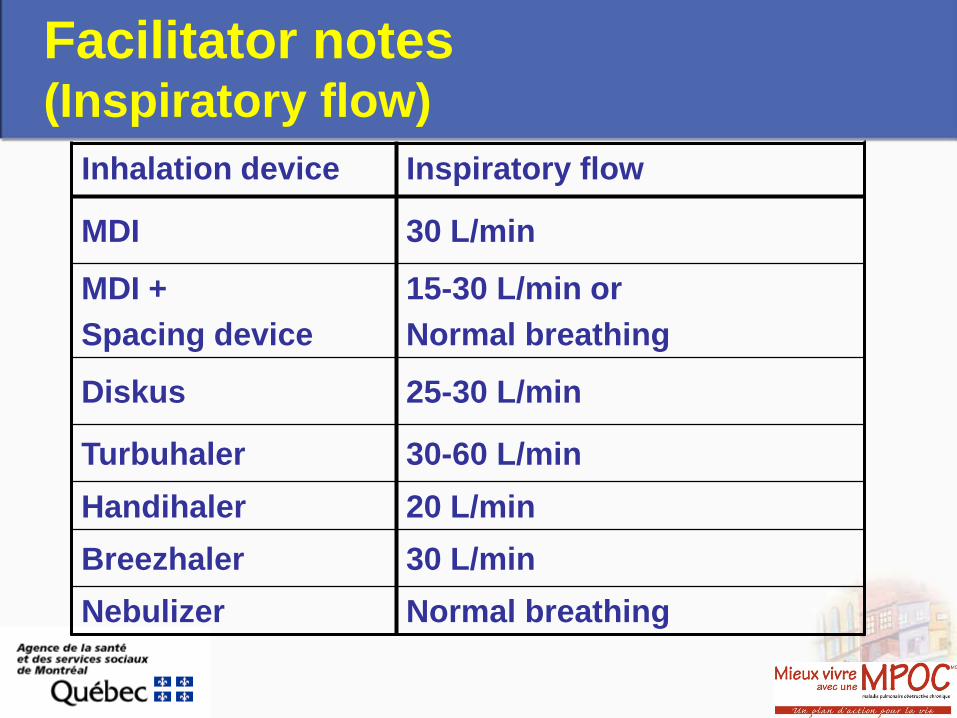
Facilitator notes (Inspiratory flow)
Inhalation device Inspiratory flow
MDI 30 L/min
MDI + Spacing device
15-30 L/min or Normal breathing
Diskus 25-30 L/min
Turbuhaler 30-60 L/min Handihaler 20 L/min Breezhaler 30 L/min Nebulizer Normal breathing
Facilitator notes (Advantages of a proper use of inhalation devices)
1. Evaluate participants’ understanding with respect to
inhalation devices.
2. Reinforce the importance of taking medication as prescribed and using the proper technique.
3. Invite patients to ask questions. Write the answers on the board.
Advantages of a proper use of inhalation devices • What are the benefits of using your inhalation devices
correctly?
• What are the advantages of using a spacing device with your inhalation aerosol?
• What can you do to use properly your inhalation devices?
Reminder : Ask your resource person, or your pharmacist, to verify your inhalation technique at each visit.
Facilitator notes (Conclusion)
• Answer the questions of the participants.
• Summarize the points to remember by type of medication/inhalation device.
• Underline the importance of taking the medication as directed by their physician and using the appropriate inhalation technique.
• Learning Contract: Encourage the participants to ask their resource person, at each visit, to verify their inhalation technique.

Questions?
- BREATHING TECHNIQUES - BODY POSITIONS
Breathing management
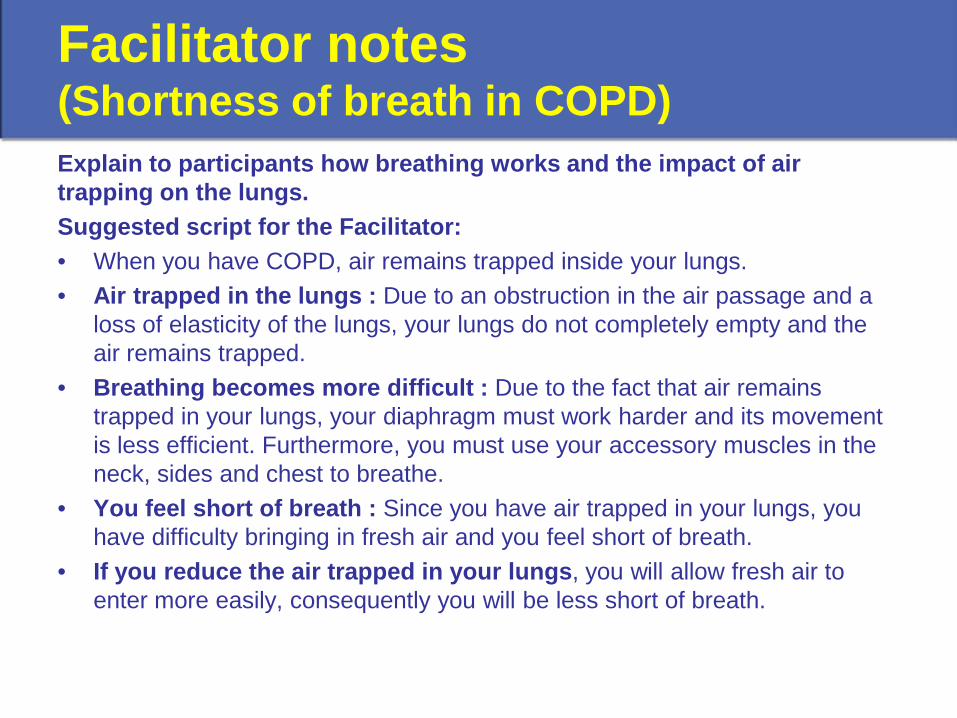
Facilitator notes (Shortness of breath in COPD) Explain to participants how breathing works and the impact of air trapping on the lungs. Suggested script for the Facilitator: • When you have COPD, air remains trapped inside your lungs. • Air trapped in the lungs : Due to an obstruction in the air passage and a
loss of elasticity of the lungs, your lungs do not completely empty and the air remains trapped.
• Breathing becomes more difficult : Due to the fact that air remains trapped in your lungs, your diaphragm must work harder and its movement is less efficient. Furthermore, you must use your accessory muscles in the neck, sides and chest to breathe.
• You feel short of breath : Since you have air trapped in your lungs, you have difficulty bringing in fresh air and you feel short of breath.
• If you reduce the air trapped in your lungs, you will allow fresh air to enter more easily, consequently you will be less short of breath.

Shortness of breath in COPD
• Why do you feel short of breath when you have COPD?
• When you have COPD, air remains trapped inside your lungs.
Facilitator notes (Pursed-lip breathing technique)
• Use the poster of the “Pursed-lip breathing technique”
• Evaluate the existing knowledge of participants with respect to pursed-lip breathing.
• Present the goal, benefits and points to remember of the pursed-lip breathing technique.
• Demonstrate the steps of the technique. Ask the participants to demonstrate the technique. Provide them constructive feedback and reinforcement on the performance of the technique.
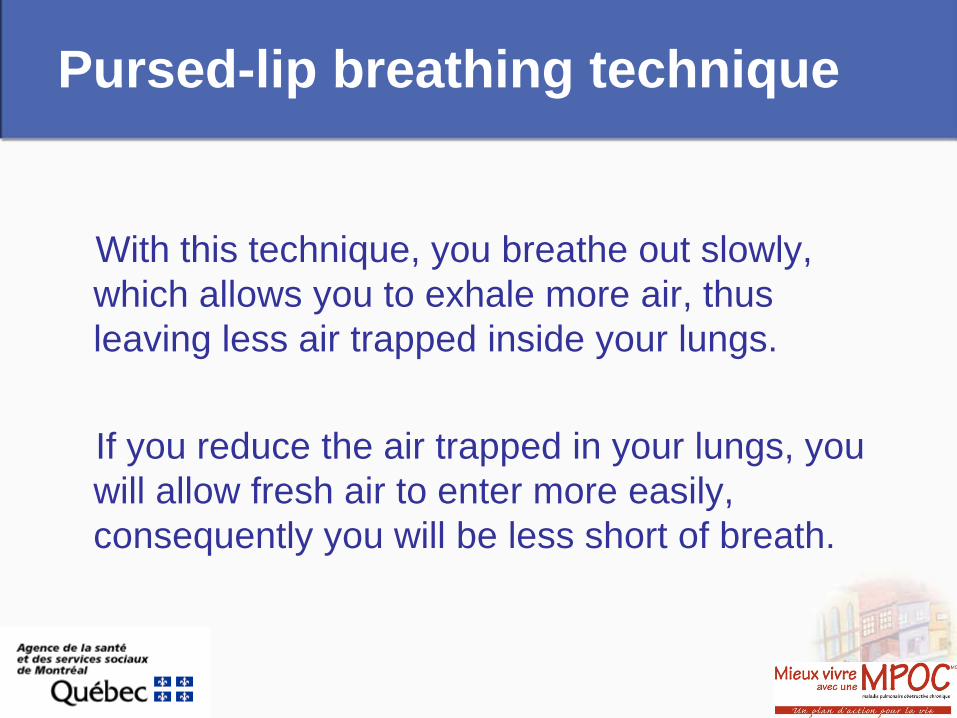
Pursed-lip breathing technique
With this technique, you breathe out slowly, which allows you to exhale more air, thus leaving less air trapped inside your lungs.
If you reduce the air trapped in your lungs, you will allow fresh air to enter more easily, consequently you will be less short of breath.

Pursed-lip breathing technique

Facilitator notes (Walking, climbing stairs, carrying parcels)
1. Demonstrate the use of pursed-lip breathing technique with activities requiring effort :
1. Walking 2. Climbing stairs 3. Carrying parcels
2. Have participants practice in front of you (walking, climbing stairs) according to the steps, while integrating the pursed-lip breathing technique. Provide them constructive feedback and reinforcement on the performance of the techniques learned.
3. Focus on taking longer time to exhale than to inhale but without forcing the exhalation.
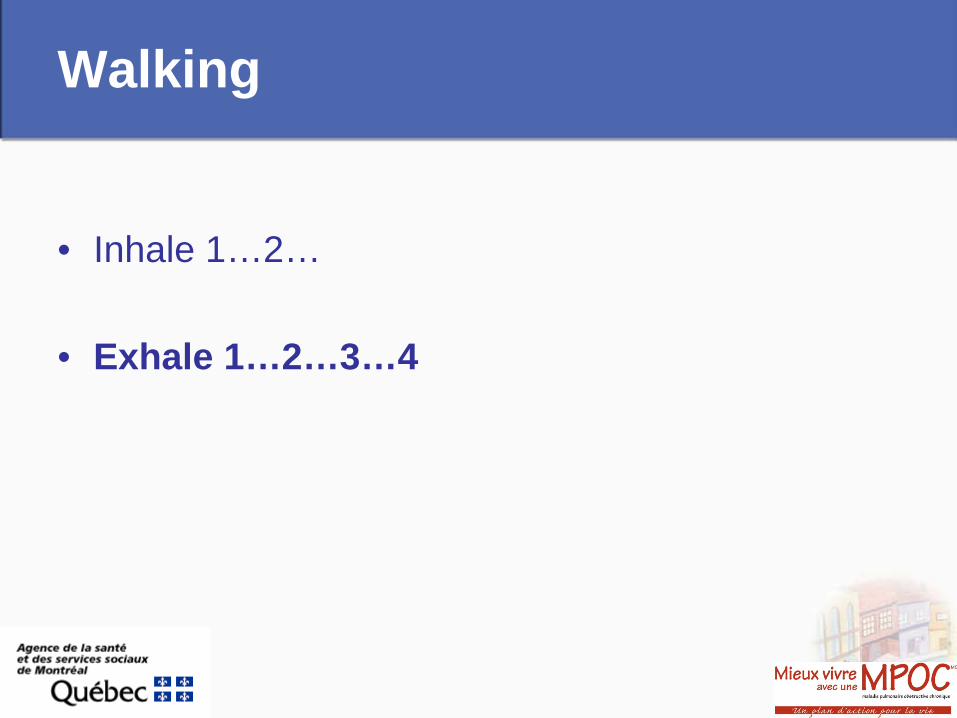
Walking
• Inhale 1…2… • Exhale 1…2…3…4
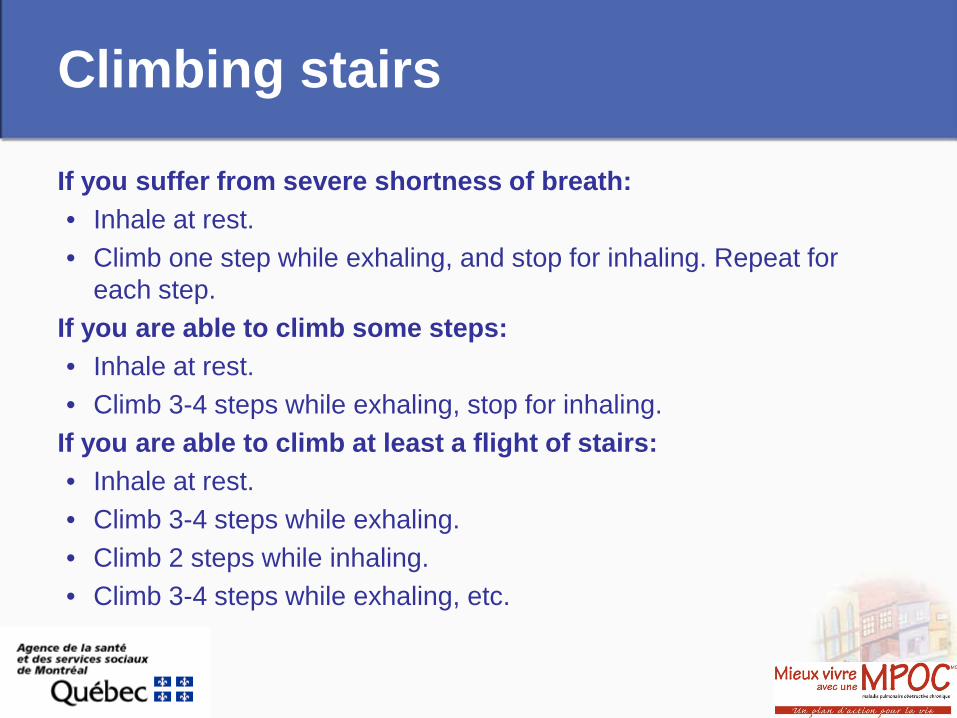
Climbing stairs
If you suffer from severe shortness of breath: • Inhale at rest. • Climb one step while exhaling, and stop for inhaling. Repeat for
each step. If you are able to climb some steps: • Inhale at rest. • Climb 3-4 steps while exhaling, stop for inhaling.
If you are able to climb at least a flight of stairs: • Inhale at rest. • Climb 3-4 steps while exhaling. • Climb 2 steps while inhaling. • Climb 3-4 steps while exhaling, etc.
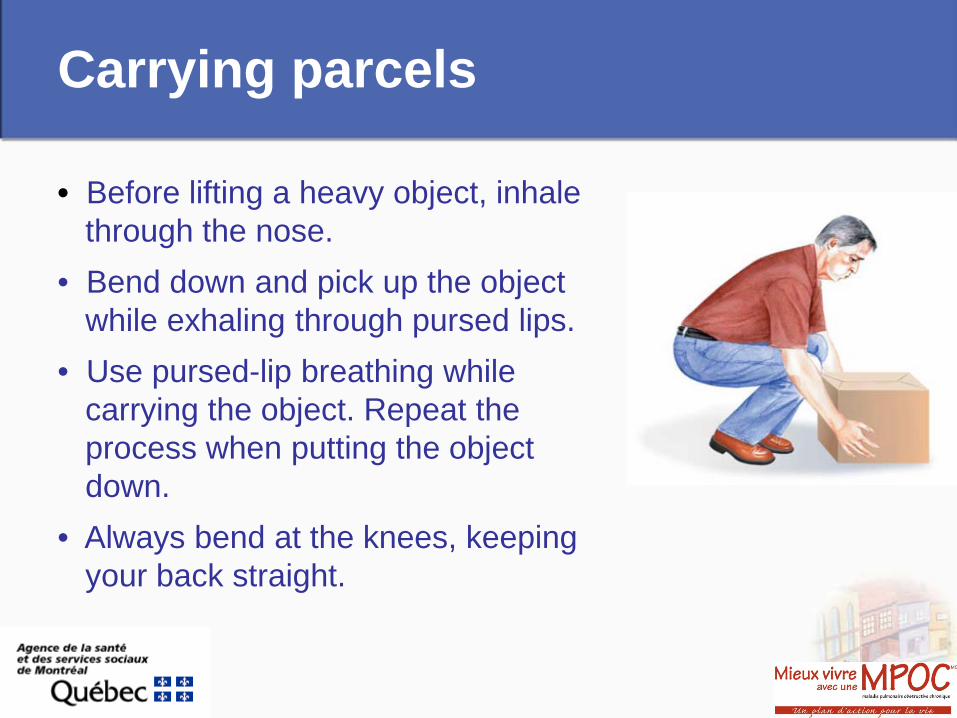
Carrying parcels
• Before lifting a heavy object, inhale through the nose.
• Bend down and pick up the object while exhaling through pursed lips.
• Use pursed-lip breathing while carrying the object. Repeat the process when putting the object down.
• Always bend at the knees, keeping your back straight.
Facilitator notes (BODY POSITIONS) Use the poster “Body Positions to reduce Shortness of breath”. 1. Evaluate the existing knowledge of participants with respect to body
positions. 2. Present the goal, benefits and points to remember of the body positions to
reduce shortness of breath. Demonstrate the five body positions. 3. Have participants practice the different body positions in front of you
according to the steps, while integrating the pursed-lip breathing technique. Provide them constructive feedback and reinforcement.
Suggested questions at the end of the practice session: • Did your breathing change when you used one of the body positions
previously described? • How did it feel different?
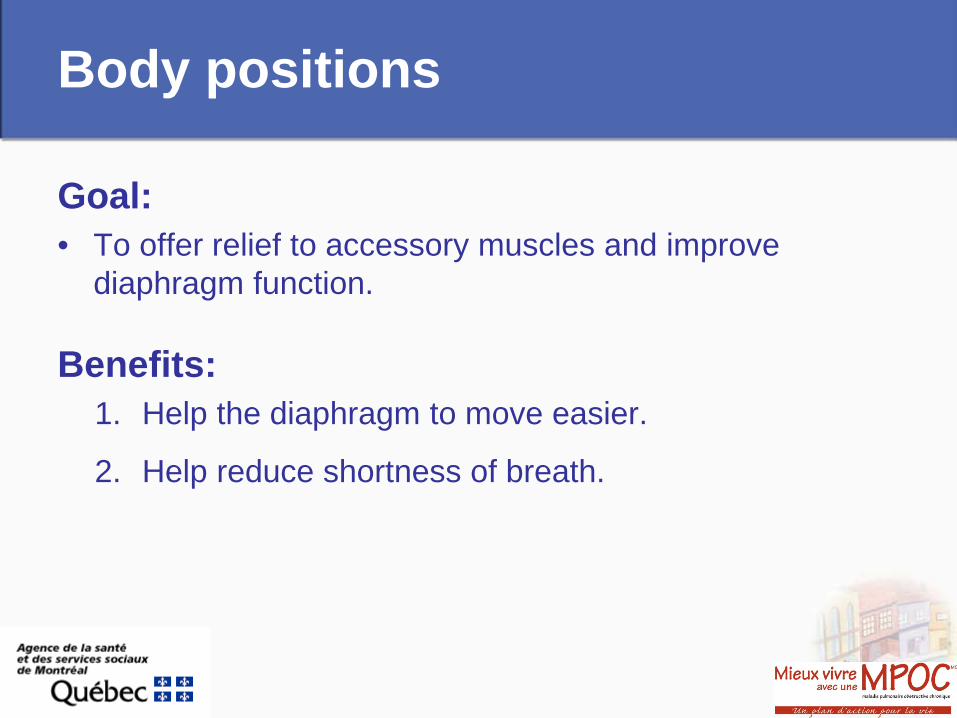
Body positions
Goal: • To offer relief to accessory muscles and improve
diaphragm function.
Benefits: 1. Help the diaphragm to move easier.
2. Help reduce shortness of breath.
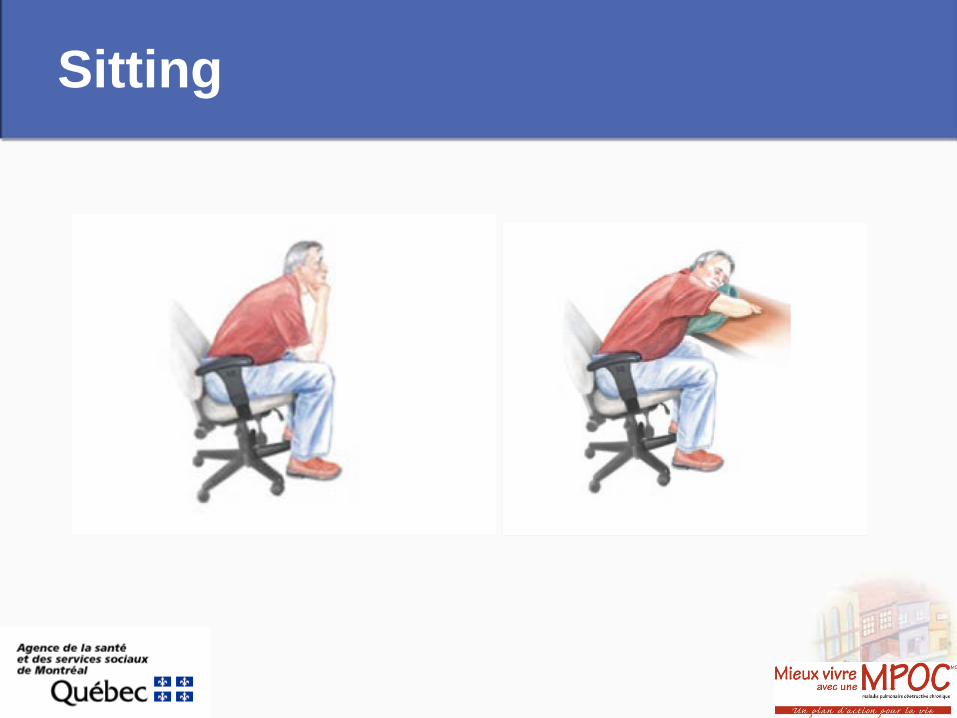
Sitting
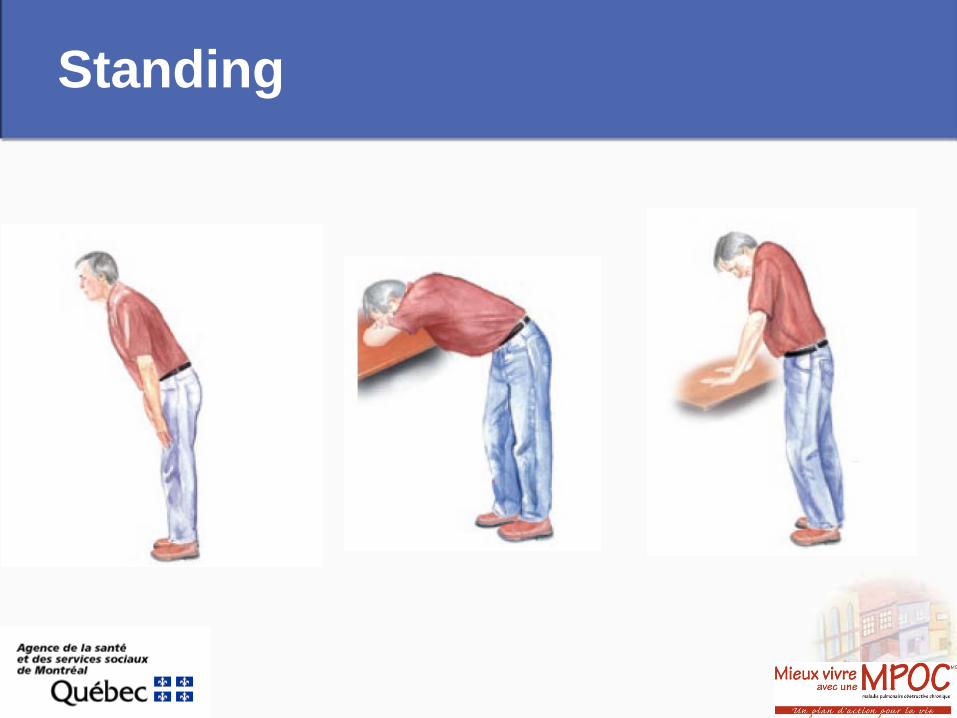
Standing

Facilitator notes (S.O.S. in an attack of shortness of breath)
1. Explore participants’ experience in managing an attack of shortness of breath.
2. Present the goal, benefits, and points to remember of the S.O.S. technique. Demonstrate the steps of the technique.
3. Have participants name the order of the steps. Provide them constructive feedback and reinforcement.
S.O.S. in an attack of shortness of breath Goal: • To bring your breathing back to normal during an acute attack
of shortness of breath.
Benefits: 1. Learn how to control shortness of breath. 2. Help reduce the panic associated with an attack.
Point to remember: • Give yourself the space and time to get your breathing back to
normal.
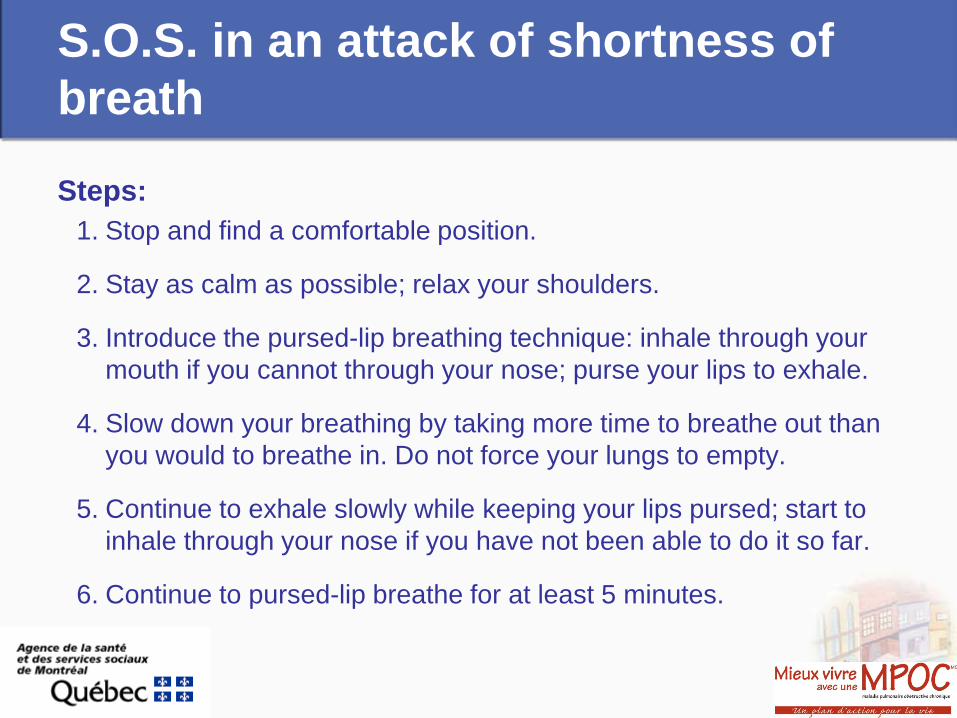
S.O.S. in an attack of shortness of breath
Steps: 1. Stop and find a comfortable position.
2. Stay as calm as possible; relax your shoulders.
3. Introduce the pursed-lip breathing technique: inhale through your mouth if you cannot through your nose; purse your lips to exhale.
4. Slow down your breathing by taking more time to breathe out than you would to breathe in. Do not force your lungs to empty.
5. Continue to exhale slowly while keeping your lips pursed; start to inhale through your nose if you have not been able to do it so far.
6. Continue to pursed-lip breathe for at least 5 minutes.

Questions?
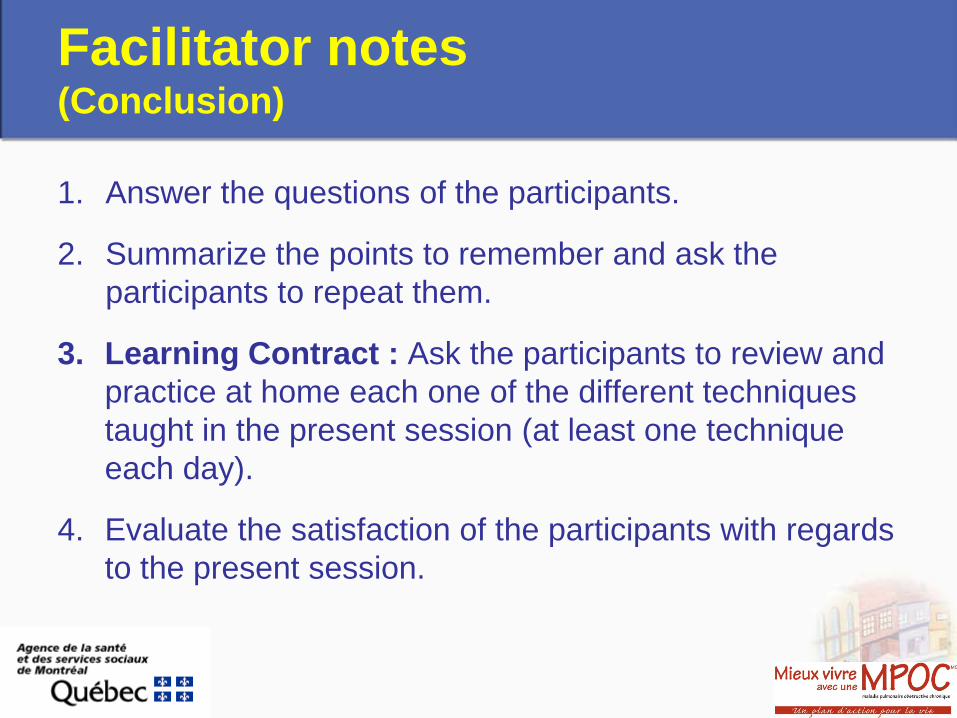
Facilitator notes (Conclusion)
1. Answer the questions of the participants.
2. Summarize the points to remember and ask the participants to repeat them.
3. Learning Contract : Ask the participants to review and practice at home each one of the different techniques taught in the present session (at least one technique each day).
4. Evaluate the satisfaction of the participants with regards to the present session.
Acknowledgements • Mrs. Maria Sedeno, Living Well with COPD • Mr. Michel Lebel, Living Well with COPD and Network Case Manager, Centre-West
region • Mrs. Esther César, Network Case Manager, North region • Mrs. Kathy Noël, Network Case Manager, East region • Mrs. Lorraine Isabelle, Network Case Manager, West region • Mrs. Nathalie Poupart, Network Case Manager, South-East region • Mrs. Lyse Millette, Network Case Manager, Centre-East region • Mrs. Cathy Dresdell, planning, programmation and research agent, Agence de la
santé et des services sociaux de Montréal • Mrs. Édith Lemay, planning, programmation and research agent, Agence de la santé
et des services sociaux de Montréal • Mrs. Lucie Des Groseillers, administrative technician, Agence de la santé et des
services sociaux de Montréal • Mrs. Élodie Cornier, administrative agent, Agence de la santé et des services sociaux
de Montréal


![Leading group walks: an introduction [Facilitator name]](https://img.dokumen.tips/doc/110x75/56649dbe5503460f94ab0c76/leading-group-walks-an-introduction-facilitator-name.jpg)