Embed Size (px)
Citation preview

Controlling Ambient Conditions For Better Quality
After working with pad printing machines for 20 years, I've seen many improvements in the technology. Upgrades in inks and pads have helped make the process more controllable. Better machine design has enabled better consistency in setting and (more importantly) easily adjusting each phase of the print cycle. Yet the basic principles of pad printing have remained the same. So have the basic problems. I've heard one di�culty expressed time and again: My machine prints well one day and badly the next. The su�erer will con�rm that nothing has been changed from the day before - same machine settings, same pad, same ink, same thinner, and even the same press operator. But in most cases, one important variable has changed - its the weather, or at least the ambient conditions within the plant.
Figure 1: Principles of pad printingTo understand why temperature swings and other changes in ambient conditions can have a drastic e�ect on the quality of your prints, you must go back to the basic principles of pad printing. In order for the silicone pad to pick up the ink from the cliché and deposit it on the substrate, very rapid changes must occur in the surface tension of the ink caused by the evaporation of solvents (Figure 1). Moreover, pad printing is a thin �lm process. It starts with an etch depth in the cliché of just 25 microns, and only about half of that ink �lm is picked up by the pad. Of this wet ink, 60% is a solvent that evapo-rates, leaving only a 5-micron dry ink deposit. You can easily see why such a thin ink �lm is so susceptible to changing temperatures, humidity levels, static charges, and even variations in air�ow. Controlling the rate that solvents evaporate from the ink is the key to overcoming these changes in ambi-ent conditions. If the solvents evaporate too quickly, the ink might not even pick up from the cliché because it has dried in the etched portions of the plate. If the solvents evaporate too slowly, the surface of the ink may not be tacky enough to stick to the pad and lift from the etch. Taken to extremes, both condi-tions have the same result - little or no ink on the pad. Once ink is on the pad, the e�ects are similar. If the solvents evaporate too quickly, the ink dries and stays on the pad. If they evaporate too slowly, only some of the ink will release from the pad onto the substrate. Adding solventsIn most cases, pad printing requires you to add solvents to your ink regularly. How much you add and how often will vary depending on the ambient conditions and also the type of equipment you are using. (Closed-cup presses, for example, prevent solvents from evaporating in the ink well, so they generally don't require solvents to be added during the run.) In a warm environment, you may need to add solvents every 20-30 min. Always add a measured amount - don't guess! Here's an example that shows how well this philosophy can work. The company in question was pad print-ing �oppy-disk shutters. They used fully automatic machines in an air-conditioned environment, operating them over three shifts. Their output averaged 3000 shutters per shift with an alarming reject rate of 30%. Obviously, something had to be done. This is the procedure they tried:
1. At the beginning of every shift, a new batch of ink was mixed and a speci�c weight of solvent was added (a 25/75% mix of retarder and thinner). 2. At hourly intervals, each press was stopped (even if the print quality was still good) and a speci�c amount of the solvent blend was added to the ink well.

2. At hourly intervals, each press was stopped (even if the print quality was still good) and a speci�c amount of the solvent blend was added to the ink well.
It took the shop approximately two days to �nd the correct thinner/retarder ratios, amounts of solvents to add, and the length of time between additions. But by strictly adhering to the procedure, production more than quadrupled to an average of 13,000 shutters per shift. Rejects were reduced to 2%. Both product quality and worker morale improved. The sta� made further improvements to this procedure and can now regularly attain 15,000 shutters per shift with less than 0.5% rejects. Using di�erent solventsYou can go a long way toward controlling the printing process by using the right type of solvent. Di�erent solvents have di�erent boiling points. Ones with low boiling points are called fast and evaporate quickly; those with high boiling points are called slow and evaporate slowly. Suppliers normally di�erentiate between them by letters or numbers. For example, a No.1 would be a fast solvent (known as a thinner), while a No.9 would be a slow solvent more commonly called a retarder). Selecting the right solvent speed for your application is essential. What is suitable for New Mexico in the summer will not be appropriate for New England in the winter, unless printers in both regions are working in air-conditioned plants with the same temperature and humidity. Your ink supplier o�ers a range of standard solvents and will help you select the most suitable one for your climate. If you can't �nd the ideal solvent, it is possible to mix your own, as the �oppy-disk printer did. Use the fastest thinner o�ered by your ink manufacturer as a base, and then add a slower solvent before mixing with the ink. Never add a very slow retarder directly to the ink, or you will experience “solvent shock,” where the ink looks as if it has curdled and will have to be thrown away. Always mix the retarder with a faster thinner �rst. When mixing di�erent solvents and inks, follow the manufacturer's recommendations. Measure the com-ponents by weight and record the make-up of each mixture you make. And above all, never mix solvents from di�erent manufacturers. Controlling ink deliveryMany of the problems printers experience can be traced back to solvent evaporation in the ink well. One route around the problem is to control this evaporation, either by carefully metering the �ow of ink to the machine or by using an enclosed ink cup. You can go a long way toward controlling the pad-printing process by using the right type of solvent. Gravity feeding can be somewhat intrusive. You can purchase more sophisticated ink-pumping systems from equipment suppliers or build one using peristaltic pumps. As with gravity-feed systems, selection of the tubing is important, but even more so since these pumps operate by compressing a tube in a circular action and forcing the ink along it through positive displacement. This compressing action puts a mechani-cal stress on the tube that, combined with the attack from the solvents, can cause failure in a very short period of time unless you use the correct tubing. Pump suppliers o�er a range of tubing materials and can suggest the best one for your needs. You can operate an ink pump at a very low �ow rate to keep your ink well topped o�, or you can set it up in a �ow-and-return con�guration, where ink is pumped through the ink well into a reservoir with a capacity up to ¼ gal. Any solvent evaporation that takes place in the ink well will be minimal compared to the total volume of ink in the system, so the overall ink/solvent balance will be maintained. Solvent-feeding systems work on a similar principle. Gravity-feed systems have been used with reasonable

success, while powered hypodermic syringes have been tried with little luck because the solvents destroy them gradually. Pumping systems work best, but must provide a means to mix the solvent into the ink. The position in which the solvent is fed into the ink well is very important. Some suppliers provide systems with modi�ed spatulas that help mix the solvent into the ink.
Several solvent dosing systems are available commercially, or you can build one using a peristaltic pump. Points to look for in a pumping system include �ow control, tubing materials (again, solvent resistance is crucial) and ease of cleaning. Presses with closed-cup ink containers have been available for several years and have become much more popular for in-line plastic-moulding applications and in areas where VOC emissions are a concern. Ink stability in these presses is much better than in models with open ink wells, although they are a�ected by ambient conditions when the pad picks up and deposits the ink. These presses also allow faster printing speeds because you can use very fast solvents that would evaporate far too quickly in an open ink well. However, the use of two-component inks, particularly isocyanate-based ones, is not recommended with these presses. Such inks will gel in the cup if not agitated and can reduce the e�ective operating period of the press from 8 hr to as little as 2 hr. Controlling temperature and air�owThe more stable the environment, the more e�ectively you can control the process. Although it may seem quite basic, I �nd that many common problems solve themselves when a few simple rules are followed. To control temperature, the obvious solution is to operate your press in an air-conditioned room. But other measures to control temperature may not be quite as evident. For example, keep your presses from direct sunlight. Don't put them too close to the entrances or exits of conveyorized dryers. Don't put them in any area of your plant subject to wide swings in temperature, whether or not they are air conditioned. If a controlled-temperature environment is beyond your reach, other options are available. An essential tool in every experienced pad printer's cupboard is a variable-speed, variable-temperature air blower. (You and I call them hair dryers!) When temperatures are too low and the solvent in the ink is not evaporating quickly enough, you'll �nd that blowing hot or even cold air from the hair dryer onto the pad or substrate will enable printing to take place. By experimenting, you can determine the proper speed, temperature, and direction of the air�ow. Normally, you can stop this procedure once ambient temperatures have returned to normal. Also, consider the role that temperature plays outside of the printing process. For example, storage of substrates before and after printing is very important prior to printing, substrates are often stored in large warehouses that are very rarely heated and may reach freezing temperatures. When you bring these parts into a heated plant during the winter, the di�erence in surface temperature is dramatic. On the substrate surface, a very �ne �lm of condensation can form that generally cannot be seen by the naked eye. Under such conditions, you will �nd it di�cult to obtain a good print or acceptable ink adhesion. To prevent this, bring the substrates into the printroom several hours in advance to allow them to reach a stable tempera-ture.
Product storage immediately after printing can also be a�ected by low temperatures. If you use a two-part ink system, don't let the printed parts drop below 59°F (15° C) until they have fully cured, which can take up to four days or longer if you are air drying them. If the parts fall below 59°F (15°C), the ink will stop curing and you cannot reverse the problem. Many of the problems printers experience can be traced back to solvent evaporation in the ink well.

To control air�ow, keep the press away from drafts. For example, don't position it underneath an air-condi-tioning duct. Too much air movement around the press will promote faster solvent evaporation. A combi-nation of high temperature and high air�ow will increase the e�ect. The accelerated, irregular ink drying will result in ink remaining in the cliché and/or on the pad, causing inconsistent ink deposits or missed prints.
Not only will drafts or re-circulating air cause faster solvent evaporation, but they can also create contami-nation problems, particularly if you are printing relatively large images or repeating the print stroke several times to increase opacity. Many of the substrates that pad printers use are packed in cardboard containers which, of course generate dust when they are opened and handled. Dust in your shop will be attracted to the tacky surface of the printed parts. The greater the air�ow around the press, the greater the chance of dust contamination. Short of clean-room measures, the only way to overcome this problem is through good housekeeping. Vacuum the �oors instead of sweeping them because brooms only re-circulate the dust. Do it at night after production has stopped. If possible, avoid bringing cardboard boxes into the production area, or at least line them with polyethylene bags. Wipe down all surfaces using a damp cloth. Controlling humidity and staticMany traditional screen printers have been known to boil a kettle underneath the press - not to make co�ee, but to produce water vapor on those dry, crisp days when static is a problem. Low humidity can cause problems in most printing processes, and pad printing generates very large amounts of static elec-tricity because of the silicone rubber pads. Using a static meter, I've taken readings over 20,000 volts in some shops. Add to this the static electricity inherent in plastic molded substrates, which are so common to pad printing, and you have the potential for real problems. You can usually spot a static problem by feathering of the print. Don't confuse this with a plate that is etched too deeply, which can cause similar print defects. Unfortunately, this problem can be more di�cult to solve than diagnose. The simplest solution is to reduce the amount of static electricity generated by slowing the press down, particularly the ink pickup and laydown. People have tried grounding the pads and jigs, which helps but is not always the solution. Others use the boiling kettle or a standalone humidi�er by the press. (If you use a humidi�er, be sure it is self-regulating and can maintain a given humidity level, or you'll run into the same problems you will any time ambient conditions �uctuate.) Static-elimination solutions and devices vary in e�ectiveness. Applying anti-static solutions to the substrates can help, but they sometimes disturb the chemistry of the inks. Since pad printing often involves three-dimensional parts, stationary ionizing-bar electrodes often aren't e�ective because the distance between the substrate surface and the electrode is critical. These devices generate a stationary static �eld and work best with �lms or other �at surfaces. Treat pad printing as an engineering process instead of black magic. In pad printing, air gun ionizing systems are preferable. With these systems, a low-velocity air�ow passes over the electrodes, carrying the conductive ions over a distance up to 3 ft. This system stands a better chance of discharging static from the silicone pad and the substrate. You can place the air gun before the print station, either with higher-velocity air that blows dust o� the substrate or a special-con�guration vacuum cleaning device. Don't aim the high-velocity air at the pad or cliché unless you wish to speed up solvent evaporation. Also keep in mind that high-velocity air can be self-defeating in that it can lift dust into the air that will land back on the substrate later. Anti-static devices will reduce the classic feathering defects, but be careful when using them. You'll often

need to experiment with them to �nd the best solution. Don't expect them to be panaceas for all of your di�culties. Before you invest a lot of money in one, make sure your clichés aren't etched too deeply or your ink isn't too thick. Controlling machine speedAnother troubleshooting step that some printers overlook is how fast the press operates. By adjusting the speed of the machine, you will give the solvent more or less time to evaporate, which allows you to address changes in shop conditions. Slowing the press down will also reduce the amount of static generated by the pad. The most common mistake people make is running their presses too quickly. Slowing them down can often improve the print quality and reduce rejects. Slow speeds allow more ink to be lifted from the cliché and deposited on the substrate. Also, machine vibration is reduced and the operator can monitor quality more easily. Remember, it's the number of good-quality items you print that matters, not the cycle time of the machine. The most important parts of the press cycle to control are the pickup and laydown of ink. I would not consider buying an automatic machine that did not allow me to adjust the speed of these two steps (known as the dwell time). This feature allows you to �ne-tune the printing process because the way the pad rolls on and o� the cliché and substrate determine, to some extent, the amount of ink that is trans-ferred. You are trying to achieve a smooth, rolling action of the pad, and smooth generally means slow. Machines without a dwell adjustment still work quite adequately, but the feature can be exceptionally useful when you face a quality problem and need to maintain overall machine speed. Controlling the variablesWe've looked at how ambient conditions can a�ect your print quality, but these aren't the only variables in the pad-printing process. The key to successful pad printing is to control all of the variables. If you can do this, you can treat pad printing as an engineering process instead of black magic.

Note: Ink, Pad, and Positive references are categories developed to work with an internally developed system that uses numbers for ink type, pad shape and size, and art �le. Modify this chart according to the systems you use in your shop. Here are two more tips to �nish with. First, a production-control card like the one in Figure 2 will go a long way to minimizing these variables, whatever the ambient conditions are in your plant. Second, whenever you are troubleshooting a quality problem, never make more than one change at a time and always keep notes on what adjustments you have made. Keep samples and number them in co-ordination with your notes so you can refer back to see which changes improved print quality and which ones caused it to deteriorate.
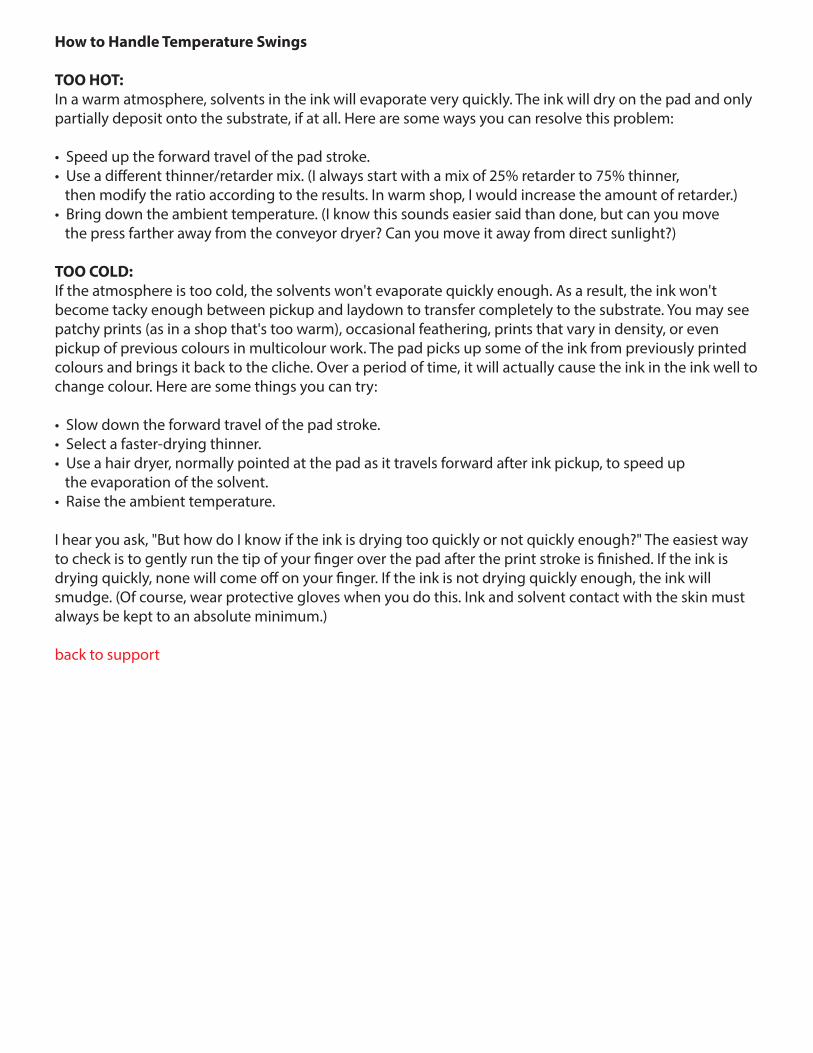
How to Handle Temperature Swings
TOO HOT:In a warm atmosphere, solvents in the ink will evaporate very quickly. The ink will dry on the pad and only partially deposit onto the substrate, if at all. Here are some ways you can resolve this problem:
• Speed up the forward travel of the pad stroke.• Use a di�erent thinner/retarder mix. (I always start with a mix of 25% retarder to 75% thinner, then modify the ratio according to the results. In warm shop, I would increase the amount of retarder.)• Bring down the ambient temperature. (I know this sounds easier said than done, but can you move the press farther away from the conveyor dryer? Can you move it away from direct sunlight?) TOO COLD:If the atmosphere is too cold, the solvents won't evaporate quickly enough. As a result, the ink won't become tacky enough between pickup and laydown to transfer completely to the substrate. You may see patchy prints (as in a shop that's too warm), occasional feathering, prints that vary in density, or even pickup of previous colours in multicolour work. The pad picks up some of the ink from previously printed colours and brings it back to the cliche. Over a period of time, it will actually cause the ink in the ink well to change colour. Here are some things you can try:
• Slow down the forward travel of the pad stroke.• Select a faster-drying thinner.• Use a hair dryer, normally pointed at the pad as it travels forward after ink pickup, to speed up the evaporation of the solvent.• Raise the ambient temperature. I hear you ask, "But how do I know if the ink is drying too quickly or not quickly enough?" The easiest way to check is to gently run the tip of your �nger over the pad after the print stroke is �nished. If the ink is drying quickly, none will come o� on your �nger. If the ink is not drying quickly enough, the ink will smudge. (Of course, wear protective gloves when you do this. Ink and solvent contact with the skin must always be kept to an absolute minimum.)
back to support