Embed Size (px)
DESCRIPTION
Colored Pencil Step by Step, from the acclaimed Walter Foster Artist’s Library Series, is filled with information that will help artists of all levels learn all about drawing with colored pencil. This colorful, comprehensive guidebook explores drawing and layering colors, plus a range of styles and techniques for creating your own works of art in colored pencil. Three renowned colored pencil artists guide you step by step through 11 vibrant lessons, demonstrating a variety of special techniques and tricks along the way. Whether you’re a novice or an accomplished artist who has never experimented with a colored pencil, this book will provide the instruction and inspiration you need to master this versatile medium.
Citation preview

librilrY
LVjlO'N1d Pencil by Step
l' I" - _II
" I" (OI(If�d I"'!lell

Contents
Introduction
Tools and Materials
Color Theory
Colored Pencil Techniques
About the Artist s
Lesson 1: l\:laking the Best of It Limited Palette
Lesson 2: Starting with It Simple Subject
Lesson 3: Using References
Lesson 4: Drawing Animals Accurately
I.f'.�son 5: Arhirving II l.ikeness
Lesson 6: Composing a Landscape
Lesson 7: Capturing Mood
Lesson 8: Understanding Value
Lesson 9: Selling Up a Still Life
Lesson 10: Creating Drama wilh Contrast
Lesson 11: Utilizing Artistic License
Conclusion

Introduction
Colored pencil is a simple, versatile medium-it can be used to replicate the look of oils, watercolor, acrylic, and more. Although it
has been used as a fine art medium for less than a century, its
popularity has grown significantly over the last few decades. It's easy to understand why morc and morc artists arc attracted to colored pencils-they are fairly inexpensive and convenient to transport. They are also nontoxic, easy to find in art and craft
stores, and combine well with other media. Whether you choose to
use colored pencils for sketches or to create fully rendered
drawings, you will find that they arc brightly hued and precise tools
Ihat are a jay to work with.
There are many different approaches and techniques to discover in colored pencil art-from layering and hatching to burnishing and blending. As you explore this an fonn, you'll discover many methods and materials that will help you realize the seemingly endless creative possibilities working with colored pencil offers.
The important thing is to have fun while you develop your own artistic style-and enjoy creating your own works of art in colored pencil I
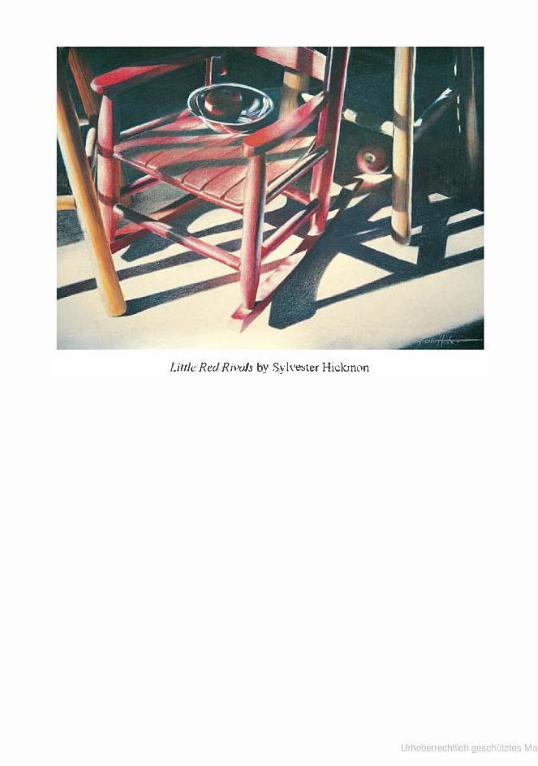
Wile Red Riw/Is by .';1'1,"<,1<1", Hickmon

Tools and Materials
You don', Ileed many supplies to get started in colored pencil, so you won't need \0 invest a lot armoney. All you need in Ihe beginning are a few basic colors, an eraser, a sharpener, and some paper. (For the projects in this book, refer to pages 16-1 7 for the
colors the artists use in their lessons). Just remember to buy the
best supplies you can afford; with better-quality supplies, your artwork will stay as vibrant and colorful over time as it did when you first created it. Then, after you've become more familiar with the variety of eITects you can create, you may want to purchase a
few more specialized tools. As colored pencil is becoming a more
popular medium, many new products are being developed to aid the colored pencil artist.
Pencils As with all art supplies, the price of a pencil indicates its quality; better pencils have truer color. Many brands offer sets of pencils that provide a basic array of colors. Some art stores also sell
colored pencils individually-this way you can pick and choose which hues you like best among several different brands. Once you've chosen your palette, make sure to store your pencils upright or safely in a container-and try not to drop them. The lead in a colored pencil is very brittle, and it's likely to break in the shaft if the pencil is dropped. This may not be immediately apparent, but
will eventually render the pencil useless.

Choos;nl!: Pendl. There nrc mnny types ()f colored IX:ncils u"ailnblc-h:"dcr, thinncr Ic:>ds ore id�al for rendcring rille lines mid d"wil, ",hile <oner, thicker leads are l.'reat for fillil'!.' in larl.'c areas. Some manufacturers make both hard. thin lead and snIt thick lend ,"crn;ons of the some colors_ Experiment to fllld ",hieh type .• you prcr�.,-_

Erasers Colored pencil artists can't use ordinary erasers to correct their work; the friction between a rubber or vinyl eraser and the paper will actually melt the wax pigment and flatten the tooth (or grain) of the paper. Instead many artists use a small battery-powered
eraser to remove the pigmen t without crushing the paper
underneath, A kneaded eraser is also useful for removing small
amounts of color; twist or pinch it into any shape you like and then press it lightly on the page to pick up the pigment When it gets
"diny" and is not as effective, you can knead it (like dough) thoroughly to reveal a clean surface.
Papers
TexlUred papers are best for colored pencil work because the rough grain �catches" the color so it accepts more pigment than a smooth paper would. Art and craft stores carry a variety of textured
watercolor papers and illustration boards that offer a good tooth for colored pencil art; look for a paper with a medium grain to stan.
For practice or for doing quick studies on site, you'll want to have a sketch pad or sketchbook. You might also want to consider
experimenting with different colored papers and specialty papers; these surfaces can help you achieve some interesting effects. (See page 13 for more infonnation on special papers.)

Colured pllp�n

Tnlun:d papu.

Sharpeners You can achieve various effects depending on how sharp or dull
your pencil is, but generally you'll want to make sure your pencils are sharpened at all times; a sharp point will ultimately provide a smoother layer of color. Although a small hand-held sharpener will
do, an electric or battery-operated sharpener is better suited for fine art purposes. You can also use a sandpaper pad to refine a pencil point.
Extras You'll need a dust brush to gently remove the pencil residue from your paper, a spray-on fixative to preserve your finished drawing,
and a paper blending stump to create soft blends. A pencil extender is handy when the pencil gets too shon to hold onto comfonably,
and you may want a triangle for making straight liaes and some
artists' tape for masking. It's also nice to have white gouache and a small brush on hand for adding tiny opaque highlights.
Hand-hdd sharpener

Blending .fuml'
Trlanl!lc

Pencil extender
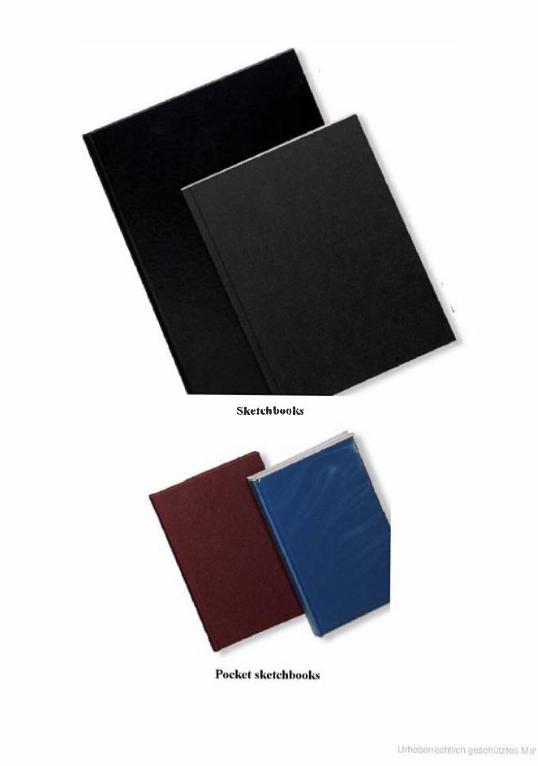
Skelcl,b..,ok!

Color Theory
Colored pencils are transparent by nature, so instead of "mixing" colors as you would for painting, you create blends by layering
colors on top orone another. Knowing a little about basic color
theory can help you tremendously in drawing with colored pencils.
Theprimmy colors (rcd, yellow, and blue) arc the three basic colors that can't be created by mixing other colors; all other colors arc derived from these three. Secolldary colors (orange, green,
purple) are each a combination of two primaries, and Icrfiary colors (red-omnge, red-purple, yellow-orange, yellow-green, blue-green,
blue-purple) are a combination of a primary color and a secondary
color. Hlle refers to the color itself, such as blue or purple, and
illlellsity means the strength or chroma of a color (usually gauged
by pressure applied or pencil quality in colored pencil).

Color ,",'hed A color wheel can be a useful reference tool for undcrstandin� color rcbtionships Km)l'lng where ea�h �"Iur hes on the color whool makes;t e,,,y to understand how colors relate to and react with one another

u.inl! Cum[ll�m�nh When placed n�-xt to each other, oompk,ncnlal)' colors create liyc1y, excit ing contrasts . Usin!! a complementnry color in the background will cause your subj�'Ct t() seem to .pop' "fT the CanVaS, F"r example, you could place hright "range poppies "B"imt a blue sl1' or draw red holly herrie< amid green lene<_

Value Value is the term used to describe the relative lightness or darkness
of a color (or of black). It is the manipulation of values that creates the illusion of form in a drawing, as shown in the sphere on page 7, For morc on value and colored pencil, see �PrcssureH on page 8 and
"Understanding ValucH on page 48.
Complementary Colors Complementary colors are any two colors directly across from each other on the color wheel (such as red and green, orange and blue, or
yellow and purple). You can actually see combinations of complementary colors in nature-for instance, if you look at white clouds in a blue sky, you'll notice a hint of orange in the clouds.
High K�,. V�rsus Low K�y A high k�)' dr:l\\'ing is filled with light "nlu�s and e,"okes all airy. "arcfK": fcc lin!; (leil), while a low key drawing UseS mo,lly dark ,"alllCs and creates a more mystc'Tious or somber mood (right).

Gray. Mo" colored pencil brand., (lffcr n ,-ariety (If gray" Thcy distinguish them hy
rl:llning them eith�r ·warm" (tup row) or ·cool" (bouom row) and th�n aJJrng � percentage to indicatc lhc conccntrat;on of color, ""eh as "rool gray 20"/0· (the lower the percentage. th" li&!lter the \"alno).

Cr .. "Cillg Form Draw the basic "h�p" Then, starting on the shJtI<nwd �ide, begin builtling up color. 1ca\-ing the paper while in the area where tile light hits directly
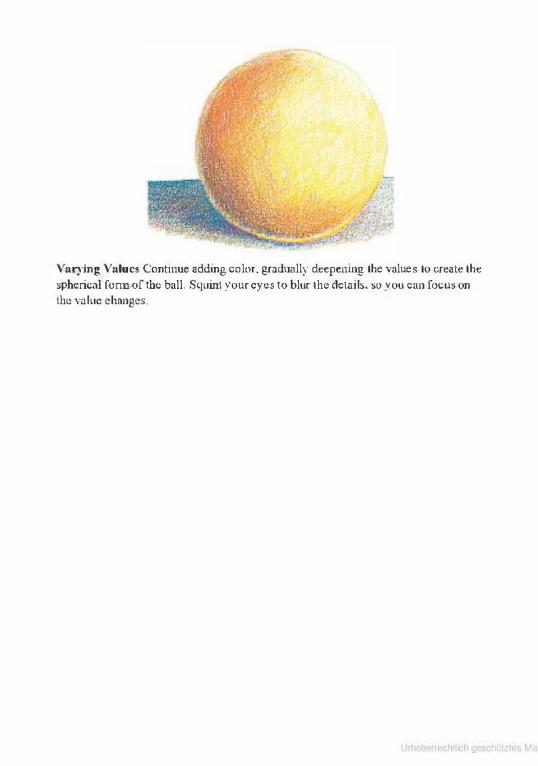
Varying Valu�. Conti""" adding col",. srmll.lally <k"1,,,oinS the values to Cf"-lk the spherical Conn 0[100 ball. Squinl your eyc. 10 blur the delail •• so )"ou can focus on the vnluc ch.1ngc'.

Building Depth Add the dorke<t '"nlue" last. As the <phere cu,ve" away I'm", the light. the ,"a lues becom� darker, so place the darkest values on the side dir",,!ly opposite {he lis!lt
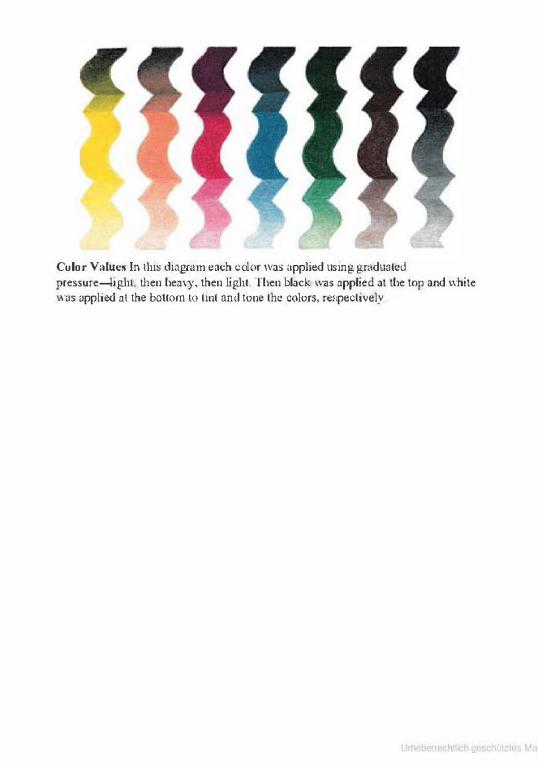
Culor VHluc. In (hi. diagrum each culM wag upphcd using gradun(ed pressure-light then hea,)'. then ligh!. Then black wag applied at the top and white was applied al the boHorn (n (in( �nd tonc (he colors, r�"lipccli\'cly

Color Psychology Colors are often referred to in terms of "temperature," but that doesn't mean actual heat. An easy way to understand color temperature is to think orthe color wheel as divided into two halves: The colors on the red side arc warm, while the colors on the
blue side are cool. Thus colors with red or yellow in thcm appear wanner, and colors with more green or blue in them appear cooler.
For instance, if a nonnally cool color (like green) has more yellow added to it, it will appear wanner; and if a warm color (like red)
has a little morc blue, it will seem cooler. Another important point
to remember about color temperature is that warm colors appear to
come forward, and cool colors appear to recede; this knowledge is
valuable when creating the illusion of depth in a scene.
Tints, Shades, and Tones Pure colors can be limed with white to make them lighter, shaded with black to make them darker, or IOIlCd with gray to make them more muted. However adding a layer of black or white over a pure
color might dull the color a bit. To revive some of the original
intensity, go back over the tint or shade with the pure color. Also, to tint a color without muting it, try applying the white first and then adding the color over it

.�. ·...,. .·f mi··rlJ. ... fi" .,t , '.'
. ,
, " ...
Wann Vcr ... ! CnnlHere dIe ""me scene IS drawn with lwo dilTcre1l1 p,1icltcs, OtIC
wann (left) and one C<Xl1 (right). Nolice thal die mood i, '\fikingl)' dilTerelli in each ,."ene, Thi.� i. bccau<;e color arousc. certain fceling.': for example, warm colors generally C'ln"CY ��lCfgy and excllcmenl, whcrca< cooler cnl",. lIsnrr lly mJica(c peacc.OO calm,

Colo r 1\ lood Th� �xmnplc, above further illllSlrale hul\' color can be used 10 er�alC mood (lelltu rig.hl): Complements eM create a Sense of tension. cool hucs Call evoke a sense of mystery; light. cool colo," can provide a feeling of tranquility, and wann oolnrs can .'TCale a ..enS<) "I' dnllgcr.

Colored Pencil Techniques
Colored pencil is amazingly satisfying to work with, partly because
it's so easily manipul ated and controlled. The way you sharpen your pencil, the way you hold it, and the amount of pressure you
apply all affect the strokes you create. With colored pencils, you
can create everything from soft blends to brilliant highlights to
realistic textures. Once you get the basics down, you'll be able 10 decide which techniques will capture your subject's unique qualities. There are as many techniques in the art of colored pencil
as there are effects-and the more you practice and experiment, the more potential you will see in the images that inspire you.
Strokes E�ch line yOll nlflke in a colored pencil drawing is important-and the direction, width, and texture of the line you draw will all contribute to the effects you create. Practice making different
strokes, as shown ill these examples. Apply light, medium, and
heavy pressure; use the side and then the point of your pencil; and experiment with long, sweeping strokes as well as short, precise
ones.

Light pressure
Medium pressure
Heavy pressure
Pre •• uT<' Vary' in)! Ihe amounl ofprcssurc yon uSC on YOUI pencil is an easy way 1o Imnsillon bolween \."llle._ Since <01","'<1 pencils arc ImnslucL'1II, Ihe color of the paper undemeJlh will ,h()w Ihr()ush. With liSht pre"sur", Ihe "olor is almost Imllspa",nL Medium pre«u", creales a Snod foundation for layering. and heavy pre"-,IITC l1ancn'lhc P"l'cr texture, nlld the color appear.; "lmOSl solid

J I
rr h h
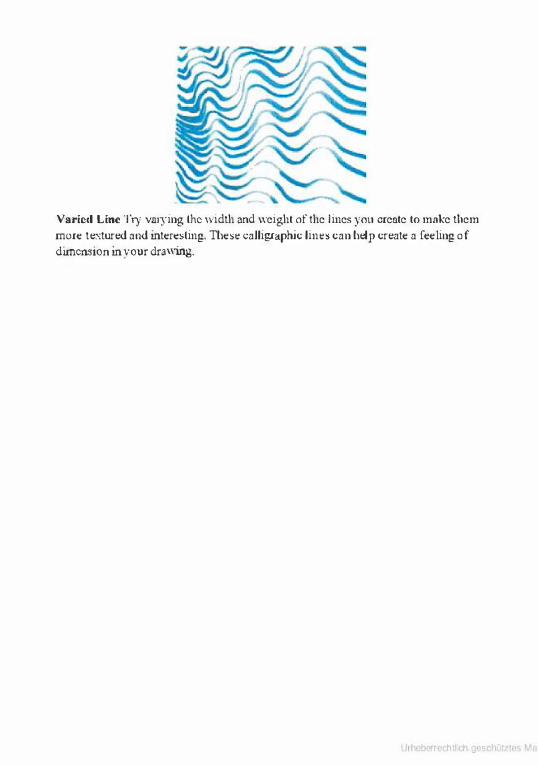
VariNILine Try ""rying Ill<: width and weight orlhe lines you creote to m.1�e them m()r� textured and int�",stins. Th�"" eaJlis'-'phic lin�' can help creat� a f��lins of dimension in your drawing.
rr h h

SII'OIII'O and Tutu!'\' You can imitate a number of diffcrenllcxtun:s bv crealing p"l!ems or dots and dashes On the P"p'-'T To crc;,lc dense, c,·cn dots . lry twi,lin!! lhe point oryour pencil on the pal�r.
rr h h

Hatching The ternl hatchillg refers to creating 11 series of roughly parallel
lines. The density of color you create with hatch strokes depends
on the weight of the lines you draw and how much space you leave
between them. Cro�'s-halchiJ/g is laying one sct of hatched lines
over another but in the opposite direction, producing a meshlike
pattern. Hatch and cross-hatch strokes can both be used to fill in an almost solid area of color, or they can be used to create texture, as
shown at right.

Crm ... Halchcd Spndng Filling in space w i th cross-hatch Slrokcs in random dir�"ti()n� creates the den,." haphazard textu", shO\'ll ubow. For a Stn<Klthc.,-, mo", evellte�ture. make cross-hatch Slrchs in IWo dir�cliells enl)' (left leaning alld riglll leaning)
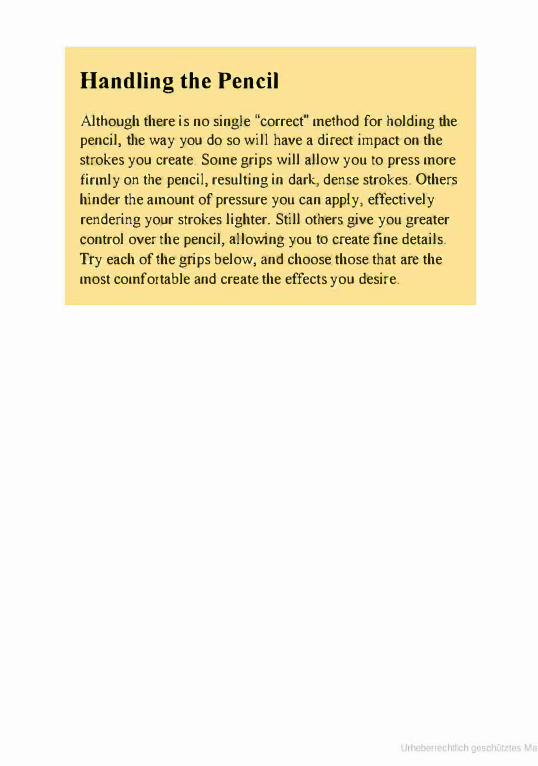
Handling the Pencil Although there is no single "correct" method for holding the pencil, the way you do so will have a direct impact on the strokes you create. Some grips will allow you to press more
firmly on the pencil, resulting in dark, dense strokes. Others
hinder the amount of pressure you can apply, effectively
rendering your strokes lighter. Still others give you greater
control over the pencil, allowing you to create fine details.
Try each of the grips below, and choose those that arc the most comfortable and crcate the effects you desire.

Onrhand Grip Guide the pencil by laying your index finger along the '}",f\ Thi,;" the bc..ll¥ip fOT ,trong �ppli��tio"" of color IIli>dc with he",)' pressure.

-Con .... llfionaJ Grip For the most control. grasp the pen ci l about 1 In" from 1he lip . Hold 11 the SlIme way rOll wrile, wilh the pencil rc.'ling firmly
agalllsi your ln1(kllc tinger. TIlls gnp IS perfect r or smooth applications of oolor. as well as ror makin g hatch strok es and small. circular slroke •. Trv to rola� and lei the pencil glide across fhe page.
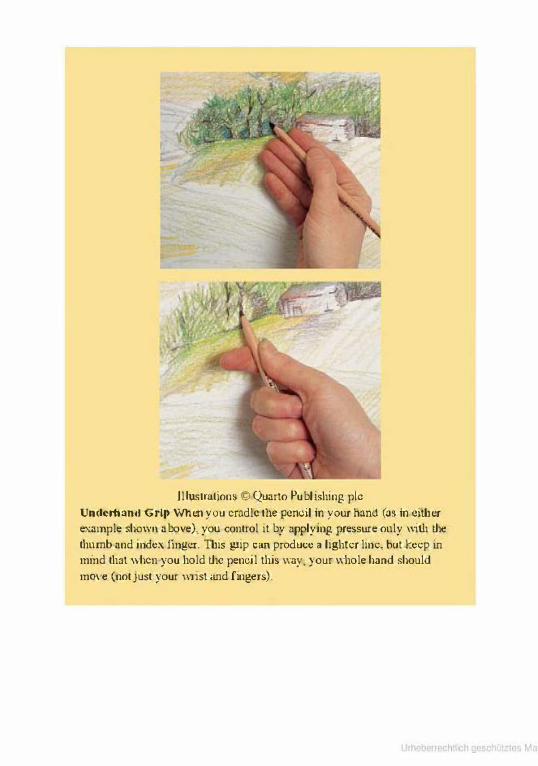
llh.l"lrnhon' e Quarto Publl.hing pIc Undcl1land Grip When you emdlc lIn: pencil in your haml (a, in either example shO\\11 above). you control it by applying presSllfe ouly with �,e thumb and index fiIl!!CT. This grip can produce. lighler line. but keep in mmd that "hen you hold the pencil this wny, your whole hand should
mO,'d (not just your wrist and ringe",).

Layering and Blending Because colored pencils are translucent, artists use a transparent
layering process to either build up color or create new hues. This
layering process is wonderful because it creates a much richer hue than you could ever achieve if you were using just one pure color.
To deepen a color, layer more of the same over it to dull iI, use its
complement. If you want to blend your strokes logether, you can use a colorless blender, as shown at the bottom of the page.

Luy�rin� wilh Hllleh SItu"". In Ihe examples al nghl, )'�l1ow, onongc, red, Md blue were layered on lup of onc anolhn wilh clOss-lmlch Slro�es to demunstrate one way uf crealing a new culor. Tu "void gelling a hllC lhat's 100 dark. begin \\'ilh Ihe IIghtcsl color attd work up 10 the dar�ctit. This way you catl tell iflhc mix is I\cllml; too muddy or deep hefore it'. too late.

\ /I
Building Up C .. lor lien: i. a 5imple slill lifc rend er ed \\'ith Jayc," of hatch strokc •.
The rOIlllS of thc Ii-uil we.,-c built up by layering dilTcrcnl Yalucs of the same color �nd then dulled a bit \11tb a (ouch of their complcmenl�_ N()tice thal lhc sh OO()ws under the fruit are blends of many different colo,...: they are neWT just smr or black

Colorle .. Blender T"i� special marker dissolws Ihe pigme!\l, crent;nl! a .mooth,
,")lid e<)lo[. Appl)' it owr Ihe p'grJlenl, a< shm\ll here. <)r on Ihe blnnk paper bclorc you add color,

Usln!!, II C .. I .. rle •• Bll.'fldc� The example at lell shows a quick study crcaK-d with colored pencils_ In the second example at right. a colorless hlender was used to
blend the pigments Notice how much smoother the strokes appear ailer bl ending The surface of the paper abo hcc"llIcS a hltle sitek ailer using the blcn<kr, so uny colors you add 0"" the blended layer will glid;, e asily on d,,, page_

Burnishing Bllrnishing (or opaque layering) is a blending technique that
requires heavy pressure to meld two or more colors, which also
flattens the tooth of the paper. Usually a heavy layer of white (or
another light color) is applied over darker colors to create a
smooth, shiny blend, as shown in the example below Tty not to
press too hard on the underlayers of the area you intend to burnish; if you flatten the paper too soon, the resulting blend won't be as effective.

--
�- - -" L-J '--I -�, ' -
I r \
( ,
,
,_ .,1 I ,
- :::. -�- ;::;';;,,�-"'� Step One B�gin with J line drawing in local oolor (the act",,] color of the obi""l) so the outline won't be visible when you',e done_ Press lightly so the outlines aren't impr�s..,d into the P"P'" surface, c,ealing <knt •. Here the solid line, indicate where lwn.l cd�es will be. and tile dashes Of broken lines denote soft edges and shadows.

SI�1' T,w As ),ou r,ll in the outlines ",ith la),e", or oolor, keep the penc,l" sharp. Apply light to ",,, .. hwn pressure as you slowly build color from hsht to dark. US"
short, controlled strohs for a s",ooth tone, gradually Ics"'ning the pressure at the lodges to ",ake them 50ft Here the darkest areas are created ",;th green, the cOlllplement of red.

SI.,p Th r, .. ' Next l"ycr the diOcrent vnlues of red ,,00 green, using hc,,.-icr pn:ssure. Be sure t o rill in any highlight, with white: thIS will act as a son ofbarri .... asain.<! s.1lUflllion !rorn lhe olher colo",.

Stefl four Finish by using a senll-sha'l' while pencil with CIrcular strokes to burnish
first the highlights and then the rest of the object You may !1C><.-d to burnish owr the
"'mc areas morc than once to gCI an cwn hlend
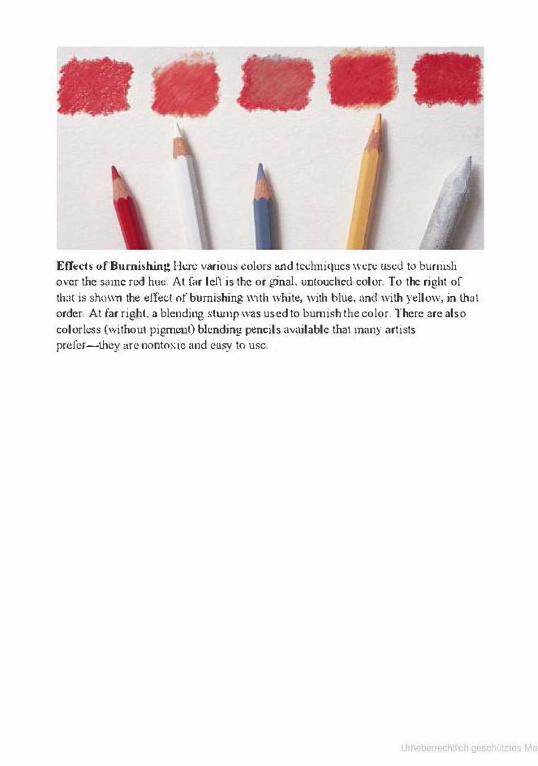
Err��" or Burni,hing Here various �olors and tcdmi'lucs Were usee! to burni,h o,,,r the .. me red hue. At far left is the originaL lUllouchee! color. To the right of thm is �I\O"n the oIToct of burnishing with white, with hl\1�. and wilh yellow, in Ih:11 order. At far right a blending stump was used to bumish the color. There are also colorlc-ss (withoul pigmcn1) blending pencils available thai many artists prcfcr-1hc}' arc nonlo�IC and coS}' to usc.

Special Effects and Techniques As you're working in colored pencil, you may sometimes need to go beyond the basics and use some specialized techniques and materials, like the ones shown here. For example, you may choose to use black paper to provide a dramatic backdrop, lift ofT color
wilh tape to reveal highlights, or make impressed lines to create
texture. There are literally hundreds of possible techniques, so feci
free to invent your own!
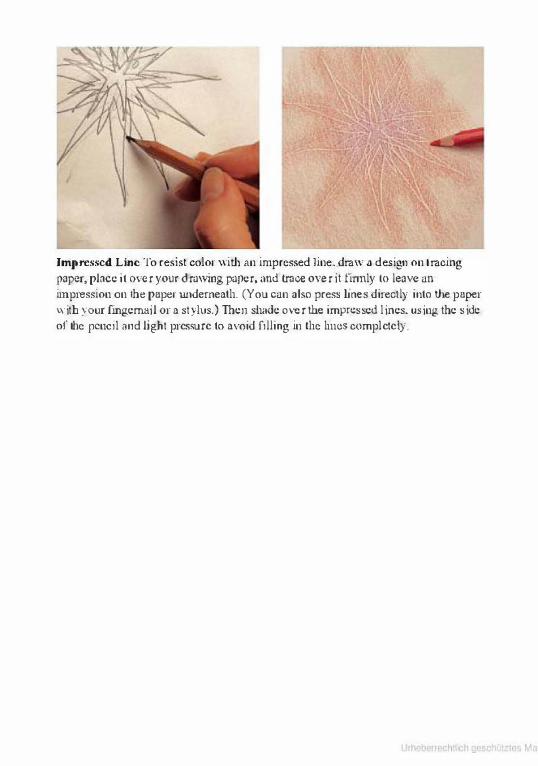
In'l'n .. ed Line To resist color with an impressed line. draw a de,;tll' on t raci ng
p.1pcr, place it ovcr your drawing paper. und truce owr it rirmly 10 Ic.1w an im pression on the paper wrdemeath_ (You can also press I""" directly into the paper with lOur rrngeffillil Or a st)-' Ill,.) Then s.",de o'''r the impre.sed lines. wing the .ide or the rend "nd light pressure to amid fIlling in lhe lllle, completely_

Using Stencil. For a stylized pattern. cut out a stencil and draw the shape repeatedly on your pa]l<-'1" For Ihe pallem shown abow. randomly fill in Ihe 'hapes with a ,-arlety of oolor<_
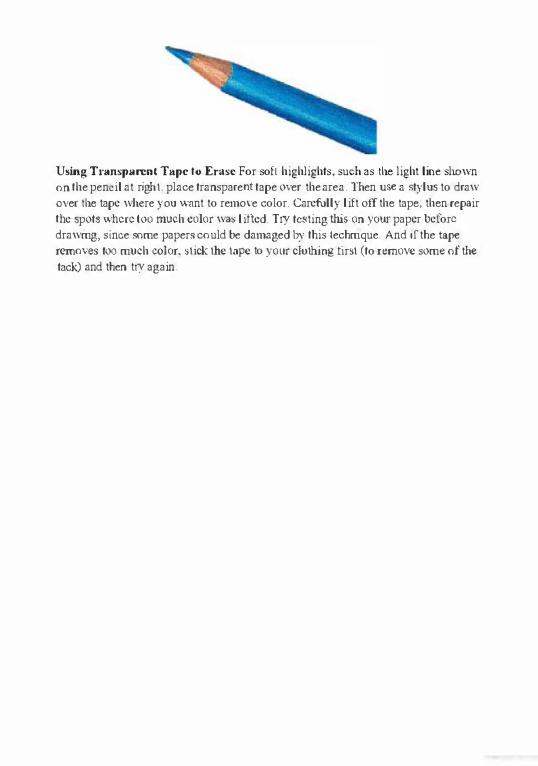
u.ing TranspHI"""t TMpc to [raSl' For soft highlights. such as the light line shown on the pencil at righ t. place transparent tape o"er the area. Then use a .tylus to draw o\'er the tape where you want to remo,'e color. Carefully lift off the tape: then repair t he spots where too mwh color was lifted. Try tC8ting this on y01l1" paper before drawmg. since <ome paper. could be damaged by this techmque. And ,fthe tape
Temows too much C010T. ,tick the tare to your clothing l1"t (to remove some ol'thc tack) and then tl}' again.

Ma.king ... ilh Tape You ean usc �rtists' tare or maskin!!- tare to create dean lines and simple borde",_ as shown above . .lust place lhe tape where you want it. apply color owr it. anu Ihcn rCm<We it to rewal clcanlincs underncath.
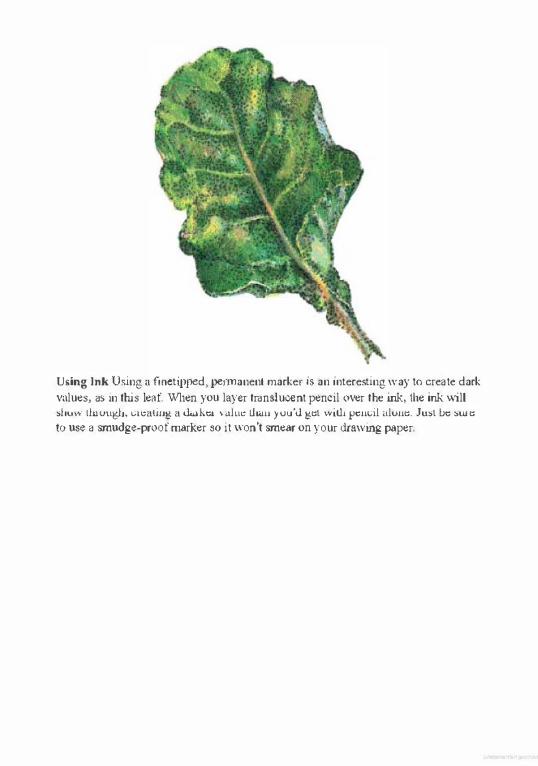
U,ing Ink ll'ing a f"'clipped> permanent marker" an IIlleresling way to create dark values, a, in this le"f. When you I"y�'f translucent pencil uver the ink, the ink will >I,,,\\, Ih",u�h. CI �alill� a da..l.c, ,aluc �",II ) uu'J gcl ,,-ill, I"'"�il al,,"c. Ju>l be ,u, c lu Usc a smU<lgc-proof marker SO it ,,'on', smear on your drawing paper.

Fro"ag� Ruhbing owr a k"tun'il surface, lik� the lcaf at right. with the side of a pencil is a k'Chnique called "jrol1age." Thi, creates an impression of the object (and its texture) on your paper
Watcrsolublc Pencils Watersoluble, or watercolor, pencils offer the same amount of
control and detail as regular colored pencils, but they have the
added versatility of being similar to painting tools as well. When you blend them with a brush and water, the artwork you creale will
have a softer and more painterly effect.
Special Papers You can also use colored grounds, multimedia panels, illustration boards, and specialty papers (such as velour, sandpaper, or mylar)
for your drawings. Each will give you a different result-some offer more texture or provide an undercolor, and others are bener suited for mixed-media projects_ When choosing paper, make sure
you select onc of high quality, and test out the pencils and techniques you plan to use ahead of lime.

Walc ... o'uhle P�'I1cil You can bknd walcrsoluble ]lCncils wuh a weI brush (sec lop example) to �r�ate soli blends like the ones sho\\n (in the boUom e:>:amplc) in the sky, inlhe h,ns. and on the road. !Jere Ihe rest oflhe scene was created mlh rCl',uFnr \\,,:>:-OOsoo colored pencils.

Colo...,d Ground. If you choo", a colored support thai sharcs a dominant hue in your drawin". you can cr�atc harmony amon" the colors in your drawing and saw a 'Igmficanl amounl oftime-lhc paper prO"I<lcS a tn<.."<lium value 10 bu,ld color on (sec examplc at rishl). Make a Icst sheci first on the back of your paper (or on a ",rap picce of paper. a. sho\\'n abow) 10 "'c how Ihe colors In yOllT pa1ell� \\'ill be affected by Ihe colored ground you chon"'_

Black Papcr The contrast of lisht colors on hlack pape.,- creates a sense of drama Brighl, colorful subJccts appear ewn bolder o"er a ,brk ground For the most bnlllant hues, 3f'Plr a layer ofwhilc before applyin& oolor m'er II,

San.lcd Paper "Sanded paper" has a griu)' quality to it that lends an interesting texture to colored pencil art. The rouSh surface will sand off the point of your pencil, <0 make sure to keep a dust brush handy to SWL'Cp away the r�",duc,

About the Artists
Debra Kauffman Yaun A graduate of the Ringling School of An and Design in Sarasota, Florida, Debra Yaun began her art career as a fashion illustrator and graphic designer. Later she discovered a book on colored pencil in a library and fell in love with the medium. Now she stays
busy with portrait commissions and nature drawings. As time allows, she teaches an occasional an class_ Her artwork has been
published in several an magazines and books, and Debra is ajuried member of the Portrait Society of Atlanta, where she serves on the
board of directors_ She is also a member of the Colored Pencil
Society of America_

Pat Averill Although she considers herself primarily self-taught, Pat Averill
has attended an array of workshops and seminars on oil, watercolor, and colored pencil. She considers the way she figuratively "inhales" the colors, values, and shapes she obscl\Ics around her to be an integral part of her artistic process. To her, the
creation oran is based on a combination of lire experiences and the
artist's reaction to the subject matter, Pat is a charter member of the Colored Pencil Society of America, and she has won numerous
awards in juried international exhibitions for her work in colored
pencil.

Sylvester Hickmon, Jr. Native South Carolinian Sylvester Hickmon, 1r., became interested
in art at an early age. He received his fonnal art training at South
Carolina State University, Orangeburg, where he earned a Bachelor of Science in Art Education_ For the past 13 years, he has taught art
at the high school, middle school, and elementary school levels. He
also conducts workshops on drawing with colored pencil. Sylvester
has exhibited throughout the United States, and his works can be found in many private collections He has also received numerous
regional awards and national recognition for his colored pencil art. Sylvester is a signature member of the Colored Pencil Society of
America, a member of the Sumter Artists' Guild, and serves on the Board of Directors of the Sumter Gallery of Art.

Color Palettes Every artist has a group of favorite colors and brands they prefer
working with; below are the colors each artist uses for the projects
in this book. Keep in mind that the names of the colors may vary
among brands; sometimes two pencils that have the same name are
two different hues.
Debra Yaun

02003,2011 Walter Foster Publishing, Inc.
Artwork on pages I, 6-14, 38-51 0 2003 Pat AverilL
Artwork on front cover and pages 3,14,52-63 C 2003
Sylvester Hickmon,
Artwork on back cover and pages 15, 16-37,64 10 2003
Debra Kauffman Yaun. All rights reserved
Digital edition: 978-1-61059-841-5
Softcover edition: 978-1-5601-0719-4
This book has been reproduced to aid the aspiring artist.
Reproduction of the work for study or finished art is
permissible, Any art produced or photomechanically
reproduced from this publication for commercial purposes is
forbidden without written consent from the publisher, Walter
Foster Publishing, Inc.