Embed Size (px)
Citation preview

The C15TA Armoured Truck was developed by GM Canada along a concept lines of the American M3 Scout Car. The vehicle used the chassis of the Chevrolet C15A Canadian Military Pattern truck design. Between 1943 and 1945 a total of 3,961 units were built in Oshawa, Ontario. Armoured hulls were supplied by the Hamilton Bridge Company
The C15TA was used by the British and Canadian units in the Northwest Europe campaign as armoured personnel carrier and ambulance. After the end of the hostilities, many vehicles were left in Europe and were subsequently employed by armies of the liberated European countries, including Belgium, Denmark, the Netherlands, Norway. In addition about 150 were sold by Canada to Spain. Trucks left by the British forces in Vietnam were taken over by the French, which used them in Indochina and later transferred to South Vietnam. Many C15TAs were employed by the police forces of the Federation of Malaya. In 1955 Portugal received a number of vehicles, which were later used in the African wars. Some vehicles remained in service until the 1960s.
CMP C15TA Armored AmbulancePrecision plastic model
MIRROR
Models
Ltd.
1/35
Scale
Kit No.
35106
Z
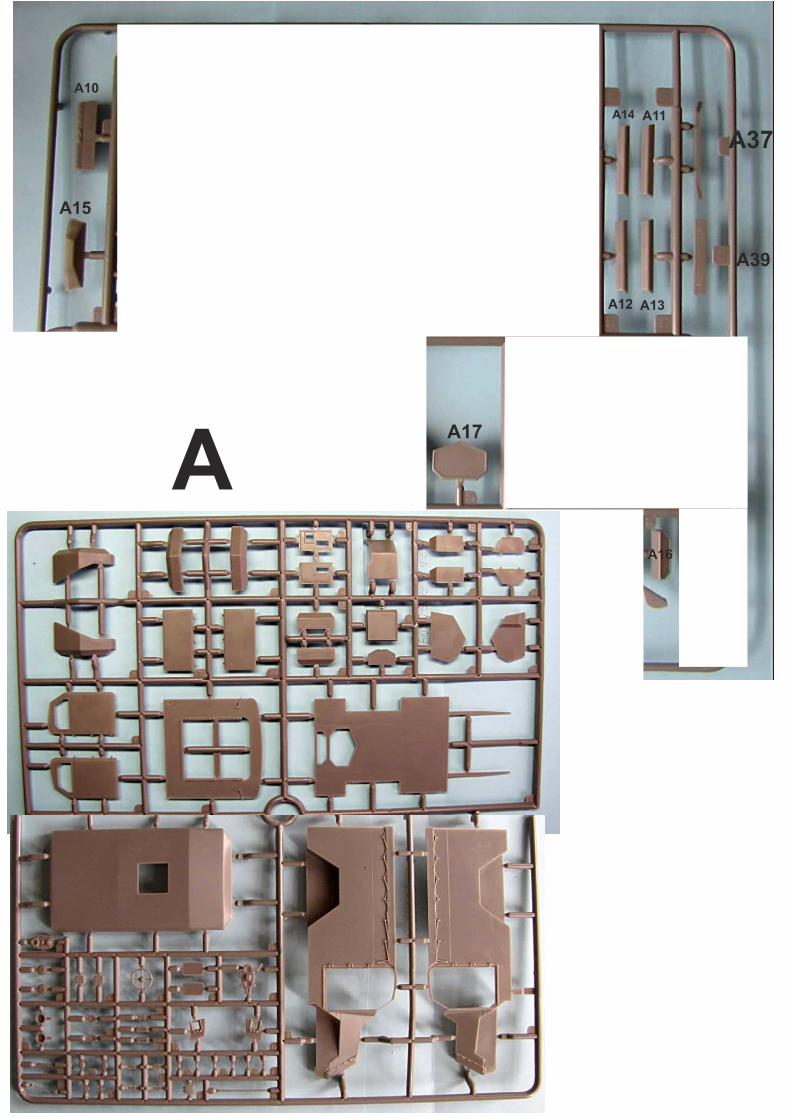
A3
A4
A5
A6
A7A8
A11
A9
A10
A12 A13
A14
A15
A25A24
A23
A22
A19
A18 A17
A16
A35
A33
A32
A31 A30
A29
A28
A26
A39
A38
A37
A36
A
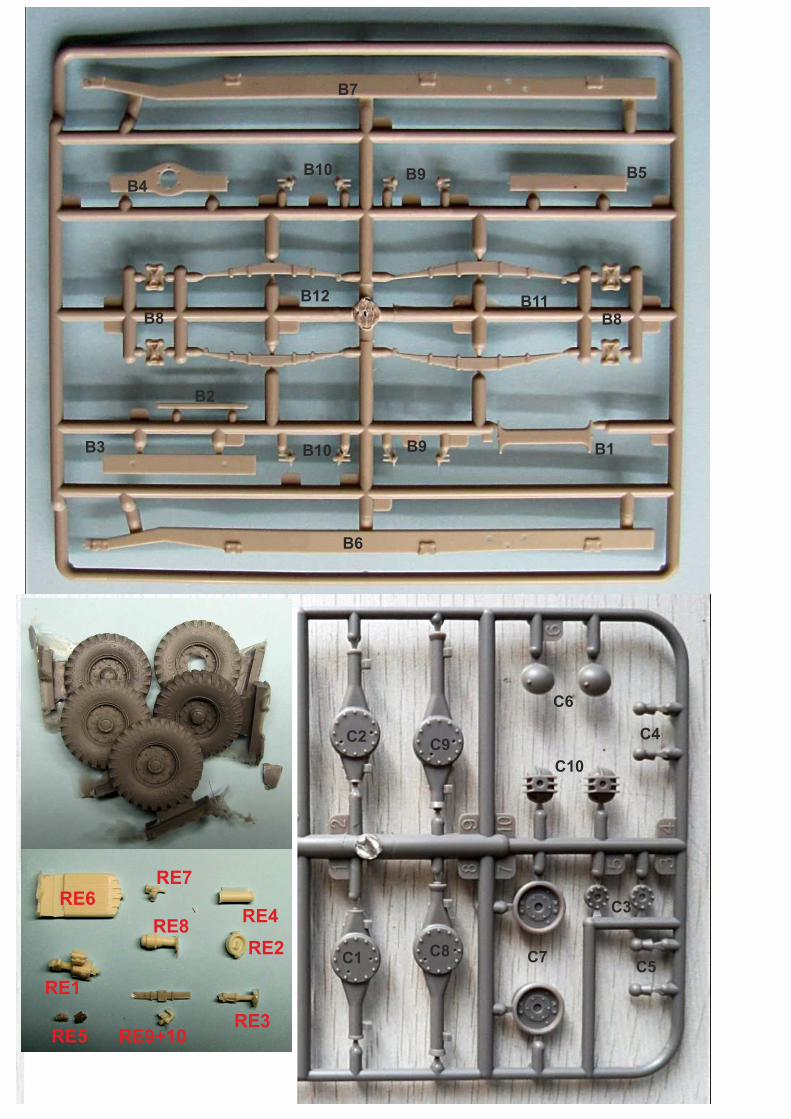
B1
B2
B3
B4B5
B6
B7
B8
B9B10
B11
B10 B9
B12
B8
C1
C2
C3
C4
C5
C6
C7C8
C9
C10
RE1
RE5
RE2
RE3
RE4RE6
RE7
RE8
RE9+10

B7
B6
B4
B1
B2
B5
pins on crossbeams into holes in frame sides
B9x 4 front
x4 backb10
B8
B8
B12
B11
C15 frame assembly
Go through assembly guide before you start your work. Extended Assembly guide and part list to download at Assembly guide based on test spruesamples, which dont have quality of final product, features like molded canvas rope and some hinges and details are not present in pictures, but will be found on the final kit
www.Mirror-models.com
Heat up PE parts with lighter before use,brass will soften and become easyto bend and work withTamiya Super Thin Glue recommendedfor plastic parts
B11
B12
C10C6
C1C2
C8 C9
Set angle between front springsaccording to angle between frontholders B9 before you gluesprings on C1+C2, check before glue dries...Make ties with 0,5mm wireand then glue both differentialson their holders. Add C3-C5and C7
angle
C10C6
C3+C4
C5C7
1
PE1x8
PE6
PE2rear endsof springswith halfround toponly
0,5mm dia wire
PE5x4

Z10
Z11
Z12
Z28
Z29
Z1
Z2+Z3
Z4
PE32
PE27
0,8mmdia wire
Glue engine in its place
Now you should leave frame assembly and build up the body base that will be neededto fit gear boxes properly and easy. Oncebody base is ready, return here and finish the frame
Dry-fit body andplace gear boxRE1, then glue
complete Z8+Z9, A52+A53, A54+A55 and assemble
A52A53
A55+A54Z8+Z9 2
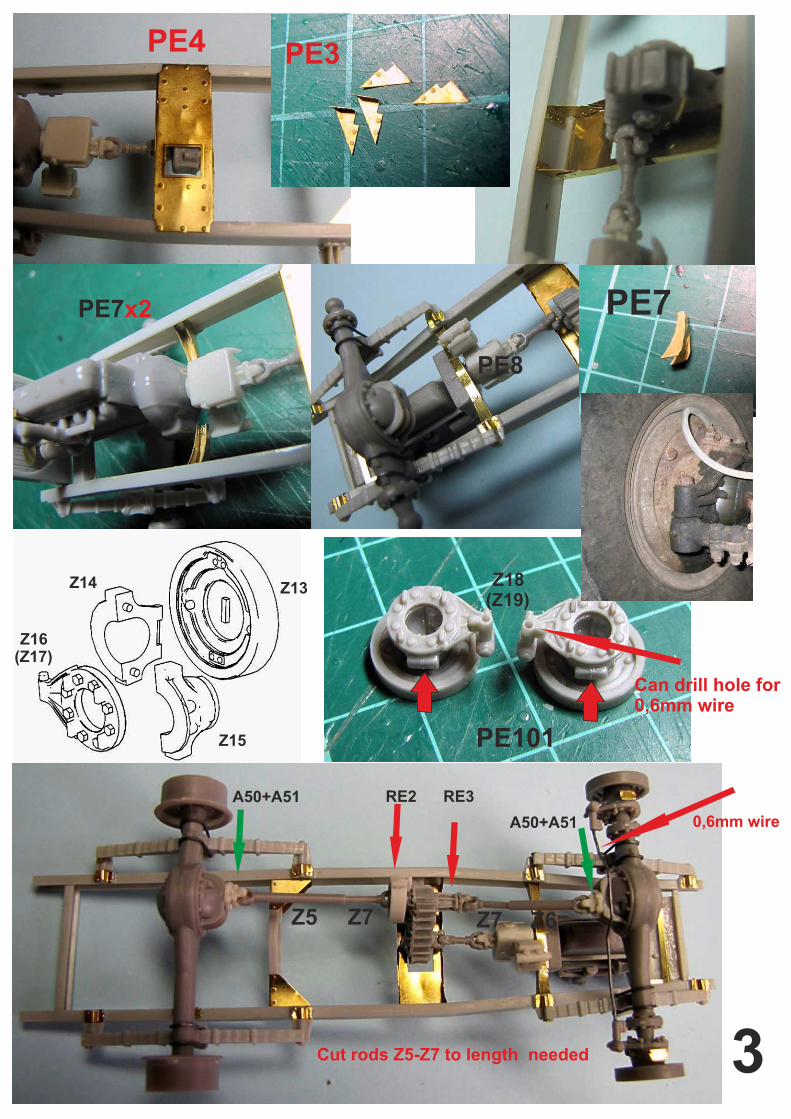
PE3PE4
PE7x2
PE8
Z14
Z15
Z16(Z17)
Z18(Z19)
Z13
PE101
Can drill hole for 0,6mm wire
0,6mm wire
A50+A51
Z5 Z6Z7 Z7
RE2 RE3
Cut rods Z5-Z7 to length needed
A50+A51
PE7
3

RE4Z25
Z26
PE26
PE15+PE16
bend ifneeded
PE10
PE9
PE11 PE36
Shock absorbers in the kit aremeant rather optional for additionaldetails, PE parts are tiny a requiresome patience (PE9-11 can be alsoreplaced by simple piece of 0,3mmdia wire for easier handling)
RE5
4
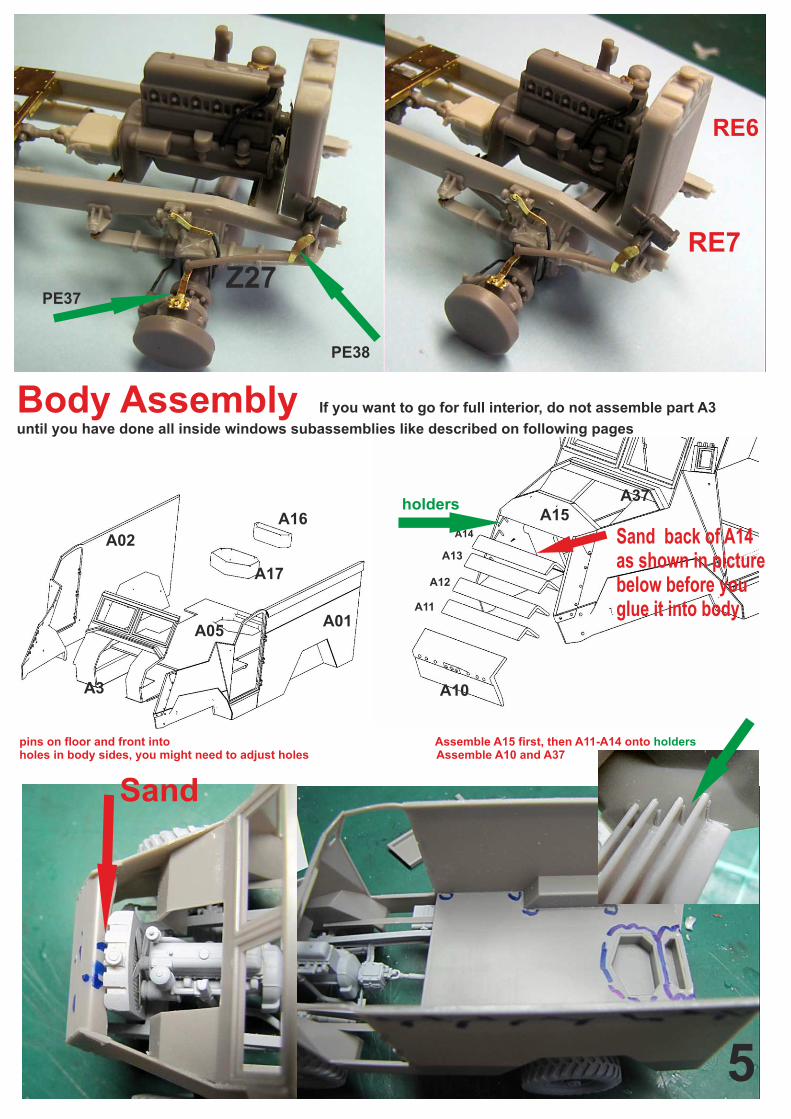
RE6
RE7
PE37
PE38
Z27
Body Assembly If you want to go for full interior, do not assemble part A3
until you have done all inside windows subassemblies like described on following pages
A01
A02
A16 A15
A10A3
A37
A11
A14
A13
A12A17
A05
pins on floor and front into Assemble A15 first, then A11-A14 onto holes in body sides, you might need to adjust holes Assemble A10 and A37
holders
Sand
Sand back of A14as shown in picturebelow before youglue it into body
holders
5

A22
A23
The kit offers option of closed or open front windows, but because of difference betweenwall thickness in real and scale, it is only possible with a little surgery. If you want tobuild closed vehicle without interior details, you can leave these steps
cut - sand - as shownin pictures for open window option
glue on 2 plastic strips (supplied in bag)0,75x1,6mm, 0,2mm thick - closed window
PE14
0,6mm wire
bend base of PE14 180° below to adjust its high forclosed window optioncut it out like in picture and use just part with rivetsto make hinges for open window option
A48 - mind inner and outerdesign
closedopen
6

small windows assembly - for closed option use PE24, for open option use PE23mind position of PE21, different for opened (down) and closed (up) window
PE24
slice of plastic rod provided in the bag
PE22 PE21
0,3mm wire
PE22
PE23
PE21
Open windows
closed windows
glue front A3 in position - pins to holes in sides, use more glue to soften plastic and then with sharp tweezers create in softened plastic nice welding lines. You might also prefer to glue pedals PE31 on A3 before it is glued between body sides.
PE31
A24
A27A47 A46
7
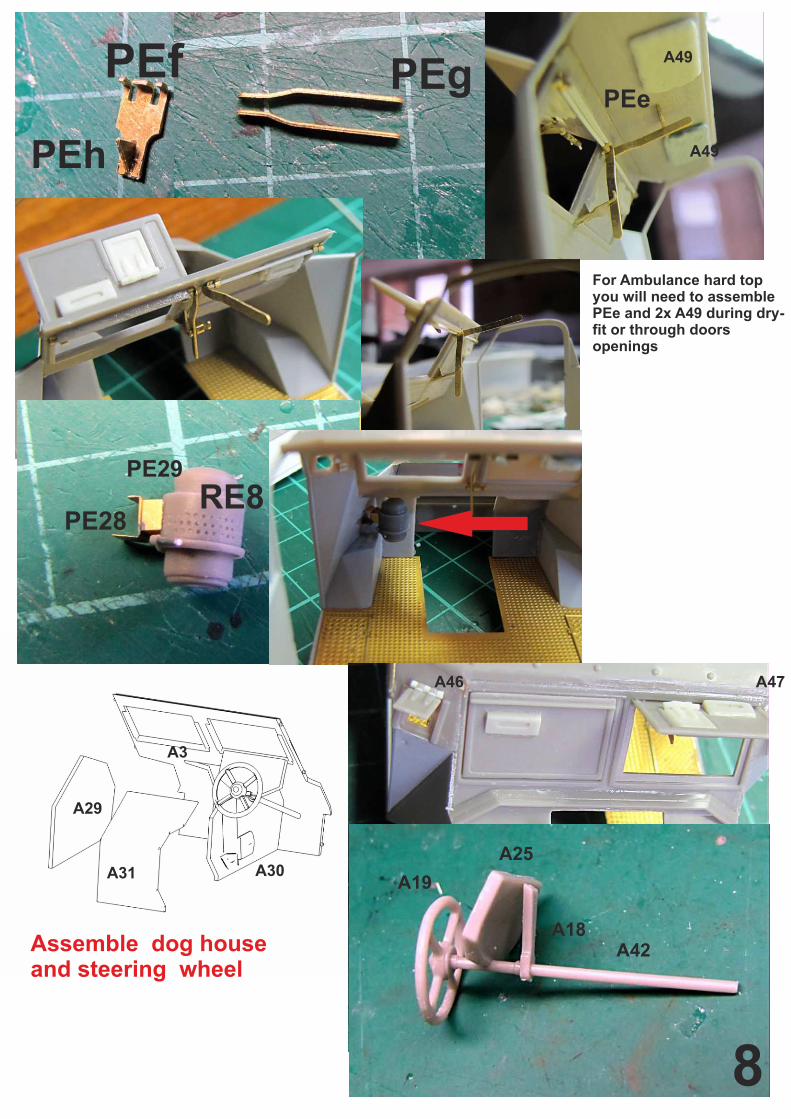
PEf
PEh
PEgPEe
RE8PE28
PE29
For Ambulance hard topyou will need to assemblePEe and 2x A49 during dry-fit or through doors openings
A49
A49
A3
A30
A29
A31
A46 A47
A42
A19
A25
A18Assemble dog house and steering wheel
8
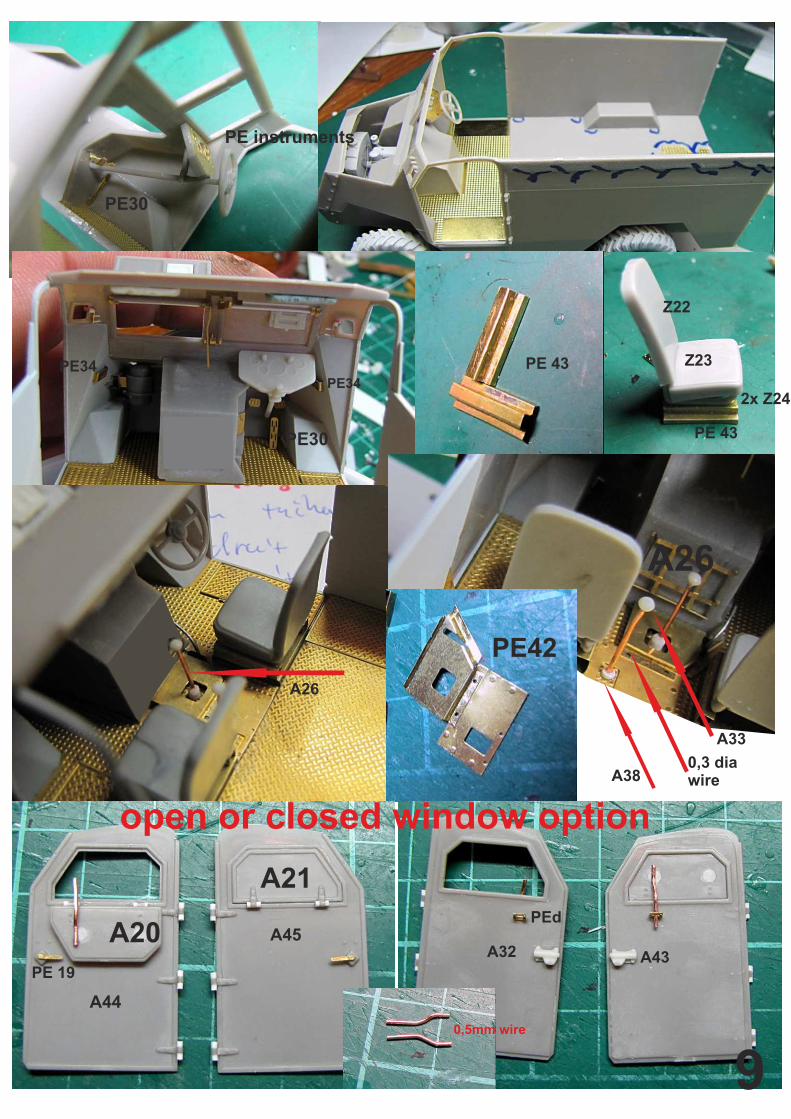
PE30
PE instruments
PE 43
PE 43
Z22
Z23
2x Z24
PE34PE34
PE30
PE42
A26
A26
A33
A380,3 diawire
open or closed window option
PEd
A32 A43PE 19
A44
A45A20
A21
0,5mm wire
9
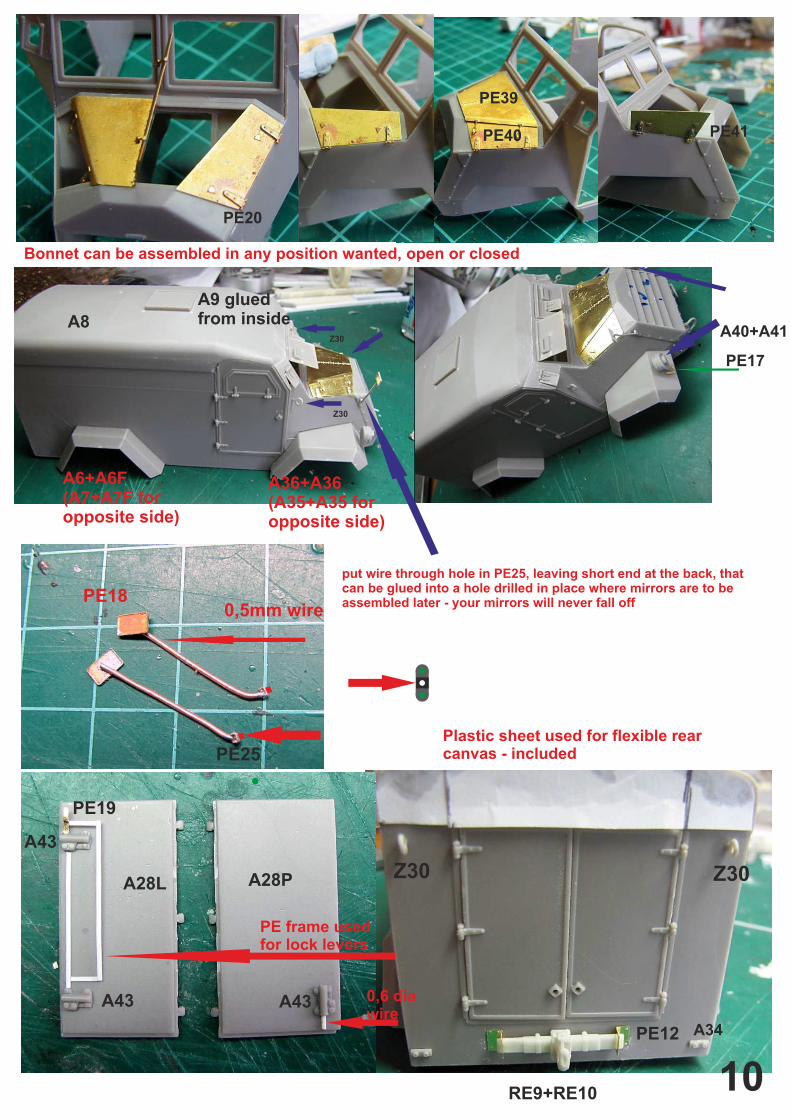
PE40
PE39
Bonnet can be assembled in any position wanted, open or closed
PE41
PE20
A6+A6F(A7+A7F foropposite side)
A36+A36(A35+A35 foropposite side)
A8
A9 gluedfrom inside
Z30
Z30A40+A41
PE17
A43
A43 A43
PE19
A28L A28P
0,6 diawire
PE frame usedfor lock levers
RE9+RE10
PE12
Plastic sheet used for flexible rear includedcanvas -
A34
Z30 Z30
0,5mm wirePE18
PE25
put wire through hole in PE25, leaving short end at the back, thatcan be glued into a hole drilled in place where mirrors are to beassembled later - your mirrors will never fall off
10
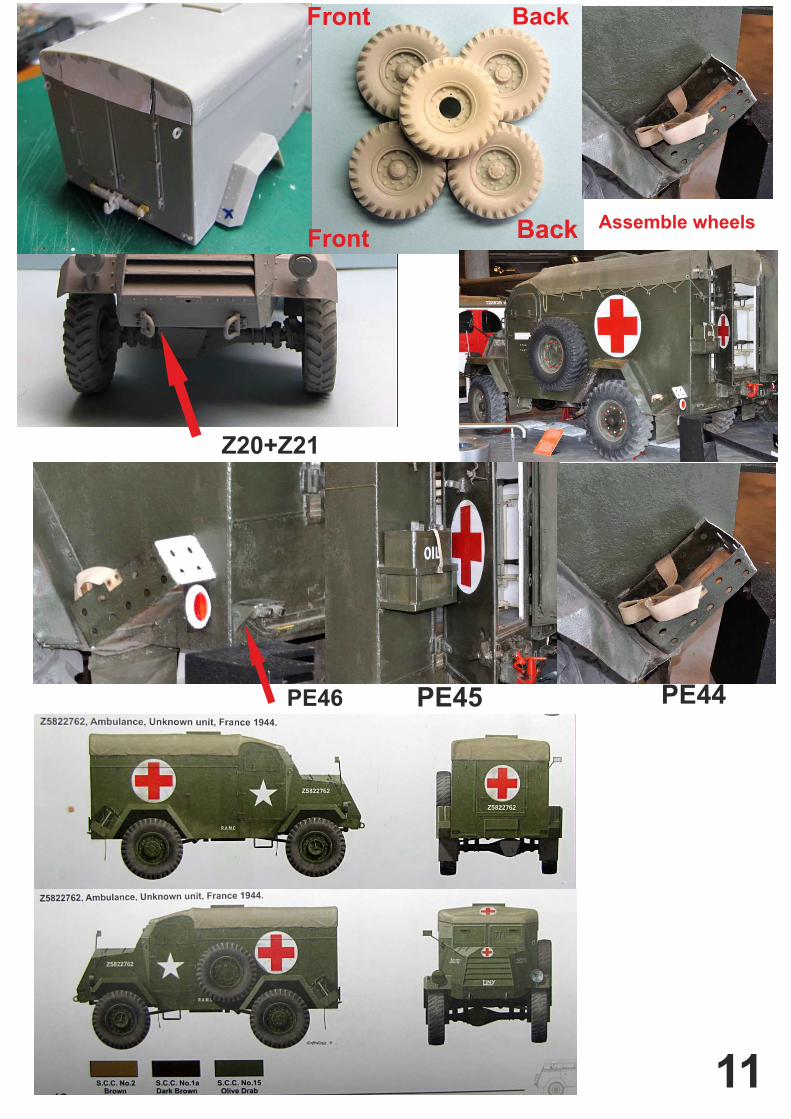
Front Back
Front Back Assemble wheels
Z20+Z21
PE44PE45PE46
11
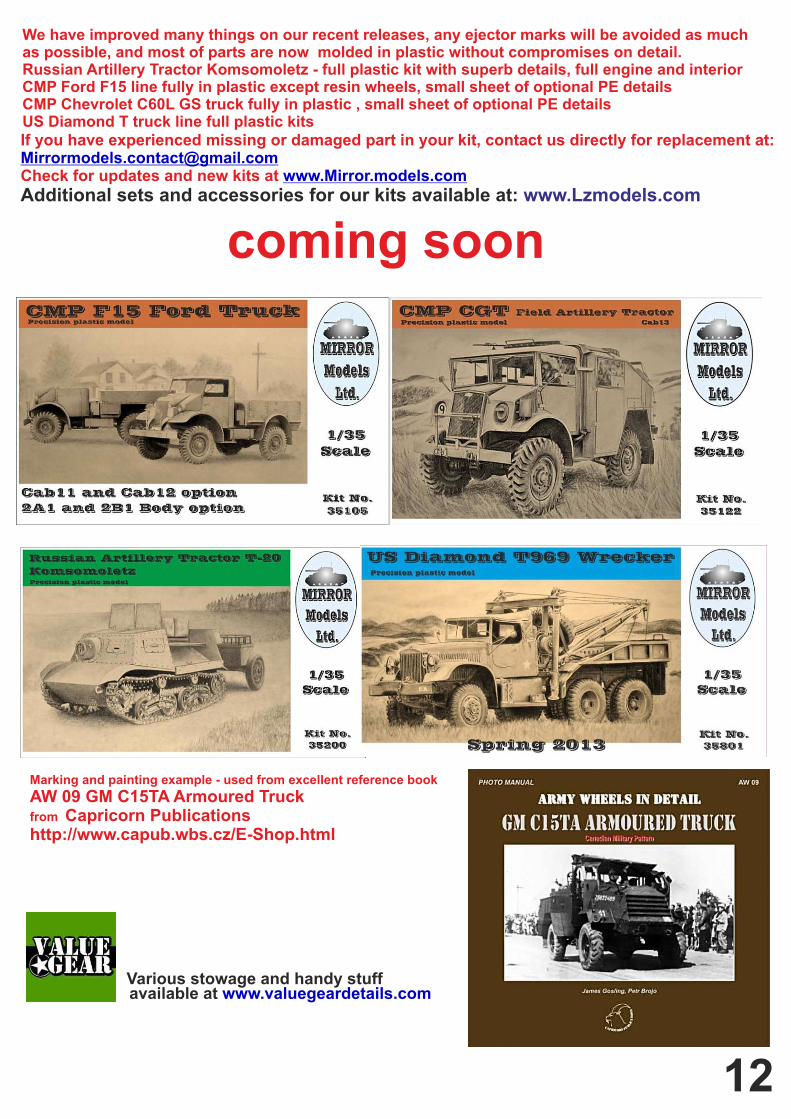
coming soon
We have improved many things on our recent releases, any ejector marks will be avoided as much as possible, and most of parts are now molded in plastic without compromises on detail. Russian Artillery Tractor Komsomoletz - full plastic kit with superb details, full engine and interiorCMP Ford F15 line fully in plastic except resin wheels, small sheet of optional PE detailsCMP Chevrolet C60L GS truck fully in plastic US Diamond T truck line full plastic kits
, small sheet of optional PE details
If you have experienced missing or damaged part in your kit, contact us directly for replacement at:
Check for updates and new kits at
Additional sets and accessories for our kits available at: www.Lzmodels.com
Various stowage and handy stuffavailable at www.valuegeardetails.com
Marking and painting example - used from excellent reference book
AW 09 GM C15TA Armoured Truckfrom Capricorn Publicationshttp://www.capub.wbs.cz/E-Shop.html
12