Embed Size (px)
Citation preview
Operations Manual March 2015
Copyright 2013 EVTV LLC 1
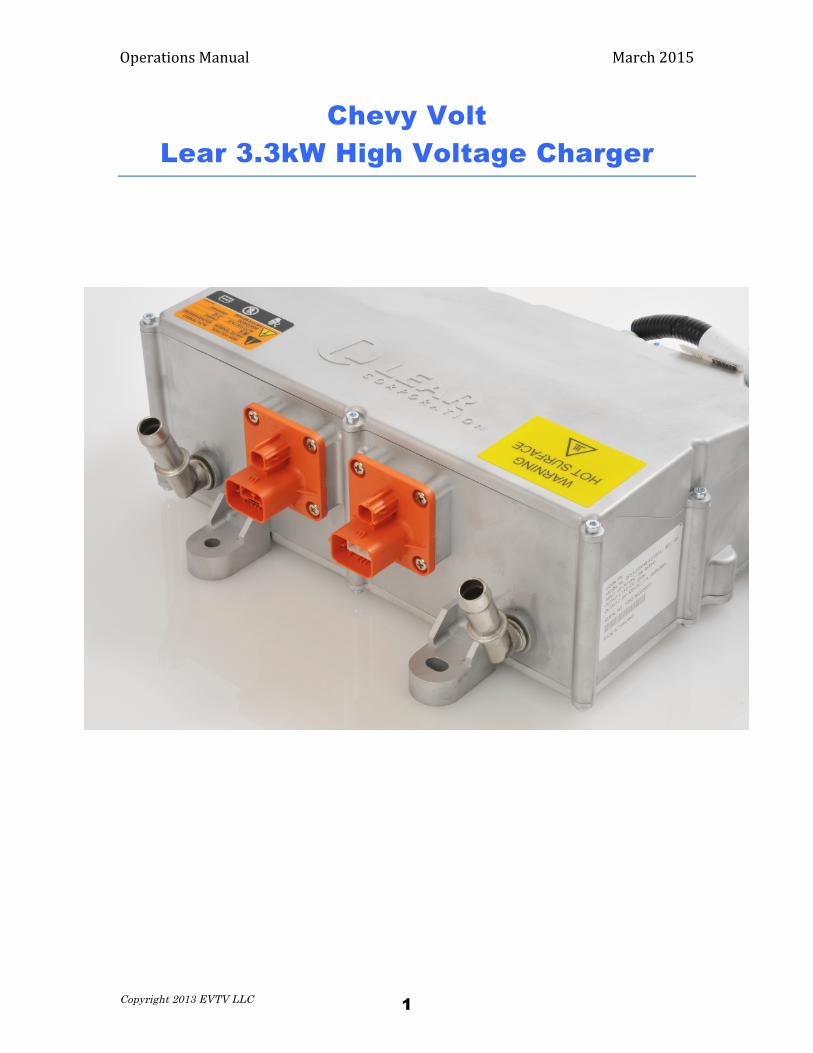
Chevy Volt Lear 3.3kW High Voltage Charger
Operations Manual March 2015
Copyright 2013 EVTV LLC 2
INTRODUCTION This manual describes the Lear 3.3kW high voltage battery charger used on a number of major automotive manufacturer electric automobiles, most notably the Chevrolet Volt and the CODA. These chargers vary slightly in operation. This manual covers operation of the Chevy VOLT version of the Lear charger. These are available from any GM Dealer or Parts Outlet as part number GM 22799689. This is an important item of information. By using this part in your electric vehicle, you are assuring that if it fails in the future, you can easily replace it at any GM Parts outlet or dealership worldwide. The Lear 3.3kW is a Controller Area Network (CAN) controlled charger suitable for charging battery packs of 200 to 420 vdc from single-phase 120vac or 240vac split phase power. The charger will produce a maximum of about 11.5 amps charging current at voltages up to 420vdc. Maximum input power is 3300 watts with efficiencies of up to 92%. Notably, this charger has a remarkably clean power factor correction and high efficiency. High quality Delphi automotive grade connectors allow safe and reliable connections to your electric vehicle. Liquid cooling allows a very small physical footprint in your electric vehicle. The Lear charger is water cooled - a 50% mixture of glycol and water to prevent corrosion. Weight: 20.5lbs dry
Dimensions: 13” x 11 x 5" outside dimensions including its mounting feet. Input: 100-240VAC / 15A 50-60Hz
Efficiency: with 208 VAC input, the charger was calculated to be 91.7% efficient while operating between 3.0-3.3 AC kW.
Charging at Level 1 with 120 VAC input the charger was calculated to be 90.6% efficient while operating near 1.3 AC kW.

Operations Manual March 2015
Copyright 2013 EVTV LLC 3
CONNECTIONS To connect the Lear 3.3kW charger to your electric vehicle systems, you must make the following connections.
• 12vdc power. • EVTV Lear Charger Controller Module • High Voltage Battery Pack • 120vac or 240 vac AC Power
12V POWER Both the Lear Controller Module and the Lear 3.3kW charger require 12vdc power from the vehicle to operate. This has been consolidated into a single connection to the Lear Controller via a red wire (+12vdc) and black wire (12v rtn/frame ground). This is normal automotive 9-‐15vdc at less than 2 amperes.

Operations Manual March 2015
Copyright 2013 EVTV LLC 4
It is important that this 12v power ONLY be applied when charging is desired. This ensures the controller module is reset at the beginning of charge. Additionally, the Charger Aux 12vdc Connector MUST be connected to a 12v battery to initiate charging.
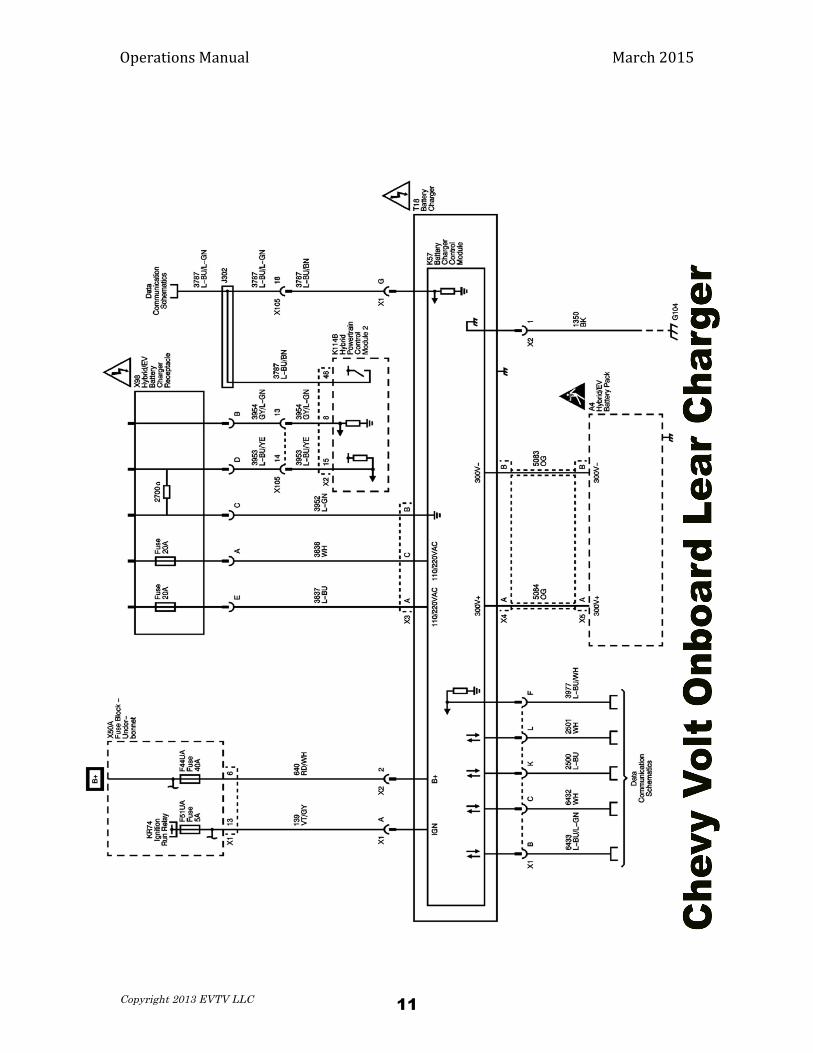
EVTV CONTROLLER MODULE The EVTV Lear Controller Module must be connected to the Lear 3.3 kW charger via the 12 pin black Delphi GT150 connector. This connector is wired as shown below.
Operations Manual March 2015
Copyright 2013 EVTV LLC 5
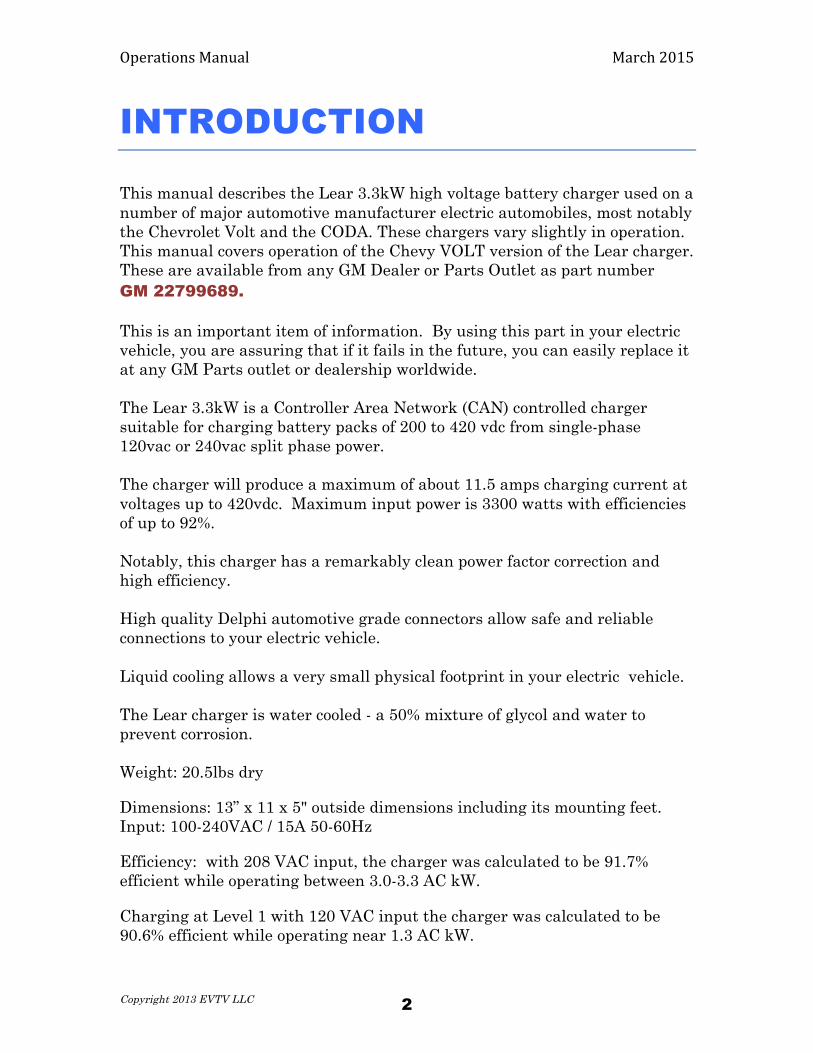
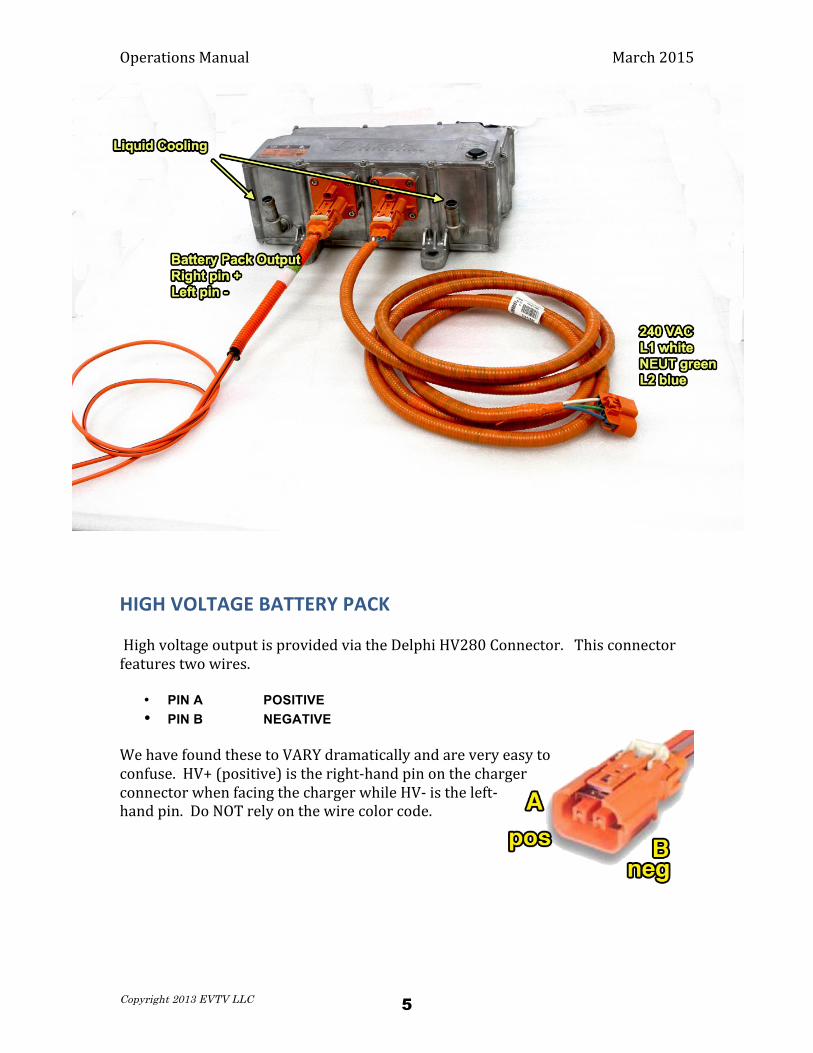
HIGH VOLTAGE BATTERY PACK High voltage output is provided via the Delphi HV280 Connector. This connector features two wires.
• PIN A POSITIVE • PIN B NEGATIVE
We have found these to VARY dramatically and are very easy to confuse. HV+ (positive) is the right-‐hand pin on the charger connector when facing the charger while HV-‐ is the left-‐hand pin. Do NOT rely on the wire color code.

Operations Manual March 2015
Copyright 2013 EVTV LLC 6
AC POWER AC Power input is provided via the Delphi power connector. The other end of the provided cable has a connector you may use, but generally would be removed to connect the three wires to your J1772 inputs as follows:
• WHITE L1 PIN A • GREEN or BLACK Neutral PIN B • BLUE or BROWN L2 PIN C
This should be connected to 240vac 60 Hz split phase power. The connection MAY be made to 120vac single-‐phase power but output power will be reduced.
OPERATION In normal operation, when 12vdc is applied to the controller module, AND 12vdc appears at the Aux 12v connector, CAN communications is established between the module and the Lear charger. As soon as AC power is applied, the charger will begin charging the battery pack. It does not matter whether AC power or 12vdc is applied first, but no charging occurs before both are present. The charger will charge at roughly the commanded current until the SetVDC voltage is reached. This is the Constant Current or CC phase. It will then quite accurately hold that voltage by gradually decreasing the provided charger current. This is referred to as the Constant Voltage or CV phase. At the point where the charge current falls below the designated END current value, the charge will terminate the charge process all together. If at any time during the charge process, either the AC power or 12v power are removed, charging will terminate. It will resume if AC power and 12vdc later become available. In this way, you can also use other devices/BMS to monitor and control charging by interrupting the 12vdc supply to the Lear Charger Controller, if desired. Note that the charger may be operated from either 110/120 or 220/240 volts. However, the power limits will be less than half at the lower 110/120 volt range. A common complaint is that the charger will not charge at 110/120volts. This is in

Operations Manual March 2015
Copyright 2013 EVTV LLC 7
almost all cases a result of having the end current set higher than the charger can make at all at 110/120v.
SETTING CHARGE VALUES The EVTV Charge Controller Module sends Controller Area Network (CAN) messages to the Lear charger to control all charge operations and receives certain informational messages in reply. The important values it uses include:
• Charger Target Voltage
• Charge Current
• End Current. These values are contained in Electrically Erasable Programmable Read Only Memory. And so anytime 12v is applied, the module initializes operation, retrieves the configuration items from EEPROM, and controls the charge process. The only time user intervention is necessary in this automatic process, is to change the values used. This can be done with any laptop computer with a serial terminal program such as Hyperterm for Windoze or CoolTerm for Mac OSX. The EVTV Lear Charger Controller Module features a Universal Serial Bus (USB) B type connector on one end. This should be connected to a laptop or other personal computer with a serial USB connection cable and serial port WITH terminal program software. The terminal program MUST be set to a data rate of 115,200 bits per second and a serial specification of 8 data bits, no parity, and 1 stop bit (8N1). Once this is performed, the screen below should appear and a regular line of ASCII text will print each second showing the SetVDC, , the Setcurrent, Actual DC Amps, the End current, ampere hours, kiloWatthours, and charging time.

Operations Manual March 2015
Copyright 2013 EVTV LLC 8
Startup successful. EVTV Motor Werks - Lear VOLT Charger Version 1.18 =========== Lear VOLT Charger CAN Controller Version 1.18 ============== ************ List of Available Commands ************ ? or h - Print this menu a - set desired DC charging current limit ie a12.7 c - sets CAN port ie c0 or c1 d - toggles DISPLAY FRAMES off/on to print received and sent CAN data traffic e - set current level to terminate charge ie e4.2 i - set interval in ms between CAN frames i550 k - set data rate in kbps ie k500 v - set target charging voltage CV ie v325.9 x - set Volt APM DC-DC output voltage ie x14.4 z - Zero amphours and kilowatt hours 1 toggle Lear charger off/on 2 toggle Volt charger off/on 3 toggle Volt DC-DC off/on ************************************************************** ============================================================== Using CAN1 - initialization completed. VOLT Charger: SetVDC:335.0v Set Current:7.5A DC Amps:7.5A End:3.50A 20.15Ah 6.75kWh Temp:39C Time: 00:00:00.612 VOLT Charger: SetVDC:335.0v Set Current:7.5A DC Amps:7.5A End:3.50A 20.17Ah 6.75kWh Temp:39C Time: 00:00:01.112 VOLT Charger: SetVDC:335.0v Set Current:7.5A DC Amps:7.5A End:3.50A 20.19Ah 6.76kWh Temp:39C Time: 00:00:01.612
SETTING VOLTAGE The most important setting is the charge voltage. This is the voltage the charger will charge your battery pack to. This appears in the printout as SetVDC. The charger will apply maximum current until this value is reached, and then gradually decrease the applied energy to maintain that voltage at that level. The command for changing this is V or v for voltage. Your terminal program should be set to send a carriage return and line feed with each line. Entering V335 and pressing return would change the SetVDC voltage to 335 and this should immediately begin appearing in the transmitted lines. The Charger will accept any value from a minimum of 200Vdc to a maximum of 511vdc. We have found it does NOT charge reliably above 420 volts. The Volt charger will automatically detect when the pack is approaching this voltage and begin limiting current output to hold that voltage at that level. As the pack continues to charge, this current will gradually taper down as the pack approaches full charge.

Operations Manual March 2015
Copyright 2013 EVTV LLC 9
Note that the Charger does NOT accurately report the pack voltage level. It does accurately measure this internally, but in the Chevy Volt installation, pack voltage is actually monitored and reported by the pack Battery Management Module. So the charger itself does NOT report the voltage over CAN. SET CURRENT. The Volt/Lear charger allows you to specify the rate of current delivery up to a maximum of 12.7A. Any value entered above that will cause the charger to shut down. If the total power limit of 3300 watts is reached, that is the maximum current the charger will deliver, even if a larger value is entered. So the charger will deliver whatever is entered up to its maximum power. The Volt charger DOES accurately report the actual current output. To Set the charger for 7.5 A, simply enter A7.5 or a7.5. Understand that the charger has TWO limitations – maximum current of 12.6 amperes and a maximum total POWER of 3300 watts. For example, at the high end of the voltage range, 12.6 amperes at 420 volts would require 12.6x420=5292 watts of power. But we are power limited to 3300 watts. So at 420 volts, the maximum current that can be applied would be about 3300/420 or 7.85 amperes of current. Similarly, if we are charging at the bottom of the range, we should be able to charge at 3300/200 = 16.5 amperes of current. But we are limited to 12.6 amperes. Both limits apply ALL the time at any voltage. When charging a pack from a low level to a high level with max current specified, you will likely see the current gradually decrease to stay within these limitations. All chargers work this way.
SETTING CHARGE TERMINATION CURRENT The command E allows you to set the termination current i.e. E2.8. This would set the termination current to 2.8 amperes. For most battery chemistries, this is normally set at C/20 or 0.05C. For example, if you had a 65 Ah pack, you might set this to 0.05 x 65 or 3.2 amps.

Operations Manual March 2015
Copyright 2013 EVTV LLC 10
At the point where the charge VOLTAGE is reached, the charger will automatically begin decreasing the applied charge current to maintain that voltage. At the point where it decreases to 3.2 amperes, in this case, the charge controller sends a disable signal to the charger and terminates the charge. The charger also reports accumulated Ampere Hours or AH that have been put into the charger at any time. This value is actually stored between charges. If you want to check the actual ampere-‐hours charged during a specific charge cycle, simply enter Z at the beginning of the charge to zero out this AH counter. You may clear the ampere-‐hour Ah counter with the character Z for Zero.
COOLING The Lear VOLT Charger does require liquid cooling. This is the key to providing 3.3kW of charge power in a small device the size of a thick book. But without liquid cooling it will quickly overheat and shutdown. A 50/50 mixture of Dextron antifreeze and water is recommended but any anti-‐freeze with an anti-‐corrosive may be used. In most applications, the charger can be included in the cooling loop with the vehicle inverter or motor. This is because you would never have the situation where you were charging at the same time you were using the motor, for example. When driving the car, the charger would act as additional heat sink or cooling for the motor. And when charging the motor would act as additional heat sink for the charger.
Operations Manual March 2015
Copyright 2013 EVTV LLC 11