Embed Size (px)
Citation preview
Support Guide for CCS Service Desk Banner Document Management
1
Banner Document Management (BDM)
Support Guide for CCS Service Desk
Support Guide for CCS Service Desk Banner Document Management
2
Table of Contents Overview 3
1. Process Details 1.1 BDM Security 4 1.2 BDM Functional Specialists 4 1.3 The Format of the Request 5 1.4 BDM Related Banner Classes 5
2. Adding Users to BDM 2.1 Who Submits the Request 6 2.2 How is the Request Submitted 6 2.3 The Process 6
3. Removing User From BDM 3.1 Who Submits the Request 8 3.2 How is the Request Submitted 8 3.3 The Process 8
4. PC & Browser Configurations 4.1 Supported Browsers 10 4.2 Active X Components 10
4.2.1 Interactive vs. Thin Client Mode 11 4.2.2 Active X Component Detection 11 4.2.3 Active X Component Installation 13 4.2.4 Checking Installed Components 13
4.3 Local Intranet Sites 15 4.4 Safari 16 4.5 32 bit vs. 64 bit Internet Explorer 16 4.6 Adobe Reader Configuration 14
Appendix A 19 Appendix B 20 Appendix C 22 Appendix D 23
Support Guide for CCS Service Desk Banner Document Management
3
Overview Banner Document Management (BDM) is Carleton University’s electronic document management solution for student records. BDM is accessible via Banner through integrated, single sign-on and available in limited integration through Self-Serve Banner (i.e. Carleton Central). BDM is based on a .NET Web Application called WebXtender and a desktop application called AppXtender. Currently in our Carleton implementation of BDM our user community only uses WebXtender. To provide a Carleton user the ability to use WebXtender, or BDM in general, they must be added to the BDM security matrix and have their PC configured for use with the .NET tools within WebXtender. Users that only access BDM through Self-Serve Banner do not have to be added to BDM security. The remainder of this document illustrates and explains the steps and process flows for both adding & removing users in BDM and setting up the user’s PC for BDM usage.

Support Guide for CCS Service Desk Banner Document Management
4
1. Process Details
1.1 BDM Security
BDM contains its own user account, user group and document security. Currently there is no synchronization within MC1 to ensure that user account changes propagate to BDM. Therefore, users must be added to BDM manually to create their accounts and then assigned to user groups. BDM User Accounts – identified by a username and password as they are in Banner. Each user account is also provided with a default user profile upon creation. BDM User Groups – these are the structures that actually provide access and privilege to users within BDM. Membership in a user group provides a user the ability to carry out tasks in BDM. These are similar to Banner Classes The metadata for all user accounts and user groups resides in the Oracle database in a series of BDM related schemas.
1.2 BDM Functional Specialists
In all functional areas where BDM is being used we have created a network of BDM Functional Specialists to serve as the BDM subject matter experts for those functional areas. In addition, these BDM Functional Specialists have been tasked with handling all requests to the CCS Service Desk for the purpose of managing users in BDM. They will be both the submitter and authorizer. They have been provided detailed documentation and instruction on their role and the process for communicating with the Service Desk The BDM Functional Specialists will handle all communications with their respective user communities to inform them of the process and work flow for adding users to BDM. This process should ensure that the Service Desk is only being contacted by these BDM Functional Specialists with user requests. For a complete list of these BDM Functional Specialists please refer to Appendix A

Support Guide for CCS Service Desk Banner Document Management
5
1.3 The Format of the Request BDM Functional Specialists have been instructed to continue to use the current User Account Request form for submitting BDM user requests to the Service Desk. In the request we have been specific that they must provide the following information:
Banner ID
Full Name
Banner Username
Banner Class(s) the user is to be added to or removed from
Any other mandatory information the form requires will also be provided. They have been instructed to use the Comment field on the form to list all the Banner Classes and details for the request. Note:
If the request contains any indication to move the ticket on to the BDM Administrator then do so. If it does not then there will be no need.
1.4 BDM Related Banner Classes
To facilitate the process of adding or removing users in BDM through the Service Desk we have created a set of Banner Classes that line up 1:1 with BDM User Groups. When a user is added to one of these BDM type classes processes in the background will handle the creation of the BDM user account and assignment to the user group. These classes are intended only for BDM use. They should not contain any Banner Forms or Reports. They have all been named with the prefix “CUBDMSGRP”. Like any Banner Class these classes are available through GZASECR for user assignment. Due to this, we are able to create a process that is seamless for the end user community and the Service Desk. The BDM Functional Specialists are responsible for knowing the details of the BDM user groups for their functional area and what Banner Classes align with them. Therefore the Service Desk staff only has to know the process for responding to requests. For a complete listing of all Banner Classes and the BDM User Groups they align with refer to Appendix B

Support Guide for CCS Service Desk Banner Document Management
6
2. Adding Users to BDM
2.1 Who Submits the Request
All requests for adding users to BDM must come from a BDM Functional Specialist. Based on the Banner Classes being requested, the request should come from the BDM Functional Specialist that owns those classes. Any request to add users to BDM that does not come from the BDM Functional Specialist responsible for the Banner Classes in question should be redirected for authorization to the appropriate BDM Functional Specialist.
2.2 How is the Request Submitted
Through the current User Account Request Form at: http://www.carleton.ca/ccs/contact/computing-account-requests/
2.3 The Process
1. A BDM Functional Specialist will submit a request to the CCS Service Desk to have a user added in BDM.
2. The CCS Service Desk will create a ticket for the request. 3. The Service Desk technician will log onto Banner PROD and open GZASECR. 4. In GZASECR enter the users Banner Username, as per the request, in the User ID
field.

Support Guide for CCS Service Desk Banner Document Management
7
5. Click on the CLASSES button. The classes list will open. 6. Scroll through the list of classes looking for the class name(s) as supplied by the
submitter in the request. 7. Double click the field next to the class name to change the value to YES.
8. Press the CLOSE button to save the changes and close the class list form. 9. Close GZASECR. Note – at this point the user has been added to BDM 10. Send confirmation to the BDM Functional Specialist that the request has been
completed.
Refer to Appendix C for more detail on the process flow for adding users to BDM.
Support Guide for CCS Service Desk Banner Document Management
8
3. Removing Users from BDM
3.1 Who Submits the Request
All requests for removing users from BDM must come from a BDM Functional Specialist. Based on the Banner Classes being requested, the request should come from the BDM Functional Specialist that owns those classes. Any request to remove users from BDM that does not come from the BDM Functional Specialist responsible for the Banner Classes in question should be redirected for authorization to the appropriate BDM Functional Specialist.
3.2 How is the Request Submitted
Through the current User Account Request Form at: http://www.carleton.ca/ccs/contact/computing-account-requests/
3.3 The Process
11. A BDM Functional Specialist will submit a request to the CCS Service Desk to have a user removed from BDM.
12. The CCS Service Desk will create a ticket for the request. 13. The Service Desk technician will log onto Banner PROD and open GZASECR. 14. In GZASECR enter the users Banner Username, as per the request, in the User ID
field.

Support Guide for CCS Service Desk Banner Document Management
9
15. Click on the CLASSES button. The classes list will open. 16. Scroll through the list of classes looking for the class name(s) as supplied by the
submitter in the request. 17. Double click the field next to the class name to change the value to ‘BLANK’ (i.e.
remove the YES).
18. Press the CLOSE button to save the changes and close the class list form. 19. Close GZASECR. Note – at this point the user has been removed from BDM 20. Send confirmation to the BDM Functional Specialist that the request has been
completed.
Refer to Appendix C for more detail on the process flow for removing users from BDM.

Support Guide for CCS Service Desk Banner Document Management
10
4. PC and Browser Configurations for BDM
The following sections have been taken from the BDM Functional Specialists guide titled PC & Browser Configurations for BDM. End users should be contacting the various Functional Specialists as first point of support for BDM issues but should they choose to contact the Service Desk this information may be of assistance. Please refer to Appendix D for some useful troubleshooting tips.
4.1 Supported Browsers
The vendor’s official support guidelines for AX Web Access .NET 6.5 (i.e. WebXtender) are as follows:
Browser Version Supported
Internet Explorer 8.0 7.0
Interactive Client (IRC) Mode on Windows OS Thin Client Mode on Windows OS
FireFox 3.5
Thin Client Mode on Windows OS Thin Client Mode on MAC OS 10.6
Safari 4 Thin Client Mode on MAC OS 10.6
Notes:
Although other versions of the listed browsers, other browsers or other versions of the listed OS may provide positive results in WebXtender 6.5 the above are the only ones supported
Issues with performance and/or lack of features are often related to the use of a non-IE browser
4.2 Active X Components
WebXtender is a Microsoft .NET application and therefore relies heavily on Microsoft technologies. One of those technologies is Active X. Many of the document actions that are carried out in WebXtender (viewing, importing, scanning, indexing, etc.) rely on specific Active X Components being installed on the

Support Guide for CCS Service Desk Banner Document Management
11
user’s PC and being available to the browser. Of course, Active X is only recognizable by Internet Explorer so therefore many document actions are either not available or are impacted in other browsers due to their inability to not recognize Active X.
4.2.1 Interactive vs. Thin Client Mode
The two client modes are defined based on the existence of and use of Active X or not. When using Internet Explorer the browser is able to make use of Active X and therefore can run WebXtender in Interactive Mode making full use of the interactive viewer and related components. Browsers that do not support Active X can only run WebXtender in Thin Client Mode. In this mode, none of the extended or interactive functionality will be available. Notes:
In our current configuration all user profiles in BDM at Carleton University are setup for interactive client mode.
Regardless of this profile setting, the browser will dictate whether interactive or thin client mode will be used. If they do not use IE then thin client will be used…if they use IE then interactive will be used.
4.2.2 Active X Component Detection
WebXtender is designed to be able to detect the existence of the Active X components on the user’s PC. It is also designed to be able to detect if the browser supports Active X to know if it should even try to detect the components. When a user is using IE, WebXtender can detect that the browser supports Active X. Therefore when the user attempts to carry out some action that requires an Active X component WebXtender knows how and where to look on the user’s PC to call that component into action. Conversely, if the user is not using IE then WebXtender can detect that the browser does not support Active X and simply send the user into Thin Client Mode. If a component is not detected as installed on the user’s PC, or is detected but determined to have not been run yet, then WebXtender will notify the user that they must install or run the component. The screen shots below illustrate how IE8 and IE9 display these notices:

Support Guide for CCS Service Desk Banner Document Management
12
IE8 Display of Error Message and Install Notice
IE9 Display of Error Message and Install Notice
In both cases the error message will typically read as follows: Error: The ‘IE’ browser does not support or could not load OBJECT ‘classid:##############’
While the Active X Component notice will look something like: This website wants to install the following add-on: ‘<Component Name>…from EMC Corporation’. Click to install. OR This website wants to run the following add-on: ‘<Component Name>...from EMC Corporation’. If you trust the website and the add-on and want to allow it to run click here…
Support Guide for CCS Service Desk Banner Document Management
13
4.2.3 Active X Component Installation
All the required Active X components for Interactive Client Mode are available for download from the BDM server through WebXtender. As detailed above, when WebXtender detects that an Active X Component has not already been installed the user will provided the option to download and install the component. However, the user must be the administrator of their PC in order to download and install using this method. The CCS Windows Group has resolved the issue of users not being the administrator of their PC, and developed a way to deploy all the Active X Components out to PCs on the CUNET domain. This deployment installs the components on the user’s PC over the network and runs on a schedule to ensure that if they get removed by a user they will be reinstalled. Notes:
This method of installing the Active X Components over the network will still require that the user “run” the component the first time they try to use it in WebXtender
The user will be prompted in the browser as per the details in the above section on component detection
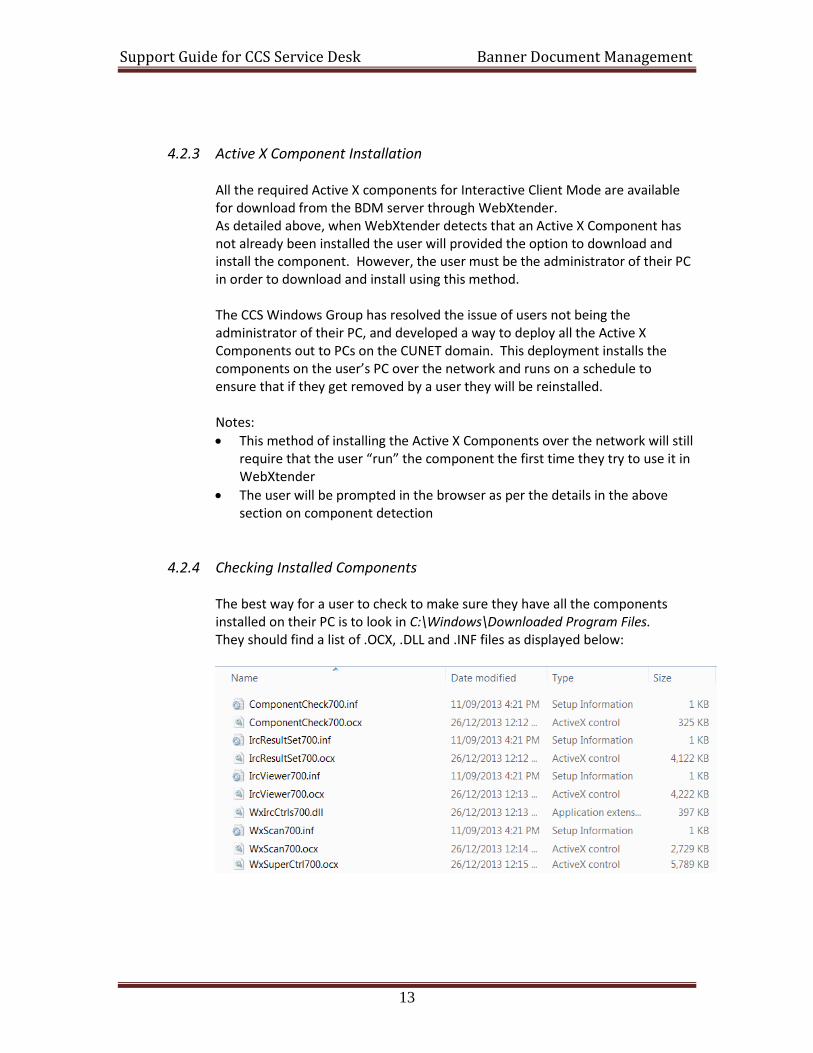
4.2.4 Checking Installed Components
The best way for a user to check to make sure they have all the components installed on their PC is to look in C:\Windows\Downloaded Program Files. They should find a list of .OCX, .DLL and .INF files as displayed below:

Support Guide for CCS Service Desk Banner Document Management
14
They can also check in C:\Program Files (x86)\Common Files\XtenderSolutions to confirm they have the following folders:
Another place the user can check on the state of installed components is in WebXtender. From the Application List view the user will click HELP -> Check Installed Components. The following window will appear:

Support Guide for CCS Service Desk Banner Document Management
15
The bottom pane of this window will indicate if any of the four components listed in the top pane have been installed.
Notes:
The user may have to click into the bottom pane to activate it The bottom pane requires an Active X component so the user may be
prompted to install or run the component This tool does not list all the components that WebXtender uses or that
we have pushed to CUNET user PCs
4.3 Local Intranet Sites
To ensure that WebXtender and the browser are able to communicate properly with the BDM servers it may be necessary to add those server addresses to the list of Local Intranet Sites in Internet Explorer. This action is only required in Internet Explorer and it is related to the use of the Active X Components. The CCS Windows Group has included these configurations in the CUNET Domain Group Policy to ensure that they are delivered to all user PCs without manual intervention. However, it may be necessary for a user to add these configurations manually should they get removed for any reason:
a. Click Tools -> Internet Options b. Click on the SECURITY tab c. Click on LOCAL INTRANET SITES d. Click on the SITES button e. Click on the ADVANCED button f. In the “Add this website to the zone” field enter each of the following one at a
time and click the Add button after each entry: https://bandoc04.carleton.ca https://docman.carleton.ca
g. Click the Close button on the Local Intranet sites window h. Click the OK button next to the Advanced button i. Click the OK button on the Internet Options window j. Close and reopen Internet Explorer to have these settings take effect
Notes:
o This is a step to be checked or carried out if the user reports problems accessing the WebXtender application or features within WebXtender and the issue is not related to the absence of the Active X Components

Support Guide for CCS Service Desk Banner Document Management
16
4.4 Safari
It has been noted that the Safari browser has pop-up blocker turned on by default. WebXtender presents some of its features and functionality through pop-ups. Therefore, Safari browsers need to have the pop-up blocker turned off. This is tricky to detect. Users will experience the loss of WebXtender features in Safari due to this issue. Errors do not appear. The user will simply try to carry out an action (i.e. click a button) and nothing will happen.
4.5 32 bit vs. 64 bit Internet Explorer
Windows 7 is a 64-bit O/S and by default presents the 64-bit version of Internet Explorer on the desktop. Windows 7 users need to ensure that they are using the 32-bit version of Internet Explorer, which also comes with Windows 7.
o Right click on the Internet Explorer desktop shortcut and choose Properties Note – if you are right clicking on the taskbar icon you will need to right click a second time on the Internet Explorer line from the popup you are presented with
o In the Properties window select the Shortcut tab o On the shortcut tab locate the field labelled Target o If the target field contains "C:\Program Files (x86)\Internet
Explorer\iexplore.exe" then this shortcut is for the 32-bit version and can be retained for use
o If the target field contains "C:\Program Files\Internet Explorer\iexplore.exe" then this shortcut is for the 64-bit version and needs to be replaced with a 32-bit shortcut
Note o On your Windows 7 Start menu in All Programs you will see Internet Explorer
listed. You can check what version it is pointing in the same manner as above. In some cases you may see two Internet Explorer entries in All Programs and one of them will be flagged as 64-bit

Support Guide for CCS Service Desk Banner Document Management
17
Creating the 32-bit IE Shortcut: o Delete the desktop shortcut for the 64-bit IE version and/or right click on the
taskbar icon and select “Unpin this program from taskbar”. If after unpinning it, Windows has moved it to the desktop as a shortcut, delete it.
o Open Windows Explorer or My Computer o Navigate to the C:\ drive and locate Program Files (x86). Open the Program
Files (x86) folder o Locate the folder Internet Explorer and open it o Inside this folder look for a file named iexplore.exe o Right click on this file and choose Create Shortcut. Windows will notify you that
you cannot create a shortcut in this folder and will ask if you want to place the shortcut on the desktop. Answer YES.
There are recognized issues with using WebXtender in the 64-bit version of Internet Explorer:
o WebXtender features become disabled o WebXtender features malfunction o Scanners do not get recognized by the Interactive Viewer
Confusion can be created in the user as WebXtender will not raise any errors or provide any messaging. Features just become disabled or malfunctioning without explanation. This is only an issue for users using Windows 7. Windows XP is a 32-bit operating system and comes with, and only supports, the 32-bit version of Internet Explorer. Non-Windows based operating systems do not come with Internet Explorer. MAC users need to be aware of this should they decide to create what is a dual-boot configuration that allows them to work on MAC and Windows.
4.6 Adobe Reader Configuration
Although not mandatory for WebXtender use, Adobe Reader can be used to render PDF documents in WebXtender. If the Adobe PDF Active X Component is installed on the user’s PC then WebXtender will use it for PDF rendering. However, when that component is not present or the user is using WebXtender in a non-IE browser Adobe Reader can be used to handle the rendering.
These steps will help make Adobe Reader more efficient in integrating within WebXtender for PDF viewing:
If using Adobe Reader 9 or Adobe Reader X, ensure that the following steps are completed:
Support Guide for CCS Service Desk Banner Document Management
18
a. Open Adobe Reader and go to EDIT -> PREFERENCES b. On the Preferences window select INTERNET from the left margin option list c. In the Internet settings pane (right side) check the box labelled “Display PDF in
Browser” d. Close Adobe Reader
In Adobe Reader XI this setting has been removed. The configuration of Adobe Reader XI has PDFs displaying in the browser by default. However, there may be a need to ensure that the browser has the Adobe Reader plugin enabled:
a. Open Adobe Reader XI and go to EDIT -> PREFERENCES b. On the Preferences window select INTERNET from the left margin option list c. In the Internet settings pane click on the link “How to set up your browser to
use Adobe products to view PDF documents” d. On the webpage that opens follow the instructions for the browser being used e. Close Adobe Reader XI
Support Guide for CCS Service Desk Banner Document Management
19
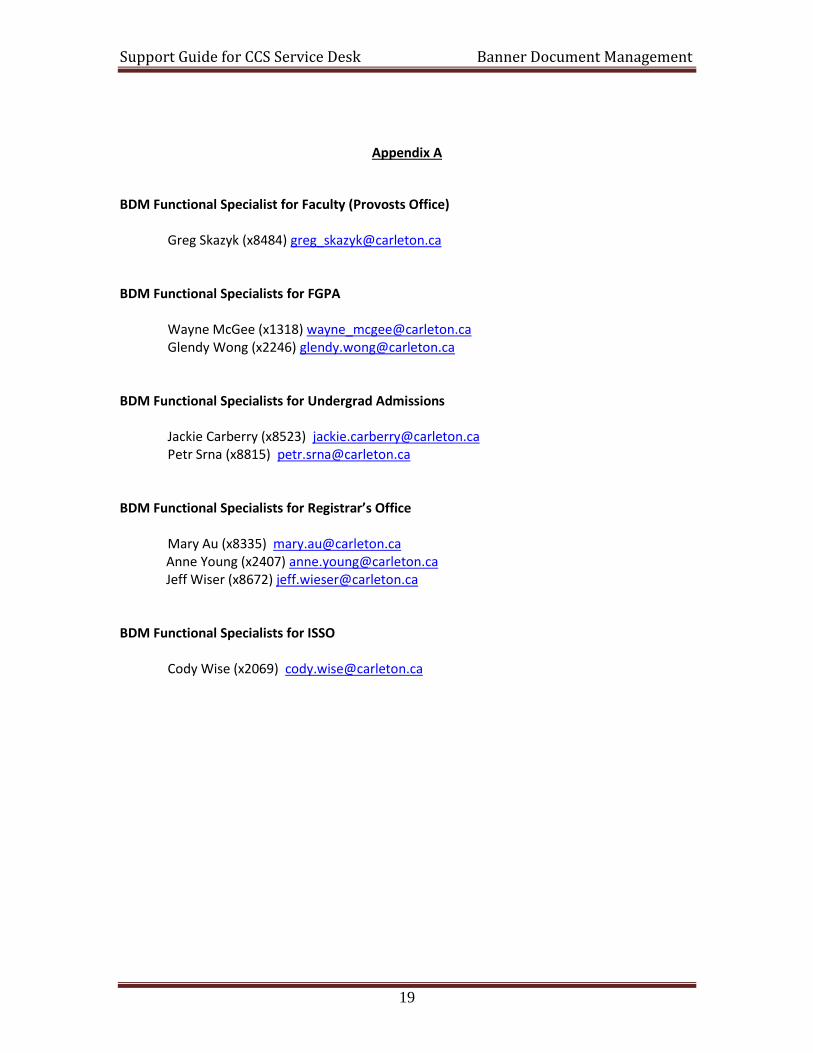
Appendix A
BDM Functional Specialist for Faculty (Provosts Office)
Greg Skazyk (x8484) [email protected] BDM Functional Specialists for FGPA
Wayne McGee (x1318) [email protected] Glendy Wong (x2246) [email protected]
BDM Functional Specialists for Undergrad Admissions
Jackie Carberry (x8523) [email protected] Petr Srna (x8815) [email protected]
BDM Functional Specialists for Registrar’s Office
Mary Au (x8335) [email protected] Anne Young (x2407) [email protected] Jeff Wiser (x8672) [email protected] BDM Functional Specialists for ISSO
Cody Wise (x2069) [email protected]
Support Guide for CCS Service Desk Banner Document Management
20
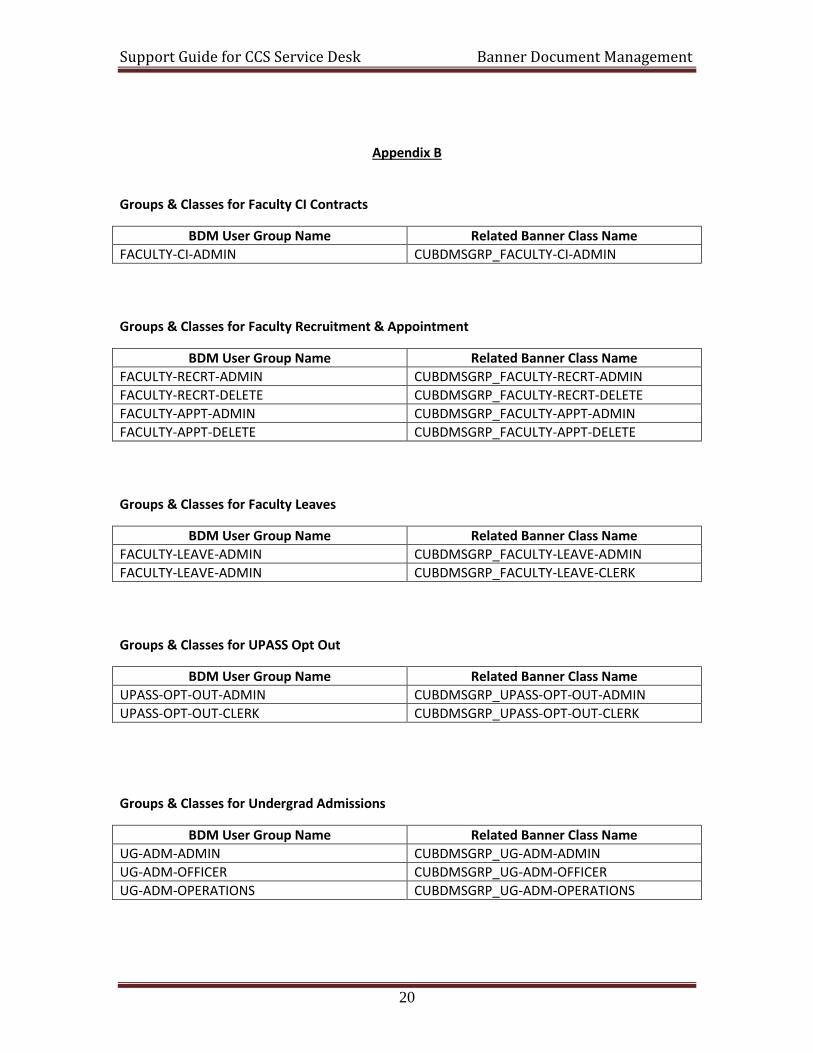
Appendix B
Groups & Classes for Faculty CI Contracts
BDM User Group Name Related Banner Class Name
FACULTY-CI-ADMIN CUBDMSGRP_FACULTY-CI-ADMIN
Groups & Classes for Faculty Recruitment & Appointment
BDM User Group Name Related Banner Class Name
FACULTY-RECRT-ADMIN CUBDMSGRP_FACULTY-RECRT-ADMIN
FACULTY-RECRT-DELETE CUBDMSGRP_FACULTY-RECRT-DELETE
FACULTY-APPT-ADMIN CUBDMSGRP_FACULTY-APPT-ADMIN
FACULTY-APPT-DELETE CUBDMSGRP_FACULTY-APPT-DELETE
Groups & Classes for Faculty Leaves
BDM User Group Name Related Banner Class Name
FACULTY-LEAVE-ADMIN CUBDMSGRP_FACULTY-LEAVE-ADMIN
FACULTY-LEAVE-ADMIN CUBDMSGRP_FACULTY-LEAVE-CLERK
Groups & Classes for UPASS Opt Out
BDM User Group Name Related Banner Class Name
UPASS-OPT-OUT-ADMIN CUBDMSGRP_UPASS-OPT-OUT-ADMIN
UPASS-OPT-OUT-CLERK CUBDMSGRP_UPASS-OPT-OUT-CLERK
Groups & Classes for Undergrad Admissions
BDM User Group Name Related Banner Class Name
UG-ADM-ADMIN CUBDMSGRP_UG-ADM-ADMIN
UG-ADM-OFFICER CUBDMSGRP_UG-ADM-OFFICER
UG-ADM-OPERATIONS CUBDMSGRP_UG-ADM-OPERATIONS

Support Guide for CCS Service Desk Banner Document Management
21
UG-ADM-SUPPORT CUBDMSGRP_UG-ADM-SUPPORT
UG-ADM-DEPT-ECON CUBDMSGRP_UG-ADM-DEPT-ECON
UG-ADM-DEPT-WOMN CUBDMSGRP_UG-ADM-DEPT-WOMN
UG-ADM-DEPT-BUSI CUBDMSGRP_UG-ADM-DEPT-BUSI
UG-ADM-DEPT-FILM CUBDMSGRP_UG-ADM-DEPT-FILM
UG-ADM-DEPT-COGS CUBDMSGRP_UG-ADM-DEPT-COGS
UG-ADM-DEPT-LALS CUBDMSGRP_UG-ADM-DEPT-LALS
Groups & Classes for Registrar’s Office
BDM User Group Name Related Banner Class Name
RO-ADMIN CUBDMSGRP_RO-ADMIN
RO-CLERK CUBDMSGRP_RO-CLERK
RO-REG-ASSISTANT CUBDMSGRP_RO-REG-ASSISTANT
RO-REG-SPECIALIST CUBDMSGRP_RO-REG-SPECIALIST
RO-REG-SPECIAL-CONF CUBDMSGRP_RO-REG-SPECIAL-CONF
RO-TEAM-LEADS CUBDMSGRP_RO-TEAM-LEADS
RO-DEPT-CIE CUBDMSGRP_RO-DEPT-CIE
Groups & Classes for ISSO
BDM User Group Name Related Banner Class Name
ISSO-ADMIN CUBDMSGRP_ISSO-ADMIN
ISSO-CLERK CUBDMSGRP_ISSO-CLERK
Groups & Classes for FGPA
BDM User Group Name Related Banner Class Name
FGPA-ADMIN CUBDMSGRP_FGPA-ADMIN
FGPA-CLERK CUBDMSGRP_FGPA-CLERK
FGPA-DEPT-ARCH CUBDMSGRP_FGPA-DEPT-ARCH
FGPA-DEPT-ARTC CUBDMSGRP_FGPA-DEPT-ARTC
FGPA-DEPT-BIOL CUBDMSGRP_FGPA-DEPT-BIOL
FGPA-DEPT-BUSI CUBDMSGRP_FGPA-DEPT-BUSI
FGPA-DEPT-CANS CUBDMSGRP_FGPA-DEPT-CANS
FGPA-DEPT-CHEM CUBDMSGRP_FGPA-DEPT-CHEM

Support Guide for CCS Service Desk Banner Document Management
22
FGPA-DEPT-CIVE CUBDMSGRP_FGPA-DEPT-CIVE
FGPA-DEPT-CLS CUBDMSGRP_FGPA-DEPT-CLS
FGPA-DEPT-COGS CUBDMSGRP_FGPA-DEPT-COGS
FGPA-DEPT-COMM CUBDMSGRP_FGPA-DEPT-COMM
FGPA-DEPT-COMP CUBDMSGRP_FGPA-DEPT-COMP
FGPA-DEPT-CSIT CUBDMSGRP_FGPA-DEPT-CSIT
FGPA-DEPT-ECON CUBDMSGRP_FGPA-DEPT-ECON
FGPA-DEPT-ELEC CUBDMSGRP_FGPA-DEPT-ELEC
FGPA-DEPT-ENGL CUBDMSGRP_FGPA-DEPT-ENGL
FGPA-DEPT-EURR CUBDMSGRP_FGPA-DEPT-EURR
FGPA-DEPT-FREN CUBDMSGRP_FGPA-DEPT-FREN
FGPA-DEPT-GEOG CUBDMSGRP_FGPA-DEPT-GEOG
FGPA-DEPT-GEOL CUBDMSGRP_FGPA-DEPT-GEOL
FGPA-DEPT-HCI CUBDMSGRP_FGPA-DEPT-HCI
FGPA-DEPT-HIST CUBDMSGRP_FGPA-DEPT-HIST
FGPA-DEPT-HLTH CUBDMSGRP_FGPA-DEPT-HLTH
FGPA-DEPT-HSTP CUBDMSGRP_FGPA-DEPT-HSTP
FGPA-DEPT-HUMM CUBDMSGRP_FGPA-DEPT-HUMM
FGPA-DEPT-INAF CUBDMSGRP_FGPA-DEPT-INAF
FGPA-DEPT-IND CUBDMSGRP_FGPA-DEPT-IND
FGPA-DEPT-IPIS CUBDMSGRP_FGPA-DEPT-IPIS
FGPA-DEPT-JOUR CUBDMSGRP_FGPA-DEPT-JOUR
FGPA-DEPT-KROE CUBDMSGRP_FGPA-DEPT-KROE
FGPA-DEPT-LALS CUBDMSGRP_FGPA-DEPT-LALS
FGPA-DEPT-LAWS CUBDMSGRP_FGPA-DEPT-LAWS
FGPA-DEPT-MAAE CUBDMSGRP_FGPA-DEPT-MAAE
FGPA-DEPT-MATH CUBDMSGRP_FGPA-DEPT-MATH
FGPA-DEPT-NEUR CUBDMSGRP_FGPA-DEPT-NEUR
FGPA-DEPT-NRTH CUBDMSGRP_FGPA-DEPT-NRTH
FGPA-DEPT-PADM CUBDMSGRP_FGPA-DEPT-PADM
FGPA-DEPT-PECO CUBDMSGRP_FGPA-DEPT-PECO
FGPA-DEPT-PHIL CUBDMSGRP_FGPA-DEPT-PHIL
FGPA-DEPT-PHYS CUBDMSGRP_FGPA-DEPT-PHYS
FGPA-DEPT-PSCI CUBDMSGRP_FGPA-DEPT-PSCI
FGPA-DEPT-PSYC CUBDMSGRP_FGPA-DEPT-PSYC
FGPA-DEPT-SERG CUBDMSGRP_FGPA-DEPT-SERG
FGPA-DEPT-SOAN CUBDMSGRP_FGPA-DEPT-SOAN
FGPA-DEPT-SOWK CUBDMSGRP_FGPA-DEPT-SOWK
FGPA-DEPT-SYST CUBDMSGRP_FGPA-DEPT-SYST
FGPA-DEPT-WOMN CUBDMSGRP_FGPA-DEPT-WOMN
FGPA-TAMS-TRANSCRIPT CUBDMSGRP_FGPA-TAMS-TRANSCRIPT

Support Guide for CCS Service Desk Banner Document Management
23
Groups & Classes for Travel Registry
BDM User Group Name Related Banner Class Name
TRAVEL-REGISTRY-BGIS CUBDMSGRP_ TRAVEL-REGISTRY-BGIS

Support Guide for CCS Service Desk Banner Document Management
24
Appendix C
Process flow for adding and removing users in BDM

Support Guide for CCS Service Desk Banner Document Management
25
Appendix D
Troubleshooting Tips Troubleshooting BDM and WebXtender issues boil down to three simple starting points:
Confirming if the browser and version could be the issue
Confirming if Active X components could be the issue
Confirming if the user’s BDM privileges could be the issue These tips provide some general direction on things that can be checked and/or confirmed with the user to determine if it is a more complex problem that would need to be escalated to the BDM Administrator in CCS.
1. Has the user referred to the BDM Support Site at http://www5.carleton.ca/bdm/? Users should be reminded that this site contains documentation, training materials and FAQs that can be of assistance.
2. Is the user using Internet Explorer 8 or 9?
If they are using IE 10 then that can be problematic. Many WebXtender features do not work with IE10. IE10 is not considered compliant with BDM yet.
3. Is the user using FireFox, Chrome, Safari or some other non-IE browser? If so they the user will experience a less empowered user interface. When using a non-IE browser the user will be defaulted into the Thin Client Mode and that mode lacks many of the features of the Interactive Client Mode.
4. If the user is using Internet Explorer 8/9 do they have the Active X components installed. Refer to the section above on “Checking Installed Components” to assist the user in determining if they do or not have the components. It could be the lack of a component that is causing the user’s issue. Many of the interactive client mode features available through IE require an active X component and if that component is not installed then the feature is not available.
5. Does the user belong to a BDM user group that provides the ability to do what they are trying to do? A user reporting that they are not able to scan a document in WebXtender may not belong to a group that provides them the privilege to scan documents.
Support Guide for CCS Service Desk Banner Document Management
26
6. Does the user have the proper BDM server addresses added to the Local Intranet Sites list in their Internet Options? Refer to section 4.3 Local Intranet Sites for details on how to check and what they should have in their list. The absence of these sites can impact some functions. The catch is that WebXtender rarely presents the user with an error message. The user will simply report “I am trying to do something and it just does nothing”.
7. Is the user getting error messages that the browser cannot recognize an “Object Id”? This is indicative of not having the Active X Components installed. See #3 above and section 4.2.2 Active X Component Detection.
8. If the user is on Windows 7 are they using the 32-bit or 64-bit version of IE? Windows 7 will default the 64-bit version of IE to the desktop. There are known impacts of trying to use WebXtender with the 64-bit version of IE…things just don’t work. The user will not get errors. Button clicks and actions will just do nothing. The user needs to be using the 32-bit version.