Embed Size (px)
Citation preview
1
Aastra 6730i
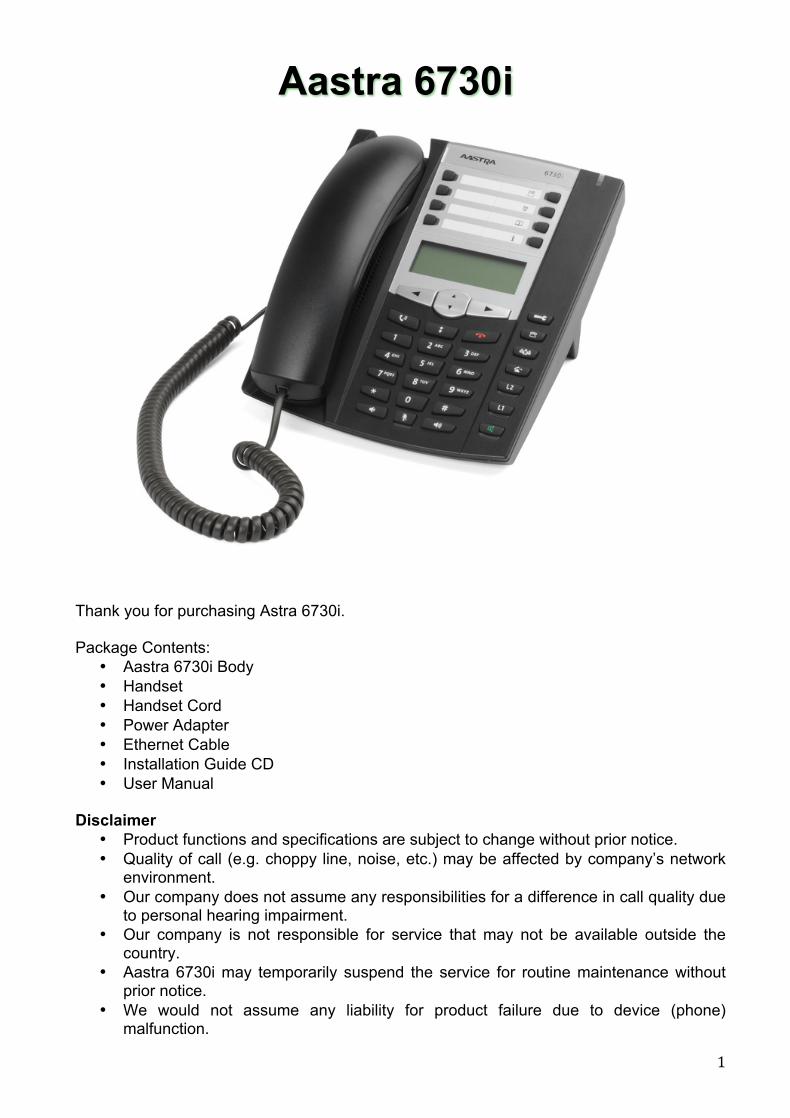
Thank you for purchasing Astra 6730i. Package Contents:
• Aastra 6730i Body • Handset • Handset Cord • Power Adapter • Ethernet Cable • Installation Guide CD • User Manual
Disclaimer
• Product functions and specifications are subject to change without prior notice. • Quality of call (e.g. choppy line, noise, etc.) may be affected by company’s network
environment. • Our company does not assume any responsibilities for a difference in call quality due
to personal hearing impairment. • Our company is not responsible for service that may not be available outside the
country. • Aastra 6730i may temporarily suspend the service for routine maintenance without
prior notice. • We would not assume any liability for product failure due to device (phone)
malfunction.
2
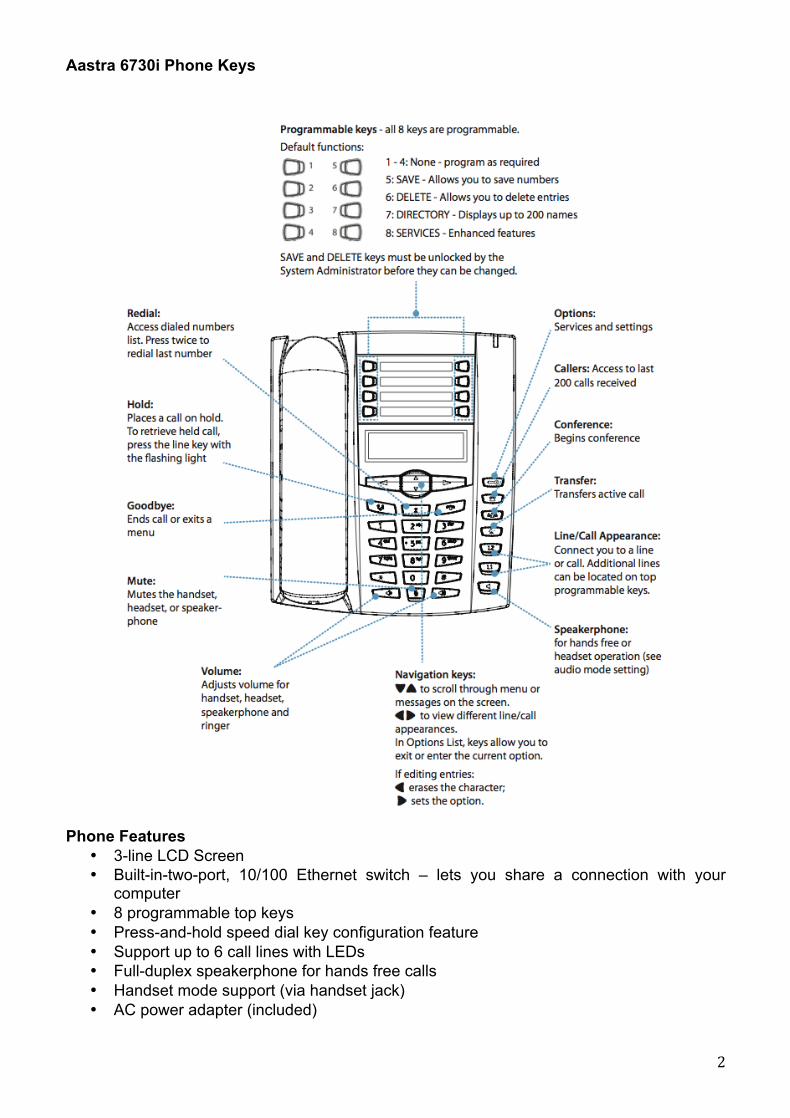
Aastra 6730i Phone Keys Phone Features
• 3-line LCD Screen • Built-in-two-port, 10/100 Ethernet switch – lets you share a connection with your
computer • 8 programmable top keys • Press-and-hold speed dial key configuration feature • Support up to 6 call lines with LEDs • Full-duplex speakerphone for hands free calls • Handset mode support (via handset jack) • AC power adapter (included)

3
Installation 1. Direct Network Connection: The port marked with [LAN] is used to connect the phone to
the network. 2. Power Adapter: Use the power adapter (provided) with your phone and plug your phone
into a power source.
* For power, use the 5V AC Power Adapter (limited power source (LPS) power supply, input rated 100-240Vac. 50-60Hz, 0.3A. Output rated 5Vdc, 2A min, included only in a specific Aastra ordering SKUs) to connect from the DC power port on the phone to a power source.
3. Connecting a Handset: Turn the phone over and locate the handset jack. Insert one end of handset cord into the jack until it clicks into place. Then route the handset cord through the groove as shown in the illustration below. Attach the handset to the other end of the handset cord.
4
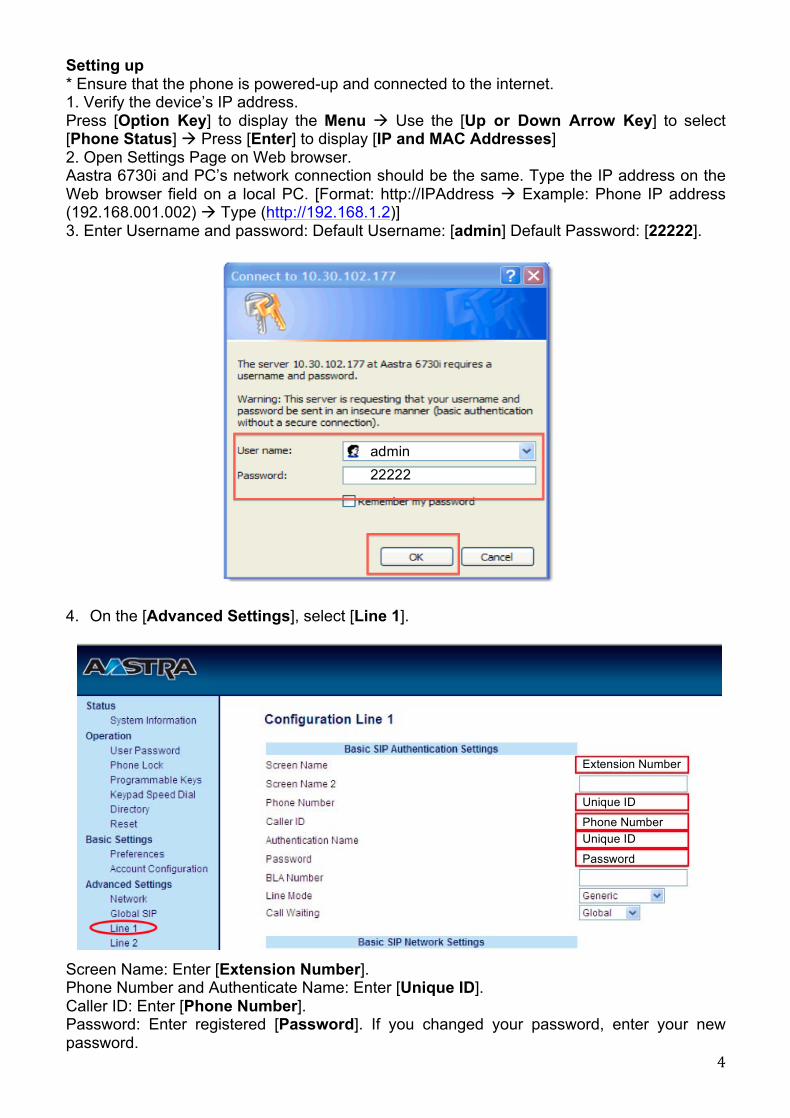
Setting up * Ensure that the phone is powered-up and connected to the internet. 1. Verify the device’s IP address. Press [Option Key] to display the Menu à Use the [Up or Down Arrow Key] to select [Phone Status] à Press [Enter] to display [IP and MAC Addresses] 2. Open Settings Page on Web browser. Aastra 6730i and PC’s network connection should be the same. Type the IP address on the Web browser field on a local PC. [Format: http://IPAddress à Example: Phone IP address (192.168.001.002) à Type (http://192.168.1.2)] 3. Enter Username and password: Default Username: [admin] Default Password: [22222].
4. On the [Advanced Settings], select [Line 1]. Screen Name: Enter [Extension Number]. Phone Number and Authenticate Name: Enter [Unique ID]. Caller ID: Enter [Phone Number]. Password: Enter registered [Password]. If you changed your password, enter your new password.
admin
22222
Extension Number
Unique ID
Phone Number
Unique ID
Password

5
VoIP Server
5060
VoIP Server
5060
VoIP Server
5060
Proxy Server, Outbound Proxy Server and Registrar Server: Enter [VoIP Server]. Proxy Port, Outbound Proxy Port and Registrar Port: Enter [5060]. * Click [Save Settings] to save changes and current configurations.
NTP Time Servers: Check [Enabled]. Time Server 1, 2, 3: Enter [ntp.jst.mfeed.ad.jp]. * Click [Save Settings] to save changes and current configurations.
6
5. Other Settings: Press [Option] key on the device and use [Up / Down Arrow] key to navigate à Select [2 Preferences] à [6 Time and Date] à [1 Time Zone] à Select [Country Code] Example: [JP] à Tokyo à [Set].
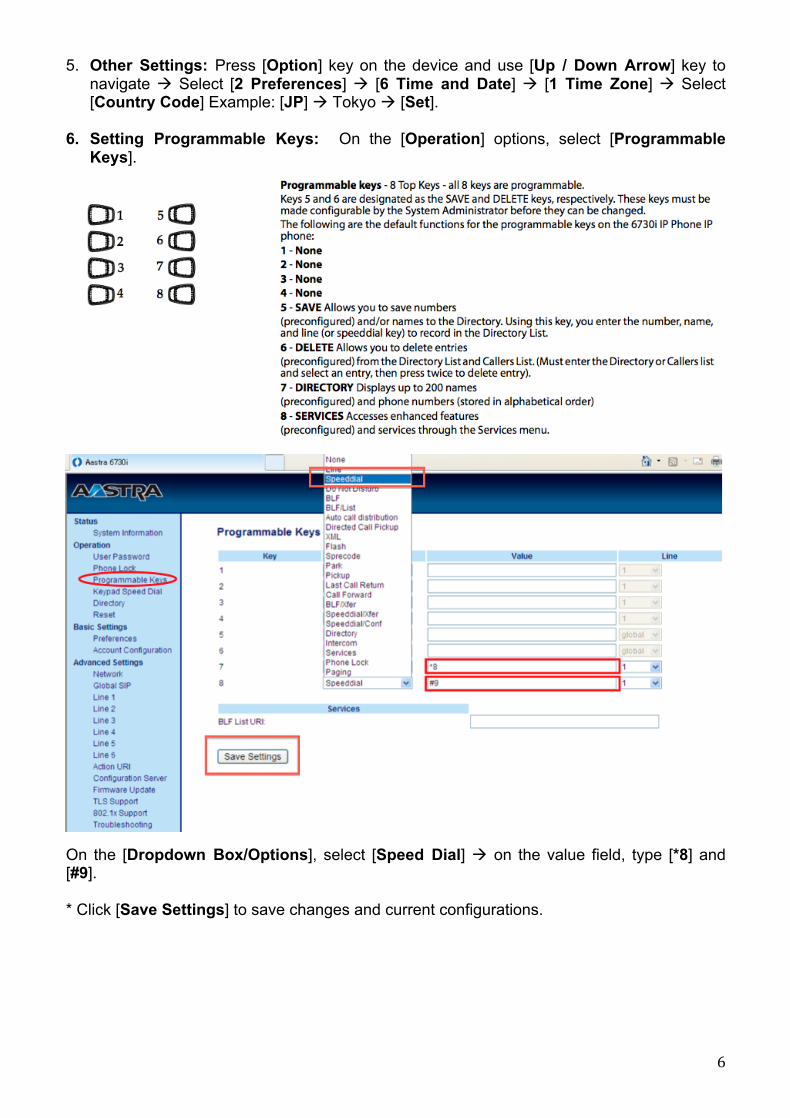
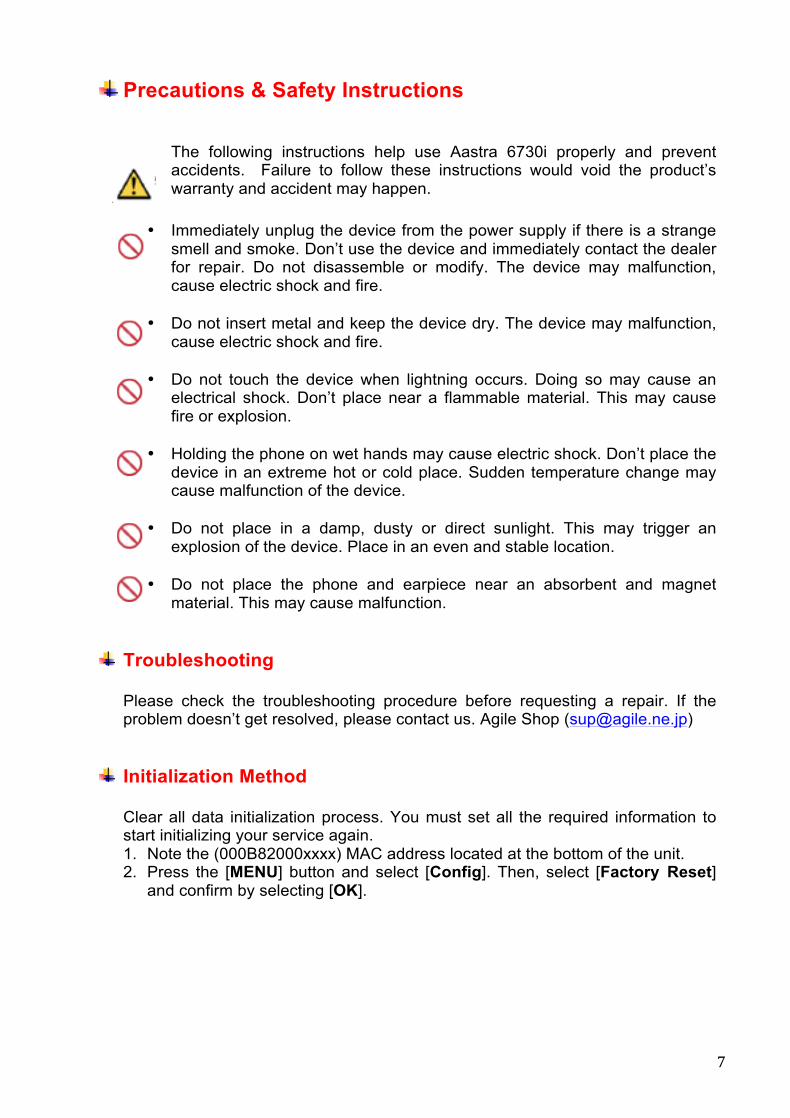
6. Setting Programmable Keys: On the [Operation] options, select [Programmable Keys].
On the [Dropdown Box/Options], select [Speed Dial] à on the value field, type [*8] and [#9]. * Click [Save Settings] to save changes and current configurations.
7
Precautions & Safety Instructions
The following instructions help use Aastra 6730i properly and prevent accidents. Failure to follow these instructions would void the product’s warranty and accident may happen.
• Immediately unplug the device from the power supply if there is a strange smell and smoke. Don’t use the device and immediately contact the dealer for repair. Do not disassemble or modify. The device may malfunction, cause electric shock and fire.
• Do not insert metal and keep the device dry. The device may malfunction, cause electric shock and fire.
• Do not touch the device when lightning occurs. Doing so may cause an
electrical shock. Don’t place near a flammable material. This may cause fire or explosion.
• Holding the phone on wet hands may cause electric shock. Don’t place the device in an extreme hot or cold place. Sudden temperature change may cause malfunction of the device.
• Do not place in a damp, dusty or direct sunlight. This may trigger an explosion of the device. Place in an even and stable location.
• Do not place the phone and earpiece near an absorbent and magnet material. This may cause malfunction.
Troubleshooting Please check the troubleshooting procedure before requesting a repair. If the problem doesn’t get resolved, please contact us. Agile Shop ([email protected])
Initialization Method Clear all data initialization process. You must set all the required information to start initializing your service again. 1. Note the (000B82000xxxx) MAC address located at the bottom of the unit. 2. Press the [MENU] button and select [Config]. Then, select [Factory Reset]
and confirm by selecting [OK].
8
PROBLEM CAUSE SOLUTION General Failure
Plug and unplug from the power source. (Do this a few times).
Wait at least one minute before you again plug the device to the power source.
If the problem is not resolved after doing this, contact us at: [email protected]
Please provide your number and broadband products.
No ringer sound
Ethernet cable is disconnected. AC adapter is disconnected. Did you change the volume settings?
Did you change the settings on the display?
Check the connection of the Ethernet cable.
Check the connection of the AC adapter.
Adjust the volume on the volume button. Revert the changed settings. Disconnect the Ethernet cable (Please reboot).
Call is interrupted by noise
Are there any abnormalities in the network environment?
Check your network environment.
Reference: http://www.manualslib.com/manual/552/Aastra-6730i.html#manual
http://www.aastra.com/document-library.htm?curr_nav=2&curr_fam=Aastra+6730i&prod_id=6167
Please check our website for FAQ. For more information on features and settings, please check http://www.agile.ne.jp/support / Inquiries by telephone and email: Send to: [email protected] Telephone number: 03-6365-1506 Weekdays: 10:00 - 19:00 For Inquiries upon product purchase: Send to: [email protected]

![Aastra 6730i / 6731i Quick Reference Guide1].pdf · Aastra 6730i / 6731i Quick Reference Guide Getting started Key Description Options key - Accesses services and options to customize](https://img.dokumen.tips/doc/110x75/5e77b6bdd680790b8608b214/aastra-6730i-6731i-quick-reference-1pdf-aastra-6730i-6731i-quick-reference.jpg)


![6730i 6731i qrg en 0509 - Moore Enterprises1].pdf · Title: 6730i_6731i_qrg_en_0509 Author: Marina Eskina Subject: Aastra 6730i_6731i Quick Reference Guide Created Date: 7/27/2010](https://img.dokumen.tips/doc/110x75/5fc152ca7b5661591a0d3f5b/6730i-6731i-qrg-en-0509-moore-1pdf-title-6730i6731iqrgen0509-author.jpg)