Embed Size (px)
Citation preview

Over & At…
A Detailed Approach
to Beginning Flute and Clarinet Pedagogy
a Generation Next Clinic
Clinicians
Sharon Kalisek - Director of Bands
Krimmel Intermediate School, Klein I.S.D. – Spring, TX.
and
John Benzer - Instrumental Music Education Faculty
University of Houston – Houston, TX.
Midwest International Band and Orchestra Clinic
65th Annual Conference
McCormick Place West
Chicago, Illinois
Friday, December 16th
, 2011
2:30 p.m. - 3:30 p.m.
Room W185

General Considerations for All Wind Instruments
General information about instrument cases
Most cases have distinguishing marks on the case such as the brand of the instrument.
Identify these marks and whether they are on the top or the bottom of the case. Most
cases have the handles on the bottom of the case. Make sure students know which
way is the proper way to open the case without spilling out the contents. The label is
usually on top of the case when the student opens the case correctly. If it is difficult
to tell which side is up, have the student place a sticker of some sort to help them
know which side is up.
Place all cases on the floor when opening them at the beginning. I usually have the
student sit on the floor with the case in front of them. This way if they drop
something, it doesn’t have very far to fall. We don’t want to break anything before
we get started.
Be sure the student understands where each part of the instrument belongs in the case.
Give very specific instructions on removing the parts of the instrument and placing
them back. Make sure the students do this with you and do not go ahead. This will
keep the instrument from being damaged.
Make sure students are given a specific step by step process in which to put the
instrument together. Make sure this order is followed every time. This will ensure
that the student is putting the instrument together correctly, and that nothing is
damaged. Follow this procedure explicitly every time.
Never leave a closed case unlatched to prevent the instrument from spilling out. Make
sure students understand how to open their particular case (buttons that slide, latches that
lift).

Identifying and Removing Flute Parts Safely From the Case and Assembly
Once the case information is understood, place the case on a flat surface. Never let
the student place the case in his lap.
Open the case from its correct position. Remember, most latches will lift up.
Students must be taught to keep one hand on some part of the flute at all times.
With the left hand, take the body out and lightly grasp the end with no keys (barrel).
Turn the body so the barrel is facing towards the left, and the G#/A-flat (“teardrop”)
key is away from the student’s body.
With the right hand, take out the footjoint and hold without touching any keys. Turn
the footjoint so that the “roller” keys face the student’s body.
Put the flute together with slight, twisting motions. Discourage students from using
their knees as leverage while assembling the body and the footjoint. If students have
difficulty, have them wipe off the edges of the body and footjoint.
To line up the flute, the rod of the footjoint must point to the center of the last circular
key on the body. The footjoint may need to be adjusted for the size of the student’s
right hand.
Hold the flute at the barrel with the left hand as it is gently resting on the left knee.
Pick up the headjoint with the right hand and attach to the barrel.
Make sure the headjoint is properly aligned with the rest of the flute so that the center
of the embouchure hole is aligned to the first circular key on the body. After the flute
is fully assembled, take your finger and run it down the flute and make sure the
embouchure hole is lined up with the first circular key.
Do not push the headjoint all the way in, leave about an eighth to a quarter of an inch
out.
SEND SEGMENTS OF THIS INFORMATION HOME TO PARENTS.
CHOOSE THE INFORMATION YOU THINK WOULD BE HELPFUL FOR
HOME PRACTICE AND INSTRUMENT CARE.
Look at the case in relation to the parts of the flute. Most cases are molded to the
shape of a particular part. Be specific when making this point to your students. Take
your time, and repeat the information many times. Notice that all circular keys are
toward the ceiling when placed correctly in the case. Damage will occur if the parts
are placed incorrectly in the case.
The embouchure hole on the headjoint must be facing the ceiling when placed
correctly in the case.
Take the instrument apart in the exact opposite manner keeping your hands on the
pieces you are removing.
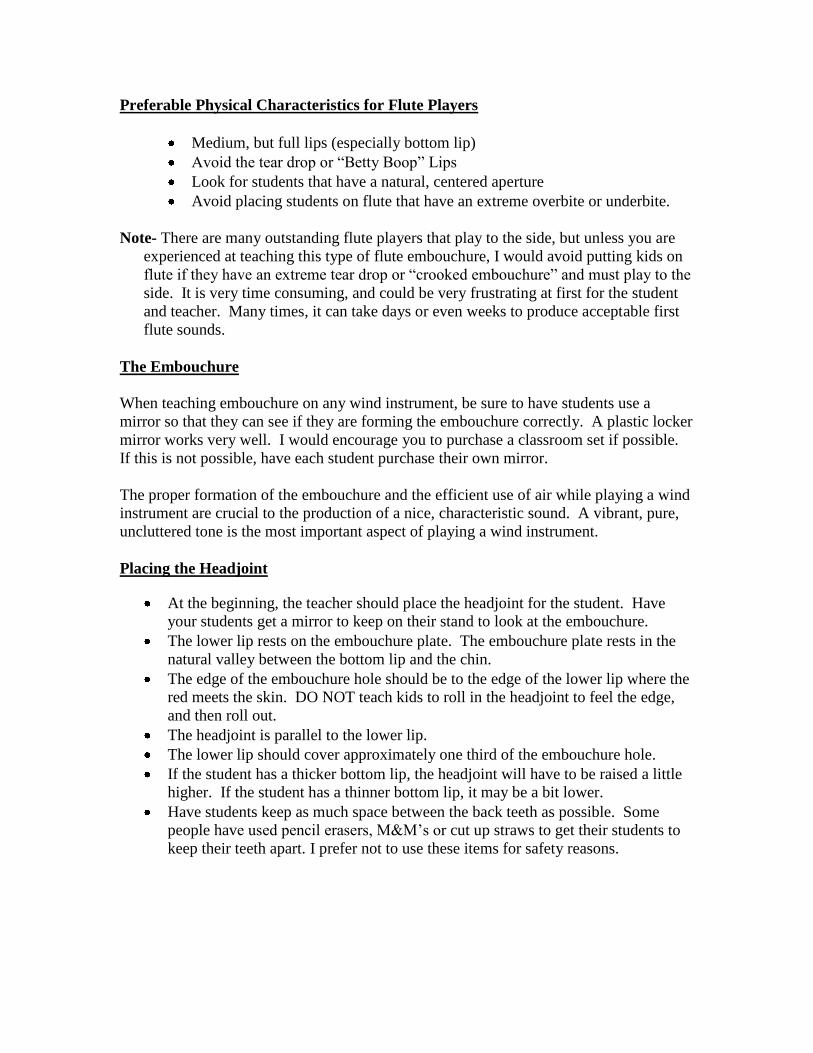
Preferable Physical Characteristics for Flute Players
Medium, but full lips (especially bottom lip)
Avoid the tear drop or “Betty Boop” Lips
Look for students that have a natural, centered aperture
Avoid placing students on flute that have an extreme overbite or underbite.
Note- There are many outstanding flute players that play to the side, but unless you are
experienced at teaching this type of flute embouchure, I would avoid putting kids on
flute if they have an extreme tear drop or “crooked embouchure” and must play to the
side. It is very time consuming, and could be very frustrating at first for the student
and teacher. Many times, it can take days or even weeks to produce acceptable first
flute sounds.
The Embouchure
When teaching embouchure on any wind instrument, be sure to have students use a
mirror so that they can see if they are forming the embouchure correctly. A plastic locker
mirror works very well. I would encourage you to purchase a classroom set if possible.
If this is not possible, have each student purchase their own mirror.
The proper formation of the embouchure and the efficient use of air while playing a wind
instrument are crucial to the production of a nice, characteristic sound. A vibrant, pure,
uncluttered tone is the most important aspect of playing a wind instrument.
Placing the Headjoint
At the beginning, the teacher should place the headjoint for the student. Have
your students get a mirror to keep on their stand to look at the embouchure.
The lower lip rests on the embouchure plate. The embouchure plate rests in the
natural valley between the bottom lip and the chin.
The edge of the embouchure hole should be to the edge of the lower lip where the
red meets the skin. DO NOT teach kids to roll in the headjoint to feel the edge,
and then roll out.
The headjoint is parallel to the lower lip.
The lower lip should cover approximately one third of the embouchure hole.
If the student has a thicker bottom lip, the headjoint will have to be raised a little
higher. If the student has a thinner bottom lip, it may be a bit lower.
Have students keep as much space between the back teeth as possible. Some
people have used pencil erasers, M&M’s or cut up straws to get their students to
keep their teeth apart. I prefer not to use these items for safety reasons.

Basic Embouchure Formation
Students should sit on the edge of their chair, with their feet flat on the floor.
Gently push the back in towards the stomach, in order to make the student sit
up nice and tall. Their head should feel as if it is floating.
Have the student take their right index finger and place it under their bottom
lip. The index finger should be parallel to the bottom lip.
Make sure that the students are not pressing their index finger into their
bottom lip. This is something your students will do as they play, especially
when they get nervous. Try to prevent the pressure from the beginning.
Flute embouchure is very natural. It is what I call “the TV face.” The face is
relaxed as if you are watching a drama on TV.
The bottom lip rests very “tubby” and relaxed on the embouchure plate.
Breathe in as if you are yawning. Breathing through the corners only will not
be enough to get sufficient air and will air cause tightness in the embouchure.
Teeth should be apart in order to get the maximum amount of air into the
instrument. The throat should be completely relaxed.
While thinking a “pooh” syllable, blow the air across the headjoint and
slightly down. We want the air to go across the headjoint and into the flute
and hit the back wall inside the headjoint. Using a “pooh” syllable will
automatically form an aperture of the appropriate size.
Students should have a slight amount of air in the cheeks to produce a relaxed,
vibrant sound.
Articulation
Tip of the tongue moves in an up and down motion.
The tongue touches at the top of the two front teeth where the teeth meet the
gums.
One taste bud of the student’s tongue should be used.
Use a “too” or “tah” syllable.
The tongue interrupts the air stream, but does not stop it.
Start the note without a tongue start and get a clear tone, then add the tongue.
Shouldn’t have a lot of motion under the chin. All that moves when the
student articulates is the air and the tongue.
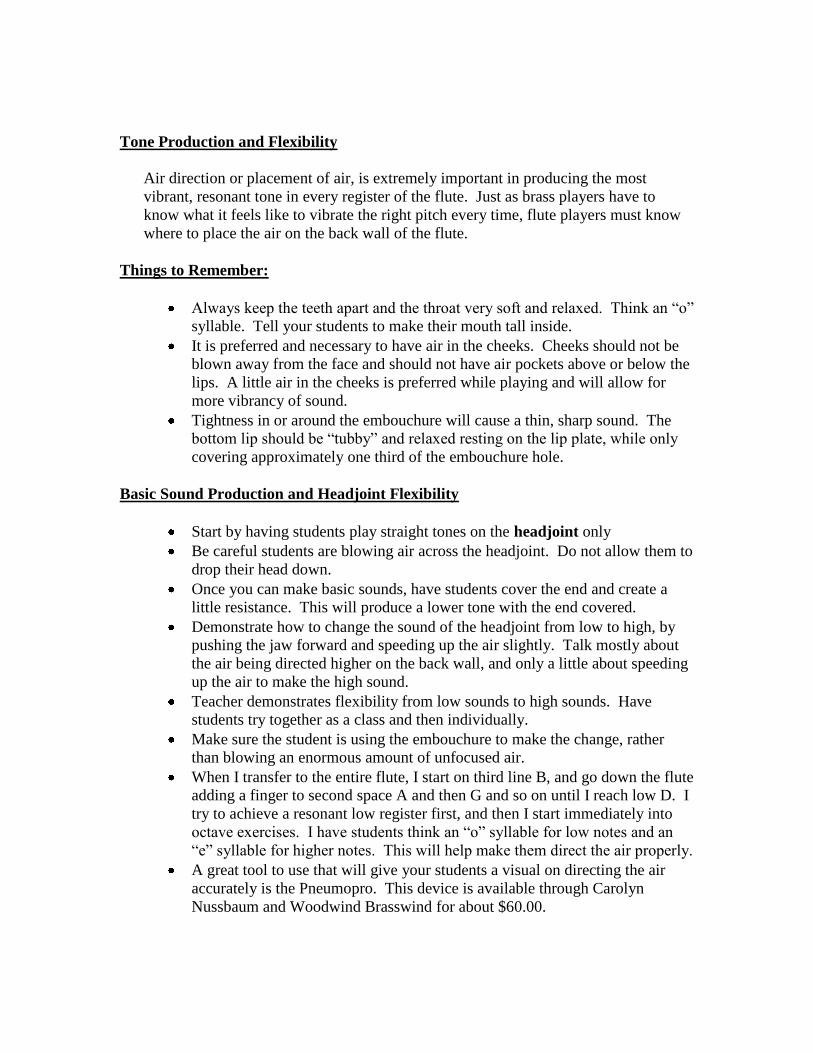
Tone Production and Flexibility
Air direction or placement of air, is extremely important in producing the most
vibrant, resonant tone in every register of the flute. Just as brass players have to
know what it feels like to vibrate the right pitch every time, flute players must know
where to place the air on the back wall of the flute.
Things to Remember:
Always keep the teeth apart and the throat very soft and relaxed. Think an “o”
syllable. Tell your students to make their mouth tall inside.
It is preferred and necessary to have air in the cheeks. Cheeks should not be
blown away from the face and should not have air pockets above or below the
lips. A little air in the cheeks is preferred while playing and will allow for
more vibrancy of sound.
Tightness in or around the embouchure will cause a thin, sharp sound. The
bottom lip should be “tubby” and relaxed resting on the lip plate, while only
covering approximately one third of the embouchure hole.
Basic Sound Production and Headjoint Flexibility
Start by having students play straight tones on the headjoint only
Be careful students are blowing air across the headjoint. Do not allow them to
drop their head down.
Once you can make basic sounds, have students cover the end and create a
little resistance. This will produce a lower tone with the end covered.
Demonstrate how to change the sound of the headjoint from low to high, by
pushing the jaw forward and speeding up the air slightly. Talk mostly about
the air being directed higher on the back wall, and only a little about speeding
up the air to make the high sound.
Teacher demonstrates flexibility from low sounds to high sounds. Have
students try together as a class and then individually.
Make sure the student is using the embouchure to make the change, rather
than blowing an enormous amount of unfocused air.
When I transfer to the entire flute, I start on third line B, and go down the flute
adding a finger to second space A and then G and so on until I reach low D. I
try to achieve a resonant low register first, and then I start immediately into
octave exercises. I have students think an “o” syllable for low notes and an
“e” syllable for higher notes. This will help make them direct the air properly.
A great tool to use that will give your students a visual on directing the air
accurately is the Pneumopro. This device is available through Carolyn
Nussbaum and Woodwind Brasswind for about $60.00.
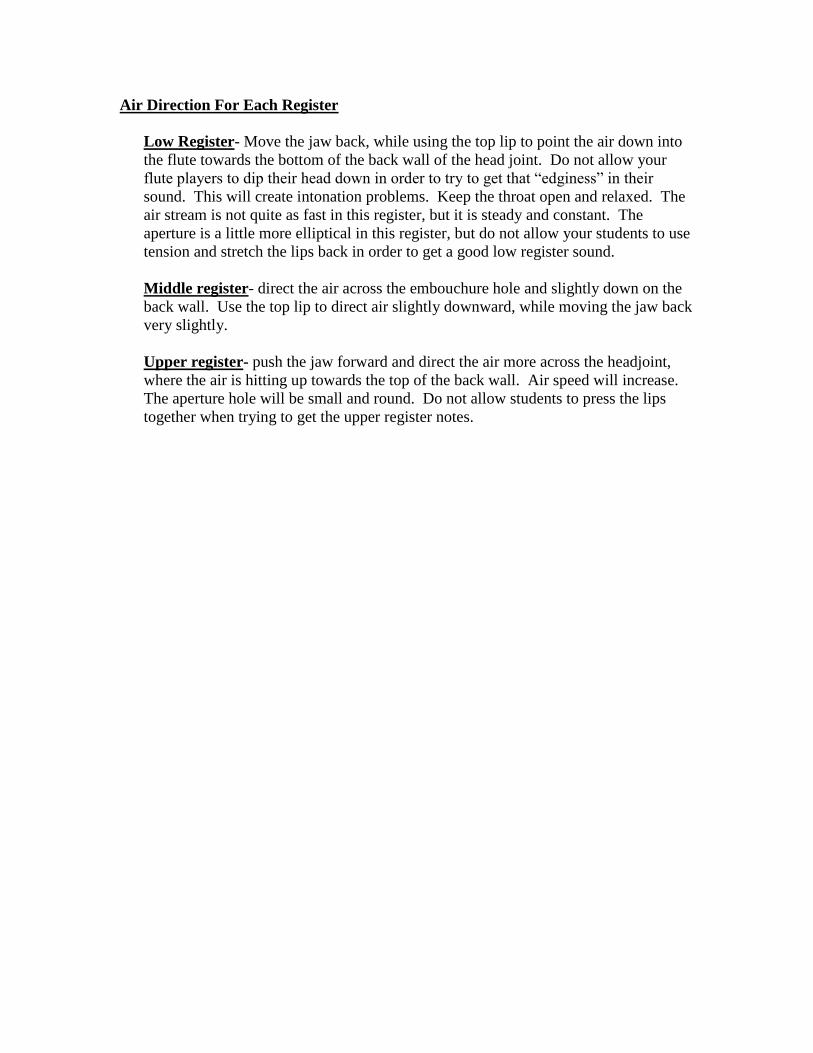
Air Direction For Each Register
Low Register- Move the jaw back, while using the top lip to point the air down into
the flute towards the bottom of the back wall of the head joint. Do not allow your
flute players to dip their head down in order to try to get that “edginess” in their
sound. This will create intonation problems. Keep the throat open and relaxed. The
air stream is not quite as fast in this register, but it is steady and constant. The
aperture is a little more elliptical in this register, but do not allow your students to use
tension and stretch the lips back in order to get a good low register sound.
Middle register- direct the air across the embouchure hole and slightly down on the
back wall. Use the top lip to direct air slightly downward, while moving the jaw back
very slightly.
Upper register- push the jaw forward and direct the air more across the headjoint,
where the air is hitting up towards the top of the back wall. Air speed will increase.
The aperture hole will be small and round. Do not allow students to press the lips
together when trying to get the upper register notes.

Flute Assembly
Remove the body of the flute from the case always holding it by the neck or
barrel of the instrument.
Then remove the footjoint and hold it in the palm of your hand where there
are no keys. Line up and twist and push it together. The post on the footjoint
is in the middle of the F# key.
Pick up the headjoint and while holding the flute by the neck, line up the
headjoint and then twist and push it together.
Do not push the headjoint all the way in, leave about an eighth to a quarter
inch out.
Take your finger and run it down the flute and make sure the embouchure hole
is lined up with the 1st key on the body.
Note- When the headjoint is not lined up properly, it can cause sound and pitch problems.
If students are turned in too far, they will play flat and stuffy. If they are turned out
too far, they will play sharp, airy and extremely unfocused.
Flute Care
Students should swab the flute with a silk flute swab or soft cloth after each
practice/playing session. I like the silk swabs, but if money is an issue, have your
students cut a strip of soft cotton or flannel cloth and use as a swab.
Thread the cloth through the eye on the tuning/cleaning rod.
Wrap a little of the cloth around the top of the cleaning rod, so that when you
put the cleaning rod into the headjoint, it will reach the moisture out of the
area above the embouchure hole.
Clean the headjoint first, then run the swab completely through the body of
the flute holding it by the neck. This is to ensure that you will not bend keys
or rods.
Run the swab through the footjoint.
Students should be given CLASS TIME to clean out his/her instrument, and
store properly in the case. A textured cloth is great to remove grease or
fingerprints from the flute. Students can also wipe both the tops and in
between the keys with this cloth.
From time to time, it is OK to run warm soapy water through the headjoint only.
Drain the water from the headjoint, and then run the swab through it again to dry.
This will not hurt the cork, in fact when the cork swells, it will help hold it firmly in
place. Do not, under any circumstances run water through the body and
footjoint of the flute. This will ruin the pads, which are costly on any level of
flute.
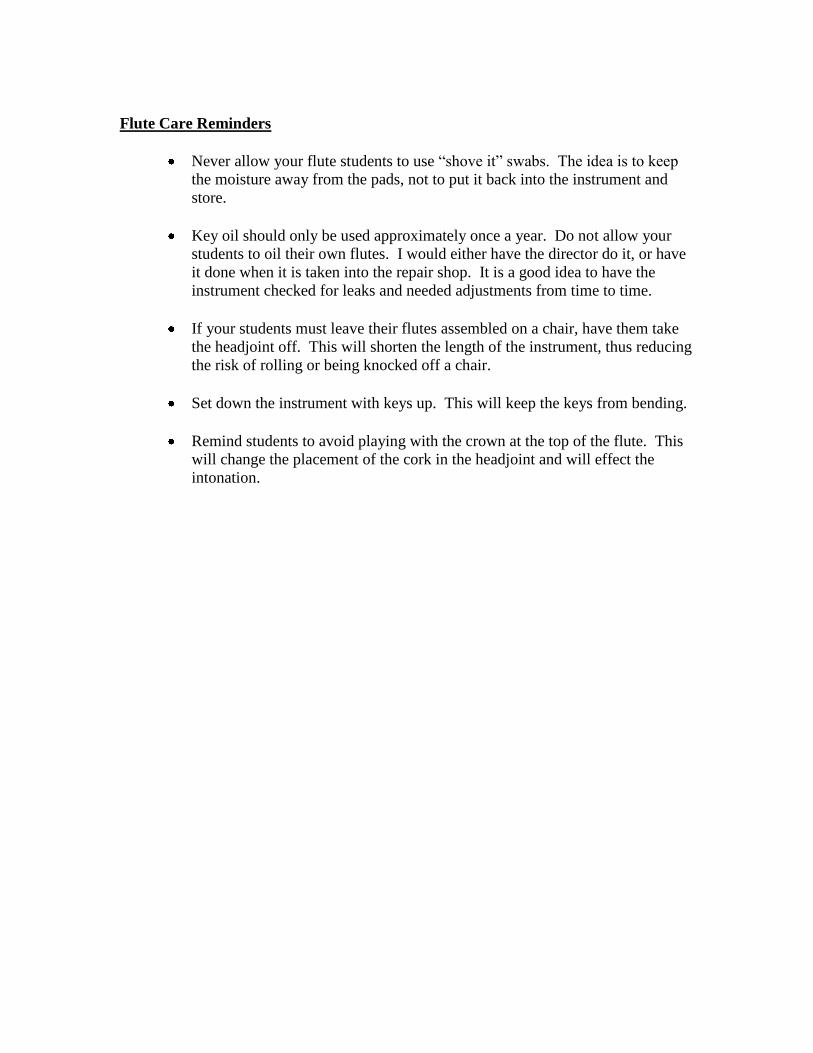
Flute Care Reminders
Never allow your flute students to use “shove it” swabs. The idea is to keep
the moisture away from the pads, not to put it back into the instrument and
store.
Key oil should only be used approximately once a year. Do not allow your
students to oil their own flutes. I would either have the director do it, or have
it done when it is taken into the repair shop. It is a good idea to have the
instrument checked for leaks and needed adjustments from time to time.
If your students must leave their flutes assembled on a chair, have them take
the headjoint off. This will shorten the length of the instrument, thus reducing
the risk of rolling or being knocked off a chair.
Set down the instrument with keys up. This will keep the keys from bending.
Remind students to avoid playing with the crown at the top of the flute. This
will change the placement of the cork in the headjoint and will effect the
intonation.

Hand Position
Right Hand Position
Have students start with their right hand down by their side in a natural
position.
Bend the arm at the elbow and raise the arm up. Elbow should be pointed to
the baseboards.
Fingers should form a flattened out “C”.
The hand should be an extension of the wrist. Do not let your do what I call
“waiter” or “server hand”. This will create tension and horrible hand position.
Index and thumb of the right hand would touch if the flute weren’t between it.
Think “OK”.
Right thumb should be on its right side. Thumb should not be sticking out
from under the flute.
Pads of the fingers should cover the holes.
Lift from the big knuckles. Do not allow students to pull their fingers
backward from the small knuckles.
Keep fingers as close to the keys as possible and lift only as high as needed to
open the key.
Students should keep their fingers hovering over “home base” for that
particular finger. This will help develop proper hand position. Never allow
students to tuck pinky fingers under the body of the flute when not in use.
This will create tension in the hands and hinder technique.
Left Hand
Left hand rests where the index finger meets the top of the palm.
Index finger curls down onto the C key.
Thumb points upward.
Wrist is underneath the flute and slightly bent so that the flute rests on the
hand.
Keep pinky above or touching the G# key. This is “home base” for the left
pinky.
Pads of the fingers cover the holes.
Lift from the big knuckles.
Keep fingers as close to the keys as possible, and lift only as high as needed to
open up the key. No “fly away” fingers.

Seating in the Ensemble/ Posture
It is my belief that the flute players in an ensemble should sit on the left side of the
ensemble. This is because the sound travels outward from mainly two places on the
flute: the embouchure hole and the end of the flute. The flute sound will not be heard
near as well if the end of the flute is pointing into the ensemble. There is only one
reason they should be seated on the right side of the group, which is for balance
reasons. If you have too many flutists and not enough of some of the other sections,
this could cause some balance issues. Rather than make your flutes hold back and
play softly (this will make them play flat), move them to the right side of the
ensemble.
In order to make your flute players look and sound their best, have them sit with their
knees and shoulders facing the right and turn their head slightly to the left. This will
get the flute slightly out in front of the body. Make sure when setting up your chairs
for rehearsal, that you space the flute chairs a bit farther apart than the clarinet chairs.
This will allow your flute players to sit correctly. Flute is the only instrument in the
band that is held out to the side of the body.

Equipment Options for Beginner and Intermediate Flutists
Curved Headjoints vs. Straight Headjoints- While the curved headjoint is a
wonderful tool to use to start very small children on flute, I do not recommend
starting all of your students on them if they can hold a flute with a straight
headjoint correctly. Use these only for your students that have trouble reaching.
If you get a curved headjoint, make sure you also get the straight headjoint. As
the child grows, make the switch to the straight headjoint.
Nickel, Silver Plated, or Silver Flutes- The more silver in the instrument, the more
vibrant the tone. The thinner the walls of the flute, the more vibrant the sound
will be. For this reason, the nickel-plated instruments do not have as vibrant of a
tone, and you will have to work harder to produce a nice tone. Plated instruments
will also begin to wear away on the plating depending on how acidic the fingers
are. Silver instruments may tarnish, but won’t corrode. If you have a student that
can’t afford a solid silver flute, then encourage them to at least buy the silver
headjoint.
Displaced G or Inline Keys- This is a matter of preference. Today, due to many
hand injuries, and the fact the displaced G is more natural to the hands, many
people who have played an inline G are switching to the displaced G.
B Foot or C Foot Joint- There is not a lot of literature out there that is written with a
B below the staff; however, it is good to have the extra key when needed. Having
a low B foot is more of a status symbol.
High C Facilitator or “Gizmo”- The gizmo key is nice to have, but not necessary.
When this key is used, it helps clear up the sound of the high C. This can also be
done with the low C roller key.
Vibrato
Vibrato is a fluctuation in the flute tone, which is done by increasing and decreasing
the amount of air going through the flute. The air is never stopped completely. There
is a rise and fall of pitch and volume. Because of the rise and fall of pitch while using
vibrato, you should tune your students without vibrato to obtain a more acute reading
of intonation.
Begin teaching vibrato after all of your flute students can produce a clear, straight
tone. This is usually in the second semester of the beginner year. The teaching of
vibrato should not be an option.
How to Teach Vibrato
Begin by telling the students that vibrato is the fluctuating of air speed/air
pressure with the diaphragm. The larynx is also used, but this happens
automatically.
Have students pretend it is their birthday. Tell them to take in a nice, deep
breath and blow out one candle on their cake.
Then have them blow out 2, 3 and 4 candles.
Remind them to not stop the air completely, because in vibrato, the air may
differ in speed, but it will not stop completely.
Once they can do this, have them finger a G in the left hand, while placing the
right hand on the diaphragm. Have them do four quarter note pulses at quarter
equals 60 on the metronome. Make sure they can feel the pulses of air
pushing their diaphragm against their hand. Repeat this exercise as needed.
Once they have mastered the quarter note pulses, have them proceed to eighth
pulses, triplet pulses and sixteenth note pulses at 60 on the metronome.
Be careful not to allow your flutes to bounce the instrument or tense the throat
in order to produce vibrato.
Vibrato will not occur on a regular basis unless you expect and demand that your
students use vibrato at all times. Have them add impulses into the Remington
Exercise, F Descending, long tones, flow studies and scales during your warm-up.
Have your students play off assignments with vibrato making sure they know they
will be graded on whether or not they are using vibrato.

Recommended Exercises
Long Tone Exercises- These are great for working on tone and teaching students to
direct their air to get their best and most in tune sound. I use the De La Sonorite book
by Marcel Moyse or the Trevor Wye Books.
Flexibility Exercises- I recommend doing Harmonic and Octave exercises. Just like it is
important for brass players to practice lip slurs for flexibility, it is important that flute
players practice harmonics and octave exercises in order to make their embouchure
and air work appropriately to achieve flexibility. Do not start harmonics until later in
the first year.
Technique Exercises- Teaching all twelve major scales full range is great. Start with one
octave scales. Just as soon as you have extended the student’s range with octave
exercises and they are capable of playing some scales two octaves, then begin to have
them play two octave scales when possible.
Possible Reasons Why My Flutes are Playing Flat and Stuffy
Student is rolling in the headjoint towards the body.
Headjoint is not lined up correctly.
If the head is down, the student will cover too much of the embouchure hole
and will play flat.
Pressing the lip plate into the bottom lip. Remember the less pressure, the
better.
Slow air stream.
Directing the air too far down the back wall of the flute.
Possible Reasons Why My Flutes Are Playing Sharp and Thin
Rolling flute out with either the hands, or the headjoint is lined up too far out.
Teeth too close together. Put more space between the teeth to lower the pitch
and get a more vibrant, resonant sound.
Direction of air is too far up the back wall of the flute.
Unfocused/Undirected air stream. Work to focus the air column.
Embouchure plate is too high on the bottom lip.

Possible Reasons Your Flutes Are Playing Flat in the Performance When They
Were Just Tuned
Rolling in
Pressing the headjoint into the bottom lip.
Student is not directing the air appropriately for each register.
Do not ever use the roll in roll out method to get your flutes to play in tune!!!
This is unacceptable. They will never develop a pitch center because they are
always moving the instrument to try to tune. Tuning adjustments should be
made by placing the air higher or lower on the back wall of the headjoint, and
not by moving the instrument.

How To Choose A Piccolo Player
Choose someone who is an aggressive, fearless kind of player.
Choose someone who is confident, and who will not be afraid to be
heard. Piccolo is a color instrument and should be heard.
Don’t choose your very best flute player, but instead choose your
second or third best flute player. Choose someone who has good
fundamentals and good pitch discrimination. Understanding how
to use the embouchure and air properly is a must.
Have your students who are interested in piccolo do a try out.
Give each student a few days to practice on the instrument, and
then have them play things such as octave exercises, scales that
start at the bottom of the piccolo range and others that go to the top
of the range. Listen for clarity and vibrancy of tone, intonation
(are they adjusting pitch on the octaves?) and ease of producing
upper register notes without “buzzing” or pressing the lips
together.
Important: Make sure your newly selected piccolo player spends an equal amount of
time on their flute and piccolo. I recommend starting a practice session on flute, then
going to piccolo, and then back to flute at the end of the session. This will help keep the
embouchure relaxed on both flute and piccolo. I find that when a young player practices
only the piccolo, they sometimes have difficulty producing a good tone on their flute.
Doubling will then be a problem.

PARTS OF THE FLUTE
Crown
(cork inside)
Embouchure hole
Headjoint
Lip plate
Barrel Body Footjoint
“teardrop”
G#/Ab key
1st trill key
2nd trill key
Lever B-flat key
High C facilitator
(Gizmo key)*
D#/Eb key
Low B roller*
* These parts will only be present on some intermediate and most professional flutes.
Thumb Bb
(round thumb)
Long thumb

FLUTE—ADJUSTING THE CROWN
Flute Cleaning Rod
Flute Headjoint
Place the tuning/cleaning rod in the headjoint. If the line is not centered in the
embouchure hole, you will need to adjust the cork in or out.
The closed end of the head joint is only a tightening mechanism.
Do not grab the headjoint by the lip plate, because it can easily dent.
On some attic horns, the lip plate can become unsoldered and will need to be
professionally repaired.
When holding the headjoint vertically, if the line is above the exact center of the
embouchure hole, then unscrew the crown and push it back in. When moving the
cork down, it is more efficient to use one larger adjustment, rather then several
smaller adjustments. Be careful not to overestimate how far down the cork needs
to be moved in.
When holding the headjoint vertically, if the line is below the exact center of the
embouchure hole, then turn the crown clockwise (as if screwing in a screw).
Make sure the tip of the cleaning rod is in contact with the bottom/metal part of
the cork; this is more easily done with the tuning/cleaning rod resting on a flat
surface or student’s knee. Tighten the crown until the line is in the center of the
embouchure hole.
If you are unable to adjust the cork by using the crown, send the headjoint to the
repair shop.
Students should never be allowed push the cork in with their tuning/cleaning rod
(exception being advanced students).
Do not allow students to aimlessly twist the cap during class! They will do this
and not realize what they are doing!

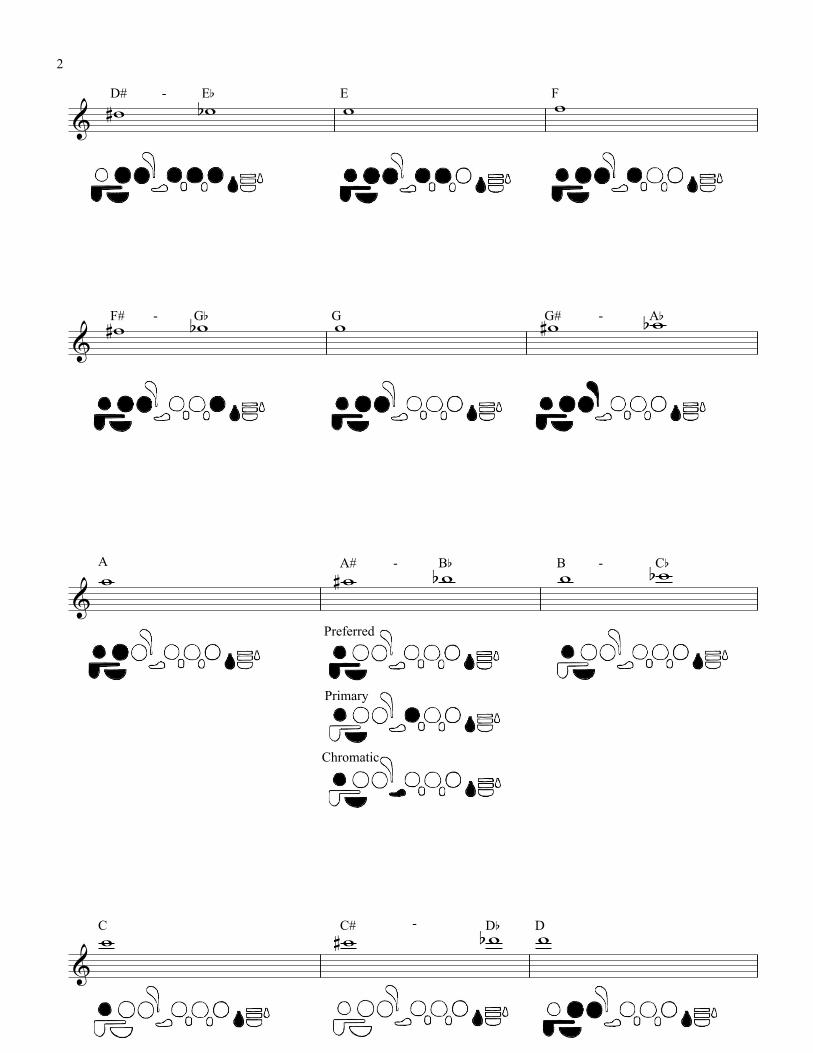
Flute Fingering Chart John Benzer
&C
-
C# - Db D
&D# Eb E F
&F# - Gb G G# - Ab
&A A# - Bb B - Cb
&C
Primary
Chromatic
C#
Preferred
- Db D
w w# wb w
w# wb w w
w# wb w w# wb
w w# wb w wb
w w# wb w
&D# - Eb E F
&F# - Gb G G# - Ab
&
A A# - Bb B - Cb
&
C
Chromatic
Preferred
Primary
C# - Db D
w# wb w w
w# wb w w# wb
w w# wb w wb
w w# wb w
2

&
D# - Eb E F
&
F# - Gb G
To lower pitch
G# -
To lower pitch
Ab
&
A
To lower pitch
A# - Bb B - Cb
&
C
Add RH pinky for stability Add RH pinky for stability
w# wb w w
w# wb w w# wb
w w# wb w wb
w
3

FLUTE- THE THREE B-FLAT FINGERINGS
Thumb Bb:
Thumb Bb is used for the F, Bb, Eb, Ab, and Db scales.
Example 1:
Example 2:
Long Thumb 1 and 1 Bb (“1 and 1”):
Long thumb 1 and 1 is used for B and Gb(F#) scales. It is used from Bb to B(Cb) when the Bb follows a
note that has the first finger of the RH down.
Example 1:
Example 2:
Example 3:

Lever Bb (A#):
Lever Bb is used in the chromatic scale. Chromatic sections in music will use this position. This is also
called the A# lever.
Example 1:
Example 2:
Example 3:
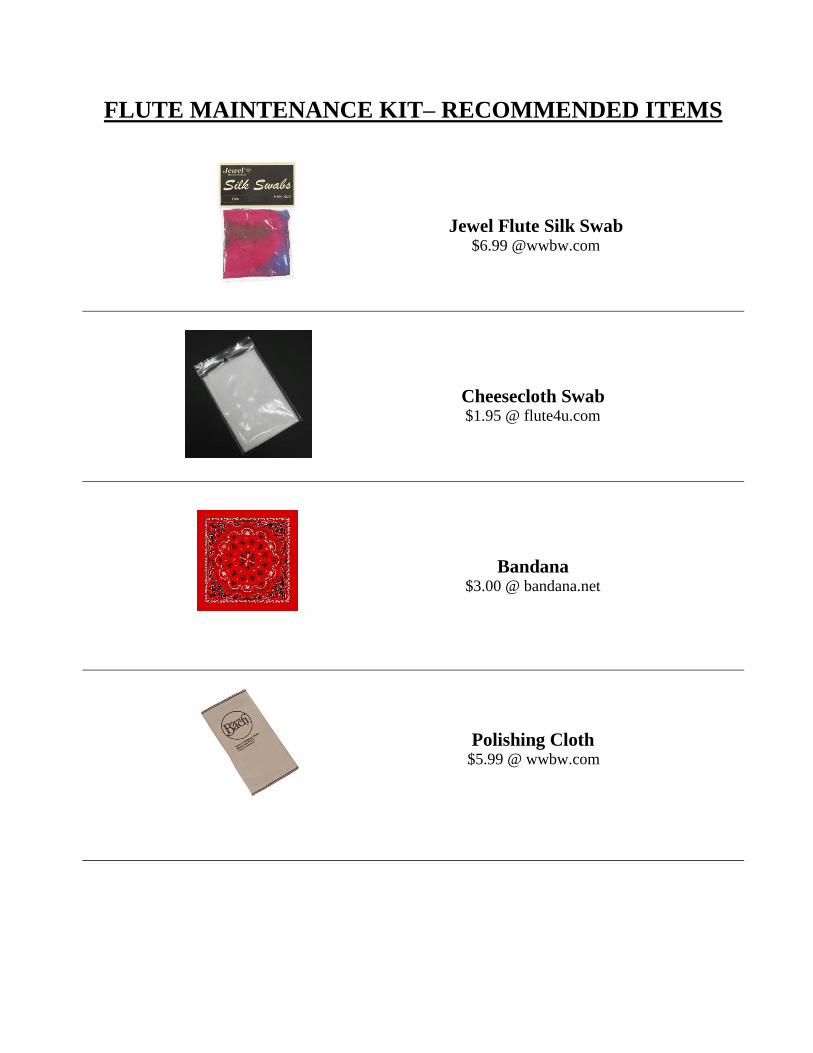
FLUTE MAINTENANCE KIT– RECOMMENDED ITEMS
Jewel Flute Silk Swab $6.99 @wwbw.com
Cheesecloth Swab $1.95 @ flute4u.com
Bandana $3.00 @ bandana.net
Polishing Cloth $5.99 @ wwbw.com

FLUTE MAINTENANCE KIT OPTIONAL
RECOMMENDED ITEMS
Bo Pep Thumb Guide for Right Hand $7.49 @ wwbw.com
Bo Pep Finger Saddle for Left Hand $7.49 @ wwbw.com
Prima Thumb Rest $19.95 @ flute4u.com

Dr. Scholl’s Mole Foam Padding
BG France Non-Slip Flute Cushions $4.75@ flute4u.com
K&M Folding Flute Stand $20.50 @ flute4u.com

& 44 w ∑ w ∑ w ∑ w ∑ w ∑ w ∑
& w ∑ w ∑ w ∑ w ∑ w ∑ w ∑
& 44 w w ∑ w w ∑ w w ∑
& w w ∑ w w ∑ w w ∑
& 44 ˙ ˙ ∑ ˙ ˙ ∑ ˙ ˙ ∑
& ˙ ˙ ∑ ˙ ˙ ∑ ˙ ˙ ∑
& 44 w w∑ w w ∑
& w w ∑ w w ∑
& w w ∑ w w ∑
& w w ∑ w w ∑
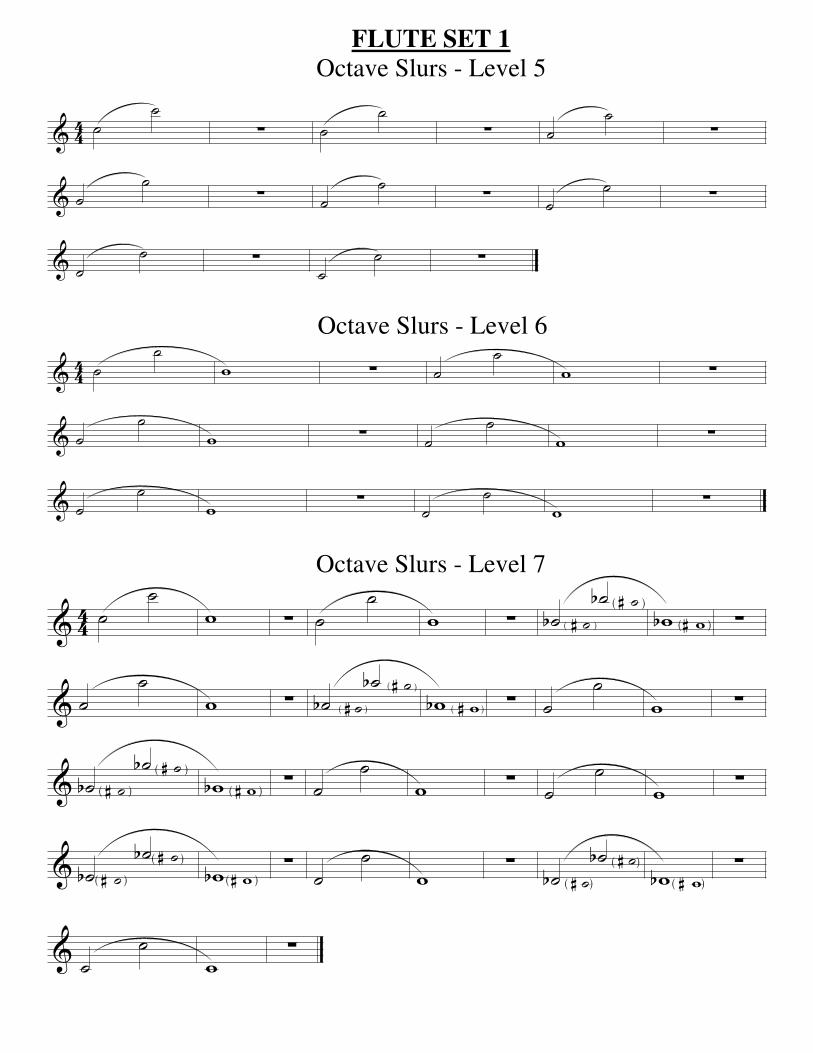
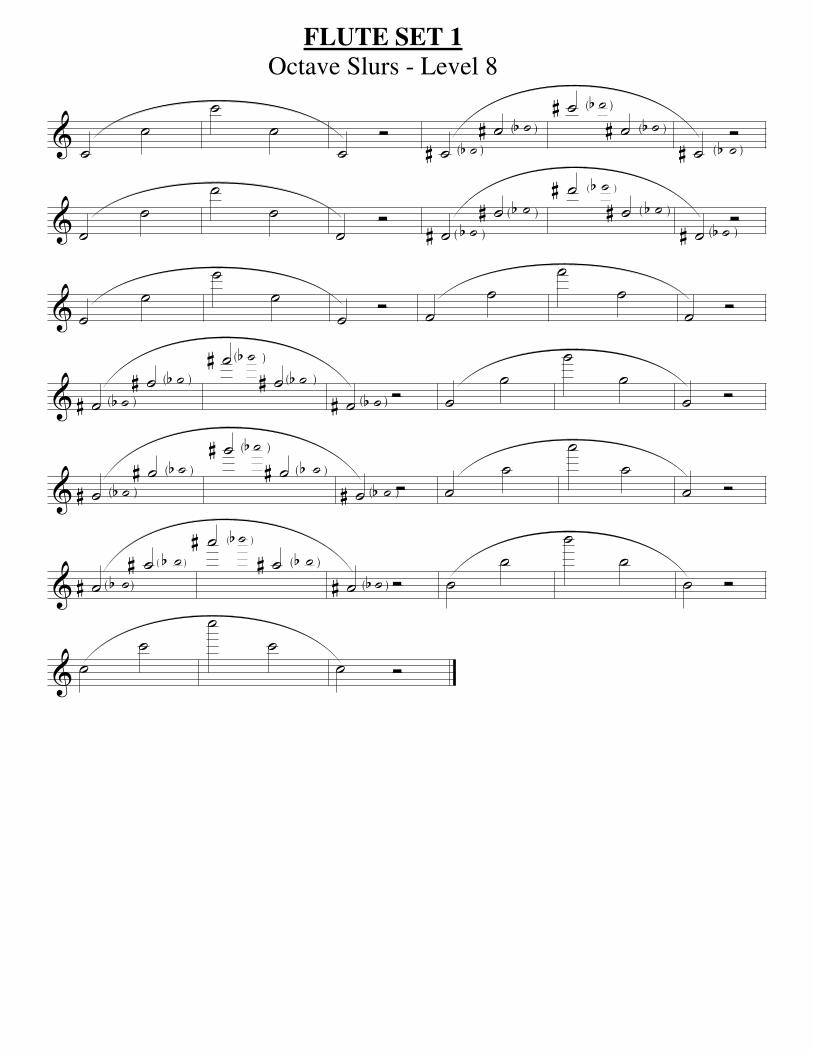
FLUTE SET 1
Octave Slurs - Level 1
Octave Slurs - Level 2
Octave Slurs - Level 3
Octave Slurs - Level 4
& 44 ˙ ˙∑ ˙ ˙ ∑ ˙ ˙ ∑
& ˙ ˙ ∑ ˙ ˙ ∑ ˙ ˙ ∑
& ˙ ˙ ∑ ˙ ˙ ∑
& 44 ˙ ˙ w ∑ ˙ ˙ w ∑
& ˙ ˙ w ∑ ˙ ˙ w ∑
& ˙ ˙ w ∑ ˙ ˙ w ∑
& 44 ˙ ˙ w ∑ ˙ ˙ w ∑ ˙b ˙b˙# )(
˙#( ) wb w# )( ∑
& ˙ ˙ w ∑ ˙b ˙b˙#( )
˙#( ) wb w#( ) ∑ ˙ ˙ w ∑
& ˙b ˙b˙# )(
˙#( ) wb w#( ) ∑ ˙ ˙ w ∑ ˙ ˙ w ∑
& ˙b ˙b˙# )(
˙# )( wb w# )( ∑ ˙ ˙ w ∑ ˙b ˙b˙# )(
˙# )( wb w# )( ∑
& ˙ ˙ w ∑
FLUTE SET 1
Octave Slurs - Level 5
Octave Slurs - Level 6
Octave Slurs - Level 7
& ˙ ˙ ˙ ˙ ˙ Ó ˙# ˙#˙b( )
˙b( ) ˙# ˙#˙b( )
˙b( ) ˙# Ó̇b( )
& ˙ ˙ ˙ ˙ ˙ Ó ˙# ˙#˙b( )
˙b( )˙# ˙#
˙b( )˙b( ) ˙# Ó˙b( )
& ˙ ˙ ˙ ˙ ˙ Ó ˙ ˙ ˙ ˙ ˙ Ó
& ˙# ˙#˙b( ) ˙b( ) ˙# ˙#
˙b( )˙b( )
˙# Ó˙b( ) ˙ ˙ ˙ ˙ ˙ Ó
& ˙# ˙#˙b( )
˙b( ) ˙# ˙#˙b( )
˙b( ) ˙# Ó˙b( ) ˙ ˙ ˙ ˙ ˙ Ó
& ˙# ˙#˙b( )
˙b( )˙# ˙#
˙b( )˙b( ) ˙# Ó˙b( ) ˙ ˙ ˙ ˙ ˙ Ó
& ˙ ˙ ˙ ˙ ˙ Ó
FLUTE SET 1
Octave Slurs - Level 8

& 44 wb ˙b ˙ ∑ œb œ œ œ wb
& 44 w ˙ ˙ ∑ œ œ œ œ w
& 44 w ˙ ˙ ∑ œ œ œ œ w
& 44 wb ˙b ˙ ∑ œb œ œ œ wb
& 44 w ˙ ˙ ∑ œ œ œ œ w
& 44 w ˙ ˙ ∑ œ œ œ œ w
& 44w ˙ ˙ ∑ œ œ œ œ w
FLUTE SET 2
Level 1

& 44 wb ˙b ˙ œb œ ,,( ) œ œ( ) wb
& 44 w ˙ ˙ œ œ ,,( ) œ œ( ) w
& 44 w ˙ ˙ œ œ ,,( ) œ œ( ) w
& 44 wb ˙b ˙ œb œ ,,( ) œ œ( ) wb
& 44 w ˙ ˙ œ œ ,,( ) œ œ( ) w
& 44 w ˙ ˙ œ œ,( ) œ , œ( ) w
&w ˙ ˙ œ œ,( ) œ , œ( ) w
FLUTE SET 2
Level 2

& 44 ˙ ˙b w ∑ ˙b ˙ wb ∑ ˙ ˙ w ∑
& ˙ ˙b w ∑ ˙b ˙ wb ∑ ˙ ˙b w ∑
& ˙b ˙ w ∑ ˙ ˙ w ∑ ˙ ˙b w ∑
& ˙b ˙ wb ∑ ˙ ˙b w ∑ ˙b ˙ wb ∑
& ˙ ˙b w ∑ ˙b ˙ wb ∑ ˙ ˙ w ∑
& ˙ ˙b w ∑ ˙b ˙ wb ∑ ˙ ˙b w ∑
& ˙b ˙ wb ∑
& 44 ˙ ˙b .˙ Œ ˙b ˙ .˙b Œ ˙ ˙ .˙ Œ ˙ ˙b .˙ Œ
& ˙b ˙ .˙b Œ ˙ ˙b .˙ Œ ˙b ˙ .˙ Œ ˙ ˙ .˙ Œ
& ˙ ˙b .˙ Œ ˙b ˙ .˙b Œ ˙ ˙b .˙ Œ ˙b ˙ .˙b Œ
& ˙ ˙b .˙ Œ ˙b ˙ .˙b Œ ˙ ˙ .˙ Œ ˙ ˙b .˙ Œ
& ˙b ˙ .˙b Œ ˙ ˙b .˙ Œ ˙b ˙ .˙b Œ
FLUTE SET 3
Level 1
Level 2

& 44 ˙# ˙ w# ∑ ˙ ˙# w ∑ ˙# ˙ w# ∑
&˙ ˙# w ∑ ˙# ˙ w# ∑ ˙ ˙ w ∑
&˙ ˙# w
∑˙# ˙ w#
∑˙ ˙# w
∑
&˙# ˙ w#
∑˙ ˙ w
∑˙ ˙# w
∑
& 44 ˙# ˙ .˙# Œ ˙ ˙# .˙ Œ ˙# ˙ .˙# Œ
&˙ ˙# .˙ Œ ˙# ˙ .˙# Œ ˙ ˙ .˙ Œ
&˙ ˙# .˙
Œ˙# ˙ .˙#
Œ˙ ˙# .˙
Œ
&˙# ˙ .˙#
Œ˙ ˙ .˙
Œ˙ ˙# .˙
Œ
FLUTE SET 4
Level 1
Level 2
& 44 ˙ ˙b w ∑ ˙b ˙ wb ∑ ˙ ˙b w ∑
& ˙b ˙ wb ∑ ˙ ˙b w ∑ ˙b ˙ wb ∑
& ˙ ˙ w ∑ ˙ ˙b w ∑ ˙b ˙ wb ∑
& ˙ ˙b w ∑ ˙b ˙ wb
& 44 ˙ ˙ w ∑ ˙ ˙# w ∑
& ˙# ˙ w# ∑ ˙ ˙# w ∑
& ˙# ˙ w# ∑ ˙ ˙# w ∑
&˙# ˙ w# ∑ ˙ ˙ w ∑
&˙ ˙# w
∑˙# ˙ w#
∑
&˙ ˙# w
∑˙# ˙ w#
∑
&˙ ˙ w
∑˙ ˙# w
∑
&˙# ˙ w#
∑˙ ˙# w
∑
&˙# ˙ w#
∑˙ ˙# w
∑
&˙# ˙ w#
∑˙ ˙ w
∑
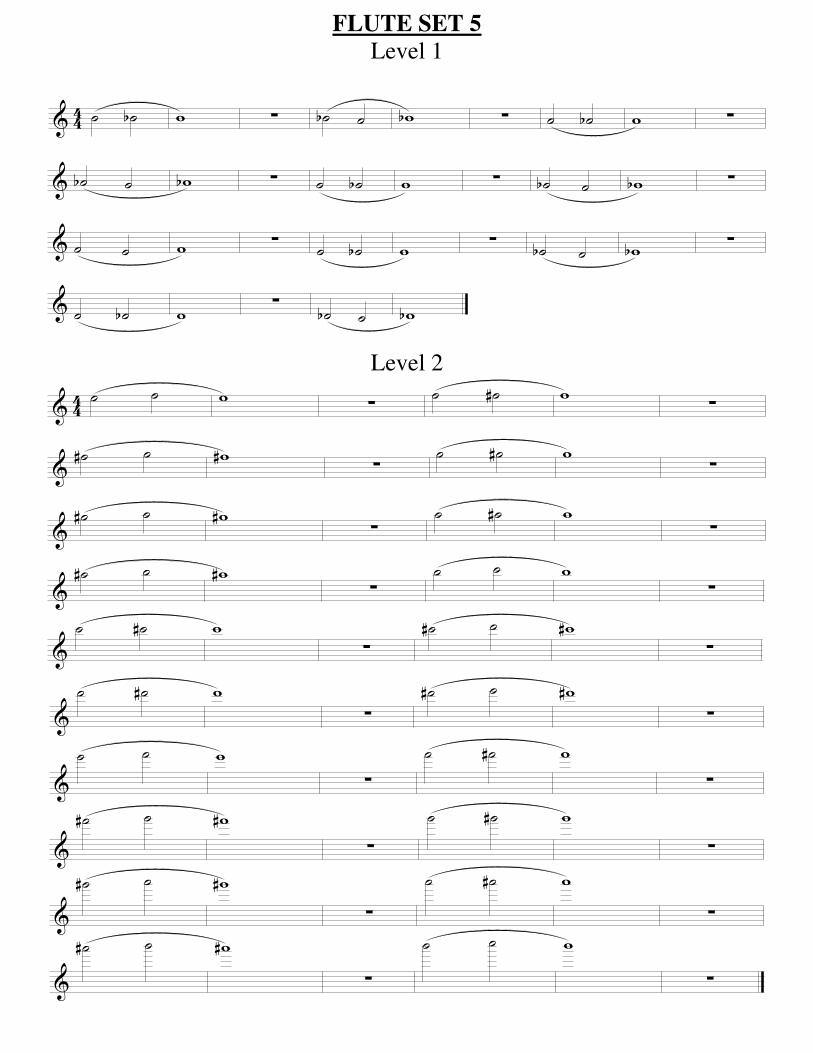
FLUTE SET 5
Level 1
Level 2

& 44 ˙ ˙b w ∑ ˙b ˙ wb ∑ ˙ ˙b w ∑
& ˙b ˙ wb ∑ ˙ ˙b w ∑ ˙b ˙ w ∑
& ˙ ˙ wb ∑ ˙ ˙b w ∑ ˙b ˙ wb ∑
& ˙ ˙b w
& 44 ˙ ˙ w# ∑ ˙ ˙# w ∑
& ˙# ˙ w# ∑ ˙ ˙# w ∑
& ˙# ˙ w# ∑ ˙ ˙# w ∑
&˙# ˙ w
∑ ˙ ˙ w#∑
&˙ ˙# w
∑˙# ˙ w#
∑
&˙ ˙# w
∑˙# ˙ w
∑
&˙ ˙ w#
∑˙ ˙# w
∑
&˙# ˙ w#
∑˙ ˙# w
∑
&˙# ˙ w#
∑˙ ˙# w
∑
&˙# ˙ w
FLUTE SET 5
Level 3
Level 4

& 44 w ¥ ¥ ¥ w ∑ w# ¥# ¥# ¥# w# ∑
& w ¥ ¥ ¥ w ∑ w# ¥# ¥# ¥# w# ∑
& w ¥ ¥ ¥ w ∑
& w ¥ ¥ ¥ ¥ ¥ w
& w# ¥# ¥# ¥# ¥# ¥# w#
& w ¥ ¥ ¥ ¥ ¥ w
& w# ¥# ¥# ¥# ¥# ¥# w#
& w ¥ ¥ ¥ ¥ ¥ w
FLUTE SET 6
Harmonics
Harmonic slurs are notes that are "overblown" from the fundamental tone.
This exercise is important for developing flexibility and strength in your embouchure.
Level 1
Level 2

& 44 œ œ# œ œ# œ œ# œ œ œ# œ œ# œ w
& œ œ œb œ œb œ œ œb œ œb œ œb w
& 43 œ œ# œ œ# œ œ œ# œ œ# œ œ# œ
& œ œ# œ œ# œ œ œ# œ œ# œ œ# œ
&œ œ# œ œ# œ œ œb œ œ œb œ œb
&œ œ œb œ œb œ œb œ œ œb œ œb
& œ œ œb œ œb œ œb œ œ œb œ œb .˙
& 44 œ œ# œ œ# œ œ œ# œ œ# œ œ# œ3 3 33
& œ œ# œ œ# œ œ œ# œ œ# œ œ# œ3
3 3 3
&œ œ# œ œ# œ œ œ# œ œ# œ œb œn
3 3 3 3
&œb œ œ œb œ œb œ œ œb œ œb œ
3 3 3 3
& œb œ œ œb œ œb œ œ œb œ œb œ3 3
3
3
& œb œ œ œb œ œb ˙3 3
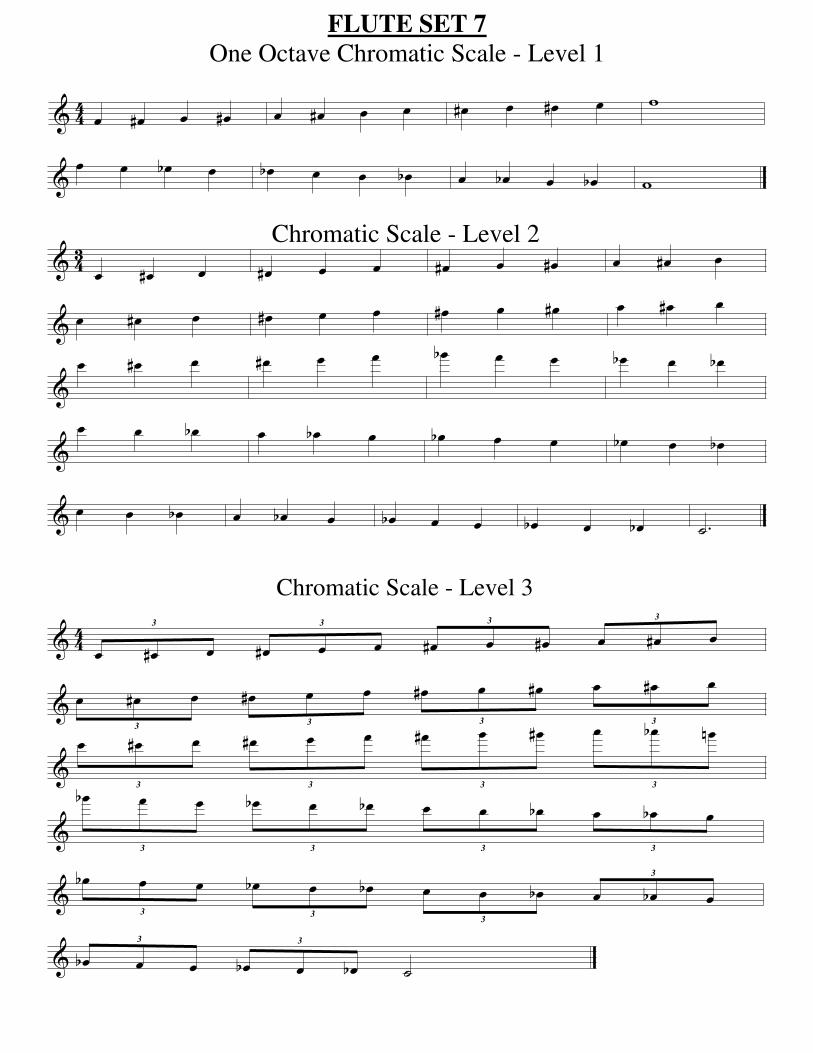
FLUTE SET 7
One Octave Chromatic Scale - Level 1
Chromatic Scale - Level 2
Chromatic Scale - Level 3

& 44 œ œ# œ œ# œ œ œ# œ œ# œ œ# œ3 3 33
& œ œ# œ œ# œ œ œ# œ œ# œ œ# œ3
3 3 3
&œ œ# œ œ# œ œ œ# œ œ# œ œ# œ
3 3 3 3
&œ œ œb œ œb œ œb œ œ œb œ œb
3 3 3 3
&œ œ œb œ œb œ œb œ œ œb œ œb
3 3 3 3
& œ œ œb œ œb œ œb œ œ œb œ œb3
33 3
& œ Œ Ó
[Title]2
FLUTE SET 7
Chromatic Scale - Level 4
& 44 œ œ# œ œ# œ œ# œ œ œ# œ œ# œ w
& œ œ œb œ œb œ œ œb œ œb œ œb w
& 43 œ œ# œ œ# œ œ œ# œ œ# œ œ# œ
& œ œ# œ œ# œ œ œ# œ œ# œ œ# œ
&œ œ# œ œ# œ œ œb œ œ œb œ œb
&œ œ œb œ œb œ œb œ œ œb œ œb
& œ œ œb œ œb œ œb œ œ œb œ œb .˙
& 44 œ œ# œ œ# œ œ œ# œ œ# œ œ# œ3 3 33
& œ œ# œ œ# œ œ œ# œ œ# œ œ# œ3
3 3 3
&œ œ# œ œ# œ œ œ# œ œ# œ œb œn
3 3 3 3
&œb œ œ œb œ œb œ œ œb œ œb œ
3 3 3 3
& œb œ œ œb œ œb œ œ œb œ œb œ3 3
3
3
& œb œ œ œb œ œb ˙3 3
FLUTE SET 7
One Octave Chromatic Scale - Level 1
Chromatic Scale - Level 2
Chromatic Scale - Level 3

& 44 œ œ# œ œ# œ œ œ# œ œ# œ œ# œ3 3 33
& œ œ# œ œ# œ œ œ# œ œ# œ œ# œ3
3 3 3
&œ œ# œ œ# œ œ œ# œ œ# œ œ# œ
3 3 3 3
&œ œ œb œ œb œ œb œ œ œb œ œb
3 3 3 3
&œ œ œb œ œb œ œb œ œ œb œ œb
3 3 3 3
& œ œ œb œ œb œ œb œ œ œb œ œb3
33 3
& œ Œ Ó
[Title]2
FLUTE SET 7
Chromatic Scale - Level 4

WORKING OUT FLUTE BLIPS AND
FINGER/TONGUE COORDINATION PROBLEMS
Blips
Blips can be defined as the uncoordinated movement of multiple fingers that should
be moving at the same time—but are not. As with the teaching of all woodwind
instruments, the most problematic fingers in both hands are the ring finger and the
pinky. Most blips occur with the use of either or both of these fingers.
o Use uneven rhythms with everything tongued.
o Students can audiate the counting while they are positioning.
o Students can audiate “long…short long….short long…short long,” while
they are positioning.

o Use uneven rhythms with everything slurred.
o Students can audiate the counting while they are positioning.
o Students can audiate “long…short long….short long…short long,” while
they are positioning.

o Use uneven rhythms with everything tongued.
o Students can audiate the counting while they are positioning.
o Students can audiate “short long….short long…short long….short,” while
they are positioning.

o Use uneven rhythms with everything slurred.
o Students can audiate the counting while they are positioning.
o Students can audiate “short long….short long…short long….short,” while
they are positioning.
These exercises can be very effective, but must be audiated and positioned at
the same time.
Playing tests can be given over these exercises being applied to certain sections of
music to promote the practicing of them.
Finger/Tongue Coordination Problems
There are two types of finger/tongue coordination problems that occur when passages are
articulated:
1. students changing the to the next fingering before they articulate (most
common)
2. students articulating before they change to the next fingering
o Students can audiate the counting.
o Students can audiate their note names.
o Students can use their air and position through their flute in playing position (but
off the lip plate, thus not producing sounds/vibrations).

& 44 œ œ ˙ œ œ ˙ œ œ œb œ ˙ Ó
& œb œ œ œ œb œ œ œ œ œ œ œ ˙ ˙
& œ œ ˙ œ œ ˙ œ œ œb œ ˙ Ó
& œb œ œ œ œb œ œ œ œ œ œb œ wb
& 44 œb œ œ œ œb œ ˙b œ œb œ œ ˙b ˙
& œb œ œ œ œb œ ˙b œ œb œ œ ˙b ˙
&œb œb œ œ œ œ ˙b œ œb œ œ ˙b ˙
& œb œ œ œ œb œ ˙ œb œb œ œ ˙b ˙b wb
FLUTE CHRISTMAS TUNES
Jingle Bells
Good King Wenceslas
&
&
&
44
44
44
Flute
Clarinet in Bb
Alto Sax.
wb
w
w
wb
w
w
∑
∑
∑
wb
wb
w
wb
w
w
∑
∑
∑
w
w
w
w
w
w
∑
∑
∑
&
&
&
Fl.
Bb Cl.
A. Sx.
w
w
w
w
w
w
∑
∑
∑
wb
w
w
wb
w
w
∑
∑
∑
w
w
w
w
w
w
&
&
&
44
44
44
Fl.
Bb Cl.
A. Sx.
wb
w
w
wb
w
w
wb
wb
w
wb
w
w
w
w
w
w
w
w
w
w
w
w
w
w
&
&
&
Fl.
Bb Cl.
A. Sx.
wb
w
w
wb
w
w
w
w
w
w
w
w
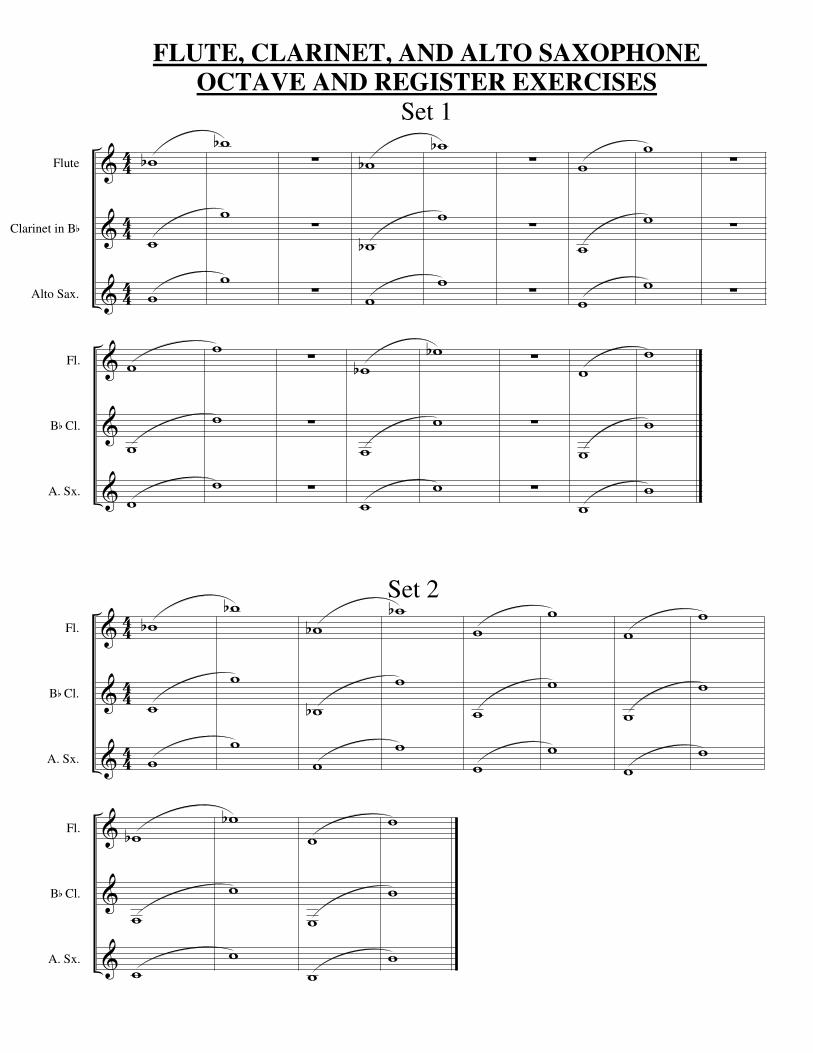
FLUTE, CLARINET, AND ALTO SAXOPHONE
OCTAVE AND REGISTER EXERCISES
Set 1
Set 2

&
&
&
44
44
44
Fl.
Bb Cl.
A. Sx.
wb
wwb
wb
w
wb
∑
∑
∑
wb
wbwb
wb
w
wb
∑
∑
∑
w
ww
w
w
w
∑
∑
∑
&
&
&
Fl.
Bb Cl.
A. Sx.
w
ww
w
w
w
∑
∑
∑
wb
wwb
wb
w
wb
∑
∑
∑
w
ww
w
w
w
&
&
&
44
44
44
Fl.
Bb Cl.
A. Sx.
wb
wwb
wb
w
wb
wb
wbwb
wb
w
wb
w
ww
w
w
w
w
ww
w
w
w
&
&
&
Fl.
Bb Cl.
A. Sx.
wb
wwb
wb
w
wb
w
ww
w
w
w
Set 4
FLUTE, CLARINET, AND ALTO SAXOPHONE
OCTAVE AND REGISTER EXERCISES
Set 3

CLARINET CASES, IDENTIFICATION OF
PARTS AND REMOVING IT FROM ITS CASE
General Information About All Woodwind Instrument Cases
Most cases have distinguishing marks somewhere on the case.
Identify these marks, and their relationship to the top and bottom of
the case. Most cases have the handles placed on the bottom section
of each case. Check to make sure.
Place all cases on the floor in front of the student, or on a large table in the
correct position. Clarinet cases are more easily opened from the top of a large
table.
Be sure the student understands where each part of the instrument belongs in
the case. Give detailed information on removing the parts from the case. Make
sure the student waits for each instruction before performing the task. Be sure
the parts of the instruments are returned to the case in the reverse order they
were removed.
All instruments must be assembled in a specific order. Follow this procedure
explicitly every time.
Never leave a closed case unlatched. Most latches open from the bottom up,
but this is not always the case. Sometimes buttons slide from side to side, etc.
Check each opening mechanism carefully before presenting the information to
your students.
Cases should be protected at all times. Try to find a safe space in the classroom
setup for each student’s case.
Identifying Parts of the Clarinet and Removing It Safely From Its Case
Once the case information is understood, place the case on a flat surface.
Never let the student place the case in his lap.
Open the case from its correct position. Remember, most latches will lift up.
As you begin to teach the clarinet, give only the upper and lower joint to the
students. Place the other parts in a plastic bag with the student’s name on it,
and place it in a locked cabinet in your office.
The previous procedure is easy to “sell” to the student. Tell him as soon as he
proves he can take care of the parts he has, he can be given another part to his
instrument.
To sell this concept to the parents, explain the money factor. It is almost as
expensive to replace one broken item as it is to buy an entire instrument.
Identify the lower joint: this joint has a thumb rest on the bottom side and three
silver rings on the upper.
Identify the upper joint: the register key is on the bottom, but call it the “long,
skinny” key or the “exclamation point” key. They will remember this
description more easily in the beginning. It also has only two silver rings on
the top.
SEND SEGMENTS OF THIS INFORMATION HOME TO PARENTS.
CHOOSE THE INFORMATION YOU THINK WOULD BE HELPFUL
FOR HOME PRACTICE AND INSTRUMENT CARE.
Look at the case in relation to the parts of the clarinet. Most cases are molded
to the shape of a particular part. Be specific when making this point to your
students. Take your time, and repeat the information many times. Notice that
all silver rings are toward the ceiling when placed correctly in the case.
Damage will occur if the parts are placed incorrectly in the case.
Corks on a new beginner instrument are usually really fat. The parts will not
easily fit together. Only someone with experience should carefully sand the
corks to the proper size. Use a very fine sand paper (400). Be very careful.
Take off a very small amount and test many times until you have the correct fit
that can easily be controlled by a small child.
After sanding, apply the correct amount of cork grease for the student the first
time. Even if the student understands how little is needed, you still must watch
them apply the cork grease several times before you trust them to do the job
alone. Never let the student have his own tube of cork grease in the beginning
of the learning process. After he has proven his competence, he may have the
tube. If the cork looks dull, or the joints are difficult to put together, a small
amount of cork grease may be needed. Teach him to ask you first before
applying. Once you know he has made the correct analysis, the student may
make his own decisions. Cork grease can mess up the inside of the case if the
tube is not completely closed, and can even damage the key mechanism if it
comes in contact with the wood or metal.
The barrel of the clarinet will look like a barrel, and will have a large end and a
small end. The large end is placed on the upper joint, and the mouthpiece (to
be identified later) is placed into the small end.
The bell looks like a bell and is placed on the lower joint.
The mouthpiece has a thin end and a fat end. The top is curved, and the bottom
(table) is flat. The importance of these features will be explained later. The
mouthpiece will also have a very fat cork that will need the same attention as
the other corks on the body of the instrument.
The ligature is usually metal for the beginning instrument. Depending on the
brand name, the screws will be placed on the upper, curved part-or on the flat
bottom part-of the mouthpiece. In either case, the screws for the ligature will
always appear on the right side of the mouthpiece as the student looks at the
mouthpiece from the flat side. Screws for ligatures will never appear on the
left side of the mouthpiece. The ligature has a large end and a small end.
The reed is basically the same shape as the mouthpiece. It has a thin end and a
fat end…..a flat side and a curved side.
The reed/mouthpiece cap (protector) should be made of plastic for the
beginning instrument. If metal protectors are used, be aware that they will

most likely scratch the mouthpiece and perhaps damage the tip of the reed.
Using a plastic protector will result in fewer broken reeds.
The table (flat part) of the mouthpiece may not necessarily be exactly flat. To
fix this, use the finest sandpaper (400). Place the sandpaper on a piece of glass.
Rub the table of the mouthpiece on the combined surface of sandpaper and
glass. Check often to see if the mouthpiece does not “rock” when placed
against the plate glass.
Periodically have mouthpiece checks. Check for chips on rails and on the tip.
Also check for chips on the inside of the tip. Give written work to your
students while you check each mouthpiece carefully. A chipped mouthpiece
can be devastating to a beginning clarinet student’s embouchure development.
Have frequent reed checks. Do not allow your students to use chipped or dirty
reeds. Reserve the right to break a reed at any time in the most professional
manner possible. Make sure the parents understand the reason for this action.
This is why we suggest you start with Mitchell Lurie or Rico (cheap) reeds for
the first few weeks. After students learn to take care of their reeds, more
expensive reeds can be used successfully. Reeds will warp. A demonstration
will be given of how to moisten and “straighten” a reed that has warped. Using
a reed guard will help keep reeds from warping so badly.
All students should have a reed guard, and all reeds should be placed in the
guard at all times. Four-slotted reed guards are recommended. Students should
either number or “letter” each slot. Each time a student plays his clarinet, a
different reed should be used in rotation.
Consider using an old or unused DRY reed to be placed on the mouthpiece at
the end of each playing session, whether it is at school or at home. This will
allow the ligature to always remain in the shape it is in when the student is
“playing” the clarinet.
Students should have a lint-free cloth in their cases. It can be used in various
ways such are wiping moisture off keys, etc. after use. No music, folders, or
unnecessary objects may be placed in the case at any time. Only the parts of
the clarinet should be allowed in the case.
The use of the swab must be carefully explained, and a quality silk swab should
be included in the cost of the maintenance kit. Even more importantly, the
student should be given CLASS TIME to clean out his instrument, and store
his reed and instrument properly in the case. Always leave the ligature on the
mouthpiece with a dry reed replacing the “class reed.” This will prevent
damage, and allow the ligature to form and bond more correctly with the
mouthpiece. DRY REEDS MUST BE USED FOR THIS PURPOSE. A
“USED/WET” REED WILL RESULT IN MOLD OR MILDEW
FORMING ON THE REED, IN THE MOUTHPIECE AND THE CASE.

PARTS OF THE CLARINET
Mouthpiece
Barrel
Lower Joint
Upper Joint
Bell
Ligature
Register Key
“Throat tone” keys
Trill keys

CLARINET ASSEMBLY AND
INSTRUMENT/BODY RATIO
BE VERY SPECIFIC!!
The student’s hands must be touching the part of the clarinet he is assembling at
all times. Be sure one hand is holding while the other is sliding up and down the
body of the clarinet as the bell, barrel and mouthpiece are added.
1. Before removing the parts of the clarinet, put the reed in the mouth to
moisten and smooth the top and bottom of it.
2. Pick up the upper joint. Use the right hand, and lay it in your left hand.
The palm of the left hand is toward the ceiling. The long skinny key goes
away from the body and toward the floor. Cross the thumb and forefinger
of the left hand, and “lock” them over the silver ring.
3. Pick up the lower joint with the right hand between the pancake keys. The
palm of the right hand should be toward the floor and the thumb rest
should also point to the floor. Lock the thumb and forefinger of the right
hand around the joint.
4. Sit down in a chair.
5. Place the lower joint on your right leg.
6. Place the middle finger of the left hand over the covered key between the
silver rings and press down. This will lift the bridge key.
7. The student cannot place two tenons or two receivers together. The tenon
on the upper joint fits into the receiver of the lower joint. Make sure that
the lower joint is straight up and down on the right leg. Place the tenon
into the receiver in a perpendicular position. Any angle could result in
damage to the tenon. Push and twist in opposite directions. Assist
students who are not strong enough to accomplish this task.
8. Check to see if the keys are in line and facing the student. Run the index
finger of the left hand down the silver rings to make sure they line up.
After the student is comfortable with this assembly process:
1. Hold the connected upper and lower joint with the left hand and pick up
the bell with the right hand.
2. Place the bell on the right knee.
3. Slide the left hand down to the lower joint. Place the bell and lower joint
together; twist and push.
4. Carefully lay the clarinet on the lap or the floor.
5. Pick up the barrel with the right hand, and the mouthpiece (without the
ligature) with the left hand.
6. When assembling the mouthpiece and barrel, students should use slight
twisting motions.

7. Place the large end of the ligature over the mouthpiece carefully. Make
sure the screws are on the right as you look at them from the table of the
mouthpiece.
8. Lift the ligature slightly with the thumb and forefinger of a chosen hand,
and carefully slide the reed onto the table of the mouthpiece. The reed is
placed fat to fat, flat to flat and thin to thin.
9. The edges of the reed should be aligned along the rails/sides of the table of
the mouthpiece.
10. A tiny bit of black should be seen when looking directly toward the tip of
the mouthpiece in relation to the tip of the reed.
11. The ligature should cover at least one of the two lines that appear on most
quality mouthpieces.
12. Tighten the bottom screw snuggly, and the top screw to its first point of
resistance.
13. Pick up the already assembled body of the clarinet with the left hand and
slide the hand to the top of the upper joint. Using the right hand, twist and
push the assembled mouthpiece and barrel to the clarinet. Make sure the
table of the mouthpiece is in line with the long skinny key.
Take the instrument apart in the exact opposite manner keeping your hands on the
pieces you are removing. Slide from piece to piece, and twist and pull apart. The
reed must be blotted and placed in the reed guard. The moisture on the inside of
the mouthpiece must be carefully removed. The ligature must be left on the
mouthpiece with a dry reed and a plastic protector. Place the parts in the case in
their proper compartments. Be sure the silver rings are facing upward. Close and
lock the case.
Instrument/Body Ratio
Familiarize the student with the instrument/body ratio by using only the upper and
lower joints.
The left hand should gently hold the upper joint in the same manner used to
assemble the instrument--without putting pressure on the long keys.
The right hand should hold the lower joint in the same manner used to assemble
the instrument--without putting pressure on the long keys.
Move the instrument up and down, side to side by using the elbows. All aspects
of the brass instrument information hold true here. The body playing position
also holds true from previous information. We are merely getting used to the
weight of the instrument; the position of the instrument; and the angle of the
instrument without using correct hand position. The student should not squeeze
the instrument as these exercises are practiced. Keep the palms of the hands soft.
Familiarize the student in this manner for a few days before placing the fingers in
their correct position.

CLARINET EMBOUCHURE
Students must be able to use air correctly before beginning to learn the
clarinet embouchure.
Use the mouthpiece and barrel for better control.
The teacher should place the mouthpiece in the beginning.
Some teachers prefer to place the mouthpiece against the upper teeth first; others
prefer to place the bottom lip first, and then the upper teeth and top lip. We prefer
the latter.
The student needs to remember how it feels and sounds.
Once the teacher has demonstrated how it feels and sounds, the student can hold
the mouthpiece and barrel in place and watch his face in a mirror to make sure
nothing moves or looks unnatural. Then, the student remembers how it looks,
feels and sounds.
It is best to hold the mouthpiece with two fingers and a thumb at the very bottom
of the barrel. The fingers should have absolutely no contact with the mouthpiece
or ligature.
The mouthpiece is held by the teeth, not the lips.
The upper teeth rest on the mouthpiece material (patch).
The students must get used to having a lifting sensation against their upper teeth.
Using rubber gloves (separate for each student), show the student how much
pressure they will feel. Do not allow the student’s head to move at all.
The lower teeth feel the reed through the lower lip that covers them.
The lower lip covers the lower teeth like a fitted sheet covers a mattress.
The back teeth are naturally apart.
The tongue is in the “li” position…..slightly up, but not pulled back.
Using the index finger, gently push the lower lip toward, but not rolled
over the lower teeth. Lick the part that goes over. That is the correct amount.
The bottom teeth should not respond to the placement of the mouthpiece by
moving backwards, and may move slightly forward to create a smooth area
in the chin called the valley. The student should not feel any tension in his jaw
as the mouthpiece is placed on his bottom lip.
The corners are toward the mouthpiece. Ultimately, the corners will be toward
the mouthpiece and down.
There should be no wrinkles in the lower lip, and red flesh must be seen
on either side of the mouthpiece.
The lower lip that is not under the reed stays in front of the teeth.
Never tell students to pull their lips over their teeth. Pulling and stretching makes
lips thicker.
The upper lip rests on top of the mouthpiece in front of the upper teeth.
The upper lip should be soft and pliable, and follow the shape/contour of the
mouthpiece.
Both the top and bottom lip should always feel soft and natural.

There should be no lines or dimples that do not appear in the natural face. The
face essentially should be “zombie”-like.
The air is directed at the clarinet, not into it.
The air is focused to an imaginary dot in the middle of the reed where the flat
part meets the tip.
The teacher can help the student feel how the lip, the lifting and the valley feel.
Enough mouthpiece must be past the lips into the chamber of the mouth to allow
the reed to freely vibrate.
As the student focuses the air at the “dot”, an instant vibration should occur.
There must be a resonant fifth line treble clef concert F# sounded.
If the sound is stuffy, the student may be holding the mouthpiece with the lips.
If the sound is strident and brittle, the student may have too much mouthpiece
in his mouth or may be using too much unfocused air.
Be sure the student can control the air well enough to find the correct balance of
air and resistance to create the sound you want on the mouthpiece and barrel.
Remember that the mouth can be too open; the teeth can be out of position; the
lips can be too loose and puffy or can grip; the tongue can be too far back in the
mouth; the student can be lifting too little. All of these will result in a sound you
will not wish to create.
Keep making subtle adjustments to the angle, amount of mouthpiece taken, etc.
Just a slight movement can really improve the resonance of the vibration.
Keep the body and face calm and still while learning this embouchure.
The embouchure is a constant work in progress. Special attention should be given
to the contact of the upper teeth with the mouthpiece material. The teacher can
attempt to move the mouthpiece out of position to make the student aware that
something is incorrect.
It is easier to make something firmer than to get rid of unnecessary tightness.
If the sound is not clear, instant and resonant on the mouthpiece, the sound on
the clarinet will not be resonant and beautiful.
When the barrel is placed on the clarinet, the first attempt at sound production
should be made with the teacher holding the instrument for the student. This will
be demonstrated.
Trade back and forth with the teacher holding: the student holding: etc.

MAKING THE FIRST CLARINET MOUTHPIECE
AND BARREL SOUND
Initial sound production cannot be introduced until correct posture and breathing
has been successfully taught. Include these two essential components as “part” of
the first sound attempt(s).
Relax position and ready position should already be taught and drilled prior to
sound production. As sound production is occurring, playing position must be
incorporated. Students need to understand that ready position means they are
ready to play. Playing position means that they are set (physically) to play.
Students should not be allowed to sit in relax position during class, except maybe
during announcements, paperwork or things not pertaining to playing. If one
word instructions are preferred, then use “ready” and “set.”
Try to get every student to make a sound on the first day of sound production. If
you will not be able to accomplish this, make a disclaimer before you start. The
students who do not end up getting to make their first sound—on the first day—
will be the first students you will start with on the second day! Students should
not be surprised or frustrated if you do not get to them on this first day.
On day one of sound production, make another disclaimer if you suspect that you
will not get far enough along to allow any of the students to take home their “set-
up”.
At the end of each class, you must make the decision to allow just those who you
assisted to take home their set-up…….or not allow set-ups to go home until
everyone has made sounds with your assistance (day one, day two, etc.).
Once you allow and require set-ups to go home on a daily basis, students should
be recording their practice time on whatever form of practice card you are using.
Be realistic when designating ____ minutes to be spent on their set-up sounds
during their home practice.
It is not necessary to have students make sounds on just the mouthpiece (without
the barrel). It will be much easier for you……and eventually less awkward for
the students…….to hold the mouthpiece and barrel. If you choose to start on just
the mouthpiece, then you are encouraged to add the barrel very soon.
Do not use a metronome when assisting students to make their first sounds. A
metronome should not be added until the class is at the point of making group
sounds.
Remind students that lipstick, Chapstick, etc. cannot be worn during class.
Students need to understand that their reeds will not last long, and they will begin
to see mold.
When working one-on-one with students in your beginning class, it is important
that the students are ready as soon as the teacher reaches them. While other
students are waiting, they must either be paying attention to what you are
doing…..or working on a music theory worksheet, etc.
While going around the room, students should not be allowed to make sounds on
their set-up—even if they have already been assisted. They should also not be

allowed to improperly hold their set-up (i.e. putting a finger in the bottom of their
barrel…..twirling or playing with the set-up in general……etc.
The instructor must place all mouthpiece and barrels for students. This may
continue for 2-5 days (if not longer), depending on the size and overall ability
level of your class.
You should be directly in front of each individual student when assisting them,
and not to the side. It would be most effective if students were standing and
“finding their horizon.” Music stands should be elevated to the proper height, and
a mirror should be properly positioned on each stand. You will learn to maneuver
around each student’s equipment, etc. At this point, all cases should be directly
under or to the side of their chairs.
As you are working with each student, your goal is to assist each student in
making a quality sound on or in the vicinity of the correct pitch (fifth line F-
sharp). Do not get on to students who do not produce the exact pitch—especially
if they are using brands of mouthpieces and ligatures that may be inferior and/or
not on your recommended list. When listening to each student, listen for:
o quality of sound
o consistency of sound
o pitch
Unless the clarinet is your primary instrument, you should not be modeling
sounds on the set-up. As you assist each student, you will eventually find a “star
student” who will become the model for future reference. Be sure to periodically
use a keyboard or a metronome—with pitches—so as not to “lose sight” of the
correct pitch (regardless of whether or not a model is used).
Be aware of fragile and/or teary-eyed students. Move on to the next student in the
interest of time, but make an effort to return to these students by the end of class.
Do not let a student leave class feeling unsuccessful. If possible, offer a pass for
struggling students to come in at lunch or before/after school.
The set-up always goes to the student; not the student to the set-up.
Before bringing the set-up to the student, check for:
o ligatures that have been placed correctly
o ligature screws that are too tight
o proper mouthpiece angles
o proper alignment of the reed
o condition of reeds
Train students not to move their faces or body when you are placing the set-up. It
may take certain students multiple tries, and if they move after each attempt, they
(and you!) basically have to start over each time.
When students breathe, do not allow their corners to pull back at all.
Furthermore, upper lips should not be coming off the plastic of the tops of the
mouthpieces. Students should breathe only through their corners, keeping their
upper lips on the tops of the mouthpieces.
With the set-up, students should progress through the following steps:
o air (The sound starts and ends with air, making students aware of how
they can control their air. This also helps students avoid undue tightness
in the embouchure.)

o air~vibration~air (The air “turns into” a vibration and returns to air.)
o air~vibration
o vibration (ultimate “final” sound)
No articulation syllable should be used when making set-up sounds. The ultimate
goal is for students to start their sounds with air. An articulation syllable will be
assigned after all students are making characteristic and consistent sounds on the
set-up, as well as the fully-assembled clarinet.
Students need to direct their air across their reed (to the imaginary dot) in order to
achieve the desired sound.
Make sure the students understand that “a sound” may not happen the very first
time. This is a trial and error process and may take multiple tries.
Once the set-up has been placed correctly and students are making the sound you
want, they need to remember:
o how it looks (by looking in the mirror)
o how it feels
Allow and instruct them to take the set-up from your hand without moving their
body and embouchure. Have them try to reproduce the sound on their own. Be
prepared to further assist them if necessary. When the sound is correct, students
need to remember how it sounds.
Train students to freeze their body, face and embouchure at the end of whatever
type of sound is being made (whether it is air, a tone, etc.) The student should not
move anything until the director calls the students to ready position. This aspect
of playing should transfer to any—and everything students play in the future (i.e.
after last notes of lines out of the book, last notes of songs, etc.)
Whether students are making individual or group sounds, they need to stop when
they feel like they are running out of air. It should never be thought of as a
contest to see who can hold their sounds the longest. That serves absolutely no
benefit.
If a student feels dizzy or faint, allow them to bend over in their chair for a little
while until they feel better.
If you feel air escaping from the student’s embouchure, the student is most likely
not sealing properly. This is usually caused by students pulling their corners
back. Students need to constantly be told to bring their corners forward. After a
student has been made aware that they are leaking air, the expectation should be
stated for the student to return to class the next day without that issue.
While students are playing, it may be necessary to gently wiggle their mouthpiece
from side to side, during which you will hear pitch variation. This is simply
making the student aware that their corners are not firm and/or their top teeth are
not on the top of the mouthpiece. Ultimately, you should not be able to move the
mouthpiece at all.
The teacher should always forewarn a student before removing the mouthpiece
from the student’s mouth. The mouthpiece can easily scrape the teeth or create
discomfort.
If you are too easily able to slide the mouthpiece out of a student’s mouth, their
top teeth are most likely not on the top of the mouthpiece like they should be.

This also means that students are holding the mouthpiece with their lips instead of
their teeth.
Extraneous noises at ends of sounds are a result of students collapsing their
embouchures and/or postures. Have students sing “la” or “dah”; then, apply that
to the end of their sound.
It is your job, as the teacher, to diagnose any problems through this trial and error
process. As you go around the room, it may be helpful to you to take written
notes on students having problems. Jot down any catchphrases, analogies or
specific things that you said to them that helped them in any way!
If you are struggling in your efforts to assist multiple students…..or are unsure
about what you are doing in general, then hire an outside consultant or
experienced private lesson teacher to come to your class and help. As this
professional goes around the room to hear your students, you need to follow
them……watch exactly what they are doing…..and take notes as well. No
matter the scenario, reference these notes as you see fit in future classes.
If you have a large class, it may be necessary for “waiting” students to re-soak
their reeds after ________ students have played.
After _____ days, students will eventually need to be able to place their set-up
and make a sound without your assistance. The amount of time will vary year to
year, taking into consideration the size of the class, the overall quality of their
sounds, and how many times you have assisted the students.
Students playing bass clarinet need to use the mouthpiece and neck for sound
production. The neck should be held by the curve closest to the mouthpiece,
avoiding the register key mechanism. Whether or not the instrument provided to
the student has a Charles Bay neck, the angle of the instrument (and the angle of
the mouthpiece when not yet on the instrument) must be similar as possible to the
angle of a B-flat clarinet.
Students need to constantly be reminded that characteristic and consistent
set-up sounds are stepping stones to making sounds on the fully-assembled
clarinet! Students who do not practice their set-up sounds at home are not
only slowing the class down, but are not contributing to the daily progress
and quality of the class.
**Much of this information is applicable to beginner interviews.

CHARACTERISTICS OF A GOOD
CLARINET SOUND
Resonant
Consistent
Relaxed
Full
Rich
Clear
Smooth
Focused
Vibrant
Centered
Buoyant
Open
Free
CLARINET HAND POSITION
RIGHT HAND POSITION
1. Place the right hand first, with the lower joint supported by the leg. The
right hand lifts the instrument, and the placement is less difficult or
complicated. The upper joint can be gently held by the left hand as you
begin the awkward process of finding the correct place for every finger.
This will be demonstrated.
2. Place the fleshy finger pads over the silver rings first. Without putting
pressure on the finger tips, feel the pads fall into the holes.
3. The hand will begin in a straight across angle, and will be in the “flat-C”
position.
4. Place the thumb on the thumb rest between the rest and the leg. The
thumb nail touches the rest. Very little (preferably, no) flesh will touch the
thumb rest. The thumb joint must always be to the right of the thumb rest,
never behind it.
5. Turn the clarinet out in front of the student like a spyglass and make sure
there is open space between the body of the clarinet and the hand.
6. The little finger rests on the most comfortable of the four keys it will use
later in this process (either key #1 or #2).
7. The middle finger will appear higher because it is longer than the other
fingers.
8. No part of any finger should touch any rod.
9. Practice moving the fingers up and down from the big knuckles. Do not
let the other two knuckles move. The finger pads should fall directly into
the holes. In the beginning the little finger can move up and down also.
10. Lean the clarinet back on the shoulder and look at the right hand fingers as
you do this. While doing this, the left hand must remain in its proper
“baby” position holding the upper joint.
11. Make sure to feel all parts of the ring with the finger pads.
12. Keep the right hand straight across the body of the clarinet for at least 6 to
8 weeks before moving into the more correct angled position. This change
will be demonstrated.
13. Do not include side keys in the initial hand position information. If asked,
tell them once the hands can move correctly using the rings and tone
holes, they will be allowed to learn to use the keys on the side.
LEFT HAND POSITION
1. While holding the lower joint gently (not using correct hand position but
the proper “baby” position) with the right hand as it rests on the leg, place
the middle knuckle of the index finger on the G# key at the top of the
upper joint. Place the first knuckle on the A key with the fleshy part of the
tip angled down toward the first silver ring. The teacher will have to
identify these “named keys” for the student.

2. Place the middle finger over the second silver ring.
3. Place the ring finger over the third hole with no silver ring.
4. Place the thumb over the ring on the back of the upper joint with the
fleshy part of the end being aware of the long, skinny key (register key).
The angle of the thumb should be at “1:00/2:00.”
5. The little finger will rest on the most comfortable of the four keys it will
use later in this process (either key #1 or #4).
6. Keep the hand in an adjusted “Flat-C” position and the wrist slightly up.
The wrist must stay in line with the rest of the forearm.
7. Continue to rest the clarinet on the leg and watch to see if the left hand
follows the line of the upper joint to form the angle of a “V” with the
upper joint.
8. Do not allow the knuckles of the index finger to lose contact with the G#
and A keys.
9. It the thumb is not being used to play specific sounds on the instrument it
MUST NOT touch the body (wood) of the instrument.
10. ALWAYS KEEP ONE HAND ON THE CLARINET AT ALL TIMES.
NEVER SIMPLY LAY IT IN THE LAP.
11. Beginners can have “fly-away” fingers in the beginning as long as they
fall back down to the correct rings. The exception is the left index finger.
If we try to get them to keep their fingers in the “finished” position too
soon, the hands can become too tense. Always feel the palm of the hands
to check for the softness of the fingers. There are more bones in this area
of the hand than any other part of the body. If the palm is soft, all other
parts of the hand will be as naturally soft as is possible. The little fingers
should have comfortable “home keys” they touch all of the time in the
beginning stages.
12. Beginning clarinet hand position is very awkward, thus taking longer to
achieve and more patience from the teacher and student is required. Do
not get in a hurry.
FINGER EXERCISES
1. All fingers in each hand move together. Call out the hand you wish to
move. The students move all of the fingers in that hand down to seat into
the rings and tone holes. The right hand thumb obviously does not ever
move when the teacher asks for “RIGHT”, but the left hand thumb will
move to its ring with the fingers of the left hand when the teacher asks for
“LEFT”.
2. Next, we move the fingers one at a time beginning with the left hand. The
thumb and first finger are already down in this exercise, and each
additional finger in both hands will be numbered two through six from top
of the upper joint to the bottom of the lower joint. The fingers will move
down or up depending on their starting position, as the number is called by
the teacher. We do not use the little fingers when we first begin this
exercise. Later, they will be numbered seven and eight.

3. Watch the fingers to see that they move smoothly, cover the holes, stay in
natural position and move up and down from the big knuckle only. The
student should understand that the movement is aided by the soft tissue of
the palm of the hand, rather than the bony texture of the top of the hand.
4. Next, we move the fingers in combinations: one, two….one, two
three…….one, two, three, four……one, two, three, four, five…..one, two,
three, four, five, six………six, five, four, three, two, one……five, four,
three, two, one…….four, three, two, one……three, two, one………two,
one…… Later in the development the thumb movement is added.
5. Using these exercises, the fingers move in all of the ways they move to
play the clarinet: all together, one at a time, and in combinations.
6. When learning to use the little fingers, we number the keys one through
four. The teacher calls out the number, and the student moves the little
finger in either hand in a circular motion to the numbered key. Call the
numbers in order: call the numbers backward: call the numbers diagonally:
call the numbers in any order you wish. Begin using the little fingers
separately, and then show the students the correlation of the keys on the
left and right side of the clarinet.

CLARINET ARTICULATION
Do not attempt to teach articulation until all students are producing characteristic
and consistent sounds on the mouthpiece and barrel, as well as the entire clarinet.
Introduce articulation on the mouthpiece and barrel.
The tongue is down 98% and up 2% of the time.
The tongue moves up and down, not back and forth.
The tongue never touches the teeth or gums.
The purpose of the tongue is to release the air which causes the reed to vibrate
which creates the sound. The tongue’s release of the air simply defines the
beginning/start of the vibration/sound.
Articulation is used to define the vibrations necessary to create musical rhythm,
style and movement--to contrast the use of slurring (which also creates similar
musical entities).
Use the DOG drill; singing “dah”, etc. as with the teaching of brass articulation.
One taste bud of the student’s tongue should touch the flat part of the reed
where the imaginary “dot” at the tip has been all along. The tongue touches this
spot, and immediately returns to its “at rest” position.
The student must always touch and interrupt a vibrating reed.
The articulation does not stop the reed vibration.
There should be no movement in the face, chin or throat. All that moves when the
student articulates is the air and the tongue.
The tongue must touch in the same spot with the same energy every time. The
spot should be where the flat part of the reed meets the tip.
YOU WILL NOW BE SHOWN COMBINED EXERCISES THAT WILL HELP
IMPROVE THE STUDENT’S TONE QUALITY IN ALL OF THE REGISTERS,
INCREASE RANGE, CREATE EVEN ARTICULATION IN ALL REGISTERS,
AND TEACH YOUNG STUDENTS HOW TO CONTROL THE ENTIRE
INSTRUMENT DURING THE FIRST YEAR.

CLARINET ARTICULATION EXERCISES
When starting articulation exercises, the use of mirrors is vital.
Remind students that the tongue only interrupts the air – it never stops the air.
Articulating with black notes as opposed to white notes, encourages students to move
their tongues down quicker.
Make sure from the very beginning, students sing and play in a connected/legato style.
Exercises to be taught in the following order:
1. Have students sing on “dah” and then ultimately on the French syllable “dih.” If
students are unable to sing in a connected style, they should not progress to the next
step.
2. Have students put their hand or index finger in front of their face and feel their air.
Students should feel continuous air and not “puffs” of air.
3. Go around the room and have each student tongue air at your hand, so you can assess
their ability to do it correctly.
4. Using a mirror, students should articulate with or without their hand/index finger,
making sure that their face, chin, and throat are not moving.
5. When you feel students have mastered the previous exercises, allow them to articulate
– using the syllable “dah” or “dih” – on the mouthpiece and barrel. Students should
put their left hands under their barrel so they can feel a continuous stream of air while
they are articulating. Students who do not feel continuous air need to be verbally
made aware that they are not articulating correctly.
** Students should start with their tongue on the reed to create the articulation.
The tongue then falls down and returns to its “at rest” position in the bottom of the
mouth. One taste bud of the student’s tongue should touch the flat part of the reed,
where the imaginary “dot” at the tip has been all along. The air and tongue go to
this same “dot.”
6. Allow students to articulate as fast as they can.
7. Allow the students to start the sound and use the "ta-day" syllable.
8. Allow the students to start the sound and articulate by snapping your finger on
command.
9. With the metronome, begin to incorporate easy follow-the-leader rhythms with you
singing or modeling – and the students echoing on their mouthpiece and barrel.
Whole rests may or may not be necessary between you and the students. As with

your initial sound production exercises, students need to continue counting with their
fingers while they are playing. This ensures that students are thinking internal
subdivision.
10. Before progressing to the fully-assembled clarinet, assign the following playing test
on the mouthpiece and barrel:
Attach the mouthpiece and barrel to the clarinet and begin articulation. Students must be
constantly reminded that they should be articulating in the same way as they were when
just using the mouthpiece and barrel.
Whether students are playing white notes or black notes, they must constantly be
reminded that the tongue moves down quickly.
When students can successfully sing note names on the same pitch, allow them to
articulate multiple notes on the same pitch.
When pulse and foot pat are learned, students articulate every time their foot touches the
floor – and then when their foot touches the floor and as it comes up.
Once the student is able to read music, call the articulation "rhythmic articulation".
Students should be tonguing as the music moves across the page.
Do not allow students to articulate back-to-back notes on different pitches until they are
playing with absolute connected style on notes of the same pitch.
When the tongue is moving correctly, you must decide when it is appropriate to have
students begin coordinating finger movement with articulation.
When students articulate back-to-back notes on different pitches, they cannot stop their
air as they change fingerings.
Teach Mary Had a Little Lamb in four segments by singing and then playing:

After all students have successfully played each segment of Mary Had a Little Lamb,
begin to string together the segments into the following finished product:
Ultimately, students should be able execute any or all of the following on a daily basis:
o articulate as fast as they can
o articulate using the "ta-day" syllable
o articulate on command
o articulate with foot pat and articulate rhythms
When playing exercises out of the method book, you can return to previously-learned
lines and add articulation. Do not feel like all lines must be executed again during class;
assign students to perform all lines at home with articulation.


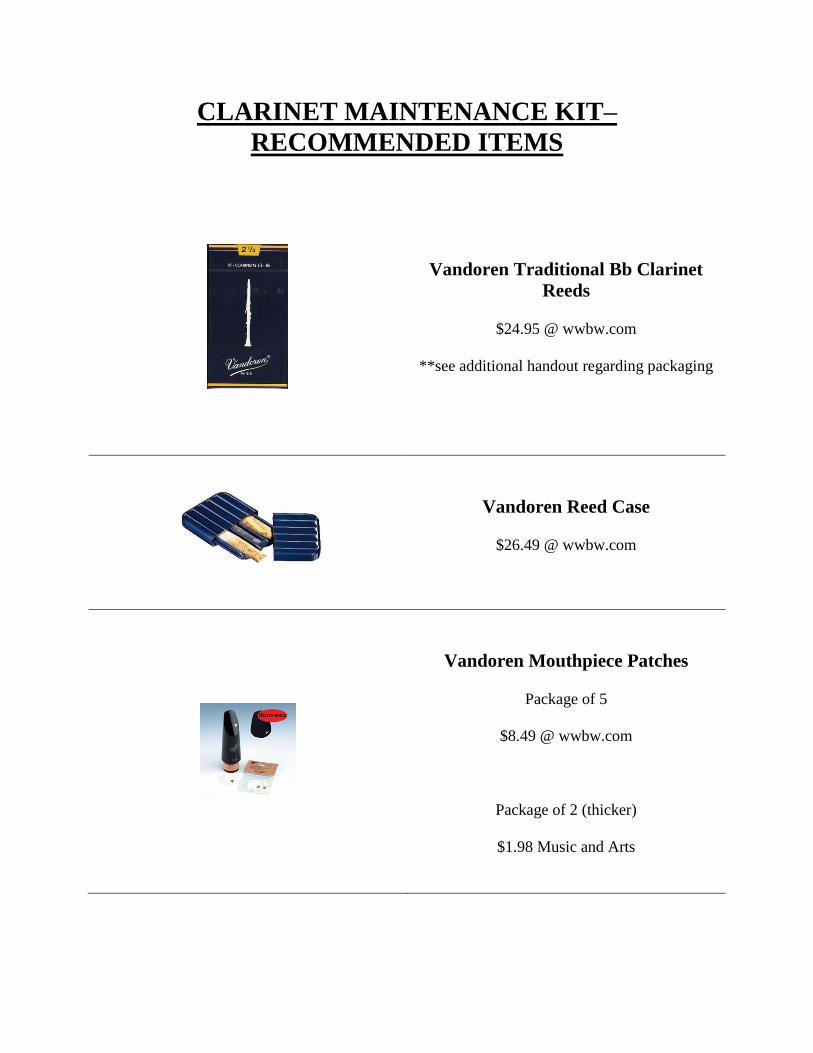
CLARINET MAINTENANCE KIT–
RECOMMENDED ITEMS
Vandoren Traditional Bb Clarinet
Reeds
$24.95 @ wwbw.com
**see additional handout regarding packaging
Vandoren Reed Case
$26.49 @ wwbw.com
Vandoren Mouthpiece Patches
Package of 5
$8.49 @ wwbw.com
Package of 2 (thicker)
$1.98 Music and Arts
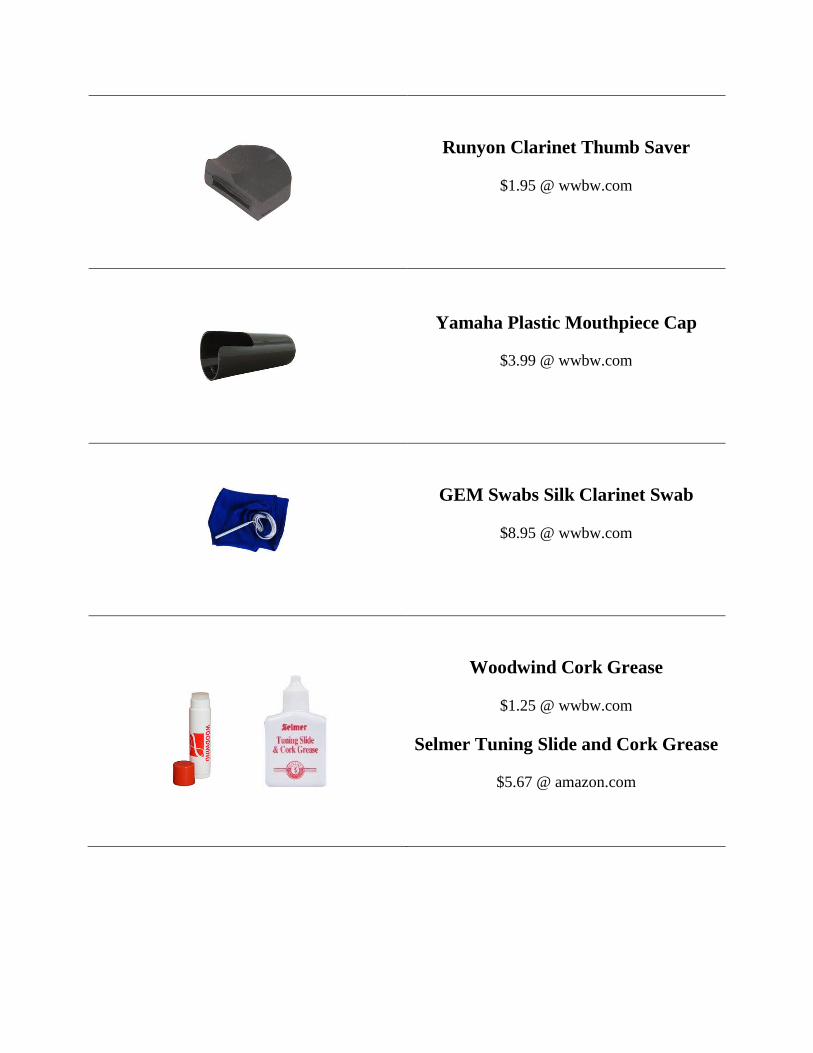
Runyon Clarinet Thumb Saver
$1.95 @ wwbw.com
Yamaha Plastic Mouthpiece Cap
$3.99 @ wwbw.com
GEM Swabs Silk Clarinet Swab
$8.95 @ wwbw.com
Woodwind Cork Grease
$1.25 @ wwbw.com
Selmer Tuning Slide and Cork Grease
$5.67 @ amazon.com

CLARINET MAINTENANCE KIT—OPTIONAL
RECOMMENDED ITEMS
Selmer Bore Oil
$2.99 @ wwbw.com
Giardinelli Bb Clarinet
Handkerchief Swab (bore oil cloth)
$5.99 @ wwbw.com
Korg MA30 Metronome
$19.99 @ wwbw.com
The Korg metronome has subdivisions of
8th
notes, triplets, and 16th
notes
Ezo Denture Cushions
$4.49 @ cvs.com
**see additional handout
EZO DENTURE CUSHIONS AND CIGARETTE PAPER
Uses
Students who have developed bad habits with biting will not be able to produce a
sound until they relax their jaw and lips
Allows students to play longer without the painful effect of the teeth cutting into
the bottom lip
For students who bite with their lower lip
Can be used for students with braces (and is really a necessity)
Protects the bottom teeth from cutting into the lower lip
Good for relieving tension during long rehearsals
Characteristics of Ezo/Procedures of Usage
Can be found at Walgreens or CVS, and is often found in the dental care aisle
next to denture creams and fixtures
Made from wax and contains 15 total denture molds
Cut each piece into four squares around the corners; cut off the excess and throw
away
Instruct the student to place it on their tongue and mold the square over their
bottom teeth with their saliva
It molds/conforms onto (over) the bottom teeth and becomes a “part” of the
embouchure (thought of and treated like a retainer)
Provides smooth surface for bottom teeth.
Each piece is reusable a few times as long as the student does not have particles of
food inside their mouth
Discouraged if used for a long period of time
A new piece moves around for 1-3 days
Pieces need to be kept in a zip-loc bag
When a piece discolors (no longer is pink) it should be discarded
Disadvantages of Usage
Students should be aware that use of Ezo increases the distance between the
bottom teeth and the reed. Inconsistent use/non-use of Ezo may provide
discrepancies in pitch and lip pressure on the reed.

Instruments Recommended for Ezo
Clarinet
Saxophone
Cigarette Paper
Characteristics/Usage
Can be used in a pinch like Ezo but has multiple uses
Coated with wax
Used to dry pads with excess moisture as a result of playing
Brand
Recommended brand is Zig-Zag
Price is ~$3.00 and contains a pack of 40 and can be purchased in a convenience
store


DO YOU WANT YOUR CHILD PLAYING ON THIS?
WE DON’T EITHER! PLEASE GO TO MUSIC AND ARTS (ON WEST BAY AREA)
AND PURCHASE NEW, HEALTHY REEDS. REEDS ONLY LAST SO LONG –
YOUR CHILD NEEDS A NEW BOX.
PLEASE BUY:
VANDOREN 2 ½ REEDS FOR CLARINET OR SAXOPHONE
THANKS SO MUCH!
LCI BAND
________ We are going to get reeds.
________ We cannot afford reeds at this time.
_________________________________________
Student Name
_________________________________________
Parent Signature

CLARINET OPEN G THREE-POSITION EXERCISE
1. POSITION 1 – “baby position”
This newly-created “baby position” now becomes the students’ new “ready
position”.
Notice that no fingers are placed on the tone holes.
The left hand is lightly grasping the barrel and the right hand is lightly grasping
the bell.
Be sure to check the angle of the clarinet; the bell should not be past the knees
and students should always be feeling a lifting sensation against their upper teeth.
Therefore students are recreating the angle of their “short instrument” (set-up).
The student’s head is level and the instrument is brought to them.
Each student should be heard individually in this position to ensure they are all
producing a 2nd
line G.
2. POSTION 2 – Slide the right hand into the correct position.
*You must have taught hand position by this point.*
Students should quickly slide their right hand up into position without pressing
any keys down.

This should be drilled until you are confident they can perform this action
correctly.
This position should not disrupt the placement of the instrument at all.
Again, make sure the bell does not go past the knees and students should still be
feeling a lifting sensation against their upper teeth.
Again, students must always look out at their horizon and not attempt to look
down to see if their right hand fingers are in the correct place.
Each student should again be heard individually in this position to ensure they are
still producing a 2nd
line G.
Be aware that students can accidently press down any finger --or combination of
fingers --and still unfortunately be able to sound their 2nd
line G.
3. POSITION 3 – Slide the left hand into the correct position.
Students should quickly slide their left hand down into this position without
pressing any keys. If any keys are pressed, the instrument will produce “mystery
sounds”.
Again, make sure the bell does not go past the knees and students should still be
feeling a lifting sensation against their upper teeth.
Again, students must always look out at their horizon and not attempt to look
down to see if their right hand fingers are in the correct place.
Each student should again be heard individually in this position to ensure they are
still producing a 2nd
line G.
Drilling and monitoring of these steps will result in correct instrument carriage as well as
hand/finger position. When the three steps are mastered, the students should progress to
the completed Three-Position Open G Exercise (next page).

COMPLETED THREE-POSITION OPEN G EXERCISE
The first whole note should be performed in POSITION 1.
The first whole rest should be performed as follows:
o Beat 1 – Release
o Beat 2 – Slide right hand up into the correct position
o Beat 3 and 4 – Breathe
The second whole note should be performed in POSITION 2.
The second whole rest should be performed as follows:
o Beat 1 – Release
o Beat 2 – Slide left hand down into the correct position
o Beat 3 and 4 – Breathe
The third and final whole note is now performed in POSITION 3 with absolute
and correct hand/finger position.
If “mystery sounds” are still heard in POSITION 3 after several days, students
are simply not aware of what is happening with their left hand fingers (especially
the thumb).
RELEASE BREATHE
SLIDE SLIDE
RELEASE BREATHE
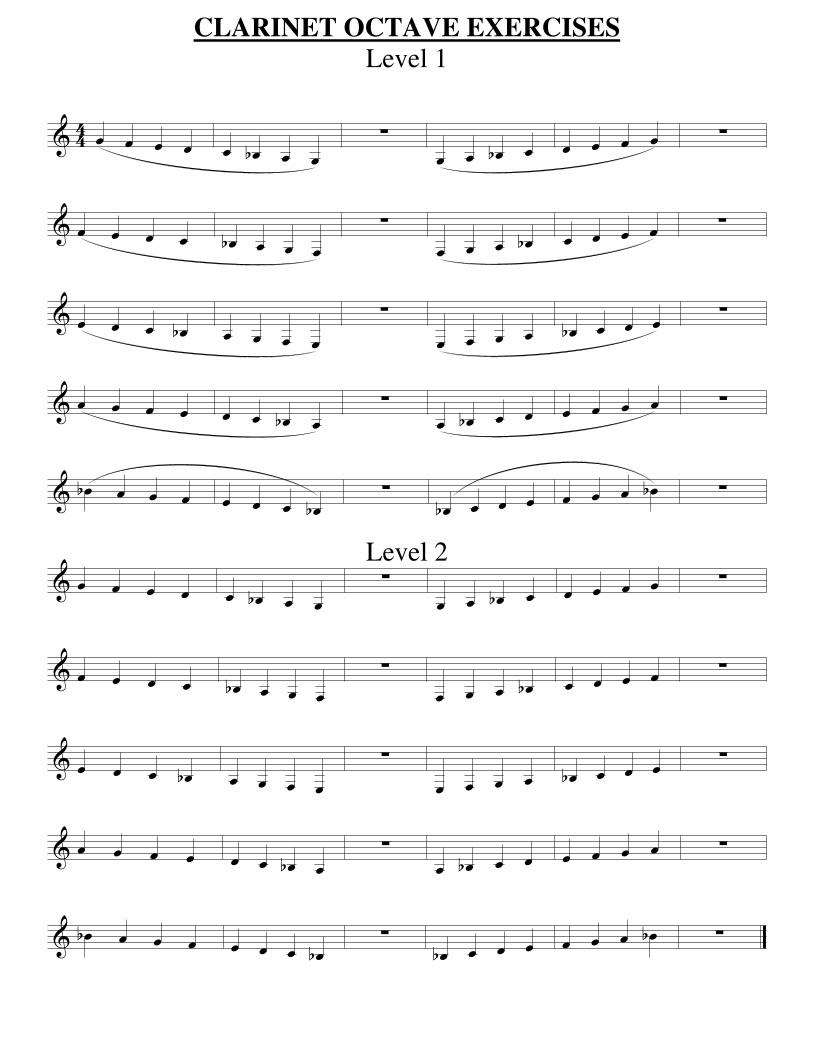
& 44 œ œ œ œ œ œb œ œ∑
œ œ œb œ œ œ œ œ ∑
& œ œ œ œ œb œ œ œ∑
œ œ œ œb œ œ œ œ ∑
& œ œ œ œb œ œ œ œ∑
œ œ œ œ œb œ œ œ ∑
& œ œ œ œ œ œ œb œ∑
œ œb œ œ œ œ œ œ ∑
& œb œ œ œ œ œ œ œb ∑ œb œ œ œ œ œ œ œb ∑
& œ œ œ œ œ œb œ œ∑
œ œ œb œ œ œ œ œ ∑
& œ œ œ œ œb œ œ œ∑
œ œ œ œb œ œ œ œ ∑
& œ œ œ œb œ œ œ œ∑
œ œ œ œ œb œ œ œ ∑
& œ œ œ œ œ œ œb œ∑
œ œb œ œ œ œ œ œ ∑
& œb œ œ œ œ œ œ œb ∑ œb œ œ œ œ œ œ œb ∑
CLARINET OCTAVE EXERCISES
Level 1
Level 2

& c1
œ œ œ œb œ œÓ
&2
œ œ œ œb œŒ Ó
&3
œ œ œ œb&
4
œ œ œ Œ
&5
œ œ œ Œ
&6
œ œ œ Œ
&1
œ œ œ œb œ œœ Œ
&2
œ œ œ œb œœ Ó
&3
œ œ œ œbœ Œ Ó
&4
œ œ œœ
&5
œ œœ Œ
&6
œ œ œœ
&7
œ œœ
Œ
CLARINET
Set 1All exercises are performed on one airstream.
Be sure all fingers move easily and naturally from the big knuckle.
Make sure all sounds have the same resonance.
Move from the center of the note to center of the note.
Set 2

& 441
œ œ œ œb œœ œ#
Œ
&2
œ œ œ œbœ œ
Ó
&3
œ œ œœ œ
Œ Ó
CLARINET
Set 3
For altissimo register, use half hole first finger instead of lifted first finger
*
*
* The right hand "speaker key" (RH G#/Ab key)
must be added on the last note. For the altissimo
register, use the "half hole" first finger instead of
the "lifted" first finger.
Once these exercises have been perfected to the teacher's
standards, add the articulation exercise taught for all
instruments to the last note of each section.
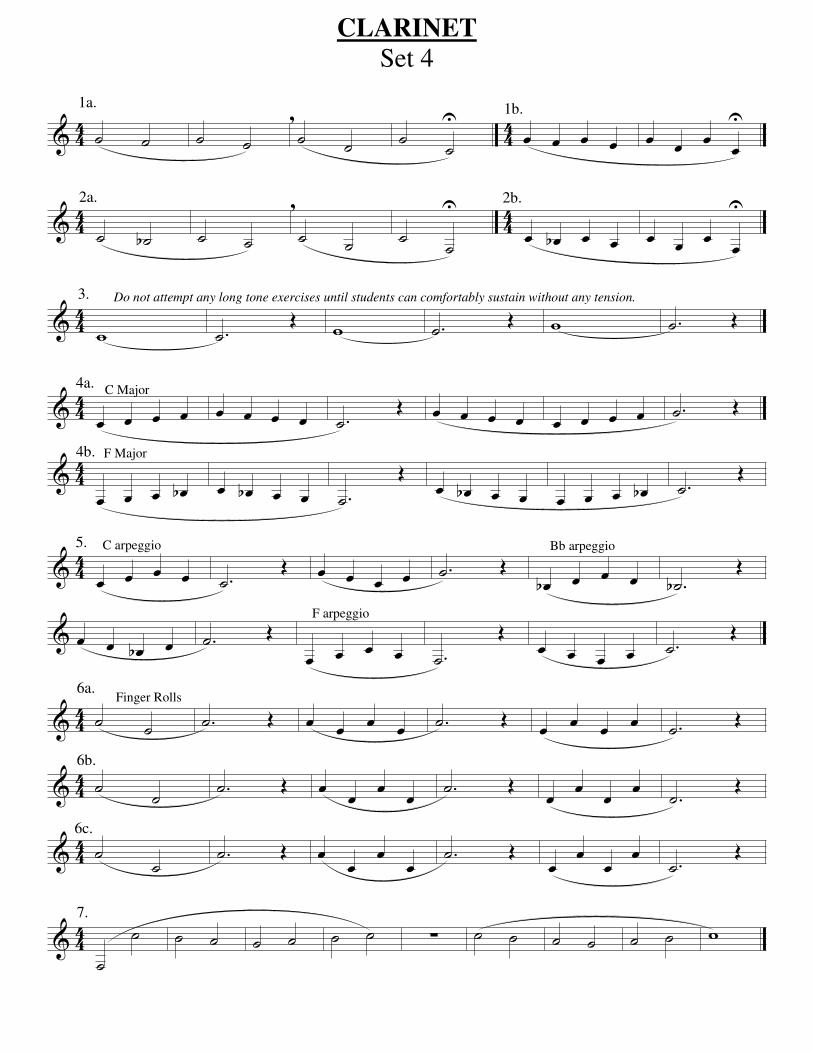
& 44 44˙ ˙ ˙ ˙ ˙,
˙ ˙ ˙U œ œ œ œ œ œ œ œ
U
& 44 44˙ ˙b ˙ ˙ ˙,
˙ ˙ ˙U
œ œb œ œ œ œ œ œU
& 44 w .˙ Œ w .˙ Œ w .˙ Œ
& 44 œ œ œ œ œ œ œ œ .˙ Œ œ œ œ œ œ œ œ œ .˙ Œ
& 44œ œ œ œb œ œb œ œ .˙
Œ œ œb œ œ œ œ œ œb .˙ Œ
& 44 œ œ œ œ .˙ Œ œ œ œ œ .˙ Œ œb œ œ œ .˙b Œ
& œ œ œb œ .˙ Œœ œ œ œ .˙
Œ œ œ œ œ .˙ Œ
& 44 ˙ ˙ .˙ Œ œ œ œ œ .˙ Œ œ œ œ œ .˙ Œ
& 44 ˙ ˙ .˙ Œ œ œ œ œ .˙ Œ œ œ œ œ .˙ Œ
& 44 ˙ ˙ .˙ Œ œ œ œ œ .˙ Œ œ œ œ œ .˙ Œ
& 44˙
˙ ˙ ˙ ˙ ˙ ˙ ˙ ∑ ˙ ˙ ˙ ˙ ˙ ˙ w
CLARINET
Set 4
Do not attempt any long tone exercises until students can comfortably sustain without any tension.
C Major
F Major
C arpeggio Bb arpeggio
F arpeggio
Finger Rolls
1a. 1b.
2a. 2b.
3.
4a.
4b.
5.
6a.
6b.
6c.
7.

& c1
˙ ˙ ˙ Ó ˙ ˙ ˙ Ó ˙ ˙ ˙ Ó
& c2
˙ ˙ ˙ Ó ˙ ˙ ˙ Ó ˙ ˙ ˙ Ó
& c3
˙ ˙ ˙ Ó ˙ ˙ ˙ Ó ˙ ˙ ˙ Ó
& c4
˙˙ ˙ Ó ∑ ˙ ˙ ∑ ˙ ˙ ˙ Ó
& c5
˙ ˙ ˙ Ó ∑ ˙ ˙ ˙ ˙ ˙ Ó
& c6
˙b ˙n ˙b Ó ˙b ˙ ˙b Ó
&1
w w w w w
&2
w wb w wb w
&3
w w w# w w# w w
&4
w w w# w w# w w
CLARINET
Set 5
Finger Rolls and Break Exercises
Set 6
Break Patterns
L R R L
R L L R

& c˙
˙ ∑˙
˙ ∑˙#
˙#˙b( )
˙b( ) ∑
& ˙˙ ∑
˙#˙#
˙b( )˙b( ) ∑
˙˙ ∑
& ˙#˙
˙b( )∑ ˙
˙# ˙b( ) ∑ ˙˙ ∑
& ˙#˙#
˙b( )˙b( ) ∑ ˙
˙ ∑ ˙#˙#
˙b( )˙b( ) ∑
& ˙˙ ∑ ˙
˙∑
& c˙
˙ w# wb( )∑
˙#˙
˙b( )w
∑
& ˙˙# ˙b( ) w# wb( )
∑ ˙˙ w
∑
& ˙#˙#
˙b( )˙b( ) w
∑ ˙˙ w# wb( )
∑
& ˙#˙#
˙b( )˙b( ) w
∑
CLARINET
Set 7
Register Slurs
Set 8
Harmonics
This is a more advanced level of Set 2.
This is a more advanced level of Set 3.
*right hand "speaker key" (RH G#/Ab key)
must be added on third note from this group
to the end of the exercise*
*
* *
* *
*

& 43œ œ œ# œ œ# œ œ# œ œ œ# œ œ#
& œ œ œ# œ œ# œ œ# œ œ œ# œ œ#
& œ œ œ# œ œ# œ œ# œ œ œ# œ œ#
&œ œ œ# œ œb œ œ œb œ œb œ œ
&œb œ œb œ œb œ œ œb œ œb œ œ
& œb œ œb œ œb œ œ œb œ œb œ œ
& œb œ œb œ œb œ .˙
CLARINET CHROMATIC SCALE
This should not be attempted until all previous pages have met your expectations. all students should be made
aware of the importance of making consistent, characteristic sounds on all notes regardless of register. Do not
continue past the note when sound consistency changes. Work your way up one note at a time.
Realistically, the chromatic scale may not be introduced until the second semester.

WORKING OUT CLARINET BLIPS AND
FINGER/TONGUE COORDINATION PROBLEMS
Blips
Blips can be defined as the uncoordinated movement of multiple fingers that should
be moving at the same time—but are not. As with the teaching of all woodwind
instruments, the most problematic fingers in both hands are the ring finger and the
pinky. Most blips occur with the use of either or both of these fingers.
o Use uneven rhythms with everything tongued.
o Students can audiate the counting while they are positioning
o Students can audiate “long…short long….short long…short long,” while
they are positioning
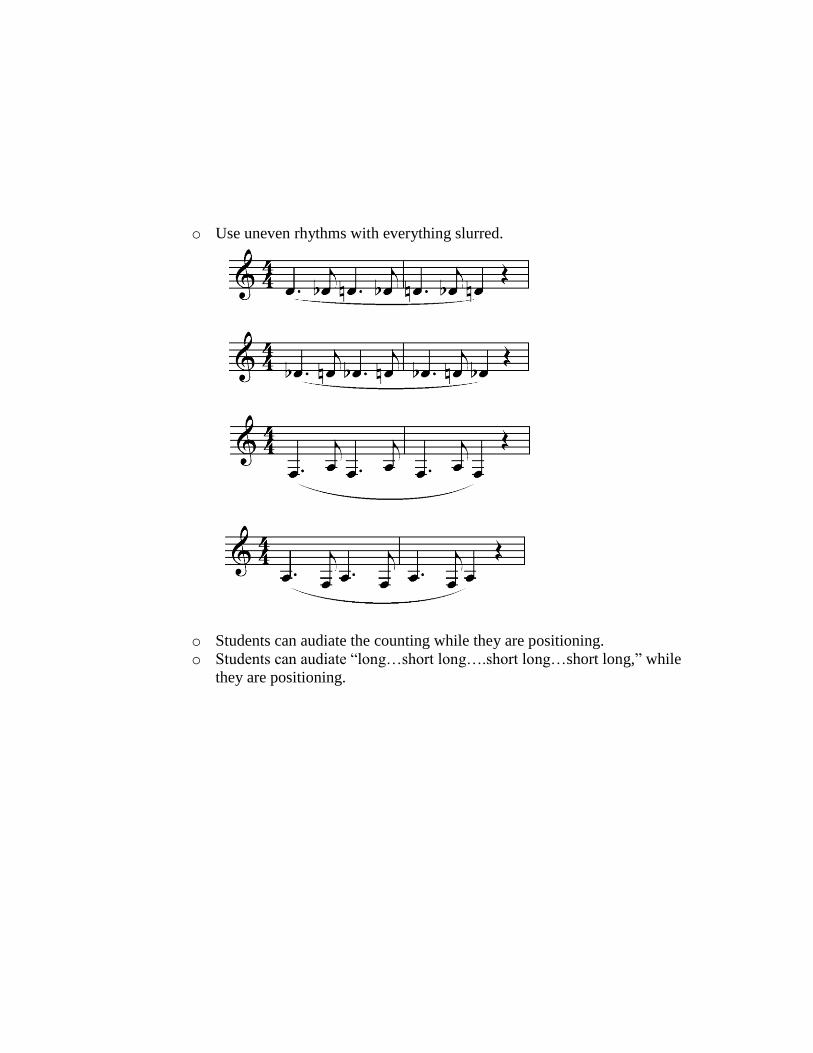
o Use uneven rhythms with everything slurred.
o Students can audiate the counting while they are positioning.
o Students can audiate “long…short long….short long…short long,” while
they are positioning.

o Use uneven rhythms with everything tongued.
o Students can audiate the counting while they are positioning.
o Students can audiate “short long….short long…short long….short,” while
they are positioning.

o Use uneven rhythms with everything slurred.
o Students can audiate the counting while they are positioning.
o Students can audiate “short long….short long…short long….short,” while
they are positioning.
These exercises can be very effective, but must be audiated and positioned at
the same time.
Playing tests can be given over these exercises being applied to certain sections of
music to promote the practicing of them.
Finger/Tongue Coordination Problems
There are two types of finger/tongue coordination problems that occur when passages are
articulated:
1. students changing to the next fingering before they articulate (most common)
2. students articulating before they change to the next fingering
o Students can audiate the counting.
o Students can audiate their note names.
o Students can use their air and position through their embouchures—without
actually producing sounds/vibrations.

& 44 œ œ ˙ œ œ ˙ œ œ œ œ ˙ Ó
& œ œ œ œ œ œ œ œ œ œ œ œ ˙ ˙
& œ œ ˙ œ œ ˙ œ œ œ œ ˙ Ó
& œ œ œ œ œ œ œ œ œ œ œ œ w
& 44 œ œ œ œ œ œ ˙ œ œ œ œ ˙ ˙
& œ œ œ œ œ œ ˙ œ œ œ œ ˙ ˙
& œ œ œ œ œ œ ˙ œ œ œ œ ˙ ˙
& œ œ œ œ œ œ ˙ œ œ œ œ ˙ ˙ w
CLARINET/BASS CLARINET CHRISTMAS TUNES
Jingle Bells
Good King Wenceslas


![[Clarinet Institute] Boccherini Flute Quintets Op25](https://img.dokumen.tips/doc/110x75/577cc75d1a28aba711a0b895/clarinet-institute-boccherini-flute-quintets-op25.jpg)
![[Clarinet Institute] Boccherini Flute Quintets Op21](https://img.dokumen.tips/doc/110x75/55cf967b550346d0338bbf18/clarinet-institute-boccherini-flute-quintets-op21.jpg)