Embed Size (px)
Citation preview

A Clothing and Textiles
Project Leader’s Guide
4H CTL 20

Florida 4-H—Fun With Clothes, page 2
CREDITS AND ACKNOWLEDGEMENTS
Publication History:
4-H FUN with CLOTHES [4H CCM 10 and 4HCCL 20] [DLN 4H115/4H111]was developed through a team effort of the Florida 4-H Youth Development Program (formerly Department of 4-H and Other Youth Programs) and the Department of Family, Youth and Community Sciences (formerly Home Economics). This curriculum package was created by Joy Cantrell Jordan, Associate Professor and 4-H Youth Development Curriculum Specialist, Shona Armstrong and Johannah Pourciau, Project Assistants, and R. Nadine Hackler, Professor, Clothing and Textiles, Department of Family Youth and Community Sciences. University of Florida Institute of Food and Agricultural Sciences.
Design Team: Shirley Clark, Gadsden County; Mary Williams, Nassau County; Dot Allenbrandt, Citrus County; Judy Butterfield, Clay County; Susan Nigg, Volunteer, Manatee County; Mary Beth Salisbury, Osceola County; and Becky Conley, Volunteer, Osceola County.
Pilot Sites and Coordinators: Shirley Bond, Hillsborough County; Shirley Clark, Gadsden County; Audrey Norman, Palm Beach County; Judy Butterfield, Clay County; Shelda Wilkens, Seminole County; Mary Beth Salisbury, Osceola County; and Donna Peacock, Sumter County.
________________
We wish to acknowledge the contributions, support and encouragement from Elna Inc., Singer Sewing Machine Company, Soap and Detergent Association, and American Home Sewing and Craft Association.
Special acknowledgement of contributions and thanks are also extended to Nancy O'Neil, Artist, for graphic illustrations and to Nancy Stuart and Angela Frampton, Department of 4-H and Other Youth Programs, for the word processing and computer graphics.
Produced by 4-H Youth Development Program( formerly the Department of 4-H and Other Youth Programs) and the Department of Family, Youth, and Community Sciences (formerly Home Economics), University of Florida Cooperative Extension, Institute of Food and Agricultural Sciences, February, 1994, revised March, 2011.

Florida 4-H—Fun With Clothes, page 3
PREFACE
4-H FUN with CLOTHES
A Clothing and Textiles Curriculum
for 5-8 Year Olds The new Florida 4-H Individual and Family Resources curriculum, OUR PERSONAL WORLD, recognizes that the social and psychological impacts of clothing and textiles are a prevailing undercurrent in many of the actions and in the development of young people. The 4-H Clothing and Textiles program provides an opportunity for young people to practice a variety of life skills while learning subject-matter, including: improving their personal appearance; how to be good consumers; clothing selection, care and construction skills; learning about textiles; becoming aware of cultural diversity; and decision-making skills in relation to careers and job seeking.
4-H FUN with CLOTHES is the first level of the 4-H Clothing and Textiles Curricula that is designed to help 5-8 year old children understand the basics of Clothing and Textiles. Additional curriculum packages are being designed for youth in other age ranges and for sequential advancement in the clothing program. The Florida 4-H Clothing and Textiles curriculum has eight major foci:
• Creativity: personal creativity and basic sewing skills. • Communication of Self: personal grooming, appearance and self-concept
development. • Cutting Edge: knowledge of fabrics, textile science and technology • Choices: clothing selection...color, line and design. • Consumerism: wise shopping practices. • Care: daily care of personal clothing. • Culture: cultural influences of clothing apparel and design. • Careers: clothing associated with many careers and career choices in the
clothing and textile industries. To the informed Florida citizen, it is not surprising that clothing and textiles are a priority within the total 4-H Individual and Family Resources curriculum. An investment in young people's knowledge, understanding and attitudes about clothing affects their self-esteem and can not be ignored now or in the future.

Florida 4-H—Fun With Clothes, page 4
TABLE OF CONTENTS
I. INTRODUCTION Credits Preface ............................................................................................. 1 Table of Contents ......................................................................... 2-4 About FUN with CLOTHES............................................................ 5-12
Lesson Profiles .......................................................................... 6 Instructional Materials Needed ............................................. 7-10
About Teaching Clothing to Preschoolers ...................................... 11-12 About Experiential Education ...................................................... 13-15
II. 4-H FUN with CLOTHES LESSON 1: CREATIVITY ................................................................ L1-1
Teaching Outline ................................................................. L1-1 Background Basics ............................................................... L1-3 Activities
1. Tools of the Trade ................................................... L1-9 2. Tool Boxes ............................................................ L1-11 3. Slides and Ladders ............................................... L1-13 4. Stitch it ................................................................ L1-15 5. A Book of Needles ................................................ L1-17 6. Pin Pillows ............................................................ L1-18 7. Loop-to-Loop ....................................................... L1-19 8. License to Drive .................................................... L1-22 9. Recycling and Sharing ........................................... L1-24 10. Stuff and Hug ..................................................... L1-26 11. Bag It! ............................................................... L1-28 12. A Puppet Party .................................................... L1-30 13. Collage Banner .................................................. L1-32
Take Home Activities Make A Pin Cushion

Florida 4-H—Fun With Clothes, page 5
TABLE OF CONTENTS (continued)
LESSON 2: COMMUNICATION OF SELF ........................................................ L2-1 Teaching Outline ................................................................................. L2-1 Background Basics ............................................................................... L2-4 Activities
1. Picture Myself ........................................................................ L2-7 2. "I Feel Like...." ........................................................................ L2-9 3. Color Chemists! .................................................................. L2-11 4. Walk a Rainbow .................................................................. L2-13 5. Are My Hands Clean? .......................................................... L2-15 6. Hold That Posture ................................................................ L2-17 7. Soap Balls! .......................................................................... L2-19
LESSON 3: CUTTING EDGE ........................................................................... L3-1 Teaching Outline ................................................................................. L3-1 Background Basics ............................................................................... L3-3 Activities
1. Make a Checker Board! ......................................................... L3-5 2. A Modern Loom .................................................................... L3-8 3. Magic Bracelets! .................................................................. L3-10 4. Fabric "Feelings" .................................................................. L3-12 5. Colorful Cut-Outs! ............................................................... L3-14 6. What a Mesh! ..................................................................... L3-16
Take-Home Activities Fabric "Feelings"
LESSON 4: CHOICES .................................................................................... L4-1 Teaching Outline ................................................................................. L4-1 Background Basics ............................................................................... L4-4 Activities
1. My Favorite Outfit .................................................................. L4-8 2. Seasonal Collage .................................................................. L4-9 3. Suitcase Relay ..................................................................... L4-11 4. "All Mixed Up" ..................................................................... L4-13 5. Pass It Around Song ............................................................. L4-15 6. Color Match ........................................................................ L4-17 7. Talking Colors ..................................................................... L4-19 8. Cool Carl and Warm Wanda ................................................ L4-21 9. What's My Line .................................................................... L4-23 10. Match Me! ........................................................................ L4-25
Take Home Activities My Suitcase
Florida 4-H—Fun With Clothes, page 6
TABLE OF CONTENTS (continued)
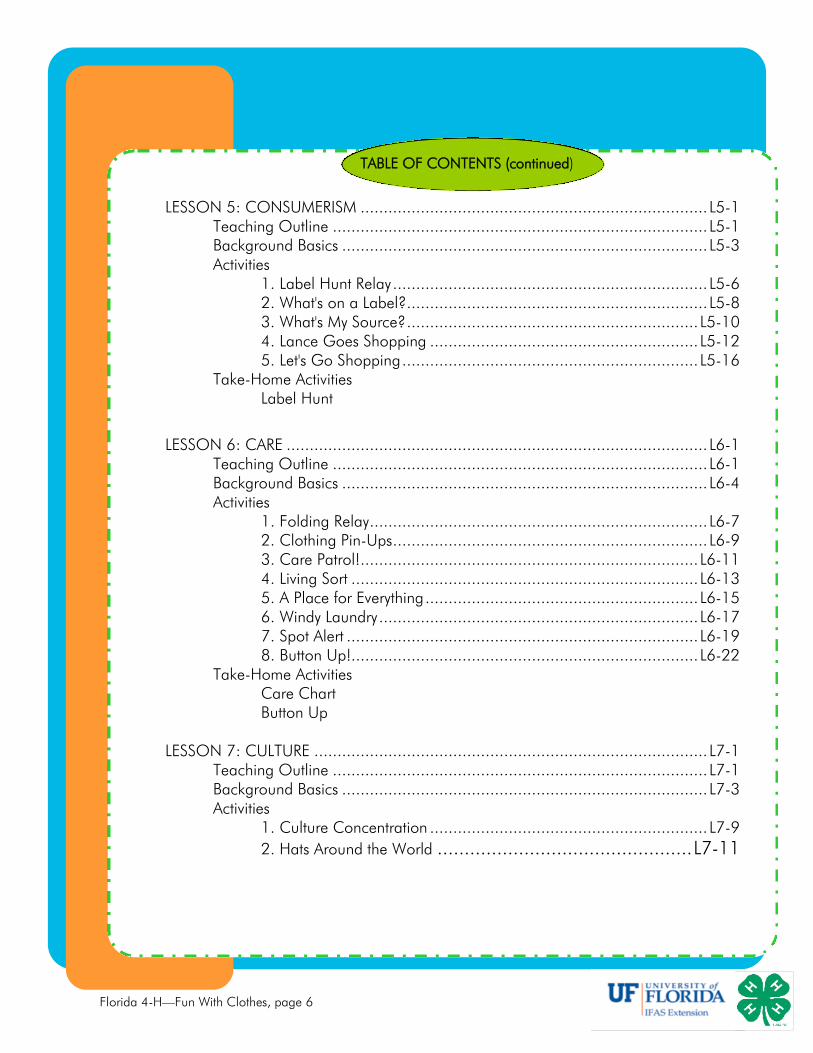
LESSON 5: CONSUMERISM ........................................................................... L5-1 Teaching Outline ................................................................................. L5-1 Background Basics ............................................................................... L5-3 Activities
1. Label Hunt Relay .................................................................... L5-6 2. What's on a Label? ................................................................. L5-8 3. What's My Source? ............................................................... L5-10 4. Lance Goes Shopping .......................................................... L5-12 5. Let's Go Shopping ................................................................ L5-16
Take-Home Activities Label Hunt
LESSON 6: CARE ........................................................................................... L6-1 Teaching Outline ................................................................................. L6-1 Background Basics ............................................................................... L6-4 Activities
1. Folding Relay ......................................................................... L6-7 2. Clothing Pin-Ups .................................................................... L6-9 3. Care Patrol! ......................................................................... L6-11 4. Living Sort ........................................................................... L6-13 5. A Place for Everything ........................................................... L6-15 6. Windy Laundry ..................................................................... L6-17 7. Spot Alert ............................................................................ L6-19 8. Button Up!........................................................................... L6-22
Take-Home Activities Care Chart Button Up
LESSON 7: CULTURE ..................................................................................... L7-1
Teaching Outline ................................................................................. L7-1 Background Basics ............................................................................... L7-3 Activities
1. Culture Concentration ............................................................ L7-9
2. Hats Around the World ............................................... L7-11

Florida 4-H—Fun With Clothes, page 7
TABLE OF CONTENTS (continued)
LESSON 8: CAREERS ...................................................................................... L8-1 Teaching Outline .................................................................................. L8-1 Background Basics ............................................................................... L8-3 Activities
1. What's My Job? ...................................................................... L8-5 2. Career Toss Up ...................................................................... L8-7
III. TAKE HOME
4-H FUN with CLOTHES Workbook
IV. EVALUATION
1. Teacher / Instructor Evaluation
2. Youth Evaluation Tools
V. RECOGNITION MATERIALS
4-H FUN with CLOTHES Certificate

Florida 4-H—Fun With Clothes, page 8
About FUN with CLOTHES...
The development of this 4-H Clothing and Textiles Project was driven by two basic principles:
1. Learning about Clothing and Textiles can be fun! The project guide provides simple and inexpensive, yet fun activities that teach youth about major clothing concepts, including construction, self concept, textiles/fabrics, selection, personal care, culture and careers.
2. 4-H volunteer teaching activities must be ready-to-use. This project includes storybooks, flashcards, games and, activity sheets needed to conduct clothing and textiles activities in an easy-to-use format. It was designed to be teacher friendly and takes much of the guesswork out of teaching this subject.
AGE OR GRADE LEVELS
This project was developed for youth ages 5-8. Both group and individual activities encourage participation and action in all aspects of this program. Teachers and volunteers are encouraged to select learning activities that are most suitable to their youth. The overall intent is to facilitate learning and to spark creativity in both teachers and youth.
CONTENTS
The following are components of the FUN with CLOTHES project:
• LEADER'S GUIDE - This three-ring notebook contains a complete, easy-to-read outline for lessons. Each lesson provides a variety of activities that can be conducted depending upon the time frame devoted to this project. Each lesson is prefaced with a lesson outline and the BACKGROUND BASICS that help you focus on the overall concepts and desired outcomes. Each lesson concludes with discussion questions for youth to REFLECT and APPLY the knowledge and skills they have gained.
• FUN with CLOTHES ACTIVITIES - creative projects, experiments, flashcards, game boards, and coloring sheets are just a few of the activities found in the leader's guide.
• 4-H FUN with CLOTHES WORKBOOK - contains activity sheets for youth that correspond to each lesson. A variety of activities including simple projects, puzzles, word searches, connect-the-dots, and other instructional activities make up this fun booklet.

Florida 4-H—Fun With Clothes, page 9
LESSON PROFILES
A brief description of the eight FUN with CLOTHES Lessons:
LESSON 1 - CREATIVITY Developing personal creativity and learning basic clothing construction skills are the foci of Lesson 1. Identifying simple sewing equipment and its use and care provides a foundation for Lessons 2-8 to expand on. Basic hand stitches are introduced in STITCH IT as a foundation for activities that follow.
•LESSON 2 - COMMUNICATION OF SELF How do we communicate through the clothes we wear? We all wear clothes that make us feel good. What we wear presents a certain personality or image. Lesson 2 focuses on how and why our image is affected by clothing choices. In COLOR CHEMISTS, primary and secondary colors are introduced.
•LESSON 3 - CUTTING EDGE This Lesson introduces different fabrics and how they are made. Fibers are where our fabrics and apparel begin. Lesson 3 will introduce us to different weaves and textures of fabrics and what they mean to our clothing. How fabrics are made is introduced in MAKE A CHECKERBOARD and A MODERN LOOM, as a foundation to the process of turning fibers into fabric.
•LESSON 4 - CHOICES Clothes are important; when you look good, you feel good. This lesson looks at how we use clothes to express ourselves. Seasonal influences, color, line, and texture are all components we take into consideration when choosing what we will wear.
•LESSON 5 - CONSUMERISM A garment label contains written information including the fiber content, care, country of origin, and registered identification number, and is attached to the garment. This lesson looks at different types of fibers and their sources, as well as clothing sources of these fibers and where to obtain them.
•LESSON 6 - CARE Caring for our clothes is important because they will last longer. Care involves folding or hanging your clothes, the steps of the washing and drying process, and identifying clothes with stains. This lesson introduces sorting your clothes before you wash them and the importance of following label care instructions.
•LESSON 7 - CULTURE Lesson 7 helps us explore the cultural influence of clothing and celebrates individual heritage through the use of national costumes.
• LESSON 8 - CAREERS We all wear different clothes when we work at different jobs. This lesson looks at occupations that require special clothes and those that let you wear your own clothes.

Florida 4-H—Fun With Clothes, page 10
Instructional Materials Needed for Learning Activities -Crayons, paper, scissors, glue and tapestry needles should all be part of the instructor's permanent activity kit. Old magazines, catalogs, newspaper sale advertisements, and department store sale advertisements in the weekend papers are also important resources. -The following list provides you with a quick summary of all the supplies needed to conduct the multiple activities in the Lesson. Specific Requirements for each activity are list within each lesson.
Fabric Scraps: • cotton • linen • silk • wool • polyester • denim • acrylic • rayon • nylon
Children's Clothing Articles: (in different colors)
• T-shirts • shorts • hat • socks • shoes • jacket • pants • gloves • scarf • button-down shirt w/ collar • tie • skirt • dress
Lesson 1:
• scissors • thread • tapestry needles • felt scraps • decorative items • glue • string/yarn
Lesson 2: • crayons • paper • scissors • watercolor paints / tempra paints • paintbrushes • construction paper of primary & secon-
dary colors Lesson 3:
• construction paper • scissors • magnifying lens • fabric scraps • glue • flashlight • yarn • styrofoam grocery tray
Lesson 4:
• crayons or markers • scissors • glue • yarn • magazines, newspaper sale ads or cata-
logs • shoe boxes • fabric scraps
Lesson 5: • markers • scissors • glue • fabric/felt scraps • cosmetic puffs • buttons • clothespins • laundry baskets • old children's clothes
Lesson 6: • children's clothes • laundry baskets • hook and loop fastener • clothes pins • musical tape & player • crayons and pencils • scissors • yarn • needles
Lesson 7: • globe or world map
Lesson 8: • ball

Florida 4-H—Fun With Clothes, page 11
About Working with 5-8 Year olds in Clothing Activities...
These project activities provide a wealth of opportunities for the growth and development of young children. The activities are a "natural" in the sense that they provide fun learning experience for the youngsters and simultaneously helps them with developmental skills. Here are just a few ways they can benefit from these activities:
developing their own personal creativity by "doing" and "making" things.
developing self-confidence as they see their own "project" accomplishments.
practicing their physical skills, such as eye-hand coordination and fine motor skills in cutting and stitching, and other sewing projects.
learning classification skills in many matching, sorting, and classifying activities.
practicing language skills in sharing and reflecting, discussions, storytelling, and skits.
learning to follow directions and sequencing steps.
learning group social skills.
As you will discover, you will not only be teaching youngsters sewing skills, or how to care for their clothes, you will be helping them develop physically, mentally and socially.

Florida 4-H—Fun With Clothes, page 12
About Working with 5-8 Year olds in Clothing Activities…(continued)
In working with young children, however, here are a few reminders that can make the project activities more successful for them and you.
If using machines with foot pedals, table and chair height need to be appropriate. Or, locate boxes or wooden steps for the foot pedal to be within reach of short legs!
Plan for a variety of activities - or break activity into several short steps - to keep their attention!
Plan, if possible, no more than 4-5 children for each adult or teen helper. Children need active interaction with adults... listening, responding, and positive feedback.
Language development is at a premium... they love to talk! Allow time for them to reflect and share their skills, what they've learned, and tell about their projects. Occasionally, choose activities - stories and skits, that allow for this.
Physical development provides several limitations in ability and quality of the project products but does not limit their interest in "making" and "doing" things! Because of limited eye-hand coordination, fine motor skills, and eye focus, try these things:
use large-eyed needles whenever possible.
* let children work in pairs to thread needles (one to hold needle and one to get it threaded!)
* be sure to check for left-handed children and help provide for their needs.
Don't expect anything to be close to perfect - stitching, cutting, pasting, etc.! They will think their handiwork is beautiful and perfect because they did it themselves- regardless of what you think!
Praise their work and use positive comments to help them accomplish their tasks.

Florida 4-H—Fun With Clothes, page 13
The Experiential Process... Steps and Techniques
The 4-H Program has a long history of providing
for a cooperative teaching—learning process
between adults and youth. The activities in each
project lesson strive to involve young people in
experiences that require them to interact, analyze,
question, reflect, and transfer what they have
learned to personal application. The activity
comes first, the ―learning‖ comes from the
―discovery‖ of new knowledge and skills as a result
of the experience. This is the 4-H ―learn-by-doing‖
process. However, to end with the experience
without building upon it through REFLECTING and
APPLYING does not help the young person
understand the significance of what he/she saw,
heard, or did. It is the transfer f this significance
from one experience to another that helps young
people apply their ―learning‖ in future situations.
Do
Each lesson topic identifies the activity or series of activities
to DO involving youth in a common EXPERIENCE.
Reflect
At the conclusion of the activities, allow time for the youth
to REFLECT (share and process) what they learned from
experience. Each lesson guide outlines some key questions
to assist you in this process.
Apply
Help youth to APPLY their new knowledge and skill to real
life situations. You can do this by helping them to identify
key principles that are important for future decisions or
personal action. Again, each lesson has outlined a few
questions to direct this process.
STEPS
This model illustrates the cooperative teaching-learning
process that is used in the 4-H curricula. A further
description of the steps in the process may be helpful as
you become an active facilitator of FUN with CLOTHES!
Experience– Begin with concrete experience. This can be
an individual activity or a group experience, but it involves
―doing something.‖
Share—Next, get the participants to talk about the
experience. Share reactions and observations. Let the
group talk freely. Acknowledge ideas; listing them visually
is helpful. Encourage group members to answer questions
posed by others. Avoid having the leader answer questions
Process—Discuss how themes, problems and issues are
brought out by the exercise. Speak to specific problems
and issues that the group discovers from the exercise or
recalls from personal experiences. Look for recurring
themes.
Generalize—Find general trends or common truths in the
experience. Draw out and identify the principles that are
important– that apply to ―real life‖, not just the activity.
This focuses on the key messages.
Apply—Concentrate on how the new learning can be
applied to everyday situations. Discuss how issues raised
by this activity can be useful in the future. Describe how
more effective behaviors can grow out of what is learned.

Florida 4-H—Fun With Clothes, page 14
TECHNIQUES
Use a Variety of Activities You might consider any one or a combination of the following: tours, interviews, judging, games, pantomimes, skits, puzzles, demonstrations, problems to solve, experiments, using a specific tool, systematic observations, creating a product, visualization, brainstorming, group initiatives, case studies, simulations, surveys leading to an event or activity, or sharing and presenting to others through talks and exhibits. Develop Questions to Ask The types of questions asked will vary with the activity, some questions may relate to the content but must go beyond it. If a specific life skill is to be enhanced, then the youth should have the opportunity to become as involved with understanding the life skill as understanding the subject related skill. Questions to help move in this direction may be as straightforward as these examples:
Sharing Questions 1. What did you do? 2. What happened? 3. How did you feel? 4. How did it feel to...? 5. What was most difficult? Easiest?
Processing Questions (Use data generated from sharing questions) 1. What problems or issues seemed to occur over and over? 2. What similar experiences have you had?
Generalizing Questions 1. What did you learn about yourself through this activity? 2. What did you learn about (life skill, i.e., making decisions)? 3. How do the major themes or ideas relate to real life and not just the activity? 4. How did you go about making your decision?
Applying Questions 1. How can you apply what you learned (making decisions) to a new situation? 2. How will the issues raised by this activity be useful in the future? 3. How will you act differently in the future as a result of this activity?
Each of these general questions could be enhanced by adding specific language referring to the experience in a particular project.

5-8 YEAR OLDS
LESSON 1 Creativity
PURPOSE
To develop personal creativity and learn basic clothing construction
skills.
OBJECTIVES
Youth will be able to:
Identify simple sewing equipment and its use and care.
Demonstrate knowledge of sewing safety.
Use sewing skills to construct items.
Identify basic parts of a sewing machine.
Demonstrate basic hand stitches.
Make simple hand or machine stitched item(s).
LESSON TIME
30 Minutes
LEARNING ACTIVITIES
TOOLS OF THE TRADE
TOOL BOXES
SLIDES AND LADDERS
STITCH IT!
A BOOK OF NEEDLES!
PIN PILLOWS
LOOP-TO-LOOP
LICENSE TO DRIVE
RECYCLING & SHARING
STUFF & HUG
BAG IT!
A PUPPET PARTY
COLLAGE BANNER
FUN with CLOTHES, Lesson 1, page 1
ADVANCE PREPARATION
1. Read the BACKGROUND BASICS on Creativity.
2. Review activities and choose appropriate one(s) to use.
3. Secure necessary materials as described.
DO
The following is suggested for using activities in Lesson 1. Materials needed for each are listed within the
activity.
Identify and learn use of simple sewing equipment with TOOLS OF THE TRADE, making a TOOL
BOX, and SLIDES AND LADDERS!
Learn and practice basic hand stitches with STITCH IT, A BOOK OF NEEDLES, and PIN PILLOWS!
Introduce the sewing machine and learn its parts with LOOP-TO-LOOP and A LICENSE TO DRIVE!
Practice machine stitching with RECYCLING AND SHARING, STUFF AND HUG, BAG IT, and A
PUPPET PARTY!
Express individual creativity by making a COLLAGE BANNER.
REFLECT
After completing the activities in this lesson, help youth reflect on what they have learned with these
questions:
What are the basic sewing tools we need? Can you name their purposes?
Needles, pins, thread, seam gauge or ruler, scissors, pin cushion
Where do we keep our sewing tools? Why?
Sewing box; to protect tools.
What was your favorite project? Tell us why.
What sewing activities did you like doing the best?
What did we learn from these activities?
APPLY
Help youth learn to apply what they have learned.
How can you use your new sewing skills?
What other kinds of projects would you like to make using your new skills?
Show an tell a friend how to make one of your projects!
Lesson 1— Creativity
FUN with CLOTHES, Lesson 1, page 2

BACKGROUND BASICS...Creativity
One of the goals of this project lesson is to help youngsters develop and maintain an interest in
sewing. Therefore, we are encouraging this is through the fun and creativity involved and the
accomplishments of completing things but not the stress that is often associated with
competition sewing. This will be their choice later. Therefore, we do not expect 5-8 year olds to
produce ―perfect‖ products.
For background, we have provided you with the basic information needed at this level for
sewing equipment, threading needles, basic stitching, and introducing the sewing
machine.‖Helps‖ such as large diagrams and instruction sheets for posters are included with
several of the activities.
SEWING EQUIPMENT
There are many sewing tools available to the home sewer. Some items are essential and others
are optional. When buying sewing equipment, select good quality items. Be sure to properly
store them to prolong their life and quality. Sharp items should be stored out of reach of small
children.
Before you can sew you will need to equip a sewing box with the essential tools. Select a strong
box, such as a shoe box.
Most sewing aids are designed for the right–handed person. Some shears, irons, and measures
have been designed for the left–handed person.
Essential Tools
Seam Gauge -- one of the handiest items in a sewing box. It is a ruler that is 6 inches and has a
moveable slide. It is used for marking hems, seams and other areas.
Tape Measure -- should be treated fabric or plastic metal tip ends. It is a 60 inch measure.
Shears -- have shaped handles (one larger than the other) to fit your hand. They have long,
sharp blades. The lower blade lets the fabric lie flat on the table as you cut.
Scissors -- have the same size handles and come in many different lengths. The most useful size
is the small embroidery or craft for snipping threads and for working at the sewing machine or
serger.
Lesson 1— Creativity
FUN with CLOTHES, Lesson 1, page 3

BACKGROUND
Seam Ripper -- has a curved blade with a sharp point that easily slips under a stitch. It is used to rip
out seams and looks similar to a pen. Remember always work away from both you and your fabric.
Pins -- should be fine, sharp, and rustproof. For young children, the ones with plastic coated heads are easier to use and see, but may melt if ironed over. There are glass headed pins, too. They come in ballpoint, extra long, and extra fine.
Thimble -- used to protect your finger when pushing the needle through the fabric. Thimbles come in a variety of sizes. They are made of plastic, metal, or leather.
Pin Cushions -- prevent spilled pins and are convenient. They are fabric covered and stuffed with sawdust or other material. Some people prefer to use a wrist pin cushion.
Thread -- needed for every sewing project. Types include cotton, cotton wrapped polyester, silk, and polyester. Select a color that blends with your fabric.
Hand Needles -- come in several sizes and types. The most common types for hand sewing are:
• sharps - which are average length with round eyes
• betweens - which are short needles with round eyes
• crewels (embroidery) - which are of average length and have long slender eyes
Soap Slivers -- used for marking
Marking Pens -- come in several colors and should be washable. On some, the marking will disappear after a short period of time, others will stay until removed by washing or spritzing with water.
Lesson 1— Creativity
FUN with CLOTHES, Lesson 1, page 4

BACKGROUND
SEWING BASICS
Activity 4 begins to introduce youngsters to the sewing basics. Large diagrams and instruction
sheets for posters are located within that activity. Suggestions for young children:
How to Thread a Needle
Diagonally cut a piece of thread about 18 inches long. Breaking the thread leaves fuzzy ends;
these will not go through the needle easily.
Grasp the needle between your thumb and finger.
Brace your hand against the other hand.
Moisten behind the eye of the needle.
Push thread through the hole.
How to Tie a Knot
Wrap one end of thread around forefinger.
Allow about 1/4 inch lap over thread.
With thumb, ―roll‖ these threads together.
Slip loop off finger and pull to end of thread.
How to Use a Thimble
Place on the middle finger of the hand that holds the needle.
Hold needle between thumb and first finger.
Put needle into fabric
Push through, using the side or end of the thimble.
How to Fasten the End of Hand Stitching
Take a very small stitch and put your needle through the loop.
Repeat two more times.
Cut thread 1/2 inch from knots.
Lesson 1— Creativity
FUN with CLOTHES, Lesson 1, page 5

BACKGROUND
BASIC HAND STITCHES
Overhand Stitch
A stitch made by taking diagonal stitches over the fabric edge. It is used to hold two pieces of
fabric together.
Buttonhole Stitch
A stitch is taken, the needle is inserted in the loop before pulling the stitch tightly and forming a
knot on the edge. It is a strong stitch. A modified blind stitch is the same but stitches are further
apart.
Running Stitch
A stitch that is made by going in and out of the fabric in even lengths. This is the most basic stitch
for younger children to learn.
How to Use Scissors when Cutting Fabric
When cutting fabric remember to keep fabric flat on the table and make long cuts.
USING THE SEWING MACHINE
Learning to use a sewing machine can be exciting. There are some general guidelines that will
help you have an enjoyable, rather than a frustrating experience with young children.
Reminders:
First, you need to learn the parts of a sewing machine and the purpose of each before attempting
to use them. The most basic parts and their function are:
Tension - used to select the correct amount of tension for the stitch, thread, and fabric you are
using. When tightening (higher number) the tension is increased. When loosened (lower
number) the tension is decreased.
Bobbin - Holds the lower thread.
Spool Pin - Holds the upper thread spool, may be vertical or horizontal.
Thread Guides - Are used to guide the upper thread from the spool to the needle
Take-up Lever - Is used to control the flow of the upper thread through the needle.
Hand-wheel - Controls the operation of the take-up lever and needle and is used n some
sewing machines to start the sewing operation.
Presser Foot - Serves the purpose of firmly holding the fabric in place against the feed dog.
Presser Foot Lifter - Is used to raise and lower the presser foot. When raised, this releases the
tension, drag or pull on the thread.
Lesson 1— Creativity
FUN with CLOTHES, Lesson 1, page 6
BACKGROUND
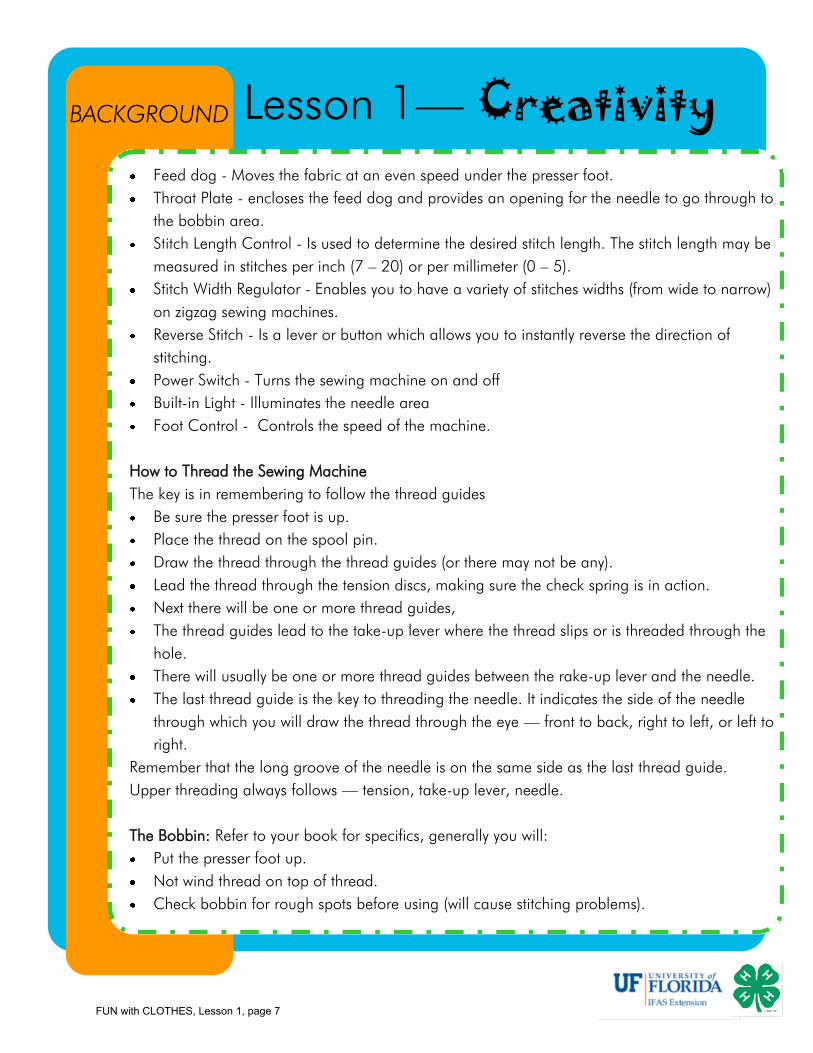
Feed dog - Moves the fabric at an even speed under the presser foot.
Throat Plate - encloses the feed dog and provides an opening for the needle to go through to
the bobbin area.
Stitch Length Control - Is used to determine the desired stitch length. The stitch length may be
measured in stitches per inch (7 – 20) or per millimeter (0 – 5).
Stitch Width Regulator - Enables you to have a variety of stitches widths (from wide to narrow)
on zigzag sewing machines.
Reverse Stitch - Is a lever or button which allows you to instantly reverse the direction of
stitching.
Power Switch - Turns the sewing machine on and off
Built-in Light - Illuminates the needle area
Foot Control - Controls the speed of the machine.
How to Thread the Sewing Machine
The key is in remembering to follow the thread guides
Be sure the presser foot is up.
Place the thread on the spool pin.
Draw the thread through the thread guides (or there may not be any).
Lead the thread through the tension discs, making sure the check spring is in action.
Next there will be one or more thread guides,
The thread guides lead to the take-up lever where the thread slips or is threaded through the
hole.
There will usually be one or more thread guides between the rake-up lever and the needle.
The last thread guide is the key to threading the needle. It indicates the side of the needle
through which you will draw the thread through the eye — front to back, right to left, or left to
right.
Remember that the long groove of the needle is on the same side as the last thread guide.
Upper threading always follows — tension, take-up lever, needle.
The Bobbin: Refer to your book for specifics, generally you will:
Put the presser foot up.
Not wind thread on top of thread.
Check bobbin for rough spots before using (will cause stitching problems).
Lesson 1— Creativity
FUN with CLOTHES, Lesson 1, page 7

BACKGROUND
Place thread in the threading hole of bobbin from inside to outside.
Grasp thread as you begin winding and hold until it breaks.
Be sure the bobbin winds evenly. If not, adjust (check your book on how to do).
Most machines will stop when bobbin is filled. If not, be sure not to overfill or it will not fit
into the bobbin case area.
Follow your book on how to thread your bobbin case.
Getting Ready To Sew
Now that the sewing machine is threaded, you will need to bridge the bobbin thread to the top
of the throat plate. Grasp the upper thread loosely and turn the hand wheel one complete turn.
REMEMBER that the take-up lever should be in highest position, so the machine will not be
unthreaded when you begin to stitch.
Pull the thread to the right and back of the presser foot when you begin to stitch. Hold the
thread ends until you have taken three or four stitches. This will eliminate bunching or thread
and unevenness in stitching at the beginning of a seam.
Fastening Ends
There are several ways to fasten thread ends. One way is to tie thread ends by hand. Another
way is to backstitch three or four stitches.
Guiding Fabric
Place a piece of masking tape at the width seam you desire. Place fabric under presser foot.
With hand wheel turn until needle is in fabric. Lower presser foot. Guide fabric with right hand.
Stitch slowly so you can stitch straight.
Folding Under an Edge
Use your seam gauge to measure and mark (with soap sliver or marking pen) the amount you
want to turn under. Fold on this line, press and stitch at desired width. Remember to decide how
you want to secure ends of thread before you start. If hand tying then leave enough thread to do
so.
Additional References:
Sewing Machine Savvy HE4201 Sewing Tools HE4202 Hand stitches HE4213
Lesson 1— Creativity
FUN with CLOTHES, Lesson 1, page 8

Lesson 1— Creativity SUGGESTED AGE:
5-8 years
OBJECTIVES:
Youth will be able to:
Identify simple
sewing
equipment
Describe uses of
simple sewing
equipment
MATERIALS:
-TOOLS OF THE
TRADE Bingo Cards
for each child
-Game pieces to
cover squares
(flannel squares,
buttons, paper, etc.)
-MAKE A PIN
CUSHRION
materials (optional)
TIME:
30 Minutes
SETTING:
A room with tables
or surface to play
bingo.
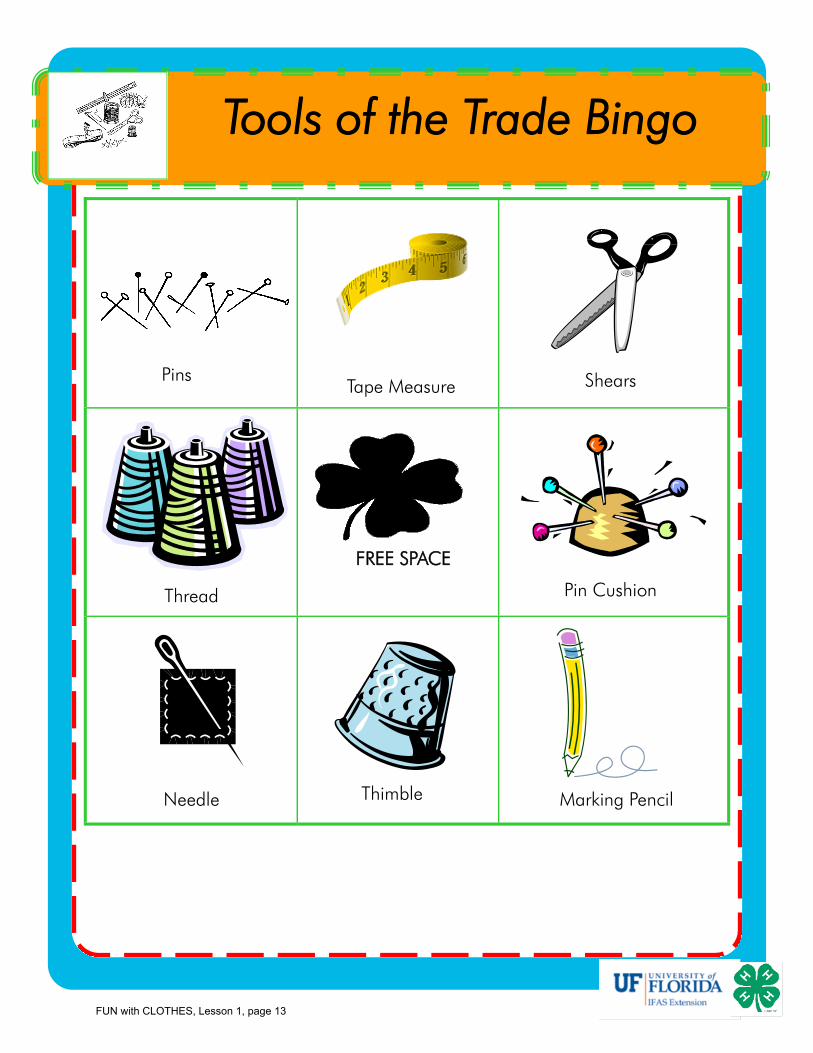
Activity 1: Tools of the Trade
INTRODUCTION
Almost everything we do uses special tools. We use crayons, scissors and glue for art. We use a ball and glove for softball. Sewing requires special tools, too. The right tools make sewing easy and fun. What are some tools needed for sewing? How can we make sure our tools are taken care of? The "Tools of the Trade Bingo" game will introduce us to the names of different sewing tools by identifying the actual tools and matching their picture on the game card.
DO
Play "TOOLS OF THE TRADE BINGO."
Give each player a bingo card and several game pieces to cover the squares. Leader (or older youth) holds up sewing tools one at a time and players cover the corresponding pictures on their cards with the game pieces. You can call out names (for older children). The first person to complete a line (horizontal, vertical, or diagonal) is the winner. The winner must also tell the uses of the tools in the line.
REFLECT
What did you learn from this game? How many sewing tools can you name?
APPLY
Make a jar lid pin cushion with fiberfill batting and a heavy piece of fabric.
When making the pin cushion, a heavy piece of fabric should hold without having to glue the flat tin in place. However, if using a low melt glue gun, any fabric scraps will work. Also, another option if available, is to use small heavy jelly glasses to store extra pins with the pin cushion screw top. Identify the pin cushion as an object where a family could find straight pins, needles and safety pins.
FUN with CLOTHES, Lesson 1, page 9

Make A Pin Cushion!
You will need:
canning jar lid and ring
scissors
heavy piece of fabric (about 5 x 5 inches)
small amount of stuffing
(fiberfill, cotton, or old panty hose)
What you do:
Cut fabric 1 inch larger than jar ring.
Lay jar ring on table with opening up.
Place fabric over jar ring. (right side down)
Place stuffing on top of fabric.
Pick up and push stuffing through ring.
Folding and holding edges down, place lid on
top and push to snap into place.
FUN with CLOTHES, Lesson 1, page 10

Tools of the Trade Bingo
FREE SPACE
Pins Thimble Pin Cushion
Marking Pencil Thread
Shears Tape Measure Needle
FUN with CLOTHES, Lesson 1, page 11

Tools of the Trade Bingo
FREE SPACE
Pins
Thimble
Pin Cushion Marking Pencil
Thread Shears
Tape Measure Needle
FUN with CLOTHES, Lesson 1, page 12
Tools of the Trade Bingo
FREE SPACE
Pins
Thimble
Pin Cushion
Marking Pencil
Thread
Shears Tape Measure
Needle
FUN with CLOTHES, Lesson 1, page 13

Tools of the Trade Bingo
FREE SPACE
Pins
Thimble
Pin Cushion
Marking Pencil Thread
Shears Needle
Seam Gauge
FUN with CLOTHES, Lesson 1, page 14

Tools of the Trade Bingo
FREE SPACE
Pins
Thimble Pin Cushion
Thread Tape Measure
Needle
Seam Gauge
Shears
FUN with CLOTHES, Lesson 1, page 15

Tools of the Trade Bingo
FREE SPACE
Pins
Thimble Pin Cushion
Marking Pencil Tape Measure
Needle
Seam Gauge Scissors
FUN with CLOTHES, Lesson 1, page 16

Tools of the Trade Bingo
FREE SPACE
Pins
Thimble
Pin Cushion
Marking Pencil
Thread Tape Measure
Needle Scissors
FUN with CLOTHES, Lesson 1, page 17

Tools of the Trade Bingo
FREE SPACE
Pins
Thimble
Pin Cushion
Marking Pencil
Thread
Tape Measure
Needle
Scissors
FUN with CLOTHES, Lesson 1, page 18

Lesson 1— Creativity SUGGESTED AGE:
5-8 years
OBJECTIVES:
Youth will be able to:
Identify tools that go
into a sewing box and
their uses.
Demonstrate decision-
making skills by
choosing the most
important tools that go
into a sewing box.
Demonstrate
knowledge of proper
care of tools by using a
sewing box.
Develop social skills by
participating in a
group sewing box
project.
Develop responsible
behaviors such as
clean up and storage
of tools.
MATERIALS:
MY SEWING TOOL BOX
Workbook page 2
Copies of SEWING
TOOL SCAVENGER
HUNT activity for each
child (Tools: tape
measure, scissors,
needles, pins, pin
cushion,thread,thimble,
notebook,and pencil,
etc.)
Containers for the tools
(shoe boxes, baskets, etc.)
Materials to decorate the
containers (markers, glue,
fabric scraps, or colored
paper, etc.)
FIND YOUR SEWING
TOOLS Workbook page
3.
Activity 2: Tool Boxes TIME:
30 Minutes
SETTING:
Room with tables and chairs for children to work.
LEADER INFORMATION
This activity can be done in a number of different ways for individual groups. For large groups of ages 5-6, we suggest making a separate box for each tool in the room. For ages 7-8, boxes can be made for small groups of children with all the tools in one box.
Another idea, depending on available resources, is for children to make individual boxes for use at group meetings or at home.
INTRODUCTION
Special tools, like the ones we use for sewing, need to be stored in a special place. We will need to make our "Tool Boxes" for our sewing supplies, today.
DO
Making Sewing TOOL BOXES!
For Ages 5-6:
Divide children into small groups, and give each group a shoe box.
Allow youth to name tools that are used when sewing. Encourage them to tell the use of each tool as it is named.
Tools that are not named by the youth should be named by the leader. Give the youth an opportunity to describe the purpose of the tool.
Discuss the importance of taking good care of sewing tools and keeping them in their proper places.
Allow each group to decorate their box. Explain that each box will contain all of one tool (one for scissors, another for rulers, etc.)
FUN with CLOTHES, Lesson 1, page 19

For Ages 7-8:
Sewing boxes will each contain all of the tools for each group.
Explain to the youth the different possibilities for a sewing box: a shoe box, basket or plastic box. Ask children if they can think of other possibilities.
Allow youth to name tools that should be put into a sewing box. Place tools in the box as they are named. Encourage youth to suggest uses for the tools.
Tools not named should be explained by the leader; have youth describe a purpose for the tool.
Discuss the importance of taking good care of tools when sewing, and of keeping them together in a sewing box.
Allow each group to decorate their box. Explain that each box will contain all of the sewing tools the group will need.
REFLECT
What are the tools needed for sewing? Make a list on poster paper.
Tape measure, scissors, needles, pins, pin cushion, thread, thimble
Why should tools have their own storage space?
So you can find them
Why is it important to take good care of sewing tools?
So they will last longer and do the job for which they were designed
APPLY
Find your sewing tools in the hidden picture in the FIND YOUR SEWING TOOLS Workbook Activity on page 3. Make a group chart of responsibilities for cleaning up and putting tools in their proper places. Assign duties to youth.
Suggest for youth to go on a "scavenger hunt" at home to find materials for their own personal sewing boxes. Provide a checklist for youth to use to collect the right sewing tools.
ACTIVITY 2 Lesson 1— Creativity
FUN with CLOTHES, Lesson 1, page 20

Sewing Tool Scavenger Hunt !
Look for these items to place in your new Sewing Tool Box. Circle
the ones you find.
Tell someone in your family what each tool is and what it is used for in sewing.
Place your box where your family members can find and use your sewing tools!
Scissors Thread Pin Cushion
Tape Measure
Needles
Thimble
Seam Gauge or Ruler
Shears
Pins
FUN with CLOTHES, Lesson 1, page 21

Lesson 1— Creativity SUGGESTED AGE:
7-8 years
OBJECTIVES:
Youth will be able to:
Identify sewing
equipment by
purpose
Develop social
skills by
cooperating with
others to play the
game
Execute decision-
making skills to
determine correct
answers to
questions
MATERIALS:
-SLIDES & LADDERS
game board, playing
pieces, question cards
-One die
-Answer sheet
TIME:
20-30 Minutes
SETTING:
Comfortable room
ADVANCE
PREPARATION:
Cut out SLIDES &
LADDERS Question
Cards
For larger groups you
may wish to make
copies for several
groups to play.
Activity 3: Slides and Ladders
INTRODUCTION
The sewing equipment we use has different purposes that we should know if we are to use them properly. The "Slides and Ladders" game will remind us of those purposes.
DO
Play "SLIDES AND LADDERS."
Each player (or group of players) chooses a different playing piece. Game pieces can be a variety of things: thread - different colors, thimbles, buttons.
Each player (or group) rolls the die to determine the playing order; the person with the highest number goes first. Other players follow in turn from left to right.
All players start their playing pieces next to Square 1.
Taking turns, each player draws one card, reads the question aloud and answers the question. If the answer is correct, the player rolls the die and moves forward that number of spaces. Players do not move forward if they are unable to answer the question correctly, and the turn continues to the next player.
Ladders: if a playing piece stops on a square at the bottom of a ladder, that player must move UP to the top of that ladder. LADDERS LEAD UP ONLY!
Slides: if a playing piece lands at the top of a slide, the player must move DOWN to the bottom of that slide. SLIDES LEAD DOWN ONLY!
All other squares (except the bottom of a ladder or the top of a slide) are counted as regular squares.
Two or more players may stop on any square at the same time.
The winner is the first player to reach Square 40.
FUN with CLOTHES, Lesson 1, page 22

REFLECT
What did you learn from this game?
What are some of the tools mentioned in the game and their uses?
(check their responses with the answer key)
APPLY
Talk about other types of tools around the house, such as cooking utensils and cleaning tools.
Relate this to sewing tools; all tools have special storage places, and there is a set of tools for many of the things we do.
Lesson 1— Creativity ACTIVITY 2
FUN with CLOTHES, Lesson 1, page 23

SLIDES & LADDERS ANSWER KEY
Seam Gauge - short 6 inch ruler with movable slide for marking hems, seams or other measurements. Tape Measure - 60 inch measure with metal tip ends. Shears - shaped handles (one larger than the other) to fit your hand and long, sharp blades. The lower blade lets the fabric lie flat as you cut. Scissors - have the same size handles and come in many different lengths. The most useful size is the small ones for snipping threads and for working at the sewing machine. Seam Ripper - has a curved blade with a sharp point that easily slips under a stitch. Used to rip out seams and looks similar to a pen. Remember to always work away from both you and your fabric. Pins - should be fine, sharp, and rustproof. The ones with plastic coated heads are easier to use and see, but may melt if you iron over them. Thimble - used to protect your finger when pushing the needle through the fabric. They come in a variety of sizes. They are made of plastic, metal, or leather. Pin Cushion - used to prevent spilled pins and are convenient. Some people prefer to use a wrist pin cushion. Thread - needed for every sewing project. Types include cotton, cotton wrapped polyester, silk, and polyester. Select a color that blends with your fabric. Hand Needles - come in several sizes and types. The most common types for hand sewing are:
sharps: are average length with round eyes betweens: are short with round eyes crewels: are average length and have long slender eyes
Marking Pen - come in several colors and should be washable. On some, the marking or pencil will disappear after a short period of time, others will stay until removed by washing or spritzing with water. Soap Slivers - used for marking. Iron - preferably one that can be used dry or with steam, is needed for pressing construction details. Press with the grain. Ironing Board - needs a smooth surface with padding. It is used for pressing sewing projects.
FUN with CLOTHES, Lesson 1, page 24

Slid
es
and L
adders
FUN with CLOTHES, Lesson 1, page 25

What do you call a 6
inch ruler with a
moveable slide for
marking hems and
seams?
What is a 60 inch
measure with metal tip
ends?
What has handles
shaped to fit your hand
and long, sharp blades
for cutting fabric?
What tool comes in
different sizes and is
best used for snipping
threads?
What has a curved
blade with a sharp
point that easily slips
under a stitch to rip it
out?
What tool should be
fine, sharp, and
rustproof? The ones
with plastic coated
heads are easier to use
and see.
What is used to protect
your finger when
pushing a needle
through fabric?
What tool is needed for
every sewing project?
There are many types,
such as cotton, silk,
polyester.
FUN with CLOTHES, Lesson 1, page 26

What hand sewing tool
comes in several sizes
and types? The most
common types are
sharps, betweens, and
cruels.
What tool comes in
several colors and is
used for marking
fabrics?
What tool can be used
dry or with steam for
pressing construction
details?
What is used with an
iron and needs a
smooth surface with
padding?
FUN with CLOTHES, Lesson 1, page 27

FUN with CLOTHES, Lesson 1, page 28

FUN with CLOTHES, Lesson 1, page 29

Lesson 1— Creativity SUGGESTED AGE:
5-8 years
OBJECTIVES:
Youth will be able to:
demonstrate and
practice sewing a basic
hand stitch
demonstrate and
practice tying a sewing
knot
develop hand-eye
coordination
develop individuality by
creating their own
designs
MATERIALS:
SEWING STEPS Poster
STITCHING Posters
(running stitch, overhand
stitch, buttonhole stitch)
STITCH-IT PATTERN
CARDS (one for each child)
Shoelaces for each card, or
yarn with taped ends
Tapestry Needles (with
larger eyes)
Embroidery thread
Foam grocery trays
(optional)
Hand-held hole punchers
(optional)
TIME:
30 Minutes
SETTING:
Area with tables and chairs
ADVANCE PREPARATION:
STITCH IT Cards are best
when cut out of card stock,
heavy paper, or foam trays
for younger children.
Activity 4: Stitch it!
LEADER INFORMATION
As you first introduce the youngsters (5-6 year olds especially) to threading a needle, let them work in pairs - one child holding the needle while the other threads it. Younger children do not have the eye-hand coordination or the focusing for these tasks yet.
INTRODUCTION
Knowing basic hand stitches is essential to being able to sew. By using these hole-
punched cards, you can practice your basic stitches.
DO
STITCH IT: Part I
Allow each child to choose a stitching card with the design of their choice, and give a piece of yarn with a taped end.
Demonstrate how to tie a knot at the hole to start the stitch.
Demonstrate how to stitch on the card using the overhand stitch.
Allow children to sew the design on their cards.
STITCH IT: Part II
Give each child an embroidery needle and enough embroidery floss or yarn to complete the butterfly.
Demonstrate how to thread a needle and knot the end of the thread.
Demonstrate how to stitch using a running stitch.
Allow the children to connect the dots to complete their butterflies.
FUN with CLOTHES, Lesson 1, page 30

REFLECT
How can you use the basic hand stitch in sewing other items?
What are some other possible ways to practice basic hand stitches?
On a piece of cloth, making doll clothes
APPLY
Allow children to make their own designs using the foam trays and hole punch (or a sharp pencil) to sew with their yarn "shoelaces".
Encourage children to use the skill they learned when making other items on their own.
At home have children follow directions of STITCH IN TIME Workbook Activity, page 4, to make them on their own.
Lesson 1— Creativity ACTIVITY 2
FUN with CLOTHES, Lesson 1, page 31

Ove
rhand S
titch
FUN with CLOTHES, Lesson 1, page 32

Butto
nhole
Stit
ch
FUN with CLOTHES, Lesson 1, page 33

Runnin
g S
titch
FUN with CLOTHES, Lesson 1, page 34

Stitc
h It Pa
ttern
s
FUN with CLOTHES, Lesson 1, page 35

Stitc
h It Pa
ttern
s
FUN with CLOTHES, Lesson 1, page 36

Stitc
h It Pa
ttern
s
FUN with CLOTHES, Lesson 1, page 37

STEPS
1. HOW TO THREAD A NEEDLE
Cut a piece of thread about 18 inches long.
Breaking the thread leaves fuzzy ends; these will not go through the needle easily.
Grasp the needle between thumb and finger.
Brace hand against other hand.
Moisten behind the eye of the needle, if needed.
Push thread through the hole.
2. HOW TO TIE A KNOT
Wrap one end of thread around forefinger.
Allow about 1/4 inch lap over of thread.
With thumb, "roll" these threads together.
Slip loop off finger and pull to end of thread
3. HOW TO USE A THIMBLE
Place on the middle finger of the hand that holds the needle.
Hold needle between thumb and first finger.
Put needle into fabric.
Push through, using the side or end of the thimble to end of thread.
FUN with CLOTHES, Lesson 1, page 38

Lesson 1— Creativity SUGGESTED AGE:
5-8 years
OBJECTIVES:
Youth will be able to:
Demonstrate and
practice sewing a
basic hand stitch
Demonstrate and
practice tying a
sewing knot
Improve
psychomotor skills
Demonstrate the
ability to follow
sequential
instructions
MATERIALS:
A BOOK OF NEEDLES!
Workbook page 5
Felt scraps,
thread,needles,scissors
A BOOK OF NEEDLES
PATTERNS
TIME:
30 Minutes
SETTING:
Room with tables for
children to work
Activity 5: A Book of Needles!
INTRODUCTION
A needle book is a useful tool to have when sewing. It is a handy and safe way to keep up with your needles.
DO
Make "A BOOK OF NEEDLES!"
Cut four pieces of the same shape. Stack the pieces on top of each other. Using the Running Stitch, stitch down the center to
connect the fabrics together. Insert the needles, fold it over at the stitching, and the book is complete.
Optional: Have youth decorate their book.
REFLECT
What skills did you use or learn when making this needle book? Threading needle, tying knot, stitching
What are some reasons for having a needle book? To keep needles in a handy container
APPLY
Add the needle book to your home sewing tool box. Discuss the importance of using a needle book with your family and friends.
FUN with CLOTHES, Lesson 1, page 39

A Book Of Needles
Patterns
FUN with CLOTHES, Lesson 1, page 40

Lesson 1— Creativity SUGGESTED AGE:
5-8 years
OBJECTIVES:
Youth will be able to:
Demonstrate and
practice sewing a
basic overhand
stitch
Demonstrate and
practice tying a
sewing knot
Improve
psychomotor
skills
Demonstrate the
ability to follow
sequential
instructions
MATERIALS:
PIN PILLOWS!
Workbook page 6
Two pieces of pre-cut
felt for each child
Stuffing (pantyhose,
cotton, polyfill, etc.)
Thread, needles, pins
and scissors
TIME:
30 Minutes
SETTING:
Room with tables for
children to work
comfortably
Activity 6: Pin Pillows!
INTRODUCTION
A pin cushion is an important tool to have when sewing. It is a useful way to keep all your pins and needles in a handy and safe place.
DO
Make “PIN PILLOWS!”
Give each child two pieces of fabric. Sew the pieces together using an overhand stitch (or blanket stitch for older youth), leaving a 2-inch opening. Pin the edges at the opening together. Stitch the 2-inch opening closed with the overhand stitch.
REFLECT
What did you learn about sewing from making this pin cushion? Threading needle, tying know, stitching, stuffing, closing, opening
What are some reasons for having a pin cushion? To store pins for easier use than a box, which can spill
APPLY
Use the pin cushion to start a home sewing box. Have children talk to their families about the importance of using the pin cushion to keep track of pins.
FUN with CLOTHES, Lesson 1, page 41

Lesson 1— Creativity SUGGESTED AGE:
5-8 years
OBJECTIVES:
Youth will be able to:
Identify and
label parts of a
sewing machine
Strengthen
psychomotor
skills
Follow
sequential
instructions
Work on
decision-making
and problem-
solving skills
MATERIALS:
SEWING MACHINE
PUZZLE Activity
Sheet
LOOP-TO-LOOP
Workbook Page 7
Scissors
Construction paper
Glue
Crayons or pencil for
each child
TIME:
30 Minutes
SETTING:
Area with tables and
chairs
Activity 7: Loop-to-Loop
LEADER INFORMATION
The SEWING MACHINE PUZZLE should be mounted on a piece of colored construction paper with a ¼ inch border so that children will be able to recognize the edge pieces of the puzzle. Also, for younger children the puzzle should be cut into larger pieces.
The parts of the sewing machine that should be labeled and identified by the group at this age are the take-up lever, tension dial, presser foot, thread guide, stitch type selectors, hand wheel, stitch length regulator, bobbin case, and thread spindles.
INTRODUCTION
Making things with a sewing machine makes sewing projects easier. We need to know the parts of a sewing machine before we start using one. Let's get acquainted with the machine parts. By completing the SEWING MACHINE PUZZLE, we will be able to learn those parts.
DO
As a group, label and identify the parts of the sewing machine on the SEWING MACHINE PUZZLE.
Give each child a copy of the SEWING MACHINE PUZZLE and a sheet of colored construction paper.
Allow them to glue the puzzle to the construction paper. Make sure they leave at least a ¼ inch margin on all sides. Explain that the edge pieces may be identified as the pieces with the colored paper.
After the glue dries, allow the children to cut the puzzle into pieces. Instruction and supervision are necessary to make sure that the pieces are cut large enough.
Allow the children to put their puzzles together, while identifying the parts on each piece.
FUN with CLOTHES, Lesson 1, page 42

REFLECT
What are some of the parts of the sewing machine that you learned? Take-up lever, tension dial, presser foot, thread guide, stitch type selectors, stitch length regulator, bobbin case, hand wheel, and thread spindles
Why should you know the parts of a sewing machine before using? Safety, proper care and operation of the machine
APPLY
Complete the LOOP-TO-LOOP Workbook Activity, page 7, about the proper way to thread a sewing machine.
Bring a sewing machine to the meeting and have the children identify the parts and demonstrate their uses.
If you have a sewing machine at home, name the parts for your family. Or find one in a store and name the parts.
Lesson 1— Creativity ACTIVITY 7
FUN with CLOTHES, Lesson 1, page 43

Sew
ing M
ach
ine
Puzz
le
FUN with CLOTHES, Lesson 1, page 44

Sew
ing M
ach
ine
Puzz
le
Answ
er K
ey
Bobbin
Are
a
Thread Guide
Pres
ser
Foot Te
nsi
on D
ial
Take
up
Leve
r
Stitc
h T
ype
Sele
ctors
Stitch Length Regulator
Thre
ad S
pin
dle
s
Hand
Whee
l
FUN with CLOTHES, Lesson 1, page 45

Lesson 1— Creativity SUGGESTED AGE:
5-8 years
OBJECTIVES:
Youth will be able to:
Demonstrate
proper use of
sewing machines
Demonstrate the
ability to follow
sequential
instructions
Develop
independence at
operating a
sewing machine
MATERIALS:
Threaded sewing
machine (preferably
enough for 2-4
children per machine)
LICENSE TO DRIVE
activity sheets for each
youth
TIME:
30 Minutes
SETTING:
Room with tables for
children to work
comfortably
Activity 8: License to Drive
INTRODUCTION
Before we complete sewing projects that require the use of the machine, it is
necessary that we know how to operate a sewing machine properly. Proper use
ensures safety, and garments have better quality. You will need to learn to stitch
straight lines and turn curves just like driving a car. Receiving your "License to Drive"
a sewing machine will allow you more freedom and independence in your sewing.
DO
Practice "LICENSE TO DRIVE!"
Make sure children are seated comfortably at the machine. Make sure children can reach the foot controls. You may need to tape foot control to a box under the table for comfortable reach. The stitch length should be 10 to 12 stitches per inch.
Demonstrate and provide the following "Driving" instructions:
Turn the balance wheel toward you until the needle is up and out of the throat plate.
Raise the presser foot.
Move the test paper under the presser foot to the point where the needle enters the black "Start Here" dot.
Turn the balance wheel forward to move the needle down into the dot.
Line up the paper so that your stitching will follow the line beginning on the dot. Lower the presser foot to hold the paper in place.
Start the machine; slowly stitch on the line, guiding the paper as you go.
Keep stitching until you reach the "End Here" dot. When you think you have had enough practice to pass the test, try stitching on the actual "Driving Test."
Once you have completed the "Driving Test," give it to your leader and parent. Together they will decide if you passed the test.
When you have passed the test, ask them to sign your license. You can cut out the license and carry it in your wallet, or frame the whole sheet to hang in your room.
FUN with CLOTHES, Lesson 1, page 46

REFLECT
What was difficult about learning to stitch correctly?
Stitching straight, controlling machine lines, controlling speed
How many times did you use a practice sheet?
Now, aren't you proud of what you have accomplished?
APPLY
How can you use this new skill you have learned?
You can now work on projects at home on your own!
ACTIVITY 8 Lesson 1— Creativity
FUN with CLOTHES, Lesson 1, page 47

License to Drive
Practice Test
•
End Here
Start Here
•
FUN with CLOTHES, Lesson 1, page 48

Lesson 1— Creativity SUGGESTED AGE:
7-8 years
OBJECTIVES:
Youth will be able to:
Demonstrate the
use of a sewing
machine
Express
individuality with
decoration
Develop a sense of
pride from giving a
gift
Extend
psychomotor skills
Follow sequential
instructions
MATERIALS:
RECYCLE, SEW &
SHARE Workbook,
page 8
Old denim jeans
Sewing machine
Scissors
Ribbon
Items for decoration
(glue, buttons, fabric
scraps, trims, laces,
braids, rickrack, fabric
paints)
Pieces of cardboard for
each youth
A bag of popcorn or
candy as a gift item
(optional)
TIME:
30 Minutes
SETTING:
Comfortable room for
decorating and sewing
Activity 9: Recycling and Sharing
INTRODUCTION
By recycling things we save money and reduce waste by reusing items. By completing this project, we are recycling old jeans into a useful bag.
DO
RECYCLE AND SHARE!
Cut the legs off an old pair of jeans. (The child can choose the size of the bag.) Stitch the cut end of the leg (right sides together) closed with the sewing machine. Turn. Using the sewing machine, stitch the ribbon to the other end for the handle (avoid seams). Decorate the bag any way you like (insert cardboard into bag while decorating). Fill the jeans bag with a bag of candy, popcorn (or whatever you like) to give as a gift.
REFLECT
Why did you choose this pair of jeans to use? What did you learn?
to recycle garments, machine stitching on fabric, turning bag inside-out, stitching ribbon, decorating, sharing with others
APPLY
How else could old denim be used?
With the legs cut off the pants, you now have a pair of shorts!
What are some other things you can recycle?
Make a group plan about using the bags, filling them, and giving them as gifts for a group citizenship project. Ideas might be a children's hospital, senior citizen home or a homeless shelter.
FUN with CLOTHES, Lesson 1, page 49
Lesson 1— Creativity SUGGESTED AGE:
7-8 years
OBJECTIVES:
Youth will be able to:
Demonstrate and
practice sewing a
basic hand stitches
Improve
psychomotor skills
Express
individuality and
decision-making
skills by selecting
embellishments
Demonstrate the
ability to follow
sequential
instructions
MATERIALS:
STUFF AND HUG
Workbook page 9
Sewing machines
An old t-shirt provided
by the child
Needle and thread
(optional
Stuffing (pantyhose,
cotton, polyester
stuffing, etc.)
Decorating items
(buttons, fabric scraps,
trim, fabric crayons,
markers, etc.)
TIME:
30-45 Minutes
(depends on
decorating-may need
to do in two sessions)
SETTING:
Comfortable room for
decorating and sewing
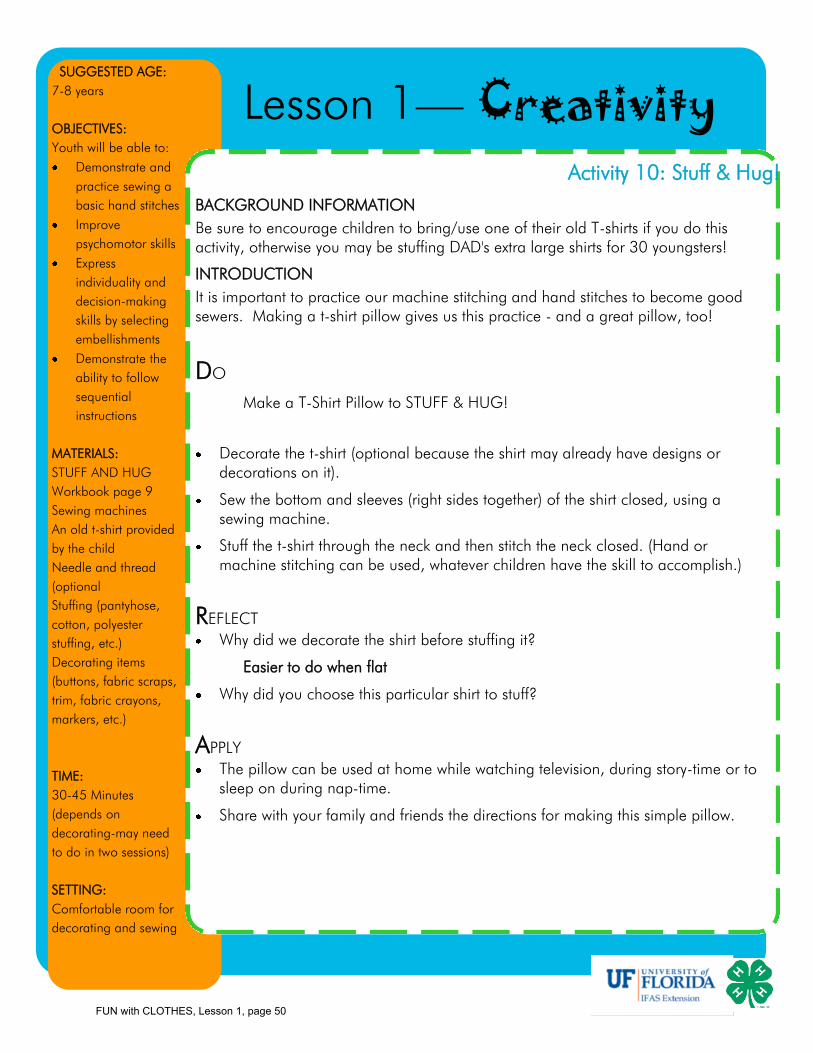
Activity 10: Stuff & Hug!
BACKGROUND INFORMATION
Be sure to encourage children to bring/use one of their old T-shirts if you do this activity, otherwise you may be stuffing DAD's extra large shirts for 30 youngsters!
INTRODUCTION
It is important to practice our machine stitching and hand stitches to become good sewers. Making a t-shirt pillow gives us this practice - and a great pillow, too!
DO
Make a T-Shirt Pillow to STUFF & HUG!
Decorate the t-shirt (optional because the shirt may already have designs or decorations on it).
Sew the bottom and sleeves (right sides together) of the shirt closed, using a sewing machine.
Stuff the t-shirt through the neck and then stitch the neck closed. (Hand or machine stitching can be used, whatever children have the skill to accomplish.)
REFLECT
Why did we decorate the shirt before stuffing it?
Easier to do when flat
Why did you choose this particular shirt to stuff?
APPLY
The pillow can be used at home while watching television, during story-time or to sleep on during nap-time.
Share with your family and friends the directions for making this simple pillow.
FUN with CLOTHES, Lesson 1, page 50

Lesson 1— Creativity SUGGESTED AGE:
7-8 years
OBJECTIVES:
Youth will be able to:
Demonstrate and
practice sewing a
basic hand stitches
Demonstrate and
practice tying a
sewing knot
Improve
psychomotor skills
Express individuality
by decorating the
bean bag
Demonstrate the
ability to follow
sequential
instructions
Demonstrate
decision-making
skills by selecting
embellishments
Strengthen social
skills by playing
games
MATERIALS:
Copy of BAG IT! Activity
sheet for each youth
Two pieces of pre-cut Felt
fabric
Scissors
Needles and thread for
each child
Beans or other stuffing
material
Decorating items such as
(buttons, scrap felt,
markers, glue)
Sewing machines
TIME:
45 Minutes
SETTING:
Area with tables and
chairs and sewing
machine
Activity 11: Bag It!
LEADER BACKGROUND
An optional method is for children to make the bean bag using a blanket hand stitch (providing the stitches are close together) if sewing machines are unavailable.
INTRODUCTION
A fun project to practice your new sewing skills is making a bean bag. Let's try it!
DO
Make a BEAN BAG! Give each child two pieces of felt and copy the BAG IT pattern. Cut out the pattern and pin onto the two pieces of felt. Cut it out. Remove the pattern. Pin the two pieces of felt together. Stitch (¼ to ½ inch seams) the felt pieces together, leaving a 2 inch opening. Turn the fabric inside-out and decorate using glue and trims. Allow glue to dry and then fill the bag with beans. Stitch the opening closed, using an overhand or blanket stitch.
REFLECT
What was the most difficult part of making this project? Stitching the curves
How did you do on your machine stitching?
Why did we decorate the bean bags before filling them?
Easier to decorate when flat
How did you choose the decorations for your bean bag?
Did you remember to take proper care of your tools?
APPLY
Use the bean bag to play games.
Encourage children to make up their own games.
FUN with CLOTHES, Lesson 1, page 51

Bag It !
FUN with CLOTHES, Lesson 1, page 52
Lesson 1— Creativity SUGGESTED AGE:
5-8 years
OBJECTIVES:
Youth will be able to:
Demonstrate
and practice
sewing a basic
overhand stitch
Demonstrate
and practice
tying a sewing
knot
Improve
psychomotor
skills
Demonstrate the
ability to follow
sequential
instructions
MATERIALS:
PIN PILLOWS!
Workbook page 6
Two pieces of pre-
cut felt for each child
Stuffing
(pantyhose,cotton,po
lyfill, etc.)
Thread,needles,pins
and scissors
TIME:
30 Minutes
SETTING:
Room with tables for
children to work
comfortably
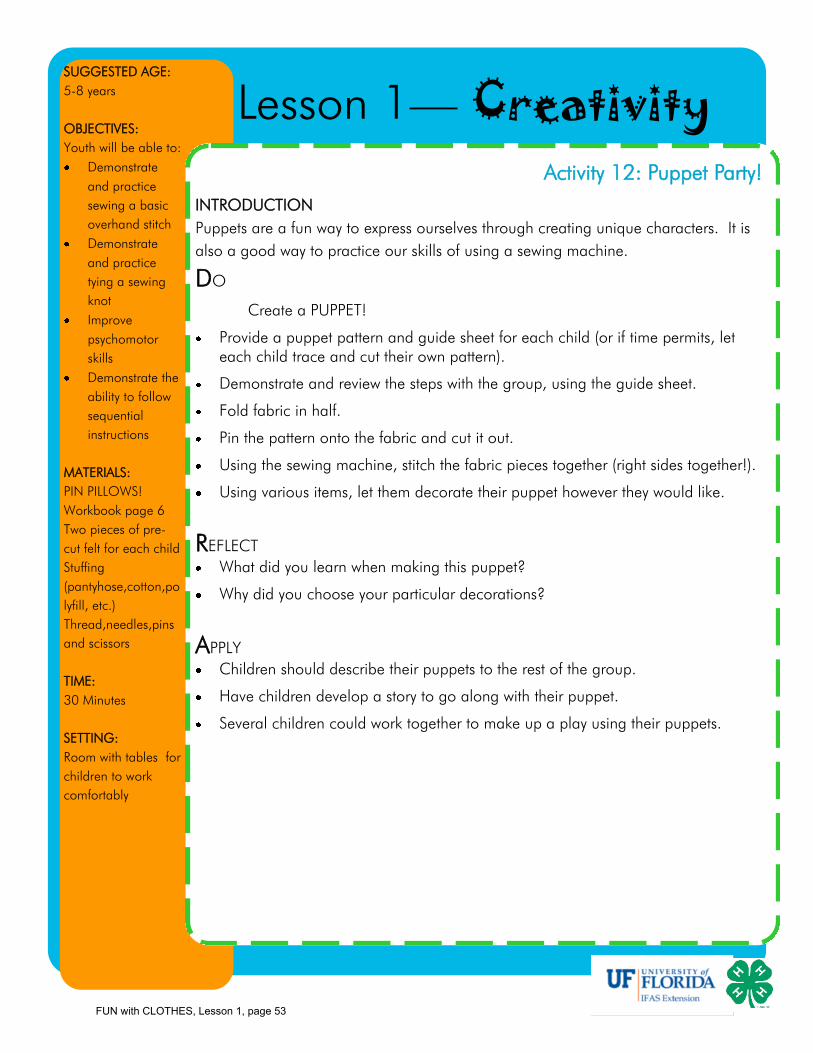
Activity 12: Puppet Party!
INTRODUCTION
Puppets are a fun way to express ourselves through creating unique characters. It is
also a good way to practice our skills of using a sewing machine.
DO
Create a PUPPET!
Provide a puppet pattern and guide sheet for each child (or if time permits, let each child trace and cut their own pattern).
Demonstrate and review the steps with the group, using the guide sheet.
Fold fabric in half.
Pin the pattern onto the fabric and cut it out.
Using the sewing machine, stitch the fabric pieces together (right sides together!).
Using various items, let them decorate their puppet however they would like.
REFLECT
What did you learn when making this puppet?
Why did you choose your particular decorations?
APPLY
Children should describe their puppets to the rest of the group.
Have children develop a story to go along with their puppet.
Several children could work together to make up a play using their puppets.
FUN with CLOTHES, Lesson 1, page 53

FUN with CLOTHES, Lesson 1, page 54

Step 1:
Cut out pattern.
Fold fabric in half.
Step 2:
Pin the pattern to the fabric
and cut out the pattern.
Step 3:
Remove the pattern and pin
“right” sides of fabric
together.
Step 4:
Stitch together 1/4 inch
from the edge. (Leave the
bottom open!)
FUN with CLOTHES, Lesson 1, page 55

Step 5:
Clip corners and curves
almost to he seam.
Step 6:
Turn the fabric right-side
out.
Step 7:
Use fabric glue to decorate
the puppet.
Step 8:
Write a skit with your friends
and have a “puppet party”
to perform the skit!
FUN with CLOTHES, Lesson 1, page 56

Puppet Pattern
FUN with CLOTHES, Lesson 1, page 57

Lesson 1— Creativity SUGGESTED AGE:
5-8 years
OBJECTIVES:
Youth will be able to:
Express individuality
by creating their own
unique banners
Extend psychomotor
skills
Use sewing skills
learned (optional)
Use decision-making
skills to determine
how banner will look
MATERIALS:
Sturdy fabric for banner,
approximately 1’ x
2’ (felt, burlap, denim)
At Items (fabric, scraps,
markers, buttons, trim,
glitter, beads, etc.)
Stick to hold the banner
(or coat hanger)
String, yarn or ribbon to
hang banner
Glue
TIME:
30-45 Minutes
SETTING:
Room with table space
for each child.
ADVANCE
PREPARATION:
Pre-cut fabric lengths for
children to choose. Also,
prepare some example
banners (or posters) of
ideas to help them
become “creative”!
Activity 13: Collage Banner
INTRODUCTION
Banners and flags are used for many different purposes. They can be used to announce something or to represent groups. They can be very individualized to represent ourselves. We are going to use these materials to make our own banners. They can be anything you want them to be.
DO
Make a BANNER!
Find a stick large enough to hold the banner or use coat hangers.
Fold the fabric around the stick. It may be hand stitched, glued, or sewn with a sewing machine depending on resources and skill levels.
Decorate the banner any way you like.
Tie string to each end of the stick so the banner can be hung.
REFLECT
Tell the group about your banner and why you decorated it the way you did.
APPLY
Take the banner home and hang it for family and friends to see.
Talk about choices and the importance of individuality.
Talk about other types of banners that you see in everyday life.
FUN with CLOTHES, Lesson 1, page 58

5-8 YEAR OLDS
Communication Of Self
LESSON 2
PURPOSE
To enhance personal grooming, appearance and development of
self-concept.
OBJECTIVES
Youth will be able to:
Discover how personality/image is expressed in clothing worn.
Discover the effects of optical illusions and feelings of color.
Discover primary and secondary colors.
Identify and practice good posture and poise.
Discover messages that media/movies communicate.
LESSON TIME
30 Minutes
LEARNING ACTIVITIES
PICTURE MYSELF!
I FEEL LIKE…
COLOR CHEMISTS
WALK A RAINBOW!
ARE MY HANDS CLEAN?
HOLD THAT POSTURE
SOAP BALLS!
ADVANCED PREPARATION
1. Read the BACKGROUND BASICS on Communication of Self.
2. Review activities and choose appropriate one(s) to use.
3. Secure necessary materials as described.
Fun with Clothes, Lesson 2, page 1

SUGGESTED AGE:
5-8 years
OBJECTIVES:
Youth will be able to:
Identify bathing
skills
Demonstrate
group
cooperation skills
Use decision-
making skills
Develop large
motor skills
Follow a set of
sequential
instructions
MATERIALS:
Soap slivers (left over
from home)
Water
Food coloring
Mixing bowl
Spoon
Cookie sheet
Foil
TIME:
20 Minutes
SETTING:
Room with table
where children can
work (will need access
to water.)
ADVANCE
PREPARATION:
Collect soap slivers
for several weeks
before this activity or
prepare shavings from
new bar of soap.
Activity 7: Soap Balls!
LEADER INFORMATION
Children need to be told of this activity a few weeks in advance so that they can be saving their soap slivers to be recycled. Also, when making the soap mixture, the amount of water used will depend on the amount of soap you have. If there is not enough soap for the mixture, you can add soap shavings from a new bar of soap.
INTRODUCTION
Bathing is essential for good health and a positive personal appearance. We need a shower or bath every day to remove perspiration, dirt or oil. We should use plenty of soap and scrub. Then rinse well with clean water and dry thoroughly. We are going to recycle leftover soap slivers to make soap balls we can use when bathing at home.
DO
Make "SOAP BALLS"
Put the soap slivers in a bowl. Have them add about ¼ - ½ teaspoon of food coloring to the soap.
Help the children gradually add small amounts of water to the mixture.
Stir until the soap pulls away from the sides of the bowl and forms a ball. The mixture should be thick but not sticky. Give each child a small amount of the soap mixture (about 1 to 2 teaspoons). Allow the children the roll the soap into a ball using the palms of their hands and place the soap balls on a foil-covered cookie sheet or foil pans. Allow the soap balls to dry for about a week.
REFLECT
How often should we take a bath or a shower?
Daily
Why is it important to bathe every day?
To remove the dirt and oil; it makes you feel better about yourself
APPLY
Use the soap balls when bathing at home.
Can you think of some other things that can be recycled in your home?
Tell your family about the importance of bathing on a daily basis.
Lesson 2— Communication Of Self
Fun with Clothes, Lesson 2, page 2

SUGGESTED AGE:
5-8 years
OBJECTIVES:
Youth will be able to:
Demonstrate
good posture and
poise
Develop social
skills by playing
cooperatively with
a group
Use decision-
making skills
Express
individuality with
the stance that
they choose
MATERIALS:
POSTURE CHECK-UP
Workbook page 11
TIME:
20 Minutes
SETTING:
Outdoors for game.
Activity 6: Hold That Posture INTRODUCTION
Good posture enhances our personal appearance. We should all practice good posture every day. When you practice good posture, your clothes will look better on you, and you will feel better, too. By playing "Hold That Posture," we will be given the opportunity to practice good posture and poise in a fun way.
DO
Play "HOLD THAT POSTURE!"
Choose one member of the group to be "It" or allow someone to volunteer.
Children should practice walking and running using good posture. They should also practice standing and sitting with good posture.
The children should play this game like freeze tag. The person who is "It" chases the rest of the group and tags as many people as he/she can. When a person is tagged, they should assume a position using proper posture and hold it until tagged by someone else who is being chased.
Allow each person to be "It" at least once during the game. Or if the group is small enough when "It" has tagged everyone and they are frozen in a position using proper posture, then he/she may choose someone else to be "It."
REFLECT
What did you learn from this activity?
How to use proper posture when standing, sitting, walking, and running
Why is it important to use proper posture?
Makes you look and feel better; makes your clothes look better on you
APPLY
Complete the POSTURE CHECK-UP Workbook Activity, on page 11. Discuss the answers with the group.
Practice using good posture all of the time.
Check your family members to see if they use good posture. Set up a program at home to remind one another to use proper posture.
Lesson 2— Communication Of Self
Fun with Clothes, Lesson 2, page 3

SUGGESTED AGE:
5-8 years
OBJECTIVES:
Youth will be able to:
Identify and
practice good
personal
grooming habits
Determine the
proper technique
for washing
hands
Practice verbal
skills by speaking
to group
Use problem-
solving skills
Use decision-
making skills
MATERIALS:
Fluorescent paint
Hand lotion
Soap
Water
Towels
Lamp with a black
light bulb
WHEN DO I WASH?
Activity Sheet
TIME:
20 Minutes
SETTING:
Area with a sink for
hand washing.
ADVANCE
PREPARATION:
You can mix the
fluorescent paint and
lotion together prior
to the meeting if
desired. The paint will
provide a visual
representation of dirt
and germs.
Activity 5: Are My Hands Clean?
INTRODUCTION
Washing our hands is very important for health and cleanliness. How can you tell if
your hands are really clean after you have washed them? Can you think of some
times you should wash your hands?
DO
ARE MY HANDS CLEAN?
Have the children wash their hands with soap and water at the sink. Make sure they dry them well.
Give each child some lotion mixed with fluorescent paint to rub on their hands as they would normally.
Have children hold their hands under the black light in a darkened room. Is the lotion worked into the hands well?
Have the children wash their hands again with soap and water. Make sure they dry their hands well. You might have half the group wash with water and the other half with soap and water for comparison.
Ask the group if they are really sure that their hands are clean. Then allow them to inspect their hands again while holding them under the black light.
REFLECT
Was there still paint in the cracks and around the fingernails?
Most of the children will probably still have some paint in these areas. Talk about the importance of washing these areas carefully.
What did you learn from this activity?
We need to make sure we do a really good job when we wash our hands.
Why is it important to wash our hands?
For good health.
When are some times we should wash our hands?
Answers will vary (before eating, after playing outside).
Lesson 2— Communication Of Self
Fun with Clothes, Lesson 2, page 4

APPLY
Complete the "WHEN DO I WASH?" Activity sheet. Discuss the answers with the group.
Make sure you wash your hands thoroughly every time.
Share your knowledge with someone else.
ACTIVITY 5 Lesson 2— Communication Of Self
Fun with Clothes, Lesson 2, page 5

WHEN DO I ? Circle the correct hand to show if you wash BEFORE or AFTER what you see in the picture.
BEFORE AFTER BEFORE AFTER
BEFORE AFTER BEFORE AFTER
Fun with Clothes, Lesson 2, page 6

SUGGESTED AGE:
5-8 years
OBJECTIVES:
Youth will be able to:
Identify primary
and secondary
colors
Demonstrate
color recognition
skills
Improve ability to
follow directions
MATERIALS:
Laminated
construction paper of
primary and
secondary colors (red,
yellow, blue, orange,
green, purple)
Tape player and tapes
TIME:
20 Minutes
SETTING:
Room with area for
children to walk in a
circle.
Activity 4: Walk a Rainbow INTRODUCTION
The primary colors are red, yellow and blue. Secondary colors are orange, green and purple. These secondary colors are made by mixing equal amounts of the primary colors together. To help us identify and remember these colors, we are going to walk a rainbow.
DO
WALK A RAINBOW!
Tape the laminated colors on the floor in a circle. The colors should be in no particular order, but have one square for each child. Have each youth stand in a circle next to one of the squares. As the music is played, children are to walk around the circle. When the music stops, the children stop. In order, the children should identify the name of the color by which they are standing and whether it is a primary or secondary color. Repeat the game as often as desired.
REFLECT
What are the primary colors?
Red, yellow, blue What are the secondary colors?
Orange, green, purple
APPLY
Draw a picture of a rainbow using the six colors
Tell someone what you learned. Identify the colors of clothing (shirts, socks, etc.) and distinguish between primary and secondary colors.
Lesson 2— Communication Of Self
Fun with Clothes, Lesson 2, page 7

SUGGESTED AGE: 5-8 years OBJECTIVES: Youth will be able to:
recognize the effects of optical illusions and feelings of color demonstrate color recognition skills demonstrate group cooperation skills demonstrate use of decision-making skills demonstrate use of problem-solving skills demonstrate classification skills discover how colors are formed distinguish between primary and secondary colors
MATERIALS: Red, yellow and blue finger/tempera paints Six clear plastic cups Spoons for stirring White paper Copy of BE A COLOR CHEMIST! for each child Crayons(red,yellow,blue,purple, orange and green only) COLOR WHEEL poster (optional) COLORFUL CLOTHES Color Wheel Workbook page 10 Optional: old,large long sleeved shirts Paint brushes TIME: 30 Minutes SETTING: A room with tables and chairs. Need access to water. ADVANCE PREPARATION: Color or paint COLOR WHEEL poster with primary and secondary colors (optional).
Activity 3: Color Chemists!
LEADER INFORMATION
Children may need assistance in mixing the colors because this activity has the potential to be very messy. But it will be lots of fun for the kids! This activity will allow you to introduce "primary" colors (red, yellow, blue) and let youngsters discover "secondary" colors as they are formed.
INTRODUCTION
How many of you have ever seen a rainbow? What colors do we see in a rainbow? (purple, blue, green, yellow, orange and red). These colors are the light from the sun. The colors blend together to make the clear, bright sunlight. When colors are mixed, they change and form new colors. We are going to try some experimenting with red, yellow, and blue. These are called "primary" colors. Let's see how different colors are created.
DO
Be a "COLOR CHEMIST!"
Allow the children to color the shorts on the COLORFUL CLOTHES CHART. One should be red, one should be yellow, and one should be blue.
Place three glasses of clean water on white paper. Add three drops of red tempura paint to the first glass, three drops of blue coloring to the second glass, and three drops of yellow to the third. Stir each glass. Children can do this on their own with a little assistance.
Tell the children (or help them) pour half the yellow water and half the blue water into an empty glass and stir. The result should be green water.
Tell the children to pour half the red water into the rest of the yellow water and stir. The new color should be orange.
Tell the children to pour the blue water into the remaining red water and stir. The color formed should be purple.
Allow the children to color the shirts on the COLORFUL CLOTHES CHART the colors that were created when the colors in the adjoining circles were mixed.
Explain that the colors that were created when mixing the primary colors are called "secondary" colors
Lesson 2— Communication Of Self
Fun with Clothes, Lesson 2, page 8

REFLECT
What are the primary colors?
Red, yellow, blue
What are the secondary colors?
Purple, orange, green
What colors are mixed to make purple? orange? green?
Red and blue; yellow and red; yellow and blue
How do each of these colors make you feel?
Answers will vary by child and by color
APPLY
Encourage children to share and practice what they learned.
Show and tell someone what you learned.
Have youngsters mix water colors and paint their own Color Wheel using the "BE A COLOR CHEMIST" Activity sheet.
Hang your color chart at home. Experiment with mixing colors to see what other exciting colors you can create.
ACTIVITY 3 Lesson 2— Communication Of Self
Fun with Clothes, Lesson 2, page 9

Be A Color Chemist!
Put a by the "primary" colors.
Put an x by the "secondary" colors.
Fun with Clothes, Lesson 2, page 10
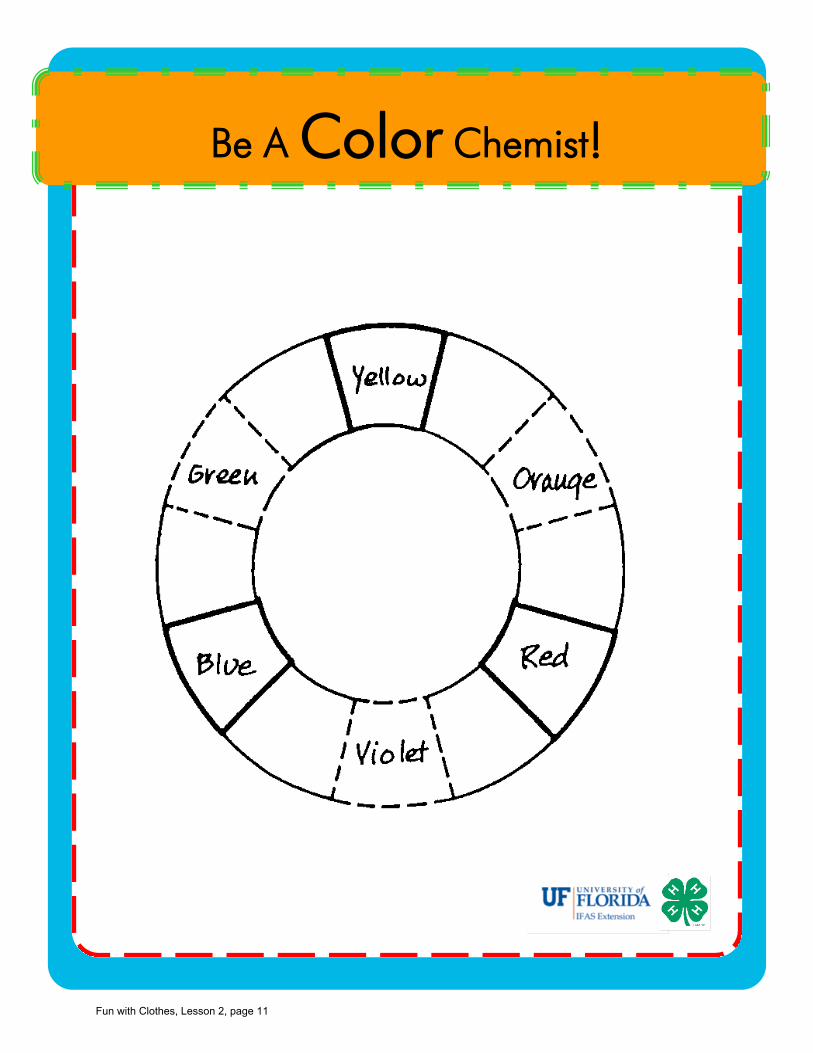
Be A Color Chemist!
Fun with Clothes, Lesson 2, page 11

SUGGESTED
AGE:
5-8 years
OBJECTIVES:
Youth will be able
to:
Describe the
effect or
feeling of color
in their
clothing
selection
Demonstrate
positive
attitudes about
their clothes
Distinguish
between likes
and dislikes
Develop
classification
skills
MATERIALS:
Paper for each
student
Watercolor paints
Paintbrushes
Small bowls of
water
TIME:
30 Minutes
SETTING:
Comfortable room
where children can
sit in a circle.
Activity 2: “I Feel Like…”
LEADER INFORMATION
In this activity there are no right or wrong answers. Encourage the children to express their feelings.
INTRODUCTION
Colors are all around us everywhere we look. Different colors make us feel certain ways. Colors can remind us of various things, such as holidays, seasons, food, happy times and sad times.
DO
Complete "I FEEL LIKE..."
Seat children in a circle.
The leader should start the activity, then allow children to join in as they feel comfortable.
The leader says, "I feel like Christmas." All children who are wearing a color that reminds them of Christmas stands up. Children should then tell why their color(s) remind them of Christmas.
Other examples to use include: seasons, holidays, foods, community helpers.
Also, the leader should mention times that have no traditional color to encourage children's creativity (i.e., birthdays).
REFLECT
What colors make you feel happy? Sad?
Which colors do you like best? Why?
APPLY
Help children apply and practice what they have learned. Encourage them to:
Complete the HOW DO I FEEL ABOUT THESE COLORS? Activity Sheet.
Using watercolors, play with different color combinations and paint whatever you would like to create.
Take your painting home and tell your family about it.
Play "I Feel Like..." with your friends at home.
Lesson 2— Communication Of Self
Fun with Clothes, Lesson 2, page 12

HOW DO YOU FEEL ABOUT THESE COLORS?
Color Makes me feel... Reminds me of...
Complete the chart by drawing pictures or writing words to de-scribe your feelings.
Red
Blue
Yellow
Green
Orange
Purple
Black
Fun with Clothes, Lesson 2, page 13
DO
The following is suggested for using the activities in Lesson 2. Materials needed for each are listed within the activity. Help children to:
Demonstrate positive attitudes about themselves and their clothes and express likes and dislikes with PICTURE MYSELF and I FEEL LIKE!
Identify and practice good personal grooming habits with ARE MY HANDS CLEAN? and SOAP BALLS!
Identify and demonstrate good posture and poise with HOLD THAT POSTURE.
Learn about the primary colors with COLOR CHEMISTS and WALK A RAINBOW!
Describe the feelings created by color with PICTURE MYSELF, I FEEL LIKE, COLOR CHEMISTS, and WALK A RAINBOW!
REFLECT
After completing the activities in this lesson, help youth reflect on what they have learned with these questions:
What colors do you like to wear?
Why do certain clothes make you feel good?
What are the primary colors? Secondary colors?
Red, yellow, blue; green, orange, purple
Which colors do you like the best? How do these colors make you feel?
Why is it important to have good grooming habits?
Why is it important to use proper posture?
Good body alignment improves your appearance and aids health by giving your internal organs room to function properly.
APPLY
Help youth learn to apply what they have learned to their daily clothing choices:
Wear your favorite clothes and tell others why you like those clothes the best.
Experiment with mixing and matching colors of your clothing.
Use good grooming skills on a daily basis.
Demonstrate proper posture in everything that you do.
BACKGROUND LESSON 2
Fun with Clothes, Lesson 2, page 14

Background Basics...Communication of Self
HOW CLOTHING COMMUNICATES…
Color
Color is fascinating. Can you imagine clothing in just white, black, or gray? Of course not! Everyone likes color and usually has a favorite one. All colors come from the three primary colors -- red, yellow and blue. Mixing two primary colors will give you the three secondary colors -- green, orange and purple. In learning the language of color you need to know that hue is the name of the color. This means "the name" (red, yellow, etc.), not a fashion name such as fire engine red or daffodil yellow. Color communicates a feeling, a message, a mood. A color can speak loud or softly. It can say you are happy or sad. It can say you are shy or bold. Children love to work with colors -- be sure to give them the opportunity to mix and be creative in their use. They like to talk -- so let them share their feelings about colors. Colors and Feelings (according to some psychologists) yellow -- warm, sunny, bright, cheerful, friendly red -- vigorous, fiery, stimulating, exciting, warm, dangerous green -- quiet, calm, restful, soothing, soft, friendly, cheerful, refreshing blue -- serene, tranquil, reserved, serious, depressing purple -- rich, aloof, royal, signified, dramatic orange -- outgoing, warm, vitality, black -- villainous, dead, sophisticated, warm white -- pure, light, cool
PERSONAL GROOMING Personal grooming is important to each of us. We like to be around people that are clean and smell good. However, children are not as concerned with cleanliness as adults.
BACKGROUND LESSON 2
Fun with Clothes, Lesson 2, page 15

Hands One's hands are always on view and they tell a story about YOU. Maintaining well cared for hands only takes a few minutes a day. An adequate diet provides food needed for developing strong fingernails. If you want pretty hands, then begin now. Each morning be sure your nails and hands are clean before you leave home. Nice hands are clean hands. Keep them clean by washing before and after meals, after going to the bathroom, and after playing. To prevent your hands from chapping, dry completely. Fingernails are shaped to be more attractive. Girls usually shape their nails slightly pointed and boys shape theirs slightly rounded. Soak your hands in warm water before shaping. This allows the nail to soften and makes shaping easier. Use an emery board or nail file to shape fingernails. File from the sides to the center with short, one way strokes. Posture Good body alignment (posture) improves your appearance and aids health by giving your internal organs room to function properly. Correct posture can actually take from ½ to 2 inches from your waistline. Here's a quick check for your posture when you are standing:
•head held high •chest rigid •shoulders relaxed •stomach pulled in •hips tucked in and under •knees flexed (relaxed) •feet flat on floor and pointing straight ahead •arms free tossing gently
If a plumb line were beside the body the ear, shoulder, hip, knee and ankle should be in a straight line. Another way to check your posture is to stand with your back to a wall. Place heels four inches from the wall. Back of head, shoulders and buttocks should touch wall. Pull waist back until only one or two hands can be placed between your body and the wall at the waistline. Keep this body alignment and walk forward. Perfect posture! Most children like to practice "good posture," so give them the opportunity to check and practice good posture in different situations -- standing, walking, sitting. They like to be involved!
BACKGROUND LESSON 2
Fun with Clothes, Lesson 2, page 16

SUGGESTED LITERATURE: These or similar books are recommended for reading in conjunction with the various activities for Communication of Self. They should be available at your local public library. Barbato, Juli. From Bed to Bus. Illustrated by Brian Schatell. New York: Macmillian Publishing Company, 1985.
A little girl gradually learns to master the various difficulties she encounters from the time she gets out of bed until the school bus arrives. This book can be read in relation to appropriate selection of clothes for school.
Conrad, Pam. The Tub People. Illustrated by Richard Egielski. New York: Harper & Row, 1989.
A family of wooden toys lives on the edge of the bathtub until disaster strikes and they fear they have been separated forever.
Kunhardt, Edith. Where's Peter? New York: Greenwillow Books, 1988.
Peter pretends to be hiding in the bathtub, a game he plays with his baby sister, Abby, when she becomes old enough for the big tub.
Sutherland, Harry A. Dad's Car Wash. Illustrated by Maxie Chambiss. New York: Athenum, 1988.
John's love of cars and trucks follows him to the bathtub where he drives himself into the car wash and gets the works.
Watson, Jane Werner, Robert E. Switzer, and J. Cotter Hirschberg. My Friend the Dentist. Illustrated by Cat Bowman Smith. New York: Crown, 1987.
Describes, simply, a visit to the dentist's office, how teeth and filled and cleaned, and what to do to have good, healthy teeth.
Yolen, Jane. No Bath Tonight. Illustrated by Nancy Winslow Parker. New York: Crowell, 1978.
A small boy refuses to take a bath until his grandmother shows him how to make "kid tea".
LESSON 2
Fun with Clothes, Lesson 2, page 17
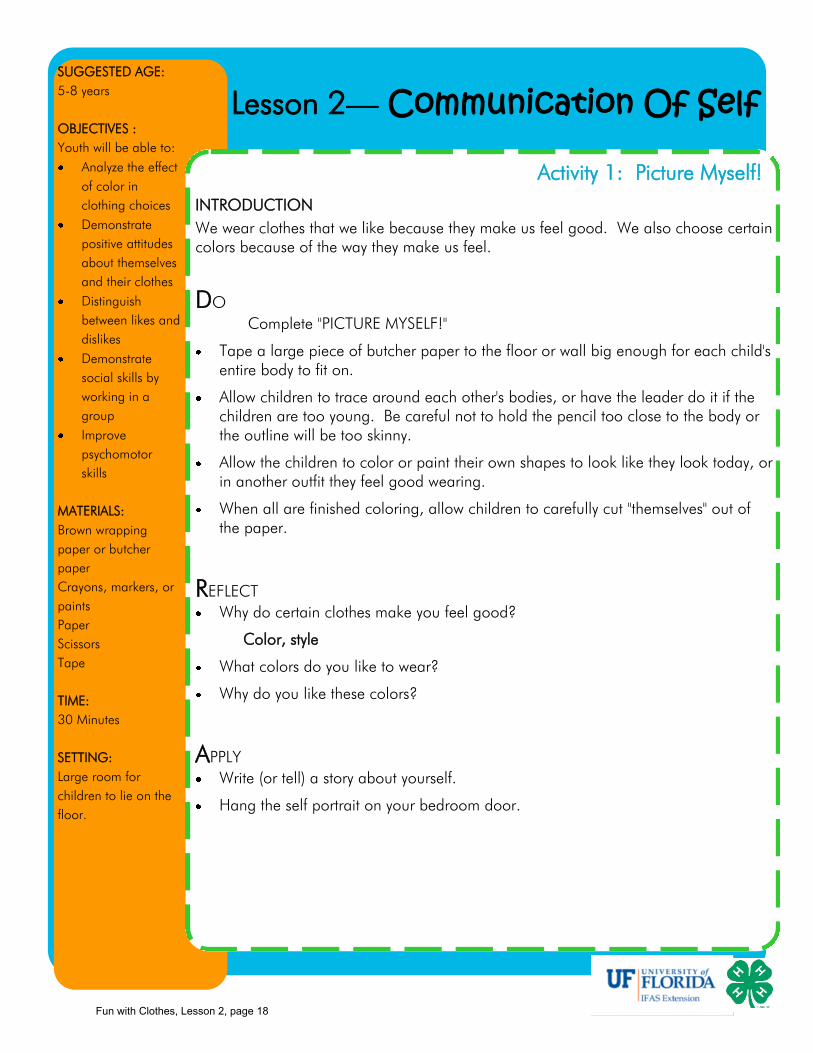
Lesson 2— Communication Of Self SUGGESTED AGE:
5-8 years
OBJECTIVES :
Youth will be able to:
Analyze the effect
of color in
clothing choices
Demonstrate
positive attitudes
about themselves
and their clothes
Distinguish
between likes and
dislikes
Demonstrate
social skills by
working in a
group
Improve
psychomotor
skills
MATERIALS:
Brown wrapping
paper or butcher
paper
Crayons, markers, or
paints
Paper
Scissors
Tape
TIME:
30 Minutes
SETTING:
Large room for
children to lie on the
floor.
Activity 1: Picture Myself!
INTRODUCTION
We wear clothes that we like because they make us feel good. We also choose certain colors because of the way they make us feel.
DO
Complete "PICTURE MYSELF!"
Tape a large piece of butcher paper to the floor or wall big enough for each child's entire body to fit on.
Allow children to trace around each other's bodies, or have the leader do it if the children are too young. Be careful not to hold the pencil too close to the body or the outline will be too skinny.
Allow the children to color or paint their own shapes to look like they look today, or in another outfit they feel good wearing.
When all are finished coloring, allow children to carefully cut "themselves" out of the paper.
REFLECT
Why do certain clothes make you feel good?
Color, style
What colors do you like to wear?
Why do you like these colors?
APPLY
Write (or tell) a story about yourself.
Hang the self portrait on your bedroom door.
Fun with Clothes, Lesson 2, page 18

You will need:
Large sheet of paper (as wide and tall as you)
Pencil
Crayons or paint
Scissors
A helper
What you do:
Lie on the paper or tape paper to a wall.
Have your helper draw around you.
Color or paint your drawing with your favorite outfit or clothes you are wearing today.
Cut out and hang on bedroom door!
ACTIVITY 1 Lesson 2— Communication Of Self
Fun with Clothes, Lesson 2, page 19

5-8 YEAR OLDS
Cutting Edge LESSON 3
PURPOSE
To learn about different fabrics and how they are made.
OBJECTIVES
Youth will be able to:
Learn how fabrics are made.
Identify different textures.
LESSON TIME
30 Minutes
LEARNING ACTIVITIES
MAKE A CHECKERBOARD
A MODERN LOOM
MAGIC BRACELETS!
FABRIC “FEEL”INGS
COLORFUL CUT-OUTS!
WHAT A MESH!
ADVANCED PREPARATION
1. Read the BACKGROUND BASICS on CUTTING Edge.
2. Review activities and choose appropriate one(s) to use.
3. Secure necessary materials as described.
FUN with CLOTHES, Lesson 3, page 1

SUGGESTED AGE:
5-8 years
OBJECTIVES:
Youth will be able to:
Identify different
textures of
fabrics
Explore other
factors related to
how fabrics are
made
Use group
cooperation
skills
Use
classification
skills
Use decision-
making skills
MATERIALS:
3 different pieces of
fabric (nylon
stocking, t-shirt,
acrylic)
Flashlight
Magnifying glass
Sheet of white paper
TIME:
30 Minutes
SETTING:
Room with a white
wall that can be
darkened.
Activity 6: What a Mesh! INTRODUCTION
An important characteristic of a fabric is the way the threads are woven or knitted together to make the fabric. The looseness or tightness of the weave or knit and the type of weave or knit have a big effect on the final fabric. We are going to try this experiment to learn about the tightness and style of knitted fabrics.
DO
WHAT A MESH!
Darken a room and place a nylon stocking over a flashlight. Pull the stocking tightly over the flashlight and shine it in the direction of a white piece of paper or a white wall.
Notice the amount of light that passes through the fabric and hits the wall. The more light that passes through the fabric, the looser the knit. Move the flashlight closer and further from the wall and tilt it at different angles until you can see the type of knit used to make the stocking.
Move the magnifying glass forward and back between the flashlight and the wall until the knit is in focus. You may also have to move the flashlight further or closer to the magnifier to get the knit into focus. Look at the tightness and style of the knit.
Now test your two other pieces of fabric in the same way to compare the style and tightness of the knit of each fabric.
REFLECT
Which fabric allowed the most light to pass through? Which allowed the least?
Which fabric do you think had the tightest knit, which had the loosest?
What did you learn from this activity?
Knits are not all alike, some you can see through and are loose, and some you can not see through and are tight.
APPLY
Try another fabric with an interesting weave to see how it looks with your 4-H fabric projector system!
Using other fabrics at home, show your family what you learned.
Lesson 3— Cutting Edge
FUN with CLOTHES, Lesson 3, page 2

SUGGESTED AGE:
5-8 years
OBJECTIVES:
Youth will be able to:
Identify different
fabric textures
Identify how
fabrics are made
Express
individuality and
creativity in
design
Strengthen
psychomotor
skills (cutting
and pasting)
MATERIALS:
COLORFUL CUT-
OUTS Activity Sheet
(optional)
Fabric scraps of
woven and knitted
fabrics
White glue
Heavy paper or
poster board
Scissors
Pencil
TIME:
30 Minutes
SETTING:
Comfortable room
with tables and
chairs.
Activity 5: Colorful Cut-Outs!
INTRODUCTION
We have seen, felt and learned about many different textures of fabrics. We have learned how fabrics are made. Who can tell me how they are made, (woven on looms or knitted). Now we are going to have fun working with these different fabrics and textures.
DO
COLORFUL CUT-OUTS!
Have each child draw a design on their paper with a pencil, or they may use the COLORFUL CUT-OUTS Activity Sheet.
Give them fabric scraps and scissors to cut the fabric to fit their designs (long strips, shapes).
Encourage the use of both natural and manufactured fibers in their designs.
The fabrics scraps are glued by putting glue on the paper in the shape of the design and putting the fabric on top.
Hang the art work to allow it to dry before sending it home.
REFLECT
Which fibers are natural and what are their sources? Cotton, linen, wool, silk; plants and animals
Which fibers are manufactured and what are their sources? Rayon, nylon, acrylic, polyester; chemicals
APPLY
Hang your Fiber Art at home.
Describe to someone which fibers are natural and which are manufactured.
Tell someone what you learned.
Why do we need to know about different types of fabrics?
Buying clothing, care
Lesson 3— Cutting Edge
FUN with CLOTHES, Lesson 3, page 3
Fabric colors and textures. FUN with CLOTHES, Lesson 3, page 4

SUGGESTED AGE:
5-8 years
OBJECTIVES:
Youth will be able to:
Identify different
textures of fabrics
Use group
cooperation skills
Use classification
skills
Use language
skills
MATERIALS:
Small fabric scraps
( felt, burlap, denim,
cotton/polyester prints
& solids, wool, silk-like
fabrics, nylon, knits,
terrycloth )
FABRIC “FEEL”INGS
Activity Sheet
Scissors
Glue
TIME:
30 Minutes
SETTING:
Comfortable room for
children.
Activity 4: Fabric “Feelings”
INTRODUCTION
Various types of fabrics have different textures. By playing the Fabric "Feelings" Game we are going to describe the different fabric textures.
DO
Play FABRIC "FEELINGS"?
Have one child stand in front of the group holding his/her hands behind their back.
Place a fabric in the child's hands and have the child describe the fabric in terms of feel and texture.
Encourage the child to guess which fabric they are holding.
Allow each child an opportunity to play the game.
REFLECT
What were some of the fabrics we identified?
How did each one feel?
What did you learn from this activity?
That different fabrics feel different, fabrics have texture you can see and feel
APPLY
Complete the FABRIC "FEELINGS" Activity Sheet.
Describe to someone what you learned about the different fabrics.
Why do we need to know about different types of fabrics?
Care of fabrics is different. Different fabrics are used for making different garments. (Identify some of these)
Identify other words that describe fabric "feelings".
Slick or slippery for shiny fabrics
Lesson 3— Cutting Edge
FUN with CLOTHES, Lesson 3, page 5

PASTE
SOFT fabrics here!
Paste Stiff
fabrics here!
abric
EELings...
F
F ACTIVITY 4
FUN with CLOTHES, Lesson 3, page 6

SUGGESTED AGE:
5-8 years
OBJECTIVES:
Youth will be able to:
Describe how
fabrics are made
Express
individuality in
selecting colors
Strengthen eye
and hand
coordination
Demonstrate
skill in following
directions
MATERIALS:
Piece of yarn, 36
inches in length
Various knit fabrics
or socks
Magnifying glass
(optional)
Sample of socks
TIME:
45 Minutes
SETTING:
Area with tables and
chairs.
Activity 3: Magic Bracelets! LEADER INFORMATION
This activity will require several helpers for young children. Asking older teenagers or mothers to attend the meeting will be helpful. For very young children (and if you have a few helpers), you may wish to have the bracelets started by tying the slip knot.
INTRODUCTION
Fabrics are made by several different methods. One method is by weaving and another is by "knitting". We are going to make a chain-stitched bracelet to demonstrate how fabrics are knitted.
DO
Make MAGIC BRACELETS!
Give each child a piece of scrap fabric that is knitted and woven for them to examine under the magnifying glass. Tell them to look for the knitted loops. Have them check out their socks (or samples provided).
Give each child a piece of yarn.
Demonstrate the steps to get started or for very young children, have the first loop started before giving out the yarn.
Let youngsters make their magic bracelets with the chain stitch.
REFLECT
What are the ways that fabrics are made?
Weaving, knitting
Was it easy to make the bracelet? Why or why not?
What did you learn from this activity?
How to make a chain
Do you think it would take a long time to knit a complete garment, like a sweater?
Discuss that most knitted fabrics and garments are done by machines today.
Lesson 3— Cutting Edge
FUN with CLOTHES, Lesson 3, page 7

APPLY
Take A CLOSER LOOK AT FABRICS using Workbook Activity on page 13.
Which of the garments that you wear use knitted fabrics?
Socks, t-shirts, sweaters
Wear your new chain-stitched bracelet with pride.
Show someone else how to make a chain-stitched bracelet.
Make a chain-stitched bracelet as a gift for someone else, or make a necklace.
ACTIVITY 3 Lesson 3— Cutting Edge
FUN with CLOTHES, Lesson 3, page 8

MAGIC BRACELETS
Verbal Instructions for Children to Follow
1. Have children place one end of yarn on table in front of them.
2. Bend it to look like a fish hook.
3. Take the end of the short "tail" and place it under long "tail" to form a loop.
4. Loop short "tail" over and through the loop like this...
5. Pick up loop, holding the two loose ends between thumb and forefinger.
6. Reach through loop with other hand and pull up loop from long "tail."
7. Let go of long "tail." While still holding new loop, with other hand pull short "tail" to make slip knot. Adjust to small loop.
8. Chain stitch by pulling up new loops through existing loop. Adjust loop sizes as you go. Add beads to bracelet, if desired.
9. Once length is complete, take the yarn through the loop to end the chain (this prevents unraveling), tie ends together.
FUN with CLOTHES, Lesson 3, page 9

SUGGESTED AGE:
5-8 years
OBJECTIVES:
Youth will be able to:
Describe how
fabrics are made
Express
individuality in
selecting colors
Strengthen eye
and hand
coordination
Demonstrate
skill in following
directions
MATERIALS:
Piece of yarn, 36
inches in length
Various knit fabrics
or socks
Magnifying glass
(optional)
Sample of socks
TIME:
45 Minutes
SETTING:
Area with tables and
chairs.
Activity 3: Magic Bracelets! LEADER INFORMATION
This activity will require several helpers for young children. Asking older teenagers or mothers to attend the meeting will be helpful. For very young children (and if you have a few helpers), you may wish to have the bracelets started by tying the slip knot.
INTRODUCTION
Fabrics are made by several different methods. One method is by weaving and another is by "knitting". We are going to make a chain-stitched bracelet to demonstrate how fabrics are knitted.
DO
Make MAGIC BRACELETS!
Give each child a piece of scrap fabric that is knitted and woven for them to examine under the magnifying glass. Tell them to look for the knitted loops. Have them check out their socks (or samples provided).
Give each child a piece of yarn.
Demonstrate the steps to get started or for very young children, have the first loop started before giving out the yarn.
Let youngsters make their magic bracelets with the chain stitch.
REFLECT
What are the ways that fabrics are made?
Weaving, knitting
Was it easy to make the bracelet? Why or why not?
What did you learn from this activity?
How to make a chain
Do you think it would take a long time to knit a complete garment, like a sweater?
Discuss that most knitted fabrics and garments are done by machines today.
Lesson 3— Cutting Edge
FUN with CLOTHES, Lesson 3, page 10

APPLY
Take A CLOSER LOOK AT FABRICS using Workbook Activity on page 13.
Which of the garments that you wear use knitted fabrics?
Socks, t-shirts, sweaters
Wear your new chain-stitched bracelet with pride.
Show someone else how to make a chain-stitched bracelet.
Make a chain-stitched bracelet as a gift for someone else, or make a necklace.
ACTIVITY 3 Lesson 3— Cutting Edge
FUN with CLOTHES, Lesson 3, page 11

MAGIC BRACELETS
Verbal Instructions for Children to Follow
1. Have children place one end of yarn on table in front of them.
2. Bend it to look like a fish hook.
3. Take the end of the short "tail" and place it under long "tail" to form a loop.
4. Loop short "tail" over and through the loop like this...
5. Pick up loop, holding the two loose ends between thumb and forefinger.
6. Reach through loop with other hand and pull up loop from long "tail."
7. Let go of long "tail." While still holding new loop, with other hand pull short "tail" to make slip knot. Adjust to small loop.
8. Chain stitch by pulling up new loops through existing loop. Adjust loop sizes as you go. Add beads to bracelet, if desired.
9. Once length is complete, take the yarn through the loop to end the chain (this prevents unraveling), tie ends together.
FUN with CLOTHES, Lesson 3, page 12

SUGGESTED AGE:
5-8 years
OBJECTIVES:
Youth will be able to:
Describe how
fabrics are made
Express
individuality in
selecting colors
Strengthen
psychomotor skills
Demonstrate
following
directions skills
Demonstrate left-
right orientation
skills
MATERIALS:
Clean Styrofoam
grocery trays
Scissors
Yarns in different
colors
Paper clips
Masking tape
TIME:
30 Minutes
SETTING:
Area with tables and
chairs.
Activity 2: A Modern Loom LEADER INFORMATION
This activity will require several helpers for younger children. Asking older teens or mothers to attend the meeting will be helpful. Scraps of yarn can be taped or wrapped around the tray. Be sure to cut small links for younger children. More than one piece can be used as they weave.
INTRODUCTION
The clothes we wear are made of fabrics. Fabrics are made of yarns. And yarns are made of fibers. One way the yarns are made into fabrics is by weaving. Weaving is done on a "loom." (Show pictures of a loom.) We are going to make our own "looms" and learn to weave.
DO
Weaving with "A MODERN LOOM"
Give each child a clean, styrofoam grocery tray and a pair of scissors. Show the children how to make the cuts (about 1/2 inch apart) at the top edge and bottom edge of the tray. Allow them to do their own if possible.
Tie a knot in the yarn and place in the first slot. Demonstrate how to string the yarn back and forth through the cuts on the foam tray. (Wrapping the yarn around the entire tray and up through the next slot is a lot easier!)
To start weaving, cut a piece of yarn and tape across the back of the foam tray to keep it from slipping.
Tie the other end of the yarn to a paperclip. Use the paperclip to help guide the yarns over and under.
Encourage children to experiment with different weaving patterns.
After the weaving process is completed, tape the end of the yarn to the back of a tray or tie a knot.
REFLECT
What is one method for making fabrics?
Weaving
Was it easy to weave the yarn back and forth? Why or why not?
Do you think it would take a long time to make fabric for your clothes this way?
Talk about how this was done by hand many years ago, and today it is done by machine.
Lesson 3— Cutting Edge
FUN with CLOTHES, Lesson 3, page 13
APPLY
Try this same technique on a block of wood with nails to string yarn back and forth; then weave.
Fabric strips made from old t-shirts or socks could also be used as weaving strips.
Teach someone else how to weave.
ACTIVITY 2 Lesson 3— Cutting Edge
FUN with CLOTHES, Lesson 3, page 14

A Modern Loom Instructions
1. Make small cuts (about ½ inch apart) at the top and bottom edge.
2. Tie a knot in the yarn and place in first slot. String yarn back and forth through cut on the tray.
(Wrap yarn around entire tray.)
3. Cut a piece of yarn and tape across the back of tray. Tie other end of the yarn to a paperclip. Using clip as a guide, pull yarn over and under.
4. When weaving is complete, tape end of yarn to the back of tray or tie a knot.
ACTIVITY 2 Lesson 3— Cutting Edge
FUN with CLOTHES, Lesson 3, page 15

3. Demonstrate how to weave "over and under," one strip at a time.
4. Staple ends once weaving is completed. Cut pieces using paper stripes or buttons and demonstrate how to play checkers using their woven board.
(Optional - You may use contact paper to cover board for more permanent use, or slip into clear notebook page holder.)
WEAVING INSTRUCTIONS MADE SIMPLE!
Continued
ACTIVITY 2 Lesson 3— Cutting Edge
FUN with CLOTHES, Lesson 3, page 16

STOP CUTTING 1/2 INCH FROM TOP
CU
T O
FF 1
/2 IN
CH
(C
opy
this
guid
e onto
colo
red p
aper
so c
hild
ren h
ave
a c
utti
ng g
uid
e.)
FUN with CLOTHES, Lesson 3, page 17

DO
The following is suggested for using the activities in Lesson 3. Materials needed for each are listed within the activity. Help children to:
Learn and describe how fabrics are made with MAKE A CHECKERBOARD. A MODERN LOOM, and MAGIC BRACELETS!
Identify and describe different textures of fabrics with FABRIC “FEEL”INGS and COLORFUL CUT-OUTS!
Identify and describe the weave of a fabric with WHAT A MESH, MAKE A CHECKERBOARD, and A MODERN LOOM!
REFLECT
After completing the activities in this lesson, help youth reflect on what they have learned with these questions:
What are ways that fabrics are made?
Woven, knitted
Which fibers are natural?
Cotton, linen, wool, silk
What are the sources of natural fibers?
Plants, animals
APPLY
Help youth learn to apply what they have learned to their daily clothing choices:
What are some of your clothes that are made from knitted fabrics?
What are some of your clothes that are made from woven fabrics?
Share with someone what you have learned!
Lesson 3— Cutting Edge
FUN with CLOTHES, Lesson 3, page 18

Background Basics...Cutting Edge
Fibers are where our fabrics and apparel begin. The generic name is the key word you need to know and understand about textile products. There are two basic types of fibers -- natural (from plants and animals) and manufactured (from chemicals). Natural fibers -- cotton, linen, silk and wool are usually water-loving (very absorbent, and are not heat sensitive). They tend to soil easily but are easily cleaned. Most manufactured fabrics (you may know them best as man-made or synthetic) are usually strong, heat sensitive, and susceptible to static electricity. They do not readily absorb moisture, so they are quick drying. Any of the fibers, natural or manufactured may be made into a variety of fabrics. Today, there is not one best fiber. Each fiber makes a contribution to the world of textiles. Each has its own use. A fiber is the basic unit of textile raw material such as cotton, wool, etc. A yarn is lots fibers twisted together to form a continuous strand which can be used in making fabric. A fabric is any woven, knitted, plaited, braided, felted, or non-woven material made of yarns. Yarns may be a single strand, or two or more yarns twisted together. They maybe small or large, rough or smooth, and tightly or loosely twisted. Loosely twisted yarns make a fabric that will wrinkle. Tightly twisted ones do not wrinkle as easily. Yarn differences create changes in appearance, durability and texture. The two most common methods of making fabric are by weaving or knitting. The way a fabric is constructed affects its durability, use, warmth or coolness, and appearance. A woven fabric is made by interlacing two sets of yarns. This is where the lengthwise yarns and crosswise yarns cross each other at right angles. They go over and under, back and forth. Lengthwise yarns form the foundation of the fabric and are usually stronger. They run parallel to the selvage, which is the finished edge. The selvage is made by doubling the number of lengthwise yarns. Crosswise yarns are perpendicular to the selvage. A plain weave is the most common method of making fabric. It is a basic one-under and one-over combination of a lengthwise and crosswise yarn. Examples are taffeta, broadcloth, and organdy. The basket weave is a variation of the plain weave -- two or more yarns are carried together in a two under and two over weave.
BACKGROUND Lesson 3— Cutting Edge
FUN with CLOTHES, Lesson 3, page 19

Knits
Knitting is a method of fabric construction. Yarns are frequently texturized. This means that they have built-in crimps or coils that allow for some stretch in a fabric. Knit fabrics stretch. Some stretch in both directions, others will primarily stretch crosswise. Single knits are like hand knitting. They are sometimes called plain or jersey.
Texture
Sight, hearing, smell and touch are all sensitive in some way to texture. Texture is the surface appeal of an object. Clothing texture can create several reactions. Your eyes respond to the look of the fabric. Your ears respond to the sound as the person moves. Your hands respond to how a fabric feels when you touch it. The way a fabric is constructed and the type of yarn used determines its texture. Every fabric has its own texture of feel, look, and sound. Frequently we refer to the "hand" of a fabric. This refers to the weight, thickness, and how the fabric drapes.
Some comparison of fabrics could include terms such as coarse vs. fine, opaque vs. sheer, thin vs. bulky, soft vs. stiff, limp vs. crisp, cool vs. warm, shiny vs. dull, light vs. heavy, stretch vs. firm, spongy vs. firm, smooth vs. rough.
References
Clothing Selection HE4033
Labels and Labeling HE4105
Shopping For Fabric HE4051
BACKGROUND Lesson 3— Cutting Edge
FUN with CLOTHES, Lesson 3, page 20

Lesson 3— Cutting Edge SUGGESTED AGE:
5-8 years
OBJECTIVES:
Youth will be able to:
Describe how fabrics
are made
Express individuality in
selecting colors
Strengthen
psychomotor skills
Demonstrate skills in
following directions
Demonstrate left-right
orientation skills
Improve group
cooperation skills
MATERIALS:
1 sheet of construction
paper per child
2 colored sheets of bright
8 1/2 x 11 paper per child
Scissors
Stapler
Various small scraps of
fabric
Magnifying lens
MAKE A CHECKERBOARD
Workbook page 12
TIME:
45 Minutes
SETTING:
Room with tables for
children to complete work.
ADVANCE PREPARATION:
Read Weaving Instructions
for another easy method
to use for a young child.
Older children, may be
able to cut paper and
weave without attaching to
a board. Test yourself first
to know which method you
want to use!
Activity 1: Make a Checkerboard!
INTRODUCTION
The clothes we wear are made from different fabrics. Fabrics are made by several different ways. One way is by weaving yarns together. We are going to look at how fabrics are made and make a checkerboard to practice weaving.
DO
Make a CHECKERBOARD!
Give each child a piece of scrap fabric for them to examine under the magnifying glass. Tell them to look for the "weave" (show and explain this new term to them). Give each child one piece of colored construction paper and two 8½ x 11 sheets of colored paper. For one sheet, cut the colored 8½ x 11 sheets into eight strips almost to the top of the sheet. Staple this sheet to the construction paper. Cut the other sheet into 8 strips to use to weave. Tell the child to weave the strips in and out of the stapled sheet like the fabric. Each strip should be stapled or glued at the end to hold it in place. The finished product should resemble a checker board. Cut paper scraps into small squares to be used as checkers.
REFLECT
What is one way that fabrics are made?
weaving Was it easy to weave the paper back and forth? Why or why not?
APPLY
Would it take you a long time to weave threads together to make a piece of fabric? Think about all the clothes we wear and the fabric used. How are fabrics woven today? Look at other fabrics using a magnifying glass to see how they are made. Play checkers on the woven checker board.
FUN with CLOTHES, Lesson 3, page 21

1. Copy Cutting Guide onto two sheets of colored paper (8½x11) for easy cutting. Cut to within ½ inch from edge of each sheet.
2. Onto the Construction Paper, staple on the two cut, colored sheets onto adjacent sides.
*Staple and fold back for younger children.
WEAVING INSTRUCTIONS
MADE SIMPLE!
ACTIVITY 1
FUN with CLOTHES, Lesson 3, page 22

3. Demonstrate how to weave "over and under," one strip at a time.
4. Staple ends once weaving is completed. Cut pieces using paper stripes or buttons and demonstrate how to play checkers using their woven board.
(Optional - You may use contact paper to cover board for more permanent use, or slip into clear notebook page holder.)
.
WEAVING INSTRUCTIONS MADE SIMPLE!
Continued
ACTIVITY 1
FUN with CLOTHES, Lesson 3, page 23

STOP CUTTING 1/2 INCH FROM TOP
CU
T O
FF 1
/2 IN
CH
(C
opy
this
guid
e onto
colo
red p
aper
so c
hild
ren h
ave
a c
utti
ng g
uid
e.)
FUN with CLOTHES, Lesson 3, page 24

5-8 YEAR OLDS
LESSON 4
PURPOSE
To make youth aware of the choices that are made when selecting
clothing to wear.
OBJECTIVES
Youth will be able to:
Demonstrate a positive attitude about their clothes.
Identify appropriate garments for special occasions.
Distinguish between likes and dislikes.
Describe the effect/feeling of color and lines in clothing choices.
Lear about seasonal choices.
Demonstrate appropriate matching of clothing choices (color, line, design)
LESSON TIME
30 Minutes
LEARNING ACTIVITIES
MY FAVORITE OUTFIT!
SEASONAL COLLAGE
SUITCASE READY
ALL MIXED UP!
PASS-IT-AROUND SONG
COLOR MATCH
TALKING COLORS
COOL CARL AND WARM WANDA
WHAT’S MY LINE?
MATCH ME!
ADVANCED PREPARATION
1. Read the BACKGROUND BASICS on Choices.
2. Review activities and choose appropriate one(s) to use.
3. Secure necessary materials as described.
Choices
FUN with CLOTHES, Lesson 4, page 1

DO
The following is suggested for using the activities in Lesson 4. Materials needed for each are listed within the activity. Help children to:
Demonstrate a positive attitude about clothes with MY FAVORITE OUTFIT! Identify appropriate uses of garments with SEASONAL COLLAGE, SUITCASE RELAY, ALL MIXED UP, and PASS-IT-AROUND SONG! Identify the effects of color in COLOR MATCH, TALKING COLORS, COOL CARL AND WARM WANDA! Identify vertical, horizontal, diagonal, and curved lines in WHAT'S MY LINE! Identify solids, stripes, plaids, and prints in MATCH ME!
REFLECT
After completing the activities in this lesson, help youth reflect on what they have learned with these questions:
What are some reasons we like certain clothes? Color, fit
Why is it important to where clothing that is appropriate to the season or activity? Comfort, safety, health
Why would we want to wear colors that compliment each other? To look good, fashion
What are the four types of lines? Vertical, horizontal, diagonal, curved
What are cool and warm colors? Blue and green; red, yellow and orange
What are the four general types of patterns of fabric? Solids, stripes, plaids, prints
What are some ways that certain colors make you feel?
APPLY
Help youth learn to apply what they have learned to their daily clothing choices. When dressing for an activity or a season, be sure that your clothing is appropriate. Wear colors, lines, and patterns that match or compliment one another when selecting clothing.
Lesson 4— Choices
FUN with CLOTHES, Lesson 4, page 2

Background Basics...Choices What do your clothes say about you? Clothes are important -- when you look good, you feel good. We use clothes to express ourselves. We have garments that are our favorites. Seasonal Influences... In many parts of the United States seasons of the year are more pronounced than in Florida. But in much of Florida we do see a change in the type of clothing worn in winter and summer. We think about wearing clothing to keep us cooler in summer and warmer in winter. Keep warm in cooler weather by:
• layering your clothing -- this keeps body heat in and cold air out. • wearing fabrics that are thick, have a close weave, are quilted or have a nap. • wearing garments with close-fitting necklines, cuffs (wrist and ankles), and waistlines,
have long sleeves. • selecting colors that are warmer, they absorb the sun's rays when you are outside. • not wearing garments too tight, there is no place for warm body heat to circulate. • wearing clean garments keeps you warmer rather than wearing dirty ones. Soil and
body oils close air spaces, so insulating powers are lost. Keep cool in warmer weather by:
• selecting fabrics that are more absorbent. When they absorb perspiration, it evaporates and you will feel cooler.
• wearing cool colors if you are going to be outside, they reflect the sun's rays and cool colors will make you feel cooler -- they remind you of the trees (shade) and water.
• selecting garments where air can circulate such as garments with large necks, armholes and legs; shirts and blouses are worn outside pants; skirts and dresses are cooler than pants, sleeveless garments are cooler.
• wearing clean clothes are cooler than dirty ones. • wearing a hat.
Color... Color is fascinating. Can you imagine clothing in just white, black, or gray? Of course not! Everyone likes color and usually has a favorite one. All colors come from the three primary colors -- red, yellow and blue. Mixing two primary colors will give you the three secondary colors -- green, orange and purple.
BACKGROUNDLesson 4— Choices
FUN with CLOTHES, Lesson 4, page 3

In learning the language of color you need to know that hue is the name of the color. This means "the name" (red, yellow), not a fashion name such as fire engine red or daffodil yellow. Color communicates a feeling, a message, a mood. A color can speak loud or softly. It can say you are happy or sad. It can say you are shy or bold. Red, orange and yellow are referred to as warm colors. They appear to advance and made objects look larger. Blue, green and violet are cool colors. They appear to recede and make objects look smaller. Line... Line is the most basic element of design and therefore the most important. It is the boundary of things. Lines are used to divide areas into shapes, forms, and spaces, provide direction, and provide movement. There are two types of lines -- straight and curved. Straight lines are forceful. Curved lines are softer and give a more graceful feeling. Both types of lines give direction either horizontal, vertical, diagonal or curved. Some effects of straight and curved lines are as follows:
• Vertical lines direct the eye up and down, add height, create an impression of poise and strength.
• Horizontal lines lead the eye across the garment, add width, suggest calmness, serenity, and gentleness.
• Diagonal lines express action, create a vertical or horizontal effect determined by how great the angle is.
• Restrained curves give a feminine feeling and have a slight degree of roundness. • Circular (rococo) curves convey excitement and have a greater degree of
roundness. The spacing of lines can change their expected effect. For example, as the space between vertical lines is increased, the illusion of height is decreased. Also, as the space between horizontal lines is increased, the illusion of width is decreased. Texture... Texture refers to the surface characteristic of a fabric or other material. The texture contributes to how something looks or to how you look.
BACKGROUNDLesson 4— Choices
FUN with CLOTHES, Lesson 4, page 4

Sight, hearing, smell and touch are all sensitive in some way to texture. Texture is the surface appeal of an object. Clothing texture can create several reactions. Your eyes respond to the look of the fabric. Your ears respond to the sound as the person moves. Your hands respond to how a fabric feels when you touch it. Fabrics can be solid colors or they may have different patterns. Some of the designs on fabric are woven or knitted in, and others are printed. The only way you can tell is by looking at the back of a fabric. Solids are just one color. Stripes are the least complicated and probably the oldest type of geometric fabric design. Stripes have lines -- horizontal or vertical, they may be even (same size and spacing) or uneven (different size/width and spacing). Plaids, too, come in a variety of plaid designs. A plaid design basically is one that has stripes crossing at right angles which may be evenly or unevenly spaced. The stripes are repeated in sequence. Prints can be anything -- whatever the designer decides on from bunnies to food items to flowers to trees. They can be an all-over design or widely spaced and very large. Additional References: Clothing Selection HE 4033
SUGGESTED LITERATURE: The following books are recommended for reading in conjunction with the various activities for Choices, Selection, and Planning. They should be available at your local public library. Barbato, Juli. From Bed to Bus. Illustrated by Brian Schatell. New York: Macmillian Publishing Company, 1985.
A little girl gradually learns to master the various difficulties she encounters from the time she gets out of bed until the school bus arrives. This book can be read in relation to appropriate selection of clothes for school.
Carlson, Nancy. I Like Me. New York: Viking Penguin Inc., 1988.
By admiring her finer points and showing that she can take care of herself and have fun when there is no one else around, a charming pig proves the best friend you can have is yourself. Read this when discussing likes, dislikes and individuality.
BACKGROUNDLesson 4— Choices
FUN with CLOTHES, Lesson 4, page 5
Carlstrom, Nancy W. Jesse Bear, What Will You Wear? Illustrated by Bruce Degen. New York: Macmillian Publishing Company, 1986.
This rhymed story describes Jesse Bear's activities from the morning until bedtime. Read this book when discussing color and selecting clothes for different times of day.
Hughes, Shirley. Two Shoes, New Shoes. New York: Lothrop, Lee & Shepard Books, 1986.
This rhyming text describes the endless fun one can have with shoes, hats, and other articles of clothing. Read this book when discussing selecting clothes.
Martin, Bill. Brown Bear, Brown Bear, What Do You See? Illustrated by Eric Carle. New York: Holt, Rinehart, & Winston, 1983.
In this story, children see a variety of animals, each one a different color. O'Neill, Mary. Hailstones and Halibut Bones: Adventures in Color. Illustrated by Leonard Weisgard. Garden City, New York: Doubleday & Company, Inc., 1961.
This is a collection of poems about the different colors discussing items of each color with bright pictures.
Peek, Merle. Mary Wore Her Red Dress, and Henry Wore Green Sneakers. New York: Clarion Books, 1985.
Each of Katy Bear's friends wears a different color of clothing to her birthday party. Ridell, Chris. Bird's New Shoes. New York: Henry Holt and Company, 1987.
The animals in the jungle get into an argumentative frenzy over what is the latest fashion in clothing. This book can be read when discussing individuality and, likes and dislikes.
Watson, Wendy. Happy Easter Day! New York: Clarion Books, 1993.
Come join this happy family for the exciting bustle of preparations, new clothes for church, a wonderful dinner, Easter games and colored eggs in a joyous celebration of the new season. This story can be read in conjunction with a discussion on seasonal choices and colors.
Yektai, Niki. Crazy Clothes. Illustrated by Susie Stevenson. New York: Bradbury Press,1988.
Patrick is determined to show his mother that he can get dressed all by himself, but his clothes seem to have their own ideas and insist on going on the wrong parts of his body. Read this book when discussing appropriate selection of clothes. Individuality can also be discussed.
BACKGROUNDLesson 4— Choices
FUN with CLOTHES, Lesson 4, page 6

Lesson 4— Choices SUGGESTED AGE:
5-8 years
OBJECTIVES:
Youth will be able to:
Express individu-
ality in selecting
an outfit to wear
to class
Improve social
skills by describ-
ing outfit to class
Demonstrate a
positive attitude
about their
clothes
Distinguish be-
tween likes and
dislikes
MATERIALS:
Outfit chosen by the
students to wear
MY FAVORITE OUT-
FIT Activity Sheet for
each youth
Crayons or pencils
TIME:
30 Minutes
SETTING:
Room with tables for
coloring activity.
Activity 1: My Favorite Outfit!
INTRODUCTION
The clothes that we wear is one way we express ourselves. The clothes we like are the ones that make us feel good when we wear them. We do not like clothes that do not make us feel good, therefore we often choose not to wear them.
DO
Allow children to stand in front of the group and describe their outfit.
Children should tell what they like about the outfit and why they chose to wear it.
The other children in the group should be encouraged to ask questions about the clothing of the others in the group.
REFLECT
What were some of the reasons certain clothes were chosen as favorites?
Make us feel good, like the color, like the feel, comfortable
What are some reasons that we do not like certain clothes? Why would we not want to wear those clothes?
Isn't comfortable, scratches, too long
APPLY
Draw a picture of yourself wearing your favorite outfit.
Show it to someone at home and tell them why you like it.
FUN with CLOTHES, Lesson 4, page 7

Draw a picture of yourself wearing your favorite clothes.
Show it to someone at home and tell them why it is your favorite
y avorite utfit
ACTIVITY 1 Lesson 4— Choices
FUN with CLOTHES, Lesson 4, page 8

SUGGESTED AGE:
5-8 years
OBJECTIVES:
Youth will be able to:
Select
appropriate
clothing for
different seasons
Demonstrate
knowledge
about seasonal
choices
Demonstrate self
-expression
Develop
psychomotor
skills by cutting
and pasting
Develop social
skills by
describing the
picture to others
MATERIALS:
Clothing catalogs,
magazines, or
newspaper sale
advertisements
Glue
Scissors
White paper
TIME:
30 Minutes
SETTING:
Area with tables and
chairs.
ADVANCE
PREPARATION:
Label each sheet of
paper with winter
and summer.
Activity 2: Seasonal Collage INTRODUCTION
What is your favorite "season" (winter, summer, fall, spring) of the year? What makes the seasons different? (Discuss the differences in Florida, plus some from other places.) Different types of clothing are worn during different seasons. It is important to wear clothing for the season that will make you comfortable.
DO
Make a SEASONAL COLLAGE
Divide the children into small groups to work. Provide each group with large paper, scissors, glue, and magazines.
Cut out or tear pictures and glue them on white paper with the appropriate season.
REFLECT
Why would we want to wear clothes that are appropriate for each season? Comfort, cooler, warmer, health
What articles of clothing are appropriate for Spring? Summer? Fall? Winter?
Would these choices be different for other parts of the country?
APPLY
What is your favorite season? Draw a picture of yourself during your favorite season wearing appropriate clothing.
Divide into small groups and describe your picture to your group.
There are other times when special clothing is worn besides during certain seasons. Can you think of any of these times? (uniforms for different jobs, clothing needed for safety precautions)
Lesson 4— Choices
FUN with CLOTHES, Lesson 4, page 9

SUGGESTED AGE:
5-8 years
OBJECTIVES:
Youth will be able to:
Identify uses of
garments
Determine
appropriateness
of articles of
clothing for
special activities
Develop social
skills by working
as part of a team
MATERIALS:
Two sets of MY
SUITCASE Activity
Cards
Two old suitcases
Clothing items:
baseball caps,
galoshes, raincoat,
big straw hats,
overcoat, dress, tie,
swimsuits, shorts,
other items that could
be worn
TIME:
30 Minutes
SETTING:
Room large enough
to have a relay.
ADVANCE
PREPARATION:
The articles of
clothing needed for
this activity should be
gathered in advance.
You may want to ask
parents to donate old
clothing.
Activity 3: Suitcase Relay INTRODUCTION
Participating in various activities can require wearing different types of clothing. We are going to play a game called "Suitcase Relay." It will give us the opportunity to decide on what clothes to wear in a fun way.
DO
Play SUITCASE RELAY!
Divide children into two teams.
Each team member draws from a bowl an activity they are to dress for. The activities should be the same for both teams.
After everyone has drawn an activity, each team goes through their suitcase as fast as they can to find one article of clothing to wear to that event.
The first team with everyone correctly dressed is the winner.
REFLECT
Why is it important to be appropriately dressed for an activity?
In what ways did your team work together?
APPLY
Make a "suitcase" out of a manila folder to take with you on a trip. Children will decide where they want to go. They then draw or cut pictures out of catalogs or magazines of clothes they should take (going to Grandma's, going camping, going to the beach, etc.)
Complete the Take-Home Activity MY SUITCASE.
Lesson 4— Choices
FUN with CLOTHES, Lesson 4, page 10

Suggested Activities:
Going to a baseball game
Going to church
Going to the beach
Going to work
Going to a party
Going for a walk in the rain
Going to school
Going to bed
Suggested "Suitcase" Items:
jeans, T-shirt
"dress-up clothes," jacket, tie
sunglasses, bathing suit
jacket, vest, briefcase, or fireman's hat,
police hat, nurse's hat
jacket, tie, dress
galoshes, rain hat, umbrella, slicker
books, book bag
Suitcase Relay
ACTIVITY 3 Lesson 4— Choices
FUN with CLOTHES, Lesson 4, page 11

Going to work Going to school
Going to a party Going to bed
FUN with CLOTHES, Lesson 4, page 12

A rainy day walk! Going to church
A baseball game! To the beach
FUN with CLOTHES, Lesson 4, page 13

My Suitcase
Draw what you need to put in your suitcase
to go to Grandma's for two days in the summer
FUN with CLOTHES, Lesson 4, page 14

SUGGESTED AGE:
5-8 years
OBJECTIVES:
Youth will be able to:
Enrich
psychomotor
skills
Develop social
skills
Demonstrate
positive attitudes
about clothes
Identify proper
uses of garments
MATERIALS:
Old clothes that will
easily fit over
children’s own
clothes (i.e. shirts,
big pants, sweaters,
hats, etc.)
One clothes hanger
for each child
Yarn
Crayons or markers
Scissors
Glue
TIME:
30 Minutes
SETTING:
Comfortable room
for children to be in
groups.
Activity 4: “All Mixed Up!” INTRODUCTION
We all change clothes every day, sometimes more than once. When are some times you change your clothes during the day? This is a fun game about changing clothes and getting "all mixed up!"
DO
Play ALL MIXED UP!
Divide children into two groups. One group dresses in a few articles of clothing. The second group carefully studies the first group's clothing then leaves the room. Two members of the first group change some item of clothing. The second group returns and tries to figure out who has changed their clothing. Next time, the order is reversed.
REFLECT
When are some times when you change clothes? In the morning; after school, before going to bed
What are certain articles of clothing you would wear one place but not another place?
School clothes to play in; church clothes to school
APPLY
Make a people-parts mobile using yarn and a hanger. Draw pictures of clothes. Make silly combinations - shorts where a shirt should be, shoes for a head, etc.
Lesson 4— Choices
FUN with CLOTHES, Lesson 4, page 15

SUGGESTED AGE:
5-8 years
OBJECTIVES:
Youth will be able to:
Describe how
fabrics are made
Express
individuality in
selecting colors
Strengthen
psychomotor
skills
Demonstrate
following
directions skills
Demonstrate left
-right orientation
skills
MATERIALS:
Clean Styrofoam
grocery trays
Scissors
Yarns in different
colors
Paper clips
Masking tape
TIME:
30 Minutes
SETTING:
Area with tables and
chairs.
Activity 5: Pass-It-Around Song LEADER INFORMATION
Find old clothes to go along with the verses of the song in advance. Put the clothes in a big box or sack.
Outline a simple human figure on paper for each child.
Pass-It-Around song: (to the tune of "Mary Had a Little Lamb")
Pass it around.
Here's a shirt -
Let's pass it around,
Hello! What's your name?
Continue with other verses, such as:
Here's a coat... Here's a shoe…
Here's a cape... Here's are pants…
Here's a hat... Here are shorts…
Here's a sock... Here's a dress…
Here's a sweater... etc.
INTRODUCTION
Choosing clothes and getting dressed is an important part of our lives everyday. While singing "Pass-It Around," we will have fun putting on clothes.
DO
PASS-IT-AROUND Song!
Seat the children in a circle near the box of clothes.
As the children sing, pass around the various articles of clothing.
The child holding the garment when the verse ends stands up from the circle, says his or her name, and puts on the garment.
Pass the next article of clothing starting with that child.
Try to include all children by making sure everyone gets to wear at least one garment.
Lesson 4— Choices
FUN with CLOTHES, Lesson 4, page 16

REFLECT
How did you know where to put each garment?
Who helps you get dressed in the morning?
APPLY
Give each child a paper with the figure drawn on it. Allow them to "dress" the person using pictures from catalogs or draw the clothing. The clothes don't have to match as long as they are on the proper part of the body. Encourage creativity (one shoe and one boot, a big sweater and shorts, etc.) and have fun!
Take home your "Choices" outfit and tell someone what you learned.
ACTIVITY 5 Lesson 4— Choices
FUN with CLOTHES, Lesson 4, page 17

FUN with CLOTHES, Lesson 4, page 18

FUN with CLOTHES, Lesson 4, page 19

SUGGESTED AGE:
5-6 years
OBJECTIVES:
Youth will be able to:
Strengthen
classification skills
by matching items
of the same color
Select colors that
look good
together for
clothing
Express
individuality in
selecting colors
Use psychomotor
skills to move
around the room
MATERIALS:
9 shoe boxes
Paper
(nine different colors to
cover boxes and make
shoe cut outs)
Scissors
Glue or tape
TIME:
30 Minutes
SETTING:
Room with tables and
chairs.
ADVANCE
PREPARATION:
Cover each shoe box
with different color
paper. Cut a slit in the
top of each box. Make
paper cut-outs of shoes
in the same colors and
place in another box or
container. Next, place
the covered shoe boxes
in different areas
around the room.
Activity 6: Color Match INTRODUCTION
Color is a very important part of selecting our clothes. When we get dressed, we want to choose garments that are either the same color or that are different colors that look good together. The "Color Match" game is a fun way to practice our matching skills.
DO
Play COLOR MATCH!
Allow each child to select a paper shoe.
The child should then find the same color box and place the shoe in it.
Several children can select shoes at one time.
After all shoes are put in boxes, open the boxes and check to see that the colors have been matched correctly.
REFLECT
How did you know which box to place the shoe in?
Why would we want to wear colors that compliment each other?
So we look good, makes us feel better
APPLY
Help a friend or family member match colors of their clothes.
When getting dressed, wear a pair of socks that match the color of your shirt or shorts.
Lesson 4— Choices
FUN with CLOTHES, Lesson 4, page 20

SUGGESTED AGE:
5-8 years
OBJECTIVES:
Youth will be able to:
Describe how
fabrics are made
Express
individuality in
selecting colors
Strengthen
psychomotor
skills
Demonstrate
following
directions skills
Demonstrate left
-right orientation
skills
MATERIALS:
Clean Styrofoam
grocery trays
Scissors
Yarns in different
colors
Paper clips
Masking tape
TIME:
30 Minutes
SETTING:
Area with tables and
chairs.
Activity 7: Talking Colors INTRODUCTION
We have learned about how some colors are cool and other colors are warm. But have you ever thought of what colors might say to you or how they make you feel when you wear them? Some colors are sad, some are shy, some are happy, some are loud. Today we are going to discover just what colors say.
DO
TALKING COLORS
Give each child a TALKING COLORS Workbook Page 14. Read each of the words under each garment.
Allow the children to choose a fabric scrap with a color that "says" that word (emotion) and glue it to the page.
Do this one at a time allowing adequate time for each child to choose their color and attach it.
After completing the worksheet, allow each child to tell why they chose the color for each emotion and describe what it "says" to them.
REFLECT
Name a color that is sad; shy; loud; happy; bold; soft.
What are some other colors that make you feel a certain way?
APPLY
Talk to the people around you to see if a color that "says" one thing to you "says" something different to them.
Identify other colors at home and what they say to you.
Lesson 4— Choices
FUN with CLOTHES, Lesson 4, page 21

SUGGESTED AGE:
5-8 years
OBJECTIVES:
Youth will be able to:
Identify warm
and cool colors
Identify the
feelings/effects
of color
Express
individuality in
selection of
fabric
Demonstrate
problem-solving
skills
Demonstrate
decision-making
skills
MATERIALS:
Copies of COOL
AND WARM Activity
sheet for each child
COOL CARL AND
WARM WANDA
Workbook page 15
COOL AND WARM
Colorwheel Poster
(optional)
Fabric scraps (all
colors)
Scissors
Glue
TIME:
30 Minutes
SETTING:
Room with tables
and chairs.
ADVANCE
PREPARATION:
Color and prepare
Colorwheel Poster.
Activity 8: Cool Carl and Warm Wanda INTRODUCTION
What do you think of when you see a swimming pool or a big shade tree? What do you think of when you are outside and see the sun? What colors do you think of when you see these things? Some colors are cool colors and some are warm colors.
DO
Give each child a COOL AND WARM Activity Sheet and some crayons.
After they have finished coloring their pictures, ask them to decide which colors they think are warm and which colors are cool.
Discuss why they think those colors are called cool and warm based on the activity sheet. Use the COOL AND WARM Colorwheel Poster to show and discuss colors.
REFLECT
What color do you think of when you see a tree?
Green
What color do you think of when you see water?
Blue, green
What colors do you think of when you see the sun?
Red, yellow, orange
What are some cool colors?
Blue, green
What are some warm colors?
Red, orange, yellow
Encourage students to think about why certain colors are warm and others are cool. Encourage the connection between the objects and the colors.
APPLY
Complete the COOL CARL AND WARM WANDA Workbook Page 15.
Share what you learned with a friend or with your family.
Lesson 4— Choices
FUN with CLOTHES, Lesson 4, page 22

Which colors are ? _________ and _______
Which colors are ? _________ and _______
ANSWERS: Cool - Green and Blue Warm - Red and Yellow
FUN with CLOTHES, Lesson 4, page 23

FUN with CLOTHES, Lesson 4, page 24
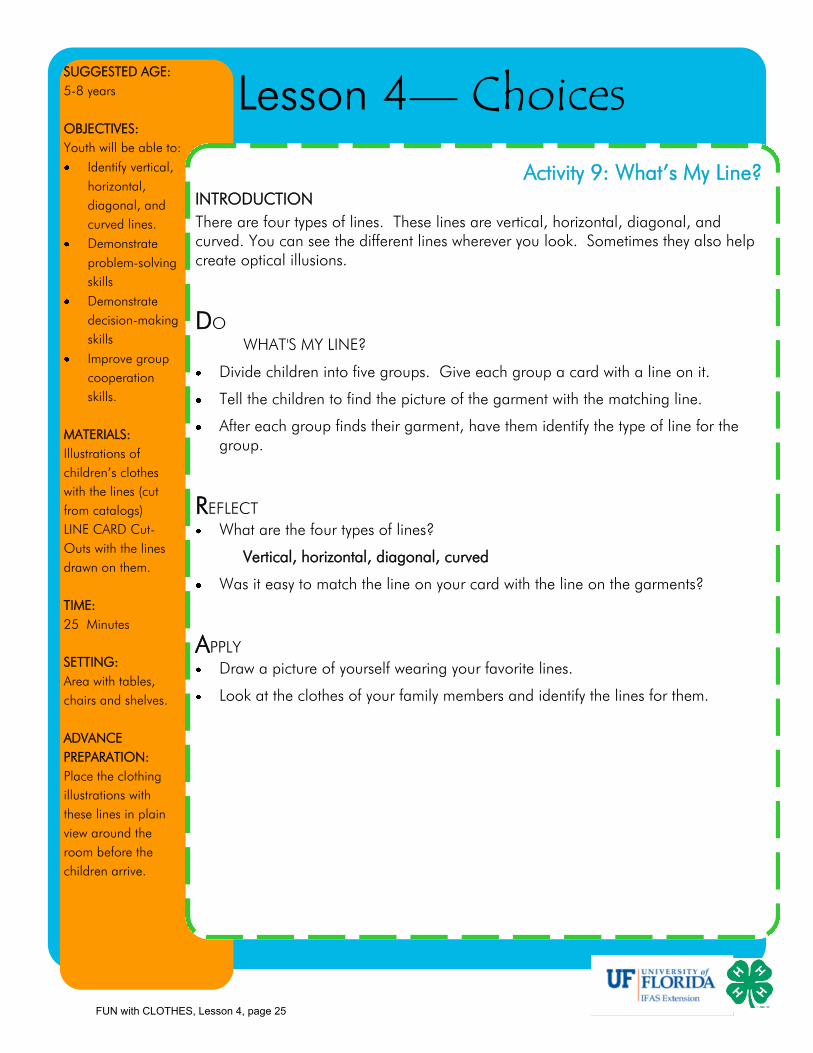
SUGGESTED AGE:
5-8 years
OBJECTIVES:
Youth will be able to:
Identify vertical,
horizontal,
diagonal, and
curved lines.
Demonstrate
problem-solving
skills
Demonstrate
decision-making
skills
Improve group
cooperation
skills.
MATERIALS:
Illustrations of
children’s clothes
with the lines (cut
from catalogs)
LINE CARD Cut-
Outs with the lines
drawn on them.
TIME:
25 Minutes
SETTING:
Area with tables,
chairs and shelves.
ADVANCE
PREPARATION:
Place the clothing
illustrations with
these lines in plain
view around the
room before the
children arrive.
Activity 9: What’s My Line? INTRODUCTION
There are four types of lines. These lines are vertical, horizontal, diagonal, and curved. You can see the different lines wherever you look. Sometimes they also help create optical illusions.
DO
WHAT'S MY LINE?
Divide children into five groups. Give each group a card with a line on it.
Tell the children to find the picture of the garment with the matching line.
After each group finds their garment, have them identify the type of line for the group.
REFLECT
What are the four types of lines?
Vertical, horizontal, diagonal, curved
Was it easy to match the line on your card with the line on the garments?
APPLY
Draw a picture of yourself wearing your favorite lines.
Look at the clothes of your family members and identify the lines for them.
Lesson 4— Choices
FUN with CLOTHES, Lesson 4, page 25

Vertical Lines Horizontal Lines
Diagonal Lines Curved Lines
FUN with CLOTHES, Lesson 4, page 26

SUGGESTED AGE:
5-8 years
OBJECTIVES:
Youth will be able to:
Identify and
make
complimentary
matches of
solids, stripes,
plaids, and
prints
Demonstrate
problem-solving
skills
Demonstrate
decision-making
skills
Improve group
cooperation
skills
MATERIALS:
Index cards
Fabric scraps (solids,
stripes, prints, plaids)
Crayons
WHICH ONE DO
YOU LIKE?
Workbook page 16
TIME:
30 Minutes
SETTING:
Room with tables
and chairs.
ADVANCE
PREPARATION:
Glue fabric scraps of
each of the patterns
to the index cards.
Make as many as
you will need to suit
your group.
Activity 10: Match Me! INTRODUCTION
Fabrics come in four general patterns. These patterns are solids, stripes, plaids, and prints. (Write these words on chart paper for the children to see.) When selecting clothes to wear we should make sure that the patterns are the same or complimentary. By playing Match Me we are going to experiment with matching these patterns.
DO
MATCH ME!
Divide the children into groups and give each group a set of pattern cards.
Tell the children to make as many matches as they can of complimentary and matching patterns.
After the groups have had enough time to discover the possible matches, allow each group to present a pattern match to the others.
REFLECT
What are the four general types of patterns of fabric?
Solids, stripes, plaids, prints
What are some possible matches?
Solid/solid, stripe/stripe, plaid/plaid, print/print, solid/stripe, solid/plaid, solid/print
Was it easy to find matches for the patterns?
APPLY
Complete the WHICH ONE DO YOU LIKE? Workbook Page 16.
Share what you learned with a friend or with your family.
Lesson 4— Choices
FUN with CLOTHES, Lesson 4, page 27

5-8 YEAR OLDS
LESSON 5 Consumerism
PURPOSE
To learn wise shopping practices.
OBJECTIVES
Youth will be able to:
Find and identify parts of a clothing label.
Identify sources of natural and manufactured fibers.
Verbalize likes and dislikes.
Discover the variety of clothing sources.
LESSON TIME
30 Minutes
LEARNING ACTIVITIES LABEL HUNT RELAY
WHAT’S ON MY LABEL?
WHAT’S MY SOURCE?
LANCE GOES SHOPPING
LET’S GO SHOPPING
ADVANCE PREPARATION
1. Read the BACKGROUND BASICS on Consumerism.
2. Review activities and choose appropriate one(s) to use.
3. Secure necessary materials as described.
Express individual creativity by making a COLLAGE BANNER.
FUN with CLOTHES, Lesson 5, page 1

DO
The following is suggested for using activities in Lesson 5. Materials needed for each are listed within the
activity.
Discover the importance of clothing labels in LABEL HUNT RELAY and WHAT’S ON A LABEL?
Identify sources of fabrics with WHAT’S MY SOURCE?
Explore different places to buy clothes in LANCE GOES SHOPPING!
Demonstrate shopping and decision-making skills in LETS GO SHOPPING!
REFLECT
After completing the activities in this lesson, help youth reflect on what they have learned with these
questions:
What information can be found on a care label?
Washing instructions, brand name, size, fiber content
What are some natural fibers and what are their sources?
Wool, silk, linen, cotton; plants and animals
Where are some places to buy clothes?
Catalog, department store, discount store, garage sale
APPLY
Help youth learn to apply what they have learned to their daily clothing choices.
Where are labels located on your clothing? Look for care labels on your clothes.
Look at clothes at home to determine if the fibers are plant, animal, or chemical.
Go shopping with someone to help pick out your own clothes.
Lesson 5— Consumerism
FUN with CLOTHES, Lesson 5, page 2

BACKGROUND BASICS...Consumerism
Labels
A label is written information that is attached to an item, such as a garment. It provides
information you need and want to know about the clothing you buy. By law most apparel items
(some exceptions are hosiery, gloves, hats, and reversible garments) must have a label or labels
with the following:
Fiber content
Care
Country of origin
Registered identification number
Care, registered identification number and country of origin must be permanently attached to
the garment. Fiber content may be permanently attached or on a hangtag.
As you shop for clothing, labeling should be used to help you in making a decision of whether
to purchase. The care instructions tell you how to properly clean the garment. Fiber content
labels not only tell you hat generic fibers have been used, but also in what percentage. Country
of origin tells you the origin of the fabrics and where the apparel was made. The registered
identification number is a number registered with the Federal Trade Commission, which tells you
the name of the manufacturer.
Clothing labels are most frequently found at the neckline or waistline. However, in some
instances they will be found on another seam.
Fibers
Fibers are where our fabrics and apparel begin. The generic name is the key word you need to
know and understand when buying a textile product. It is the family name of the natural and
manufactured fibers. The two most common cellulosic (plant) natural fibers are cotton and
linen. The two most common protein (animal) natural fibers are wool and silk. The most
common manufactured (cellulosic) is rayon. The most common manufactured (chemical) are
polyester, nylon, and acrylic. These are the generic names.
BACKGROUND Lesson 5— Consumerism
FUN with CLOTHES, Lesson 5, page 3

Fibers may also have a trademark name that could be included on the label. A trademark (trade
name) is a word or symbol copyrighted by the producer of the fiber. It serves to identify these
products and to distinguish the textile product of one manufacturer from another. Trademarked
fibers are protected by a quality control program. Examples are Acrilan® acrylic and Trevira®
polyester.
Where to Shop
There are several places you can find clothing:
Department store– sells everything
Specialty store—offers a particular clothing item or clothing for a particular group of
people
Off-Price store– offers clothing at reduced price of current-season clothes
Discount store– has low prices, but ticket does not reflect a price reduction (unless on
sale)
Catalog/mail order– convenience of shopping at home, but cannot have immediately
Resale clothing– used clothing which you can find at garage sales, flea markets,
clothing exchanges, thrift shops, consignment shops
In order to get more mileage from your clothing dollar you should decide on your needs, the
quality you want, the amount of money you can spend, comparison shop, and stick to your
budget.
There are many places that you can buy clothing. Using catalogs to shop for clothing has been
done for years. It is convenient to shop at home and you can have clothing that is not available
in your local stores. However, it is difficult to judge quality, and the garment may not fit.
Discount clothing and factory outlet stores are now a major market and not just located in
factory towns. It is a place to save money and offers a challenge in finding a bargain. However,
they won’t have all sizes and clothing may not ―look‖ fresh. Some have a no return policy and
the fashions may not be as up-to-date.
BACKGROUND Lesson 5— Consumerism
FUN with CLOTHES, Lesson 5, page 4

Garage sales are popular especially if you are a bargain hunter. You can have the satisfaction of
finding a bargain with quality at low cost. However you can not return items and what you need
may not be available. Also— you can’t try on the garments.
Department stores carry the very latest in clothing, but frequently by the time the ―season‖ arrives
they are already stocking clothing for the next season.
Additional References:
Labels and Labeling HE 4105
Clothing: More Mileage For Your Money HE 4102
SUGGESTED LITERATURE:
The following books are recommended for reading in conjunction with the various activities for
Consumerism. They should be available at your local public library.
Carlson, Nancy. I Like Me. New York: Viking Penguin Inc., 1988.
By admiring her finer points and showing that she can take care of herself and have fun when there's no one else around, a charming pig proves the best friend you can have is yourself. Read this when discussing likes and dislikes.
Ridell, Chris. Bird's New Shoes. New York: Henry Holt and Company, 1987.
The animals in the jungle get into an argumentative frenzy over what is the latest fashion in clothing. This book can be read when discussing likes and dislikes.
BACKGROUND Lesson 5— Consumerism
FUN with CLOTHES, Lesson 5, page 5

SUGGESTED AGE:
5-8 years
OBJECTIVES:
Youth will be able to:
Identify a label in a
garment.
Describe the general
purpose of a label.
Develop social skills
by working with a
group.
Generalize the
concept of labeling
to other items.
MATERIALS:
Copies of HANDLE WITH
CARE Name tags for
each child
Markers, safety pins
Various articles of
clothing with labels
(about 5 items per team)
Clothespins (to be placed
on the labels)
LABEL HUNT Activity
Sheets for each child
Laundry baskets or boxes
TIME:
30 Minutes
SETTING:
Area for participants to
run in a relay race.
ADVANCE
PREPARATION:
Prepare each name tag
with child’s name. Place
a clothespin on each of
the clothing labels of
items to be used in the
relay.
Activity 1: Label Hunt Relay
INTRODUCTION
There are labels all around us on many different objects. What are some of these labels? Can you think of any? Today we are going to find labels on clothing.
DO
Use HANDLE WITH CARE Name Tags As each child arrives, pin a Name Tag onto each as an example to introduce clothing labels (optional for older youth). Ask the children where the labels are on their clothes. Discuss the location of the labels on clothing items: pants, skirt, t-shirt, blouse, shoe, jacket, scarf, jeans, sweaters, etc. Using each item, locate each label with the children . Discuss briefly the information on the label. Point out what their Name Tag "Label" has on it. Why are labels on our clothes? (They tell us how to care for our clothes. They also give the size, fiber content, washing instructions and country of origin for each clothing item.) Use enlarged, poster-size labels to explain the labels. You may also discuss that some labels are "permanently" attached to their clothes (some are more secure, like the one they are wearing with the safety pin versus a clothespin or tape that someone could pull off).
DO
Play "LABEL HUNT RELAY!" Conduct a relay race. Divide the children into two or more teams according to the size of the group. Designate a boundary behind which the teams will sit in a line in front of a basket of clothes. The baskets should be placed a few feet from the back of the line. The first child in each line runs to the team basket, removes the clothespins from the labels, runs back to give the clothespins to the second team member, and then sits at the end of the line. The child with the clothespins runs to the basket, pins each of the labels again, runs back to tag the next team member in line and then returns to the end of the line. The third person runs to the basket, removes the pins from the labels, passes them to the next team member and so on. The front of the line should continue moving up toward the boundary line as runners take their place at the end of the line.
Lesson 5— Consumerism
FUN with CLOTHES, Lesson 5, page 6

REFLECT
Where are labels located on: t-shirts, jackets, pants, shoes, etc.?
Back of neck, legs of shorts, back of waist, pocket, etc.
What does each label tell us?
Washing instructions, brand name, size, fiber content
When should labels be found and read?
Before buying the item, before washing the item
APPLY
Give each child a name label and a marker to write their name on it. Discuss other types of labels.
Give each child a LABEL HUNT Take Home Activity Sheet and have them complete it at home.
Tell them to share what they learned with someone else.
ACTIVITY 1 Lesson 5— Consumerism
FUN with CLOTHES, Lesson 5, page 7

Label Hunt The Case of the Missing Labels
Locate the labels on these items around your home. After finding the labels draw the
missing labels on the items. (or mark an X where you found the label.)
Now find 3 more things around your home and draw pictures showing the label.
FUN with CLOTHES, Lesson 5, page 8

M
Y N
AM
E IS
HA
ND
LE
WIT
H C
AR
E!
FUN with CLOTHES, Lesson 5, page 9

SUGGESTED AGE:
7-8 years
OBJECTIVES:
Youth will be able
to:
Locate a label
in a garment
Identify basic
purpose of a
label
Develop social
skills by
interacting with
a group
Identify sources
of fibers
MATERIALS:
Copies of
GARMENT LABEL
Activity Sheets for
each child
Pencils, index cards
(for garment labels)
World map
Push pins or stickers
Articles f children’s
clothing or fabric
swatches of
manufactured and
natural fibers
LABEL LINGO
Workbook page 17
TIME:
20 Minutes
SETTING:
Comfortable room
for children to sit in
a circle.
ADVANCE
PREPARATION:
Make copies of the
GARMENT LABEL
for each participant.
Activity 2: What’s on a Label?
LEADER INFORMATION
Find a large world map to display in the room.
Gather articles of clothing that are made from various types of natural fibers. Pin an index card onto each item with the type of fiber (silk, cotton, linen, wool) labeled on the card.
INTRODUCTION
Labels in garments provide us with important information such as fibers the garment is made of, how to care for the garment, and the country in which it was made.
DO
WHAT'S A LABEL?
Have the children sit in a circle and give each of them a pencil and a copy of the Garment Label.
Ask them to check an easy-to-find garment label of something the person next to them is wearing.
Have the children write on the label handout their neighbor's garment fiber content and country of origin.
Allow them to share their findings with the group. Let children mark each country represented on the map with a push pin or star, giving them assistance when they need it.
Discuss the source (animal, plant) of these natural fibers in relation to the countries of origin.
REFLECT
What are natural fibers? Can you name any?
Natural fibers come from animal or plant sources. Wool, silk, linen, and cotton are examples.
Pass examples of the fibers around the circle for the children to touch. Can anyone identify the type of fiber?
Lesson 5— Consumerism
FUN with CLOTHES, Lesson 5, page 10

APPLY
Look at your garments at home and categorize them by fiber content and country of origin.
Complete LABEL LINGO Workbook Activity on page 17.
ACTIVITY 2 Lesson 5— Consumerism
FUN with CLOTHES, Lesson 5, page 11

Country
of
Origin:_________________________
Fiber
Content: _______________________
What’s on a
Label?
FUN with CLOTHES, Lesson 5, page 12

SUGGESTED AGE:
5-8 years
OBJECTIVES:
Youth will be able to:
Identify sources of
natural fibers
(plant or animal)
Practice
classification skills
Practice
cooperative
teamwork skills
and psychomotor
skills
Express creativity
in making sock
puppets
MATERIALS:
FLASH CARDS
Construction paper
Scissors and glue
Fabric scraps (cotton,
linen, wool, silk)
WHAT AM I?
Workbook Activity
page 18
LAMB-SOCKS Activity
Materials for each
participant (optional)
TIME:
20 Minutes
SETTING:
Comfortable room for
children to sit in a
circle.
ADVANCE
PREPARATION:
Prepare flash cards by
stapling fabric scraps
to the back of the
picture card
Activity 3: What’s My Source?
LEADER INFORMATION
Using the flash cards ask the following questions: 1. I am cotton. I come from a cotton boll. Am I made from a plant or animal? 2. I am linen. I come from a flax stalk. Am I made from a plant or animal? 3. I am wool. I come from the fleece of sheep. Am I made from a plant or
animal? 4. I am silk. I am spun into a cocoon by a wild silkworm. Am I made from a
plant or animal? Note: This would be a good topic to invite a sheep or cotton producer or someone who can demonstrate carding wool or cotton to the group.
INTRODUCTION
The fabrics our clothes are made of contain fibers. The fibers come from different sources. The natural fibers come from plants or animals, and the manufactured fibers are man-made and come from mixing different chemicals together.
DO
Play WHAT'S MY SOURCE!
Discuss the sources of fibers by groups of plants or animals. Help children to distinguish among these fiber sources. Divide children into two or more teams. Have each team sit in a tight circle. Using flash cards, the leader reads the information and questions for the card to the entire group. The teams discuss the information quietly among themselves. When the team is ready to answer the question, a designated team speaker raises his or her hand. The first team to answer the question correctly receives one point. The only possible answers are "plant" or "animal". The team with the most points after all cards are read is the winner. Complete the WHAT AM I? Workbook Activity on page 18.
Lesson 5— Consumerism
FUN with CLOTHES, Lesson 5, page 13

REFLECT
What did you learn from this activity?
What are some natural fibers?
cotton, linen, wool, silk
What are the two sources of natural fibers?
plants and animals
APPLY
Use the flash cards to quiz one another.
Look at your clothes at home to determine if the fibers are plant or animal.
Tell someone else what you learned about clothing fibers.
Make LAMB-SOCKS puppets and create a story about where and how we get wool fabric!
ACTIVITY 3 Lesson 5— Consumerism
FUN with CLOTHES, Lesson 5, page 14

You will need: What you do:
put cardboard
inside sock while
decorating.
glue eyes, nose,
mouth, and cotton
to sock.
let dry.
Sheep provide us with
WOOL yarn for warm
clothes!
old white sock
scissors
fabric glue OR
low melt glue gun
2 buttons or felt
(for eyes)
felt scraps (black
& pink) for nose
and ears
cosmetic puffs
FUN with CLOTHES, Lesson 5, page 15

Wool
——————————————
Silk
FUN with CLOTHES, Lesson 5, page 16

Place Sample Here
Wool
——————————————
Silk
Place Sample Here
FUN with CLOTHES, Lesson 5, page 17

Linen
—————–—————————
Cotton
FUN with CLOTHES, Lesson 5, page 18

Place Sample Here
Linen
——————————————
Cotton
Place Sample Here
FUN with CLOTHES, Lesson 5, page 19

SUGGESTED AGE:
5 years
OBJECTIVES:
Youth will be able
to:
Identify the
variety of
clothing
sources
available to
them
Verbalize likes
and dislikes
about clothing
Use decision-
making skills
Use
classification
skills
MATERIALS:
Copy of “LANCE
GOES SHOPPING”
story book for each
child
Flannel board and
felt cut outs
Crayons
TIME:
25 Minutes
SETTING:
Comfortable room
for children to work.
ADVANCE
PREPARATION:
Cut out felt pieces
to illustrate the
story. To make
storybooks, copy
front to back.
Activity 4: Lance Goes Shopping INTRODUCTION
There are many different places to buy clothes. Can you name some places you buy clothes in our town? Today we're going to read a story about a boy named Lance and how he went shopping one day.
DO
LANCE GOES SHOPPING!
Read "LANCE GOES SHOPPING," using the flannel board to illustrate the story, for younger children.
Allow children to help place felt pieces on the board during the story.
Have children complete their own storybook as you read, or read the story again and let them draw pictures to illustrate each activity. For older children, let them take turns reading sentences, then complete their drawings, make their own illustrations and cut-outs to present story.
REFLECT
Where did Lance go shopping?
catalog, department store, discount store, garage sale
How did Lance get money to buy the clothes?
allowance
Who helped Lance on his shopping trip?
sister (Lisa)
Why did Lance choose the clothes he bought?
he liked them, the clothes fit well
What are some of the places you like to shop for your clothes?
How many of you get an allowance? Do you spend any of it on clothes?
APPLY
Draw a picture of yourself wearing your favorite outfit talking to Lance.
Go shopping with someone to pick out clothes you like to wear.
Lesson 5— Consumerism
FUN with CLOTHES, Lesson 5, page 20

LANCE GOES SHOPPING Lance is eight years old. He gets an allowance every week for taking out the
garbage and recyclables, making his bed, cleaning his room, and setting the table. Lance wanted to buy a new t-shirt for school. So he saved his allowance for two weeks. It was hard to save the money, but his older sister Lisa kept it in her piggy bank for him.
While Lance was waiting to have enough money, he looked through some catalogs
that came to his house in the mail. He found a yellow t-shirt that he really liked. He asked Lisa to help him fill out the catalog order. He gave his mom the amount of the order, and she wrote a check to the catalog company. In three weeks when the mailman delivered the t-shirt to Lance's house, he was ready to go shopping to find a pair of shorts and socks to match it. Lisa said she would help him go shopping. So they took the money and headed to town. They walked to town to look in the stores. Lance and Lisa first went into a department store. Lance went to the part of the store with the clothes for boys. He looked all over until he found a pair of dark blue shorts. He thought these shorts would look great with his new shirt. He checked the label for the size and tried on the shorts. They fit perfectly! He was so happy. Lisa helped him to count his money to pay for the shorts. Next, Lance needed a pair of socks to match his new yellow shirt and dark blue shorts. Lisa helped him find the discount store down the street. She said the socks would cost less to buy them there. Lance picked out a pair of yellow socks that would look perfect.
Now, Lance's outfit was complete, or was it? On the way home from shopping
downtown, Lance and Lisa came upon a garage sale. Their neighbors were selling some things that they did not need anymore. Lance saw an old yellow and blue hat. Even though it was used, it still looked almost new. He just had to have it. He had just enough money to buy the old hat.
Now his outfit was complete. When Lance and Lisa got home, he rushed to his
room to try on his new outfit. His mother and father were so proud of him for saving his money, and for doing such a nice job at picking out his own clothes. Lance gave Lisa a big hug and thanked her for helping him shop.
The next week at school, Lance proudly wore his outfit. He told his teacher about
his new outfit and how he had saved his money and how he had picked it out himself. She let him share his story about his shopping trip with the rest of the class.
FUN with CLOTHES, Lesson 5, page 21

CUT-OUTS
FUN with CLOTHES, Lesson 5, page 22

CUT-OUTS
FUN with CLOTHES, Lesson 5, page 23

CUT-OUTS
FUN with CLOTHES, Lesson 5, page 24

Now his outfit was complete. When Lance and Lisa got
home, he rushed to his room to try on his new outfit. His
mother and father were so proud of him for saving his money,
and for doing such a nice job at picking out his own clothes.
Lance gave Lisa a big hug and thanked her for helping him
shop.
The next week at school, Lance proudly wore his outfit.
He told his teacher about his new outfit and how he had saved
his money and picked out himself. She let him share his story
about his shopping trip with the rest of the class.
LANCE
GOES
SHOPPING!
7 4-H Fun With Clothes FUN with CLOTHES, Lesson 5, page 25

LANCE GOES SHOPPING
Lance is eight years old. He gets an allowance
every week for taking out the garbage and recyclables,
making his bed, cleaning his room, and setting the table.
Lance wanted to buy a new t-shirt for school. So
he saved his allowance for two weeks. It was hard to
save the money, but his older sister Lisa kept it in her
piggy bank for him.
1
Now, Lance's outfit was complete, or was it? On
the way home from shopping downtown, Lance and Lisa
came upon a garage sale. Their neighbors were selling
some things that they did not need anymore. Lance saw
an old yellow and blue hat. Even though it was used, it
still looked almost new. He just had to have it. He had
just enough money to buy the old hat.
6 FUN with CLOTHES, Lesson 5, page 26

Next, Lance needed a pair of socks to match his new
yellow shirt and dark blue shorts. Lisa helped him find the
discount store down the street. She said the socks would
cost less to buy them there. Lance picked out a pair of
yellow socks that would look perfect.
While Lance was waiting to have enough money, he looked
through some catalogs that came to his house in the mail.
He found a yellow t-shirt that he really liked. He asked Lisa
to help him fill out the catalog order. He gave his mom the
amount of the order, and she wrote a check to the catalog
company.
2 5
FUN with CLOTHES, Lesson 5, page 27

In three weeks when the mailman delivered the t-shirt to
Lance's house, he was ready to go shopping to find a pair of
shorts and socks to match it. Lisa said she would help him
go shopping. So they took the money and headed to town.
They walked to town to look in the stores. Lance and Lisa
first went into a department store. Lance went to the part
of the store with the clothes for boys. He looked all over
until he found a pair of dark blue shorts. He thought these
shorts would look great with his new shirt. He checked the
label for the size and tried on the shorts. They fit perfectly!
He was so happy. Lisa helped him to count his money to pay
for the shorts.
4 3
FUN with CLOTHES, Lesson 5, page 28

SUGGESTED AGE:
7-8 years
OBJECTIVES:
Youth will be able to:
Identify a variety of
clothing sources
Use classification
skills
Strengthen
decision-making
and math skills
Express
individuality by
verbalizing likes
and dislikes
Stimulate making
choices in the
marketplace
MATERIALS:
Old children’s clothing
(shorts, shirts, pants)
catalogs
PLAY MONEY SHEETS
Signs for clothing
sources (catalog store,
department store,
discount store, garage
sales)
LETS GO SHOPPING
LIST for each child, or
group of children
TIME:
30 Minutes
SETTING:
Large room for setting
up “stores”.
ADVANCE
PREPARATION:
Make appropriate
number of copies of
play money.
Activity 5: Let’s Go Shopping LEADER INFORMATION
Clothing for this activity should be gathered in advance. Each child should "purchase" a summer outfit (t-shirt and shorts) and a warmer outfit (long-sleeved shirt, pants), buying one item from each location. Enough clothing should be made available. If it is not possible to locate enough children's clothing, the children could shop for only one outfit, but encourage them to shop around. Or they may shop as groups.
• Posters with the name of each store should be posted at each location so that the children may copy the name onto their papers.
• Set up "stores" in advance.
Department Store Prices - everything for $3.
Catalog Prices - everything for $3. (Have catalogs for children to look through and pretend to pick something out of the catalog. Place order, go shop for something else to demonstrate the time for delivery, and go back to the store to pick up.)
Discount Store Prices - everything for $2.
Garage Sale Prices - everything for $1.
INTRODUCTION
The clothes we wear come from somewhere. Do you know where? There are several places we can go. During this activity, we are going to pretend we are on a shopping trip for an outfit. We will go to many different places.
DO
LET'S GO SHOPPING!
Allow some children to "work" in stores to collect money and hand out clothes. You can have shopping bags to make it more realistic. Repeat the activity as necessary to allow all children a chance to shop.
Give each child $10 and checklist.
Instruct them to go shopping and to buy all of their items with the money they have, while only buying one item per store.
Lesson 5— Consumerism
FUN with CLOTHES, Lesson 5, page 29

Encourage children to base their selections on their likes and dislikes and according to price, whichever is the most important to them.
As they buy an item they should check it on their sheet and write the name of the place where they bought it. (They may copy it from the posters if they are unsure of the spellings.
REFLECT
What were the places (sources) available to buy clothing?
Department store, discount store, catalog, garage sale
What were the differences, if any, among the sources?
Department store and catalog may have same prices, catalog takes longer to receive, discount store prices are lower, garage sale prices are the lowest
How much money did you have left over?
Answers will vary. Discuss the differences.
APPLY
Where do you like to shop with your family? Go shopping with someone.
Tell someone what you learned.
ACTIVITY 5 Lesson 5— Consumerism
FUN with CLOTHES, Lesson 5, page 30

LET'S GO SHOPPING LIST
T-Shirt
Place purchased _________________________________
Cost ___________________________________________
Jams
Place purchased ________________________________
Cost ___________________________________________
Sweatshirt
Place purchased _______________________________
Cost __________________________________________
Sweatpants
Place purchased ___________________________________
Cost _____________________________________________
FUN with CLOTHES, Lesson 5, page 31

FUN with CLOTHES, Lesson 5, page 32

FUN with CLOTHES, Lesson 5, page 33

5-8 YEAR OLDS
LESSON 6 Clothing Care
PURPOSE
Practice daily care of personal clothing.
OBJECTIVES
Youth will be able to:
Practice daily care of personal clothing... hang up and fold clothes.
Prepare clothes for the wash.
Explain the steps of washing clothes.
Identify and isolate clothing that has been stained.
Sew on a button.
LESSON TIME
30 minutes
LEARNING ACTIVITIES
FOLDING RELAY
CLOTHING PIN-UPS!
CARE PATROL
LIVING SORT
A PLACE FOR EVERYTHING
WINDY LAUNDRY
SPOT ALERT
BUTTON UP
ADVANCE PREPARATION
1. Read the BACKGROUND BASICS on Care.
2. Review activities and choose appropriate one(s) to use.
3. Secure necessary materials as described.
FUN with CLOTHES, Lesson 6, page 1

DO
The following is suggested for using the activities in Lesson 6. Materials needed for each are listed within the activity.
Demonstrate clothing care techniques with FOLDING RELAY, CARE PATROL, LIVING SORT, SPOT ALERT, AND BUTTON UP!
Learn how to fold and hang clothes with FOLDING RELAY!
Identify clothing parts with CLOTHING PIN-UPS!
Learn the steps in the process of washing clothes with CARE PATROL, LIVING SORT, WINDY LAUNDRY
Identify the necessity of clothing with A PLACE FOR EVERYTHING!
Identify and practice mending skills with BUTTON UP!
REFLECT
After completing the activities in this lesson, help youth reflect on what they have learned with these questions:
Why do we fold our clothes?
Easier storage, better care, no wrinkles
Name some clothing parts.
Sleeve cuffs, pant cuffs, shirt pockets, jeans pockets, zippers
What are the four groups we separate our clothes into before washing?
Whites, darks, brights, lights
Where should clothes be kept when they are not being worn?
Closets, drawers, shelves
Why should stains be identified before washing?
More easily removed if pretreated
Why would we want to learn mending skills?
To make repairs on our own, save money
Lesson 6— Clothing Care
FUN with CLOTHES, Lesson 6, page 2

APPLY
Help youth learn to apply what they have learned to their daily clothing choices
Help family with the laundry process at home by sorting, folding, and hanging clothes.
Keep clothing in its proper place at home.
Check clothing every day to look for stains that need to be treated.
Mend (or help someone to mend) your clothes at home.
Lesson 6— Clothing Care
FUN with CLOTHES, Lesson 6, page 3

BACKGROUND
BACKGROUND BASICS...Care
Did you know that proper care of clothing makes it last longer. Caring for your clothing involves:
Proper care when you undress -- fold or hang or if soiled then place in the laundry basket
Learning the steps in doing the washing of clothes
Learning how to sort clothes
Learning about hanging clothes outside to dry
Learning to identify clothing that has stains
When you undress and the clothing is unsoiled, then you can hang it back in the closet or you can fold and place on a shelf or in a drawer. If you just toss it on the floor, the clothing will need to be ironed to remove the wrinkles.
Washing Clothes...
The steps in washing your clothing are:
Carefully read labels found on the clothing to determine how to wash, water temperature, products to use and/or how to dry
Sort clothing into "like" piles
Check clothing carefully for "things" in pockets or a stain
Zip zippers, button buttons
Decide on water temperature
Decide on wash cycle
Read laundry product labels and use recommended amount
Fill washing machine, add laundry products
Add clothing to be washed, do not overload
Remove clothing promptly to prevent wrinkling
Lesson 6— Clothing Care
FUN with CLOTHES, Lesson 6, page 4
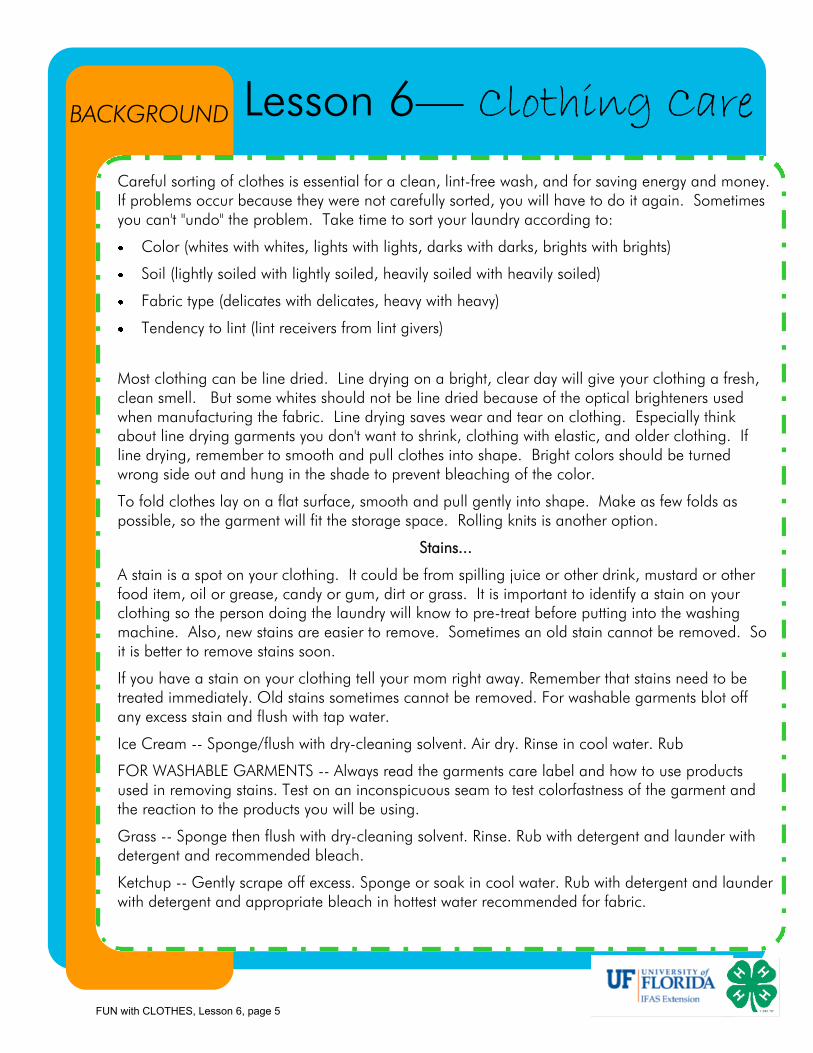
Careful sorting of clothes is essential for a clean, lint-free wash, and for saving energy and money. If problems occur because they were not carefully sorted, you will have to do it again. Sometimes you can't "undo" the problem. Take time to sort your laundry according to:
Color (whites with whites, lights with lights, darks with darks, brights with brights)
Soil (lightly soiled with lightly soiled, heavily soiled with heavily soiled)
Fabric type (delicates with delicates, heavy with heavy)
Tendency to lint (lint receivers from lint givers)
Most clothing can be line dried. Line drying on a bright, clear day will give your clothing a fresh, clean smell. But some whites should not be line dried because of the optical brighteners used when manufacturing the fabric. Line drying saves wear and tear on clothing. Especially think about line drying garments you don't want to shrink, clothing with elastic, and older clothing. If line drying, remember to smooth and pull clothes into shape. Bright colors should be turned wrong side out and hung in the shade to prevent bleaching of the color.
To fold clothes lay on a flat surface, smooth and pull gently into shape. Make as few folds as possible, so the garment will fit the storage space. Rolling knits is another option.
Stains...
A stain is a spot on your clothing. It could be from spilling juice or other drink, mustard or other food item, oil or grease, candy or gum, dirt or grass. It is important to identify a stain on your clothing so the person doing the laundry will know to pre-treat before putting into the washing machine. Also, new stains are easier to remove. Sometimes an old stain cannot be removed. So it is better to remove stains soon.
If you have a stain on your clothing tell your mom right away. Remember that stains need to be treated immediately. Old stains sometimes cannot be removed. For washable garments blot off any excess stain and flush with tap water.
Ice Cream -- Sponge/flush with dry-cleaning solvent. Air dry. Rinse in cool water. Rub
FOR WASHABLE GARMENTS -- Always read the garments care label and how to use products used in removing stains. Test on an inconspicuous seam to test colorfastness of the garment and the reaction to the products you will be using.
Grass -- Sponge then flush with dry-cleaning solvent. Rinse. Rub with detergent and launder with detergent and recommended bleach.
Ketchup -- Gently scrape off excess. Sponge or soak in cool water. Rub with detergent and launder with detergent and appropriate bleach in hottest water recommended for fabric.
Lesson 6— Clothing Care BACKGROUND
FUN with CLOTHES, Lesson 6, page 5

Mustard -- Gently scrape off excess. Sponge or soak in cool water. Rub with detergent and launder with detergent and appropriate bleach in hottest water recommended for fabric.
Grape Juice -- Flush then soak in cool water. Rub with detergent and launder with detergent and appropriate bleach in the hottest water recommended for the fabric. Air dry, until you know stain has been removed.
Ice Cream -- Sponge/flush with dry-cleaning solvent. Air dry. Rinse in cool water. Rub
with laundry bar soap and launder with detergent and appropriate bleach in the hottest water recommended for fabric.
Paint, Oil Base -- Gently scrape excess. Immediately sponge, then flush with paint solvent. Repeat, if needed. Air dry. Sponge with water. Rub with detergent and launder as usual.
Mud -- Let dry, scrape/brush gently. Sponge with cool water. Rub with detergent. Launder with detergent and bleach, if not contrary to care label.
Mending Basics...
Steps for Teaching Sew-Through Buttons:
Use a double thread or single thread of either all purpose, topstitching, or buttonhole thread.
Hide knot or secure thread under button.
Bring thread up through hole allowing for shank (use toothpick or pin).
Go through second hole taking thread through fabric.
Continue stitching in the same place for 6 stitches.
If you used a toothpick or pin remove, wind thread around stitches under button.
Secure thread.
Additional References:
Buttons, Buttonholes, Fasteners HE 4212
Laundry Techniques HE 4103
Stain Removal HE 4027
Lesson 6— Clothing Care BACKGROUND
FUN with CLOTHES, Lesson 6, page 6

SUGGESTED LITERATURE:
The following books are recommended for reading in conjunction with the various activities for Care. They should be available at your local public library.
Berry, Joy Wilt. What to Do When Your Mom or Dad says--"Take Care of Your Clothes. Chicago: Children's Press, 1982.
Children learn how to take proper care of their clothing so they will last longer, and so that their parents won't get upset.
Brown, Craig McFarland. The Patchwork Farmer. New York: Greenwillow Books, 1989.
After ripping his overalls again and again in the course of his daily work, a farmer ends up with a colorful patchwork pair.
Lesson 6— Clothing Care BACKGROUND
FUN with CLOTHES, Lesson 6, page 7

Lesson 6— Clothing Care SUGGESTED AGE:
5-8 years
OBJECTIVES:
Youth will be able to:
Fold different
types of clothing
neatly
Actively
participate in
folding clothes
Improve social
skills by working
as part of a
team.
MATERIALS:
Sets of children’s
clothes for each
team (socks, pants,
long-sleeved shirts,
etc.)
Rope, chalk or tape
to make boundary
lines
Laundry baskets for
each team
TIME:
15-30 Minutes
SETTING:
A large area cleared
of tables and chairs
ADVANCE
PREPARATION:
Gather items of
clothing to be used
in the relay races.
Activity 1: Folding Relay INTRODUCTION
Folding clothes is a good way to keep them neat. Who does the folding in your family? What would happen if that person decided not to fold any clothes? How would your clothes look?
DO
Play "FOLDING RELAY!"
Demonstrate how to fold and/or hang several different items of clothing. (Make sure to include each type of clothing that will be used in the relay.)
After the demonstrations, mark a line that all participants will remain behind and stay seated during the relay until they are "tagged" to race. Divide participants into groups of 3 or 4 and arrange them in order of their participation in the relay.
Place the laundry baskets 15-20 feet from the boundary line. Make sure there is a basket for each team and an equal number of items in each basket.
Participants start behind the line. When a signal is given to "GO!," the first child in line runs to that team's laundry basket, selects an item, and folds that item properly. He or she then shows the folded item to the named judge for approval, and places it back in the basket. (If the judge says the item is folded incorrectly, the child must re-fold the item until it is approved by the judge.)
After the judge's approval, the child races back to his or her team to tag the next person in line.
The relay continues until both teams have finished folding the items in their team baskets.
Conduct several relays using socks, t-shirts, long-sleeved shirts, pants, shorts, jeans, hanging items, and combinations of these items.
REFLECT
Why do we fold our clothes?
Easier storage; better care; no wrinkles
Can everyone help fold their own clothes at home?
FUN with CLOTHES, Lesson 6, page 8
APPLY
Help your family with the laundry by folding and hanging your clothes after they are washed.
Help your family with the laundry by folding and hanging your clothes after they are washed.
Lesson 6— Clothing Care ACTIVITY 1
FUN with CLOTHES, Lesson 6, page 9

Lesson 1— Creativity SUGGESTED AGE:
5-8 years
OBJECTIVES:
Youth will be able to:
Identify tools that go
into a sewing box and
their uses.
Demonstrate decision-
making skills by
choosing the most
important tools that go
into a sewing box.
Demonstrate
knowledge of proper
care of tools by using a
sewing box.
Develop social skills by
participating in a
group sewing box
project.
Develop responsible
behaviors such as
clean up and storage
of tools.
MATERIALS:
MY SEWING TOOL BOX
Workbook page 2
Copies of SEWING
TOOL SCAVENGER
HUNT activity for each
child (Tools: tape
measure, scissors,
needles, pins, pin
cushion,thread,thimble,
notebook,and pencil,
etc.)
Containers for the tools
(shoe boxes, baskets, etc.)
Materials to decorate the
containers (markers, glue,
fabric scraps, or colored
paper, etc.)
FIND YOUR SEWING
TOOLS Workbook page
3.
Activity 2: Tool Boxes TIME:
30 Minutes
SETTING:
Room with tables and chairs for children to work.
LEADER INFORMATION
This activity can be done in a number of different ways for individual groups. For large groups of ages 5-6, we suggest making a separate box for each tool in the room. For ages 7-8, boxes can be made for small groups of children with all the tools in one box.
Another idea, depending on available resources, is for children to make individual boxes for use at group meetings or at home.
INTRODUCTION
Special tools, like the ones we use for sewing, need to be stored in a special place. We will need to make our "Tool Boxes" for our sewing supplies, today.
DO
Making Sewing TOOL BOXES!
For Ages 5-6:
Divide children into small groups, and give each group a shoe box.
Allow youth to name tools that are used when sewing. Encourage them to tell the use of each tool as it is named.
Tools that are not named by the youth should be named by the leader. Give the youth an opportunity to describe the purpose of the tool.
Discuss the importance of taking good care of sewing tools and keeping them in their proper places.
Allow each group to decorate their box. Explain that each box will contain all of one tool (one for scissors, another for rulers, etc.)
FUN with CLOTHES, Lesson 6, page 10

For Ages 7-8:
Sewing boxes will each contain all of the tools for each group.
Explain to the youth the different possibilities for a sewing box: a shoe box, basket or plastic box. Ask children if they can think of other possibilities.
Allow youth to name tools that should be put into a sewing box. Place tools in the box as they are named. Encourage youth to suggest uses for the tools.
Tools not named should be explained by the leader; have youth describe a purpose for the tool.
Discuss the importance of taking good care of tools when sewing, and of keeping them together in a sewing box.
Allow each group to decorate their box. Explain that each box will contain all of the sewing tools the group will need.
REFLECT
What are the tools needed for sewing? Make a list on poster paper.
Tape measure, scissors, needles, pins, pin cushion, thread, thimble
Why should tools have their own storage space?
So you can find them
Why is it important to take good care of sewing tools?
So they will last longer and do the job for which they were designed
APPLY
Find your sewing tools in the hidden picture in the FIND YOUR SEWING TOOLS Workbook Activity on page 3. Make a group chart of responsibilities for cleaning up and putting tools in their proper places. Assign duties to youth.
Suggest for youth to go on a "scavenger hunt" at home to find materials for their own personal sewing boxes. Provide a checklist for youth to use to collect the right sewing tools.
ACTIVITY 2 Lesson 1— Creativity
FUN with CLOTHES, Lesson 6, page 11

Sewing Tool Scavenger Hunt !
Look for these items to place in your new Sewing Tool Box. Circle
the ones you find.
Tell someone in your family what each tool is and what it is used for in sewing.
Place your box where your family members can find and use your sewing tools!
Scissors Thread Pin Cushion
Tape Measure
Needles
Thimble
Seam Gauge or Ruler
Shears
Pins
FUN with CLOTHES, Lesson 6, page 12

Lesson 1— Creativity SUGGESTED AGE:
7-8 years
OBJECTIVES:
Youth will be able to:
Identify sewing
equipment by
purpose
Develop social
skills by
cooperating with
others to play the
game
Execute decision-
making skills to
determine correct
answers to
questions
MATERIALS:
-SLIDES & LADDERS
game board, playing
pieces, question cards
-One die
-Answer sheet
TIME:
20-30 Minutes
SETTING:
Comfortable room
ADVANCE
PREPARATION:
Cut out SLIDES &
LADDERS Question
Cards
For larger groups you
may wish to make
copies for several
groups to play.
Activity 3: Slides and Ladders
INTRODUCTION
The sewing equipment we use has different purposes that we should know if we are to use them properly. The "Slides and Ladders" game will remind us of those purposes.
DO
Play "SLIDES AND LADDERS."
Each player (or group of players) chooses a different playing piece. Game pieces can be a variety of things: thread - different colors, thimbles, buttons.
Each player (or group) rolls the die to determine the playing order; the person with the highest number goes first. Other players follow in turn from left to right.
All players start their playing pieces next to Square 1.
Taking turns, each player draws one card, reads the question aloud and answers the question. If the answer is correct, the player rolls the die and moves forward that number of spaces. Players do not move forward if they are unable to answer the question correctly, and the turn continues to the next player.
Ladders: if a playing piece stops on a square at the bottom of a ladder, that player must move UP to the top of that ladder. LADDERS LEAD UP ONLY!
Slides: if a playing piece lands at the top of a slide, the player must move DOWN to the bottom of that slide. SLIDES LEAD DOWN ONLY!
All other squares (except the bottom of a ladder or the top of a slide) are counted as regular squares.
Two or more players may stop on any square at the same time.
The winner is the first player to reach Square 40.
FUN with CLOTHES, Lesson 6, page 13

REFLECT
What did you learn from this game?
What are some of the tools mentioned in the game and their uses?
(check their responses with the answer key)
APPLY
Talk about other types of tools around the house, such as cooking utensils and cleaning tools.
Relate this to sewing tools; all tools have special storage places, and there is a set of tools for many of the things we do.
Lesson 1— Creativity ACTIVITY 2
FUN with CLOTHES, Lesson 6, page 14

SLIDES & LADDERS ANSWER KEY
Seam Gauge - short 6 inch ruler with movable slide for marking hems, seams or other measurements. Tape Measure - 60 inch measure with metal tip ends. Shears - shaped handles (one larger than the other) to fit your hand and long, sharp blades. The lower blade lets the fabric lie flat as you cut. Scissors - have the same size handles and come in many different lengths. The most useful size is the small ones for snipping threads and for working at the sewing machine. Seam Ripper - has a curved blade with a sharp point that easily slips under a stitch. Used to rip out seams and looks similar to a pen. Remember to always work away from both you and your fabric. Pins - should be fine, sharp, and rustproof. The ones with plastic coated heads are easier to use and see, but may melt if you iron over them. Thimble - used to protect your finger when pushing the needle through the fabric. They come in a variety of sizes. They are made of plastic, metal, or leather. Pin Cushion - used to prevent spilled pins and are convenient. Some people prefer to use a wrist pin cushion. Thread - needed for every sewing project. Types include cotton, cotton wrapped polyester, silk, and polyester. Select a color that blends with your fabric. Hand Needles - come in several sizes and types. The most common types for hand sewing are:
sharps: are average length with round eyes betweens: are short with round eyes crewels: are average length and have long slender eyes
Marking Pen - come in several colors and should be washable. On some, the marking or pencil will disappear after a short period of time, others will stay until removed by washing or spritzing with water. Soap Slivers - used for marking. Iron - preferably one that can be used dry or with steam, is needed for pressing construction details. Press with the grain. Ironing Board - needs a smooth surface with padding. It is used for pressing sewing projects.
FUN with CLOTHES, Lesson 6, page 15

Slid
es
and L
adders
FUN with CLOTHES, Lesson 6, page 16

What do you call a 6
inch ruler with a
moveable slide for
marking hems and
seams?
What is a 60 inch
measure with metal tip
ends?
What has handles
shaped to fit your hand
and long, sharp blades
for cutting fabric?
What tool comes in
different sizes and is
best used for snipping
threads?
What has a curved
blade with a sharp
point that easily slips
under a stitch to rip it
out?
What tool should be
fine, sharp, and
rustproof? The ones
with plastic coated
heads are easier to use
and see.
What is used to protect
your finger when
pushing a needle
through fabric?
What tool is needed for
every sewing project?
There are many types,
such as cotton, silk,
polyester.
FUN with CLOTHES, Lesson 6, page 17

What hand sewing tool
comes in several sizes
and types? The most
common types are
sharps, betweens, and
cruels.
What tool comes in
several colors and is
used for marking
fabrics?
What tool can be used
dry or with steam for
pressing construction
details?
What is used with an
iron and needs a
smooth surface with
padding?
FUN with CLOTHES, Lesson 6, page 18
FUN with CLOTHES, Lesson 6, page 19

FUN with CLOTHES, Lesson 6, page 20

Lesson 1— Creativity SUGGESTED AGE:
5-8 years
OBJECTIVES:
Youth will be able to:
demonstrate and
practice sewing a basic
hand stitch
demonstrate and
practice tying a sewing
knot
develop hand-eye
coordination
develop individuality by
creating their own
designs
MATERIALS:
SEWING STEPS Poster
STITCHING Posters
(running stitch, overhand
stitch, buttonhole stitch)
STITCH-IT PATTERN
CARDS (one for each child)
Shoelaces for each card, or
yarn with taped ends
Tapestry Needles (with
larger eyes)
Embroidery thread
Foam grocery trays
(optional)
Hand-held hole punchers
(optional)
TIME:
30 Minutes
SETTING:
Area with tables and chairs
ADVANCE PREPARATION:
STITCH IT Cards are best
when cut out of card stock,
heavy paper, or foam trays
for younger children.
Activity 4: Stitch it!
LEADER INFORMATION
As you first introduce the youngsters (5-6 year olds especially) to threading a needle, let them work in pairs - one child holding the needle while the other threads it. Younger children do not have the eye-hand coordination or the focusing for these tasks yet.
INTRODUCTION
Knowing basic hand stitches is essential to being able to sew. By using these hole-
punched cards, you can practice your basic stitches.
DO
STITCH IT: Part I
Allow each child to choose a stitching card with the design of their choice, and give a piece of yarn with a taped end.
Demonstrate how to tie a knot at the hole to start the stitch.
Demonstrate how to stitch on the card using the overhand stitch.
Allow children to sew the design on their cards.
STITCH IT: Part II
Give each child an embroidery needle and enough embroidery floss or yarn to complete the butterfly.
Demonstrate how to thread a needle and knot the end of the thread.
Demonstrate how to stitch using a running stitch.
Allow the children to connect the dots to complete their butterflies.
FUN with CLOTHES, Lesson 6, page 21
REFLECT
How can you use the basic hand stitch in sewing other items?
What are some other possible ways to practice basic hand stitches?
On a piece of cloth, making doll clothes
APPLY
Allow children to make their own designs using the foam trays and hole punch (or a sharp pencil) to sew with their yarn "shoelaces".
Encourage children to use the skill they learned when making other items on their own.
At home have children follow directions of STITCH IN TIME Workbook Activity, page 4, to make them on their own.
Lesson 1— Creativity ACTIVITY 2
FUN with CLOTHES, Lesson 6, page 22

Ove
rhand S
titch
FUN with CLOTHES, Lesson 6, page 23

Butto
nhole
Stit
ch
FUN with CLOTHES, Lesson 6, page 24

Runnin
g S
titch
FUN with CLOTHES, Lesson 6, page 25

Stitc
h It Pa
ttern
s
FUN with CLOTHES, Lesson 6, page 26

Stitc
h It Pa
ttern
s
FUN with CLOTHES, Lesson 6, page 27

Stitc
h It Pa
ttern
s
FUN with CLOTHES, Lesson 6, page 28

STEPS
1. HOW TO THREAD A NEEDLE
Cut a piece of thread about 18 inches long.
Breaking the thread leaves fuzzy ends; these will not go through the needle easily.
Grasp the needle between thumb and finger.
Brace hand against other hand.
Moisten behind the eye of the needle, if needed.
Push thread through the hole.
2. HOW TO TIE A KNOT
Wrap one end of thread around forefinger.
Allow about 1/4 inch lap over of thread.
With thumb, "roll" these threads together.
Slip loop off finger and pull to end of thread
3. HOW TO USE A THIMBLE
Place on the middle finger of the hand that holds the needle.
Hold needle between thumb and first finger.
Put needle into fabric.
Push through, using the side or end of the thimble to end of thread.
FUN with CLOTHES, Lesson 6, page 29

Lesson 1— Creativity SUGGESTED AGE:
5-8 years
OBJECTIVES:
Youth will be able to:
Demonstrate and
practice sewing a
basic hand stitch
Demonstrate and
practice tying a
sewing knot
Improve
psychomotor skills
Demonstrate the
ability to follow
sequential
instructions
MATERIALS:
A BOOK OF NEEDLES!
Workbook page 5
Felt scraps,
thread,needles,scissors
A BOOK OF NEEDLES
PATTERNS
TIME:
30 Minutes
SETTING:
Room with tables for
children to work
Activity 5: A Book of Needles!
INTRODUCTION
A needle book is a useful tool to have when sewing. It is a handy and safe way to keep up with your needles.
DO
Make "A BOOK OF NEEDLES!"
Cut four pieces of the same shape. Stack the pieces on top of each other. Using the Running Stitch, stitch down the center to
connect the fabrics together. Insert the needles, fold it over at the stitching, and the book is complete.
Optional: Have youth decorate their book.
REFLECT
What skills did you use or learn when making this needle book? Threading needle, tying knot, stitching
What are some reasons for having a needle book? To keep needles in a handy container
APPLY
Add the needle book to your home sewing tool box. Discuss the importance of using a needle book with your family and friends.
FUN with CLOTHES, Lesson 6, page 30

A Book Of Needles
Patterns
FUN with CLOTHES, Lesson 6, page 31

Lesson 1— Creativity SUGGESTED AGE:
5-8 years
OBJECTIVES:
Youth will be able to:
Demonstrate and
practice sewing a
basic overhand
stitch
Demonstrate and
practice tying a
sewing knot
Improve
psychomotor
skills
Demonstrate the
ability to follow
sequential
instructions
MATERIALS:
PIN PILLOWS!
Workbook page 6
Two pieces of pre-cut
felt for each child
Stuffing (pantyhose,
cotton, polyfill, etc.)
Thread, needles, pins
and scissors
TIME:
30 Minutes
SETTING:
Room with tables for
children to work
comfortably
Activity 6: Pin Pillows!
INTRODUCTION
A pin cushion is an important tool to have when sewing. It is a useful way to keep all your pins and needles in a handy and safe place.
DO
Make “PIN PILLOWS!”
Give each child two pieces of fabric. Sew the pieces together using an overhand stitch (or blanket stitch for older youth), leaving a 2-inch opening. Pin the edges at the opening together. Stitch the 2-inch opening closed with the overhand stitch.
REFLECT
What did you learn about sewing from making this pin cushion? Threading needle, tying know, stitching, stuffing, closing, opening
What are some reasons for having a pin cushion? To store pins for easier use than a box, which can spill
APPLY
Use the pin cushion to start a home sewing box. Have children talk to their families about the importance of using the pin cushion to keep track of pins.
FUN with CLOTHES, Lesson 6, page 32

Lesson 1— Creativity SUGGESTED AGE:
5-8 years
OBJECTIVES:
Youth will be able to:
Identify and
label parts of a
sewing machine
Strengthen
psychomotor
skills
Follow
sequential
instructions
Work on
decision-making
and problem-
solving skills
MATERIALS:
SEWING MACHINE
PUZZLE Activity
Sheet
LOOP-TO-LOOP
Workbook Page 7
Scissors
Construction paper
Glue
Crayons or pencil for
each child
TIME:
30 Minutes
SETTING:
Area with tables and
chairs
Activity 7: Loop-to-Loop
LEADER INFORMATION
The SEWING MACHINE PUZZLE should be mounted on a piece of colored construction paper with a ¼ inch border so that children will be able to recognize the edge pieces of the puzzle. Also, for younger children the puzzle should be cut into larger pieces.
The parts of the sewing machine that should be labeled and identified by the group at this age are the take-up lever, tension dial, presser foot, thread guide, stitch type selectors, hand wheel, stitch length regulator, bobbin case, and thread spindles.
INTRODUCTION
Making things with a sewing machine makes sewing projects easier. We need to know the parts of a sewing machine before we start using one. Let's get acquainted with the machine parts. By completing the SEWING MACHINE PUZZLE, we will be able to learn those parts.
DO
As a group, label and identify the parts of the sewing machine on the SEWING MACHINE PUZZLE.
Give each child a copy of the SEWING MACHINE PUZZLE and a sheet of colored construction paper.
Allow them to glue the puzzle to the construction paper. Make sure they leave at least a ¼ inch margin on all sides. Explain that the edge pieces may be identified as the pieces with the colored paper.
After the glue dries, allow the children to cut the puzzle into pieces. Instruction and supervision are necessary to make sure that the pieces are cut large enough.
Allow the children to put their puzzles together, while identifying the parts on each piece.
FUN with CLOTHES, Lesson 6, page 33

REFLECT
What are some of the parts of the sewing machine that you learned? Take-up lever, tension dial, presser foot, thread guide, stitch type selectors, stitch length regulator, bobbin case, hand wheel, and thread spindles
Why should you know the parts of a sewing machine before using? Safety, proper care and operation of the machine
APPLY
Complete the LOOP-TO-LOOP Workbook Activity, page 7, about the proper way to thread a sewing machine.
Bring a sewing machine to the meeting and have the children identify the parts and demonstrate their uses.
If you have a sewing machine at home, name the parts for your family. Or find one in a store and name the parts.
Lesson 1— Creativity ACTIVITY 7
FUN with CLOTHES, Lesson 6, page 34

Sew
ing M
ach
ine
Puzz
le
FUN with CLOTHES, Lesson 6, page 35

Sew
ing M
ach
ine
Puzz
le
Answ
er K
ey
Bobbin
Are
a
Thread Guide
Pres
ser
Foot Te
nsi
on D
ial
Take
up
Leve
r
Stitc
h T
ype
Sele
ctors
Stitch Length Regulator
Thre
ad S
pin
dle
s
Hand
Whee
l
FUN with CLOTHES, Lesson 6, page 36

Lesson 1— Creativity SUGGESTED AGE:
5-8 years
OBJECTIVES:
Youth will be able to:
Demonstrate
proper use of
sewing machines
Demonstrate the
ability to follow
sequential
instructions
Develop
independence at
operating a
sewing machine
MATERIALS:
Threaded sewing
machine (preferably
enough for 2-4
children per machine)
LICENSE TO DRIVE
activity sheets for each
youth
TIME:
30 Minutes
SETTING:
Room with tables for
children to work
comfortably
Activity 8: License to Drive
INTRODUCTION
Before we complete sewing projects that require the use of the machine, it is
necessary that we know how to operate a sewing machine properly. Proper use
ensures safety, and garments have better quality. You will need to learn to stitch
straight lines and turn curves just like driving a car. Receiving your "License to Drive"
a sewing machine will allow you more freedom and independence in your sewing.
DO
Practice "LICENSE TO DRIVE!"
Make sure children are seated comfortably at the machine. Make sure children can reach the foot controls. You may need to tape foot control to a box under the table for comfortable reach. The stitch length should be 10 to 12 stitches per inch.
Demonstrate and provide the following "Driving" instructions:
Turn the balance wheel toward you until the needle is up and out of the throat plate.
Raise the presser foot.
Move the test paper under the presser foot to the point where the needle enters the black "Start Here" dot.
Turn the balance wheel forward to move the needle down into the dot.
Line up the paper so that your stitching will follow the line beginning on the dot. Lower the presser foot to hold the paper in place.
Start the machine; slowly stitch on the line, guiding the paper as you go.
Keep stitching until you reach the "End Here" dot. When you think you have had enough practice to pass the test, try stitching on the actual "Driving Test."
Once you have completed the "Driving Test," give it to your leader and parent. Together they will decide if you passed the test.
When you have passed the test, ask them to sign your license. You can cut out the license and carry it in your wallet, or frame the whole sheet to hang in your room.
FUN with CLOTHES, Lesson 6, page 37

REFLECT
What was difficult about learning to stitch correctly?
Stitching straight, controlling machine lines, controlling speed
How many times did you use a practice sheet?
Now, aren't you proud of what you have accomplished?
APPLY
How can you use this new skill you have learned?
You can now work on projects at home on your own!
ACTIVITY 8 Lesson 1— Creativity
FUN with CLOTHES, Lesson 6, page 38

License to Drive
Practice Test
•
End Here
Start Here
•
FUN with CLOTHES, Lesson 6, page 39

Lesson 1— Creativity SUGGESTED AGE:
7-8 years
OBJECTIVES:
Youth will be able to:
Demonstrate the
use of a sewing
machine
Express
individuality with
decoration
Develop a sense of
pride from giving a
gift
Extend
psychomotor skills
Follow sequential
instructions
MATERIALS:
RECYCLE, SEW &
SHARE Workbook,
page 8
Old denim jeans
Sewing machine
Scissors
Ribbon
Items for decoration
(glue, buttons, fabric
scraps, trims, laces,
braids, rickrack, fabric
paints)
Pieces of cardboard for
each youth
A bag of popcorn or
candy as a gift item
(optional)
TIME:
30 Minutes
SETTING:
Comfortable room for
decorating and sewing
Activity 9: Recycling and Sharing
INTRODUCTION
By recycling things we save money and reduce waste by reusing items. By completing this project, we are recycling old jeans into a useful bag.
DO
RECYCLE AND SHARE!
Cut the legs off an old pair of jeans. (The child can choose the size of the bag.) Stitch the cut end of the leg (right sides together) closed with the sewing machine. Turn. Using the sewing machine, stitch the ribbon to the other end for the handle (avoid seams). Decorate the bag any way you like (insert cardboard into bag while decorating). Fill the jeans bag with a bag of candy, popcorn (or whatever you like) to give as a gift.
REFLECT
Why did you choose this pair of jeans to use? What did you learn?
to recycle garments, machine stitching on fabric, turning bag inside-out, stitching ribbon, decorating, sharing with others
APPLY
How else could old denim be used?
With the legs cut off the pants, you now have a pair of shorts!
What are some other things you can recycle?
Make a group plan about using the bags, filling them, and giving them as gifts for a group citizenship project. Ideas might be a children's hospital, senior citizen home or a homeless shelter.
FUN with CLOTHES, Lesson 6, page 40

Lesson 1— Creativity SUGGESTED AGE:
7-8 years
OBJECTIVES:
Youth will be able to:
Demonstrate and
practice sewing a
basic hand stitches
Improve
psychomotor skills
Express
individuality and
decision-making
skills by selecting
embellishments
Demonstrate the
ability to follow
sequential
instructions
MATERIALS:
STUFF AND HUG
Workbook page 9
Sewing machines
An old t-shirt provided
by the child
Needle and thread
(optional
Stuffing (pantyhose,
cotton, polyester
stuffing, etc.)
Decorating items
(buttons, fabric scraps,
trim, fabric crayons,
markers, etc.)
TIME:
30-45 Minutes
(depends on
decorating-may need
to do in two sessions)
SETTING:
Comfortable room for
decorating and sewing
Activity 10: Stuff & Hug!
BACKGROUND INFORMATION
Be sure to encourage children to bring/use one of their old T-shirts if you do this activity, otherwise you may be stuffing DAD's extra large shirts for 30 youngsters!
INTRODUCTION
It is important to practice our machine stitching and hand stitches to become good sewers. Making a t-shirt pillow gives us this practice - and a great pillow, too!
DO
Make a T-Shirt Pillow to STUFF & HUG!
Decorate the t-shirt (optional because the shirt may already have designs or decorations on it).
Sew the bottom and sleeves (right sides together) of the shirt closed, using a sewing machine.
Stuff the t-shirt through the neck and then stitch the neck closed. (Hand or machine stitching can be used, whatever children have the skill to accomplish.)
REFLECT
Why did we decorate the shirt before stuffing it?
Easier to do when flat
Why did you choose this particular shirt to stuff?
APPLY
The pillow can be used at home while watching television, during story-time or to sleep on during nap-time.
Share with your family and friends the directions for making this simple pillow.
FUN with CLOTHES, Lesson 6, page 41
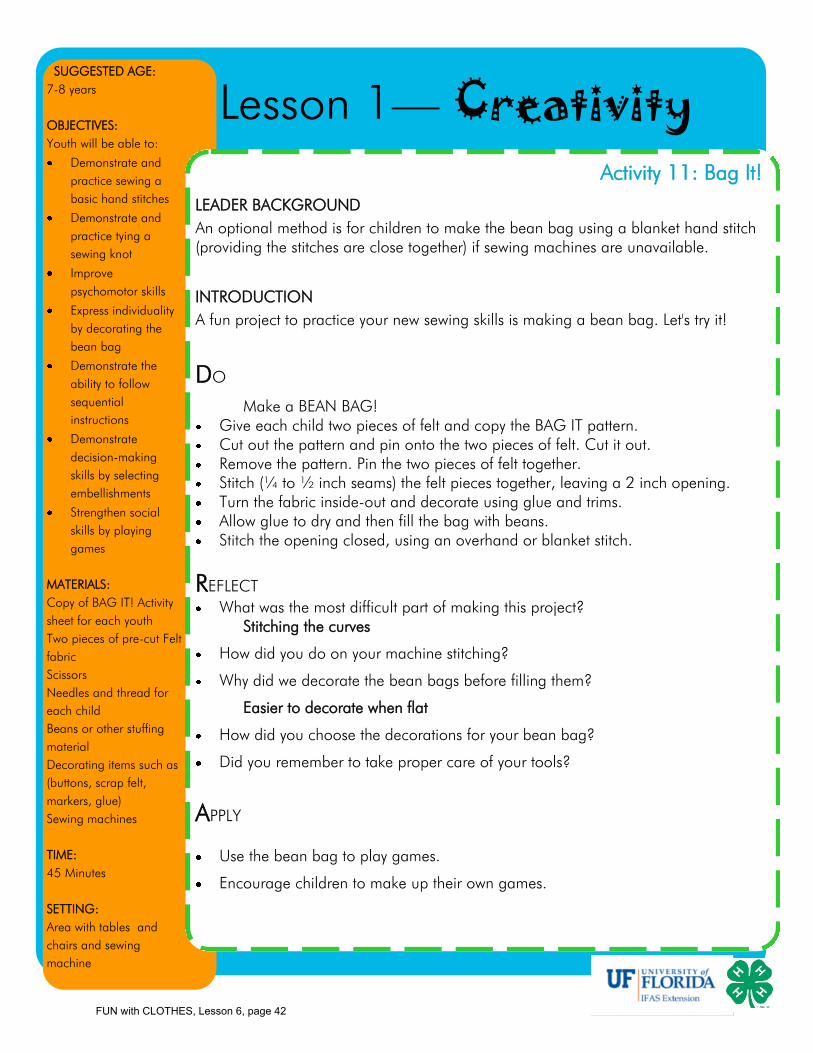
Lesson 1— Creativity SUGGESTED AGE:
7-8 years
OBJECTIVES:
Youth will be able to:
Demonstrate and
practice sewing a
basic hand stitches
Demonstrate and
practice tying a
sewing knot
Improve
psychomotor skills
Express individuality
by decorating the
bean bag
Demonstrate the
ability to follow
sequential
instructions
Demonstrate
decision-making
skills by selecting
embellishments
Strengthen social
skills by playing
games
MATERIALS:
Copy of BAG IT! Activity
sheet for each youth
Two pieces of pre-cut Felt
fabric
Scissors
Needles and thread for
each child
Beans or other stuffing
material
Decorating items such as
(buttons, scrap felt,
markers, glue)
Sewing machines
TIME:
45 Minutes
SETTING:
Area with tables and
chairs and sewing
machine
Activity 11: Bag It!
LEADER BACKGROUND
An optional method is for children to make the bean bag using a blanket hand stitch (providing the stitches are close together) if sewing machines are unavailable.
INTRODUCTION
A fun project to practice your new sewing skills is making a bean bag. Let's try it!
DO
Make a BEAN BAG! Give each child two pieces of felt and copy the BAG IT pattern. Cut out the pattern and pin onto the two pieces of felt. Cut it out. Remove the pattern. Pin the two pieces of felt together. Stitch (¼ to ½ inch seams) the felt pieces together, leaving a 2 inch opening. Turn the fabric inside-out and decorate using glue and trims. Allow glue to dry and then fill the bag with beans. Stitch the opening closed, using an overhand or blanket stitch.
REFLECT
What was the most difficult part of making this project? Stitching the curves
How did you do on your machine stitching?
Why did we decorate the bean bags before filling them?
Easier to decorate when flat
How did you choose the decorations for your bean bag?
Did you remember to take proper care of your tools?
APPLY
Use the bean bag to play games.
Encourage children to make up their own games.
FUN with CLOTHES, Lesson 6, page 42

Bag It !
FUN with CLOTHES, Lesson 6, page 43

Lesson 1— Creativity SUGGESTED AGE:
5-8 years
OBJECTIVES:
Youth will be able to:
Demonstrate
and practice
sewing a basic
overhand stitch
Demonstrate
and practice
tying a sewing
knot
Improve
psychomotor
skills
Demonstrate the
ability to follow
sequential
instructions
MATERIALS:
PIN PILLOWS!
Workbook page 6
Two pieces of pre-
cut felt for each child
Stuffing
(pantyhose,cotton,po
lyfill, etc.)
Thread,needles,pins
and scissors
TIME:
30 Minutes
SETTING:
Room with tables for
children to work
comfortably
Activity 12: Puppet Party!
INTRODUCTION
Puppets are a fun way to express ourselves through creating unique characters. It is
also a good way to practice our skills of using a sewing machine.
DO
Create a PUPPET!
Provide a puppet pattern and guide sheet for each child (or if time permits, let each child trace and cut their own pattern).
Demonstrate and review the steps with the group, using the guide sheet.
Fold fabric in half.
Pin the pattern onto the fabric and cut it out.
Using the sewing machine, stitch the fabric pieces together (right sides together!).
Using various items, let them decorate their puppet however they would like.
REFLECT
What did you learn when making this puppet?
Why did you choose your particular decorations?
APPLY
Children should describe their puppets to the rest of the group.
Have children develop a story to go along with their puppet.
Several children could work together to make up a play using their puppets.
FUN with CLOTHES, Lesson 6, page 44

FUN with CLOTHES, Lesson 6, page 45

Step 1:
Cut out pattern.
Fold fabric in half.
Step 2:
Pin the pattern to the fabric
and cut out the pattern.
Step 3:
Remove the pattern and pin
“right” sides of fabric
together.
Step 4:
Stitch together 1/4 inch
from the edge. (Leave the
bottom open!)
FUN with CLOTHES, Lesson 6, page 46
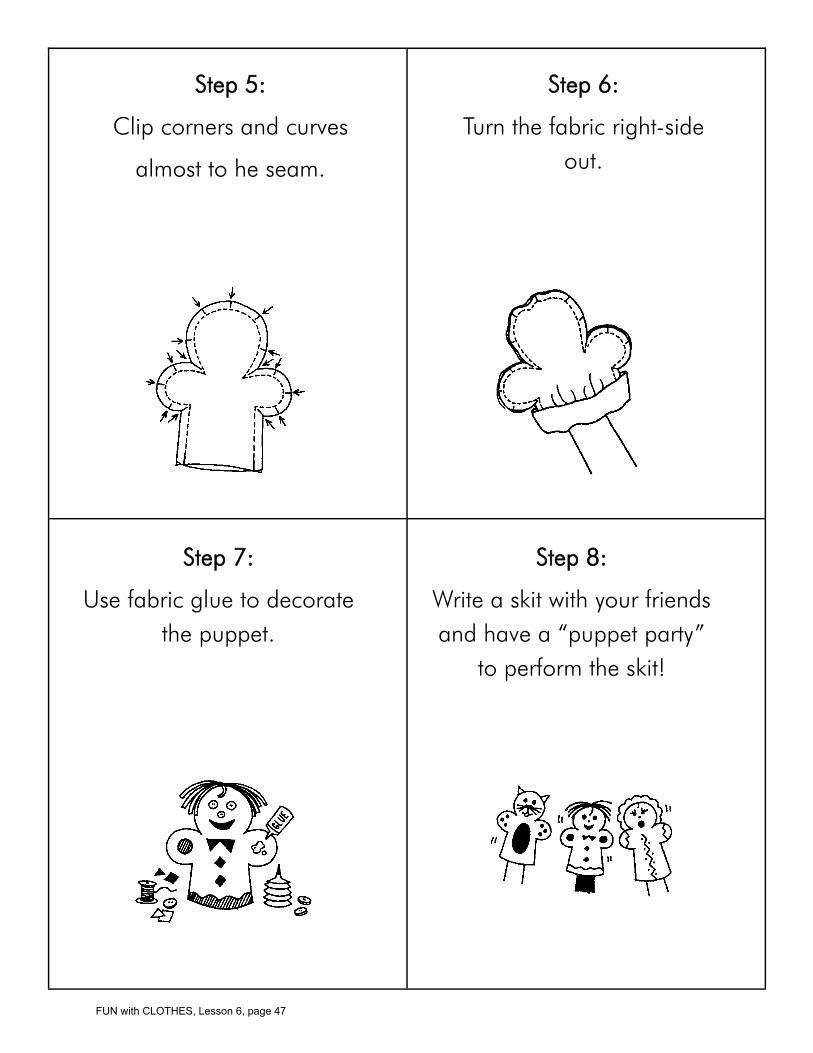
Step 5:
Clip corners and curves
almost to he seam.
Step 6:
Turn the fabric right-side
out.
Step 7:
Use fabric glue to decorate
the puppet.
Step 8:
Write a skit with your friends
and have a “puppet party”
to perform the skit!
FUN with CLOTHES, Lesson 6, page 47

Puppet Pattern
FUN with CLOTHES, Lesson 6, page 48

Lesson 1— Creativity SUGGESTED AGE:
5-8 years
OBJECTIVES:
Youth will be able to:
Express individuality
by creating their own
unique banners
Extend psychomotor
skills
Use sewing skills
learned (optional)
Use decision-making
skills to determine
how banner will look
MATERIALS:
Sturdy fabric for banner,
approximately 1’ x
2’ (felt, burlap, denim)
At Items (fabric, scraps,
markers, buttons, trim,
glitter, beads, etc.)
Stick to hold the banner
(or coat hanger)
String, yarn or ribbon to
hang banner
Glue
TIME:
30-45 Minutes
SETTING:
Room with table space
for each child.
ADVANCE
PREPARATION:
Pre-cut fabric lengths for
children to choose. Also,
prepare some example
banners (or posters) of
ideas to help them
become “creative”!
Activity 13: Collage Banner
INTRODUCTION
Banners and flags are used for many different purposes. They can be used to announce something or to represent groups. They can be very individualized to represent ourselves. We are going to use these materials to make our own banners. They can be anything you want them to be.
DO
Make a BANNER!
Find a stick large enough to hold the banner or use coat hangers.
Fold the fabric around the stick. It may be hand stitched, glued, or sewn with a sewing machine depending on resources and skill levels.
Decorate the banner any way you like.
Tie string to each end of the stick so the banner can be hung.
REFLECT
Tell the group about your banner and why you decorated it the way you did.
APPLY
Take the banner home and hang it for family and friends to see.
Talk about choices and the importance of individuality.
Talk about other types of banners that you see in everyday life.
FUN with CLOTHES, Lesson 6, page 49

5-8 YEAR OLDS
LESSON 7 Culture
PURPOSE
To introduce cultural influences on clothing styles and choices.
OBJECTIVES
Youth will be able to:
Discover historic and cultural influences on fashion choices.
Identify and celebrate national costumes with cultural heritage.
LESSON TIME
30 Minutes
LEARNING ACTIVITIES
CULTURE CONCENTRATION
HATS AROUND THE WORLD!
ADVANCE PREPARATION
1. Read the BACKGROUND BASICS on Culture.
2. Review activities and choose appropriate one(s) to use.
3. Secure necessary materials as described.
FUN with CLOTHES, Lesson 7, page 1

DO
The following is suggested for using activities in Lesson 7. Materials needed for each are listed within
the activity.
Play CULTURE CONCENTRATION to match clothing with different cultures around the world.
Identify some different geographic regions and cultural influences on clothing in HATS AROUND
THE WORLD!
REFLECT
After completing the activities in this lesson, help youth reflect on what they have learned with these
questions:
What does clothing tell you about a culture?
What different cultures can you identify by looking at their clothing?
APPLY
Help youth learn to apply what they have learned to their daily clothing choices
Take a trip to the library to find books on other cultures and their clothing.
Choose some clothing for yourself that resembles that of another culture.
Lesson 7— Culture
FUN with CLOTHES, Lesson 7, page 2

BACKGROUND
BACKGROUND BASICS...Culture
Cultural identity is one of many forms of identification that an individual may express through
clothing. Conformity helps determine characteristics of a culture because the members often
want to show they belong. Clothing is one very visible way to demonstrate culture.
Some aspects of conformity include loyalty to an organization, university or country.
Conformity creates a sense of solidarity with others. Individualization is present in every
culture, but it is more common in Western cultures. Individualism is shown through our
clothes, jewelry and our actions. Whether we are expressing conformity or individuality, much
can be observed from our appearances. Our clothing can tell others many things about
yourself and we can learn from clothing of other cultures.
When studying other cultures, be sure to have a map handy so that you can locate the country
you are talking about. Note the surrounding countries. How close is the country to the
equator? What kind of weather do you think they have? Does this affecr the clothing worn in
that country?
Why do we study other cultures? So that we can learn about how other people live and also to
discover influences in our own culture.
ESKIMO CULTURE
Eskimos still live as their ancestors did carrying on the same traditions and way of life. The
name eskimo means “eaters of raw flesh”. Eskimos live in Greenland, the northern fringe of
North America and in Eastern Siberia. They mainly live in the coastal regions of these areas.
In the regions where Eskimos live, there are short summers and very long winters. They
dressed in heavy coats most of the year, and they ised to build their houses out of ice blocks.
Huting was a way of life for the Eskimos. They would hunt seals, walruses, and in Canada they
hunted caribou. They also hunted white whales in groups. The Eskimos also eat a lot of fish.
Caribou skins were used to make hooded parkas. Fitted trousers, fur mittens and bots with
seal skin soles complete the Eskimo winter wardrobe. Today the Eskimos have adopted the
culture of the country in which they live and many of the old clothing traditions have been
abandoned. In hunting communities, the seal skin soles are still used to an extent. The
Eskimos have welcomed new technologies to make life in the cold climate easier.
Lesson 7— Culture
FUN with CLOTHES, Lesson 7, page 3

MEXICO
Traditional clothing in Mexico consists of hand woven cotton cloth. This cloth is often embroidered with wool to create
designs. The traditional dress for a male is the mestizo (mas-te-zo) which is cotton pants that come below the knee
and a cotton shirt, a wool poncho and a sombrero. The sombrero is good protection from the hot sun. Because of
the influence of Western culture, this traditional dress has given way to Western fashion trends.
The sombrero is a broad-brimmed, high-crowned hat made of felt or straw. It is worn especially in Spain, Mexico, and
the Southwestern United States. The sombrero derived its name from the Spanish word sombra, meaning shade, and
first appeared in the 15th century. Gentlemen often wore tan, white or gray felt sombreros while the peasants wore
straw ones. The sombrero was modified into the cowboy hat we know today.
SCOTLAND
Clans became associated with the tartans, a skirt or kilt, with distinctive plaid on it. A clan is made up of people who
trace their ancenstry to a common descendent. All members of a clan are considered to be kin. They fight together
and are very territorial. In the 18th century the kilt became a cmmon characteristic of each clan. The clans developed
different plaid designs that distinguished them.
The Scottish kilt is a knew-length, pleated skirt worn by the men of the Scottish Highland. The kilt is usually made of
wool and has a distinctive plaid. The modern kilt is made of six yards of fabric and is pleated except for the end
sections. It is wrapped around the waist and belted. The two unpleated sections cross over each other in the front.
The dwellers of the Scottish Highlands lived in clans and were very isolated by mountains and water. Each clan
colored their cloth with vegetable dyes. Since the color choice was limited to local flora, different patterns and colors
became predominant in each area. The pattrn of the chief’s tartan was copied by his followers so that the plaid
design became common for that region, and each clan developed a distinctive plaid.
The kilt is usually made from a cross-checked repeating pattern called the tartan plaid. The kilt is the only national
costume of the British Isles that is still used for ordinary purposes rather than just festive garb. The kilt is worn by the
Scottish regiments of the British Army and was last worn in battle during World War II.
INDIA
In India, the men wear the dhoti (do te), similar to pants, and the women wear a sari (sa re), a cloth wrapped around
to make a dress. All classes wear variations of these garments, but the quality of the fabric varies with class. For men,
headdress is very distinctive. Aside from the many ways to wrap a turban, a small black hat in the shape of a rimless
bowler may be worn, or an angora woll hat. Women do not wear any particular headdress other than a shawl or the
end of a sari. Often religion can be distinguished by the colors of the saris or dhotis and the way in which they are
worn.
The turban is of Oriental origin consisting of a ong scarf wound around the head or an inner hat. Today, however, we
associate the turban with the Turks and those of the Muslin faith. The turban varies in shape, clor, and size, some
reach lengths of up to 50 yards. The length of a turban depends on one’s position in society. The longer the turban,
BACKGROUND Lesson 7— Culture
FUN with CLOTHES, Lesson 7, page 4

BACKGROUND
JAPAN
In Japan, it is important to always dress neatly and to have your garments well-pressed and clean. Their use of color
is traditional. Elderly people avoid wearing bright colors and stick to somber, muted colors. The Japanese kimono (ki
mo no), worn by the women, is reserved for special occasions and the Japanese generally wear Western style
clothing.
Businessmen today wear somber grey or dark suits that almost seem like a uniform for them. Japanese women are
just as comfortable n the traditional kimono as they are in Western clothing like we wear in the United States.
The sash worn around the kimono is called the obi (o be). The obi is tied tightly behind the back n an ornate bow. An
obi is used to decorate a kimono for different occasions, and it is also meant to accent the waist. Some obis are
embroidered with designs of pine, bamboo, plums, orchids or chrysanthemums. Thin obis are worn in the summer
and thicker ones in the winter. Young girls wear a simple obi with their kimonos, but with age. The obis become wider
and more elaborate.
HAWAII
Hawaii’s climate is subtropical and the temperature is generally in the mid-70s. The ancient Hawaiian customs
provide entertainment for visitors. The luau, a traditional feast, and hula dances are performed for the tourists. Soft
flowing sundresses are worn by the women and the necklaces of flowers traded as a sign of welcome are called a lei
(la).
The Hawaiian culture has had many influences as the discovery of the new world expanded. In the 1850s, the
Chinese were a gradual influence and then missionaries from America brought a New England influence. The
Hawaiian culture was one of oral history and not written, so not much is known of the Hawaiian history before the
18th century. Hawaii became our 50th state in 1959.
AFRICAN
The dashiki (da she ke) is a tunic-like garment worn by males in parts of Africa. The dashiki is often decorated through
tir-dyeing or beads are sewnon the fabric. Another form of adornment is skin decorations, both permanent and
temporary. We call them tattoos. It is a sign of bravery for boys and girls to endure this painful process. Skin
demarcations are made all over the body.
Strands of beads and jewelry have great significance. The number of strands indicate rank. Royalty is shown by the
adornment of expensive and rare beads. In Nigeria, in order to wear certain beads, it is necessary to receive
permission from the king (Oba). Punishment for disobeying this law is death. It is common to wear sixty iron rings
around the left arm and on the right wrist to wear a brass bracelet engraved with patterns. An ornate pattern signifies
wealth.
Improved methods of weaving and decorating garments has made it easier for the people to clothe themselves. Tie-
dying is a common form of decoration. The cloth after being dyed is laid over a flat log and beaten with heavy
mallets. This process causes the cloth to shine like satin, producing a much desired effect. Favored colors are blue,
natural shades, and crimson.
Lesson 7— Culture
FUN with CLOTHES, Lesson 7, page 5

BACKGROUND
AMERICAN
INDIAN
Plainsmen wore a semi-tailored shirt with half-length sleeves, a breecg cloth and full-length leggings. The women
wore a fulllength dress with half-lengthed sleeves. The men and the women wore moccasins of buckskin, the women’s
moccasins being knee length. This clothing was made from elk skins with the fur removed. The Indians made their
clothing from the animals they were able to hunt in each region. In the cold weather, they wrapped themselves in
robes of buffalo skin.
The Pueblos lived in what is today Arizona and New Mexico. They liuved in buildings made of stone blocks that were
plastered with clay. Their diet consisted mainly of corn, beans, and squash. They made their clothes of cotton and
wore moccasins made of buckskins and buffalo hides.
The Eastern Woodlands Indians are best known for their massive burial mounds. These Indians lived in the wilderness
areasa east of the Mississippi reaching into Canada and to the Gulf of Mexico. They lived in houses with rectangular
log frames with roofs of bark to thatch using mud to plaster. These Indians lived in villages and clans.
DUTCH
The sabot is a heavy wooden shoe worn by the European peasants in the late 19th century and through World War I.
There are two kinds of sabots,one is shaped and hollowed from a single piece of wood. This kind is called klompen
by the Dutch. The other is a heavy leather showe with a wooden sole.
The traditional costume of baggy pants, full skirts, and lace caps are seen only in tourist centers. Wooden shoes are
far more resistant to the damp than stitched leather shoes, and they are still worn in the farm fields.
Half of the Netherlands’ land lies below the high-water levels of its many rivers and of the bordering North Sea. Nealy
60% of the population lives in the dike-protected areas. The Netherlands is Europe’s third most densely populated
country. The two official languages are Dutch and Frisian, both of these are of Germanic origin.
CHINA
In Asia, the main cultural influence is that of China/ The Chinese traditional dress for men is bloomer-like trousers
and a loose jacket tied with a bow. Women wear a short blouse called a cholori tied together by a bow and a high
waisted, long full skirt called the chima. The sleeves of the women’s and children’s festive jackets are colorfully
decorated, often with stripes. Pointed rubber shoes with the toes slightly turned up are the normal footwear.
Western dress has taken over the traditional dress, but the dress is often drab and kept to colors of grey, khaki, or
blacl. In communist China, it was dangerous to show personal expression through clothing and this promoted this
drab way of dress. Now, however, the Chinese dress is very colorful and western.
Additional References:
The New Encyclopedia Britannica, 1992, Encyclopedia Britannica, Inc.: Chicago.
The Encyclopedia American International Edition, 1990, Grolier Inc. : Danbury, Connecticut
Nigerian Body Adornment, de Nigri, E., 1992, Academic Press Ltd: Logas
Lesson 7— Culture
FUN with CLOTHES, Lesson 7, page 6

Lesson 7— Culture SUGGESTED AGE:
5-8 years
OBJECTIVES:
Youth will be able to:
Discover
historical,
geographical and
cultural influences
on fashion
choices.
Demonstrate
social skills by
working as a
group
Increase memory
skills
Demonstrate use
of classification
skills.
MATERIALS:
CULTURE
CONCENTRATION
CARDS
Globe or world map
(optional)
TIME:
30 Minutes
SETTING:
Comfortable room
with tables and chairs.
ADVANCED
PREPARATION:
Paste the
concentration cards to
cardboard or
construction paper
before cutting
(optional). Color the
cards before the
game is played.
Activity 1: Culture Concentration
LEADER INFORMATION You may wish to have colored examples of each child from a different culture, then let the children color the cards before playing the game, if time permits. Another suggestion is to point out on the globe or pin the picture to the region on the map. (Let older children find for themselves.) INTRODUCTION People can often be identified by the clothing that they wear. Cultures have certain types of garments that are significant and are often used in cultural celebrations. By playing Culture Concentration we will identify children from the following cultures by the clothes they are wearing: Eskimo, Dutch, Scottish, Mexican, Hawaiian, Japanese, African, and Indian.
DO
Play CULTURE CONCENTRATION! Give the concentration cards to two groups of children. (This can be played with two small groups, letting individuals within the group take turns.) All of the cards should be shuffled and placed face down. Each group of children should take turns turning over two cards, trying to match the pictures. If no match is made, the child turns the two cards back over and allows the next group to have a turn. If a match is made the child must identify the culture before keeping the cards. If the child correctly identifies the culture of the child on the card, the two cards are kept by that group until the end of the game. The child then proceeds with another turn until no match is made. If the culture is not correctly identified they must be turned back over. The game is over when all of the cards have been matched and collected. The winner is determined by the group having the most matches.
REFLECT
What did you learn by playing Culture Concentration? About the clothing of various cultures
What are some cultures that were identified in the game? Eskimo, Dutch, Scottish, Mexican, Hawaiian, Japanese, African, Indian
What and where are the geographical origins of these different cultures?
FUN with CLOTHES, Lesson 7, page 7

What were some of the parts of their clothing that helped you identify the children from different cultures?
Let children identify and describe the unique clothing features. Help children think about the clothing features and to associate this with geographical/climatic requirements.
APPLY
If the resources are available, Culture Concentration cards can be made for each child. Allow them to color the cards and play the game at home. Visit a museum with an exhibit of clothing from other cultures. Have a visitor that represents a different culture come to the meeting to show and tell them about their lifestyle and clothing styles.
ACTIVITY 1 Lesson 7— Culture
FUN with CLOTHES, Lesson 7, page 8

Indian
Scottish
Dutch
Eskimo
FUN with CLOTHES, Lesson 7, page 9

Japanese
Hawaiian
African
Mexican
FUN with CLOTHES, Lesson 7, page 10

SUGGESTED
AGE:
5-8 years
OBJECTIVES:
Youth will be able
to:
Discover
historical and
cultural
influence on
fashion
choices
Demonstrate
social skills by
speaking to
the group
Strengthen
cooperative
group skills
MATERIALS:
“HATS AROUND
THE WORLD”
Game Board
Globe or World
Map (optional)
TIME:
30 Minutes
SETTING:
Comfortable
room for children
to sir n a circle.
ADVANCE
PREPARATION:
Make the Game
Board, color the
pictures of the
hats and paste to
the board.
Activity 2: Hats Around the World!
INTRODUCTION People from different cultures wear different types of clothing. Their choices are influenced by their cultural heritage. We are going to identify some hats from various cultures.
DO
Play HATS AROUND THE WORLD! Sit children in a circle around the wheel. Large group option: Divide children into 2 groups and play as team game, letting
children take turns for their team. Allow children to spin the wheel one at a time, and discuss the hat the spinner lands on and the culture that the hat identifies. Locate on World Map or Globe. Allow children to respond to questions about the picture:
What do you like about this hat? Dislike? Would you wear a hat like this? What does this hat tell you about its culture? Have you seen a hat like this? Where?
REFLECT
What does clothing tell you about a culture? What are some cultures that you can identify by looking at their clothing? Can you think of other types of hats we wear? Are these unique to our culture?
APPLY
Draw a picture of yourself dressed in clothing from another culture Take a trip to the library to find books on other cultures. Tell someone what you learned.
Lesson 7— Culture
FUN with CLOTHES, Lesson 7, page 11

Instructions for "HATS AROUND THE WORLD" Game Board
You Will Need:
4 different colors of 8½ x 11 paper
Scissors
2 large sheets of poster board (22 x 28inches)
Glue
Spinner brad (or kitchen lazy-susan works to glue wheel to)
What You Do:
1. Fold diagonally to make 8 1/2 X 8 1/2 square
2.Cut off excess.
3.Cut along diagonal lines.
4.Trim long side to same length as short angle.
5.Glue on to 1 sheet of poster board to form multi-colored
wheel. Each color makes 1/4 of wheel.
6.Cut around edges to cut off excess poster.
7.Attach to other poster board with paper brad through the
center. (or mount to kitchen lazy susan).
8.Mark backboard with pointer/marker.
9.Glue picture hats to pie shaped pieces of the wheel. Add
points for scoring game (optional).
FUN with CLOTHES, Lesson 7, page 12

HATS AROUND THE WORLD!
ESKIMO
INDIAN
NATIVE AMERICAN
CHINESE
FUN with CLOTHES, Lesson 7, page 13

HATS AROUND THE WORLD!
MEXICAN
DUTCH
SCOTTISH
LAPLAND
FUN with CLOTHES, Lesson 7, page 14

HATS AROUND THE WORLD!
KUWAIT
AFRICAN
FUN with CLOTHES, Lesson 7, page 15

5-8 YEAR OLDS
LESSON 8 CAREERS
PURPOSE
To learn about specific types of clothing required for particular
occupations.
OBJECTIVES
Youth will be able to:
Identify clothing for specific jobs.
LESSON TIME
30 Minutes
LEARNING ACTIVITIES
WHAT’S MY JOB?
CAREER TOSS UP
ADVANCE PREPARATION
1. Read the BACKGROUND BASICS on Careers.
2. Review activities and choose appropriate one(s) to use.
3. Secure necessary materials as described.
FUN with CLOTHES, Lesson 8, page1

DO
The following is suggested for using activities in Lesson 8. Materials needed for each are listed
within the activity.
Learn about and identify clothing for specific jobs with WHAT’S MY JOB? and CAREER TOSS
UP!
REFLECT
After completing the activities in this lesson, help youth reflect on what they have learned with
these questions:
What are some occupations that require special clothing?
Doctor, nurse, police officer, fireman, chef, sports player, grocery store cashier, city/
county employee
What are some reasons for wearing special clothing?
Safety, so that people will recognize them.
What are some jobs that allow workers to wear their own clothes?
Answers will vary. Some examples are teacher, secretary, and business person.
APPLY
Help youth learn to apply what they have learned to their daily clothing choices.
What do members of your family wear to work?
Talk to a person that wears special clothing to work, and ask them to tell you about it.
Lesson 8— CAREERS
FUN with CLOTHES, Lesson 8, page2

BACKGROUND BASICS...Careers
On a daily basis, we learn things from the clothes that people around us are wearing. A
person’s appearance gives a hint about what the person might be going to do or has just done.
A person’s clothing might also be able to tell us about their occupation.
Custom and tradition have established many guidelines and rules as to what type of clothing is
appropriate for certain occasions. These “rules” can be written or unwritten. This is why we have
certain expectations related to clothing. Because of tradition and customs, we are able to tell
many things about a person from the clothing they wear.
Safety and health standards also provide the need for certain occupational clothing
requirements. Astronauts,firemen, racecar drivers, and professional sports players all have
special clothing needs.
Career Uniforms
A uniform makes it easy to tell membership of a group. Uniforms create a special image for a
group and can tell us a message about the person wearing the uniform. Members of the police
force, fire department and the military wear uniforms for a very special reason. Their uniforms
are a sign of public cafety and can be easily recognized.
Members of sports teams also wear uniforms to make it easy to distinguish a member of a
group. They might also be worn for safety reasons, such as in the case of a fire fighter.
People who work in service occupations like a waitress or waiter, a stewardess or pilot and
members of a hotel staff are often required to wear uniforms. They wear a uniform so that they
can be distinguished from the people they are serving. Their uniforms create recognition and an
identity for the company they work for.
Uniforms make it easy for us to distinguish members of a group. Look around you in your daily
life and you will be surprised how many uniforms you will find.
Lesson 8— CAREERS BACKGROUND
FUN with CLOTHES, Lesson 8, page3

Traditional Dress
Not every worker is required to wear a uniform, but we can often still identify a person’s
occupation by the clothes they wear.
Judges wear a traditional black robe in the courtroom. Some ministers and priests wear special
clothing for religious services. Business men and women generally wear dark blue or gray suits.
Although these examples are not uniforms, we can still guess the profession of those who dress in
this manner.
What is the standard dress for a student? Would you be able to guess the occupation of your
fellow classmates by the way that they dress?
Textile Careers
There are many careers in the clothing and textile industry. You could be a fabric designer who
researches new weaves, patterns, prints, and colors, or you could be an apparel designer, a
chemist, engineer, sales personel, or even a computer technician.
Additional References:
Weber, Jeanette, Clothing, 1990, Glencoe Publishing Co.
Lesson 8— CAREERS BACKGROUND
FUN with CLOTHES, Lesson 8, page4

SUGGESTED AGE:
5-8 years
OBJECTIVES:
Youth will be able
to:
Identify clothing
for specific jobs
Develop scial
skills by
interacting with
a group
Demonstrate
oral
communication
skills
MATERIALS:
Career Picture
Cards (nurse,
doctor, police
officer, fireman,
cook)
TIME:
20 Minutes
SETTING:
Cofortable room
with chairs.
ADVANCE
PREPARATION:
The picture cards to
be used in the
activity will need to
be colored in
advance. It would
also be beneficial to
cover them with
clear, sticky plastic.
Activity 1: What’s My Job? INTRODUCTION Certain jobs require special clothing or uniforms. By playing “What’s My Job?” we will learn about and talk about these clothes.
DO
Play “WHAT’S MY JOB?” Show all of the job cards to the group so they will know what they have to choose from when playing the game. Choose a child to be the “worker.” Tape or pin a job card on his/her back without showing the card to the child. Stand the child with his or her back to the rest of the group so that they may see the card. When everyone has seen the card the child may turn around and ask, “What’s my job”? Instruct the group to give the “worker” clues about his/her occupation by describing the clothing. Children should raise their hands to be called on by the “worker”. When the “worker” guesses the occupations, take the card off and show it to the child. Continue this with all the occupations. You may want to repeat some of the occupations to give every child an opportunity to be a “worker” if you have a large group.
REFLECT
What are the occupations that require special clothing or uniforms? Doctor, nurse, police officer, fireman, cook
Can you think of some occupations not mentioned in this game that require special clothing?
Answers will vary according to what the children are familiar with in their community
What are some reasons for wearing special clothing? Safety, so that people will recognize them
Lesson 8— CAREERS
FUN with CLOTHES, Lesson 8, page5

APPLY
Think about the types of clothing that the people in your family wear to work. Discuss it with the group. Talk to a person that wears special clothing to work and ask them to tell you about it. Make a job collage by looking through a wide variety of different kinds of magazines to find people with different occupations. Cut out pictures, glue them on a large sheet of construction paper. Tell what you like about each job. Pin up the collage for everyone to see.
Lesson 8— CAREERS ACTIVITY 1
FUN with CLOTHES, Lesson 8, page6

Co
nstr
ucti
on
Wo
rker
B
usin
ess O
wn
er
———————————————————————————————————————————————————————
FUN with CLOTHES, Lesson 8, page7

Teach
er
P
osta
l W
ork
er
———————————————————————————————————————————————————————
FUN with CLOTHES, Lesson 8, page8
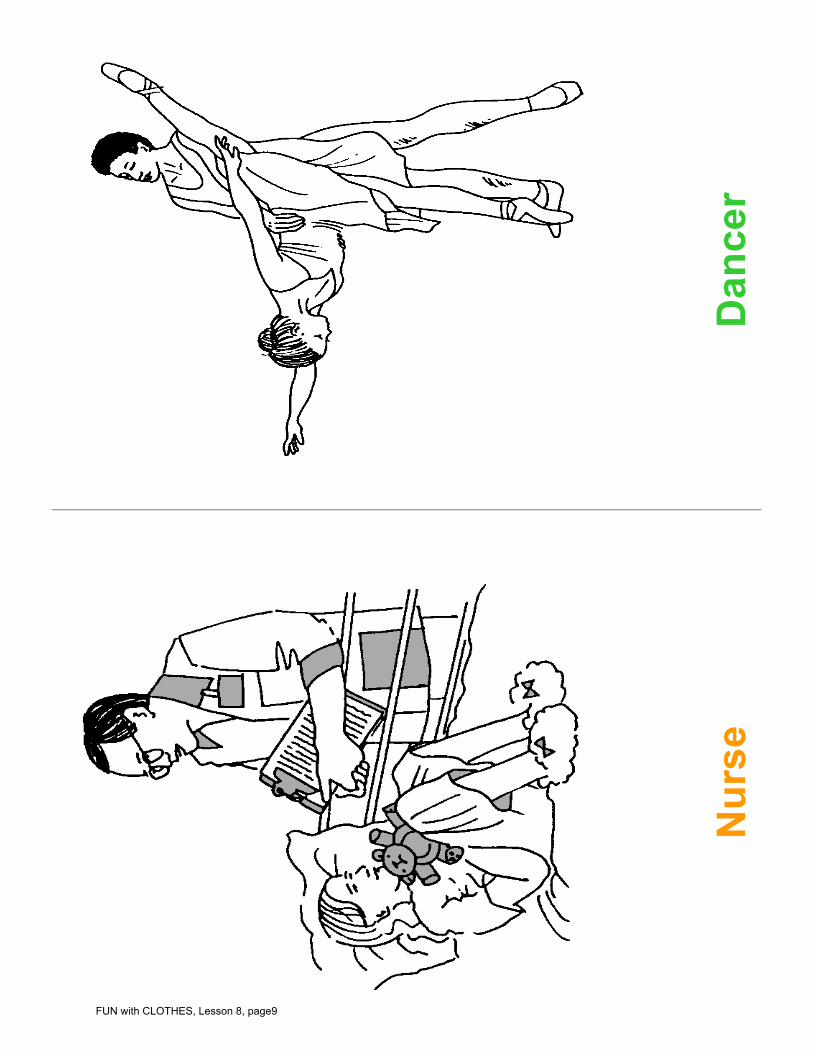
Nu
rse
D
an
cer
———————————————————————————————————————————————————————
FUN with CLOTHES, Lesson 8, page9

Ne
wscaste
r
Fir
e p
ers
on
———————————————————————————————————————————————————————
FUN with CLOTHES, Lesson 8, page10

Ath
lete
S
ecre
tary
———————————————————————————————————————————————————————
FUN with CLOTHES, Lesson 8, page11

Do
cto
r
Ch
ef
———————————————————————————————————————————————————————
FUN with CLOTHES, Lesson 8, page12

SUGGESTED AGE:
5-8 years
OBJECTIVES:
Youth will be able
to:
Identify clothing
for specific jobs
Develop social
skills by
interacting with
a group
Demonstrate
decision-
making skills
Develop
psychomotor
skills
MATERIALS:
CAREER LABEL
CARDS
All (larger ball for
younger children)
TIME:
20 Minutes
SETTING:
Large room for
children to stand in
a circle or outside.
Activity 2: Career Toss Up LEADER INFORMATION Careers need to be selected in advance. There should be some that require special clothing and some that do not. Make sure that enough careers are selected for all of the members of the group. The Career Label Cards will need to be created by you to correspond with the careers chosen for your group. These may be large sheets of paper with career names, if children can read, or you may use picture cards from Activity 1.
INTRODUCTION Certain careers require special clothing or uniforms while other careers allow people to wear their own clothes to work. Career Toss Up is a fun way to identify the clothing that people wear to work.
DO
Play CAREER TOSS UP! Attach one career label to the shirt of each child. Make sure all of the children know their career. Instruct them to think of some type of clothing that a person in that career might wear to work. Have children stand in a circle with the leader in the middle holding the ball. The leader tosses the ball in the air and calls out a career. The child with that career label runs forward to catch the ball. As he child catches the ball, he/she tells some type of clothing that person would wear to work. If the child is correct, he/she tosses the ball into the air and calls out a career. If the child is not correct the child goes back to the circle and the leader calls out another career. This should be continued, at least, until everyone has had a turn providing the correct answer.
REFLECT
What are the occupations that require special clothing or uniforms? Doctor, nurse, police officer, fireman, cook, professional sports players, some fast food restaurants, etc.
What are some occupations that allow the workers to wear their own clothes? Answers will vary according. Some examples are teacher, secretary, business person, some factory workers.
What did you learn from playing this game? Answers will vary.
Lesson 8— CAREERS
FUN with CLOTHES, Lesson 8, page13
APPLY
What do members of your family wear to work? Interview someone in your family about their job to find out what they wear and why. Draw a picture of your family dressed for work. Share it with the rest of the group, and tell about each person’s career.
ACTIVITY 2 Lesson 8— CAREERS
FUN with CLOTHES, Lesson 8, page14

_______________________ 4-H Club Motto Name "To make the best better" ___________________________ 4-H Pledge Address
I Pledge: My head to clearer thinking
My heart to greater loyalty ____________________________ My hands to larger service, and Name of Club/School My health to better living for my club, my community, my country, and my world. _____________________________ Leader/Teacher's Name 4-H Colors Green and White
———————————————————————————————————————————————————————-- The University of Florida 4-H Youth Development Program, Florida Cooperative Extension, Institute of Food and Agricultural Sciences, March 2011. ________________________
Cooperative Extension Service, University of Florida, Institute of Food and Agricultural Sciences, Millie Ferrer-Chancy,
Interim Director, in cooperation with the United States Department of Agriculture, publishes this information to further the
purpose of the May 8 and June 30, 1914 Acts of Congress; and is authorized to provide research, educational information, and
other services only to individuals and institutions that function without discrimination with respect to race, creed, color,
religion, age, disability, sexual orientation, marital status, national origin, political opinions or affiliations, genetic information
and veteran status as protected under the Vietnam Era Veterans' Readjustment Assistance Act. Single copies of extension
publications (excluding 4-H and youth publications) are available free to Florida residents from county extension offices.
Information about alternate formats is available from IFAS Information and Communication Services, University of Florida,
PO Box 110810, Gainesville, FL 32611-0810.Originally Printed 1994 and revised March 2011.


![[1907] Watson, Kate Heintz - Textiles and Clothing](https://img.dokumen.tips/doc/110x75/577ce0951a28ab9e78b3a680/1907-watson-kate-heintz-textiles-and-clothing.jpg)