Embed Size (px)
Citation preview

LPI exam 102 prep: KernelJunior Level Administration (LPIC-1) topic 105
Skill Level: Intermediate
Ian Shields ([email protected])Senior ProgrammerEMC
21 Mar 2006
In this tutorial, Ian Shields begins preparing you to take the Linux ProfessionalInstitute® Junior Level Administration (LPIC-1) Exam 102. In this first in a series ofnine tutorials, Ian introduces you to the kernel on Linux®. By the end of this tutorial,you will know how to build, install, and query a Linux kernel and its kernel modules.
Section 1. Before you start
Learn what these tutorials can teach you and how you can get the most from them.
About this series
The Linux Professional Institute (LPI) certifies Linux system administrators at twolevels: junior level (also called "certification level 1") and intermediate level (alsocalled "certification level 2"). To attain certification level 1, you must pass exams 101and 102; to attain certification level 2, you must pass exams 201 and 202.
developerWorks offers tutorials to help you prepare for each of the four exams. Eachexam covers several topics, and each topic has a corresponding self-study tutorialon developerWorks. For LPI exam 102, the nine topics and correspondingdeveloperWorks tutorials are:
Table 1. LPI exam 102: Tutorials and topics
Kernel Trademarks© Copyright IBM Corporation 2006. All rights reserved. Page 1 of 26

LPI exam 102 topic developerWorks tutorial Tutorial summary
Topic 105 LPI exam 102 prep:Kernel
(This tutorial). Learn how toinstall and maintain Linuxkernels and kernel modules.See detailed objectives below.
Topic 106 LPI exam 102 prep:Boot, initialization, shutdown,and runlevels
Coming soon.
Topic 107 LPI exam 102 prep:Printing
Coming soon.
Topic 108 LPI exam 102 prep:Documentation
Coming soon.
Topic 109 LPI exam 102 prep:Shells, scripting, programmingand compiling
Coming soon.
Topic 111 LPI exam 102 prep:Administrative tasks
Coming soon.
Topic 112 LPI exam 102 prep:Networking fundamentals
Coming soon.
Topic 113 LPI exam 102 prep:Networking services
Coming soon.
Topic 114 LPI exam 102 prep:Security
Coming soon.
To pass exams 101 and 102 (and attain certification level 1), you should be able to:
• Work at the Linux command line
• Perform easy maintenance tasks: help out users, add users to a largersystem, back up and restore, and shut down and reboot
• Install and configure a workstation (including X) and connect it to a LAN,or connect a stand-alone PC via modem to the Internet
To continue preparing for certification level 1, see the developerWorks tutorials forLPI exams 101 and 102, as well as the entire set of developerWorks LPI tutorials.
The Linux Professional Institute does not endorse any third-party exam preparationmaterial or techniques in particular. For details, please contact [email protected].
About this tutorial
Welcome to "Kernel," the first of nine tutorials designed to prepare you for LPI exam102. In this tutorial, you learn how to build, install, and query a Linux kernel and its
developerWorks® ibm.com/developerWorks
Kernel Trademarks© Copyright IBM Corporation 2006. All rights reserved. Page 2 of 26
kernel modules.
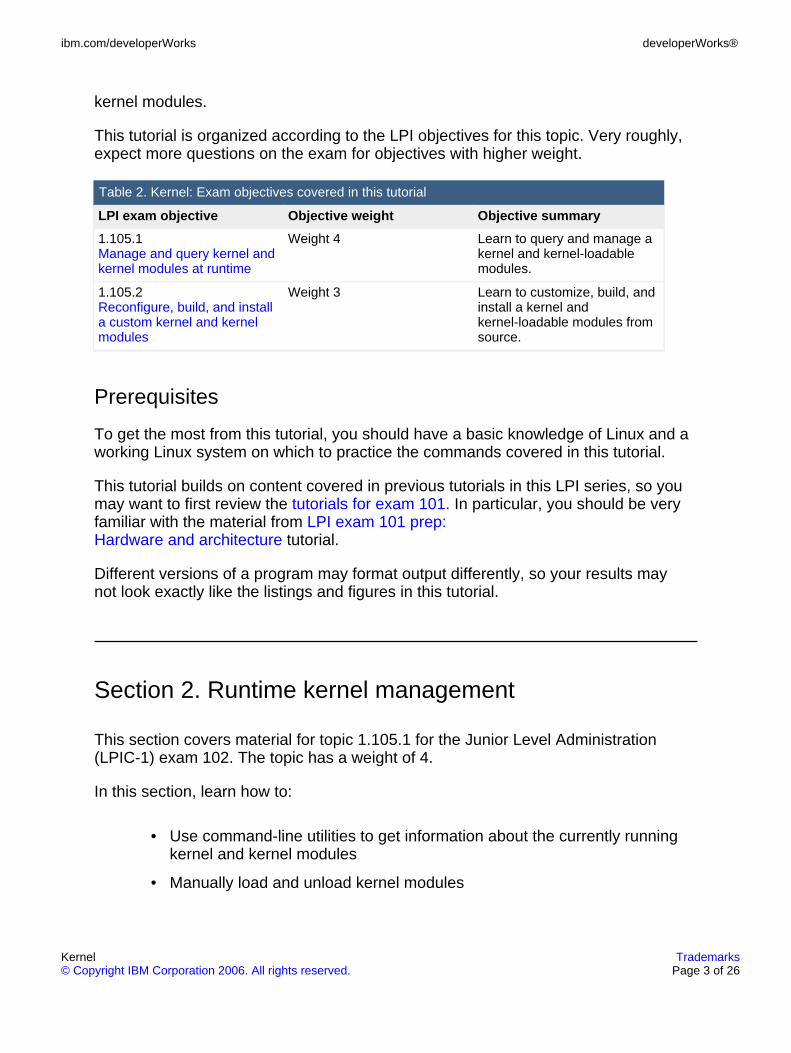
This tutorial is organized according to the LPI objectives for this topic. Very roughly,expect more questions on the exam for objectives with higher weight.
Table 2. Kernel: Exam objectives covered in this tutorial
LPI exam objective Objective weight Objective summary
1.105.1Manage and query kernel andkernel modules at runtime
Weight 4 Learn to query and manage akernel and kernel-loadablemodules.
1.105.2Reconfigure, build, and installa custom kernel and kernelmodules
Weight 3 Learn to customize, build, andinstall a kernel andkernel-loadable modules fromsource.
Prerequisites
To get the most from this tutorial, you should have a basic knowledge of Linux and aworking Linux system on which to practice the commands covered in this tutorial.
This tutorial builds on content covered in previous tutorials in this LPI series, so youmay want to first review the tutorials for exam 101. In particular, you should be veryfamiliar with the material from LPI exam 101 prep:Hardware and architecture tutorial.
Different versions of a program may format output differently, so your results maynot look exactly like the listings and figures in this tutorial.
Section 2. Runtime kernel management
This section covers material for topic 1.105.1 for the Junior Level Administration(LPIC-1) exam 102. The topic has a weight of 4.
In this section, learn how to:
• Use command-line utilities to get information about the currently runningkernel and kernel modules
• Manually load and unload kernel modules
ibm.com/developerWorks developerWorks®
Kernel Trademarks© Copyright IBM Corporation 2006. All rights reserved. Page 3 of 26

• Determine when modules can be unloaded
• Configure the system to load modules by names other than their file name
Technically, Linux is the kernel of your system. The kernel provides a framework forapplications to run and use various hardware devices. It is low-level code that dealswith hardware interfaces, scheduling, and memory management among otherthings. Many people refer to a whole system as GNU/Linux because many of thetools that make most distributions usable come from the GNU project of the FreeSoftware Foundation. Nevertheless, you will often just see "Linux" instead of"GNU/Linux."
uname
The uname command prints information about your system and its kernel. Listing 1shows the various options for uname and the resulting information; each option isdefined in Table 3.
Listing 1. The uname command
ian@pinguino:~$ unameLinuxian@pinguino:~$ uname -sLinuxian@pinguino:~$ uname -npinguinoian@pinguino:~$ uname -r2.6.12-10-386ian@pinguino:~$ uname -v#1 Mon Jan 16 17:18:08 UTC 2006ian@pinguino:~$ uname -mi686ian@pinguino:~$ uname -oGNU/Linuxian@pinguino:~$ uname -aLinux pinguino 2.6.12-10-386 #1 Mon Jan 16 17:18:08 UTC 2006 i686 GNU/Linux
Table 3. Options for uname
Option Description
-s Print the kernel name.This is the default if nooption is specified.
-n Print the nodename orhostname.
-r Print the release of thekernel. This option isoften used withmodule-handlingcommands.
-v Print the version of the
developerWorks® ibm.com/developerWorks
Kernel Trademarks© Copyright IBM Corporation 2006. All rights reserved. Page 4 of 26

kernel.
-m Print the machine'shardware (CPU) name.
-o Print the operatingsystem name.
-a Print all of the aboveinformation.
Listing 1 is from an Ubuntu system running on an Intel® CPU. The uname commandis available on most UNIX® and UNIX-like systems as well as Linux. The informationprinted will vary by Linux distribution and version as well as by the type of machineyou are running on. Listing 2 shows the output from an AMD Athlon 64 systemrunning Fedora Core 4 and, for comparison, an Apple PowerBook.
Listing 2. Using uname with another system
Linux attic4 2.6.14-1.1656_FC4 #1 Thu Jan 5 22:13:55 EST 2006 x86_64x86_64 x86_64 GNU/Linuxfilesystem
Darwin Ian-Shields-Computer.local 7.9.0 Darwin Kernel Version 7.9.0:Wed Mar 30 20:11:17 PST 2005; root:xnu/xnu-517.12.7.obj~1/RELEASE_PPCPower Macintosh powerpc
Kernel modules
The kernel manages many of the low-level aspects of your system, includinghardware and interfaces. With a large variety of possible hardware and severaldifferent file systems, a kernel that supported everything would be rather large.Fortunately, kernel modules allow you to load support software such as hardwaredrivers or file systems when needed, so you can start your system with a smallkernel and then load other modules as needed. Often the loading is automatic, suchas when USB devices are plugged in.
The remainder of this section looks at the commands and configuration for kernelmodules.
The commands for tasks such as loading or unloading modules require rootauthority. The commands for displaying information about modules can usually berun by general users. However, since they reside in /sbin, they are not usually on anon-root user's path, so you will probably have to use full path names if you are notroot.
lsmod
ibm.com/developerWorks developerWorks®
Kernel Trademarks© Copyright IBM Corporation 2006. All rights reserved. Page 5 of 26

Use the lsmod command to display the modules that are currently loaded on yoursystem, as shown in Listing 3. Your output is likely to be different, although youshould see some common entries.
Listing 3. Displaying kernel modules with lsmod
[ian@attic4 ~]$ /sbin/lsmodModule Size Used bynvnet 74148 0nvidia 4092336 12forcedeth 24129 0md5 4161 1ipv6 268737 12parport_pc 29189 1lp 13129 0parport 40969 2 parport_pc,lpautofs4 29637 1sunrpc 168453 1ipt_REJECT 5825 1ipt_state 1985 3ip_conntrack 42009 1 ipt_stateiptable_filter 3137 1ip_tables 19521 3 ipt_REJECT,ipt_state,iptable_filterdm_mod 58613 0video 16069 0button 4161 0battery 9541 0ac 4933 0ohci_hcd 26977 0ehci_hcd 41165 0i2c_nforce2 7105 0i2c_core 21825 1 i2c_nforce2shpchp 94661 0snd_intel8x0 34945 1snd_ac97_codec 76217 1 snd_intel8x0snd_seq_dummy 3781 0snd_seq_oss 37569 0snd_seq_midi_event 9409 1 snd_seq_osssnd_seq 62801 5 snd_seq_dummy,snd_seq_oss,snd_seq_midi_eventsnd_seq_device 9037 3 snd_seq_dummy,snd_seq_oss,snd_seqsnd_pcm_oss 51569 0snd_mixer_oss 18113 1 snd_pcm_osssnd_pcm 100553 3 snd_intel8x0,snd_ac97_codec,snd_pcm_osssnd_timer 33733 2 snd_seq,snd_pcmsnd 57669 11 snd_intel8x0,snd_ac97_codec,snd_seq_oss,snd_seq,snd_seq_device,snd_pcm_oss,snd_mixer_oss,snd_pcm,snd_timersoundcore 11169 1 sndsnd_page_alloc 9925 2 snd_intel8x0,snd_pcmfloppy 65397 0ext3 132681 3jbd 86233 1 ext3sata_nv 9541 0libata 47301 1 sata_nvsd_mod 20545 0scsi_mod 147977 2 libata,sd_mod[ian@attic4 ~]$
You can see that this system has many loaded modules. Most of these are suppliedwith the kernel. However, some, such as the nvnet, nvidia, and sata_nv modulesfrom NVIDIA Corporation include proprietary code and are not supplied as part of astandard kernel. In this way, the modular approach allows proprietary code to beplugged in to an open source kernel. Assuming the vendor license permits it, a Linux
developerWorks® ibm.com/developerWorks
Kernel Trademarks© Copyright IBM Corporation 2006. All rights reserved. Page 6 of 26

distributor may add proprietary modules to a distribution, saving you the effort ofgetting them directly from a vendor and helping to ensure that you have theappropriate levels.
From Listing 3, you can also see that modular support extends to devices such asvideo, SATA and SCSI hard drives, floppy disks, and sound cards, as well as tonetworking features such as IPV6, file system support such as ext3, and Sun remoteprocedure call (RPC).
In addition to the module name, lsmod also shows the module size and the numberof users of the module. If the module is used by any other modules, these are listed.So, for example, the soundcore module is used by the snd module, which in turn isused by several other sound modules.
modinfo
The modinfo command displays information about one or more modules. As shownin Listing 4, the information includes the full path to the file, the author, license, anyparameters that the module might accept, version, dependencies, and otherinformation.
Listing 4. Basic module information
[ian@attic4 ~]$ /sbin/modinfo floppyfilename: /lib/modules/2.6.12-1.1456_FC4/kernel/drivers/block/floppy.koauthor: Alain L. Knafflicense: GPLalias: block-major-2-*vermagic: 2.6.12-1.1456_FC4 686 REGPARM 4KSTACKS gcc-4.0depends:srcversion: 2633BC999A0747D8D215F1Fparm: FLOPPY_DMA:intparm: FLOPPY_IRQ:intparm: floppy:charp[ian@attic4 ~]$ /sbin/modinfo sata_nvfilename: /lib/modules/2.6.12-1.1456_FC4/kernel/drivers/scsi/sata_nv.koauthor: NVIDIAdescription: low-level driver for NVIDIA nForce SATA controllerlicense: GPLversion: 0.6vermagic: 2.6.12-1.1456_FC4 686 REGPARM 4KSTACKS gcc-4.0depends: libataalias: pci:v000010DEd0000008Esv*sd*bc*sc*i*alias: pci:v000010DEd000000E3sv*sd*bc*sc*i*alias: pci:v000010DEd000000EEsv*sd*bc*sc*i*alias: pci:v000010DEd00000054sv*sd*bc*sc*i*alias: pci:v000010DEd00000055sv*sd*bc*sc*i*alias: pci:v000010DEd00000036sv*sd*bc*sc*i*alias: pci:v000010DEd0000003Esv*sd*bc*sc*i*alias: pci:v000010DEd*sv*sd*bc01sc01i*srcversion: 3094AD48C1B869BCC301E9F
In Listing 4, notice in the lines giving the module filenames that these filenames endin a .ko suffix. This distinguishes modules for 2.6 kernels from other object files and
ibm.com/developerWorks developerWorks®
Kernel Trademarks© Copyright IBM Corporation 2006. All rights reserved. Page 7 of 26
from modules for 2.4 and earlier kernels, which used the same .o suffix as otherobject files.
You will also notice that the module path include the kernel version. For example,/lib/modules/2.6.12-1.1456_FC4/kernel/drivers/block/floppy.ko includes2.6.12-1.1456_FC4 as a path element. This is the same value emitted by uname-r. Kernel modules are specific to a given kernel, and this structure manages thatrelationship.
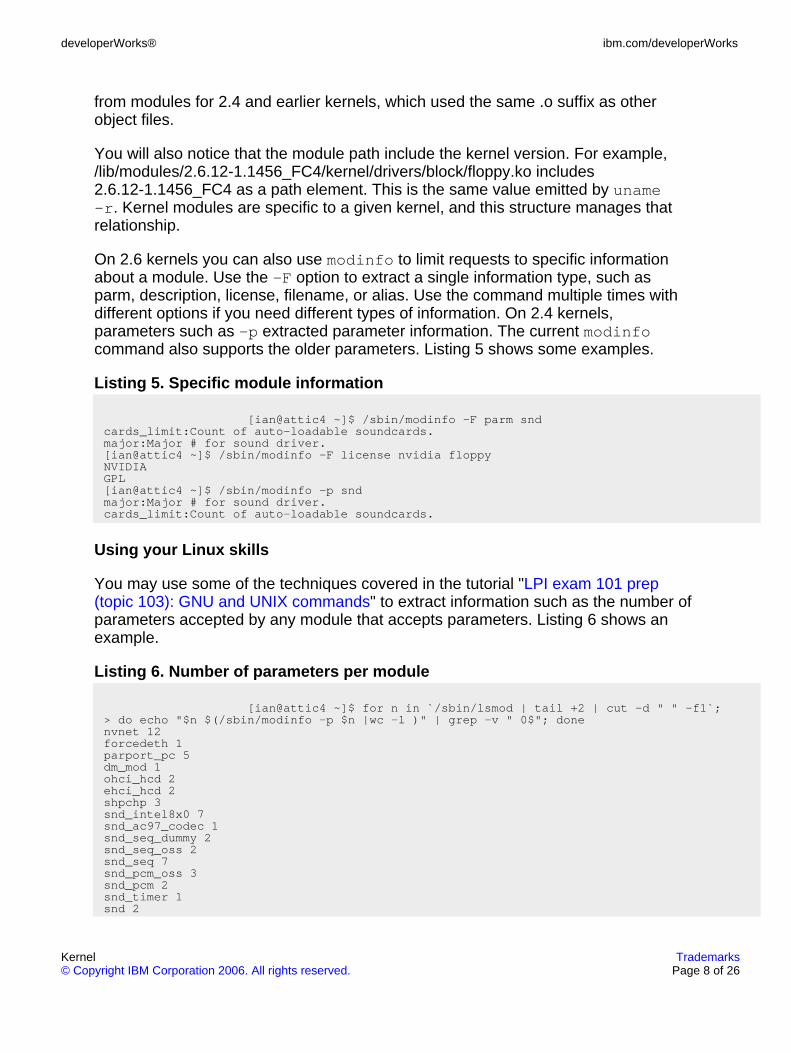
On 2.6 kernels you can also use modinfo to limit requests to specific informationabout a module. Use the -F option to extract a single information type, such asparm, description, license, filename, or alias. Use the command multiple times withdifferent options if you need different types of information. On 2.4 kernels,parameters such as -p extracted parameter information. The current modinfocommand also supports the older parameters. Listing 5 shows some examples.
Listing 5. Specific module information
[ian@attic4 ~]$ /sbin/modinfo -F parm sndcards_limit:Count of auto-loadable soundcards.major:Major # for sound driver.[ian@attic4 ~]$ /sbin/modinfo -F license nvidia floppyNVIDIAGPL[ian@attic4 ~]$ /sbin/modinfo -p sndmajor:Major # for sound driver.cards_limit:Count of auto-loadable soundcards.
Using your Linux skills
You may use some of the techniques covered in the tutorial "LPI exam 101 prep(topic 103): GNU and UNIX commands" to extract information such as the number ofparameters accepted by any module that accepts parameters. Listing 6 shows anexample.
Listing 6. Number of parameters per module
[ian@attic4 ~]$ for n in `/sbin/lsmod | tail +2 | cut -d " " -f1`;> do echo "$n $(/sbin/modinfo -p $n |wc -l )" | grep -v " 0$"; donenvnet 12forcedeth 1parport_pc 5dm_mod 1ohci_hcd 2ehci_hcd 2shpchp 3snd_intel8x0 7snd_ac97_codec 1snd_seq_dummy 2snd_seq_oss 2snd_seq 7snd_pcm_oss 3snd_pcm 2snd_timer 1snd 2
developerWorks® ibm.com/developerWorks
Kernel Trademarks© Copyright IBM Corporation 2006. All rights reserved. Page 8 of 26

snd_page_alloc 1scsi_mod 6
rmmod
If a module's use count is 0, you may safely remove it. For example, you might dothis in preparation for loading an updated version. This is a great feature of amodular kernel because you do not always have to reboot just to update support forone or another particular device. To remove a mod, use the rmmod command alongwith the module name as shown in Listing 7.
Listing 7. Removing a module for a running system
[root@attic4 ~]# rmmod floppy
Consult the man pages for other options available with rmmod.
insmod and modprobe
Once you have removed a module, you may need to reload it. You can do this usingthe insmod command, which takes the full path name of the module to be reloaded,along with any module options that may be required. If you use this command, youwill probably want to use command substitution for generating the filename. Twoways of doing this are shown in Listing 8.
Listing 8. Loading a module using insmod
[root@attic4 ~]# insmod /lib/modules/`uname -r`/kernel/drivers/block/floppy.ko[root@attic4 ~]# rmmod floppy[root@attic4 ~]# insmod $(modinfo -F filename floppy)
The second form above saves you the need to remember which subdirectory(drivers/block in this case) a module is located in, but there is an even better way toload a module. The modprobe command provides a higher-level interface thatoperates with the module name instead of file path. It also handles loading additionalmodules upon which a module depends, and can remove modules as well as loadthem.
Listing 9 shows how to use modprobe to remove the vfat module, along with thefat module that uses it. It then shows what the system would do if the module werereloaded, and finally the result of reloading the module. Note that the -v option isspecified to obtain verbose output; otherwise, modprobe (and the underlyinginsmod command) will display only error messages from the module itself. Betweeneach step, the output of lsmod is piped through grep to show whether either the
ibm.com/developerWorks developerWorks®
Kernel Trademarks© Copyright IBM Corporation 2006. All rights reserved. Page 9 of 26

vfat or fat module is loaded or not.
Listing 9. Loading a module using modprobe
[root@lyrebird root]# modprobe -r vfatvfat: Device or resource busy[root@lyrebird root]# lsmod | grep fatvfat 13132 1fat 38744 0 [vfat][root@lyrebird root]# umount /windows/D[root@lyrebird root]# modprobe -r vfat[root@lyrebird root]# modprobe -v --show vfat/sbin/insmod /lib/modules/2.4.21-37.0.1.EL/kernel/fs/fat/fat.o/sbin/insmod /lib/modules/2.4.21-37.0.1.EL/kernel/fs/vfat/vfat.o[root@lyrebird root]# lsmod | grep fat[root@lyrebird root]# modprobe -v vfat/sbin/insmod /lib/modules/2.4.21-37.0.1.EL/kernel/fs/fat/fat.oUsing /lib/modules/2.4.21-37.0.1.EL/kernel/fs/fat/fat.oSymbol version prefix ''/sbin/insmod /lib/modules/2.4.21-37.0.1.EL/kernel/fs/vfat/vfat.oUsing /lib/modules/2.4.21-37.0.1.EL/kernel/fs/vfat/vfat.o[root@lyrebird root]# lsmod | grep fatvfat 13132 0 (unused)fat 38744 0 [vfat]
depmod
You have just seen that modprobe can handle the automatic loading of multiplemodules when some are dependent on others. The dependencies are kept in themodules.dep file in the /lib/modules subdirectory for the appropriate kernel, as givenby the uname -r command. This file, along with several map files, is generated bythe depmod command. The -a (for all) is now optional.
The depmod command scans the modules in the subdirectories of /lib/modules forthe kernel you are working on and freshens the dependency information. Anexample, along with the resulting changed files, is shown in Listing 10.
Listing 10. Using depmod to rebuild modules.dep
[root@lyrebird root]# dateThu Mar 16 10:41:05 EST 2006[root@lyrebird root]# depmod[root@lyrebird root]# cd /lib/modules/`uname -r`[root@lyrebird 2.4.21-37.0.1.EL]# ls -l mod*-rw-rw-r-- 1 root root 54194 Mar 16 10:41 modules.dep-rw-rw-r-- 1 root root 31 Mar 16 10:41 modules.generic_string-rw-rw-r-- 1 root root 73 Mar 16 10:41 modules.ieee1394map-rw-rw-r-- 1 root root 1614 Mar 16 10:41 modules.isapnpmap-rw-rw-r-- 1 root root 29 Mar 16 10:41 modules.parportmap-rw-rw-r-- 1 root root 65171 Mar 16 10:41 modules.pcimap-rw-rw-r-- 1 root root 24 Mar 16 10:41 modules.pnpbiosmap-rw-rw-r-- 1 root root 122953 Mar 16 10:41 modules.usbmap[root@lyrebird 2.4.21-37.0.1.EL]# cd -/root
You can customize the behavior of modprobe and depmod using the configuration
developerWorks® ibm.com/developerWorks
Kernel Trademarks© Copyright IBM Corporation 2006. All rights reserved. Page 10 of 26

file /etc/modules.conf. This is commonly used to alias module names and to specifycommands that should be run after a module is loaded or before it is unloaded.However, an extensive range of other configuration can be done. Listing 11 showsan example of /etc/modules.conf. Consult the man page for modules.conf for moredetails.
Listing 11. Example /etc/modules file
[root@lyrebird root]# cat /etc/modules.confalias eth0 e100alias usb-controller usb-uhcialias usb-controller1 ehci-hcdalias sound-slot-0 i810_audiopost-install sound-slot-0 /bin/aumix-minimal -f /etc/.aumixrc -L >/dev/null 2>&1 || :pre-remove sound-slot-0 /bin/aumix-minimal -f /etc/.aumixrc -S >/dev/null 2>&1 || :
You should also be aware that some systems use another configuration file calledmodprobe.conf, while others store module configuration information in the/etc/modules.d directory. You may also find a file called /etc/modules on somesystems; this file contains the names of kernel modules that should be loaded atboot time.
USB modules
When you hot plug a USB device into your Linux system, the kernel must determinewhich modules to load to handle the device. This is usually done for you by a hotplug script that uses the usbmodules command to find the appropriate module. Youcan also run usbmodules (as root) to see for yourself. Listing 12 shows anexample.
Listing 12. USB modules
root@pinguino:~# lsusbBus 005 Device 004: ID 1058:0401 Western Digital Technologies, Inc.Bus 005 Device 003: ID 054c:0220 Sony Corp.Bus 005 Device 001: ID 0000:0000Bus 004 Device 001: ID 0000:0000Bus 003 Device 001: ID 0000:0000Bus 002 Device 001: ID 0000:0000Bus 001 Device 003: ID 04b3:310b IBM Corp. Red Wheel MouseBus 001 Device 001: ID 0000:0000root@pinguino:~# usbmodules --device /proc/bus/usb/005/003usb-storageroot@pinguino:~# usbmodules --device /proc/bus/usb/001/003usbmouseusbhid
The next section shows you how to build and configure a custom kernel.
ibm.com/developerWorks developerWorks®
Kernel Trademarks© Copyright IBM Corporation 2006. All rights reserved. Page 11 of 26

Section 3. Customize and build kernels and kernelmodules
This section covers material for topic 1.105.2 for the Junior Level Administration(LPIC-1) exam 102. The topic has a weight of 3.
In this section, learn how to:
• Customize the current kernel configuration
• Build a new kernel and appropriate kernel modules
• Install a new kernel and any modules
• Ensure that the boot manager can locate the new kernel and associatedfiles
As you learned in the previous section, Runtime kernel management, the kernelprovides the low-level support for your system hardware and file systems. A modernkernel image usually contains only essential functions, but is configured to supportadditional functions that you might need through the use of kernel modules. Theadditional support is loaded only when needed, for example when a device isplugged in or otherwise enabled.
The modular code becomes an integral part of the kernel, dynamically extending thekernel functions. If the functions of a loaded kernel module have not been used forseveral minutes, the kernel can voluntarily disassociate it from the rest of the kerneland unload it from memory through a process known as autocleaning.
Without kernel modules, your running kernel, which is loaded from disk as a singlebinary file, would have to contain all the functionality you might possibly ever need.You would also need to build a completely new kernel every time you wanted to addfunctionality to your system.
You cannot put everything in a module, however. At a bare minimum, the kernelimage that is loaded must be able to mount your root file system. But, as youlearned in the tutorial "LPI exam 101 prep (topic 102): Linux installation and packagemanagement," your boot loader can load an initial RAM disk (or initrd), which maycontain the modules necessary to mount the root file system. Nevertheless, thekernel image must at least contain support for the RAM file system used in the initialRAM disk. If it does not, your system will not boot.
Once your system has bootstrapped itself this far, it proceeds to mount the root filesystem and then start the other initialization processes. After a few seconds, the
developerWorks® ibm.com/developerWorks
Kernel Trademarks© Copyright IBM Corporation 2006. All rights reserved. Page 12 of 26

system is up and ready for you to use. The kernel, however, remains in controlawaiting requests to perform work for user processes and scheduling the systemresources among the tasks that require them.
Modular kernels work well in modern systems with plenty of RAM and disk space.However, you may have a new piece of hardware, such as a video card or storagesystem, that is not supported by the kernel that came with your distribution. Indeed,some drivers contain proprietary code that is said to taint a pure Linux kernel, sosome distributors will not include it, even if the vendor license terms permit it to bedistributed by your chosen distributor. In this case, you will need to at least build newmodules, and possibly even build a new kernel.
Linux can be used in many environments, from embedded systems such as mobilephones, to networking devices such as routers, to set-top boxes as well as moretraditional computing environments. Some of these devices use a kernel that iscustomized to support only those functions that the system is intended to support.For example, a system intended to be a diskless firewall probably does not needsupport for any file system other than the read-only file system from which it loaded,yet it may need support for advanced networking hardware that is not part of astandard kernel. Again, a custom kernel will be required.
Source packages
The ultimate source for the Linux kernel is the Linux Kernel Archives (see Resourcesfor a link). Unless you already know what you are doing, you should use a kernelpackage from your Linux distribution, because your distributor may have addedcustom patches. If you are already familiar with obtaining and extracting sourcepackages, review the tutorial "LPI exam 101 prep (topic 102): Linux installation andpackage management." As with anything that may change your system, makebackups first so that you can recover if things go wrong.
If you download source from the public kernel archives, you will download acompressed file, and you will need to decompress it using gzip or bzip2,according to whether you download the .gz or the .bz2 version of the kernel source.The pub/linux/kernel/ directory on the download server has a directory for eachkernel version, such as 2.4, 2.5, or 2.6. At the date of this writing, the latest bzip2version of the 2.6 kernel is linux-2.6.15.tar.bz2.
In that kernel directory, you will also see a corresponding ChangeLog-2.6.15.6 filethat describes changes in this version, and a patch-2.6.15.bz2, which is a smaller filethat allows you to patch the prior version of source to bring it up to 2.6.15 level. Youwill also notice signature files that you may use to verify that your downloaded filewas not corrupted, either accidentally or maliciously.
The compressed source is normally uncompressed in /usr/src, and it creates a new
ibm.com/developerWorks developerWorks®
Kernel Trademarks© Copyright IBM Corporation 2006. All rights reserved. Page 13 of 26

subdirectory for the kernel version, such as linux-2.6.15, containing the tree of filesneeded to build your kernel. If you already have such a directory, you may want toback it up or rename it before unpacking the new kernel source. This will ensure thatyou can go back if you need to, and also that you will not have stray files that shouldnot be in your kernel source tree. You need about 40MB of disk space for the tarballand about 350MB for the expanded source code.
Some distributors, notably Red Hat, now distribute the kernel headers and sourcenecessary for building kernel modules as a kernel development package.Documentation may be in a separate kernel documentation package. These aredesigned for and sufficient for building modules, such as a proprietary vendorgraphics card module, but they are not sufficient for rebuilding a custom kernel. Yourdistribution should have information about how to rebuild a kernel and how thesource can be obtained. Check for documentation such as release notes.
Suppose you use FTP or HTTP to download the kernel-2.6.15-1.1833_FC4.src.rpmsource RPM from the pub/fedora/linux/core/updates/4/SRPMS/ atdownload.fedora.redhat.com, and the file is in the /root directory. Note that versionnumbers used here will probably be different for your system, so make sure you getthe updated version of source corresponding to your installed kernel. Now, forFedora, you must install the source RPM, then switch to the /usr/src/redhat/SPECSdirectory, and finally build the source RPM in order to create the Linux kernel sourcetree as shown in Listing 13.
Listing 13. Creating the kernel source tree for Fedora Core
[root@attic4 ~]# uname -r2.6.15-1.1833_FC4[root@attic4 ~]# rpm -Uvh kernel-2.6.15-1.1833_FC4.src.rpm
1:kernel ########################################### [100%][root@attic4 ~]# cd /usr/src/redhat/SPECS[root@attic4 SPECS]# rpmbuild -bp --target $(arch) kernel-2.6.specBuilding target platforms: x86_64Building for target x86_64Executing(%prep): /bin/sh -e /var/tmp/rpm-tmp.23188+ umask 022+ cd /usr/src/redhat/BUILD+ LANG=C+ export LANG+ unset DISPLAY+ '[' '!' -d kernel-2.6.15/vanilla ']'+ cd /usr/src/redhat/BUILD+ rm -rf kernel-2.6.15+ /bin/mkdir -p kernel-2.6.15+ cd kernel-2.6.15+ /usr/bin/bzip2 -dc /usr/src/redhat/SOURCES/linux-2.6.15.tar.bz2+ tar -xf -...+ echo '# x86_64'+ cat .config+ perl -p -i -e 's/^SUBLEVEL.*/SUBLEVEL = 15/' Makefile+ perl -p -i -e 's/^EXTRAVERSION.*/EXTRAVERSION = -prep/' Makefile+ find . -name '*.orig' -o -name '*~' -exec rm -f '{}' ';'+ exit 0
developerWorks® ibm.com/developerWorks
Kernel Trademarks© Copyright IBM Corporation 2006. All rights reserved. Page 14 of 26

The Linux kernel source for Fedora is now located in/usr/src/redhat/BUILD/kernel-2.6.15/linux-2.6.15. By convention, the /linux-2.6.15tree is often moved to /usr/src and symbolically linked to /usr/src/linux, as shown inListing 14. This is not strictly necessary, but it's easier to follow along with referencesthat assume the kernel source tree will be in .usr./src/linux.
Listing 14. Moving the source tree to ./usr/src
[root@attic4 SPECS]# mv ../BUILD/kernel-2.6.15/linux-2.6.15 /usr/src[root@attic4 SPECS]# cd /usr/src[root@attic4 src]# ln -s linux-2.6.15 linux[root@attic4 src]# ls -ld lin*lrwxrwxrwx 1 root root 12 Mar 20 18:23 linux -> linux-2.6.15drwxr-xr-x 20 root root 4096 Mar 20 18:13 linux-2.6.15
Before you attempt to build anything, review the Changes file that is located in theDocumentation directory. Among other things, it lists the minimum levels of varioussoftware packages that you need to build a kernel. Make sure that you have thesepackages installed.
You may notice Makefile and .config among the files shown in Listing 13. The makefile contains several make targets for tasks such as configuring the kernel options,building the kernel and its modules, and installing the modules and building RPM ordeb packages. More recent kernel sources allow you to use make help for briefhelp on each target. For older systems, you may need to consult the documentationor examine the make file. Listing 15 shows partial output for make help.
Listing 15. Help for kernel building make file
[ian@attic4 linux-2.6.15]$ make helpCleaning targets:clean - remove most generated files but keep the configmrproper - remove all generated files + config + various backup files
Configuration targets:config - Update current config utilising a line-oriented programmenuconfig - Update current config utilising a menu based programxconfig - Update current config utilising a QT based front-endgconfig - Update current config utilising a GTK based front-endoldconfig - Update current config utilising a provided .config as baserandconfig - New config with random answer to all optionsdefconfig - New config with default answer to all optionsallmodconfig - New config selecting modules when possibleallyesconfig - New config where all options are accepted with yesallnoconfig - New minimal config
Other generic targets:all - Build all targets marked with [*]
* vmlinux - Build the bare kernel* modules - Build all modulesmodules_install - Install all modulesdir/ - Build all files in dir and belowdir/file.[ois] - Build specified target only
...
ibm.com/developerWorks developerWorks®
Kernel Trademarks© Copyright IBM Corporation 2006. All rights reserved. Page 15 of 26

Configuration
The .config file in your kernel build directory contains configuration information foryour kernel, including the target machine environment, the features to be included,and whether a feature should be compiled into the kernel or built as a module.Creating a .config file is the first step to building or rebuilding a kernel. You create itusing one of the configuration targets in the make file.
The main configuration options are:
configThe config target uses a command-line interface to obtain answers to manyquestions to either build or update your .config file. With the advent of themenu-based configuration targets, this command-line interface is rarely usedtoday.
menuconfigThe menuconfig target uses an ncurses-based, menu-based program tocreate or update your .config file. You need only answer questions for itemsyou want to change. This approach has superseded the older config target.You run this in a terminal window either remotely or locally.
xconfigThe xconfig target uses a graphical menu system based on a QT front-end,like the one used with the KDE desktop.
gconfigThe gconfig target uses a graphical menu system based on a GTK front-end,like the one used with the GNOME desktop.
oldconfigThe oldconfig target allows you to build a configuration using an existing.config file, such as you might have from a previous build or another system.For example, if you installed the kernel source for Fedora as described above,you may copy the configuration file for your running system from/lib/modules/$(uname -r)/build/.config to /usr/src/linux.Once you've built it, you may use one of the menu configuration targets tomodify it if necessary.
Figure 1 shows what you might see if you run make menuconfig for a 2.4 serieskernel. Press Enter to descend into lower-level menus, and press Esc to return.Help is available for most items. Either tab to the < Help > button and press Enter,or simply type h. Press Esc to return to configuring.
Figure 1. Running make menuconfig on a 2.4 kernel
developerWorks® ibm.com/developerWorks
Kernel Trademarks© Copyright IBM Corporation 2006. All rights reserved. Page 16 of 26

Table 4 shows the various options for including features in the kernel, either built inor as modules. When an option is highlighted, press the space bar to toggle betweenthe allowable choices for that feature. You can also press y to enable an option, n todisable it, or m to have it compiled as a module if possible.
Table 4. Options for menuconfig
Option Description
[*] Feature will be built intothe kernel.
[ ] Feature will not beincluded in the kernel.
<M> Feature will be built asa kernel module.
< > Feature will not beincluded in the kernelbut is capable of beingbuilt as a module.
Figure 2 shows what you might see if you run make gconfig for a 2.6 serieskernel. Click the arrows to expand or collapse menu items. Help is displayed in alower pane.
Figure 2. Running make gconfig on a 2.6 kernel
ibm.com/developerWorks developerWorks®
Kernel Trademarks© Copyright IBM Corporation 2006. All rights reserved. Page 17 of 26

The major configuration sections for a 2.6 kernel are described below. You may notfind all of these with 2.4 and earlier kernels, but this list gives you an overview ofwhere to find what.
Code maturity level optionsThis section contains an option that determines whether remaining options giveyou a choice for code that is considered experimental. If you do not select thisoption, then you will be able to select only options that are considered stable.Be warned that functions you choose may or may not work at the current codelevel on your system, so you might have a chance to help with debugging.
General setupThis section lets you include an identification string with your new kernel, alongwith options for several kernel attributes that do not belong elsewhere but thatyou must specify.
Loadable module supportThis section contains an option that determines whether your kernel willsupport modules and whether they may be automatically loaded and unloaded.You should enable module support.
developerWorks® ibm.com/developerWorks
Kernel Trademarks© Copyright IBM Corporation 2006. All rights reserved. Page 18 of 26

Block layerThis section contains support for disks larger than 2TB, and allows you tochoose the type of disk scheduling that you would like.
Processor type and featuresThis section contains CPU-specific configuration options. Here you choose theprocessor or processor family that your kernel will support, as well as whetheror not to enable access to various processor features. Be sure to enablesymmetric multi-processing support if you have more than one CPU or ahyperthreaded CPU. Generally, you should enable the MTRR option to allowbetter graphic performance with AGP or PCI video cards.
Power management optionsThis section contains several power management options. These areparticularly useful on laptops. Besides controlling power states, you will findoptions here to control and monitor such things as temperatures or fan states.
Bus options (PCI etc.)This section contains options for buses supported by your system, such asPCI, PCI Express, and PC Card buses. You can also enable the /proc/pci filesystem here, although you should generally use lspci instead.
Executable file formats / EmulationsThis section contains options for supporting various binary file formats. Youshould enable ELF binary support. You may also enable support for DOSbinaries to run under DOSEMU, as well as wrapper-driven binaries such asJava™, Python, Emacs-Lisp, and so on. Finally, for a 64-bit system thatsupports 32-bit emulation, you probably want to enable 32-bit binary support.
NetworkingThe networking section is large. Here you can enable basic sockets andTCP/IP networking, as well as packet filtering, bridging, routing, and support fora variety of protocols such as IPV6, IPX, Appletalk, and X.25. You can alsoenable wireless, infrared, and amateur radio support here.
Device driversThis section is also very large. Here you enable support for most of yourhardware devices, including IDE/ATAPI or SCSI hard drives and flash memorydevices. Enable DMA for your IDE devices; otherwise, they will work in theslower PIO mode. If you want support for multiple devices such as RAID orLVM, this is where you enable it. You can also configure parallel port supporthere if you want parallel printer support. This is also where you configure a vastrange of possible networking devices to support the networking protocols youconfigured above. You will also find support here for audio and video capturedevices, USB and IEEE 1384 (Firewire) devices, as well as a variety ofhardware monitoring devices. Under the character devices subsection, you will
ibm.com/developerWorks developerWorks®
Kernel Trademarks© Copyright IBM Corporation 2006. All rights reserved. Page 19 of 26

probably want to enable parallel print support and direct rendering support.
Firmware driversThis section contains a few options related to BIOS setting and updating, suchas using the Dell System Management functions on certain Dell systems.
File systemsThis section is for configuring the file systems that you want your kernel tosupport, either compiled in or as modules. You will also find file systems herefor removable media such as diskettes and CD or DVD devices, along withsupport for networked file systems such as NFS, SMB, or CIFS. Support for avariety of partitions and Native Language Support is found here too.
Instrumentation supportThis section allows you to enable experimental profiling support for profilingyour system's activity.
Kernel hackingThis section allows you to enable kernel debugging and choose which featureswill be enabled.
Security optionsThis section allows you to configure several security options and to enable andconfigure SELinux (Security Enhanced Linux).
Cryptographic optionsThis section allows you to configure several cryptographic algorithms, such asMD4, DES, and SHA256.
Library routinesThis section allows you to decide whether certain CRC algorithms should becompiled in or built as modules.
Building
Now that you've seen the major aspects of configuring a kernel, you're ready to buildone. If you are not sure of the state of your build tree, run make clean beforeconfiguring your new kernel. For an even more extreme cleanup target, run makemrproper; this will remove your .config file as well as some other files used by thebuild process. If you do this and then need to restore a backed up .config file, youwill need to run make oldconfig before configuring.
While you are experimenting, you should give your new kernel a custom name soyou can easily identify it. Do this by setting a local version value and enabling theoption to automatically append version information to the version string under the
developerWorks® ibm.com/developerWorks
Kernel Trademarks© Copyright IBM Corporation 2006. All rights reserved. Page 20 of 26

General setup section as shown in Figure 3.
Figure 3. Configuring a custom kernel
In the spirit of taking small steps, the examples in the remainder of this tutorial arebased on building a kernel with just the two changes shown in Figure 3.
In principle, the kernel does not require root authority to build, although you will needroot authority to install your new kernel. However, if you are using the packageinstalled by your distribution, you will probably have to run as root because of the fileand directory permissions that have been set up. You can practice in user mode bydownloading a kernel source tarball from the Linux kernel archives and unpacking itin your home directory, or by making a copy of your kernel build tree and changingthe permissions to your userid.
To start building a 2.6 kernel, type make.
To start building a 2.4 kernel, run these three commands:make depmake bzImagemake modules
ibm.com/developerWorks developerWorks®
Kernel Trademarks© Copyright IBM Corporation 2006. All rights reserved. Page 21 of 26
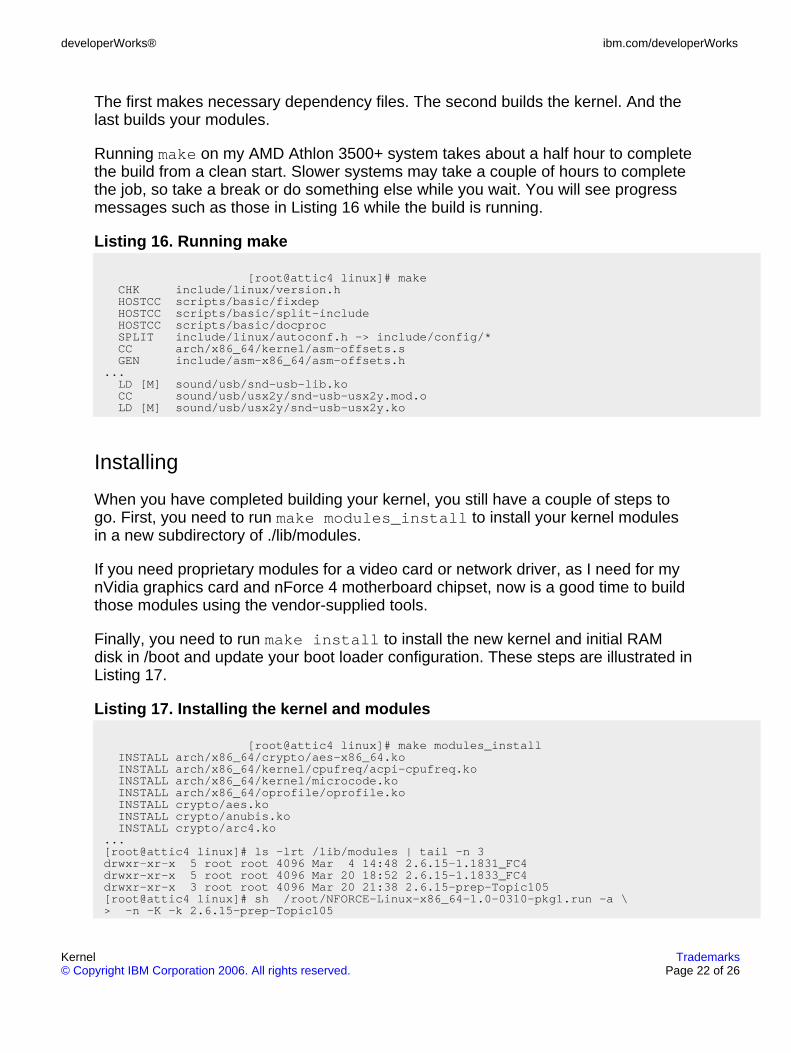
The first makes necessary dependency files. The second builds the kernel. And thelast builds your modules.
Running make on my AMD Athlon 3500+ system takes about a half hour to completethe build from a clean start. Slower systems may take a couple of hours to completethe job, so take a break or do something else while you wait. You will see progressmessages such as those in Listing 16 while the build is running.
Listing 16. Running make
[root@attic4 linux]# makeCHK include/linux/version.hHOSTCC scripts/basic/fixdepHOSTCC scripts/basic/split-includeHOSTCC scripts/basic/docprocSPLIT include/linux/autoconf.h -> include/config/*CC arch/x86_64/kernel/asm-offsets.sGEN include/asm-x86_64/asm-offsets.h
...LD [M] sound/usb/snd-usb-lib.koCC sound/usb/usx2y/snd-usb-usx2y.mod.oLD [M] sound/usb/usx2y/snd-usb-usx2y.ko
Installing
When you have completed building your kernel, you still have a couple of steps togo. First, you need to run make modules_install to install your kernel modulesin a new subdirectory of ./lib/modules.
If you need proprietary modules for a video card or network driver, as I need for mynVidia graphics card and nForce 4 motherboard chipset, now is a good time to buildthose modules using the vendor-supplied tools.
Finally, you need to run make install to install the new kernel and initial RAMdisk in /boot and update your boot loader configuration. These steps are illustrated inListing 17.
Listing 17. Installing the kernel and modules
[root@attic4 linux]# make modules_installINSTALL arch/x86_64/crypto/aes-x86_64.koINSTALL arch/x86_64/kernel/cpufreq/acpi-cpufreq.koINSTALL arch/x86_64/kernel/microcode.koINSTALL arch/x86_64/oprofile/oprofile.koINSTALL crypto/aes.koINSTALL crypto/anubis.koINSTALL crypto/arc4.ko
...[root@attic4 linux]# ls -lrt /lib/modules | tail -n 3drwxr-xr-x 5 root root 4096 Mar 4 14:48 2.6.15-1.1831_FC4drwxr-xr-x 5 root root 4096 Mar 20 18:52 2.6.15-1.1833_FC4drwxr-xr-x 3 root root 4096 Mar 20 21:38 2.6.15-prep-Topic105[root@attic4 linux]# sh /root/NFORCE-Linux-x86_64-1.0-0310-pkg1.run -a \> -n -K -k 2.6.15-prep-Topic105
developerWorks® ibm.com/developerWorks
Kernel Trademarks© Copyright IBM Corporation 2006. All rights reserved. Page 22 of 26

Verifying archive integrity...OKUncompressing NVIDIA nForce drivers for Linux-x86_64 1.0-0310...................[root@attic4 linux]# sh /root/NVIDIA-Linux-x86_64-1.0-8178-pkg2.run -a \> -n -K -k 2.6.15-prep-Topic105Verifying archive integrity... OKUncompressing NVIDIA Accelerated
Graphics Driver for Linux-x86_64 1.0-8178.................[root@attic4 linux]# make installCHK include/linux/version.hCHK include/linux/compile.hCHK usr/initramfs_list
Kernel: arch/x86_64/boot/bzImage is ready (#2)sh /usr/src/linux-2.6.15/arch/x86_64/boot/install.sh 2.6.15-prep-Topic105arch/x86_64/boot/bzImage System.map "/boot"[root@attic4 linux]# ls -lrt /boot | tail -n 6-rw-r--r-- 1 root root 1743149 Mar 20 21:45 vmlinuz-2.6.15-prep-Topic105lrwxrwxrwx 1 root root 28 Mar 20 21:45 vmlinuz -> vmlinuz-2.6.15-prep-Topic105-rw-r--r-- 1 root root 980796 Mar 20 21:45 System.map-2.6.15-prep-Topic105lrwxrwxrwx 1 root root 31 Mar 20 21:45 System.map -> System.map-2.6.15-prep-Topic105-rw-r--r-- 1 root root 1318741 Mar 20 21:45 initrd-2.6.15-prep-Topic105.imgdrwxr-xr-x 2 root root 4096 Mar 20 21:45 grub
Initial RAM disk
Notice that the build process automatically created the necessary initial RAM disk(initrd) for you. If you ever need to create one manually, you do so using themkinitrd command. See the man pages for details.
Boot loaders
If everything worked correctly, the make install step should have also updatedyour boot loader configuration. Some lines from mine are shown in Listing 18.
Listing 18. Updated GRUB configuration file
default=1timeout=10splashimage=(hd0,5)/boot/grub/splash.xpm.gzpassword --md5 $1$y.uQRs1W$Sqs30hDB3GtE957PoiDWO.title Fedora Core (2.6.15-prep-Topic105)
root (hd0,11)kernel /boot/vmlinuz-2.6.15-prep-Topic105 ro root=LABEL=FC4-64 rhgb quietinitrd /boot/initrd-2.6.15-prep-Topic105.img
title Fedora Core -x86-64 (2.6.15-1.1833_FC4)
The entry for the newly built kernel has been placed at the top, but the default entryhas been adjusted to remain as the previous default. If you use LILO instead, thenthe grubby command that is used in the build script should have updated your LILOconfiguration. If the configuration was not updated correctly for any reason, refer tothe tutorial "LPI exam 101 prep (topic 102): Linux installation and packagemanagement," where you will find full instructions on setting up your boot loader.
One final note. You may wonder why the sample configuration added -Topic105,yet the created files all had -prep-Topic105 instead. This is a Fedora safety
ibm.com/developerWorks developerWorks®
Kernel Trademarks© Copyright IBM Corporation 2006. All rights reserved. Page 23 of 26

measure to prevent you from inadvertently destroying your live kernel. This iscontrolled by the EXTRAVERSION variable set near the top of the main make file, asshown in Listing 19. Edit the file if you need to remove this.
Listing 19. Updated GRUB configuration file
[root@attic4 linux]# head -n 6 MakefileVERSION = 2PATCHLEVEL = 6SUBLEVEL = 15EXTRAVERSION = -prepNAME=Sliding Snow Leopard
Rebooting
If all is well, you should now be able to boot your new system. You will need toselect the configuration entry for the new kernel because it is not (yet) the default.After you are happy with it, you can make it the default. When you reboot, use theuname command to check your system's kernel as shown in Listing 20.
Listing 20. Checking your new system
[ian@attic4 ~]$ uname -rv2.6.15-prep-Topic105 #2 Mon Mar 20 21:13:20 EST 2006
developerWorks® ibm.com/developerWorks
Kernel Trademarks© Copyright IBM Corporation 2006. All rights reserved. Page 24 of 26

Resources
Learn
• Review the entire LPI exam prep tutorial series on developerWorks to learnLinux fundamentals and prepare for system administrator certification.
• At the LPIC Program, find task lists, sample questions, and detailed objectivesfor the three levels of the Linux Professional Institute's Linux systemadministration certification.
• In "Basic tasks for new Linux developers" (developerWorks, March 2005), learnhow to open a terminal window or shell prompt and much more.
• The Linux Documentation Project has a variety of useful documents, especiallyits HOWTOs.
• The Linux Kernel Archives is the ultimate resource for the Linux kernel. Checkfor your nearest mirror before you download.
• The kernelnewbies project has lots of information for those new to kernels andbuilding them.
• The Kernel Rebuild Guide shows you how to configure, build, and install a newkernel.
• The Linux Kernel Module Programming Guide from Linuxtopia is an online bookabout kernel modules for Linux.
• LPI Linux Certification in a Nutshell (O'Reilly, 2001) and LPIC I Exam Cram 2:Linux Professional Institute Certification Exams 101 and 102 (Exam Cram 2)(Que, 2004) are references for readers who prefer book format.
• Find more tutorials for Linux developers in the developerWorks Linux zone.
• Stay current with developerWorks technical events and Webcasts.
Get products and technologies
• Download IBM trial software directly from developerWorks.
Discuss
• Participate in the discussion forum for this content.
• Read developerWorks blogs, and get involved in the developerWorkscommunity.
About the author
ibm.com/developerWorks developerWorks®
Kernel Trademarks© Copyright IBM Corporation 2006. All rights reserved. Page 25 of 26

Ian ShieldsIan Shields works on a multitude of Linux projects for thedeveloperWorks Linux zone. He is a Senior Programmer at IBM at theResearch Triangle Park, NC. He joined IBM in Canberra, Australia, as aSystems Engineer in 1973, and has since worked on communicationssystems and pervasive computing in Montreal, Canada, and RTP, NC.He has several patents. His undergraduate degree is in puremathematics and philosophy from the Australian National University. Hehas an M.S. and Ph.D. in computer science from North Carolina StateUniversity. You can contact Ian at [email protected].
Trademarks
DB2, Lotus, Rational, Tivoli, and WebSphere are trademarks of IBM Corporation inthe United States, other countries, or both.Linux is a trademark of Linus Torvalds in the United States, other countries, or both.UNIX is a registered trademark of The Open Group in the United States and othercountries.Java and all Java-based trademarks are trademarks of Sun Microsystems, Inc. in theUnited States, other countries, or both.Intel is a registered trademark of Intel Corporation or its subsidiaries in the UnitedStates and other countries.Microsoft and Windows are trademarks of Microsoft Corporation in the United States,other countries, or both.
developerWorks® ibm.com/developerWorks
Kernel Trademarks© Copyright IBM Corporation 2006. All rights reserved. Page 26 of 26