Embed Size (px)
DESCRIPTION
How to install and use Proteus 8
Citation preview
Nama : Muhammad Amin Marzuqi
Kelas : EK 2C
Making 2 Instruction
How to install Proteus in 32-bit & 64-bit operating systems
Step 1:- Run Setup File
Open the setup folder of Proteus on your system and check for the “pro-setup 77 (type -application)”. Now run this setup and press next at every command and refer step 2 when setup asked for a key.
Step 2:- Installation of key
Now select “use a locally installed licensed key” and press“NEXT”. Now you may get one of two windows either a window showing already installed key or the one with no key installed earlier.
Step 2(a):- Already installed key
If you got a window showing already installed key then simply press “NEXT” and move further till setup shows “SELECT FEATURES” window.
Step 2(b):- No key Installed earlier
If you got a window with message “NO KEY INSTALLED” then no need to worry simply click on next and then you get a blank window, click on “BROWSE FOR KEY FILE” and go to the folder where all files of software are placed. Open folder “PACH PROTEUS 7.7 SP 2 v1.0” and select key file and click “OPEN”. Now click on “INSTALL” to install key then press “YES” and then“CLOSE”. Now setup will show a window showing installed key then simply press “NEXT” and move further till setup shows“SELECT FEATURES” window.
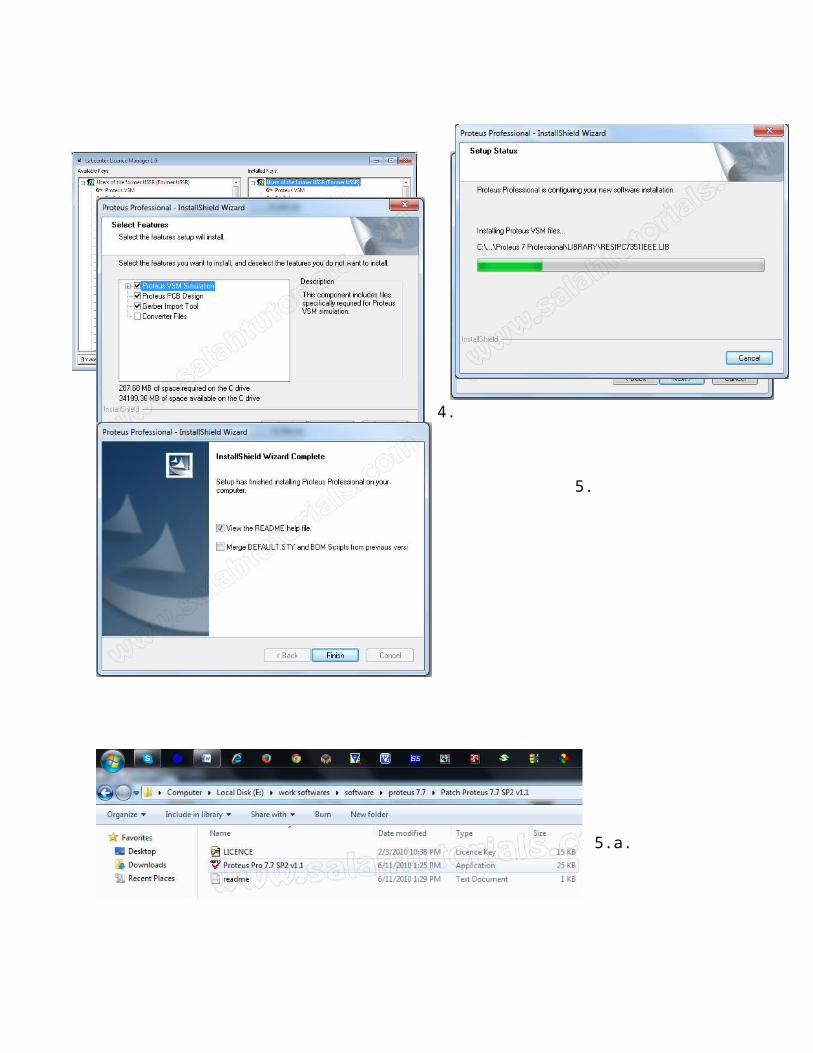
Step 3:- Select Features
If automatically not selected then select the first three features of Proteus showing on select features window and press “NEXT” to continue installation.
Step 4:- Installation / Setup status
Now the window will indicate us the installation process with a green bar covering the empty bar and when installation completes it will ask you to finish the setup installation, so click on “FINISH”to complete the installation.

Now Proteus is successfully installed on our system. Now you may thinking that what’s the difference for 32-bit & 64-bit operating system.
Step 5:- Updating Proteus
This is the final step and last process before running Proteus on your desktop/Laptop and is compulsory to perform otherwise the shortcut icon of Proteus you got on your home screen will not open.
Oh! Don’t worry updating of Proteus doesn’t require any internet connection, it’s a offline process and require just to update license key you installed during installation.
Step 5(a):- 32-BIT OPERATING SYSTEM (WIN XP / VISTA / WIN 7 32-bit)
Again go to the folder where setup is placed and open “PACH PROTEUS 7.7 SP2 v1.1” and then open properties of “PROTEUS PRO 7.7 SP2 v1.1”. Select “COMPATIBILITY” and then select“WINDOW XP SERVICE PACK 3”(in case of win 7) and select “RUN THIS PROGRAM AS AN ADMINISTRATOR” and then “APPLY & OK”. Now click on “UPDATE” and when update is complete click on“CLOSE”. For win XP direct run the “PROTEUS PRO 7.7 SP2 v1.1” and direct update it.
Step 5(b):- 64-BIT OPERATING SYSTEM (WIN 8 / WIN 64-bit)
First open your C drive and go to “PROGRAM FILES X86” and cut the folder named “LABCENTER ELECTRONICS” and paste it to the folder named “PROGRAM FILES” in C-drive only.
Again go to the folder where setup is placed and open “PACH PROTEUS 7.7 SP2 v1.1” and then open properties of “PROTEUS PRO 7.7 SP2 v1.1”. Select “COMPATIBILITY” and then select“WINDOW XP SERVICE PACK 3”(in case of win 7/win 8) and select “RUN THIS PROGRAM AS AN ADMINISTRATOR” and then “APPLY & OK”. Now click on “UPDATE” and when update is complete click on “CLOSE”.
Now again cut the folder named as “LABCENTER ELECTRONICS”which you pasted in “PROGRAM FILES” and again paste it to“PROGRAM FILES X86” in C-drive only.
So the only change is just cut copy paste and rest is same as for 32-bit Operating System.
NOW run your PROTEUS shortcut icon and enjoy your simulator for various pcb design & simulation design purposes.
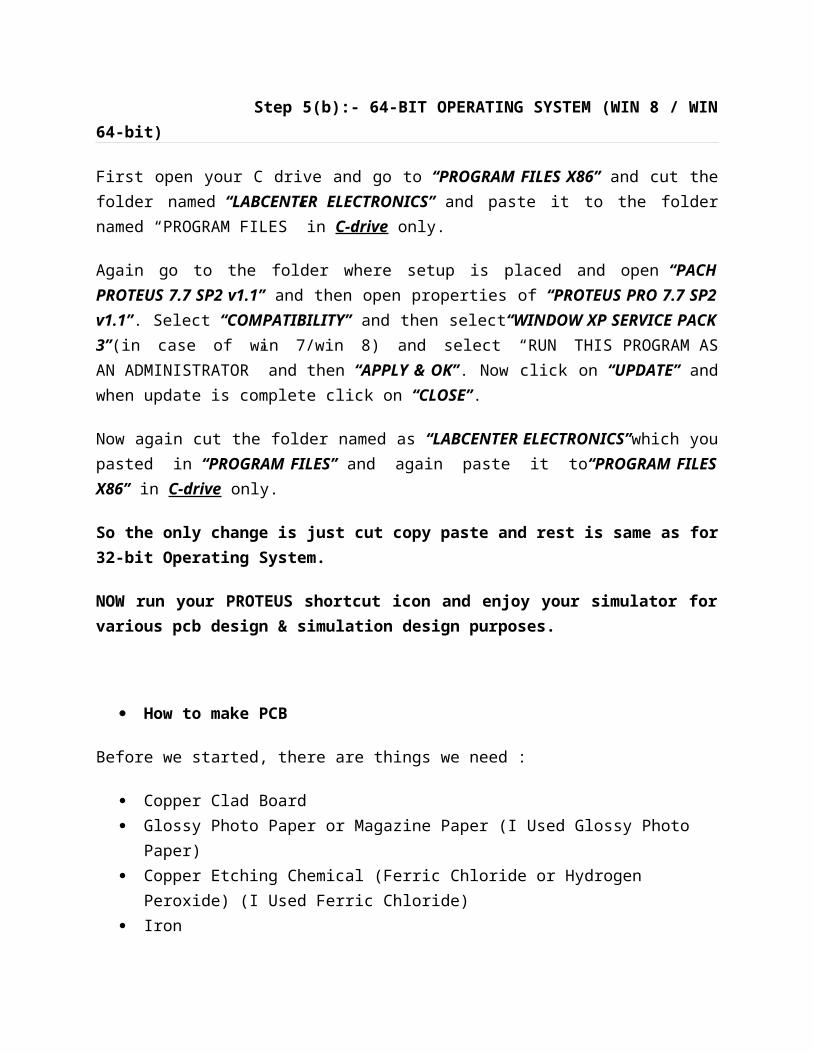
How to make PCB
Before we started, there are things we need :
Copper Clad Board Glossy Photo Paper or Magazine Paper (I Used Glossy Photo Paper) Copper Etching Chemical (Ferric Chloride or Hydrogen Peroxide) (I Used Ferric
Chloride) Iron 2 Containers (1 Small And 1 Big) (Make Sure That The Smaller One Gets Fitted
Between The Bigger One, There Must Be Space Between Them) Hand Drill Machine (With 1mm Bit) Laser Printer (If You Don't Have Then Draw the Designs With Permanent Marker On
Copper Clad Board) PCB Designs On Your Computer (Make Your Own In Proteus Software)
Step 1: Design The Schematics And Print Them
Download Any Design Or Make Your Own. I Used Proteus.Print The Design On Glossy Photo Paper Or Magazine Paper Using Laser Printer Only.If You Don't Have A Laser Printer Then You Can Draw The Design With Permanent Marker On The Copper Clad Board.
Step 2: Prepare Your Copper Clad Board
To Prepare The Copper Clad Board :
1. Apply Liquid Soap Or Dishwasher Liquid On The Copper Clad Board2. Rub Steel Wool On It Till It Gets Shiny3. Rub It With Scotch-Brite4. Soak It With Water5. Finally, Clean It With A Cloth
Now Your Copper Clad Board Is Ready For Toner Transfer (Toner Onto The Board) .
Step 3: Toner Transfer (Transfer Of Toner Onto The Board)
For The Toner Transfer:
1. Heat The iron to its Maximum Setting.2. Cut The Design And Place It Upside-Down On The Board And Make Sure That It Is
Completely on the Board.3. Slowly Move And Press the Iron On The Board with Pressure For 20-25 Minutes.

Step 4: Washing The Board And Completely Removing the Paper
After Heating, Wash The Board With Water Till the Paper Completely Gets Removed, Now Only Black Lines Are Left on the Board. DO NOT REMOVE THOSE LINES. After That IF There Are Any Non Transferred Lines Then Grab A Permanent marker And Draw The Lines.
Step 5: The Etching Method
For The Etching Method :-
1. Boil Approx. 500 ml Of Water In A Utensil For 15-20 Minutes. The Hotter The Water is, The Less Time The Etching Method Will Take.
2. Pour Ferric Chloride In The Small Container.3. Now, Pour The Boiling Water In Ferric Chloride. (The Hotter The Water is, The Less
Time The Etching Method Will Take) (Do Not Completely Fill the Container)4. Also Pour the Boiling Water In The Big Container (Again, Do Not Completely Fill It)5. Now Put The Small Container In The Big Container, After Doing That Put The Board In
The Small Container6. Keep Checking That The Copper Is Removed Or Not.
Hold The Board With Tweezers(Not With Hands Like I Am Doing, As It Is A Chemical).7. If The Copper Is Completely Removed(Like This) Then, The Etching Is Done.
Step 6: Washing It
Now Hold The Board With Spoon Or Tweezers And Wash It With Water And Make Sure That The Chemical Is Completely Removed.
Step 7: Remove The Toner, And You Made A PCB
Remove The Toner With A Steel Wool Like Its Shown In The Picture , And You Made A PCB.
Step 8: Drill
Drill The PCB With A 1mm Drill Bit (I Used A Hand Drill)
Step 9: Solder Your Components And Its Ready
Solder Your Components And Its Ready
1.
2.a
2.b.

3. 4.
5.

5.a.
1. 2.
3. 4.

5.
6. 7.
8. 9.