Embed Size (px)
Citation preview
1
Revised January 2014
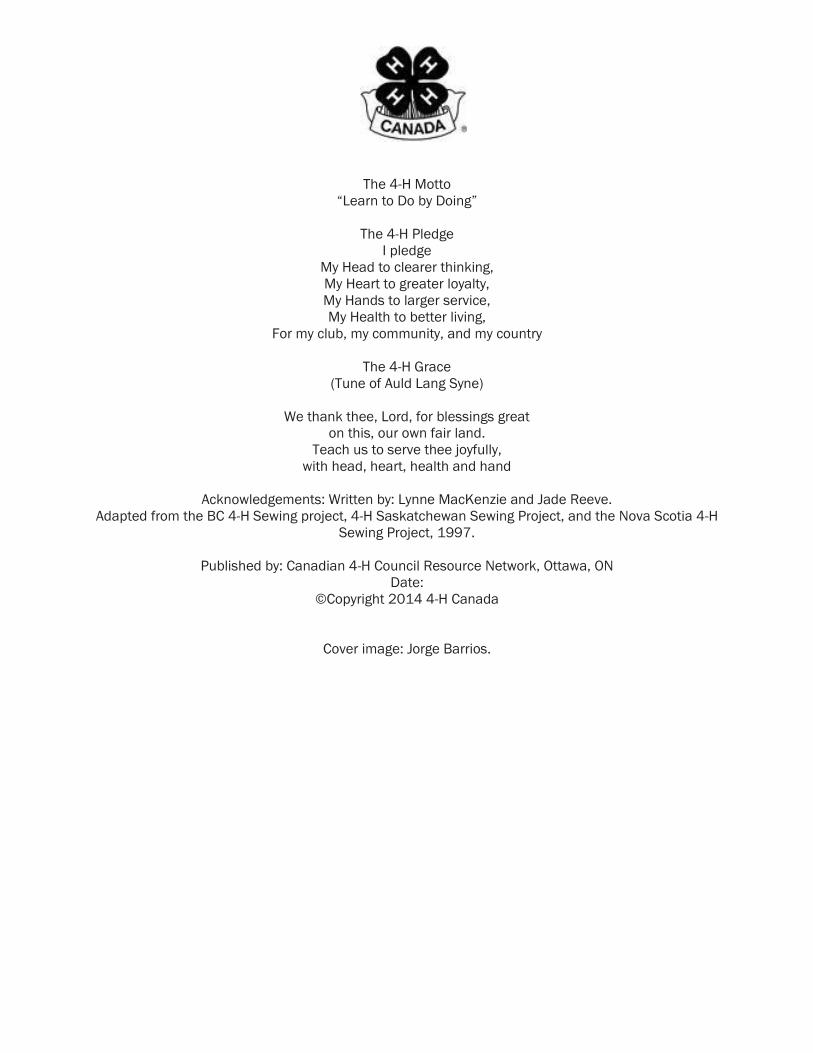
4-H Sewing Project Activity Guide

The 4-H Motto
“Learn to Do by Doing”
The 4-H Pledge
I pledge
My Head to clearer thinking,
My Heart to greater loyalty,
My Hands to larger service,
My Health to better living,
For my club, my community, and my country
The 4-H Grace
(Tune of Auld Lang Syne)
We thank thee, Lord, for blessings great
on this, our own fair land.
Teach us to serve thee joyfully,
with head, heart, health and hand
Acknowledgements: Written by: Lynne MacKenzie and Jade Reeve.
Adapted from the BC 4-H Sewing project, 4-H Saskatchewan Sewing Project, and the Nova Scotia 4-H
Sewing Project, 1997.
Published by: Canadian 4-H Council Resource Network, Ottawa, ON
Date:
©Copyright 2014 4-H Canada
Cover image: Jorge Barrios.
4-H SEWING PROJECT – ACTIVITY GUIDE – TABLE OF CONTENTS
Introduction ....................................................................................................................................................... 1
How to Use the 4-H Sewing Project Activity Guide ..................................................................................... 1
I’ve Got a Notion ........................................................................................................................................... 3
Everything in its Place .................................................................................................................................. 5
I Have a Point ................................................................................................................................................ 6
Stitch-in Time ................................................................................................................................................ 7
Your Sewing Machine ................................................................................................................................... 8
Parts of the Sewing Machine ....................................................................................................................... 9
And Another Point ....................................................................................................................................... 10
Paper Stitching ........................................................................................................................................... 12
Fabric and Thread ...................................................................................................................................... 16
What’s My Size............................................................................................................................................ 17
Pattern Markings ........................................................................................................................................ 19
Designing Women and Men ....................................................................................................................... 22
Serging Ahead ............................................................................................................................................. 23
Putting Your Best Foot Forward ................................................................................................................. 25
Getting Closure ........................................................................................................................................... 27
The Inside Story .......................................................................................................................................... 29
Colours That Compliment........................................................................................................................... 32
Fashion File ................................................................................................................................................. 34
Should I Buy or Should I Sew? ................................................................................................................... 35
Wardrobe Planning ..................................................................................................................................... 37
Sewing Green .............................................................................................................................................. 41
Answer Guide .............................................................................................................................................. 43


4-H SEWING PROJECT – FABRIC CARE AND USE GUIDE 1
INTRODUCTION
How to Use the 4-H Sewing Project Activity Guide
The activities in this guide are presented in a logical order of skill progression and should be presented
in this order. The activities are meant for members to have an opportunity to help them learn, evaluate,
make decisions, communicate and develop confidence.
Each activity has the following format:
Title
Topic
Learning Outcomes
Time
Materials/resources
Instructions
Suggestions/Comments
Processing Prompts
Each activity in the 4-H Sewing Project has learning outcomes identified at the beginning of the activity,
and processing prompts at the end. To gain a better understanding of why these were added to every
activity, we have included the following section about experiential learning.
Experiential Learning
Experiential learning is a model that, simply put, consists of action and reflection. Research shows that
learning is often best achieved when it is fun, active, interesting and easy to understand. Participating
in fun activities creates a sense of togetherness within a group and help members relate to one
another, as well as allowing the group to relax, to feel safe and at ease. Through guided reflection and
discussion, activities with meaning often help individuals understand concepts and skills more than if
the same meaning was presented in a lecture format.
A leader can help 4-H members and groups learn, by leading activities with meaning. These activities
can then be processed to help the group find the meaning. These lessons can then be applied to other
area of the members’ lives – helping them to transfer the meaning from the activity to the real world
and everyday life.
What is Processing?
Processing is when individuals reflect, describe, analyze and communicate what they have or will be
experiencing in an activity.
Each activity has processing prompts. There will be a list of questions to ask regarding the concept to
focus on in a group discussion. Some or all of the questions can be used to process the activity. Feel
free to add your own processing prompts if you feel there is a specific topic that you would like to
discuss.
When implementing the 4-H Sewing Activity Guide, processing is most easily done with the group when
sitting or standing in a circle, and when the group is attentive and focused on the discussion.

2 4-H SEWING PROJECT – ACTIVITY GUIDE
When questions are designed properly and used thoughtfully, discussion questions can be an effective
learning tool that promotes creativity, as well as generates meaningful interaction and understanding
for the member. Processing can be fast or slow depending on the group and the activity.
4-H SEWING PROJECT – FABRIC CARE AND USE GUIDE 3
I’ve Got a Notion
TOPIC: Learning about sewing notions
LEARNING OUTCOMES:
To learn about basic sewing tools
TIME: 30 minutes
MATERIALS/RESOURCES:
Paper and pen/pencil
Word match exercise sheet
INSTRUCTIONS:
Distribute a copy of the Word Match exercise sheet and a pen or pencil to each member. Instruct them
to match the word in the left-hand column to the correct definition in the right-hand column.
DISCUSSION/COMMENTS:
Every hobby has its own specialized tools and terms and sewing is no different. It’s important to
understand the terms and to know how the tools and equipment works before we start to sew.
Cutting tools
Sewing scissors are very important and you'll need your own. Choose a pair 10 cm to 15 cm long, with
sharp blades for cutting threads, trimming and clipping seams. Dressmaker's shears are used for
cutting fabric, and are very sharp. Use them with care. Bent-handled shears are recommended for
easier cutting.
Measuring tools:
Tape measure – choose one that measures 150 cm, that has metal ends and is plastic coated, so it
won't stretch or ravel.
Ruler – a 15 cm clear plastic ruler or a metal sewing gauge is handy.
Sewing tools:
Pins – choose fine, non-rusting, stainless steel dressmaker pins. Pins with coloured heads are easy to
see and handle.
Pin cushions – come in different shapes and sizes. The tomato shape is popular; the type that clips to
your wrist is easy to work with.
Hand sewing needles – have different thicknesses, lengths, points and eye sizes. There are numerous
types of hand sewing needles and the most common are sharps, betweens, embroidery or crewel and
ballpoint. The common hand sewing needles are available in sizes from 1 – 12, 1 being the thickest
and longest and 12 being short and fine. Each type of needle is designed to work with specific fabrics
and threads.
Sewing machine needles – come in different sizes to sew different fabrics.
Seam ripper – a useful tool used to take out stitches when you make a mistake.
4 4-H SEWING PROJECT – ACTIVITY GUIDE
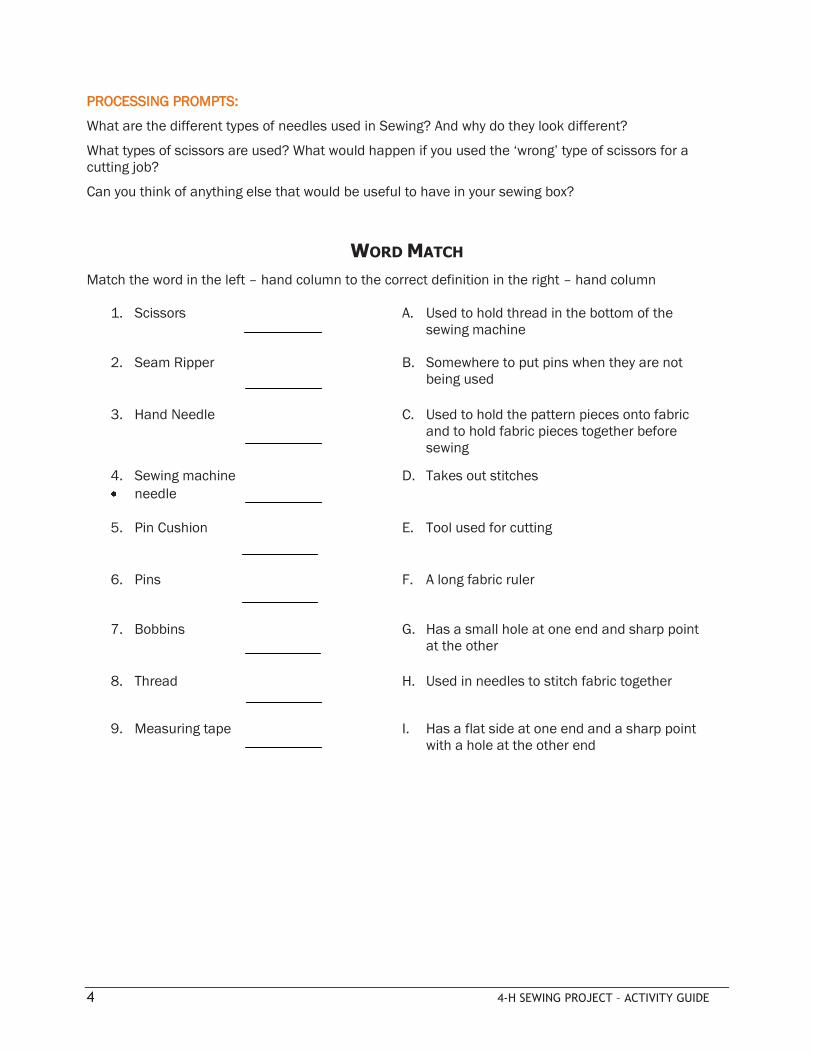
PROCESSING PROMPTS:
What are the different types of needles used in Sewing? And why do they look different?
What types of scissors are used? What would happen if you used the ‘wrong’ type of scissors for a
cutting job?
Can you think of anything else that would be useful to have in your sewing box?
WORD MATCH
Match the word in the left – hand column to the correct definition in the right – hand column
1. Scissors A. Used to hold thread in the bottom of the
sewing machine
2. Seam Ripper B. Somewhere to put pins when they are not
being used
3. Hand Needle C. Used to hold the pattern pieces onto fabric
and to hold fabric pieces together before
sewing
4. Sewing machine
needle
D. Takes out stitches
5. Pin Cushion E. Tool used for cutting
6. Pins F. A long fabric ruler
7. Bobbins G. Has a small hole at one end and sharp point
at the other
8. Thread H. Used in needles to stitch fabric together
9. Measuring tape I. Has a flat side at one end and a sharp point
with a hole at the other end

4-H SEWING PROJECT – FABRIC CARE AND USE GUIDE 5
Everything in its Place
TOPIC: Make a container for sewing notions
LEARNING OUTCOMES:
To create a container to store notions necessary for sewing
TIME: 30 minutes
MATERIALS/RESOURCES:
Sturdy box with lid
Scraps of fabric, paper, ribbon, etc. to decorate the box
Glue sticks or hot glue gun
Basic sewing notions – scissors, pins and a pincushion, sewing needles, sewing machine needles, measuring tape, bobbins, seam-ripper and all-purpose thread
INSTRUCTIONS:
Using the glue sticks or glue guns secure the chosen materials or items to the box. Be careful not to use
anything that can’t be secured or that will come off easily.
Gather notions and place in sewing box.
DISCUSSION/COMMENTS:
Having your notions in one safe place helps keep your work space tidy and also helps you find your
notions quickly when you want to work on a sewing project. Having a place to keep sharp items such as
pins and needles and scissors is a good safety practice.
PROCESSING PROMPTS:
Where would it be best to store your box of notions?
Can you think of anything else that would be useful to have in your sewing box?
6 4-H SEWING PROJECT – ACTIVITY GUIDE
I Have a Point
TOPIC: Hand sewing needles
LEARNING OUTCOMES:
To learn about the different types of hand sewing needles and their use
TIME: 30 minutes
MATERIALS/RESOURCES:
Selection of needles including sharps, betweens, embroidery/crewel and ballpoint in different sizes
Thimbles
Swatches of different types of fabrics such as cotton, nylon, knit
Scissors
Thread suitable for each type of fabric
INSTRUCTIONS:
In small groups, have the members try different types of needles with each type of fabric using a basic
running stitch.
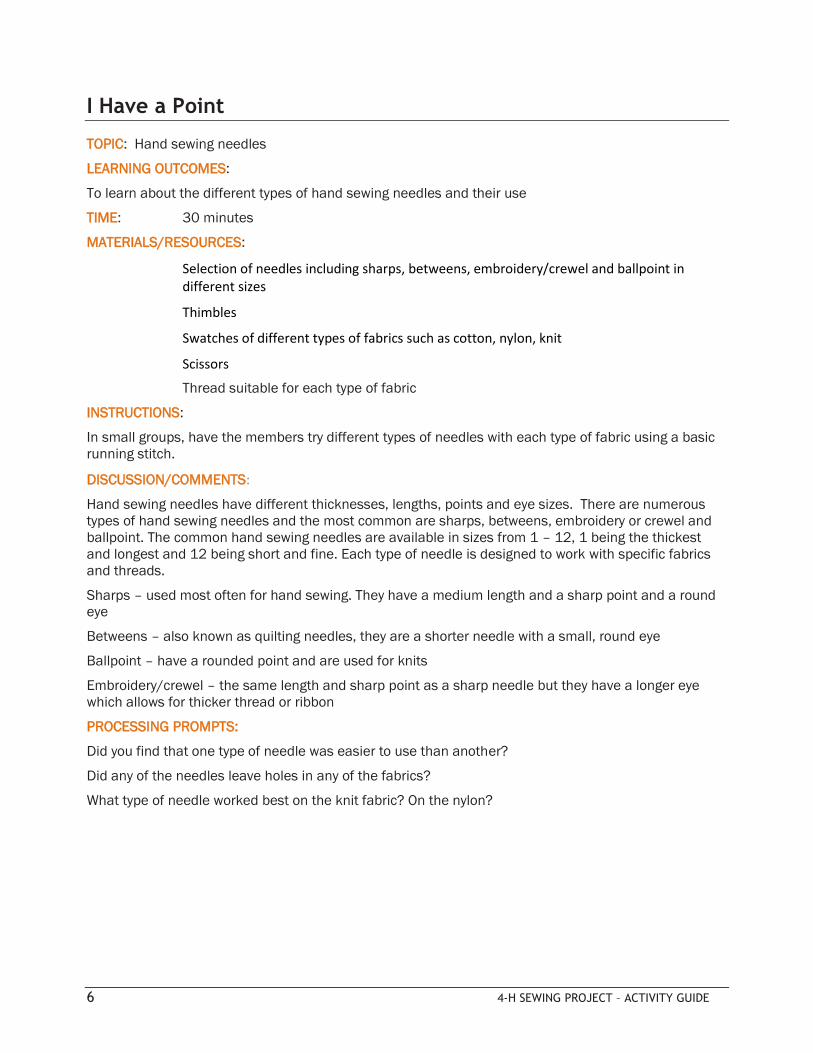
DISCUSSION/COMMENTS:
Hand sewing needles have different thicknesses, lengths, points and eye sizes. There are numerous
types of hand sewing needles and the most common are sharps, betweens, embroidery or crewel and
ballpoint. The common hand sewing needles are available in sizes from 1 – 12, 1 being the thickest
and longest and 12 being short and fine. Each type of needle is designed to work with specific fabrics
and threads.
Sharps – used most often for hand sewing. They have a medium length and a sharp point and a round
eye
Betweens – also known as quilting needles, they are a shorter needle with a small, round eye
Ballpoint – have a rounded point and are used for knits
Embroidery/crewel – the same length and sharp point as a sharp needle but they have a longer eye
which allows for thicker thread or ribbon
PROCESSING PROMPTS:
Did you find that one type of needle was easier to use than another?
Did any of the needles leave holes in any of the fabrics?
What type of needle worked best on the knit fabric? On the nylon?
4-H SEWING PROJECT – FABRIC CARE AND USE GUIDE 7
Stitch-in Time
TOPIC: Hand sewing
LEARNING OUTCOMES:
To learn the basic hand sewing stitches
TIME: 45 minutes
MATERIALS/RESOURCES:
Cotton fabric pieces measuring approx. 10cm square
Thread
Hand sewing needles (sharps would be best)
Scissors
Thimbles
INSTRUCTIONS:
Demonstrate each of the basic hand stitches. Give each member some fabric, needles and thread and
have them practice each stitch.
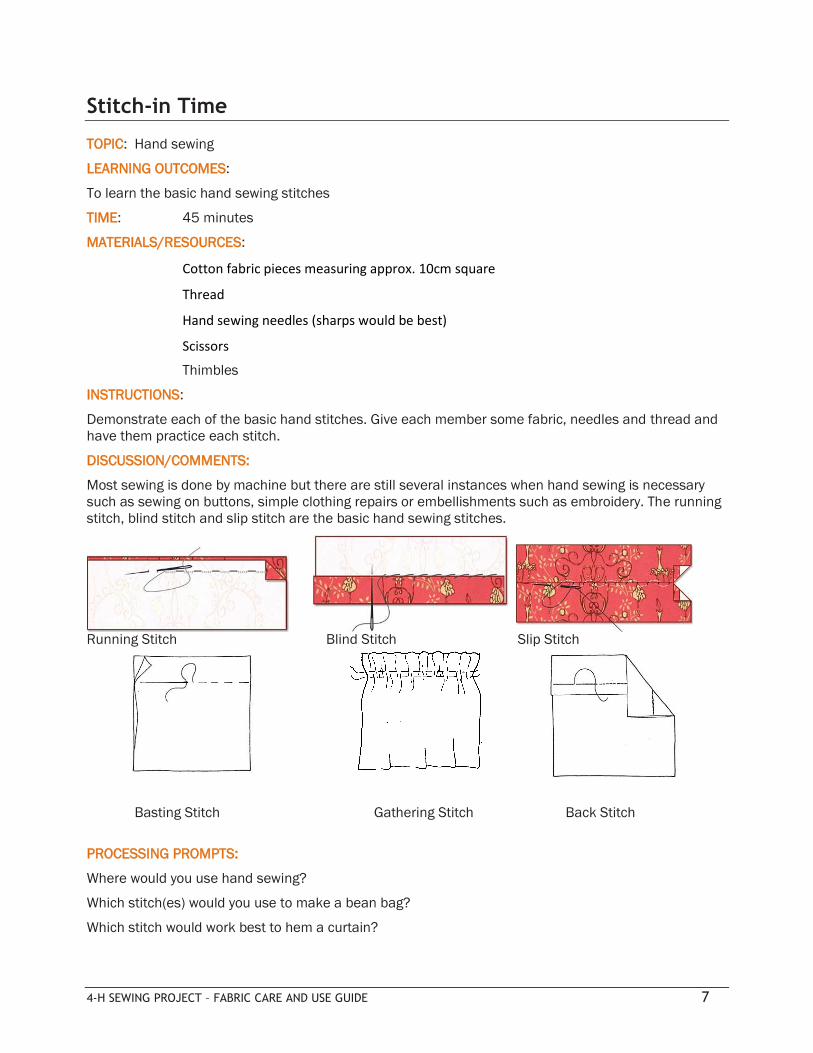
DISCUSSION/COMMENTS:
Most sewing is done by machine but there are still several instances when hand sewing is necessary
such as sewing on buttons, simple clothing repairs or embellishments such as embroidery. The running
stitch, blind stitch and slip stitch are the basic hand sewing stitches.
Running Stitch Blind Stitch Slip Stitch
Basting Stitch Gathering Stitch Back Stitch
PROCESSING PROMPTS:
Where would you use hand sewing?
Which stitch(es) would you use to make a bean bag?
Which stitch would work best to hem a curtain?

8 4-H SEWING PROJECT – ACTIVITY GUIDE
Your Sewing Machine
TOPIC: Getting to know the parts of your sewing machine
LEARNING OUTCOMES:
To learn the parts of the sewing machine and how they work
TIME: 30 minutes
MATERIALS/RESOURCES:
At least one sewing machine
Paper and a pencil/pen
Diagram of sewing machine without labels
INSTRUCTIONS:
Explain the parts of the sewing machine to the members in small groups if possible. Demonstrate how
the parts work with one another to create a stitch. Demonstrate how to wind a bobbin and how to
thread the machine. Explain that their machine may be different and that the manual for their machine
will show the correct way to thread their machine.
Give each member a copy of the sewing machine diagram without labels and ask them to identify each
part.
DISCUSSION/COMMENTS:
A sewing machine has many moving parts and it is important to understand how they work together to
create stitches. Understanding how the sewing machine works will make it easier to troubleshoot when
something is not working correctly.
It will be useful to discuss the answers to the labelling exercise with the group to share knowledge of
the various parts of a sewing machine and what they do. This activity is a good indication of the sewing
level of each member.
PROCESSING PROMPTS:
How many parts could you identify?
What would happen if the machine was not threaded correctly?
What happens if the bobbin is not wound correctly?

4-H SEWING PROJECT – FABRIC CARE AND USE GUIDE 9
LABEL PARTS OF THE SEWING MACHINE
Parts of the Sewing Machine
(Illustration from http://msucares.com/pubs/images/p1302-16.htm)

10 4-H SEWING PROJECT – ACTIVITY GUIDE
And Another Point
TOPIC: Sewing machine needles
LEARNING OUTCOMES:
Members will learn to identify different types of sewing machine needles and when to use them
TIME: 20 minutes
MATERIALS/RESOURCES:
Pen/pencil
Diagram of sewing machine needles
INSTRUCTIONS:
Give each member a copy of the sewing machine needles diagram and a pen/pencil. Have them
identify the type of needles in the picture.
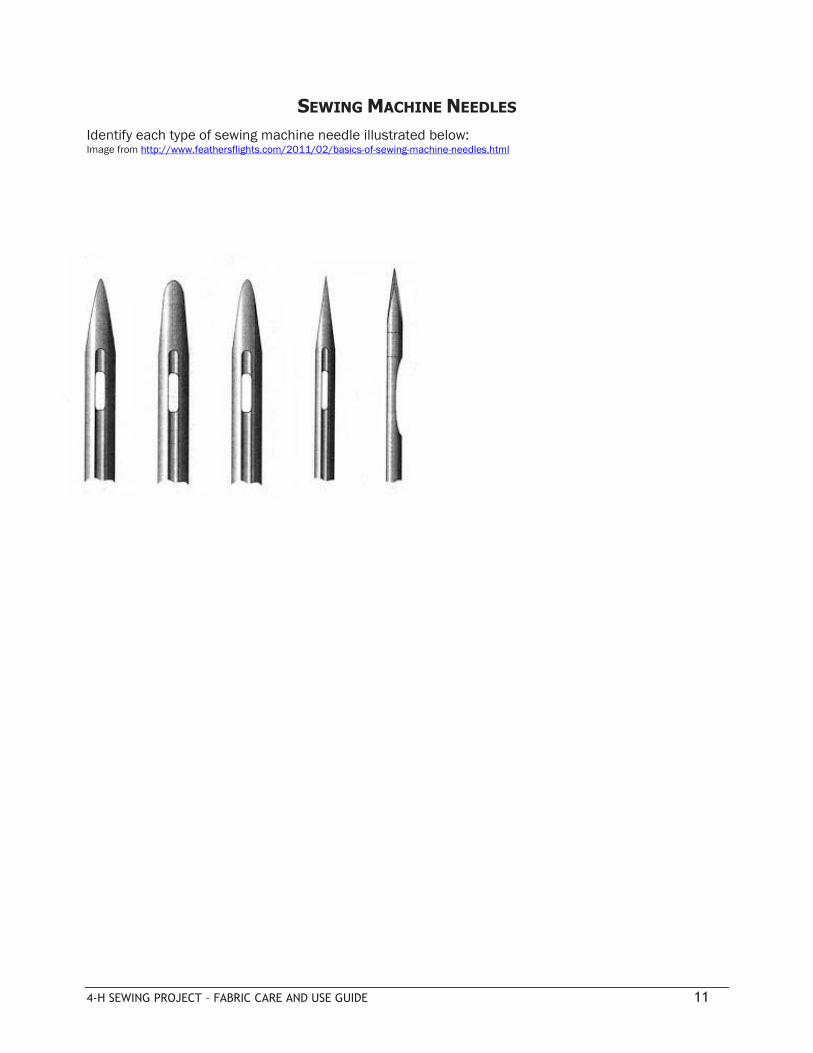
DISCUSSION/COMMENTS:
To produce the best results when sewing, it is important to use the right equipment. There are many
different types of sewing machine needles and each is designed for a specific purpose. Generally
speaking, lighter fabrics will use smaller the needle sizes and heavier fabrics need a larger needle. The
needle size should also match the type of thread being used in your project. There are six basic sewing
machine needle types:
1. Universal – Has a slightly rounded point and is used for both knits and woven fabrics
2. Ballpoint – Has a rounded point which pushes aside fabric threads instead of piercing
them. Used for sewing heavy, loose knit fabrics.
3. Stretch – Similar to the ballpoint needle but the point is a little less round. For sewing knits
and knit fabrics containing lycra.
4. Sharp - Pointed needle used on woven fabrics such as microfiber, polyester and silk
5. Leather – Has a cutting point and cuts the fabric rather than simply piercing it. Is used on
coarse materials such as leather and vinyl.
6. Twin or Triple – There are two or three needles on one shaft and can come in a variety of
points. Used for decorative stitching, topstitching and for hemming T-shirts and fleece
fabrics.
PROCESSING PROMPTS:
What type of needle would you use if you were sewing a bathing suit?
Which needle would you choose for pyjama pants?
What would happen if used the wrong sewing needle on a material? For example, using a sharp needle
on a fabric containing lycra or a leather needle with cotton fabric.
4-H SEWING PROJECT – FABRIC CARE AND USE GUIDE 11
SEWING MACHINE NEEDLES
Identify each type of sewing machine needle illustrated below: Image from http://www.feathersflights.com/2011/02/basics-of-sewing-machine-needles.html
12 4-H SEWING PROJECT – ACTIVITY GUIDE
Paper Stitching
TOPIC: First stitches on a sewing machine
LEARNING OUTCOMES:
To learn how to sew with a sewing machine
TIME: 60 minutes
MATERIALS/RESOURCES:
Lined notebook paper and a copy of the practice sheets for each member
Sewing machine with universal needle
INSTRUCTIONS:
Remove thread and bobbin from sewing machine. Give each member a piece of lined paper. Have the
members raise the presser foot and place the lined paper under the foot. Make sure the needle is lined
up with one of the lines on the ruled paper. Drop the presser foot and begin sewing along the lines. At
the end of each line, move the paper over to line up with the next line and continue sewing along the
lines. Have the member continue sewing on the lines until they are comfortable starting, stopping and
guiding the paper through the feed dogs.
Once the members are comfortable sewing along the lines, have them use the line as a guide for the
sewing machine foot and sew beside the line, not on it. Using the line as a guide will encourage them to
not watch the needle when sewing.
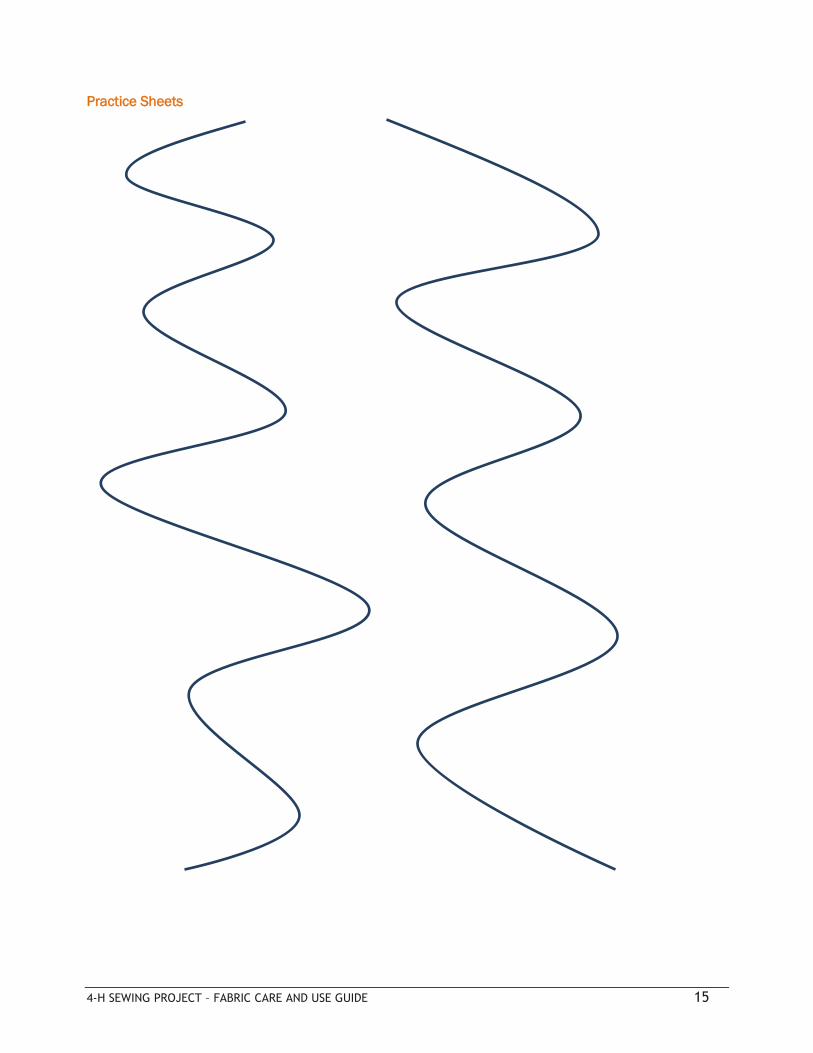
When members are consistently using the lines as a guide, distribute the use the practice sheets. The
practice sheets include boxes to practice how to pivot when sewing as well as curved shapes to learn
how to sew more complicated shapes. Instruct the members to use the lines as guides and not to sew
on top of them.
DISCUSSION/COMMENTS:
Learning to use the sewing machine without thread allows members to learn how to stitch without the
interference of tension settings, bobbin threads and tangled pieces of threads.
It is important that the members learn not to use the needle as a guide when sewing. Using guides such
as lines drawn on fabric or the lines on the machine results in more accurate seams and makes sewing
along curves easier.
While the members are sewing, point out the action of the feed dogs. Have them observe that the paper
will move under the needle without pushing it and that they need to simply guide the paper (and
eventually the fabric). Forcing the material could result in bent and broken needles and maybe even
damage the machine.
PROCESSING PROMPTS:
Did you find it difficult to follow the lines or curves? Were you able to find a way to make it easier to
follow along the printed lines?
Why would you pivot when changing direction instead of lifting the needle out of the paper to turn?

4-H SEWING PROJECT – FABRIC CARE AND USE GUIDE 13
Practice Sheets
PIV
OT
PIV
OT
PIV
OT
PIV
OT
PIV
OT PIV
OT
PIV
OT
PIV
OT

14 4-H SEWING PROJECT – ACTIVITY GUIDE
Practice Sheets
4-H SEWING PROJECT – FABRIC CARE AND USE GUIDE 15
Practice Sheets
16 4-H SEWING PROJECT – ACTIVITY GUIDE
Fabric and Thread
TOPIC: Machine sewing with fabric and thread
LEARNING OUTCOMES:
To learn how to sew on fabric
To learn how to identify different types of fabric
TIME: 45 minutes
MATERIALS/RESOURCES:
Sewing machines
Samples of different types of fabric such as cotton, spandex, denim, polar fleece, satin
or silky polyester, felt, fun fur, etc. – 5 samples per each member would be ideal
Thread
Scissors
INSTRUCTIONS:
Have members select 5 different fabrics they like from the sample fabrics. Thread the sewing machines
and have the members sew straight lines on each of the fabrics.
DISCUSSION/COMMENTS:
There are two types of fibres: natural and synthetic (man-made). Many natural fibres come from
agriculture: Linen (from Flax), Wool (from animals), Silk (from silk worms), Cotton, Hemp, Bamboo (all
from plants). Synthetic fibres are man-made. They include polyester, acetate, acrylic, nylon, spandex,
viscose rayon, etc. Blends of natural and synthetic fibres are common and give the best features of
both to a fabric.
There are three main types of fabric structures; woven, knits and non-wovens. Wovens, such as denim
and cotton, consist of yarns interlaced at right angles. Knits, such as fleece and spandex, are formed by
the interlooping of yarns. Non-wovens, such as felt and most iron on interfacings, are made from fibres
that have been pressed into shape.
Identify the types of fabric with the members and classify them by their structure.
PROCESSING PROMPTS:
Which type of fabric was easiest to sew?
What made some of the fabrics more difficult than others to sew?
4-H SEWING PROJECT – FABRIC CARE AND USE GUIDE 17
What’s My Size
TOPIC: Body measurements and pattern size
LEARNING OUTCOMES:
To learn how to make correct body measurements
To learn how to choose the correct pattern size
TIME: 30 minutes
MATERIALS/RESOURCES:
Paper and pen/pencil
Copy of body measurement chart
Tape measure
Piece of string larger than the member’s waist
Copies of measurement charts from a pattern company (these can be found online)
INSTRUCTIONS:
Give each member a copy of the measurement chart from the pattern company, a copy of the body
measurement chart, a pen or pencil, tape measure and piece of string. Demonstrate how to properly
take body measurements. Have the members write down their measurements on the chart.
Demonstrate how to find their measurements and size on the pattern company’s chart.
DISCUSSION/COMMENTS:
Having accurate measurements before shopping for patterns is an essential part of a successful sewing
project. If the members are wearing bulky clothing, they should ask someone to help measure again in
clothing that will give a more accurate measurement.
Pattern size rarely matches the ready-made clothing size and it is important to purchase a pattern
based on measurements, not on the size from the clothing store.
Before starting to measure, tie the piece of string at your natural waistline.
Measuring for Girls
Bust/Chest: Place a tape around the fullest part of the bust/chest just touching the top of the shoulder
blade and the back.
Waist: Measure around the waist at the string.
Hip: Measure around the hip in the fullest area usually 18 – 23 cm (7-8”) below the waist.
Back Waist Length: Measure down the centre back from the prominent bone at the base of the neck to
the string at your waist.
Skirt Length: Measure centre front or back from waist to desired length.
Dress Length: Measure centre back, base of neck to desired length.
Measuring for Boys
Neck: Measure around neck base.
Chest: Measure around the fullest part.
Waist: Measure around natural waist at string.
18 4-H SEWING PROJECT – ACTIVITY GUIDE
Sleeve Length: Measure from centre base of neck over shoulder and bent elbow to wrist.
PROCESSING PROMPTS:
Did your measurements match any of the sizes exactly? If not, how did you determine what size pattern
you should purchase?
Does the pattern size match the ready-made clothing size you would buy?
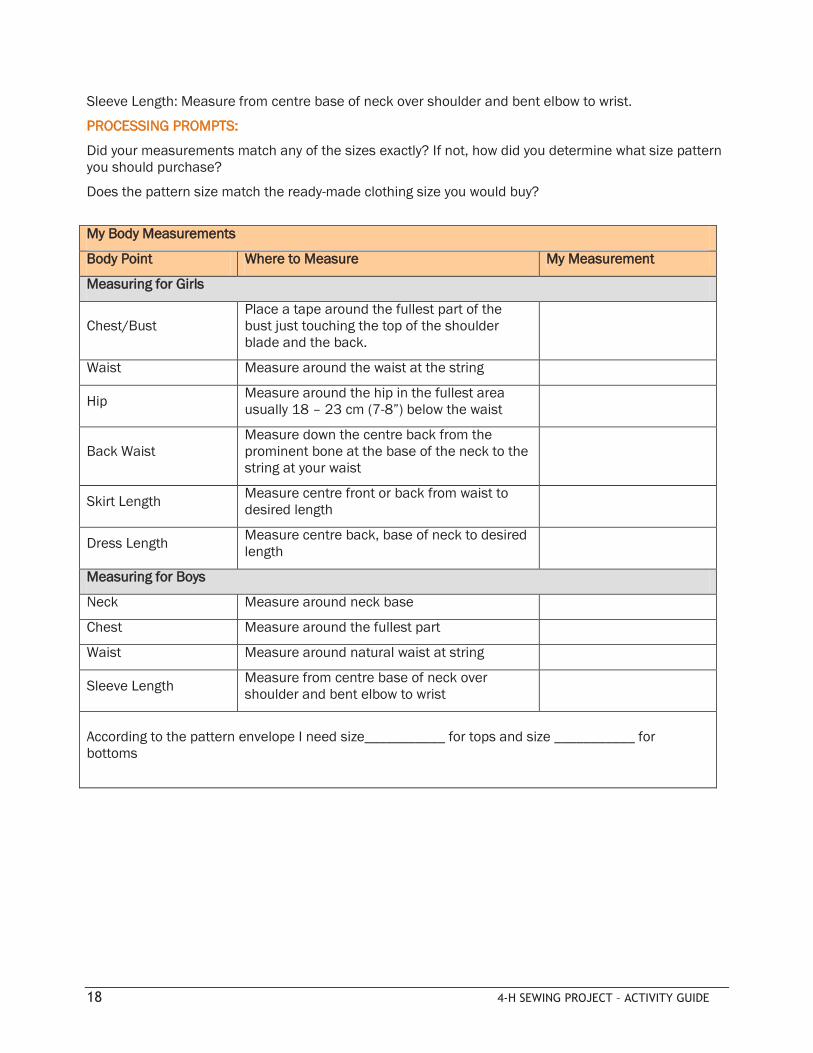
My Body Measurements
Body Point Where to Measure My Measurement
Measuring for Girls
Chest/Bust
Place a tape around the fullest part of the
bust just touching the top of the shoulder
blade and the back.
Waist Measure around the waist at the string
Hip Measure around the hip in the fullest area
usually 18 – 23 cm (7-8”) below the waist
Back Waist
Measure down the centre back from the
prominent bone at the base of the neck to the
string at your waist
Skirt Length Measure centre front or back from waist to
desired length
Dress Length Measure centre back, base of neck to desired
length
Measuring for Boys
Neck Measure around neck base
Chest Measure around the fullest part
Waist Measure around natural waist at string
Sleeve Length Measure from centre base of neck over
shoulder and bent elbow to wrist
According to the pattern envelope I need size___________ for tops and size ___________ for
bottoms

4-H SEWING PROJECT – FABRIC CARE AND USE GUIDE 19
Pattern Markings
TOPIC: Symbols and Markings on Pattern Pieces
LEARNING OUTCOMES:
To learn what the symbols and markings on pattern pieces mean
TIME: 45 minutes
MATERIALS/RESOURCES:
Commercial pattern pieces
Know Your Pattern Markings quiz
Pen/pencil
INSTRUCTIONS:
Using the commercial pattern pieces, explain the markings on the pattern. Hand out the Know Your
Pattern Markings quiz and a pen or pencil to each member. Have the members label the markings.
DISCUSSION/COMMENTS:
The arrows, dots and dashes may seem meaningless and confusing at first but the symbols are the
pattern’s way of telling you how to sew correctly without the use of words. Pattern symbols are generally
standard from pattern to pattern.
Once you have finished cutting your pieces, you will need to transfer the markings from the tissue to the
fabric. There are several ways to mark patterns. For a first project, the tracing wheel and tracing paper
or tracing carbon is the easiest to use.
Here are the explanations about the symbols that may be on the pattern pieces:
Cutting line - the heavy outlines on which you cut or the line on the piece for an alternate
shorter/smaller view from the same pattern.
Seam line - broken lines showing the stitching line.
Dots for adjusting sleeve ease - match those on the sleeves with those on the armholes. Mark
the dots with a tracing wheel or a tailor’s chalk.
Seam line arrow - indicates direction for cutting and stitching.
Place on fold – an arrowed bracket. Place the pattern edge exactly on the fold of fabric to cut
out
Double line across pattern pieces - use this line to lengthen or shorten your pattern before
placing on the fabric for cutting.
Centre line for dart - fold along this line before stitching
Straight-of-grain fabric symbol - a double headed arrow. The line should follow the straight grain
of fabric as closely as possible.
Buttonholes and buttons - indicate the length and the exact location of the buttonhole.
Seam allowance - is 1.6 cm (5/8”) from the cutting line unless otherwise indicated. For stitching
accuracy mark curved seams.
Centre front line - mark dots at top and bottom, pin and press to mark the centre in line.
Notches - diamond shaped symbols for matching when sewing. Always cut notches outward, not
into the seam allowance.
Dots - for accuracy, match to dots on other fabric pieces when sewing. Mark with tracing wheel
or tailor’s chalk
Special cutting instructions – if the pattern piece is used more than once, or if facing interfacing
is cut from the same pattern, the number of pieces that need to be cut is printed on the pattern.
20 4-H SEWING PROJECT – ACTIVITY GUIDE
PROCESSING PROMPTS
Which symbols tell you what you need to know to cut out your fabric?
Which symbols tell you how to sew your pieces together?
How will you know where the symbols are when you remove the pattern pieces from the fabric?
4-H SEWING PROJECT – FABRIC CARE AND USE GUIDE 21
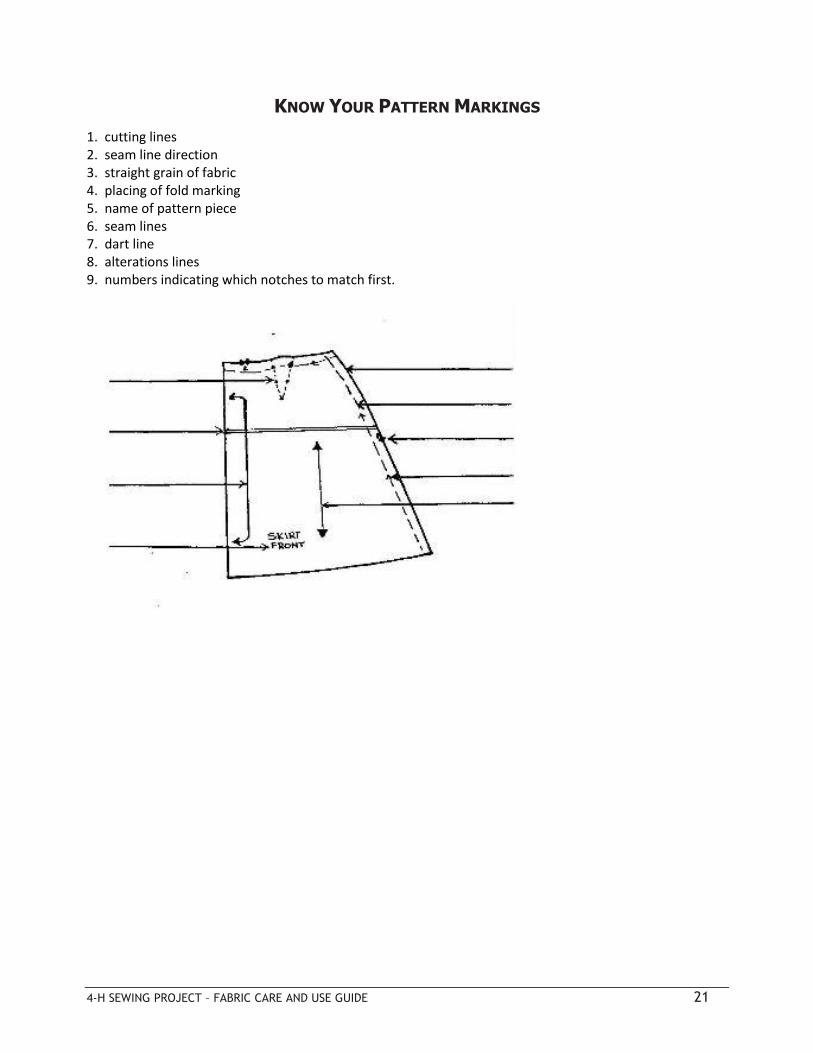
KNOW YOUR PATTERN MARKINGS
1. cutting lines 2. seam line direction 3. straight grain of fabric 4. placing of fold marking 5. name of pattern piece 6. seam lines 7. dart line 8. alterations lines 9. numbers indicating which notches to match first.
22 4-H SEWING PROJECT – ACTIVITY GUIDE
Designing Women and Men
TOPIC: Pattern making
LEARNING OUTCOMES:
To understand the technique and process of creating a pattern
TIME: 30 minutes
MATERIALS/RESOURCES:
Pen/pencil/marker
Poster paper
INSTRUCTIONS:
Give each member a piece of paper and drawing tool. Have each member draw a pattern of an item
they would like to sew such as a bag, shirt, shorts, hat, etc.
DISCUSSION/COMMENTS:
This activity will be useful to determine if members have an understanding of how a pattern relates to
the finished product. Members should include pattern markings needed for their item such as grainline,
fold lines, darts, notches and hem lines.
PROCESSING PROMPTS:
Was it difficult to create a pattern?
How did you determine the best size and shape for your item?
How will you use this pattern?
What type of fabric were you thinking of using when you created the pattern?

4-H SEWING PROJECT – FABRIC CARE AND USE GUIDE 23
Serging Ahead
TOPIC: The parts of a serger and how it works
LEARNING OUTCOMES:
To learn the parts of a serger
To learn how a serger works
TIME: 30 minutes
MATERIALS/RESOURCES:
A serger
Diagram of serger without labels
Pen/pencil
INSTRUCTIONS:
Explain the parts of the serger to the members in small groups if it is possible to have more than one
serger at the meeting. Demonstrate how the serger works. Demonstrate how to thread the serger.
Explain that their machine may be different and that the manual will show the correct way to thread
their serger.
Give each member a copy of the serger diagram without labels and ask them to identify each part.
DISCUSSION/COMMENTS:
A serger, which is sometimes called an overlock machine, stitches, trims and overcasts a seam in one
step at almost twice the speed of a conventional sewing machine. There are 2, 3, 4 and 5 thread
machines and they generally use two needles.
A serger cannot replace a conventional sewing machine as it is not capable of making buttonholes,
installing zippers or topstitching. A serger produces a seam and finish that makes a garment look more
professional and is particularly useful for working with knit fabrics such as jersey and fleece.
Not every home sewer needs a serger of course and it is worth discussing the pros and cons to
purchasing one. A serger can be expensive so the person who only sews a couple of things a year
probably does not really need a serger – a sewing machine with a zigzag stitch will suffice. However, if
having a professionally finished seam is important, for instance if you plan on selling what you make,
than a serger would be very useful. A serger would also be very helpful if you plan on sewing with knit
fabrics as it will make the process much faster and produce a stronger seam. A serger also finishes the
edges of delicate fabrics quickly and easily and gives them a much more professional look.
PROCESSING PROMPTS:
How does the serger differ from a sewing machine?
What type of project would you be most likely to make on serger? Why?
What would you not sew with a serger?
24 4-H SEWING PROJECT – ACTIVITY GUIDE
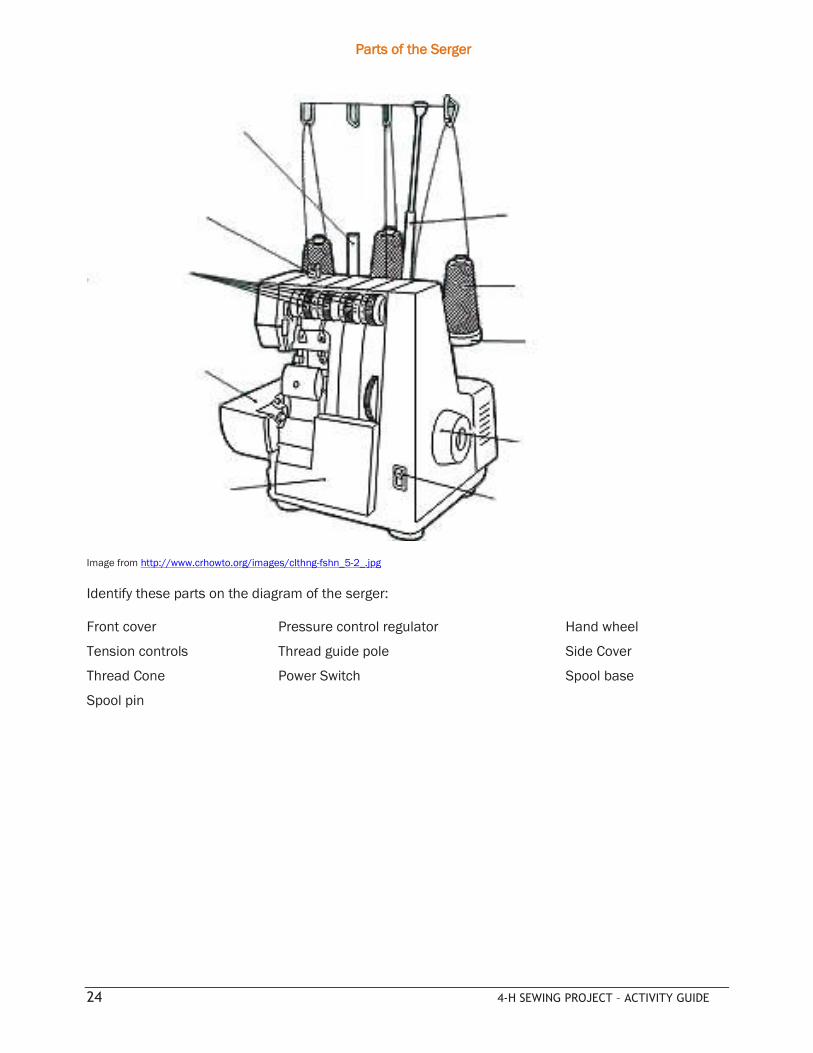
Image from http://www.crhowto.org/images/clthng-fshn_5-2_.jpg
Identify these parts on the diagram of the serger:
Front cover Pressure control regulator Hand wheel
Tension controls Thread guide pole Side Cover
Thread Cone Power Switch Spool base
Spool pin
Parts of the Serger
4-H SEWING PROJECT – FABRIC CARE AND USE GUIDE 25
Putting Your Best Foot Forward
TOPIC: Sewing Machine Presser Feet
LEARNING OUTCOMES:
To learn about different types of presser feet
To learn how and when to use different feet when sewing
TIME: 60 minutes
MATERIALS/RESOURCES:
Sewing machines Assortment of feet for each machine including an all-purpose foot, a zipper foot, a buttonhole foot, and if possible, a speciality foot such as a rolled hem foot or a walking foot Buttons (these will not be sewn on but used as a measurement for the buttonhole foot) 6”x6” cotton or poly/cotton blend fabric scraps, enough for each member to have two squares each 6” of piping for each member Thread Scissors
INSTRUCTIONS:
Attach a different type of foot to each machine and thread the machine before beginning. Explain the
use of each foot and then demonstrate each of the feet, using the piping with the zipper foot. Give each
member two squares of fabric, a button and a piece of piping. If desired, each member could have an
extra length of piping and attempt to sew it to the fabric with the all-purpose foot.
The members will rotate through stations to learn about the different types of presser feet.. Each station
will focus on a particular type of foot. The piping will be used with the zipper foot.
DISCUSSION/COMMENTS:
Presser feet work by putting pressure on the fabric as it is fed through the feed dogs. The all-purpose
foot is the most widely used presser foot and can be used to sew pretty much anything. However, there
is a wide assortment of different types of pressure feet available and using the right one will make
some tasks, such as sewing zippers or buttonholes, much easier to do. The feet that most often are
included with a sewing machine are:
All-purpose foot - used most often
- has a wider opening for the needle to allow making a zigzag stitch
Zipper foot - allows to sew very close to the edge of a zipper, piping or any other detail that may be too thick for a regular foot
- usually adjustable to sew from the right or left hand side
Buttonhole foot - is adjustable and makes buttonholes that are just right for whichever size button is being used
Many other feet are available and it is important to consult your sewing machine manual to determine
which type of feet will work on your machine.
PROCESSING PROMPTS:
Which type of foot would you use to sew the seams of pyjama pants?

26 4-H SEWING PROJECT – ACTIVITY GUIDE
When you would you probably use a zigzag foot?
If you tried to sew the piping with two different feet, which foot was easier and why?

4-H SEWING PROJECT – FABRIC CARE AND USE GUIDE 27
Getting Closure
TOPIC: Buttons, zippers, snaps and hook and loop tape
LEARNING OUTCOMES:
To learn how to use the various closures used in sewing
TIME: 45 minutes
MATERIALS/RESOURCES:
Sewing machines
Zipper feet
Hand needles
Thread
Scissors
Assorted buttons, some with shanks if possible
7” Zippers, one for each member
Sew-on snaps
Hook and loop tape (commonly referred to as Velcro)
Hooks and eye, toggles, and other examples of fasteners if possible - these are simply
for illustrating the variety of fasteners available
6”x6” fabric scraps, medium weight, four for each member
INSTRUCTIONS:
The members will rotate through stations to learn about the common types of closures used in sewing.
Each station will focus on a particular type of closure. At each station the member will learn when to use
that particular closure, how it is attached and then have a chance to use the closure. Give each
member four fabric squares – buttons, hook and loop tape and snaps will be sewn on two of them,
allowing the hook and loop tape and the snaps to function. The remaining two squares will be used with
the zipper.
Station One: Buttons
Have a selection of buttons available for use including buttons with shanks. Hand
sewing needles, thread and scissors are also necessary at this station.
Station Two: Hook and loop tape
Cut hook and loop tape into strips approximately 2” long. A sewing machine with an all-
purpose foot and thread, scissors and pins will be needed at this station.
Station Three: Snaps
Supplied needed are snaps, scissors, hand sewing needles, thread and scissors.
Station Four: Zippers
Members will be sewing an exposed zipper at this station and each member will need a
zipper and the two pieces of fabric that have not been used with the other closures. A
sewing machine with a zipper foot, thread, scissors and pins are needed at this station.
Station Five (optional): Other fasteners
Other fasteners such as hook and eyes, toggles, frogs, and examples of button loops
can be introduced if desired at this station.

28 4-H SEWING PROJECT – ACTIVITY GUIDE
DISCUSSION/COMMENTS:
Closures are often the finishing touches of a sewing project but that certainly doesn’t mean that they
are not a very important part of the process. It is important to choose a closure not only for its function
but also for how it will look with the fabric and style of the garment.
Closures must function properly with the weight and texture of the fabric and also look appropriate and
stylish for the garment.
Buttons should be sewn through two layers of fabric using a double thread. Attach buttons with as
strong a thread as possible without looking too coarse for the item.
Hook and loop tape is a versatile fastener. It is an easy substitute for buttons or snaps. It is composed
of two tape strips, one with looped surface (fuzzy) and the other with a hooked surface (rough). When
pressed together the surfaces grip and remain locked until they are pulled apart. When the two sides
are pressed together, the hooks catch in the loops and hold the pieces together. When the layers are
separated, the strips make a characteristic "ripping" sound.
Hook and loop tape comes in sew-on strips as well as pre-cut disks in a variety of colours. Purchase
according to use.
To apply follow these instructions. Place each part at least 6 mm from the garment edge. The loop part
goes on the over lap (top) the hook on the under lap (bottom). To attach by machine stitch edge stitch
the squares and strips, stitch dots with a triangle.
Sew-on snaps have two parts – a ball and a socket. Snaps are not seen from the right side of the fabric
and are used when a light weight closure is suitable such as above a zipper or with delicate fabrics. The
ball part of the snap is sewn on the top and is attached first. It is useful to mark the ball with chalk to
determine where the socket should be placed on the bottom. Attach the snap to the fabric with an
overhand stitch in each hole around the edge of the snap.
Zippers can have metal or plastic teeth and are available in a variety of lengths and weights. There are
many ways to put in a zipper. The easiest is the exposed application.
1. Place zipper face down on the right side of the fabric edge. The zipper should be slightly
longer than the fabric is wide. Centre the zipper on the fabric aligning the edge of the zipper
tape with the raw edge of the fabric. Using the zipper foot, stitch in place.
2. Bring the other sides raw edge to the other side of the zipper tape. The right side of the
zipper should be touching the right side of the fabric. Sew the sipper to the fabric again
aligning the zipper tape with the raw edge of the fabric. Make sure to line up the side
seams of both pieces of fabric.
3. Open up two pieces and lie flat. It is optional to topstitch along the edge of the fabric.
4. Sew across the zipper teeth to make the zipper the same length as the piece of fabric. Cut
off the extra zipper tape.
PROCESSING PROMPTS:
Which closure works best on a skirt or pair of pants?
What kind of closure would be best on a wool jacket?
When would a decorative closure such as a toggle or frog be used?
4-H SEWING PROJECT – FABRIC CARE AND USE GUIDE 29
The Inside Story
TOPIC: Interfacing
LEARNING OUTCOMES:
To learn how interfacing and fabric work together
To learn how to apply interfacing
TIME: 45 minutes
MATERIALS/RESOURCES:
Interfacing Worksheet Pen/pencil 10cm x 10cm swatches of two different sew-in interfacings one woven and one non-woven and two swatches of different weight fusible interfacings - each member will need a swatch of 3 different kinds of interfacing 10cm x 10cm squares of different types of fabrics, each member will need 4 swatches of the same material Sewing machine or hand needles Thread Scissors Iron
INSTRUCTIONS:
Each member should apply a sample of their fabric without interfacing to the Interfacing Worksheet and
record the details about their fabric.
Apply 3 different types of interfacing, at least one sew-in and one iron-on, to fabric swatches following
the application directions.
Have members attach the samples of fabric and interfacing to the Interfacing Worksheet and fill in the
details for each sample.
DISCUSSION/COMMENTS:
Interfacing is an additional layer of fabric placed between the outer shell and the facing or hem.
Interfacings are used to prevent sagging at necklines and button closures; to add softness to hemlines;
to add body, shape or wrinkle resistance to entire garments or garment sections; and to stabilize and
emphasize details, such as collars, cuffs, and pockets.
There are two types of interfacing. Sew-in interfacings are stitched by hand or machine to your garment,
while fusible interfacing have a resin coating on the back that fuses to the fabric when steam, heat, and
pressure are applied.
Fusible interfacing is quick and easy to use and gives a crisper look after fusing. Also, fusible
interfacings are great for stabilizing small areas such as buttonholes, slashes, and plackets. However,
as fusible interfacings age and are repeatedly laundered, they tend to bubble and may eventually
separate from the fabric.
Woven interfacings are made of synthetic, cotton or a blend of fibres and are available in a variety of
weights from lightweight polyester to heavyweight canvas. Non-woven interfacing is made of synthetic
fibres bonded together in weights from sheer to heavy. Knitted interfacing also exists, and is made from
30 4-H SEWING PROJECT – ACTIVITY GUIDE
tricot knit, tri-dimensional, weft insertion, or warp insertion construction, providing flexibility for
lightweight knits and wovens.
Your pattern will indicate if interfacing will be used and how much is needed. It will suggest the type of
interfacing to use and how to lay out the pattern pieces for cutting.
When selecting an interfacing consider what type of fabric will be used and how the finished garment
will be used and cleaned.
PROCESSING PROMPTS:
Did one combination work better than the others?
Is there a combination that didn’t work at all?
How did the feel of your fabric change when the interfacing was added?
Did you find that you liked working with one type of interfacing rather than another?

4-H SEWING PROJECT – FABRIC CARE AND USE GUIDE 31
INTERFACING WORK SHEET
Sample One:
Type of Fabric: _________________________________
Sample One:
Type of Fabric: _________________________________
Type of Interfacing: _____________________________
Observations: __________________________________
_____________________________________________
Why or why not is this combination of fabric and
interfacing suitable? ____________________________
_____________________________________________
Sample Two:
Type of Fabric: _________________________________
Type of Interfacing: _____________________________
Observations: __________________________________
_____________________________________________
Why or why not is this combination of fabric and
interfacing suitable? ____________________________
_____________________________________________
Sample Three:
Type of Fabric: _________________________________
Type of Interfacing: _____________________________
Observations: __________________________________
_____________________________________________
Why or why not is this combination of fabric and
interfacing suitable? ____________________________
_____________________________________________
Attach swatch of fabric without
interfacing here
Attach fabric and interfacing sample
one here
Attach fabric and interfacing sample
two here
Attach fabric and interfacing sample
three here

32 4-H SEWING PROJECT – ACTIVITY GUIDE
Colours That Compliment
TOPIC: Choosing Your Best Colours
LEARNING OUTCOMES:
To learn how colour affects clothing choices
To learn which colours are most flattering for your skin tone
TIME: 45 minutes
MATERIALS/RESOURCES:
White sheet or fabric, one for each member
Mirrors
Large samples of different coloured fabrics, some cool colours such as black, bright red, icy blue and
some warm colours such as ivory, brown and orange
INSTRUCTIONS:
Explain how to determine the undertone of their skin – blue undertones are cool skin tones, golden or
yellow undertones are warm skin tones – and then help members determine their skin tone.
Once skin tones have been determined, have members sit in front of a mirror and drape them with the
white sheet. Place the coloured fabrics, one at a time, on top of the sheet. Discuss with members which
colours they feel are more flattering to their skin tone.
DISCUSSION/COMMENTS:
The colour of a garment is often what first attracts us to a piece of clothing. Understanding colour and
how colours work together is an important part of wardrobe planning. The colours we choose often
affect and reflect our moods and feelings.
There are a number of ways to make colour work for your unique skin tone and hair colour and even
your body type. Here are some ways you can use colour to work for your best advantage:
Choose colours which enhance your complexion - skin with a blue undertone looks best against
cool colours and skin with a yellow tone will look best with warm colours.
Use a repetition of colour to play up a good feature. For example, a blue-eyed person wearing a
blue sweater, or a dark brunette in a black dress.
Use colour contrast to emphasize a good feature. This is done by selecting the complement of
the colour we wish to emphasize. For example, the blue-eyed person could choose a shade of
light orange to highlight their eyes.
Choose colours which reflect your personality. Vivacious people often prefer colour of brighter
intensity.
Choose colours which best flatter your body type. Colour can create illusions by making things
appear larger or smaller.
In general, to look larger or draw attention to a figure or part of it choose warm colours
with light values, bright colours and whites
The rules of thumb to make a figure or part of it look smaller or to de-emphasize body
contours choose cool colours with dark values and dull intensities.
4-H SEWING PROJECT – FABRIC CARE AND USE GUIDE 33
PROCESSING PROMPTS:
What is your skin tone?
Which colours looked best on you?
Do you wear certain colours more often than others?
How does your favourite colour make you feel?
34 4-H SEWING PROJECT – ACTIVITY GUIDE
Fashion File
TOPIC: Creating a design file
LEARNING OUTCOMES:
To enhance the member’s creativity as they participate in the sewing project
To help reinforce the skills learned throughout the sewing project
TIME: 30 minutes
MATERIALS/RESOURCES:
Notebook or 3-ring binder with paper
Pen/pencil/crayons/markers
Glue
Scissors
Magazines, catalogues, internet
INSTRUCTIONS:
Using images from magazines, catalogues or from the internet, have members cut out pictures of
clothes, models, accessories, etc. that appeal to them. Glue images to notebook or paper.
DISCUSSION/COMMENTS:
This activity will encourage members to think about the process behind design and encourage them to
connect their sewing skills to the world of fashion.
Over the course of the project members should continually update their design file and add notes such
as pattern tips, information on fabrics and materials and fitting tips that would be helpful for the
design(s) they would like to recreate.
Creating and updating their design file will help members reflect on what they have learned as they
progress through the project.
PROCESSING PROMPTS:
How hard would it be to replicate the designs you have chosen?
Have the designs been entirely created with a sewing machine and serger or are there elements that
have been hand stitched as well?
What kinds of fabrics were used in the images chosen?
How easy is it to work with the fabrics in the images you have chosen?
Do you notice some common elements in the different designs you have chosen for your fashion file?

4-H SEWING PROJECT – FABRIC CARE AND USE GUIDE 35
Should I Buy or Should I Sew?
TOPIC: Comparing the cost of sewing clothing to ready made
LEARNING OUTCOMES:
To determine if it is always practical or cost-effective to sew a garment
TIME: 30 minutes
MATERIALS/RESOURCES:
Garment Cost Sheet
Pen/pencil
Receipts from project or estimates if still in planning stage
Flyer, catalogue or prices from store visit
INSTRUCTIONS:
Fill in the Garment Cost Sheet using the receipts from purchasing the supplies for your sewing project
List the cost of 3 different purchased items of similar quality.
DISCUSSION/COMMENTS:
Sewing an item of clothing will not always be practical or possible. Sometimes the garment will not lend
itself to be replicated at home, such as a pair of jeans. Other times it will just be too expensive to make
compared to finding a similar ready-made item on sale.
Sewing is always the right choice if you would like to make creative, unique clothing that is different
from that found in department stores. Sewing can also be cheaper if you watch for sales or buy fabric at
thrift stores or other second hand shops. Sewing your own clothing is also very practical if you find it
hard to find clothing that properly fits in regular shops. Quality of an item is also an important factor
when deciding to sew or buy – if the seams of a ready-made item fall apart after one washing or if the
article is going to be worn a number of times, it may be more cost-effective to sew it.
Of course, sewing is a hobby and can be a very satisfying process and that is an important factor to
consider when deciding to make or buy an article of clothing.
PROCESSING PROMPTS:
What are the pros and cons of sewing vs. buying?
What types of clothing would you probably never sew?
Is the quality of a ready-made item, such as pyjama pants or a skirt, that you own as good as one that
you could sew yourself?

36 4-H SEWING PROJECT – ACTIVITY GUIDE
GARMENT COST SHEET
Garment Constructed: ___________________________________________
HOME-MADE COST
Pattern (company and number) _____________________ _______________
Fabric(s) - (type and amount)
_____________________________________________ _______________
_____________________________________________ _______________
Notions—thread, elastic, button, etc.
_____________________________________________ _______________
_____________________________________________ _______________
Other
_____________________________________________ _______________
_____________________________________________ _______________
TOTAL COST OF SEWING GARMENT _______________
Cost of Similar Commercially Made Item
STORE COST
1. _________________________________________________ _____________
2. _________________________________________________ _____________
3. _________________________________________________ _____________
Sewing vs. Buying
Pros: _____________________________________________________________
__________________________________________________________________
__________________________________________________________________
Cons: _____________________________________________________________
__________________________________________________________________
__________________________________________________________________
4-H SEWING PROJECT – FABRIC CARE AND USE GUIDE 37
Wardrobe Planning
TOPIC: How to plan a clothing wardrobe
LEARNING OUTCOMES:
To learn how to build a wardrobe that reflects your style, budget and activities
TIME: 45 minutes plus time at home to complete the Wardrobe Inventory
MATERIALS/RESOURCES:
Completed Wardrobe Inventory
Wardrobe Work Sheet
Pen/pencil
INSTRUCTIONS:
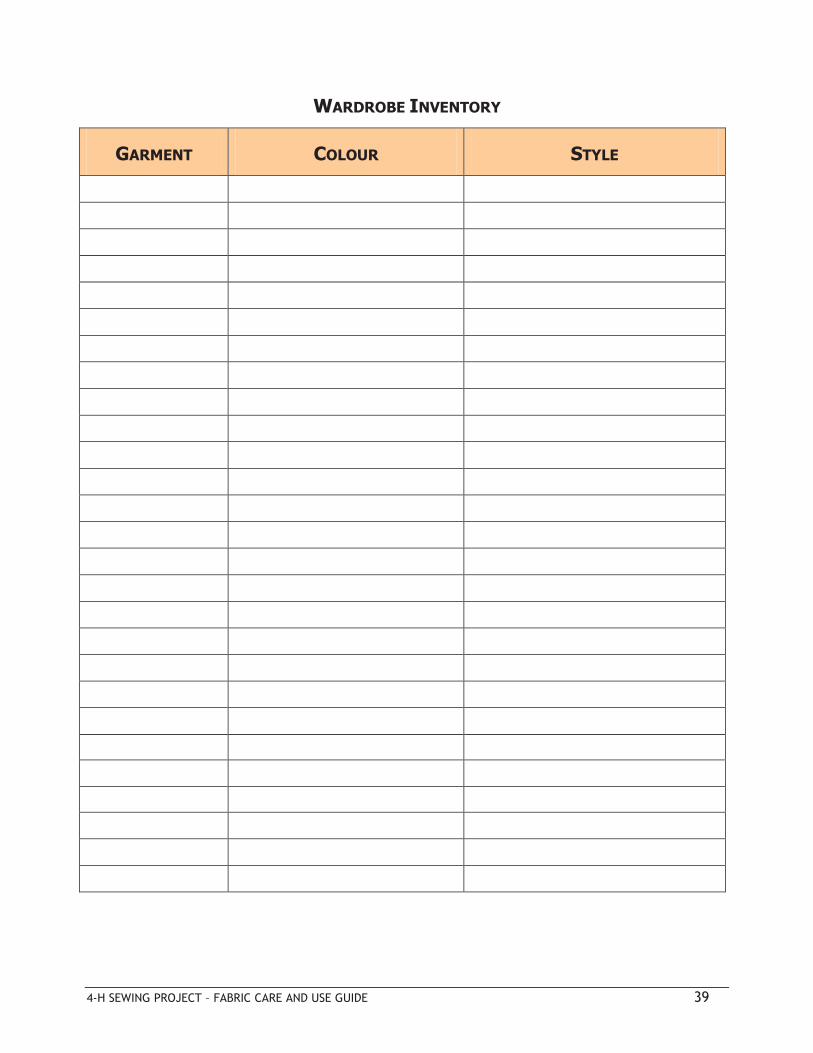
Members should first do a wardrobe inventory at home before starting this activity. Each member
should go through their clothes and ensure each item fits, is ready to wear and is something the
member likes to wear. Have members fill in the information on the Wardrobe Inventory and bring the
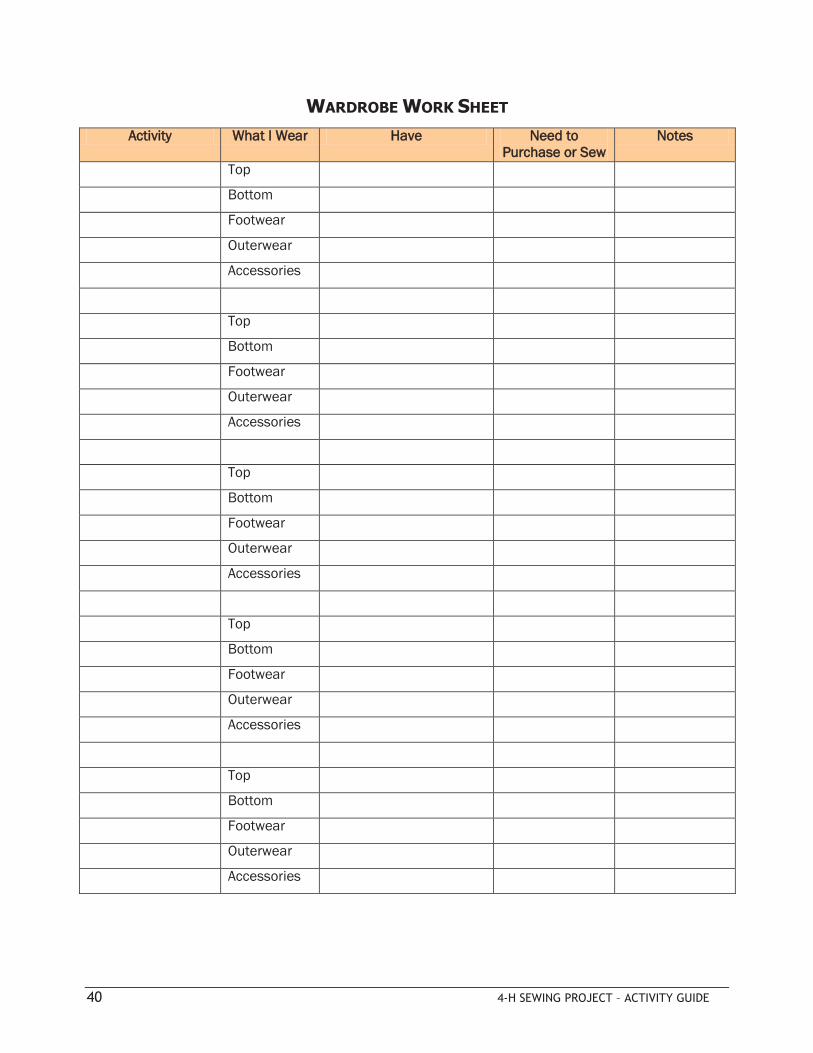
inventory with them to complete the Wardrobe Work Sheet. Members will likely need more than one
copy of the Wardrobe Work Sheet.
Have members fill in the information on the Wardrobe Work Sheet.
DISCUSSION/COMMENTS:
The ideal wardrobe need not be large, but it should provide appropriate outfits for all your daily
activities. Decide on a basic colour plan. Neutrals are always in style and are a good foundation for a
wardrobe. Buy the best quality clothes that members can afford. They will last longer, wear better and
save money in the long run.
Plan a wardrobe for variety and flexibility. Choose a few fun pieces to keep it looking fresh and up-to-
date. Mix and Match key pieces to create different looks. No two pieces should be the same, but they
should coordinate with one another.
For a wardrobe to work well, all items should be in good repair and ready to wear. Your wardrobe should
be examined at the beginning of each season in order to ensure your clothing fits, is in good repair and
is current.
It may take a bit of time to fill in the missing pieces of your wardrobe. Make a budget and decide which
items are the most important missing pieces that you will need first. Take your list of what you need
with you when shopping in order to take advantage of sales and to help curb impulse buying.
Members may wish to put together a Look Book of their clothing and accessories. A Look Book is a
collection of pictures of clothing, accessories and outfits that appeal to the person making the book.
The pictures can be of the creator wearing the complete outfit or pictures of each item of clothing
separately. It is a great way to help coordinate an outfit, to see what elements of clothing work well
together and to help the creator accessorize their wardrobe.
PROCESSING PROMPTS:
Most of you are students now. Will you be looking for a job in the summer or in the next year? What
sort of job will you be looking for? What type of clothing will you need for this job?
Do you wish to follow current fashions? Or are you someone who likes to be “different?”
What are my activities in school? Outside of school? At home?

38 4-H SEWING PROJECT – ACTIVITY GUIDE
Are there regular weekly/monthly/annual events for which I need special clothing?
Which missing piece of your wardrobe will you fill in first? Why?
4-H SEWING PROJECT – FABRIC CARE AND USE GUIDE 39
WARDROBE INVENTORY
GARMENT COLOUR STYLE
40 4-H SEWING PROJECT – ACTIVITY GUIDE
WARDROBE WORK SHEET
Activity What I Wear Have Need to
Purchase or Sew
Notes
Top
Bottom
Footwear
Outerwear
Accessories
Top
Bottom
Footwear
Outerwear
Accessories
Top
Bottom
Footwear
Outerwear
Accessories
Top
Bottom
Footwear
Outerwear
Accessories
Top
Bottom
Footwear
Outerwear
Accessories
4-H SEWING PROJECT – FABRIC CARE AND USE GUIDE 41
Sewing Green
TOPIC: Recycling, Refashioning and Upcycling Clothing and Fabric
LEARNING OUTCOMES:
To learn how to reduce waste by remaking existing clothing and fabric into something new
To learn how to update clothing to current trends
To create a project plan
TIME: 30 minutes
MATERIALS/RESOURCES:
Repurposing a Garment or Fabric worksheet
Pen/Pencil
Guide 3 of the 4-H Sewing Project, Internet, magazines
INSTRUCTIONS:
Have each member fill in the Repurposing a Garment or Fabric worksheet.
DISCUSSION/COMMENTS:
Sewing Green is all about using your sewing skills to create unique “just for you” garments and other
items from existing resources. This means not going to the store to buy new fabrics and notions for
each new project. It also means finding and sewing with fabrics that were manufactured in an
environmentally friendly way.
When choosing fabrics and garments to upcycle, make sure they are free from smells, holes, stains and
other wear and tear. It may be possible to work around some of these issues such as cutting around
holes or stains.
Once you have found the garments or fabrics you wish to work with, they will need to be deconstructed.
The first step is to launder them according to the care label. If there is no label or you are not sure of
the fiber content hand wash and hang to dry.
If you are using the garment for its fabric, use a stitch ripper and sharp fabric shears to take the
garment apart. Start by trimming away any lining. Open up side seams, darts, hems and any other areas
that are stitched together. Pull out any remaining threads and press smooth with an iron on the wrong
side of the fabric. Depending on your project, you may not want to take apart certain elements of the
garment such as collars, cuffs, button plackets, pockets etc.
For future use keep any accessories such as buttons, buckles, zippers, straps, D-rings etc. You may also
be able to save any trim, lace or ribbon. Use a little liquid seam sealant on the ends to prevent trims
from unraveling.
Often linings are in poor shape and can be thrown out. Also discard interfacings, and any worn or
stained areas.
PROCESSING PROMPTS:
Can you think of any other ways you can “sew green” besides repurposing?

42 4-H SEWING PROJECT – ACTIVITY GUIDE
REPURPOSE A GARMENT OR FABRIC WORKSHEET
Before you start your project it is important to plan out what you want to do. Think about where the
fabric will come from and what you need to do to it to prepare it for use. What technique will you use
and is it suitable for the fabric? What will you make and how will it look?
1. What item will you repurpose? ________________________________________
2. Research 3 techniques for repurposing your item.
Ideas List Resources
3. Which idea will you do? __________________________________________________
4. What will the finished item look like? Draw or attach picture.
5. What sewing techniques are required? ____________________________________________
_______________________________________________________________________________
6. Do you have these skills? If not, research how to do this technique. ____________________
_______________________________________________________________________________
7. What supplies are needed? ______________________________________________________
_____________________________________________________________________________
4-H SEWING PROJECT – FABRIC CARE AND USE GUIDE 43
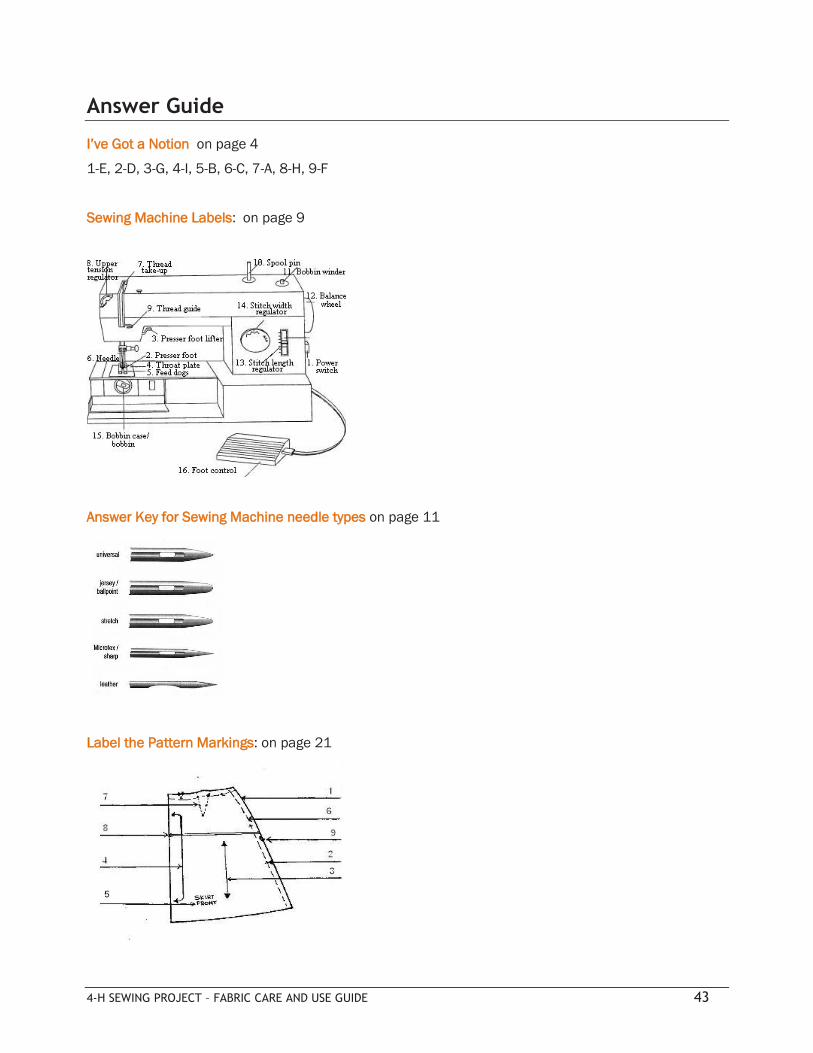
Answer Guide
I’ve Got a Notion on page 4
1-E, 2-D, 3-G, 4-I, 5-B, 6-C, 7-A, 8-H, 9-F
Sewing Machine Labels: on page 9
Answer Key for Sewing Machine needle types on page 11
Label the Pattern Markings: on page 21

44 4-H SEWING PROJECT – ACTIVITY GUIDE
Serger Labels: on page 24