Embed Size (px)
Citation preview

SOUTH CAROLINA SUPPORT SYSTEM INSTRUCTIONAL PLANNING GUIDEContent Area: Sixth Grade Science Sixth Grade Science Recommended Days of Instruction: 6 (one day equals 55 min)Standard(s) addressed: 6-4The student will demonstrate an understanding of the relationship between Earth's atmospheric properties and processes and its weather and climate. (Earth Science)
Processes of the Water Cycle
Indicator Recommended Resources Suggested Instructional Strategies Assessment Guidelines
6-4.2 Summarize the interrelationships among the dynamic processes of the water cycle (including precipitation, evaporation, transpiration, condensation, surface-water.
SC Science Standards Support Guidehttps://www.ed.sc.gov/apps/cso/standards/supdocs_k8.cfm
Downloads from NOAAhttp://www.srh.noaa.gov/srh/jetstream/append/downloads.htm
Reader’s Theatre Script: “Water Adventure” from Enchanted Learninghttp://www.enchantedlearning.com/rt/weather/watercycle.shtml
The Water Cyclehttp://www.fergusonfoundation.orgThis interactive website uses diagrams and text to explain the stages of the water cycle. From home-page go to “kids zone”.
Water Cycle Posterhttp://www.srh.noaa.gov/srh/jetstream/atmos/hydro_cycle.htm
Environmental AgencyWater Cycle- Walter Droplet Explains the Water Cycle
See Module 6-4.2.From SC Science Support Document:The objective of this indicator is to summarize the interrelationships among the processes of the water cycle; therefore, the primary focus of assessment should be to generalize major points about the parts of the water cycle (including precipitation, evaporation, transpiration, condensation, surface-water flow, and groundwater flow). However, appropriate assessments should also require students to identify parts of the water cycle; compare one part of the water cycle with another; or illustrate parts of the water cycle using words, drawings, diagrams, or symbols.
August 2010 Science S3 Sixth Grade Module 6-4.2 1

Module 6-4.2 ContinuedIndicator Recommended Resources Suggested Instructional Strategies Assessment
Guidelineshttp://www.national-aquarium.co.uk/interactive/water.aspThrough animations with sound this website explains the states of the water cycle.
NASA Teacher’s Guide – Meteorology: An Educator's Resource for Inquiry-Based Learning for Grades 5-9http://www.nasa.gov/pdf/288978main_Meteorology_Guide.pdfSupplement your existing curricula with this guide. Many of the activities build upon each other. They use the inquiry from the previous activity to assist in the activity that follows. Thus, this publication enhances the understanding of meteorology by beginning with basic and essential parameters of weather and then moving through mind-engaging interactions with complex meteorological systems. Students will build and use weather instruments; then they will build a weather station. Students will collect weather information and combine it with existing information about cloud systems. They can then apply their knowledge to predict weather systems.
SC ETV Streamlinehttp://etv.streamline.org
August 2010 Science S3 Sixth Grade Module 6-4.2 2

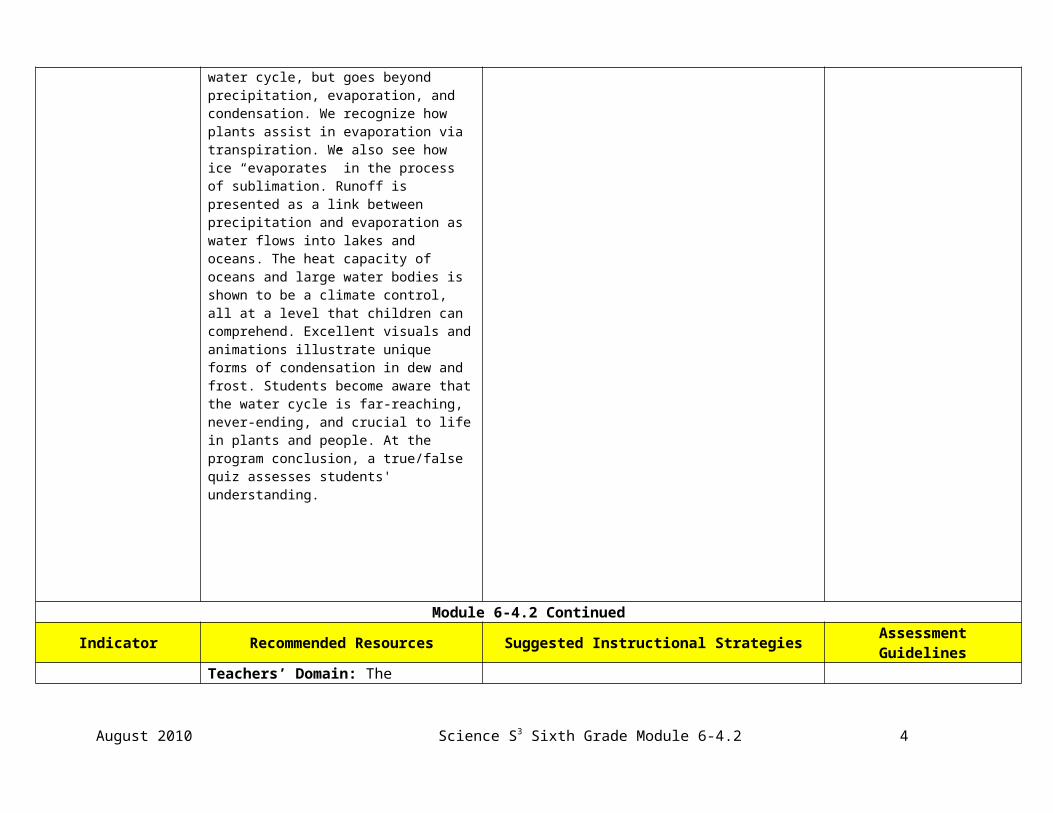
Water Smart: The Sun, Water Cycle, And Climate http://player.discoveryeducation.com/index.cfm?guidAssetId=C929D8EE-24CC-421D-B00D-5BF3174850A7&blnFromSearch=1&productcode=USThe sun is presented as Earth's energy source that drives the water cycle. This program covers the fundamental phases of the water cycle, but goes beyond precipitation, evaporation, and condensation. We recognize how plants assist in evaporation via transpiration. We also see how ice “evaporates” in the process of sublimation. Runoff is presented as a link between precipitation and evaporation as water flows into lakes and oceans. The heat capacity of oceans and large water bodies is shown to be a climate control, all at a level that children can comprehend. Excellent visuals and animations illustrate unique forms of condensation in dew and frost. Students become aware that the water cycle is far-reaching, never-ending, and crucial to life in plants and people. At the program conclusion, a true/false quiz assesses students' understanding.
Module 6-4.2 ContinuedIndicator Recommended Resources Suggested Instructional Strategies Assessment
Guidelines
August 2010 Science S3 Sixth Grade Module 6-4.2 3
Teachers’ Domain: The Hydrologic Cycle http://www.teachersdomain.org/resource/ess05.sci.ess.watcyc.hydrocycle
EPA: Thirstin’s Water Cycle http://www.epa.gov/safewater/kids/flash/flash_watercycle.html
EarthGuide Diagrams: Water Cycle http://earthguide.ucsd.edu/earthguide/diagrams/watercycle/index.html
Teachers’Domain: Observe Precipitation http://www.teachersdomain.org/resource/ess05.sci.ess.watcyc.precipitation
Teachers’ Domain: Water Vapor Circulation on Earth http://www.teachersdomain.org/resource/ess05.sci.ess.watcyc.cloudprecip
August 2010 Science S3 Sixth Grade Module 6-4.2 4

Sixth Grade
Science Module 6-4.2
Processes of the Water CycleLessons A-D
August 2010 Science S3 Sixth Grade Module 6-4.2 5
Standard 6-4: The student will demonstrate an understanding of the relationship between Earth's atmospheric properties and processes and its weather and climate. (Earth Science)
Indicator 6-4.2: Summarize the interrelationships among the dynamic processes of the water cycle (including precipitation, evaporation, transpiration, condensation, surface-water.
Other indicators addressed:6-1.1: Use appropriate tools and instruments (including a spring scale, beam balance, barometer, and sling psychrometer) safely and accurately when conducting a controlled scientific investigation.

From the South Carolina Science Support Documents:
Indicator 6-4.2: Summarize the interrelationships among the dynamic processes of the water cycle (including precipitation, evaporation, transpiration, condensation, surface-water.
Taxonomy level of indicator:Understand Conceptual Knowledge (2.4-B)
Previous/Future Knowledge:In 4th grade, students summarized the processes of the water cycle (including evaporation, condensation, precipitation, and runoff) (4-4.1) and classified clouds according to their three basic types (4-4.2). In 5th grade (5-4.2), students compared the physical properties of the states of matter. The addition of transpiration and the two areas of run-off are new information. In 7th grade (7-4.5), students will study groundwater zones and surface water drainage basins.
It is essential for students to know that water is always moving between the atmosphere (troposphere) and surface of Earth. Each components of the water cycle process has certain conditions under which each form of precipitation develops:
Precipitation After condensation occurs (forming clouds), water droplets fall in various forms
of precipitation – rain, snow, freezing rain, sleet, or hail, depending upon weather conditions.
Temperature variations within clouds and/or within the region between the cloud and Earth allows for the various forms of precipitation.
Evaporation/Transpiration Water enters the atmosphere as water vapor through evaporation and
transpiration, plants releasing water vapor.
CondensationCondensation happens in the atmosphere as water vapor changes to water
droplets. Clouds form as a result of condensation. Dew forms when water vapor condenses directly onto a surface; Frost forms when water vapor changes from gas directly to ice crystals on a
surface when the temperature at which condensing would take place is at the freezing point or below.
Run-off If precipitation falls on land surfaces, it always attempts to move back toward
sea level as surface-water flow or groundwater flow. The surface that receives the precipitation determines its flow back towards sea
level. Examples are: Water will remain on the surface when the surface is not porous or the
precipitation is falling too fast for the water to sink into the ground. Water will sink into the ground when the surface is porous and there is lots of
space in the soil to hold the water.
August 2010 Science S3 Sixth Grade Module 6-4.2 6

It is not essential for students to know what happens to the individual water particles as they change from one state of matter to another.
Assessment Guidelines:The objective of this indicator is to summarize the interrelationships among the processes of the water cycle; therefore, the primary focus of assessment should be to generalize major points about the parts of the water cycle (including precipitation, evaporation, transpiration, condensation, surface-water flow, and groundwater flow). However, appropriate assessments should also require students to identify parts of the water cycle; compare one part of the water cycle with another; or illustrate parts of the water cycle using words, drawings, diagrams, or symbols.
August 2010 Science S3 Sixth Grade Module 6-4.2 7

Teaching Indicator 6-4.2: Lesson A-- “Water, Water Everywhere”
Introduction to the lesson:This lesson is an example of how a teacher might address the intent of this indicator. Water is the most abundant and important resource on earth. It continually moves through the water cycle changing state as it travels: solid, liquid, gas. The amount of water on earth today is the same as it was millions of years ago. It is located on the surface of the earth, in the ground and in the atmosphere. Water moves through the water cycle changing states as it moves. In addition to precipitation, evaporation and condensation, water moves through transpiration, on the surface (surface-water flow) and into and through the ground (groundwater).
The Science and Technology Concepts for Middle SchoolTM (STCTM) kit Catastrophic Events and the Foss Weather and Water kit provide an opportunity for conceptual development of the concepts within the standard.
Important: If you have not already completed Inquiry Lesson 6-1.1, you should use it during these lessons to introduce the students to the sling psychrometer and its importance in measuring the amount of water vapor in the air. Transpiration may be a new term for students. If you have completed 6-2.7 then they have been introduced to it, if not you may want to be sure they are familiar with the term.
Preparation for the Lesson:The teacher will need to obtain containers or beakers as indicated in the Engage section of the lesson. Each student group will also need a 1-2 liter bottle of water. Students or parents may be able to contribute to this.
Misconceptions:Students have a hard time believing that the water we use today is the same water that was on Earth during the time of the dinosaurs.Be careful not to emphasize the terms evaporation, condensation, precipitation and transpiration to the extent that students lack an understanding of what is actually happening to the water within the cycle. Many students still have a hard time accepting the fact there water exists in the atmosphere. Often diagrams of the water cycle lead to the misconception that the water evaporates to form a white cloud then has to move to form the dark clouds from which precipitation eventually falls. This often leads to the misconception that one cloud is formed from evaporation and the other from condensation.
Safety Note: Safety must be emphasized at the beginning of the school year and reinforced with every lab activity. Students should understand that safety is everyone’s responsibility.
Lesson time:2 Days (1 day equals 55 minutes)
Materials Needed:Eyedroppers
August 2010 Science S3 Sixth Grade Module 6-4.2 8

Poster showing the water cycle http://www.srh.noaa.gov/srh/jetstream/atmos/hydro_cycle.htmEight 1000 ml beakers (per group if available) or various other containers andLiter bottle with 100 mL water (per group)Plastic Cup
Focus Question:Where is our earth’s water supply located?
Engage:1. Ask students to predict where they think the Earth’s water is located and how
much they think they would find in each location. Example: If you’re given a liter of water (1000 mL), how much of it would represent the oceans, how much the amount of water in lakes, etc. Have them record their predictions in their notebooks using percentages or amounts.
2. Label beaker 1 “oceans” and fill it with 1000 ml of water Label beaker 2 “Glaciers and icecaps” Label beaker 3 “groundwater” Label beaker 4 “fresh water lakes” Label beaker 5 “inland seas” Label beaker 6 “soil moisture” Label beaker 7 “atmosphere” Label beaker 8 “rivers” Put all the beakers except the first one aside for use later.
3. Inform students that the earth’s total water supply has been reduced to 1000 mL as shown in beaker 1.
4. Provide students with a liter bottle of water. Tell them this represents the 1000 mL that is shown in beaker 1.
5. Ask them to divide their 1000 ML by pouring it into containers that represent the location and amount of water found on Earth. Ask them to label their containers with the location (i.e. pond, lake, groundwater, etc).
6. After students have poured what they think is the correct amount of water in each beaker, discuss their results. Have them share the amounts, locations and reasons for those decisions.
7. Use the beakers prepared earlier and illustrate the location of the Earth’s water by placing the amounts listed below in each beaker as you indicate what that amount represents.
2. 21.4 ml3. 6.1 ml4. 0.09 ml5. 0.08 ml6. 0.05 ml7. 0.01 ml8. 0.001 ml
August 2010 Science S3 Sixth Grade Module 6-4.2 9

That leaves most of the water in the Ocean Beaker. 97.2% of earth’s water is found in the ocean.
Explore:1. Set up a demonstration or simulations of the water cycle process. This can
be done a. using baggies, and colored water. Once the colored water is in the
bag, students close the bag and place them in a sunny location in the classroom.
b. using a large container (plastic or glass), plastic wrap such as Saran Wrap and ice. Place water in the container and stretch the plastic wrap tightly over the top. Add ice on top of the plastic wrap and observe.
2. Have students observe the baggies for several days, adding observations, sketches of changes and date and time to their data.
3. If you demonstrate using the large container, again have students draw sketches of and describe their observations.
4. Have student groups construct a concept map of the water cycle to include the following terms: evaporation, condensation, solar energy, transpiration, clouds, ground water, surface water, precipitation.
5. Post student maps.6. Have students complete a Gallery Walk (see description below):
a. With notebooks and pens or pencils in hand, and without talking, students walk around classroom viewing posters of other groups. In notebooks, they note commonalities and any questions they might have. They return to their seats and prepare to share.
Explain:
1. Ask students what commonalities they saw on the posters. As they share the commonalities, they should also share a description or definition of any processes they are naming.
2. Ask questions such as: What is transpiration? What is the difference between transpiration and evaporation? Transpiration and precipitation? What causes evaporation to occur? What types of water sources can be classified as surface water? Why? What is ground water? Since transpiration, ground water and surface water are new terms, the teacher may have to provide knowledge on these processes.
3. Tell students that they have just completed an activity showing where the earth’s water is located. Ask them where they would find the water that has transpired? Evaporated? Is it ground water? Is it surface run off? Ask them when they would expect to see greater surface run off?
4. Ask students to pose questions they have about the posters or water cycle maps. Scribe these questions.
Extend:1. Have students create a RAFT (Role/Audience/Format/topic) for the water
cycle. Identify the role (water drop), audience (other water drops), format (travel guide), topic (journey through the water cycle) for the students and have them use this information to provide a written summary of the processes in the water cycle.
2. Review the Water Cycle and its parts by using: Reader’s Theatre Script: Water Adventure from Enchanted Learning
August 2010 Science S3 Sixth Grade Module 6-4.2 10

http://www.enchantedlearning.com/rt/weather/watercycle.shtml
August 2010 Science S3 Sixth Grade Module 6-4.2 11

Teaching Indicator 6-4.2: Lesson B—“Evaporation and Transpiration”
Introduction Considerations: This lesson is an example of how a teacher might address the intent of this indicator. A portion of the Earth’s water is found in the atmosphere in the form of water vapor. The liquid water from the earth’s surface is turning into an invisible, odorless gas that enters the atmosphere. Water enters the atmosphere as water vapor through evaporation and transpiration. This lesson allows the students to review evaporation and learn about transpiration (Review transpiration if you taught this in 6.2.) Because students will be making predictions and observations during this lesson, it is a good place to review the differences between observations and inferences.
The Science and Technology Concepts for Middle SchoolTM (STCTM) kit Catastrophic Events and the FOSS Weather and Water kit provide an opportunity for conceptual development of the concepts within the standard.
Preparation for the Lesson:Secure materials needed for demonstrating/investigating evaporation and transpiration.
Misconceptions:Many students at this level have difficulty believing that air is matter and that water exists in the air in a form we cannot see. They often lack a complete understanding of where the water goes after it evaporates.
Safety Notes:Students should know and practice safety procedures and wear proper safety equipment such as aprons and goggles.
Lesson time:1 Day + time for evaporation to occur (1 day equals 55 minutes)
Materials Needed: (Obtain enough so that half of the class sets up the investigation to observe transpiration and the other half to observe evaporation)
Salt Rock 2 jar lids or petri dishes Large, clear plastic bag Tree or bush outside or small potted plants
Focus Question:In what ways are evaporation and transpiration similar? Different?
Engage:1. Show students a diagram of the water cycle (NOAA.gov) or refer them back to
the one they used in Lesson A. http://www.srh.noaa.gov/srh/jetstream/atmos/hydro_cycle.htm
Ask them to use their notebooks and describe what is happening during the evaporation process. Sample response might include: The liquid water is turning into an invisible, odorless gas that enters the atmosphere.
August 2010 Science S3 Sixth Grade Module 6-4.2 12

2. Ask them to note where they see the term transpiration on the diagram then ask them to infer what is happening in the process of transpiration and record their inference in their notebook.
Explore:1. Divide the class into groups of 3-4 and tell them they are going to set up an
investigation that they will observe over the next couple of days. (See student preparation below!)
2. Provide half of the groups with the materials needed to set up the Petri dishes for observation of evaporation of fresh and salt water and the other groups with materials to set up for observation of transpiration.
3. Once all groups have completed their set up, pair groups and have them share what they have done. As they share, groups should record pertinent information on materials, procedure, etc. in notebooks. Then each group puts their plants and/or Petri dishes in a location that can be easily viewed daily.
4. In notebooks, have students predict the changes they think they will observe over the next few days to a week. (predict changes in both investigations).
5. Provide time daily for students to make and record observations in their notebooks.
6. At the end of the observation period students return one last time to predictions and compare their observations summarizing what they observed with the plants and the water containers making sure their summaries include the terms evaporation, water vapor, transpiration and water.
Student Preparation for Evaporation:1. Student groups fill two shallow jar lids or Petri dishes with equal amounts of
water.2. Student groups add salt to one lid/dish to simulate ocean water and fresh
water to other lid or dish.3. After sharing set up with partner group, they place lids/dishes in a sunny
location in the classroom.4. Students predict what they will observe over the next several days/week.
(Review prediction with students.)Student Preparation for Transpiration:
1. Student groups select a tree or bush outside and tie a plastic bag around one of the twigs, etc. or bring a potted plant into the classroom and place it
August 2010 Science S3 Sixth Grade Module 6-4.2 13

in a plastic bag. If an outside tree limb is used, make sure there are no leaks. Tie a rock to the bag or put the rock in the bag so that you form a collection point for the water. After 2 or 3 hours, you should be able to poke a hole in the bag and drain the water.
2. After sharing their set up with their partner group, they place the plant and the baggie in a sunny location.
3. For the next several days to a week, students should record observations in their notebook.
Explain:1. Class Sharing: Scribe observations made with both investigations.2. Ask: How did these observations align with your predictions?3. Tell students: These two investigations have allowed you to observe first
hand two of the processes of the water cycle. Ask students to individually identify and record in their notebooks the two processes that have been investigated as well as provide evidence for their choices.
4. Ask students to share their thoughts.5. Explain to students that that transpiration (evaporation of water from plant
leaves) is the process they observed with the plant in the baggie and evaporation (liquid water turns into an invisible, odorless gas and enters the earth’s atmosphere) is the process they observed with the water in the Petri dishes.
6. Assess students by having them write a summary of their investigations making sure they include the terms: evaporation, water vapor, transpiration, and water. Sample paragraph: Water enters the atmosphere as water vapor through evaporation and transpiration. The liquid water from the earth’s surface is turning into an invisible odorless gas that enters the atmosphere. Water evaporates from the ocean, lakes and other surface water areas. It transpires from plants. Examples might include: Water found in the baggie with the plant indicates transpiration is occurring; missing water in Petri dishes is an example that evaporation has occurred.
Extend:1. Refer back to the models of the water cycle in Lesson A. Have students
repeat this model with the baggie and add salt to the water. Observe for several days, noting changes. Describe any differences they note in the baggies as the water evaporates.
2. Allow students to set up an investigation to measure the differences in the rate of transpiration from different plants, in different seasons, in the morning vs in the afternoon, etc. As part of reporting their data, students should develop a graph of their results.
3. Describe how evaporation and transpiration cause water to change from a liquid to a gas.
August 2010 Science S3 Sixth Grade Module 6-4.2 14

Teaching 6-4.2 Lesson C: – “Condensation forms dew, frost, and clouds”
Instructional Considerations:This lesson is an example of how a teacher might address the intent of this indicator. As water vapor rises into the atmosphere through transpiration or evaporation, it beings to cool and condense. Condensation forms dew, frost and clouds. Students will be recording data in charts in Explore: Part II. As a teacher you might need to review construction of charts for recording data before you begin this lesson. When ready to complete Explore: Part II review the use and reading of thermometers.
The Science and Technology Concepts for Middle SchoolTM (STC/MSTM) STC kit Catastrophic Events and FOSS Weather and Water kit provide an opportunity for conceptual development of the concepts within the standard.
Preparation for the Lesson:Gather the materials needed for the Explore
Misconceptions:Since many students have difficulty believing that the air holds water that they cannot see, it is difficult for them to believe that it could condense into water they can see. Many students believe that condensation on the outside of a container is water that seeped through the container itself (or sweated through the walls of the container).
Safety Notes: Students should follow all classroom safety procedures. Safety must be emphasized at the beginning of the school year and reinforced with every lab activity. Students should understand that safety is everyone’s responsibility. Aprons and goggles should be worn during this experiment.
Lesson time:2 Days (1 day equals 55 minutes)
Materials Needed: Glass or beaker Colored water Ice Quart glass jars Hot water (almost boiling) Matches Baggies Rock salt Thermometers Soup/bean metal cans Foil
Focus Question:What role does condensation play in the water cycle?
August 2010 Science S3 Sixth Grade Module 6-4.2 15

Engage:1. When students arrive have a glass or beaker of colored water with ice cubes
sitting on their tables. 2. Ask students to record observations about the beaker in their notebooks3. Tell them that the water that collects on the mirrors in a bath after a shower
occurs from the same process that is occurring in the beaker.4. Ask them to explain where the water comes from.
Explore: Part 1: Cloud Formation1. Tell students that the same process that caused the water on the outside of
the glass and the water on their bathroom mirror is responsible for forming clouds.
2. Tell them that you are going to make a cloud in a jar to help them to understand this process.
3. Show students the set up you will use and ask them to sketch it in their notebooks. Tell them to use it to record any observations and/or notes as they observe the demonstration.
4. Demonstrate a cloud formed in a jar: Use a large jar (at least a quart) and pour very hot water into the jar to a depth of about 6 cm. Quickly drop a lighted match into the jar and then place a baggie full of ice cubes on the top of jar. A cloud will form inside the jar.
5. Have students write an explanation of the process of cloud formation.
Explore: Part II: Dew and Frost
1. Set up student groups of 3-4 students.2. Provide each group with 2 metal cans (soup or bean cans work fine),
aluminum foil to cover the cans, 2 thermometers, ice, water, and rock salt.3. Student groups should fill each can with ice and carefully slide a thermometer
into each can. 4. In one can, students will pour water to fill the can and cover it with foil. (dew
forms on this can)5. In the other can, students add rock salt to the ice and then add water to fill
the can. Cover this can with foil. (frost forms on this can)6. Students should observe the cans for 15 minutes recording what they
observe on the outside of the cans and the temperature of the cans every 2-3 minutes.
Explain:1. Have students return to the original class demonstration and add any new
information and/or correct any incorrect information.2. Allow time for students to describe how the demonstrations and the two
activities were alike.3. Ask students: In what ways are the processes of cloud formation and the
processes of dew and frost formation alike? Different?4. Explain to students that outside when water evaporates and forms water
vapor, it rises into cooler air. As the air cools, the water vapor changes back into small drops of water and forms a cloud. This process is condensation.
5. Have them compare the activities to this process. What represented the warmth of the earth? The dust in the air around which water vapor condenses? The colder air in the atmosphere?
August 2010 Science S3 Sixth Grade Module 6-4.2 16

6. Assess students by asking them to respond to the following scenario:“You wake up one morning and as you go to get the paper you notice the grass is wet.” Explain why. Why was the grass simply wet and not icy?Pair the students and have them share their answers.
7. Assess student by asking them to respond to: What causes a cloud to form? OR What conditions are necessary to produce clouds?Explanations should include cause and effect relationships. The grass is wet because the water vapor in the air condensed (changed into a liquid from a gas as it rose and cooled. The temperature was above freezing or it would have condensed as a solid.
Extend: 1. Choose a time of year when the temperature is changing (from colder to warmer or warmer to colder) and have students gather data on overnight temperatures and their relationships to dew or frost appearing in the morning.2. NASA Teacher’s Guide – Meteorology: An Educator's Resource for Inquiry-Based Learning for Grades 5-9http://www.nasa.gov/pdf/288978main_Meteorology_Guide.pdfSupplement your existing curricula with this guide. Many of the activities build upon each other. They use the inquiry from the previous activity to assist in the activity that follows. Thus, this publication enhances the understanding of meteorology by beginning with basic and essential parameters of weather and then moving through mind-engaging interactions with complex meteorological systems. Students will build and use weather instruments; then they will build a weather station. Students will collect weather information and combine it with existing information about cloud systems. They can then apply their knowledge to predict weather systems.
August 2010 Science S3 Sixth Grade Module 6-4.2 17

http://www.nasa.gov/audience/foreducators/topnav/materials/listbytype/Meteorology_Guide.htmlFrom page 22
August 2010 Science S3 Sixth Grade Module 6-4.2 18

Teaching Indicator 6-4.2: Lesson D – “Precipitation and Run-off”
Instructional Considerations:This lesson is an example of how a teacher might address the intent of this indicator. After condensation occurs, the water droplets join together to make larger drops that fall to the earth as precipitation. The type of precipitation that forms depends on the temperature in the clouds and in the region between the clouds and earth. The Science and Technology Concepts for Middle SchoolTM (STC/MSTM) kit Catastrophic Events and the FOSS Weather and Water kit provide an opportunity for conceptual development of the concepts within the standard.
Preparation for the Lesson:Obtain materials for students to observe precipitation forming. Use a glass quart jar and very hot water (almost boiling) and a baggie of ice cubes.
Misconceptions: None noted
Safety Notes:Students should follow all classroom safety procedures. Safety must be emphasized at the beginning of the school year and reinforced with every lab activity. Students should understand that safety is everyone’s responsibility. Aprons and goggles should be worn during this experiment. Lesson time:1 Day (1 day equals 55 minutes)
Materials Needed: Watering canGlass quart jarBaggie with ice
Focus Question:What happens to precipitation when it falls on a porous and non-porous surface?
Engage:1. Use Paired Verbal Fluency to have students review what they know about
precipitation. (directions follow)2. Pair students and designate one as student A, the other as student B.3. Tell the students they will be sharing all they know about precipitation with
their partner.4. At the teachers signal, partner A talks while partner B listens. After 20
seconds pairs change roles and Partner B talks while partner A listens. Partner B cannot repeat anything partner A has already said. After 20 more seconds, round 1 is complete.
5. Complete 2 more rounds. Round 2 = 40 seconds for each. Round 3 = 60 seconds each. After three rounds, students return to their seats
6. Provide time for them to share whole class new learning on precipitation.
August 2010 Science S3 Sixth Grade Module 6-4.2 19

Explore: Part I: Reviewing Precipitation Formation1. Demonstrate the formation of precipitation. Tell students they will have to
illustrate what they have observed in their notebooks.2. Pour hot water (almost boiling) into a large glass jar to a depth of about 6 cm.3. Quickly cover the jar with a baggie of ice cubes.4. Ask students to record their observations. (Water droplets should form on the
bottom of the baggie and run down the sides of the jar. This is precipitation.5. Ask students to illustrate this demonstration in their notebooks. A completed
illustration should include the information that the water represents the warm earth while the ice represents the colder temperatures in the atmosphere.
Explore: Part II: Precipitation that Reaches the Earth’s Surface1. Provide students with watering cans or other containers of water.2. Take the class outside.3. Have them move to several different types of surfaces and pour a small
amount of water on each surface making and recording observations of what happens as the water meets the surfaces. If possible, students might want to measure the time it takes for the water to disappear in each of the areas. Set up a rotation for the groups.Surfaces should include:a. a hill or slopeb. Bare soil/sand, earthc. Pavementd. Grass
4. Return to the classroom and have assign students one of the above areas as a group. Have them use a piece of chart paper to record the following information. Type of surface, what happened, evidence for why that happened.
Explain:1. Student groups share results from outside “field trip” activity and then post.
Teacher listens for understanding and asks questions as necessary. What type of surface allows water to soak in faster? (porous surfaces like grass and loose soils) What evidence do you have for this? What is the characteristic of the earth’s surface that causes this to happen? What happens on the paved areas? Why? (runs off quickly due to non—porous surface) on bare soils? (runs off quickly taking soils with it) Where does all precipitation seek to eventually end up? (oceans)
2. Use VVWA (Visual and Verbal Word Association – description below) to allow students to share what they have reviewed/learned about precipitation, surface water flow or groundwater flow.
3. VVWA: Visual and Verbal Word Association:Student groups are provided with chart paper and markers.The chart is then divided into 4 sections. In one section, students write the word/vocabulary term they are given; in another they write a definition, in the third they illustrate the term and in the fourth they share something about the term that relates to them.Terms to use include: precipitation, surface water flow, ground water flow.
4. Groups post their charts and then share whole group allowing for questions/comments from the other class members.
August 2010 Science S3 Sixth Grade Module 6-4.2 20

Extend:1. Set up an investigation to illustrate the effect of water flow and speed on
various surfaces.2. Various web sites are available for use with students who need more work
with this indicator. Some of them include:
Teachers’ Domain: The Hydrologic Cycle http://www.teachersdomain.org/resource/ess05.sci.ess.watcyc.hydrocycle
EPA: Thirstin’s Water Cycle http://www.epa.gov/safewater/kids/flash/flash_watercycle.html
EarthGuide Diagrams: Water Cycle http://earthguide.ucsd.edu/earthguide/diagrams/watercycle/index.html
Teachers’Domain: Observe Precipitation http://www.teachersdomain.org/resource/ess05.sci.ess.watcyc.precipitation
Teachers’ Domain: Water Vapor Circulation on Earth http://www.teachersdomain.org/resource/ess05.sci.ess.watcyc.cloudprecip
August 2010 Science S3 Sixth Grade Module 6-4.2 21