Embed Size (px)
Citation preview

Basic Static Machines 1st Edition
FURN02/1
LEARNING RESOURCE PACKAGE

Publishing details: These notes were prepared by Construction & Transport Division TAFE NSW For Construction and Transport Division TAFE NSW Victoria Road Castle Hill NSW 2154 Ph: (02) 9204 4600 First Published 2003 ISBN 0 7348 1292 2 © Construction and Transport Division TAFE NSW, 2003 Copyright of this material is reserved to Construction and Transport Division TAFE NSW. Reproduction or transmittal in whole or part, other than for the purposes and subject to the provision of the Copyright Act, is prohibited without the written authority of Construction and Transport Division, TAFE NSW. Published by Construction and Transport Division TAFE NSW

Basic Static Machines ©Construction & Transport Division TAFE NSW Fist Edition 2003
Contents
Introduction to the learning resource package 1 Section 1: Sawing Machines 7
Cross cut saw 8 Rip saw 18 Scroll Bandsaw 30 Panel saws 42
Section 2: Planing Machines 55
Surface planer (buzzer/jointer) 56 Panel planer 71
Section 3: Sanding Machines 81 Sanding machines 82 Stroke sanders 84 Edge or linisher sanders 93 Disc sanders 97 Contour or pneumatic drum sander 100 Bobbin sander 104
Section 4: Boring Machines 107 Boring machines 108 Vertical drill 108 Horizontal borers or dowel borer 115
i

BLANK PAGE

Basic Static Machines 1 ©Construction & Transport Division TAFE NSW First Edition 2003
Introduction Basic static machines This module is designed to assist participants are undertaking the National Furnishings Core skills in basic machinery. This module provides the underpinning knowledge to reinforce the skills learned during your practical class. Module purpose The purpose of this module is to develop skills, so that you can safely set up and operate basic wood cutting machinery. This module has 4 sections. Each section covers the basic operation of a number of machines as well as a short activity that you can complete in class or at home. Structure Section 1: Sawing machines; Cross cut saws Rip saws Scroll band saws Panel saws Section 2: Planing machines; Surface planers Panel planers Section 3: Sanding machines; Stroke sanders Edge sanders Disc sanders Contour sanders Bobbin sanders Section 4: Boring machines; Vertical borers Horizontal borers You can learn more about these machines and others by completing the Woodmachining trade course.

2 Basic Static Machines First Edition 2003 ©Construction & Transport Division TAFE NSW
Safety The learner should understand that all machines no matter how simple in design could be potentially dangerous. Machinery does not have to be spinning around at high speed to give you or another worker a serious injury. There are some basic safety issues that we must always follow to reduce the chance of injury • Don’t use the machine if you haven’t been given instruction on
how to use it
• Don’t use the machine if you haven’t proven that you are competent in using it.
• All machines are potentially dangerous don’t take anything for granted
• Always turn the isolation switch off when setting any machine up
• If your not sure how to use the machine ask you teacher or supervisor
• Remember all the house keeping rules, keep the machine and surrounding area clean and tidy
• You must wear close fitting clothing, safety boots and hearing protection. You may also be required to wear respirators, safety glasses and hairnets.
• Report anything that you feel is wrong on the machine
• Seek help from your teacher or instructor if you feel that the machine is not working properly.
• Seek help from your teacher or instructor if you feel unsure or uneasy when operating the machine
Remember safety rules when operating machinery are not specific to just one machine they can be relate to all.

Basic Static Machines 3 ©Construction & Transport Division TAFE NSW First Edition 2003
Trade terms Abrasive Material that is very hard has sharp edges,
used to wear away a softer surface. Anti-Kickback Block A block or stop clamped on the fence or table
of a machine o prevent kickback (also known as Limiting Stop or Stop Block).
Arbour Metal shaft or axle on which a cutter block or
saw blade is fitted. Arris The corner or sharp edge where two surfaces
meet. Backing Material, generally paper, cloth or
combination of both; which has abrasive grit bonded to it, to form a belt or disc.
Back Out To pull the material back towards the
operator before the cut has been completed. Bearing Surface A surface onto which something is pushed or
rests. Belt Name given to a length of backing, which has
the abrasive grit, bonded to it. Bevel An angled cut that alters the edge of material
to other than 90°. Bow A hollow that may be found in the length of
material. Burn Marks Marks, which show on the material because
either the blade is blunt, or the feed had stopped.
Cabriole Leg The shape applied to legs of Queen Anne
furniture. Casting Web Metal rib used for added strength under Machine tables. Clogging To congest, block or choke up. Close Coat Coated abrasive having abrasive particles bonded closely together. Check Plate A small plate inserted into the fence of a surface planer to stop material being pushed under it.

4 Basic Static Machines First Edition 2003 ©Construction & Transport Division TAFE NSW
Chuck Fixed to the end of the drive shaft. Contains key or hand tightened jaws to hold the bits. Cutting Circle The circle scribed by the points of the teeth of a saw blade or the extreme cutting edge of cutters when they are secured in the cutter block. Dressed/Planed All A description of material that has been Round planed on all surfaces. (DAR or PAR) Face The larger (wider) surface of material that has been planed straight, flat and free of twist. Face Edge A surface planed at 900 to the face. Filler Strip Material used to fill a gap. Flitch A part of a log suitable for further conversion, the rectangular section of which is not less than 300 mm x 100 mm. Foot Control A device used to activate the boring cycle. Gapped A term used to describe a chip in the cutter. Grain The direction of cells in the structure of timber. Hopper Funnel-like device used for directing waste
material. Isolate Switch off the main power supply to the
machine. Jig A device used for guiding and/or holding
material during a machine operation. Kerf The width of cut produced by the teeth of a saw
blade. Kickback The throwing back of material by the force of
revolving cutters or saw blades. Lever Stroke Long arm connected to the sanding pad used on
the stroke sander.

Basic Static Machines 5 ©Construction & Transport Division TAFE NSW First Edition 2003
Limiting Stop A block or stop used to prevent kickback or to limit the travel of material over or past the cutters.
MDF Medium Density Fibreboard - a type of solid timber
substitute board that does not have any grain direction.
Micro Adjustment Small or minute amount of adjustment. Off-saw A term used to describe material that has been sawn
and has not been processed further. Open Coat Coated abrasive with the grit spaced apart so that
soft timber will not clog the belt. Pneumatic Operated by the force exerted by compressed air. Push Stick A piece of timber with a birds-mouth shape cut on
one end for pushing material through the machine. Relief Cut The removal of waste material to allow easier
access for a cutter or blade. Ripping Sawing along the grain. Serrated Grooved or notched. Shedding Abrasive particles dislodged from the bond. Skew Not straight, angled to the centre line or slanting. Stock Another name used to describe the material or
component being processed. Streaking Blemishes on the sanded surface caused through a
clogged belt. Table Clamp A means of securing stock to the table. Tailer Out A person who supports material from the outfeed
side of a machine. Tension The amount of pressure placed on the abrasive belt
by moving the drums apart. This allows the belt to be driven around the drums.
Test Cut A cut applied to scrap material to test a set up.

6 Basic Static Machines First Edition 2003 ©Construction & Transport Division TAFE NSW
Traverse To sand diagonally across a surface. Trunnion A projecting support on which a band saw table
tilts. Turret A device used to hold multiple bits on a horizontal
drill.
Basic Static Machines 7 ©Construction & Transport Division TAFE NSW First Edition 2003
Sawing Machines
SECTION
1

8 Basic Static Machines First Edition 2003 ©Construction & Transport Division TAFE NSW
Cross cut saw Machine description and use The primary function of a crosscut saw is to cut timber across the grain. It may be a rough-cut or a finished cut. Some machines will allow a variety of cuts depending on their design; i.e. trenching, angle cutting, bevel ripping, trenching, mitre and bevel cutting and compound cutting etc. The machine consists of a fabricated steel base, which supports a vertical column or pillar from which a cantilever arm is supported. The saw blade is mounted on the motor, which travels along the arm allowing you to cross cut timber.
The cantilever arm can be swiveled up to 45 degrees in either direction enabling you to cut angles across the timber. The saw blade can also be tilted on its side to cut angles across the thickness of the timber. The saw blade can be raised up or down to allow for different size saw blades and adjusting the depth of cut.

Basic Static Machines 9 ©Construction & Transport Division TAFE NSW First Edition 2003
Parts and their functions Table and fence
The table is generally made of timber (but sometimes they are constructed in metal) and should be long enough to support the general lengths of timber that is to be cut. There is a cut in the table, which allows the saw blade the saw blade to cut through the timber. This area must be lined or made from timber, so as not to damage the saw blade. This area can also be in the form of an insert, and it may be replaced (as wear dictates) to prevent breakout on the under-surface of the material being cut. Some machines have a roller table as an extension to the timber table. The rollers are level with the main table. All rollers should run freely and run at 90º to the line of the fence. The fence can be metal, aluminium section or made from timber. It generally runs the full length of the table and is firmly fixed. Provision is often provided for measuring systems or stops. The fence is used to support the timber. The gap in the fence where the saw blade travels will become larger with wear and therefore dangerous. This gap must be kept to a minimum to support the timber and reduce the chance of off cuts being caught between the saw blade and the fence.
Locking of saw Arm raising and lowering lever
head rotation
Handgrip
Release of saw head
rotation Blade guards
Arm swivelling manual locking
Anti kick-backs
Dust chute

10 Basic Static Machines First Edition 2003 ©Construction & Transport Division TAFE NSW
Operating handle This handle is used to bring the saw forwards or to push it backwards. If the handle is fitted on the right-hand side of the saw blade, the handle is pulled with the left hand and the timber held with the right hand or if the handle is fitted on the left-hand side the opposite applies. This method of operation is necessary to prevent the operator being directly in line with the saw blade. Note: the saw blade must be able to return behind the fence line by itself and not roll forward. Guarding (crown or hood type) This protects the section of the blade not cutting the timber and, if adjustable, should be located as close as practicable to the timber being cut. The extension piece is adjustable above the material being cut. Some guards also direct the removal of sawdust to the extraction system. Control switches (Refer to Australian standards as 1473)
All machines must be fitted with a flush green on switch and a red, mushroom-shaped head stop switch or, alternatively, an “on/off “rocker switch mounted on the operating handle.
Each machine must be fitted with a red mushroom shaped emergency stop button. This must be of the push and lock-in type to ensure that it is not possible to start the machine until the button has been re-set. An isolation switch must also be fitted to enable the main power supply to be locked off when maintaining or adjusting the machine. The switches should be placed in an easily accessible position.
start

Basic Static Machines 11 ©Construction & Transport Division TAFE NSW First Edition 2003
Removing and replacing saw blade To remove a crosscut saw blade you will need the following tools: • A spanner for the locknut • Spanners for removing the guard • A wooden mallet • A rag Procedure • Isolate the machine and test the on off switch to ensure that the
machine cannot be turned on • Remove hood/crown guard and be careful of the sharp teeth on
the saw blade • At this stage, you may have to bring the saw blade unit forward
to gain access to the saw blade. On some machines you can lock the head in this position.
NOTE: if you have not change a crosscut saw blade before mark on the inner guard the direct the saw teeth must face to ensure the correct rotation. • Place the lock nut spanner on the nut and tap the end of the
spanner with the mallet to loosen the nut in the same direction as the saw blade rotates.
• Remove nut collar and blade. Ensure that the blade is properly
stored, so as to protect the teeth from damage. • Thoroughly clean the collars and lock nut and check for damage.
Replace any parts which are damaged. • Place one of the collars onto the arbor, and then place the new
saw blade onto the arbor, ensuring that the blade teeth are pointing in the correct direction.
• Place the remaining collar onto the arbor and tighten lock nut.
Several taps with the mallet on the end of the spanner should be enough to tighten the nut. Check to see if the blade rotates without wobbling, this is generally caused if the collars or saw blade is dirty.

12 Basic Static Machines First Edition 2003 ©Construction & Transport Division TAFE NSW
• The table is free of grit or other foreign material. • The fence is square to the table and locked in position. Operational safety precautions When operating a radial arm saw: • Do not attempt to remove off-cuts or sawdust from the table with
your hands, when the saw is running. • The crown guard extension should be set as close as possible to
the top of the timber being cut, and to clear the fence. • The operator should be positioned out of the direct line of the
saw blade at all times. • Do not place your hands inline with the cut. • The saw should be operated with the hand, which does not
require the body to be in line with the blade. • Always hold the piece of timber that is up against the stop. • Do not force feed the material. • Keep the table of the machine and the surrounding area clean
and free of off-cuts. • When cutting bowed material, place the round face down onto
the table and the round edge against the fence. • Check that all locks on the machine are tight. • Never leave material on the radial arm table in line with the saw
and away from the fence. • Always return the saw to a non cutting position after each cut. • Never leave the saw unattended with the power turned on.

Basic Static Machines 13 ©Construction & Transport Division TAFE NSW First Edition 2003
Operating a radial arm saw Rough docking to length The following procedure can be used to rough dock timber to length: • The power to the machine must be isolated and the “on/off
“switch should be checked to ensure the electricity supply is off. The machine table and the work area surrounding the machine should be clean and free from all “off-cuts”.
• The blade should be checked to ensure it is sharp and suitably
positioned to cut through the material thickness. The blade should also be checked for squareness to tine fence and table.
• The crown (or hood) guard must be adjusted as close as possible
to the top of the material to be cut. The gap must not exceed 13 mm for safe operation.
• The stop is adjusted to the required length. • As further machining operations are required, then an extra 25
mm allowance is added. • The stop may be set at the required distance by using the
graduated scale on the fence if one is fitted, measuring to a pencil line or from the saw blade. Clamp or tighten stop in position.
• The material must be checked for bows, twists and for any
foreign matter, which may be embedded in the surface. The foreign matter must be removed as this may damage the teeth. The spring (or rounded) edge must be placed against the fence and the bowed side placed downwards onto the table.
NOTE: if the material has excessive spring it may have to be planed straight prior to cutting.
• If it has a planed face and edge, the edge is positioned against the fence and the face placed downwards onto the table.
Round side against fence Round side on table

14 Basic Static Machines First Edition 2003 ©Construction & Transport Division TAFE NSW
• Restore the power to the machine. Start the saw motor, and allow the blade to reach full revolutions.
• Place the face of the material on the table with the edge held
firmly against the fence. Advance the saw carriage and feed the saw blade through the timber.
• Trim the end of the board, and inspect for splits. If the end is
clean slide the board carefully up against the stop and cut timber to length.
When the operation has been completed: • All switches must be turned off
• If the machine has a brake fitted, apply the brake and bring the
blade to a halt. • The table should be cleared of any off-cuts before the machine
is left unattended

Basic Static Machines 15 ©Construction & Transport Division TAFE NSW First Edition 2003
Procedure for squaring to length on a radial arm saw The power to the machine must be isolated and the “on/off “switch should be checked to ensure the electricity supply is off. The machine table and the work area surrounding the machine should be clean and free from all “off-cuts”. The blade should be checked to ensure it is sharp, raised and locked at a suitable height. The fence should be checked for squareness to the blade. • The crown guard (or hood) must be adjusted as close as possible
to the top of the material to be cut. • The stop is adjusted to the required finished size of the material. • The stop may be set at the required distance by using the
graduated scale on the fence if one is fitted, measuring to a pencil line or from the saw blade. Clamp or tighten stop in position.
• The stop is locked in this position. • Restore the power to the machine. Start the saw motor, and
allow the blade to reach full revolutions. • Place the face of the material on the table with the edge held
firmly against the fence. Advance the saw carriage and feed the saw blade through the timber.
• Trim the end of the board, and inspect that the cut is square. If the end is clean slide the board carefully up against the stop and cut timber to length.
NOTE: At no time should hands be placed in line with the saw blade. At no time place your hands any closer than 200 mm to the saw blade. • Make a trial cut to check the accuracy of the stop position, by
advancing the saw to touch the edge of the board. Adjust the stop if necessary.
• Proceed with the saw cut, ensuring that you hold the timber against both the fence, and fence stop.
When the operation has been completed: • All switches must be turned off • If the machine has a brake fitted, apply the brake and bring the
blade to a halt. • The table should be cleared of any off-cuts before the machine is
left unattended

16 Basic Static Machines First Edition 2003 ©Construction & Transport Division TAFE NSW
Machine fault finding Listed below are some of the more common faults that you may experience when operation a crosscut saw:
Machine fault Cause Remedy Timber out of square • Saw head is out of
square with the table or the fence
• Reset saw head
square to table
Machine vibrates • Saw blade out of balance or damaged
• Replace saw blade and send damaged saw to saw doctor, do not try to fix the blade yourself
Break out • Gap in table or fence
badly worn • Saw blade needs
renovating
• Renew fence • Sharpen saw blade
Travel not returning • Gummed up or damaged slides
• Clean and lubricate, or renovate
Saw head hard to pull out
• Gummed up or damaged slides
• Clean and lubricate, or renovate
Saw self feeding in cut
• Wrong type of saw blade being used for cross cutting
• Replace saw blade with a cross cut blade
Saw blade hard to cut • Saw blade blunt • Sharpen

Basic Static Machines 17 ©Construction & Transport Division TAFE NSW First Edition 2003
Activity: Written questions Exercises require to complete this section
You are asked to give written answers to the following questions
Crosscut saw 1/ What is the main function of a cross cut saw?
__________________________________________________
2/ State the setting of the hood guard
__________________________________________________
3/ What type of angle does tungsten tipped crosscut saw blade have
and what is the approximate angle?
__________________________________________________
4/ List six pre operational safety precautions related to cross cut
saws
__________________________________________________
__________________________________________________
__________________________________________________
__________________________________________________
__________________________________________________
__________________________________________________
5/ List six operational safety precautions related to cross cut saws
__________________________________________________
__________________________________________________
__________________________________________________
__________________________________________________
__________________________________________________
__________________________________________________
6/ What is rough docking?
__________________________________________________

18 Basic Static Machines First Edition 2003 ©Construction & Transport Division TAFE NSW
Rip saw Machine description and use The circular rip saw bench is available in a variety of sizes and types. All machines have a solid base, table, motor, guard, fence and an arbour or saw spindle. The main function of a ripsaw is to cut timber along the grain. The two main cuts are “flat cutting” which is ripping the timber along its face and “deep cutting” which is ripping the timber along its thickness. Some ripsaws can also cut angles. Parts and their functions Table The table is a flat machined, cast iron surface which extends the full length and width of the machine. The table has a slot which the blade protrudes though, and a removable section (to allow blade removal) called a finger plate or gap plate.
Blade
Knife
Fence
Spindle
Base
Electrical
Table Hood Guard

Basic Static Machines 19 ©Construction & Transport Division TAFE NSW First Edition 2003
Fence A rectangular metal fence is located on a guide bar, which is attached to the front of the table. The function of the fence is to guide the material during the cutting process. When correctly set for operation, the fence must be square to the table and in most cases parallel to the blade. In some circumstances, the fence may be adjusted to have either “led-in” or “lead-out”. This means that the fence is either adjusted to point slightly towards or away from the point of cut. This is described more fully in the Rips Raw module.
The fence may be adjusted sideways to allow for different widths of cut; and there is a variety of methods used to lock the fence onto the table. Some machines also have fine adjustment devices to accurately set the required width of cut.
The front end of the fence plate has a curve shaped. This curve follows the curvature of the blade; and is known as the toe of the fence. The base of the toe must be set in line with the base of the gullets of the teeth at table level when the blade is at its highest position. If the toe is positioned past the gullet the material is held between the fence and the blade after cutting and may cause the material to bind or unduly rub on the blade. If the toe is set in front of the blade the material will leave the fence before the cut is completed and the material will no longer be supported.
Fence
Table
Knife
Blade Fence

20 Basic Static Machines First Edition 2003 ©Construction & Transport Division TAFE NSW
Control switches (Refer to Australian standards as 1473) All machines must be fitted with a flush green on switch and must be fitted with a red mushroom shaped emergency stop button. This must be of the push and lock-in type to ensure that it is not possible to start the machine until the button has been re-set. An isolation switch must also be fitted to enable the main power supply to be locked off when maintaining or adjusting the machine. The switches should be placed in an easily accessible position. Guards The hood/crown guard is fitted to rip saws. It is designed to cover the top of the blade and riving knife. The hood or crown guard is set in position i.e. just to clear the top of the timber by either manually adjusting the height or some guards are self-adjusting. The belts and pulleys are also guarded and any other moving part to ensure the safety of the operator. Some guards may be fitted with a hinged (fence side) side guard, which enables the fence to be positioned close to the blade for ripping narrow material. A small movable extension piece may also be fitted to the front of the guard. This can be adjusted independently and its function is to guard the exposed portion of the saw blade between the timber and the crown guard. The distance between the crown guard and the material to be cut should not exceed 13 mm.
Crown Guard

Basic Static Machines 21 ©Construction & Transport Division TAFE NSW First Edition 2003
Setting up riving knife (Refer to Australian standards as 1473.3.200)
Hand fed ripsaws must be equipped with a riving knife. The function of the riving knife is to stop timber closing up on the saw blade therefore causing kick back. It is set no more than 13mm lower than the blade and no more than 13mm from the back of the blade. It is fixed below the machine table, behind and in line with the saw blade and on the same rise and fall adjustment as the blade. This allows the same height to be maintained as the blade is adjusted up and down. The riving knife is usually made of tempered steel and must be thicker than the body of the blade but slightly thinner than the kerf and follow the same radius as the saw blade.
Removing and replacing saw blade To remove a rip saw blade you will need the following tools:
• A spanner for the locknut • A spanner to remove riving knife • A wooden mallet • A rag
Blade

22 Basic Static Machines First Edition 2003 ©Construction & Transport Division TAFE NSW
Procedure • Isolate the machine and test the on off switch to ensure that the
machine cannot be turned on • Remove hood/crown guard and be careful of the sharp teeth on
the saw blade • Raise the saw blade up to a high position. • If the new saw blade is the same diameter as the old blade you
will not have to adjust the riving knife. But if the blade is a different diameter the riving knife will have to be move out of the way while the blade is changed.
• Should the riving knife need to be adjusted, adjust the knife so that it is no more than 13mm below the blade, and no more than 13mm from the back of the blade (see AS 1473.1 – 2000).
• Place the lock nut spanner on the nut and tap the end of the spanner with the mallet to loosen the nut in the same direction as the saw blade rotates.
• Remove nut collar and blade. Ensure that the blade is properly stored, so as to protect the teeth from damage.
• Thoroughly clean the collars and lock nut and check for damage. Replace any parts which are damaged. Place one of the collars onto the arbor, and then place the new saw blade onto the arbor, ensuring that the blade teeth are pointing in the correct direction.
• Place the remaining collar onto the arbor and tighten lock nut. Several taps with the mallet on the end of the spanner should be enough to tighten the nut. Check to see if the blade rotates without wobbling, this is generally caused if the collars or saw blade is dirty.
• Replace guards and set them to the correct position. Check to see if saw blade clears the inside of the guard.
• Turn on isolation switch, stand to the side of machine and start machine.
Blade selection and identification Rip saw blades have a hook angle from 5° to 35°. This angle enables the saw to cut the timber effectively (along the gain) and reduced the effort required by the operator. When the blade is correctly set, and wound to the full height; the cutting action of the blade will hold the timber (down) on the table. The two types of blades used in a rip saw bench are: - • Spring set plate blades • Tungsten carbide tipped blades (the most commonly used blade
type) Both saw blades have similar tooth shapes and angles.

Basic Static Machines 23 ©Construction & Transport Division TAFE NSW First Edition 2003
Spring set plate blades These are blades manufactured from a steel plate containing carbon steel alloys. They are ground flat, tempered, gulleted, tensioned and the teeth are set and sharpened. This type of blade is in limited use as tungsten carbide blades give longer life a better cut. Tungsten carbide tipped blades A shaped tip of tungsten carbide is brazed to the front of each tooth of the blade. Tungsten carbide tips are very hard, have a longer wearing life and remain sharp longer than spring set plate blades. Safety Operators of ripsaws must be aware of the hazards, which exist when using these machines. The following safety precautions must be observed when operating, setting up and maintaining a rip saw. Pre-operational safety precautions Always isolate the power to machine by turning the isolation switch to off before carrying out any adjustments. Check that the main elec-tricity supply has been isolated by pressing the machine “on/off “switch. • Ensure that the machine and surrounding area are clean and free
from obstacles and off cuts. • Always use a push stick whenever possible; to keep your hands
clear of the blade (refer to Australian standards AS 1 473-1 991 section 3.16.3).
• All guards are to be correctly positioned and secured. • If a hood guard has an extension piece it must be positioned as
close as practical to the material being cut. • Check that the riving knife is positioned correctly, and that it is
secure. • Check that blade is installed with the teeth facing in the correct
direction, i.e. towards the infeed side of the table with the points facing downwards.

24 Basic Static Machines First Edition 2003 ©Construction & Transport Division TAFE NSW
• Inspect the blade for damage. • Inspect that the blade is sharp. • Ensure that blade is square to the table. • The blade must be adjusted as high as possible above the table
before ripping. The teeth are then cutting downwards which reduces the risk of kickback and makes the work easier to feed.
• If fitted, inspect the packing for damage and ensure that there are
no off-cuts jammed between the packing and the blade • Ensure that the table is free from grit or any other foreign
material • Check that the table, locked in position, and in line with the
gullets of the blade at table level

Basic Static Machines 25 ©Construction & Transport Division TAFE NSW First Edition 2003
Operational safety precautions When operating the rip saw: • Do not attempt to remove off cuts or saw dust from the table
with your hands when the blade is in motion • Never place your hands in line with the cut • Do not stand directly behind the material being cut • Do not force feed the material • Use a push stick when cutting short or narrow material • Keep the table of the machine and the surrounding area clean
and free of off cuts. • When ripping bowed material place the round face down onto
the table and the round edge against the fence. • Twisted material is potentially the most dangerous material to rip
as it binds on the sides of the saw as it twists. Badly twisted material should be discarded or cut into short lengths and planed on a surface planer prior to ripping.
• Never leave the saw unattended with the power turned on • Seek assistance to cut long, heavy or large material. i.e. use a
“tailor out” Machine operations Parallel ripping Normally, timber that is cut on a rip saw is supplied in a pre-sawn form. The timber may also be wet or sticky, dressed, bowed, and twisted, long, short or in the form of narrow strips. Because the condition of the timber to be sawn may vary, this will impact on the type of “set-up” used on the machine, as well as the way we physically rip the timber. In addition to know defects or conditions, every piece of timber possesses individual characteristics. These characteristics cannot be accurately determined prior to sawing. Timber is made up of fibres that are in a constant state of strain, some pulling in one direction and some in another. When the fibres are cut, the timber will move; causing the timber to spring or twist. When setting and ripping solid timber on a rip saw, these characteristics must be considered.

26 Basic Static Machines First Edition 2003 ©Construction & Transport Division TAFE NSW
Procedure for ripping The power to the machine must be isolated, and the “start” switch should be checked to ensure the electricity supply has been disconnected. The machine table and the work area surrounding the machine should be clean and free from all off-cuts. • The blade should be checked to ensure it is sharp, raised and
locked at its maximum height. The fence should be checked for squareness to the table.
• The hood guard (or
crown) must be adjusted as close as possible to the top of the material to be cut. The gap must not exceed 13 mm for safe operation.
• The fence is adjusted to the sawn size (width) and locked in this position. (An allowance of 5mm is generally added for dressing.)
• The material must be checked for bows, twists and any other
foreign matter, which may be embedded in the surface. The foreign matter must be removed as this may damage the teeth. The bow (or rounded) edge must be placed against the fence and the bowed side placed downwards onto the table.
• If the material is bowed or twisted excessively then it will have
to be planed straight prior to cutting. • If it has a planed face and edge the edge is positioned against the
fence and the face placed downwards onto the table. • The power is restored and the machine is turned on. When the
blade has reached full revolutions the face of the material is placed on the table with the selected edge held firmly against the fence. It is then hand fed into the blade.

Basic Static Machines 27 ©Construction & Transport Division TAFE NSW First Edition 2003
• If you are ripping
long lengths a tailor out must be used
• If the timber is short
the operator can rip the timber half way along its length then turn the timber end to end and cut the timber again. Alternately you may push the timber through with a push stick.
NOTE: The operator must stand to the left of the material when hand feeding the timber into the blade in case of kickback. At no time should hands be placed in line with the blade nor any closer than 200 mm to it. • As the material passes
the clear of the guard and riving knife the tailor out should grasp the timber that is being ripped to width as well as the off cut. The tailor out must not place their hands under the guard at any time.
• The function of the tailor out is to support the material and the
off-cut and to ensure that the material stays flat on the table and against the fence at all times. The tailor out should not pull the material; the operator controls the feed rate.
• When the material has passed the front edge of the table the
operator should remove his hands from the material and use a push stick to complete the cut.
• When the cut has been completed the function of the tailor out is
to pull both pieces of the cut material clear of the blade. If more than one piece is cut from the same board the tailor out should stack the cut material clear of the working area and return the section to be re-cut to the operator without turning it over.

28 Basic Static Machines First Edition 2003 ©Construction & Transport Division TAFE NSW
When the operation has been completed: • All switches must be turned off. • Use the machine brake or wait until the saw blade has come to a
complete stop. • And finally the table should be cleared of any off-cuts before the
machine is left unattended. Machine fault finding Listed are a few of the more common faults you may experience when operation a rip saw:
Machine fault Cause Remedy Timber out of square
• Saw blade or fence not at 90° to table
• Check and reset saw blade and check and reset fence
Machine vibrates • Saw blade out of
balance or damaged, • Vee belt breaking up
• Send saw blade to saw doctor
• Renew belts
Timber continually leading off fence
• Fence out of parallel with saw blade
• Reset fence with slight lead in
Timber hard to push
• Blunt blade, • Timber closing on
blade, saw blade set to low, wrong blade
• Sharpen blade • Double cut • Raise saw blade • Change blade
Poor finish to cut
• Saw blade damaged • Sharpen or repair blade
Timber opening up or closing on the saw blade
• Timber either to wet or to dry, timber stressed
• Double cut

Basic Static Machines 29 ©Construction & Transport Division TAFE NSW First Edition 2003
Activity: Written questions Exercises require to complete this section
You are asked to give written answers to the following questions
Rip saw 1/ State the function of the rip saw
__________________________________________________
2/ Where should the rip fence be set in relation to the saw blade?
__________________________________________________
3/ What type of angle does a rip saw blade have?
__________________________________________________
4/ What is the function and setting of the riving knife?
__________________________________________________
__________________________________________________
5/ List six pre operational safety precautions related to rip saws
__________________________________________________
__________________________________________________
__________________________________________________
__________________________________________________
__________________________________________________
__________________________________________________
6/ List six operation safety precautions related to rip saws?
__________________________________________________
__________________________________________________
__________________________________________________
__________________________________________________
__________________________________________________
7/ Why do you use a push stick?
__________________________________________________
8/ What height do you set a crown guard?
__________________________________________________
9/ When must you use a tailor out?
__________________________________________________

30 Basic Static Machines First Edition 2003 ©Construction & Transport Division TAFE NSW
Scroll Bandsaw
Machine description and use There are three types of band sawing machines used in the woodworking industry.
1. The largest of these machines is the band mill or log band saw. This machine is used in the conversion of logs into commercial timber sizes.
2. The second type is the band re-saw which is used to convert sawn timber (previously in log form) into smaller sizes. These smaller sizes are used in furniture factories, joinery shops and timber mills.
3. The third type of Bandsaw is the narrow or scroll band saw. This type of bandsaw is found in most furniture factories and is designed for curved cutting and light ripping.
NOTE: The following notes focus on the scroll bandsaw.
Parts and their functions Table The table is a casting with a heavily ribbed steel underside and a flat-machined top. On some machines, the table can be tilted up to 45° in one direction. This movement enables bevelled or splayed work to be carried out. A slot, from the front to the centre of the table, allows the blade to be passed through when it is removed or replaced. At the end of the slot is a wooden throat piece that allows the blade to pass through the centre of the table. This supports the material (being cut) and reduces breakout on the article being cut. The condition of the table insert must be checked periodically for wear, as small off-cuts may become jammed between the blade and the insert. These off-cuts may also fall through the opening (between the blade & throat piece) and lodge between the blade and the bottom band wheel, resulting in possible blade breakage.
Adjustment
Neck
Fence
Front
Adjustable Front Guard
Upper Guide Assembly
Blade
Table
Electrical Control
Bandwheel
wheel behind

Basic Static Machines 31 ©Construction & Transport Division TAFE NSW First Edition 2003
A “table alignment bracket” on is fitted on some machines. This bracket is located on the front edge of the table and is removed and replaced on blade changes. This component assists the table with ri-gidity. Fence On some models of band-saw a metal rip fence may be fitted, on either the left or right side of the blade (depending on make & model). The fence is fitted onto a slide and the fence can be locked in the de-sired position. The fence is set at 90° to the front of the machine table. Alter-nately a timber fence may be attached with “G” clamps if required. The fence must be set square to the table and parallel to the blade. It may be positioned on either side of the blade (depending on design) and locked into the required position by either a locking lever or knob. The function of the fence is to act as a guide to the material during the cutting process to ensure a parallel cut and to give support to the material when ripping.
Some machine have the option of fitting a mitre fence. This attach-ment is designed for light duty cuts.
Brake Most bandsaw are fitted with a brake. The brake design may be ei-ther manual or electronic. The manual braking systems normally util-ise a foot pedal and may apply braking force to either on or two wheels. Electronic braking will engage once the stop button has been activated. It must be understood that on a high proportion of machines, braking only occurs on the drive wheel, i.e. the wheel which transfers the power to drive the blade.

32 Basic Static Machines First Edition 2003 ©Construction & Transport Division TAFE NSW
When these types of machine have the brake applied, the blade assists in bringing both wheels to a stop. When a blade breaks, only the bottom wheel is effectively stopped. Great care must be taken to ensure that the top wheel has come to a stop before opening the top wheel guard (to change the broken blade). Failure to do so could see operator injured by a broken blade which makes contact with the rotating top wheel (which may eject in the direction of the operator). Wheels Most band saws have two wheels, although some very small bandsaws (handyman type) may have three. These wheels have a rubber-covered rim. The bottom wheel is fixed in position whilst the top wheel can be raised and lowered as well as tilted. The top wheel needs to be raised and lowered to fit different length blades and to change a blade. Also the top wheel has a tracking device which enables the operator to slightly tilt the top wheel and track the blade. We track the blade for the following reasons: • To ensure the blade will run on a different spot on the rim giving
even wear to the rubber. • Due to the way band saw blades are made all blades will run
differently on the rim and will need to tracked so that they don’t run off the rim.
Blade Guides
Perhaps the most important parts of a band saw are the guides and thrust wheels. If these are not in good condition and correctly adjusted, it is almost impossible to make an accurate cut. The function of the guides are to
support the blade whilst “in the cut”, by preventing the blade from twisting. The thrust wheel stops the blade from being pushed backwards whilst cutting. If the blade moves backwards whilst cutting, the teeth on the blade will make contact with the guides, causing damage to both, and in some circumstances, the blade may be forced (pushed) over the back edge of the wheel.
Guides
Anti-friction disc Saw Blade
Anti-friction disc
Guides

Basic Static Machines 33 ©Construction & Transport Division TAFE NSW First Edition 2003
A machine normally has two guide assemblies, one fixed below the table, and one above (fixed to an adjustable guard). The upper guide assembly is adjustable to allow for different thickness material, and it incorporates a guard. Prior to cutting, the top guide assembly should be set to just clear the top surface of the material being cut. This allows for a greater blade control, and more importantly gauds the operator from contact with the blade. The guides are set just to clear the side of the blade with the front of the guide’s level with the gullets. The thrust wheel should just clear the back of the blade and only rotate when pressure is applied to the front of the blade i.e. when you start cutting. Guards Both upper and lower band wheels are enclosed with metal guards. A guard covering the front of the blade may be mounted on the guidepost which moves up and down with the guide post adjustments. This must be set to just clear the timber you as cutting. As with all other machines any other moving part must be guarded such as motors, pulleys etc. Control switches All machines must be fitted with a flush green on switch and must be fitted with a red mushroom-shaped emergency stop button. This must be of the push and lock-in type to ensure that it is not possible to start the machine until the button has been re-set. An isolation switch must also be fitted to enable the main power supply to be locked off when maintaining or adjusting the machine. The switches should be placed in an easily accessible position. (Refer to Australian standards as 1473)

34 Basic Static Machines First Edition 2003 ©Construction & Transport Division TAFE NSW
Safety The following safety precautions must be observed when operating, setting up and maintaining a band saw. Pre-operational safety precautions Always isolate the main power to machine by turning the isolation switch off before carrying out any adjustments. Check that the electricity supply is not on by pressing the machine “on/off “switch. • Clean the surrounding work area then ensure that: • The blade has been installed with the teeth facing in the correct
direction (i.e. towards the operator and with the points facing downwards in the direction of rotation).
• The blade has no defects, and that it is sharp. • The blade type suits the material to be cut, and that the blade is
correctly tensioned. • The table is square (at 90°) to the blade • The blade is tracking correctly • The guides are correctly adjusted and not damaged or worn. • The thrust wheels are correctly adjusted, spin freely and are not
scored the table insert is in good condition and no off-cuts have been jammed between it and the blade.
• The band wheels tyres are clean and not damaged all guards are correctly positioned and secure.
• The upper guidepost assembly has been adjusted as close as practicable to the top of the material to be cut.
• The dust extraction system has been turned on. • No waste material has been left on the machine or floor. Operational safety precautions The following precautions must be observed to ensure the safe operation of the band saw: • When using the scroll band saw the operator should position
their body to give support to the stock as well as being able to see the line being cut. The operator’s hands should be kept well away from the line of cut to ensure they cannot slip into the blade.
Basic Static Machines 35 ©Construction & Transport Division TAFE NSW First Edition 2003
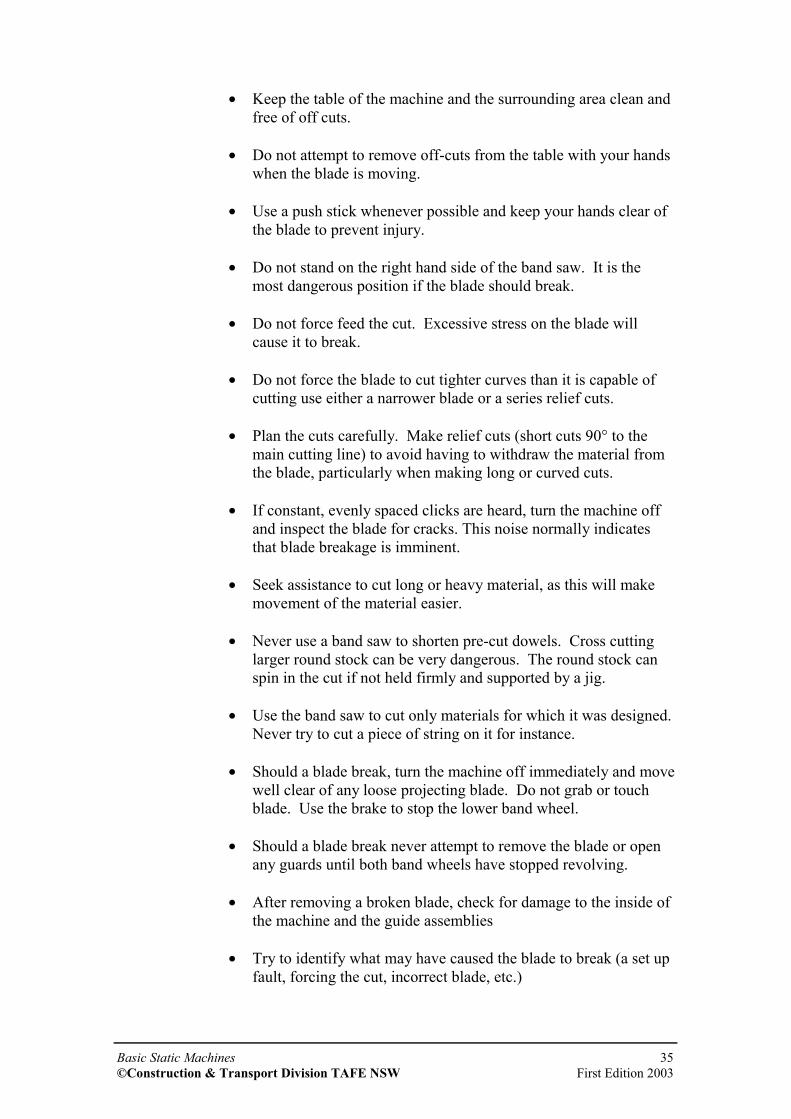
• Keep the table of the machine and the surrounding area clean and free of off cuts.
• Do not attempt to remove off-cuts from the table with your hands
when the blade is moving. • Use a push stick whenever possible and keep your hands clear of
the blade to prevent injury. • Do not stand on the right hand side of the band saw. It is the
most dangerous position if the blade should break. • Do not force feed the cut. Excessive stress on the blade will
cause it to break. • Do not force the blade to cut tighter curves than it is capable of
cutting use either a narrower blade or a series relief cuts. • Plan the cuts carefully. Make relief cuts (short cuts 90° to the
main cutting line) to avoid having to withdraw the material from the blade, particularly when making long or curved cuts.
• If constant, evenly spaced clicks are heard, turn the machine off
and inspect the blade for cracks. This noise normally indicates that blade breakage is imminent.
• Seek assistance to cut long or heavy material, as this will make
movement of the material easier. • Never use a band saw to shorten pre-cut dowels. Cross cutting
larger round stock can be very dangerous. The round stock can spin in the cut if not held firmly and supported by a jig.
• Use the band saw to cut only materials for which it was designed.
Never try to cut a piece of string on it for instance. • Should a blade break, turn the machine off immediately and move
well clear of any loose projecting blade. Do not grab or touch blade. Use the brake to stop the lower band wheel.
• Should a blade break never attempt to remove the blade or open
any guards until both band wheels have stopped revolving. • After removing a broken blade, check for damage to the inside of
the machine and the guide assemblies • Try to identify what may have caused the blade to break (a set up
fault, forcing the cut, incorrect blade, etc.)
36 Basic Static Machines First Edition 2003 ©Construction & Transport Division TAFE NSW
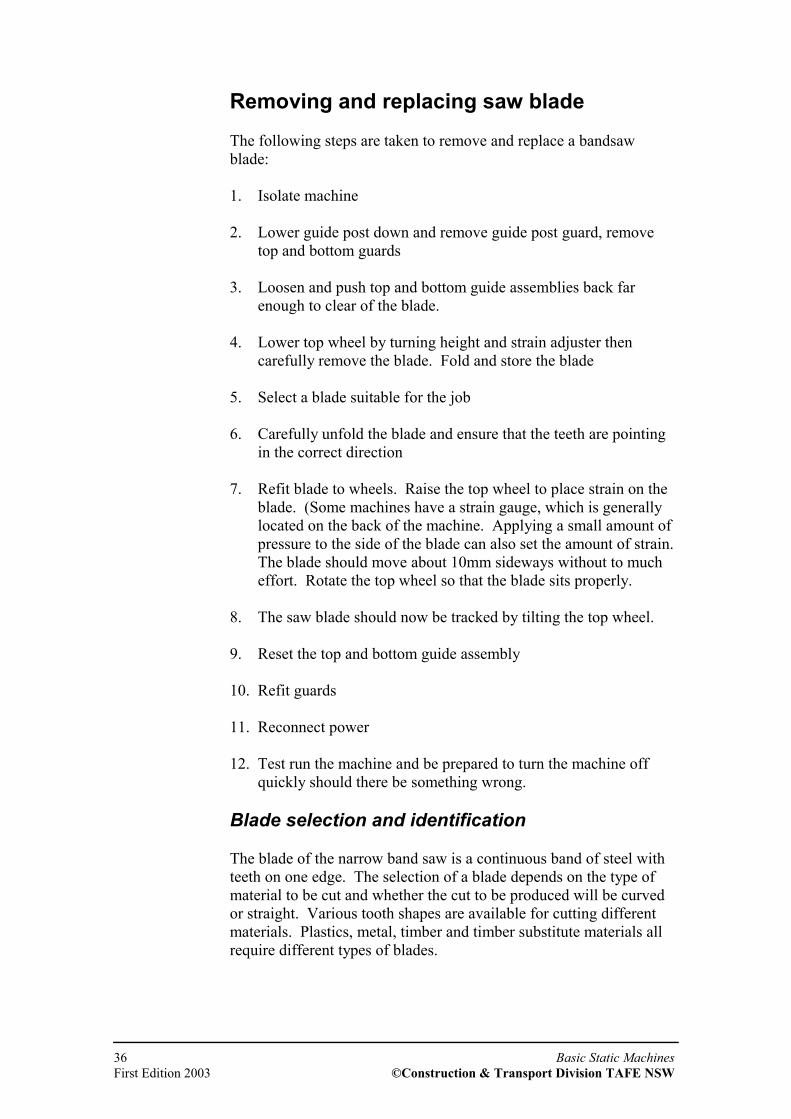
Removing and replacing saw blade The following steps are taken to remove and replace a bandsaw blade: 1. Isolate machine 2. Lower guide post down and remove guide post guard, remove
top and bottom guards 3. Loosen and push top and bottom guide assemblies back far
enough to clear of the blade. 4. Lower top wheel by turning height and strain adjuster then
carefully remove the blade. Fold and store the blade 5. Select a blade suitable for the job 6. Carefully unfold the blade and ensure that the teeth are pointing
in the correct direction 7. Refit blade to wheels. Raise the top wheel to place strain on the
blade. (Some machines have a strain gauge, which is generally located on the back of the machine. Applying a small amount of pressure to the side of the blade can also set the amount of strain. The blade should move about 10mm sideways without to much effort. Rotate the top wheel so that the blade sits properly.
8. The saw blade should now be tracked by tilting the top wheel. 9. Reset the top and bottom guide assembly 10. Refit guards 11. Reconnect power 12. Test run the machine and be prepared to turn the machine off
quickly should there be something wrong. Blade selection and identification The blade of the narrow band saw is a continuous band of steel with teeth on one edge. The selection of a blade depends on the type of material to be cut and whether the cut to be produced will be curved or straight. Various tooth shapes are available for cutting different materials. Plastics, metal, timber and timber substitute materials all require different types of blades.

Basic Static Machines 37 ©Construction & Transport Division TAFE NSW First Edition 2003
The size (gauge / thickness and width) of band saw blades should be carefully selected depending on the size (diameter) of the wheels and the type of work they will perform i.e. straight cutting or curved cutting. The basic principle is to use the widest blade possible to do the job, the widest blade being the strongest. Narrow blades should only be used for tight curves and wide blades for large curves and ripping. When purchasing new blades you should consult your supplier to purchase the most suitable blade. Folding a bandsaw blade Bandsaw blades are folded into thirds. This is done by holding the blade flat in both hands with the palms outwards, as shown in (a). Turn the hands over; this will twist the blade, as shown in (b). Don’t let the blade slip or turning the hands. The blade will almost automatically fall into three-loop (c). The blade should be kept in a safe, dry place. Operating a bandsaw Procedure for straight cutting – Ripping without a fence. When straight cutting, the use of a wide blade is recommended, as this will follow the line with less deviation than a narrow blade. It is easier to rip with a fence as no marking out is required only a fence setting. However, if it is require you rip material freehand: • Mark out a straight line on the timber • Decide were you are going to cut i.e. on the line or to which side. • Lower the guide assembly to just clear the timber ensuring the
front guard is in place • Start the machine up and commence cutting ensuring your hands
are not in line with the blade • Push the timber through the cut up to the last 200mm
remembering never to force the cut • When you only have about 200mm left to cut your left hand can
be placed clear of the back of the blade and the front of the timber can be pushed through with a push stick held by your right hand

38 Basic Static Machines First Edition 2003 ©Construction & Transport Division TAFE NSW
Procedure for ripping to a fence The pre-operational safety precautions must always be observed before attempting this procedure. • The main power to the machine must be isolated. The machine's
“on/off “switch is checked to ensure the electricity supply is not on. The machine table and the work area surrounding the machine should be clean and free from all off-cuts.
• The correct blade must be selected for the work it will perform it
should track correctly and be suitably tensioned. The guide assemblies must be adjusted to the blade with the top guide’s set to just clear the timber.
• The fence is set in position ensuring that it is running parallel to
the blade. To ensure that the fence is parallel to the side of the blade, a carpenters square is placed against the front of the table and along the edge nearest the blade.
• The material to be cut is placed face down on the table with the
straightest edge or bow against the fence. The machine is started and the cut commenced.
• When ripping wide material, place one hand on top of the
material clear of the blade to prevent the material from wandering away from the fence. A push stick should also be used in the other hand once cutting has begun.
• When ripping narrow material, a push stick should be used at all
times to ensure the hands do not come in contact with the blade. • When all cuts have been completed, the machine is turned off
and the band wheels are slowly brought to a stop by lightly applying the brake (if one has been fitted). The machine is isolated, the cramps and the fence are removed and the machine is restored for normal use.
• If several boards are to be cut together, it is advisable to use a
wooden comb (feather board) to assist in holding the timber against the fence. The comb is made of solid timber and consists of a series of cuts, called fingers, made on the band saw. These flexible fingers bend like springs when material is forced past them and provide a holding force to keep the material against the fence.

Basic Static Machines 39 ©Construction & Transport Division TAFE NSW First Edition 2003
Machining of bowed or cupped material In most cases material being cut on a band saw has been pre-machined. When cutting bowed or cupped timber the bowed or rounded side is always placed onto the table. This allows the cut to open up and fall away from the blade as the cut is completed rather than jamming onto the blade as the cut is completed. When cutting with the side fence the bowed or round side is always placed against the fence 'to ensure a parallel cut to the edge and prevent jamming. Freehand curve cutting Before cutting curved shapes careful consideration should be given to types of band saw blades available. If a narrow blade can not be used for cutting tight curves, an alternative method must be planned. It may be necessary to use several relief cuts or to back out after some cuts. Procedure for cutting curved shapes Pre-operational safety precautions must always be observed before attempting this procedure. • The main power to the machine must be isolated. The machine's
“on/off “switch is checked to ensure the electricity supply is not on. The machine table and the work area surrounding the machine should be clean and free from all off-cuts.
• The correct blade must be selected for the work it will perform it should track correctly and be suitably tensioned. The guide assemblies must be adjusted to the blade with the top guide’s set to just clear the timber.
• The material to be cut is marked out from the pattern and placed flat on the table with the waste side of the line facing either left or right depending upon the preference of the operator.
• Decide if you are cutting in the line, to the side of the line or how much you are going to leave on the line for further processing.
• The power to the machine is restored. The method of cutting must be carefully planned and, if relief cuts are necessary, these should be cut first.
• Where possible, the shortest cuts are made first. It is important to back out carefully from these cuts to prevent the blade grabbing and being pulled off the band wheels.
• When making long cuts, maintain an even feed rate to achieve accuracy and a good finish.
• When all the cuts have been completed, the machine is turned off and the band wheels are slowly brought to a stop by lightly applying the brake (if one has been fitted). The machine is isolated and restored for normal use.

40 Basic Static Machines First Edition 2003 ©Construction & Transport Division TAFE NSW
Machine fault finding Listed are a few of the more common faults you may experience when operation a scroll bandsaw:
Machine fault Cause Remedy Timber out of square
• Saw blade or fence not at 90° to table
• Blade running loose in the cut
• Reset table • Check blade tension
Machine vibrates
• Badly made saw blade,
• Wheels out of balanced or damaged
• Replace blade • Have the wheels
renovated
Timber continually leading off fence
• Fence out of parallel with saw blade
• Set fence parallel with the blade
Timber hard to push • Blunt blade, • Timber closing on
blade, • Saw blade set to low, • Wrong blade
• Replace blade • Place wedge in cut to
stop closing • Raise guide post • Replace blade
Poor finish to cut • Saw blade damaged
• Replace blade
Timber opening up or closing on the saw blade
• Timber either to wet or to dry, timber stressed
• Place wedge in cut to stop closing
Blade running out of guides
• Carelessly withdrawing timber in the cut,
• Tracking of blade incorrect,
• Badly worn rims on wheels
• Take greater care withdrawing timber
• Re-track blade • Have rims renovated

Basic Static Machines 41 ©Construction & Transport Division TAFE NSW First Edition 2003
Activity: Written questions Exercises require to complete this section
You are asked to give written answers to the following questions
Scroll band saw 1/ Explain the function of the scroll band saw __________________________________________________
2/ What is the height of the guide assembly when cutting? __________________________________________________
3/ Why do we need to track a bandsaw blade? __________________________________________________
__________________________________________________
4/ State six pre-operational checks to be made to the bandsaw prior to cutting __________________________________________________ __________________________________________________ __________________________________________________ __________________________________________________ __________________________________________________ __________________________________________________ 5/ List six operational checks to be made to the bandsaw prior to cutting __________________________________________________ __________________________________________________ __________________________________________________ __________________________________________________ __________________________________________________ __________________________________________________ 6/ When would you make relief cuts:?
__________________________________________________ 7/ Explain how you would rip timber on the scroll bandsaw? __________________________________________________ __________________________________________________ __________________________________________________ __________________________________________________ __________________________________________________

42 Basic Static Machines First Edition 2003 ©Construction & Transport Division TAFE NSW
Panel saws
Machine description and use Panel saws are used to cut large panels into smaller required sizes. The panel saw is manually fed and requires the operator to set the appropriate fence and stops to the required size and manually feed the stock past the saw to cut the sheet material down to the required size. When operating a panel saw, panels are generally cut (ripped) to width first and then turned 90° and rested against a crosscutting fence to be cut to length. The largest width of panel these machines will cut will depend upon the machine's design. The main application for the sliding table panel saw is the clean cutting of panels and boards, by utilising the roller carriage and cross slide, board material can be cut to size on all four sides. Parts and their functions Table The panel saw has two tables, the main table for ripping panels and the sliding table for cross cutting and ripping. The sliding table runs on bearings, which make it very easy for the operator to load the table and cut heavy boards. A pivoting arm mounted to the body of the machine supports the sliding table. Saw blade rise and fall and tilting adjustment The saw unit can be raised or lowered by a hand wheel located at the front of the machine base. This adjustment allows you raise or lower the main blade depending on its diameter, and the required cutting height of the blade. The scoring saw is normally independent to the main blade, and is adjusted for height by either a hand wheel or spanners. Both the main and the scoring saw can be tilted up to 45° by another either manually, or by way of numerical control.
Riving Knife Crown Guard Rip Fence Blade & Scriber
Sliding Table
Table
Control Panel

Basic Static Machines 43 ©Construction & Transport Division TAFE NSW First Edition 2003
Blades Blades for panel saws are made from quality steel plate with tungsten carbide tips brazed onto the blade. Tungsten has a long lasting cutting edge and stands up to abrasive materials such as particleboard, MDF and laminated plastics. There are various designs and tooth configurations available for panel saws. Should you require a new saw blade or specific information about a saw blade and you should contact your supplier or saw doctor to seek advice on the best blade for what you are cutting. A typical panel saw blade would have 72 to 96 teeth with a hook angle of 10°. The tungsten tipped scribing saw has 12 teeth whether it is a single saw or a split saw set. Ripping fence The ripping fence is located on the right side of the saw blade, parallel to the blade and at right angles to the cross slide. It slides and can be locked on a guide bar, which is attached to the front of the table. Its function is to guide the material during the ripping process to achieve a straight parallel cut. When large panels or boards are to be cut and the whole table is utilised the rip fence may be removed. On most machines the fence is swung under the table without dismantling. The fence in this position is out of the way and cannot be damaged.
Ripping Fence
Locking
Fine Adjustment

44 Basic Static Machines First Edition 2003 ©Construction & Transport Division TAFE NSW
Cross cutting fence The cross cutting fence is fixed to the frame that is part of the sliding table. The function of the cross cutting fence is to cross cut the ends of timber or board after they have been ripped. The cut is generally square but may also be cut at up to 45°. Stops are positioned along the squaring off fence to allow accurate and constant cuts to be made. The stops may be swung back out of the way when not in use. Angle fences These are small mountable fences, which fit onto the crosscut table. They come in various designs from adjustable angle to a fixed mitre fence.
Guards
A hood / crown guard is used on panel saws and is designed to cover the saw blade to ensure the safety of the operator. The style of this type of guard may vary in the way that it is fixed to the machine but all must comply with the current Australian standard 1473 - 2000. The hood guard covers the top of the blade/s and must be long enough to cover the front and back of the blade/s and its height set to
just clear material being cut. Most panel saw hood guards have dust extraction fitted.
Stop
Locking Nut
Stop
Arm
Ball Bearings

Basic Static Machines 45 ©Construction & Transport Division TAFE NSW First Edition 2003
Riving knife Panel saws must also be equipped with a riving knife. The function of the riving knife is to stop material closing up on the saw blade therefore causing kick back. It is set no more than 13mm lower than the blade and no more than 13mm from the back of the blade (see as 1473.1 – 2000). It is fixed below the machine table, behind and in line with the saw blade and on the same rise and fall adjustment as the blade. This allows the same height to be maintained as the blade is adjusted up and down. The riving knife is usually made of tempered steel and must be thicker than the body of the blade but slightly thinner than the kerf and follow the same radius as the saw blade. Control switches The range of switches found on these machines can be grouped as follows; • Start and stop buttons for the main saw. • Start and stop buttons for the scribing saws. NOTE: It must be noted that the majority of panel saws the main blade must be “running” before the scoring unit can be activated. • All machines must be fitted with a large red emergency stop
button. This must be of the push-in type to ensure that it is not possible to start the machine until the button has been re-set.
In addition to the switches for saw activation, additional switches and electronic units may be found. These may include; • Raise and lower the motor for changing speeds. • Display read cuts for motor speed. • Tilt and lift the blade using electronic/mechanical systems. • Set rip fence positions. • Set cross cut stop positions. • Set saw height. • Set saw angle. • Set scribing saw left/right adjustment & height.

46 Basic Static Machines First Edition 2003 ©Construction & Transport Division TAFE NSW
All machines must also be fitted with a red mushroom-shaped emergency stop button. This must be of the push and lock-in type to ensure that it is not possible to start the machine until the button has been re-set. An isolation switch must also be fitted to enable the main power supply to be locked off when maintaining or adjusting the machine with all switches placed in an easily accessible position. (Refer to Australian standards as 1473) Brake Most modern and all new machines have some form of brake, which slows the motor down at a rapid pace (about 4 seconds). It will not stop the blade that quick that would cause the locking nut will come loose. Brakes are fitted to the motors of the main blade and the scribing blade. Removing and replacing saw blades To remove a panel saw blade/s you will need the following tools: • A spanner for the locknut • A spanner to remove riving knife • A wooden mallet • A rag Procedure • Isolate the machine and test the “on off” switch to ensure that the
machine cannot be activated. • Remove hood/crown guard and be careful of the sharp teeth on
the saw blade. • Raise the saw blade to the maximum height.

Basic Static Machines 47 ©Construction & Transport Division TAFE NSW First Edition 2003
Changing the main blade: 1. If the new saw blade is the same diameter as the old blade you
will not have to adjust the riving knife. But if the blade is a different diameter the riving knife will have to be move out of the way while the blade is changed.
2. Place the lock nut spanner on the nut and tap the end of the spanner with the mallet to loosen the nut. The nut will loose in the same direction as the saw blade rotates.
3. Remove nut collar and blade ensuring that the blade is now properly stored away.
4. Thoroughly clean all parts and check all parts for damage. Replace as required.
5. Replace saw blade ensuring that the blade rotates in the correct direction.
6. Refit collars and tighten lock nut. Several taps with the mallet on the end of the spanner should be enough to tighten the nut. Check to see if the blade rotates without wobbling, this is generally caused if the collars or saw blade is dirty.
7. Reset riving knife. It is set no more than 13mm lower than the blade and no more than 13mm from the back of the blade (see as 1473.1 – 2000).
8. Replace guards and set in position. Check to see if saw blade clears the inside of the guard, table and any other part.
9. Turn on isolation switch, stand to the side of machine and turn on blade.
10. Test cut to see if blade is running true (i.e. not wobbling). If the blade is not running true isolate the machine and remove blade, clean all parts reassemble and test again.
Scoring saw If you are required to change the scoring saw it is remove the same way as the main blade except that the saw is running and the locking nut rotates in the opposite direction to the main blade. The following steps will allow you to remove and reset the most scoring blade: 1. Loosen locknut by placing
allen key into spindle center and rotating locknut in the opposite direction to blade rotation.

48 Basic Static Machines First Edition 2003 ©Construction & Transport Division TAFE NSW
2. Remove blade/s 3. If you are replacing a one-piece blade install blade and tighten
locknut. If the blade is a split (two piece) blade it will require shimming to match the kerf of the main blade.
4. Once the scoring saw is installed it will need to be raised up no
more than 1mm above the table level then laterally adjusted to be in line with the main blade. You will need to read the machine instruction manuals to find out how this is done, as not all machines are the same.
5. Once the scorer, the main blade and the riving knife has been set
you will need to set guards then reset the power tom the machine.
To test the cut you will need to take a sample cut on a board and test for the following: • The two cuts are in line • The scoring saw is cutting no more than 1 mm deep. This depth
is dependent on the material being cut, and should be kept to a minimum. Normally, the cut should be deep enough to just cut through the finished surface. Setting the scoring unit too high will result in the board being “flung” towards the main blade. After all, when using the scoring unit, you are using tooling which is actually “back-cutting”.
• The width of the scoring cut is marginally wider than the kerf
produced by the main blade. • There is no breakout NOTE: a sheet of a melamine coated board is good for testing the setup as it breakout easy and you can see the sharp edge of a cut line Safety Operators of panel saws must be aware of potential hazards which exist when using these machines and the following safety precautions must be observed when operating, setting up and maintaining a panel saw. Pre operational safety precautions Isolate the machine and check that the electricity supply has been isolated by pressing the machine “on/off “switch. Then ensure that:

Basic Static Machines 49 ©Construction & Transport Division TAFE NSW First Edition 2003
• A push stick is provided to be used whenever possible to keep your hands clear of the blade (refer to Australian standards as 14730, 2000
• All guards are correctly positioned and secured if a crown guard with an extension piece is fitted, the extension piece is positioned as close as practicable to the material being cut
• The riving knife is positioned correctly
• The blade is installed with the teeth facing in the correct direction, towards the operator, with the points facing down
• The blade is not damaged and is sharp
• The blade is square (90°) to the table
• The table is free of grit or other foreign material
• The fence is square to the table and locked in position
• The work area is clear of off-cuts and all components are stacked neatly on pallets
Some blades on panel saws can be quite noisy. To reduce noise and vibration from the saw blades, modern noise reducing blades may be used. (Refer to Australian standards as 1473, 2000) NOTE: Never use the rip fence as a stop to cut narrow material to length. It may result in a kickback Pre-operational safety precautions Always isolate the power to the machine by turning the isolation switch to off before carrying out any adjustments. Check that the main electricity supply has been isolated by pressing the machines “on/off “switch. • Clean the surrounding work area and then ensure that:
• The machine and the surrounding area is clean and free from obstacles and off-cuts
• All guards are correctly positioned and secured
• A hood guard is positioned as close as practicable to the material being cut
• The riving knife is positioned correctly and secured

50 Basic Static Machines First Edition 2003 ©Construction & Transport Division TAFE NSW
• The main blade is installed with the teeth facing in the correct direction
• The scoring blade is installed with the teeth facing towards the main blade
• The blades have been checked for damage
• The blades are sharp
• The blade is square (at 90°) to the table, fences and stops set & locked
• The table is free of off-cuts
• Make sure a push stick is available to push small material past the saw
• Do not cut material that is to large for the machine
• Keep hands away from moving parts
• Use correct procedures and work practises Operational safety precautions When operating a panel saw: • The operator should be positioned out of the direct line of the
saw blade at all times.
• Do not make adjustments to machine while it is running i.e. ad-justing guard height.
• Do not place your hands inline with the cut.
• Do not force feed the material.
• Keep the table of the machine and the surrounding area clean and free of off-cuts.
• Check that all locks on the machine are tight.
• Keep the table of the machine and the surrounding area clean and free of off-cuts.
• Never attempt to remove off-cuts from the table with your hands when the saw is running.
• Never place your hands in line with the cut never stand directly behind the material being cut ensure scribing saw is set correctly ensure that the crown guard is set in the correct position do not force feed the cut.

Basic Static Machines 51 ©Construction & Transport Division TAFE NSW First Edition 2003
• If ripping or crosscutting bowed material, place the round face down onto the table and the round edge against the fence.
• Seek assistance to cut long, heavy or large material. • Never use the ripping fence as a stop to dock narrow material.
Always use the stops on the squaring fence. • Ensure that you work on the correct side of the cross cut fence. Never leave the saw unattended with the power turned on. Personal safety In addition to the pre operational checks and operational safety precautions, the operator must wear suitable clothing, safety boots and hearing protection. Some companies insist on the operator also wearing safety glasses all the time. It is certainly advisable when cutting materials like laminates melamine’s etc. Additionally the operator should: • Remove rings, watches, bracelets • Button up or roll up shirt sleeves • Remove ties • Not wear loose clothing • Keep long hair tied back • Wear safety shoes • Wear safety glasses and hearing protection Large panel handling loading Large panels (e.g. 32 mm MDF) require the use of a forklift or several people to load the panels onto the sliding table. The operator should ensure that he does not strain his/her back while loading or unloading the machine. During the cutting operation, normally the stock is ripped to the required width first; always use a person to tail out the stock being ripped. The ripped panel should be stacked on a pallet truck and any off-cuts disposed of to ensure that they do not become a hazard on the factory floor. Operator position The operator should not stand in line with the saw blade. He/she should position themselves behind the sliding table to allow the stock to be pushed through at a constant feed rate. This position should allow the use of the adjustable return bar to return the sliding table to a non-cutting position.

52 Basic Static Machines First Edition 2003 ©Construction & Transport Division TAFE NSW
Feed speed The thickness of stock or the number of panels stacked on top of one another will determine the rate of feed. The rate of feed speed should be a constant even rate. If the job requires the operator to force the cut, the sharpness of the blade should be checked. A blunt blade will leave burn marks along the cut. Push stick When ripping narrow stock, a push stick is used to pass the stock between the blade and the fence. This ensures the operator's hand does not come to close to the saw blade. It is also handy to use the push stick to remove offcuts from around the saw blade. Operating a panel saw Considerations when ripping There are a variety of materials that may be straight ripped on the panel saw. Some common materials that may be cut are: • Plywood plain- veneered • MDF plain- veneered • Particle board plain veneered Procedure for cutting material 1. To ensure ease of operation when breaking down sheets into
panel components, one edge of the sheet is trimmed for straightness and squareness form the sliding table.
2. The width of the material is cut off the ripping fence. 3. When ripping, always have the face side of the sheet facing
upwards, because breakout will occur underneath unless the scribing saw is used and set correctly
4. The stop on the crosscut fence is then set to the required position 5. The material trimmed one end rotated 180° and cut to length off
the stop. Both ends of the panel would normally be square. 6. It is dangerous and not recommended that sheets are stacked on
top of each other on a hand feed panel saw as some sheets may slip
7. The panel saw can be used to square solid timber to length. For best results, the timber should be placed in front of the fence, on the same side as the saw blade and the scoring saw turned off and drop below table level.
8. If the timber is positioned behind the fence it should be held firmly, otherwise the blade will push the material away from the fence and the cut will not be square.

Basic Static Machines 53 ©Construction & Transport Division TAFE NSW First Edition 2003
Machine fault finding Listed are a few of the more common faults you may experience when operation a panel saw:
Machine fault Cause Remedy Timber out of square • Saw blade or fence
not at 90° to table
• Check and reset
Machine vibrates
• Saw blade out of balance or damaged,
• Vee belt breaking up
• Have saw blade renovated
• Replace vee belts
Panel continually leading off fence
• Fence out of parallel with saw blade
• Reset fence parallel to saw blade
Panel hard to push
• Blunt blade, • Timber closing on
blade, • saw blade set to low, • Wrong blade
• Replace blade • Double cut timber • Raise saw blade to
highest setting • Use correct saw
blade Poor finish to cut
• Saw blade damaged
• Have blade renovated
Breakout on the underside of the cut
• Scoring saw incorrectly set,
• Scoring saw blunt
• Reset scoring saw • Replace scoring saw
Scoring saw gets blunt very quickly
• Scoring saw set too high
• Check setting on scoring saw
Breakout on surface of panel
• Saw blade blunt, • Saw blade set too
high, • Incorrect saw blade
• Replace saw • Vary the height of
the saw blade • Change the blade for
a more suitable blade for the material that you are cutting

54 Basic Static Machines First Edition 2003 ©Construction & Transport Division TAFE NSW
Activity: Written questions Exercises require to complete this section
You are asked to give written answers to the following questions
Panel saw 1/ Explain the function of the rip fence
__________________________________________________
2/ What is the setting of the crown guard?
__________________________________________________
3/ What is the setting of the scoring saw?
__________________________________________________
4/ List six pre-operational safety checks related to panel saw
__________________________________________________
__________________________________________________
__________________________________________________
__________________________________________________
__________________________________________________
__________________________________________________
5/ List six operational safety checks related to panel saws
__________________________________________________
__________________________________________________
__________________________________________________
__________________________________________________
__________________________________________________
__________________________________________________
6/ Explain the process of cutting a panel to width
__________________________________________________
__________________________________________________
7/ Explain the process of cutting a panel to length
__________________________________________________
__________________________________________________

Basic Static Machines 55 ©Construction & Transport Division TAFE NSW First Edition 2003
Planing Machines
SECTION
2

56 Basic Static Machines First Edition 2003 ©Construction & Transport Division TAFE NSW
Surface planer (buzzer/jointer) Machine description and use Surface planing machines are made in a large variety of sizes from small bench mounted models to large production units. Consisting of a base or frame, which supports the adjustable indeed and out-feed tables and a cutter block situated between these tables, the surface planer operates on the principle of rotary cutting planning the underside of the timber. The surface planers function is to straighten and face & edge the timber. During the drying (seasoning) process, timber will move and distort along its’ length (twisting, springing) as well as distorting in its’ cross section (cupping, going out of square). These phenomena happen more on some timbers than others. Therefore for the timber to be straight, and square it will need to be dressed by using the surface planer. In addition to its basic function the surface planer can also machine chamfers, bevels, rebates, tapers and various types of stopped work. Parts and their functions Tables The surface planer is fitted with two tables, known as the “in-feed” and the “out-feed” tables. Their main function is to support the material during the planing process. The tables, which may be raised or lowered independently of each other, are fitted on either side of the cutter block. The in-feed table faces the direction of the cutter block rotation and is lowered to increase depth of cut. For general machining the out-feed table must be exactly level with the cutters at their highest point (cutting circle). The tables are raised and lowered by hand wheels or levers then locked into position.
Face Edge

Basic Static Machines 57 ©Construction & Transport Division TAFE NSW First Edition 2003
Some machines have long in-feed tables, which are designed to help support long lengths of timber. Long material may be difficult to hold down and will need to be supported on the out-feed table to prevent it from falling. Using a trestle or having someone support the end of the timber can do this. The fence The fence is a flat, machined casting, which is used to support the timber at 90° to the cutters whilst you machine the edge. The fence can be moved across the full width of the tables. This allows the full width of the cutter head to be utilised, and also allows for rebating. Guards Guards are designed to cover the cutter block and all other moving parts to ensure the safety of the operator. There are two main guards covering the cutter block on a surface planer. These are known as: 1. Front guards 2. Back guards Front guards These are mounted on the left hand or working side of the in-feed table. There are three main types of “approved” front guards used on the surface planer. These are: 1. Bridge guard 2. Leg of mutton guard 3. Self-adjusting

58 Basic Static Machines First Edition 2003 ©Construction & Transport Division TAFE NSW
Bridge guard The bridge type should be adjusted to completely cover the cutters at all times. A rise and fail movement is provided to accommodate variations in the thickness of material and a lateral adjustment for the timbers thickness. The height of the guard is raised or lowered so that the gap between the bridge guard and the timber being surfaced is no more than 10 mm. The gap between the fence and bridge guard must not exceed the thickness of the timber plus 10 mm. Leg of mutton guard The leg of mutton guard is self-adjusting and can only move horizontally. It self adjusts by the force of the material pushing against it when the material moves forwards over the cutter block. At the completion of the cut, the guard returns to its original position by means of a return spring. Self-adjusting This guard also self adjust to the width and thickness of the material and returns to the closed position as soon as the timber clears the guard. Rear guard These are fixed to the non-working side of the fence and automatically cover the cutter block, regardless of the position of the fences on the table. (Refer to Australian standards as 1473 - 2000)

Basic Static Machines 59 ©Construction & Transport Division TAFE NSW First Edition 2003
Electrical switch gear (Refer to Australian standards as 1473) All machines must be fitted with a flush green on switch and must be fitted with a red mushroom shaped emergency stop button. This must be of the push and lock-in type to ensure that it is not possible to start the machine until the button has been re-set. An isolation switch must also be fitted to enable the main power supply to be locked off when maintaining or adjusting the machine. The switches should be placed in an easily accessible position. Cutters The cutters are normally made from solid high speed steel, although there are some manufacturers who use “disposable” tungsten cutters. When the cutters’ edge deteriorates, due to wear & tear or excess honing, they can be reground. The most common number of cutters use in surface planers is 2; however there are a few machines in the marketplace that have 3 cutters. Cutter marks Cutter marks can be described as a series of hollows produced by rotary cutting action. When two or more cutters are mounted on a cutter block, which rotates at high speed, the cutters have an intermittent cutting action caused by the gap between each cutter striking the material. This action is described as rotary planing and produces a series ridges and hollows across the material. The pitch or the distance between each ridge is measured in mm and the number of cutter marks or the pitch determines the quality of the finish. The size of the cutter marks (or pitch marks) is affected by four factors: • The speed of the cutter block • The feed speed • The number of cutters • The accuracy of the cutter setting

60 Basic Static Machines First Edition 2003 ©Construction & Transport Division TAFE NSW
Safety The following safety precautions must be observed when operating, setting up and maintaining a surface planer. Pre-operational safety precautions Always isolate the main power to the machine by turning the isolation switch to the off position before carrying out any adjustments. Check that the electricity supply has been disconnected by pressing the machine “on/off “switch. • Clean the surrounding work area and then ensure that: • The cutters are sharp and free of cracks or chips
• The out-feed table has been set to the cutting circle for general
surfacing
• The in-feed table is set to take off no more than 1mm cut for general machining although the table should be set less than 1mm for boards over 100mm or when the cutters are loosing their edge
• The cutter block or cutters are guarded behind the fence • The leg of mutton guard operates so that the spring action will
always allow the guard to cover the cutters or the bridge guard is set to within 10 mm of the material being planed
• The depth of cut set for general surfacing does not exceed 2 mm • The fence is in the locked position prior to starting the machine Operational safety precautions The following safety precautions must be observed to ensure the safe operation of the surface planer: • Adopt a safe, comfortable stance to enable full control of the
operation. • Maintain a firm grip on the material and always keep hands on
the top surfaces. • Never place hands or fingers on the trailing or rear end of the
material. • Material that is less than five times the distance between the lip of
the in-feed and out-feed table must not be planed.

Basic Static Machines 61 ©Construction & Transport Division TAFE NSW First Edition 2003
• Check that the material is free of splits, metal particles and loose knots.
• Plane timber with the grain to get a good finish and reduce the
chance of kickback. • Avoid making dangerously deep cuts, but take several lighter cuts
instead. • Use push blocks when planing short or thin timber. • Re-set the machine for general surfacing after completing stopped
work, rebates or bevels or when you have taken a deep cut. Material characteristics affecting surface finish Even though cutters may be sharp, it is necessary to remember that there are many varieties of timber and substitute boards, each having different working characteristics. Timber is a fibrous material in which the cells lie in layers that are not necessarily straight or face in the same direction. The direction of the cells is called the grain. The fibres often lie in curved paths and circle around knots and other timber defects. When timber is machined, the grain is usually cut at an angle, thereby exposing the ends of the fibres. Consideration must be given to any other peculiar characteristics of substitute boards, which could cause severe blunting, and chipping of the cutters. Machining material having silicon deposits will cause more frequent need to change the cutters, or could require the use of tungsten tipped cutters. Grain direction Whilst difficult to describe, grain direction of solid timber plays an important part in quality control. The cutting action of a rotating planer knife requires planing with the grain to achieve the best finish. Grain direction may be determined in two ways: 1. By feel 2. By observation (sight)

62 Basic Static Machines First Edition 2003 ©Construction & Transport Division TAFE NSW
Feel Being able to determine grain direction in solid timber comes mainly with practice. If timber is rough, moving the hand over the surface to be planed will help to feel the grain. Moving with the grain will feel smooth whilst moving against the grain will feel rough. This may be compared with short hairdo dogs or cats. In one direction the hair feels smooth, whilst in the other direction the hair is raised and feels rough. Observation The lines of the grain pattern will give you a reasonable idea of the grain direction and which way to plan the timber. Note: the machinist must also consider the shape of the timber, whether it is bowed or twisted by the effects of seasoning and the position of defects such as knots and wavy edges. Planing principles When operating a surface planer there are a number of principles and material characteristics that must be observed. The following planing principles should be observed during any operation on the surface planer: • The full width of cutters should be used to evenly distribute wear.
• A controlled and even rate of feed will ensure a good finished surface.
• For material that requires sanding and a polished finish there should not be more than eight cutter marks per 25 mm.
• For material used in construction applications, there should not be more than five cutter marks per 25 mm.
• The far right of the cutters should be used to plane abrasive type materials, as this will keep the relating edge sharp.
• Most operators would take at least two cuts on each face. Should you hear or feel the timber breaking out on the first cut, turn the timber around to cut with the grain on the second cut. If this is not possible slow down the rate of feed.
• Wet timber is difficult to plan and has a poor finish. If you have to dress wet timber the table will have to be well lubricated so that the timber slides on the table.
• Material characteristics affect the safe operation of the machine and also the quality of finish.

Basic Static Machines 63 ©Construction & Transport Division TAFE NSW First Edition 2003
Push blocks It is dangerous to plan short lengths but if you have to it is best to leave the timber in long lengths and cut down to size later. This makes the planing operation safer and faster because the operator's hands are further away from the cutter and fewer pieces need to be handled. Alternately a push block can be used. Push blocks can be used to assist the planing of a face on short material. However, the bridge guard will have to be adjusted across to allow the push block access over the cutters. The guard should be set as close as possible to the edge of the push block. A simple method for determining the shortest length that should be passed over the cutters is to lower the in-feed table to the required depth of cut. Measure the distance from the lip of the in-feed table to the lip of the out-feed table and multiply the distance by five. No material should be passed over the cutters by hand if under the calculated size. NOTE: timber less than 300mm should not be dressed on the surface planer with or without a push block

64 Basic Static Machines First Edition 2003 ©Construction & Transport Division TAFE NSW
Operating a surface planer Planing a face and face edge The purpose of planing a face and edge on the material before further operations are undertaken is to provide straight, flat reference surfaces. The reference surfaces produced on a surface planer will provide the accurate basis for other machining operations. It is most important for the edge to be exactly 90° to the planned face. Faults that remain in the material at this stage cannot be corrected in following machine operations. Procedure for planing a face and face edge All pre-operational safety precautions must be observed before attempting this procedure. Planing a face (general surfacing) 1. The main power to the machine must be isolated. The machine's
“on/off” switch is checked, to ensure that the electricity supply has been disconnected. The surrounding area should be clean and free of off-cuts and the cutters should be checked to make sure that they are sharp and free of gaps.
2. The fence should be adjusted to the width of the material, locked
in position and checked that it is 90° to the machine table. The guard is set to suit the material being cut. If you are using a bridge guard, it should be 5 to 10 mm above the top surface of the material. When the material is placed on its edge against the fence there should be only sufficient gap to allow the material to pass between the guard and the fence.
3. The material must be examined to check for straightness. If it is
bowed or twisted, the hollow or twisted side must be placed down on the table. The direction of the grain on the proposed face side must also be determined. The grain must point away from the direction of the rotation of the cutter block when the face is placed on the table. If the material is not bowed or twisted, the best side is selected as the face. The grain direction is determined on the side to be planed. .
4. The power is restored to the machine and the material is placed
on to the in-feed table with the hollow surface to the table.

Basic Static Machines 65 ©Construction & Transport Division TAFE NSW First Edition 2003
5. Light hand pressure is applied on the upper-most surface and the material is fed over the cutters. The right hand must always be on top of the material and never be placed behind the trailing end.
6. As soon as there is enough material on the out-feed table, the left
hand should be lifted from the in-feed side, over the guard, and placed on the material on the out-feed table. Downward pressure is now applied on the out-feed table by the left hand and the rate of feed is continued.
7. When there is enough material on the out-feed table the right
hand is transferred to the top of the material in the same manner as the left. As one hand leaves the material, the other should control the pressure (similar to a walking action but with your hands) maintaining a constant feed speed without pause until all the material is past the cutters.
8. Steps 4, 5 and 6 are repeated until the surface has been planed
straight, flat and free from twist. This now becomes the face and the main reference surface for planing a face edge.
Planing edge Before planing a face edge it is important to ensure that the fence is square (at 90°) to the table. 1. The edges of the material are inspected and if one is bowed this
will be the proposed face edge. 2. The hollow edge is placed down on the in-feed and the face is
placed against the fence. If the material is solid timber and it does not have a hollow edge then the grain direction on the edge to be planed must point away from the rotation of the cutters.
Light downward pressure on infeed side
Left hand transferred to outfeed side as soon as possible
Both hands on outfeed side as soon as there is enough room to place them

66 Basic Static Machines First Edition 2003 ©Construction & Transport Division TAFE NSW
3. Pressure must be applied to the material to hold it against the fence as well as down on the table. It is extremely important to ensure the material is held 1. firmly against the fence and only a light downward pressure applied when the material is moved over the cutters. If the pressure applied downwards exceeds the pressure against the fence the material may rest on the table or the unplaned edge instead of the fence. Because this edge is generally not square to the face, the result will be that the planed edge will also be out of square to the face.
4. When planing, the left hand directs the position of the material
and holds it against the fence while the right hand is used to push feed the material over the cutters at a constant rate.
Note: both hands must remain on top of the material at all times and the right hand must never be placed behind the trailing end. The fingers on one face with the thumb on the other, as illustrated above, prevents the hands from slipping either down or across the work piece
5. Repeat the last two steps until the edge is clean straight and has a
good finish. 6. All switches must be turned off, the machine isolated and when
the cutters stop revolving the machine table cleared of any off-cuts before the machine is left unattended.
Planing chamfer Before planing a chamfer on an edge it is important to ensure that the fence is set to the required angle, this can be done with a sliding bevel, a combination square, mitre square etc. 1. Determine whether the chamfer can be cut in one pass or will
require several cuts to cut the full chamfer safely. Set the in-feed table.
2. The timber edge is placed down on the in-feed and the face is
placed against the fence. The material is generally already dressed therefore it is straight and flat.

Basic Static Machines 67 ©Construction & Transport Division TAFE NSW First Edition 2003
3. Pressure must be applied to the material to hold it against the fence as well as down on the table. It is extremely important to ensure the material is held firmly against the fence and only a light downward pressure applied when the material is moved over the cutters. If the pressure applied downwards exceeds the pressure against the fence the material will slide down the fence and the edge will not be the correct angle.
4. When planing, the left hand directs the position of the material
and holds it against the fence while the right hand is used to push feed the material over the cutters at a constant rate.
NOTE: both hands must remain on top of the material at all times and the right hand must never be placed behind the trailing end. The fingers on one face with the thumb on the other, as illustrated above, prevents the hands from slipping either down or across the work piece 5. Repeat the last two steps until the edge has the required chamfer
and is clean straight and has a good finish. 6. All switches must be turned off, the machine isolated and when
the cutters stop revolving the machine table cleared of any off-cuts and the fence is set square before the machine is left unattended.

68 Basic Static Machines First Edition 2003 ©Construction & Transport Division TAFE NSW
Machine fault finding Listed are a few of the more common faults you may experience when operation a surface planer:
Machine fault Cause Remedy The timber raises up off the out-feed table
• Out-feed table too high
• Reset table
The timber will not straighten
• Out-feed table too high or low
• Reset table
The timber gets caught on the out-feed table
• Out-feed table too high • Reset table
The timber has a dip in the trailing end of it
• Out-feed table too low • Reset table
The timber will not slide on the table or fence
• Dry surface on table
• Table needs cleaning and lubricating with wax or a spray on dry lubricant
Poor finish to timber
• Timber is wet, • Cutters are blunt, • Cutting against the grain, • Cutting too fast or too slow
• Use dry timber • Have cutters replaced or
honed • Cut with the grain • Use appropriate cutting
speed Cutters getting dull too quickly
• Wrong type of cutter steel for the material being cut, cutting too slow,
• Dirty timber
• Have cutters changed • Slightly increase cutting
speed Groove along the length of the timber
• Gapped (chipped) cutters • Have cutters replaced
Cutters pounding the timber
• Cutters have been honed too much and need regrinding to renew the clearance angle
• On a set of new cutters the clearance angle is not sufficient,
• Cutters blunt, • Timber to hard for the
cutters.
• Have cutters reground • Have saw doctor regrind
clearance angle • Sharpened cutters • Consult saw doctor about
a different cutter steel

Basic Static Machines 69 ©Construction & Transport Division TAFE NSW First Edition 2003
Activity: Written questions Exercises require to complete this section
You are asked to give written answers to the following questions
Surface planer 1/ State the main functions of the surface planer
__________________________________________________
2/ Name the two tables used on the surface planer?
__________________________________________________
3/ Other than the back guard, name three approved guards used on
the surface planer
__________________________________________________
__________________________________________________
__________________________________________________
4/ What is a cutter mark?
__________________________________________________
__________________________________________________
5/ State six pre-operational checks to be made to the surface planer
prior to cutting
__________________________________________________
__________________________________________________
__________________________________________________
__________________________________________________
__________________________________________________
__________________________________________________
6/ State six operational checks to be made to the surface planer
prior to cutting
__________________________________________________
__________________________________________________
__________________________________________________
__________________________________________________
__________________________________________________
__________________________________________________

70 Basic Static Machines First Edition 2003 ©Construction & Transport Division TAFE NSW
7/ When facing timber why do we run with the hollow side down?
__________________________________________________
__________________________________________________
8/ What would cause the timber to rise up off the out-feed table?
__________________________________________________
__________________________________________________
9/ What would cause the timber to have a dip in the trailing end?
__________________________________________________
__________________________________________________

Basic Static Machines 71 ©Construction & Transport Division TAFE NSW First Edition 2003
Panel planer Introduction The main function of the panel planer (commonly referred to as a thicknesser) is to bring timber to a parallel width and thickness. It is describe by the maximum width that it can plane or the table width. i.e. a 900 mm panel planer indicates a maximum cutting width of 900 mm. The panel planer consists of a main frame, which supports the table or bed, feed rollers, the feeding mechanism, a cutter block and pressure device. A series of guards and an exhaust hood, cover the revolving cutter block to prevent possible injury to the operator and to direct shavings away during the planing process. The material, generally solid timber is placed onto the table at the front of the machine, with the pre-machined face or edge facing downwards. The timber is then fed into the machine by feed rollers. Parts and their function
Table The table, or bed, of the panel planer is a heavy casting, which has been machined perfectly flat on the working surface. The working surface may be smooth or lightly grooved to resist friction. Table or anti friction rollers are positioned parallel to
and directly under the in-feed roller and the first out-feed roller. The table has a rise and fall mechanism to adjust the height of the table. The height is set to rules or digital read outs on the machine. The height is adjusted by revolving a hand wheel, or by electric motor, which is enclosed within the main frame and controlled through switches, or by lever. Machines with motorised rise and fall also have a fine adjustment of the table, which is normally a hand wheel.
Table
Isolation Switch
Dust hood
Chipbreakers
Rise & Fall Mechanism

72 Basic Static Machines First Edition 2003 ©Construction & Transport Division TAFE NSW
Cutters High-speed steel is the most suitable type of metal used in panel planers for a general range of work. These cutters may be ground when gapped or have been honed several times. Cutter blocks can have from 2 to 4 cutters. Other types of cutters steels (tungsten carbide, stellite etc.) are available on jointers and some newer machines using disposable cutters with two cutting edges (reversible cutters).
Cutter marks Cutter marks can be described as a series of hollows produced by rotary cutting action. When two or more cutters are mounted on a cutter block, which rotates at high speed, the cutters have an intermittent cutting action caused by the gap between each cutter striking the material. This action is described as rotary planing and produces a series ridges and hollows across the material. The pitch or the distance between each ridge is measured in mm and the number of cutter marks or the pitch determines the quality of the finish. The size of the cutter marks or pitch is affected by four factors: • The speed of the cutter block • The feed speed • The number of cutters • The accuracy of the cutter setting
Helicoidal Cutter-head
Square Block Cylindrical
Cutter-head
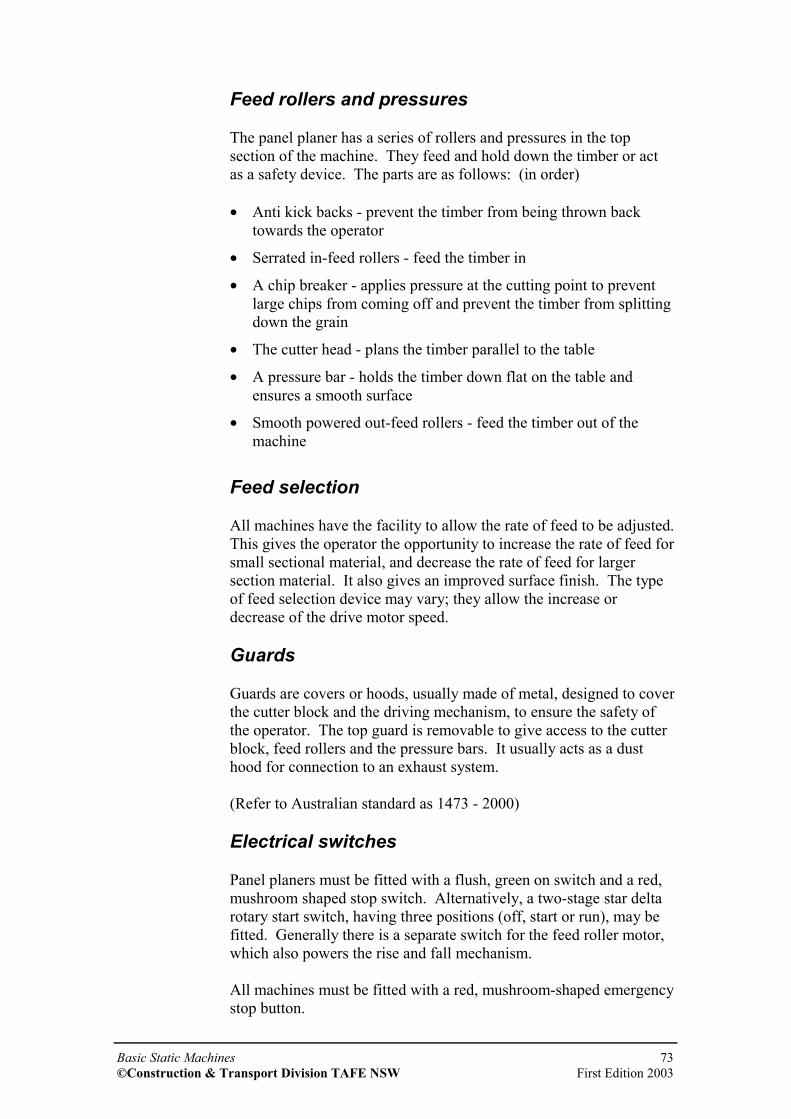
Basic Static Machines 73 ©Construction & Transport Division TAFE NSW First Edition 2003
Feed rollers and pressures The panel planer has a series of rollers and pressures in the top section of the machine. They feed and hold down the timber or act as a safety device. The parts are as follows: (in order) • Anti kick backs - prevent the timber from being thrown back
towards the operator
• Serrated in-feed rollers - feed the timber in
• A chip breaker - applies pressure at the cutting point to prevent large chips from coming off and prevent the timber from splitting down the grain
• The cutter head - plans the timber parallel to the table
• A pressure bar - holds the timber down flat on the table and ensures a smooth surface
• Smooth powered out-feed rollers - feed the timber out of the machine
Feed selection All machines have the facility to allow the rate of feed to be adjusted. This gives the operator the opportunity to increase the rate of feed for small sectional material, and decrease the rate of feed for larger section material. It also gives an improved surface finish. The type of feed selection device may vary; they allow the increase or decrease of the drive motor speed. Guards Guards are covers or hoods, usually made of metal, designed to cover the cutter block and the driving mechanism, to ensure the safety of the operator. The top guard is removable to give access to the cutter block, feed rollers and the pressure bars. It usually acts as a dust hood for connection to an exhaust system. (Refer to Australian standard as 1473 - 2000) Electrical switches Panel planers must be fitted with a flush, green on switch and a red, mushroom shaped stop switch. Alternatively, a two-stage star delta rotary start switch, having three positions (off, start or run), may be fitted. Generally there is a separate switch for the feed roller motor, which also powers the rise and fall mechanism. All machines must be fitted with a red, mushroom-shaped emergency stop button.

74 Basic Static Machines First Edition 2003 ©Construction & Transport Division TAFE NSW
This must be of the push and lock-in type to ensure that it is not pos-sible to start the machine until the button has been re-set. Addition-ally an isolation switch must be fitted to enable the main power sup-ply to be locked off when maintaining or adjusting the machine. All switches should be placed in an easily accessible position. (Refer Australian standards as 1473 2000) Safety The following safety precautions must be observed when operating, setting up and maintaining a panel planer. Pre - operational safety precautions Always isolate the main power to the machine by turning the isola-tion switch to 'off before carrying out any adjustments. Check that the electricity supply has been turned off, by pressing the machine’s “on/off “switch. • Clean the surrounding work area and then ensure that: • No knots or chips are on the machine table, and the table is clean
and free from all gum and residue build up (brush the table clean, do not use your hands)
• Cutters are sharp, balanced (this is normally done prior to setting
the cutter in the head), not chipped or damaged and are tight in the cutter block
• The serration’s of the in-feed roller are not clogged with gum
and timber particles (if it is a sectional roller, ensure all sections move freely)
• The out-feed roller is clean • The timber is checked for knots, splits, metal particles and other
imperfections before machining it • The anti friction rollers revolve freely and no chips are jammed
between the rollers and the gap in the table • The dust extraction hood is positioned and secured correctly • All guards are in position

Basic Static Machines 75 ©Construction & Transport Division TAFE NSW First Edition 2003
Operational safety precautions The following precautions must be observed to ensure the safe operation of the Panel planer: • Do not simultaneously feed material of varying thickness
through a machine which is fitted with a solid in-feed roller. • Never look through the machine feed opening when the cutter
block is revolving. • Stand to one side of the material being fed through the machine
in case of kickback. • Do not attempt to make a cut exceeding manufacturers’
recommendations. • Do not feed material with too great a variation in thickness
through a machine as kickback may occur. • Do not remove broken pieces, knots or chips from the table
while the cutter block is revolving. • Always machine solid timber with the grain; never run solid
timber through the machine across the grain. • To free a jammed work piece, push it sideways. • Never put your entire weight onto a jammed work piece,
particularly if it's thin. • When planing thin timber (5 mm or thinner), use a false table. • Never lower the table when a piece of timber will not feed
through as kickback may occur - isolate the machine, wait for the cutter block to stop revolving, lower the table and then make any necessary adjustments.
• Allow the cutter block to reach maximum revolutions before
feeding material through the machine. • Never grip the underside of timber when feeding short stock as
the timber sometimes lifts and fingers may be pinched when the feed rollers grip.
• Feed successive pieces of timber “end to end”, whenever
possible.

76 Basic Static Machines First Edition 2003 ©Construction & Transport Division TAFE NSW
Grain direction Whilst difficult to describe, grain direction of solid timber plays an important part in quality control. The cutting action of a rotating planer knife requires planing with the grain to achieve the best finish. Grain direction may be determined in two ways: 1. By feel 2. By observation (sight) Feel Being able to determine grain direction in solid timber comes mainly with practice. If timber is rough, moving the hand over the surface to be planed will help to feel the grain. Moving with the grain will feel smooth whilst moving against the grain will feel rough. This may be compared with short hair dogs or cats. In one direction the hair feels smooth, whilst in the other direction the hair is raised and feels rough. Observation The lines of the grain pattern will give you a reasonable idea of the grain direction and which way to plan the timber. Note: the machinist must also consider the shape of the timber, whether it is bowed or twisted by the effects of seasoning and the position of defects such as knots and wavy edges. Cutting with the grain A cutter, which revolves in the direction shown in the above diagram, is said to cut with the grain. Operating a panel planer Dressing faced and edged material The process of machining material after it has been faced and edged on a surface planer is referred to as square dressing, and the final product is generally termed planed all round (par), or dressed all round (DAR). When square dressing material the width should always be machined first to reduce the possibility of the timber tipping over or tilting as it passes through the machine and the grain must always face in the direction of the cutter block rotation.

Basic Static Machines 77 ©Construction & Transport Division TAFE NSW First Edition 2003
Procedure for dressing faced and edged material The pre-operational safety precautions must be observed before attempting this procedure (refer to the section on safety). Planing an edge or dressing to width 1. The widest dimension of the material should always be
planed first. This process is called planing an edge. The width is measured, the main power to the machine restored, and the table adjusted to the required dimension. If the cut required is greater than 4 mm over the required finished size, two or more passes through the machine will be required.
2. When setting the table, it is advisable to lower it below the
required measurement and then adjust it back up to the required setting and lock it in position. This will stop the table from creeping down as the timber passes through the machine and prevent the material from being tapered from one end to the other. This creeping is caused by clearance in the thread or by wear in the rise and fall mechanism.
3. If there are separate switches for the cutter block and feed
rollers, these are turned to on and the material to be planed is placed with the dressed edge (face edge) down on the table.
NOTE: if the material to be planed is solid timber, the grain direction on the upper edge must be determined and be placed to point towards the operator in the same direction as the cutter's rotation. 4. Place the face edge down on the table 5. When the face edge is flat on the table and the grain points in the
correct direction the material is pushed into the machine until contact is made with the in-feed roller.
6. As soon as the material is gripped by the in-feed roller the
operator must move to the out-feed side of the machine and tail out the material. The width of the material should be checked to ensure that the thickness indicator is set correctly.
7. If a number of cuts are necessary, the table is re-adjusted to the
next setting (maximum 4 mm cut) or, if within 4 mm of the required finished size, the material is passed through again until the required width is achieved.
8. If the material is to be planed to thickness immediately after
planing to width, there is no need to turn the machine off.

78 Basic Static Machines First Edition 2003 ©Construction & Transport Division TAFE NSW
Planing a face to thickness 1. The main power to the machine restored and the table is adjusted
to the required dimension. It is advisable to take 1 mm - 2 mm cuts if the material is over 100 mm wide.
2. If the material to be planed is solid timber the grain direction on
the upper face must be determined and placed to point towards the operator, in the same direction as the cutter's rotation.
3. The material is placed with the face flat on the table and pushed
into the machine until contact is made with the in-feed roller. 4. As soon as the material is gripped by the in-feed roller the
operator must move to the out-feed side of the machine to tail-out the material. The thickness of the material is checked.
5. If a number of cuts are necessary, the table is re-adjusted to the
next setting (maximum 4 mm cut) or, if within 4 mm of the required finished size, the material is passed through again until the required thickness is achieved.
6. The table is lowered. The main power to the machine is isolated
and, when the cutter block has stopped revolving the table is cleared of any off-cuts before leaving the machine unattended.
Planing thin material When planing thin material there is a tendency for the material to bounce or chatter as the cutters strike, producing an unacceptable finish on the material. A jig, called a false table, is used to achieve the best results. The same procedures are followed for machining thin material but you should ensure that each piece feeds out of the machine before the next piece is fed into the machine. Planing short stock When planing short material, e.g. material less than 300 mm long, there is a tendency for the material to turn sideways in the panel planer. To reduce this problem, the shorter lengths can be fed through the machine continuously behind one another with the last piece being backed up by a scrap piece of material that is long enough to push the other pieces out.

Basic Static Machines 79 ©Construction & Transport Division TAFE NSW First Edition 2003
Machine fault finding Listed are a few of the more common faults you may experience when operation a panel planer:
Machine fault Cause Remedy Timber moving sideways
• Anti friction rollers not parallel with feed rollers
• Check and adjust anti-friction rollers
Timber wont feed
• Feed rollers not running
• Trying to take off too much
• Turn on feed rollers or engage the gear
• Take two or more cuts
Timber stops as it is feeding through he machine
• Timber is tapered along its length and has jammed,
• Timber caught on something inside the machine
• Table requires lubricating
• Rip timber parallel or take several lighter cuts
• Stop machine isolate and remove obstruction
• Lubricate table
Groove on the underside of the timber
• Something caught in table roller, gap
• Stop machine isolate and remove obstruction
Irregular cutter marks • Not enough pressure form the chip breaker and or pressure bar
• Have the machine checked for cutter setting and pressure setting
Roller marks on surface
• Not taking enough timber off
• Allow more material to be removed
Dips (scallops) on either end of timber
• Table rollers too high
• Reset table rollers 0.5mm above table, run more timber to check and fin adjust
Breakout on surface of timber
• Cutting against the grain
• Check grain direction before feeding into machine

80 Basic Static Machines First Edition 2003 ©Construction & Transport Division TAFE NSW
Activity: Written questions Exercises require to complete this section
You are asked to give written answers to the following questions
Panel planer 1/ State the main functions of the panel planer
__________________________________________________
2/ State six pre-operational checks to be made to the panel planer
prior to cutting
__________________________________________________
__________________________________________________
__________________________________________________
__________________________________________________
__________________________________________________
__________________________________________________
3/ State six operational checks to be made to the panel planer
prior to cutting
__________________________________________________
__________________________________________________
__________________________________________________
__________________________________________________
__________________________________________________
__________________________________________________
4/ State the function of the anti friction rollers
__________________________________________________
5/ What would happen to the timber if the table rollers were set too
high?
__________________________________________________
6/ When would you use a false table?
__________________________________________________

Basic Static Machines 81 ©Construction & Transport Division TAFE NSW First Edition 2003
Sanding Machines
SECTION
3

82 Basic Static Machines First Edition 2003 ©Construction & Transport Division TAFE NSW
Sanding machines Introduction In the woodworking industry sanding machines are used extensively for sanding surfaces to: • Flush off intersecting members (door frames, laminated timber
bench tops etc.) • Sand surfaces prior to polishing. (To remove cutter marks, fine
sanding, sanding to a shape etc.) There are many different types of sanding machines available for the furniture industry. Some machines are made to do a specific job and others are general purpose. While some companies have had machines made to their own specifications. General safety when operation sanding machines Because of the variety of sanding machines available it is important to have a general understanding of the safe use of these machines as generally no safety issue is specific to just one machine. Therefore it is important that operators of sanding machines should: • Not disregard the dangers of sanding machines. The edge of a
rotating belt can cut like a razor sharp knife. The face of the belt will abrade the skin if touched.
• Fix all guards to the machine. • Sand only against the rotation of the belt or drum. • Never sand metal on the sander, sparks can cause dust to ignite,
and may cause either a fire or explosion. • Seek help if they are not familiar with the machines operation. • Not stand or allow anyone to stand in an area that could be
dangerous if a belt breaks. • Only use the machine for the purpose it was designed for. • Not use old belts that may break when being used.

Basic Static Machines 83 ©Construction & Transport Division TAFE NSW First Edition 2003
• Familiarise themselves with the position of the switches and their
function. • Remember! All machines must be fitted with a flush, green on
switch and a red, mushroom shaped stop switch. All machines must be fitted with a red, mushroom-shaped emergency stop button. This must be of the push and lock-in type to ensure that it is not possible to start the machine until the button has been re-set. Additionally an isolation switch must be fitted to enable the main power supply to be locked off when maintaining or adjusting the machine. All switches should be placed in an easily accessible position. (refer Australian standards as 1473 2000)
• Dust extractors must be used. Common sanding machines The following notes cover some of the more common sanding machines available within the furniture industry. • Stroke sanders • Edge or linisher sanders • Disc sanders • Contour & pneumatic drum sanders • Bobbin sanders NOTE: wide belt and other types of sanders are covered (in full detail) in Sanding Machines module.

84 Basic Static Machines First Edition 2003 ©Construction & Transport Division TAFE NSW
Stroke sanders Introduction This machine is also known as a lacey or belt sander. The main function of the stroke sander is to flat sanding veneered panels, and solid timber components.
Parts and their function Table The table supports the workpiece during the sanding operation. To accommodate various thickness materials ranging from thin panels to finished cabinets. The table has a considerable range of height adjustment, this is made possible by vertical steel slides with rise and provided by hand wheel or by electric drive. Traversing movement of the table is provided to allow wide stock to be sanded and to prevent streaking and burning of narrow stock. The table is fitted with wheels that run on steel rails at either end of the machine. The operator moves the table under the belt by means of a long handle. Guards To enclose the belt as it revolves around the idler pulley and drive pulley, shaped metal guards cover the top belt and the pulleys on either end. Other parts that must be guard are drive belts and any other moving part. Unfortunately there is a large open section of belt that cannot be guarded and great care must be taken when operating this machine.
STROKE SANDER

Basic Static Machines 85 ©Construction & Transport Division TAFE NSW First Edition 2003
The pad The pad is generally a piece of timber with a layer of industrial felt and then covered with a graphite impregnated slip cloth. The felt has a cushioning effect that eliminates the thumping effect that the belt joint has when running over the panel whilst the slip cloth reduces the drag or friction between the belt and the pad. There are two types of pad used: • ‘Lever stroke’ operates the up and downward movement of a
sanding pad as well as the movement along the length of the machine. The stroke moves on rollers over bars that extend the length of the machine. This may be operated manually or on some machines automatically.
• ‘Sanding pad’ or ‘hand pad’ is made up of a wooden base with a
wooden handle. The pad is used the same way as the lever stroke except that it is operated by hand. Some operators prefer to use the hand pad on smaller jobs.
The sanding belt The sanding belt is approximately 150 mm wide and may be cloth or paper backed, coated with abrasive. The endless belt runs the full length of the machine around booth pulleys and is normally around 8000 mm long. The abrasive belts are available in with different grains, grain distribution, backing and grit sizes. These combinations will vary depending on what you are sanding and the finish required. Belt tensioner Sanding belts are removed and fitted to the machine by applying or releasing pressure on the adjustable pulley. Either a hand wheel, crank or counter weight systems, may apply tension. The tension is applied to the sanding belt to ensure that it revolves without slipping or running off of the pulleys. It is usually in the form of a pair of horizontal slides on which the idler pulley is mounted.

86 Basic Static Machines First Edition 2003 ©Construction & Transport Division TAFE NSW
The amount of tension that is applied to the belt may vary on the operator but as a general rule the belt when tension should: • Not sag it must be parallel with the table • Not run forward or backward when pressure is applied to the belt • Not slip when pressure is applied to the belt • Over tensioning will cause the belt to break NOTE: When the machine is not being used, the belt tension must be released. Or better still, remove the belt, roll it up and put it in a dry cupboard. This will also prevent cupping and twisting in the belt on wet and very hot days. Tracking adjustment Most belts will run in a different position on the pulleys due to manufacturing irregularities and the condition of the belt. Therefore once the belt is properly tensioned the belt will need to be tracked on the pulleys so that it runs completely on the pulleys. The tracking device is on the adjustable pulley and is normally a hand wheel and locking device. By turning the hand wheel the belt will run forward or backward on the pulley. It must be locked in position when adjusted correctly Safety Although sanding machines do not have revolving cutters they are still potentially dangerous machines. The abrasive materials used on sanding belts can inflict bad burning abrasions to the skin and the sharp edges of the belt are razor sharp when moving. You must remember the moving parts on these machines are more open than most other machines therefore extra care is needed. Safety techniques When operating a stroke sander, the following techniques should be observed to ensure safer operation: Position of operator The operator should be positioned in front of the machine at all times. Never stand or allow anyone to stand on either end of the machine in case the belt breaks.

Basic Static Machines 87 ©Construction & Transport Division TAFE NSW First Edition 2003
Position of hands With machines that require the use of sanding pads, the pad should be operated with the hand, which feels most comfortable to the operator. The operator must never let go of the pad when the pad is over the belt. The other hand should be used to control the movement of the table. A right-handed person would probably feel more comfortable operating the pad with the right hand and moving the table with the left. Sanding machine safety precautions The following safety precautions must be observed when operating sanding machines:
• Lighting and ventilation are adequate
• Turn on the exhaust system
• Check to see if sanding pads and platens are in serviceable condition
• Never let go of the hand pad when it is over or in contact with the belt.
• Keep hand well away from the sharp edge of a running belt
• Ensure the table moves freely
• Check the belt tension and direction of rotation
• Check the abrasive is in good condition and that there are no nicks or tears in the disc or belt
• Locate stock firmly against the stop prior to applying pressure against the abrasive
Sanding machine pre-operational checklist The following pre-operational checklist must be observed: • Isolate the machine to avoid accidental starting when changing
belts, platens, making major adjustments or performing maintenance functions.
• Re-set stops, fences and tables and, where possible, rotate the belt by hand to check that it is tracking correctly.
• Secure any guards, stops and platens before starting.
88 Basic Static Machines First Edition 2003 ©Construction & Transport Division TAFE NSW
• Start and allow the belt to reach maximum revolutions before operating to avoid overloading.
• It is important to select the appropriate belt for the job to be
performed. The type of grit, backing and bond determine its use. Before starting the machine, check that the belt is appropriate for the job.
• The pads are used to place pressure on the belt. They should be
in good condition, which allows them to be held and used safely. The slip cloth (graphite impregnated cloth fixed to the bottom of the pad), should be in good condition and fixed firmly to the pad. The graphite in the slip cloth acts as the lubricant between the pad and back of the belt.
• Abrasive belts should be changed when their cutting action
becomes inefficient. This is due to the abrasive glazing or loaded. On some machines the belts position and exposure allows the belt to be cleaned with a stick of abrasive cleaner.
• Tension placed on the belt by mechanical means keeps the belt
flat and allows even wear on the belt and permits the drive roller to run the best between the rollers.
• The join in the belt should be placed on the machine so that it is
facing in the correct direction. The printing on the belt or the arrow on the belt must run in the direction that the belt rotates.
• Ensure there are no nails or screws in the table that could scratch
you job. NOTE: all general machine safety precautions must be observed when operating sanding machines.

Basic Static Machines 89 ©Construction & Transport Division TAFE NSW First Edition 2003
Operating a stroke sander Flat sanding When flat sanding with a stroke sander, the best results are obtained by flushing off across the grain to remove high or low spots, glue, etc. When this is completed, the component should be finish sanded with the grain. Sanding panels • Isolate the machine to avoid accidental starting while you are
completing your pre-operational checklist and set up. Ensure that you fit the guards, check the tension, tracking and make sure you have the correct belt.
• Set stops on the left-hand side of the machine so that the belt rotation pulls the panel against the stop. It the stop is made of metal you may have to make a false table and stop when sanding thin material. Do not use the metal stop if there is a chance of the belt touching it.
• Place the panel on the machine. Raise or lower the table until the belt clears the job by about 40mm. The belt may drop when it is running so you may have to readjust the table height.
• Start and allow the belt to reach maximum revolutions before operating.
• Place the pad (lever or hand pad are used the same way) flat and level on the belt and apply pressure until the belt comes in contact with the panel.
• Make sure that you don’t roll the pad off the edge of the panel NOTE: Make sure that you keep the table and or the pad moving; otherwise you will sand a hollow in the panel. Remember the veneer on some panels is very thin (normally 0.5 mm to 0.7 mm). • Now move the table so that you are sanding across the grain and
at the same time move the pad down the full length of the panel. When you have completed this you should have sanded the whole panel.
• Finish sanding with the pad running along the grain • When you have finished sanding pull the tables out all the way,
remove the panel and load the machine up with the next panel. Be careful that you don’t touch the edge of the belt with your job or your hand.
NOTE: If the panel is very wide it is best to sand the half the width of the panel then turn the panel around and sand the other half. This will reduce the chance of sanding the edges off or what is commonly called dubbing.

90 Basic Static Machines First Edition 2003 ©Construction & Transport Division TAFE NSW
Sanding timber rails • Isolate the machine to avoid accidental starting while you are
completing your pre-operational checklist and set up. Ensure that you fit the guards, check the tension, tracking and make sure you have the correct belt.
• Set stops on the left-hand side of the machine so that the belt
rotation pulls the timber rails against the stop. Sometimes a false table with a stop and fences helps to control lighter rails that tend to move.
• Place the rails on the machine. You can generally sand more
than one at a time as long as they are not moving while sanding. Raise or lower the table until the belt clears the job by about 40mm. The belt may drop when it is running so you may have to readjust the table height.
• Start and allow the belt to reach maximum revolutions before
operating. • Place the pad (lever or hand pad are used the same way) flat and
level on the belt and apply pressure until the belt comes in contact with the timber.
• Make sure that you don’t roll the pad off the edge of the timber • Make sure that you keep the table and or the pad moving;
otherwise you will sand a hollow in the timber rails. • Now move the table so that you are sanding across the grain and
at the same time move the pad down the full length of the rails. Ensure that the rails are kept up against the stop and parallel to the belt. If the rails move too much you will have to use a fence on either side of the rails.
• Finish sanding with the pad running along the grain NOTE: If you can’t see the back edge of the rails you may accidentally roll the pad over and sand the edge off the last rail (this is commonly called dubbing). It is best to sand the half the width of the rails then turn them around and sand the other half. • When you have finished sanding pull the tables out all the way;
remove the rails and load the machine up with the next set of timber rails. Be careful that you don’t touch the edge of the belt with your job or your hand.

Basic Static Machines 91 ©Construction & Transport Division TAFE NSW First Edition 2003
Machine fault finding Listed are a few of the more common faults you may experience when operation a stroke sander: Machine fault Cause Remedy
Belt slides from under the pad
• Too much pressure, • Not enough belt
tension
• Reduce the amount of pressure you are using with the pad
• Check and adjust belt tension
Panel scored on underside of panel
• Nail or screw projecting through the table
• Check table and remove nail or screw
Belt breaks
• Belt running in the wrong direction,
• Old belt, • To much pad
pressure, • Too much tension
• Take more care when selecting belt rotation
• Belts deteriorate when they get old, discard old belts as they may brake
• Reduce pad pressure • Check and reduce
tension
Belt cupping
• The belt has been left on the machine when not in use and has become damp or very dry
• Remove belt and store for later use or leave belt running and it may straighten up

92 Basic Static Machines First Edition 2003 ©Construction & Transport Division TAFE NSW
Activity: Written questions Exercises require to complete this section
You are asked to give written answers to the following questions
Lacey sander 1/ State the main functions of the lacey sander
__________________________________________________
2/ Why do we need to track the belts?
__________________________________________________
3/ What would happen if you had too much tension on the belt?
__________________________________________________
4/ What would happen if you had too little tension?
__________________________________________________
5/ State six pre-operational checks to be made to the lacey sander
__________________________________________________
__________________________________________________
__________________________________________________
__________________________________________________
__________________________________________________
__________________________________________________
6/ State six operational checks to be made to the lacey sander
__________________________________________________
__________________________________________________
__________________________________________________
__________________________________________________
__________________________________________________
__________________________________________________

Basic Static Machines 93 ©Construction & Transport Division TAFE NSW First Edition 2003
Edge or linisher sanders Introduction These machines vary have a vertical or horizontal belt. Modern machines with vertical belts can have oscillating heads. Edge sanders have a fixed platen, which can vary in length depending on the machine size and design. On some machines with vertical belts the pulleys can be used as contour or bobbin sanders. The main function of the linisher is to sand edges of rail and panels and some machines can also sand contours and profiles.
Combination edge sander & bobbin sander
Linisher
Combination narrow belt edge sander & linisher

94 Basic Static Machines First Edition 2003 ©Construction & Transport Division TAFE NSW
Parts and their function Driven pulley This may be a direct drive motor to shaft or small belt drive and may oscillate up and down or remain in a fixed position. Idler pulley Spring loaded so that the belt may be tensioned and may oscillate up and down. It also provides tracking adjustment. Table or fence May be fixed or tilting and may have provision for an adjustable fence. Its function is to support the material while it is being sanded. Platen The platen, which supports the belt, is normally covered with slip cloth. Some edge sanders are designed and used for flat edge sanding but machines are also designed to use special shaped pads to sand edge contours, e.g. Table tops. Belt May be cloth, paper or combination and vary in size from 25 mm to 150 mm in width and around 3000mm long. The abrasive belts are available in with different grains, grain distribution, backing and grit sizes. These combinations will vary depending on what you are sanding and the finish required. Changing and tracking a belt The belt is changed and tracked the same way as the stroke sander. Care must also be taken when: • Selecting belt direction, • To ensure belt is tracked and is completely on the pulleys • Applying a suitable amount of tensioning to the belt

Basic Static Machines 95 ©Construction & Transport Division TAFE NSW First Edition 2003
Operation and safety The linisher or edge sander is normally operated by hand that is the operator holds the job against the belt. In addition to all other machine safety precautions there are several others that also need to be observed when operating a linisher: • Always apply pressure against the belt rotation
• Never apply to much pressure to the belt as this can cause the belt to break or move forward or backwards
• Never sand articles that are to small to hold safely
• Only one person should use the machine at any time
• Only sand one piece at a time Machine fault finding Listed are a few of the more common faults you may experience when operation a linisher:
Machine fault Cause Remedy Belt slides on platen
• Too much pressure, • Not enough belt
tension
• Reduce pressure • Increase belt
tension
Job hard to hold • Too much pressure, • Try to take off too
much to quickly
• Reduce pressure • Take lighter cuts
Belt breaks
• Belt running in the wrong direction,
• Old belt, • Too much tension
• Take more care when selecting belt rotation
• Belts deteriorate when they get old, discard old belts as they may brake
• Check and reduce belt tension
Belt cupping
• The belt has been left on the machine when not in use and has become damp or very dry.
• Remove belt and store for later use or leave belt running and it may straighten up

96 Basic Static Machines First Edition 2003 ©Construction & Transport Division TAFE NSW
Activity: Written questions Exercises require to complete this section
You are asked to give written answers to the following questions
Linisher 1/ State the main functions of the linisher sander
__________________________________________________
2/ What is the function of the fence?
__________________________________________________
3/ State three operation and safety checks to be made to the linisher
__________________________________________________
__________________________________________________
__________________________________________________
4/ State two reasons why the belt would slide sideways on the platen __________________________________________________
__________________________________________________
5/ What would cause the belt to cup?
__________________________________________________

Basic Static Machines 97 ©Construction & Transport Division TAFE NSW First Edition 2003
Disc sanders Introduction The disc sander is a rotating disc that is covered when an abrasive paper. The machine is available as a double-sided machine; a combination machine with either a linisher or bobbin sander or it may be an attachment to a hand lathe. It is used to rough sanding, end grain sanding and shaping. Parts and their function The disc The disc is made of metal, generally an alloy, and is fixed to a shaft. It may be either belt or direct drive. An abrasive disc is fastened to the metal plate by either gluing it with special disc cement or by clamping with a metal ring on its outer periphery. The table On most machines the work table can be adjusted to an angle 45 degrees below and 10 degrees above the horizontal and can be locked in position. A hand wheel and screw control the canting motion. A small guide fence is fitted to the table can be used to help the operator to sand square or up to 45°. It can be reversed to suit right or left-handed work.
Combination disc sanders

98 Basic Static Machines First Edition 2003 ©Construction & Transport Division TAFE NSW
Operation and Safety The operator holds the job against the disc. In addition to all other machine safety precautions, listed are several other precautions that also need to be observed when operating a disc sander. • Only downward side (generally the right hand side) of the disc
should be used • The side that you cannot use should be guarded • Keep the gap between the disc and the table to a minimum 1 to 2
mm to prevent small pieces of timber being caught • Use the centre of the disc for slow sanding and the outside of the
disc for fast stock removal Fault finding Faults that may occur on a disc sander are:
Machine fault Cause Remedy • Sanding out of
square
• Table not square to disc
• Reset table square to disc
• • Lumpy disc or
edge of disc hitting table
• Disc paper bubbles or is coming away from disc
• Table too close to disc
• Burst air bubbles and apply pressure, re-glue edges
• Reset table

Basic Static Machines 99 ©Construction & Transport Division TAFE NSW First Edition 2003
Activity: Written questions Exercises require to complete this section
You are asked to give written answers to the following questions
Disc sander 1/ State the main functions of the disc sander
__________________________________________________
2/ What side of the disc do we sand on?
__________________________________________________
3/ How far should the table be set from the disc?
__________________________________________________
4/ If you were only taking a small amount of material off what part of the disc would you sand on? __________________________________________________

100 Basic Static Machines First Edition 2003 ©Construction & Transport Division TAFE NSW
Contour or pneumatic drum sander
Introduction Contour sanders are used for sanding mouldings or edge details on shaped components. There are two types of contour sanders one that uses a pneumatic drum and the other that uses a drum and idler pulley. The pneumatic drum is directly driven from the motor. When the air pressure is increased or decreased it can form the contour of the job. A hard drum can sand a flat surface while a softer drum can sand a dowel shape. The drum must have enough air pressure to hold the sleeve on. The machines that use a drum and idler pulley do not always have pneumatic drums. Some machines have various density foam or a solid drums covered in carpet. These machines generally use long belts instead of sleeves therefore the belt life is greater. The operation is the same for both types of machine.
Guards removed for illustration purposes

Basic Static Machines 101 ©Construction & Transport Division TAFE NSW First Edition 2003
Parts and their function The pneumatic drum The pneumatic drum is simply a rubber drum, when pumped up with air forms the shape of a cylinder. The drums are available in various diameters. A thick calico sleeve fits over the drum then the abrasive sleeve is fitted. The calico sleeve protects the rubber bag against punctures should the abrasive sleeve rip. On the end of the drum is a schrader air valve, the same type that is used on tyres in the automotive industry. The Sleeve Contour sanders use an abrasive sleeve. The sleeve is purchased the exact size of the drum so that it fits neatly fits the drum and maintains the exact shape of the drum exactly. Sleeves are available in different grades, grits etc. Drum and idler pulley This type of machine has one drive pulley and one idler pulley which apply tension to a sanding belt in the same way as stroke sanders and linisher. The belt will also need to b tracked. Guarding Because the operator generally uses the complete drum (the whole surface of the cylinder) guarding is generally limited to the dust extraction hood. On a good set up the hood is adjustable and can be moved to an area of the belt/sleeve that is not used.

102 Basic Static Machines First Edition 2003 ©Construction & Transport Division TAFE NSW
Operation and safety The drum and contour sander is operated by hand that is the operator holds the job against the drum. In addition to all other machine safety precautions, listed are several other precautions that also need to be observed when operating a drum sander. • Always apply pressure against the belt and drum rotation • Never apply too much pressure to the belt as this can cause the
belt to break or move across the drum • Never sand articles that are to small to hold safely • Only one person should use the machine at any time • Only sand one piece at a time • Due to the openness of this machines good dust extraction may be
adequate. The operator should wear safety glasses to prevent dust and grit entering the eyes and a dust mask
Fault finding Faults that may occur on a pneumatic drum or contour sander are: Machine fault Cause Remedy
Belt or sleeve running off drum
• Incorrect air pressure or belt tension
• Increase air pressure and check sleeve length
Sleeve bursting • Too much air pressure
• Reduce air pressure, check condition of belts
Sanding flat on round stock
• Too much air pressure
• Release air from drum, reduce pressure on abrasive, use a softer drum
Pneumatic drum looses pressure
• Puncture in drum • Check for cause and repair puncture

Basic Static Machines 103 ©Construction & Transport Division TAFE NSW First Edition 2003
Activity: Written questions Exercises require to complete this section
You are asked to give written answers to the following questions
Contour sander 1/ State the main functions of the contour sander
__________________________________________________
2/ List four operations and safety checks you would make prior to sanding __________________________________________________
__________________________________________________
__________________________________________________
__________________________________________________
3/ Why do we use a calico sleeve under the abrasive sleeve?
__________________________________________________
4/ What may happen if the pneumatic drum was pumped up too hard?
__________________________________________________

104 Basic Static Machines First Edition 2003 ©Construction & Transport Division TAFE NSW
Bobbin sander Introduction The bobbin sander is mostly used for sanding small profiles with internal and external radius. There are various size bobbin heads, which are used for the different radius work. The basic principle is to use the largest one that will do your job as this will have the larger sanding area and leave fewer bumps in the job. Parts and their functions The machine consists of a plain metal table with the bobbin spindle in the centre. The bobbin The vertical sanding bobbin rotates at 3000 rpm, while a reciprocating (bobbin) motion is given to the bobbin. This bobbin motion reduces loading of the belt therefore longer belt life and better finish. When an area of the belt is worn a screw adjustment is provided to enable the operator to raise or lower the bobbin slide to allow the full length of the abrasive paper to be used. The bobbin is made of metal. It is in two sections hinged together with a narrow slot between. When the paper is attached and the two sections closed the paper is stretched until it is tight. On most machines the bobbin table can cant to 30° to one side and 10° the other side. A hand wheel adjusts the canting motion. A graduated scale indicates the angle. A loose fitting ring is provided in order to keep the table opening for the sanding bobbin as small as possible.

Basic Static Machines 105 ©Construction & Transport Division TAFE NSW First Edition 2003
Operation and safety The bobbin sander is operated by hand that is the operator holds the job against the bobbin. In addition to all other machine safety precautions, listed are several other precautions that also need to be observed when operating a bobbin sander. • Always apply pressure against the bobbin rotation • Never apply too much pressure to the belt as this can cause the
belt to break and load up quickly. • Never sand articles that are to small to hold safely • Only one person should use the machine at any time • Only sand one piece at a time Operation 1. Isolate the machine
2. Select an abrasive that is suited to the job
3. Fit the belt to the bobbin ensuring that there are no loose sections as this will reduce the life of the belt and reduce the efficiency of the sanding
4. Ensure any guarding is replaced, dust extraction is turned on and power is restored
5. Turn on machine
6. Sand the job ensuring that you apply pressure against the rotation of the bobbin
7. Don’t hold the job in one position, as you will sand a hollow in the job. Keep the job moving.
8. When the belt is worn in one area moving the bobbin to another sharp area to get full use of the belt
9. Turn the machine off when you have finished

106 Basic Static Machines First Edition 2003 ©Construction & Transport Division TAFE NSW
Machine faults Because the machine is very simple there are few things that can go wrong. But with all mechanical machines it is essential to maintain the machines especially the worm gear that controls the reciprocating motion of the bobbin. Other things that may go wrong are:
Activity: Written questions Exercises require to complete this section
You are asked to give written answers to the following questions
Bobbin sander 1/ State the main functions of the bibbin sander
__________________________________________________
2/ What would cause a belt to break?
__________________________________________________
Machine fault Cause Remedy Belt breaking -
• Poor fitting • Too much pressure • Using old
deteriorated belts
• Refit a new belt correctly
• Reduce the work pressure
• Use a new belt
Machine bobbin not operating correctly
• Machine not serviced or broken
• Have worm drive on bobbin serviced

Basic Static Machines 107 ©Construction & Transport Division TAFE NSW First Edition 2003
Boring Machines
SECTION
4

108 Basic Static Machines First Edition 2003 ©Construction & Transport Division TAFE NSW
Boring machines There are many different types of boring machines used in the furniture industry. They may drill one hole at a time or multiple holes. Newer types of machines as well as high production machines may use CNC or NC to position drills. CNC multi-borers, and CNC point to point borers (machining centers) are being increasing used in the furnisher production industries. Multi-borers and point to point borers are covered in their respective modules.
Vertical drill Introduction Vertical drills are used to accurately and safely drill holes in timber, metal and plastics.
Drills are available in varying pedestal lengths to suit floor or bench mounting. Powered by an electric motor and driven by pulleys and belts a variety of speeds can be chosen. Combining a graduated feed, dead stop and fences or a vice, accurate repetitive boring is possible.

Basic Static Machines 109 ©Construction & Transport Division TAFE NSW First Edition 2003
Machine parts and their function Table A machined surface to support work 'that can be raised, rotated or lowered and locked in position. Centre opening allows the drill bit to pass through the table. In the furniture industry the table is normally covered with a larger wooden table and a fence. This false table helps to support the job and any jigs. The fence is used to locate the job accurately under the drill for repetitive work. As most pedestal drill are built for drill metal as well as wood slots are provided in the table for fitting a vice. Table rise and fall Allows the raising and lowering of the table to suit a variety of material sizes. It should always be lock once set in position. Belt and pulley Adjustable belts and pulleys are used to vary the speed of the chuck. The chuck needs to rotate at a variety of speeds to suit the material and the diameter of the tooling. Metal cutting drills run a lot slower than wood cutting drills and the large the diameter or the drill the slower the rotation. The general speed for drill bits cutting a wood product is 2200 to 3000rpm. To change the chuck speed the motor is unlocked and brought forward, allowing the "v' belt to be changed on the pulleys. Depth gauge A stop set on the travel arm. It is set when the operator needs to control the depth of the hole or has to drill a series of holes at a set depth. Raising and lowering the table will also effect the depth of the holes. Switch Vertical drills must be fitted with a flush, green on switch and a red, mushroom shaped stop switch. All machines must be fitted with a red, mushroom-shaped emergency stop button. This must be of the push and lock-in type to ensure that it is not possible to start the machine until the button has been re-set. Additionally an isolation switch must be fitted to enable the main power supply to be locked off when maintaining or adjusting the machine. All switches should be placed in an easily accessible position. (Refer Australian standards 1473, 2000)

110 Basic Static Machines First Edition 2003 ©Construction & Transport Division TAFE NSW
Safety Pedestal drill can be a potentially dangerous machine. If used incorrectly they can cause injury to the operator. The following are points that must be considered when operating a pedestal borer. • Before operating the drill, secure all items of loose clothing and
hair. Personal safety equipment such as safety glasses and approved footwear must be worn.
• Isolate power to avoid accidental starting when changing bits, or
when making major adjustments, fitting or removing fences and stops or when performing maintenance on the machine.
• Ensure that the vertical borer and the surrounding area clear of
any obstruction. • Be sure to remove the chuck key from the chuck before starting
the machine. • Removing the drill bit at the completion of the work. • If possible have the longer part of the job on the left side of the
drill. This will give greater support to the job if it tries to turn. • Never attempt to drill any work unless it lies flat on the table. • Any work, which will not sit flat on the table, must be supported
in a jig, held in a vice or clamped to the table. • Request assistance or use trestles to support long lengths of
material. • When drilling sheet metal special care must be taken when the
drill bit is breaking through the material surface. • Take notice of the position of the stop switch in case of
emergency. • Allow the drill to clear the waste. If a drill bit clogs, do not
attempt to clear it while it is in running. • Do not clear waste from the table when the machine is running. • Do not get distracted. The operation of this machine requires the
operator’s undivided attention and concentration at all times.

Basic Static Machines 111 ©Construction & Transport Division TAFE NSW First Edition 2003
Operating a pedestal borer The following steps may be taken to set-up and borer a hole accurately. You must also follow all other safety and pre-operational safety procedures • Ensure the machine is isolated and is in a serviceable condition.
Also ensure that the surrounding area is clean and safe. • Select the correct drill bit for the materials to be bored. Drills
for drilling wood have a lead point and spurs, which ensures the holes run true with clean shoulders.
• When drilling metal, ensure that a drilling vice and safetly
glasses are used. • Select the correct rotational speed for the drill being used. • Make sure that shank of the drill bit is free of burrs and that the
drill bit is correctly sharpened. • Insert the drill bit as far as it will go into the chuck then tighten
the three jaws uniformly with the correct size chuck key. • Adjust the table heights to suit the material being bored. • Adjust the depth stop if necessary. • Set the fence in position with g clamps this will stop the material
from spinning should the drill grab and also accurately locate your job
• G clamp the fence stops, this will accurately position work piece • Check to see if chuck key has been removed and all clamps are
tight • Reconnect power • During drilling allow the drill bit to cut at its own speed without
applying undue force. Reduce the speed of drilling on larger bits • When you have finished the drilling operation, turn off the
machine, remove your job when drill is stationary, and clean the surrounding area, isolate machine, and remove drill bit.

112 Basic Static Machines First Edition 2003 ©Construction & Transport Division TAFE NSW
Changing drill speed Pedestal drills use stepped pulleys to alter the rotation speed of the bit. A pedestal drill may have two or three stepped pulleys. This is due to accommodate different materials, drill types and different bit sizes. A drill with three pulleys offers a wider range of speeds to choose from. A two-pulley drill usually has five speeds and three pulleys can have a choice of nine speeds. Moving a vee belt up or down on the pulleys adjusts the rotation speed. To obtain the slowest rotation speeds use the smallest pulley on the motor and the largest pulley on the spindle. Changing speeds 1. Ensure the power is isolated before commencing any speed
adjustment.
2. Open the belt guard.
3. Unlock the belt tension knob, this usually allows the motor to move toward the spindle.
4. Shift the belts to obtain the required rotation speed. It is important to ensure the belts are running in line with the pulleys.
5. Move the motor away from the spindle to obtain the desired belt tension and lock the belt tension knob.
6. Close the belt guard.
7. Reinstate the power supply.
8. Test drill on scrap material for correct rotation speed and correct belt tension. If the speed is incorrect or if the belts are slipping, repeat the above procedure.
Changing a drill bit Most drills have a standard three jaw key tightened chuck. If frequent changing of bits is necessary a keyless chuck may be used. This type of chuck is tightened by hand and requires a flick of the wrist to loosen or tighten it.

Basic Static Machines 113 ©Construction & Transport Division TAFE NSW First Edition 2003
Fault finding There are few faults that would stop the pedestal borer from working. Most faults occur through setting up. Listed are some of the more common faults. Machine fault Cause Remedy
Hole is larger than the bit
• Drill bit incorrectly fitted
• Burr on shank of drill bit
• Lead point out of centre
• Spurs different heights
• Refit drill, • Remove burr • Regrind point in
centre • Regrind spurs with
equal height
Drill bit burns
• Drill is running too fast
• Drill bit blunt
• Reduce speed • Sharpen drill
Hole is not clean • Drill too slow • Drill blunt
• Increase speed • Sharpen drill
Machine vibrates
• Drill off centre in the chuck
• Reset drill and check shank
Holes not in correct position
• Fence moved • Stops moved • Table not locked in
position
• Reset fence and tighten
• Reset stops and tighten
• Reset and tighten
Hole depth irregular • Waste under the work piece
• Clean waste away

114 Basic Static Machines First Edition 2003 ©Construction & Transport Division TAFE NSW
Activity: Written questions Exercises require to complete this section
You are asked to give written answers to the following questions
Vertical borers 1/ State the function of the vertical borer
__________________________________________________
2/ State two ways of adjusting drill depth __________________________________________________
__________________________________________________
3/ Describe how to change the drill speed
__________________________________________________
__________________________________________________
__________________________________________________
4/ State two causes of the hole not being clean __________________________________________________
__________________________________________________
5/ State six safety and pre-operational checks to be made to the vertical borer. __________________________________________________
__________________________________________________
__________________________________________________
__________________________________________________
__________________________________________________
__________________________________________________

Basic Static Machines 115 ©Construction & Transport Division TAFE NSW First Edition 2003
Horizontal borers or dowel borer Introduction Simple horizontal boring machines are extensively used in furniture production to produce the holes for dowel joints the most common joints in cabinet framing. Borers have been continually redesigned to produce fast accurate boring. The single borer has evolved into automated, multiple bit machines. Cycles in the machine allow for head movement as well as clamping the work piece. This, in turn, has reduced the fatigue levels to which an operator was subjected to during large production runs. Conventional boring machine bits are rotated or driven by single or three phase electrical motors. The drive is directly attached to the bit or connected by means of pulleys and belts.
1. Fence 2. Fence lock 3. Rise & fall
adjustment wheel 4. Rise & fall
adjustment lock 5. Cramp lock nut 6. Cycle activation
pedal 7. Turret or chuck 8. Turret lock 9. Lubrication point 10. Mode selector 11. Travel adjustment 12 Depth adjustment
5
2
4
3
6
7
9
10
11
12
1 8
116 Basic Static Machines First Edition 2003 ©Construction & Transport Division TAFE NSW
Parts and their function Table The table supports stock to be bored. The table is normally a solid metal casting machined to support the fence and cramping mechanism. It can be raised, lowered and tilted usually by winding a handle then locked into position. Fence The fence is a guide used to ensure that a hole is bored in the required position and at the required angle. When boring end grain a fence set parallel to the bit is useful to slide material against. On single bit borers, correctly positioning a fence will help counter the drills tendency to wander. A fence that slides in the table and is square to the bits is will hold the material square. The fence lock nut must be tightened to prevent movement. Clamps Pneumatically or manually operated clamps, set just to clear the material are used to stop the material from moving. Clamps are faced with a soft timber, cork or rubber to protect material. Position of clamp face above material is adjusted by releasing the adjustment nut. Automatic cycle machines Most vertical borers have a foot operated cycle. Once activated the machine runs through an automatic cycle. The material is positioned onto the table and by depressing the foot pedal, the cycle begins, clamp down, drill out, drill retract and clamp up the cycle is then completed. On most machines it is difficult to interrupt the cycle once engaged. Note: When setting up an automatic machine, you should set the machine in a manual mode. In manual mode, the operator physically moves the material to be bored into the drill bit to the required depth, checks the position of the drills and the machine's clamp height. This is the safest way to set up this type of machine and will reduce the chance of damage to the machine and danger to the operator when it is run in automatic.

Basic Static Machines 117 ©Construction & Transport Division TAFE NSW First Edition 2003
Bits Are held in a turret (cluster head) or chuck and are of a twist drill shape with lead point and spurs. Older styles of machines had adjustable drill centres while newer machines use fixed centre heads. The main advantage of fixed centre heads is that they are quick to set up and the drill centres are always the same distance apart.
The drill bits are held in the chuck or turret by grub screws, tapered shank jaws or they may have threaded shanks. Care should be taken when selecting threaded bits because some have left or right hand threads.
Depth stops Depth stops control how deep the holes are bored. For multiple holes to be all the same depth all drills must be the same length. Switches The drill must be fitted with a flush green on switch and a raised red stop switch. An isolation switch must be fitted to lock off main power supply when maintaining or adjusting the machine. The switches should be placed in an easily accessible position. (Refer to Australian standards as 1473 – 2000) Pneumatic Ensure the air pressure is at the correct level for efficient working of the machine. Most machines will use around 85 pounds per square inch (psi) which is equal to 6 bar.

118 Basic Static Machines First Edition 2003 ©Construction & Transport Division TAFE NSW
Safety Safety and pre operational checks Horizontal borers are potentially dangerous. If used incorrectly they can cause injury to the operator. The following are points that must be considered when operating a pedestal borer. • Before operating the drill, secure all items of loose clothing and
hair. Personal safety equipment such as safety glasses and approved footwear must be worn.
• Isolate power to avoid accidental starting when changing bits, or
when making major adjustments, fitting or removing fences and stops or when performing maintenance on the machine.
• Ensure that the borer and the surrounding area are clear of any
obstruction. • Be sure to remove spanners and all other tooling before starting
the machine. • Never attempt to drill any work unless it lies flat on the table. • Any work which will not sit flat on the table must be supported
in a jig • Request assistance or use trestles to support long lengths of
material. • Take notice of the position of the stop switch in case of
emergency. • Allow the drill to clear the waste. If a drill bit clogs, do not
attempt to clear it while it is in running. • Do not clear the worktable of waste material while the machine
is in operation. • Do not get distracted. The operation of this machine requires the • Operators undivided attention and concentration at all times.

Basic Static Machines 119 ©Construction & Transport Division TAFE NSW First Edition 2003
Operating a horizontal borer It is wise to double check all the settings and machine locks are in position and secure. Some machines have guards, which need to be removed to allow setting up, it is important that they be replaced before boring commences. The following points should be observed in order to bore holes safely and accurately. These procedures can be used for drill all size holes with standard drill bits: • Set the clamp to just clear the job (maximum 3mm) this ensures
the operator can’t clamp their fingers between the material and the clamp. Setting the clamp at this height does not necessarily increase the clamping pressure
• Work with the face side of the material flat on the table to ensure a flush joint.
• Have complete control of the timber to be bored before allowing the drill to enter it. A pneumatic clamp or mechanical clamp is ideal for securing material.
• Avoid a build up of chips and dust between the timber and the fence or table.
• Do not remove chips and fibres from the table or fence by brushing with the hand or a piece of rag, use a brush.
• Avoid rapid boring you will not get clean holes. • Ensure that all moving parts are guarded. • The operator with long hair should wear suitable headgear, or
confine their hair as directed by local OH&S regulations. • On automatic machines, avoid a forward movement into the
timber before setting the drill revolving. • On machines using compressed air ensure that adequate air
pressure is supplied to the machine. • Periodically check the depth of holes when boring over lengthy
period. • Keep fingers well away from pneumatically operated cramping
hammers. • Keep drill bits sharp and the machine well lubricated. • After setting up an automatic machine the only action on the part
of the operator is to press the lever or foot pedal, then immediately release it. This sets the full cycle of the machine in operation. A foot pedal held down will retain the drill at its extreme depth and prevent the return action. However on some machines, the cancellation of the cycle is possible after the initial start by pressing the 'quick return' button usually located at knee level.

120 Basic Static Machines First Edition 2003 ©Construction & Transport Division TAFE NSW
Fault finding As with the pedestal borer when working the dowel borer most faults will occur through poor setting up. Listed are some of the more common faults.
Machine fault Cause Remedy Hole is larger than the bit
• Drill bit incorrectly fitted,
• Burr on shank of drill bit
• Lead point out of centre
• Spurs different heights
• Reset drill • File shank smooth • Regrind drill bit • Regrind drill bit
Drill bit burns
• Drill is running too fast
• Drill bit blunt
• Reduce speed • Sharpen drill
Hole is not clean • Drill too slow • Drill blunt
• Increase speed • Sharpen drill
Machine vibrates • Drill off centre in the chuck
• Reset drill
Holes not in correct position
• Fence moved, • Stops moved, • Table not locked in
position
• Reset and lock • Reset and lock • Reset and lock
Hole depth irregular
• Drill bits set at different lengths
• Reset all drills at equal length
Timber moves under clamp
• Clamp set too high • Insufficient air
pressure, • face of clamp is too
smooth
• Reset clamp • Check and adjust • New surface on
clamp Drill head does not travel smoothly
• Incorrect air pressure,
• slide on head needs cleaning & lubricating
• Check and adjust • Clean and lubricate
Holes in the wrong position
• Waste under job, • Drill bits not locked
in position (wobbling)
• Clean table • Reset drill and
tighten

Basic Static Machines 121 ©Construction & Transport Division TAFE NSW First Edition 2003
Activity: Written questions Exercises require to complete this section
You are asked to give written answers to the following questions
Horizontal borers 1/ State the function of the horizontal borer
__________________________________________________
2/ State the height of the clamp __________________________________________________
3/ State two causes of the hole burning
__________________________________________________
__________________________________________________
4/ State six safety and pre-operational checks to be made to the horizontal borer. __________________________________________________
__________________________________________________
__________________________________________________
__________________________________________________
__________________________________________________
__________________________________________________

122 Basic Static Machines First Edition 2003 ©Construction & Transport Division TAFE NSW
Student Notes

ISBN 0 7348 1292 2

BLANK PAGE