Embed Size (px)
Citation preview

Transfer CFTVersion 3.3.223 June 2022
Installation and Operation Guide z/OS
Copyright © 2018 Axway
All rights reserved.
This documentation describes the following Axway AMPLIFY software:
Transfer CFT 3.3.2
No part of this publication may be reproduced, transmitted, stored in a retrieval system, or translated into any human or computer language, in any form or by any means, electronic, mechanical, magnetic, optical, chemical, manual, or otherwise, without the prior written permission of the copyright owner, Axway.
This document, provided for informational purposes only, may be subject to significant modification. The descriptions and information in this document may not necessarily accurately represent or reflect the current or planned functions of this product. Axway may change this publication, the product described herein, or both. These changes will be incorporated in new versions of this document. Axway does not warrant that this document is error free.
Axway recognizes the rights of the holders of all trademarks used in its publications.
The documentation may provide hyperlinks to third-party web sites or access to third-party content. Links and access to these sites are provided for your convenience only. Axway does not control, endorse or guarantee content found in such sites. Axway is not responsible for any content, associated links, resources or services associated with a third-party site.
Axway shall not be liable for any loss or damage of any sort associated with your use of third-party content.

Contents
Preface 1About Transfer CFT 1Installation guide outline 1Who should read this guide 2Transfer CFT documentation set 2Support services 2
Accessibility 3Accessibility features of the documentation 3Screen reader support 3Support for high contrast and accessible use of colors 3
1 Prerequisites 5What's new 5Version format 5Delivery - distribution method 5Transfer CFT z/OS components 6Special characters 7System requirements 8Hardware 8Software 8End User License Agreement 9OpenMVS requirements 9TSO requirement 10
File sizes and formats 11Distribution environment file formats and requirements 11Instance environment file formats and requirements 14
Java 17Secure Relay prerequisites 17Java requirements for Transfer CFT z/OS 17
Default ports 19About system users 20Release a resource for receive transfers 21
Apply a license key 22Check your authorization 22Obtain a license key 22Apply a license key 23
Certificates 25
Transfer CFT z/OS 3.3.2 Installation and Operation Guide i
2 Installation 26SMP/E: Create the distribution environment 28SMP/E distribution file 28Create a Transfer CFT z/OS instance SMP/E 29
Non-SMP/E: Create the distribution environment 36Define a Transfer CFT alias 36Download the installation library from ESD 36Installation files 37Upload Transfer CFT z/OS using the installer 37Silent installation 39Decompress the installation files 40Create a Transfer CFT instance environment 42
Common installation steps 43Perform common steps before installing (A03PARM and A12OPTSP) 43Customize parameters in the JCL 43Set standard JCL parameters A03PARM 43Configure the SGINSTAL using UCONF or A12OPTSP 53Define the environment variables file 60Start A00CUSTO to customize installation files 61
Standard installation (A05ALL ) 63Use A05ALL to perform an auto install 63Common customization steps 66
Advanced installation 72Manually install or modify installation 72LINK-EDIT Transfer CFT using JOB B20LINK 74LINK-EDIT Web services using JOB B25LKWS 74Set up Copilot server files in USS using COPA010 75Configure the Transfer CFT Copilot server 75Configure optional features 76Enable Sentinel and Event Router 78CFTUTIL in a z/OS environment 83Define internal access management 84
3 Verify your installation 88Installed directories 88
4 Multi-node architecture 90Multi-node architecture 90Before you start 90Prerequisites 90Architecture 92Concepts 94Service descriptions 95Recovery 96
Transfer CFT z/OS 3.3.2 Installation and Operation Guide ii

Limitations 97Multi-node installation overview 98Steps 98
Customize the VIPA and execute commands 99Procedure overview 99Customize the UPARM(TC*) members 100Customize the cluster 101Define a distribution method 102
Customize MNINIT 103About MNINIT 103Procedure 103
Execute MNINIT 105Start the multi-node Transfer CFT 105Start a node 105
Multi-node commands 108cftinit 108cftcopl 108copstop 109start 109stop 109restart 110add_host 111add_node 111remove_node 111enable_node 112disable_node 112cftping 113listlog 113display/listcat 113listnode 114
Configuration parameters 115Connection dispatcher parameters 118
Manage multi-node 119Starti the Transfer CFT cluster 119Stop the Transfer CFT cluster 119Add a host to the cluster 120Add a node to the Transfer CFT cluster 120Remove a node from the Transfer CFT cluster 121Rebalance after a fail over 121
5 Post-installation 123Start and stop the server JOBs 123Start Transfer CFT 123Stop Transfer CFT 123
Transfer CFT z/OS 3.3.2 Installation and Operation Guide iii
Transfer CFT Copilot server commands 124Communication media JCL for transfer requests 125Submit the JCL 128Facilitate deployment 130Overview 131Prerequisite 131Create a master copy 132Distribute the master copy 132Restore the master copy 133Install the instance 133Generate a patch or service pack 133Transfer the generated patch or service pack 134Apply the patch or service pack 135
Set up optional features 135Copilot options for log and catalog filters 135Transfer CFT to Sentinel communication parameters 136
About the system configuration 140System environment for z/OS 140About operator interface commands 142Diagnostic commands 144System interface messages 151Using a communication server 153Set up RACF security software 157Increase the catalog size 158
Secure Transfer CFT 160Change default certificates 160About system users 161Use SAF-based PKI 161External access management (RACF) 161
Build APIs and exits 189Programming interfaces 189Exits in Transfer CFT z/OS 194How to migrate DLL exits 200Specific z/OS exits in Transfer CFT 201AM exits 203Troubleshoot and example definitions 204
Working with files and coding 208Specific parameters for z/OS 208Platform specific characters 208Transferable files 209Code Transfer CFT filenames 211Dynamically create files 215Work with files 218HFS hierarchical files 219
Transfer CFT z/OS 3.3.2 Installation and Operation Guide iv

Calls to z/OS utilities from Transfer CFT 222Files in fixed-standard and variable-SPANNED formats 227
Optimize performance 228Transfer CFT z/OS performance 228Guidelines for improving CPU efficiency 233
6 Activate Central Governance connectivity 236Before you start 236Manually activate connectivity 236Prerequisites 236Procedure 237Use compliant characters for the z/OS shared secret 238Verify the UCONF setting 239Use a proxy server between Transfer CFT and Central Governance 239
Connect to a different Central Governance system 239Use former configuration objects 239View managed features 240
7 Update, upgrade, or migrate 242Update, upgrade, or migrate 242Before you start 242Update procedure 242Upgrade procedure 242Migration procedure 242
Update 243Transfer CFT maintenance (SMP/E) 243Transfer CFT maintenance (non-SMP/E) 246
Upgrade 253Prerequisites 254Create a master copy 254Distribute the master copy 254Restore the master copy 255Copy the JCLs to upgrade 255Upgrade the target instance (product environment) 255Upgrade the target instance (DATA) 257Upgrade a multi-node architecture 259
Migrate 262Prerequisites 262Overview 262Procedure 263Migrate a multi-node architecture 266
8 Uninstall 270Uninstall Transfer CFT 270
Transfer CFT z/OS 3.3.2 Installation and Operation Guide v
9 Troubleshooting 272Post installation messages and codes 272System interface messages 272File error codes in z/OS 273Return and ABEND codes 279Diagnostic messages 283Axway support files error diagnostics 291
Troubleshoot the UCONFRUN dataset 291
10 Appendix A: About APIs 294About Transfer CFT services 294Delivered templates for z/OS 294Assembler language 294C language 295COBOL language 297
Transfer CFT z/OS 3.3.2 Installation and Operation Guide vi
Preface
This documentation provides information to aide you in installing, updating, upgrading, or migrating Transfer CFT.
About Transfer CFTTransfer CFT is the file transfer component in the Axway Managed File Transfer solution, and provides a multi-platform, high-volume, file and message transfer service. This documentation explains how to install, configure, and manage Transfer CFT.
Using version 3.1.x or higher, you can configure Transfer CFT and manage flows using Axway Central Governance. Central Governance simplifies Transfer CFT usage, and provides services such as identity and access management, certificate management, monitoring, alerting, and a web dashboard.
For more information on Axway products, visit www.axway.com.
Installation guide outlineThis guide explains how to perform a full installation of Transfer CFT. It also describes how to:
Prepare and plan your installation – Describes what you should plan for deploying and configuring your system architecture, installing any prerequisite software, and configuring other components.
Install – Describes how to perform a complete install as well as apply a service pack.
Post installation – Provides instructions on how to check if the installation was successful and set up Transfer CFT. Additionally it describes any tasks to perform before the administrator can log on to the product for initial configuration.
Upgrade – Involves a change in product version and the replacement of binary artifacts; may also require configuration change.
Migrate– Involves a change in product versions, such as from 2.7.1 to 3.3.2. As part of this process, the existing configuration may need to be modified or updated to be compatible with the new version. For example, you may need to modify configuration files or the internal datafile schema. Because migration can be a complex process, organizations typically set up a migration project to study the new features and determine the impact on the existing configuration, and to plan for the changes across the various environments.
Uninstall – Describes how you can uninstall Transfer CFT.
Transfer CFT z/OS 3.3.2 Installation and Operation Guide 1
Preface
ExpressPackage - Describes how to create a product package that you can deploy to multiple remote sites.
Troubleshoot the installation or registration process – Describes the different types of troubleshooting errors you can encounter during installation, upgrade and post-installation.
Who should read this guideThis guide is intended for enterprise personnel involved in installing software and Axway Professional Services personnel. Familiarity with AMPLIFY products is recommended.
This guide presumes you have knowledge of:
l Your company’s business processes and practices
l Your company’s hardware, software, and IT policies
l The Internet, including use of a browser
Others who may find parts of this guide useful include network or systems administrators and other technical or business users.
Transfer CFT documentation setTransfer CFT provides a complete set of documentation, covering all aspects of using the product. These documents include the following:
l Transfer CFT 3.3.2 Release Notes
l Transfer CFT 3.3.2 User Guide (HTML)
l Transfer CFT 3.3.2 Local Administration User Guide
l AMPLIFY Supported Platforms Guide
l AMPLIFY Interoperability Matrix
Support servicesThe Axway Global Support team provides worldwide 24 x 7 support, subject to validation of your license agreement. Email [email protected] or, for your local support telephone number, visit support.axway.com and click Contact Axway Support.
Transfer CFT z/OS 3.3.2 Installation and Operation Guide 2

Accessibility
At Axway, we strive to create accessible products and documentation for all of our users.
This section describes the accessibility features of the documentation.
Accessibility features of the documentationThe product documentation provides the following accessibility features:
l Screen reader support
l Support for high contrast and accessible use of colors
Screen reader support l Alternative text is provided for images whenever necessary.
l The PDF documents are tagged to provide a logical reading order.
Support for high contrast and accessible use of colors l The documentation can be used in high-contrast mode.
l There is sufficient contrast between the text and the background color.
Transfer CFT z/OS 3.3.2 Installation and Operation Guide 3
Accessibility
4 Installation and Operation Guide Transfer CFT z/OS 3.3.2
1 Prerequisites
The Transfer CFT Installation Guide provides instructions for installing and deploying your Transfer CFT.
What's newThis version features the following enhancements and support:
l Password phrase support (RACF). See RACF password phrase support.
l Delivered diffusion package procedures. See Facilitate deployment.
l Delivered upgrade procedures. See Upgrade from 3.1.3 or 3.2.x.
l A UCONF variable can replace the SGINSTAL executable. See Set standard JCL parameters A12OPTSP.
l You can use a user LOAD to store specific exit(s) and API(s), which is created automatically during the installation. See USER.LOAD.
The minimum z/OS version depends on the JES:
l If you use the JES2 component, then you require z/OS 2.1 or higher
l If you use the JES3 component, then you require z/OS 2.2 or higher
Version formatTo accommodate changing product versions, we use the convention <version> in place of the actual version number in samples and lists.
For example if your Transfer CFT is version 3.3.x, the file ZOS/CFT/<version> would be ZOS/CFT/3.3.x.
Delivery - distribution methodAxway delivers Transfer CFT z/OS on the support site: support.axway.com. To download the packages from Axway support, you require a user ID and password.
There are three Transfer CFT packages available on the Axway support site - 2 packages for the standard Transfer CFT installation method (which differ only in file format, ADRDSSU or XMIT), and the SMP/E Transfer CFT installation package.
Transfer CFT z/OS 3.3.2 Installation and Operation Guide 5
1 Prerequisites
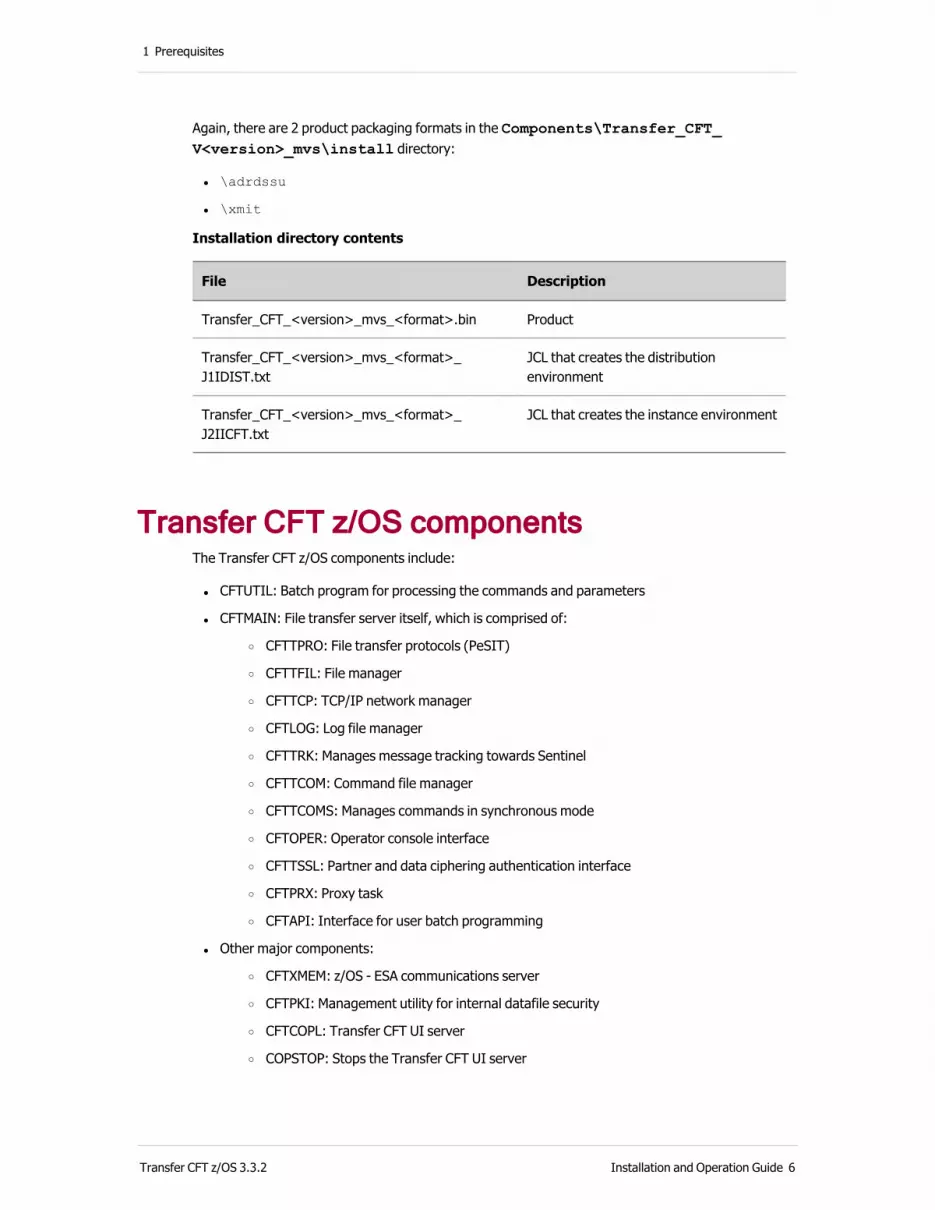
Again, there are 2 product packaging formats in the Components\Transfer_CFT_V<version>_mvs\install directory:
l \adrdssu
l \xmit
Installation directory contents
File Description
Transfer_CFT_<version>_mvs_<format>.bin Product
Transfer_CFT_<version>_mvs_<format>_J1IDIST.txt
JCL that creates the distribution environment
Transfer_CFT_<version>_mvs_<format>_J2IICFT.txt
JCL that creates the instance environment
Transfer CFT z/OS componentsThe Transfer CFT z/OS components include:
l CFTUTIL: Batch program for processing the commands and parameters
l CFTMAIN: File transfer server itself, which is comprised of:
o CFTTPRO: File transfer protocols (PeSIT)
o CFTTFIL: File manager
o CFTTCP: TCP/IP network manager
o CFTLOG: Log file manager
o CFTTRK: Manages message tracking towards Sentinel
o CFTTCOM: Command file manager
o CFTTCOMS: Manages commands in synchronous mode
o CFTOPER: Operator console interface
o CFTTSSL: Partner and data ciphering authentication interface
o CFTPRX: Proxy task
o CFTAPI: Interface for user batch programming
l Other major components:
o CFTXMEM: z/OS - ESA communications server
o CFTPKI: Management utility for internal datafile security
o CFTCOPL: Transfer CFT UI server
o COPSTOP: Stops the Transfer CFT UI server
Transfer CFT z/OS 3.3.2 Installation and Operation Guide 6
1 Prerequisites
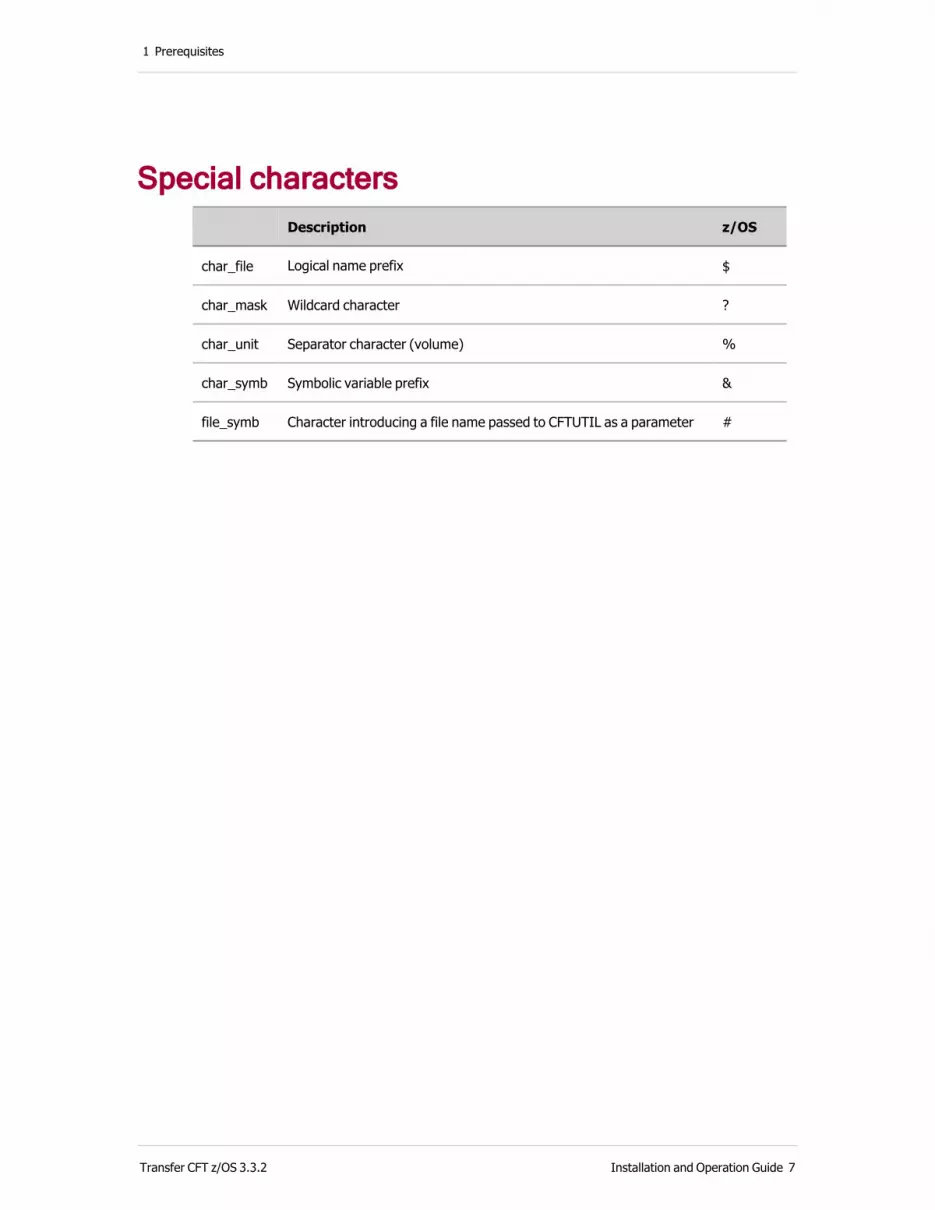
Special characters Description z/OS
char_file Logical name prefix $
char_mask Wildcard character ?
char_unit Separator character (volume) %
char_symb Symbolic variable prefix &
file_symb Character introducing a file name passed to CFTUTIL as a parameter #
Transfer CFT z/OS 3.3.2 Installation and Operation Guide 7

1 Prerequisites
System requirementsThis section outlines the minimum requirements to install Transfer CFT in a z/OS environment.
This chapter describes the system requirements for Transfer CFT. System requirements can change when Axway releases service packs and patches for a product version. Therefore, you may want to refer to the Axway Supported Platforms document. The document lists the supported operating systems, databases, web servers, and browsers.
Hardware
About the z/server processorYou can install Transfer CFT using an IBM supported version of z/OS. Transfer CFT is located in a permanent address space and can process several simultaneous transfer demands locally, which create and manage appropriated tasks.
Input/output unitsTo restore installation files, you require a DVD reader to install from a workstation (Windows, UNIX, and Linux).
Sufficient disk space is required for the Transfer CFT object modules, procedures, and examples.
SoftwareTransfer CFT z/OS uses the following software products and versions:
l TCP/IP network
l Execution environment:
o Language environment for the z/OS version
l Programming interfaces and EXITS:
o COBOL
o C
o ASM
Platform requirementsTransfer CFT requires the following z/OS version depending on the JES component used:
Transfer CFT z/OS 3.3.2 Installation and Operation Guide 8
1 Prerequisites
l JES2 requires at a minimum z/OS 2.1
l JES3 requires at a minimum z/OS 2.2
XML Toolkit requirementsYou require the z/OS XML Toolkit v1.10 to implement:
l Central Governance
l PassPort AM
l Web services with the Transfer CFT Copilot server
You can download the XML Parser C++ Edition libraries for the z/OS XML Toolkit v1.10 from the IBM web site: http://www-1.ibm.com/servers/eserver/zseries/software/xml/
Note The Toolkit release is version specific, and refer to the restrictions as described at IBM: http://www-03.ibm.com/systems/z/os/zos/tools/xml/
XML Toolkit requirementsTransfer CFT with Central Governance or Web Services requires an installed XML Toolkit v1.10. The XML Toolkit v1.10 is available for download at: http://www-03.ibm.com/systems/z/os/zos/tools/xml/.
End User License AgreementYou should read and accept the End User License Agreement (EULA) prior to installing Transfer CFT. The EULA file is in the directory where you decompressed the Transfer CFT package.
OpenMVS requirementsYou must define the OpenMVS (OMVS) segment for each user if they need to access the z/OS USS resources or access TCP/IP communication services. You can use CA ACF2, CA Top Secret, or IBM RACF to enable this access. The OMVS segment is required, for example, in the following cases:
l To access TCP/IP services
o Users connecting to Copilot UI
o A user that starts CFTMAIN and/or the Copilot server
o A user implementing a synchronous API as a batch API, or from CFTUTIL
o The am.type=passport option is selected
l To access USS resources
o When the option userctrl=yes when transferring HFS files
o A user that starts CFTMAIN and/or the Copilot server
Transfer CFT z/OS 3.3.2 Installation and Operation Guide 9
1 Prerequisites
TSO requirementCheck that the user that starts Copilot and Transfer CFT has a TSO segment in their profile.
TSO version
The user ID for the user that starts Copilot and Transfer CFT has a 7-characters maximum when using z/OS 2.2 or lower. Therefore, a user with an 8-character user ID cannot use TSO with a z/OS version lower than v2.3.
Transfer CFT z/OS 3.3.2 Installation and Operation Guide 10

1 Prerequisites
File sizes and formatsThis section describes the installation environment and the space requirements for installation.
A distribution environment is created during the product retrieval phase of the installation. This distribution environment contains the transferred files that provide the product contents, as well as any installed upgrades.
The Transfer CFT instance is the environment that the user configures for operational use, and is created from the distribution environment. File sizes in the user target environment are defined in the JCL J2IICFT. This JCL is defined twice - in the UPLIB library, and in the INSTALL library of the distribution environment.
The tables in this section provide information about the files and allocation requirements for the distribution and instance environments. Note that an ESD installation requires an additional 1100 disk cylinders (3390 disk) of space.
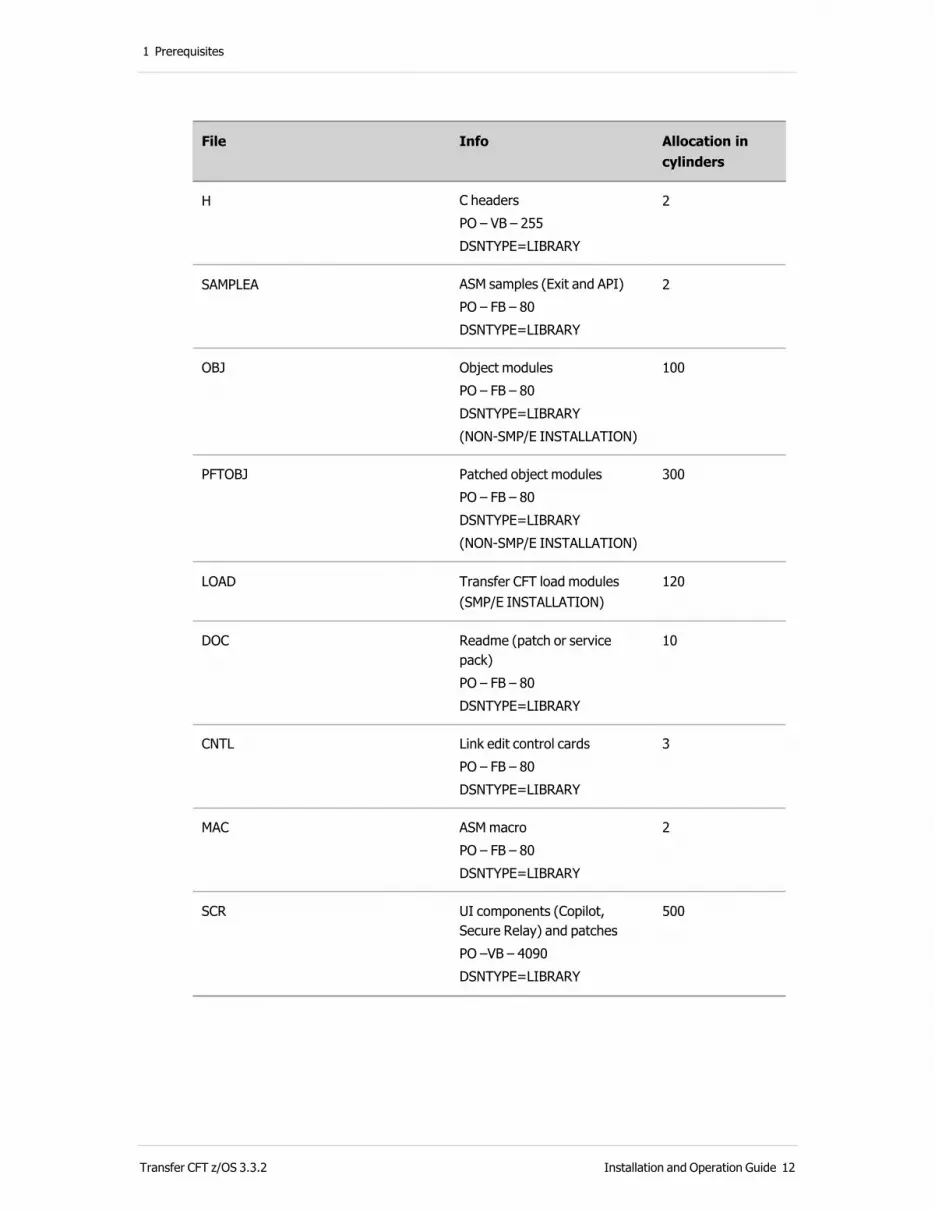
Distribution environment file formats and requirements
File Info Allocation in cylinders
INSTALL Installation and exploitationPO – FB – 80DSNTYPE=LIBRARY
10
SAMPLE Sample JCLs, and Transfer CFT sample parametersPO – FB – 80DSNTYPE=LIBRARY
2
SAMPLEO COBOL samples (Exit and API)PO – FB – 80DSNTYPE=LIBRARY
2
COPY Copy book (Cobol)PO – FB – 80 DSNTYPE=LIBRARY
2
SAMPLEC C samples (Exit and API)PO – VB – 255DSNTYPE=LIBRARY
2
Transfer CFT z/OS 3.3.2 Installation and Operation Guide 11
1 Prerequisites
File Info Allocation in cylinders
H C headersPO – VB – 255DSNTYPE=LIBRARY
2
SAMPLEA ASM samples (Exit and API)PO – FB – 80DSNTYPE=LIBRARY
2
OBJ Object modulesPO – FB – 80DSNTYPE=LIBRARY(NON-SMP/E INSTALLATION)
100
PFTOBJ Patched object modulesPO – FB – 80DSNTYPE=LIBRARY(NON-SMP/E INSTALLATION)
300
LOAD Transfer CFT load modules (SMP/E INSTALLATION)
120
DOC Readme (patch or service pack) PO – FB – 80DSNTYPE=LIBRARY
10
CNTL Link edit control cardsPO – FB – 80DSNTYPE=LIBRARY
3
MAC ASM macroPO – FB – 80DSNTYPE=LIBRARY
2
SCR UI components (Copilot, Secure Relay) and patches PO –VB – 4090DSNTYPE=LIBRARY
500
Transfer CFT z/OS 3.3.2 Installation and Operation Guide 12
1 Prerequisites
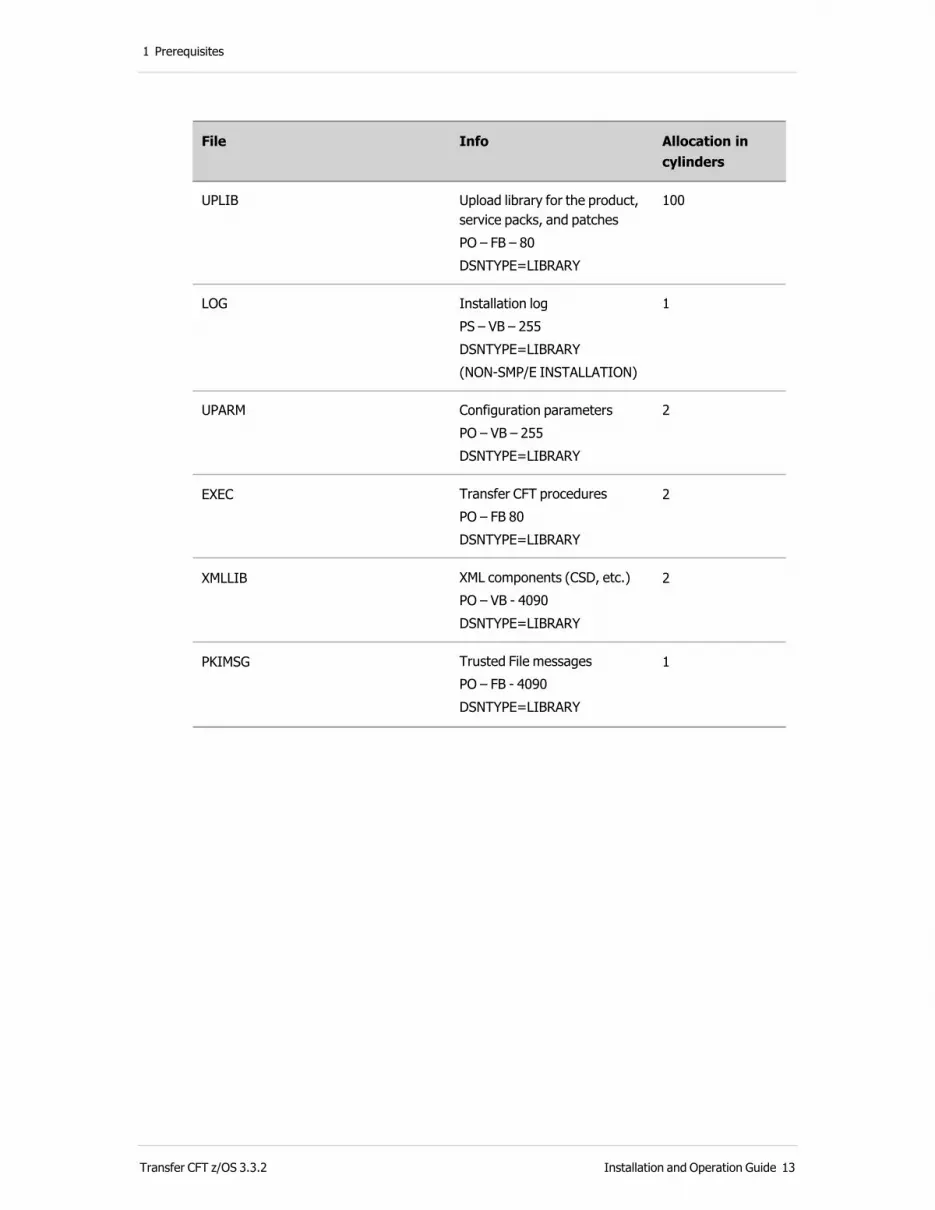
File Info Allocation in cylinders
UPLIB Upload library for the product, service packs, and patchesPO – FB – 80DSNTYPE=LIBRARY
100
LOG Installation logPS – VB – 255DSNTYPE=LIBRARY(NON-SMP/E INSTALLATION)
1
UPARM Configuration parametersPO – VB – 255DSNTYPE=LIBRARY
2
EXEC Transfer CFT proceduresPO – FB 80DSNTYPE=LIBRARY
2
XMLLIB XML components (CSD, etc.)PO – VB - 4090 DSNTYPE=LIBRARY
2
PKIMSG Trusted File messagesPO – FB - 4090DSNTYPE=LIBRARY
1
Transfer CFT z/OS 3.3.2 Installation and Operation Guide 13
1 Prerequisites
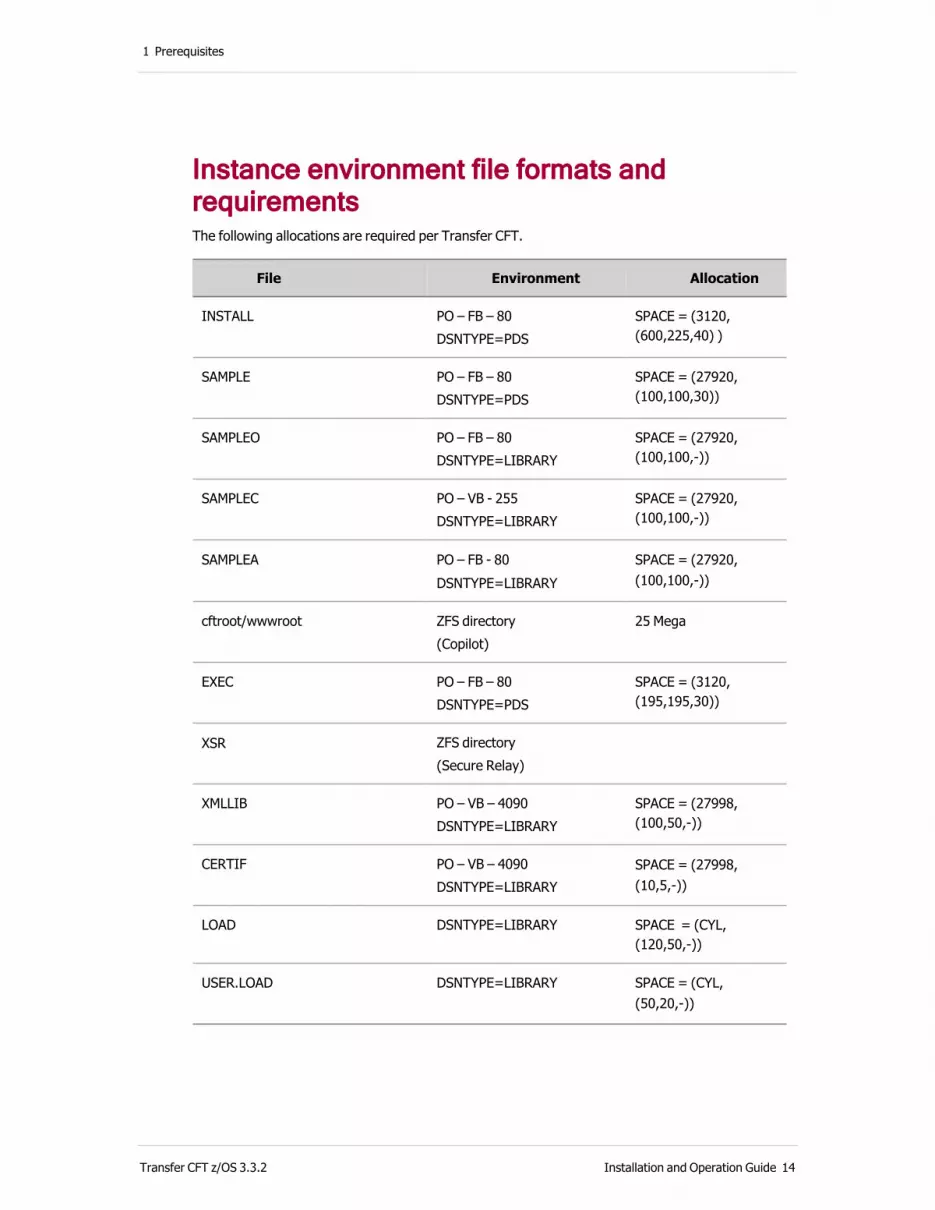
Instance environment file formats and requirements The following allocations are required per Transfer CFT.
File Environment Allocation
INSTALL PO – FB – 80 DSNTYPE=PDS
SPACE = (3120,(600,225,40) )
SAMPLE PO – FB – 80 DSNTYPE=PDS
SPACE = (27920,(100,100,30))
SAMPLEO PO – FB – 80DSNTYPE=LIBRARY
SPACE = (27920,(100,100,-))
SAMPLEC PO – VB - 255 DSNTYPE=LIBRARY
SPACE = (27920,(100,100,-))
SAMPLEA PO – FB - 80 DSNTYPE=LIBRARY
SPACE = (27920,(100,100,-))
cftroot/wwwroot ZFS directory(Copilot)
25 Mega
EXEC PO – FB – 80 DSNTYPE=PDS
SPACE = (3120,(195,195,30))
XSR ZFS directory(Secure Relay)
XMLLIB PO – VB – 4090 DSNTYPE=LIBRARY
SPACE = (27998,(100,50,-))
CERTIF PO – VB – 4090 DSNTYPE=LIBRARY
SPACE = (27998,(10,5,-))
LOAD DSNTYPE=LIBRARY SPACE = (CYL,(120,50,-))
USER.LOAD DSNTYPE=LIBRARY SPACE = (CYL,(50,20,-))
Transfer CFT z/OS 3.3.2 Installation and Operation Guide 14

1 Prerequisites
File Environment Allocation
UCONF Runtime configuration parametersPS – VB - 2048
SPACE = (TRK,(5,2))
UCONFRUN Runtime configuration parametersPS – VB – 2048
SPACE=(TRK,(5,2))
USER.OBJ API and exits objectsPO – FB – 80DSNTYPE=LIBRARY
SPACE=(3200,(200,100,-))
UPARM PO – VB - 255DSNTYPE=PDS
SPACE = (TRK,(5,5,20))
PKIMSG PO – VB - 4090DSNTYPE=LIBRARY
SPACE=(TRK,(1,1,-))
XLATE PO – FB - 256DSNTYPE=LIBRARY
SPACE=(TRK,(5,5,-))
FTEST Test file PS – VB – 84
SPACE = (TRK,(1,1))
INCDLL SYSDEFSD – Link-edit IMPORT control statementsPO – FB – 80 DSNTYPE=LIBRARY
SPACE = (TRK,(50,10,-))
MONLOG Started Transfer CFT server log for multi-nodePS – VB – 255
SPACE = (TRK,(20,10))
UPLOAD Upload library used by Central Governance PO – FB – 80 DSNTYPE=LIBRARY
SPACE = (TRK,(20,10))
LOG Installation LOG PS – VB - 255
SPACE = (TRK,(10,50))
CRYPKEY File name containing the private key that enciphers data
Transfer CFT z/OS 3.3.2 Installation and Operation Guide 15

1 Prerequisites
File Environment Allocation
CRYPSALT File name containing the salt used to create the private key
Note
l The Instance environment list above does not include files that Transfer CFT creates in its implementation, such as CATALOG, PARM, PART, COM, PKIFILE, LOG, ACCOUNT etc.
l The persistent cache file for PassPort AM (CFTAM, VSAM KSDS) is created when the UCONF AM.type=passport variable is set to Yes.
l To customize INSTALL, SAMPLE, EXEC and UPARM THE library must be PDS and not PDSE.
Transfer CFT z/OS 3.3.2 Installation and Operation Guide 16

1 Prerequisites
Java
Secure Relay prerequisitesWhen using Secure Relay, Java must be installed in the same environment as the Transfer CFT installation. The Master Agent is managed, but the Router Agent can be in another environment.
Java requirements for Transfer CFT z/OSBegin by checking if the z/OS system already has a Java environment available. Secure Relay requires a Java SDK environment 6.0.1 or higher. If you do not have this Java level installed, visit the IBM Java website for z/OS.
1. Select, download, and install the appropriate Java SDK for your environment. We used the 31-bit Java 6.0.1 SDK for our examples.
2. Check if the JZOS Batch Launcher is installed in your environment.
l JZOS is a set of tools that enhances the ability for z/OS Java applications to run in a traditional batch environment and/or access z/OS system services.
l The function consists of a load module and a sample start proc put into an appropriate PROCLIB.
To identify if your current system has JZOS available:
1. Check the system dataset "SYS1.SIEALNKE" for a member JVMLDMxx where xx is the version and release of the Java you are using:
JVMLDM61 for V6.0.1 31-bit SDK
JVMLDM67 for V6.0.1 64-bit SDK
JVMLDM70 for V7.0.0 31-bit SDK
JVMLDM76 for V7.0.0 64-bit SDK
2. Check in the system PROCLIBs for a member JVMPRCxx where xx is the version and release of the Java you are using:
JVMPRC61 for V6.0.1 31-bit SDK
JVMPRC67 for V6.0.1 64-bit SDK
JVMPRC70 for V7.0.0 31-bit SDK
JVMPRC76 for V7.0.0 64-bit SDK
Transfer CFT z/OS 3.3.2 Installation and Operation Guide 17

1 Prerequisites
If these modules are present, then JZOS is available. If it is not available:
1. Go to the IBM JZOS Java Launcher and Toolkit overview page.
2. Choose, download, and install the appropriate JZOS Batch Launcher and Toolkit Installation (we use the JZOS Batch Launcher and Toolkit function for 31-bit Java 6.0.1 SDK in our examples).
Note IBM introduced a specialty processor for running Java applications called the zSeries Application Assist Processor, also known as zAAP. This type of processor is an optional feature in the System z9 hardware.
Once installed and enabled, zAPP allows the customer to benefit from an expand of the system’s CPU capacity at a relatively low cost, if the workload that is run is based on Java.
Transfer CFT z/OS 3.3.2 Installation and Operation Guide 18

1 Prerequisites
Default portsThe following list contains the default Transfer CFT port numbers used for installation. You can check in advance that these ports do not conflict with ports used by other applications on the same machine.
You may need to modify the default port numbers, depending on your configuration.
The Internet Assigned Numbers Authority (IANA) reserves the TCP ports 1761-1768 for Transfer CFT. For more information, refer to: www.iana.org/assignments/service-names-port-numbers/service-names-port-numbers.
Component Port
PeSIT 1761
SSL 1762
COMS 1765
Copilot 1766
Copilot for Central Governance 1767
REST API 1768
Central Governance 12553
Central Governance SSL 12554
Secure Relay MAma.comm_port
6801
Secure Relay RA
l ra.comm_port
l ra.admin_port
l 6811
l 6810
Legend:
l PeSIT (PESITANY protocol): PeSIT in plain text
l SSL: PeSIT protocol over SSL/TLS
l COMS: Synchronous transfers
l Copilot: Provides access to Transfer CFT Copilot server from a user Internet browser
l Copilot for Central Governance: Provides secure access for Central Governance (mutual authentication)
l Central Governance: Used to connect to Central Governance
Transfer CFT z/OS 3.3.2 Installation and Operation Guide 19

1 Prerequisites
About system usersAn APF, authorized program facility, is a security element that allows an installation to identify system or user programs. When a Transfer CFT system does not use an APF, the Transfer CFT USERCTRL parameter has no effect on file permissions and all file actions are done by the account that started Transfer CFT. This means that to enable user control for file permissions, your Transfer CFT requires APF.
Non-APF installationsIn non-APF installations, Transfer CFT is started by the user USERMON and the USERCTRL does not affect file rights or actions.
APF installations with USERCTRL
Receiver sideWhile Transfer CFT is still started by the user USERMON, in an APF installation the USERCTRL setting has a direct effect on the transfer procedure.
1. USERCTRL=NO USERID=TEST
l A receive is performed by the user USERMON
l TEST submits the end-of-transfer procedure
2. USERCTRL=NO USERID=
l A receive is performed by the user USERMON
l USERMON submits the end-of-transfer procedure
3. USERCTRL=NO USERID=NON RACF USERID (not in RACF database)
l A receive is performed by the user USERMON
l USERMON submits the end-of-transfer procedure
4. USERCTRL=YES USERID=TEST
l A receive is performed by the user TEST
l TEST submits the end-of-transfer procedure
5. USERCTRL=YES USERID=
l A receive is performed by the user USERMON
l USERMON submits the end-of-transfer procedure
6. USERCTRL=YES USERID=NON RACF USERID (not in RACF database)
l Receive is not performed
l End-of transfer procedure not submitted
Transfer CFT z/OS 3.3.2 Installation and Operation Guide 20
1 Prerequisites
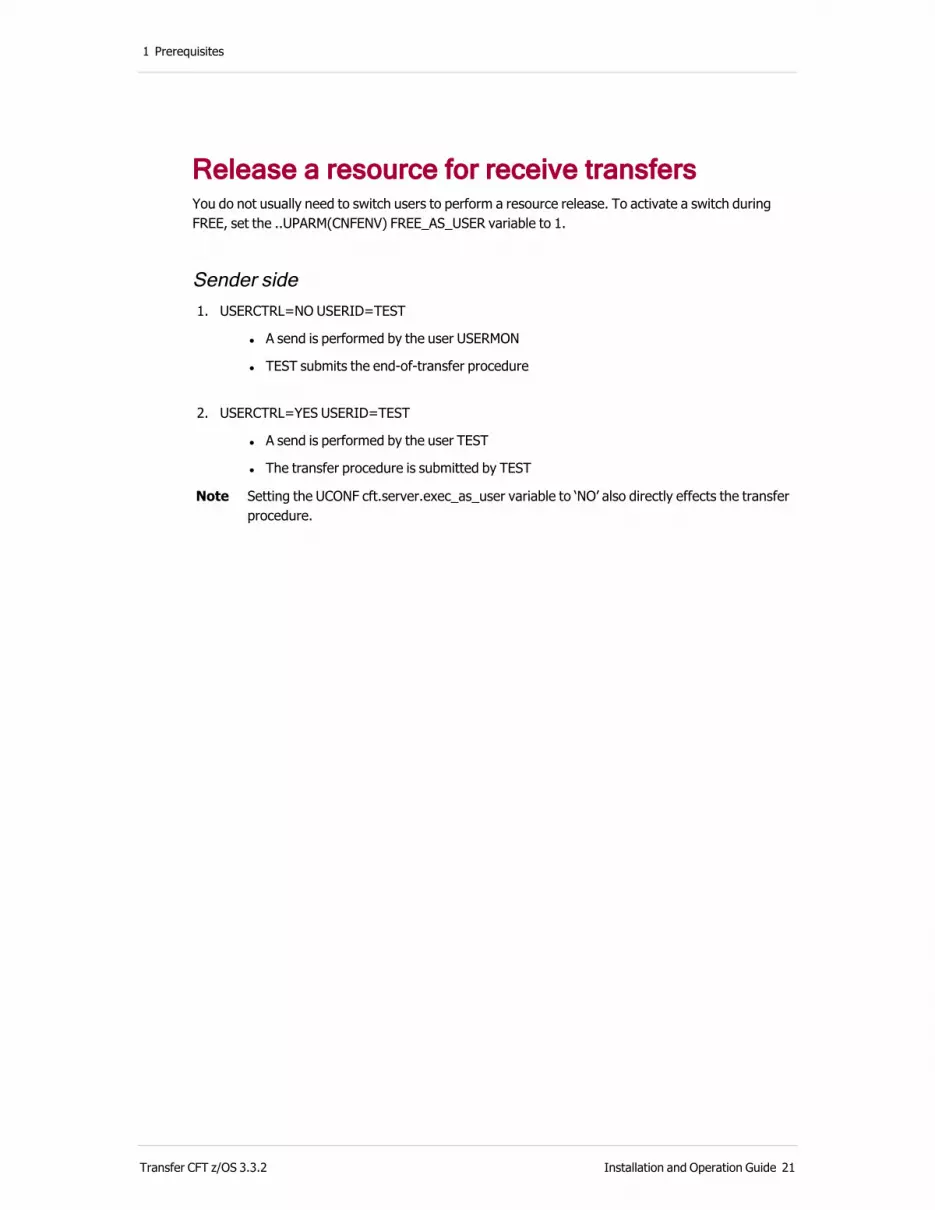
Release a resource for receive transfersYou do not usually need to switch users to perform a resource release. To activate a switch during FREE, set the ..UPARM(CNFENV) FREE_AS_USER variable to 1.
Sender side 1. USERCTRL=NO USERID=TEST
l A send is performed by the user USERMON
l TEST submits the end-of-transfer procedure
2. USERCTRL=YES USERID=TEST
l A send is performed by the user TEST
l The transfer procedure is submitted by TEST
Note Setting the UCONF cft.server.exec_as_user variable to ‘NO’ also directly effects the transfer procedure.
Transfer CFT z/OS 3.3.2 Installation and Operation Guide 21

1 Prerequisites
Apply a license key
Check your authorizationVerify that you can access Sphere by going to support.axway.com and logging in. If you do not have an account, follow the instructions in your welcome letter.
Log in to download or access:
l The product installation package
l Your product license key
l Product documentation
l Product updates, including patches and service packs
l Product announcements
l The case center, to open a new case or to track opened cases
You can also access other resources, such as articles in the Knowledge Base, and documentation for all Axway products.
You need to apply a valid license key to Transfer CFT in the following situations:
l You perform an initial Transfer CFT installation.
l A hardware upgrade changes the CPU ID (CPU serial number).
l After a year passes, to replace an expired license key.
l To ramp up a Transfer CFT Disaster Recovery instance (for example, on a DR LPAR for z/OS systems).
l If you are migrating from a version 2.x Transfer CFT to a version 3.x.
Note You require as many keys as instances of Transfer CFT z/OS running at same time, including when running in multi-node. For example, two Transfer CFT instances cannot run at the same time, on the same server, using the same license key.
Obtain a license key 1. For a new installation, install Transfer CFT.
2. After completing the installation, or for an existing installation, use the command cftutil about to retrieve your system information. For details see the examples below.
3. Contact the Axway Fulfillment team at the appropriate email address to obtain a valid key.
l For a US key, contact: [email protected]
l For an EMEA or APAC key, contact: [email protected]
Transfer CFT z/OS 3.3.2 Installation and Operation Guide 22

1 Prerequisites
4. Provide the hostname where Transfer CFT is to be installed or updated.
5. Provide the list of characters in the CPU ID.
Apply a license keyTo apply the license key from the Axway Fulfillment team, enter the key(s) in the indirection file. Place the character # before the path name of the indirection file. For example, enter KEY=#prefix..UPARM(PRODKEY) in the CFTPARM definition. Note:
l The file can contain one or multiple license keys, but there must be one key per line.
l On start up the first valid key is used.
Transfer CFT in multi-node architecture requires:
l One key per node must have the cluster option (see key), and if there is more than one host you require at least one valid key per host.
Example
If you have 2 hosts and 4 nodes, you require 4 keys with at least one key per host. Possible key combinations could be:
l On each of the two hosts, you have two keys.
l On one host you have 1 key, and on the second host you have 3 keys.
As of Transfer CFT 3.3.2 SP2, you can use a single key for a multi-node installation. To use a single key for multiple hosts, either:
l The hostname must not be defined for the key, or
l The hostname defined for the key matches the hostname of one of the hosts that composes the multi-node instance
Additionally, the key must have the cluster option.
ExamplesEnter the license key in the following format.
CFTPARM ID = IDPARM0 ,
…KEY = #%ENVCFT%.UPARM(PRODKEY),
…
Access the <TARGET>.INSTALL library, and run the JCL called CFTABOUT. Near the bottom of the CFTABOUT output, the cpuid line is displayed.
* cpuid = 000000000ABC1234
Transfer CFT z/OS 3.3.2 Installation and Operation Guide 23
1 Prerequisites
In this example, you would provide the CPU ID 000000000ABC1234.
Note Your cpuid will differ from those shown in the examples.
Transfer CFT z/OS 3.3.2 Installation and Operation Guide 24
1 Prerequisites
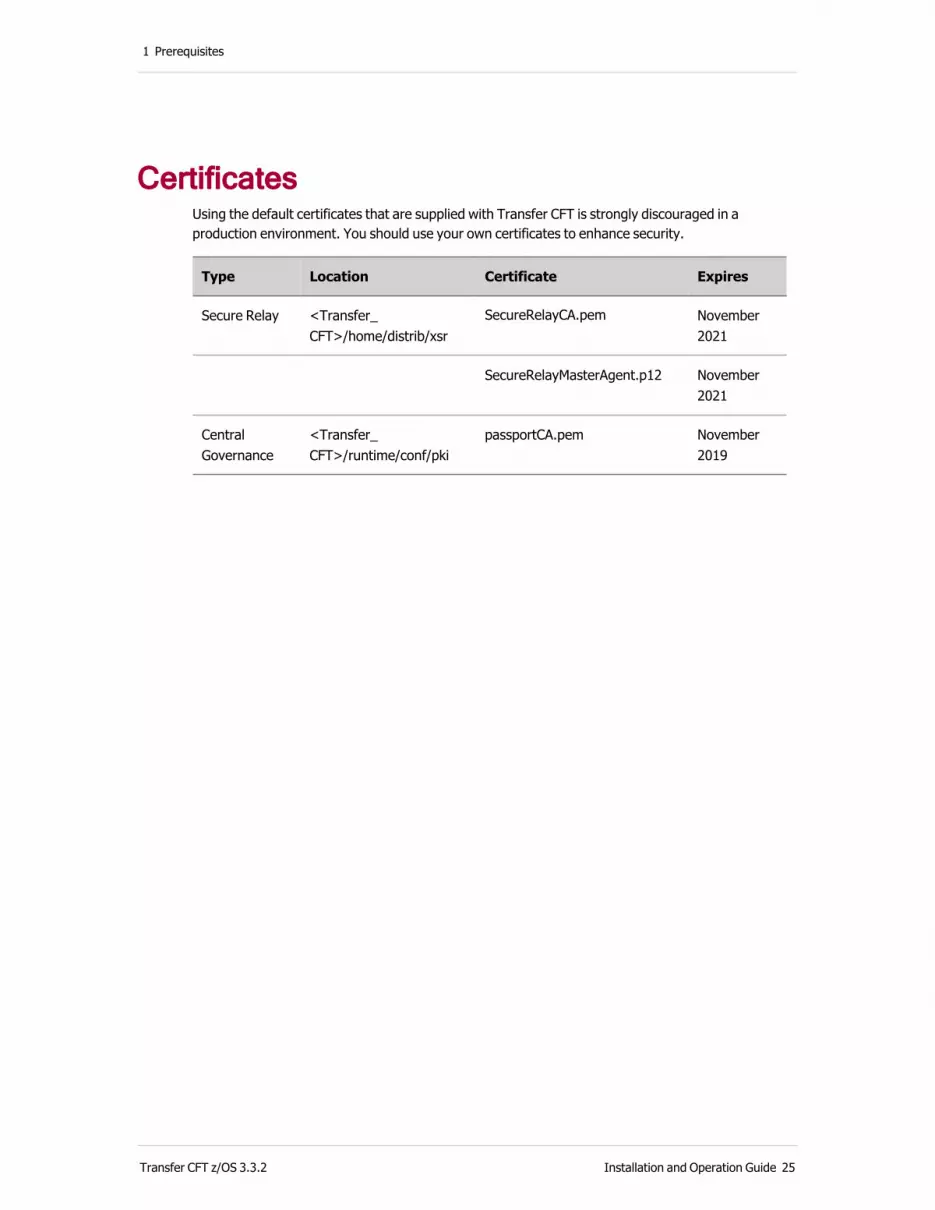
CertificatesUsing the default certificates that are supplied with Transfer CFT is strongly discouraged in a production environment. You should use your own certificates to enhance security.
Type Location Certificate Expires
Secure Relay <Transfer_CFT>/home/distrib/xsr
SecureRelayCA.pem November 2021
SecureRelayMasterAgent.p12 November 2021
Central Governance
<Transfer_CFT>/runtime/conf/pki
passportCA.pem November 2019
Transfer CFT z/OS 3.3.2 Installation and Operation Guide 25
2 Installation
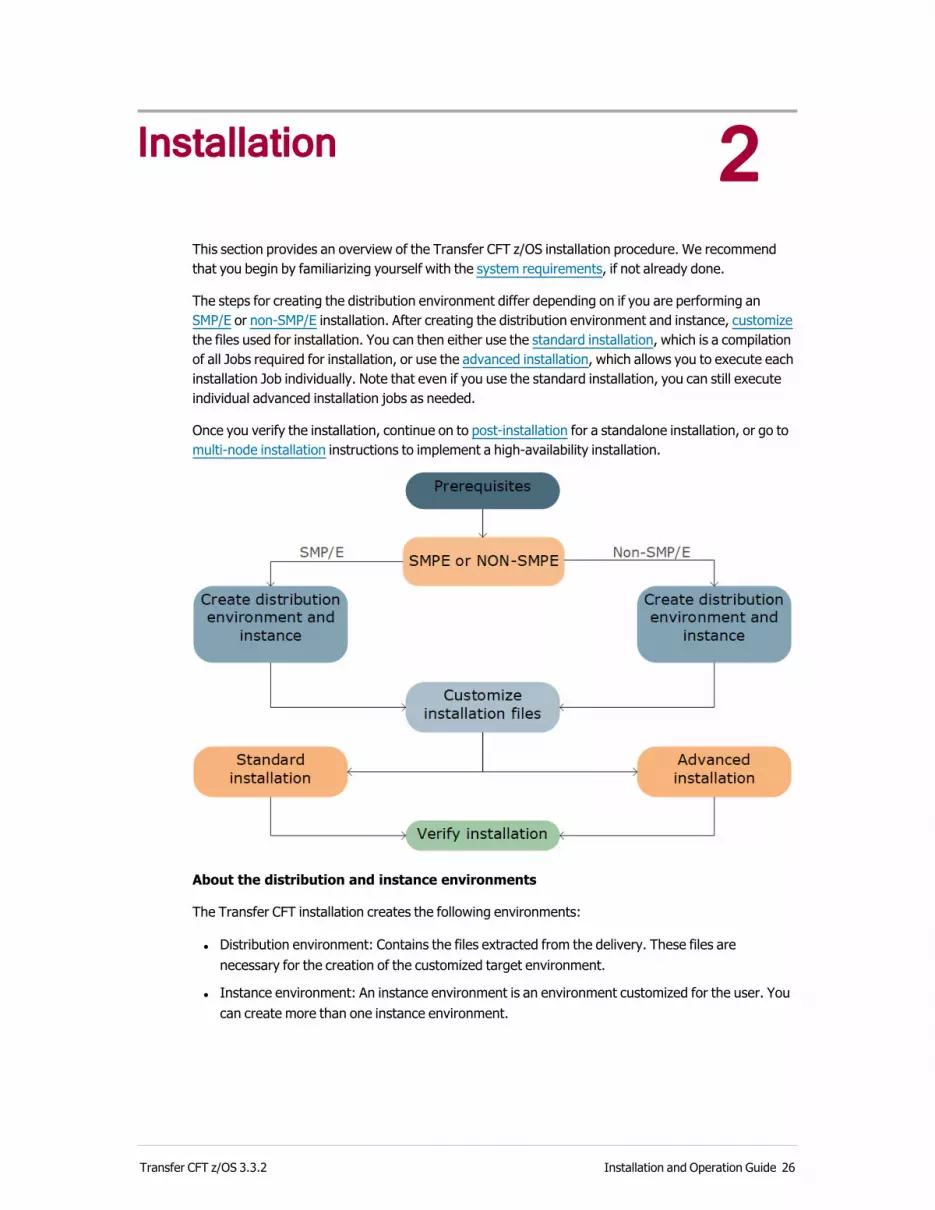
This section provides an overview of the Transfer CFT z/OS installation procedure. We recommend that you begin by familiarizing yourself with the system requirements, if not already done.
The steps for creating the distribution environment differ depending on if you are performing an SMP/E or non-SMP/E installation. After creating the distribution environment and instance, customize the files used for installation. You can then either use the standard installation, which is a compilation of all Jobs required for installation, or use the advanced installation, which allows you to execute each installation Job individually. Note that even if you use the standard installation, you can still execute individual advanced installation jobs as needed.
Once you verify the installation, continue on to post-installation for a standalone installation, or go to multi-node installation instructions to implement a high-availability installation.
About the distribution and instance environments
The Transfer CFT installation creates the following environments:
l Distribution environment: Contains the files extracted from the delivery. These files are necessary for the creation of the customized target environment.
l Instance environment: An instance environment is an environment customized for the user. You can create more than one instance environment.
Transfer CFT z/OS 3.3.2 Installation and Operation Guide 26
2 Installation
The act of installing Transfer CFT creates a distribution environment that contains product binaries and templates. Do no store any personal files in this environment, or modify existing files in this environment, as they are erased during updates.
Note You use the distribution environment to create the instance environment, which is your target (runtime).
The directories that are installed during the installation procedure are described in Verify your installation.
Transfer CFT z/OS 3.3.2 Installation and Operation Guide 27

SMP/E: Create the distribution environmentSystem Modification Program/Extended (SMP/E) is a tool developed by IBM to manage the installation of products in z/OS environments, and to apply maintenance to the repository products. This section describes how to use the SMP/E method to manage a Transfer CFT installation.
The following paragraphs describe how to install the distribution environment. After installing the distribution environment, you should not need to modify it. Next, you use the installed distribution environment to create a Transfer CFT instance environment (runtime). The term instance replaces the former notion of a target environment in Transfer CFT.
SMP/E distribution fileYou can download the SMP/E distribution file Transfer_CFT_3.3.x_install_mvs_BNnnnnnnn.smpe.zip to your computer (Windows or Unix) from Axway Sphere.
The Transfer CFT z/OS 3.3.x SMP/E package Build Number nnnnnnn archive file contains:
In the root folder:
l Two installation scripts: setup.sh (Unix) and setup.bat (Windows)
l Two license agreement files: EULA.html and EULA.txt
In the /install subdirectory:
l A file (silent_smpe_install.conf) to customize the silent installation or default parameters.
l A pax.Z archive file that contains the SMP/E modification control statements (SMPMCS) and the associated relative files (RELFILEs)
l SMP/E model jobs ($C01DCSI, etc.) to extract the Transfer CFT product package, create the corresponding SMP/E Transfer CFT target environment, and create a new Transfer CFT instance.
In the /bin subdirectory:
l The installation executables, procedures, and log installation files.
Transfer CFT z/OS 3.3.2 Installation and Operation Guide 28

Create a Transfer CFT z/OS instance SMP/E
SMP/E FMIDs list The Transfer CFT software has a SYSMOD FMID (Function Module ID) that identifies the software and its release number. For example, FMID TCF0300 identifies the Transfer CFT 3.3.2 release.
FMID Format
TCF0100 T = Type of function CF0 = Component Code for Transfer CFT 300 = Release 3.3.2
Upload the SMP/E package to the mainframe 1. Unzip the package file, for example Transfer_CFT_3.3.2_install_mvs_BNnnnnnnnn.smpe.zip.
2. Run the setup.bat (Windows) or setup.sh (Unix).
3. Enter the following parameters in the console. Upon completion you require an FTP client.
Question Default value
Dataset name for the product SMPE samples AXWAY.SMPE.CFT332.SMPCNTL
USS SMP/E Network Temporary Store /home/AXWAY/smpnts
USS package subdirectory CFT332
Hostname mainframe addressLogin userLogin password
l The setup procedure allocates the destination library dataset (default is AXWAY.SMPE.CFT332.SMPCNTL),with the attributes recfm=fb,lrecl=80,blksize=27920,space=(cyl,(1,5)).
o To add a volume or device name, edit the &vol= or &unit= field in the silent_smpe_install.conf file.
l The sample member $C* is transferred to the dataset using FTP in text mode.
l The setup procedure creates the destination USS directory (default is /home/AXWAY/smpnts), and subdirectory (default is CFT332).
l The Transfer_CFT_mvs.pax.Z SMP/E package file is transferred to the subdirectory using FTP in binary mode, and renamed to CFT332.pax.Z (approximately 150 Mbytes).
Transfer CFT z/OS 3.3.2 Installation and Operation Guide 29
Silent modeYou can run the setup procedure in silent mode, setup –s. In this case, you do not have to enter parameters in the console, but prior to starting you must update the silent_smpe_install.conf file located in the install directory.
Transfer CFT z/OS 3.3.2 Installation and Operation Guide 30

Create a new Transfer CFT SMP/E environment The user ID you use must have read access to the SAF facility class resources GIM.CMD.command and GIM.PGM.program, for example PERMIT GIM.* CLASS(FACILITY) ID(user ID) ACCESS(READ).
1. Edit the sample jobs in the following table, modifying as necessary; supply a valid JOB JCL card statement, select and modify the dataset qualifier &HLQ&, and the optional device &UNIT& and volume &VOLUME&.
Member Name
Description
$C01DCSI Allocate the SMP/E CSI, and the operational and work data sets used by SMP/E.
$C02DZON Define the SMP/E distribution and target zones.
2. Submit the jobs in the order listed.
Transfer CFT z/OS 3.3.2 Installation and Operation Guide 31

Receive the Transfer CFT SMP/E product 1. Edit the sample job listed in the following table, modifying as necessary; supply a valid JOB JCL
card statement, select and modify the dataset qualifier &HLQ&.
Member name
Description
$C10RECV UNPAX the archive package and RECEIVE the FMIDs functions.
2. Submit the job.
The following data sets (approximately 300 cylinders) are created and suffixed by their corresponding FMID identifier (TCF0nnn) and RELFILEs number (Fn).
File Number
Data Set Suffix
Description
1 TCF0nnn.F1 HFS pax files
2 TCF0nnn.F2 Transfer CFT XML files
3 TCF0nnn.F3 Transfer CFT exec procedures
4 TCF0nnn.F4 Transfer CFT JCLs
5 TCF0nnn.F5 Trusted File messages
6 TCF0nnn.F6 Transfer CFT parameter and JCL samples
7 TCF0nnn.F7 Transfer CFT general parameters
8 TCF0nnn.F8 Link-edit maps
9 TCF0nnn.F9 Transfer CFT load modules
10 TCF0nnn.F10 Copy COBOL
11 TCF0nnn.F11 H headers
12 TCF0nnn.F12 Assembler macros
13 TCF0nnn.F13 Assembler samples
14 TCF0nnn.F14 C samples
15 TCF0nnn.F15 COBOL samples
Transfer CFT z/OS 3.3.2 Installation and Operation Guide 32
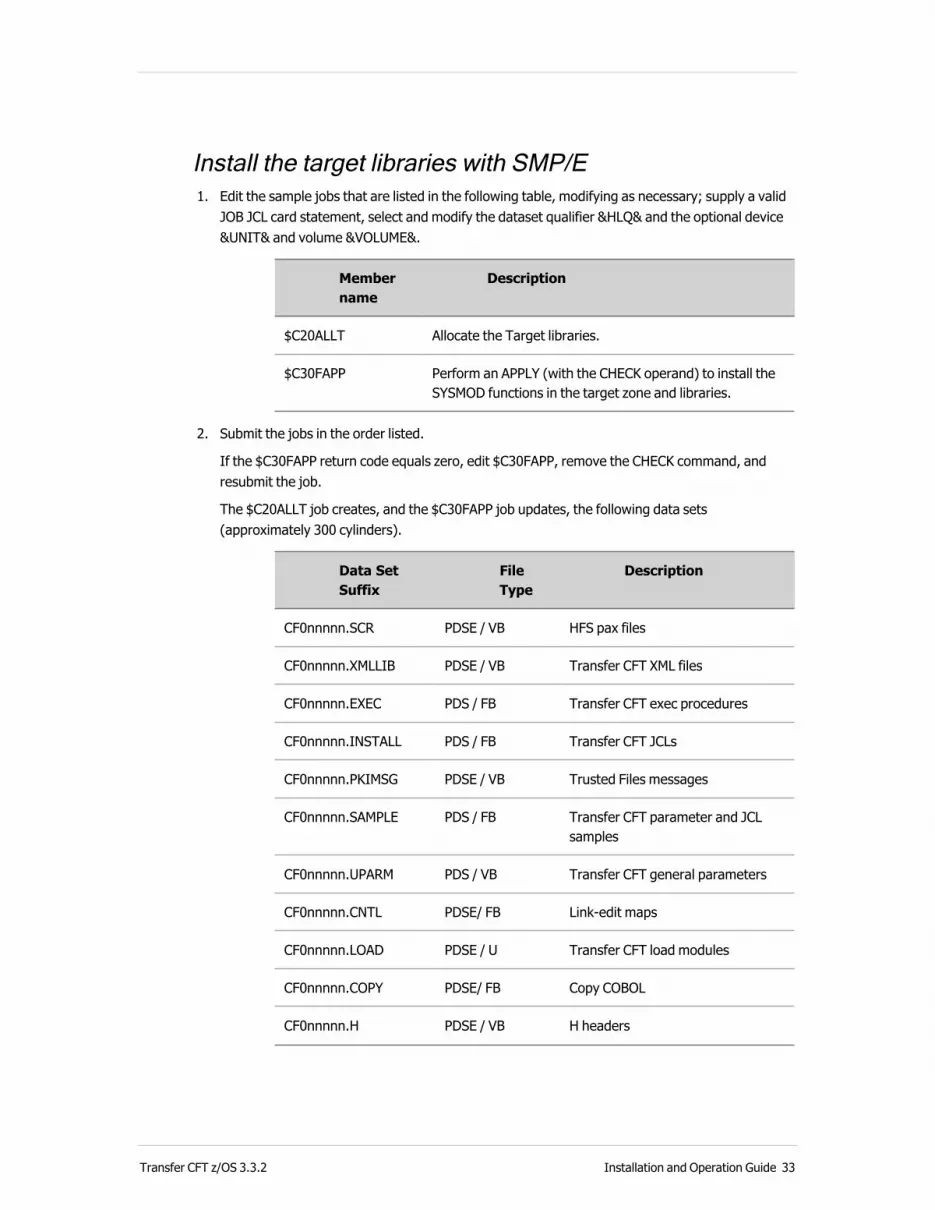
Install the target libraries with SMP/E 1. Edit the sample jobs that are listed in the following table, modifying as necessary; supply a valid
JOB JCL card statement, select and modify the dataset qualifier &HLQ& and the optional device &UNIT& and volume &VOLUME&.
Member name
Description
$C20ALLT Allocate the Target libraries.
$C30FAPP Perform an APPLY (with the CHECK operand) to install the SYSMOD functions in the target zone and libraries.
2. Submit the jobs in the order listed.
If the $C30FAPP return code equals zero, edit $C30FAPP, remove the CHECK command, and resubmit the job.
The $C20ALLT job creates, and the $C30FAPP job updates, the following data sets (approximately 300 cylinders).
Data Set Suffix
File Type
Description
CF0nnnnn.SCR PDSE / VB HFS pax files
CF0nnnnn.XMLLIB PDSE / VB Transfer CFT XML files
CF0nnnnn.EXEC PDS / FB Transfer CFT exec procedures
CF0nnnnn.INSTALL PDS / FB Transfer CFT JCLs
CF0nnnnn.PKIMSG PDSE / VB Trusted Files messages
CF0nnnnn.SAMPLE PDS / FB Transfer CFT parameter and JCL samples
CF0nnnnn.UPARM PDS / VB Transfer CFT general parameters
CF0nnnnn.CNTL PDSE/ FB Link-edit maps
CF0nnnnn.LOAD PDSE / U Transfer CFT load modules
CF0nnnnn.COPY PDSE/ FB Copy COBOL
CF0nnnnn.H PDSE / VB H headers
Transfer CFT z/OS 3.3.2 Installation and Operation Guide 33

Data Set Suffix
File Type
Description
CF0nnnnn.MAC PDSE / FB Assembler macros
CF0nnnnn.SAMPLEA PDSE / FB Assembler samples
CF0nnnnn.SAMPLEC PDSE / VB C samples
CF0nnnnn.SAMPLEO PDSE / FB COBOL samples
Transfer CFT z/OS 3.3.2 Installation and Operation Guide 34
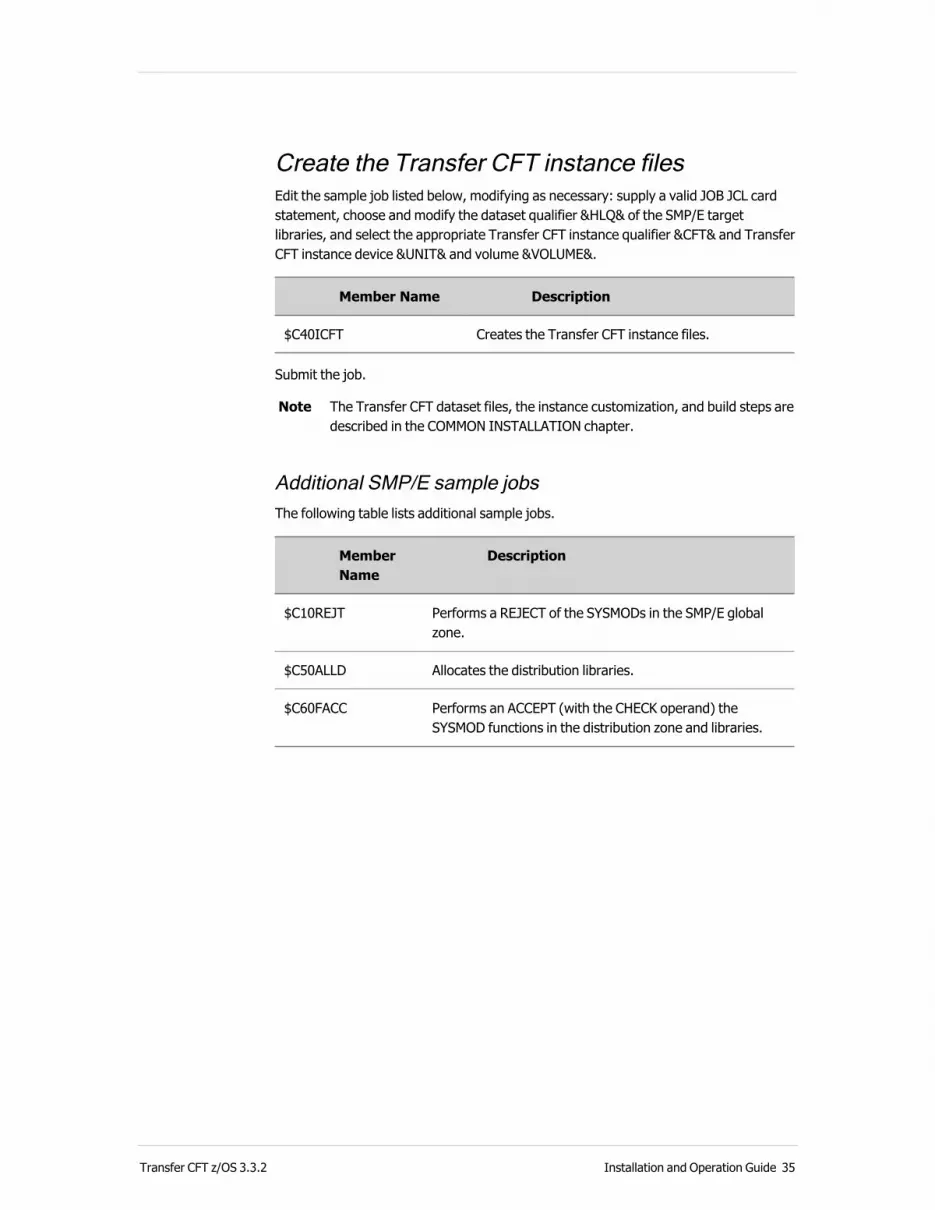
Create the Transfer CFT instance files Edit the sample job listed below, modifying as necessary: supply a valid JOB JCL card statement, choose and modify the dataset qualifier &HLQ& of the SMP/E target libraries, and select the appropriate Transfer CFT instance qualifier &CFT& and Transfer CFT instance device &UNIT& and volume &VOLUME&.
Member Name Description
$C40ICFT Creates the Transfer CFT instance files.
Submit the job.
Note The Transfer CFT dataset files, the instance customization, and build steps are described in the COMMON INSTALLATION chapter.
Additional SMP/E sample jobsThe following table lists additional sample jobs.
Member Name
Description
$C10REJT Performs a REJECT of the SYSMODs in the SMP/E global zone.
$C50ALLD Allocates the distribution libraries.
$C60FACC Performs an ACCEPT (with the CHECK operand) the SYSMOD functions in the distribution zone and libraries.
Transfer CFT z/OS 3.3.2 Installation and Operation Guide 35

Non-SMP/E: Create the distribution environment
This section describes how to install the distribution environment. After installing the distribution environment, you should not need to modify it. Next, you use the installed distribution environment to create a Transfer CFT instance environment (runtime). The term instance replaces the former notion of a target environment in Transfer CFT.
When you install the Transfer CFT you can create the following environments in a single step:
l Distribution environment
l Transfer CFT run-time instance environment
Define a Transfer CFT aliasYou can create a Transfer CFT ALIAS in the USER CATALOG if the file names mentioned in the installation JOBs are reserved for operation.
To define an alias, adapt the parameters in bold to suit your environment. Enter:
//DEFALIAS EXEC PGM=IDCAMS
//SYSPRINT DD SYSOUT=sysout
//SYSIN DD *
DEFINE ALIAS(NAME(CFTV2) RELATE(USER.CATALOG))
...................
/*
Download the installation library from ESD
Required configuration l An FTP client that permits the transfer of files to the z/OS host
l Download the ESD file from Axway Support at https://support.axway.com
Note ISO files were deprecated in version 3.0.1.
To install the Transfer CFT z/OS product, you need approximately:
l 200 cylinders 3390 of disk space on z/OS to transfer the delivery files from another system using FTP
l 450 additional cylinders of disk space to unpack the installation files
Transfer CFT z/OS 3.3.2 Installation and Operation Guide 36
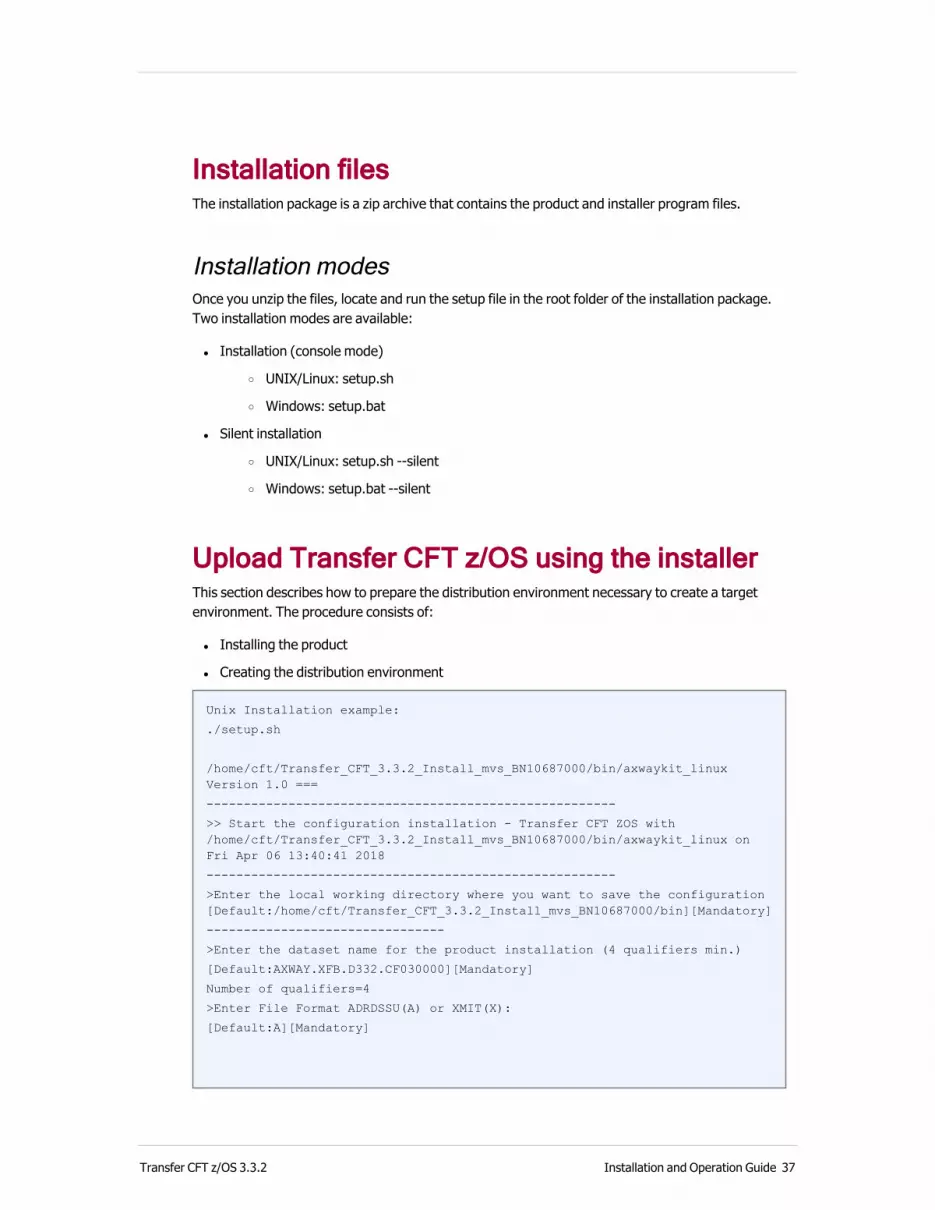
Installation files The installation package is a zip archive that contains the product and installer program files.
Installation modesOnce you unzip the files, locate and run the setup file in the root folder of the installation package. Two installation modes are available:
l Installation (console mode)
o UNIX/Linux: setup.sh
o Windows: setup.bat
l Silent installation
o UNIX/Linux: setup.sh --silent
o Windows: setup.bat --silent
Upload Transfer CFT z/OS using the installerThis section describes how to prepare the distribution environment necessary to create a target environment. The procedure consists of:
l Installing the product
l Creating the distribution environment
Unix Installation example:
./setup.sh
/home/cft/Transfer_CFT_3.3.2_Install_mvs_BN10687000/bin/axwaykit_linux Version 1.0 ===
-------------------------------------------------------
>> Start the configuration installation - Transfer CFT ZOS with /home/cft/Transfer_CFT_3.3.2_Install_mvs_BN10687000/bin/axwaykit_linux on Fri Apr 06 13:40:41 2018
-------------------------------------------------------
>Enter the local working directory where you want to save the configuration [Default:/home/cft/Transfer_CFT_3.3.2_Install_mvs_BN10687000/bin][Mandatory]
--------------------------------
>Enter the dataset name for the product installation (4 qualifiers min.)
[Default:AXWAY.XFB.D332.CF030000][Mandatory]
Number of qualifiers=4
>Enter File Format ADRDSSU(A) or XMIT(X):
[Default:A][Mandatory]
Transfer CFT z/OS 3.3.2 Installation and Operation Guide 37
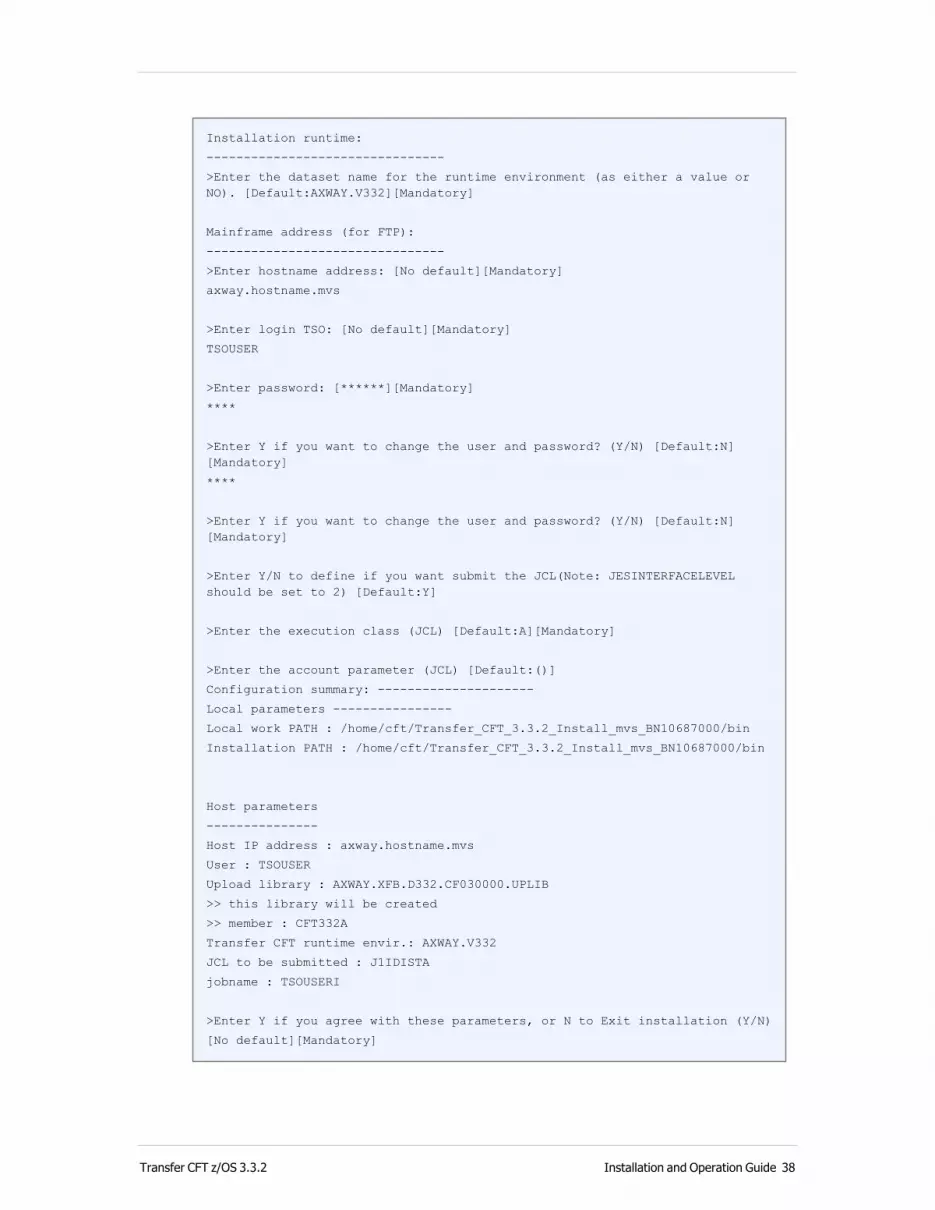
Installation runtime:
--------------------------------
>Enter the dataset name for the runtime environment (as either a value or NO). [Default:AXWAY.V332][Mandatory]
Mainframe address (for FTP):
--------------------------------
>Enter hostname address: [No default][Mandatory]
axway.hostname.mvs
>Enter login TSO: [No default][Mandatory]
TSOUSER
>Enter password: [******][Mandatory]
****
>Enter Y if you want to change the user and password? (Y/N) [Default:N][Mandatory]
****
>Enter Y if you want to change the user and password? (Y/N) [Default:N][Mandatory]
>Enter Y/N to define if you want submit the JCL(Note: JESINTERFACELEVEL should be set to 2) [Default:Y]
>Enter the execution class (JCL) [Default:A][Mandatory]
>Enter the account parameter (JCL) [Default:()]
Configuration summary: ---------------------
Local parameters ----------------
Local work PATH : /home/cft/Transfer_CFT_3.3.2_Install_mvs_BN10687000/bin
Installation PATH : /home/cft/Transfer_CFT_3.3.2_Install_mvs_BN10687000/bin
Host parameters
---------------
Host IP address : axway.hostname.mvs
User : TSOUSER
Upload library : AXWAY.XFB.D332.CF030000.UPLIB
>> this library will be created
>> member : CFT332A
Transfer CFT runtime envir.: AXWAY.V332
JCL to be submitted : J1IDISTA
jobname : TSOUSERI
>Enter Y if you agree with these parameters, or N to Exit installation (Y/N)
[No default][Mandatory]
Transfer CFT z/OS 3.3.2 Installation and Operation Guide 38
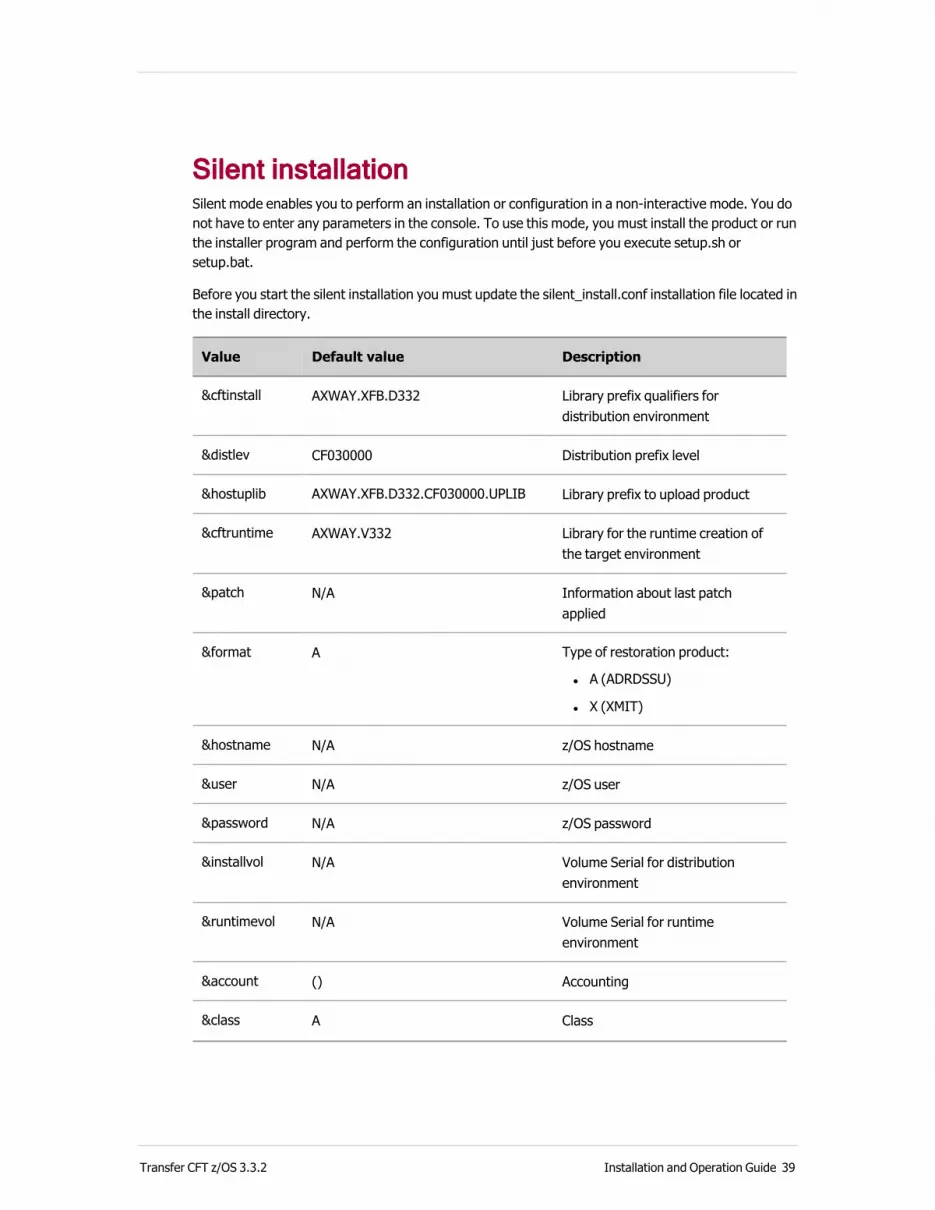
Silent installationSilent mode enables you to perform an installation or configuration in a non-interactive mode. You do not have to enter any parameters in the console. To use this mode, you must install the product or run the installer program and perform the configuration until just before you execute setup.sh or setup.bat.
Before you start the silent installation you must update the silent_install.conf installation file located in the install directory.
Value Default value Description
&cftinstall AXWAY.XFB.D332 Library prefix qualifiers for distribution environment
&distlev CF030000 Distribution prefix level
&hostuplib AXWAY.XFB.D332.CF030000.UPLIB Library prefix to upload product
&cftruntime AXWAY.V332 Library for the runtime creation of the target environment
&patch N/A Information about last patch applied
&format A Type of restoration product:
l A (ADRDSSU)
l X (XMIT)
&hostname N/A z/OS hostname
&user N/A z/OS user
&password N/A z/OS password
&installvol N/A Volume Serial for distribution environment
&runtimevol N/A Volume Serial for runtime environment
&account () Accounting
&class A Class
Transfer CFT z/OS 3.3.2 Installation and Operation Guide 39
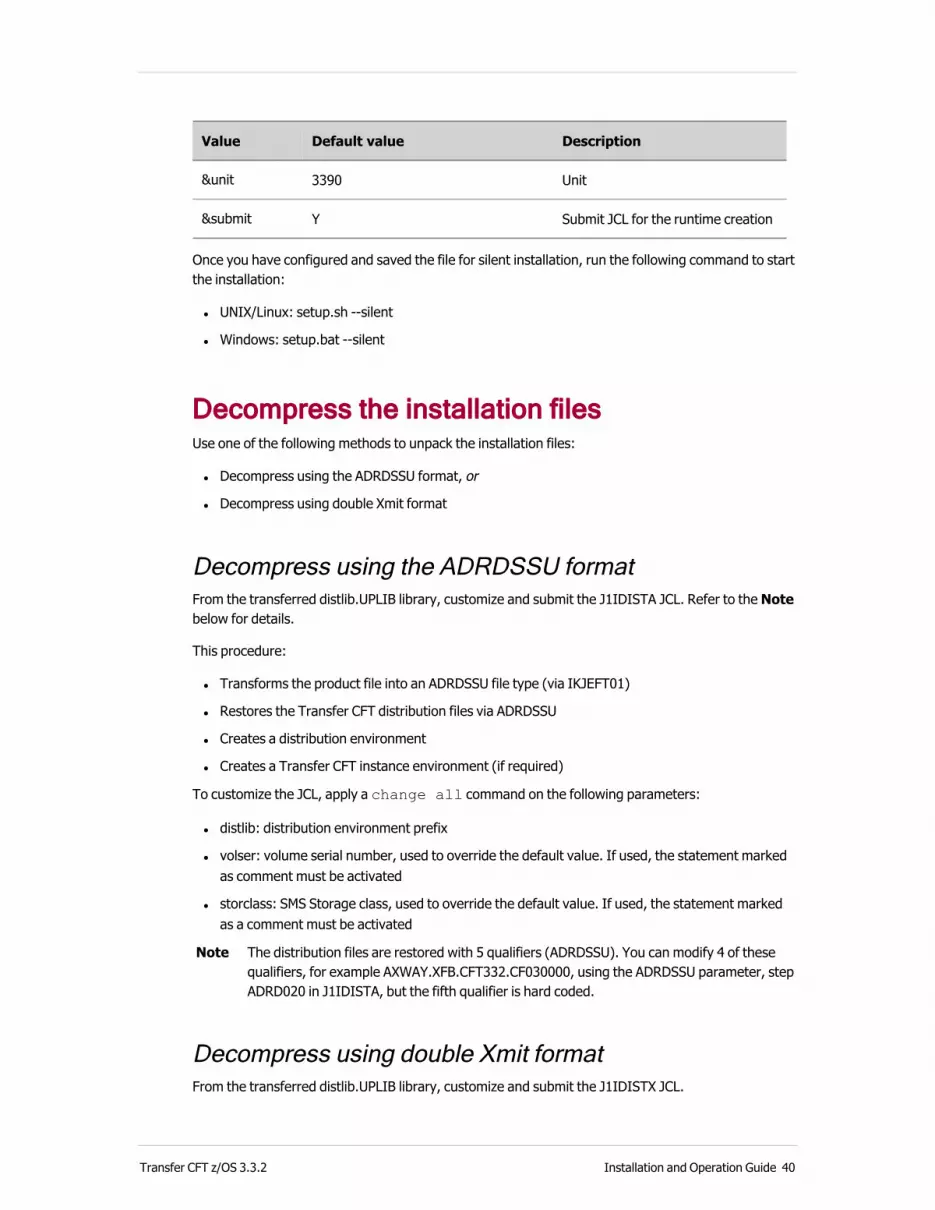
Value Default value Description
&unit 3390 Unit
&submit Y Submit JCL for the runtime creation
Once you have configured and saved the file for silent installation, run the following command to start the installation:
l UNIX/Linux: setup.sh --silent
l Windows: setup.bat --silent
Decompress the installation filesUse one of the following methods to unpack the installation files:
l Decompress using the ADRDSSU format, or
l Decompress using double Xmit format
Decompress using the ADRDSSU formatFrom the transferred distlib.UPLIB library, customize and submit the J1IDISTA JCL. Refer to the Note below for details.
This procedure:
l Transforms the product file into an ADRDSSU file type (via IKJEFT01)
l Restores the Transfer CFT distribution files via ADRDSSU
l Creates a distribution environment
l Creates a Transfer CFT instance environment (if required)
To customize the JCL, apply a change all command on the following parameters:
l distlib: distribution environment prefix
l volser: volume serial number, used to override the default value. If used, the statement marked as comment must be activated
l storclass: SMS Storage class, used to override the default value. If used, the statement marked as a comment must be activated
Note The distribution files are restored with 5 qualifiers (ADRDSSU). You can modify 4 of these qualifiers, for example AXWAY.XFB.CFT332.CF030000, using the ADRDSSU parameter, step ADRD020 in J1IDISTA, but the fifth qualifier is hard coded.
Decompress using double Xmit format From the transferred distlib.UPLIB library, customize and submit the J1IDISTX JCL.
Transfer CFT z/OS 3.3.2 Installation and Operation Guide 40

This procedure:
l Performs two successive orders RECEIVE (via IKJEFT01)
l Creates a distribution environment
l Creates a Transfer CFT instance environment (if needed)
l Creates a Composer connector environment for Transfer CFT (if needed)
To customize the JCL, apply a change all command to the following parameters:
l distlib: distribution environment prefix
l Volse: volume serial number, used to override the default value. If used, the statement marked as comment must be activated
Transfer CFT z/OS 3.3.2 Installation and Operation Guide 41

Create a Transfer CFT instance environmentThe concept of a target environment has been replaced by what is now referred to as a Transfer CFT instance, or run-time environment. This procedure describes how to install the Transfer CFT instance environment.
If during installation you created both the distribution environment and the Transfer CFT instance environment, you may go directly to Customize the instance environment. Otherwise, you must first create your runtime environment.
Note that you require an installed Distribution environment before you can create the instance environment. See Distribution environment installation.
Procedure
1. Make a copy of the JCL. It is recommended that you work from a copy.
2. From the distlib.INSTALL library, customize and submit the J2IICFT.
This procedure:
l Creates a Transfer CFT instance run-time environment
l Copies certain Transfer CFT distribution environment elements to the target environment
After creating the target environment, leave the distribution environment in its original state. You should now work exclusively in the target environment.
Next, execute the installation JCLs as described in the table JCL installation steps.
Transfer CFT z/OS 3.3.2 Installation and Operation Guide 42

Common installation steps
Perform common steps before installing (A03PARM and A12OPTSP)This section applies to both SMP/E and non-SMP/E installations.
Customize parameters in the JCL l Set standard JCL parameters A03PARM on page 43
l Configure the SGINSTAL using UCONF or A12OPTSP on page 53
Execute the JOB:
1. Adapt the customization parameters in the A03PARM member.
2. Submit the JOB.
3. Quit both EDIT and the library.
4. Wait for the JOB to execute.
When you modify the A03PARM member, respect the following keyword conventions:
l Enter keywords in lower case
l Enter keyword values between quotes ' '
l Refer to the Keyword description table for details, and adapt bold parameters to suit your environment
Set standard JCL parameters A03PARM Before submitting JCL A00CUSTO to customize the Target.INSTALL library JCL, modify the Target.INSTALL (A03PARM) member.
Keyword descriptions
When modifying the A03PARM member, adapt any parameters displayed in bold text to suit your environment. If you used the Installer to install, the starred (*) parameters are already customized.
Password encryption (CFTGNKEY)Before you can customize the instance environment, you require a password to generate a key to use for internal encryption. The password you enter must be at least 8 characters long, contain upper and lower case characters as well as numeric and special characters (*#$!?+-@).
Transfer CFT z/OS 3.3.2 Installation and Operation Guide 43
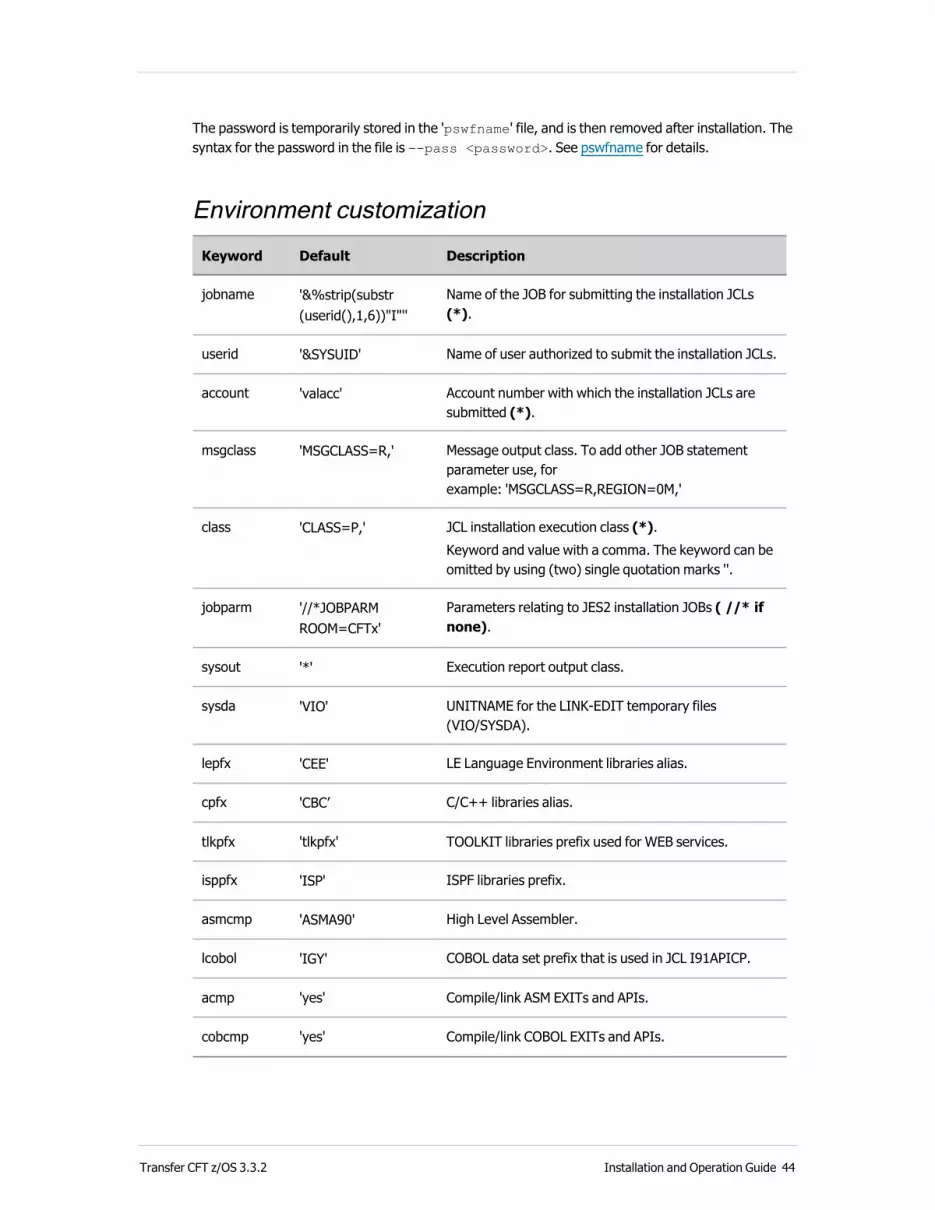
The password is temporarily stored in the 'pswfname' file, and is then removed after installation. The syntax for the password in the file is --pass <password>. See pswfname for details.
Environment customization
Keyword Default Description
jobname '&%strip(substr(userid(),1,6))"I"''
Name of the JOB for submitting the installation JCLs (*).
userid '&SYSUID' Name of user authorized to submit the installation JCLs.
account 'valacc' Account number with which the installation JCLs are submitted (*).
msgclass 'MSGCLASS=R,' Message output class. To add other JOB statement parameter use, for example: 'MSGCLASS=R,REGION=0M,'
class 'CLASS=P,' JCL installation execution class (*).Keyword and value with a comma. The keyword can be omitted by using (two) single quotation marks ''.
jobparm '//*JOBPARM ROOM=CFTx'
Parameters relating to JES2 installation JOBs ( //* if none).
sysout '*' Execution report output class.
sysda 'VIO' UNITNAME for the LINK-EDIT temporary files (VIO/SYSDA).
lepfx 'CEE' LE Language Environment libraries alias.
cpfx 'CBC’ C/C++ libraries alias.
tlkpfx 'tlkpfx' TOOLKIT libraries prefix used for WEB services.
isppfx 'ISP' ISPF libraries prefix.
asmcmp 'ASMA90' High Level Assembler.
lcobol 'IGY' COBOL data set prefix that is used in JCL I91APICP.
acmp 'yes' Compile/link ASM EXITs and APIs.
cobcmp 'yes' Compile/link COBOL EXITs and APIs.
Transfer CFT z/OS 3.3.2 Installation and Operation Guide 44

Keyword Default Description
ccmp 'yes' Compile/link C EXITs and APIs.
cftvol 'volsert' Name of the volume for Transfer CFT z/OS file creation (*).
cftunit '3390' Disk unit type.
cftv2 '&&TARGET' Transfer CFT z/OS file creation alias (*).
hostadd '&&HOSTBYADDR' Host address (or '&&HOSTID')
tlkpfx 'tlkpfx' Toolkit libraries prefix, which is mandatory for:
l Central Governance
l am.type=passport
l Web services usage
Transfer CFT loadlib managementTransfer CFT z/OS allows you to concatenate two libraries, a user library and the product library. The user library is not mandatory, but is strongly advised, and should be positioned first.
Note
l A ..USER.LOAD load is created during the installation.
l If the Transfer CFT LOAD is an APF, the USER load must also be an APF.
l Set cftuload '&&TARGET".LOAD"' to manage only one LOAD.
Keyword Default Description
cftuload '&&TARGET".USER.LOAD"' First loadlib in steplib / joblib
cftload '&&TARGET".LOAD"' Second loadlib in steplib / joblib
syslmods '&%$cftuload' SYSLMOD (link output) for SGINSTAL Or $cftload
syslmodx '&%$cftuload' SYSLMOD for Exit(s) and/or API(s) or $cftload
Transfer CFT z/OS 3.3.2 Installation and Operation Guide 45
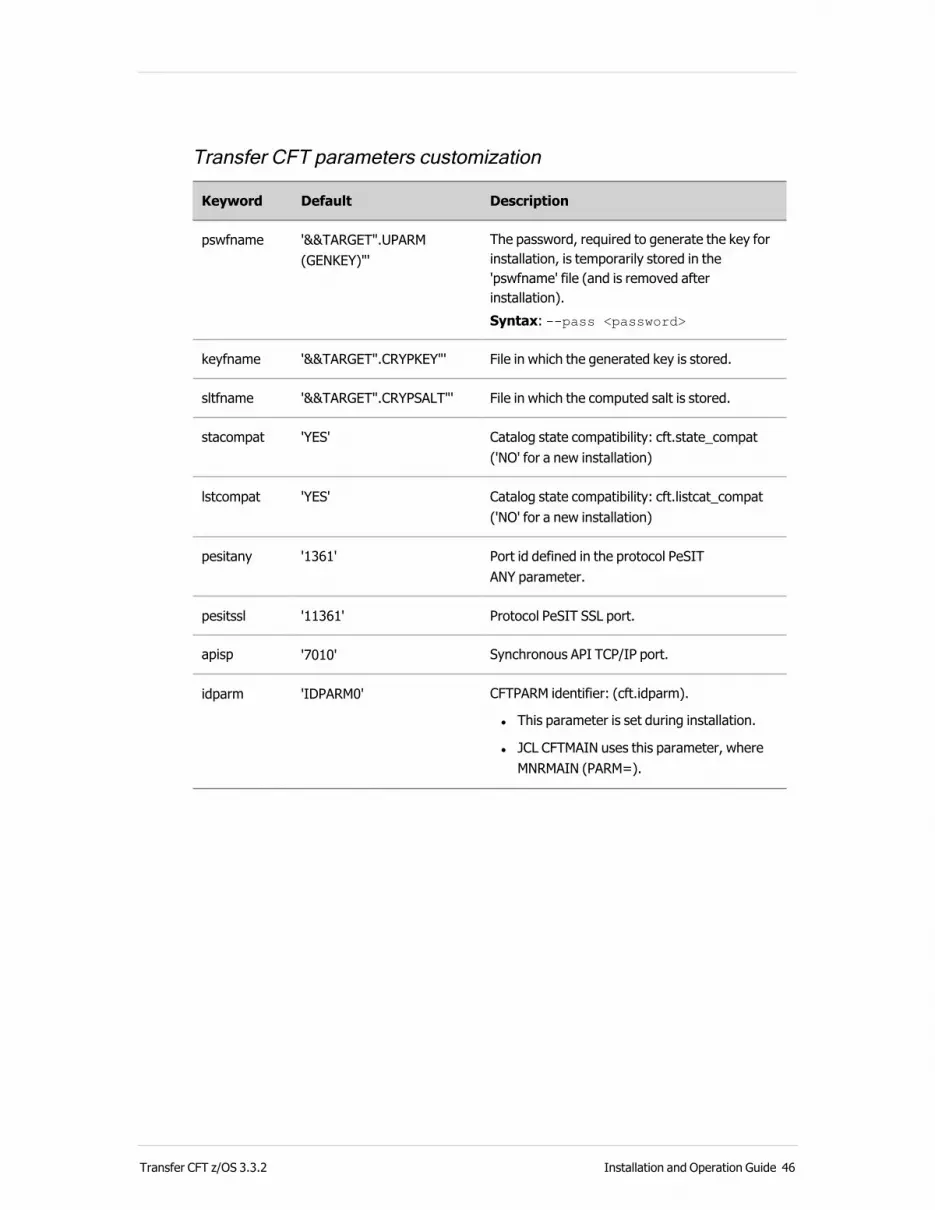
Transfer CFT parameters customization
Keyword Default Description
pswfname '&&TARGET".UPARM(GENKEY)"'
The password, required to generate the key for installation, is temporarily stored in the 'pswfname' file (and is removed after installation). Syntax: --pass <password>
keyfname '&&TARGET".CRYPKEY"' File in which the generated key is stored.
sltfname '&&TARGET".CRYPSALT"' File in which the computed salt is stored.
stacompat 'YES' Catalog state compatibility: cft.state_compat ('NO' for a new installation)
lstcompat 'YES' Catalog state compatibility: cft.listcat_compat ('NO' for a new installation)
pesitany '1361' Port id defined in the protocol PeSIT ANY parameter.
pesitssl '11361' Protocol PeSIT SSL port.
apisp '7010' Synchronous API TCP/IP port.
idparm 'IDPARM0' CFTPARM identifier: (cft.idparm).
l This parameter is set during installation.
l JCL CFTMAIN uses this parameter, where MNRMAIN (PARM=).
Transfer CFT z/OS 3.3.2 Installation and Operation Guide 46

Keyword Default Description
cftinst '&%"Z11"$pesitany' The Transfer CFT instance ID, CFTPARM partner (value size <= 24). This value identifies the Transfer CFT and must be unique (cft.instance_id). If Composer is enabled, the naming conventions differs:
l Value size <= 8
l First alphabetic character
l Naming convention: the same as the PDS’s member
The sentence '&%Mvsvar("SYSNAME")" "$pesitany' is replaced with the result of the REXX function Mvsvar("SYSNAME")" concatenated with the value of the previously customized pesitany field. "Z11" represents the z/OS partition’s name. For example, $pesitany corresponds to the value assigned to keyword 'pesitany'.
cftgroup 'Production.zos' Transfer CFT instance GROUP
Transfer CFT Copilot server customization
Keyword Default Description
copenable 'yes' Enable the Transfer CFT Copilot server.
copladdr '&&HOSTBYADDR' Transfer CFT Copilot server TCP/IP address. The key word '&&HOSTBYADDR' is substituted by the result of the REXX function socket ("GETHOSTBYADDR"). (copilot.general.serverhost)
coplport '1766' Transfer CFT Copilot listening port (copilot.general.serverport).
coplsslp '1767' Copilot server SSL listening port. *Mandatory for Central Governance (copilot.general.ssl_serverport).
Transfer CFT z/OS 3.3.2 Installation and Operation Guide 47

Keyword Default Description
coppath '/home/AXWAY/CFT32X/inst/cop' USS directory for Transfer CFT Copilot server files. (copilot.http.httprootdir)
restenable 'yes' Enable Copilot REST API (Yes/No).
restport '1768' Copilot REST API server port
Transfer CFT Heartbeat for Sentinel Dashboards
Keyword Default Description
jobcft 'S:&:1.8SJOBNAME' Transfer CFT job name.
jobcop 'N:COPP' Transfer CFT Copilot server port.* 'COPP' is a keyword, and the asterisk value * is found via the uconf file.
Certificates management
Keyword Default Description
xpkiopt 'YES' Exit PKI used (YES or NO)Note that xpkiopt=YES is mandatory when pkitype=system, and that you should use the YES option when possible, even if using pkitype=cft or pkitype=passport.
csflib 'CSF.SCSFMOD0' CSF library, mandatory if xpkiopt=yes
pkitype 'cft' Possible values:
l cft: certificates are stored in a PKI internal datafile
l passport: manages certificates via PassPort
l system: PKI system is activated
pasaddr 'pasaddr' If pkitype=passport then the PassPort server TCP/IP listening address.
pasport '7000' PassPort server port (7000).
exitpki 'YES'
Transfer CFT z/OS 3.3.2 Installation and Operation Guide 48

Sentinel installation customization
Keyword Default Description
snenable 'no' Enable Sentinel services.
sntlload '&&TARGET".LOAD"' Location of the Universal Agent (TRKUTIL Load library).
sntllocad '127.0.0.1' Local TCP/IP address for Sentinel.
sntladdr 'sntl.srv.xx' Sentinel server or Event Router address (TCP/IP).
sntlp '1305' Sentinel server or Event Router port (TCP/IP).
sntlgstr 'CFTLG30X' LOGGER file identification with a maximum length of 26 characters, or '', available exclusively with the Event Router.
Parameters for RACF (or SAF enabled) control of Transfer CFTUse these parameters only with the Transfer CFT z/OS security setup described in Setting up RACF Security.
Keyword Default Description
grpcft 'grpcft' Transfer CFT administrator SAF group.
grpmon 'grpmon' Transfer CFT SAF group.
grpaprm 'grpaprm' All parameters access SAF group.
grpfprm 'grpfprm' PARM and PART access SAF group.
grpdesk 'grpdesk' Transfer CFT help desk SAF group.
grptrf 'grptrf' Transfer CFT transfer SAF group.
userdef 'userdef' Default CFTRECV userid.
safcftcl 'safcftcl' SAF class for Transfer CFT profiles.
Transfer CFT z/OS 3.3.2 Installation and Operation Guide 49
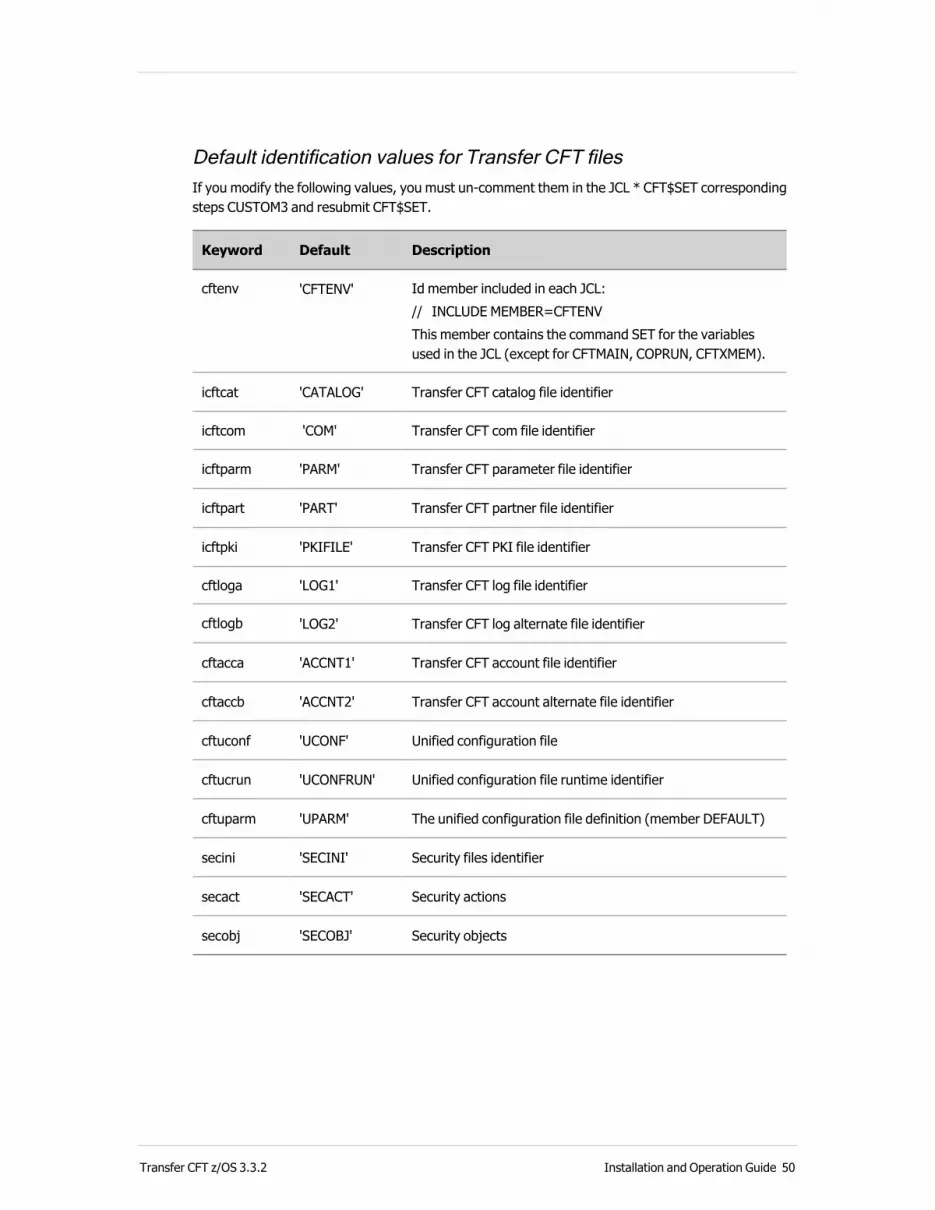
Default identification values for Transfer CFT filesIf you modify the following values, you must un-comment them in the JCL * CFT$SET corresponding steps CUSTOM3 and resubmit CFT$SET.
Keyword Default Description
cftenv 'CFTENV' Id member included in each JCL:// INCLUDE MEMBER=CFTENVThis member contains the command SET for the variables used in the JCL (except for CFTMAIN, COPRUN, CFTXMEM).
icftcat 'CATALOG' Transfer CFT catalog file identifier
icftcom 'COM' Transfer CFT com file identifier
icftparm 'PARM' Transfer CFT parameter file identifier
icftpart 'PART' Transfer CFT partner file identifier
icftpki 'PKIFILE' Transfer CFT PKI file identifier
cftloga 'LOG1' Transfer CFT log file identifier
cftlogb 'LOG2' Transfer CFT log alternate file identifier
cftacca 'ACCNT1' Transfer CFT account file identifier
cftaccb 'ACCNT2' Transfer CFT account alternate file identifier
cftuconf 'UCONF' Unified configuration file
cftucrun 'UCONFRUN' Unified configuration file runtime identifier
cftuparm 'UPARM' The unified configuration file definition (member DEFAULT)
secini 'SECINI' Security files identifier
secact 'SECACT' Security actions
secobj 'SECOBJ' Security objects
Transfer CFT z/OS 3.3.2 Installation and Operation Guide 50

Central Governance
Keyword Default Description
cgenable 'no' Enables exchanges with the Central Governance server. (yes | no)
cghost 'cghost' Central Governance server host address.
cgport 'cgport' ('12553')
Transfer CFT’s port for registering with Central Governance.
cgsecret 'cgsecret' Central Governance shared secret.
amsusers '&%userid()' AM superuser(s) for Central Governance.
Secure Relay
Keyword Default Description
srenable 'no' Enable/disable Secure Relay.
srmapath '/home/AXWAY/CFT32X/inst' USS directory for Secure Relay Master Agent (/xsr is automatically added).
Note Read only, you can share the directory with other Transfer CFTs.
srmarun '/home/AXWAY/CFT32X/runtime/xsr' Runtime directory for Secure Relay Master Agent; one per instance, with Read/Write rights for Transfer CFT.
srmacopo 'srmacopo' Secure Relay Master Agent communication port.
srrahost 'srrahost' Secure Relay Router Agent host.
srraadpo '6810' Secure Relay Router Agent administration port.
Transfer CFT z/OS 3.3.2 Installation and Operation Guide 51
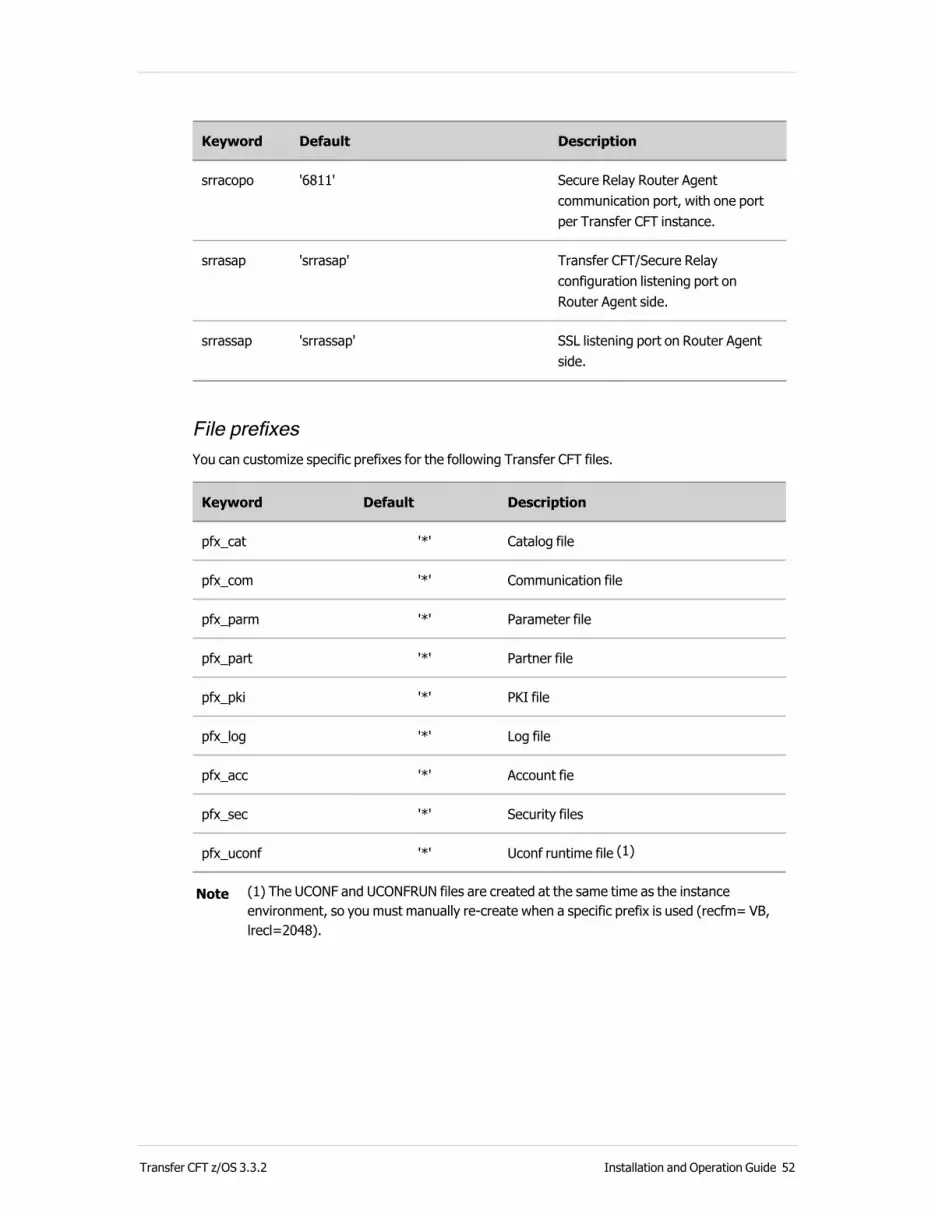
Keyword Default Description
srracopo '6811' Secure Relay Router Agent communication port, with one port per Transfer CFT instance.
srrasap 'srrasap' Transfer CFT/Secure Relay configuration listening port on Router Agent side.
srrassap 'srrassap' SSL listening port on Router Agent side.
File prefixesYou can customize specific prefixes for the following Transfer CFT files.
Keyword Default Description
pfx_cat '*' Catalog file
pfx_com '*' Communication file
pfx_parm '*' Parameter file
pfx_part '*' Partner file
pfx_pki '*' PKI file
pfx_log '*' Log file
pfx_acc '*' Account fie
pfx_sec '*' Security files
pfx_uconf '*' Uconf runtime file (1)
Note (1) The UCONF and UCONFRUN files are created at the same time as the instance environment, so you must manually re-create when a specific prefix is used (recfm= VB, lrecl=2048).
Transfer CFT z/OS 3.3.2 Installation and Operation Guide 52
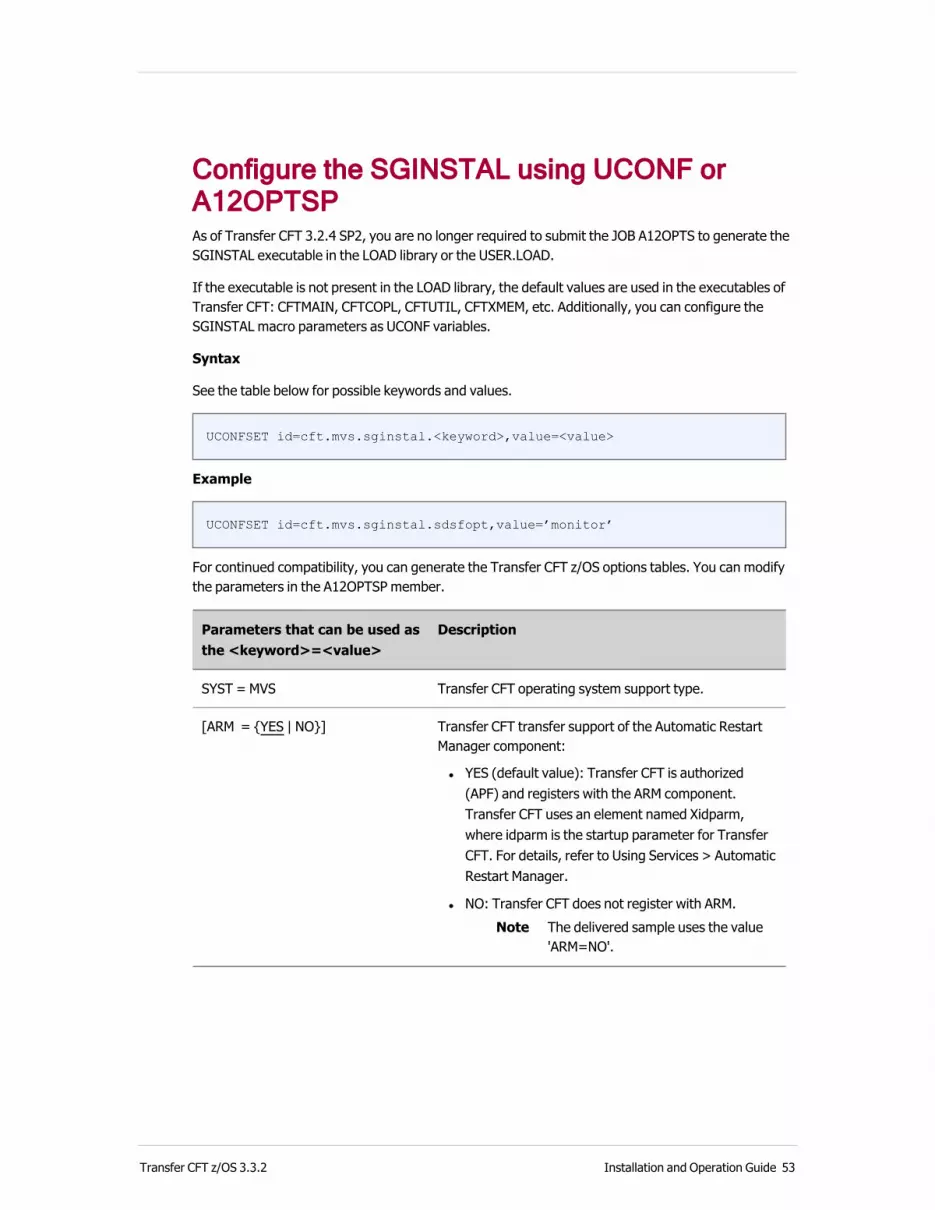
Configure the SGINSTAL using UCONF or A12OPTSPAs of Transfer CFT 3.2.4 SP2, you are no longer required to submit the JOB A12OPTS to generate the SGINSTAL executable in the LOAD library or the USER.LOAD.
If the executable is not present in the LOAD library, the default values are used in the executables of Transfer CFT: CFTMAIN, CFTCOPL, CFTUTIL, CFTXMEM, etc. Additionally, you can configure the SGINSTAL macro parameters as UCONF variables.
Syntax
See the table below for possible keywords and values.
UCONFSET id=cft.mvs.sginstal.<keyword>,value=<value>
Example
UCONFSET id=cft.mvs.sginstal.sdsfopt,value=’monitor’
For continued compatibility, you can generate the Transfer CFT z/OS options tables. You can modify the parameters in the A12OPTSP member.
Parameters that can be used as the <keyword>=<value>
Description
SYST = MVS Transfer CFT operating system support type.
[ARM = {YES | NO}] Transfer CFT transfer support of the Automatic Restart Manager component:
l YES (default value): Transfer CFT is authorized (APF) and registers with the ARM component. Transfer CFT uses an element named Xidparm, where idparm is the startup parameter for Transfer CFT. For details, refer to Using Services > Automatic Restart Manager.
l NO: Transfer CFT does not register with ARM. Note The delivered sample uses the value
'ARM=NO'.
Transfer CFT z/OS 3.3.2 Installation and Operation Guide 53
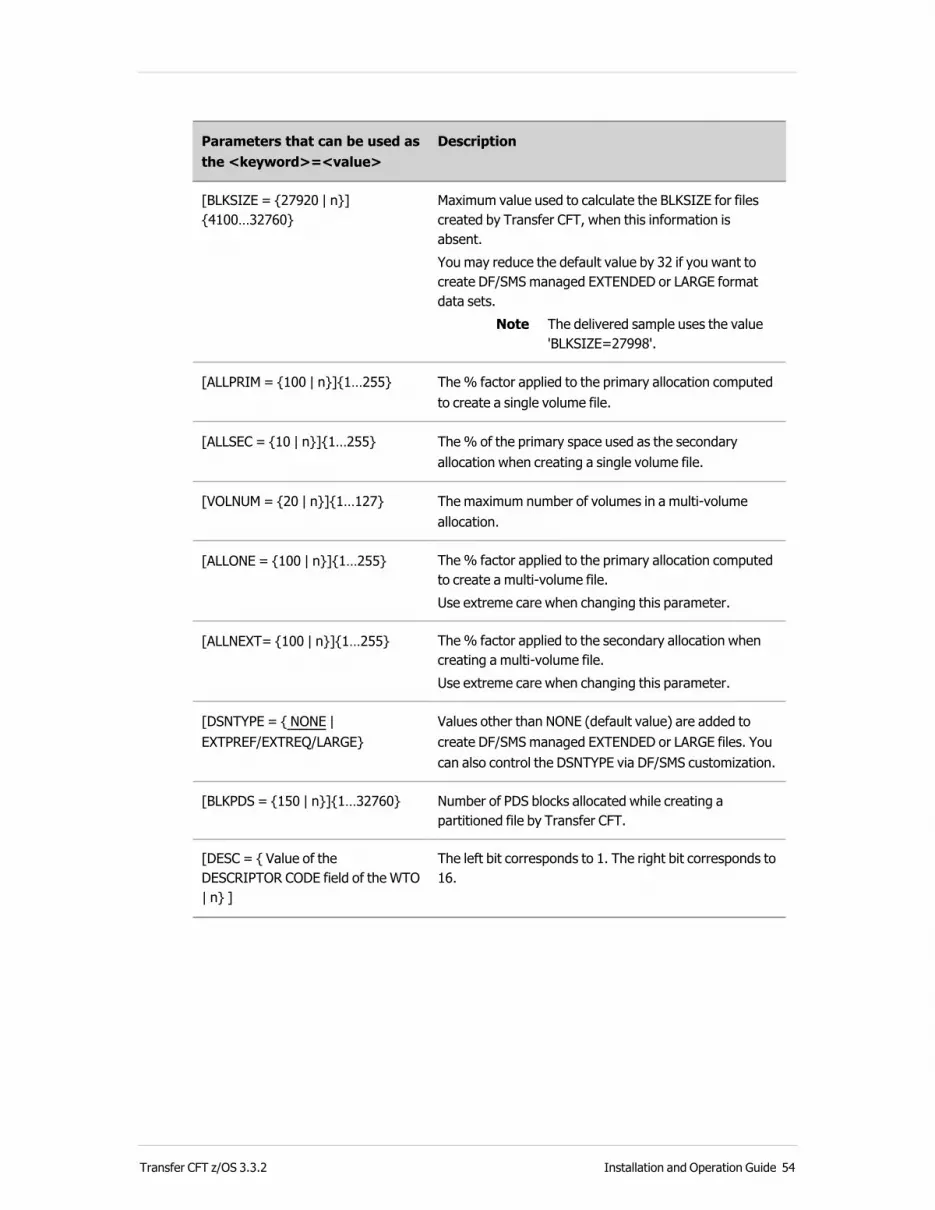
Parameters that can be used as the <keyword>=<value>
Description
[BLKSIZE = {27920 | n}] {4100…32760}
Maximum value used to calculate the BLKSIZE for files created by Transfer CFT, when this information is absent. You may reduce the default value by 32 if you want to create DF/SMS managed EXTENDED or LARGE format data sets.
Note The delivered sample uses the value 'BLKSIZE=27998'.
[ALLPRIM = {100 | n}]{1…255} The % factor applied to the primary allocation computed to create a single volume file.
[ALLSEC = {10 | n}]{1…255} The % of the primary space used as the secondary allocation when creating a single volume file.
[VOLNUM = {20 | n}]{1…127} The maximum number of volumes in a multi-volume allocation.
[ALLONE = {100 | n}]{1…255} The % factor applied to the primary allocation computed to create a multi-volume file. Use extreme care when changing this parameter.
[ALLNEXT= {100 | n}]{1…255} The % factor applied to the secondary allocation when creating a multi-volume file. Use extreme care when changing this parameter.
[DSNTYPE = { NONE | EXTPREF/EXTREQ/LARGE}
Values other than NONE (default value) are added to create DF/SMS managed EXTENDED or LARGE files. You can also control the DSNTYPE via DF/SMS customization.
[BLKPDS = {150 | n}]{1…32760} Number of PDS blocks allocated while creating a partitioned file by Transfer CFT.
[DESC = { Value of the DESCRIPTOR CODE field of the WTO | n} ]
The left bit corresponds to 1. The right bit corresponds to 16.
Transfer CFT z/OS 3.3.2 Installation and Operation Guide 54
Parameters that can be used as the <keyword>=<value>
Description
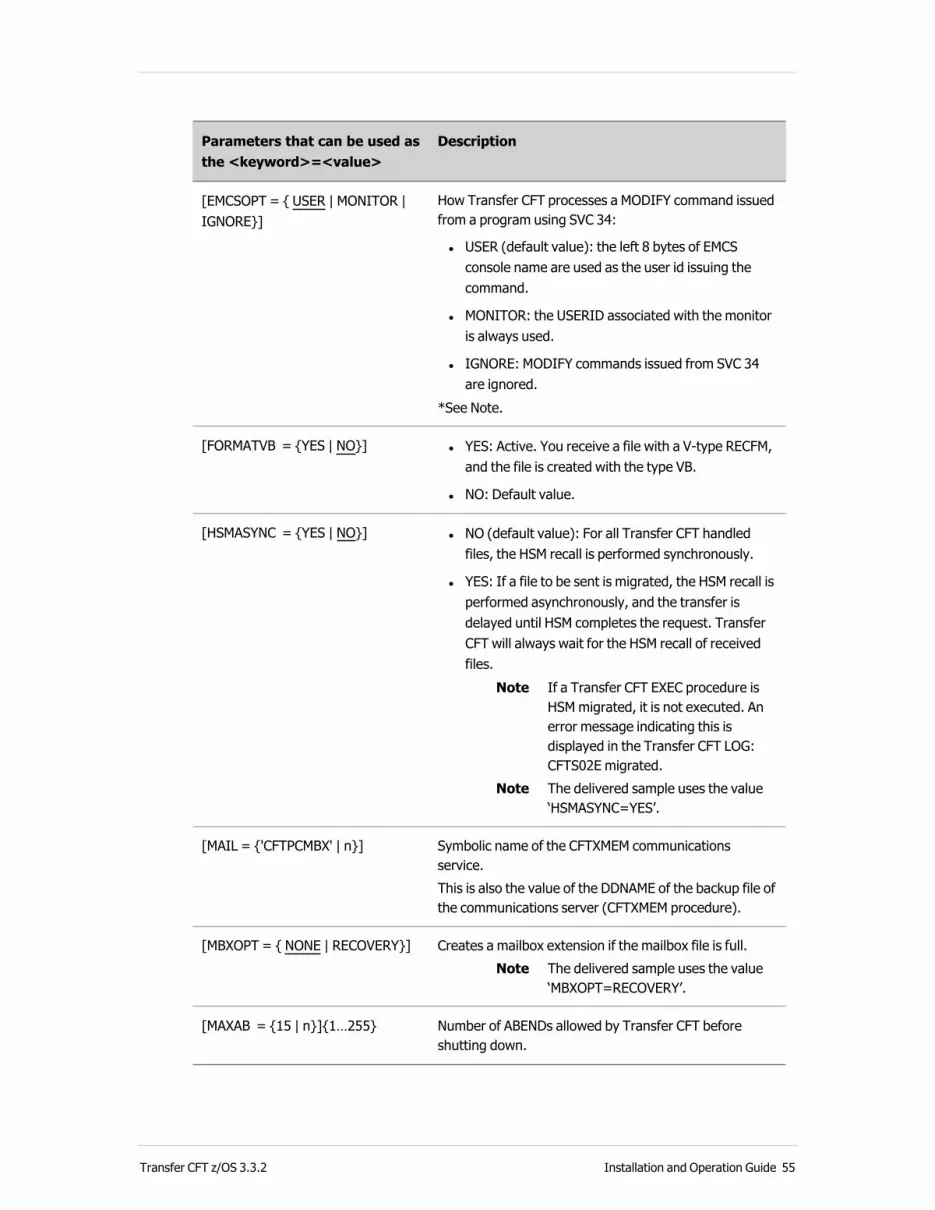
[EMCSOPT = { USER | MONITOR | IGNORE}]
How Transfer CFT processes a MODIFY command issued from a program using SVC 34:
l USER (default value): the left 8 bytes of EMCS console name are used as the user id issuing the command.
l MONITOR: the USERID associated with the monitor is always used.
l IGNORE: MODIFY commands issued from SVC 34 are ignored.
*See Note.
[FORMATVB = {YES | NO}] l YES: Active. You receive a file with a V-type RECFM, and the file is created with the type VB.
l NO: Default value.
[HSMASYNC = {YES | NO}] l NO (default value): For all Transfer CFT handled files, the HSM recall is performed synchronously.
l YES: If a file to be sent is migrated, the HSM recall is performed asynchronously, and the transfer is delayed until HSM completes the request. Transfer CFT will always wait for the HSM recall of received files.
Note If a Transfer CFT EXEC procedure is HSM migrated, it is not executed. An error message indicating this is displayed in the Transfer CFT LOG: CFTS02E migrated.
Note The delivered sample uses the value ‘HSMASYNC=YES’.
[MAIL = {'CFTPCMBX' | n}] Symbolic name of the CFTXMEM communications service.This is also the value of the DDNAME of the backup file of the communications server (CFTXMEM procedure).
[MBXOPT = { NONE | RECOVERY}] Creates a mailbox extension if the mailbox file is full.Note The delivered sample uses the value
‘MBXOPT=RECOVERY’.
[MAXAB = {15 | n}]{1…255} Number of ABENDs allowed by Transfer CFT before shutting down.
Transfer CFT z/OS 3.3.2 Installation and Operation Guide 55
Parameters that can be used as the <keyword>=<value>
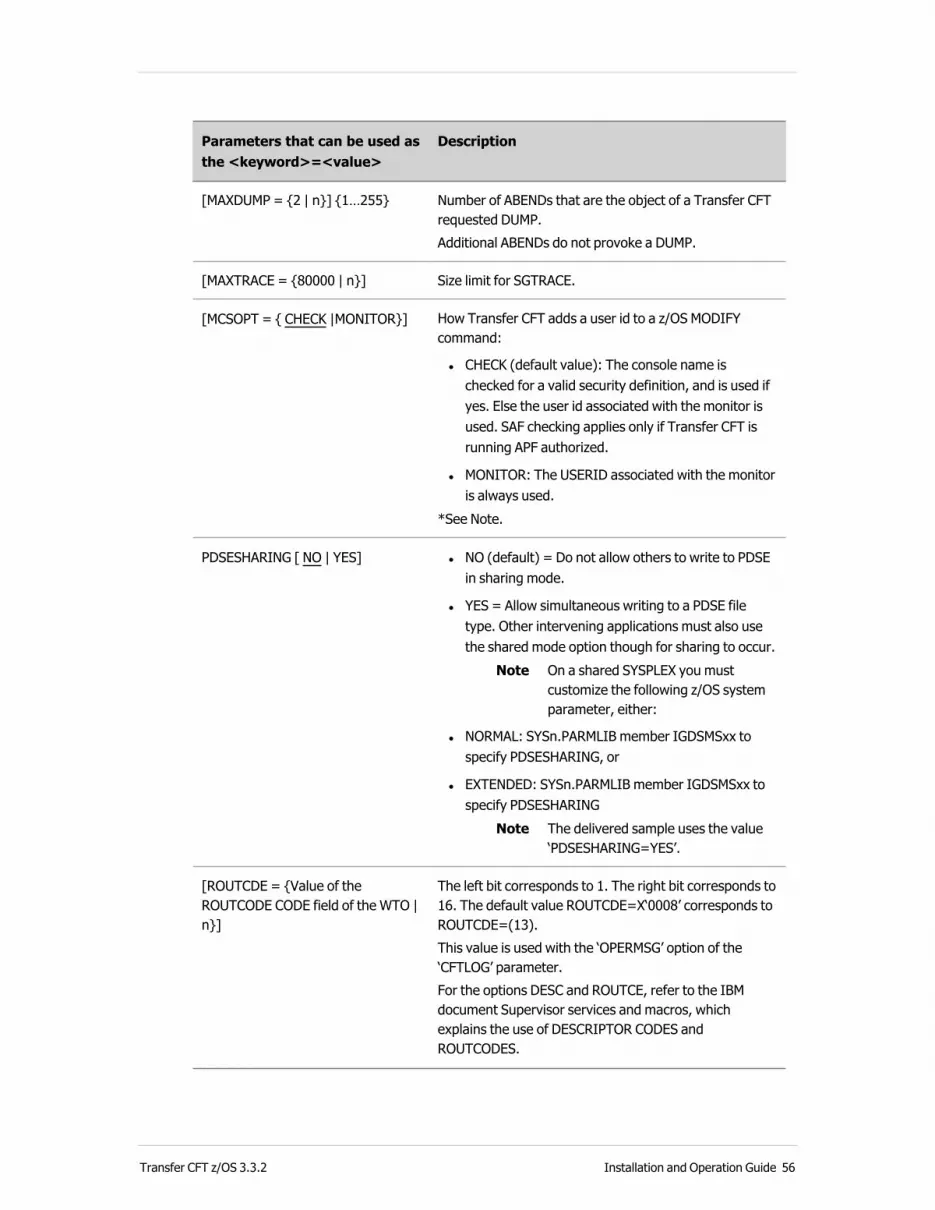
Description
[MAXDUMP = {2 | n}] {1…255}
Number of ABENDs that are the object of a Transfer CFT requested DUMP.Additional ABENDs do not provoke a DUMP.
[MAXTRACE = {80000 | n}] Size limit for SGTRACE.
[MCSOPT = { CHECK |MONITOR}] How Transfer CFT adds a user id to a z/OS MODIFY command:
l CHECK (default value): The console name is checked for a valid security definition, and is used if yes. Else the user id associated with the monitor is used. SAF checking applies only if Transfer CFT is running APF authorized.
l MONITOR: The USERID associated with the monitor is always used.
*See Note.
PDSESHARING [ NO | YES] l NO (default) = Do not allow others to write to PDSE in sharing mode.
l YES = Allow simultaneous writing to a PDSE file type. Other intervening applications must also use the shared mode option though for sharing to occur.
Note On a shared SYSPLEX you must customize the following z/OS system parameter, either:
l NORMAL: SYSn.PARMLIB member IGDSMSxx to specify PDSESHARING, or
l EXTENDED: SYSn.PARMLIB member IGDSMSxx to specify PDSESHARING
Note The delivered sample uses the value ‘PDSESHARING=YES’.
[ROUTCDE = {Value of the ROUTCODE CODE field of the WTO | n}]
The left bit corresponds to 1. The right bit corresponds to 16. The default value ROUTCDE=X‘0008’ corresponds to ROUTCDE=(13).This value is used with the ‘OPERMSG’ option of the ‘CFTLOG’ parameter.For the options DESC and ROUTCE, refer to the IBM document Supervisor services and macros, which explains the use of DESCRIPTOR CODES and ROUTCODES.
Transfer CFT z/OS 3.3.2 Installation and Operation Guide 56
Parameters that can be used as the <keyword>=<value>
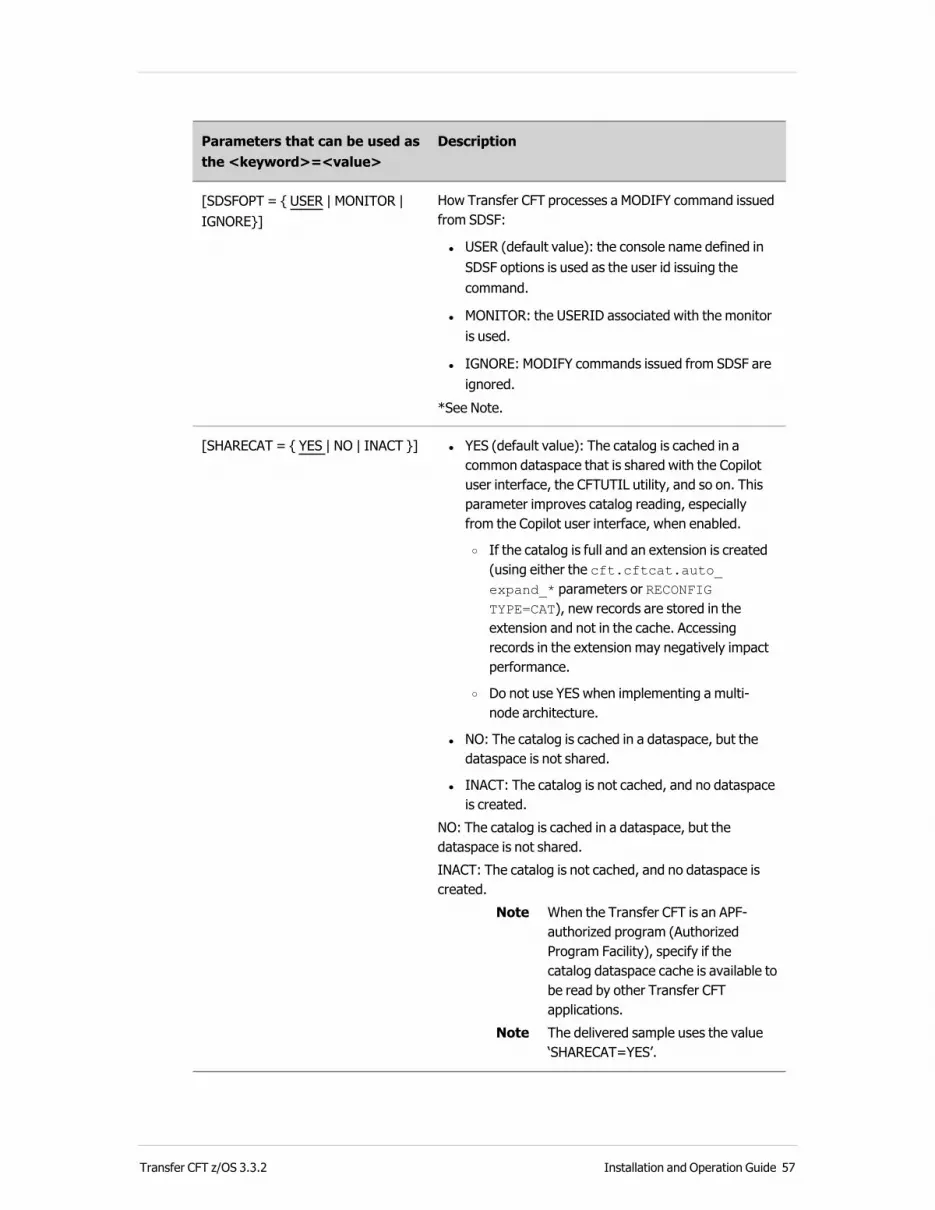
Description
[SDSFOPT = { USER | MONITOR | IGNORE}]
How Transfer CFT processes a MODIFY command issued from SDSF:
l USER (default value): the console name defined in SDSF options is used as the user id issuing the command.
l MONITOR: the USERID associated with the monitor is used.
l IGNORE: MODIFY commands issued from SDSF are ignored.
*See Note.
[SHARECAT = { YES | NO | INACT }] l YES (default value): The catalog is cached in a common dataspace that is shared with the Copilot user interface, the CFTUTIL utility, and so on. This parameter improves catalog reading, especially from the Copilot user interface, when enabled.
o If the catalog is full and an extension is created (using either the cft.cftcat.auto_expand_* parameters or RECONFIG TYPE=CAT), new records are stored in the extension and not in the cache. Accessing records in the extension may negatively impact performance.
o Do not use YES when implementing a multi-node architecture.
l NO: The catalog is cached in a dataspace, but the dataspace is not shared.
l INACT: The catalog is not cached, and no dataspace is created.
NO: The catalog is cached in a dataspace, but the dataspace is not shared.INACT: The catalog is not cached, and no dataspace is created.
Note When the Transfer CFT is an APF-authorized program (Authorized Program Facility), specify if the catalog dataspace cache is available to be read by other Transfer CFT applications.
Note The delivered sample uses the value ‘SHARECAT=YES’.
Transfer CFT z/OS 3.3.2 Installation and Operation Guide 57

Parameters that can be used as the <keyword>=<value>
Description
[SGTRACE = {0 | n}] {1…65535} Initial value of the SGTRACE trace file.A value other than 0 may be used if requested by Transfer CFT customer support.Possible combinations are:
l 1: Network actions (TCP)
l 2: Erroneous actions
l 4: File manager actions
l 8: Read/write to files
l 16: C functions
l 32: Long messages
l 64: Inter-task communication actions
l 128: Program calls and return messages
l 256: Interactive interface actions
l 512: User exit callsNote When you use the SGTRACE options
with the Transfer CFT interface under VTAM, the non-encrypted passwords are listed in the trace records.
[SUBOPT = { 0 | 1 | 3 } ] Manages 2 statistic lines for a job submitted by Transfer CFT:
l 0: Default. Generates 2 lines at the end of JCL //* SUBMITTED BY:jobname AT DD/MM/YY hh:mm:ss ,USERID=username ,CARDS= 0000000 // .
l 1: Generates only the statistic line at the end of the JCL and no card ‘//’ //* SUBMITTED BY:jobname AT DD/MM/YY hh:mm:ss ,USERID=username ,CARDS= 0000000 .
l 3: Does not generate a line at the end of the JCL.Note If the last line of JCL is not a JCL CARD, no statistic line is
generated.
[TRACE = { 128 | n}] {4…16383} Transfer CFT internal trace size (in Kb).
Transfer CFT z/OS 3.3.2 Installation and Operation Guide 58

Parameters that can be used as the <keyword>=<value>
Description
[TAPE = {NOTSUP | UPDATE | OUTPUT}]
l NOTSUP: Forbids access to tape files for all Transfer CFT programs.
l UPDATE: Default. Enables writing of tape files protected by means of a retaining date or tape library management software.
l OUPUT: The transfer fails in ABDEND 713 if the tape is write-protected by tape library management software, or an expiration date.
Note The delivered sample uses the value ‘TAPE=OUTPUT’.
[TSOEDIT = { NO | YES}] File support with sequence number in columns 73 to 80:
l YES: If the ISPF editor with the ‘NUMBER ON’ option creates them, then the input files read by CFTUTIL can contain an eight-digit sequence number in columns 73 to 80. This sequence number is then ignored by Transfer CFT z/OS.
l NO: Input files are read without changes from CFTUTIL.
Note The delivered sample uses the value ‘TSOEDIT=YES’.
[XSIZE = {1024 | n}] Maximum number of buffered entries in the CFTXMEM service.
Note The delivered sample uses the value ‘XSIZE=256’.
Note *MCSOPT, SDSFOPT, EMCSOPT: A user id is added only to CFTUTIL commands. The z/OS PAUSE command is interpreted as a CFTUTIL SHUT FAST=YES command. Transfer CFT diagnosis commands are not associated with a used id, for example MODIFY cft or ECHO.
When you start Transfer CFT, all parameters are printed in the transfer CFT LOG, for example:
CFTI18I+Installation options (macro SGINSTAL)
CFTI18I+ Macro date - 05/29/17 15.45 (MM/DD/YY hh.mm) (c)
CFTI18I+ SHARECAT=NO CFTI18I+ TAPE=UPDATE CFTI18I+ BLKSIZE=27998
CFTI18I+ BLKPDS=200 CFTI18I+ HSMASYNC=YES
CFTI18I+ ALLPRIM=100,ALLSEC=10,VOLNUM=20,ALLONE=100,ALLNEX=100
CFTI18I+ …
When Transfer CFT starts, the CFTI18I message and DATE macro display in one of four formats:
Transfer CFT z/OS 3.3.2 Installation and Operation Guide 59

1. CFTI18I and DATE macro - 06/16/17 14.10 (MM/DD/YY hh.mm) (c) SGINSTAL default model.
The SGINSTAL executable does not exist.
This was not configured with the cft.mvs.sginstal.xxxx variables.
2. CFTI18I and DATE macro - 06/05/17 15.30 (MM/DD/YY hh.mm) (c) SGINSTAL load.
The SGINSTAL executable exists.
This was not configured with the cft.mvs.sginstal.xxxx variables.
3. CFTI18I and DATE macro - 06/16/17 14.10 (MM/DD/YY hh.mm) (c) SGINSTAL default model modified by UCONF.
The SGINSTAL executable does not exist.
This was configured with a variable(s) of the cft.mvs.sginstal.xxxx type.
4. CFTI18I and DATE macro - 06/05/17 15.30 (MM/DD/YY hh.mm) (c) SGINSTAL load modified by UCONF.
The SGINSTAL executable exists.
A variable of the type cft.mvs.sginstal.xxxx.
To generate parameters from the SGINSTAL executable as UCONF variables:
//* STEP 1 : GENERATE
//CFTSGIGN EXEC PGM=CFTSGIGN
//STEPLIB DD DISP=SHR,DSN=&CFTLOAD (LIBRARY contains SGINSTAL)
//UCONFGEN DD UNIT=SYSDA,DISP=(NEW,PASS),
// DCB=(RECFM=VB,LRECL=256,BLKSIZE=2560),
// SPACE=(TRK,(1)),
// DSN=&&TMP
//* STEP 2 : UPDATE UCONF
//UCONF EXEC PCFTUTL,PARM=''
//CFTIN DD DISP=(OLD,DELETE),
// DSN=&&TMP
Delivered JCL INSTALL(MIGRSGI) extract.
Define the environment variables fileYou must define the environment variables in the ..UPARM (CNFENV) file with the DDname STDENV.
Note The ENVAR runtime option is: envar("_CEE_ENVFILE_S=DD:STDENV".
This file must contain the following definition: CFTUCONF=dd:UCONF (initialized when creating the instance - do not change this value).
You can modify this file to, for example, obtain traces, set the stack TCP/IP, etc.
When you start Transfer CFT, some parameters are printed in the transfer CFT LOG. For example:
Transfer CFT z/OS 3.3.2 Installation and Operation Guide 60

CFTI18I+Environment variables (platform dependant) (DDname:STDENV)
CFTI18I+ CFTUCONF=dd:UCONF
CFTI18I+ _BPXK_SETIBMOPT_TRANSPORT=TCPIP
Start A00CUSTO to customize installation files
Customize JCL A00CUSTO parametersThe A00CUSTO JOB customizes the installation files. The customization is done directly in the installation library instance environment. You must quit the file editing program and library before you execute the SUBMIT. If you do not first quit these programs before executing the SUBMIT, the message Waiting for data set is returned. If you performed an Installer installation, these parameters are already customized.
Installed directoriesNote Do NOT customize the distribution environment.
Variables Description
CFTV2 Prefix of the Transfer CFT instance environment.
DISTLIB Three first qualifiers of the distribution environment.Example: Axway.XFB.CFT00332
DISTLEV Fourth qualifier of the distribution environment (level of distribution) Example: CF030000
You can repeat A00CUSTO several times to customize any parameters that were not customized.
Advanced parametersTo make any modifications to advanced parameters you must do this prior to starting the A05ALL JCL.
The parameters can be modified in the A12OPTSP member. For more information, refer to Set standard JCL parameters A12OPTSP.
Replay the customization After completing the initial A00CUSTO customization, you can use the JCL A04RPLAY to repeat this process. This JCL recopies the members from distribution environment to the target environment (including the INSTALL, EXEC, UPARM and SAMPLE libraries).
Transfer CFT z/OS 3.3.2 Installation and Operation Guide 61
Once the JOB is complete, update the A03PARM file in the target environment and resubmit the JCL A00CUSTO.
Transfer CFT z/OS 3.3.2 Installation and Operation Guide 62
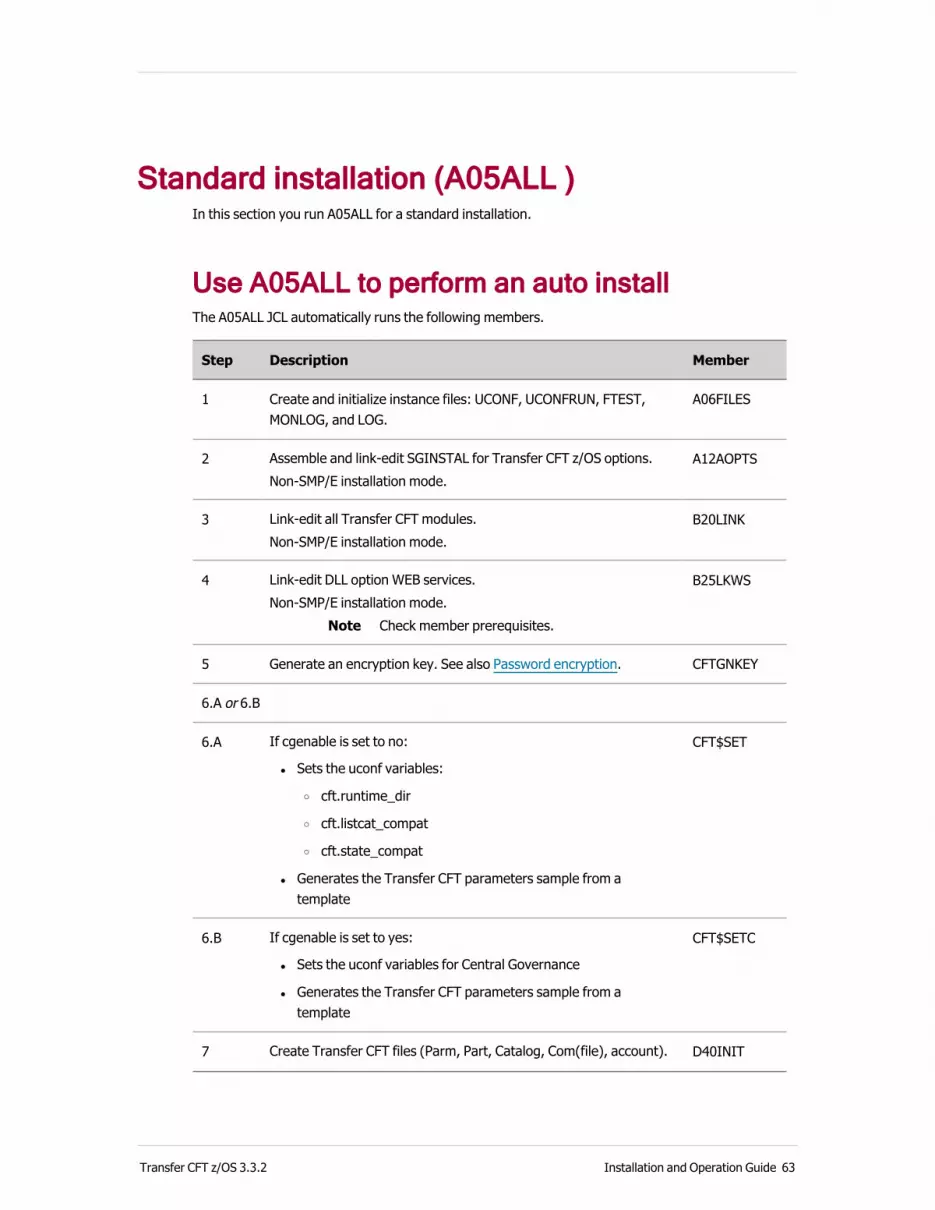
Standard installation (A05ALL )In this section you run A05ALL for a standard installation.
Use A05ALL to perform an auto installThe A05ALL JCL automatically runs the following members.
Step Description Member
1 Create and initialize instance files: UCONF, UCONFRUN, FTEST, MONLOG, and LOG.
A06FILES
2 Assemble and link-edit SGINSTAL for Transfer CFT z/OS options. Non-SMP/E installation mode.
A12AOPTS
3 Link-edit all Transfer CFT modules.Non-SMP/E installation mode.
B20LINK
4 Link-edit DLL option WEB services. Non-SMP/E installation mode.
Note Check member prerequisites.
B25LKWS
5 Generate an encryption key. See also Password encryption. CFTGNKEY
6.A or 6.B
6.A If cgenable is set to no:
l Sets the uconf variables:
o cft.runtime_dir
o cft.listcat_compat
o cft.state_compat
l Generates the Transfer CFT parameters sample from a template
CFT$SET
6.B If cgenable is set to yes:
l Sets the uconf variables for Central Governance
l Generates the Transfer CFT parameters sample from a template
CFT$SETC
7 Create Transfer CFT files (Parm, Part, Catalog, Com(file), account). D40INIT
Transfer CFT z/OS 3.3.2 Installation and Operation Guide 63

Step Description Member
8 Loads the Transfer CFT default settings. E50PARM
PKI
9 Creates Data base PKI using the sample certificates. D43PKI
10 If pkitype=passport: Enable PassPort PKI configuration. D44PASS
11 If pkitype=system: Enable the PKI system. D47SYST
Central Governance
15 If cgenable=yes:Create the Axway Central Governance Demonstration Root Certificate.
CFTCGPKI
16 If cgenable=yes:Transfer CFT to Central Governance registration.
CFTCGREG
Sentinel
20 If snenable = yes:Sentinel parameters are activated (TCP configuration).
Note This JCL does not create Sentinel tracker logstream.
SN05CONF
25 If sntlgcre = yes:Delete /define log stream – DASDONLY.
SN10CLGR
Copilot
30 If copenable=yes:Copilot files are transferred in the USS environment (HFS/ZFS).
COPA010
31 If copenable=yes:Updates Copilot UCONF parameters.
COPA020
32 REST API configuration. RESTCFG
Secure Relay
40 If Secure Relay is enabled:Install on USS environment, the files for Secure Relay Master Agent.
XSRA010
Transfer CFT z/OS 3.3.2 Installation and Operation Guide 64
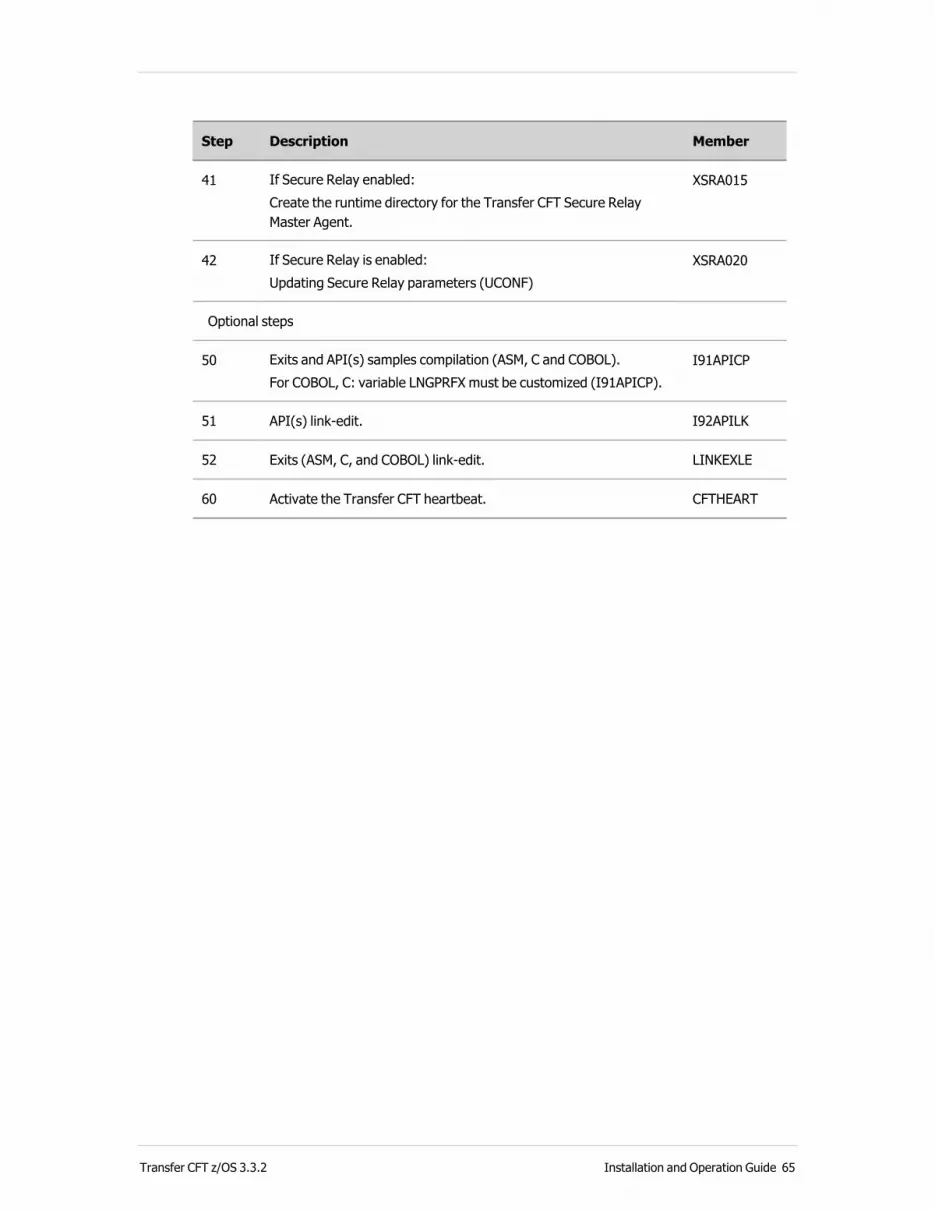
Step Description Member
41 If Secure Relay enabled:Create the runtime directory for the Transfer CFT Secure Relay Master Agent.
XSRA015
42 If Secure Relay is enabled:Updating Secure Relay parameters (UCONF)
XSRA020
Optional steps
50 Exits and API(s) samples compilation (ASM, C and COBOL).For COBOL, C: variable LNGPRFX must be customized (I91APICP).
I91APICP
51 API(s) link-edit. I92APILK
52 Exits (ASM, C, and COBOL) link-edit. LINKEXLE
60 Activate the Transfer CFT heartbeat. CFTHEART
Transfer CFT z/OS 3.3.2 Installation and Operation Guide 65

Common customization steps Each target environment corresponds to a Transfer CFT. This section describes the specific Transfer CFT customization. Transfer CFT customization is application dependent, as opposed to the target environment, which is system dependent.
JCL CFTENV (include member)This member is customized during installation phase. It contains a list of JCL SET commands concerning the current instance, CFTENV must be included when PCFTUTIL and PCFTUTL procedures are used.
For z/OS 2.1: JCL variables can be exported:
Export Global
Uncomment //* EXPORT SYMLIST=* in CFTENV member
Or
Before INCLUDE MEMBER=CFTENV add directives
// EXPORT SYSMLIST=*
// INCLUDE MEMBER=CFTENV
Example:
// LIB JCLLIB ORDER=(MY.CFTPROD.PROCLIB)
// EXPORT SYSMLIST=*
// INCLUDE MEMBER=CFTENV
//CFTSND EXEC PCFTUTIL,PARM='',QUAL=&CFTENV,OUT=&OUT
//CFTPARM DD DUMMY to optimize
//CFTIN DD *,SYMBOLS=(CNVTSYS,SUBSLOG)
SEND PART=PARIS,IDF=BIN,
FNAME=&CFTENV..FTEST,
IDA=’&SYSNAME-&ZOSLVL-&SYSCLONE’
/*
JCL CFTINC (include member)You can use the CFTINC member in an INCLUDE statement to reference a list of Transfer CFT file allocation statements.
Example:
// LIB JCLLIB ORDER=(MY.CFTPROD.PROCLIB
Transfer CFT z/OS 3.3.2 Installation and Operation Guide 66
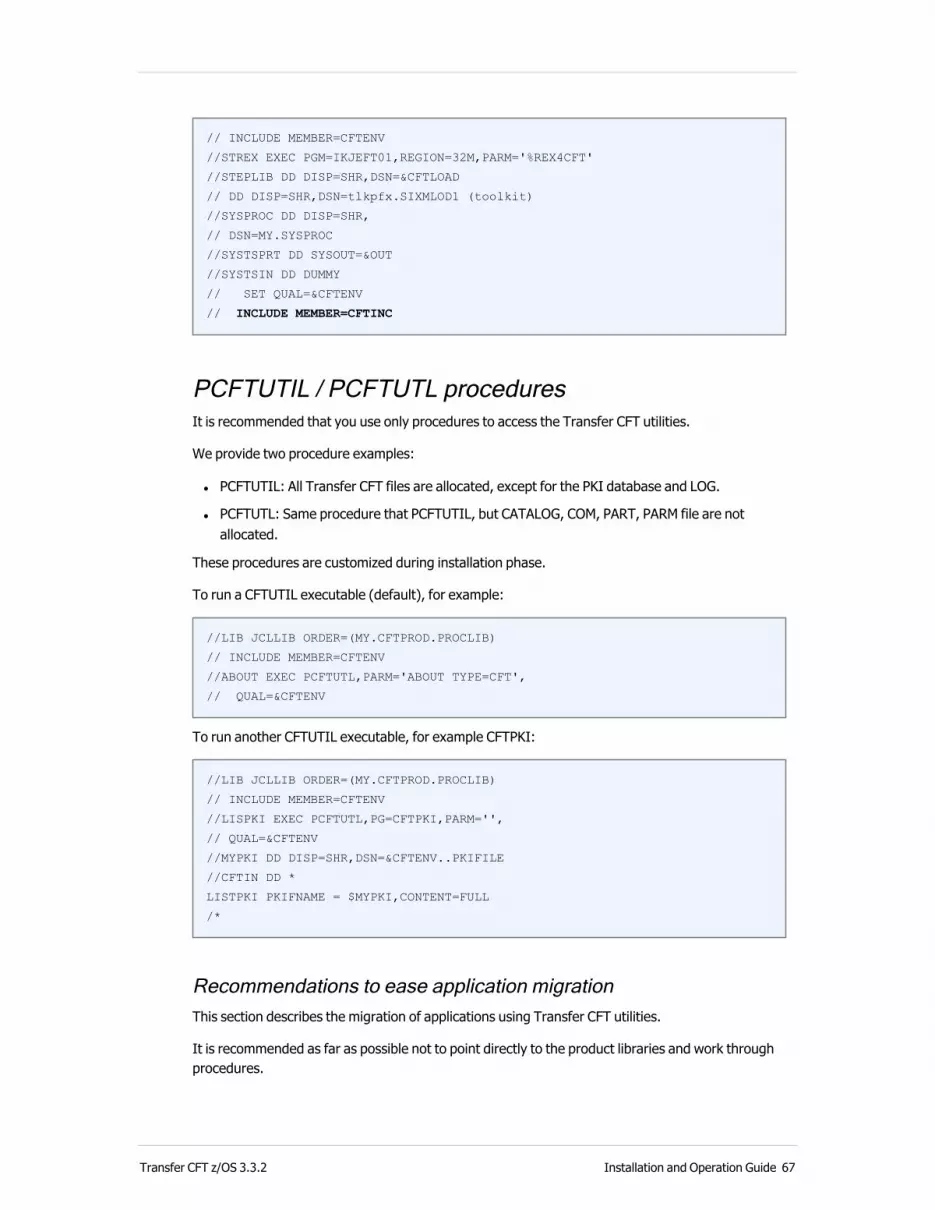
// INCLUDE MEMBER=CFTENV
//STREX EXEC PGM=IKJEFT01,REGION=32M,PARM='%REX4CFT'
//STEPLIB DD DISP=SHR,DSN=&CFTLOAD
// DD DISP=SHR,DSN=tlkpfx.SIXMLOD1 (toolkit)
//SYSPROC DD DISP=SHR,
// DSN=MY.SYSPROC
//SYSTSPRT DD SYSOUT=&OUT
//SYSTSIN DD DUMMY
// SET QUAL=&CFTENV
// INCLUDE MEMBER=CFTINC
PCFTUTIL / PCFTUTL proceduresIt is recommended that you use only procedures to access the Transfer CFT utilities.
We provide two procedure examples:
l PCFTUTIL: All Transfer CFT files are allocated, except for the PKI database and LOG.
l PCFTUTL: Same procedure that PCFTUTIL, but CATALOG, COM, PART, PARM file are not allocated.
These procedures are customized during installation phase.
To run a CFTUTIL executable (default), for example:
//LIB JCLLIB ORDER=(MY.CFTPROD.PROCLIB)
// INCLUDE MEMBER=CFTENV
//ABOUT EXEC PCFTUTL,PARM='ABOUT TYPE=CFT',
// QUAL=&CFTENV
To run another CFTUTIL executable, for example CFTPKI:
//LIB JCLLIB ORDER=(MY.CFTPROD.PROCLIB)
// INCLUDE MEMBER=CFTENV
//LISPKI EXEC PCFTUTL,PG=CFTPKI,PARM='',
// QUAL=&CFTENV
//MYPKI DD DISP=SHR,DSN=&CFTENV..PKIFILE
//CFTIN DD *
LISTPKI PKIFNAME = $MYPKI,CONTENT=FULL
/*
Recommendations to ease application migrationThis section describes the migration of applications using Transfer CFT utilities.
It is recommended as far as possible not to point directly to the product libraries and work through procedures.
Transfer CFT z/OS 3.3.2 Installation and Operation Guide 67

To do this, copy the following members into a specific PROCLIB:
l CFTENV
l CFTINC
l PCFTUTIL
l PCFTUTL
When changing the Transfer CFT version, you should get the new version of these members. A rollback is done by copying the backups of these members. This also applies to the end-of-transfer procedures.
Miscellaneous JCL templatesThe target.EXEC library contains an example of Transfer CFT procedures:
l EXECSF: End of file send procedure
l EXECRF: End of file reception procedure
l SWIACC: Procedure submitted when SWITCHING the Transfer CFT accounting file
l SWILOG: Procedure submitted when switching the Transfer CFT log file
l EXECCRON: Procedure submitted by a CFTCRON command
l COPXLOG: Sample of JCL submitted by Transfer CFT Navigator (with dynamic parameter)
l COPEXT: Sample of JCL submitted by Transfer CFT Navigator to extract Transfer CFT parameter in a file
l CFTHEART: HEARTBEAT JCL for SENTINEL dashboards
l SNTLEXEC: End of file reception procedure including SENTINEL
l TFCIPH: Transfer CFT Preprocessing script for TrustedFile
l TFDCIPH: Transfer CFT End of transfer script for TrustedFile
l TFDELFIL: Transfer CFT Send exec script for TrustedFile
l CA7POST: Indicates to CA7 that the creation of a data set has completed
l COPYFILR and COPYFILS: templates that use the COPYFILE command
l CRONSTAR: Sample of the JCL that is submitted at Transfer CFT STARTUP
l CRONSHUT: Sample of the JCL that is submitted at Transfer CFT shutdown
l EXECIDF: End of file reception procedure sample with conditional steps
l EXECIFD2: The value of the IDF is checked among a list of values by a REXX that sets a return code
l EXECIDF3: The JCL is conditional and uses the )SEL and )ENDSEL syntax - see Syntax for )SEL and )ENDSEL on page 69
These procedures are customized during the A00CUSTO phase.
Transfer CFT z/OS 3.3.2 Installation and Operation Guide 68
Syntax for )SEL and )ENDSEL
)SEL argument1 op argument2
At least one space is mandatory between the arguments and operator.
The test is systematically performed on the length of the first argument, enabling generic arguments to be compared if necessary.
The maximum number of nested )SELs is 32, where:
l argument = constant, variable in the &xxx format
l op = condition operator
= EQU or EQ: equal to
> or GT: greater than
< or LT: less than
>= or GTE: greater than or equal to
<= or LTE: less than or equal to
<> or != or |= or NEQ: different from
Examples
)SEL &P1 = SITE1: includes the following cards if parameter 1 is equal to SITE1
)SEL AG = &P1: includes the following cards if parameter 1 starts with AG
)SEL AG <> &P2: includes the following cards if parameter 2 does not start with AG
)ENDSEL
The )ENDSEL card does not contain any arguments.
The appropriate number of )ENDSELs required to terminate all active )ENDSELs are automatically added at the end of the JCL.
Update the unified configuration file CFT$SETThe JCL CFT$SET, located in the target.INSTALL library, updates the unified configuration file and creates a Transfer CFT parameters sample (..SAMPLE(CFTPARM)) from a template (..SAMPLE(ZCFTPARM)).
The parameters in this JCL were customized during the (A00CUSTO) process, while customizing the CFTENV file (JCL variables).
List of updated variables:
Transfer CFT z/OS 3.3.2 Installation and Operation Guide 69

l cft.runtime_dir
l cft.full_hostname
l cft.state_compat
l cft.listcat_compat
l cft.instance_id
l cft.instance_group
l samples.pesitany_sap.value
l samples.pesitssl_sap.value
l samples.coms_port.value
You can run the JCL multiple times, once to create the member .. SAMPLE (CFTPARM), which the procedure does not modify.
Format Transfer CFT work files D40INITThe JOB D40INIT prepares the Transfer CFT z/OS files. Before submitting this JOB, adapt the following points to the requirements of the operating service:
l File names (if the default values in the samples are not usable)
o By default file names are defined in JCL INCLUDE=CFTENV
l The values of the parameters RECNB and FSPACE
The following data is required to use the basic Transfer CFT installation customization parameters. These work files are:
l CFTPARM: VSAM KSDS file, Transfer CFT parameters descriptions
l CFTPART: VSAM KSDS file, Transfer CFT partners description
l CFTCAT: VSAM ESDS file, Transfer CFT catalog
l CFTLOG1: Sequential file used as the log file by Transfer CFT
l CFTLOG2: Sequential file used by Transfer CFT as the alternate log file
l CFTACNT1: Sequential file used as the account file by Transfer CFT
l CFTACNT2: Sequential file used by Transfer CFT as the alternate account file
l CFTCOM: VSAM ESDS file used by Transfer CFT as a buffer for the Transfer CFT commands submitted by CFTUTIL, a BATCH program, a TSO user, the Transfer CFT Navigator, or the Transfer CFT GUI component
CFTPARM configuration update E50PARMThe JCL E50PARM, located in the target.INSTALL library, updates the Transfer CFT configuration PARAM and PART files (PARM step).
Transfer CFT z/OS 3.3.2 Installation and Operation Guide 70

E50PARM
//PARM EXEC PCFTUTIL,
// PARM='',
// QUAL=&CFTENV,OUT=&OUT
//CFTIN DD DISP=SHR,
// DSN=&QUAL..SAMPLE(CFTPARM)
The underlined parameters are substituted during the submit phase.
Transfer CFT z/OS 3.3.2 Installation and Operation Guide 71

Advanced installation
Manually install or modify installationThe following JCLs are contained in the INSTALL library. Execute the JCLs in the order listed in the following table.
Step JCL Description
Target customization
1 A03PARM Customize file parameters
2 A00CUSTO Customize JOBs installation
3 A06FILES Create and initialize instance files
4 A12OPTS Select options for Transfer CFT operationsOptional step
After performing Steps 1 -4, you can either continue with the following step-by-step instructions, or start the JOB A05ALL, which uses the customized settings in the A03PARM file to run.
5 B20LINK General LINK-EDIT of Transfer CFT modules. Submit for non-SMP/E installations.
6 CFTGNKEY Generate an encryption key. See also Password encryption.
7 COPA010
Transfer CFT installation customization
8 CFT$SETCFT$SETC
Select one of the two options available for this step to set the UCONF variables and create Transfer CFT parameters from a template.
l CFT$SET: When not using Central Governance.
l CFT$SETC: When using Central Governance.
Transfer CFT z/OS 3.3.2 Installation and Operation Guide 72
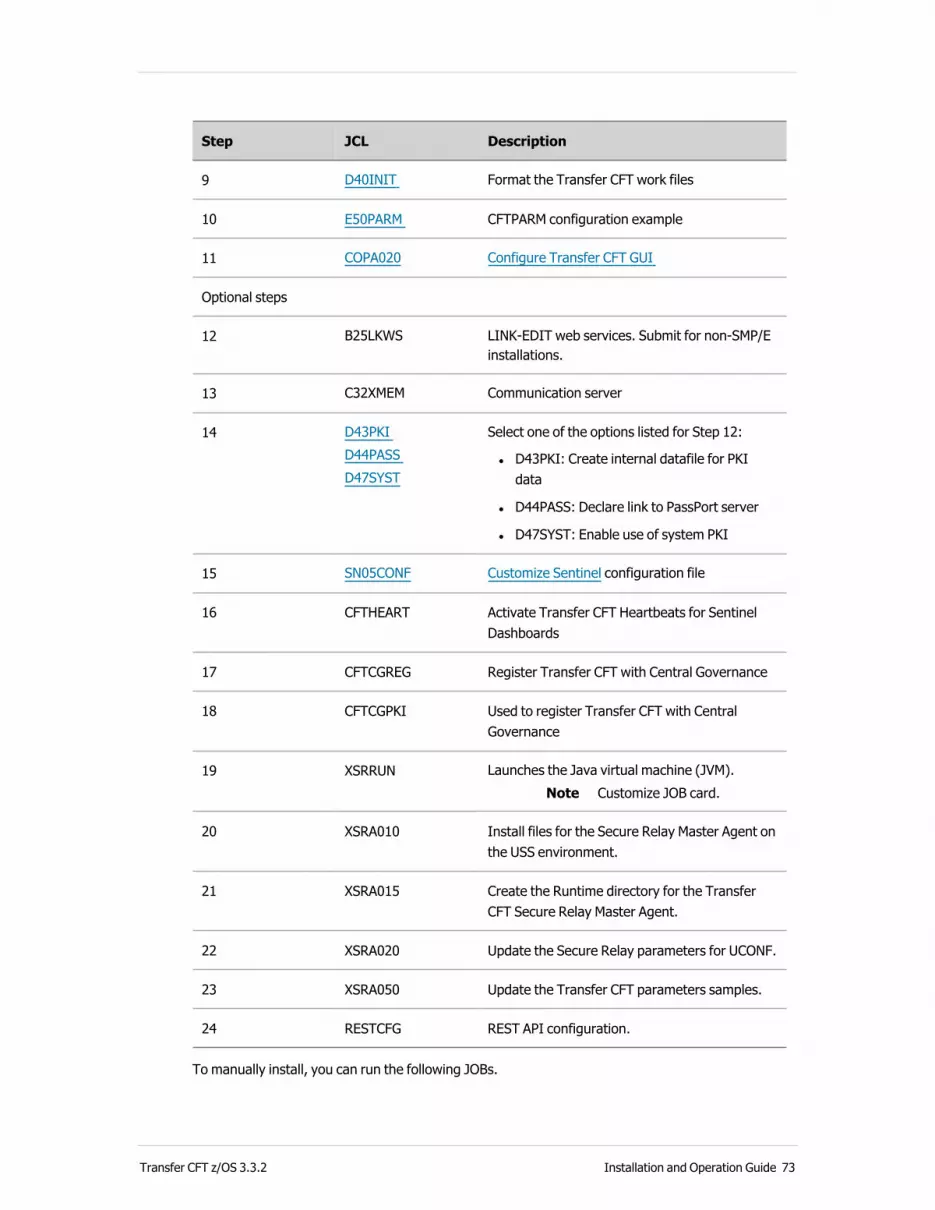
Step JCL Description
9 D40INIT Format the Transfer CFT work files
10 E50PARM CFTPARM configuration example
11 COPA020 Configure Transfer CFT GUI
Optional steps
12 B25LKWS LINK-EDIT web services. Submit for non-SMP/E installations.
13 C32XMEM Communication server
14 D43PKI D44PASS D47SYST
Select one of the options listed for Step 12:
l D43PKI: Create internal datafile for PKI data
l D44PASS: Declare link to PassPort server
l D47SYST: Enable use of system PKI
15 SN05CONF Customize Sentinel configuration file
16 CFTHEART Activate Transfer CFT Heartbeats for Sentinel Dashboards
17 CFTCGREG Register Transfer CFT with Central Governance
18 CFTCGPKI Used to register Transfer CFT with Central Governance
19 XSRRUN Launches the Java virtual machine (JVM).Note Customize JOB card.
20 XSRA010 Install files for the Secure Relay Master Agent on the USS environment.
21 XSRA015 Create the Runtime directory for the Transfer CFT Secure Relay Master Agent.
22 XSRA020 Update the Secure Relay parameters for UCONF.
23 XSRA050 Update the Transfer CFT parameters samples.
24 RESTCFG REST API configuration.
To manually install, you can run the following JOBs.
Transfer CFT z/OS 3.3.2 Installation and Operation Guide 73

LINK-EDIT Transfer CFT using JOB B20LINKYou should only use this JCL for non-SMP/E installations.
The B20LINK JOB does a LINK-EDIT of Transfer CFT z/OS modules. Programs that are created in this step use the DLL mechanism.
Before beginning it is recommended that you save the execution listing for this JOB.
The CFTMAIN/CFTMA31 programs are copied in an authorized APF library for the cases in which Transfer CFT:
l Writes ACCOUNT records to SMF.
l Uses the RACF options.
l Sends messages to TSO users.
l Uses dynamic UCBs (DRM) or UCBs that are defined in 31 bits in IODF.
l Uses the ARM services.
l Uses a shared catalog cache.
l Frees unused space for received files.
The CFTXMEM program is copied in an authorized APF library, if APF is used.
Note The return code generated by the LINK-EDIT must be 0.
Note IMPORTANT - If you have applied a patch, resubmitting the JCL B20LINK resets all the executable files generated by this procedure to their original versions and therefore cancels any and all applied patches.
LINK-EDIT Web services using JOB B25LKWSYou should only use this JCL for non-SMP/E installations.
Use the optional JOB B25LKWS to link-edit when you use web services with Transfer CFT Copilot.
Prerequisites for a Web Services Link-edit:
l Libraries for Parser C++ V1.10 in the XML Toolkit for z/OS that are available to download from the IBM site: http://www-1.ibm.com/servers/eserver/zseries/software/xml/
l Libraries C/C++ (CBC.SCLBSID)
Transfer CFT z/OS 3.3.2 Installation and Operation Guide 74
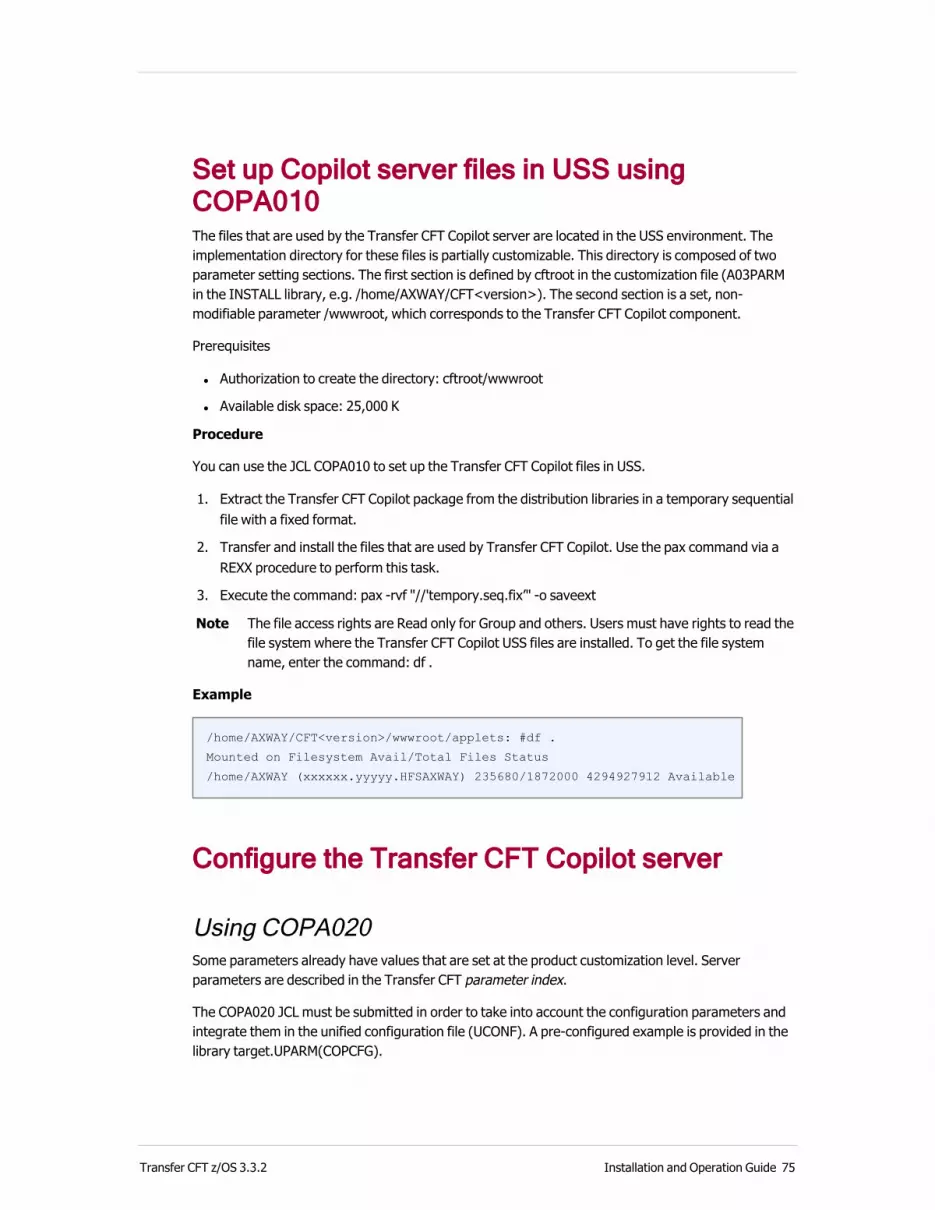
Set up Copilot server files in USS using COPA010The files that are used by the Transfer CFT Copilot server are located in the USS environment. The implementation directory for these files is partially customizable. This directory is composed of two parameter setting sections. The first section is defined by cftroot in the customization file (A03PARM in the INSTALL library, e.g. /home/AXWAY/CFT<version>). The second section is a set, non-modifiable parameter /wwwroot, which corresponds to the Transfer CFT Copilot component.
Prerequisites
l Authorization to create the directory: cftroot/wwwroot
l Available disk space: 25,000 K
Procedure
You can use the JCL COPA010 to set up the Transfer CFT Copilot files in USS.
1. Extract the Transfer CFT Copilot package from the distribution libraries in a temporary sequential file with a fixed format.
2. Transfer and install the files that are used by Transfer CFT Copilot. Use the pax command via a REXX procedure to perform this task.
3. Execute the command: pax -rvf "//'tempory.seq.fix’" -o saveext
Note The file access rights are Read only for Group and others. Users must have rights to read the file system where the Transfer CFT Copilot USS files are installed. To get the file system name, enter the command: df .
Example
/home/AXWAY/CFT<version>/wwwroot/applets: #df .
Mounted on Filesystem Avail/Total Files Status
/home/AXWAY (xxxxxx.yyyyy.HFSAXWAY) 235680/1872000 4294927912 Available
Configure the Transfer CFT Copilot server
Using COPA020Some parameters already have values that are set at the product customization level. Server parameters are described in the Transfer CFT parameter index.
The COPA020 JCL must be submitted in order to take into account the configuration parameters and integrate them in the unified configuration file (UCONF). A pre-configured example is provided in the library target.UPARM(COPCFG).
Transfer CFT z/OS 3.3.2 Installation and Operation Guide 75
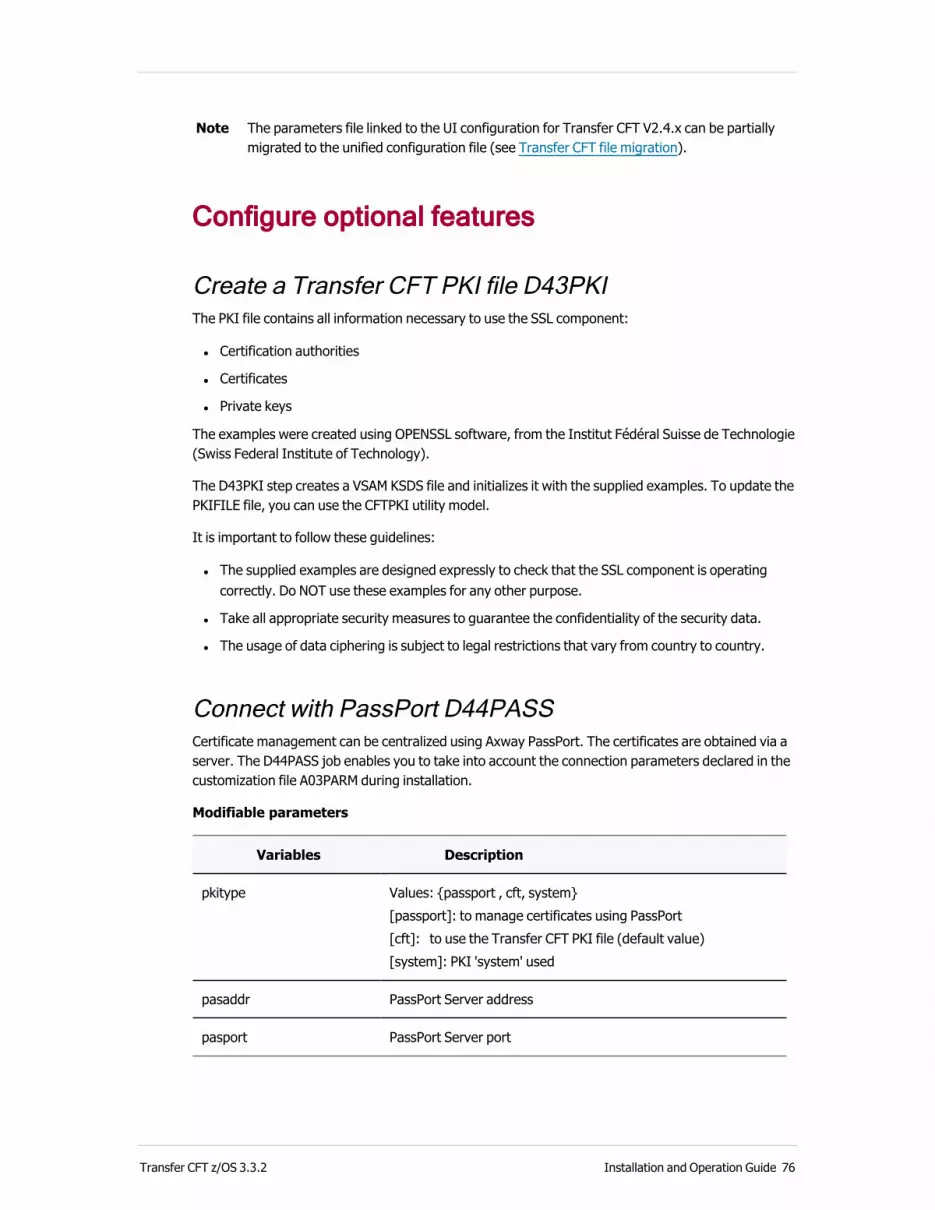
Note The parameters file linked to the UI configuration for Transfer CFT V2.4.x can be partially migrated to the unified configuration file (see Transfer CFT file migration).
Configure optional features
Create a Transfer CFT PKI file D43PKIThe PKI file contains all information necessary to use the SSL component:
l Certification authorities
l Certificates
l Private keys
The examples were created using OPENSSL software, from the Institut Fédéral Suisse de Technologie (Swiss Federal Institute of Technology).
The D43PKI step creates a VSAM KSDS file and initializes it with the supplied examples. To update the PKIFILE file, you can use the CFTPKI utility model.
It is important to follow these guidelines:
l The supplied examples are designed expressly to check that the SSL component is operating correctly. Do NOT use these examples for any other purpose.
l Take all appropriate security measures to guarantee the confidentiality of the security data.
l The usage of data ciphering is subject to legal restrictions that vary from country to country.
Connect with PassPort D44PASSCertificate management can be centralized using Axway PassPort. The certificates are obtained via a server. The D44PASS job enables you to take into account the connection parameters declared in the customization file A03PARM during installation.
Modifiable parameters
Variables Description
pkitype Values: {passport , cft, system}[passport]: to manage certificates using PassPort[cft]: to use the Transfer CFT PKI file (default value) [system]: PKI 'system' used
pasaddr PassPort Server address
pasport PassPort Server port
Transfer CFT z/OS 3.3.2 Installation and Operation Guide 76

Use a SAF based PKI System Authorization Facility (SAF) based PKI offers a more secured SSL. The optional SAF method uses RACF, or the equivalent, and an optional cryptographic coprocessor to increase data security. To enable the SAF mode of operation you must:
l Enable the IBM Crypto Express 2 coprocessor, if available
l Configure the IBM ICSF program to use a secured PKDS database
l Install and configure the option for Transfer CFT
l Define RACF
l Define the CFTSSL PARM fields or ROOTCID/USERCID fields
Enabling the Transfer CFT PKI system D47SYST
To enable the Transfer CFT PKI system, access the CONFIG file. The job responsible for enabling the PKI system is D47SYST.
Managing the PKI database
A sample named RACDCERT is delivered in the cftv2.INSTALL library. This RACDCERT show how to create a RING named XFBCFT, and to add test certificates: AXWMFTCA and AXWMFTUS. Additionally, the sample adds RACF authorizations for the Transfer CFT userid.
Note Transfer CFT no longer delivers sample certificates.
For information on SAF compatible security products, such as ACF/2 or TOP-SECRET, refer to the product-supplied documentation.
For information on how to manage certificates using RACF, refer to the IBM documentation SA22-7687, Security Server RACF Command Language Reference. For example, if you are not using an IBM Crypto Express coprocessor, you must remove the PCICC(*) parameter of the RACDCER ADD command.
CFTSSL parameter changes for a SAF based PKI
SAF certificate management is based on:
l A RING used to store one or more certificates (RACDECRT RING)
l The USER that owns the certificates (RACDCERT ID)
Both the RING and OWNER are passed to the system from the PARM field or ROOTCID/USERCID fields of the CFTSSL definitions. Code CFTSSL using one of the two following methods:
CFTSSL ID= …,
ROOTCID = 'certificate authority_1’,
USERCID = 'Local user certificate’,
PARM=’RING=ring_name,OWNER=userid’
Transfer CFT z/OS 3.3.2 Installation and Operation Guide 77
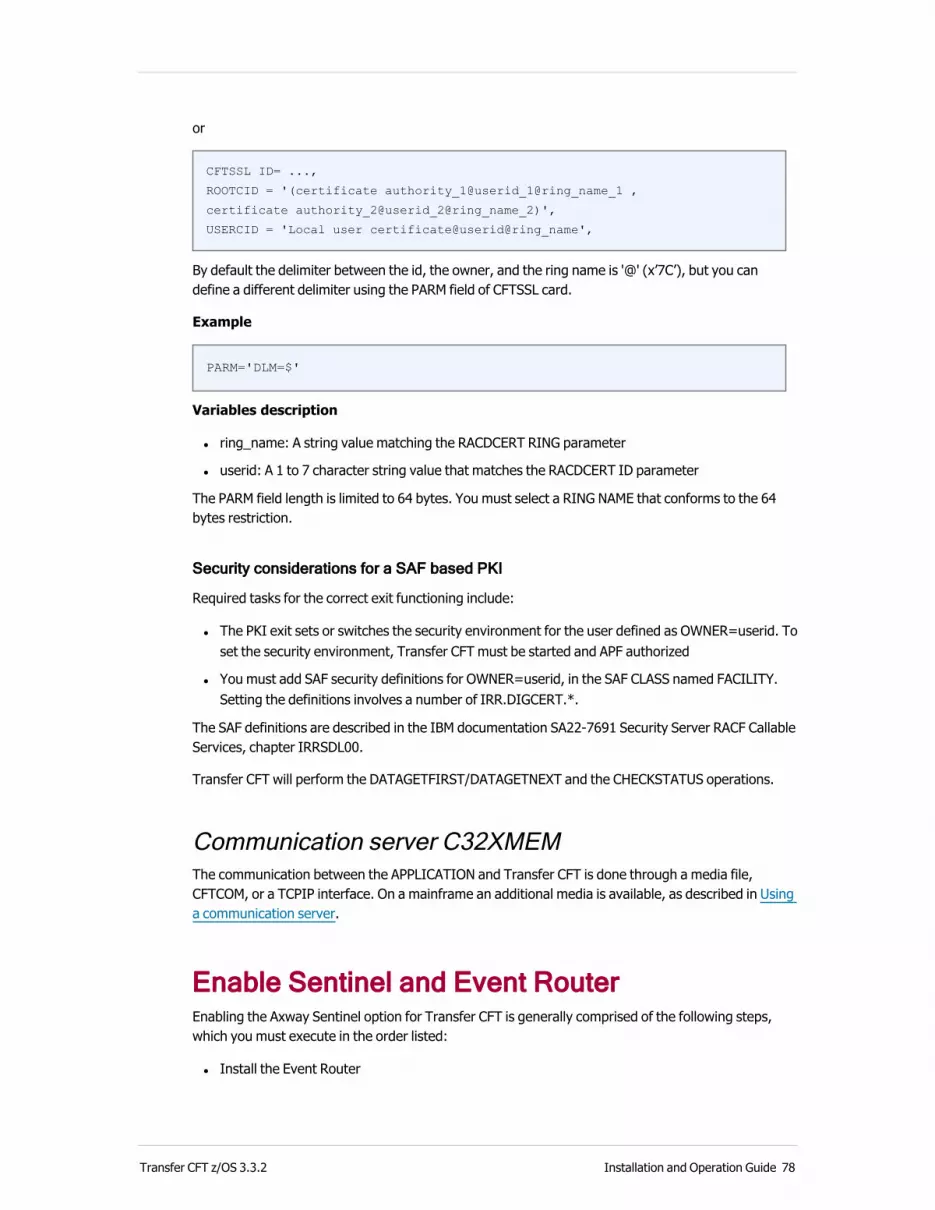
or
CFTSSL ID= ...,
ROOTCID = '(certificate authority_1@userid_1@ring_name_1 ,
certificate authority_2@userid_2@ring_name_2)',
USERCID = 'Local user certificate@userid@ring_name',
By default the delimiter between the id, the owner, and the ring name is '@' (x’7C’), but you can define a different delimiter using the PARM field of CFTSSL card.
Example
PARM='DLM=$'
Variables description
l ring_name: A string value matching the RACDCERT RING parameter
l userid: A 1 to 7 character string value that matches the RACDCERT ID parameter
The PARM field length is limited to 64 bytes. You must select a RING NAME that conforms to the 64 bytes restriction.
Security considerations for a SAF based PKI
Required tasks for the correct exit functioning include:
l The PKI exit sets or switches the security environment for the user defined as OWNER=userid. To set the security environment, Transfer CFT must be started and APF authorized
l You must add SAF security definitions for OWNER=userid, in the SAF CLASS named FACILITY. Setting the definitions involves a number of IRR.DIGCERT.*.
The SAF definitions are described in the IBM documentation SA22-7691 Security Server RACF Callable Services, chapter IRRSDL00.
Transfer CFT will perform the DATAGETFIRST/DATAGETNEXT and the CHECKSTATUS operations.
Communication server C32XMEMThe communication between the APPLICATION and Transfer CFT is done through a media file, CFTCOM, or a TCPIP interface. On a mainframe an additional media is available, as described in Using a communication server.
Enable Sentinel and Event RouterEnabling the Axway Sentinel option for Transfer CFT is generally comprised of the following steps, which you must execute in the order listed:
l Install the Event Router
Transfer CFT z/OS 3.3.2 Installation and Operation Guide 78

l Set the Sentinel parameters in the unified configuration file
l Create a LOGGER type padding file (optional)
o Use the LOGGER in a SYSPLEX
l Shut down Transfer CFT
l Restart Transfer CFT
Note Universal Agent installation is necessary only for end-to-end application monitoring.
ProcedureThis section provides step by step instructions for installing Sentinel for Transfer CFT z/OS.
Install the Event Router For detailed information about Event Router installation refer to the Sentinel Event Router information in the Axway A 5 Suite Prerequisites and Installation Guide.
l During the installation procedure, specify the creation of the BUFFER file as the type LOGGER (under SYSPLEX).
l During setup, a LOGGER type BUFFER file is created. Note the name of the file for use when setting values of the configuration file.
If the Event Router is not set up, you must create a LOGGER type file using the JCL: SN10CLGR.
Set the Sentinel parameters A00CUSTOYou can set the Sentinel parameters in the unified configuration. If the Sentinel parameters are already customized, skip this section. Otherwise, customization parameters are located in the parameter file A03PARM of the installation library (sntlocad, sntladd, sntlp, sntlqueue, sntlgstr).
For a description of the general parameters refer to the Event Router information in the Sentinel documentation.
Note If the communication mode between Transfer CFT and the Event Router is an XCF type, and the TRKSVC is equal to 0, then you must define the Transfer CFT executable library as APF authorized.
Activate the unified configuration file parameters SN05CONFBefore submitting the SN05CONF JCL, you can modify the command file. Enter:
Trktname parameter
l Using a buffer file is strongly encouraged, but not mandatory. If you prefer to not use a buffer file, modify the command UCONFSET as follows:
UCONFSET ID=sentinel.TRKTNAME,VALUE=
Transfer CFT z/OS 3.3.2 Installation and Operation Guide 79

l The following message displays in the log when you restart Transfer CFT:
CFTS31W XTRK Warning No Buffer File(LOGGER file)defined Error Code = -1
To connect to the Event Router via XFC, manually modify the commands file to activate the appropriate communication mode and comment commands:
/* UCONFSET ID=sentinel.TRKIPADDR,
VALUE=sntladdr
UCONFSET ID=sentinel.TRKIPPORT,VALUE=sntlp*/
Create a LOGGER type padding file (optional)If the Transfer CFT does not use the same padding file as the Event Router, you must create a padding file. This LOGGER type file should not be shared with other applications.
The new LOGGER file is a DASD-ONLY type file. Use the JCL SN10CLGR, via the IBM IXCMIAPU utility, to create this file.
Example
DEFINE LOGSTREAM NAME(sntlgstr)
DASDONLY(YES)
LOWOFFLOAD(0)
LS_SIZE(180)
STG_SIZE(0)
MAXBUFSIZE(64000)
The keywords that are displayed in bold should be substituted by the JCL A00CUSTO. For more information refer to the IBM documentation on Setting up a Sysplex.
Use the LOGGER file in a SYSPLEX
To create an overflow file (LOGGER) that is available for all SYSPLEX partitions, in the Coupling Facility Resource Manager (CFRM) add the following structure (&userstr) to the coupling data set.
Example
The following is an example of a structure definition:
STRUCTURE NAME(&userstr)
SIZE(6000)
INITSIZE(1200)
REBUILDPERCENT(30)
PRELIST(FACIL02,FACIL01)
The following is an example of a logstream definition:
DEFINE LOGSTREAM NAME(&LGRID)
Transfer CFT z/OS 3.3.2 Installation and Operation Guide 80

STRUCTNAME(&userstr)
&Userstr is the structure name
&LGRID is the logger file name
Note You must be a system administrator to perform these operations.
Overflow file definition The following table describes the overflow file definition for the Logger file, where:
l TRKSHAREDFILE=YES is MANDATORY when the logger file is shared between the Event Router and applications. Set this to NO if the applications are sending messages directly to the Sentinel server without going through a ER
l The log structure is ONLY used to define a logger file shared between the partitions of the SYSPLEX, and is NOT referenced in any parameters
Event Router
TRKUTIL Transfer CFT 2.7 and later
Configuration file
USEPARIN TRKCONF UCONF
Logger file (AGENT)api_file=
TRKTNAME= UCONFSET ID=sentinel.TRKTNAME, VALUE=xxxx.xxxx.xxx
TRKSHAREDFILE=YES
UCONFSET ID=sentinel.TRKSHAREDFILE,VALUE=YES
Communication with the Event Router The following parameters define communication with the Event Router via XCF. In this setup:
l The XCF definition (queue=xxxx) is the XCF member name representing the ER server
l The XCF group is PELISCOP by default. You can modify this default by setting queue = “member group”
Event Router TRKUTIL Transfer CFT 2.6.x
Configuration file
USEPARIN TRKCONF UCONF
SVC (SYSTEM) svc_nb=nnn
TRKSVC=nnn UCONFSET ID=sentinel.TRKSVC,VALUE=nnn
Transfer CFT z/OS 3.3.2 Installation and Operation Guide 81

Event Router TRKUTIL Transfer CFT 2.6.x
XCF definition (AGENT)queue= TRKQUEUE= UCONFSET ID=sentinel.TRKQUEUE,VALUE=xxxx
TRKTYPE=XCF UCONFSET ID=sentinel.TRKTYPE,VALUE=XCF
Modify the Transfer CFT start-up procedureDuring the start-up procedure, the task dedicated to managing messages towards Sentinel allocates a sysout (ddname=TRKOUT) for any generated error messages or traces.
Register configuration file valuesFor configuration file modifications to be taken into account, including updates, stop and then restart Transfer CFT.
Set message sending modeUse the TRKTMODE parameter of the configuration file to manage the sending mode for messages emitted towards Sentinel.
Possible values:
l TRKTMODE=I: Immediate, default value
l TRKTMODE=D: Differed, the messages are stored to the buffer file
l TRKTMODE=R: Retry, enables the management of a sending delay via a parameter TRKTCONNRETRY=nn in case of a connection problem with SENTINEL
TCP/IP source port conflictSentinel notifications can get the source port from the system when the variable sentinel.trk_min_port is set to '0' (zero).
The system will assign one of the Ephemeral Port range (default is 1024 - 65535)
Command: uconfset id='sentinel.trk_min_port',value=0
End-to-End monitoring examplesThe following JCLs are available as end-to-end monitoring examples:
l SNTLCFT: The deposit of a file transfer command via the CFTUTIL utility, with the same CycleID as generated by the TRKUTIL SENDEVENT command. This is available in the INSTALL library.
Transfer CFT z/OS 3.3.2 Installation and Operation Guide 82
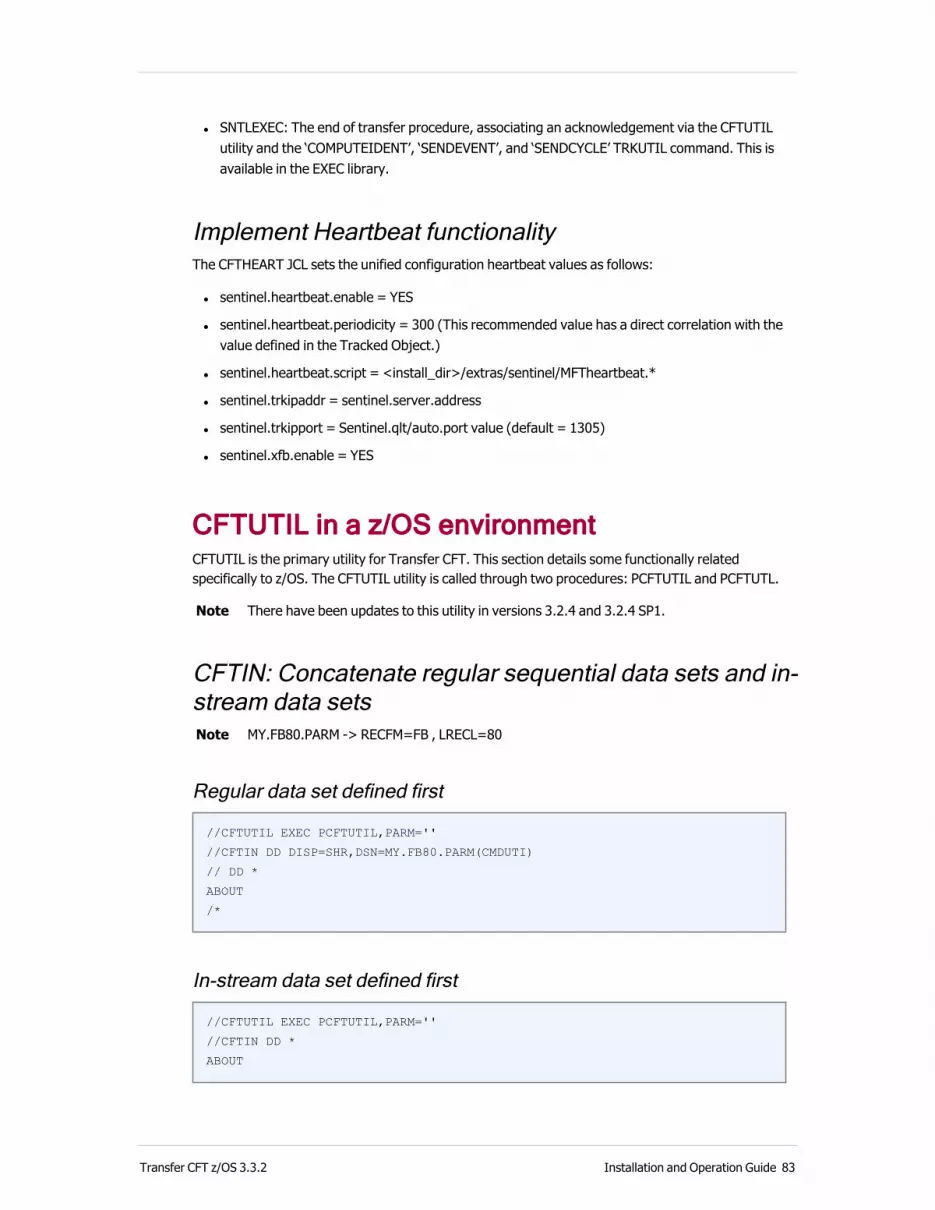
l SNTLEXEC: The end of transfer procedure, associating an acknowledgement via the CFTUTIL utility and the ‘COMPUTEIDENT’, ‘SENDEVENT’, and ‘SENDCYCLE’ TRKUTIL command. This is available in the EXEC library.
Implement Heartbeat functionalityThe CFTHEART JCL sets the unified configuration heartbeat values as follows:
l sentinel.heartbeat.enable = YES
l sentinel.heartbeat.periodicity = 300 (This recommended value has a direct correlation with the value defined in the Tracked Object.)
l sentinel.heartbeat.script = <install_dir>/extras/sentinel/MFTheartbeat.*
l sentinel.trkipaddr = sentinel.server.address
l sentinel.trkipport = Sentinel.qlt/auto.port value (default = 1305)
l sentinel.xfb.enable = YES
CFTUTIL in a z/OS environmentCFTUTIL is the primary utility for Transfer CFT. This section details some functionally related specifically to z/OS. The CFTUTIL utility is called through two procedures: PCFTUTIL and PCFTUTL.
Note There have been updates to this utility in versions 3.2.4 and 3.2.4 SP1.
CFTIN: Concatenate regular sequential data sets and in-stream data setsNote MY.FB80.PARM -> RECFM=FB , LRECL=80
Regular data set defined first
//CFTUTIL EXEC PCFTUTIL,PARM=''
//CFTIN DD DISP=SHR,DSN=MY.FB80.PARM(CMDUTI)
// DD *
ABOUT
/*
In-stream data set defined first
//CFTUTIL EXEC PCFTUTIL,PARM=''
//CFTIN DD *
ABOUT
Transfer CFT z/OS 3.3.2 Installation and Operation Guide 83
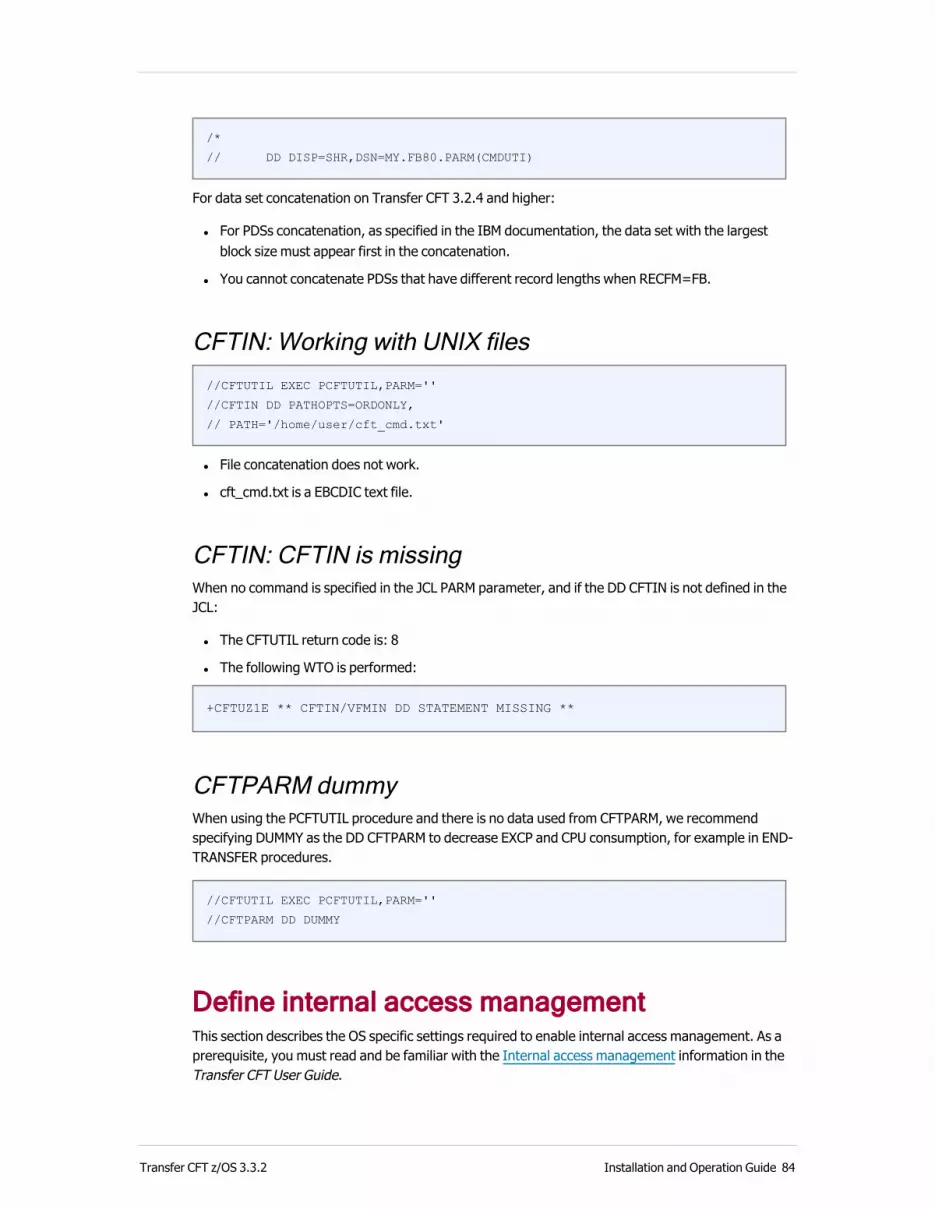
/*
// DD DISP=SHR,DSN=MY.FB80.PARM(CMDUTI)
For data set concatenation on Transfer CFT 3.2.4 and higher:
l For PDSs concatenation, as specified in the IBM documentation, the data set with the largest block size must appear first in the concatenation.
l You cannot concatenate PDSs that have different record lengths when RECFM=FB.
CFTIN: Working with UNIX files//CFTUTIL EXEC PCFTUTIL,PARM=''
//CFTIN DD PATHOPTS=ORDONLY,
// PATH='/home/user/cft_cmd.txt'
l File concatenation does not work.
l cft_cmd.txt is a EBCDIC text file.
CFTIN: CFTIN is missingWhen no command is specified in the JCL PARM parameter, and if the DD CFTIN is not defined in the JCL:
l The CFTUTIL return code is: 8
l The following WTO is performed:
+CFTUZ1E ** CFTIN/VFMIN DD STATEMENT MISSING **
CFTPARM dummyWhen using the PCFTUTIL procedure and there is no data used from CFTPARM, we recommend specifying DUMMY as the DD CFTPARM to decrease EXCP and CPU consumption, for example in END-TRANSFER procedures.
//CFTUTIL EXEC PCFTUTIL,PARM=''
//CFTPARM DD DUMMY
Define internal access managementThis section describes the OS specific settings required to enable internal access management. As a prerequisite, you must read and be familiar with the Internal access management information in the Transfer CFT User Guide.
Transfer CFT z/OS 3.3.2 Installation and Operation Guide 84
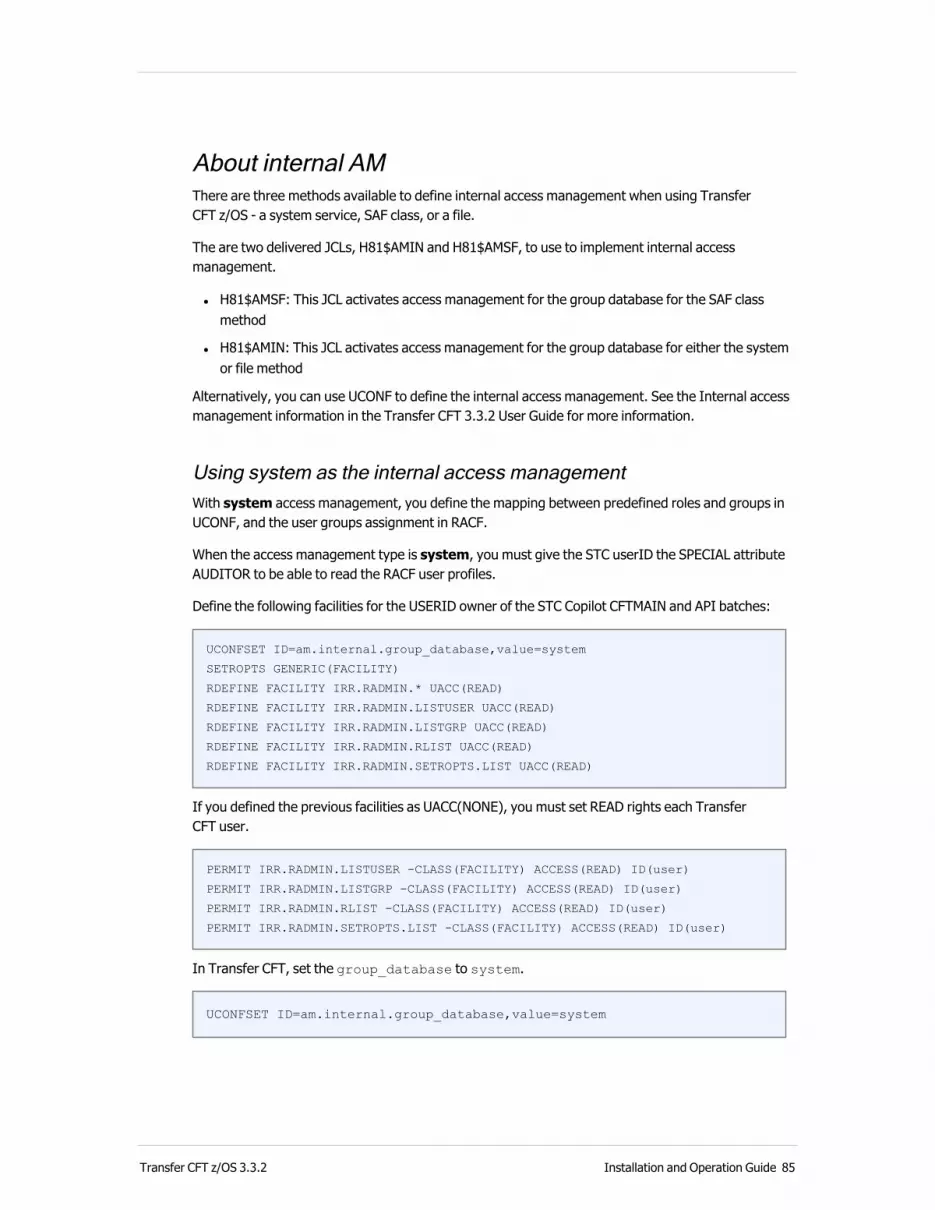
About internal AMThere are three methods available to define internal access management when using Transfer CFT z/OS - a system service, SAF class, or a file.
The are two delivered JCLs, H81$AMIN and H81$AMSF, to use to implement internal access management.
l H81$AMSF: This JCL activates access management for the group database for the SAF class method
l H81$AMIN: This JCL activates access management for the group database for either the system or file method
Alternatively, you can use UCONF to define the internal access management. See the Internal access management information in the Transfer CFT 3.3.2 User Guide for more information.
Using system as the internal access managementWith system access management, you define the mapping between predefined roles and groups in UCONF, and the user groups assignment in RACF.
When the access management type is system, you must give the STC userID the SPECIAL attribute AUDITOR to be able to read the RACF user profiles.
Define the following facilities for the USERID owner of the STC Copilot CFTMAIN and API batches:
UCONFSET ID=am.internal.group_database,value=system
SETROPTS GENERIC(FACILITY)
RDEFINE FACILITY IRR.RADMIN.* UACC(READ)
RDEFINE FACILITY IRR.RADMIN.LISTUSER UACC(READ)
RDEFINE FACILITY IRR.RADMIN.LISTGRP UACC(READ)
RDEFINE FACILITY IRR.RADMIN.RLIST UACC(READ)
RDEFINE FACILITY IRR.RADMIN.SETROPTS.LIST UACC(READ)
If you defined the previous facilities as UACC(NONE), you must set READ rights each Transfer CFT user.
PERMIT IRR.RADMIN.LISTUSER -CLASS(FACILITY) ACCESS(READ) ID(user)
PERMIT IRR.RADMIN.LISTGRP -CLASS(FACILITY) ACCESS(READ) ID(user)
PERMIT IRR.RADMIN.RLIST -CLASS(FACILITY) ACCESS(READ) ID(user)
PERMIT IRR.RADMIN.SETROPTS.LIST -CLASS(FACILITY) ACCESS(READ) ID(user)
In Transfer CFT, set the group_database to system.
UCONFSET ID=am.internal.group_database,value=system
Transfer CFT z/OS 3.3.2 Installation and Operation Guide 85
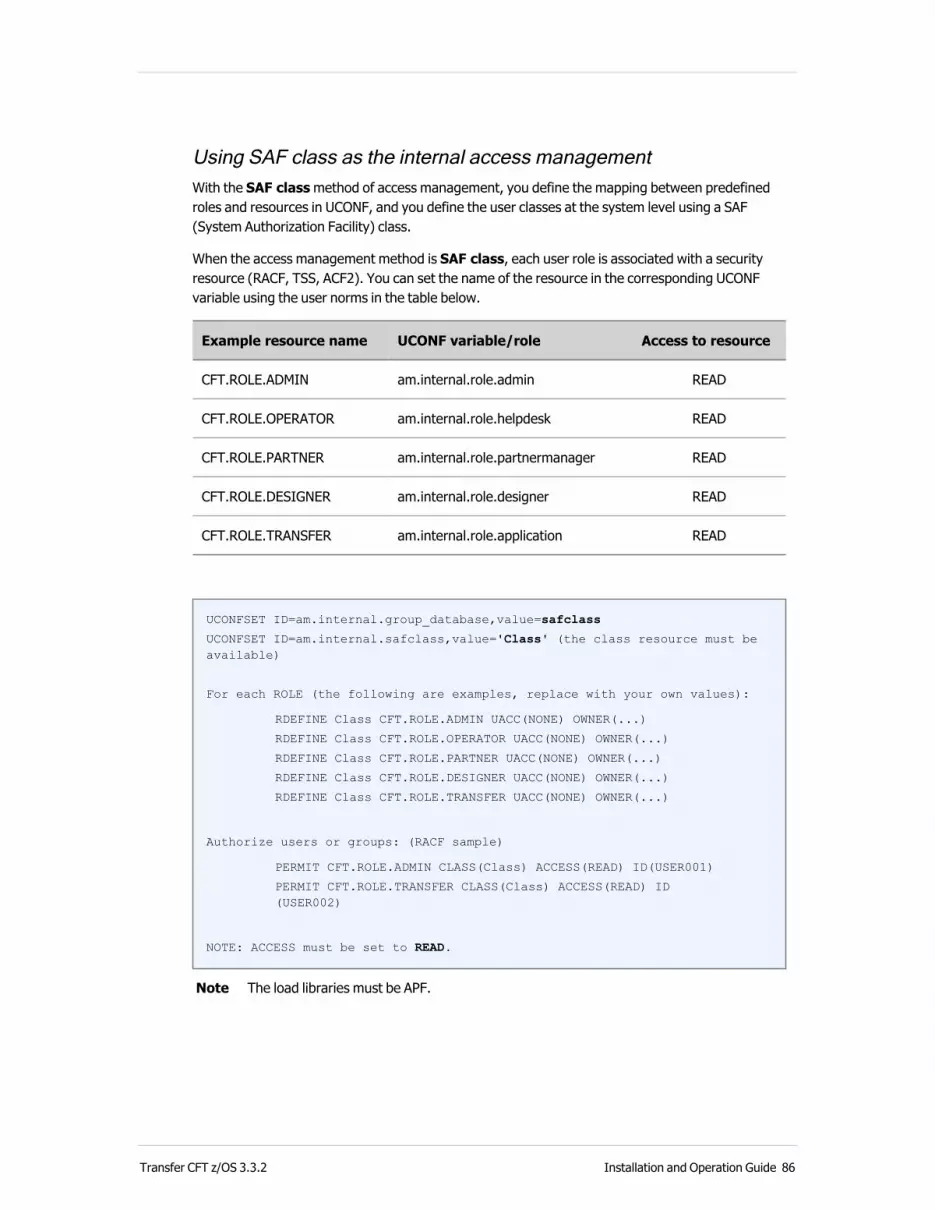
Using SAF class as the internal access managementWith the SAF class method of access management, you define the mapping between predefined roles and resources in UCONF, and you define the user classes at the system level using a SAF (System Authorization Facility) class.
When the access management method is SAF class, each user role is associated with a security resource (RACF, TSS, ACF2). You can set the name of the resource in the corresponding UCONF variable using the user norms in the table below.
Example resource name UCONF variable/role Access to resource
CFT.ROLE.ADMIN am.internal.role.admin READ
CFT.ROLE.OPERATOR am.internal.role.helpdesk READ
CFT.ROLE.PARTNER am.internal.role.partnermanager READ
CFT.ROLE.DESIGNER am.internal.role.designer READ
CFT.ROLE.TRANSFER am.internal.role.application READ
UCONFSET ID=am.internal.group_database,value=safclass
UCONFSET ID=am.internal.safclass,value='Class' (the class resource must be available)
For each ROLE (the following are examples, replace with your own values):
RDEFINE Class CFT.ROLE.ADMIN UACC(NONE) OWNER(...)
RDEFINE Class CFT.ROLE.OPERATOR UACC(NONE) OWNER(...)
RDEFINE Class CFT.ROLE.PARTNER UACC(NONE) OWNER(...)
RDEFINE Class CFT.ROLE.DESIGNER UACC(NONE) OWNER(...)
RDEFINE Class CFT.ROLE.TRANSFER UACC(NONE) OWNER(...)
Authorize users or groups: (RACF sample)
PERMIT CFT.ROLE.ADMIN CLASS(Class) ACCESS(READ) ID(USER001)
PERMIT CFT.ROLE.TRANSFER CLASS(Class) ACCESS(READ) ID(USER002)
NOTE: ACCESS must be set to READ.
Note The load libraries must be APF.
Transfer CFT z/OS 3.3.2 Installation and Operation Guide 86

Using file as the internal access managementWith file type access management, you define the mapping between predefined roles and groups in UCONF, and assign the user groups in an external file.
When using this type of access management, the file format must be VB, where the maximum number of lrecl is 1024. Enter the character * in column 1 to allow comments.
User/Group record description
Start with the UserID in column 1 using blanks as separators. For example, to assign users rights, use the format:
Format
USER001 OPERATOR PARTNER .....
USER002 ADMIN .....
In Transfer CFT, set the group_database to file and specify the path to the file defined above.
UCONFSET ID=am.internal.group_database,value=file
UCONFSET ID=am.internal.group_database.fname,value=filename
Transfer CFT z/OS 3.3.2 Installation and Operation Guide 87
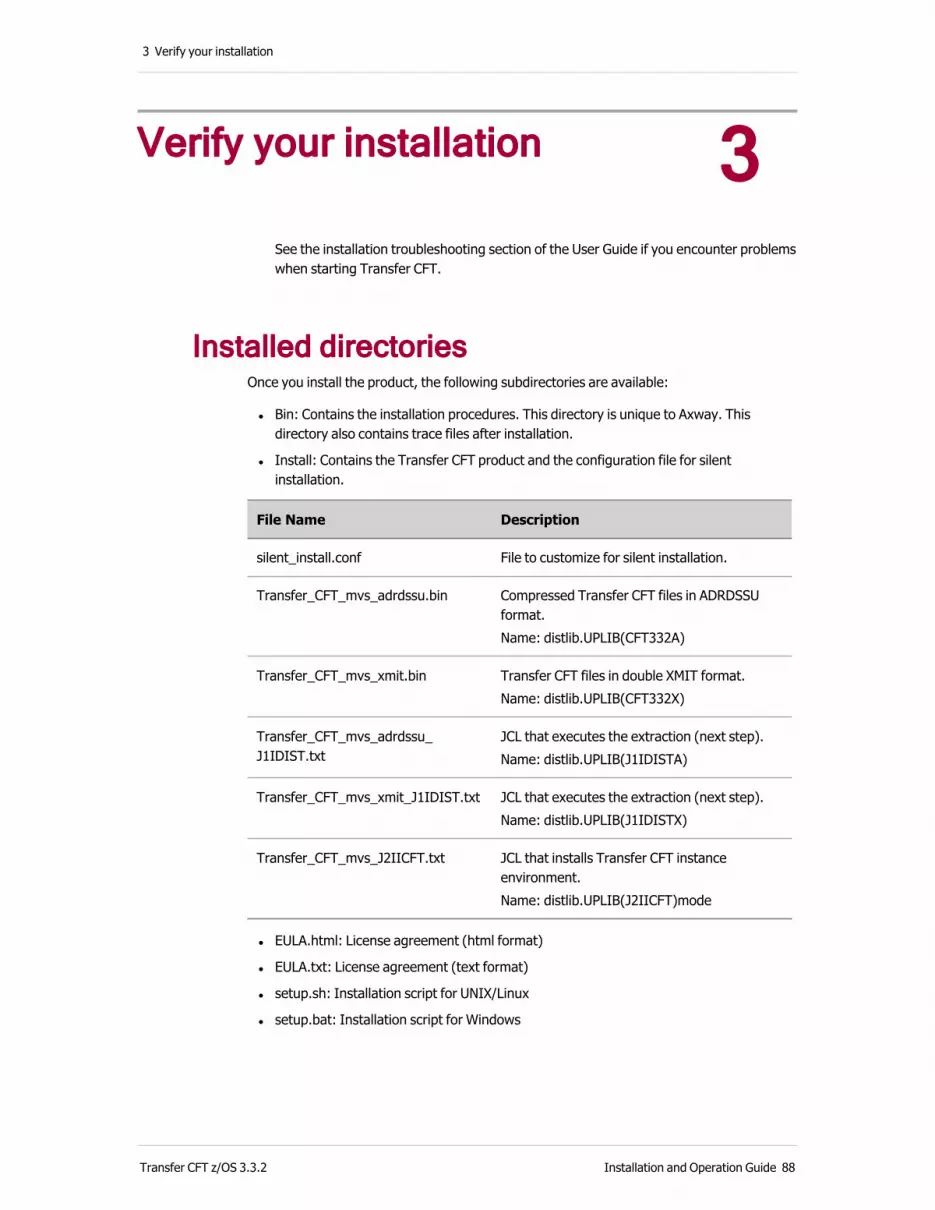
3 Verify your installation
3 Verify your installation
See the installation troubleshooting section of the User Guide if you encounter problems when starting Transfer CFT.
Installed directoriesOnce you install the product, the following subdirectories are available:
l Bin: Contains the installation procedures. This directory is unique to Axway. This directory also contains trace files after installation.
l Install: Contains the Transfer CFT product and the configuration file for silent installation.
File Name Description
silent_install.conf File to customize for silent installation.
Transfer_CFT_mvs_adrdssu.bin Compressed Transfer CFT files in ADRDSSU format.Name: distlib.UPLIB(CFT332A)
Transfer_CFT_mvs_xmit.bin Transfer CFT files in double XMIT format.Name: distlib.UPLIB(CFT332X)
Transfer_CFT_mvs_adrdssu_J1IDIST.txt
JCL that executes the extraction (next step).Name: distlib.UPLIB(J1IDISTA)
Transfer_CFT_mvs_xmit_J1IDIST.txt
JCL that executes the extraction (next step).Name: distlib.UPLIB(J1IDISTX)
Transfer_CFT_mvs_J2IICFT.txt JCL that installs Transfer CFT instance environment.Name: distlib.UPLIB(J2IICFT)mode
l EULA.html: License agreement (html format)
l EULA.txt: License agreement (text format)
l setup.sh: Installation script for UNIX/Linux
l setup.bat: Installation script for Windows
Transfer CFT z/OS 3.3.2 Installation and Operation Guide 88

3 Verify your installation
Note The act of installing Transfer CFT creates a distribution environment that contains product binaries and templates. Do no store any personal files in this environment, or modify existing files in this environment, as they are erased during updates.
Transfer CFT z/OS 3.3.2 Installation and Operation Guide 89

4 Multi-node architecture
Multi-node architectureThis topic describes the Transfer CFT multi-node feature, which provides you with horizontal scalability and high availability for failovers.
Multi-node benefits for Transfer CFT include:
l Horizontal scalability: increased transfer flow capacity.
l High availability: active/active including patch management on an active cluster, and automatic node restart after fail over.
l Traffic management: load balancing between nodes using sysplex with VIPA distribution methods.
Before you startCheck that the user that starts Copilot and Transfer CFT has:
l Read/write rights for the Transfer CFT instance files
l An OMVS segment and a TSO segment in their profile
l Rights to issue MODIFY and START console commands
TSO version
The user ID for the user that starts Copilot and Transfer CFT has a 7-characters maximum when using z/OS 2.2 or lower. Therefore, a user with an 8-character user ID cannot use TSO with a z/OS version lower than v2.3.
PrerequisitesTransfer CFT in multi-node architecture can use a single key for a multi-node installation (which is stored in the PDS member: UPARM(PRODKEY)) as either:
l The hostname must not be defined for the key, or
l The hostname defined for the key matches the hostname of one of the hosts that composes the multi-node instance
Additionally, the key must have the cluster option.
Transfer CFT z/OS 3.3.2 Installation and Operation Guide 90

4 Multi-node architecture
l A shared file system for use of a multi-node architecture on several hosts. Additionally, the system must be configured prior to the multi-node installation and the shared disk ready when starting the Copilot server.
l The Transfer CFT configuration files (PARM, PART, COM, CAT) and services files (LOG, ACCNT) must implement SMS (system-managed storage).
l The SHARECAT parameter in the SGINSTAL macro (INSTALL(A12OPTS) and INSTALL(A12OPTSP) members) must be set to ‘NO’ or ‘INACT’.
Transfer CFT z/OS 3.3.2 Installation and Operation Guide 91

4 Multi-node architecture
Architecture The Transfer CFT multi-node architecture is based on hosts, nodes, and a shared file system. Regardless of the number of servers hosting the nodes from outside the cluster, the nodes are viewed as a single machine on a network.
In a z/OS environment, the multi-node architecture uses SYSPLEX components that include data sharing and a VIPA SYSPLEX distributor, along with LPAR (logical partition) resources.
High level architectural overview
What is a host?
In a z/OS environment, the host is an LPAR located in a SYSPLEX distributor configuration.
What is a node?
Transfer CFT z/OS 3.3.2 Installation and Operation Guide 92
4 Multi-node architecture
A node is a Transfer CFT runtime running on a host. Multiple nodes are called a Transfer CFT cluster, which can run on one or multiple hosts. A server can host zero or multiple nodes. That said, Transfer CFT itself does not manage the round robin or other load distribution mechanisms.
What is a shared file system?
A shared file system is a file system resource that where data is shared by several nodes and/or hosts.
The shared file system for Transfer CFT z/OS is a DASD (direct-access storage device) in a SYSPLEX environment.
Transfer CFT z/OS 3.3.2 Installation and Operation Guide 93

4 Multi-node architecture
Concepts l Transfer CFT provides one node manager per host that monitors every node and checks that its nodes are active. If a node goes down, the node manager detects the inactivity and takes over that node's activity.
l For multiple nodes to be able to access the same files, using the same set configuration, the system requires the use of a shared file system. The shared disk provides communication, configuration, partners, data flows, databases and nodes. In the following illustration, you can see that the shared data includes parameter files and configuration settings.
l Incoming flow passes by a sysplex distributor. However, exiting flow does not pass through the sysplex distributor.
l In z/OS architecture, you use VIPA commands to perform all configuration tasks.
Incoming flow from external Transfer CFT partner
Legend
Transfer CFT z/OS 3.3.2 Installation and Operation Guide 94
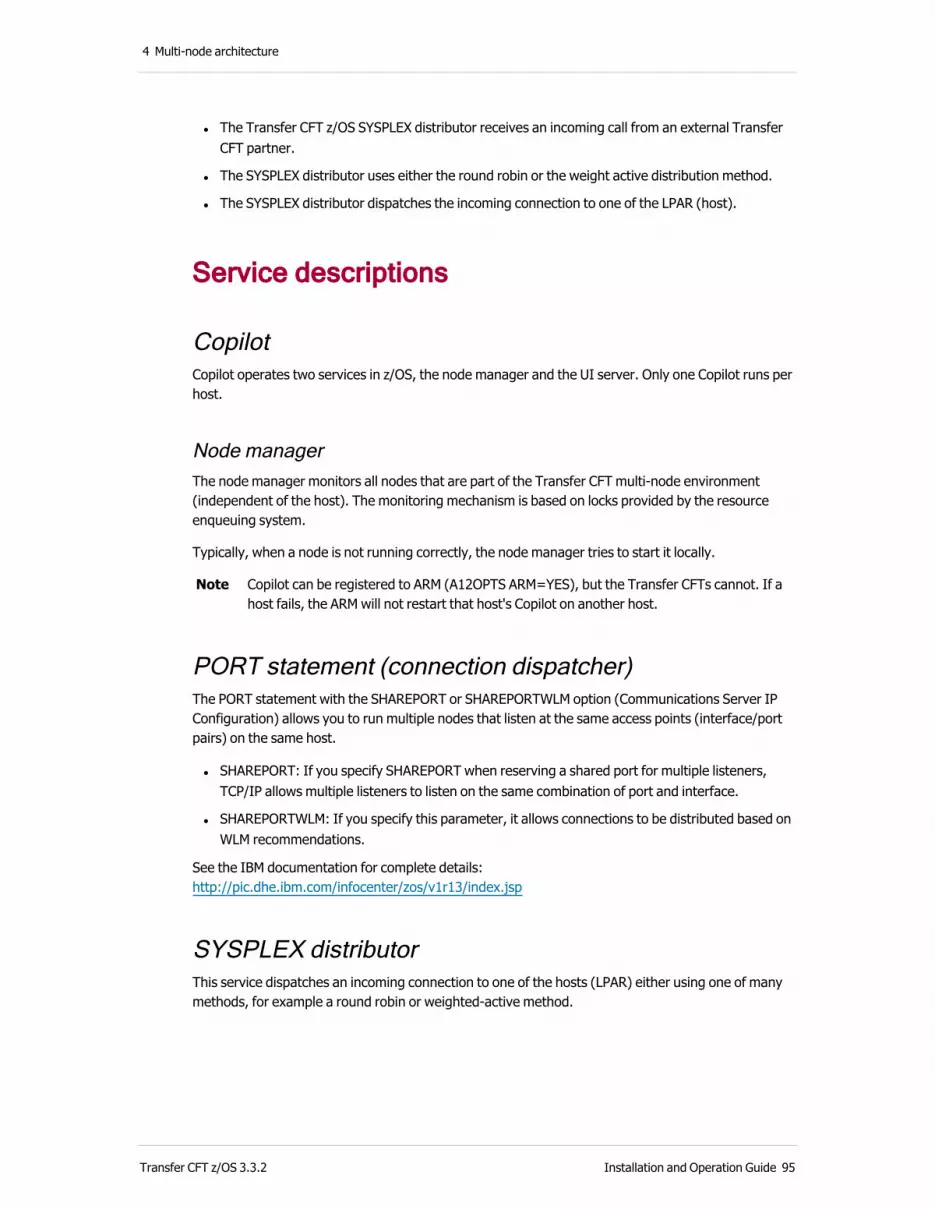
4 Multi-node architecture
l The Transfer CFT z/OS SYSPLEX distributor receives an incoming call from an external Transfer CFT partner.
l The SYSPLEX distributor uses either the round robin or the weight active distribution method.
l The SYSPLEX distributor dispatches the incoming connection to one of the LPAR (host).
Service descriptions
CopilotCopilot operates two services in z/OS, the node manager and the UI server. Only one Copilot runs per host.
Node managerThe node manager monitors all nodes that are part of the Transfer CFT multi-node environment (independent of the host). The monitoring mechanism is based on locks provided by the resource enqueuing system.
Typically, when a node is not running correctly, the node manager tries to start it locally.
Note Copilot can be registered to ARM (A12OPTS ARM=YES), but the Transfer CFTs cannot. If a host fails, the ARM will not restart that host's Copilot on another host.
PORT statement (connection dispatcher)The PORT statement with the SHAREPORT or SHAREPORTWLM option (Communications Server IP Configuration) allows you to run multiple nodes that listen at the same access points (interface/port pairs) on the same host.
l SHAREPORT: If you specify SHAREPORT when reserving a shared port for multiple listeners, TCP/IP allows multiple listeners to listen on the same combination of port and interface.
l SHAREPORTWLM: If you specify this parameter, it allows connections to be distributed based on WLM recommendations.
See the IBM documentation for complete details: http://pic.dhe.ibm.com/infocenter/zos/v1r13/index.jsp
SYSPLEX distributor This service dispatches an incoming connection to one of the hosts (LPAR) either using one of many methods, for example a round robin or weighted-active method.
Transfer CFT z/OS 3.3.2 Installation and Operation Guide 95

4 Multi-node architecture
CFTCOM dispatcherFor outgoing calls, you can set the CFTCOM dispatcher to use either a round robin load balancing, or define a one-to-one relationship between a partner and a node. A one-to-one relationship ensures that for any given partner the transfers are kept in the correct chronological order. In the unified configuration, set the variable: cft.multi_node.cftcom.dispatcher_policy
l Round robin: round_robin (default)
l One-to-one: node_affinity
Runtime filesAll runtime data are stored on a shared file system.
The following databases are shared between nodes:
l Parameter internal datafile (CFTPARM)
l Partners internal datafile (CFTPART)
l PKI base (CFTPKI)
l Main communication media file (CFTCOM)
l Unified Configuration (UCONF)
The following databases are node specific, and the filename is flagged by the node identifier:
l Catalog (..CATALOG.N00,..CATALOG.N01,...)
l Communication media file (..COM.N00, ..COM.N01,...)
l Log files (..LOG1.N00, ..LOG2.N00, ..LOG1.N01, ..LOG2.N01, ,...)
l Account file (..ACCNT1.N00, ..ACCNT2.N00, ..ACCNT1.N01, ..ACCNT2.N01 ,...)
Note When using multi-node architecture, the allocated space in the catalog file is 10% greater than when working in a standalone Transfer CFT.
Recovery
Node recovery There are two possibilities when a node manager detects a node failure:
l If it is a local node fail over, the node manager automatically attempts to restart the node on the local server.
l If it is a remote node fail over, the node manager waits for the remote node manager to restart the node. If the remote node manager does not restart the node before the timeout, the local node manager restarts the node on the local server.
Transfer CFT z/OS 3.3.2 Installation and Operation Guide 96

4 Multi-node architecture
After the node is restarted, whether local or remote, it completes all transfer requests that were active when the failure occurred.
After a fail over, manual intervention is required to rebalance the cluster.
When a node manager fails but nodes are still active, after a timeout nodes are stopped and restarted on another server. A manual intervention is required to restore the node manager.
See Rebalancing after a failover for an example.
Transfer recovery When a node receives an incoming request, be that a transfer receive, restart, acknowledgement or negative acknowledgement, if the corresponding transfer record cannot be found in the node's own catalog, the node requests the transfer record from other nodes through the CFTPRX task.
Possible scenarios include:
l If another node has the catalog record, the node retrieves it and performs the transfer.
l If no nodes have the record, an error is returned.
l If any one of the nodes does not respond, the requesting node continues to retry all nodes until the session's timeout. Once the timeout is reached, the node ends the connection. After this, the remote partner retries the request according to its retry parameters.
In the case of node failure during the transfer recovery process, the catalog record is locked in both catalogs until both nodes are available for recovery.
Limitations Note the following restrictions:
l Transfer CFT mailbox services are not supported.
l The only network is TCP/IP.
l The use of the console interface commands can apply only to one specific node.
l Bandwidth control is calculated by node.
l Accounting statistics are generated by node.
l Nodes are not automatically re-balanced when a host is recovered after a failure.
l Duplicate file detection is not supported.
l If the parameter 'ARM' in SGINSTAL is set to 'YES':
o The Node Manager (CFTCOPL) will register to ARM.
o Transfer CFT (CFTMAIN) will not register to ARM.
l Secure Relay is not supported in a multi-node architecture.
l You can only have one communication media of the type "file".
Transfer CFT z/OS 3.3.2 Installation and Operation Guide 97
4 Multi-node architecture
l The SHARECAT parameter in the SGINSTAL macro (INSTALL(A12OPTS) and INSTALL(A12OPTSP) members) must be set to ‘NO’ or ‘INACT’.
Multi-node installation overviewInstalling Transfer CFT
If you have not done so already, begin by performing a standard Transfer CFT z/OS installation. See the Transfer CFT 3.3.2 z/OS Installation Overview for information on how to get started. You can set up Transfer CFT multi-node either with multiple nodes and hosts, or multi-node mono-host. This documentation primarily focuses on the multi-node, multi-host scenario.
If you create a multi-node, mulit-host installation, and the USS Environment for Transfer CFT is not shared between all the hosts, you must install a separate USS Environment on each host. To do this, execute the member COPA010, in the INSTALL library, on each host that is not shared.
If an APF mode is defined on one of the hosts, then you must configure the APF mode for every host.
After installing
After installing Transfer CFT, you must customize this Transfer CFT from a standard standalone installation to a multi-node enabled Transfer CFT. The following sections, which describe how to customize MNINIT and the VIPA programs, are based on a multi-node and multi-host example implementation. If your organization requires a mono-host installation, you can modify the example procedure accordingly.
StepsThe process consists of customizing the z/OS specific programs and members, checking the Transfer CFT configuration, and then executing the customized programs.
Note To execute the multi-node customization you require administrator rights.
Transfer CFT z/OS 3.3.2 Installation and Operation Guide 98

4 Multi-node architecture
Step Task
1 Customize VIPA programs and execute the customized members, including the following tasks.For each LPAR:
l Enable the port sharing (to execute on each LPAR) - Share Listening port: (protocol port (e.g. PESIT and port PESIT SSL))
l Identified all ports (protocol ports) to share on the LPAR
l Define the LPAR dynamic XCF address (DYNAMICXCF)On the first LPAR
l Define the cluster address (VIPA)
l Define the port balancing between the LPAR
2 Customize MNINIT.
3 Execute the customized MNINIT.
Note Depending on the type of installation you are performing, a Transfer CFT CATALOG file may be created during installation. Additionally, files having the format CATALOG.Nxx (where Nxx represents the node identifier) are created by the MNINIT JCL. The CATALOG file without a suffix is not used, so you can delete this file (the one without the .Nxx suffix). We recommend that you comment the //CFTCAT DD cards in the JCL and procedures. For example, comment the cards in the PCFTUTIL procedure and CFTINC member.
Customize the VIPA and execute commandsThis sections describes how to customize the LPAR (hosts) for your multi-node setup. It is based on an example implementation of an Active/Active High Availability multi-host configuration use case. For a mono host, multi-node installation, you only customize one LPAR (host).
After you complete the customization and configuration checks, execute the program commands.
Procedure overviewTo customize the hosts in your setup and submit the customization, perform the tasks listed in the table.
"How to" instructions for configuring LPAR options and submitting the VARY OBEYFILE commands are provided in the sections following this table.
Transfer CFT z/OS 3.3.2 Installation and Operation Guide 99

4 Multi-node architecture
Step Task
1 If you have not done so, customize MNINIT.
2 Customize the UPARM(TC*) members. The example below demonstrates how to customize LPAR1 and LPAR2. If you have additional machines in your configuration, repeat this step for each host machine. For a single host installation, you only customize UPARM(TCPSHAP1).
3 Perform a Transfer CFT configuration check:
l Verify that the CFTNET object host parameter corresponds with what you defined for the VIPA.
l Verify that the CFTNET command SRCPORT parameter is set to 1.
4 Submit the MNINIT. The Transfer CFT is now configured for multi-node.
Steps 5 and 6, which use the VARY OBEYFILE commands, require administrator rights.
5 Execute the VARY OBEYFILE command for each UPARM(TC*) member.
6 For a z/OS restart, the administrator must do all of the VIPA OBEYFILE commands performed in Step 5 on the z/OS machine.
Customize the UPARM(TC*) membersThe UPARM(TC*) members customization example is based on a setup two hosts, LPAR1 and LPAR2. For a mono host, multi-node installation, you only need to customize the UPARM(TCPSHAP1).
For each host in your multi-node configuration, perform the following customization and execute. You can execute after each option, or after customizing all options.
Customize the LPAR1 Define the shareport method.
..UPARM(TCPSHAP1) SHAREPORT / SHAREPORTWLM
Example VIPA command to execute:
v tcpip,tcpip,obeyfile,dsn=... UPARM(TCPSHAP1)
Customize the dynamic XCF address (automatic function to declare LPAR).
..UPARM(TCPDYMX1) DYNAMICXCF
Transfer CFT z/OS 3.3.2 Installation and Operation Guide 100

4 Multi-node architecture
Example VIPA command to execute:
v tcpip,tcpip,obeyfile,dsn=...UPARM(TCPDYMX1)
Customize the LPAR2 Define the shareport method.
..UPARM(TCPSHAP1) SHAREPORT / SHAREPORTWLM
Example VIPA command to execute:
v tcpip,tcpip,obeyfile,dsn=...V30X.UPARM(TCPSHAP1)
Customize the dynamic XCF address (automatic function to declare LPAR).
..UPARM(TCPDYMX2) DYNAMICXCF (one for each host)
Example VIPA command to execute:
v tcpip,tcpip,obeyfile,dsn=...V30X.UPARM(TCPDYMX2)
Customize the clusterDefine the cluster address after configuring the DYNAMICXCF on all hosts (that is, the customization of LPAR1 and LPAR2 in the previous section). This host address is the unique host address as seen externally, and should correspond with the one declared in the local CFTNET.
Remember that the VIPA commands must be executed by someone with administrator rights.
Customize the cluster as follows:
..UPARM(TCVIPDEF) VIPADEFINE (global for all hosts VIPADEFINE mask @DVIPA)
Example VIPA command to execute:
v tcpip,tcpip,obeyfile,dsn=...UPARM(TCVIPDEF)
This means that in the example configuration, the cluster will work with the machines (LPAR1, LPAR2,...) using this one single dynamic address.
About CopilotFor each listening port configuration (for the SYSPLEX distributor incoming calls), you can have one dvipa address for Copilot, where there is one Copilot for each host.
Transfer CFT z/OS 3.3.2 Installation and Operation Guide 101

4 Multi-node architecture
Note There is no PORT statement for Copilot. An external Copilot passes via the SYSPLEX distributor directly to the host Copilot. There is one Copilot per host, regardless of the number of Transfer CFT nodes on the host.
Two command samples contain the VIPAdistribute statement, which concerns the SYSPLEX distributor. There is also a command also for Copilot.
About REST APIWhen using REST API (copilot.restapi.enable=yes) in a multi-node environment, you must also define the copilot.restapi.serverport value in the VIPA configuration. See, for example, the delivered UPARM(TCVIPRN5) and UPARM(TCVIPWG5) files.
Define a distribution methodThe following examples, WeightedActive and RounRobin, represent two of the possible load distribution methods that you can use in VIPA. Select a load distribution method, and execute the corresponding VARY OBEYFILE command once you have finished customizing this option.
Weighted active example
- DISTMethod WEIGHTEDActive
..UPARM(TCVIPWG0) Port pesit
Example VIPA command to execute:
v tcpip,tcpip,obeyfile,dsn=...UPARM(TCVIPWG0)
..UPARM(TCVIPWG1) Port pesit ssl
v tcpip,tcpip,obeyfile,dsn=...UPARM(TCVIPWG1)
..UPARM(TCVIPWG2) Port Copilot
v tcpip,tcpip,obeyfile,dsn=….UPARM(TCVIPWG2)
Round robin example
- DISTMethod ROUNDROBIN
..UPARM(TCVIPRN0) Port pesit
Example VIPA command to execute:
v tcpip,tcpip,obeyfile,dsn=...UPARM(TCVIPRN0)
..UPARM(TCVIPRN1) Port pesit ssl
Transfer CFT z/OS 3.3.2 Installation and Operation Guide 102
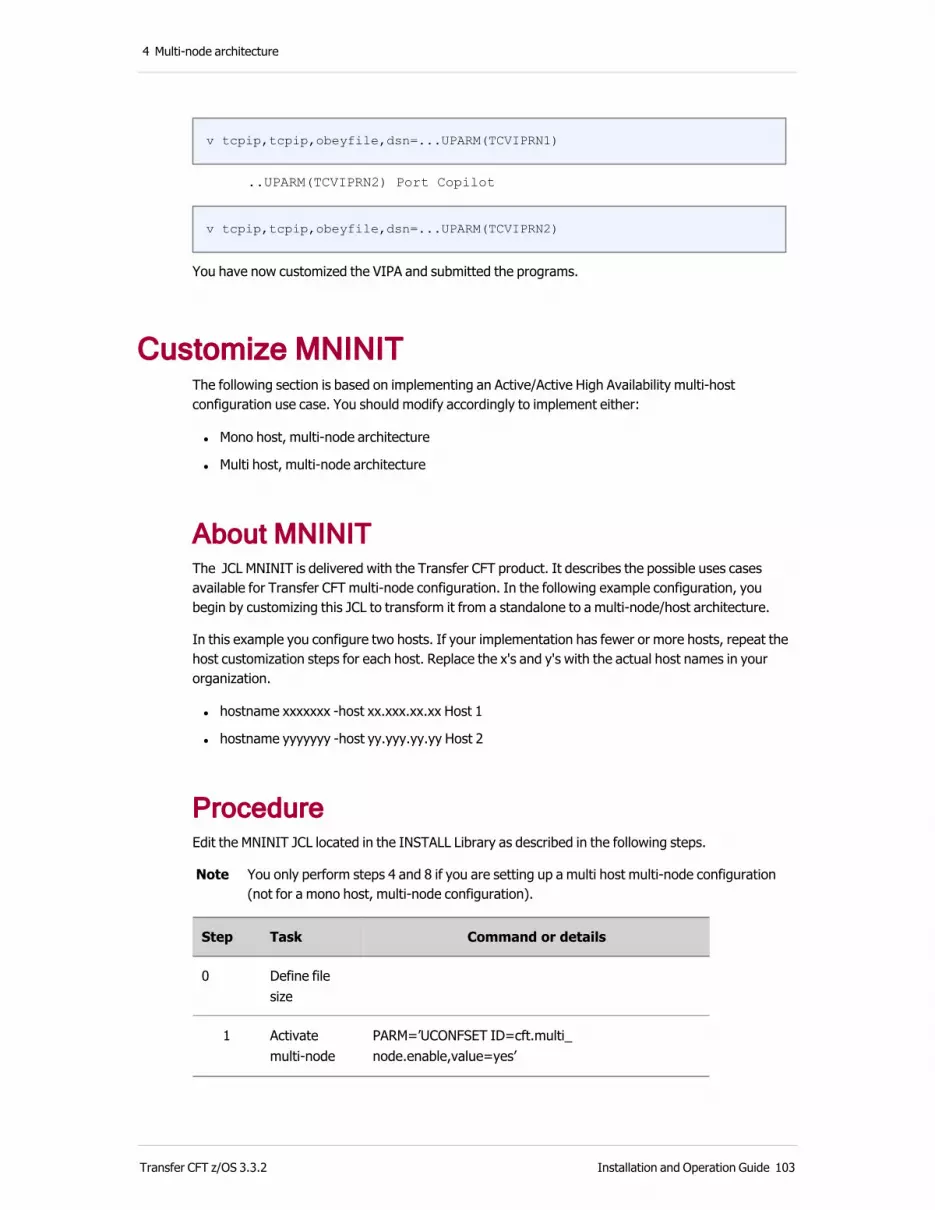
4 Multi-node architecture
v tcpip,tcpip,obeyfile,dsn=...UPARM(TCVIPRN1)
..UPARM(TCVIPRN2) Port Copilot
v tcpip,tcpip,obeyfile,dsn=...UPARM(TCVIPRN2)
You have now customized the VIPA and submitted the programs.
Customize MNINITThe following section is based on implementing an Active/Active High Availability multi-host configuration use case. You should modify accordingly to implement either:
l Mono host, multi-node architecture
l Multi host, multi-node architecture
About MNINITThe JCL MNINIT is delivered with the Transfer CFT product. It describes the possible uses cases available for Transfer CFT multi-node configuration. In the following example configuration, you begin by customizing this JCL to transform it from a standalone to a multi-node/host architecture.
In this example you configure two hosts. If your implementation has fewer or more hosts, repeat the host customization steps for each host. Replace the x's and y's with the actual host names in your organization.
l hostname xxxxxxx -host xx.xxx.xx.xx Host 1
l hostname yyyyyyy -host yy.yyy.yy.yy Host 2
ProcedureEdit the MNINIT JCL located in the INSTALL Library as described in the following steps.
Note You only perform steps 4 and 8 if you are setting up a multi host multi-node configuration (not for a mono host, multi-node configuration).
Step Task Command or details
0 Define file size
1 Activate multi-node
PARM=’UCONFSET ID=cft.multi_node.enable,value=yes’
Transfer CFT z/OS 3.3.2 Installation and Operation Guide 103

4 Multi-node architecture
Step Task Command or details
2 Define the number of nodes
PARM=’UCONFSET ID=cft.multi_node.nodes,value=2’
3 Add hostname 1
PARM=’add_host –hostname xxxxxxx –host xx.xxx.xx.xx’
4 Add hostname 2 (repeat for additional hosts)
PARM=’add_host –hostname yyyyyyy –host yy.yyy.yy.yy’
5 Create transfer files for each node
PARM=’cftinit &EXTPARM’CFTIN DD DISP=(NEW,PASS),DSN=&&TMPU,SPACE=(TRK,(1)),DCB=(RECFM=VB,LRECL=1024,DSORG=PS)
6 Enable node 0 PARM='enable_node -n 0'
7 Enable node 1 (repeat for additional nodes)
PARM=’enable_node –n 1’
8 Customize the Copilot server address
PARM=uconfset ID=copilot.GENERAL.ServerHost,value=&COPVIPA'
Note JCL variables to customize as described in the table above:
l EXTPARM: Transfer CFT configuration file
l COPVIPA: VIPA address for Copilot
l CFTVIPA: VIPA address for Transfer CFT server
Additional steps and notes l Operator commands are 'local' to a node.
l The UCONF sentinel.trktname parameter defines the Sentinel overflow file. Configure as follows:
o Set the sentinel.trksharedfile parameter to YES.
o You must use an Event Router to process the overflow file.
o For a multi-hosts, multi-node implementation, define the logger file using a CF-Structure.
Transfer CFT z/OS 3.3.2 Installation and Operation Guide 104
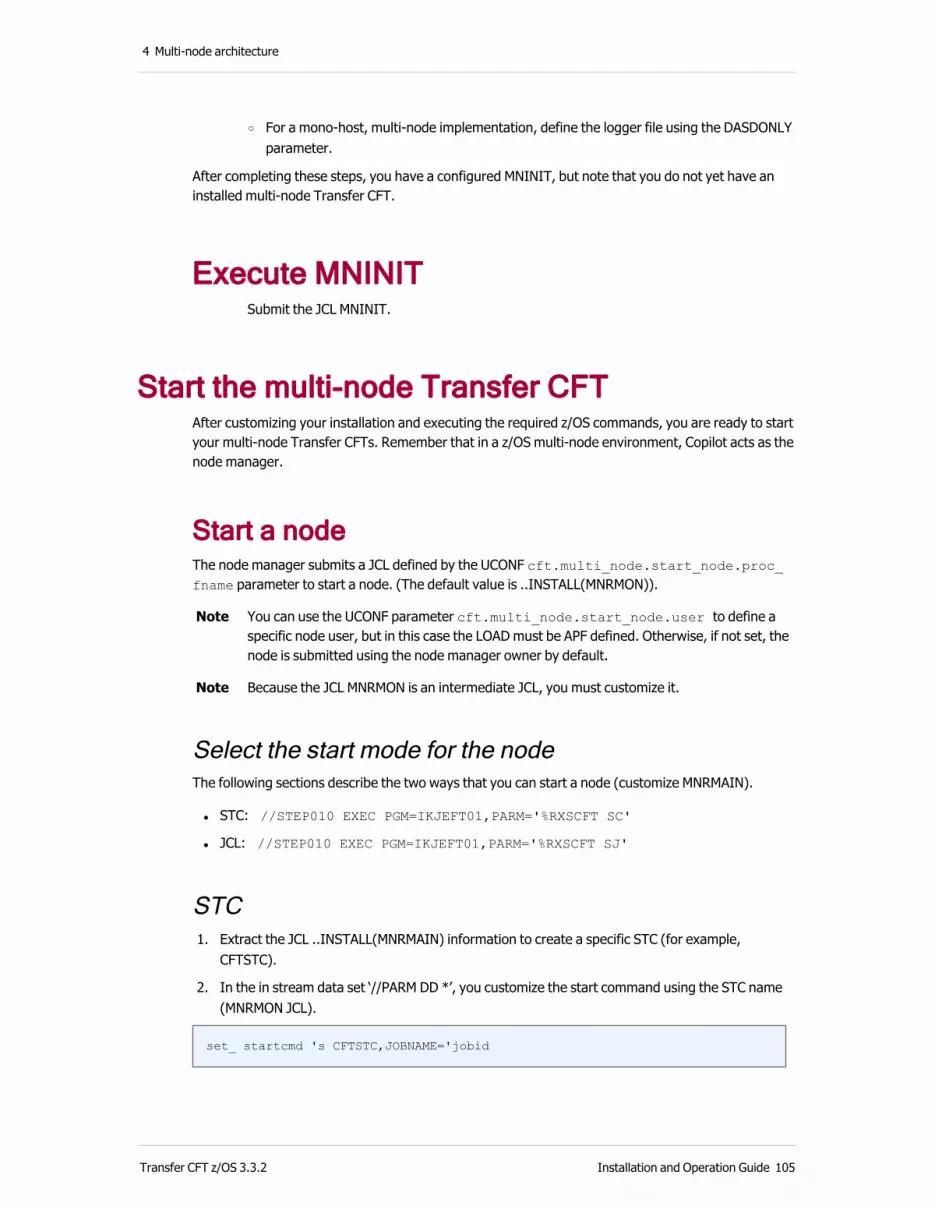
4 Multi-node architecture
o For a mono-host, multi-node implementation, define the logger file using the DASDONLY parameter.
After completing these steps, you have a configured MNINIT, but note that you do not yet have an installed multi-node Transfer CFT.
Execute MNINITSubmit the JCL MNINIT.
Start the multi-node Transfer CFTAfter customizing your installation and executing the required z/OS commands, you are ready to start your multi-node Transfer CFTs. Remember that in a z/OS multi-node environment, Copilot acts as the node manager.
Start a nodeThe node manager submits a JCL defined by the UCONF cft.multi_node.start_node.proc_fname parameter to start a node. (The default value is ..INSTALL(MNRMON)).
Note You can use the UCONF parameter cft.multi_node.start_node.user to define a specific node user, but in this case the LOAD must be APF defined. Otherwise, if not set, the node is submitted using the node manager owner by default.
Note Because the JCL MNRMON is an intermediate JCL, you must customize it.
Select the start mode for the nodeThe following sections describe the two ways that you can start a node (customize MNRMAIN).
l STC: //STEP010 EXEC PGM=IKJEFT01,PARM='%RXSCFT SC'
l JCL: //STEP010 EXEC PGM=IKJEFT01,PARM='%RXSCFT SJ'
STC 1. Extract the JCL ..INSTALL(MNRMAIN) information to create a specific STC (for example,
CFTSTC).
2. In the in stream data set ‘//PARM DD *’, you customize the start command using the STC name (MNRMON JCL).
set_ startcmd 's CFTSTC,JOBNAME='jobid
Transfer CFT z/OS 3.3.2 Installation and Operation Guide 105

4 Multi-node architecture
JCLThe JCL to be submitted is defined by DDNAME CFTJCL (the JCL MNRMAIN was customized during the installation phase).
//CFTJCL DD DISP=SHR,
// DSN=&CFTENV..SAMPLE(MNRMAIN)
How the JOBNAME is computedJobname is unique by LPAR, use the command DISPLAY JOBS to know the list of nodes started on the LPAR system. In the in stream data set ‘//PARM DD *’, there are two variables that determine the JOBNAME, maskjob and masklist.
MaskjobPrefix of jobname delimited by a ‘*’.
Example
set maskjob ‘CFTNOD*’
Or
Customize set maskjob using any valid REXX sentence.
Example
set maskjob strip(substr(USERID(),1,6))'t*' (6 first characters of userid concatenated with ‘t*’)
Masklist This is a list of characters allowed to substitute the ‘*’.
Example
set masklist '3456'
Result if maskjob=CFTNOD*:
CFTNOD3, CFTNOD4, CFTNOD5, CFTNOD6
Or
Example
Transfer CFT z/OS 3.3.2 Installation and Operation Guide 106
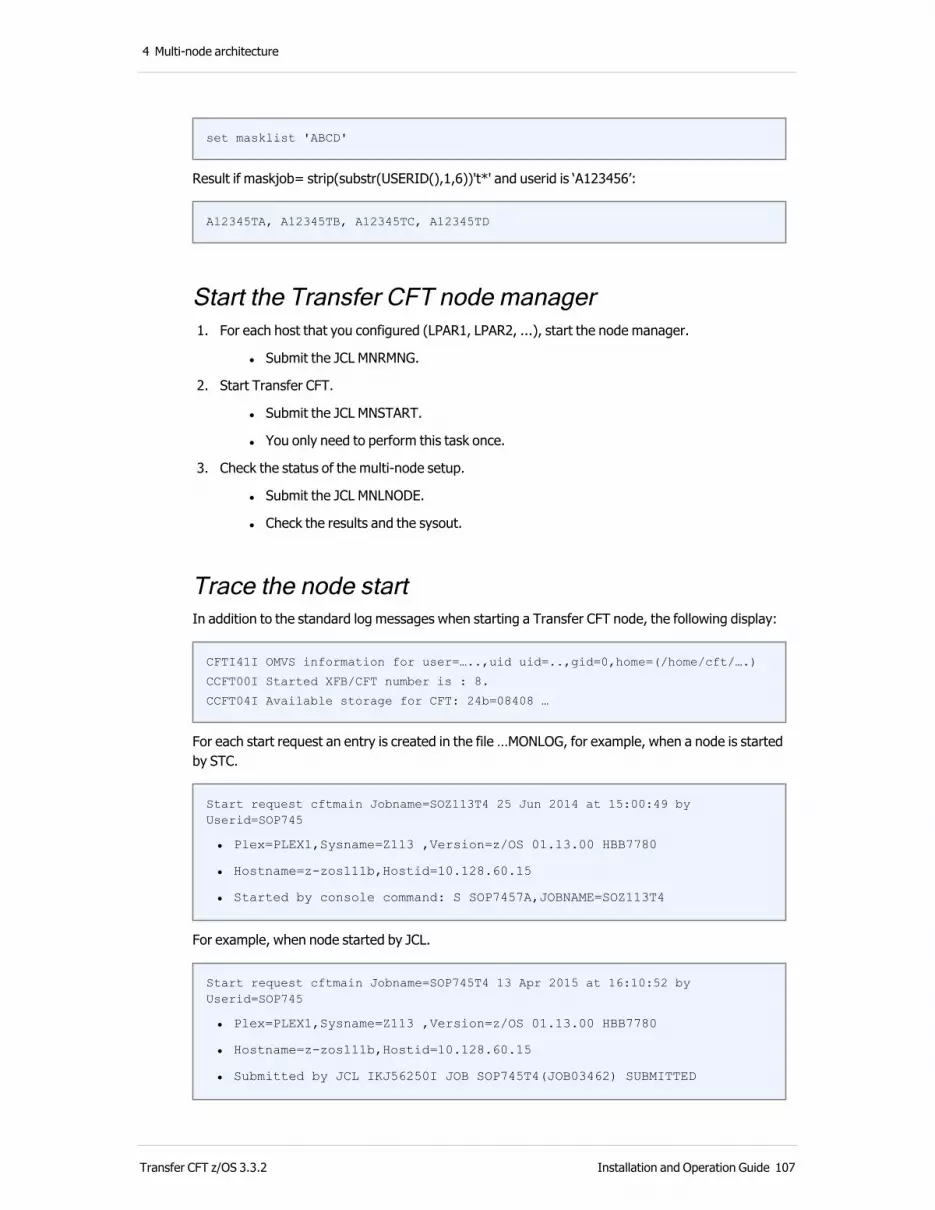
4 Multi-node architecture
set masklist 'ABCD'
Result if maskjob= strip(substr(USERID(),1,6))'t*' and userid is ‘A123456’:
A12345TA, A12345TB, A12345TC, A12345TD
Start the Transfer CFT node manager 1. For each host that you configured (LPAR1, LPAR2, ...), start the node manager.
l Submit the JCL MNRMNG.
2. Start Transfer CFT.
l Submit the JCL MNSTART.
l You only need to perform this task once.
3. Check the status of the multi-node setup.
l Submit the JCL MNLNODE.
l Check the results and the sysout.
Trace the node start In addition to the standard log messages when starting a Transfer CFT node, the following display:
CFTI41I OMVS information for user=…..,uid uid=..,gid=0,home=(/home/cft/….)
CCFT00I Started XFB/CFT number is : 8.
CCFT04I Available storage for CFT: 24b=08408 …
For each start request an entry is created in the file …MONLOG, for example, when a node is started by STC.
Start request cftmain Jobname=SOZ113T4 25 Jun 2014 at 15:00:49 by Userid=SOP745
l Plex=PLEX1,Sysname=Z113 ,Version=z/OS 01.13.00 HBB7780
l Hostname=z-zos111b,Hostid=10.128.60.15
l Started by console command: S SOP7457A,JOBNAME=SOZ113T4
For example, when node started by JCL.
Start request cftmain Jobname=SOP745T4 13 Apr 2015 at 16:10:52 by Userid=SOP745
l Plex=PLEX1,Sysname=Z113 ,Version=z/OS 01.13.00 HBB7780
l Hostname=z-zos111b,Hostid=10.128.60.15
l Submitted by JCL IKJ56250I JOB SOP745T4(JOB03462) SUBMITTED
Transfer CFT z/OS 3.3.2 Installation and Operation Guide 107

4 Multi-node architecture
Multi-node commandsThis topic describes how to manage Transfer CFT nodes, and related actions such as restarting a stopped node, or rebalancing after a fail over.
cftinitThe cftinit command initializes Transfer CFT internal datafiles. If nothing is specified, then all internal datafiles are initialized, both common and specific.
Options-c|-common only common internal datafiles are initialized (PARM, PART, main COM)
-n|-node only node specific internal datafiles are initialized (CATALOG, COM, LOG)
Usage
EXEC PCFTUTL,PG=CFT,PARM=’CFTINIT &CFTENV..SAMPLE(CFTPARM)’
Common internal datafiles are initialized using provided configuration files.
CFTINIT –N 2
Specific internal datafiles for node 2 are initialized (CATALOG.N02,COM.N02,LOG1.N02,LOG2.N02C).
JCL
..INSTALL(MNINIT)
cftcoplThe executable CFTCOPL starts the Copilot (Node Manager and UI server).
Syntax
EXEC PGM=CFTCOPL
JCL
..INSTALL(MNRMNG)
The files such as COM, CATALOG, or LOG are not assigned in the JCL.
Transfer CFT z/OS 3.3.2 Installation and Operation Guide 108
4 Multi-node architecture
copstopThe executable COPSTOP stops the Copilot (Node Manager and UI server). When stopping a Copilot on a host, all nodes running on this host are stopped and re-started on the other hosts in the cluster.
Syntax
copstop
Usage
COPSTOP
JCL
..INSTALL(COPSTOP)
startThe start command starts one or all nodes. If no node is specified, all nodes are started.
Note You must first start the node manager.
Syntax
start [options]
OptionsThe -n|-node <node_id> starts the node <node_id>.
Usage
EXEC PCFTUTL,PG=CFT,PARM=’start’
All nodes are started by the node managers.
EXEC PCFTUTL,PG=CFT,PARM=’start –n 0’
Node 0 is started by a node manager.
JCL
..INSTALL(MNSTART)
stopThe stop command stops one or all nodes. If no node is specified, all nodes are stopped.
Syntax
Transfer CFT z/OS 3.3.2 Installation and Operation Guide 109
4 Multi-node architecture
stop [options]
OptionsThe -n|-node <node_id> stops the node <node_id>.
Usage
EXEC PCFTUTL,PG=CFT,PARM=’stop’
Stops all nodes.
EXEC PCFTUTL,PG=CFT,PARM=’stop –n 0’
Stops node 0.
JCL
..INSTALL(MNSTOP)
restartThe restart command restarts one or all nodes. If no node is specified all nodes are restarted.
Note You must first start the node manager.
Syntax
restart [options]
Options
The -n|-node <node_id> re-starts the node <node_id>.
The -ln|-local_node re-starts all nodes hosted locally that are running on the host from where the command is performed.
Usage
EXEC PCFTUTL,PG=CFT,PARM=’restart’
All nodes are re-started by the node managers.
EXEC PCFTUTL,PG=CFT,PARM=’restart –n 0’
Node 0 is re-started by a node manager.
EXEC PCFTUTL,PG=CFT,PARM=’restart –ln’
All nodes hosted locally are re-started by the node manager.
JCL
..INSTALL(MNRESTAR)
Transfer CFT z/OS 3.3.2 Installation and Operation Guide 110
4 Multi-node architecture
add_hostThe add_host command adds a new host entry in the configuration. The following UCONF parameters are set:
l cft.multi_node.hostnames
l cft.multi_node.hostnames.<hostname>.host = <host_address>
Syntax
add_host –hostname <hostname> –host <host_address>
Usage
EXEC PCFTUTL,PG=CFT,PARM=’add_host –hostname srv0 –host srv0.domain.int’
JCL
..INSTALL(MNAHOST)
add_nodeThe add_node command adds a new node to the Transfer CFT cluster. The number of nodes is incremented (uconf: cft.multi_node.nodes = N+1). The internal datafiles associated with the new node are initialized and the node state is set to DISABLED (uconf:cft.multi_node.nodes.<node_id>.nodestate).
Syntax
add_node
Usage
EXEC PCFTUTL,PG=CFT,PARM=’add_node’
JCL
..INSTALL(MNANODE)
remove_nodeThe cft remove_node command removes the node identified by the higher node id in the Transfer CFT cluster. To remove a node, the node state must be both DISABLED (uconf:cft.multi_node.nodes.<node_id>.nodestate) and STOPPED (uconf:cft.multi_node.nodes.<node_id>.state).
The node number is decremented (uconf: cft.multi_node.nodes = N+1) , and any internal datafiles associated with the node are removed.
Syntax
remove_node –n <the_higher_node_id>
Transfer CFT z/OS 3.3.2 Installation and Operation Guide 111

4 Multi-node architecture
Usage
EXEC PCFTUTIL,PG=CFT,PARM=’remove_node –n 3’
JCL
..INSTALL(MNREMOVE)
enable_nodeThe enable_node command enables the specified node. The node state is set from DISABLED to ENABLED_STOPPED (uconf:cft.multi_node.nodes.<node_id>.nodestate).
Syntax
enable_node -n -<node_id>
Usage
EXEC PCFTUTIL,PG=CFT,PARM=’enable_node -n -<node_id>’
JCL
..INSTALL(MNENABLE)
disable_nodeThe disable_node command disables the specified node. The parameter uconf:cft.multi_node.nodes.<node_id>.disabling is set to Yes.
l The node unregisters its listening points from the connection dispatcher so that it does not received incoming requests.
l Outgoing requests coming from APIs are no longer dispatched to this node.
l Once the catalog related to the node is empty, the node state is set to DISABLED and the node stops.
Syntax
disable_node -n -<node_id>
Usage
EXEC PCFTUTIL,PG=CFT,PARM=’disable_node -n -<node_id>’
JCL
..INSTALL(MNDISABL)
Transfer CFT z/OS 3.3.2 Installation and Operation Guide 112

4 Multi-node architecture
cftpingThe cftping command checks the status of one or all enabled nodes. By default the cftping checks status of all nodes.
Return values:
l 0: all enabled nodes are stopped
l 1: all enabled nodes are running
l 2: not all enabled nodes are running
Syntax
cftping [options]
Options
-n|-node <node_id> checks the status of the node <node_id>
-v verbose mode
-p shows PID (Process IDs) of all CFTMAIN processes
-h shows the help
JCL
..INSTALL(MNPING)
listlogUse the CFTUTIL listlog command to display the log content, which can be defined according to certain criteria, such as date or node. Additionally, you can filter the log according to multiple criteria, or view a log that is merged for several nodes in cluster mode.
display/listcatUse the CFTUTIL display or CFTUTIL listcat to show catalog transfer records. In multi-node, these commands aggregate all catalog internal datafiles to show catalog transfer records as a unique catalog.
Note The first character in the IDTU corresponds to the node number.
Transfer CFT z/OS 3.3.2 Installation and Operation Guide 113
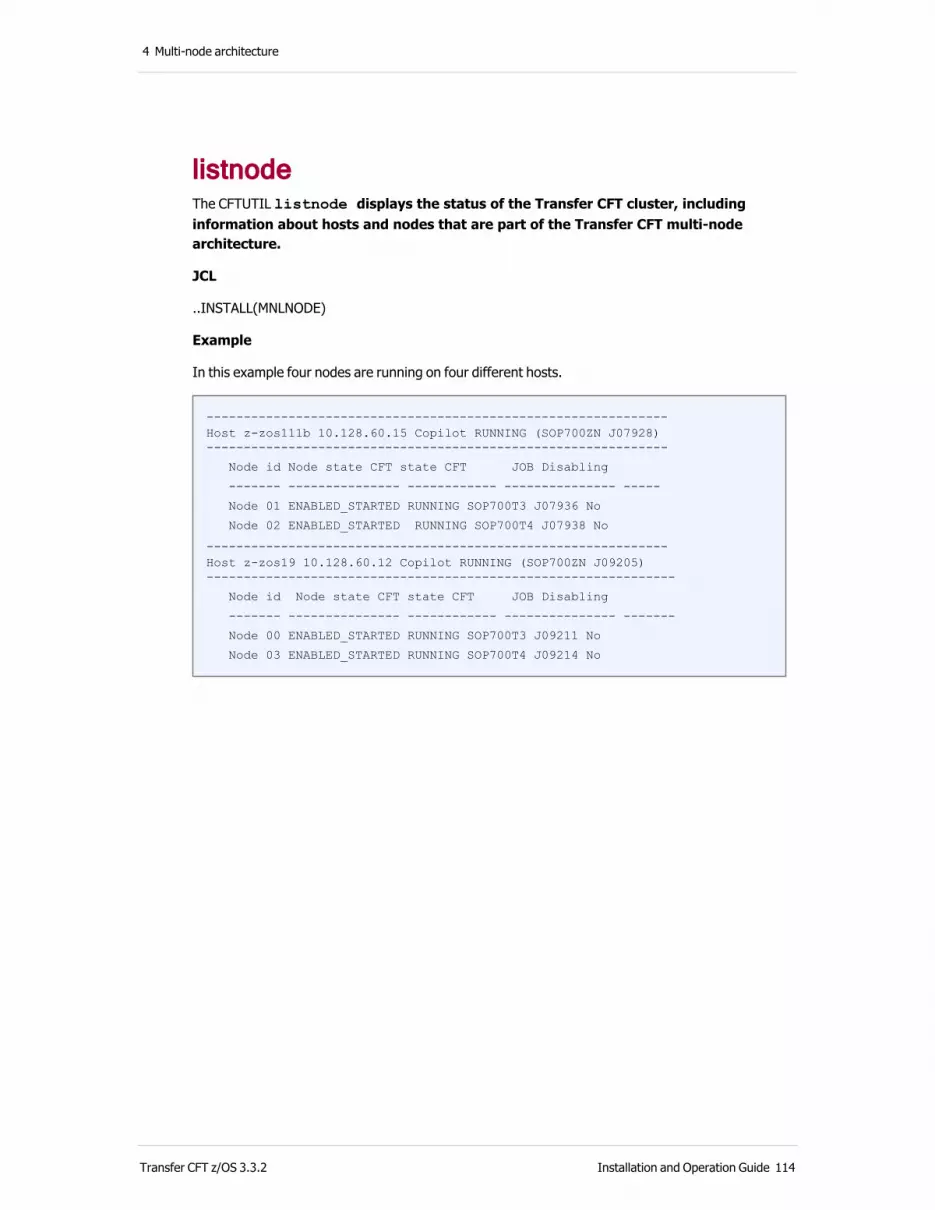
4 Multi-node architecture
listnodeThe CFTUTIL listnode displays the status of the Transfer CFT cluster, including information about hosts and nodes that are part of the Transfer CFT multi-node architecture.
JCL
..INSTALL(MNLNODE)
Example
In this example four nodes are running on four different hosts.
--------------------------------------------------------------Host z-zos111b 10.128.60.15 Copilot RUNNING (SOP700ZN J07928)--------------------------------------------------------------
Node id Node state CFT state CFT JOB Disabling
------- --------------- ------------ --------------- -----
Node 01 ENABLED_STARTED RUNNING SOP700T3 J07936 No
Node 02 ENABLED_STARTED RUNNING SOP700T4 J07938 No
--------------------------------------------------------------Host z-zos19 10.128.60.12 Copilot RUNNING (SOP700ZN J09205)---------------------------------------------------------------
Node id Node state CFT state CFT JOB Disabling
------- --------------- ------------ --------------- -------
Node 00 ENABLED_STARTED RUNNING SOP700T3 J09211 No
Node 03 ENABLED_STARTED RUNNING SOP700T4 J09214 No
Transfer CFT z/OS 3.3.2 Installation and Operation Guide 114

4 Multi-node architecture
Configuration parametersThis topic presents the multi-node uconf parameters and their default values. The column Modify indicates a strong recommendation that you should not modify this value if No is indicated.
Parameters Description
Default
Values
Modify
cft.multi_node.enable Enables/disables the multi-node feature.
No Yes, No Yes
cft.multi_node.max Maximum number of nodes.
16 integer from 0 to 16
No
cft.multi_node.cftcomlock.fname
Lock file for the main communication media file task in multi-node
$(cft.runtime_dir)/data/cftcom.lck
fname Yes
cft.multi_node.cftcom.dispatcher_policy
Specifies the dispatching policy. - round_robin: Random dispatching across all nodes occurs.- node_affinity: Creates a one to one link between a partner and a node. Transfer requests for a given partner will always be performed by the same node.
round_robin round_robin, node_affinity
Yes
cft.multi_node.sharedidt.fname
Shared file for global IDT calculation in multi-node
$(cft.runtime_dir)/data/cftsidt
fname Yes
cft.multi_node.sharedidt.enable
Use global IDT calculation method
No Yes, No Yes
Transfer CFT z/OS 3.3.2 Installation and Operation Guide 115
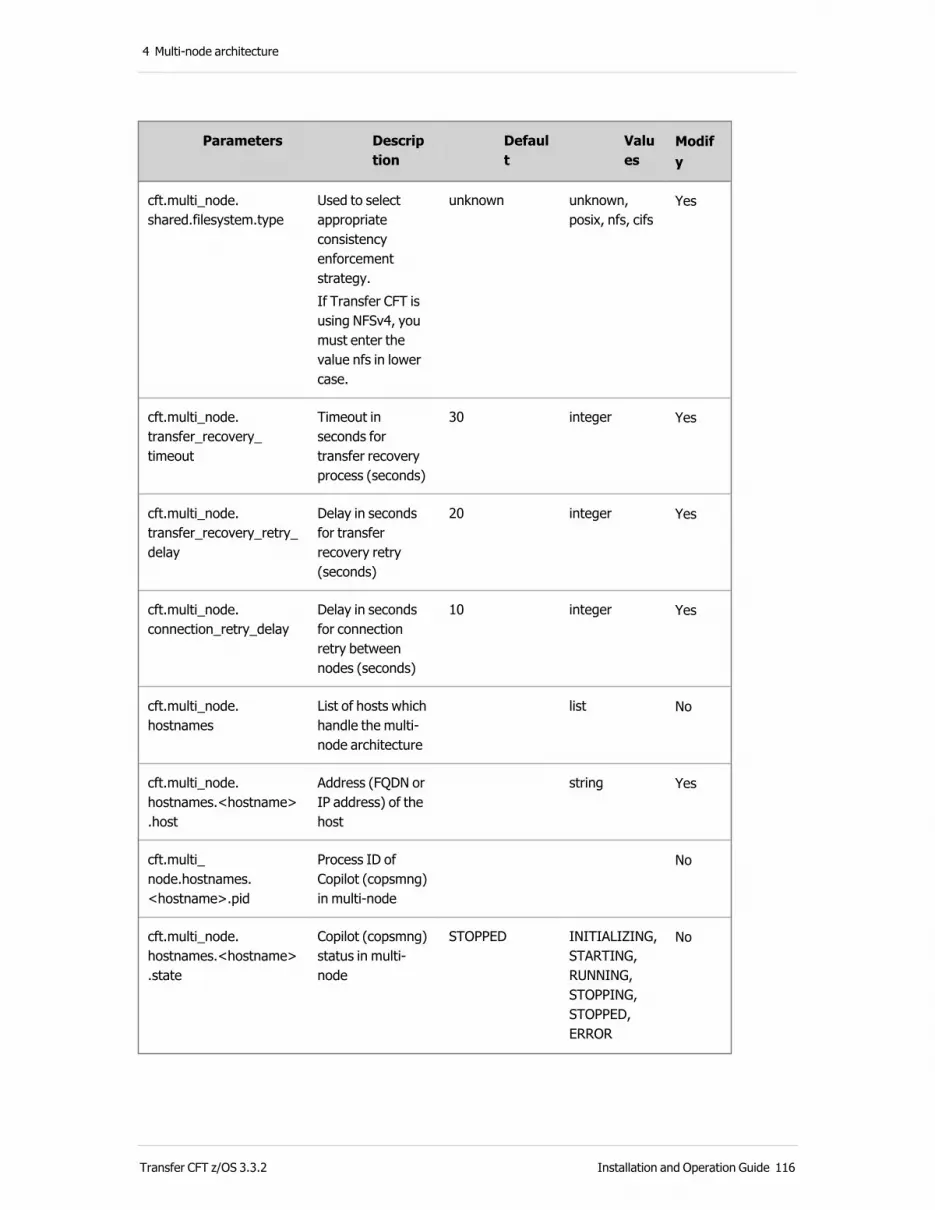
4 Multi-node architecture
Parameters Description
Default
Values
Modify
cft.multi_node.shared.filesystem.type
Used to select appropriate consistency enforcement strategy. If Transfer CFT is using NFSv4, you must enter the value nfs in lower case.
unknown unknown, posix, nfs, cifs
Yes
cft.multi_node.transfer_recovery_timeout
Timeout in seconds for transfer recovery process (seconds)
30 integer Yes
cft.multi_node.transfer_recovery_retry_delay
Delay in seconds for transfer recovery retry (seconds)
20 integer Yes
cft.multi_node.connection_retry_delay
Delay in seconds for connection retry between nodes (seconds)
10 integer Yes
cft.multi_node.hostnames
List of hosts which handle the multi-node architecture
list No
cft.multi_node.hostnames.<hostname>.host
Address (FQDN or IP address) of the host
string Yes
cft.multi_node.hostnames.<hostname>.pid
Process ID of Copilot (copsmng) in multi-node
No
cft.multi_node.hostnames.<hostname>.state
Copilot (copsmng) status in multi-node
STOPPED INITIALIZING, STARTING, RUNNING, STOPPING, STOPPED, ERROR
No
Transfer CFT z/OS 3.3.2 Installation and Operation Guide 116

4 Multi-node architecture
Parameters Description
Default
Values
Modify
cft.multi_node.hostnames.<hostname>.copui_pid
Process ID of UI server (copui) in multi-node
No
cft.multi_node.hostnames.<hostname>.copui_client_socket
Windows socket passing for UI server (copui) in multi-node
integer No
cft.multi_node.hostnames.<hostname>.copui_notification_port
Notification port for UI server (copui) in multi-node
integer No
cft.multi_node.nodes Number of nodes 2 integer from 2 to $(cft.multi_node.max)
No
cft.multi_node.nodes.<node_id>.nodestate
Node status DISABLED DISABLED, ENABLED_STOPPED, ENABLED_STARTED
No
cft.multi_node.nodes.<node_id>.state
Transfer CFT status
STOPPED INITIALIZING, STARTING, RUNNING, STOPPING, STOPPED, ERROR
No
cft.multi_node.nodes.<node_id>.pid
CFTMAIN process ID
integer No
cft.multi_node.nodes.<node_id>.hostname
Hostname of the server where the node is running on
string No
cft.multi_node.nodes.<node_id>.host
Host address of the server where the node is running on.
string No
Transfer CFT z/OS 3.3.2 Installation and Operation Guide 117
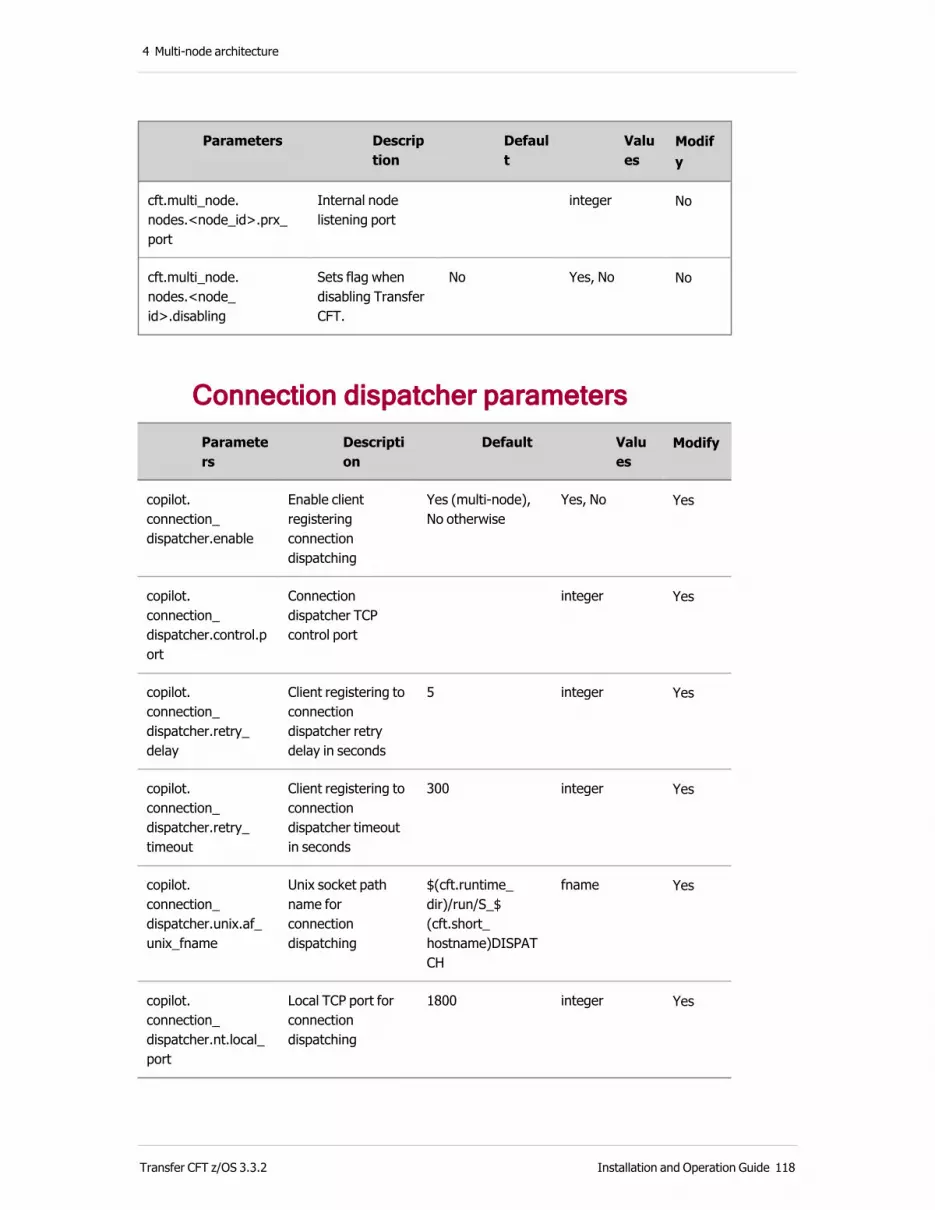
4 Multi-node architecture
Parameters Description
Default
Values
Modify
cft.multi_node.nodes.<node_id>.prx_port
Internal node listening port
integer No
cft.multi_node.nodes.<node_id>.disabling
Sets flag when disabling Transfer CFT.
No Yes, No No
Connection dispatcher parametersParameters
Description
Default Values
Modify
copilot.connection_dispatcher.enable
Enable client registering connection dispatching
Yes (multi-node), No otherwise
Yes, No Yes
copilot.connection_dispatcher.control.port
Connection dispatcher TCP control port
integer Yes
copilot.connection_dispatcher.retry_delay
Client registering to connection dispatcher retry delay in seconds
5 integer Yes
copilot.connection_dispatcher.retry_timeout
Client registering to connection dispatcher timeout in seconds
300 integer Yes
copilot.connection_dispatcher.unix.af_unix_fname
Unix socket path name for connection dispatching
$(cft.runtime_dir)/run/S_$(cft.short_hostname)DISPATCH
fname Yes
copilot.connection_dispatcher.nt.local_port
Local TCP port for connection dispatching
1800 integer Yes
Transfer CFT z/OS 3.3.2 Installation and Operation Guide 118
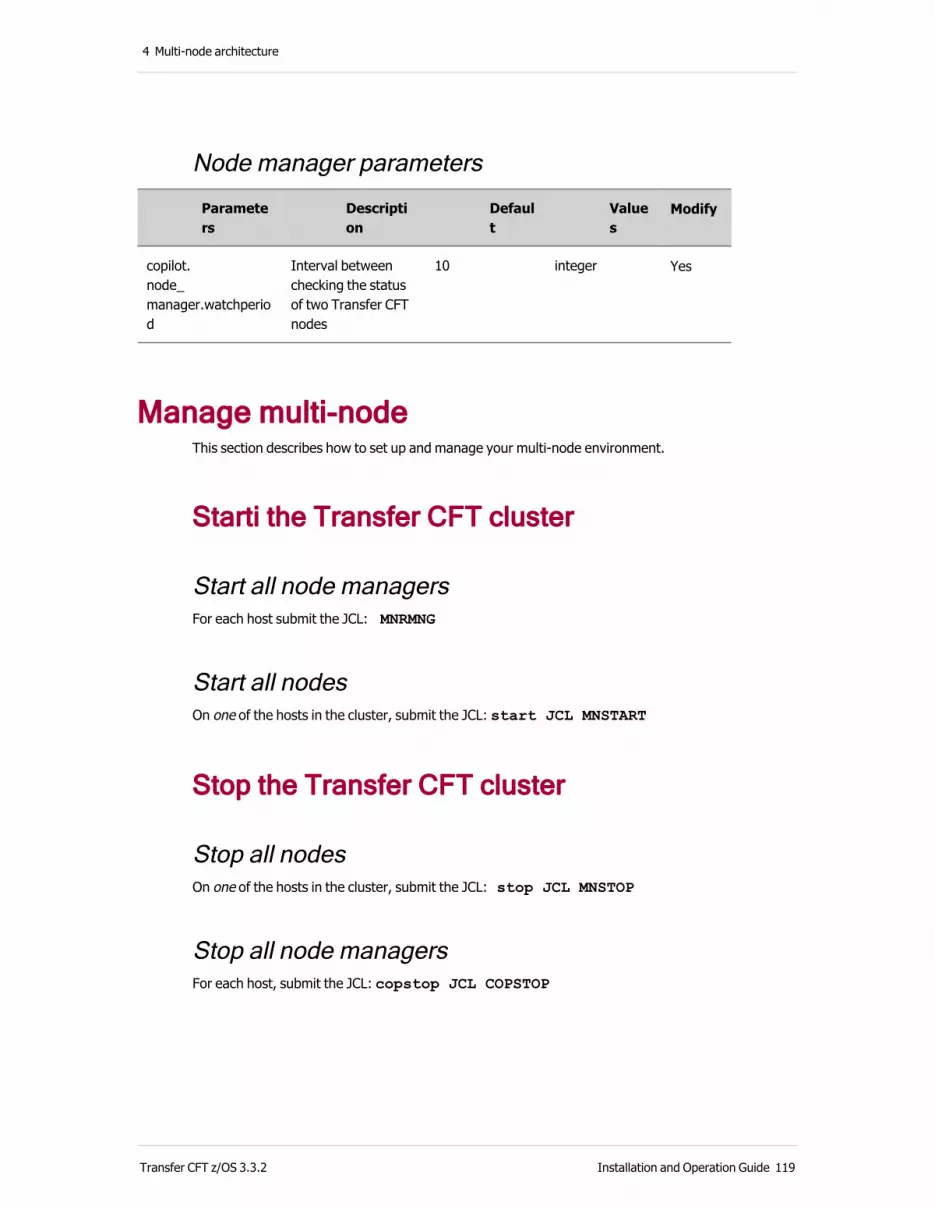
4 Multi-node architecture
Node manager parameters
Parameters
Description
Default
Values
Modify
copilot.node_manager.watchperiod
Interval between checking the status of two Transfer CFT nodes
10 integer Yes
Manage multi-node This section describes how to set up and manage your multi-node environment.
Starti the Transfer CFT cluster
Start all node managersFor each host submit the JCL: MNRMNG
Start all nodesOn one of the hosts in the cluster, submit the JCL: start JCL MNSTART
Stop the Transfer CFT cluster
Stop all nodesOn one of the hosts in the cluster, submit the JCL: stop JCL MNSTOP
Stop all node managersFor each host, submit the JCL: copstop JCL COPSTOP
Transfer CFT z/OS 3.3.2 Installation and Operation Guide 119

4 Multi-node architecture
Add a host to the cluster
Install Transfer CFT binaries on the target host l If binaries and runtime files are stored on the shared disk, skip this step and go to "Add the target host to the cluster".
l Install binaries on the host using the Axway Installer and choose the Cluster Installation Architecture with the additional nodes option.
Add the target host to the clusterExecute: add_host –hostname <hostname> -host <host_address> (JCL MNAHOST)
Start the node managerStart the node manager using: JCL MNRMNG
Add a node to the Transfer CFT clusterIn this example the Transfer CFT cluster accounts at the beginning two nodes, node 0 and node 1.
Add a nodeExecute the following command to add a new node: add_node (JCL MNANODE)
The node 2 is created. The cluster is composed of three nodes: node 0, node 1 and node 2. All associated files associated with node 2 are initialized and its node state is set to DISABLED.
Note When adding a node, you must add the corresponding new license for that node in a license-key file ..UPARM(PRODKEY) by default.
Enable a nodeOnce the new node has been added, you can now enable it using the command: enable_node -n 2 (JCL MNENABLE)
Start a nodeThe node 2 can be started using the command: start -n 2 (JCL MNSTART)
Transfer CFT z/OS 3.3.2 Installation and Operation Guide 120
4 Multi-node architecture
Remove a node from the Transfer CFT clusterNote Only the last node can be removed.
Disable the last nodeYou must fence the last node before removing it, as follows.
Enter: disable_node –n <node_id> (JCL MNDISABL)
The node runs as long as its catalog is not empty. Once the catalog is empty, the node state is set to DISABLED and the node stops automatically.
Remove the last nodeAfter fencing and stopping the last node, you can remove it.
Enter: remove_node –n <node_id> (JCL MNREMOVE)
Rebalance after a fail overOnce the failed node manager is running again, you can rebalance the cluster by re-starting one or multiple nodes.
In this example there are two hosts (host00 and host01), and two nodes (node00 and node01). Node00 is running on host00, and node01 is running on host01.
1. Host00 and node00 experience a failover.
2. The host01 node manager re-starts the node00 locally.
3. Node00 and node01 run on host01.
4. Host00 and its node manager are manually re-started.
5. From one of the Transfer CFT cluster hosts, host00 or host01, execute the command: restart –n 0 (JCL MNRESTAR)
6. The host00 node manager restarts the node00 locally.
Step results: Node00 is running on host00, and node01 running on host01.
Transfer CFT z/OS 3.3.2 Installation and Operation Guide 121

Transfer CFT z/OS 3.3.2 Installation and Operation Guide 122
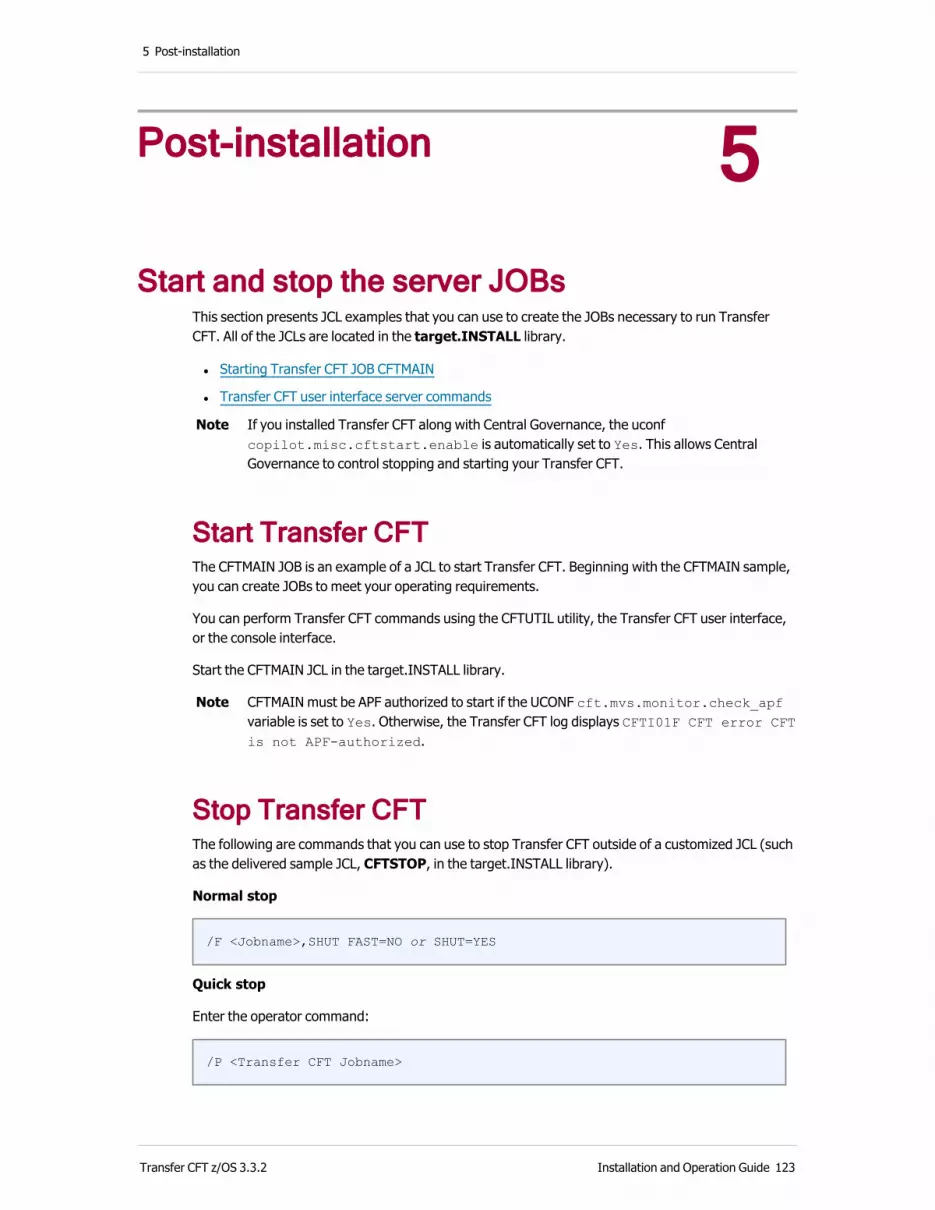
5 Post-installation
5 Post-installation
Start and stop the server JOBsThis section presents JCL examples that you can use to create the JOBs necessary to run Transfer CFT. All of the JCLs are located in the target.INSTALL library.
l Starting Transfer CFT JOB CFTMAIN
l Transfer CFT user interface server commands
Note If you installed Transfer CFT along with Central Governance, the uconf copilot.misc.cftstart.enable is automatically set to Yes. This allows Central Governance to control stopping and starting your Transfer CFT.
Start Transfer CFT The CFTMAIN JOB is an example of a JCL to start Transfer CFT. Beginning with the CFTMAIN sample, you can create JOBs to meet your operating requirements.
You can perform Transfer CFT commands using the CFTUTIL utility, the Transfer CFT user interface, or the console interface.
Start the CFTMAIN JCL in the target.INSTALL library.
Note CFTMAIN must be APF authorized to start if the UCONF cft.mvs.monitor.check_apf variable is set to Yes. Otherwise, the Transfer CFT log displays CFTI01F CFT error CFT is not APF-authorized.
Stop Transfer CFT The following are commands that you can use to stop Transfer CFT outside of a customized JCL (such as the delivered sample JCL, CFTSTOP, in the target.INSTALL library).
Normal stop
/F <Jobname>,SHUT FAST=NO or SHUT=YES
Quick stop
Enter the operator command:
/P <Transfer CFT Jobname>
Transfer CFT z/OS 3.3.2 Installation and Operation Guide 123
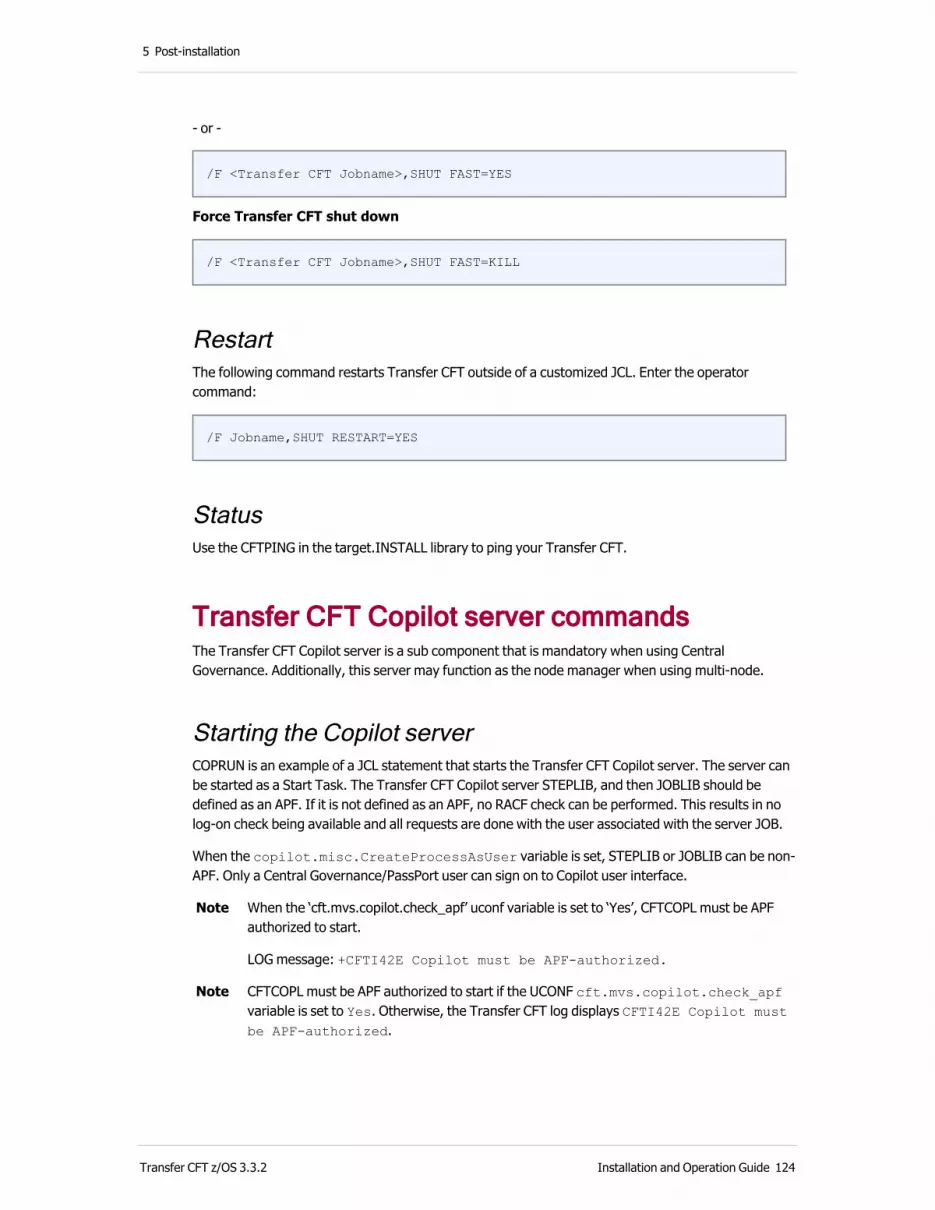
5 Post-installation
- or -
/F <Transfer CFT Jobname>,SHUT FAST=YES
Force Transfer CFT shut down
/F <Transfer CFT Jobname>,SHUT FAST=KILL
RestartThe following command restarts Transfer CFT outside of a customized JCL. Enter the operator command:
/F Jobname,SHUT RESTART=YES
Status Use the CFTPING in the target.INSTALL library to ping your Transfer CFT.
Transfer CFT Copilot server commandsThe Transfer CFT Copilot server is a sub component that is mandatory when using Central Governance. Additionally, this server may function as the node manager when using multi-node.
Starting the Copilot serverCOPRUN is an example of a JCL statement that starts the Transfer CFT Copilot server. The server can be started as a Start Task. The Transfer CFT Copilot server STEPLIB, and then JOBLIB should be defined as an APF. If it is not defined as an APF, no RACF check can be performed. This results in no log-on check being available and all requests are done with the user associated with the server JOB.
When the copilot.misc.CreateProcessAsUser variable is set, STEPLIB or JOBLIB can be non-APF. Only a Central Governance/PassPort user can sign on to Copilot user interface.
Note When the ‘cft.mvs.copilot.check_apf’ uconf variable is set to ‘Yes’, CFTCOPL must be APF authorized to start.
LOG message: +CFTI42E Copilot must be APF-authorized.
Note CFTCOPL must be APF authorized to start if the UCONF cft.mvs.copilot.check_apf variable is set to Yes. Otherwise, the Transfer CFT log displays CFTI42E Copilot must be APF-authorized.
Transfer CFT z/OS 3.3.2 Installation and Operation Guide 124
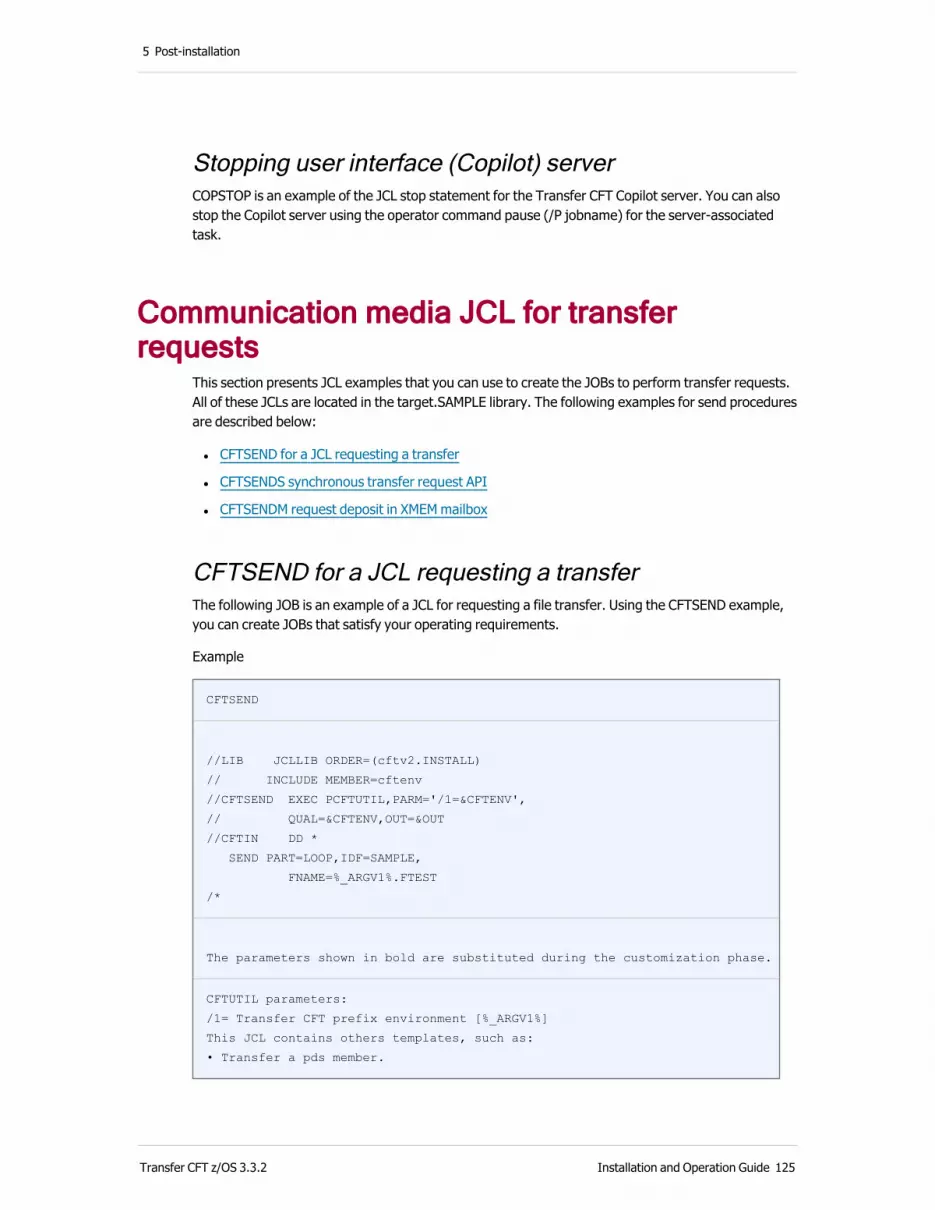
5 Post-installation
Stopping user interface (Copilot) serverCOPSTOP is an example of the JCL stop statement for the Transfer CFT Copilot server. You can also stop the Copilot server using the operator command pause (/P jobname) for the server-associated task.
Communication media JCL for transfer requests
This section presents JCL examples that you can use to create the JOBs to perform transfer requests. All of these JCLs are located in the target.SAMPLE library. The following examples for send procedures are described below:
l CFTSEND for a JCL requesting a transfer
l CFTSENDS synchronous transfer request API
l CFTSENDM request deposit in XMEM mailbox
CFTSEND for a JCL requesting a transferThe following JOB is an example of a JCL for requesting a file transfer. Using the CFTSEND example, you can create JOBs that satisfy your operating requirements.
Example
CFTSEND
//LIB JCLLIB ORDER=(cftv2.INSTALL)
// INCLUDE MEMBER=cftenv
//CFTSEND EXEC PCFTUTIL,PARM='/1=&CFTENV',
// QUAL=&CFTENV,OUT=&OUT
//CFTIN DD *
SEND PART=LOOP,IDF=SAMPLE,
FNAME=%_ARGV1%.FTEST
/*
The parameters shown in bold are substituted during the customization phase.
CFTUTIL parameters:
/1= Transfer CFT prefix environment [%_ARGV1%]
This JCL contains others templates, such as:
• Transfer a pds member.
Transfer CFT z/OS 3.3.2 Installation and Operation Guide 125

5 Post-installation
• Transfer files from a files list.
• Transfer a file using broadcast list.
• Generate and transfer a files list.
• Transfer a group files
• Transfer a group files using REGEX filter.
CFTSENDS synchronous transfer request API Example
CFTSENDS
//LIB JCLLIB ORDER=(cftv2.INSTALL)
// INCLUDE MEMBER=cftenv
//CFTSENDS EXEC PCFTUTIL,PARM='/1=&CFTENV',
// QUAL=&CFTENV,OUT=&OUT
/* ---- WITH INDIRECT CONFIGURATION FILE ---- */
CONFIG TYPE=COM,FNAME=$CFTTCP
SEND PART=LOOP,IDF=SAMPLE,
FNAME=%_ARGV1%.FTEST
The parameters shown in bold are substituted during the customization phase
CFTUTIL parameters:
/1= Transfer CFT prefix environment [%_ARGV1%]
CFTSENDM request deposit in XMEM mailboxThe CFTSENDM JOB is an example of a JCL file transfer request for a deposit in the Communication media server mailbox in cross-memory (XMEM). Starting with the CFTSENDM example, you can create jobs that correspond to your operating needs with optimized response times.
Example
This JCL for a transfer request uses the communication commands for the server mailbox in cross-memory (XMEM) to explicitly select:
l Mailbox (CFTPT262)
l XMEM server (TXTPCMBX)
CFTSENDM
Transfer CFT z/OS 3.3.2 Installation and Operation Guide 126

5 Post-installation
//LIB JCLLIB ORDER=(cftv2.INSTALL)
// INCLUDE MEMBER=cftenv
//CFTSENDS EXEC PCFTUTIL,PARM='/1=&CFTENV',
// QUAL=&CFTENV,OUT=&OUT
CONFIG TYPE=COM,MEDIACOM=MBX,FNAME='CFTPT262TXTPCMBX'
SEND PART=LOOP,IDF=SAMPLE,
FNAME=%_ARGV1%.FTEST
The parameters shown in bold are substituted during the customization phase
CFTUTIL parameters:
/1= Transfer CFT prefix environment [%_ARGV1%]
This JCL contains others templates, such as:
• Direct COM media configuration.
• Wait end of transfer (using WSTATES parameter)
CFTSWAIT JCL show other example of SYNCHROUNOUS API usage.
Example
This JCL transfer request uses the communication commands for the server mailbox in cross-memory (XMEM) to explicitly select:
l Mailbox (CFTPT262)
l Default server (defined in A12OPTS)
CFTSENDM
//LIB JCLLIB ORDER=(cftv2.INSTALL)
// INCLUDE MEMBER=cftenv
//CFTSENDS EXEC PCFTUTIL,PARM='/1=&CFTENV',
// QUAL=&CFTENV,OUT=&OUT
CONFIG TYPE=COM,MEDIACOM=MBX,FNAME='CFTPT262'
SEND PART=LOOP,IDF=SAMPLE,
FNAME=%_ARGV1%.FTEST
The parameters shown in bold are substituted during the customization phase
CFTUTIL parameters:
/1= Transfer CFT prefix environment [%_ARGV1%]
Transfer CFT z/OS 3.3.2 Installation and Operation Guide 127
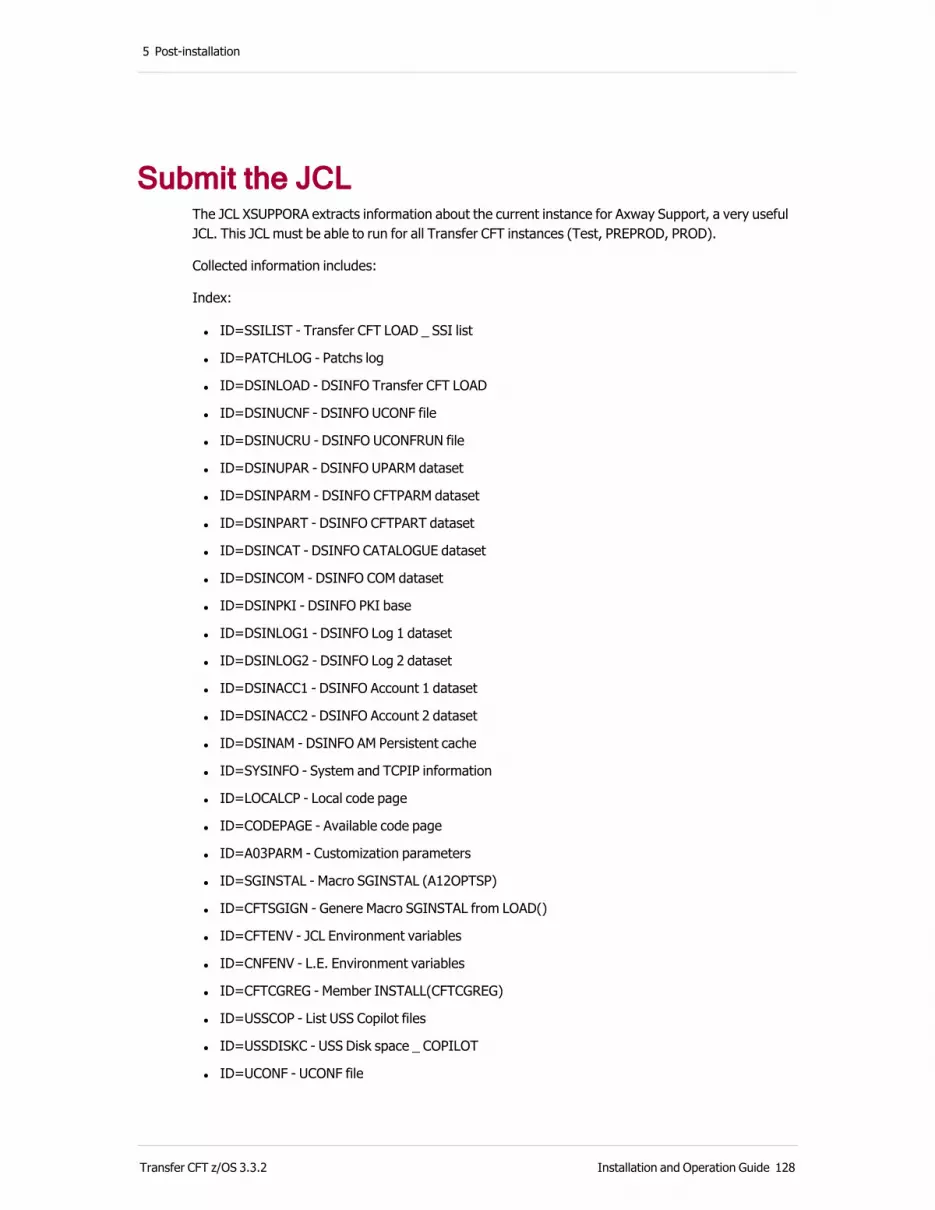
5 Post-installation
Submit the JCL The JCL XSUPPORA extracts information about the current instance for Axway Support, a very useful JCL. This JCL must be able to run for all Transfer CFT instances (Test, PREPROD, PROD).
Collected information includes:
Index:
l ID=SSILIST - Transfer CFT LOAD _ SSI list
l ID=PATCHLOG - Patchs log
l ID=DSINLOAD - DSINFO Transfer CFT LOAD
l ID=DSINUCNF - DSINFO UCONF file
l ID=DSINUCRU - DSINFO UCONFRUN file
l ID=DSINUPAR - DSINFO UPARM dataset
l ID=DSINPARM - DSINFO CFTPARM dataset
l ID=DSINPART - DSINFO CFTPART dataset
l ID=DSINCAT - DSINFO CATALOGUE dataset
l ID=DSINCOM - DSINFO COM dataset
l ID=DSINPKI - DSINFO PKI base
l ID=DSINLOG1 - DSINFO Log 1 dataset
l ID=DSINLOG2 - DSINFO Log 2 dataset
l ID=DSINACC1 - DSINFO Account 1 dataset
l ID=DSINACC2 - DSINFO Account 2 dataset
l ID=DSINAM - DSINFO AM Persistent cache
l ID=SYSINFO - System and TCPIP information
l ID=LOCALCP - Local code page
l ID=CODEPAGE - Available code page
l ID=A03PARM - Customization parameters
l ID=SGINSTAL - Macro SGINSTAL (A12OPTSP)
l ID=CFTSGIGN - Genere Macro SGINSTAL from LOAD()
l ID=CFTENV - JCL Environment variables
l ID=CNFENV - L.E. Environment variables
l ID=CFTCGREG - Member INSTALL(CFTCGREG)
l ID=USSCOP - List USS Copilot files
l ID=USSDISKC - USS Disk space _ COPILOT
l ID=UCONF - UCONF file
Transfer CFT z/OS 3.3.2 Installation and Operation Guide 128
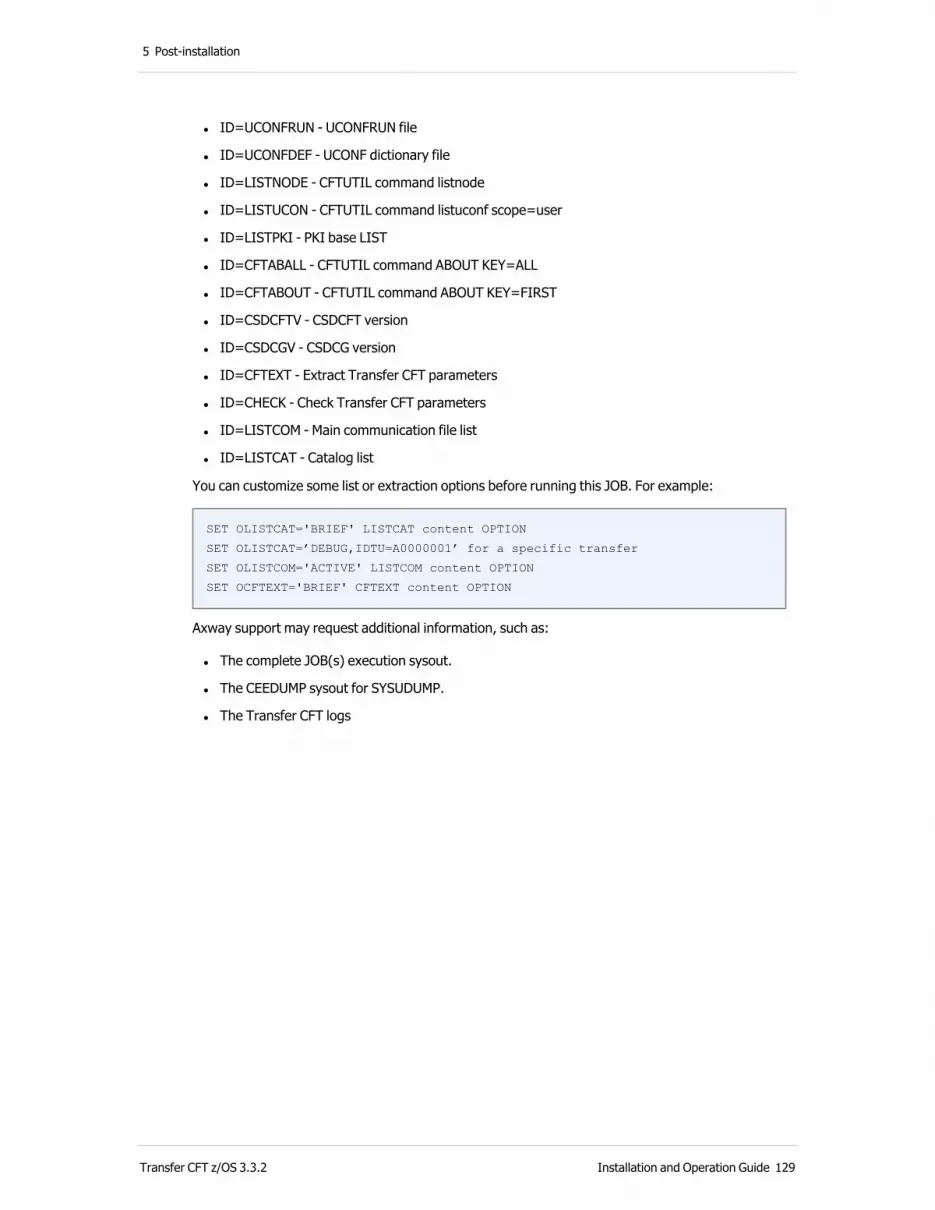
5 Post-installation
l ID=UCONFRUN - UCONFRUN file
l ID=UCONFDEF - UCONF dictionary file
l ID=LISTNODE - CFTUTIL command listnode
l ID=LISTUCON - CFTUTIL command listuconf scope=user
l ID=LISTPKI - PKI base LIST
l ID=CFTABALL - CFTUTIL command ABOUT KEY=ALL
l ID=CFTABOUT - CFTUTIL command ABOUT KEY=FIRST
l ID=CSDCFTV - CSDCFT version
l ID=CSDCGV - CSDCG version
l ID=CFTEXT - Extract Transfer CFT parameters
l ID=CHECK - Check Transfer CFT parameters
l ID=LISTCOM - Main communication file list
l ID=LISTCAT - Catalog list
You can customize some list or extraction options before running this JOB. For example:
SET OLISTCAT='BRIEF' LISTCAT content OPTION
SET OLISTCAT=’DEBUG,IDTU=A0000001’ for a specific transfer
SET OLISTCOM='ACTIVE' LISTCOM content OPTION
SET OCFTEXT='BRIEF' CFTEXT content OPTION
Axway support may request additional information, such as:
l The complete JOB(s) execution sysout.
l The CEEDUMP sysout for SYSUDUMP.
l The Transfer CFT logs
Transfer CFT z/OS 3.3.2 Installation and Operation Guide 129

5 Post-installation
Facilitate deploymentTransfer CFT delivers procedures that can help you deploy instances to other LPARs as well as deploy patches and service packs.
You require the following environments in order to install and deploy Transfer CFT:
l Distribution environment
l Transfer CFT run-time instance environment
For a detailed description of these environments, see Non-SMP/E: Create the distribution environment on page 36.
Deployment overview
The following sections describe how to:
l Create a master copy (1)
l Distribute the master copy (2)
l Restore the master copy (3)
l Install the instance (4)
Transfer CFT z/OS 3.3.2 Installation and Operation Guide 130
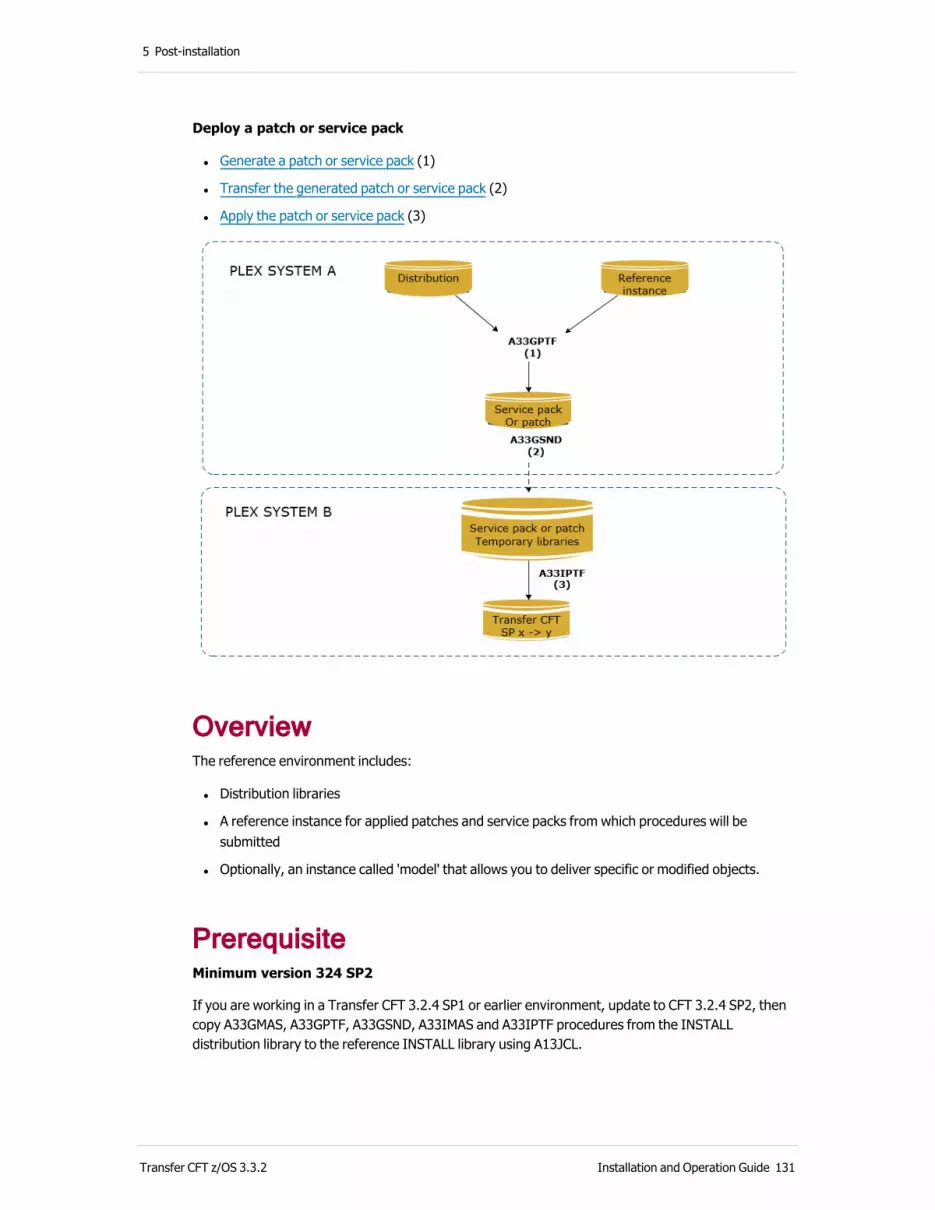
5 Post-installation
Deploy a patch or service pack
l Generate a patch or service pack (1)
l Transfer the generated patch or service pack (2)
l Apply the patch or service pack (3)
OverviewThe reference environment includes:
l Distribution libraries
l A reference instance for applied patches and service packs from which procedures will be submitted
l Optionally, an instance called 'model' that allows you to deliver specific or modified objects.
PrerequisiteMinimum version 324 SP2
If you are working in a Transfer CFT 3.2.4 SP1 or earlier environment, update to CFT 3.2.4 SP2, then copy A33GMAS, A33GPTF, A33GSND, A33IMAS and A33IPTF procedures from the INSTALL distribution library to the reference INSTALL library using A13JCL.
Transfer CFT z/OS 3.3.2 Installation and Operation Guide 131
5 Post-installation
Create a master copyA master copy is the product version that you want to deploy, and can be either a basic Transfer CFT installation, or a specific patch or service pack level.
Use the A33GMAS JCL to create the master copy from the distribution environment and from the reference instance.
You must customize the following 4 variables before submitting the JCL.
l SQUAL Qualifying source:
o Mode 1: Prefix distribution
o Mode 2: Prefix model target
l TQUAL: Transport prefix qualifier
l COPBASE Copilot PAX id: COPBASE, SP id or NONE
l XSRBASE Secure relay PAX id: XSRBASE, SP id or NONE
An XMIT file is generated.
Distribute the master copyUse the A33GSND JCL to transfer the following elements via FTP:
l Master copy
l The components necessary to restore the master copy
Note Customize variables before submitting the JCL.
l Common variables:
o ADDRESS Remote address
o RQUAL Remote QUALIFIER (instance prefix)
o RVOL Remote Volume (optional)
o USER User for FTP
o PSW Password for FTP
l Specific variables:
o SNDFIL the master copy file (ADRDSSU/XMIT, generated by A33GMAS)
o MEMPRD the product name defined in A33IMAS
o MEMJCL A33IMAS JCL to restore the product
Transfer CFT z/OS 3.3.2 Installation and Operation Guide 132

5 Post-installation
This creates a remote UPLIB library.
Restore the master copy 1. Customize the following variables before submitting the A33IMAS JCL.
l QUAL: identifies the prefix under which the Transfer CFT instance is restored
l PUPLIB: Set variable PUPLIB in accordance with A33GSND
2. From the transferred UPLIB, use A33IMAS JCL to restore the master version.
This creates an instance.
Install the instance 1. Use A00CUSTO JCL to customize the instance.
2. Customize the following variables before submitting the JCL:
l SET CFTV2 = XX.YY.ZZ instance prefix
l SET DISTLIB = XX.YY distribution prefix
l SET DISTLEV = ZZ distribution suffix (last level of CFTV2)
3. If required, adapt the A03PARM JCL and submit it.
4. Run the JCL A05ALL.
This completes the specific part of the Transfer CFT installation. Remaining tasks in include the APF, creating the STC in PROCLIB, etc.
Note ZFS file creation is not taken into account in this process.
Generate a patch or service pack
PrerequisitesThe reference target environment must be up to date.
Procedure 1. Use A33GPTF JCL to generate a patch or a service pack from the distribution environment and
the reference instance.
2. Customize the following 3 parameters before submitting the JCL:
l SQUAL = & DISTLIB Source prefix qualifier
l TQUAL = CFTDEV.REF.TRANSPOR Transport prefix qualify
Transfer CFT z/OS 3.3.2 Installation and Operation Guide 133

5 Post-installation
l ID = 0xxxxx Patch id
An XMIT file is generated.
Transfer the generated patch or service packYou can use the A33GSND JCL to transfer the following elements via FTP:
l A patch or service pack
l Components to apply the patch
Customize the variables before submitting the JCL.
l Common variables:
o ADDRESS Remote address
o RQUAL Remote QUALIFIER (instance prefix)
o RVOL Remote Volume (optional)
o USER User for FTP
o PSW Password for FTP
l Specific variables:
o ID='0xxxxx' Patch id
o SNDFIL=&QUAL..CF&ID Path/SP package (ADRDSSU/XMIT, generated by A33GPTF)
o MEMPRD=CF&ID Patch id (member in UPLIB)
o MEMJCL=A33IPTF JCL to install Patch
This creates a remote UPLIB library.
Transfer CFT z/OS 3.3.2 Installation and Operation Guide 134

5 Post-installation
Apply the patch or service packNote Save the Transfer CFT LOAD, as well as the Copilot USS environment prior to applying a
patch.
1. Customize the A33IPTF JCL delivered in the UPLIB library, and transferred by A33GSND:
Set JCLLIB using the instance prefix qualifiers.
Set the variable ID: Patch ID.
Set the variable PUPLIB in accordance with A33GSND.
2. Submit the JCL.
The instance is now updated.
Set up optional features
Copilot options for log and catalog filtersYou can optionally set up log and catalog filters in Copilot using the JCL described in this section.
The JCL COPFILTR lets you create a directory under the USS to store the Copilot catalog and log filters. This server directory has read, write, and delete rights for Transfer CFT Copilot users, but is independent of the Copilot component directory.
Creating a filter directoryYou use the following JCL and statements to create a filter directory.
Defining the directoryYou will need to enter the directory name twice for the following:
l STP001 - To create the directory
l STP002 - To initialize the variable copilot.general.persistencedir
Example
You can use the following example as a reference for creating your directory. In this example, we used /home/COPILOT/runtime/persist as the new directory.
//*
// SET P='/home/COPILOT/runtime/persist'
//*
Transfer CFT z/OS 3.3.2 Installation and Operation Guide 135

5 Post-installation
//STP001 EXEC PGM=BPXBATCH,
// PARM='SH mkdir -p -m 774 &P'
//STDIN DD DUMMY
//STDOUT DD SYSOUT=*
//STDERR DD SYSOUT=*
//*
//* Set variable: copilot.general.persistencedir
//*
//STP002 EXEC PCFTUTIL,PARM='/1=&P'
//CFTIN DD *
UCONFSET ID=copilot.general.persistencedir,
VALUE='%_ARGV1%'
/*
Transfer CFT to Sentinel communication parametersTo define to enable Sentinel to Transfer CFT interoperability, refer to:
l Communication with an Event via TCP all platforms
l UCONF parameters for Sentinel interoperability all platforms
l Communication with the Event Router for z/OS
l Overflow file definition for z/OS
Communication with an Event via TCP All platforms
This table lists the main parameters that you must define in order to communicate with an Event via TCP, and uses TRKTYPE=TCP as the default value.
Event Router TRKUTIL Transfer CFT
Configuration file
USEPARIN TRKCONF UCONF
Transfer CFT z/OS 3.3.2 Installation and Operation Guide 136
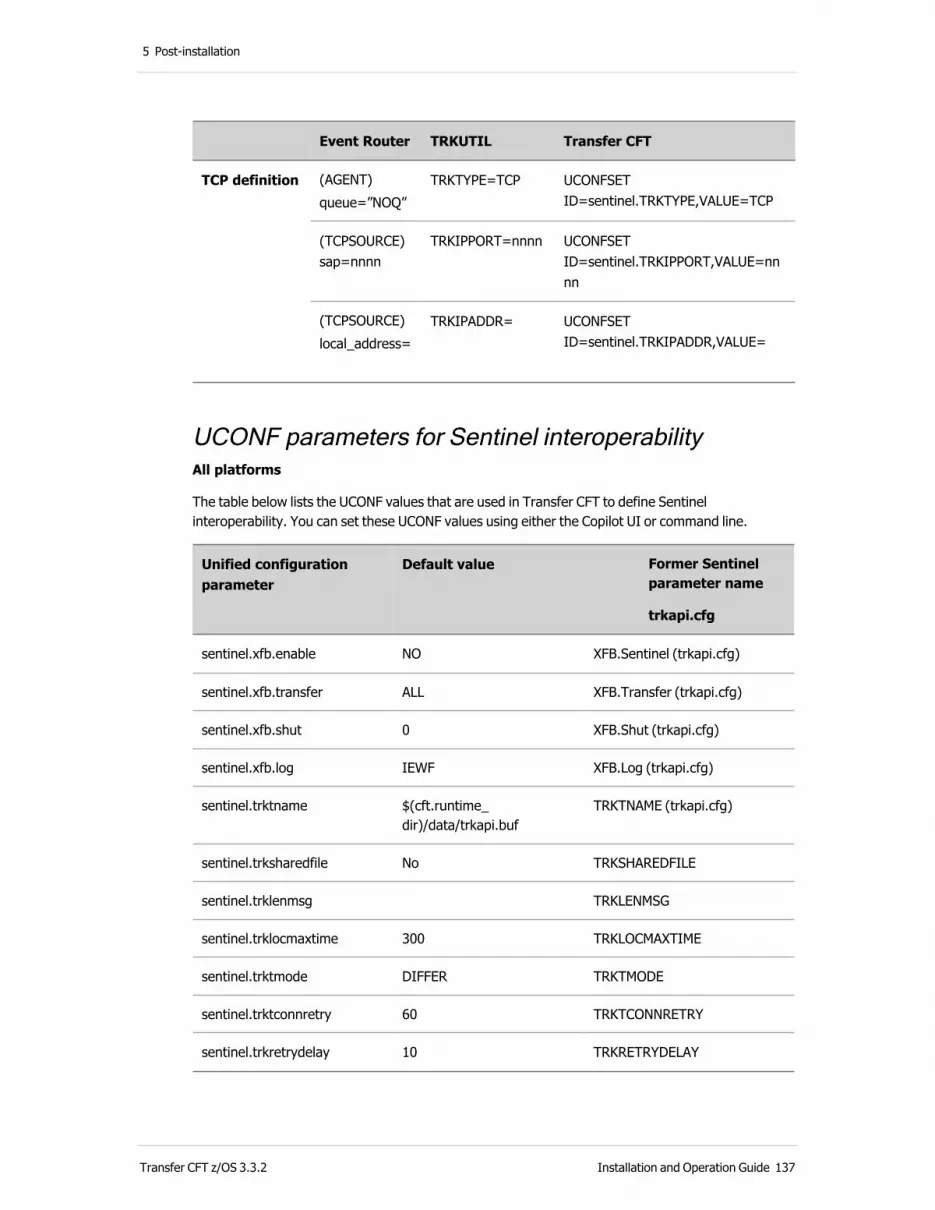
5 Post-installation
Event Router TRKUTIL Transfer CFT
TCP definition (AGENT)queue=”NOQ”
TRKTYPE=TCP UCONFSET ID=sentinel.TRKTYPE,VALUE=TCP
(TCPSOURCE) sap=nnnn
TRKIPPORT=nnnn UCONFSET ID=sentinel.TRKIPPORT,VALUE=nnnn
(TCPSOURCE)local_address=
TRKIPADDR= UCONFSET ID=sentinel.TRKIPADDR,VALUE=
UCONF parameters for Sentinel interoperabilityAll platforms
The table below lists the UCONF values that are used in Transfer CFT to define Sentinel interoperability. You can set these UCONF values using either the Copilot UI or command line.
Unified configuration parameter
Default value Former Sentinel parameter name
trkapi.cfg
sentinel.xfb.enable NO XFB.Sentinel (trkapi.cfg)
sentinel.xfb.transfer ALL XFB.Transfer (trkapi.cfg)
sentinel.xfb.shut 0 XFB.Shut (trkapi.cfg)
sentinel.xfb.log IEWF XFB.Log (trkapi.cfg)
sentinel.trktname $(cft.runtime_dir)/data/trkapi.buf
TRKTNAME (trkapi.cfg)
sentinel.trksharedfile No TRKSHAREDFILE
sentinel.trklenmsg TRKLENMSG
sentinel.trklocmaxtime 300 TRKLOCMAXTIME
sentinel.trktmode DIFFER TRKTMODE
sentinel.trktconnretry 60 TRKTCONNRETRY
sentinel.trkretrydelay 10 TRKRETRYDELAY
Transfer CFT z/OS 3.3.2 Installation and Operation Guide 137

5 Post-installation
Unified configuration parameter
Default value Former Sentinel parameter name
trkapi.cfg
sentinel.trkretrynb 6 TRKRETRYNB
sentinel.trkdelay 10 TRKDELAY
sentinel.trktimeout 60 TRKTIMEOUT
sentinel.trkproductname CFT TRKPRODUCTNAME
sentinel.trkipaddr sentinel-server-hostname TRKIPADDR
sentinel.trkipport 1761 TRKIPPORT
sentinel.trk_min_port 5000 TRK_MIN_PORT
sentinel.trk_max_port 32000 TRK_MAX_PORT
sentinel.trkipaddr_bkup TRKIPADDR_BKUP
sentinel.trkipport_bkup 1761 TRKIPPORT_BKUP
sentinel.trk_min_port_bkup 5000 TRK_MIN_PORT_BKUP
sentinel.trk_max_port_bkup 32000 TRK_MAX_PORT_BKUP
sentinel.trktype TCP TRKTYPE
sentinel.trkgmtdiff 60 TRKGMTDIFF
sentinel.trktrcfile $(cft.runtime_dir)/run/sentinel.trc
TRKTRCFILE
sentinel.trktrace 0 TRKTRACE
Communication with the Event Router Z/OS environment
The following parameters define communication with the Event Router via XCF. In this setup:
l The XCF definition (queue=xxxx) is the XCF member name representing the ER server
l The XCF group is PELISCOP by default. You can modify this default by setting queue = “member group”
Transfer CFT z/OS 3.3.2 Installation and Operation Guide 138

5 Post-installation
ER TRKUTIL Transfer CFT
Configuration file
USEPARIN TRKCONF UCONF
SVC (SYSTEM) svc_nb=nnn
TRKSVC=nnn UCONFSET ID=sentinel.TRKSVC,VALUE=nnn
XCF definition (AGENT)queue= TRKQUEUE= UCONFSET ID=sentinel.TRKQUEUE,VALUE=xxxx
TRKTYPE=XCF UCONFSET ID=sentinel.TRKTYPE,VALUE=XCF
Overflow file definition Z/OS environment
The following table describes the overflow file definition for the Logger file. In this setup:
l TRKSHAREDFILE=YES is MANDATORY when the logger file is shared between the Event Router and other applications. Set this to NO if the applications are sending messages directly to the Sentinel server without going through the Event Router
l The log structure is ONLY used to define a logger file shared between the partitions of the SYSPLEX, and is NOT referenced in any parameters
Event Router
TRKUTIL Transfer CFT
Configuration file
USEPARIN TRKCONF UCONF
Logger file (AGENT)api_file=
TRKTNAME= UCONFSET ID=sentinel.TRKTNAME, VALUE=xxxx.xxxx.xxx
TRKSHAREDFILE=YES
UCONFSET ID=sentinel.TRKSHAREDFILE,VALUE=YES
Installing Sentinel for Transfer CFT z/OS
Transfer CFT z/OS 3.3.2 Installation and Operation Guide 139
5 Post-installation
About the system configuration
System environment for z/OSThis section presents system environment functions that are specific to Transfer CFT z/OS and provides information about:
l Creating files in z/OS
l File-sharing options in z/OS
l Submitting JOBs
Create files in z/OSTransfer CFT z/OS creates files:
l Using the CFTFILE TYPE=CREATE function
l Using the COPYFILE function
l During reception of transferred files
SAM files are created by SVC99(DYNALLOC). The main options for creating SAM files are as follows:
l If the F/V/U format is received, it is processed; otherwise the U format is taken by default
l If the BLKSIZE is omitted, three cases are possible:
l In F format, the closest value to MAXBLKSIZE is taken (MAXBLKSIZE is an installation option, with a default value of 27,920)
l In V format, MAXBLKSIZE is taken
l In U format, 32760 is taken
l The secondary space allocated is equal to 10 percent of the primary space
l For a PDS, 150 DIRECTORY blocks are allocated (this value is modifiable during installation of Transfer CFT/z/OS)
l The file is destroyed in event of error
l If VOLUME and/or UNIT are not specified, SVC99 uses the SVC99 default value
DETAILS: z/OS/ESA SPL - Dynamic allocation
This default value can conflict with the installation options or EXITS, and the DF/SMS options.
The VSAM files are created by dynamic calls to IDCAMS. In this case, the parameter VOLUME is mandatory, unless DF/SMS assumes a default value.
Transfer CFT z/OS 3.3.2 Installation and Operation Guide 140

5 Post-installation
File-sharing options in z/OSTransfer CFT z/OS allows file-sharing with the operating system, with the following options:
l A file to be sent is allocated with DISP=SHR
l A file to be received is allocated with DISP=OLD
l Depending on the PDSE installation option (see PDSESHARING), you can allow simultaneous writing to a PDSE file type
Transfer CFT z/OS prohibits:
l Sending and receiving simultaneously on the same file, including two members of a PDS
l Simultaneous receiving of two members of a given PDS file
Delete files in z/OSTransfer CFT z/OS does not permit deleting:
l The “minus n” versions of a GDG file
l A file allocated by another user
Manage files by DF/SMSTransfer CFT z/OS creates files compatible with DF/SMS, where:
l DCB is always specified in the format DCB=(RECFM=xx,LRECL=111,BLKSIZE=bbb)
l The SPACE is always specified in the format SPACE=(bbb,(nnn,sss))
l The ACS ROUTINES, in certain cases, must be adapted to the Transfer CFT operating mode
Submit JOBs Transfer CFT constructs and submits JOBs from any type of file that can be read by Transfer CFT. By default, the JOB is submitted with the USERID of the user requesting the transfer.
If the last card in the JOB is a JCL card beginning with ‘/*’ or ‘//’, Transfer CFT adds an additional comment card with the following format:
//* SUBMITTED BY:jjjjjjjj AT hh:mm:ss, USERID=uuuuuuuu ,CARDS=
nnnnnnnn
Where:
l jjjjjjjj: Transfer CFT JOBNAME
l hh:mm:ss: SUBMIT time
l uuuuuuuu: USERID used
Transfer CFT z/OS 3.3.2 Installation and Operation Guide 141

5 Post-installation
l nnnnnnnn: Number of cards submitted
Note The SUBOPT parameter in the SGINSTAL macro (A12OPTS member) may affect the automation.
Support for the SHUT RESTART=YES commandTransfer CFT supports the CFTUTIL SHUT RESTART=YES command. First, a SHUT FAST=YES is performed, and then the CFTMAIN program is restarted using the same parameter string, but with a new copy of all modules including CFTMAIN itself.
Support for the RECONFIG TYPE=CAT commandTransfer CFT supports the CFTUTIL RECONFIG TYPE=CAT command, expanding the currently opened catalog with the following limits:
l Addition of EXTENTS to the current catalog is limited to the initial volume, and its available space.
l A catalog smaller than 215,000 records (the RECNB parameter of the CFTFILE command (physical records total 248 970), a VSAM file smaller than 4 GBs that cannot be expanded over 4 GBs if it was not defined as VSAM-extended. In this case, you must create a new catalog in VSAM-extended format, and copy the old one to it using the Transfer CFT utility.
l Users connected to the catalog must disconnect/reconnect to access the newly created records.
l The catalog cache is not expanded, and access to the newly created records will be slower. An ordered SHUTDOWN is suggested to recover the full Transfer CFT performances.
About operator interface commandsThis section describes how to set up the diagnosis commands, which enable you to perform a search of errors that can occur in Transfer CFT.
Operator interface interactions
Types of commands The z/OS operator interface for Transfer CFT supports two types of commands:
l The Transfer CFT commands described the Command Index found in the Transfer CFT online help
l The diagnostic commands described in section Diagnostic commands found in the Transfer CFT online help
Types of responsesThe Transfer CFT operator interface for z/OS supplies the following responses:
Transfer CFT z/OS 3.3.2 Installation and Operation Guide 142
5 Post-installation
l SGOP02I Command Complete dd/mm/yyyy, hh:mm:ss User=xxxxxx
o The command is processed without error.
l SGOP03E Command error,RC=xxxxxxxx
o The command ends with the return code xx.
l SGCM05E Unknown Transfer CFT command...
o Transfer CFT does not recognize the command.
l SGCM03E Command ignored
o The command is not processed.
Transfer CFT z/OS 3.3.2 Installation and Operation Guide 143
5 Post-installation
Diagnostic commands The diagnostic commands search for operating errors that occur in Transfer CFT, and should be used under Axway customer support supervision. The commands syntax usage are described in the following sections.
Diagnostic command descriptions
SGTRACE commandThe SGTRACE command allows an external trace file to be processed. The possible values for the SGTRACE command are:
l ON: Activates the trace
l OFF: Deactivates the trace
l CLOSE: Closes the trace file
l OPEN: Opens the trace file
l nnnnnn: Numeric value between 0 and 511, which allows the events to be selected when the corresponding value is true
Values
l 1: Trace of network messages
l 2: Trace of non-0 return codes and other errors
l 4: Trace of DASDM/CATALOG/SVC99 file operations
l 8: Trace of file read/write operations
l 16: Trace of calls to C functions
l 64: Trace of communications between Transfer CFT tasks
l 128: Trace of program calls
l 256: Trace of the display interface actions
l 512: Trace of calls to Transfer CFT exits
The SGTRACE command allows for a dynamic modification of the default option defined in SGINSTAL, or set in PARM.
Using the SGTRACE file
The SGTRACE file opens automatically when Transfer CFT initializes, and the trace is marked as logically active if the opening is correct. The trace value used is the one defined in the SGINSTAL MACRO installation step (A12OPTS).
Events are recorded if the following conditions are satisfied:
Transfer CFT z/OS 3.3.2 Installation and Operation Guide 144

5 Post-installation
l The event is selected.
l The trace is logically active.
l The file is open.
The file has the FIXED BLOCKED, LRECL=132 format. You can change the value of the trace used by the PARM field of each Transfer CFT.
Example
// UTIL EXEC PGM=CFTUTIL,
// PARM=‘SGTRACE nnn’
SGTRACE nnn must be the first and second parameters of the PARM field.
If the DD SGTRACE card is absent, Transfer CFT OS/390 allocates the file dynamically with SYSOUT = A.
ITRACE commandThe ITRACE command enables the internal trace of Transfer CFT and the associated file SGSTAE to be managed. The possible values of the ITRACE command are:
l CLOSE: Closes the file trace
l OPEN: Opens the file trace
l nnnnnn: Numeric value from 4 to 4096 allowing the size of the internal trace buffer (in Kbytes) to be modified
The internal trace is automatically activated when you start Transfer CFT. The size of the trace buffer used is the size defined during installation, in the MACRO SGINSTALL.
Using the SGSTAE file
The SGSTAE file is automatically opened when you start Transfer CFT. This file receives a formatted version of the internal trace for each ABEND of Transfer CFT. This file is of the format FIXED BLOCKED, LRECL=132.
If the DD SGSTAE card is not present, Transfer CFT dynamically allocates a file with SYSOUT = A.
DEBUG commandThe DEBUG command enables you to request a formatted version of the internal trace of Transfer CFT, in the file SGSTAE. This command does not have any parameters.
ABEND commandThe ABEND command causes an ABEND 0C1 in the operator module. It causes a DUMP of Transfer CFT and generation of a formatted version of the internal trace of Transfer CFT, in the file SGSTAE. This command does not have any parameters. The command decrements the counters MAXABEND
Transfer CFT z/OS 3.3.2 Installation and Operation Guide 145

5 Post-installation
and MAXDUMP defined in SGINSTAL.
ECHO commandThe ECHO command has no effect, and ends with messages such as the following, which let you check that Transfer CFT is in operating condition:
'SGOP00I MVSv32x-B102162-2017/03/17'‘SGOP02I Command Complete 18/05/2017, 15:52:03 User=xxxxxx'
CACHE commandThe cache command is used to control the Transfer CFT catalog cache. There are two options available:
l CACHE QUERY: to query all cache settings. For example:
DDIS30i Cache Dsn=cftv2..CATALOG Common/Private
DDIS31i Cache Alet=alet Sid=plex Ori=1000 N/p=4 Rec=rrr
DDIS32i Cache Pall=total In=recin nbr Users nbds D/S
Common/Private: The cache is shared (common) or not.
o Alet: The ALET of the first data space
o Plex: The SYSPLEX member running the cache
o Ori: The system offset in the data space
o N/P: the number of 4K pages needed to save one CFTCAT record
o Rrr: the total number of records in the cache
o Total : the total number of allocated pages
o Recin : the numbers of cached records in the cache
o Nbr : the numbers of users sharing this cache, valid only with COMMON status
o Nbds : the number of dataspace used.
l CACHE LOAD: to force the complete load of the Transfer CFT catalog into the cache. Use extreme care with his command! At end of processing, messages DDIS30I to DDIS32I are displayed.
The ? commandThe ? command enables you to find the status of certain Transfer CFT components. Available options include:
l ? TASK: Lists Transfer CFT tasks
l ? FILES: Lists the open files
l ? ENQ: Lists the shared resources and conflicts
l ? SCB: Lists the CFT queues and their status
Transfer CFT z/OS 3.3.2 Installation and Operation Guide 146

5 Post-installation
l ? TCP: Lists the status of the TCP/IP sub-task
l ? APF: Lists the APF ON/OFF status and the default user
l ? MEM: Lists the memory status in the SGTRACE file
l ? Thhhhhhhh: Displays the memory at hexadecimal address ‘hhhhhhhh’ in the Transfer CFT area, 16 bytes aligned on a double word
l ? TRK: Lists the sub-task status
l ? SSL: Lists the CFTTSSL sub-task status
l ? TCOM, COS, LOG...: Lists the state under the task CFTTCOM, CFTTCOMS (Synchronous), CFTLOG, and so on
l ? EXITS: Lists the state of the CFTEXIT subtask(s)
l ? ABTCP: Lists the TCP/IP sub-task status, and forces an ABEND-S0C6 in this sub-task. Use only under Axway support supervision
l ? ABTRK: Lists the CFTTRK sub-task status, and forces an ABEND-S0C6 in this sub-task. Use only under Axway support supervision
l ? ABSSL: Lists the CFTTSSL sub-task status, and forces an ABEND-S0C6 in this sub-task. Use only under Axway support supervision
l ? ABCOM, ABCOS, and ABLOG: Lists the CFTCOM, CFTCOMS, CFTLOG task status and launches an ABEND-S0C6 in the sub-task. Use only under Axway support supervision
l ? TIOT: Lists the active entries in the TIOT (task I/O table).
DISPLAY command response
TASK
DTSK01I TASK SUMMARY (SGNUC=001EA000):
DTSK02I 002BFA20 " L62RCAK" EPA=07602480 OWN=CFTR324 PRIVATE.
Addr task block, EPA, user name, type-private/ OS
DTOD03I TOD=16:11:50:155444.
TOD of the last DISPATCH
DTSK03I 0022F000 "CFTTPRO " EPA=00000000 TCB=006F6388 OWN=CFTR223. OS Task
FILES
DFIL01I FILE SUMMARY:
DFIL02I 0022EE90 FIL00007 SOP$CFT.REF.C324.COM UPDATE
Addr FCB, DDNAME, DSNAME, Access type
DFIL04I Read=2550 Write=145 TOD=14:01:27:985867 GU SGFVSDIR 240517 B102162Read count, write count, TOD of the last access, operation, module/date/revision
Transfer CFT z/OS 3.3.2 Installation and Operation Guide 147
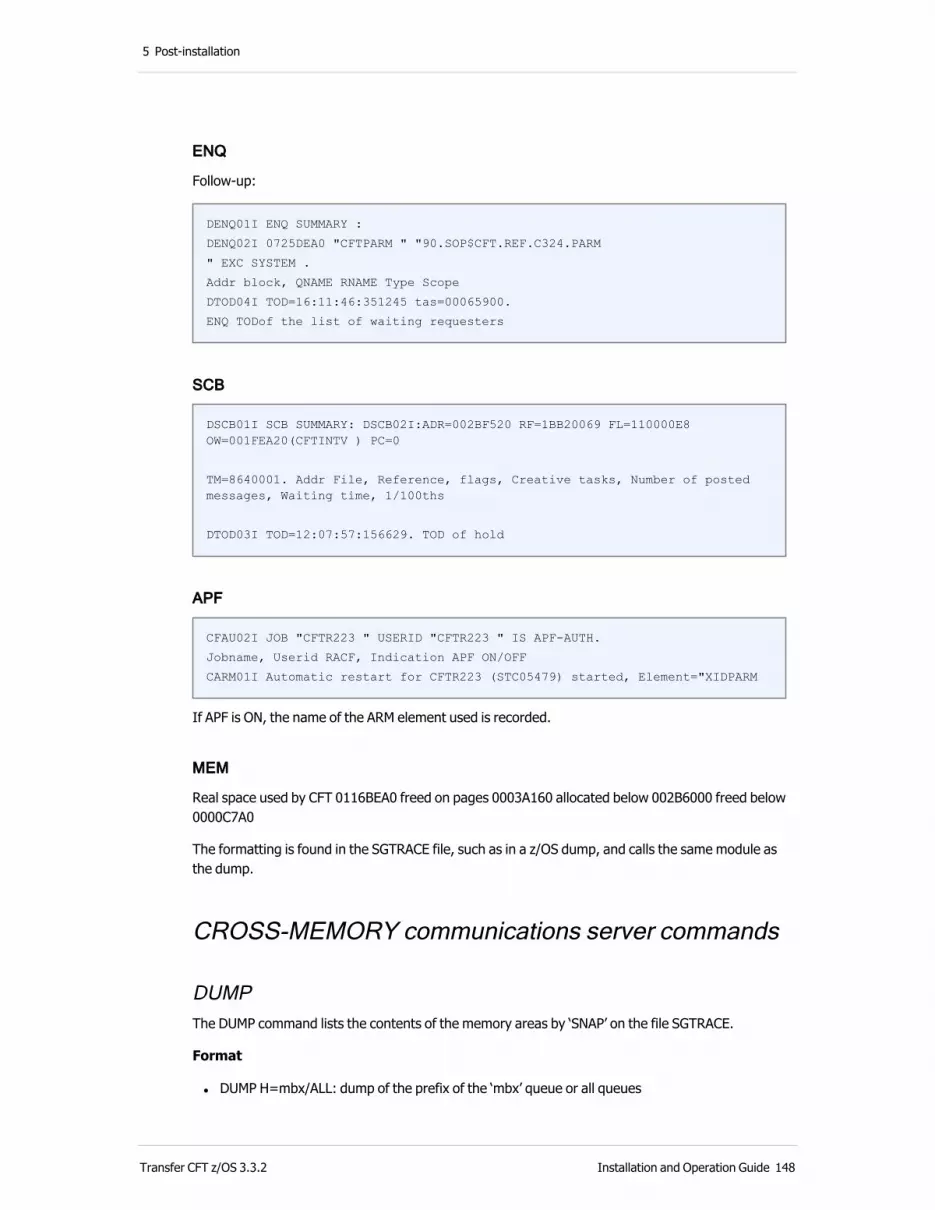
5 Post-installation
ENQ
Follow-up:
DENQ01I ENQ SUMMARY :
DENQ02I 0725DEA0 "CFTPARM " "90.SOP$CFT.REF.C324.PARM
" EXC SYSTEM .
Addr block, QNAME RNAME Type Scope
DTOD04I TOD=16:11:46:351245 tas=00065900.
ENQ TODof the list of waiting requesters
SCB
DSCB01I SCB SUMMARY: DSCB02I:ADR=002BF520 RF=1BB20069 FL=110000E8 OW=001FEA20(CFTINTV ) PC=0
TM=8640001. Addr File, Reference, flags, Creative tasks, Number of posted messages, Waiting time, 1/100ths
DTOD03I TOD=12:07:57:156629. TOD of hold
APF
CFAU02I JOB "CFTR223 " USERID "CFTR223 " IS APF-AUTH.
Jobname, Userid RACF, Indication APF ON/OFF
CARM01I Automatic restart for CFTR223 (STC05479) started, Element="XIDPARM
If APF is ON, the name of the ARM element used is recorded.
MEM
Real space used by CFT 0116BEA0 freed on pages 0003A160 allocated below 002B6000 freed below 0000C7A0
The formatting is found in the SGTRACE file, such as in a z/OS dump, and calls the same module as the dump.
CROSS-MEMORY communications server commands
DUMP The DUMP command lists the contents of the memory areas by ‘SNAP’ on the file SGTRACE.
Format
l DUMP H=mbx/ALL: dump of the prefix of the ‘mbx’ queue or all queues
Transfer CFT z/OS 3.3.2 Installation and Operation Guide 148

5 Post-installation
l DUMP Q=mbx/ALL: dump of the contents of the ‘mbx’ queue or all queues
Response
l CFXM01W: dump mailbox accepted
l CFXM10W: mailbox closed
l CFXM06E: mailbox unknown
DELETE The DELETE command deletes a queue.
Format
l DELETE Q=mbx/ALL: deletes the ‘mbx’ queue or all queues, and clears the space reserved in the ‘DIV’
Response
l CFXM05W: target deleted
l CFXM57W: mailbox delete failure
l CFXM09E: no target found
DELREQ The DELREQ command deletes the messages waiting in a queue:
Format
l DELREQ Q=mbx/ALL: deletes the messages in the ‘mbx’ queue or all the queues
l Response: CFXM16W:delete user request accepted
QRYOPN The QRYOPN command lists the status of the queue:
Format
l QRYOPN Q=mbx/ALL: lists the status of the ‘mbx’ queue or all the queues
Response
l CFXM40W:mailbox ‘mbx’ has nnnn waiting message(s). no waiting message. near (div) closed.
l CFXM06E:mailbox unknown
OPEN The OPEN command opens a queue:
Transfer CFT z/OS 3.3.2 Installation and Operation Guide 149
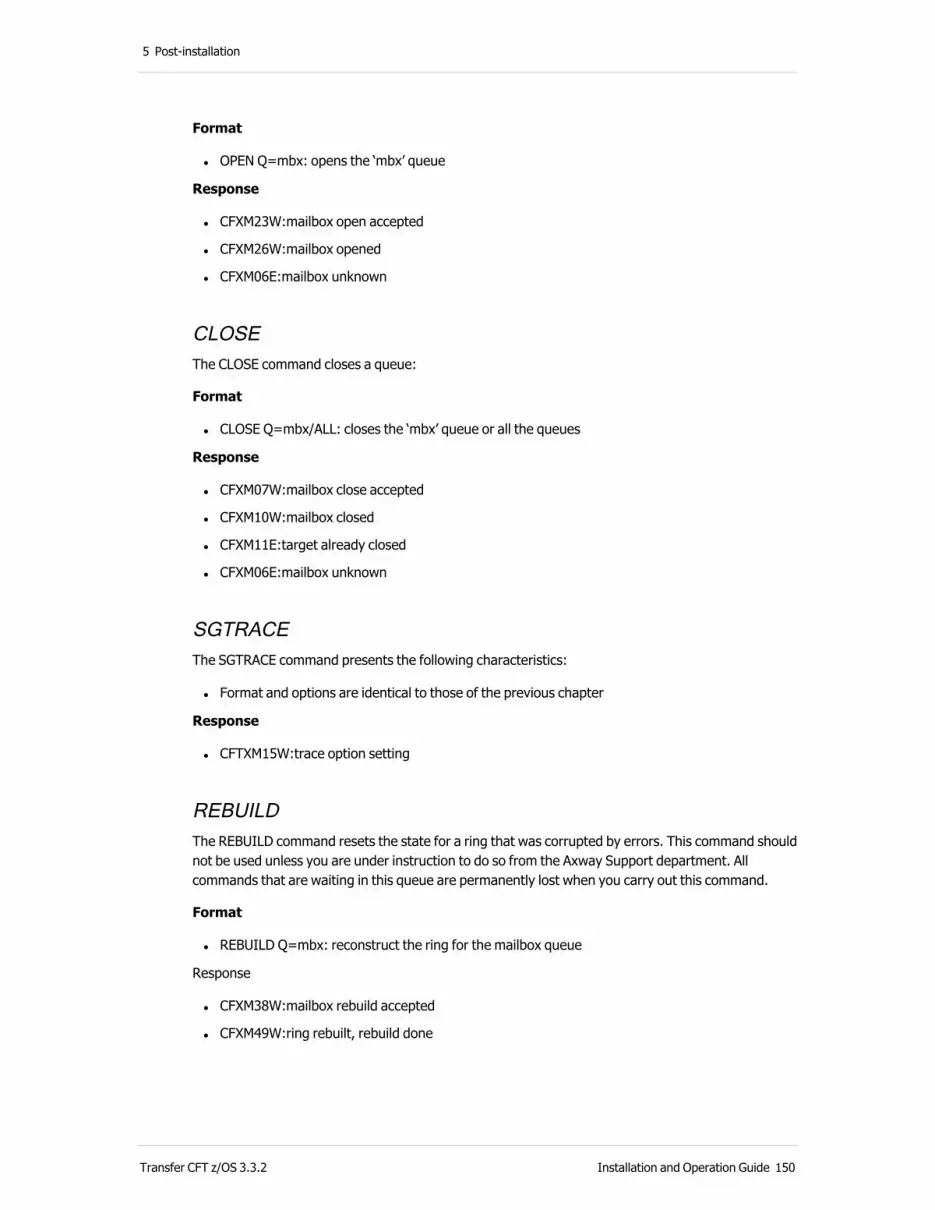
5 Post-installation
Format
l OPEN Q=mbx: opens the ‘mbx’ queue
Response
l CFXM23W:mailbox open accepted
l CFXM26W:mailbox opened
l CFXM06E:mailbox unknown
CLOSE The CLOSE command closes a queue:
Format
l CLOSE Q=mbx/ALL: closes the ‘mbx’ queue or all the queues
Response
l CFXM07W:mailbox close accepted
l CFXM10W:mailbox closed
l CFXM11E:target already closed
l CFXM06E:mailbox unknown
SGTRACE The SGTRACE command presents the following characteristics:
l Format and options are identical to those of the previous chapter
Response
l CFTXM15W:trace option setting
REBUILD The REBUILD command resets the state for a ring that was corrupted by errors. This command should not be used unless you are under instruction to do so from the Axway Support department. All commands that are waiting in this queue are permanently lost when you carry out this command.
Format
l REBUILD Q=mbx: reconstruct the ring for the mailbox queue
Response
l CFXM38W:mailbox rebuild accepted
l CFXM49W:ring rebuilt, rebuild done
Transfer CFT z/OS 3.3.2 Installation and Operation Guide 150
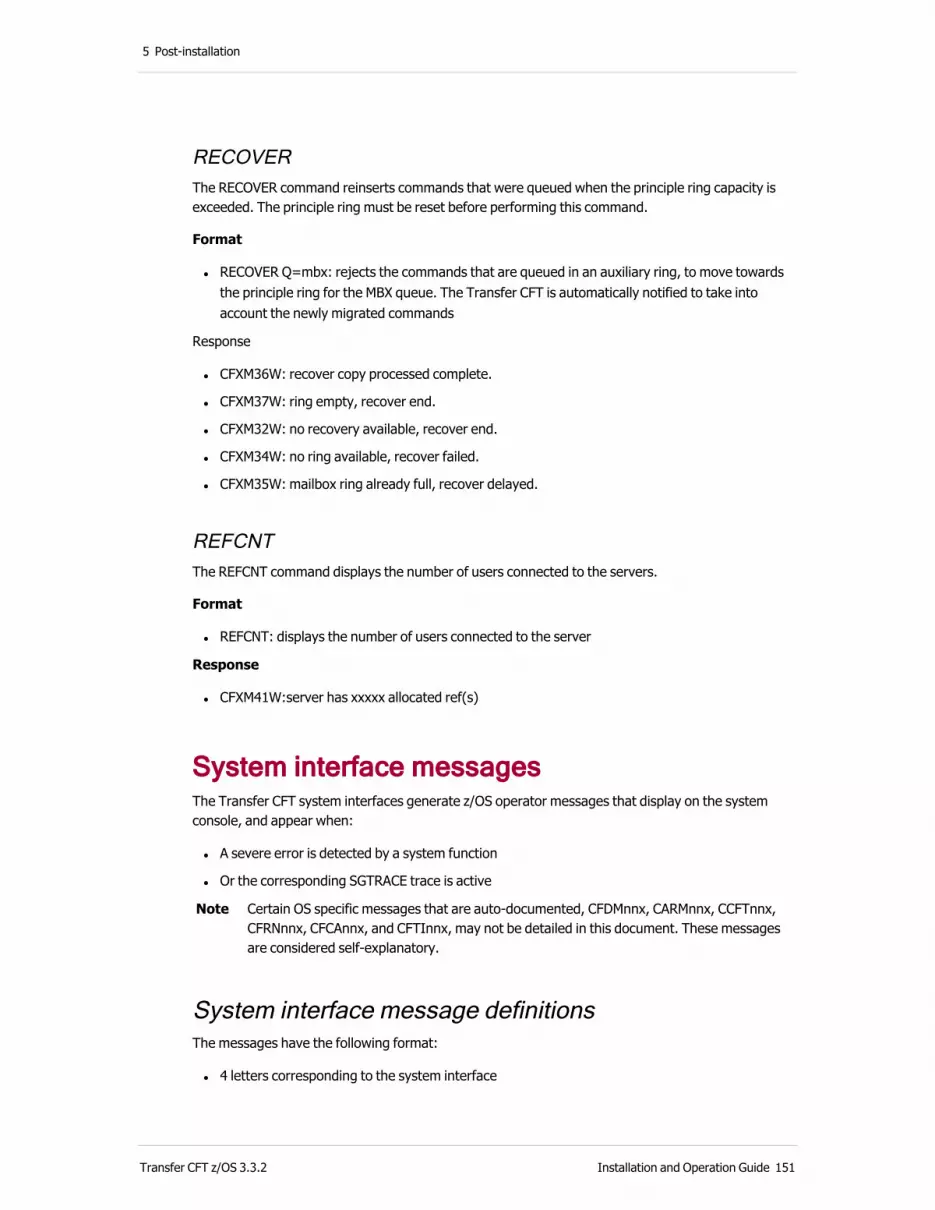
5 Post-installation
RECOVER The RECOVER command reinserts commands that were queued when the principle ring capacity is exceeded. The principle ring must be reset before performing this command.
Format
l RECOVER Q=mbx: rejects the commands that are queued in an auxiliary ring, to move towards the principle ring for the MBX queue. The Transfer CFT is automatically notified to take into account the newly migrated commands
Response
l CFXM36W: recover copy processed complete.
l CFXM37W: ring empty, recover end.
l CFXM32W: no recovery available, recover end.
l CFXM34W: no ring available, recover failed.
l CFXM35W: mailbox ring already full, recover delayed.
REFCNT The REFCNT command displays the number of users connected to the servers.
Format
l REFCNT: displays the number of users connected to the server
Response
l CFXM41W:server has xxxxx allocated ref(s)
System interface messagesThe Transfer CFT system interfaces generate z/OS operator messages that display on the system console, and appear when:
l A severe error is detected by a system function
l Or the corresponding SGTRACE trace is active
Note Certain OS specific messages that are auto-documented, CFDMnnx, CARMnnx, CCFTnnx, CFRNnnx, CFCAnnx, and CFTInnx, may not be detailed in this document. These messages are considered self-explanatory.
System interface message definitionsThe messages have the following format:
l 4 letters corresponding to the system interface
Transfer CFT z/OS 3.3.2 Installation and Operation Guide 151
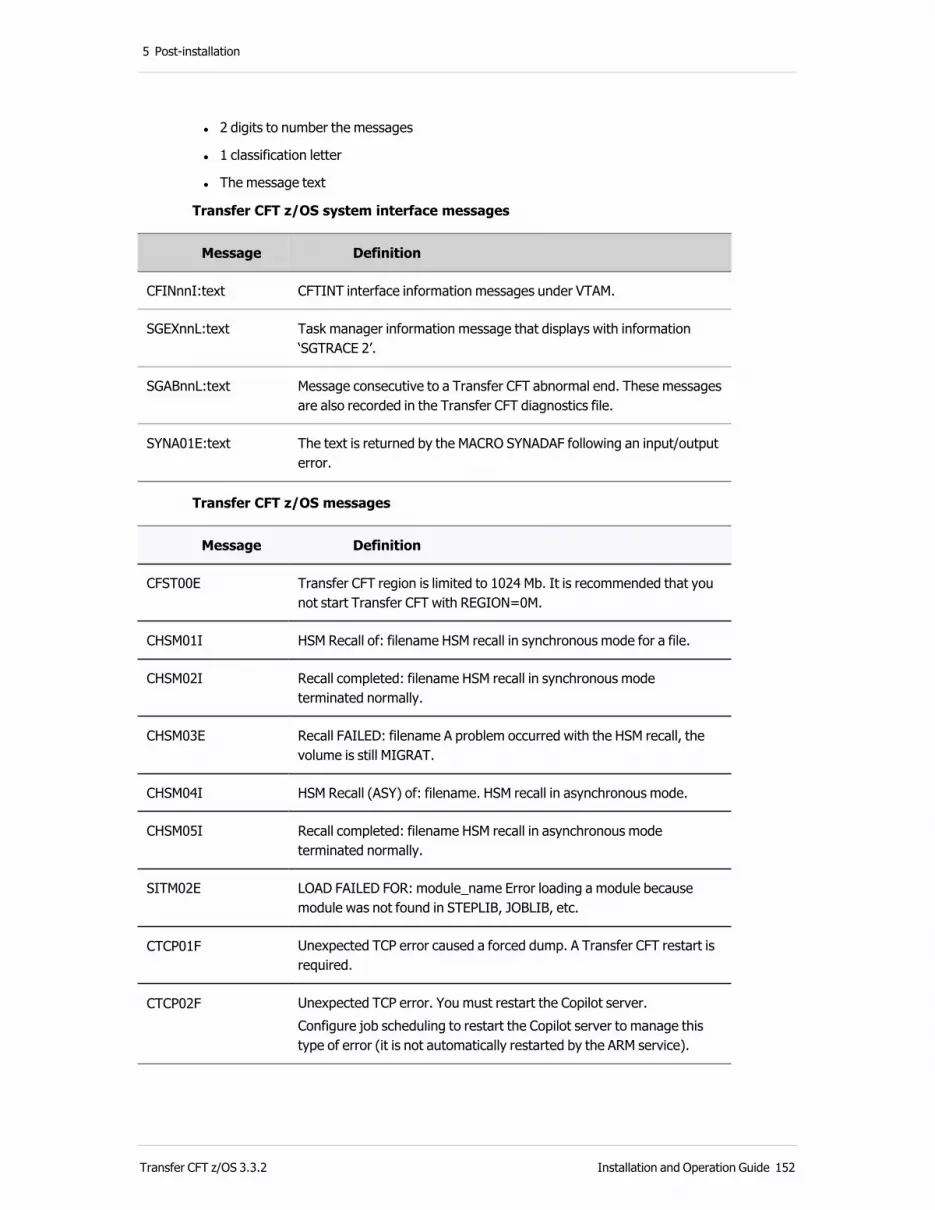
5 Post-installation
l 2 digits to number the messages
l 1 classification letter
l The message text
Transfer CFT z/OS system interface messages
Message Definition
CFINnnI:text CFTINT interface information messages under VTAM.
SGEXnnL:text Task manager information message that displays with information ‘SGTRACE 2’.
SGABnnL:text Message consecutive to a Transfer CFT abnormal end. These messages are also recorded in the Transfer CFT diagnostics file.
SYNA01E:text The text is returned by the MACRO SYNADAF following an input/output error.
Transfer CFT z/OS messages
Message Definition
CFST00E Transfer CFT region is limited to 1024 Mb. It is recommended that you not start Transfer CFT with REGION=0M.
CHSM01I HSM Recall of: filename HSM recall in synchronous mode for a file.
CHSM02I Recall completed: filename HSM recall in synchronous mode terminated normally.
CHSM03E Recall FAILED: filename A problem occurred with the HSM recall, the volume is still MIGRAT.
CHSM04I HSM Recall (ASY) of: filename. HSM recall in asynchronous mode.
CHSM05I Recall completed: filename HSM recall in asynchronous mode terminated normally.
SITM02E LOAD FAILED FOR: module_name Error loading a module because module was not found in STEPLIB, JOBLIB, etc.
CTCP01F Unexpected TCP error caused a forced dump. A Transfer CFT restart is required.
CTCP02F Unexpected TCP error. You must restart the Copilot server.Configure job scheduling to restart the Copilot server to manage this type of error (it is not automatically restarted by the ARM service).
Transfer CFT z/OS 3.3.2 Installation and Operation Guide 152

5 Post-installation
For a complete list of possible error messages and their meaning, refer to the Troubleshooting topics in the Transfer CFT 3.3.2 Documentation.
Using a communication serverThis section describes the use of a communication server. The communication server enables you to accelerate the processing of transfer commands that are normally deposited in a file. Communication server installation and use are optional.
About the communication server setupC32XMEM
l The Transfer CFT z/OS communications server (MAILBOX/XMEM) uses a data address space (DIV) that is shared by all Transfer CFT z/OS users on the same z/OS partition.
l All users can access the communications server via a GLOBAL-type PC instruction. Therefore it is recommended that you do not shut down the server.
l The data address space is saved in a VSAM LINEAR file.
l Each ‘CFTCOM TYPE=MBX, NAME=nnn’ configuration command reserves 1,024 pages in the DIV space, and by extension 1,024 4K blocks in the backup file (approximately seven 3,390 cylinders).
l A single server controls all communications that concern one or more instances of Transfer CFT z/OS on the same z/OS partition. This server must be running before a Transfer CFT is initialized. Each Transfer CFT must, in turn, point to a different mailbox.
l The C32XMEM JOB creates the server backup file.
Note In a SYSPLEX, the communications server cannot be accessed by applications running on different systems, or different z/OS partitions.
Communications server start procedureThe CFTXMEM JCL is an example of a procedure for starting the communications server.
//CFTXMEM PROC OUT=sysout,
// QUAL=cftv2
//CFTXMEM EXEC PGM=CFTXMEM,
// REGION=3000K,
// TIME=1440 ** MANDATORY **
//STEPLIB DD DISP=SHR,DSN=&QUAL..LOAD
//CFTPCMBX DD DISP=SHR,DSN=&QUAL..CFTXMEM
//SYSUDUMP DD SYSOUT=&OUT
//SGTRACE DD SYSOUT=&OUT
Transfer CFT z/OS 3.3.2 Installation and Operation Guide 153
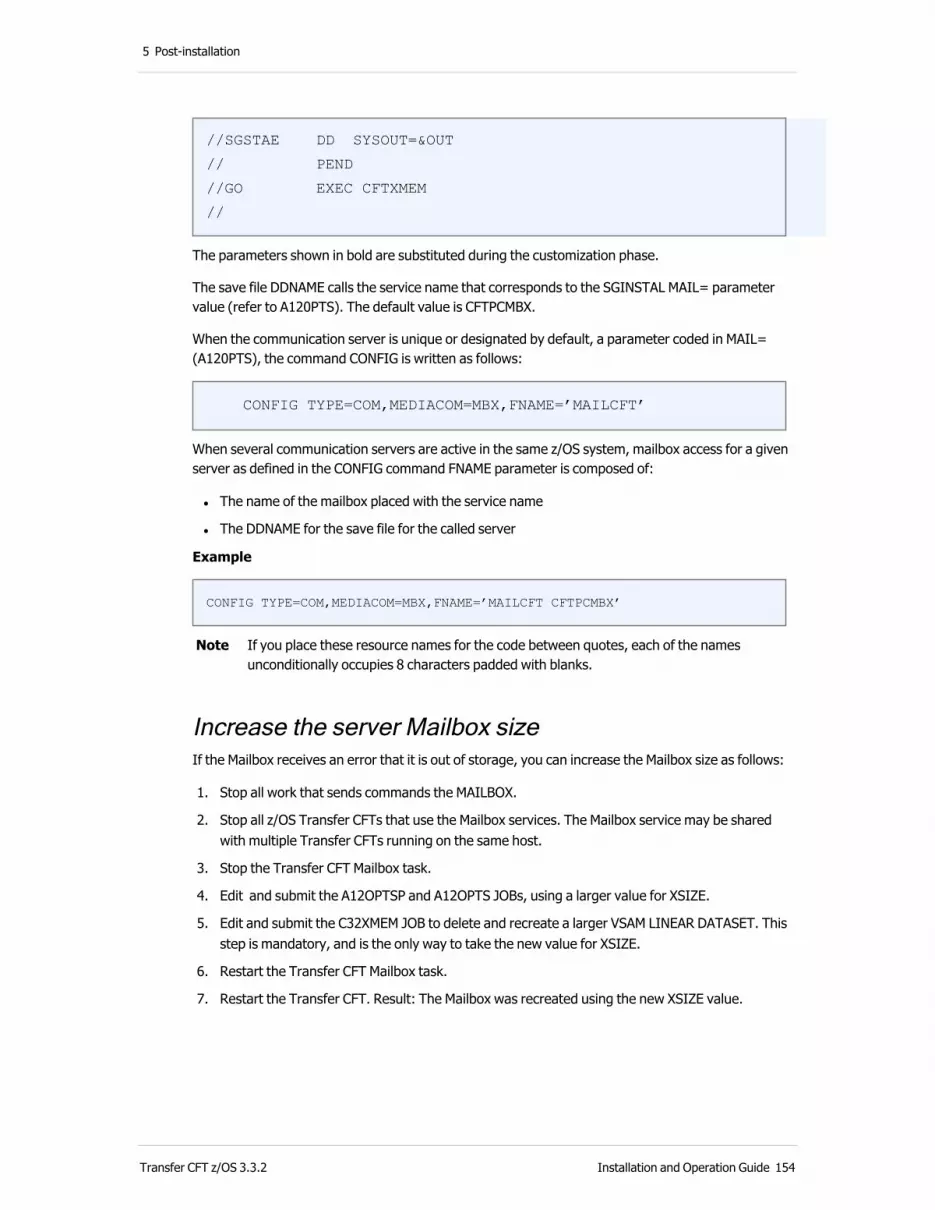
5 Post-installation
//SGSTAE DD SYSOUT=&OUT
// PEND
//GO EXEC CFTXMEM
//
The parameters shown in bold are substituted during the customization phase.
The save file DDNAME calls the service name that corresponds to the SGINSTAL MAIL= parameter value (refer to A120PTS). The default value is CFTPCMBX.
When the communication server is unique or designated by default, a parameter coded in MAIL= (A120PTS), the command CONFIG is written as follows:
CONFIG TYPE=COM,MEDIACOM=MBX,FNAME=’MAILCFT’
When several communication servers are active in the same z/OS system, mailbox access for a given server as defined in the CONFIG command FNAME parameter is composed of:
l The name of the mailbox placed with the service name
l The DDNAME for the save file for the called server
Example
CONFIG TYPE=COM,MEDIACOM=MBX,FNAME=’MAILCFT CFTPCMBX’
Note If you place these resource names for the code between quotes, each of the names unconditionally occupies 8 characters padded with blanks.
Increase the server Mailbox sizeIf the Mailbox receives an error that it is out of storage, you can increase the Mailbox size as follows:
1. Stop all work that sends commands the MAILBOX.
2. Stop all z/OS Transfer CFTs that use the Mailbox services. The Mailbox service may be shared with multiple Transfer CFTs running on the same host.
3. Stop the Transfer CFT Mailbox task.
4. Edit and submit the A12OPTSP and A12OPTS JOBs, using a larger value for XSIZE.
5. Edit and submit the C32XMEM JOB to delete and recreate a larger VSAM LINEAR DATASET. This step is mandatory, and is the only way to take the new value for XSIZE.
6. Restart the Transfer CFT Mailbox task.
7. Restart the Transfer CFT. Result: The Mailbox was recreated using the new XSIZE value.
Transfer CFT z/OS 3.3.2 Installation and Operation Guide 154
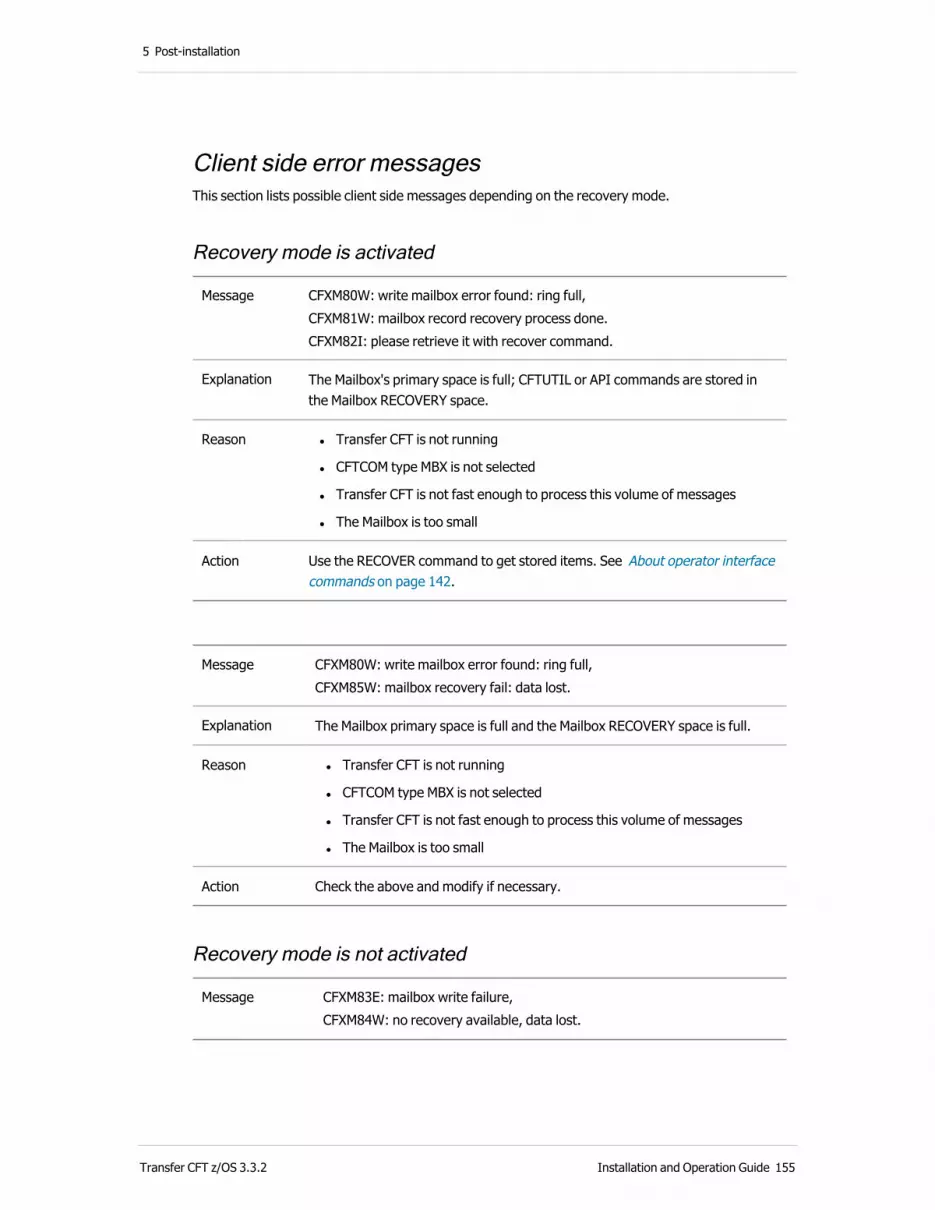
5 Post-installation
Client side error messagesThis section lists possible client side messages depending on the recovery mode.
Recovery mode is activated
Message CFXM80W: write mailbox error found: ring full,CFXM81W: mailbox record recovery process done.CFXM82I: please retrieve it with recover command.
Explanation The Mailbox's primary space is full; CFTUTIL or API commands are stored in the Mailbox RECOVERY space.
Reason l Transfer CFT is not running
l CFTCOM type MBX is not selected
l Transfer CFT is not fast enough to process this volume of messages
l The Mailbox is too small
Action Use the RECOVER command to get stored items. See About operator interface commands on page 142.
Message CFXM80W: write mailbox error found: ring full,CFXM85W: mailbox recovery fail: data lost.
Explanation The Mailbox primary space is full and the Mailbox RECOVERY space is full.
Reason l Transfer CFT is not running
l CFTCOM type MBX is not selected
l Transfer CFT is not fast enough to process this volume of messages
l The Mailbox is too small
Action Check the above and modify if necessary.
Recovery mode is not activated
Message CFXM83E: mailbox write failure,CFXM84W: no recovery available, data lost.
Transfer CFT z/OS 3.3.2 Installation and Operation Guide 155
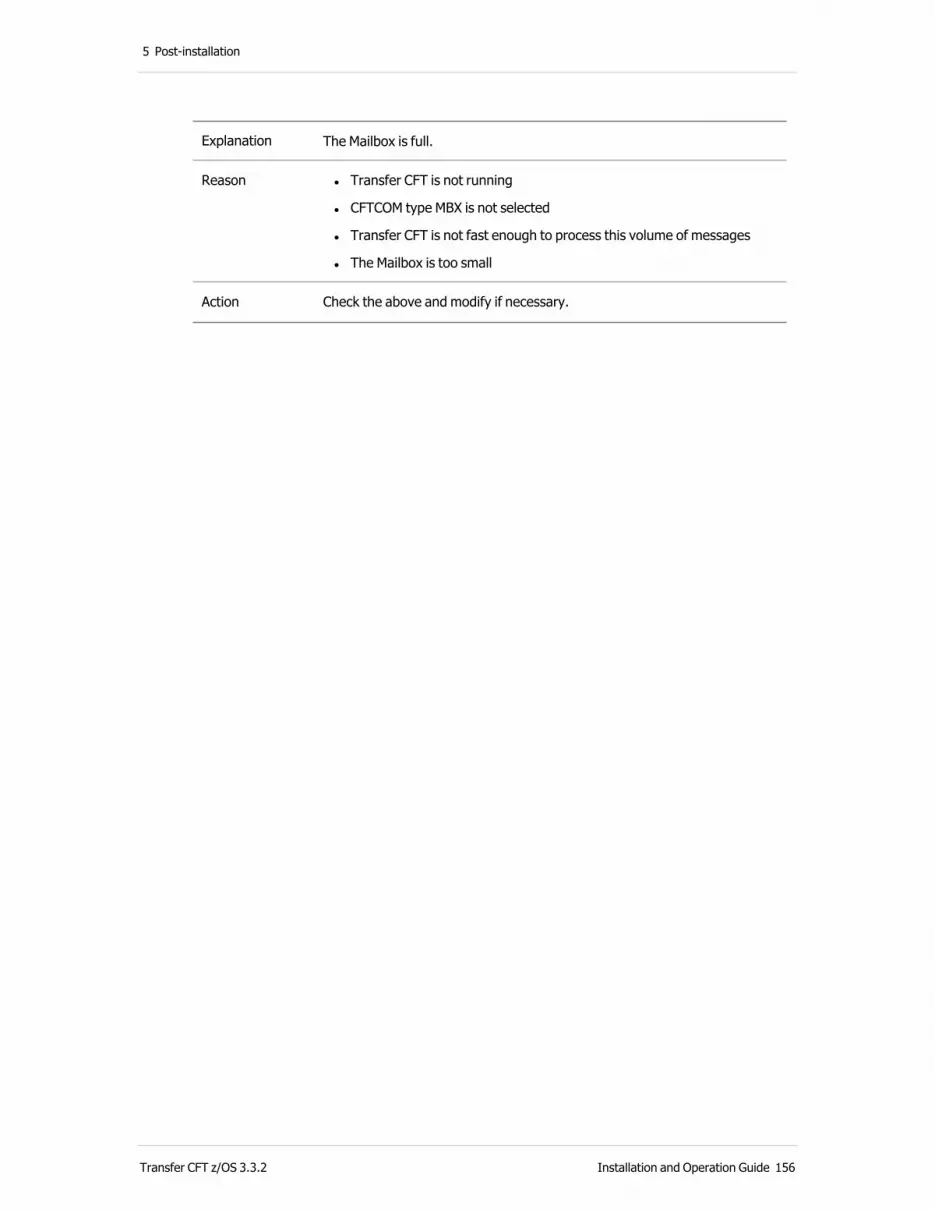
5 Post-installation
Explanation The Mailbox is full.
Reason l Transfer CFT is not running
l CFTCOM type MBX is not selected
l Transfer CFT is not fast enough to process this volume of messages
l The Mailbox is too small
Action Check the above and modify if necessary.
Transfer CFT z/OS 3.3.2 Installation and Operation Guide 156

5 Post-installation
Set up RACF security softwareThis section describes how to set up RACF software to provide security control for file handling operations. Transfer CFT z/OS uses the SAF security interface, and is compatible with the security software packages that use this interface, in particular RACF.
File handling operations controlBy default, Transfer CFT implements file handling operations under its own authority.
Transfer CFT systematically checks the file access rights, both for its own access rights and for the user accounts. A 91300038 or 80000913 error code is returned for any unsuccessful access attempt.
You can activate more elaborate control in the following cases:
l To request the submission of an end-of-send procedure under the authority of the transfer requester
l To request the submitting an end-of-receive procedure under the authority of the transfer receiver
l To request opening a file to be sent under the authority of the transfer requester
l To request opening a file to be received under the authority of the transfer receiver
Activate RACF authorization controlThe SAF services call (RACF or equivalent) is systematic.
Advanced use of RACF functions can be implemented when the following conditions are fulfilled:
l Transfer CFT is an authorized program
l The corresponding option is activated in the SGINSTAL installation options
l The CFTPARM USERCTRL=YES parameter is set
For more information on CFTPARM, refer to Transfer CFT online documentation.
RACF and the Internet RACF is required when the Internet interface is used to check the PASSWORDs. The interface cannot check the passwords if:
l It is not authorized
l SAF is not available
In either of these cases, you can log in by entering a random value in the PASSWORD field. You then have the privileges of the JOB where you are logged on.
Transfer CFT z/OS 3.3.2 Installation and Operation Guide 157

5 Post-installation
RACF and the JAVA user interfaceThe JAVA interface connects to the Transfer CFT GUI (Copilot) server. It is identified by the pair USERID/PASSWORD, even when connecting from OPEN/MVS. The interface cannot verify passwords, if either:
l Password is not authorized
l SAF is not available
In either of these cases, you can enter any value in the PASSWORD field to connect. You then have privileges for the JOB you are connected to.
Note Transfer CFT z/OS accepts passwords in lower case using RACF or Top-Secret.
RACF password phrase supportTransfer CFT supports the use of a password phrase (RACF) in the Copilot user interface, JPIUTIL, REST API, and synchronous API services.
Limitations
l When using Copilot with RACF to enter your password phrase, the confirm password pop-up window does not display after the password phrase expiration.
l While RACF password phrases can be up to 100 characters, the length in Transfer CFT is limited by the product's field limitations (30 characters).
Access USS filesSpecific configuration is required to access USS files:
l Transfer CFT must be able to transfer USS files.
l The Transfer CFT GUI server (Copilot) must be able to access USS files.
We recommend that you:
l Assign a UID other than 0 to Transfer CFT and the GUI server.
l Give READ access to the BPX.SERVER resource in the RACF FACILITY class.
Example of PERMIT
PERMIT PBX.SERVER CLASS(FACILITY) ID(CFT) ACCESS(READ)
ID(COPILOT)
Increase the catalog sizeYou can increase the catalog size either dynamically or statically as described below.
Transfer CFT z/OS 3.3.2 Installation and Operation Guide 158
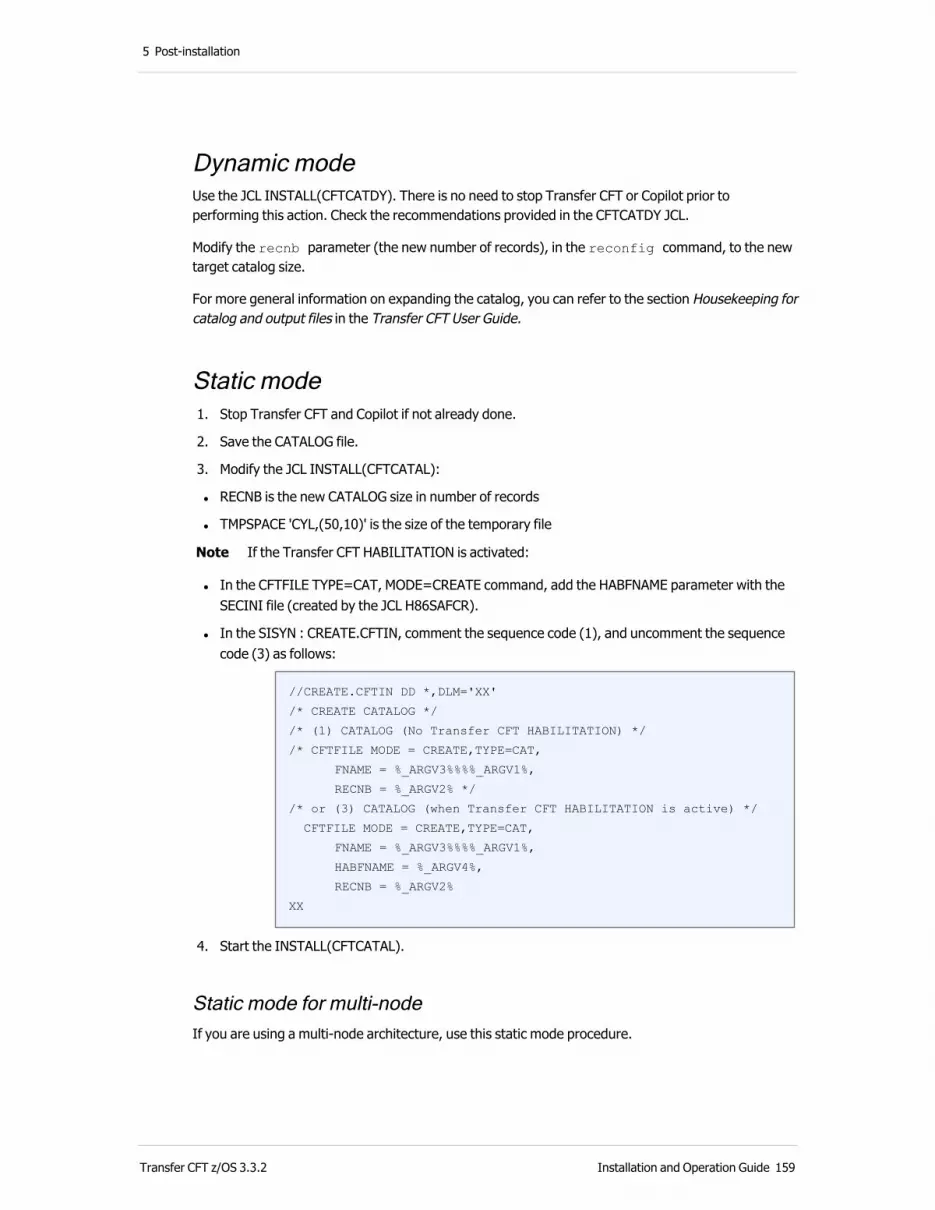
5 Post-installation
Dynamic modeUse the JCL INSTALL(CFTCATDY). There is no need to stop Transfer CFT or Copilot prior to performing this action. Check the recommendations provided in the CFTCATDY JCL.
Modify the recnb parameter (the new number of records), in the reconfig command, to the new target catalog size.
For more general information on expanding the catalog, you can refer to the section Housekeeping for catalog and output files in the Transfer CFT User Guide.
Static mode 1. Stop Transfer CFT and Copilot if not already done.
2. Save the CATALOG file.
3. Modify the JCL INSTALL(CFTCATAL):
l RECNB is the new CATALOG size in number of records
l TMPSPACE 'CYL,(50,10)' is the size of the temporary file
Note If the Transfer CFT HABILITATION is activated:
l In the CFTFILE TYPE=CAT, MODE=CREATE command, add the HABFNAME parameter with the SECINI file (created by the JCL H86SAFCR).
l In the SISYN : CREATE.CFTIN, comment the sequence code (1), and uncomment the sequence code (3) as follows:
//CREATE.CFTIN DD *,DLM='XX'
/* CREATE CATALOG */
/* (1) CATALOG (No Transfer CFT HABILITATION) */
/* CFTFILE MODE = CREATE,TYPE=CAT,
FNAME = %_ARGV3%%%%_ARGV1%,
RECNB = %_ARGV2% */
/* or (3) CATALOG (when Transfer CFT HABILITATION is active) */
CFTFILE MODE = CREATE,TYPE=CAT,
FNAME = %_ARGV3%%%%_ARGV1%,
HABFNAME = %_ARGV4%,
RECNB = %_ARGV2%
XX
4. Start the INSTALL(CFTCATAL).
Static mode for multi-nodeIf you are using a multi-node architecture, use this static mode procedure.
Transfer CFT z/OS 3.3.2 Installation and Operation Guide 159

5 Post-installation
1. Stop all Transfer CFT nodes and all Copilot servers if not already done.
2. Save the CATALOG files.
3. Modify the JCL INSTALL(CFTCATAL):
l RECNB is the new CATALOG size in number of records
l TMPSPACE 'CYL,(50,10)' is the size of the temporary file
l NODE is the node ID (ex NODE=’0’)
l In the SISYN : CREATE.CFTIN, comment the sequence code (1), and uncomment the sequence code (2) as follows:
//CREATE.CFTIN DD *,DLM='XX'
/* CREATE CATALOG */
/* (1) CATALOG (No Transfer CFT HABILITATION) */
/* CFTFILE MODE = CREATE,TYPE=CAT,
FNAME = %_ARGV3%%%%_ARGV1%,
RECNB = %_ARGV2% */
/* or (2) CATALOG MULTI-NODES (No Transfer CFT HABILITATION) */
CFTFILE MODE = CREATE,TYPE=CAT,
FNAME = %_ARGV3%%%%_ARGV1%,
NODE = %_ARGV5%,
RECNB = %_ARGV2%
4. Submit this procedure as many times as there are nodes.
Secure Transfer CFT
Change default certificatesUsing the default certificates that are supplied with Transfer CFT is strongly discouraged in a production environment. You should use your own certificates to enhance security.
Type Location Certificate Expires
Secure Relay <Transfer_CFT>/home/distrib/xsr
SecureRelayCA.pem November 2021
SecureRelayMasterAgent.p12 November 2021
Central Governance
<Transfer_CFT>/runtime/conf/pki
passportCA.pem November 2019
Transfer CFT z/OS 3.3.2 Installation and Operation Guide 160

5 Post-installation
About system usersIf the system does not have an APF, authorized program facility, the USERCTRL has no effect on the file actions. All file actions are done by the account that started Transfer CFT. Refer to About system users on page 20, and the Transfer CFT User Guide for more information on USERCTRL.
To enable user control for file actions, you require an APF.
Note An APF allows an installation to identify system or user programs that can use sensitive system functions.
Use SAF-based PKISystem Authorization Facility (SAF) based PKI offers a more secure SSL. The optional SAF method uses RACF, or the equivalent, and an optional cryptographic coprocessor to increase data security. To enable the SAF mode of operation you must:
1. Enable the IBM Crypto Express 2 Coprocessor, if available.
2. Configure the IBM ICSF program to use a secure PKDS database.
3. Install and configure the option for Transfer CFT.
4. Define RACF.
5. Define the CFTSSL PARM fields or ROOTCID/USERCID fields.
Note A SAF PKI implementation in Transfer CFT requires that the ‘ring-specific profile checking' (RDATALIB class) be activated.
External access management (RACF)
Install with securityTo protect its objects, Transfer CFT uses the SAF interface (System Authorization Facility) on z/OS platforms to address authorization requests to an ESM, such as RACF. Transfer CFT does not perform any checks itself, and accepts the ESM decision. Before implementing specific protection, you must protect any Transfer CFT objects that the operating system recognizes from a file, an operator command, or program protection mechanisms.
When installing Transfer CFT, all procedures that update RACF must be performed by users with RACF rights. Other procedures are performed by the Transfer CFT administrator. For information on the Transfer CFT administrator definition, see the H83SAFDA member details.
Transfer CFT z/OS 3.3.2 Installation and Operation Guide 161

5 Post-installation
Transfer CFT installation proceduresTransfer CFT software can be installed with or without the security system. In all cases, you must follow the installation procedure indicated in the Transfer CFT z/OS Installation and Operations Guide. The security system is intended to be installed on systems already running Transfer CFT. It is installed in several steps; each represents control levels with increasing severity.
l Level 0: Transfer CFT without security
l Level 1: Transfer CFT with security controlling configuration files and transfers
Level 2: corresponds to level 1 with an additional program-based control of accesses to CFT files (PADS) (USERCTRL=YES)
Access management under Central Governance
When running under Central Governance, the access management is automatically set to am.type=passport. If you want to use external access management, RACF, you must manually modify this value after registering with Central Governance using the command:
CFTUTIL UCONFSET id=am.type, value=internal
Installation prerequisites
Creating RACF classesThe security system uses a general resource class, safcftcl. It is created using the H81SACDT (or H81SAFCD and H82SAFRT) job, which is adapted from the samples provided in the SYS1.SAMPLIB RACTABLE member.
l H81SACDT / H81SAFCD: Creates a RACF class (to adapt to requirements) H81SACDT is based on the RACF dynamic class definition. H81SAFCD is the former linked class table.
l H82SAFRT: Creates a router table (to adapt to requirements), and is only required with H81SAFCD.
l MVS IPL: Applies RACF classes, needed only with the H81SAFCD JOB.
Creating RACF groups and users l H83SAFDA: Creates groups and users
Once the H83SAFDA job is adapted, use this job to create groups and the Transfer CFT administrator (admcft) responsible for installing the security system. This user must be able to create and manage general resource profiles for the Transfer CFT class (safcftcl), and perform all installation-related procedures (file creation rights).
Transfer CFT z/OS 3.3.2 Installation and Operation Guide 162

5 Post-installation
Modify the existing configuration l A00CUSTO: Customizes installation files
After adapting the security system values in the A03PARM member, you must execute the A00CUSTO job again.
**************************************************************
* New parameters for RACF (or SAF enabled) control of Transfer CFT.
* These definitions are not used in the base installation.
* You must read the “Transfer CFT Installing z/OS Security”
* before changing the following values:
**************************************************************
grpcft 'grpcft' CFT administrator SAF group
grpmon 'grpmon' CFT monitor SAF group
grpaprm 'grpaprm' all parameter access SAF group
grpfprm 'grpfprm' PARM and PART access SAF group
grpdesk 'grpdesk' CFT help desk SAF group
grptrf 'grptrf' CFT transfer SAF group
userdef 'userdef' default CFTRECV userid
safcftcl 'safcftcl' SAF class for CFT profiles
Security system installation procedureWhen the general resource class (safcftcl) is applied by RACF, the authorized user can begin the installation to implement the minimum (Transfer CFT and RACF) resources required to run the security system. You must perform the installation procedures in the order shown in the following table.
Security system installation procedures
Job Installation procedure
H84SAFDF Creates RACF general resource CFT profiles
H85SAFPR Executes RACF PERMIT commands
H86SAFCR Creates the LOADMAIN library and SECINI file
Transfer CFT z/OS 3.3.2 Installation and Operation Guide 163
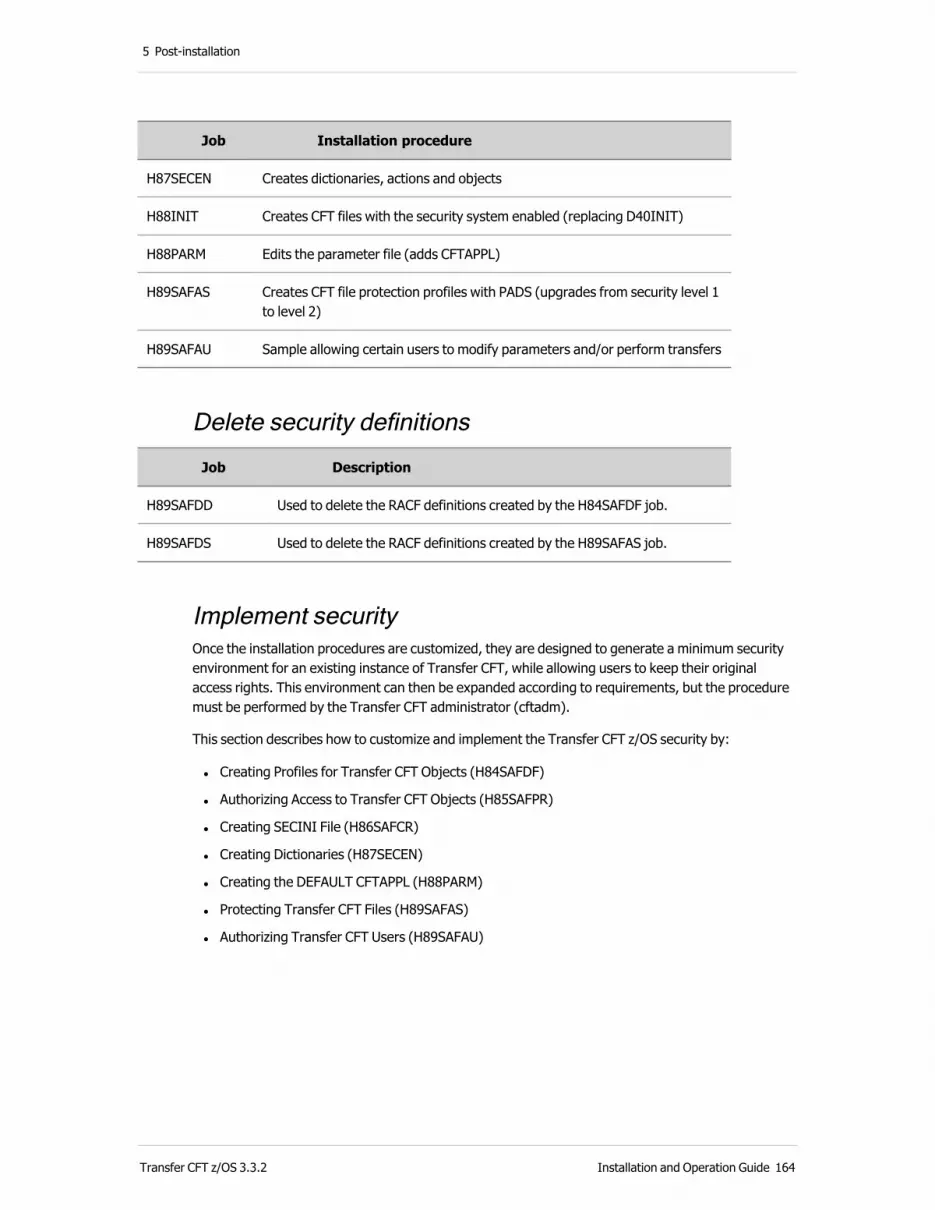
5 Post-installation
Job Installation procedure
H87SECEN Creates dictionaries, actions and objects
H88INIT Creates CFT files with the security system enabled (replacing D40INIT)
H88PARM Edits the parameter file (adds CFTAPPL)
H89SAFAS Creates CFT file protection profiles with PADS (upgrades from security level 1 to level 2)
H89SAFAU Sample allowing certain users to modify parameters and/or perform transfers
Delete security definitions
Job Description
H89SAFDD Used to delete the RACF definitions created by the H84SAFDF job.
H89SAFDS Used to delete the RACF definitions created by the H89SAFAS job.
Implement securityOnce the installation procedures are customized, they are designed to generate a minimum security environment for an existing instance of Transfer CFT, while allowing users to keep their original access rights. This environment can then be expanded according to requirements, but the procedure must be performed by the Transfer CFT administrator (cftadm).
This section describes how to customize and implement the Transfer CFT z/OS security by:
l Creating Profiles for Transfer CFT Objects (H84SAFDF)
l Authorizing Access to Transfer CFT Objects (H85SAFPR)
l Creating SECINI File (H86SAFCR)
l Creating Dictionaries (H87SECEN)
l Creating the DEFAULT CFTAPPL (H88PARM)
l Protecting Transfer CFT Files (H89SAFAS)
l Authorizing Transfer CFT Users (H89SAFAU)
Transfer CFT z/OS 3.3.2 Installation and Operation Guide 164

5 Post-installation
Customize and implement Transfer CFT z/OS security
Create profiles for Transfer CFT objects (H84SAFDF)
The Transfer CFT administrator should already be declared in RACF with sufficient rights to define general resources and assign access rights to the various Transfer CFT users.
Authorize access to Transfer CFT objects (H85SAFPR)
This JOB issues all of the required RACF PERMIT commands.
Create the SECINI file (H86SAFCR)
For the security system to operate correctly, programs accessing secure files must be located in APF libraries.
Users must edit the JCLs to adapt them to their requirements. For the RACF interface to be applied, the SEARCH-MODE parameter must be set to EXT in the SECINI file. This file must be protected by RACF against any updates.
Create dictionaries (H87SECEN)
The H87SECEN job contains the Transfer CFT actions definitions (ddname CFTHACT). The RACF access type value must match each Transfer CFT action. The CONTROL Transfer CFT action may correspond to the READ or UPDATE RACF access right.
The H87SECEN job contains the definitions of the objects used by Transfer CFT (ddname CFTHOBJ). Users can adapt this file by editing the VALUE field according to their own requirements. Transfer CFT uses information from the VALUE field to create a resource name, which is then checked by RACF (resource name = Object_name.Value).
The FILE object does not have to be used on z/OS platforms, because file access is systematically controlled by RACF. However, its definition must exist in the file with the STATE parameter set to INACT.
Creating Transfer CFT files (H88INIT)
For files to be controlled by the security system, you must create these files (PARM, PART, COM, and CATALOG ) with the HABFNAME=security_file_name parameter. Refer to the H86SAFCR procedure used to create the cftv2.SECINI security file.
You cannot enable the security system on an existing TransferCFT environment. Back up existing files and recreate with the security parameters set.
The H88INIT job comprises three steps:
1. Backs up the cftv2.PARM and cftv2.PART files in a cftv2.BACKUP file. The cftv2.COM and cftv2.CATALOG files are not backed up in this procedure. If necessary, users must back them up before running H88INIT.
Transfer CFT z/OS 3.3.2 Installation and Operation Guide 165

5 Post-installation
2. Deletes and recreates the cftv2.PARM, cftv2.PART, cftv2.COM and cftv2.CATALOG files with the HABFNAME=security_file_name parameter.
3. Restores the cftv2.PARM and cftv2.PART files from the backup in the cftv2.BACKUP file.
Create the DEFAULT CFTAPPL (H88PARM)
This job is used to edit the configuration and include a CFTAPPL command for the DEFAULT identifier. This command enables all transfers to be performed via the local application (APPL). See the CFTPARM command DEFAULT parameter for more information.
If the CFTPARM command does not contain the DEFAULT parameter, users must replace the CFTIN file with the CFTAPPL commands corresponding to the CFTSEND and/or CFTRECV commands.
The CFTRECV ID=DEFAULT command is used to define users other than the monitor user, so that files can be received under their control. You are strongly advised against performing transfers with the monitor user. An owner is assigned to the transfers by setting the USERID= and GROUPID= parameters in the CFTRECV or CFTAPPL DIRECT=RECV commands.
Protect Transfer CFT files (H89SAFAS)
This job is used to protect Transfer CFT files. By default user groups do not have access to files. Each group created by the H83SAFDA job is granted file access rights by executing the H89SAFAS job. Any user wishing to perform configuration or transfer operations must be associated with one of these groups.
Some groups only access files in read or write mode under Transfer CFT program control (CFTUTIL, CFTCOPL, and so on). If other user programs are to be added to the list, a PADS must be executed on them.
If required, update the CFTENV member:
000073 //* SAF parameters
000074 // SET SAFCFTCL='xxxxxxx'
Authorize Transfer CFT users (H89SAFAU)
Use this job to provide a model for the commands to be executed to allow:
l A user to update the Transfer CFT configuration (example: CFTSEND command)
l A user to submit transfer requests (example: SEND command)
l A transfer owner to send or receive a file (example: APPL object)
l Users to be associated with a group so that they can be granted Transfer CFT file access rights
Defining Transfer CFT user descriptionsThis section describes how to define the Transfer CFT user description in z/OS. The user groups are:
l Administrator group (GRPCFT)
Transfer CFT z/OS 3.3.2 Installation and Operation Guide 166

5 Post-installation
l Transfer group(grpmon)
l Configuration (update) group (GRPAPRM)
l Configuration Group(grpfprm)
l Help desk group (GRPDESK)
l File transfer group (GRPTRF)
About user descriptionsIn order to modify Transfer CFT files for configuration purposes, transfers, and so on, you must be authorized to access the following:
l The file (in read or write mode)
l Transfer CFT objects protected by safcftcl class profiles
If one or other of the requirements is not met, the operation fails. To simplify authorization implementation in RACF, groups have been defined to allow files and safcftcl class profiles to be accessed. These groups are:
l The grpcft group has file and safcftcl class profile access rights, to enable administrators to manage all resources.
l The grpmon group has file and safcftcl class profile access rights, to enable the monitor to perform all transfers.
l The grpaprm group has safcftcl class profile access rights, to enable users belonging to the group to edit all Transfer CFT parameters.
l The grpfprm group has file access rights, to enable users belonging to the group to access the configuration files.
l The grpdesk group has file and safcftcl class profile access rights, to enable operators to manage the monitor.
l The grptrf group has file access rights, to enable users belonging to the group to submit transfer requests.
Administrator group (GRPCFT)
ALTER access rights for all Transfer CFT filesThe administrator group is in charge of product installation and maintenance. As such, it may need to create or delete Transfer CFT files.
safcftcl RACF class profile ownerAll safcftcl class profile definitions must specify the grpcft group as OWNER.
CONTROL access rights for all safcftcl class general resources
Transfer CFT z/OS 3.3.2 Installation and Operation Guide 167

5 Post-installation
The administrator group must be able to perform all Transfer CFT management commands and operations.
Monitor group (GRPMON)
CFTMAIN JOB ownerThe only JOBs to be executed under the GRPMON group user must be the monitor start procedures, and the SWITCH – LOG and SWITCH-ACCNT commands. All CFTRECV and CFTSEND IMPL=YES commands must be defined with the USERID= and GROUPID= parameters, so that the Transfer CFT does not execute any end-of-transfer commands under user authority instead of under a correct user.
CFTMAIN execution rightsFor security reasons, no users other than those belonging to the GRPMON group must be able to execute the CFTMAIN program:
PERMIT ‘CFTV2.LOADMAIN’ ID(GRPMON GRPCFT) ACCESS(EXECUTE)
SECINI, SECACT, SECOBJ, UCONF, PARM and PART file read access rights:
PERMIT ‘CFTV2.*’ ID(GRPMON) ACCESS(READ)PERMIT ‘CFTV2.SECINI’ ID(GRPMON) ACCESS(READ)PERMIT ‘CFTV2.SECACT’ ID(GRPMON) ACCESS(READ)PERMIT ‘CFTV2.SECOBJ’ ID(GRPMON) ACCESS(READ)PERMIT ‘CFTV2.PARM’ ID(GRPMON) ACCESS(READ)PERMIT ‘CFTV2.PART’ ID(GRPMON) ACCESS(READ)
COM, CATALOG, LOG and ACCNT file update access rights:
PERMIT ‘CFTV2.COM’ ID(GRPMON) ACCESS(UPDATE)PERMIT ‘CFTV2.CATALOG’ ID(GRPMON) ACCESS(UPDATE)PERMIT ‘CFTV2.LOG1’ ID(GRPMON) ACCESS(UPDATE)PERMIT ‘CFTV2.ACCNT1’ ID(GRPMON) ACCESS(UPDATE)PERMIT ‘CFTV2.UCONF’ ID(GRPMON) ACCESS(UPDATE)
Read access rights for all procedure files (EXEC parameter):
PERMIT ‘XXX.EXEC’ ID(GRPMON … ) ACCESS(READ)
Execution rights for all EXIT programs (CFTEXIT command):
EXIT programs are located in the library containing the CFTMAIN program.
Note The GRPMON group must be the only group in charge of Transfer CFT (CFTMAIN) execution, for all Transfer CFT environments that depend on the same RACF mechanism and regardless of their role (production or test). This group has no reason to have specific access rights with regard to the files that are sent or received, as transfers (FNAME and WFNAME file allocation and EXEC procedure submission) are performed with the user of the transfer owner.
Transfer CFT z/OS 3.3.2 Installation and Operation Guide 168
5 Post-installation
Configuration group (GRPAPRM)This group allows any user belonging to the group to edit all configuration objects protected by the safcftcl class profiles:
l SECINI, SECACT and SECOBJ file read access rights.
l PARM, UCONF and PART file write access rights:
PERMIT ‘CFTV2.PARM’ ID(GRPAPRM)ACCES(UPDATE)PERMIT ‘CFTV2.PART’ ID(GRPAPRM)ACCES(UPDATE)
PERMIT ‘CFTV2.UCONF’ ID(GRPAPRM)ACCES(UPDATE)
Note: The GRPAPRM group must be the only group in charge of Transfer CFT configuration files (PARM and PART) for all Transfer CFT environments that depend on the same RACF mechanism, regardless of their role (production or test).
Parameter file access group (GRPFPRM)This group defines PARM and PART parameter file access rights so that any user belonging to this group can, under Transfer CFT program control, edit the PARM and PART files.
CFTUTIL, CFTCOPL execution rights:
PERMIT ‘CFTV2.LOAD’ ID(GRPFPRM) ACCESS(EXECUTE)
SECINI, SECACT and SECOBJ file read access rights.
PARM and PART file write access rights:
PERMIT ‘CFTV2.PARM’ ID(GRPFPRM) ACCESS(UPDATE) WHEN(PROGRAM(CFTUTIL …))PERMIT ‘CFTV2.PART’ ID(GRPFPRM) ACCESS(UPDATE) WHEN(PROGRAM(CFTUTIL …))
Help desk group (GRPDESK)Users belonging to this group can submit Transfer CFT management commands (SHUT, LISTCAT, ACT, INACT, and so on) or transfer management commands (DELETE, START, and so on).
CFTUTIL, CFTCOPL execution rights:
PERMIT ‘CFTV2.LOAD’ ID(GRPDESK) ACCESS(EXECUTE)
SECINI, SECACT and SECOBJ file read access rights.
CATALOG, UCONF and PARM file read access rights under CFT utility control:
Transfer CFT z/OS 3.3.2 Installation and Operation Guide 169

5 Post-installation
PERMIT ‘CFTV2.CATALOG’ ID(GRPDESK) ACCESS(READ) WHEN(PROGRAM(CFTUTIL …))PERMIT ‘CFTV2.PARM’ ID(GRPDESK) ACCESS(READ) WHEN(PROGRAM(CFTUTIL …))
PERMIT ‘CFTV2.UCONF’ ID(GRPDESK) ACCESS(READ) WHEN(PROGRAM(CFTUTIL …))
PART and COM file write access rights under CFT utility control:
PERMIT ‘CFTV2.PART’ ID(GRPDESK) ACCESS(UPDATE) WHEN(PROGRAM(CFTUTIL …))PERMIT ‘CFTV2.COM’ ID(GRPDESK) ACCESS(UPDATE) WHEN(PROGRAM(CFTUTIL …))
Access to all ALL_xxx objects and Transfer CFT management commands:
ALL_CAT, ALL_COM, ALL_PART and ALL_PARM SHUT, SWITCH LOG, SWITCH ACCOUNT and MQUERY
File transfer group (GRPTRF)This group can define Transfer CFT file access rights, though it is not itself intended to submit transfer commands. It does not hold rights to APPL, TRANSFER, COMMUT, MESSAGE, and FILE objects.
Users submitting transfer commands (SEND, RECV, DELETE, START, and so on) must belong to this group to access Transfer CFT files, and hold specific rights to objects, such as APPL, TRANSFER and MESSAGE.
Execution rights for utilities (CFTUTIL, CFTCOPL,…)These are located in the CFTV2.LOAD library, and defined as follows:
PERMIT ‘CFTV2.LOAD’ ID(GRPTRF) ACCESS(EXECUTE)
SECINI, SECACT and SECOBJ file read access rights.
COM and CATALOG write access rights controlled by CFT utilities:
PERMIT ‘CFTV2.COM’ ID(GRPTRF) ACCESS(UPDATE)WHEN(PROGRAM(CFTUTIL …))
PERMIT ‘CFTV2.CATALOG’ ID(GRPTRF) ACCESS(UPDATE) WHEN(PROGRAM(CFTUTIL …))
Transfer CFT z/OS 3.3.2 Installation and Operation Guide 170
5 Post-installation
Transfer CFT object protectionThis section describes protecting Transfer CFT objects and how to configure the following:
Resource name generation
General resource profile definition
l Control the CFTxxx configuration commands
l Control via ALL_xxx objects
l Control the SWITCH, MQUERY and SHUT commands
l Control via the APPL object
l Control FILE type transfers
l Control MESSAGE-type transfers
Add UCONF resource name generation controlDepending on the Transfer CFT command and parameter values , the Transfer CFT programs determine the ACTION type and OBJET name, whose properties are obtained from the ACTION (SECACT) and OBJECT (SECOBJ) dictionaries respectively. The VALUE field is set according to information in the file or command. The resource name passed to RACF has the following format:
Object_Name.Set_value
Depending on the object definition and the Transfer CFT configuration, RACF receives the following resource names:
CFTPARM.IDPARM0
CFTSEND.DEFAULT
CFTRECV.DEFAULT
CFTAPPL.DEFAULT
Resource access control
Commands relating to specific information, CFTPARM for example, generate a single RACF control with the following format:
CFTPARM.IDPARM0 USER(usercmd) ACCESS(create)
Where:
l CFTPARM.IDPARM0 is the resource name passed to RACF
l Usercmd is the system user (TSO) of the person submitting the command
l Create is the resource access mode
Transfer CFT z/OS 3.3.2 Installation and Operation Guide 171

5 Post-installation
Commands relating to generic information, LISTPARM TYPE=ALL for example, generate a RACF control with the following format:
ALL_PARM.CFTV2.PARM USER(usercmd) ACCESS(read)
If the RACF return code is equal to zero, the Transfer CFT program lists all entries in the parameter file (PARM).
If the RACF return code is different from zero, the Transfer CFT program generates the following RACF controls:
CFTPARM.IDPARM0USER(usercmd) ACCESS(read)
CFTSEND.DEFAULT USER(usercmd) ACCESS(read)
CFTRECV.DEFAULT USER(usercmd) ACCESS(read)
CFTAPPL.DEFAULT USER(usercmd) ACCESS(read)
If the RACF return code is equal to zero, the Transfer CFT program lists the entry.
Transfer CFT z/OS files on page 187 explains the commands controlled by the Transfer CFT programs.
Transfer CFT general resource profile definition
Control the CFTxxx configuration commandsIf users in the grpaprm group are the only ones intended to modify CFTxxx commands, the samples provided are sufficient to grant them the necessary rights.
However, if specific authorizations must be granted to some users, declare the definitions in RACF as follows:
RDEFINE safcftcl CFTRECV.DEFAULT UACC(NONE) OWNER( grpcft )PERMIT CFTRECV.DEFAULT CLASS( safcftcl ) ACCESS(CONTROL) -ID( grpcft grpaprm usera userb and so on )CONNECT usera GROUP( grpfprm ) OWNER( grpcft )CONNECT userb GROUP( grpfprm ) OWNER( grpcft )
Control via ALL_xxx objectsOnly users in the grpdesk group are supposed to execute commands, the control of which is performed via ALL_xxx objects (ALL_CAT, ALL_COM, ALL_PART, ALL_PARM, ALL_EXT).The definitions supplied in the samples are sufficient to grant the necessary rights.
Transfer CFT z/OS 3.3.2 Installation and Operation Guide 172

5 Post-installation
Control the SWITCH, MQUERY and SHUT commandsOnly users in the grpdesk group are supposed to execute these commands. The definitions supplied in the samples are sufficient to grant them the necessary rights.
Control via the APPL objectThe SEND, RECV, START, DELETE, HALT, KEEP, END and SUBMIT commands are controlled by the APPL object, and are dependent on the relevant CFTAPPL command ID.
If the following definitions are declared in the PARM file:
CFTPARM ID=IDPARM0,DEFAULT=DEFAULT, …
CFTSENDID=DEFAULT,IMPL=NO, …
CFTRECV ID=DEFAULT,USERID=USRTSO, …
CFTAPPL ID=DEFAULT,USERID=&USERID, …
CFTAPPL ID=TEXT,USERID=USRTSO2, …
The parameter file CFTAPPL command is used to define the transfer owner. There are two possible scenarios for CFTAPPL, explicit and implicit definitions.
l When the user is explicitly indicated in the CFTAPPL ID=Text, USERID=Usrtso2, DIRECT=BOTH command, the owner of the transfer in send and/or receive mode is the one specified by the USERID parameter.
l When the user is implicitly indicated by the CFTAPPL ID=Default, USERID=&USERID, DIRECT=BOTH command, the owner, in requester mode, is deduced from the SEND or RECV command owner; in server mode, the owner is deduced from the user indicated in the CFTRECV or CFTSEND command.
If no user is indicated in the CFTRECV or CFTSEND command, the monitor user is considered to be the transfer owner. Avoid this method for security reasons, as the end-of-transfer procedures would be performed under its authority.
The CFTAPPL command lets Transfer CFT control access to a parameter file identifier in one of several cases:
l Any file identifier defined in the parameter file by a CFTSEND ID= Default … or CFTRECV ID= Default … command must also be defined by a CFTAPPL ID= Default command; if not, the transfer is rejected.
l Any user (usrtso1) of a SEND IDF=Default,… or RECV IDF=Default,… command must correspond to an RACF profile:
RDEFINE safcftcl APPL.DefaultUACC(NONE) OWNER(GRPCFT)PERMIT APPL.DefaultCLASS(safcftcl) ID(usrtso1)ACCESS(CONTROL)
l Any file identifier not defined in the parameter file by a CFTSEND or CFTRECV command inherits the DEFAULT identifier definition information, if it already exists; if not, the transfer is rejected. In this case, the user must correspond to an RACF profile:
Transfer CFT z/OS 3.3.2 Installation and Operation Guide 173
5 Post-installation
RDEFINE safcftcl APPL.DEFAULT UACC(NONE) OWNER(GRPCFT)
PERMIT APPL.DEFAULT CLASS(safcftcl) ID(usrtso1) ACCESS(CONTROL)
l Any file identifier (Text for example) not defined in the parameter file by a CFTSEND or CFTRECV command can be defined by a CFTAPPL ID=Text, USERID=Usrtso2 command.In this case, CFTAPPL command information is applied and completed with that of the DEFAULT identifier if it already exists. This possibility is used to force the transfer owner. The Usrtso1 user (belonging to the GRPTRF group) submitting the SEND or RECV command must correspond to an RACF profile:
RDEFINE safcftcl APPL.TEXT UACC(NONE) OWNER(GRPCFT)
PERMIT APPL.TEXT CLASS(safcftcl) ID(Usrtso1) ACCESS(CONTROL)
Note As end-of-transfer commands are submitted from the transfer owner account (Usrtso2), these procedures cannot execute certain commands (DELETE, START, KEEP, and so on) unless the USRTSO2 user corresponds to a RACF profile type:PERMIT APPL.TEXT CLASS(safcftcl) ID(usrtso2) ACCESS(CONTROL)orPERMIT ALL_CAT.** CLASS(safcftcl) ID(usrtso2) ACCESS(CONTROL)
Control FILE type transfersTRANSFER and COMMUT objects are used to check if the transfer owner has the right to send/receive a physical file to/from a partner site.
If the following definitions are declared in the PARM file:
CFTPARM ID=IDPARM0,DEFAULT=DEFAULT, …
CFTSEND ID=DEFAULT,IMPL=NO, …
CFTRECV ID=DEFAULT,USERID=USRTSO, …
CFTAPPL ID=DEFAULT,USERID=&USERID, …
CFTAPPL ID=TEXT,USERID=USRTSO2, …
CFTPART ID=BANK, …
If the Usrtso1 user, belonging to the GRPTRF group, submits the command:
SEND IDF=TEXT,PART=BANK,FNAME=CFTV2.TEST.CHECK
Then the transfer is rejected unless Usrtso2, the transfer owner, corresponds to an RACF profile of the type:
RDEFINE safcftcl TRANSFER.TEXT.S.BANK.CFTV2.TEST.* -
UACC(NONE) OWNER(GRPCFT)
PERMIT TRANSFER.TEXT.S.BANK.CFTV2.TEST.* CLASS(safcftcl) –
ID(Usrtso2) ACCESS(CONTROL)
In server mode or if the Usrtso1 user submits the following command in requester mode:
Transfer CFT z/OS 3.3.2 Installation and Operation Guide 174
5 Post-installation
RECV IDF=TEXT,PART=BANK,FNAME=CFTV2.TEST.CHECK
The transfer is rejected unless Usrtso2, the transfer owner, corresponds to an RACF profile of the type (in receive mode, the &FNAME variable is ignored if it is in the TRANSFER object definition):
RDEFINE safcftcl TRANSFER.TEXT.R.BANK UACC(NONE) OWNER(GRPCFT)
PERMIT TRANSFER.TEXT.R.BANK CLASS(safcftcl) –
ID(Usrtso2) ACCESS(CONTROL)
Control MESSAGE type transfersMESSAGE objects are used to check if the transfer owner has the right to send/receive a message to/from a partner site.
If the Usrtso1 user submits the command:
SEND IDM=TEXT,TYPE=MESSAGE,PART=BANK,MSG='SEND SUCCESSFUL'
Then the transfer is rejected unless Usrtso2, the transfer owner, corresponds to an RACF profile of the type:
RDEFINE safcftcl MESSAGE.TEXT.S.BANK UACC(NONE) OWNER(GRPCFT)
PERMIT MESSAGE.TEXT.S.BANK CLASS(safcftcl)-
ID(Usrtso2) ACCESS(CONTROL)
If the Usrtso1 user submits the command:
RECV IDM=TEXT, TYPE=REPLY, PART=BANK, IDT= C3110510, MSG='ACKNOWLEDGED'
Then the transfer is rejected unless Usrtso2, the transfer owner, corresponds to an RACF profile of the type:
RDEFINE safcftcl MESSAGE.TEXT.S.BANK UACC(NONE) OWNER(GRPCFT)
PERMIT MESSAGE.TEXT.S.BANK CLASS(safcftcl) –
ID(Usrtso2 GRPTRF) ACCESS(CONTROL)
The BANK partner Transfer CFT (if authorized) receives the response if the Usrtso3 user owning the transfer with IDT=C3110510 corresponds to an RACF profile type:
RDEFINEsafcftcl MESSAGE.TEXT.R.BANK UACC(NONE) OWNER(GRPCFT)
PERMIT MESSAGE.TEXT.R.BANK CLASS(safcftcl) –
ID(Usrtso3) ACCESS(CONTROL)
Note Objects whose VALUE parameter contains the &FNAME variable generate a resource name that takes into account the physical file name. RACF profiles must anticipate the differing cases, in particular PDS or GDG members.
Transfer CFT z/OS 3.3.2 Installation and Operation Guide 175

5 Post-installation
File protectionThe section Transfer CFT z/OS files on page 187 provides a list of files used by Transfer CFT and, depending on the user group, indicates access rights. The default file access rights must be UACC(NONE). Privileges, which are based on user type, are detailed in the following sections:
l Program libraries
l Security files
l Secure files
Program librariesThe security system requires Transfer CFT programs to be located in APF libraries.
If a user has developed specific applications using the Transfer CFT API to access Transfer CFT files (COM, CATALOG, etc.), the main programs (APPLIx) must:
l Be authorized (AC=1)
l Be located in an APF library
l Define the pgmuser program in the PROGRAM class:
REDEFINE PROGRAM pgmuser UACC(EXECUTE) OWNER(grpcft)-ADDMEN(‘pgmuser library’//NOPADCHK)
PERMIT pgmuser CLASS(PROGRAM) ACCESS(READ) -ID(grpcft grpmon grpaprm) SETROPTS WHEN(PROGRAM) REFRESH
l Authorize file access under program control:
PERMIT‘cftv2.CATALOG’ GENERIC ACCESS(READ) -ID(grpcft grpmon grpaprm …) WHEN( PROGRAM(pgmuser))
PERMIT ‘cftv2.COM’ GENERIC ACCESS(UPDATE) -ID(grpcft grpmon grpaprm …) WHEN( PROGRAM(pgmuser))
l Recompiled and link-edited existing applications with the authorized Transfer CFT APIs
All users executing Transfer CFT commands are assigned to a predefined group (GRPTRF).
Only the GRPMON group must have the right to execute the CFTMAIN and CFTCOPL programs.
Security filesSECINI, SECACT and SECOBJ files must be made available in read mode to all Transfer CFT program users (these files do not contain confidential data).
Transfer CFT z/OS 3.3.2 Installation and Operation Guide 176

5 Post-installation
Although each secure file can point to a dedicated group of security files, this is not recommended, because it may complicate RACF profile management.
Secure filesSecure files (PARM, PART, COM, UCONF and CATALOG) access differs according to the user type.
l Any user with the right to update the whole file has the UPDATE file access right.
l Any user with the right to read the whole file has the READ file access right.
l Any user with the right to update part of the file has the UPDATE WHEN (PROGRAM(CFTUTIL CFTCOPL …)) access right.
l Any user with the right to read part of the file has the READ WHEN (PROGRAM(CFTUTIL CFTCOPL …)) access right.
CFTUTIL commands for z/OSThis section lists the Transfer CFT z/OS CFTUTIL commands, and additional object and class information for:
l Users with all rights
l Users with all rights except for the $CFTOPER class
User with all rights
Command Object Class VARS UserID Actions File/ACC Notes
ABOUT No control
PURGE COM(UPDATE)
No control
COPYFILE No control
Transfer CFT z/OS 3.3.2 Installation and Operation Guide 177
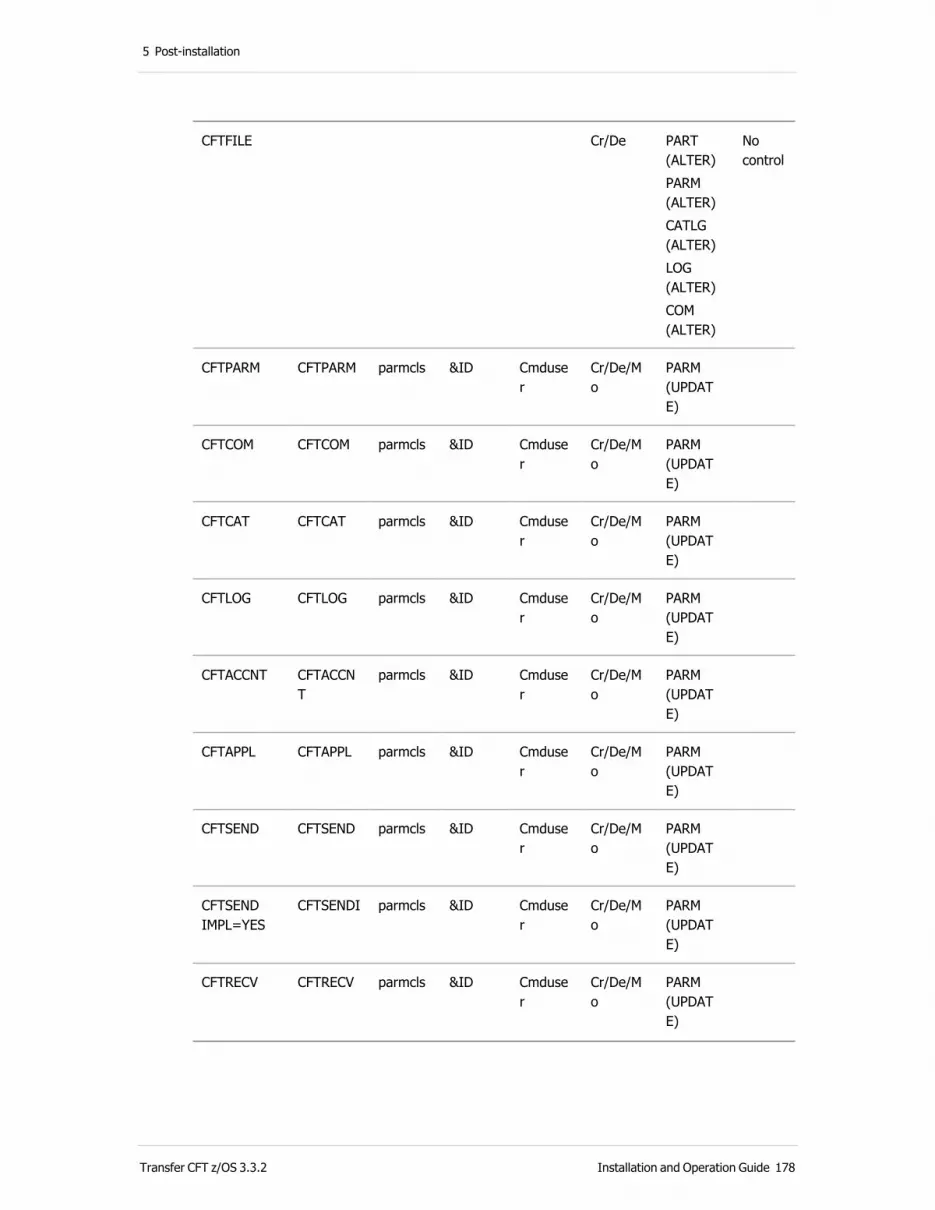
5 Post-installation
CFTFILE Cr/De PART(ALTER)PARM(ALTER)CATLG(ALTER)LOG(ALTER)COM(ALTER)
No control
CFTPARM CFTPARM parmcls &ID Cmduser
Cr/De/Mo
PARM(UPDATE)
CFTCOM CFTCOM parmcls &ID Cmduser
Cr/De/Mo
PARM(UPDATE)
CFTCAT CFTCAT parmcls &ID Cmduser
Cr/De/Mo
PARM(UPDATE)
CFTLOG CFTLOG parmcls &ID Cmduser
Cr/De/Mo
PARM(UPDATE)
CFTACCNT CFTACCNT
parmcls &ID Cmduser
Cr/De/Mo
PARM(UPDATE)
CFTAPPL CFTAPPL parmcls &ID Cmduser
Cr/De/Mo
PARM(UPDATE)
CFTSEND CFTSEND parmcls &ID Cmduser
Cr/De/Mo
PARM(UPDATE)
CFTSEND IMPL=YES
CFTSENDI parmcls &ID Cmduser
Cr/De/Mo
PARM(UPDATE)
CFTRECV CFTRECV parmcls &ID Cmduser
Cr/De/Mo
PARM(UPDATE)
Transfer CFT z/OS 3.3.2 Installation and Operation Guide 178

5 Post-installation
CFTEXIT CFTEXIT parmcls &ID Cmduser
Cr/De/Mo
PARM(UPDATE)
CFTAUTH CFTAUTH parmcls &ID Cmduser
Cr/De/Mo
PARM(UPDATE)
CFTIDF CFTIDF parmcls &ID Cmduser
Cr/De/Mo
PARM(UPDATE)
CFTXLATE CFTXLATE parmcls &ID Cmduser
Cr/De/Mo
PARM(UPDATE)
CFTNET CFTNET parmcls &ID Cmduser
Cr/De/Mo
PARM(UPDATE)
CFTPROT CFTPROT parmcls &ID Cmduser
Cr/De/Mo
PARM(UPDATE)
CFTETB CFTETB parmcls &ID Cmduser
Cr/De/Mo
PARM(UPDATE)
CFTPART CFTPART parmcls &ID Cmduser
Cr/De/Mo
PART(UPDATE)
CFTDEST CFTDEST parmcls &ID Cmduse Cr/De/Mo
PART(UPDATE)
CFTTCP CFTTCP parmcls &ID Cmduser
Cr/De/Mo
PART(UPDATE)
UCONFGET UCONF &ID Cmduser
Read UCONF(READ)
UCONFSUBST
UCONF &ID Cmduser
Read UCONF(READ)
Transfer CFT z/OS 3.3.2 Installation and Operation Guide 179
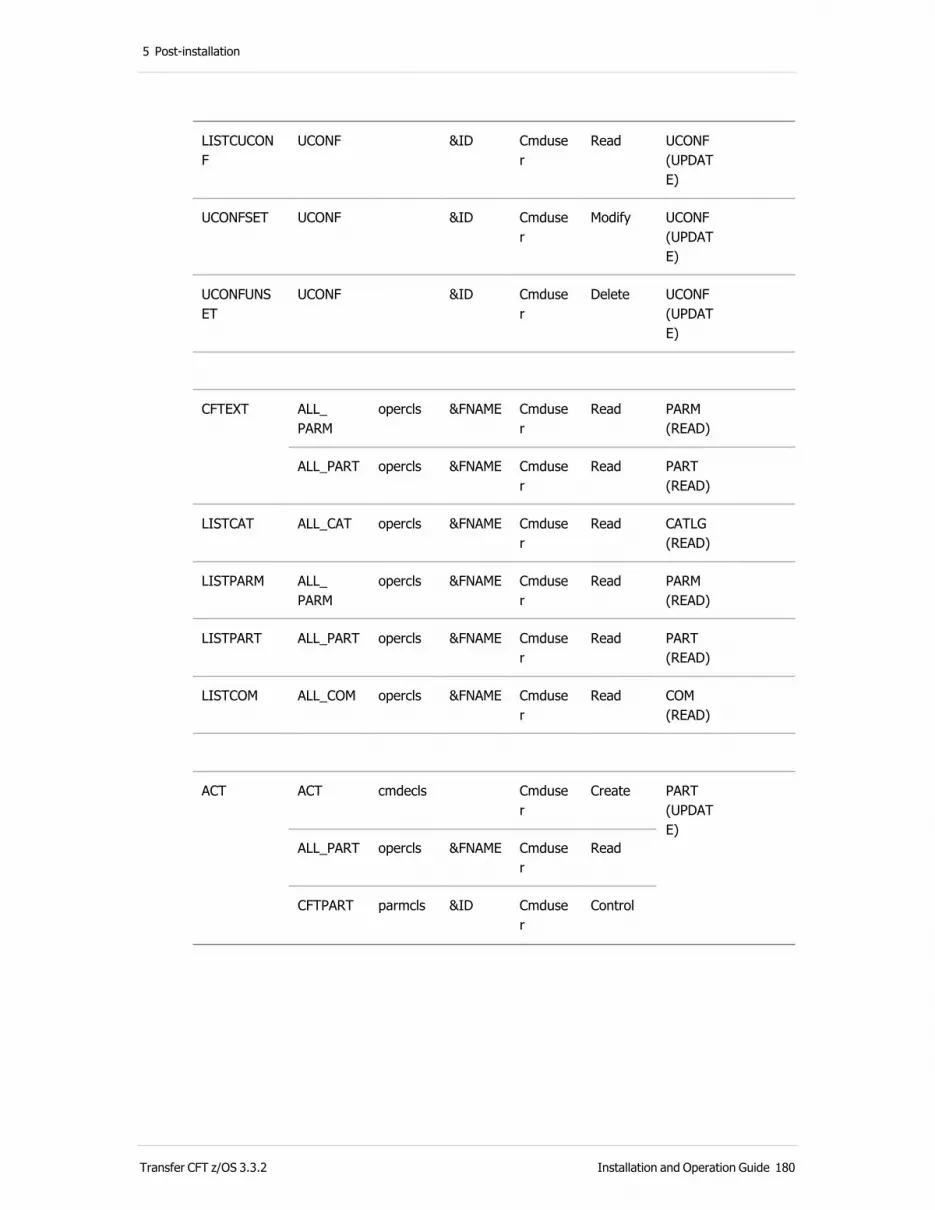
5 Post-installation
LISTCUCONF
UCONF &ID Cmduser
Read UCONF(UPDATE)
UCONFSET UCONF &ID Cmduser
Modify UCONF(UPDATE)
UCONFUNSET
UCONF &ID Cmduser
Delete UCONF(UPDATE)
CFTEXT ALL_PARM
opercls &FNAME Cmduser
Read PARM(READ)
ALL_PART opercls &FNAME Cmduser
Read PART(READ)
LISTCAT ALL_CAT opercls &FNAME Cmduser
Read CATLG(READ)
LISTPARM ALL_PARM
opercls &FNAME Cmduser
Read PARM(READ)
LISTPART ALL_PART opercls &FNAME Cmduser
Read PART(READ)
LISTCOM ALL_COM opercls &FNAME Cmduser
Read COM(READ)
ACT ACT cmdecls Cmduser
Create PART(UPDATE)
ALL_PART opercls &FNAME Cmduser
Read
CFTPART parmcls &ID Cmduser
Control
Transfer CFT z/OS 3.3.2 Installation and Operation Guide 180
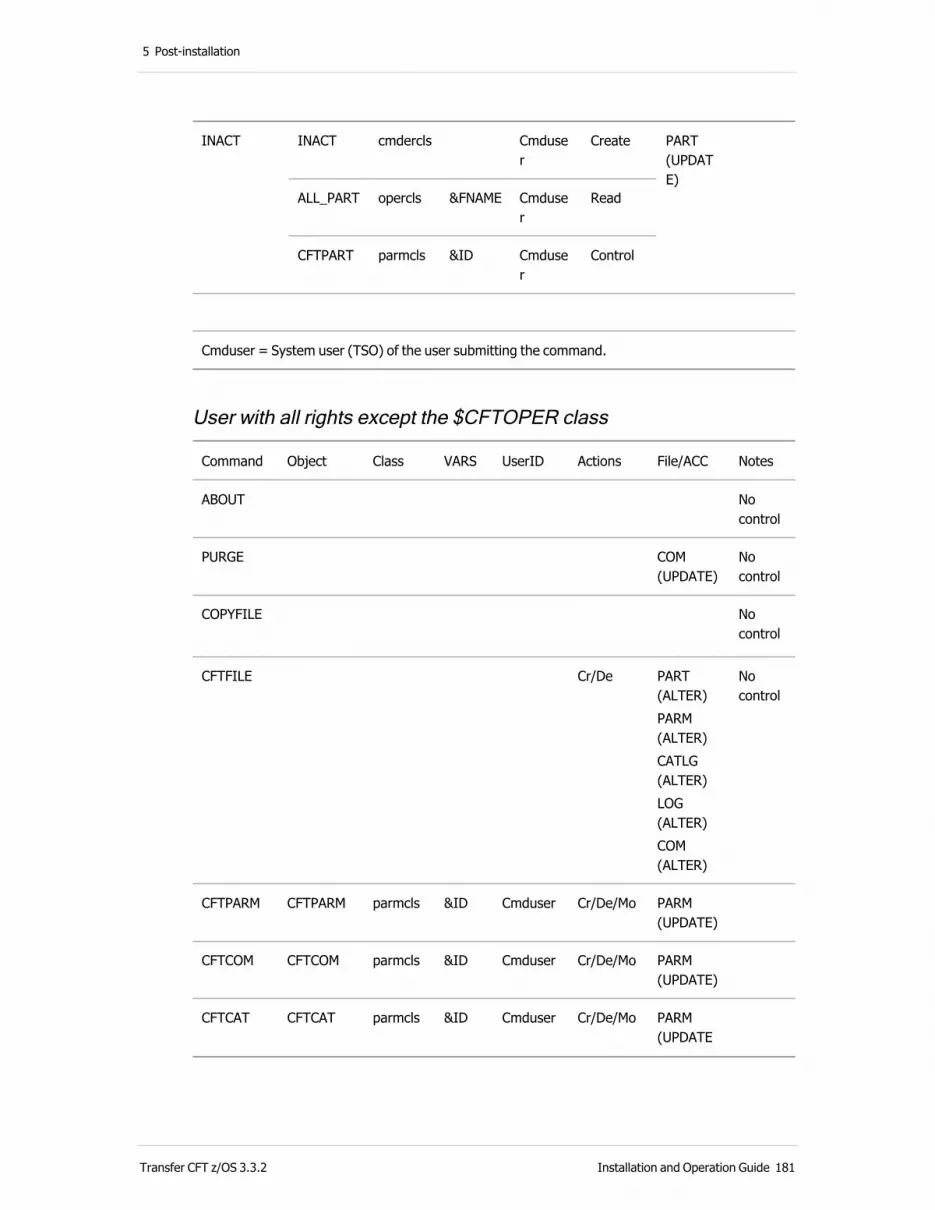
5 Post-installation
INACT
INACT cmdercls Cmduser
Create PART(UPDATE)
ALL_PART opercls &FNAME Cmduser
Read
CFTPART parmcls &ID Cmduser
Control
Cmduser = System user (TSO) of the user submitting the command.
User with all rights except the $CFTOPER class
Command Object Class VARS UserID Actions File/ACC Notes
ABOUT No control
PURGE COM(UPDATE)
No control
COPYFILE No control
CFTFILE Cr/De
PART(ALTER)PARM(ALTER)CATLG(ALTER)LOG(ALTER)COM(ALTER)
No control
CFTPARM CFTPARM parmcls &ID Cmduser Cr/De/Mo PARM(UPDATE)
CFTCOM CFTCOM parmcls &ID Cmduser Cr/De/Mo PARM(UPDATE)
CFTCAT CFTCAT parmcls &ID Cmduser Cr/De/Mo PARM(UPDATE
Transfer CFT z/OS 3.3.2 Installation and Operation Guide 181
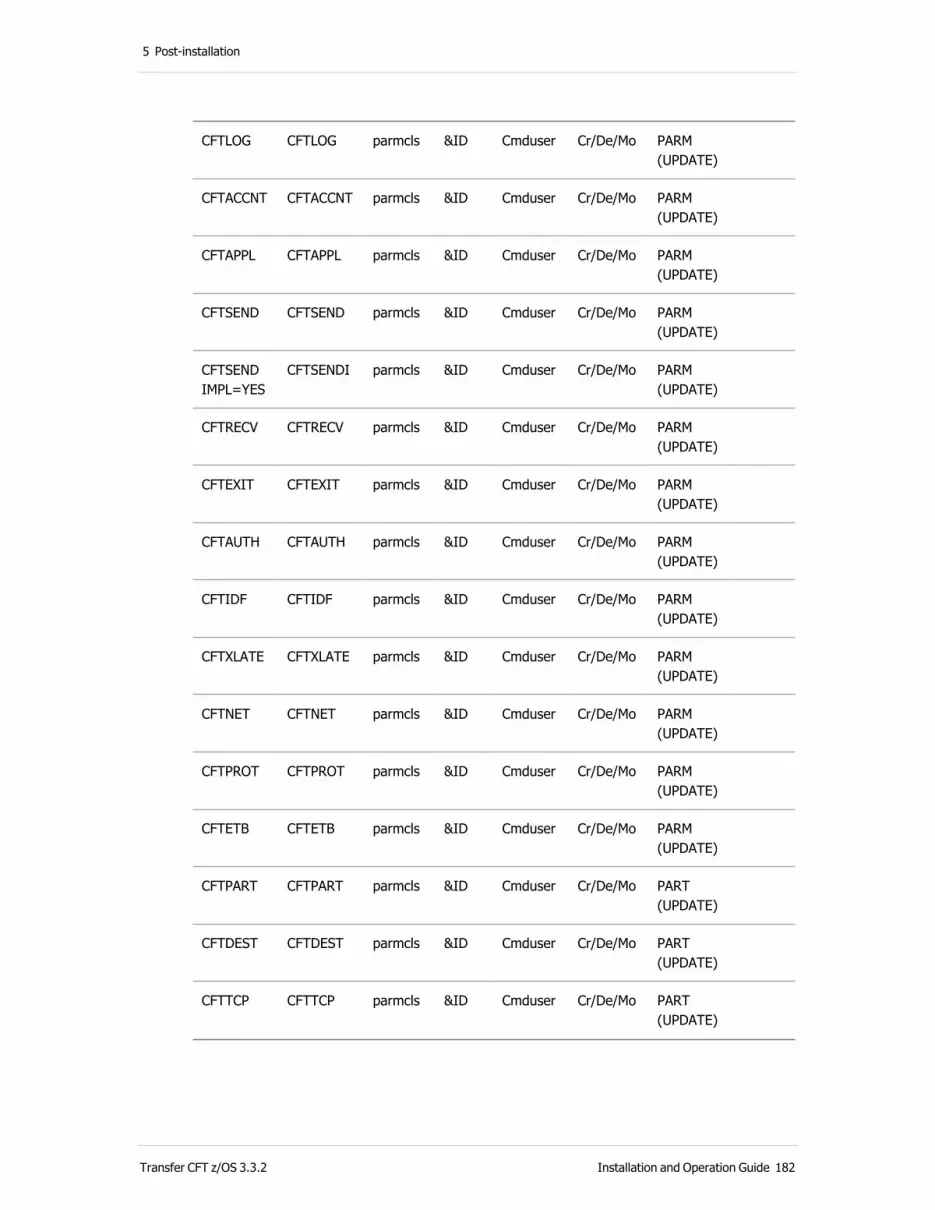
5 Post-installation
CFTLOG CFTLOG parmcls &ID Cmduser Cr/De/Mo PARM(UPDATE)
CFTACCNT CFTACCNT parmcls &ID Cmduser Cr/De/Mo PARM(UPDATE)
CFTAPPL CFTAPPL parmcls &ID Cmduser Cr/De/Mo PARM(UPDATE)
CFTSEND CFTSEND parmcls &ID Cmduser Cr/De/Mo PARM(UPDATE)
CFTSEND IMPL=YES
CFTSENDI parmcls &ID Cmduser Cr/De/Mo PARM(UPDATE)
CFTRECV CFTRECV parmcls &ID Cmduser Cr/De/Mo PARM(UPDATE)
CFTEXIT CFTEXIT parmcls &ID Cmduser Cr/De/Mo PARM(UPDATE)
CFTAUTH CFTAUTH parmcls &ID Cmduser Cr/De/Mo PARM(UPDATE)
CFTIDF CFTIDF parmcls &ID Cmduser Cr/De/Mo PARM(UPDATE)
CFTXLATE CFTXLATE parmcls &ID Cmduser Cr/De/Mo PARM(UPDATE)
CFTNET CFTNET parmcls &ID Cmduser Cr/De/Mo PARM(UPDATE)
CFTPROT CFTPROT parmcls &ID Cmduser Cr/De/Mo PARM(UPDATE)
CFTETB CFTETB parmcls &ID Cmduser Cr/De/Mo PARM(UPDATE)
CFTPART CFTPART parmcls &ID Cmduser Cr/De/Mo PART(UPDATE)
CFTDEST CFTDEST parmcls &ID Cmduser Cr/De/Mo PART(UPDATE)
CFTTCP CFTTCP parmcls &ID Cmduser Cr/De/Mo PART(UPDATE)
Transfer CFT z/OS 3.3.2 Installation and Operation Guide 182
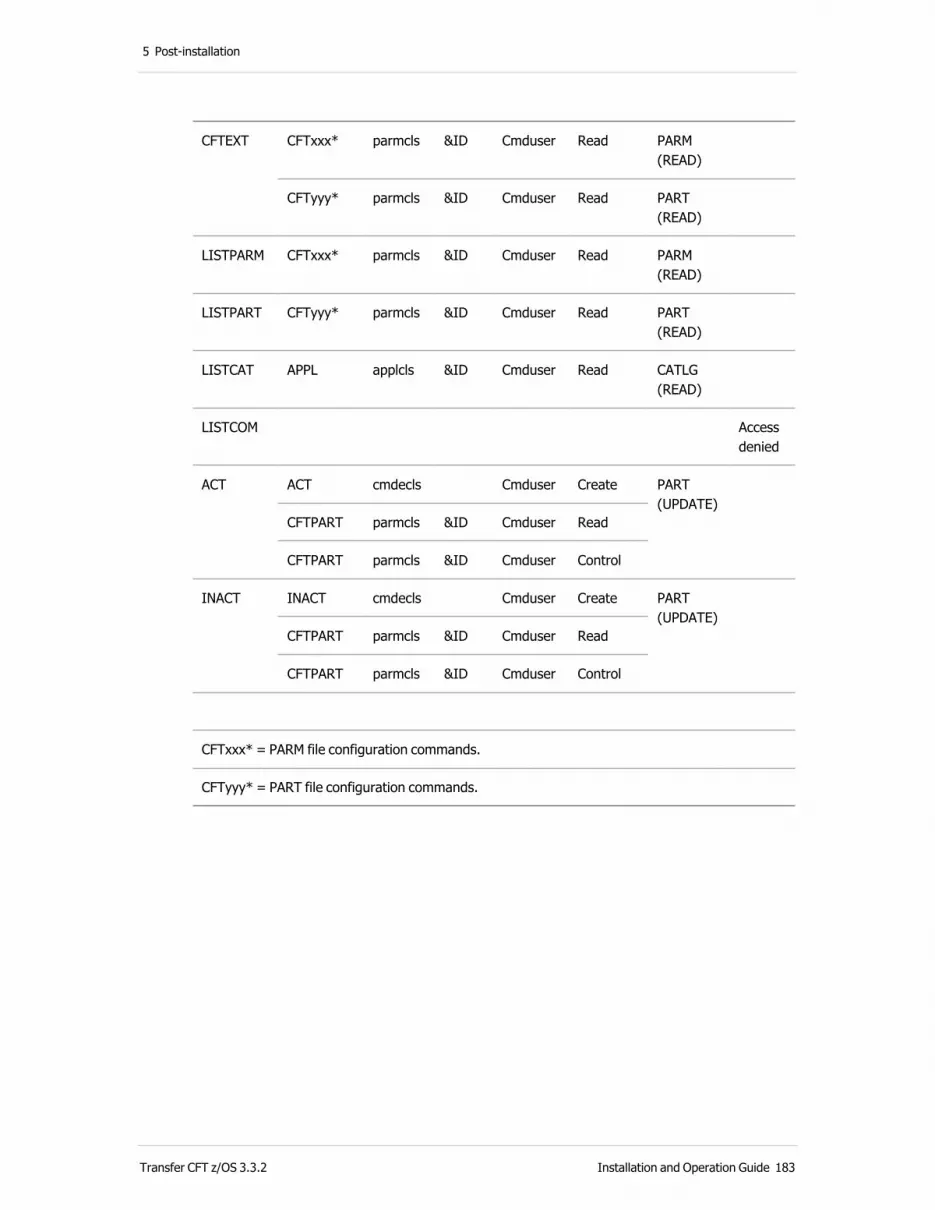
5 Post-installation
CFTEXT CFTxxx* parmcls &ID Cmduser Read PARM(READ)
CFTyyy* parmcls &ID Cmduser Read PART(READ)
LISTPARM CFTxxx* parmcls &ID Cmduser Read PARM(READ)
LISTPART CFTyyy* parmcls &ID Cmduser Read PART(READ)
LISTCAT APPL applcls &ID Cmduser Read CATLG(READ)
LISTCOM Access denied
ACT
ACT cmdecls Cmduser Create PART(UPDATE)
CFTPART parmcls &ID Cmduser Read
CFTPART parmcls &ID Cmduser Control
INACT
INACT cmdecls Cmduser Create PART(UPDATE)
CFTPART parmcls &ID Cmduser Read
CFTPART parmcls &ID Cmduser Control
CFTxxx* = PARM file configuration commands.
CFTyyy* = PART file configuration commands.
Transfer CFT z/OS 3.3.2 Installation and Operation Guide 183

5 Post-installation
CFTMAIN controlled commandsThis section lists the Transfer CFT z/OS CFTUTIL commands, and additional object and class information for:
l Users with all rights except for the ALL_CAT object
l Users with all rights to the ALL_CAT object
l Users with all rights
User with all right except for the ALL_CAT objectFILE(ACCESS): PARM(READ), PART(READ), COM(UPD), CATLG(UPD), LOG(UPD).
Command Object Class Variable UserID Action
START APPL applcls &ID Cmduser Control
HALT APPL applcls &ID Cmduser Control
KEEP APPL applcls &ID Cmduser Control
END APPL applcls &ID Cmduser Control
SUBMIT APPL applcls &ID Cmduser Control
DELETE APPL applcls &ID Cmduser Delete
User with all rights to the ALL_CAT objectFILE(ACCESS): PARM(READ), PART(READ), COM(UPD), CATLG(UPD), LOG(UPD).
Command Object Class Variable UserID Action
START ALL_CAT opercls &FNAME Cmduser Control
HALT ALL_CAT opercls &FNAME Cmduser Control
KEEP ALL_CAT opercls &FNAME Cmduser Control
END ALL_CAT opercls &FNAME Cmduser Control
SUBMIT ALL_CAT opercls &FNAME Cmduser Control
DELETE ALL_CAT opercls &FNAME Cmduser Delete
Transfer CFT z/OS 3.3.2 Installation and Operation Guide 184
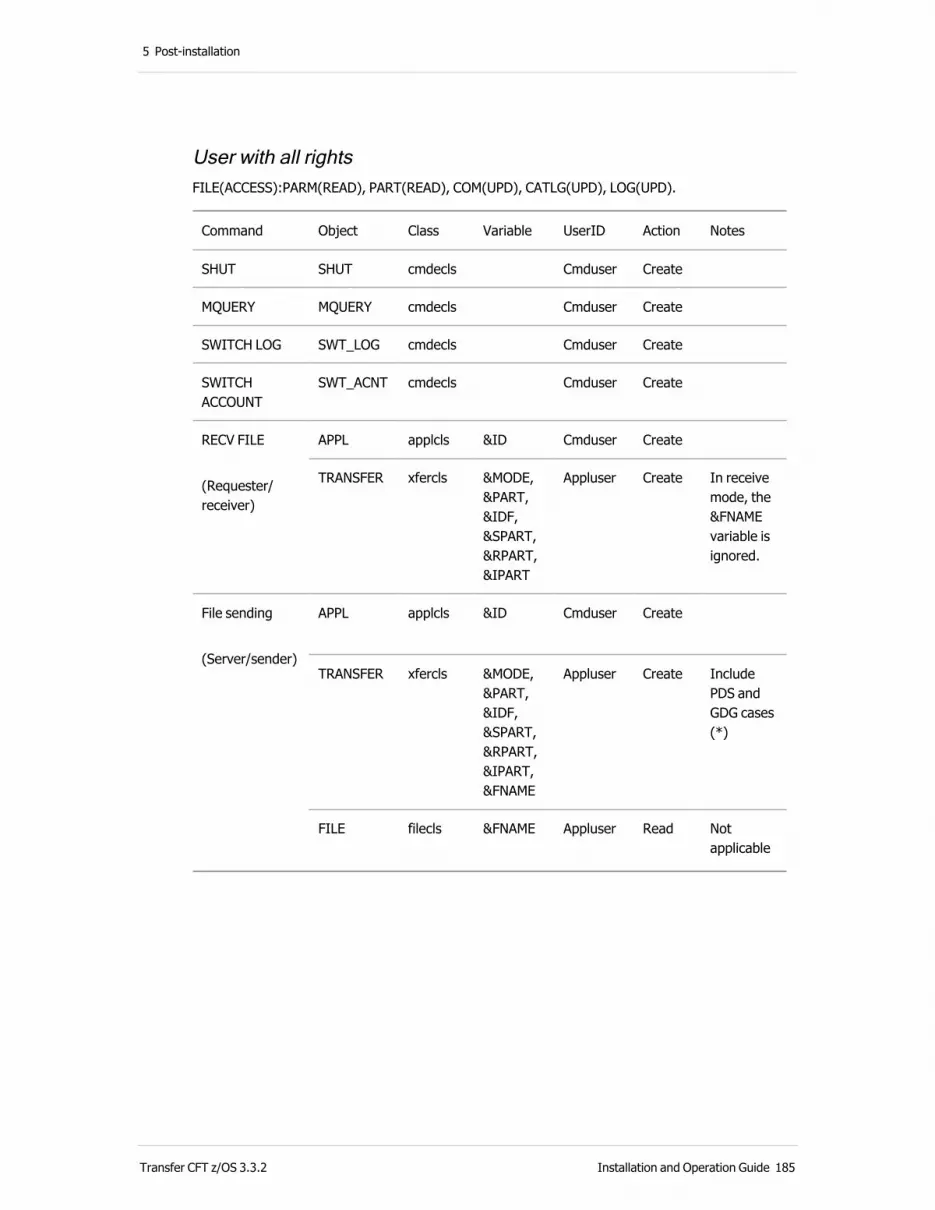
5 Post-installation
User with all rightsFILE(ACCESS):PARM(READ), PART(READ), COM(UPD), CATLG(UPD), LOG(UPD).
Command Object Class Variable UserID Action Notes
SHUT SHUT cmdecls Cmduser Create
MQUERY MQUERY cmdecls Cmduser Create
SWITCH LOG SWT_LOG cmdecls Cmduser Create
SWITCH ACCOUNT
SWT_ACNT cmdecls Cmduser Create
RECV FILE (Requester/ receiver)
APPL applcls &ID Cmduser Create
TRANSFER
xfercls
&MODE, &PART, &IDF, &SPART, &RPART, &IPART
Appluser
Create
In receive mode, the &FNAME variable is ignored.
File sending (Server/sender)
APPL
applcls &ID Cmduser Create
TRANSFER
xfercls
&MODE, &PART, &IDF, &SPART, &RPART, &IPART, &FNAME
Appluser
Create
Include PDS and GDG cases (*)
FILE
filecls
&FNAME
Appluser
Read
Not applicable
Transfer CFT z/OS 3.3.2 Installation and Operation Guide 185

5 Post-installation
SEND FILE (Requester/ sender)
APPL applcls &ID Cmduser Create
TRANSFER
xfercls
&MODE, &PART, &IDF, &SPART, &RPART, &IPART, &FNAME
Appluser
Create
Include PDS and GDG cases (*)
FILE filecls &FNAME Appluser Read Not applicable
File reception(Server/ receiver)
TRANSFER
xfercls
&MODE, &PART, &IDF, &SPART, &RPART, &IPART
Appluser
Create
In receive mode, the &FNAME variable is ignored.
SEND MESSAGE(Requester/ sender)
APPL applcls &ID Cmduser Create
MESSAGE messcls &MODE, &PART, &IDM, &SPART, &RPART
Appluser
Create
Message reception(Server/ receiver)
MESSAGE
messcls
&MODE, &PART, &IDM, &SPART, &RPART
Appluser
Create
SEND REPLY(Requester/ sender)
APPL
applcls
&ID
Cmduser
Create
Reply reception(Server/ receiver)
APPL
applcls
&ID
Trfuser Create
(*) If GDG &FNAME=CFTV2.GDGHAB(0) Or &FNAME=CFTV2.GDGHAB.G0002V00 If PDS &FNAME=CFTV2.INSTALL(D40INIT)
Appluser = System user (TSO) of the user defined by the CFTAPPL command.
Trfuser = System user (TSO) of the original file transfer owner.
Transfer CFT z/OS 3.3.2 Installation and Operation Guide 186

5 Post-installation
Transfer CFT z/OS files The Transfer CFT z/OS file types are listed and defined below.
File Definition Note Grpaprm Grpdesk Grptrf
CFTV2.ACCNT1 Account file Update None None None
CFTV2.ACCNT2 Account file Update None None None
CFTV2.CATALOG Catalog file Update None Read* Read*
CFTV2.CFTXMEM Mailbox COM Update None None None
CFTV2.COM Communication file
Update Update* Update* Update*
CFTV2.EXEC JCL sample library
Read Read Read Read
CFTV2.SECACT Action dictionary
Read Read Read Read
CFTV2.SECINI Security file Read Read Read Read
CFTV2.SECOBJ Object dictionary
Read Read Read Read
CFTV2.INSTALL Installation library
None None None None
CFTV2.LOAD Program library Execute Execute Execute Execute
CFTV2.LOG1 Log file Update Read Read Read
CFTV2.LOG2 Log file Update Read Read Read
CFTV2.USER.OBJ Object library None None None None
CFTV2.PARM Parameter file Read Update* Update* None
CFTV2.PART Partner file Read Update* Update* None
CFTV2.SAMPLE Sample library Read Read Read Read
Transfer CFT z/OS 3.3.2 Installation and Operation Guide 187
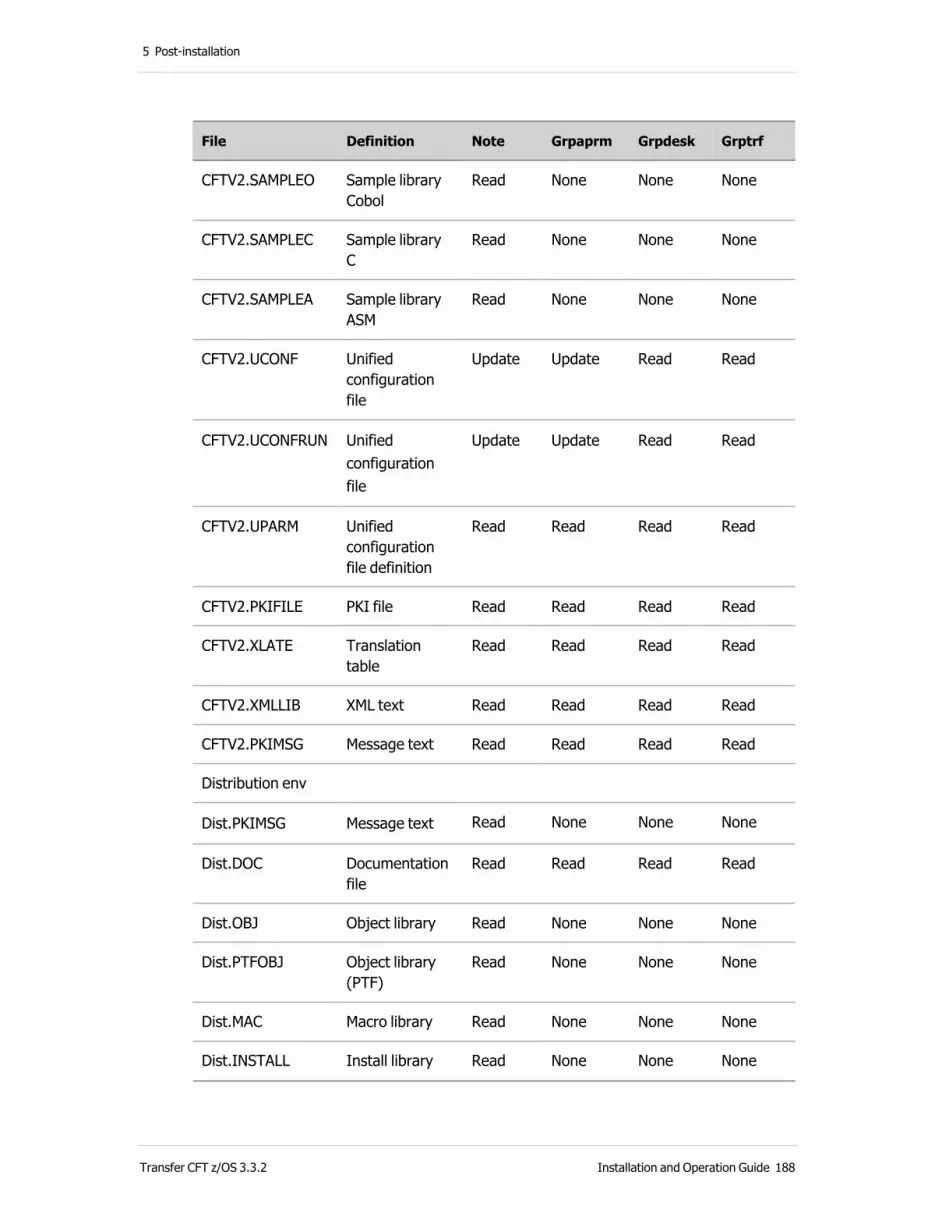
5 Post-installation
File Definition Note Grpaprm Grpdesk Grptrf
CFTV2.SAMPLEO Sample library Cobol
Read None None None
CFTV2.SAMPLEC Sample library C
Read None None None
CFTV2.SAMPLEA Sample library ASM
Read None None None
CFTV2.UCONF Unified configuration file
Update Update Read Read
CFTV2.UCONFRUN
Unified configuration file
Update Update Read Read
CFTV2.UPARM Unified configuration file definition
Read Read Read Read
CFTV2.PKIFILE PKI file Read Read Read Read
CFTV2.XLATE Translation table
Read Read Read Read
CFTV2.XMLLIB XML text Read Read Read Read
CFTV2.PKIMSG Message text Read Read Read Read
Distribution env
Dist.PKIMSG Message text Read None None None
Dist.DOC Documentation file
Read Read Read Read
Dist.OBJ Object library Read None None None
Dist.PTFOBJ Object library (PTF)
Read None None None
Dist.MAC Macro library Read None None None
Dist.INSTALL Install library Read None None None
Transfer CFT z/OS 3.3.2 Installation and Operation Guide 188

5 Post-installation
File Definition Note Grpaprm Grpdesk Grptrf
Dist.SAMPLE Sample library Read Read Read Read
Dist.SAMPLEO Sample library Cobol
Read None None None
Dist.SAMPLEC Sample library Cl
Read None None None
Dist.SAMPLEA Sample library ASm
Read None None None
Dist.H Header C Read None None None
Dist.COPY Copy Cobol Read None None None
Dist.SCR - Read None None None
Dist.UPLIB Upload library Read None None None
Dist.CNTL Link-edit plan Read None None None
Dist.LOG Installation product LOG
Read None None None
Build APIs and exits
Programming interfacesThis section describes the Transfer CFT batch programming interfaces for Transfer CFT.
Transfer CFT APIs in a z/OS environmentTransfer CFT APIs are described in the Transfer CFT User's Guide Using APIs. This programming interface can be accessed in the Assembler, COBOL and C programming languages.
Transfer CFT APIs use the DLL mode exclusively, with samples located in the following libraries:
l cftv2.SAMPLEA for Assembler
l cftv2.SAMPLEC for C
l cftv2.SAMPLEO for COBOL
The programs are compiled with the main options:
Transfer CFT z/OS 3.3.2 Installation and Operation Guide 189

5 Post-installation
l RENT, GOFF, LIST(133) for Assembler
l DLL, LONGNAME, RENT for C
l DLL, RENT for COBOL NODYNAM
To LINK-EDIT a program that uses Transfer CFT services, you must import references called by the Transfer CFT user. Additionally, you require a JOBLIB/STEPLIB containing the LOAD-MODULE CFTDAPI and CFTDSCP for execution.
The usable imports list is defined in member distlib.CNTL(LINKAPID).
Programming examplesSamples are located in the CFTV2.SAMPLEA, SAMPLEO, or SAMPLEC files.
l Assembler
o AAPIDLL: Uses CFTAI CFTAC
o AAPIUST: Selection area description ’macro’, catalog returned, and so on
l COBOL NODYNAM
o OAPIC: Uses CFTC
o OAPII: Uses CFTI
o OAPIW: Deposit a request (using CFTU) and wait for the result (CFTI)
o OAPIX: Uses cftaix
o OAPISYN: Deposit of requests (VIA synchronous API, or communication, or Mailbox)
l Cobol Copybook
o OAPICST: Constants and common descriptions
o OAPIINF: Structure returned by function GETXINFO
o OAPIMSG: Structure of the message returned by cftau
l OAPIUST: Global Copy book
o OAPISL: Selection area description (for compatibility)
o OAPICA: catalog area description returned (for compatibility)
o OAPICX: catalog area description returned by cftaix API (for compatibility)
l OAPI24: Global Copy book - equivalent to OAPIUST (long fields)
o OAPISL4 : Selection area description (long fields)
o OAPICA4 : catalog area description returned (long fields)
o OAPICX4 : catalog area description returned by cftaix API (long fields)
l Cobol Copybook API 2
o OCFTAPI2
Transfer CFT z/OS 3.3.2 Installation and Operation Guide 190

5 Post-installation
COBOL API subroutines called in static mode
COBOL DYNAM
This section describes the special use of COBOL compiled with the DYNAM option.
The DYNAM compile option is incompatible with the DLL option. To be able to use the CFT APIs, an interface (called 'OAPIFC') is provided. You must only call this interface one time, and return function pointers corresponding to DLL API entry points.
Implementation
1. In the working storage section, add the copy book OCFTAPD2.
2. In the procedure division, call the module 'OAPIFC' once:
if (ipc-loaded = zero) then
call 'OAPIFC' using ipc-par end-call
end-if
Syntax to call CFT APIs
Call cftu using parameters…
Call cfti using parameters…
Call cftc using parameters…
Etc.
In this case cftu, cfti, and cftc are defined as pointer functions (see OCFTAPD2).
Note If the pointers are not initialized by OAPIFC an abend 0C1 occurs.
l Delivered samples:
OAPIWS, OAPIIS, OAPICS, OPAIXS, OAPI2AS, OAPI2BS
l Compilation options:
CBL DYNAM,RENT,DATA(31),NODLL,PGMNAME(LONGMIXED)
l Link-edit model:
Example OAPIWS sample:
INCLUDE USER(OAPIWS)
MODE AMODE(31)
MODE RMODE(ANY)
NAME OAPIWS(R)
3. To run the sample OAPIWS , use INSTALL(I93APIRN) and replace:
//OAPIW EXEC CFTAPI,PROG=OAPIW,APIP='SEND PART=PARIS,IDF=TXT'
Transfer CFT z/OS 3.3.2 Installation and Operation Guide 191
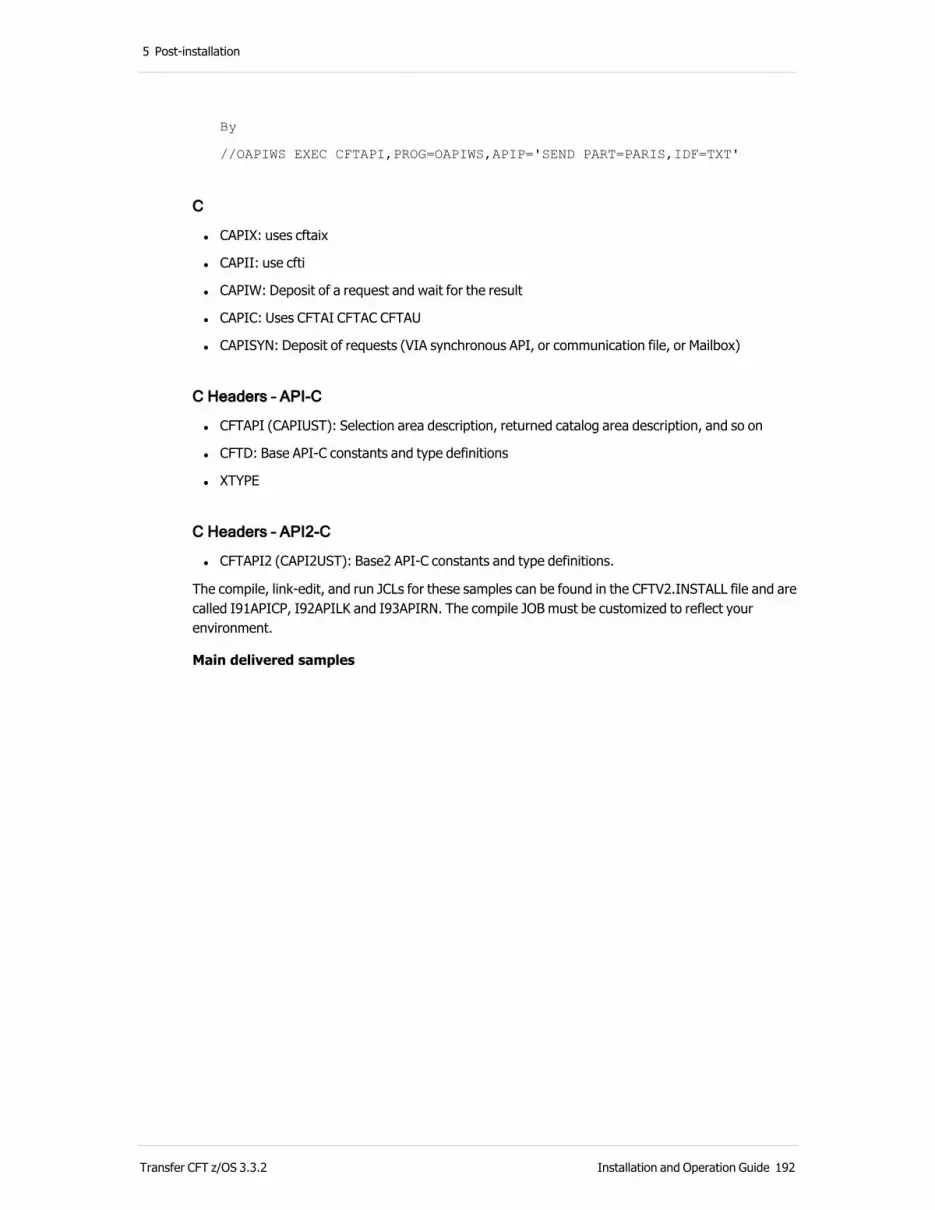
5 Post-installation
By
//OAPIWS EXEC CFTAPI,PROG=OAPIWS,APIP='SEND PART=PARIS,IDF=TXT'
C
l CAPIX: uses cftaix
l CAPII: use cfti
l CAPIW: Deposit of a request and wait for the result
l CAPIC: Uses CFTAI CFTAC CFTAU
l CAPISYN: Deposit of requests (VIA synchronous API, or communication file, or Mailbox)
C Headers – API-C
l CFTAPI (CAPIUST): Selection area description, returned catalog area description, and so on
l CFTD: Base API-C constants and type definitions
l XTYPE
C Headers – API2-C
l CFTAPI2 (CAPI2UST): Base2 API-C constants and type definitions.
The compile, link-edit, and run JCLs for these samples can be found in the CFTV2.INSTALL file and are called I91APICP, I92APILK and I93APIRN. The compile JOB must be customized to reflect your environment.
Main delivered samples
Transfer CFT z/OS 3.3.2 Installation and Operation Guide 192
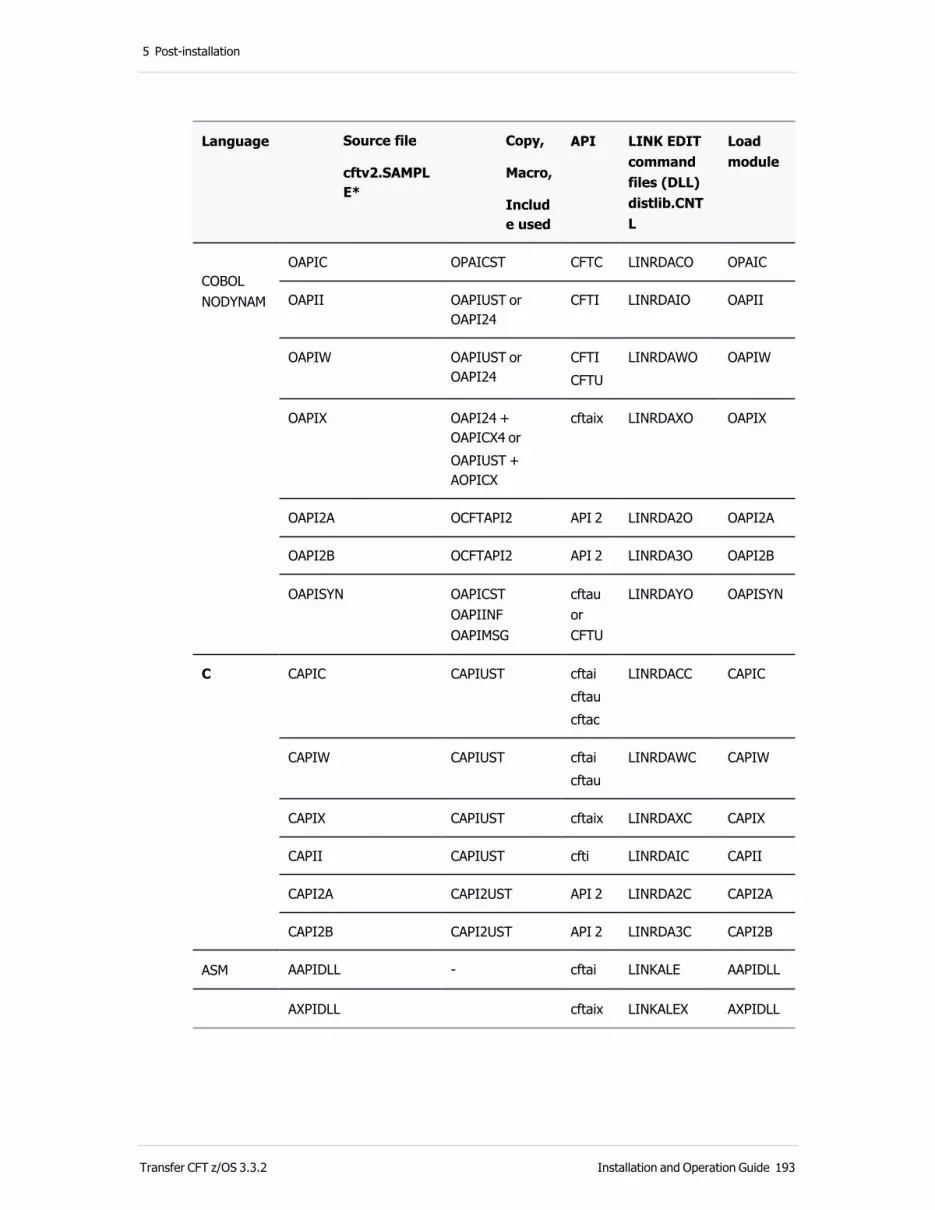
5 Post-installation
Language Source file
cftv2.SAMPLE*
Copy,
Macro,
Include used
API LINK EDIT command files (DLL) distlib.CNTL
Load module
COBOL NODYNAM
OAPIC OPAICST CFTC LINRDACO OPAIC
OAPII OAPIUST or OAPI24
CFTI LINRDAIO OAPII
OAPIW OAPIUST or OAPI24
CFTICFTU
LINRDAWO OAPIW
OAPIX OAPI24 + OAPICX4 orOAPIUST + AOPICX
cftaix LINRDAXO OAPIX
OAPI2A OCFTAPI2 API 2 LINRDA2O OAPI2A
OAPI2B OCFTAPI2 API 2 LINRDA3O OAPI2B
OAPISYN OAPICST OAPIINF OAPIMSG
cftau or CFTU
LINRDAYO OAPISYN
C
CAPIC CAPIUST cftaicftaucftac
LINRDACC CAPIC
CAPIW CAPIUST cftaicftau
LINRDAWC CAPIW
CAPIX CAPIUST cftaix LINRDAXC CAPIX
CAPII CAPIUST cfti LINRDAIC CAPII
CAPI2A CAPI2UST API 2 LINRDA2C CAPI2A
CAPI2B CAPI2UST API 2 LINRDA3C CAPI2B
ASM AAPIDLL - cftai LINKALE AAPIDLL
AXPIDLL cftaix LINKALEX AXPIDLL
Transfer CFT z/OS 3.3.2 Installation and Operation Guide 193

5 Post-installation
Exits in Transfer CFT z/OSWhen running under Central Governance, you can use but not manage your Transfer CFT exits. To manage exits, use the information to manually configure as described in this section.
Using the DLL mode for Transfer CFT exits Transfer CFT exits that are written in COBOL, C language, or Assembler must be used in DLL mode. The advantages of this mode are:
l You do not need to recreate the LINK-EDIT when you change Transfer CFT versions
l You can mix using Assembler COBOL and C programs
l All Transfer CFT API are supported
l The ETEBAC3 protocol is obsolete, so samples for the ETEBAC3 exits are no longer available
Create exits in AssemblerTo create exits with Assembler, access the following files:
l cftv2.SAMPLEA(AEX*DLL):
Samples for the ACCESS (AEXADLL), CATALOG (AEXEDLL), or FILE (AEXFDLL) are provided, and contain the steps required for a Transfer CFT EXIT:
o The main entry point, called ‘callexig*’, is exported and is called by the Transfer CFT EXIT loader.
o The init function, the name is free, and samples are using EXEAINI, EXEINI, and EXFINI names. The init function returns the Transfer CFT EXIT run function address.
o The run function, the name is free, and samples use EXAXMP1, EXEXMP1, and EXFXMP1 names.
o Exits must be compiled with the GOFF assembler option.
o An example of the call to Transfer CFT APIs within an exit is provided in the AEXEDLL sample.
l distlib.MAC (AEX*UST):
o Macro containing the DSECTs of the exchange areas with the Transfer CFT. Macros AEXAUST, AEXEUST, and AEXFUST are provided. Be sure to use the same value for VERSION= in the CFTEXIT as in the macro expansion.
l distlib.CNTL(LINKEXDL):
o Imports functions for a LINK-EDIT DLL.
Transfer CFT z/OS 3.3.2 Installation and Operation Guide 194

5 Post-installation
l distlib.CNTL (LINRDXGn):
o Transfer CFT modules for various Transfer CFT exits. The value for ‘n’ may vary from 0 to 9. Use the naming conventions in the following table.
Main exported EPA DLL name CFTEXIT PROG=value
calllexig0 CFTDXG0 CFTEXIG0
callexig1 CFTDXG1 CFTEXIG1
And up to callexig9 And up to CFTDXG9 up to CFTEXIG9
l Exits must be linked with CALL,REUS=RENT,DYNAM=DLL,CASE=MIXED options.
l Only the customer code is linked, and the Transfer CFT interfaces imported. For example:
* CFT/MVS file EXIT - DLL versionSETOPT PARM(CALL,REUS=RENT,DYNAM=DLL,CASE=MIXED)* Customer codeINCLUDE USER(AEXFDLL) ** the exit* Import EXIT support codeIMPORT CODE,CFTDMAI,'exfrun1'MODE AMODE(31)MODE RMODE(ANY)NAME CFTDXG5(R)
File Definition
AEX*DLL Sample program in Assembler. This sample provides the 3 steps needed in a Transfer CFT exit.
AEX*UST Macro containing the DSECTs of the exchange areas with the Transfer CFT.
Create exits in CTo create exits with C, access the following files:
l cftv2.SAMPLEC(CEX*DLL):
Samples for the ACCESS (CEXADLL), CATALOG (CEXEDLL), or FILE (CEXFDLL) are provided, and contain the steps required for a Transfer CFT EXIT:
o The main entry point, ‘callexig*’, is exported and is called by the Transfer CFT EXIT loader.
o The init function, where the name is free, and samples are using EXAINI, EXEINI, and EXFINI names. The init function returns the Transfer CFT EXIT run function address.
Transfer CFT z/OS 3.3.2 Installation and Operation Guide 195

5 Post-installation
o The run function, where the name is free, and samples use EXAXMP1, EXEXMP1, and EXFXMP1 names.
o Exits must be compiled with the options: LANG(EXTENDED), RENT, DLL, LONGNAME.
o An example of a call to Transfer CFT APIs within an exit is provided in the CEXEDLL sample.
l distlib.H (*xeus)
l distlib.CNTL(LINKEXDL):
o Sample import functions for a LINK-EDIT DLL
l distlib.CNTL (LINRDXGn):
o Transfer CFT modules for various Transfer CFT exits. The value for ‘n’ may vary from 0 to 9. Use the naming conventions in the following table.
Main exported EPA DLL name CFTEXIT PROG=value
calllexig0 CFTDXG0 CFTEXIG0
callexig1 CFTDXG1 CFTEXIG1
And up to callexig9 And up to CFTDXG9 Up to CFTEXIG9
l Exits must be linked with CALL, REUS=RENT, DYNAM=DLL, CASE=MIXED options.
l Only the customer code is linked, and the Transfer CFT interface imported. For example:
* CFT/zos exit TYPE=FILE- DLL versionSETOPT PARM(CALL,REUS=RENT,DYNAM=DLL,CASE=MIXED)* Customer codeINCLUDE USER(CEXFDLL) ** the exit* Import EXIT support codeIMPORT CODE,CFTDMAI,'exfrun1'MODE AMODE(31)MODE RMODE(ANY)NAME CFTDXG5(R)
File Definition
CEX*DLL Sample program in C. This sample provides the 3 steps needed in a Transfer CFT exit.
*XEUS The header containing the structure of the exchange areas with the Transfer CFT.
Create exits in COBOLTo create exits with Cobol, access the following files:
Transfer CFT z/OS 3.3.2 Installation and Operation Guide 196
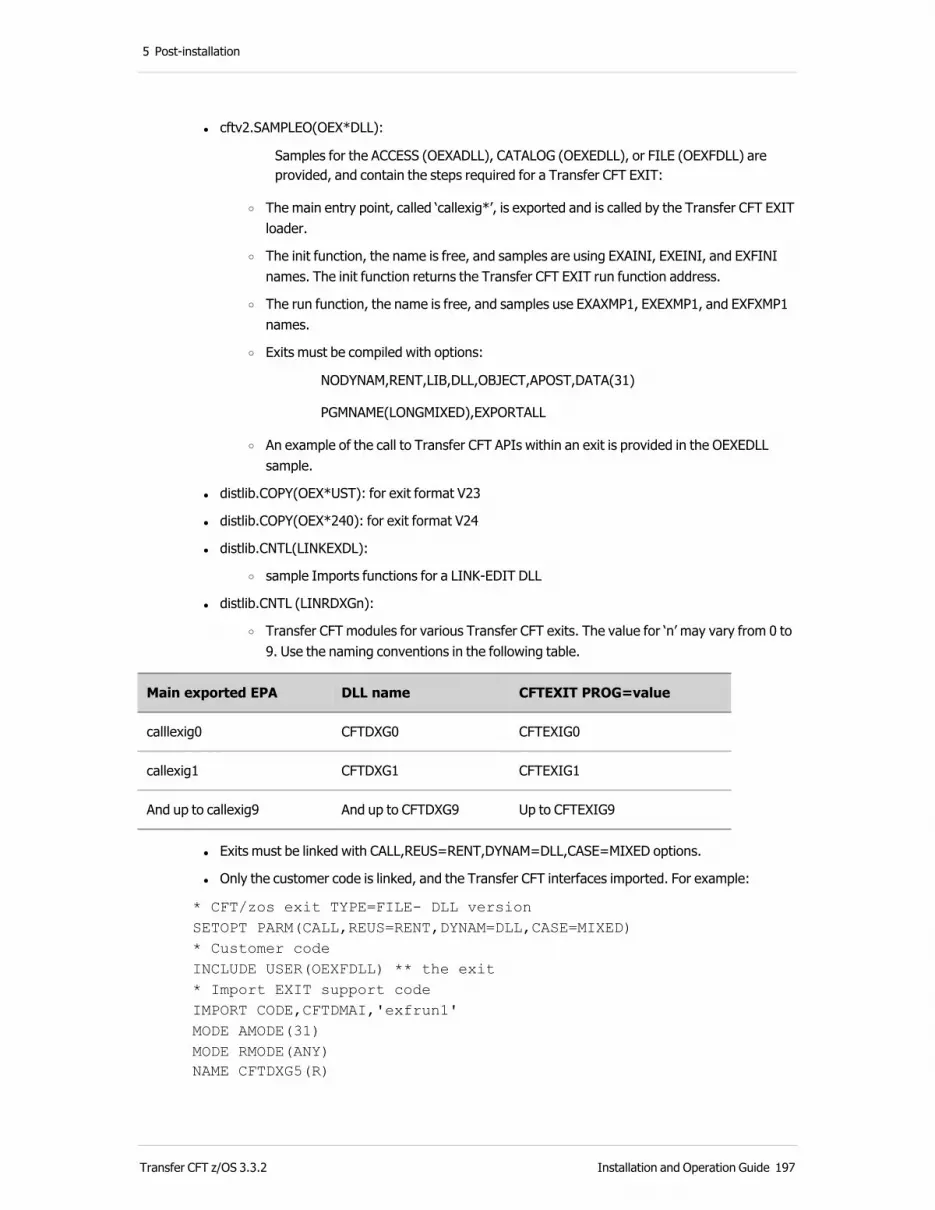
5 Post-installation
l cftv2.SAMPLEO(OEX*DLL):
Samples for the ACCESS (OEXADLL), CATALOG (OEXEDLL), or FILE (OEXFDLL) are provided, and contain the steps required for a Transfer CFT EXIT:
o The main entry point, called ‘callexig*’, is exported and is called by the Transfer CFT EXIT loader.
o The init function, the name is free, and samples are using EXAINI, EXEINI, and EXFINI names. The init function returns the Transfer CFT EXIT run function address.
o The run function, the name is free, and samples use EXAXMP1, EXEXMP1, and EXFXMP1 names.
o Exits must be compiled with options:
NODYNAM,RENT,LIB,DLL,OBJECT,APOST,DATA(31)
PGMNAME(LONGMIXED),EXPORTALL
o An example of the call to Transfer CFT APIs within an exit is provided in the OEXEDLL sample.
l distlib.COPY(OEX*UST): for exit format V23
l distlib.COPY(OEX*240): for exit format V24
l distlib.CNTL(LINKEXDL):
o sample Imports functions for a LINK-EDIT DLL
l distlib.CNTL (LINRDXGn):
o Transfer CFT modules for various Transfer CFT exits. The value for ‘n’ may vary from 0 to 9. Use the naming conventions in the following table.
Main exported EPA DLL name CFTEXIT PROG=value
calllexig0 CFTDXG0 CFTEXIG0
callexig1 CFTDXG1 CFTEXIG1
And up to callexig9 And up to CFTDXG9 Up to CFTEXIG9
l Exits must be linked with CALL,REUS=RENT,DYNAM=DLL,CASE=MIXED options.
l Only the customer code is linked, and the Transfer CFT interfaces imported. For example:
* CFT/zos exit TYPE=FILE- DLL versionSETOPT PARM(CALL,REUS=RENT,DYNAM=DLL,CASE=MIXED)* Customer codeINCLUDE USER(OEXFDLL) ** the exit* Import EXIT support codeIMPORT CODE,CFTDMAI,'exfrun1'MODE AMODE(31)MODE RMODE(ANY)NAME CFTDXG5(R)
Transfer CFT z/OS 3.3.2 Installation and Operation Guide 197
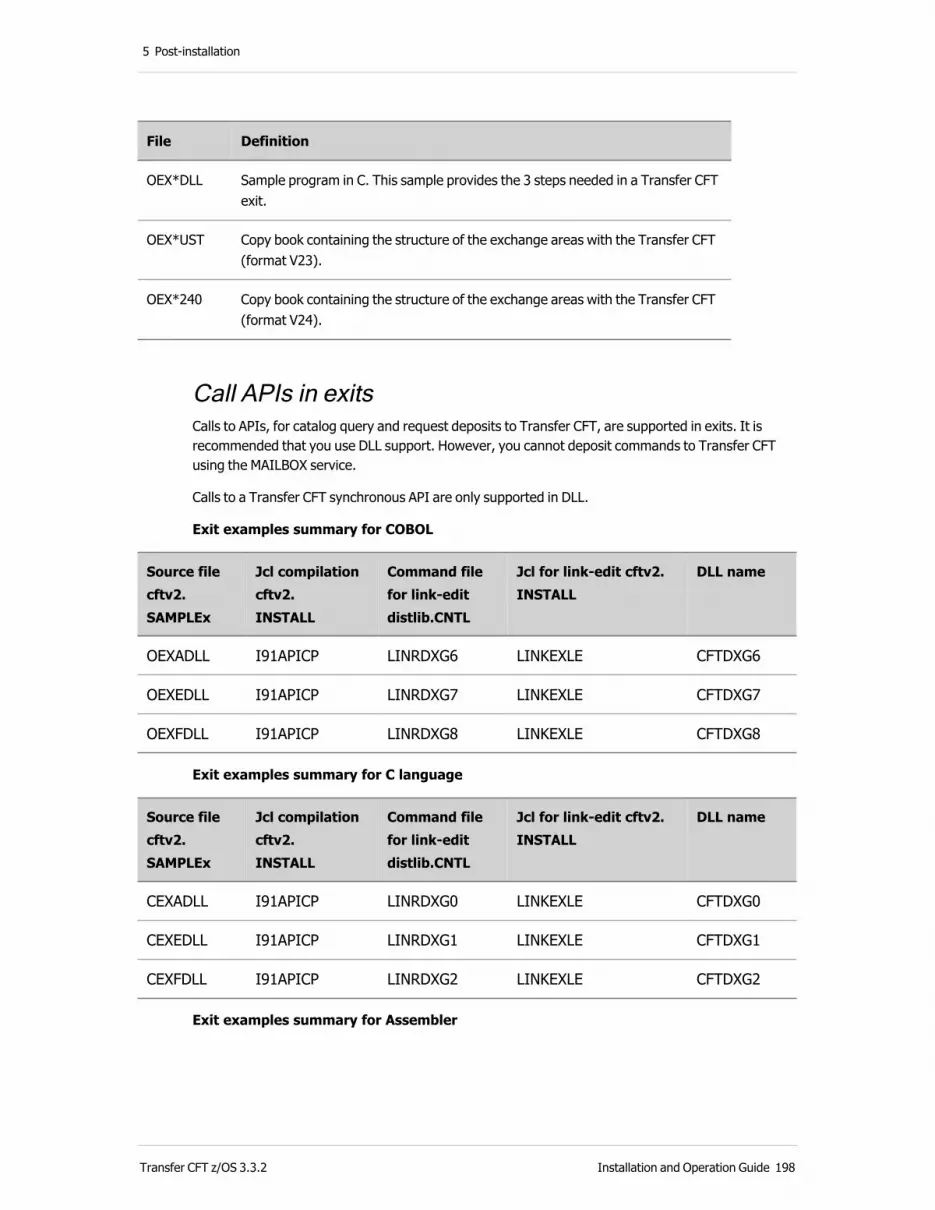
5 Post-installation
File Definition
OEX*DLL Sample program in C. This sample provides the 3 steps needed in a Transfer CFT exit.
OEX*UST Copy book containing the structure of the exchange areas with the Transfer CFT (format V23).
OEX*240 Copy book containing the structure of the exchange areas with the Transfer CFT (format V24).
Call APIs in exitsCalls to APIs, for catalog query and request deposits to Transfer CFT, are supported in exits. It is recommended that you use DLL support. However, you cannot deposit commands to Transfer CFT using the MAILBOX service.
Calls to a Transfer CFT synchronous API are only supported in DLL.
Exit examples summary for COBOL
Source filecftv2.SAMPLEx
Jcl compilationcftv2.INSTALL
Command file for link-edit distlib.CNTL
Jcl for link-edit cftv2.INSTALL
DLL name
OEXADLL I91APICP LINRDXG6 LINKEXLE CFTDXG6
OEXEDLL I91APICP LINRDXG7 LINKEXLE CFTDXG7
OEXFDLL I91APICP LINRDXG8 LINKEXLE CFTDXG8
Exit examples summary for C language
Source filecftv2.SAMPLEx
Jcl compilationcftv2.INSTALL
Command file for link-edit distlib.CNTL
Jcl for link-edit cftv2.INSTALL
DLL name
CEXADLL I91APICP LINRDXG0 LINKEXLE CFTDXG0
CEXEDLL I91APICP LINRDXG1 LINKEXLE CFTDXG1
CEXFDLL I91APICP LINRDXG2 LINKEXLE CFTDXG2
Exit examples summary for Assembler
Transfer CFT z/OS 3.3.2 Installation and Operation Guide 198
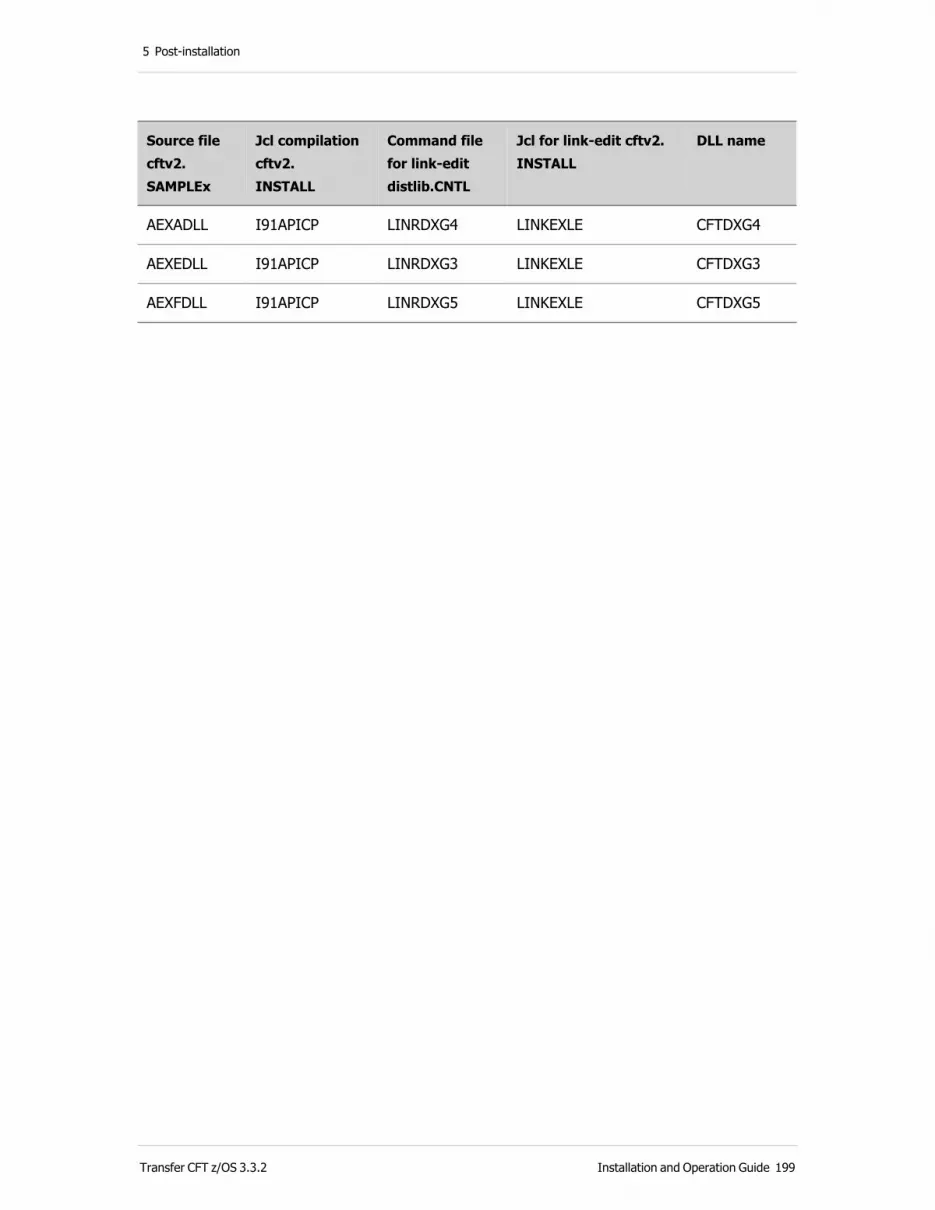
5 Post-installation
Source filecftv2.SAMPLEx
Jcl compilationcftv2.INSTALL
Command file for link-edit distlib.CNTL
Jcl for link-edit cftv2.INSTALL
DLL name
AEXADLL I91APICP LINRDXG4 LINKEXLE CFTDXG4
AEXEDLL I91APICP LINRDXG3 LINKEXLE CFTDXG3
AEXFDLL I91APICP LINRDXG5 LINKEXLE CFTDXG5
Transfer CFT z/OS 3.3.2 Installation and Operation Guide 199

5 Post-installation
How to migrate DLL exits
Overview This section describes how to migrate DLL exits for Transfer CFT in a z/OS environment.
Considerations prior to migrating
l Is the exit still valid? Could you instead replace it with a new Transfer CFT processing procedure?
l Is the exit written in assembler? If so, would it be better to use a more accessible language, such as C?
PreparationUse the examples supplied in distribution libraries as a basis for your migration. Each example provides recommendations for compilation and link-edits, as well as adequate settings for CFTEXIT. The body of the exit should not be affected; the updates concern the encapsulation of the entire exit's Prologue and Epilogue (especially in assembler).
Note For API/Batch C and COBOL recompilation, the correct link-edit options (DLL,…) may be sufficient to migrate APIs. For assembler, see the recommendations in the following section.
Migrate the Assembler API exitNote the following:
l Reserve and do not use register 12 (mandatory for the Language Environment).
l The use of the V24 format for the API catalog requires additional registers.
l Calls to Transfer CFT APIs are performed via the CEEPCALL macro.
l The CEEENTRY macro creates the prologue.
l The CEETERM macro creates the epilogue.
l Since the exit is LE compatible, this means it can use certain C functions (for example PRINTF, etc.).
Known issues l There is an inconsistency between the format of the exit in the CFTEXIT and the macro version, the C structure, and COBOL copy chosen in the exit.
l For assembler, an issue occurs when using register 12.
Transfer CFT z/OS 3.3.2 Installation and Operation Guide 200
5 Post-installation
How to link-edit
Reentrancy / amode / rmode l The examples and link-edit plans are delivered with reentrant rmode=any, and amode (31), the recommended setting.
l If the source code requires that you change other values, when you modify the link-edit options remember that the exit may have the AC link (1) option.
Post migration DLL maintenanceIt is recommended that for each version change you recompile and link the exits and the APIs, especially when using the v24 communication structure version.
Specific z/OS exits in Transfer CFTThis section describes exits in Transfer CFT z/OS, and includes information about:
l Exit lists
l File-type Exits
l Calling APIs in Exits
Exit listsThe exit list is installed automatically as CFTEXILI. For more information, refer to the Transfer CFT 3.3.2 online documentation.
File type exitsFor more information on exits in Transfer CFT, refer to the Transfer CFT online documentation File exits.
This section provides additional information required to construct exits under OS/390.
Calling Transfer CFT exits in z/OSTransfer CFT provides the following types exits:
l Directory (*)=A
l File (*)=F
l End of transfer (*)=E
Transfer CFT z/OS 3.3.2 Installation and Operation Guide 201
5 Post-installation
(*) In the following descriptions, the ‘*’ character refers to the four exits, and is replaced with one of the four characters (A, E, or F) as applicable.
An exit is a program comprising 3 parts:
l The exit monitor, which is delivered with Transfer CFT
l The ‘EX*INI’ program
l The main program whose address is returned by the EX*INI program
The ‘EX*INI’ program and the main program are written by the Transfer CFT user, and then LINK EDITED with the exit server.
The 'EX*INI' INIT function name is determined by the exit type:
l EXAINI: directory type
l EXFINI: file type
l EXEINI: end of transfer type
The exit program is dynamically loaded by Transfer CFT on the first request. It is executed in the same way as an OS monitor. You may write the programs in ASSEMBLER 370, IBM C or COBOL, or C and COBOL together.
The programs can be called repeatedly for different transfers, meaning the programs must be serially reusable. Each data area in the program is reset each time it is called and NOT declared with an initial value.
Several different exits can be executed concurrently, each of them being a separate task. It is impossible for 2 exits to write to the same file, particularly if it is a ‘SYSPRINT’, ‘SYSDBOUT’ or ‘STDOUT’ file used to debug C or COBOL languages.
The exit interface dialogs with the monitor using 31-bit memory fields.
The names of the exit load-modules must always begin with the 6-character ‘CFTEXI’ string.
Exits are called in problem mode and with a user key. They have the same privileges as the Transfer CFT, which in most cases is an authorized program.
The SGTRACE 512 debug option allows you to obtain the following information in the SGTRACE file, before each call to the processing function:
l ‘EX*3RUN-PARM1-5’: 5 words in hexadecimal characters:
l Word 1: processing address
l Words 2 to 5: addresses of the 4 received parameters
l ‘EX*3RUN-DUMPCTX: 32 or nnn bytes in hexadecimal characters
The first 32 bytes (SGTRACE=512) or the whole parameter field (SGTRACE=544) submitted to the exit are listed. If an ABEND occurs during the exit, the Transfer CFT error processing function takes control. A brief diagnosis of the error is displayed on the z/OS console.
Example of a Transfer CFT diagnosis:
Transfer CFT z/OS 3.3.2 Installation and Operation Guide 202

5 Post-installation
SGAB00E: Jobname Stepname SITMOS Date Time Version
ABEND = 84sssuuu , PSW =xxxxxxxx xxxxxxxx , EPA =xxxxxxxx
SGAB01E: REG 0-7 =xxxxxxxx .......
SGAB02E: REG 8-15=xxxxxxxx ......
SGAB03E: SGNUC =xxxxxxxx , TRACE =xxxxxxxx ...
SGAB08E: INSTRUCTIONS : xxxxxxxx:-6 xxxxxxx
SGAB08E: ** USER EXIT ABEND DETECTED ** L=l EPA= x NAME=Mod
SGAB30E: xxxxxxxx CFTEXInn TCB: Tcbaddr SGNUC: xxx EPA : Epa
SGAB09E: TASK-AC =CFTEXInn , KCB =xx , PRV =xx ,SGSAVE =xxSAVE = Saveaddr MODULE = EXITASK date Version EPA= xx RET= xx
Additionally, the following are valid for the example:
o The Transfer CFT internal trace is edited in the SGSTAE file
o A dump is made, depending on the MAXDUMP value
o If Transfer CFT detects a lack of response from the exit, then the transfer is placed in the HOLD status
For an exit in COBOL or C, the diagnostics are also available in the 'CEEDUMP' file.
AM exits
Activating a platform-generic exit 1. Check that the 'am.exit.custom.safclass.value' parameter is not set to a value.
2. Ensure that the parameter 'am.exit.custom.rbac_fname.value' is associated with a correct configuration file.
API and CFTUTILUnified configuration file (UCONF) must be allocated in the execution JCL.
JCL(s) to adaptH84SAFDF: TO CREATE CFT GENERAL RESOURCE CLASS PROFILES
RDEFINE safcftcl UI.** UACC(NONE) OWNER(grpcft)
RDEFINE safcftcl CFTUCONF.** UACC(NONE) OWNER(grpcft)
RDEFINE safcftcl FILE.** UACC(NONE) OWNER(grpcft)
RDEFINE safcftcl BATCH.** UACC(NONE) OWNER(grpcft)
RDEFINE safcftcl FILTER.LOG.** UACC(NONE) OWNER(grpcft)
Transfer CFT z/OS 3.3.2 Installation and Operation Guide 203

5 Post-installation
RDEFINE safcftcl FILTER.CATALOG.** UACC(NONE) OWNER(grpcft)
RDEFINE safcftcl SENTINEL.** UACC(NONE) OWNER(grpcft)
H85SAFPR: TO ISSUE RACF PERMIT COMMANDS
Example
PERMIT UI.** CLASS(safcftcl) ACCESS(READ) -
ID(grpcft grpdesk )
Troubleshoot and example definitions
Common mistakes> ICH409I 282-014 ABEND DURING RACHECK PROCESSING
-> invalid access value (if value <> 2 & 4 & 8)
AdministratorThis file must be managed by Transfer CFT Administrator:
control pp_level_msg 1 // 1 = Potential Perm level message
// 0 = No message
control trace 1 // 0 = No trace generated
// 1 = Only specific traces (default)
// 2 = All Requests SAF traced
control exit_trace 0 // 0 = No trace in exit main
// 1 = trace activated in exit main
define VIEW 2 // racf read
define DEFACC 8 // racf control (default access)
define DELETE 8 // racf control
define CREATE 8 // racf control
define SWITCH 8 // racf control
define SHUTDOWN 8 // racf control
define PURGE 8 // racf control
define TURN 8 // racf control
Transfer CFT z/OS 3.3.2 Installation and Operation Guide 204
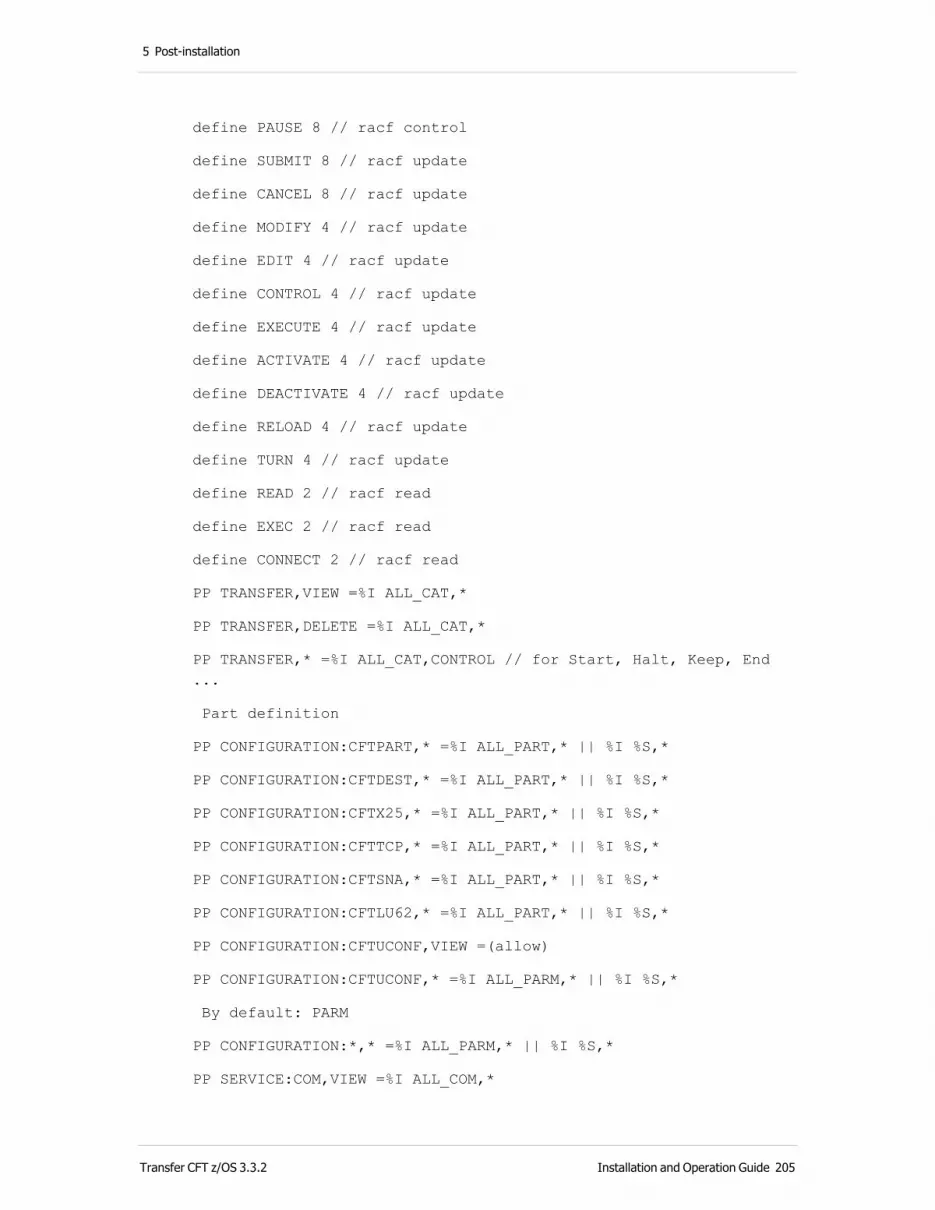
5 Post-installation
define PAUSE 8 // racf control
define SUBMIT 8 // racf update
define CANCEL 8 // racf update
define MODIFY 4 // racf update
define EDIT 4 // racf update
define CONTROL 4 // racf update
define EXECUTE 4 // racf update
define ACTIVATE 4 // racf update
define DEACTIVATE 4 // racf update
define RELOAD 4 // racf update
define TURN 4 // racf update
define READ 2 // racf read
define EXEC 2 // racf read
define CONNECT 2 // racf read
PP TRANSFER,VIEW =%I ALL_CAT,*
PP TRANSFER,DELETE =%I ALL_CAT,*
PP TRANSFER,* =%I ALL_CAT,CONTROL // for Start, Halt, Keep, End ...
Part definition
PP CONFIGURATION:CFTPART,* =%I ALL_PART,* || %I %S,*
PP CONFIGURATION:CFTDEST,* =%I ALL_PART,* || %I %S,*
PP CONFIGURATION:CFTX25,* =%I ALL_PART,* || %I %S,*
PP CONFIGURATION:CFTTCP,* =%I ALL_PART,* || %I %S,*
PP CONFIGURATION:CFTSNA,* =%I ALL_PART,* || %I %S,*
PP CONFIGURATION:CFTLU62,* =%I ALL_PART,* || %I %S,*
PP CONFIGURATION:CFTUCONF,VIEW =(allow)
PP CONFIGURATION:CFTUCONF,* =%I ALL_PARM,* || %I %S,*
By default: PARM
PP CONFIGURATION:*,* =%I ALL_PARM,* || %I %S,*
PP SERVICE:COM,VIEW =%I ALL_COM,*
Transfer CFT z/OS 3.3.2 Installation and Operation Guide 205
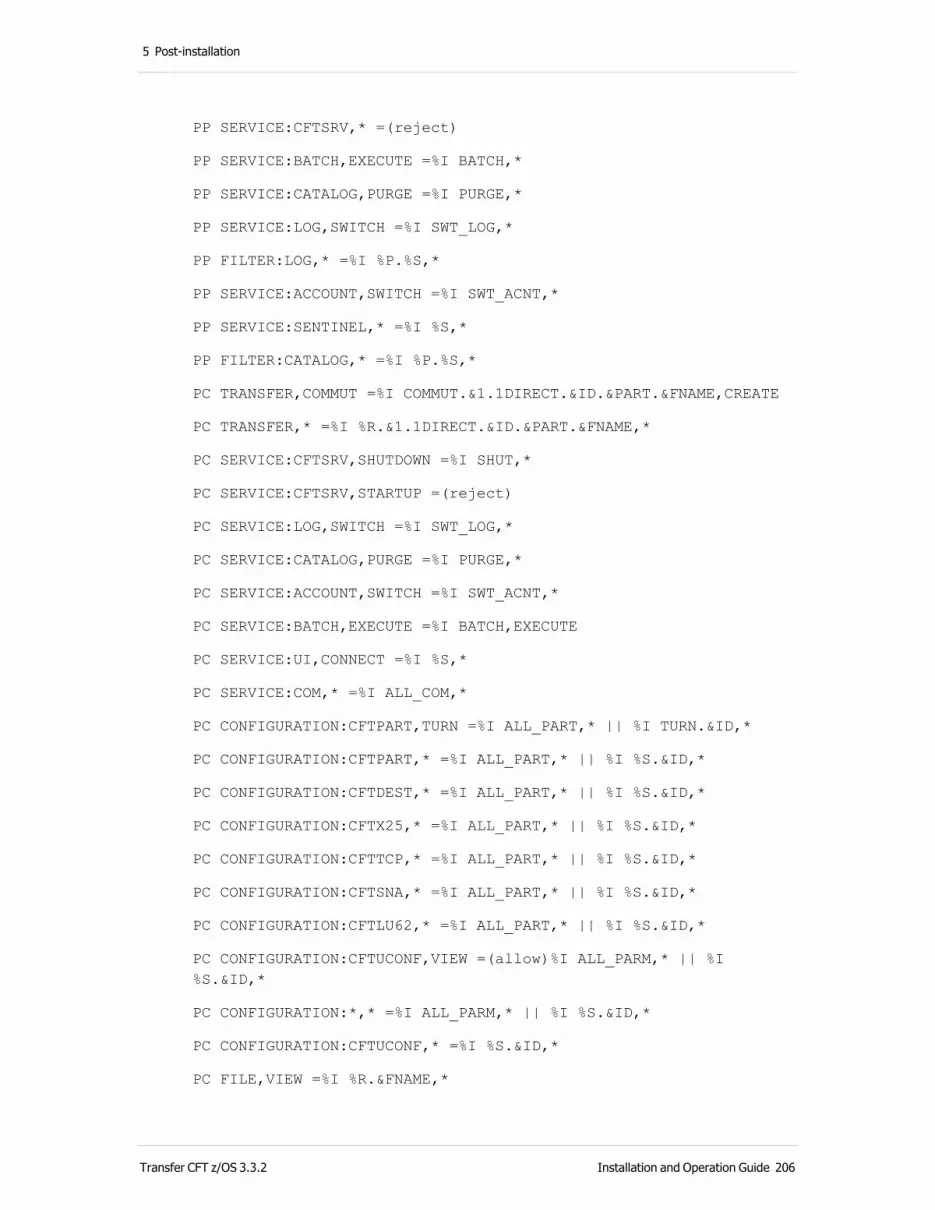
5 Post-installation
PP SERVICE:CFTSRV,* =(reject)
PP SERVICE:BATCH,EXECUTE =%I BATCH,*
PP SERVICE:CATALOG,PURGE =%I PURGE,*
PP SERVICE:LOG,SWITCH =%I SWT_LOG,*
PP FILTER:LOG,* =%I %P.%S,*
PP SERVICE:ACCOUNT,SWITCH =%I SWT_ACNT,*
PP SERVICE:SENTINEL,* =%I %S,*
PP FILTER:CATALOG,* =%I %P.%S,*
PC TRANSFER,COMMUT =%I COMMUT.&1.1DIRECT.&ID.&PART.&FNAME,CREATE
PC TRANSFER,* =%I %R.&1.1DIRECT.&ID.&PART.&FNAME,*
PC SERVICE:CFTSRV,SHUTDOWN =%I SHUT,*
PC SERVICE:CFTSRV,STARTUP =(reject)
PC SERVICE:LOG,SWITCH =%I SWT_LOG,*
PC SERVICE:CATALOG,PURGE =%I PURGE,*
PC SERVICE:ACCOUNT,SWITCH =%I SWT_ACNT,*
PC SERVICE:BATCH,EXECUTE =%I BATCH,EXECUTE
PC SERVICE:UI,CONNECT =%I %S,*
PC SERVICE:COM,* =%I ALL_COM,*
PC CONFIGURATION:CFTPART,TURN =%I ALL_PART,* || %I TURN.&ID,*
PC CONFIGURATION:CFTPART,* =%I ALL_PART,* || %I %S.&ID,*
PC CONFIGURATION:CFTDEST,* =%I ALL_PART,* || %I %S.&ID,*
PC CONFIGURATION:CFTX25,* =%I ALL_PART,* || %I %S.&ID,*
PC CONFIGURATION:CFTTCP,* =%I ALL_PART,* || %I %S.&ID,*
PC CONFIGURATION:CFTSNA,* =%I ALL_PART,* || %I %S.&ID,*
PC CONFIGURATION:CFTLU62,* =%I ALL_PART,* || %I %S.&ID,*
PC CONFIGURATION:CFTUCONF,VIEW =(allow)%I ALL_PARM,* || %I %S.&ID,*
PC CONFIGURATION:*,* =%I ALL_PARM,* || %I %S.&ID,*
PC CONFIGURATION:CFTUCONF,* =%I %S.&ID,*
PC FILE,VIEW =%I %R.&FNAME,*
Transfer CFT z/OS 3.3.2 Installation and Operation Guide 206
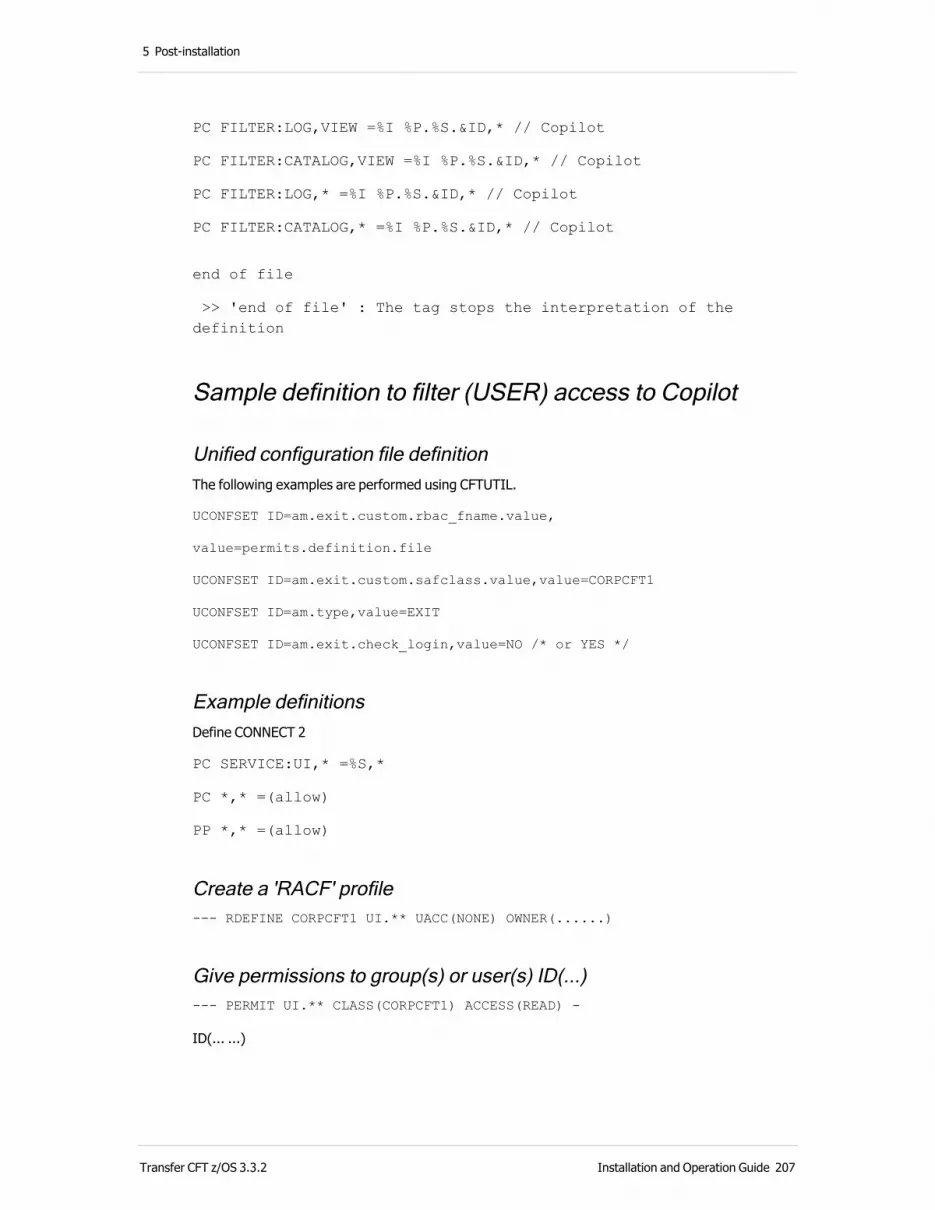
5 Post-installation
PC FILTER:LOG,VIEW =%I %P.%S.&ID,* // Copilot
PC FILTER:CATALOG,VIEW =%I %P.%S.&ID,* // Copilot
PC FILTER:LOG,* =%I %P.%S.&ID,* // Copilot
PC FILTER:CATALOG,* =%I %P.%S.&ID,* // Copilot
end of file
>> 'end of file' : The tag stops the interpretation of the definition
Sample definition to filter (USER) access to Copilot
Unified configuration file definition The following examples are performed using CFTUTIL.
UCONFSET ID=am.exit.custom.rbac_fname.value,
value=permits.definition.file
UCONFSET ID=am.exit.custom.safclass.value,value=CORPCFT1
UCONFSET ID=am.type,value=EXIT
UCONFSET ID=am.exit.check_login,value=NO /* or YES */
Example definitions Define CONNECT 2
PC SERVICE:UI,* =%S,*
PC *,* =(allow)
PP *,* =(allow)
Create a 'RACF' profile--- RDEFINE CORPCFT1 UI.** UACC(NONE) OWNER(......)
Give permissions to group(s) or user(s) ID(...)--- PERMIT UI.** CLASS(CORPCFT1) ACCESS(READ) -
ID(... ...)
Transfer CFT z/OS 3.3.2 Installation and Operation Guide 207

5 Post-installation
Working with files and coding
Specific parameters for z/OS This section describes the parameters and values that are specific to Transfer CFT z/OS and information about:
l Transfer CFT z/OS specific values
l Transferable files
l Filename coding
Platform specific characters Description Windows Unix **OpenVMS z/OS IBM i
char_file Logical name prefix
$ _ No specific character; logical names are processed transparently by RMS
x'5B'285 = £297 = $
x'4E'285 = +297 = +
char_mask Wildcard character
? ? %x x' 6F285 = ?297 = ?
x'6F'285 = ? 297 = ?
char_unit Separator character (volume)
% \01 No volume concept
x' 6C'285 = %297 = %
x '5E'285 = ;297 = ;
char_symb Symbolic variable prefix
& & & x'50'285 = & 297 = &
x'6F'285 = ? 297 = ?
file_symb Character introducing a file name passed to CFTUTIL as a parameter
# @ Either # or @ x'7B’285 = #297 = £
x'B1'285 = [ 297 = #
Transfer CFT z/OS 3.3.2 Installation and Operation Guide 208

5 Post-installation
Description Windows Unix **OpenVMS z/OS IBM i
char_directory
Character introduced in the path name of the FNAME parameter (CFTRECV) from which a tree structure can be created
+ + + +Limited to USS files
+ Limited to HFS files
Transferable filesFile characteristics that are found automatically for sending are listed in the following table.
File characteristics
Parameter Found automatically for sending
FSPACE YES
FLRECL YES
FBLKSIZE YES
FRECFM YES
FTYPE YES
FTYPE and FRECFM combinations for sending
Type of file to be sent Implicit value of FTYPE
Implicit value of FRECFMz
Disk sequential files F/V/U
Members of PDS files (1 transfer per member)
F/V/U
Designated version of a file in GDG F/V/U
Multivolume disk file F/V/U
VSAM KSDS or ESDS file F/V
Transfer CFT z/OS 3.3.2 Installation and Operation Guide 209
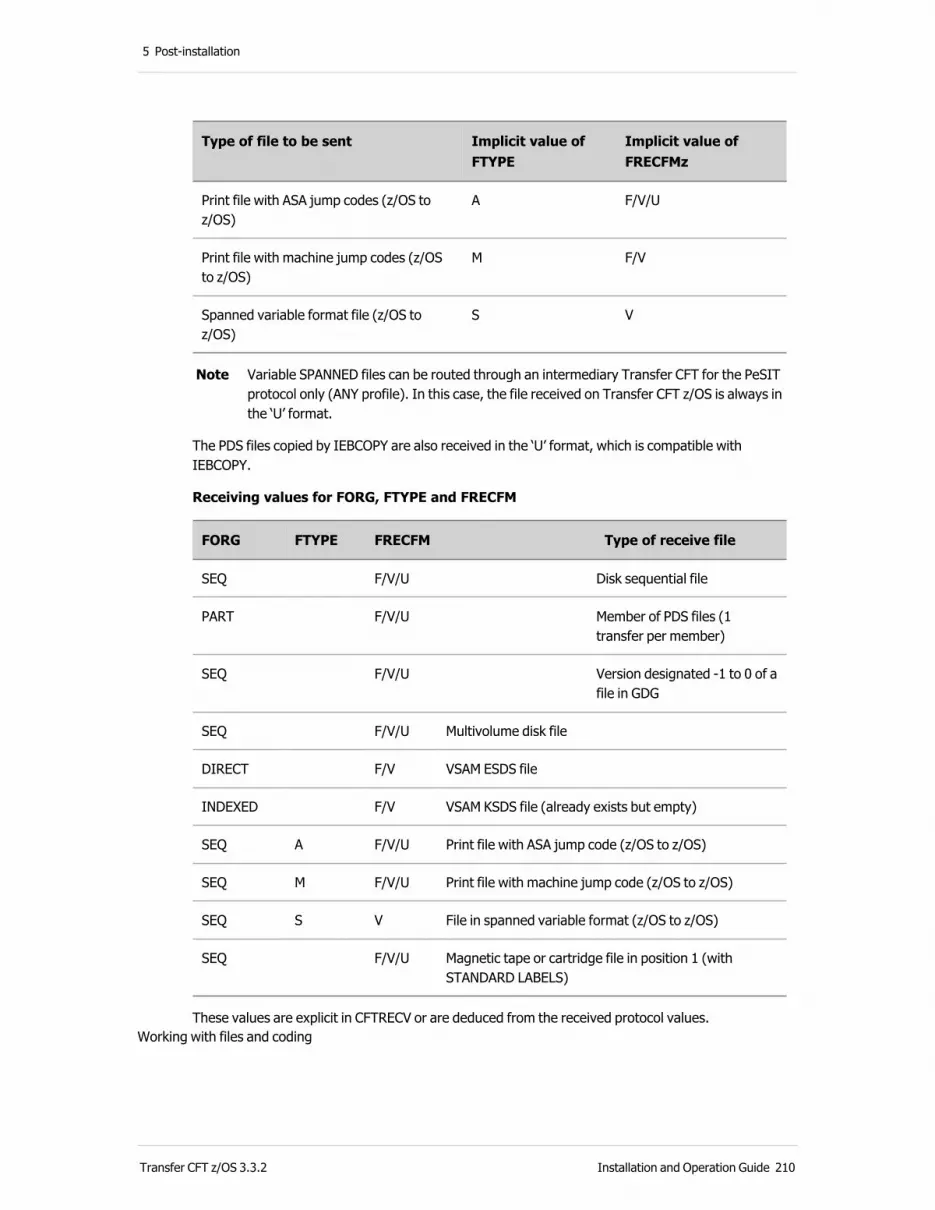
5 Post-installation
Type of file to be sent Implicit value of FTYPE
Implicit value of FRECFMz
Print file with ASA jump codes (z/OS to z/OS)
A F/V/U
Print file with machine jump codes (z/OS to z/OS)
M F/V
Spanned variable format file (z/OS to z/OS)
S V
Note Variable SPANNED files can be routed through an intermediary Transfer CFT for the PeSIT protocol only (ANY profile). In this case, the file received on Transfer CFT z/OS is always in the ‘U’ format.
The PDS files copied by IEBCOPY are also received in the ‘U’ format, which is compatible with IEBCOPY.
Receiving values for FORG, FTYPE and FRECFM
FORG FTYPE FRECFM Type of receive file
SEQ F/V/U Disk sequential file
PART F/V/U Member of PDS files (1 transfer per member)
SEQ F/V/U Version designated -1 to 0 of a file in GDG
SEQ F/V/U Multivolume disk file
DIRECT F/V VSAM ESDS file
INDEXED F/V VSAM KSDS file (already exists but empty)
SEQ A F/V/U Print file with ASA jump code (z/OS to z/OS)
SEQ M F/V/U Print file with machine jump code (z/OS to z/OS)
SEQ S V File in spanned variable format (z/OS to z/OS)
SEQ F/V/U Magnetic tape or cartridge file in position 1 (with STANDARD LABELS)
These values are explicit in CFTRECV or are deduced from the received protocol values.Working with files and coding
Transfer CFT z/OS 3.3.2 Installation and Operation Guide 210
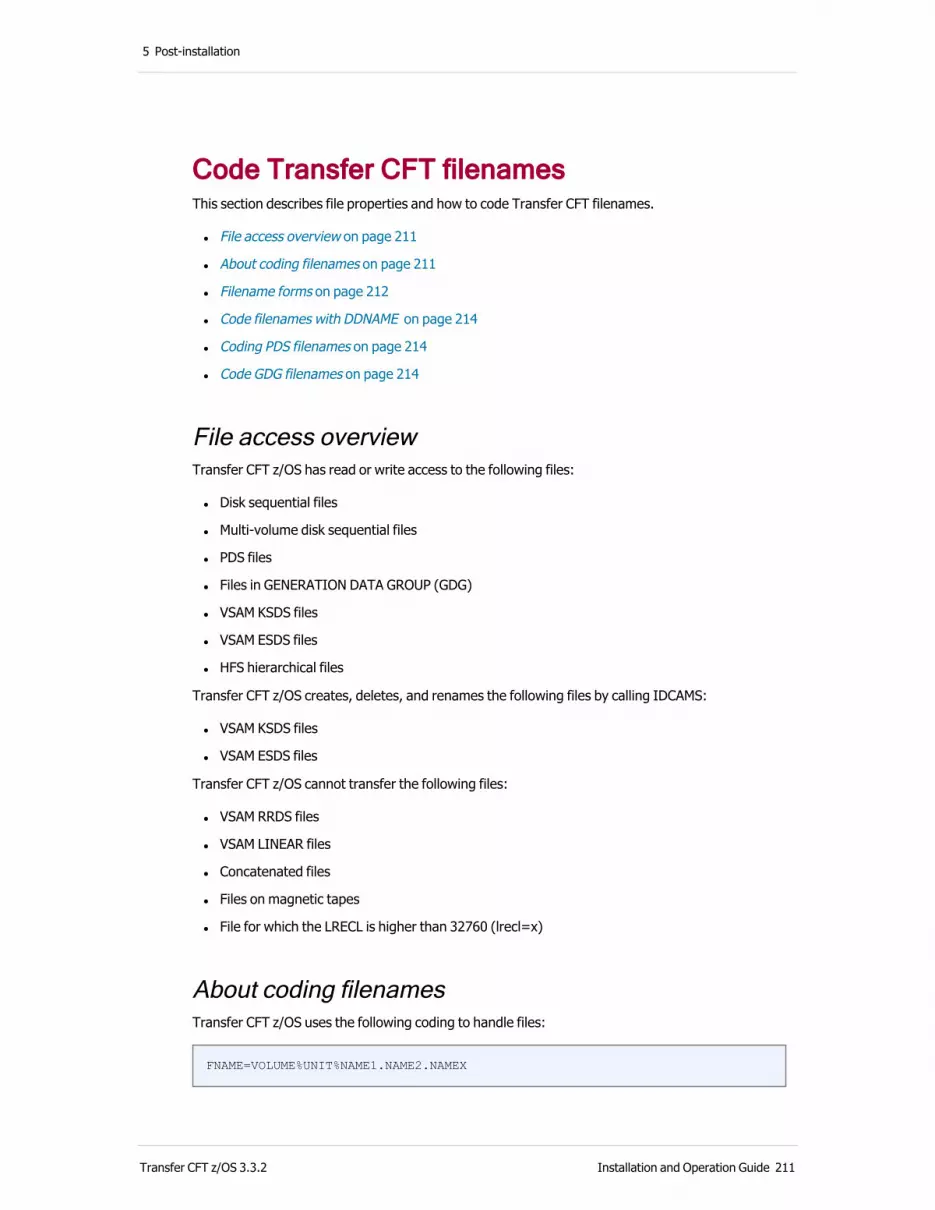
5 Post-installation
Code Transfer CFT filenamesThis section describes file properties and how to code Transfer CFT filenames.
l File access overview on page 211
l About coding filenames on page 211
l Filename forms on page 212
l Code filenames with DDNAME on page 214
l Coding PDS filenames on page 214
l Code GDG filenames on page 214
File access overviewTransfer CFT z/OS has read or write access to the following files:
l Disk sequential files
l Multi-volume disk sequential files
l PDS files
l Files in GENERATION DATA GROUP (GDG)
l VSAM KSDS files
l VSAM ESDS files
l HFS hierarchical files
Transfer CFT z/OS creates, deletes, and renames the following files by calling IDCAMS:
l VSAM KSDS files
l VSAM ESDS files
Transfer CFT z/OS cannot transfer the following files:
l VSAM RRDS files
l VSAM LINEAR files
l Concatenated files
l Files on magnetic tapes
l File for which the LRECL is higher than 32760 (lrecl=x)
About coding filenamesTransfer CFT z/OS uses the following coding to handle files:
FNAME=VOLUME%UNIT%NAME1.NAME2.NAMEX
Transfer CFT z/OS 3.3.2 Installation and Operation Guide 211

5 Post-installation
Where:
l VOLUME has the following characteristics:
o Indicates the name of the disk volume where the file will be created or searched
o Is optional, but useful for requesting Transfer CFT to create a VSAM file or other file, except for SMS managed volumes
o Corresponds to the VOLUME parameter of the DEFINE CLUSTER VSAM or VOL=SER= of the JCL
o Should not be used with DF/SMS
l UNIT has the following characteristics:
o Indicates the UNITNAME used
o Is optional but useful for a tape or disk SAM file
o Corresponds to the parameter UNIT= of the JCL
o By default, the value SYSALLDA or the value imposed by your DYNALLOC EXIT will be used
l NAME1.NAME2.NAMEx have the following characteristics:
o Defines the filename
o Mandatory
o The initial character in HFS filenames is the slash: ( / )
Example
CFTVOL%%FILENAME
%3390%FILENAME
%%FILENAME
FILENAME
/path/file.extension
Note The two % signs are mandatory only if the VOLUME parameter or the UNIT parameter has been specified.
Filename formsA filename can have different forms:
l A DSNAME or a string coded in form ‘VOLUME%UNIT%DSNAME’ (VOLUME and UNIT are often optional).
l A logical name, associated with a DD card [ JCL ] or with an ALLOC [ CLIST ].
l PDS member name, which is also by completing with the member name between brackets.
Example
Transfer CFT z/OS 3.3.2 Installation and Operation Guide 212
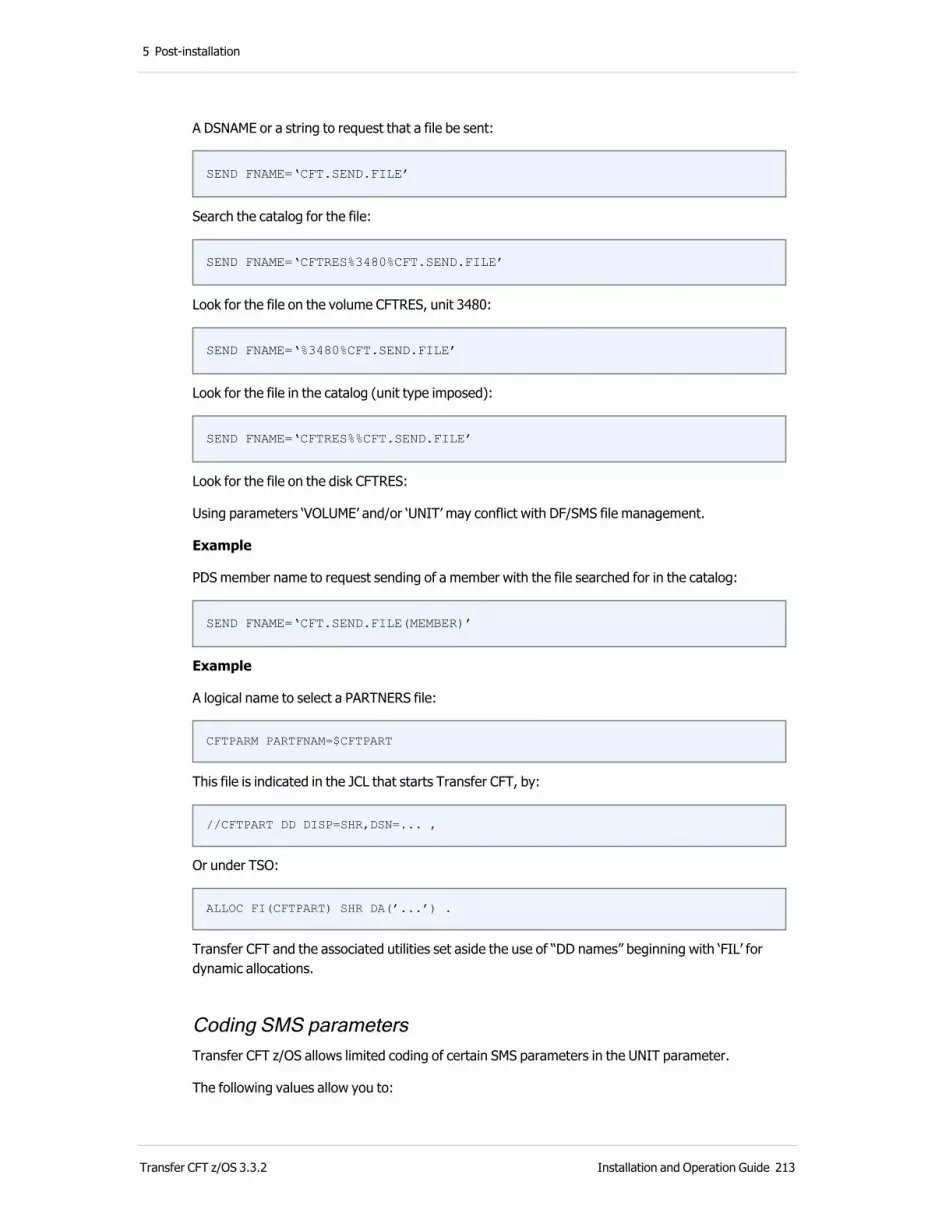
5 Post-installation
A DSNAME or a string to request that a file be sent:
SEND FNAME=‘CFT.SEND.FILE’
Search the catalog for the file:
SEND FNAME=‘CFTRES%3480%CFT.SEND.FILE’
Look for the file on the volume CFTRES, unit 3480:
SEND FNAME=‘%3480%CFT.SEND.FILE’
Look for the file in the catalog (unit type imposed):
SEND FNAME=‘CFTRES%%CFT.SEND.FILE’
Look for the file on the disk CFTRES:
Using parameters ‘VOLUME’ and/or ‘UNIT’ may conflict with DF/SMS file management.
Example
PDS member name to request sending of a member with the file searched for in the catalog:
SEND FNAME=‘CFT.SEND.FILE(MEMBER)’
Example
A logical name to select a PARTNERS file:
CFTPARM PARTFNAM=$CFTPART
This file is indicated in the JCL that starts Transfer CFT, by:
//CFTPART DD DISP=SHR,DSN=... ,
Or under TSO:
ALLOC FI(CFTPART) SHR DA(’...’) .
Transfer CFT and the associated utilities set aside the use of “DD names” beginning with ‘FIL’ for dynamic allocations.
Coding SMS parametersTransfer CFT z/OS allows limited coding of certain SMS parameters in the UNIT parameter.
The following values allow you to:
Transfer CFT z/OS 3.3.2 Installation and Operation Guide 213

5 Post-installation
l >STORCLA: specify a value for STORAGE-CLASS
l <DATACLA: specify a value for DATA CLASS
l *MGTCLAS: specify a value for MANAGEMENT CLASS
An alternate way to specify full-length DF/SMS parameters is described in DF/SMS large file support.
Code filenames with DDNAME Transfer CFT z/OS uses the following coding to refer to a DDNAME declared in the JCL:
FNAME=$DDNAME
Example
FNAME=$CFTCAT
Coding PDS filenamesTransfer CFT z/OS handles PDS files one member at a time. Transfer CFT z/OS processes PDS files:
l Member by member in sequence
l By calling IEBCOPY UNLOAD
l For the entire PDS, by setting FNAME=#DSNAME or #DSNAME(*)
Note The second syntax is recommended as it is the syntax to use for heterogeneous transfers.
l For a selected subset of members, using the ’*’ character to replace a character string or ’?’ to replace one character and by setting FNAME=#DSNAME(ME?BER*)
A PDS file is coded as:
FNAME=NAME1.NAMEX(MEMBER)
Delivered template:
l ..SAMPLE(CFTPDS)
Code GDG filenamesA GDG filename is coded as:
FNAME=NAME1.NAMEX(0)
FNAME=NAME1.NAMEX(-n)
FNAME=NAME1.NAMEX(+n)
Note Transfer CFT z/OS does not allow the concatenation of all versions of a GDG file.
Transfer CFT z/OS 3.3.2 Installation and Operation Guide 214
5 Post-installation
Delivered templates:
l ..SAMPLE(CFTGDGS) (send GDG)
l ..SAMPLE(CFTGDGR) (receive GDG)
Dynamically create files
File characteristics overviewDynamically created Transfer CFT z/OS files have the following characteristics:
l All files that are created by Transfer CFT are cataloged
l SAM files are created by DYNALLOC
l VSAM files are created by dynamic calling IDCAMS
l PDS files are created with BLKPDS directory blocks. BLKPDS is an option of the Transfer CFT installation JOB A12OPTS. Its default value is 150
l GDG files can only be created if the PATTERN DSCB exists
The primary space is calculated from the size in Kbytes indicated in the parameters or defined by the partner. The secondary space is equal to 10% of the primary space.
The BLKSIZE can be:
l Calculated depending on the value indicated in the customization parameters
l Announced by the partner (in PeSIT profile CFT and ANY only)
l Calculated from the BLKSIZE defined in the JOB A12OPTS
When DSNTYPE=EXTPREF/EXTREQ/LARGE is specified in JOB A12OPTS, the BLKSIZE value is decreased if possible by at least 32, to compensate for the DF/SMS 32 bytes added to every physical block.
The file allocation is in the form SPACE=(BBBB,(PPPP,SSSS)),DCB=(BLKSIZE=BBBB), with:
l BBBB: Value of the calculated BLKSIZE
l PPPP: Primary allocation, which is updated with the % factor defined in JOB A12OPTS ALLPRIM= or ALLONE=
l SSSS: 10 % of PPPP, which is computed as a % of the primary allocation defined in ALLSEC=, for a single volume allocation, or updated with the % factor defined in ALLNEXT=
Transfer CFT z/OS may also create multi-volume files through the DF/SMS 'ACS ROUTINES', using a DATACLASS that describes striped files. For more information, refer to the IBM documentation DFSMS Storage Administration Reference [Document Number SC26-7402-xx].
Transfer CFT z/OS 3.3.2 Installation and Operation Guide 215
5 Post-installation
Dynamically creating multi-volume filesThe dynamic creation of multi-volume files is a feature that enables you to receive very large files. It is complementary to existing support through SMS.
This mechanism is called automatically when:
l File creation fails because of lack of space or request for more than 65535 tracks in a NON EXTENDED FORMAT volume
l The VOLUME parameter is not completed
o You can deactivate this device when this parameter is present and set. The maximum number of volumes, 20 by default, is customizable in the JOB A12OPTS VOLNUM= .
DYNALLOC is called up to VOLNUM= additional times with:
l The request for one extra volume
l The corresponding reduction in the PPPP primary allocation
Transfer CFT reserves the requested space on the assigned volumes. If this reservation fails for one volume, file creation is rejected and the error code ‘xxxxxE37’ returned.
To request the creation of a multi-volume file, use ‘fname=’%+nnn%DSNAME’, where nnn is a numerical value between 2 and 127:
l If nnn is less than VOLNUM, allocation will be retried up to the limit of 20 volumes
l If nnn is greater than VOLNUM, a single allocation attempt is performed
DF/SMS extended, large and EAV file support
About large file support functionality
Transfer CFT supports the DF/SMS features introduced by IBM for z/OS environments. Additionally, the extended format files and the DFSMS BLOCKTOKENSIZE=LARGE option are automatically managed by Transfer CFT. The JCL parameter DSNTYPE=EXTPREF, indicating a preference for an extended format, can be added when applicable and supported. The EATTR parameter introduced with z/OS 1.11 is also supported.
Overall large file support in Transfer CFT z/OS includes:
l A maximum record size for storing USS text files of 32,756 bytes, and a maximum number of records for a USS text file of 2**31.
l The number of volumes for a file is 255. The maximum supported file size is 54 gigabytes, or 4 terabytes per EAV volume, times 255 volumes. Nevertheless, the maximum file size is limited to 4 terabytes.
l The maximum catalog size is 328,000 saved entries for a non SMS managed volume, 5,000,000 entries for an SMS managed volume, or 10,000,000 with EATTR=OPT.
Transfer CFT z/OS 3.3.2 Installation and Operation Guide 216

5 Post-installation
l Support for the DFSMS BLOCKTOKENSIZE=LARGE parameter, which was introduced with z/OS 1.7.
l Support for VSAM files larger than 4 gigabytes.
l Support for HFS “text” files containing more than 16 million records.
l Support for files created with DSNTYPE=EXTPREF or the LARGE parameter for create, read, or write operations. Files created on the extended address volume (EAV) section of the 3390-A units are also supported for create, read or write operations.
l For Transfer CFT to use the described EXTENDED or LARGE file features, you should specify these using the DFSMS ACS routines. Transfer CFT also provides a certain number of alternate options to specify DFSMS parameters when creating files.
l Transfer CFT will discard unsupported options when it is running on a back-level z/OS system.
Specifying a default DSNTYPE value in the SGINSTAL options
SGINSTAL option provides a global default value for DSNTYPE. For more information, refer to the Selecting Transfer CFT functional options section in Customizing the JCL installation files.
Specifying additional DFSMS parameters
In two specific cases certain DFSMS parameters can be specified when creating a file, using one of the following:
l CFTRECV WFNAME=’value’ (*)
l CFTFILE FNAME=’value’
Where 'value' is in the format:
WFNAME=‘AN.MVS.DSNAME,keword1=value1,keyword2=value2’
or
FNAME=‘AN.MVS.DSNAME,keword1=value1,keyword2=value2’
Note Keywords are separated with comma, and must be enclosed in quotes.
Supported keywords and values include:
l DATACLAS=class
l DSNTYPE=BASIC/EXTPREF/EXTREQ/LARGE - to override a predefined value in the SGINSTAL option
l EATTR=OPT - valid only with z/OS 1.11 and higher, otherwise it is discarded
l MGMTCLAS=class
l STORCLAS=class
l RETPD=nnnn
l EXPDT=yyyyddd or yyddd
Note Concerning expiration dates:
Transfer CFT z/OS 3.3.2 Installation and Operation Guide 217
5 Post-installation
l Expiration dates of 1999365 and 1999366 are considered “never-scratch”.
Or
l Expiration dates 99365 and 99366 are considered “never-scratch” dates.
l For expiration dates of January 1, 2000 and later, you MUST use the EXPDT=yyyyddd format.
(*) For the CFTRECV command (only), you can specify DFSMS parameters in ATTSUSER.
Example 1
To force the creation of the received file in the EAV section of a volume:
CFTRECV FNAME=A.GDG(+1), WFNAME=’WORK.&PART.&IDTU,DSNTYPE=EXTREQ,EATTR=OPT’
Or
CFTRECV FNAME=A.GDG(+1),ATTSUSER=’DSNTYPE=EXTREQ,EATTR=OPT’, WFNAME=’WORK.&PART.&IDTU’
Note The ATTSUSER field is presently not managed by Central Governance.
Example 2
To create a large (greater than 215,000 records) Transfer CFT catalog:
CFTFILE TYPE=CAT,MODE=CREATE,FNAME=’cftv2.CATALOG,EATTR=OPT’,RECNB=7123456
Work with filesNote Do not use a dash "-" as a special character in z/OS (MVS) file names. This is an invalid
system character.
About filesWhen renaming a file, Transfer CFT z/OS only releases the unused space if authorized to do so (APF), and if the file is allocated on a single volume. All files deleted by Transfer CFT are removed from the catalog.
l SAM files are deleted/renamed by CAMLST
l PDS members are deleted/renamed by STOW
l VSAM files are deleted/renamed by dynamic calling to IDCAMS
Overwrite PDS membersThe CFTRECV MACTION=REPLACE parameter controls the overwriting of any PDS file members received.
Transfer CFT z/OS 3.3.2 Installation and Operation Guide 218

5 Post-installation
The CFTRECV command MACTION=REPLACE parameter controls the files that are received from the ADRDSSU utility DUMP.
Share Transfer CFT filesFile sharing characteristics include:
l Transfer CFT VSAM files are allocated as DISP=SHR
l Read transfer files are allocated as DISP=SHR
l Write files are allocated as DISP=OLD
GRS multi-system protectionTransfer CFT uses QNAME CFTSHARE to protect various resources. QNAME CFTSHARE must be propagated in all members of a GRS configuration. This is the only QNAME to be propagated.
Transfer CFT uses the following other QNAMEs:
l CFTFILES to protect transferred files
l CFTSUBM to serialize JOBS submitted on the Internal Reader
l CFTPUTS for general internal serialization
l CFTCATSH to share the catalog dataspace
The CFTFILES ENQs do not need to be broadcast to all systems in the GRS RING.
HFS hierarchical filesThe HFS Hierarchical File System data architecture is consecutive and non-structured for records and blocks. The HFS files are installed in hierarchical disk spaces, and divided into directories and sub-directories according to UNIX conventions.
HFS files are managed either by applications that work in an UNIX/OMVS environment, or by applications that use the USS UNIX System Services, such as the management and access interface.
Transfer CFT only accepts the complete name from the root directory. All file name components are separated by the ‘/’ character. The complete name is limited to 248 characters.
The z/OS file characteristics, such as format (RECFM), record size (LRECL), and block size (BLKSIZE) are meaningless for an HFS file. However, Transfer CFT uses these characteristics as a basis for ensuring the data management and the transmission of file characteristics towards the receiver for a transfer. As a result, parameter settings must take these characteristics into account when characteristics are conveyed between heterogeneous partners.
Transfer CFT z/OS can only access HFS files for a transfer. This excludes any other use in the Transfer CFT. This means that Transfer CFT z/OS:
l Does not support generic sending of HFS in homogeneous mode.
l The CFTUTIL utility COPYFILE function does not work with HFS files.
Transfer CFT z/OS 3.3.2 Installation and Operation Guide 219

5 Post-installation
HFS file namesFile names coded in the FNAME=, WFNAME=, and NFNAME= parameters must follow the UNIX conventions for file identification. This means that the files values for the parameters associated with FNAME=, and WFNAME= parameters must be coded between quotes “…”.
However, as the value for the NFNAME= parameter is not converted to upper case, it should not be coded between quotes “…”.
Example
FNAME ="/home/qualcft/send/SEND.File.Lowercase"
NFNAME= '/home/qualcft/recv/Recv.File.Lowercase'
or
/home/qualcft/recv/Recv.File.Lowercase
To enable recursive processing for a group of files, use the following syntax ** (two asterisks). To select all files in all of the folders, for example:
FNAME =/home/qualcft/**
Note A single asterisk * only selects the file in the immediate folder.
HFS file characteristicsHFS files are specified by their type, depending on whether they contain text (structured) or are binary (non-structured). The FTYPE= and NTYPE= parameters convey the file type.
The values allocated to TYPE are:
l T: text file
o This file is structured
o The logical records are limited
o Transfer CFT treats the data in record mode
l B: binary file
o This file is non-structured
o Transfer CFT treats the data in continuous flow
l J: stream text
o Enables sending a text file that contains records that are larger than 32 KB
If the parameter is not present, the binary file type becomes the default type.
Transfer CFT z/OS 3.3.2 Installation and Operation Guide 220
5 Post-installation
RECFM, LRECL, and BLKSIZE characteristicsThe RECFM, LRECL and BLKSIZE parameters retain their characteristics when they are conveyed between heterogeneous partners.
Transfer CFT uses these parameter characteristics as a basis for ensuring data management for a transfer. For this reason, parameter settings must take into account the following:
l Transfer CFT interprets the file format (FRECFM= and NRECFM=) to select a data exchange method. If this parameter is not present, V is the default value.
l Transfer CFT interprets the size of a logical record (FLRECL= and NRECL=) to adapt the size of exchanged articles. If this parameter is not present, 4096 is the default value.
l The size of a block is ignored (FBLKSIZE= and NBLKSIZE=) and is set to 0.
l The LRECL for text files is limited to 32,752 bytes. Some JAVA/XML applications create non delimited text files, not supported by Transfer CFT.
HFS file owner and access rights An HFS file owner, or attribute, is characterized by:
l A UID (user number)
l A GID (group number)
l A string that specifies access rights
Transfer CFT z/OS manages the file owner and the access rights in two ways:
l Transfer CFT is an authorized program and the CFTPARM USERCTRL parameter is set to YES. As a result, files are created/read/written with the same rights as the requesting user. This is the recommended operating mode.
l Otherwise, the HFS files are created/read/written with the rights of the Transfer CFT. It is recommended that you assign a UID to the Transfer CFT that is not 0.
When a received transfer leads to the creation of an HFS file, the file is created with the access right -rwxr-xr-x.
Before Transfer CFT z/OS creates a file, it checks that enough space is available in the File System. If not, Transfer CFT refuses the creation, and returns error code 00F00B37.
Transfer CFT handles HFS files smaller than 4 terabytes.
Changing the name of an HFS file can only be carried out in the same directory. Additionally, the file path that is described in the FNAME= parameter must be identical to the path specified in the WFNAME=parameter.
HFS-specific error messageFor each HFS file access error, Transfer CFT z/OS displays the CFTHF01E message in the SYSLOG.
Transfer CFT z/OS 3.3.2 Installation and Operation Guide 221

5 Post-installation
CFHF01E:BPX1mod ,RSN=05F1006C,RC=ENOENT (129)No such file or
directory
Where:
l BPX1mod: Name of the service module that returned the error
l RSN=xxxxxxxx: The returned reason code
Refer to the IBM brochure UNIX System Services Messages & Codes.
l RC=: The return code in abbreviated mnemonic (numeric) form
Calls to z/OS utilities from Transfer CFTThe Z/OS utility call function enables you to transfer files that are not directly readable by Transfer CFT. The IEBCOPY and ADRDSSU utilities are supported. The following sections describe this operating mode.
Common rules for utility callsUtilities are called to:
l Transform data for output in a temporary sequential file. Transformation is done when the file is selected, before the network session is open.
l Transform the incoming file into a format identical to the sent file(s). Transformation is done on reception of an end of transfer notification. The network session stays open and the message originator receives an indication of reception or transfer failure.
Respect the following rules:
l The Transfer CFT must be and authorized program (APF)
l The transfer is only possible between two Transfer CFT, one switch via an intermediary Transfer CFT site is allowed
CFTSEND or SEND command codingThe following parameters are required:
l The # character is necessary at the head of FNAME (hexadecimal code 7B)
l WFNAME indicates the intermediary file name that will be written by the utility, and then transferred by Transfer CFT. Files that have DSNTYPE=EXTENDED/LARGE are not supported by IEBCOPY or ADRDSSU.
l NSPACE indicates the size of the intermediary file.This parameter is necessary if the FNAME value translates to a selection of files or members
l FACTION=DELETE is not supported (ignored by the utility).
Transfer CFT z/OS 3.3.2 Installation and Operation Guide 222
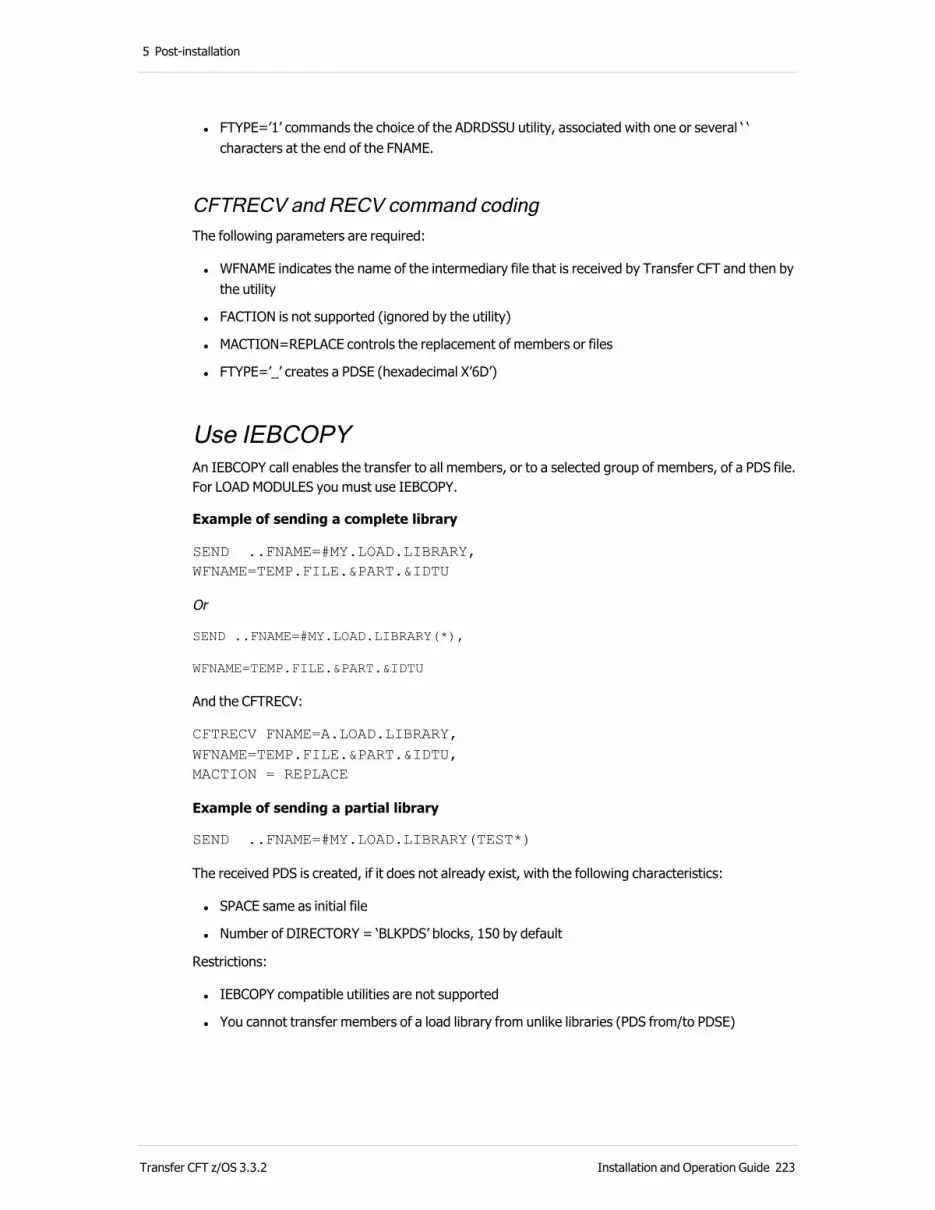
5 Post-installation
l FTYPE=’1’ commands the choice of the ADRDSSU utility, associated with one or several ‘ ‘ characters at the end of the FNAME.
CFTRECV and RECV command codingThe following parameters are required:
l WFNAME indicates the name of the intermediary file that is received by Transfer CFT and then by the utility
l FACTION is not supported (ignored by the utility)
l MACTION=REPLACE controls the replacement of members or files
l FTYPE=’_’ creates a PDSE (hexadecimal X’6D’)
Use IEBCOPY An IEBCOPY call enables the transfer to all members, or to a selected group of members, of a PDS file. For LOAD MODULES you must use IEBCOPY.
Example of sending a complete library
SEND ..FNAME=#MY.LOAD.LIBRARY,WFNAME=TEMP.FILE.&PART.&IDTU
Or
SEND ..FNAME=#MY.LOAD.LIBRARY(*),
WFNAME=TEMP.FILE.&PART.&IDTU
And the CFTRECV:
CFTRECV FNAME=A.LOAD.LIBRARY,WFNAME=TEMP.FILE.&PART.&IDTU,MACTION = REPLACE
Example of sending a partial library
SEND ..FNAME=#MY.LOAD.LIBRARY(TEST*)
The received PDS is created, if it does not already exist, with the following characteristics:
l SPACE same as initial file
l Number of DIRECTORY = ‘BLKPDS’ blocks, 150 by default
Restrictions:
l IEBCOPY compatible utilities are not supported
l You cannot transfer members of a load library from unlike libraries (PDS from/to PDSE)
Transfer CFT z/OS 3.3.2 Installation and Operation Guide 223
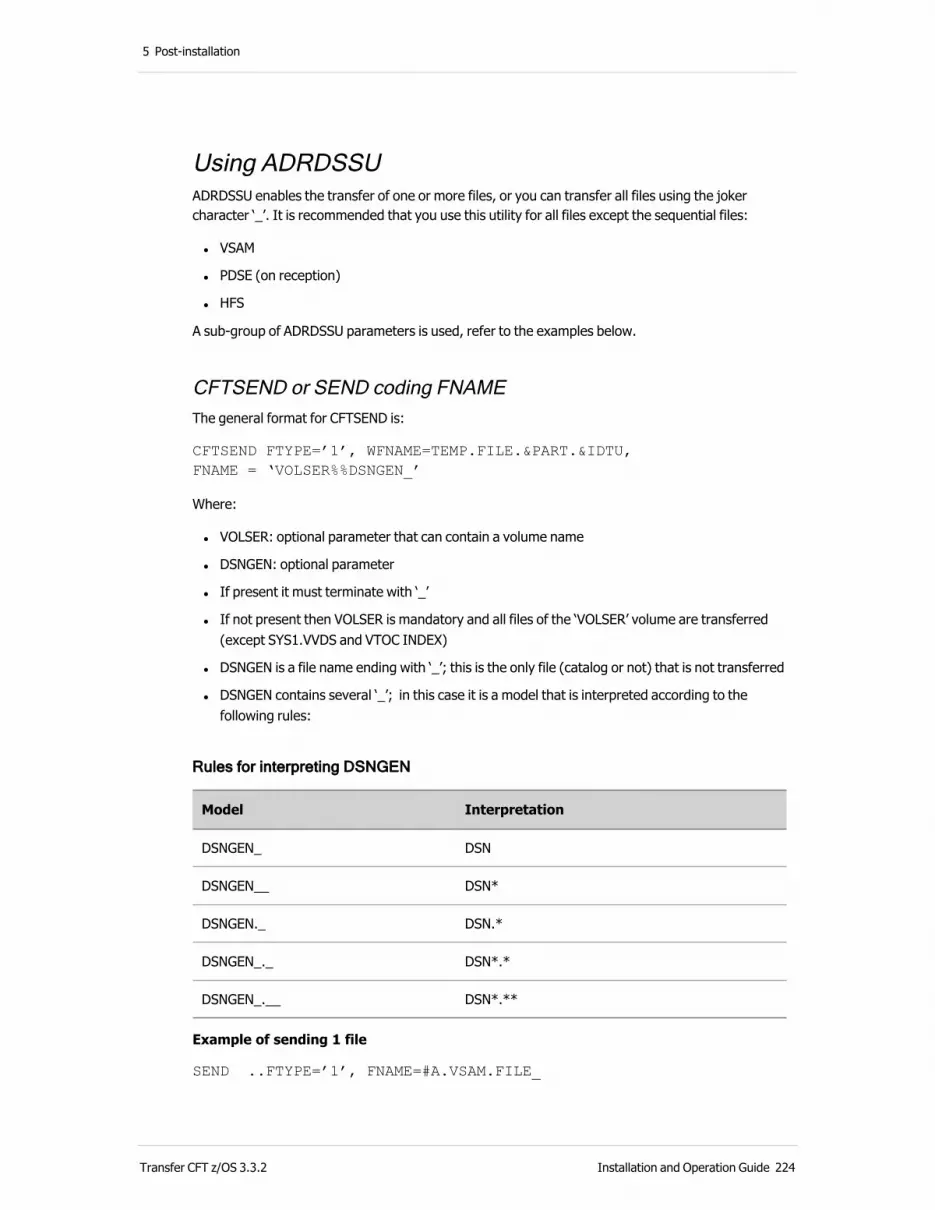
5 Post-installation
Using ADRDSSUADRDSSU enables the transfer of one or more files, or you can transfer all files using the joker character ‘_’. It is recommended that you use this utility for all files except the sequential files:
l VSAM
l PDSE (on reception)
l HFS
A sub-group of ADRDSSU parameters is used, refer to the examples below.
CFTSEND or SEND coding FNAME The general format for CFTSEND is:
CFTSEND FTYPE=’1’, WFNAME=TEMP.FILE.&PART.&IDTU, FNAME = ‘VOLSER%%DSNGEN_’
Where:
l VOLSER: optional parameter that can contain a volume name
l DSNGEN: optional parameter
l If present it must terminate with ‘_’
l If not present then VOLSER is mandatory and all files of the ‘VOLSER’ volume are transferred (except SYS1.VVDS and VTOC INDEX)
l DSNGEN is a file name ending with ‘_’; this is the only file (catalog or not) that is not transferred
l DSNGEN contains several ‘_’; in this case it is a model that is interpreted according to the following rules:
Rules for interpreting DSNGEN
Model Interpretation
DSNGEN_ DSN
DSNGEN__ DSN*
DSNGEN._ DSN.*
DSNGEN_._ DSN*.*
DSNGEN_.__ DSN*.**
Example of sending 1 file
SEND ..FTYPE=’1’, FNAME=#A.VSAM.FILE_
Transfer CFT z/OS 3.3.2 Installation and Operation Guide 224

5 Post-installation
The generated ADRDSSU command has the format:
DUMP DATASET ( INCLUDE ( A.VSAM.FILE )COMPRESS ALLDATA(*) TOLERATE(ENQFAILURE) SPHERE
Example of sending n files
SEND ..FTYPE=’1’, FNAME=#CFTV2.NEW.VERSION.__ , NSPACE=150000
Example of ending n files of 1 volume
SEND ..FTYPE=’1’, FNAME=#VOLSER%%CFTV2.NEW.__, NSPACE=1000000
The ADRDSSU command also uses the parameters:
EXCLUDE ( SYS1.VVDS.V* , SYS1.VTOCIX.* ) LOGINDYNAM ( VOLSER) SELECTMULTI ( ANY )
Notes
l All of the allocated space is copied (ALLDATA parameter)
l The VSAM CLUSTERS are copied with alternating indexes (SPHERE parameter)
l The multivolume files are copied completely (SELECTMULTI parameter)
Restrictions:
l ADRDSSU does not take into account migrated HSM files
l The PAGE DATASET files and the VSAM catalogs are not supported
CFTRECV or RECV coding
The general format for CFTRECV is:
CFTRECV FNAME = ‘VOLSER%%QUALIF1’WFNAME=TEMP.FILE.&PART.&IDTU
Where:
l VOLSER: An optional parameter that can contain the name of the volume that receives the files.
l QUALIF1: An optional parameter that enables you to change the first QUALIFIER of the file. QUALIF1 can also be a RENAME PATTERN of up to 180 bytes in length, and contain 1 or more strings each separated by a comma. The syntax must conform with ADRDSSU rules, and be enclosed in quotes.
ExamplesExample of a received files RENAME with a pattern:
CFTRECV FNAME= ‘(QUALIF1),(OLD.PATTERN1,NEW.PATTERN1),(OLD.PATTERN2, NEW.PATTERN2)’
Example of receiving files under their initial name:
Transfer CFT z/OS 3.3.2 Installation and Operation Guide 225
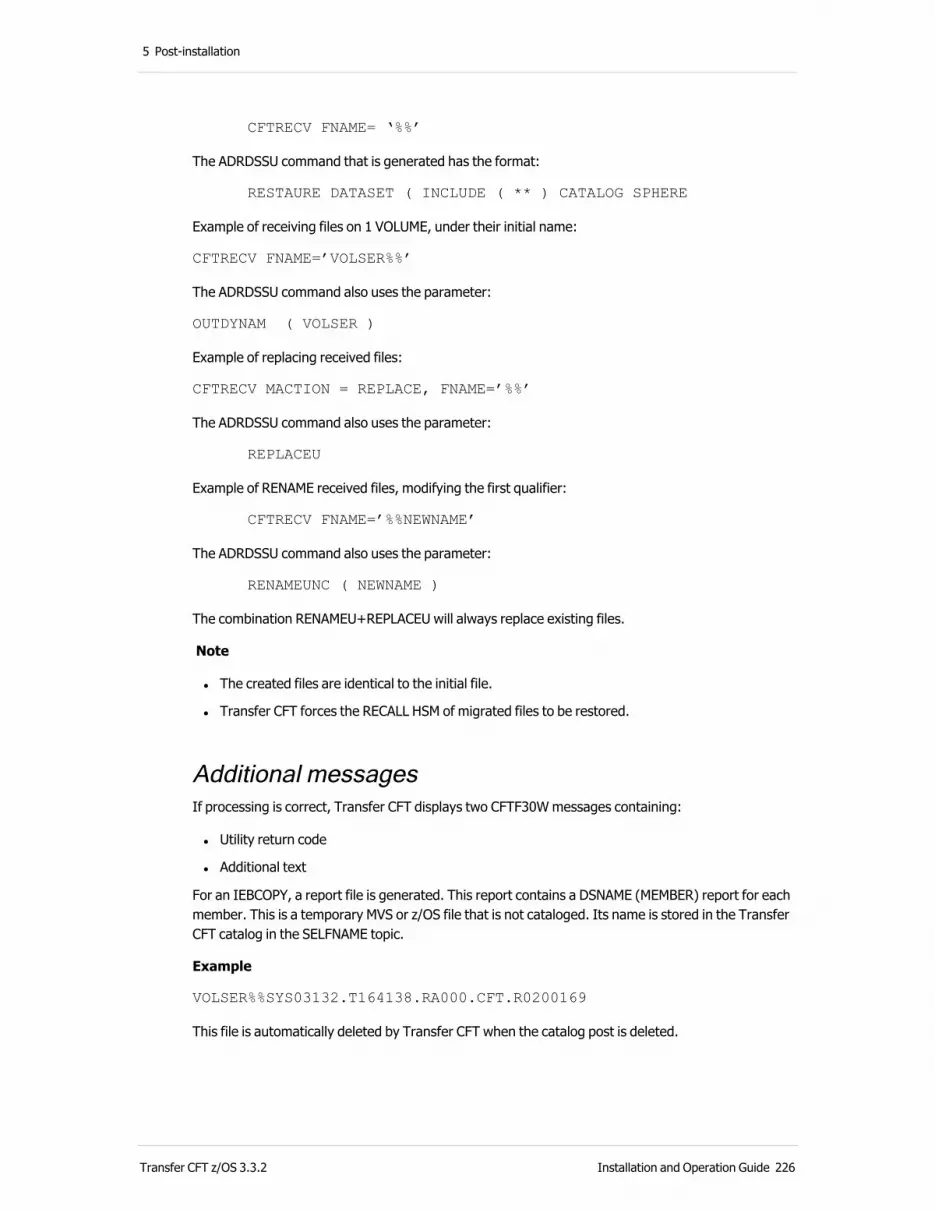
5 Post-installation
CFTRECV FNAME= ‘%%’
The ADRDSSU command that is generated has the format:
RESTAURE DATASET ( INCLUDE ( ** ) CATALOG SPHERE
Example of receiving files on 1 VOLUME, under their initial name:
CFTRECV FNAME=’VOLSER%%’
The ADRDSSU command also uses the parameter:
OUTDYNAM ( VOLSER )
Example of replacing received files:
CFTRECV MACTION = REPLACE, FNAME=’%%’
The ADRDSSU command also uses the parameter:
REPLACEU
Example of RENAME received files, modifying the first qualifier:
CFTRECV FNAME=’%%NEWNAME’
The ADRDSSU command also uses the parameter:
RENAMEUNC ( NEWNAME )
The combination RENAMEU+REPLACEU will always replace existing files.
Note
l The created files are identical to the initial file.
l Transfer CFT forces the RECALL HSM of migrated files to be restored.
Additional messagesIf processing is correct, Transfer CFT displays two CFTF30W messages containing:
l Utility return code
l Additional text
For an IEBCOPY, a report file is generated. This report contains a DSNAME (MEMBER) report for each member. This is a temporary MVS or z/OS file that is not cataloged. Its name is stored in the Transfer CFT catalog in the SELFNAME topic.
Example
VOLSER%%SYS03132.T164138.RA000.CFT.R0200169
This file is automatically deleted by Transfer CFT when the catalog post is deleted.
Transfer CFT z/OS 3.3.2 Installation and Operation Guide 226

5 Post-installation
Error messagesWhen an error occurs, a message is displayed for either:
l The ABEND code of the utility
l The first error message of the utility
Additionally, most error messages are sent to the SYSLOG z/OS.
The list of all files not restored by ADRDSSU is displayed in the SYSLOG z/OS, in the message: CDSS04E: Failed to Restore=DSNAME
Refer to the related IBM documents for explanations, or see the IEBCOPY and ADRDSSU parameters and messages.
The SGTRACE 12 fine control option enables the recording of detailed traces in the SGTRACE file.
Utility performanceTransfer CFT z/OS calls a single external utility at a given time. Memory use is as follows:
Memory use
Utility 24 bit memory 31 bit memory
IEBCOPY 1024K 0
ADRDSSU 2048K 8192K
The CFTPROT RTO=seconds parameter must contain a value expressed in seconds that is large enough to allow the complete operation by the utility on the receiving side.
For ADRDSSU and RACF, the TOLERATE (ENQFAILURE) parameter requires READ access to the FACILITY class STGADMIN.ADR.DUMP.TOLERATE.ENQF resource, from the sending side.
Files in fixed-standard and variable-SPANNED formatsYou can transfer files in fixed-standard and variable-spanned formats while respecting their specific characteristics. This transfer mode is subject to a certain number of restrictions.
Fixed-standard format filesFixed-standard format files are transferred like fixed format files. They can be exchanged between all Transfer CFTs.
Transfer CFT z/OS 3.3.2 Installation and Operation Guide 227
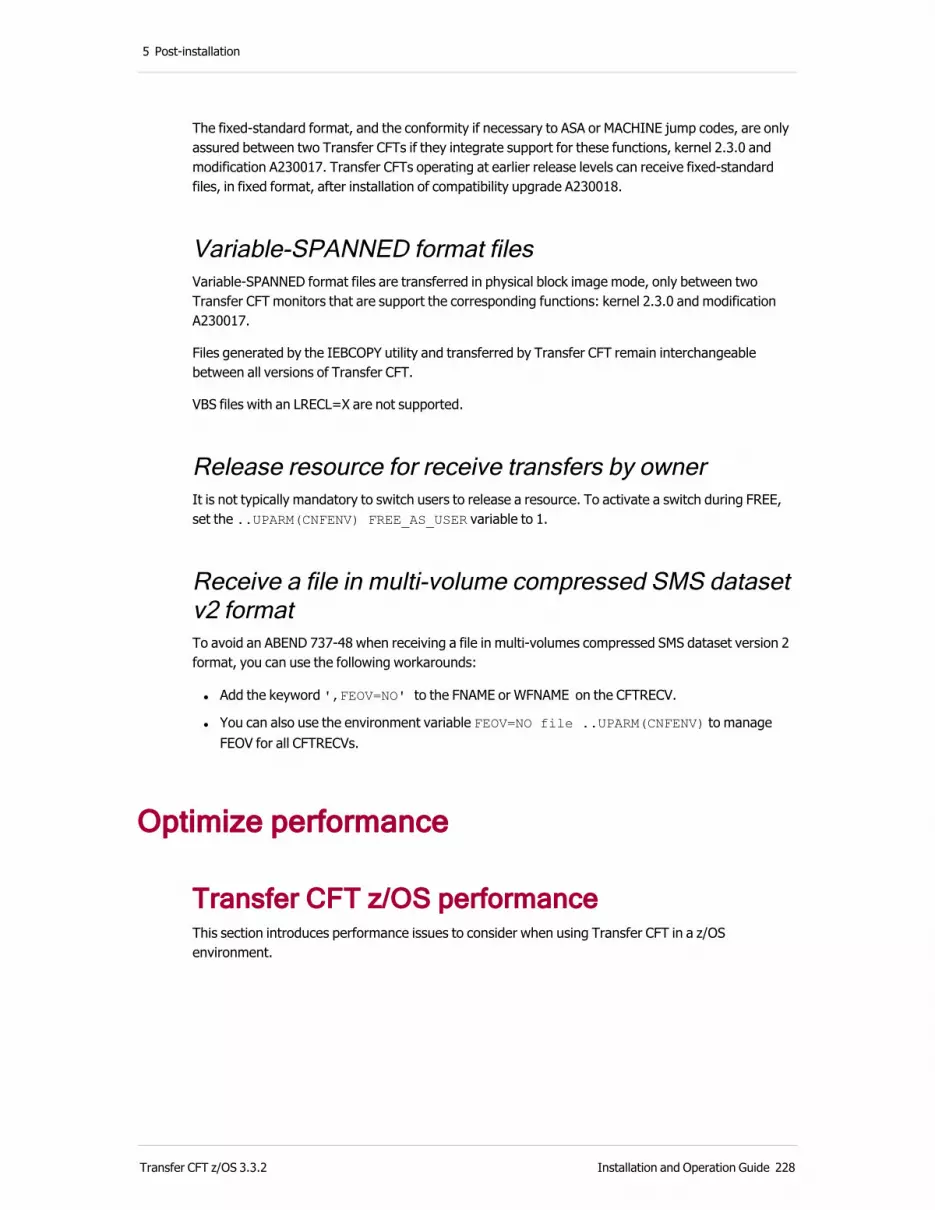
5 Post-installation
The fixed-standard format, and the conformity if necessary to ASA or MACHINE jump codes, are only assured between two Transfer CFTs if they integrate support for these functions, kernel 2.3.0 and modification A230017. Transfer CFTs operating at earlier release levels can receive fixed-standard files, in fixed format, after installation of compatibility upgrade A230018.
Variable-SPANNED format filesVariable-SPANNED format files are transferred in physical block image mode, only between two Transfer CFT monitors that are support the corresponding functions: kernel 2.3.0 and modification A230017.
Files generated by the IEBCOPY utility and transferred by Transfer CFT remain interchangeable between all versions of Transfer CFT.
VBS files with an LRECL=X are not supported.
Release resource for receive transfers by ownerIt is not typically mandatory to switch users to release a resource. To activate a switch during FREE, set the ..UPARM(CNFENV) FREE_AS_USER variable to 1.
Receive a file in multi-volume compressed SMS dataset v2 format To avoid an ABEND 737-48 when receiving a file in multi-volumes compressed SMS dataset version 2 format, you can use the following workarounds:
l Add the keyword ',FEOV=NO' to the FNAME or WFNAME on the CFTRECV.
l You can also use the environment variable FEOV=NO file ..UPARM(CNFENV) to manage FEOV for all CFTRECVs.
Optimize performance
Transfer CFT z/OS performanceThis section introduces performance issues to consider when using Transfer CFT in a z/OS environment.
Transfer CFT z/OS 3.3.2 Installation and Operation Guide 228

5 Post-installation
Memory usage
File transfer serverThe 24–bit addressed memory (JCL REGION parameter) is used as follows:
l Approximately 1,000 k used by the programs and memory areas.
l Each transfer task requires an additional 4 k.
The 31–bit addressed memory is used as follows:
l Approximately 64 Mbytes are used by the programs and the memory zones.
l Each transfer task requires an additional 1 Mbyte.
l Each open BSAM file uses two buffers, the size of which is equal to BLKSIZE.
l Each receive transfer uses (CFTPROT PACING*CHKW) receive buffers; the use of high values with a large number of concurrent transfers may cause Transfer CFT z/OS to abort (ABENDS878).
l The CFTSSL module needs an extra 4 Mbytes.
l The installation of Sentinel requires an increase in the size of the execution area according to the configuration file options selected, and according to the number of messages to be processed.
Transfer CFT z/OS delays additional transfer creation when:
l 64 K of 24-bit memory is not available – message: CFTA02E
l 1 MB of 31-bit memory is not available – messages: CFTA01W for a transfer TASK (TFIL) or CFTA01E
The 64–bit addressed memory is used as follows:
l Approximately 512 Mbytes are allocated at startup
l 8 to 12 MB are allocated for each transfer
l Transfer CFT may use up to 20 Gbytes of storage above the bar
You can control the 64-bit usage with the MEMLIMIT=value JCL parameter. When the value is less than 512M, the use of 64-bit storage is disabled. In this case, Transfer CFT will handle a smaller number of parallel transfers and use more (20%) CPU cycles.
Even if Transfer CFT is running in a single address space, it may use a very large amount of virtual storage. You should monitor the z/OS use of page datasets.
Transfer CFT GUI (Copilot) interactive interface server The 24–bit addressed memory is used as follows:
l Approximately 1400 k used by the programs and memory areas
The 31–bit addressed memory is used as follows:
l Each logged-in user requires an additional 10 Mbytes
Transfer CFT z/OS 3.3.2 Installation and Operation Guide 229

5 Post-installation
Disk input/outputDisk I/O operations are performed in the following cases:
l When each BSAM block is read, or written
l When a BSAM block is written at each synchronization point and a TCLOSE is sent for the file in write mode
l When each catalog record is written every UPDAT synchronization points (CFTCAT parameter value)
l When the first record in each CFTCOM file is read every WSCAN seconds (CFTCOM value)
l Input/output management for HFS files is performed under the control of the OMVS address space. Using RECFM=V to write HFS files is usually faster than using RECFM=U
Used z/OS dataspaceTransfer CFT z/OS keeps a copy of the Transfer CFT CATALOG in a dataspace. As a result:
l Transfer CFT does not reread the records.
l Transfer CFT uses CFTCAT 4*RECNB pages in z/OS auxiliary storage.
l If A12OPTS SHARECAT=YES is specified, other Transfer CFT applications read the catalog primarily from this cache (messages CFCA03I and CFCA04I on the system console). In this case, stopping Transfer CFT may be delayed if another user is sharing this cache (messages CFCA06W and CFCA01).
l A 2-GB data space is allocated for everyunit of 131,000 records in the catalog.
Release unused disk space in received filesIn z/OS the Transfer CFT releases unused disk space in the files received if Transfer CFT is APF authorized (using wfname).
DF/SMS compressionTransfer CFT in z/OS is partially compatible with file compression managed by DF/SMS.
l Read: Transfer CFT recalculates the size of the non-compressed file from DF/SMS information.
l Create: Transfer CFT requests the space required to write a non-compressed file. If possible, Transfer CFT then frees space not used at the end of transfer.
You cannot restart a receive transfer for a DF/SMS compressed file.
Transfer CFT z/OS 3.3.2 Installation and Operation Guide 230
5 Post-installation
Automatic Restart Manager ServiceTransfer CFT authorized programs subscribe to the z/OS Automatic Restart Manager Service. These programs are restarted automatically depending on the rules defined in the ARM component.
The component names have the following formats:
l CFTMAIN: Xidparm, where idparm is the name of the parameter passed to Transfer CFT (shortened to 15 characters).
l CFTXMEM: Xcftpcmbx, where cftpcmbx is the name of the MAILBOX service.
To modify the element name:
1. Add a DD card attributing it the DDNAME ‘CFTARMID’.
2. Provide a single unique record, of which the first 16 bytes are used as substitutions for Xidparm.
The RESTART is delayed for one minute to handle the TCP/IP network sessions.
LE diagnostic files Certain Transfer CFT modules use a diagnostic file generated by LE. This file is CEEDUMP, an LE-formatted dump file.
Virtual IP address support (VIPA)This section describes the specific parameters to use Transfer CFT with VIPA. You must customize the VIPA features in the TCPPARMS file of the IBM TCP/IP stack.
Dynamic VIPA
Note The LOWPORT parameter is deprecated.
Transfer CFT is fully compatible with dynamic VIPA. There are two methods available to use dynamic VIPA with Transfer CFT:
l Use the IBM program MODDVIPA to create or delete a dynamic VIPA definition. This is the mode of operations required for Transfer CFT GUI.
l Use the CFTNET SRCPORTS=(1-65535) value in Transfer CFT parameters. A SAF security profile update may be required in this case. Please read IBM SC31-8775 for more information.
Source VIPA
Transfer CFT is compatible with source VIPA. To enable, configure this feature in the TCP/IP parameters, and code CFTNET SRCPORTS=value with value <2.
Transfer CFT z/OS 3.3.2 Installation and Operation Guide 231

5 Post-installation
Summary
l When SRCPORTS=(‘0 - 65535’), only Source VIPA is enabled.
l When SRCPORTS=(‘1 - 65535’), both Source and Dynamic VIPA are enabled.
Note For ascending compatibility with Transfer CFT parameters, LOWPORT=0 (or 1) is still supported in the CFTNET and will automatically set the SRCPORTS with the correct value, but only if it is not already set in the macro!
A source CFTNET as below:
CFTNET ID=xxxx
...
LOWPORT = 0,
.....
Will result in:
CFTNET ID=xxxx,
...
SRCPORTS = (0 - 65535),
...
Note To avoid TCP/IP source port conflict with Sentinel, see the Sentinel Configuration instructions.
TCP/IP stack affinityIf you want to ensure that Transfer CFT has an affinity to a particular TCP/IP stack, use the _BPXK_SETIBMOPT_TRANSPORT environment variable.
The environment variable _BPXK_SETIBMOPT_TRANSPORT located in UPARM(CNFENV) can be uncommented and set with the TCP/IP stack to be used by CFT.
Modify record format to improve performanceTo improve the performance, we recommend using the variable file format (set this in the CFTRECV object, ID=xxx,FRECFM=V). You should set the FBLKSIZE to less than or equal to 27992, which is the value we recommend you use. This results in:
l The EXCP number is divided by 4.
l The CPU time is lowered.
l The memory usage may either decrease or increase, depending on the FBLKSIZE used.
Transfer CFT z/OS 3.3.2 Installation and Operation Guide 232

5 Post-installation
Guidelines for improving CPU efficiencyUse the following guidelines to help reduce your CPU load and enhance performance.
l The data compression/decompression functions are CPU-time consuming.
l The SGTRACE option activation is very CPU-time consuming.
l Transfer CFT can multi-task, using multiple processors concurrently.
l Transfer CFT z/OS accepts CFTPROT xRUSIZE values that are less than or equal to 65,000 bytes.
o A high RUSIZE value significantly reduces the CPU load. For example, changing the RUSIZE from 4k to 1 k reduces the load by 30%. Since CFTPROT values are negotiated with the remote side and the smallest value is used, specifying large values for CFTPROT RRUSIZE and RPACING is a good performance choice.
o Do not set RCHKW to 0, which would indicate no flow control.
l Transfer CFT can detect and use available CPACF features (hardware assist). CPACF is a free IBM feature for the z/Series.
l The SSL handshake may use a lot of CPU cycles depending on the length of the asymmetric (RSA) key. Using an IBM Crypto Express coprocessor, along with a supporting PKI exit, may improve performance.
Using zIIP This section describes how Transfer CFT z/OS uses zIIP capability for Transfer CFT compression. The System z Integrated Information Processor, zIIP, is a special purpose engine available on IBM z9 and z10 mainframes that enables you to significantly reduce the cost of computing by reducing CPU consumption.
To use the zIIP feature:
l Your System z must have one or more online zIIP processors.
l You require a minimum z/OS version of 1.10.
l Set ziipsup to 1 to activate. You can modify this in the member of target.UPARM(CNFENV), which by default is set to 0.
Cryptographic devices and supported algorithms
Available SSL cryptographic devicesThe following SSL crypto devices and related crypto algorithms are available for the z9, z10, and z196 models.
l CPACF (CP Assist for Cryptographic Functions): DES, 3DES, AES128, AES256, SHA256, SHA512
l CEX2 (Crypto Express2): RSA
Transfer CFT z/OS 3.3.2 Installation and Operation Guide 233

5 Post-installation
l CEX3 (Crypto Express3): RSA
Transfer CFT 3.x z/OS crypto device usageThis table lists, for each possible SSL-protocol cryptographic function and Pki.type used, whether a crypto device used.
TLS protocol exchange
Cryptographic function
Pki.type z9 - z10 z196
Handshake phase RSA CFT PASSPORT SYSTEM
Software Software CEX2
Software Software CEX3
Record Level SYM encryption
DES, 3DES CFT PASSPORT SYSTEM
CPACF CPACF CPACF
CPACF CPACF CPACF
Record Level SYM encryption
AES CFT PASSPORT SYSTEM
CPACF CPACF CPACF
CPACF CPACF CPACF
Record Level SYM encryption
RC4 CFT PASSPORT SYSTEM
Software Software Software
Software Software Software
Record Level hashing SHA, SHA-256 CFT PASSPORT SYSTEM
CPACF CPACF CPACF
CPACF CPACF CPACF
Record Level hashing MD5 CFT PASSPORT SYSTEM
Software Software Software
Software Software Software
Crypto configuration informationWhen Transfer CFT is started, depending on the system configuration, the Transfer CFT log contains the following information:
CFTI18I+Crypto configuration
CFTI18I+ CPACF Cryptographic assist is set.
CFTI18I+ The following CP Assist for Cryptographic Function (CPACF)
CFTI18I+ operations are supported by OpenSSL s390 engine:
CFTI18I+ SHA-1: No
CFTI18I+ SHA-256: Yes
Transfer CFT z/OS 3.3.2 Installation and Operation Guide 234
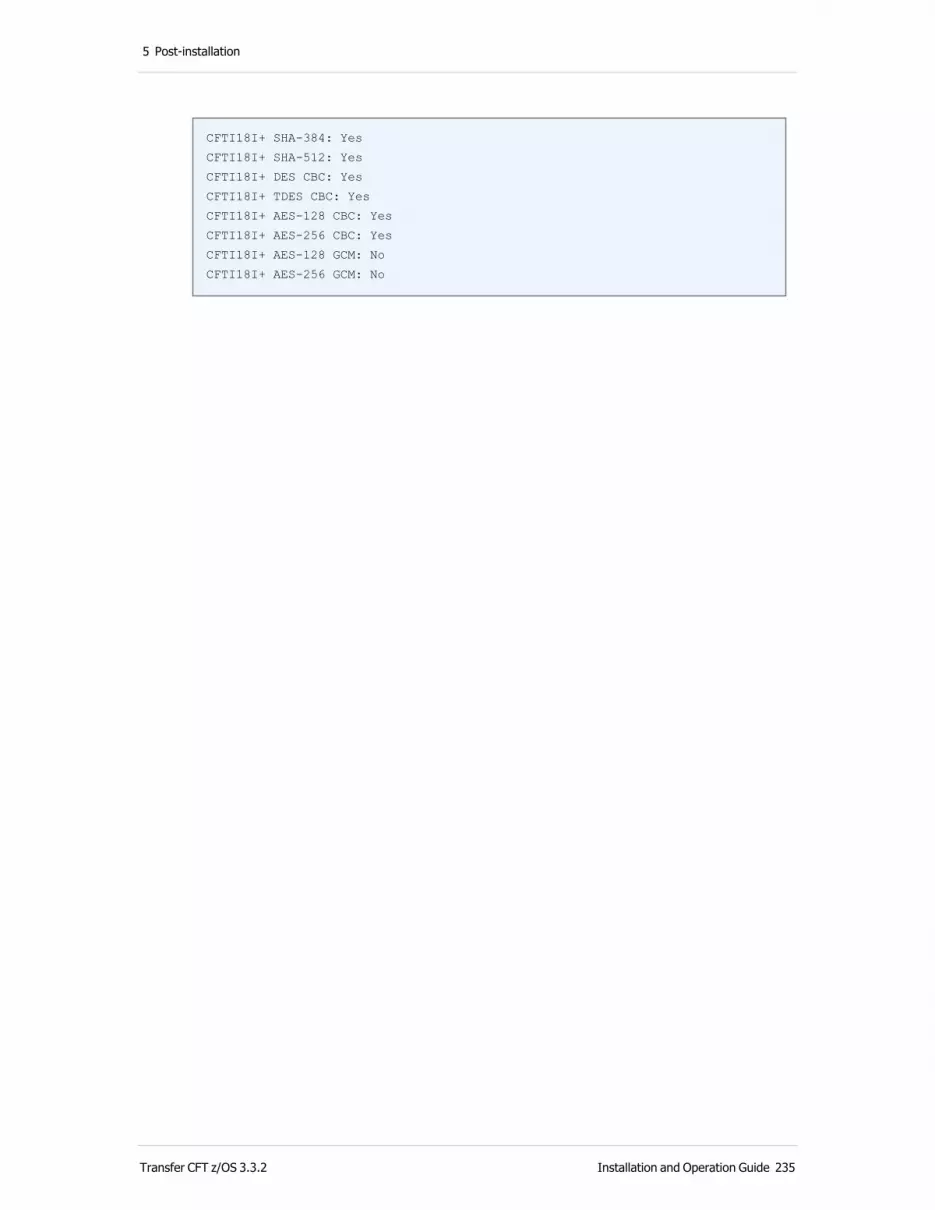
5 Post-installation
CFTI18I+ SHA-384: Yes
CFTI18I+ SHA-512: Yes
CFTI18I+ DES CBC: Yes
CFTI18I+ TDES CBC: Yes
CFTI18I+ AES-128 CBC: Yes
CFTI18I+ AES-256 CBC: Yes
CFTI18I+ AES-128 GCM: No
CFTI18I+ AES-256 GCM: No
Transfer CFT z/OS 3.3.2 Installation and Operation Guide 235
6 Activate Central Governance connectivity
Central Governance simplifies the management of Transfer CFT and provides identity and access management, certificate security services, monitoring, alerting, and web dashboard services. Central Governance replaces possible existing services from earlier Transfer CFT installations that required implementing and configuring multiple products, such as Transfer CFT Navigator, PassPort, and Composer.
You can perform this activation procedure only for Transfer CFT 3.1.3 or higher.
Before you startCheck that the user that starts Copilot and Transfer CFT has:
l Read/write rights for the Transfer CFT instance files
l An OMVS segment and a TSO segment in their profile
l Rights to issue MODIFY and START console commands
l Been included in the Transfer CFT superuser definition [am.passport.superuser]
TSO version
The user ID for the user that starts Copilot and Transfer CFT has a 7-characters maximum when using z/OS 2.2 or lower. Therefore, a user with an 8-character user ID cannot use TSO with a z/OS version lower than v2.3.
Manually activate connectivityThis section describes how to manually modify the Transfer CFT configuration to enable Central Governance connectivity in command line.
Prerequisites 1. Stop Transfer CFT and Copilot if running.
2. Enabling Central Governance connectivity after an upgrade implies replacing any standalone connectors. Therefor, prior to connecting to Central Governance deactivate all previously activated connectors, for example PassPort AM, PassPort PS, and Sentinel.
Transfer CFT z/OS 3.3.2 Installation and Operation Guide 236
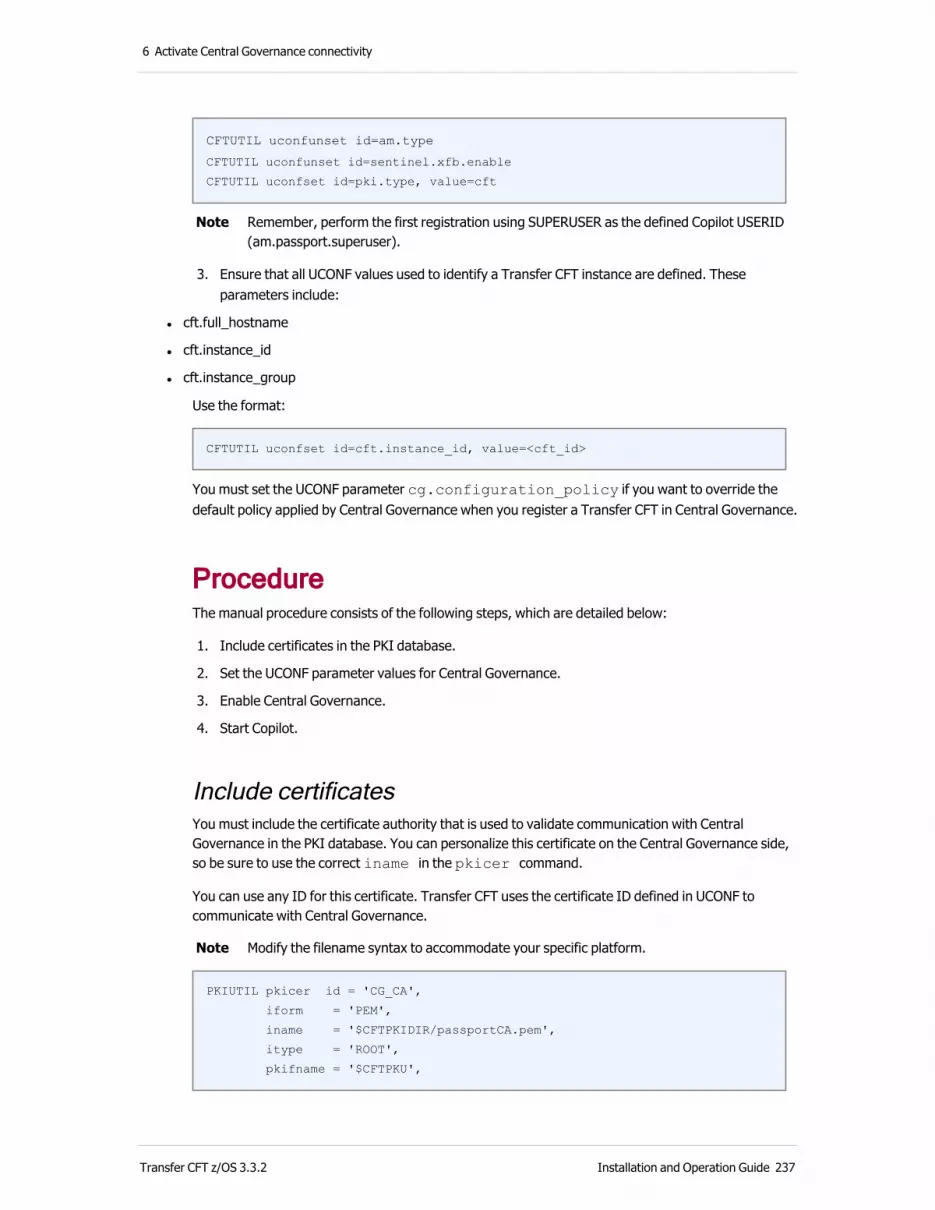
6 Activate Central Governance connectivity
CFTUTIL uconfunset id=am.type
CFTUTIL uconfunset id=sentinel.xfb.enable
CFTUTIL uconfset id=pki.type, value=cft
Note Remember, perform the first registration using SUPERUSER as the defined Copilot USERID (am.passport.superuser).
3. Ensure that all UCONF values used to identify a Transfer CFT instance are defined. These parameters include:
l cft.full_hostname
l cft.instance_id
l cft.instance_group
Use the format:
CFTUTIL uconfset id=cft.instance_id, value=<cft_id>
You must set the UCONF parameter cg.configuration_policy if you want to override the default policy applied by Central Governance when you register a Transfer CFT in Central Governance.
ProcedureThe manual procedure consists of the following steps, which are detailed below:
1. Include certificates in the PKI database.
2. Set the UCONF parameter values for Central Governance.
3. Enable Central Governance.
4. Start Copilot.
Include certificatesYou must include the certificate authority that is used to validate communication with Central Governance in the PKI database. You can personalize this certificate on the Central Governance side, so be sure to use the correct iname in the pkicer command.
You can use any ID for this certificate. Transfer CFT uses the certificate ID defined in UCONF to communicate with Central Governance.
Note Modify the filename syntax to accommodate your specific platform.
PKIUTIL pkicer id = 'CG_CA',
iform = 'PEM',
iname = '$CFTPKIDIR/passportCA.pem',
itype = 'ROOT',
pkifname = '$CFTPKU',
Transfer CFT z/OS 3.3.2 Installation and Operation Guide 237
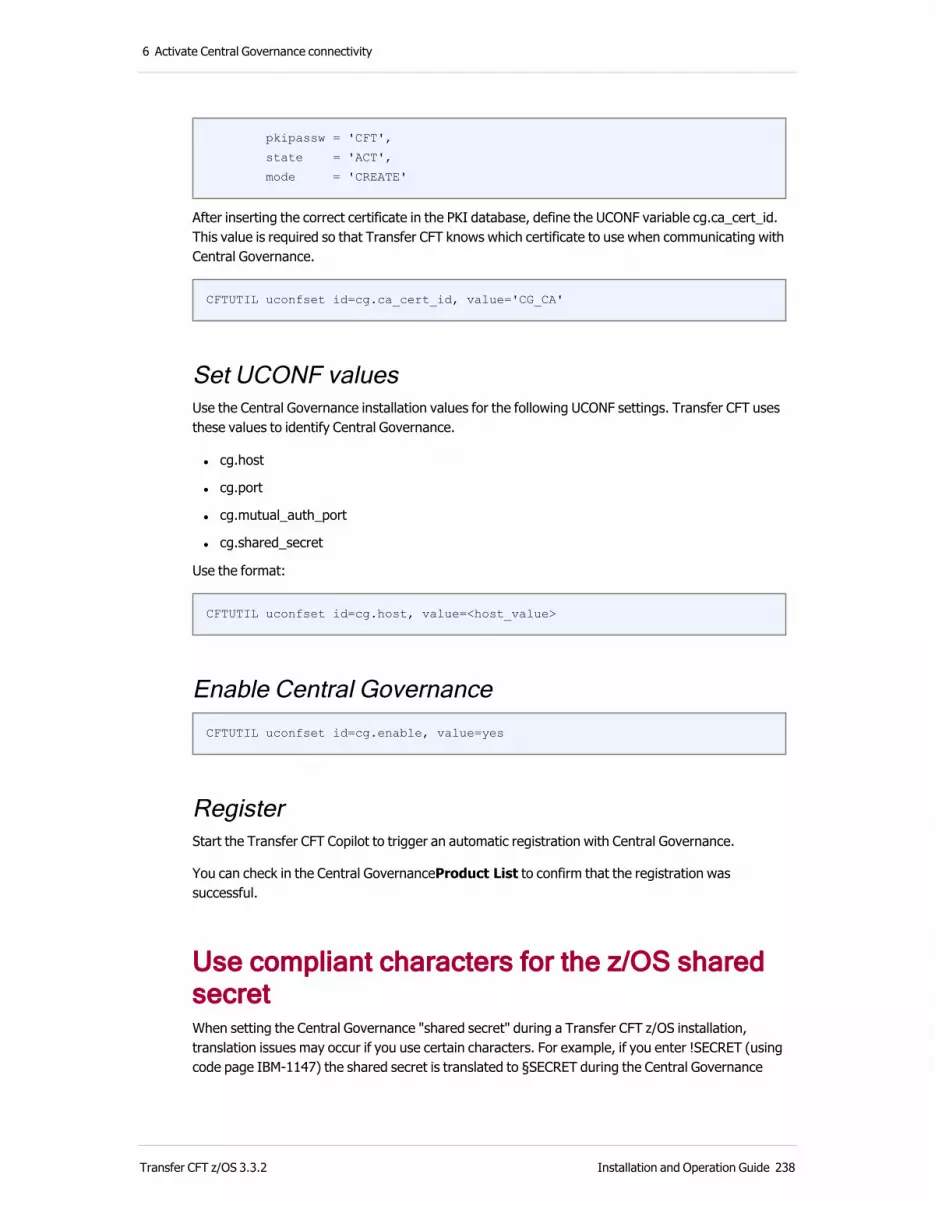
6 Activate Central Governance connectivity
pkipassw = 'CFT',
state = 'ACT',
mode = 'CREATE'
After inserting the correct certificate in the PKI database, define the UCONF variable cg.ca_cert_id. This value is required so that Transfer CFT knows which certificate to use when communicating with Central Governance.
CFTUTIL uconfset id=cg.ca_cert_id, value='CG_CA'
Set UCONF valuesUse the Central Governance installation values for the following UCONF settings. Transfer CFT uses these values to identify Central Governance.
l cg.host
l cg.port
l cg.mutual_auth_port
l cg.shared_secret
Use the format:
CFTUTIL uconfset id=cg.host, value=<host_value>
Enable Central GovernanceCFTUTIL uconfset id=cg.enable, value=yes
RegisterStart the Transfer CFT Copilot to trigger an automatic registration with Central Governance.
You can check in the Central GovernanceProduct List to confirm that the registration was successful.
Use compliant characters for the z/OS shared secretWhen setting the Central Governance "shared secret" during a Transfer CFT z/OS installation, translation issues may occur if you use certain characters. For example, if you enter !SECRET (using code page IBM-1147) the shared secret is translated to §SECRET during the Central Governance
Transfer CFT z/OS 3.3.2 Installation and Operation Guide 238

6 Activate Central Governance connectivity
registration. Therefore, you must use compliant characters in the shared secret value when working in a z/OS environment.
Verify the UCONF settingPrior to the registration, you must ensure that the JCL CFTMON (copilot.misc.cftstart.enable = Yes) is configured to match the jobname or the STC name used to launch Transfer CFT.
Use compliant characters for the z/OS shared secret
Use a proxy server between Transfer CFT and Central GovernanceTo use a proxy server between Transfer CFT and Central Governance, set the following Transfer CFT proxy parameters prior to registering with Central Governance:
l cg.proxy.in.host
l cg.proxy.in.port
l cg.proxy.in.login
l cg.proxy.in.password
Connect to a different Central Governance system
If Transfer CFTwas previously registered on a Central Governance system but you now want to register it on a different one, perform the steps in Manually activate connectivity and as a final step, prior to starting Copilot, reset the Central Governance registration id.
CFTUTIL uconfunset id=cg.registration_id
Use former configuration objectsIn Central Governance you can use the Legacy Flows feature to view and use an imported configuration. For more information, please refer to the Central Governance documentation.
Transfer CFT z/OS 3.3.2 Installation and Operation Guide 239
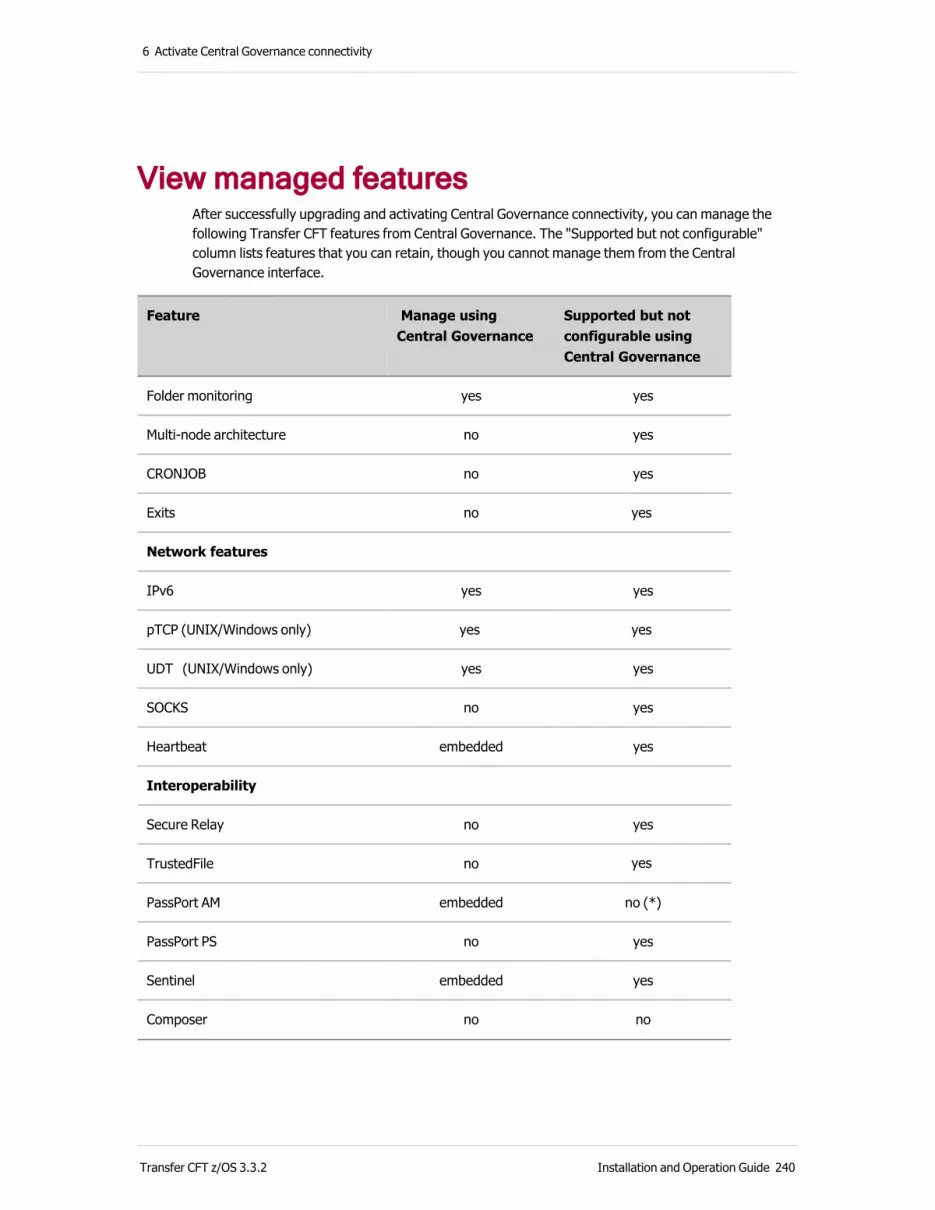
6 Activate Central Governance connectivity
View managed featuresAfter successfully upgrading and activating Central Governance connectivity, you can manage the following Transfer CFT features from Central Governance. The "Supported but not configurable" column lists features that you can retain, though you cannot manage them from the Central Governance interface.
Feature Manage using Central Governance
Supported but not configurable using Central Governance
Folder monitoring yes yes
Multi-node architecture no yes
CRONJOB no yes
Exits no yes
Network features
IPv6 yes yes
pTCP (UNIX/Windows only) yes yes
UDT (UNIX/Windows only) yes yes
SOCKS no yes
Heartbeat embedded yes
Interoperability
Secure Relay no yes
TrustedFile no yes
PassPort AM embedded no (*)
PassPort PS no yes
Sentinel embedded yes
Composer no no
Transfer CFT z/OS 3.3.2 Installation and Operation Guide 240

6 Activate Central Governance connectivity
Feature Manage using Central Governance
Supported but not configurable using Central Governance
Protocols
PeSIT yes yes
ODETTE no yes
EBICS no yes
* If you perform a migration or upgrade from a previous version, you must migrate your PassPort AM.
Transfer CFT z/OS 3.3.2 Installation and Operation Guide 241
7 Update, upgrade, or migrate
Update, upgrade, or migrate
Before you startThis section describes how to upgrade or migrate to Transfer CFT 3.3.2. Additionally, it describes the two methods for updating Transfer CFT z/OS and provides links to detailed information.
See the section System requirements on page 8 for details on system prerequisites.
Note You should not modify the CSD files (library XMLLIB: members CSDCFT and CSDCG) or the UCONF dictionary (library UPARM: member DEFAULT), as these items are updated in the instance (runtime) during the following procedures.
Update procedureApplying a service pack (or patch) updates the product without changing the version. Typically it provides corrections to known issues, and may add minor enhancements. There are two supported methods to apply a service pack on Transfer CFT z/OS:
l Update the Transfer CFT instance with the maintenance identifier (SMP/E)
l Update or apply a service pack (non-SMP/E)
Upgrade procedureThis procedure involves a change in product version and the replacement of binary artifacts. See Upgrade on page 253 for details.
Migration procedure
Important information before performing a migration procedure l You must update your Transfer CFT to the most recent service pack version.
l Backup Transfer CFT before beginning an upgrade or migration procedure.
Transfer CFT z/OS 3.3.2 Installation and Operation Guide 242
7 Update, upgrade, or migrate
l Before beginning the upgrade or migration procedure stop the existing version of Transfer CFT and the UI server. (Meaning you must stop all cluster nodes as a database migration occurs when performing an upgrade.)
About license keys l You require a new license key if you are migrating from a version 2.x Transfer CFT to a version 3.x.
l For details on how to apply or update a license key, and the new license key location, see the section Apply a license key.
Note You require as many keys as instances of Transfer CFT z/OS running at same time. For example, two Transfer CFT instances cannot run at the same time, on the same server, using the same license key.
UpdateThis section describes how to update Transfer CFT 3.3.2 in a z/OS environment.
Transfer CFT maintenance (SMP/E)
Receive the SMP/E PTFsThe data set SMPCNTL contains the following model job for receiving SMP/E PTFs.
Member Name Description
$C10RECV UNPAX the Maintenance archive package and RECEIVE the Maintenance Pack.
1. Create a new USS subdirectory to receive the maintenance package. The name and path are defined in the $C10RECV JCL (FROMNTS is the new package subdirectory, and SMPNTS DD PATH designates the path prefix).
2. Use FTP in binary mode to download the pax.Z archive file of the appropriate PTF to this new package subdirectory. The name of the pax.Z archive file is defined in the $C10RECV JCL (STEP UNPAX: pax command).
Install the SMP/E PTFs maintenanceEdit the sample jobs that are listed in the following table, modifying as necessary (supply a valid JOB JCL card statement, select and modify the dataset qualifier &HLQ& and the Patch number &NNNN&).
Transfer CFT z/OS 3.3.2 Installation and Operation Guide 243

7 Update, upgrade, or migrate
The format of a Transfer CFT PTF SYSMOD ID is P01NNNN. For example, the PTF P010003 is comprised of the Patch number 0003, where P01 represents Transfer CFT version 323.
The SMPCNTL data set contains the following model job for the SMP/E PTFs maintenance.
Submit the job described in the table below.
Member Name Description
$C30PAPP Performs an APPLY (with the CHECK operand) to install the PTFs in the target zone and libraries.
If the $C30PAPP return code is a zero or a 4, edit $C30PAPP, remove the CHECK command, and resubmit the job.
The APPLY CHECK and APPLY jobs may end with a RC=4, and return the following warning messages:
GIM38201W THERE IS A MODID ERROR FOR DATA ENTRY CSDNEW IN SYSMOD pid.
GIM31901I SYSMOD pid DOES NOT SPECIFY pre-pid ON THE PRE OR SUP OPERAND.
These messages are normal; you can ignore them.
Additional SMP/E sample jobsThe following table lists additional sample jobs.
Member Name Description
$C30PREM Performs a RESTORE (to remove) for the PTF elements from the target zone.
$C60PACC Performs an ACCEPT (with the CHECK operand) of the PTFs in the distribution zone and libraries.
Update the Transfer CFT instance with the maintenance identifierEdit the sample jobs listed in the table below, modifying as necessary.
The Transfer CFT instance data set INSTALL contains the following model jobs for Transfer CFT SMP/E maintenance.
Transfer CFT z/OS 3.3.2 Installation and Operation Guide 244

7 Update, upgrade, or migrate
Member Name Description
A13SMPE Applies maintenance to the Transfer CFT product instance.
A13UCOP Applies maintenance to Copilot.
A13UXSR Applies maintenance to the Secure Relay Master Agent.
Transfer CFT z/OS 3.3.2 Installation and Operation Guide 245

7 Update, upgrade, or migrate
Transfer CFT maintenance (non-SMP/E)
Update or apply a service pack (non-SMP/E)This section describes how to install a patch or service pack on your z/OS Transfer CFT using the non-SMP/E method.
Information includes:
l Install update libraries (PTF)
l Transfer the PTF file to the host machine
l Integrate PTF elements using A13PTFLD
l Apply a PTF using A13PTFLK
Install update libraries A PTF file results from the fixed formatting (80) of an ADRDSSU-type file containing the update libraries. The PTF format is used by all delivery and distribution modes. The PTF files are available at support.axway.com.
Note PTF files are cumulative. A basic Transfer CFT z/OS installation can integrate PTFs. If you use this method, apply the PTFs one at a time.
Table 1. Libraries taken into account during a DUMP ADRDSSU
Libraries Contents
INSTALL Update the installation JCLs
SAMPLE Update the SAMPLES
SAMPLEO Update the COBOL samples
SAMPLEC Update the C samples
SAMPLEA Update the ASM samples
PFTOBJ Update OBJECT modules
DOC Update documentation
CNTL Control files
Transfer CFT z/OS 3.3.2 Installation and Operation Guide 246

7 Update, upgrade, or migrate
Libraries Contents
MAC Macros
SCR Update components for interactive functions, messages, sample SSL
UPARM Update unified configuration parameters definition.
OBJ Update NEW OBJECT modules.
COPY Update Cobol copybook.
H Update ‘header’ C.
XMLLIB Update XML components.
EXEC Update Transfer CFT procedures.
Transfer the PTF file to the host machineYou can transfer a given PTF file from either the workstation or the host, in binary form, to the central site distlib.UPLIB library.
Transfer file using FTPThe following is an example of commands for the binary transfer of the PTF file from the workstation to the host:
open hostname
userid
userpsw
binary
put c:\mycftpatchs\patch_from Axway support website 'distlib.UPLIB(CFxxxxxx)'
Where:
l xxxxxx identifies the PTF number
l distlib indicates the distribution environment
l distlib.UPLIB library is created during the product installation
Transfer CFT z/OS 3.3.2 Installation and Operation Guide 247

7 Update, upgrade, or migrate
Retrieve file using FTP A13PTFFTIf an FTP server is configured on the workstation, you can use the sample JCL, A13PTFFT in target.INSTALL library, to transfer the PTF file in binary format via FTP. In the JCL, specify the address of the workstation and the PTF identifier.
A13* JCL descriptionsAll of the A13* JCLs are used to update or apply a Service Pack to Transfer CFT as described here.
JCL Description
A13AUTO To automatically apply fixes.
A13PTFFT To transfer a patch to the distlib.UPLIB in binary mode (using FTP - mode GET).
A13PTFLD To update the distribution libraries. (ADRDSSU)
A13PTFLI To update the distribution libraries. (XMIT)
A13PTFLK To apply a patch in the Transfer CFT loadlib (create a save library/link-edit).
A13RSTOR To restore the loadlib from a save library.
A13SDEL To delete a save-load library when a patch is validated, or if the loadlib is restored to reapply a patch.
Transfer CFT Copilot update
A13UCOPA To apply a patch to Transfer CFT Copilot (Create a save file).
A13UCOPR To restore the Transfer CFT Navigator environment from a save file in USS environment.
A13UCOPD To delete a save file when a patch is validated.
Transfer CFT - Secure Relay - Master Agent update
A13UXSRA To apply a patch to Secure Relay - Master Agent (creates a save file).
A13UXSRR To restore the Transfer CFT Secure Relay environment from a save file in USS environment.
A13UXSRD To delete a save file when a patch is validated.
Transfer CFT z/OS 3.3.2 Installation and Operation Guide 248

7 Update, upgrade, or migrate
JCL Description
Other JCL
A13JCL To customize the patched JCL.
A13UCONF To update the unified configuration parameter definitions.
A13XML To update the XML library.
A13WDEL To delete work files.
A13RBACK To automatically execute the three jobs A13RSTOR, A13UCOPR, and A13UXSRR.
Integrate PTF elements using A13PTFLDAfter loading PTF files, you must integrate the composing elements of the PTF files into the distribution libraries. Only perform this operation though from one of the Transfer CFT instances environments.
The JCLs used are found in the target.INSTALL libraries below.
Before you submit the JOB, specify the PTF identifier in the EXEC card:
A13PTFLD: PTF integration in distribution libraries
//LOADPTF EXEC PLOADPU,ID=’xxxxxx’, …
This JOB takes place in several stages:
1. Deletes the PTF temporary libraries.
2. Formats the ADRDSSU of the PTF (IKJEFT01).
3. Extracts temporary PTF libraries (ADRDSSU, or IKJEFT01).
4. Copies (with replace) PTF components in the distribution libraries.
5. Deletes the PTF temporary libraries.
Note This operation is displayed in the file distlib.LOG.
For more information, you can consult the patch documentation located in the distlib.DOC library and named DCxxxxxx (xxxxxx are the patch identifiers). These documents describe known incidents, corrections and PTF specifics (exits, and so on). Additionally the library, PTFINFO member, lists all corrected incidents.
Apply a PTF using A13PTFLKUsually a patch is applied through a LINK-EDIT. The JCL A13PTFLK is found in the target.INSTALL library.
Transfer CFT z/OS 3.3.2 Installation and Operation Guide 249
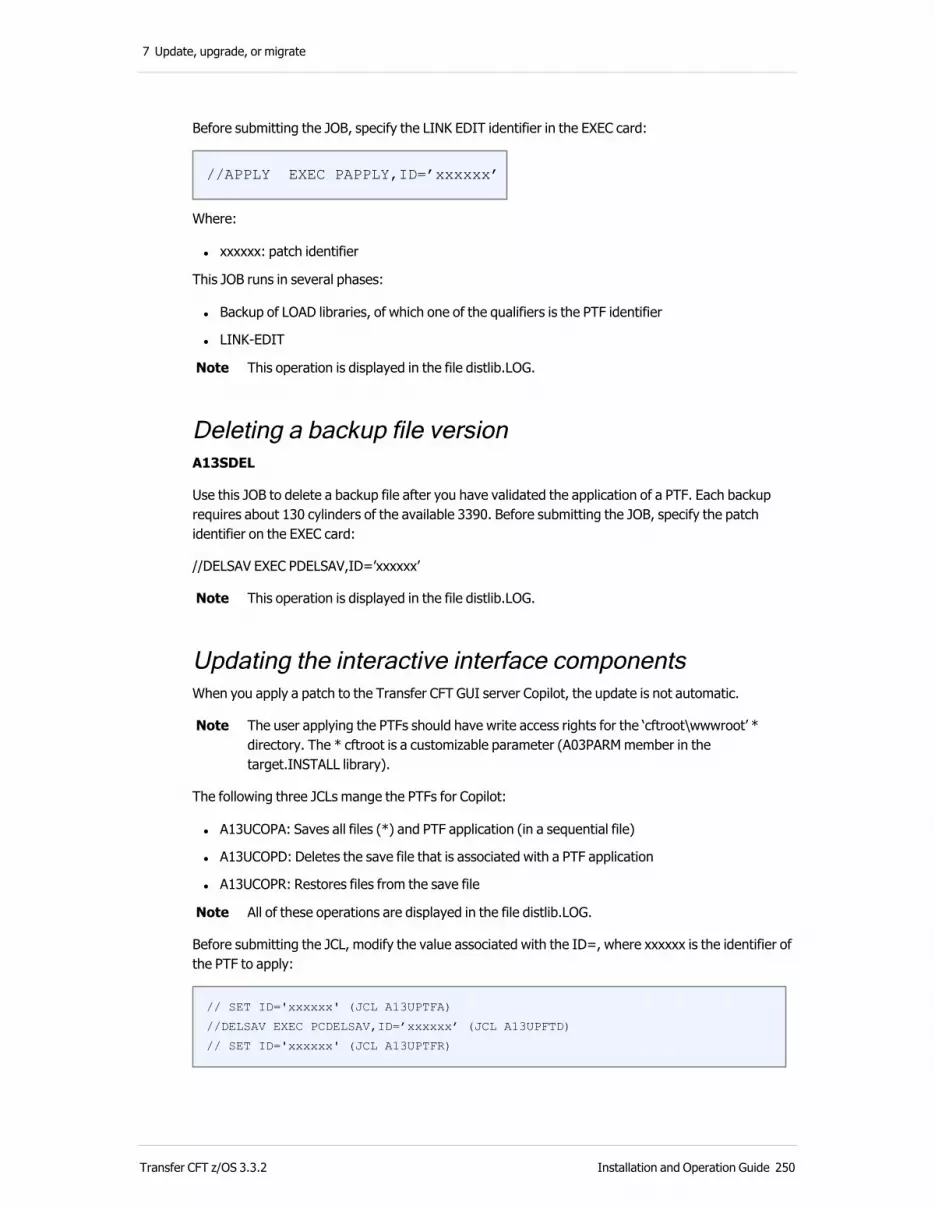
7 Update, upgrade, or migrate
Before submitting the JOB, specify the LINK EDIT identifier in the EXEC card:
//APPLY EXEC PAPPLY,ID=’xxxxxx’
Where:
l xxxxxx: patch identifier
This JOB runs in several phases:
l Backup of LOAD libraries, of which one of the qualifiers is the PTF identifier
l LINK-EDIT
Note This operation is displayed in the file distlib.LOG.
Deleting a backup file versionA13SDEL
Use this JOB to delete a backup file after you have validated the application of a PTF. Each backup requires about 130 cylinders of the available 3390. Before submitting the JOB, specify the patch identifier on the EXEC card:
//DELSAV EXEC PDELSAV,ID=’xxxxxx’
Note This operation is displayed in the file distlib.LOG.
Updating the interactive interface componentsWhen you apply a patch to the Transfer CFT GUI server Copilot, the update is not automatic.
Note The user applying the PTFs should have write access rights for the ‘cftroot\wwwroot’ * directory. The * cftroot is a customizable parameter (A03PARM member in the target.INSTALL library).
The following three JCLs mange the PTFs for Copilot:
l A13UCOPA: Saves all files (*) and PTF application (in a sequential file)
l A13UCOPD: Deletes the save file that is associated with a PTF application
l A13UCOPR: Restores files from the save file
Note All of these operations are displayed in the file distlib.LOG.
Before submitting the JCL, modify the value associated with the ID=, where xxxxxx is the identifier of the PTF to apply:
// SET ID='xxxxxx' (JCL A13UPTFA)
//DELSAV EXEC PCDELSAV,ID=’xxxxxx’ (JCL A13UPFTD)
// SET ID='xxxxxx' (JCL A13UPTFR)
Transfer CFT z/OS 3.3.2 Installation and Operation Guide 250

7 Update, upgrade, or migrate
Updating the unified configuration definitions A13UCONFThis JOB updates the member DEFAULT in target.UPARM.
Automatically applying fixes A13AUTOThe use of this JCL is optional. It allows you to submit JOB 'A13*', which runs as described in the patch readme (Distlib..doc(..)). Check the information concerning the application of the patch or service pack's in the associated readme.
You must configure the following JCLs in automatic mode.
..INSTALL(A13PTFLD) >> ID='AUTO'
..INSTALL(A13PTFLK) >> ID='AUTO'
..INSTALL(A13UCOPA) >> ID='AUTO' or ID='NONE'
..INSTALL(A13UXSRA) >> ID='AUTO' or ID='NONE'
..INSTALL(B25LKWS) >> ID='AUTO' or ID='NONE'
If ID='NONE', this JCL is not submitted.
Roll back a service pack or patchThe following procedure enables you to rollback after applying a SP or patch to its previous state. This is useful in the case of an incident during the application of a PTF, or when testing the patch validation.
Use the A13RBACKUse the A13RBACK to restore the executable file library, USS Copilot and USS Secure Relay environment. This JCL executes the following three JCLs:
l A13RSTOR: Restores the Transfer CFT Load library.
l A13UCOPR: Restores the Transfer CFT USS Copilot environment.
l A13UXSRR: Restores the Transfer CFT USS Secure Relay environment.
Before submitting the JOB configure the following JCL in automatic mode:
..INSTALL(A13RSTOR) >> ID='AUTO'
..INSTALL(A13SDEL) >> ID='AUTO'
..INSTALL(A13UCOPR) >> ID='AUTO'
..INSTALL(A13UCOPD) >> ID='AUTO'
..INSTALL(A13UXSRR) >> ID='AUTO'
Transfer CFT z/OS 3.3.2 Installation and Operation Guide 251

7 Update, upgrade, or migrate
..INSTALL(A13UXSRD) >> ID='AUTO'
l Stop Transfer CFT and Copilot.
l Set the parameter 'ID' with the last six characters of the patch id. For example, 0E0500 for the patch id CF0E0500.
l Submit the JCL.
Note This operation is displayed in the distlib.LOG file.
Transfer CFT z/OS 3.3.2 Installation and Operation Guide 252
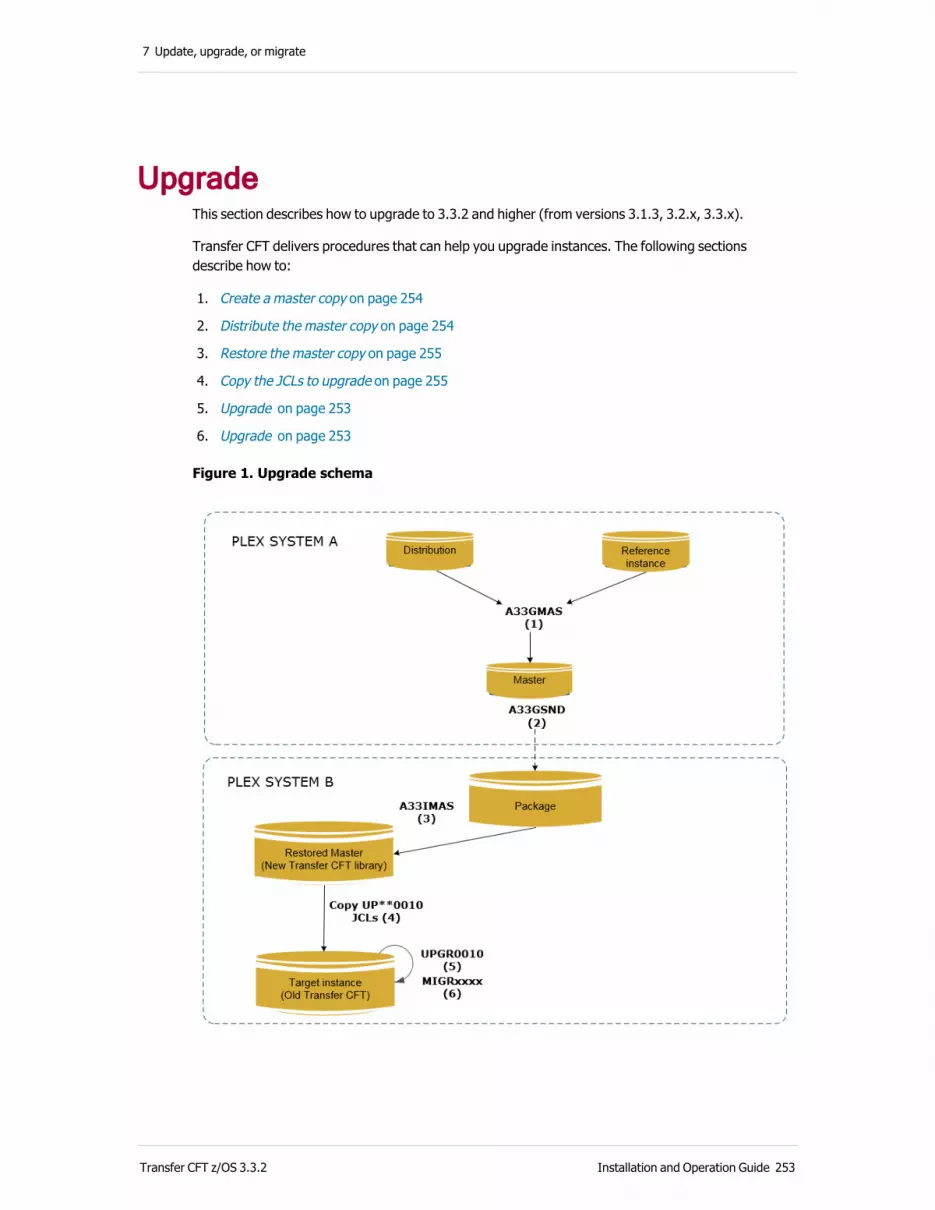
7 Update, upgrade, or migrate
Upgrade This section describes how to upgrade to 3.3.2 and higher (from versions 3.1.3, 3.2.x, 3.3.x).
Transfer CFT delivers procedures that can help you upgrade instances. The following sections describe how to:
1. Create a master copy on page 254
2. Distribute the master copy on page 254
3. Restore the master copy on page 255
4. Copy the JCLs to upgrade on page 255
5. Upgrade on page 253
6. Upgrade on page 253
Figure 1. Upgrade schema
Transfer CFT z/OS 3.3.2 Installation and Operation Guide 253
7 Update, upgrade, or migrate
PrerequisitesTransfer CFT requires the following z/OS version depending on the JES component used:
l JES2 requires at a minimum z/OS 2.1
l JES3 requires at a minimum z/OS 2.2
Create a master copyA master copy is the product version that you want to use as an upgrade, and can be either a basic Transfer CFT installation, or a specific patch or service pack.
Use the A33GMAS JCL to create the master copy from the distribution environment and from the reference instance.
You must customize the following 4 variables before submitting the JCL.
l SQUAL Qualifying source:
o Mode 1: Prefix distribution
o Mode 2: Prefix model target
l TQUAL Transport prefix qualifier
l COPBASE Copilot PAX id: COPBASE, SP id or NONE
l XSRBASE Secure relay PAX id: XSRBASE, SP id or NONE
Results
Creates an XMIT file.
Distribute the master copyTo remotely create an UPLIB library:
Use the A33GSND JCL to transfer the following elements via FTP:
l Master copy
l The components necessary to restore the master copy
Customize variables before submitting the JCL.
l Common variables:
o ADDRESS Remote address
o RQUAL Remote QUALIFIER (instance prefix)
Transfer CFT z/OS 3.3.2 Installation and Operation Guide 254
7 Update, upgrade, or migrate
o RVOL Remote Volume (optional)
o USER User for FTP
o PSW Password for FTP
l Specific variables:
o SNDFIL Master copy file (ADRDSSU/XMIT, generated by A33GMAS)
o MEMPRD Product name defined in A33IMAS
o MEMJCL A33IMAS JCL to restore Product
Restore the master copyTo creates an instance:
1. Use A33IMAS JCL to restore the master version.
2. Variables must be customized before submitting the JCL transferred by the previous JCL (A33GSND).
l QUAL: identifies the prefix under which the Transfer CFT instance is restored
l PUPLIB: Set variable PUPLIB in accordance with A33GSND
Copy the JCLs to upgradeCopy the following JCLs from the new instance to the target instance to upgrade:
l INSTALL(UPGR0010) to upgrade libraries
l INSTALL(UPRS0010) to restore all the instance
l INSTALL(UPRM0010) to remove all backup files
Upgrade the target instance (product environment) 1. Customize the UPGR0010 JCL.
l Set the job card.
l Set the following variables:
o FROMQUAL new prefix package
o RUN Migration run ID
Transfer CFT z/OS 3.3.2 Installation and Operation Guide 255
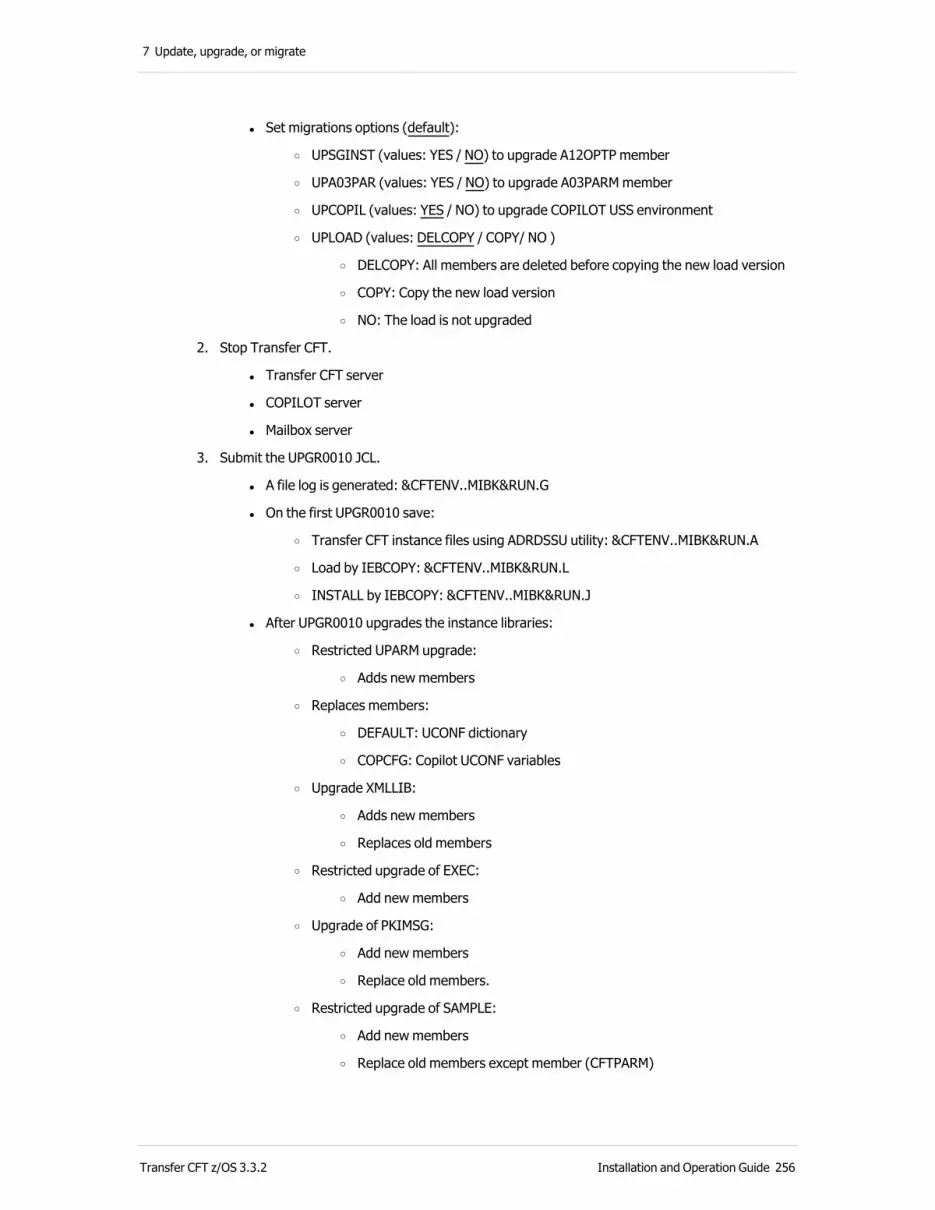
7 Update, upgrade, or migrate
l Set migrations options (default):
o UPSGINST (values: YES / NO) to upgrade A12OPTP member
o UPA03PAR (values: YES / NO) to upgrade A03PARM member
o UPCOPIL (values: YES / NO) to upgrade COPILOT USS environment
o UPLOAD (values: DELCOPY / COPY/ NO )
o DELCOPY: All members are deleted before copying the new load version
o COPY: Copy the new load version
o NO: The load is not upgraded
2. Stop Transfer CFT.
l Transfer CFT server
l COPILOT server
l Mailbox server
3. Submit the UPGR0010 JCL.
l A file log is generated: &CFTENV..MIBK&RUN.G
l On the first UPGR0010 save:
o Transfer CFT instance files using ADRDSSU utility: &CFTENV..MIBK&RUN.A
o Load by IEBCOPY: &CFTENV..MIBK&RUN.L
o INSTALL by IEBCOPY: &CFTENV..MIBK&RUN.J
l After UPGR0010 upgrades the instance libraries:
o Restricted UPARM upgrade:
o Adds new members
o Replaces members:
o DEFAULT: UCONF dictionary
o COPCFG: Copilot UCONF variables
o Upgrade XMLLIB:
o Adds new members
o Replaces old members
o Restricted upgrade of EXEC:
o Add new members
o Upgrade of PKIMSG:
o Add new members
o Replace old members.
o Restricted upgrade of SAMPLE:
o Add new members
o Replace old members except member (CFTPARM)
Transfer CFT z/OS 3.3.2 Installation and Operation Guide 256

7 Update, upgrade, or migrate
o Restricted upgrade of INSTALL:
o Delete some samples in INSTALL now available in SAMPLE (as of v3.2.2)
o Add new members
o Replace under condition for: A12OPTSP and A03PARM
o Replace old members except: A00CUSTO, UPGR0010, UPRM0010, UPRS0010
o Save and upgrade of the Copilot USS environment
o The customer can choose how to manage this step with the UPCOPIL variable (YES or NO)
o Old Copilot is saved in a PAX &CFTENV..MIBK&RUN.N
o Remove USS directories
o Install new pax
o Upgrade the LOAD:
o The customer can choose how to manage this step with the UPLOAD variable (value=DELCOPY, COPY, NO)
4. Set A03PARM.
l If A03PARM was upgraded, you must customize this file.
l If A03PARM is not upgraded, the new missing parameters will have the compatible value.
5. Customize and submit A00CUSTO JCL:
l SET CFTV2 = XX.YY.ZZ Instance prefix
l SET DISTLIB = XX.YY Distribution prefix
l SET DISTLEV = ZZ Distribution suffix (latest level of CFTV2)
l Submit A00CUSTO
Results
Now the CFTLOAD variable defined in the CFTENV member refers to the new LOAD. If the upgrade process fails, use the UPRS0010 JCL to restore the instance files. Simply set the job card, and submit the JCL.
Upgrade the target instance (DATA) 1. Customize MIGR$SET:
l OLDENV=&CFTENV
l OLDEXEC: You can use, for example, the LOAD backup: (&CFTENV..MIBK&RUN.L)
l Remember to adapt the size allocation for the work file
2. Submit MIGRPKI1 (export certificates).
3. Submit MIGRPART.
4. Submit MIGRPARM.
Transfer CFT z/OS 3.3.2 Installation and Operation Guide 257

7 Update, upgrade, or migrate
5. Submit MIGRPK2 (import certificates).
6. Submit MIGRCAT (* for multi-node configuration, migrate the catalogs).
7. Submit MIGRCOM (*for multi-node configuration).
Note The MIGRCAT procedure migrates the catalog files, one catalog file at a time. You must modify and execute this procedure for each node.
Customize the step PMIGR2 JCL MIGRCATIf the migration process fails, use the UPRS0010 JCL to restore the instance files. Simply set the job card, and submit the JCL.
If the option UPCOPIL is set to 'NO', do not forget to set the UCONF variables:
l UCONFSET ID=cft.install_dir,VALUE='coppath/home'
l UCONFSET ID=copilot.HTTP.HttpRootDir,VALUE='coppath/runtime/wwwroot'
Note The UNCONFSET commands are defined in UPARM(COPCFG) and the JCL to be submiited is COPA020.
Upgrade the STC CFT and Copilot if needed.
If the instance is independent from the distribution environment, customize the DISTLIB, DISTPRF and DISTLVL variables in INSTALL(CFTENV)
// SET DISTLIB=&CFTENV
// SET DISTPRF= -> &CFTENV without the last qualifier
// SET DISTLVL= -> last qualifier of &CFTENV
For example if CFTENV=XX.YY.ZZ
// SET DISTLIB=&CFTENV or XX.YY.ZZ
// SET DISTPRF=XX.YY
// SET DISTLVL=ZZ
For example, if CFTENV=XX.YY.ZZ:
// SET DISTLIB=&CFTENV
// SET DISTPRF= -> &CFTENV without the last qualifier
// SET DISTLVL= -> last qualifier of &CFTENV
For example if CFTENV=XX.YY.ZZ
// SET DISTLIB=&CFTENV or XX.YY.ZZ
// SET DISTPRF=XX.YY
// SET DISTLVL=ZZ
If the instance is linked to a distribution environment, set the DISTLIB, DISTPRF, DISTLVL variables to it.
Transfer CFT z/OS 3.3.2 Installation and Operation Guide 258

7 Update, upgrade, or migrate
Upgrade a multi-node architectureThis section describes the upgrade of an instance of Transfer CFT z/OS configured in multi-node.
PrerequisiteYou must first perform Steps 1 through 5 as described in the Upgrade section to the target instance.
Upgrade the CATALOG files (MIGRCAT)The MIGRCAT procedure migrates one catalog file at a time. The procedure must be modified and executed for each of the nodes.
Customize the PMIGR2 step of the JCL MIGRCAT as follows, where you define RECNB, NODE, OLDFIL, TMPFIL and NEWFIL, replacing X with the node number.
//PMIGR2 EXEC PMIGR2,XEXPORT=&XEXPORT,
// OUT=&OUT,
// UNIT=&CFTUNIT,
// CFTLOAD=&CFTLOAD,
// OLDEXEC=&OLDEXEC,
// SPACE=&SEP&TMPSCAT&SEP,
// SER='DK231F',
// SPACE=&SEP&TMPSCAT&SEP,
// NODE='X', => node id x
// OLDFIL=Source.CATALOG.N0X, => Source CATALOG node 0X
// TMPFIL=Prefix.WORK.CATALOG.N0X, => Temporary file (size defined by &TMPSCAT)
// NEWFIL=Target.CATALOG.N0X, => Target CATALOG node 0X
// RECNB=50000, => Target CATALOG records number (to be customized)
// DISPFIL=&DISPCAT,
// HABFNAME='NO'
Submit the procedure ..INSTALL(MIGRCAT).
Upgrade the communication media files The MIGRCOM procedure migrates one media file at a time. The procedure must therefore be modified and executed for each of the nodes and for the main communication medium.
Transfer CFT z/OS 3.3.2 Installation and Operation Guide 259

7 Update, upgrade, or migrate
Upgrade the main communication media fileCustomize the PMIGR2 step of the MIGRCOM procedure and set the variables RECNB, OLDFIL, TMPFIL and NEWFIL as follows:
//PMIGR2 EXEC PMIGR2,XEXPORT=&XEXPORT,
// OUT=&OUT,
// UNIT=&CFTUNIT,
// CFTLOAD=&CFTLOAD,
// OLDEXEC=&OLDEXEC,
// SPACE=&SEP&TMPSCOM&SEP,
// SER='DK231F',
// OLDFIL=Source.COM, => Source MAIN COM
// TMPFIL=Prefix.WORK.COM, => Temporary file (size defined by &TMPSCOM)
// NEWFIL=Target.COM, => Target MAIN COM
// RECNB=5000, => Target MAIN COM records number (to be customized)
// DISPFIL=&DISPCOM,
// HABFNAME='NO'
Submit the procedure ..INSTALL(MIGRCOM).
Upgrade the nodes (node x) communication media fileThe following steps must be performed for each of the nodes.
Customize the PMIGR2 parameters in the JCL MIGRCOM:
Define the variables RECNB, OLDFIL, TMPFIL and NEWFIL. Replace X with the node number.
//PMIGR2 EXEC PMIGR2,XEXPORT=&XEXPORT,
// OUT=&OUT,
// UNIT=&CFTUNIT,
// CFTLOAD=&CFTLOAD,
// OLDEXEC=&OLDEXEC,
// SPACE=&SEP&TMPSCOM&SEP,
// SER='DK231F',
// OLDFIL=Source.COM.N0X, => Source COM node 0X
// TMPFIL=Prefix.WORK.MCOM.N0X, => Temporary file (size defined by &TMPSCOM)
// NEWFIL=Target.COM.N0X, => Target COM node 0X
// RECNB=5000, => Target COM node 0X records number (to be customized)
// DISPFIL=&DISPCOM,
// HABFNAME='NO'
Submit the procedure ..INSTALL(MIGRCOM).
Transfer CFT z/OS 3.3.2 Installation and Operation Guide 260
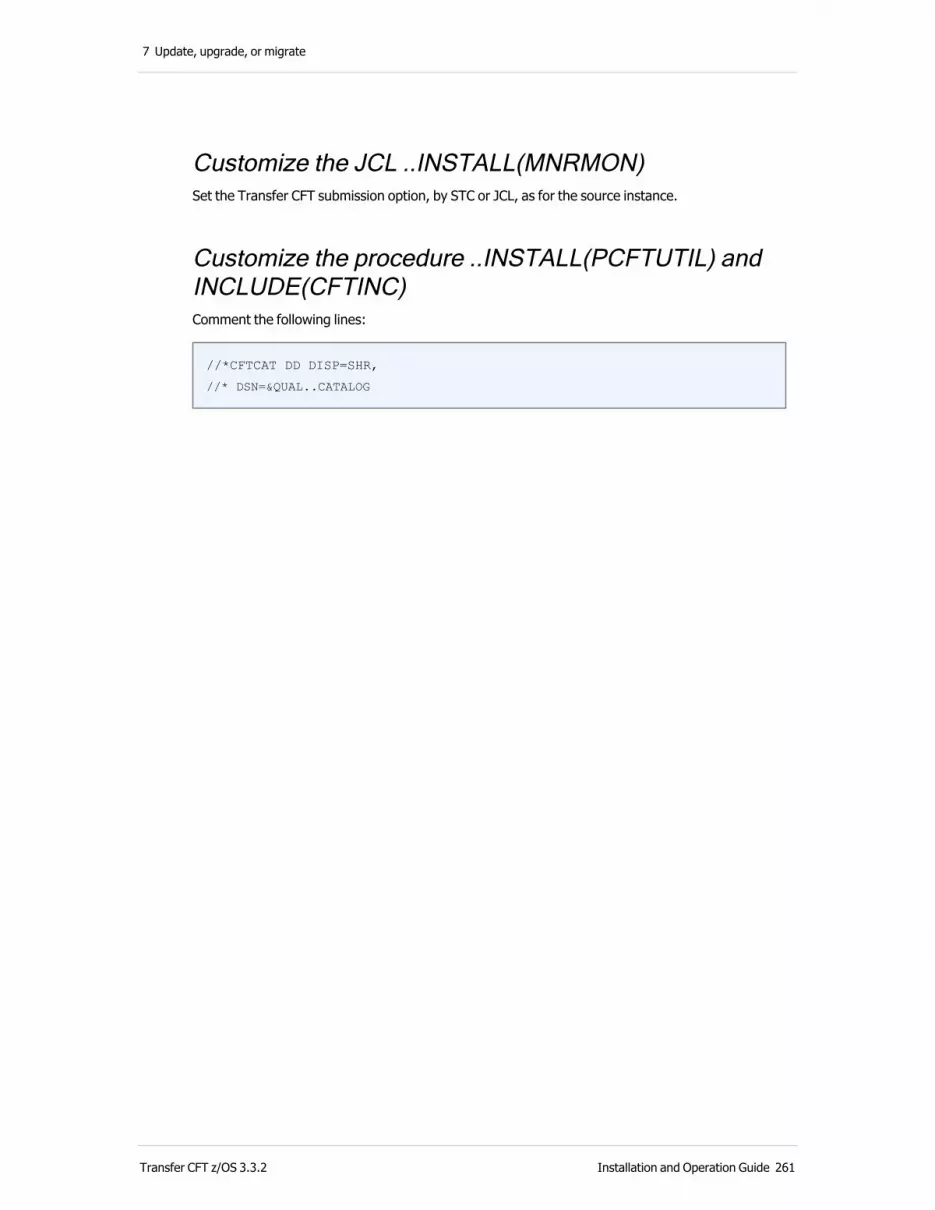
7 Update, upgrade, or migrate
Customize the JCL ..INSTALL(MNRMON)Set the Transfer CFT submission option, by STC or JCL, as for the source instance.
Customize the procedure ..INSTALL(PCFTUTIL) and INCLUDE(CFTINC)Comment the following lines:
//*CFTCAT DD DISP=SHR,
//* DSN=&QUAL..CATALOG
Transfer CFT z/OS 3.3.2 Installation and Operation Guide 261

7 Update, upgrade, or migrate
MigrateThis section describes the Transfer CFT z/OS migration procedure and the statements you use to complete the process.
PrerequisitesBefore you start, create a new Transfer CFT instance following the installation procedure in this guide. This is your target instance.
OverviewMigration consists of extracting the configuration (CFTPARM, CFTPART, UCONF, PKI), the contents of the catalogs, the communication media files from the source instance (old installation), and importing them into the target instance (new installation).
All migration operations are from the target instance.
The following table lists and describes the MIGR* members used in a Transfer CFT migration process. If you want to use the delivered procedure, as a first step you need to customize the MIGR$SET member.
Table 2. Migration Job Control Language (JCL) Statements
Member name
Purpose
MIGR$SET JCL variables to customize
MIGRCAT Migrate the catalog file
MIGRCOM Migrate the communication file
MIGRPARM Migrate the Managed File Transfer parameters file
MIGRPART Migrate the Managed File Transfer partners file
MIGRPKI1 Export the keys and certificates
MIGRPKI2 Import the keys and certificates
MIGRPTIN Sample - Include JCL called by MIGRPART
MIGRPTCL Sample - CLIST updates partners extract file
Transfer CFT z/OS 3.3.2 Installation and Operation Guide 262

7 Update, upgrade, or migrate
Member name
Purpose
MIGRPMIN Sample - Include JCL called by MIGRPARM
MIGRPMCL Sample - CLIST updates parameters extract file
PMIGR2 Common procedure to migrate PARM, PART, CATALOG and communication media file.
The MIGR$$$ file is located in the target.INSTALL library, and contains information about the JCL required for a Transfer CFT z/OS migration. Among the delivered JCL, MIGR$SET is used to customize variables used in the migration procedure. See the Migration Job Control Language (JCL) Statements table below for a description of the JCL and members to use.
The PMIGR2 procedure, is comprised of several steps:
l Export the content of the source file in a sequential work file.
l Optionally, activate a step to adapt this extracted file (Only for PART and PARM file)
l Create (recreate) the target file (or no operation).
l Import from the work file the data in the target file.
l List the content of target file.
Procedure This section describes how to migrate the various configuration elements in a non-multi-node environment or in a multi-node environment. Except for the migration of catalogs and the media communication file in a multi node environment, which are described in a specific section Procedure for mutli-node.
1. Customize the MIGR$SET file.
Edit the MIGR$SET and SET variables.
2. Migrate the PARM file (MIGRPARM).
The following variables can be set in MIGR$SET file or/and in the PMIGR2 parameters.
Variable Default value
Definition
OLDEXEC Executable library for the Transfer CFT version (source) to migrate.
OLDPARM Transfer CFT PARM source file name.
NEWPARM Transfer CFT PARM target file name.
Transfer CFT z/OS 3.3.2 Installation and Operation Guide 263
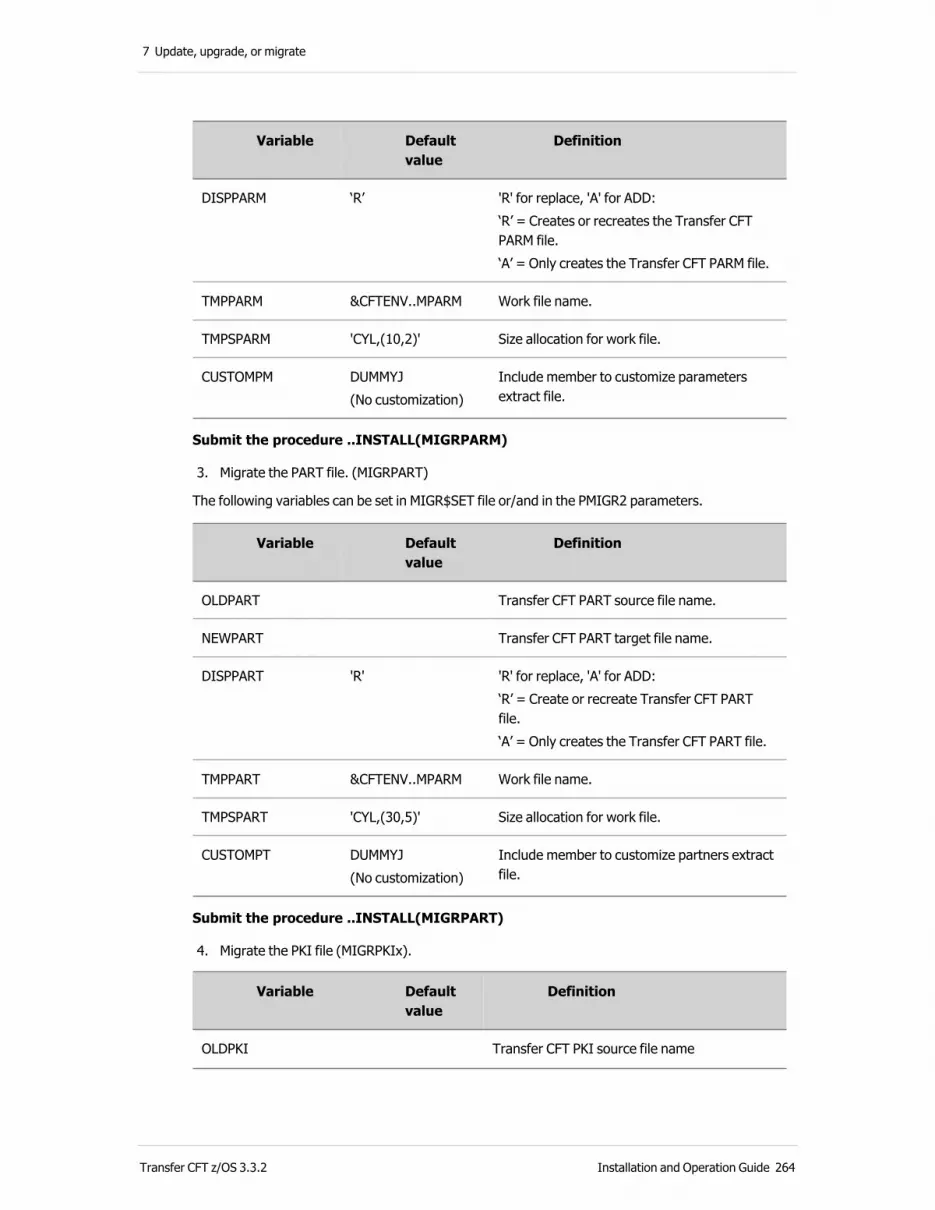
7 Update, upgrade, or migrate
Variable Default value
Definition
DISPPARM ‘R’ 'R' for replace, 'A' for ADD:‘R’ = Creates or recreates the Transfer CFT PARM file.‘A’ = Only creates the Transfer CFT PARM file.
TMPPARM &CFTENV..MPARM Work file name.
TMPSPARM 'CYL,(10,2)' Size allocation for work file.
CUSTOMPM DUMMYJ(No customization)
Include member to customize parameters extract file.
Submit the procedure ..INSTALL(MIGRPARM)
3. Migrate the PART file. (MIGRPART)
The following variables can be set in MIGR$SET file or/and in the PMIGR2 parameters.
Variable Default value
Definition
OLDPART Transfer CFT PART source file name.
NEWPART Transfer CFT PART target file name.
DISPPART 'R' 'R' for replace, 'A' for ADD:‘R’ = Create or recreate Transfer CFT PART file.‘A’ = Only creates the Transfer CFT PART file.
TMPPART &CFTENV..MPARM Work file name.
TMPSPART 'CYL,(30,5)' Size allocation for work file.
CUSTOMPT DUMMYJ(No customization)
Include member to customize partners extract file.
Submit the procedure ..INSTALL(MIGRPART)
4. Migrate the PKI file (MIGRPKIx).
Variable Default value
Definition
OLDPKI Transfer CFT PKI source file name
Transfer CFT z/OS 3.3.2 Installation and Operation Guide 264

7 Update, upgrade, or migrate
Variable Default value
Definition
NEWPKI Transfer CFT PKItarget file name.
If the target version is 3.3.2 or lower:
l Submit the procedure ..INSTALL(MIGRPKI) (export + import)
5. Migrate the UCONF file parameters. (MIGRUCNF)
The JCL ..INSTALL(MIGRUCNF) must be customized to determine UCONF parameters to migrate.
Replace the line:
CFTEXT ID=*,TYPE=UCONF,FOUT=$EXT
With the list of UCONF parameters to migrate. For example:
CFTEXT ID=cft.mvs.sginstal.*,TYPE=UCONF,FOUT=$EXT
CFTEXT ID=cg.*,TYPE=UCONF,FOUT=$EXT
CFTEXT ID=cft.multi_node.*,TYPE=UCONF,FOUT=$EXT
CFTEXT ID=cft.cftcat.default_size,TYPE=UCONF,FOUT=$EXT
CFTEXT ID=cft.cftcom.default_size,TYPE=UCONF,FOUT=$EXT
CFTEXT ID=cft.cftlog.fname.atts,TYPE=UCONF,FOUT=$EXT
CFTEXT ID=cft.cftaccnt.fname.atts,TYPE=UCONF,FOUT=$EXT
Etc.
Submit the procedure ..INSTALL(MIGRUCNF)
6. Migrate the CATALOG file (MIGRCAT) for a non multi-node environment.
You can set the following variables in the MIGR$SET file and (or) in the PMIGR2 parameters:
Variable Default value
Definition
OLDEXEC Executable library of the Transfer CFT version to migrate.
OLDCAT Transfer CFT CATALOG source file name.
NEWCAT Transfer CFT CATALOG target file name
DISPCAT ‘R’ 'R' for replace, 'A' for ADD:‘R’ = Create or recreate CFT CATALOG file‘A’ = Will only create a Transfer CFT CATALOG file.
Transfer CFT z/OS 3.3.2 Installation and Operation Guide 265

7 Update, upgrade, or migrate
Variable Default value
Definition
RECNBCAT 50000 Size in records if Catalog must be created.
TMPCAT &CFTENV..MCAT Work file name.
TMPSCAT 'CYL,(50,10)' Size allocation for work file. Use 3 cylinders for every 1000 transfers to be migrated.
Submit the procedure ..INSTALL(MIGRCAT).
7. Migrate the communication media file(s) (MIGRCOM)for a non mutli-node environment.
You can set the following variables in the MIGR$SET file or/and in the PMIGR2 parameters:
Variable Default value
Definition
OLDEXEC Executable library of the Transfer CFT version to migrate.
OLDCOM Transfer CFT communication source file name.
NEWCOM Transfer CFT communication target file name.
DISPCOM ‘R’ 'R' for replace, 'A' for ADD:‘R’ = Create or recreate a Transfer CFT communication file.‘A’ = Will only create a Transfer CFT communication file.
RECNBCOM 5000 Size in records if communication file must be created.
TMPCOM Work file name.
TMPSCOM 'CYL,(10,10)' Size allocation for work file.
Submit the procedure ..INSTALL(MIGRCOM).
Migrate a multi-node architectureThis section describes the upgrade of an instance of Transfer CFT z /OS configured in multi-node. Perform the sames steps as in the non multi-node environment, with the only difference being the MIGRCAT, MIGRCOM and PMIGR2 procedures as described in the following sections.
Transfer CFT z/OS 3.3.2 Installation and Operation Guide 266
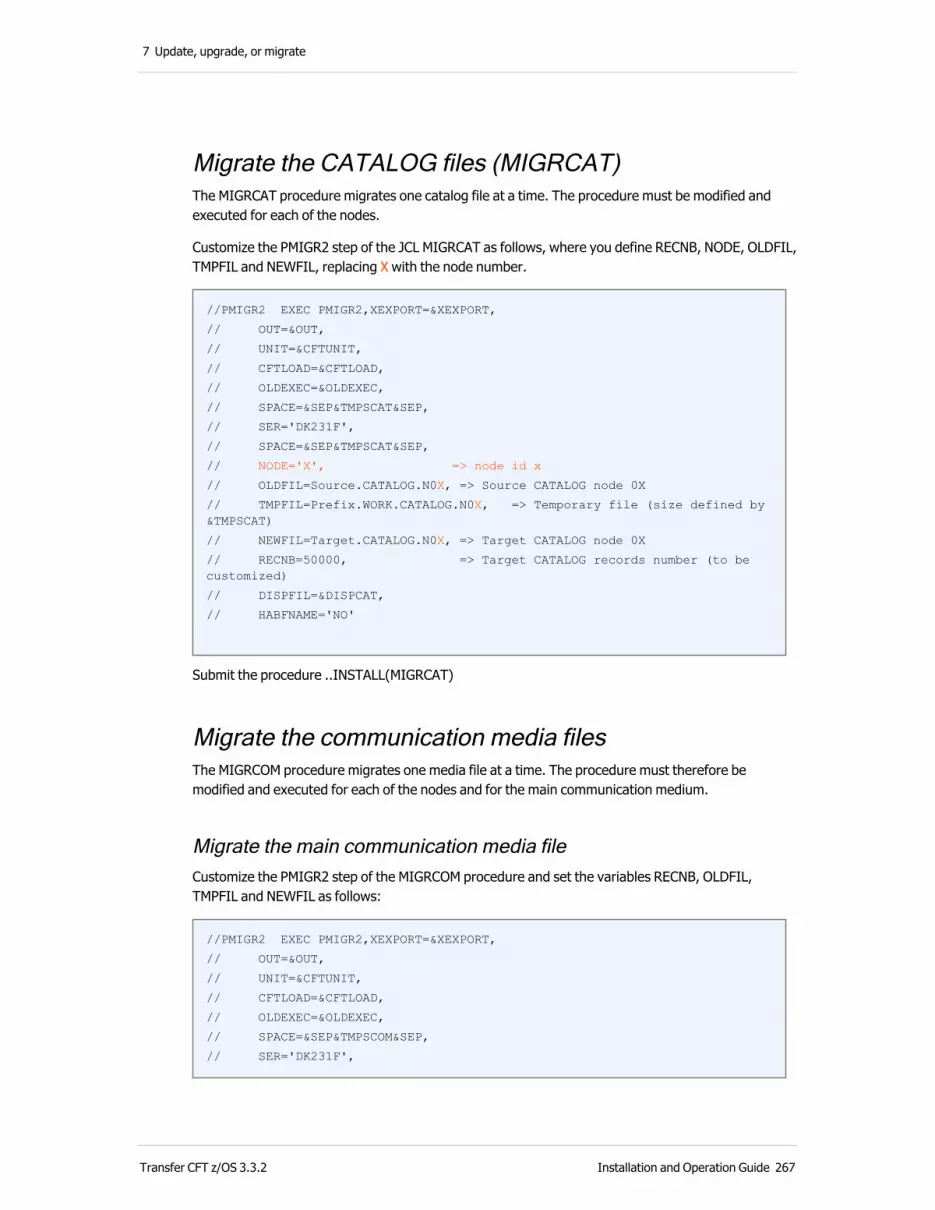
7 Update, upgrade, or migrate
Migrate the CATALOG files (MIGRCAT)The MIGRCAT procedure migrates one catalog file at a time. The procedure must be modified and executed for each of the nodes.
Customize the PMIGR2 step of the JCL MIGRCAT as follows, where you define RECNB, NODE, OLDFIL, TMPFIL and NEWFIL, replacing X with the node number.
//PMIGR2 EXEC PMIGR2,XEXPORT=&XEXPORT,
// OUT=&OUT,
// UNIT=&CFTUNIT,
// CFTLOAD=&CFTLOAD,
// OLDEXEC=&OLDEXEC,
// SPACE=&SEP&TMPSCAT&SEP,
// SER='DK231F',
// SPACE=&SEP&TMPSCAT&SEP,
// NODE='X', => node id x
// OLDFIL=Source.CATALOG.N0X, => Source CATALOG node 0X
// TMPFIL=Prefix.WORK.CATALOG.N0X, => Temporary file (size defined by &TMPSCAT)
// NEWFIL=Target.CATALOG.N0X, => Target CATALOG node 0X
// RECNB=50000, => Target CATALOG records number (to be customized)
// DISPFIL=&DISPCAT,
// HABFNAME='NO'
Submit the procedure ..INSTALL(MIGRCAT)
Migrate the communication media files The MIGRCOM procedure migrates one media file at a time. The procedure must therefore be modified and executed for each of the nodes and for the main communication medium.
Migrate the main communication media fileCustomize the PMIGR2 step of the MIGRCOM procedure and set the variables RECNB, OLDFIL, TMPFIL and NEWFIL as follows:
//PMIGR2 EXEC PMIGR2,XEXPORT=&XEXPORT,
// OUT=&OUT,
// UNIT=&CFTUNIT,
// CFTLOAD=&CFTLOAD,
// OLDEXEC=&OLDEXEC,
// SPACE=&SEP&TMPSCOM&SEP,
// SER='DK231F',
Transfer CFT z/OS 3.3.2 Installation and Operation Guide 267
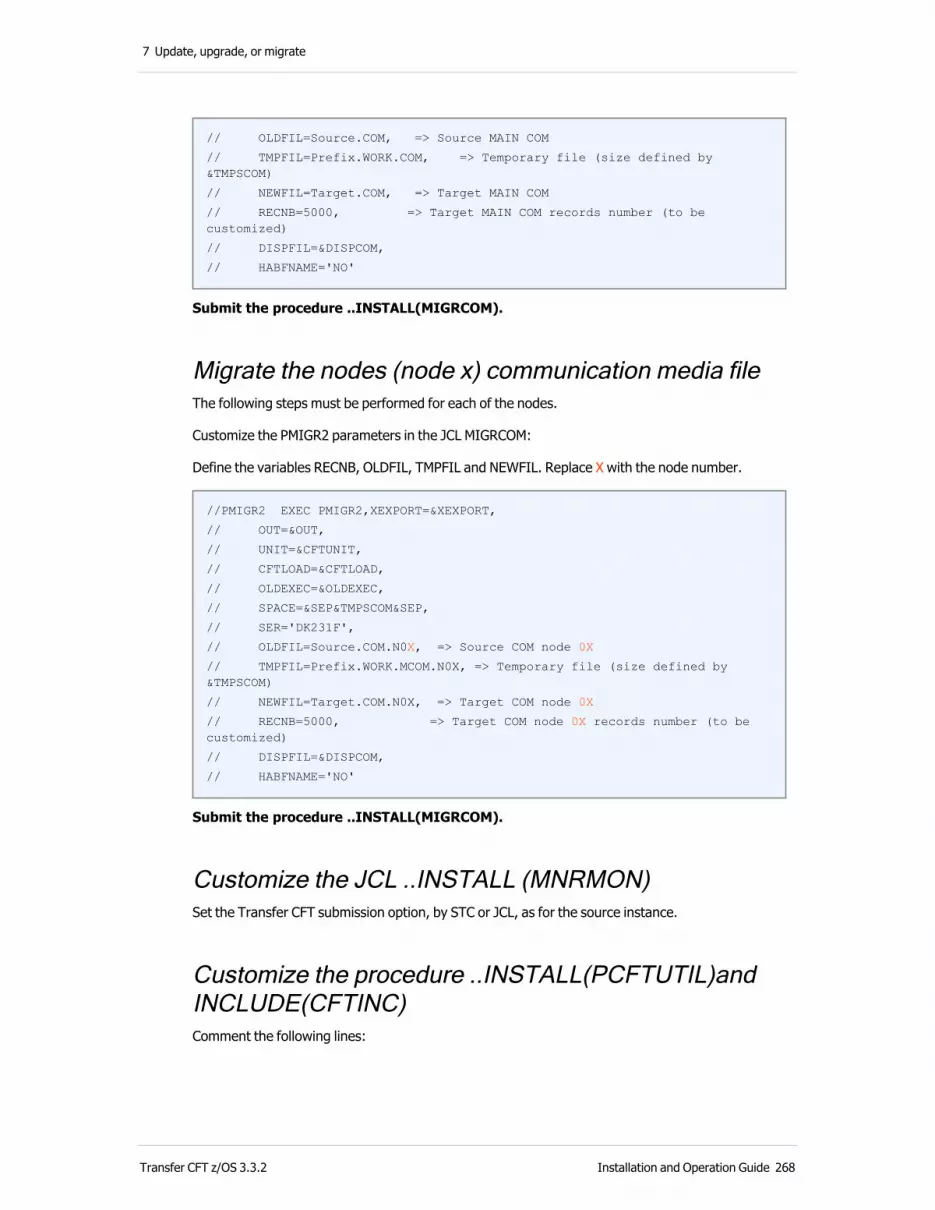
7 Update, upgrade, or migrate
// OLDFIL=Source.COM, => Source MAIN COM
// TMPFIL=Prefix.WORK.COM, => Temporary file (size defined by &TMPSCOM)
// NEWFIL=Target.COM, => Target MAIN COM
// RECNB=5000, => Target MAIN COM records number (to be customized)
// DISPFIL=&DISPCOM,
// HABFNAME='NO'
Submit the procedure ..INSTALL(MIGRCOM).
Migrate the nodes (node x) communication media fileThe following steps must be performed for each of the nodes.
Customize the PMIGR2 parameters in the JCL MIGRCOM:
Define the variables RECNB, OLDFIL, TMPFIL and NEWFIL. Replace X with the node number.
//PMIGR2 EXEC PMIGR2,XEXPORT=&XEXPORT,
// OUT=&OUT,
// UNIT=&CFTUNIT,
// CFTLOAD=&CFTLOAD,
// OLDEXEC=&OLDEXEC,
// SPACE=&SEP&TMPSCOM&SEP,
// SER='DK231F',
// OLDFIL=Source.COM.N0X, => Source COM node 0X
// TMPFIL=Prefix.WORK.MCOM.N0X, => Temporary file (size defined by &TMPSCOM)
// NEWFIL=Target.COM.N0X, => Target COM node 0X
// RECNB=5000, => Target COM node 0X records number (to be customized)
// DISPFIL=&DISPCOM,
// HABFNAME='NO'
Submit the procedure ..INSTALL(MIGRCOM).
Customize the JCL ..INSTALL (MNRMON)Set the Transfer CFT submission option, by STC or JCL, as for the source instance.
Customize the procedure ..INSTALL(PCFTUTIL)and INCLUDE(CFTINC)Comment the following lines:
Transfer CFT z/OS 3.3.2 Installation and Operation Guide 268

7 Update, upgrade, or migrate
//*CFTCAT DD DISP=SHR,
//* DSN=&QUAL..CATALOG
Transfer CFT z/OS 3.3.2 Installation and Operation Guide 269

8 Uninstall
Uninstall Transfer CFT This topic describes how to uninstall Transfer CFT in a z/OS environment.
If you uninstall a Transfer CFT, you will lose the entire Transfer CFT configuration. To avoid this, you must save your environment prior removing the Transfer CFT.
ProcedureBefore uninstalling, you must stop the servers you want to uninstall (including Copilot).
Run the UNINSTAL JCL, which:
1. Removes all files from the INSTANCE, including multi-node, except for the JCL library (target.INSTALL).
2. Removes sub-USS directories, Copilot, and Secure Relay.
3. Removes the distribution environment.
Note You must manually modify the JCL, by default the distribution environment is not removed (see lines 000018, 000081, and 000082 in the example).
Table 3. Example
000014 //* 2 phases in this JCL:
000015 //* --------------------
000016 //* Phase 1 - Delete Transfer CFT instance env.
000017 //* Phase 2 - Delete Transfer CFT distribution env.
000018 //
000019 //
000020 //* Phase 1 - Delete Transfer CFT instance env.
000021 //* ------------------------------------------
000022 //* INSTALL library is not deleted.
000023 //IN01 EXEC PREXX,PARM='%RXDEL &CFTENV..USER.OBJ 0'
000024 //IN02 EXEC PREXX,PARM='%RXDEL &CFTENV..SAMPLE 0'
…[continued]…
000085 //
000086 //
000087 //* --------------------------------------------------
000088 //* Phase 2 - Delete Transfer CFT distribution env.
000089 //* --------------------------------------------------
Transfer CFT z/OS 3.3.2 Installation and Operation Guide 270

8 Uninstall
000090 //DI03 EXEC PREXX,PARM='%RXDEL &DISTLIB..CNTL 0'
000091 //DI04 EXEC PREXX,PARM='%RXDEL &DISTLIB..DOC 0'
000092 //DI05 EXEC PREXX,PARM='%RXDEL &DISTLIB..SAMPLE 0'
000093 //DI06 EXEC PREXX,PARM='%RXDEL &DISTLIB..LOG 0'
000094 //DI07 EXEC PREXX,PARM='%RXDEL &DISTLIB..MAC 0'
…[continued]…
271 Installation and Operation Guide Transfer CFT z/OS 3.3.2
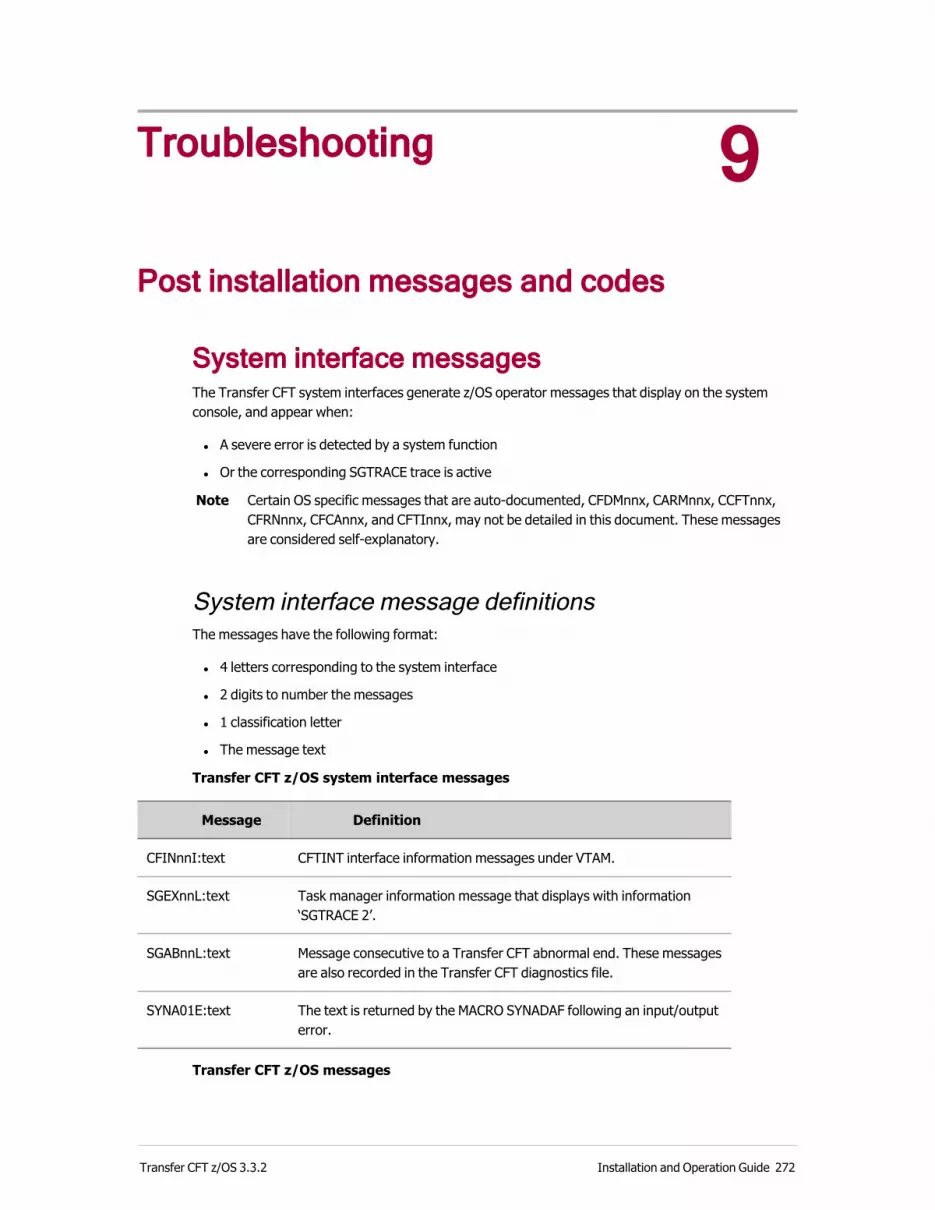
9 Troubleshooting
Post installation messages and codes
System interface messagesThe Transfer CFT system interfaces generate z/OS operator messages that display on the system console, and appear when:
l A severe error is detected by a system function
l Or the corresponding SGTRACE trace is active
Note Certain OS specific messages that are auto-documented, CFDMnnx, CARMnnx, CCFTnnx, CFRNnnx, CFCAnnx, and CFTInnx, may not be detailed in this document. These messages are considered self-explanatory.
System interface message definitionsThe messages have the following format:
l 4 letters corresponding to the system interface
l 2 digits to number the messages
l 1 classification letter
l The message text
Transfer CFT z/OS system interface messages
Message Definition
CFINnnI:text CFTINT interface information messages under VTAM.
SGEXnnL:text Task manager information message that displays with information ‘SGTRACE 2’.
SGABnnL:text Message consecutive to a Transfer CFT abnormal end. These messages are also recorded in the Transfer CFT diagnostics file.
SYNA01E:text The text is returned by the MACRO SYNADAF following an input/output error.
Transfer CFT z/OS messages
Transfer CFT z/OS 3.3.2 Installation and Operation Guide 272

9 Troubleshooting
Message Definition
CFST00E Transfer CFT region is limited to 1024 Mb. It is recommended that you not start Transfer CFT with REGION=0M.
CHSM01I HSM Recall of: filename HSM recall in synchronous mode for a file.
CHSM02I Recall completed: filename HSM recall in synchronous mode terminated normally.
CHSM03E Recall FAILED: filename A problem occurred with the HSM recall, the volume is still MIGRAT.
CHSM04I HSM Recall (ASY) of: filename. HSM recall in asynchronous mode.
CHSM05I Recall completed: filename HSM recall in asynchronous mode terminated normally.
SITM02E LOAD FAILED FOR: module_name Error loading a module because module was not found in STEPLIB, JOBLIB, etc.
CTCP01F Unexpected TCP error caused a forced dump. A Transfer CFT restart is required.
CTCP02F Unexpected TCP error. You must restart the Copilot server.Configure job scheduling to restart the Copilot server to manage this type of error (it is not automatically restarted by the ARM service).
For a complete list of possible error messages and their meaning, refer to the Troubleshooting topics in the Transfer CFT 3.3.2 Documentation.
File error codes in z/OSThis section lists the codes that define the Transfer CFT performance on z/OS. The file error codes have the same form as:
l Transfer CFT messages
l The DIAGP field of the Transfer CFT catalog
DIAGP field formatThe usual format of file error codes is as follows: SFRRNNNN.
l S: The environment code
S Environment code
Code definition
273 Installation and Operation Guide Transfer CFT z/OS 3.3.2
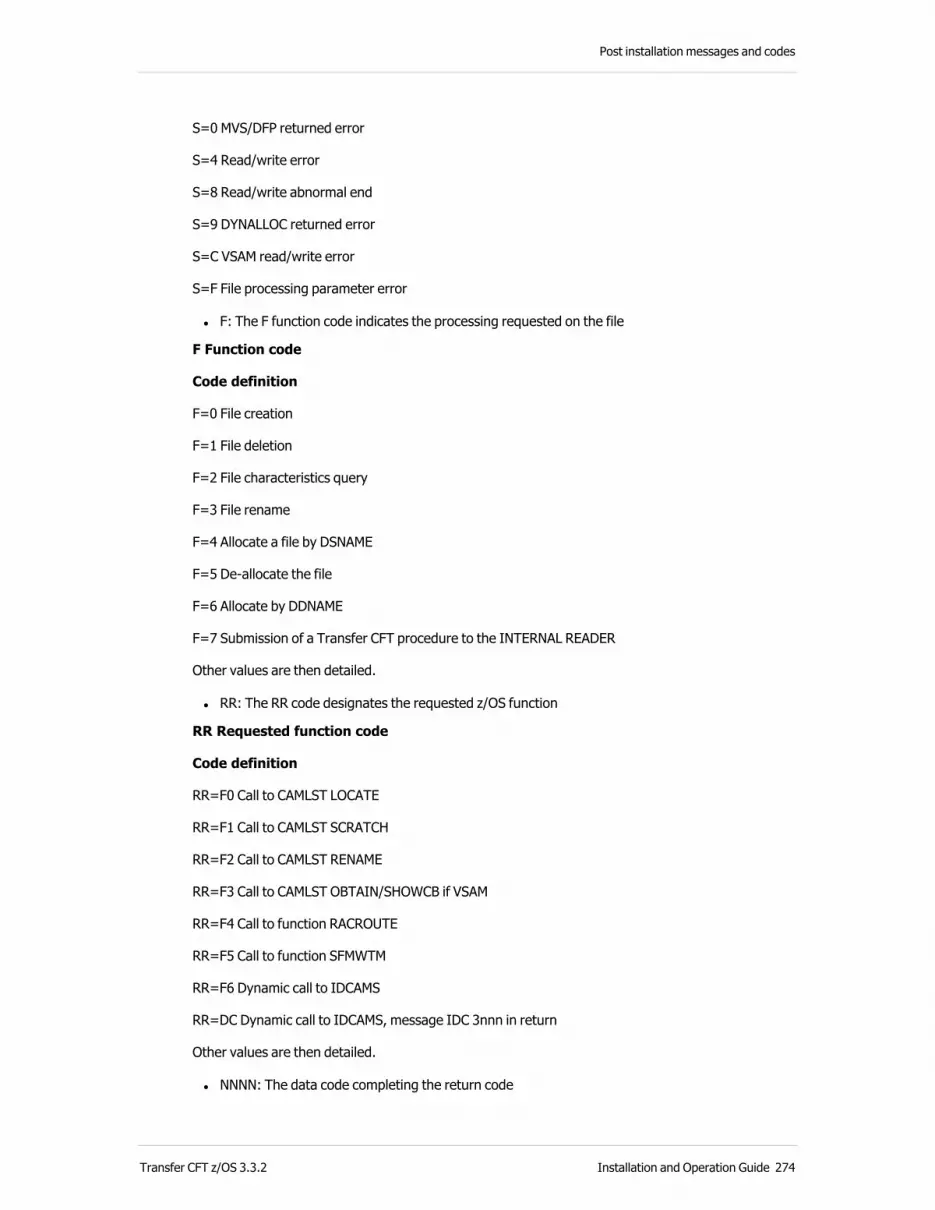
Post installation messages and codes
S=0 MVS/DFP returned error
S=4 Read/write error
S=8 Read/write abnormal end
S=9 DYNALLOC returned error
S=C VSAM read/write error
S=F File processing parameter error
l F: The F function code indicates the processing requested on the file
F Function code
Code definition
F=0 File creation
F=1 File deletion
F=2 File characteristics query
F=3 File rename
F=4 Allocate a file by DSNAME
F=5 De-allocate the file
F=6 Allocate by DDNAME
F=7 Submission of a Transfer CFT procedure to the INTERNAL READER
Other values are then detailed.
l RR: The RR code designates the requested z/OS function
RR Requested function code
Code definition
RR=F0 Call to CAMLST LOCATE
RR=F1 Call to CAMLST SCRATCH
RR=F2 Call to CAMLST RENAME
RR=F3 Call to CAMLST OBTAIN/SHOWCB if VSAM
RR=F4 Call to function RACROUTE
RR=F5 Call to function SFMWTM
RR=F6 Dynamic call to IDCAMS
RR=DC Dynamic call to IDCAMS, message IDC 3nnn in return
Other values are then detailed.
l NNNN: The data code completing the return code
Transfer CFT z/OS 3.3.2 Installation and Operation Guide 274

9 Troubleshooting
NNNN: The data code
NNNN is the z/OS or OPEN VSAM return code, or one of the following codes:
for RR=DC, NNNN is the IDCAMS IDCnnnn message number
Example
00DC3203 corresponds to the message IDC32031 ITEM ”-” DOES NOT ADHERE TO RESTRICTIONS.
NNNN file error code table
Specific codes:
l 00F000B37 : No space in an HFS File System
l 0x0y00E37 : Multi-volume file creation not supported on volume 'x' in 'y'
l 91300038 or 80000913 : Read/write operation requested by user is not allowed by RACF
NNNN code for S=0
Code definition
0005 No DD card
0017 Multi-volume file not supported
0019 VOLUME discrepancy with catalog
001A DSNAME error or access via an ALIAS
001B UCB not found or access generated in DRM
001C File not found in VTOC
001E Concatenated files not supported
0028 File not found in catalog
0030 File not found in catalog
0040 DSNAME missing
0048 File root in GDG without version number
0050 DSNAME not conform with z/OS rules
03DE File not deleted/renamed, member of PDS
03DF File not deleted/renamed, ENQ OLD impossible
03E0 Shared file not available, allocated by another task
03E1 Allocate of a PDS file without member name
03E2 Allocate of a GDG without BLDG
03E3 Allocate of a GDG in version +1
03E4 File not deleted/renamed, does not exist
275 Installation and Operation Guide Transfer CFT z/OS 3.3.2

Post installation messages and codes
03E5 File not created; file already exists
03E6 File not deleted/renamed, on tape
03E7 Creation of a file with a logical name (DDNAME)
0051 RENAME, GDG(+1) mandatory
0052 RENAME, temporary file cannot be GDG
0053 RENAME, CAMLST RENAME error
0054 RENAME, CAMLST CATALOG error
0055 RENAME, temporary file cannot be GDG(+1)
0056 RENAME, duplicate file on 1 volume
0057 SCRATCH, file not found
0058 SCRATCH, CAMLST SCRATCH error
0059 SCRATCH, volume not mounted
005A SCRATCH, CAMLST UNCAT outside SMS
005F RENAME, member of PDS file
Example
’04F003E0’: allocate by DSNAME, file already allocated to another transfer by Transfer CFT.
’04F00028’: allocated by DSNAME, file not found in the catalog.
NNNN Code for S=4 (Read/Write Error)
F and RR have no significance
NNNN takes on the following values:
Code definition
00D4 OPEN, LRECL/BLKSIZE incorrect
00D8 OPEN, no parameter delimiter
00E4 OPEN, DDNAME incorrect
00E8 OPEN, DDNAME missing
00EC OPEN, no more memory for buffers
00F0 OPEN, parameters missing
00F4 FCB reference incorrect
00F8 Invalid SGF function code
00FC Non-authorized function code
00FD OPEN, non-0 return code
Transfer CFT z/OS 3.3.2 Installation and Operation Guide 276

9 Troubleshooting
0FFF BSAM, read/write/POINT error
This error is accompanied by Transfer CFT and/or z/OS messages depending on whether:
l Transfer CFT ‘POINT ERROR’ message in the case of repositioning on a file that does not support it.
l Transfer CFT ‘SYNA01E:’ message accompanied by the z/OS ‘SYNADAF’ message text.
This message is only displayed on the z/OS console
l z/OSIEA000 or IECxxx message
These messages are only displayed on the z/OS console
NNNN Code Table for S=8 (ABEND during a Read/Write)
F and RR have no significance
NNNN has the ABEND code intercepted by Transfer CFT
Example
0B37, 0013
Example
’80000913’: AbendS913 at file opening, Transfer CFT does not have the right to read/write.
NNNN Code Table for S=C (VSAM Read/Write Error)
F has no significance
RR is the VSAM RETURN-CODE
NNNN is the VSAM FDBK
The VSAM RTNCD/FDBK codes are explained in the VSAM documentation.
Example
’C004001C’: no more space in the file.
NNNN Code table for S=F (File Parameter Error)
RR and NNNN have no significance
NNNN code table for S=F
Code Definition
F = 4 Function not allowed
F = 7 Function unknown
F = C File reference incorrect
Submit these to Axway Technical Support.
DYNALLOC Error Codes S=9
277 Installation and Operation Guide Transfer CFT z/OS 3.3.2

Post installation messages and codes
The DYNALLOC errors are explained in the IBM brochure Z/OS Vx MVS Authorized Assembler Services Guide.
Value of F for the DYNALLOC function:
Code definition
F=1 Allocate
F=2 De-allocate
Value of RR for DYNALLOC:
l RR is the DYNALLOC return code. It can take on values 04, 08, 0C
Value of NNNN for DYNALLOC:
l NNNN is the DYNALLOC REASON CODE
Example of a DYNALLOC error code
‘9104970C’ error: no more space to create the file.
The "IKJnnnnnI" and "IGDnnnnnI" error messages returned by DYNALLOC (under SMS) are displayed on the z/OS console:
l IKJ56893I DATA SET NOT ALLOCATED+
l IGD17273I ALLOCATION HAS FAILED FOR ALL VOLUMES SELECTED FOR DATA SET
Note The ‘nnnn’ hexadecimal value converted to decimal gives the SMS IGD message number. For example, the X’4379’ value corresponds to the IGD172731 message.
Diagnostics for file errorsThe following complementary diagnostics are available on request by Axway support, through the SGTRACE tool:
l SGTRACE 4: Traces the file read/write actions. This value must be used for codes S=0 and S=9
l SGTRACE 8: Traces the file read/write actions. This value must be used for codes S=4, 8, C, F
l SGTRACE 2: traces the errors
l SGTRACE 128: traces the module calls and returns
The modules concerned are:
l S=0: SGF3ACC, SGF3STAT, SIFM, SGF3VSAM, SGF3REN
l S=9: SGF3SV99
l S=4, 8, C, F: SGF3C, SIDM
Transfer CFT z/OS 3.3.2 Installation and Operation Guide 278
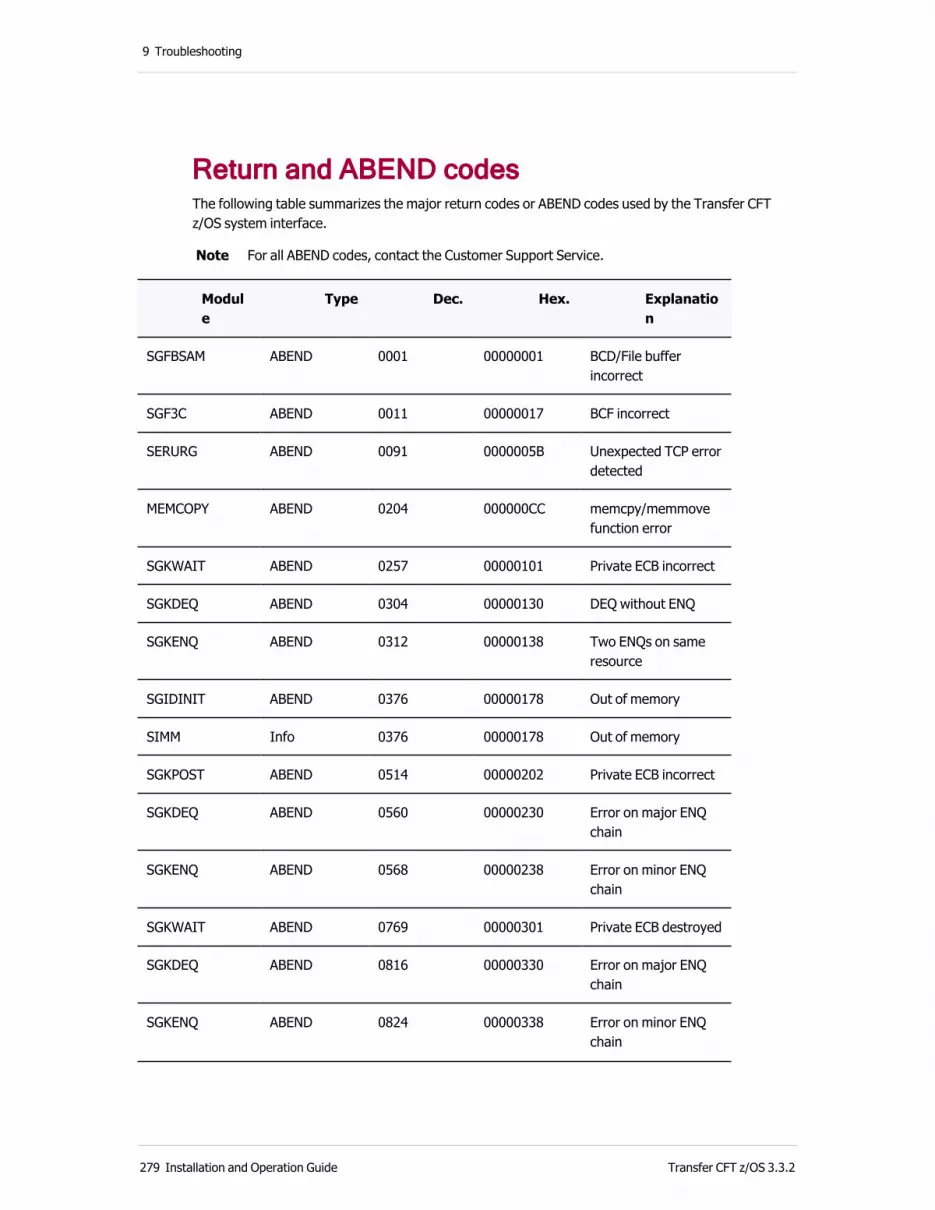
9 Troubleshooting
Return and ABEND codesThe following table summarizes the major return codes or ABEND codes used by the Transfer CFT z/OS system interface.
Note For all ABEND codes, contact the Customer Support Service.
Module
Type Dec. Hex. Explanation
SGFBSAM ABEND 0001 00000001 BCD/File buffer incorrect
SGF3C ABEND 0011 00000017 BCF incorrect
SERURG ABEND 0091 0000005B Unexpected TCP error detected
MEMCOPY ABEND 0204 000000CC memcpy/memmove function error
SGKWAIT ABEND 0257 00000101 Private ECB incorrect
SGKDEQ ABEND 0304 00000130 DEQ without ENQ
SGKENQ ABEND 0312 00000138 Two ENQs on same resource
SGIDINIT ABEND 0376 00000178 Out of memory
SIMM Info 0376 00000178 Out of memory
SGKPOST ABEND 0514 00000202 Private ECB incorrect
SGKDEQ ABEND 0560 00000230 Error on major ENQ chain
SGKENQ ABEND 0568 00000238 Error on minor ENQ chain
SGKWAIT ABEND 0769 00000301 Private ECB destroyed
SGKDEQ ABEND 0816 00000330 Error on major ENQ chain
SGKENQ ABEND 0824 00000338 Error on minor ENQ chain
279 Installation and Operation Guide Transfer CFT z/OS 3.3.2
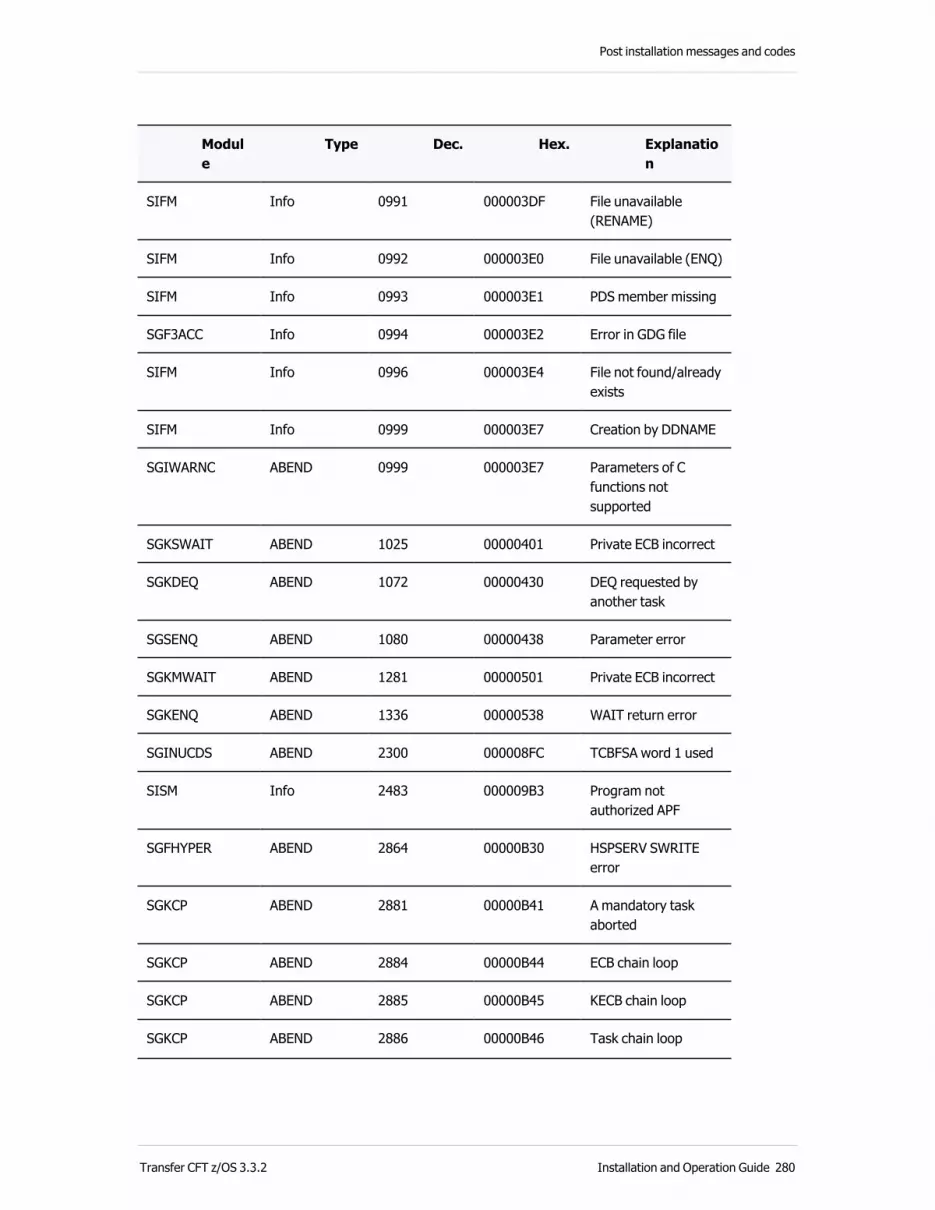
Post installation messages and codes
Module
Type Dec. Hex. Explanation
SIFM Info 0991 000003DF File unavailable (RENAME)
SIFM Info 0992 000003E0 File unavailable (ENQ)
SIFM Info 0993 000003E1 PDS member missing
SGF3ACC Info 0994 000003E2 Error in GDG file
SIFM Info 0996 000003E4 File not found/already exists
SIFM Info 0999 000003E7 Creation by DDNAME
SGIWARNC ABEND 0999 000003E7 Parameters of C functions not supported
SGKSWAIT ABEND 1025 00000401 Private ECB incorrect
SGKDEQ ABEND 1072 00000430 DEQ requested by another task
SGSENQ ABEND 1080 00000438 Parameter error
SGKMWAIT ABEND 1281 00000501 Private ECB incorrect
SGKENQ ABEND 1336 00000538 WAIT return error
SGINUCDS ABEND 2300 000008FC TCBFSA word 1 used
SISM Info 2483 000009B3 Program not authorized APF
SGFHYPER ABEND 2864 00000B30 HSPSERV SWRITE error
SGKCP ABEND 2881 00000B41 A mandatory task aborted
SGKCP ABEND 2884 00000B44 ECB chain loop
SGKCP ABEND 2885 00000B45 KECB chain loop
SGKCP ABEND 2886 00000B46 Task chain loop
Transfer CFT z/OS 3.3.2 Installation and Operation Guide 280

9 Troubleshooting
Module
Type Dec. Hex. Explanation
SGKCP ABEND 2887 00000B47 KCP overwritten
SGKCP ABEND 2888 00000B48 Second dispatcher init
SGKCP ABEND 2889 00000B49 Error in task chain
MVSBXCRE Info 2915 00000B63 Opening error
MVSBXCRE Info 2916 00000B64 Queue error
MVSBXCRE Info 2917 00000B65 Mailbox naming error
MVSBXCRE Info 2918 00000B66 z/OS system not ESA
MVSBXCRE Info 2919 00000B67 Mailbox already exists
MVSBXCRE Info 2920 00000B68 GQSCAM error
IBM3PARM ABEND 2930 00000B72 More than 16 parameters
SISY Info 2933 00000B76 Semaphore ACR invalid
SISY Info 2934 00000B77 Semaphore reference invalid
SISY Info 2935 00000B78 MODE ENQ - message incorrect
SISY ABEND 2936 00000B78 Semaphore acronym incorrect
SISYDEL ABEND 2937 00000B79 Semaphore acronym incorrect
SISY ABEND 2937 00000B79 Message acronym incorrect
SISYDEL ABEND 2938 00000B7A Message acronym incorrect
SISY ABEND 2938 00000B7A Message acronym incorrect
281 Installation and Operation Guide Transfer CFT z/OS 3.3.2

Post installation messages and codes
Module
Type Dec. Hex. Explanation
SISYDEF Info 2939 00000B7B Zero-length message
SISY Info 2940 00000B7C Mailbox not supported in VM
SISY Info 2941 00000B7D Mailbox not supported in VM
SISY Info 2942 00000B7E Mailbox not supported in VM
SISY Info 2943 00000B7F Request to clear a free LOCK
SISY Info 2945 00000B81 Two requests for same LOCK
SISY Info 2946 00000B82 LOCK number > 63
SISY Info 2946 00000B82 LOCK number > 63
SISY Info 2947 00000B83 Error in length of control data
SISY Info 2948 00000B84 Error in message length
SISYDEL Info 2949 00000B85 Semaphore reference incorrect
SITM Info 2951 00000B87 Unknown function
SISM Info 2960 00000B90 Unknown function
SYMSYSF ABEND 2976 00000BA0 FREEMAIN at 0
SYMSYSF ABEND 2977 00000BA1 Memory chaining error
SYMSYSF ABEND 2978 00000BA2 FREEMAIN on a non-allocated area
SYMSYSF ABEND 2979 00000BA3 Memory area prefix incorrect
Transfer CFT z/OS 3.3.2 Installation and Operation Guide 282
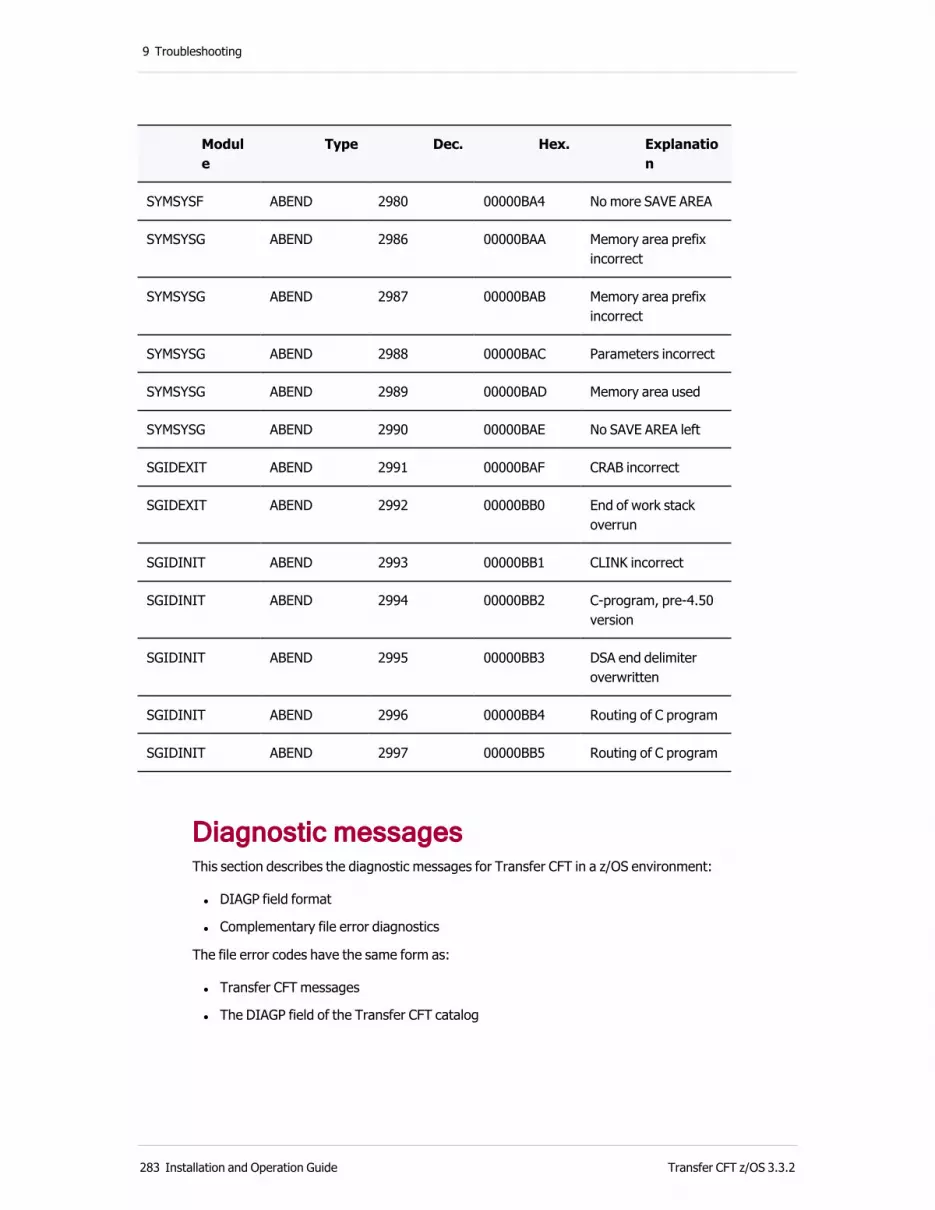
9 Troubleshooting
Module
Type Dec. Hex. Explanation
SYMSYSF ABEND 2980 00000BA4 No more SAVE AREA
SYMSYSG ABEND 2986 00000BAA Memory area prefix incorrect
SYMSYSG ABEND 2987 00000BAB Memory area prefix incorrect
SYMSYSG ABEND 2988 00000BAC Parameters incorrect
SYMSYSG ABEND 2989 00000BAD Memory area used
SYMSYSG ABEND 2990 00000BAE No SAVE AREA left
SGIDEXIT ABEND 2991 00000BAF CRAB incorrect
SGIDEXIT ABEND 2992 00000BB0 End of work stack overrun
SGIDINIT ABEND 2993 00000BB1 CLINK incorrect
SGIDINIT ABEND 2994 00000BB2 C-program, pre-4.50 version
SGIDINIT ABEND 2995 00000BB3 DSA end delimiter overwritten
SGIDINIT ABEND 2996 00000BB4 Routing of C program
SGIDINIT ABEND 2997 00000BB5 Routing of C program
Diagnostic messagesThis section describes the diagnostic messages for Transfer CFT in a z/OS environment:
l DIAGP field format
l Complementary file error diagnostics
The file error codes have the same form as:
l Transfer CFT messages
l The DIAGP field of the Transfer CFT catalog
283 Installation and Operation Guide Transfer CFT z/OS 3.3.2

Post installation messages and codes
DIAGP field formatThe typical file error code format is: SFRRNNNN.
l S: The environment code
Environment code
Code definition
S=0 MVS/DFP returned error
S=4 Read/write error
S=8 Read/write abnormal end
S=9 DYNALLOC returned error
S=C VSAM read/write error
S=F File processing parameter error
l F: The F function code indicates the processing requested on the file.
The F function code values are:
F code Description
F=0 File creation
F=1 File deletion
F=2 File characteristics query
F=3 File rename
F=4 Allocate a file by DSNAME
F=5 De-allocate the file
F=6 Allocate by DDNAME
F=7 Submission of a CFT procedure to the INTERNAL READER
Other values are then detailed.
l RR: The RR code designates the requested z/OS function.
Transfer CFT z/OS 3.3.2 Installation and Operation Guide 284

9 Troubleshooting
RR code Description
RR=F0 Call to CAMLST LOCATE
RR=F1 Call to CAMLST SCRATCH
RR=F2 Call to CAMLST RENAME
RR=F3 Call to CAMLST OBTAIN/SHOWCB if VSAM
RR=F4 Call to function RACROUTE
RR=F5 Call to function SFMWTM
RR=F6 Dynamic call to IDCAMS
RR=DC Dynamic call to IDCAMS, message IDC 3nnn in return
Other values are then detailed.
l NNNN: The data code completing the return code
NNNN is the z/OS or OPEN VSAM return code, or one of the following codes:
for RR=DC, NNNN is the IDCAMS IDCnnnn message number
Example:
00DC3203 corresponds to the message IDC32031 ITEM ”-” DOES NOT ADHERE TO RESTRICTIONS.
NNNN file error codesSpecific codes:
l 00F000B37: No space in an HFS File System
l 0x0y00E37: Multi-volume file creation not supported on volume 'x' in 'y'
l 91300038 or 80000913: Read/write operation requested by user is not allowed by RACF
NNNN Code Table for S=0
NNNN code table for S=0
NNNN code Description
0005 No DD card
0017 Multi-volume file not supported
285 Installation and Operation Guide Transfer CFT z/OS 3.3.2
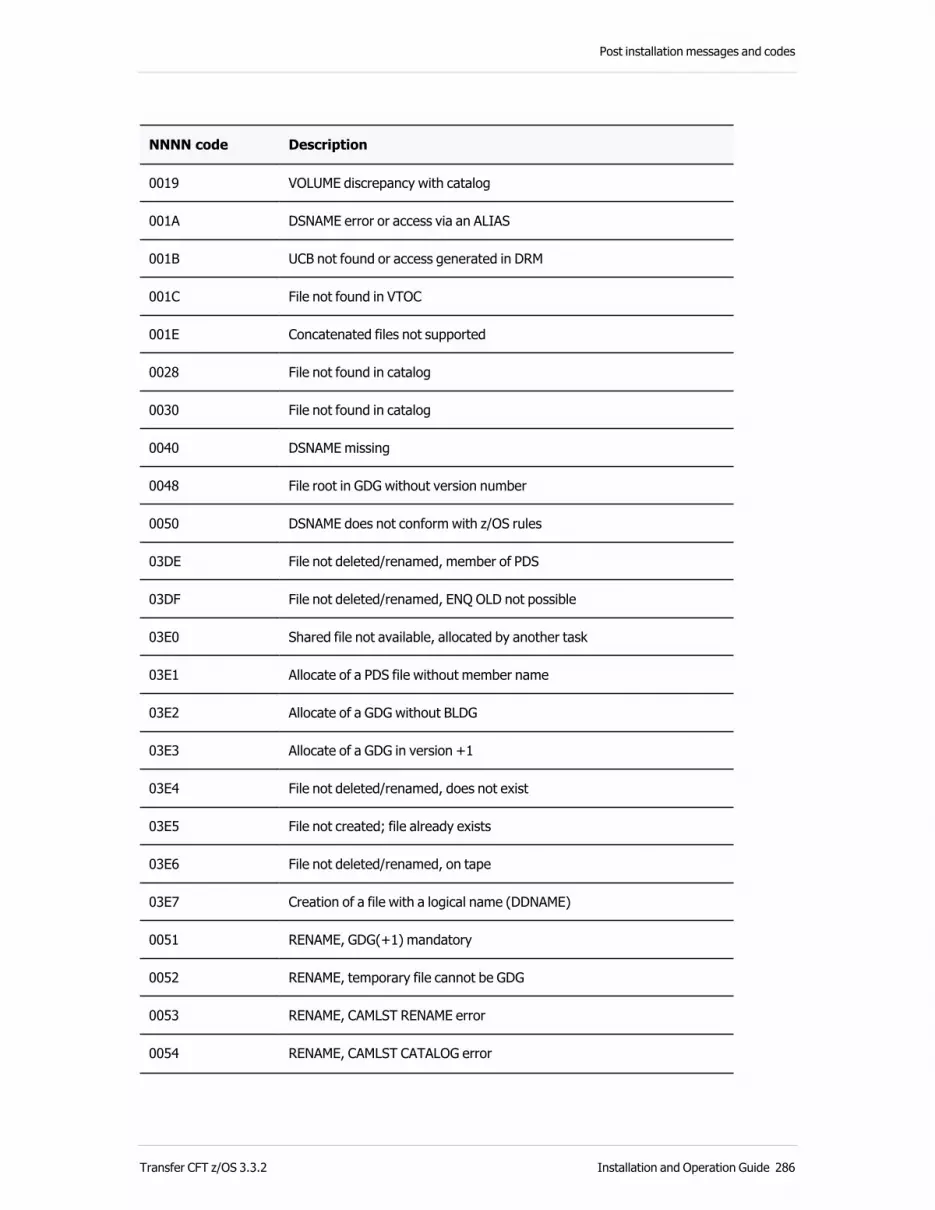
Post installation messages and codes
NNNN code Description
0019 VOLUME discrepancy with catalog
001A DSNAME error or access via an ALIAS
001B UCB not found or access generated in DRM
001C File not found in VTOC
001E Concatenated files not supported
0028 File not found in catalog
0030 File not found in catalog
0040 DSNAME missing
0048 File root in GDG without version number
0050 DSNAME does not conform with z/OS rules
03DE File not deleted/renamed, member of PDS
03DF File not deleted/renamed, ENQ OLD not possible
03E0 Shared file not available, allocated by another task
03E1 Allocate of a PDS file without member name
03E2 Allocate of a GDG without BLDG
03E3 Allocate of a GDG in version +1
03E4 File not deleted/renamed, does not exist
03E5 File not created; file already exists
03E6 File not deleted/renamed, on tape
03E7 Creation of a file with a logical name (DDNAME)
0051 RENAME, GDG(+1) mandatory
0052 RENAME, temporary file cannot be GDG
0053 RENAME, CAMLST RENAME error
0054 RENAME, CAMLST CATALOG error
Transfer CFT z/OS 3.3.2 Installation and Operation Guide 286
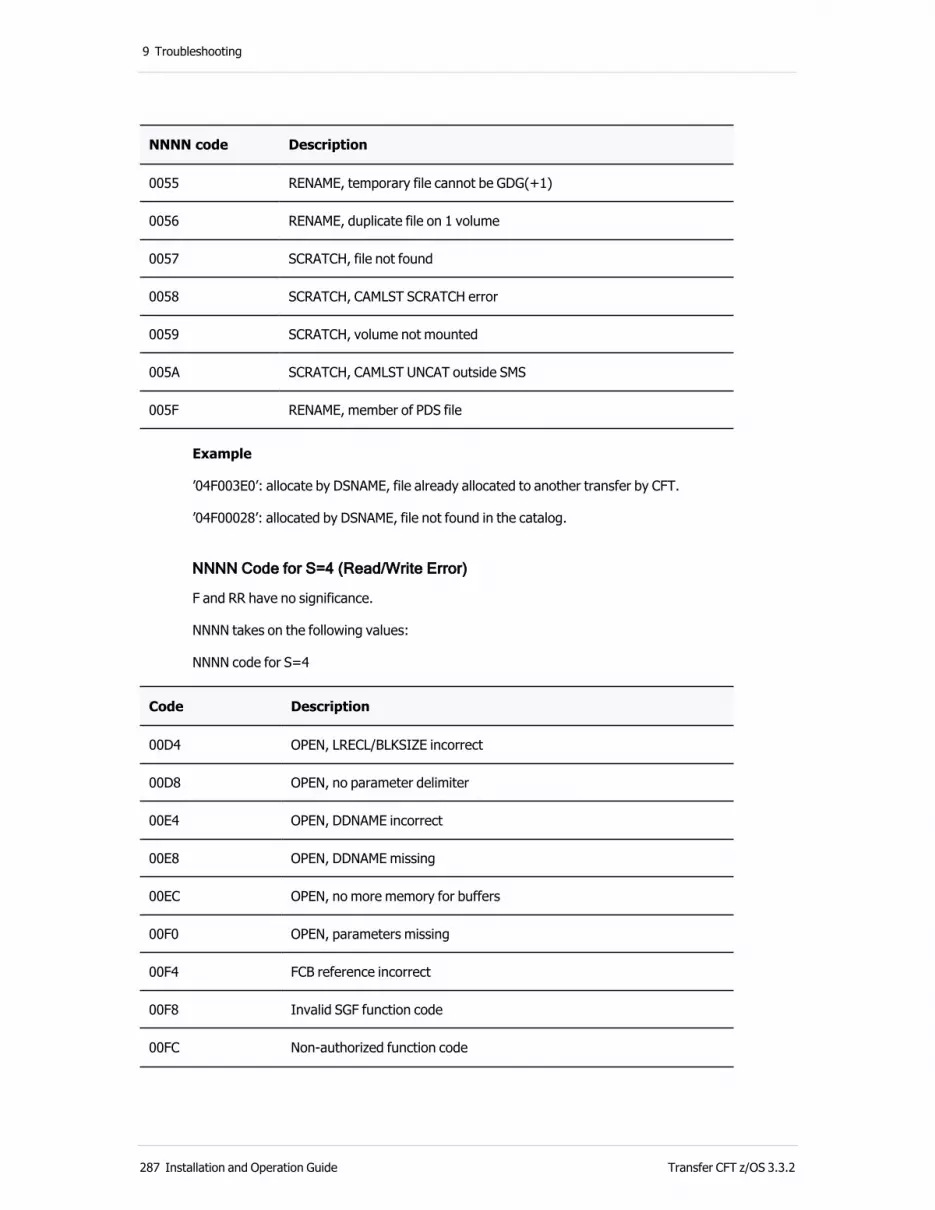
9 Troubleshooting
NNNN code Description
0055 RENAME, temporary file cannot be GDG(+1)
0056 RENAME, duplicate file on 1 volume
0057 SCRATCH, file not found
0058 SCRATCH, CAMLST SCRATCH error
0059 SCRATCH, volume not mounted
005A SCRATCH, CAMLST UNCAT outside SMS
005F RENAME, member of PDS file
Example
’04F003E0’: allocate by DSNAME, file already allocated to another transfer by CFT.
’04F00028’: allocated by DSNAME, file not found in the catalog.
NNNN Code for S=4 (Read/Write Error)
F and RR have no significance.
NNNN takes on the following values:
NNNN code for S=4
Code Description
00D4 OPEN, LRECL/BLKSIZE incorrect
00D8 OPEN, no parameter delimiter
00E4 OPEN, DDNAME incorrect
00E8 OPEN, DDNAME missing
00EC OPEN, no more memory for buffers
00F0 OPEN, parameters missing
00F4 FCB reference incorrect
00F8 Invalid SGF function code
00FC Non-authorized function code
287 Installation and Operation Guide Transfer CFT z/OS 3.3.2
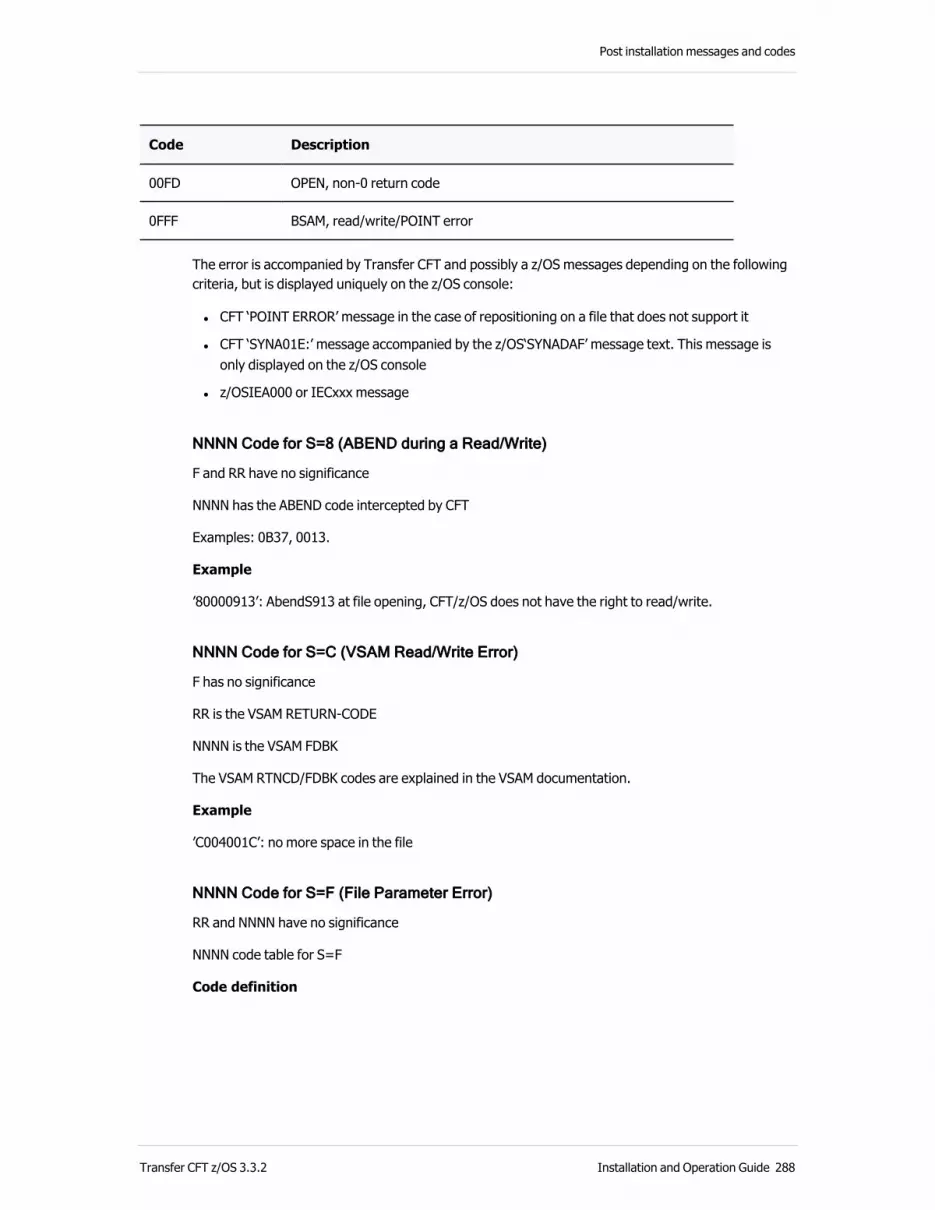
Post installation messages and codes
Code Description
00FD OPEN, non-0 return code
0FFF BSAM, read/write/POINT error
The error is accompanied by Transfer CFT and possibly a z/OS messages depending on the following criteria, but is displayed uniquely on the z/OS console:
l CFT ‘POINT ERROR’ message in the case of repositioning on a file that does not support it
l CFT ‘SYNA01E:’ message accompanied by the z/OS‘SYNADAF’ message text. This message is only displayed on the z/OS console
l z/OSIEA000 or IECxxx message
NNNN Code for S=8 (ABEND during a Read/Write)
F and RR have no significance
NNNN has the ABEND code intercepted by CFT
Examples: 0B37, 0013.
Example
’80000913’: AbendS913 at file opening, CFT/z/OS does not have the right to read/write.
NNNN Code for S=C (VSAM Read/Write Error)
F has no significance
RR is the VSAM RETURN-CODE
NNNN is the VSAM FDBK
The VSAM RTNCD/FDBK codes are explained in the VSAM documentation.
Example
’C004001C’: no more space in the file
NNNN Code for S=F (File Parameter Error)
RR and NNNN have no significance
NNNN code table for S=F
Code definition
Transfer CFT z/OS 3.3.2 Installation and Operation Guide 288

9 Troubleshooting
Code Description
F = 4 Function not allowed
F = 7 Function unknown
F = C File reference incorrect
These codes must be submitted to the Transfer CFT Technical Support.
DYNALLOC Error Codes S=9
The DYNALLOC errors are explained in the IBM brochure “IBM SPL system macros & facilities”.
Value of F for the DYNALLOC function
Code Definition
F=1 Allocate
F=2 De-allocate
Value of RR for DYNALLOC:
l RR is the DYNALLOC return code. It can take on values 04, 08, 0C
Value of NNNN for DYNALLOC:
l NNNN is the DYNALLOC REASON CODE
Example of a DYNALLOC error code:
‘9104970C’ error: no more space to create the file.
The "IKJnnnnnI" and "IGDnnnnnI" error messages returned by DYNALLOC (under SMS) are displayed on the z/OS console:
l IKJ56893I DATA SET NOT ALLOCATED+
l IGD17273I ALLOCATION HAS FAILED FOR ALL VOLUMES SELECTED FOR DATA SET
The ‘nnnn’ hexadecimal value converted to decimal gives the SMS IGD message number. For example, the X’4379’ value corresponds to the IGD172731 message.
Complementary file error diagnosticsThe following complementary diagnostics are available on request by Transfer CFT support, through the SGTRACE tool:
l SGTRACE 4:
Traces the file read/write actions. This value must be used for codes S=0 and S=9
289 Installation and Operation Guide Transfer CFT z/OS 3.3.2

Post installation messages and codes
l SGTRACE 8:
Traces the file read/write actions. This value must be used for codes S=4, 8, C, F
l SGTRACE 2: traces the errors
l SGTRACE 128: traces the module calls and returns
The modules concerned are:
l S=0: SGF3ACC, SGF3STAT, SIFM, SGF3VSAM, SGF3REN
l S=9: SGF3SV99
l S=4, 8, C, F: SGF3C, SIDM
Transfer CFT z/OS 3.3.2 Installation and Operation Guide 290

9 Troubleshooting
Axway support files error diagnosticsThe following complementary diagnostics are available on request by Axway support using the SGTRACE tool.
l SGTRACE 4:
o Traces the file read/write actions. This value must be used for codes S=0 and S=9
l SGTRACE 8:
o Traces the file read/write actions. This value must be used for codes S=4, 8, C, F
l SGTRACE 2: traces the errors
l SGTRACE 128: traces the module calls and returns
The modules concerned are:
l S=0: SGF3ACC, SGF3STAT, SIFM, SGF3VSAM, SGF3REN
l S=9: SGF3SV99
l S=4, 8, C, F: SGF3C, SIDM
Troubleshoot the UCONFRUN datasetCFTMAIN hangs while it waits for the UCONFRUN dataset to be freed
Messages
IEF861I FOLLOWING RESERVED DATA SET NAMES UNAVAILABLE TO CFTMAIN
IEF863I DSN = CFAUTO.AXWAY.D322.CFT.UCONFRUN CFTMAIN RC = 04
IEF099I JOB CFTMAIN WAITING FOR DATA SETS
Cause
When CFTMAIN is started, the UCONFRUN dataset is exclusively held by CFTMAIN and Copilot waits for the dataset to be freed.
-or-
If Copilot is started, the UCONFRUN dataset is held exclusively by Copilot.
Resolution
This issue is related to the use of at least one of the z/OS storage management tools, such as the IBM Tivoli Allocation Optimizer. The easiest way to disable Tivoli Allocation Optimizer is to add the bypass DDNAME in the JCL (COPRUN and CFTMAIN). Doing so bypasses the Tivoli Allocation Optimizer for all of the datasets accessed by this step.
The ddname is AOBYPASS and the format of the DD card is: //AOBYPASS DD DUMMY
Example
291 Installation and Operation Guide Transfer CFT z/OS 3.3.2
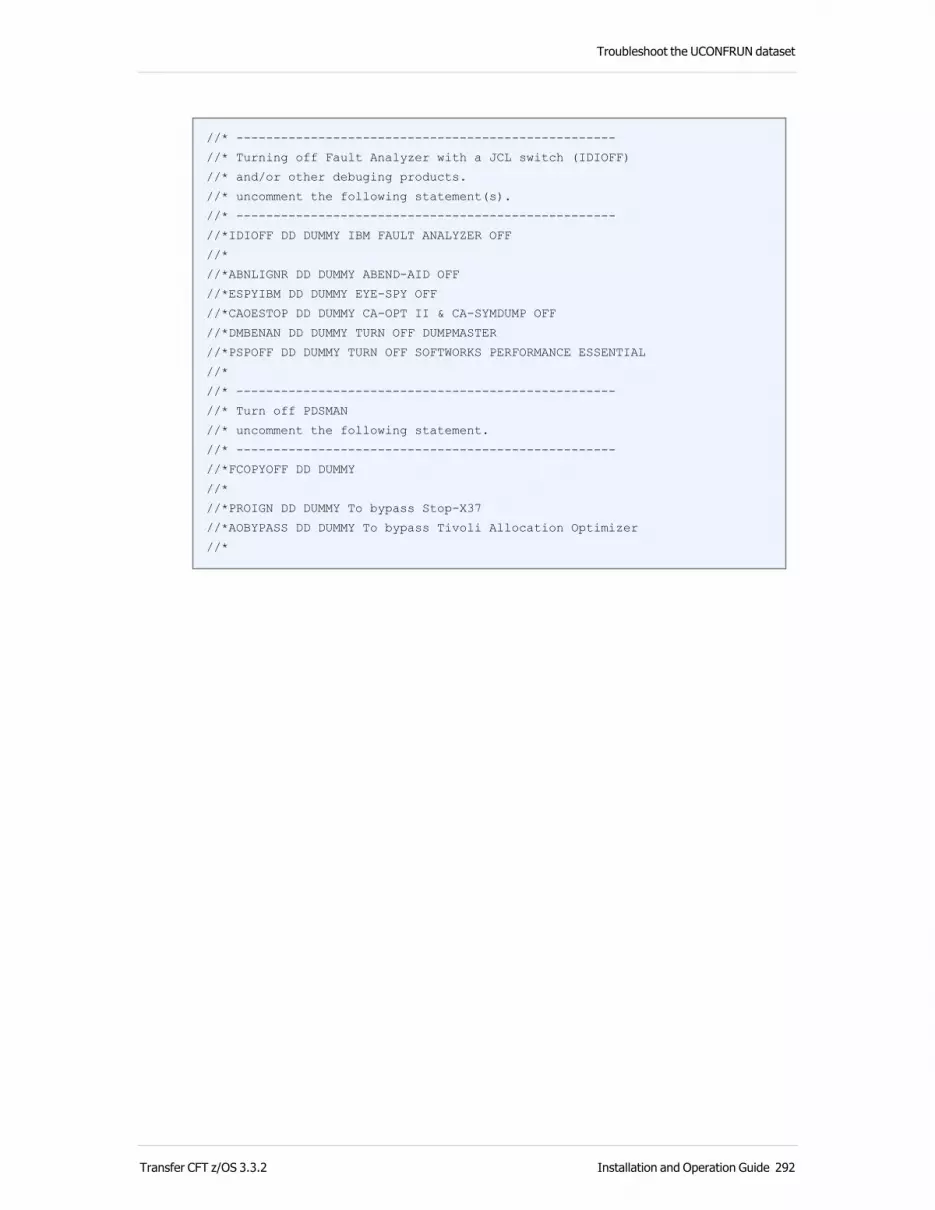
Troubleshoot the UCONFRUN dataset
//* ---------------------------------------------------
//* Turning off Fault Analyzer with a JCL switch (IDIOFF)
//* and/or other debuging products.
//* uncomment the following statement(s).
//* ---------------------------------------------------
//*IDIOFF DD DUMMY IBM FAULT ANALYZER OFF
//*
//*ABNLIGNR DD DUMMY ABEND-AID OFF
//*ESPYIBM DD DUMMY EYE-SPY OFF
//*CAOESTOP DD DUMMY CA-OPT II & CA-SYMDUMP OFF
//*DMBENAN DD DUMMY TURN OFF DUMPMASTER
//*PSPOFF DD DUMMY TURN OFF SOFTWORKS PERFORMANCE ESSENTIAL
//*
//* ---------------------------------------------------
//* Turn off PDSMAN
//* uncomment the following statement.
//* ---------------------------------------------------
//*FCOPYOFF DD DUMMY
//*
//*PROIGN DD DUMMY To bypass Stop-X37
//*AOBYPASS DD DUMMY To bypass Tivoli Allocation Optimizer
//*
Transfer CFT z/OS 3.3.2 Installation and Operation Guide 292

9 Troubleshooting
293 Installation and Operation Guide Transfer CFT z/OS 3.3.2
10 Appendix A: About APIs
Application Programming Interfaces, or APIs, are a set of functions that use a service. The service is followed by an application program.
The programming interfaces and programming language are related. The services can be called by programs in COBOL or in C language as described in this section.
About Transfer CFT servicesYou can query information related to correctly completed transfers. This information can be accessed in the communication structure.
A description of this structure sub-assembly is provided in the cftapi.h for the C language, and cftapi.cop for COBOL.
Restrictions l Visual Basic APIs are available on PCs only.
l The security APIs are not covered in this section.
Delivered templates for z/OSThis topic lists the Axway Transfer CFT API templates that are delivered for the z/OS platform. You may decide to use the delivered samples as a basis for integrating APIs, or as a model to create your own. Templates include samples in:
Assembler language
C language
COBOL language
The Transfer CFT z/OS templates are located in the installed Transfer CFT distribution library.
Assembler languageIn the Template column, click the template link to view the sample template as a text file.
Transfer CFT z/OS 3.3.2 Installation and Operation Guide 294
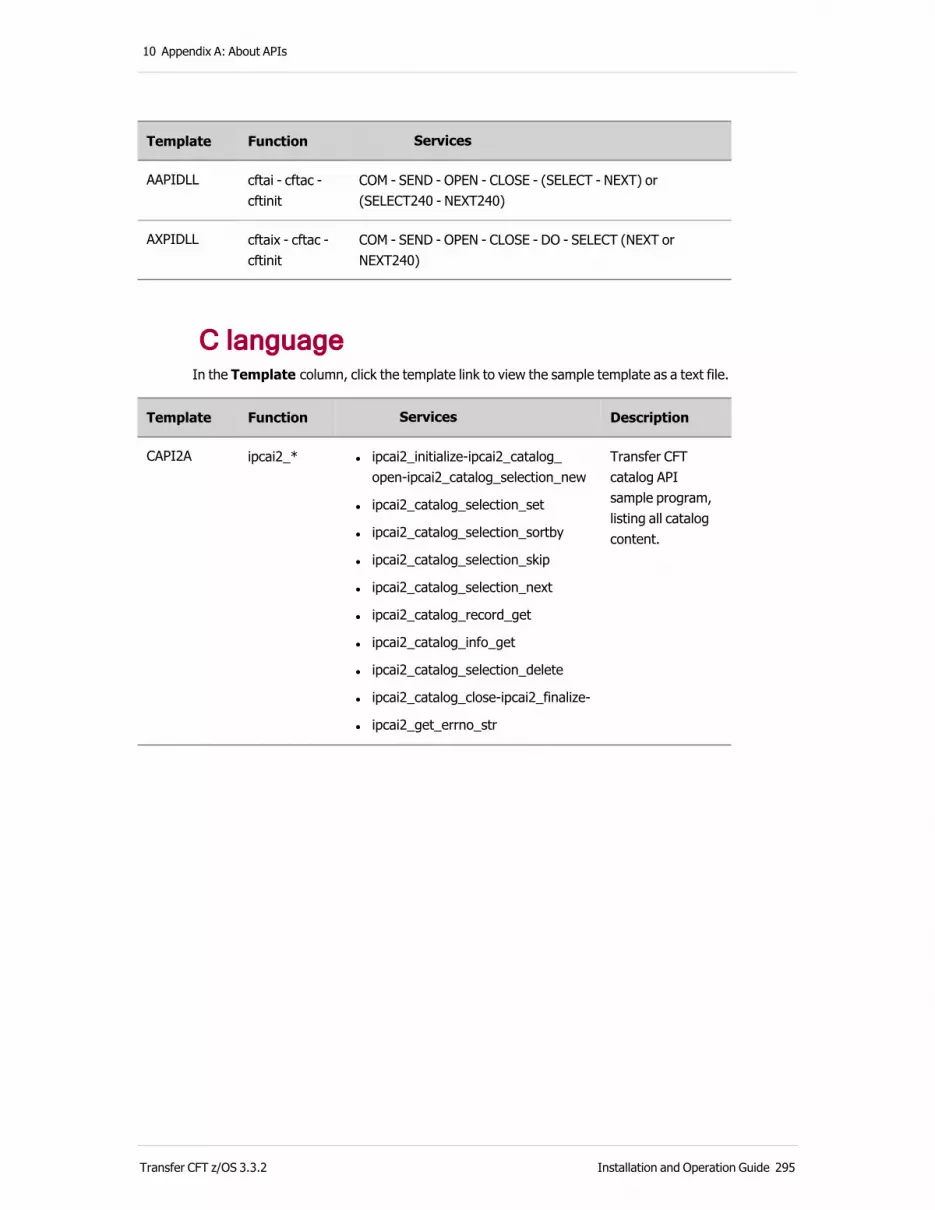
10 Appendix A: About APIs
Template Function Services
AAPIDLL cftai - cftac - cftinit
COM - SEND - OPEN - CLOSE - (SELECT - NEXT) or (SELECT240 - NEXT240)
AXPIDLL cftaix - cftac - cftinit
COM - SEND - OPEN - CLOSE - DO - SELECT (NEXT or NEXT240)
C languageIn the Template column, click the template link to view the sample template as a text file.
Template Function Services Description
CAPI2A ipcai2_* l ipcai2_initialize-ipcai2_catalog_open-ipcai2_catalog_selection_new
l ipcai2_catalog_selection_set
l ipcai2_catalog_selection_sortby
l ipcai2_catalog_selection_skip
l ipcai2_catalog_selection_next
l ipcai2_catalog_record_get
l ipcai2_catalog_info_get
l ipcai2_catalog_selection_delete
l ipcai2_catalog_close-ipcai2_finalize-
l ipcai2_get_errno_str
Transfer CFT catalog API sample program, listing all catalog content.
Transfer CFT z/OS 3.3.2 Installation and Operation Guide 295
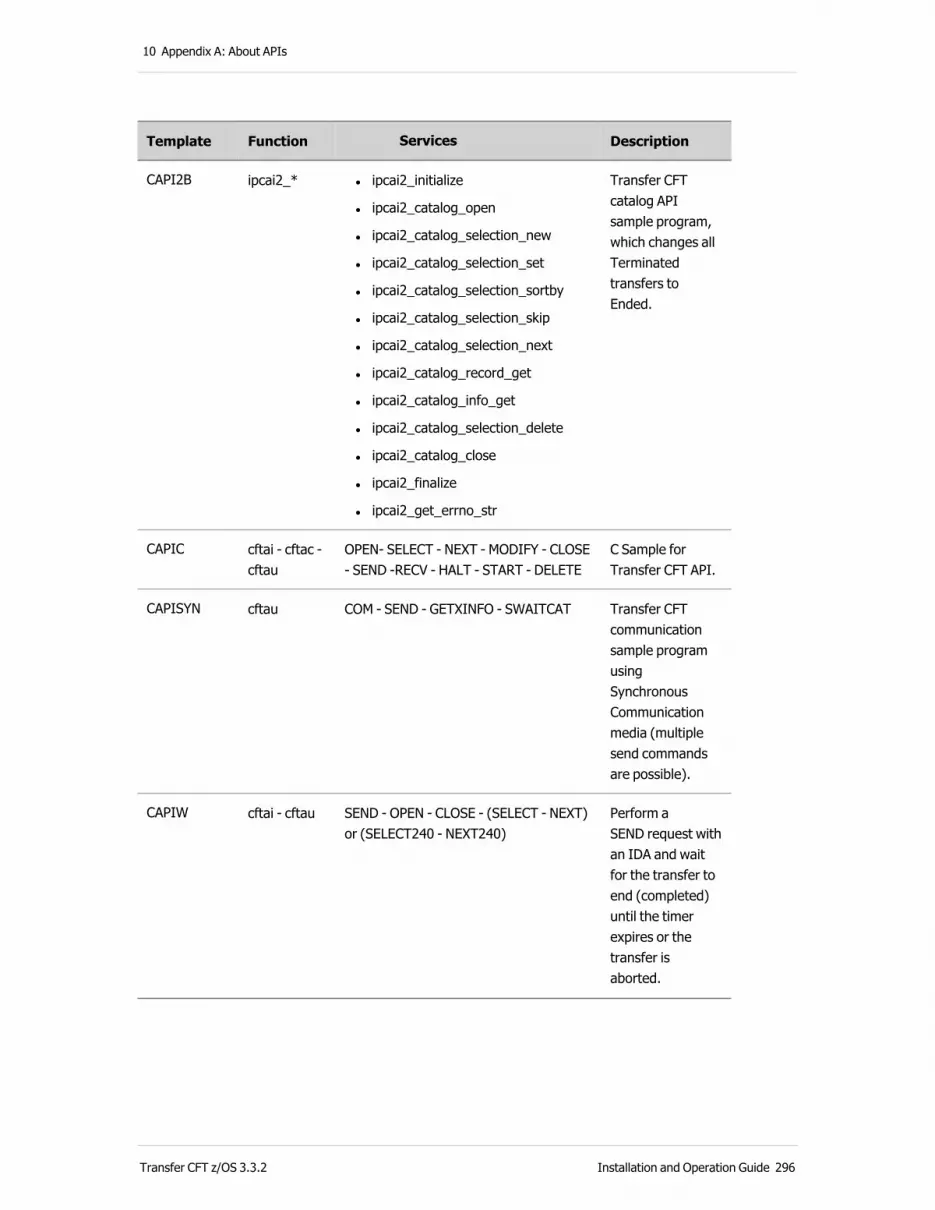
10 Appendix A: About APIs
Template Function Services Description
CAPI2B ipcai2_* l ipcai2_initialize
l ipcai2_catalog_open
l ipcai2_catalog_selection_new
l ipcai2_catalog_selection_set
l ipcai2_catalog_selection_sortby
l ipcai2_catalog_selection_skip
l ipcai2_catalog_selection_next
l ipcai2_catalog_record_get
l ipcai2_catalog_info_get
l ipcai2_catalog_selection_delete
l ipcai2_catalog_close
l ipcai2_finalize
l ipcai2_get_errno_str
Transfer CFT catalog API sample program, which changes all Terminated transfers to Ended.
CAPIC cftai - cftac - cftau
OPEN- SELECT - NEXT - MODIFY - CLOSE - SEND -RECV - HALT - START - DELETE
C Sample for Transfer CFT API.
CAPISYN cftau COM - SEND - GETXINFO - SWAITCAT Transfer CFT communication sample program using Synchronous Communication media (multiple send commands are possible).
CAPIW cftai - cftau SEND - OPEN - CLOSE - (SELECT - NEXT) or (SELECT240 - NEXT240)
Perform a SEND request with an IDA and wait for the transfer to end (completed) until the timer expires or the transfer is aborted.
Transfer CFT z/OS 3.3.2 Installation and Operation Guide 296
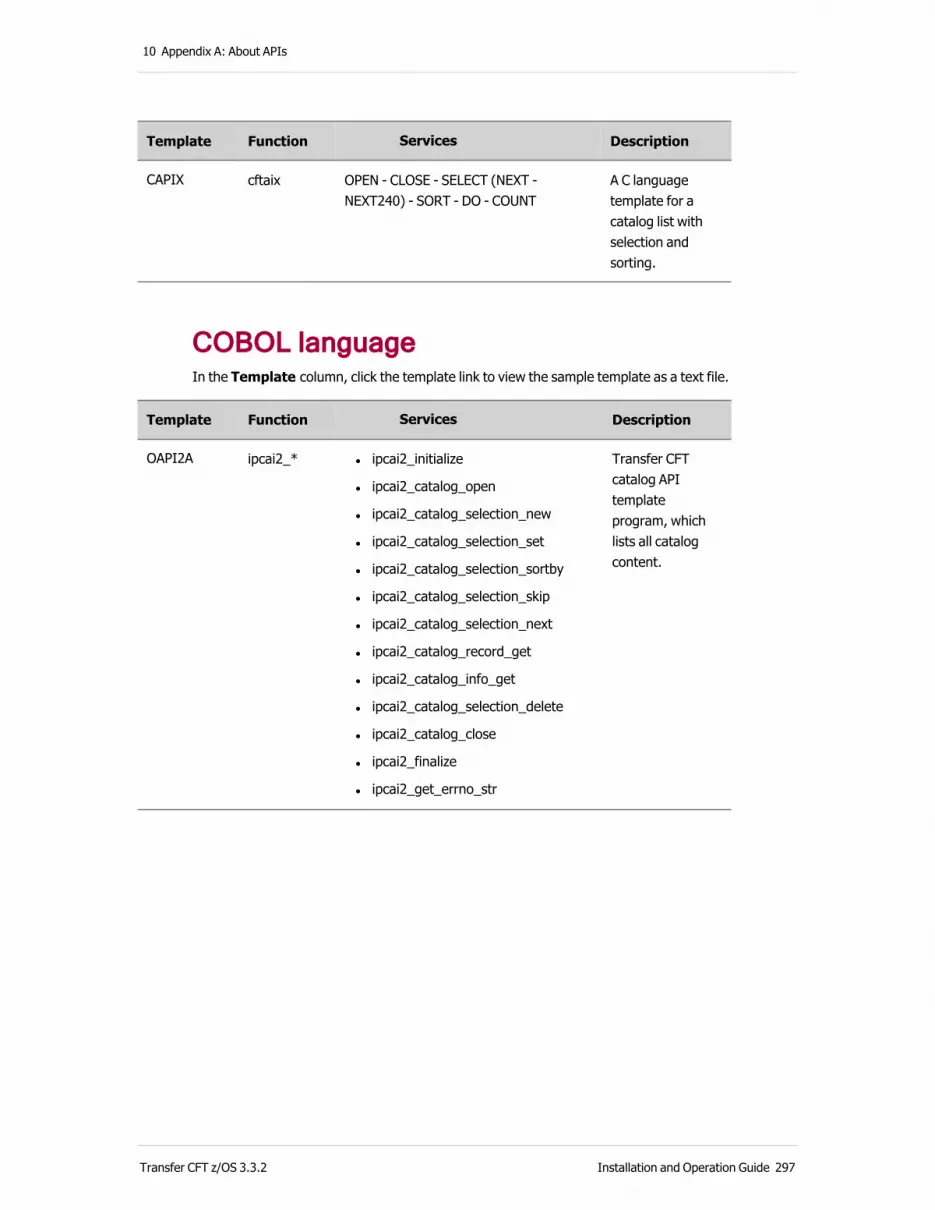
10 Appendix A: About APIs
Template Function Services Description
CAPIX cftaix OPEN - CLOSE - SELECT (NEXT - NEXT240) - SORT - DO - COUNT
A C language template for a catalog list with selection and sorting.
COBOL languageIn the Template column, click the template link to view the sample template as a text file.
Template Function Services Description
OAPI2A ipcai2_* l ipcai2_initialize
l ipcai2_catalog_open
l ipcai2_catalog_selection_new
l ipcai2_catalog_selection_set
l ipcai2_catalog_selection_sortby
l ipcai2_catalog_selection_skip
l ipcai2_catalog_selection_next
l ipcai2_catalog_record_get
l ipcai2_catalog_info_get
l ipcai2_catalog_selection_delete
l ipcai2_catalog_close
l ipcai2_finalize
l ipcai2_get_errno_str
Transfer CFT catalog API template program, which lists all catalog content.
Transfer CFT z/OS 3.3.2 Installation and Operation Guide 297

10 Appendix A: About APIs
Template Function Services Description
OAPI2AS ipcai2_* l ipcai2_initialize
l ipcai2_catalog_open
l ipcai2_catalog_selection_new
l ipcai2_catalog_selection_set
l ipcai2_catalog_selection_sortby
l ipcai2_catalog_selection_skip
l ipcai2_catalog_selection_next
l ipcai2_catalog_record_get
l ipcai2_catalog_info_get
l ipcai2_catalog_selection_delete
l ipcai2_catalog_close
l ipcai2_finalize
l ipcai2_get_errno_str
Transfer CFT catalog API template program, which lists all of the catalog content.
OAPI2B ipcai2_* l ipcai2_initialize-
l ipcai2_catalog_open
l ipcai2_catalog_selection_new
l ipcai2_catalog_selection_set
l ipcai2_catalog_selection_sortby
l ipcai2_catalog_selection_skip
l ipcai2_catalog_selection_next
l ipcai2_catalog_record_get
l ipcai2_catalog_info_get
l ipcai2_catalog_selection_delete
l ipcai2_catalog_close
l ipcai2_finalize
l ipcai2_get_errno_str
Transfer CFT catalog API template program, which changes all successful transfers to a completed state.
Transfer CFT z/OS 3.3.2 Installation and Operation Guide 298
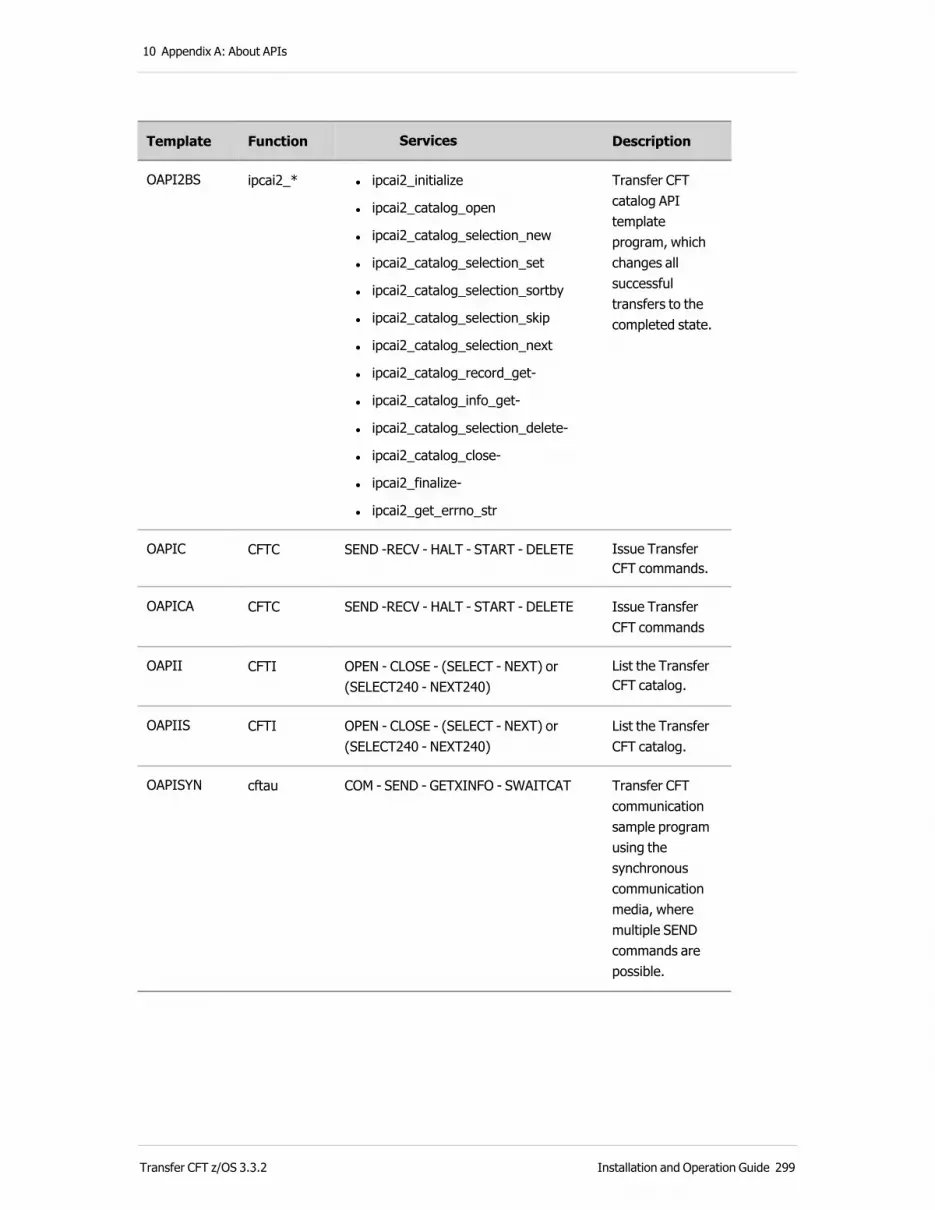
10 Appendix A: About APIs
Template Function Services Description
OAPI2BS ipcai2_* l ipcai2_initialize
l ipcai2_catalog_open
l ipcai2_catalog_selection_new
l ipcai2_catalog_selection_set
l ipcai2_catalog_selection_sortby
l ipcai2_catalog_selection_skip
l ipcai2_catalog_selection_next
l ipcai2_catalog_record_get-
l ipcai2_catalog_info_get-
l ipcai2_catalog_selection_delete-
l ipcai2_catalog_close-
l ipcai2_finalize-
l ipcai2_get_errno_str
Transfer CFT catalog API template program, which changes all successful transfers to the completed state.
OAPIC CFTC SEND -RECV - HALT - START - DELETE Issue Transfer CFT commands.
OAPICA CFTC SEND -RECV - HALT - START - DELETE Issue Transfer CFT commands
OAPII CFTI OPEN - CLOSE - (SELECT - NEXT) or (SELECT240 - NEXT240)
List the Transfer CFT catalog.
OAPIIS CFTI OPEN - CLOSE - (SELECT - NEXT) or (SELECT240 - NEXT240)
List the Transfer CFT catalog.
OAPISYN cftau COM - SEND - GETXINFO - SWAITCAT Transfer CFT communication sample program using the synchronous communication media, where multiple SEND commands are possible.
Transfer CFT z/OS 3.3.2 Installation and Operation Guide 299
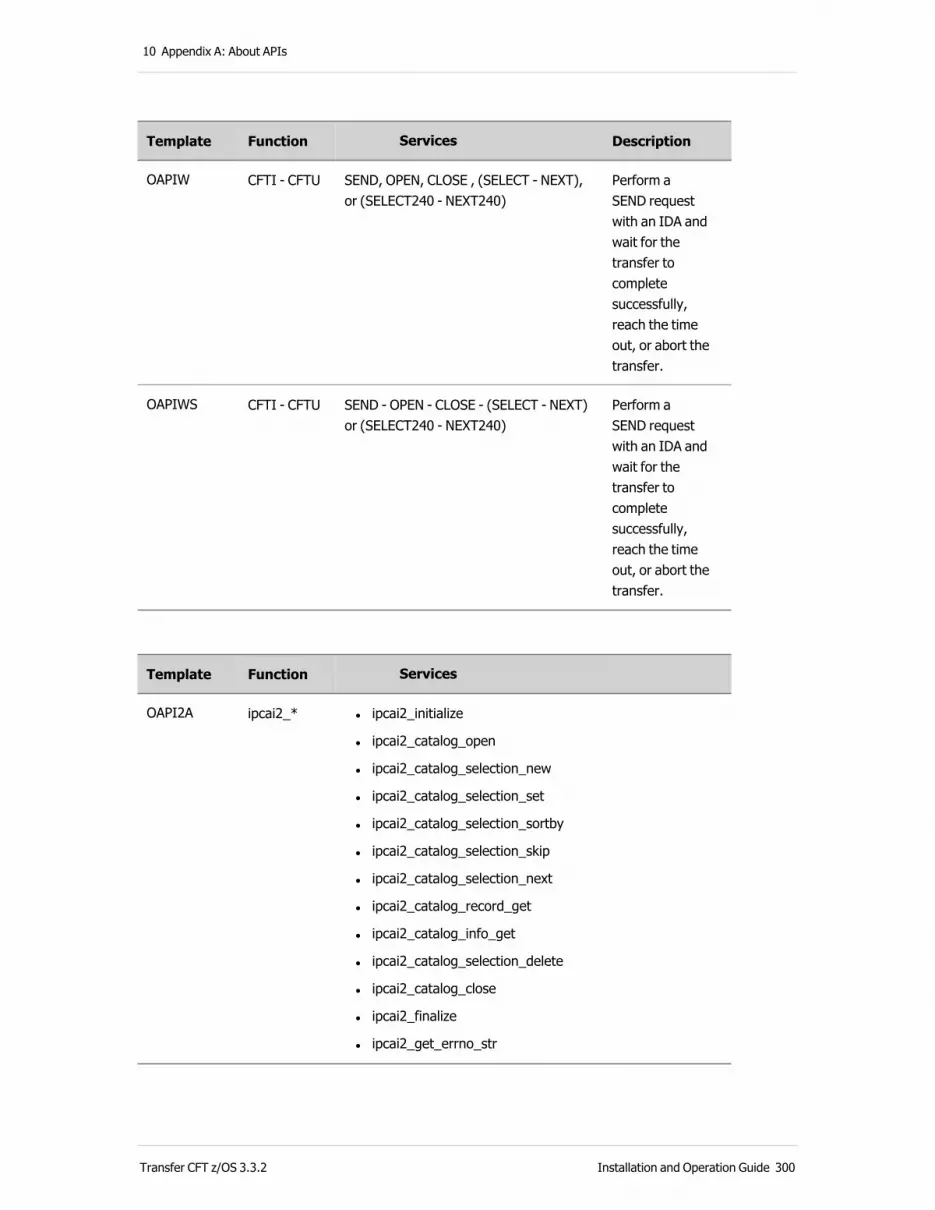
10 Appendix A: About APIs
Template Function Services Description
OAPIW CFTI - CFTU SEND, OPEN, CLOSE , (SELECT - NEXT), or (SELECT240 - NEXT240)
Perform a SEND request with an IDA and wait for the transfer to complete successfully, reach the time out, or abort the transfer.
OAPIWS CFTI - CFTU SEND - OPEN - CLOSE - (SELECT - NEXT) or (SELECT240 - NEXT240)
Perform a SEND request with an IDA and wait for the transfer to complete successfully, reach the time out, or abort the transfer.
Template Function Services
OAPI2A ipcai2_* l ipcai2_initialize
l ipcai2_catalog_open
l ipcai2_catalog_selection_new
l ipcai2_catalog_selection_set
l ipcai2_catalog_selection_sortby
l ipcai2_catalog_selection_skip
l ipcai2_catalog_selection_next
l ipcai2_catalog_record_get
l ipcai2_catalog_info_get
l ipcai2_catalog_selection_delete
l ipcai2_catalog_close
l ipcai2_finalize
l ipcai2_get_errno_str
Transfer CFT z/OS 3.3.2 Installation and Operation Guide 300

10 Appendix A: About APIs
Template Function Services
OAPI2AS ipcai2_* l ipcai2_initialize
l ipcai2_catalog_open
l ipcai2_catalog_selection_new
l ipcai2_catalog_selection_set
l ipcai2_catalog_selection_sortby
l ipcai2_catalog_selection_skip
l ipcai2_catalog_selection_next
l ipcai2_catalog_record_get
l ipcai2_catalog_info_get
l ipcai2_catalog_selection_delete
l ipcai2_catalog_close
l ipcai2_finalize
l ipcai2_get_errno_str
OAPI2B ipcai2_* l ipcai2_initialize-
l ipcai2_catalog_open
l ipcai2_catalog_selection_new
l ipcai2_catalog_selection_set
l ipcai2_catalog_selection_sortby
l ipcai2_catalog_selection_skip
l ipcai2_catalog_selection_next
l ipcai2_catalog_record_get
l ipcai2_catalog_info_get
l ipcai2_catalog_selection_delete
l ipcai2_catalog_close
l ipcai2_finalize
l ipcai2_get_errno_str
Transfer CFT z/OS 3.3.2 Installation and Operation Guide 301

10 Appendix A: About APIs
Template Function Services
OAPI2BS ipcai2_* l ipcai2_initialize
l ipcai2_catalog_open
l ipcai2_catalog_selection_new
l ipcai2_catalog_selection_set
l ipcai2_catalog_selection_sortby
l ipcai2_catalog_selection_skip
l ipcai2_catalog_selection_next
l ipcai2_catalog_record_get-
l ipcai2_catalog_info_get-
l ipcai2_catalog_selection_delete-
l ipcai2_catalog_close-
l ipcai2_finalize-
l ipcai2_get_errno_str
OAPIC CFTC SEND -RECV - HALT - START - DELETE
OAPICS CFTC SEND -RECV - HALT - START - DELETE
OAPII CFTI OPEN - CLOSE - (SELECT - NEXT) or (SELECT240 - NEXT240)
OAPIIS CFTI OPEN - CLOSE - (SELECT - NEXT) or (SELECT240 - NEXT240)
OAPISYN cftau COM - SEND - GETXINFO - SWAITCAT
OAPIW CFTI - CFTU SEND, OPEN, CLOSE , (SELECT - NEXT), or (SELECT240 - NEXT240)
OAPIWS CFTI - CFTU SEND - OPEN - CLOSE - (SELECT - NEXT) or (SELECT240 - NEXT240)
Transfer CFT z/OS 3.3.2 Installation and Operation Guide 302


