Embed Size (px)
Citation preview
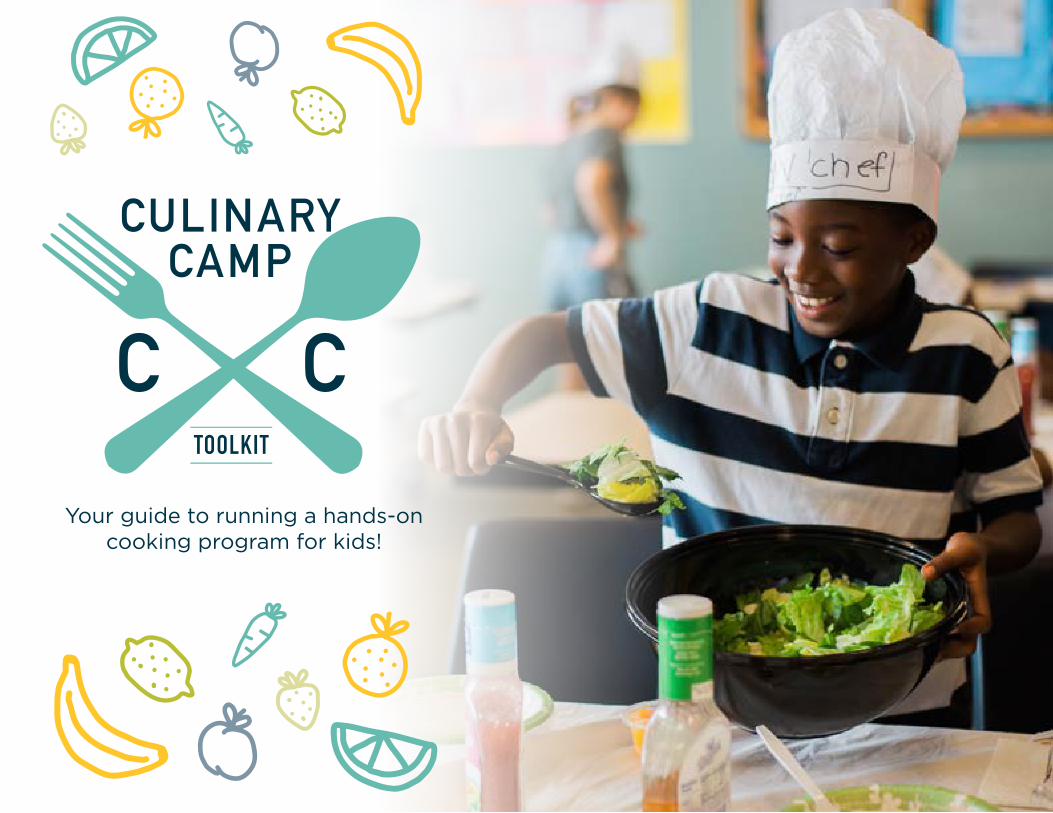
Your guide to running a hands-on cooking program for kids!
TOOLKIT
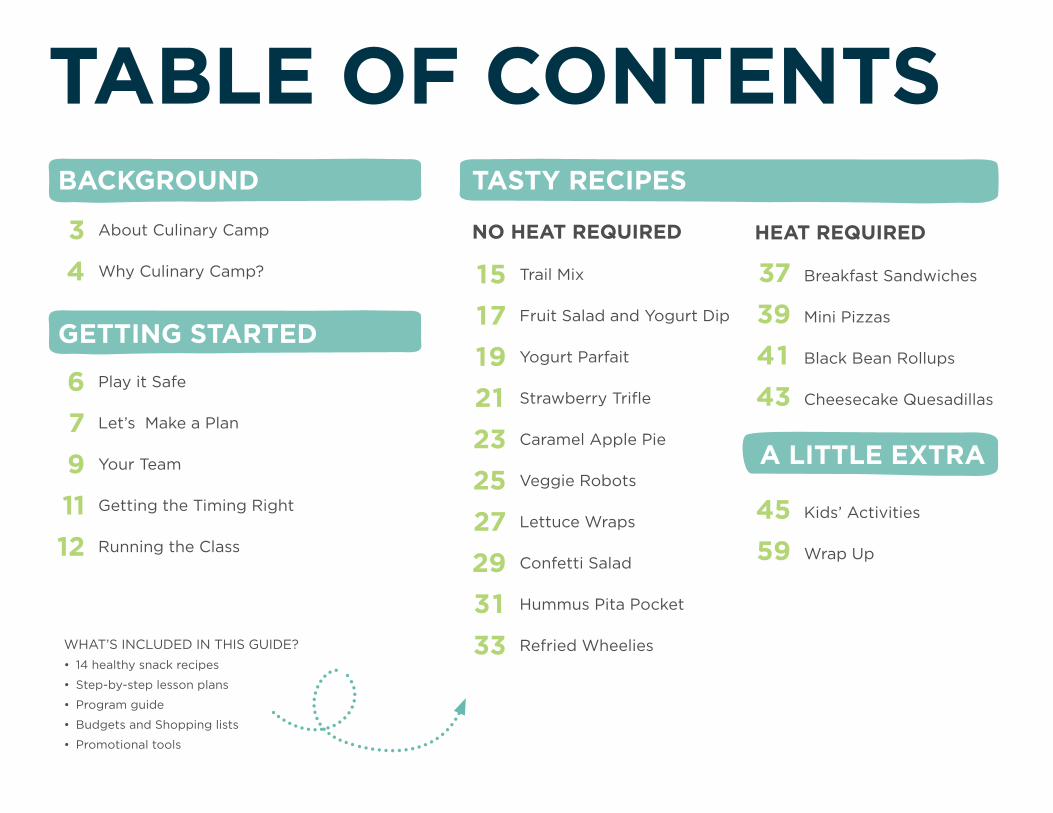
WHAT’S INCLUDED IN THIS GUIDE?• 14 healthy snack recipes
• Step-by-step lesson plans
• Program guide
• Budgets and Shopping lists
• Promotional tools
6791112
151719
23252729
3331
21
3739
4341
4559
Play it Safe
Let’s Make a Plan
Your Team
Getting the Timing Right
Running the Class
34
TABLE OF CONTENTS
NO HEAT REQUIRED HEAT REQUIREDAbout Culinary Camp
Why Culinary Camp?
TASTY RECIPES
A LITTLE EXTRA
BACKGROUND
GETTING STARTED
Trail Mix
Fruit Salad and Yogurt Dip
Yogurt Parfait
Strawberry Trifle
Caramel Apple Pie
Veggie Robots
Lettuce Wraps
Confetti Salad
Hummus Pita Pocket
Refried Wheelies
Breakfast Sandwiches
Mini Pizzas
Black Bean Rollups
Cheesecake Quesadillas
Kids’ Activities
Wrap Up
3
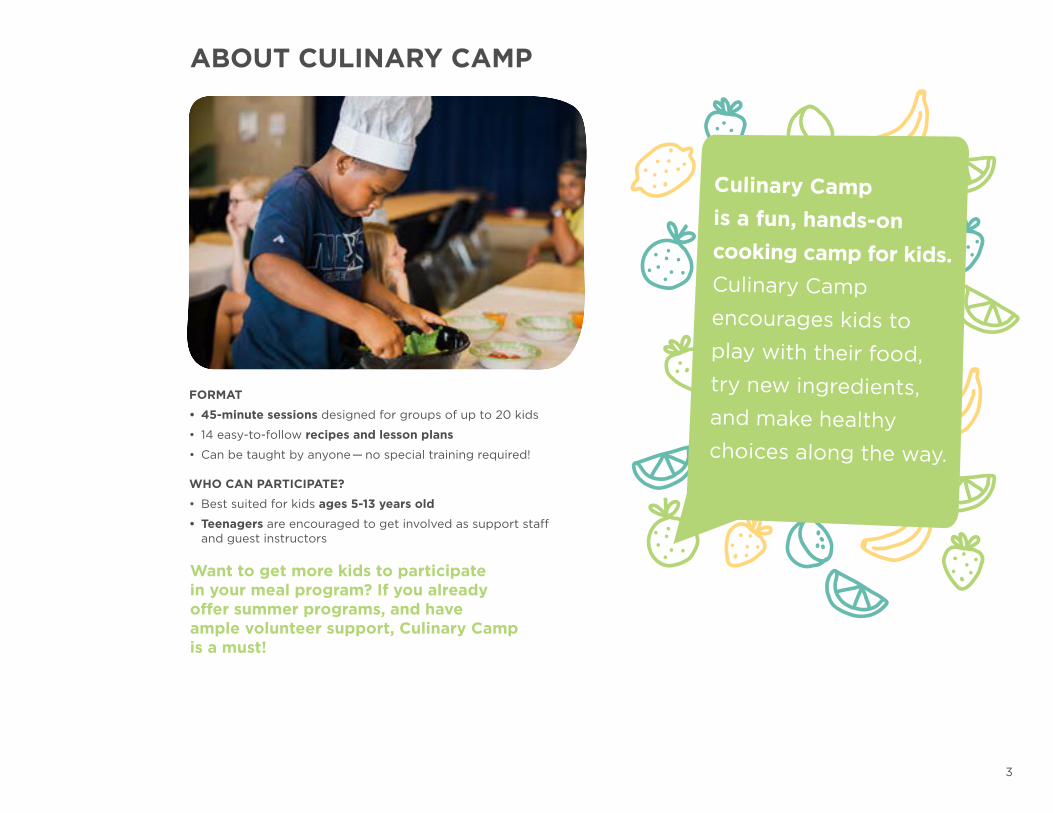
ABOUT CULINARY CAMP
FORMAT
• 45-minute sessions designed for groups of up to 20 kids
• 14 easy-to-follow recipes and lesson plans
• Can be taught by anyone — no special training required!
WHO CAN PARTICIPATE?
• Best suited for kids ages 5-13 years old
• Teenagers are encouraged to get involved as support staff and guest instructors
Want to get more kids to participate in your meal program? If you already offer summer programs, and have ample volunteer support, Culinary Camp is a must!
Culinary Camp is a fun, hands-on cooking camp for kids. Culinary Camp encourages kids to play with their food, try new ingredients, and make healthy choices along the way.
4
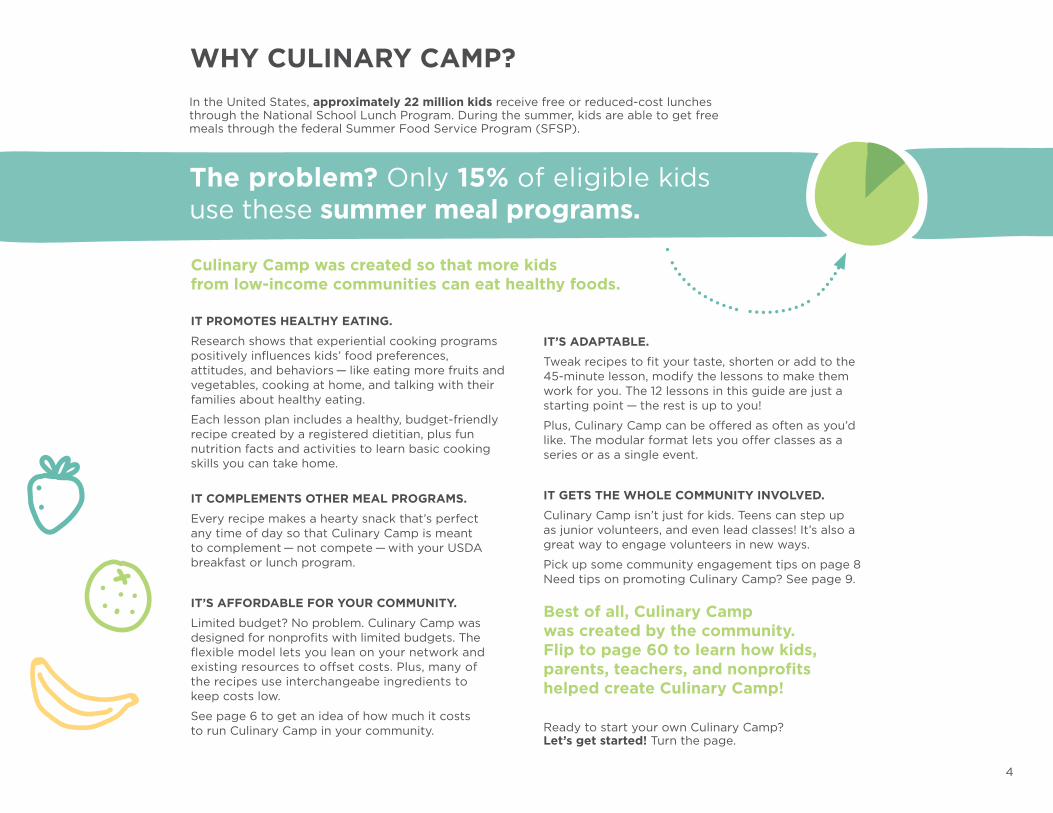
WHY CULINARY CAMP?
The problem? Only 15% of eligible kids use these summer meal programs.
In the United States, approximately 22 million kids receive free or reduced-cost lunches through the National School Lunch Program. During the summer, kids are able to get free meals through the federal Summer Food Service Program (SFSP).
Culinary Camp was created so that more kids from low-income communities can eat healthy foods.
IT PROMOTES HEALTHY EATING.
Research shows that experiential cooking programs positively influences kids’ food preferences, attitudes, and behaviors — like eating more fruits and vegetables, cooking at home, and talking with their families about healthy eating.
Each lesson plan includes a healthy, budget-friendly recipe created by a registered dietitian, plus fun nutrition facts and activities to learn basic cooking skills you can take home.
IT COMPLEMENTS OTHER MEAL PROGRAMS.
Every recipe makes a hearty snack that’s perfect any time of day so that Culinary Camp is meant to complement — not compete — with your USDA breakfast or lunch program.
IT’S AFFORDABLE FOR YOUR COMMUNITY.
Limited budget? No problem. Culinary Camp was designed for nonprofits with limited budgets. The flexible model lets you lean on your network and existing resources to offset costs. Plus, many of the recipes use interchangeabe ingredients to keep costs low.
See page 6 to get an idea of how much it costs to run Culinary Camp in your community.
IT’S ADAPTABLE.
Tweak recipes to fit your taste, shorten or add to the 45-minute lesson, modify the lessons to make them work for you. The 12 lessons in this guide are just a starting point — the rest is up to you!
Plus, Culinary Camp can be offered as often as you’d like. The modular format lets you offer classes as a series or as a single event.
IT GETS THE WHOLE COMMUNITY INVOLVED.
Culinary Camp isn’t just for kids. Teens can step up as junior volunteers, and even lead classes! It’s also a great way to engage volunteers in new ways.
Pick up some community engagement tips on page 8 Need tips on promoting Culinary Camp? See page 9.
Best of all, Culinary Camp was created by the community. Flip to page 60 to learn how kids, parents, teachers, and nonprofits helped create Culinary Camp!
Ready to start your own Culinary Camp? Let’s get started! Turn the page.
5
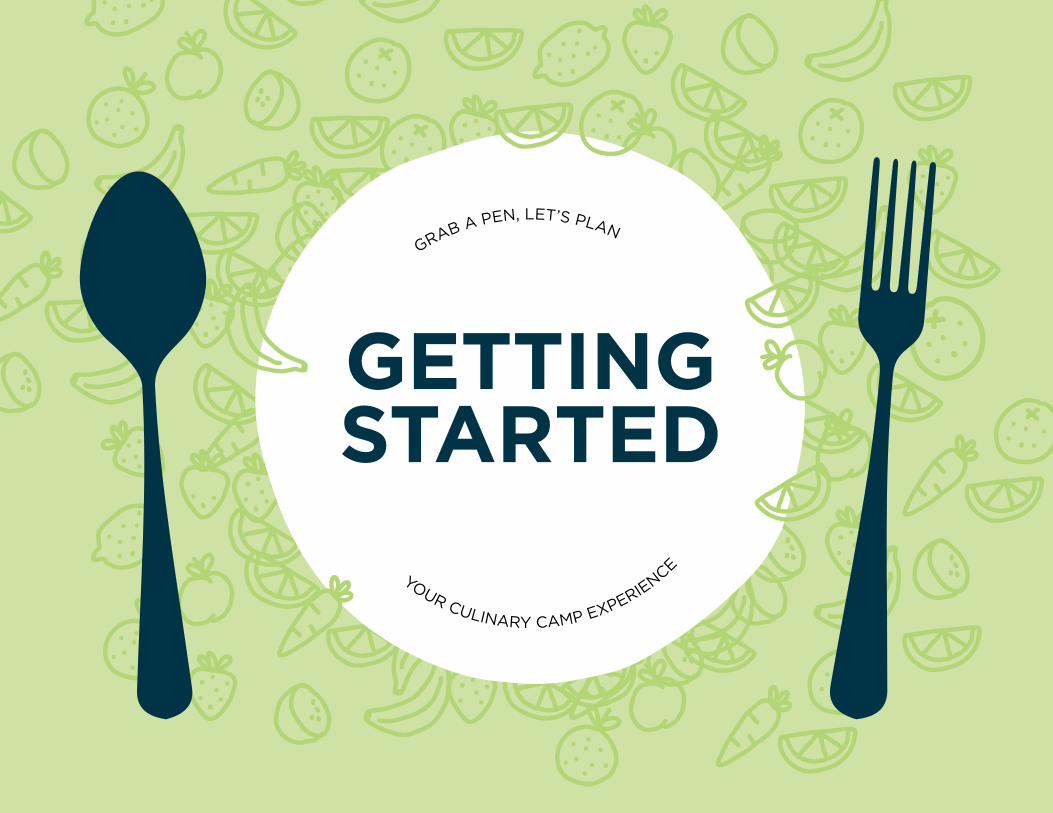
GRAB A PEN, LET’S PLAN
YOUR CULINARY CAMP EXPERIENCE
GETTING STARTED
6
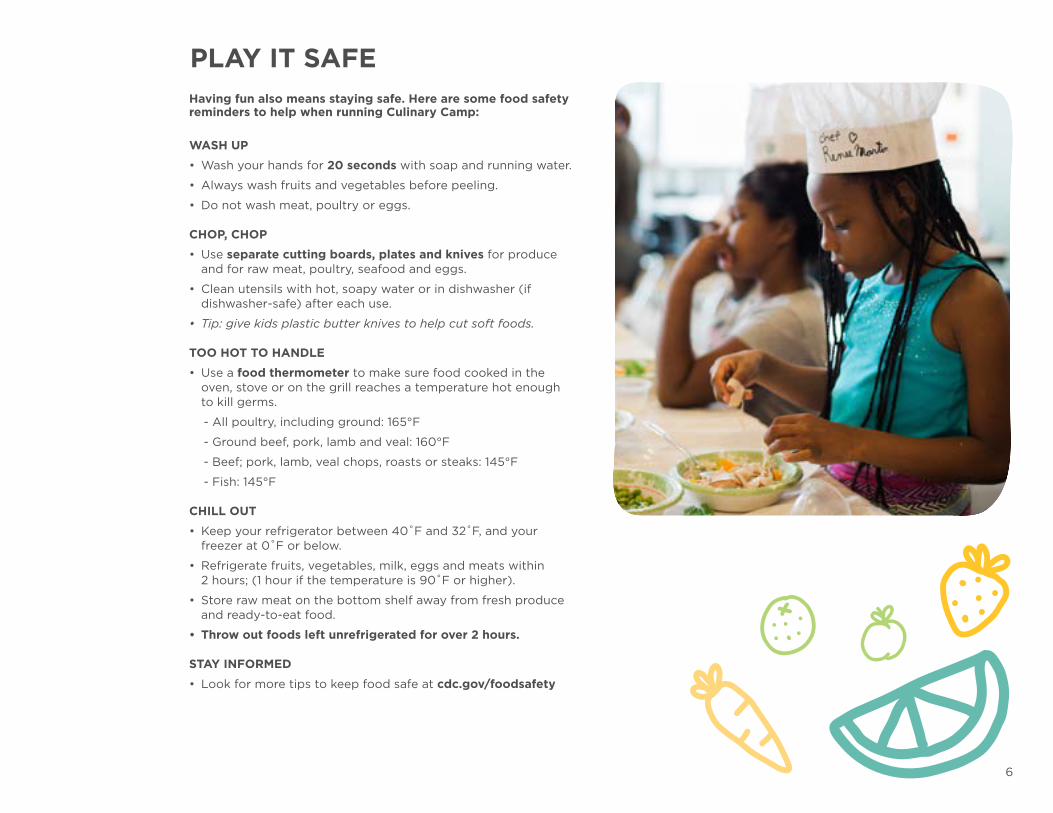
PLAY IT SAFEHaving fun also means staying safe. Here are some food safety reminders to help when running Culinary Camp:
WASH UP
• Wash your hands for 20 seconds with soap and running water.
• Always wash fruits and vegetables before peeling.
• Do not wash meat, poultry or eggs.
CHOP, CHOP
• Use separate cutting boards, plates and knives for produce and for raw meat, poultry, seafood and eggs.
• Clean utensils with hot, soapy water or in dishwasher (if dishwasher-safe) after each use.
• Tip: give kids plastic butter knives to help cut soft foods.
TOO HOT TO HANDLE
• Use a food thermometer to make sure food cooked in the oven, stove or on the grill reaches a temperature hot enough to kill germs.
- All poultry, including ground: 165°F
- Ground beef, pork, lamb and veal: 160°F
- Beef; pork, lamb, veal chops, roasts or steaks: 145°F
- Fish: 145°F
CHILL OUT
• Keep your refrigerator between 40˚F and 32˚F, and your freezer at 0˚F or below.
• Refrigerate fruits, vegetables, milk, eggs and meats within 2 hours; (1 hour if the temperature is 90˚F or higher).
• Store raw meat on the bottom shelf away from fresh produce and ready-to-eat food.
• Throw out foods left unrefrigerated for over 2 hours.
STAY INFORMED
• Look for more tips to keep food safe at cdc.gov/foodsafety
7
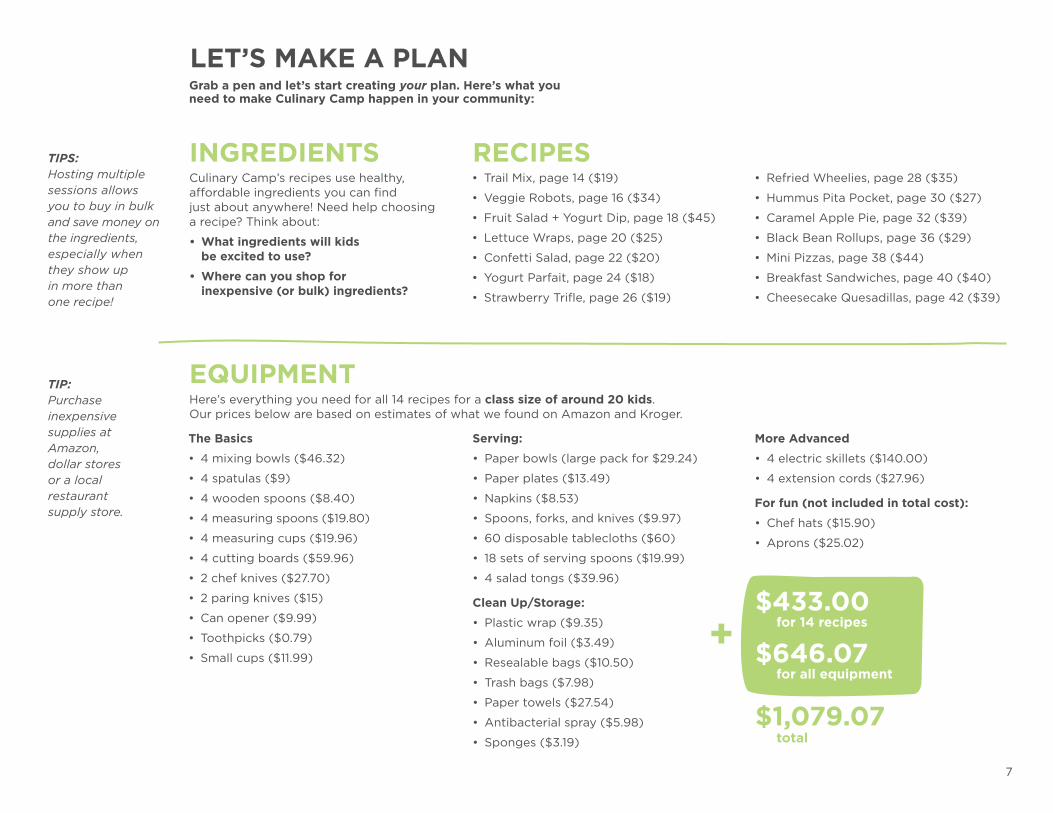
LET’S MAKE A PLAN
TIP: Purchase inexpensive supplies at Amazon, dollar stores or a local restaurant supply store.
Grab a pen and let’s start creating your plan. Here’s what you need to make Culinary Camp happen in your community:
EQUIPMENT
The Basics
• 4 mixing bowls ($46.32)
• 4 spatulas ($9)
• 4 wooden spoons ($8.40)
• 4 measuring spoons ($19.80)
• 4 measuring cups ($19.96)
• 4 cutting boards ($59.96)
• 2 chef knives ($27.70)
• 2 paring knives ($15)
• Can opener ($9.99)
• Toothpicks ($0.79)
• Small cups ($11.99)
Here’s everything you need for all 14 recipes for a class size of around 20 kids. Our prices below are based on estimates of what we found on Amazon and Kroger.
Serving:
• Paper bowls (large pack for $29.24)
• Paper plates ($13.49)
• Napkins ($8.53)
• Spoons, forks, and knives ($9.97)
• 60 disposable tablecloths ($60)
• 18 sets of serving spoons ($19.99)
• 4 salad tongs ($39.96)
Clean Up/Storage:
• Plastic wrap ($9.35)
• Aluminum foil ($3.49)
• Resealable bags ($10.50)
• Trash bags ($7.98)
• Paper towels ($27.54)
• Antibacterial spray ($5.98)
• Sponges ($3.19)
TIPS: Hosting multiple sessions allows you to buy in bulk and save money on the ingredients, especially when they show up in more than one recipe!
INGREDIENTS RECIPESCulinary Camp’s recipes use healthy, affordable ingredients you can find just about anywhere! Need help choosing a recipe? Think about:
• What ingredients will kids be excited to use?
• Where can you shop for inexpensive (or bulk) ingredients?
• Trail Mix, page 14 ($19)
• Veggie Robots, page 16 ($34)
• Fruit Salad + Yogurt Dip, page 18 ($45)
• Lettuce Wraps, page 20 ($25)
• Confetti Salad, page 22 ($20)
• Yogurt Parfait, page 24 ($18)
• Strawberry Trifle, page 26 ($19)
• Refried Wheelies, page 28 ($35)
• Hummus Pita Pocket, page 30 ($27)
• Caramel Apple Pie, page 32 ($39)
• Black Bean Rollups, page 36 ($29)
• Mini Pizzas, page 38 ($44)
• Breakfast Sandwiches, page 40 ($40)
• Cheesecake Quesadillas, page 42 ($39)
More Advanced
• 4 electric skillets ($140.00)
• 4 extension cords ($27.96)
For fun (not included in total cost):
• Chef hats ($15.90)
• Aprons ($25.02)
$433.00
$646.07
$1,079.07
+ for 14 recipes
for all equipment
total
8
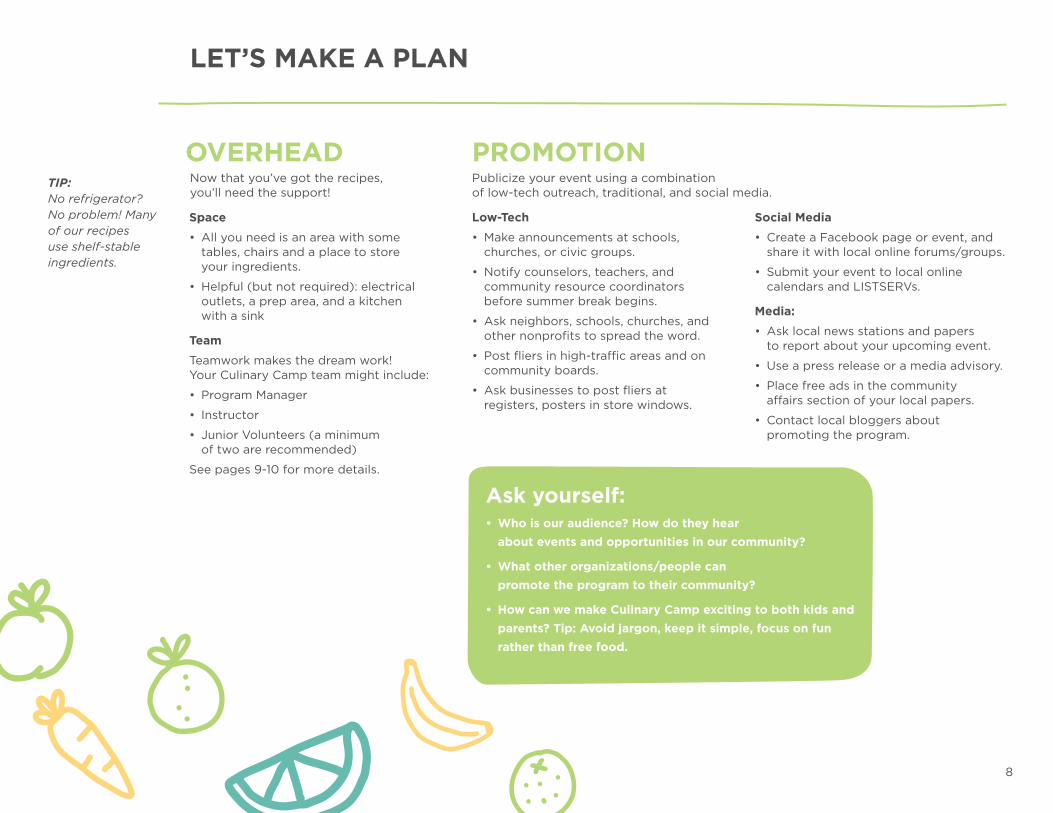
Low-Tech
• Make announcements at schools, churches, or civic groups.
• Notify counselors, teachers, and community resource coordinators before summer break begins.
• Ask neighbors, schools, churches, and other nonprofits to spread the word.
• Post fliers in high-traffic areas and on community boards.
• Ask businesses to post fliers at registers, posters in store windows.
Social Media
• Create a Facebook page or event, and share it with local online forums/groups.
• Submit your event to local online calendars and LISTSERVs.
Media:
• Ask local news stations and papers to report about your upcoming event.
• Use a press release or a media advisory.
• Place free ads in the community affairs section of your local papers.
• Contact local bloggers about promoting the program.
Ask yourself: • Who is our audience? How do they hear
about events and opportunities in our community?
• What other organizations/people can promote the program to their community?
• How can we make Culinary Camp exciting to both kids and parents? Tip: Avoid jargon, keep it simple, focus on fun rather than free food.
Space
• All you need is an area with some tables, chairs and a place to store your ingredients.
• Helpful (but not required): electrical outlets, a prep area, and a kitchen with a sink
Team
Teamwork makes the dream work! Your Culinary Camp team might include:
• Program Manager
• Instructor
• Junior Volunteers (a minimum of two are recommended)
See pages 9-10 for more details.
OVERHEAD PROMOTIONTIP: No refrigerator? No problem! Many of our recipes use shelf-stable ingredients.
LET’S MAKE A PLAN
Publicize your event using a combination of low-tech outreach, traditional, and social media.
Now that you’ve got the recipes, you’ll need the support!
9
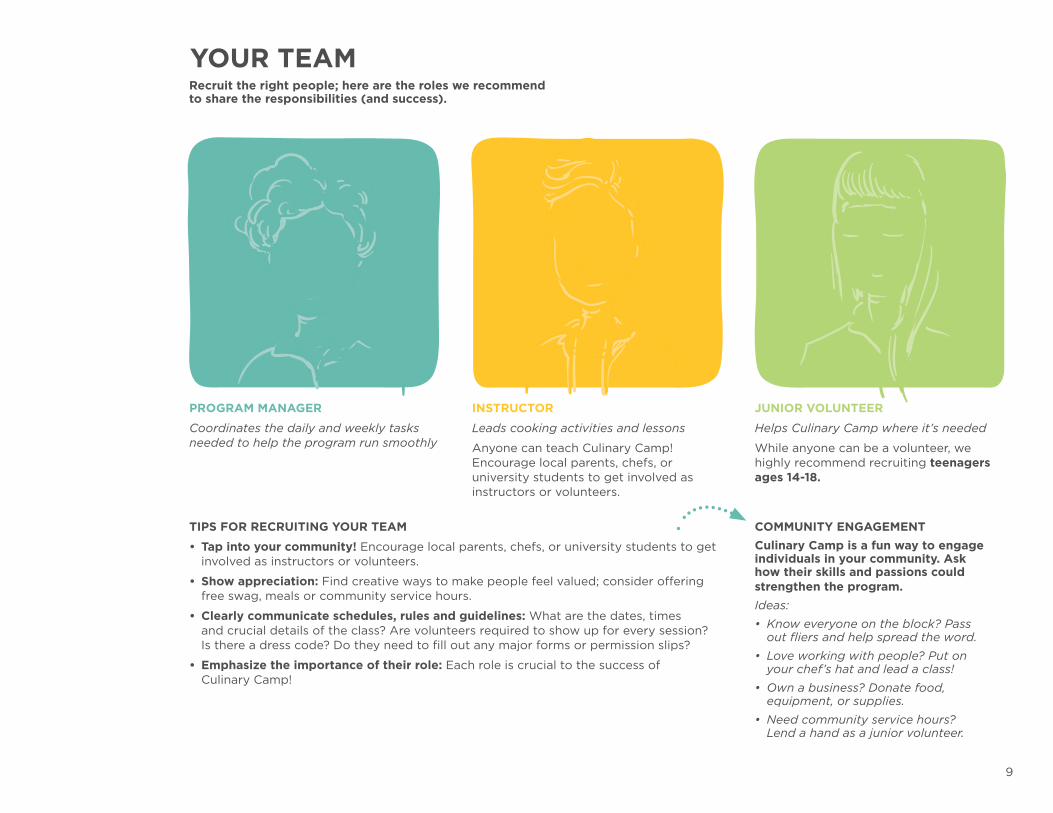
TIPS FOR RECRUITING YOUR TEAM
• Tap into your community! Encourage local parents, chefs, or university students to get involved as instructors or volunteers.
• Show appreciation: Find creative ways to make people feel valued; consider offering free swag, meals or community service hours.
• Clearly communicate schedules, rules and guidelines: What are the dates, times and crucial details of the class? Are volunteers required to show up for every session? Is there a dress code? Do they need to fill out any major forms or permission slips?
• Emphasize the importance of their role: Each role is crucial to the success of Culinary Camp!
JUNIOR VOLUNTEER
Helps Culinary Camp where it’s needed
While anyone can be a volunteer, we highly recommend recruiting teenagers ages 14-18.
YOUR TEAMRecruit the right people; here are the roles we recommend to share the responsibilities (and success).
PROGRAM MANAGER
Coordinates the daily and weekly tasks needed to help the program run smoothly
INSTRUCTOR
Leads cooking activities and lessons
Anyone can teach Culinary Camp! Encourage local parents, chefs, or university students to get involved as instructors or volunteers.
COMMUNITY ENGAGEMENTCulinary Camp is a fun way to engage individuals in your community. Ask how their skills and passions could strengthen the program. Ideas:
• Know everyone on the block? Pass out fliers and help spread the word.
• Love working with people? Put on your chef’s hat and lead a class!
• Own a business? Donate food, equipment, or supplies.
• Need community service hours? Lend a hand as a junior volunteer.
10
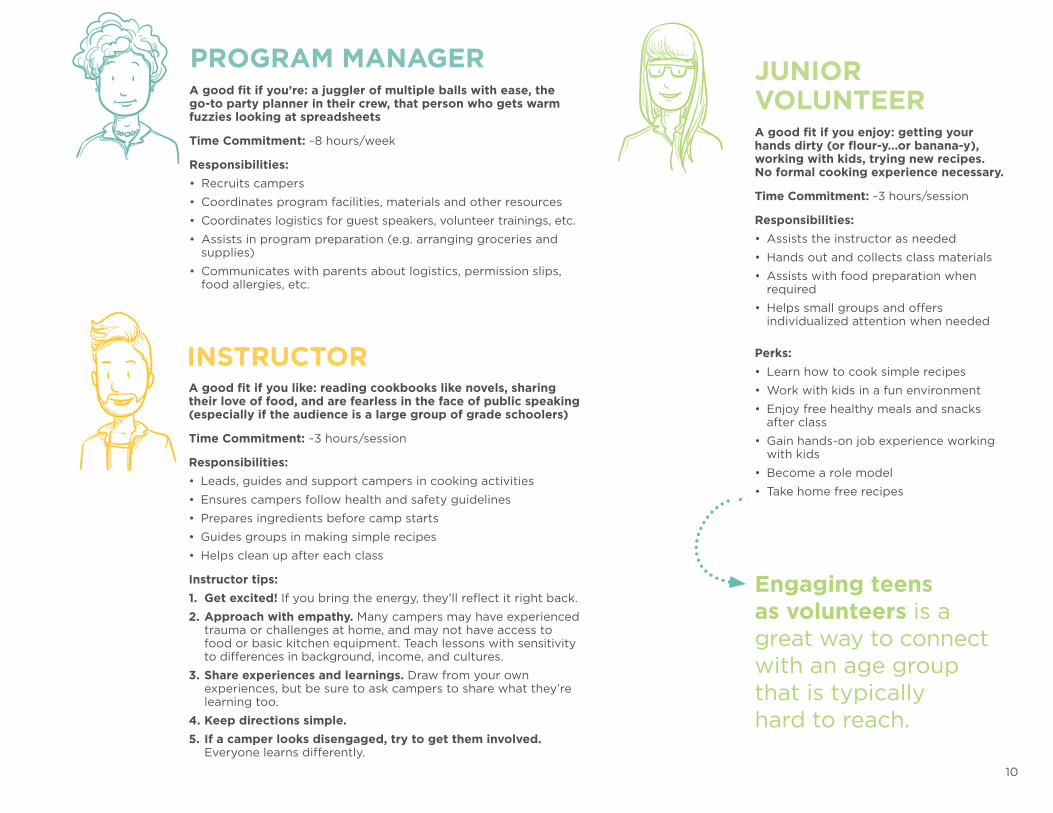
PROGRAM MANAGERA good fit if you’re: a juggler of multiple balls with ease, the go-to party planner in their crew, that person who gets warm fuzzies looking at spreadsheets
Time Commitment: ~8 hours/week
Responsibilities:• Recruits campers
• Coordinates program facilities, materials and other resources
• Coordinates logistics for guest speakers, volunteer trainings, etc.
• Assists in program preparation (e.g. arranging groceries and supplies)
• Communicates with parents about logistics, permission slips, food allergies, etc.
INSTRUCTORA good fit if you like: reading cookbooks like novels, sharing their love of food, and are fearless in the face of public speaking (especially if the audience is a large group of grade schoolers)
Time Commitment: ~3 hours/session
Responsibilities:• Leads, guides and support campers in cooking activities
• Ensures campers follow health and safety guidelines
• Prepares ingredients before camp starts
• Guides groups in making simple recipes
• Helps clean up after each class
Instructor tips:1. Get excited! If you bring the energy, they’ll reflect it right back.
2. Approach with empathy. Many campers may have experienced trauma or challenges at home, and may not have access to food or basic kitchen equipment. Teach lessons with sensitivity to differences in background, income, and cultures.
3. Share experiences and learnings. Draw from your own experiences, but be sure to ask campers to share what they’re learning too.
4. Keep directions simple. 5. If a camper looks disengaged, try to get them involved.
Everyone learns differently.
JUNIOR VOLUNTEERA good fit if you enjoy: getting your hands dirty (or flour-y...or banana-y), working with kids, trying new recipes. No formal cooking experience necessary.
Time Commitment: ~3 hours/session
Responsibilities:• Assists the instructor as needed
• Hands out and collects class materials
• Assists with food preparation when required
• Helps small groups and offers individualized attention when needed
Perks:• Learn how to cook simple recipes
• Work with kids in a fun environment
• Enjoy free healthy meals and snacks after class
• Gain hands-on job experience working with kids
• Become a role model
• Take home free recipes
Engaging teens as volunteers is a great way to connect with an age group that is typically hard to reach.
11
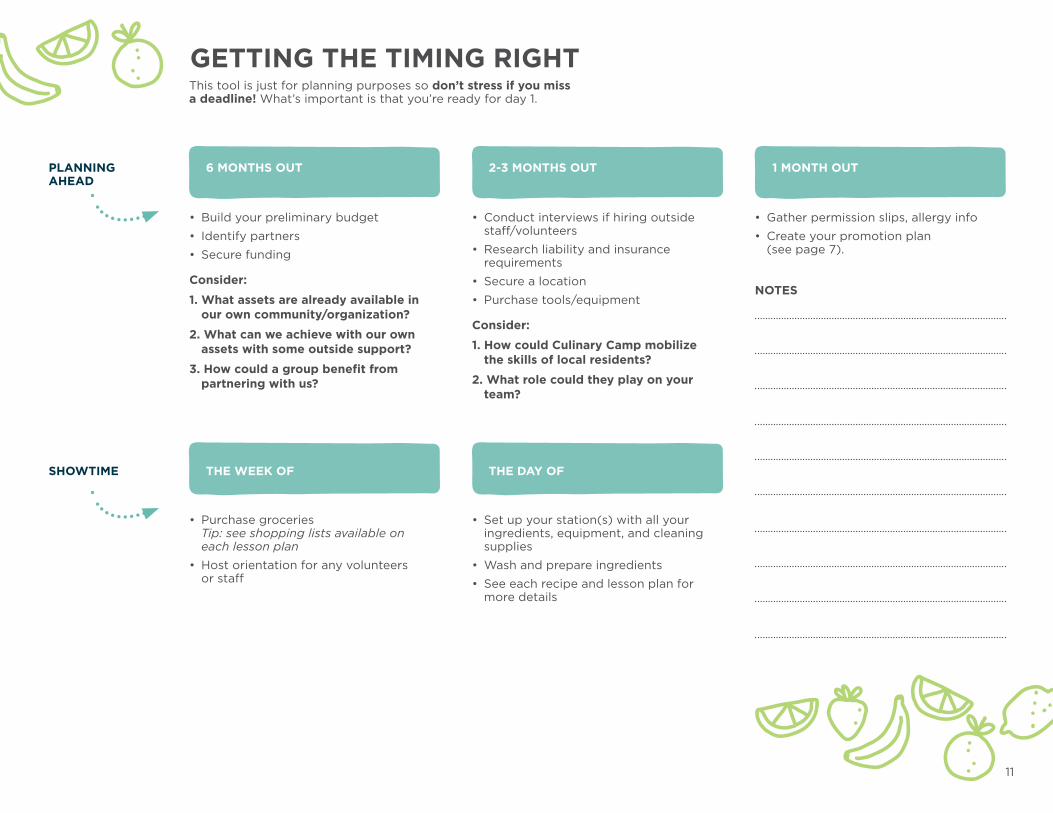
GETTING THE TIMING RIGHTThis tool is just for planning purposes so don’t stress if you miss a deadline! What’s important is that you’re ready for day 1.
PLANNING AHEAD
6 MONTHS OUT
THE WEEK OF
2-3 MONTHS OUT
THE DAY OF
1 MONTH OUT
SHOWTIME
• Build your preliminary budget
• Identify partners
• Secure funding
Consider:
1. What assets are already available in our own community/organization?
2. What can we achieve with our own assets with some outside support?
3. How could a group benefit from partnering with us?
• Purchase groceries Tip: see shopping lists available on each lesson plan
• Host orientation for any volunteers or staff
• Conduct interviews if hiring outside staff/volunteers
• Research liability and insurance requirements
• Secure a location
• Purchase tools/equipment
Consider:
1. How could Culinary Camp mobilize the skills of local residents?
2. What role could they play on your team?
• Set up your station(s) with all your ingredients, equipment, and cleaning supplies
• Wash and prepare ingredients
• See each recipe and lesson plan for more details
• Gather permission slips, allergy info
• Create your promotion plan (see page 7).
NOTES
12
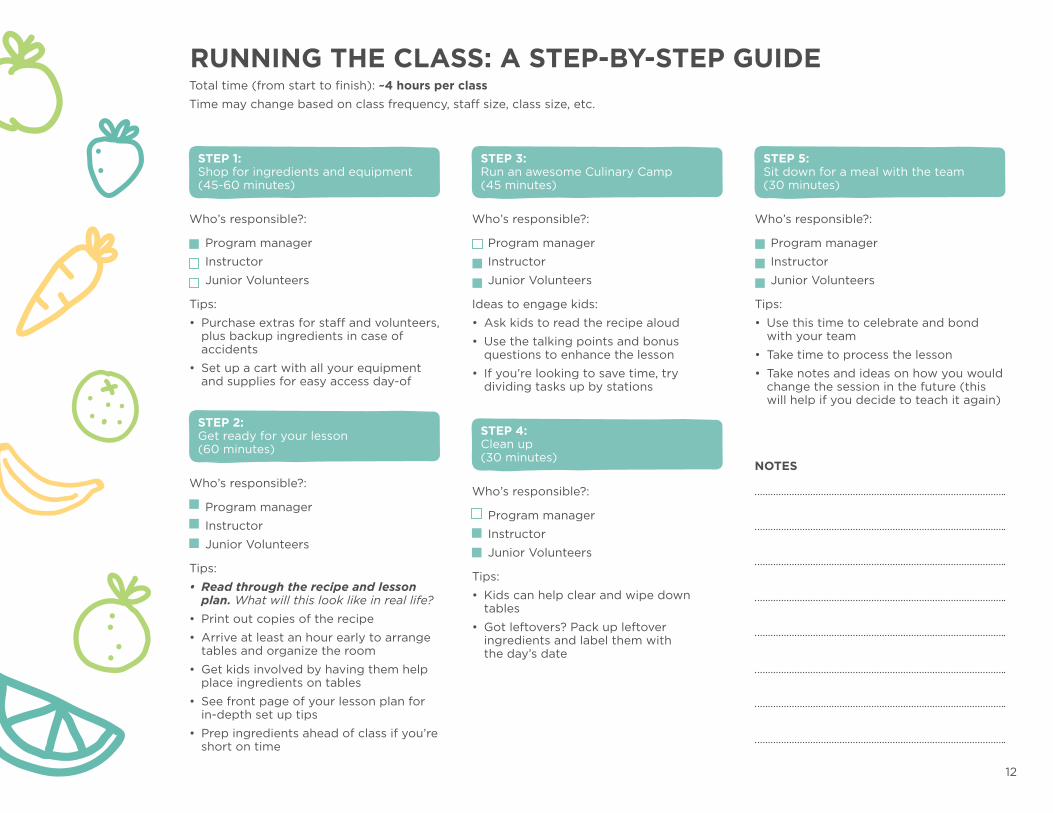
RUNNING THE CLASS: A STEP-BY-STEP GUIDETotal time (from start to finish): ~4 hours per class Time may change based on class frequency, staff size, class size, etc.
STEP 1: Shop for ingredients and equipment (45-60 minutes)
STEP 3: Run an awesome Culinary Camp (45 minutes)
STEP 5: Sit down for a meal with the team (30 minutes)
STEP 4: Clean up (30 minutes)
STEP 2: Get ready for your lesson (60 minutes)
Who’s responsible?:
Program manager
Instructor
Junior Volunteers
Tips:
• Purchase extras for staff and volunteers, plus backup ingredients in case of accidents
• Set up a cart with all your equipment and supplies for easy access day-of
Who’s responsible?:
Program manager
Instructor
Junior Volunteers
Ideas to engage kids:
• Ask kids to read the recipe aloud
• Use the talking points and bonus questions to enhance the lesson
• If you’re looking to save time, try dividing tasks up by stations
Who’s responsible?:
Program manager
Instructor
Junior Volunteers
Tips:
• Use this time to celebrate and bond with your team
• Take time to process the lesson
• Take notes and ideas on how you would change the session in the future (this will help if you decide to teach it again)
Who’s responsible?:
Program manager
Instructor
Junior Volunteers
Tips:
• Kids can help clear and wipe down tables
• Got leftovers? Pack up leftover ingredients and label them with the day’s date
Who’s responsible?:
Program manager
Instructor
Junior Volunteers
Tips:
• Read through the recipe and lesson plan. What will this look like in real life?
• Print out copies of the recipe
• Arrive at least an hour early to arrange tables and organize the room
• Get kids involved by having them help place ingredients on tables
• See front page of your lesson plan for in-depth set up tips
• Prep ingredients ahead of class if you’re short on time
NOTES

13
IT’S TIME TO GET COOKING
NO HEAT REQUIRED
TASTY RECIPES
14
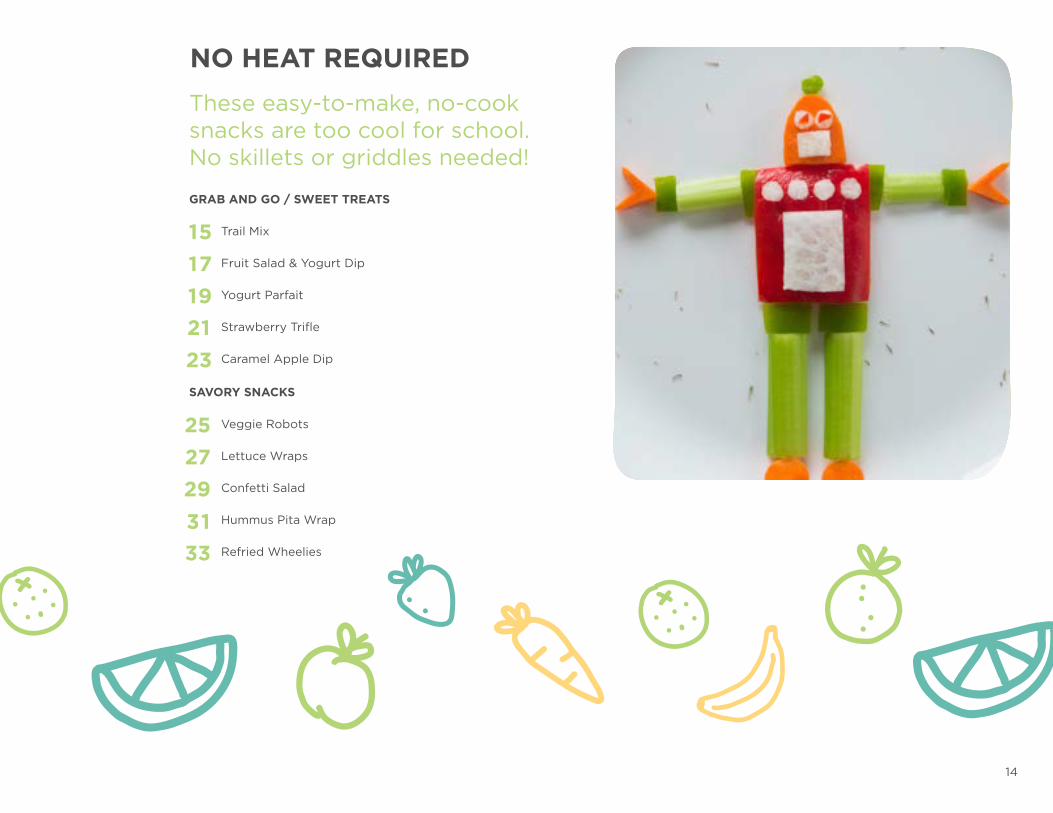
GRAB AND GO / SWEET TREATS
Trail Mix
Fruit Salad & Yogurt Dip
Yogurt Parfait
Strawberry Trifle
Caramel Apple Dip
SAVORY SNACKS
Veggie Robots
Lettuce Wraps
Confetti Salad
Hummus Pita Wrap
Refried Wheelies
NO HEAT REQUIRED
252729
33
151719
23
31
21
These easy-to-make, no-cook snacks are too cool for school. No skillets or griddles needed!
15
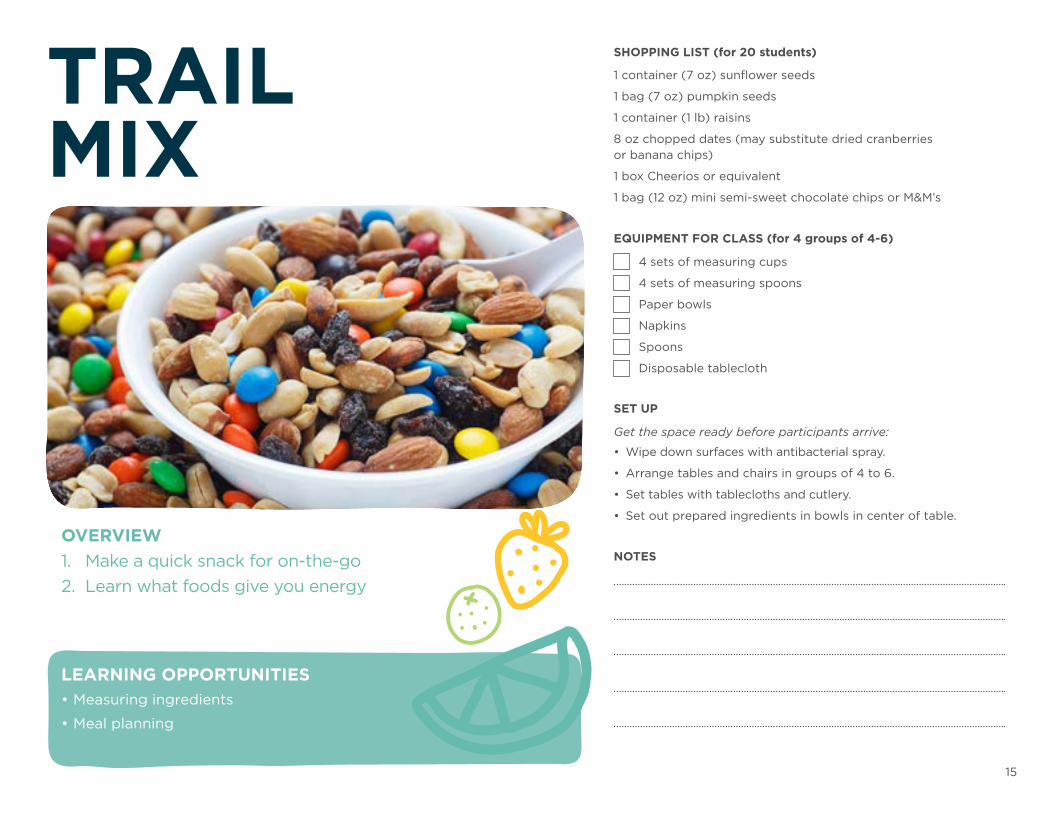
SHOPPING LIST (for 20 students)
EQUIPMENT FOR CLASS (for 4 groups of 4-6)
SET UP
NOTES
1 container (7 oz) sunflower seeds
1 bag (7 oz) pumpkin seeds
1 container (1 lb) raisins
8 oz chopped dates (may substitute dried cranberries or banana chips)
1 box Cheerios or equivalent
1 bag (12 oz) mini semi-sweet chocolate chips or M&M’s
4 sets of measuring cups
4 sets of measuring spoons
Paper bowls
Napkins
Spoons
Disposable tablecloth
Get the space ready before participants arrive:
• Wipe down surfaces with antibacterial spray.
• Arrange tables and chairs in groups of 4 to 6.
• Set tables with tablecloths and cutlery.
• Set out prepared ingredients in bowls in center of table.
OVERVIEW1. Make a quick snack for on-the-go 2. Learn what foods give you energy
LEARNING OPPORTUNITIES• Measuring ingredients
• Meal planning
TRAILMIX
16
Dates have lots of natural sugars and are often used in place of sugar to sweeten desserts.
Trail mix has been eaten by Native Americans for thousands of years, and originally included buffalo meat.
20-25 min Serves 4-6
Trail Mix
LESSON PLAN directions :
ingredients :
TALKING POINTS
• Trail mix is a great snack because it’s lightweight and easy to store, and is also very nutritious: the carbohydrates in dried fruit and granola offer a quick energy boost, and sustained energy from fats in nuts.
• Carbohydrates, fats and proteins provide the fuel needed for energy production from food.
• Nuts and seeds are good sources of plant-based proteins.
BONUS QUESTIONS
1. What other ingredients could be added to the trail mix?
2. Which food groups are present in the trail mix?
did you know... tip:You can add leftover nuts to Confetti Salads (21) or Yogurt Parfaits (23) in place of granola.
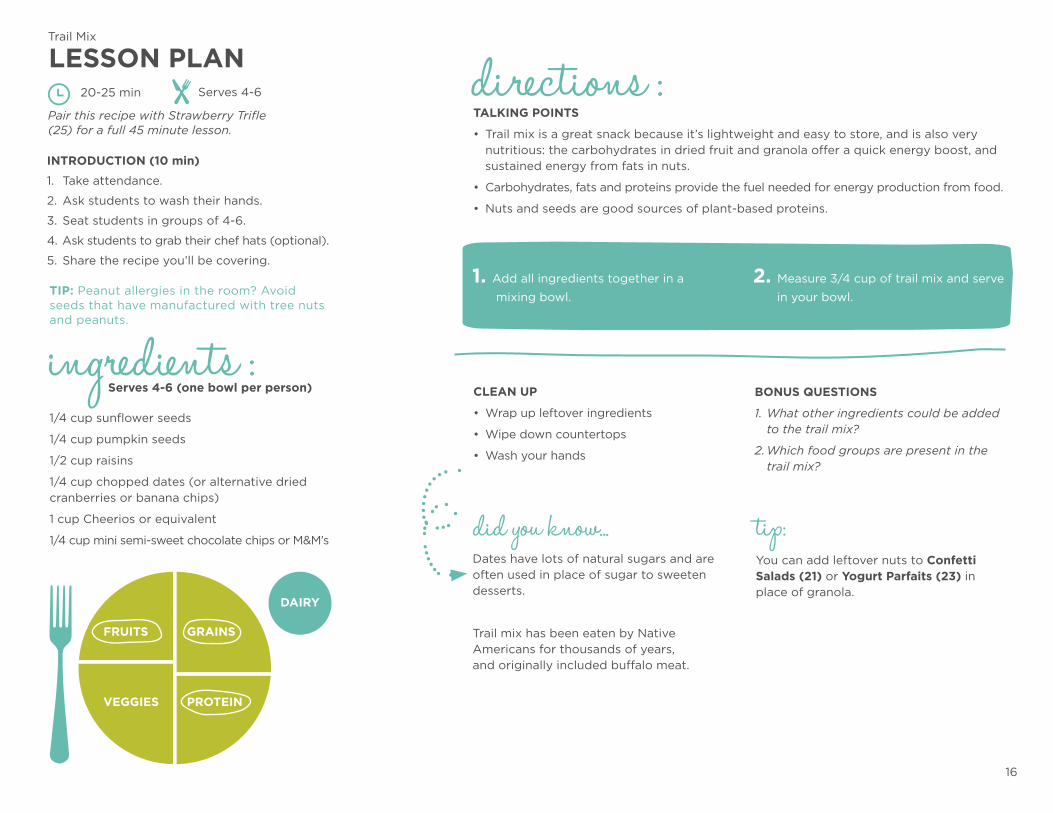
FRUITS GRAINS
PROTEINVEGGIES
1/4 cup sunflower seeds
1/4 cup pumpkin seeds
1/2 cup raisins
1/4 cup chopped dates (or alternative dried cranberries or banana chips)
1 cup Cheerios or equivalent
1/4 cup mini semi-sweet chocolate chips or M&M’s
1. Add all ingredients together in a
mixing bowl.
2. Measure 3/4 cup of trail mix and serve
in your bowl.
DAIRY
Pair this recipe with Strawberry Trifle (25) for a full 45 minute lesson.
INTRODUCTION (10 min)
1. Take attendance.
2. Ask students to wash their hands.
3. Seat students in groups of 4-6.
4. Ask students to grab their chef hats (optional).
5. Share the recipe you’ll be covering.
CLEAN UP
• Wrap up leftover ingredients
• Wipe down countertops
• Wash your hands
TIP: Peanut allergies in the room? Avoid seeds that have manufactured with tree nuts and peanuts.
Serves 4-6 (one bowl per person)
17
EQUIPMENT FOR CLASS (for 4 groups of 4-6)
SET UP
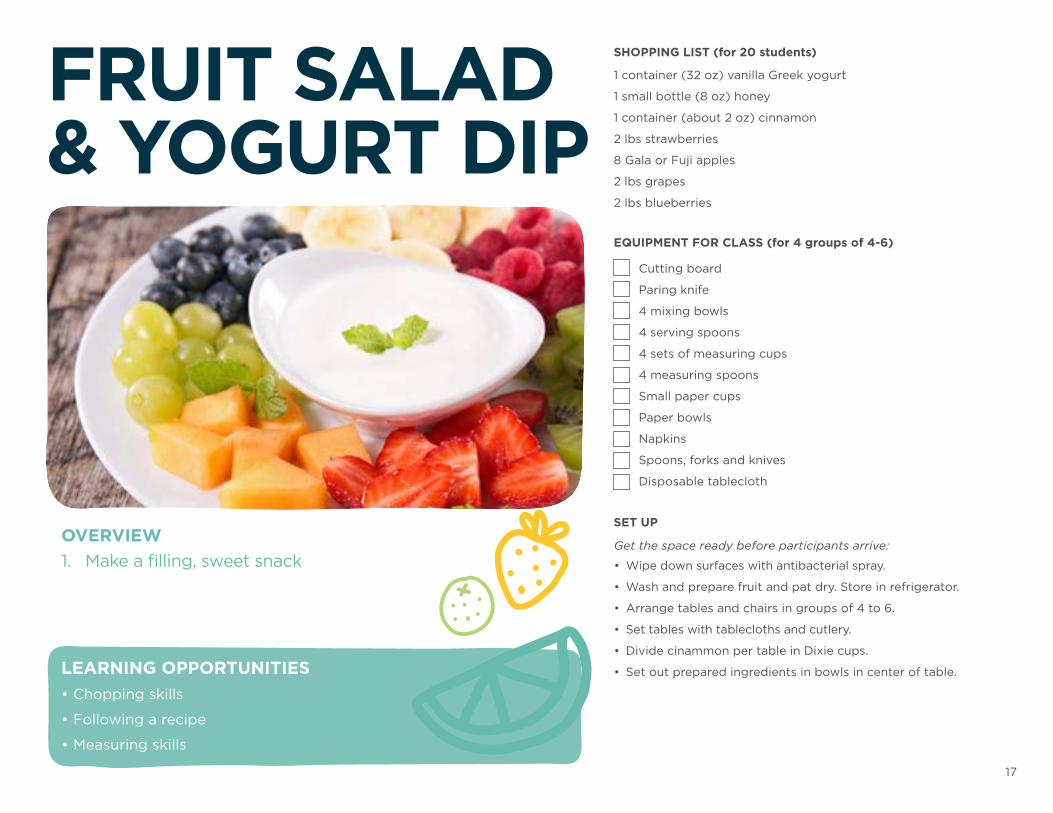
1 container (32 oz) vanilla Greek yogurt
1 small bottle (8 oz) honey
1 container (about 2 oz) cinnamon
2 lbs strawberries
8 Gala or Fuji apples
2 lbs grapes
2 lbs blueberries
Cutting board
Paring knife
4 mixing bowls
4 serving spoons
4 sets of measuring cups
4 measuring spoons
Small paper cups
Paper bowls
Napkins
Spoons, forks and knives
Disposable tablecloth
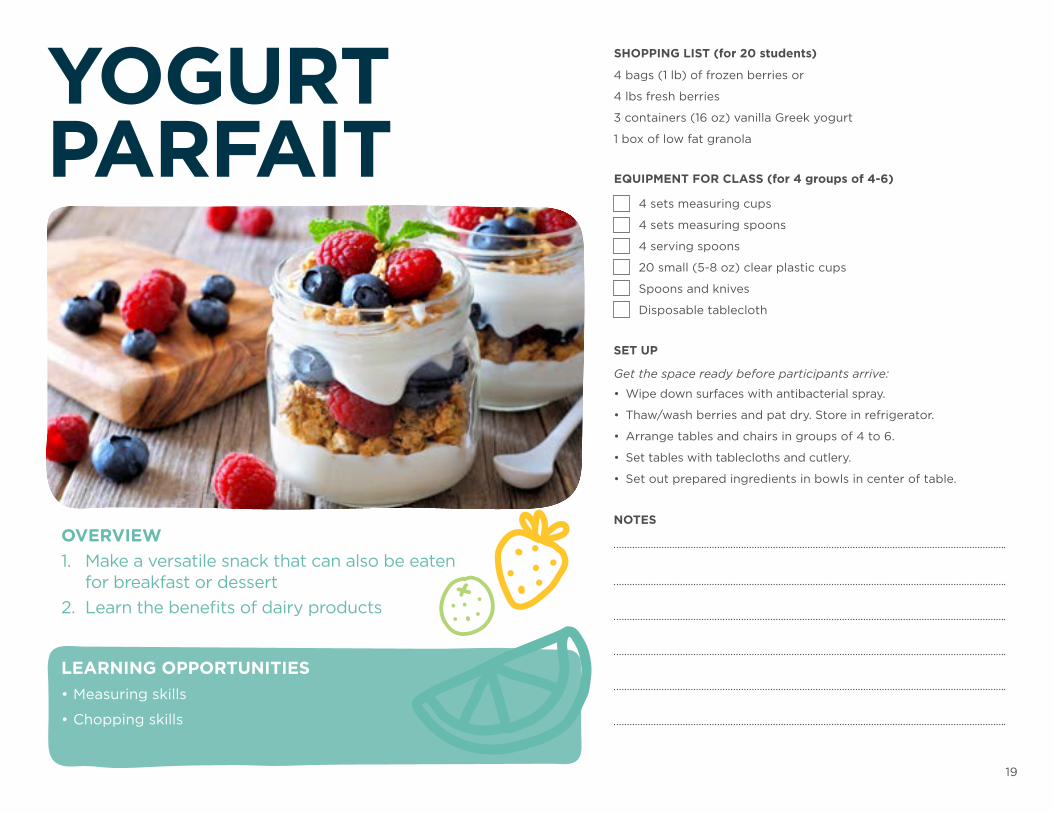
OVERVIEW1. Make a filling, sweet snack
LEARNING OPPORTUNITIES• Chopping skills
• Following a recipe
• Measuring skills
FRUIT SALAD& YOGURT DIP
SHOPPING LIST (for 20 students)
Get the space ready before participants arrive:
• Wipe down surfaces with antibacterial spray.
• Wash and prepare fruit and pat dry. Store in refrigerator.
• Arrange tables and chairs in groups of 4 to 6.
• Set tables with tablecloths and cutlery.
• Divide cinammon per table in Dixie cups.
• Set out prepared ingredients in bowls in center of table.
18
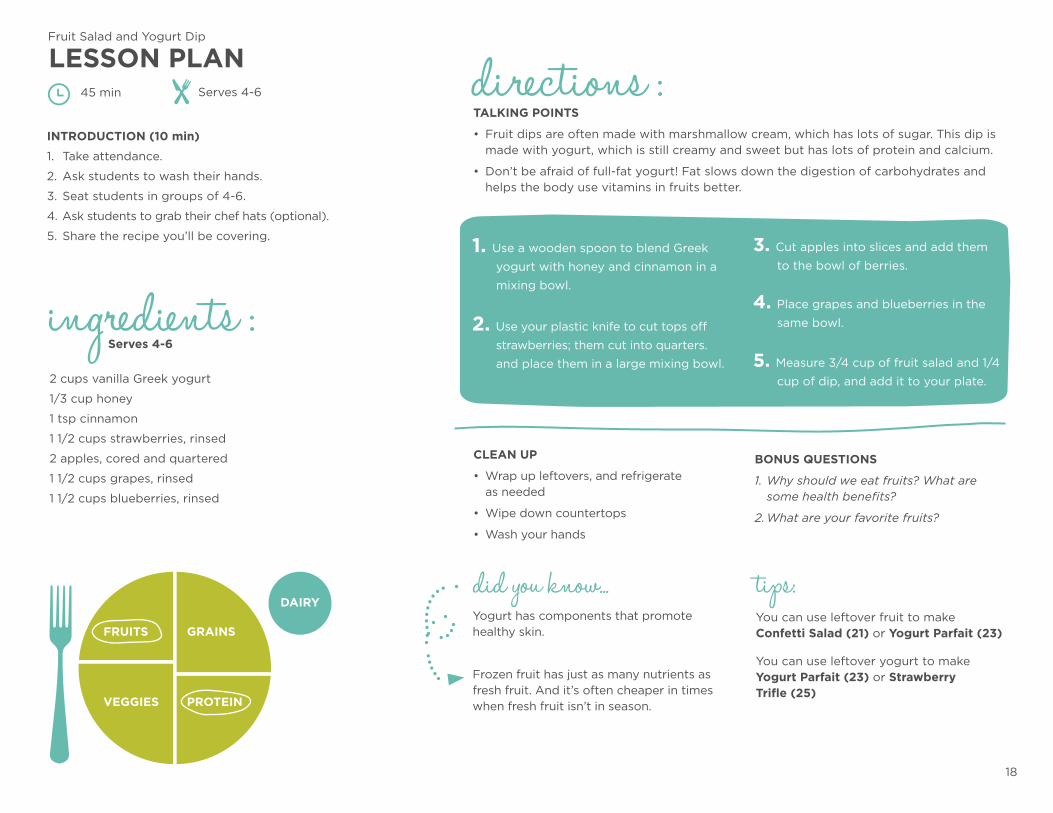
45 min Serves 4-6
Fruit Salad and Yogurt Dip
LESSON PLAN directions :TALKING POINTS
• Fruit dips are often made with marshmallow cream, which has lots of sugar. This dip is made with yogurt, which is still creamy and sweet but has lots of protein and calcium.
• Don’t be afraid of full-fat yogurt! Fat slows down the digestion of carbohydrates and helps the body use vitamins in fruits better.
CLEAN UP
• Wrap up leftovers, and refrigerate as needed
• Wipe down countertops
• Wash your hands
BONUS QUESTIONS
1. Why should we eat fruits? What are some health benefits?
2. What are your favorite fruits?
did you know... tips:You can use leftover fruit to make Confetti Salad (21) or Yogurt Parfait (23)
You can use leftover yogurt to make Yogurt Parfait (23) or Strawberry Trifle (25)
Yogurt has components that promote healthy skin.
Frozen fruit has just as many nutrients as fresh fruit. And it’s often cheaper in times when fresh fruit isn’t in season.
FRUITS GRAINS
PROTEINVEGGIES
2 cups vanilla Greek yogurt
1/3 cup honey
1 tsp cinnamon
1 1/2 cups strawberries, rinsed
2 apples, cored and quartered
1 1/2 cups grapes, rinsed
1 1/2 cups blueberries, rinsed
1. Use a wooden spoon to blend Greek
yogurt with honey and cinnamon in a
mixing bowl.
2. Use your plastic knife to cut tops off
strawberries; them cut into quarters.
and place them in a large mixing bowl.
3. Cut apples into slices and add them
to the bowl of berries.
4. Place grapes and blueberries in the
same bowl.
5. Measure 3/4 cup of fruit salad and 1/4
cup of dip, and add it to your plate.
DAIRY
INTRODUCTION (10 min)
1. Take attendance.
2. Ask students to wash their hands.
3. Seat students in groups of 4-6.
4. Ask students to grab their chef hats (optional).
5. Share the recipe you’ll be covering.
ingredients :Serves 4-6
19
SET UP
NOTES
4 bags (1 lb) of frozen berries or
4 lbs fresh berries
3 containers (16 oz) vanilla Greek yogurt
1 box of low fat granola
4 sets measuring cups
4 sets measuring spoons
4 serving spoons
20 small (5-8 oz) clear plastic cups
Spoons and knives
Disposable tablecloth
Get the space ready before participants arrive:
• Wipe down surfaces with antibacterial spray.
• Thaw/wash berries and pat dry. Store in refrigerator.
• Arrange tables and chairs in groups of 4 to 6.
• Set tables with tablecloths and cutlery.
• Set out prepared ingredients in bowls in center of table.
OVERVIEW 1. Make a versatile snack that can also be eaten
for breakfast or dessert2. Learn the benefits of dairy products
LEARNING OPPORTUNITIES• Measuring skills
• Chopping skills
YOGURTPARFAIT
SHOPPING LIST (for 20 students)
EQUIPMENT FOR CLASS (for 4 groups of 4-6)
20
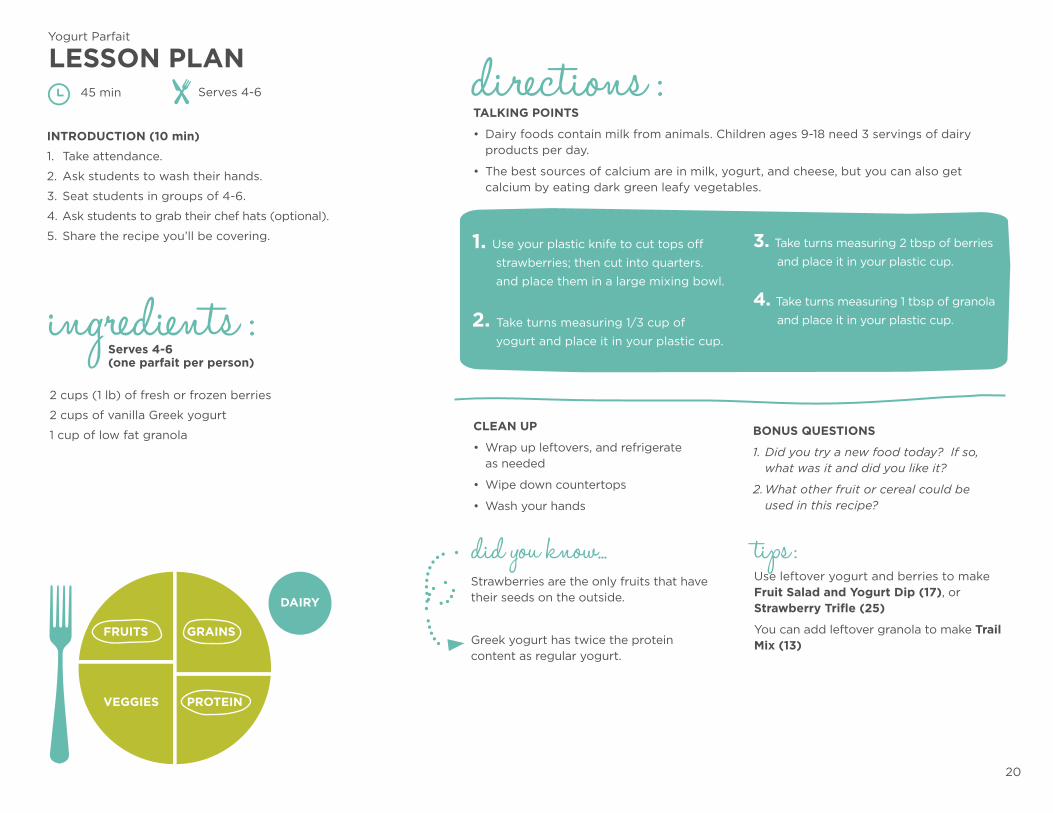
45 min Serves 4-6
Yogurt Parfait
LESSON PLAN directions :
ingredients :
TALKING POINTS
• Dairy foods contain milk from animals. Children ages 9-18 need 3 servings of dairy products per day.
• The best sources of calcium are in milk, yogurt, and cheese, but you can also get calcium by eating dark green leafy vegetables.
INTRODUCTION (10 min)
1. Take attendance.
2. Ask students to wash their hands.
3. Seat students in groups of 4-6.
4. Ask students to grab their chef hats (optional).
5. Share the recipe you’ll be covering.
CLEAN UP
• Wrap up leftovers, and refrigerate as needed
• Wipe down countertops
• Wash your hands
BONUS QUESTIONS
1. Did you try a new food today? If so, what was it and did you like it?
2. What other fruit or cereal could be used in this recipe?
tips :Use leftover yogurt and berries to make Fruit Salad and Yogurt Dip (17), or Strawberry Trifle (25)
You can add leftover granola to make Trail Mix (13)
FRUITS GRAINS
PROTEINVEGGIES
2 cups (1 lb) of fresh or frozen berries
2 cups of vanilla Greek yogurt
1 cup of low fat granola
1. Use your plastic knife to cut tops off
strawberries; then cut into quarters.
and place them in a large mixing bowl.
2. Take turns measuring 1/3 cup of
yogurt and place it in your plastic cup.
3. Take turns measuring 2 tbsp of berries
and place it in your plastic cup.
4. Take turns measuring 1 tbsp of granola
and place it in your plastic cup.
DAIRY
did you know...Strawberries are the only fruits that have their seeds on the outside.
Greek yogurt has twice the protein content as regular yogurt.
Serves 4-6 (one parfait per person)
21
NOTES
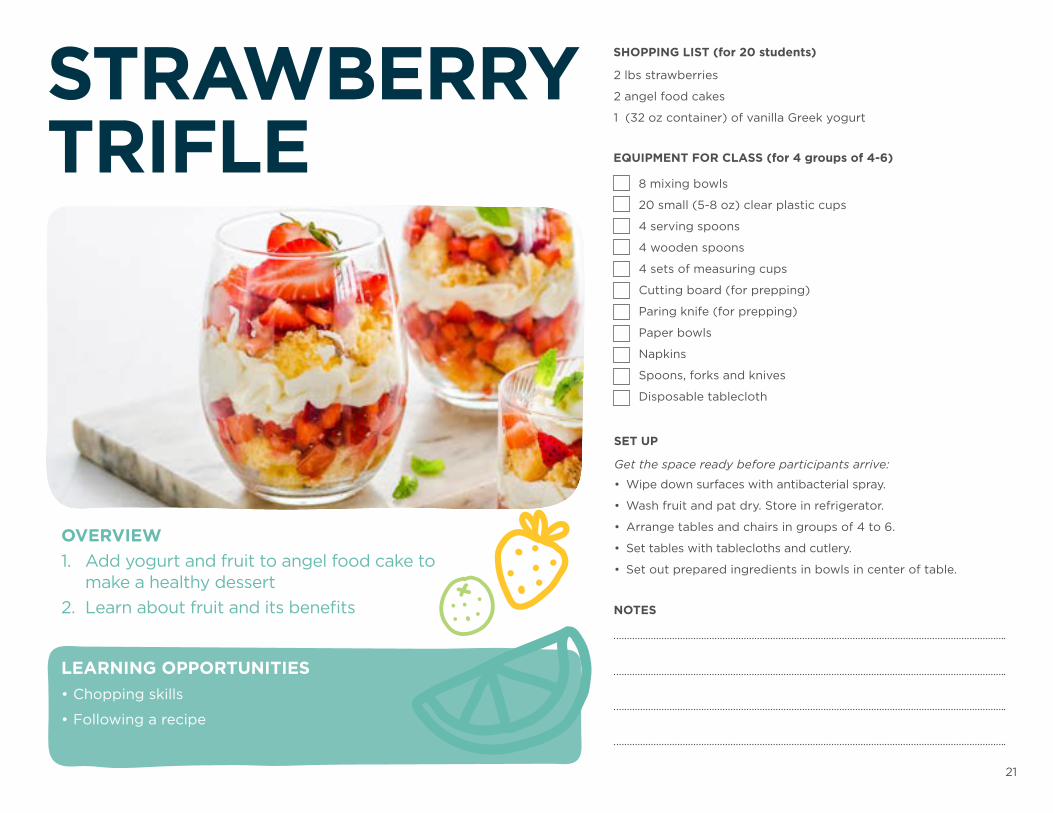
2 lbs strawberries
2 angel food cakes
1 (32 oz container) of vanilla Greek yogurt
8 mixing bowls
20 small (5-8 oz) clear plastic cups
4 serving spoons
4 wooden spoons
4 sets of measuring cups
Cutting board (for prepping)
Paring knife (for prepping)
Paper bowls
Napkins
Spoons, forks and knives
Disposable tablecloth
OVERVIEW1. Add yogurt and fruit to angel food cake to
make a healthy dessert2. Learn about fruit and its benefits
LEARNING OPPORTUNITIES• Chopping skills
• Following a recipe
STRAWBERRYTRIFLE EQUIPMENT FOR CLASS (for 4 groups of 4-6)
SHOPPING LIST (for 20 students)
SET UP
Get the space ready before participants arrive:
• Wipe down surfaces with antibacterial spray.
• Wash fruit and pat dry. Store in refrigerator.
• Arrange tables and chairs in groups of 4 to 6.
• Set tables with tablecloths and cutlery.
• Set out prepared ingredients in bowls in center of table.
22
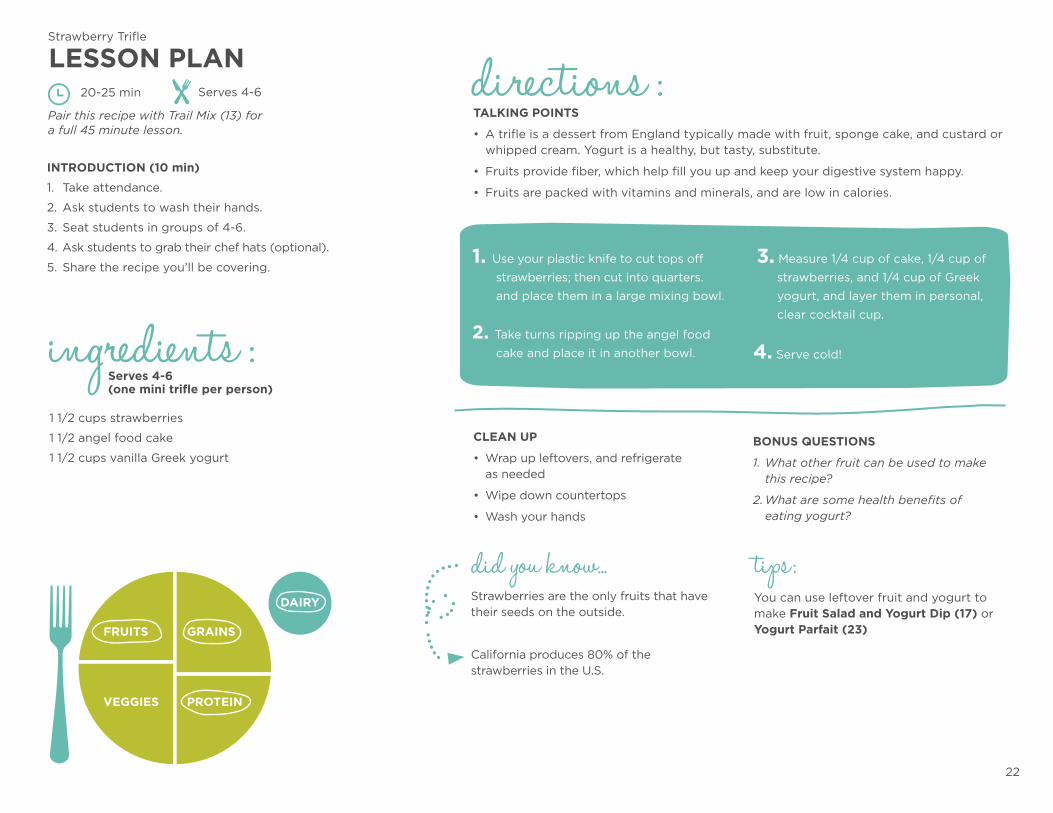
20-25 min Serves 4-6
Strawberry Trifle
LESSON PLAN directions :
ingredients :
TALKING POINTS
• A trifle is a dessert from England typically made with fruit, sponge cake, and custard or whipped cream. Yogurt is a healthy, but tasty, substitute.
• Fruits provide fiber, which help fill you up and keep your digestive system happy.
• Fruits are packed with vitamins and minerals, and are low in calories.
CLEAN UP
• Wrap up leftovers, and refrigerate as needed
• Wipe down countertops
• Wash your hands
BONUS QUESTIONS
1. What other fruit can be used to make this recipe?
2. What are some health benefits of eating yogurt?
did you know... tips :You can use leftover fruit and yogurt to make Fruit Salad and Yogurt Dip (17) or Yogurt Parfait (23)
Strawberries are the only fruits that have their seeds on the outside.
California produces 80% of the strawberries in the U.S.
FRUITS GRAINS
PROTEINVEGGIES
1 1/2 cups strawberries
1 1/2 angel food cake
1 1/2 cups vanilla Greek yogurt
1. Use your plastic knife to cut tops off
strawberries; then cut into quarters.
and place them in a large mixing bowl.
2. Take turns ripping up the angel food
cake and place it in another bowl.
3. Measure 1/4 cup of cake, 1/4 cup of
strawberries, and 1/4 cup of Greek
yogurt, and layer them in personal,
clear cocktail cup.
4. Serve cold!
DAIRY
Pair this recipe with Trail Mix (13) for a full 45 minute lesson.
INTRODUCTION (10 min)
1. Take attendance.
2. Ask students to wash their hands.
3. Seat students in groups of 4-6.
4. Ask students to grab their chef hats (optional).
5. Share the recipe you’ll be covering.
Serves 4-6 (one mini trifle per person)
23
SET UP
8 tart apples (Gala or Granny Smith)
4 blocks (8 oz ea) light cream cheese
1 bag (16 oz) powdered sugar
1 container (about 2 oz) cinnamon
1 bottle (about 2 oz) vanilla extract
1 box (14.4 oz) graham crackers
1 container (about 16 oz) caramel sauce
Paring knife (for prepping)
Cutting board (for prepping)
4 mixing bowls
4 serving spoon
4 wooden spoons
4 sets measuring cups
4 sets measuring spoons
4 spatulas
Small paper cups
Paper plates
Napkins
Forks and knives
Disposable tablecloth
Get the space ready before participants arrive:
• Wipe down surfaces with antibacterial spray.
• Wash apples and pat dry. Store in refrigerator.
• Arrange tables and chairs in groups of 4 to 6.
• Set tables with tablecloths and cutlery.
• Divide spices per table in Dixie cups.
• Set out prepared ingredients in bowls in center of table.
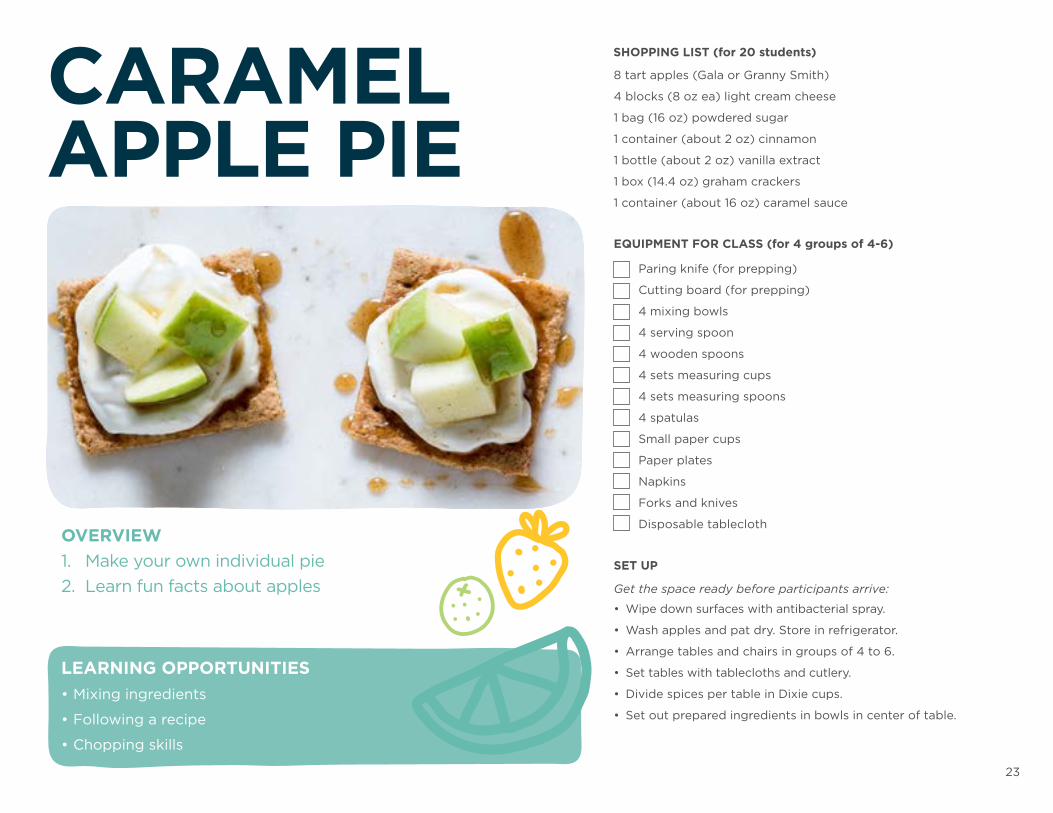
OVERVIEW1. Make your own individual pie2. Learn fun facts about apples
LEARNING OPPORTUNITIES• Mixing ingredients
• Following a recipe
• Chopping skills
CARAMELAPPLE PIE
SHOPPING LIST (for 20 students)
EQUIPMENT FOR CLASS (for 4 groups of 4-6)
24
45 min Serves 4-6
Caramel Apple Pie
LESSON PLAN directions :
ingredients :
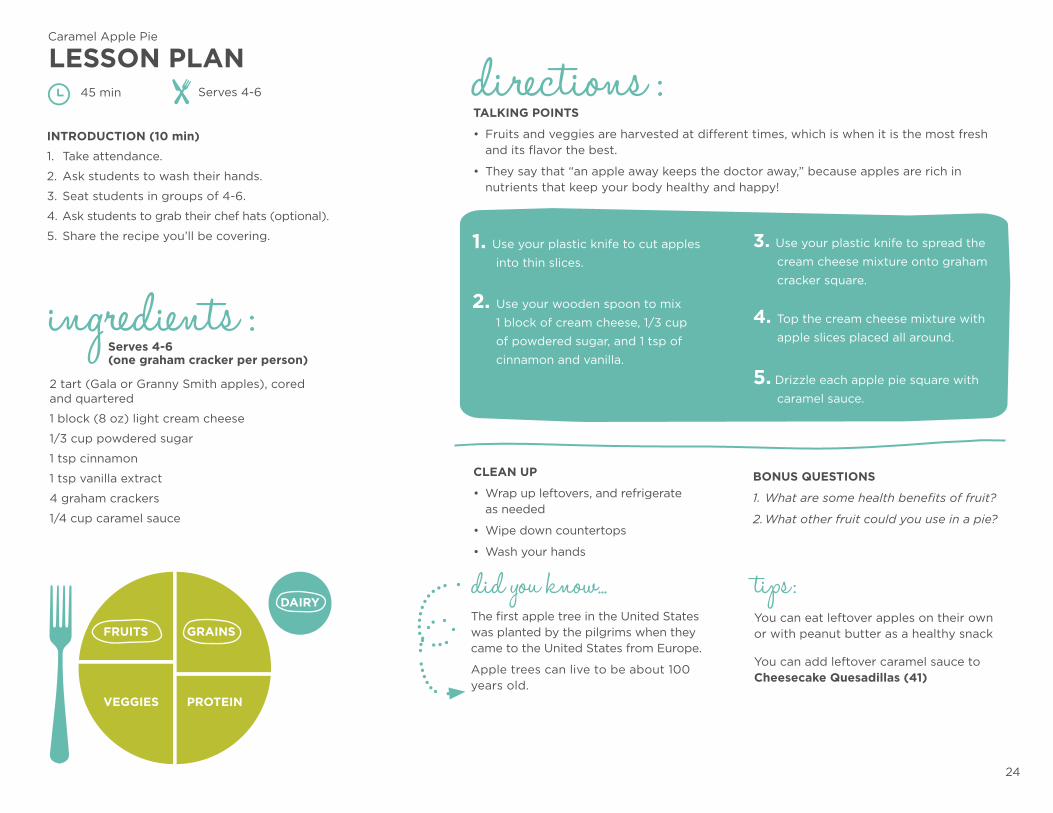
TALKING POINTS
• Fruits and veggies are harvested at different times, which is when it is the most fresh and its flavor the best.
• They say that “an apple away keeps the doctor away,” because apples are rich in nutrients that keep your body healthy and happy!
INTRODUCTION (10 min)
1. Take attendance.
2. Ask students to wash their hands.
3. Seat students in groups of 4-6.
4. Ask students to grab their chef hats (optional).
5. Share the recipe you’ll be covering.
CLEAN UP
• Wrap up leftovers, and refrigerate as needed
• Wipe down countertops
• Wash your hands
BONUS QUESTIONS
1. What are some health benefits of fruit?
2. What other fruit could you use in a pie?
did you know... tips :You can eat leftover apples on their own or with peanut butter as a healthy snack
You can add leftover caramel sauce to Cheesecake Quesadillas (41)
The first apple tree in the United States was planted by the pilgrims when they came to the United States from Europe.
Apple trees can live to be about 100 years old.
FRUITS GRAINS
PROTEINVEGGIES
2 tart (Gala or Granny Smith apples), cored and quartered
1 block (8 oz) light cream cheese
1/3 cup powdered sugar
1 tsp cinnamon
1 tsp vanilla extract
4 graham crackers
1/4 cup caramel sauce
1. Use your plastic knife to cut apples
into thin slices.
2. Use your wooden spoon to mix
1 block of cream cheese, 1/3 cup
of powdered sugar, and 1 tsp of
cinnamon and vanilla.
3. Use your plastic knife to spread the
cream cheese mixture onto graham
cracker square.
4. Top the cream cheese mixture with
apple slices placed all around.
5. Drizzle each apple pie square with
caramel sauce.
DAIRY
Serves 4-6 (one graham cracker per person)
25
SHOPPING LIST (for 20 students)
EQUIPMENT FOR CLASS (for 4 groups of 4-6)
SET UP
NOTES
2 large bunches celery
1 bag (10 oz) baby spinach
2 containers (10 oz ea) cherry tomatoes
1 bag (1 lb) baby carrots
6 red or yellow bell peppers, sliced
2 containers (10 oz ea) classic hummus
1 bottle (16 oz) light ranch dressing
Paring knife (for prepping)
Cutting board (for prepping)
Paper bowls (for vegetables)
200 toothpicks
4 salad tongs
Paper plates
Napkins
Spoons and knives
Disposable tablecloth
Get the space ready before participants arrive:
• Wipe down surfaces with antibacterial spray.
• Wash vegetables and pat dry. Store in refrigerator.
• Arrange tables and chairs in groups of 4 to 6.
• Set tables with tablecloths and cutlery.
• Set out prepared ingredients in bowls in center of table.
OVERVIEW1. Learn about vegetables and their benefits2. Play with your food—build a robot out
of vegetables!
LEARNING OPPORTUNITIES• Creativity
• Sharing
• Chopping skills
VEGGIE ROBOTS
Judith Yeabsley, The Art of Nutrition
26
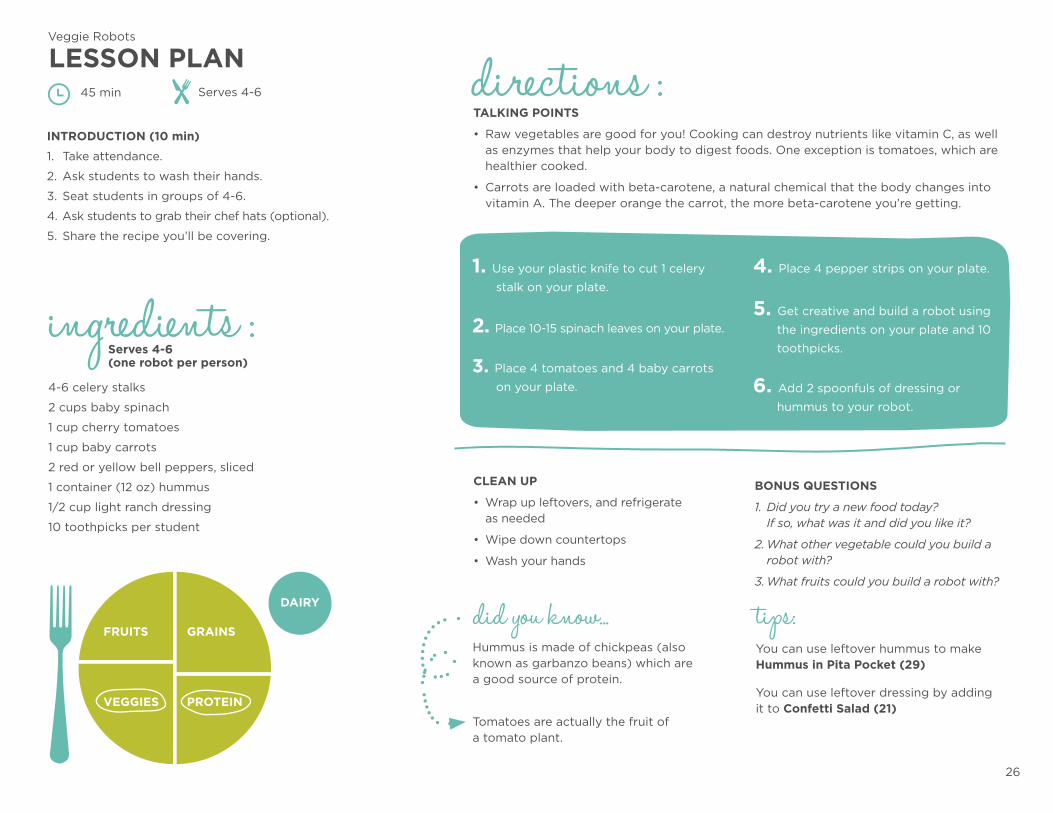
45 min Serves 4-6
Veggie Robots
LESSON PLAN directions :
ingredients :
TALKING POINTS
• Raw vegetables are good for you! Cooking can destroy nutrients like vitamin C, as well as enzymes that help your body to digest foods. One exception is tomatoes, which are healthier cooked.
• Carrots are loaded with beta-carotene, a natural chemical that the body changes into vitamin A. The deeper orange the carrot, the more beta-carotene you’re getting.
INTRODUCTION (10 min)
1. Take attendance.
2. Ask students to wash their hands.
3. Seat students in groups of 4-6.
4. Ask students to grab their chef hats (optional).
5. Share the recipe you’ll be covering.
CLEAN UP
• Wrap up leftovers, and refrigerate as needed
• Wipe down countertops
• Wash your hands
BONUS QUESTIONS
1. Did you try a new food today? If so, what was it and did you like it?
2. What other vegetable could you build a robot with?
3. What fruits could you build a robot with?
did you know... tips:You can use leftover hummus to make Hummus in Pita Pocket (29)
You can use leftover dressing by adding it to Confetti Salad (21)
Hummus is made of chickpeas (also known as garbanzo beans) which are a good source of protein.
Tomatoes are actually the fruit of a tomato plant.
FRUITS GRAINS
PROTEINVEGGIES
4-6 celery stalks
2 cups baby spinach
1 cup cherry tomatoes
1 cup baby carrots
2 red or yellow bell peppers, sliced
1 container (12 oz) hummus
1/2 cup light ranch dressing
10 toothpicks per student
1. Use your plastic knife to cut 1 celery
stalk on your plate.
2. Place 10-15 spinach leaves on your plate.
3. Place 4 tomatoes and 4 baby carrots
on your plate.
4. Place 4 pepper strips on your plate.
5. Get creative and build a robot using
the ingredients on your plate and 10
toothpicks.
6. Add 2 spoonfuls of dressing or
hummus to your robot.
DAIRY
Serves 4-6 (one robot per person)
27
SET UP
NOTES
1 bag (10 oz) Romaine lettuce hearts
1 bottle (16 oz) light ranch dressing
2 lbs deli ham or turkey
4 red, orange or yellow bell peppers, sliced
2 bags (10 oz) baby spinach
1 bag (12 oz) shredded cheddar cheese
Paring knife
Cutting board
Paper plates
Napkins
Spoons and forks
Disposable tablecloth
Get the space ready before participants arrive:
• Wipe down surfaces with antibacterial spray.
• Wash vegetables and pat dry. Store in refrigerator.
• Arrange tables and chairs in groups of 4 to 6.
• Set tables with tablecloths and cutlery.
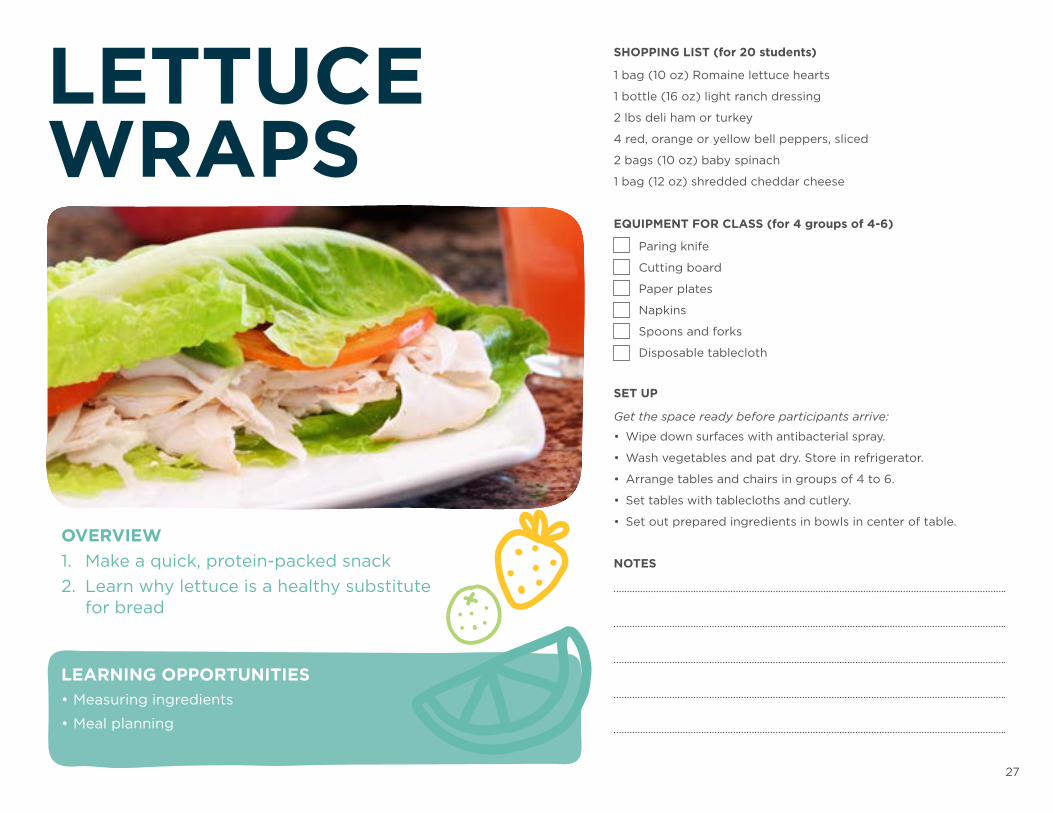
• Set out prepared ingredients in bowls in center of table.OVERVIEW1. Make a quick, protein-packed snack2. Learn why lettuce is a healthy substitute
for bread
LEARNING OPPORTUNITIES• Measuring ingredients
• Meal planning
LETTUCEWRAPS
SHOPPING LIST (for 20 students)
EQUIPMENT FOR CLASS (for 4 groups of 4-6)
28
45 min Serves 4-6
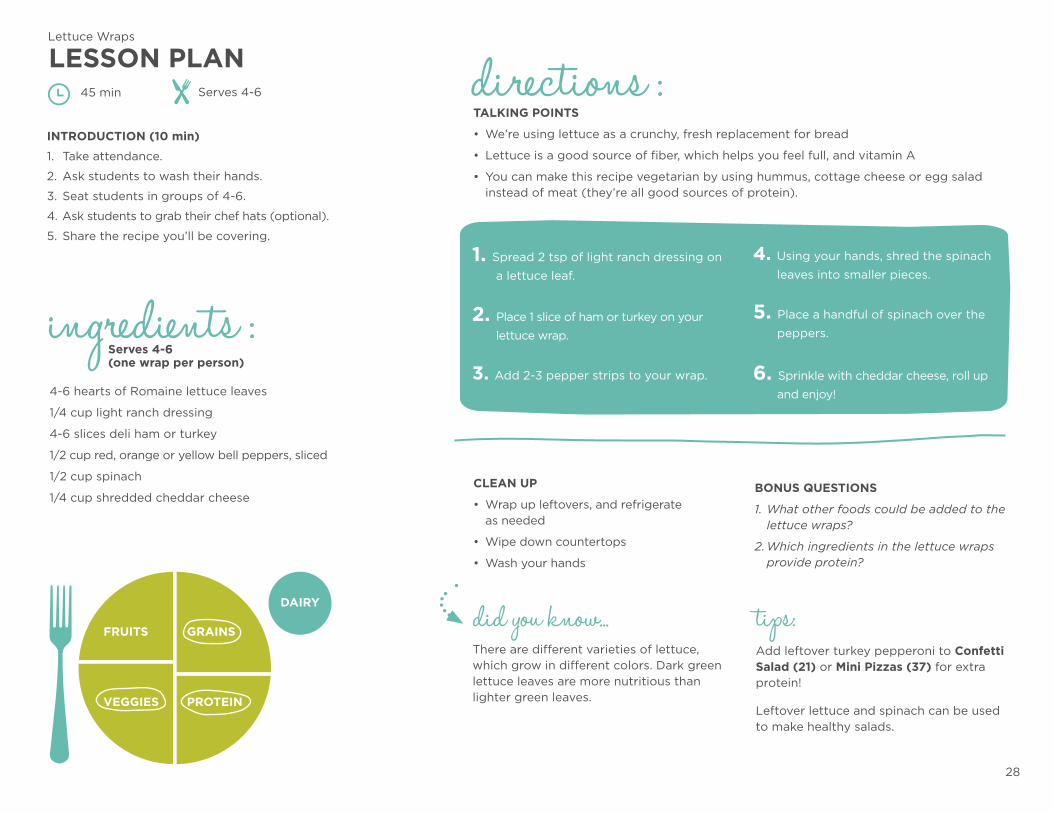
Lettuce Wraps
LESSON PLAN directions :
ingredients :
TALKING POINTS
• We’re using lettuce as a crunchy, fresh replacement for bread
• Lettuce is a good source of fiber, which helps you feel full, and vitamin A
• You can make this recipe vegetarian by using hummus, cottage cheese or egg salad instead of meat (they’re all good sources of protein).
CLEAN UP
• Wrap up leftovers, and refrigerate as needed
• Wipe down countertops
• Wash your hands
BONUS QUESTIONS
1. What other foods could be added to the lettuce wraps?
2. Which ingredients in the lettuce wraps provide protein?
did you know... tips:Add leftover turkey pepperoni to Confetti Salad (21) or Mini Pizzas (37) for extra protein!
Leftover lettuce and spinach can be used to make healthy salads.
There are different varieties of lettuce, which grow in different colors. Dark green lettuce leaves are more nutritious than lighter green leaves.
FRUITS GRAINS
PROTEINVEGGIES
4-6 hearts of Romaine lettuce leaves
1/4 cup light ranch dressing
4-6 slices deli ham or turkey
1/2 cup red, orange or yellow bell peppers, sliced
1/2 cup spinach
1/4 cup shredded cheddar cheese
1. Spread 2 tsp of light ranch dressing on
a lettuce leaf.
2. Place 1 slice of ham or turkey on your
lettuce wrap.
3. Add 2-3 pepper strips to your wrap.
4. Using your hands, shred the spinach
leaves into smaller pieces.
5. Place a handful of spinach over the
peppers.
6. Sprinkle with cheddar cheese, roll up
and enjoy!
DAIRY
INTRODUCTION (10 min)
1. Take attendance.
2. Ask students to wash their hands.
3. Seat students in groups of 4-6.
4. Ask students to grab their chef hats (optional).
5. Share the recipe you’ll be covering.
Serves 4-6 (one wrap per person)
29
SHOPPING LIST (for 20 students)
EQUIPMENT FOR CLASS (for 4 groups of 4-6)
SET UP
2 bags (10 oz) Romaine lettuce or baby spinach
1 lb sliced deli ham or turkey
1 bag (1 lb) frozen shelled edamame
1 can (15 oz) mandarin oranges in fruit juice
2 lbs fresh strawberries
1 jar (8 oz) sunflower or pumpkin seeds
1 bottle (16 oz) Italian dressing
1 bottle (16 oz) raspberry vinaigrette
1 can opener
4 wooden spoons
4 serving spoons
4 mixing bowls
4 salad tongs
Paper bowls
Napkins
Forks and knives
Disposable tablecloth
Get the space ready before participants arrive:
• Wipe down surfaces with antibacterial spray.
• Wash fruits and vegetables and pat dry. Store in refrigerator.
• Arrange tables and chairs in groups of 4 to 6.
• Set tables with tablecloths and cutlery.
• Set out prepared ingredients in bowls in center of table.
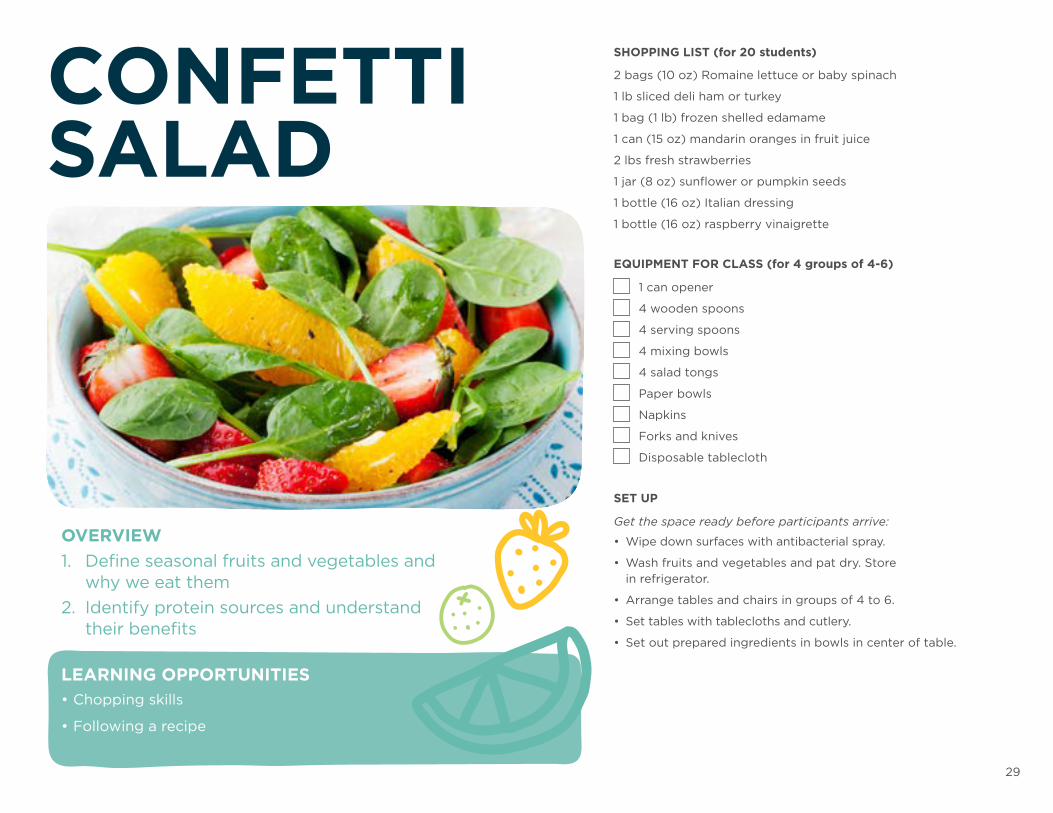
OVERVIEW1. Define seasonal fruits and vegetables and
why we eat them2. Identify protein sources and understand
their benefits
LEARNING OPPORTUNITIES• Chopping skills
• Following a recipe
CONFETTI SALAD
30
45 min Serves 4-6
Confetti Salad
LESSON PLAN directions :
ingredients :
TALKING POINTS
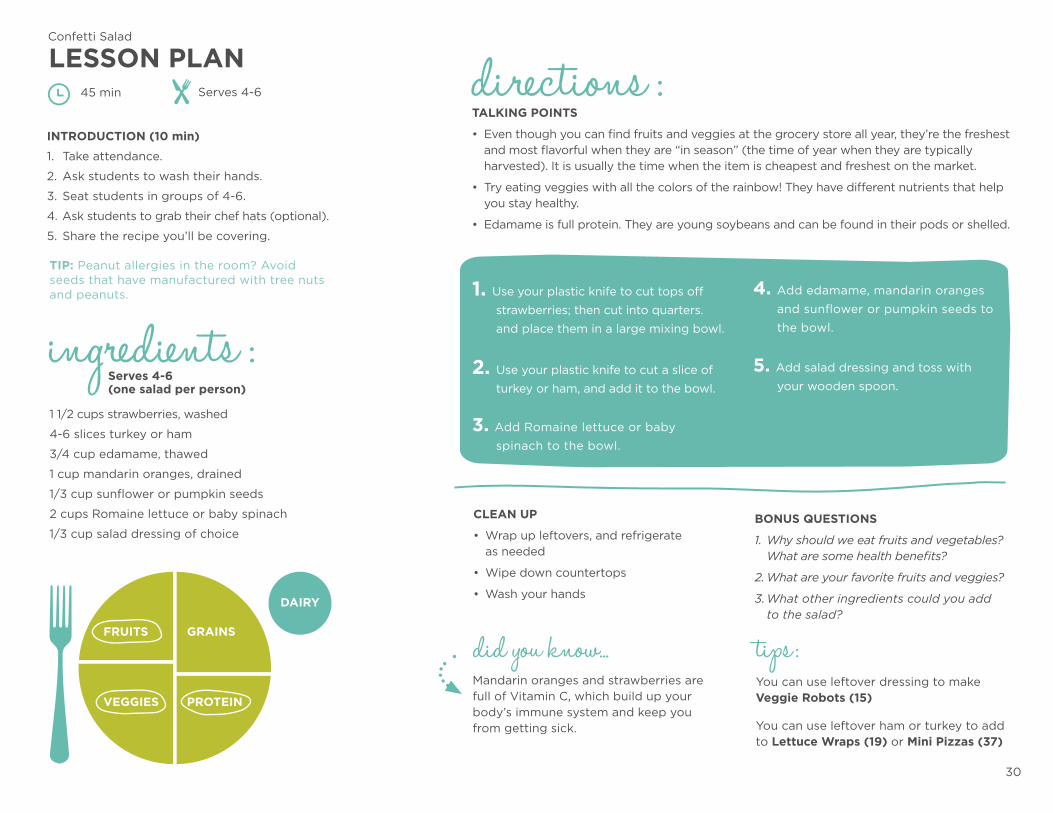
• Even though you can find fruits and veggies at the grocery store all year, they’re the freshest and most flavorful when they are “in season” (the time of year when they are typically harvested). It is usually the time when the item is cheapest and freshest on the market.
• Try eating veggies with all the colors of the rainbow! They have different nutrients that help you stay healthy.
• Edamame is full protein. They are young soybeans and can be found in their pods or shelled.
CLEAN UP
• Wrap up leftovers, and refrigerate as needed
• Wipe down countertops
• Wash your hands
BONUS QUESTIONS
1. Why should we eat fruits and vegetables? What are some health benefits?
2. What are your favorite fruits and veggies?
3. What other ingredients could you add to the salad?
did you know... tips :You can use leftover dressing to make Veggie Robots (15)
You can use leftover ham or turkey to add to Lettuce Wraps (19) or Mini Pizzas (37)
Mandarin oranges and strawberries are full of Vitamin C, which build up your body’s immune system and keep you from getting sick.
FRUITS GRAINS
PROTEINVEGGIES
1 1/2 cups strawberries, washed
4-6 slices turkey or ham
3/4 cup edamame, thawed
1 cup mandarin oranges, drained
1/3 cup sunflower or pumpkin seeds
2 cups Romaine lettuce or baby spinach
1/3 cup salad dressing of choice
TIP: Peanut allergies in the room? Avoid seeds that have manufactured with tree nuts and peanuts. 1. Use your plastic knife to cut tops off
strawberries; then cut into quarters.
and place them in a large mixing bowl.
2. Use your plastic knife to cut a slice of
turkey or ham, and add it to the bowl.
3. Add Romaine lettuce or baby
spinach to the bowl.
4. Add edamame, mandarin oranges
and sunflower or pumpkin seeds to
the bowl.
5. Add salad dressing and toss with
your wooden spoon.
DAIRY
INTRODUCTION (10 min)
1. Take attendance.
2. Ask students to wash their hands.
3. Seat students in groups of 4-6.
4. Ask students to grab their chef hats (optional).
5. Share the recipe you’ll be covering.
Serves 4-6 (one salad per person)
31
SHOPPING LIST (for 20 students)
EQUIPMENT FOR CLASS (for 4 groups of 4-6)
SET UP
NOTES
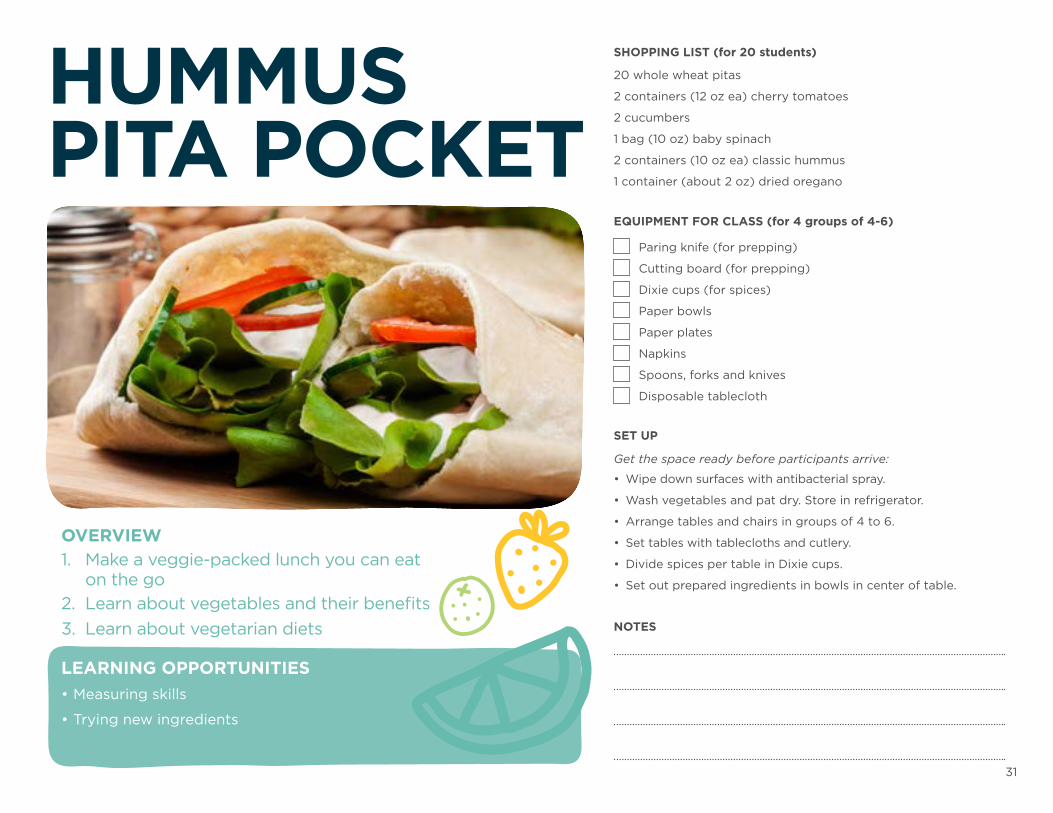
20 whole wheat pitas
2 containers (12 oz ea) cherry tomatoes
2 cucumbers
1 bag (10 oz) baby spinach
2 containers (10 oz ea) classic hummus
1 container (about 2 oz) dried oregano
Paring knife (for prepping)
Cutting board (for prepping)
Dixie cups (for spices)
Paper bowls
Paper plates
Napkins
Spoons, forks and knives
Disposable tablecloth
Get the space ready before participants arrive:
• Wipe down surfaces with antibacterial spray.
• Wash vegetables and pat dry. Store in refrigerator.
• Arrange tables and chairs in groups of 4 to 6.
• Set tables with tablecloths and cutlery.
• Divide spices per table in Dixie cups.
• Set out prepared ingredients in bowls in center of table.
OVERVIEW 1. Make a veggie-packed lunch you can eat
on the go2. Learn about vegetables and their benefits3. Learn about vegetarian diets
LEARNING OPPORTUNITIES• Measuring skills
• Trying new ingredients
HUMMUSPITA POCKET
32
45 min Serves 4-6
Hummus in Pita Pocket
LESSON PLAN directions :
ingredients :
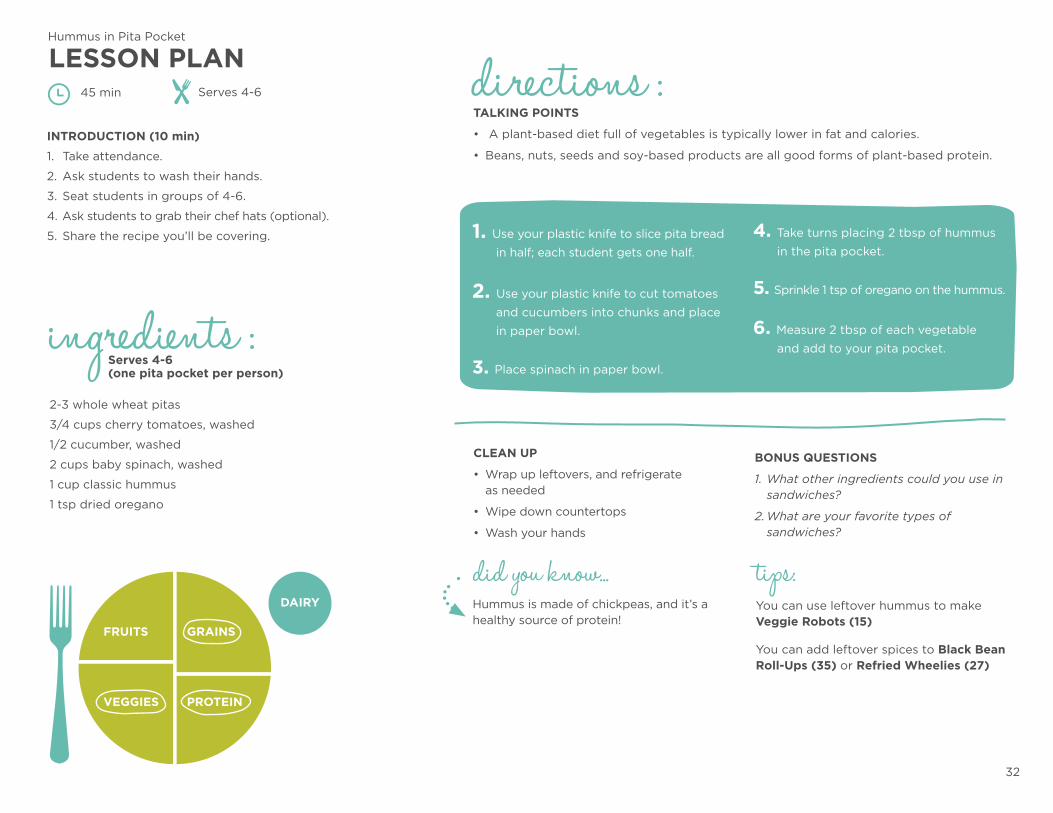
TALKING POINTS
• A plant-based diet full of vegetables is typically lower in fat and calories.
• Beans, nuts, seeds and soy-based products are all good forms of plant-based protein.
BONUS QUESTIONS
1. What other ingredients could you use in sandwiches?
2. What are your favorite types of sandwiches?
did you know... tips:You can use leftover hummus to make Veggie Robots (15)
You can add leftover spices to Black Bean Roll-Ups (35) or Refried Wheelies (27)
Hummus is made of chickpeas, and it’s a healthy source of protein!
FRUITS GRAINS
PROTEINVEGGIES
2-3 whole wheat pitas
3/4 cups cherry tomatoes, washed
1/2 cucumber, washed
2 cups baby spinach, washed
1 cup classic hummus
1 tsp dried oregano
1. Use your plastic knife to slice pita bread
in half; each student gets one half.
2. Use your plastic knife to cut tomatoes
and cucumbers into chunks and place
in paper bowl.
3. Place spinach in paper bowl.
4. Take turns placing 2 tbsp of hummus
in the pita pocket.
5. Sprinkle 1 tsp of oregano on the hummus.
6. Measure 2 tbsp of each vegetable
and add to your pita pocket.
DAIRY
INTRODUCTION (10 min)
1. Take attendance.
2. Ask students to wash their hands.
3. Seat students in groups of 4-6.
4. Ask students to grab their chef hats (optional).
5. Share the recipe you’ll be covering.
CLEAN UP
• Wrap up leftovers, and refrigerate as needed
• Wipe down countertops
• Wash your hands
Serves 4-6 (one pita pocket per person)
33
SHOPPING LIST (for 20 students)
SET UP
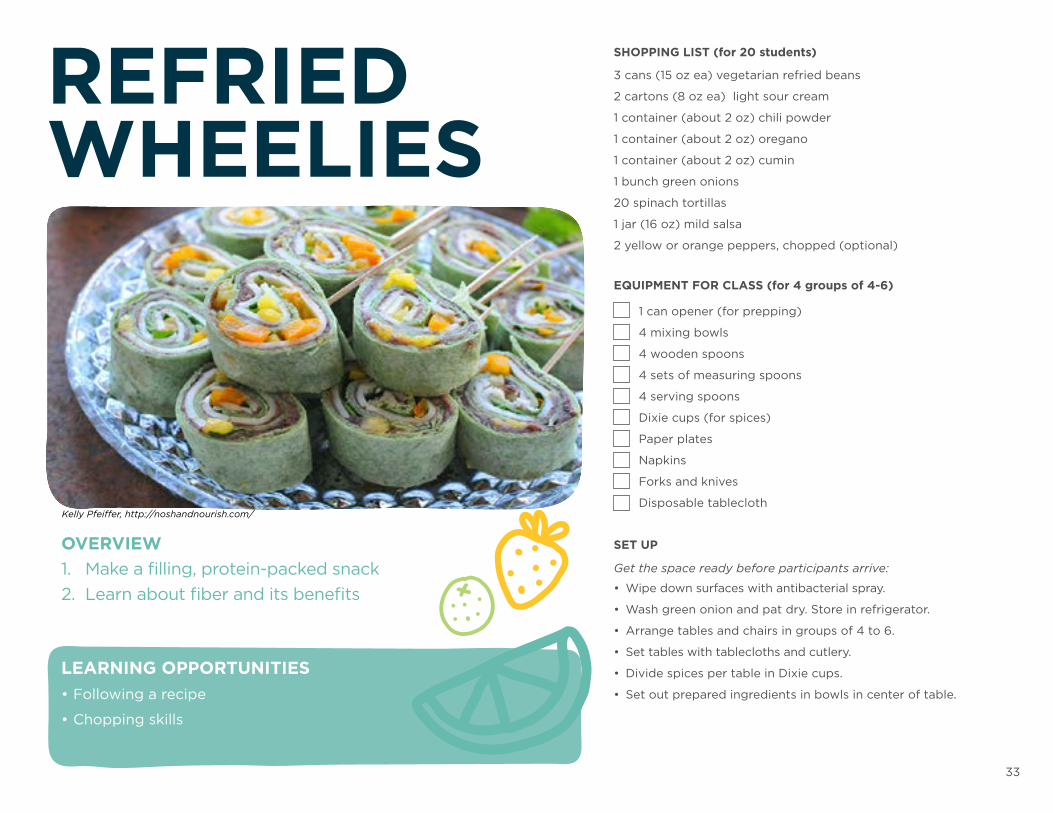
3 cans (15 oz ea) vegetarian refried beans
2 cartons (8 oz ea) light sour cream
1 container (about 2 oz) chili powder
1 container (about 2 oz) oregano
1 container (about 2 oz) cumin
1 bunch green onions
20 spinach tortillas
1 jar (16 oz) mild salsa
2 yellow or orange peppers, chopped (optional)
Get the space ready before participants arrive:
• Wipe down surfaces with antibacterial spray.
• Wash green onion and pat dry. Store in refrigerator.
• Arrange tables and chairs in groups of 4 to 6.
• Set tables with tablecloths and cutlery.
• Divide spices per table in Dixie cups.
• Set out prepared ingredients in bowls in center of table.
OVERVIEW1. Make a filling, protein-packed snack 2. Learn about fiber and its benefits
LEARNING OPPORTUNITIES• Following a recipe
• Chopping skills
REFRIEDWHEELIES
EQUIPMENT FOR CLASS (for 4 groups of 4-6)
1 can opener (for prepping)
4 mixing bowls
4 wooden spoons
4 sets of measuring spoons
4 serving spoons
Dixie cups (for spices)
Paper plates
Napkins
Forks and knives
Disposable tableclothKelly Pfeiffer, http://noshandnourish.com/
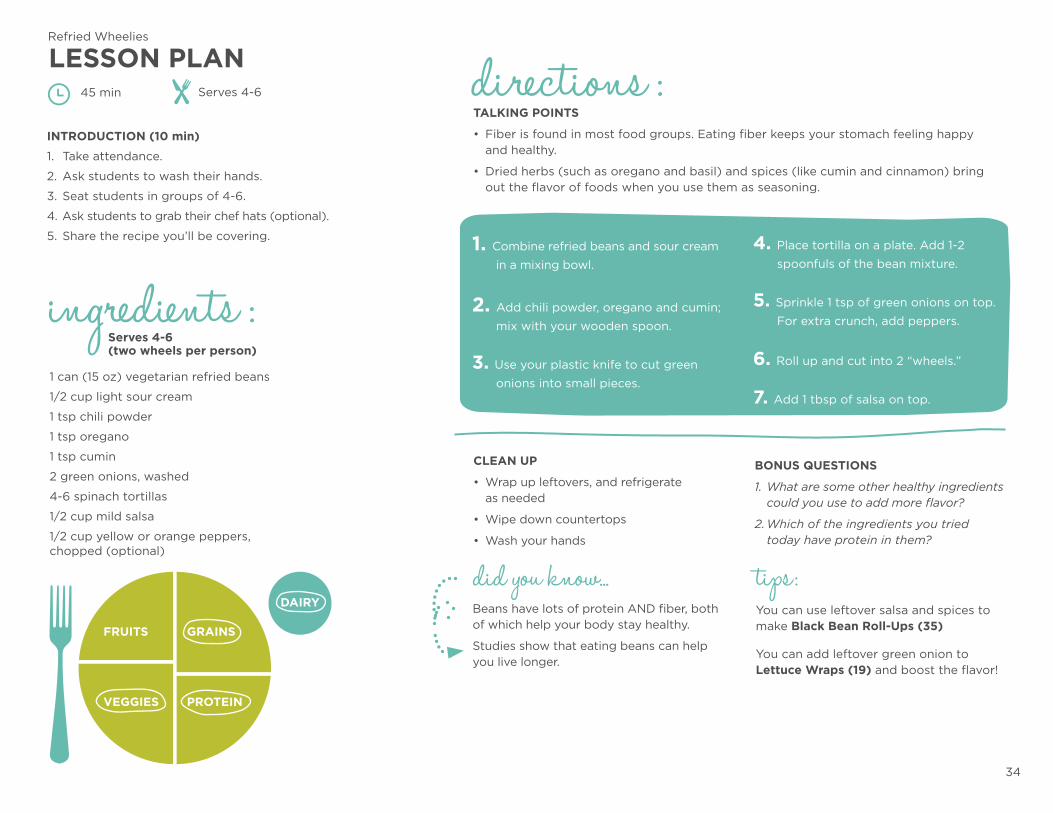
34
45 min Serves 4-6
Refried Wheelies
LESSON PLAN directions :
ingredients :
TALKING POINTS
• Fiber is found in most food groups. Eating fiber keeps your stomach feeling happy and healthy.
• Dried herbs (such as oregano and basil) and spices (like cumin and cinnamon) bring out the flavor of foods when you use them as seasoning.
INTRODUCTION (10 min)
1. Take attendance.
2. Ask students to wash their hands.
3. Seat students in groups of 4-6.
4. Ask students to grab their chef hats (optional).
5. Share the recipe you’ll be covering.
CLEAN UP
• Wrap up leftovers, and refrigerate as needed
• Wipe down countertops
• Wash your hands
BONUS QUESTIONS
1. What are some other healthy ingredients could you use to add more flavor?
2. Which of the ingredients you tried today have protein in them?
did you know... tips :You can use leftover salsa and spices to make Black Bean Roll-Ups (35)
You can add leftover green onion to Lettuce Wraps (19) and boost the flavor!
Beans have lots of protein AND fiber, both of which help your body stay healthy.
Studies show that eating beans can help you live longer.
FRUITS GRAINS
PROTEINVEGGIES
1 can (15 oz) vegetarian refried beans
1/2 cup light sour cream
1 tsp chili powder
1 tsp oregano
1 tsp cumin
2 green onions, washed
4-6 spinach tortillas
1/2 cup mild salsa
1/2 cup yellow or orange peppers, chopped (optional)
1. Combine refried beans and sour cream
in a mixing bowl.
2. Add chili powder, oregano and cumin;
mix with your wooden spoon.
3. Use your plastic knife to cut green
onions into small pieces.
4. Place tortilla on a plate. Add 1-2
spoonfuls of the bean mixture.
5. Sprinkle 1 tsp of green onions on top.
For extra crunch, add peppers.
6. Roll up and cut into 2 “wheels.”
7. Add 1 tbsp of salsa on top.
DAIRY
Serves 4-6 (two wheels per person)

35
IT’S TIME TO GET COOKING
HEAT REQUIRED
TASTY RECIPES
36
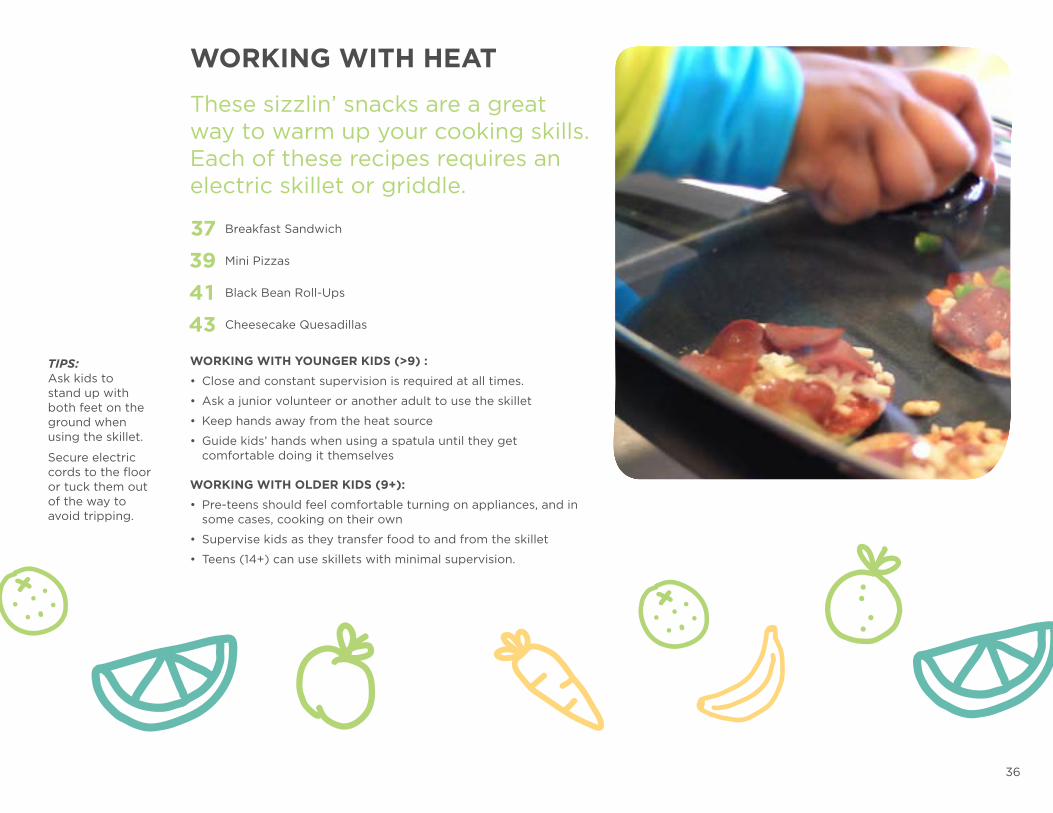
These sizzlin’ snacks are a great way to warm up your cooking skills. Each of these recipes requires an electric skillet or griddle.
WORKING WITH HEAT
WORKING WITH YOUNGER KIDS (>9) :
• Close and constant supervision is required at all times.
• Ask a junior volunteer or another adult to use the skillet
• Keep hands away from the heat source
• Guide kids’ hands when using a spatula until they get comfortable doing it themselves
WORKING WITH OLDER KIDS (9+):
• Pre-teens should feel comfortable turning on appliances, and in some cases, cooking on their own
• Supervise kids as they transfer food to and from the skillet
• Teens (14+) can use skillets with minimal supervision.
Breakfast Sandwich
Mini Pizzas
Black Bean Roll-Ups
Cheesecake Quesadillas
3739
4341
TIPS: Ask kids to stand up with both feet on the ground when using the skillet.
Secure electric cords to the floor or tuck them out of the way to avoid tripping.
37
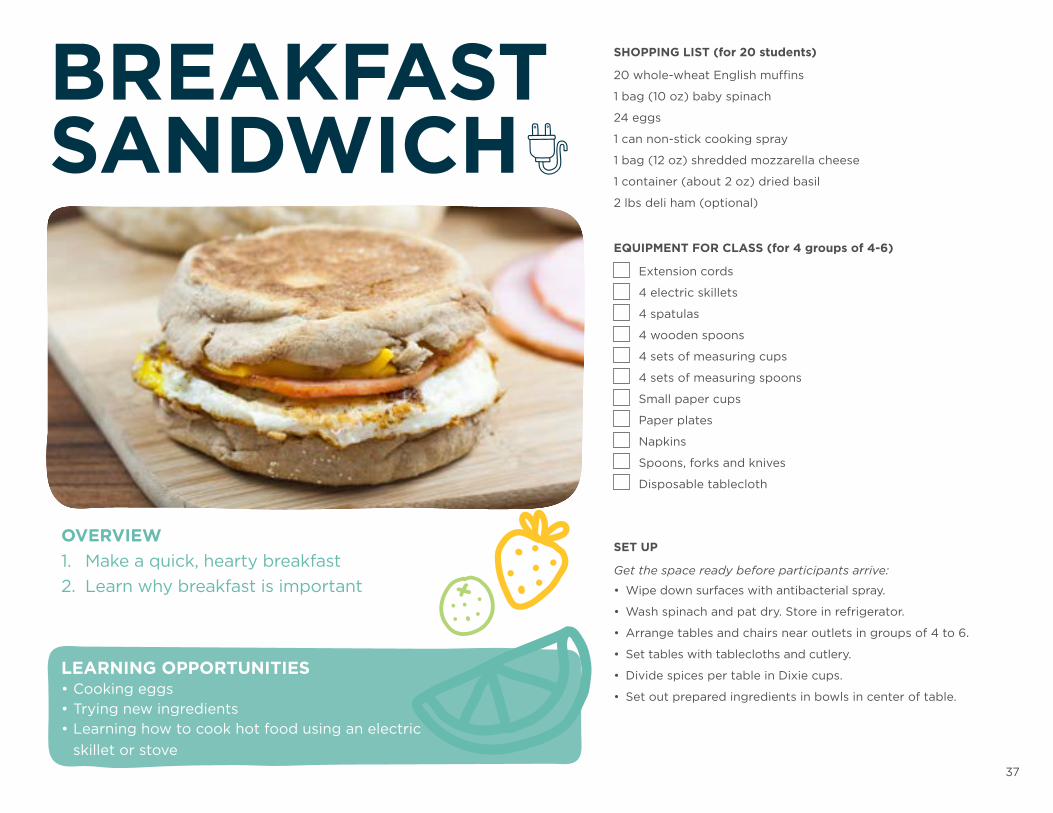
SHOPPING LIST (for 20 students)
EQUIPMENT FOR CLASS (for 4 groups of 4-6)
SET UP
20 whole-wheat English muffins
1 bag (10 oz) baby spinach
24 eggs
1 can non-stick cooking spray
1 bag (12 oz) shredded mozzarella cheese
1 container (about 2 oz) dried basil
2 lbs deli ham (optional)
Extension cords
4 electric skillets
4 spatulas
4 wooden spoons
4 sets of measuring cups
4 sets of measuring spoons
Small paper cups
Paper plates
Napkins
Spoons, forks and knives
Disposable tablecloth
Get the space ready before participants arrive:
• Wipe down surfaces with antibacterial spray.
• Wash spinach and pat dry. Store in refrigerator.
• Arrange tables and chairs near outlets in groups of 4 to 6.
• Set tables with tablecloths and cutlery.
• Divide spices per table in Dixie cups.
• Set out prepared ingredients in bowls in center of table.
OVERVIEW1. Make a quick, hearty breakfast 2. Learn why breakfast is important
LEARNING OPPORTUNITIES• Cooking eggs• Trying new ingredients• Learning how to cook hot food using an electric
skillet or stove
BREAKFASTSANDWICH
38
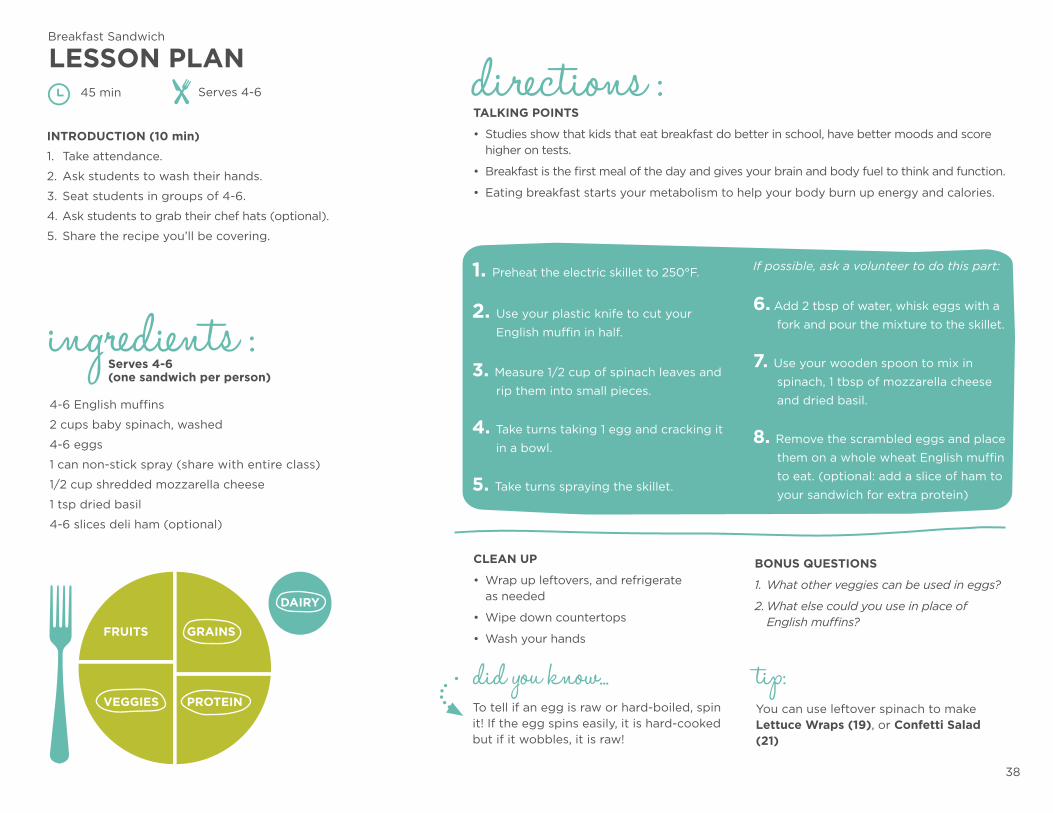
45 min Serves 4-6
Breakfast Sandwich
LESSON PLAN directions :TALKING POINTS
• Studies show that kids that eat breakfast do better in school, have better moods and score higher on tests.
• Breakfast is the first meal of the day and gives your brain and body fuel to think and function.
• Eating breakfast starts your metabolism to help your body burn up energy and calories.
BONUS QUESTIONS
1. What other veggies can be used in eggs?
2. What else could you use in place of English muffins?
did you know... tip:You can use leftover spinach to make Lettuce Wraps (19), or Confetti Salad (21)
To tell if an egg is raw or hard-boiled, spin it! If the egg spins easily, it is hard-cooked but if it wobbles, it is raw!
FRUITS GRAINS
PROTEINVEGGIES
4-6 English muffins
2 cups baby spinach, washed
4-6 eggs
1 can non-stick spray (share with entire class)
1/2 cup shredded mozzarella cheese
1 tsp dried basil
4-6 slices deli ham (optional)
1. Preheat the electric skillet to 250°F.
2. Use your plastic knife to cut your
English muffin in half.
3. Measure 1/2 cup of spinach leaves and
rip them into small pieces.
4. Take turns taking 1 egg and cracking it
in a bowl.
5. Take turns spraying the skillet.
If possible, ask a volunteer to do this part:
6. Add 2 tbsp of water, whisk eggs with a
fork and pour the mixture to the skillet.
7. Use your wooden spoon to mix in
spinach, 1 tbsp of mozzarella cheese
and dried basil.
8. Remove the scrambled eggs and place
them on a whole wheat English muffin
to eat. (optional: add a slice of ham to
your sandwich for extra protein)
DAIRY
ingredients :
INTRODUCTION (10 min)
1. Take attendance.
2. Ask students to wash their hands.
3. Seat students in groups of 4-6.
4. Ask students to grab their chef hats (optional).
5. Share the recipe you’ll be covering.
CLEAN UP
• Wrap up leftovers, and refrigerate as needed
• Wipe down countertops
• Wash your hands
Serves 4-6 (one sandwich per person)

39
SHOPPING LIST (for 20 students)
EQUIPMENT FOR CLASS (for 4 groups of 4-6)
SET UP
20 whole-wheat English muffins
1 jar (16 oz) pizza sauce
1 bag (8 oz) shredded mozzarella cheese
1 can (8 oz) sliced mushrooms
4 bags (5 oz each) turkey pepperoni
1 container (about 2 oz) dried oregano
1 container (about 2 oz) dried basil
Extension cords
4 electric skillets
4 spatulas
1 can opener (for prepping)
Dixie cups (for spices)
Paper plates
Napkins
Spoons
Disposable tablecloth
Get the space ready before participants arrive:
• Wipe down surfaces with antibacterial spray.
• Arrange tables and chairs near outlets in groups of 4 to 6.
• Set tables with tablecloths and cutlery.
• Divide spices per table in Dixie cups.
• Set out prepared ingredients in bowls in center of table.
OVERVIEW1. Learn to make your own pizza2. Learn how to use spices to make foods
more flavorful3. Learn about carbohydrates and vegetables
LEARNING OPPORTUNITIES• Trying new ingredients
• Learning how to cook hot food using an electric skillet or stove
MINIPIZZAS
40
45 min Serves 4-6
Mini Pizzas
LESSON PLAN directions :
ingredients :
TALKING POINTS
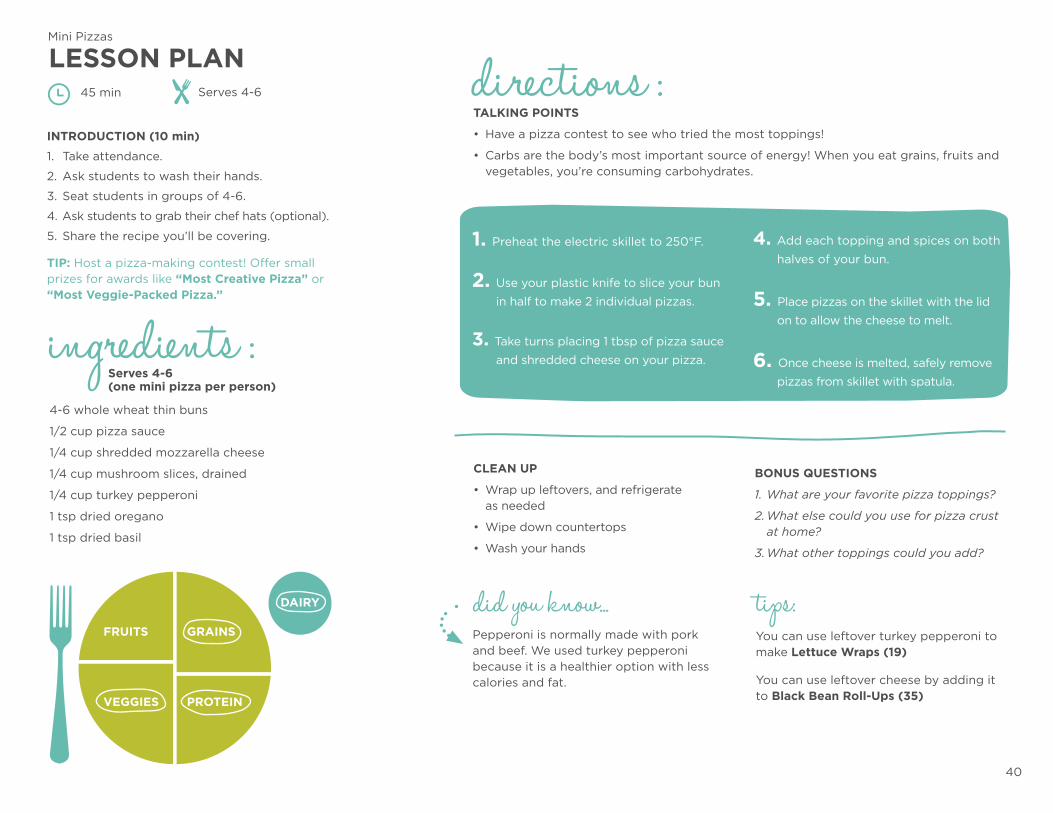
• Have a pizza contest to see who tried the most toppings!
• Carbs are the body’s most important source of energy! When you eat grains, fruits and vegetables, you’re consuming carbohydrates.
INTRODUCTION (10 min)
1. Take attendance.
2. Ask students to wash their hands.
3. Seat students in groups of 4-6.
4. Ask students to grab their chef hats (optional).
5. Share the recipe you’ll be covering.
CLEAN UP
• Wrap up leftovers, and refrigerate as needed
• Wipe down countertops
• Wash your hands
BONUS QUESTIONS
1. What are your favorite pizza toppings?
2. What else could you use for pizza crust at home?
3. What other toppings could you add?
did you know... tips:You can use leftover turkey pepperoni to make Lettuce Wraps (19)
You can use leftover cheese by adding it to Black Bean Roll-Ups (35)
Pepperoni is normally made with pork and beef. We used turkey pepperoni because it is a healthier option with less calories and fat.
FRUITS GRAINS
PROTEINVEGGIES
4-6 whole wheat thin buns
1/2 cup pizza sauce
1/4 cup shredded mozzarella cheese
1/4 cup mushroom slices, drained
1/4 cup turkey pepperoni
1 tsp dried oregano
1 tsp dried basil
1. Preheat the electric skillet to 250°F.
2. Use your plastic knife to slice your bun
in half to make 2 individual pizzas.
3. Take turns placing 1 tbsp of pizza sauce
and shredded cheese on your pizza.
4. Add each topping and spices on both
halves of your bun.
5. Place pizzas on the skillet with the lid
on to allow the cheese to melt.
6. Once cheese is melted, safely remove
pizzas from skillet with spatula.
DAIRY
TIP: Host a pizza-making contest! Offer small prizes for awards like “Most Creative Pizza” or “Most Veggie-Packed Pizza.”
Serves 4-6 (one mini pizza per person)
41
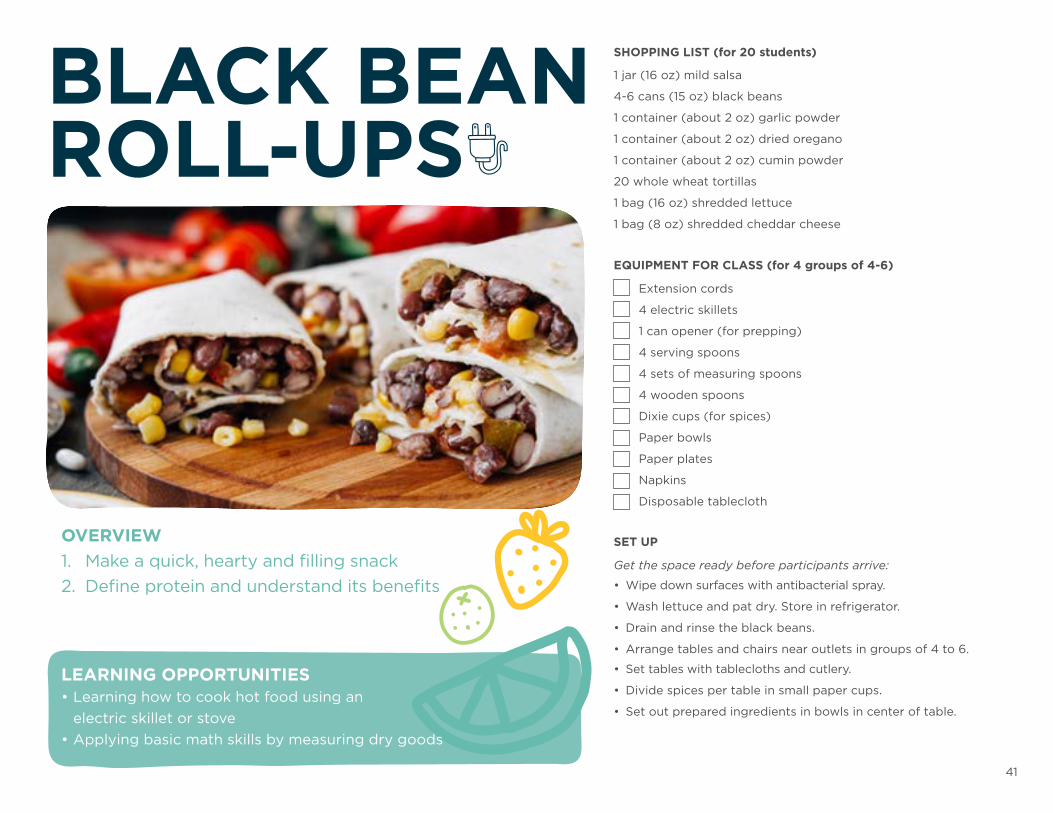
SHOPPING LIST (for 20 students)
EQUIPMENT FOR CLASS (for 4 groups of 4-6)
SET UP
1 jar (16 oz) mild salsa
4-6 cans (15 oz) black beans
1 container (about 2 oz) garlic powder
1 container (about 2 oz) dried oregano
1 container (about 2 oz) cumin powder
20 whole wheat tortillas
1 bag (16 oz) shredded lettuce
1 bag (8 oz) shredded cheddar cheese
Extension cords
4 electric skillets
1 can opener (for prepping)
4 serving spoons
4 sets of measuring spoons
4 wooden spoons
Dixie cups (for spices)
Paper bowls
Paper plates
Napkins
Disposable tablecloth
Get the space ready before participants arrive:
• Wipe down surfaces with antibacterial spray.
• Wash lettuce and pat dry. Store in refrigerator.
• Drain and rinse the black beans.
• Arrange tables and chairs near outlets in groups of 4 to 6.
• Set tables with tablecloths and cutlery.
• Divide spices per table in small paper cups.
• Set out prepared ingredients in bowls in center of table.
OVERVIEW1. Make a quick, hearty and filling snack 2. Define protein and understand its benefits
BLACK BEANROLL-UPS
LEARNING OPPORTUNITIES• Learning how to cook hot food using an
electric skillet or stove • Applying basic math skills by measuring dry goods
42
45 min Serves 4-6
Black Bean Roll-Ups
LESSON PLAN directions :
ingredients :
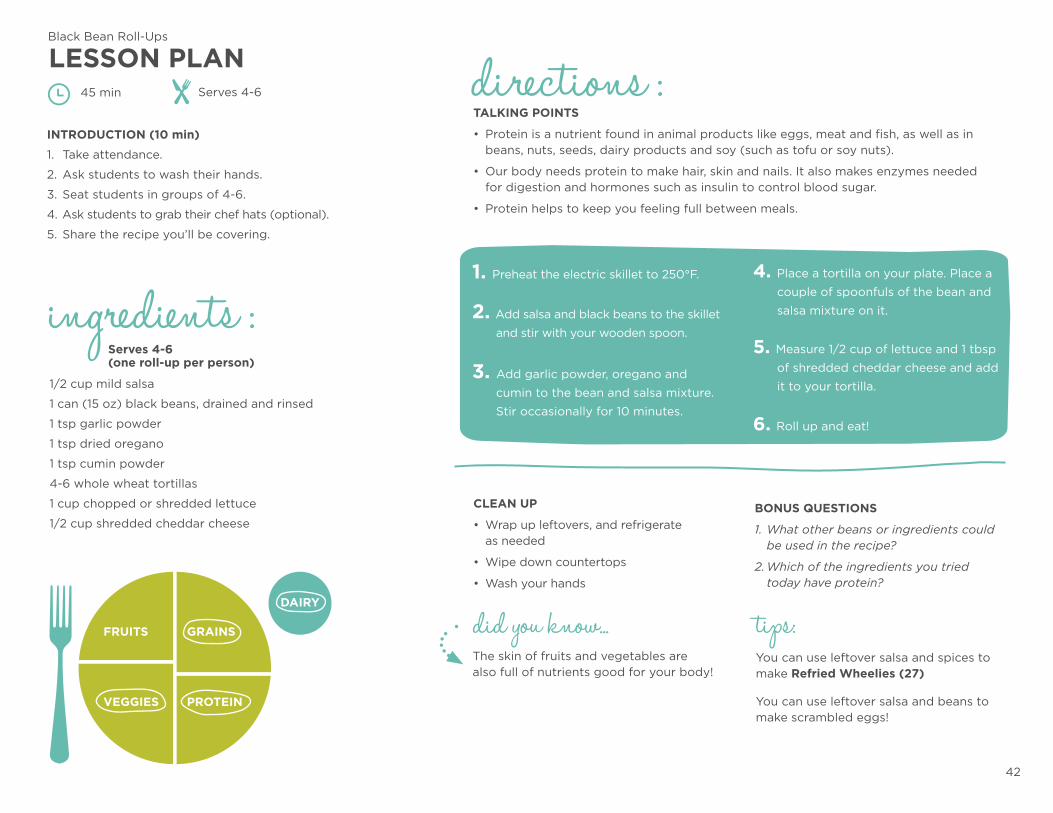
TALKING POINTS
• Protein is a nutrient found in animal products like eggs, meat and fish, as well as in beans, nuts, seeds, dairy products and soy (such as tofu or soy nuts).
• Our body needs protein to make hair, skin and nails. It also makes enzymes needed for digestion and hormones such as insulin to control blood sugar.
• Protein helps to keep you feeling full between meals.
INTRODUCTION (10 min)
1. Take attendance.
2. Ask students to wash their hands.
3. Seat students in groups of 4-6.
4. Ask students to grab their chef hats (optional).
5. Share the recipe you’ll be covering.
CLEAN UP
• Wrap up leftovers, and refrigerate as needed
• Wipe down countertops
• Wash your hands
BONUS QUESTIONS
1. What other beans or ingredients could be used in the recipe?
2. Which of the ingredients you tried today have protein?
did you know... tips:You can use leftover salsa and spices to make Refried Wheelies (27)
You can use leftover salsa and beans to make scrambled eggs!
The skin of fruits and vegetables are also full of nutrients good for your body!
FRUITS GRAINS
PROTEINVEGGIES
1/2 cup mild salsa
1 can (15 oz) black beans, drained and rinsed
1 tsp garlic powder
1 tsp dried oregano
1 tsp cumin powder
4-6 whole wheat tortillas
1 cup chopped or shredded lettuce
1/2 cup shredded cheddar cheese
1. Preheat the electric skillet to 250°F.
2. Add salsa and black beans to the skillet
and stir with your wooden spoon.
3. Add garlic powder, oregano and
cumin to the bean and salsa mixture.
Stir occasionally for 10 minutes.
4. Place a tortilla on your plate. Place a
couple of spoonfuls of the bean and
salsa mixture on it.
5. Measure 1/2 cup of lettuce and 1 tbsp
of shredded cheddar cheese and add
it to your tortilla.
6. Roll up and eat!
DAIRY
Serves 4-6 (one roll-up per person)
43
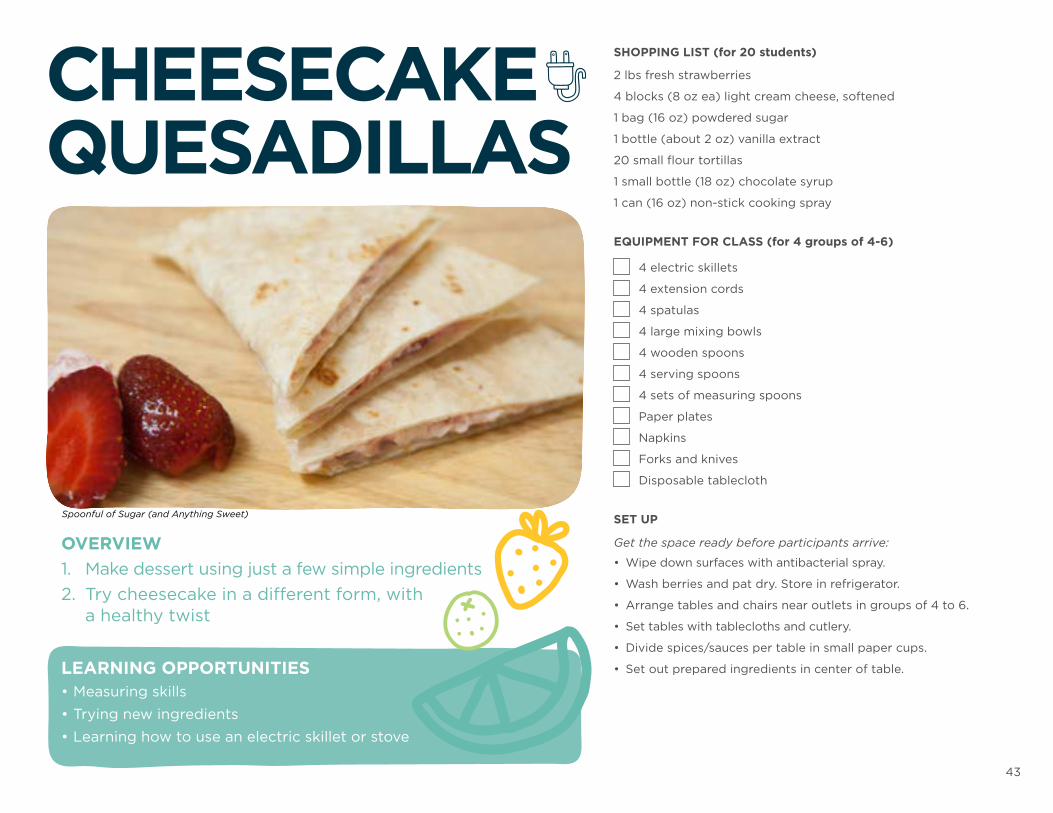
SHOPPING LIST (for 20 students)
EQUIPMENT FOR CLASS (for 4 groups of 4-6)
2 lbs fresh strawberries
4 blocks (8 oz ea) light cream cheese, softened
1 bag (16 oz) powdered sugar
1 bottle (about 2 oz) vanilla extract
20 small flour tortillas
1 small bottle (18 oz) chocolate syrup
1 can (16 oz) non-stick cooking spray
4 electric skillets
4 extension cords
4 spatulas
4 large mixing bowls
4 wooden spoons
4 serving spoons
4 sets of measuring spoons
Paper plates
Napkins
Forks and knives
Disposable tablecloth
OVERVIEW1. Make dessert using just a few simple ingredients 2. Try cheesecake in a different form, with
a healthy twist
LEARNING OPPORTUNITIES• Measuring skills• Trying new ingredients• Learning how to use an electric skillet or stove
CHEESECAKEQUESADILLAS
SET UP
Get the space ready before participants arrive:
• Wipe down surfaces with antibacterial spray.
• Wash berries and pat dry. Store in refrigerator.
• Arrange tables and chairs near outlets in groups of 4 to 6.
• Set tables with tablecloths and cutlery.
• Divide spices/sauces per table in small paper cups.
• Set out prepared ingredients in center of table.
Spoonful of Sugar (and Anything Sweet)
44
45 min Serves 4-6
Cheesecake Quesadillas
LESSON PLAN directions :
ingredients :
TALKING POINTS
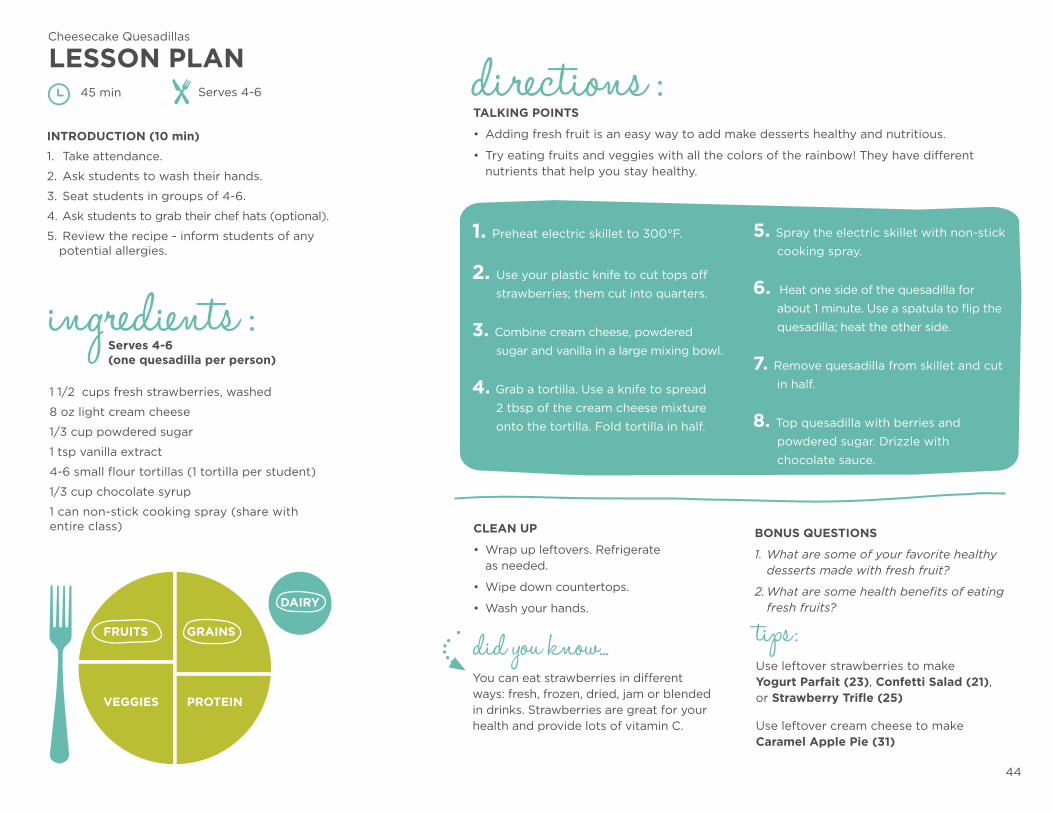
• Adding fresh fruit is an easy way to add make desserts healthy and nutritious.
• Try eating fruits and veggies with all the colors of the rainbow! They have different nutrients that help you stay healthy.
INTRODUCTION (10 min)
1. Take attendance.
2. Ask students to wash their hands.
3. Seat students in groups of 4-6.
4. Ask students to grab their chef hats (optional).
5. Review the recipe - inform students of any potential allergies.
CLEAN UP
• Wrap up leftovers. Refrigerate as needed.
• Wipe down countertops.
• Wash your hands.
BONUS QUESTIONS
1. What are some of your favorite healthy desserts made with fresh fruit?
2. What are some health benefits of eating fresh fruits?
did you know... tips :Use leftover strawberries to make Yogurt Parfait (23), Confetti Salad (21), or Strawberry Trifle (25)
Use leftover cream cheese to make Caramel Apple Pie (31)
You can eat strawberries in different ways: fresh, frozen, dried, jam or blended in drinks. Strawberries are great for your health and provide lots of vitamin C.
FRUITS GRAINS
PROTEINVEGGIES
1 1/2 cups fresh strawberries, washed
8 oz light cream cheese
1/3 cup powdered sugar
1 tsp vanilla extract
4-6 small flour tortillas (1 tortilla per student)
1/3 cup chocolate syrup
1 can non-stick cooking spray (share with entire class)
1. Preheat electric skillet to 300°F.
2. Use your plastic knife to cut tops off
strawberries; them cut into quarters.
3. Combine cream cheese, powdered
sugar and vanilla in a large mixing bowl.
4. Grab a tortilla. Use a knife to spread
2 tbsp of the cream cheese mixture
onto the tortilla. Fold tortilla in half.
5. Spray the electric skillet with non-stick
cooking spray.
6. Heat one side of the quesadilla for
about 1 minute. Use a spatula to flip the
quesadilla; heat the other side.
7. Remove quesadilla from skillet and cut
in half.
8. Top quesadilla with berries and
powdered sugar. Drizzle with
chocolate sauce.
DAIRY
Serves 4-6 (one quesadilla per person)
45
ADDITIONAL LESSONS
KIDS’ACTIVITIES
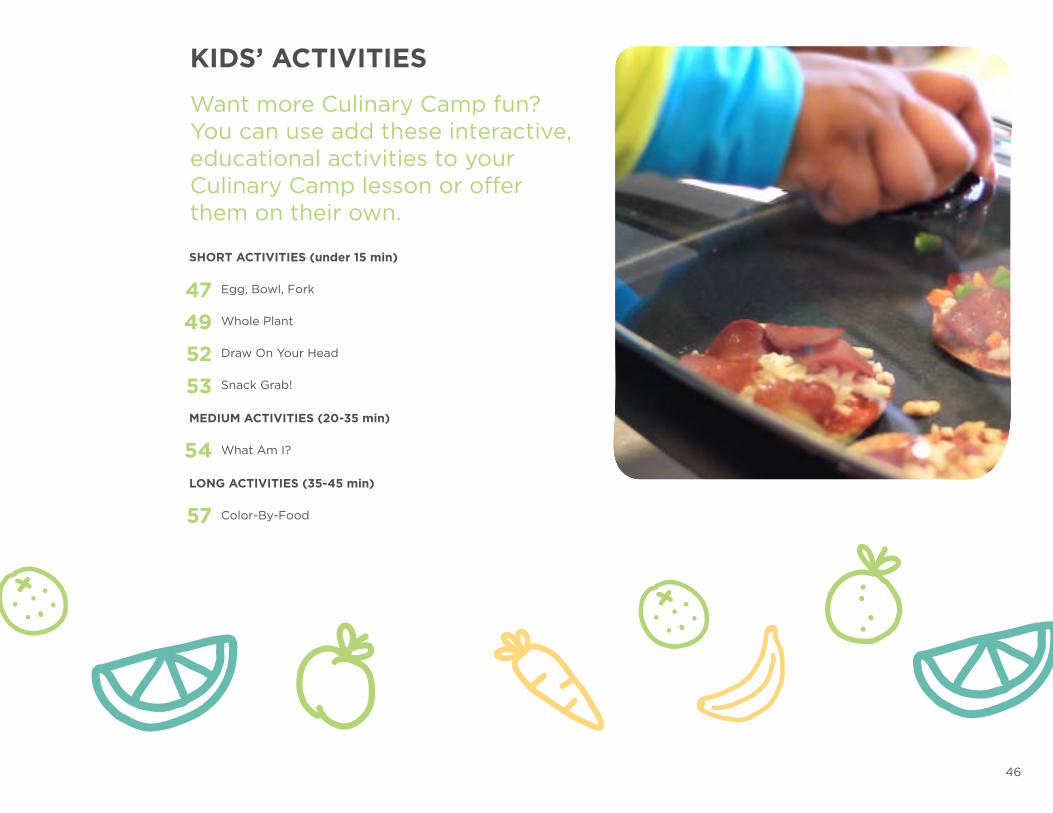
46
SHORT ACTIVITIES (under 15 min)
Egg, Bowl, Fork
Whole Plant
Draw On Your Head
Snack Grab!
MEDIUM ACTIVITIES (20-35 min)
What Am I?
LONG ACTIVITIES (35-45 min)
Color-By-Food
47495253
54
57
Want more Culinary Camp fun? You can use add these interactive, educational activities to your Culinary Camp lesson or offer them on their own.
KIDS’ ACTIVITIES
47
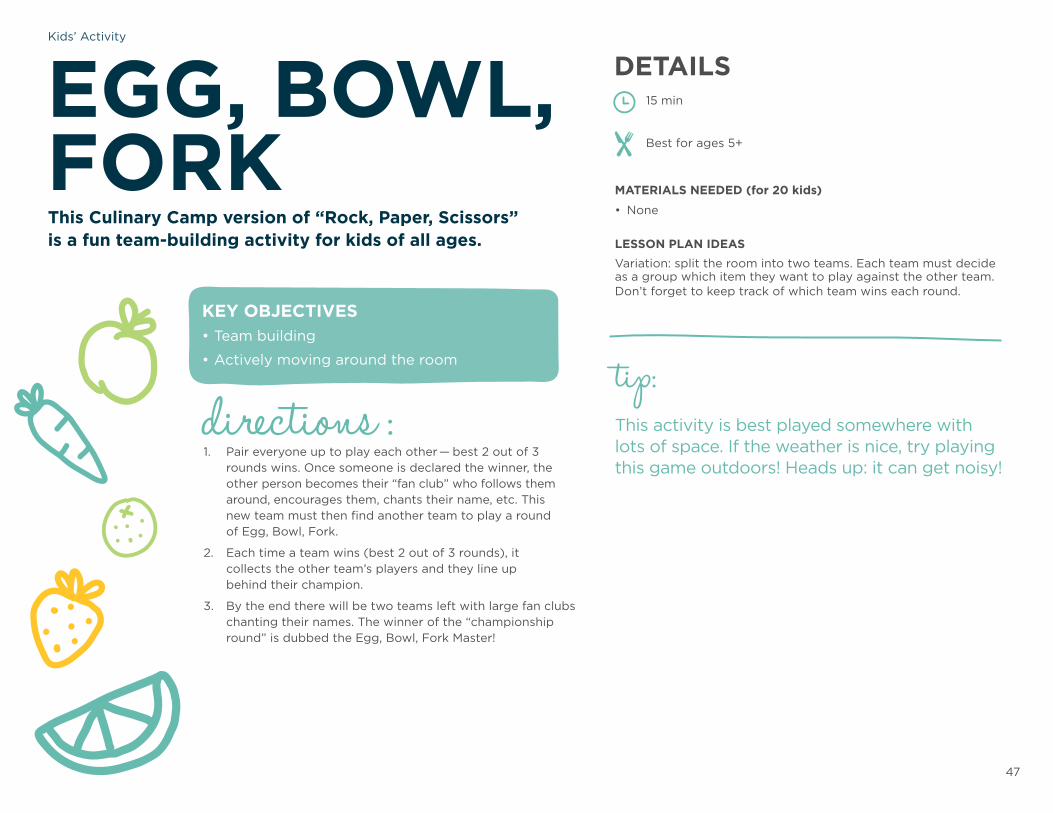
tip: This activity is best played somewhere with lots of space. If the weather is nice, try playing this game outdoors! Heads up: it can get noisy!
directions :1. Pair everyone up to play each other — best 2 out of 3
rounds wins. Once someone is declared the winner, the other person becomes their “fan club” who follows them around, encourages them, chants their name, etc. This new team must then find another team to play a round of Egg, Bowl, Fork.
2. Each time a team wins (best 2 out of 3 rounds), it collects the other team’s players and they line up behind their champion.
3. By the end there will be two teams left with large fan clubs chanting their names. The winner of the “championship round” is dubbed the Egg, Bowl, Fork Master!
KEY OBJECTIVES• Team building
• Actively moving around the room
EGG, BOWL, FORKThis Culinary Camp version of “Rock, Paper, Scissors” is a fun team-building activity for kids of all ages.
15 min
DETAILS
MATERIALS NEEDED (for 20 kids)
• None
LESSON PLAN IDEASVariation: split the room into two teams. Each team must decide as a group which item they want to play against the other team. Don’t forget to keep track of which team wins each round.
Kids’ Activity
Best for ages 5+
48
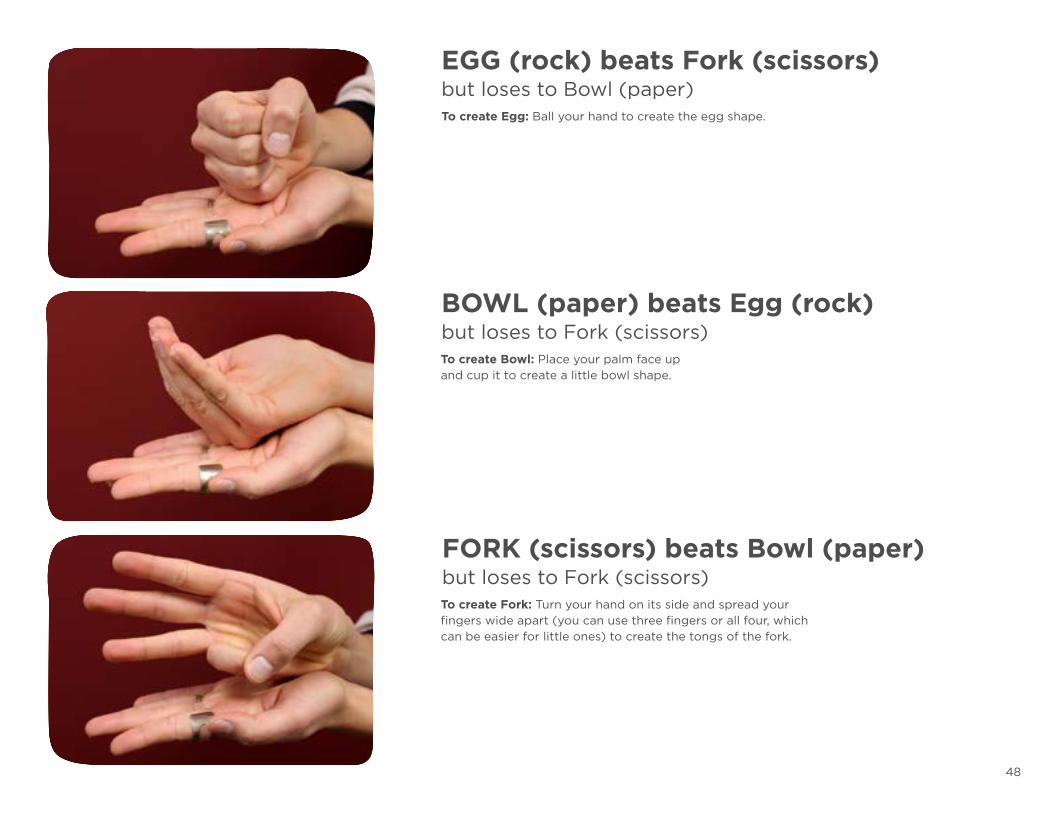
EGG (rock) beats Fork (scissors) but loses to Bowl (paper)
BOWL (paper) beats Egg (rock)but loses to Fork (scissors)
FORK (scissors) beats Bowl (paper)but loses to Fork (scissors)
To create Egg: Ball your hand to create the egg shape.
To create Bowl: Place your palm face up and cup it to create a little bowl shape.
To create Fork: Turn your hand on its side and spread your fingers wide apart (you can use three fingers or all four, which can be easier for little ones) to create the tongs of the fork.
49
LESSON PLAN IDEAS
KEY OBJECTIVES• Learn about the different parts of a plant
• See the foods around you in a new light
This activity works quite well with the Veggie Robots recipe (page 25) since it uses many of the same ingredients
Use this activity to help lead a short lesson on each section of a plant before asking students to try it themselves.
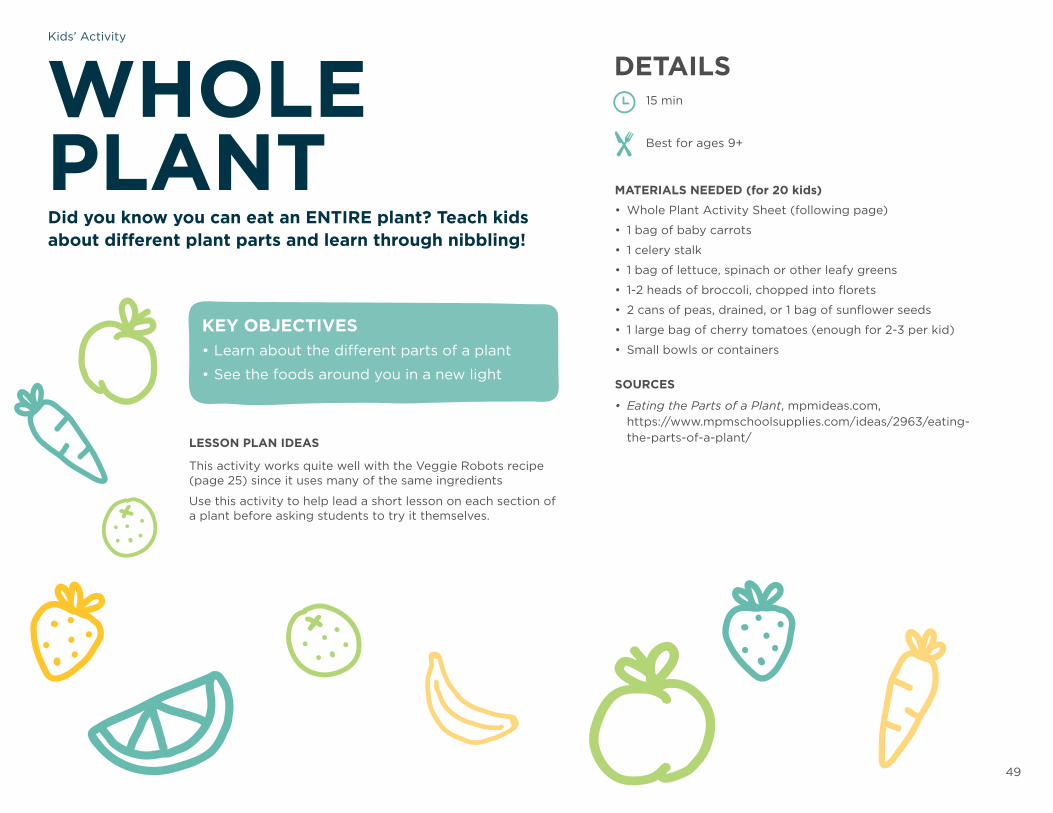
WHOLEPLANTDid you know you can eat an ENTIRE plant? Teach kids about different plant parts and learn through nibbling!
15 min
DETAILS
MATERIALS NEEDED (for 20 kids)
• Whole Plant Activity Sheet (following page)
• 1 bag of baby carrots
• 1 celery stalk
• 1 bag of lettuce, spinach or other leafy greens
• 1-2 heads of broccoli, chopped into florets
• 2 cans of peas, drained, or 1 bag of sunflower seeds
• 1 large bag of cherry tomatoes (enough for 2-3 per kid)
• Small bowls or containers
SOURCES
• Eating the Parts of a Plant, mpmideas.com, https://www.mpmschoolsupplies.com/ideas/2963/eating-the-parts-of-a-plant/
Kids’ Activity
Best for ages 9+
50
tip: Have large groups or younger kids work in groups so everyone feels supported.
• ROOTS A plant’s roots are hidden underground to anchor the
plant in the dirt. They absorb water and minerals from
the surrounding soil to feed the plant.
• STEM The stem is what makes the plant stand tall. It carries
the water and minerals from the roots to the leaves to
help it grow.
• LEAVES The leaves are usually green, and they convert the sunlight
into food in a process called photosynthesis.
• FLOWER The flower is often the most colorful part of the plant. It
comes in different shapes, sizes and colors, and produces
the fruits and seeds.
• SEEDS This little case holds a baby plant inside! Bury it in the
ground, add water, and a new plant will grow.
• FRUIT The fruit holds the seeds. They’re usually tasty, often
sweet, and brightly colored.
Kids’ Activity
WHOLE PLANT
directions :1. Arrange tables in groups of four. At every table set out small bowls with handfuls
of each ingredients so that each person has a few of each item.
2. Pass out a Whole Plant Activity Sheets to each person. Use the Plant Parts lesson (see right) to discuss each plant part one by one. Ask the group to write down one or two words to help them remember the terms in the designated areas.
3. Set a timer for five minutes. Take turns guessing which ingredients go in their correct spots on the worksheet.
4. Once time is up, as a group, discuss the correct answers.
5. Chow time! Allow everyone to eat the “whole plant” all together! Bon appétit!
lesson : p lant parts
• Carrots = Roots
• Celery = Stalk
• Lettuce/Spinach = Leaves
• Broccoli = Flower
• Peas or Sunflower Seeds = Seeds
• Tomatoes = Fruits
ANSWER KEY
51
ROOTS
LEAVES
FRUITS
STALK
FLOWER
SEEDS
Whole Plant Activity Sheet
52
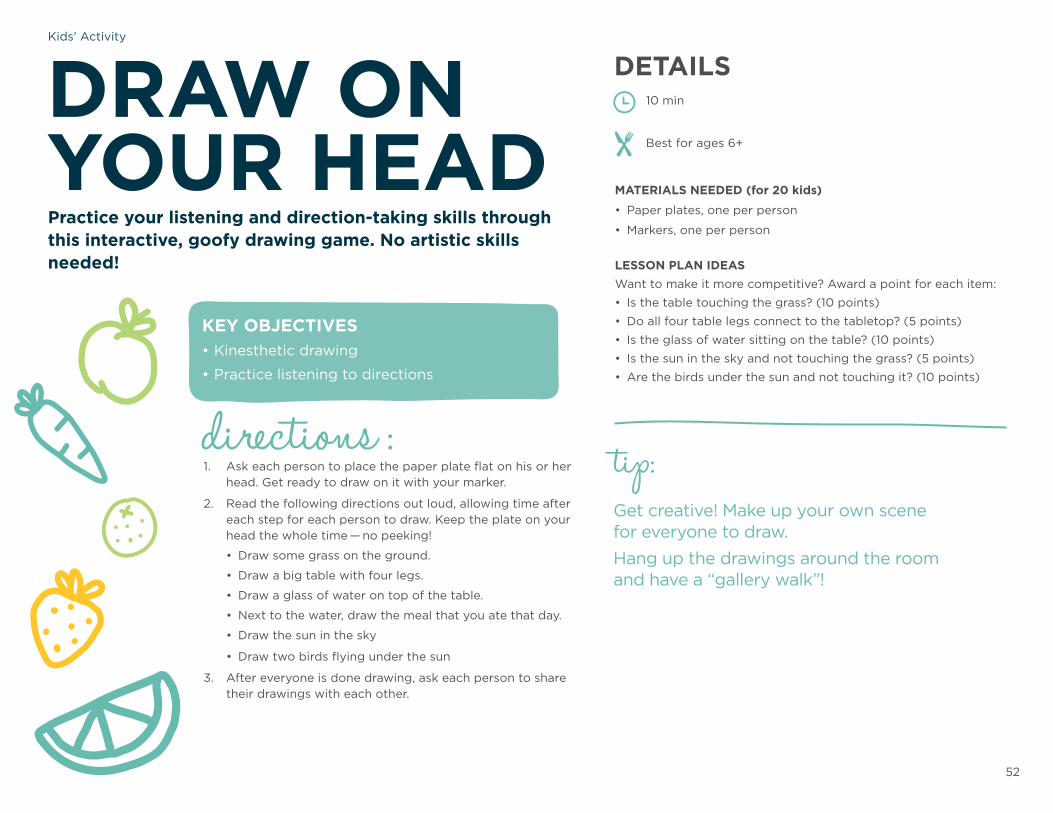
tip: Get creative! Make up your own scene for everyone to draw. Hang up the drawings around the room and have a “gallery walk”!
directions :1. Ask each person to place the paper plate flat on his or her
head. Get ready to draw on it with your marker.
2. Read the following directions out loud, allowing time after each step for each person to draw. Keep the plate on your head the whole time — no peeking!
• Draw some grass on the ground.
• Draw a big table with four legs.
• Draw a glass of water on top of the table.
• Next to the water, draw the meal that you ate that day.
• Draw the sun in the sky
• Draw two birds flying under the sun
3. After everyone is done drawing, ask each person to share their drawings with each other.
KEY OBJECTIVES• Kinesthetic drawing
• Practice listening to directions
DRAW ON YOUR HEADPractice your listening and direction-taking skills through this interactive, goofy drawing game. No artistic skills needed!
10 min
DETAILS
MATERIALS NEEDED (for 20 kids)
• Paper plates, one per person
• Markers, one per person
LESSON PLAN IDEASWant to make it more competitive? Award a point for each item:
• Is the table touching the grass? (10 points)
• Do all four table legs connect to the tabletop? (5 points)
• Is the glass of water sitting on the table? (10 points)
• Is the sun in the sky and not touching the grass? (5 points)
• Are the birds under the sun and not touching it? (10 points)
Kids’ Activity
Best for ages 6+
53
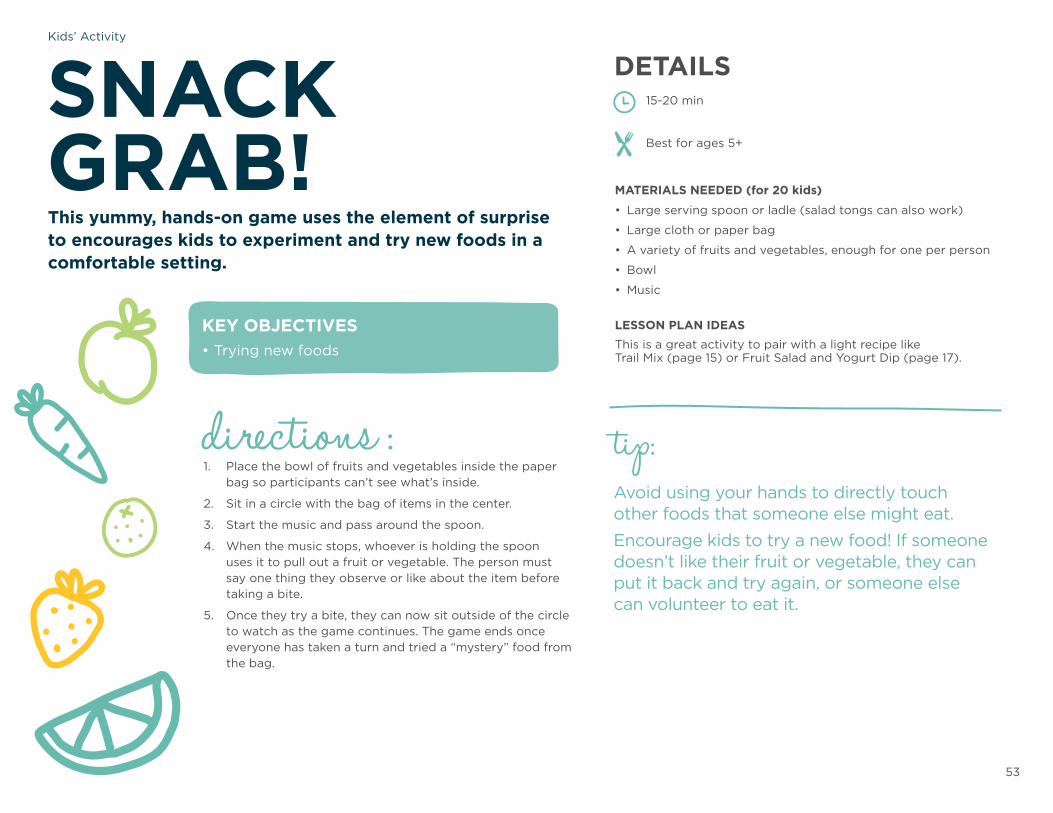
directions :1. Place the bowl of fruits and vegetables inside the paper
bag so participants can’t see what’s inside.
2. Sit in a circle with the bag of items in the center.
3. Start the music and pass around the spoon.
4. When the music stops, whoever is holding the spoon uses it to pull out a fruit or vegetable. The person must say one thing they observe or like about the item before taking a bite.
5. Once they try a bite, they can now sit outside of the circle to watch as the game continues. The game ends once everyone has taken a turn and tried a “mystery” food from the bag.
KEY OBJECTIVES• Trying new foods
SNACK GRAB!This yummy, hands-on game uses the element of surprise to encourages kids to experiment and try new foods in a comfortable setting.
15-20 min
DETAILS
MATERIALS NEEDED (for 20 kids)
• Large serving spoon or ladle (salad tongs can also work)
• Large cloth or paper bag
• A variety of fruits and vegetables, enough for one per person
• Bowl
• Music
LESSON PLAN IDEASThis is a great activity to pair with a light recipe like Trail Mix (page 15) or Fruit Salad and Yogurt Dip (page 17).
tip: Avoid using your hands to directly touch other foods that someone else might eat. Encourage kids to try a new food! If someone doesn’t like their fruit or vegetable, they can put it back and try again, or someone else can volunteer to eat it.
Kids’ Activity
Best for ages 5+
54
tip: Adults can play this one too! Invite staff to join in the fun to play on their own, or join up with a kid to help ask questions.
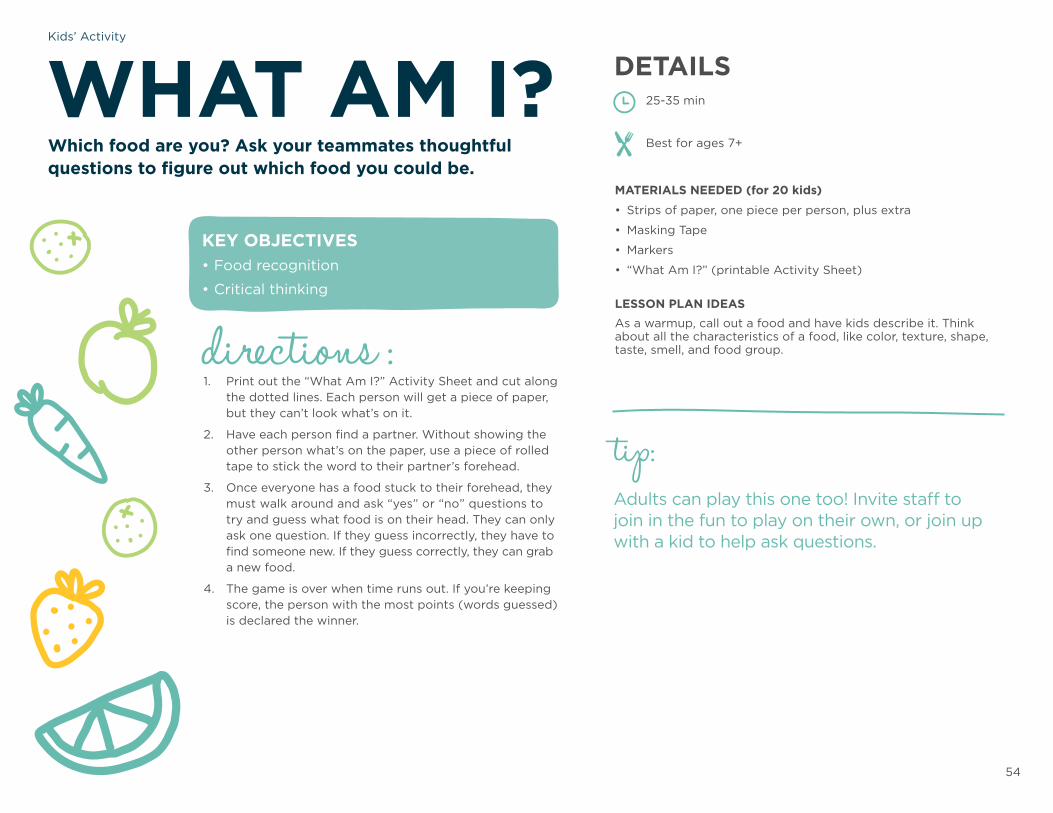
MATERIALS NEEDED (for 20 kids)
• Strips of paper, one piece per person, plus extra
• Masking Tape
• Markers
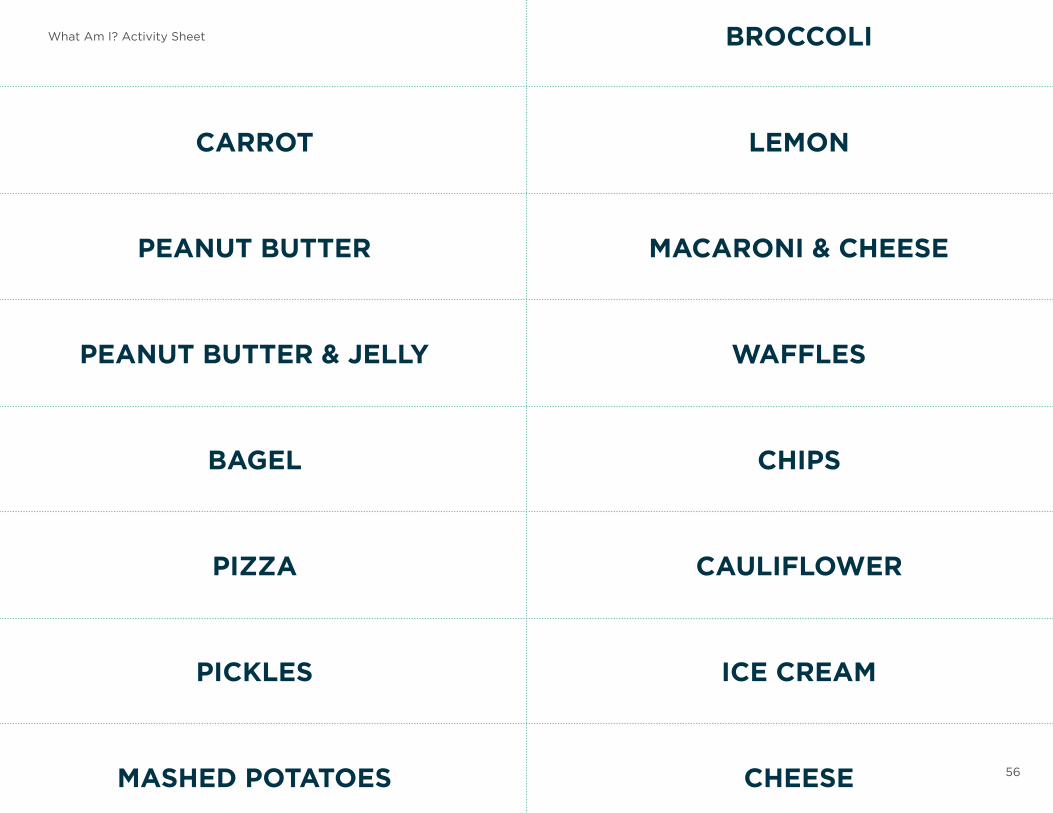
• “What Am I?” (printable Activity Sheet)
LESSON PLAN IDEASAs a warmup, call out a food and have kids describe it. Think about all the characteristics of a food, like color, texture, shape, taste, smell, and food group. directions :
1. Print out the “What Am I?” Activity Sheet and cut along the dotted lines. Each person will get a piece of paper, but they can’t look what’s on it.
2. Have each person find a partner. Without showing the other person what’s on the paper, use a piece of rolled tape to stick the word to their partner’s forehead.
3. Once everyone has a food stuck to their forehead, they must walk around and ask “yes” or “no” questions to try and guess what food is on their head. They can only ask one question. If they guess incorrectly, they have to find someone new. If they guess correctly, they can grab a new food.
4. The game is over when time runs out. If you’re keeping score, the person with the most points (words guessed) is declared the winner.
KEY OBJECTIVES• Food recognition
• Critical thinking
WHAT AM I?Which food are you? Ask your teammates thoughtful questions to figure out which food you could be.
25-35 min
Best for ages 7+
DETAILSKids’ Activity
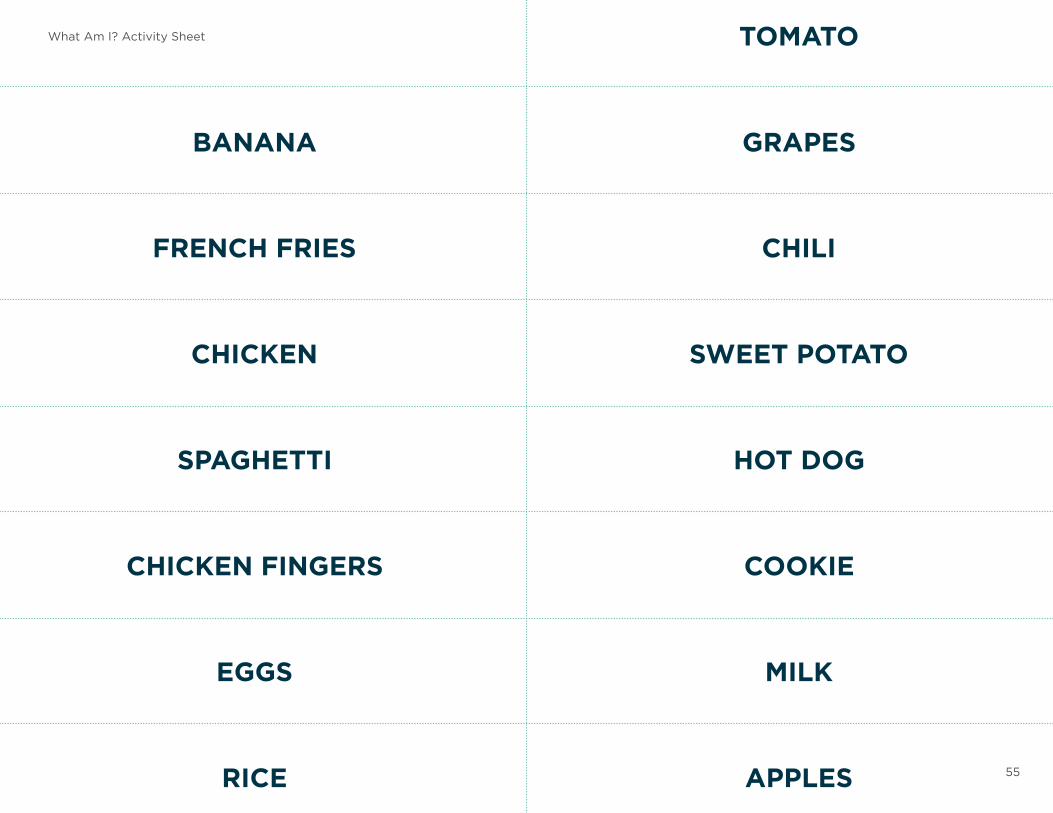
55APPLES
SPAGHETTI
EGGS
FRENCH FRIES
HOT DOG
TOMATO
MILK
CHILI
CHICKEN FINGERS
BANANA
RICE
CHICKEN
COOKIE
GRAPES
SWEET POTATO
What Am I? Activity Sheet
56CHEESE
BAGEL
PICKLES
PEANUT BUTTER
CHIPS
BROCCOLI
ICE CREAM
MACARONI & CHEESE
PIZZA
CARROT
MASHED POTATOES
PEANUT BUTTER & JELLY
CAULIFLOWER
LEMON
WAFFLES
What Am I? Activity Sheet
57
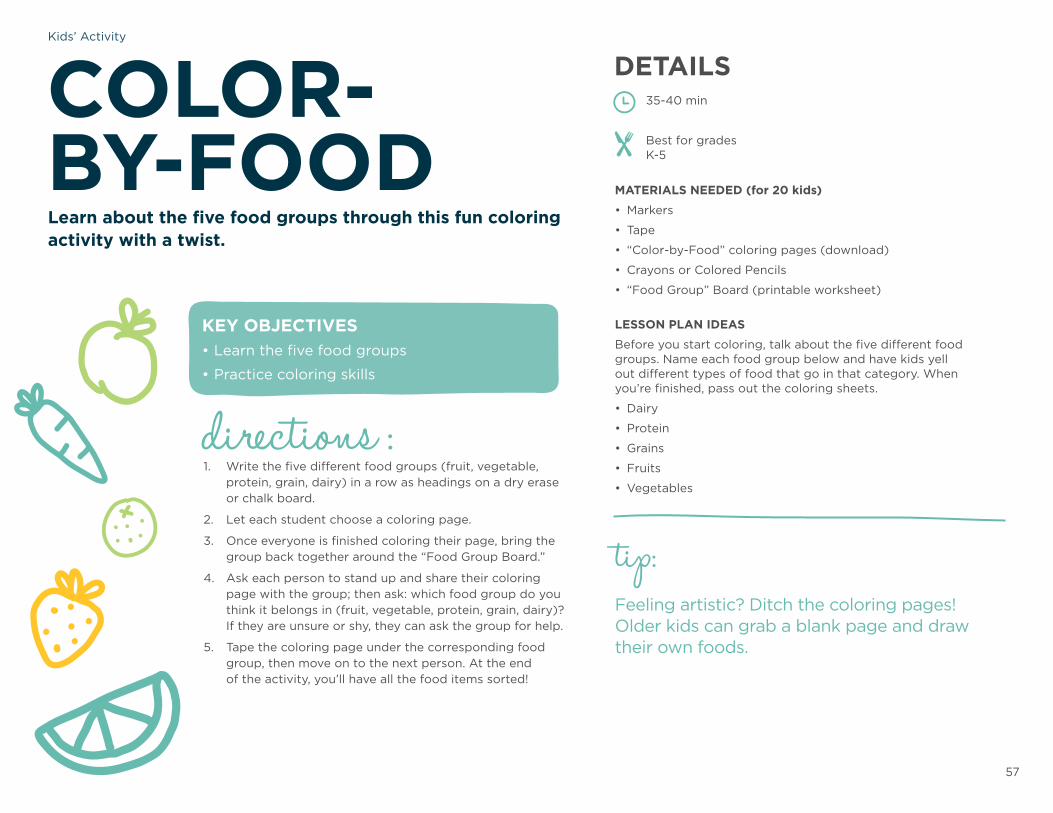
tip: Feeling artistic? Ditch the coloring pages! Older kids can grab a blank page and draw their own foods.
MATERIALS NEEDED (for 20 kids)
• Markers
• Tape
• “Color-by-Food” coloring pages (download)
• Crayons or Colored Pencils
• “Food Group” Board (printable worksheet)
LESSON PLAN IDEAS
Before you start coloring, talk about the five different food groups. Name each food group below and have kids yell out different types of food that go in that category. When you’re finished, pass out the coloring sheets.
• Dairy
• Protein
• Grains
• Fruits
• Vegetables
directions :1. Write the five different food groups (fruit, vegetable,
protein, grain, dairy) in a row as headings on a dry erase or chalk board.
2. Let each student choose a coloring page.
3. Once everyone is finished coloring their page, bring the group back together around the “Food Group Board.”
4. Ask each person to stand up and share their coloring page with the group; then ask: which food group do you think it belongs in (fruit, vegetable, protein, grain, dairy)? If they are unsure or shy, they can ask the group for help.
5. Tape the coloring page under the corresponding food group, then move on to the next person. At the end of the activity, you’ll have all the food items sorted!
KEY OBJECTIVES• Learn the five food groups
• Practice coloring skills
COLOR- BY-FOODLearn about the five food groups through this fun coloring activity with a twist.
35-40 min
Best for grades K-5
DETAILSKids’ Activity
58
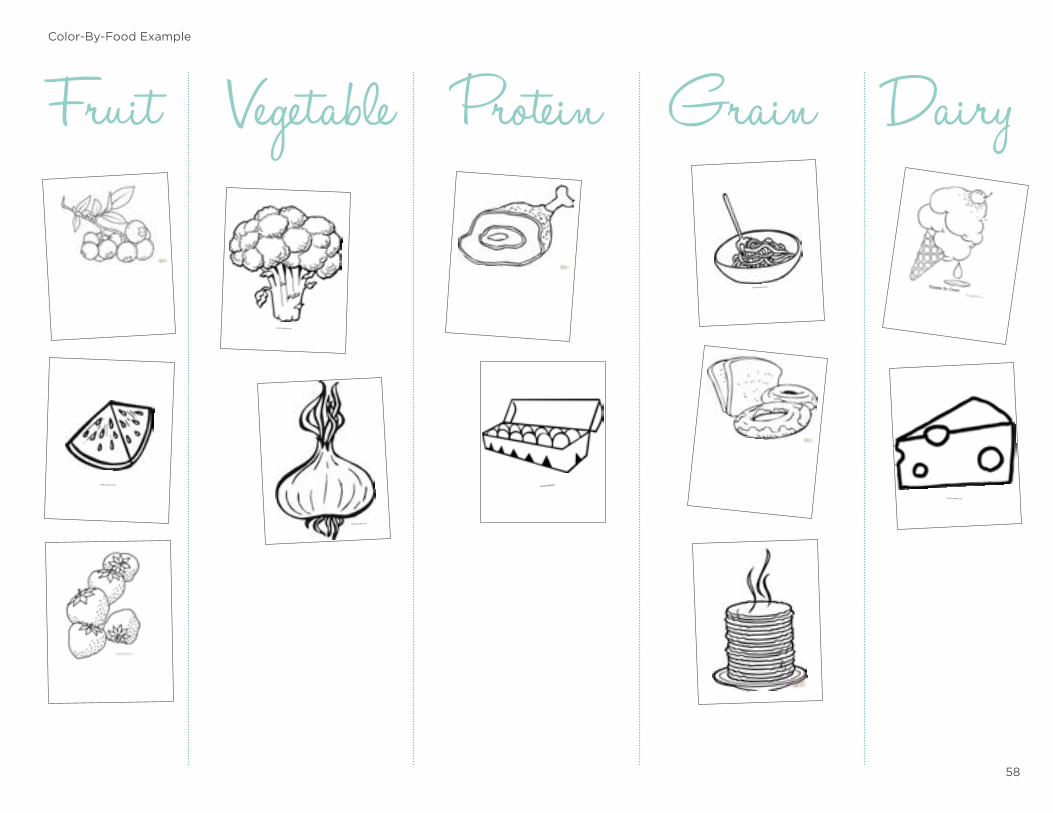
Color-By-Food Example
Fruit Vegetab le Protein Grain Dairy
twistynoodle.oom
twisty�/e.com
Save
1wistynoodle.com
'lwistynoodle.com
'lwistynoodle.com
59
ARE SUPPORT, LOVE AND COLLABORATION
THE KEY INGREDIENTS IN THIS TOOLKITWRAP
UP

60
INVESTING IN ACTIONAfter multiple evaluations and feedback sessions, we’ve taken what we’ve learned from this successful pilot and turned it into a helpful guide that anyone can use to launch their own Culinary Camp.
BACKGROUND
OUTCOMES
PILOTThe Culinary Camp curriculum was developed to increase kids’ access to healthy foods in economically disadvantaged neighborhoods, and promote healthy eating habits. The program was inspired and vetted directly from students, parents, and program staff who utilize or work with USDA-funded meal programs.
• Saw increased program attendance at Millvale over 3 days.
• 89% of kids said they would participate in Culinary Camp again.
Culinary Camp was first piloted in 2016 as part of an effort between Freestore Foodbank, Design Impact, and Sprout Insight to identify kids’ barriers to summer meal participation, and develop program models to fill the summer feeding gap. In Cincinnati, only 9% of kids who were eligible for free and reduced-priced lunch ate at Summer Food Service Program sites.
After preliminary research was conducted by Sprout Insight, Freestore Foodbank and Design Impact developed and tested Culinary Camp at two sites, detailed below.
Culinary Camp was offered at two test sites in two different formats:
• Millvale Recreation Center Part of open summer programming for three consecutive days in a row. Set up in a long hallway, open to the public. Served an average of 21 kids per day.
• UpSpring Summer 360 Incorporated into summer camp programming for children who have or are currently experiencing homelessness. Served an average of 40 kids per day.
We have 4 kids, ages 4-12, that I saw for the first time this week. I mentioned Culinary Camp to them and they came everyday. They were so excited; on the last day, they came running.
JIM BOYLEService Area Coordinator, Cincinnati Recreation Commission
61
THANK YOU
FREESTORE FOODBANK
The Freestore Foodbank is the largest emergency food and services provider to children and families in tristate area and is part of the Feeding America National Network. Last year, FSFB distributed 24 million meals in the community through 400 community partners in 20 counties throughout Northern Kentucky, Ohio and SE Indiana. The Freestore Foodbank’s mission is to provide food and services, create stability, and further self-reliance for people in crisis. freestorefoodbank.org
DESIGN IMPACT
Design Impact is a nonprofit social innovation firm made up of designers, community development practitioners, social entrepreneurs and educators. We bring design and innovation to the nonprofit world to tackle social issues, equip leaders, and inspire communities. d-impact.org
FEEDING AMERICA
Culinary Camp was developed through a grant provided by Feeding America and ConAgra Foods Foundation. freestorefoodbank.org.
LISA ANDREWS, MEd, RD, LD
All recipes were developed by Lisa Andrews, Registered Dietitian since 1990 and the owner of Sound Bites Nutrition, LLC. She works with individuals and groups on eating for better health. She holds a Bachelors and Masters degree in Nutrition and worked as a clinical dietitian for the VA Medical Center for over 23 years. She served as a community dietitian for the Nutrition Council of Cincinnati and has taught nutrition courses at the University of Cincinnati and Northern Kentucky University since 1998. soundbitesnutrition.com
THANKS TO EVERYONE WHO HELPED MAKE THIS PILOT PROGRAM AND GUIDE POSSIBLE:
ConAgra Foods Foundation
Ray Ball, A Few Hungry Girls
Findlay Market
Melissa Jennings, Stockpiling Moms
Live Healthy Appalachia
Millvale Community Center
New Prospect Baptist Church
The Public Library of Cincinnati and Hamilton County
Sprout Insight
UpSpring
Xavier University
ADDITIONAL PHOTO CREDITS:
Kelly Pfeiffer, Nosh and Nourish http://noshandnourish.com/
Spoonful of Sugar (and Anything Sweet)
Judith Yeabsley, The Art of Nutrition