Embed Size (px)
Citation preview
Saturday, July 6, 2013
Installing Slackware 14 on a Linux Software RAID 1 (MIRRORING)
This is beginners guide on how to install Slackware Linux 14 on a RAID 1 (mirrored) drive.
Boot the system with Slackware 14 ISO and then when prompted, choose the appropriate keyboard type. To login type root and
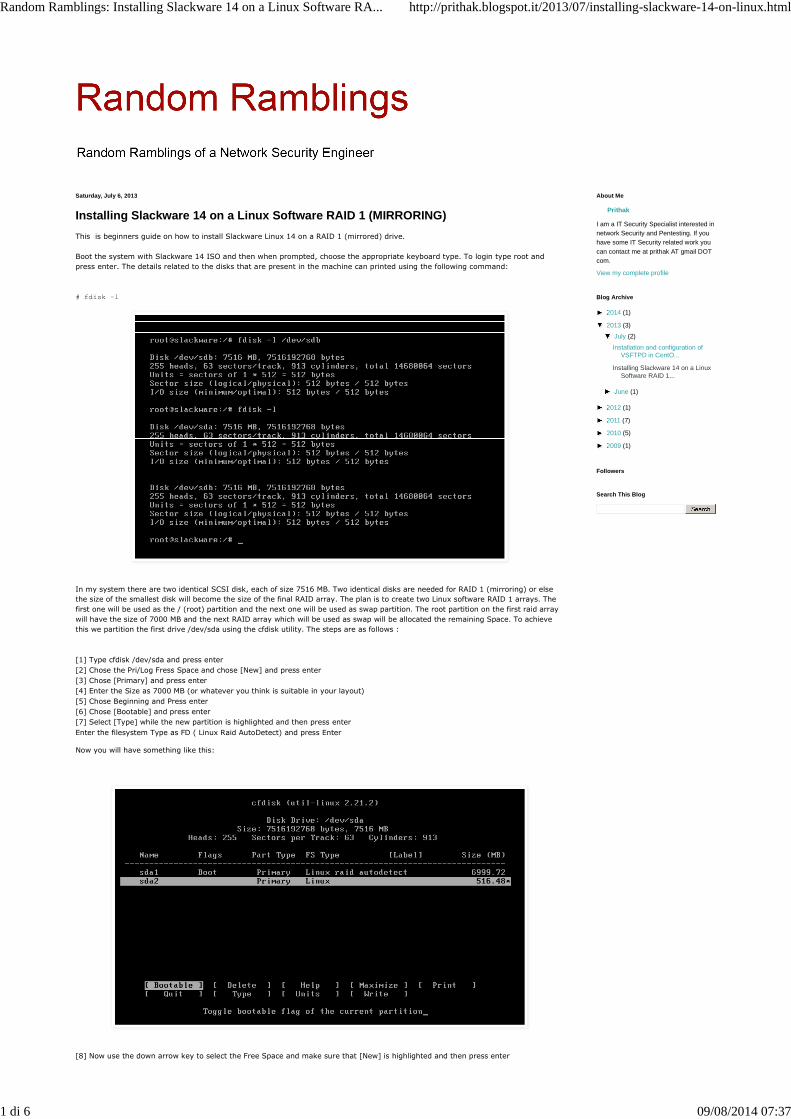
press enter. The details related to the disks that are present in the machine can printed using the following command:
# fdisk –l
In my system there are two identical SCSI disk, each of size 7516 MB. Two identical disks are needed for RAID 1 (mirroring) or else
the size of the smallest disk will become the size of the final RAID array. The plan is to create two Linux software RAID 1 arrays. The
first one will be used as the / (root) partition and the next one will be used as swap partition. The root partition on the first raid array
will have the size of 7000 MB and the next RAID array which will be used as swap will be allocated the remaining Space. To achieve
this we partition the first drive /dev/sda using the cfdisk utility. The steps are as follows :
[1] Type cfdisk /dev/sda and press enter
[2] Chose the Pri/Log Fress Space and chose [New] and press enter
[3] Chose [Primary] and press enter
[4] Enter the Size as 7000 MB (or whatever you think is suitable in your layout)
[5] Chose Beginning and Press enter
[6] Chose [Bootable] and press enter
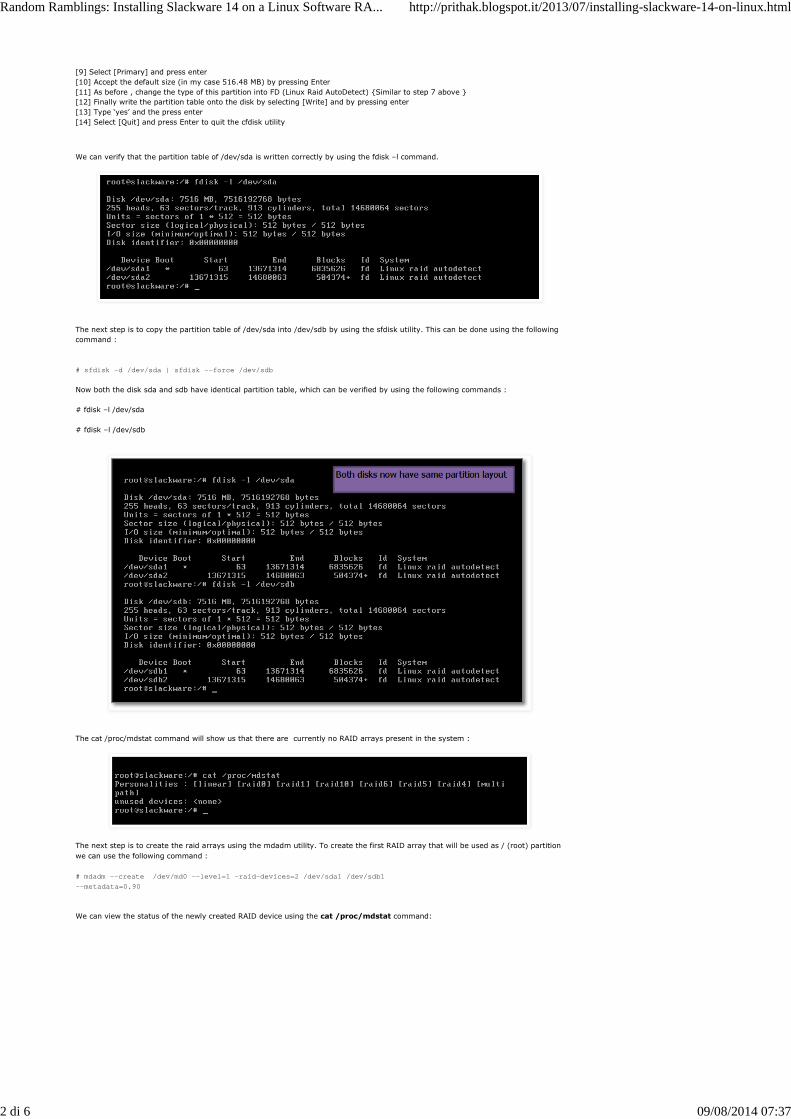
[7] Select [Type] while the new partition is highlighted and then press enter
Enter the filesystem Type as FD ( Linux Raid AutoDetect) and press Enter
Now you will have something like this:
[8] Now use the down arrow key to select the Free Space and make sure that [New] is highlighted and then press enter
Prithak
I am a IT Security Specialist interested innetwork Security and Pentesting. If youhave some IT Security related work youcan contact me at prithak AT gmail DOTcom.
View my complete profile
About Me
2014 (1)
2013 (3)
July (2)
Installation and configuration ofVSFTPD in CentO...
Installing Slackware 14 on a LinuxSoftware RAID 1...
June (1)
2012 (1)
2011 (7)
2010 (5)
2009 (1)
Blog Archive
Followers
Search This Blog
Random Ramblings: Installing Slackware 14 on a Linux Software RA... http://prithak.blogspot.it/2013/07/installing-slackware-14-on-linux.html
1 di 6 09/08/2014 07:37
[9] Select [Primary] and press enter
[10] Accept the default size (in my case 516.48 MB) by pressing Enter
[11] As before , change the type of this partition into FD (Linux Raid AutoDetect) {Similar to step 7 above }
[12] Finally write the partition table onto the disk by selecting [Write] and by pressing enter
[13] Type ‘yes’ and the press enter
[14] Select [Quit] and press Enter to quit the cfdisk utility
We can verify that the partition table of /dev/sda is written correctly by using the fdisk –l command.
The next step is to copy the partition table of /dev/sda into /dev/sdb by using the sfdisk utility. This can be done using the following
command :
# sfdisk -d /dev/sda | sfdisk --force /dev/sdb
Now both the disk sda and sdb have identical partition table, which can be verified by using the following commands :
# fdisk –l /dev/sda
# fdisk –l /dev/sdb
The cat /proc/mdstat command will show us that there are currently no RAID arrays present in the system :
The next step is to create the raid arrays using the mdadm utility. To create the first RAID array that will be used as / (root) partition
we can use the following command :
# mdadm --create /dev/md0 --level=1 –raid-devices=2 /dev/sda1 /dev/sdb1
--metadata=0.90
We can view the status of the newly created RAID device using the cat /proc/mdstat command:
Random Ramblings: Installing Slackware 14 on a Linux Software RA... http://prithak.blogspot.it/2013/07/installing-slackware-14-on-linux.html
2 di 6 09/08/2014 07:37
Similarly, we can create the RAID device /dev/md1 which will be used as our swap partition using the following command:
# mdadm --create /dev/md1 --level=1 –raid-devices=2 /dev/sda2 /dev/sdb2
--metadata=0.90
As we can see from the above output /dev/md0 is fine and /dev/md1 is being synced. Now our raid arrays are in place. Before we
being the installation of the Slackware using the setup command, we will format /dev/md1 as the swap partition.
# mkswap /dev/md1
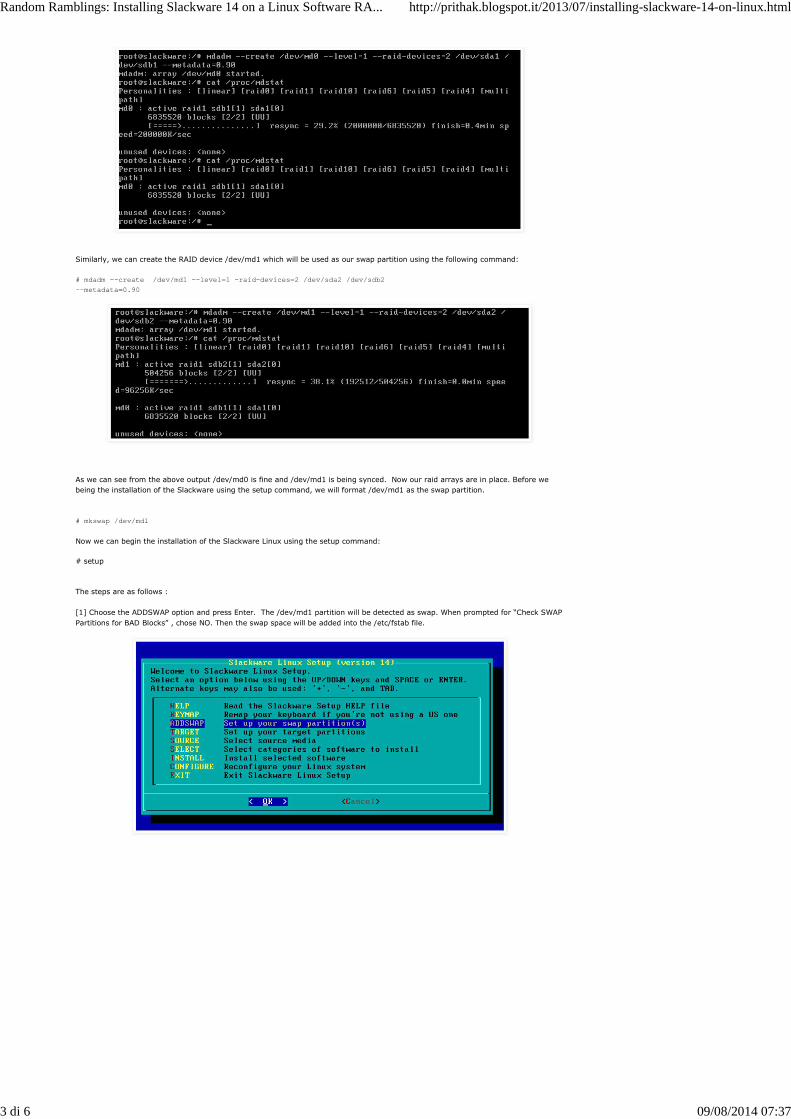
Now we can begin the installation of the Slackware Linux using the setup command:
# setup
The steps are as follows :
[1] Choose the ADDSWAP option and press Enter. The /dev/md1 partition will be detected as swap. When prompted for “Check SWAP
Partitions for BAD Blocks” , chose NO. Then the swap space will be added into the /etc/fstab file.
Random Ramblings: Installing Slackware 14 on a Linux Software RA... http://prithak.blogspot.it/2013/07/installing-slackware-14-on-linux.html
3 di 6 09/08/2014 07:37
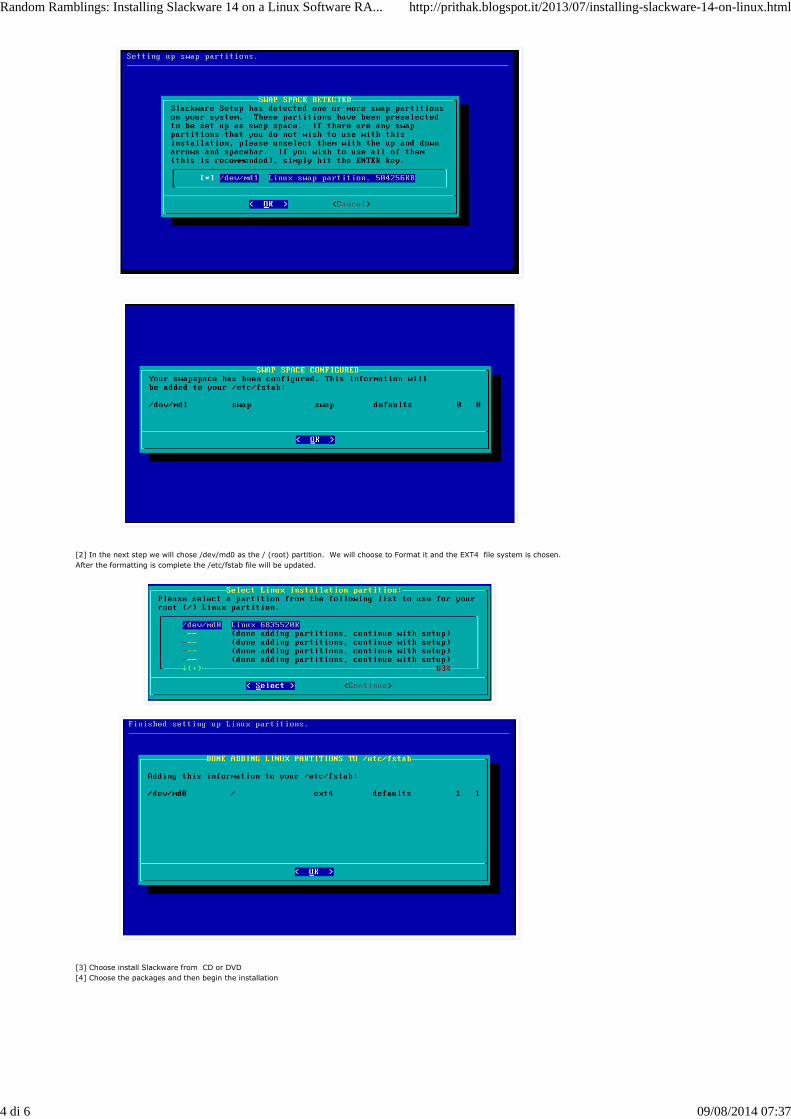
[2] In the next step we will chose /dev/md0 as the / (root) partition. We will choose to Format it and the EXT4 file system is chosen.
After the formatting is complete the /etc/fstab file will be updated.
[3] Choose install Slackware from CD or DVD
[4] Choose the packages and then begin the installation
Random Ramblings: Installing Slackware 14 on a Linux Software RA... http://prithak.blogspot.it/2013/07/installing-slackware-14-on-linux.html
4 di 6 09/08/2014 07:37
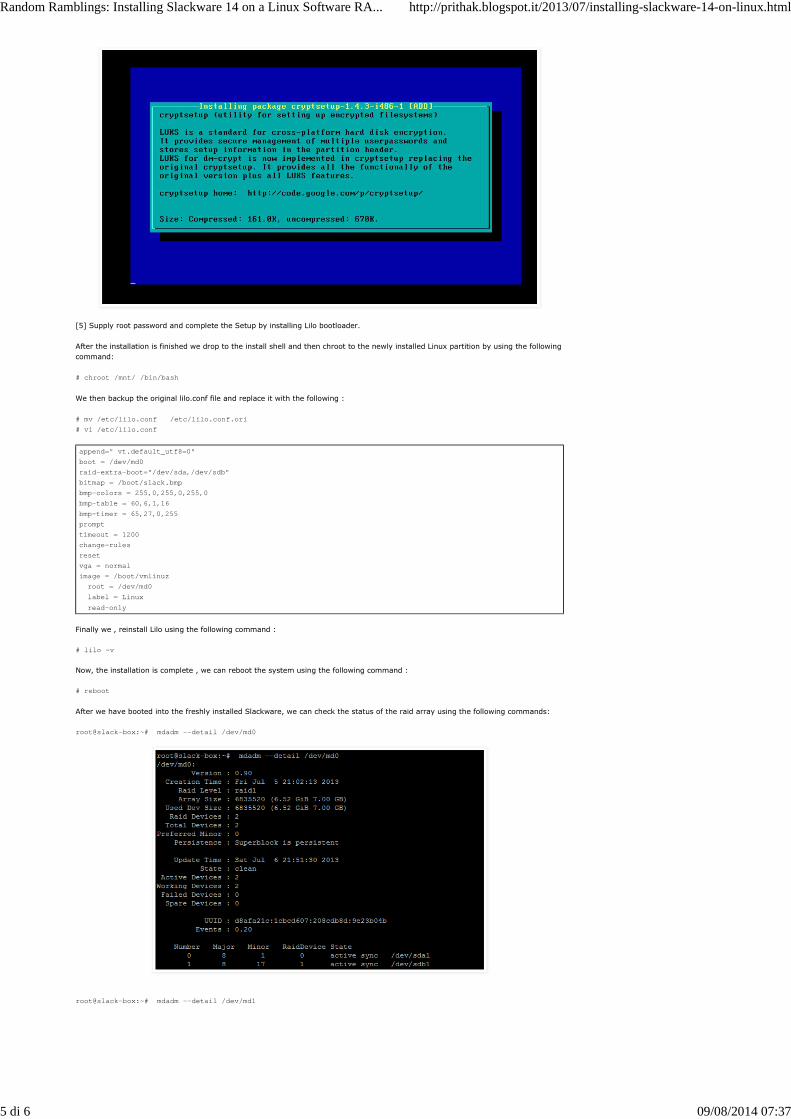
[5] Supply root password and complete the Setup by installing Lilo bootloader.
After the installation is finished we drop to the install shell and then chroot to the newly installed Linux partition by using the following
command:
# chroot /mnt/ /bin/bash
We then backup the original lilo.conf file and replace it with the following :
# mv /etc/lilo.conf /etc/lilo.conf.ori
# vi /etc/lilo.conf
append=" vt.default_utf8=0"
boot = /dev/md0
raid-extra-boot="/dev/sda,/dev/sdb"
bitmap = /boot/slack.bmp
bmp-colors = 255,0,255,0,255,0
bmp-table = 60,6,1,16
bmp-timer = 65,27,0,255
prompt
timeout = 1200
change-rules
reset
vga = normal
image = /boot/vmlinuz
root = /dev/md0
label = Linux
read-only
Finally we , reinstall Lilo using the following command :
# lilo –v
Now, the installation is complete , we can reboot the system using the following command :
# reboot
After we have booted into the freshly installed Slackware, we can check the status of the raid array using the following commands:
root@slack-box:~# mdadm --detail /dev/md0
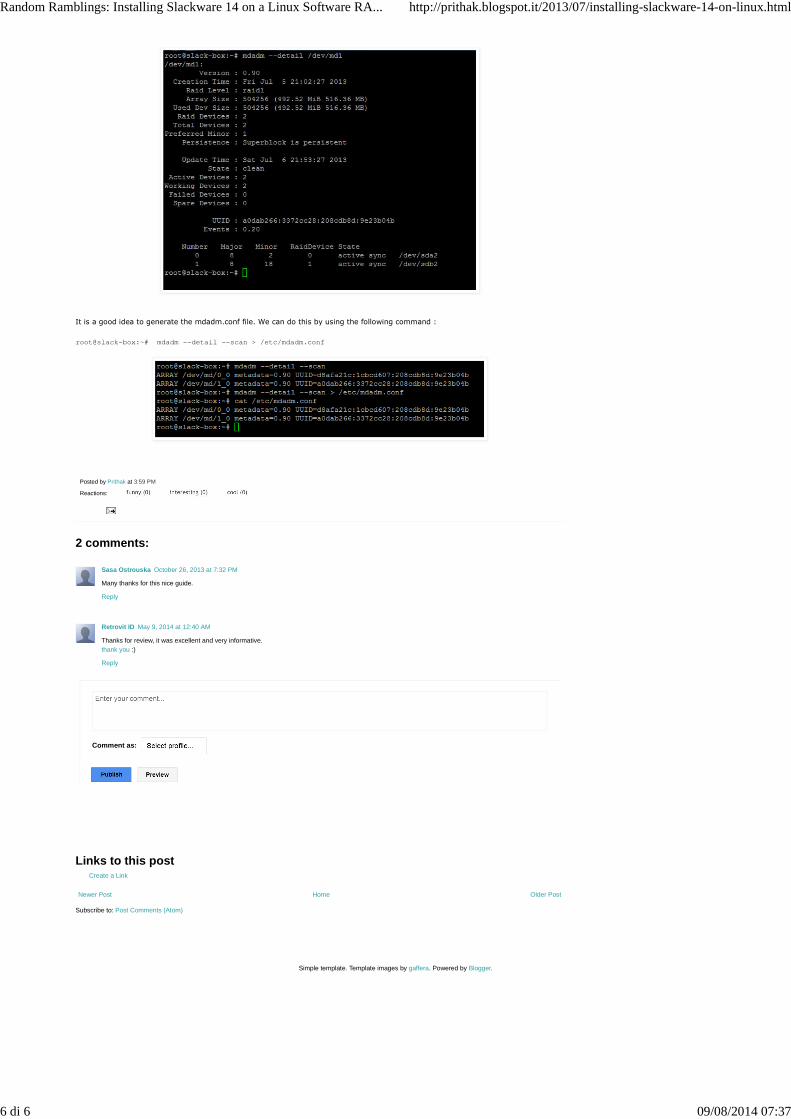
root@slack-box:~# mdadm --detail /dev/md1
Random Ramblings: Installing Slackware 14 on a Linux Software RA... http://prithak.blogspot.it/2013/07/installing-slackware-14-on-linux.html
5 di 6 09/08/2014 07:37
Newer Post Older PostHome
Subscribe to: Post Comments (Atom)
Posted by Prithak at 3:59 PM
Reactions:
It is a good idea to generate the mdadm.conf file. We can do this by using the following command :
root@slack-box:~# mdadm --detail --scan > /etc/mdadm.conf
Comment as:
Publish
Create a Link
2 comments:
Sasa Ostrouska October 26, 2013 at 7:32 PM
Many thanks for this nice guide.
Reply
Retrovit ID May 9, 2014 at 12:40 AM
Thanks for review, it was excellent and very informative.thank you :)
Reply
Links to this post
Simple template. Template images by gaffera. Powered by Blogger.
Random Ramblings: Installing Slackware 14 on a Linux Software RA... http://prithak.blogspot.it/2013/07/installing-slackware-14-on-linux.html
6 di 6 09/08/2014 07:37