Embed Size (px)
Citation preview

How to Draw a ….. Mold in SolidWorks?
This tutorial shows you how to create a mold for a coke bottle in SolidWorks. We’ll use the
Cravity feature to do this. This tool can be very helpfull to subtract a shape from another
shape. In this case we’ll subtract the shape of a plastic bottle froma solid block (the mold).
The tutorial will show you how to Split a part into to new parts.
Open the file Bottle.SLDPRT
Go to: File > New > Open > Bottle. SLDPRT
NOTE: It’s a bottle without an inner space to create the shape of the mold.

Now it’s time to draw the mold block
Open a new part with model units set to millimeters

Go to: File > New > Part
Create a 2D sketch
Select the Front Plane in the feature tree (menu at the left side) and create a sketch by clicking
on the 2D Sketch icon
The display changes so the Front plane faces you.
Draw a Center Rectangle
Go to Tools > Sketch Entities > Center Rectangle or click at the center rectangle icon
Create a sketch which starts at the Origin.
Change the dimensions of the rectangle into 100 and 250 mm by clicking at the dimension
button

Create an Extruded Boss/Base
Go to: Insert > Boss/Base > Extrude or click at the Extrude icon
The Boss-Extrude menu appears
Direction 1 is set to Midplane
Change D1 into 100 mm
Click OK

Save the file with the following name: Mold_Block.SLDPRT

Create a new assembly
Go to File > New > Assembly or click at the Assembly icon
Select the three planes in the feature tree and make them visible by clicking on the glasses.
Insert the Mold_Block
Go to: Insert > Component > Existing Part/Assembly
Click on the button.
Select the Mold_Block.SLDPRT in your working map.
Click OK
The Mold_Block is fixed automatically in the assembly.

Insert the Coke bottle
Go to: Insert > Component > Existing Part/Assembly
Click on the button.
Select the Bottle.SLDPRT in your working map.
Place the model of the Bottle next to the Mold_Block as shown in the picture.

Unhide the Planes
Go to View > Planes or click at the Planes icon
If the planes keep unvisible click at the Glasses in the Feature Tree to Unhide the planes as
shown in the picture

Place the Bottle inside the Mold_Block
Create a coincident mate
Go to: Insert > Mate
Select the coincident option.
Select the Front Plane of the Mold Block and the Front Plane of the Bottle.
Click OK

Create another coincident mate
Go to: Insert > Mate
Select the coincident option.
Select the Top Plane of the Mold Block and the MIDPLANE of the Bottle.
Click OK

Create another coincident mate
Go to: Insert > Mate
Select the coincident option.
Select the Right Plane of the Mold Block and the Right Plane of the Bottle.
Click OK

The two models are now fully defined.
Use the Section View to check if the Bottle is inside the Mold Block.
Go to View > Display > Section View or click at the Section View button

Now it’s time to subtract the model of the bottle from the Mold Block.
Click at the Mold_Block and click at the Edit Part icon as shown in the picture
You’ll get the Following warning: “The assembly must be saved to perform this
command”
Click at Save and Continue to Save the assembly.
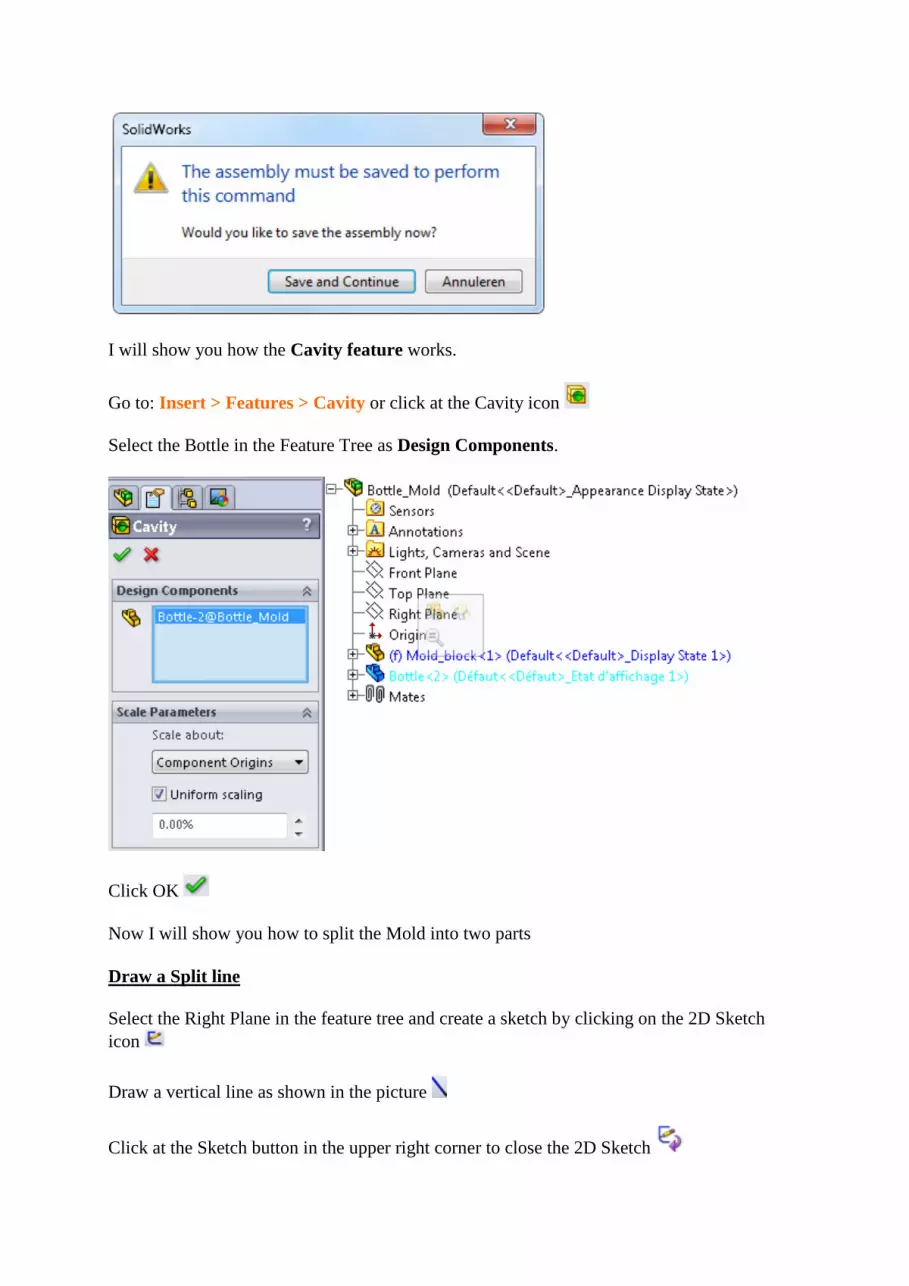
I will show you how the Cavity feature works.
Go to: Insert > Features > Cavity or click at the Cavity icon
Select the Bottle in the Feature Tree as Design Components.
Click OK
Now I will show you how to split the Mold into two parts
Draw a Split line
Select the Right Plane in the feature tree and create a sketch by clicking on the 2D Sketch
icon
Draw a vertical line as shown in the picture
Click at the Sketch button in the upper right corner to close the 2D Sketch
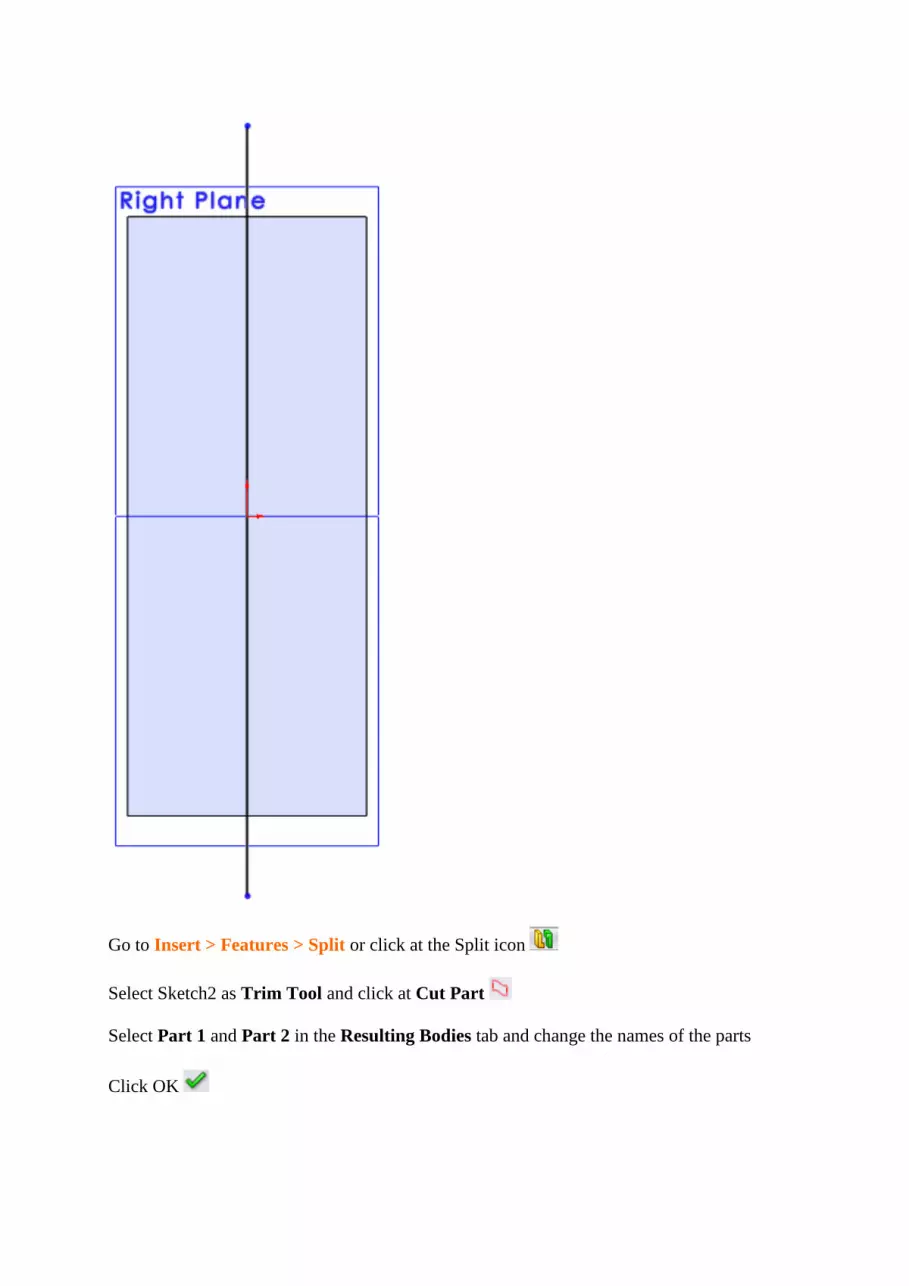
Go to Insert > Features > Split or click at the Split icon
Select Sketch2 as Trim Tool and click at Cut Part
Select Part 1 and Part 2 in the Resulting Bodies tab and change the names of the parts
Click OK


