Embed Size (px)
Citation preview

HD4768, HD4766

2

3
QR
TU
P
S
W
V
X
Y��
D
E
B
A
C
G
F
H
I
J
K
M
L
N
O
1

4

HD
4768
, HD
4766
EnglisH 6inDonEsia 29ภาษาไทย 53Tiếng ViệT 72

6
introductionCongratulations on your purchase and welcome to Philips! To fully benefit from the support that Philips offers, register your product at www.philips.com/welcome.
general description (Fig. 1)a Measuring cupB Soup ladleC Rice scoop D Water level indicationsE Inner pot with handlesF Detachable inner lid g Sealing ringH Heating element i Temperature sensor J Control panelK Displayl Up and down buttonsM Main bodyn Mains plugo Detachable mains cord P Socket for appliance plugQ Lid release button R Mounting bracket of scoop holders Scoop holderT Outer lidU Detachable steam vent capV Rice cooker handleW Steam basketX Detachable steam trayY Yoghurt pot
importantRead this user manual carefully before you use the appliance and save it for future reference.
Danger - Never immerse the main body of the rice cooker in water, nor rinse it under the tap.
Warning - Check if the voltage indicated on the appliance corresponds to the local mains voltage before
you connect the appliance. - Only connect the appliance to an earthed wall socket. Always make sure that the plug is
inserted firmly into the wall socket. - Do not use the appliance if the plug, the mains cord, the inner pot or the main body is damaged. - If the mains cord is damaged, you must have it replaced by Philips, a service centre authorised by
Philips or similarly qualified persons in order to avoid a hazard. - This appliance is not intended for use by persons (including children) with reduced physical,
sensory or mental capabilities, or lack of experience and knowledge, unless they have been given supervision or instruction concerning use of the appliance by a person responsible for their safety.
- Children should be supervised to ensure that they do not play with the appliance. - Keep the mains cord out of the reach of children. Do not let the mains cord hang over the edge
of the table or worktop on which the appliance stands.
EnglisH

- Make sure the heating element, the temperature sensor and the outside of the inner pot are clean and dry before you put the plug in the wall socket.
- Do not use the appliance if the sealing ring is damaged. - Do not plug in the appliance or press any of the buttons on the control panel with wet hands. - Never connect this appliance to an external timer switch in order to avoid a hazardous situation.
Caution - Never use any accessories or parts from other manufacturers or that Philips does
not specifically recommend. If you use such accessories or parts, your guarantee becomes invalid.
- Only use the rice scoop provided. Avoid using sharp utensils. - Do not expose the rice cooker to high temperatures, nor place it on a working or still hot stove
or cooker. - Always insert the inner pot before you put the plug in the wall socket and switch on the rice
cooker. - Always unplug the rice cooker if you are not going to use it for a longer period of time. - Always let the rice cooker cool down before you clean or move it. - Do not place the inner pot directly over an open fire to cook rice. - If the appliance is used improperly or for professional or semi-professional purposes or if it is
not used according to the instructions in this user manual, the guarantee becomes invalid and Philips refuses liability for any damage caused.
- This appliance is intended to be used in household and similar applications such as: - staff kitchen areas in shops, offices and other working environments; - farm houses; - by clients in hotels, motels and other residential type environments; - bed and breakfast type environments.
- Place the rice cooker on a stable, horizontal and level surface. - The accessible surfaces may become hot when the appliance is operating. Only touch the
control panel. - Beware of hot steam coming out of the steam vent during cooking or out of the rice cooker
when you open the lid. - Do not lift and move the rice cooker by its handle while it is operating. - Be careful with the inner pot and the steam basket when you handle them after the cooking
process, as they may be hot and heavy. - Do not expose the rice cooker to direct sunlight. - Do not insert metallic objects or alien substances into the steam vent. - Do not place a magnetic item on the lid. Do not use the appliance near a magnetic item. - Do not use the inner pot if it is deformed. - Do not exceed the maximum water level indicated in the inner pot to prevent overflows. - Do not place the rice scoop inside the pot while cooking, keeping warm or reheating rice. - Always clean the appliance after use. - Do not clean the appliance in the dishwasher.
Electromagnetic fields (EMF)This Philips appliance complies with all standards regarding electromagnetic fields (EMF). If handled properly and according to the instructions in this user manual, the appliance is safe to use based on scientific evidence available today.
Power failure backup functionThis appliance has a backup function that remembers the status before a power failure, provided the power supply is resumed within 2 hours. If the power failure occurs during a cooking process, the countdown of the cooking time continues where it left off when the power supply resumes.
EnglisH 7

If the power failure lasts longer than 2 hours and the failure occurs during a cooking process, the rice cooker automatically resets to standby mode when the power supply resumes. Open the rice cooker, remove its contents and start all over again.If you have set the timer and the preset cooking process has not yet started when a power failure occurs, the process starts when the power supply resumes, provided it resumes within 12 hours.
Preparing for use Before first use
1 Remove the sheet between the inner pot and the heating element. 2 Clean the parts of the rice cooker thoroughly before you use the appliance for the first time
(see chapter ‘Cleaning’). 3 Dry all parts thoroughly before you start to use the appliance. 4 Attach the scoop holder to the body of the rice cooker (Fig. 2).
Control panel and displayThe control panel has 12 buttons with which you operate the appliance. The display gives information on the selected processes. The display light goes on as soon as you press any button, to give you a better view of the display information.
Note: When the appliance is cooking or reheating, the display light switches off after 10 minutes. - Control panel and display (Fig. 3)
Up and down buttonsYou can use the up and down buttons below the display to select the desired menu and to adjust settings (clock, timer and cooking time).
Menu/control buttonsThere are 4 control buttons on the top part of the control panel and 6 menu buttons on the bottom part of the control panel.A flashing button indicates that you can press this button to go to the next step. You can use the Stop/Cancel button to stop a cooking process or to stop a preset timer. You can also use this button as an “undo” button when you are programming a cooking process to go back to the previous screen.
Menus Some of the menus have submenus. When you press the buttons for these menus, the submenu appears on the display. If a menu does not have a submenu, the first step of the cooking process is shown on the display. In some of the menus, text and animations are shown on the display to guide you through the cooking process step by step.
setting the clock timeNote: You cannot adjust the clock time during a cooking process or when the appliance is in keep-warm mode. 1 Put the plug in the wall socket and switch on the mains. , The display shows the greeting message (‘Good morning’, ‘Good afternoon’ or ‘Good
evening’). 2 Press the Preset/Clock button twice (Fig. 4). 3 Press the up or down button to select ‘Clock setting’. (Fig. 5)
EnglisH8

4 Press the Cook/OK button (Fig. 6). 5 Press the up or down button to set the clock (24-hour time notation). Press and hold the up
or down button to move the time forward or backward quickly (Fig. 7). 6 Press the Cook/OK button to confirm the time (Fig. 6).Note: If you want to cancel the change, press the Stop/Cancel button. , The message ‘Saved’ is shown on the display. The time stops flashing and the display shows
the set clock time (Fig. 8).Note: The clock time is confirmed automatically if you do not press the Cook/OK button within 30 seconds.Note: The display only shows the clock time when the appliance is plugged into the wall socket.
setting the display languageYou can select one of three languages: Simplified Chinese, Traditional Chinese or English.
1 Press the Preset/Clock button twice (Fig. 4). 2 Press the up or down button to select ‘Language setting’ (Fig. 9). 3 Press the Cook/OK button (Fig. 6). 4 Press the up or down button to select the desired language (Simplified Chinese, Traditional
Chinese or English) (Fig. 10). 5 Press the Cook/OK button to confirm the language (Fig. 6).Note: If you want to cancel the change, press the Stop/Cancel button. , The message ‘Saved’ is shown on the display (Fig. 8).
Using the appliancelist of 20 rice cooker menus
Menu Submenu
Rice Plain
Quick plain
Small portion plain
Glutinous
Mixed
Rice with soup
Congee/Pasta Plain congee thick
Plain congee thin
Mixed grain congee
Pasta
Soup/Stew Vegetable soup
Stew
Long boil soup
EnglisH 9

Menu Submenu
Yoghurt Yoghurt
Dessert/Pudding Green bean soup
Cereal cake
Carrot cake
White radish pudding
Taro pudding
Steam Steam
step-by-step cooking guideThe table below shows you what steps to perform in the different submenus.The numbers of the list below correspond to the numbers in the table and tell you what to you have to do next at certain points during the cooking process.1 Press the Cook/OK button to start the cooking process. If you do not press this button, the
cooking process starts automatically after 10 seconds.2 Press the Cook/OK button to continue the cooking process. If you do not press this button, the
cooking process continues automatically after 30 seconds.3 Cooking only starts if you press Cook/OK button.4 Press the Cook/OK button. If you do not press this button, the display automatically shows
the cooking time after 10 seconds.5 Press the Cook/OK button. If you do not press this button, the display automatically shows
the cooking time after 30 seconds.
Menu Submenu Steps before cooking Cooking time for second step
Steps during cooking
Steps after cook-ing
Rice Rice with soup
Cook rice first (1) Depends on the amount of rice cooked
Add warm broth and other ingredients (2)
Congee/Pasta
Mixed grain con-gee
Add mixed grains and water (5)
Pasta Add pasta, sauce and water (5)
Soup/Stew
Vegetable soup
Add water to make broth (4) Approx. 10-15 min.
Add vegetables (2)
Stew Add water, meat and other ingredients (4)
Long boil soup
Add water and ingredients (4)
EnglisH10

Menu Submenu Steps before cooking Cooking time for second step
Steps during cooking
Steps after cook-ing
Yoghurt Yoghurt Pour warm milk (40°C) and yoghurt mixture into yoghurt pot, fill inner pot with water (5)
Dessert/Pudding
Green bean soup
Add water and dessert ingredients (4)
White radish pudding
Add white radish, dried shrimps, Chinese sausages and seasonings (3)
20 min. Add rice flour mixture (3)
Taro pudding
Add taro, Chinese sausages, dried shrimps and seasonings (3)
20 min. Add rice flour mixture (3)
Cereal cake
Put cake mixture in inner pot (1)
Carrot cake
Put cake mixture in inner pot (1)
Steam Steam Put the dish on steam basket, fill inner pot with water (5)
Cooking riceThe Rice menu of this appliance consists of 6 submenus that allow you to cook different types of rice or rice recipes.
1 Measure the rice with the measuring cup provided (Fig. 11).Each cup of uncooked rice normally gives 2 bowls of cooked rice. Do not exceed the quantities indicated on the inside of the inner pot. 1 cup of rice is approx. 180ml. - HD4768: inner pot capacity is 5.0L, maximum capacity for cups of rice is 1.8L - HD4766: inner pot capacity is 4.0L, maximum capacity for cups of rice is 1.5L
Rice quantities and cooking times for rice menusThe table below shows the approximate cooking time. The actual cooking time may vary, depending on the voltage, room temperature, humidity and amount of water used.
Menu HD4766 Approximate cooking time
HD4766 Quantity of rice (cups)
HD4768 Approximate cooking time
HD4768 Quantity of rice (cups)
Plain rice 40-50 min. 2-8 40-50 min. 2-10
Quick plain rice*
30-40 min. 2-4 30-40 min. 2-6
Small portion plain rice**
40-50 min. 2-3 40-50 min. 2-3
Glutinous rice 50-90 min. 2-8 50-90 min. 2-8
Mixed rice 40-50 min. 2-4 40-50 min. 2-6
EnglisH 11
Menu HD4766 Approximate cooking time
HD4766 Quantity of rice (cups)
HD4768 Approximate cooking time
HD4768 Quantity of rice (cups)
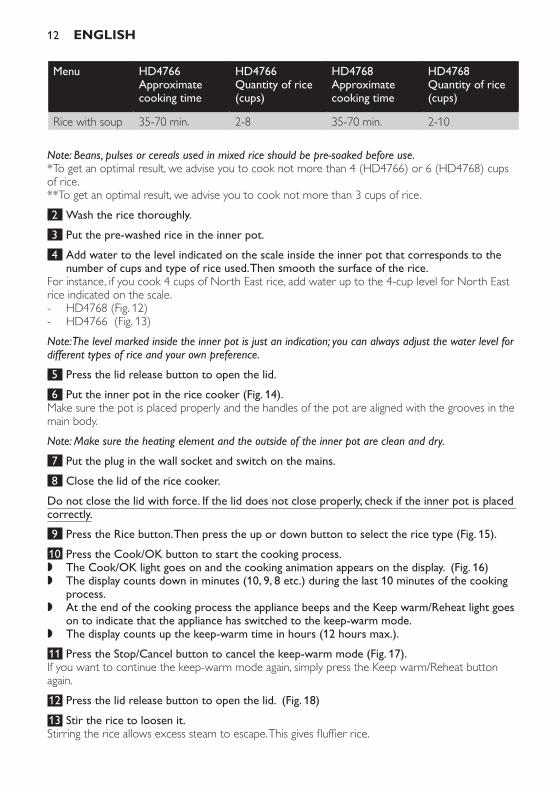
Rice with soup 35-70 min. 2-8 35-70 min. 2-10
Note: Beans, pulses or cereals used in mixed rice should be pre-soaked before use.*To get an optimal result, we advise you to cook not more than 4 (HD4766) or 6 (HD4768) cups of rice.**To get an optimal result, we advise you to cook not more than 3 cups of rice.
2 Wash the rice thoroughly. 3 Put the pre-washed rice in the inner pot. 4 Add water to the level indicated on the scale inside the inner pot that corresponds to the
number of cups and type of rice used. Then smooth the surface of the rice.For instance, if you cook 4 cups of North East rice, add water up to the 4-cup level for North East rice indicated on the scale. - HD4768 (Fig. 12) - HD4766 (Fig. 13)
Note: The level marked inside the inner pot is just an indication; you can always adjust the water level for different types of rice and your own preference. 5 Press the lid release button to open the lid. 6 Put the inner pot in the rice cooker (Fig. 14).Make sure the pot is placed properly and the handles of the pot are aligned with the grooves in the main body.
Note: Make sure the heating element and the outside of the inner pot are clean and dry. 7 Put the plug in the wall socket and switch on the mains. 8 Close the lid of the rice cooker.Do not close the lid with force. If the lid does not close properly, check if the inner pot is placed correctly. 9 Press the Rice button. Then press the up or down button to select the rice type (Fig. 15). 10 Press the Cook/OK button to start the cooking process. , The Cook/OK light goes on and the cooking animation appears on the display. (Fig. 16) , The display counts down in minutes (10, 9, 8 etc.) during the last 10 minutes of the cooking
process. , At the end of the cooking process the appliance beeps and the Keep warm/Reheat light goes
on to indicate that the appliance has switched to the keep-warm mode. , The display counts up the keep-warm time in hours (12 hours max.).
11 Press the Stop/Cancel button to cancel the keep-warm mode (Fig. 17).If you want to continue the keep-warm mode again, simply press the Keep warm/Reheat button again.
12 Press the lid release button to open the lid. (Fig. 18) 13 Stir the rice to loosen it.Stirring the rice allows excess steam to escape. This gives fluffier rice.
EnglisH12

14 Press the Stop/Cancel button to go to standby mode or unplug the rice cooker to switch it off.Rice with soup
1 Follow steps 1 to 9 in section ‘Cooking rice’. 2 Press the Cook/OK button to confirm the setting (Fig. 6). , The first instruction appears on the display.
3 Press the Cook/OK button again to start the cooking process.If you do not press the Cook/OK button again, the cooking process starts automatically after 10 seconds. , The Cook/OK light goes on and the cooking animation appears on the display.
4 The rice cooker beeps and the Cook/OK button flashes to indicate when you have to add other ingredients.
5 Add the ingredients shown on the display. Then press the Cook/OK button to continue the cooking process.
If you do not press the Cook/OK button again, the cooking process continues automatically after 30 seconds. , The display counts down in minutes (10, 9, 8 etc.) during the last 10 minutes of the cooking
process. , At the end of the cooking process, the appliance beeps and the message ‘Done’ appears on
the display. 6 Press the Stop/Cancel button once to cancel the cooking process, the preset setting or the
keep-warm mode. 7 Press the Stop/Cancel button to go to standby mode or unplug the rice cooker to switch it
off.Congee
The Congee/Pasta menu contains 3 submenus for congee.
Menu HD4766 Approximate cooking time
HD4766 Quantity of rice (cups)
HD4768 Approximate cooking time
HD4768 Quantity of rice (cups)
Plain congee thick
0.5-4 hrs 0.5-2 0.5-4 hrs 0.5-2.5
Plain congee thin 0.5-4 hrs 0.5-1 0.5-4 hrs 0.5-1.5
Mixed grain congee
0.5-4 hrs 0.5-2 0.5-4 hrs 0.5-2.5
1 Put the ingredients in the inner pot. 2 Add the water.Make sure all ingredients including water do not exceed the maximum water level on the scale for pasta indicated on the inside of the inner pot. - HD4768 (Fig. 19) - HD4766 (Fig. 20)
3 Follow steps 5 to 8 in section ‘Cooking rice’ in this chapter.
EnglisH 13

4 Press the Congee/Pasta button (Fig. 21). 5 Press the up or down button to select the type of congee you want to cook. 6 Press the Cook/OK button. , The default cooking time of 1 hour appears on the display. , If you have selected ‘mixed grain congee’, the first instruction appears on the display.
Note: If you have selected ‘mixed grain congee’ and you do not press the Cook/OK button, the display automatically shows the cooking time after 30 seconds. 7 To adjust the cooking time, press the up or down button. Press and hold the up or down
button to move the time forward or backward quickly.You can set any time from 30 minutes to 4 hours.
Tip: Set 30 minutes if you cook 0.5 cups of rice in HD4766 or HD4768. Set 4 hours if you cook 2 cups of rice in HD4766 or 2.5 cups of rice in HD4768. 8 Press the Cook/OK button to start the cooking process (Fig. 6). , The Cook/OK light goes on and the cooking animation appears on the display. , The display counts down the cooking time in minutes. , At the end of the cooking process, the appliance beeps and the Keep warm/Reheat light goes
on to indicate that the appliance has switched to keep-warm mode. , The display counts up the keep-warm time in hours (12 hours max.).
9 Press the Stop/Cancel button to cancel the keep-warm mode. 10 Press the lid release button to open the lid. 11 Press the Stop/Cancel button to go to standby mode or unplug the rice cooker to switch it
off.Cooking in other menus
The table below shows the default cooking time and the adjustable cooking time in other menus.
Cooking times in other menus
Menu Default cooking time
Opmtimal capacity for default cooking time
Adjustable cooking time
Suggested cooking time for maximum capacity
Pasta 30 min. 250g pasta 20-30 min. 30 min.
Vegetable soup
30 min. Soup level up to Plain rice level 4
30 min.-1 hr 30 min.
1 hr 30 min.
Long boil soup
3 hrs Soup level up to Plain rice level 8
2-4 hrs 4 hrs
Yoghurt 4 hrs 4 cups yoghurt 3-6 hrs 4 hrs
Green bean soup
1 hr 2l water 30 min.-4 hrs 2 hrs
Cereal cake 50 min. Cake mixture up to Cake level - -
Carrot cake 50 min. Cake mixture up to Cake level - -
Stew 1 hr 300g meat 45 min.-4 hrs 3 hrs
EnglisH14

Menu Default cooking time
Opmtimal capacity for default cooking time
Adjustable cooking time
Suggested cooking time for maximum capacity
White radish pudding
70 min. 600g white radish, 250g pumpkin, 360ml water, 300g rice flour mixture up to the Pudding level
- -
Taro pudding 70 min. 700g taro, 250 rice flour mixture, 700ml water up to the Pudding level
- -
Steaming 30 min. 300g pork ribs 10 min.-1 hr 1 hr
PastaThe Congee/Pasta menu contains 1 submenu for pasta.
1 Put the ingredients and water in the inner pot.Make sure all ingredients including water do not exceed the maximum water level on the scale for pasta indicated on the inside of the inner pot. - HD4768 (Fig. 22) - HD4766 (Fig. 23)
2 Follow steps 5 to 8 in section ‘Cooking rice’ in this chapter. 3 Press the Congee/Pasta button. Then press the up or down button to select the Pasta
submenu (Fig. 21). , The first instruction appears on the display.
4 Press the Cook/OK button. , The default cooking time of 30 minutes appears on the display.
5 To adjust the cooking time, press the up or down button. Press and hold the up or down button to move the time forward or backward quickly.
You can set any time from 20 to 30 minutes.
6 Press the Cook/OK button to start the cooking process. , The Cook/OK light goes on and the cooking animation appears on the display. , The display counts down the cooking time in minutes. , At the end of the cooking process, the appliance beeps and the message ‘Done’ appears on
the display. 7 Press the lid release button to open the lid. 8 Press the Stop/Cancel button to go to standby mode or unplug the rice cooker to switch it
off.soup/stewsoup
The Soup/Stew menu contains 2 submenus for soup: vegetable soup and long boil soup. The vegetable soup submenu is suitable for cooking types of soup that just need a short cooking time but high power, like cabbage and meat soup. The long boil soup submenu is suitable for cooking types of soup that need longer cooking times and low power to boil out all of the taste from the ingredients, like chicken soup with Chinese medicine.
EnglisH 15

1 Put the ingredients in the inner pot according to the display.Note: You can put the vegetables for vegetable soup in the inner pot in the second step in order to cook these ingredients soft. 2 Add the water.Make sure all ingredients including water do not exceed the maximum water level on the scale for soup indicated on the inside of the inner pot. - HD4768 (Fig. 22) - HD4766 (Fig. 23)
3 Follow steps 5 to 8 in section ‘Cooking rice’ in this chapter. 4 Press the Soup/Stew button. (Fig. 24) 5 Press the up or down button to select the type of soup you want to cook. 6 Press the Cook/OK button. , The first instruction appears on the display.
7 Press the Cook/OK button. If you do not press this button, the display automatically shows the cooking time for vegetable soup or long boil soup after 10 seconds.
, The default cooking time (30 minutes for vegetable soup and 3 hours for long boil soup) appears on the display.
8 To adjust the cooking time, press the up or down button. Press and hold the up or down button to move the time forward or backward quickly.
You can set any time from 30 minutes to 1 hour and 30 minutes for vegetable soup and from 2 to 4 hours for long boil soup.
9 Press the Cook/OK button to start the cooking process. , The Cook/OK light goes on and the cooking animation appears on the display. , The display counts down the cooking time in minutes. , For vegetable soup, the appliance beeps and the Cook/OK light flashes to indicate that you
have to perform the next step shown on the display. Press the Cook/OK button to continue the cooking process. If you do not press this button, the cooking process continues automatically after 30 seconds.
, At the end of the cooking process, the appliance beeps and the message ‘Done’ appears on the display.
, The display counts up the keep-warm time in hours (12 hours max.). 10 Press the Stop/Cancel button to cancel the keep-warm mode. 11 Press the lid release button to open the lid. 12 Press the Stop/Cancel button to go to standby mode or unplug the rice cooker to switch it
off.stew
The Soup/Stew menu contains 1 submenu for stew.
1 Put the ingredients in the inner pot.Make sure all ingredients including water do not exceed the maximum water level on the scale for stew indicated on the inside of the inner pot. 2 Add water until ¾ of the ingredients are covered. 3 Follow steps 5 to 8 in section ‘Cooking rice’ in this chapter. 4 Press the Soup/Stew button (Fig. 24).
EnglisH16

5 Press the up or down button to select the Stew submenu. 6 Press the Cook/OK button. , The first instruction appears on the display.
7 Press the Cook/OK button. If you do not press this button, the display automatically shows the cooking time after 10 seconds.
, The default cooking time of 1 hour appears on the display. 8 To adjust the cooking time, press the up or down button. Press and hold the up or down
button to move the time forward or backward quickly.You can set any time from 45 minutes to 3 hours.
9 Press the Cook/OK button to start the cooking process. , The Cook/OK light goes on and the cooking animation appears on the display. , The display counts down the cooking time in minutes. , At the end of the cooking process, the appliance beeps and the message ‘Done’ appears on
the display. , At the end of the cooking process, the appliance beeps and the Keep warm/Reheat light goes
on to indicate that the appliance has switched to keep-warm mode. , The display counts up the keep-warm time in hours (12 hours max.).
10 Press the Stop/Cancel button to cancel the keep-warm mode. 11 Press the lid release button to open the lid. 12 Press the Stop/Cancel button to go to standby mode or unplug the rice cooker to switch it
off.Yoghurt
1 Pour warm milk and yoghurt mixture into the yoghurt pots. 2 Put the steam tray in the inner pot (Fig. 25). 3 Fill the inner pot with water (Fig. 26).Make sure all ingredients including water do not exceed the maximum water level on the scale for yoghurt indicated on the inside of the inner pot. - HD4768 (Fig. 22) - HD4766 (Fig. 23)
4 Put the yoghurt pots on the steam tray. (Fig. 27) 5 Follow steps 5 to 8 in section ‘Cooking rice’ in this chapter. 6 Press the Yoghurt button. (Fig. 28) 7 Press the Cook/OK button. , The first instruction appears on the display.
8 Press the Cook/OK button. If you do not press this button, the display automatically shows the cooking time after 30 seconds.
, The default cooking time of 4 hours appears on the display. 9 To adjust the cooking time, press the up or down button. Press and hold the up or down
button to move the time forward or backward quickly.You can set any time from 3 to 6 hours.
10 Press the Cook/OK button to start the cooking process. , The Cook/OK light goes on and the cooking animation appears on the display. , The display counts down the cooking time in minutes.
EnglisH 17

, At the end of the cooking process, the appliance beeps and the message ‘Done’ is shown on the display.
11 Press the lid release button to open the lid. 12 Press the Stop/Cancel button to go to standby mode or unplug the rice cooker to switch it
off.Dessert/Pudding
The Dessert/Pudding menu contains 1 submenu for dessert soup, 2 submenus for pudding and 2 submenus for cake.
green bean soup 1 Put the ingredients in the inner pot. 2 Add the water.Make sure all ingredients including water do not exceed the maximum water level on the scale for dessert indicated on the inside of the inner pot. - HD4768 (Fig. 22) - HD4766 (Fig. 23)
3 Follow steps 5 to 8 in section ‘Cooking rice’ in this chapter. 4 Press the Dessert/Pudding button. (Fig. 29) 5 Press the up or down button to select Green bean soup. 6 Press the Cook/OK button. , The first instruction appears on the display.
7 Press the Cook/OK button. If you do not press this button, the display automatically shows the cooking time after 10 seconds.
, The default cooking time of 1 hour appears on the display. 8 To adjust the cooking time, press the up or down button. Press and hold the up or down
button to move the time forward or backward quickly.You can set any time from 30 minutes to 4 hours.
9 Press the Cook/OK button to start the cooking process. , The Cook/OK light goes on and the cooking animation appears on the display. , The display counts down the cooking time in minutes. , At the end of the cooking process, the appliance beeps and the Keep warm/Reheat light goes
on to indicate that the appliance has switched to keep-warm mode. , The display counts up the keep-warm time in hours (12 hours max.).
10 Press the Stop/Cancel button to cancel the keep-warm mode. 11 Press the lid release button to open the lid. 12 Press the Stop/Cancel button to go to standby mode or unplug the rice cooker to switch it
off.Pudding
The Desert/Pudding menu contains 2 submenus for pudding: white radish pudding and taro pudding.
1 Put the ingredients in the inner pot. - White Radish pudding: Put the white radish, Chinese sausages, dried shrimps and seasonings in
the inner pot and mix well.
EnglisH18

- Taro pudding: Put the taro, Chinese sausages, dried shrimps and seasonings in the inner pot and mix well.
Make sure all ingredients including water do not exceed the maximum water level on the scale for pudding indicated on the inside of the inner pot.Note: Follow the instructions in the White radish pudding recipe or Taro pudding recipe in chapter ‘Recipes’. 2 Press the Dessert/Pudding button (Fig. 29). 3 Press the up or down button to select the type of pudding you want to make. 4 Press the Cook/OK button. , The first instruction appears on the display.
5 Press the Cook/OK button to start the cooking process. If you do not press this button, the cooking process does not start.
Note: You cannot change the cooking time for the Pudding submenus. , The Cook/OK light goes on and the cooking animation appears on the display. , The appliance beeps and the Cook/OK button flashes to indicate when you have to add the
rice flour mixture. Be careful when you open the lid to add the rice flour mixture. The lid and the steam that comes out of the inner pot are hot. 6 Add the rice flour mixture and stir it well. Then press the Cook/OK button to continue the
cooking process. If you do not press this button, the cooking process does not start. , The display counts down the cooking time in minutes. , At the end of the cooking process, the appliance beeps and the message ‘Done’ appears on
the display. 7 Press the lid release button to open the lid. 8 Press the Stop/Cancel button to go to standby mode or unplug the rice cooker to switch it
off.Cake
The Dessert/Pudding menu contains 2 submenus for cake: cereal cake and carrot cake.
1 Mix the ingredients to prepare the cake mixture.Note: Follow the instructions in the cake recipes in chapter ‘Recipes’. 2 Grease the inner pot. 3 Put the cake mixture in the inner pot. 4 Follow steps 5 to 8 in section ‘Cooking rice’ in this chapter. 5 Press the Dessert/Pudding button (Fig. 29). 6 Press the up or down button to select the type of cake you want to make. 7 Press the Cook/OK button. , The first instruction appears on the display.
8 Press the Cook/OK button to start the cooking process. If you do not press this button, the cooking process starts automatically after 10 seconds
Note: You cannot change the cooking time for cake. , The Cook/OK light goes on and the cooking animation appears on the display. , The display counts down the cooking time in minutes.
EnglisH 19

, At the end of the cooking process, the appliance beeps and the message ‘Done’ is shown on the display.
9 Press the lid release button to open the lid. 10 Press the Stop/Cancel button to go to standby mode or unplug the rice cooker to switch it
off.steaming
1 Put the steam tray in the steam basket. The line on the steam tray has to point to the mark on the steam basket. (Fig. 30)
2 Measure 3 cups of water with the measuring cup and pour them into the inner pot.It takes approx. 8 minutes for 3 cups of water to come to the boil.
Note: The amount of water depends on the amount of food to be steamed. 3 Put the assembled steam basket with steam tray in the inner pot (Fig. 31). 4 Put the food to be steamed on a plate or in the steam basket.Note: To ensure even steaming, spread out the food evenly and do not pile it up. 5 Follow steps 5 to 8 in section ‘Cooking rice’ in this chapter. 6 Press the Steam button to select the Steam menu (Fig. 32). , The first instruction appears on the display.
7 Press the Cook/OK button. If you do not press this button, the display automatically shows the cooking time after 30 seconds.
, The default cooking time of 30 minutes appears on the display. 8 To adjust the cooking time, press the up or down button. Press and hold the up or down
button to move the time forward or backward quickly.You can set any time from 10 minutes to 1 hour.
9 Press the Cook/OK button to start the cooking process. , The Cook/OK light goes on and the cooking animation appears on the display. , The display counts down the cooking time in minutes. , At the end of the cooking process, the appliance beeps and the message ‘Done’ appears on
the display. 10 Press the lid release button to open the lid. 11 Press the Stop/Cancel button to go to standby mode or unplug the rice cooker to switch it
off.Reheating
You can use the reheat mode to warm up rice that has cooled down. Fill the inner pot to not more than half its capacity to ensure that the rice is heated up properly.
Note: Do not reheat cooled rice more than once. 1 Loosen the cooled rice and evenly distribute it in the inner pot. 2 Pour ½ cup of water onto the rice to prevent it from becoming too dry. The amount of
water to be added depends on the amount of rice being reheated.If the rice starts scorching, add more water.
3 Follow steps 5 to 8 in section ‘Cooking rice’ in this chapter. 4 Press the Keep warm/Reheat button twice to start the reheating process. (Fig. 33)
EnglisH20

, The Keep warm/Reheat light goes on and the reheat animation and the remaining reheat time appear on the display. (Fig. 34)
Note: The default reheat time is 23 minutes. , When the reheating process is finished, you hear a beep and the message ‘Done’ is shown on
the display. 5 Press the lid release button to open the lid. 6 Press the Stop/Cancel button to go to standby mode or unplug the rice cooker to switch it
off.Keeping warm
The keep-warm mode allows you to keep your rice or food warm for a longer period of time.
Note: We advise you to keep your rice or food warm for not more than 12 hours so as to preserve its taste. 1 Press the Keep warm/Reheat button once to activate the keep-warm mode (Fig. 33). , The Keep warm/Reheat light is on continuously. , During the keep-warm process, the display shows the time in hours from 0 to 11 (0HR, 1HR
...11HR). , After 12 hours, the keep-wam mode automatically ends and the rice cooker beeps 10 times.
The display switches to clock time.Timer
The table below shows the timer options available for the different menus.
Menu Submenu Timer options
Rice Plain 1 hr- 24 hrs
Quick plain -
Small portion plain 1 hr - 24 hrs
Glutinous 1 hr - 24 hrs
Mixed 1 hr - 24 hrs
Rice with soup -
Congee/Pasta Plain congee thick 1 hr - 24 hrs
Plain congee thin 1 hr - 24 hrs
Mixed grain congee 1 hr - 24 hrs
Pasta -
Soup/Stew Vegetable soup -
Long boil soup 1 hr - 12 hrs
Stew 1 hr - 12 hrs
Yoghurt Yoghurt -
Dessert/Pudding Green bean soup 1 hr - 12 hrs
White radish pudding -
Taro pudding -
EnglisH 21

Menu Submenu Timer options
Cereal cake -
Carrot cake -
Steam Steam 1 hr - 12 hrs
Note: Some menus allow you to set the cooking time. You can set both the timer and the cooking time in these menus. You can set the timer first and then the cooking time, or vice versa.
setting the ready time with the Preset/Clock button 1 Press the Preset/Clock button (Fig. 4). , The lights of the available menu buttons go on. (Fig. 35)
2 Press the button of the menu you want to use and, if necessary, select the desired submenu with the up or down button. Then press the Cook/OK button.
3 To set the ready time, press the up or down button. Press and hold the up or down button to move the time forward or backward quickly.
Note: You can for example use the Preset/Clock button to set the ready time at 18:30 (Fig. 36). 4 Press the Cook/OK button to start the timer. , The message ‘Saved’ appears on the display. , The Cook/OK light goes on and the text ‘Timer set’ and the preset ready time for the
selected menu appear on the display. , When the cooking process starts, the cooking animation and the remaining cooking time
appear on the display.Note: If the preset time is shorter than the required total cooking time of the selected menu, the rice cooker starts the cooking process immediately, using the default cooking time. The cooking time is not shortened if the preset time is shorter than the required total cooking time. You can adjust the cooking time before you set the timer if the cooking time of the selected menu is adjustable.
setting the ready time with the menu buttons 1 Press the button of the menu you want to use and, if necessary, select the desired
submenu with the up or down button. Then press the Preset/Clock button.Note: You can also press the preset button in the submenu screen, the first step-by-step screen or the cooking time screen. 2 To set the ready time, press the up or down button. Press and hold the up or down button
to move the time forward or backward quickly. Note: You can for example use the Preset/Clock button to set the ready time at 18:30. 3 Press the Cook/OK button to start the timer. , The Cook/OK light goes on and the text ‘Timer set’ and the preset ready time for the
selected menu appear on the display. , When the cooking process starts, the cooking animation and the remaining cooking time
appear on the display.
CleaningUnplug the rice cooker before you clean it.Wait until the rice cooker has cooled down sufficiently before you clean it.
EnglisH22

To protect the non-stick coating of the inner pot, do not: - use the inner pot for washing dishes; - put vinegar in the pot.
1 Take the steam basket with tray, yoghurt pot and the inner pot out of the body of the appliance.
2 Detach the inner lid from the outer lid by pressing the lid release tabs and pulling the inner lid outwards and downwards (Fig. 37).
To reattach the inner lid, slot the top end of the inner lid into the outer lid and push the release tabs firmly home (‘click’).
3 Detach the steam vent cap from the outer lid by pulling it upwards (Fig. 38). - To remove the bottom cover of the steam vent cap, press the locking tab to the open position
and detach the cover from the hinge. (Fig. 39) - To reattach the bottom cover of the steam vent cap, insert the projections of the bottom cover
into the slots of the cap, push the bottom cover against the cap (1) and push the locking tab to the closed position (2) (‘click’). (Fig. 40)
- To put the steam vent cap back into the vent hole of the outer lid, insert it into the hole and push it down firmly.
4 Clean the inner lid, inner pot, steam basket with tray, yoghurt pots, rice scoop and steam vent cap with a sponge or a cloth in hot water with some washing-up liquid.
Do not use abrasive cleaning agents, scourers or metal utensils to clean the inner pot as these damage the non-stick coating. 5 Use only a damp cloth to wipe the inside and outside of the body of the rice cooker. Never immerse the body of the rice cooker in water, nor rinse it under the tap.
storage 1 You can store all accessories inside the appliance in the following way: (Fig. 41) - Put the steam tray in the inner pot. - Put the yoghurt pots in the inner pot. - Put the stream tray in the inner pot
2 Store the appliance in a safe, dry place.
Environment - Do not throw away the appliance with the normal household waste at the end of its life, but
hand it in at an official collection point for recycling. By doing this, you help to preserve the environment (Fig. 42).
guarantee and serviceIf you need service or information or if you have a problem, please visit the Philips website at www.philips.com or contact the Philips Consumer Care Centre in your country (you find its phone number in the worldwide guarantee leaflet). If there is no Consumer Care Centre in your country, go to your local Philips dealer.
TroubleshootingIf your rice cooker does not function properly or if the cooking quality is insufficient, consult the table below. If you are unable to solve the problem, please contact the Philips Consumer Care Centre in your country.
EnglisH 23
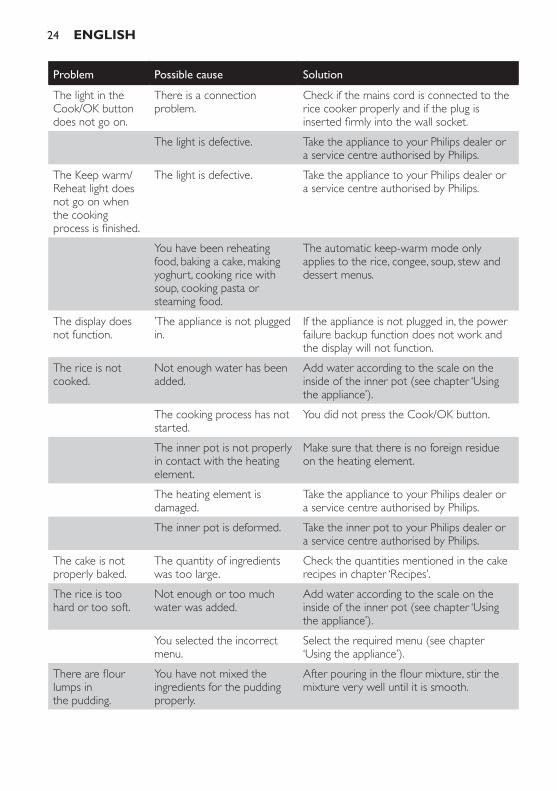
Problem Possible cause Solution
The light in the Cook/OK button does not go on.
There is a connection problem.
Check if the mains cord is connected to the rice cooker properly and if the plug is inserted firmly into the wall socket.
The light is defective. Take the appliance to your Philips dealer or a service centre authorised by Philips.
The Keep warm/Reheat light does not go on when the cooking process is finished.
The light is defective. Take the appliance to your Philips dealer or a service centre authorised by Philips.
You have been reheating food, baking a cake, making yoghurt, cooking rice with soup, cooking pasta or steaming food.
The automatic keep-warm mode only applies to the rice, congee, soup, stew and dessert menus.
The display does not function.
’The appliance is not plugged in.
If the appliance is not plugged in, the power failure backup function does not work and the display will not function.
The rice is not cooked.
Not enough water has been added.
Add water according to the scale on the inside of the inner pot (see chapter ‘Using the appliance’).
The cooking process has not started.
You did not press the Cook/OK button.
The inner pot is not properly in contact with the heating element.
Make sure that there is no foreign residue on the heating element.
The heating element is damaged.
Take the appliance to your Philips dealer or a service centre authorised by Philips.
The inner pot is deformed. Take the inner pot to your Philips dealer or a service centre authorised by Philips.
The cake is not properly baked.
The quantity of ingredients was too large.
Check the quantities mentioned in the cake recipes in chapter ‘Recipes’.
The rice is too hard or too soft.
Not enough or too much water was added.
Add water according to the scale on the inside of the inner pot (see chapter ‘Using the appliance’).
You selected the incorrect menu.
Select the required menu (see chapter ‘Using the appliance’).
There are flour lumps in the pudding.
You have not mixed the ingredients for the pudding properly.
After pouring in the flour mixture, stir the mixture very well until it is smooth.
EnglisH24

Problem Possible cause Solution
The Preset/Clock light does not go on when I set the timer.
The light is defective. Take the appliance to your Philips dealer or a service centre authorised by Philips.
The rice is scorched.
You have not rinsed the rice properly.
Rinse the rice until the water runs clear.
The rice cooker does not switch to keep-warm mode automatically.
You have been reheating food, baking a cake, cooking rice with soup, cooking pasta or steaming food.
The automatic keep-warm mode only works in the rice, congee, soup, stew and dessert menus.
The temperature control is defective.
Take the appliance to your Philips dealer or a service centre authorised by Philips.
The yoghurt is not firm enough or does not form at all.
You have warmed the milk to over 40°C, which has destroyed the bacteria in the yoghurt culture.
Do not warm the milk too long in order to keep the bacteria alive in the yoghurt culture. For smoother and firmer yoghurt, you can add 60g milk powder to the milk and then warm it.
Error message E5 appears on the display.
There has been a power failure during cooking or in the keep-warm mode that lasted longer than 2 hours.
When the power supply resumes, press the Stop/Cancel button to reset the appliance.
RecipesPasta
Serves 3-4 personsIngredients: - 250g pasta (penne or macaroni) - 500ml pasta sauce - 700ml water
1 Put the pasta and pasta sauce in the inner pot and add water up to the water level for pasta. Press the Congee/Pasta button and select the Pasta submenu. Set the cooking time to 20 minutes for macaroni or 30 minutes for penne. Then press the Cook/OK button to cook.
2 When the pasta cooking process is finished, sprinkle some pepper or cheese on top and serve the pasta hot. Yoghurt
Serves 4 personsIngredients: - 500ml milk - 100ml plain live yoghurt
1 Place the yoghurt in room temperature a few minutes before cooking to warm up the yoghurt culture. Warm the milk to around 40°C. Mix the yoghurt with the warm milk rapidly in a separate big pot and pour the mixture into the individual yoghurt pots. Cover the pots with the lids.
EnglisH 25

Note: It takes only a few seconds to warm the milk to 40°C. If the milk reaches a too high temperature, it will destroy the bacteria in the yoghurt. 2 Put the steam tray in the inner pot. Add water up to the level indication for yoghurt. Then
put the cups on the steam tray. 3 Press the Yoghurt button. Set the cooking time to 3 hours. Then press the Cook/OK button
to cook.Note: If you want a more sour taste, you can set to a longer cooking time. 4 When the yoghurt cooking process is finished, add some fruits or honey to the yoghurt and
serve. Or you can let the yoghurt cool down and put it into the fridge overnight and then serve cold. Tip
For smoother and firmer yoghurt, you can add 60g milk powder to the milk and then warm it. Then follow the above steps.
Carrot cake Serves 3-4 personsIngredients: - 250ml vegetable oil - 4 large eggs - 50g white sugar - 225g all-purpose flour - 2 tbsp baking powder - ½ tsp (2g) baking soda - a pinch of salt - 1 tsp vanilla extract - 190g grated carrot
1 Put the eggs, oil, white sugar and vanilla extract in a large bowl and beat them together.Note: Make sure there are no lumps in the sugar. 2 Mix in the flour, baking soda, baking powder and salt. 3 Add the grated carrots. 4 Pour the mixture into the inner pot. 5 Press the Dessert/Pudding button and select the Carrot cake submenu. 6 Press the Cook/OK button to cook.
Banana oatmeal cakeServes 3-4 personsIngredients: - 120g all-purpose flour - 120g oatmeal - 90g brown sugar - 2¼ tsp baking powder - 38g milk powder - 2.5 large bananas - 2 large eggs (120-130g) - 1 egg white (35-40g) - 1.5 tbsp butter (softened) - 1 tsp vanilla oil
EnglisH26

- 1.5 tbsp honey
1 Mix the flour, oatmeal, brown sugar, baking powder, and milk powder in a mixing bowl. 2 Mash the bananas into a paste. 3 In a different bowl, mix the eggs, egg white, banana paste, softened butter, vanilla oil and
honey. Then stir in the ingredients mixed in step 1. Mix well and make sure the mixture does not contain any lumps.
Tip: To increase the banana flavour of the cake, use a ripe banana and mash it. Tip: To make the cake more moist, add another half banana. 4 Pour the cake mixture into the inner pot. 5 Press the Dessert/Pudding button and select the Oatmeal cake submenu. 6 Press the Cook/OK button to cook.
White radish puddingServes 3-4 personsIngredients: - 250g rice flour - 7 tbsp tang mien flour (56g) - 60g dried shrimps - 2 chinese sausages (90g) - 700g white radish - 360ml water
Seasoning: - 2 tbsp chicken powder - 2 tbsp sugar - 1 tsp white pepper
1 Mix the rice flour and tang mien flour with 360ml water in a mixing bowl and put it aside. 2 Shred the white radish. 3 Chop the Chinese sausages into small pieces. 4 Press the Desert/Pudding button and select the White radish pudding submenu. 5 Put the Chinese sausages, dried shrimps and shredded white radish in the inner pot. Press
the Cook/OK button to cook for 20 minutes.Tip: To increase the flavour, stir-fry the ingredients in the inner pot for 5 minutes after you have pressed the Cook/OK button and then close the lid. 6 When the rice cooker beeps, stir the seasoning into the white radish mixture and gradually
pour the flour mixture into the inner pot. Stir again.Tip: Pour in the flour mixture in 3 batches. After pouring in each batch, stir well to avoid lumps. 7 Press the Cook/OK button to continue cooking. Tip: You can serve the pudding while it is still hot, or you can let it cool down in the refrigerator and then fry it.
Taro puddingServes 3-4 personsIngredients: - 400g taro
EnglisH 27

- 150g rice flour - 100g corn starch - 2 Chinese sausages (90g) - 60g dried shrimps - 700ml water
Seasoning 1: - 1 tbsp water - ½ tbsp soy sauce - 1½ tsp chicken powder - ¼ tsp allspice - ½ tsp salt - ¼ tsp white pepper
Seasoning 1: - ½ tsp soy sauce - ¼ tsp sugar - ½ tbsp shaoxing wine
1 Mix the rice flour and corn starch with 250ml water in a mixing bowl and set it aside. 2 Chop the taro into cubes of 1.2cm and mix them with seasoning 1. 3 Chop the Chinese sausages into small pieces and mix them with seasoning 2. 4 Press the Desert/Pudding button and select the Taro pudding submenu. 5 Put the Chinese sausages, dried shrimps, taro and 450ml water in the inner pot. Press the
Cook/OK button to cook for 20 minutes.Tip: To increase the flavour, stir-fry the ingredients in the inner pot for 5 minutes after you have pressed the Cook/OK button and then close the lid. 6 When the rice cooker beeps, open the lid and mash the taro into a paste. Stir the flour
mixture again and pour it into the inner pot gradually. Stir again.Tip: Pour in the flour mixture in 3 batches. After pouring in each batch, stir well to avoid lumps. 7 Press the Cook/OK button to continue cooking. Tip: You can serve the pudding while it is still hot, or you can let it cool down in the refrigerator and then fry it.
EnglisH28

29
PendahuluanSelamat atas pembelian Anda dan selamat datang di Philips! Untuk memanfaatkan sepenuhnya dukungan yang ditawarkan Philips, daftarkan produk Anda di www.philips.com/welcome.
gambaran umum (gbr. 1)a Gelas ukurB Sendok supC Sendok nasi D Indikator ukuran airE Panci bagian dalam dengan gagangF Tutup bagian dalam lepas-pasang g Gelang penyegelH Elemen pemanas i Sensor suhu J Panel kontrolK Layarl Tombol naik dan turunM Badan utaman Steker listriko Kabel listrik lepas-pasang P Soket steker alatQ Tombol pelepas tutup R Braket pemasangan tempat sendok nasis Tempat sendok nasiT Tutup luarU Tutup lubang uap lepas-pasangV Pegangan penanak nasiW Keranjang kukusanX Baki kukusan lepas-pasangY Panci yoghurt
PentingBacalah petunjuk penggunaan ini dengan saksama sebelum Anda menggunakan alat dan simpanlah sebagai referensi nanti.
Bahaya - Jangan sekali-kali merendam badan utama penanak nasi di dalam air, atau membilasnya di bawah
keran.
Peringatan - Periksalah apakah voltase pada alat sesuai dengan voltase listrik di rumah Anda, sebelum
menghubungkan alat. - Alat hanya boleh dihubungkan ke stopkontak dinding yang memiliki arde. Selalu pastikan steker
masuk dengan pas ke stopkontak dinding. - Jangan menggunakan alat ini jika steker, kabel listrik, panci bagian dalam atau badan utamanya
rusak. - Jika kabel listrik rusak, maka harus diganti oleh Philips, pusat layanan resmi Philips atau orang yang
mempunyai keahlian sejenis agar terhindar dari bahaya. - Alat ini tidak dimaksudkan untuk digunakan oleh orang (termasuk anak-anak) dengan cacat fisik,
indera atau kecakapan mental yang kurang, atau kurang pengalaman dan pengetahuan, kecuali jika mereka diberikan pengawasan atau petunjuk mengenai penggunaan alat oleh orang yang bertanggung jawab bagi keselamatan mereka.
inDonEsia
- Anak kecil harus diawasi untuk memastikan mereka tidak bermain-main dengan alat ini. - Jauhkan kabel listrik dari jangkauan anak-anak. Jangan biarkan kabel listrik tergantung di tepi meja
atau tempat alat berada. - Pastikan elemen pemanas, sensor suhu dan bagian luar panci bagian dalam, bersih dan kering
sebelum memasukkan steker ke stopkontak dinding. - Jangan menggunakan alat jika gelang penyegel dalam keadaan rusak. - Jangan masukkan steker pada alat atau menekan tombol apa pun pada panel kontrol dengan
tangan basah. - Jangan sekali-kali menghubungkan alat ini ke saklar timer eksternal untuk menghindari situasi yang
membahayakan.
Perhatian - Jangan sekali-kali menggunakan aksesori atau komponen apa pun dari produsen lain atau yang
tidak secara khusus direkomendasikan oleh Philips. Jika Anda menggunakan aksesori atau komponen tersebut, garansi Anda menjadi batal.
- Hanya gunakan sendok nasi yang disediakan. Hindari menggunakan peralatan yang tajam. - Jangan biarkan penanak nasi terkena suhu yang tinggi atau menempatkannya di atas kompor atau
alat memasak lainnya yang sedang bekerja atau masih panas. - Selalu masukkan panci bagian dalam terlebih dulu sebelum Anda memasukkan steker ke
stopkontak dinding dan menghidupkan penanak nasi. - Selalu cabut steker penanak nasi jika Anda tidak akan menggunakannya dalam jangka waktu yang
lama. - Selalu biarkan penanak nasi mendingin sebelum membersihkan atau memindahkannya. - Jangan menempatkan panci bagian dalam secara langsung di atas nyala api untuk memasak nasi. - Jika alat digunakan tidak secara semestinya atau untuk tujuan profesional atau semi profesional
atau tidak digunakan sesuai instruksi dalam petunjuk penggunaan ini, garansi menjadi tidak berlaku dan Philips tidak bertanggung jawab atas kerusakan apa pun yang ditimbulkan.
- Alat ini ditujukan untuk digunakan di rumah tangga dan pemakaian yang serupa seperti: - area dapur staf di toko, kantor, dan lingkungan kerja lainnya; - rumah ladang; - oleh klien di hotel, motel, dan lingkungan berjenis tempat tinggal lainnya; - lingkungan yang menyediakan tempat tidur dan sarapan.
- Tempatkan penanak nasi pada permukaan yang stabil, horizontal dan rata. - Permukaan alat yang dapat tersentuh dapat menjadi panas pada saat dioperasikan. Hanya sentuh
panel kontrol. - Hati-hati, ada uap panas yang keluar dari lubang uap penanak nasi sewaktu memasak atau
sewaktu Anda membuka tutupnya. - Jangan mengangkat dan memindahkan penanak nasi dengan menggenggam pegangannya saat alat
masih bekerja. - Berhati-hatilah dengan panci bagian dalam dan keranjang kukusan bila Anda memegangnya
setelah proses memasak, karena dapat menjadi panas dan berat. - Jangan biarkan penanak nasi terkena sinar matahari langsung. - Jangan memasukkan barang logam atau benda asing ke dalam lubang uap. - Jangan meletakkan barang yang bersifat magnet pada tutup. Jangan menggunakan alat di dekat
barang yang bersifat magnet. - Jangan menggunakan panci bagian dalam jika sudah rusak. - Jangan melebihi batas air maksimum yang ditunjukkan pada panci bagian dalam agar tidak meluap. - Jangan meletakkan sendok nasi di dalam panci saat memasak, menghangatkan atau memanaskan
nasi kembali. - Selalu bersihkan setiap kali selesai menggunakan alat. - Jangan bersihkan alat di dalam mesin cuci piring.
inDonEsia30

Medan elektromagnet (EMF)Alat Philips ini mematuhi semua standar yang berkaitan dengan medan elektromagnet (EMF). Jika ditangani dengan benar dan sesuai dengan instruksi petunjuk penggunaan ini, alat tersebut aman digunakan berdasarkan pada bukti ilmiah yang kini tersedia.
Fungsi pencadangan bila listrik matiAlat ini memiliki fungsi pencadangan yang mengingat status sebelum listrik mati, asalkan listrik mengalir lagi dalam 2 jam. Bila listrik mati saat proses memasak, penghitungan mundur waktu memasak akan dilanjutkan lagi sesuai dengan hitungan terakhir saat listrik kembali hidup. Jika listrik mati lebih dari 2 jam dan terjadi saat proses memasak, maka penanak nasi secara otomatis akan dikembalikan ke mode siaga bila listrik kembali hidup. Buka penanak nasi, keluarkan isinya dan mulai lagi prosesnya dari awal.Jika Anda telah menyetel timer tapi proses memasak preset belum dimulai saat listrik mati, proses tersebut akan dimulai bila listrik kembali hidup, asalkan kembali hidup dalam waktu 12 jam.
Persiapan penggunaan sebelum menggunakan alat pertama kali.
1 Lepaskan lapisan antara panci bagian dalam dan elemen pemanas. 2 Bersihkan semua komponen penanak nasi secara menyeluruh sebelum menggunakan alat
untuk pertama kali (lihat bab ‘Membersihkan’). 3 Keringkan semua komponen dengan saksama sebelum Anda mulai menggunakan alat. 4 Pasang tempat sendok nasi pada badan penanak nasi (Gbr. 2).
Panel kontrol dan layarPanel kontrol memiliki 12 tombol yang digunakan untuk mengoperasikan alat. Layarnya memberikan informasi mengenai proses yang dipilih. Lampu layar akan hidup segera setelah Anda menekan sembarang tombol, untuk memberikan tampilan yang lebih jelas terhadap informasi yang ditampilkan.
Catatan: Saat alat sedang memasak atau memanaskan ulang, lampu layar akan mati setelah 10 menit. - Panel kontrol dan layar (Gbr. 3)
Tombol naik dan turunAnda dapat menggunakan tombol naik dan turun di bawah layar untuk memilih menu yang diinginkan dan untuk menyesuaikan setelan (jam, timer dan waktu memasak).
Tombol menu/kontrolTerdapat 4 tombol kontrol di bagian atas panel kontrol dan 6 tombol menu di bagian bawah panel kontrol.Tombol yang berkedip menandakan bahwa Anda dapat menekan tombol ini untuk melanjutkan ke langkah berikutnya. Anda dapat menggunakan tombol Stop/Cancel untuk menghentikan proses memasak atau untuk menghentikan timer preset. Anda juga dapat menggunakan tombol ini sebagai tombol “pengurungan” saat memprogram proses memasak dan kembali ke layar sebelumnya.
Menu Beberapa menu memiliki submenu. Bila Anda menekan tombol menu-menu ini, submenunya akan muncul pada layar. Jika menu tidak mempunyai submenu, maka langkah pertama proses memasak akan ditampilkan pada layar. Dalam beberapa menu, teks dan animasi akan ditampilkan pada layar untuk memandu Anda menjalani proses memasak langkah demi langkah.
inDonEsia 31

Menyetel waktu jamCatatan: Anda tidak dapat menyesuaikan waktu jam saat proses memasak atau saat alat berada dalam mode keep-warm. 1 Masukkan steker pada stopkontak dinding dan hidupkan arus listrik. , Layar menampilkan salam pembuka (‘Good morning’, ‘Good afternoon’ atau ‘Good evening’).
2 Tekan tombol Preset/Clock dua kali (Gbr. 4). 3 Tekan tombol naik atau turun untuk memilih ‘Clock setting’. (Gbr. 5) 4 Tekan tombol Cook/OK (Gbr. 6). 5 Tekan tombol naik atau turun untuk menyetel jam (notasi waktu 24-jam). Tekan dan tahan
tombol naik atau turun untuk memajukan atau memundurkan waktu dengan cepat (Gbr. 7). 6 Tekan tombol Cook/OK untuk mengonfirmasi waktu (Gbr. 6).Catatan: Jika Anda ingin membatalkan perubahan, tekan tombol Stop/Cancel. , Pesan ‘Saved’ ditampilkan pada layar. Waktu akan berhenti berkedip dan layar akan
menampilkan waktu yang telah disetel (Gbr. 8).Catatan: Waktu jam dikonfirmasikan secara otomatis jika Anda tidak menekan tombol Cook/OK dalam jangka waktu 30 detik.Catatan: Layar hanya akan menampilkan waktu jam bila alat dihubungkan ke stopkontak dinding.
Menyetel bahasa tampilanAnda dapat memilih satu dari ketiga bahasa ini: Mandarin Singkat, Mandarin Tradisional atau Inggris.
1 Tekan tombol Preset/Clock dua kali (Gbr. 4). 2 Tekan tombol naik atau turun untuk memilih ‘Language setting’ (Gbr. 9). 3 Tekan tombol Cook/OK (Gbr. 6). 4 Tekan tombol naik atau turun untuk memilih bahasa yang diinginkan (Mandarin Singkat,
Mandarin Tradisional atau Inggris (Gbr. 10). 5 Tekan tombol Cook/OK untuk mengonfirmasi bahasa (Gbr. 6).Catatan: Jika Anda ingin membatalkan perubahan, tekan tombol Stop/Cancel. , Pesan ‘Saved’ akan ditampilkan pada layar (Gbr. 8).
Menggunakan alatDaftar 20 menu penanak nasi
Menu Submenu
Rice Plain
Quick plain
Small portion plain
Glutinous
Mixed
Rice with soup
Congee/Pasta Plain congee thick
inDonEsia32

Menu Submenu
Plain congee thin
Mixed grain congee
Pasta
Soup/Stew Vegetable soup
Stew
Long boil soup
Yoghurt Yoghurt
Dessert/Pudding Green bean soup
Cereal cake
Carrot cake
White raddish pudding
Taro pudding
Steam Steam
Panduan memasak langkah-demi-langkahTabel di bawah ini akan menunjukkan langkah apa yang harus dilakukan dalam tiap submenu yang berbeda.Nomor dari daftar berikut ini sesuai dengan nomor dalam tabel dan memberi tahu Anda apa yang harus dilakukan selanjutnya dalam tahap tertentu selama proses memasak.1 Tekan tombol Cook/OK untuk memulai proses memasak. Jika Anda tidak menekan tombol ini,
proses memasak akan dimulai secara otomatis setelah 10 detik.2 Tekan tombol Cook/OK untuk melanjutkan proses memasak. Jika Anda tidak menekan tombol
ini, proses memasak akan dilanjutkan secara otomatis setelah 30 detik.3 Proses memasak hanya akan dimulai jika Anda menekan tombol Cook/OK.4 Tekan tombol Cook/OK. Jika Anda tidak menekan tombol ini, layar secara otomatis akan
menampilkan waktu memasak setelah 10 detik.5 Tekan tombol Cook/OK. Jika Anda tidak menekan tombol ini, layar secara otomatis akan
menampilkan waktu memasak setelah 30 detik.
Menu Submenu Langkah-langkah sebelum memasak
Waktu memasak untuk langkah kedua
Langkah-langkah selama memasak
Langkah-langkah setelah memasak
Rice Rice with soup
Masak beras terlebih dahulu (1)
Tergantung pada banyaknya beras yang dimasak
Tambahkan kaldu hangat dan bahan-bahan lain (2)
Congee/Pasta
Mixed grain congee
Tambahkan mixed grain dan air (5)
inDonEsia 33

Menu Submenu Langkah-langkah sebelum memasak
Waktu memasak untuk langkah kedua
Langkah-langkah selama memasak
Langkah-langkah setelah memasak
Pasta Tambahkan pasta, saus dan air (5)
Soup/Stew
Vegetable soup
Tambahkan air untuk membuat kaldu (4)
Kurang-lebih 10-15 menit
Tambahkan sayuran (2)
Stew Tambahkan air, daging dan bahan-bahan lain (4)
Long boil soup
Tambahkan air dan bahan-bahan (4)
Yoghurt Yoghurt Tuangkan susu hangat (40°C) dan adonan yoghurt ke dalam panci yoghurt, isi panci bagian dalam dengan air (5)
Dessert/Pudding
Green bean soup
Tambahkan air dan bahan-bahan pencuci mulut (4)
White raddish pudding
Tambahkan lobak putih, udang kering/ebi, sosis Cina (lap cheong) dan bumbu penyedap (3)
20 menit Tambahkan adonan tepung beras (3)
Taro pudding Tambahkan talas, sosis Cina, udang kering/ebi dan bumbu penyedap (3)
20 menit Tambahkan adonan tepung beras (3)
Cereal cake Tuangkan adonan kue ke panci bagian dalam (1)
Carrot cake Tuangkan adonan kue ke panci bagian dalam (1)
Steam Steam Letakkan pinggan pada keranjang kukusan, isilah panci bagian dalam dengan air (5)
Memasak nasiMenu Rice pada alat ini terdiri dari 6 submenu yang memungkinkan Anda memasak berbagai jenis nasi atau resep nasi yang berbeda.
1 Takarlah beras dengan gelas ukur yang sudah disediakan (Gbr. 11).Tiap cangkir beras biasanya menghasilkan 2 mangkuk nasi. Jangan melewati takaran yang ditandai pada panci bagian dalam. 1 cangkir beras kurang-lebih 180 ml. - HD4768: kapasitas panci bagian dalam adalah 5,0 L, kapasitas maksimum untuk sekian cangkir
beras adalah 1,8 L - HD4766: kapasitas panci bagian dalam adalah 4,0 L, kapasitas maksimum untuk sekian cangkir
beras adalah 1,5 L
inDonEsia34

Takaran beras dan waktu memasak untuk berbagai menu nasiTabel di bawah memperlihatkan perkiraan waktu memasak. Waktu memasak sesungguhnya dapat berbeda, tergantung pada voltase, suhu kamar, kelembaban dan jumlah air yang digunakan.
Menu HD4766 Perkiraan waktu memasak
HD4766 Takaran beras (cangkir)
HD4768 Perkiraan waktu memasak
HD4768 Takaran beras (cangkir)
Plain rice 40-50 menit 2-8 40-50 menit 2-10
Quick plain rice* 30-40 menit 2-4 30-40 menit 2-6
Small portion plain rice**
40-50 menit 2-3 40-50 menit 2-3
Glutinous rice 50-90 menit 2-8 50-90 menit 2-8
Mixed rice 40-50 menit 2-4 40-50 menit 2-6
Rice with soup 35-70 menit 2-8 35-70 menit 2-10
Catatan: Kacang-kacangan, biji-bijian atau sereal yang digunakan untuk campuran beras harus direndam dulu sebelum digunakan.*Untuk mendapatkan hasil optimal, kami sarankan Anda memasak tidak lebih dari 4 cangkir beras (HD4766) atau 6 cangkir beras (HD4768).**Untuk mendapatkan hasil optimal, kami sarankan Anda memasak tidak lebih dari 3 cangkir beras.
2 Cuci beras sampai bersih. 3 Masukkan beras yang sudah dicuci sebelumnya ke panci bagian dalam. 4 Tambahkan air sampai ukuran yang ditunjukkan pada skala di panci bagian dalam sesuai
dengan jumlah cangkir beras dan jenis beras yang dipakai. Lalu ratakan permukaan beras.Misalnya, untuk 4 cangkir beras North East, tambahkan air hingga seukuran 4 cangkir untuk beras North East yang ditunjukkan pada skala. - HD4768 (Gbr. 12) - HD4766 (Gbr. 13)
Catatan: Ukuran yang tertera pada panci bagian dalam hanya sebagai panduan saja; Anda boleh saja menyesuaikan ukuran air dengan jenis beras yang berbeda sesuai selera. 5 Tekan tombol pelepas tutup untuk membuka tutupnya. 6 Masukkan panci bagian dalam pada penanak nasi (Gbr. 14).Pastikan panci tersebut dipasang dengan benar dan gagangnya sejajar dengan ulir di badan utama.
Catatan: Pastikan elemen pemanas dan bagian luar dari panci bagian dalam bersih dan kering. 7 Masukkan steker pada stopkontak dinding dan hidupkan arus listrik. 8 Rapatkan tutup penanak nasi.Jangan menutupnya dengan paksa. Jika tutupnya tidak bisa ditutup dengan benar, periksa apakah panci bagian dalam telah dipasang dengan benar. 9 Tekan tombol Rice. Kemudian tekan tombol naik atau turun untuk memilih jenis
nasi (Gbr. 15). 10 Tekan tombol Cook/OK untuk memulai proses memasak. , Lampu Cook/OK akan menyala dan animasi memasak akan muncul pada layar. (Gbr. 16)
inDonEsia 35

, Layar menghitung mundur dalam beberapa menit (10, 9, 8 dst.) selama 10 menit terakhir proses memasak.
, Di akhir proses memasak, alat akan berbunyi bip dan lampu Keep warm/Reheat akan menyala untuk menandakan bahwa alat beralih ke mode keep-warm.
, Layar menghitung waktu keep-warm dalam beberapa jam (maks. 12 jam). 11 Tekan tombol Stop/Cancel untuk membatalkan mode keep-warm (Gbr. 17).Jika Anda ingin melanjutkan mode keep-warm lagi, cukup tekan lagi tombol Keep warm/Reheat.
12 Tekan tombol pelepas tutup untuk membuka tutupnya. (Gbr. 18) 13 Aduklah nasi agar tidak lengket.Pengadukan nasi akan membuat kelebihan uap keluar. Ini akan membuat nasi lebih pulen.
14 Tekan tombol Stop/Cancel untuk berpindah ke mode siaga atau cabutlah steker penanak nasi untuk mematikannya.Rice with soup
1 Ikuti langkah 1 hingga 9 dalam bagian ‘Memasak nasi’. 2 Tekan tombol Cook/OK untuk mengonfirmasi setelan (Gbr. 6). , Petunjuk pertama akan muncul pada layar.
3 Tekan lagi tombol Cook/OK untuk memulai proses memasak.Jika Anda tidak menekan lagi tombol Cook/OK, proses memasak akan dimulai secara otomatis setelah 10 detik. , Lampu Cook/OK akan menyala dan animasi memasak akan muncul pada layar.
4 Penanak nasi akan berbunyi bip dan tombol Cook/OK akan berkedip untuk menandakan saatnya Anda harus menambahkan bahan lainnya.
5 Tambahkan bahan yang ditampilkan pada layar. Kemudian tekan tombol Cook/OK untuk melanjutkan proses memasak.
Jika Anda tidak menekan lagi tombol Cook/OK, proses memasak akan dilanjutkan secara otomatis setelah 30 detik. , Layar menghitung mundur dalam beberapa menit (10, 9, 8 dst.) selama 10 menit terakhir
proses memasak. , Di akhir proses memasak, alat akan berbunyi bip dan pesan ‘Done’ muncul pada layar.
6 Tekan tombol Stop/Cancel sekali untuk membatalkan proses memasak, setelan preset atau mode keep-warm.
7 Tekan tombol Stop/Cancel untuk berpindah ke mode siaga atau cabutlah steker penanak nasi untuk mematikannya.Congee
Menu Congee/Pasta berisi 3 submenu untuk bubur.
Menu HD4766 Perkiraan waktu memasak
HD4766 Takaran beras (cangkir)
HD4768 Perkiraan waktu memasak
HD4768 Takaran beras (cangkir)
Plain congee thick 0,5-4 jam 0,5-2 0,5-4 jam 0,5-2,5
Plain congee thin 0,5-4 jam 0,5-1 0,5-4 jam 0,5-1,5
Mixed grain congee
0,5-4 jam 0,5-2 0,5-4 jam 0,5-2,5
inDonEsia36

1 Masukkan bahan-bahan pada panci bagian dalam. 2 Tambahkan air.Pastikan semua bahan termasuk air tidak melebihi batas air maksimum pada skala untuk pasta yang tertera pada panci bagian dalam. - HD4768 (Gbr. 19) - HD4766 (Gbr. 20)
3 Ikuti langkah 5 hingga 8 pada bagian ‘Memasak nasi’ dalam bab ini. 4 Tekan tombol Congee/Pasta (Gbr. 21). 5 Tekan tombol naik atau turun untuk memilih jenis bubur yang ingin Anda masak. 6 Tekan tombol Cook/OK. , Waktu memasak default 1 jam akan muncul pada layar. , Jika Anda memilih ‘mixed grain congee’, petunjuk pertama akan muncul pada layar.
Catatan: Jika Anda memilih ‘mixed grain congee’ dan Anda tidak menekan tombol Cook/OK, layar secara otomatis menampilkan waktu memasak setelah 30 detik. 7 Untuk menyesuaikan waktu memasak, tekan tombol naik atau turun. Tekan dan tahan tombol
naik atau turun untuk memajukan atau memundurkan waktu dengan cepat.Anda dapat menyetel waktunya mulai 30 menit sampai 4 jam.
Tip: Setel 30 menit jika Anda memasak 0,5 cangkir beras di HD4766 atau HD4768. Setel 4 jam jika Anda memasak 2 cangkir beras di HD4766 atau 2,5 cangkir beras di HD4768. 8 Tekan tombol Cook/OK untuk memulai proses memasak (Gbr. 6). , Lampu Cook/OK akan menyala dan animasi memasak akan muncul pada layar. , Layar akan menghitung mundur waktu memasak dalam hitungan menit. , Di akhir proses memasak, alat akan berbunyi bip dan lampu Keep warm/Reheat akan menyala
untuk menandakan bahwa alat beralih ke mode keep-warm. , Layar menghitung waktu keep-warm dalam beberapa jam (maks. 12 jam).
9 Tekan tombol Stop/Cancel untuk membatalkan mode keep-warm. 10 Tekan tombol pelepas tutup untuk membuka tutupnya. 11 Tekan tombol Stop/Cancel untuk berpindah ke mode siaga atau cabutlah steker penanak nasi
untuk mematikannya.Memasak di menu lainnya
Tabel di bawah menampilkan waktu memasak default dan waktu memasak yang dapat disesuaikan di menu lainnya.
Waktu memasak di menu lainnya
Menu Waktu memasak default
Kapasitas Optimal untuk waktu memasak default
Waktu memasak yang dapat disesuaikan
Waktu memasak yang disarankan untuk kapasitas maksimum
Pasta 30 menit 250 g pasta 20-30 menit 30 menit
Vegetable soup
30 menit Tingkat Soup hingga Plain rice di tingkat 4
30 menit-1 jam 30 menit
1 jam 30 menit
inDonEsia 37

Menu Waktu memasak default
Kapasitas Optimal untuk waktu memasak default
Waktu memasak yang dapat disesuaikan
Waktu memasak yang disarankan untuk kapasitas maksimum
Long boil soup
3 jam Tingkat Soup hingga Plain rice di tingkat 8
2-4 jam 4 jam
Yoghurt 4 jam 4 cangkir yoghurt 3-6 jam 4 jam
Green bean soup
1 jam 2 l air 30 menit-4 jam
2 jam
Cereal cake 50 menit Adonan cake hingga tingkat Cake - -
Carrot cake 50 menit Adonan cake hingga tingkat Cake - -
Stew 1 jam 300 g daging 45 menit-4 jam
3 jam
White raddish pudding
70 menit 600 g lobak putih, 250 g labu kuning, 360 ml air, 300 g adonan tepung beras hingga tingkat Pudding
- -
Taro pudding
70 menit 700 g talas, 250 g adonan tepung beras, 700 ml air hingga tingkat Pudding
- -
Mengukus 30 menit 300 g rusuk babi 10 menit-1 jam
1 jam
PastaMenu Congee/Pasta berisi 1 submenu untuk pasta.
1 Masukkan bahan-bahan dan air pada panci bagian dalam.Pastikan semua bahan termasuk air tidak melebihi batas air maksimum pada skala untuk pasta yang tertera pada panci bagian dalam. - HD4768 (Gbr. 22) - HD4766 (Gbr. 23)
2 Ikuti langkah 5 hingga 8 pada bagian ‘Memasak nasi’ dalam bab ini. 3 Tekan tombol Congee/Pasta. Kemudian tekan tombol naik atau turun untuk memilih submenu
Pasta (Gbr. 21). , Petunjuk pertama akan muncul pada layar.
4 Tekan tombol Cook/OK. , Waktu memasak default 30 menit akan muncul pada layar.
5 Untuk menyesuaikan waktu memasak, tekan tombol naik atau turun. Tekan dan tahan tombol naik atau turun untuk memajukan atau memundurkan waktu dengan cepat.
Anda dapat menyetel waktunya mulai 20 sampai 30 menit.
6 Tekan tombol Cook/OK untuk memulai proses memasak. , Lampu Cook/OK akan menyala dan animasi memasak akan muncul pada layar.
inDonEsia38

, Layar akan menghitung mundur waktu memasak dalam hitungan menit. , Di akhir proses memasak, alat akan berbunyi bip dan pesan ‘Done’ muncul pada layar.
7 Tekan tombol pelepas tutup untuk membuka tutupnya. 8 Tekan tombol Stop/Cancel untuk berpindah ke mode siaga atau cabutlah steker penanak nasi
untuk mematikannya.soup/stewsoup
Menu Soup/Stew berisi 2 submenu untuk sup: vegetable soup dan long boil soup. Submenu vegetable soup cocok untuk memasak jenis sup yang hanya butuh waktu memasak yang singkat tapi listrik yang dibutuhkan tinggi, seperti sup daging dan kubis. Submenu long boil soup cocok untuk memasak jenis sup yang butuh waktu memasak lebih lama dan daya listrik yang rendah untuk mengeluarkan rasa dari bahan, seperti sup ayam dengan rempah Cina.
1 Masukkan bahan-bahan pada panci bagian dalam sesuai dengan di layar.Catatan: Anda dapat memasukkan sayuran untuk sup sayur (vegetable soup) di panci bagian dalam langkah kedua untuk memasak bahan-bahan ini agar lunak. 2 Tambahkan air.Pastikan semua bahan termasuk air tidak melebihi batas air maksimum pada skala untuk sup yang tertera di dalam panci bagian dalam. - HD4768 (Gbr. 22) - HD4766 (Gbr. 23)
3 Ikuti langkah 5 hingga 8 pada bagian ‘Memasak nasi’ dalam bab ini. 4 Tekan tombol Soup/Stew. (Gbr. 24) 5 Tekan tombol naik atau turun untuk memilih jenis sup yang ingin Anda masak. 6 Tekan tombol Cook/OK. , Petunjuk pertama akan muncul pada layar.
7 Tekan tombol Cook/OK. Jika Anda tidak menekan tombol ini, layar secara otomatis akan menampilkan waktu memasak untuk vegetable soup atau long boil soup setelah 10 detik.
, Waktu memasak default (30 menit untuk vegetable soup dan 3 jam untuk long boil soup) akan muncul pada layar.
8 Untuk menyesuaikan waktu memasak, tekan tombol naik atau turun. Tekan dan tahan tombol naik atau turun untuk memajukan atau memundurkan waktu dengan cepat.
Anda dapat menyetel waktunya mulai 30 menit sampai 1 jam dan 30 menit untuk vegetable soup dan mulai 2 sampai 4 jam untuk long boil soup.
9 Tekan tombol Cook/OK untuk memulai proses memasak. , Lampu Cook/OK akan menyala dan animasi memasak akan muncul pada layar. , Layar akan menghitung mundur waktu memasak dalam hitungan menit. , Untuk vegetable soup, alat akan berbunyi bip dan lampu Cook/OK akan berkedip untuk
menandakan bahwa Anda harus melakukan langkah kedua yang ditampilkan pada layar. Tekan tombol Cook/OK untuk melanjutkan proses memasak. Jika Anda tidak menekan tombol ini, proses memasak akan dilanjutkan secara otomatis setelah 30 detik.
, Di akhir proses memasak, alat akan berbunyi bip dan pesan ‘Done’ muncul pada layar. , Layar menghitung waktu keep-warm dalam beberapa jam (maks. 12 jam).
10 Tekan tombol Stop/Cancel untuk membatalkan mode keep-warm. 11 Tekan tombol pelepas tutup untuk membuka tutupnya.
inDonEsia 39

12 Tekan tombol Stop/Cancel untuk berpindah ke mode siaga atau cabutlah steker penanak nasi untuk mematikannya.stew
Menu Soup/Stew berisi 1 submenu untuk stew.
1 Masukkan bahan-bahan pada panci bagian dalam.Pastikan semua bahan termasuk air tidak melebihi batas air maksimum pada skala untuk stew yang tertera di dalam panci bagian dalam. 2 Tambahkan air hingga menutupi ¾ bahan. 3 Ikuti langkah 5 hingga 8 pada bagian ‘Memasak nasi’ dalam bab ini. 4 Tekan tombol Soup/Stew (Gbr. 24). 5 Tekan tombol naik atau turun untuk memilih submenu Stew. 6 Tekan tombol Cook/OK. , Petunjuk pertama akan muncul pada layar.
7 Tekan tombol Cook/OK. Jika Anda tidak menekan tombol ini, layar secara otomatis akan menampilkan waktu memasak setelah 10 detik.
, Waktu memasak default 1 jam akan muncul pada layar. 8 Untuk menyesuaikan waktu memasak, tekan tombol naik atau turun. Tekan dan tahan tombol
naik atau turun untuk memajukan atau memundurkan waktu dengan cepat.Anda dapat menyetel waktunya mulai 45 menit sampai 3 jam.
9 Tekan tombol Cook/OK untuk memulai proses memasak. , Lampu Cook/OK akan menyala dan animasi memasak akan muncul pada layar. , Layar akan menghitung mundur waktu memasak dalam hitungan menit. , Di akhir proses memasak, alat akan berbunyi bip dan pesan ‘Done’ muncul pada layar. , Di akhir proses memasak, alat akan berbunyi bip dan lampu Keep warm/Reheat akan menyala
untuk menandakan bahwa alat beralih ke mode keep-warm. , Layar menghitung waktu keep-warm dalam beberapa jam (maks. 12 jam).
10 Tekan tombol Stop/Cancel untuk membatalkan mode keep-warm. 11 Tekan tombol pelepas tutup untuk membuka tutupnya. 12 Tekan tombol Stop/Cancel untuk berpindah ke mode siaga atau cabutlah steker penanak nasi
untuk mematikannya.Yoghurt
1 Tuangkan susu hangat dan adonan yoghurt ke panci yoghurt. 2 Taruh baki kukusan pada panci bagian dalam (Gbr. 25). 3 Isilah panci bagian dalam dengan air (Gbr. 26).Pastikan semua bahan termasuk air tidak melebihi batas air maksimum pada skala untuk yoghurt yang tertera di dalam panci bagian dalam. - HD4768 (Gbr. 22) - HD4766 (Gbr. 23)
4 Letakkan panci yoghurt di baki kukusan. (Gbr. 27) 5 Ikuti langkah 5 hingga 8 pada bagian ‘Memasak nasi’ dalam bab ini. 6 Tekan tombol Yoghurt. (Gbr. 28)
inDonEsia40

7 Tekan tombol Cook/OK. , Petunjuk pertama akan muncul pada layar.
8 Tekan tombol Cook/OK. Jika Anda tidak menekan tombol ini, layar secara otomatis akan menampilkan waktu memasak setelah 30 detik.
, Waktu memasak default 4 jam akan muncul pada layar. 9 Untuk menyesuaikan waktu memasak, tekan tombol naik atau turun. Tekan dan tahan tombol
naik atau turun untuk memajukan atau memundurkan waktu dengan cepat.Anda dapat menyetel waktunya mulai 3 sampai 6 jam.
10 Tekan tombol Cook/OK untuk memulai proses memasak. , Lampu Cook/OK akan menyala dan animasi memasak akan muncul pada layar. , Layar akan menghitung mundur waktu memasak dalam hitungan menit. , Di akhir proses memasak, alat akan berbunyi bip dan pesan ‘Done’ ditampilkan pada layar.
11 Tekan tombol pelepas tutup untuk membuka tutupnya. 12 Tekan tombol Stop/Cancel untuk berpindah ke mode siaga atau cabutlah steker penanak nasi
untuk mematikannya.Dessert/Pudding
Menu Dessert/Pudding berisi 1 submenu untuk dessert soup (sup penutup), 2 submenu untuk pudding dan 2 submenu untuk cake.
green bean soup 1 Masukkan bahan-bahan pada panci bagian dalam. 2 Tambahkan air.Pastikan semua bahan termasuk air tidak melebihi batas air maksimum pada skala untuk dessert yang tertera di dalam panci bagian dalam. - HD4768 (Gbr. 22) - HD4766 (Gbr. 23)
3 Ikuti langkah 5 hingga 8 pada bagian ‘Memasak nasi’ dalam bab ini. 4 Tekan tombol Dessert/Pudding. (Gbr. 29) 5 Tekan tombol naik atau turun untuk memilih submenu Green bean soup. 6 Tekan tombol Cook/OK. , Petunjuk pertama akan muncul pada layar.
7 Tekan tombol Cook/OK. Jika Anda tidak menekan tombol ini, layar secara otomatis akan menampilkan waktu memasak setelah 10 detik.
, Waktu memasak default 1 jam akan muncul pada layar. 8 Untuk menyesuaikan waktu memasak, tekan tombol naik atau turun. Tekan dan tahan tombol
naik atau turun untuk memajukan atau memundurkan waktu dengan cepat.Anda dapat menyetel waktunya mulai 30 menit sampai 4 jam.
9 Tekan tombol Cook/OK untuk memulai proses memasak. , Lampu Cook/OK akan menyala dan animasi memasak akan muncul pada layar. , Layar akan menghitung mundur waktu memasak dalam hitungan menit. , Di akhir proses memasak, alat akan berbunyi bip dan lampu Keep warm/Reheat akan menyala
untuk menandakan bahwa alat beralih ke mode keep-warm. , Layar menghitung waktu keep-warm dalam beberapa jam (maks. 12 jam).
10 Tekan tombol Stop/Cancel untuk membatalkan mode keep-warm.
inDonEsia 41

11 Tekan tombol pelepas tutup untuk membuka tutupnya. 12 Tekan tombol Stop/Cancel untuk berpindah ke mode siaga atau cabutlah steker penanak nasi
untuk mematikannya.Pudding
Menu Desert/Pudding berisi 2 submenu untuk pudding: white radish pudding dan taro pudding.
1 Masukkan bahan-bahan pada panci bagian dalam. - White Radish pudding: Masukkan lobak putih, sosis Cina, udang kering/ebi dan bumbu penyedap
dalam panci bagian dalam lalu aduk hingga rata. - Taro pudding: Masukkan talas, sosis Cina, udang kering/ebi dan bumbu penyedap dalam panci
bagian dalam lalu aduk hingga rata.
Pastikan semua bahan termasuk air tidak melebihi batas air maksimum pada skala untuk pudding yang tertera di dalam panci bagian dalam.Catatan: Ikuti petunjuk di resep White radish pudding atau resep Taro pudding dalam bab ‘Resep’. 2 Tekan tombol Dessert/Pudding (Gbr. 29). 3 Tekan tombol naik atau turun untuk memilih jenis puding yang ingin Anda buat. 4 Tekan tombol Cook/OK. , Petunjuk pertama akan muncul pada layar.
5 Tekan tombol Cook/OK untuk memulai proses memasak. Jika Anda tidak menekan tombol ini, proses memasak tidak akan dimulai.
Catatan: Anda tidak dapat mengubah waktu memasak untuk submenu Pudding. , Lampu Cook/OK akan menyala dan animasi memasak akan muncul pada layar. , Alat akan berbunyi bip dan tombol Cook/OK berkedip untuk menandakan saatnya Anda
harus menambahkan adonan tepung beras. Berhati-hatilah saat membuka tutupnya untuk menambahkan adonan tepung beras. Tutup dan uap yang keluar dari panci bagian dalam panas. 6 Tambahkan adonan tepung beras dan aduk hingga rata. Kemudian tekan tombol Cook/OK
untuk melanjutkan proses memasak. Jika Anda tidak menekan tombol ini, proses memasak tidak akan dimulai.
, Layar akan menghitung mundur waktu memasak dalam hitungan menit. , Di akhir proses memasak, alat akan berbunyi bip dan pesan ‘Done’ muncul pada layar.
7 Tekan tombol pelepas tutup untuk membuka tutupnya. 8 Tekan tombol Stop/Cancel untuk berpindah ke mode siaga atau cabutlah steker penanak nasi
untuk mematikannya.Cake
Menu Dessert/Pudding berisi 2 submenu untuk cake: cereal cake dan carrot cake.
1 Campurlah bahan untuk membuat adonan cake.Catatan: Ikuti petunjuk dalam resep cake dalam bab ‘Resep’. 2 Oleskan mentega pada panci bagian dalam. 3 Masukkan adonan cake pada panci bagian dalam. 4 Ikuti langkah 5 hingga 8 pada bagian ‘Memasak nasi’ dalam bab ini. 5 Tekan tombol Dessert/Pudding (Gbr. 29). 6 Tekan tombol naik atau turun untuk memilih jenis cake yang ingin Anda buat.
inDonEsia42

7 Tekan tombol Cook/OK. , Petunjuk pertama akan muncul pada layar.
8 Tekan tombol Cook/OK untuk memulai proses memasak. Jika Anda tidak menekan tombol ini, proses memasak akan dimulai secara otomatis setelah 10 detik.
Catatan: Anda tidak dapat mengubah waktu memasak untuk cake. , Lampu Cook/OK akan menyala dan animasi memasak akan muncul pada layar. , Layar akan menghitung mundur waktu memasak dalam hitungan menit. , Di akhir proses memasak, alat akan berbunyi bip dan pesan ‘Done’ ditampilkan pada layar.
9 Tekan tombol pelepas tutup untuk membuka tutupnya. 10 Tekan tombol Stop/Cancel untuk berpindah ke mode siaga atau cabutlah steker penanak nasi
untuk mematikannya.Mengukus
1 Letakkan baki kukusan di keranjang kukusan. Garis di baki kukusan harus menunjuk ke tanda di keranjang kukusan. (Gbr. 30)
2 Takar 3 cangkir air dengan gelas ukur dan tuangkan ke panci bagian dalam.Ini akan berlangsung kurang-lebih 8 menit untuk 3 cangkir air hingga mendidih.
Catatan: Jumlah air tergantung pada jumlah makanan yang akan dikukus. 3 Masukkan keranjang kukusan yang telah dipasangi baki kukusan pada panci bagian
dalam (Gbr. 31). 4 Letakkan makanan yang akan dikukus pada piring atau keranjang kukusan.Catatan: Untuk memastikan pengukusan yang merata, sebarkan makanan hingga merata dan jangan menumpuknya. 5 Ikuti langkah 5 hingga 8 pada bagian ‘Memasak nasi’ dalam bab ini. 6 Tekan tombol Steam untuk memilih menu Steam (Gbr. 32). , Petunjuk pertama akan muncul pada layar.
7 Tekan tombol Cook/OK. Jika Anda tidak menekan tombol ini, layar secara otomatis akan menampilkan waktu memasak setelah 30 detik.
, Waktu memasak default 30 menit akan muncul pada layar. 8 Untuk menyesuaikan waktu memasak, tekan tombol naik atau turun. Tekan dan tahan tombol
naik atau turun untuk memajukan atau memundurkan waktu dengan cepat.Anda dapat menyetel waktunya mulai 10 menit hingga 1 jam.
9 Tekan tombol Cook/OK untuk memulai proses memasak. , Lampu Cook/OK akan menyala dan animasi memasak akan muncul pada layar. , Layar akan menghitung mundur waktu memasak dalam hitungan menit. , Di akhir proses memasak, alat akan berbunyi bip dan pesan ‘Done’ muncul pada layar.
10 Tekan tombol pelepas tutup untuk membuka tutupnya. 11 Tekan tombol Stop/Cancel untuk berpindah ke mode siaga atau cabutlah steker penanak nasi
untuk mematikannya.Memanaskan Ulang
Anda dapat menggunakan mode reheat untuk menghangatkan nasi yang sudah dingin. Isilah panci bagian dalam dengan tidak melebihi setengah kapasitasnya untuk memastikan nasi dipanaskan dengan benar.
inDonEsia 43

Catatan: Jangan memanaskan ulang nasi dingin lebih dari sekali. 1 Aduk nasi dingin tersebut dan ratakan pada panci bagian dalam. 2 Tuangkan ½ cangkir air pada nasi agar tidak menjadi terlalu kering. Takaran air yang
ditambahkan tergantung pada takaran nasi yang akan dipanaskan.Jika nasi mulai gosong, tambah lagi airnya.
3 Ikuti langkah 5 hingga 8 pada bagian ‘Memasak nasi’ dalam bab ini. 4 Tekan tombol Keep warm/Reheat dua kali untuk memulai proses memanaskan
ulang. (Gbr. 33) , Lampu Keep warm/Reheat akan menyala dan animasi pemanasan ulang akan muncul pada
layar. (Gbr. 34)Catatan: Waktu memanaskan default adalah 23 menit. , Bila proses pemanasan ulang selesai, Anda akan mendengar bunyi bip dan pesan ‘Done’
ditampilkan pada layar. 5 Tekan tombol pelepas tutup untuk membuka tutupnya. 6 Tekan tombol Stop/Cancel untuk berpindah ke mode siaga atau cabutlah steker penanak nasi
untuk mematikannya.Menghangatkan
Mode keep-warm memungkinkan Anda menjaga nasi atau makanan tetap hangat untuk jangka waktu yang lebih lama.
Catatan: Kami sarankan Anda tidak menghangatkan nasi atau beras lebih dari 12 jam agar rasanya tidak hilang. 1 Tekan tombol Keep warm/Reheat sekali untuk mengaktifkan mode keep-warm (Gbr. 33). , Lampu Keep warm/Reheat akan terus menyala. , Selama proses menghangatkan, layar akan menampilkan waktu dalam jam, mulai 0 sampai 11
(0HR, 1HR ...11HR). , Setelah 12 jam, mode keep-wam secara otomatis berhenti dan penanak nasi berbunyi bip 10
kali. Layar akan beralih menampilkan waktu.Timer
Tabel di bawah ini menampilkan pilihan timer yang tersedia untuk beragam menu.
Menu Submenu Pilihan timer
Rice Plain 1 jam - 24 jam
Quick plain -
Small portion plain 1 jam - 24 jam
Glutinous 1 jam - 24 jam
Mixed 1 jam - 24 jam
Rice with soup -
Congee/Pasta Plain congee thick 1 jam - 24 jam
Plain congee thin 1 jam - 24 jam
Mixed grain congee 1 jam - 24 jam
Pasta -
inDonEsia44

Menu Submenu Pilihan timer
Soup/Stew Vegetable soup -
Long boil soup 1 jam - 12 jam
Stew 1 jam - 12 jam
Yoghurt Yoghurt -
Dessert/Pudding Green bean soup 1 jam - 12 jam
White raddish pudding -
Taro pudding -
Cereal cake -
Carrot cake -
Steam Steam 1 jam - 12 jam
Catatan: Beberapa menu memungkinkan Anda menyetel waktu memasak. Anda dapat menyetel timer maupun waktu memasak dalam menu-menu ini. Anda dapat menyetel timer terlebih dahulu kemudian waktu memasak, atau sebaliknya.
Menyetel waktu siap dengan tombol Preset/Clock 1 Tekan tombol Preset/Clock (Gbr. 4). , Lampu tombol menu yang tersedia akan menyala. (Gbr. 35)
2 Tekan tombol menu yang ingin Anda gunakan dan, jika perlu, pilih submenu yang diinginkan dengan tombol naik atau turun. Kemudian tekan tombol Cook/OK.
3 Untuk menyetel waktu siap, tekan tombol naik atau turun. Tekan dan tahan tombol naik atau turun untuk memajukan atau memundurkan waktu dengan cepat.
Catatan: Misalnya, Anda dapat menggunakan tombol Preset/Clock untuk menyetel waktu siap pada pukul 18:30 (Gbr. 36). 4 Tekan tombol Cook/OK untuk memulai timer. , Pesan ‘Saved’ akan muncul pada layar. , Lampu Cook/OK akan menyala dan teks ‘Timer set’ serta waktu siap preset untuk menu yang
dipilih akan muncul pada layar. , Saat proses memasak dimulai, animasi memasak dan sisa waktu memasak akan muncul pada
layar.Catatan: Jika waktu preset kurang dari total waktu memasak yang diperlukan untuk menu yang dipilih, penanak nasi akan memulai proses memasak dengan segera, dengan waktu memasak default. Waktu memasak tidak diperpendek jika waktu preset lebih singkat dari total waktu memasak yang diperlukan. Anda dapat menyesuaikan waktu memasak sebelum Anda menyetel timer jika waktu memasak untuk menu yang dipilih dapat disesuaikan.
Menyetel waktu siap dengan tombol-tombol menu 1 Tekan tombol menu yang ingin Anda gunakan dan, jika perlu, pilih submenu yang
diinginkan dengan tombol naik atau turun. Kemudian tekan tombol Preset/Clock.Catatan: Anda juga dapat menekan tombol preset di layar submenu, layar langkah-demi-langkah yang pertama atau layar waktu memasak.
inDonEsia 45

2 Untuk menyetel waktu siap, tekan tombol naik atau turun. Tekan dan tahan tombol naik atau turun untuk memajukan atau memundurkan waktu dengan cepat.
Catatan: Misalnya, Anda dapat menggunakan tombol Preset/Clock untuk menyetel waktu siap pada pukul 18:30. 3 Tekan tombol Cook/OK untuk memulai timer. , Lampu Cook/OK akan menyala dan teks ‘Timer set’ serta waktu siap preset untuk menu yang
dipilih akan muncul pada layar. , Saat proses memasak dimulai, animasi memasak dan sisa waktu memasak akan muncul pada
layar.
MembersihkanCabut steker penanak nasi sebelum membersihkannya.Tunggu sampai penanak nasi sudah cukup dingin sebelum membersihkannya. Untuk melindungi lapisan anti-lengket panci bagian dalam, jangan: - menggunakan panci bagian dalam untuk mencuci piring; - menuangkan cuka ke dalam panci.
1 Keluarkan keranjang kukusan bersama bakinya, panci yoghurt dan panci bagian dalam dari badan alat.
2 Lepaskan tutup bagian dalam dari tutup luar dengan menekan tab pelepas tutupnya dan tarik keluar dan ke bawah (Gbr. 37).
Untuk memasang kembali tutup dalamnya, masukkan ujung atas tutup bagian dalam ke tutup luar dan tekan kembali tab pelepas dengan kuat (hingga berbunyi ‘klik’).
3 Lepaskan tutup lubang uap dari tutup luar dengan menariknya ke atas (Gbr. 38). - Untuk melepas penutup bawah pada tutup lubang uap, tekan tab pengunci ke posisi buka dan
lepaskan tutupnya dari engsel. (Gbr. 39) - Untuk memasang kembali penutup bawah pada tutup lubang uap, masukkan pengarah penutup
bawah ke slot pada tutupnya, tekan penutup bawah pada tutupnya (1) dan tekan tab pengunci ke posisi tutup (2) (hingga berbunyi ‘klik’). (Gbr. 40)
- Untuk mengembalikan tutup lubang uap ke dalam lubang uap pada tutup luarnya, masukkan ke lubangnya dan tekan dengan kuat.
4 Bersihkan tutup bagian dalam, panci bagian dalam, keranjang kukusan bersama bakinya, panci yoghurt, sendok nasi dan tutup lubang uap dengan spons atau kain yang dibasahi air panas serta cairan pembersih.
Jangan menggunakan bahan pembersih abrasif, sabut gosok atau perkakas logam untuk membersihkan panci bagian dalam karena merusak lapisan anti-lengketnya. 5 Gunakan kain lembab saja untuk menyeka bagian dalam dan bagian luar penanak nasi. Jangan merendam badan penanak nasi di dalam air, atau membilasnya di bawah keran.
Penyimpanan 1 Anda dapat menyimpan semua aksesori di dalam alat dengan cara berikut: (Gbr. 41) - Taruh baki kukusan pada panci bagian dalam. - Masukkan panci yoghurt pada panci bagian dalam. - Masukkan baki kukusan pada panci bagian dalam.
2 Simpan alat di tempat yang aman dan kering.
inDonEsia46

lingkungan - Jangan membuang alat bersama limbah rumah tangga biasa jika alat sudah tidak dapat dipakai lagi,
tetapi serahkan ke tempat pengumpulan barang bekas yang resmi untuk didaur ulang. Dengan melakukan hal ini, Anda ikut membantu melestarikan lingkungan (Gbr. 42).
garansi dan servisJika Anda membutuhkan servis atau informasi atau mengalami masalah, harap kunjungi situs web Philips di www.philips.com atau hubungi Pusat Layanan Konsumen Philips di negara Anda (Anda dapat menemukan nomor teleponnya dalam leaflet garansi internasional). Jika tidak ada Pusat Layanan Konsumen di negara Anda, kunjungi dealer Philips setempat.
Pemecahan MasalahJika penanak nasi tidak berfungsi dengan benar atau jika kualitas masakan kurang baik, lihat tabel di bawah. Jika Anda tidak dapat mengatasi masalah, harap hubungi Pusat Layanan Konsumen Philips di negara Anda.
Masalah Kemungkinan penyebab Solusi
Lampu tombol Cook/OK tidak menyala.
Ada masalah sambungan. Periksa apakah kabel listrik sudah terhubung ke penanak nasi dengan benar dan apakah steker sudah dimasukkan dengan benar ke stopkontak dinding.
Lampu rusak. Bawalah alat ke dealer Philips Anda atau ke pusat layanan resmi Philips.
Lampu Keep warm/Reheat tidak menyala saat proses memasak selesai.
Lampu rusak. Bawalah alat ke dealer Philips Anda atau ke pusat layanan resmi Philips.
Anda memanaskan ulang makanan, memanggang cake, membuat yoghurt, memasak nasi dengan sup, memasak pasta atau mengukus makanan.
Mode keep-warm otomatis hanya digunakan untuk menu-menu nasi, bubur, sup, setup dan makanan pencuci mulut.
Layar tidak berfungsi. Steker alat tidak dimasukkan.
Jika steker alat belum dimasukkan, fungsi cadangan listrik mati tidak akan bekerja dan layar tidak akan berfungsi.
Nasi tidak matang. Air yang ditambahkan kurang banyak.
Tambahkan air sesuai skala pada panci bagian dalam (lihat bab ‘Menggunakan alat’).
Proses memasak belum dimulai.
Anda tidak menekan tombol Cook/OK.
Panci bagian dalam tidak menyentuh elemen pemanas dengan benar.
Pastikan tidak ada benda asing pada elemen pemanas.
Elemen pemanas rusak. Bawalah alat ke dealer Philips Anda atau ke pusat layanan resmi Philips.
inDonEsia 47

Masalah Kemungkinan penyebab Solusi
Panci bagian dalam rusak. Bawalah panci bagian dalam ke dealer Philips Anda atau ke pusat layanan resmi Philips.
Cake tidak matang dengan benar.
Takaran bahan terlalu banyak.
Periksa takaran yang disebutkan dalam resep cake dalam bab ‘Resep’.
Nasi terlalu keras atau terlalu lembek.
Air yang ditambahkan kurang banyak atau terlalu banyak.
Tambahkan air sesuai skala pada panci bagian dalam (lihat bab ‘Menggunakan alat’).
Anda memilih menu yang salah.
Pilih menu yang diperlukan (lihat bab ‘Menggunakan alat’).
Ada gumpalan tepung dalam puding.
Anda belum mencampur bahan untuk puding dengan benar.
Setelah menuangkan adonan tepung, aduklah adonan dengan baik hingga halus.
Lampu Preset/Clock tidak menyala bila saya menyetel timer.
Lampu rusak. Bawalah alat ke dealer Philips Anda atau ke pusat layanan resmi Philips.
Nasi gosong. Anda belum mencuci beras dengan benar.
Cucilah beras hingga airnya benar-benar tiris.
Penanak nasi tidak secara otomatis beralih ke mode keep-warm.
Anda memanaskan ulang makanan, memanggang cake, memasak nasi dengan sup, memasak pasta atau mengukus makanan.
Mode keep-warm otomatis hanya digunakan untuk menu-menu nasi, bubur, sup, rebusan dan makanan pencuci mulut.
Kontrol suhu rusak. Bawalah alat ke dealer Philips Anda atau ke pusat layanan resmi Philips.
Yoghurt tidak cukup kental atau tidak jadi sama sekali.
Anda menghangatkan susu hingga melebihi 40 °C, yang menghancurkan bakteri dalam biakan yoghurt.
Jangan hangatkan susu terlalu lama untuk menjaga bakteri tetap hidup dalam biakan yoghurt. Agar yoghurt lebih halus dan lebih kental, Anda dapat menambahkan 60 g susu bubuk pada susu kemudian hangatkan.
Pesan kesalahan E5 akan muncul pada layar.
Listrik mati sewaktu memasak atau saat dalam mode keep-warm yang berlangsung lebih dari 2 jam.
Saat listrik mengalir kembali, tekan tombol Stop/Cancel untuk mereset alat.
inDonEsia48

ResepPasta
Sajikan untuk 3-4 orangBahan-bahan: - 250 g pasta (penne atau makaroni) - 500 ml saus pasta - 700 ml air
1 Masukkan pasta dan saus pasta pada panci bagian dalam dan tambahkan air hingga batas air untuk pasta. Tekan tombol Congee/Pasta dan pilih submenu Pasta. Setel waktu memasak hingga 20 menit untuk makaroni atau 30 menit untuk penne. Kemudian tekan tombol Cook/OK untuk memasak.
2 Bila proses memasak pasta telah selesai, taburkan lada atau keju di atas nya dan sajikan pasta selagi panas. Yoghurt
Sajikan untuk 4 orangBahan-bahan: - 500 ml susu - 100 ml yoghurt segar biasa
1 Simpan yoghurt dalam suhu kamar beberapa menit sebelum memasak untuk menghangatkan biakan yoghurt. Hangatkan susu hingga sekitar 40 °C. Campurlah yoghurt dengan susu hangat dengan cepat dalam panci besar terpisah dan tuangkan campuran tersebut ke masing-masing panci yoghurt. Tutupi panci tersebut dengan tutupnya.
Catatan: Hanya butuh waktu beberapa detik untuk menghangatkan susu hingga 40 °C. Jika susu mencapai suhu yang terlalu tinggi, bakteri yang ada dalam yoghurt akan mati. 2 Masukkan baki kukusan pada panci bagian dalam. Tambahkan air hingga tanda batas untuk
yoghurt. Kemudian letakkan cangkir-cangkirnya pada baki kukusan. 3 Tekan tombol Yoghurt. Setel waktu memasak hingga 3 jam. Kemudian tekan tombol Cook/OK
untuk memasak.Catatan: Jika Anda ingin rasa lebih asam, Anda dapat menyetel waktu memasak lebih lama. 4 Bila proses memasak yoghurt telah selesai, tambahkan sedikit buah-buahan atau madu pada
yoghurt lalu sajikan. Atau Anda dapat membiarkan yoghurt dingin sendiri dan masukkan ke kulkas semalaman kemudian sajikan selagi dingin. Tip
Agar yoghurt lebih halus dan lebih kental, Anda dapat menambahkan 60 g susu bubuk pada susu kemudian hangatkan. Kemudian ikuti langkah-langkah di atas.
Carrot cake Sajikan untuk 3-4 orangBahan-bahan: - 250 ml minyak sayur - 4 butir telur yang besar - 50 g gula pasir - 225 g tepung serbaguna - 2 sendok makan baking powder - ½ sendok teh (2 g) soda kue - sejumput garam
inDonEsia 49
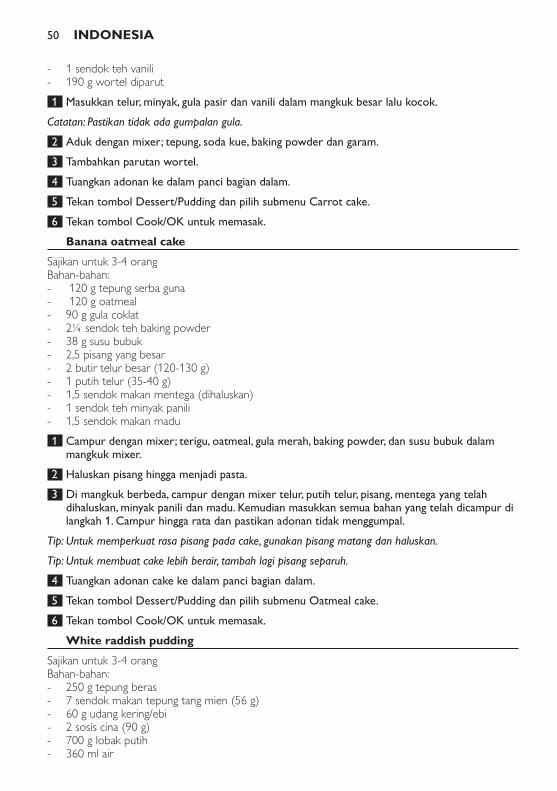
- 1 sendok teh vanili - 190 g wortel diparut
1 Masukkan telur, minyak, gula pasir dan vanili dalam mangkuk besar lalu kocok.Catatan: Pastikan tidak ada gumpalan gula. 2 Aduk dengan mixer; tepung, soda kue, baking powder dan garam. 3 Tambahkan parutan wortel. 4 Tuangkan adonan ke dalam panci bagian dalam. 5 Tekan tombol Dessert/Pudding dan pilih submenu Carrot cake. 6 Tekan tombol Cook/OK untuk memasak.
Banana oatmeal cakeSajikan untuk 3-4 orangBahan-bahan: - 120 g tepung serba guna - 120 g oatmeal - 90 g gula coklat - 2¼ sendok teh baking powder - 38 g susu bubuk - 2,5 pisang yang besar - 2 butir telur besar (120-130 g) - 1 putih telur (35-40 g) - 1,5 sendok makan mentega (dihaluskan) - 1 sendok teh minyak panili - 1,5 sendok makan madu
1 Campur dengan mixer; terigu, oatmeal, gula merah, baking powder, dan susu bubuk dalam mangkuk mixer.
2 Haluskan pisang hingga menjadi pasta. 3 Di mangkuk berbeda, campur dengan mixer telur, putih telur, pisang, mentega yang telah
dihaluskan, minyak panili dan madu. Kemudian masukkan semua bahan yang telah dicampur di langkah 1. Campur hingga rata dan pastikan adonan tidak menggumpal.
Tip: Untuk memperkuat rasa pisang pada cake, gunakan pisang matang dan haluskan. Tip: Untuk membuat cake lebih berair, tambah lagi pisang separuh. 4 Tuangkan adonan cake ke dalam panci bagian dalam. 5 Tekan tombol Dessert/Pudding dan pilih submenu Oatmeal cake. 6 Tekan tombol Cook/OK untuk memasak.
White raddish puddingSajikan untuk 3-4 orangBahan-bahan: - 250 g tepung beras - 7 sendok makan tepung tang mien (56 g) - 60 g udang kering/ebi - 2 sosis cina (90 g) - 700 g lobak putih - 360 ml air
inDonEsia50

Bumbu penyedap: - 2 sendok makan kaldu ayam bubuk - 2 sendok makan gula pasir - 1 sendok teh lada putih
1 Campurlah tepung beras dan tepung tang mien dengan 360 ml air dalam mangkuk dan sisihkan.
2 Iris-iris lobak putih. 3 Potong kecil sosis Cina. 4 Tekan tombol Desert/Pudding dan pilih submenu White radish pudding. 5 Masukkan sosis Cina, udang kering/ebi dan irisan lobak putih pada panci bagian dalam. Tekan
tombol Cook/OK untuk memasak selama 20 menit.Tip: Untuk menambah rasa, sangrai bahan di panci bagian dalam selama 5 menit setelah Anda menekan tombol Cook/OK kemudian rapatkan tutupnya. 6 Bila penanak nasi berbunyi bip, aduklah bumbu penyedap ke dalam adonan lobak putih dan
tuangkan sedikit demi sedikit campuran tepung ke panci bagian dalam. Aduk lagi.Tip: Tuangkan adonan tepung dalam 3 takaran. Setelah menuang setiap takar, aduklah agar tidak menggumpal. 7 Tekan tombol Cook/OK untuk melanjutkan memasak. Tip: Anda dapat menyajikan puding selagi panas, atau membiarkannya dingin dulu di kulkas kemudian digoreng.
Taro puddingSajikan untuk 3-4 orangBahan-bahan: - 400 g talas - 150 g tepung beras - 100 g tepung maizena - 2 sosis Cina (90 g) - 60 g udang kering/ebi - 700 ml air
Bumbu penyedap 1: - 1 sendok makan air - ½ sendok makan kecap - 1½ sendok teh kaldu ayam bubuk - ¼ sendok teh allspice (bubuk kari) - ½ sendok teh garam - ¼ sendok teh lada putih
Bumbu penyedap 1: - ½ sendok teh kecap - ¼ sendok teh gula pasir - ½ sendok makan arak shaoxing
1 Campur tepung beras dan tepung maizena dengan 250 ml air dalam mangkuk pencampuran dan sisihkan.
2 Potong dadu talas berukuran 1,2 cm dan campurkan dengan bumbu penyedap 1. 3 Potong kecil sosis Cina dan campurkan dengan bumbu penyedap 2. 4 Tekan tombol Desert/Pudding dan pilih submenu Taro pudding.
inDonEsia 51

5 Masukkan sosis Cina, udang kering/ebi, talas dan 450 ml air pada panci bagian dalam. Tekan tombol Cook/OK untuk memasak selama 20 menit.
Tip: Untuk menambah rasa, sangrai bahan di panci bagian dalam selama 5 menit setelah Anda menekan tombol Cook/OK kemudian rapatkan tutupnya. 6 Bila penanak nasi berbunyi bip, bukalah tutupnya dan haluskan talas hingga menjadi pasta. Aduk
lagi adonan tepung dan tuangkan ke panci bagian dalam sedikit demi sedikit. Aduk lagi.Tip: Tuangkan adonan tepung dalam 3 takaran. Setelah menuang setiap takar, aduklah agar tidak menggumpal. 7 Tekan tombol Cook/OK untuk melanjutkan memasak. Tip: Anda dapat menyajikan puding selagi panas, atau membiarkannya dingin dulu di kulkas kemudian digoreng.
inDonEsia52

53
บทนำา
ขอแสดงความยนดทคณสงซอและยนดตอนรบสผลตภณฑของ Philips! เพอใหคณไดรบประโยชนอยางเตมทจากบรการท Philips มอบให โปรดลงทะเบยนผลตภณฑของคณท www.philips.com/welcome
สวนประกอบ (รปท 1)
a ถวยตวงB ทพพตกซปC ทพพตกขาว D ขดแสดงระดบนE หมอในทมดามจบF ฝาดานในทถอดออกได g หวงยางกนรวซมH แผนทำาความรอน i เซนเซอรอณหภม J ปมควบคมK หนาจอแสดงผลl ปม Up และ DownM ตวหมอn ปลกไฟo สายไฟถอดออกได P ชองสำาหรบเสยบQ ปมปลดลอคฝาปด R ขายดชองสำาหรบใสทพพs ชองสำาหรบใสทพพT ฝาดานนอกU ฝาปดชองไอนถอดออกไดV ดามจบหมอหงขาวW ตะแกรงสำาหรบนงอาหารX ถาดสำาหรบนงอาหารถอดออกไดY หมอโยเกรต
ขอควรจำา
ควรอานคมออยางละเอยดกอนใชงานและเกบไวเพอใชอางองในครงตอไป
อนตราย - หามจมหมอหงขาวลงในนและหามเปดนกอกลางเปนอนขาด
คำาเตอน - กอนใชงานโปรดตรวจสอบแรงดนไฟทระบบนผลตภณฑวาตรงกบแรงดนไฟทใชภายในบานหรอไม - เสยบปลกไฟหมอหงขาวเขากบเตารบบนผนงทตอสายดนไวเรยบรอยแลว จากนนตรวจดใหแนใจอกครงวาเสยบปลกไฟเขากบเตารบบนผนงเรยบรอยแลวหรอไม - หามใชหมอหงขาว หากปลกไฟ สายไฟ หมอในหรอตวเครองชำารด - หากสายไฟชำารด ควรนำาไปเปลยนทบรษทฟลปส หรอศนยบรการทไดรบอนญาตจากฟลปส หรอบคคลทผานการอบรมจากฟลปสดำาเนนการเปลยนให เพอหลก
เลยงอนตรายทอาจเกดขนได - ไมควรใหบคคล (รวมทงเดกเลก) ทมสภาพรางกายไมแขงแรงหรอสภาพจตใจไมปกต หรอขาดประสบการณและความรความเขาใจ นำาผลตภณฑนไปใชงาน
เวนแตจะอยในการควบคมดแลหรอไดรบคำาแนะนำาในการใชงานโดยผทรบผดชอบในดานความปลอดภย - เดกเลกควรไดรบการดแลเพอปองกนไมใหเดกนำาผลตภณฑนไปเลน - ควรเกบสายไฟใหพนมอเดก ไมควรปลอยใหสายไฟหอยลงมาจากขอบโตะหรอบรเวณทวางผลตภณฑนอย - ตรวจดใหแนใจวาชนสวนทำาความรอน เซนเซอรอณหภมและดานนอกของหมอในสะอาดและแหงกอนเสยบปลกไฟเขากบเตารบบนผนง - หามใชงานหมอหงขาว หากซลยางกนรวซมชำารด - ไมควรใชมอเปยกเสยบปลกไฟเครองหรอกดปมควบคมใดๆ ท หนาจอควบคม - หามตอหมอหงขาวกบเครองตงเวลาภายนอก เพอหลกเลยงอนตรายรายแรงทอาจเกดขน
ภาษาไทย

ขอควรระวง - หามใชอปกรณเสรม หรอชนสวนทผลตโดยผผลตรายอน หรอบรษททฟลปสไมไดแนะนำา การรบประกนจะเปนโมฆะทนท หากคณใชอปกรณเสรม หรอชนสวน
ดงกลาว - ใชทพพตกขาวทใหมาเทานน ไมควรใชอปกรณอนๆ ทมความคม - ไมควรวางหมอหงขาวลงบนบรเวณทมอณหภมสง หรอวางบนเตาไฟหรอเครองหงตมทกำาลงใชงานหรอทมความรอน - ใสหมอในทกครงกอนเสยบปลกไฟเขากบเตารบบนผนงและเปดสวตชหมอหงขาว - ถอดปลกไฟหมอหงขาวออกทกครงหากไมใชงานเปนเวลานาน - ปลอยใหหมอหงขาวเยนลงทกครงกอนทำาความสะอาดหรอเคลอนยาย - หามตงหมอในไวบนเตาไฟเพอหงขาวโดยตรง - หากนำาเครองไปใชในทางไมเหมาะสม นำาไปใชในการคาหรอกงการคา หรอใชโดยไมปฏบตตามคำาแนะนำาการใชงานในคมอน การรบประกนจะถอเปนโมฆะ
และ Philips จะไมรบผดชอบคาเสยหายใดๆ ทงสน - ตวเครองเหมาะสำาหรบใชงานภายในครวเรอนและการใชงานทมวตถประสงคคลายคลงกน
- ภายในหองครวในราน สำานกงาน และสภาวะแวดลอมการทำางานอนๆ - บานพกในฟารม; - ใชงานภายในโรงแรม โมเตลและสภาวะแวดลอมทอยอาศยอน - สภาวะแวดลอมประเภททพก
- วางหมอหงขาวไวบนพนผวทเรยบและมนคง - ขณะทหมอหงขาวกำาลงทำางานอย บรเวณรอบๆ พนทวางหมอหงขาวอาจจะมความรอน สมผสไดเฉพาะบรเวณหนาจอควบคมเทานน - ควรระวงไอนพงออกจากชองระบายในระหวางหงขาวหรอเมอเปดฝาหมอหงขาว - หามยกและเคลอนยายหมอหงขาวโดยดงดามจบขณะหมอหงขาวทำางาน - ใหระมดระวงเมอจบถอหมอในและตะแกรงสำาหรบนงอาหารหลงการใชงานเนองจากอาจรอนและหนก - ไมควรปลอยใหหมอหงขาวโดนแสงแดด - หามแหยวตถททำาดวยโลหะและวสดแปลกปลอมเขาไปในชองระบายไอน - หามวางวตถทเปนแมเหลกบนฝา และหามใชงานหมอหงขาวใกลกบวตถทเปนแมเหลก - หามใช หมอในหากมรปทรงบดเบยว - อยาเตมนเกนขดระดบสงสดทระบไวทหมอในเพอปองกนการลน - หามใสทพพตกขาวภายในหมอขณะหงหรออนขาว - ทำาความสะอาดเครองหลงใชงานทกครง - หามทำาความสะอาดหมอหงขาวดวยเครองลางจาน
Electromagnetic fields (EMF)ผลตภณฑของฟลปสไดมาตรฐานดานคลนแมเหลกไฟฟา (EMF) หากมการใชงานอยางเหมาะสมและสอดคลองกบคำาแนะนำาในคมอน คณสามารถใชผลตภณฑไดอยางปลอดภยตามขอพสจนทางวทยาศาสตรในปจจบน
ฟงกชนสำารอง ไฟฟาหมอหงขาวมฟงกชนสำารองไฟฟาทจำาสถานะ กอนไฟฟาดบ โดยสามารถจายไฟฟาสำารองไดนานถง 2 ชวโมง หากไฟฟาดบขณะการทำาอาหาร เวลาในการหงเรมนบถอยหลงตอภายหลงทไฟฟาตดแลว หากไฟฟาดบนานกวา 2 ชวโมง หรอไฟฟาดบขณะหงขาว หมอหงขาว จะรเซตเปนโหมดสแตนดบายโดยอตโนมตเมอไฟฟาตด ใหเปดหมอหงขาวเพอนำาสงตางๆ ออก แลวเรมทำาใหมอกครงหากคณตงเวลาและตงคาการหงขาวไวลวงหนา เมอไฟฟาดบ ขนตอนการหงขาว จะเรมขนเมอไฟฟาตด ขนตอนการหงขาวจะเรมภายใน 12 ชวโมง
การเตรยมตวกอนใชงาน
กอนใชงานครงแรก
1 ลอกแผนรองระหวางหมอในและแผนทำาความรอนออกกอน
2 ควรทำาความสะอาดสวนตางๆ ของหมอหงขาวใหเรยบรอยกอนการใชงานครงแรก (ดหวขอ ‘การทำาความสะอาด’)
3 เชดสวนตางๆ ใหแหงกอนเรมใชหมอหงขาว
4 ตดชองสำาหรบใสทพพเขากบหมอหงขาว (รปท 2)
แผงควบคมและหนาจอ
แผงควบคมม 12 ปมทใชในการควบคมหมอหงขาว หนาจอแสดงขอมลของขนตอนทเลอก ไฟหนาจอจะสวางขนเมอคณกดปมเพอใหคณดขอมลบนหนาจอไดชดเจนขน
ภาษาไทย54

หมายเหต: เมอหมอหงขาวกำาลงหงหรออนใหความรอน ไฟหนาจอจะดบ หลงจาก 10 นาท - แผงควบคมและหนาจอ (รปท 3)
ปม Up และ Downคณสามารถใชปม Up และ Down ดานลางหนาจอเพอเลอกเมนทตองการ และปรบ การตงคาตางๆ (นาฬกา ตวตงเวลา และเวลาทใชหง)
ปมเมน/ควบคมมปมควบคม 4 ปมทดานบนสดของแผงควบคม และ 6 ปมทดานลางของแผงควบคมปมกะพรบแสดงวาสามารถกดปมนเพอทำาขนตอนถดไป สามารถใชปม Stop/Cancel (หยด/ยกเลก) เพอหยดการทำาอาหารหรอเวลาทตงไว นอกจากนยงสามารถใชปมนเปนปม ยกเลกเมอไดตงโปรแกรมหงไว เพอกลบไปยงหนาจอกอนหนาน
เมน บางเมนมเมนยอย เมอกดปมเมนเหลาน เมนยอยจะปรากฏบนหนาจอ หากเมนไมมเมนยอย ขนตอนแรกในการหงขาวจะปรากฏบนหนาจอ บางเมน ขอความและสญลกษณจะแสดงบนหนาจอควบคมเพอใหคำาแนะนำาในการปรงอาหารในแตละขนตอน
การตงเวลา
หมายเหต: เวลาในการประกอบอาหารขณะททำาการประกอบอาหารหรอขณะทอยในโหมดอนเกบความรอนไมสามารถปรบเปลยนได
1 เสยบปลกไฟเขากบเตารบบนผนงและกดสวตชหลกเปด , หนาจอแสดงขอความทกทาย (‘Good morning’, ‘Good afternoon’ หรอ ‘Good evening’ [‘อรณสวสด’, ‘สวสดตอนบาย’ หรอ ‘สวสดตอนเยน’])
2 กดปม Preset/Clock (ตงคาลวงหนา/นาฬกา) สองครง (รปท 4)
3 กดปม Up หรอ Down เพอเลอก ‘Clock setting’ (การตงคานาฬกา) (รปท 5)
4 กดปม Cook/OK (รปท 6)
5 กดปม Up หรอ Down เพอตงนาฬกา (รปแบบ 24 ชวโมง) กดปม Up หรอ Down คางไวเพอเลอนเวลาไปขางหนาหรอถอยหลงอยางรวดเรว (รปท 7)
6 กดปม Cook/OK เพอยนยนเวลา (รปท 6)
หมายเหต: กดปม Stop/Cancel เพอยกเลกการเปลยนแปลง , หนาจอแสดง ขอความ ‘Saved’ (บนทกแลว) เวลาหยดกะพรบและหนาจอจะแสดงเวลาทตงไว (รปท 8)
หมายเหต: หากไมกดปม Cook/OK ภายใน 30 วนาท เวลาทตงไวจะไดรบการยนยนการตงคาอยางอตโนมต
หมายเหต: หนาจอแสดงเวลาเมอเสยบปลกหมอหงขาวเขากบเตารบผนง
การตงคาแสดงภาษา
มภาษาใหเลอก 3 ภาษา คอ จนไตหวน จนแผนดนใหญ หรอภาษาองกฤษ
1 กดปม Preset/Clock (ตงคาลวงหนา/นาฬกา) สองครง (รปท 4)
2 กดปม Up หรอ Down เพอเลอก ‘Clock setting’ (การตงคาภาษา) (รปท 9)
3 กดปม Cook/OK (รปท 6)
4 กดปม Up หรอ Down เพอเลอกภาษาทตองการ (จนไตหวน จนแผนดนใหญหรอภาษาองกฤษ) (รปท 10)
5 กดปม Cook/OK เพอยนยนการตงคาภาษา (รปท 6)
หมายเหต: กดปม Stop/Cancel เพอยกเลกการเปลยนแปลง , หนาจอแสดงขอความ ‘Saved’ (บนทกแลว) (รปท 8)
การใชงาน
รายการเมนของหมอหงขาว 20 เมน
เมน เมนยอย
ขาว เปลา
ภาษาไทย 55

เมน เมนยอย
ธรรมดาอยางเรว
ธรรมดาปรมาณนอย
ขาวเหนยว
ผสม
ขาวพรอมซป
โจก/พาสตา โจกขนไมใสเครอง
โจกเหลวไมใสเครอง
โจกธญพชรวม
พาสตา
ซป/ตน ซปผก
Stew (ตน)
ซปแบบเคยวนาน
โยเกรต โยเกรต
อาหารหวาน/พดดง ซปถวเขยว
เคกซเรยล
เคกแครอท
พดดงหวไชเทา
พดดงเผอก
พลงไอน พลงไอน
คำาแนะนำาในการปรงอาหารในแตละขนตอน
ตารางดานลางแสดงขนตอนทตองทำาในแตละเมนยอยจำานวนทแสดงดานลางเกยวของกบจำานวนในตาราง และบอกสงทตองทำาตอไปขณะขนตอนการทำาอาหาร1 กดปม Cook/OK เพอเรมขนตอนการปรงอาหาร หากไมกดปมน ขนตอนการปรงอาหารจะเรมตนหลงจาก 10 วนาท2 กดปม Cook/OK เพอดำาเนนการปรงอาหารตอ หากไมกดปมนขนตอนการปรงอาหารจะดำาเนนการตออตโนมตหลงจาก 30 วนาท3 การทำาอาหารเรมตนหากกดปม Cook/OK4 กดปม Cook/OK หากไมกดปมน หนาจอจะแสดงเวลาทใชหงโดยอตโนมตหลงจาก 10 วนาท5 กดปม Cook/OK หากไมกดปมน หนาจอจะแสดงเวลาทใชหงโดยอตโนมตหลงจาก 30 วนาท
เมน เมนยอย ขนตอนกอนการทำาอาหาร เวลาทใชในการทำาอาหารสำาหรบขนทสอง
ขนตอนระหวางการทำาอาหาร ขนตอนหลงการทำาอาหาร
ขาว ขาวพรอมซป หงขาวขนแรก (1) ขนอยกบปรมาณขาวทหง เตมนซปอนและสวนผสมอนๆ (2)
โจก/พาสตา โจก ธญพชรวม เตมธญพชรวมและน (5)
พาสตา เตมพาสตา ซอสและน (5)
ซป/ตน ซปผก เตมนเพอทำานซป (4) ประมาณ 10-15 นาท เตมผก (2)
Stew (ตน) เตมน เนอสตวและสวนผสมอนๆ (4)
ซปแบบเคยวนาน เตมนและสวนผสมตางๆ(4)
ภาษาไทย56
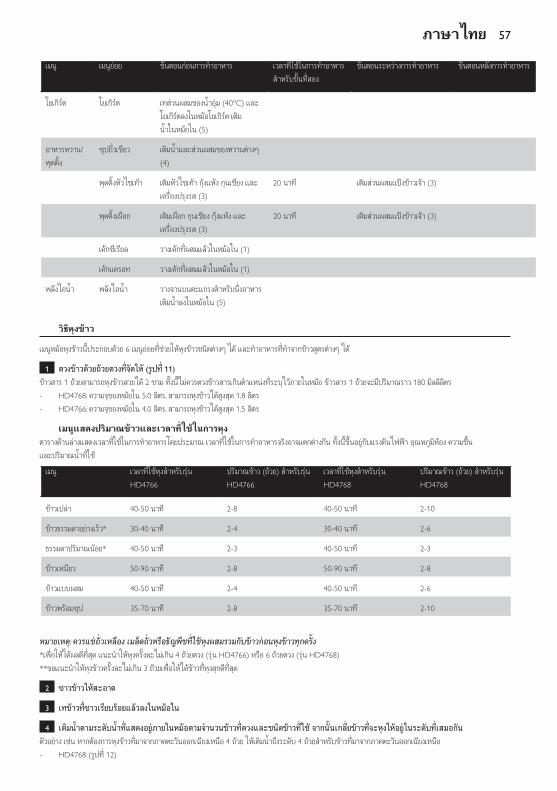
เมน เมนยอย ขนตอนกอนการทำาอาหาร เวลาทใชในการทำาอาหารสำาหรบขนทสอง
ขนตอนระหวางการทำาอาหาร ขนตอนหลงการทำาอาหาร
โยเกรต โยเกรต เทสวนผสมของนอม (40°C) และโยเกรตลงในหมอโยเกรต เตมนในหมอใน (5)
อาหารหวาน/พดดง
ซปถวเขยว เตมนและสวนผสมของหวานตางๆ (4)
พดดงหวไชเทา เตมหวไชเทา กงแหง กนเชยง และเครองปรงรส (3)
20 นาท เตมสวนผสมแปงขาวเจา (3)
พดดงเผอก เตมเผอก กนเชยง กงแหง และเครองปรงรส (3)
20 นาท เตมสวนผสมแปงขาวเจา (3)
เคกซเรยล วางเคกทผสมแลวในหมอใน (1)
เคกแครอท วางเคกทผสมแลวในหมอใน (1)
พลงไอน พลงไอน วางจานบนตะแกรงสำาหรบนงอาหาร เตมนลงในหมอใน (5)
วธหงขาว
เมนหมอหงขาวนประกอบดวย 6 เมนยอยทชวยใหหงขาวชนดตางๆ ได และทำาอาหารททำาจากขาวสตรตางๆ ได
1 ตวงขาวดวยถวยตวงทจดให (รปท 11)ขาวสาร 1 ถวยสามารถหงขาวสวยได 2 ชาม ทงนไมควรตวงขาวสารเกนตำาแหนงทระบไวภายในหมอ ขาวสาร 1 ถวยจะมปรมาณราว 180 มลลลตร - HD4768: ความจของหมอใน 5.0 ลตร, สามารถหงขาวไดสงสด 1.8 ลตร - HD4766: ความจของหมอใน 4.0 ลตร, สามารถหงขาวไดสงสด 1.5 ลตร
เมนแสดงปรมาณขาวและเวลาทใชในการหงตารางดานลางแสดงเวลาทใชในการทำาอาหารโดยประมาณ เวลาทใชในการทำาอาหารจรงอาจแตกตางกน ทงนขนอยกบแรงดนไฟฟา อณหภมหอง ความชน และปรมาณนทใช
เมน เวลาทใชหงสำาหรบรน HD4766
ปรมาณขาว (ถวย) สำาหรบรน HD4766
เวลาทใชหงสำาหรบรน HD4768
ปรมาณขาว (ถวย) สำาหรบรน HD4768
ขาวเปลา 40-50 นาท 2-8 40-50 นาท 2-10
ขาวธรรมดาอยางเรว* 30-40 นาท 2-4 30-40 นาท 2-6
ธรรมดาปรมาณนอย* 40-50 นาท 2-3 40-50 นาท 2-3
ขาวเหนยว 50-90 นาท 2-8 50-90 นาท 2-8
ขาวแบบผสม 40-50 นาท 2-4 40-50 นาท 2-6
ขาวพรอมซป 35-70 นาท 2-8 35-70 นาท 2-10
หมายเหต: ควรแชถวเหลอง เมลดถวหรอธญพชทใชหงผสมรวมกบขาวกอนหงขาวทกครง*เพอใหไดผลดทสด แนะนำาใหหงครงละไมเกน 4 ถวยตวง (รน HD4766) หรอ 6 ถวยตวง (รน HD4768)**ขอแนะนำาใหหงขาวครงละไมเกน 3 ถวยเพอใหไดขาวทหงสกดทสด
2 ซาวขาวใหสะอาด
3 เทขาวทซาวเรยบรอยแลวลงในหมอใน
4 เตมนตามระดบนทแสดงอยภายในหมอตามจำานวนขาวทตวงและชนดขาวทใช จากนนเกลยขาวทจะหงใหอยในระดบทเสมอกนตวอยาง เชน หากตองการหงขาวทมาจากภาคตะวนออกเฉยงเหนอ 4 ถวย ใหเตมนถงระดบ 4 ถวยสำาหรบขาวทมาจากภาคตะวนออกเฉยงเหนอ - HD4768 (รปท 12)
ภาษาไทย 57

- HD4766 (รปท 13)
หมายเหต: ระดบนทแสดงภายในหมอเปนการคาดคะเนเทานน สามารถเตมนไดตามความตองการหรอตามชนดของขาวทหง
5 กดปมคลายลอคเพอเปดฝา
6 วางหมอในลงในตวเครอง (รปท 14)ตรวจดใหแนใจวาวางหมอเขาทและดามจบมอยในแนวเดยวกนกบชองทอยตวหมอ
หมายเหต: ตรวจดใหแนใจวาชนสวนทำาความรอนและดานนอกของหมอในสะอาดและแหง
7 เสยบปลกไฟเขากบเตารบบนผนงและกดสวตชหลกเปด
8 ปดฝาหมอหงขาว
หามใชแรงกดปดฝาหมอ หากฝาหมอปดไมสนท ใหตรวจสอบวาวางหมอในในตำาแหนงทถกตองแลวหรอไม
9 กดปม Rice (ขาว) แลวกดปม Up หรอ Down เพอเลอกชนดขาว (รปท 15)
10 กดปม Cook/OK เพอเรมขนตอนการทำาอาหาร , ไฟ Cook/OK จะสวางและสญลกษณกำาลงปรงอาหารจะปรากฏบนหนาจอ (รปท 16) , หนาจอจะเรมนบถอยหลงเปนนาท (10, 9, 8 เปนตน) ในชวง 10 นาทสดทายกอนเสรจสนขนตอนการทำาอาหาร , เมอขาวสก จะมสญญาณดง และไฟ Keep warm/Reheat จะสวางขนเพอแสดงวาหมอหงขาวเปลยนเปนโหมดอน , หนาจอนบเวลาอนเปนชวโมง ( สงสด 12 ชวโมง)
11 กดปม Stop/Cancel เพอยกเลกโหมดอนเกบความรอน (รปท 17)หากตองการใหโหมดอนเกบความรอนทำางานตออก ใหกดปม Keep warm/Reheat (อน/อนรอน) อกครง
12 กดปมคลายลอคเพอเปดฝา (รปท 18)
13 คนขาวเพอใหไมเกาะกนแนนคนขาวเพอใหไอนสวนเกนระบายออก ซงจะทำาใหขาวฟยงขน
14 กดปม Stop/Cancel เพอไปยงโหมดสแตนดบายหรอถอดปลกหมอหงขาวออก
ขาวพรอมซป
1 ทำาตามขนตอนท 1 ถง 9 ในหวขอ ‘วธหงขาว’
2 กดปม Cook/OK เพอยนยนการตงคา (รปท 6) , คำาแนะนำาปรากฏบนหนาจอ
3 กดปม Cook/OK เพอเรมขนตอนการทำาอาหารหากคณไมกดปม Cook/OK อกครง ขนตอนการปรงอาหารจะเรมตนหลงจาก 10 วนาท , ไฟ Cook/OK สวางและสญลกษณกำาลงปรงอาหารปรากฏบนหนาจอ
4 หมอหงขาวสงเสยงบพและปม Cook/OK กะพรบ เพอแสดงถงเวลาทตองเตมสวนผสมอนๆ
5 เตมสวนผสมทแสดงบนหนาจอ แลวกดปม Cook/OK เพอดำาเนนการปรงอาหารตอหากคณไมกดปม Cook/OK อกครง ขนตอนการปรงอาหารจะเรมตนหลงจาก 30 วนาท , หนาจอจะเรมนบถอยหลงเปนนาท (10, 9, 8 เปนตน) ในชวง 10 นาทสดทายกอนเสรจสนขนตอนการทำาอาหาร , เมอเสรจสนการทำาอาหาร หมอหงขาวจะสงเสยงบพและและหนาจอจะปรากฏขอความ ‘Done’
6 กดปม Stop/Cancel หนงครงเพอยกเลกขนตอนการทำาอาหาร การตงคาลวงหนาหรอโหมดอนเกบความรอน
7 กดปม Stop/Cancel เพอไปยงโหมดสแตนดบายหรอถอดปลกหมอหงขาวออก
โจก
เมนโจก/พาสตา มเมนยอยสำาหรบโจก 3 เมน
เมน เวลาทใชหงสำาหรบรน HD4766
ปรมาณขาว (ถวย) สำาหรบรน HD4766
เวลาทใชหงสำาหรบรน HD4768
ปรมาณขาว (ถวย) สำาหรบรน HD4768
โจกขนไมใสเครอง 0.5-4 ชม. 0.5-2 0.5-4 ชม. 0.5-2.5
ภาษาไทย58

เมน เวลาทใชหงสำาหรบรน HD4766
ปรมาณขาว (ถวย) สำาหรบรน HD4766
เวลาทใชหงสำาหรบรน HD4768
ปรมาณขาว (ถวย) สำาหรบรน HD4768
โจกเหลวไมใสเครอง 0.5-4 ชม. 0.5-1 0.5-4 ชม. 0.5-1.5
โจกธญพชรวม 0.5-4 ชม. 0.5-2 0.5-4 ชม. 0.5-2.5
1 เตมสวนผสมและนลงในหมอใน
2 เตมน
ตรวจสอบใหแนใจวาสวนผสมทงหมดรวมถงนไมเกนระดบสงสดของขดแสดงระดบนสำาหรบพาสตาทดานในของหมอชนใน
- HD4768 (รปท 19) - HD4766 (รปท 20)
3 ทำาตามขนตอน 5 ถง 8 ในหวขอ ‘วธหงขาว’ ในบทน
4 กดปม Congee/Pasta (รปท 21)
5 กดปม Up หรอ Down เพอเลอกประเภทโจกทคณตองการทำา
6 กดปม Cook/OK , เวลาในการประกอบอาหารดฟอลต 1 ชวโมงจะปรากฏบนหนาจอ , หากคณเลอก ‘mixed grain congee’ (โจกธญพชรวม) คำาแนะนำาจะปรากฏบนหนาจอ
หมายเหต: หากคณเลอก ‘mixed grain congee’ (โจกธญพชรวม) และคณไมกดปม Cook/OK หนาจอจะแสดงเวลาทใชหงโดยอตโนมตหลงจาก 30 วนาท
7 กดปม Up หรอ Down เพอปรบเวลาทใชหง กดปม Up หรอ Down คางไวเพอเลอนเวลาไปขางหนาหรอถอยหลงอยางรวดเรวคณสามารถตงคาเวลาไดตงแตในชวงระหวาง 30 นาทถง 4 ชวโมง
เคลดลบ: ตงเวลา 30 นาท หากหงขาว 0.5 ถวย โดยใชหมอหงขาวรน HD4766 หรอ HD4768 ตงเวลา 4 ชวโมง หากหงขาว 2 ถวย โดยใชหมอหงขาวรน HD4766 หรอ 2.5 ถวย โดยใชหมอหงขาวรน HD4768
8 กดปม Cook/OK เพอเรมขนตอนการทำาอาหาร (รปท 6) , ไฟ Cook/OK สวางและสญลกษณกำาลงปรงอาหารปรากฏบนหนาจอ , หนาจอนบเวลาการปรงอาหารแบบนาทถอยหลง , เมอขาวสก จะมสญญาณดง และไฟ Keep warm/Reheat สวางขนเพอแสดงวาหมอหงขาวเปลยนไปเปนโหมดอนเกบความรอน , หนาจอนบเวลาอนเปนชวโมง ( สงสด 12 ชวโมง)
9 กดปม Stop/Cancel เพอยกเลกโหมดอนเกบความรอน
10 กดปมคลายลอคเพอเปดฝา
11 กดปม Stop/Cancel เพอไปยงโหมดสแตนดบายหรอถอดปลกหมอหงขาวออก
การประกอบอาหารในเมนตางๆ
ตารางดานลางแสดงเวลาเรมตนในการประกอบอาหาร และเวลาในการประกอบอาหารทปรบไดในเมนตางๆ
เวลาในการประกอบอาหารในเมนตางๆ
เมน เวลาในการประกอบอาหารดฟอลต ประสทธภาพสงสดสำาหรบเวลาในการประกอบอาหารดฟอลต
เวลาในการประกอบอาหารแบบปรบได
เวลาในการประกอบอาหารทใหประสทธภาพสงสด
พาสตา 30 นาท พาสตา 250 กรม 20-30 นาท 30 นาท
ซปผก 30 นาท เตมนซปใหถงตวแสดงระดบขาวธรรมดาระดบ 4
30 นาท -1 ชวโมง 30 นาท
1 ชวโมง 30 นาท
ซปแบบเคยวนาน 3 ชวโมง เตมนซปใหถงตวแสดงระดบขาวธรรมดาระดบ 8
2-4 ชม. 4 ชวโมง
ภาษาไทย 59
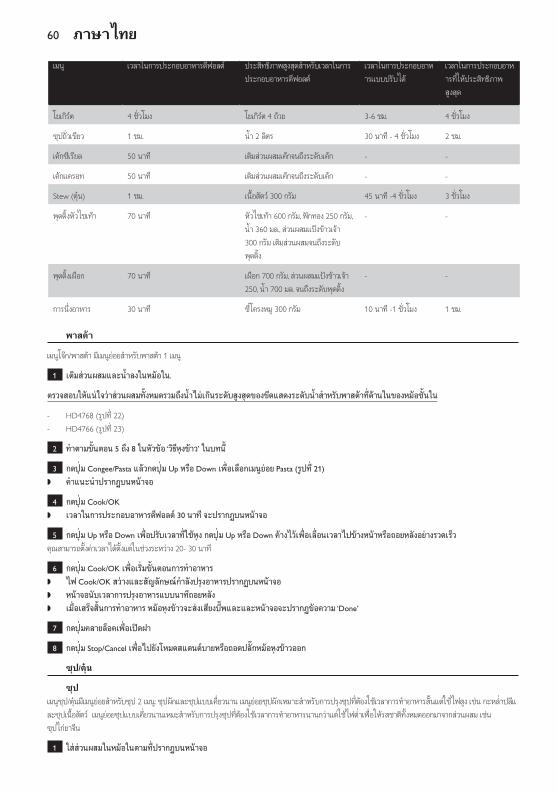
เมน เวลาในการประกอบอาหารดฟอลต ประสทธภาพสงสดสำาหรบเวลาในการประกอบอาหารดฟอลต
เวลาในการประกอบอาหารแบบปรบได
เวลาในการประกอบอาหารทใหประสทธภาพสงสด
โยเกรต 4 ชวโมง โยเกรต 4 ถวย 3-6 ชม. 4 ชวโมง
ซปถวเขยว 1 ชม. น 2 ลตร 30 นาท - 4 ชวโมง 2 ชม.
เคกซเรยล 50 นาท เตมสวนผสมเคกจนถงระดบเคก - -
เคกแครอท 50 นาท เตมสวนผสมเคกจนถงระดบเคก - -
Stew (ตน) 1 ชม. เนอสตว 300 กรม 45 นาท -4 ชวโมง 3 ชวโมง
พดดงหวไชเทา 70 นาท หวไชเทา 600 กรม, ฟกทอง 250 กรม, น 360 มล., สวนผสมแปงขาวเจา 300 กรม เตมสวนผสมจนถงระดบพดดง
- -
พดดงเผอก 70 นาท เผอก 700 กรม, สวนผสมแปงขาวเจา 250, น 700 มล. จนถงระดบพดดง
- -
การนงอาหาร 30 นาท ซโครงหม 300 กรม 10 นาท -1 ชวโมง 1 ชม.
พาสตา
เมนโจก/พาสตา มเมนยอยสำาหรบพาสตา 1 เมน
1 เตมสวนผสมและนลงในหมอใน.
ตรวจสอบใหแนใจวาสวนผสมทงหมดรวมถงนไมเกนระดบสงสดของขดแสดงระดบนสำาหรบพาสตาทดานในของหมอชนใน
- HD4768 (รปท 22) - HD4766 (รปท 23)
2 ทำาตามขนตอน 5 ถง 8 ในหวขอ ‘วธหงขาว’ ในบทน
3 กดปม Congee/Pasta แลวกดปม Up หรอ Down เพอเลอกเมนยอย Pasta (รปท 21) , คำาแนะนำาปรากฏบนหนาจอ
4 กดปม Cook/OK , เวลาในการประกอบอาหารดฟอลต 30 นาท จะปรากฏบนหนาจอ
5 กดปม Up หรอ Down เพอปรบเวลาทใชหง กดปม Up หรอ Down คางไวเพอเลอนเวลาไปขางหนาหรอถอยหลงอยางรวดเรวคณสามารถตงคาเวลาไดตงแตในชวงระหวาง 20- 30 นาท
6 กดปม Cook/OK เพอเรมขนตอนการทำาอาหาร , ไฟ Cook/OK สวางและสญลกษณกำาลงปรงอาหารปรากฏบนหนาจอ , หนาจอนบเวลาการปรงอาหารแบบนาทถอยหลง , เมอเสรจสนการทำาอาหาร หมอหงขาวจะสงเสยงบพและและหนาจอจะปรากฏขอความ ‘Done’
7 กดปมคลายลอคเพอเปดฝา
8 กดปม Stop/Cancel เพอไปยงโหมดสแตนดบายหรอถอดปลกหมอหงขาวออก
ซป/ตน
ซปเมนซป/ตนมเมนยอยสำาหรบซป 2 เมน: ซปผกและซปแบบเคยวนาน เมนยอยซปผกเหมาะสำาหรบการปรงซปทตองใชเวลาการทำาอาหารสนแตใชไฟสง เชน กะหลปลและซปเนอสตว เมนยอยซปแบบเคยวนานเหมะสำาหรบการปรงซปทตองใชเวลาการทำาอาหารนานกวาแตใชไฟตเพอใหรสชาตทงหมดออกมาจากสวนผสม เชน ซปไกยาจน
1 ใสสวนผสมในหมอในตามทปรากฏบนหนาจอ
ภาษาไทย60

หมายเหต: คณสามารถเตมผกสำาหรบซปผกไดในหมอในในขนตอนทสอง เพอใหสวนผสมนม
2 เตมน
ตรวจสอบใหแนใจวาสวนผสมทงหมดรวมถงนไมเกนระดบสงสดของขดแสดงระดบนสำาหรบซปทดานในของหมอชนใน
- HD4768 (รปท 22) - HD4766 (รปท 23)
3 ทำาตามขนตอน 5 ถง 8 ในหวขอ ‘วธหงขาว’ ในบทน
4 กดปม Soup/Stew (รปท 24)
5 กดปม Up หรอ Down เพอเลอกประเภทซปทคณตองการทำา
6 กดปม Cook/OK , คำาแนะนำาปรากฏบนหนาจอ
7 กดปม Cook/OK หากคณไมกดปมน หนาจอจะแสดงเวลาทใชปรงซปผกหรอซปแบบเคยวนานโดยอตโนมตหลงจาก 10 วนาท , เวลาในการประกอบอาหารดฟอลต (ซปผก 30 นาท และซปแบบเคยวนาน 3 ชวโมง) จะปรากฏบนหนาจอ
8 กดปม Up หรอ Down เพอปรบเวลาทใชหง กดปม Up หรอ Down คางไวเพอเลอนเวลาไปขางหนาหรอถอยหลงอยางรวดเรวคณสามารถตงเวลาไดตงแต 30 นาท ถง 1 ชวโมง 30 นาท สำาหรบซปผกและ 2 ถง 4 ชวโมง สำาหรบซปแบบเคยวนาน
9 กดปม Cook/OK เพอเรมขนตอนการทำาอาหาร , ไฟ Cook/OK สวางและสญลกษณกำาลงปรงอาหารปรากฏบนหนาจอ , หนาจอนบเวลาการปรงอาหารแบบนาทถอยหลง , สำาหรบซปผก หมอหงขาวสงเสยงบพ ไฟ Cook/OK จะกะพรบเพอแสดงวาคณตองทำาขนตอนถดไปทแสดงบนหนาจอ กดปม Cook/OK เพอดำาเ
นนการปรงอาหารตอ หากไมกดปมน ขนตอนการปรงอาหารจะเรมตนอตโนมตหลงจาก 30 วนาท , เมอเสรจสนการทำาอาหาร หมอหงขาวจะสงเสยงบพและและหนาจอจะปรากฏขอความ ‘Done’ , หนาจอนบเวลาอนเปนชวโมง ( สงสด 12 ชวโมง)
10 กดปม Stop/Cancel เพอยกเลกโหมดอนเกบความรอน
11 กดปมคลายลอคเพอเปดฝา
12 กดปม Stop/Cancel เพอไปยงโหมดสแตนดบายหรอถอดปลกหมอหงขาวออก
Stew (ตน)เมนซป/ตนมเมนยอยสำาหรบซป 1เมน
1 เตมสวนผสมและนลงในหมอใน
ตรวจสอบใหแนใจวาสวนผสมทงหมดรวมถงนไมเกนระดบสงสดของขดแสดงระดบนสำาหรบสตทดานในของหมอชนใน
2 เตมน ใหทวมสวนผสม ¾
3 ทำาตามขนตอน 5 ถง 8 ในหวขอ ‘วธหงขาว’ ในบทน
4 กดปม Soup/Stew (รปท 24)
5 กดปม Up หรอ Down เพอเลอกเมนยอย Stew
6 กดปม Cook/OK , คำาแนะนำาปรากฏบนหนาจอ
7 กดปม Cook/OK หากไมกดปมน หนาจอจะแสดงเวลาทใชหงโดยอตโนมตหลงจาก 10 วนาท , เวลาในการประกอบอาหารดฟอลต 1 ชวโมงจะปรากฏบนหนาจอ
8 กดปม Up หรอ Down เพอปรบเวลาทใชหง กดปม Up หรอ Down คางไวเพอเลอนเวลาไปขางหนาหรอถอยหลงอยางรวดเรวคณสามารถตงคาเวลาไดตงแต 45 นาทถง 3 ชวโมง
9 กดปม Cook/OK เพอเรมขนตอนการทำาอาหาร , ไฟ Cook/OK สวางและสญลกษณกำาลงปรงอาหารปรากฏบนหนาจอ , หนาจอนบเวลาการปรงอาหารแบบนาทถอยหลง
ภาษาไทย 61

, เมอเสรจสนการทำาอาหาร หมอหงขาวจะสงเสยงบพและและหนาจอจะปรากฏขอความ ‘Done’ , เมอขาวสก จะมสญญาณดง และไฟ Keep warm/Reheat สวางขนเพอแสดงวาหมอหงขาวเปลยนไปเปนโหมดอนเกบความรอน , หนาจอนบเวลาอนเปนชวโมง ( สงสด 12 ชวโมง)
10 กดปม Stop/Cancel เพอยกเลกโหมดอนเกบความรอน
11 กดปมคลายลอคเพอเปดฝา
12 กดปม Stop/Cancel เพอไปยงโหมดสแตนดบายหรอถอดปลกหมอหงขาวออก
โยเกรต
1 เทสวนผสมนมอนและโยเกรตลงในหมอโยเกรต
2 วางถาดสำาหรบนงอาหารลงในหมอใน (รปท 25)
3 เตมนลงในหมอใน (รปท 26)
ตรวจสอบใหแนใจวาสวนผสมทงหมดรวมถงนไมเกนระดบสงสดของขดแสดงระดบนสำาหรบโยเกรตทดานในของหมอชนใน
- HD4768 (รปท 22) - HD4766 (รปท 23)
4 วางหมอโยเกรตบนถาดสำาหรบนงอาหาร (รปท 27)
5 ทำาตามขนตอน 5 ถง 8 ในหวขอ ‘วธหงขาว’ ในบทน
6 กดปม Yoghurt (รปท 28)
7 กดปม Cook/OK , คำาแนะนำาปรากฏบนหนาจอ
8 กดปม Cook/OK หากไมกดปมน หนาจอจะแสดงเวลาทใชหงโดยอตโนมตหลงจาก 30 วนาท , เวลาในการประกอบอาหารดฟอลต 4 ชวโมงจะปรากฏบนหนาจอ
9 กดปม Up หรอ Down เพอปรบเวลาทใชหง กดปม Up หรอ Down คางไวเพอเลอนเวลาไปขางหนาหรอถอยหลงอยางรวดเรวคณสามารถตงคาเวลาไดตงแต 3 ถง 6 ชวโมง
10 กดปม Cook/OK เพอเรมขนตอนการทำาอาหาร , ไฟ Cook/OK สวางและสญลกษณกำาลงปรงอาหารปรากฏบนหนาจอ , หนาจอนบเวลาการปรงอาหารแบบนาทถอยหลง , เมอเสรจสนการทำาอาหาร หมอหงขาวจะสงเสยงบพและหนาจอจะปรากฏขอความ ‘Done’
11 กดปมคลายลอคเพอเปดฝา
12 กดปม Stop/Cancel เพอไปยงโหมดสแตนดบายหรอถอดปลกหมอหงขาวออก
อาหารหวาน/พดดง
เมนอาหารหวาน/พดดงมเมนยอยสำาหรบอาหารหวาน 1 เมน 2 เมนยอยสำาหรบพดดง และ 2 เมนยอยสำาหรบเคก
ซปถวเขยว
1 เตมสวนผสมและนลงในหมอใน
2 เตมน
ตรวจสอบใหแนใจวาสวนผสมทงหมดรวมถงนไมเกนระดบสงสดของขดแสดงระดบนสำาหรบของหวานทดานในของหมอชนใน
- HD4768 (รปท 22) - HD4766 (รปท 23)
3 ทำาตามขนตอน 5 ถง 8 ในหวขอ ‘วธหงขาว’ ในบทน
4 กดปม Dessert/Pudding (รปท 29)
5 กดปม Up หรอ Down เพอเลอก Green bean soup (ซปถวเขยว)
ภาษาไทย62

6 กดปม Cook/OK , คำาแนะนำาปรากฏบนหนาจอ
7 กดปม Cook/OK หากไมกดปมน หนาจอจะแสดงเวลาทใชหงโดยอตโนมตหลงจาก 10 วนาท , เวลาในการประกอบอาหารดฟอลต 1 ชวโมงจะปรากฏบนหนาจอ
8 กดปม Up หรอ Down เพอปรบเวลาทใชหง กดปม Up หรอ Down คางไวเพอเลอนเวลาไปขางหนาหรอถอยหลงอยางรวดเรวคณสามารถตงคาเวลาไดตงแตในชวงระหวาง 30 นาทถง 4 ชวโมง
9 กดปม Cook/OK เพอเรมขนตอนการทำาอาหาร , ไฟ Cook/OK สวางและสญลกษณกำาลงปรงอาหารปรากฏบนหนาจอ , หนาจอนบเวลาการปรงอาหารแบบนาทถอยหลง , เมอขาวสก จะมสญญาณดง และไฟ Keep warm/Reheat สวางขนเพอแสดงวาหมอหงขาวเปลยนไปเปนโหมดอนเกบความรอน , หนาจอนบเวลาอนเปนชวโมง ( สงสด 12 ชวโมง)
10 กดปม Stop/Cancel เพอยกเลกโหมดอนเกบความรอน
11 กดปมคลายลอคเพอเปดฝา
12 กดปม Stop/Cancel เพอไปยงโหมดสแตนดบายหรอถอดปลกหมอหงขาวออก
พดดงเมนอาหารหวาน/พดดงมเมนยอยสำาหรบพดดง 2 เมน คอ พดดงหวไชเทาและพดดงเผอก
1 เตมสวนผสมและนลงในหมอใน - พดดงหวไชเทา: ใสหวไชเทา กนเชยง กงแหง และเครองปรงรส ในหมอในและผสมใหเขากน - พดดงเผอก: ใสเผอก กนเชยง กงแหง และเครองปรงรส ในหมอในและผสมใหเขากน
ตรวจสอบใหแนใจวาสวนผสมทงหมดรวมถงนไมเกนระดบสงสดของขดแสดงระดบนสำาหรบพดดงทดานในของหมอชนใน
หมายเหต: ทำาตามคำาแนะนำาในสตรพดดงหวไชเทาหรอพดดงเผอกในบท ‘สตรอาหาร’
2 กดปม Dessert/Pudding (รปท 29)
3 กดปม Up หรอ Down เพอเลอกประเภทพดดงทตองการทำา
4 กดปม Cook/OK , คำาแนะนำาปรากฏบนหนาจอ
5 กดปม Cook/OK เพอเรมขนตอนการปรงอาหาร หากไมกดปมน ขนตอนการปรงอาหารจะไมเรมตน
หมายเหต: คณไมสามารถเปลยนเวลาในการทำาในเมนยอยพดดงได , ไฟ Cook/OK สวางและสญลกษณกำาลงปรงอาหารปรากฏบนหนาจอ , หมอหงขาวสงเสยงบพและปม Cook/OK กะพรบ เพอแสดงถงเวลาทตองใสขาวและสวนผสมแปงขาวเจา
ควรระมดระวงเมอเปดฝาเพอเตมสวนผสมแปงขาวเจาเพราะฝาและไอนทออกมาจากหมอในจะรอนมาก
6 เตมสวนผสมแปงขาวเจาและคนใหเขาให จากนนกดปม Cook/OK เพอปรงตอ หากไมกดปมน ขนตอนการปรงอาหารจะไมเรมตน , หนาจอนบเวลาการปรงอาหารแบบนาทถอยหลง , เมอเสรจสนการทำาอาหาร หมอหงขาวจะสงเสยงบพและและหนาจอจะปรากฏขอความ ‘Done’
7 กดปมคลายลอคเพอเปดฝา
8 กดปม Stop/Cancel เพอไปยงโหมดสแตนดบายหรอถอดปลกหมอหงขาวออก
เคกเมนอาหารหวาน/พดดงมเมนยอยสำาหรบเคก 2 เมน คอ เคกซเรยลและเคกแครอท
1 กวนสวนผสมเพอเตรยมสวนผสมเคก
หมายเหต: ทำาตามคำาแนะนำาในสตรเคกในบท ‘สตรอาหาร’
2 ทานมนทหมอใน
3 ใสสวนผสมเคกลงในหมอใน
ภาษาไทย 63

4 ทำาตามขนตอน 5 ถง 8 ในหวขอ ‘วธหงขาว’ ในบทน
5 กดปม Dessert/Pudding (รปท 29)
6 กดปม Up หรอ Down เพอเลอกประเภทเคกทตองการทำา
7 กดปม Cook/OK , คำาแนะนำาปรากฏบนหนาจอ
8 กดปม Cook/OK เพอเรมขนตอนการปรงอาหาร หากไมกดปมน ขนตอนการปรงอาหารจะเรมตนอตโนมตหลงจาก 10 วนาท
หมายเหต: เวลาในการประกอบอาหารสำาหรบเคกไมสามารถเปลยนได , ไฟ Cook/OK สวางและสญลกษณกำาลงปรงอาหารปรากฏบนหนาจอ , หนาจอนบเวลาการปรงอาหารแบบนาทถอยหลง , เมอเสรจสนการทำาอาหาร หมอหงขาวจะสงเสยงบพและหนาจอจะปรากฏขอความ ‘Done’
9 กดปมคลายลอคเพอเปดฝา
10 กดปม Stop/Cancel เพอไปยงโหมดสแตนดบายหรอถอดปลกหมอหงขาวออก
การนงอาหาร
1 วางถาดสำาหรบนงอาหารลงบนตะแกรงสำาหรบนงอาหาร ขดบนถาดสำาหรบนงอาหารตองใหตรงกบเครองหมายทอยบนตะแกรงสำาหรบนงอาหาร (รปท 30)
2 ตวงน 3 ถวยตวง แลวเทใสลงในหมอในน 3 ถวยตวงจะเดอดในเวลาประมาณ 8 นาท
หมายเหต: ปรมาตรของนขนอยกบปรมาณอาหารทตองการนง
3 วางตะแกรงสำาหรบนงอาหารทประกอบเขากบถาดสำาหรบนงอาหารลงในหมอใน (รปท 31)
4 วางอาหารทตองการนงลงในจานหรอบนถาดสำาหรบนงอาหาร
หมายเหต: เพอการนงอยางทวถง ควรจดอาหารใหกระจายออกเสมอกน และไมควรกองอาหารทบกน
5 ทำาตามขนตอน 5 ถง 8 ในหวขอ ‘วธหงขาว’ ในบทน
6 กดปม Steam เพอเลอกเมนนง (รปท 32) , คำาแนะนำาปรากฏบนหนาจอ
7 กดปม Cook/OK หากไมกดปมน หนาจอจะแสดงเวลาทใชหงโดยอตโนมตหลงจาก 30 วนาท , เวลาในการประกอบอาหารดฟอลต 30 นาท ปรากฏบนหนาจอ
8 กดปม Up หรอ Down เพอปรบเวลาทใชหง กดปม Up หรอ Down คางไวเพอเลอนเวลาไปขางหนาหรอถอยหลงอยางรวดเรวคณสามารถตงคาเวลาไดตงแตในชวงระหวาง 10 นาทถง 1 ชวโมง
9 กดปม Cook/OK เพอเรมขนตอนการทำาอาหาร , ไฟ Cook/OK สวางและสญลกษณกำาลงปรงอาหารปรากฏบนหนาจอ , หนาจอนบเวลาการปรงอาหารแบบนาทถอยหลง , เมอเสรจสนการทำาอาหาร หมอหงขาวจะสงเสยงบพและและหนาจอจะปรากฏขอความ ‘Done’
10 กดปมคลายลอคเพอเปดฝา
11 กดปม Stop/Cancel เพอไปยงโหมดสแตนดบายหรอถอดปลกหมอหงขาวออก
การอนรอน
คณสามารถใชโหมดอนรอนเพออนขาวใหรอนขน ใสขาวลงในหมอโดยไมเกนครงหนงของความจหมอเพอใหไดขาวทอนรอนพอด
หมายเหต: อยาอนรอนขาวเยนมากกวาหนงครง
1 คยขาวออกจากกนแลวกระจายออกใหทวภายในหมอ
2 เตมนลงในขาว ½ ถวย เพอปองกนไมใหขาวแหงเกนไป จำานวนนทเตมขนอยกบจำานวนขาวทอนรอนถาขาวเรมไหมเกรยม ใหเตมนเพม
ภาษาไทย64

3 ทำาตามขนตอน 5 ถง 8 ในหวขอ ‘วธหงขาว’ ในบทน
4 กดปม Keep warm/Reheat สองครง เพอเรมขนตอนการอนรอน (รปท 33) , ไฟ Keep warm/Reheat สวางและสญลกษณแสดงการใหความรอนและเวลาทเหลอในการใหความรอนจะปรากฏหนาจอ (รปท 34)
หมายเหต: เวลาเรมตนสำาหรบการอนรอนอยท 23 นาท , เมอขนตอนการใหความรอนเสรจสน จะมเสยงบพ และขอความ ‘Done’ จะปรากฏบนหนาจอ
5 กดปมคลายลอคเพอเปดฝา
6 กดปม Stop/Cancel เพอไปยงโหมดสแตนดบายหรอถอดปลกหมอหงขาวออก
การอน
โหมดอนเกบความรอนชวยทำาใหขาวรอนเปนเวลานาน
หมายเหต: ขอแนะนำาไมใหอนขาวหรออาหารนานเกน 12 ชวโมง เพอคงรสชาตทดไว
1 กดปม Keep warm/Reheat หนงครงเพอใชงานโหมดอนเกบความรอน (รปท 33) , ไฟ Keep warm/Reheat สวางอยางตอเนอง , ในระหวางทอนเกบความรอนทำางาน หนาจอจะแสดงเวลาเปนชวโมง ตงแต 0 ถง 11 (0 ชม., 1 ชม. ...11 ชม.) , หลงจาก 12 ชวโมง โหมดอนเกบความรอนจะหยดโดยอตโนมตและหมอหงขาวจะสงเสยงบพ 10 ครง หนาจอจะเปลยนเปนแสดงเวลาปกต
ตวตงเวลา
ตารางขางลางแสดงตวเลอกเวลาสำาหรบเมนตางๆ
เมน เมนยอย ตวเลอกตงเวลา
ขาว เปลา 1 - 24 ชม.
ธรรมดาอยางเรว -
ธรรมดาปรมาณนอย 1 - 24 ชม.
ขาวเหนยว 1 - 24 ชม.
ผสม 1 - 24 ชม.
ขาวพรอมซป -
โจก/พาสตา โจกขนไมใสเครอง 1 - 24 ชม.
โจกเหลวไมใสเครอง 1 - 24 ชม.
โจกธญพชรวม 1 - 24 ชม.
พาสตา -
ซป/ตน ซปผก -
ซปแบบเคยวนาน 1 - 12 ชม.
Stew (ตน) 1 - 12 ชม.
โยเกรต โยเกรต -
อาหารหวาน/พดดง ซปถวเขยว 1 - 12 ชม.
พดดงหวไชเทา -
พดดงเผอก -
เคกซเรยล -
เคกแครอท -
พลงไอน พลงไอน 1 - 12 ชม.
ภาษาไทย 65

หมายเหต: คณสามารถเลอกเวลาประกอบอาหารเองไดบางเมน สามารถตงไดทงนาฬกาจบเวลาและระยะเวลาในการประกอบอาหาร คณสามารถตงเวลาใดกอนกได
ใชปม Preset/Clock สำาหรบการตงเวลาพรอมเสรฟ
1 กดปม Preset/Clock (รปท 4) , เมนทสามารถใชงานไดจะมไฟสวาง (รปท 35)
2 กดปมเมนทตองการใช และหากจำาเปน ใหเลอกเมนยอยทตองการดวยปม Up หรอ Down แลวกดปม Cook/OK
3 กดปม Up หรอ Down เพอตงเวลาพรอมเสรฟ กดปม Up หรอ Down คางไวเพอเลอนเวลาไปขางหนาหรอถอยหลงอยางรวดเรว
หมายเหต: ตวอยางเชน คณสามารถใชปม Preset/Clock ตงคาเวลาสำาหรบขาวสกพรอมเสรฟทเวลา 18:30 น (รปท 36).
4 กดปม Cook/OK เพอเรมนาฬกาจบเวลา , ขอความ ‘Saved’ จะปรากฏบนหนาจอ , ไฟ Cook/OK สวางและขอความ ‘Timer set’ และเวลาพรอมเสรฟสำาหรบเมนทเลอกจะปรากฏบนหนาจอ , เมอขนตอนการทำาอาหารเรม สญลกษณแสดงการทำาอาหารและเวลาทเหลอในการทำาอาหารจะปรากฏบนหนาจอ
หมายเหต: หากการตงคาไวลวงหนาสนกวาเวลาทงหมดทใชในการประกอบอาหารในเมนทเลอกหมอหงขาวจะเรมขนตอนการทำาอาหารทนท โดยใชเวลาในการประกอบอาหารดฟอลต หากเวลาในการประกอบอาหารสามารถปรบเปลยนคาได คณสามารถปรบเปลยนเวลาในการประกอบอาหารไดกอนตงนาฬกาจบเวลา
ใชปมเมน สำาหรบการตงเวลาพรอมเสรฟ
1 กดปมเมนทตองการใช และหากจำาเปน ใหเลอกเมนยอยทตองการดวยปม Up หรอ Down แลวกดปม Preset/Clock
หมายเหต: นอกจากน คณยงสามารถกดปมตงคาไวลวงหนาในหนาจอเมนยอย หนาจอแสดงในแตละขนตอนหรอหนาจอแสดงเวลาในการประกอบอาหาร
2 กดปม Up หรอ Down เพอตงเวลาพรอมเสรฟ กดปม Up หรอ Down คางไวเพอเลอนเวลาไปขางหนาหรอถอยหลงอยางรวดเรว
หมายเหต: ตวอยางเชน คณสามารถใชปม Preset/Clock ตงคาเวลาสำาหรบขาวสกพรอมเสรฟทเวลา 18:30 น.
3 กดปม Cook/OK เพอเรมนาฬกาจบเวลา , ไฟ Cook/OK สวางและขอความ ‘Timer set’ และเวลาพรอมเสรฟสำาหรบเมนทเลอกจะปรากฏบนหนาจอ , เมอขนตอนการทำาอาหารเรม สญลกษณแสดงการทำาอาหารและเวลาทเหลอในการทำาอาหารจะปรากฏบนหนาจอ
การทำาความสะอาด
ถอดปลกไฟหมอหงขาวออกกอนเรมทำาความสะอาด
รอจนกวาหมอหงขาวเยนลงกอนเรมทำาความสะอาด
เพอปองกนสารเคลอบกนอาหารตดของหมอใน คณไมควร: - ใชหมอในลางจานชาม - ใสนสมสายชลงในหมอ
1 ถอดตะแกรงสำาหรบนงอาหารพรอมถาด หมอโยเกรต และหมอในออกจากหมอหงขาว
2 ถอดฝาปดดานในออกจากฝาปดดานนอก โดยกดปมปลดลอคและดงฝาปดดานในออกทางดานลาง (รปท 37)หากตองการใสฝาปดดานในกลบเขาทอกครง ใหสอดดานบนของฝาปดดานในเขาในฝาปดดานนอก และกดปมปลดลอคกลบเขาท (‘เสยงคลก’)
3 ถอดฝาปดชองไอนออกจากฝาดานนอกโดยดงขน (รปท 38) - ถอดฝาครอบดานลางของฝาปดชองไอน กดตวลอคไปทตำาแหนงเปดและถอดฝาครอบออกจากบานพบ (รปท 39) - ใสฝาครอบดานลางของฝาปดชองไอน ใสสวนทยนของฝาคลอบดานลางไปยงชองฝาปดกดฝาคลอบดานลางเขาไปทฝาปด (1) และกดตวลอคไปทตำาแหนงปด
(2) (‘คลก’) (รปท 40) - หากตองการวางฝาปดชองไอนกลบเขาในชองระบายไอนของฝาดานนอก ใหใสเขาไปในชองแลวกดลงใหแนน
4 ทำาความสะอาดฝาดานใน หมอใน ตะแกรงสำาหรบนงอาหารพรอมถาด หมอโยเกรต ทพพตกขาว และฝาปดชองไอน ดวยฟองนหรอผาชบนอนทผสมนยาทำาความสะอาดเลกนอย
ไมควรใชของสารขดถ ใยขดถหรอฝอยขดหมอทำาความสะอาดหมอในเปนอนขาด เพราะอาจทำาลายสารเคลอบภายในได
ภาษาไทย66

5 ควรใชผาชบนบดพอหมาดเทานนในการเชดทำาความสะอาดดานนอกและดานในของตวหมอหงขาว
หามจมหมอหงขาวลงในนและหามเปดนกอกลางเปนอนขาด
การจดเกบ
1 คณสามารถเกบอปกรณเสรมทงหมดในหมอหงขาวดวยวธตอไปน: (รปท 41) - วางถาดสำาหรบนงอาหารลงในหมอใน - วางหมอโยเกรตลงในหมอใน - วางถาดสำาหรบนงอาหารลงในหมอใน
2 ควรจดเกบในทแหงและปลอดภย
สภาพแวดลอม
- หามทงผลตภณฑนรวมกบขยะในครวเรอนทวไป เมอหมดอายการใชงานแลว ควรทงลงในถงขยะสำาหรบนำากลบไปใชใหมได (รไซเคล) เพอชวยรกษาสภาวะสงแวดลอมทด (รปท 42)
การรบประกนและบรการ
หากคณตองการขอรบบรการ ตองการทราบขอมล หรอมปญหา โปรดเขาชมเวบไซตของ Philips ไดท www.philips.com หรอตดตอศนยบรการดแลลกคาของบรษท Philips ในประเทศของคณ (หมายเลขโทรศพทของศนยบรการฯ อยในเอกสารแผนพบเกยวกบการรบประกนทวโลก) หากในประเทศของคณไมมศนยบรการ โปรดตดตอตวแทนจำาหนายผลตภณฑของบรษท Philips ในประเทศ
การแกปญหา
หากหมอหงขาวทำางานผดปกต หรอประสทธภาพการทำางานไมดพอ โปรดอานขอมลในตารางดานลาง หากไมสามารถแกไขปญหาได โปรดตดตอศนยบรการลกคาของ Philips ในประเทศของทาน
ปญหา สาเหต การแกปญหา
ไฟปม Cook/OK ไมตด มปญหาเกยวกบการตอสายไฟ ตรวจสอบวาสายไฟตอกบหมอหงขาวอยางถกตองหรอไม และปลกไฟเสยบเขากบเตารบบนผนงแนนหรอไม
สญญาณไฟทำางานบกพรอง นำาหมอหงขาวไปทตวแทนจำาหนายฟลปสหรอศนยบรการทไดรบอนญาตจากฟลปส
สญญาณไฟอนขาวไมทำางาน เมอการประกอบอาหารเสรจเรยบรอยแลว
สญญาณไฟทำางานบกพรอง นำาหมอหงขาวไปทตวแทนจำาหนายฟลปสหรอศนยบรการทไดรบอนญาตจากฟลปส
คณไดอนอาหารใหรอน อบเคก ทำาโยเกรต หงขาวดวยซป ทำาพาสตาหรอนงอาหาร
โหมดอนเกบความรอนอตโนมตใชสำาหรบเมนขาว โจก ซป สตวและอาหารหวานเทานน
หนาจอไมทำางาน ยงไมเสยบปลกไฟ หากยงไมเสยบปลกไฟ ฟงกชนสำารองไฟฟาจะไมทำางานและหนาจอจะไมทำางานดวย
หมอหงขาวไมทำางาน เตมนไมเพยงพอ ควรเตมนตามทกำาหนดไวภายในหมอในโดยดทขดบอกระดบน (ดไดจากหวขอ ‘การใชงาน’)
หมอหงขาวไมทำางาน คณไมไดกดปม Cook/OK
หมอในไมแนบสนทกบแผนทำาความรอน ตรวจดวาไมมสงแปลกปลอมอยบนทำาแผนทำาความรอน
แผนทำาความรอนชำารดเสยหาย นำาหมอหงขาวไปทตวแทนจำาหนายฟลปสหรอศนยบรการทไดรบอนญาตจากฟลปส
หมอในมรปทรงบดเบยว นำาหมอหงขาวไปทตวแทนจำาหนาย Philips หรอศนยบรการทไดรบอนญาตจาก Philips
เคกอบไมสก ปรมาณสวนผสมมากเกนไป ตรวจดปรมาณตามทอธบายไวในสตรเคกในบท ‘สตรอาหาร’
ภาษาไทย 67

ปญหา สาเหต การแกปญหา
ขาวแขงหรอแฉะเกนไป เตมนนอยหรอมากเกนไป ควรเตมนตามทกำาหนดไวภายในหมอในโดยดทขดบอกระดบน (ดไดจากหวขอ ‘การใชงาน’)
เลอกเมนไมถกตอง เลอกเมนทตองการ (ดไดจากบท ‘การใชหมอหงขาว’)
มกอนแปงในพดดง คณผสมสวนผสมตางๆ ของพดดงไมถกตอง หลงจากเทสวนผสมแปง คนสวนผสมใหเขากนจนกวาจะเนอเดยวกน
ไฟ Preset/Clock ไมสวางขณะตงเวลา สญญาณไฟทำางานบกพรอง นำาหมอหงขาวไปทตวแทนจำาหนายฟลปสหรอศนยบรการทไดรบอนญาตจากฟลปส
ขาวไหมเกรยม การซาวขาวไมถกตอง ซาวขาวจนกระทงนใสขน
หมอหงขาวไมเปลยนไปทโหมดอนเกบความรอนโดยอตโนมต
คณไดอนอาหารใหรอน อบเคก หงขาวดวยซป ทำาพาสตาหรอนงอาหาร
โหมดอนเกบความรอนอตโนมตใชสำาหรบเมนขาว โจก ซป สตวและอาหารหวานเทานน
ปมควบคมอณหภมมความผดปกต นำาหมอหงขาวไปทตวแทนจำาหนายฟลปสหรอศนยบรการทไดรบอนญาตจากฟลปส
โยเกรตไมแขงตวด หรอเหลว คณไดอนนมรอนเกน 40°C ซงทำาใหแบคทเรยใน โยเกรตสญเสยสภาพ
อยาอนนมนานเกนไปเพอทำาใหแบคทเรยในโยเกรตยงมชวต เพอใหไดโยเกรตทนมมากขน อาจเตมนมผง 60 กรม ลงในนมและอนใหความรอน
ขอความแสดงขอผดพลาด E5 ปรากฏขนบนจอ
เกดไฟฟาขดของขณะหงหรออยในโหมดอนซงนานกวา 2 ชวโมง
เมอไฟฟาใชไดอกครง กดปม Stop/Cancel เพอรเซตหมอหงขาว
สตรอาหาร
พาสตา
เสรฟ 3-4 คนสวนผสม: - พาสตา 250 กรม (เพนเนหรอมะกะโรน) - ซอสพาสตา 500 มล. - น 700 มล.
1 ใสพาสตาและซอสพาสตาในหมอในและเตมนจนถงขดบอกระดบพาสตา กดปม Congee/Pasta และเลอกเมนยอย Pasta ตงเวลาการประกอบอาหาร 20 นาท สำาหรบมะกะโรน หรอ 30 นาท สำาหรบเพนเน แลวกดปม Cook/OK เพอเรมทำาอาหาร
2 เมอทำาพาสตาเสรจแลว โรยพรกไทยหรอชสเลกนอยลงทดานบนและเสรฟพาสตาขณะรอน
โยเกรต
เสรฟ 4 คนสวนผสม: - นม 500 มล. - โยเกรตแบบเพลน 100 มล.
1 วางโยเกรตไวทอณหภมหองสองสามนาท กอนใช เพอกระตนแบคทเรยในโยเกรต อนนมใหมอณหภมประมาณ 40°C ผสม โยเกรตกบนมอนทนทในอกหมอและเทสวนผสมลงในหมอโยเกรตแตละหมอ ปดฝาหมอดวยฝาปด
หมายเหต: ใชเวลา 2-3 นาท สำาหรบอนนมใหรอน 40°C หากนมมอณหภมสงเกนไป จะทำาใหใหแบคทเรยในโยเกรตเสยสภาพ
2 วางถาดสำาหรบนงอาหารลงหมอใน เตมนใหถงขดบอกระดบโยเกรต แลววางถวยลงบนถาดสำาหรบนงอาหาร
3 กดปม Yoghurt ตงเวลาในการประกอบอาหารท 3 ชวโมง แลวกดปม Cook/OK เพอเรมการทำาอาหาร
หมายเหต: หากตองการรสเปรยวมากขน ใหตงเวลาการประกอบอาหารใหนานขน
4 เมอโยเกรตเสรจเรยบรอยแลว เตมผลไมหรอนผงบนโยเกรตและเสรฟ หรออาจปลอยใหโยเกรตเยนตวและใสในตเยนขามคนและเสรฟขณะเยน
เคลดลบเพอใหไดโยเกรตทนมและแขงตวด คณอาจเตมนมผง 60 กรม ลงในนมและอนใหความรอน แลวทำาตามขนตอนดานบน
ภาษาไทย68

เคกแครอท
เสรฟ 3-4 คนสวนผสม: - นมนพช 250 มล. - ไข 4 ฟองใหญ - นตาลทรายขาว 50 กรม - แปงอเนกประสงค 225 กรม - แปงขนมปง 2 ชอนโตะ - ผงฟ ½ ชอนชา (2 กรม) - เกลอเลกนอย - วนลา 1 ชอนชา - แครอทขดฝอย 190 กรม
1 ใสไข นมน นตาลทรายขาว และวนลาในชามใหญ แลวตใหเขากน
หมายเหต: ดใหแนใจวานตาลไมจบดวยเปนกอน
2 ผสมแปง ผงฟ แปงขนมปง และเกลอรวมกน
3 เตมแครอทขดฝอย
4 เทสวนผสมทงหมดในหมอใน
5 กดปม Dessert/Pudding และเลอกเมนยอย Carrot cake
6 กดปม Cook/OK เพอเรมทำา
เคกขาวโอตกลวยหอม
เสรฟ 3-4 คนสวนผสม: - แปงอเนกประสงค 120 กรม - ขาวโอต 120 กรม - นตาลทรายแดง 90 กรม - แปงขนมปง 2¼ชอนโตะ - นมผง 38 กรม - กลวยหอมขนาดใหญ 2.5 ลก - ไขขนาดใหญ 2 ฟอง (120-130 กรม) - ไขขาว 1ฟอง (35-40 กรม) - เนย 1.5 ชอนโตะ (ชนดออน) - นมนกลนวนลา 1 ชอนโตะ - นผง 1.5 ชอนโตะ
1 ผสม แปง ขาวโอต นตาลทรายแดง แปงขนมปง และนมผงเขาดวยกนในชาม
2 บดกลวยหอมใหเหลวนดหนอย
3 อกชามหนง ใหผสมไข ไขขาว กลวยบด เนยชนดออน นมนกลนวนลาและนผงเขาดวยกน แลวคนสวนผสมทงหมดใหเขากนตามขนตอนท 1 ผสมใหเขากนดและแนใจวาสวนผสมไมจบตวเปนกอน
เคลดลบ: หากตองการเพมกลนและรสใหเคก ใหนำากลวยสกมาบด
เคลดลบ: หากตองการใหเนอเคกฉ ใหใสเนอกลวยอกครงหนง
4 เทสวนผสมทงหมดในหมอใน
5 กดปม Dessert/Pudding และเลอกเมนยอย Oatmeal cake
6 กดปม Cook/OK เพอเรมทำา
ภาษาไทย 69

พดดงหวไชเทา
เสรฟ 3-4 คนสวนผสม: - แปงขาวเจา 250 กรม - แปงตงหมน 7 ชอนโตะ (56 กรม) - กงแหง 60 กรม - กนเชยง 2 อน (90 กรม) - หวไชเทา 700 กรม - น 360 มลลลตร
เครองปรง: - ผงปรงรสไก 2 ชอนโตะ - นตาล 2 ชอนโตะ - พรกไทยขาว 1 ชอนชา
1 ผสมแปงขาวเจาและแปงตงหมนกบน 360 มล. ในชาม และวางไวสกคร
2 หนหวไชเทาเปนชนเลกๆ
3 หนกนเชยงเปนชนเลกๆ
4 กดปม Desert/Pudding และเลอกเมนยอย White radish pudding
5 ใสกนเชยง กงแหง และหนหวไชเทาชนเลกๆ ลงในหมอใน กดปม Cook/OK เพมเรมทำาเปนเวลา 20 นาท
เคลดลบ: หากตองการเพมกลนและรส ใหผดสวนผสมในหมอใน 5 นาทหลงจากกดปม Cook/OK แลวปดฝา
6 เมอหมอหงขาวสงเสยงบพ ใสเครองปรงในสวนผสมของหวไชเทาและคนใหเขากน คอยๆ เทสวนผสมแปงลงในหมอใน และคนอกครง
เคลดลบ: เทสวนผสมแปงเปน 3 สวน จากนน ใหคนแตละสวนใหเขากนเพอไมใหจบตวเปนกอน
7 กดปม Cook/OK เพอดำาเนนการปรงอาหารตอ
เคลดลบ: คณสามารถเสรฟพดดงไดขณะรอน หรอจะแชเยนในตเยนกอนนำาไปทอด
พดดงเผอก
เสรฟ 3-4 คนสวนผสม: - เผอก 400 กรม - แปงขาวเจา 150 กรม - แปงขาวโพด 100 กรม - กนเชยง 2 อน (90 กรม) - กงแหง 60 กรม - น 700 มล.
เครองปรง 1: - นเปลา 1 ชอนโตะ - ซอว ½ ชอนโตะ - ผงปรงรสไก 1½ ชอนชา - เครองเทศ ¼ ชอนชา - เกลอ ½ชอนชา - พรกไทยขาว ¼ ชอนชา
เครองปรง 1: - ซอว ½ ชอนชา - นตาล ¼ ชอนชา - เหลาจน ½ ชอนโตะ
1 ผสมแปงขาวเจาและแปงขาวโพดกบน 250 มล. ในชาม แลวพกไวสกคร
2 หนเผอกออกเปนชนขนาด 1.2 ซม. และใสเครองปรง 1
ภาษาไทย70

3 หนกนเชยงออกเปนชนเลกๆ และใสเครองปรง 2
4 กดปม Desert/Pudding และเลอกเมนยอย Taro pudding
5 ใสกนเชยง กงแหง เผอก และน 450 มล. ในหมอใน กดปม Cook/OK เพมเรมทำาเปนเวลา 20 นาท
เคลดลบ: หากตองการเพมกลนและรส ใหผดสวนผสมในหมอใน 5 นาทหลงจากกดปม Cook/OK แลวปดฝา
6 เมอหมอหงขาวสงเสยงบพ ใหเปดฝาและบดเผอกใหเหลวนดหนอย คนสวนผสมแปงอกกครง แลวคอยๆ เทลงในหมอใน คนอกครง
เคลดลบ: เทสวนผสมแปงเปน 3 สวน จากนน ใหคนแตละสวนใหเขากนเพอไมใหจบตวเปนกอน
7 กดปม Cook/OK เพอดำาเนนการปรงอาหารตอ
เคลดลบ: คณสามารถเสรฟพดดงไดขณะรอน หรอจะแชเยนในตเยนกอนนำาไปทอด
ภาษาไทย 71

72
giơi thiêuChúc mừng bạn đã mua được sản phẩm Philips mới và chào mừng bạn đến với Philips! Để có được lợi ích đầy đủ từ sự hỗ trợ do Philips cung cấp, hãy đăng ký sản phẩm tại www.philips.com/welcome.
Mô ta tông quat (Hinh 1)a Côc đinh lượngB Môi xúpC Muỗng cơm D Chỉ báo mức nướcE Nồi trong có cánF Nắp trong có thể tháo rời g Vòng đệmH Đế nhiệt i Cảm biến nhiệt độ J Panen điều khiểnK Màn hìnhl Các nút lên và xuôngM Thân chínhn Phích cắmo Dây điện nguồn có thể tháo rời P Ổ cắm cho phích cắm thiết biQ Nút mở nắp R Giá gắn bộ phận giữ muỗngs Bộ phận giữ muỗngT Nắp ngoàiU Nắp thông hơi có thể tháo rờiV Tay cầm nồi cơm điệnW Giỏ hơiX Khay hấp có thể tháo rờiY Nồi chế biến sữa chua
Lưu yHãy đọc kỹ hướng dẫn sử dụng này trước khi sử dụng thiết bi và cất giữ để tiện tham khảo sau này.
nguy hiểm - Không nhúng phần thân nồi cơm điện vào trong nước, hay rửa dưới vòi nước.
Canh bao - Kiểm tra xem điện áp ghi trên máy có tương ứng với điện áp nguồn nơi sử dụng trước khi bạn
nôi máy vào nguồn điện. - Chỉ nôi thiết bi này vào ô cắm điện có dây tiếp đất. Luôn đảm bảo răng phích cắm được cắm
chăt vào ô điện. - Không sử dụng thiết bi nếu phích cắm, dây điện nguồn, nồi trong hoăc phần thân nồi bi hư hỏng. - Nếu dây điện bi hư hỏng, bạn nên thay dây điện tại trung tâm bảo hành của Philips, trung tâm
bảo hành do Philips ủy quyền hoăc những nơi có khả năng và trình độ tương đương để tránh gây nguy hiểm.
- Thiết bi này không dành cho người dùng (bao gồm cả trẻ em) có sức khỏe kém, khả năng giác quan hoăc có dấu hiệu tâm thần, hoăc thiếu kinh nghiệm và kiến thức, trừ khi họ được giám sát hoăc hướng dẫn sử dụng thiết bi bởi người có trách nhiệm đảm bảo an toàn cho họ.
- Trẻ em phải được giám sát để đảm bảo răng chúng không chơi đùa với thiết bi này. - Để dây điện xa tầm tay trẻ em. Không để dây điện treo lơ lửng ngang cạnh bàn hay măt bếp nơi
đăt bếp.
Tiếng ViệT

- Bảo đảm đế nhiệt, bộ cảm biến nhiệt độ và măt ngoài của nồi trong luôn sạch sẽ và khô trước khi cắm phích cắm vào ô điện.
- Không sử dụng thiết bi nếu vòng đệm bi hỏng. - Không cắm phích cắm của thiết bi vào ô điện hoăc nhấn bất kỳ nút nào trên bảng điều khiển
băng tay ướt. - Không nôi thiết bi này với công tắc hẹn giờ bên ngoài để tránh tình huông nguy hiểm.
Chú y - Không sử dụng bất kỳ phụ kiện hoăc bộ phận nào mà Philips không đăc biệt khuyên dùng. Nếu
bạn sử dụng các phụ kiện hoăc bộ phận không phải của Philips, việc bảo hành sẽ bi mất hiệu lực. - Chỉ sử dụng thìa múc cơm đi kèm. Tránh sử dụng những dụng cụ sắc. - Không để nồi dưới nhiệt độ cao, hay đăt nồi lên bếp hay dụng cụ nấu khác đang đun hoăc vẫn
còn nóng. - Luôn đăt nồi trong vào trước khi cắm phích cắm vào ô điện và bật nồi cơm điện. - Luôn rút phích cắm của nồi cơm điện nếu bạn không sử dụng thiết bi trong một khoảng thời
gian dài. - Luôn để nồi cơm điện nguội xuông trước khi lau chùi hoăc di chuyển. - Không đăt nồi trong trực tiếp lên ngọn lửa để nấu cơm. - Nếu sử dụng thiết bi này không đúng cách hay dùng cho những mục đích chuyên nghiệp hay
bán chuyên nghiệp hoăc nếu sử dụng thiết bi này không theo hướng dẫn, chế độ bảo hành sẽ bi mất hiệu lực và Philips sẽ không chiu trách nhiệm đôi với bất cứ hư hỏng nào gây ra.
- Thiết bi này được thiết kế để sử dụng trong nhà và những ứng dụng tương tự như là: - khu vực nhà bếp dành cho nhân viên trong các cửa hàng, văn phòng và các môi trường làm
việc khác; - nhà trại; - sử dụng bởi khách hàng trong các khách sạn, nhà nghỉ và các môi trường dân cư khác; - môi trường thuộc loại giường ngủ và ăn sáng.
- Đăt nồi cơm điện này trên một măt phẳng năm ngang,vững chắc và băng phẳng. - Những măt có thể tiếp xúc có thể trở nên rất nóng khi thiết bi đang hoạt động. Chỉ chạm vào
bảng điều khiển. - Cẩn thận với hơi nước thoát ra từ lỗ thoát hơi nước trong khi nấu hoăc hơi nước trực tiếp từ
trong nồi khi mở nắp. - Không nhấc và di chuyển nồi cơm điện trong khi nồi cơm đang hoạt động. - Cẩn thận khi bạn cầm nồi trong và giỏ hơi sau khi nấu, vì chúng có thể nóng và năng. - Không để nồi cơm điện tiếp xúc trực tiếp với ánh nắng măt trời. - Không cho các vật băng kim loại hoăc các chất lạ vào lỗ thông hơi. - Không đăt vật có từ tính lên trên nắp nồi. Không sử dụng thiết bi gần vật có từ tính. - Không sử dụng nồi trong nếu nồi trong bi biến dạng. - Không cho nước quá mức nước tôi đa được đánh dấu trong nồi trong để tránh bi trào. - Không đăt muỗng cơm trong nồi khi đang nấu, giữ ấm hoăc hâm nóng cơm. - Luôn lau chùi thiết bi sau khi sử dụng. - Không làm sạch thiết bi băng máy rửa chén.
Từ trường điên (EMF)Thiết bi Philips này tuân thủ tất cả các tiêu chuẩn liên quan đến các từ trường điện (EMF). Nếu được sử dụng đúng và tuân thủ các hướng dẫn trong sách hướng dẫn này, theo các băng chứng khoa học hiện nay, việc sử dụng thiết bi này là an toàn.
Chức năng dự phòng khi mất điên.Thiết bi này có chức năng dự phòng ghi nhớ trạng thái trước khi mất điện, với điều kiện nguồn điện được khôi phục trong vòng 2 giờ. Nếu xảy ra mất điện trong quá trình nấu, khi nguồn điện được khôi phục, thời gian nấu đếm ngược sẽ tiếp tục tại điểm thời gian đếm đã dừng lại. Nếu việc mất điện xảy ra trong quá trình nấu và kéo dài quá 2 giờ, nồi cơm điện tự động đăt lại về chế độ chờ khi nguồn điện được khôi phục. Mở nồi cơm điện, bỏ hết đồ nấu và bắt đầu lại từ đầu.
Tiếng ViệT 73

Nếu bạn đăt bộ hẹn giờ và quá trình nấu cài sẵn vẫn chưa bắt đầu khi mất điện, quá trình sẽ bắt đầu khi nguồn điện được khôi phục, với điều kiện nguồn điện được khôi phục trong vòng 12 giờ.
Cach chuân bi sư dung may Trươc khi sư dung lân đâu
1 Tháo tấm giữa nồi trong và bộ phận làm nóng. 2 Làm sạch kỹ các bộ phận của nồi cơm điện trước khi sử dụng lần đầu tiên (xem chương ‘Vệ
sinh máy’). 3 Lau thật khô tất cả các bộ phận trước khi bắt đầu sử dụng thiết bị. 4 Lắp giá giữ thìa vào phần thân chinh của nồi cơm điện (Hình 2).
Bang điều khiển và màn hinh hiển thiBảng điều khiển có 12 nút để điều khiển thiết bi. Màn hình hiển thi cung cấp thông tin về các quá trình đã được chọn. Màn hình bật sáng ngay sau khi bạn nhấn bất kỳ nút nào, để bạn có thể xem thông tin hiển thi rõ hơn.Lưu ý: Khi thiết bị đang nấu hoặc hâm nóng, ánh sáng hiển thị sẽ bị tắt sau 10 phút. - Bảng điều khiển và màn hình hiển thi (Hình 3)
Cac nút lên và xuốngBạn có thể sử dụng các nút lên và xuông phía dưới màn hình hiển thi để chọn menu mong muôn và để điều chỉnh các thông sô cài đăt (đồng hồ, bộ hẹn giờ và thời gian nấu).
Cac nút menu/điều khiểnCó 4 nút điều khiển ở phần trên cùng của bảng điều khiển và 6 nút menu ở phần dưới cùng của bảng điều khiển.Có nút đèn nhấp nháy để chỉ ra răng bạn có thể nhấn nút này để chuyển sang bước tiếp theo. Bạn có thể sử dụng nút Stop/Cancel (Ngừng/Hủy) để ngừng quá trình nấu hoăc ngừng bộ hẹn giờ cài sẵn. Bạn cũng có thể sử dụng nút này như là nút “hủy thao tác” khi bạn đang lập trình quá trình nấu để quay lại màn hình trước.
Menu Một sô menu có menu con. Khi bạn nhấn nút cho các menu này, menu con xuất hiện trên màn hình. Nếu menu không có menu con, bước đầu tiên của quá trình nấu được hiển thi trên màn hình. Ở một sô menu, chữ và hình ảnh động được hiển thi trên màn hình để hướng dẫn bạn thực hiện quá trình nấu theo từng bước.
Đặt đồng hồ thời gianLưu ý: Bạn không thể điều chỉnh đồng hồ thời gian trong quá trình nấu hoặc khi thiết bị đang ở chế độ giữ ấm. 1 Cắm phich cắm vào ổ điện và bật công tắc chinh. , Màn hình hiển thị lời chào (‘Chào buổi sáng’, ‘Chào buổi chiều’ hoặc ‘Chào buổi tối’).
2 Nhấn nút Preset/Clock (Cài sẵn/Đồng hồ) hai lần (Hình 4). 3 Nhấn nút lên hoặc xuống để chọn ‘Clock setting’ (Cài đặt đồng hồ). (Hình 5) 4 Nhấn nút Cook/OK (Nấu/OK) (Hình 6). 5 Nhấn nút lên hoặc xuống để đặt đồng hồ (biểu diễn thời gian 24 giờ). Nhấn và giữ nút lên
hoặc xuống để dịch chuyển nhanh thời gian tiến hoặc lùi (Hình 7). 6 Nhấn nút Cook/OK (Nấu/OK) để xác nhận thời gian (Hình 6).
Tiếng ViệT74

Lưu ý: Nếu bạn muốn hủy thay đổi, nhấn nút Stop/Cancel (Ngừng/Hủy). , Thông báo ‘Saved’ (Đã lưu) được hiển thị trên màn hình. Thời gian ngừng nhấp nháy và màn
hình hiển thị đồng hồ thời gian đã đặt (Hình 8).Lưu ý: Đồng hồ thời gian được xác nhận tự động nếu bạn không nhấn nút Cook/OK (Nấu/OK) trong vòng 30 giây.Lưu ý: Màn hình chỉ hiển thị đồng hồ thời gian khi thiết bị được cắm vào ổ điện.
Đặt ngôn ngữ hiển thiBạn có thể chọn một trong ba ngôn ngữ: Tiếng Trung Quôc giản lược, Tiếng Trung Quôc truyền thông hoăc tiếng Anh. 1 Nhấn nút Preset/Clock (Cài sẵn/Đồng hồ) hai lần (Hình 4). 2 Nhấn nút lên hoặc xuống để chọn ‘Language setting’ (Cài đặt ngôn ngữ) (Hình 9). 3 Nhấn nút Cook/OK (Nấu/OK) (Hình 6). 4 Nhấn nút lên hoặc xuống để chọn ngôn ngữ mong muốn (Tiếng Trung Quốc giản lược, Tiếng
Trung Quốc truyền thống hoặc Tiếng Anh) (Hình 10). 5 Nhấn nút Cook/OK (Nấu/OK) để xác nhận ngôn ngữ (Hình 6).Lưu ý: Nếu bạn muốn hủy thay đổi, nhấn nút Stop/Cancel (Ngừng/Hủy). , Thông báo ‘Saved’ (Đã lưu) được hiển thị trên màn hình (Hình 8).
Cach sư dung mayDanh sach 20 menu của nồi cơm điên
Menu Menu con
Gạo Gạo thườngGạo thường nấu nhanhGạo thường khẩu phần nhỏGạo nếpGạo trộnCơm với xúp
Cháo congee/Mì ông pasta Cháo congee gạo thường loại đăcCháo congee gạo thường loại loảngCháo congee trộn nhiều loại ngũ côcMì ông Pasta
Xúp/Hầm Xúp rauHầmXúp đun sôi lâu
Sữa chua Sữa chuaMón tráng miệng/Bánh Pútđinh Xúp đậu xanh
Bánh ngũ côc
Tiếng ViệT 75

Menu Menu con
Bánh cà rôtBánh pútđinh củ cải trắngBánh pútđinh khoai sọ
Hơi nước Hơi nước
Hương dẫn nấu ăn từng bươcBảng dưới đây cho bạn thấy các bước thực hiện trong các menu con khác nhau.Các sô trong danh sách dưới đây tương ứng với các sô trong bảng và cho bạn biết bạn phải làm gì tiếp theo tại các điểm nhất đinh trong quá trình nấu ăn.1 Nhấn nút Cook/OK (Nấu/OK) để bắt đầu quá trình nấu ăn. Nếu bạn không nhấn nút này, quá
trình nấu ăn sẽ bắt đầu tự động sau 10 giây.2 Nhấn nút Cook/OK (Nấu/OK) để tiếp tục quá trình nấu ăn. Nếu bạn không nhấn nút này, quá
trình nấu sẽ tiếp tục tự động sau 30 giây.3 Quá trình nấu chỉ bắt đầu khi bạn nhấn nút Cook/OK.4 Nhấn nút Cook/OK. Nếu bạn không nhấn nút này, màn hình tự động hiển thi thời gian nấu sau
10 giây.5 Nhấn nút Cook/OK. Nếu bạn không nhấn nút này, màn hình tự động hiển thi thời gian nấu sau
30 giây.
Menu Menu con Các bước trước khi nấu Thời gian cho bước thứ 2
Các bước trong quá trình nấu
Các bước sau khi nấu
Gạo Cơm với xúp Nấu cơm trước tiên (1) Tùy thuộc vào lượng cơm được nấu.
Thêm nước xuýt ấm và các nguyên liệu khác (2)
Cháo congee/Mì ông pasta
Cháo congee ngũ côc trộn nhiều loại.
Thêm ngũ côc trộn và nước (5)
Mì ông Pasta Thêm mì ông pasta, nước xôt và nước (5)
Xúp/Hầm Xúp rau Thêm nước để tạo nước xuýt (4)
Khoàng 10-15 phút
Thêm rau xanh (2)
Hầm Thêm nước, thit và các nguyên liệu khác (4)
Xúp đun sôi lâu Thêm nước và các nguyên liệu (4)
Sữa chua Sữa chua Rót hỗn hợp sữa ấm (40°C) và sữa chua vào nồi sữa chua, đô nước vào nồi trong (5)
Tiếng ViệT76

Menu Menu con Các bước trước khi nấu Thời gian cho bước thứ 2
Các bước trong quá trình nấu
Các bước sau khi nấu
Món tráng miệng/Bánh Pútđinh
Xúp đậu xanh Thêm nước và nguyên liệu làm món tráng miệng (4)
Bánh pútđinh củ cải trắng
Thêm củ cải trắng, tôm khô, lạp xườn Trung Quôc và gia vi (3)
20 phút Thêm hỗn hợp bột gạo (3)
Bánh pútđinh khoai sọ
Thêm khoai sọ, lạp xườn Trung Quôc, tôm khô và gia vi (3)
20 phút Thêm hỗn hợp bột gạo (3)
Bánh ngũ côc Cho hỗn hợp làm bánh vào nồi trong (1)
Bánh cà rôt Cho hỗn hợp làm bánh vào nồi trong (1)
Hơi nước Hơi nước Đăt đĩa vào giỏ hơi, đô nước vào nồi trong (5)
nấu cơmMenu Nấu cơm của thiết bi này bao gồm 6 menu con cho phép bạn nấu các loại gạo khác nhau hoăc các công thức nấu cơm khác nhau. 1 Lường gạo để nấu cơm băng chen định lượng gạo cấp kem (Hình 11).Thông thường mỗi chén lường gạo có thể cho ra 2 bát cơm. Không nấu nhiều hơn những sô lượng được ghi ở trong nồi. 1 chén lường gạo có thể tích khoảng 180ml. - HD4768: Dung tích nồi trong là 5,0L, dung tích tôi đa đôi với gạo là 1,8L - HD4766: Dung tích nồi trong là 4,0L, dung tích tôi đa đôi với gạo là 1,5L
Lượng gạo và thời gian nấu cho cac menu nấu cơmBảng dưới đây hiển thi thời gian nấu tương đôi. Thời gian nấu thực tế có thể khác nhau tùy theo điện áp, nhiệt độ phòng, độ ẩm và lượng nước được sử dụng.
Menu HD4766 Thời gian nấu tương đôi
HD4766 Lượng gạo (chén)
HD4768 Thời gian nấu tương đôi
HD4768 Lượng gạo (chén)
Gạo thường 40-50 phút 2-8 40-50 phút 2-10Gạo thường nấu nhanh*
30-40 phút 2-4 30-40 phút 2-6
Gạo thường khẩu phần ít**
40-50 phút 2-3 40-50 phút 2-3
Gạo nếp 50-90 phút 2-8 50-90 phút 2-8Cơm trộn 40-50 phút 2-4 40-50 phút 2-6
Tiếng ViệT 77

Menu HD4766 Thời gian nấu tương đôi
HD4766 Lượng gạo (chén)
HD4768 Thời gian nấu tương đôi
HD4768 Lượng gạo (chén)
Cơm với xúp 35-70 phút 2-8 35-70 phút 2-10
Lưu ý: Đậu, hạt đậu khô hoặc ngũ cốc được sử dụng trong cơm trộn cần được ngâm trước khi sử dụng.*Để có được kết quả tôi ưu, chúng tôi khuyên bạn không nấu quá 4 (HD4766) hoăc 6 (HD4768) chén gạo.**Để có được kết quả tôi ưu, chúng tôi khuyên bạn không nên nấu quá 3 chén gạo. 2 Vo gạo thật sạch. 3 Cho gạo đã vo sạch vào nồi trong. 4 Cho nước vào đến mưc nước được chỉ dân trên thang chia mưc nước ơ nồi trong, tương
ưng với số lượng chen gạo đã sử dụng. Sau đó làm cho bề mặt gạo trong nồi băng đều.Ví dụ, nếu bạn nấu 4 chén gạo Đông Bắc, thêm nước vào lên đến mức nước 4 chén cho gạo Đông Bắc được chỉ dẫn trên thang chia. - HD4768 (Hình 12) - HD4766 (Hình 13)
Lưu ý: Mưc nước được đánh dấu ở nồi trong này chỉ là một mưc nước chỉ báo tham khao; bạn luôn luôn có thể điều chỉnh mưc nước cho thich hợp với các loại gạo khác nhau và theo sở thich của riêng bạn. 5 Nhấn nút mơ để mơ nắp. 6 Đặt nồi trong vào nồi cơm điện (Hình 14).Bảo đảm răng nồi được đăt chuẩn xác và tay cầm của nồi thẳng hàng với các rãnh trên thân chính.Lưu ý: Bao đam rằng bộ phận đun nóng và mặt bên ngoài của nồi trong sạch sẽ và khô ráo. 7 Cắm phich cắm vào ổ điện và bật công tắc chinh. 8 Đóng nắp nồi cơm điện.Không dùng lực để đóng nắp. Nếu nắp đóng không chuẩn, kiểm tra xem nồi trong đã được đặt chinh xác chưa. 9 Nhấn nút Rice (Nấu cơm). Sau đó nhấn nút lên hoặc xuống để chọn loại gạo (Hình 15). 10 Nhấn nút Cook/OK (Nấu cơm/OK) để bắt đầu quá trình nấu. , Đen Cook/OK bật sáng và hình động nấu ăn xuất hiện trên màn hình hiển thị. (Hình 16) , Màn hình sẽ hiển thị thời gian đếm ngược tinh theo phút (10, 9, 8 v.v...) trong 10 phút cuối
của quá trình nấu. , Khi kết thúc quá trình nấu thiết bị phát tiếng bip và đen Giữ ấm/Hâm nóng bật sáng để cho
biết thiết bị đã chuyển sang chế độ giữ ấm. , Màn hình đếm tiến thời gian giữ ấm tinh theo giờ (tối đa 12 giờ).
11 Nhấn nút Stop/Cancel (Ngừng/Hủy) để hủy chế độ giữ ấm (Hình 17).Nếu bạn muôn tiếp tục lại chế độ giữ ấm, bạn chỉ cần nhấn lại nút Giữ ấm/Hâm nóng. 12 Nhấn nút mơ để mơ nắp. (Hình 18) 13 Đánh tơi cơm.Đánh cơm cho phép hơi nước thừa thoát ra. Làm như vậy cơm sẽ tơi hơn. 14 Nhấn nút Stop/Cancel (Ngừng/Hủy) để chuyển sang chế độ chờ hoặc rút phich cắm để tắt
nồi cơm điện.
Tiếng ViệT78

Cơm vơi xúp 1 Thực hiện theo các bước từ 1 đến 9 trong mục ‘Nấu cơm’. 2 Nhấn nút Cook/OK (Nấu/OK) để xác nhận cài đặt (Hình 6). , Hướng dân đầu tiên xuất hiện trên màn hình.
3 Nhấn lại nút Cook/OK (Nấu/OK) để bắt đầu quá trình nấu.Nếu bạn không nhấn lại nút Cook/OK (Nấu/OK), quá trình nấu sẽ bắt đầu tự động sau 10 giây. , Đen Nấu/OK bật sáng và hình động nấu ăn xuất hiện trên màn hình hiển thị.
4 Nồi cơm điện phát ra tiếng bip và nút Cook/OK (Nấu/OK) nhấp nháy để báo đến lúc bạn phải thêm các nguyên liệu khác.
5 Thêm các nguyên liệu được hiển thị trên màn hình. Sau đó nhấn nút Cook/OK (Nấu/OK) để tiếp tục quá trình nấu.
Nếu bạn không nhấn lại nút Cook/OK (Nấu/OK), quá trình nấu sẽ tự động tiếp tục sau 30 giây. , Màn hình sẽ hiển thị thời gian đếm ngược tinh theo phút (10, 9, 8 v.v...) trong 10 phút cuối
của quá trình nấu. , Khi kết thúc quá trình nấu, thiết bị phát ra tiếng bip và thông báo ‘Hoàn thành’ xuất hiện trên
màn hình. 6 Nhấn nút Stop/Cancel (Ngừng/Hủy) để hủy quá trình nấu, cài đặt sẵn hoặc chế độ giữ ấm. 7 Nhấn nút Stop/Cancel (Ngừng/Hủy) để chuyển sang chế độ chờ hoặc rút phich cắm để tắt
nồi cơm điện.Chao congee
Menu Cháo Congee/Mì ông Pasta chứa 3 menu con cho cháo congee.
Menu HD4766 Thời gian nấu tương đôi
HD4766 Lượng gạo (chén)
HD4768 Thời gian nấu tương đôi
HD4768 Lượng gạo (chén)
Cháo congee gạo thường loại đăc
0,5-4 giờ 0,5-2 0,5-4 giờ 0,5-2,5
Cháo congee gạo thường loại loảng
0,5-4 giờ 0,5-1 0,5-4 giờ 0,5-1,5
Cháo congee trộn nhiều loại ngũ côc
0,5-4 giờ 0,5-2 0,5-4 giờ 0,5-2,5
1 Cho nguyên liệu vào nồi trong. 2 Thêm nước.Bảm đảm răng tất cả nguyên liệu kể cả nước không vượt quá mưc nước tối đa trên thang chia dành cho mì ống pasta như được chỉ dân trên mặt bên trong của nồi trong. - HD4768 (Hình 19) - HD4766 (Hình 20)
3 Thực hiện theo các bước 5 đến 8 trong mục ‘Nấu cơm’ trong chương này. 4 Nhấn nút Cháo congee/Mì ống Pasta (Hình 21). 5 Nhấn nút lên hoặc xuống để chọn loại cháo congee bạn muốn nấu. 6 Nhấn nút Cook/OK (Nấu/OK). , Thời gian nấu mặc định 1 giờ xuất hiện trên màn hình hiển thị.
Tiếng ViệT 79

, Nếu bạn đã chọn ‘Cháo congee ngũ cốc trộn’, hướng dân đầu tiên xuất hiện trên màn hình hiển thị.
Lưu ý: Nếu bạn đã chọn ‘Cháo congee ngũ cốc trộn’ và không nhấn nút Cook/OK (Nấu/OK), màn hình tự động hiển thị thời gian nấu sau 30 giây. 7 Để điều chỉnh thời gian, nhấn nút lên hoặc xuống. Nhấn và giữ nút lên hoặc xuống để dịch
chuyển nhanh thời gian tiến hoặc lùi.Bạn có thể đăt thời gian bất kỳ trong khoảng từ 30 phút đến 4 tiếng.Meo: Đặt 30 phút nếu bạn nấu 0,5 chén gạo với HD4766 hoặc HD4768. Đặt 4 giờ nếu bạn nấu 2 chén gạo với HD4766 hoặc 2.5 chén gạo với HD4768. 8 Nhấn nút Cook/OK (Nấu/OK) để bắt đầu quá trình nấu (Hình 6). , Đen Nấu/OK bật sáng và hình động nấu ăn xuất hiện trên màn hình hiển thị. , Màn hình hiển thị đếm lùi thời gian nấu tinh băng phút. , Khi kết thúc quá trình nấu, thiết bị phát ra tiếng bip và đen Giữ ấm/Hâm nóng bật sáng để
cho biết thiết bị đã chuyển sang chế độ giữ ấm. , Màn hình hiển thị thời gian giữ ấm đếm tiến tinh băng giờ (tối đa 12 giờ).
9 Nhấn nút Stop/Cancel (Ngừng/Hủy) để hủy chế độ giữ ấm. 10 Nhấn nút mơ để mơ nắp. 11 Nhấn nút Stop/Cancel (Ngừng/Hủy) để chuyển sang chế độ chờ hoặc rút phich cắm để tắt
nồi cơm điện.nấu ăn vơi cac menu khac.
Bảng dưới đây hiển thi thời gian nấu măc đinh và thời gian nấu có thể điều chỉnh trong các menu khác.
Thời gian nấu trong cac menu khac
Menu Thời gian nấu măc đinh
Dung tích tôi ưu cho thời gian nấu măc đinh
Thời gian nấu có thể điều chỉnh
Thời gian nấu gợi ý cho dung tích tôi đa
Mì ông Pasta 30 phút. 250g pasta 20-30 phút 30 phút.Xúp rau 30 phút. Mức độ xúp lên đến gạo thường
mức 430 phút-1 giờ 30 phút
1 giờ 30 phút
Xúp đun sôi lâu
3 giờ Mức độ xúp lên đến gạo thường mức 8
2-4 giờ 4 giờ
Sữa chua 4 giờ 4 chén sữa chua 3-6 giờ 4 giờXúp đậu xanh
1 giờ 2l nước 30 phút-4 giờ 2 giờ
Bánh ngũ côc 50 phút Hỗn hợp làm bánh lên đến mức Bánh
- -
Bánh cà rôt 50 phút Hỗn hợp làm bánh lên đến mức Bánh
- -
Hầm 1 giờ 300g thit 45 phút-4 giờ 3 giờ
Tiếng ViệT80

Menu Thời gian nấu măc đinh
Dung tích tôi ưu cho thời gian nấu măc đinh
Thời gian nấu có thể điều chỉnh
Thời gian nấu gợi ý cho dung tích tôi đa
Bánh pútđinh củ cải trắng
70 phút 600g củ cải trắng, 250g bí ngô, 360ml nước, 300g hỗn hợp bột gạo lên đến mức Bánh Pútđinh
- -
Bánh pútđinh khoai sọ
70 phút 700g khoai sọ, 250 hỗn hợp bột gạo, 700ml nước lên đến mức Bánh Pútđinh
- -
Hấp thức ăn 30 phút. 300g sườn lợn 10 phút-1 giờ 1 giờ
Mi ống PastaMenu Cháo Congee/Mì ông Pasta có 1 menu con cho mì ông pasta. 1 Cho nguyên liệu và nước vào nồi trong.Bảm đảm răng tất cả nguyên liệu kể cả nước không vượt quá mưc nước tối đa trên thang chia dành cho mì ống pasta như được chỉ dân trên mặt bên trong của nồi trong. - HD4768 (Hình 22) - HD4766 (Hình 23)
2 Thực hiện theo các bước 5 đến 8 trong mục ‘Nấu cơm’ trong chương này. 3 Nhấn nút Cháo congee/Mì ống Pasta. Sau đó nhấn nút lên hoặc xuống để chọn menu con
Pasta (Hình 21). , Hướng dân đầu tiên xuất hiện trên màn hình.
4 Nhấn nút Cook/OK (Nấu/OK). , Thời gian nấu mặc định 30 phút xuất hiện trên màn hình.
5 Để điều chỉnh thời gian, nhấn nút lên hoặc xuống. Nhấn và giữ nút lên hoặc xuống để dịch chuyển nhanh thời gian tiến hoặc lùi.
Bạn có thể đăt bất kỳ thời gian nào từ 20 đến 30 phút. 6 Nhấn nút Cook/OK (Nấu/OK) để bắt đầu quá trình nấu. , Đen Nấu/OK bật sáng và hình động nấu ăn xuất hiện trên màn hình hiển thị. , Màn hình hiển thị đếm lùi thời gian nấu tinh băng phút. , Khi kết thúc quá trình nấu, thiết bị phát tiếng bip và thông báo ‘Hoàn thành’ xuất hiện trên
màn hình. 7 Nhấn nút mơ để mơ nắp. 8 Nhấn nút Stop/Cancel (Ngừng/Hủy) để chuyển sang chế độ chờ hoặc rút phich cắm để tắt
nồi cơm điện.Xúp/HâmXúp
Menu Xúp/Hầm chứa 2 menu con cho xúp: xúp rau và xúp đun sôi lâu. Menu con xúp rau thích hợp để nấu các loại xúp chỉ cần thời gian nấu ngắn nhưng có công suất cao, như xúp cải bắp và thit. Menu con đun sôi lâu thích hợp cho các loại xúp cần thời gian nấu lâu hơn và công suất thấp để có được toàn bộ hương vi từ các nguyên liệu, như xúp gà với các loại thuôc bắc. 1 Cho nguyên liệu vào nồi trong theo hướng dân trên màn hình hiển thị.
Tiếng ViệT 81

Lưu ý: Bạn có thể cho rau để nấu xúp rau vào nồi trong ở bước thư hai để nấu mềm các nguyên liệu này. 2 Thêm nước.Bảo đảm răng tất cả các nguyên liệu kể cả nước không vượt quá mưc nước tối đa trên thang chia dành cho xúp được chỉ dân ơ mặt bên trong của nồi trong. - HD4768 (Hình 22) - HD4766 (Hình 23)
3 Thực hiện theo các bước 5 đến 8 trong mục ‘Nấu cơm’ trong chương này. 4 Nhấn nút Xúp/Hầm. (Hình 24) 5 Nhấn nút lên hoặc xuống để chọn loại xúp bạn muốn nấu. 6 Nhấn nút Cook/OK (Nấu/OK). , Hướng dân đầu tiên xuất hiện trên màn hình.
7 Nhấn nút Cook/OK. Nếu bạn không nhấn nút này, màn hình tự động hiển thị thời gian nấu cho xúp rau hoặc xúp sôi lâu sau 10 giây.
, Thời gian nấu mặc định (30 phút cho xúp rau và 3 giờ cho xúp sôi lâu) xuất hiện trên màn hình.
8 Để điều chỉnh thời gian nấu, nhấn nút lên hoặc xuống. Nhấn và giữ nút lên hoặc xuống để di chuyển nhanh thời gian tiến hoặc lùi.
Bạn có thể đăt bất kỳ thời gian nào từ 30 phút đến 1 giờ 30 phút cho xúp rau và từ 2 đến 4 giờ cho xúp sôi lâu. 9 Nhấn nút Cook/OK (Nấu/OK) để bắt đầu quá trình nấu. , Đen Nấu/OK bật sáng và hình động nấu ăn xuất hiện trên màn hình hiển thị. , Màn hình hiển thị đếm lùi thời gian nấu tinh băng phút. , Với xúp rau, thiết bị phát tiếng bip và đen Cook/OK nhấp nháy cho biết bạn phải thực hiện
bước tiếp theo được hiển thị trên màn hình. Nhấn nút Cook/OK (Nấu/OK) để tiếp tục quá trình nấu. Nếu bạn không nhấn nút này, quá trình nấu tiếp tục tự động sau 30 giây.
, Khi kết thúc quá trình nấu, thiết bị phát tiếng bip và thông báo ‘Hoàn thành’ xuất hiện trên màn hình.
, Màn hình đếm tiến thời gian giữ ấm tinh theo giờ (tối đa 12 giờ). 10 Nhấn nút Stop/Cancel (Ngừng/Hủy) để hủy chế độ giữ ấm. 11 Nhấn nút mơ để mơ nắp. 12 Nhấn nút Stop/Cancel (Ngừng/Hủy) để chuyển sang chế độ chờ hoặc rút phich cắm để tắt
nồi cơm điện.Hâm
Menu Xúp/Hầm có 1 menu con cho món hầm. 1 Cho nguyên liệu vào nồi trong.Bảo đảm răng tất cả nguyên liệu kể cả nước không vượt quá mưc nước tối đa trên thang chia cho món hầm được chỉ dân ơ mặt bên trong của nồi trong. 2 Thêm nước cho đến khi ngập ¾ lượng nguyên liệu. 3 Thực hiện theo các bước 5 đến 8 trong mục ‘Nấu cơm’ trong chương này. 4 Nhấn nút Xúp/Hầm (Hình 24). 5 Nhấn nút lên hoặc xuống để chọn menu con Món hầm. 6 Nhấn nút Cook/OK (Nấu/OK).
Tiếng ViệT82
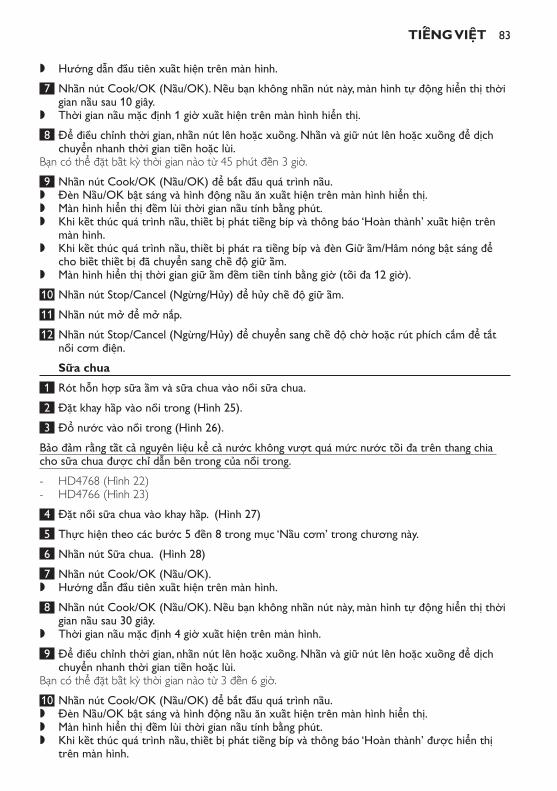
, Hướng dân đầu tiên xuất hiện trên màn hình. 7 Nhấn nút Cook/OK (Nấu/OK). Nếu bạn không nhấn nút này, màn hình tự động hiển thị thời
gian nấu sau 10 giây. , Thời gian nấu mặc định 1 giờ xuất hiện trên màn hình hiển thị.
8 Để điều chỉnh thời gian, nhấn nút lên hoặc xuống. Nhấn và giữ nút lên hoặc xuống để dịch chuyển nhanh thời gian tiến hoặc lùi.
Bạn có thể đăt bất kỳ thời gian nào từ 45 phút đến 3 giờ. 9 Nhấn nút Cook/OK (Nấu/OK) để bắt đầu quá trình nấu. , Đen Nấu/OK bật sáng và hình động nấu ăn xuất hiện trên màn hình hiển thị. , Màn hình hiển thị đếm lùi thời gian nấu tinh băng phút. , Khi kết thúc quá trình nấu, thiết bị phát tiếng bip và thông báo ‘Hoàn thành’ xuất hiện trên
màn hình. , Khi kết thúc quá trình nấu, thiết bị phát ra tiếng bip và đen Giữ ấm/Hâm nóng bật sáng để
cho biết thiết bị đã chuyển sang chế độ giữ ấm. , Màn hình hiển thị thời gian giữ ấm đếm tiến tinh băng giờ (tối đa 12 giờ).
10 Nhấn nút Stop/Cancel (Ngừng/Hủy) để hủy chế độ giữ ấm. 11 Nhấn nút mơ để mơ nắp. 12 Nhấn nút Stop/Cancel (Ngừng/Hủy) để chuyển sang chế độ chờ hoặc rút phich cắm để tắt
nồi cơm điện.Sữa chua
1 Rót hỗn hợp sữa ấm và sữa chua vào nồi sữa chua. 2 Đặt khay hấp vào nồi trong (Hình 25). 3 Đổ nước vào nồi trong (Hình 26).Bảo đảm răng tất cả nguyên liệu kể cả nước không vượt quá mưc nước tối đa trên thang chia cho sữa chua được chỉ dân bên trong của nồi trong. - HD4768 (Hình 22) - HD4766 (Hình 23)
4 Đặt nồi sữa chua vào khay hấp. (Hình 27) 5 Thực hiện theo các bước 5 đến 8 trong mục ‘Nấu cơm’ trong chương này. 6 Nhấn nút Sữa chua. (Hình 28) 7 Nhấn nút Cook/OK (Nấu/OK). , Hướng dân đầu tiên xuất hiện trên màn hình.
8 Nhấn nút Cook/OK (Nấu/OK). Nếu bạn không nhấn nút này, màn hình tự động hiển thị thời gian nấu sau 30 giây.
, Thời gian nấu mặc định 4 giờ xuất hiện trên màn hình. 9 Để điều chỉnh thời gian, nhấn nút lên hoặc xuống. Nhấn và giữ nút lên hoặc xuống để dịch
chuyển nhanh thời gian tiến hoặc lùi.Bạn có thể đăt bất kỳ thời gian nào từ 3 đến 6 giờ. 10 Nhấn nút Cook/OK (Nấu/OK) để bắt đầu quá trình nấu. , Đen Nấu/OK bật sáng và hình động nấu ăn xuất hiện trên màn hình hiển thị. , Màn hình hiển thị đếm lùi thời gian nấu tinh băng phút. , Khi kết thúc quá trình nấu, thiết bị phát tiếng bip và thông báo ‘Hoàn thành’ được hiển thị
trên màn hình.
Tiếng ViệT 83

11 Nhấn nút mơ để mơ nắp. 12 Nhấn nút Stop/Cancel (Ngừng/Hủy) để chuyển sang chế độ chờ hoặc rút phich cắm để tắt
nồi cơm điện.Món trang miêng/Banh Pútđinh
Menu Món tráng miệng/Bánh Pútđinh gồm 1 menu con cho món xúp tráng miệng, 2 menu con cho bánh pútđinh và 2 menu con cho bánh ngọt.
Xúp đậu xanh 1 Cho nguyên liệu vào nồi trong. 2 Thêm nước.Bảo đảm răng tất cả nguyên liệu kể cả nước không vượt quá mưc nước tối đa cho món tráng miệng được chỉ dân ơ bên trong của nồi trong. - HD4768 (Hình 22) - HD4766 (Hình 23)
3 Thực hiện theo các bước 5 đến 8 trong mục ‘Nấu cơm’ trong chương này. 4 Nhấn nút Món tráng miệng/Bánh pútđinh . (Hình 29) 5 Nhấn nút lên hoặc xuống để chọn món xúp đậu xanh. 6 Nhấn nút Cook/OK (Nấu/OK). , Hướng dân đầu tiên xuất hiện trên màn hình.
7 Nhấn nút Cook/OK (Nấu/OK). Nếu bạn không nhấn nút này, màn hình tự động hiển thị thời gian nấu sau 10 giây.
, Thời gian nấu mặc định 1 giờ xuất hiện trên màn hình hiển thị. 8 Để điều chỉnh thời gian, nhấn nút lên hoặc xuống. Nhấn và giữ nút lên hoặc xuống để dịch
chuyển nhanh thời gian tiến hoặc lùi.Bạn có thể đăt thời gian bất kỳ trong khoảng từ 30 phút đến 4 tiếng. 9 Nhấn nút Cook/OK (Nấu/OK) để bắt đầu quá trình nấu. , Đen Nấu/OK bật sáng và hình động nấu ăn xuất hiện trên màn hình hiển thị. , Màn hình hiển thị đếm lùi thời gian nấu tinh băng phút. , Khi kết thúc quá trình nấu, thiết bị phát ra tiếng bip và đen Giữ ấm/Hâm nóng bật sáng để
cho biết thiết bị đã chuyển sang chế độ giữ ấm. , Màn hình hiển thị thời gian giữ ấm đếm tiến tinh băng giờ (tối đa 12 giờ).
10 Nhấn nút Stop/Cancel (Ngừng/Hủy) để hủy chế độ giữ ấm. 11 Nhấn nút mơ để mơ nắp. 12 Nhấn nút Stop/Cancel (Ngừng/Hủy) để chuyển sang chế độ chờ hoặc rút phich cắm để tắt
nồi cơm điện.Banh pútđinh
Menu Món tráng miệng/Bánh pútđinh có 2 menu con cho bánh pútđinh: bánh pútđinh củ cải trắng và bánh pútđinh khoai sọ. 1 Cho nguyên liệu vào nồi trong. - Bánh pútđinh củ cải trắng: Cho củ cải trắng, lạp xườn Trung Quôc, tôm khô và gia vi vào nồi
trong và trộn đều. - Bánh pútđinh khoai sọ: cho khoai sọ, lạp xườn Trung Quôc, tôm khô và gia vi vào nồi trong và
trộn đều.
Tiếng ViệT84

Bảo đảm răng tất cả nguyên liệu kể cả nước không vượt quá mưc nước tối đa trên thang chia cho bánh pútđinh được chỉ dân bên trong của nồi trong.Lưu ý: Thực hiện theo các hướng dẫn trong công thưc làm bánh pútđinh củ cai trắng hoặc bánh pútđinh khoai sọ trong chương ‘Công thưc nấu ăn’. 2 Nhấn nút Món tráng miệng/Bánh pútđinh (Hình 29). 3 Nhấn nút lên hoặc xuống để chọn loại bánh pútđinh bạn muốn làm. 4 Nhấn nút Cook/OK (Nấu/OK). , Hướng dân đầu tiên xuất hiện trên màn hình.
5 Nhấn nút Cook/OK (Nấu/OK) để bắt đầu quá trình nấu. Nếu bạn không nhấn nút này, quá trình nấu sẽ không bắt đầu.
Lưu ý: Bạn không thể thay đổi thời gian nấu cho các menu con Bánh pútđinh. , Đen Nấu/OK bật sáng và hình động nấu ăn xuất hiện trên màn hình hiển thị. , Thiết bị phát tiếng bip và nút Cook/OK nhấp nháy để báo răng bạn phải thêm hỗn hợp bột
gạo. Cẩn thận khi mơ nắp để thêm hỗn hợp bột gạo. Nắp và hơi thoát ra từ nồi trong rất nóng. 6 Thêm hỗn hợp bột gạo và quấy đều. Sau đó nhấn nút Cook/OK (Nấu/OK) để tiếp tục quá
trình nấu. Nếu bạn không nhấn nút này, quá trình nấu sẽ không bắt đầu. , Màn hình hiển thị đếm lùi thời gian nấu tinh băng phút. , Khi kết thúc quá trình nấu, thiết bị phát tiếng bip và thông báo ‘Hoàn thành’ xuất hiện trên
màn hình. 7 Nhấn nút mơ để mơ nắp. 8 Nhấn nút Stop/Cancel (Ngừng/Hủy) để chuyển sang chế độ chờ hoặc rút phich cắm để tắt
nồi cơm điện.Làm banh
Menu Món tráng miệng/Bánh pútđinh có 2 menu con cho bánh ngọt: bánh ngũ côc và bánh cà rôt. 1 Trộn các nguyên liệu để chuẩn bị hỗn hợp làm bánh.Lưu ý: Thực hiện theo hướng dẫn trong các công thưc làm bánh ngọt tại chương ‘Công thưc nấu ăn’. 2 Cho dầu vào nồi trong. 3 Cho hỗn hợp làm bánh vào nồi trong. 4 Thực hiện theo các bước 5 đến 8 trong mục ‘Nấu cơm’ trong chương này. 5 Nhấn nút Món tráng miệng/Bánh pútđinh (Hình 29). 6 Nhấn nút lên hoặc xuống để chọn loại bánh bạn muốn làm. 7 Nhấn nút Cook/OK (Nấu/OK). , Hướng dân đầu tiên xuất hiện trên màn hình.
8 Nhấn nút Cook/OK (Nấu/OK) để bắt đầu quá trình nấu. Nếu bạn không nhấn nút này, quá trình nấu sẽ bắt đầu tự động sau 10 giây.
Lưu ý: Bạn không thể thay đổi thời gian nấu cho bánh ngọt. , Đen Nấu/OK bật sáng và hình động nấu ăn xuất hiện trên màn hình hiển thị. , Màn hình hiển thị đếm lùi thời gian nấu tinh băng phút. , Khi kết thúc quá trình nấu, thiết bị phát tiếng bip và thông báo ‘Hoàn thành’ được hiển thị
trên màn hình. 9 Nhấn nút mơ để mơ nắp.
Tiếng ViệT 85

10 Nhấn nút Stop/Cancel (Ngừng/Hủy) để chuyển sang chế độ chờ hoặc rút phich cắm để tắt nồi cơm điện.Hấp thức ăn
1 Đặt khay hấp vào giỏ hơi, vạch thẳng trên khay hấp phải trỏ đến dấu trên giỏ hơi. (Hình 30) 2 Rót 3 chen nước băng chen đong vào nồi trong.Sẽ mất khoảng 8 phút để đun sôi 3 chén nước.Lưu ý: Lượng nước phụ thuộc vào lượng thưc ăn cần hấp. 3 Đặt giỏ hơi đã gắn khay hấp vào nồi trong (Hình 31). 4 Cho thưc ăn cần hấp lên một cái đia hay cho vào khay hấp thưc ăn.Lưu ý: Để bao đam hấp đều, trai đều thưc ăn và không chất đống. 5 Thực hiện theo các bước 5 đến 8 trong mục ‘Nấu cơm’ trong chương này. 6 Nhấn nút Hấp để chọn menu Hấp (Hình 32). , Hướng dân đầu tiên xuất hiện trên màn hình.
7 Nhấn nút Cook/OK (Nấu/OK). Nếu bạn không nhấn nút này, màn hình tự động hiển thị thời gian nấu sau 30 giây.
, Thời gian nấu mặc định 30 phút xuất hiện trên màn hình. 8 Để điều chỉnh thời gian, nhấn nút lên hoặc xuống. Nhấn và giữ nút lên hoặc xuống để dịch
chuyển nhanh thời gian tiến hoặc lùi.Bạn có thể đăt thời gian bất kỳ trong khoảng từ 10 phút đến 1 tiếng. 9 Nhấn nút Cook/OK (Nấu/OK) để bắt đầu quá trình nấu. , Đen Nấu/OK bật sáng và hình động nấu ăn xuất hiện trên màn hình hiển thị. , Màn hình hiển thị đếm lùi thời gian nấu tinh băng phút. , Khi kết thúc quá trình nấu, thiết bị phát tiếng bip và thông báo ‘Hoàn thành’ xuất hiện trên
màn hình. 10 Nhấn nút mơ để mơ nắp. 11 Nhấn nút Stop/Cancel (Ngừng/Hủy) để chuyển sang chế độ chờ hoặc rút phich cắm để tắt
nồi cơm điện.Hâm nóng
Bạn có thể sử dụng chế độ hâm nóng để hâm nóng cơm nguội. Đô không quá nửa nồi để bảo đảm cơm được hâm nóng đều.Lưu ý: Không hâm nóng cơm nguội hai lần. 1 Đánh tơi cơm nguội và trải đều trong nồi trong. 2 Cho thêm ½ chen nước vào cơm để tránh bị khô. Lượng nước cần thêm tùy thuộc vào
lượng cơm sẽ được hâm nóng.Nếu cơm bắt đầu cháy, hãy đô thêm nước. 3 Thực hiện theo các bước 5 đến 8 trong mục ‘Nấu cơm’ trong chương này. 4 Nhấn nút Keep warm/Reheat (Giữ ấm/Hâm nóng) hai lân để bắt đầu quá trình hâm
nóng. (Hình 33) , Đen Giữ ấm/Hâm nóng bật sáng và hình ảnh động hâm nóng và thời gian hâm nóng còn lại
xuất hiện trên màn hình. (Hình 34)Lưu ý: Thời gian hâm nóng mặc định là 23 phút.
Tiếng ViệT86
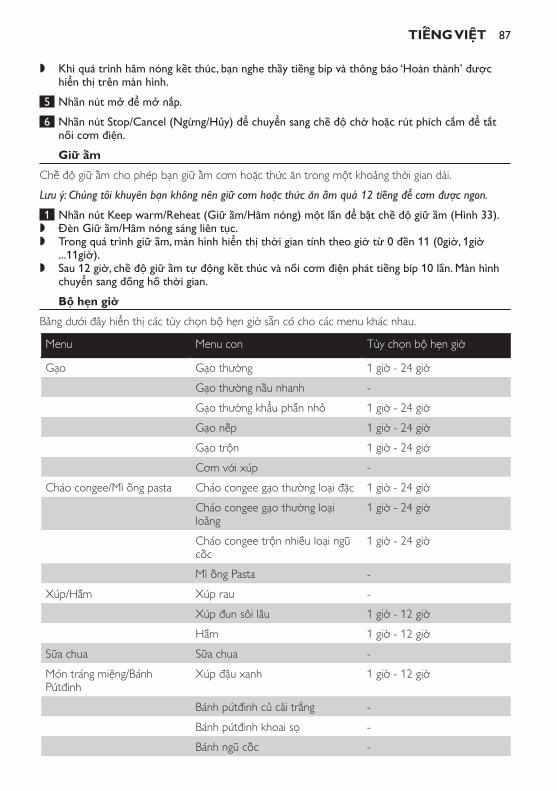
, Khi quá trình hâm nóng kết thúc, bạn nghe thấy tiếng bip và thông báo ‘Hoàn thành’ được hiển thị trên màn hình.
5 Nhấn nút mơ để mơ nắp. 6 Nhấn nút Stop/Cancel (Ngừng/Hủy) để chuyển sang chế độ chờ hoặc rút phich cắm để tắt
nồi cơm điện.giữ ấm
Chế độ giữ ấm cho phép bạn giữ ấm cơm hoăc thức ăn trong một khoảng thời gian dài.Lưu ý: Chúng tôi khuyên bạn không nên giữ cơm hoặc thưc ăn ấm quá 12 tiếng để cơm được ngon. 1 Nhấn nút Keep warm/Reheat (Giữ ấm/Hâm nóng) một lần để bật chế độ giữ ấm (Hình 33). , Đen Giữ ấm/Hâm nóng sáng liên tục. , Trong quá trình giữ ấm, màn hình hiển thị thời gian tinh theo giờ từ 0 đến 11 (0giờ, 1giờ
...11giờ). , Sau 12 giờ, chế độ giữ ấm tự động kết thúc và nồi cơm điện phát tiếng bip 10 lần. Màn hình
chuyển sang đồng hồ thời gian.Bô hẹn giờ
Bảng dưới đây hiển thi các tùy chọn bộ hẹn giờ sẵn có cho các menu khác nhau.
Menu Menu con Tùy chọn bộ hẹn giờ
Gạo Gạo thường 1 giờ - 24 giờGạo thường nấu nhanh -Gạo thường khẩu phần nhỏ 1 giờ - 24 giờGạo nếp 1 giờ - 24 giờGạo trộn 1 giờ - 24 giờCơm với xúp -
Cháo congee/Mì ông pasta Cháo congee gạo thường loại đăc 1 giờ - 24 giờCháo congee gạo thường loại loảng
1 giờ - 24 giờ
Cháo congee trộn nhiều loại ngũ côc
1 giờ - 24 giờ
Mì ông Pasta -Xúp/Hầm Xúp rau -
Xúp đun sôi lâu 1 giờ - 12 giờHầm 1 giờ - 12 giờ
Sữa chua Sữa chua -Món tráng miệng/Bánh Pútđinh
Xúp đậu xanh 1 giờ - 12 giờ
Bánh pútđinh củ cải trắng -Bánh pútđinh khoai sọ -Bánh ngũ côc -
Tiếng ViệT 87

Menu Menu con Tùy chọn bộ hẹn giờ
Bánh cà rôt -Hơi nước Hơi nước 1 giờ - 12 giờ
Lưu ý: Một số menu cho phép bạn đặt thời gian nấu. Bạn có thể đặt ca bộ hen giờ và thời gian nấu trong các menu này. Bạn có thể đặt bộ hen giờ trước và sau đó đặt thời gian nấu, hoặc ngược lại.
Đặt thời gian sẵn sàng bằng nút Preset/Clock (Cài sẵn/Đồng hồ) 1 Nhấn nút Preset/Clock (Cài sẵn/Đồng hồ) (Hình 4). , Đen cho các nút menu sẵn có bật sáng. (Hình 35)
2 Nhấn nút cho menu bạn muốn sử dụng và, nếu cần thiết, chọn menu con mong muốn băng nút lên hoặc xuống. Sau đó nhấn nút Cook/OK (Nấu/OK).
3 Để đặt thời gian sẵn sàng, nhấn nút lên hoặc xuống. Nhấn và giữ nút lên hoặc xuống để dịch chuyển nhanh thời gian tiến hoặc lùi.
Lưu ý: Vi dụ, bạn có thể sử dụng nút Preset/Clock (Cài sẵn/Đồng hồ) để đặt thời gian sẵn sàng vào lúc 18:30 (Hình 36). 4 Nhấn nút Cook/OK (Nấu/OK) để bắt đầu bộ hẹn giờ. , Thông báo ‘Saved’ (Đã lưu) xuất hiện trên màn hình. , Đen Cook/OK (Nấu/OK) bật sáng và đoạn chữ ‘Timer set’ (Bộ hẹn giờ đã được đặt) và thời
gian cài sẵn cho menu đã chọn xuất hiện trên màn hình. , Khi quá trình nấu bắt đầu, hình ảnh động nấu ăn và thời gian nấu còn lại xuất hiện trên màn
hình.Lưu ý: Nếu thời gian cài sẵn ngắn hơn tổng thời gian nấu cần thiết của menu đã chọn, nồi cơm điện bắt đầu quá trình nấu ngay lập tưc, sử dụng thời gian nấu mặc định. Thời gian nấu không bị rút ngắn lại nếu thời gian cài sẵn ngắn hơn tổng thời gian nấu yêu cầu. Bạn có thể điều chỉnh thời gian nấu trước khi đặt bộ hen giờ nếu thời gian nấu của menu đã chọn có thể điều chỉnh được.
Đặt thời gian sẵn sàng vơi cac nút menu 1 Nhấn nút của menu bạn muốn sử dụng và, nếu cần thiết, chọn menu con mong muốn băng
nút lên hoặc xuống. Sau đó nhấn nút Preset/Clock (Cài sẵn/Đồng hồ).Lưu ý: Bạn cũng có thể nhấn nút cài sẵn trong màn hình menu con, màn hình hướng dẫn từng bước đầu tiên hoặc màn hình thời gian nấu. 2 Để đặt thời gian sẵn sàng, nhấn nút lên hoặc xuống. Nhấn và giữ nút lên hoặc xuống để dịch
chuyển nhanh thời gian tiến hoặc lùi. Lưu ý: Vi dụ, bạn có thể sử dụng nút Preset/Clock (Cài sẵn/Đồng hồ) để đặt thời gian sẵn sàng vào lúc 18:30. 3 Nhấn nút Cook/OK (Nấu/OK) để bắt đầu bộ hẹn giờ. , Đen Cook/OK (Nấu/OK) bật sáng và đoạn chữ ‘Timer set’ (Bộ hẹn giờ đã được đặt) và thời
gian cài sẵn cho menu đã chọn xuất hiện trên màn hình. , Khi quá trình nấu bắt đầu, hình ảnh động nấu ăn và thời gian nấu còn lại xuất hiện trên màn
hình.
Vê sinh mayRút phich cắm của nồi cơm điện ra khỏi ổ cắm điện trước khi làm sạch nồi.Chờ cho tới khi nồi cơm điện đủ nguội trước khi làm sạch.
Tiếng ViệT88

Để bảo vệ lớp chông dính của nồi trong, không: - sử dụng nồi trong để rửa chén; - đô giấm vào nồi.
1 Lấy giỏ hơi cùng với khay hấp, nồi sữa chua và nồi trong ra khỏi thân của thiết bị. 2 Tháo nắp trong ra khỏi nắp ngoài băng cách nhấn vào các chốt tháo và keo nắp trong ra
ngoài và xuống dưới (Hình 37).Để lắp lại nắp trong, trượt đầu trên của nắp trong vào nắp ngoài và nhấn chôt tháo vào vi trí (‘nghe tiếng click’). 3 Tháo nắp thông hơi ra khỏi nắp ngoài băng cách keo nắp lên trên (Hình 38). - Để tháo nắp đáy của nắp thông hơi, ấn chôt khóa sang vi trí mở và tháo nắp ra khỏi bản
lề. (Hình 39) - Để lắp lại nắp đáy của nắp thông hơi, lắp các đầu của nắp đáy vào các rãnh của nắp thông
hơi, đẩy nắp đáy vào nắp thông hơi (1) và ấn chôt khóa sang vi trí đóng (2) (nghe tiếng ‘click’). (Hình 40)
- Để lắp nắp thông hơi vào lỗ thông hơi của nắp ngoài, lắp nắp thông hơi vào lỗ và ấn xuông. 4 Lau sạch nắp trong, nồi trong, giỏ hấp cùng với khay hấp, nồi sữa chua, muỗng cơm và nắp
thông hơi băng miếng xốp hoặc giẻ lau trong nước nóng cùng với một chút nước rửa chen. Không sử dụng những chất làm sạch có tinh ăn mòn, máy rửa chen hay dụng cụ kim loại để làm sạch nồi trong vì những thư này sẽ làm hỏng lớp tráng chống dinh. 5 Chỉ sử dụng vải ẩm để lau sạch phần bên trong và bên ngoài của thân nồi cơm điện. Không nhúng phần thân nồi vào trong nước, hay rửa dưới vòi nước.
Bao quan 1 Bạn có thể bảo quản tất cả các phụ kiện bên trong thiết bị băng cách sau: (Hình 41) - Đăt khay hấp vào nồi trong. - Đăt nồi sữa chua vào nồi trong. - Đăt khay hấp vào nồi trong.
2 Bảo quản máy ơ nơi an toàn và khô ráo.
Môi trường - Không vứt thiết bi này cùng chung với chất thải gia đình thông thường khi ngừng sử dụng nó.
Hãy đem nó đến điểm thu gom chính thức để tái chế. Làm như thế, bạn sẽ giúp bảo vệ môi trường (Hình 42).
Bao hành và dich vuNếu bạn cần biết dich vụ, thông tin hay găp trục trăc, vui lòng vào website của Philips tại www.philips.com hoăc liên hệ với Trung Tâm Chăm Sóc Khách Hàng của Philips ở nước bạn (bạn sẽ tìm thấy sô điện thoại của Trung tâm trong tờ bảo hành khắp thế giới). Nếu không có Trung Tâm Chăm Sóc Khách Hàng tại quôc gia của bạn, hãy liên hệ với đại lý Philips tại đia phương bạn.
Cach khăc phuc sự cốNếu nồi cơm điện hoạt động không bình thường hoăc chất lượng nấu không tôt, hãy tham khảo bảng sau đây. Nếu bạn không thể giải quyết được vấn đề, vui lòng liên hệ với Trung Tâm Chăm Sóc Khách Hàng của Philips tại nước của bạn.
Tiếng ViệT 89

Vấn đề Nguyên nhân có thể Giải pháp
Đèn của nút Cook/OK (Nấu/OK) không bật sáng.
Có vấn đề về dây nôi hay phích cắm điện.
Kiểm tra xem dây điện nguồn có nôi chăt với nồi cơm điện không và xem phích cắm có cắm chăt vào ô điện không.
Đèn báo bi trục trăc. Mang thiết bi đến đại lý Philips của bạn hoăc trung tâm dich vụ được ủy quyền bởi Philips.
Đèn Keep warm/Reheat (Giữ ấm/Hâm nóng) không bật sáng khi quá trình nấu kết thúc.
Đèn báo bi trục trăc. Mang thiết bi đến đại lý Philips của bạn hoăc trung tâm dich vụ được ủy quyền bởi Philips.
Bạn đang hâm nóng thức ăn, nướng bánh, làm sữa chua, nấu cơm với xúp, nấu mì ông pasta hoăc hấp thức ăn.
Chế độ giữ ấm tự động chỉ áp dụng cho các menu cơm, cháo congee, xúp, hầm và món tráng miệng.
Màn hình không hoạt động.
Thiết bi không được cắm điện.
Nếu thiết bi không được cắm điện, chức năng dự phòng mất điện không hoạt động và màn hình sẽ không hoạt động.
Cơm không chín. Không có đủ nước. Cho thêm nước theo thang phân chia các mức nước ở nồi trong (xem chương ‘Cách sử dụng thiết bi’).
Quá trình nấu không bắt đầu.
Bạn không nhấn nút Cook/OK (Nấu/OK).
Nồi trong không tiếp xúc tôt với bộ phận làm nóng.
Đảm bảo răng không có vật lạ trên bộ phận làm nóng.
Bộ phận làm nóng bi hư hỏng.
Mang thiết bi đến đại lý Philips của bạn hoăc trung tâm dich vụ được ủy quyền bởi Philips.
Nồi trong bi biến dạng. Mang nồi trong đến đại lý Philips hoăc trung tâm dich vụ được Philips ủy quyền.
Bánh không được nướng đúng cách.
Quá nhiều nguyên liệu. Kiểm tra sô lượng được đề cập trong các công thức làm bánh tại chương ‘Công thức nấu ăn’.
Cơm quá cứng hoăc quá nhão.
Sử dụng không đủ hoăc quá nhiều nước.
Cho thêm nước theo thang phân chia các mức nước ở nồi trong (xem chương ‘Cách sử dụng thiết bi’).
Bạn đã chọn menu không chính xác.
Chọn menu yêu cầu (xem chương ‘Sử dụng thiết bi’).
Có những cục bột trong bánh pútđinh.
Bạn không trộn nguyên liệu làm bánh pútđinh đúng cách.
Sau khi rót nước vào hỗn hợp bột, quấy hỗn hợp thật kỹ cho đến khi hỗn hợp trở nên nhuyễn.
Tiếng ViệT90

Vấn đề Nguyên nhân có thể Giải pháp
Đèn Preset/Clock (Cài sẵn/Đồng hồ) không sáng măc dù tôi đã đăt bộ hẹn giờ.
Đèn báo bi trục trăc. Mang thiết bi đến đại lý Philips của bạn hoăc trung tâm dich vụ được ủy quyền bởi Philips.
Cơm bi khét. Bạn không vo gạo đúng cách.
Rửa sạch gạo đến khi nước vo gạo trong hoàn toàn.
Nồi cơm điện không tự động chuyển sang chế độ giữ ấm.
Bạn đang hâm nóng thức ăn, nướng bánh, nấu cơm với xúp, nấu mì ông pasta hoăc hấp thức ăn.
Chế độ giữ ấm chỉ hoạt động với các menu cơm, cháo congee, xúp, hầm và món tráng miệng.
Bộ điều khiển nhiệt độ bi hư hỏng.
Mang thiết bi đến đại lý Philips của bạn hoăc trung tâm dich vụ được ủy quyền bởi Philips.
Sữa chua không đủ chắc hoăc không thành hình.
Bạn đã làm nóng sữa quá 40°C, làm hỏng vi khuẩn trong mẻ cấy vi khuẩn sữa chua.
Không làm nóng sữa quá lâu để giữ cho vi khuẩn sông trong mẻ cấy vi khuẩn sữa chua. Để có sữa chua mượt hơn và chắc hơn, bạn có thể thêm 60g sữa bột vào sữa và làm nóng.
Thông báo lỗi E5 xuất hiện trên màn hình.
Đã xảy ra mất điện trong quá trình nấu hoăc ở chế độ giữ ấm và kéo dài quá 2 giờ.
Khi nguồn điện được khôi phục, nhấn nút Stop/Cancel (Ngừng/Hủy) để khởi tạo lại thiết bi.
Công thức nấu ănMi ống Pasta
Phục vụ 3-4 ngườiNguyên liệu: - 250g pasta (penne hoăc macaroni) - 500ml dầu pasta - 700ml nước
1 Cho mì pasta và dầu pasta vào nồi trong và thêm nước đến mưc nước dành cho pasta. Nhấn nút Congee/Pasta (Cháo congee/Mì pasta) và chọn menu con Pasta. Đặt thời gian nấu 20 phút cho mì macaroni hoặc 30 phút cho mì penne. Sau đó nhấn nút Cook/OK (Nấu/OK) để nấu.
2 Khi quá trình nấu mì pasta kết thúc, rắc một chút tiêu hoặc pho mát lên trên và phục vụ pasta nóng. Sữa chua
Phục vụ 4 ngườiNguyên liệu: - 500ml sữa - 100ml sữa chua thường còn sông
1 Đặt sữa chua tại nhiệt độ trong phòng một vài phút trước khi đun để làm nóng mẻ cấy vi khuẩn sữa chua. Làm nóng sữa đến khoảng 40°C. Trộn nhanh sữa chua với sữa ấm trong một nồi lớn riêng và rót hỗn hợp vào các nồi sữa chua. Đậy nắp nồi.
Tiếng ViệT 91

Lưu ý: Chỉ mất một vài giây để làm nóng sữa đến 40°C. Nếu sữa đạt nhiệt độ quá cao, điều này sẽ làm hỏng các vi khuẩn trong sữa chua. 2 Đặt khay hấp trong nồi trong. Thêm nước cho đến chỉ báo mưc nước cho sữa chua. Sau đó
đặt các chen sữa chua vào khay hấp. 3 Nhấn nút Yoghurt (Sữa chua). Đặt thời gian nấu 3 giờ. Sau đó nhấn nút Cook/OK (Nấu/OK)
để nấu.Lưu ý: Nếu bạn muốn vị chua hơn, bạn có thể đặt thời gian nấu lâu hơn. 4 Khi quá trình nấu sữa chua kết thúc, thêm một chút hoa quả hoặc mật ong vào sữa chua và
dùng ngay. Hoặc bạn có thể để sữa chua nguội xuống và đặt vào tủ lạnh qua đêm và sau đó ăn lạnh. Mẹo
Để có được sữa chua mượt hơn và chắc hơn, bạn cũng có thể thêm 60g sữa bột vào sữa và làm nóng. Sau đó thực hiện theo các bước ở trên.
Banh cà rốt Phục vụ 3-4 ngườiNguyên liệu: - 250ml dầu thực vật - 4 quả trứng lớn - 50g đường trắng - 225g bột đa chức năng - 2 thìa bột làm bánh - ½ thìa cà phê (2g) sô-đa làm bánh - Một ít muôi - 1 thìa cà phê chiết xuất vani - 190g cà rôt nạo
1 Cho trưng, dầu, đường trắng và chiết xuất vani vào một bát lớn và đánh chúng với nhau.Lưu ý: Bao đam rằng không có đường vón cục. 2 Trộn bột, sô-đa làm bánh, bột làm bánh và muối. 3 Thêm cà rốt nạo. 4 Rót hỗn hợp vào nồi trong. 5 Nhấn nút Dessert/Pudding (Món tráng miệng/Bánh pútđinh) và chọn menu con Bánh cà rốt. 6 Nhấn nút Cook/OK (Nấu/OK) để nấu.
Banh bôt yến mạch chuốiPhục vụ 3-4 ngườiNguyên liệu: - 120g bột đa chức năng - 120g bột yến mạch - 90g đường nâu - 2¼ thìa bột làm bánh - 38g sữa bột - 2,5 quả chuôi lớn - 2 quả trứng lớn (120-130g) - 1 lòng trắng trứng (35-40g) - 1,5 thìa bơ (mềm) - 1 thìa dầu vani
Tiếng ViệT92

- 1,5 thìa mật 1 Trộn bột, bột yến mạch, đường nâu, bột làm bánh và sữa bột trong bát trộn. 2 Nghiền chuối thành bột nhão. 3 Trong một chiếc bát khác, trộn trưng, lòng trắng trưng, bột nhão chuối, bơ mềm, dầu vani và
mật. Sau đó quấy nguyên liệu đã trộn trong bước 1. Trộn kỹ và bảo đảm răng hỗn hợp không vón cục.
Meo: Để tăng hương vị chuối của bánh, sử dụng một qua chuối chin và nghiền. Meo: Để làm cho bánh ẩm hơn, thêm một nửa qua chuối khác. 4 Rót hỗn hợp làm bánh vào nồi trong. 5 Nhấn nút Dessert/Pudding (Món tráng miệng/Bánh Pútđinh) và chọn menu con Bánh bột yến
mạch. 6 Nhấn nút Cook/OK (Nấu/OK) để nấu.
Banh pútđinh củ cai trăngPhục vụ 3-4 ngườiNguyên liệu: - 250g bột gạo - 7 thìa bột tang mien (56g) - 60g tôm khô - 2 chiếc lạp xườn Trung Quôc (90g) - 700g củ cải trắng - 360ml nước
Gia vi: - 2 thìa bột gà - 2 thìa đường - 1 thìa cà phê tiêu trắng
1 Trộn bột gạo và bột tang mien với 360ml nước trong bát trộn và đặt sang một bên. 2 Băm củ cải trắng. 3 Cắt lạp xườn Trung Quốc thành các miếng be. 4 Nhấn nút Dessert/Pudding (Món tráng miệng/Bánh pútđinh) và chọn menu con Bánh pútđinh
củ cải trắng. 5 Cho lạp xườn Trung Quốc, tôm khô và củ cải trắng băm vào nồi trong. Nhấn nút Cook/OK
(Nấu/OK) để nấu trong 20 phút.Meo: Để tăng hương vị, rán nguyên liệu trong nồi trong 5 phút sau khi bạn đã nhấn nút Cook/OK (Nấu/OK) và sau đó đóng nắp. 6 Khi nồi cơm điện phát tiếng bip, quấy gia vị vào hỗn hợp củ cải trắng và rót từ từ hỗn hợp
bột vào nồi trong. Quấy lại.Meo: Rót hỗn hợp bột thành 3 mẻ. Sau khi rót vào từng mẻ, quấy kỹ để tránh vón cục. 7 Nhấn nút Cook/OK (Nấu/OK) để tiếp tục nấu. Meo: Bạn có thể ăn bánh pútđinh khi bánh vẫn còn nóng, hoặc bạn có thể để bánh nguội đi trong tủ lạnh và sau đó rán bánh.
Banh pútđinh khoai sọPhục vụ 3-4 người
Tiếng ViệT 93

Nguyên liệu: - 400g khoai sọ - 150g bột gạo - 100g tinh bột ngô - 2 chiếc lạp xườn Trung Quôc (90g) - 60g tôm khô - 700ml nước
Gia vi 1: - 1 thìa nước - ½ thìa xì dầu - 1½ thìa cà phê bột gà - ¼ thìa cà phê hạt tiêu Gia-mai-ca - ½ thìa cà phê muôi - ¼ thìa cà phê tiêu trắng
Gia vi 1: - ½ thìa cà phê xì dầu - ¼ thìa cà phê đường - ½ thìa rượu shaoxing
1 Trộn bột gạo và tinh bột ngô với 250ml nước trong bát trộn và đặt sang bên cạnh. 2 Cắt khoai môn thành các miếng vuông 1,2cm và trộn chúng với gia vị 1. 3 Cắt lạp xườn Trung Quốc thành các miếng nhỏ và trộn chúng với gia vị 2. 4 Nhấn nút Dessert/Pudding (Món tráng miệng/Bánh pútđinh) và chọn menu con Bánh pútđinh
khoai môn. 5 Cho lạp xườn Trung Quốc, tôm khô, khoai môn và 450ml nước vào nồi trong. Nhấn nút
Cook/OK (Nấu/OK) để nấu trong 20 phút.Meo: Để tăng hương vị, rán nguyên liệu trong nồi trong 5 phút sau khi đã nhấn nút Cook/OK (Nấu/OK) và sau đó đóng nắp. 6 Khi nồi cơm điện phát tiếng bip, mơ nắp và nghiền khoai môn thành bột nhuyễn. Quấy lại
hỗn hợp bột và rót từ từ hỗn hợp vào nồi trong. Quấy lại.Meo: Rót hỗn hợp bột thành 3 mẻ. Sau khi rót vào từng mẻ, quấy kỹ để tránh vón cục. 7 Nhấn nút Cook/OK (Nấu/OK) để tiếp tục nấu. Meo: Bạn có thể ăn bánh pútđinh khi bánh còn nóng, hoặc bạn có thể để bánh nguội xuống trong tủ lạnh và sau đó rán bánh.
Tiếng ViệT94

95

96

97

98
2
12:00
3
2 x
4
clock setting
clocksetting
5
6 7
Saved!
Saved!
8
clock settinglanguage setting
languagesetting
9
Simplified ChineseTraditionalChinese
English
English
10 11 12 13
14 15 16 17
18 19 20 21

22 23 24 25
26 27 28 29
30 31 32
2 x
33
23
23
34 35
18:30
36 37
38 39
12
40 41
42

4222.200.0416.1


