Embed Size (px)
Citation preview
Inside this issue:
Fun Flexible
Creative Self
Esteem
Special
Needs
Lones
Resources Healthy
Lifestyles Rangers
STEM Environment Program
FunFinder
Pledge to Use
Reusable: Water
Bottles and/or
Shopping Bags
2
Map Your Meal 7
Make Your Own
Green Products 10
Plant a Tree 14
Be an Energy
Detective 17
Supporting Animal
Habitats 23
Transforming Trash
to Treasure 28
BC PROGRAM COMMITTEE
January 2014
© Girl Guides of Canada - BC Program Committee
Sustainability.
Every unit is
encouraged to take part
in this initiative, and to
log your actions on the
NSP website at
http://nsp.girlguides.ca.
Once you have logged
your actions, you can
purchase your
Operation Earth Action
crest from the online
store. https://www.thegirlguidestore.ca/
Operation Earth Action
is the 2012-2014
National Service Project
(NSP) for Girl Guides of
Canada - Guides du
Canada. This NSP is
based on the United
Nations’ Millennium
Development Goal #7:
Ensure Environmental
Operation Earth Action Issue
Operation Earth Action Activities the more we can help
the environment!
The NSP website
suggests activities for
each of these sections.
The BC Program
Committee has come up
with additional, alternate
activity ideas for each of
the seven sections. You
are welcome to adapt
any of the ideas found
online or in this issue of
the FunFinder to meet
the objectives of the
challenge. The goal is to
encourage our members
to work together to
make a difference
for our world.
Visit http://
nsp.girlguides.ca/
home.aspx to view the
complete Operation
Earth Action package
(there is a link at the
bottom of the page).
Don’t forget to LOG
YOUR ACTIONS by
clicking the “Take
Action” button for each
section you complete,
then submitting your
actions using the Unit or
Individual reporting
buttons on the right side
of the screen.
To earn your Operation Earth Action crest, you must complete at least two activities from the seven sections below:
1. Pledge to use reusable: water bottles and/or shopping bags
2. Map your meal 3. Make your own
green products 4. Plant a tree 5. Be an energy
detective 6. Supporting animal
habitats 7. Transforming trash
to treasure
Although you only need
to do two activities, the
more activities you do,
The BC Program Committee is a
busy and rewarding committee
to be a part of. We create
challenges, produce the
FunFinder, provide trainings for
Guiders and host Girl Events.
We work as a team for many of
our activities, but also have
individual responsibilities based
on our positions.
We are currently looking to fill a
number of positions on our team
with dedicated Guiders who are
passionate about the program.
Please see the last page for
more information. TAKE ACTION!

PLEDGE TO USE REUSABLE: WATER BOTTLES AND/OR SHOPPING BAGS
FunFinder (January 2014) © Girl Guides of Canada - BC Program Committee Page 2
Choosing to use a re-usable drink container whenever possible
Choosing to use a re-usable shopping bag whenever possible
Date my pledge was logged with Girl Guides of Canada
Signature Name
I pledge to help reduce waste by:
Girl Guides of Canada is asking that you pledge online and log your National Service
Project actions. Go to http://nsp.girlguides.ca/pledge.aspx to do this.
Plastic Shopping Bags:
Did you know …
… 17,000 plastic bags are used every
minute in Canada. In a year, this is
enough bags to go around the world 55
times.
… that the plastic bag that you chose to
use for a few minutes can take up to
1000 years to decompose.
… plastic bags can kill wildlife who
mistake them for food.
… Using a fabric shopping bag impacts
the environment in a positive way from
the first time that you use it, and they
will last for years.
Plastic Water Bottles:
Did you know …
… Bottled water can contribute to world
water shortages because to
manufacture a one litre water bottle, it
takes 3 to 5 litres of water.
… In 2009, Stewardship Ontario said that
44% of plastic bottles or 30,906 tonnes
of plastic bottles ended up in landfills.
… It takes approximately 700 years for a
plastic bottle to decompose
… choosing to use a reusable water
bottle, saves both the environment and
money! It costs up to $2.50 for a litre
of water, but tap water is free.
My Pledge to Save My Environment
Supplies
reusable water bottle
measuring tape
1 foam sheet (8.5” x 11”) and foam
scraps
scissors
plastic lacing
¼” hole punch
glue
elastic band
paper and pencil
coordinating duct tape
Directions
1. Measure the height of the water bottle and divide in half. Write this number down.
2. Measure the circumference of the bottle and add one inch. Write this number down.
3. Measure and cut out a rectangle from one of the foam sheets using your first measurement for the height and your second measurement for the length. For example, if your bottle is 9 inches high and 5 inches around, your foam rectangle will be 4.5 inches X 6 inches.
4. Punch 1 hole every inch of the height at both ends so they match up.
5. Cut shapes out of other pieces of foam and decorate.
6. Cup Sling: Cut a 7” piece of duct tape. Tape one end 1/3 of the way into the left side of the rectangle, parallel to the short side. Tape the other end 1/3 of the way into the right side of the rectangle, parallel to the short side. Do not let your sling to drop below the bottom of the foam.
7. Shoulder Strap: Cut a piece of duct tape about a metre long.
FunFinder (January 2014) © Girl Guides of Canada - BC Program Committee Page 3
Foam Water Bottle Carrier Supplies
plastic cups with lids – preferably
white or a light colour
permanent markers in a variety of
colours
jewels for bedazzling
Ideas for your cups:
positive words – have each girl
write her own name on a cup, then
pass it around to everyone in the
group to write a positive word about
that person, i.e. caring, amazing,
kind, friendly etc. In the end, the
girls will each have a personalized
cup that will remind them of the
positive examples they are to
everyone around them.
Create a work of art using simple
designs like Australian dot painting,
Warli art, tribal designs, etc. or
intricate designs of leaves, swirls,
flowers, etc.
bejewel the cup with rhinestones
(be careful when washing)
Note: You could also decorate plastic
water bottles with permanent
markers. Just make sure that you
experiment ahead of time to see that
the colours stay on when washed.
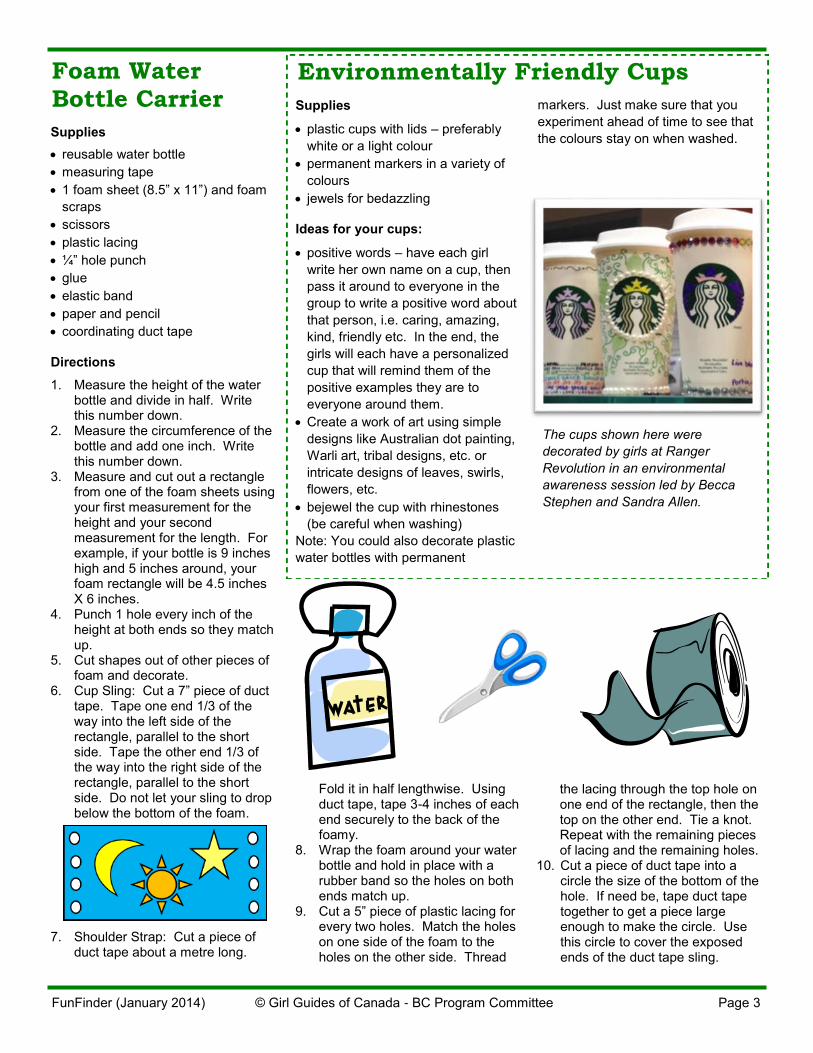
Environmentally Friendly Cups
the lacing through the top hole on one end of the rectangle, then the top on the other end. Tie a knot. Repeat with the remaining pieces of lacing and the remaining holes.
10. Cut a piece of duct tape into a circle the size of the bottom of the hole. If need be, tape duct tape together to get a piece large enough to make the circle. Use this circle to cover the exposed ends of the duct tape sling.
Fold it in half lengthwise. Using duct tape, tape 3-4 inches of each end securely to the back of the foamy.
8. Wrap the foam around your water bottle and hold in place with a rubber band so the holes on both ends match up.
9. Cut a 5” piece of plastic lacing for every two holes. Match the holes on one side of the foam to the holes on the other side. Thread
The cups shown here were
decorated by girls at Ranger
Revolution in an environmental
awareness session led by Becca
Stephen and Sandra Allen.
Supplies
2 coordinating colours of duct tape
ruler
scissors
measuring tape
pencil and paper
Directions
1. Bottom straps: Cut two 5 x 23 cm strips. Fold in half lengthwise and set aside.
2. Shoulder strap: Cut 2.5 cm x 1 m strip. Fold in half lengthwise and set aside.
3. On your paper make a table similar to this one:
a) Measure the height of the bottle ● Divide by 2 – write this number under “inside” ● Add 2.5 cm to the above measurement and write this number under “outside”. b) Measure the circumference of the bottle (all the way around) ● Write this number under inside rectangle ● Add 2.5 cm to the above measurement and this write number under “outside”.
Example:
4. You will now be making rectangles out of duct tape by taking strips of duct tape and overlapping a little to make your rectangle more secure. Use the measurements that you’ve put
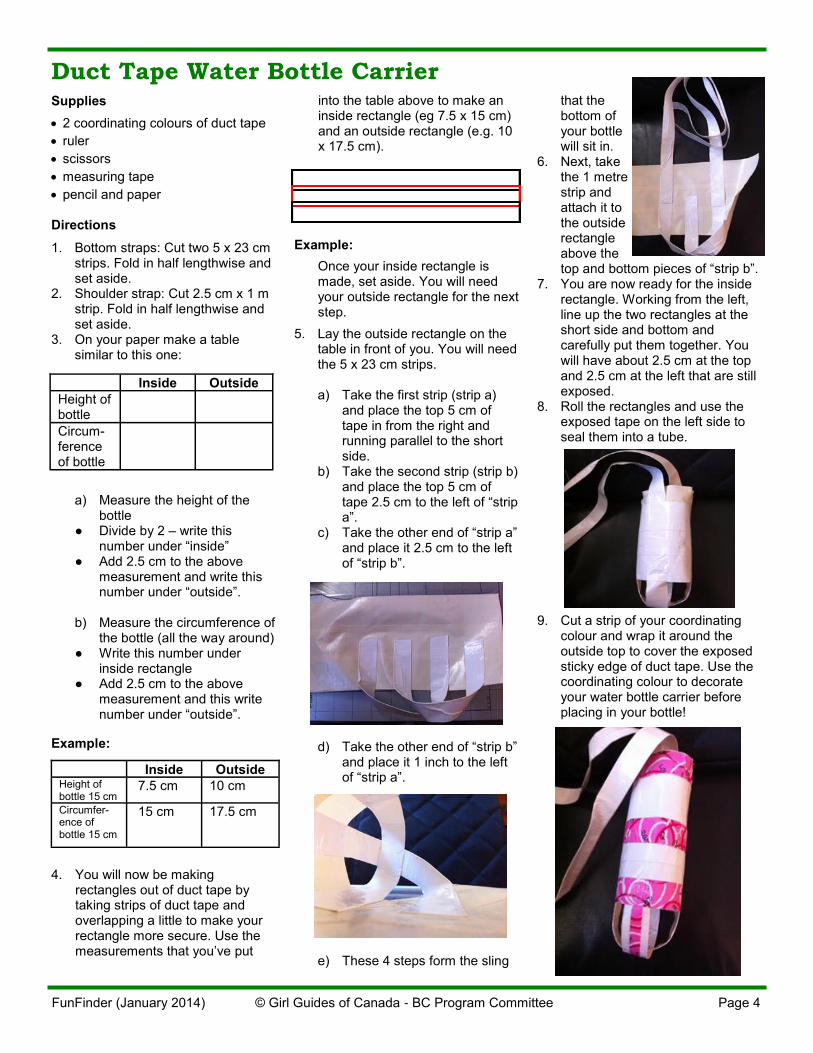
Duct Tape Water Bottle Carrier into the table above to make an inside rectangle (eg 7.5 x 15 cm) and an outside rectangle (e.g. 10 x 17.5 cm).
Example:
Once your inside rectangle is made, set aside. You will need your outside rectangle for the next step.
5. Lay the outside rectangle on the table in front of you. You will need the 5 x 23 cm strips. a) Take the first strip (strip a) and place the top 5 cm of tape in from the right and running parallel to the short side. b) Take the second strip (strip b) and place the top 5 cm of tape 2.5 cm to the left of “strip a”. c) Take the other end of “strip a” and place it 2.5 cm to the left of “strip b”.
d) Take the other end of “strip b” and place it 1 inch to the left of “strip a”.
e) These 4 steps form the sling
that the bottom of your bottle will sit in.
6. Next, take the 1 metre strip and attach it to the outside rectangle above the top and bottom pieces of “strip b”.
7. You are now ready for the inside rectangle. Working from the left, line up the two rectangles at the short side and bottom and carefully put them together. You will have about 2.5 cm at the top and 2.5 cm at the left that are still exposed.
8. Roll the rectangles and use the exposed tape on the left side to seal them into a tube.
9. Cut a strip of your coordinating colour and wrap it around the outside top to cover the exposed sticky edge of duct tape. Use the coordinating colour to decorate your water bottle carrier before placing in your bottle!
FunFinder (January 2014) © Girl Guides of Canada - BC Program Committee Page 4
Inside Outside
Height of bottle
Circum-ference of bottle
Inside Outside Height of bottle 15 cm
7.5 cm 10 cm
Circumfer-ence of bottle 15 cm
15 cm 17.5 cm
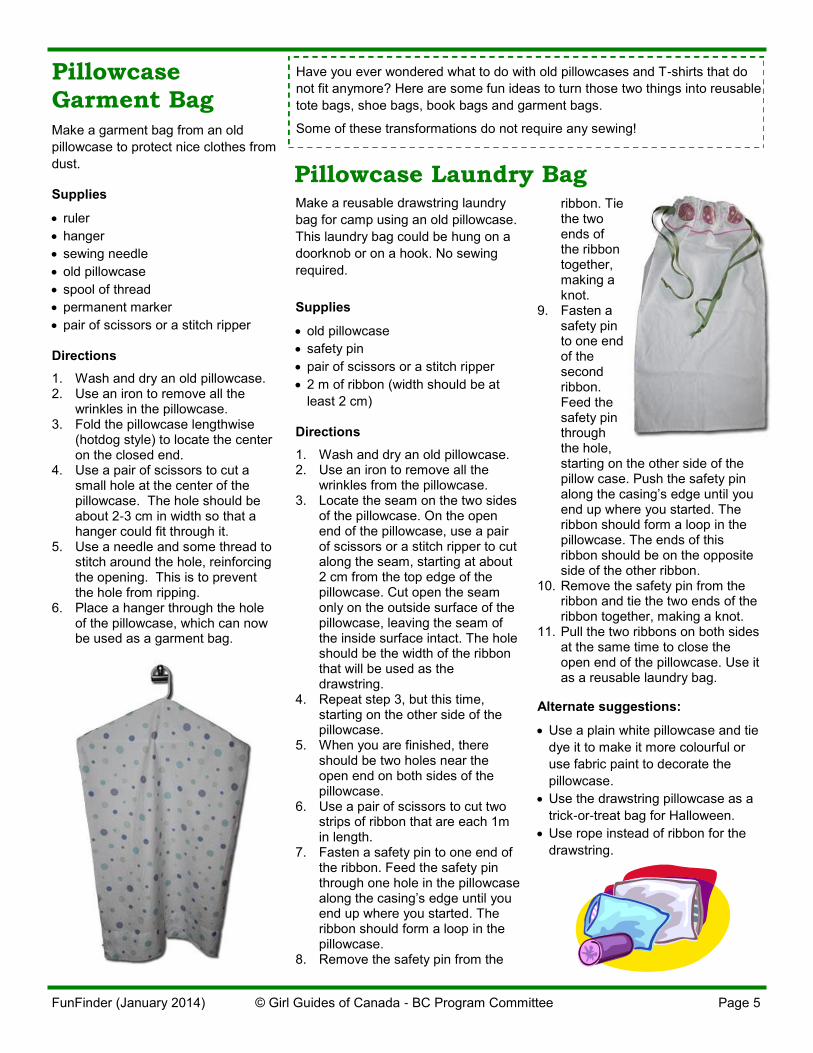
Make a garment bag from an old
pillowcase to protect nice clothes from
dust.
Supplies
ruler
hanger
sewing needle
old pillowcase
spool of thread
permanent marker
pair of scissors or a stitch ripper
Directions
1. Wash and dry an old pillowcase. 2. Use an iron to remove all the
wrinkles in the pillowcase. 3. Fold the pillowcase lengthwise
(hotdog style) to locate the center on the closed end.
4. Use a pair of scissors to cut a small hole at the center of the pillowcase. The hole should be about 2-3 cm in width so that a hanger could fit through it.
5. Use a needle and some thread to stitch around the hole, reinforcing the opening. This is to prevent the hole from ripping.
6. Place a hanger through the hole of the pillowcase, which can now be used as a garment bag.
Pillowcase Garment Bag
FunFinder (January 2014) © Girl Guides of Canada - BC Program Committee Page 5
Pillowcase Laundry Bag Make a reusable drawstring laundry
bag for camp using an old pillowcase.
This laundry bag could be hung on a
doorknob or on a hook. No sewing
required.
Supplies
old pillowcase
safety pin
pair of scissors or a stitch ripper
2 m of ribbon (width should be at
least 2 cm)
Directions
1. Wash and dry an old pillowcase. 2. Use an iron to remove all the
wrinkles from the pillowcase. 3. Locate the seam on the two sides
of the pillowcase. On the open end of the pillowcase, use a pair of scissors or a stitch ripper to cut along the seam, starting at about 2 cm from the top edge of the pillowcase. Cut open the seam only on the outside surface of the pillowcase, leaving the seam of the inside surface intact. The hole should be the width of the ribbon that will be used as the drawstring.
4. Repeat step 3, but this time, starting on the other side of the pillowcase.
5. When you are finished, there should be two holes near the open end on both sides of the pillowcase.
6. Use a pair of scissors to cut two strips of ribbon that are each 1m in length.
7. Fasten a safety pin to one end of the ribbon. Feed the safety pin through one hole in the pillowcase along the casing’s edge until you end up where you started. The ribbon should form a loop in the pillowcase.
8. Remove the safety pin from the
ribbon. Tie the two ends of the ribbon together, making a knot.
9. Fasten a safety pin to one end of the second ribbon. Feed the safety pin through the hole, starting on the other side of the pillow case. Push the safety pin along the casing’s edge until you end up where you started. The ribbon should form a loop in the pillowcase. The ends of this ribbon should be on the opposite side of the other ribbon.
10. Remove the safety pin from the ribbon and tie the two ends of the ribbon together, making a knot.
11. Pull the two ribbons on both sides at the same time to close the open end of the pillowcase. Use it as a reusable laundry bag.
Alternate suggestions:
Use a plain white pillowcase and tie
dye it to make it more colourful or
use fabric paint to decorate the
pillowcase.
Use the drawstring pillowcase as a
trick-or-treat bag for Halloween.
Use rope instead of ribbon for the
drawstring.
Have you ever wondered what to do with old pillowcases and T-shirts that do
not fit anymore? Here are some fun ideas to turn those two things into reusable
tote bags, shoe bags, book bags and garment bags.
Some of these transformations do not require any sewing!

T-Shirt Book Bag
FunFinder (January 2014) © Girl Guides of Canada - BC Program Committee Page 6
Make a book bag from an old
favourite T-shirt. No sewing required.
Supplies
ruler
stapler
staples
duck tape
old T-shirt
pair of
scissors
permanent marker
Directions
1. Wash and dry an old T-shirt. 2. Use an iron to remove all the
wrinkles from it. 3. Lay it flat on a table. 4. Use a pair of scissors to cut off
the sleeves along the seam. 5. Trim 2 cm along the outside of the
neckline. 6. Turn the shirt inside out and lay it
flat with the front of the shirt
facing up. 7. Use duct tape to tape the inside
of the shirt. Do this to the front and then the back of the shirt. This will create a plastic lining to the bag.
8. Use a ruler and measure 3 cm from the bottom of the shirt. Make sure the line is above the original hem. Use a permanent marker to draw a straight line across the bottom of the shirt.
9. Use a stapler and staple the bottom of the shirt together along the drawn line, making sure that the staples are side by side.
10. Place a strip of duck tape over the staple line so that it covers all the staples. Do this to the front and the back of the shirt.
11. Turn the shirt on its side. 12. Use a ruler and measure 5 cm
from the corner tip of the shirt. Use a permanent marker to draw a straight line across the bottom.
13. Use a stapler and staple the
bottom corner of the shirt. Do this to both sides.
14. Use a pair of scissors to trim off the pointy corner of the shirt about 1 cm below the staple line. Do this for both sides.
15. Place a strip of duck tape over the staple line, making sure it covers all the staples. Do this for the right and the left side of the shirt.
16. Seal off the seams on the two sides of the shirt starting from the armpit down to the bottom using duck tape. This will create a clean finish on the inside.
17. Turn the T-shirt right side out. It is ready to be used a tote bag to carry library books, program books to unit meetings, etc.
T-Shirt Shoe Bag Make a reusable
shoe bag using an
old T-shirt that
does not fit
anymore. This
shoe bag could be
used to carry your
indoor shoes,
water shoes, or
runners to camp.
No sewing required.
Supplies
old T-shirt
pair of scissors
Directions
1. Wash and iron an old T-shirt.
2. Lay the shirt flat on a table.
3. Use a pair of scissors to cut off
the sleeves along the seam.
4. Trim 2 cm along the outside of the
neckline.
5. Cut off 3 cm at the bottom,
making sure the hem is removed.
6. Cut strips along the bottom of the
T-shirt so that they are about 2
cm in width. The strips should be
about 6 cm in length.
7. Tie the front strip together with
the corresponding back strip,
making two knots. Do
this all across the
bottom so that it
seals off the
bottom.
Jeans Purse Supplies
old pair of jeans (find
some at the thrift store)
pair of scissors
needle & thread
fabric trimmings – ribbon,
patches, buttons, etc.
Directions
1. Cut the legs off of the jeans, at least 1 inch below the bottom of the back pockets and below the
zipper. 2. Turn the top of the jeans inside
out, and sew them closed where you cut the legs off. Turn right side out again.
3. Cut a strip at least 2 inches wide down the entire length of one of the leg pieces. Cut it to the length you would like for a strap.
4. Turn the handle strip inside out and sew it along the long end. This will form a “tube”. Turn the tube right side out. You may need
a piece of dowel to help turn it. 5. Sew each end of the handle to
the inside of the jeans at the side seams.
6. If you would like to be able to close your purse, add a zipper or Velcro across the top opening.
7. Add buttons, ribbons, sequins, or anything else you would like to the outside of the purse.
Search online for various other jeans
purse ideas. https://www.google.ca/
#q=jeans+purse+pattern
This activity can be done with all age
groups, though Sparks and some
Brownies may need help reading the
text.
Supplies
grocery flyers
scissors
tape (or poster putty)
large map (posted on the wall)
photos of packaged foods clear
enough to read country of origin
(cheeses, breads, rice, etc)
if preplanning, you could have the
girls bring a photograph from home
of a food that clearly identifies what
country it comes from
Directions
1. Have the girls look at grocery flyers for pictures of food, especially fruit and vegetables as many will state the country they are a product of: one flyer had cantaloupe from Guatemala, pineapple from Costa Rica, blueberries from Chile, rice from India and Granny Smith apples from the USA. Have each girl end up with one food from a country or part of Canada that is not BC. Note that if the fruit/vegetable origin is not listed, you can find a list of where different foods originate from on the National Service Project website at http://nsp.girlguides.ca/doc/how-to-map-your-meal.pdf
2. Have the girls read out their country and then search for that country on the posted map and tape it in position.
3. The girls will point out the distances of many of the foods.
4. To take it one step farther, have a pre-made grid of food miles - the miles from your town in BC to the many countries likely to be identified.
You can calculate these numbers online using the following website: http://www.timeanddate.com/worldclock/distance.html
BC to Guatemala: 5,000 km
BC to India: 11,000 km
BC to Chile: 12,000 km
BC to Costa Rica: 6,000 km
BC to New Zealand: 11,000 km
BC to New Brunswick: 4,000 km
Even better! Take the girls to a
grocery store with a list of foods to
read the labels of for country of origin.
Where in the World?
FunFinder (January 2014) © Girl Guides of Canada - BC Program Committee Page 7
This activity can be done across all
branches, dependent upon how much
help is offered for the younger girls.
Directions
1. Have the girls think about the last camp they went to and what they had for supper. Write down all the foods they remember (embellish if need be, rounding out the drink, salad and desserts)
2. Now, guess or look up where all the particular food items came from – if you had tacos, then jalapenos from Mexico, corn tortillas from South America, ground beef from Alberta, lettuce from the USA, etc.
3. The more countries involved in your meal, the more likely you’ll have a large food travel distance.
How Many Countries?
MAP YOUR MEAL
The idea behind "mapping your
meal" is to determine the distance
(known worldwide as "food miles")
that the foods we eat travel before
making it onto our plates. We want
to know so that we can make smart
decisions about where and whom
we buy our food from – we should
use our resources wisely, and be as
“green” as possible.
However, it's hard to map a meal
unless you know where your food is
coming from, so before you do the
“mapping” activity, start with a
couple of simple activities.
DID YOU KNOW? BC grows 95% of
the blueberries
grown in Canada!
Why, then, do we
have flyers with
blueberries from
Chile?
FunFinder (January 2014) © Girl Guides of Canada - BC Program Committee Page 8
Homegrown Healthiness Ultimately, our goal is
to reduce food miles.
Thus, the more we
can eat that is locally
grown, then the better
we will all be!
Directions
1. Have the girls make a list of the foods grown and raised within a 100 kilometer radius of their
hometown. Challenge them to think of accompaniments, spices, ingredients, etc. You'll be surprised at how much they can come up with!
2. Now have them become chefs renowned for their use of local foods! With the list of foods they have developed, have them create a menu that meets the needs of a balanced meal. Could
they make the same menu in the winter as they could in the summer? If not, why not?
The Travelling Tomato Game Supplies
9 nametags for group 1: grower,
picker, truck loader, truck driver,
plane or ship loader, plane pilot or
ship captain, warehouse owner,
store owner, consumer
2 nametags for group 2: farmer,
consumer
washable ink
two tomatoes
Directions
1. Split the girls into a group of 9
and a group of 2. Distribute the nametags.
2. Start with group 1. The grower presses her finger onto the washable ink, then picks up the tomato (so that the ink transfers to the tomato).
3. The picker then presses her finger onto the washable ink, and takes the tomato from the grower – leaving her fingerprint on the tomato, as well.
4. Continue with the truck loader, truck driver, plane/ship loader, plane pilot/ship captain,
warehouse owner, store owner, and finally the consumer.
5. Now group 2 has their turn. Start with the farmer then pass to the consumer, also using the washable ink.
6. Finally, check out both of the tomatoes and how many fingerprints are on them. Which one would they be more likely to want to eat?
This game helps illustrate how food will be fresher and in better condition
if it passes through less hands.
Next Thing is Naked The food mile and
mapping a meal is
just the first step in
helping us create
a more
sustainable
world. The next is
to help our food go
naked! That is a two-
fold process: reducing
the packaging required for
our food and reducing the
chemicals and processing needed to
bring our food to the table.
As girls get more comfortable in
recognizing that their food might have
"miles" on it, help them think about
what else it might have: was it
sprayed with a pesticide? Has it been
sprayed with a preservative? Did it
require special packaging for travel?
Did it need to be re-packaged?
Directions
1. For a week between meetings, have the girls keep a bag into which every piece of plastic or paper or metal or Styrofoam is put.
2. Take a picture of the bag or weigh it and have the girls compare their bags.
3. Award a crest to every girl who
took the time to recognize the impact of packaging.
4. Have the girls try to think of ways to reduce packaging or disposable products – such as reusable containers or buying from local farmer markets.
FunFinder (January 2014) © Girl Guides of Canada - BC Program Committee Page 9
Online Resources Food Miles Calculator:
http://www.foodmiles.com/ (note that this
website assumes that you are in
Ontario when you choose Canada as
your origin).
Where in the World does your food
come from? A Series of Lessons on
the Global Food System and Local
Alternatives for the Elementary
School Level: http://lifecyclesproject.ca/resources/
downloads/Where_in_the_world.pdf
Travelling Tomatoes: A Lesson in
Food Sustainability:
http://www.gbbr.ca/download/lessons-in-a
-backpack/FOOD.pdf
Food Miles: Growing Local Food
Connections (Grades K-8).
Educational activities to teach your
students about the food they eat and
where it comes from: http://www.gardenabcs.com/uploads/
foodmiles.pdf
Putting Yourself on the Earth Action Map
Time to put yourself on the website by
making a difference!
Pick a meal that someone had and
determine the food miles of the
products used. An example might be
chicken, carrots and potatoes.
Now see if that same or similar meal
can be made using ingredients within
that 100 kilometer radius.
Go to http://nsp.girlguides.ca/meal.aspx
with the following information:
the number of kilometres of your
first meal
the number of kilometres of your
second meal.
When you report these numbers,
Operation Earth Action will log the
distance you have saved by eating
locally!
Climate Choices, Children’s Voices.
See the Food Choices section:
http://www.climatechoices.org.uk/pages/
activities0.htm
Food Miles activity booklet from
Northern Ireland (includes a
Chocolate Crunch Game similar to
Travelling Tomato): http://www.nicurriculum.org.uk/docs/
key_stage_3/areas_of_learning/
learning_for_life_and_work/
KS3_LLW_Integrated_Activities/
FM_Booklet.pdf
Food Produced in British Columbia Some climates in BC are conducive to
year-round cultivation of a variety of
produce including:
Vegetables
Asparagus, Beans, Beets,
Broccoli, Brussels sprouts,
Cabbage, Carrots,
Cauliflower, Celery, Chinese
vegetables (Bok choy, Gai
lan, Lo bok, Snow peas, Sui
choy), Cilantro, Corn,
Cucumber, Eggplant,
Fennel, Green onions. Leeks,
Lettuce, Mushrooms, Onions,
Parsley, Parsnips, Peas,
Peppers, Potatoes, Rutabagas,
Spinach, Sprouts (Alfalfa,
Bean, Radish), Squash
(Summer, Winter,
Pumpkin), Tomatoes, Watercress
Fruit
Apples, Apricots,
Berries, Cherries,
Cantaloupes &
other muskmelons, Grapes, Kiwis,
Nectarines, Peaches, Pears, Plums,
Prunes, Rhubarb, Watermelons
Meats
Clams, Crabs, Oysters,
Prawns, Shrimp, Cod,
Halibut, Ling cod, Perch,
Rockfish, Salmon,
Snapper, Sole, Trout,
Chicken, Duck, Goose,
Turkey, Beef, Lamb, Pork, Rabbit,
Veal, Bison, Deer, Reindeer
Dairy Products
Eggs, Milk,
Acidophilus milk,
Buttermilk Yogurt,
Cheese (Cheddar,
Colby, Edam, Feta,
Farmer’s, Goat milk
cheese, Gouda,
Monterey jack, Mozzarella,
Parmesan, Sheep milk cheese, Un-
ripened cheeses
Nuts and Beans
Filberts / Hazelnut,
Lentils, Split peas
Reference: B.C. Agriculture in the
Classroom Foundation, Grow B.C.: A
Teacher’s Handbook on BC’s
Agriculture, Fish and Food Business.
(Abbotsford, BC: BC Agriculture in the
Classroom Foundation, 1998), 182-
184. For more information, see the
BC Agriculture in the Classroom
Foundation website at http://aitc.ca/
bc/bcs_agriculture/
All Purpose Cleaner
FunFinder (January 2014) © Girl Guides of Canada - BC Program Committee Page 10
Remove soap scum and clean the
shower using vinegar and dish soap.
Ingredients
1 cup (250 mL) dish soap
1 cup (250 mL) white vinegar
Supplies
dish scrubber
plastic container
Directions
1. Heat the vinegar in the microwave until it is slightly hot.
2. Add the dish soap and vinegar to a plastic container. Mix well.
3. Use a dish scrubber and the vinegar-soap mixture to clean the shower and bathtub.
Make an all-
purpose cleaning
solution that will
clean kitchen
surfaces, mirrors
and windows
using vinegar. In
addition to being
environmentally
friendly, vinegar disinfects, absorbs
odours, dissolves scum, and removes
stains all at the same time.
Ingredients
½ cup (125 mL) water
lemon-scented essential oil
1½ cup (375 mL) white vinegar
Supplies
spoon
spray bottle
mixing bowl
Directions
1. Add vinegar, water and 5 drops of the essential oil to a bowl. Mix well with a spoon.
2. Pour the contents of the bowl into a spray bottle and the cleaning solution is ready to be used on kitchen surfaces, mirrors, glass and windows.
Shower Cleaner Lavender Disinfectant Water Lavender can be used as a
disinfectant to clean countertops and
doorknobs around the house. It can
also be sprayed into the air.
Ingredients
1 cup (250 mL) fresh lavender
2 cups (500 mL) boiling water
OR
2 cups (500 mL) water
5 drops of lavender essential oil
Supplies
square cheesecloth
glass mixing bowl with a lid
spray bottle
Directions
1. Place the lavender in the square cheesecloth. Tie off the cheesecloth.
2. Put the cheesecloth with the lavender in a glass mixing bowl.
3. Boil some water with a kettle. Add the 500 mL of boiling water to the glass mixing bowl.
4. Cover the bowl with a lid and allow the water to cool.
5. Once the water is at room temperature, remove the cheesecloth with the lavender from the glass bowl.
6. Pour the lavender water into a spray bottle and store in a dry and cool location.
7. Alternatively, lavender essential
oils can be added to 500 mL of
water to get the same effect. Add
the mixture to a spray bottle to
use as a cleaner.
MAKE YOUR OWN GREEN PRODUCTS
GREEN CLEANING PRODUCTS!
FunFinder (January 2014) © Girl Guides of Canada - BC Program Committee Page 11
Remove greasy fingerprints in the
kitchen.
Ingredients
1 teaspoon Borax
2 cups of warm water
1 teaspoon of baking soda
2 teaspoons of lemon juice
2 teaspoons of dish soap
Supplies
spray bottle
Directions
1. Add the Borax, warm water, baking soda, lemon juice and dish soap to a spray bottle.
2. Mix the contents well. 3. Use the mixture to clean grease
off the stove and kitchen surfaces.
Mould Remover Remove mould and mildew from the
bathtub.
Ingredients
½ cup (125 mL) 3% hydrogen
peroxide
1 cup (250 mL)
water
Odour Remover Use baking soda to remove odours.
Ingredients
10 drops of essential oil
1 tablespoon baking soda
2 cups (500 mL) warm water
Supplies
spray bottle
Directions
1. Add the essential oil, water and baking soda to a spray bottle.
2. Mix well. 3. Use the
mixture to remove odours.
Furniture Polish Use a cleaner that does not contain
any harmful chemicals to polish
furniture.
Ingredients
½ cup (125 mL) olive oil
4 tablespoons of lemon juice
10 drops of lemon scented essential
oil
Supplies
glass bowl
microfiber cloth
Directions
1. Mix the olive oil, lemon juice and essential oil into a glass bowl.
2. Use a microfiber cloth and apply a small amount of the furniture polish to the piece of furniture.
Grease Fighter
Use this simple solution to spot clean
carpet.
Ingredients
water
lemon scented essential oil
1 tablespoon white vinegar
1 tablespoon clear dish soap
2 cups (500 mL) warm water
Supplies
spray bottle
Directions
1. Place the essential oil, vinegar
Carpet Spot Cleaner and dish soap into a spray bottle. Mix the contents by shaking the bottle.
2. Add the warm water and mix well. 3. To remove stains from a carpet,
add some baking soda to the stain. Let the baking soda sit for 5 minutes.
4. Spray the vinegar-soap mixture onto the carpet until it is wet. Let the mixture sit for 5 minutes.
5. Scrub the carpet with the cloth until the stain is removed. Let the carpet air dry.
Drain Cleaner Unclog the bathroom sink and bathtub
drains using this simple recipe and
set of instructions.
Ingredients
½ cup (125 mL) vinegar
½ cup (125 mL) baking soda
Directions
1. Pour the baking soda down the sink.
2. Next, pour the vinegar down the sink. This will cause a chemical reaction to break down the clog.
3. After 10-15 minutes, turn on the hot water tap and let the hot water run for about 1 minute.
Supplies
spray bottle
Directions
1. Mix the hydrogen peroxide and water in a spray bottle.
2. Spray the mixture on mould or mildew in the bathtub and let it sit for 60 minutes.
3. Use a sponge to scrub the mould away. Rinse with water.
Homemade Natural Lip Gloss
FunFinder (January 2014) © Girl Guides of Canada - BC Program Committee Page 12
Ingredients
coconut oil
beeswax
(grated or in
pellets)
A few drops of vitamin E
A few drops of flavour oil (e.g.
peppermint, orange, etc.)
Supplies
microwave-safe glass container
with a spout (e.g. measuring cup)
dropper
1-ounce or smaller jars, tubes or
tins
labels or washi tape (optional)
Directions
1. In the glass container, combine 2 parts of coconut oil and 1 part of beeswax.
2. Heat in the microwave on high until beeswax is completely melted, stirring every 30 seconds.
3. Add a few drops of flavour oil. You can combine flavours to make interesting mixes or leave them as a single flavor.
4. After adding the flavour, pour into containers and allow to solidify completely (about 15-20 minutes).
5. Add label or decorate with washi tape.
6. Note: flavours such as vanilla and coconut are milder than
cinnamon, mint and citrus, so remember to adjust your flavour depending on what you are using. Test by dabbing a bit of the liquid mix onto your lips, but remember that as the lip gloss solidifies, the flavour will intensify.
Bath Tea Directions
1. Start with 4 cups of salt. A mixture of both Epsom and sea salt is nicest. In a glass or metal bowl, mix in desired amount of essential oil. Start with 16 drops per 4 cups of salt and add more until satisfied.
2. Add 1 cup of chamomile and ¾ cup of lavender then mix well.
3. Take ½ cup of the mixture and put it in an organza bag and tie closed. You can either distribute all of the mixture into the organza bags, or store the remainder in an airtight container.
4. When ready to use, hang the bag under running water (it could be hung from the spigot of your bathtub). Once the mixture in the bag has been used, empty it out, rinse, dry and refill from the airtight container.
Mix it Up with Scents
Essential oils: spearmint, grapefruit,
mandarin, bergamot or rosewood.
Mix in: powdered milk, baking soda,
cornstarch, ground oatmeal. All of
these are skin softening agents.
Herbs: rosemary, basil leaves, rose
petals, calendula flowers.
GREEN BEAUTY PRODUCTS!
Ingredients
Epsom salt or sea salt or both
essential oil (orange, lavender, etc.)
herbs (chamomile flowers, lavender
buds, etc.)
Supplies
glass or metal
bowl
dropper
small organza
bags (found in the wedding section
of dollar stores)
airtight container (optional)
Creamsicle Bath Salts Ingredients
4 cups Epsom salt
½ tsp liquid glycerine
essential oils or extract (vanilla and
orange extract)
paste food colour - orange
Supplies
2 glass or metal bowls
dropper
toothpick to add paste food colour
canning jars with lids
homemade labels
Directions
1. Mix the glycerine and salt
together. Divide into 2 bowls.
2. To the first bowl, add orange
extract with a tiny bit of orange
food colouring.
3. In the second bowl, add vanilla
extract and leave it white.
4. You now have a bowl of “cream”
and a bowl of “orange”.
5. Use canning jars to hold the
finished bath salts. Layer the two
colours together to create a swirl
affect.
6. Seal the jar and add a nice round
of fabric and/or a ribbon and label
to finish.
Homemade Eye Makeup Remover
FunFinder (January 2014) © Girl Guides of Canada - BC Program Committee Page 13
Ingredients
1 cup water
1½ tbsp
baby
shampoo (tear free)
⅛ tsp almond oil or olive oil
Supplies
small container with
a spout (such as a
measuring cup)
small bottle with lid
(squirt spout is
ideal)
Directions
1. In a small container, mix the ingredients together gently to avoid forming bubbles.
2. Pour gently into bottle and close lid.
3. To use: Pour a small amount on a cotton ball and gently wipe to remove make-up.
Bath Bombs Directions
1. Mix 2 cups baking soda and 1 cup citric acid in a bowl until they’re combined.
2. In the plastic container, combine a second batch with 2/3 cup baking soda and 1/3 cup citric acid as an emergency mix, to use if necessary.
3. Spray small amounts of water into your dry mixture until you get the right consistency. It should be thick, soft and slightly damp and clump in your hand). Don’t get it too wet because the mixture gets wetter over time, and water starts the dissolving process.
4. When your bath bombs are the right consistency, it will be easy to mold and unmold them. Do this right away and don’t leave the mixture to sit because the water will evaporate and your bath bombs will crack.
5. Pack the mixture firmly into the mold. When you turn it upside down to unmold, the mixture will almost seem to drop away from the sides. It shouldn’t stick to the mold. If it does, then it has too much water in it. Use your emergency dry batch, adding a bit at a time until you get to the right consistency. You can also mold by hand.
6. Place finished product in a plastic bag and tie off with a pretty bow, then label with the type of bath bomb that it is.
Ingredients
2 parts baking soda
1 part citric acid, aka “Sour Salt” at
the grocery store (Kosher or spice
section)
water in a spray bottle
Optional Ingredients
moisturizing oil: 1 - 3 tsp. massage,
almond, olive oil, etc.
liquid food colour: 5 - 20 drops until
you get to the desired colour
fragrance or essential oil: ½ - 1 tsp.
(make sure they are skin safe!);
lavender, vanilla, orange, etc. all
work well.
Supplies
large, wide mixing bowl
plastic container for emergency mix
2 piece ornament molds or plastic
soap molds
surgical gloves
plastic bags, ribbon, labels
Online Beauty Product Recipes
Coconut Lavender Conditioner: https://www.google.ca/
#q=homemade+coconut+lavender+conditi
oner
Homemade Coconut Milk: https://www.google.ca/
#q=homemade+coconut+milk+shampoo
Sugar Scrub:
https://www.google.ca/
#q=sugar+scrub+recipe
Lotion Bars:
https://www.google.ca/#q=lotion+bars
How To Get Started
FunFinder (January 2014) © Girl Guides of Canada - BC Program Committee Page 14
Trees play a vital role in the health of
our environment. Trees provide
homes and shade for many creatures,
provide oxygen, remove carbon
dioxide from the air, and produce food
for humans and animals alike.
Planting trees with your unit can be a
valuable activity to help your local
environment. Planting a tree can
foster a sense of responsibility,
conservation, and an appreciation for
the natural world for your girls. Plus,
it’s always fun to get your hands dirty
digging in the dirt!
Before planting trees, there are some
important things to consider. It is
suggested that you speak to a
forestry resource person (e.g.
municipal councillor, member of a
local horticulture club, tree nursery
staff, arborist, a landscape architect,
someone from the BC Ministry of
Forests, Lands and Natural Resource
Operations, etc.) in your area to find
out about specific details and
requirements for planting trees in your
area. We spoke with Erlene Amero
(SVI Area Camp Adviser), and she
shared the tips and hints included
here for tree planting with your unit.
When Should I Plant?
The best time of year to plant trees is
during their dormant season. The
dormant season varies based on
where you live, but is generally
between November and March. It
usually is best to wait for the snow
and frost to melt before planting.
Consult a naturalist or other forestry
professional in your area that can
help you choose the best time to plant
your trees.
Tip from Erlene: If you are working
with younger children, you may want
to purchase a case of trees (usually
under a hundred dollars for 100 trees
depending on species), pot the trees
and then plant later, when the
weather is a little nicer.
Where Should I Plant? Your tree planting project could take
place on a Girl Guides of Canada
owned site (e.g. camp property, field
at meeting hall), on public land owned
by your city or town (e.g. public park)
or a conservation area. It is important
to identify who owns the land and to
receive permission to plant trees
there before you plan your tree
planting event.
If planting on a Girl Guides of Canada
property, check to see if the property
has a tree planting program
organized. If they do, an educated
facilitator (i.e. someone who has
already done all the research for tree
planting in that area) will be able to
facilitate a program and help girls to
plant the trees. Check to see if they
will provide the trees or if you need to
order them yourself. If there is not a
program in place, then you will have
to work on a self-directed tree
planting project.
Often public parks will require you to
plant specific species of trees in
specific areas of the park. At a public
park you would probably be asked to
plant only a few trees for your whole
unit. The nice thing about planting in
public park is that it’s close to home
and the girls can watch the trees grow
as they pass and visit the park on
trips around town.
Conservation areas often have
facilitated tree planting programs that
your unit can join in on. In most cases
the trees are purchased for the event
and the ground is prepared so that all
you have to do is put the trees into
the ground. Planting in a conservation
area is a good choice if you live close
by, don’t want to do a lot of research
pre-event, and programs or nature
activities to go along with the tree
planting are offered.
PLANT A TREE
What Can I Plant?
FunFinder (January 2014) © Girl Guides of Canada - BC Program Committee Page 15
Once you have decided where to
plant your trees, you need to know
which trees are appropriate to grow
there (i.e. native species). Try and
find out what type of soil is in the area
you wish to plant. Certain types of
trees do better in different types of
soil. If you are taking part in a tree
planting program with a facilitator,
trees will most likely already be
provided for your event. If you are
doing a self-directed tree planting
event or planting in a public park, you
need to find out the exact species of
trees that are native to that area and
that will survive there.
The first step is to find out which
forestry zone you are going to be
planting in. Information about forestry
zones and native trees in BC can be
found on the BC Ministry of Forests,
Lands and Natural Resource
Operations website. An important
resource, “Tree Book: Learning to
Recognize Trees in British Columbia”
can be found here: http://
www.for.gov.bc.ca/hfd/library/documents/
treebook/index.htm. On the table of
contents on the left of the screen,
click on “Biogeoclimatic Map of
British Columbia” to find out which
trees grow best in your area. This
book also provides an extensive
guide on how to identify trees around
the province.
Tips From Erlene for Planting Day It is healthiest for the trees to come
out of the freezer at the nursery and
be placed in the ground within 48
hours. The more handling, the less
likely the tree is to survive.
Remember: Rangers and older
Pathfinders will be able to follow
directions and get the trees into the
ground with some skill. Younger
children often have great
enthusiasm but lack the
coordination to get the trees into the
ground exactly as instructed. Be
sure to have lots of adults to help
younger girls.
For some girls, it may be the first
time they have ever dug a hole or
held a beetle larvae or worm in their
hands. Have patience and expect
Where Can I Buy Trees To Plant?
Trees are available at both
commercial nurseries and Silviculture
farms. Silviculture refers to the
practice of regulating growth, health
and quality of forests. Commercial
nurseries usually sell more expensive
and exotic varieties of trees that are
not suitable for the purposes of
reforestation. Arbutus Grove Nursery,
located on Vancouver Island, supplies
various forestry companies across BC
with seedlings. K&C Silviculture farm
in Oliver, BC also sells seedlings for
reforestation projects
Girl Guides of Canada-Guides du
Canada, in partnership with TD
Friends of the Environment
Foundation, offers members a $500
grant each year for tree planting
projects.
You can find the application here:
https://www.girlguides.ca/GGC/
Programs/
Specialized_Programming/
Tree_Planting/GGC/Programs/
Specialized_Programming/
Tree_Planting.aspx
Once you have planted your tree(s),
don’t forget to log your actions on
the National Service Project:
Operation Earth Action website at:
http://nsp.girlguides.ca/
them to perform as children, not as
professional tree planters.
Don’t try and move trees that are
growing wild. Their root system is
usually fairly large and the trees
won’t survive. Silviculture trees
really do work best.
Use browsing guards if you can get
them, on fir trees. It reduces the
deer munching. I’ve found it is hard
to purchase browsing guards in
small quantities and they can cost
more than the trees.
Expect 30 – 50% of trees not to
survive the first three years. This is
the natural attrition process. Other
factors such as seasonal climate,
drought, deer browse will all effect
survival rates.
"The best time to plant a
tree was twenty years ago.
The second best time is now.”
—Anonymous
Making your own paper is a great
way to discuss the importance of
recycling and how this can help the
environment. There are many
resources online for methods of
making your own paper.
Supplies
small strips of recycled paper (e.g.
newspaper, printer paper, etc)
a blender
wire hanger
pair of pantyhose
2 tbsp of white glue
water
insect screen or strainer (optional)
a large basin or tube filled with 4
inches of water.
Directions
1. Use the hanger to make a frame. Bend the hanger into a rectangle or square shape and stretch one leg of the pantyhose over the hanger until tight and flat.
2. Place torn pieces of paper and water in the blender. Blend until you have a mushy ball (blend until you can’t see the paper anymore, and then for 2 minutes after that).
3. Place 2 tbsp. of white glue and the paper pulp you just blended, into the water basin and mix well using your hands.
4. Dip your wire frame to the bottom of the basin and slowly pull up, letting all the water drain out as you bring the frame out of the basin (allow at least one minute to drain).
5. Hang your frame somewhere to dry. Once dry you can carefully peel off the paper.
Extension to this
activity: add flower
seeds to the paper as
it is drying. Use this
seed-infused paper
as a greeting card
that can be planted in
the garden and will
grow flowers for the
lucky recipient!
Tree Planting & Forestry Resources
FunFinder (January 2014) © Girl Guides of Canada - BC Program Committee Page 16
Southern Vancouver Island Area Girl
Guides Area Camp Adviser, Erlene
Amero is a fabulous resource for all
things tree planting. She has
developed a tree planting program at
Camp Jubilee, an Area-owned camp,
for girls of all ages. If you have further
questions about tree planting she can
be contacted by email at
Girl Guides of Canada-Guides du
Canada has some very useful
planning resources available at https://
www.girlguides.ca/GGC/Programs/
Specialized_Programming/Tree_Planting/
GGC/Programs/
Specialized_Programming/
Tree_Planting.aspx. Click on “Tree
Planting Toolkit” for a step by step
guide.
TD Planting Days website will help
you locate tree planting projects in
your area. http://www.tdtreedays.com/en-ca
EcoKids Website has some excellent
information for kids on how to plant
seedlings, why we should plant trees,
great tips for your tree planting day,
proper techniques on planting
seedlings, and ways to take care of
your tree in the years following tree
planting day. http://www.ecokids.ca/pub/
eco_info/topics/climate/tree_planting/
Association of BC Forest
Professionals students page http://
www.abcfp.ca/students/default.htm.
Forestry education information and
lesson plans for students in
elementary through high school.
Canadian Women in Timber provides
an activity book for children in grades
K-5 to learn about forestry. http://
canadianwomenintimber.com/
Education.html
Hug a Tree Game characteristics of that tree (i.e. is the bark rough or smooth? Is the tree wide, or thin?).
4. After a couple minutes of blindfolded exploration, Partner B leads Partner A back to the starting point.
5. At that time, Partner A removes her blindfold and tries to identify the tree she was feeling.
6. Have the players switch roles and explore a new tree. A fun challenge for all ages!
Play this outdoors in an area with a
variety of trees.
Supplies
blindfold (optional)
Directions
1. Girls are partnered up. 2. Partner A closes her eyes or is
blindfolded then Partner B leads her to a nearby tree.
3. Partner A uses her hands to feel the tree and get a sense of the
Four Trees Game closed and counts to 10 (count higher if trees are spaced a fair distance apart).
4. As she is counting, the rest of the group runs to hide behind one of the designated trees.
5. The counter chooses one of the trees, keeping her eyes closed. Whoever is hiding behind that tree comes to sit in the middle.
6. If the counter calls a tree where no one is hiding, everyone who is out can go back into the game.
Play outdoors in an area that has at
least four trees large enough for a few
girls to hide behind.
Directions
1. Name the trees #1, 2, 3, 4 or by the type of tree (i.e. douglas fir, maple, cedar, etc).
2. Play the game as you would play Four Corners using the trees as the “corners”.
3. One girl stands in the middle of the playing area with her eyes
Make Paper

Energy Icebreaker Name Game
FunFinder (January 2014) © Girl Guides of Canada - BC Program Committee Page 17
“Be an Energy Detective” is one of
the action activities in Operation
Earth Action. This activity includes
two versions of an energy audit
worksheet on the National Service
Project website (http://
nsp.girlguides.ca/energy.aspx) for
you to print and either send home
with the girls, or audit your meeting
space. But you can do so much
more with this activity! In this section
you will find an alternate version of
an energy audit worksheet, as well
as some energy awareness activities
you can do with your girls, and links
to numerous activity books online.
Note: an alternate Energy Jeopardy
game can be found on the NEED
Project website at http://
needproject.membershipsoftware.org/
energysources.
Divide the girls into teams (could be
by patrol – about 6 girls per team
works well) and give each team some
sort of buzzer – could be a party horn,
could be a bell, could be something
else – be creative!
There are many ways you could set
up your Jeopardy game. You could
use a board with a grid of envelopes
attached to it, the categories listed
across the top and the point values
for the questions written on each
envelope, or use file folders with the
point value written on the outside of
the folder, and the “answer” written on
a piece of paper inside (you can have
the “question” written on the reverse
side of the paper, but only have the
answer showing when you lift up the
folder). Or just write the categories
and point values on a chalk board
with the Guider holding the list of
questions. (Example on Next Page).
One team is randomly selected to go
The NEED Project (National Energy
Education Development Project) has
some fabulous resources online that
may be reproduced for non-
commercial education purposes. The
following activity was taken from the
Energy Games and Icebreakers
booklet, which can be downloaded
from http://
needproject.membershipsoftware.org/
energysources. This is just one
example of the many activities
available from this website – it is
highly recommended that you take a
look at their resources!
Start the game by sitting in a circle.
You could divide the group into two
smaller groups (i.e. groups of 10-12) if
desired.
1. The group leader should instruct the students that they will be choosing new last names. Their new last names should begin with the same letter as their first names and be energy-related—a source of energy, an energy-consuming or -producing device, or energy term. For example: Brenda Biomass, Martha Microwave, Gina Generator, etc. Tell the members of the group that no relatives will be allowed in the game – there can’t be both Brenda and Barbara Biomass.
2. Before you get started, ask if anyone in the group is having a problem thinking of an energy last name. For those who are, ask them to tell the group their first names. Then have the group brainstorm several last names for them.
3. The group leader begins by saying, “Hi, my name is…” and then her first name, followed by her new energy last name. The person to the left of the leader says the first person’s first and last name, and then her own new energy name. The third person continues by giving the first two names, then her own energy name. This continues until the final person, sitting to the right of the group leader, gives everyone’s name and then her own name.
4. If, during the game, someone in the group has a problem remembering a person’s first or last name, have members of the group give that person a hint. For example: If the person’s name is Tammy Toaster, someone in the group could say, “You put your bread in it in the morning.” If the person’s name is Petra Petroleum, a group member could say, “You make gasoline from it.”
BE AN ENERGY DETECTIVE
first. That team chooses a category
and a point value. (For example
“Saving Energy for 100 points.”)
A Guider reads the clue out loud as
an answer. (For example “We need to
turn these off when we’re not using
them.”)
Any player on any team can now
sound the “buzzer” to attempt to
answer the question. You must
instruct the girls that they are NOT to
buzz before you finish reading the
question!
Another Guider identifies who
sounded the buzzer first, and selects
that girl to ask the question related to
the answer read out loud. Remember,
she must form her response as a
question! (For example “What are
lights or appliances?”) Teams cannot
discuss the answer in advance. If the
response is correct, that team earns
the number of points listed and
chooses the next category and point
value.
If the
Energy Jeopardy
Continued on page 18
Energy Jeopardy Continued….
FunFinder (January 2014) © Girl Guides of Canada - BC Program Committee Page 18
answer is incorrect, the number of
points on the card is deducted from
their team score, and another team
may buzz and respond. If no team
can respond correctly, the Guider
reads the correct response and the
team who chose the question may
choose again.
Continue playing until all category
point values have been used up.
Have some small trinkets available for
the winning team – something energy
-related would be perfect!
Jeopardy Questions Category: Saving Energy
A – We need to turn these off when
we’re not using them.
Q – What are lights or appliances?
A – This type of light bulb uses much
less energy than an incandescent
bulb.
Q – What is a compact fluorescent
bulb?
A – These two appliances should only
run when fully loaded.
Q – What are a dishwasher and a
washing machine?
A – We need to adjust the setting on
this for day and night.
Q – What is a thermostat?
A – This should be between your front
door and the door frame.
Q – What is weather stripping?
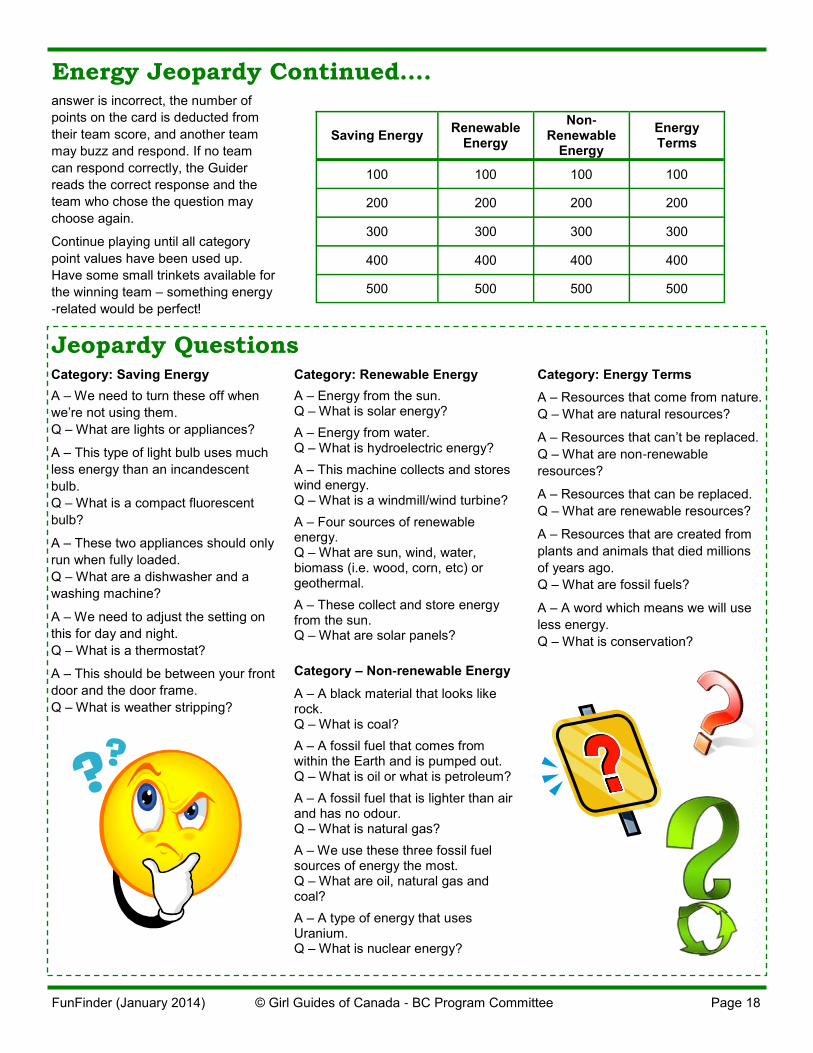
Saving Energy Renewable
Energy
Non-Renewable
Energy
Energy Terms
100 100 100 100
200 200 200 200
300 300 300 300
400 400 400 400
500 500 500 500
Category: Renewable Energy
A – Energy from the sun. Q – What is solar energy?
A – Energy from water. Q – What is hydroelectric energy?
A – This machine collects and stores wind energy. Q – What is a windmill/wind turbine?
A – Four sources of renewable energy. Q – What are sun, wind, water, biomass (i.e. wood, corn, etc) or geothermal.
A – These collect and store energy from the sun. Q – What are solar panels?
Category – Non-renewable Energy
A – A black material that looks like rock. Q – What is coal?
A – A fossil fuel that comes from within the Earth and is pumped out. Q – What is oil or what is petroleum?
A – A fossil fuel that is lighter than air and has no odour. Q – What is natural gas?
A – We use these three fossil fuel sources of energy the most. Q – What are oil, natural gas and coal?
A – A type of energy that uses Uranium. Q – What is nuclear energy?
Category: Energy Terms
A – Resources that come from nature.
Q – What are natural resources?
A – Resources that can’t be replaced.
Q – What are non-renewable
resources?
A – Resources that can be replaced.
Q – What are renewable resources?
A – Resources that are created from
plants and animals that died millions
of years ago.
Q – What are fossil fuels?
A – A word which means we will use
less energy.
Q – What is conservation?
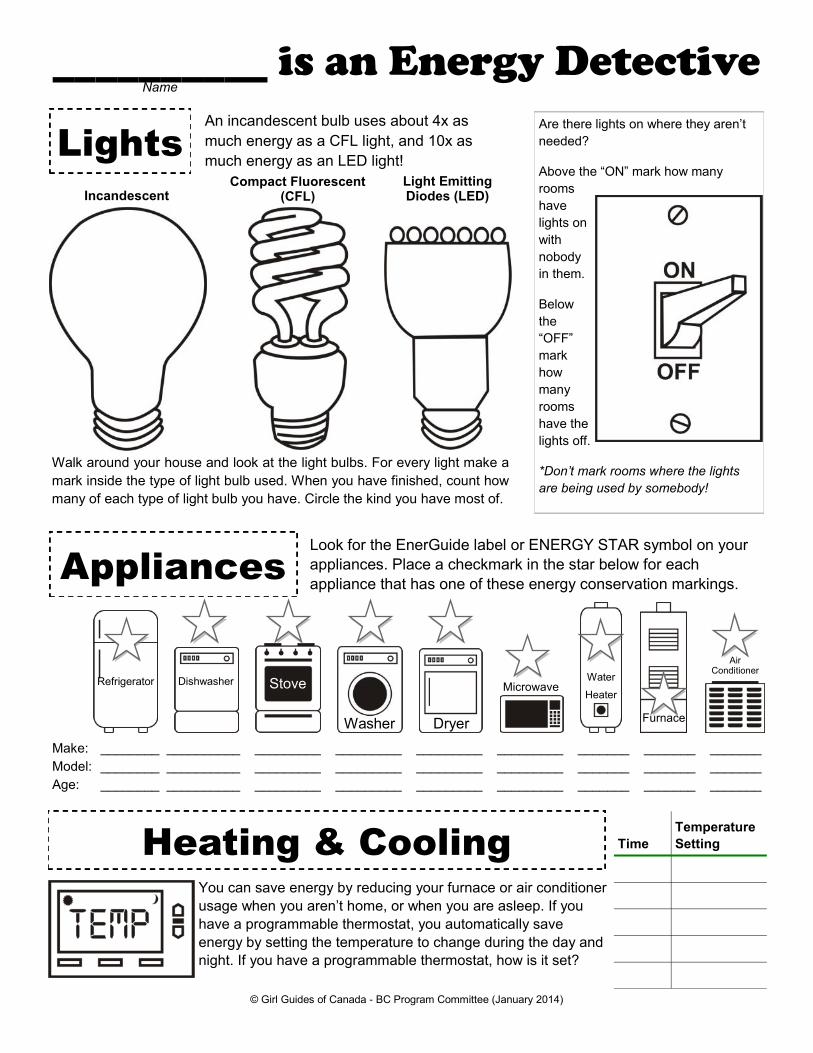
__________ is an Energy Detective
Walk around your house and look at the light bulbs. For every light make a
mark inside the type of light bulb used. When you have finished, count how
many of each type of light bulb you have. Circle the kind you have most of.
Are there lights on where they aren’t
needed?
Above the “ON” mark how many
rooms
have
lights on
with
nobody
in them.
Below
the
“OFF”
mark
how
many
rooms
have the
lights off.
*Don’t mark rooms where the lights
are being used by somebody!
An incandescent bulb uses about 4x as
much energy as a CFL light, and 10x as
much energy as an LED light! Lights
Incandescent Compact Fluorescent
(CFL) Light Emitting Diodes (LED)
Appliances
Look for the EnerGuide label or ENERGY STAR symbol on your
appliances. Place a checkmark in the star below for each
appliance that has one of these energy conservation markings.
Refrigerator Dishwasher Stove
Washer Dryer
Microwave Water
Heater
Furnace
Air Conditioner
Make: ________ __________ _________ _________ _________ _________ _______ _______ _______
Model: ________ __________ _________ _________ _________ _________ _______ _______ _______
Age: ________ __________ _________ _________ _________ _________ _______ _______ _______
You can save energy by reducing your furnace or air conditioner
usage when you aren’t home, or when you are asleep. If you
have a programmable thermostat, you automatically save
energy by setting the temperature to change during the day and
night. If you have a programmable thermostat, how is it set?
Time
Temperature
Setting
Heating & Cooling
Name
© Girl Guides of Canada - BC Program Committee (January 2014)
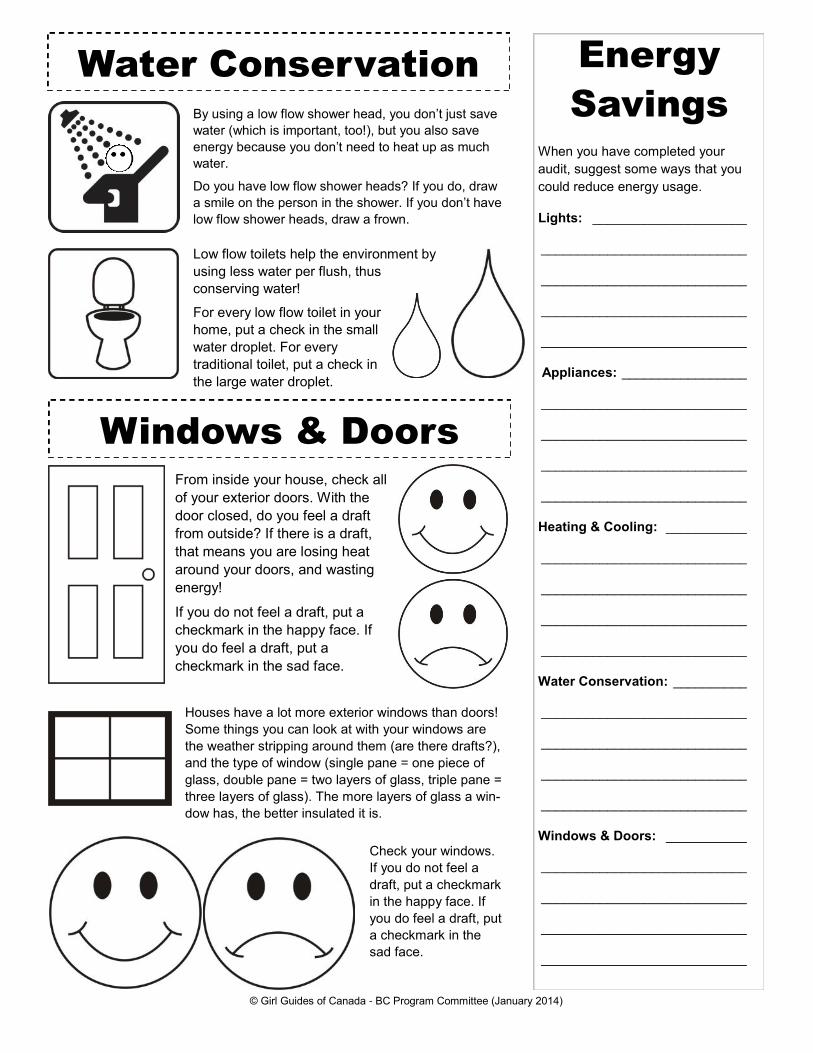
Water Conservation
By using a low flow shower head, you don’t just save
water (which is important, too!), but you also save
energy because you don’t need to heat up as much
water.
Do you have low flow shower heads? If you do, draw
a smile on the person in the shower. If you don’t have
low flow shower heads, draw a frown.
Low flow toilets help the environment by
using less water per flush, thus
conserving water!
For every low flow toilet in your
home, put a check in the small
water droplet. For every
traditional toilet, put a check in
the large water droplet.
Windows & Doors
From inside your house, check all
of your exterior doors. With the
door closed, do you feel a draft
from outside? If there is a draft,
that means you are losing heat
around your doors, and wasting
energy!
If you do not feel a draft, put a
checkmark in the happy face. If
you do feel a draft, put a
checkmark in the sad face.
Houses have a lot more exterior windows than doors!
Some things you can look at with your windows are
the weather stripping around them (are there drafts?),
and the type of window (single pane = one piece of
glass, double pane = two layers of glass, triple pane =
three layers of glass). The more layers of glass a win-
dow has, the better insulated it is.
Check your windows.
If you do not feel a
draft, put a checkmark
in the happy face. If
you do feel a draft, put
a checkmark in the
sad face.
When you have completed your
audit, suggest some ways that you
could reduce energy usage.
Lights: _____________________
____________________________
____________________________
____________________________
____________________________
Appliances: _________________
____________________________
____________________________
____________________________
____________________________
Heating & Cooling: ___________
____________________________
____________________________
____________________________
____________________________
Water Conservation: __________
____________________________
____________________________
____________________________
____________________________
Windows & Doors: ___________
____________________________
____________________________
____________________________
____________________________
Energy
Savings
© Girl Guides of Canada - BC Program Committee (January 2014)
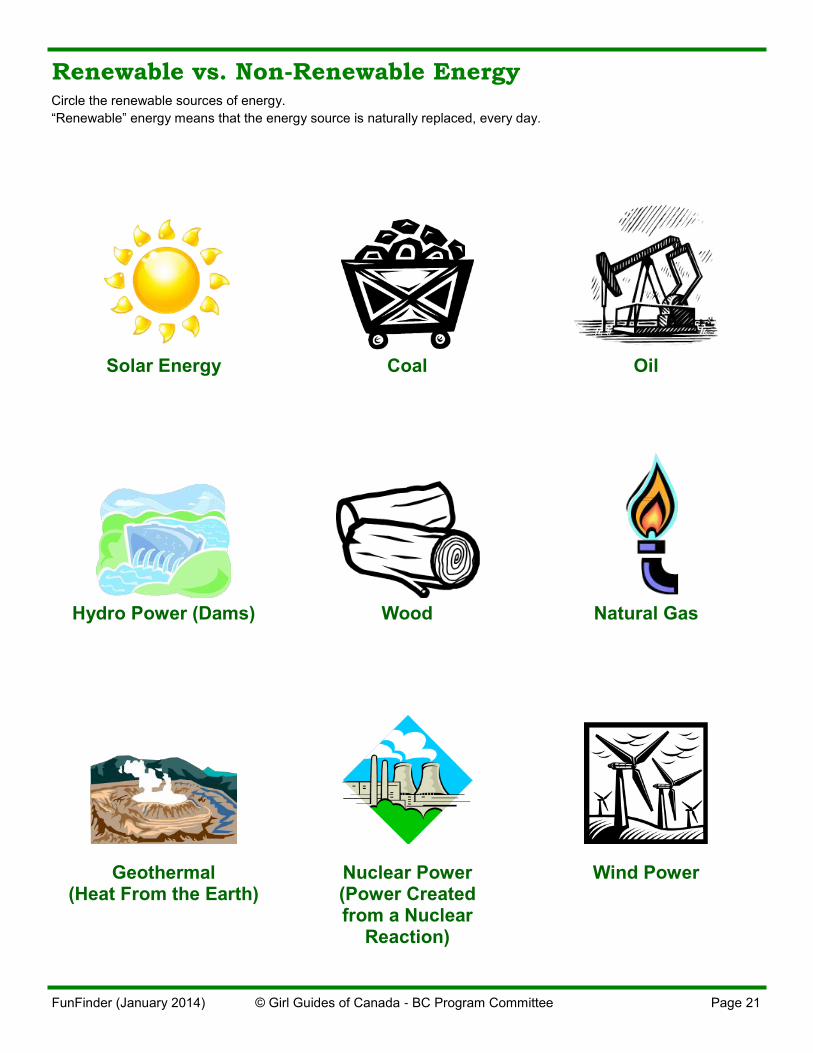
Renewable vs. Non-Renewable Energy
FunFinder (January 2014) © Girl Guides of Canada - BC Program Committee Page 21
Circle the renewable sources of energy.
“Renewable” energy means that the energy source is naturally replaced, every day.
Solar Energy Coal Oil
Hydro Power (Dams) Wood Natural Gas
Geothermal (Heat From the Earth)
Nuclear Power (Power Created from a Nuclear
Reaction)
Wind Power
The Lorax
FunFinder (January 2014) © Girl Guides of Canada - BC Program Committee Page 22
Online Energy Activity Booklets and Resources EcoKids Get Energy Wise, includes
links to printable activities, such as a
school energy audit, an energy
scramble and Fossil Fuel activities.
Sign up for a free Teacher’s account
for access to more resources
http://www.ecokids.ca/pub/eco_info/
topics/energy/intro/index.cfm
Natural Resources Canada - Energy
and the Environment activity booklets
https://www.nrcan.gc.ca/energy/
efficiency/kidsclub/7811
Alliant Energy – Energy Explorer
Activity Book, and more
http://www.alliantenergykids.com/
FunandGames/FunStufftoPrint/
Energy Star Kids activities
http://www.energystar.gov/index.cfm?
c=kids.kids_index
US Department of Energy activities
http://www1.eere.energy.gov/
education/lessonplans/
Girl Guides of Canada National
Service Project Energy Detective
http://nsp.girlguides.ca/energy.aspx
National Energy Education
Development Project (NEED)
Curriculum Resources
http://
needproject.membershipsoftware.org/
curriculum
Energy Hog Resources
http://energyhog.org/adult/resources/
APOGEE Electric & Gas Company
Energy Education
http://c03.apogee.net/contentplayer/?
coursetype=kids&utilityid=demo&id=1
6163
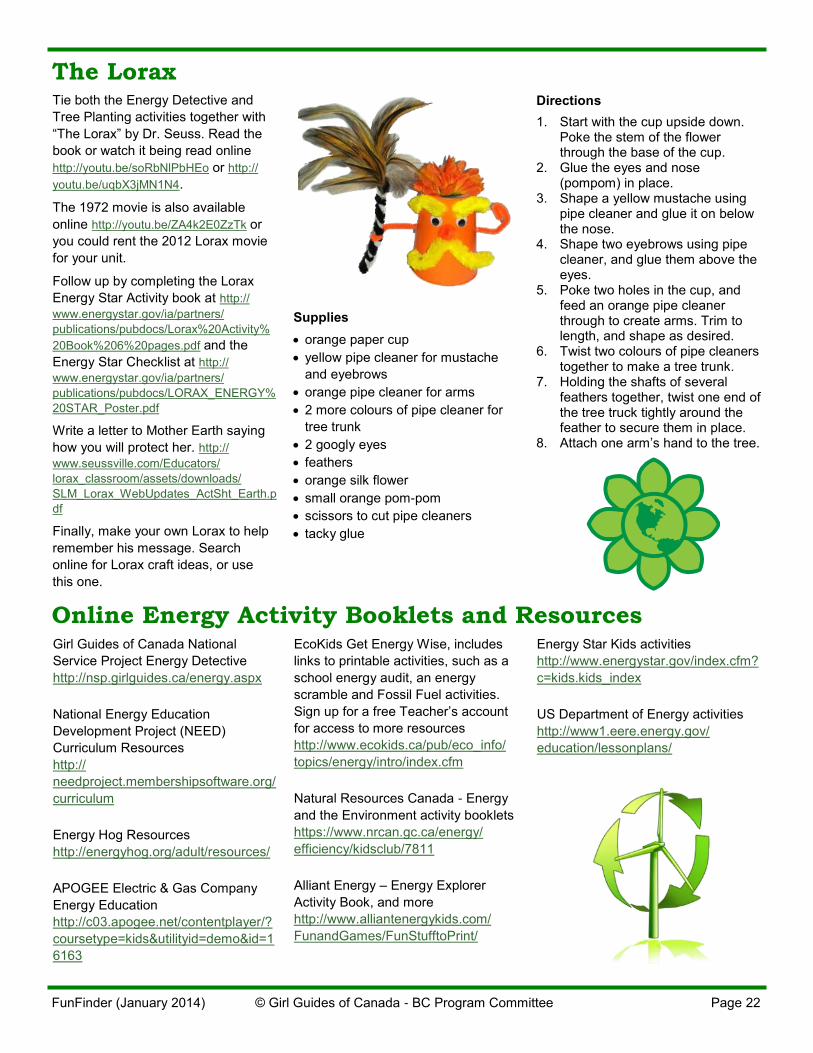
Supplies
orange paper cup
yellow pipe cleaner for mustache
and eyebrows
orange pipe cleaner for arms
2 more colours of pipe cleaner for
tree trunk
2 googly eyes
feathers
orange silk flower
small orange pom-pom
scissors to cut pipe cleaners
tacky glue
Directions
1. Start with the cup upside down. Poke the stem of the flower through the base of the cup.
2. Glue the eyes and nose (pompom) in place.
3. Shape a yellow mustache using pipe cleaner and glue it on below the nose.
4. Shape two eyebrows using pipe cleaner, and glue them above the eyes.
5. Poke two holes in the cup, and feed an orange pipe cleaner through to create arms. Trim to length, and shape as desired.
6. Twist two colours of pipe cleaners together to make a tree trunk.
7. Holding the shafts of several feathers together, twist one end of the tree truck tightly around the feather to secure them in place.
8. Attach one arm’s hand to the tree.
Tie both the Energy Detective and
Tree Planting activities together with
“The Lorax” by Dr. Seuss. Read the
book or watch it being read online
http://youtu.be/soRbNlPbHEo or http://
youtu.be/uqbX3jMN1N4.
The 1972 movie is also available
online http://youtu.be/ZA4k2E0ZzTk or
you could rent the 2012 Lorax movie
for your unit.
Follow up by completing the Lorax
Energy Star Activity book at http://
www.energystar.gov/ia/partners/
publications/pubdocs/Lorax%20Activity%
20Book%206%20pages.pdf and the
Energy Star Checklist at http://
www.energystar.gov/ia/partners/
publications/pubdocs/LORAX_ENERGY%
20STAR_Poster.pdf
Write a letter to Mother Earth saying
how you will protect her. http://
www.seussville.com/Educators/
lorax_classroom/assets/downloads/
SLM_Lorax_WebUpdates_ActSht_Earth.p
df
Finally, make your own Lorax to help
remember his message. Search
online for Lorax craft ideas, or use
this one.
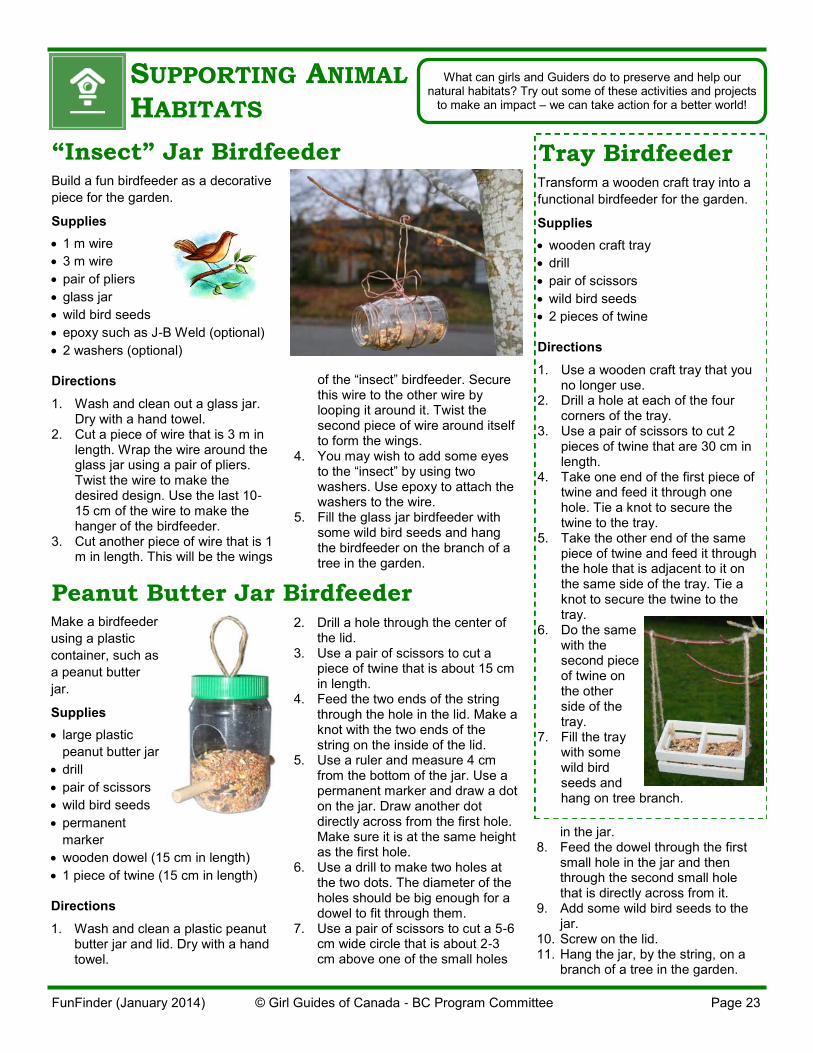
“Insect” Jar Birdfeeder
FunFinder (January 2014) © Girl Guides of Canada - BC Program Committee Page 23
Build a fun birdfeeder as a decorative
piece for the garden.
Supplies
1 m wire
3 m wire
pair of pliers
glass jar
wild bird seeds
epoxy such as J-B Weld (optional)
2 washers (optional)
Directions
1. Wash and clean out a glass jar. Dry with a hand towel.
2. Cut a piece of wire that is 3 m in length. Wrap the wire around the glass jar using a pair of pliers. Twist the wire to make the desired design. Use the last 10-15 cm of the wire to make the hanger of the birdfeeder.
3. Cut another piece of wire that is 1 m in length. This will be the wings
of the “insect” birdfeeder. Secure this wire to the other wire by looping it around it. Twist the second piece of wire around itself to form the wings.
4. You may wish to add some eyes to the “insect” by using two washers. Use epoxy to attach the washers to the wire.
5. Fill the glass jar birdfeeder with some wild bird seeds and hang the birdfeeder on the branch of a tree in the garden.
Tray Birdfeeder Transform a wooden craft tray into a
functional birdfeeder for the garden.
Supplies
wooden craft tray
drill
pair of scissors
wild bird seeds
2 pieces of twine
Directions
1. Use a wooden craft tray that you no longer use.
2. Drill a hole at each of the four corners of the tray.
3. Use a pair of scissors to cut 2 pieces of twine that are 30 cm in length.
4. Take one end of the first piece of twine and feed it through one hole. Tie a knot to secure the twine to the tray.
5. Take the other end of the same piece of twine and feed it through the hole that is adjacent to it on the same side of the tray. Tie a knot to secure the twine to the tray.
6. Do the same with the second piece of twine on the other side of the tray.
7. Fill the tray with some wild bird seeds and hang on tree branch.
Peanut Butter Jar Birdfeeder Make a birdfeeder
using a plastic
container, such as
a peanut butter
jar.
Supplies
large plastic
peanut butter jar
drill
pair of scissors
wild bird seeds
permanent
marker
wooden dowel (15 cm in length)
1 piece of twine (15 cm in length)
Directions
1. Wash and clean a plastic peanut butter jar and lid. Dry with a hand towel.
2. Drill a hole through the center of the lid.
3. Use a pair of scissors to cut a piece of twine that is about 15 cm in length.
4. Feed the two ends of the string through the hole in the lid. Make a knot with the two ends of the string on the inside of the lid.
5. Use a ruler and measure 4 cm from the bottom of the jar. Use a permanent marker and draw a dot on the jar. Draw another dot directly across from the first hole. Make sure it is at the same height as the first hole.
6. Use a drill to make two holes at the two dots. The diameter of the holes should be big enough for a dowel to fit through them.
7. Use a pair of scissors to cut a 5-6 cm wide circle that is about 2-3 cm above one of the small holes
SUPPORTING ANIMAL HABITATS
What can girls and Guiders do to preserve and help our natural habitats? Try out some of these activities and projects
to make an impact – we can take action for a better world!
in the jar. 8. Feed the dowel through the first
small hole in the jar and then through the second small hole that is directly across from it.
9. Add some wild bird seeds to the jar.
10. Screw on the lid. 11. Hang the jar, by the string, on a
branch of a tree in the garden.
Butterfly Feeder
FunFinder (January 2014) © Girl Guides of Canada - BC Program Committee Page 24
Build a beautiful butterfly feeder to encourage insect pollinators, like butterflies, to visit your garden in the spring.
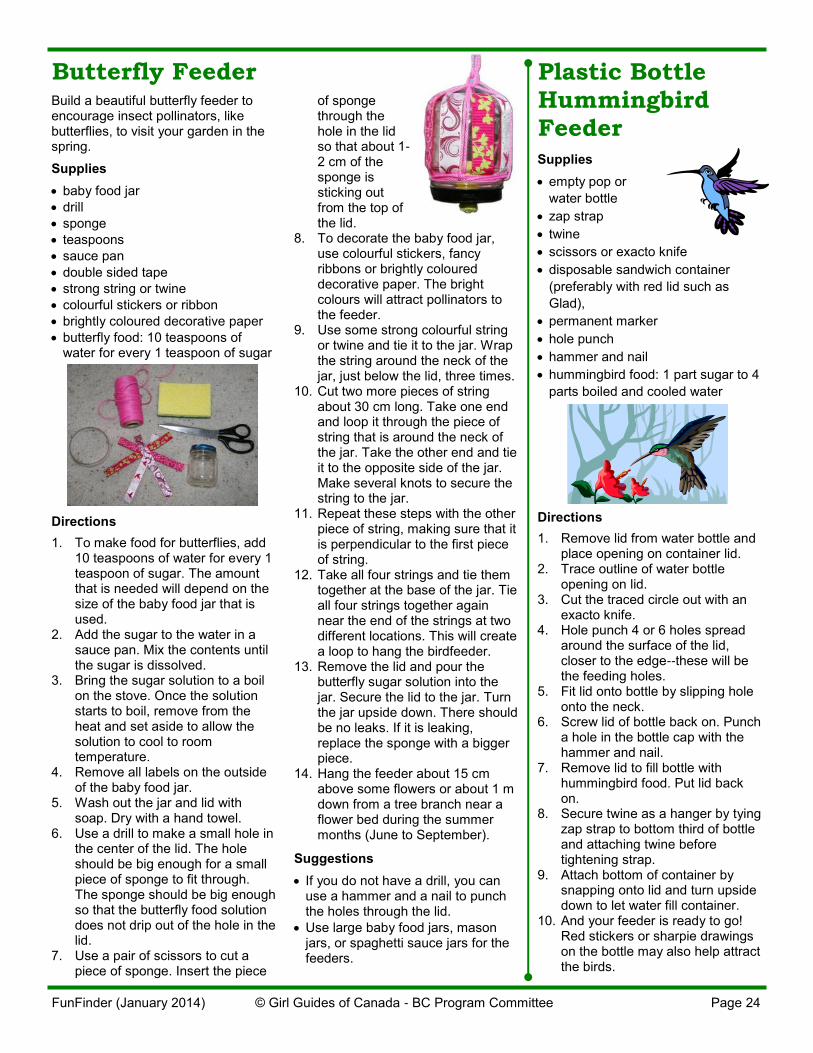
Supplies
baby food jar
drill
sponge
teaspoons
sauce pan
double sided tape
strong string or twine
colourful stickers or ribbon
brightly coloured decorative paper
butterfly food: 10 teaspoons of water for every 1 teaspoon of sugar
Directions
1. To make food for butterflies, add 10 teaspoons of water for every 1 teaspoon of sugar. The amount that is needed will depend on the size of the baby food jar that is used.
2. Add the sugar to the water in a sauce pan. Mix the contents until the sugar is dissolved.
3. Bring the sugar solution to a boil on the stove. Once the solution starts to boil, remove from the heat and set aside to allow the solution to cool to room temperature.
4. Remove all labels on the outside of the baby food jar.
5. Wash out the jar and lid with soap. Dry with a hand towel.
6. Use a drill to make a small hole in the center of the lid. The hole should be big enough for a small piece of sponge to fit through. The sponge should be big enough so that the butterfly food solution does not drip out of the hole in the lid.
7. Use a pair of scissors to cut a piece of sponge. Insert the piece
of sponge through the hole in the lid so that about 1-2 cm of the sponge is sticking out from the top of the lid.
8. To decorate the baby food jar, use colourful stickers, fancy ribbons or brightly coloured decorative paper. The bright colours will attract pollinators to the feeder.
9. Use some strong colourful string or twine and tie it to the jar. Wrap the string around the neck of the jar, just below the lid, three times.
10. Cut two more pieces of string about 30 cm long. Take one end and loop it through the piece of string that is around the neck of the jar. Take the other end and tie it to the opposite side of the jar. Make several knots to secure the string to the jar.
11. Repeat these steps with the other piece of string, making sure that it is perpendicular to the first piece of string.
12. Take all four strings and tie them together at the base of the jar. Tie all four strings together again near the end of the strings at two different locations. This will create a loop to hang the birdfeeder.
13. Remove the lid and pour the butterfly sugar solution into the jar. Secure the lid to the jar. Turn the jar upside down. There should be no leaks. If it is leaking, replace the sponge with a bigger piece.
14. Hang the feeder about 15 cm above some flowers or about 1 m down from a tree branch near a flower bed during the summer months (June to September).
Suggestions
If you do not have a drill, you can use a hammer and a nail to punch the holes through the lid.
Use large baby food jars, mason jars, or spaghetti sauce jars for the feeders.
Plastic Bottle Hummingbird Feeder Supplies
empty pop or
water bottle
zap strap
twine
scissors or exacto knife
disposable sandwich container
(preferably with red lid such as
Glad),
permanent marker
hole punch
hammer and nail
hummingbird food: 1 part sugar to 4
parts boiled and cooled water
Directions
1. Remove lid from water bottle and place opening on container lid.
2. Trace outline of water bottle opening on lid.
3. Cut the traced circle out with an exacto knife.
4. Hole punch 4 or 6 holes spread around the surface of the lid, closer to the edge--these will be the feeding holes.
5. Fit lid onto bottle by slipping hole onto the neck.
6. Screw lid of bottle back on. Punch a hole in the bottle cap with the hammer and nail.
7. Remove lid to fill bottle with hummingbird food. Put lid back on.
8. Secure twine as a hanger by tying zap strap to bottom third of bottle and attaching twine before tightening strap.
9. Attach bottom of container by snapping onto lid and turn upside down to let water fill container.
10. And your feeder is ready to go! Red stickers or sharpie drawings on the bottle may also help attract the birds.
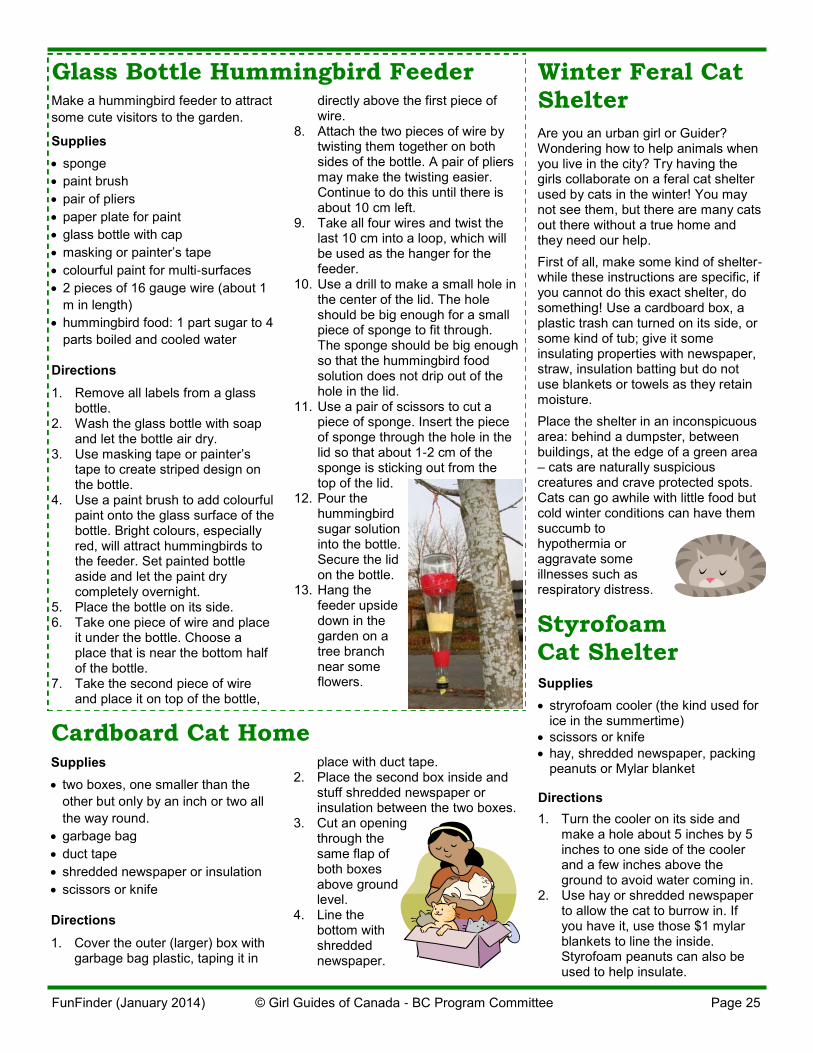
Styrofoam Cat Shelter Supplies
stryrofoam cooler (the kind used for ice in the summertime)
scissors or knife
hay, shredded newspaper, packing peanuts or Mylar blanket
Directions
1. Turn the cooler on its side and make a hole about 5 inches by 5 inches to one side of the cooler and a few inches above the ground to avoid water coming in.
2. Use hay or shredded newspaper to allow the cat to burrow in. If you have it, use those $1 mylar blankets to line the inside. Styrofoam peanuts can also be used to help insulate.
Glass Bottle Hummingbird Feeder
FunFinder (January 2014) © Girl Guides of Canada - BC Program Committee Page 25
Make a hummingbird feeder to attract
some cute visitors to the garden.
Supplies
sponge
paint brush
pair of pliers
paper plate for paint
glass bottle with cap
masking or painter’s tape
colourful paint for multi-surfaces
2 pieces of 16 gauge wire (about 1
m in length)
hummingbird food: 1 part sugar to 4
parts boiled and cooled water
Directions
1. Remove all labels from a glass bottle.
2. Wash the glass bottle with soap and let the bottle air dry.
3. Use masking tape or painter’s tape to create striped design on the bottle.
4. Use a paint brush to add colourful paint onto the glass surface of the bottle. Bright colours, especially red, will attract hummingbirds to the feeder. Set painted bottle aside and let the paint dry completely overnight.
5. Place the bottle on its side. 6. Take one piece of wire and place
it under the bottle. Choose a place that is near the bottom half of the bottle.
7. Take the second piece of wire and place it on top of the bottle,
directly above the first piece of wire.
8. Attach the two pieces of wire by twisting them together on both sides of the bottle. A pair of pliers may make the twisting easier. Continue to do this until there is about 10 cm left.
9. Take all four wires and twist the last 10 cm into a loop, which will be used as the hanger for the feeder.
10. Use a drill to make a small hole in the center of the lid. The hole should be big enough for a small piece of sponge to fit through. The sponge should be big enough so that the hummingbird food solution does not drip out of the hole in the lid.
11. Use a pair of scissors to cut a piece of sponge. Insert the piece of sponge through the hole in the lid so that about 1-2 cm of the sponge is sticking out from the top of the lid.
12. Pour the hummingbird sugar solution into the bottle. Secure the lid on the bottle.
13. Hang the feeder upside down in the garden on a tree branch near some flowers.
Winter Feral Cat Shelter
Are you an urban girl or Guider? Wondering how to help animals when you live in the city? Try having the girls collaborate on a feral cat shelter used by cats in the winter! You may not see them, but there are many cats out there without a true home and they need our help.
First of all, make some kind of shelter-while these instructions are specific, if you cannot do this exact shelter, do something! Use a cardboard box, a plastic trash can turned on its side, or some kind of tub; give it some insulating properties with newspaper, straw, insulation batting but do not use blankets or towels as they retain moisture.
Place the shelter in an inconspicuous area: behind a dumpster, between buildings, at the edge of a green area – cats are naturally suspicious creatures and crave protected spots. Cats can go awhile with little food but cold winter conditions can have them succumb to hypothermia or aggravate some illnesses such as respiratory distress.
place with duct tape. 2. Place the second box inside and
stuff shredded newspaper or insulation between the two boxes.
3. Cut an opening through the same flap of both boxes above ground level.
4. Line the bottom with shredded newspaper.
Cardboard Cat Home Supplies
two boxes, one smaller than the
other but only by an inch or two all
the way round.
garbage bag
duct tape
shredded newspaper or insulation
scissors or knife
Directions
1. Cover the outer (larger) box with garbage bag plastic, taping it in
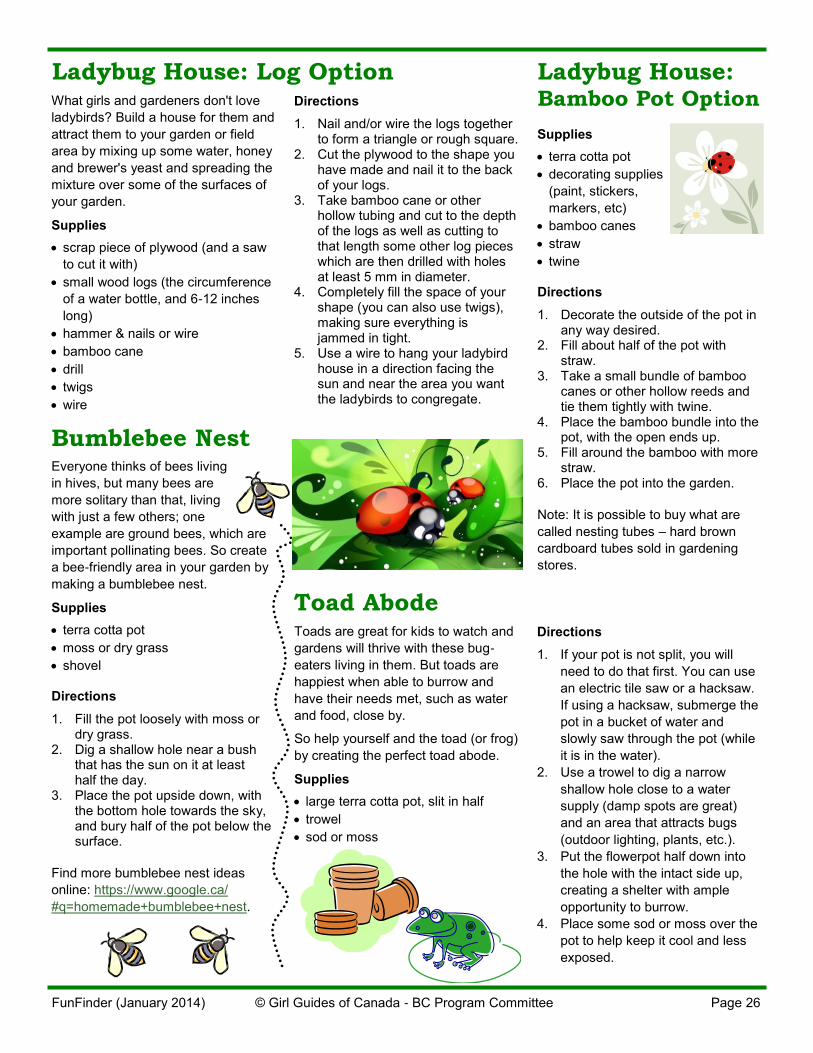
Ladybug House: Log Option
FunFinder (January 2014) © Girl Guides of Canada - BC Program Committee Page 26
What girls and gardeners don't love
ladybirds? Build a house for them and
attract them to your garden or field
area by mixing up some water, honey
and brewer's yeast and spreading the
mixture over some of the surfaces of
your garden.
Supplies
scrap piece of plywood (and a saw
to cut it with)
small wood logs (the circumference
of a water bottle, and 6-12 inches
long)
hammer & nails or wire
bamboo cane
drill
twigs
wire
Directions
1. Nail and/or wire the logs together to form a triangle or rough square.
2. Cut the plywood to the shape you have made and nail it to the back of your logs.
3. Take bamboo cane or other hollow tubing and cut to the depth of the logs as well as cutting to that length some other log pieces which are then drilled with holes at least 5 mm in diameter.
4. Completely fill the space of your shape (you can also use twigs), making sure everything is jammed in tight.
5. Use a wire to hang your ladybird house in a direction facing the sun and near the area you want the ladybirds to congregate.
Bumblebee Nest Everyone thinks of bees living
in hives, but many bees are
more solitary than that, living
with just a few others; one
example are ground bees, which are
important pollinating bees. So create
a bee-friendly area in your garden by
making a bumblebee nest.
Supplies
terra cotta pot
moss or dry grass
shovel
Directions
1. Fill the pot loosely with moss or dry grass.
2. Dig a shallow hole near a bush that has the sun on it at least half the day.
3. Place the pot upside down, with the bottom hole towards the sky, and bury half of the pot below the surface.
Find more bumblebee nest ideas
online: https://www.google.ca/
#q=homemade+bumblebee+nest.
Ladybug House: Bamboo Pot Option
Supplies
terra cotta pot
decorating supplies
(paint, stickers,
markers, etc)
bamboo canes
straw
twine
Directions
1. Decorate the outside of the pot in any way desired.
2. Fill about half of the pot with straw.
3. Take a small bundle of bamboo canes or other hollow reeds and tie them tightly with twine.
4. Place the bamboo bundle into the pot, with the open ends up.
5. Fill around the bamboo with more straw.
6. Place the pot into the garden.
Note: It is possible to buy what are
called nesting tubes – hard brown
cardboard tubes sold in gardening
stores.
Toad Abode Toads are great for kids to watch and
gardens will thrive with these bug-
eaters living in them. But toads are
happiest when able to burrow and
have their needs met, such as water
and food, close by.
So help yourself and the toad (or frog)
by creating the perfect toad abode.
Supplies
large terra cotta pot, slit in half
trowel
sod or moss
Directions
1. If your pot is not split, you will
need to do that first. You can use
an electric tile saw or a hacksaw.
If using a hacksaw, submerge the
pot in a bucket of water and
slowly saw through the pot (while
it is in the water).
2. Use a trowel to dig a narrow
shallow hole close to a water
supply (damp spots are great)
and an area that attracts bugs
(outdoor lighting, plants, etc.).
3. Put the flowerpot half down into
the hole with the intact side up,
creating a shelter with ample
opportunity to burrow.
4. Place some sod or moss over the
pot to help keep it cool and less
exposed.

FunFinder (January 2014) © Girl Guides of Canada - BC Program Committee Page 27
There are lots of instructions for making wooden birdhouses! Why not teach the girls to use natural materials just as native North and South Americans did hundreds of years ago.
Dried gourds make wonderful birdhouses but be prepared to spend the Guiding year to see the final product.
Supplies
gourds, harvested in the fall, and left to dry until the spring
warm, soapy water
steel wool or sandpaper
drill
serrated knife
long handled spoon
oil-based primer
polyurethane
paint brushes
twine
Directions
1. Gourds should be harvested in the fall when the vine withers and then hung to dry in a dry warm spot for at least 4 to 6 months. Mould may begin to grow, but the gourds just need to be wiped
Insect Bath Making animal habitats
is more than their home
base – without food or
water animals cannot
thrive! So encourage bees and other
small flying insects, such as ladybugs,
butterflies and even wasps, to come
visit by giving them a place to land.
Conventional birdbaths don't work on
their own as the insects need a place
to land (the bugs are like helicopters,
not float planes!).
Supplies
shallow bowls or plates
small rocks and pebbles
Directions
1. Create bee baths by placing shallow bowls or plates at ground level near plants.
2. Add small rocks and pebbles to the water to act as landing pads so the insects don't crash into the water.
3. Check on the bee bath daily, replenishing or replacing the water so that it is fresh.
Coconut Bird House
If the girls and Guiders do not have
patience to wait for a gourd to dry,
then try a coconut.
Supplies
coconut
hacksaw
drill
twine
Directions
1. Use a hacksaw to cut a hole into the side of the coconut and scoop out the meat and milk. It does not have to be completely clean as the birds will eat the coconut meat.
2. Drill drain holes and a hanging hole. If the hole is large, the birds may not nest in the coconut but it then can be used as a feeder.
3. Attach twine through the hanging hole.
Gourd Birdhouse down with a disinfectant solution of 1 part bleach to 10 parts water. Only throw the gourd out if it softens or wrinkles. You'll know it's ready to become a birdhouse when you shake it and the seeds rattle!
2. Soak the gourd for 15 minutes in warm, soapy water and then scrape the outer skin and any remaining mold off. Use steel wool to smooth the exterior. The gourd can even be sanded.
3. With the help of adults, drill a hole of a suitable size for the bird you are trying to attract. Also, drill holes at the bottom for drainage and one at the top for securing twine to.
4. Clean the gourd out with a serrated knife to break up the contents, then a long handled spoon and some patience! It does not have to be completely clean.
5. Treat the gourd with oil-based primer and then polyurethane to seal it. Let dry and then hang.
6. No perches are needed as the birds are so precise in their flying they can land directly on the sill of the hole!
To help the girls understand the
importance of maintaining animal
habitats, play a game of Shrinking
Worlds.
Supplies
carpet mats, foam mats or newspaper
small objects: toothpicks, pebbles or beads
method to play music
Directions
1. Using a number of carpet mats, or foam mats, or newspaper - spread them throughout the playing area.
2. Scatter two different kinds of small objects such as toothpicks, pebbles, or beads throughout – these will represent food and water.
3. Instruct the girls that while the
Shrinking Worlds Game music is playing they are creatures who must be out and about collecting food and water to live. When the music stops they must find shelter – the mats – before they are killed by their natural enemies.
4. After each round of music, remove a mat or two as well as some of the food and water, explaining to the girls that the disappearing objects are a result of humankind's encroachment upon the animal habitat and the effects of "civilization".
5. The girls will begin to find it harder and harder to fit all of them onto the mat or find food and water each time.
6. Explain that they are "dying" because their habitat is being lost. This is why it is so important to do our part and help our world be a place we can all live in.
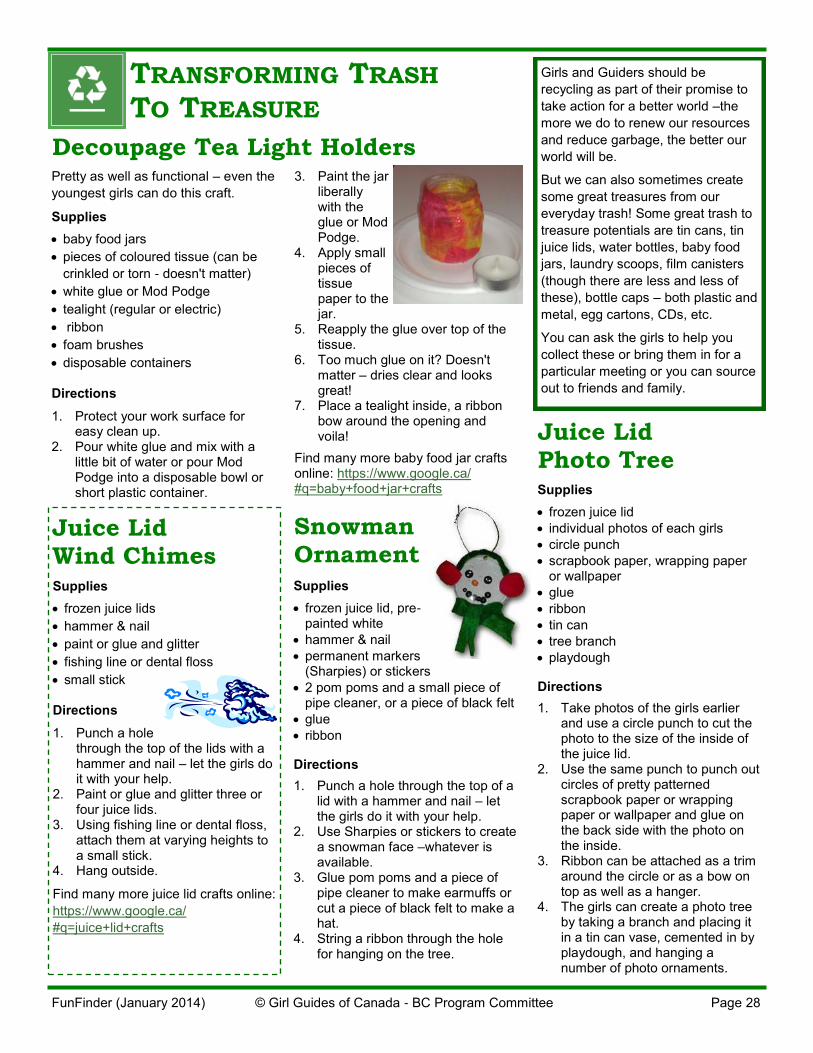
FunFinder (January 2014) © Girl Guides of Canada - BC Program Committee Page 28
Juice Lid Photo Tree Supplies
frozen juice lid
individual photos of each girls
circle punch
scrapbook paper, wrapping paper or wallpaper
glue
ribbon
tin can
tree branch
playdough
Directions
1. Take photos of the girls earlier and use a circle punch to cut the photo to the size of the inside of the juice lid.
2. Use the same punch to punch out circles of pretty patterned scrapbook paper or wrapping paper or wallpaper and glue on the back side with the photo on the inside.
3. Ribbon can be attached as a trim around the circle or as a bow on top as well as a hanger.
4. The girls can create a photo tree by taking a branch and placing it in a tin can vase, cemented in by playdough, and hanging a number of photo ornaments.
Decoupage Tea Light Holders Pretty as well as functional – even the
youngest girls can do this craft.
Supplies
baby food jars
pieces of coloured tissue (can be
crinkled or torn - doesn't matter)
white glue or Mod Podge
tealight (regular or electric)
ribbon
foam brushes
disposable containers
Directions
1. Protect your work surface for easy clean up.
2. Pour white glue and mix with a little bit of water or pour Mod Podge into a disposable bowl or short plastic container.
3. Paint the jar liberally with the glue or Mod Podge.
4. Apply small pieces of tissue paper to the jar.
5. Reapply the glue over top of the tissue.
6. Too much glue on it? Doesn't matter – dries clear and looks great!
7. Place a tealight inside, a ribbon bow around the opening and voila!
Find many more baby food jar crafts online: https://www.google.ca/#q=baby+food+jar+crafts
TRANSFORMING TRASH TO TREASURE
Snowman Ornament Supplies
frozen juice lid, pre-painted white
hammer & nail
permanent markers (Sharpies) or stickers
2 pom poms and a small piece of pipe cleaner, or a piece of black felt
glue
ribbon
Directions
1. Punch a hole through the top of a lid with a hammer and nail – let the girls do it with your help.
2. Use Sharpies or stickers to create a snowman face –whatever is available.
3. Glue pom poms and a piece of pipe cleaner to make earmuffs or cut a piece of black felt to make a hat.
4. String a ribbon through the hole for hanging on the tree.
Supplies
frozen juice lids
hammer & nail
paint or glue and glitter
fishing line or dental floss
small stick
Directions
1. Punch a hole through the top of the lids with a hammer and nail – let the girls do it with your help.
2. Paint or glue and glitter three or four juice lids.
3. Using fishing line or dental floss, attach them at varying heights to a small stick.
4. Hang outside.
Find many more juice lid crafts online:
https://www.google.ca/
#q=juice+lid+crafts
Juice Lid Wind Chimes
Girls and Guiders should be
recycling as part of their promise to
take action for a better world –the
more we do to renew our resources
and reduce garbage, the better our
world will be.
But we can also sometimes create
some great treasures from our
everyday trash! Some great trash to
treasure potentials are tin cans, tin
juice lids, water bottles, baby food
jars, laundry scoops, film canisters
(though there are less and less of
these), bottle caps – both plastic and
metal, egg cartons, CDs, etc.
You can ask the girls to help you
collect these or bring them in for a
particular meeting or you can source
out to friends and family.
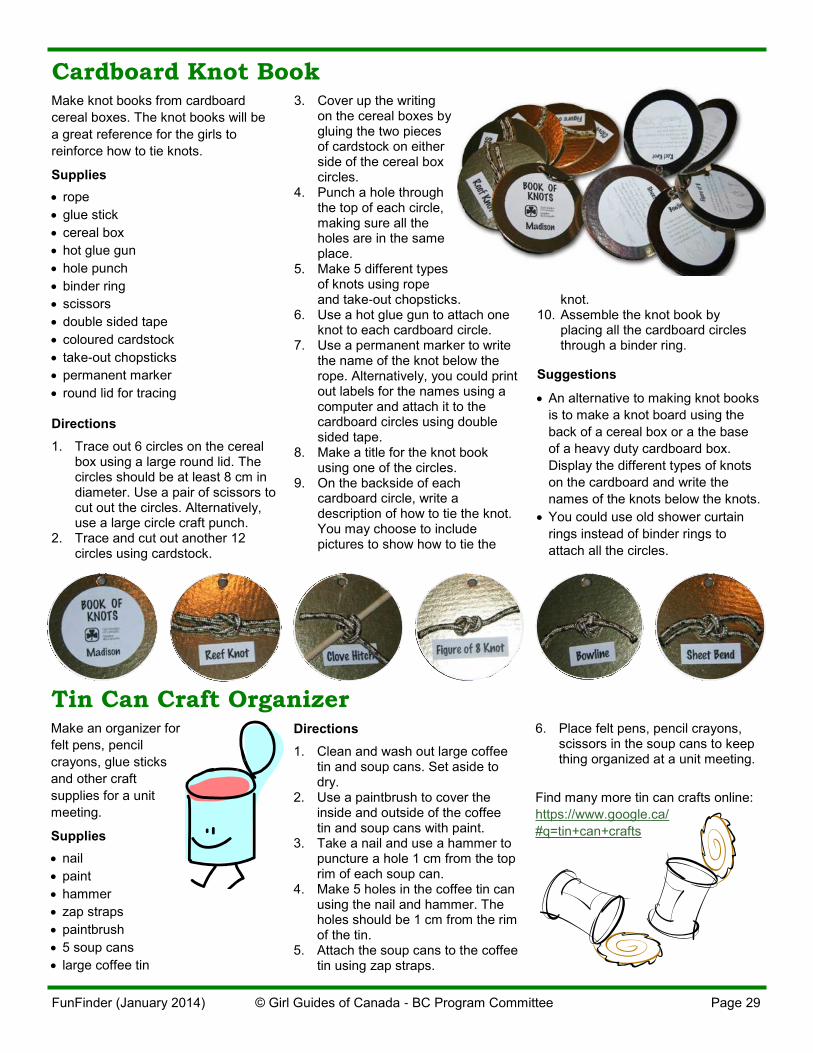
Cardboard Knot Book
FunFinder (January 2014) © Girl Guides of Canada - BC Program Committee Page 29
Make knot books from cardboard
cereal boxes. The knot books will be
a great reference for the girls to
reinforce how to tie knots.
Supplies
rope
glue stick
cereal box
hot glue gun
hole punch
binder ring
scissors
double sided tape
coloured cardstock
take-out chopsticks
permanent marker
round lid for tracing
Directions
1. Trace out 6 circles on the cereal box using a large round lid. The circles should be at least 8 cm in diameter. Use a pair of scissors to cut out the circles. Alternatively, use a large circle craft punch.
2. Trace and cut out another 12 circles using cardstock.
3. Cover up the writing on the cereal boxes by gluing the two pieces of cardstock on either side of the cereal box circles.
4. Punch a hole through the top of each circle, making sure all the holes are in the same place.
5. Make 5 different types of knots using rope and take-out chopsticks.
6. Use a hot glue gun to attach one knot to each cardboard circle.
7. Use a permanent marker to write the name of the knot below the rope. Alternatively, you could print out labels for the names using a computer and attach it to the cardboard circles using double sided tape.
8. Make a title for the knot book using one of the circles.
9. On the backside of each cardboard circle, write a description of how to tie the knot. You may choose to include pictures to show how to tie the
knot. 10. Assemble the knot book by
placing all the cardboard circles through a binder ring.
Suggestions
An alternative to making knot books
is to make a knot board using the
back of a cereal box or a the base
of a heavy duty cardboard box.
Display the different types of knots
on the cardboard and write the
names of the knots below the knots.
You could use old shower curtain
rings instead of binder rings to
attach all the circles.
Tin Can Craft Organizer Make an organizer for
felt pens, pencil
crayons, glue sticks
and other craft
supplies for a unit
meeting.
Supplies
nail
paint
hammer
zap straps
paintbrush
5 soup cans
large coffee tin
Directions
1. Clean and wash out large coffee tin and soup cans. Set aside to dry.
2. Use a paintbrush to cover the inside and outside of the coffee tin and soup cans with paint.
3. Take a nail and use a hammer to puncture a hole 1 cm from the top rim of each soup can.
4. Make 5 holes in the coffee tin can using the nail and hammer. The holes should be 1 cm from the rim of the tin.
5. Attach the soup cans to the coffee tin using zap straps.
6. Place felt pens, pencil crayons, scissors in the soup cans to keep thing organized at a unit meeting.
Find many more tin can crafts online:
https://www.google.ca/
#q=tin+can+crafts
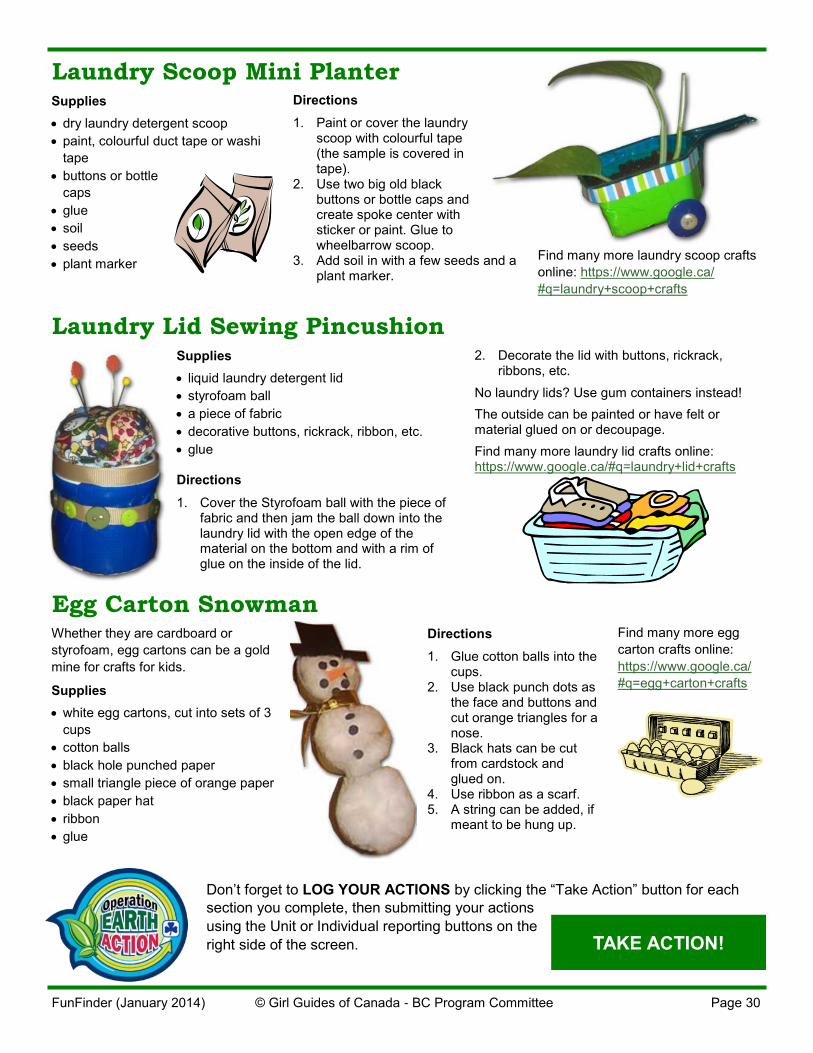
Egg Carton Snowman Whether they are cardboard or
styrofoam, egg cartons can be a gold
mine for crafts for kids.
Supplies
white egg cartons, cut into sets of 3
cups
cotton balls
black hole punched paper
small triangle piece of orange paper
black paper hat
ribbon
glue
Directions
1. Glue cotton balls into the cups.
2. Use black punch dots as the face and buttons and cut orange triangles for a nose.
3. Black hats can be cut from cardstock and glued on.
4. Use ribbon as a scarf. 5. A string can be added, if
meant to be hung up.
Laundry Scoop Mini Planter
FunFinder (January 2014) © Girl Guides of Canada - BC Program Committee Page 30
Supplies
dry laundry detergent scoop
paint, colourful duct tape or washi
tape
buttons or bottle
caps
glue
soil
seeds
plant marker
Laundry Lid Sewing Pincushion Supplies
liquid laundry detergent lid
styrofoam ball
a piece of fabric
decorative buttons, rickrack, ribbon, etc.
glue
Directions
1. Cover the Styrofoam ball with the piece of fabric and then jam the ball down into the laundry lid with the open edge of the material on the bottom and with a rim of glue on the inside of the lid.
2. Decorate the lid with buttons, rickrack, ribbons, etc.
No laundry lids? Use gum containers instead!
The outside can be painted or have felt or material glued on or decoupage.
Find many more laundry lid crafts online: https://www.google.ca/#q=laundry+lid+crafts
Directions
1. Paint or cover the laundry scoop with colourful tape (the sample is covered in tape).
2. Use two big old black buttons or bottle caps and create spoke center with sticker or paint. Glue to wheelbarrow scoop.
3. Add soil in with a few seeds and a plant marker.
Find many more laundry scoop crafts
online: https://www.google.ca/
#q=laundry+scoop+crafts
Find many more egg
carton crafts online:
https://www.google.ca/
#q=egg+carton+crafts
Don’t forget to LOG YOUR ACTIONS by clicking the “Take Action” button for each
section you complete, then submitting your actions
using the Unit or Individual reporting buttons on the
right side of the screen. TAKE ACTION!
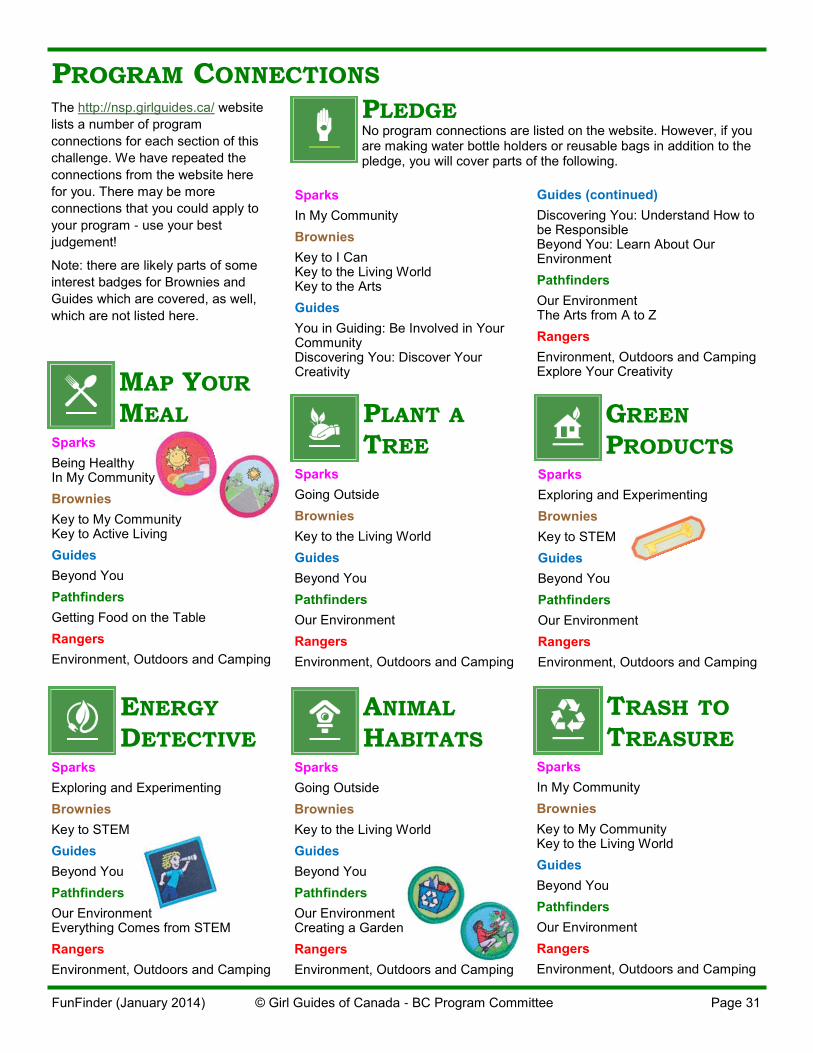
MAP YOUR MEAL
Sparks
Being Healthy In My Community
Brownies
Key to My Community Key to Active Living
Guides
Beyond You
Pathfinders
Getting Food on the Table
Rangers
Environment, Outdoors and Camping
Sparks
In My Community
Brownies
Key to I Can Key to the Living World Key to the Arts
Guides
You in Guiding: Be Involved in Your Community Discovering You: Discover Your Creativity
FunFinder (January 2014) © Girl Guides of Canada - BC Program Committee Page 31
PROGRAM CONNECTIONS The http://nsp.girlguides.ca/ website
lists a number of program
connections for each section of this
challenge. We have repeated the
connections from the website here
for you. There may be more
connections that you could apply to
your program - use your best
judgement!
Note: there are likely parts of some
interest badges for Brownies and
Guides which are covered, as well,
which are not listed here.
GREEN PRODUCTS
Sparks
Exploring and Experimenting
Brownies
Key to STEM
Guides
Beyond You
Pathfinders
Our Environment
Rangers
Environment, Outdoors and Camping
PLANT A TREE
Sparks
Going Outside
Brownies
Key to the Living World
Guides
Beyond You
Pathfinders
Our Environment
Rangers
Environment, Outdoors and Camping
ENERGY DETECTIVE
Sparks
Exploring and Experimenting
Brownies
Key to STEM
Guides
Beyond You
Pathfinders
Our Environment Everything Comes from STEM
Rangers
Environment, Outdoors and Camping
ANIMAL HABITATS
Sparks
Going Outside
Brownies
Key to the Living World
Guides
Beyond You
Pathfinders
Our Environment Creating a Garden
Rangers
Environment, Outdoors and Camping
TRASH TO TREASURE
Sparks
In My Community
Brownies
Key to My Community Key to the Living World
Guides
Beyond You
Pathfinders
Our Environment
Rangers
Environment, Outdoors and Camping
Guides (continued)
Discovering You: Understand How to be Responsible Beyond You: Learn About Our Environment
Pathfinders
Our Environment The Arts from A to Z
Rangers
Environment, Outdoors and Camping Explore Your Creativity
PLEDGE No program connections are listed on the website. However, if you are making water bottle holders or reusable bags in addition to the pledge, you will cover parts of the following.
This publication may not be reproduced, in whole or in part, in any form, or by any means, electronic or
mechanical, for use other than for Guiding activities within Canada, without the prior written permission of
the BC Program Committee. [email protected]
BC Program Adviser
Julie Thomson
Lones Coordinator
Susan Stephen
Arts Specialist
Barb Wilson
BC Program Committee
Girl Programs Specialist
Carla MacRae
Environment Specialist
Van Chau
Communications Liaison
Alyssa Robertson
STEM Specialist
Vacant
Healthy Lifestyles Specialist
Vacant
Ranger Specialist
Vacant
FunFinder (January 2014) © Girl Guides of Canada - BC Program Committee Page 32
Ranger Specialist
Purpose
To stimulate and promote an active interest in the Girl Guides of Canada-Guides du Canada program, especially the Ranger program, throughout British Columbia.
Qualifications
Be conversant with the Ranger program.
Be passionate about girls and Guiders having fun while completing the different levels of program.
Be able to relate well to both girls and adults.
Should have experience in working with Rangers.
STEM Specialist
Purpose
To stimulate and promote the use of Science, Technology, Engineering and Math activities through British Columbia in the delivery of the Girl Guides of Canada-Guides du Canada program for girls and Guiders.
Qualifications
Be conversant with the programs for all branches of Guiding (or willing to learn!).
Be enthusiastic about STEM and have some work experience in at least one of the fields.
The BC Program Committee is a busy
and rewarding committee to be a part
of. We create challenges, produce the
FunFinder, provide trainings for
Guiders and host Girl Events. We
work as a team for many of our
activities, but also have individual
responsibilities based on our
positions. We are currently looking to
fill the following positions with
dedicated Guiders who are
passionate about the program.
Healthy Lifestyles Specialist
Purpose
To stimulate and promote Healthy Lifestyle activities through British Columbia in the delivery of the Girl Guides of Canada-Guides du Canada program for girls and Guiders.
Qualifications
Be conversant with the programs for all branches of Guiding (or willing to learn!).
Be enthusiastic about active living, healthy lifestyles choices, self-esteem, etc. and have an understanding of current concerns and issues.
Upcoming Tasks
Create a brand new BC Challenge - “Colour Me Healthy”.
BC Program Committee Available Positions
Lones Coordinator
Although we do currently have the Lones Coordinator position filled, Susan Stephen has agreed to take on the position of Deputy Program Adviser, so we are looking for her replacement in the Lones position.
The Lones Branch of Guiding was established to enable girls to become Sparks, Brownies, Guides, Pathfinders and Rangers who, because of work, studies, illness or distance from an active Unit, are unable to attend meetings in the usual way.
Following is an excerpt from the Lones Coordinator position description.
Purpose
To promote additional program ideas and activities for Lones.
To provide a way for the Lones Coordinator and all Lones to keep in touch with each other.
Qualifications
Be conversant with the program for all branches of Guiding, being familiar with Lones.
To apply for any of these positions, please contact


