Embed Size (px)
Citation preview
TOCAbout This Guide 1
Additional FMEServer Resources 1
Planning an FME Server Installation 3
Choosing a Deployment Architecture 3
Express 3
Distributed/Fault-Tolerant 4
Disaster Recovery 4
Distributed Engine 5
Planning for Fault Tolerance 5
Distributing FMEServer Components 6
Benefits of Distributing Components 8
Implementing a Distributed Architecture 8
Planning for Disaster Recovery 9
Planning for Security Updates 11
Planning for Scalability and Performance 12
About Component and Job Recovery in FMEServer 15
Component Recovery 15
Job Recovery 15
System Requirements 16
Linux: Offline Installations 16
Linux: Online Installations 17
Internet-restricted Installations through a Proxy 17
Table of Contents ii

Check for Active Subscription (Red Hat Only) 18
Make Sure the System is Up-to-Date 18
Install zip and unzip Utilities 18
Red Hat/CentOS: Configure Access to EPEL Repository 18
Requirements for FMEWorkspaces 19
FMEWorkbench 19
Connecting to FMEServer 19
Version of FME Workbench 20
GridShift Files 20
Third-Party Applications for FME 20
Performing an Installation 21
Install FME Server: Express Installation for Windows 21
Obtain the Installer 21
Run the Installer 22
FME Server Installation Extractor 22
Choose Setup Type 23
Destination Folder 24
FMEServer Hostname 26
Web Application Server Port 26
Database User 27
Starting and Stopping FMEServer 28
Log on to the Web User Interface 29
Request and Install a License 29
Automatic Mode (Recommended) 29
Table of Contents iii
Manual Mode 31
Extending an Evaluation License 32
Automatic Mode (Recommended) 32
Manual Mode 32
Problems? 33
Verify the Installation 33
Uninstalling 36
Things to Consider 36
To Uninstall: 36
Install FMEServer: Express Installation for Linux 36
Obtain the Installer 37
Run the Installer 37
Starting and Stopping FMEServer 39
Log on to the Web User Interface 39
Request and Install a License 40
Automatic Mode (Recommended) 40
Manual Mode 41
Extending an Evaluation License 42
Automatic Mode (Recommended) 42
Manual Mode 43
Problems? 43
Verify the Installation 43
Uninstalling 46
Things to Consider 46
To Uninstall: 46
Table of Contents iv
Installing a Scalable, Fault-Tolerant FME Server 46
Before Installation 48
Next Steps 48
Provide a Database Server 48
Provide a Remote File System for the FME Server System Share 49
Linux Only 50
Example Instructions 50
Obtain the Installer 51
Install the FMEServers 52
(Windows only) Installation Extractor 52
Choose Setup Type 53
Custom Setup 53
Destination Folder 54
User Account 55
FME Server System Share 56
FMEServer Hostname 57
Database Server Type 58
Database Server Parameters 59
Database User 60
Web Application Server 61
Web Application Server Port 62
Configure the FMEServer Database on a Separate Database Server 63
Using the Command Prompt 72
Using the Command Prompt 77
Set Up the Load Balancer and Configure with FME Server 87
Table of Contents v
Load Balancing the FME Server Web Services 87
Required 87
Recommended 87
Optional 87
Load Balancing the WebSocket Server 88
Required 88
Recommended 88
Update Service URLs 88
Update Topic Monitoring URL 88
Update Reset Password URL (Optional) 89
Log on to the Web User Interface 89
Request and Install a License 90
Automatic Mode (Recommended) 90
Manual Mode 91
Extending an Evaluation License 92
Automatic Mode (Recommended) 92
Manual Mode 92
Problems? 93
Distributing Components (2-Tier) 93
Before Installation 95
Next Steps 95
Provide a Database Server 95
Updating the FME Server Database Password 96
Provide a Remote File System for the FME Server System Share 100
Linux Only 101
Table of Contents vi
Example Instructions 101
Obtain the Installer 102
Install the FMEServer Database 102
(Windows only) Installation Extractor 102
Choose Setup Type 103
Custom Setup 104
Destination Folder 105
Database Parameters 106
Database User 107
Install the FMEServer Core, FMEEngines, and Web Application Server 108
(Windows only) Installation Extractor 109
Choose Setup Type 109
Custom Setup 110
Destination Folder 111
User Account 112
FME Server System Share 113
FME Server Hostname 114
Database Server Type 115
Database Server Parameters 116
Database User 117
Web Application Server 118
Web Application Server Port 119
Configure the FMEServer Database on a Separate Database Server 120
Using the Command Prompt 130
Using the Command Prompt 135
Table of Contents vii
Log on to the Web User Interface 145
Request and Install a License 145
Automatic Mode (Recommended) 145
Manual Mode 146
Extending an Evaluation License 147
Automatic Mode (Recommended) 148
Manual Mode 148
Problems? 148
Distributing Components (3-Tier) 149
Before Installation 150
Next Steps 151
Provide a Database Server 151
Updating the FME Server Database Password 152
Provide a Remote File System for the FME Server System Share 155
Linux Only 156
Example Instructions 156
Provide a Web Application Server 157
Obtain the Installer 158
Install the FMEServer Database 158
(Windows only) Installation Extractor 159
Choose Setup Type 159
Custom Setup 160
Destination Folder 161
Database Parameters 162
Database User 163
Table of Contents viii
Install the FMEServer Core and FMEEngines 164
(Windows only) Installation Extractor 164
Choose Setup Type 165
Custom Setup 166
Destination Folder 167
User Account 168
FME Server System Share 169
FME Server Hostname 170
Database Server Type 171
Database Server Parameters 172
Database User 173
Web Application Server Hostname 174
Install the FMEServer Web Services 175
Configure the FMEServer Database on a Separate Database Server 180
Using the Command Prompt 189
Using the Command Prompt 194
Log on to the Web User Interface 204
Update the WebSocket Host 204
Request and Install a License 205
Automatic Mode (Recommended) 205
Manual Mode 206
Extending an Evaluation License 207
Automatic Mode (Recommended) 207
Manual Mode 207
Problems? 208
Table of Contents ix
Adding FMEEngines on a Separate Machine 208
Performing a Silent Installation (Windows) 216
Extracting Installation Files 216
Installer Flags 217
Specifying FME Server Components to Install 217
Example 218
Installation Properties 218
Post-Install Tasks 226
Distributed/Fault Tolerant Installations 226
MSSQL Formats 226
Examples 226
Invoking the .exe Installer to Extract and Install 226
Extract installer to C:\FME\installer and install with all default options (sim-ilar to Express install) 226
Extract installer to C:\FME\installer and install core only with an FMEServerSystem Share directory on a share on another machine named "\\ma-chine1\share" 227
Invoking the .msi File to Install, Following Manual Extraction 227
Install with all default options (similar to Express install), with loggingenabled 227
Install core only with an FME Server System Share directory on a share onanother machine named "\\machine1\share" 227
Express install, but with an MSSQL database located on another server 228
FMEEngine-only install, with all other FMEServer components on anotherserver named "\\machine1\FMEServerSystemShare" 228
Performing a Silent Installation (Linux) 228
Table of Contents x
Specifying FMEServer Components to Install 228
Installation Properties 229
Post-Install: MSSQL Formats Only 237
Examples 237
Deploying FMEServer with Docker Compose 239
Limitations and Considerations 239
About the Docker Compose File for FME Server 240
Services 240
See Also 241
Ports 241
Volumes 241
Deploying and Administering FMEServer on Docker Compose 242
Download the Docker Compose File for FME Server 242
Working with the docker-compose Command 242
To Launch a New FME Server Stack 242
To Launch a New FME Server Stack with a Dynamic Engine (CPU Usage)License 242
To Stop a Running FME Server 243
To Start FME Server 243
To Restart FME Server 243
To Specify Services in the Compose File 243
To Scale FMEEngines 243
To Remove an FME Server Deployment 243
To Upgrade an FMEServer Deployment 243
To Run Multiple FMEServers on One Machine 244
Table of Contents xi
To Disable https 246
To Use a Custom TLS/SSL Certificate 246
See Also 246
Working with FMEServer Container Environment Variables 247
FMEServer Web Services Container 247
FME Engine Container 248
FME Server Core Container 250
NGINXContainer 253
Changing the Database Connection 254
Initializing the PostgreSQL Database 254
Running the Containers as a Different User 255
Running Containers in the Local Time Zone 256
Upgrading to a Patch Build in Docker 256
Patch Builds 256
Deploying FMEServer with Kubernetes 257
Prerequisites and Considerations 258
Install Kubernetes 258
Install Helm 258
Install NGINX 258
Other Considerations 259
Performing the Kubernetes Deployment 259
Add the Safe Software Helm Repository 259
Example: Install FMEServer 2021.2 259
Example: Install with User-Supplied Values 260
Parameters to Note 260
Table of Contents xii
Install FME Server 261
Scale FMEEngines 262
Delete an FMEServer Deployment 262
Defining FMEEngines, Queue Control, and Streams to a Kubernetes Deployment262
Example FMEEngine Deployments 263
Deploying with Kubernetes and a Trusted Certificate 264
Deploying with Kubernetes across Multiple Hosts 265
Architecture of a High-Availability FME Server Kubernetes Deployment 265
To Deploy Across Multiple Hosts 267
Deploying with an NFSClient Provisioner 267
Deploying with an External Database 268
Deploying with Kubernetes to a Cloud Provider 269
Deploying to Azure Kubernetes Service Using Azure Files 270
Deploying to Google Cloud Using Google Kubernetes Engine and CloudFilestore 276
Deploying to Amazon Elastic Kubernetes Service Using Elastic File System 283
Deploying to Alibaba Cloud Using Network Attached Storage 290
Upgrading a Kubernetes Deployment of FMEServer 295
Performing the Upgrade 296
Upgrading to a Patch Build in Kubernetes 299
Patch Builds 299
Upgrading FME Server 301
Full FMEServer Upgrade 301
Upgrading to a Second Machine, Using a Different Host Name 301
Upgrading to a Second Machine, Using the Same Host Name 301
Table of Contents xiii
Upgrading In-Place, on the Same Machine 302
Upgrading to a Second Machine, Using a Different Host Name 303
Upgrading to a Second Machine, Using the Same Host Name 303
Upgrading In Place, On the Same Machine 305
Back Up Configuration 305
Back Up the FMEServer Configuration Files 306
Back up Repository Versions 306
Back up the FMEServer Configuration 306
Uninstall 307
Stop the FMEServer System Services 307
Drop the FMEServer Database 308
Uninstall FMEServer 309
Install 309
Restore Configuration 310
FMEEngine Only Upgrade 310
Obtaining the Installer 311
Install on Windows 311
To install FME Engine in a Windows environment 311
Install on Linux 312
To Undo an Engine Upgrade 313
Upgrading a Kubernetes Deployment of FMEServer 314
Performing the Upgrade 315
Optimizing FME Server 318
Configuring the Number of FMEEngines to Start 318
Table of Contents xiv
To add or remove FMEEngines to Start 318
Adding FMEEngines on a Separate Machine 318
Changing the Database Provider for the FME Server Database 326
Backup Your FMEServer Configuration 326
Configure the New Database Server 326
Configure the Database Connection 326
Restart FME Server 331
Restore Your FMEServer Configuration 331
Remove Dependency, Disable, and Stop the Previous Database Service 331
Removing the FMEServer Core Dependency on the FMEServer Database 331
Moving the Web Applications Server to Another Machine 332
Install a web applications server on the new host machine (optional) 333
Install the FMEServer Web Services on the new host 333
Update Services URLs 333
Configure CORSfilters (optional) 334
Using a Reverse Proxy with FME Server 334
Routing Traffic to the FME Server Web Services 335
Recommended 335
Optional 335
Routing Traffic to the WebSocket Server 335
Required 335
Recommended 335
Update Service URLs 336
Update Topic Monitoring URL 336
Table of Contents xv
Update Reset Password URL (Optional) 336
Securing FME Server 337
Security Basics 337
Role-Based and User-Based Access Control 337
Role-Based Access 337
User-Based Access 339
User Ownership 339
User Permission 339
Shared Access 340
About the Trusted User Account 340
Default User Accounts and Passwords 341
Configuring Authentication for the FME Server Web Services 342
Authenticating with Tokens 343
Removing the Authentication Requirement 343
Using the guest User Account 343
Using Directory Server Accounts 343
Configuring for HTTPS 344
Configuring for HTTPS 345
Using a CA-issued Certificate 345
Using a PFXor P12 Certificate 354
See Also 366
Configuring Integrated Windows Authentication 366
Updating the Windows Domain Configuration 368
A) Assign a Service Principal Name 368
Table of Contents xvi
B) Register an SPN to a Service Account 369
C) Ensure the Service Account Requires Kerberos Pre-authentication: 369
Updating the Web Browser Configuration 370
Update the Tomcat Properties File 371
Troubleshooting Authentication Services Configurations 372
Failure to Connect to Directory Server (SSL) 373
Unable to Use SASL Authentication 373
Unsupported SASL Mechanism 374
Single Sign-On Authentication Failure (Incorrect Mechanism) 375
Single Sign-On Authentication Failure (Negotiation Error) 376
Single Sign-On Authentication Failure (Service Account) 377
Single Sign-On Authentication Failure (Cross-Domain User) 378
Single Sign-On Authentication Failure (Same Machine Access) 379
SASL Authentication Failure 1 379
SASL Authentication Failure 2 380
SASL Authentication Failure 3 381
SASL Authentication Failure 4 381
Importing a CACertificate for SSL Connections 382
Running the FMEServer System Services Under Different Accounts (Windows) 383
Encrypting the FMEServer Database Password 385
Other Tasks 387
Licensing and Administration Tasks 387
Licensing 387
Automatic Mode (Recommended) 387
Table of Contents xvii

Manual Mode 388
Extending an Evaluation License 389
Automatic Mode (Recommended) 389
Manual Mode 390
Problems? 390
Configuring the FMEEngine 390
Configuring Implicit NAD27 to NAD83 Datum Shifts 391
Configuring Grid Transformation Definitions 392
Using Python with FME Server 393
Using Additional Python Modules 393
Obtaining the Python Module 394
Uploading the Python Module 394
Changing the Python Interpreter (Windows only) 394
FMEServer 2018.0 and earlier 395
FMEServer 2018.1 and later 395
Using Rwith FMEServer 396
Install R 396
Windows 396
Linux 396
Install the sqldf package for R 396
Standard Install 396
Upload to Resources 397
Using an RInterpreter Installed in a Non-Standard Location 397
Windows 397
Linux 397
Table of Contents xviii
Working with the FMEServer System Services 397
About the FMEServer System Services 398
FMEServer Application Server 398
FMEServer Core 398
FMEServer Database 398
FMEServer Engines 398
Starting and Stopping FMEServer Manually 398
Determining FMEServer Processes 400
Configuring FMEServer as a System Service (Linux) 403
Purging Logs and History 406
Changing the Web Application Server Host Name and Port 406
Update Service URLs (For Updating Host Name or Port) 406
Update FME Server Web URL (For Updating Host Name or Port) 406
Update the Web Application Server XML File (For Updating Port) 407
Configuring International Character Encoding 408
Moving the FME Server System Share to Another Machine 409
Providing Support for OGCServices 410
Backup, Restore, and Migration Tasks 410
Migrating an FME Server Configuration 410
Performing Scheduled Backups of an FMEServer Configuration 410
Notifications Tasks 411
Configuring FMEServer to Receive Email 411
SMTP or IMAP? 412
Changing the Default SMTP Port (Optional) 412
Table of Contents xix
Configuring FMEServer to Send Email Notifications 413
Workflow and Resources Tasks 413
Sending Jobs to Specific Engines with Job Queues 413
Job Recovery 414
Configuring Job Recovery 414
Sharing FMEEngine Resources 414
Table of Contents xx
Safe Software Inc. makes no warranty either expressed or implied, including, but not lim-
ited to, any implied warranties of merchantability or fitness for a particular purpose
regarding these materials, and makes such materials available solely on an “as-is” basis.
In no event shall Safe Software Inc. be liable to anyone for special, collateral, incidental,
or consequential damages in connection with or arising out of purchase or use of these
materials. The sole and exclusive liability of Safe Software Inc., regardless of the form or
action, shall not exceed the purchase price of the materials described herein.
This manual describes the functionality and use of the software at the time of pub-
lication. The software described herein, and the descriptions themselves, are subject to
change without notice.
Copyright
© 2005 – 2022 Safe Software Inc. All rights are reserved.
Revisions
Every effort has been made to ensure the accuracy of this document. Safe Software Inc.
regrets any errors and omissions that may occur and would appreciate being informed
of any errors found. Safe Software Inc. will correct any such errors and omissions in a
subsequent version, as feasible. Contact us at:
Safe Software Inc.
Suite 1200 - 9639 137AStreet
Surrey, BC
Canada V3T 0M1
www.safe.com
Safe Software Inc. assumes no responsibility for any errors in this document or their con-
sequences, and reserves the right to make improvements and changes to this document
without notice.
xxi
Trademarks
FMEis a registered trademark of Safe Software Inc.
All brands and their product names mentioned herein may be trademarks or registered
trademarks of their respective holders and should be noted as such.
Document Information
Document Name: FMEServer Administrator's Guide
Version: FMEServer 2022.0
Updated: February 2022
Version Information
FMEServer 2022.0 is Version 2022.7.43 of the FMEsoftware.
xxii
About This GuideThe FME®Server Administrator's Guide is intended for system administrators and
those who are responsible for installing and configuring FMEServer in a Windows or
Linux environment.
This document assumes that system and FMEServer administrators have knowledge of
or access to resources in the following areas:
l The location and structure of the spatial data resources you want to work with in
FMEServer
l Your web application architecture
l FMEWorkbench, if you plan on installing FMEDesktop and authoring workspaces
Additional FME Server ResourcesSafe Software provides the following resources to assist with your learning about FME
Server:
l FME Community is the online source for all information on Safe Software products,
including documentation, demos and support resources:
https://community.safe.com/
l Product documentation
The most up-to-date product documentation is available on the FME Community.
Installed product documentation is available in the FMEServer installation directory
> Docs.
FMEServer product documentation includes:
About ThisGuide 1
l FMEServer Administrator’s Guide: Information on installation, licensing, upgrad-
ing and common configurations.
l FMEServer Tutorial: An introductory course on authoring and publishing in FME
Server.
l FMEServer Reference Manual: Developer resources and detailed technical doc-
umentation.
l FMEServer Web User Interface: Aguide to using the FMEServer's web interface.
l FMEServer Developer's Guide: Quick-start, tutorial and sample code for working
with the FMEServer APIs.
l FMEServer REST API Specifications: Developer reference for working with the
REST API.
l Training
Training courses on FMEDesktop and FMEServer (offered by Safe Software and our
reseller network)
The current public training calendar is available from:
http://www.safe.com/learning > Course Schedule
Contact your Safe Software account manager or your FMEreseller to arrange a
private training course for your organization.
About ThisGuide 2
Planning an FME Server InstallationWhen you acquire FMEServer, you must decide how to deploy it on your system. There
are a number of considerations:
l Choosing a Deployment Architecture: Learn about your options for how to deploy
FME Server, either as a stand-alone system, or distributed on your network.
l Planning for Security Updates: Understand how security updates on FME Server-
related components may affect how you decide to deploy FME Server.
l Planning for Scalability and Performance: Following installation, you can scale up
your FMEServer by increasing job throughput and optimizing job performance.
These are measures you can take anytime after you install. Although they may not
affect your initial planning, it's important to understand your options both up front,
and going forward as you work with FME Server.
See Also
l About Component and Job Recovery in FMEServer
l System Requirements
l Requirements for FMEWorkspaces
Choosing a Deployment ArchitectureFMEServer supports three primary options for installation: Express, Distributed/Fault
Tolerant, and Distributed Engine.
Express
An Express architecture installs all the required components of FME Server on a single
host machine, and is the quickest and easiest way to get started with FME Server.
Planning an FMEServer Installation 3
Perform an Express installation if you are not concerned about planning for a Dis-
tributed/Fault Tolerant architecture (see below). You want to get started quickly with
FMEServer.
l Install FME Server: Express Installation for Windows
l Install FMEServer: Express Installation for Linux
Distributed/Fault-Tolerant
ADistributed/Fault Tolerant installation provides options for spreading components
across a network, ensuring high availability, and allowing greater control of some com-
ponents that you provide and maintain yourself.
Within the Distributed/Fault Tolerant scenario are two primary architectures:
l Fault Tolerance: Comprised of redundant FMEServers spread across separate serv-
ers, this architecture ensures that if a hardware component fails, FME Server
remains online. A third-party load balancer is required, which directs incoming
traffic to one of the redundant web components. To learn more, see Planning for
Fault Tolerance.
l Distributed: This scenario distributes some FME Server components to achieve a 2-
or 3-tiered architecture. The primary benefit of a distributed system is to keep com-
ponents separate so that each can be managed by the appropriate expert team.
However, it does not provide the same level of high availability, and therefore is not
recommended over a fault-tolerant scenario. To learn more, see Distributing FME
Server Components.
Disaster Recovery
Disaster recovery is primarily concerned with recovering FMEServer operations and
data in the event of a major failure of a data center. The general concept of disaster
recovery is that if one data center fails, the second data center takes over, and the FME
Planning an FMEServer Installation 4
Server Core located there becomes the 'active' Core. Disaster recovery can be incor-
porated into any of the other architectures discussed here.
For more information, see Planning for Disaster Recovery.
Distributed Engine
The Distributed Engine installation allows you to build onto a current FME Server install-
ation by Adding FMEEngines on a Separate Machine. For more information, see Plan-
ning for Scalability and Performance.
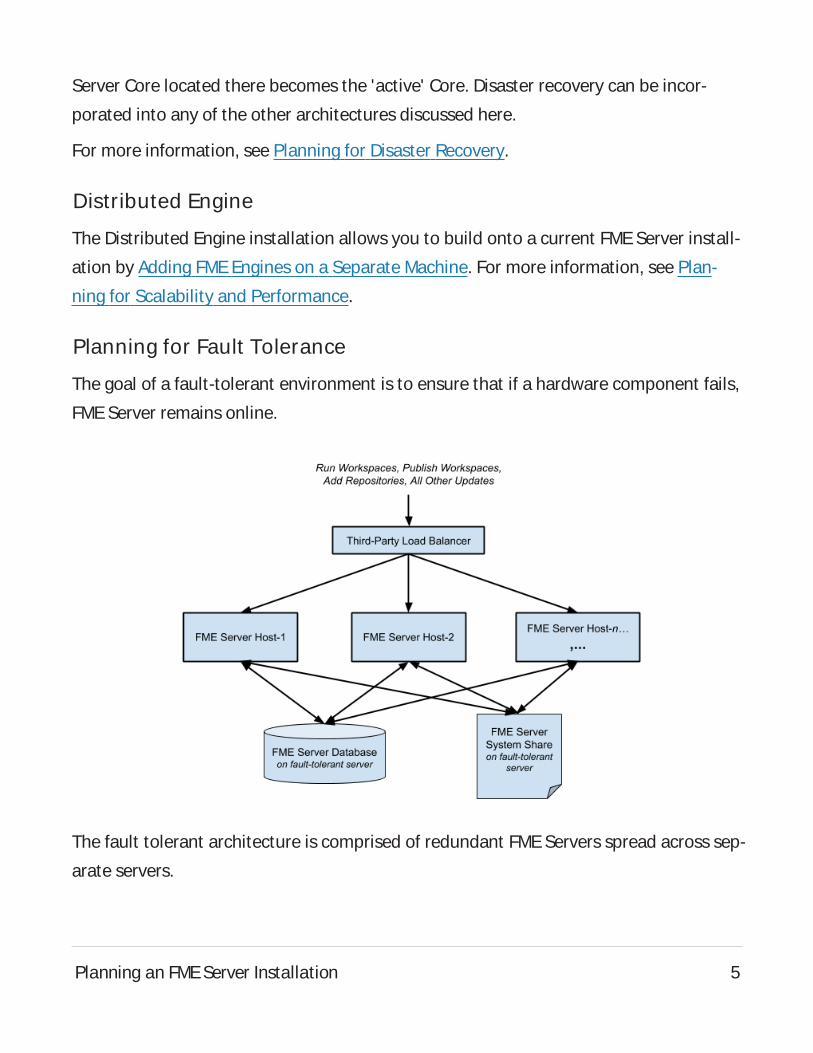
Planning for Fault Tolerance
The goal of a fault-tolerant environment is to ensure that if a hardware component fails,
FME Server remains online.
The fault tolerant architecture is comprised of redundant FME Servers spread across sep-
arate servers.
Planning an FMEServer Installation 5
Athird-party load balancer is required, which directs incoming traffic to one of the
redundant web components.
Organizations are expected to maintain the FMEServer Database and FME Server Sys-
tem Share (a file system for hosting Repositories and Resources) on their own fault-tol-
erant servers. This ensures the fault-tolerant FME Server has reliable access to
workspaces, repositories, resources, and other items.
WARNING: We recommend installing all FME Servers on systems that are syn-
chronized to the same time zone. If time zones differ across FME Servers, unexpected
issues may arise, including:
Improper timing of Schedule Initiated triggers.
Inconsistent or misleading timestamps in log files (accessed from Resources).
Note: In a fault tolerant installation of FME Server, the Automations triggers UDP
Message Received and Email Received (SMTP) (and corresponding Notification Ser-
vice UDP Publisher and SMTP Publisher) are not supported. To receive email mes-
sages, consider the Email Received (IMAP) trigger instead.
To Install a Fault Tolerant System
Proceed to Installing a Scalable, Fault-Tolerant FME Server.
Distributing FME Server Components
You can physically distribute the components of an FME Server installation to achieve
an n-tier architecture. Both 3-tier and 2-tier configurations are supported:
Planning an FMEServer Installation 6
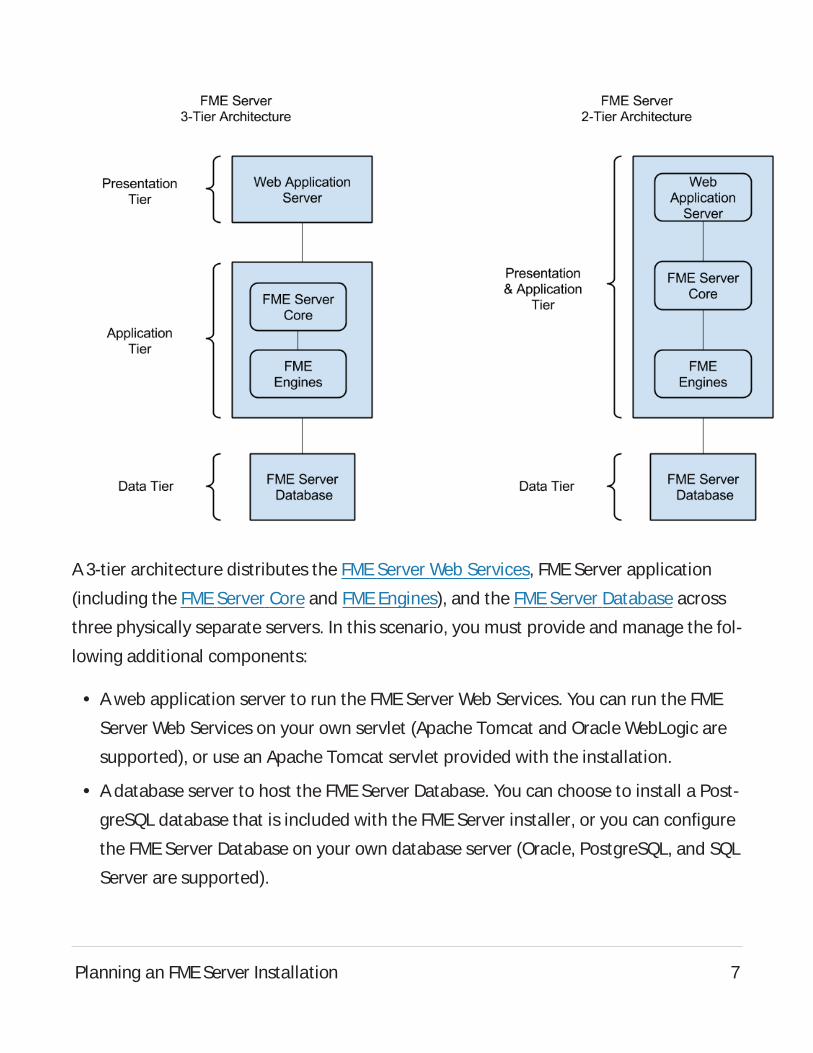
A3-tier architecture distributes the FMEServer Web Services, FME Server application
(including the FMEServer Core and FME Engines), and the FMEServer Database across
three physically separate servers. In this scenario, you must provide and manage the fol-
lowing additional components:
l Aweb application server to run the FMEServer Web Services. You can run the FME
Server Web Services on your own servlet (Apache Tomcat and Oracle WebLogic are
supported), or use an Apache Tomcat servlet provided with the installation.
l Adatabase server to host the FME Server Database. You can choose to install a Post-
greSQL database that is included with the FME Server installer, or you can configure
the FME Server Database on your own database server (Oracle, PostgreSQL, and SQL
Server are supported).
Planning an FMEServer Installation 7
l Aremote file system to host the FME Server System Share, which includes Repos-
itories and Resources.
WARNING: We recommend installing the web application server on a system that is
synchronized to the same time zone as the FME Server Core. Differing time zones may
result in improper timing of Schedule Initiated triggers.
In a 2-tier architecture, an Apache Tomcat servlet is provided to run the FME Server Web
Services, and is installed along with the FMEServer Core and Engines. Only the
FME Server Database is installed separately, along with a remote file system.
Benefits of Distributing Components
Distribute components if you want to keep them separate so that each can be managed
by the appropriate expert team.
Implementing a Distributed Architecture
You can implement a distributed architecture of FME Server in one of two ways:
l At installation time, by choosing:l Distributing Components (2-Tier)
l Distributing Components (3-Tier)
l After an Express installation, by performing the following reconfigurations, where
necessary:l Moving the Web Applications Server to Another Machine
l Changing the Database Provider for the FME Server Database
l Moving the FME Server System Share to Another Machine
Planning an FMEServer Installation 8
Planning for Disaster Recovery
Disaster recovery is primarily concerned with recovering FMEServer operations and
data in the event of a major failure of a data center. The general concept of disaster
recovery is that if one data center fails, the second data center takes over, and the FME
Server Core located there becomes the 'active' Core. The time frame for disaster recov-
ery is typically longer than fault-tolerant recovery. Disaster recovery may range from
minutes, hours, or even days, while fault-tolerant recovery is typically in seconds to
minutes.
Disaster recovery can be incorporated into a fault-tolerant architecture. Alternatively, if
you are primarily concerned with disaster recovery, and less concerned about the fast
recovery provided by fault tolerance, you may want to implement a different archi-
tecture.
WARNING: We recommend installing all FME Servers on systems that are syn-
chronized to the same time zone. If time zones differ across FME Servers, unexpected
issues may arise, including:
Improper timing of Schedule Initiated triggers.
Inconsistent or misleading timestamps in log files (accessed from Resources).
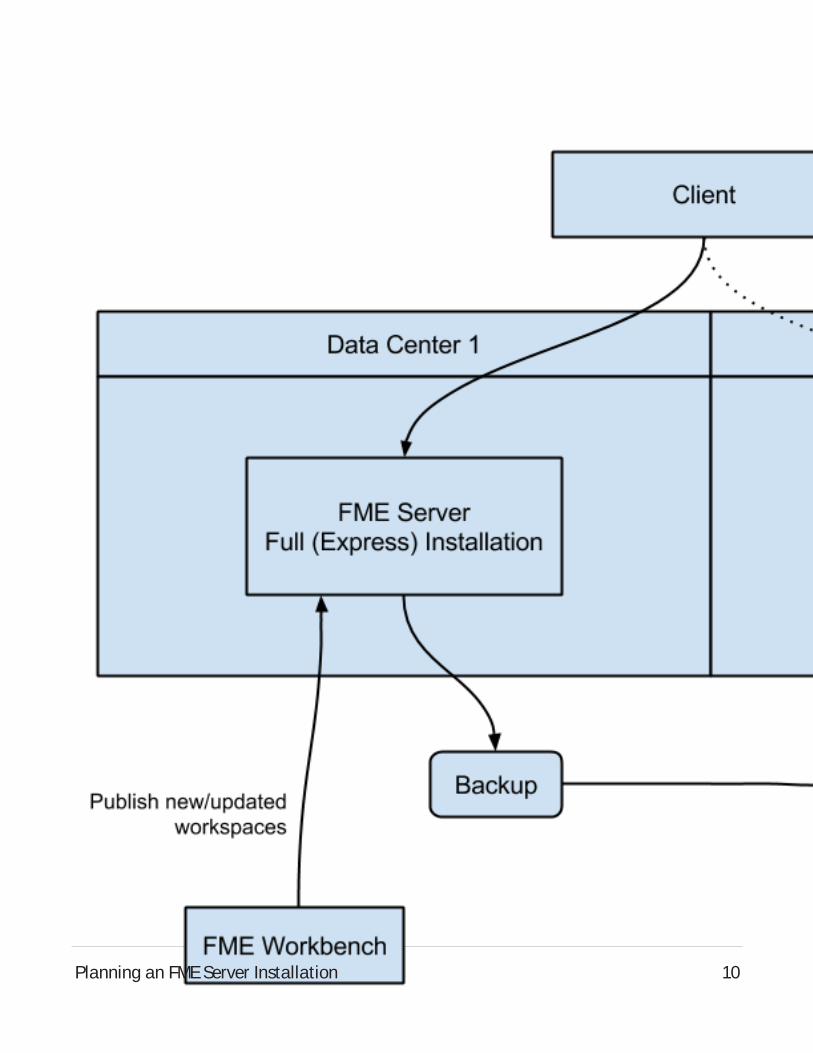
This example of disaster recovery is a combination of an Express installation and a fault-
tolerant installation. However, instead of a third-party load balancer between systems,
FMEServer clients must be manually redirected to the FME Server Core host server of
the second data center in the event of a disaster. Each data center houses full
("Express") installations of FMEServer, essentially configured to provide similar func-
tionality. To ensure synchronicity of FMEServer system data between data centers,
Backup & Restore operations are performed regularly. (Otherwise, workspaces and
other updates must be published twice - to the FMEServer Core hosts on each data cen-
ter.)
Planning an FMEServer Installation 9
Planning an FMEServer Installation 10
Keep in mind that when planning for disaster recovery, all clients of FMEServer, includ-
ing web browsers, the FME Server Console, and the FMEServer REST API, must connect
to the "active" FMEServer Core host.
Planning for Security UpdatesAll installations of FMEServer, regardless of type, include the FMEServer Core and
FME Engines. These components are always provided directly from the FME Server
installation package. Two additional components - a Web Application Server and a
server for the FMEServer Database - must also be installed. When you choose an
Express installation of FMEServer, the install package provides its own versions of these
components, including an Apache Tomcat web application servlet, and a PostgreSQL
database server. If you choose a Distributed/Fault-Tolerant installation of FMEServer,
you may need to provide your own database server and web application server, depend-
ing on the scenario.
One factor in deciding between a stand-alone or distributed installation of FME Server is
the degree of control you want in applying security updates to the web application and
database servers. If you install a full, stand-alone FMEServer (Express), keep in mind
that any security updates to these components are dependent on updates to FME Server
releases in general. Each time FMEServer releases an update to its software (including
both major and minor releases), any security updates for these components are
included in that release.
If you do not want to rely on updates to the FMEServer software in general for security
updates to the web application and database servers, then we recommend a Dis-
tributed/Fault Tolerant installation. You can provide these components on your own,
and maintain security for them separately. In the case of the web application server,
Apache Tomcat and Oracle WebLogic are supported. The FME Server Database supports
PostgreSQL, Oracle, and SQL Server. Alternatively, if your FME Server is entirely internal
Planning an FMEServer Installation 11
to your organization, and behind a firewall, then you may be more comfortable with the
security updates provided with a full installation.
l To proceed with a full installation of FME Server, including web application and data-
base servers provided with the install package, see Install FME Server: Express Install-
ation for Windows or Install FMEServer: Express Installation for Linux.
l To read about installation scenarios that support providing your own web applic-
ation and database servers, see Distributed/Fault-Tolerant.
Planning for Scalability and PerformanceScale up your FMEServer to increase job throughput and optimize job performance.
Increasing Job Throughput
To increase the ability of FME Server to run jobs simultaneously, consider any of these
approaches:
Multiple Engines on the Same Machine
You can scale FMEServer to support a higher volume of jobs by adding FMEEngines on
the same machine as the FMEServer Core. Asingle active Core is all you need to scale
processing capacity. The FMEServer Core contains a Software Load Balancer that dis-
tributes jobs to the FMEEngines. Each FMEEngine can process one job at any one time,
so if you have ten engines, you can run ten jobs simultaneously. If you have many sim-
ultaneous job requests, with jobs consistently in the queue, consider adding engines to
your Core machine.
Note: Adding engines to the same machine does not reduce the time a single trans-
lation takes to run. This time is dependent on the underlying hardware and the
design of the workspace. Complex workspaces, big data manipulation, and large
datasets take more time to run.
Planning an FMEServer Installation 12
Having multiple engines on the same machine also helps with Job Recovery.
Adding Engines on Separate Machines
If existing FMEEngines are utilizing all system resources to process jobs, you can add
FMEEngines on a separate machine. This allows you to use the system resources of mul-
tiple machines, which allows additional concurrent jobs to be run.
Multiple FME Server Installations
Afault tolerant architecture provides for multiple, stand-alone FME Server installations.
In addition to providing fault tolerance, this configuration distributes jobs between
FME Servers via a third-party load balancer.
Increasing Job Performance
Adding FMEEngines on a Separate Machine provides flexibility for running jobs in close
physical proximity to the data they read and write. This approach can be used within a
network, or across networks that are geographically distributed.
Note: Distributing FMEEngines across networks that are geographically distributed
requires that the network connecting FMEcomponents is high-speed and reliable.
Specifically, the FMEEngines read data and configuration files from, and write log
files to, the FME Server System Share location. The network cannot be occasionally
connected; it must always be connected.
To ensure each job is run by the intended engine, you must use this approach in com-
bination with Job Queues.
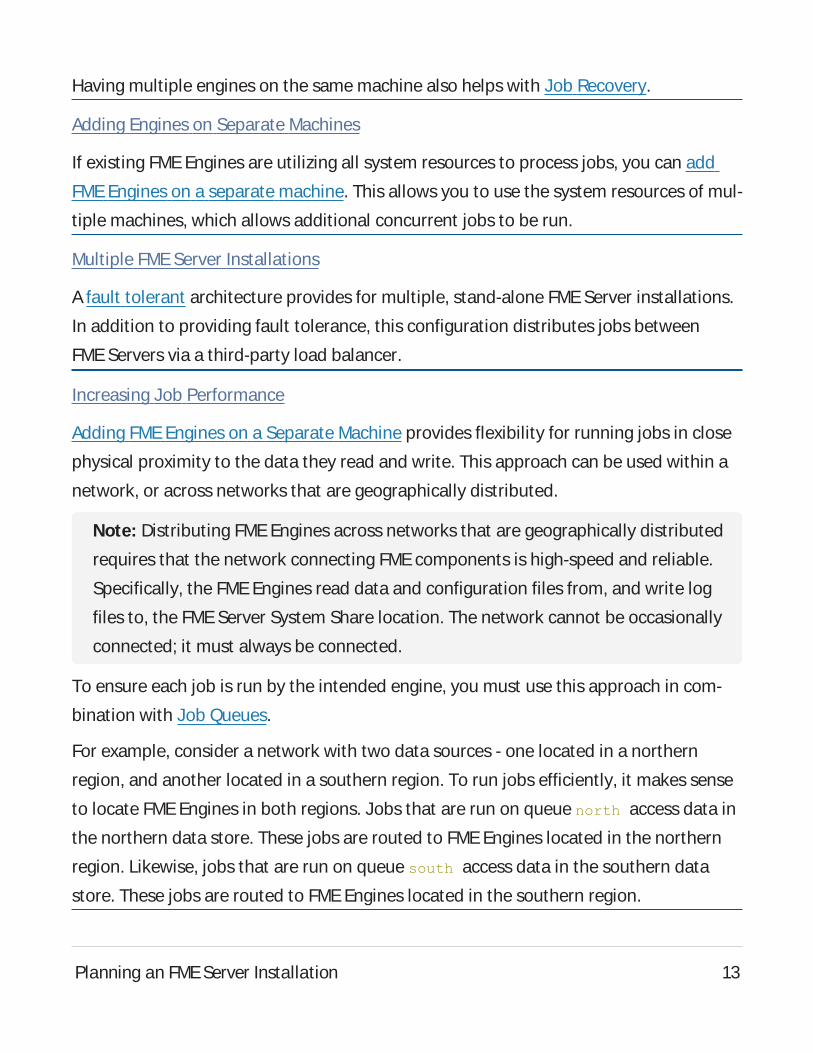
For example, consider a network with two data sources - one located in a northern
region, and another located in a southern region. To run jobs efficiently, it makes sense
to locate FMEEngines in both regions. Jobs that are run on queue north access data in
the northern data store. These jobs are routed to FME Engines located in the northern
region. Likewise, jobs that are run on queue south access data in the southern data
store. These jobs are routed to FME Engines located in the southern region.
Planning an FMEServer Installation 13
Controlling the Queue
To exercise a finer level of control over how jobs are processed, consider the following
approaches:
Queue Control
Job Queues manages or spreads the work load of engines running workspaces. In a dis-
tributed environment, you may wish to run small jobs on certain engines, and larger
jobs on other engines.
Or, you may have a mix of OSplatforms on which certain FMEformats can and cannot
be run. For instance, consider an FMEServer on a Linux OS. Linux cannot run some
formats that may be required by your business. So, it may be necessary to have a Win-
dows OSconfigured with an additional FMEServer Engine.
Planning an FMEServer Installation 14
Queues are also used when Adding FMEEngines on a Separate Machine, to route jobs to
engines that are located in close physical proximity to the data they read and write.
You can set engines to process certain jobs based on the queue of the transformation
request.
Queue Priority
FMEServer allows you to set job priority using the Priority directive of a queue. Jobs in
higher-priority queues may execute before jobs in lower-priority queues.
About Component and Job Recovery in FMEServerFME Server restarts components and jobs automatically when crashes occur—no addi-
tional planning is needed.
Component Recovery
FMEServer comes out-of-the-box with component recovery. This means that, even on a
single system, FMEServer monitors and restarts components that fail, including the
FME Engines and the FMEServer Core. This is achieved through the FMEServer Process
Monitor. The ability for FMEServer to monitor its own components ensures reliable
uptime and dependability.
Job Recovery
FMEServer also includes the ability to restart a translation (job) when a crash occurs.
FMEServer continues to resubmit a translation up to a specified number of attempts. As
a result, jobs that experience temporary issues, such as a network hiccup, are resub-
mitted and run again. Job recovery is configurable and can be turned off entirely. For
more information, see Job Recovery.
Planning an FMEServer Installation 15
Note: Resubmitted jobs may cause data duplication, such as when writing to data-
base formats.
System RequirementsFor system requirements for the Windows or Linux operating systems, see
https://www.safe.com/fme/tech-specs/.
For information about supported web browsers, see Accessing the Web User Interface.
Linux: Offline Installations
Expand for more information
FMEon Linux requires many third party packages. These dependencies must be satisfied
when FMEis installed. The easiest way to satisfy these dependencies is to install FMEon
a computer that is connected to the internet, allowing packages to be downloaded as
needed.
It is possible, however, to manually prepare an offline computer for FMEinstallation.
1. Get dependencies for the FMEEngines component of the installation.
a. Extract all files from the FMEServer installer with flags --noexec and --keep.
For example:
./fme-server-2021.2.2-b21806-linux~ubuntu.20.04.run --noexec
--keep
These flags create a folder fme-server in the current directory that contains
the contents of the FMEServer installer, including the FMEEngine .deb or
.rpm package.
b. Get the package dependencies:
Planning an FMEServer Installation 16
l Ubuntu/Debian: dpkg -I <package_name>.deb
l Red Hat/CentOS: yum deplist <package_name>.rpm
2. Get dependencies for the FME Server component of the installation
l Packages required: zip, unzip, perl
l If your deployment architecture includes the PostgreSQL database server
provided with the installation (Express and certain distributed architectures),
the following additional packages are required:
l Debian/Ubuntu: postgresql
l Redhat/CentOS: postgresql-server
Note: RedHat and CentOSrequire that NumPy and Matplotlib packages are
installed via pip and pip3. This may be done before or after installing FME. For more
information, see Using Python with FME Server.
For more information:
l Ubuntu/Debian: Installing packages without an Internet connection
l Red Hat/CentOS: https://access.redhat.com/solutions/29269
WARNING: If you are accessing local mirrors of public repositories, ensure they
match the version of your Linux.
Linux: Online Installations
Expand for more information
Internet-restricted Installations through a Proxy
If installing on a machine with limited internet access in which a proxy is configured to
handle communication required by the installer, the proxy must be configured to allow
Planning an FMEServer Installation 17
connections to the system package repository for that operating system.
Check for Active Subscription (Red Hat Only)
FMEcannot be installed on a Red Hat instance unless it has an active subscription. For
more information:
l https://access.redhat.com/documentation/en-us/red_hat_subscription_man-
agement/1/html/quick_registration_for_rhel/
Make Sure the System is Up-to-Date
On Fedora/Red Hat/CentOS, run:
yum update
On Ubuntu/Debian, run:
apt update && apt upgrade
Install zip and unzip Utilit ies
On Fedora/Red Hat/CentOS, run:
yum install zip
yum install unzip
On Ubuntu/Debian, run:
apt-get install zip
apt-get install unzip
Red Hat/CentOS: Configure Access to EPEL Repository
On Red Hat or CentOS, you must first download and install the Extra Package for Enter-
prise Linux (EPEL) Community Project repository.
For more information:
Planning an FMEServer Installation 18
l https://fedoraproject.org/wiki/EPEL#How_can_I_use_these_extra_packages.3F
See also:
l https://docs.rackspace.com/support/how-to/install-epel-and-additional-repos-
itories-on-centos-and-red-hat/
Requirements for FME WorkspacesTo perform data transformations, FMEServer runs workspaces. When a workspace runs
on FMEServer, it is referred to as a job.
In this Section
l FMEWorkbench
l GridShift Files
l Third-Party Applications for FME
FME Workbench
FMEWorkbench is used to author and publish the workspaces used by FMEServer. FME
Workbench is not part of FMEServer; rather, it is part of the FMEDesktop product.
Contact your Safe Software account manager or your local Safe Software reseller, if you
would like more information about FMEDesktop.
If you don't have access to FMEDesktop, you cannot publish workspaces to FMEServer,
although you can still perform and test the installation.
Connecting to FME Server
Web connection allows FMEWorkbench to connect to FMEServer using the HTTP pro-
tocol. It requires the Web Application Server port to be open to communication between
the FMEWorkbench computer and the FMEServer computer.
Planning an FMEServer Installation 19
Version of FME Workbench
The version of FMEWorkbench you use must match the FMEServer version you have
installed. This requirement ensures that the workspaces you author will run when pub-
lished to FMEServer.
If you are running an FMEServer version that is older than your FMEWorkbench, it is
possible to upgrade the FMEEngines used by FME Server to match your FMEWorkbench
version. Instructions for upgrading the FMEEngine only are available in FMEEngine Only
Upgrade
GridShift Files
If you plan to run workspaces that transform data between the datums NAD27 and
NAD83, you can use datum shift files for Canada or the US. For more information, see
Configuring Implicit NAD27 to NAD83 Datum Shifts.
Third-Party Applications for FME
FMEWorkspaces often rely on third party applications for connecting to data sources.
Examples include an Oracle client for connecting to an Oracle database and an ArcGIS
installation for connecting to Esri Geodatabases.
If you must install a third-party application for your FMEDesktop installation, repeat
that installation on all machines hosting FME Engines. Review our FMEformats matrix
and compare by platforms to check if the formats you plan to use are available.
Planning an FMEServer Installation 20
Performing an InstallationInstall FME Server: Express Installation for Windows 21Install FMEServer: Express Installation for Linux 36Installing a Scalable, Fault-Tolerant FME Server 46Distributing Components (2-Tier) 93Distributing Components (3-Tier) 149Adding FMEEngines on a Separate Machine 208
Install FME Server: Express Installation for Win-dowsThis chapter provides information for an Express installation of FMEServer for Windows.
Before getting started, take a few minutes to review Planning an FMEServer Installation.
To Perform an Express Installation for Windows
1. Obtain the Installer
2. Run the Installer
3. Starting and Stopping FMEServer
4. Log on to the Web User Interface
5. Request and Install a License
6. Verify the Installation
See Also
l Uninstalling
Obtain the Installer
To obtain the applicable FMEServer installation package, visit the FMEDownloads page.
This page includes download links to release and beta installation packages for various
platforms.
Performing an Installation 21
To request a 60-day trial license of FMEServer, visit http://www.safe.com/fme/fme-tech-
nology/fme-server/trial-download/.
You can also contact [email protected] to get access.
What's Next?
l Run the Installer
Run the Installer
Run the installer under an administrator account. This account must have:
l Write privileges to the specified installation directory.
l "Log on as a service" rights on this machine. For more information, see this
Microsoft Docs article.
FME Server Installation Extractor
Start the FME Server installer.
On the Installation Extractor dialog, specify a Destination folder in which to extract
installation files. Note that this folder only specifies where installation files are extrac-
ted—it does not specify where FME Server program files are installed. That location is
specified later in the installer.
Tip: Take note of the specified Destination folder location. Following installation,
you may wish to:
Review the installation .log file.
Remove these files. Doing so saves almost 2 GB disk space.
Performing an Installation 22
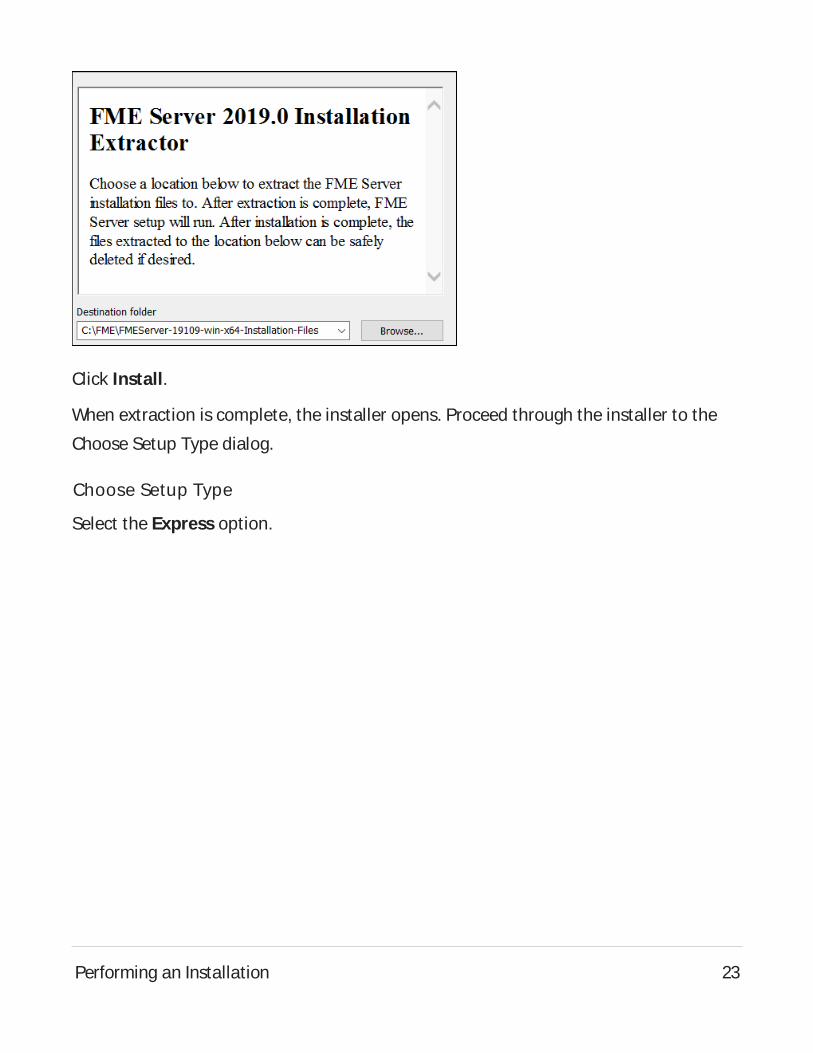
Click Install.
When extraction is complete, the installer opens. Proceed through the installer to the
Choose Setup Type dialog.
Choose Setup Type
Select the Express option.
Performing an Installation 23
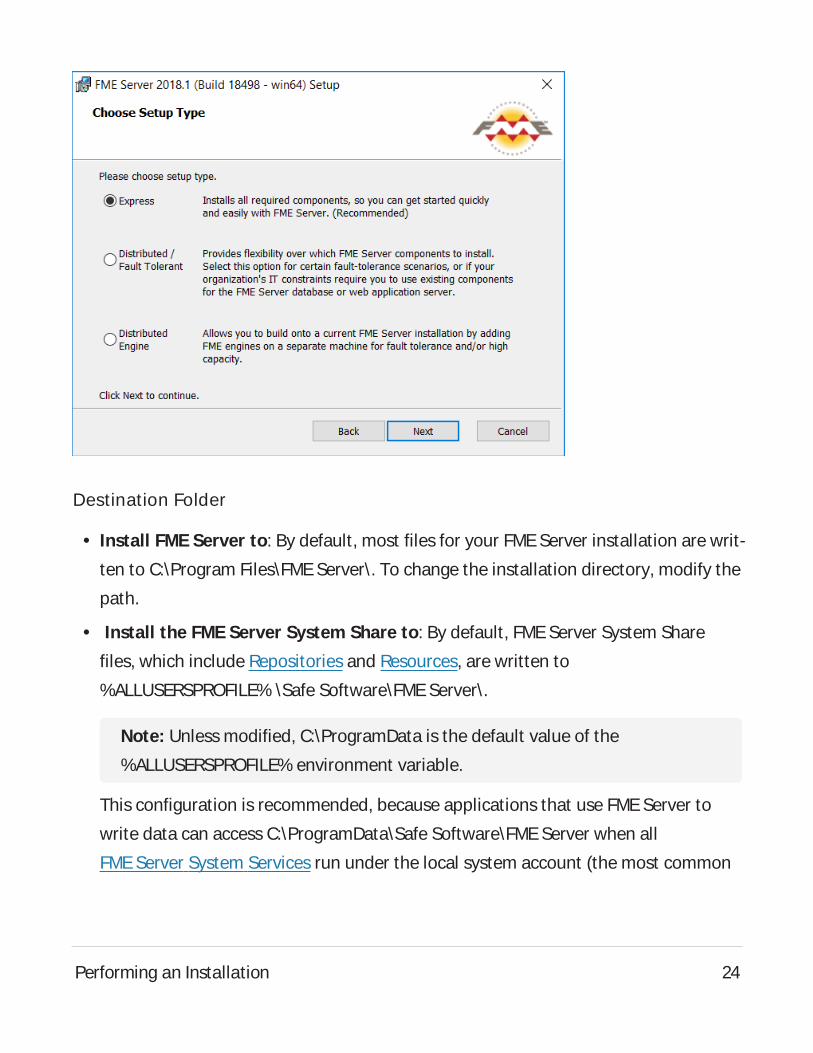
Destination Folder
l Install FME Server to: By default, most files for your FMEServer installation are writ-
ten to C:\Program Files\FME Server\. To change the installation directory, modify the
path.
l Install the FME Server System Share to: By default, FMEServer System Share
files, which include Repositories and Resources, are written to
%ALLUSERSPROFILE% \Safe Software\FMEServer\.
Note: Unless modified, C:\ProgramData is the default value of the
%ALLUSERSPROFILE% environment variable.
This configuration is recommended, because applications that use FME Server to
write data can access C:\ProgramData\Safe Software\FMEServer when all
FME Server System Services run under the local system account (the most common
Performing an Installation 24
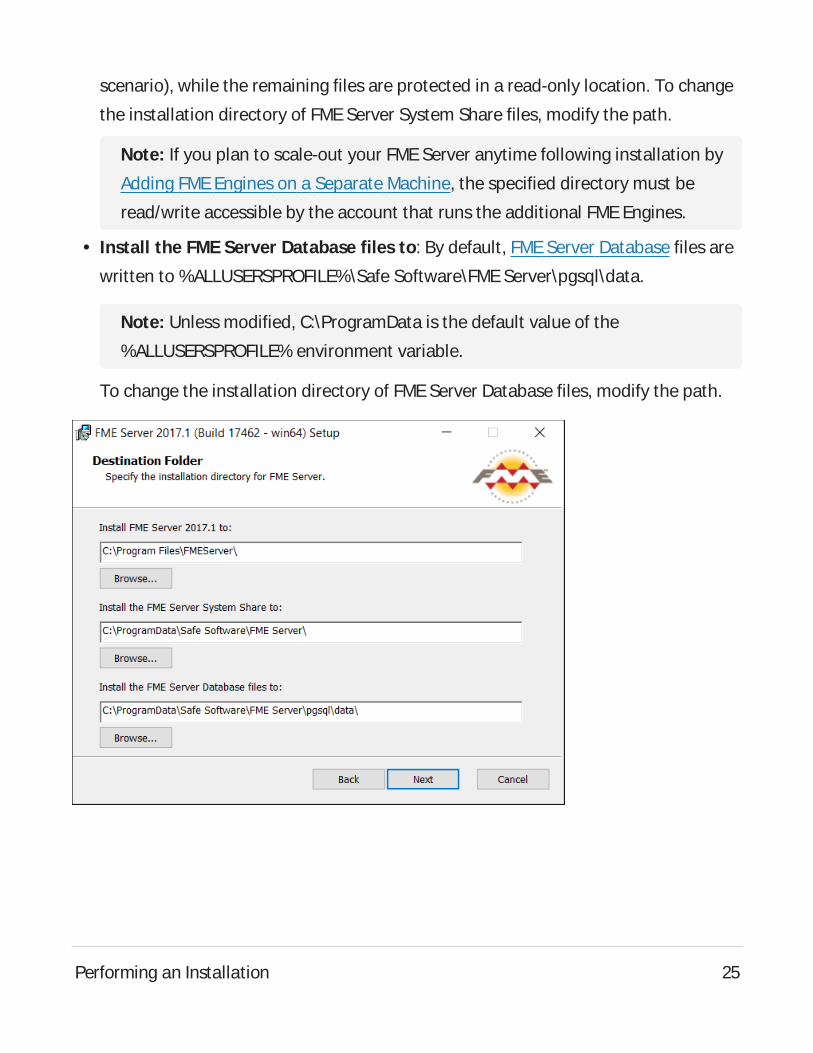
scenario), while the remaining files are protected in a read-only location. To change
the installation directory of FME Server System Share files, modify the path.
Note: If you plan to scale-out your FME Server anytime following installation by
Adding FMEEngines on a Separate Machine, the specified directory must be
read/write accessible by the account that runs the additional FME Engines.
l Install the FME Server Database files to: By default, FMEServer Database files are
written to %ALLUSERSPROFILE%\Safe Software\FMEServer\pgsql\data.
Note: Unless modified, C:\ProgramData is the default value of the
%ALLUSERSPROFILE% environment variable.
To change the installation directory of FMEServer Database files, modify the path.
Performing an Installation 25
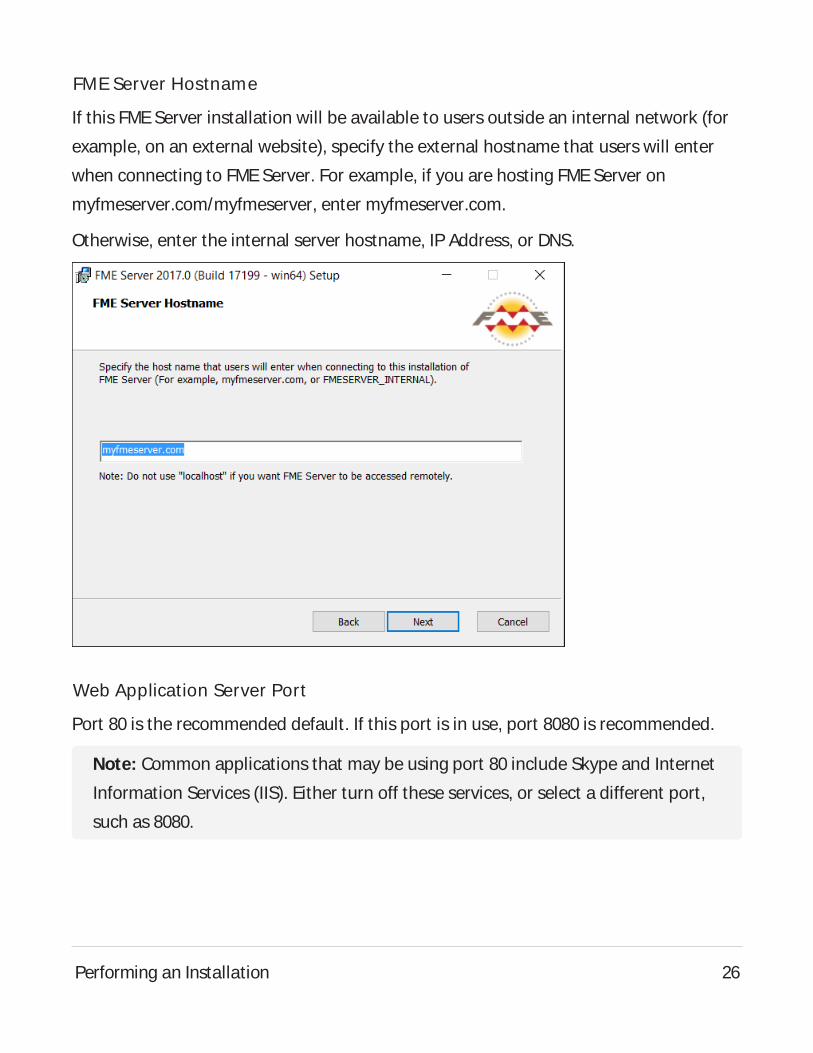
FME Server Hostname
If this FMEServer installation will be available to users outside an internal network (for
example, on an external website), specify the external hostname that users will enter
when connecting to FMEServer. For example, if you are hosting FMEServer on
myfmeserver.com/myfmeserver, enter myfmeserver.com.
Otherwise, enter the internal server hostname, IP Address, or DNS.
Web Application Server Port
Port 80 is the recommended default. If this port is in use, port 8080 is recommended.
Note: Common applications that may be using port 80 include Skype and Internet
Information Services (IIS). Either turn off these services, or select a different port,
such as 8080.
Performing an Installation 26
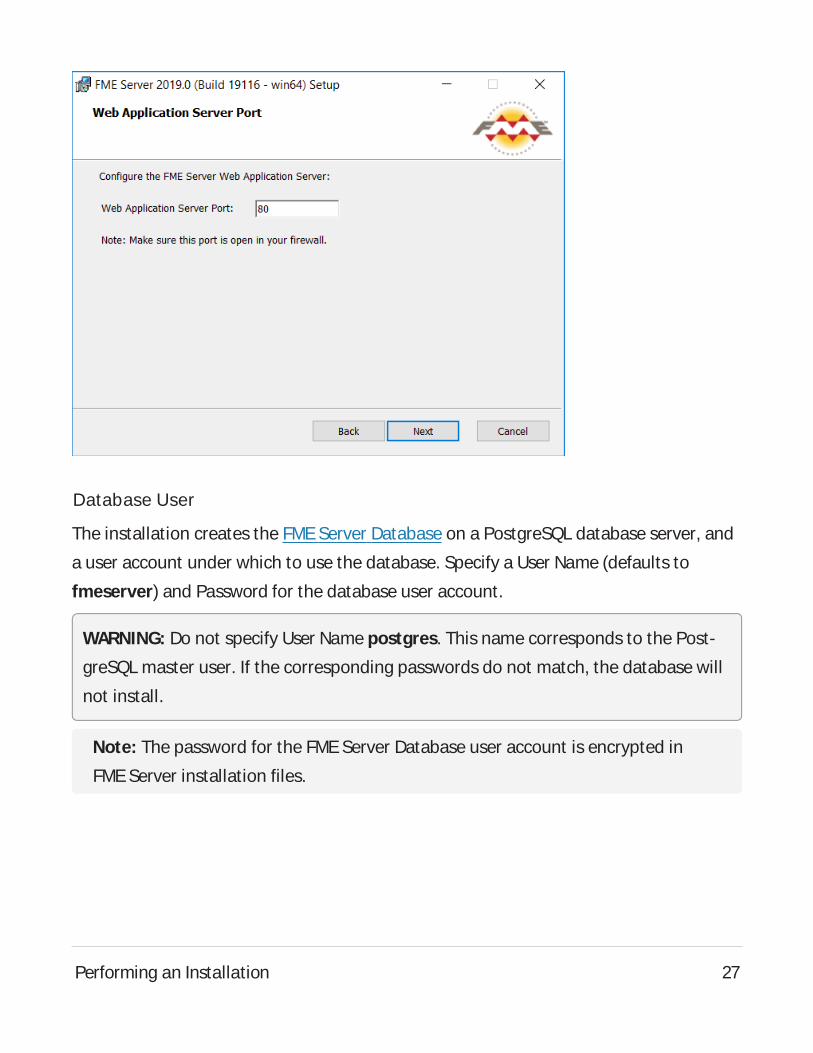
Database User
The installation creates the FMEServer Database on a PostgreSQL database server, and
a user account under which to use the database. Specify a User Name (defaults to
fmeserver) and Password for the database user account.
WARNING: Do not specify User Name postgres. This name corresponds to the Post-
greSQL master user. If the corresponding passwords do not match, the database will
not install.
Note: The password for the FME Server Database user account is encrypted in
FME Server installation files.
Performing an Installation 27

On the last screen, click Install.
Proceed to Starting and Stopping FMEServer.
Starting and Stopping FME Server
After performing the installation, the FMEServer service and associated applications
start automatically. You might have to start and stop these applications at some point.
See Starting and Stopping FMEServer Manually for instructions.
Note: If UAC(User Account Control) is enabled on your Windows system and the
installation was not run from an elevated prompt (that is, Run as administrator),
you might need to start the FMEServer Windows Services.
Performing an Installation 28
What's Next?
l Log on to the Web User Interface
Log on to the Web User Interface
To log in to the Web User Interface for the first time as an administrator following install-
ation, specify Username admin and Password admin. You will be prompted to update
the admin password upon initial use, based on the default Password Policy con-
figuration.
For more information:
l Accessing the Web User Interface
l Changing the Login Password
l Default User Accounts and Passwords
l Role-Based and User-Based Access Control
What's Next?
l Request and Install a License
Request and Install a License
License files are installed, by default, to: Windows: C:\ProgramData\Safe Soft-
ware\FME Server\licenses Linux: /opt/fmeserver/licensesDynamic Engine (CPU
Usage) licensing is not available for engines on FMECloud.
Automatic Mode (Recommended)
If your FME Server host machine has an internet connection, you can request and install
a license online without any need for downloading and re-uploading a license file.
Performing an Installation 29
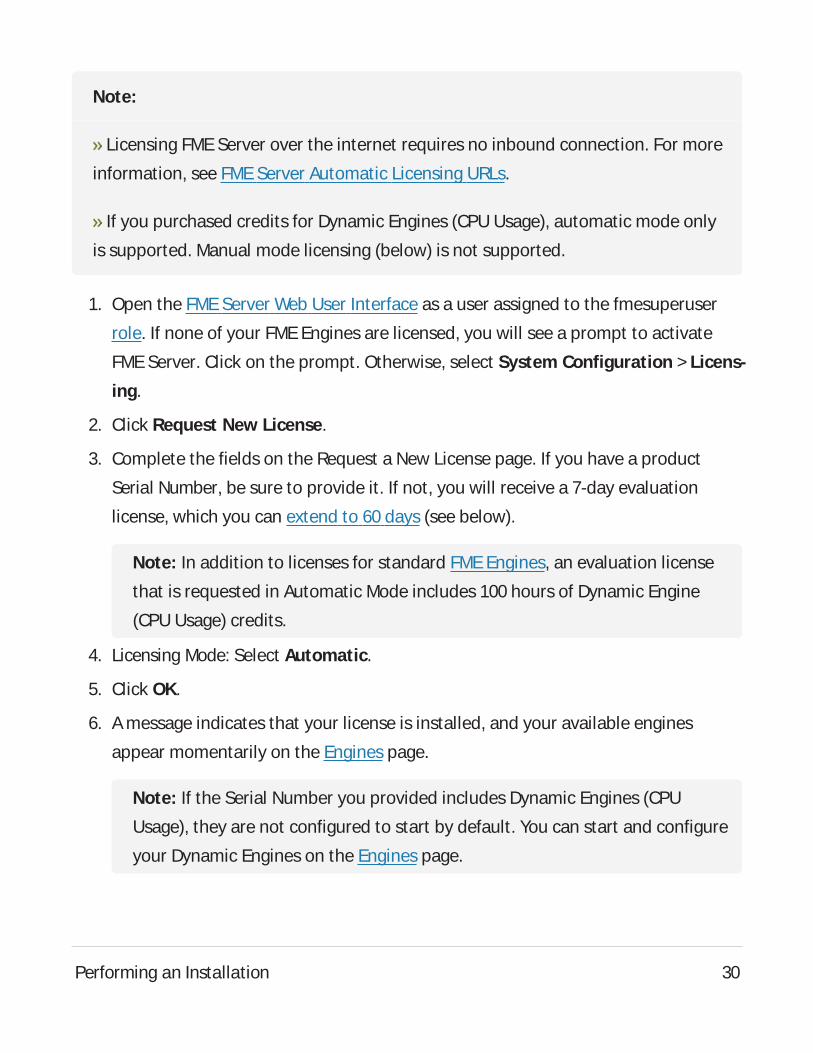
Note:
Licensing FMEServer over the internet requires no inbound connection. For more
information, see FMEServer Automatic Licensing URLs.
If you purchased credits for Dynamic Engines (CPU Usage), automatic mode only
is supported. Manual mode licensing (below) is not supported.
1. Open the FMEServer Web User Interface as a user assigned to the fmesuperuser
role. If none of your FME Engines are licensed, you will see a prompt to activate
FME Server. Click on the prompt. Otherwise, select System Configuration > Licens-
ing.
2. Click Request New License.
3. Complete the fields on the Request a New License page. If you have a product
Serial Number, be sure to provide it. If not, you will receive a 7-day evaluation
license, which you can extend to 60 days (see below).
Note: In addition to licenses for standard FME Engines, an evaluation license
that is requested in Automatic Mode includes 100 hours of Dynamic Engine
(CPU Usage) credits.
4. Licensing Mode: Select Automatic.
5. Click OK.
6. Amessage indicates that your license is installed, and your available engines
appear momentarily on the Engines page.
Note: If the Serial Number you provided includes Dynamic Engines (CPU
Usage), they are not configured to start by default. You can start and configure
your Dynamic Engines on the Engines page.
Performing an Installation 30
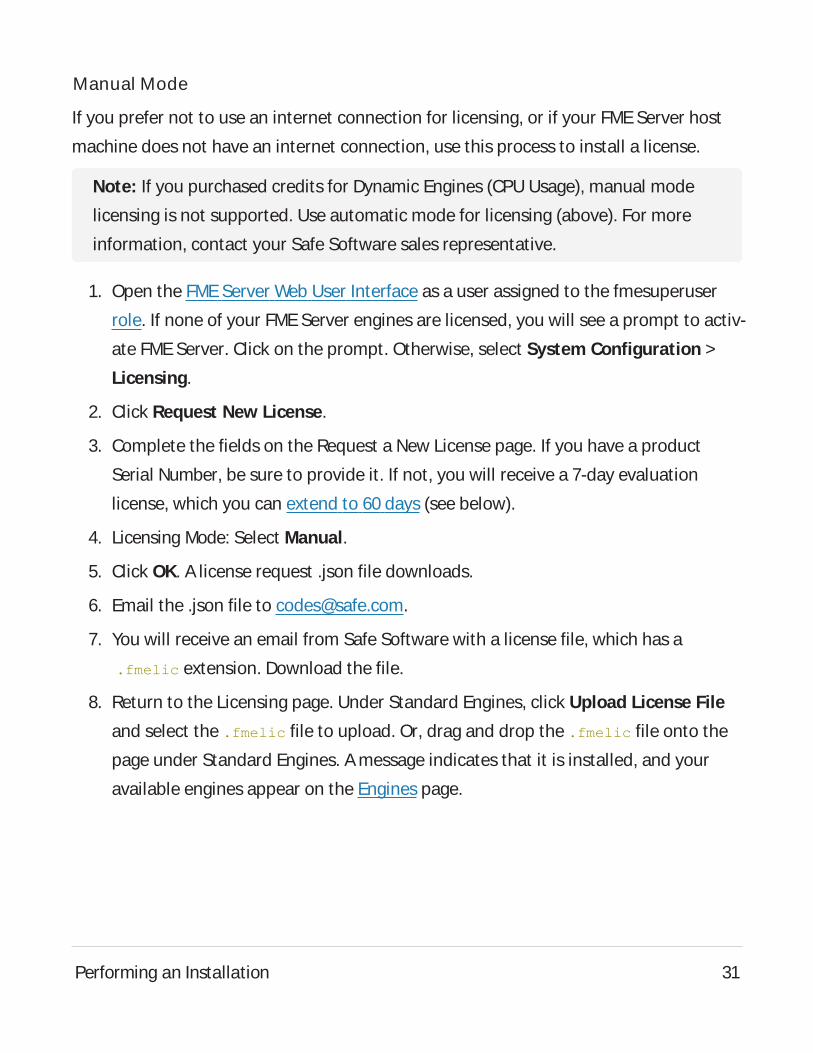
Manual Mode
If you prefer not to use an internet connection for licensing, or if your FME Server host
machine does not have an internet connection, use this process to install a license.
Note: If you purchased credits for Dynamic Engines (CPU Usage), manual mode
licensing is not supported. Use automatic mode for licensing (above). For more
information, contact your Safe Software sales representative.
1. Open the FMEServer Web User Interface as a user assigned to the fmesuperuser
role. If none of your FME Server engines are licensed, you will see a prompt to activ-
ate FME Server. Click on the prompt. Otherwise, select System Configuration >
Licensing.
2. Click Request New License.
3. Complete the fields on the Request a New License page. If you have a product
Serial Number, be sure to provide it. If not, you will receive a 7-day evaluation
license, which you can extend to 60 days (see below).
4. Licensing Mode: Select Manual.
5. Click OK. A license request .json file downloads.
6. Email the .json file to [email protected].
7. You will receive an email from Safe Software with a license file, which has a
.fmelic extension. Download the file.
8. Return to the Licensing page. Under Standard Engines, click Upload License File
and select the .fmelic file to upload. Or, drag and drop the .fmelic file onto the
page under Standard Engines. Amessage indicates that it is installed, and your
available engines appear on the Engines page.
Performing an Installation 31
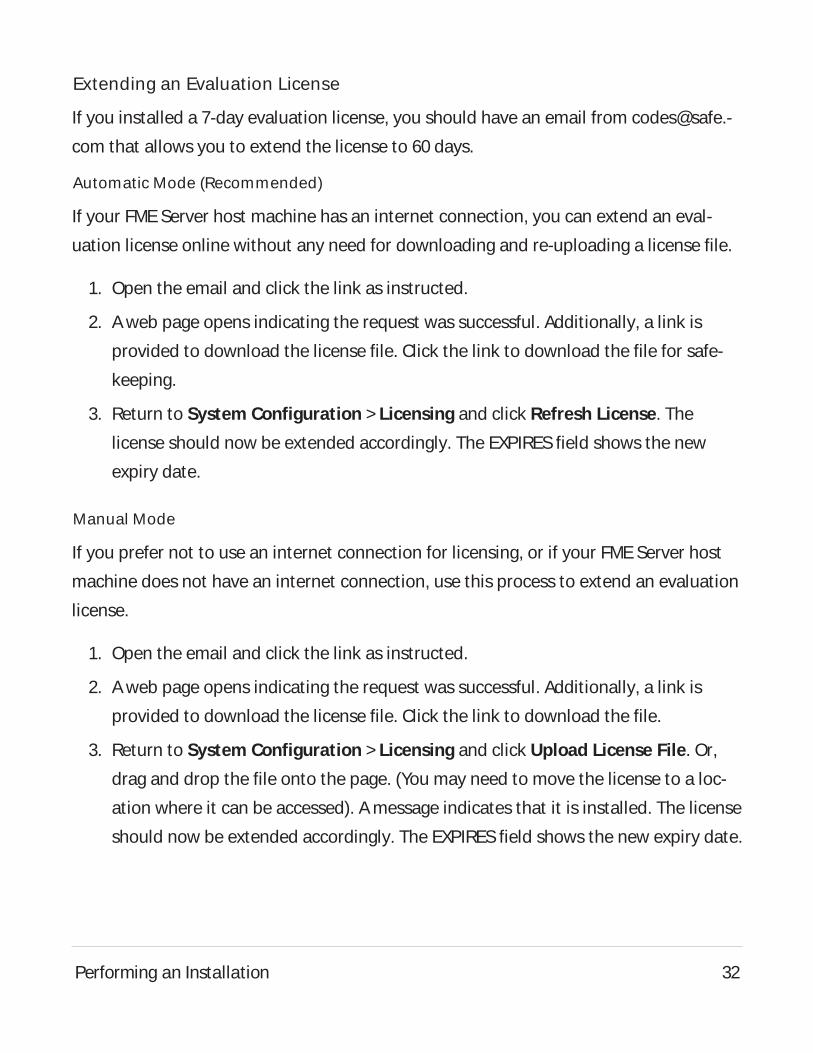
Extending an Evaluation License
If you installed a 7-day evaluation license, you should have an email from [email protected]
com that allows you to extend the license to 60 days.
Automatic Mode (Recommended)
If your FME Server host machine has an internet connection, you can extend an eval-
uation license online without any need for downloading and re-uploading a license file.
1. Open the email and click the link as instructed.
2. Aweb page opens indicating the request was successful. Additionally, a link is
provided to download the license file. Click the link to download the file for safe-
keeping.
3. Return to System Configuration > Licensing and click Refresh License. The
license should now be extended accordingly. The EXPIRESfield shows the new
expiry date.
Manual Mode
If you prefer not to use an internet connection for licensing, or if your FME Server host
machine does not have an internet connection, use this process to extend an evaluation
license.
1. Open the email and click the link as instructed.
2. Aweb page opens indicating the request was successful. Additionally, a link is
provided to download the license file. Click the link to download the file.
3. Return to System Configuration > Licensing and click Upload License File. Or,
drag and drop the file onto the page. (You may need to move the license to a loc-
ation where it can be accessed). Amessage indicates that it is installed. The license
should now be extended accordingly. The EXPIRESfield shows the new expiry date.
Performing an Installation 32
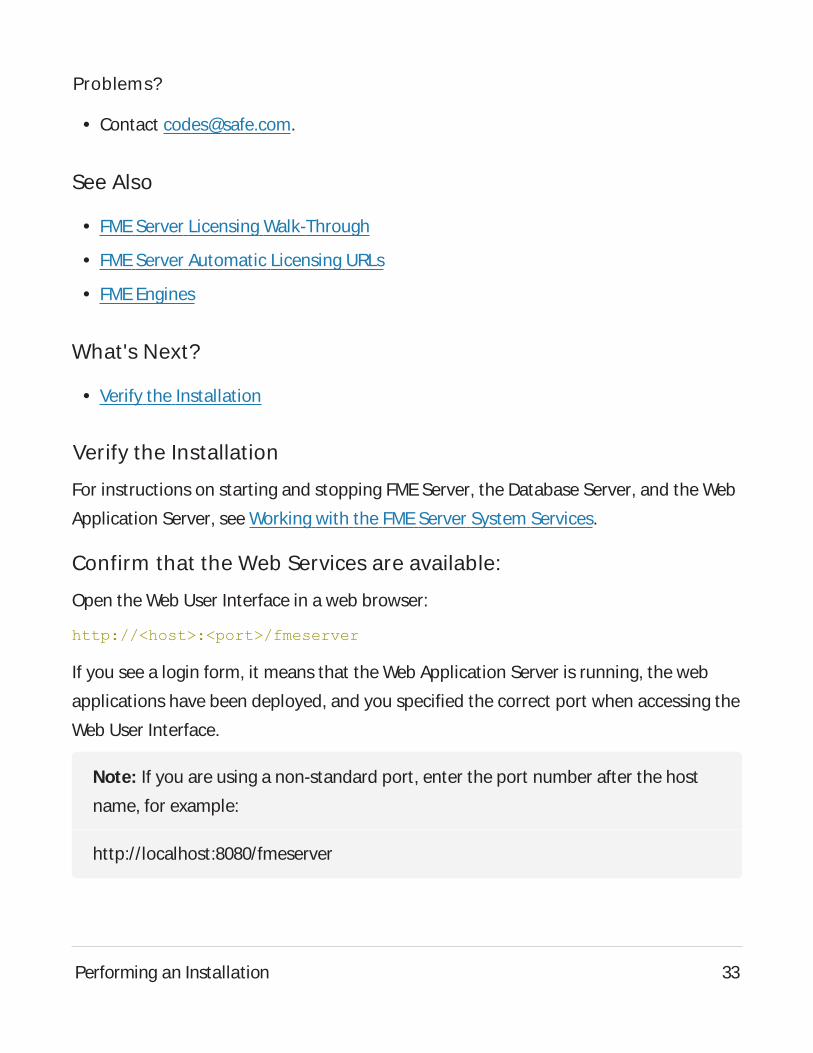
Problems?
l Contact [email protected].
See Also
l FMEServer Licensing Walk-Through
l FMEServer Automatic Licensing URLs
l FME Engines
What's Next?
l Verify the Installation
Verify the Installation
For instructions on starting and stopping FMEServer, the Database Server, and the Web
Application Server, see Working with the FMEServer System Services.
Confirm that the Web Services are available:
Open the Web User Interface in a web browser:
http://<host>:<port>/fmeserver
If you see a login form, it means that the Web Application Server is running, the web
applications have been deployed, and you specified the correct port when accessing the
Web User Interface.
Note: If you are using a non-standard port, enter the port number after the host
name, for example:
http://localhost:8080/fmeserver
Performing an Installation 33

Confirm that FME Server is available:
Log in to the Web User Interface with the username and password you entered during
installation.
l If you are able to log in , it confirms that FMEServer is installed and running.
l If you cannot access the Web UI, the page shows a Server error, or you can confirm
that FMEServer is not running, you might have a problem with installation. For sup-
port, go to safe.com/support.
Confirm that the FME Engines are licensed:
Log in to the Web User Interface with the username and password you entered during
installation.
If your FMEEngines are unlicensed, a dialog will appear. Click the link to navigate to the
Engines & Licensing page. Alternatively, on the menu, click Engines & Licensing.
The Engines & Licensing page lists the licensed and running FMEEngines.
If there are no FMEEngines, your FMEServer might not be licensed. See Request and
Install a License for instructions on acquiring a license.
If you still do not see active FMEEngines in the Web User Interface, send the following
information:
l From the FMEServer computer, the most recent copy of the following logs:
<FMEServerDir>\Logs\processMonitor_xx.log
<FMEServerDir>\Logs\fmeServer_xx.log
Confirm that FME Server can run a job:
After you confirm that your FMEEngines are licensed, confirm that FMEServer can per-
form its primary function—running a job.
Performing an Installation 34
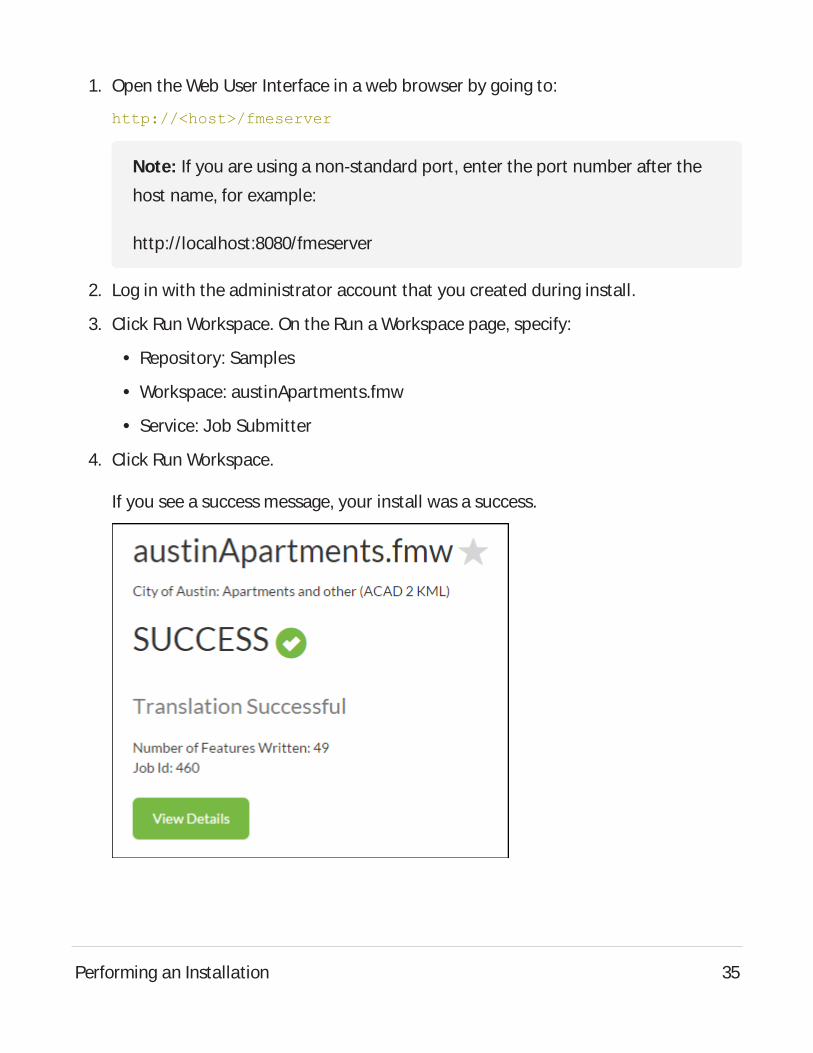
1. Open the Web User Interface in a web browser by going to:
http://<host>/fmeserver
Note: If you are using a non-standard port, enter the port number after the
host name, for example:
http://localhost:8080/fmeserver
2. Log in with the administrator account that you created during install.
3. Click Run Workspace. On the Run a Workspace page, specify:
l Repository: Samples
l Workspace: austinApartments.fmw
l Service: Job Submitter
4. Click Run Workspace.
If you see a success message, your install was a success.
Performing an Installation 35
Uninstalling
Things to Consider
Before uninstalling FME Server, keep in mind the following:
l Before you upgrade to a newer version of FMEServer, see Upgrading FME Server for
instructions on backing up your existing configuration. You must uninstall any pre-
vious versions of FMEServer before installing an upgrade.
l Uninstalling FMEServer removes the contents of your Tomcat directory if you
installed the default Web Application Server. This folder is located in the FMEServer
installation directory under Utilities\tomcat. If you made custom modi-
fications to this Tomcat, these modifications should be backed up before uninstall.
To Uninstall:
Ensure that FMEServer, FMEServer Application Server, or other Web Application servers
are shut down before proceeding.
You can uninstall FMEServer as you would any other program by selecting Start menu >
Control Panel > Programs and Features > FMEServer.
Install FME Server: Express Installation for LinuxThis chapter provides information for an Express installation FMEServer for Linux.
Before getting started, take a few minutes to review Planning an FMEServer Installation.
To Perform an Express Installation for Linux
1. Ensure System Requirements are met, including updates and dependencies.
2. Obtain the Installer
3. Run the Installer
Performing an Installation 36
4. Starting and Stopping FMEServer
5. Log on to the Web User Interface
6. Request and Install a License
7. Verify the Installation
See Also
l Uninstalling
Obtain the Installer
To obtain the applicable FMEServer installation package, visit the FMEDownloads page.
This page includes download links to release and beta installation packages for various
platforms.
To request a 60-day trial license of FMEServer, visit http://www.safe.com/fme/fme-tech-
nology/fme-server/trial-download/.
You can also contact [email protected] to get access.
What's Next?
l Run the Installer
Run the Installer
The installer should be executed as the root user. The recommended method is to call
the install file directly. These examples assume you are in the same directory as the
installer:
l As root user:
chmod +x fme-server-b18205-linux-x64~ubuntu.16.04.run
./fme-server-b18205-linux-x64~ubuntu.16.04.run
Performing an Installation 37
l Not root user, but with sudo privileges:
sudo chmod +x fme-server-b18205-linux-x64~ubuntu.16.04.run
sudo ./fme-server-b18205-linux-x64~ubuntu.16.04.run
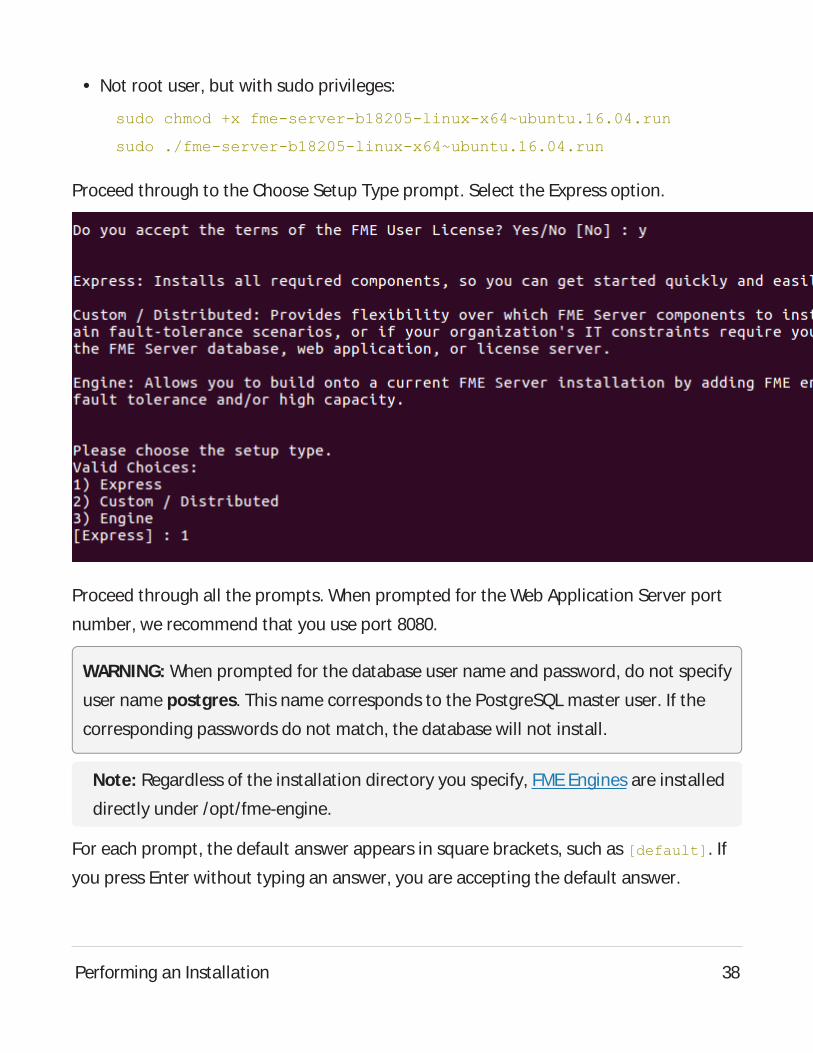
Proceed through to the Choose Setup Type prompt. Select the Express option.
Proceed through all the prompts. When prompted for the Web Application Server port
number, we recommend that you use port 8080.
WARNING: When prompted for the database user name and password, do not specify
user name postgres. This name corresponds to the PostgreSQL master user. If the
corresponding passwords do not match, the database will not install.
Note: Regardless of the installation directory you specify, FME Engines are installed
directly under /opt/fme-engine.
For each prompt, the default answer appears in square brackets, such as [default]. If
you press Enter without typing an answer, you are accepting the default answer.
Performing an Installation 38
Note:
If you select port 80 or any port number less than 1024 for the default Web Applic-
ation Server, start that service as root.
The password for the FME Server Database user account is encrypted in
FME Server installation files.
Proceed to Starting and Stopping FMEServer.
Starting and Stopping FME Server
After performing the installation, start the FMEServer System Services. For instructions
on starting and stopping the services manually, see Starting and Stopping FMEServer
Manually. For instructions on configuring the services to start at boot time, see Con-
figuring FMEServer as a System Service (Linux).
What's Next?
l Log on to the Web User Interface
Log on to the Web User Interface
To log in to the Web User Interface for the first time as an administrator following install-
ation, specify Username admin and Password admin. You will be prompted to update
the admin password upon initial use, based on the default Password Policy con-
figuration.
For more information:
l Accessing the Web User Interface
l Changing the Login Password
Performing an Installation 39
l Default User Accounts and Passwords
l Role-Based and User-Based Access Control
What's Next?
l Request and Install a License
Request and Install a License
License files are installed, by default, to: Windows: C:\ProgramData\Safe Soft-
ware\FME Server\licenses Linux: /opt/fmeserver/licensesDynamic Engine (CPU
Usage) licensing is not available for engines on FMECloud.
Automatic Mode (Recommended)
If your FME Server host machine has an internet connection, you can request and install
a license online without any need for downloading and re-uploading a license file.
Note:
Licensing FMEServer over the internet requires no inbound connection. For more
information, see FMEServer Automatic Licensing URLs.
If you purchased credits for Dynamic Engines (CPU Usage), automatic mode only
is supported. Manual mode licensing (below) is not supported.
1. Open the FMEServer Web User Interface as a user assigned to the fmesuperuser
role. If none of your FME Engines are licensed, you will see a prompt to activate
FME Server. Click on the prompt. Otherwise, select System Configuration > Licens-
ing.
2. Click Request New License.
Performing an Installation 40
3. Complete the fields on the Request a New License page. If you have a product
Serial Number, be sure to provide it. If not, you will receive a 7-day evaluation
license, which you can extend to 60 days (see below).
Note: In addition to licenses for standard FME Engines, an evaluation license
that is requested in Automatic Mode includes 100 hours of Dynamic Engine
(CPU Usage) credits.
4. Licensing Mode: Select Automatic.
5. Click OK.
6. Amessage indicates that your license is installed, and your available engines
appear momentarily on the Engines page.
Note: If the Serial Number you provided includes Dynamic Engines (CPU
Usage), they are not configured to start by default. You can start and configure
your Dynamic Engines on the Engines page.
Manual Mode
If you prefer not to use an internet connection for licensing, or if your FME Server host
machine does not have an internet connection, use this process to install a license.
Note: If you purchased credits for Dynamic Engines (CPU Usage), manual mode
licensing is not supported. Use automatic mode for licensing (above). For more
information, contact your Safe Software sales representative.
1. Open the FMEServer Web User Interface as a user assigned to the fmesuperuser
role. If none of your FME Server engines are licensed, you will see a prompt to activ-
ate FME Server. Click on the prompt. Otherwise, select System Configuration >
Licensing.
2. Click Request New License.
Performing an Installation 41
3. Complete the fields on the Request a New License page. If you have a product
Serial Number, be sure to provide it. If not, you will receive a 7-day evaluation
license, which you can extend to 60 days (see below).
4. Licensing Mode: Select Manual.
5. Click OK. A license request .json file downloads.
6. Email the .json file to [email protected].
7. You will receive an email from Safe Software with a license file, which has a
.fmelic extension. Download the file.
8. Return to the Licensing page. Under Standard Engines, click Upload License File
and select the .fmelic file to upload. Or, drag and drop the .fmelic file onto the
page under Standard Engines. Amessage indicates that it is installed, and your
available engines appear on the Engines page.
Extending an Evaluation License
If you installed a 7-day evaluation license, you should have an email from [email protected]
com that allows you to extend the license to 60 days.
Automatic Mode (Recommended)
If your FME Server host machine has an internet connection, you can extend an eval-
uation license online without any need for downloading and re-uploading a license file.
1. Open the email and click the link as instructed.
2. Aweb page opens indicating the request was successful. Additionally, a link is
provided to download the license file. Click the link to download the file for safe-
keeping.
3. Return to System Configuration > Licensing and click Refresh License. The
license should now be extended accordingly. The EXPIRESfield shows the new
expiry date.
Performing an Installation 42
Manual Mode
If you prefer not to use an internet connection for licensing, or if your FME Server host
machine does not have an internet connection, use this process to extend an evaluation
license.
1. Open the email and click the link as instructed.
2. Aweb page opens indicating the request was successful. Additionally, a link is
provided to download the license file. Click the link to download the file.
3. Return to System Configuration > Licensing and click Upload License File. Or,
drag and drop the file onto the page. (You may need to move the license to a loc-
ation where it can be accessed). Amessage indicates that it is installed. The license
should now be extended accordingly. The EXPIRESfield shows the new expiry date.
Problems?
l Contact [email protected].
See Also
l FMEServer Licensing Walk-Through
l FMEServer Automatic Licensing URLs
l FME Engines
What's Next?
l Verify the Installation
Verify the Installation
For instructions on starting and stopping FMEServer, the Database Server, and the Web
Application Server, see Working with the FMEServer System Services.
Performing an Installation 43
Confirm that the Web Services are available:
Open the Web User Interface in a web browser:
http://<host>:<port>/fmeserver
If you see a login form, it means that the Web Application Server is running, the web
applications have been deployed, and you specified the correct port when accessing the
Web User Interface.
Note: If you are using a non-standard port, enter the port number after the host
name, for example:
http://localhost:8080/fmeserver
Confirm that FME Server is available:
Log in to the Web User Interface with the username and password you entered during
installation.
l If you are able to log in, it confirms that FMEServer is installed and running.
l If you cannot access the Web UI, the page shows a Server error, or you can confirm
that FMEServer is not running, you might have a problem with installation. For sup-
port, go to safe.com/support.
Confirm that the FME Engines are licensed:
Log in to the Web User Interface with the username and password you entered during
installation.
The Engines page lists the licensed and running FMEEngines.
If there are no FMEEngines, your FMEServer might not be licensed. Confirm that you
have an FMEEngine license available. See Request and Install a License for instructions
on acquiring a license.
Performing an Installation 44
If you still do not see active FMEEngines in the Web User Interface, send the following
information:
l From the FMEServer computer, the most recent copy of the following logs:
<FMEServerDir>\Logs\processMonitor_xx.log
<FMEServerDir>\Logs\fmeServer_xx.log
Confirm that FME Server can run a job:
After you confirm that your FMEEngines are licensed, confirm that FMEServer can per-
form its primary function—running a job.
1. Open the Web User Interface in a web browser by going to:http://<host>/fmeserver
Note: If you are using a non-standard port, enter the port number after the
host name, for example:
http://localhost:8080/fmeserver
2. Log in with the administrator account that you created during install.
3. Click Run Workspace.
4. On the Run Workspace page, specify:l Repository: Samples
l Workspace: austinApartments.fmw
l Service: Job Submitter
5. Click Run.
If you see a success message, your install was a success.
Performing an Installation 45
Uninstalling
Things to Consider
Before uninstalling FME Server, keep in mind the following:
l Before you upgrade to a newer version of FMEServer, see Upgrading FME Server for
instructions on backing up your existing configuration. You must uninstall any pre-
vious versions of FMEServer before installing an upgrade.
l Uninstalling FMEServer removes the contents of your Tomcat directory if you
installed the default Web Application Server. This folder is located in the FMEServer
installation directory under Utilities\tomcat. If you made custom modi-
fications to this Tomcat, these modifications should be backed up before uninstall.
l Uninstalling removes the configuration of the following components, but does not
uninstall them. If reinstalling or performing an upgrade, these components are
reused and reconfigured:l The PostgreSQL FMEServer Database, if applicable.
l The NGINXreverse proxy.
To Uninstall:
Ensure that FMEServer, FMEServer Application Server, or other Web Application servers
are shut down before proceeding.
Run the uninstall.sh script in the FMEServer installation directory. To ensure that
everything gets uninstalled, run this script as root.
Installing a Scalable, Fault-Tolerant FME ServerBefore installing FME Server for fault tolerance, make sure you have:
Performing an Installation 46
l Read and understood Planning an FMEServer Installation, including Planning for
Fault Tolerance.
l Provided the prerequisites in Before Installation.
l Linux: Ensured System Requirements are met on all machines you have allocated for
your fault-tolerant architecture, including updates and dependencies.
To perform an installation for fault tolerance:
1. Obtain the Installer
2. Install the FMEServers on all machines you have allocated for your fault-tolerant
architecture.
3. Configure the FMEServer Database on your database server.
4. Set Up the Load Balancer and Configure with FME Server to route traffic between
each FME Server instance you installed.
5. Start the FME Server system services. Following a fault-tolerant installation, the
FME Server system services do not start automatically. You must manually start
them.
6. Log on to the Web User Interface and update the password for the admin user
account (recommended).
7. Request and Install a License.
What's Next?
Optimize: You can scale-up your system by:
l Increasing the number of FME Engines that run on machines that are part of your
FME Server deployment.
Performing an Installation 47

l Adding FMEEngines on additional machines.
For more information, see Planning for Scalability and Performance.
Before Installation
Before you install FME Server for fault tolerance, ensure the following components are
in place on your network:
l Separate machines on which to install the number of FME Servers that you have
allocated for your fault tolerant architecture.
l Aload balancer to route traffic between each FME Server instance you install.
l Fault-tolerant database server on a separate machine.
l Fault-tolerant file system on a separate machine.
Next Steps
Proceed to Obtain the Installer.
Provide a Database Server
FME Server uses its own database to manage jobs and workspace information. It is not a
source or destination data source for FMEworkspaces.
When configuring a fault tolerant environment for FME Server, you must provide your
own database server on which to configure the FMEServer database. Supported data-
base servers include:
l Oracle
l PostgreSQL
l SQL Server
Performing an Installation 48
Provide a database server that is physically separate from the machines on which the
FME Servers are installed. Separating the FMEServer Database ensures that it also
remains available in a failover scenario.
When providing a database server, keep in mind the following:
l In addition to being physically separate, the database server should, by itself, be con-
figured for fault tolerance.
l When you install the FME Servers, the database server must be running and you
must know the connection information.
l If using an Oracle database server, you must obtain the Oracle Database JDBC
driver. For more information, see https://www.or-
acle.com/technetwork/database/application-devel-
opment/jdbc/downloads/index.html.
Note: Oracle Database JDBCdriver versions that use ojdbc10.jar are not sup-
ported.
l Following installation, you must be able to create a new database on the server
using SQL scripts.
For information about acquiring a fault tolerant database server, consult your IT depart-
ment.
Provide a Remote File System for the FME Server System Share
l Skill Level: Intermediate
l Estimated Time Required: 5-15 minutes
l Prerequisites:l Domain Service Account has correct permissions on network shares.
Performing an Installation 49

FMEServer System Share files, which include Repositories and Resources, are installed
in specific directories that are shared to enable access from different computers.
Create a directory for the FME Server System Share that is physically separate from the
machine on which the FME Server Core and web application server are installed. Separ-
ating the file system ensures it remains available in a fault tolerant scenario.
When providing a remote file system, keep in mind the following:
l The accounts that run the FMEServer components must have read and write per-
missions on the remote file system directory. For more information, see Directory
and Account Permissions.
l In addition to being physically separate, the file system should, by itself, be con-
figured for fault tolerance.
l When the directory is specified during installation, it must be in the form of a UNC
path. Mapped drives are not supported.
l The directory that holds the System Share must be empty, unless System Share
folders have already been created there as part of an installation involving multiple
FME Server Cores.
For information about acquiring a fault tolerant file system, consult your IT department.
Linux Only
For distributed installations on Linux, it is necessary to create a user, prior to install-
ation, on the machine that will host the installation of the FMEServer Core and Engines.
This user must be named 'fmeserver' and belong to group 'fmeserver', and be granted
permissions on the FME Server System Share. For more information, see Directory and
Account Permissions.
Example Instructions
The following example creates user 'fmeserver' in group 'fmeserver', and allows mount
/mnt/data to be writable by the newly-created user.
Performing an Installation 50
Note: The following instructions are provided as a general guideline for adding a
user and mounting a directory. Exact instructions may vary depending on the dis-
tribution and share type in your Linux configuration.
1. Run the following commands in the Linux command line:
groupadd fmeserver
useradd -m -g fmeserver fmeserver
2. Mount the FME Server System Share directory so that user 'fmeserver' has read
and write permissions. For example, to mount a Windows-based file share:
mount -v -t cifs //network/share /mnt/data -o gid=1008,uid=1008
gid and uid are the group id and user id of the user and group that were created.
These id's can be found using these commands:
id -g fmeserver
id -u fmeserver
Obtain the Installer
To obtain the applicable FMEServer installation package, visit the FMEDownloads page.
This page includes download links to release and beta installation packages for various
platforms.
To request a 60-day trial license of FMEServer, visit http://www.safe.com/fme/fme-tech-
nology/fme-server/trial-download/.
You can also contact [email protected] to get access.
What's Next?
l Install the FMEServers
Performing an Installation 51

Install the FME Servers
Perform the following installation on all machines you have allocated for your fault tol-
erant architecture.
Start the FMEServer Installer.
(Windows only) Installation Extractor
On the Installation Extractor dialog, specify a Destination folder in which to extract
installation files. Note that this folder only specifies where installation files are extrac-
ted—it does not specify where FME Server program files are installed. That location is
specified later in the installer.
Tip: Take note of the specified Destination folder location. Following installation,
you may wish to:
Review the installation .log file.
Remove these files. Doing so saves almost 2 GB disk space.
Click Install.
Performing an Installation 52
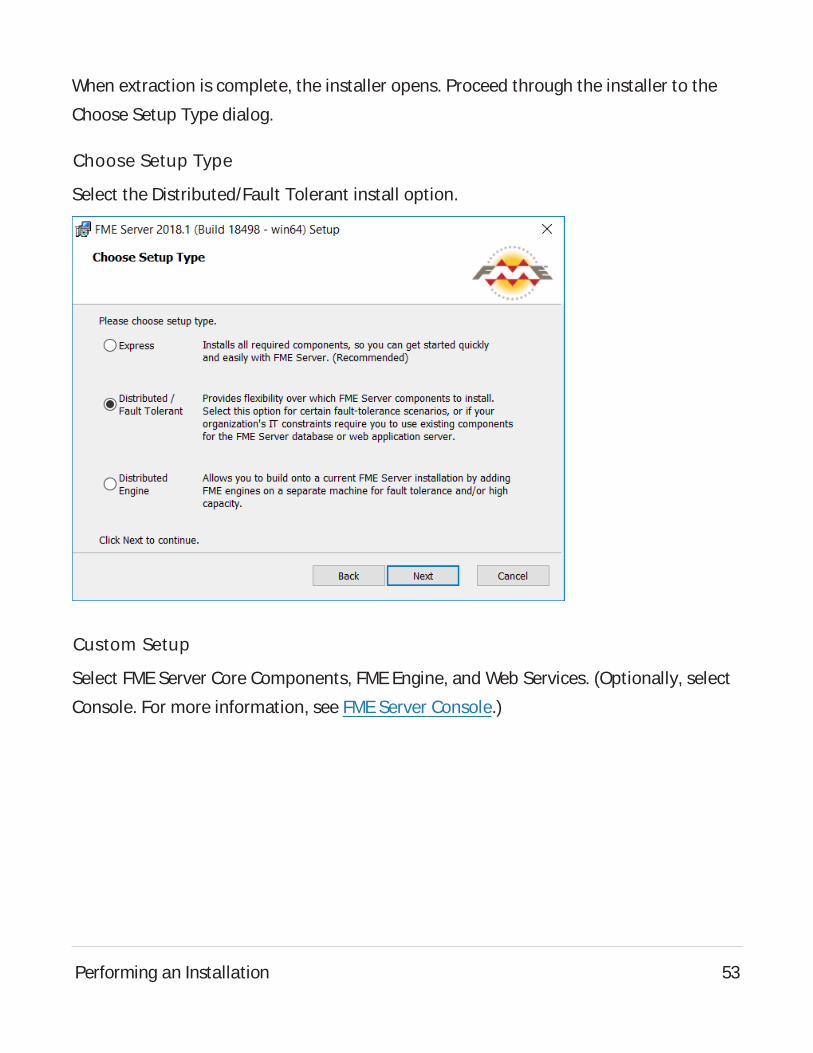
When extraction is complete, the installer opens. Proceed through the installer to the
Choose Setup Type dialog.
Choose Setup Type
Select the Distributed/Fault Tolerant install option.
Custom Setup
Select FMEServer Core Components, FMEEngine, and Web Services. (Optionally, select
Console. For more information, see FME Server Console.)
Performing an Installation 53

Destination Folder
Specify the installation directory for FME Server.
Performing an Installation 54

User Account
Specify the Windows user account that will run the FME Server System Services. This
account must have:
l Read/Write access to the FMEServer System Share that you specify in the next dia-
log. The System Share is the location where FME Server stores Repositories and
Resources files. It must be accessible by all machines that comprise the FMEServer
deployment. (For more information, see Provide a Remote File System for the
FME Server System Share.)
l Read/Write access to the FME Server installation directory that you specified in the
previous dialog.
l "Log on as a service" rights on this machine. For more information, see this
Microsoft Docs article.
Note: The FME Server Database service always runs under the local system account.
Performing an Installation 55
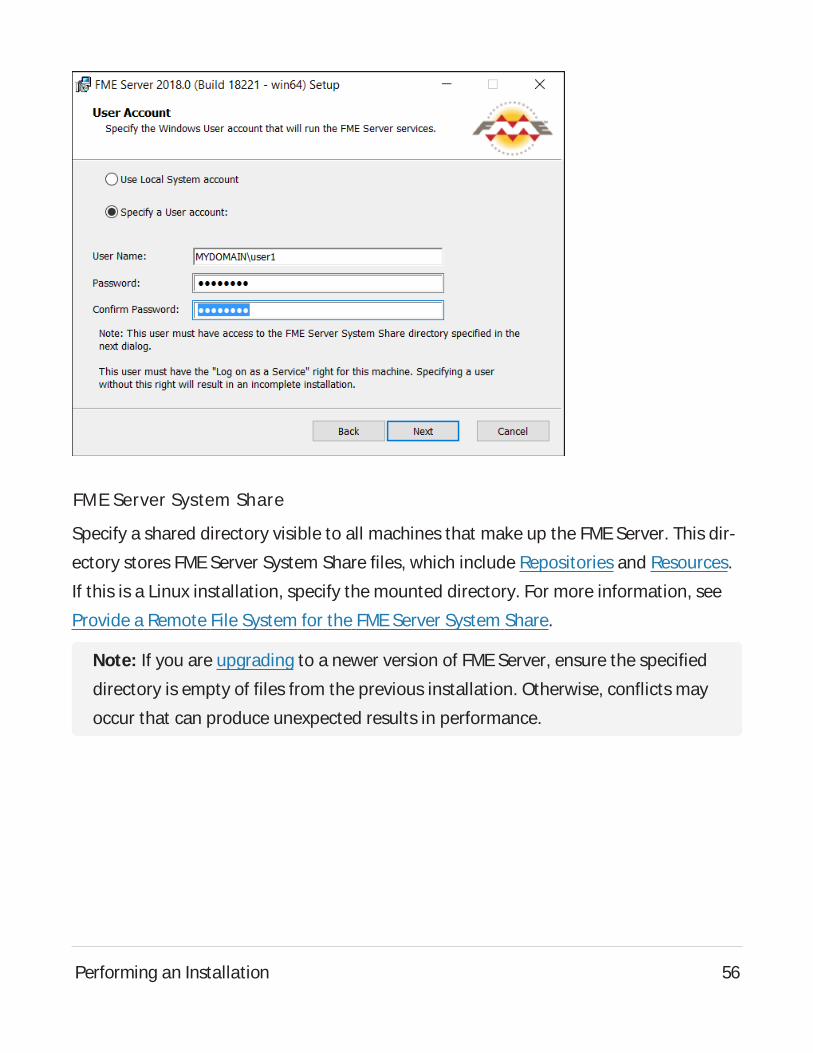
FME Server System Share
Specify a shared directory visible to all machines that make up the FMEServer. This dir-
ectory stores FMEServer System Share files, which include Repositories and Resources.
If this is a Linux installation, specify the mounted directory. For more information, see
Provide a Remote File System for the FME Server System Share.
Note: If you are upgrading to a newer version of FME Server, ensure the specified
directory is empty of files from the previous installation. Otherwise, conflicts may
occur that can produce unexpected results in performance.
Performing an Installation 56
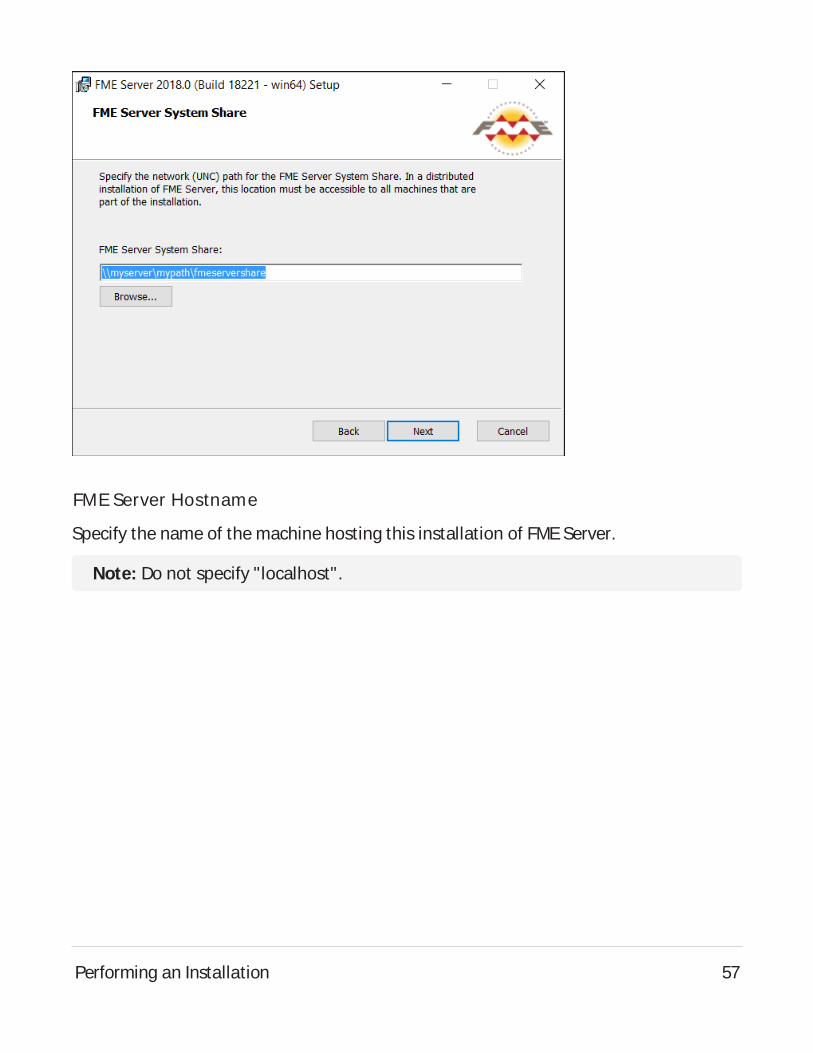
FME Server Hostname
Specify the name of the machine hosting this installation of FME Server.
Note: Do not specify "localhost".
Performing an Installation 57
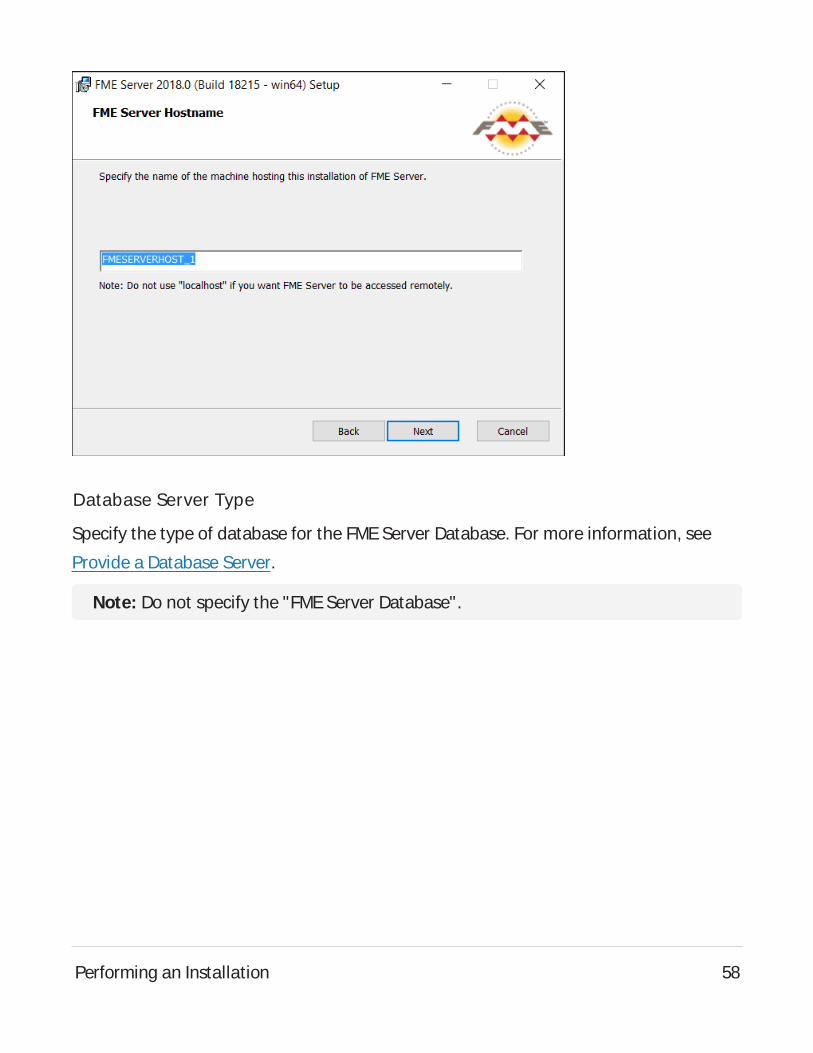
Database Server Type
Specify the type of database for the FMEServer Database. For more information, see
Provide a Database Server.
Note: Do not specify the "FMEServer Database".
Performing an Installation 58
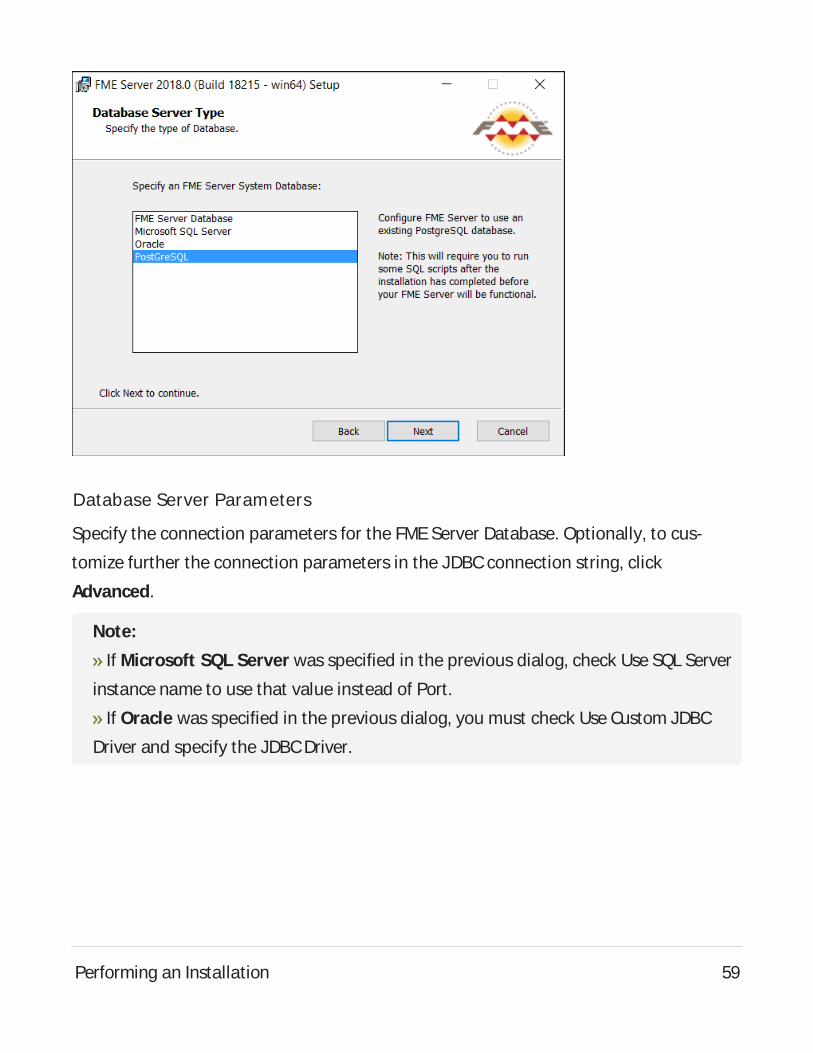
Database Server Parameters
Specify the connection parameters for the FMEServer Database. Optionally, to cus-
tomize further the connection parameters in the JDBCconnection string, click
Advanced.
Note:
If Microsoft SQL Server was specified in the previous dialog, check Use SQL Server
instance name to use that value instead of Port.
If Oracle was specified in the previous dialog, you must check Use Custom JDBC
Driver and specify the JDBCDriver.
Performing an Installation 59
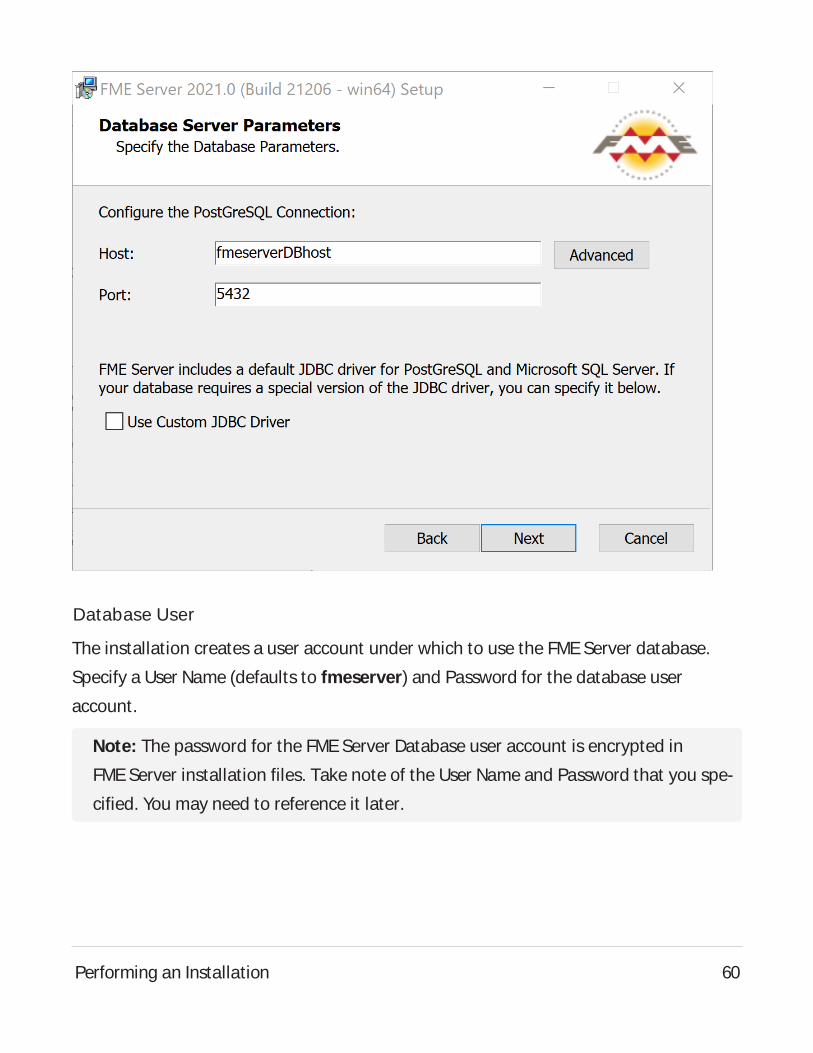
Database User
The installation creates a user account under which to use the FME Server database.
Specify a User Name (defaults to fmeserver) and Password for the database user
account.
Note: The password for the FME Server Database user account is encrypted in
FME Server installation files. Take note of the User Name and Password that you spe-
cified. You may need to reference it later.
Performing an Installation 60
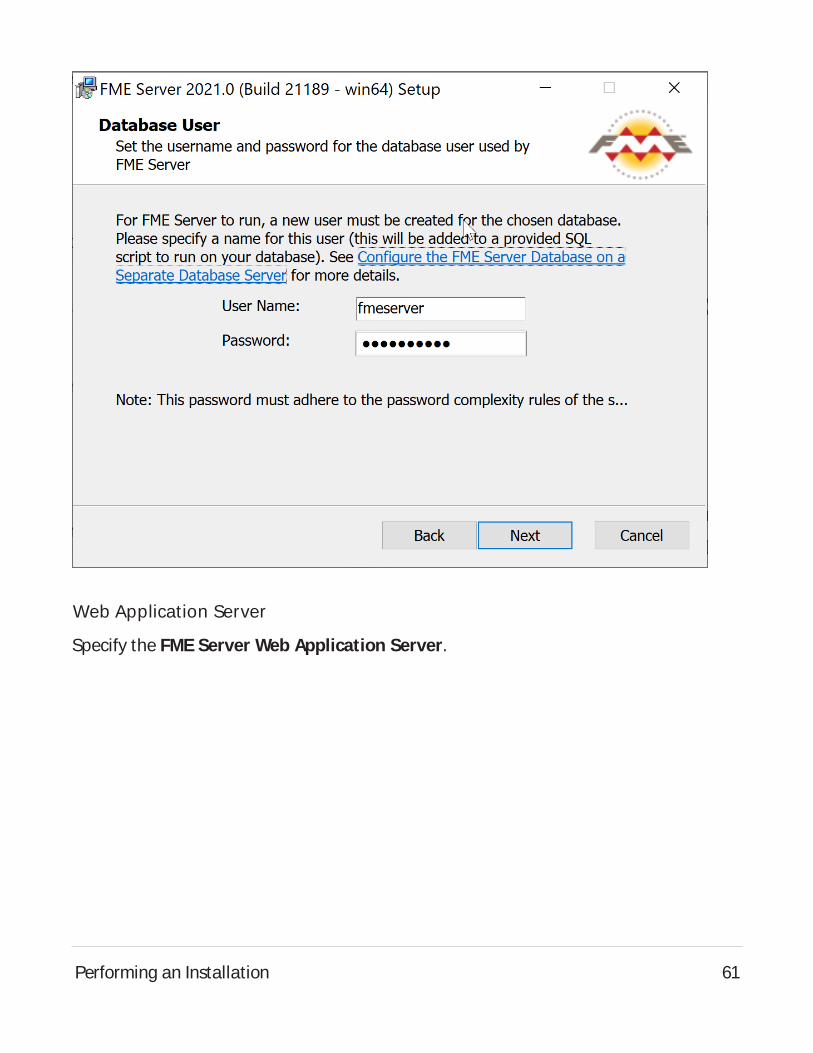
Web Application Server
Specify the FME Server Web Application Server.
Performing an Installation 61

Web Application Server Port
Specify the port to use for communication with the Web Application Server. On Win-
dows, port 80 is the recommended default. If this port is in use, port 8080 is recom-
mended. On Linux, port 8080 is recommended.
Note: Common applications that may be using port 80 include Skype and Internet
Information Services (IIS). Either turn off these services, or select a different port,
such as 8080.
Performing an Installation 62
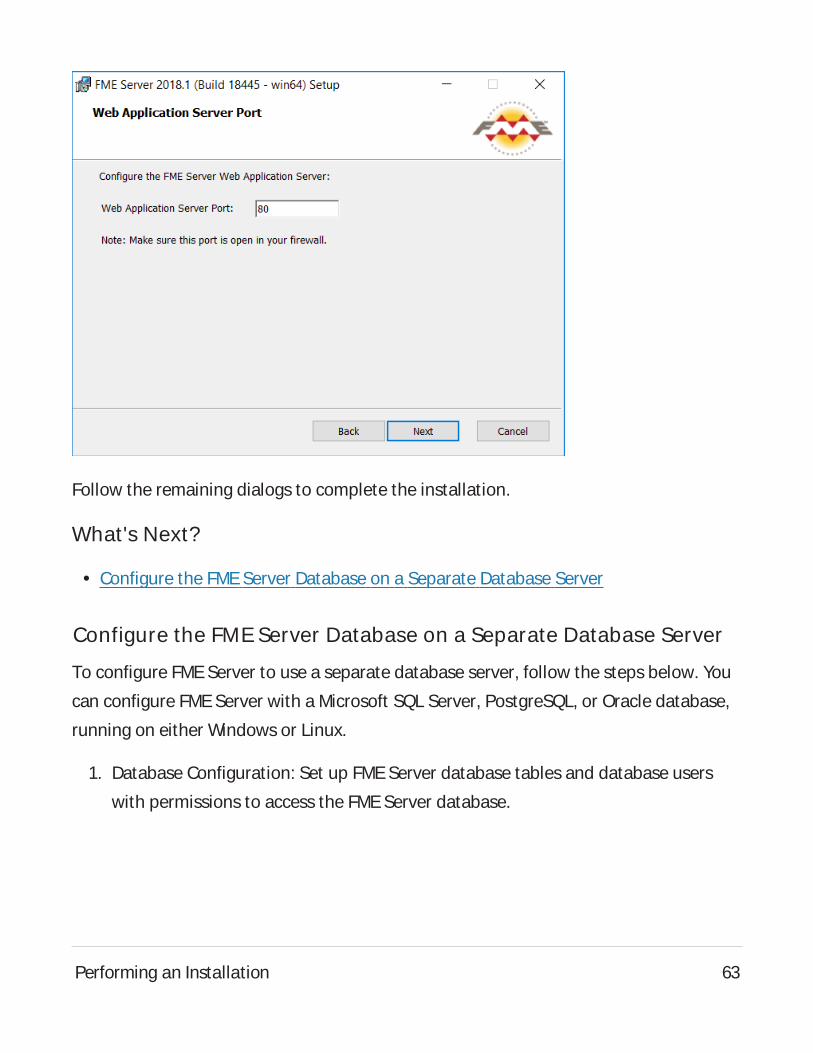
Follow the remaining dialogs to complete the installation.
What's Next?
l Configure the FMEServer Database on a Separate Database Server
Configure the FME Server Database on a Separate Database Server
To configure FMEServer to use a separate database server, follow the steps below. You
can configure FME Server with a Microsoft SQL Server, PostgreSQL, or Oracle database,
running on either Windows or Linux.
1. Database Configuration: Set up FMEServer database tables and database users
with permissions to access the FMEServer database.
Performing an Installation 63

Note: The specific way to set up database tables and user permissions on vari-
ous production databases may differ depending on the available database
tools and intended target platform.
Database Configuration - Microsoft SQL Server
It is assumed that SQL Server is installed.
One notation used is <FMEServerDir>, which is the installation directory of FME
Server. In Windows, this is typically C:\Program Files\FMEServer.
SQL scripts are provided to help with SQL Server database configuration. These
SQL scripts are located in the <FMEServerDir>\Server\database\sqlserver\ dir-
ectory of the FME Server Core machine.
Note: This directory refers to the machine on which the FMEServer Core is
installed (not the machine on which the database server is installed). To run
these scripts, you must transfer this directory to the database machine, or ref-
erence it through a UNCpath.
If you are upgrading, you should back up any job history you want to keep.
Instructions Using SQL Server Management Studio
1. Open the SQL Server Management Studio and connect to the SQL Server data-
base engine.
2. Open sqlserver_createDB.sql and run the script against the fmeserver
database, as shown below:
Performing an Installation 64

Performing an Installation 65
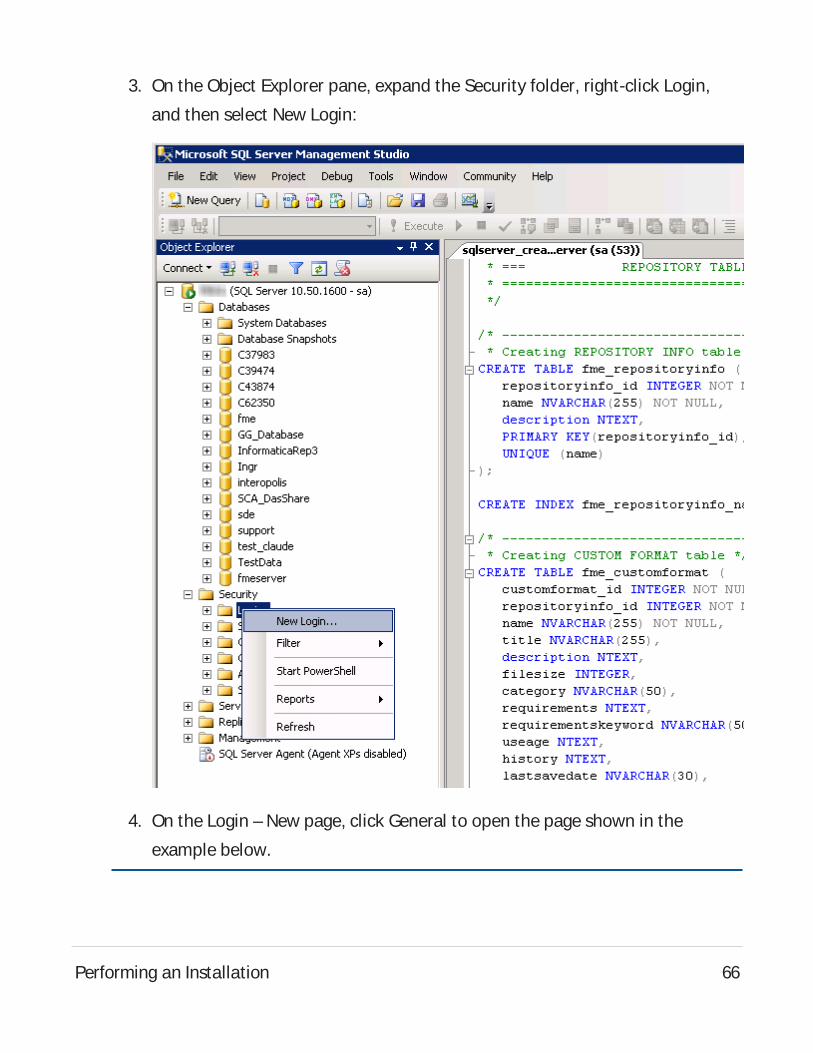
3. On the Object Explorer pane, expand the Security folder, right-click Login,
and then select New Login:
4. On the Login – New page, click General to open the page shown in the
example below.
Performing an Installation 66

l At the Login name field, enter fmeserver.
l Make sure the option button is active for SQL Server authentication.
l In the Password field enter the password that was specified for the data-
base during the FME Server installation, and in the Confirm password field
enter the same password again.
l Make sure the Enforce password policy is active. If not, click the checkbox
to activate it.
l If required, click the checkbox for Enforce password expiration to clear it.
l At the Default database field enter fmeserver.
Performing an Installation 67
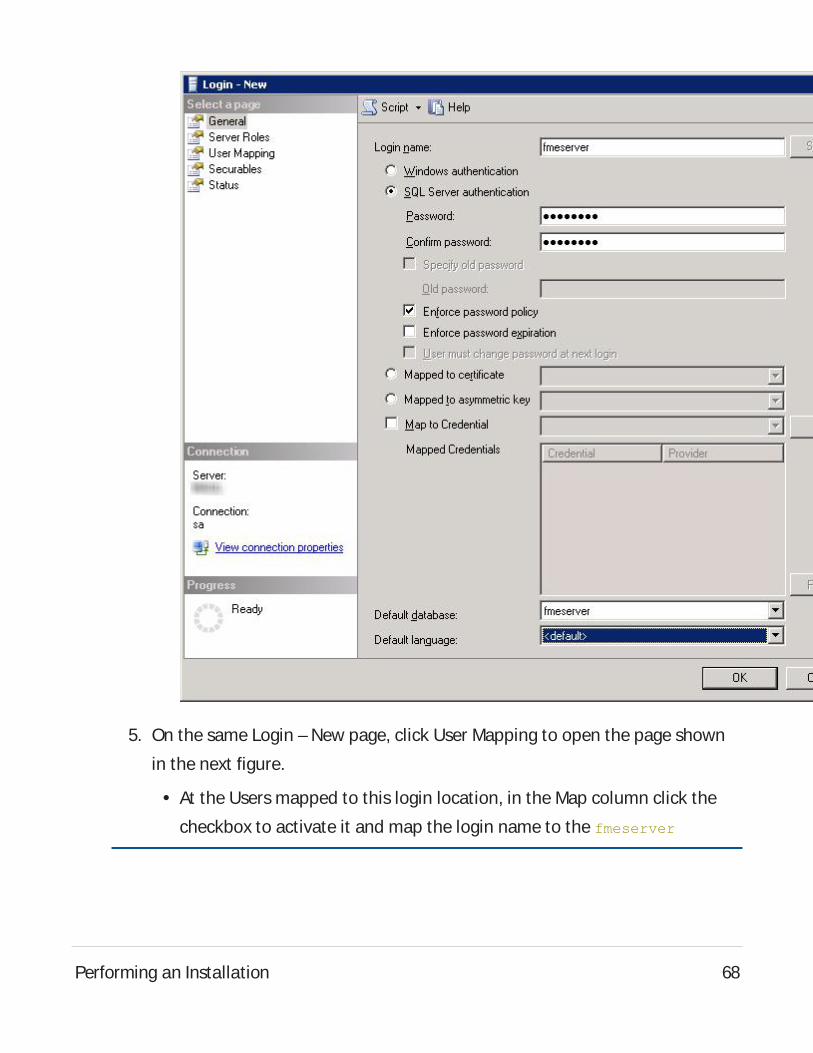
5. On the same Login – New page, click User Mapping to open the page shown
in the next figure.
l At the Users mapped to this login location, in the Map column click the
checkbox to activate it and map the login name to the fmeserver
Performing an Installation 68
database.
l At the Database role membership for location, notice that the fmeserver
database is specified and check db_owner to assign that role to this data-
base.
l Click OK to close this page.
Performing an Installation 69

Instructions Without SQL Server Management Studio
1. Connect to the SQL Server database engine and run sqlserver_cre-
ateDB.sql.
2. Open sqlserver_createUser.sql.
Performing an Installation 70
3. Look for the line that begins:
CREATE LOGIN fmeserver WITH PASSWORD =
Replace <<DATABASE_PASSWORD>> with the password specified during the
installation.
4. Run the script.
Note: If your SQL Server uses an Always On availability group, you must also
configure the MultisubnetFailover property of the DB_JDBC_URL parameter
in the fmeDatabaseConfig.txt configuration file. For more information, see the
SQL Server examples under Configure the Database Connection.
Database Configuration - Oracle
Before proceeding, you must provide the following:
l Install an Oracle database server.
l Obtain the Oracle Database JDBCdriver. For more information, see
https://www.oracle.com/technetwork/database/application-devel-
opment/jdbc/downloads/index.html.
<FMEServerDir> is the installation directory of FMEServer. In Windows, this is typ-
ically C:\Program Files\FMEServer.
If you are upgrading, you should back up any job history you want to keep.
Windows
This section describes how to configure an Oracle database. You can configure the
Oracle database from other Oracle database tools depending on your personal
preference.
For an Oracle database configuration, various SQL scripts are provided to help.
Performing an Installation 71

These SQL scripts are located in the <FMEServerDir>\Server\database\oracle dir-
ectory of the FME Server Core machine.
Note: This directory refers to the machine on which the FMEServer Core is
installed (not the machine on which the database server is installed). To run
these scripts, you must transfer this directory to the database machine, or ref-
erence it through a UNCpath.
l oracle_createUser.sql – This script creates the FMEServer database user,
and grants all required permissions to the FMEServer database user. The pass-
word appears as <<DATABASE_PASSWORD>>. Before running this script, replace
<<DATABASE_PASSWORD>> with the password that was specified for the database
during the FME Server installation.
l oracle_createDB.sql – This script creates all FMEServer related database
packages, tables, indexes, views, and triggers.
l oracle_dropUser.sql – This script drops the FMEServer database user and
the database packages, tables, indexes, views, and triggers associated with the
FMEServer database user.
Using the Command Prompt
To use the command prompt to configure the database, follow these instructions:
1. Install Oracle SQL*Plus, if you haven’t already.
2. Open Oracle SQL*Plus and log on as a user with adequate privileges, such as
SYSDBA.
In this example, the following parameters were used and entered:
l User: SYSASSYSDBA
l Password: fmeserver
Performing an Installation 72
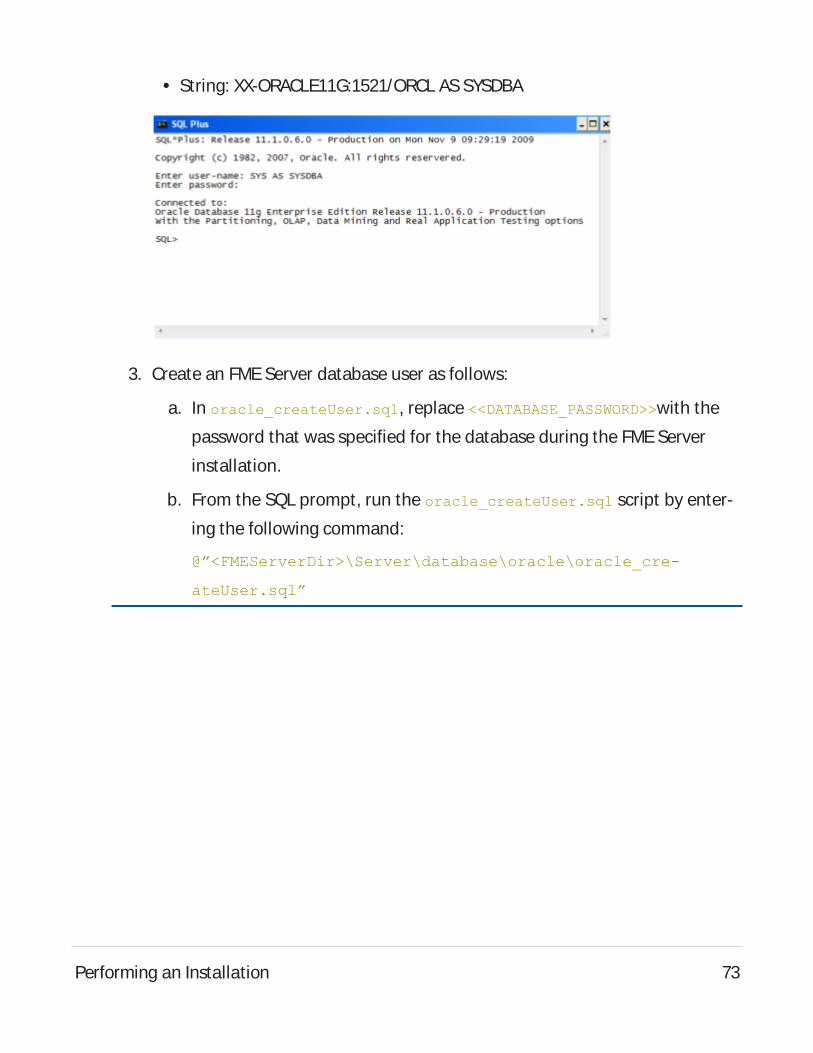
l String: XX-ORACLE11G:1521/ORCL ASSYSDBA
3. Create an FMEServer database user as follows:
a. In oracle_createUser.sql, replace <<DATABASE_PASSWORD>>with the
password that was specified for the database during the FMEServer
installation.
b. From the SQL prompt, run the oracle_createUser.sql script by enter-
ing the following command:
@”<FMEServerDir>\Server\database\oracle\oracle_cre-
ateUser.sql”
Performing an Installation 73
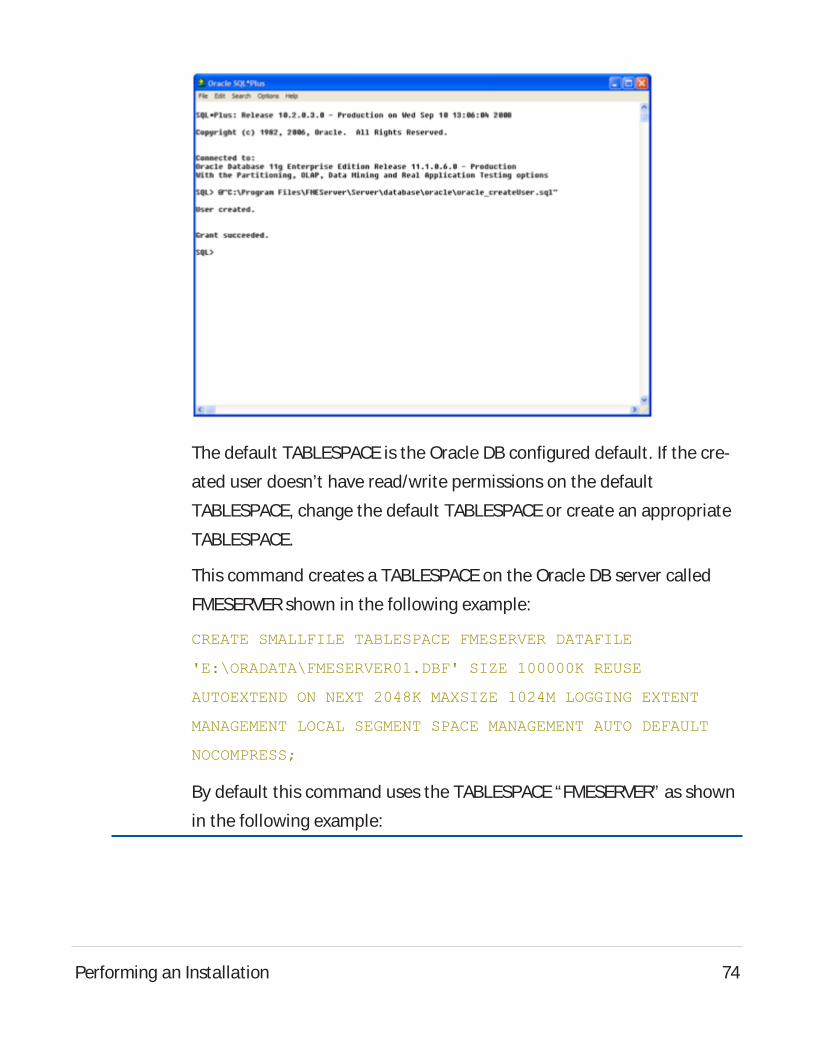
The default TABLESPACEis the Oracle DB configured default. If the cre-
ated user doesn’t have read/write permissions on the default
TABLESPACE, change the default TABLESPACEor create an appropriate
TABLESPACE.
This command creates a TABLESPACEon the Oracle DB server called
FMESERVERshown in the following example:
CREATE SMALLFILE TABLESPACE FMESERVER DATAFILE
'E:\ORADATA\FMESERVER01.DBF' SIZE 100000K REUSE
AUTOEXTEND ON NEXT 2048K MAXSIZE 1024M LOGGING EXTENT
MANAGEMENT LOCAL SEGMENT SPACE MANAGEMENT AUTO DEFAULT
NOCOMPRESS;
By default this command uses the TABLESPACE“FMESERVER” as shown
in the following example:
Performing an Installation 74

CREATE USER fmeserver IDENTIFIED BY fmeserver DEFAULT
TABLESPACE "FMESERVER" TEMPORARY TABLESPACE "TEMP";
4. When an FMEServer database user is created, you can connect to it by log-
ging on again to SQL*Plus.
In this example, the following parameters were used and entered on the user
interface:
l User: fmeserver
l Password: fmeserver
Note: The preceding example assumes your user name and password are
fmeserver.
5. When connected to the FMEServer database, run the oracle_createDB.sql
script by entering the following command:
@”<FMEServerDir>\Server\database\oracle\oracle_createDB.sql”
Performing an Installation 75

Note: If you drop the FMEServer database and login user, run the oracle_
dropUser.sql script.
Linux
Oracle SQL*Plus is a freeware client for connecting to an Oracle database. You can
download it from the Internet using the following address:
http://www.oracle.com/technology/software/tech/sql_plus/index.html
For more information, see the Oracle web site at:
http://www.oracle.com/technology/sample_code/tech/sql_plus/ht-
docs/demobld.html
The instructions that follow describe how to configure Oracle for use with FME
Server. These instructions describe using SQL*Plus for the database setup. Depend-
ing on your personal preference, you can also configure the Oracle database using
other Oracle tools.
Performing an Installation 76
For Oracle configurations, various SQL scripts are provided to help with Oracle
database configuration. These SQL scripts are located in the
<FMEServerDir>/Server/database oracle/ directory of the FME Server Core
machine.
Note: This directory refers to the machine on which the FMEServer Core is
installed (not the machine on which the database server is installed). To run
these scripts, you must transfer this directory to the database machine, or ref-
erence it through a UNCpath.
l oracle_createUser.sql – This script creates the FMEServer database user,
and grants all required permissions to the FMEServer database user. The pass-
word appears as <<DATABASE_PASSWORD>>. Before running this script, replace
<<DATABASE_PASSWORD>> with the password that was specified for the database
during the FME Server installation.
l oracle_createDB.sql – This script creates all FMEServer related database
packages, tables, indexes, views, and triggers.
l oracle_dropUser.sql – This script drops the FMEServer database user and
the database packages, tables, indexes, views, and triggers associated with the
FMEServer database user.
Using the Command Prompt
To use the command prompt to configure the database, follow these instructions:
1. Install the Oracle Client Tools, which includes SQL*Plus, if you haven’t
already.
2. Run sqlplus and log on as a user with adequate privileges, such as SYSDBA.
For example:
Performing an Installation 77

sqlplus SYS/<password>@<Host>:<Port>/<service> AS SYSDBA
3. Create the FMEServer database user:
a. In a text editor, open the oracle_creatorUser.sql script and update
the password <<DATABASE_PASSWORD>> to the one specified during the
FMEServer installation.
b. From the SQL prompt, run the oracle_createUser.sql script by entering
the following command:
@”<FMEServerDir>/Server/database/oracle/oracle_cre-
ateUser.sql”
The default TABLESPACEis the Oracle DB configured default. If the cre-
ated user doesn’t have read/write permissions on the default
TABLESPACE, you need to change the default TABLESPACEor create an
appropriate TABLESPACE.
This command creates a TABLESPACEon the Oracle DB server called
FMESERVERshown in the following example:
CREATE SMALLFILE TABLESPACE FMESERVER DATAFILE
'/ORADATA/FMESERVER01.DBF' SIZE 100000K REUSE AUTOEXTEND
ON NEXT 2048K MAXSIZE 1024M LOGGING EXTENT MANAGEMENT
LOCAL SEGMENT SPACE MANAGEMENT AUTO DEFAULT NOCOMPRESS;
By default this command uses the TABLESPACE“FMESERVER” shown in
this example:
CREATE USER fmeserver IDENTIFIED BY fmeserver DEFAULT
TABLESPACE "FMESERVER" TEMPORARY TABLESPACE "TEMP";
Performing an Installation 78

4. When an FMEServer database user has been created, you can connect to it by
logging on again to SQL*Plus or by entering the following command:
CONNECT <UserName>/<Password>@<Host>:<Port>/<service>;
5. When connected to the FMEServer database, run the oracle_createDB.sql
script by entering the following command:
@”<FMEServerDir>/Server/database/oracle/oracle_createDB.sql”
Database Configuration - PostgreSQL
PostgreSQL is an open source database that can be downloaded from the Internet.
For more information, see the PostgreSQL web site at:
http://www.postgresql.com
It’s assumed that PostgreSQL is already installed .
One notation used is <FMEServerDir>, which is the installation directory of FME
Server. In Windows, this is typically C:\Program Files\FMEServer.
It’s also assumed that you have JRE5 or higher and PostgreSQL database installed
before you proceed further. If you want to use the JDBCdriver, there are several
steps to perform.
If you are upgrading, you should back up any job history you want to keep.
Windows
This section describes how to configure a PostgreSQL database. You can configure
this database from other PostgreSQL database tools, depending on your personal
preference.
For a PostgreSQL database configuration, various SQL scripts are provided to assist
you. These SQL scripts are located in the following directory:
<FMEServerDir>\Server\database\postgresql
Performing an Installation 79
Note: This directory refers to the machine on which the FMEServer Core is
installed (not the machine on which the database server is installed). To run
these scripts, you must transfer this directory to the database machine, or ref-
erence it through a UNCpath.
l postgresql_createUser.sql – This script creates the FMEServer database
user and password that you specified during installation, and grants all
required permissions to this user. The password appears as <<DATABASE_
PASSWORD>>. Before running this script, replace <<DATABASE_PASSWORD>> with
the password that was specified for the database during the FME Server install-
ation.
l postgresql_createDB.sql – This script creates the FMEServer database.
l postgresql_createSchema.sql – This script creates all FMEServer related
tables, indexes, views, and triggers.
l postgresql_dropUser.sql – This script drops the FMEServer database user.
l postgresql_dropDB.sql – This script drops the FMEServer database.
Using the Command Prompt
To use the command prompt to configure the database, follow these instructions:
1. Install PostgreSQL SQL shell (psql) if you haven’t done so already.
2. Open psql and log on as a user with the appropriate privileges:
Performing an Installation 80

3. Create an FMEServer database user as follows:
a. Open postgresql_createUser.sql in a text editor, and replace
<<DATABASE_PASSWORD>> with the password specified during the FME
Server installation.
b. From the SQL prompt, run the postgresql_createUser.sql script by
entering the following command:
\i '<FMEServerDIR>/Server/database/postgresql/postgresql_
createUser.sql'
By default, the provided SQL script creates the FMEServer database
Performing an Installation 81

user and password that you specified during installation:
4. Create an FMEServer database.
From the SQL prompt, run the postgresql_createDB.sql script by entering
the following command:
\i '<FMEServerDIR>/Server/database/postgresql/postgresql_cre-
ateDB.sql'
By default, the provided SQL script creates an FMEServer database named
fmeserver and grants all privileges on the database to the user.
Performing an Installation 82
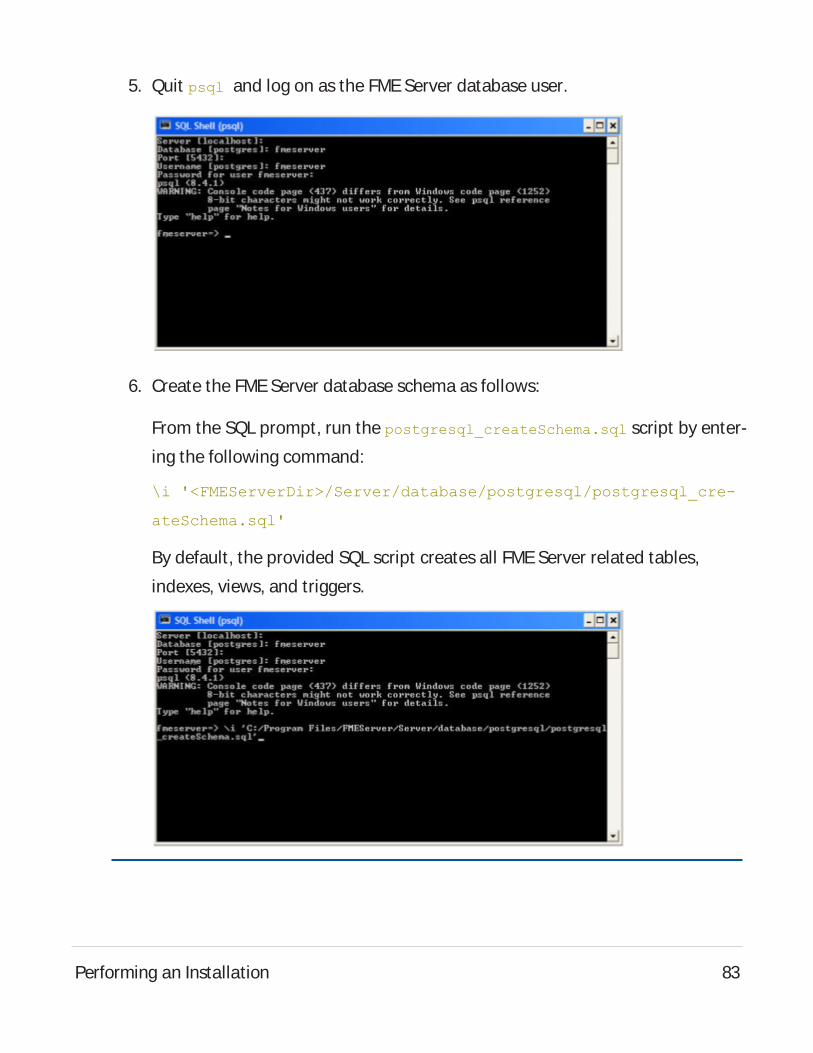
5. Quit psql and log on as the FMEServer database user.
6. Create the FMEServer database schema as follows:
From the SQL prompt, run the postgresql_createSchema.sql script by enter-
ing the following command:
\i '<FMEServerDir>/Server/database/postgresql/postgresql_cre-
ateSchema.sql'
By default, the provided SQL script creates all FMEServer related tables,
indexes, views, and triggers.
Performing an Installation 83

Linux
This section describes configuring PostgreSQL from both the command prompt
and a user interface, such as the PostgreSQL Query Browser and the PostgreSQL
Administrator.
For PostgreSQL configurations, various SQL scripts are provided to help with Post-
greSQL database configuration. These SQL scripts are located in the <FMEServer-
Dir>/Server/database/postgresql/ directory of the FME Server Core machine.
Note: This directory refers to the machine on which the FMEServer Core is
installed (not the machine on which the database server is installed). To run
these scripts, you must transfer this directory to the database machine, or ref-
erence it through a UNCpath.
l postgresql_createUser.sql – This script creates the FMEServer database
user and password that you specified during installation, and grants all
required permissions to the FMEServer database user. The password appears
as <<DATABASE_PASSWORD>>. Before running this script, replace <<DATABASE_
PASSWORD>> with the password that was specified for the database during the
FME Server installation.
Note: The password is encrypted and appears in the script as <<DATABASE_
PASSWORD>>.
l postgresql_createDB.sql – This script drops the FMEServer database and
creates a new one with the required FMEServer tables. By default this data-
base is named fmeserver. Be careful when running this script because it drops
the existing FMEServer database.
l postgresql_createSchema.sql – This script creates all FMEServer related
tables, indexes, views, and triggers.
Performing an Installation 84

Note: This script must be run as user fmeserver.
l postgresql_dropDB.sql – This script drops the existing FMEServer database,
which is named fmeserver by default.
l postgresql_dropUser.sql – This script drops the FMEServer database user.
Using the Command Prompt
To use the command prompt to configure the database, follow these instructions:
1. Install PostgreSQL Server if you haven’t already.
2. Open a command prompt and change to the following directory, which con-
tains the PostgreSQL SQL scripts:
<FMEServerDir>/Server/database/postgresql/
3. Open postgresql_createUser.sql in a text editor, and replace <<DATABASE_
PASSWORD>> with the password specified during the FMEServer installation.
4. Run the postgresql program with the postgresql_createUser.sql script:psql -d postgres -h <hostname> -p <port> -f postgresql_cre-
ateUser.sql
5. Run the postgresql program with the postgresql_createDB.sql script:psql -d postgres -h <hostname> -p <port> -f postgresql_cre-
ateDB.sql
6. Run the postgresql program with the postgresql_createSchema.sql script, as
the user you specified during installation:
psql -U <username> -d fmeserver -h <hostname> -p <port> -f
postgresql_createSchema.sql
Performing an Installation 85

Note: If you drop the FMEServer database and login user, run the postgresql
program with the appropriate postgresql_dropDB.sql or postgresql_dropUser-
.sql scripts.
After Database Creation
1. On the machine on which the FME Server database server is installed, open
pg_hba.conf. For default installation directories of this file:l PostgreSQL 10: <PostgreSQLDir>\data\pg10\pg_hba.conf
l PostgreSQL 11: C:\Program Files\PostgreSQL\11\data\pg_hba.conf
2. Change the following lines:
host all all 127.0.0.1/32 md5
host all all ::1/128 md5
to:
host all all 0.0.0.0/0 md5
host all all ::/0 md5
3. Restart the FME Server Database service.
2. Enable connections: FMEServer connects to the database when it starts. There-
fore, ensure that your database server is running and configured to accept incom-
ing connections before FMEServer is started. The database must allow
connections over TCP/IP with all machines on which the FME Server Core and
FME Engines are installed.
3. Ensure that all installations of FMEServer are running. For more information, see
Working with the FMEServer System Services.
What's Next?
l Set Up the Load Balancer and Configure with FME Server
Performing an Installation 86
Set Up the Load Balancer and Configure with FME Server
Use these instructions to:
1. Set up your load balancer to prepare for routing traffic between each FME Server
instance you installed under Installing a Scalable, Fault-Tolerant FME Server.
2. Configure FME Server to recognize the load balancer URL.
Set Up the Load Balancer
Load Balancing the FME Server Web Services
Required
l Route traffic on port 80 (Windows) or port 8080 (Linux) to each FMEServer instance
in your deployment.
Recommended
l Set up a health check for FMEServer. Ahealth check endpoint determines if either
the FMEServer Web Services or FMEServer Core node is down, and if so, requests
are not routed to that server. Without a health check configured, the load balancer
may try to route client requests to an unhealthy (down) server. The consequences of
routing requests to an unhealthy server vary depending on the load balancer, and
may result in error responses or long delays in response due to request timeouts
and retrying on a healthy server.
Optional
l Configure timeouts for client- and server-side inactivity. When configuring timeouts,
consider that longer timeouts on the server are appropriate for time-consuming
operations, particularly running workspaces that take a long time to complete.
Performing an Installation 87
Load Balancing the WebSocket Server
An FME Server WebSocket Server runs on each FMEServer instance, but only one
WebSocket Server should be used at a time. The WebSocket Server is used mainly for
Notification Service Topic Monitoring.
Required
l Route traffic on port 7078 to one WebSocket Server, and switch to others if the one
in use fails. If the load balancer does not support automatic failover to backup serv-
ers, then manual intervention is required to route to a healthy WebSocket Server.
Recommended
l Set longer client- and server-side timeouts to allow for longer WebSocket con-
nections.
Configure FME Server with the Load Balancer URL
To configure FME Server to recognize the load balancer URL, perform the following tasks
in the FMEServer Web User Interface:
Update Service URLs
l On the Services page, click Change All Hosts. In the Change All Hosts dialog, enter
the public load balancer URL, and click OK.
Update Topic Monitoring URL
1. On the Networking page, expand Topic Monitoring.
2. Under Fault Tolerant Configuration, update the Internal WebSocket URL field with
the public load balancer URL. Automations Destinations (and Notification Service
Subscribers) use this URL to communicate with the FME Server WebSocket Server.
The load balancer URL redirects requests to the active WebSocket Server.
3. If necessary, update Advanced Routing settings:
Performing an Installation 88
l External WebSocket Host: The load balancer name. For example:
fme-server-loadbalancer
This setting does not likely need to be changed, and should only be set if you
use separate hosts to route HTTP and Websocket traffic to FMEServer.
l External WebSocket Port: If the WebSocket Server is accessed through a port
other than 7078, specify the port number here. Otherwise, leave blank.
4. Click Save.
Update Reset Password URL (Optional)
If you plan to enable the Reset Password feature, update the Public URL field on the
Reset Password page with the public load balancer URL, and click Save.
What's Next?
Proceed to Log on to the Web User Interface.
Log on to the Web User Interface
To log in to the Web User Interface for the first time as an administrator following install-
ation, specify Username admin and Password admin. You will be prompted to update
the admin password upon initial use, based on the default Password Policy con-
figuration.
For more information:
l Accessing the Web User Interface
l Changing the Login Password
l Default User Accounts and Passwords
l Role-Based and User-Based Access Control
What's Next?
Performing an Installation 89
l Request and Install a License
Request and Install a License
License files are installed, by default, to: Windows: C:\ProgramData\Safe Soft-
ware\FME Server\licenses Linux: /opt/fmeserver/licensesDynamic Engine (CPU
Usage) licensing is not available for engines on FMECloud.
Automatic Mode (Recommended)
If your FME Server host machine has an internet connection, you can request and install
a license online without any need for downloading and re-uploading a license file.
Note:
Licensing FMEServer over the internet requires no inbound connection. For more
information, see FMEServer Automatic Licensing URLs.
If you purchased credits for Dynamic Engines (CPU Usage), automatic mode only
is supported. Manual mode licensing (below) is not supported.
1. Open the FMEServer Web User Interface as a user assigned to the fmesuperuser
role. If none of your FME Engines are licensed, you will see a prompt to activate
FME Server. Click on the prompt. Otherwise, select System Configuration > Licens-
ing.
2. Click Request New License.
3. Complete the fields on the Request a New License page. If you have a product
Serial Number, be sure to provide it. If not, you will receive a 7-day evaluation
license, which you can extend to 60 days (see below).
Performing an Installation 90
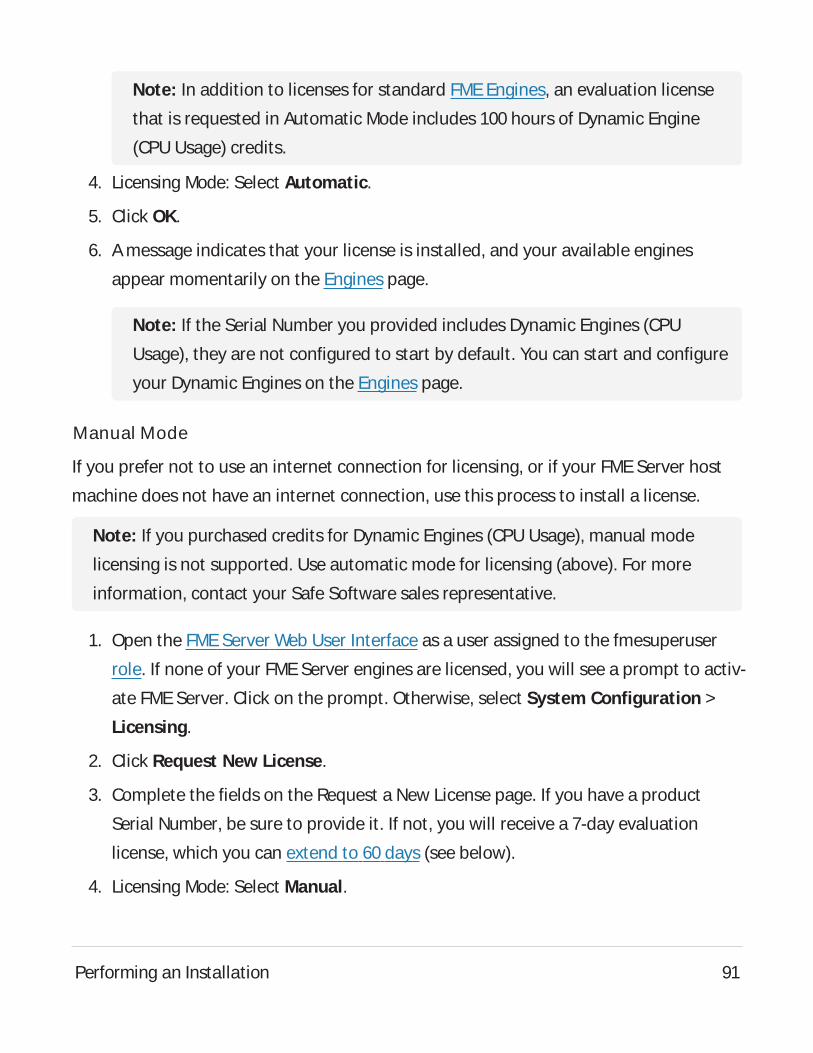
Note: In addition to licenses for standard FME Engines, an evaluation license
that is requested in Automatic Mode includes 100 hours of Dynamic Engine
(CPU Usage) credits.
4. Licensing Mode: Select Automatic.
5. Click OK.
6. Amessage indicates that your license is installed, and your available engines
appear momentarily on the Engines page.
Note: If the Serial Number you provided includes Dynamic Engines (CPU
Usage), they are not configured to start by default. You can start and configure
your Dynamic Engines on the Engines page.
Manual Mode
If you prefer not to use an internet connection for licensing, or if your FME Server host
machine does not have an internet connection, use this process to install a license.
Note: If you purchased credits for Dynamic Engines (CPU Usage), manual mode
licensing is not supported. Use automatic mode for licensing (above). For more
information, contact your Safe Software sales representative.
1. Open the FMEServer Web User Interface as a user assigned to the fmesuperuser
role. If none of your FME Server engines are licensed, you will see a prompt to activ-
ate FME Server. Click on the prompt. Otherwise, select System Configuration >
Licensing.
2. Click Request New License.
3. Complete the fields on the Request a New License page. If you have a product
Serial Number, be sure to provide it. If not, you will receive a 7-day evaluation
license, which you can extend to 60 days (see below).
4. Licensing Mode: Select Manual.
Performing an Installation 91
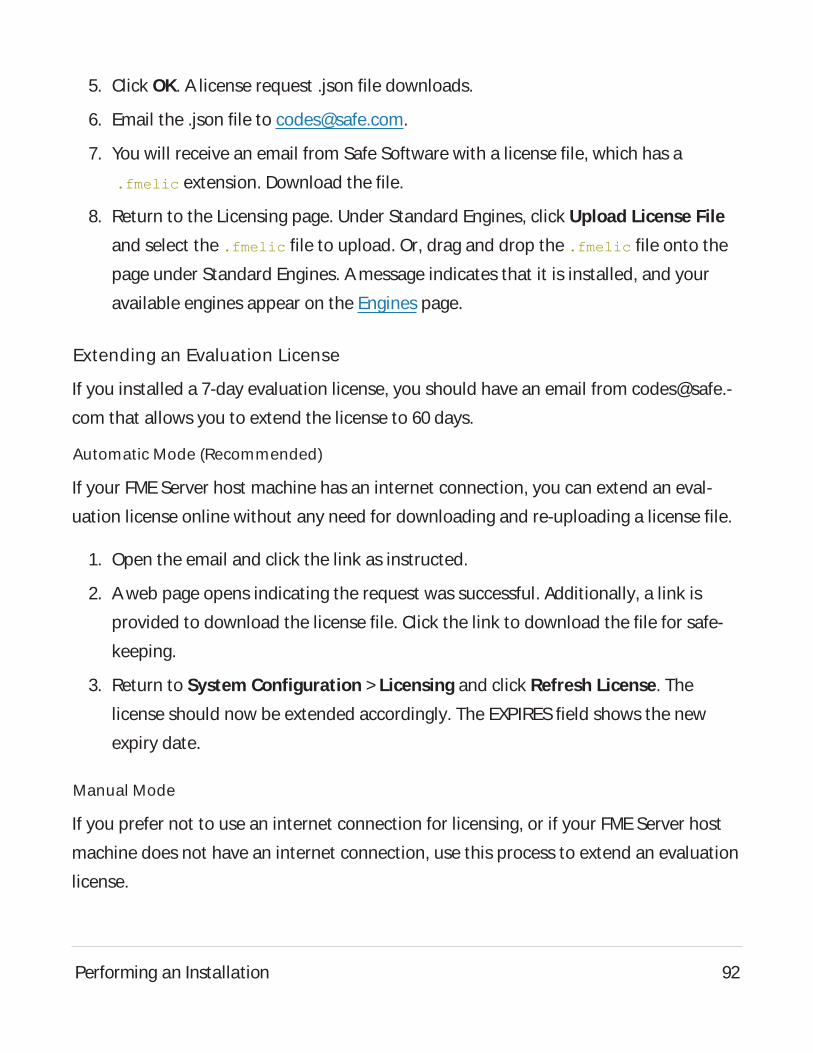
5. Click OK. A license request .json file downloads.
6. Email the .json file to [email protected].
7. You will receive an email from Safe Software with a license file, which has a
.fmelic extension. Download the file.
8. Return to the Licensing page. Under Standard Engines, click Upload License File
and select the .fmelic file to upload. Or, drag and drop the .fmelic file onto the
page under Standard Engines. Amessage indicates that it is installed, and your
available engines appear on the Engines page.
Extending an Evaluation License
If you installed a 7-day evaluation license, you should have an email from [email protected]
com that allows you to extend the license to 60 days.
Automatic Mode (Recommended)
If your FME Server host machine has an internet connection, you can extend an eval-
uation license online without any need for downloading and re-uploading a license file.
1. Open the email and click the link as instructed.
2. Aweb page opens indicating the request was successful. Additionally, a link is
provided to download the license file. Click the link to download the file for safe-
keeping.
3. Return to System Configuration > Licensing and click Refresh License. The
license should now be extended accordingly. The EXPIRESfield shows the new
expiry date.
Manual Mode
If you prefer not to use an internet connection for licensing, or if your FME Server host
machine does not have an internet connection, use this process to extend an evaluation
license.
Performing an Installation 92
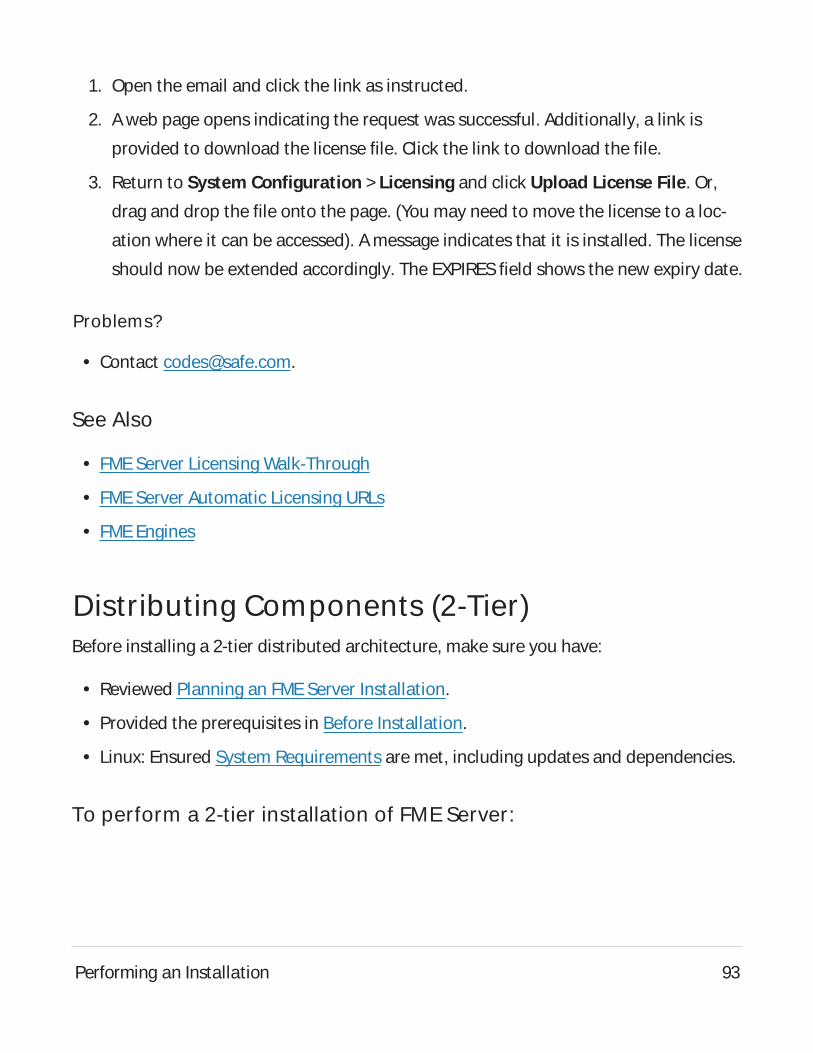
1. Open the email and click the link as instructed.
2. Aweb page opens indicating the request was successful. Additionally, a link is
provided to download the license file. Click the link to download the file.
3. Return to System Configuration > Licensing and click Upload License File. Or,
drag and drop the file onto the page. (You may need to move the license to a loc-
ation where it can be accessed). Amessage indicates that it is installed. The license
should now be extended accordingly. The EXPIRESfield shows the new expiry date.
Problems?
l Contact [email protected].
See Also
l FMEServer Licensing Walk-Through
l FMEServer Automatic Licensing URLs
l FME Engines
Distributing Components (2-Tier)Before installing a 2-tier distributed architecture, make sure you have:
l Reviewed Planning an FMEServer Installation.
l Provided the prerequisites in Before Installation.
l Linux: Ensured System Requirements are met, including updates and dependencies.
To perform a 2-tier installation of FME Server:
Performing an Installation 93
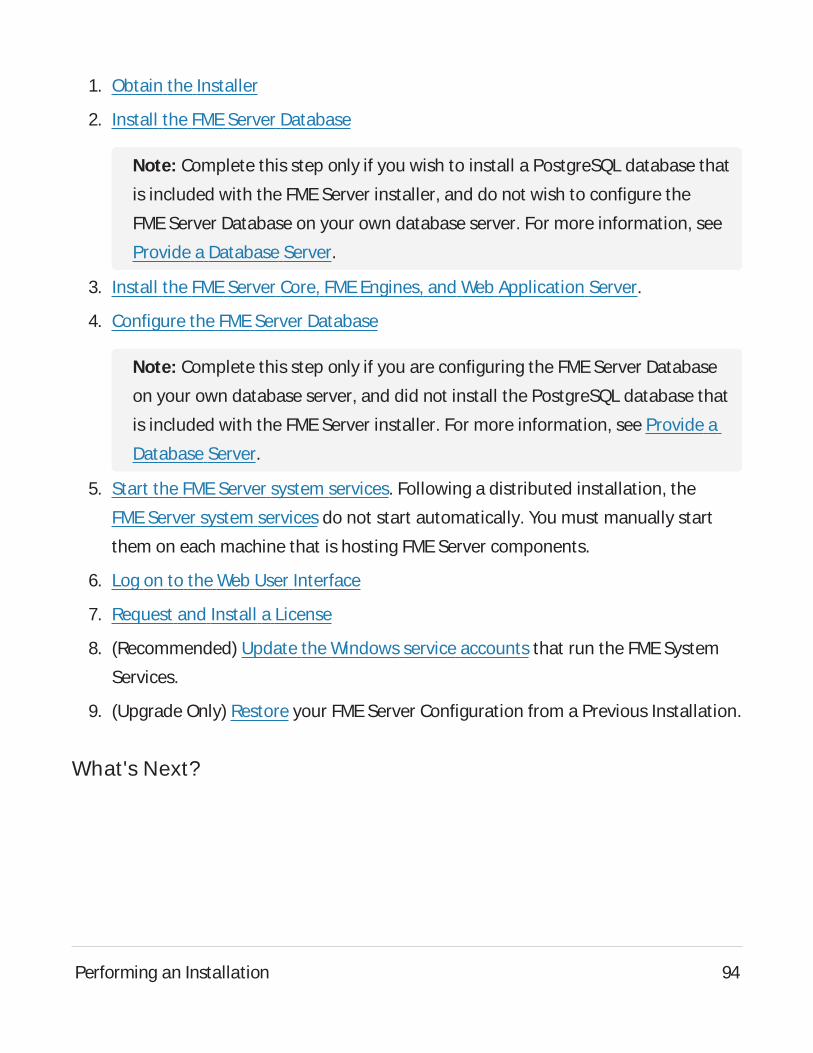
1. Obtain the Installer
2. Install the FMEServer Database
Note: Complete this step only if you wish to install a PostgreSQL database that
is included with the FME Server installer, and do not wish to configure the
FME Server Database on your own database server. For more information, see
Provide a Database Server.
3. Install the FMEServer Core, FMEEngines, and Web Application Server.
4. Configure the FMEServer Database
Note: Complete this step only if you are configuring the FME Server Database
on your own database server, and did not install the PostgreSQL database that
is included with the FME Server installer. For more information, see Provide a
Database Server.
5. Start the FME Server system services. Following a distributed installation, the
FME Server system services do not start automatically. You must manually start
them on each machine that is hosting FMEServer components.
6. Log on to the Web User Interface
7. Request and Install a License
8. (Recommended) Update the Windows service accounts that run the FME System
Services.
9. (Upgrade Only) Restore your FME Server Configuration from a Previous Installation.
What's Next?
Performing an Installation 94
Optimize: You can scale-up your FMEServer by:
l Increasing the number of FME Engines that run when you start FME Server.
l Adding FMEEngines on separate machines that are closer to your data.
For more information, see Planning for Scalability and Performance.
Before Installation
Before you install the FME Server components for a 2-tier system, ensure the following
non-FME Server components are in place on your network:
l Database server on a separate machine.
l File system on a separate machine.
Next Steps
Proceed to Obtain the Installer.
Provide a Database Server
FME Server uses its own database to manage jobs and workspace information. It is not a
source or destination data source for FMEworkspaces.
To ensure the FMEServer Database remains available in a failover scenario, provide a
machine on which to install the database that is physically separate from the machines
on which the FME Servers are installed. In addition to being physically separate, the
database server should, by itself, be configured for fault tolerance.
You can choose to install a PostgreSQL database that is included with the FME Server
installer, or you can configure the FME Server Database on your own database server. If
you use your own database server, keep in mind the following:
Performing an Installation 95
l PostgreSQL, Oracle, and SQL Server are supported. The following versions are recom-
mended:l PostgreSQL: 11.x or later.
l Oracle: 12c or later.
l SQL Server: 2016 or later.
l When you install the FME Servers, the database server must be running and you
must know the connection information.
l If using an Oracle database server, you must obtain the Oracle Database JDBC
driver. For more information, see https://www.or-
acle.com/technetwork/database/application-devel-
opment/jdbc/downloads/index.html.
Note: Oracle Database JDBCdriver versions that use ojdbc10.jar are not sup-
ported.
l Following installation, you must be able to create a new database on the server
using SQL scripts.
For information about acquiring a fault-tolerant database server, consult your IT depart-
ment.
Updating the FME Server Database Password
If you choose to install a PostgreSQL database that is included with the FME Server
installer, and want to update the password for the database user account, follow these
instructions:
Expand for instructions - Windows
Performing an Installation 96
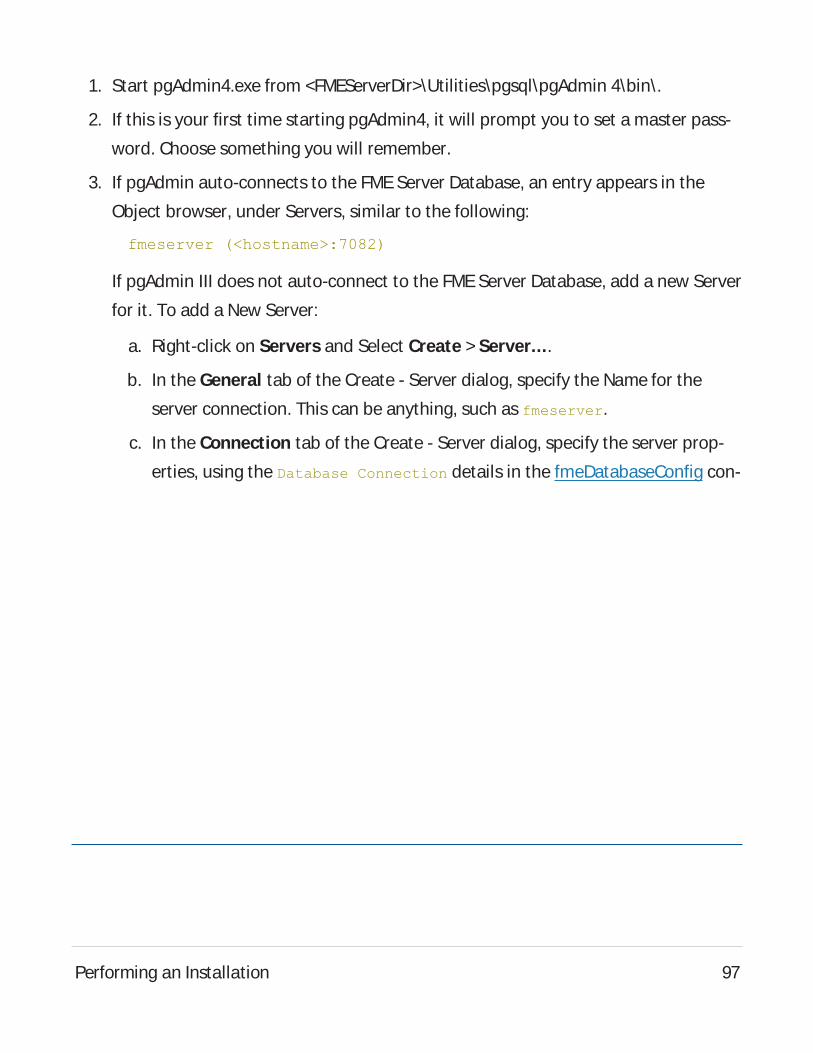
1. Start pgAdmin4.exe from <FMEServerDir>\Utilities\pgsql\pgAdmin 4\bin\.
2. If this is your first time starting pgAdmin4, it will prompt you to set a master pass-
word. Choose something you will remember.
3. If pgAdmin auto-connects to the FME Server Database, an entry appears in the
Object browser, under Servers, similar to the following:
fmeserver (<hostname>:7082)
If pgAdmin III does not auto-connect to the FMEServer Database, add a new Server
for it. To add a New Server:
a. Right-click on Servers and Select Create > Server....
b. In the General tab of the Create - Server dialog, specify the Name for the
server connection. This can be anything, such as fmeserver.
c. In the Connection tab of the Create - Server dialog, specify the server prop-
erties, using the Database Connection details in the fmeDatabaseConfig con-
Performing an Installation 97
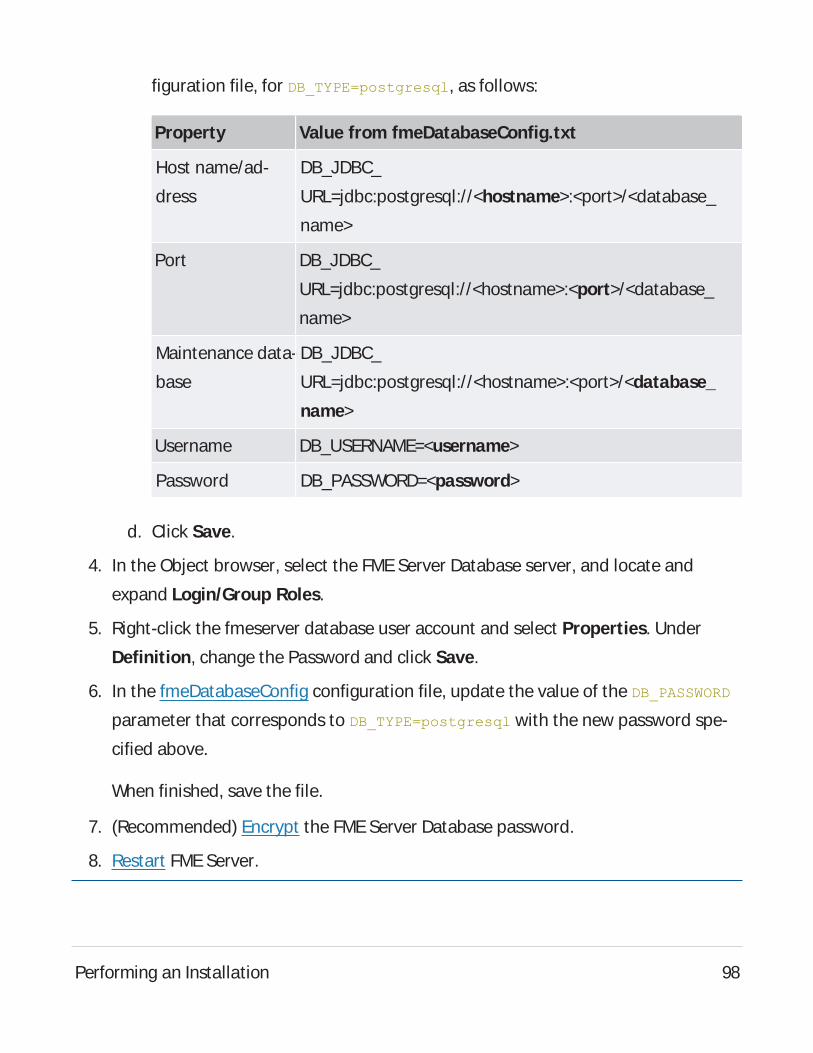
figuration file, for DB_TYPE=postgresql, as follows:
Property Value from fmeDatabaseConfig.txt
Host name/ad-
dress
DB_JDBC_
URL=jdbc:postgresql://<hostname>:<port>/<database_
name>
Port DB_JDBC_
URL=jdbc:postgresql://<hostname>:<port>/<database_
name>
Maintenance data-
base
DB_JDBC_
URL=jdbc:postgresql://<hostname>:<port>/<database_
name>
Username DB_USERNAME=<username>
Password DB_PASSWORD=<password>
d. Click Save.
4. In the Object browser, select the FMEServer Database server, and locate and
expand Login/Group Roles.
5. Right-click the fmeserver database user account and select Properties. Under
Definition, change the Password and click Save.
6. In the fmeDatabaseConfig configuration file, update the value of the DB_PASSWORD
parameter that corresponds to DB_TYPE=postgresql with the new password spe-
cified above.
When finished, save the file.
7. (Recommended) Encrypt the FME Server Database password.
8. Restart FMEServer.
Performing an Installation 98
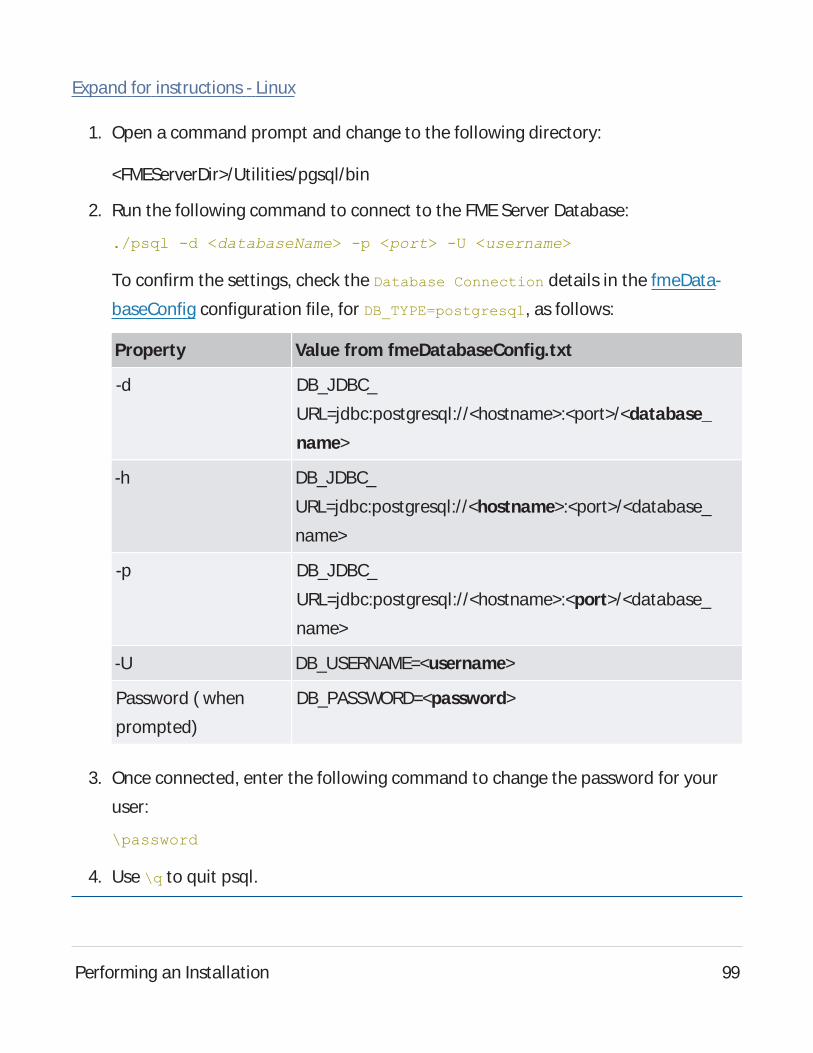
Expand for instructions - Linux
1. Open a command prompt and change to the following directory:
<FMEServerDir>/Utilities/pgsql/bin
2. Run the following command to connect to the FME Server Database:
./psql -d <databaseName> -p <port> -U <username>
To confirm the settings, check the Database Connection details in the fmeData-
baseConfig configuration file, for DB_TYPE=postgresql, as follows:
Property Value from fmeDatabaseConfig.txt
-d DB_JDBC_
URL=jdbc:postgresql://<hostname>:<port>/<database_
name>
-h DB_JDBC_
URL=jdbc:postgresql://<hostname>:<port>/<database_
name>
-p DB_JDBC_
URL=jdbc:postgresql://<hostname>:<port>/<database_
name>
-U DB_USERNAME=<username>
Password ( when
prompted)
DB_PASSWORD=<password>
3. Once connected, enter the following command to change the password for your
user:
\password
4. Use \q to quit psql.
Performing an Installation 99
5. In the the fmeDatabaseConfig configuration file, update the value of the DB_
PASSWORD parameter that corresponds to DB_TYPE=postgresql with the new pass-
word specified above, and save the file.
6. (Recommended) Encrypt the FME Server Database password.
7. Restart FMEServer.
Provide a Remote File System for the FME Server System Share
l Skill Level: Intermediate
l Estimated Time Required: 5-15 minutes
l Prerequisites:l Domain Service Account has correct permissions on network shares.
FMEServer System Share files, which include Repositories and Resources, are installed
in specific directories that are shared to enable access from different computers.
Create a directory for the FME Server System Share that is physically separate from the
machine on which the FME Server Core and web application server are installed. Separ-
ating the file system ensures it remains available in a fault tolerant scenario.
When providing a remote file system, keep in mind the following:
l The accounts that run the FMEServer components must have read and write per-
missions on the remote file system directory. For more information, see Directory
and Account Permissions.
l In addition to being physically separate, the file system should, by itself, be con-
figured for fault tolerance.
l When the directory is specified during installation, it must be in the form of a UNC
path. Mapped drives are not supported.
Performing an Installation 100
l The directory that holds the System Share must be empty, unless System Share
folders have already been created there as part of an installation involving multiple
FME Server Cores.
For information about acquiring a fault tolerant file system, consult your IT department.
Linux Only
For distributed installations on Linux, it is necessary to create a user, prior to install-
ation, on the machine that will host the installation of the FMEServer Core and Engines.
This user must be named 'fmeserver' and belong to group 'fmeserver', and be granted
permissions on the FME Server System Share. For more information, see Directory and
Account Permissions.
Example Instructions
The following example creates user 'fmeserver' in group 'fmeserver', and allows mount
/mnt/data to be writable by the newly-created user.
Note: The following instructions are provided as a general guideline for adding a
user and mounting a directory. Exact instructions may vary depending on the dis-
tribution and share type in your Linux configuration.
1. Run the following commands in the Linux command line:
groupadd fmeserver
useradd -m -g fmeserver fmeserver
2. Mount the FME Server System Share directory so that user 'fmeserver' has read
and write permissions. For example, to mount a Windows-based file share:
mount -v -t cifs //network/share /mnt/data -o gid=1008,uid=1008
gid and uid are the group id and user id of the user and group that were created.
These id's can be found using these commands:
Performing an Installation 101
id -g fmeserver
id -u fmeserver
Obtain the Installer
To obtain the applicable FMEServer installation package, visit the FMEDownloads page.
This page includes download links to release and beta installation packages for various
platforms.
To request a 60-day trial license of FMEServer, visit http://www.safe.com/fme/fme-tech-
nology/fme-server/trial-download/.
You can also contact [email protected] to get access.
What's Next?
If you are opting to install a PostgreSQL database that is included with the FME Server
installer, and do not wish to configure the FME Server Database on your own database
server, proceed to Install the FMEServer Database. Otherwise, proceed to Install the
FMEServer Core, FMEEngines, and Web Application Server.
Install the FME Server Database
Install a PostgreSQL FME Server Database on a separate machine on your network.
Note: Complete this step only if you wish to install a PostgreSQL database that is
included with the FME Server installer, and do not wish to configure the FME Server
Database on your own database server. For more information, see Provide a Data-
base Server.
Start the FME Server installer.
(Windows only) Installation Extractor
On the Installation Extractor dialog, specify a Destination folder in which to extract
installation files. Note that this folder only specifies where installation files are
Performing an Installation 102

extracted—it does not specify where FME Server program files are installed. That loc-
ation is specified later in the installer.
Tip: Take note of the specified Destination folder location. Following installation,
you may wish to:
Review the installation .log file.
Remove these files. Doing so saves almost 2 GB disk space.
Click Install.
When extraction is complete, the installer opens. Proceed through the installer to the
Choose Setup Type dialog.
Choose Setup Type
Select the Distributed/Fault Tolerant install option.
Performing an Installation 103

Custom Setup
Specify FME Server Database. Unselect all other components.
Performing an Installation 104

Destination Folder
Specify the installation directory for the FME Server Database.
Performing an Installation 105
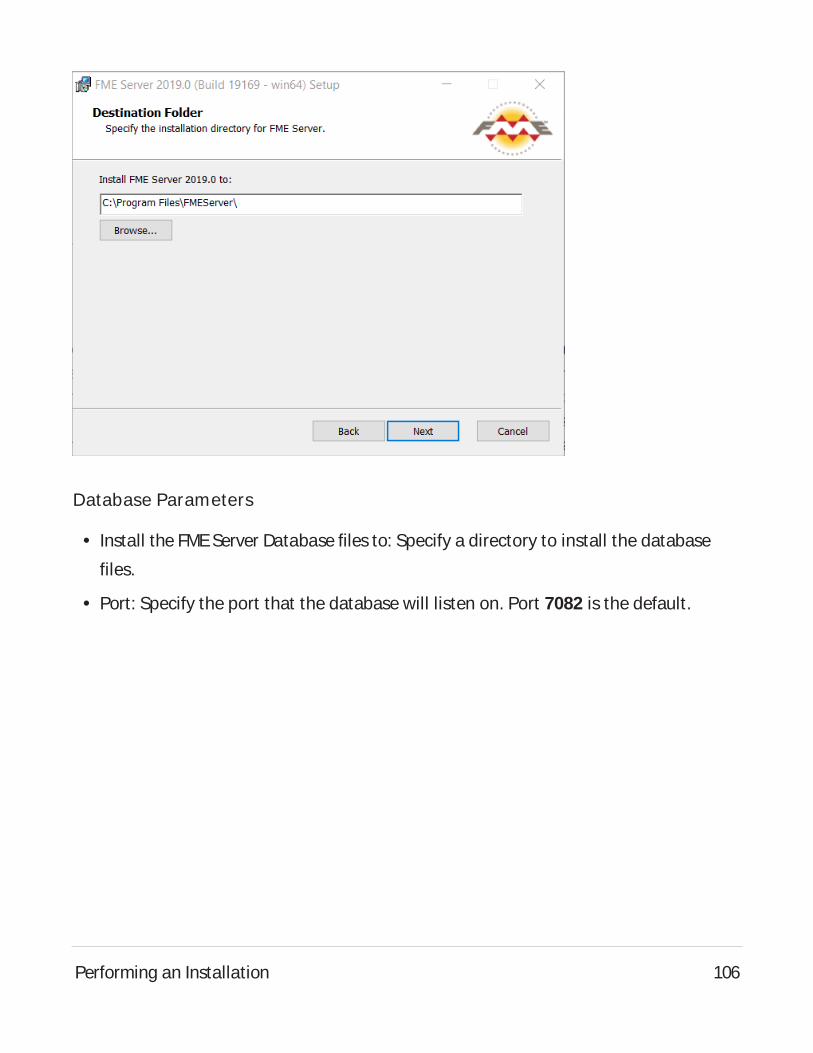
Database Parameters
l Install the FME Server Database files to: Specify a directory to install the database
files.
l Port: Specify the port that the database will listen on. Port 7082 is the default.
Performing an Installation 106

Database User
Specify a User Name (defaults to fmeserver) and Password for the database user
account.
WARNING: Do not specify User Name postgres. This name corresponds to the Post-
greSQL master user. If the corresponding passwords do not match, the database will
not install.
Note: The password for the FME Server Database user account is encrypted in
FME Server installation files. Take note of the User Name and Password that you spe-
cified. You may need to reference it later.
Performing an Installation 107
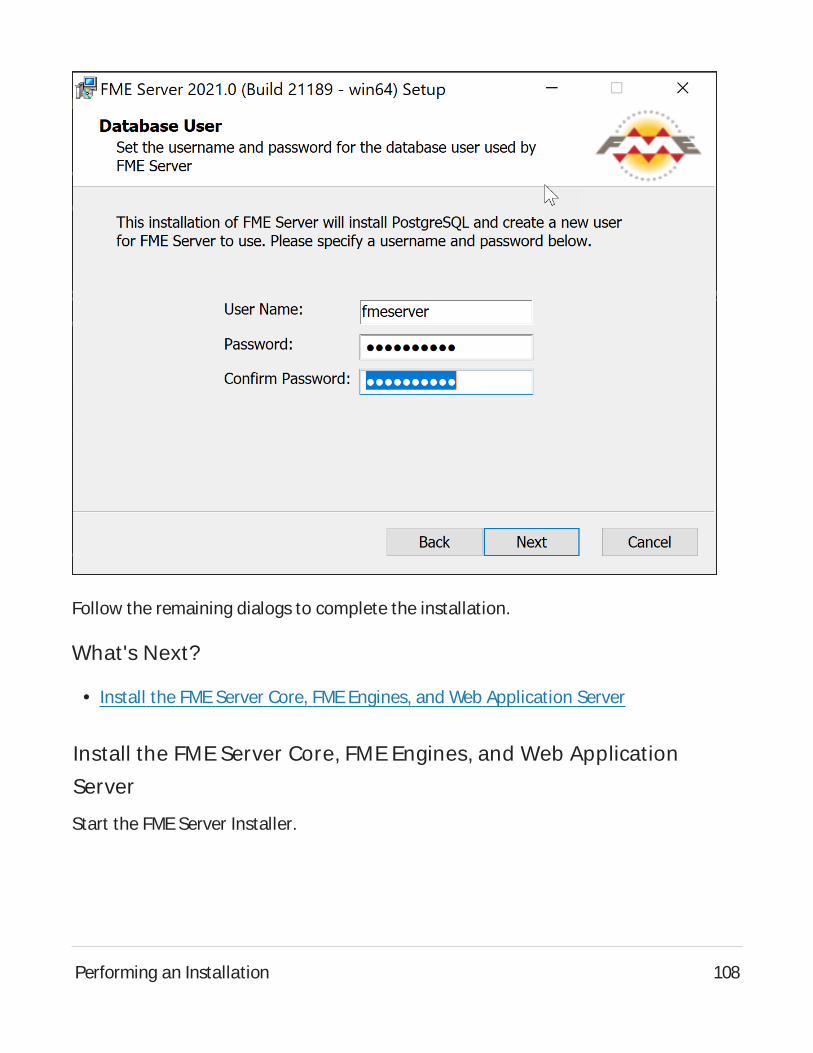
Follow the remaining dialogs to complete the installation.
What's Next?
l Install the FMEServer Core, FMEEngines, and Web Application Server
Install the FME Server Core, FME Engines, and Web Application
Server
Start the FMEServer Installer.
Performing an Installation 108
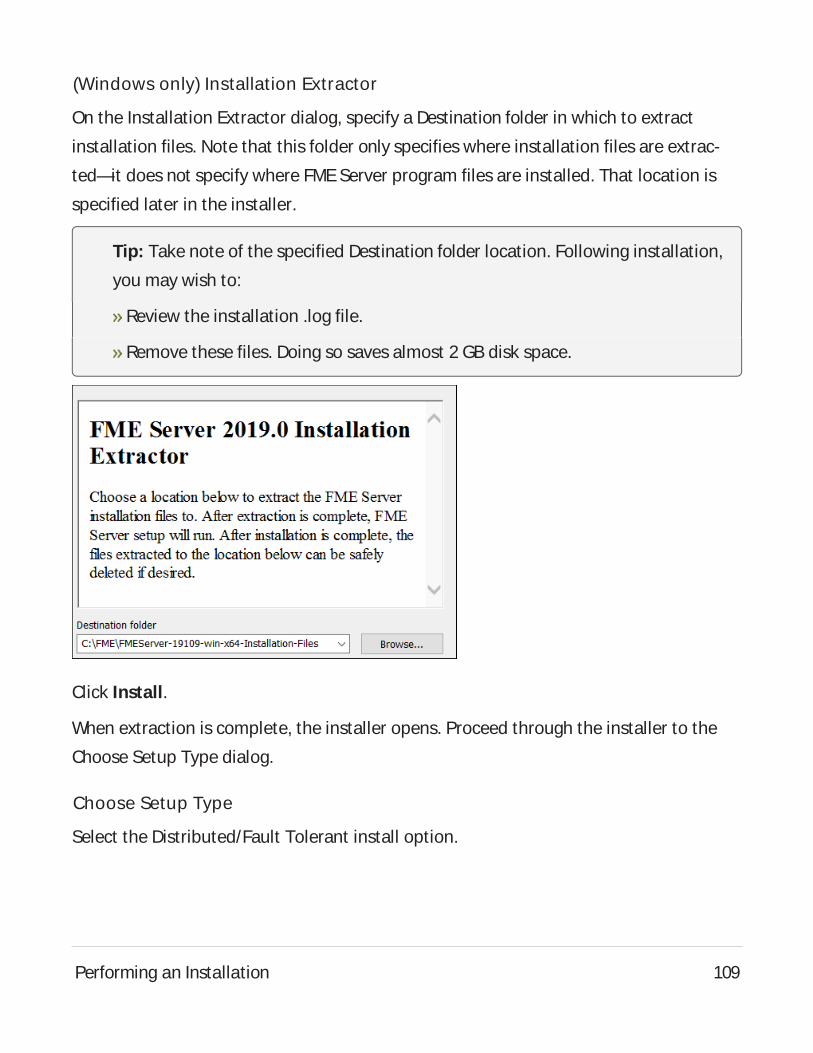
(Windows only) Installation Extractor
On the Installation Extractor dialog, specify a Destination folder in which to extract
installation files. Note that this folder only specifies where installation files are extrac-
ted—it does not specify where FME Server program files are installed. That location is
specified later in the installer.
Tip: Take note of the specified Destination folder location. Following installation,
you may wish to:
Review the installation .log file.
Remove these files. Doing so saves almost 2 GB disk space.
Click Install.
When extraction is complete, the installer opens. Proceed through the installer to the
Choose Setup Type dialog.
Choose Setup Type
Select the Distributed/Fault Tolerant install option.
Performing an Installation 109
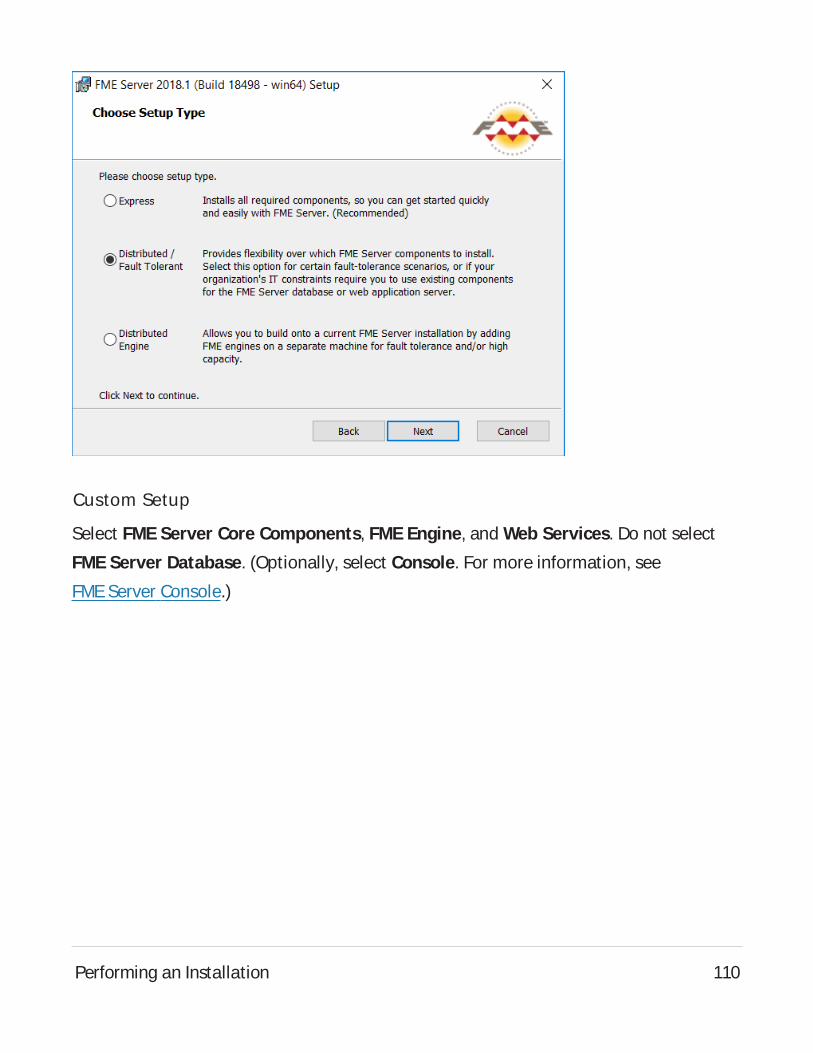
Custom Setup
Select FME Server Core Components, FME Engine, and Web Services. Do not select
FME Server Database. (Optionally, select Console. For more information, see
FME Server Console.)
Performing an Installation 110

Destination Folder
Specify the installation directory for FME Server.
Performing an Installation 111
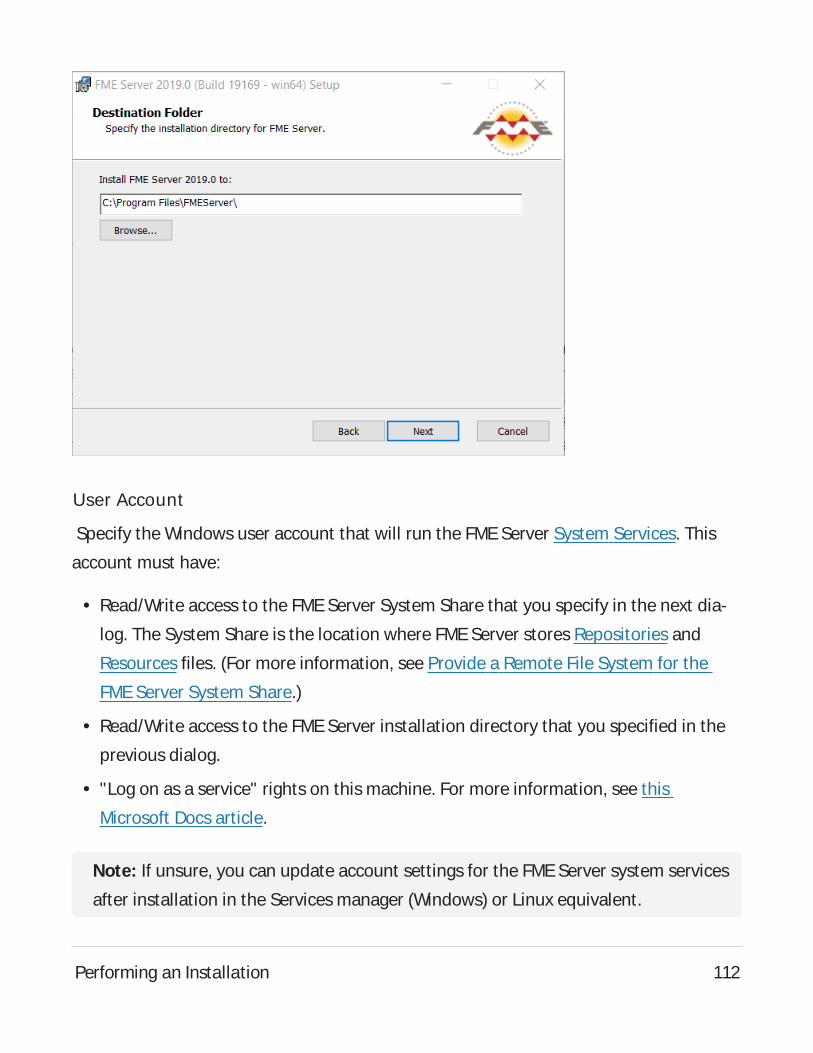
User Account
Specify the Windows user account that will run the FME Server System Services. This
account must have:
l Read/Write access to the FMEServer System Share that you specify in the next dia-
log. The System Share is the location where FME Server stores Repositories and
Resources files. (For more information, see Provide a Remote File System for the
FME Server System Share.)
l Read/Write access to the FME Server installation directory that you specified in the
previous dialog.
l "Log on as a service" rights on this machine. For more information, see this
Microsoft Docs article.
Note: If unsure, you can update account settings for the FME Server system services
after installation in the Services manager (Windows) or Linux equivalent.
Performing an Installation 112
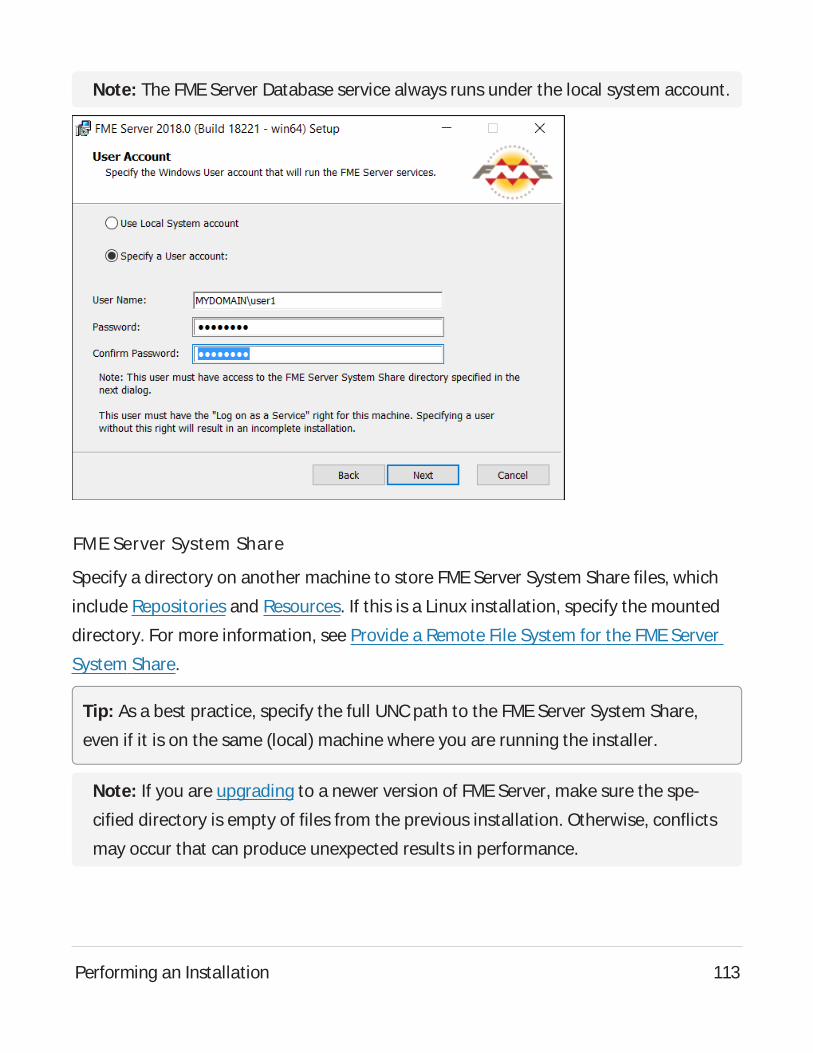
Note: The FME Server Database service always runs under the local system account.
FME Server System Share
Specify a directory on another machine to store FMEServer System Share files, which
include Repositories and Resources. If this is a Linux installation, specify the mounted
directory. For more information, see Provide a Remote File System for the FME Server
System Share.
Tip: As a best practice, specify the full UNCpath to the FMEServer System Share,
even if it is on the same (local) machine where you are running the installer.
Note: If you are upgrading to a newer version of FME Server, make sure the spe-
cified directory is empty of files from the previous installation. Otherwise, conflicts
may occur that can produce unexpected results in performance.
Performing an Installation 113

FME Server Hostname
Specify the host that will run the FME Server Core.
Performing an Installation 114

Database Server Type
Specify the type of database for the FMEServer Database. If you installed the Post-
greSQL database included with the FME Server installer, select FME Server Database. If
you are configuring the FME Server Database on your own database server, select the
database server type: Microsoft SQL Server, Oracle, or PostgreSQL. For more inform-
ation, see Provide a Database Server.
Performing an Installation 115

Database Server Parameters
Specify the connection parameters for the FMEServer Database. Optionally, to cus-
tomize further the connection parameters in the JDBCconnection string, click
Advanced.
Note:
If Microsoft SQL Server was specified in the previous dialog, check Use SQL Server
instance name to use that value instead of Port.
If Oracle was specified in the previous dialog, you must check Use Custom JDBC
Driver and specify the JDBCDriver.
Performing an Installation 116
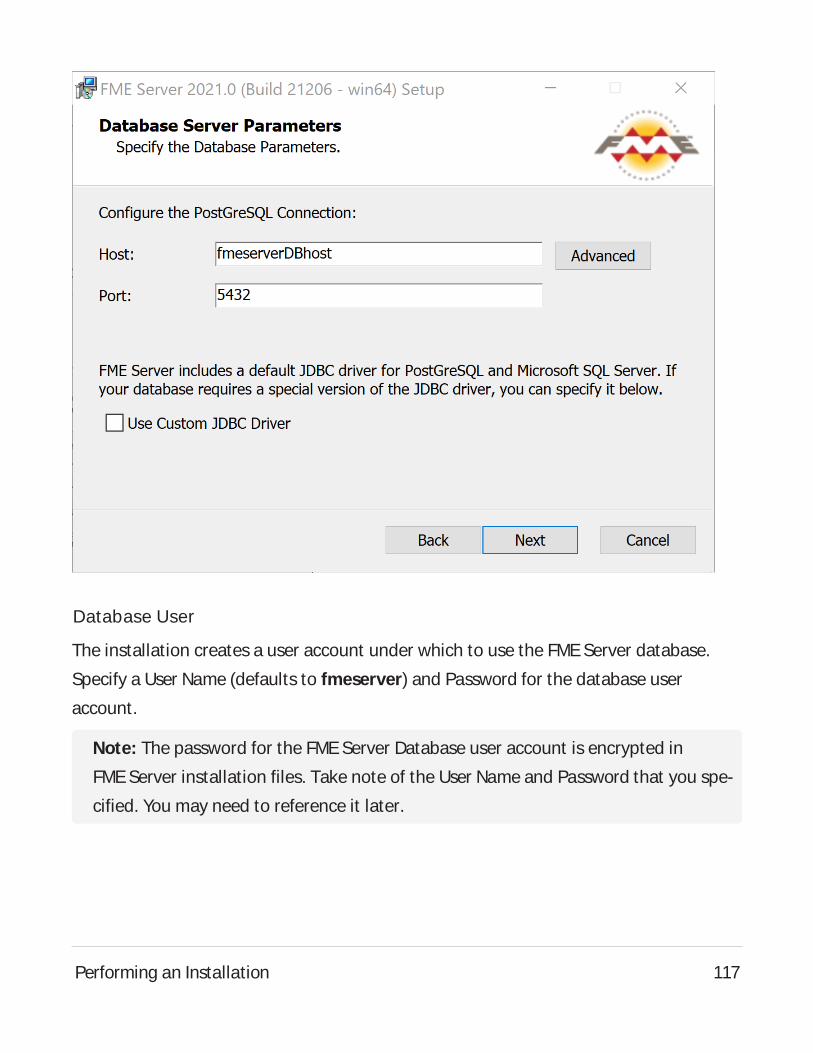
Database User
The installation creates a user account under which to use the FME Server database.
Specify a User Name (defaults to fmeserver) and Password for the database user
account.
Note: The password for the FME Server Database user account is encrypted in
FME Server installation files. Take note of the User Name and Password that you spe-
cified. You may need to reference it later.
Performing an Installation 117
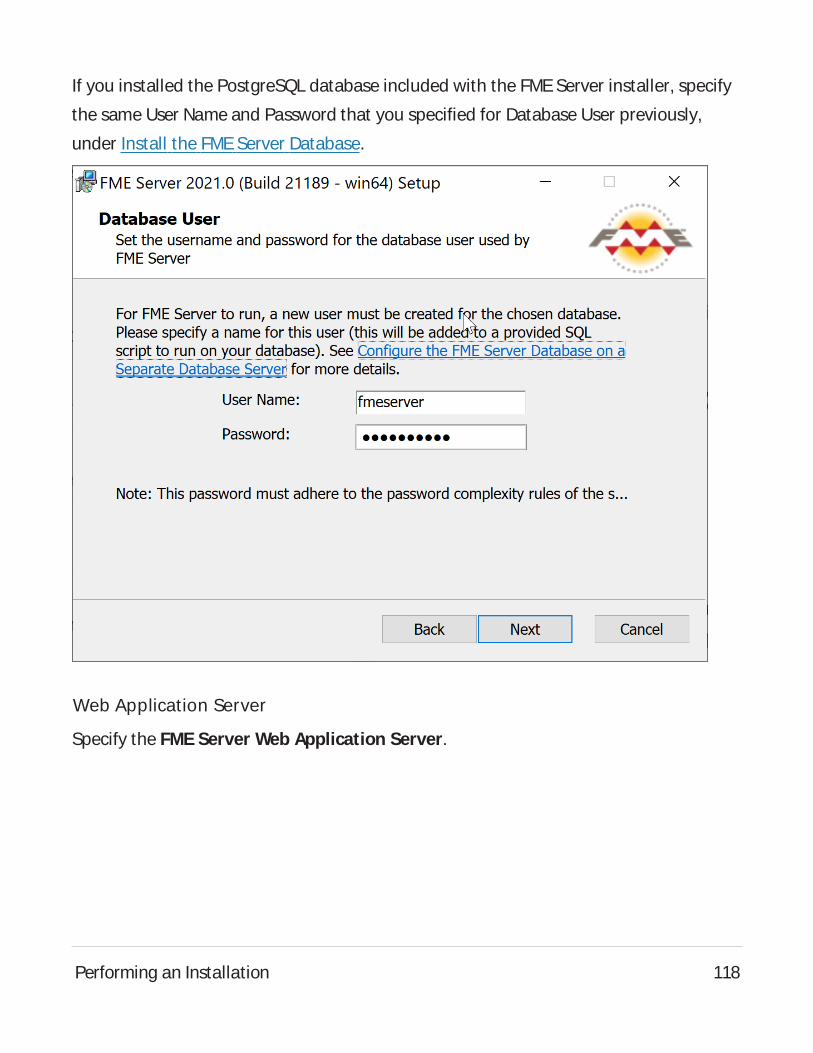
If you installed the PostgreSQL database included with the FME Server installer, specify
the same User Name and Password that you specified for Database User previously,
under Install the FMEServer Database.
Web Application Server
Specify the FME Server Web Application Server.
Performing an Installation 118
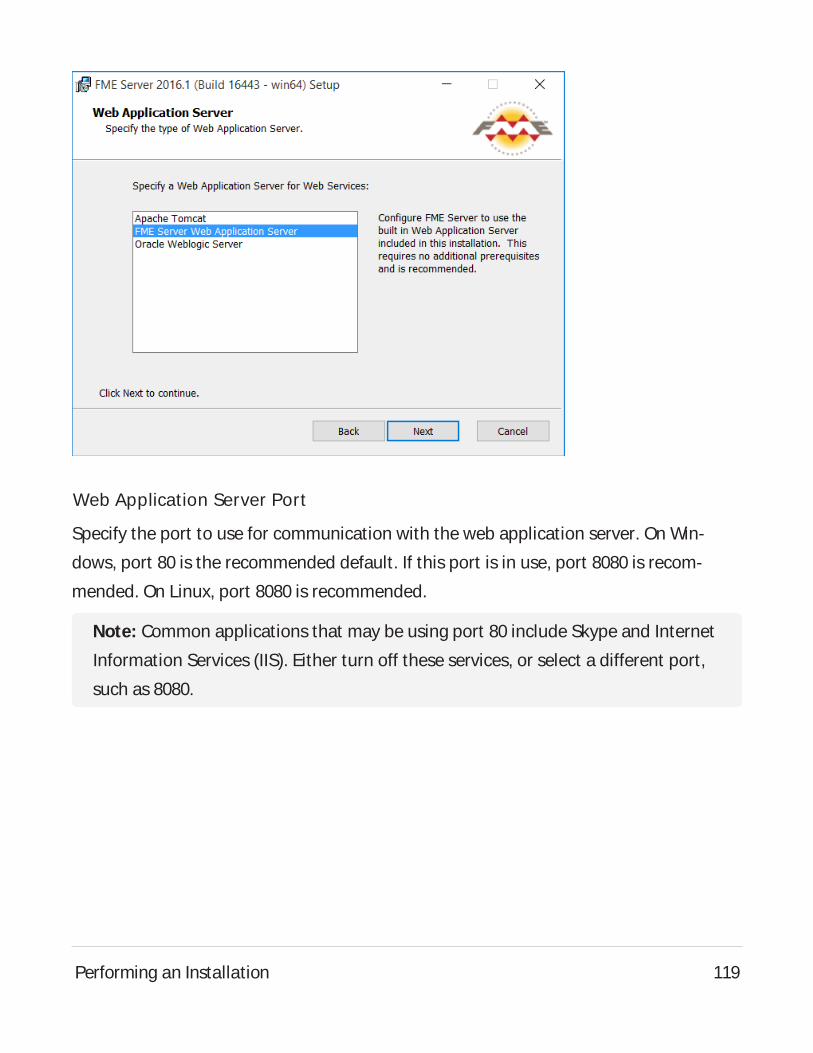
Web Application Server Port
Specify the port to use for communication with the web application server. On Win-
dows, port 80 is the recommended default. If this port is in use, port 8080 is recom-
mended. On Linux, port 8080 is recommended.
Note: Common applications that may be using port 80 include Skype and Internet
Information Services (IIS). Either turn off these services, or select a different port,
such as 8080.
Performing an Installation 119
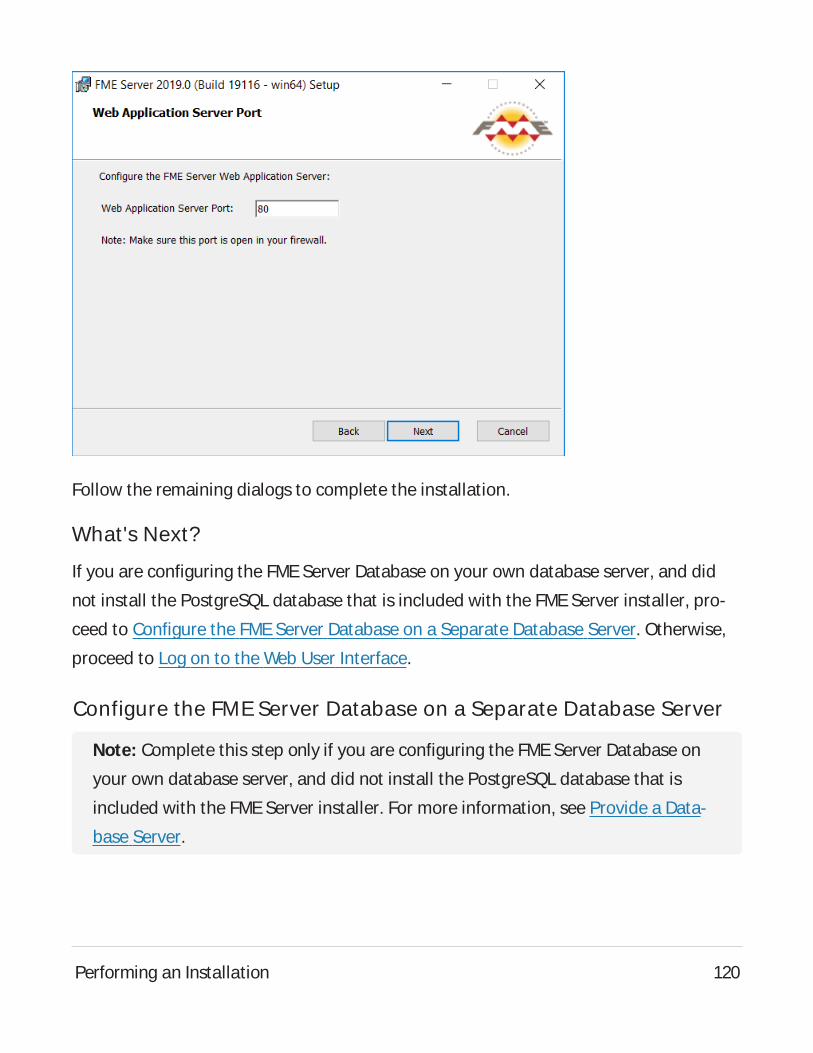
Follow the remaining dialogs to complete the installation.
What's Next?
If you are configuring the FME Server Database on your own database server, and did
not install the PostgreSQL database that is included with the FME Server installer, pro-
ceed to Configure the FMEServer Database on a Separate Database Server. Otherwise,
proceed to Log on to the Web User Interface.
Configure the FME Server Database on a Separate Database Server
Note: Complete this step only if you are configuring the FME Server Database on
your own database server, and did not install the PostgreSQL database that is
included with the FME Server installer. For more information, see Provide a Data-
base Server.
Performing an Installation 120
To configure FMEServer to use a separate database server, follow the steps below. You
can configure FME Server with a Microsoft SQL Server, PostgreSQL, or Oracle database,
running on either Windows or Linux.
1. Database Configuration: Set up FMEServer database tables and database users
with permissions to access the FMEServer database.
Note: The specific way to set up database tables and user permissions on vari-
ous production databases may differ depending on the available database
tools and intended target platform.
Database Configuration - Microsoft SQL Server
It is assumed that SQL Server is installed.
One notation used is <FMEServerDir>, which is the installation directory of FME
Server. In Windows, this is typically C:\Program Files\FMEServer.
SQL scripts are provided to help with SQL Server database configuration. These
SQL scripts are located in the <FMEServerDir>\Server\database\sqlserver\ dir-
ectory of the FME Server Core machine.
Note: This directory refers to the machine on which the FMEServer Core is
installed (not the machine on which the database server is installed). To run
these scripts, you must transfer this directory to the database machine, or ref-
erence it through a UNCpath.
If you are upgrading, you should back up any job history you want to keep.
Instructions Using SQL Server Management Studio
1. Open the SQL Server Management Studio and connect to the SQL Server data-
base engine.
Performing an Installation 121
2. Open sqlserver_createDB.sql and run the script against the fmeserver
database, as shown below:
Performing an Installation 122

Performing an Installation 123

3. On the Object Explorer pane, expand the Security folder, right-click Login,
and then select New Login:
4. On the Login – New page, click General to open the page shown in the
example below.
Performing an Installation 124

l At the Login name field, enter fmeserver.
l Make sure the option button is active for SQL Server authentication.
l In the Password field enter the password that was specified for the data-
base during the FME Server installation, and in the Confirm password field
enter the same password again.
l Make sure the Enforce password policy is active. If not, click the checkbox
to activate it.
l If required, click the checkbox for Enforce password expiration to clear it.
l At the Default database field enter fmeserver.
Performing an Installation 125

5. On the same Login – New page, click User Mapping to open the page shown
in the next figure.
l At the Users mapped to this login location, in the Map column click the
checkbox to activate it and map the login name to the fmeserver
Performing an Installation 126

database.
l At the Database role membership for location, notice that the fmeserver
database is specified and check db_owner to assign that role to this data-
base.
l Click OK to close this page.
Performing an Installation 127
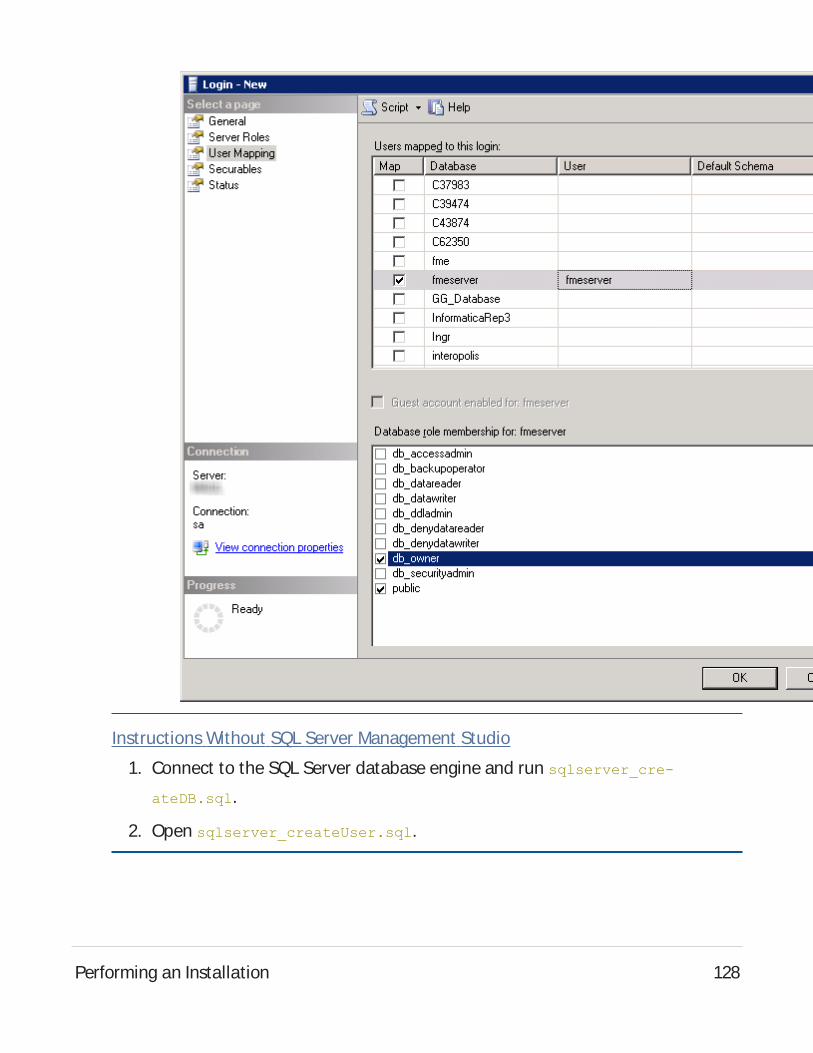
Instructions Without SQL Server Management Studio
1. Connect to the SQL Server database engine and run sqlserver_cre-
ateDB.sql.
2. Open sqlserver_createUser.sql.
Performing an Installation 128

3. Look for the line that begins:
CREATE LOGIN fmeserver WITH PASSWORD =
Replace <<DATABASE_PASSWORD>> with the password specified during the
installation.
4. Run the script.
Note: If your SQL Server uses an Always On availability group, you must also
configure the MultisubnetFailover property of the DB_JDBC_URL parameter
in the fmeDatabaseConfig.txt configuration file. For more information, see the
SQL Server examples under Configure the Database Connection.
Database Configuration - Oracle
Before proceeding, you must provide the following:
l Install an Oracle database server.
l Obtain the Oracle Database JDBCdriver. For more information, see
https://www.oracle.com/technetwork/database/application-devel-
opment/jdbc/downloads/index.html.
<FMEServerDir> is the installation directory of FMEServer. In Windows, this is typ-
ically C:\Program Files\FMEServer.
If you are upgrading, you should back up any job history you want to keep.
Windows
This section describes how to configure an Oracle database. You can configure the
Oracle database from other Oracle database tools depending on your personal
preference.
For an Oracle database configuration, various SQL scripts are provided to help.
Performing an Installation 129
These SQL scripts are located in the <FMEServerDir>\Server\database\oracle dir-
ectory of the FME Server Core machine.
Note: This directory refers to the machine on which the FMEServer Core is
installed (not the machine on which the database server is installed). To run
these scripts, you must transfer this directory to the database machine, or ref-
erence it through a UNCpath.
l oracle_createUser.sql – This script creates the FMEServer database user,
and grants all required permissions to the FMEServer database user. The pass-
word appears as <<DATABASE_PASSWORD>>. Before running this script, replace
<<DATABASE_PASSWORD>> with the password that was specified for the database
during the FME Server installation.
l oracle_createDB.sql – This script creates all FMEServer related database
packages, tables, indexes, views, and triggers.
l oracle_dropUser.sql – This script drops the FMEServer database user and
the database packages, tables, indexes, views, and triggers associated with the
FMEServer database user.
Using the Command Prompt
To use the command prompt to configure the database, follow these instructions:
1. Install Oracle SQL*Plus, if you haven’t already.
2. Open Oracle SQL*Plus and log on as a user with adequate privileges, such as
SYSDBA.
In this example, the following parameters were used and entered:
l User: SYSASSYSDBA
l Password: fmeserver
Performing an Installation 130
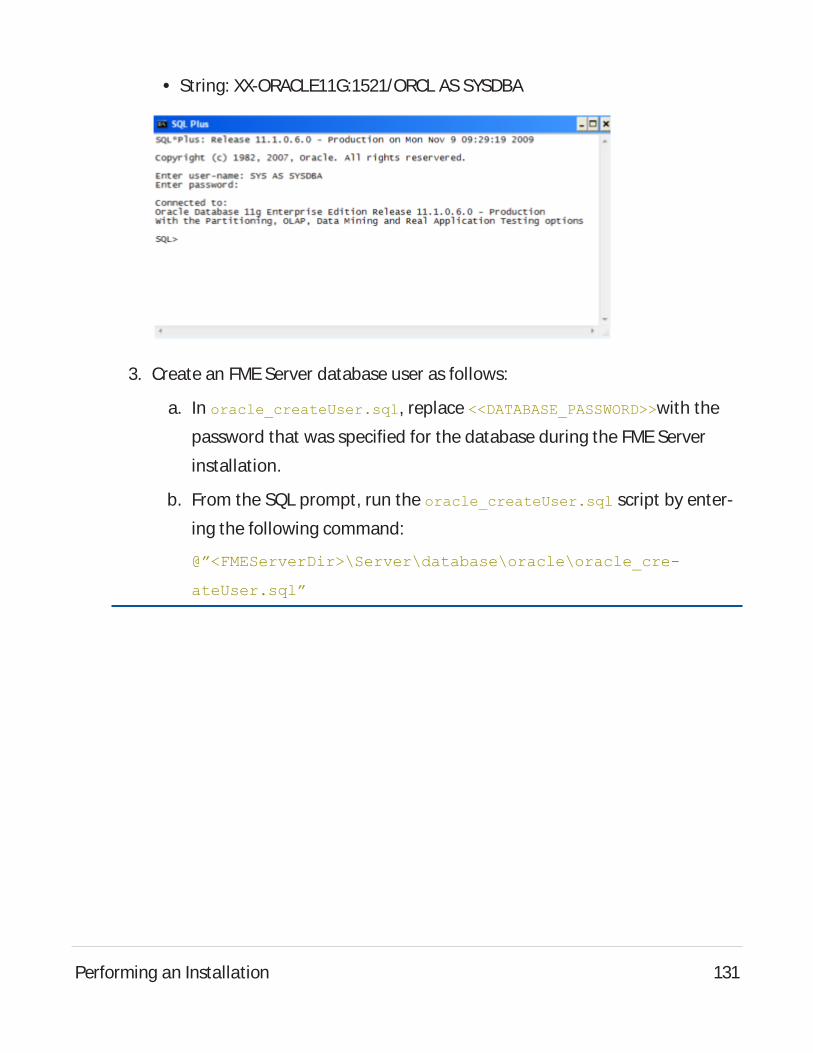
l String: XX-ORACLE11G:1521/ORCL ASSYSDBA
3. Create an FMEServer database user as follows:
a. In oracle_createUser.sql, replace <<DATABASE_PASSWORD>>with the
password that was specified for the database during the FMEServer
installation.
b. From the SQL prompt, run the oracle_createUser.sql script by enter-
ing the following command:
@”<FMEServerDir>\Server\database\oracle\oracle_cre-
ateUser.sql”
Performing an Installation 131

The default TABLESPACEis the Oracle DB configured default. If the cre-
ated user doesn’t have read/write permissions on the default
TABLESPACE, change the default TABLESPACEor create an appropriate
TABLESPACE.
This command creates a TABLESPACEon the Oracle DB server called
FMESERVERshown in the following example:
CREATE SMALLFILE TABLESPACE FMESERVER DATAFILE
'E:\ORADATA\FMESERVER01.DBF' SIZE 100000K REUSE
AUTOEXTEND ON NEXT 2048K MAXSIZE 1024M LOGGING EXTENT
MANAGEMENT LOCAL SEGMENT SPACE MANAGEMENT AUTO DEFAULT
NOCOMPRESS;
By default this command uses the TABLESPACE“FMESERVER” as shown
in the following example:
Performing an Installation 132

CREATE USER fmeserver IDENTIFIED BY fmeserver DEFAULT
TABLESPACE "FMESERVER" TEMPORARY TABLESPACE "TEMP";
4. When an FMEServer database user is created, you can connect to it by log-
ging on again to SQL*Plus.
In this example, the following parameters were used and entered on the user
interface:
l User: fmeserver
l Password: fmeserver
Note: The preceding example assumes your user name and password are
fmeserver.
5. When connected to the FMEServer database, run the oracle_createDB.sql
script by entering the following command:
@”<FMEServerDir>\Server\database\oracle\oracle_createDB.sql”
Performing an Installation 133

Note: If you drop the FMEServer database and login user, run the oracle_
dropUser.sql script.
Linux
Oracle SQL*Plus is a freeware client for connecting to an Oracle database. You can
download it from the Internet using the following address:
http://www.oracle.com/technology/software/tech/sql_plus/index.html
For more information, see the Oracle web site at:
http://www.oracle.com/technology/sample_code/tech/sql_plus/ht-
docs/demobld.html
The instructions that follow describe how to configure Oracle for use with FME
Server. These instructions describe using SQL*Plus for the database setup. Depend-
ing on your personal preference, you can also configure the Oracle database using
other Oracle tools.
Performing an Installation 134

For Oracle configurations, various SQL scripts are provided to help with Oracle
database configuration. These SQL scripts are located in the
<FMEServerDir>/Server/database oracle/ directory of the FME Server Core
machine.
Note: This directory refers to the machine on which the FMEServer Core is
installed (not the machine on which the database server is installed). To run
these scripts, you must transfer this directory to the database machine, or ref-
erence it through a UNCpath.
l oracle_createUser.sql – This script creates the FMEServer database user,
and grants all required permissions to the FMEServer database user. The pass-
word appears as <<DATABASE_PASSWORD>>. Before running this script, replace
<<DATABASE_PASSWORD>> with the password that was specified for the database
during the FME Server installation.
l oracle_createDB.sql – This script creates all FMEServer related database
packages, tables, indexes, views, and triggers.
l oracle_dropUser.sql – This script drops the FMEServer database user and
the database packages, tables, indexes, views, and triggers associated with the
FMEServer database user.
Using the Command Prompt
To use the command prompt to configure the database, follow these instructions:
1. Install the Oracle Client Tools, which includes SQL*Plus, if you haven’t
already.
2. Run sqlplus and log on as a user with adequate privileges, such as SYSDBA.
For example:
Performing an Installation 135

sqlplus SYS/<password>@<Host>:<Port>/<service> AS SYSDBA
3. Create the FMEServer database user:
a. In a text editor, open the oracle_creatorUser.sql script and update
the password <<DATABASE_PASSWORD>> to the one specified during the
FMEServer installation.
b. From the SQL prompt, run the oracle_createUser.sql script by entering
the following command:
@”<FMEServerDir>/Server/database/oracle/oracle_cre-
ateUser.sql”
The default TABLESPACEis the Oracle DB configured default. If the cre-
ated user doesn’t have read/write permissions on the default
TABLESPACE, you need to change the default TABLESPACEor create an
appropriate TABLESPACE.
This command creates a TABLESPACEon the Oracle DB server called
FMESERVERshown in the following example:
CREATE SMALLFILE TABLESPACE FMESERVER DATAFILE
'/ORADATA/FMESERVER01.DBF' SIZE 100000K REUSE AUTOEXTEND
ON NEXT 2048K MAXSIZE 1024M LOGGING EXTENT MANAGEMENT
LOCAL SEGMENT SPACE MANAGEMENT AUTO DEFAULT NOCOMPRESS;
By default this command uses the TABLESPACE“FMESERVER” shown in
this example:
CREATE USER fmeserver IDENTIFIED BY fmeserver DEFAULT
TABLESPACE "FMESERVER" TEMPORARY TABLESPACE "TEMP";
Performing an Installation 136

4. When an FMEServer database user has been created, you can connect to it by
logging on again to SQL*Plus or by entering the following command:
CONNECT <UserName>/<Password>@<Host>:<Port>/<service>;
5. When connected to the FMEServer database, run the oracle_createDB.sql
script by entering the following command:
@”<FMEServerDir>/Server/database/oracle/oracle_createDB.sql”
Database Configuration - PostgreSQL
PostgreSQL is an open source database that can be downloaded from the Internet.
For more information, see the PostgreSQL web site at:
http://www.postgresql.com
It’s assumed that PostgreSQL is already installed .
One notation used is <FMEServerDir>, which is the installation directory of FME
Server. In Windows, this is typically C:\Program Files\FMEServer.
It’s also assumed that you have JRE5 or higher and PostgreSQL database installed
before you proceed further. If you want to use the JDBCdriver, there are several
steps to perform.
If you are upgrading, you should back up any job history you want to keep.
Windows
This section describes how to configure a PostgreSQL database. You can configure
this database from other PostgreSQL database tools, depending on your personal
preference.
For a PostgreSQL database configuration, various SQL scripts are provided to assist
you. These SQL scripts are located in the following directory:
<FMEServerDir>\Server\database\postgresql
Performing an Installation 137

Note: This directory refers to the machine on which the FMEServer Core is
installed (not the machine on which the database server is installed). To run
these scripts, you must transfer this directory to the database machine, or ref-
erence it through a UNCpath.
l postgresql_createUser.sql – This script creates the FMEServer database
user and password that you specified during installation, and grants all
required permissions to this user. The password appears as <<DATABASE_
PASSWORD>>. Before running this script, replace <<DATABASE_PASSWORD>> with
the password that was specified for the database during the FME Server install-
ation.
l postgresql_createDB.sql – This script creates the FMEServer database.
l postgresql_createSchema.sql – This script creates all FMEServer related
tables, indexes, views, and triggers.
l postgresql_dropUser.sql – This script drops the FMEServer database user.
l postgresql_dropDB.sql – This script drops the FMEServer database.
Using the Command Prompt
To use the command prompt to configure the database, follow these instructions:
1. Install PostgreSQL SQL shell (psql) if you haven’t done so already.
2. Open psql and log on as a user with the appropriate privileges:
Performing an Installation 138
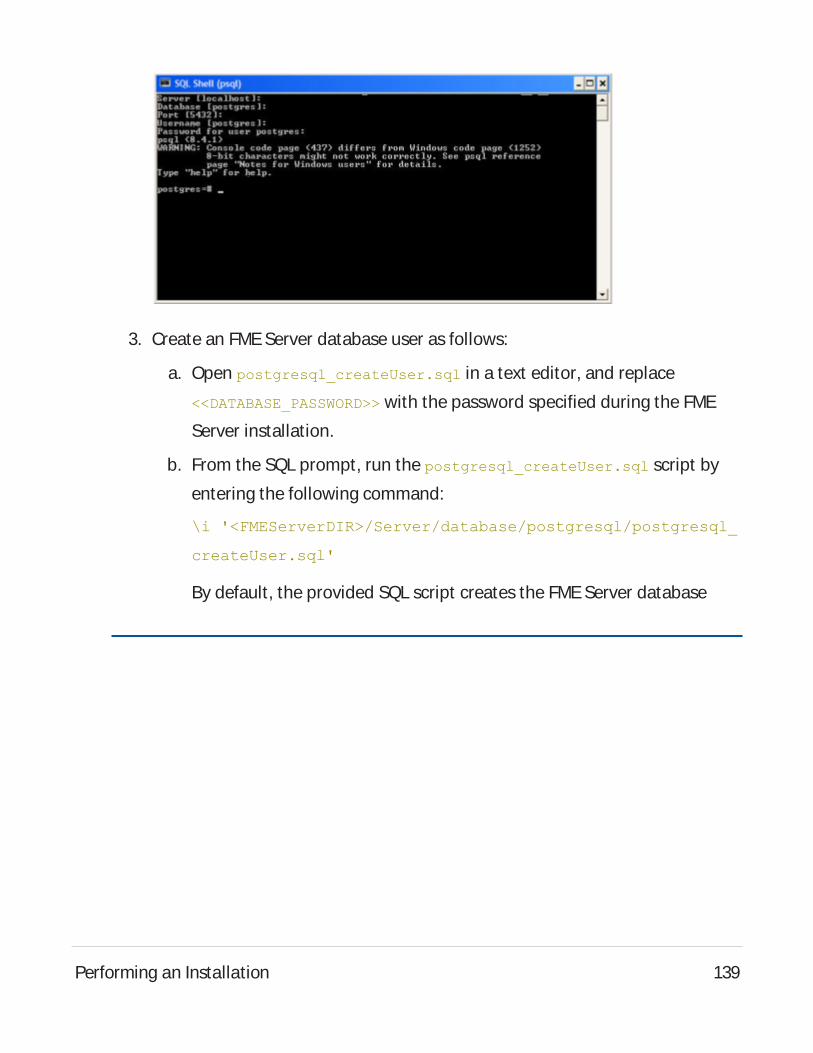
3. Create an FMEServer database user as follows:
a. Open postgresql_createUser.sql in a text editor, and replace
<<DATABASE_PASSWORD>> with the password specified during the FME
Server installation.
b. From the SQL prompt, run the postgresql_createUser.sql script by
entering the following command:
\i '<FMEServerDIR>/Server/database/postgresql/postgresql_
createUser.sql'
By default, the provided SQL script creates the FMEServer database
Performing an Installation 139
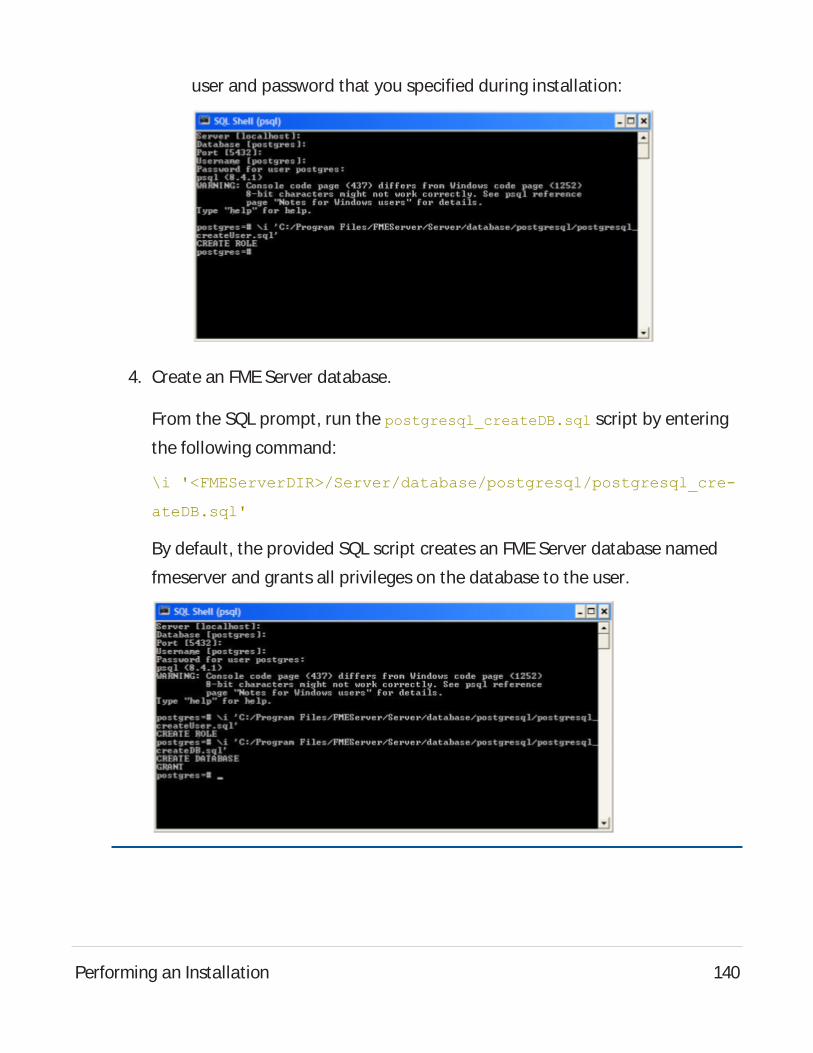
user and password that you specified during installation:
4. Create an FMEServer database.
From the SQL prompt, run the postgresql_createDB.sql script by entering
the following command:
\i '<FMEServerDIR>/Server/database/postgresql/postgresql_cre-
ateDB.sql'
By default, the provided SQL script creates an FMEServer database named
fmeserver and grants all privileges on the database to the user.
Performing an Installation 140

5. Quit psql and log on as the FMEServer database user.
6. Create the FMEServer database schema as follows:
From the SQL prompt, run the postgresql_createSchema.sql script by enter-
ing the following command:
\i '<FMEServerDir>/Server/database/postgresql/postgresql_cre-
ateSchema.sql'
By default, the provided SQL script creates all FMEServer related tables,
indexes, views, and triggers.
Performing an Installation 141

Linux
This section describes configuring PostgreSQL from both the command prompt
and a user interface, such as the PostgreSQL Query Browser and the PostgreSQL
Administrator.
For PostgreSQL configurations, various SQL scripts are provided to help with Post-
greSQL database configuration. These SQL scripts are located in the <FMEServer-
Dir>/Server/database/postgresql/ directory of the FME Server Core machine.
Note: This directory refers to the machine on which the FMEServer Core is
installed (not the machine on which the database server is installed). To run
these scripts, you must transfer this directory to the database machine, or ref-
erence it through a UNCpath.
l postgresql_createUser.sql – This script creates the FMEServer database
user and password that you specified during installation, and grants all
required permissions to the FMEServer database user. The password appears
as <<DATABASE_PASSWORD>>. Before running this script, replace <<DATABASE_
PASSWORD>> with the password that was specified for the database during the
FME Server installation.
Note: The password is encrypted and appears in the script as <<DATABASE_
PASSWORD>>.
l postgresql_createDB.sql – This script drops the FMEServer database and
creates a new one with the required FMEServer tables. By default this data-
base is named fmeserver. Be careful when running this script because it drops
the existing FMEServer database.
l postgresql_createSchema.sql – This script creates all FMEServer related
tables, indexes, views, and triggers.
Performing an Installation 142
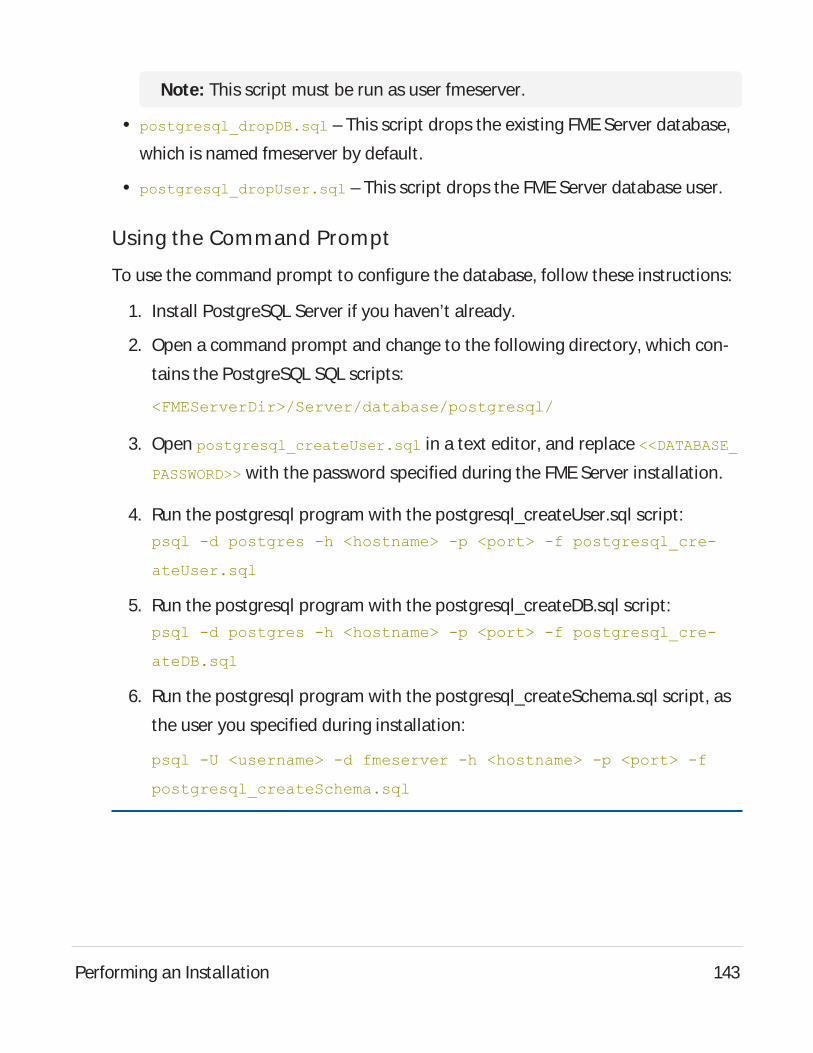
Note: This script must be run as user fmeserver.
l postgresql_dropDB.sql – This script drops the existing FMEServer database,
which is named fmeserver by default.
l postgresql_dropUser.sql – This script drops the FMEServer database user.
Using the Command Prompt
To use the command prompt to configure the database, follow these instructions:
1. Install PostgreSQL Server if you haven’t already.
2. Open a command prompt and change to the following directory, which con-
tains the PostgreSQL SQL scripts:
<FMEServerDir>/Server/database/postgresql/
3. Open postgresql_createUser.sql in a text editor, and replace <<DATABASE_
PASSWORD>> with the password specified during the FMEServer installation.
4. Run the postgresql program with the postgresql_createUser.sql script:psql -d postgres -h <hostname> -p <port> -f postgresql_cre-
ateUser.sql
5. Run the postgresql program with the postgresql_createDB.sql script:psql -d postgres -h <hostname> -p <port> -f postgresql_cre-
ateDB.sql
6. Run the postgresql program with the postgresql_createSchema.sql script, as
the user you specified during installation:
psql -U <username> -d fmeserver -h <hostname> -p <port> -f
postgresql_createSchema.sql
Performing an Installation 143

Note: If you drop the FMEServer database and login user, run the postgresql
program with the appropriate postgresql_dropDB.sql or postgresql_dropUser-
.sql scripts.
After Database Creation
1. On the machine on which the FME Server database server is installed, open
pg_hba.conf. For default installation directories of this file:l PostgreSQL 10: <PostgreSQLDir>\data\pg10\pg_hba.conf
l PostgreSQL 11: C:\Program Files\PostgreSQL\11\data\pg_hba.conf
2. Change the following lines:
host all all 127.0.0.1/32 md5
host all all ::1/128 md5
to:
host all all 0.0.0.0/0 md5
host all all ::/0 md5
3. Restart the FME Server Database service.
2. Enable connections: FMEServer connects to the database when it starts. There-
fore, ensure that your database server is running and configured to accept incom-
ing connections before FMEServer is started. The database must allow
connections over TCP/IP with all machines on which the FME Server Core and
FME Engines are installed.
3. Ensure that all installations of FMEServer are running. For more information, see
Working with the FMEServer System Services.
What's Next?
l Log on to the Web User Interface
Performing an Installation 144
Log on to the Web User Interface
To log in to the Web User Interface for the first time as an administrator following install-
ation, specify Username admin and Password admin. You will be prompted to update
the admin password upon initial use, based on the default Password Policy con-
figuration.
For more information:
l Accessing the Web User Interface
l Changing the Login Password
l Default User Accounts and Passwords
l Role-Based and User-Based Access Control
What's Next?
l Request and Install a License
Request and Install a License
License files are installed, by default, to: Windows: C:\ProgramData\Safe Soft-
ware\FME Server\licenses Linux: /opt/fmeserver/licensesDynamic Engine (CPU
Usage) licensing is not available for engines on FMECloud.
Automatic Mode (Recommended)
If your FME Server host machine has an internet connection, you can request and install
a license online without any need for downloading and re-uploading a license file.
Note:
Licensing FMEServer over the internet requires no inbound connection. For more
information, see FMEServer Automatic Licensing URLs.
Performing an Installation 145
If you purchased credits for Dynamic Engines (CPU Usage), automatic mode only
is supported. Manual mode licensing (below) is not supported.
1. Open the FMEServer Web User Interface as a user assigned to the fmesuperuser
role. If none of your FME Engines are licensed, you will see a prompt to activate
FME Server. Click on the prompt. Otherwise, select System Configuration > Licens-
ing.
2. Click Request New License.
3. Complete the fields on the Request a New License page. If you have a product
Serial Number, be sure to provide it. If not, you will receive a 7-day evaluation
license, which you can extend to 60 days (see below).
Note: In addition to licenses for standard FME Engines, an evaluation license
that is requested in Automatic Mode includes 100 hours of Dynamic Engine
(CPU Usage) credits.
4. Licensing Mode: Select Automatic.
5. Click OK.
6. Amessage indicates that your license is installed, and your available engines
appear momentarily on the Engines page.
Note: If the Serial Number you provided includes Dynamic Engines (CPU
Usage), they are not configured to start by default. You can start and configure
your Dynamic Engines on the Engines page.
Manual Mode
If you prefer not to use an internet connection for licensing, or if your FME Server host
machine does not have an internet connection, use this process to install a license.
Performing an Installation 146
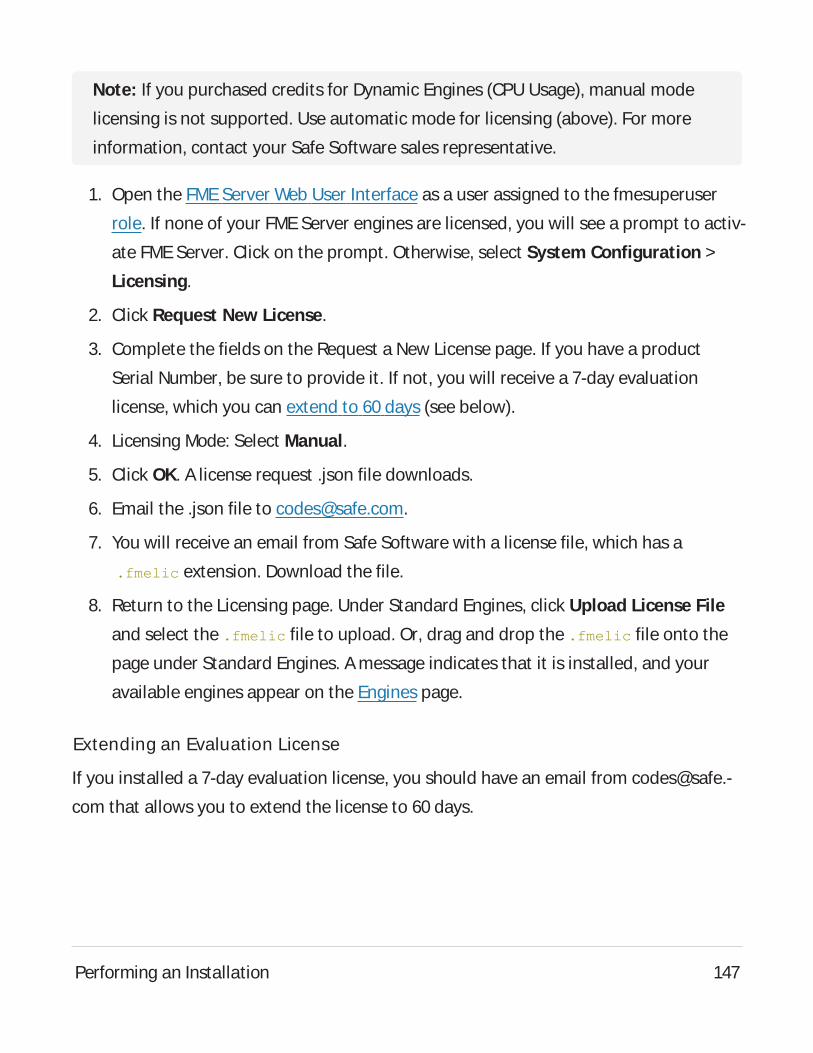
Note: If you purchased credits for Dynamic Engines (CPU Usage), manual mode
licensing is not supported. Use automatic mode for licensing (above). For more
information, contact your Safe Software sales representative.
1. Open the FMEServer Web User Interface as a user assigned to the fmesuperuser
role. If none of your FME Server engines are licensed, you will see a prompt to activ-
ate FME Server. Click on the prompt. Otherwise, select System Configuration >
Licensing.
2. Click Request New License.
3. Complete the fields on the Request a New License page. If you have a product
Serial Number, be sure to provide it. If not, you will receive a 7-day evaluation
license, which you can extend to 60 days (see below).
4. Licensing Mode: Select Manual.
5. Click OK. A license request .json file downloads.
6. Email the .json file to [email protected].
7. You will receive an email from Safe Software with a license file, which has a
.fmelic extension. Download the file.
8. Return to the Licensing page. Under Standard Engines, click Upload License File
and select the .fmelic file to upload. Or, drag and drop the .fmelic file onto the
page under Standard Engines. Amessage indicates that it is installed, and your
available engines appear on the Engines page.
Extending an Evaluation License
If you installed a 7-day evaluation license, you should have an email from [email protected]
com that allows you to extend the license to 60 days.
Performing an Installation 147
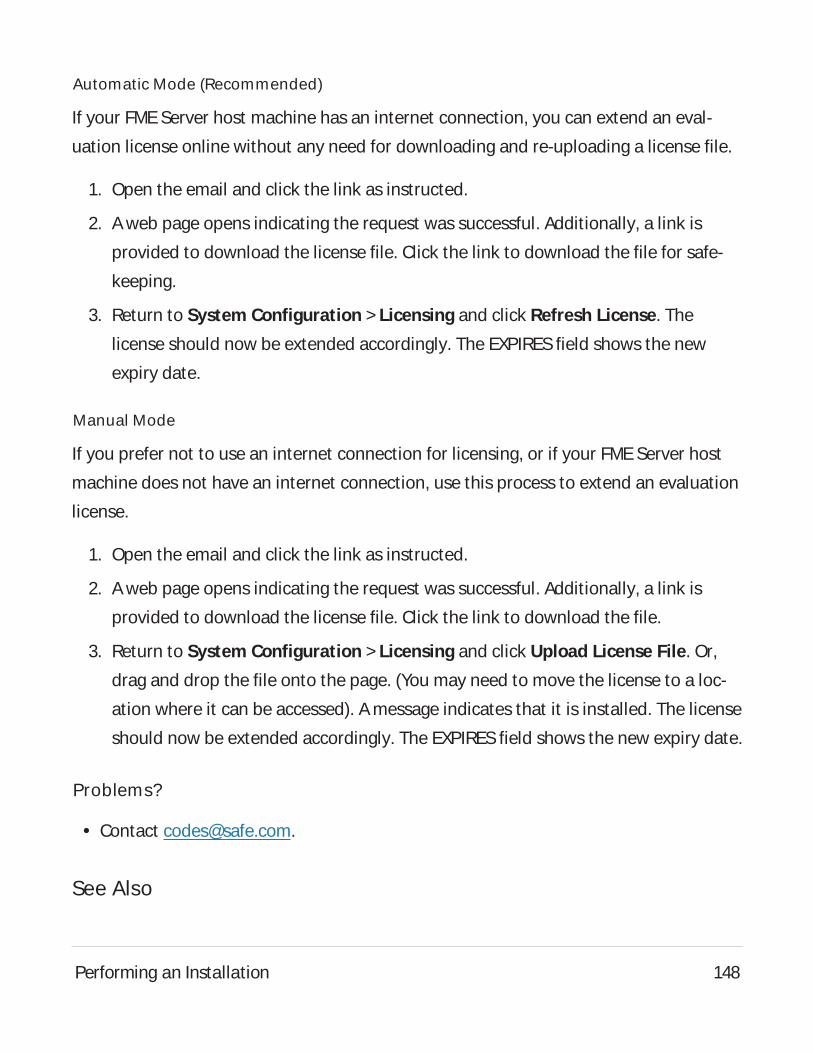
Automatic Mode (Recommended)
If your FME Server host machine has an internet connection, you can extend an eval-
uation license online without any need for downloading and re-uploading a license file.
1. Open the email and click the link as instructed.
2. Aweb page opens indicating the request was successful. Additionally, a link is
provided to download the license file. Click the link to download the file for safe-
keeping.
3. Return to System Configuration > Licensing and click Refresh License. The
license should now be extended accordingly. The EXPIRESfield shows the new
expiry date.
Manual Mode
If you prefer not to use an internet connection for licensing, or if your FME Server host
machine does not have an internet connection, use this process to extend an evaluation
license.
1. Open the email and click the link as instructed.
2. Aweb page opens indicating the request was successful. Additionally, a link is
provided to download the license file. Click the link to download the file.
3. Return to System Configuration > Licensing and click Upload License File. Or,
drag and drop the file onto the page. (You may need to move the license to a loc-
ation where it can be accessed). Amessage indicates that it is installed. The license
should now be extended accordingly. The EXPIRESfield shows the new expiry date.
Problems?
l Contact [email protected].
See Also
Performing an Installation 148
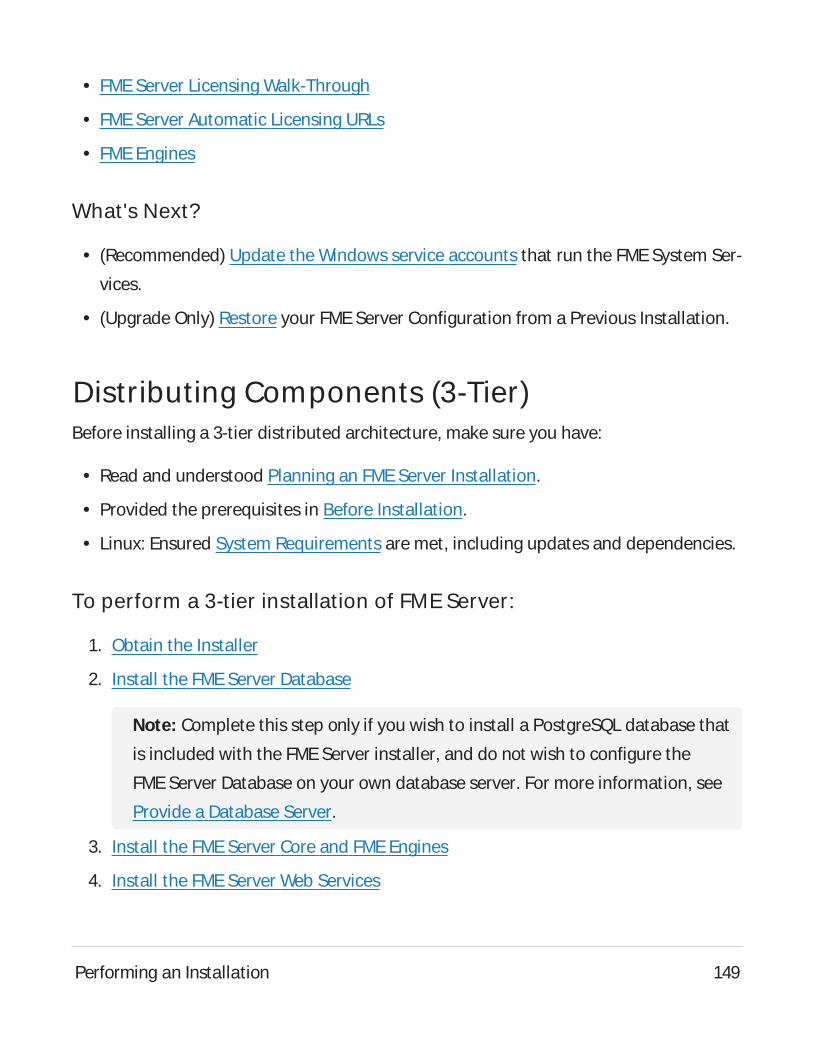
l FMEServer Licensing Walk-Through
l FMEServer Automatic Licensing URLs
l FME Engines
What's Next?
l (Recommended) Update the Windows service accounts that run the FME System Ser-
vices.
l (Upgrade Only) Restore your FME Server Configuration from a Previous Installation.
Distributing Components (3-Tier)Before installing a 3-tier distributed architecture, make sure you have:
l Read and understood Planning an FMEServer Installation.
l Provided the prerequisites in Before Installation.
l Linux: Ensured System Requirements are met, including updates and dependencies.
To perform a 3-tier installation of FME Server:
1. Obtain the Installer
2. Install the FMEServer Database
Note: Complete this step only if you wish to install a PostgreSQL database that
is included with the FME Server installer, and do not wish to configure the
FME Server Database on your own database server. For more information, see
Provide a Database Server.
3. Install the FMEServer Core and FMEEngines
4. Install the FMEServer Web Services
Performing an Installation 149

5. Configure the FMEServer Database
Note: Complete this step only if you are configuring the FME Server Database
on your own database server, and did not install the PostgreSQL database that
is included with the FME Server installer. For more information, see Provide a
Database Server.
6. Start the FME Server system services. Following a distributed installation, the
FME Server system services do not start automatically. You must manually start
them on each machine that is hosting FMEServer components.
7. Log on to the Web User Interface
8. Update the WebSocket Host
9. Request and Install a License
10. (If necessary) Update the Windows service accounts that run the FME System Ser-
vices.
11. (Upgrade only) Restore your FME Server Configuration from a Previous Installation.
What's Next?
Optimize: You can scale-up your FMEServer by:
l Increasing the number of FME Engines that run when you start FME Server.
l Adding FMEEngines on separate machines that are closer to your data.
For more information, see Planning for Scalability and Performance.
Before Installation
Before you install the FME Server components for a 3-tier architecture, ensure the fol-
lowing non-FME Server components are in place on your network:
Performing an Installation 150
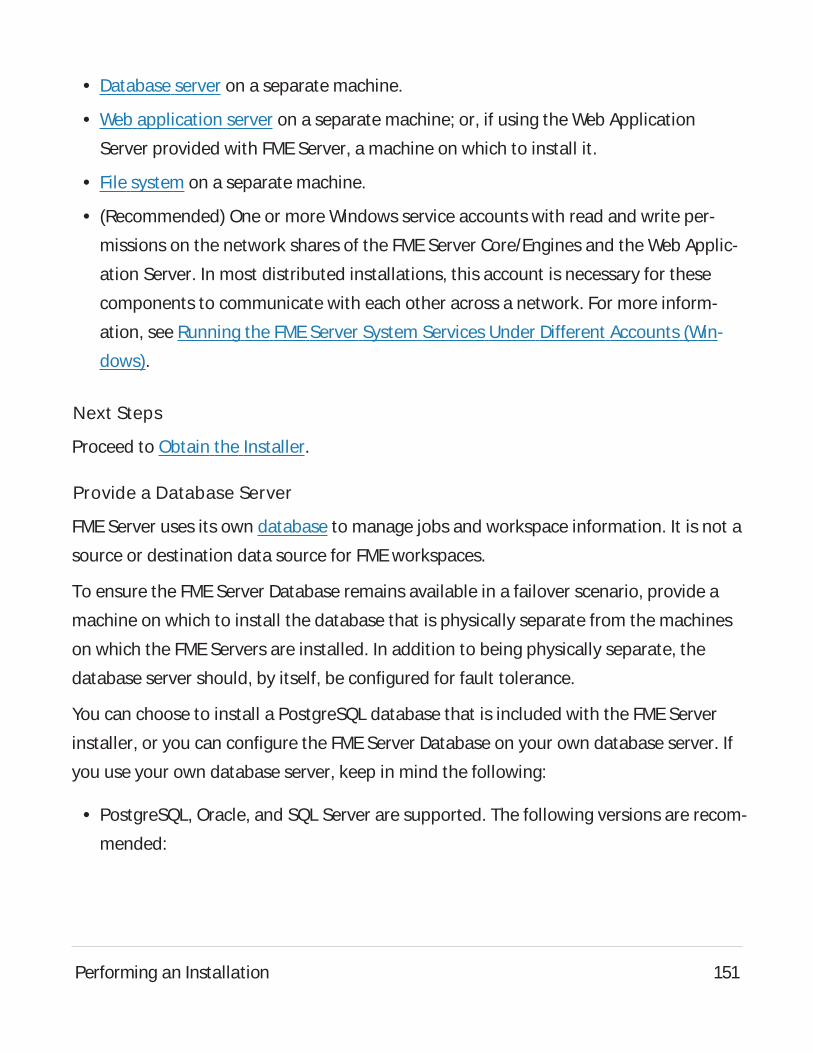
l Database server on a separate machine.
l Web application server on a separate machine; or, if using the Web Application
Server provided with FME Server, a machine on which to install it.
l File system on a separate machine.
l (Recommended) One or more Windows service accounts with read and write per-
missions on the network shares of the FMEServer Core/Engines and the Web Applic-
ation Server. In most distributed installations, this account is necessary for these
components to communicate with each other across a network. For more inform-
ation, see Running the FMEServer System Services Under Different Accounts (Win-
dows).
Next Steps
Proceed to Obtain the Installer.
Provide a Database Server
FME Server uses its own database to manage jobs and workspace information. It is not a
source or destination data source for FMEworkspaces.
To ensure the FMEServer Database remains available in a failover scenario, provide a
machine on which to install the database that is physically separate from the machines
on which the FME Servers are installed. In addition to being physically separate, the
database server should, by itself, be configured for fault tolerance.
You can choose to install a PostgreSQL database that is included with the FME Server
installer, or you can configure the FME Server Database on your own database server. If
you use your own database server, keep in mind the following:
l PostgreSQL, Oracle, and SQL Server are supported. The following versions are recom-
mended:
Performing an Installation 151
l PostgreSQL: 11.x or later.
l Oracle: 12c or later.
l SQL Server: 2016 or later.
l When you install the FME Servers, the database server must be running and you
must know the connection information.
l If using an Oracle database server, you must obtain the Oracle Database JDBC
driver. For more information, see https://www.or-
acle.com/technetwork/database/application-devel-
opment/jdbc/downloads/index.html.
Note: Oracle Database JDBCdriver versions that use ojdbc10.jar are not sup-
ported.
l Following installation, you must be able to create a new database on the server
using SQL scripts.
For information about acquiring a fault-tolerant database server, consult your IT depart-
ment.
Updating the FME Server Database Password
If you choose to install a PostgreSQL database that is included with the FME Server
installer, and want to update the password for the database user account, follow these
instructions:
Expand for instructions - Windows
1. Start pgAdmin4.exe from <FMEServerDir>\Utilities\pgsql\pgAdmin 4\bin\.
2. If this is your first time starting pgAdmin4, it will prompt you to set a master pass-
word. Choose something you will remember.
Performing an Installation 152
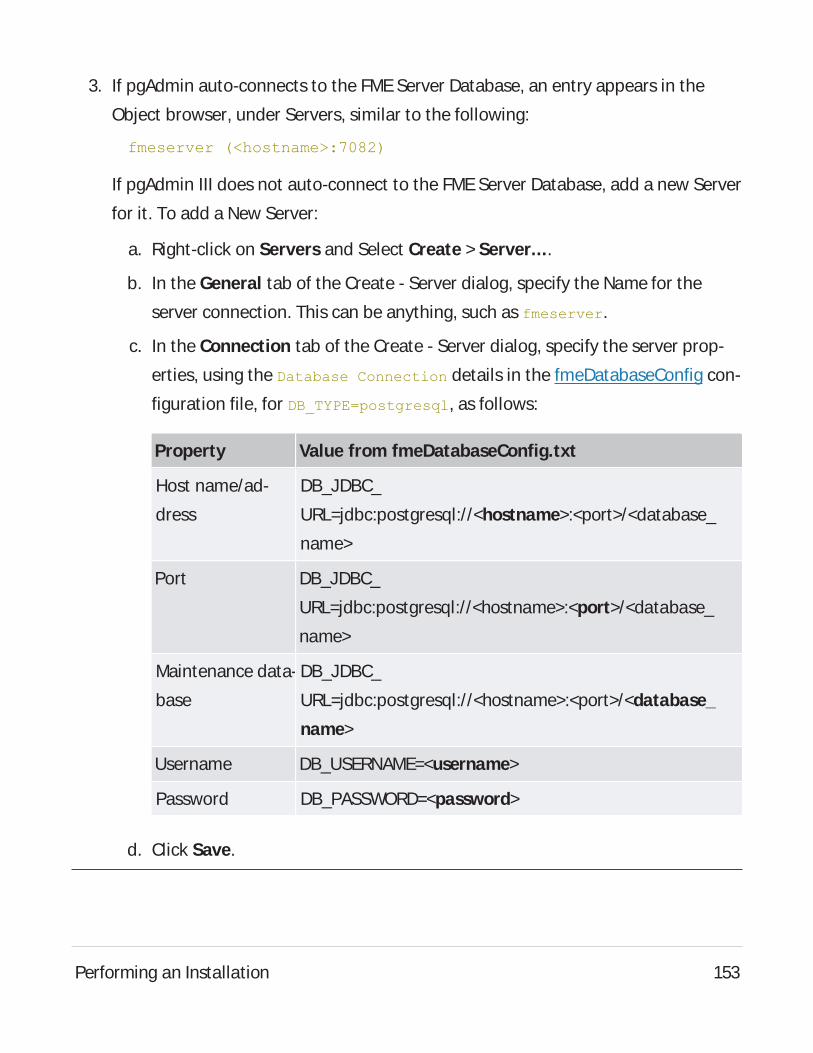
3. If pgAdmin auto-connects to the FME Server Database, an entry appears in the
Object browser, under Servers, similar to the following:
fmeserver (<hostname>:7082)
If pgAdmin III does not auto-connect to the FMEServer Database, add a new Server
for it. To add a New Server:
a. Right-click on Servers and Select Create > Server....
b. In the General tab of the Create - Server dialog, specify the Name for the
server connection. This can be anything, such as fmeserver.
c. In the Connection tab of the Create - Server dialog, specify the server prop-
erties, using the Database Connection details in the fmeDatabaseConfig con-
figuration file, for DB_TYPE=postgresql, as follows:
Property Value from fmeDatabaseConfig.txt
Host name/ad-
dress
DB_JDBC_
URL=jdbc:postgresql://<hostname>:<port>/<database_
name>
Port DB_JDBC_
URL=jdbc:postgresql://<hostname>:<port>/<database_
name>
Maintenance data-
base
DB_JDBC_
URL=jdbc:postgresql://<hostname>:<port>/<database_
name>
Username DB_USERNAME=<username>
Password DB_PASSWORD=<password>
d. Click Save.
Performing an Installation 153
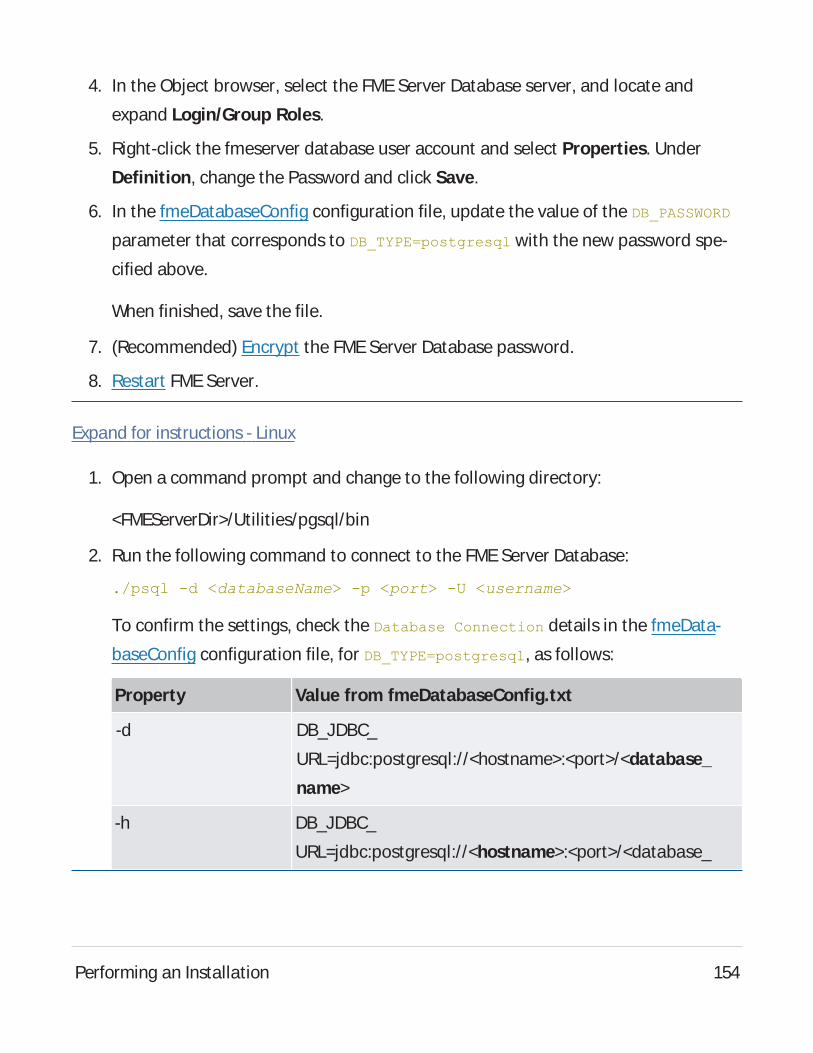
4. In the Object browser, select the FMEServer Database server, and locate and
expand Login/Group Roles.
5. Right-click the fmeserver database user account and select Properties. Under
Definition, change the Password and click Save.
6. In the fmeDatabaseConfig configuration file, update the value of the DB_PASSWORD
parameter that corresponds to DB_TYPE=postgresql with the new password spe-
cified above.
When finished, save the file.
7. (Recommended) Encrypt the FME Server Database password.
8. Restart FMEServer.
Expand for instructions - Linux
1. Open a command prompt and change to the following directory:
<FMEServerDir>/Utilities/pgsql/bin
2. Run the following command to connect to the FME Server Database:
./psql -d <databaseName> -p <port> -U <username>
To confirm the settings, check the Database Connection details in the fmeData-
baseConfig configuration file, for DB_TYPE=postgresql, as follows:
Property Value from fmeDatabaseConfig.txt
-d DB_JDBC_
URL=jdbc:postgresql://<hostname>:<port>/<database_
name>
-h DB_JDBC_
URL=jdbc:postgresql://<hostname>:<port>/<database_
Performing an Installation 154

Property Value from fmeDatabaseConfig.txt
name>
-p DB_JDBC_
URL=jdbc:postgresql://<hostname>:<port>/<database_
name>
-U DB_USERNAME=<username>
Password ( when
prompted)
DB_PASSWORD=<password>
3. Once connected, enter the following command to change the password for your
user:
\password
4. Use \q to quit psql.
5. In the the fmeDatabaseConfig configuration file, update the value of the DB_
PASSWORD parameter that corresponds to DB_TYPE=postgresql with the new pass-
word specified above, and save the file.
6. (Recommended) Encrypt the FME Server Database password.
7. Restart FMEServer.
Provide a Remote File System for the FME Server System Share
l Skill Level: Intermediate
l Estimated Time Required: 5-15 minutes
l Prerequisites:l Domain Service Account has correct permissions on network shares.
Performing an Installation 155
FMEServer System Share files, which include Repositories and Resources, are installed
in specific directories that are shared to enable access from different computers.
Create a directory for the FME Server System Share that is physically separate from the
machine on which the FME Server Core and web application server are installed. Separ-
ating the file system ensures it remains available in a fault tolerant scenario.
When providing a remote file system, keep in mind the following:
l The accounts that run the FMEServer components must have read and write per-
missions on the remote file system directory. For more information, see Directory
and Account Permissions.
l In addition to being physically separate, the file system should, by itself, be con-
figured for fault tolerance.
l When the directory is specified during installation, it must be in the form of a UNC
path. Mapped drives are not supported.
l The directory that holds the System Share must be empty, unless System Share
folders have already been created there as part of an installation involving multiple
FME Server Cores.
For information about acquiring a fault tolerant file system, consult your IT department.
Linux Only
For distributed installations on Linux, it is necessary to create a user, prior to install-
ation, on the machine that will host the installation of the FMEServer Core and Engines.
This user must be named 'fmeserver' and belong to group 'fmeserver', and be granted
permissions on the FME Server System Share. For more information, see Directory and
Account Permissions.
Example Instructions
The following example creates user 'fmeserver' in group 'fmeserver', and allows mount
/mnt/data to be writable by the newly-created user.
Performing an Installation 156
Note: The following instructions are provided as a general guideline for adding a
user and mounting a directory. Exact instructions may vary depending on the dis-
tribution and share type in your Linux configuration.
1. Run the following commands in the Linux command line:
groupadd fmeserver
useradd -m -g fmeserver fmeserver
2. Mount the FME Server System Share directory so that user 'fmeserver' has read
and write permissions. For example, to mount a Windows-based file share:
mount -v -t cifs //network/share /mnt/data -o gid=1008,uid=1008
gid and uid are the group id and user id of the user and group that were created.
These id's can be found using these commands:
id -g fmeserver
id -u fmeserver
Provide a Web Application Server
Aweb application server may be installed on the local system or on a separate machine.
FME Server supports Apache Tomcat version 9.0.x. On Windows, we recommend running
the web application server on the same version of the Java Runtime Environment as
FME Server runs. To determine this version, use a text editor to open file release in
<FMEServerDir>\FMEServer\Utilities\jre.
The following are not supported:
l Apache Tomcat version 10.x.
l Java Runtime Environment 9 or later.
Note: On Linux, you must add the following environment variable to etc/en-
vironment:
Performing an Installation 157
JAVA_HOME="/usr/lib/jvm/java-8-openjdk-amd64"
You must know the port number on which your web application server receives incom-
ing requests and the path to the directory where your web application server stores web
application .war files. (This directory is normally called webapps.)
Additionally, you must allow the necessary system accounts permission to run the web
application server. For more information, see Directory and Account Permissions.
Obtain the Installer
To obtain the applicable FMEServer installation package, visit the FMEDownloads page.
This page includes download links to release and beta installation packages for various
platforms.
To request a 60-day trial license of FMEServer, visit http://www.safe.com/fme/fme-tech-
nology/fme-server/trial-download/.
You can also contact [email protected] to get access.
What's Next?
If you are opting to install a PostgreSQL database that is included with the FME Server
installer, and do not wish to configure the FME Server Database on your own database
server, proceed to Install the FMEServer Database. Otherwise, proceed to Install the
FMEServer Core and FMEEngines.
Install the FME Server Database
Install a PostgreSQL FME Server Database on a separate machine on your network.
Note: Complete this step only if you wish to install a PostgreSQL database that is
included with the FME Server installer, and do not wish to configure the FME Server
Database on your own database server. For more information, see Provide a Data-
base Server.
Performing an Installation 158
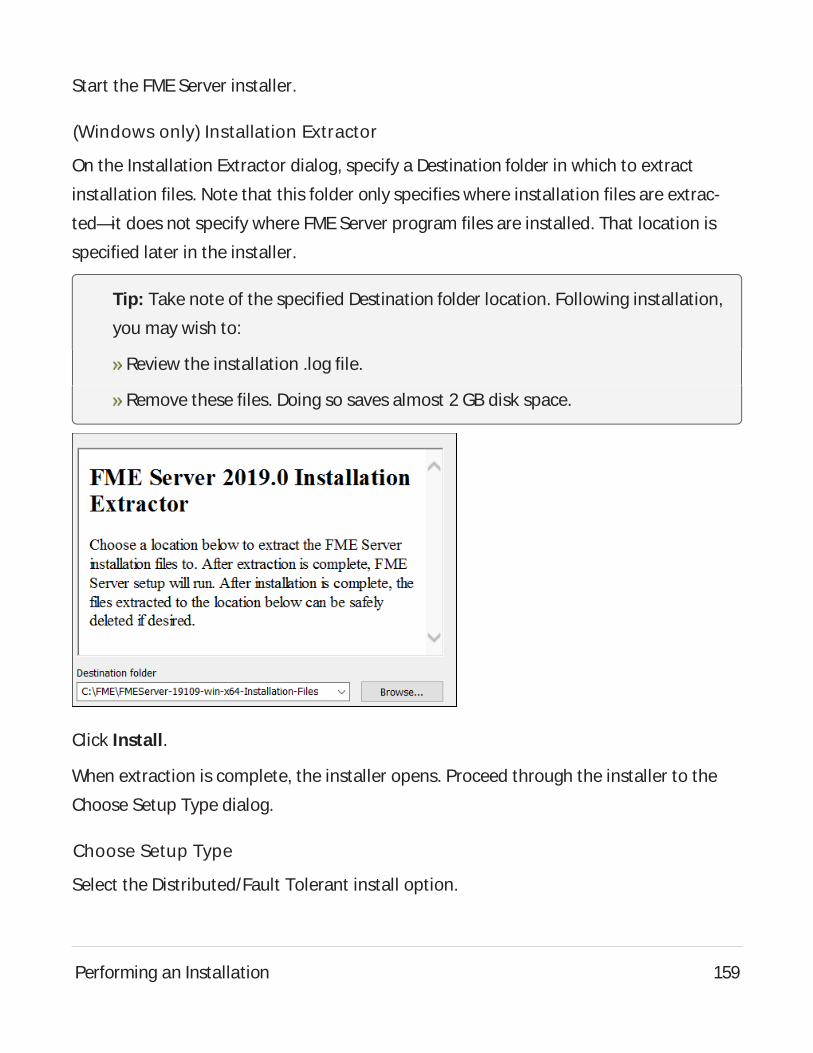
Start the FME Server installer.
(Windows only) Installation Extractor
On the Installation Extractor dialog, specify a Destination folder in which to extract
installation files. Note that this folder only specifies where installation files are extrac-
ted—it does not specify where FME Server program files are installed. That location is
specified later in the installer.
Tip: Take note of the specified Destination folder location. Following installation,
you may wish to:
Review the installation .log file.
Remove these files. Doing so saves almost 2 GB disk space.
Click Install.
When extraction is complete, the installer opens. Proceed through the installer to the
Choose Setup Type dialog.
Choose Setup Type
Select the Distributed/Fault Tolerant install option.
Performing an Installation 159
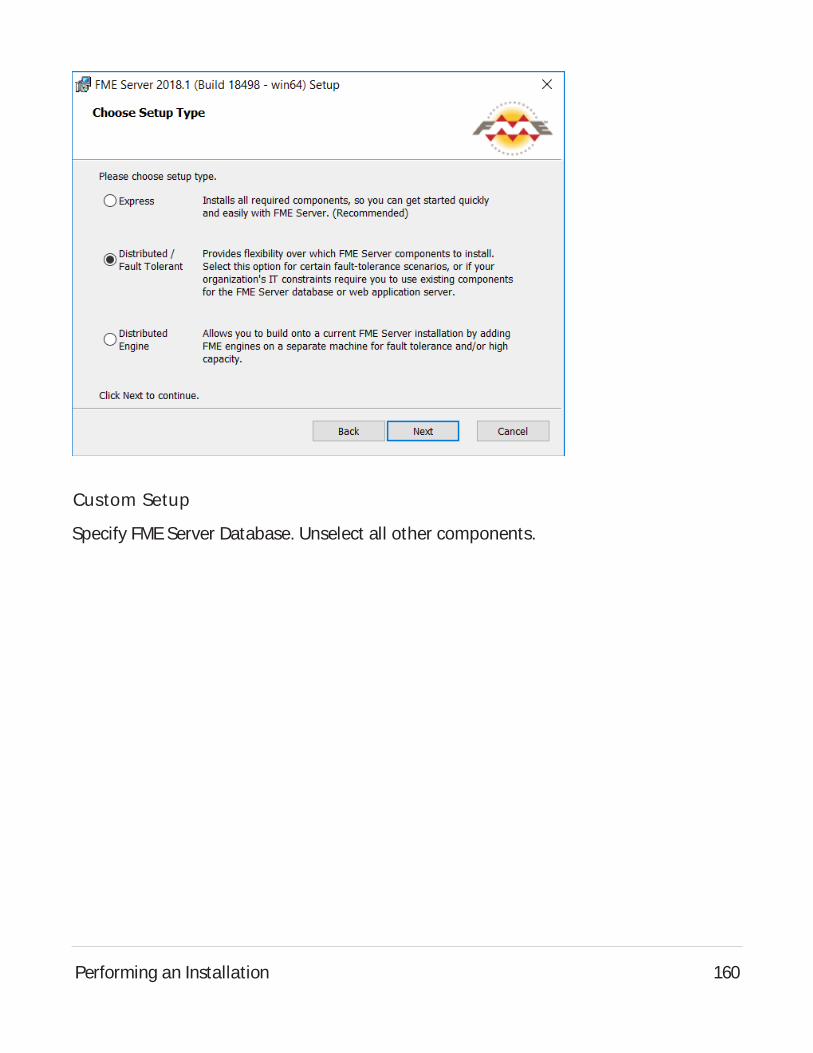
Custom Setup
Specify FME Server Database. Unselect all other components.
Performing an Installation 160

Destination Folder
Specify the installation directory for the FME Server Database.
Performing an Installation 161

Database Parameters
l Install the FME Server Database files to: Specify a directory to install the database
files.
l Port: Specify the port that the database will listen on. Port 7082 is the default.
Performing an Installation 162
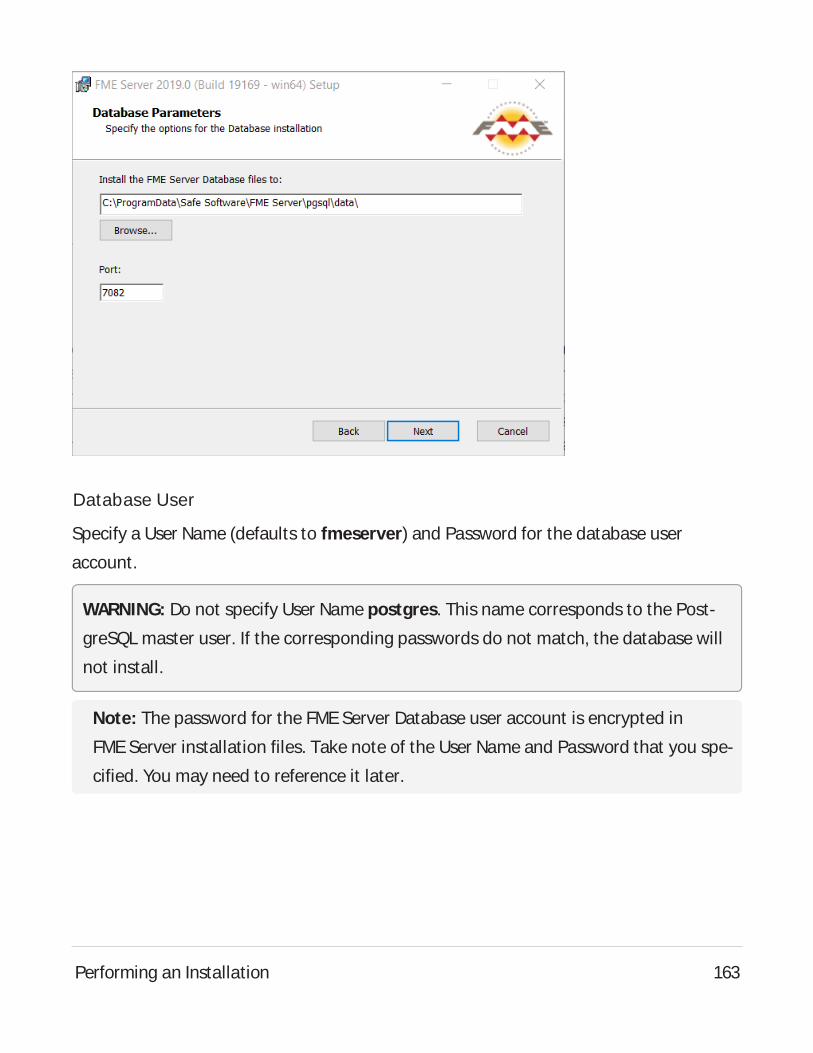
Database User
Specify a User Name (defaults to fmeserver) and Password for the database user
account.
WARNING: Do not specify User Name postgres. This name corresponds to the Post-
greSQL master user. If the corresponding passwords do not match, the database will
not install.
Note: The password for the FME Server Database user account is encrypted in
FME Server installation files. Take note of the User Name and Password that you spe-
cified. You may need to reference it later.
Performing an Installation 163

Follow the remaining dialogs to complete the installation.
What's Next?
l Install the FMEServer Core and FMEEngines
Install the FME Server Core and FME Engines
Start the FMEServer Installer.
(Windows only) Installation Extractor
On the Installation Extractor dialog, specify a Destination folder in which to extract
installation files. Note that this folder only specifies where installation files are
Performing an Installation 164

extracted—it does not specify where FME Server program files are installed. That loc-
ation is specified later in the installer.
Tip: Take note of the specified Destination folder location. Following installation,
you may wish to:
Review the installation .log file.
Remove these files. Doing so saves almost 2 GB disk space.
Click Install.
When extraction is complete, the installer opens. Proceed through the installer to the
Choose Setup Type dialog.
Choose Setup Type
Select the Distributed/Fault Tolerant install option.
Performing an Installation 165
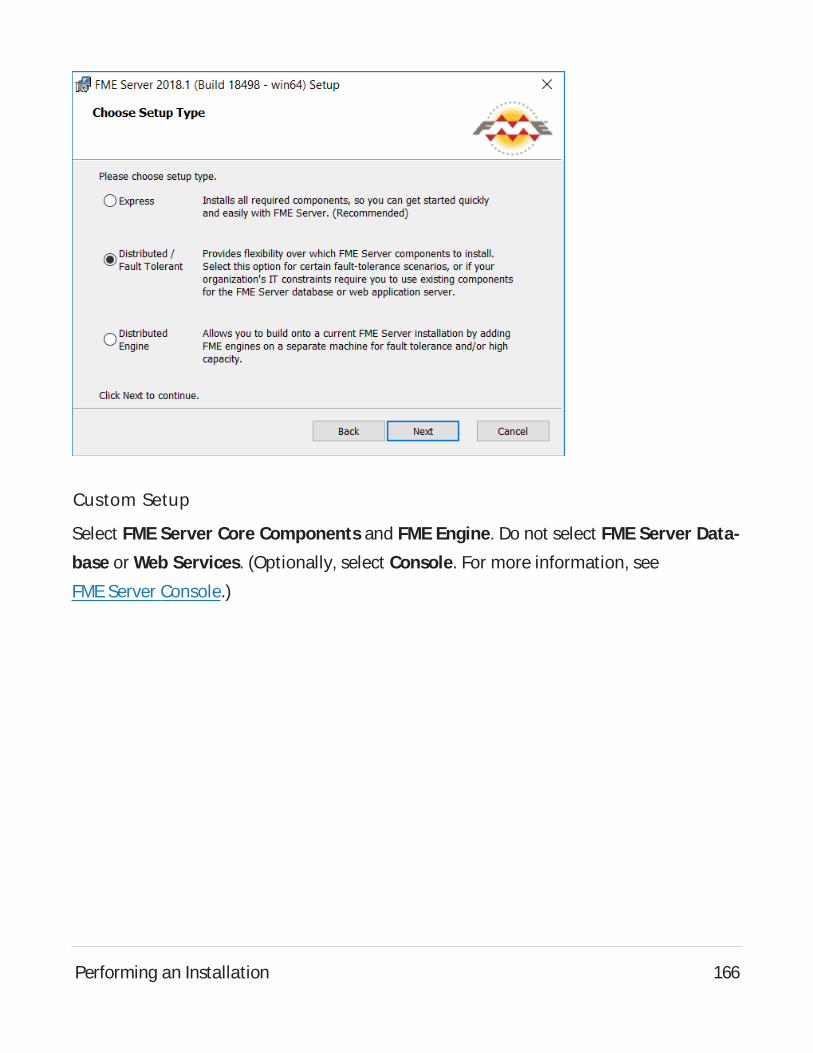
Custom Setup
Select FME Server Core Componentsand FME Engine. Do not select FME Server Data-
base or Web Services. (Optionally, select Console. For more information, see
FME Server Console.)
Performing an Installation 166
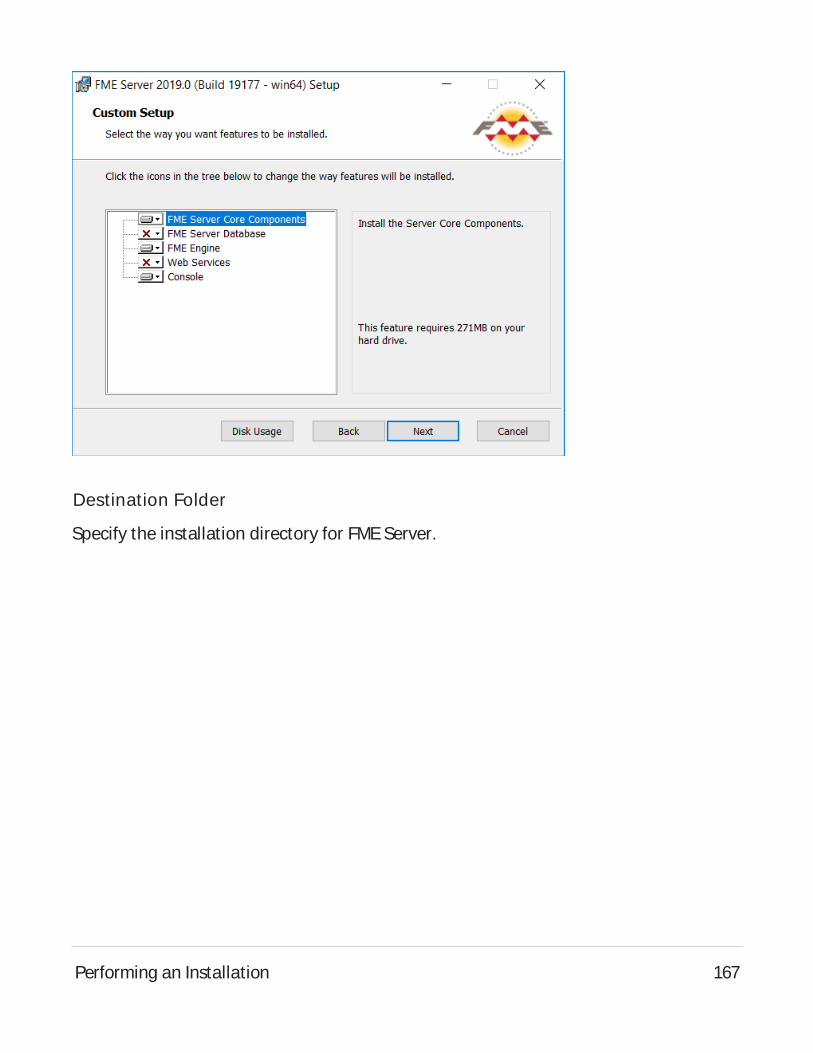
Destination Folder
Specify the installation directory for FME Server.
Performing an Installation 167
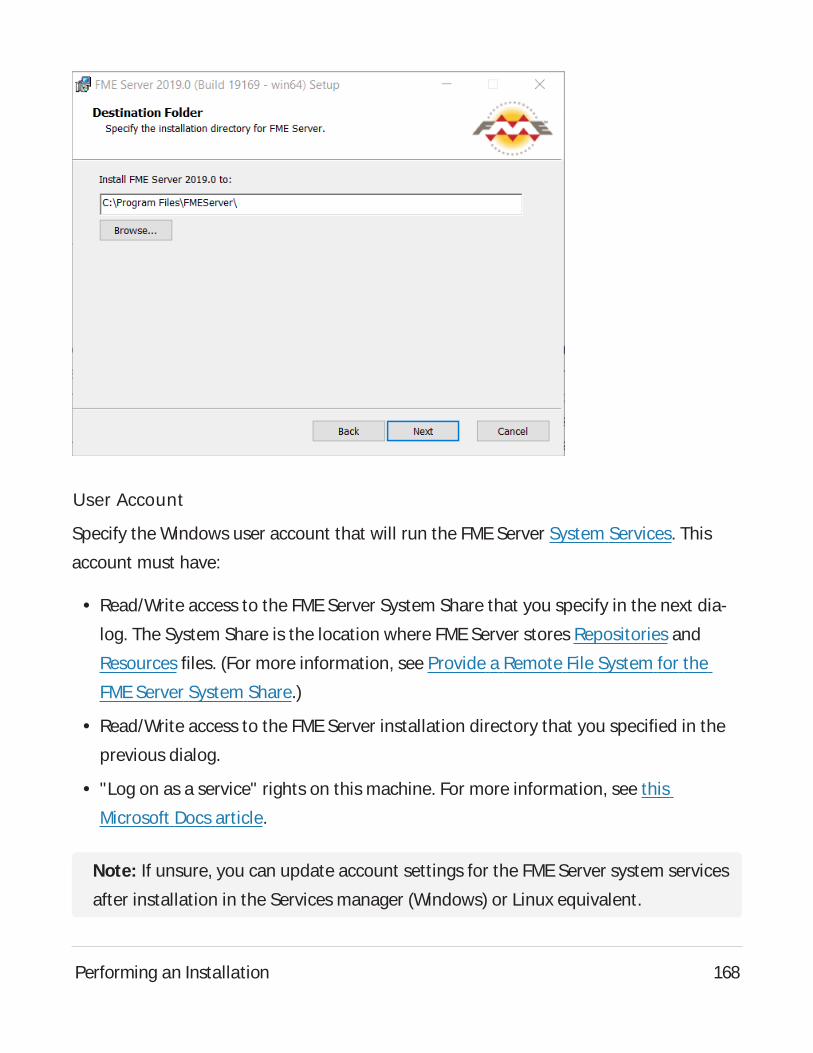
User Account
Specify the Windows user account that will run the FME Server System Services. This
account must have:
l Read/Write access to the FMEServer System Share that you specify in the next dia-
log. The System Share is the location where FME Server stores Repositories and
Resources files. (For more information, see Provide a Remote File System for the
FME Server System Share.)
l Read/Write access to the FME Server installation directory that you specified in the
previous dialog.
l "Log on as a service" rights on this machine. For more information, see this
Microsoft Docs article.
Note: If unsure, you can update account settings for the FME Server system services
after installation in the Services manager (Windows) or Linux equivalent.
Performing an Installation 168

Note: The FME Server Database service always runs under the local system account.
FME Server System Share
Specify a directory on another machine to store FMEServer System Share files, which
include Repositories and Resources. If this is a Linux installation, specify the mounted
directory. For more information, see Provide a Remote File System for the FME Server
System Share.
Tip: As a best practice, specify the full UNCpath to the FMEServer System Share,
even if it is on the same (local) machine where you are running the installer.
Note: If you are upgrading to a newer version of FME Server, make sure the spe-
cified directory is empty of files from the previous installation. Otherwise, conflicts
may occur that can produce unexpected results in performance.
Performing an Installation 169

FME Server Hostname
Specify the host that will run the FME Server Core.
Performing an Installation 170

Database Server Type
Specify the type of database for the FMEServer Database. If you installed the Post-
greSQL database included with the FME Server installer, select FME Server Database. If
you are configuring the FME Server Database on your own database server, select the
database server type: Microsoft SQL Server, Oracle, or PostgreSQL. For more inform-
ation, see Provide a Database Server.
Performing an Installation 171
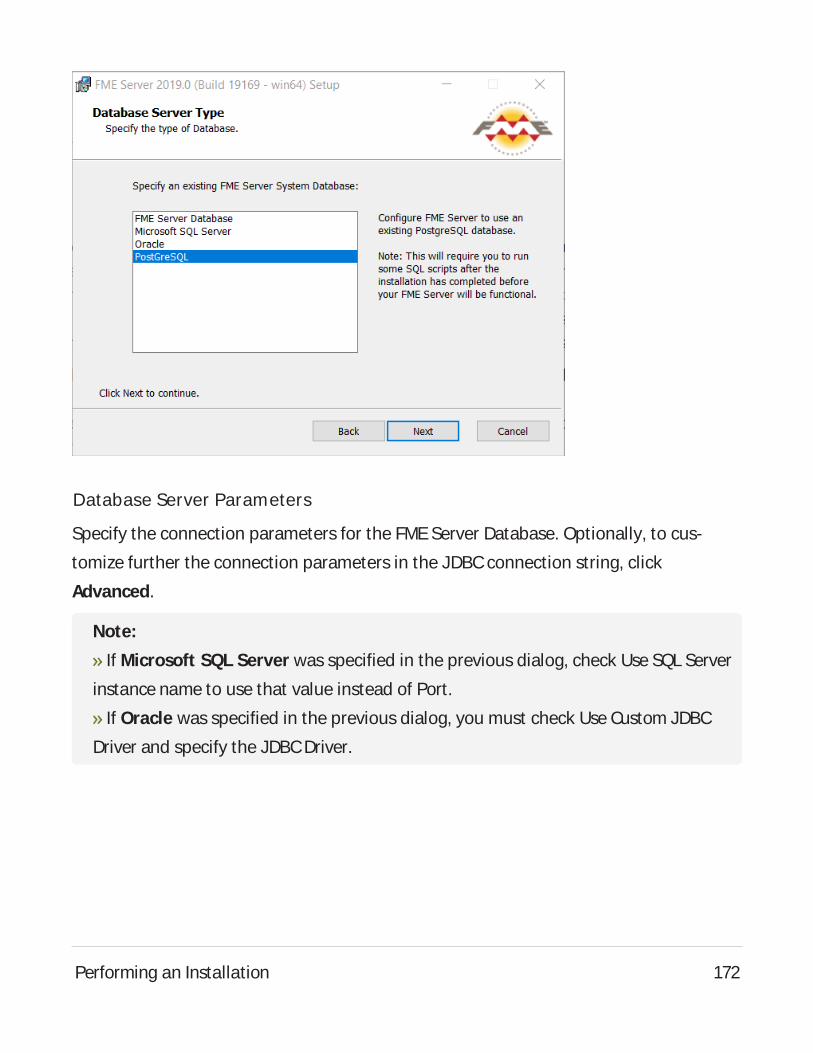
Database Server Parameters
Specify the connection parameters for the FMEServer Database. Optionally, to cus-
tomize further the connection parameters in the JDBCconnection string, click
Advanced.
Note:
If Microsoft SQL Server was specified in the previous dialog, check Use SQL Server
instance name to use that value instead of Port.
If Oracle was specified in the previous dialog, you must check Use Custom JDBC
Driver and specify the JDBCDriver.
Performing an Installation 172
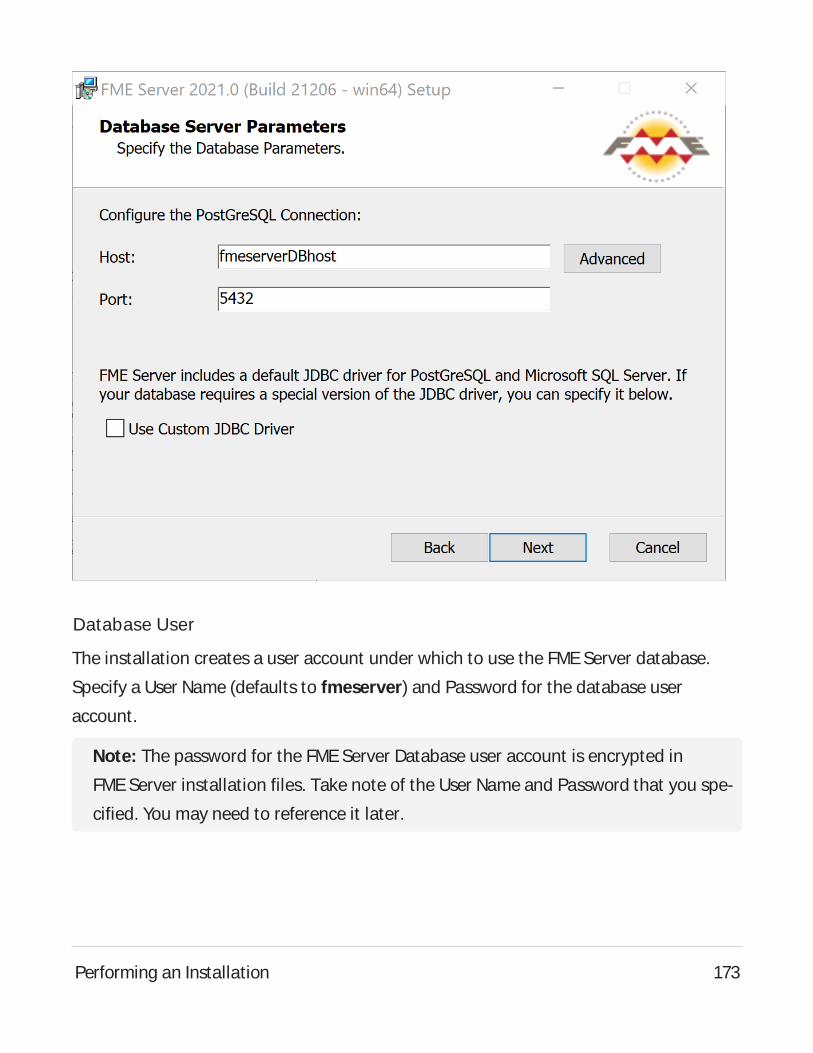
Database User
The installation creates a user account under which to use the FME Server database.
Specify a User Name (defaults to fmeserver) and Password for the database user
account.
Note: The password for the FME Server Database user account is encrypted in
FME Server installation files. Take note of the User Name and Password that you spe-
cified. You may need to reference it later.
Performing an Installation 173
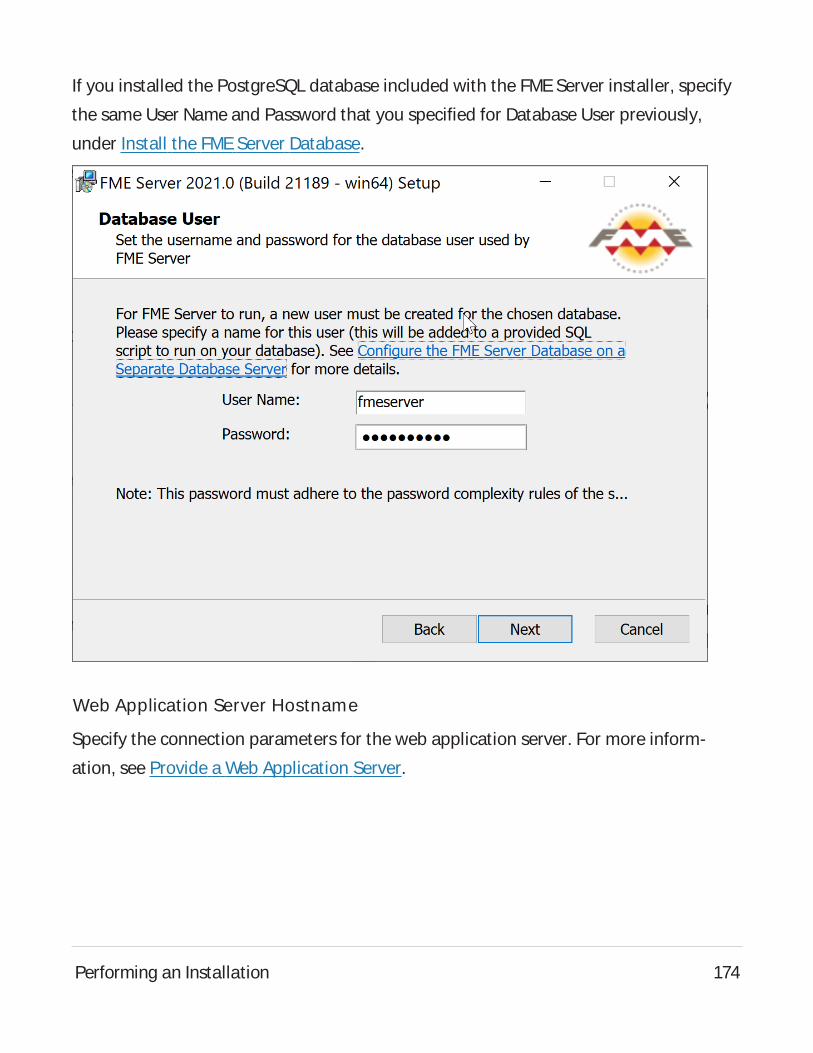
If you installed the PostgreSQL database included with the FME Server installer, specify
the same User Name and Password that you specified for Database User previously,
under Install the FMEServer Database.
Web Application Server Hostname
Specify the connection parameters for the web application server. For more inform-
ation, see Provide a Web Application Server.
Performing an Installation 174
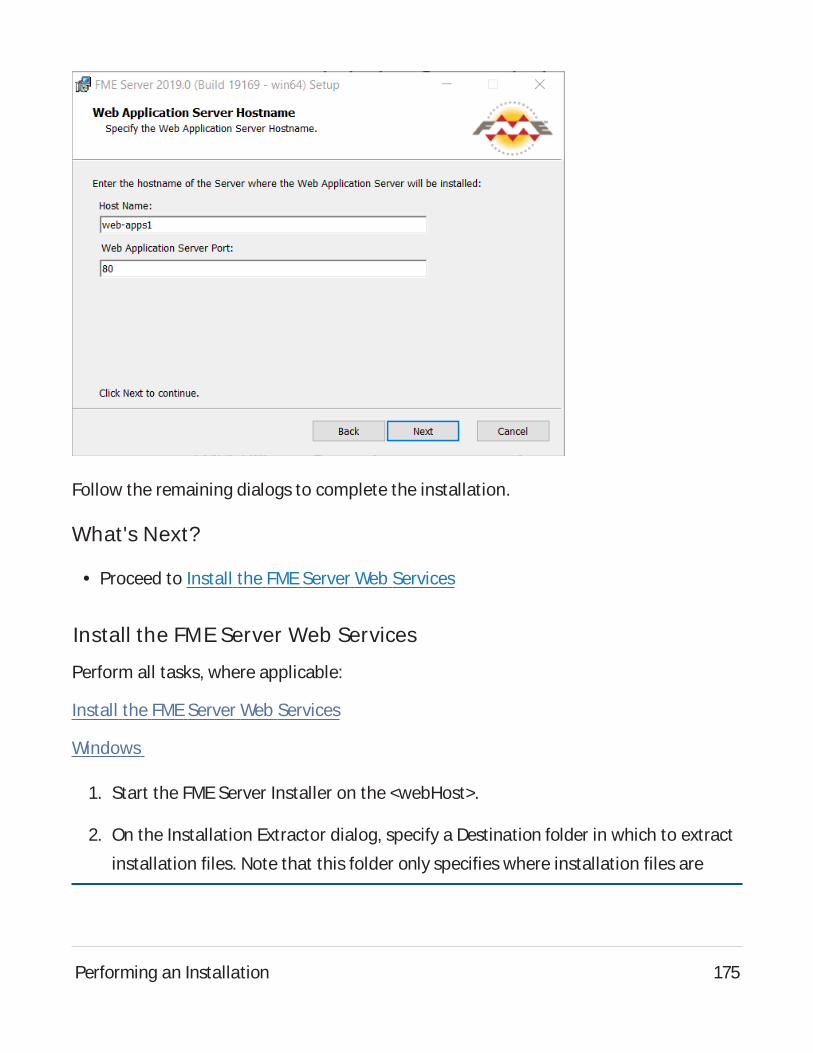
Follow the remaining dialogs to complete the installation.
What's Next?
l Proceed to Install the FMEServer Web Services
Install the FME Server Web Services
Perform all tasks, where applicable:
Install the FMEServer Web Services
Windows
1. Start the FMEServer Installer on the <webHost>.
2. On the Installation Extractor dialog, specify a Destination folder in which to extract
installation files. Note that this folder only specifies where installation files are
Performing an Installation 175
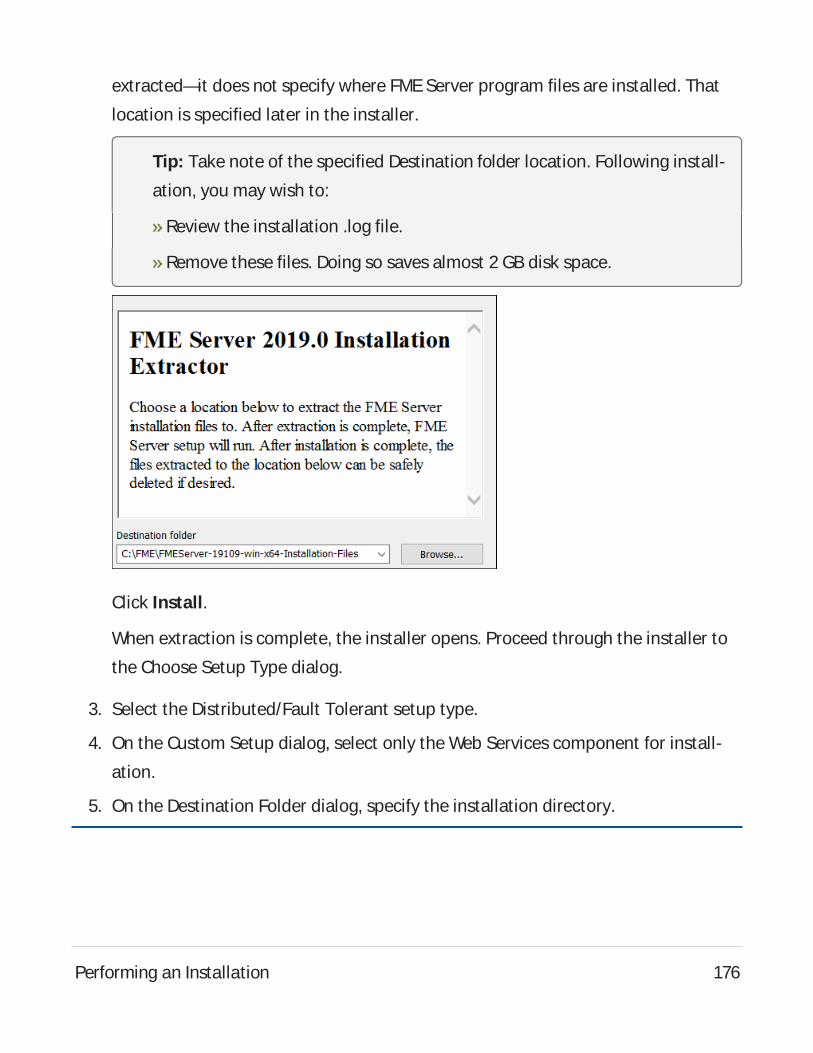
extracted—it does not specify where FME Server program files are installed. That
location is specified later in the installer.
Tip: Take note of the specified Destination folder location. Following install-
ation, you may wish to:
Review the installation .log file.
Remove these files. Doing so saves almost 2 GB disk space.
Click Install.
When extraction is complete, the installer opens. Proceed through the installer to
the Choose Setup Type dialog.
3. Select the Distributed/Fault Tolerant setup type.
4. On the Custom Setup dialog, select only the Web Services component for install-
ation.
5. On the Destination Folder dialog, specify the installation directory.
Performing an Installation 176
6. On the User Account dialog, specify the Windows user account that will run the
FME Server System Services. This account must have:l Read/Write access to the FMEServer System Share that you specify in the next
dialog. The System Share is the location where FME Server stores Repositories
and Resources files. (For more information, see Provide a Remote File System
for the FME Server System Share.)
l Read/Write access to the FME Server installation directory that you specified in
the previous dialog.
l "Log on as a service" rights on this machine. For more information, see this
Microsoft Docs article.
Note: If unsure, you can update account settings for the FME Server sys-
tem services after installation in the Services manager (Windows) or Linux
equivalent.
7. On the Existing FME Server System Share dialog, specify the UNCpath to the
remote file system for the FME Server System Share.
Tip: As a best practice, specify the full UNCpath to the FMEServer System
Share, even if it is on the same (local) machine where you are running the
installer.
8. On the FME Server Hostname dialog, enter the host name of the computer on
which FME Server is installed.
9. On the Web Application Server dialog, specify the web application server. If already
provided, it is recommended that you shut down the service during installation.
Performing an Installation 177
10. On the Web Application Server Port dialog, specify the port to use for com-
munication with the web application server. Port 80 is the recommended default. If
this port is in use, port 8080 is recommended.
Note: Common applications that may be using port 80 include Skype and Inter-
net Information Services (IIS). Either turn off these services, or select a dif-
ferent port, such as 8080.
Linux
1. Start the FMEServer Installer.
2. Select the Distributed (Custom) install option.
3. At the feature selection dialog, select only the Web Services component.
The installer prompts you for the name of the FMEServer Host.
4. Enter the host name of the computer on which the FME Server Core is installed.
5. The installer prompts you for the path to the remote file system for the FME Server
System Share. Enter the path to the mounted directory that was specified in
Provide a Remote File System for the FME Server System Share.
6. The installer prompts you to specify the web application server. If already
provided, it is recommended that you shut down the service during installation.
Port 8080 is recommended.
7. Manually start FMEServer and configure it to start automatically. See Working with
the FMEServer System Services.
8. In order for the Data Download and Data Streaming web services to reference the
correct web host location when outputting results that are returned from an FME
Engine, you must manually change this location in your FMEEngine configuration
files:
Performing an Installation 178
a. Locate your FMEEngine configuration files, under <FMEServerDir>\Server-
\fmeEngineConfig*.txt
b. For each file, under the SUB_SECTION for FILE_DOWNLOAD_SERVICEand
STREAM_DOWNLOAD_SERVICE, modify the SUCCESS_RESPONSEdirective as
follows:
From:
SUCCESS_RESPONSE 0:Translation Successful|OutputLocation=!FME_
AUTO_DIR_NAME!
To:
SUCCESS_RESPONSE 0:Translation
Successful|OutputLocation=<webHost>/DefaultResults/!FME_AUTO_DIR_
NAME_SIMPLE!
Following the installation on <webHost>, the FMEServer Web Application Server auto-
matically starts. If you used your own web application server, you can restart that ser-
vice.
Configure Firewall Settings
The FMEServer Web Services and other clients communicate with the FMEServer Core
over TCP/IP. Requests are sent to the FMEServer Core over port 7071. Result messages
are returned to clients over a randomly assigned port created by the FMEServer Core.
Therefore, be sure to configure any firewall settings on the <webHost> with a rule to
allow for full communication with the <coreHost> machines.
(Oracle WebLogic only) Disable WebLogic Authentication
If you are using an Oracle WebLogic server, you must disable WebLogic authentication.
This step is necessary to prevent WebLogic from intercepting login requests, which inter-
feres with FMEServer authentication.
Performing an Installation 179

1. Locate and open the following configuration file in your WebLogic installation:
<WebLogic_install_dir>/user_projects/domains/<your_domain>/con-
fig/config.xml
2. Add (or change) the following lines before the security configuration closing tag
</security-configuration>:
<enforce-valid-basic-auth-credentials>
false
</enforce-valid-basic-auth-credentials>
3. Save and close the file.
What's Next?
If you are configuring the FME Server Database on your own database server, and did
not install the PostgreSQL database that is included with the FME Server installer, pro-
ceed to Configure the FMEServer Database on a Separate Database Server. Otherwise,
proceed to Log on to the Web User Interface.
Configure the FME Server Database on a Separate Database Server
Note: Complete this step only if you are configuring the FME Server Database on
your own database server, and did not install the PostgreSQL database that is
included with the FME Server installer. For more information, see Provide a Data-
base Server.
To configure FMEServer to use a separate database server, follow the steps below. You
can configure FME Server with a Microsoft SQL Server, PostgreSQL, or Oracle database,
running on either Windows or Linux.
1. Database Configuration: Set up FMEServer database tables and database users
with permissions to access the FMEServer database.
Performing an Installation 180
Note: The specific way to set up database tables and user permissions on vari-
ous production databases may differ depending on the available database
tools and intended target platform.
Database Configuration - Microsoft SQL Server
It is assumed that SQL Server is installed.
One notation used is <FMEServerDir>, which is the installation directory of FME
Server. In Windows, this is typically C:\Program Files\FMEServer.
SQL scripts are provided to help with SQL Server database configuration. These
SQL scripts are located in the <FMEServerDir>\Server\database\sqlserver\ dir-
ectory of the FME Server Core machine.
Note: This directory refers to the machine on which the FMEServer Core is
installed (not the machine on which the database server is installed). To run
these scripts, you must transfer this directory to the database machine, or ref-
erence it through a UNCpath.
If you are upgrading, you should back up any job history you want to keep.
Instructions Using SQL Server Management Studio
1. Open the SQL Server Management Studio and connect to the SQL Server data-
base engine.
2. Open sqlserver_createDB.sql and run the script against the fmeserver
database, as shown below:
Performing an Installation 181

Performing an Installation 182

3. On the Object Explorer pane, expand the Security folder, right-click Login,
and then select New Login:
4. On the Login – New page, click General to open the page shown in the
example below.
Performing an Installation 183
l At the Login name field, enter fmeserver.
l Make sure the option button is active for SQL Server authentication.
l In the Password field enter the password that was specified for the data-
base during the FME Server installation, and in the Confirm password field
enter the same password again.
l Make sure the Enforce password policy is active. If not, click the checkbox
to activate it.
l If required, click the checkbox for Enforce password expiration to clear it.
l At the Default database field enter fmeserver.
Performing an Installation 184

5. On the same Login – New page, click User Mapping to open the page shown
in the next figure.
l At the Users mapped to this login location, in the Map column click the
checkbox to activate it and map the login name to the fmeserver
Performing an Installation 185

database.
l At the Database role membership for location, notice that the fmeserver
database is specified and check db_owner to assign that role to this data-
base.
l Click OK to close this page.
Performing an Installation 186

Instructions Without SQL Server Management Studio
1. Connect to the SQL Server database engine and run sqlserver_cre-
ateDB.sql.
2. Open sqlserver_createUser.sql.
Performing an Installation 187

3. Look for the line that begins:
CREATE LOGIN fmeserver WITH PASSWORD =
Replace <<DATABASE_PASSWORD>> with the password specified during the
installation.
4. Run the script.
Note: If your SQL Server uses an Always On availability group, you must also
configure the MultisubnetFailover property of the DB_JDBC_URL parameter
in the fmeDatabaseConfig.txt configuration file. For more information, see the
SQL Server examples under Configure the Database Connection.
Database Configuration - Oracle
Before proceeding, you must provide the following:
l Install an Oracle database server.
l Obtain the Oracle Database JDBCdriver. For more information, see
https://www.oracle.com/technetwork/database/application-devel-
opment/jdbc/downloads/index.html.
<FMEServerDir> is the installation directory of FMEServer. In Windows, this is typ-
ically C:\Program Files\FMEServer.
If you are upgrading, you should back up any job history you want to keep.
Windows
This section describes how to configure an Oracle database. You can configure the
Oracle database from other Oracle database tools depending on your personal
preference.
For an Oracle database configuration, various SQL scripts are provided to help.
Performing an Installation 188

These SQL scripts are located in the <FMEServerDir>\Server\database\oracle dir-
ectory of the FME Server Core machine.
Note: This directory refers to the machine on which the FMEServer Core is
installed (not the machine on which the database server is installed). To run
these scripts, you must transfer this directory to the database machine, or ref-
erence it through a UNCpath.
l oracle_createUser.sql – This script creates the FMEServer database user,
and grants all required permissions to the FMEServer database user. The pass-
word appears as <<DATABASE_PASSWORD>>. Before running this script, replace
<<DATABASE_PASSWORD>> with the password that was specified for the database
during the FME Server installation.
l oracle_createDB.sql – This script creates all FMEServer related database
packages, tables, indexes, views, and triggers.
l oracle_dropUser.sql – This script drops the FMEServer database user and
the database packages, tables, indexes, views, and triggers associated with the
FMEServer database user.
Using the Command Prompt
To use the command prompt to configure the database, follow these instructions:
1. Install Oracle SQL*Plus, if you haven’t already.
2. Open Oracle SQL*Plus and log on as a user with adequate privileges, such as
SYSDBA.
In this example, the following parameters were used and entered:
l User: SYSASSYSDBA
l Password: fmeserver
Performing an Installation 189

l String: XX-ORACLE11G:1521/ORCL ASSYSDBA
3. Create an FMEServer database user as follows:
a. In oracle_createUser.sql, replace <<DATABASE_PASSWORD>>with the
password that was specified for the database during the FMEServer
installation.
b. From the SQL prompt, run the oracle_createUser.sql script by enter-
ing the following command:
@”<FMEServerDir>\Server\database\oracle\oracle_cre-
ateUser.sql”
Performing an Installation 190

The default TABLESPACEis the Oracle DB configured default. If the cre-
ated user doesn’t have read/write permissions on the default
TABLESPACE, change the default TABLESPACEor create an appropriate
TABLESPACE.
This command creates a TABLESPACEon the Oracle DB server called
FMESERVERshown in the following example:
CREATE SMALLFILE TABLESPACE FMESERVER DATAFILE
'E:\ORADATA\FMESERVER01.DBF' SIZE 100000K REUSE
AUTOEXTEND ON NEXT 2048K MAXSIZE 1024M LOGGING EXTENT
MANAGEMENT LOCAL SEGMENT SPACE MANAGEMENT AUTO DEFAULT
NOCOMPRESS;
By default this command uses the TABLESPACE“FMESERVER” as shown
in the following example:
Performing an Installation 191
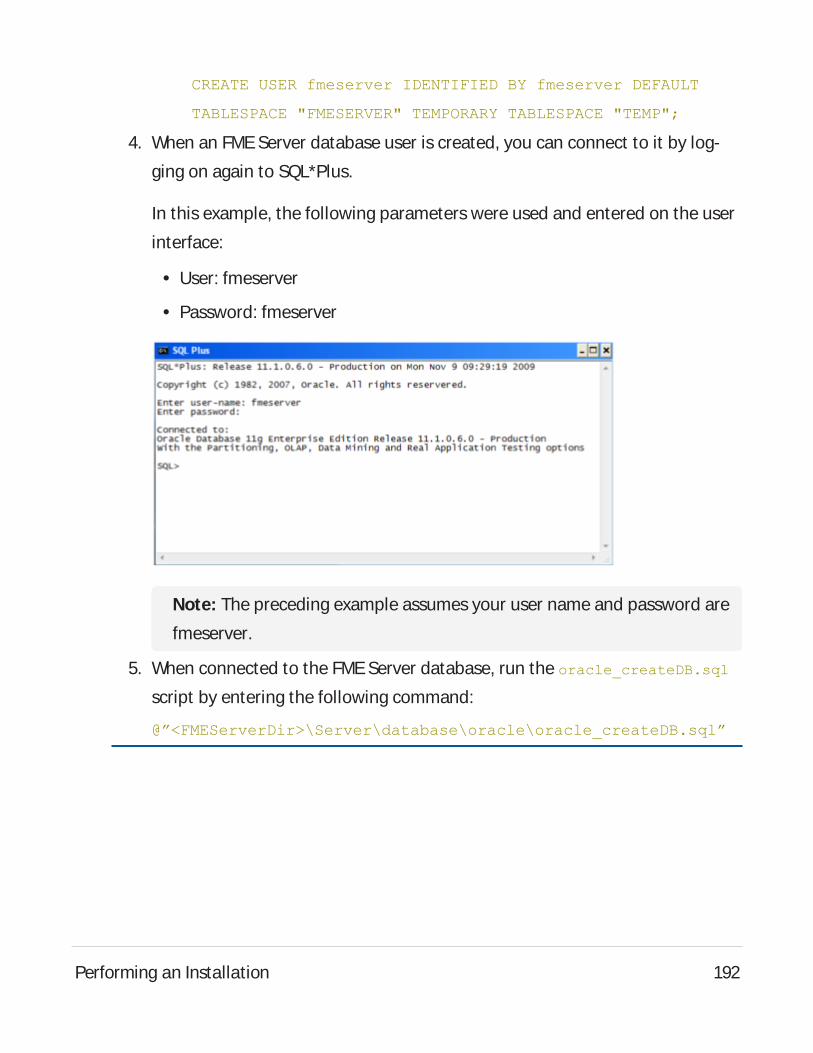
CREATE USER fmeserver IDENTIFIED BY fmeserver DEFAULT
TABLESPACE "FMESERVER" TEMPORARY TABLESPACE "TEMP";
4. When an FMEServer database user is created, you can connect to it by log-
ging on again to SQL*Plus.
In this example, the following parameters were used and entered on the user
interface:
l User: fmeserver
l Password: fmeserver
Note: The preceding example assumes your user name and password are
fmeserver.
5. When connected to the FMEServer database, run the oracle_createDB.sql
script by entering the following command:
@”<FMEServerDir>\Server\database\oracle\oracle_createDB.sql”
Performing an Installation 192
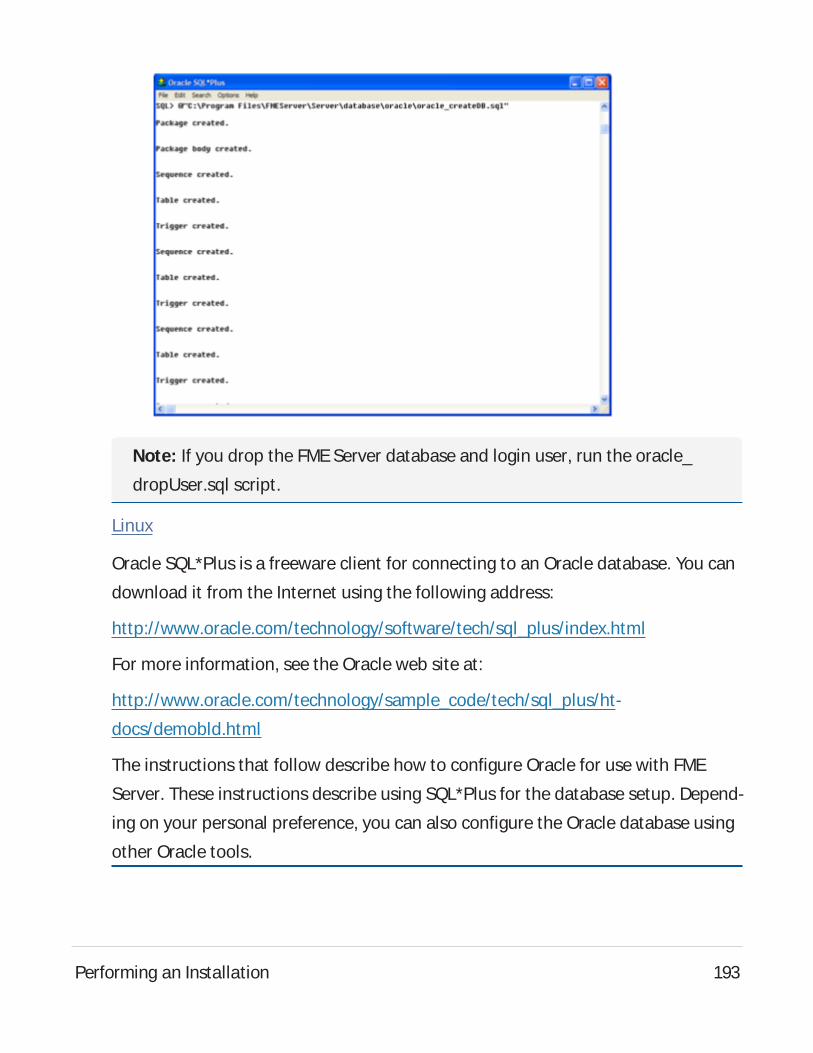
Note: If you drop the FMEServer database and login user, run the oracle_
dropUser.sql script.
Linux
Oracle SQL*Plus is a freeware client for connecting to an Oracle database. You can
download it from the Internet using the following address:
http://www.oracle.com/technology/software/tech/sql_plus/index.html
For more information, see the Oracle web site at:
http://www.oracle.com/technology/sample_code/tech/sql_plus/ht-
docs/demobld.html
The instructions that follow describe how to configure Oracle for use with FME
Server. These instructions describe using SQL*Plus for the database setup. Depend-
ing on your personal preference, you can also configure the Oracle database using
other Oracle tools.
Performing an Installation 193

For Oracle configurations, various SQL scripts are provided to help with Oracle
database configuration. These SQL scripts are located in the
<FMEServerDir>/Server/database oracle/ directory of the FME Server Core
machine.
Note: This directory refers to the machine on which the FMEServer Core is
installed (not the machine on which the database server is installed). To run
these scripts, you must transfer this directory to the database machine, or ref-
erence it through a UNCpath.
l oracle_createUser.sql – This script creates the FMEServer database user,
and grants all required permissions to the FMEServer database user. The pass-
word appears as <<DATABASE_PASSWORD>>. Before running this script, replace
<<DATABASE_PASSWORD>> with the password that was specified for the database
during the FME Server installation.
l oracle_createDB.sql – This script creates all FMEServer related database
packages, tables, indexes, views, and triggers.
l oracle_dropUser.sql – This script drops the FMEServer database user and
the database packages, tables, indexes, views, and triggers associated with the
FMEServer database user.
Using the Command Prompt
To use the command prompt to configure the database, follow these instructions:
1. Install the Oracle Client Tools, which includes SQL*Plus, if you haven’t
already.
2. Run sqlplus and log on as a user with adequate privileges, such as SYSDBA.
For example:
Performing an Installation 194

sqlplus SYS/<password>@<Host>:<Port>/<service> AS SYSDBA
3. Create the FMEServer database user:
a. In a text editor, open the oracle_creatorUser.sql script and update
the password <<DATABASE_PASSWORD>> to the one specified during the
FMEServer installation.
b. From the SQL prompt, run the oracle_createUser.sql script by entering
the following command:
@”<FMEServerDir>/Server/database/oracle/oracle_cre-
ateUser.sql”
The default TABLESPACEis the Oracle DB configured default. If the cre-
ated user doesn’t have read/write permissions on the default
TABLESPACE, you need to change the default TABLESPACEor create an
appropriate TABLESPACE.
This command creates a TABLESPACEon the Oracle DB server called
FMESERVERshown in the following example:
CREATE SMALLFILE TABLESPACE FMESERVER DATAFILE
'/ORADATA/FMESERVER01.DBF' SIZE 100000K REUSE AUTOEXTEND
ON NEXT 2048K MAXSIZE 1024M LOGGING EXTENT MANAGEMENT
LOCAL SEGMENT SPACE MANAGEMENT AUTO DEFAULT NOCOMPRESS;
By default this command uses the TABLESPACE“FMESERVER” shown in
this example:
CREATE USER fmeserver IDENTIFIED BY fmeserver DEFAULT
TABLESPACE "FMESERVER" TEMPORARY TABLESPACE "TEMP";
Performing an Installation 195
4. When an FMEServer database user has been created, you can connect to it by
logging on again to SQL*Plus or by entering the following command:
CONNECT <UserName>/<Password>@<Host>:<Port>/<service>;
5. When connected to the FMEServer database, run the oracle_createDB.sql
script by entering the following command:
@”<FMEServerDir>/Server/database/oracle/oracle_createDB.sql”
Database Configuration - PostgreSQL
PostgreSQL is an open source database that can be downloaded from the Internet.
For more information, see the PostgreSQL web site at:
http://www.postgresql.com
It’s assumed that PostgreSQL is already installed .
One notation used is <FMEServerDir>, which is the installation directory of FME
Server. In Windows, this is typically C:\Program Files\FMEServer.
It’s also assumed that you have JRE5 or higher and PostgreSQL database installed
before you proceed further. If you want to use the JDBCdriver, there are several
steps to perform.
If you are upgrading, you should back up any job history you want to keep.
Windows
This section describes how to configure a PostgreSQL database. You can configure
this database from other PostgreSQL database tools, depending on your personal
preference.
For a PostgreSQL database configuration, various SQL scripts are provided to assist
you. These SQL scripts are located in the following directory:
<FMEServerDir>\Server\database\postgresql
Performing an Installation 196
Note: This directory refers to the machine on which the FMEServer Core is
installed (not the machine on which the database server is installed). To run
these scripts, you must transfer this directory to the database machine, or ref-
erence it through a UNCpath.
l postgresql_createUser.sql – This script creates the FMEServer database
user and password that you specified during installation, and grants all
required permissions to this user. The password appears as <<DATABASE_
PASSWORD>>. Before running this script, replace <<DATABASE_PASSWORD>> with
the password that was specified for the database during the FME Server install-
ation.
l postgresql_createDB.sql – This script creates the FMEServer database.
l postgresql_createSchema.sql – This script creates all FMEServer related
tables, indexes, views, and triggers.
l postgresql_dropUser.sql – This script drops the FMEServer database user.
l postgresql_dropDB.sql – This script drops the FMEServer database.
Using the Command Prompt
To use the command prompt to configure the database, follow these instructions:
1. Install PostgreSQL SQL shell (psql) if you haven’t done so already.
2. Open psql and log on as a user with the appropriate privileges:
Performing an Installation 197

3. Create an FMEServer database user as follows:
a. Open postgresql_createUser.sql in a text editor, and replace
<<DATABASE_PASSWORD>> with the password specified during the FME
Server installation.
b. From the SQL prompt, run the postgresql_createUser.sql script by
entering the following command:
\i '<FMEServerDIR>/Server/database/postgresql/postgresql_
createUser.sql'
By default, the provided SQL script creates the FMEServer database
Performing an Installation 198

user and password that you specified during installation:
4. Create an FMEServer database.
From the SQL prompt, run the postgresql_createDB.sql script by entering
the following command:
\i '<FMEServerDIR>/Server/database/postgresql/postgresql_cre-
ateDB.sql'
By default, the provided SQL script creates an FMEServer database named
fmeserver and grants all privileges on the database to the user.
Performing an Installation 199
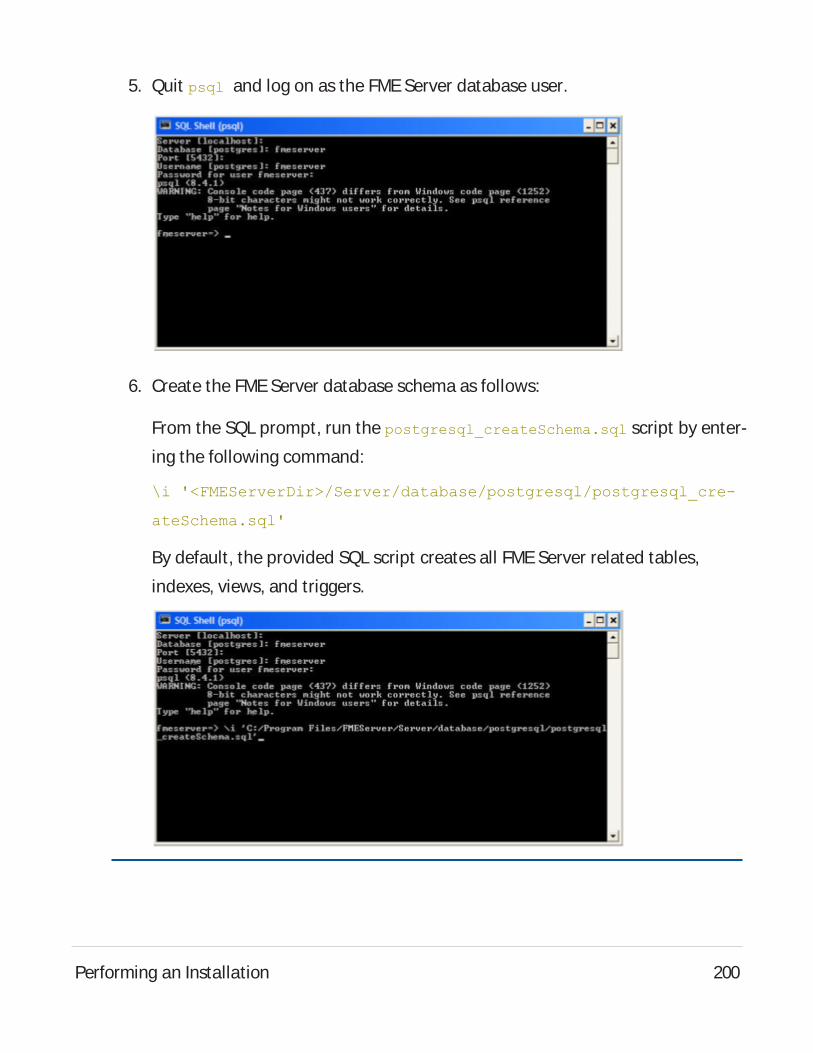
5. Quit psql and log on as the FMEServer database user.
6. Create the FMEServer database schema as follows:
From the SQL prompt, run the postgresql_createSchema.sql script by enter-
ing the following command:
\i '<FMEServerDir>/Server/database/postgresql/postgresql_cre-
ateSchema.sql'
By default, the provided SQL script creates all FMEServer related tables,
indexes, views, and triggers.
Performing an Installation 200
Linux
This section describes configuring PostgreSQL from both the command prompt
and a user interface, such as the PostgreSQL Query Browser and the PostgreSQL
Administrator.
For PostgreSQL configurations, various SQL scripts are provided to help with Post-
greSQL database configuration. These SQL scripts are located in the <FMEServer-
Dir>/Server/database/postgresql/ directory of the FME Server Core machine.
Note: This directory refers to the machine on which the FMEServer Core is
installed (not the machine on which the database server is installed). To run
these scripts, you must transfer this directory to the database machine, or ref-
erence it through a UNCpath.
l postgresql_createUser.sql – This script creates the FMEServer database
user and password that you specified during installation, and grants all
required permissions to the FMEServer database user. The password appears
as <<DATABASE_PASSWORD>>. Before running this script, replace <<DATABASE_
PASSWORD>> with the password that was specified for the database during the
FME Server installation.
Note: The password is encrypted and appears in the script as <<DATABASE_
PASSWORD>>.
l postgresql_createDB.sql – This script drops the FMEServer database and
creates a new one with the required FMEServer tables. By default this data-
base is named fmeserver. Be careful when running this script because it drops
the existing FMEServer database.
l postgresql_createSchema.sql – This script creates all FMEServer related
tables, indexes, views, and triggers.
Performing an Installation 201

Note: This script must be run as user fmeserver.
l postgresql_dropDB.sql – This script drops the existing FMEServer database,
which is named fmeserver by default.
l postgresql_dropUser.sql – This script drops the FMEServer database user.
Using the Command Prompt
To use the command prompt to configure the database, follow these instructions:
1. Install PostgreSQL Server if you haven’t already.
2. Open a command prompt and change to the following directory, which con-
tains the PostgreSQL SQL scripts:
<FMEServerDir>/Server/database/postgresql/
3. Open postgresql_createUser.sql in a text editor, and replace <<DATABASE_
PASSWORD>> with the password specified during the FMEServer installation.
4. Run the postgresql program with the postgresql_createUser.sql script:psql -d postgres -h <hostname> -p <port> -f postgresql_cre-
ateUser.sql
5. Run the postgresql program with the postgresql_createDB.sql script:psql -d postgres -h <hostname> -p <port> -f postgresql_cre-
ateDB.sql
6. Run the postgresql program with the postgresql_createSchema.sql script, as
the user you specified during installation:
psql -U <username> -d fmeserver -h <hostname> -p <port> -f
postgresql_createSchema.sql
Performing an Installation 202
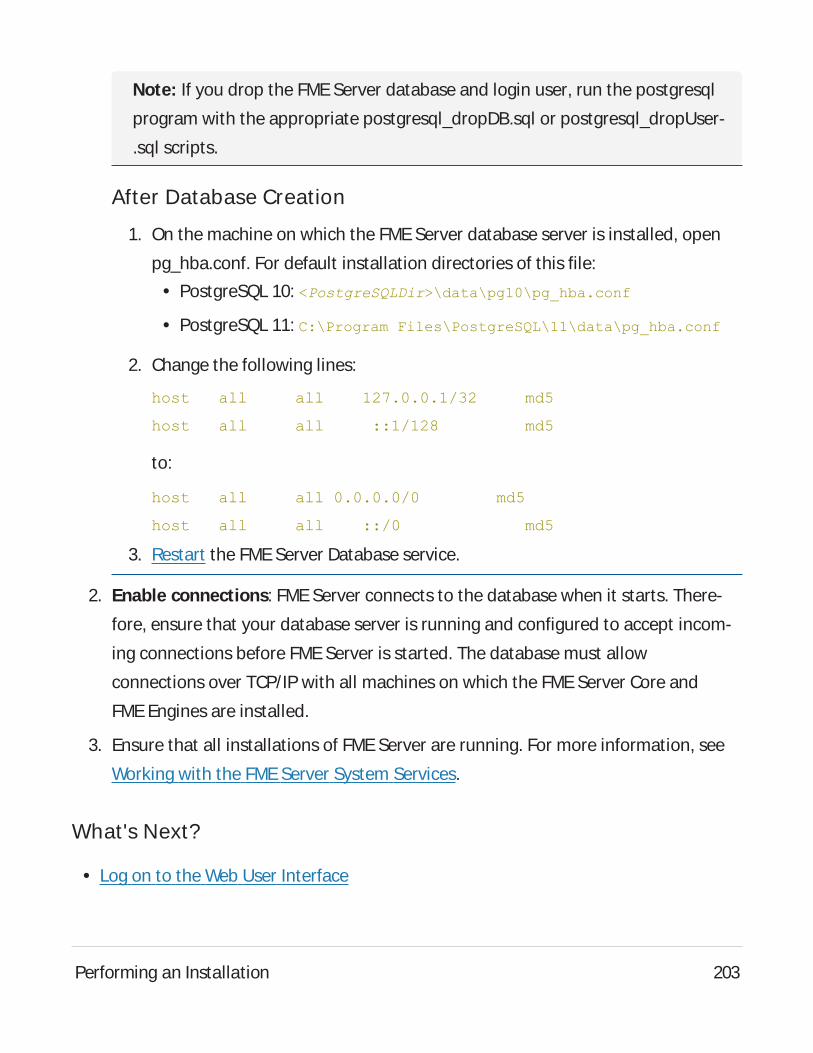
Note: If you drop the FMEServer database and login user, run the postgresql
program with the appropriate postgresql_dropDB.sql or postgresql_dropUser-
.sql scripts.
After Database Creation
1. On the machine on which the FME Server database server is installed, open
pg_hba.conf. For default installation directories of this file:l PostgreSQL 10: <PostgreSQLDir>\data\pg10\pg_hba.conf
l PostgreSQL 11: C:\Program Files\PostgreSQL\11\data\pg_hba.conf
2. Change the following lines:
host all all 127.0.0.1/32 md5
host all all ::1/128 md5
to:
host all all 0.0.0.0/0 md5
host all all ::/0 md5
3. Restart the FME Server Database service.
2. Enable connections: FMEServer connects to the database when it starts. There-
fore, ensure that your database server is running and configured to accept incom-
ing connections before FMEServer is started. The database must allow
connections over TCP/IP with all machines on which the FME Server Core and
FME Engines are installed.
3. Ensure that all installations of FMEServer are running. For more information, see
Working with the FMEServer System Services.
What's Next?
l Log on to the Web User Interface
Performing an Installation 203
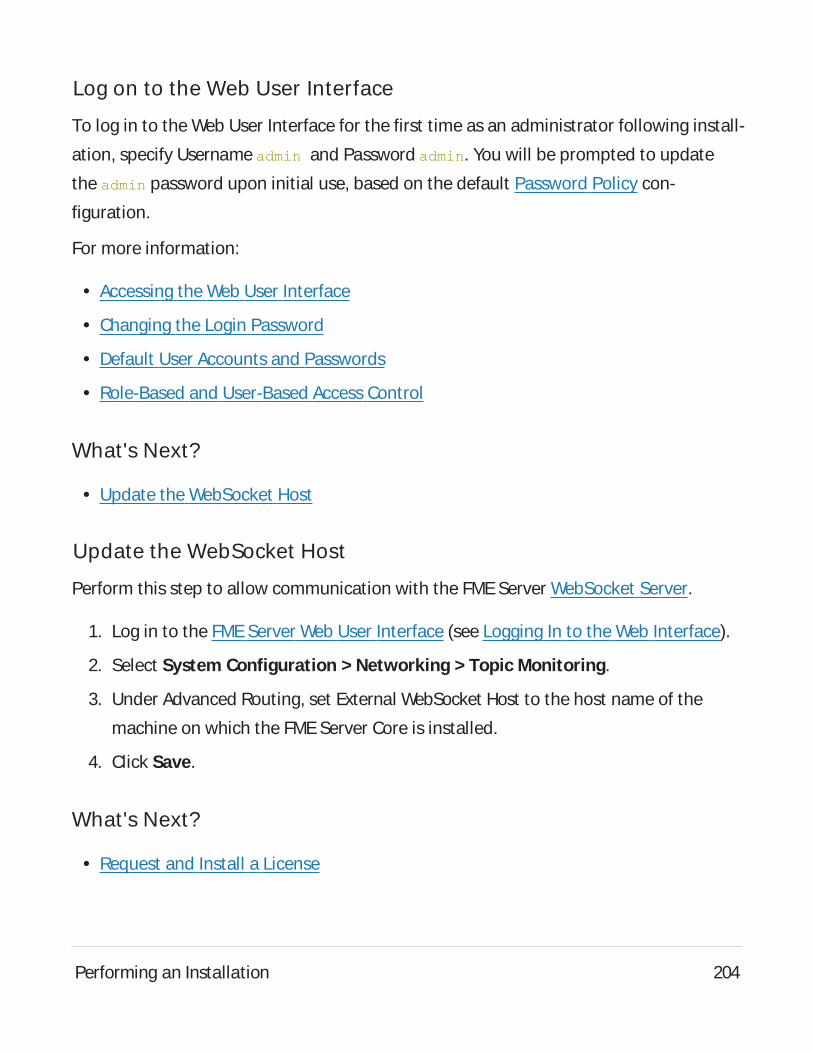
Log on to the Web User Interface
To log in to the Web User Interface for the first time as an administrator following install-
ation, specify Username admin and Password admin. You will be prompted to update
the admin password upon initial use, based on the default Password Policy con-
figuration.
For more information:
l Accessing the Web User Interface
l Changing the Login Password
l Default User Accounts and Passwords
l Role-Based and User-Based Access Control
What's Next?
l Update the WebSocket Host
Update the WebSocket Host
Perform this step to allow communication with the FME Server WebSocket Server.
1. Log in to the FMEServer Web User Interface (see Logging In to the Web Interface).
2. Select System Configuration > Networking > Topic Monitoring.
3. Under Advanced Routing, set External WebSocket Host to the host name of the
machine on which the FMEServer Core is installed.
4. Click Save.
What's Next?
l Request and Install a License
Performing an Installation 204
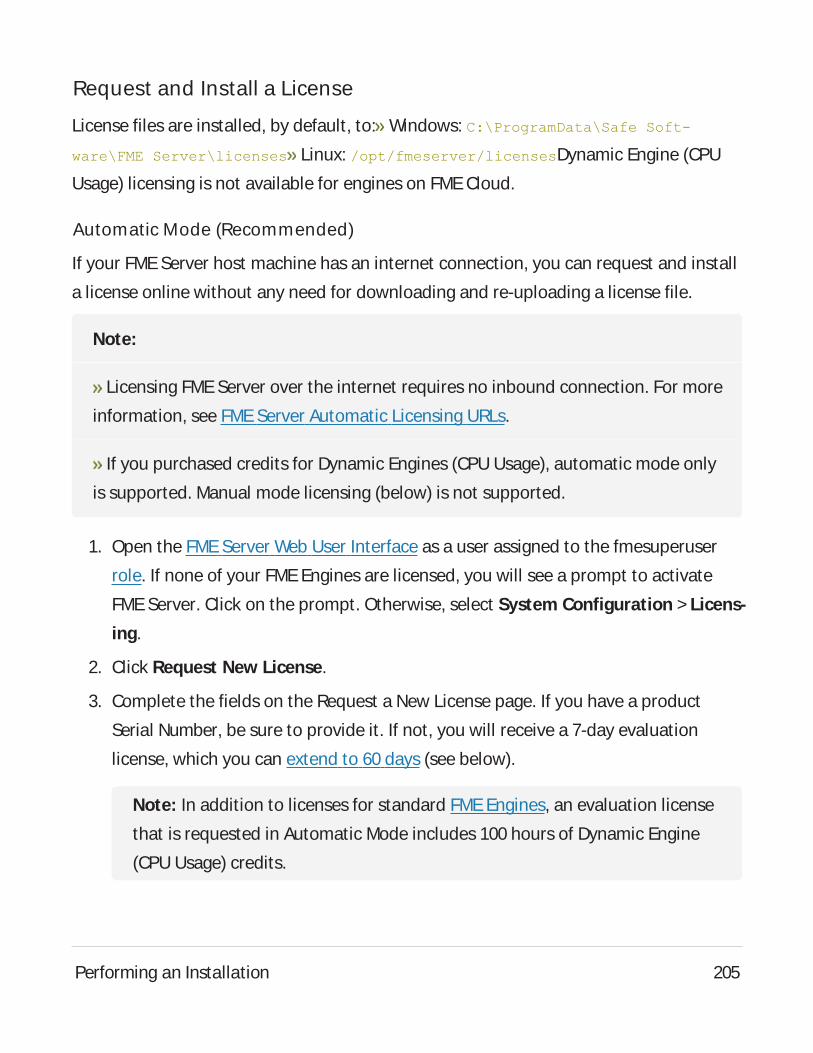
Request and Install a License
License files are installed, by default, to: Windows: C:\ProgramData\Safe Soft-
ware\FME Server\licenses Linux: /opt/fmeserver/licensesDynamic Engine (CPU
Usage) licensing is not available for engines on FMECloud.
Automatic Mode (Recommended)
If your FME Server host machine has an internet connection, you can request and install
a license online without any need for downloading and re-uploading a license file.
Note:
Licensing FMEServer over the internet requires no inbound connection. For more
information, see FMEServer Automatic Licensing URLs.
If you purchased credits for Dynamic Engines (CPU Usage), automatic mode only
is supported. Manual mode licensing (below) is not supported.
1. Open the FMEServer Web User Interface as a user assigned to the fmesuperuser
role. If none of your FME Engines are licensed, you will see a prompt to activate
FME Server. Click on the prompt. Otherwise, select System Configuration > Licens-
ing.
2. Click Request New License.
3. Complete the fields on the Request a New License page. If you have a product
Serial Number, be sure to provide it. If not, you will receive a 7-day evaluation
license, which you can extend to 60 days (see below).
Note: In addition to licenses for standard FME Engines, an evaluation license
that is requested in Automatic Mode includes 100 hours of Dynamic Engine
(CPU Usage) credits.
Performing an Installation 205
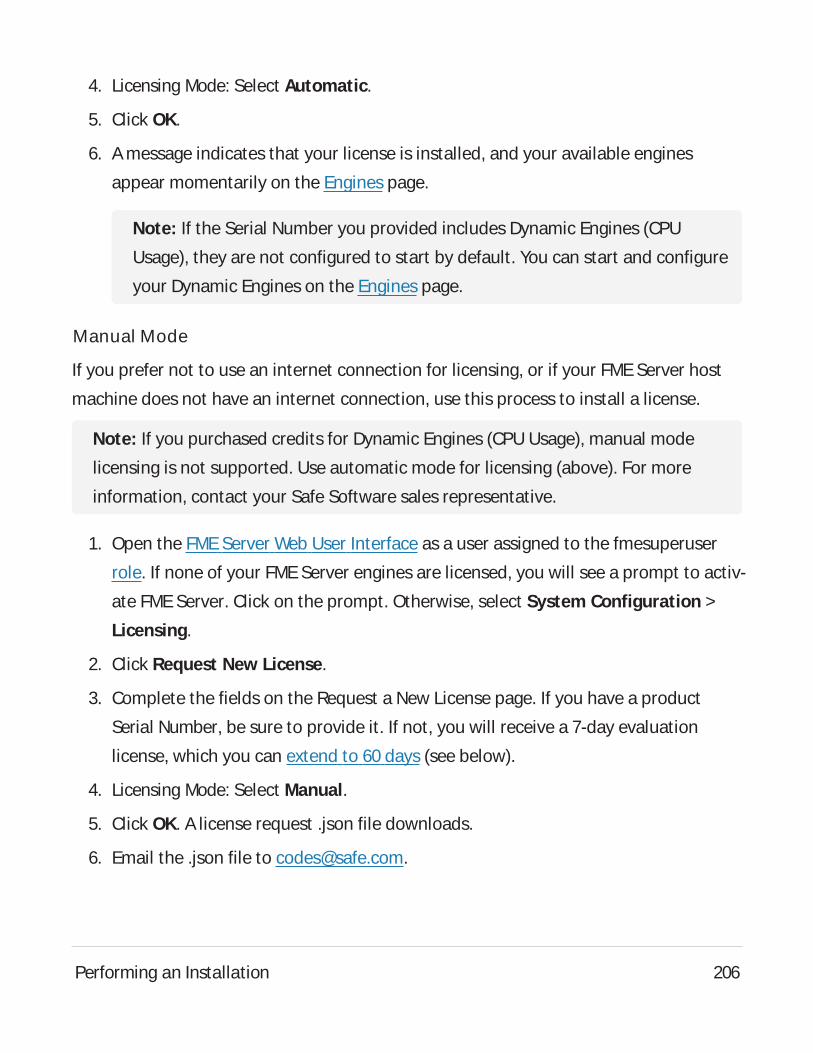
4. Licensing Mode: Select Automatic.
5. Click OK.
6. Amessage indicates that your license is installed, and your available engines
appear momentarily on the Engines page.
Note: If the Serial Number you provided includes Dynamic Engines (CPU
Usage), they are not configured to start by default. You can start and configure
your Dynamic Engines on the Engines page.
Manual Mode
If you prefer not to use an internet connection for licensing, or if your FME Server host
machine does not have an internet connection, use this process to install a license.
Note: If you purchased credits for Dynamic Engines (CPU Usage), manual mode
licensing is not supported. Use automatic mode for licensing (above). For more
information, contact your Safe Software sales representative.
1. Open the FMEServer Web User Interface as a user assigned to the fmesuperuser
role. If none of your FME Server engines are licensed, you will see a prompt to activ-
ate FME Server. Click on the prompt. Otherwise, select System Configuration >
Licensing.
2. Click Request New License.
3. Complete the fields on the Request a New License page. If you have a product
Serial Number, be sure to provide it. If not, you will receive a 7-day evaluation
license, which you can extend to 60 days (see below).
4. Licensing Mode: Select Manual.
5. Click OK. A license request .json file downloads.
6. Email the .json file to [email protected].
Performing an Installation 206
7. You will receive an email from Safe Software with a license file, which has a
.fmelic extension. Download the file.
8. Return to the Licensing page. Under Standard Engines, click Upload License File
and select the .fmelic file to upload. Or, drag and drop the .fmelic file onto the
page under Standard Engines. Amessage indicates that it is installed, and your
available engines appear on the Engines page.
Extending an Evaluation License
If you installed a 7-day evaluation license, you should have an email from [email protected]
com that allows you to extend the license to 60 days.
Automatic Mode (Recommended)
If your FME Server host machine has an internet connection, you can extend an eval-
uation license online without any need for downloading and re-uploading a license file.
1. Open the email and click the link as instructed.
2. Aweb page opens indicating the request was successful. Additionally, a link is
provided to download the license file. Click the link to download the file for safe-
keeping.
3. Return to System Configuration > Licensing and click Refresh License. The
license should now be extended accordingly. The EXPIRESfield shows the new
expiry date.
Manual Mode
If you prefer not to use an internet connection for licensing, or if your FME Server host
machine does not have an internet connection, use this process to extend an evaluation
license.
Performing an Installation 207
1. Open the email and click the link as instructed.
2. Aweb page opens indicating the request was successful. Additionally, a link is
provided to download the license file. Click the link to download the file.
3. Return to System Configuration > Licensing and click Upload License File. Or,
drag and drop the file onto the page. (You may need to move the license to a loc-
ation where it can be accessed). Amessage indicates that it is installed. The license
should now be extended accordingly. The EXPIRESfield shows the new expiry date.
Problems?
l Contact [email protected].
See Also
l FMEServer Licensing Walk-Through
l FMEServer Automatic Licensing URLs
l FME Engines
What's Next?
l (Recommended) Update the Windows service accounts that run the FME System Ser-
vices.
l (Upgrade Only) Restore your FME Server Configuration from a Previous Installation.
Adding FME Engines on a Separate Machine
WARNING: This topic applies only to traditional FMEServer installations. If your
FME Server runs in a containerized environment, such as Docker Compose or a Kuber-
netes cluster, this architecture is not supported.
Performing an Installation 208
l Skill Level: Intermediate
l Estimated Time Required: 30-45 minutes
l Prerequisites:l Existing Distributed/Fault-Tolerant FMEServer installation.
l Access to system, network, and FME Server administrators.
You can add processing capacity to your FMEServer by installing additional FMEEngines
on a separate computer from the FMEServer Core.
When adding FME Engines, keep in mind the following:
l Adding FME Engines that do not match the primary release version of the FMEServer
Core is not supported. The primary release version refers to the first decimal value
following the release year. For example, if the release version of the FME Server Core
is 2020.0, FME Engines from release versions 2020.0.1 or 2020.0.2 are supported.
However, FME Engines from release versions 2020.1 or 2021 are not supported.
l We recommend installing all FME Engines on systems that are synchronized to the
same time zone as other FME Engines and the FMEServer Core. If time zones differ,
unexpected issues may arise, including:l Difficulty accessing the FMEServer Web User Interface.
l Improper timing of Schedule Initiated triggers.
l Inconsistent or misleading timestamps in log files (accessed from Resources).
For more information, see About Times and Time Zones.
In the instructions below, the computer that hosts the FMEServer Core is the
<coreHost>.
Note: In a fault-tolerance environment, we recommend assigning unique names to
FMEEngines. However, if multiple FMEEngine hosts have the same FMEEngine
name, the queue server configuration applies to all FMEEngines with the same
Performing an Installation 209
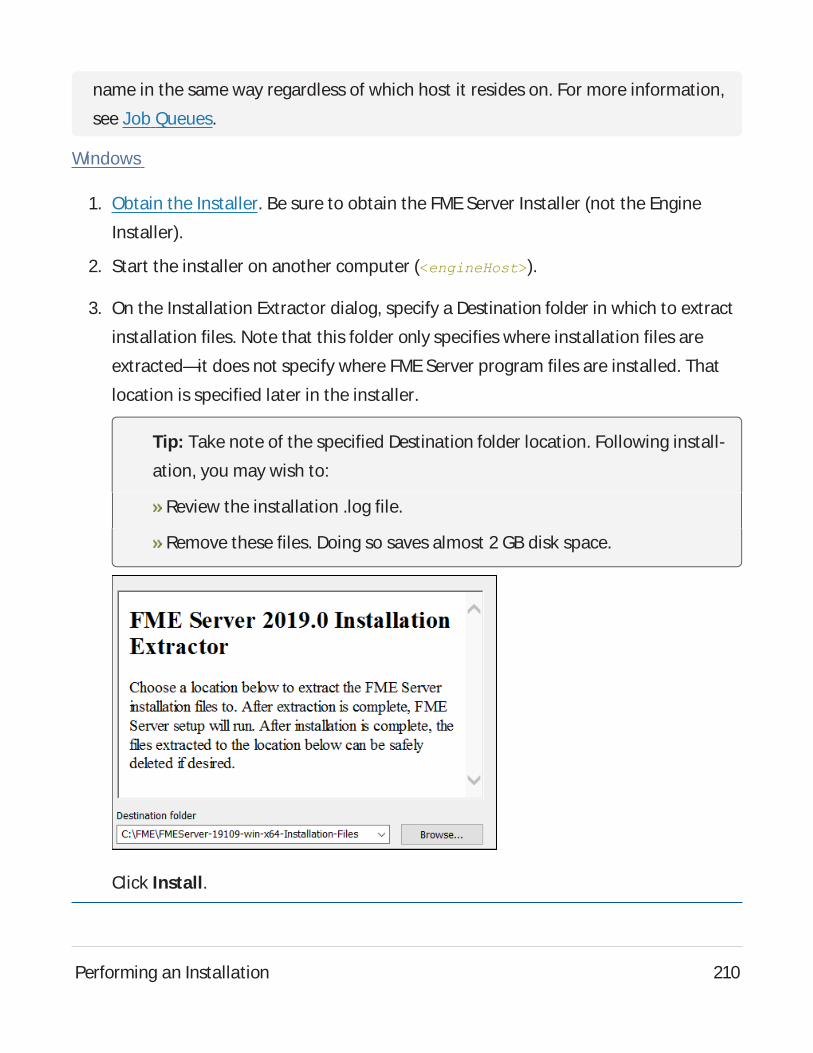
name in the same way regardless of which host it resides on. For more information,
see Job Queues.
Windows
1. Obtain the Installer. Be sure to obtain the FMEServer Installer (not the Engine
Installer).
2. Start the installer on another computer (<engineHost>).
3. On the Installation Extractor dialog, specify a Destination folder in which to extract
installation files. Note that this folder only specifies where installation files are
extracted—it does not specify where FME Server program files are installed. That
location is specified later in the installer.
Tip: Take note of the specified Destination folder location. Following install-
ation, you may wish to:
Review the installation .log file.
Remove these files. Doing so saves almost 2 GB disk space.
Click Install.
Performing an Installation 210
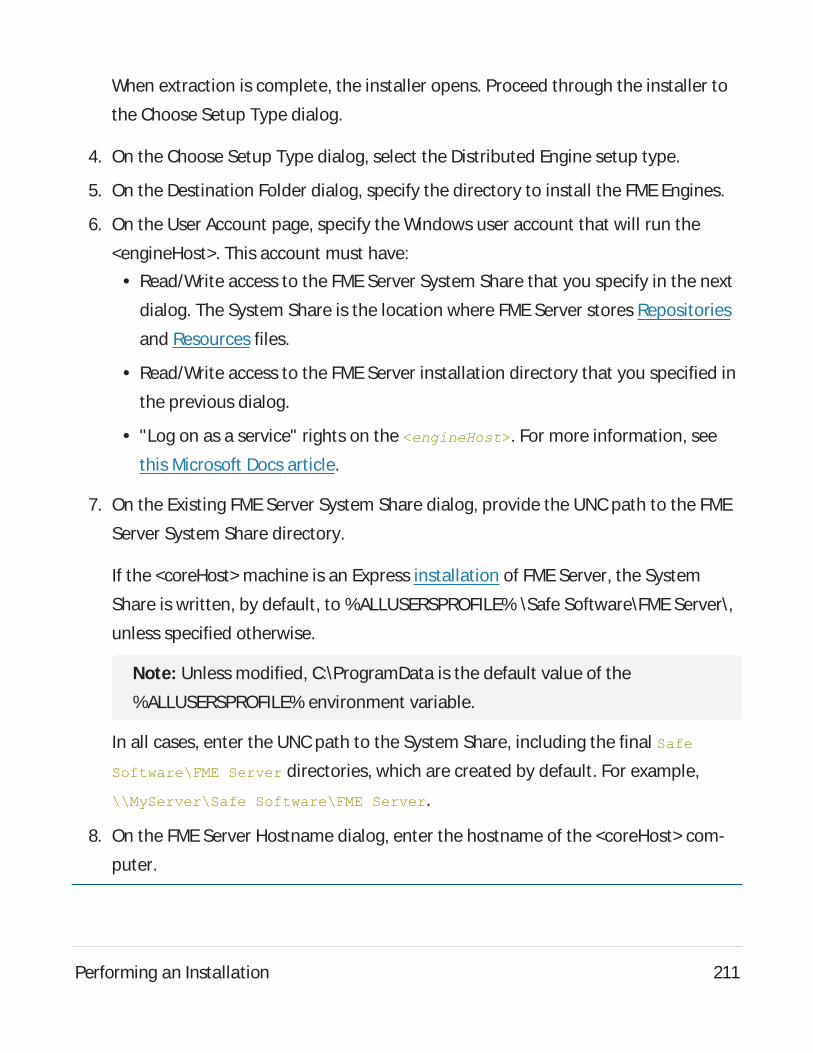
When extraction is complete, the installer opens. Proceed through the installer to
the Choose Setup Type dialog.
4. On the Choose Setup Type dialog, select the Distributed Engine setup type.
5. On the Destination Folder dialog, specify the directory to install the FME Engines.
6. On the User Account page, specify the Windows user account that will run the
<engineHost>. This account must have:l Read/Write access to the FMEServer System Share that you specify in the next
dialog. The System Share is the location where FME Server stores Repositories
and Resources files.
l Read/Write access to the FMEServer installation directory that you specified in
the previous dialog.
l "Log on as a service" rights on the <engineHost>. For more information, see
this Microsoft Docs article.
7. On the Existing FMEServer System Share dialog, provide the UNCpath to the FME
Server System Share directory.
If the <coreHost> machine is an Express installation of FME Server, the System
Share is written, by default, to %ALLUSERSPROFILE% \Safe Software\FMEServer\,
unless specified otherwise.
Note: Unless modified, C:\ProgramData is the default value of the
%ALLUSERSPROFILE% environment variable.
In all cases, enter the UNCpath to the System Share, including the final Safe
Software\FME Server directories, which are created by default. For example,
\\MyServer\Safe Software\FME Server.
8. On the FMEServer Hostname dialog, enter the hostname of the <coreHost> com-
puter.
Performing an Installation 211

9. On the Database Server Type dialog, specify the database type that you specified
when installing the FMEServer Core. If you specified a database other than the
"FMEServer Database," enter the connection parameters in the next dialog.
10. On the Database User dialog, specify the user name and password for the
FME Server Database that you specified when installing FME Server.
11. Complete the remaining dialogs of the FME Server Installer.
12. If this <engineHost> is connecting to a <coreHost> that also hosts the built-in
FME Server database and the initial FMEengines, as with an Express Installation,
allow the necessary connection to this machine:
a. On the <coreHost>, open file pg_hba.conf, located in
%ALLUSERSPROFILE%\Safe Software\FMEServer\pgsql\data.
Note: Unless modified, C:\ProgramData is the default value of the
%ALLUSERSPROFILE% environment variable.
b. Change the following lines:
host all all 127.0.0.1/32 md5
host all all ::1/128 md5
to:
host all all 0.0.0.0/0 md5
host all all ::/0 md5
c. Restart the FME Server Database and FME Server Engines services.
13. If the <coreHost> machine was an Express Installation of FME Server, complete the
following steps on the <coreHost> to configure the FME Server Web Services:
a. Open the corresponding propertiesFile.properties file for the Data Download,
Data Streaming, Job Submitter, and Notification services, located at
<FMEServerDir>\Utilities\tomcat\webapps\<service_name>\WEB-
Performing an Installation 212
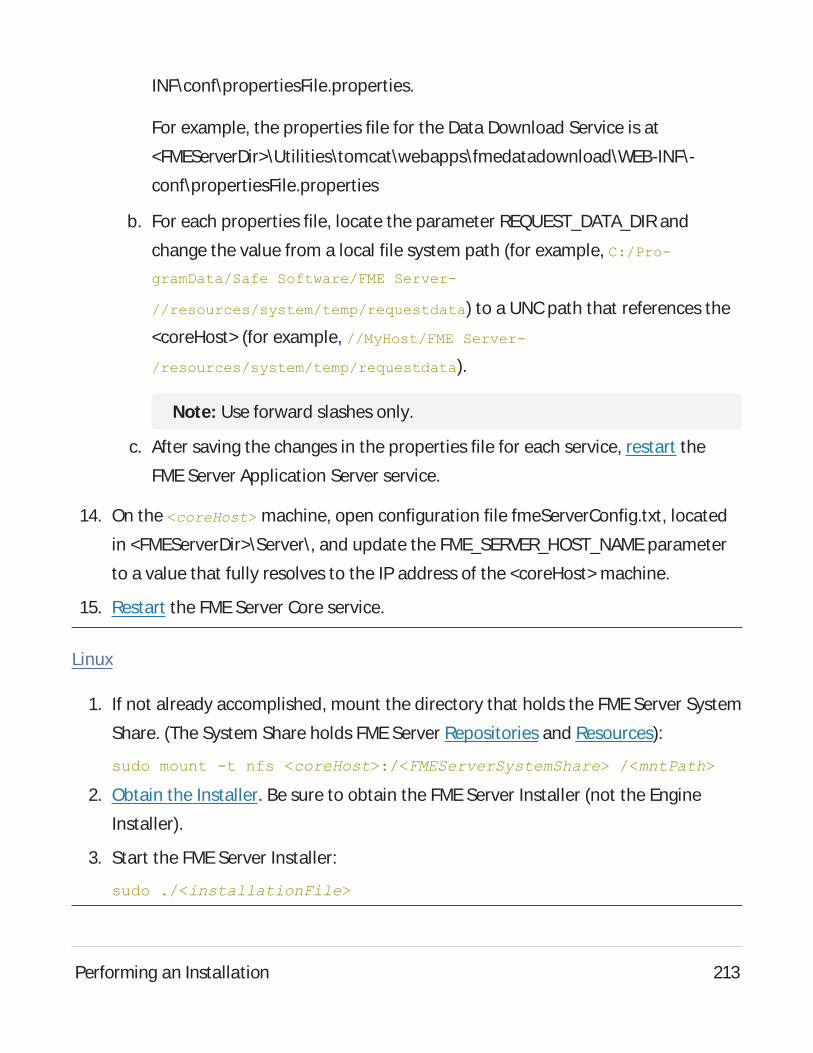
INF\conf\propertiesFile.properties.
For example, the properties file for the Data Download Service is at
<FMEServerDir>\Utilities\tomcat\webapps\fmedatadownload\WEB-INF\-
conf\propertiesFile.properties
b. For each properties file, locate the parameter REQUEST_DATA_DIRand
change the value from a local file system path (for example, C:/Pro-
gramData/Safe Software/FME Server-
//resources/system/temp/requestdata) to a UNCpath that references the
<coreHost> (for example, //MyHost/FME Server-
/resources/system/temp/requestdata).
Note: Use forward slashes only.
c. After saving the changes in the properties file for each service, restart the
FME Server Application Server service.
14. On the <coreHost> machine, open configuration file fmeServerConfig.txt, located
in <FMEServerDir>\Server\, and update the FME_SERVER_HOST_NAMEparameter
to a value that fully resolves to the IP address of the <coreHost> machine.
15. Restart the FMEServer Core service.
Linux
1. If not already accomplished, mount the directory that holds the FME Server System
Share. (The System Share holds FME Server Repositories and Resources):
sudo mount -t nfs <coreHost>:/<FMEServerSystemShare> /<mntPath>
2. Obtain the Installer. Be sure to obtain the FMEServer Installer (not the Engine
Installer).
3. Start the FMEServer Installer:
sudo ./<installationFile>
Performing an Installation 213

4. From the setup type list, choose Engine.
5. The installer prompts you for a location to install the FMEServer Engine com-
ponents. This can be on the local machine.
6. The installer prompts you for the name of the <coreHost>. In a fault-tolerant
installation, the primary <coreHost> should always be specified. Do not specify the
failover host.
7. The installer prompts you for the FMEServer System Share location. Enter the
mounted directory created in step 1.
8. Enter the database type you specified when installing the FMEServer Core. If you
specified a database other than the "FMEServer Database", enter the connection
parameters.
9. Enter the user name and password for the FME Server Database that you specified
when installing FME Server.
10. Complete the remaining dialogs of the FMEServer Installer.
11. Manually start FMEServer, and configure it to start automatically.
12. If this <engineHost> is connecting to a <coreHost> that also hosts the built-in
FME Server database and the initial FMEengines, as with an Express Installation,
allow the necessary connection to this machine:
a. On the <coreHost>, open file pg_hba.conf, located in <FMEServerDir>\Util-
ities\pgsql\data\.
b. Change the following lines:
host all all 127.0.0.1/32 md5
host all all ::1/128 md5
to:
Performing an Installation 214
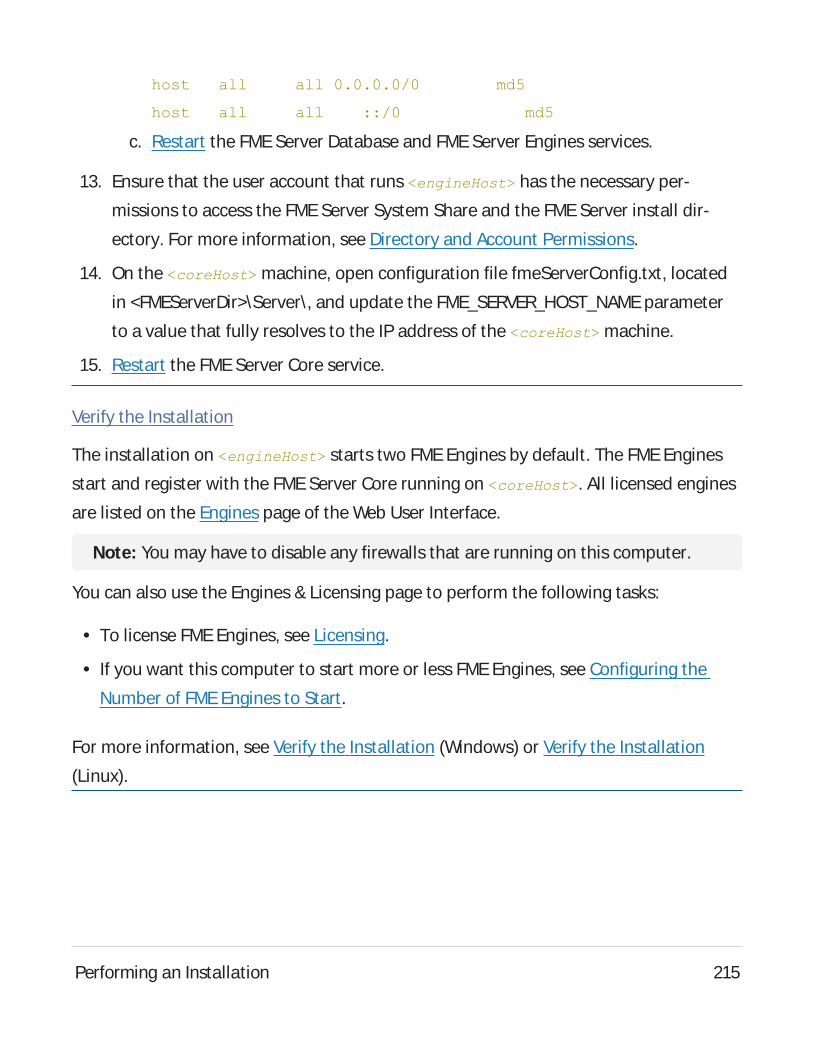
host all all 0.0.0.0/0 md5
host all all ::/0 md5
c. Restart the FME Server Database and FMEServer Engines services.
13. Ensure that the user account that runs <engineHost> has the necessary per-
missions to access the FME Server System Share and the FMEServer install dir-
ectory. For more information, see Directory and Account Permissions.
14. On the <coreHost> machine, open configuration file fmeServerConfig.txt, located
in <FMEServerDir>\Server\, and update the FME_SERVER_HOST_NAMEparameter
to a value that fully resolves to the IP address of the <coreHost> machine.
15. Restart the FMEServer Core service.
Verify the Installation
The installation on <engineHost> starts two FMEEngines by default. The FMEEngines
start and register with the FMEServer Core running on <coreHost>. All licensed engines
are listed on the Engines page of the Web User Interface.
Note: You may have to disable any firewalls that are running on this computer.
You can also use the Engines & Licensing page to perform the following tasks:
l To license FME Engines, see Licensing.
l If you want this computer to start more or less FMEEngines, see Configuring the
Number of FMEEngines to Start.
For more information, see Verify the Installation (Windows) or Verify the Installation
(Linux).
Performing an Installation 215
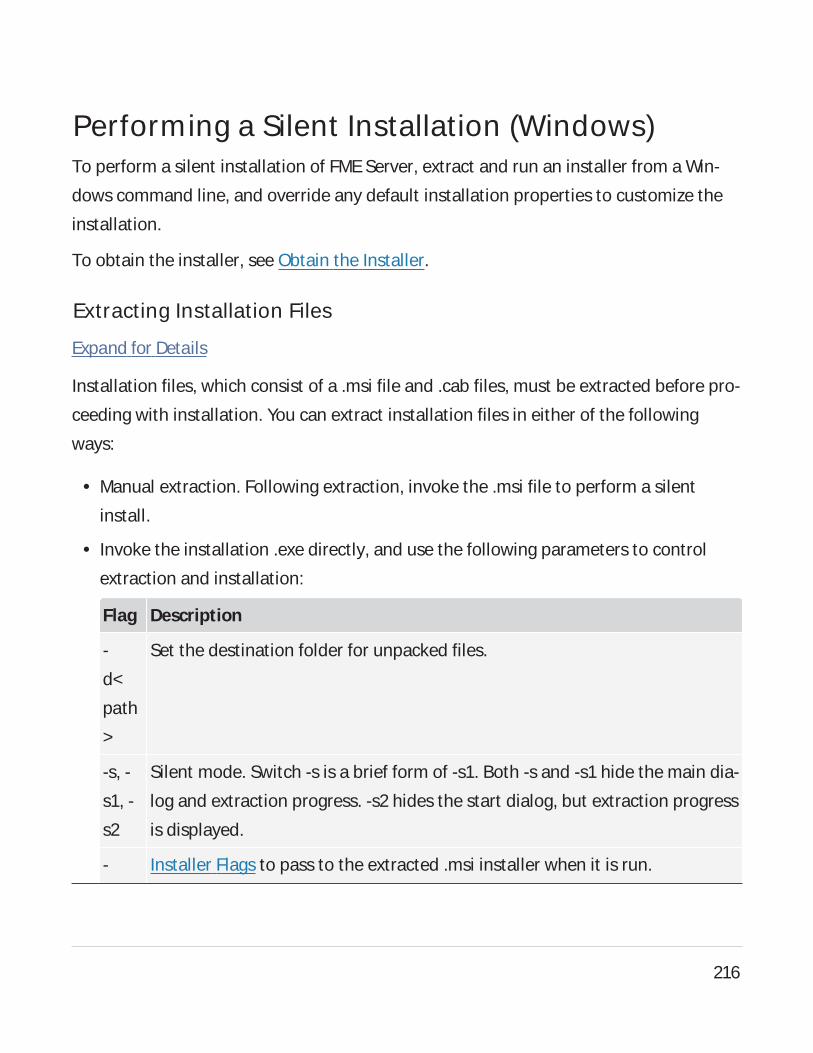
Performing a Silent Installation (Windows)To perform a silent installation of FME Server, extract and run an installer from a Win-
dows command line, and override any default installation properties to customize the
installation.
To obtain the installer, see Obtain the Installer.
Extracting Installation Files
Expand for Details
Installation files, which consist of a .msi file and .cab files, must be extracted before pro-
ceeding with installation. You can extract installation files in either of the following
ways:
l Manual extraction. Following extraction, invoke the .msi file to perform a silent
install.
l Invoke the installation .exe directly, and use the following parameters to control
extraction and installation:
Flag Description
-
d<
path
>
Set the destination folder for unpacked files.
-s, -
s1, -
s2
Silent mode. Switch -s is a brief form of -s1. Both -s and -s1 hide the main dia-
log and extraction progress. -s2 hides the start dialog, but extraction progress
is displayed.
- Installer Flags to pass to the extracted .msi installer when it is run.
216
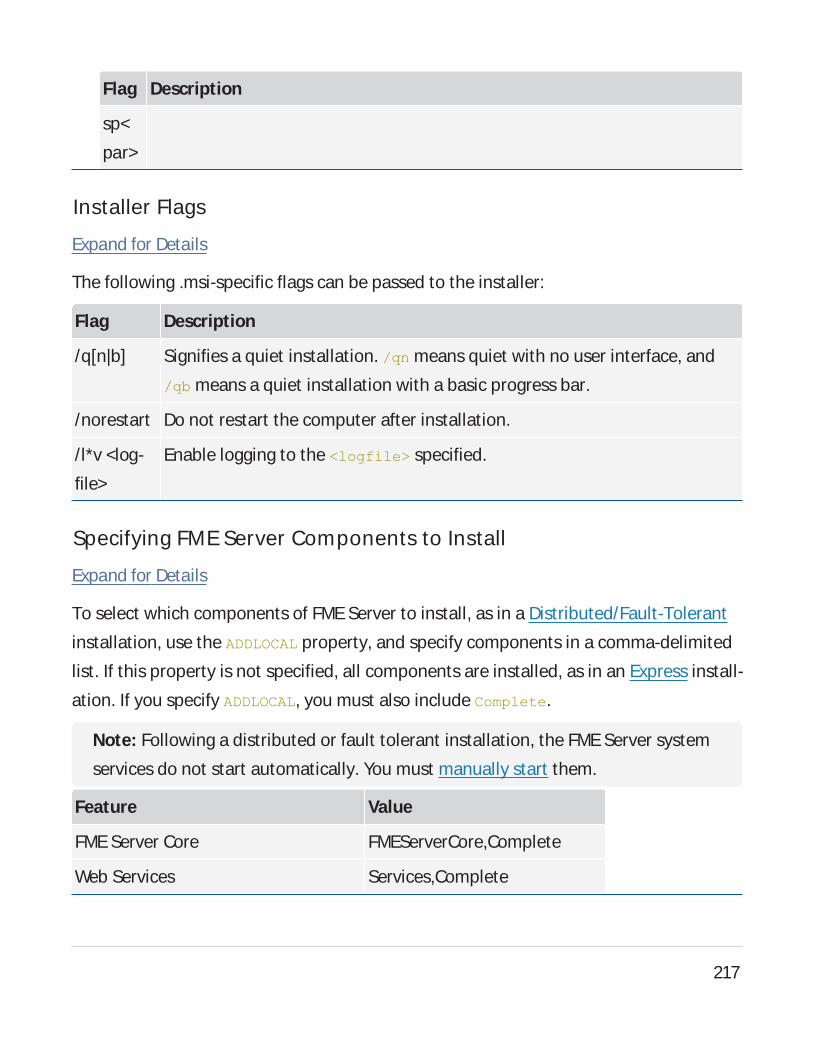
Flag Description
sp<
par>
Installer Flags
Expand for Details
The following .msi-specific flags can be passed to the installer:
Flag Description
/q[n|b] Signifies a quiet installation. /qn means quiet with no user interface, and
/qb means a quiet installation with a basic progress bar.
/norestart Do not restart the computer after installation.
/l*v <log-
file>
Enable logging to the <logfile> specified.
Specifying FME Server Components to Install
Expand for Details
To select which components of FME Server to install, as in a Distributed/Fault-Tolerant
installation, use the ADDLOCAL property, and specify components in a comma-delimited
list. If this property is not specified, all components are installed, as in an Express install-
ation. If you specify ADDLOCAL, you must also include Complete.
Note: Following a distributed or fault tolerant installation, the FME Server system
services do not start automatically. You must manually start them.
Feature Value
FMEServer Core FMEServerCore,Complete
Web Services Services,Complete
217
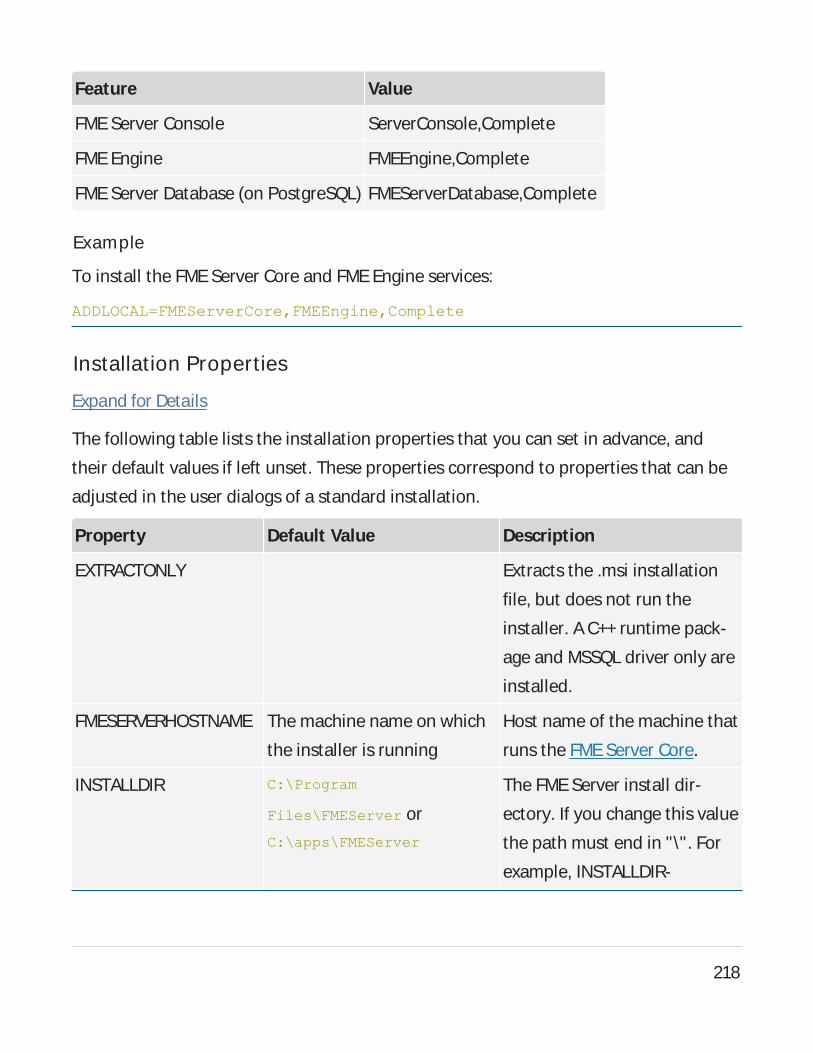
Feature Value
FME Server Console ServerConsole,Complete
FME Engine FMEEngine,Complete
FME Server Database (on PostgreSQL) FMEServerDatabase,Complete
Example
To install the FMEServer Core and FMEEngine services:
ADDLOCAL=FMEServerCore,FMEEngine,Complete
Installation Properties
Expand for Details
The following table lists the installation properties that you can set in advance, and
their default values if left unset. These properties correspond to properties that can be
adjusted in the user dialogs of a standard installation.
Property Default Value Description
EXTRACTONLY Extracts the .msi installation
file, but does not run the
installer. AC++ runtime pack-
age and MSSQL driver only are
installed.
FMESERVERHOSTNAME The machine name on which
the installer is running
Host name of the machine that
runs the FMEServer Core.
INSTALLDIR C:\Program
Files\FMEServer or
C:\apps\FMEServer
The FMEServer install dir-
ectory. If you change this value
the path must end in "\". For
example, INSTALLDIR-
218
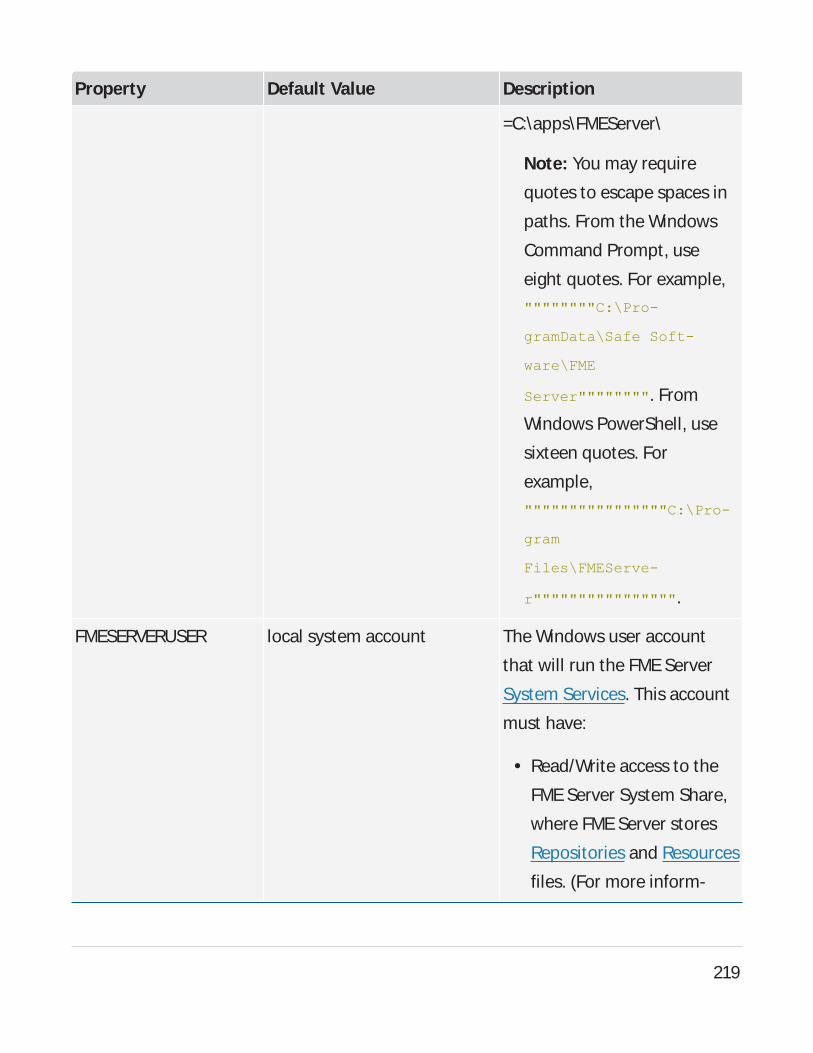
Property Default Value Description
=C:\apps\FMEServer\
Note: You may require
quotes to escape spaces in
paths. From the Windows
Command Prompt, use
eight quotes. For example,
""""""""C:\Pro-
gramData\Safe Soft-
ware\FME
Server"""""""". From
Windows PowerShell, use
sixteen quotes. For
example,
""""""""""""""""C:\Pro-
gram
Files\FMEServe-
r"""""""""""""""".
FMESERVERUSER local system account The Windows user account
that will run the FMEServer
System Services. This account
must have:
l Read/Write access to the
FMEServer System Share,
where FMEServer stores
Repositories and Resources
files. (For more inform-
219
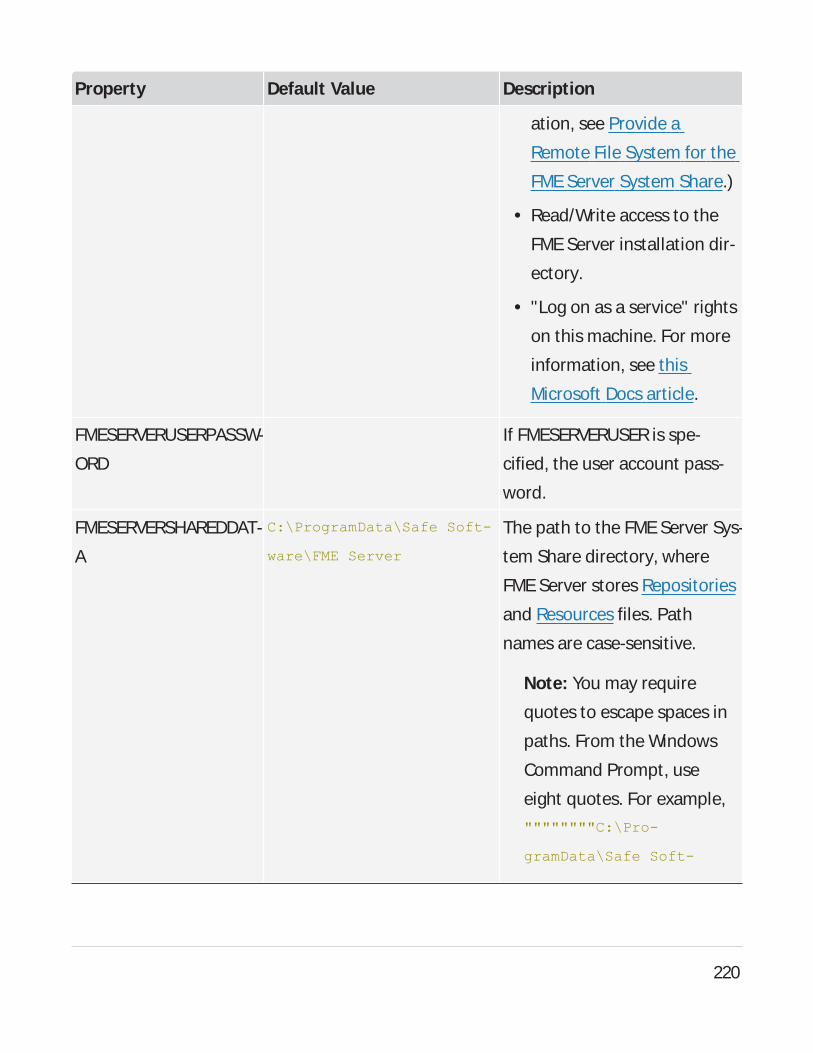
Property Default Value Description
ation, see Provide a
Remote File System for the
FME Server System Share.)
l Read/Write access to the
FME Server installation dir-
ectory.
l "Log on as a service" rights
on this machine. For more
information, see this
Microsoft Docs article.
FMESERVERUSERPASSW-
ORD
If FMESERVERUSERis spe-
cified, the user account pass-
word.
FMESERVERSHAREDDAT-
A
C:\ProgramData\Safe Soft-
ware\FME Server
The path to the FMEServer Sys-
tem Share directory, where
FMEServer stores Repositories
and Resources files. Path
names are case-sensitive.
Note: You may require
quotes to escape spaces in
paths. From the Windows
Command Prompt, use
eight quotes. For example,
""""""""C:\Pro-
gramData\Safe Soft-
220
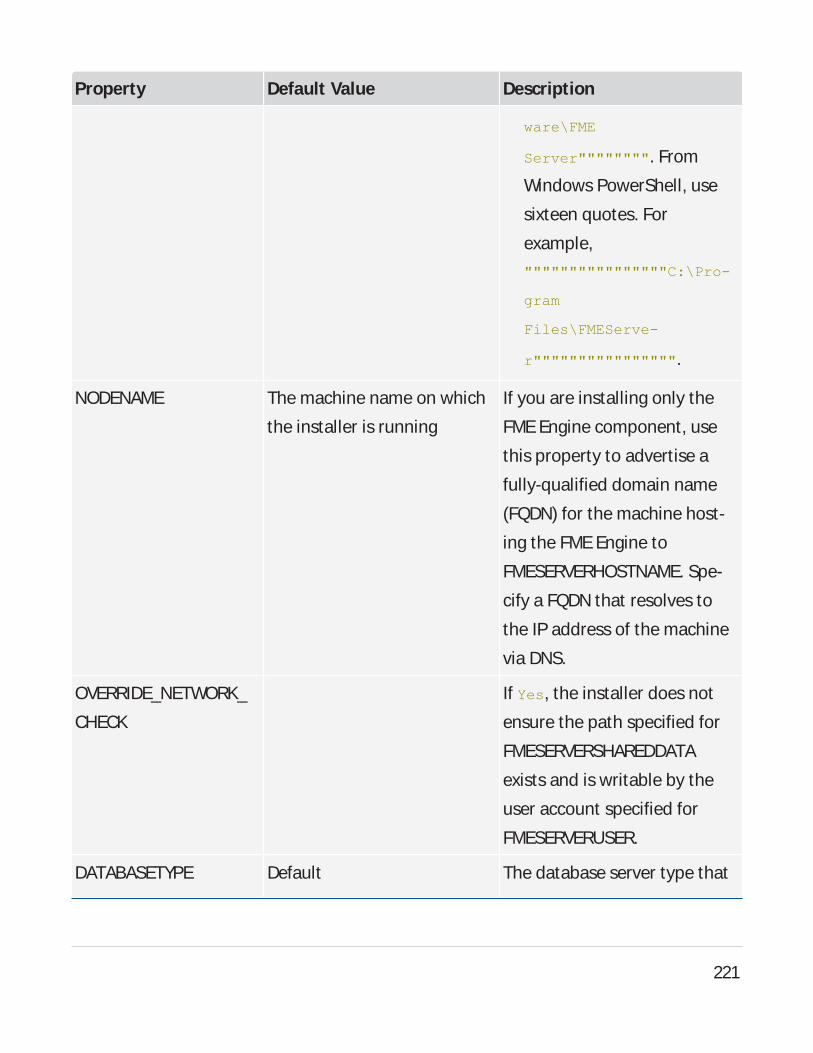
Property Default Value Description
ware\FME
Server"""""""". From
Windows PowerShell, use
sixteen quotes. For
example,
""""""""""""""""C:\Pro-
gram
Files\FMEServe-
r"""""""""""""""".
NODENAME The machine name on which
the installer is running
If you are installing only the
FME Engine component, use
this property to advertise a
fully-qualified domain name
(FQDN) for the machine host-
ing the FME Engine to
FMESERVERHOSTNAME. Spe-
cify a FQDN that resolves to
the IP address of the machine
via DNS.
OVERRIDE_NETWORK_
CHECK
If Yes, the installer does not
ensure the path specified for
FMESERVERSHAREDDATA
exists and is writable by the
user account specified for
FMESERVERUSER.
DATABASETYPE Default The database server type that
221
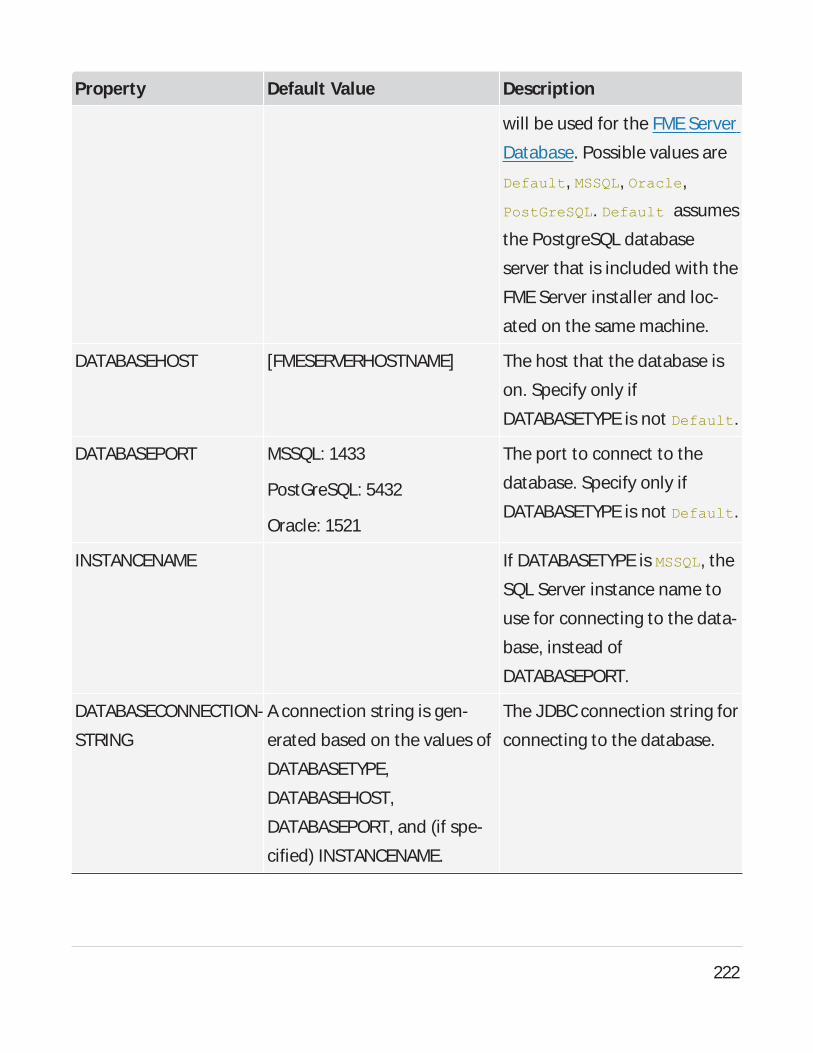
Property Default Value Description
will be used for the FMEServer
Database. Possible values are
Default, MSSQL, Oracle,
PostGreSQL. Default assumes
the PostgreSQL database
server that is included with the
FMEServer installer and loc-
ated on the same machine.
DATABASEHOST [FMESERVERHOSTNAME] The host that the database is
on. Specify only if
DATABASETYPEis not Default.
DATABASEPORT MSSQL: 1433
PostGreSQL: 5432
Oracle: 1521
The port to connect to the
database. Specify only if
DATABASETYPEis not Default.
INSTANCENAME If DATABASETYPEis MSSQL, the
SQL Server instance name to
use for connecting to the data-
base, instead of
DATABASEPORT.
DATABASECONNECTION-
STRING
Aconnection string is gen-
erated based on the values of
DATABASETYPE,
DATABASEHOST,
DATABASEPORT, and (if spe-
cified) INSTANCENAME.
The JDBCconnection string for
connecting to the database.
222
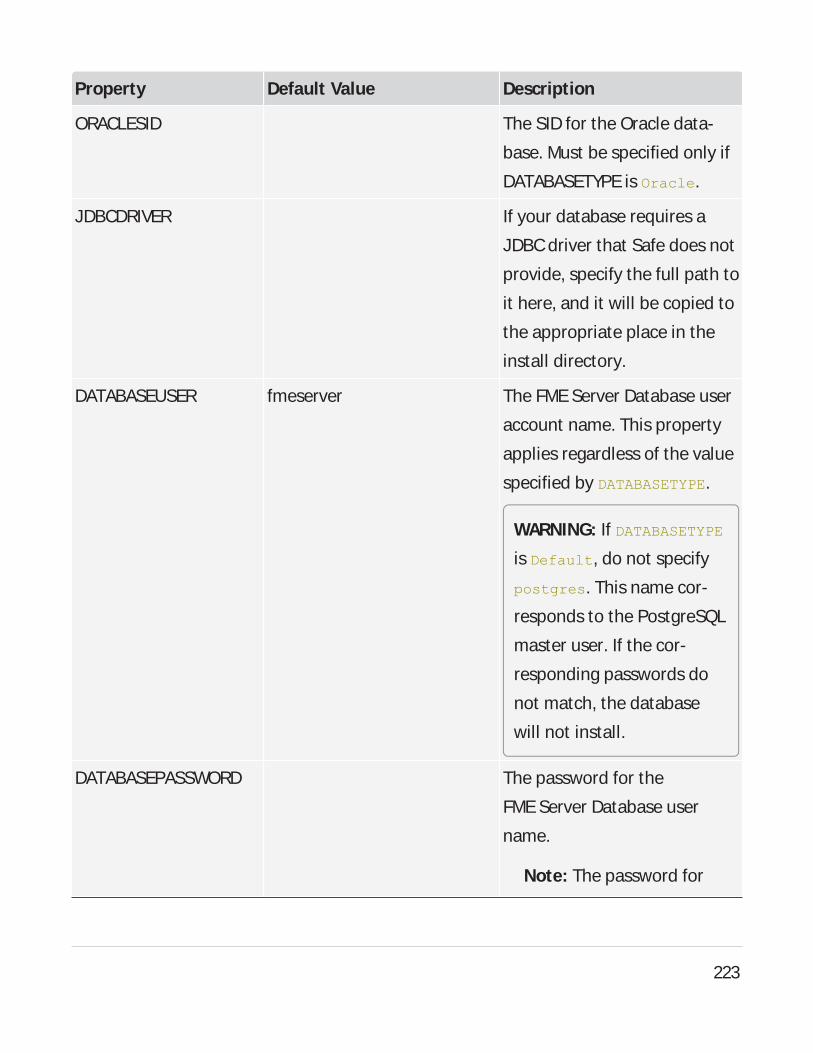
Property Default Value Description
ORACLESID The SID for the Oracle data-
base. Must be specified only if
DATABASETYPEis Oracle.
JDBCDRIVER If your database requires a
JDBCdriver that Safe does not
provide, specify the full path to
it here, and it will be copied to
the appropriate place in the
install directory.
DATABASEUSER fmeserver The FME Server Database user
account name. This property
applies regardless of the value
specified by DATABASETYPE.
WARNING: If DATABASETYPE
is Default, do not specify
postgres. This name cor-
responds to the PostgreSQL
master user. If the cor-
responding passwords do
not match, the database
will not install.
DATABASEPASSWORD The password for the
FME Server Database user
name.
Note: The password for
223
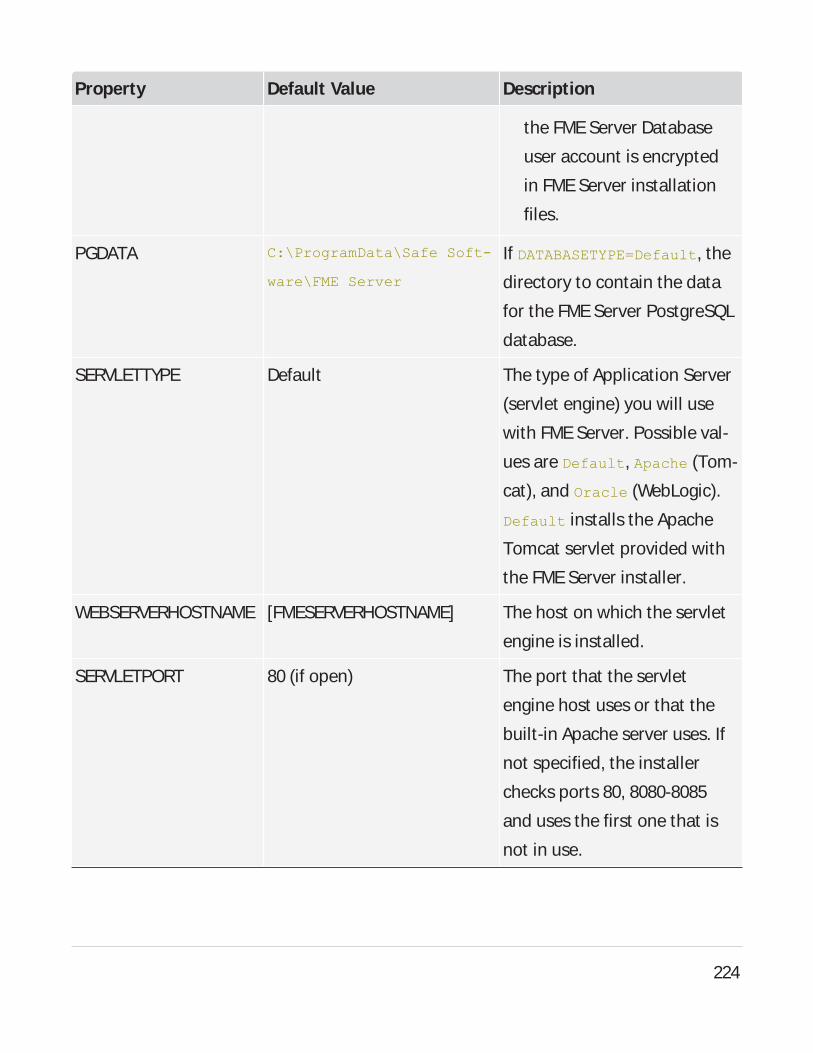
Property Default Value Description
the FME Server Database
user account is encrypted
in FME Server installation
files.
PGDATA C:\ProgramData\Safe Soft-
ware\FME Server
If DATABASETYPE=Default, the
directory to contain the data
for the FME Server PostgreSQL
database.
SERVLETTYPE Default The type of Application Server
(servlet engine) you will use
with FMEServer. Possible val-
ues are Default, Apache (Tom-
cat), and Oracle (WebLogic).
Default installs the Apache
Tomcat servlet provided with
the FME Server installer.
WEBSERVERHOSTNAME [FMESERVERHOSTNAME] The host on which the servlet
engine is installed.
SERVLETPORT 80 (if open) The port that the servlet
engine host uses or that the
built-in Apache server uses. If
not specified, the installer
checks ports 80, 8080-8085
and uses the first one that is
not in use.
224
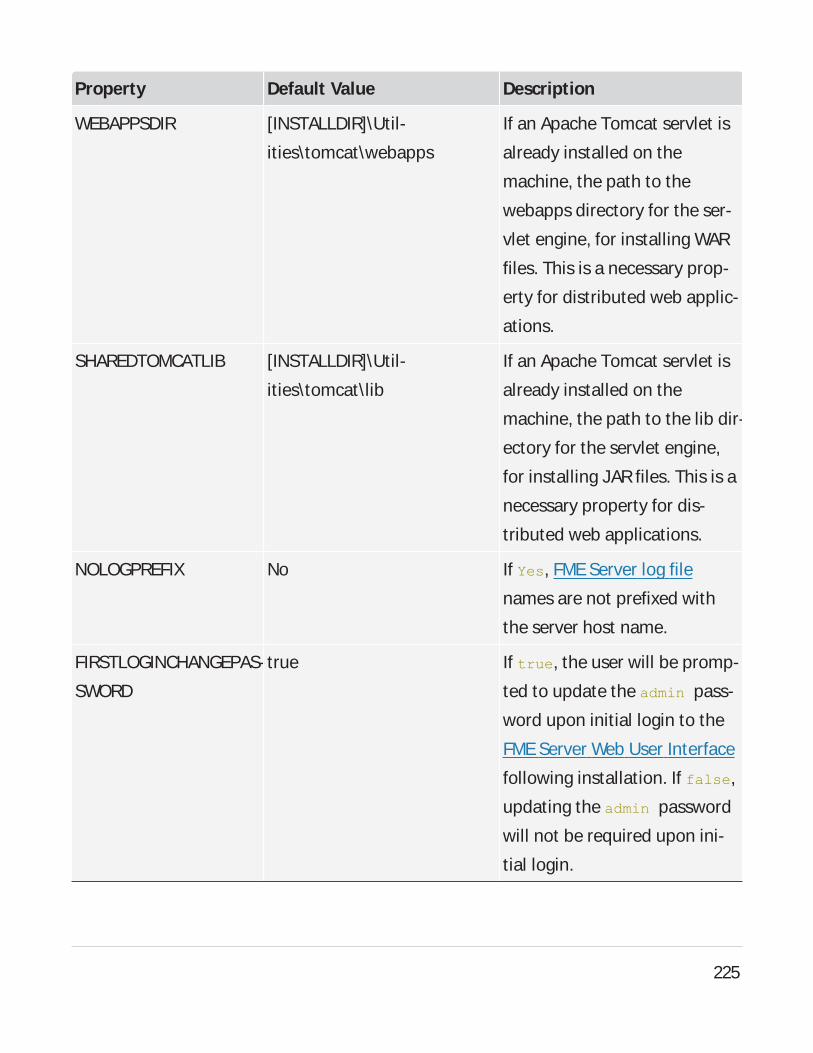
Property Default Value Description
WEBAPPSDIR [INSTALLDIR]\Util-
ities\tomcat\webapps
If an Apache Tomcat servlet is
already installed on the
machine, the path to the
webapps directory for the ser-
vlet engine, for installing WAR
files. This is a necessary prop-
erty for distributed web applic-
ations.
SHAREDTOMCATLIB [INSTALLDIR]\Util-
ities\tomcat\lib
If an Apache Tomcat servlet is
already installed on the
machine, the path to the lib dir-
ectory for the servlet engine,
for installing JARfiles. This is a
necessary property for dis-
tributed web applications.
NOLOGPREFIX No If Yes, FME Server log file
names are not prefixed with
the server host name.
FIRSTLOGINCHANGEPAS-
SWORD
true If true, the user will be promp-
ted to update the admin pass-
word upon initial login to the
FMEServer Web User Interface
following installation. If false,
updating the admin password
will not be required upon ini-
tial login.
225
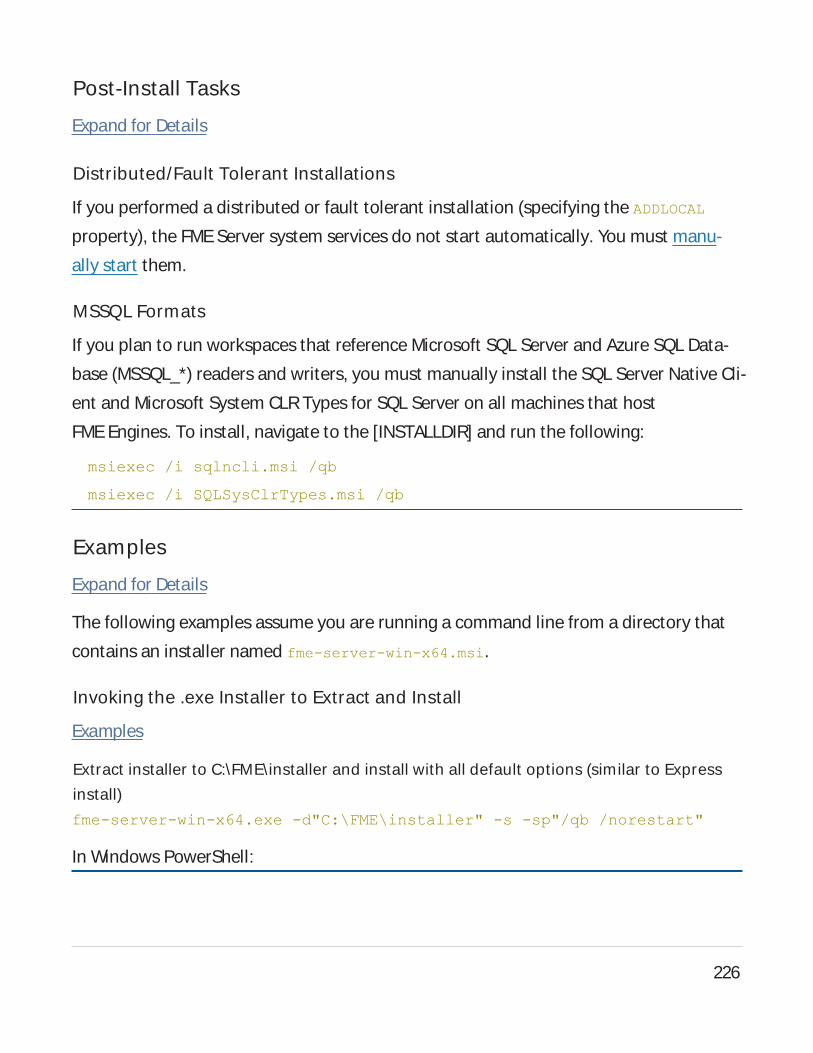
Post-Install Tasks
Expand for Details
Distributed/Fault Tolerant Installations
If you performed a distributed or fault tolerant installation (specifying the ADDLOCAL
property), the FME Server system services do not start automatically. You must manu-
ally start them.
MSSQL Formats
If you plan to run workspaces that reference Microsoft SQL Server and Azure SQL Data-
base (MSSQL_*) readers and writers, you must manually install the SQL Server Native Cli-
ent and Microsoft System CLRTypes for SQL Server on all machines that host
FME Engines. To install, navigate to the [INSTALLDIR] and run the following:
msiexec /i sqlncli.msi /qb
msiexec /i SQLSysClrTypes.msi /qb
Examples
Expand for Details
The following examples assume you are running a command line from a directory that
contains an installer named fme-server-win-x64.msi.
Invoking the .exe Installer to Extract and Install
Examples
Extract installer to C:\FME\installer and install with all default options (similar to Express
install)
fme-server-win-x64.exe -d"C:\FME\installer" -s -sp"/qb /norestart"
In Windows PowerShell:
226
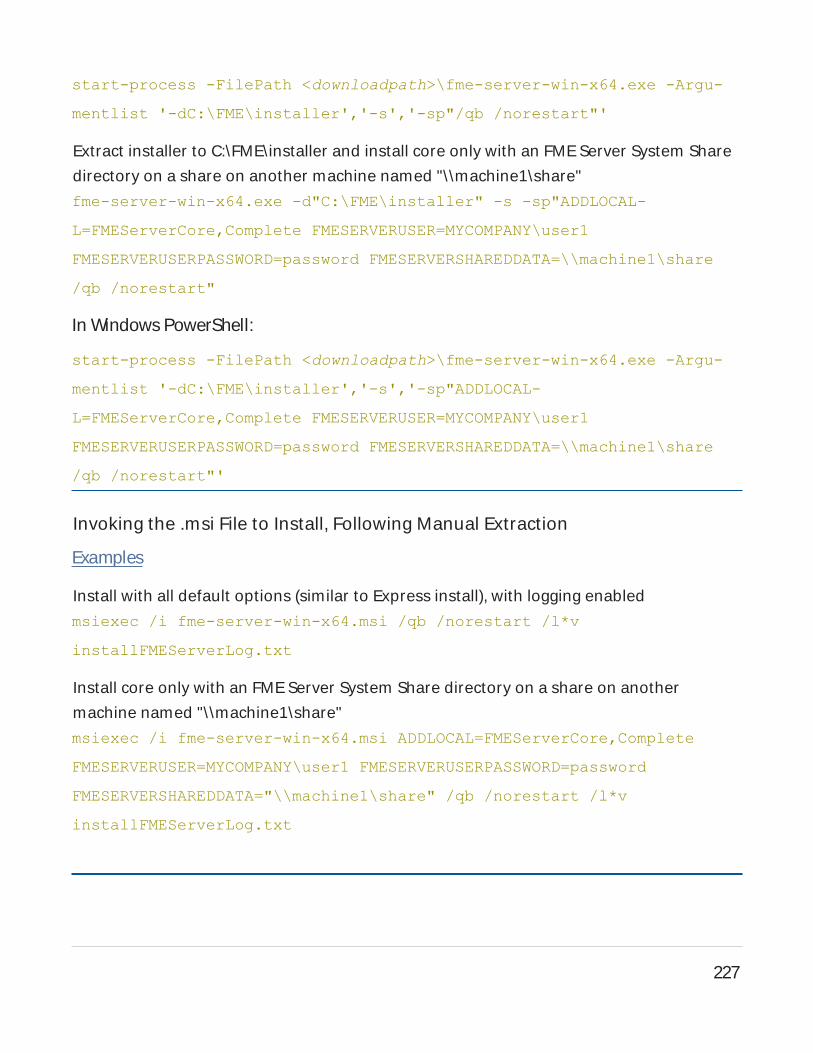
start-process -FilePath <downloadpath>\fme-server-win-x64.exe -Argu-
mentlist '-dC:\FME\installer','-s','-sp"/qb /norestart"'
Extract installer to C:\FME\installer and install core only with an FME Server System Share
directory on a share on another machine named "\\machine1\share"
fme-server-win-x64.exe -d"C:\FME\installer" -s -sp"ADDLOCAL-
L=FMEServerCore,Complete FMESERVERUSER=MYCOMPANY\user1
FMESERVERUSERPASSWORD=password FMESERVERSHAREDDATA=\\machine1\share
/qb /norestart"
In Windows PowerShell:
start-process -FilePath <downloadpath>\fme-server-win-x64.exe -Argu-
mentlist '-dC:\FME\installer','-s','-sp"ADDLOCAL-
L=FMEServerCore,Complete FMESERVERUSER=MYCOMPANY\user1
FMESERVERUSERPASSWORD=password FMESERVERSHAREDDATA=\\machine1\share
/qb /norestart"'
Invoking the .msi File to Install, Following Manual Extraction
Examples
Install with all default options (similar to Express install), with logging enabled
msiexec /i fme-server-win-x64.msi /qb /norestart /l*v
installFMEServerLog.txt
Install core only with an FME Server System Share directory on a share on another
machine named "\\machine1\share"
msiexec /i fme-server-win-x64.msi ADDLOCAL=FMEServerCore,Complete
FMESERVERUSER=MYCOMPANY\user1 FMESERVERUSERPASSWORD=password
FMESERVERSHAREDDATA="\\machine1\share" /qb /norestart /l*v
installFMEServerLog.txt
227
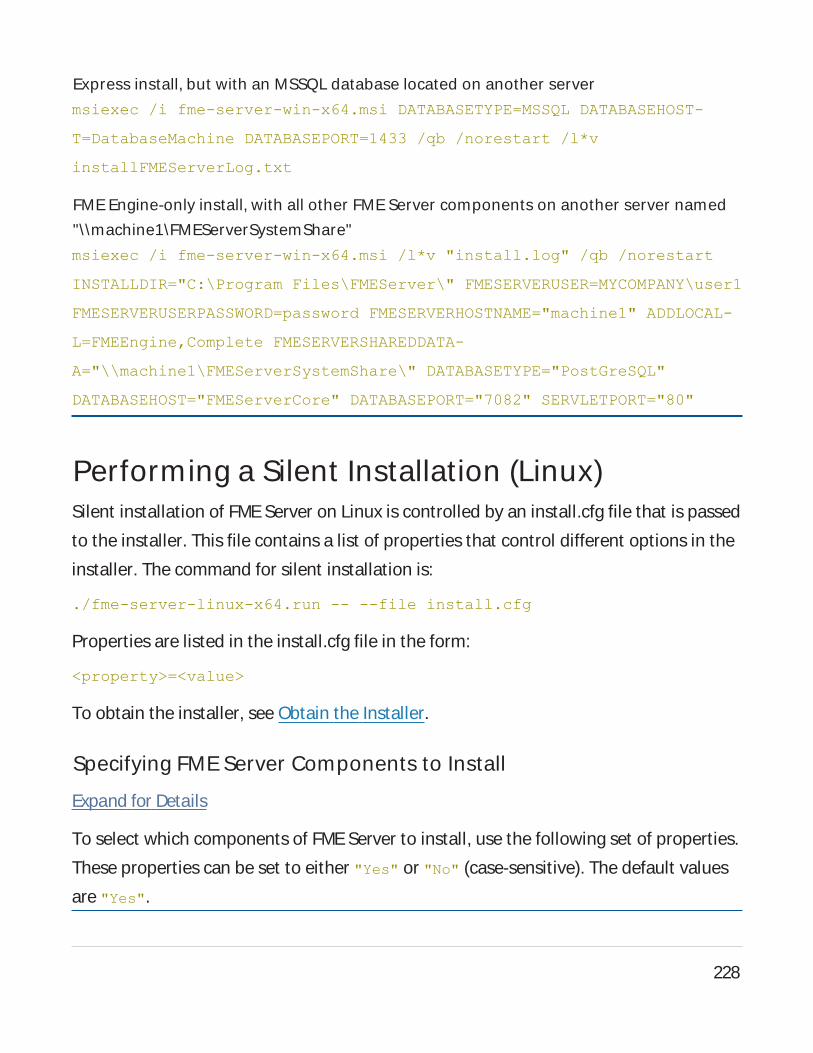
Express install, but with an MSSQL database located on another server
msiexec /i fme-server-win-x64.msi DATABASETYPE=MSSQL DATABASEHOST-
T=DatabaseMachine DATABASEPORT=1433 /qb /norestart /l*v
installFMEServerLog.txt
FME Engine-only install, with all other FME Server components on another server named
"\\machine1\FMEServerSystemShare"
msiexec /i fme-server-win-x64.msi /l*v "install.log" /qb /norestart
INSTALLDIR="C:\Program Files\FMEServer\" FMESERVERUSER=MYCOMPANY\user1
FMESERVERUSERPASSWORD=password FMESERVERHOSTNAME="machine1" ADDLOCAL-
L=FMEEngine,Complete FMESERVERSHAREDDATA-
A="\\machine1\FMEServerSystemShare\" DATABASETYPE="PostGreSQL"
DATABASEHOST="FMEServerCore" DATABASEPORT="7082" SERVLETPORT="80"
Performing a Silent Installation (Linux)Silent installation of FME Server on Linux is controlled by an install.cfg file that is passed
to the installer. This file contains a list of properties that control different options in the
installer. The command for silent installation is:
./fme-server-linux-x64.run -- --file install.cfg
Properties are listed in the install.cfg file in the form:
<property>=<value>
To obtain the installer, see Obtain the Installer.
Specifying FME Server Components to Install
Expand for Details
To select which components of FME Server to install, use the following set of properties.
These properties can be set to either "Yes" or "No" (case-sensitive). The default values
are "Yes".
228
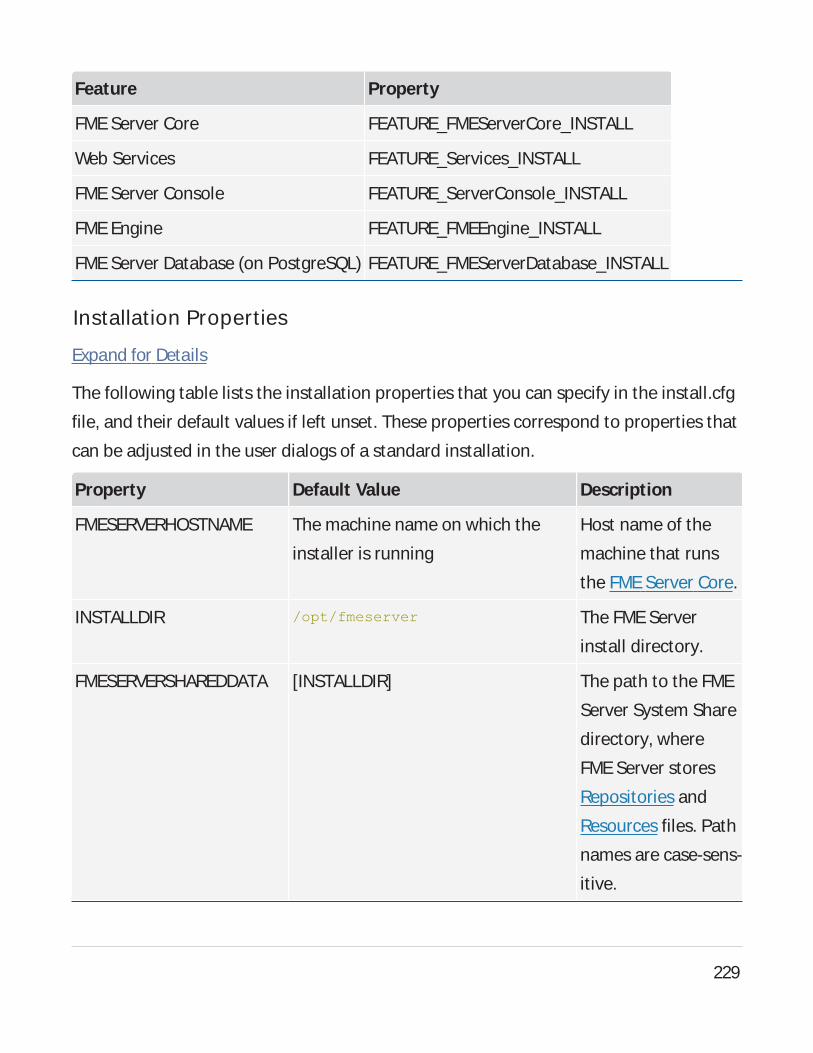
Feature Property
FMEServer Core FEATURE_FMEServerCore_INSTALL
Web Services FEATURE_Services_INSTALL
FME Server Console FEATURE_ServerConsole_INSTALL
FME Engine FEATURE_FMEEngine_INSTALL
FME Server Database (on PostgreSQL) FEATURE_FMEServerDatabase_INSTALL
Installation Properties
Expand for Details
The following table lists the installation properties that you can specify in the install.cfg
file, and their default values if left unset. These properties correspond to properties that
can be adjusted in the user dialogs of a standard installation.
Property Default Value Description
FMESERVERHOSTNAME The machine name on which the
installer is running
Host name of the
machine that runs
the FMEServer Core.
INSTALLDIR /opt/fmeserver The FMEServer
install directory.
FMESERVERSHAREDDATA [INSTALLDIR] The path to the FME
Server System Share
directory, where
FMEServer stores
Repositories and
Resources files. Path
names are case-sens-
itive.
229
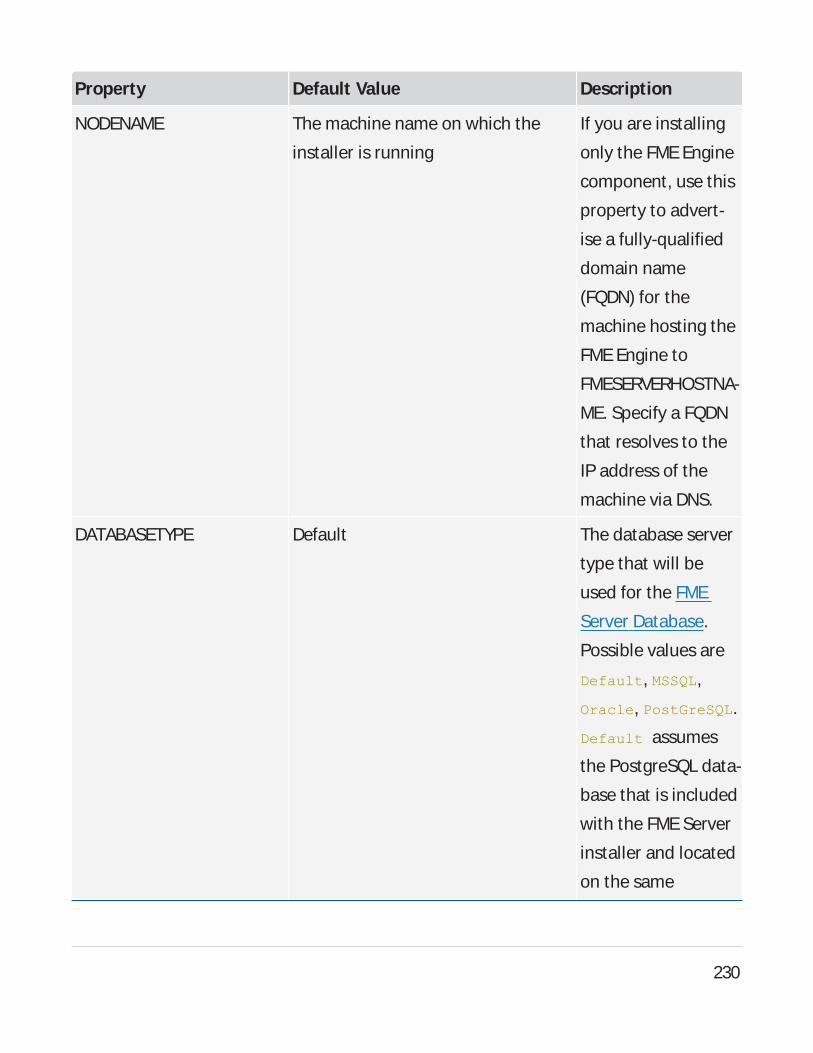
Property Default Value Description
NODENAME The machine name on which the
installer is running
If you are installing
only the FME Engine
component, use this
property to advert-
ise a fully-qualified
domain name
(FQDN) for the
machine hosting the
FME Engine to
FMESERVERHOSTNA-
ME. Specify a FQDN
that resolves to the
IP address of the
machine via DNS.
DATABASETYPE Default The database server
type that will be
used for the FME
Server Database.
Possible values are
Default, MSSQL,
Oracle, PostGreSQL.
Default assumes
the PostgreSQL data-
base that is included
with the FMEServer
installer and located
on the same
230
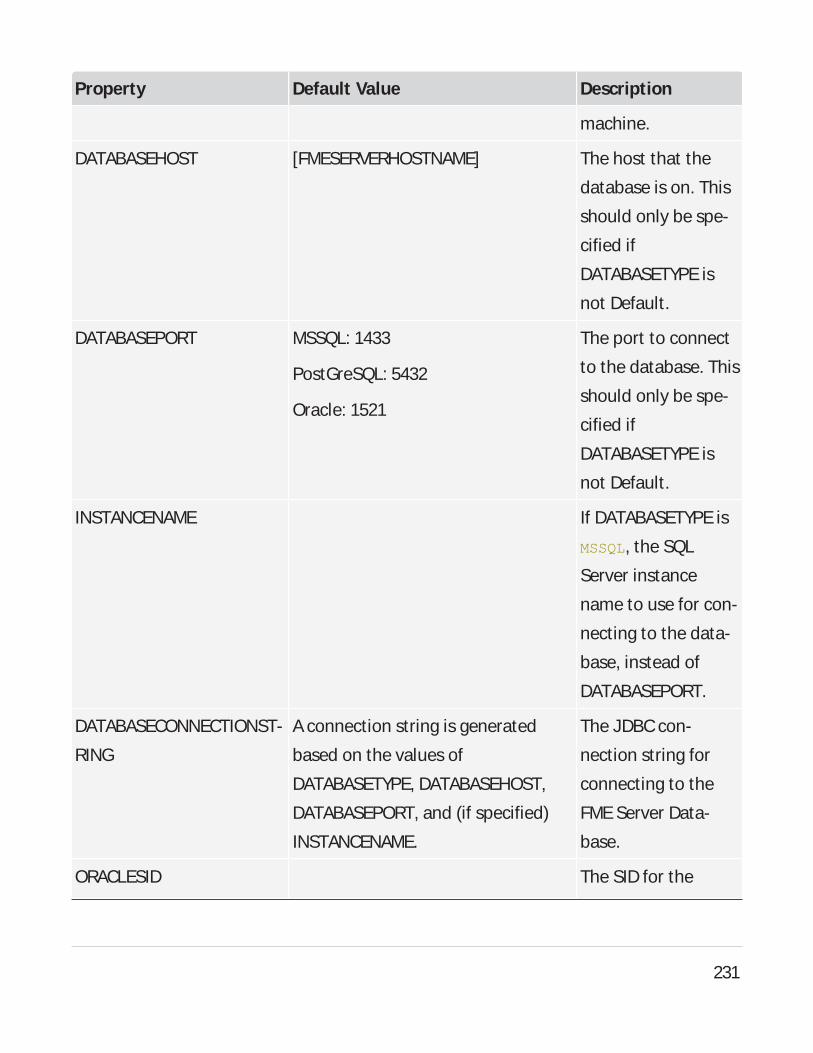
Property Default Value Description
machine.
DATABASEHOST [FMESERVERHOSTNAME] The host that the
database is on. This
should only be spe-
cified if
DATABASETYPEis
not Default.
DATABASEPORT MSSQL: 1433
PostGreSQL: 5432
Oracle: 1521
The port to connect
to the database. This
should only be spe-
cified if
DATABASETYPEis
not Default.
INSTANCENAME If DATABASETYPEis
MSSQL, the SQL
Server instance
name to use for con-
necting to the data-
base, instead of
DATABASEPORT.
DATABASECONNECTIONST-
RING
Aconnection string is generated
based on the values of
DATABASETYPE, DATABASEHOST,
DATABASEPORT, and (if specified)
INSTANCENAME.
The JDBCcon-
nection string for
connecting to the
FME Server Data-
base.
ORACLESID The SID for the
231
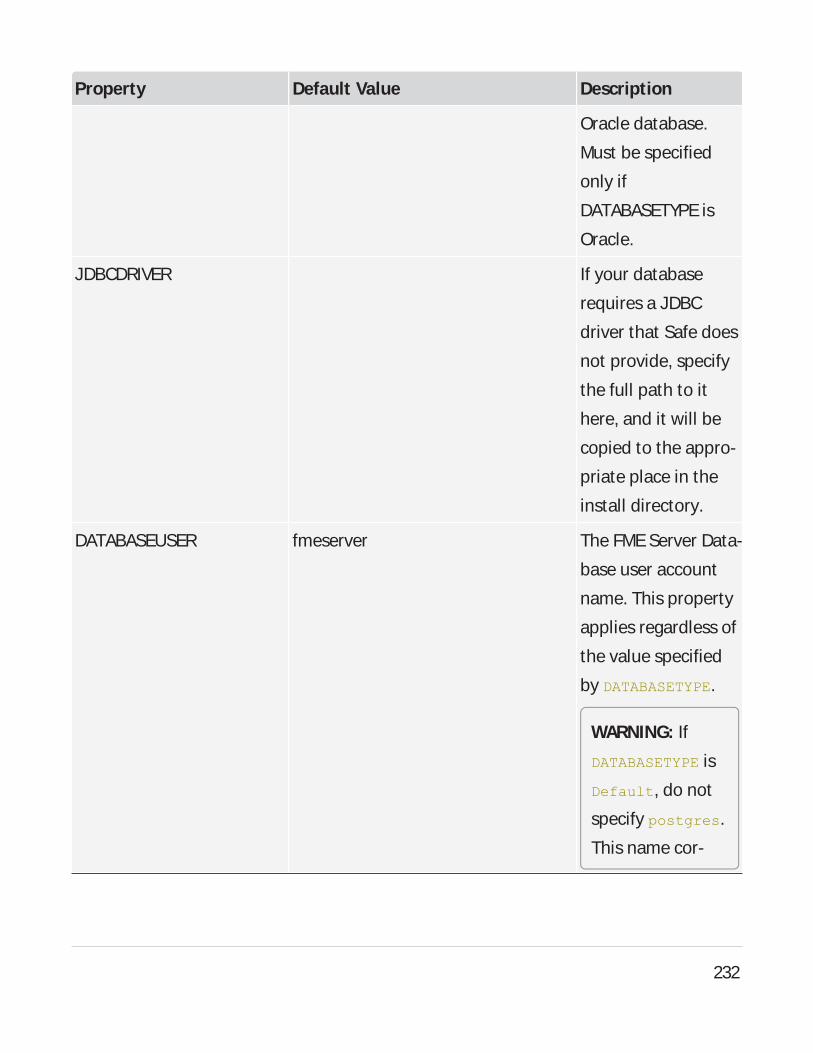
Property Default Value Description
Oracle database.
Must be specified
only if
DATABASETYPEis
Oracle.
JDBCDRIVER If your database
requires a JDBC
driver that Safe does
not provide, specify
the full path to it
here, and it will be
copied to the appro-
priate place in the
install directory.
DATABASEUSER fmeserver The FME Server Data-
base user account
name. This property
applies regardless of
the value specified
by DATABASETYPE.
WARNING: If
DATABASETYPE is
Default, do not
specify postgres.
This name cor-
232
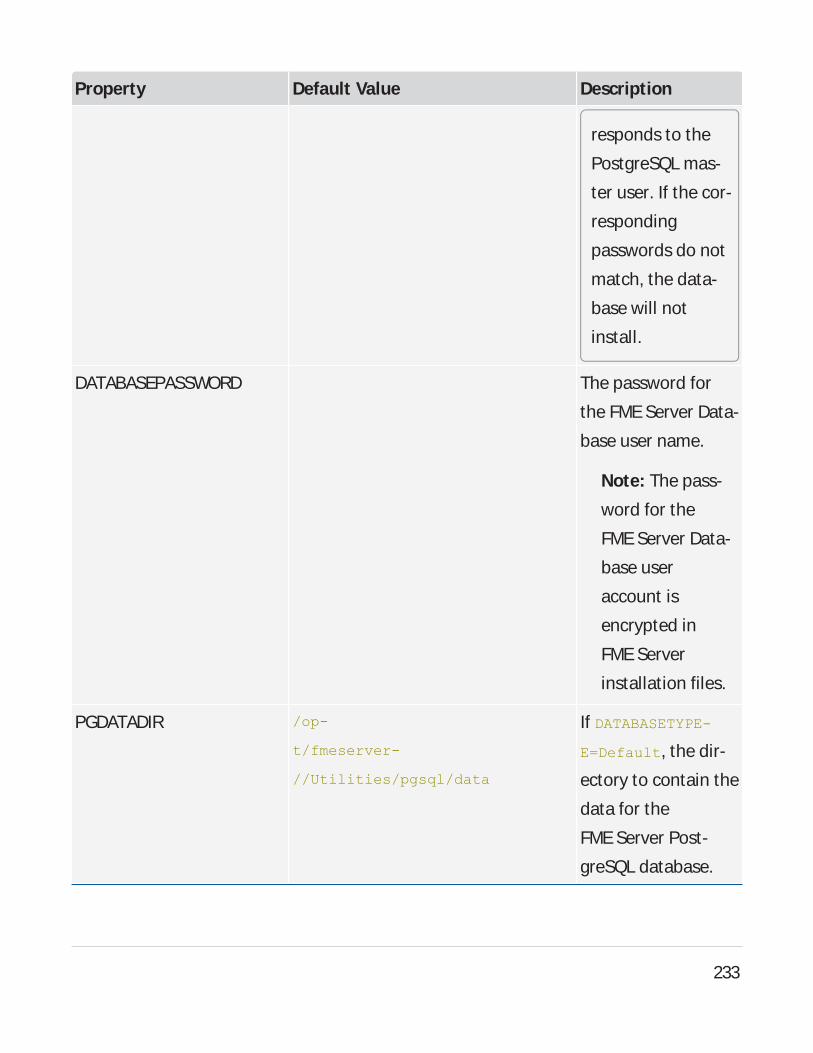
Property Default Value Description
responds to the
PostgreSQL mas-
ter user. If the cor-
responding
passwords do not
match, the data-
base will not
install.
DATABASEPASSWORD The password for
the FMEServer Data-
base user name.
Note: The pass-
word for the
FME Server Data-
base user
account is
encrypted in
FME Server
installation files.
PGDATADIR /op-
t/fmeserver-
//Utilities/pgsql/data
If DATABASETYPE-
E=Default, the dir-
ectory to contain the
data for the
FME Server Post-
greSQL database.
233
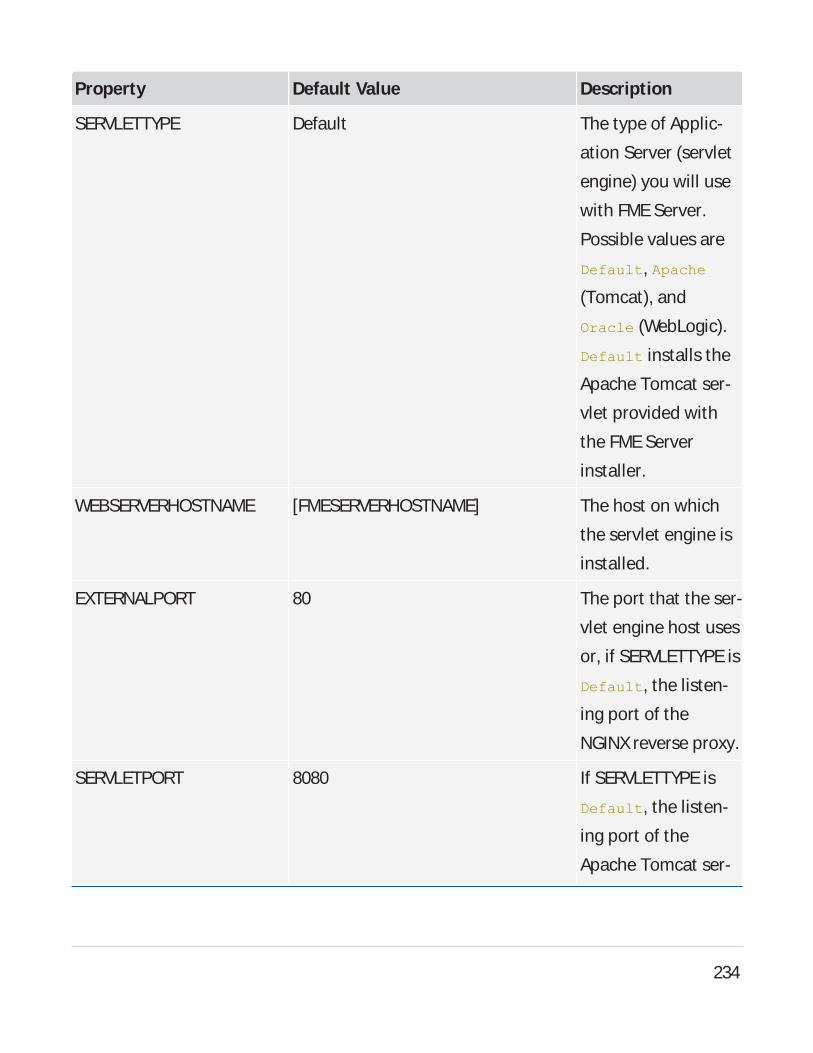
Property Default Value Description
SERVLETTYPE Default The type of Applic-
ation Server (servlet
engine) you will use
with FMEServer.
Possible values are
Default, Apache
(Tomcat), and
Oracle (WebLogic).
Default installs the
Apache Tomcat ser-
vlet provided with
the FME Server
installer.
WEBSERVERHOSTNAME [FMESERVERHOSTNAME] The host on which
the servlet engine is
installed.
EXTERNALPORT 80 The port that the ser-
vlet engine host uses
or, if SERVLETTYPEis
Default, the listen-
ing port of the
NGINXreverse proxy.
SERVLETPORT 8080 If SERVLETTYPEis
Default, the listen-
ing port of the
Apache Tomcat ser-
234

Property Default Value Description
vlet engine host.
Must be different
from
EXTERNALPORT.
WEBAPPSDIR [INSTALLDIR]\Util-
ities\tomcat\webapps
If an Apache Tomcat
servlet is already
installed on the
machine, the path to
the webapps dir-
ectory for the servlet
engine, for installing
WARfiles. This is a
necessary property
for distributed web
applications.
SHAREDTOMCATLIB [INSTALLDIR]\Utilities\tomcat\lib If an Apache Tomcat
servlet is already
installed on the
machine, the path to
the lib directory for
the servlet engine,
for installing JAR
files. This is a neces-
sary property for dis-
tributed web
applications.
235
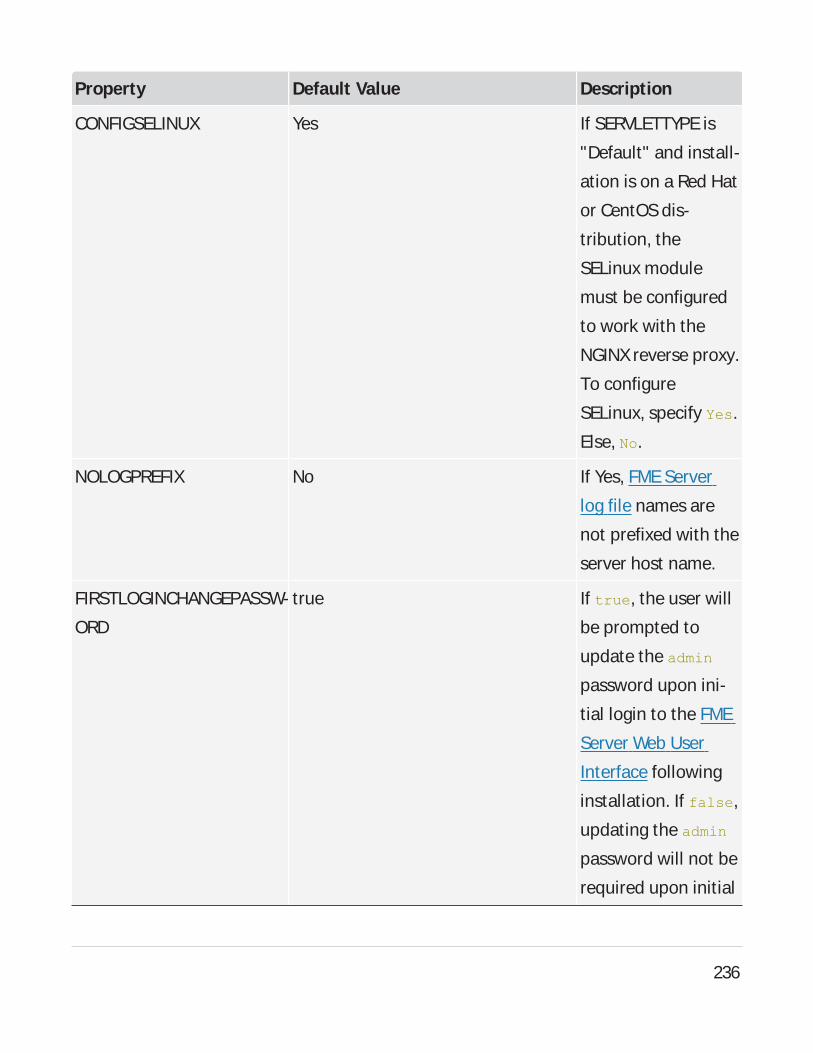
Property Default Value Description
CONFIGSELINUX Yes If SERVLETTYPEis
"Default" and install-
ation is on a Red Hat
or CentOSdis-
tribution, the
SELinux module
must be configured
to work with the
NGINXreverse proxy.
To configure
SELinux, specify Yes.
Else, No.
NOLOGPREFIX No If Yes, FME Server
log file names are
not prefixed with the
server host name.
FIRSTLOGINCHANGEPASSW-
ORD
true If true, the user will
be prompted to
update the admin
password upon ini-
tial login to the FME
Server Web User
Interface following
installation. If false,
updating the admin
password will not be
required upon initial
236
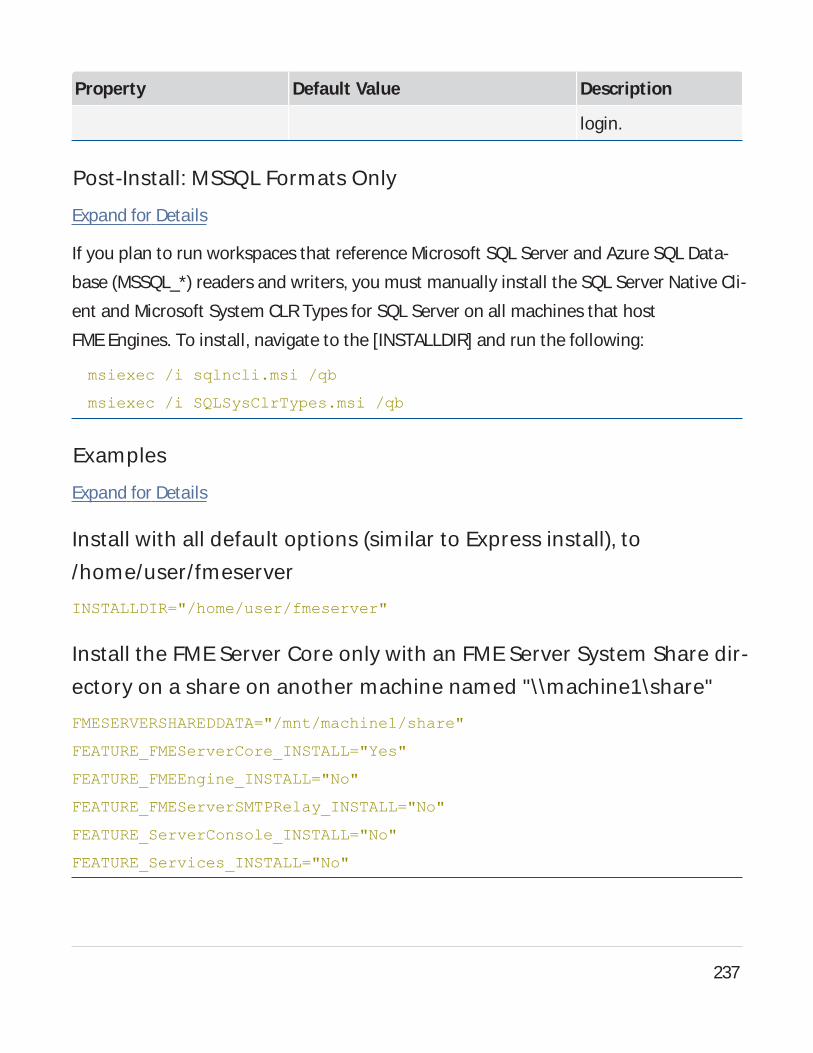
Property Default Value Description
login.
Post-Install: MSSQL Formats Only
Expand for Details
If you plan to run workspaces that reference Microsoft SQL Server and Azure SQL Data-
base (MSSQL_*) readers and writers, you must manually install the SQL Server Native Cli-
ent and Microsoft System CLRTypes for SQL Server on all machines that host
FME Engines. To install, navigate to the [INSTALLDIR] and run the following:
msiexec /i sqlncli.msi /qb
msiexec /i SQLSysClrTypes.msi /qb
Examples
Expand for Details
Install with all default options (similar to Express install), to
/home/user/fmeserver
INSTALLDIR="/home/user/fmeserver"
Install the FME Server Core only with an FME Server System Share dir-
ectory on a share on another machine named "\\machine1\share"
FMESERVERSHAREDDATA="/mnt/machine1/share"
FEATURE_FMEServerCore_INSTALL="Yes"
FEATURE_FMEEngine_INSTALL="No"
FEATURE_FMEServerSMTPRelay_INSTALL="No"
FEATURE_ServerConsole_INSTALL="No"
FEATURE_Services_INSTALL="No"
237
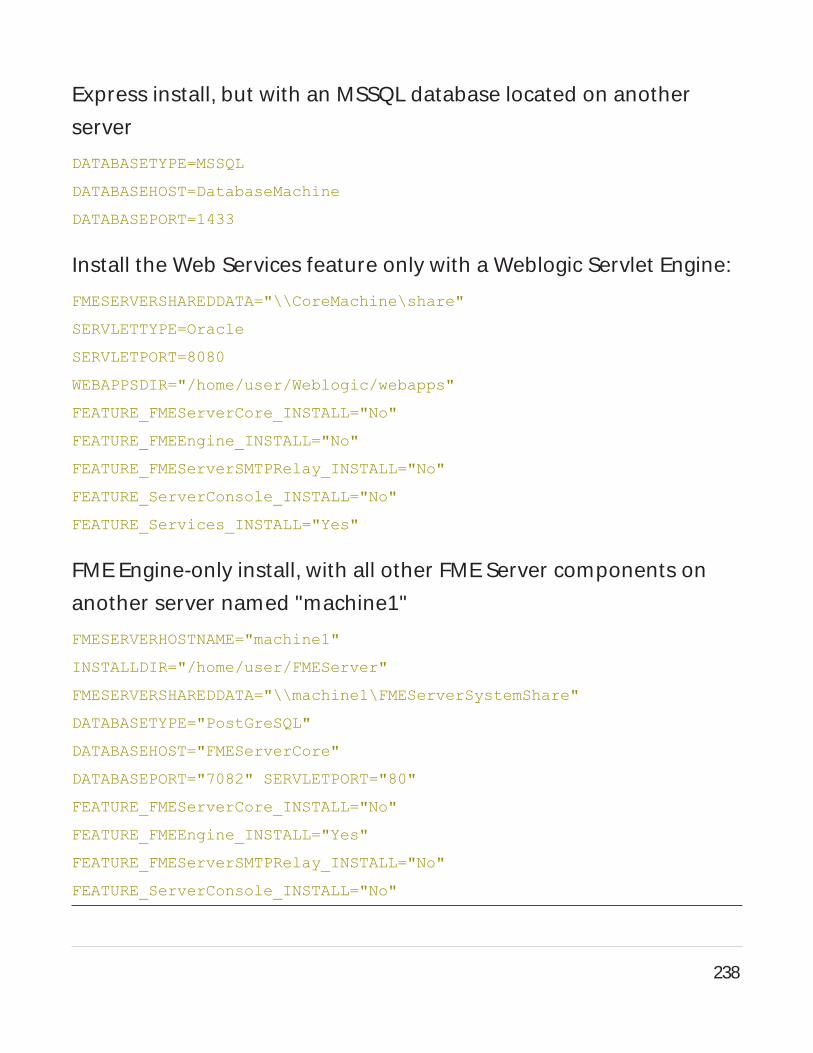
Express install, but with an MSSQL database located on another
server
DATABASETYPE=MSSQL
DATABASEHOST=DatabaseMachine
DATABASEPORT=1433
Install the Web Services feature only with a Weblogic Servlet Engine:
FMESERVERSHAREDDATA="\\CoreMachine\share"
SERVLETTYPE=Oracle
SERVLETPORT=8080
WEBAPPSDIR="/home/user/Weblogic/webapps"
FEATURE_FMEServerCore_INSTALL="No"
FEATURE_FMEEngine_INSTALL="No"
FEATURE_FMEServerSMTPRelay_INSTALL="No"
FEATURE_ServerConsole_INSTALL="No"
FEATURE_Services_INSTALL="Yes"
FME Engine-only install, with all other FME Server components on
another server named "machine1"
FMESERVERHOSTNAME="machine1"
INSTALLDIR="/home/user/FMEServer"
FMESERVERSHAREDDATA="\\machine1\FMEServerSystemShare"
DATABASETYPE="PostGreSQL"
DATABASEHOST="FMEServerCore"
DATABASEPORT="7082" SERVLETPORT="80"
FEATURE_FMEServerCore_INSTALL="No"
FEATURE_FMEEngine_INSTALL="Yes"
FEATURE_FMEServerSMTPRelay_INSTALL="No"
FEATURE_ServerConsole_INSTALL="No"
238
FEATURE_Services_INSTALL="No"
Deploying FME Server with Docker ComposeAs a multi-container application, FMEServer supports deployment with Docker Com-
pose. We recommend deploying FME Server this way only if you have worked with
Docker before and understand its architecture.
Limitations and Considerations
Expand for details
When deciding if you want to deploy FMEServer with Docker Compose, keep in mind
the following:
l Container deployments of FMEServer are built on Linux. Review our FMEformats
matrix and compare by platforms to see if the formats you plan to use are available
on Linux. In particular:l Certain Esri formats cannot be used in a Docker deployment due to operating
system compatibility. For integrating Esri formats with FMEServer, we recom-
mend installing FMEServer on Windows machines and not using containers. Esri
integrations with ArcPy/ArcGISPro require Windows libraries. ArcGISServer for
Linux is not a usable alternative.
l Database formats (such as SQL Server) require the JDBCversion of the format,
which may require workspace modification if publishing from FMEDesktop on
Windows.
l To use third-party libraries, JDBCdrivers, and similar requires creating your own
FMEServer engine container image.
239
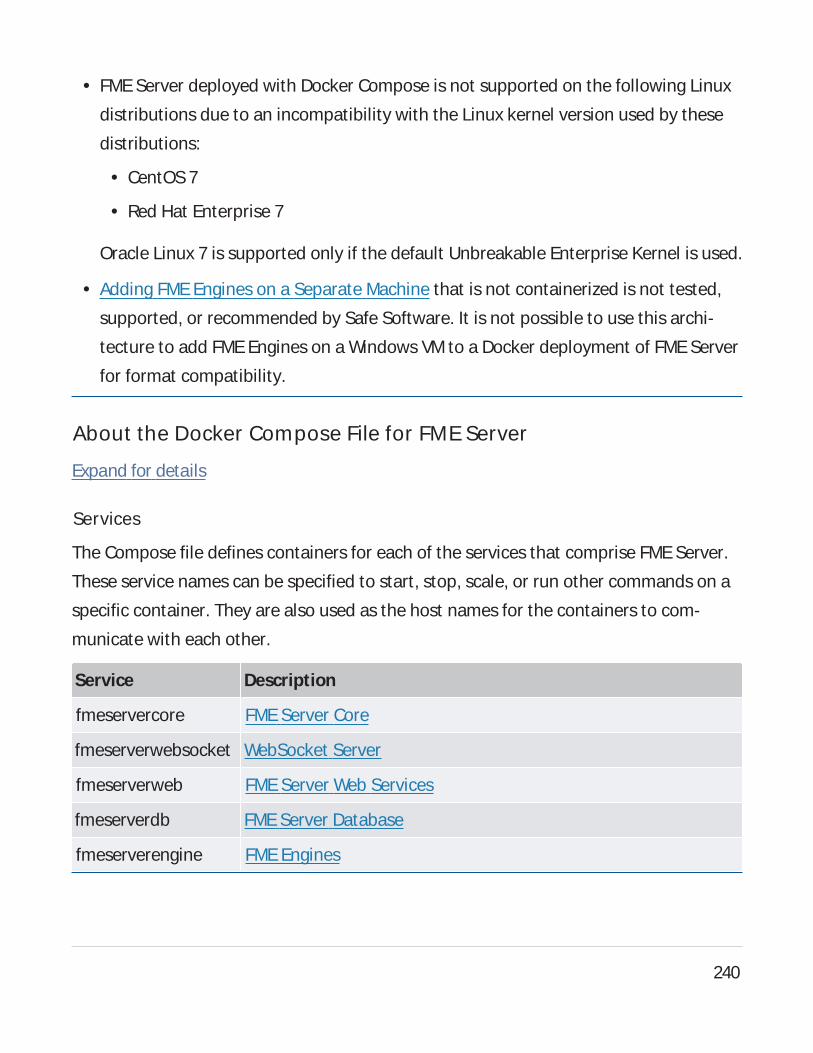
l FME Server deployed with Docker Compose is not supported on the following Linux
distributions due to an incompatibility with the Linux kernel version used by these
distributions:
l CentOS7
l Red Hat Enterprise 7
Oracle Linux 7 is supported only if the default Unbreakable Enterprise Kernel is used.
l Adding FMEEngines on a Separate Machine that is not containerized is not tested,
supported, or recommended by Safe Software. It is not possible to use this archi-
tecture to add FMEEngines on a Windows VM to a Docker deployment of FMEServer
for format compatibility.
About the Docker Compose File for FME Server
Expand for details
Services
The Compose file defines containers for each of the services that comprise FMEServer.
These service names can be specified to start, stop, scale, or run other commands on a
specific container. They are also used as the host names for the containers to com-
municate with each other.
Service Description
fmeservercore FMEServer Core
fmeserverwebsocket WebSocket Server
fmeserverweb FMEServer Web Services
fmeserverdb FMEServer Database
fmeserverengine FME Engines
240
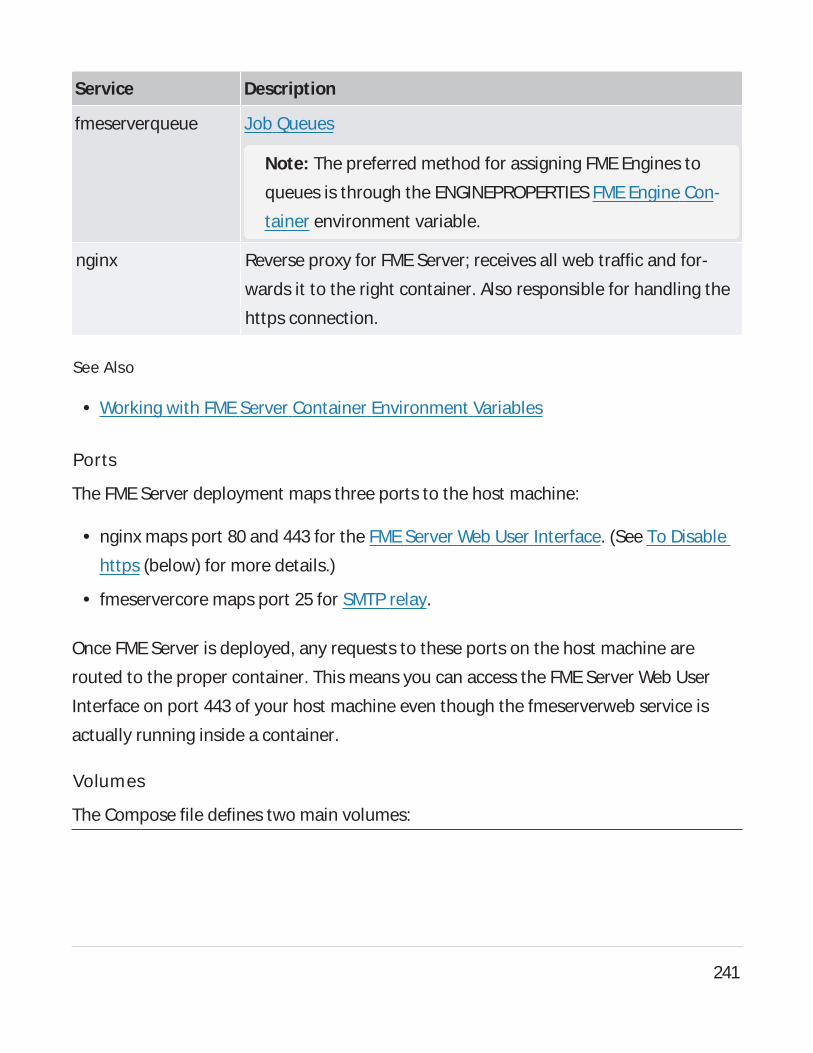
Service Description
fmeserverqueue Job Queues
Note: The preferred method for assigning FME Engines to
queues is through the ENGINEPROPERTIESFME Engine Con-
tainer environment variable.
nginx Reverse proxy for FMEServer; receives all web traffic and for-
wards it to the right container. Also responsible for handling the
https connection.
See Also
l Working with FMEServer Container Environment Variables
Ports
The FMEServer deployment maps three ports to the host machine:
l nginx maps port 80 and 443 for the FMEServer Web User Interface. (See To Disable
https (below) for more details.)
l fmeservercore maps port 25 for SMTP relay.
Once FMEServer is deployed, any requests to these ports on the host machine are
routed to the proper container. This means you can access the FMEServer Web User
Interface on port 443 of your host machine even though the fmeserverweb service is
actually running inside a container.
Volumes
The Compose file defines two main volumes:
241
l Database - Where the fmeserverdb service stores its database files.
l FMEServer System Share - Actually comprised of several volumes that restrict
access to certain folders from containers that do not require it.
Deploying and Administering FME Server on Docker Compose
Expand for details
Download the Docker Compose File for FME Server
Docker Compose files are available at https://www.safe.com/support/downloads/ for
each available tag (version) of the FMEServer container deployment.
Working with the docker-compose Command
Use the docker-compose command to create, start, and stop FMEServer. This command
looks in the current directory for a file named docker-compose.yaml, and uses that for
the definition of what to deploy. Alternatively, you can pass in a path to a compose file
using the -f parameter. Example commands below assume that a docker-com-
pose.yaml exists in the current working directory.
To Launch a New FME Server Stack
Use the up parameter to bring up a new set of containers as defined in docker-com-
pose.yaml. Pass in the -d parameter to run in the background.
docker-compose up -d
Docker Compose creates the networks, volumes and containers defined in the Compose
file. When complete, you can connect to the FMEServer Web User Interface on https://-
localhost/. The administrator user name and password defaults to admin and admin,
respectively. You can change this on the Users page.
To Launch a New FME Server Stack with a Dynamic Engine (CPU Usage) License
docker-compose -f docker-compose.yaml -f docker-compose-dynamic-
engine.yaml up -d
242
To Stop a Running FME Server
docker-compose stop
To Start FME Server
docker-compose start
To Restart FME Server
docker-compose restart
To Specify Services in the Compose File
You can specify the Services defined in the Compose file to start and stop. For example,
to stop just the FMEServer Web Services container:
docker-compose stop fmeserverweb
To Scale FME Engines
You can scale the number of running engines by launching additional FME Engines con-
tainers. (For more information, see Configuring the Number of FMEEngines to Start.)
Use the scale command to specify the number of FME Engines you want after the com-
mand executes. The following command scales the number of engines to 4:
docker-compose up --scale fmeserverengine=4
To Remove an FME Server Deployment
The down command destroys all containers, volumes and networks that were created in
the stack. The -v parameter removes the volumes as well.
docker-compose down -v
Without the -v parameter, the Database and FMEServer System Share volumes are not
destroyed, and if the same stack were launched again using up, no data would be lost.
To Upgrade an FME Server Deployment
Note: See also Upgrading to a Patch Build in Docker.
243
1. Make a local backup of FMEServer on the Backup & Restore page of the Web User
Interface. Make sure this file is saved somewhere outside of the FMEServer
Resources folders, as those will be removed.
2. Remove the containers, volumes and networks.
docker-compose down -v
3. Download the latest version of the containers.
docker-compose pull
4. Deploy the new version of the containers.
docker-compose up -d
5. Restore your backup on the Backup & Restore page of the Web User Interface by
uploading the backup file you saved in step 1.
To Run Multiple FME Servers on One Machine
While not recommended for production machines, running multiple FMEServer stacks
on a single machine may be useful if you are prototyping or testing workflows on mul-
tiple versions of FMEServer.
When running multiple FME Servers on the same machine, keep in mind the following:
l When launching a stack, docker-compose prepends a project name, separated by an
underscore, to all the containers, volumes and networks. The project name defaults
to the name of the working directory when the stack is created. In the image below,
the stack was launched in a directory named server, so server_ is prepended to all
the resources created:
244
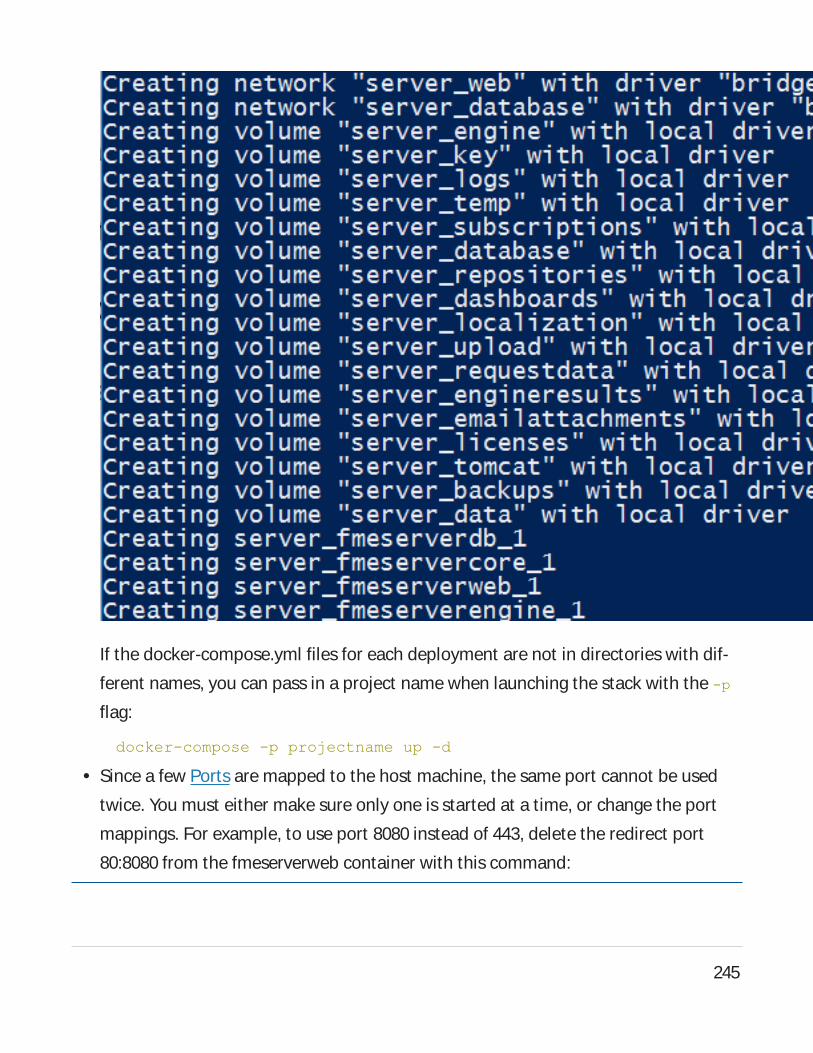
If the docker-compose.yml files for each deployment are not in directories with dif-
ferent names, you can pass in a project name when launching the stack with the -p
flag:
docker-compose -p projectname up -d
l Since a few Ports are mapped to the host machine, the same port cannot be used
twice. You must either make sure only one is started at a time, or change the port
mappings. For example, to use port 8080 instead of 443, delete the redirect port
80:8080 from the fmeserverweb container with this command:
245
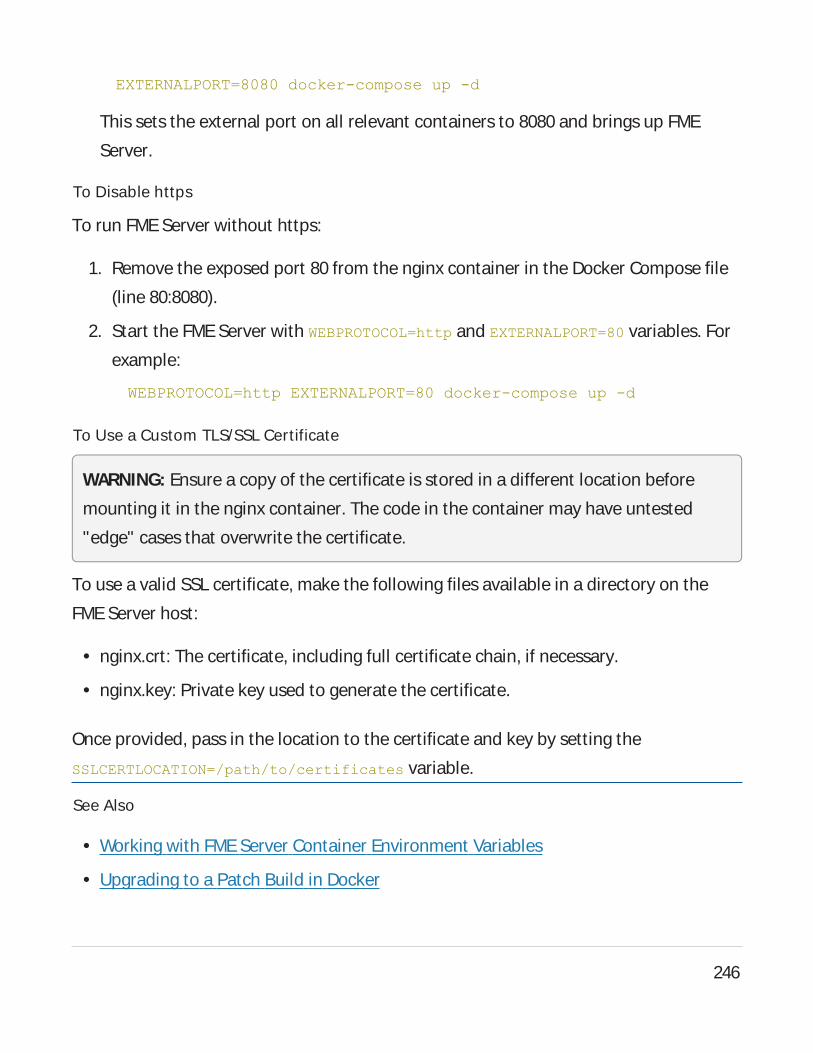
EXTERNALPORT=8080 docker-compose up -d
This sets the external port on all relevant containers to 8080 and brings up FME
Server.
To Disable https
To run FMEServer without https:
1. Remove the exposed port 80 from the nginx container in the Docker Compose file
(line 80:8080).
2. Start the FMEServer with WEBPROTOCOL=http and EXTERNALPORT=80 variables. For
example:
WEBPROTOCOL=http EXTERNALPORT=80 docker-compose up -d
To Use a Custom TLS/SSL Certificate
WARNING: Ensure a copy of the certificate is stored in a different location before
mounting it in the nginx container. The code in the container may have untested
"edge" cases that overwrite the certificate.
To use a valid SSL certificate, make the following files available in a directory on the
FMEServer host:
l nginx.crt: The certificate, including full certificate chain, if necessary.
l nginx.key: Private key used to generate the certificate.
Once provided, pass in the location to the certificate and key by setting the
SSLCERTLOCATION=/path/to/certificates variable.
See Also
l Working with FMEServer Container Environment Variables
l Upgrading to a Patch Build in Docker
246
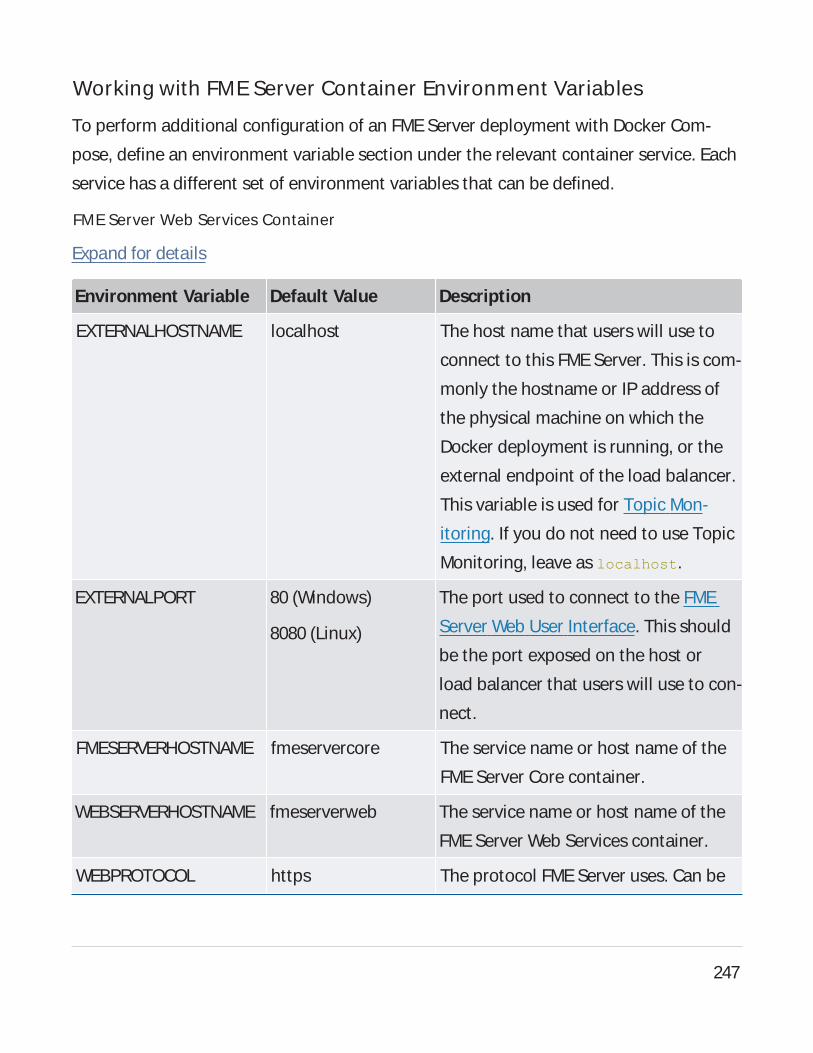
Working with FME Server Container Environment Variables
To perform additional configuration of an FMEServer deployment with Docker Com-
pose, define an environment variable section under the relevant container service. Each
service has a different set of environment variables that can be defined.
FME Server Web Services Container
Expand for details
Environment Variable Default Value Description
EXTERNALHOSTNAME localhost The host name that users will use to
connect to this FMEServer. This is com-
monly the hostname or IP address of
the physical machine on which the
Docker deployment is running, or the
external endpoint of the load balancer.
This variable is used for Topic Mon-
itoring. If you do not need to use Topic
Monitoring, leave as localhost.
EXTERNALPORT 80 (Windows)
8080 (Linux)
The port used to connect to the FME
Server Web User Interface. This should
be the port exposed on the host or
load balancer that users will use to con-
nect.
FMESERVERHOSTNAME fmeservercore The service name or host name of the
FMEServer Core container.
WEBSERVERHOSTNAME fmeserverweb The service name or host name of the
FMEServer Web Services container.
WEBPROTOCOL https The protocol FMEServer uses. Can be
247
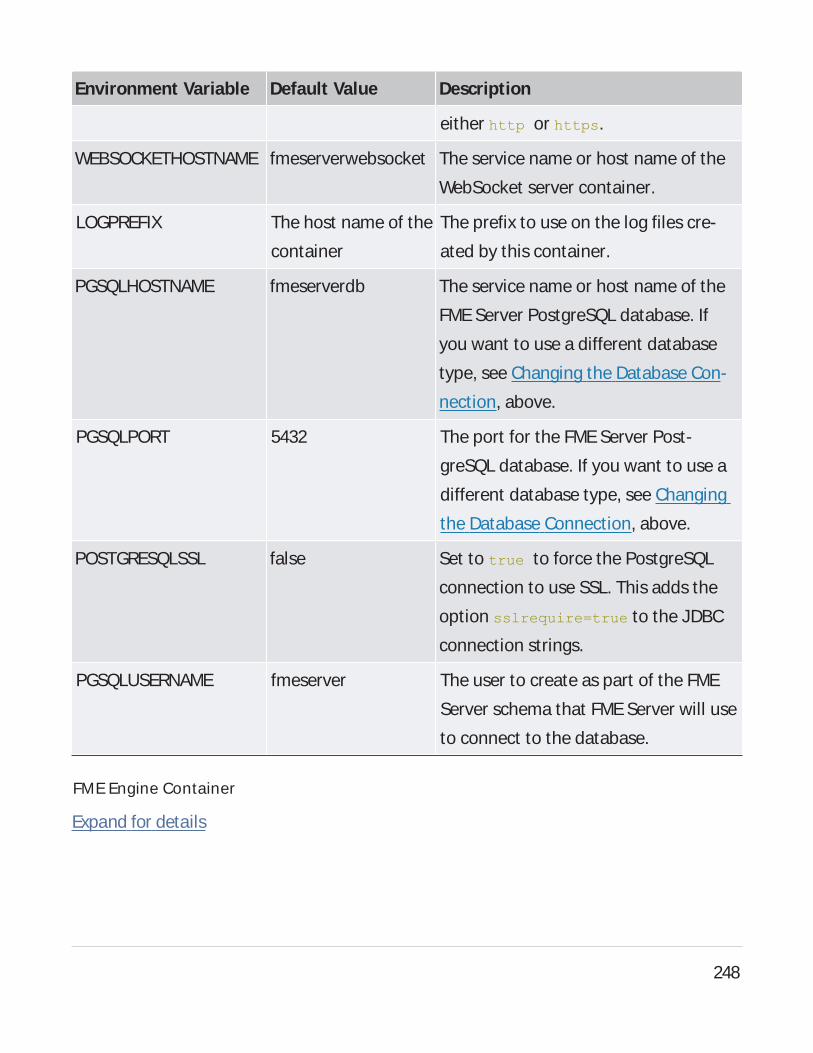
Environment Variable Default Value Description
either http or https.
WEBSOCKETHOSTNAME fmeserverwebsocket The service name or host name of the
WebSocket server container.
LOGPREFIX The host name of the
container
The prefix to use on the log files cre-
ated by this container.
PGSQLHOSTNAME fmeserverdb The service name or host name of the
FMEServer PostgreSQL database. If
you want to use a different database
type, see Changing the Database Con-
nection, above.
PGSQLPORT 5432 The port for the FMEServer Post-
greSQL database. If you want to use a
different database type, see Changing
the Database Connection, above.
POSTGRESQLSSL false Set to true to force the PostgreSQL
connection to use SSL. This adds the
option sslrequire=true to the JDBC
connection strings.
PGSQLUSERNAME fmeserver The user to create as part of the FME
Server schema that FMEServer will use
to connect to the database.
FME Engine Container
Expand for details
248

Environment Variable Default Value Description
ENGINEPROPERTIES Acomma-delimited list of properties to set on
this engine. Engine properties are useful when
assigning FMEEngines to queues.
EXTERNALHOSTNAME localhost The host name that users will use to connect
to this FMEServer. This is commonly the host-
name or IP address of the physical machine on
which the Docker deployment is running. This
is used for the data download results URL that
is returned after running a job in the Data
Download Service. If you don’t use the Data
Download service, leave as localhost.
EXTERNALPORT 443 Port used to connect to FMEServer.
FMESERVERHOSTNAME fmeservercore The service name or host name of the FME
Server Core container.
PGSQLHOSTNAME fmeserverdb The service name or host name of the FME
Server PostgreSQL database. If you want to
use a different database type, see Changing
the Database Connection, above.
PGSQLPORT 5432 The port for the FMEServer PostgreSQL data-
base. If you want to use a different database
type, see Changing the Database Connection,
above.
POSTGRESQLSSL false Set to true to force the PostgreSQL con-
nection to use SSL. This adds the option
sslrequire=true to the JDBCconnection
249
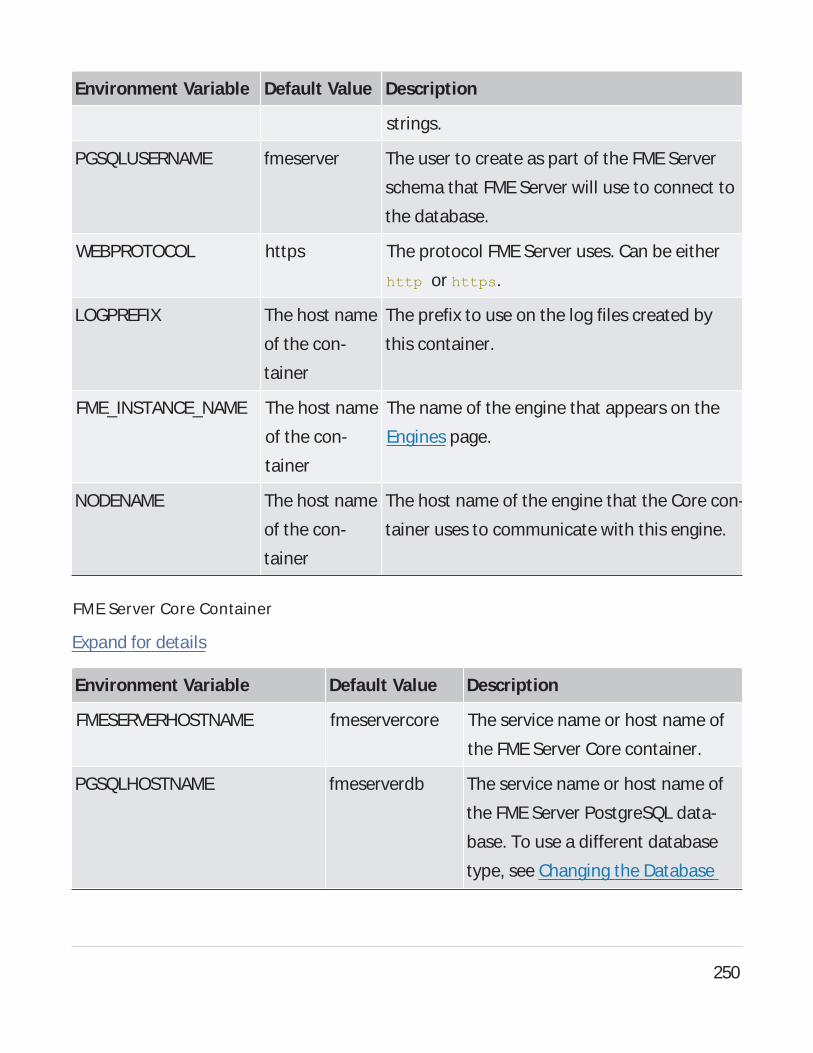
Environment Variable Default Value Description
strings.
PGSQLUSERNAME fmeserver The user to create as part of the FMEServer
schema that FMEServer will use to connect to
the database.
WEBPROTOCOL https The protocol FMEServer uses. Can be either
http or https.
LOGPREFIX The host name
of the con-
tainer
The prefix to use on the log files created by
this container.
FME_INSTANCE_NAME The host name
of the con-
tainer
The name of the engine that appears on the
Engines page.
NODENAME The host name
of the con-
tainer
The host name of the engine that the Core con-
tainer uses to communicate with this engine.
FME Server Core Container
Expand for details
Environment Variable Default Value Description
FMESERVERHOSTNAME fmeservercore The service name or host name of
the FMEServer Core container.
PGSQLHOSTNAME fmeserverdb The service name or host name of
the FMEServer PostgreSQL data-
base. To use a different database
type, see Changing the Database
250

Environment Variable Default Value Description
Connection, above.
PGSQLPORT 5432 The port for the FMEServer Post-
greSQL database. To use a different
database type, see Changing the
Database Connection, above.
POSTGRESQLSSL false Set to true to force the Post-
greSQL connection to use SSL. This
adds the option sslrequire=true
to the JDBCconnection strings.
PGSQLUSERNAME fmeserver The user to create as part of the
FMEServer schema that FMEServer
will use to connect to the database.
WEBSERVERHOSTNAME fmeserverweb The service name or host name of
the FMEServer Web Services con-
tainer.
REDISHOSTS fmeserverqueue The service name or host name of
the Redis queue.
REDISPORT 6379 The port for the Redis queue.
PORTPOOL This setting is required only if FME
Engines that are not running in
Docker are connecting to this FME
Server Core. If engines are con-
necting from outside the docker
network, perform the following:
251
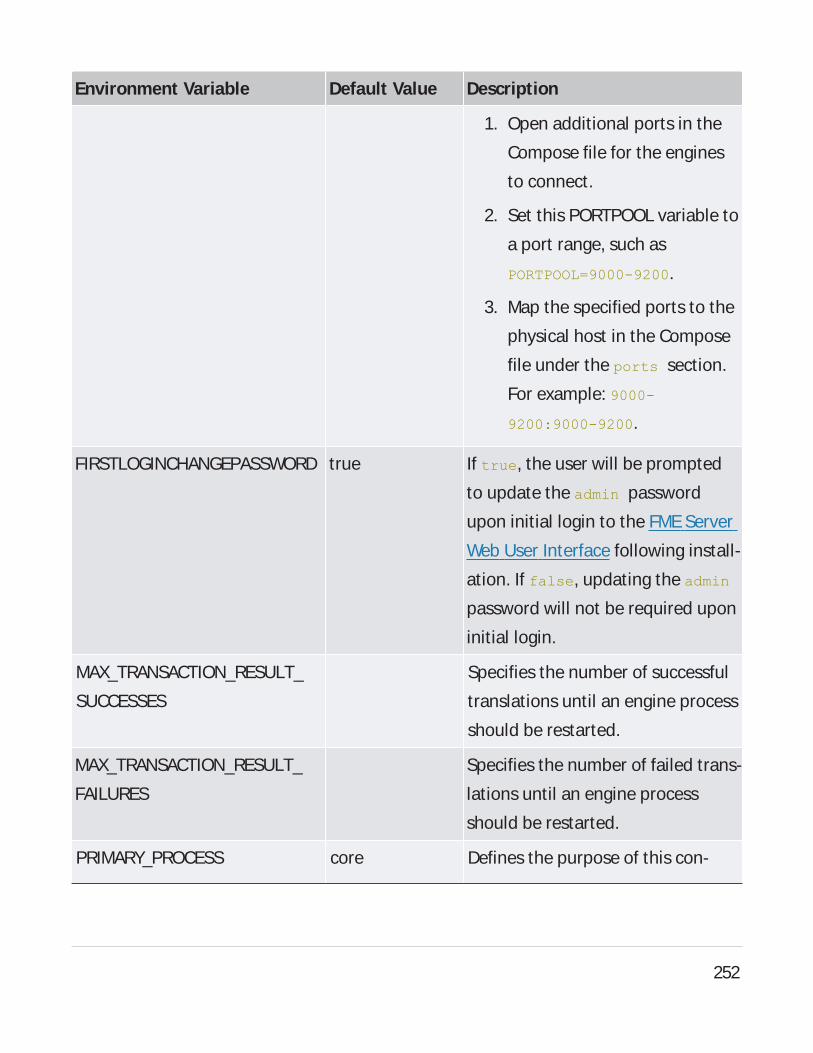
Environment Variable Default Value Description
1. Open additional ports in the
Compose file for the engines
to connect.
2. Set this PORTPOOL variable to
a port range, such as
PORTPOOL=9000-9200.
3. Map the specified ports to the
physical host in the Compose
file under the ports section.
For example: 9000-
9200:9000-9200.
FIRSTLOGINCHANGEPASSWORD true If true, the user will be prompted
to update the admin password
upon initial login to the FMEServer
Web User Interface following install-
ation. If false, updating the admin
password will not be required upon
initial login.
MAX_TRANSACTION_RESULT_
SUCCESSES
Specifies the number of successful
translations until an engine process
should be restarted.
MAX_TRANSACTION_RESULT_
FAILURES
Specifies the number of failed trans-
lations until an engine process
should be restarted.
PRIMARY_PROCESS core Defines the purpose of this con-
252
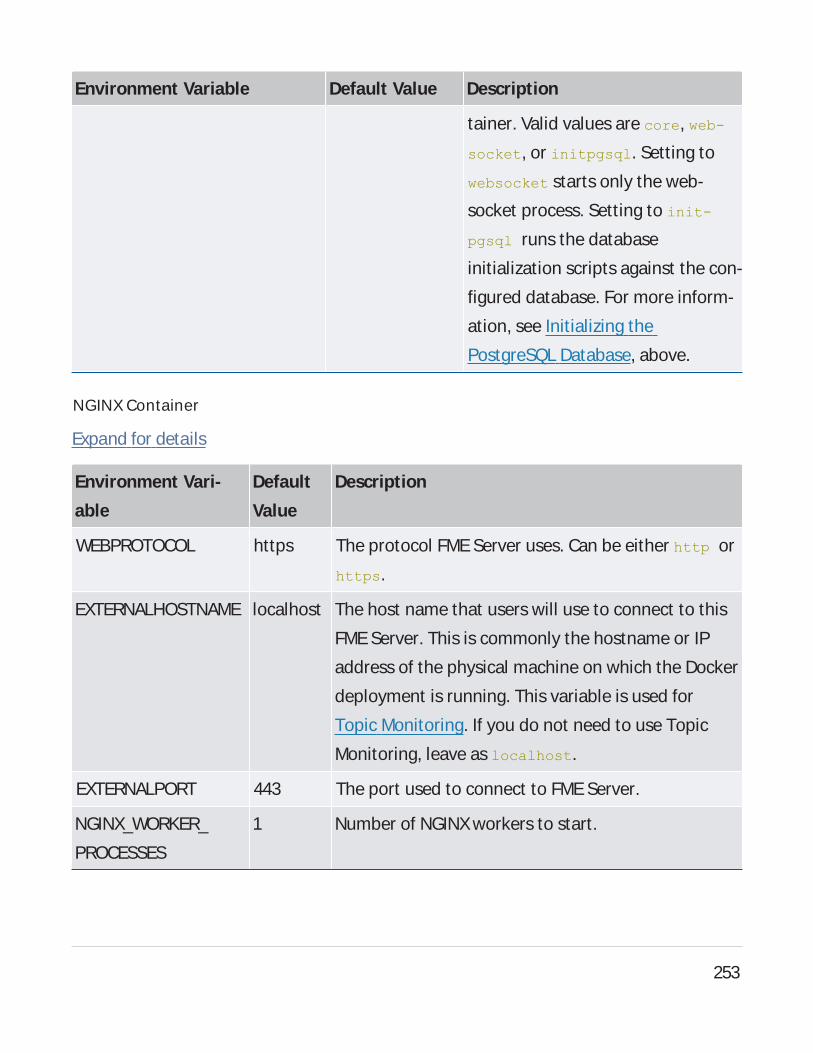
Environment Variable Default Value Description
tainer. Valid values are core, web-
socket, or initpgsql. Setting to
websocket starts only the web-
socket process. Setting to init-
pgsql runs the database
initialization scripts against the con-
figured database. For more inform-
ation, see Initializing the
PostgreSQL Database, above.
NGINX Container
Expand for details
Environment Vari-
able
Default
Value
Description
WEBPROTOCOL https The protocol FMEServer uses. Can be either http or
https.
EXTERNALHOSTNAME localhost The host name that users will use to connect to this
FMEServer. This is commonly the hostname or IP
address of the physical machine on which the Docker
deployment is running. This variable is used for
Topic Monitoring. If you do not need to use Topic
Monitoring, leave as localhost.
EXTERNALPORT 443 The port used to connect to FMEServer.
NGINX_WORKER_
PROCESSES
1 Number of NGINXworkers to start.
253
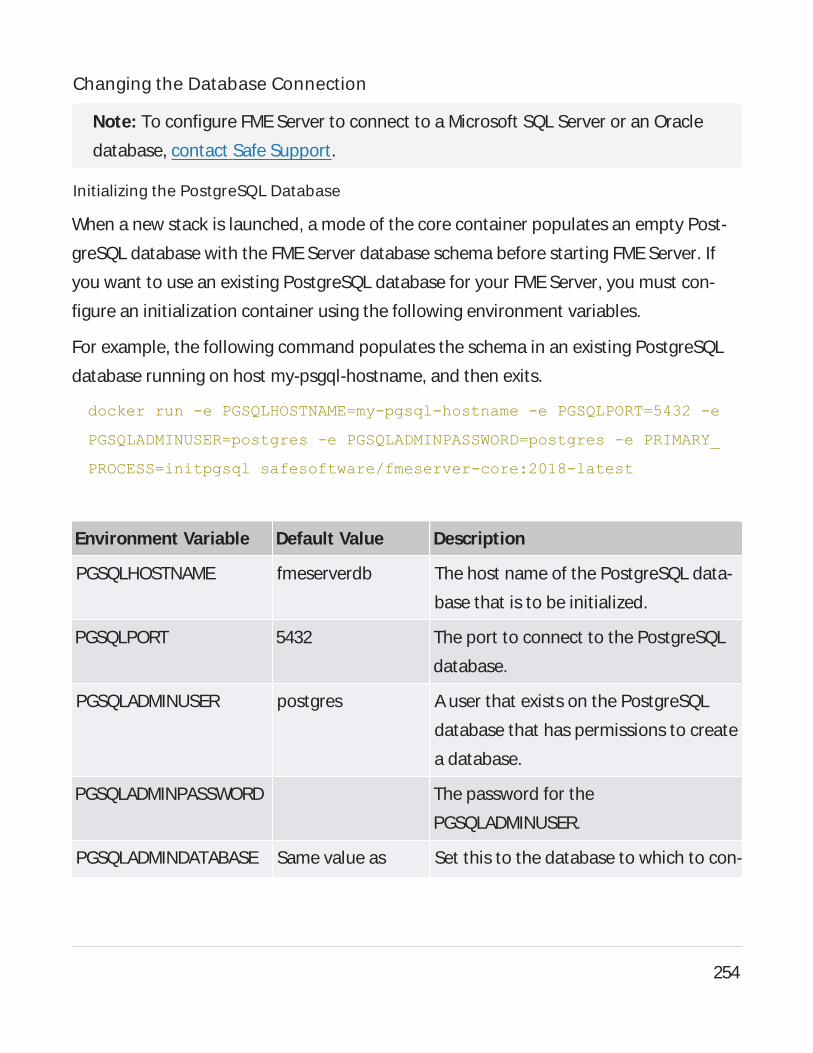
Changing the Database Connection
Note: To configure FMEServer to connect to a Microsoft SQL Server or an Oracle
database, contact Safe Support.
Initializing the PostgreSQL Database
When a new stack is launched, a mode of the core container populates an empty Post-
greSQL database with the FMEServer database schema before starting FMEServer. If
you want to use an existing PostgreSQL database for your FMEServer, you must con-
figure an initialization container using the following environment variables.
For example, the following command populates the schema in an existing PostgreSQL
database running on host my-psgql-hostname, and then exits.
docker run -e PGSQLHOSTNAME=my-pgsql-hostname -e PGSQLPORT=5432 -e
PGSQLADMINUSER=postgres -e PGSQLADMINPASSWORD=postgres -e PRIMARY_
PROCESS=initpgsql safesoftware/fmeserver-core:2018-latest
Environment Variable Default Value Description
PGSQLHOSTNAME fmeserverdb The host name of the PostgreSQL data-
base that is to be initialized.
PGSQLPORT 5432 The port to connect to the PostgreSQL
database.
PGSQLADMINUSER postgres Auser that exists on the PostgreSQL
database that has permissions to create
a database.
PGSQLADMINPASSWORD The password for the
PGSQLADMINUSER.
PGSQLADMINDATABASE Same value as Set this to the database to which to con-
254
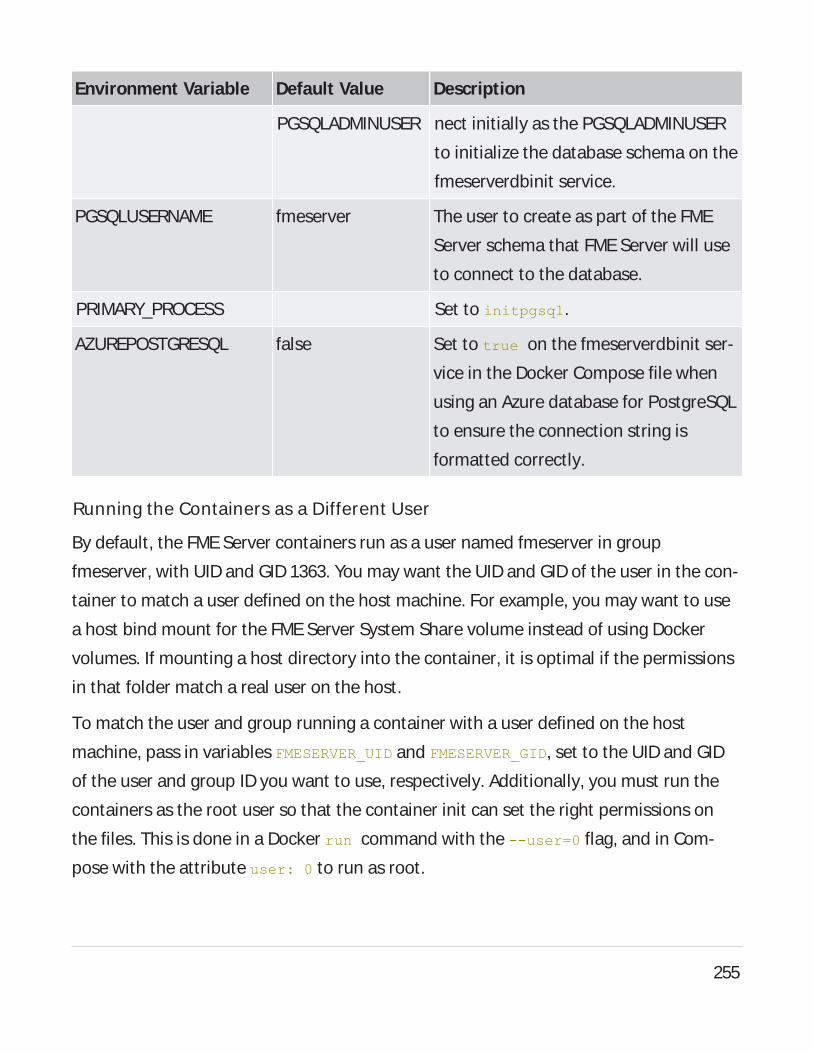
Environment Variable Default Value Description
PGSQLADMINUSER nect initially as the PGSQLADMINUSER
to initialize the database schema on the
fmeserverdbinit service.
PGSQLUSERNAME fmeserver The user to create as part of the FME
Server schema that FMEServer will use
to connect to the database.
PRIMARY_PROCESS Set to initpgsql.
AZUREPOSTGRESQL false Set to true on the fmeserverdbinit ser-
vice in the Docker Compose file when
using an Azure database for PostgreSQL
to ensure the connection string is
formatted correctly.
Running the Containers as a Different User
By default, the FMEServer containers run as a user named fmeserver in group
fmeserver, with UID and GID 1363. You may want the UID and GID of the user in the con-
tainer to match a user defined on the host machine. For example, you may want to use
a host bind mount for the FMEServer System Share volume instead of using Docker
volumes. If mounting a host directory into the container, it is optimal if the permissions
in that folder match a real user on the host.
To match the user and group running a container with a user defined on the host
machine, pass in variables FMESERVER_UID and FMESERVER_GID, set to the UID and GID
of the user and group ID you want to use, respectively. Additionally, you must run the
containers as the root user so that the container init can set the right permissions on
the files. This is done in a Docker run command with the --user=0 flag, and in Com-
pose with the attribute user: 0 to run as root.
255
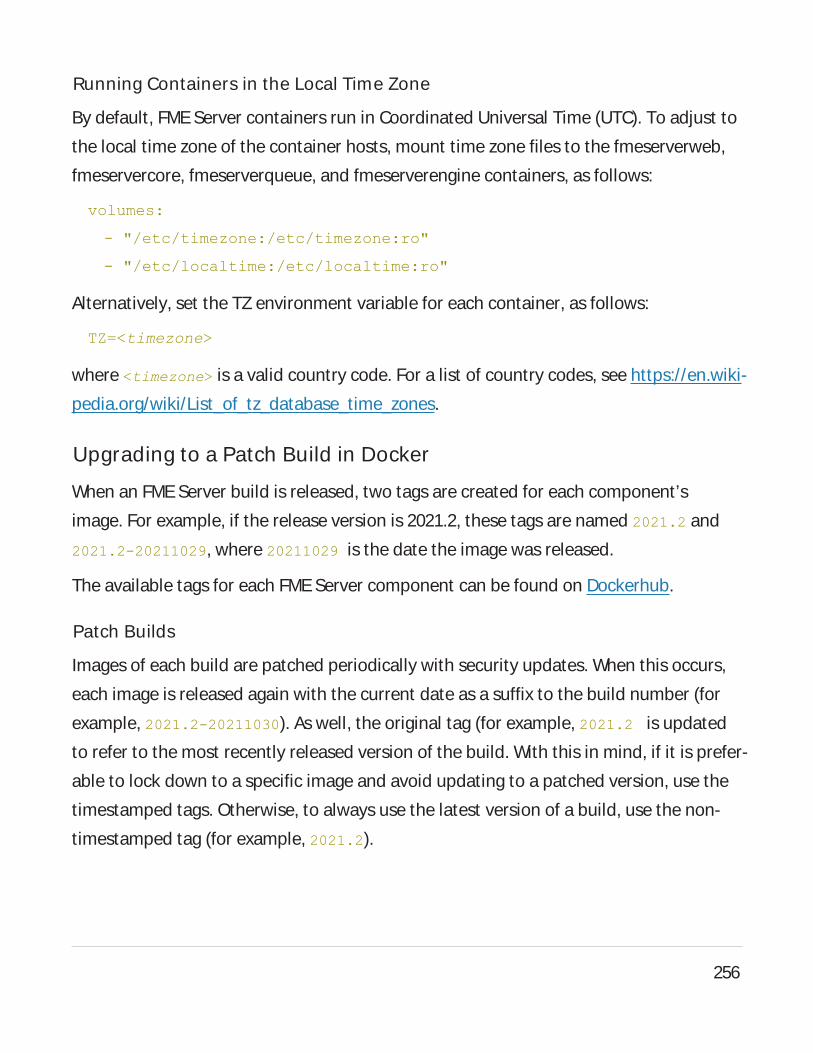
Running Containers in the Local Time Zone
By default, FME Server containers run in Coordinated Universal Time (UTC). To adjust to
the local time zone of the container hosts, mount time zone files to the fmeserverweb,
fmeservercore, fmeserverqueue, and fmeserverengine containers, as follows:
volumes:
- "/etc/timezone:/etc/timezone:ro"
- "/etc/localtime:/etc/localtime:ro"
Alternatively, set the TZ environment variable for each container, as follows:
TZ=<timezone>
where <timezone> is a valid country code. For a list of country codes, see https://en.wiki-
pedia.org/wiki/List_of_tz_database_time_zones.
Upgrading to a Patch Build in Docker
When an FMEServer build is released, two tags are created for each component’s
image. For example, if the release version is 2021.2, these tags are named 2021.2 and
2021.2-20211029, where 20211029 is the date the image was released.
The available tags for each FMEServer component can be found on Dockerhub.
Patch Builds
Images of each build are patched periodically with security updates. When this occurs,
each image is released again with the current date as a suffix to the build number (for
example, 2021.2-20211030). As well, the original tag (for example, 2021.2 is updated
to refer to the most recently released version of the build. With this in mind, if it is prefer-
able to lock down to a specific image and avoid updating to a patched version, use the
timestamped tags. Otherwise, to always use the latest version of a build, use the non-
timestamped tag (for example, 2021.2).
256
To upgrade to the latest patch build in a Docker Compose deploy-
ment
1. Pull the latest images. Run:
>> docker-compose pull
2. Update the FME Server deployment with the new images. Run:
>> docker-compose -f docker-compose.yml up -d
3. Remove the old images. (They should be listed with repository <none> and tag
<none>.)
To upgrade to a specific patch build
1. Search for the build on Dockerhub or Quay.io, which will display each of the patch
builds for that build number.
2. In your docker compose file, update each image tag (after the ‘:’ in the image
name) to the desired build/timestamp.
3. Update the FMEServer deployment with the new images. Run:
>> docker-compose -f docker-compose.yml up -d
See Also
l To Upgrade an FMEServer Deployment
Deploying FME Server with Kubernetes
Prerequisites and Considerations 258Install Kubernetes 258Install Helm 258Install NGINX 258Other Considerations 259Performing the Kubernetes Deployment 259Add the Safe Software Helm Repository 259Example: Install FMEServer 2021.2 259Example: Install with User-Supplied Values 260Scale FMEEngines 262Delete an FMEServer Deployment 262Defining FMEEngines, Queue Control, and Streams to a Kubernetes Deployment 262Example FMEEngine Deployments 263Deploying with Kubernetes and a Trusted Certificate 264Deploying with Kubernetes across Multiple Hosts 265Architecture of a High-Availability FME Server Kubernetes Deployment 265
257

To Deploy Across Multiple Hosts 267Deploying with an NFSClient Provisioner 267Deploying with an External Database 268Deploying with Kubernetes to a Cloud Provider 269Deploying to Azure Kubernetes Service Using Azure Files 270Deploying to Google Cloud Using Google Kubernetes Engine and Cloud Filestore 276Deploying to Amazon Elastic Kubernetes Service Using Elastic File System 283Deploying to Alibaba Cloud Using Network Attached Storage 290Upgrading a Kubernetes Deployment of FMEServer 295Performing the Upgrade 296Upgrading to a Patch Build in Kubernetes 299Patch Builds 299
Prerequisites and Considerations
To deploy FME Server with Kubernetes, you must fulfill the following prerequisites:
Install Kubernetes
Install and configure a Kubernetes cluster. To install a local (single-node) cluster, we
recommend installing Docker Desktop, and following the Getting Started guide. Once
installed, select Enable Kubernetes to start a single-node cluster.
Tip: Ensure sufficient CPU and memory resources are assigned to your Docker
Engine, preferably higher than the default allocations. We recommend at least 4
CPUs and 8 GB memory.
Install Helm
The Helm tool is required for pulling the fmeserver Kubernetes chart.
1. Install Helm.
2. (Helm v2 only) Initialize it into the cluster. Run:
helm init
3. Add the fmeserver chart to the cluster:
helm repo add safesoftware https://safesoftware.github.io/helm-
charts/
Install NGINX
FME Server deployments do not ship with an NGINXingress controller container.
Instead, we leverage the official nginx-ingress controller. The instructions to deploy this
are here. We recommend using Helm as the simplest method:
258
l Helm v2: helm install stable/nginx-ingress --name my-nginx
l Helm v3: helm install my-nginx stable/nginx-ingress
Other Considerations
When deploying FME Server to a Kubernetes cluster, keep in mind the following:
l It is not possible to use the FME Server Web User Interface to deploy FME Engines or
change the number of FMEEngines. For more information, see Defining FME
Engines, Queue Control, and Streams to a Kubernetes Deployment.
l Any memory or CPU limits you define on containers are ignored by all FMEServer
processes. Memory and CPU limits defined on FMEEngine containers are honored.
l Pods for the FME Engines and FME Server Core/Web Services can be scaled; no other
Pods can be scaled.
Performing the Kubernetes Deployment
Use the Helm tool to deploy FME Server with Kubernetes. This tool allows you to set vari-
ous deployment parameters, depending on need.
Add the Safe Software Helm Repositoryhelm repo add safesoftware https://safesoftware.github.io/helm-
charts/
At a minimum, you must provide the FME Server release and build number.
Example: Install FME Server 2021.2helm install fmeserver safesoftware/fmeserver-2021.2 --set fmeserv-
er.image.tag=2021.2
After running the install command, you can connect to the FMEServer Web User Inter-
face on https://<hostname>. For more information, see:
259
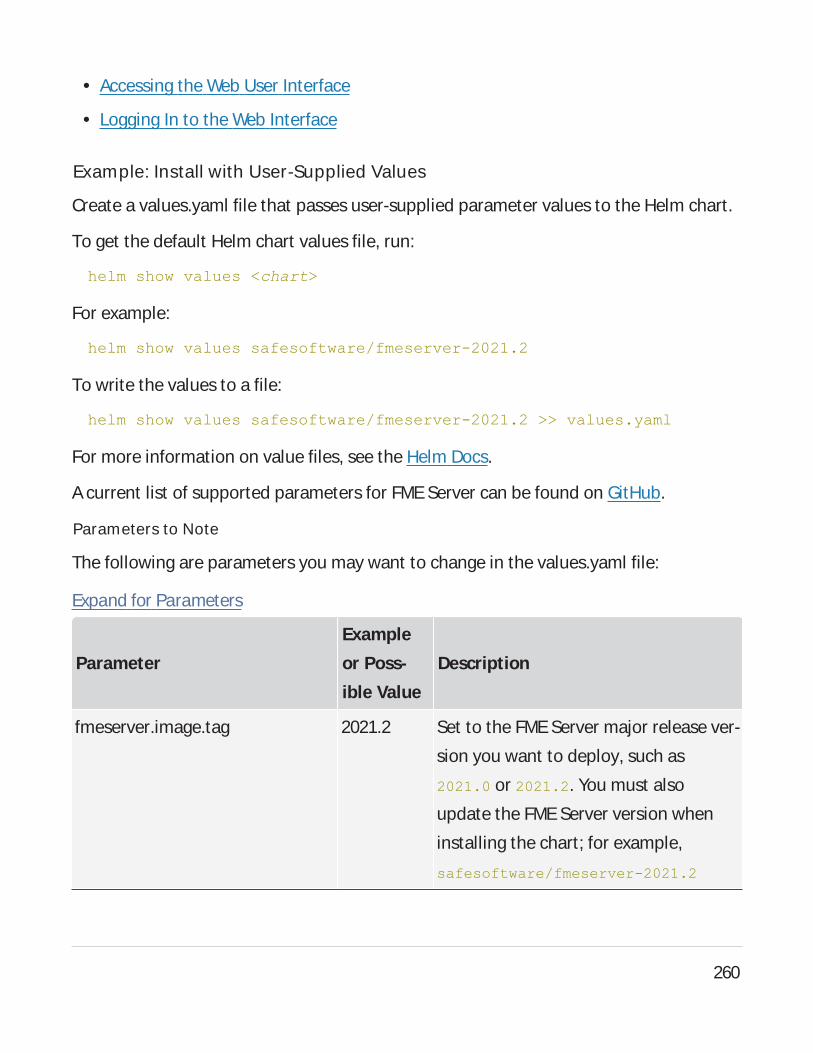
l Accessing the Web User Interface
l Logging In to the Web Interface
Example: Install with User-Supplied Values
Create a values.yaml file that passes user-supplied parameter values to the Helm chart.
To get the default Helm chart values file, run:
helm show values <chart>
For example:
helm show values safesoftware/fmeserver-2021.2
To write the values to a file:
helm show values safesoftware/fmeserver-2021.2 >> values.yaml
For more information on value files, see the Helm Docs.
Acurrent list of supported parameters for FMEServer can be found on GitHub.
Parameters to Note
The following are parameters you may want to change in the values.yaml file:
Expand for Parameters
Parameter
Example
or Poss-
ible Value
Description
fmeserver.image.tag 2021.2 Set to the FMEServer major release ver-
sion you want to deploy, such as
2021.0 or 2021.2. You must also
update the FMEServer version when
installing the chart; for example,
safesoftware/fmeserver-2021.2
260
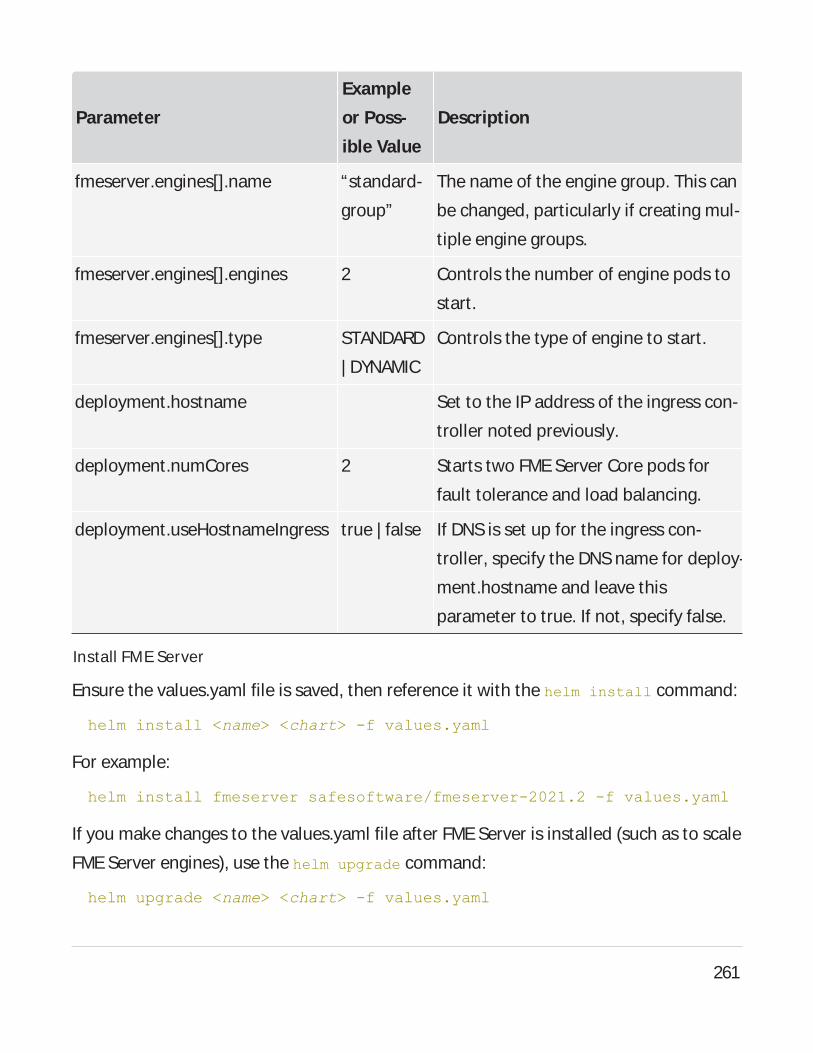
Parameter
Example
or Poss-
ible Value
Description
fmeserver.engines[].name “standard-
group”
The name of the engine group. This can
be changed, particularly if creating mul-
tiple engine groups.
fmeserver.engines[].engines 2 Controls the number of engine pods to
start.
fmeserver.engines[].type STANDARD
| DYNAMIC
Controls the type of engine to start.
deployment.hostname Set to the IP address of the ingress con-
troller noted previously.
deployment.numCores 2 Starts two FMEServer Core pods for
fault tolerance and load balancing.
deployment.useHostnameIngress true | false If DNSis set up for the ingress con-
troller, specify the DNSname for deploy-
ment.hostname and leave this
parameter to true. If not, specify false.
Install FME Server
Ensure the values.yaml file is saved, then reference it with the helm install command:
helm install <name> <chart> -f values.yaml
For example:
helm install fmeserver safesoftware/fmeserver-2021.2 -f values.yaml
If you make changes to the values.yaml file after FMEServer is installed (such as to scale
FMEServer engines), use the helm upgrade command:
helm upgrade <name> <chart> -f values.yaml
261
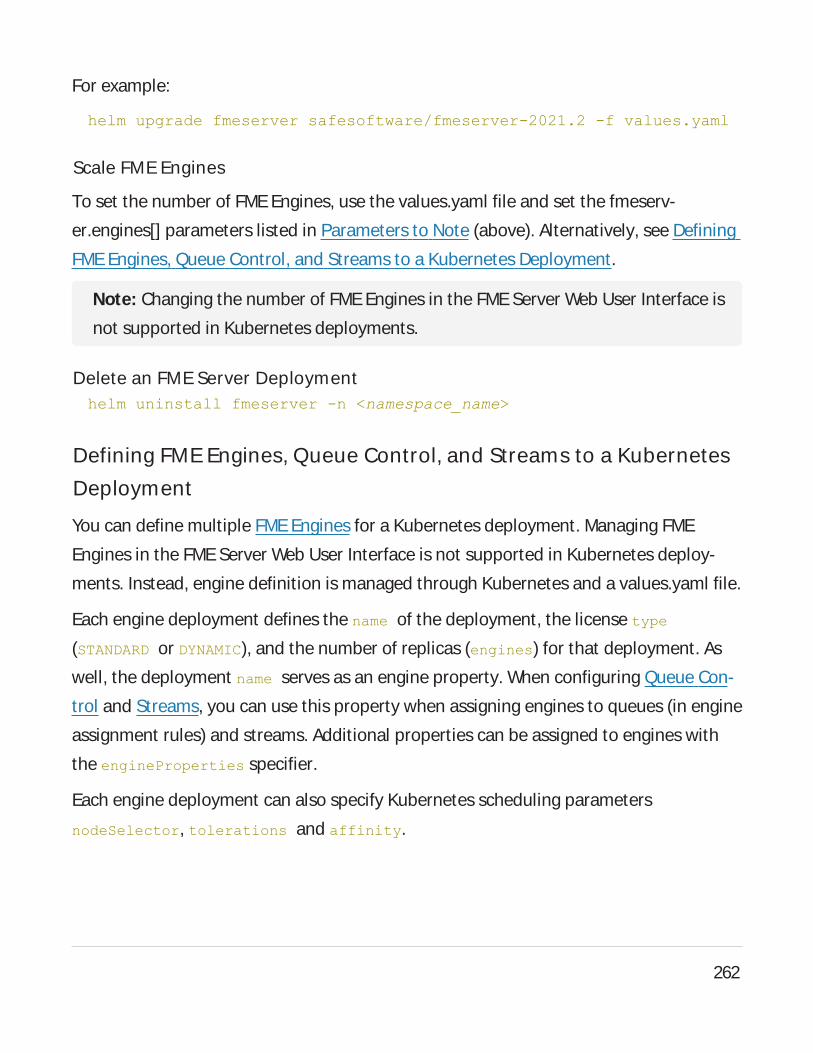
For example:
helm upgrade fmeserver safesoftware/fmeserver-2021.2 -f values.yaml
Scale FME Engines
To set the number of FMEEngines, use the values.yaml file and set the fmeserv-
er.engines[] parameters listed in Parameters to Note (above). Alternatively, see Defining
FMEEngines, Queue Control, and Streams to a Kubernetes Deployment.
Note: Changing the number of FMEEngines in the FMEServer Web User Interface is
not supported in Kubernetes deployments.
Delete an FME Server Deploymenthelm uninstall fmeserver -n <namespace_name>
Defining FME Engines, Queue Control, and Streams to a Kubernetes
Deployment
You can define multiple FME Engines for a Kubernetes deployment. Managing FME
Engines in the FMEServer Web User Interface is not supported in Kubernetes deploy-
ments. Instead, engine definition is managed through Kubernetes and a values.yaml file.
Each engine deployment defines the name of the deployment, the license type
(STANDARD or DYNAMIC), and the number of replicas (engines) for that deployment. As
well, the deployment name serves as an engine property. When configuring Queue Con-
trol and Streams, you can use this property when assigning engines to queues (in engine
assignment rules) and streams. Additional properties can be assigned to engines with
the engineProperties specifier.
Each engine deployment can also specify Kubernetes scheduling parameters
nodeSelector, tolerations and affinity.
262
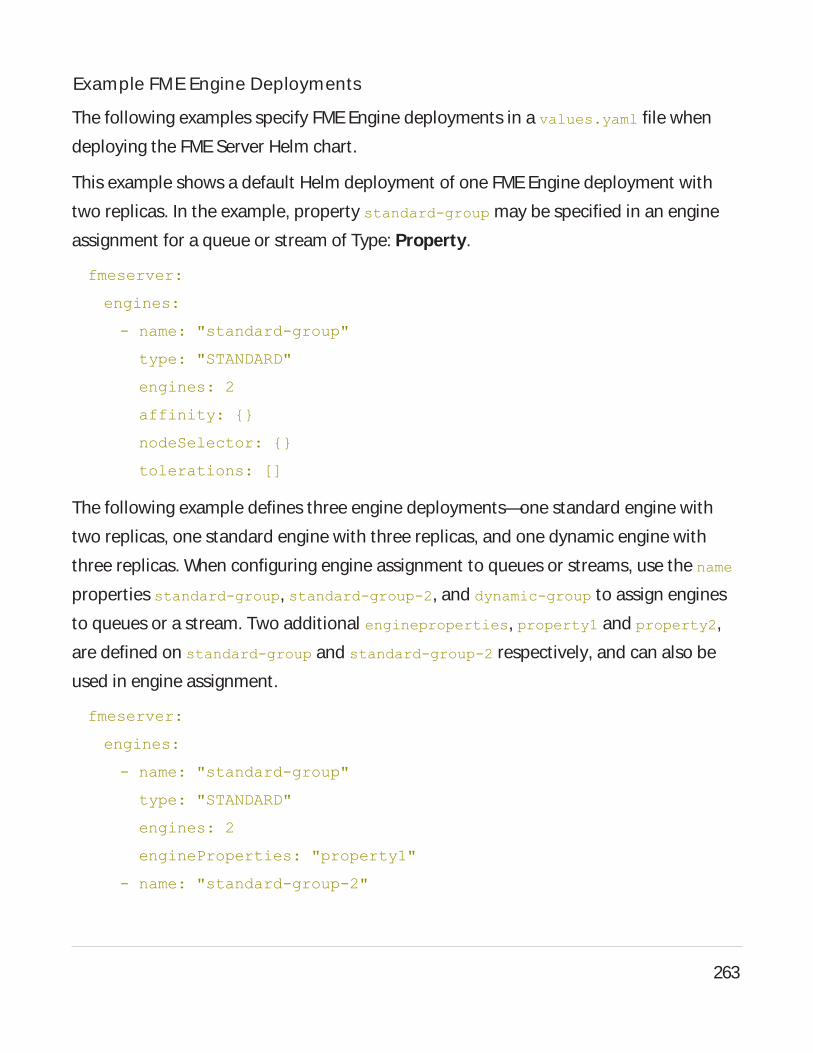
Example FME Engine Deployments
The following examples specify FMEEngine deployments in a values.yaml file when
deploying the FMEServer Helm chart.
This example shows a default Helm deployment of one FMEEngine deployment with
two replicas. In the example, property standard-group may be specified in an engine
assignment for a queue or stream of Type: Property.
fmeserver:
engines:
- name: "standard-group"
type: "STANDARD"
engines: 2
affinity: {}
nodeSelector: {}
tolerations: []
The following example defines three engine deployments—one standard engine with
two replicas, one standard engine with three replicas, and one dynamic engine with
three replicas. When configuring engine assignment to queues or streams, use the name
properties standard-group, standard-group-2, and dynamic-group to assign engines
to queues or a stream. Two additional engineproperties, property1 and property2,
are defined on standard-group and standard-group-2 respectively, and can also be
used in engine assignment.
fmeserver:
engines:
- name: "standard-group"
type: "STANDARD"
engines: 2
engineProperties: "property1"
- name: "standard-group-2"
263
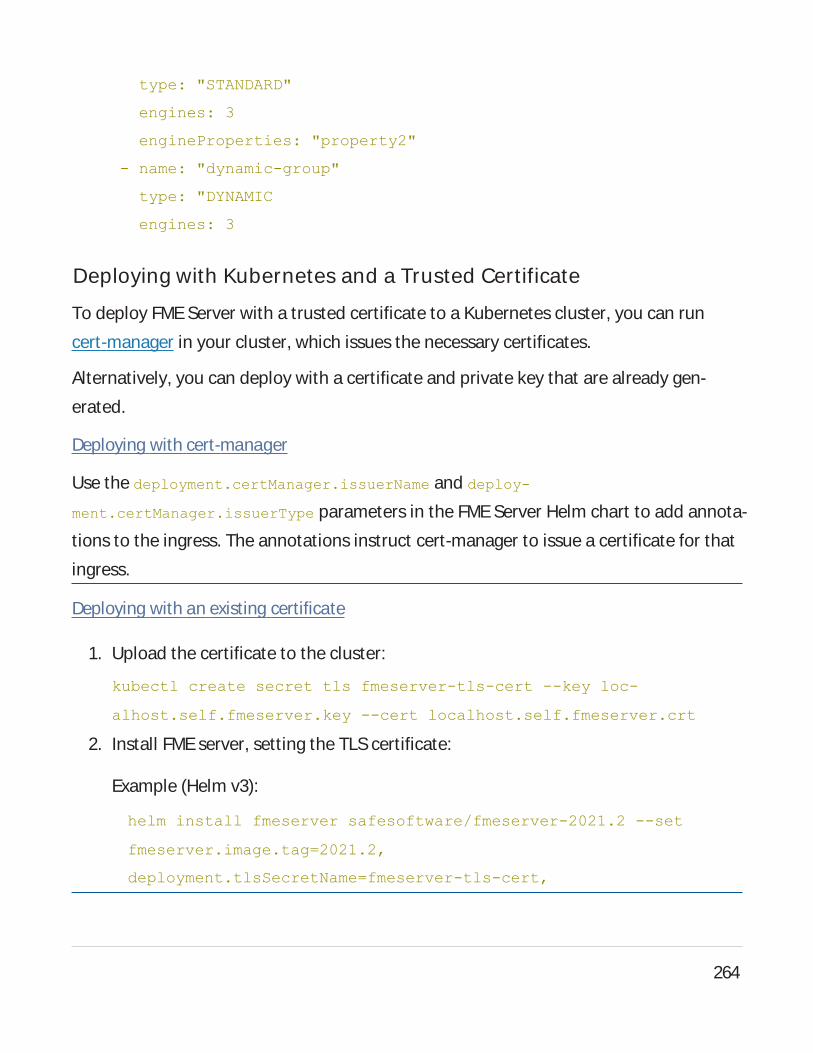
type: "STANDARD"
engines: 3
engineProperties: "property2"
- name: "dynamic-group"
type: "DYNAMIC
engines: 3
Deploying with Kubernetes and a Trusted Certificate
To deploy FMEServer with a trusted certificate to a Kubernetes cluster, you can run
cert-manager in your cluster, which issues the necessary certificates.
Alternatively, you can deploy with a certificate and private key that are already gen-
erated.
Deploying with cert-manager
Use the deployment.certManager.issuerName and deploy-
ment.certManager.issuerType parameters in the FMEServer Helm chart to add annota-
tions to the ingress. The annotations instruct cert-manager to issue a certificate for that
ingress.
Deploying with an existing certificate
1. Upload the certificate to the cluster:
kubectl create secret tls fmeserver-tls-cert --key loc-
alhost.self.fmeserver.key --cert localhost.self.fmeserver.crt
2. Install FMEserver, setting the TLScertificate:
Example (Helm v3):
helm install fmeserver safesoftware/fmeserver-2021.2 --set
fmeserver.image.tag=2021.2,
deployment.tlsSecretName=fmeserver-tls-cert,
264
deployment.hostname=localhost
When finished, connect to the FMEServer Web User Interface on http://localhost. For
more information, see:
l Accessing the Web User Interface
l Logging In to the Web Interface.
Deploying with Kubernetes across Multiple Hosts
You can duplicate the FMEServer Core across multiple hosts in a Kubernetes deploy-
ment. This duplication provides higher availability; if one host fails, the FMEServer Core
on the other host can continue functioning.
To deploy FMEServer across multiple hosts, a network file system (NFS) or other dis-
tributed system is required. In a Kubernetes deployment, the storage volume must sup-
port a ReadWriteMany access mode. If no existing distributed file system is available, we
recommend using an existing NFSserver and configuring Kubernetes to use that server
to provision volumes. Alternatively, use an offering from a Cloud provider, such as Azure
Files.
Note: The Helm chart requires multiple hosts (nodes) to work with more than one
FME Server Core. Only one Core is launched per node.
Architecture of a High-Availability FME Server Kubernetes Deployment
Mouse-over for diagram:
265
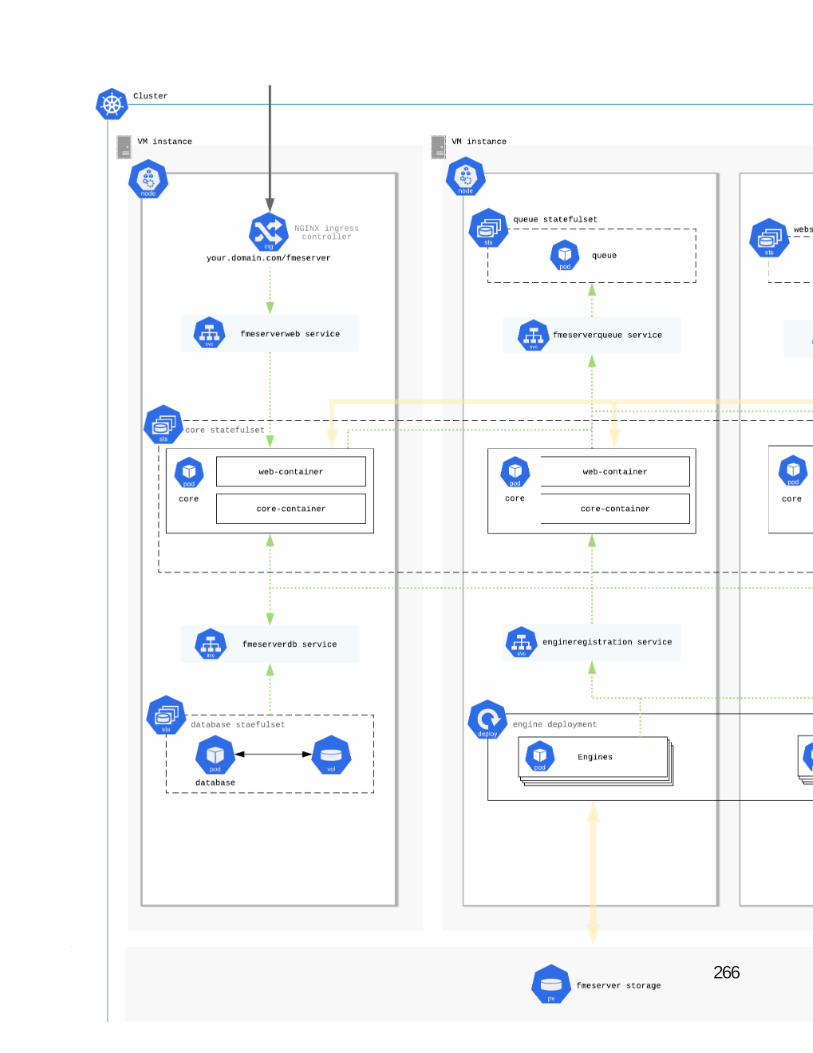
266
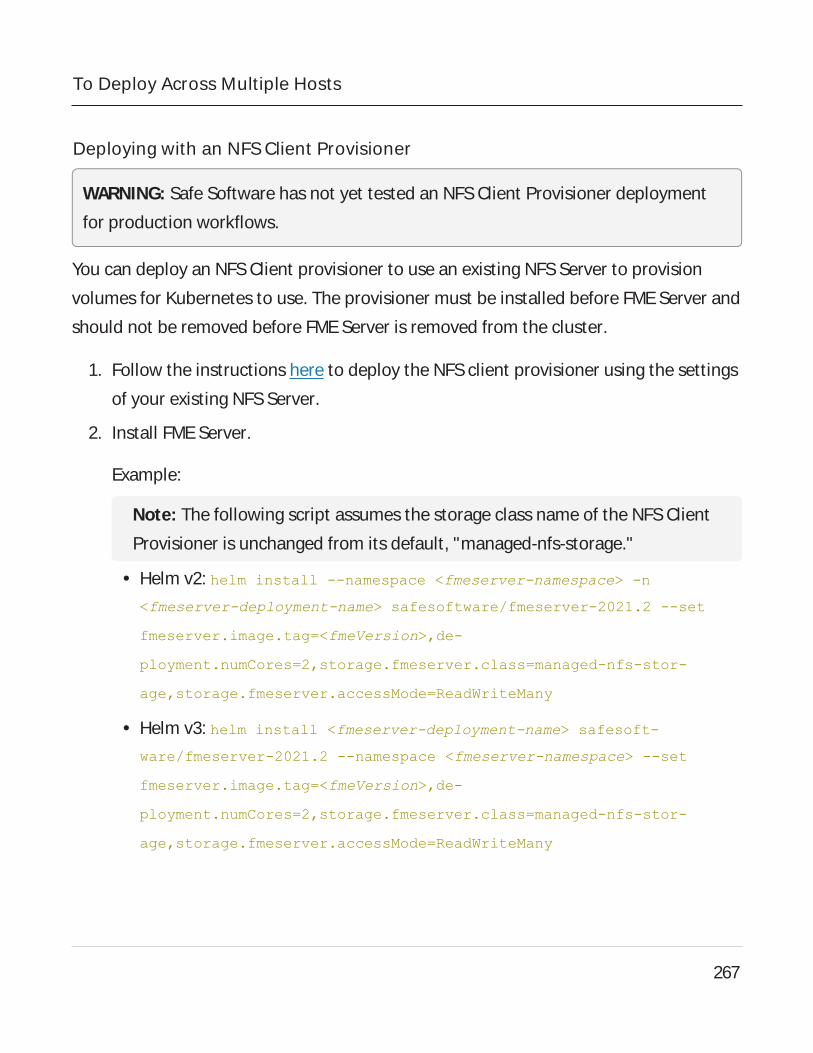
To Deploy Across Multiple Hosts
Deploying with an NFSClient Provisioner
WARNING: Safe Software has not yet tested an NFSClient Provisioner deployment
for production workflows.
You can deploy an NFSClient provisioner to use an existing NFSServer to provision
volumes for Kubernetes to use. The provisioner must be installed before FMEServer and
should not be removed before FMEServer is removed from the cluster.
1. Follow the instructions here to deploy the NFSclient provisioner using the settings
of your existing NFSServer.
2. Install FMEServer.
Example:
Note: The following script assumes the storage class name of the NFSClient
Provisioner is unchanged from its default, "managed-nfs-storage."
l Helm v2: helm install --namespace <fmeserver-namespace> -n
<fmeserver-deployment-name> safesoftware/fmeserver-2021.2 --set
fmeserver.image.tag=<fmeVersion>,de-
ployment.numCores=2,storage.fmeserver.class=managed-nfs-stor-
age,storage.fmeserver.accessMode=ReadWriteMany
l Helm v3: helm install <fmeserver-deployment-name> safesoft-
ware/fmeserver-2021.2 --namespace <fmeserver-namespace> --set
fmeserver.image.tag=<fmeVersion>,de-
ployment.numCores=2,storage.fmeserver.class=managed-nfs-stor-
age,storage.fmeserver.accessMode=ReadWriteMany
267
Parameters
Note: To add other parameters, if required, see the relevant topic under
Deploying FMEServer with Kubernetes.
l fmeserver-namespace: Kubernetes namespace in which to install FMEServer.
l fmeserver-deployment-name: Helm deployment name, arbitrary.
l fmeVersion: FMEServer major release version (examples: 2021.0 or 2021.2).
Deploying with an External Database
The FMEServer Database is a critical part of any FMEServer deployment. In a default
Kubernetes deployment, it is a single point of failure. If it fails, FMEServer stops func-
tioning. For a highly available deployment of FMEServer, we recommend that you use a
highly available PostgreSQL database. For example, if you are deploying on AWS, you
may want to use Amazon Relational Database Service (RDS), which is a highly available
and scalable managed database.
To use an external database outside of the Kubernetes cluster, perform the following:
1. Provision the database and take note of the host, master username, and master
password.
2. Ensure the cluster has access on port 5432.
3. Create a secret in your cluster in the namespace where you will deploy that con-
tains the admin password for the database. The password must be base64-
encoded.
a. Create a secrets.yaml file similar to the following:
Note: You must manually encode the password in base64.
apiVersion: v1
kind: Secret
268
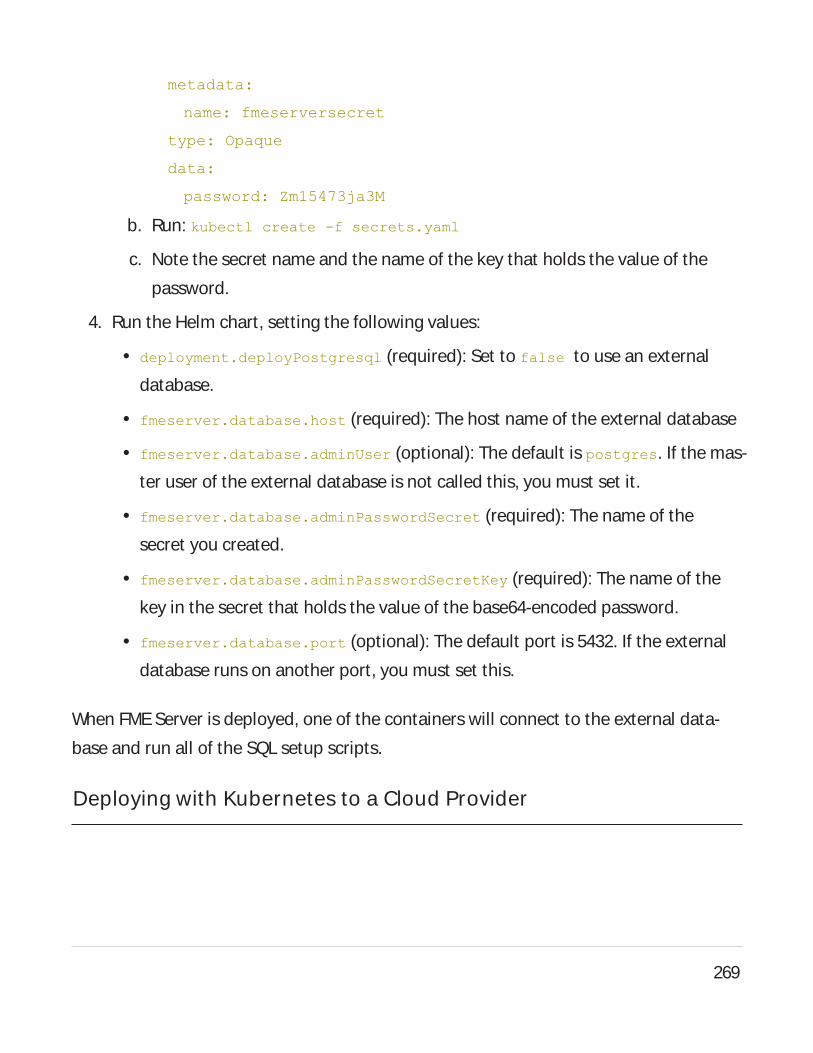
metadata:
name: fmeserversecret
type: Opaque
data:
password: Zm15473ja3M
b. Run: kubectl create -f secrets.yaml
c. Note the secret name and the name of the key that holds the value of the
password.
4. Run the Helm chart, setting the following values:
l deployment.deployPostgresql (required): Set to false to use an external
database.
l fmeserver.database.host (required): The host name of the external database
l fmeserver.database.adminUser (optional): The default is postgres. If the mas-
ter user of the external database is not called this, you must set it.
l fmeserver.database.adminPasswordSecret (required): The name of the
secret you created.
l fmeserver.database.adminPasswordSecretKey (required): The name of the
key in the secret that holds the value of the base64-encoded password.
l fmeserver.database.port (optional): The default port is 5432. If the external
database runs on another port, you must set this.
When FMEServer is deployed, one of the containers will connect to the external data-
base and run all of the SQL setup scripts.
Deploying with Kubernetes to a Cloud Provider
269
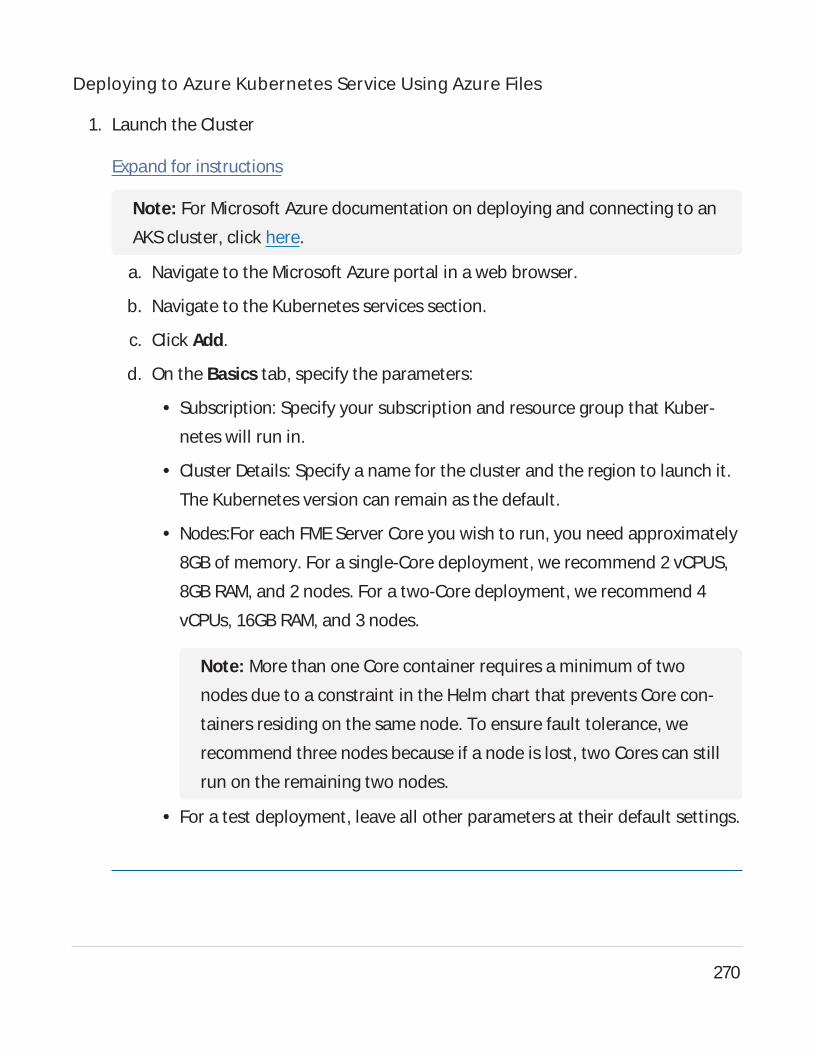
Deploying to Azure Kubernetes Service Using Azure Files
1. Launch the Cluster
Expand for instructions
Note: For Microsoft Azure documentation on deploying and connecting to an
AKScluster, click here.
a. Navigate to the Microsoft Azure portal in a web browser.
b. Navigate to the Kubernetes services section.
c. Click Add.
d. On the Basics tab, specify the parameters:
l Subscription: Specify your subscription and resource group that Kuber-
netes will run in.
l Cluster Details: Specify a name for the cluster and the region to launch it.
The Kubernetes version can remain as the default.
l Nodes:For each FMEServer Core you wish to run, you need approximately
8GB of memory. For a single-Core deployment, we recommend 2 vCPUS,
8GB RAM, and 2 nodes. For a two-Core deployment, we recommend 4
vCPUs, 16GB RAM, and 3 nodes.
Note: More than one Core container requires a minimum of two
nodes due to a constraint in the Helm chart that prevents Core con-
tainers residing on the same node. To ensure fault tolerance, we
recommend three nodes because if a node is lost, two Cores can still
run on the remaining two nodes.
l For a test deployment, leave all other parameters at their default settings.
270
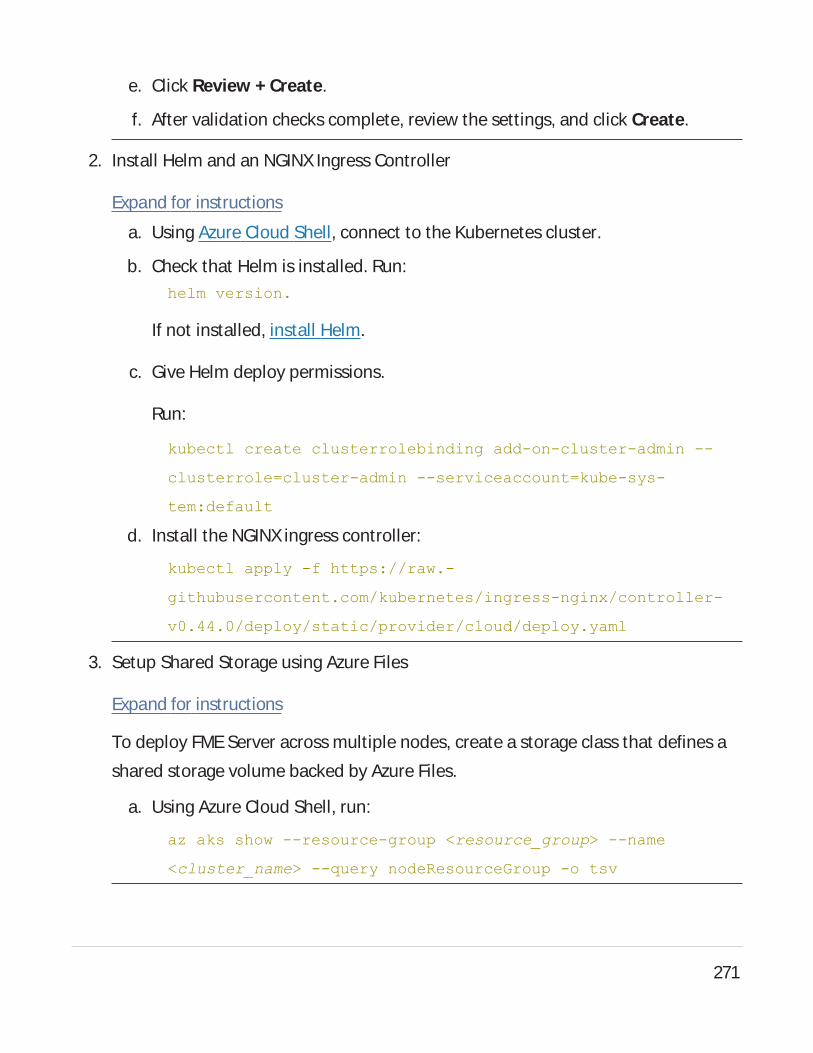
e. Click Review + Create.
f. After validation checks complete, review the settings, and click Create.
2. Install Helm and an NGINXIngress Controller
Expand for instructions
a. Using Azure Cloud Shell, connect to the Kubernetes cluster.
b. Check that Helm is installed. Run:helm version.
If not installed, install Helm.
c. Give Helm deploy permissions.
Run:
kubectl create clusterrolebinding add-on-cluster-admin --
clusterrole=cluster-admin --serviceaccount=kube-sys-
tem:default
d. Install the NGINXingress controller:
kubectl apply -f https://raw.-
githubusercontent.com/kubernetes/ingress-nginx/controller-
v0.44.0/deploy/static/provider/cloud/deploy.yaml
3. Setup Shared Storage using Azure Files
Expand for instructions
To deploy FMEServer across multiple nodes, create a storage class that defines a
shared storage volume backed by Azure Files.
a. Using Azure Cloud Shell, run:
az aks show --resource-group <resource_group> --name
<cluster_name> --query nodeResourceGroup -o tsv
271
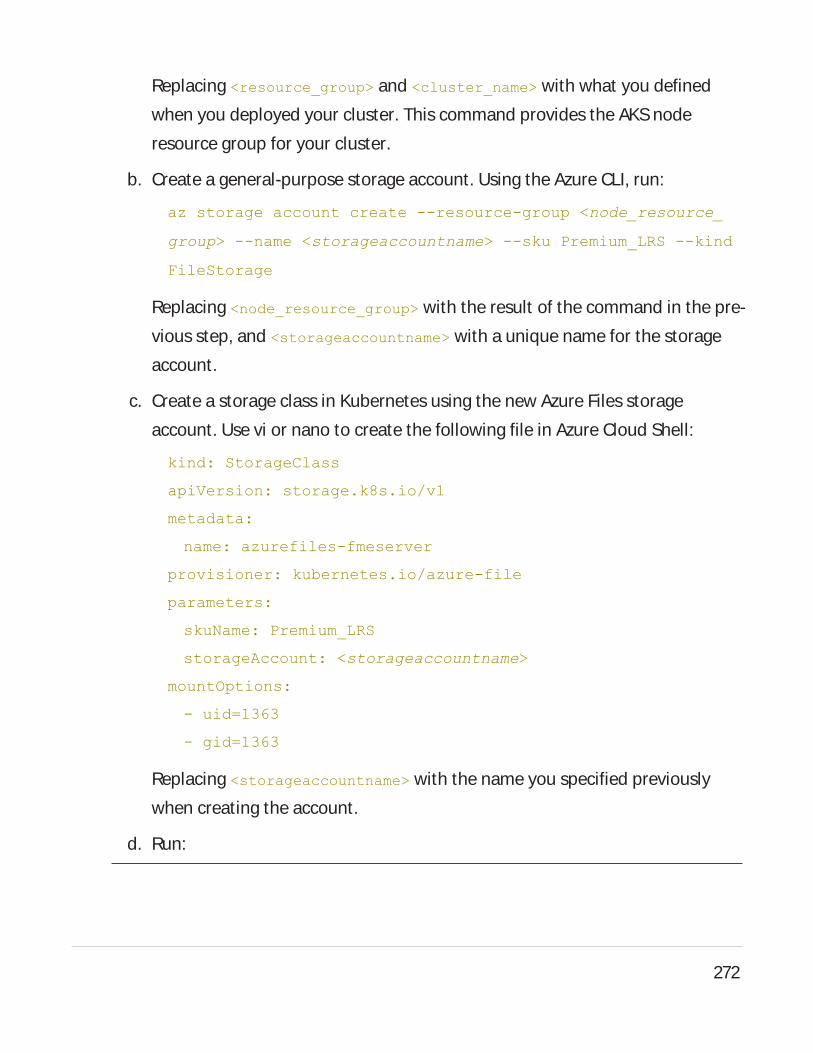
Replacing <resource_group> and <cluster_name> with what you defined
when you deployed your cluster. This command provides the AKSnode
resource group for your cluster.
b. Create a general-purpose storage account. Using the Azure CLI, run:
az storage account create --resource-group <node_resource_
group> --name <storageaccountname> --sku Premium_LRS --kind
FileStorage
Replacing <node_resource_group> with the result of the command in the pre-
vious step, and <storageaccountname> with a unique name for the storage
account.
c. Create a storage class in Kubernetes using the new Azure Files storage
account. Use vi or nano to create the following file in Azure Cloud Shell:
kind: StorageClass
apiVersion: storage.k8s.io/v1
metadata:
name: azurefiles-fmeserver
provisioner: kubernetes.io/azure-file
parameters:
skuName: Premium_LRS
storageAccount: <storageaccountname>
mountOptions:
- uid=1363
- gid=1363
Replacing <storageaccountname> with the name you specified previously
when creating the account.
d. Run:
272

kubectl apply -f <path_to_file>
Where <path_to_file> is the YAML file created above.
To see azurefiles-fmeserver in the list, run:
kubectl get sc
e. If RBACis enabled, grant permissions to Azure Files:
kubectl create clusterrolebinding add-on-cluster-vol-binder
--clusterrole=cluster-admin --serviceaccount=kube-sys-
tem:persistent-volume-binder
4. Deploy FMEServer
Expand for instructions
Perform the following in the Azure Cloud Shell:
a. Add the Safe Software Helm repository:
helm repo add safesoftware https://safesoft-
ware.github.io/helm-charts/
b. Get the IP address of the ingress controller:
kubectl get services --namespace ingress-nginx
Note the "External IP" of the nginx-ingress-controller. This is the ingress into
the cluster. In a production environment, set up a DNSthat points to this IP
address and use that as the hostname when deploying FMEServer. In this pro-
cedure, we access FMEServer directly using the IP.
c. Create a namespace in which to deploy. Run:
kubectl create namespace <namespace_name>
For example:
kubectl create namespace fmeserver
273
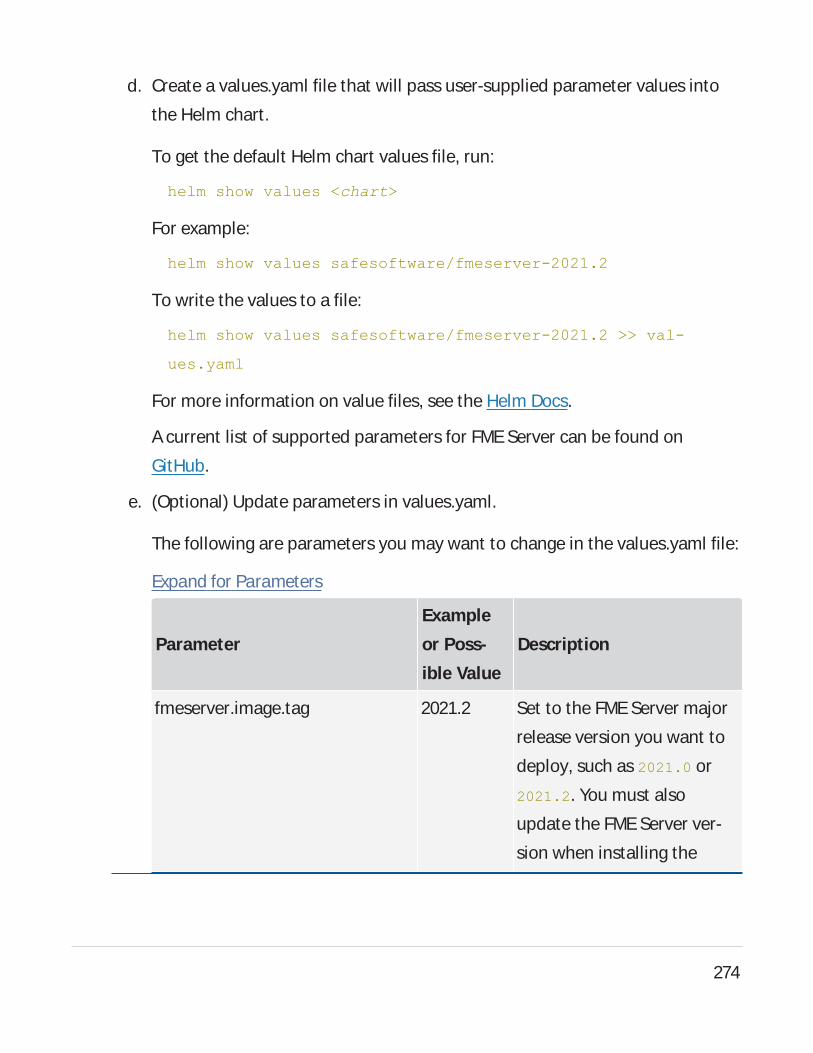
d. Create a values.yaml file that will pass user-supplied parameter values into
the Helm chart.
To get the default Helm chart values file, run:
helm show values <chart>
For example:
helm show values safesoftware/fmeserver-2021.2
To write the values to a file:
helm show values safesoftware/fmeserver-2021.2 >> val-
ues.yaml
For more information on value files, see the Helm Docs.
Acurrent list of supported parameters for FMEServer can be found on
GitHub.
e. (Optional) Update parameters in values.yaml.
The following are parameters you may want to change in the values.yaml file:
Expand for Parameters
Parameter
Example
or Poss-
ible Value
Description
fmeserver.image.tag 2021.2 Set to the FMEServer major
release version you want to
deploy, such as 2021.0 or
2021.2. You must also
update the FMEServer ver-
sion when installing the
274
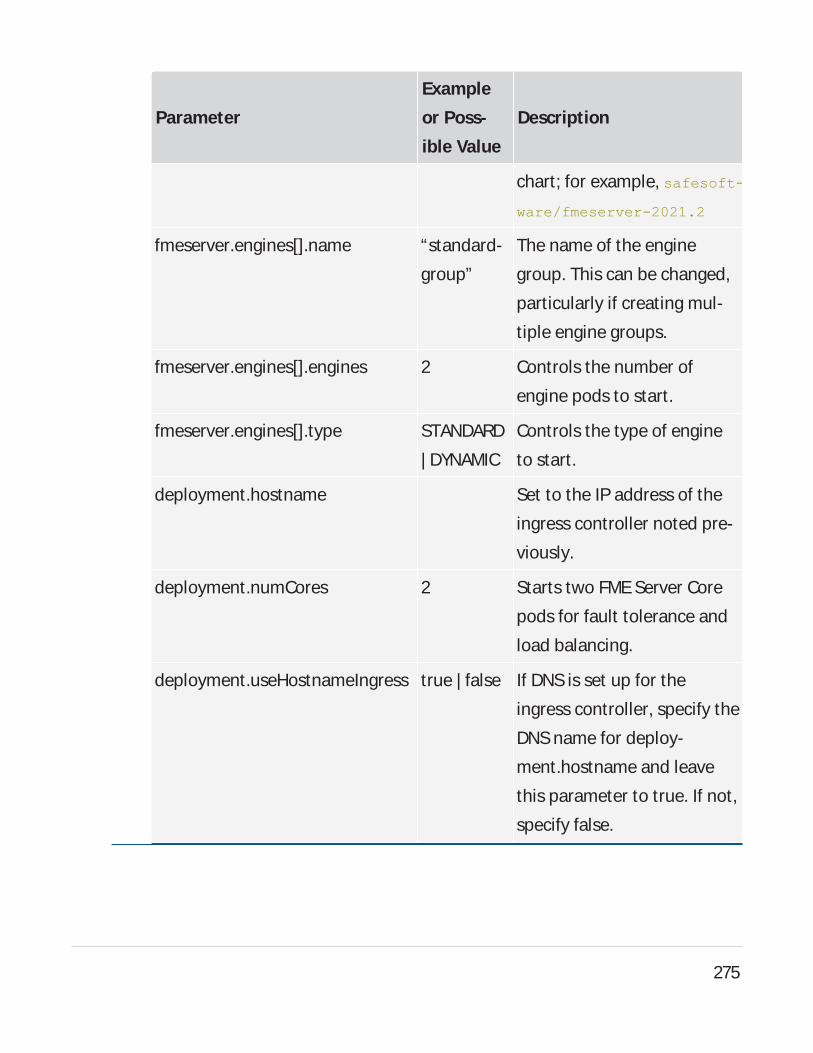
Parameter
Example
or Poss-
ible Value
Description
chart; for example, safesoft-
ware/fmeserver-2021.2
fmeserver.engines[].name “standard-
group”
The name of the engine
group. This can be changed,
particularly if creating mul-
tiple engine groups.
fmeserver.engines[].engines 2 Controls the number of
engine pods to start.
fmeserver.engines[].type STANDARD
| DYNAMIC
Controls the type of engine
to start.
deployment.hostname Set to the IP address of the
ingress controller noted pre-
viously.
deployment.numCores 2 Starts two FMEServer Core
pods for fault tolerance and
load balancing.
deployment.useHostnameIngress true | false If DNSis set up for the
ingress controller, specify the
DNSname for deploy-
ment.hostname and leave
this parameter to true. If not,
specify false.
275
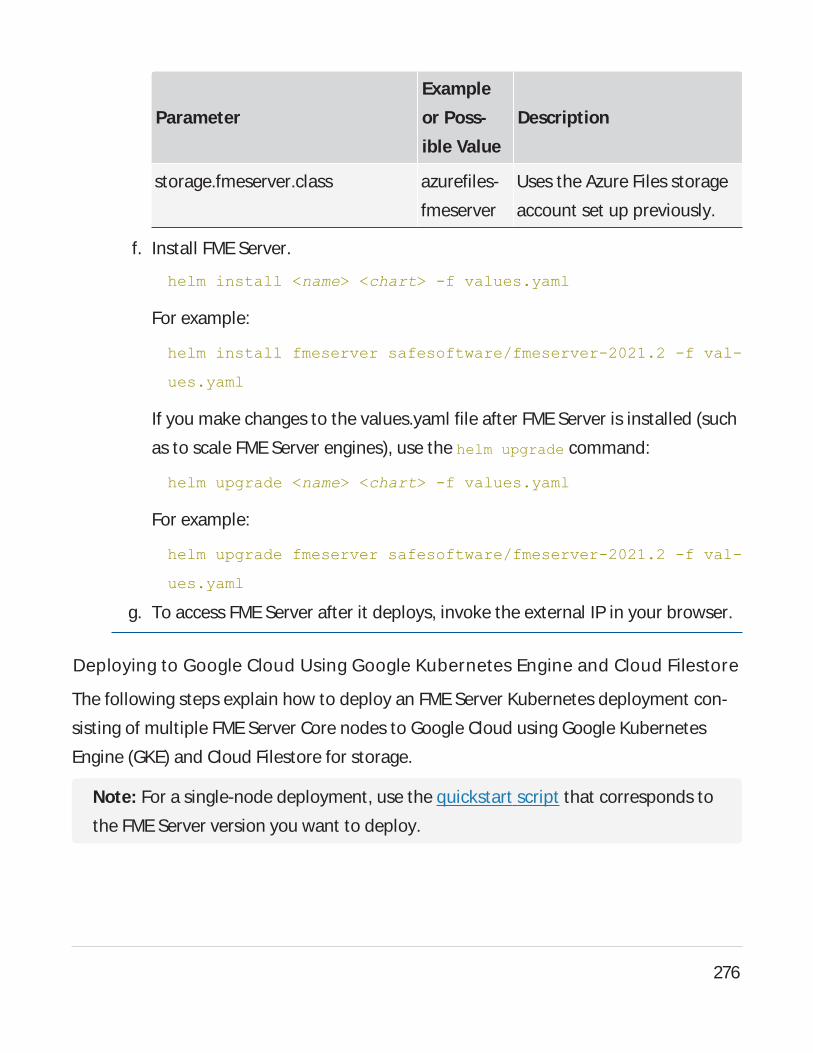
Parameter
Example
or Poss-
ible Value
Description
storage.fmeserver.class azurefiles-
fmeserver
Uses the Azure Files storage
account set up previously.
f. Install FMEServer.
helm install <name> <chart> -f values.yaml
For example:
helm install fmeserver safesoftware/fmeserver-2021.2 -f val-
ues.yaml
If you make changes to the values.yaml file after FMEServer is installed (such
as to scale FMEServer engines), use the helm upgrade command:
helm upgrade <name> <chart> -f values.yaml
For example:
helm upgrade fmeserver safesoftware/fmeserver-2021.2 -f val-
ues.yaml
g. To access FMEServer after it deploys, invoke the external IP in your browser.
Deploying to Google Cloud Using Google Kubernetes Engine and Cloud Filestore
The following steps explain how to deploy an FMEServer Kubernetes deployment con-
sisting of multiple FME Server Core nodes to Google Cloud using Google Kubernetes
Engine (GKE) and Cloud Filestore for storage.
Note: For a single-node deployment, use the quickstart script that corresponds to
the FME Server version you want to deploy.
276
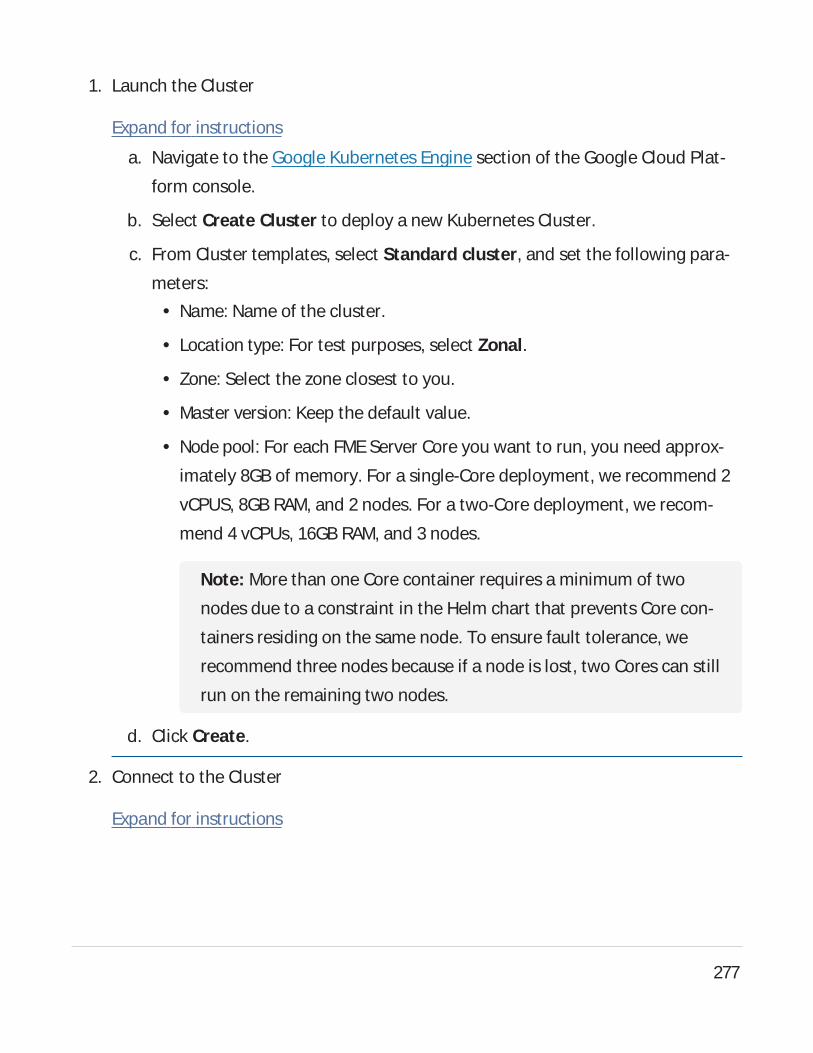
1. Launch the Cluster
Expand for instructions
a. Navigate to the Google Kubernetes Engine section of the Google Cloud Plat-
form console.
b. Select Create Cluster to deploy a new Kubernetes Cluster.
c. From Cluster templates, select Standard cluster, and set the following para-
meters:l Name: Name of the cluster.
l Location type: For test purposes, select Zonal.
l Zone: Select the zone closest to you.
l Master version: Keep the default value.
l Node pool: For each FMEServer Core you want to run, you need approx-
imately 8GB of memory. For a single-Core deployment, we recommend 2
vCPUS, 8GB RAM, and 2 nodes. For a two-Core deployment, we recom-
mend 4 vCPUs, 16GB RAM, and 3 nodes.
Note: More than one Core container requires a minimum of two
nodes due to a constraint in the Helm chart that prevents Core con-
tainers residing on the same node. To ensure fault tolerance, we
recommend three nodes because if a node is lost, two Cores can still
run on the remaining two nodes.
d. Click Create.
2. Connect to the Cluster
Expand for instructions
277
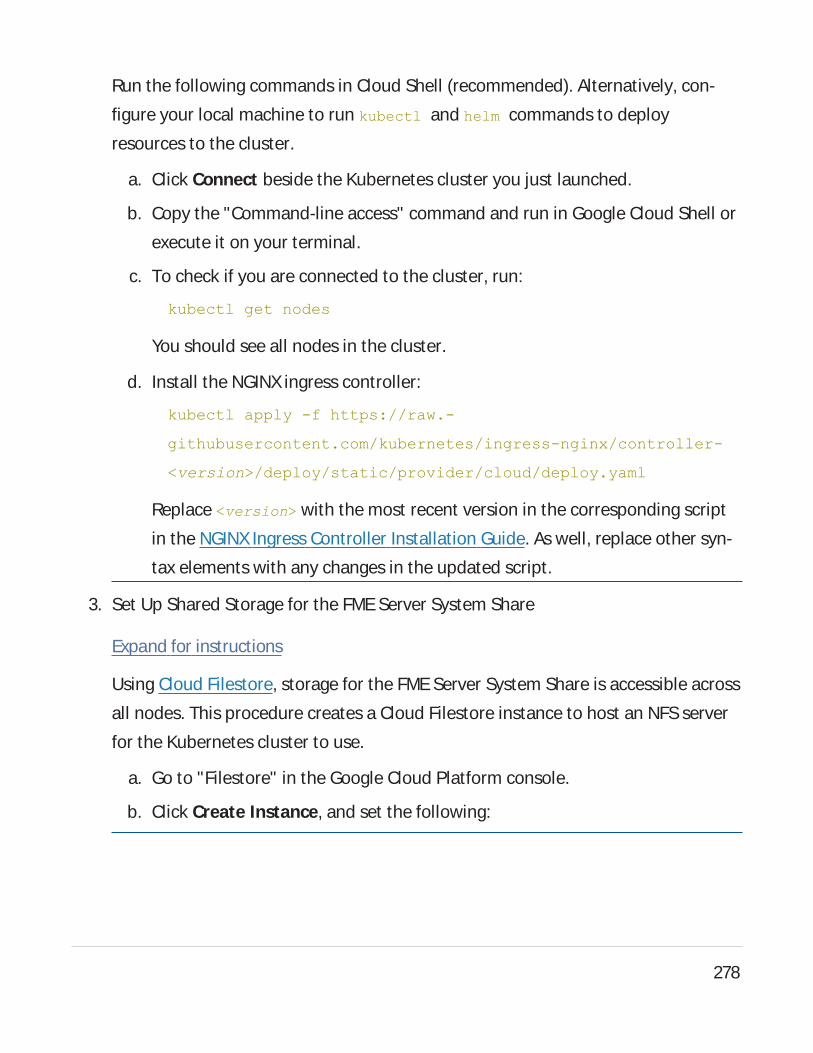
Run the following commands in Cloud Shell (recommended). Alternatively, con-
figure your local machine to run kubectl and helm commands to deploy
resources to the cluster.
a. Click Connect beside the Kubernetes cluster you just launched.
b. Copy the "Command-line access" command and run in Google Cloud Shell or
execute it on your terminal.
c. To check if you are connected to the cluster, run:
kubectl get nodes
You should see all nodes in the cluster.
d. Install the NGINXingress controller:
kubectl apply -f https://raw.-
githubusercontent.com/kubernetes/ingress-nginx/controller-
<version>/deploy/static/provider/cloud/deploy.yaml
Replace <version> with the most recent version in the corresponding script
in the NGINXIngress Controller Installation Guide. As well, replace other syn-
tax elements with any changes in the updated script.
3. Set Up Shared Storage for the FME Server System Share
Expand for instructions
Using Cloud Filestore, storage for the FME Server System Share is accessible across
all nodes. This procedure creates a Cloud Filestore instance to host an NFSserver
for the Kubernetes cluster to use.
a. Go to "Filestore" in the Google Cloud Platform console.
b. Click Create Instance, and set the following:
278
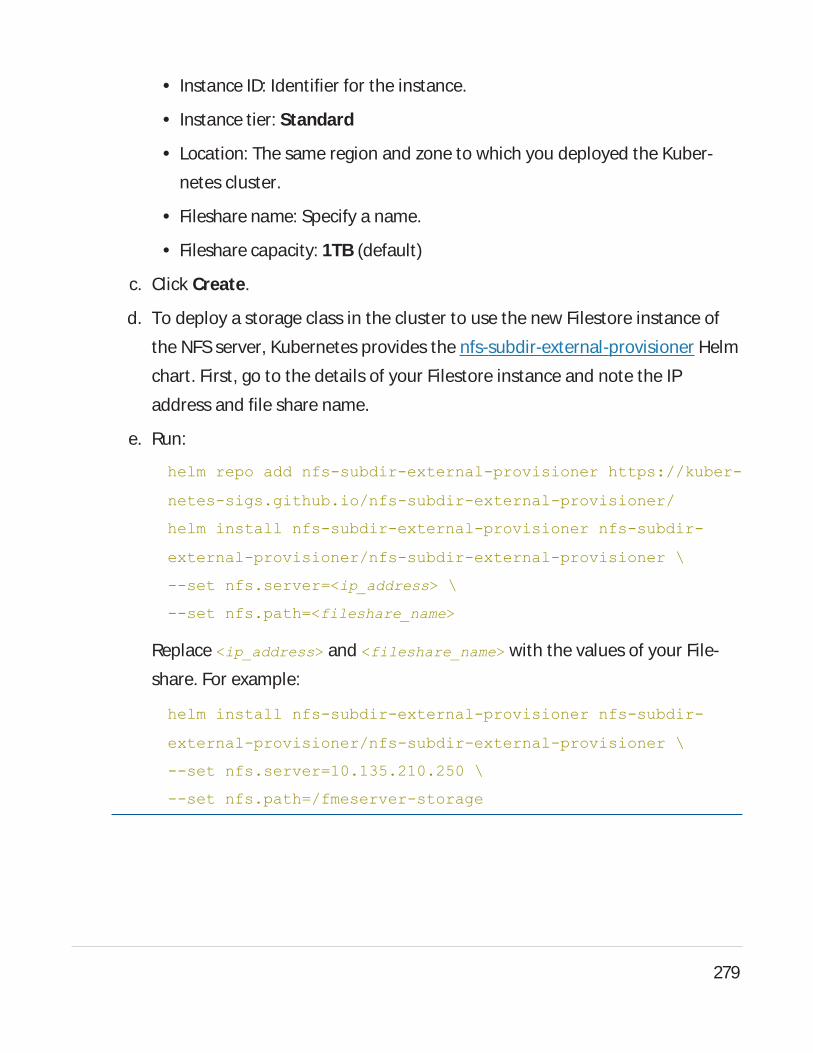
l Instance ID: Identifier for the instance.
l Instance tier: Standard
l Location: The same region and zone to which you deployed the Kuber-
netes cluster.
l Fileshare name: Specify a name.
l Fileshare capacity: 1TB (default)
c. Click Create.
d. To deploy a storage class in the cluster to use the new Filestore instance of
the NFSserver, Kubernetes provides the nfs-subdir-external-provisioner Helm
chart. First, go to the details of your Filestore instance and note the IP
address and file share name.
e. Run:
helm repo add nfs-subdir-external-provisioner https://kuber-
netes-sigs.github.io/nfs-subdir-external-provisioner/
helm install nfs-subdir-external-provisioner nfs-subdir-
external-provisioner/nfs-subdir-external-provisioner \
--set nfs.server=<ip_address> \
--set nfs.path=<fileshare_name>
Replace <ip_address> and <fileshare_name> with the values of your File-
share. For example:
helm install nfs-subdir-external-provisioner nfs-subdir-
external-provisioner/nfs-subdir-external-provisioner \
--set nfs.server=10.135.210.250 \
--set nfs.path=/fmeserver-storage
279
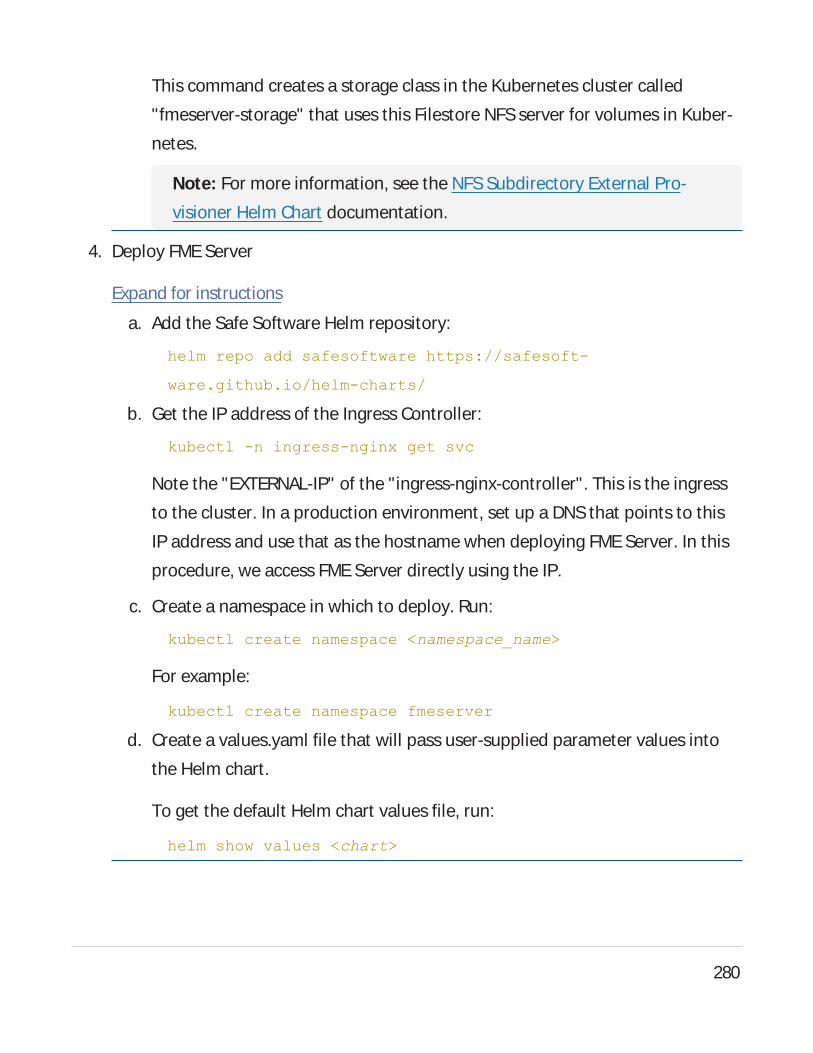
This command creates a storage class in the Kubernetes cluster called
"fmeserver-storage" that uses this Filestore NFSserver for volumes in Kuber-
netes.
Note: For more information, see the NFSSubdirectory External Pro-
visioner Helm Chart documentation.
4. Deploy FME Server
Expand for instructions
a. Add the Safe Software Helm repository:
helm repo add safesoftware https://safesoft-
ware.github.io/helm-charts/
b. Get the IP address of the Ingress Controller:
kubectl -n ingress-nginx get svc
Note the "EXTERNAL-IP" of the "ingress-nginx-controller". This is the ingress
to the cluster. In a production environment, set up a DNSthat points to this
IP address and use that as the hostname when deploying FMEServer. In this
procedure, we access FMEServer directly using the IP.
c. Create a namespace in which to deploy. Run:
kubectl create namespace <namespace_name>
For example:
kubectl create namespace fmeserver
d. Create a values.yaml file that will pass user-supplied parameter values into
the Helm chart.
To get the default Helm chart values file, run:
helm show values <chart>
280

For example:
helm show values safesoftware/fmeserver-2021.2
To write the values to a file:
helm show values safesoftware/fmeserver-2021.2 >> val-
ues.yaml
For more information on value files, see the Helm Docs.
Acurrent list of supported parameters for FMEServer can be found on
GitHub.
e. (Optional) Update parameters in values.yaml.
The following are parameters you may want to change in the values.yaml file:
Expand for Parameters
Parameter
Example
or Poss-
ible Value
Description
fmeserver.image.tag 2021.2 Set to the FMEServer major
release version you want to
deploy, such as 2021.0 or
2021.2. You must also
update the FMEServer ver-
sion when installing the
chart; for example, safesoft-
ware/fmeserver-2021.2
fmeserver.engines[].name “standard-
group”
The name of the engine
group. This can be changed,
particularly if creating mul-
281
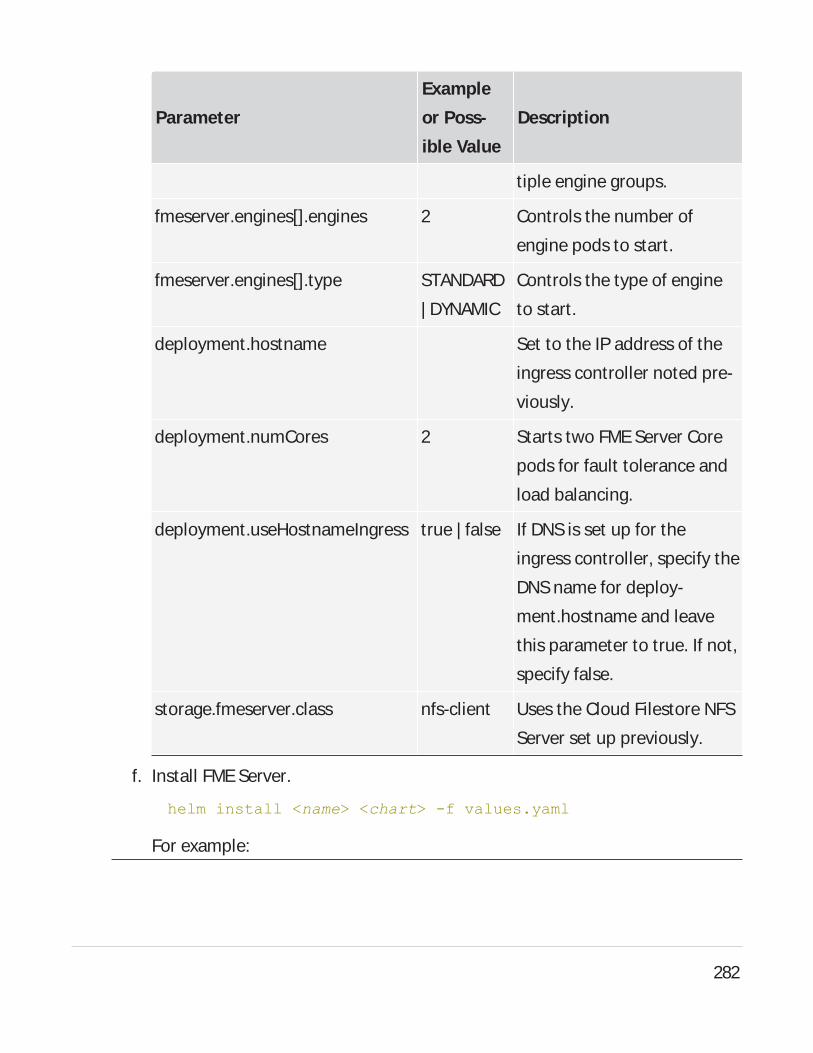
Parameter
Example
or Poss-
ible Value
Description
tiple engine groups.
fmeserver.engines[].engines 2 Controls the number of
engine pods to start.
fmeserver.engines[].type STANDARD
| DYNAMIC
Controls the type of engine
to start.
deployment.hostname Set to the IP address of the
ingress controller noted pre-
viously.
deployment.numCores 2 Starts two FMEServer Core
pods for fault tolerance and
load balancing.
deployment.useHostnameIngress true | false If DNSis set up for the
ingress controller, specify the
DNSname for deploy-
ment.hostname and leave
this parameter to true. If not,
specify false.
storage.fmeserver.class nfs-client Uses the Cloud Filestore NFS
Server set up previously.
f. Install FMEServer.
helm install <name> <chart> -f values.yaml
For example:
282
helm install fmeserver safesoftware/fmeserver-2021.2 -f val-
ues.yaml
If you make changes to the values.yaml file after FMEServer is installed (such
as to scale FMEServer engines), use the helm upgrade command:
helm upgrade <name> <chart> -f values.yaml
For example:
helm upgrade fmeserver safesoftware/fmeserver-2021.2 -f val-
ues.yaml
g. To access FME Server after it deploys, use your browser to invoke the external
IP in your browser.
Deploying to Amazon Elastic Kubernetes Service Using Elastic File System
1. Launch the Cluster and Connect
Expand for instructions
To launch and connect to a cluster in Amazon Elastic Kubernetes Service (EKS), fol-
low the instructions in the Getting Started with Amazon EKSdocumentation. You
must configure some prerequisite resources such as an Amazon Virtual Private
Cloud (VPC) and Identity and Access Management (IAM) role for the cluster.
To deploy an FMEServer to the cluster for test purposes, we recommend the fol-
lowing settings:
l NodeAutoScalingGroupMinSize: 3
l NodeAutoScalingGroupDesiredSize: 3
l NodeAutoScalingGroupMaxSize: 4
l NodeInstanceType: t3.large
You can skip the step to "Launch a Guest Book Application."
283
2. Install Helm and an NGINXIngress Controller
Expand for instructions
a. Check if Helm is already installed. Run:
helm version
If not installed, install Helm.
b. Give Helm deploy permissions.
Run:
kubectl create clusterrolebinding add-on-cluster-admin --
clusterrole=cluster-admin --serviceaccount=kube-sys-
tem:default
c. Install the NGINXingress controller for AWS:
kubectl apply -f https://raw.-
githubusercontent.com/kubernetes/ingress-nginx/controller-
<version>/deploy/static/provider/aws/deploy.yaml
Replace <version> with the most recent version in the corresponding script
in the NGINXIngress Controller Installation Guide. As well, replace other syn-
tax elements with any changes in the updated script.
3. Configure Shared Storage Using Amazon Elastic File System
Expand for instructions
To deploy FMEServer across multiple nodes, configure storage for the FME Server
System Share using Amazon Elastic File System (EFS).
Note: The default Amazon EFSperformance options may not be adequate for
how your FMEServer is used. If you experience performance issues, see the
Amazon EFSPerformance documentation.
284
a. From the AWSManagement Console, navigate to EFS.
i. Click Create file system.
ii. Select the new VPCcreated for the Kubernetes cluster.
iii. Click Customize.
iv. Add any tags as desired. Everything can be left as default. Click Next.
b. The subnets should change to the EKSsubnets. Add the EKSNode security
group to the list of security groups so that our nodes have permissions to
mount them.
i. Click Next and then Create.
ii. Create Access Point. We recommend the following settings:
l Root directory path: /data/fmeserverdata
l POSIXuserl User ID: 1363
l Group ID: 1363
l Root directory creation permissionsl Owner user ID: 1363
l Owner group ID: 1363
l Permissions: 0755
c. Install the Amazon EFSCSI Driver for your region.
d. Create the efs storage class:
kind: StorageClass
apiVersion: storage.k8s.io/v1
metadata:
name: efs-sc
285
provisioner: efs.csi.aws.com
e. Create the persistent volume using the following yaml file as an example. You
will need to replace the volumeHandle with your File system ID and Access
point ID from the EFS.
apiVersion: v1
kind: PersistentVolume
metadata:
name: fmeserver-data
spec:
capacity:
storage: 10Gi
volumeMode: Filesystem
accessModes:
- ReadWriteMany
persistentVolumeReclaimPolicy: Retain
storageClassName: efs-sc
csi:
driver: efs.csi.aws.com
volumeHandle: fs-<file-system-id>::fsap-<access-point-
id>
4. Deploy FMEServer
Expand for instructions
a. Add the Safe Software Helm repository:
helm repo add safesoftware https://safesoft-
ware.github.io/helm-charts/
b. Get the IP address of the Ingress Controller:
286

kubectl describe service ingress-nginx-controller --
namespace ingress-nginx
Note the "LoadBalancer Ingress:" of the nginx-ingress-controller. This is the
ingress into the cluster.
c. Create a namespace in which to deploy. Run:
kubectl create namespace <namespace_name>
For example:
kubectl create namespace fmeserver
d. Create a values.yaml file that will pass user-supplied parameter values into
the Helm chart.
To get the default Helm chart values file, run:
helm show values <chart>
For example:
helm show values safesoftware/fmeserver-2021.2
To write the values to a file:
helm show values safesoftware/fmeserver-2021.2 >> val-
ues.yaml
For more information on value files, see the Helm Docs.
Acurrent list of supported parameters for FMEServer can be found on
GitHub.
e. (Optional) Update parameters in values.yaml.
The following are parameters you may want to change in the values.yaml file:
Expand for Parameters
287
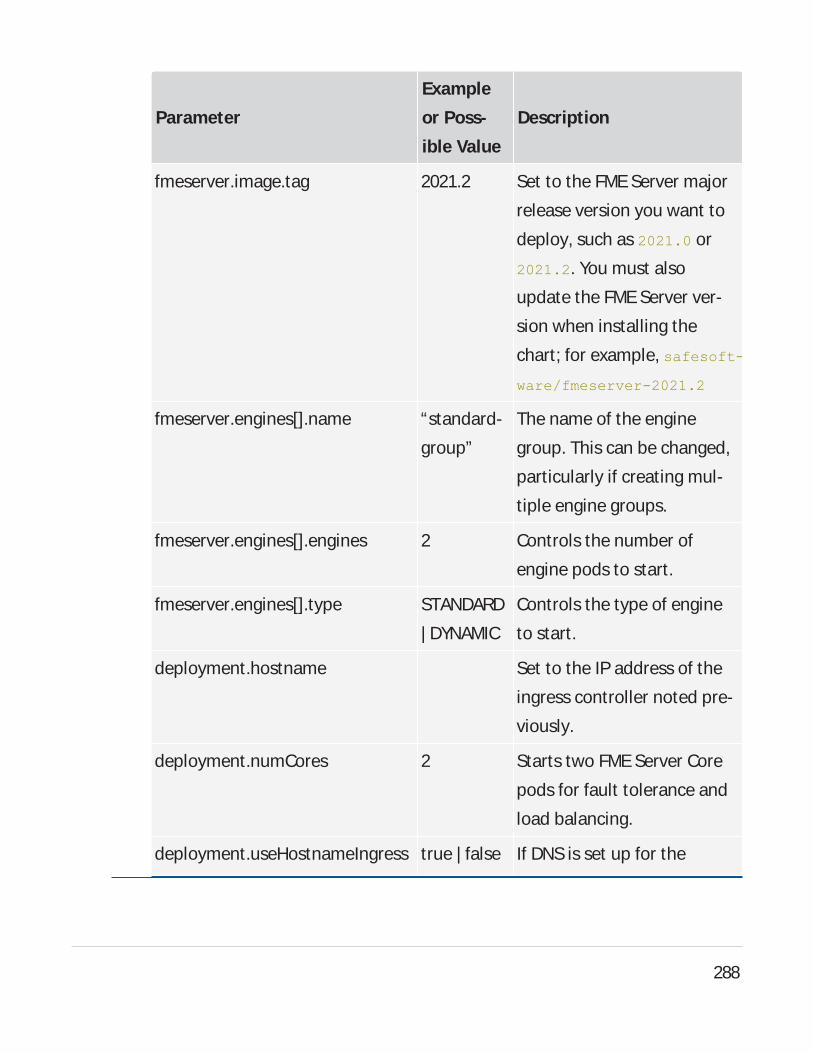
Parameter
Example
or Poss-
ible Value
Description
fmeserver.image.tag 2021.2 Set to the FMEServer major
release version you want to
deploy, such as 2021.0 or
2021.2. You must also
update the FMEServer ver-
sion when installing the
chart; for example, safesoft-
ware/fmeserver-2021.2
fmeserver.engines[].name “standard-
group”
The name of the engine
group. This can be changed,
particularly if creating mul-
tiple engine groups.
fmeserver.engines[].engines 2 Controls the number of
engine pods to start.
fmeserver.engines[].type STANDARD
| DYNAMIC
Controls the type of engine
to start.
deployment.hostname Set to the IP address of the
ingress controller noted pre-
viously.
deployment.numCores 2 Starts two FMEServer Core
pods for fault tolerance and
load balancing.
deployment.useHostnameIngress true | false If DNSis set up for the
288
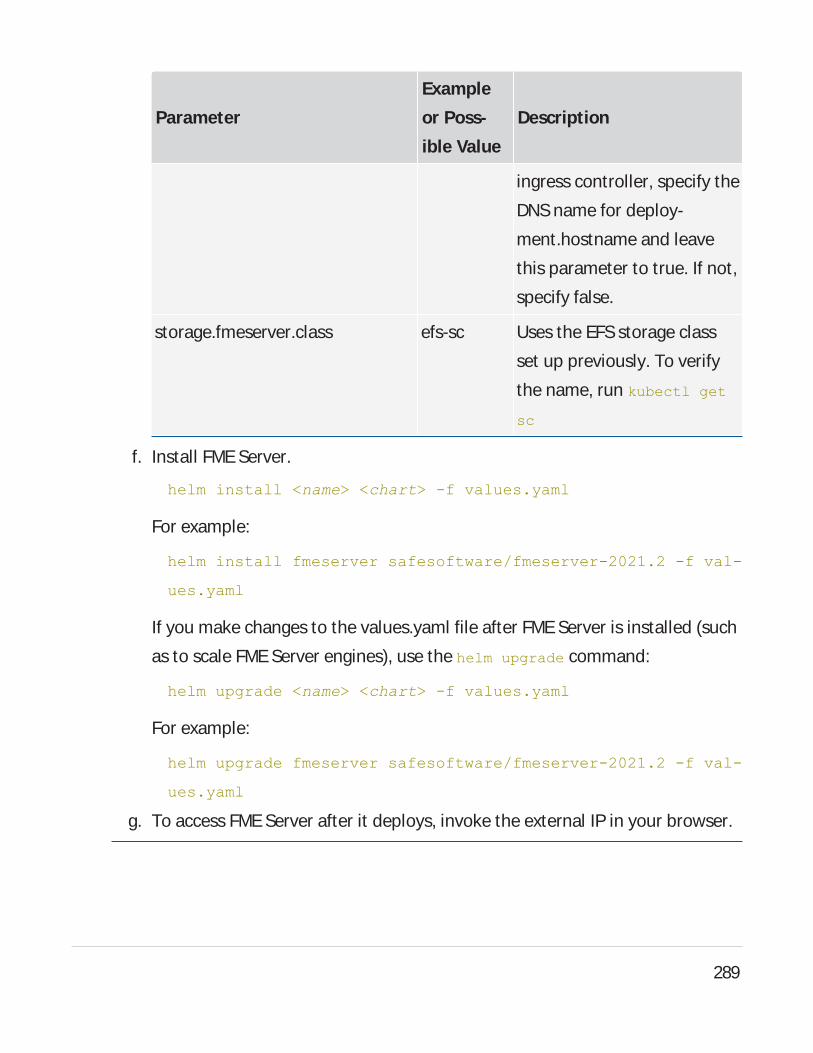
Parameter
Example
or Poss-
ible Value
Description
ingress controller, specify the
DNSname for deploy-
ment.hostname and leave
this parameter to true. If not,
specify false.
storage.fmeserver.class efs-sc Uses the EFSstorage class
set up previously. To verify
the name, run kubectl get
sc
f. Install FMEServer.
helm install <name> <chart> -f values.yaml
For example:
helm install fmeserver safesoftware/fmeserver-2021.2 -f val-
ues.yaml
If you make changes to the values.yaml file after FMEServer is installed (such
as to scale FMEServer engines), use the helm upgrade command:
helm upgrade <name> <chart> -f values.yaml
For example:
helm upgrade fmeserver safesoftware/fmeserver-2021.2 -f val-
ues.yaml
g. To access FMEServer after it deploys, invoke the external IP in your browser.
289
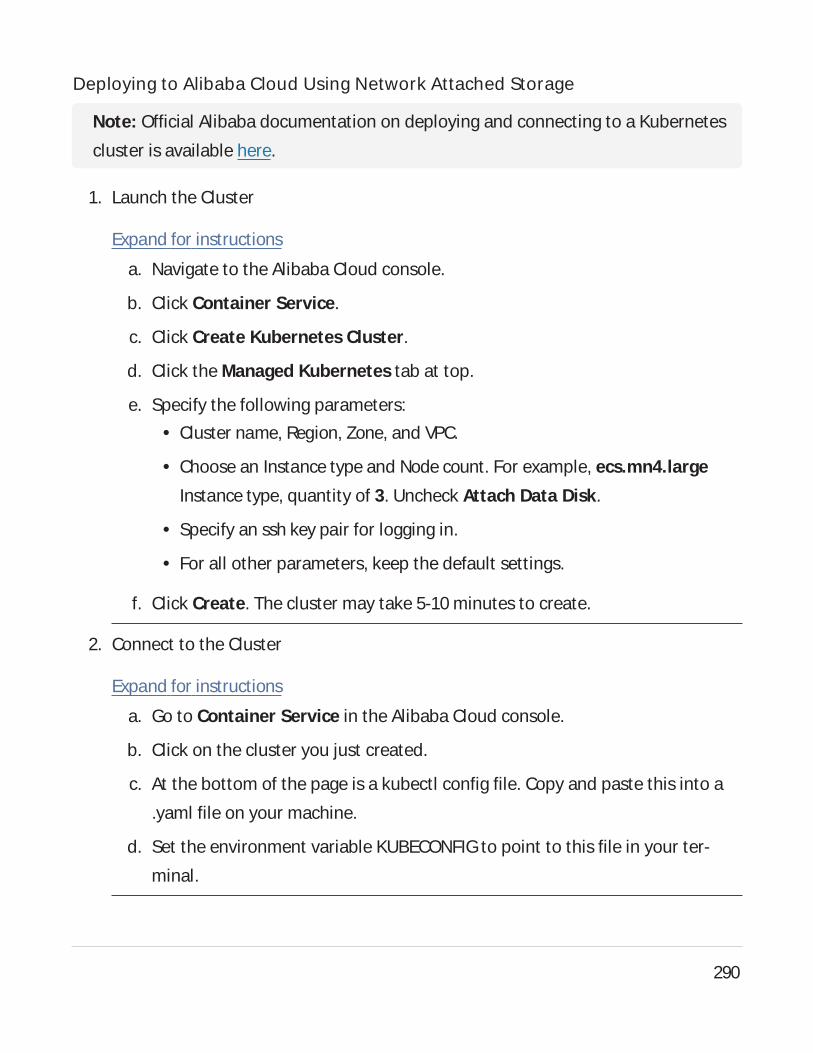
Deploying to Alibaba Cloud Using Network Attached Storage
Note: Official Alibaba documentation on deploying and connecting to a Kubernetes
cluster is available here.
1. Launch the Cluster
Expand for instructions
a. Navigate to the Alibaba Cloud console.
b. Click Container Service.
c. Click Create Kubernetes Cluster.
d. Click the Managed Kubernetes tab at top.
e. Specify the following parameters:l Cluster name, Region, Zone, and VPC.
l Choose an Instance type and Node count. For example, ecs.mn4.large
Instance type, quantity of 3. Uncheck Attach Data Disk.
l Specify an ssh key pair for logging in.
l For all other parameters, keep the default settings.
f. Click Create. The cluster may take 5-10 minutes to create.
2. Connect to the Cluster
Expand for instructions
a. Go to Container Service in the Alibaba Cloud console.
b. Click on the cluster you just created.
c. At the bottom of the page is a kubectl config file. Copy and paste this into a
.yaml file on your machine.
d. Set the environment variable KUBECONFIGto point to this file in your ter-
minal.
290
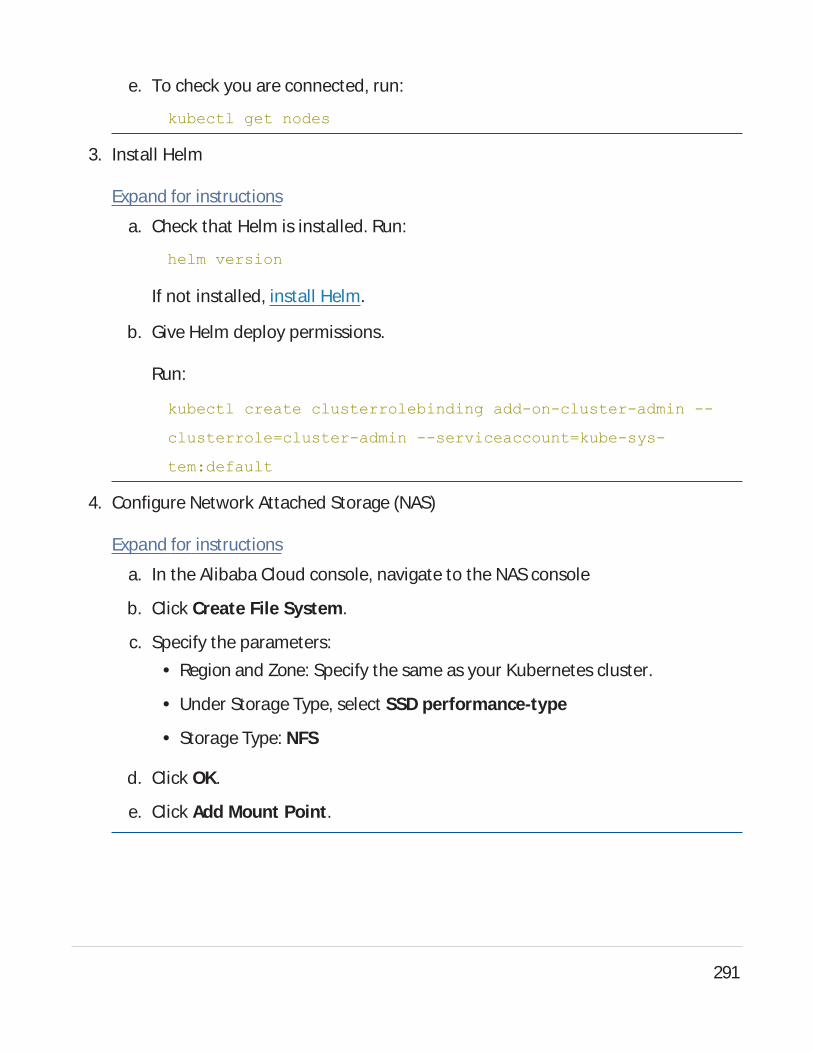
e. To check you are connected, run:
kubectl get nodes
3. Install Helm
Expand for instructions
a. Check that Helm is installed. Run:
helm version
If not installed, install Helm.
b. Give Helm deploy permissions.
Run:
kubectl create clusterrolebinding add-on-cluster-admin --
clusterrole=cluster-admin --serviceaccount=kube-sys-
tem:default
4. Configure Network Attached Storage (NAS)
Expand for instructions
a. In the Alibaba Cloud console, navigate to the NASconsole
b. Click Create File System.
c. Specify the parameters:l Region and Zone: Specify the same as your Kubernetes cluster.
l Under Storage Type, select SSD performance-type
l Storage Type: NFS
d. Click OK.
e. Click Add Mount Point.
291
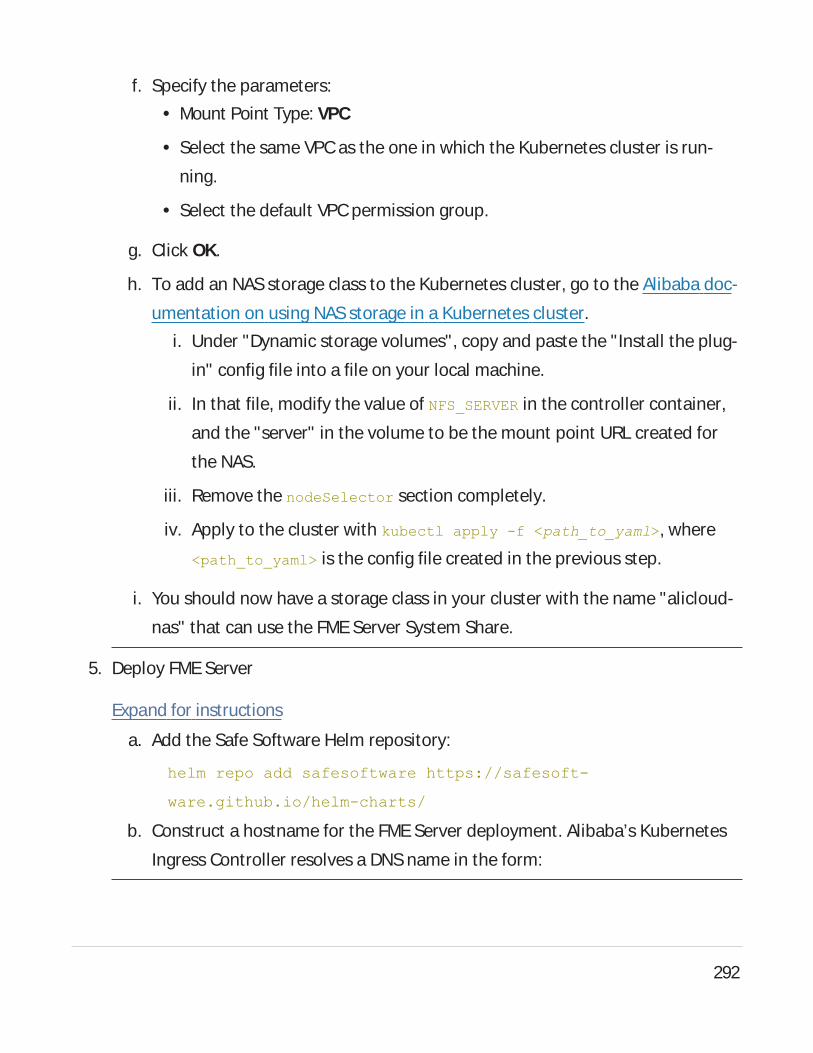
f. Specify the parameters:l Mount Point Type: VPC
l Select the same VPCas the one in which the Kubernetes cluster is run-
ning.
l Select the default VPCpermission group.
g. Click OK.
h. To add an NASstorage class to the Kubernetes cluster, go to the Alibaba doc-
umentation on using NASstorage in a Kubernetes cluster.
i. Under "Dynamic storage volumes", copy and paste the "Install the plug-
in" config file into a file on your local machine.
ii. In that file, modify the value of NFS_SERVER in the controller container,
and the "server" in the volume to be the mount point URL created for
the NAS.
iii. Remove the nodeSelector section completely.
iv. Apply to the cluster with kubectl apply -f <path_to_yaml>, where
<path_to_yaml> is the config file created in the previous step.
i. You should now have a storage class in your cluster with the name "alicloud-
nas" that can use the FMEServer System Share.
5. Deploy FME Server
Expand for instructions
a. Add the Safe Software Helm repository:
helm repo add safesoftware https://safesoft-
ware.github.io/helm-charts/
b. Construct a hostname for the FMEServer deployment. Alibaba’s Kubernetes
Ingress Controller resolves a DNSname in the form:
292
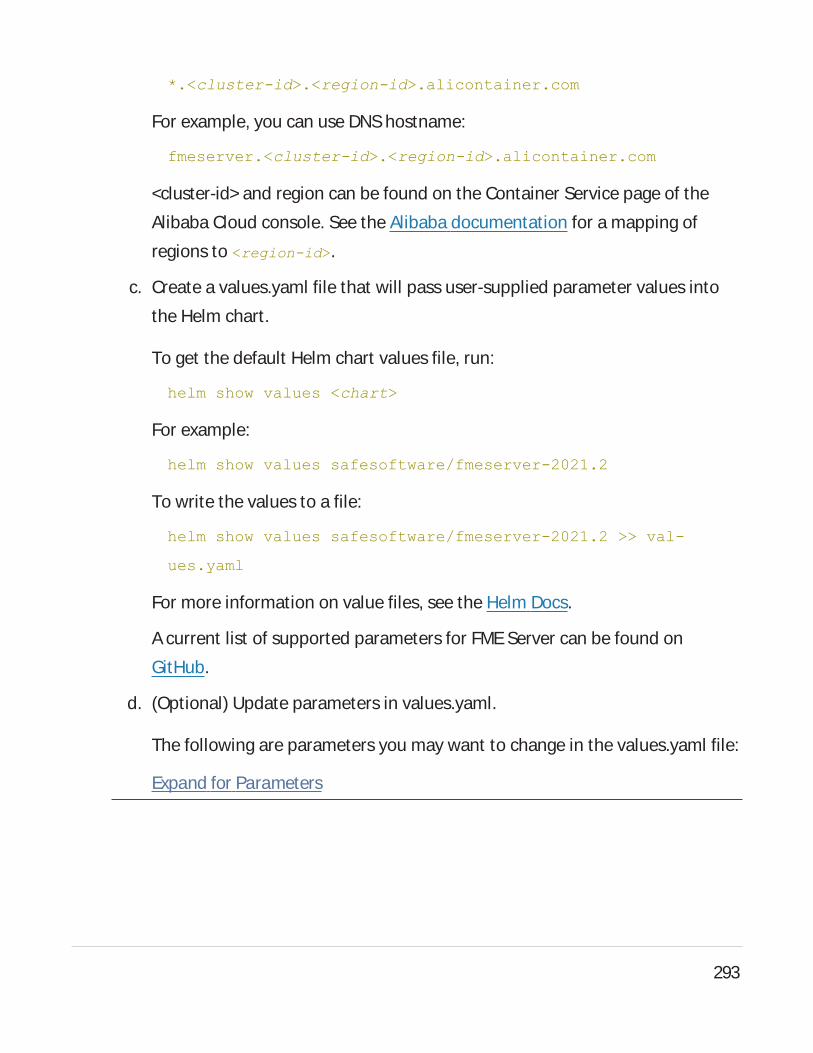
*.<cluster-id>.<region-id>.alicontainer.com
For example, you can use DNShostname:
fmeserver.<cluster-id>.<region-id>.alicontainer.com
<cluster-id> and region can be found on the Container Service page of the
Alibaba Cloud console. See the Alibaba documentation for a mapping of
regions to <region-id>.
c. Create a values.yaml file that will pass user-supplied parameter values into
the Helm chart.
To get the default Helm chart values file, run:
helm show values <chart>
For example:
helm show values safesoftware/fmeserver-2021.2
To write the values to a file:
helm show values safesoftware/fmeserver-2021.2 >> val-
ues.yaml
For more information on value files, see the Helm Docs.
Acurrent list of supported parameters for FMEServer can be found on
GitHub.
d. (Optional) Update parameters in values.yaml.
The following are parameters you may want to change in the values.yaml file:
Expand for Parameters
293

Parameter
Example
or Poss-
ible Value
Description
fmeserver.image.tag 2021.2 Set to the FMEServer major
release version you want to
deploy, such as 2021.0 or
2021.2. You must also
update the FMEServer ver-
sion when installing the
chart; for example, safesoft-
ware/fmeserver-2021.2
fmeserver.engines[].name “standard-
group”
The name of the engine
group. This can be changed,
particularly if creating mul-
tiple engine groups.
fmeserver.engines[].engines 2 Controls the number of
engine pods to start.
fmeserver.engines[].type STANDARD
| DYNAMIC
Controls the type of engine
to start.
deployment.hostname Set to the IP address of the
ingress controller noted pre-
viously.
deployment.numCores 2 Starts two FMEServer Core
pods for fault tolerance and
load balancing.
deployment.useHostnameIngress true | false If DNSis set up for the
294
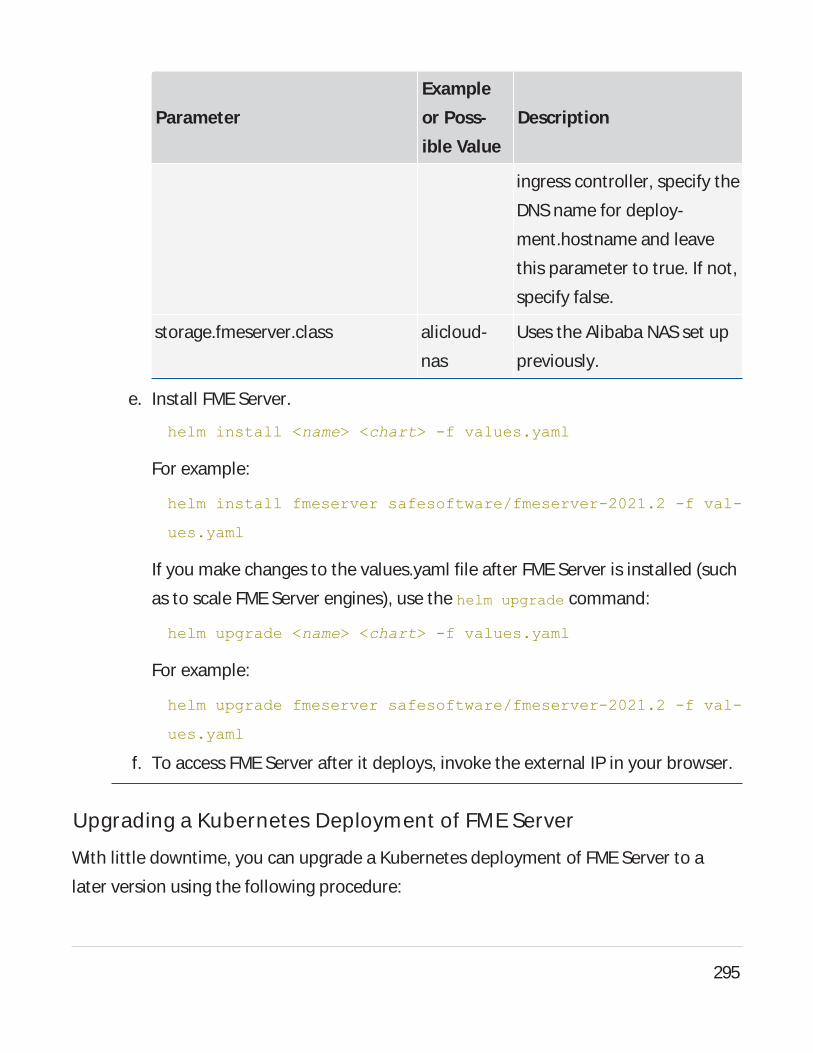
Parameter
Example
or Poss-
ible Value
Description
ingress controller, specify the
DNSname for deploy-
ment.hostname and leave
this parameter to true. If not,
specify false.
storage.fmeserver.class alicloud-
nas
Uses the Alibaba NASset up
previously.
e. Install FMEServer.
helm install <name> <chart> -f values.yaml
For example:
helm install fmeserver safesoftware/fmeserver-2021.2 -f val-
ues.yaml
If you make changes to the values.yaml file after FMEServer is installed (such
as to scale FMEServer engines), use the helm upgrade command:
helm upgrade <name> <chart> -f values.yaml
For example:
helm upgrade fmeserver safesoftware/fmeserver-2021.2 -f val-
ues.yaml
f. To access FMEServer after it deploys, invoke the external IP in your browser.
Upgrading a Kubernetes Deployment of FME Server
With little downtime, you can upgrade a Kubernetes deployment of FME Server to a
later version using the following procedure:
295
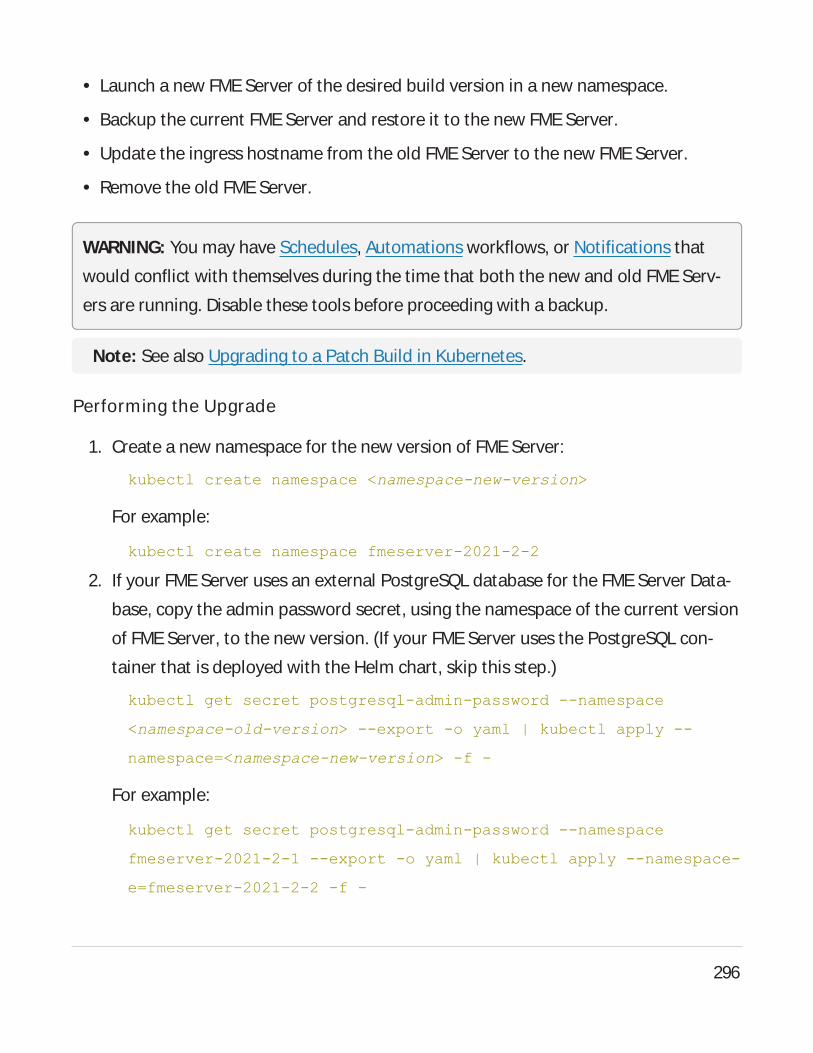
l Launch a new FMEServer of the desired build version in a new namespace.
l Backup the current FMEServer and restore it to the new FMEServer.
l Update the ingress hostname from the old FMEServer to the new FMEServer.
l Remove the old FMEServer.
WARNING: You may have Schedules, Automations workflows, or Notifications that
would conflict with themselves during the time that both the new and old FMEServ-
ers are running. Disable these tools before proceeding with a backup.
Note: See also Upgrading to a Patch Build in Kubernetes.
Performing the Upgrade
1. Create a new namespace for the new version of FMEServer:
kubectl create namespace <namespace-new-version>
For example:
kubectl create namespace fmeserver-2021-2-2
2. If your FME Server uses an external PostgreSQL database for the FME Server Data-
base, copy the admin password secret, using the namespace of the current version
of FME Server, to the new version. (If your FME Server uses the PostgreSQL con-
tainer that is deployed with the Helm chart, skip this step.)
kubectl get secret postgresql-admin-password --namespace
<namespace-old-version> --export -o yaml | kubectl apply --
namespace=<namespace-new-version> -f -
For example:
kubectl get secret postgresql-admin-password --namespace
fmeserver-2021-2-1 --export -o yaml | kubectl apply --namespace-
e=fmeserver-2021-2-2 -f -
296
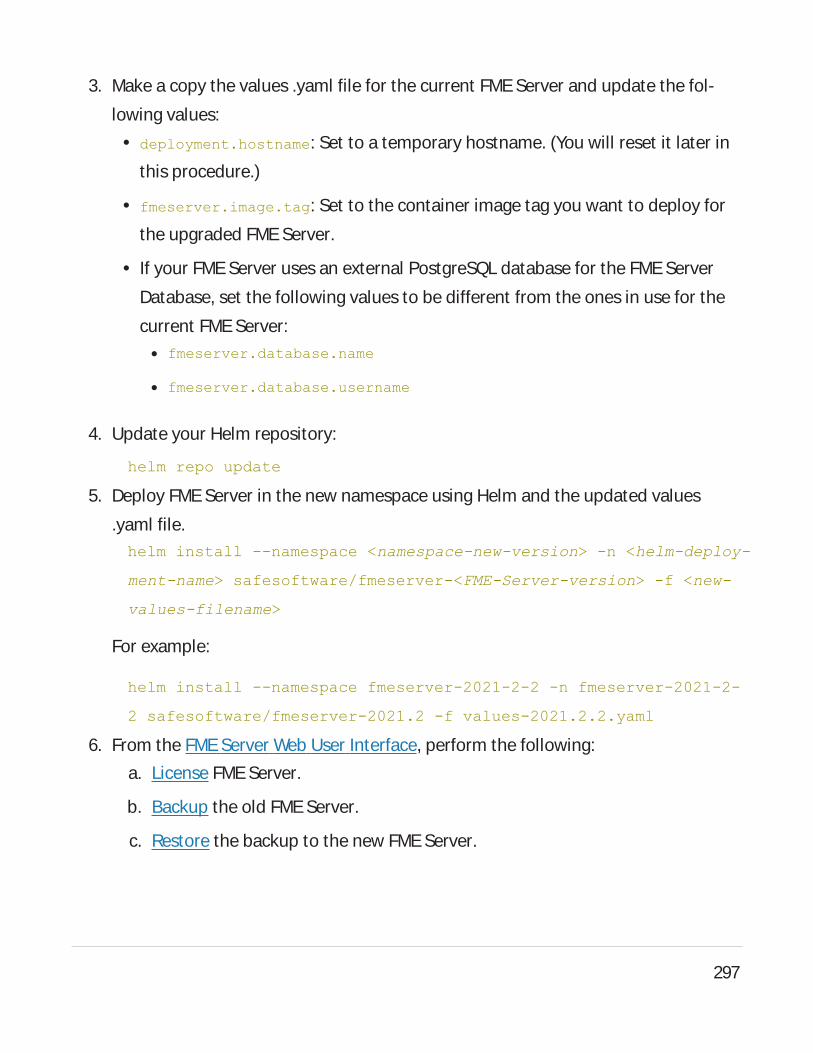
3. Make a copy the values .yaml file for the current FMEServer and update the fol-
lowing values:l deployment.hostname: Set to a temporary hostname. (You will reset it later in
this procedure.)
l fmeserver.image.tag: Set to the container image tag you want to deploy for
the upgraded FMEServer.
l If your FME Server uses an external PostgreSQL database for the FME Server
Database, set the following values to be different from the ones in use for the
current FME Server:l fmeserver.database.name
l fmeserver.database.username
4. Update your Helm repository:
helm repo update
5. Deploy FMEServer in the new namespace using Helm and the updated values
.yaml file.helm install --namespace <namespace-new-version> -n <helm-deploy-
ment-name> safesoftware/fmeserver-<FME-Server-version> -f <new-
values-filename>
For example:
helm install --namespace fmeserver-2021-2-2 -n fmeserver-2021-2-
2 safesoftware/fmeserver-2021.2 -f values-2021.2.2.yaml
6. From the FMEServer Web User Interface, perform the following:
a. License FMEServer.
b. Backup the old FME Server.
c. Restore the backup to the new FMEServer.
297
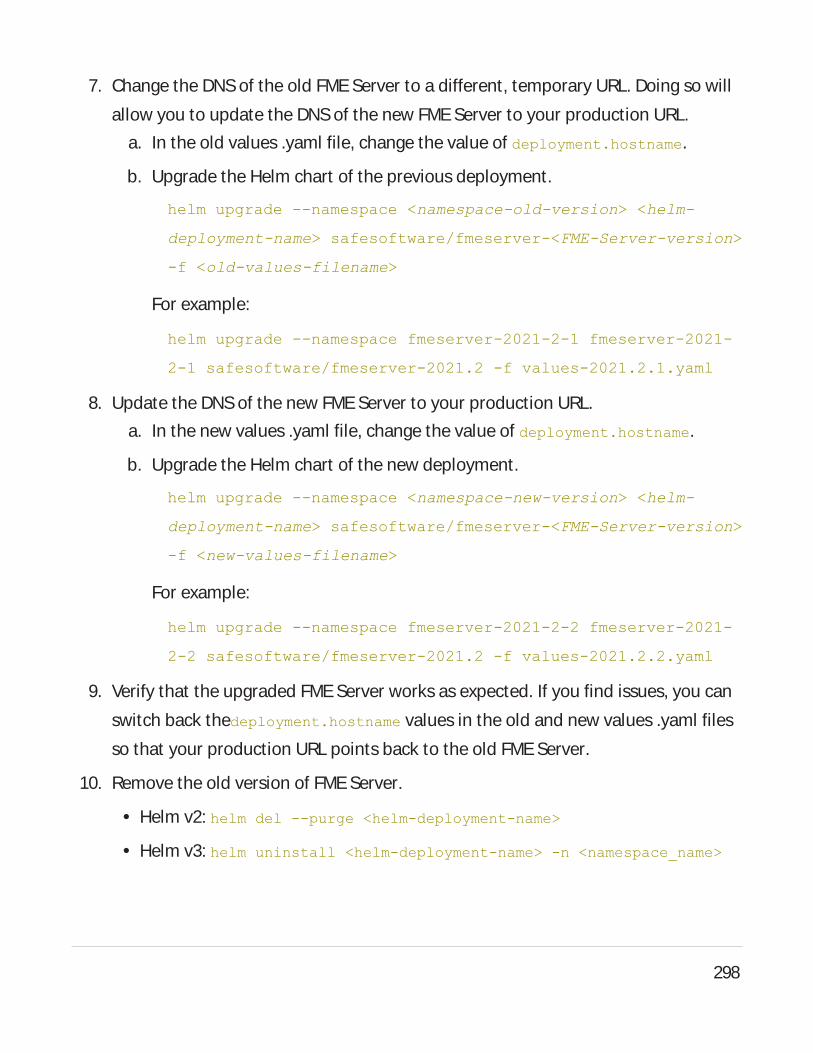
7. Change the DNSof the old FME Server to a different, temporary URL. Doing so will
allow you to update the DNSof the new FME Server to your production URL.
a. In the old values .yaml file, change the value of deployment.hostname.
b. Upgrade the Helm chart of the previous deployment.
helm upgrade --namespace <namespace-old-version> <helm-
deployment-name> safesoftware/fmeserver-<FME-Server-version>
-f <old-values-filename>
For example:
helm upgrade --namespace fmeserver-2021-2-1 fmeserver-2021-
2-1 safesoftware/fmeserver-2021.2 -f values-2021.2.1.yaml
8. Update the DNSof the new FMEServer to your production URL.
a. In the new values .yaml file, change the value of deployment.hostname.
b. Upgrade the Helm chart of the new deployment.
helm upgrade --namespace <namespace-new-version> <helm-
deployment-name> safesoftware/fmeserver-<FME-Server-version>
-f <new-values-filename>
For example:
helm upgrade --namespace fmeserver-2021-2-2 fmeserver-2021-
2-2 safesoftware/fmeserver-2021.2 -f values-2021.2.2.yaml
9. Verify that the upgraded FME Server works as expected. If you find issues, you can
switch back thedeployment.hostname values in the old and new values .yaml files
so that your production URL points back to the old FME Server.
10. Remove the old version of FME Server.
l Helm v2: helm del --purge <helm-deployment-name>
l Helm v3: helm uninstall <helm-deployment-name> -n <namespace_name>
298

For example:
l Helm v2: helm del --purge fmeserver-2021-2-1
l Helm v3: helm uninstall fmeserver-2021-2-1 -n fmeserver-2021-2-1
11. If your FME Server uses an external PostgreSQL database for the FME Server Data-
base, drop the database for the old FME Server.
Upgrading to a Patch Build in Kubernetes
When an FMEServer build is released, two tags are created for each component’s
image. For example, if the release version is 2021.2, these tags are named 2021.2 and
2021.2-20211029, where 20211029 is the date the image was released.
The available tags for each FMEServer component can be found on Dockerhub.
Patch Builds
Images of each build are patched periodically with security updates. When this occurs,
each image is released again with the current date as a suffix to the build number (for
example, 2021.2-20211030). As well, the original tag (for example, 2021.2 is updated
to refer to the most recently released version of the build. With this in mind, if it is prefer-
able to lock down to a specific image and avoid updating to a patched version, use the
timestamped tags. Otherwise, to always use the latest version of a build, use the non-
timestamped tag (for example, 2021.2).
To upgrade to a patched image in a Kubernetes deployment
1. Add the FME Server Helm repository and the values file that were initially used to
deploy FME Server. Run:
>> helm repo add safesoftware https://safesoft-
ware.github.io/helm-charts
2. Update fmeserver.image.tag in the values file to the desired tag. Run:
299
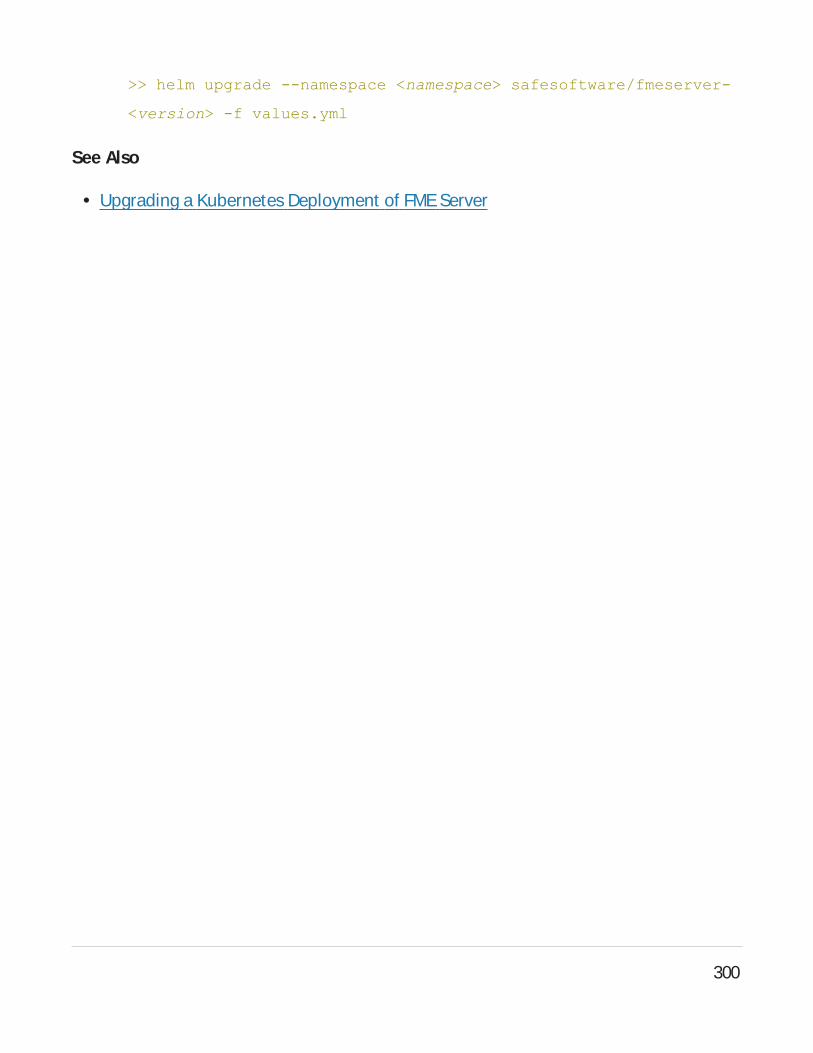
>> helm upgrade --namespace <namespace> safesoftware/fmeserver-
<version> -f values.yml
See Also
l Upgrading a Kubernetes Deployment of FMEServer
300
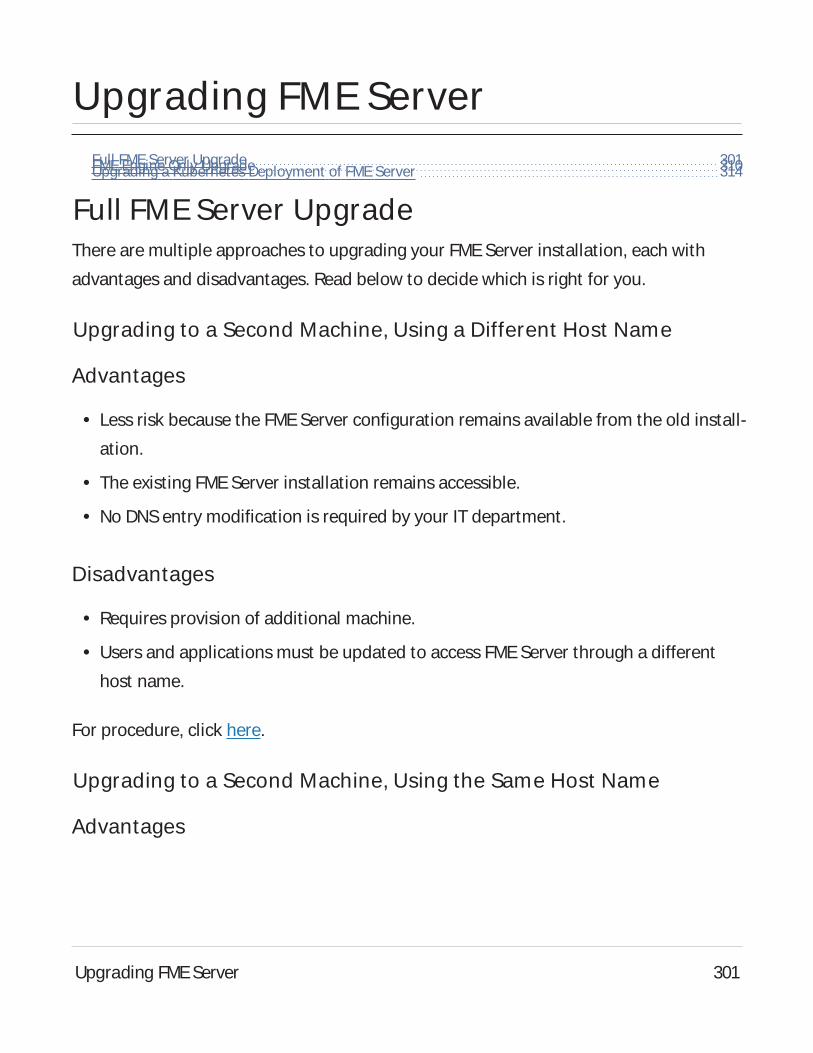
Upgrading FME ServerFull FMEServer Upgrade 301FMEEngine Only Upgrade 310Upgrading a Kubernetes Deployment of FMEServer 314
Full FME Server UpgradeThere are multiple approaches to upgrading your FMEServer installation, each with
advantages and disadvantages. Read below to decide which is right for you.
Upgrading to a Second Machine, Using a Different Host Name
Advantages
l Less risk because the FMEServer configuration remains available from the old install-
ation.
l The existing FMEServer installation remains accessible.
l No DNSentry modification is required by your IT department.
Disadvantages
l Requires provision of additional machine.
l Users and applications must be updated to access FMEServer through a different
host name.
For procedure, click here.
Upgrading to a Second Machine, Using the Same Host Name
Advantages
Upgrading FME Server 301
l Less risk because the FMEServer configuration remains available from the old install-
ation.
l The existing FMEServer installation remains accessible from the same host name
without interruption.
Disadvantages
l Requires provision of additional machine.
l Requires DNSentry modification by your IT department.
For procedure, click here.
Upgrading In-Place, on the Same Machine
Advantages
l Does not require provision of additional machine.
l Does not require DNSentry modification by your IT department.
Disadvantages
l More risk because the FME Server configuration cannot be retrieved if the backup
file is corrupted.
l The FMEServer installation is inaccessible for a period of time.
For procedure, click here.
See Also
l FMEEngine Only Upgrade
Upgrading FME Server 302
Upgrading to a Second Machine, Using a Different Host Name
Note: If the FMEServer you are upgrading from was configured for HTTPS, you
must reconfigure HTTPSafter the upgrade is complete.
1. Provide a new machine for the upgrade.
2. Backup the FMEServer configuration from the old machine.
3. Install FMEServer on the new machine. On the FMEServer Hostname dialog, spe-
cify the new hostname.
Note: If your FMEServer installation includes an FME Server Database that is
configured on your own database server, you must perform the step to Con-
figure the FME Server Database on a Separate Database Server as part of install-
ation. You cannot reuse the FME Server Database from a previous installation
because the table schemas may differ from the upgraded version.
4. Restore the backed-up FMEServer configuration to the new machine.
5. Test that your configuration has been migrated successfully.
Note: Hardcoded paths to the previous host name in workspaces, trans-
formers and HTTP push subscriptions must be manually updated.
6. Uninstall FME Server from the old machine (or recycle the machine).
Upgrading to a Second Machine, Using the Same Host Name
Note: If the FMEServer you are upgrading from was configured for HTTPS, you
must reconfigure HTTPSafter the upgrade is complete.
1. Provide a new machine for the upgrade.
2. Note the host name you are using to access your currently-installed FMEServer.
Upgrading FME Server 303

3. On the new machine, configure the hosts file so that this host name resolves to the
new machine.
Windows:
1. In a text editor, open C:\Windows\System32\Drivers\etc\hosts
2. Add a line like this: <localhost_ip> <hostname>
For example: 127.0.0.1 fmeserver.com
Linux:
1. In a text editor, open /etc/hosts
2. Add a line like this: <localhost_ip> <hostname> <hostname>
For example: 127.0.0.1 fmeserver.com fmeserver.com
4. Backup the FMEServer configuration from the old machine.
5. Install FMEServer on the new machine. On the FMEServer Hostname dialog, spe-
cify the same host name as the previous installation.
Note: If your FMEServer installation includes an FME Server Database that is
configured on your own database server, you must perform the step to Con-
figure the FME Server Database on a Separate Database Server as part of install-
ation. You cannot reuse the FME Server Database from a previous installation
because the table schemas may differ from the upgraded version.
6. Restore the backed-up FMEServer configuration to the new machine.
7. Test that your configuration has been migrated successfully by running a work-
space from the Web User Interface in a browser on the new machine. Alternatively,
if you want to test from a remote machine, you must temporarily configure the
machine to route requests for the FMEServer host to the new FMEServer machine.
Use the same procedure as step 3 above.
Upgrading FME Server 304
8. Instruct your IT department to switch the DNSsetting for the host name so that it
routes to the new machine instead of the old machine.
9. Uninstall FME Server from the old machine (or recycle the machine).
Upgrading In Place, On the Same Machine
Note: If the FMEServer you are upgrading from was configured for HTTPS, you
must reconfigure HTTPSafter the upgrade is complete.
1. Back Up Configuration.
2. Verify the integrity of the backup by restoring the configuration to the existing FME
Server. Asuccessful restore indicates the backup is valid.
3. Uninstall FMEServer.
4. Install the newer version.
Note: If your FMEServer installation includes an FME Server Database that is
configured on your own database server, you must perform the step to Con-
figure the FME Server Database on a Separate Database Server as part of install-
ation. You cannot reuse the FME Server Database from a previous installation
because the table schemas may differ from the upgraded version.
5. Restore Configuration.
Back Up Configuration
To back up an FME Server, perform the following:
1. Back up the FMEServer configuration files.
2. Back up repository file versions, if applicable.
3. Back up the FMEServer configuration .
Upgrading FME Server 305

Note: Before proceeding, be sure to note your product's serial number. It may be
required when you restore the configuration to the upgraded FME Server. You can
find the serial number on the Licensing page.
Back Up the FME Server Configuration Files
Before proceeding with the primary task of backing up your FMEServer configuration,
we recommend manually backing up the FMEServer Configuration Files to a location
outside of your FMEServer installation directory, in case you need to refer to them later.
These files contain configurations for the FMEServer Database and miscellaneous set-
tings for the Transformation and Repository Managers. These configurations are not
included in the primary backup procedure. To restore any changes that were made in
these files, you must be able to refer to them when the upgrade is complete, so that you
can make the corresponding changes in the replacement file.
WARNING: Configuration files from a backed-up FME Server are for reference only.
Do not copy them to the corresponding directory of a restored FME Server.
Back up Repository Versions
If Version Control is enabled on the current FME Server, and it is not configured with a
remote Git repository, previous versions of repository files are not available following an
upgrade.
You can view all versions from the Repositories page (History), and download them as
desired.
Back up the FME Server Configuration
The FMEServer Web User Interface makes it easy to back up your FMEServer. For
information about what is included in a backup, see Which FMEServer Configuration
Components are Migrated?.
Note: Backing up job history is not supported.
Upgrading FME Server 306
To perform the backup, use the Web User Interface tool.
Note: To restore your configuration after you upgrade FMEServer, see Restore Con-
figuration.
Uninstall
To uninstall FME Server, complete the following steps:
1. Stop the FME Server System Services
2. Drop the FMEServer Database (if required)
3. Uninstall FMEServer
Stop the FME Server System Services
Note: Before proceeding, be sure to note your product's serial number. It may be
required when you restore the configuration to the upgraded FME Server. You can
find the serial number on the Licensing page.
For the uninstall process to complete properly, you must first stop the FME Server Sys-
tem Services, as well as any third-party web application and database services. For
more information, see Starting and Stopping FMEServer Manually.
If you have FME Server components installed on multiple machines, you must stop the
services on all applicable machines. For example, if you have installed multiple
FME Servers for fault tolerance, you must stop all services on their respective machines.
Likewise, if you have FME Engines installed on multiple machines, you must stop the
FME Server Engines service on all applicable machines.
To stop the web application server and database services depends on which ones you
installed. If you installed FMEServer using the Express option, you can use the instruc-
tions at Starting and Stopping FMEServer Manually to stop these services as well. If you
installed FMEServer using a Distributed Installation, then you are using your own data-
Upgrading FME Server 307
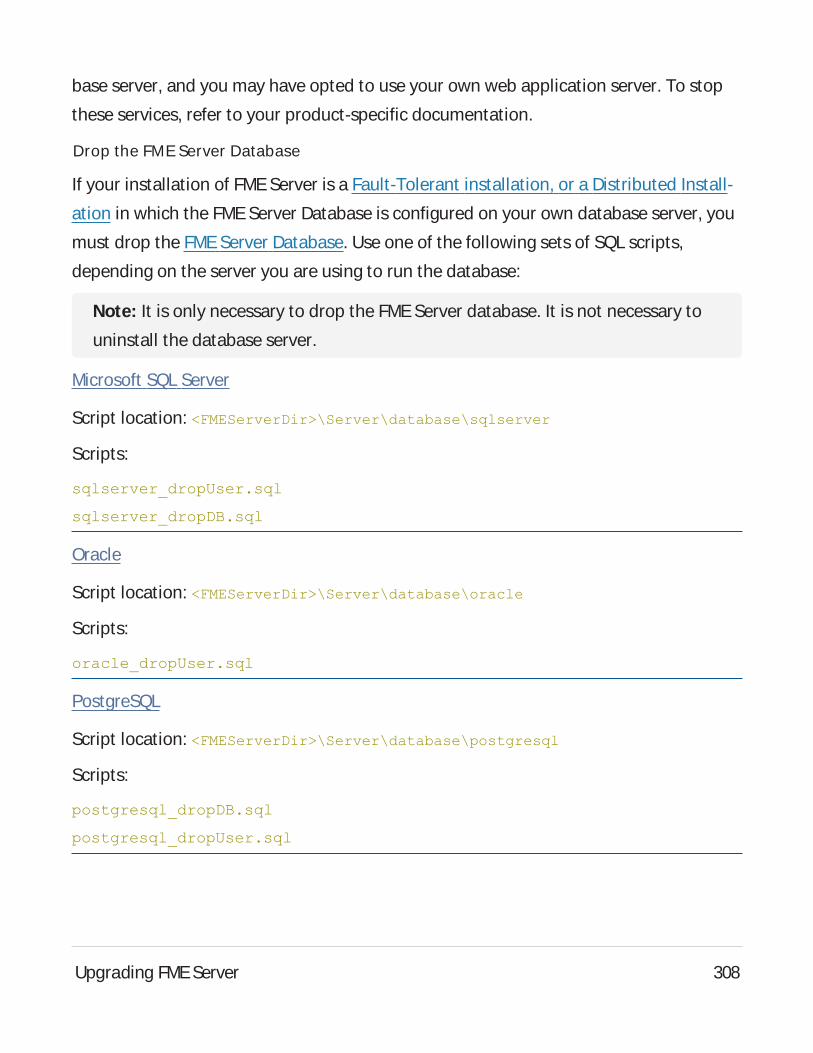
base server, and you may have opted to use your own web application server. To stop
these services, refer to your product-specific documentation.
Drop the FME Server Database
If your installation of FMEServer is a Fault-Tolerant installation, or a Distributed Install-
ation in which the FMEServer Database is configured on your own database server, you
must drop the FMEServer Database. Use one of the following sets of SQL scripts,
depending on the server you are using to run the database:
Note: It is only necessary to drop the FMEServer database. It is not necessary to
uninstall the database server.
Microsoft SQL Server
Script location: <FMEServerDir>\Server\database\sqlserver
Scripts:
sqlserver_dropUser.sql
sqlserver_dropDB.sql
Oracle
Script location: <FMEServerDir>\Server\database\oracle
Scripts:
oracle_dropUser.sql
PostgreSQL
Script location: <FMEServerDir>\Server\database\postgresql
Scripts:
postgresql_dropDB.sql
postgresql_dropUser.sql
Upgrading FME Server 308
Uninstall FME Server
l On Windows, uninstall FMEServer through the Control Panel.
l On Linux, run the uninstall.sh script in the FMEServer installation directory. To
ensure that everything gets uninstalled, run this script as root.
If you have FME Server components installed on multiple machines, you must uninstall
the components on all applicable machines. For example, if you have installed multiple
FME Servers for fault tolerance, you must uninstall FME Server from all machines. Like-
wise, if you have FME Engines installed on multiple machines, you must uninstall the
FME Server Engines from all applicable machines.
If you installed FMEServer by distributing components and opted to use your own web
application server, it is not necessary to uninstall it. Instead, delete all folders and .war
files from the web application installation directory that begin with "fme" (that is, are
named like fme*).
Finally, if you installed FME Server using any Distributed/Fault Tolerant Installation, you
must remove the FME Server System Share, assuming you have already performed a
backup of FME Server, or upgraded FME Server to a second machine.
Note: On Linux, uninstalling removes the configuration of the following com-
ponents, but does not uninstall them. They are reconfigured when FME Server is
reinstalled. If you want to use the more current version of these components,
remove them completely from the system before re-installing:
The PostgreSQL FMEServer Database, if applicable.
The NGINXreverse proxy.
Install
Depending on the type of installation you want to perform and your operating system,
perform the installation and licensing procedures provided in one of the following sec-
tions:
Upgrading FME Server 309
l Express Installation for Windows
l Express Installation for Linux
l Fault-Tolerant Installation
l Distributed Installation (2-tier)
l Distributed Installation (3-tier)
Restore Configuration
To restore an FMEServer that you backed up previously, use the Restore tool in the FME
Server Web User Interface.
FME Engine Only UpgradeFME Engines are the component of FMEServer that perform the actual data translations
and transformations. At times, you might want to upgrade only your FMEEngines and
not any other FMEServer components. For example, you might want to provide support
for recently added formats or other newer functionality included in a new release, which
requires only an upgrade of the FME Engines.
The procedures described in this section use the standard FMEinstaller provided on the
Safe Software web site, and can be performed with an official or beta release of the FME
Engine installer.
Safe supports installing newer FMEEngines, as long as the engines share the same
major version/year as the current installation of FME Server. For example, on FMEServer
2016.0, the FMEEngines may be upgraded to 2016.1.3, but may not be upgraded to
2017.0.
In this Section
Upgrading FME Server 310
Obtaining the Installer
Install the upgraded FMEEngine in its own path rather than overwriting the existing
FME Engine. This way, you can reverse the upgrade if required.
To upgrade only the FMEEngine component when installing an FMEServer envir-
onment, use a stand-alone FMEEngine installer, not the FMEServer installer, and follow
these steps.
To obtain the appropriate FME Engine Installer, visit the FMEDownloads page.
Install on Windows
To install FME Engine in a Windows environment
1. Run the FMEinstaller on any computers that are running FMEEngines that you
want to upgrade.
Be sure to leave the existing FMEEngine in place as a backup:
<FMEServerDir>\Server\fme
and create a new directory for the upgraded FME:
<FMEServerDir>\Server\FMEEngineUpgrade
2. You must license your new FMEEngines
For licensing instructions, see Licensing.
3. Open Windows Explorer.
4. Make a copy of the file <FMEServerDir>\Server\FMEEngineUpgrade\fme.exe,
place that copy in the same <FMEServerDir>\Server\FMEEngineUpgrade dir-
ectory, and rename it FMEEngine.exe.
5. Edit the <FMEServerDir>\Server\processMonitorConfigEngines.txt file.
Look for lines that start FMEEngines, such as the following:
Upgrading FME Server 311
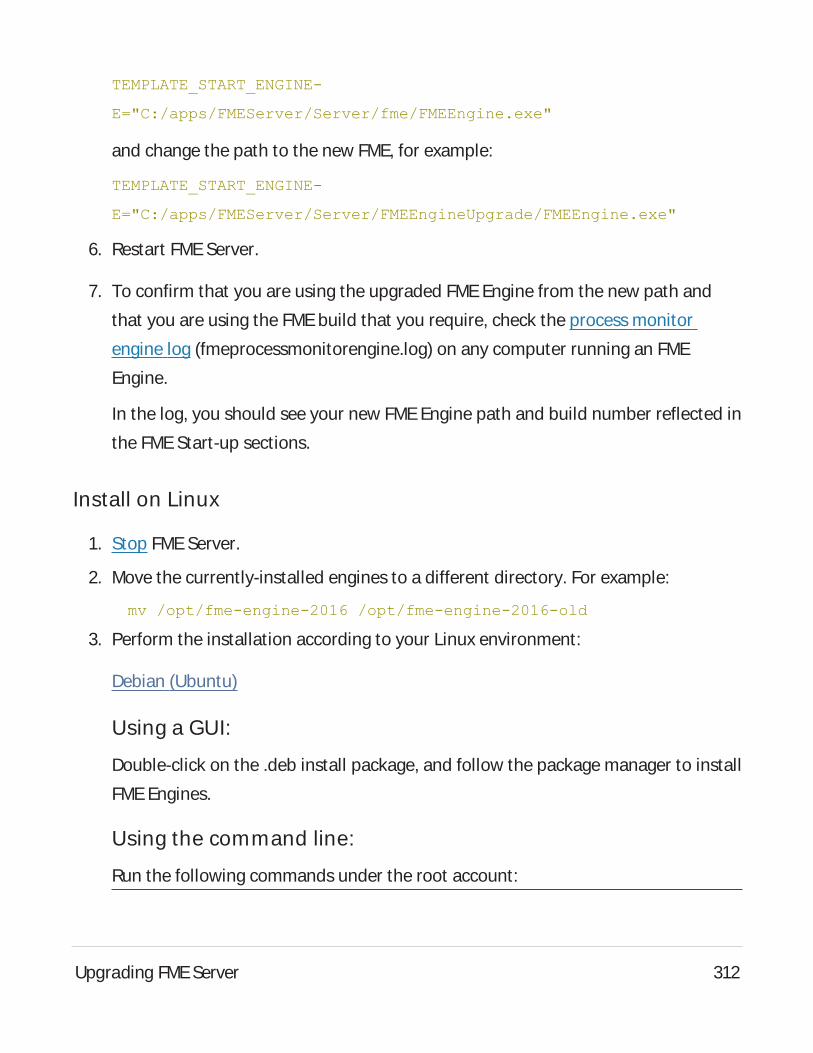
TEMPLATE_START_ENGINE-
E="C:/apps/FMEServer/Server/fme/FMEEngine.exe"
and change the path to the new FME, for example:
TEMPLATE_START_ENGINE-
E="C:/apps/FMEServer/Server/FMEEngineUpgrade/FMEEngine.exe"
6. Restart FMEServer.
7. To confirm that you are using the upgraded FMEEngine from the new path and
that you are using the FMEbuild that you require, check the process monitor
engine log (fmeprocessmonitorengine.log) on any computer running an FME
Engine.
In the log, you should see your new FMEEngine path and build number reflected in
the FMEStart-up sections.
Install on Linux
1. Stop FME Server.
2. Move the currently-installed engines to a different directory. For example:
mv /opt/fme-engine-2016 /opt/fme-engine-2016-old
3. Perform the installation according to your Linux environment:
Debian (Ubuntu)
Using a GUI:
Double-click on the .deb install package, and follow the package manager to install
FMEEngines.
Using the command line:
Run the following commands under the root account:
Upgrading FME Server 312
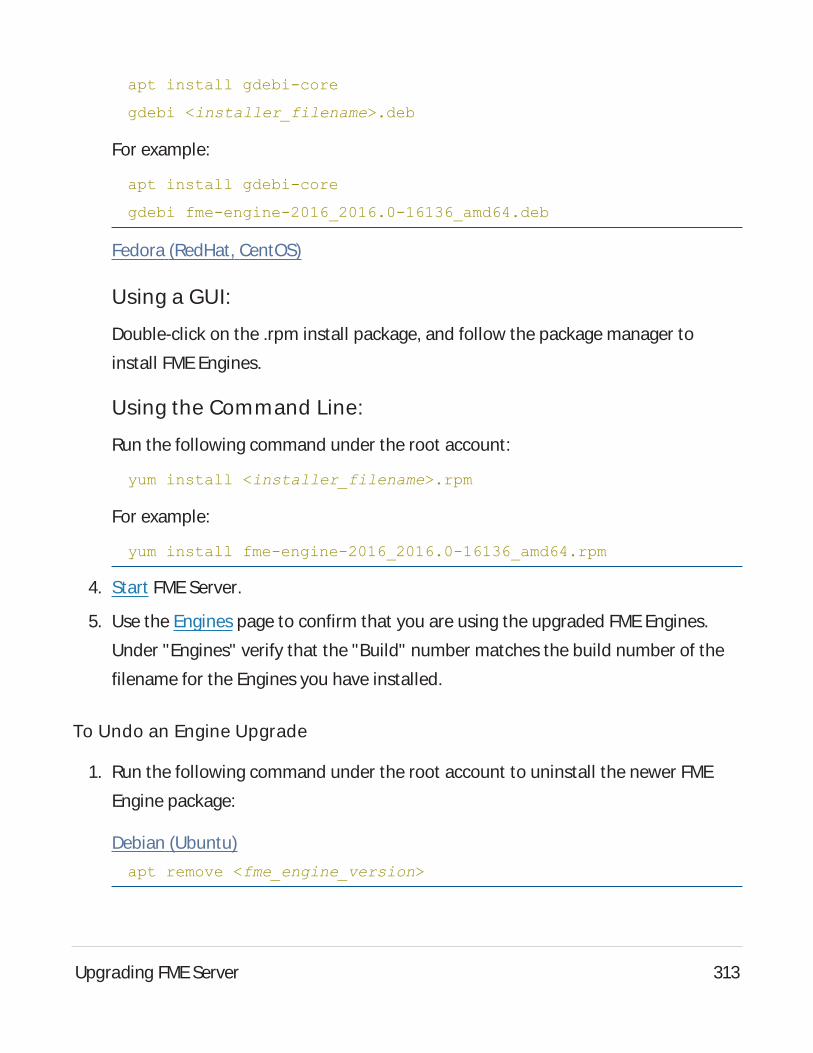
apt install gdebi-core
gdebi <installer_filename>.deb
For example:
apt install gdebi-core
gdebi fme-engine-2016_2016.0-16136_amd64.deb
Fedora (RedHat, CentOS)
Using a GUI:
Double-click on the .rpm install package, and follow the package manager to
install FMEEngines.
Using the Command Line:
Run the following command under the root account:
yum install <installer_filename>.rpm
For example:
yum install fme-engine-2016_2016.0-16136_amd64.rpm
4. Start FME Server.
5. Use the Engines page to confirm that you are using the upgraded FMEEngines.
Under "Engines" verify that the "Build" number matches the build number of the
filename for the Engines you have installed.
To Undo an Engine Upgrade
1. Run the following command under the root account to uninstall the newer FME
Engine package:
Debian (Ubuntu)
apt remove <fme_engine_version>
Upgrading FME Server 313
For example:
apt remove fme-engine-2016
Fedora (RedHat, CentOS)
yum remove <fme_engine_version>
For example:
yum remove fme-desktop-2016
2. Move the older FMEEngines back to the current directory. For example:
mv /opt/fme-engine-2016-old /opt/fme-engine-2016
Upgrading a Kubernetes Deployment of FMEServerWith little downtime, you can upgrade a Kubernetes deployment of FME Server to a
later version using the following procedure:
l Launch a new FMEServer of the desired build version in a new namespace.
l Backup the current FMEServer and restore it to the new FMEServer.
l Update the ingress hostname from the old FMEServer to the new FMEServer.
l Remove the old FMEServer.
WARNING: You may have Schedules, Automations workflows, or Notifications that
would conflict with themselves during the time that both the new and old FMEServ-
ers are running. Disable these tools before proceeding with a backup.
Note: See also Upgrading to a Patch Build in Kubernetes.
Upgrading FME Server 314
Performing the Upgrade
1. Create a new namespace for the new version of FMEServer:
kubectl create namespace <namespace-new-version>
For example:
kubectl create namespace fmeserver-2021-2-2
2. If your FME Server uses an external PostgreSQL database for the FME Server Data-
base, copy the admin password secret, using the namespace of the current version
of FME Server, to the new version. (If your FME Server uses the PostgreSQL con-
tainer that is deployed with the Helm chart, skip this step.)
kubectl get secret postgresql-admin-password --namespace
<namespace-old-version> --export -o yaml | kubectl apply --
namespace=<namespace-new-version> -f -
For example:
kubectl get secret postgresql-admin-password --namespace
fmeserver-2021-2-1 --export -o yaml | kubectl apply --namespace-
e=fmeserver-2021-2-2 -f -
3. Make a copy the values .yaml file for the current FMEServer and update the fol-
lowing values:l deployment.hostname: Set to a temporary hostname. (You will reset it later in
this procedure.)
l fmeserver.image.tag: Set to the container image tag you want to deploy for
the upgraded FMEServer.
l If your FME Server uses an external PostgreSQL database for the FME Server
Database, set the following values to be different from the ones in use for the
current FME Server:
Upgrading FME Server 315
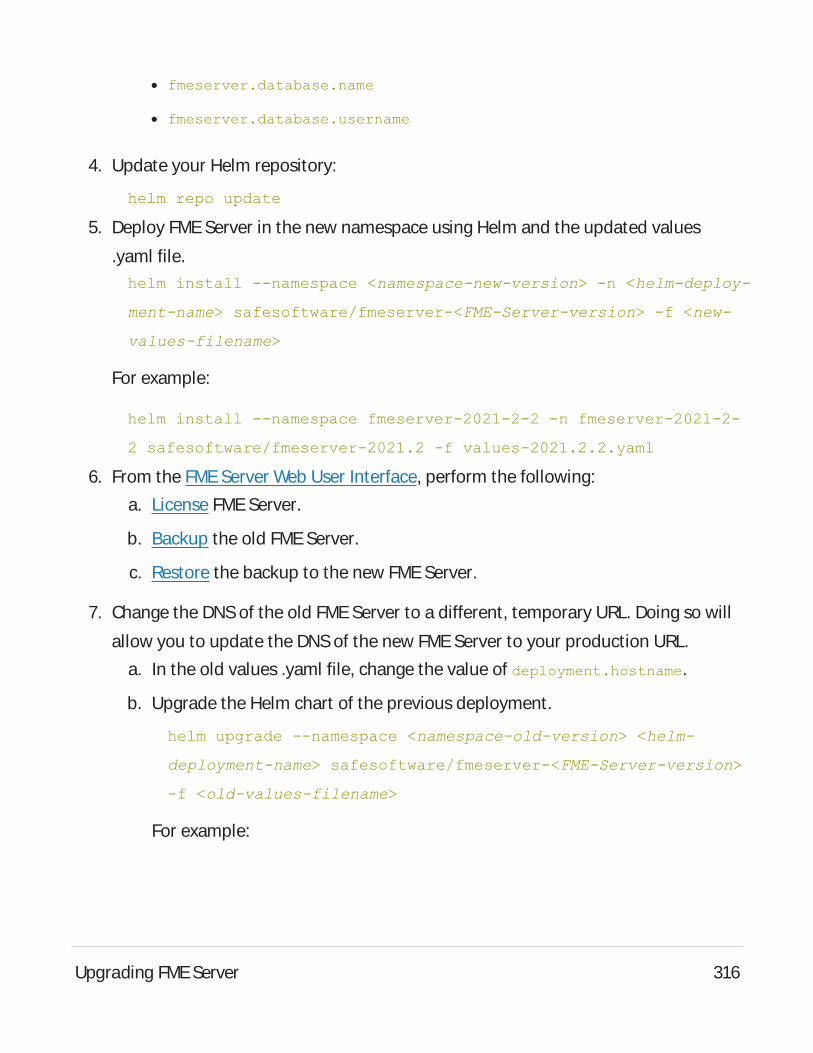
l fmeserver.database.name
l fmeserver.database.username
4. Update your Helm repository:
helm repo update
5. Deploy FMEServer in the new namespace using Helm and the updated values
.yaml file.helm install --namespace <namespace-new-version> -n <helm-deploy-
ment-name> safesoftware/fmeserver-<FME-Server-version> -f <new-
values-filename>
For example:
helm install --namespace fmeserver-2021-2-2 -n fmeserver-2021-2-
2 safesoftware/fmeserver-2021.2 -f values-2021.2.2.yaml
6. From the FMEServer Web User Interface, perform the following:
a. License FMEServer.
b. Backup the old FME Server.
c. Restore the backup to the new FMEServer.
7. Change the DNSof the old FME Server to a different, temporary URL. Doing so will
allow you to update the DNSof the new FME Server to your production URL.
a. In the old values .yaml file, change the value of deployment.hostname.
b. Upgrade the Helm chart of the previous deployment.
helm upgrade --namespace <namespace-old-version> <helm-
deployment-name> safesoftware/fmeserver-<FME-Server-version>
-f <old-values-filename>
For example:
Upgrading FME Server 316
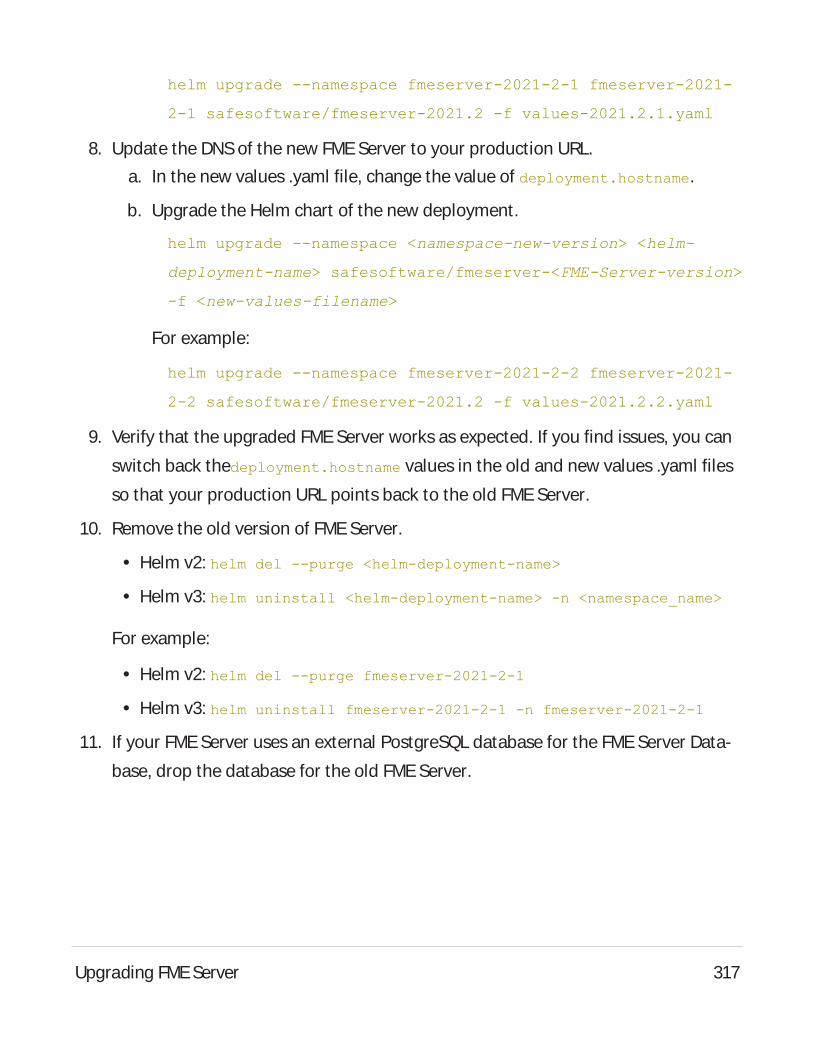
helm upgrade --namespace fmeserver-2021-2-1 fmeserver-2021-
2-1 safesoftware/fmeserver-2021.2 -f values-2021.2.1.yaml
8. Update the DNSof the new FMEServer to your production URL.
a. In the new values .yaml file, change the value of deployment.hostname.
b. Upgrade the Helm chart of the new deployment.
helm upgrade --namespace <namespace-new-version> <helm-
deployment-name> safesoftware/fmeserver-<FME-Server-version>
-f <new-values-filename>
For example:
helm upgrade --namespace fmeserver-2021-2-2 fmeserver-2021-
2-2 safesoftware/fmeserver-2021.2 -f values-2021.2.2.yaml
9. Verify that the upgraded FME Server works as expected. If you find issues, you can
switch back thedeployment.hostname values in the old and new values .yaml files
so that your production URL points back to the old FME Server.
10. Remove the old version of FME Server.
l Helm v2: helm del --purge <helm-deployment-name>
l Helm v3: helm uninstall <helm-deployment-name> -n <namespace_name>
For example:
l Helm v2: helm del --purge fmeserver-2021-2-1
l Helm v3: helm uninstall fmeserver-2021-2-1 -n fmeserver-2021-2-1
11. If your FME Server uses an external PostgreSQL database for the FME Server Data-
base, drop the database for the old FME Server.
Upgrading FME Server 317
Optimizing FME Server
Configuring the Number of FME Engines to StartFME Engines connect to an FMEServer Core and process requests from the Core. Adding
FMEEngines to start with the Core provides these benefits:
l Increases the Core's ability to perform concurrent processing of requests.
l Helps with Job Recovery.
The number of licensed FMEEngines you can add is limited only by the host's CPU and
memory resources, which constrain the maximum concurrent request throughput.
By default, FMEServer is configured to start two FMEEngines, if two licenses are avail-
able. If only one license is available, only one FMEEngine starts.
To add or remove FME Engines to Start
Open the Engines page of the Web User Interface, and follow the steps under Con-
figuring the Number of FME Engines to Start.
Adding FME Engines on a Separate Machine
WARNING: This topic applies only to traditional FMEServer installations. If your
FME Server runs in a containerized environment, such as Docker Compose or a Kuber-
netes cluster, this architecture is not supported.
l Skill Level: Intermediate
l Estimated Time Required: 30-45 minutes
Optimizing FMEServer 318
l Prerequisites:l Existing Distributed/Fault-Tolerant FMEServer installation.
l Access to system, network, and FME Server administrators.
You can add processing capacity to your FMEServer by installing additional FMEEngines
on a separate computer from the FMEServer Core.
When adding FME Engines, keep in mind the following:
l Adding FME Engines that do not match the primary release version of the FMEServer
Core is not supported. The primary release version refers to the first decimal value
following the release year. For example, if the release version of the FME Server Core
is 2020.0, FME Engines from release versions 2020.0.1 or 2020.0.2 are supported.
However, FME Engines from release versions 2020.1 or 2021 are not supported.
l We recommend installing all FME Engines on systems that are synchronized to the
same time zone as other FME Engines and the FMEServer Core. If time zones differ,
unexpected issues may arise, including:l Difficulty accessing the FMEServer Web User Interface.
l Improper timing of Schedule Initiated triggers.
l Inconsistent or misleading timestamps in log files (accessed from Resources).
For more information, see About Times and Time Zones.
In the instructions below, the computer that hosts the FMEServer Core is the
<coreHost>.
Note: In a fault-tolerance environment, we recommend assigning unique names to
FMEEngines. However, if multiple FMEEngine hosts have the same FMEEngine
name, the queue server configuration applies to all FMEEngines with the same
name in the same way regardless of which host it resides on. For more information,
see Job Queues.
Optimizing FMEServer 319
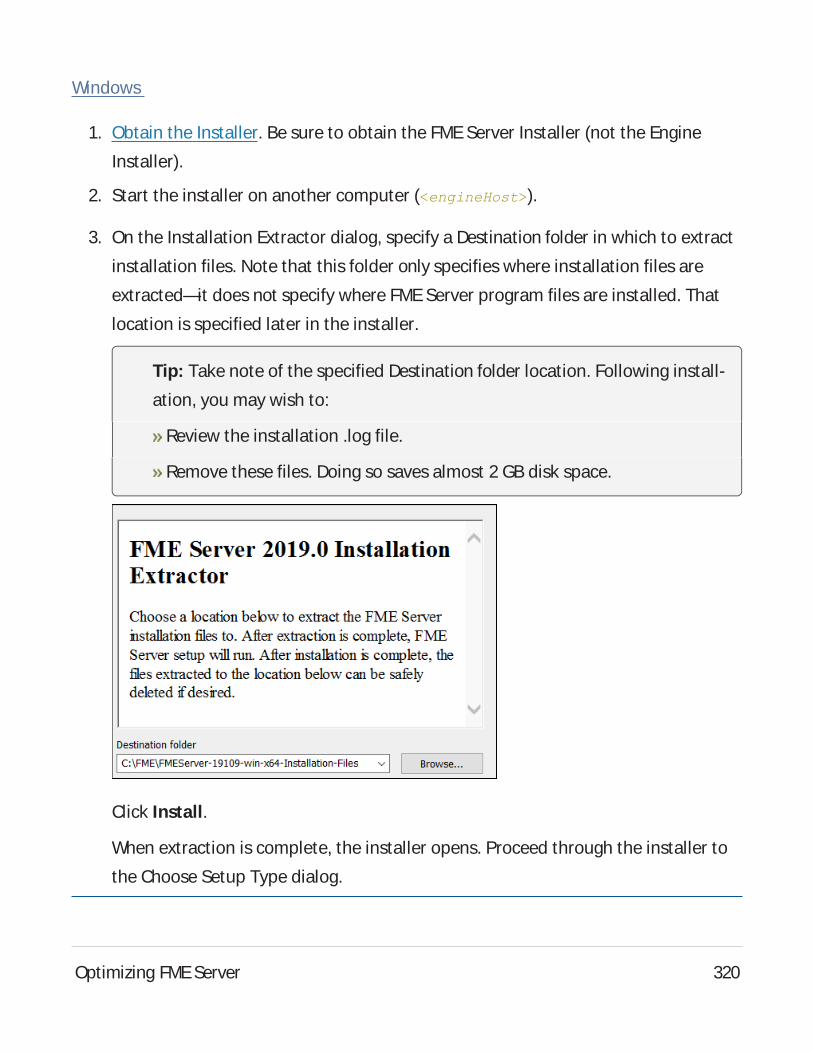
Windows
1. Obtain the Installer. Be sure to obtain the FMEServer Installer (not the Engine
Installer).
2. Start the installer on another computer (<engineHost>).
3. On the Installation Extractor dialog, specify a Destination folder in which to extract
installation files. Note that this folder only specifies where installation files are
extracted—it does not specify where FME Server program files are installed. That
location is specified later in the installer.
Tip: Take note of the specified Destination folder location. Following install-
ation, you may wish to:
Review the installation .log file.
Remove these files. Doing so saves almost 2 GB disk space.
Click Install.
When extraction is complete, the installer opens. Proceed through the installer to
the Choose Setup Type dialog.
Optimizing FMEServer 320
4. On the Choose Setup Type dialog, select the Distributed Engine setup type.
5. On the Destination Folder dialog, specify the directory to install the FME Engines.
6. On the User Account page, specify the Windows user account that will run the
<engineHost>. This account must have:l Read/Write access to the FMEServer System Share that you specify in the next
dialog. The System Share is the location where FME Server stores Repositories
and Resources files.
l Read/Write access to the FMEServer installation directory that you specified in
the previous dialog.
l "Log on as a service" rights on the <engineHost>. For more information, see
this Microsoft Docs article.
7. On the Existing FMEServer System Share dialog, provide the UNCpath to the FME
Server System Share directory.
If the <coreHost> machine is an Express installation of FME Server, the System
Share is written, by default, to %ALLUSERSPROFILE% \Safe Software\FMEServer\,
unless specified otherwise.
Note: Unless modified, C:\ProgramData is the default value of the
%ALLUSERSPROFILE% environment variable.
In all cases, enter the UNCpath to the System Share, including the final Safe
Software\FME Server directories, which are created by default. For example,
\\MyServer\Safe Software\FME Server.
8. On the FMEServer Hostname dialog, enter the hostname of the <coreHost> com-
puter.
Optimizing FMEServer 321
9. On the Database Server Type dialog, specify the database type that you specified
when installing the FMEServer Core. If you specified a database other than the
"FMEServer Database," enter the connection parameters in the next dialog.
10. On the Database User dialog, specify the user name and password for the
FME Server Database that you specified when installing FME Server.
11. Complete the remaining dialogs of the FME Server Installer.
12. If this <engineHost> is connecting to a <coreHost> that also hosts the built-in
FME Server database and the initial FMEengines, as with an Express Installation,
allow the necessary connection to this machine:
a. On the <coreHost>, open file pg_hba.conf, located in
%ALLUSERSPROFILE%\Safe Software\FMEServer\pgsql\data.
Note: Unless modified, C:\ProgramData is the default value of the
%ALLUSERSPROFILE% environment variable.
b. Change the following lines:
host all all 127.0.0.1/32 md5
host all all ::1/128 md5
to:
host all all 0.0.0.0/0 md5
host all all ::/0 md5
c. Restart the FME Server Database and FME Server Engines services.
13. If the <coreHost> machine was an Express Installation of FME Server, complete the
following steps on the <coreHost> to configure the FME Server Web Services:
a. Open the corresponding propertiesFile.properties file for the Data Download,
Data Streaming, Job Submitter, and Notification services, located at
<FMEServerDir>\Utilities\tomcat\webapps\<service_name>\WEB-
Optimizing FMEServer 322
INF\conf\propertiesFile.properties.
For example, the properties file for the Data Download Service is at
<FMEServerDir>\Utilities\tomcat\webapps\fmedatadownload\WEB-INF\-
conf\propertiesFile.properties
b. For each properties file, locate the parameter REQUEST_DATA_DIRand
change the value from a local file system path (for example, C:/Pro-
gramData/Safe Software/FME Server-
//resources/system/temp/requestdata) to a UNCpath that references the
<coreHost> (for example, //MyHost/FME Server-
/resources/system/temp/requestdata).
Note: Use forward slashes only.
c. After saving the changes in the properties file for each service, restart the
FME Server Application Server service.
14. On the <coreHost> machine, open configuration file fmeServerConfig.txt, located
in <FMEServerDir>\Server\, and update the FME_SERVER_HOST_NAMEparameter
to a value that fully resolves to the IP address of the <coreHost> machine.
15. Restart the FMEServer Core service.
Linux
1. If not already accomplished, mount the directory that holds the FME Server System
Share. (The System Share holds FME Server Repositories and Resources):
sudo mount -t nfs <coreHost>:/<FMEServerSystemShare> /<mntPath>
2. Obtain the Installer. Be sure to obtain the FMEServer Installer (not the Engine
Installer).
3. Start the FMEServer Installer:
sudo ./<installationFile>
Optimizing FMEServer 323
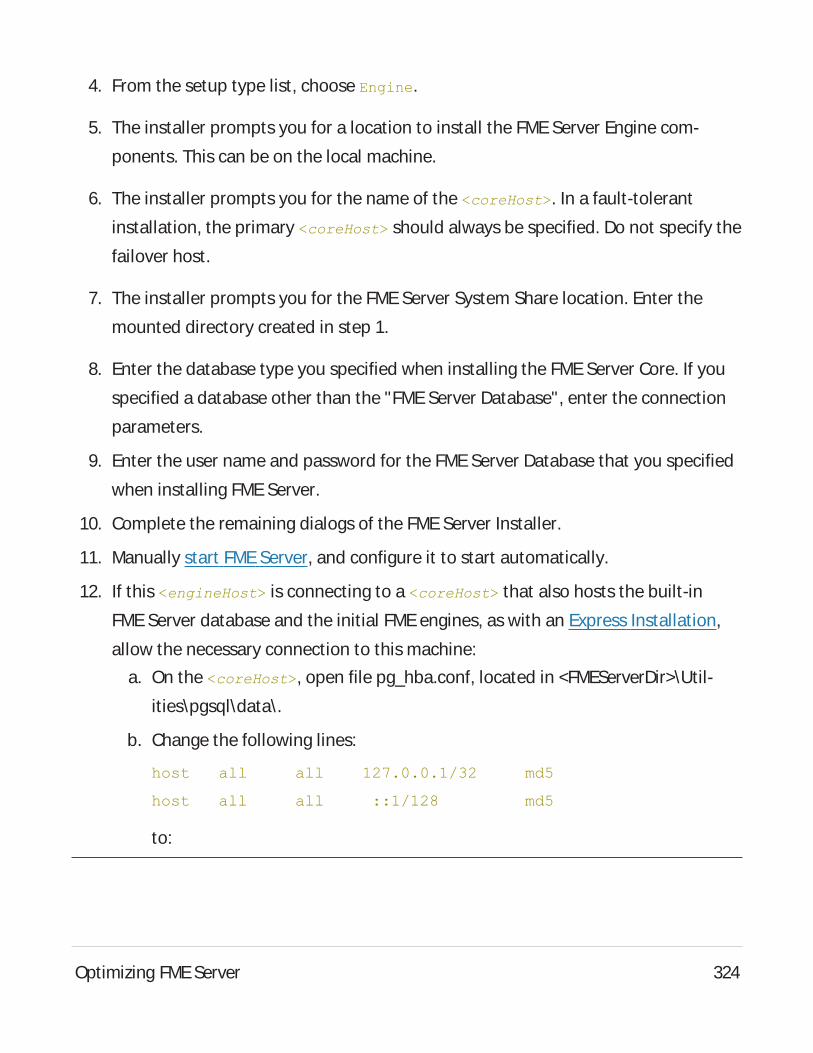
4. From the setup type list, choose Engine.
5. The installer prompts you for a location to install the FMEServer Engine com-
ponents. This can be on the local machine.
6. The installer prompts you for the name of the <coreHost>. In a fault-tolerant
installation, the primary <coreHost> should always be specified. Do not specify the
failover host.
7. The installer prompts you for the FMEServer System Share location. Enter the
mounted directory created in step 1.
8. Enter the database type you specified when installing the FMEServer Core. If you
specified a database other than the "FMEServer Database", enter the connection
parameters.
9. Enter the user name and password for the FME Server Database that you specified
when installing FME Server.
10. Complete the remaining dialogs of the FMEServer Installer.
11. Manually start FMEServer, and configure it to start automatically.
12. If this <engineHost> is connecting to a <coreHost> that also hosts the built-in
FME Server database and the initial FMEengines, as with an Express Installation,
allow the necessary connection to this machine:
a. On the <coreHost>, open file pg_hba.conf, located in <FMEServerDir>\Util-
ities\pgsql\data\.
b. Change the following lines:
host all all 127.0.0.1/32 md5
host all all ::1/128 md5
to:
Optimizing FMEServer 324
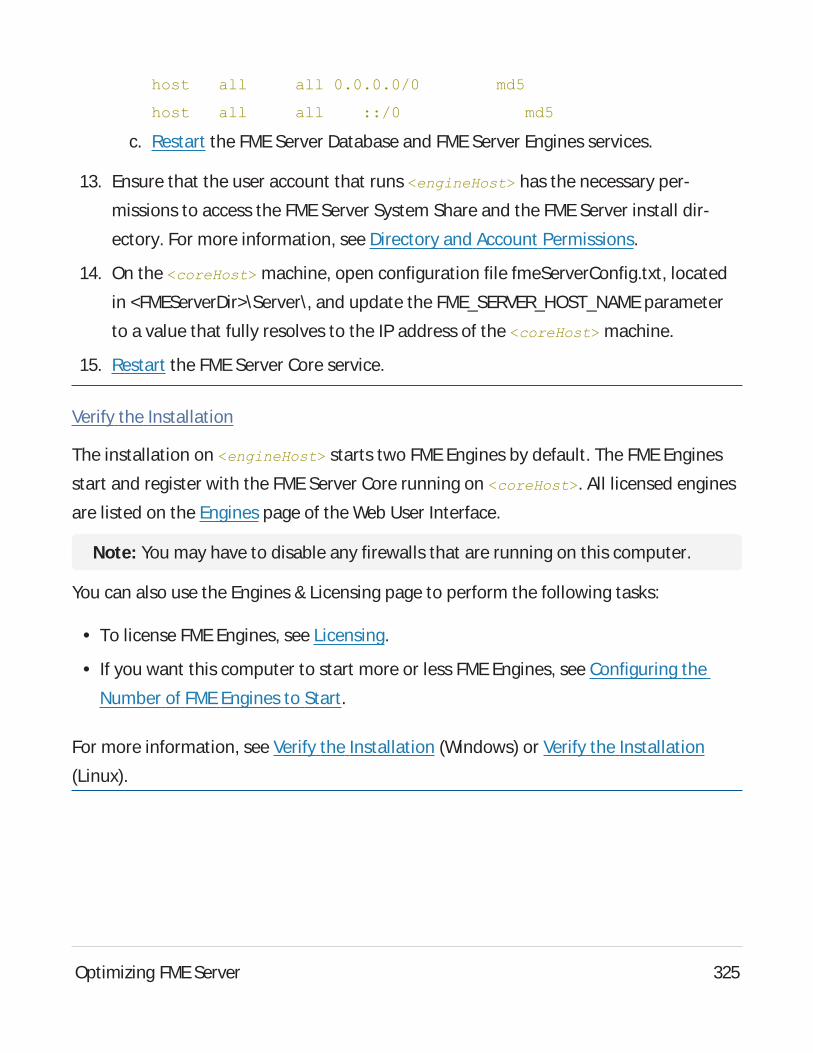
host all all 0.0.0.0/0 md5
host all all ::/0 md5
c. Restart the FME Server Database and FMEServer Engines services.
13. Ensure that the user account that runs <engineHost> has the necessary per-
missions to access the FME Server System Share and the FMEServer install dir-
ectory. For more information, see Directory and Account Permissions.
14. On the <coreHost> machine, open configuration file fmeServerConfig.txt, located
in <FMEServerDir>\Server\, and update the FME_SERVER_HOST_NAMEparameter
to a value that fully resolves to the IP address of the <coreHost> machine.
15. Restart the FMEServer Core service.
Verify the Installation
The installation on <engineHost> starts two FMEEngines by default. The FMEEngines
start and register with the FMEServer Core running on <coreHost>. All licensed engines
are listed on the Engines page of the Web User Interface.
Note: You may have to disable any firewalls that are running on this computer.
You can also use the Engines & Licensing page to perform the following tasks:
l To license FME Engines, see Licensing.
l If you want this computer to start more or less FMEEngines, see Configuring the
Number of FMEEngines to Start.
For more information, see Verify the Installation (Windows) or Verify the Installation
(Linux).
Optimizing FMEServer 325
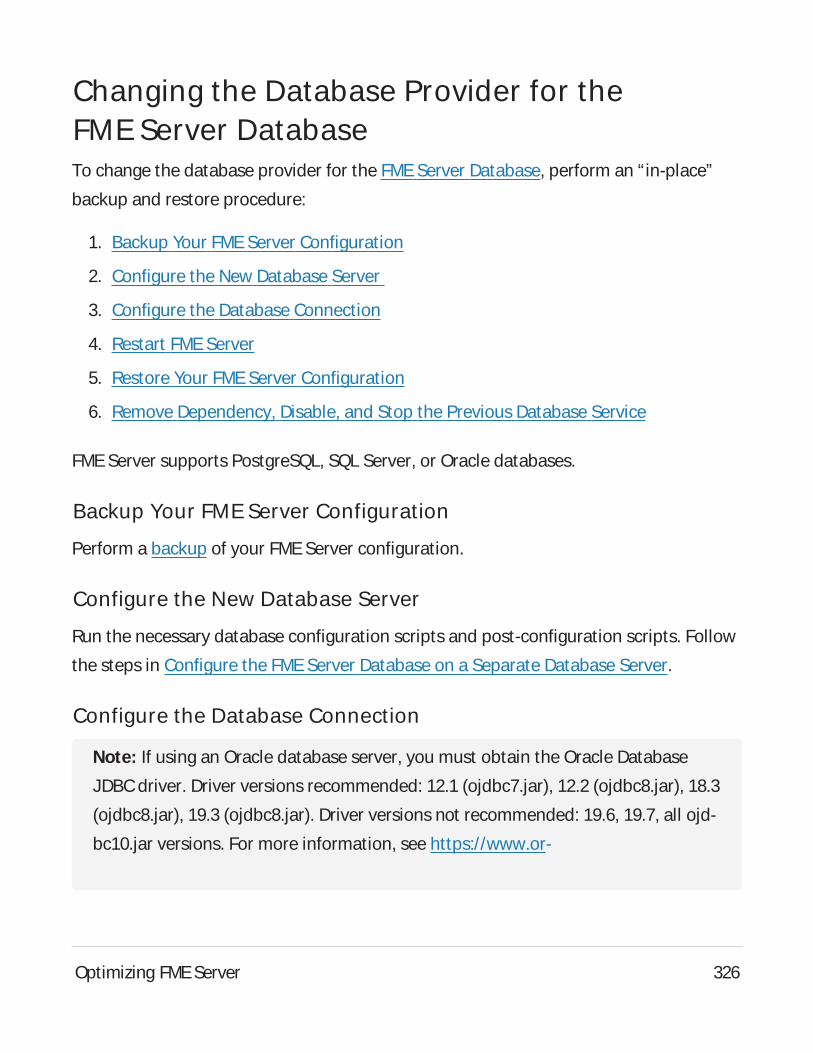
Changing the Database Provider for theFME Server DatabaseTo change the database provider for the FMEServer Database, perform an “in-place”
backup and restore procedure:
1. Backup Your FMEServer Configuration
2. Configure the New Database Server
3. Configure the Database Connection
4. Restart FME Server
5. Restore Your FMEServer Configuration
6. Remove Dependency, Disable, and Stop the Previous Database Service
FMEServer supports PostgreSQL, SQL Server, or Oracle databases.
Backup Your FME Server Configuration
Perform a backup of your FMEServer configuration.
Configure the New Database Server
Run the necessary database configuration scripts and post-configuration scripts. Follow
the steps in Configure the FMEServer Database on a Separate Database Server.
Configure the Database Connection
Note: If using an Oracle database server, you must obtain the Oracle Database
JDBCdriver. Driver versions recommended: 12.1 (ojdbc7.jar), 12.2 (ojdbc8.jar), 18.3
(ojdbc8.jar), 19.3 (ojdbc8.jar). Driver versions not recommended: 19.6, 19.7, all ojd-
bc10.jar versions. For more information, see https://www.or-
Optimizing FMEServer 326
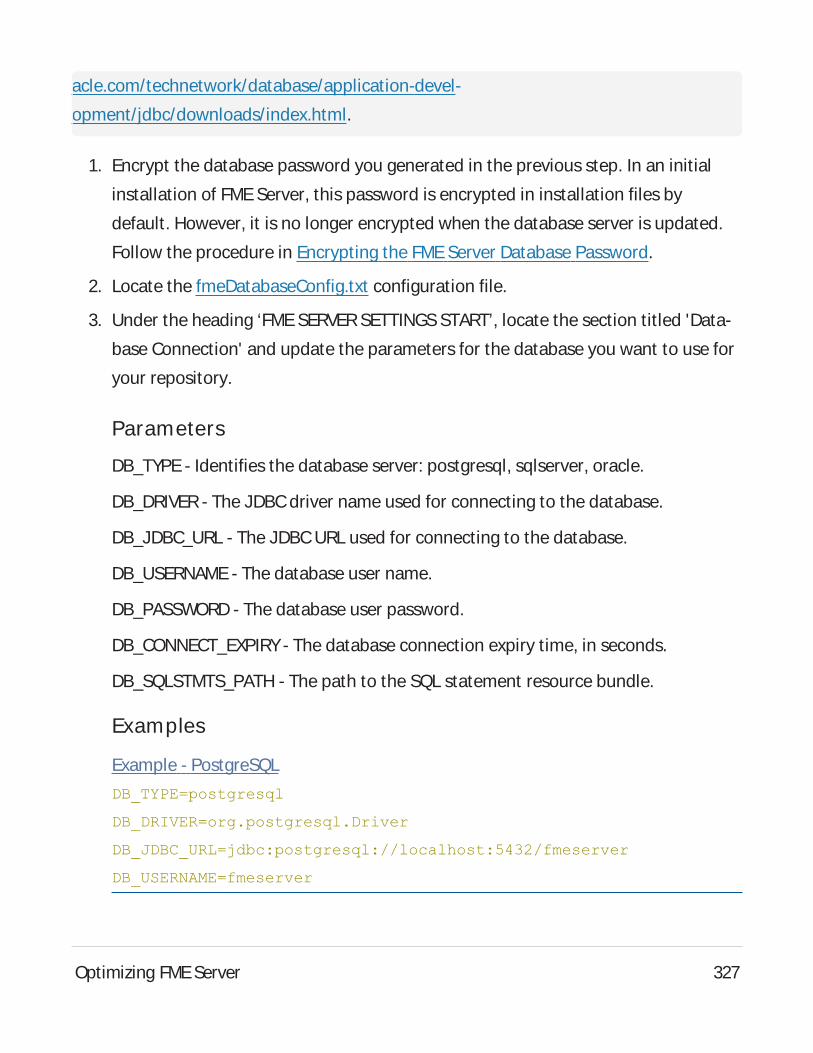
acle.com/technetwork/database/application-devel-
opment/jdbc/downloads/index.html.
1. Encrypt the database password you generated in the previous step. In an initial
installation of FME Server, this password is encrypted in installation files by
default. However, it is no longer encrypted when the database server is updated.
Follow the procedure in Encrypting the FMEServer Database Password.
2. Locate the fmeDatabaseConfig.txt configuration file.
3. Under the heading ‘FMESERVERSETTINGSSTART’, locate the section titled 'Data-
base Connection' and update the parameters for the database you want to use for
your repository.
Parameters
DB_TYPE- Identifies the database server: postgresql, sqlserver, oracle.
DB_DRIVER- The JDBCdriver name used for connecting to the database.
DB_JDBC_URL - The JDBCURL used for connecting to the database.
DB_USERNAME- The database user name.
DB_PASSWORD - The database user password.
DB_CONNECT_EXPIRY- The database connection expiry time, in seconds.
DB_SQLSTMTS_PATH - The path to the SQL statement resource bundle.
Examples
Example - PostgreSQL
DB_TYPE=postgresql
DB_DRIVER=org.postgresql.Driver
DB_JDBC_URL=jdbc:postgresql://localhost:5432/fmeserver
DB_USERNAME=fmeserver
Optimizing FMEServer 327
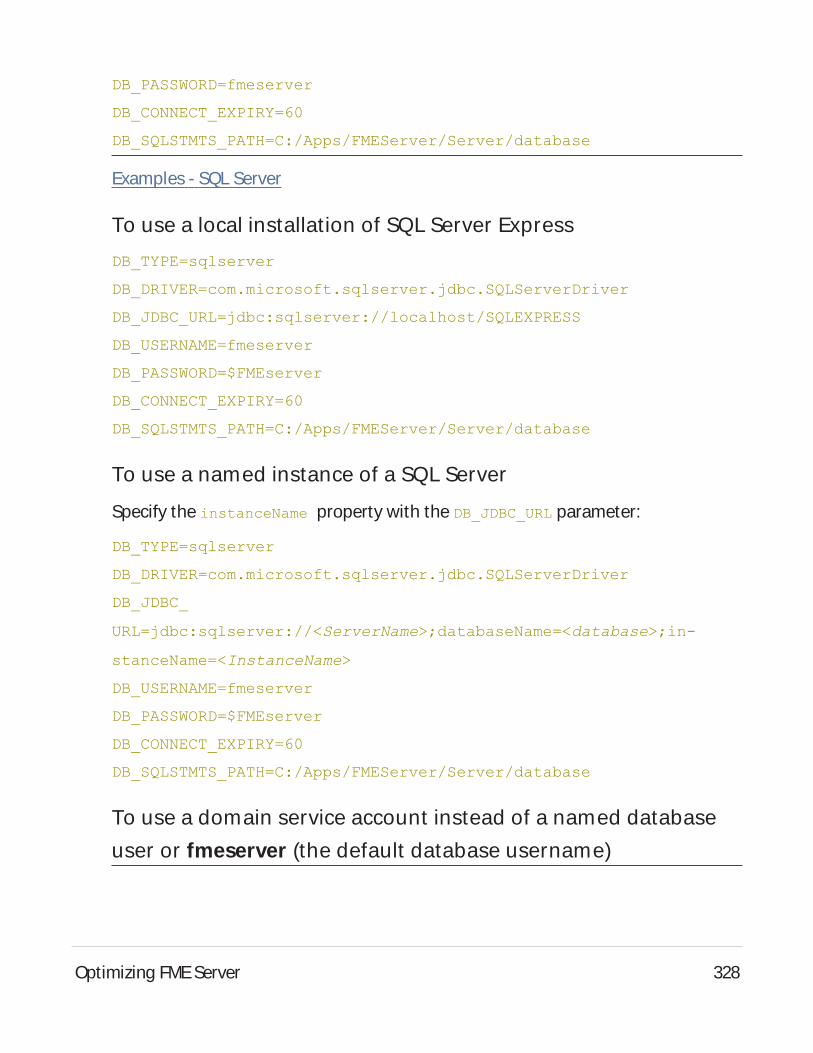
DB_PASSWORD=fmeserver
DB_CONNECT_EXPIRY=60
DB_SQLSTMTS_PATH=C:/Apps/FMEServer/Server/database
Examples - SQL Server
To use a local installation of SQL Server Express
DB_TYPE=sqlserver
DB_DRIVER=com.microsoft.sqlserver.jdbc.SQLServerDriver
DB_JDBC_URL=jdbc:sqlserver://localhost/SQLEXPRESS
DB_USERNAME=fmeserver
DB_PASSWORD=$FMEserver
DB_CONNECT_EXPIRY=60
DB_SQLSTMTS_PATH=C:/Apps/FMEServer/Server/database
To use a named instance of a SQL Server
Specify the instanceName property with the DB_JDBC_URL parameter:
DB_TYPE=sqlserver
DB_DRIVER=com.microsoft.sqlserver.jdbc.SQLServerDriver
DB_JDBC_
URL=jdbc:sqlserver://<ServerName>;databaseName=<database>;in-
stanceName=<InstanceName>
DB_USERNAME=fmeserver
DB_PASSWORD=$FMEserver
DB_CONNECT_EXPIRY=60
DB_SQLSTMTS_PATH=C:/Apps/FMEServer/Server/database
To use a domain service account instead of a named database
user or fmeserver (the default database username)
Optimizing FMEServer 328
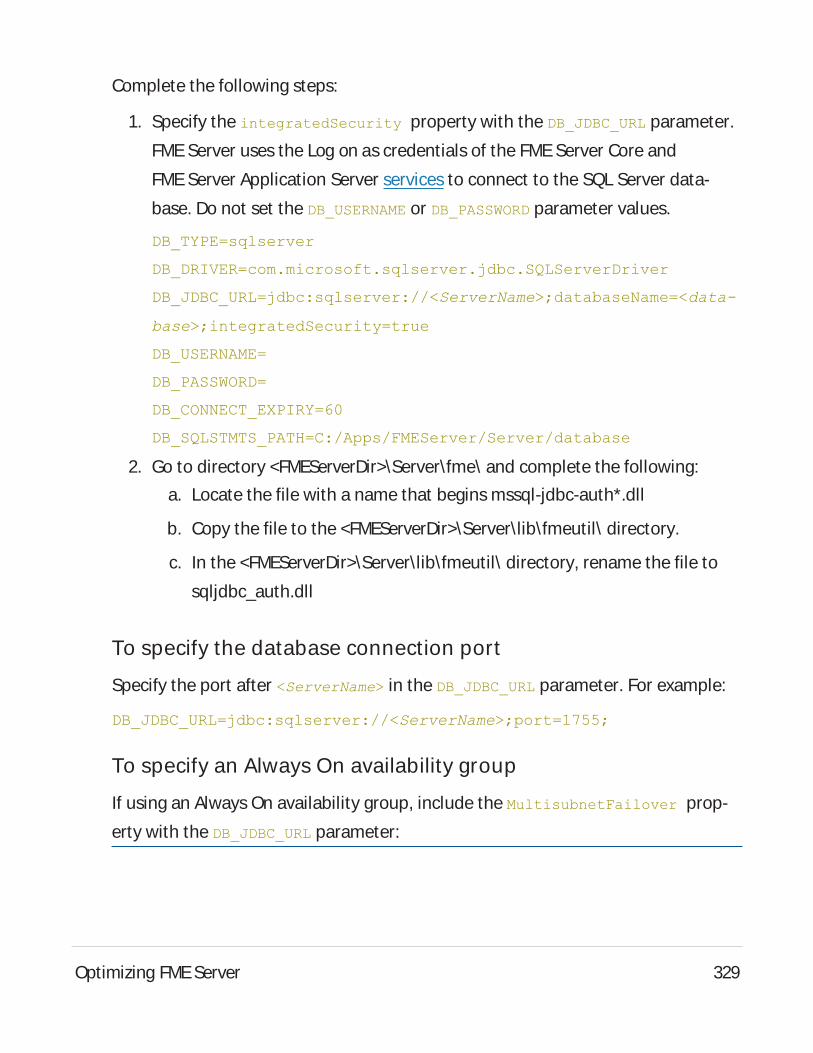
Complete the following steps:
1. Specify the integratedSecurity property with the DB_JDBC_URL parameter.
FME Server uses the Log on as credentials of the FMEServer Core and
FME Server Application Server services to connect to the SQL Server data-
base. Do not set the DB_USERNAME or DB_PASSWORD parameter values.
DB_TYPE=sqlserver
DB_DRIVER=com.microsoft.sqlserver.jdbc.SQLServerDriver
DB_JDBC_URL=jdbc:sqlserver://<ServerName>;databaseName=<data-
base>;integratedSecurity=true
DB_USERNAME=
DB_PASSWORD=
DB_CONNECT_EXPIRY=60
DB_SQLSTMTS_PATH=C:/Apps/FMEServer/Server/database
2. Go to directory <FMEServerDir>\Server\fme\ and complete the following:
a. Locate the file with a name that begins mssql-jdbc-auth*.dll
b. Copy the file to the <FMEServerDir>\Server\lib\fmeutil\ directory.
c. In the <FMEServerDir>\Server\lib\fmeutil\ directory, rename the file to
sqljdbc_auth.dll
To specify the database connection port
Specify the port after <ServerName> in the DB_JDBC_URL parameter. For example:
DB_JDBC_URL=jdbc:sqlserver://<ServerName>;port=1755;
To specify an Always On availability group
If using an Always On availability group, include the MultisubnetFailover prop-
erty with the DB_JDBC_URL parameter:
Optimizing FMEServer 329
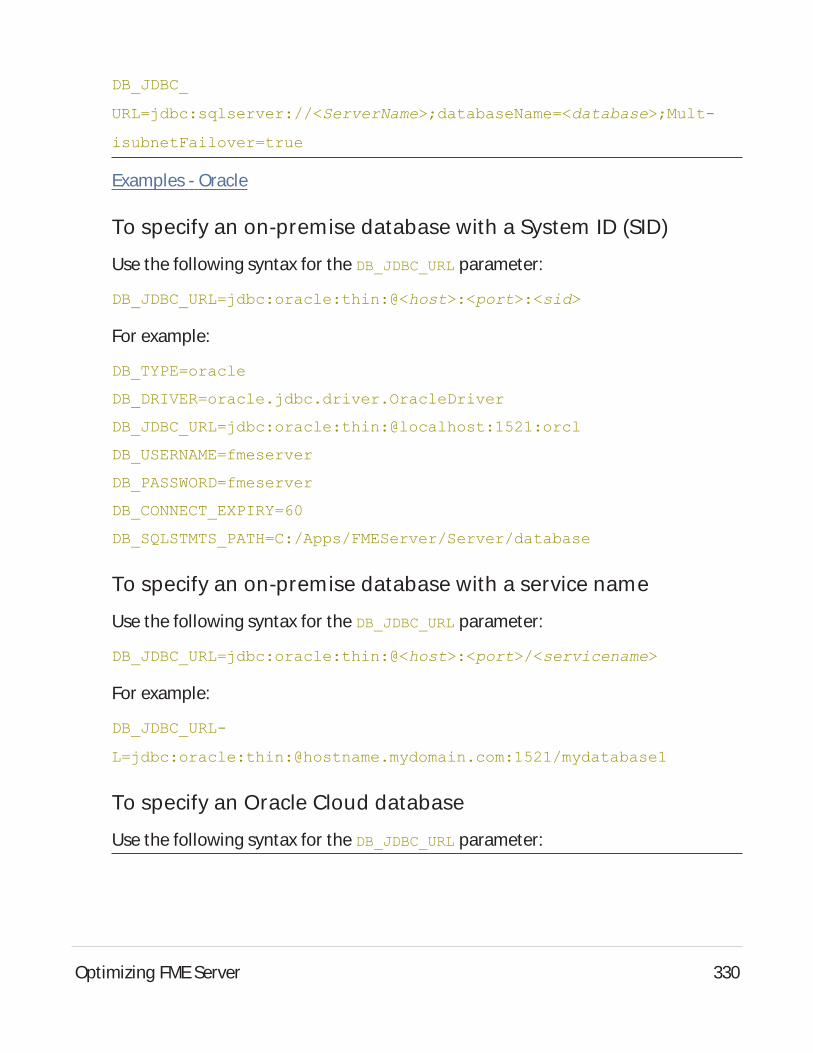
DB_JDBC_
URL=jdbc:sqlserver://<ServerName>;databaseName=<database>;Mult-
isubnetFailover=true
Examples - Oracle
To specify an on-premise database with a System ID (SID)
Use the following syntax for the DB_JDBC_URL parameter:
DB_JDBC_URL=jdbc:oracle:thin:@<host>:<port>:<sid>
For example:
DB_TYPE=oracle
DB_DRIVER=oracle.jdbc.driver.OracleDriver
DB_JDBC_URL=jdbc:oracle:thin:@localhost:1521:orcl
DB_USERNAME=fmeserver
DB_PASSWORD=fmeserver
DB_CONNECT_EXPIRY=60
DB_SQLSTMTS_PATH=C:/Apps/FMEServer/Server/database
To specify an on-premise database with a service name
Use the following syntax for the DB_JDBC_URL parameter:
DB_JDBC_URL=jdbc:oracle:thin:@<host>:<port>/<servicename>
For example:
DB_JDBC_URL-
L=jdbc:oracle:thin:@hostname.mydomain.com:1521/mydatabase1
To specify an Oracle Cloud database
Use the following syntax for the DB_JDBC_URL parameter:
Optimizing FMEServer 330
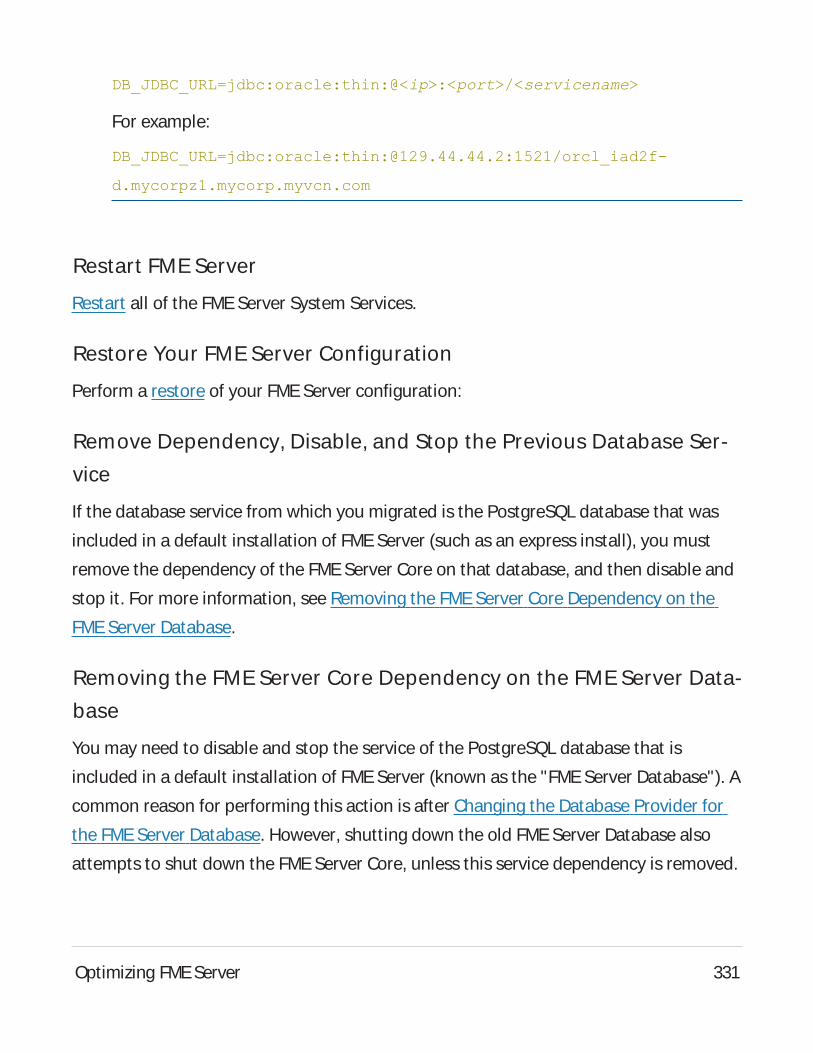
DB_JDBC_URL=jdbc:oracle:thin:@<ip>:<port>/<servicename>
For example:
DB_JDBC_URL=jdbc:oracle:thin:@129.44.44.2:1521/orcl_iad2f-
d.mycorpz1.mycorp.myvcn.com
Restart FME Server
Restart all of the FME Server System Services.
Restore Your FME Server Configuration
Perform a restore of your FMEServer configuration:
Remove Dependency, Disable, and Stop the Previous Database Ser-
vice
If the database service from which you migrated is the PostgreSQL database that was
included in a default installation of FMEServer (such as an express install), you must
remove the dependency of the FME Server Core on that database, and then disable and
stop it. For more information, see Removing the FMEServer Core Dependency on the
FMEServer Database.
Removing the FME Server Core Dependency on the FME Server Data-
base
You may need to disable and stop the service of the PostgreSQL database that is
included in a default installation of FMEServer (known as the "FME Server Database"). A
common reason for performing this action is after Changing the Database Provider for
the FME Server Database. However, shutting down the old FMEServer Database also
attempts to shut down the FMEServer Core, unless this service dependency is removed.
Optimizing FMEServer 331
1. Remove the Dependency of the FME Server Core on the FME Server Database
a. Open a Command Prompt as administrator (Start Menu > Command Prompt
> right click and select "Run as administrator").
b. Type the following command into the Command Window and press Enter.
sc config "FME Server Core" depend= /
2. Disable and Stop the FMEServer Database
a. Open the Windows Services (Control Panel > Administrative Tools > Services)
b. Open the FMEServer Database service.
c. In the Properties dialog, change Startup Type to Disabled.
d. Under Service status, click Stop.
e. Click Apply.
Moving the Web Applications Server to AnotherMachineTo improve performance and free up resources, you may wish to move the web applic-
ations server, which runs the FMEServer Web Services, to another machine.
WARNING: We recommend installing the web application server on a system that is
synchronized to the same time zone as the FME Server Core. Differing time zones may
result in improper timing of Schedule Initiated triggers.
This move requires the following steps:
1. Install a web applications server on the new host machine (optional)
2. Install the FMEServer Web Services on the new host
Optimizing FMEServer 332
3. Update Services URLs
4. Configure CORSfilters (optional)
Install a web applications server on the new host machine (optional)
To run the FMEServer Web Services, you can use the Apache Tomcat web application
server that is automatically provided when you install the services. In this case, skip this
step and proceed to the next step.
Alternatively, you can install and use your own web application server for running the
FMEServer Web Services. Supported web applications servers include Apache Tomcat
and Oracle WebLogic.
You must know the port number on which your web application server receives incom-
ing requests and the path to the directory where your web application server stores web
application .war files. (This directory is sometimes called webapps.)
Install the FME Server Web Services on the new host
On the new web applications server host, follow the instructions under Install the FME
Server Web Services, for either Windows or Linux.
Update Services URLs
On the machine hosting the FMEServer Core:
1. Open the fmeServerConfig.txt configuration file.
Locate the FME_SERVER_WEB_URL directive and update the URL value to the new
web applications server host. For example:
FME_SERVER_WEB_URL=http://MY_WEBAPP_HOST:80
2. Open the FMEServer Web User Interface.
Optimizing FMEServer 333
a. Login and navigate to Services.
b. Click on each service to open the Editing Service page.
c. In the URL Pattern field, update the URL value to the new web applications
server host, and click OK when done.
For example, to update the Data Download Service:
http://MY_WEBAPP_HOST/fmedatadownload
Configure CORSfilters (optional)
If you are a web application developer, you may want to configure Cross-Origin
Resource Sharing (CORS) filters, so that your application can bypass manual authen-
tication when accessing the FMEServer Web Services on another domain.
See Also
l Changing the Web Application Server Host Name and Port
Using a Reverse Proxy with FME ServerAreverse proxy forwards requests from the internet or intranet to a server that fulfills
the requests. Often a reverse proxy configured with SSL provides a secure entry point
into a network through a DMZ.
The instructions for configuring your reverse proxy depend on the brand of web server
or other product you select to fill this role.
Use these instructions to:
1. Set up your reverse proxy to route traffic to FME Server.
2. Configure FME Server to recognize the reverse proxy URL.
Set Up the Reverse Proxy
Optimizing FMEServer 334
Routing Traffic to the FME Server Web Services
Recommended
l Route two-way traffic between the FMEServer Core, FMEServer Web Services, and
the reverse proxy.
Optional
l Configure timeouts for client- and server-side inactivity. When configuring timeouts,
consider that longer timeouts on the server are appropriate for time-consuming
operations, particularly running workspaces that take a long time to complete.
Routing Traffic to the WebSocket Server
An FME Server WebSocket Server runs on each FMEServer instance, but only one
WebSocket Server should be used at a time. The WebSocket Server is used mainly for
Notification Service Topic Monitoring.
Required
l Route traffic on port 7078 to one WebSocket Server, and switch to others if the one
in use fails. If the reverse proxy does not support automatic failover to backup serv-
ers, then manual intervention is required to route to a healthy WebSocket Server.
Recommended
l Set longer client- and server-side timeouts to allow for longer WebSocket con-
nections.
Configure FME Server with the Reverse Proxy URL
To configure FME Server to recognize the reverse proxy URL, perform the following tasks
in the FMEServer Web User Interface:
Optimizing FMEServer 335
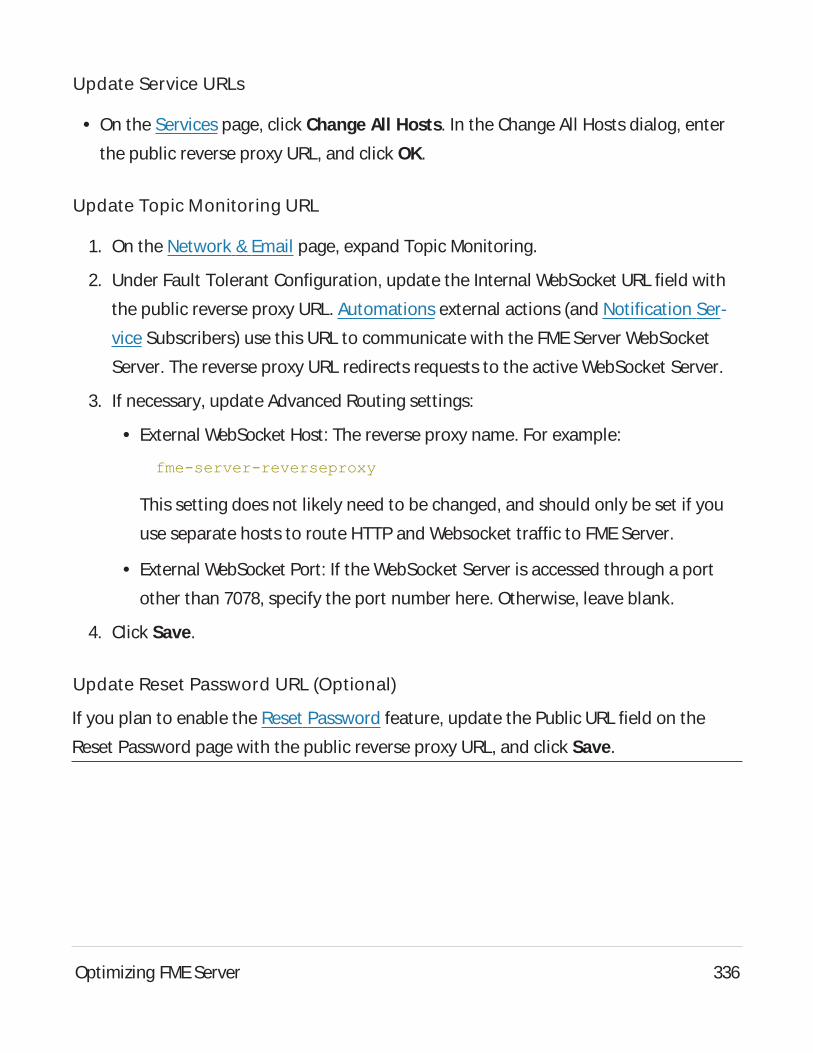
Update Service URLs
l On the Services page, click Change All Hosts. In the Change All Hosts dialog, enter
the public reverse proxy URL, and click OK.
Update Topic Monitoring URL
1. On the Network & Email page, expand Topic Monitoring.
2. Under Fault Tolerant Configuration, update the Internal WebSocket URL field with
the public reverse proxy URL. Automations external actions (and Notification Ser-
vice Subscribers) use this URL to communicate with the FME Server WebSocket
Server. The reverse proxy URL redirects requests to the active WebSocket Server.
3. If necessary, update Advanced Routing settings:
l External WebSocket Host: The reverse proxy name. For example:
fme-server-reverseproxy
This setting does not likely need to be changed, and should only be set if you
use separate hosts to route HTTP and Websocket traffic to FMEServer.
l External WebSocket Port: If the WebSocket Server is accessed through a port
other than 7078, specify the port number here. Otherwise, leave blank.
4. Click Save.
Update Reset Password URL (Optional)
If you plan to enable the Reset Password feature, update the Public URL field on the
Reset Password page with the public reverse proxy URL, and click Save.
Optimizing FMEServer 336
Securing FME Server
Security BasicsTo get started with FME Server security, there are three main tasks to perform:
l Configuring Role-Based and User-Based Access Control
l Configuring Authentication for the FME Server Web Services
l Configuring for HTTPS
Role-Based and User-Based Access Control
FMEServer security is based on two primary concepts:
l Users: The individual accounts that access FMEServer. When FMEServer is installed
for the first time, default user accounts are created. Note that the default Statusof
these accounts, except the admin account, is Disabled.
l Roles: Comprised of one or more users.
FMEServer security controls access to resources either through role-based or user-
based access.
Optionally, you can incorporate your organization's directory server (for example, Win-
dows Active Directory) groups and users into your FMEServer security configuration.
Role-Based Access
Roles make it easy to assign the same set of permissions to multiple users based on job
function. Permissions to perform certain operations are assigned to specific roles. In
turn, these permissions apply to the users who belong to that role.
Securing FMEServer 337
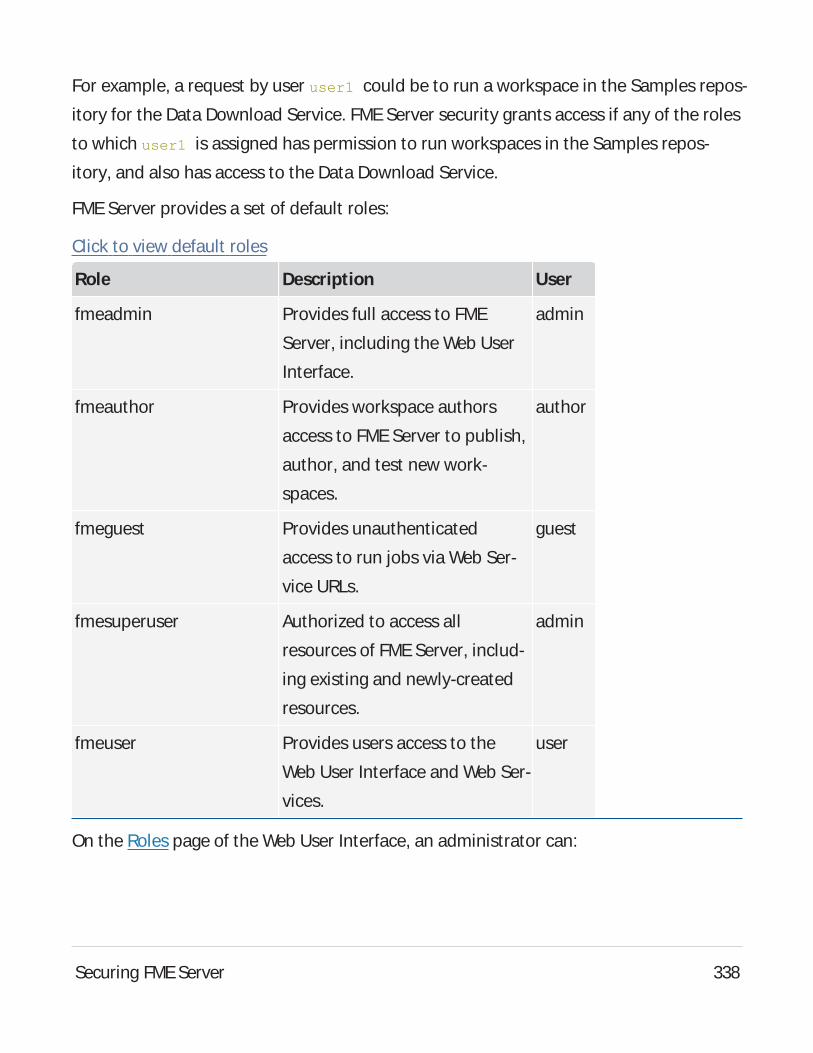
For example, a request by user user1 could be to run a workspace in the Samples repos-
itory for the Data Download Service. FMEServer security grants access if any of the roles
to which user1 is assigned has permission to run workspaces in the Samples repos-
itory, and also has access to the Data Download Service.
FMEServer provides a set of default roles:
Click to view default roles
Role Description User
fmeadmin Provides full access to FME
Server, including the Web User
Interface.
admin
fmeauthor Provides workspace authors
access to FMEServer to publish,
author, and test new work-
spaces.
author
fmeguest Provides unauthenticated
access to run jobs via Web Ser-
vice URLs.
guest
fmesuperuser Authorized to access all
resources of FMEServer, includ-
ing existing and newly-created
resources.
admin
fmeuser Provides users access to the
Web User Interface and Web Ser-
vices.
user
On the Roles page of the Web User Interface, an administrator can:
Securing FMEServer 338
l Create and remove roles.
l Configure users in roles.
l Configure permissions of roles.
On the Active Directory page of the Web User Interface, an administrator can integrate
the organization's Windows Active Directory, LDAP, or other directory server groups and
users into its FMEServer security configuration.
User-Based Access
Another way for FME Server to determine if a user can access a resource is whether the
user owns it, or has been given permissions on it.
User Ownership
Anything a user creates in FME Server, such as a repository, is owned by that user. When
you own something, you have full permissions on it. This permission supersedes the per-
missions you have on other items in FME Server based on the role to which you belong.
Additionally, as an owner, you can:
l Share permissions on the items you own with other users or roles.
l Assign ownership of something to another user. To change ownership of an item,
edit it from the Items page.
User Permission
Users can be granted permissions on resources, and these permissions may supersede
the permissions available to them through their role. (In fact, it is not even necessary for
a user to belong to a role.)
On the Users page of the Web User Interface, an administrator can:
Securing FMEServer 339
l Create and remove users.
l Configure users in roles.
l Configure permissions of users.
On the Active Directory page of the Web User Interface, an administrator can integrate
the organization's Windows Active Directory, LDAP, or other directory server users and
groups into its FMEServer security configuration.
Shared Access
Through sharing, users can grant different levels of access to items in FME Server to
other users or roles. Auser can share an item if their account is enabled for sharing, and
either of the following is true:
l The user owns the item.
l The user has Manage permission in User Management (usually granted to an admin-
istrator).
About the Trusted User Account
Aspecial account, referred to as the trusted account, can be used to provide unau-
thenticated access to any component. By default, this trusted account is named guest
and is assigned to the fmeguest role. By default, the fmeguest role is configured to
allow unauthenticated access to the FMEServer Web Services. This means it is possible
to invoke a service URL without providing any credentials.
Note:
The Statusof the guest user account is Disabled by default.
Securing FMEServer 340
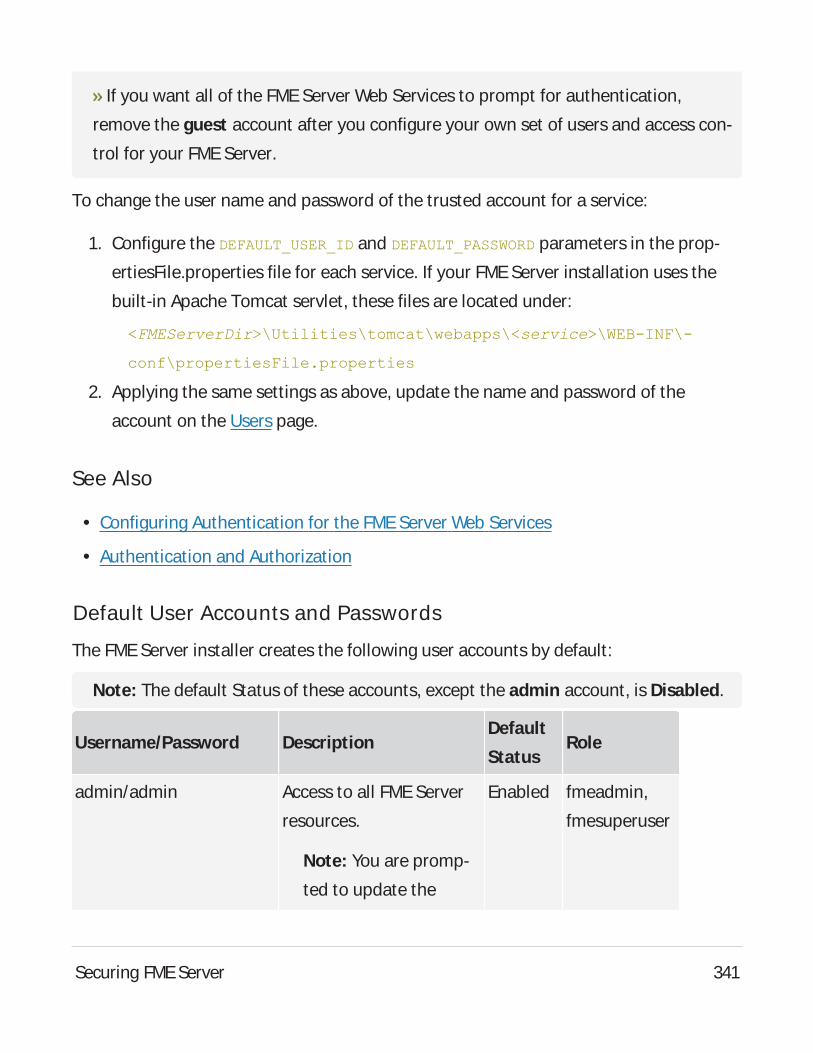
If you want all of the FMEServer Web Services to prompt for authentication,
remove the guest account after you configure your own set of users and access con-
trol for your FME Server.
To change the user name and password of the trusted account for a service:
1. Configure the DEFAULT_USER_ID and DEFAULT_PASSWORD parameters in the prop-
ertiesFile.properties file for each service. If your FME Server installation uses the
built-in Apache Tomcat servlet, these files are located under:
<FMEServerDir>\Utilities\tomcat\webapps\<service>\WEB-INF\-
conf\propertiesFile.properties
2. Applying the same settings as above, update the name and password of the
account on the Users page.
See Also
l Configuring Authentication for the FME Server Web Services
l Authentication and Authorization
Default User Accounts and Passwords
The FMEServer installer creates the following user accounts by default:
Note: The default Statusof these accounts, except the admin account, is Disabled.
Username/Password DescriptionDefault
StatusRole
admin/admin Access to all FMEServer
resources.
Note: You are promp-
ted to update the
Enabled fmeadmin,
fmesuperuser
Securing FMEServer 341
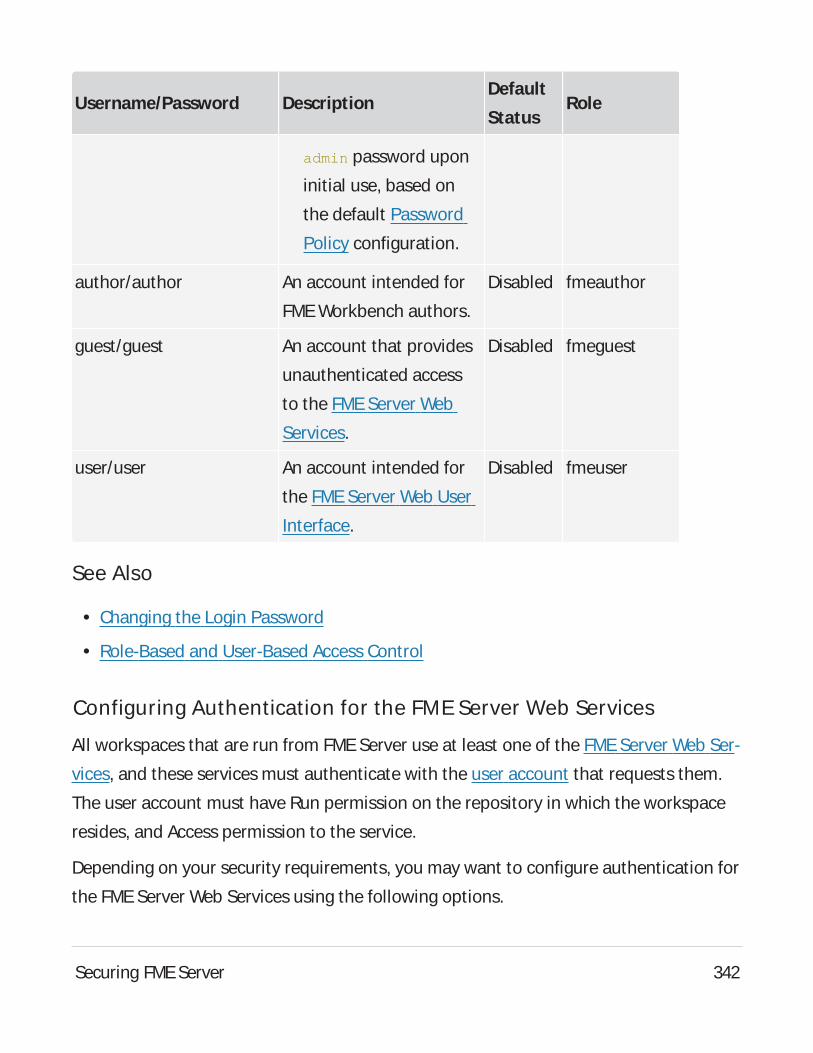
Username/Password DescriptionDefault
StatusRole
admin password upon
initial use, based on
the default Password
Policy configuration.
author/author An account intended for
FMEWorkbench authors.
Disabled fmeauthor
guest/guest An account that provides
unauthenticated access
to the FMEServer Web
Services.
Disabled fmeguest
user/user An account intended for
the FMEServer Web User
Interface.
Disabled fmeuser
See Also
l Changing the Login Password
l Role-Based and User-Based Access Control
Configuring Authentication for the FME Server Web Services
All workspaces that are run from FME Server use at least one of the FMEServer Web Ser-
vices, and these services must authenticate with the user account that requests them.
The user account must have Run permission on the repository in which the workspace
resides, and Access permission to the service.
Depending on your security requirements, you may want to configure authentication for
the FME Server Web Services using the following options.
Securing FMEServer 342
Authenticating with Tokens
Atoken can provide the credentials required for authentication. We recommend using
tokens in conjunction with user accounts that have only the required permissions for
their service requests to succeed, and no additional permissions.
Removing the Authentication Requirement
In some cases, you may want to remove the authentication requirement for a given
repository and service. You can use this approach with the data download, data stream-
ing, job submitter, KML network link, and data upload services. You can provide unau-
thenticated access either through the guest user account, or Directory Server accounts.
Using the guest User Account
You can provide unauthenticated access to a web service simply by providing the guest
user account with access to the repository of the workspace you want to run. This scen-
ario is possible because the guest user account acts as a trusted account in FME Server,
and by default, already has full access to the web services. Whenever a user's account
credentials fail to authenticate with a web service, FME Server attempts to authenticate
with the guest user. Therefore, if the guest user is given Run permission on the repos-
itory of the workspace being run, authentication succeeds. Configure guest user per-
missions on the Users page.
Note: By default, the Statusof the guest user account is Disabled.
Using Directory Server Accounts
If you have imported Active Directory accounts into FME Server as users, you can
provide those accounts with access to repositories and services. Configure directory
server user permissions on the Users page. Alternatively, if your directory server
accounts belong to roles, you can configure role access on the Roles page.
See Also
Securing FMEServer 343
l Authentication and Authorization
Configuring for HTTPS
Note: The task described here should be undertaken by advanced users only.
Before proceeding, consider your options for alternative solutions until you are cer-
tain you wish to proceed. For additional resources, consult the FMECommunity or
FMESupport.
l Skill Level: Advanced
l Estimated Time Required: 45-60 minutes
l Prerequisites:l Test jobs and services to ensure FMEServer is fully functional. For more inform-
ation, see:l Verify the Installation (Windows)
l Verify the Installation (Linux)
l Familiarity with the Certificate Authority (CA) instructions from your certificate
provider, particularly for generating the Certificate Signing Request (CSR).
l (Recommended) Familiarity with your web application server's SSL configuration
and certificates. (Apache Tomcat is the servlet for an Express or Fault-Tolerant
installation of FME Server, and as an option with certain Distributed install-
ations.)
l (Recommended) Access to the person who generates your certificates.
Note: If using Microsoft IISApplication Request Routing (ARR), refer to this
FME Community article.
Securing FMEServer 344
Configuring for HTTPS
HTTPSensures that communication between the client and server is encrypted, so that
if it is intercepted, a third party cannot easily view or use the information. You can use
HTTPSwith FME Server to ensure that sensitive login information is not exposed.
The following are two supported methods for securing FMEServer with HTTPS. For
alternative methods, such as using a self-signed certificate, see Configuring FME Server
for HTTPSin the FME Community.
Note: The following instructions provide steps for setting up SSL for Apache Tom-
cat, which is the application server included with an Express or Fault-Tolerant
installation of FME Server, and as an option with certain Distributed installations.
Instructions to set up SSL on different web application servers vary.
For more information about configuring Apache Tomcat for HTTPS, or if you are
using a different version of Apache Tomcat, see the documention for your version
on http://tomcat.apache.org/.
Windows
Using a CA-issued Certificate
This method requires you to generate a certificate signing request from FMEServer,
which your IT team can use to create a CAcertificate with the .cer or .crt extensions. If
the certificate uses the .pfx extension, follow Using a PFXor P12 Certificate (below)
instead.
Expand for instructions
1. Create a Keystore Generation Script
Open a text editor and copy the example script below, replacing the argument val-
ues with your own.
Securing FMEServer 345

Note: The storepass and keypass arguments must be the same and at least
6 characters.
keytool -genkey -noprompt -keyalg RSA -keystore tomcat.keystore
-alias <alias> -dname "<dname>" -storepass <storepass> -keypass
<keypass> -ext san="<san>" -deststoretype pkcs12
Keytool Arguments
Argument Description
genkey The keytool program command to generate a new keystore.
noprompt Using this argument in the command removes any interaction
with the user.
keyalg The algorithm to generate a private/public key pair.
keystore The keystore file name.
deststoretype Keystore type, pkcs12 or jks.
dname The CN name, Organization Unit, Organization, Location (city),
State, and two-letter country code. The distinguished name is a
set of values used to create the certificate and should be entered
as you would like them to be presented to FMEServer users and
visitors.
storepass, key-
pass
The password of the key and keystore. The value must be a min-
imum of six characters and must be the same for both arguments.
ext san The subject alternative name is a structured way to indicate all of
the domain names and IP addresses that are secured by the cer-
tificate.
alias The name of the key inside the keystore being created.
Securing FMEServer 346
Example:
keytool -genkey -noprompt -keyalg RSA -keystore tomcat.keystore
-alias tomcat -dname "CN=fmeserver.example.org, OU=support,
O=SafeSoftware, L=Surrey, S=BC, C=CA" -storepass password1 -key-
pass password1 -ext san-
n="dns:fmeserver.example.org,dns:fmeserver" -deststoretype
pkcs12
2. Run the Keystore Generation Script
a. Open a command prompt as administrator and navigate to the FMEServer
installation Java bin directory:
cd <FMEServerDir>\Utilities\jre\bin\
Where <FMEServerDir> is the location of the FMEServer installation folder.
b. Execute the command created in step 1.
3. Generate a Certificate Signing Request (CSR)
In the command prompt, remain in <FMEServerDir>\Utilities\jre\bin\ and run:
keytool -certreq -keyalg RSA -alias <alias> -file <filename> -
keystore tomcat.keystore -ext san="<san>"
Specify the certificate signing request path to the <filename>, and update <alias>
and <san> to match that set in step 1.
Example:
keytool -certreq -keyalg RSA -alias tomcat -file certreq.csr -
keystore tomcat.keystore -ext san-
n="dns:fmeserver.example.org,dns:fmeserver"
4. Obtain a Certificate
Securing FMEServer 347
Submit the CSR(for example, certreq.csr) generated in step 3 to your CAto obtain
a certificate, according to your CA's instructions.
5. Import the Certificate into the Keystore
If you have multiple certificates, install them in the following order, and be sure to
update the alias and certificate path for each.
a. Import the root certificate (if you have one):
keytool -import -alias root -keystore tomcat.keystore -
trustcacerts -file <path/certificate_filename>
b. Import the intermediate certificate (If you have one):
keytool -import -alias intermediate -keystore tom-
cat.keystore -trustcacerts -file <path/certificate_filename>
c. Import the certificate:
keytool -import -alias <alias> -keystore tomcat.keystore -
trustcacerts -file <path/certificate_filename>
Note: Use the same <alias> specified in step 1.
6. Import the Keystore into FMEServer's trusted certs
In a command prompt, from <FMEServerDir>\Utilities\jre\bin\, use the following
command to import the keystore into FMEServer's trusted certs, specifying the
srcstorepass argument with the password from step 1.
keytool -importkeystore -noprompt -srckeystore tomcat.keystore -
destkeystore "<FMEServerDir>\Utilities\jre\lib\security\cacerts"
-deststorepass changeit -srcstorepass <password>
Note: Ignore the warning that the destination type must default to jks.
7. Back up the Tomcat XML Configuration Files
Securing FMEServer 348
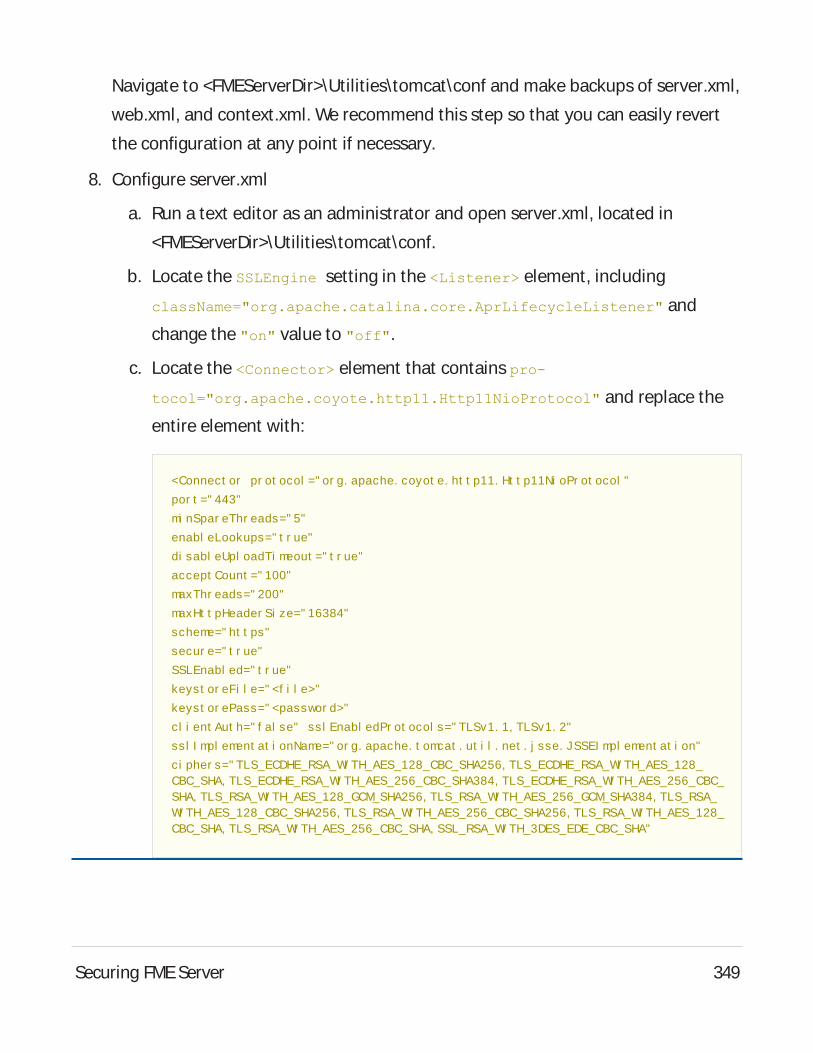
Navigate to <FMEServerDir>\Utilities\tomcat\conf and make backups of server.xml,
web.xml, and context.xml. We recommend this step so that you can easily revert
the configuration at any point if necessary.
8. Configure server.xml
a. Run a text editor as an administrator and open server.xml, located in
<FMEServerDir>\Utilities\tomcat\conf.
b. Locate the SSLEngine setting in the <Listener> element, including
className="org.apache.catalina.core.AprLifecycleListener" and
change the "on" value to "off".
c. Locate the <Connector> element that contains pro-
tocol="org.apache.coyote.http11.Http11NioProtocol" and replace the
entire element with:
<Connect or pr ot ocol =" or g. apache. coyot e. ht t p11. Ht t p11Ni oPr ot ocol "
por t =" 443"
mi nSpar eThr eads=" 5"
enabl eLookups=" t r ue"
di sabl eUpl oadTi meout =" t r ue"
accept Count =" 100"
maxThr eads=" 200"
maxHt t pHeader Si ze=" 16384"
scheme=" ht t ps"
secur e=" t r ue"
SSLEnabl ed=" t r ue"
keyst or eFi l e=" <f i l e>"
keyst or ePass=" <passwor d>"
cl i ent Aut h=" f al se" ssl Enabl edPr ot ocol s=" TLSv1. 1, TLSv1. 2"
ssl I mpl ement at i onName=" or g. apache. t omcat . ut i l . net . j sse. JSSEI mpl ement at i on"
ci pher s=" TLS_ECDHE_RSA_WI TH_AES_128_CBC_SHA256, TLS_ECDHE_RSA_WI TH_AES_128_CBC_SHA, TLS_ECDHE_RSA_WI TH_AES_256_CBC_SHA384, TLS_ECDHE_RSA_WI TH_AES_256_CBC_SHA, TLS_RSA_WI TH_AES_128_GCM_SHA256, TLS_RSA_WI TH_AES_256_GCM_SHA384, TLS_RSA_WI TH_AES_128_CBC_SHA256, TLS_RSA_WI TH_AES_256_CBC_SHA256, TLS_RSA_WI TH_AES_128_CBC_SHA, TLS_RSA_WI TH_AES_256_CBC_SHA, SSL_RSA_WI TH_3DES_EDE_CBC_SHA"
Securing FMEServer 349
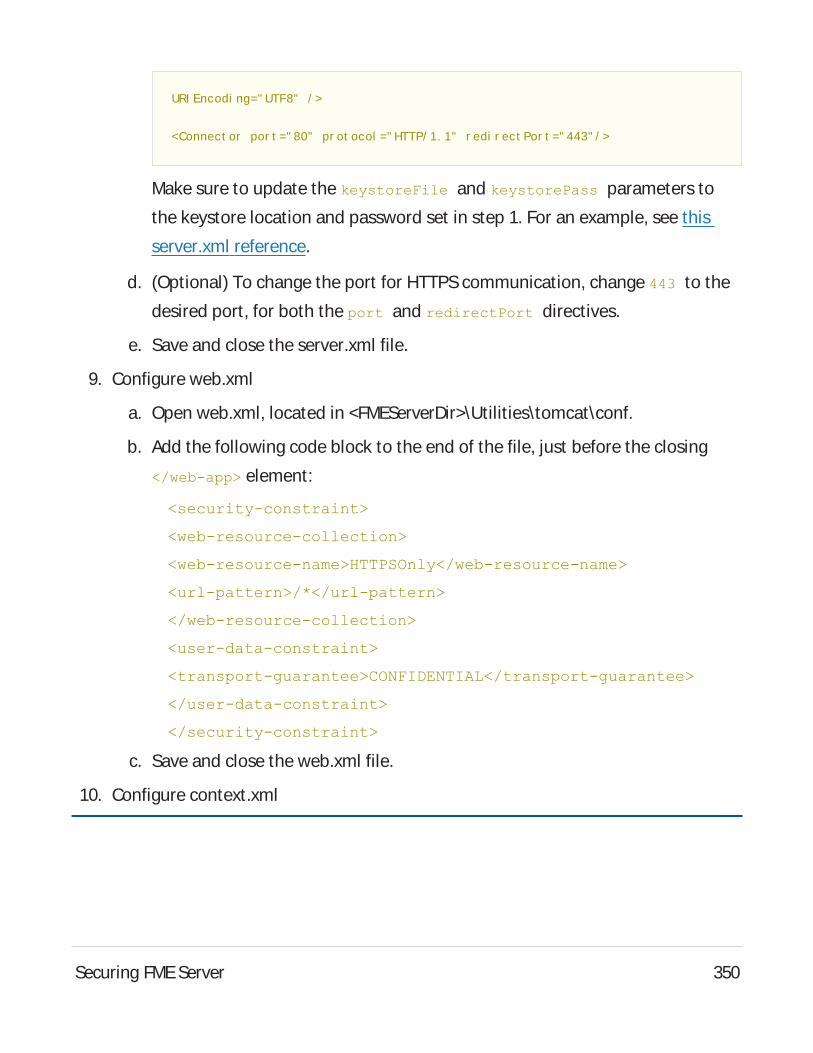
URI Encodi ng=" UTF8" / >
<Connect or por t =" 80" pr ot ocol =" HTTP/ 1. 1" r edi r ect Por t =" 443" / >
Make sure to update the keystoreFile and keystorePass parameters to
the keystore location and password set in step 1. For an example, see this
server.xml reference.
d. (Optional) To change the port for HTTPScommunication, change 443 to the
desired port, for both the port and redirectPort directives.
e. Save and close the server.xml file.
9. Configure web.xml
a. Open web.xml, located in <FMEServerDir>\Utilities\tomcat\conf.
b. Add the following code block to the end of the file, just before the closing
</web-app> element:
<security-constraint>
<web-resource-collection>
<web-resource-name>HTTPSOnly</web-resource-name>
<url-pattern>/*</url-pattern>
</web-resource-collection>
<user-data-constraint>
<transport-guarantee>CONFIDENTIAL</transport-guarantee>
</user-data-constraint>
</security-constraint>
c. Save and close the web.xml file.
10. Configure context.xml
Securing FMEServer 350
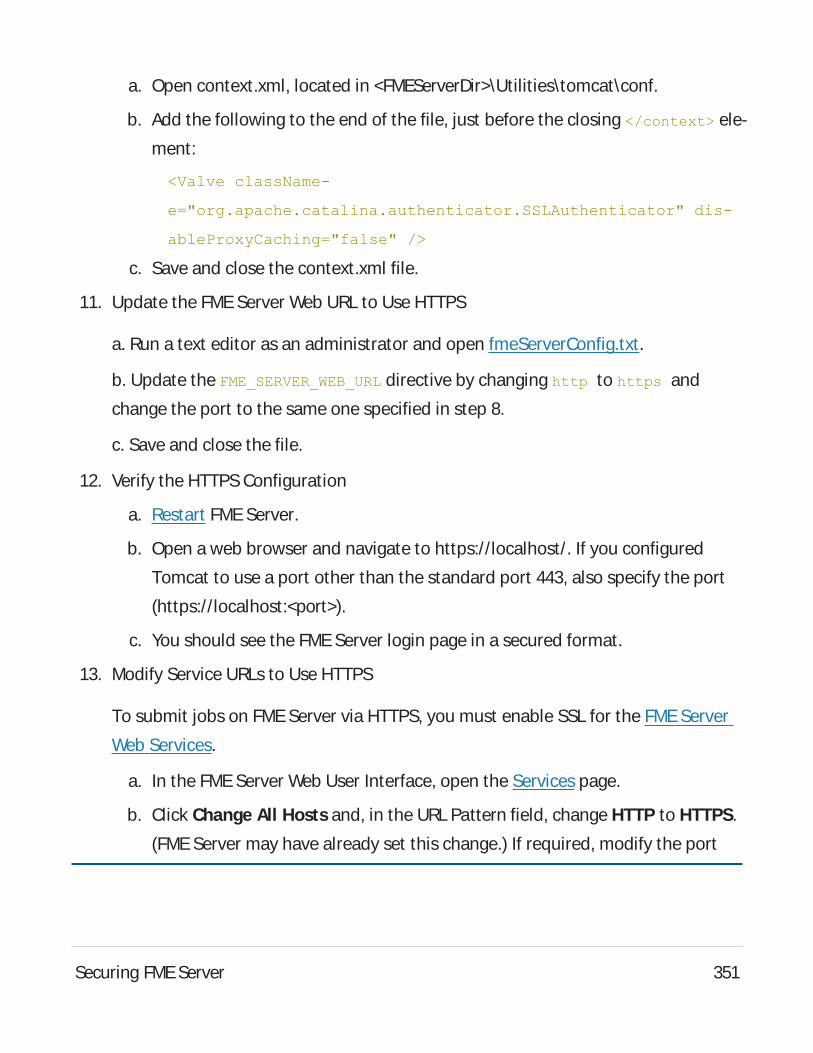
a. Open context.xml, located in <FMEServerDir>\Utilities\tomcat\conf.
b. Add the following to the end of the file, just before the closing </context> ele-
ment:
<Valve className-
e="org.apache.catalina.authenticator.SSLAuthenticator" dis-
ableProxyCaching="false" />
c. Save and close the context.xml file.
11. Update the FMEServer Web URL to Use HTTPS
a. Run a text editor as an administrator and open fmeServerConfig.txt.
b. Update the FME_SERVER_WEB_URL directive by changing http to https and
change the port to the same one specified in step 8.
c. Save and close the file.
12. Verify the HTTPSConfiguration
a. Restart FMEServer.
b. Open a web browser and navigate to https://localhost/. If you configured
Tomcat to use a port other than the standard port 443, also specify the port
(https://localhost:<port>).
c. You should see the FMEServer login page in a secured format.
13. Modify Service URLs to Use HTTPS
To submit jobs on FMEServer via HTTPS, you must enable SSL for the FMEServer
Web Services.
a. In the FMEServer Web User Interface, open the Services page.
b. Click Change All Hostsand, in the URL Pattern field, change HTTP to HTTPS.
(FMEServer may have already set this change.) If required, modify the port
Securing FMEServer 351
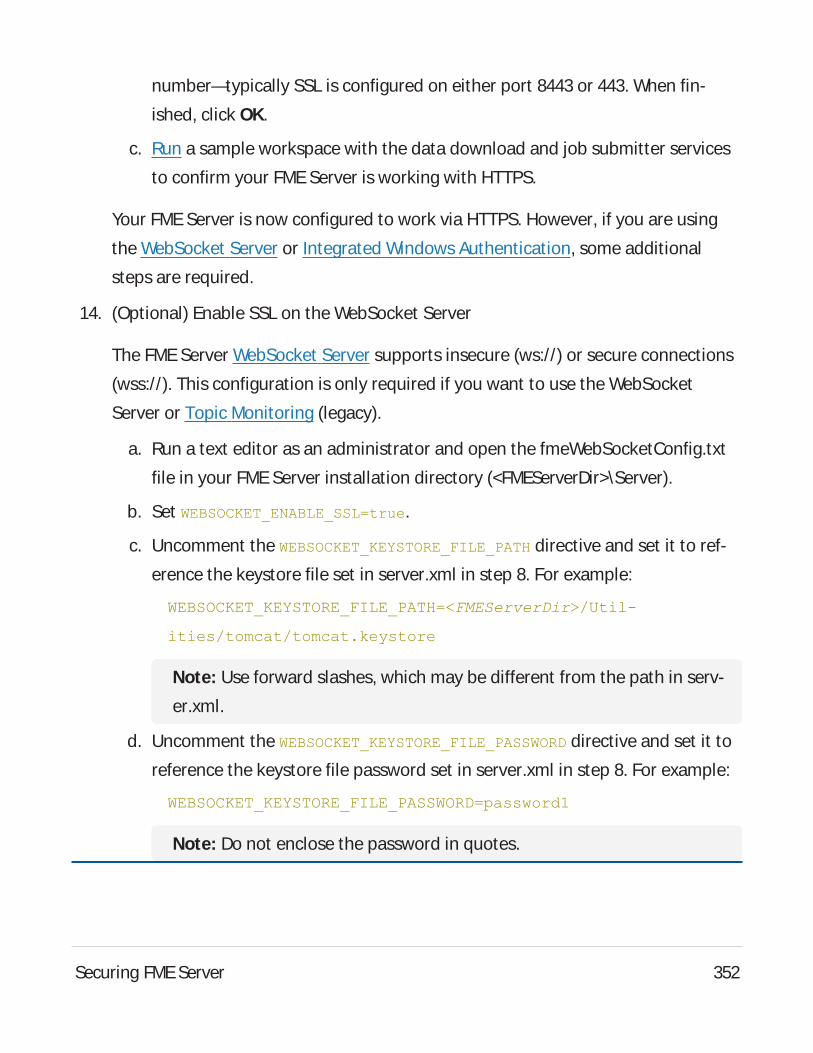
number—typically SSL is configured on either port 8443 or 443. When fin-
ished, click OK.
c. Run a sample workspace with the data download and job submitter services
to confirm your FMEServer is working with HTTPS.
Your FMEServer is now configured to work via HTTPS. However, if you are using
the WebSocket Server or Integrated Windows Authentication, some additional
steps are required.
14. (Optional) Enable SSL on the WebSocket Server
The FMEServer WebSocket Server supports insecure (ws://) or secure connections
(wss://). This configuration is only required if you want to use the WebSocket
Server or Topic Monitoring (legacy).
a. Run a text editor as an administrator and open the fmeWebSocketConfig.txt
file in your FMEServer installation directory (<FMEServerDir>\Server).
b. Set WEBSOCKET_ENABLE_SSL=true.
c. Uncomment the WEBSOCKET_KEYSTORE_FILE_PATH directive and set it to ref-
erence the keystore file set in server.xml in step 8. For example:
WEBSOCKET_KEYSTORE_FILE_PATH=<FMEServerDir>/Util-
ities/tomcat/tomcat.keystore
Note: Use forward slashes, which may be different from the path in serv-
er.xml.
d. Uncomment the WEBSOCKET_KEYSTORE_FILE_PASSWORD directive and set it to
reference the keystore file password set in server.xml in step 8. For example:
WEBSOCKET_KEYSTORE_FILE_PASSWORD=password1
Note: Do not enclose the password in quotes.
Securing FMEServer 352
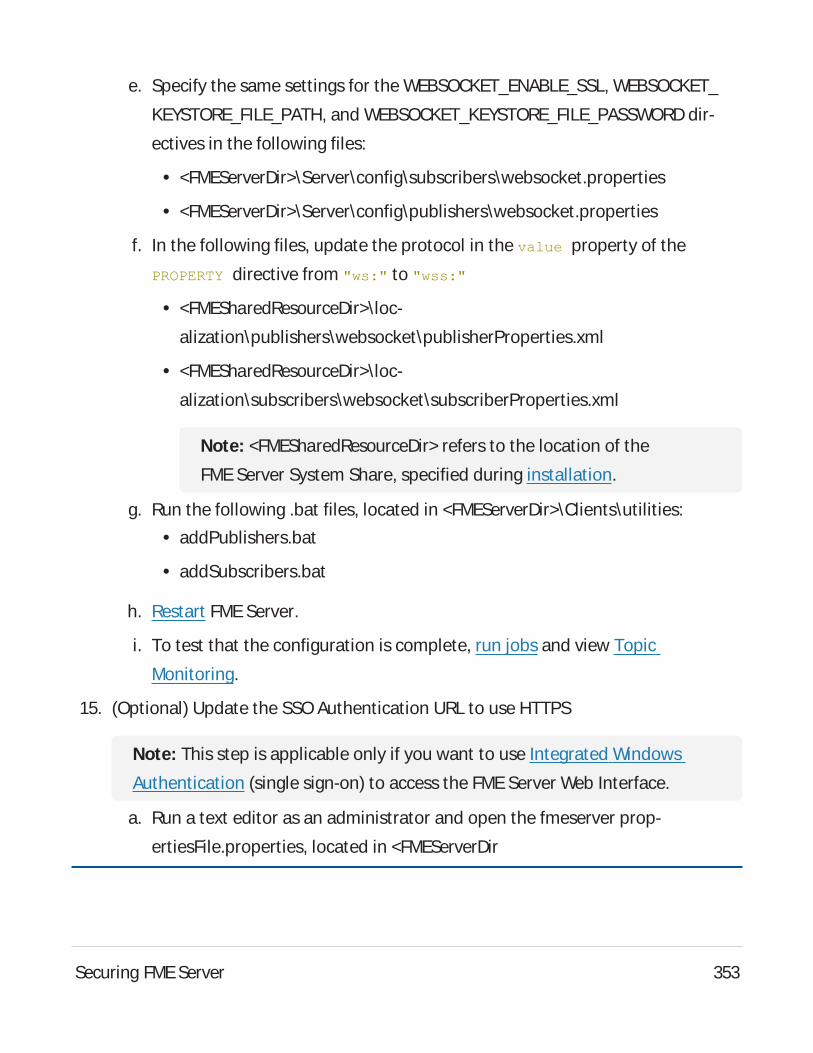
e. Specify the same settings for the WEBSOCKET_ENABLE_SSL, WEBSOCKET_
KEYSTORE_FILE_PATH, and WEBSOCKET_KEYSTORE_FILE_PASSWORD dir-
ectives in the following files:
l <FMEServerDir>\Server\config\subscribers\websocket.properties
l <FMEServerDir>\Server\config\publishers\websocket.properties
f. In the following files, update the protocol in the value property of the
PROPERTY directive from "ws:" to "wss:"
l <FMESharedResourceDir>\loc-
alization\publishers\websocket\publisherProperties.xml
l <FMESharedResourceDir>\loc-
alization\subscribers\websocket\subscriberProperties.xml
Note: <FMESharedResourceDir> refers to the location of the
FME Server System Share, specified during installation.
g. Run the following .bat files, located in <FMEServerDir>\Clients\utilities:l addPublishers.bat
l addSubscribers.bat
h. Restart FME Server.
i. To test that the configuration is complete, run jobs and view Topic
Monitoring.
15. (Optional) Update the SSOAuthentication URL to use HTTPS
Note: This step is applicable only if you want to use Integrated Windows
Authentication (single sign-on) to access the FMEServer Web Interface.
a. Run a text editor as an administrator and open the fmeserver prop-
ertiesFile.properties, located in <FMEServerDir
Securing FMEServer 353
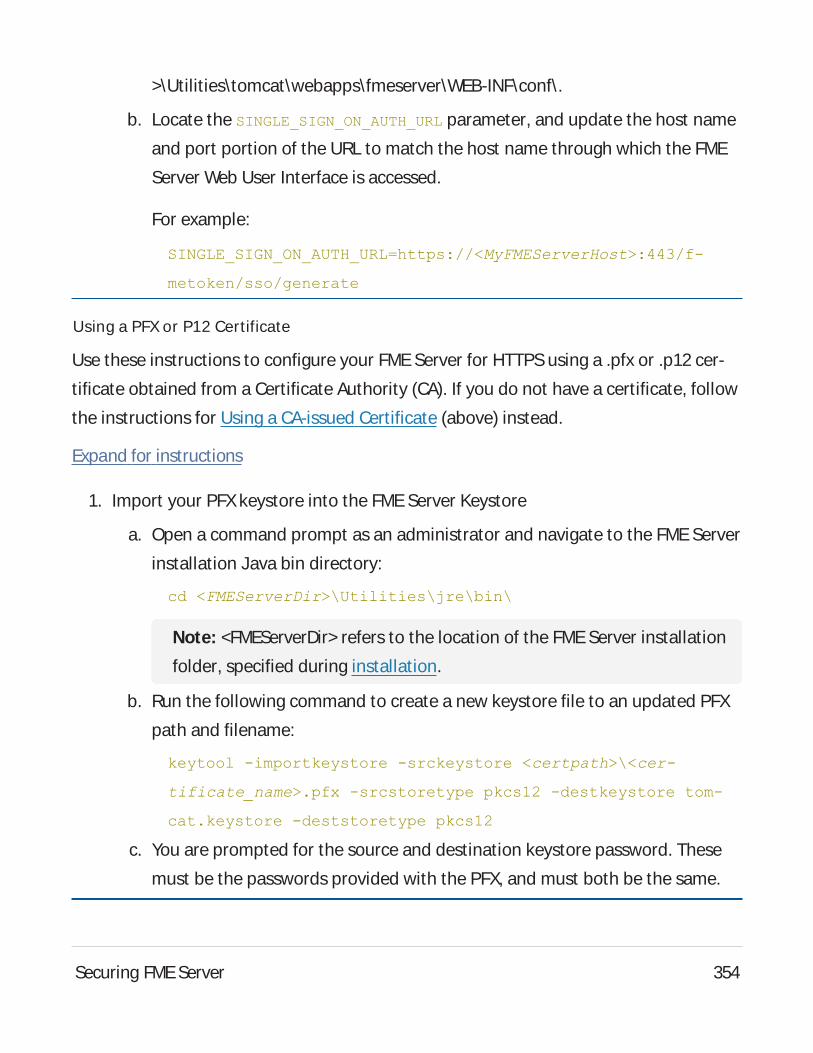
>\Utilities\tomcat\webapps\fmeserver\WEB-INF\conf\.
b. Locate the SINGLE_SIGN_ON_AUTH_URL parameter, and update the host name
and port portion of the URL to match the host name through which the FME
Server Web User Interface is accessed.
For example:
SINGLE_SIGN_ON_AUTH_URL=https://<MyFMEServerHost>:443/f-
metoken/sso/generate
Using a PFX or P12 Certificate
Use these instructions to configure your FMEServer for HTTPSusing a .pfx or .p12 cer-
tificate obtained from a Certificate Authority (CA). If you do not have a certificate, follow
the instructions for Using a CA-issued Certificate (above) instead.
Expand for instructions
1. Import your PFXkeystore into the FMEServer Keystore
a. Open a command prompt as an administrator and navigate to the FMEServer
installation Java bin directory:
cd <FMEServerDir>\Utilities\jre\bin\
Note: <FMEServerDir> refers to the location of the FMEServer installation
folder, specified during installation.
b. Run the following command to create a new keystore file to an updated PFX
path and filename:
keytool -importkeystore -srckeystore <certpath>\<cer-
tificate_name>.pfx -srcstoretype pkcs12 -destkeystore tom-
cat.keystore -deststoretype pkcs12
c. You are prompted for the source and destination keystore password. These
must be the passwords provided with the PFX, and must both be the same.
Securing FMEServer 354
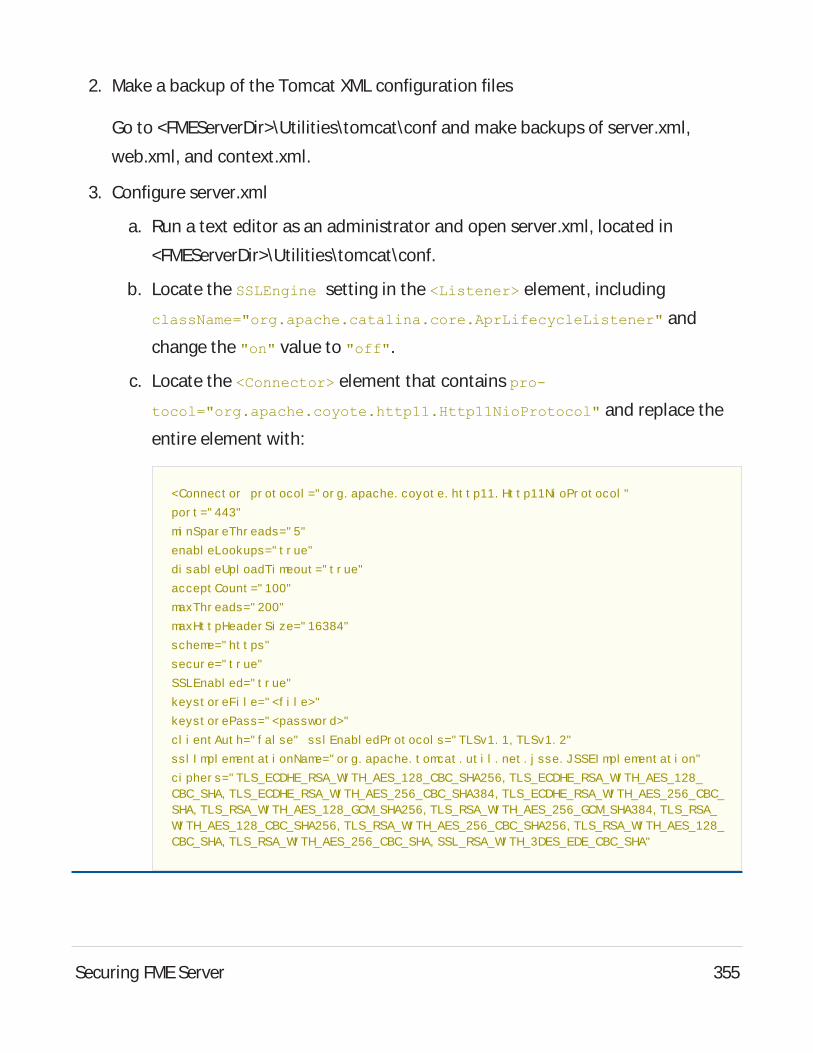
2. Make a backup of the Tomcat XML configuration files
Go to <FMEServerDir>\Utilities\tomcat\conf and make backups of server.xml,
web.xml, and context.xml.
3. Configure server.xml
a. Run a text editor as an administrator and open server.xml, located in
<FMEServerDir>\Utilities\tomcat\conf.
b. Locate the SSLEngine setting in the <Listener> element, including
className="org.apache.catalina.core.AprLifecycleListener" and
change the "on" value to "off".
c. Locate the <Connector> element that contains pro-
tocol="org.apache.coyote.http11.Http11NioProtocol" and replace the
entire element with:
<Connect or pr ot ocol =" or g. apache. coyot e. ht t p11. Ht t p11Ni oPr ot ocol "
por t =" 443"
mi nSpar eThr eads=" 5"
enabl eLookups=" t r ue"
di sabl eUpl oadTi meout =" t r ue"
accept Count =" 100"
maxThr eads=" 200"
maxHt t pHeader Si ze=" 16384"
scheme=" ht t ps"
secur e=" t r ue"
SSLEnabl ed=" t r ue"
keyst or eFi l e=" <f i l e>"
keyst or ePass=" <passwor d>"
cl i ent Aut h=" f al se" ssl Enabl edPr ot ocol s=" TLSv1. 1, TLSv1. 2"
ssl I mpl ement at i onName=" or g. apache. t omcat . ut i l . net . j sse. JSSEI mpl ement at i on"
ci pher s=" TLS_ECDHE_RSA_WI TH_AES_128_CBC_SHA256, TLS_ECDHE_RSA_WI TH_AES_128_CBC_SHA, TLS_ECDHE_RSA_WI TH_AES_256_CBC_SHA384, TLS_ECDHE_RSA_WI TH_AES_256_CBC_SHA, TLS_RSA_WI TH_AES_128_GCM_SHA256, TLS_RSA_WI TH_AES_256_GCM_SHA384, TLS_RSA_WI TH_AES_128_CBC_SHA256, TLS_RSA_WI TH_AES_256_CBC_SHA256, TLS_RSA_WI TH_AES_128_CBC_SHA, TLS_RSA_WI TH_AES_256_CBC_SHA, SSL_RSA_WI TH_3DES_EDE_CBC_SHA"
Securing FMEServer 355

URI Encodi ng=" UTF8" / >
<Connect or por t =" 80" pr ot ocol =" HTTP/ 1. 1" r edi r ect Por t =" 443" / >
Make sure to update the keystoreFile and keystorePass parameters to
the keystore location and password set in step 1. For an example, see this
server.xml reference.
d. (Optional) To change the port for HTTPScommunication, change 443 to the
desired port, for both the port and redirectPort directives.
e. Save and close the server.xml file.
4. Configure web.xml
a. Open web.xml, located in <FMEServerDir>\Utilities\tomcat\conf.
b. Add the following code block to the end of the file, just before the closing
</web-app> element:
<security-constraint>
<web-resource-collection>
<web-resource-name>HTTPSOnly</web-resource-name>
<url-pattern>/*</url-pattern>
</web-resource-collection>
<user-data-constraint>
<transport-guarantee>CONFIDENTIAL</transport-guarantee>
</user-data-constraint>
</security-constraint>
c. Save and close the web.xml file.
5. Configure context.xml
Securing FMEServer 356
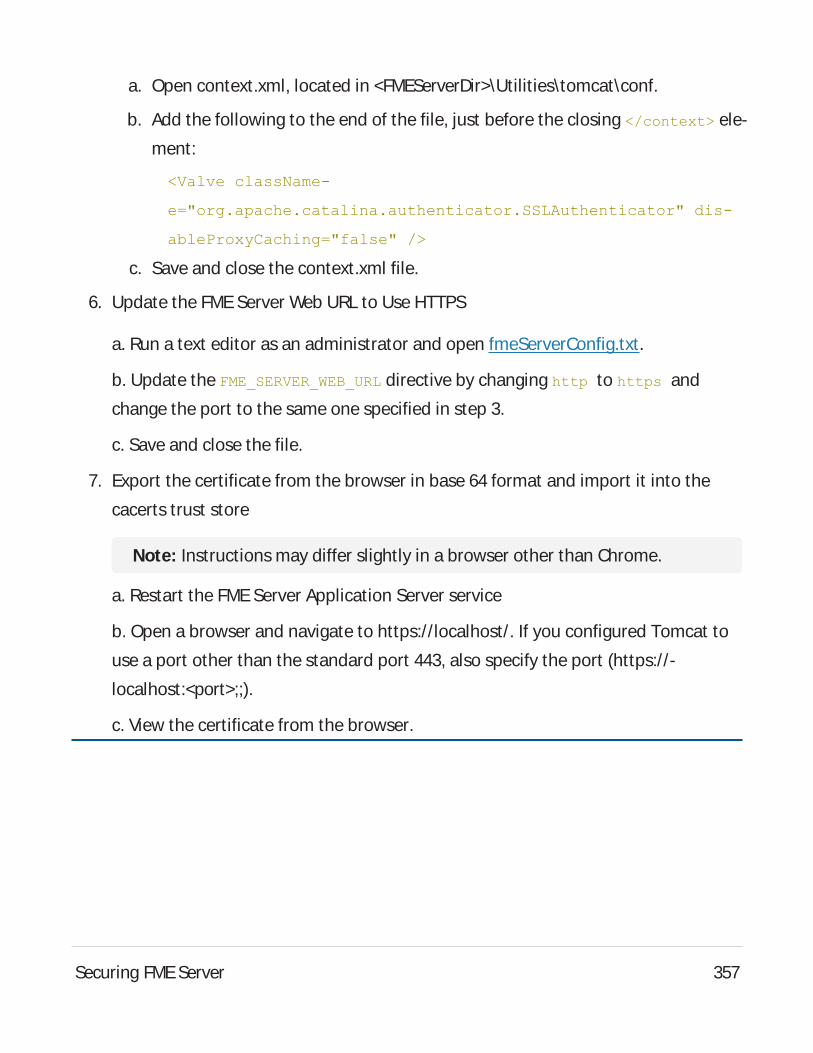
a. Open context.xml, located in <FMEServerDir>\Utilities\tomcat\conf.
b. Add the following to the end of the file, just before the closing </context> ele-
ment:
<Valve className-
e="org.apache.catalina.authenticator.SSLAuthenticator" dis-
ableProxyCaching="false" />
c. Save and close the context.xml file.
6. Update the FMEServer Web URL to Use HTTPS
a. Run a text editor as an administrator and open fmeServerConfig.txt.
b. Update the FME_SERVER_WEB_URL directive by changing http to https and
change the port to the same one specified in step 3.
c. Save and close the file.
7. Export the certificate from the browser in base 64 format and import it into the
cacerts trust store
Note: Instructions may differ slightly in a browser other than Chrome.
a. Restart the FMEServer Application Server service
b. Open a browser and navigate to https://localhost/. If you configured Tomcat to
use a port other than the standard port 443, also specify the port (https://-
localhost:<port>;;).
c. View the certificate from the browser.
Securing FMEServer 357
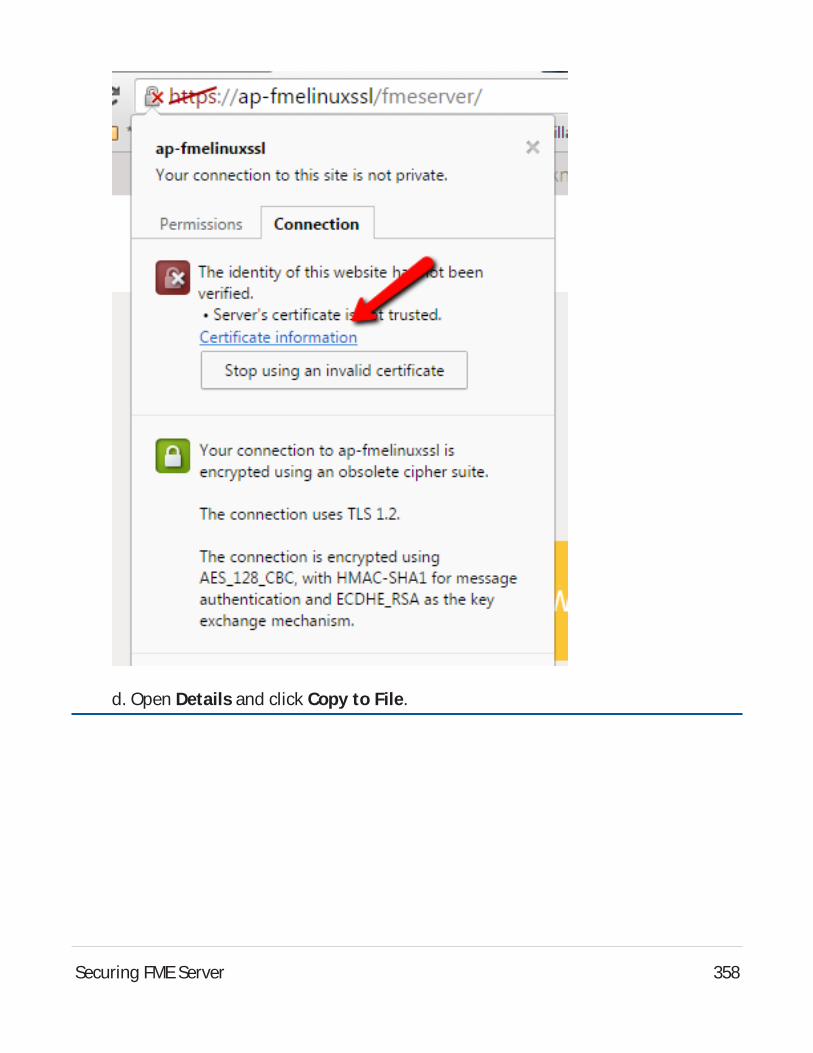
d. Open Details and click Copy to File.
Securing FMEServer 358
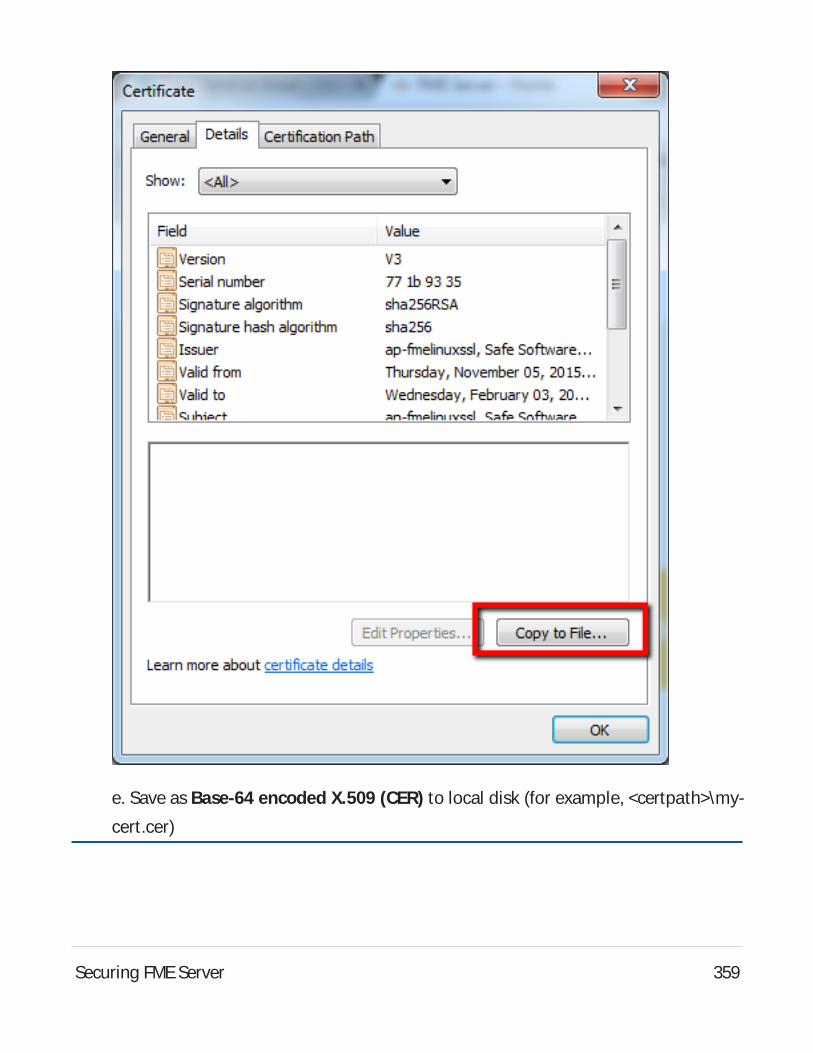
e. Save as Base-64 encoded X.509 (CER) to local disk (for example, <certpath>\my-
cert.cer)
Securing FMEServer 359
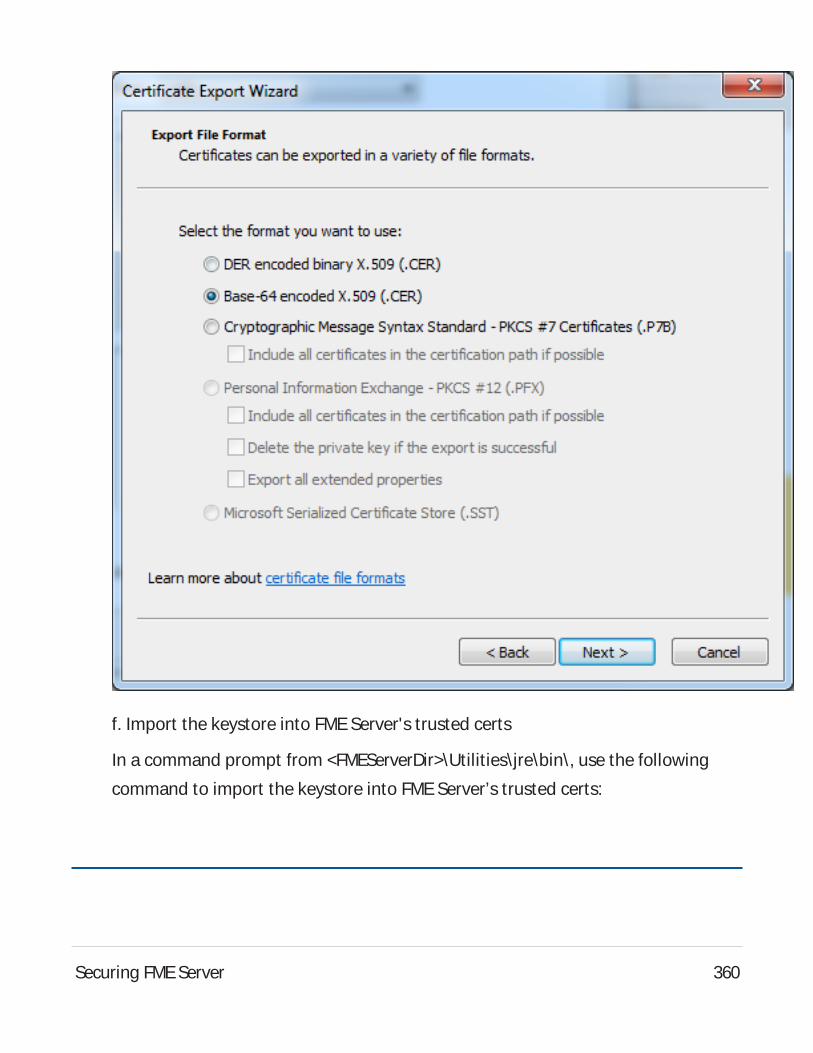
f. Import the keystore into FMEServer's trusted certs
In a command prompt from <FMEServerDir>\Utilities\jre\bin\, use the following
command to import the keystore into FMEServer’s trusted certs:
Securing FMEServer 360
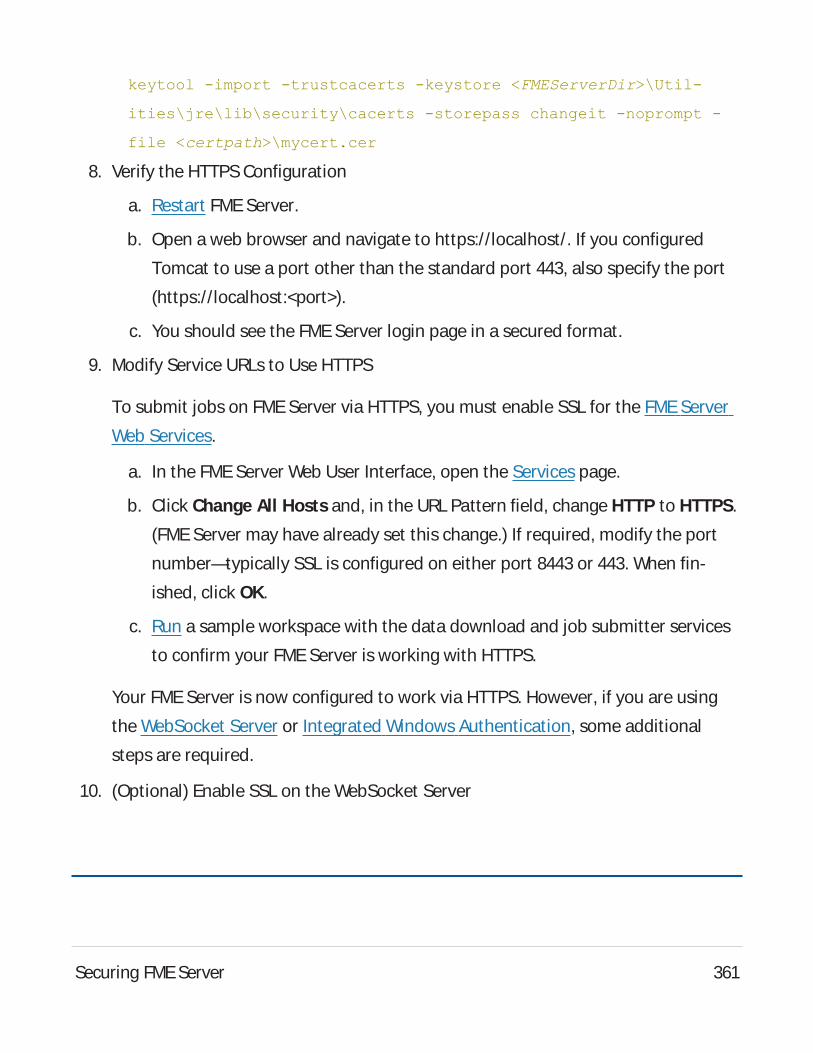
keytool -import -trustcacerts -keystore <FMEServerDir>\Util-
ities\jre\lib\security\cacerts -storepass changeit -noprompt -
file <certpath>\mycert.cer
8. Verify the HTTPSConfiguration
a. Restart FMEServer.
b. Open a web browser and navigate to https://localhost/. If you configured
Tomcat to use a port other than the standard port 443, also specify the port
(https://localhost:<port>).
c. You should see the FMEServer login page in a secured format.
9. Modify Service URLs to Use HTTPS
To submit jobs on FMEServer via HTTPS, you must enable SSL for the FMEServer
Web Services.
a. In the FMEServer Web User Interface, open the Services page.
b. Click Change All Hostsand, in the URL Pattern field, change HTTP to HTTPS.
(FMEServer may have already set this change.) If required, modify the port
number—typically SSL is configured on either port 8443 or 443. When fin-
ished, click OK.
c. Run a sample workspace with the data download and job submitter services
to confirm your FMEServer is working with HTTPS.
Your FMEServer is now configured to work via HTTPS. However, if you are using
the WebSocket Server or Integrated Windows Authentication, some additional
steps are required.
10. (Optional) Enable SSL on the WebSocket Server
Securing FMEServer 361
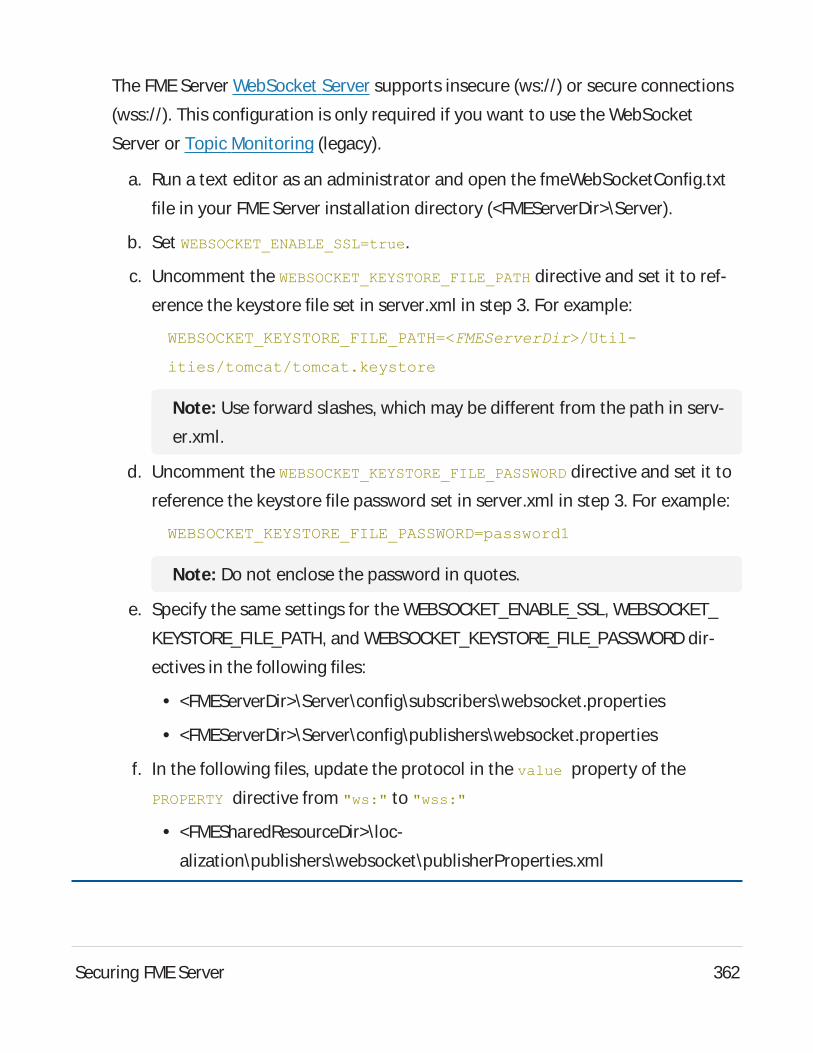
The FMEServer WebSocket Server supports insecure (ws://) or secure connections
(wss://). This configuration is only required if you want to use the WebSocket
Server or Topic Monitoring (legacy).
a. Run a text editor as an administrator and open the fmeWebSocketConfig.txt
file in your FMEServer installation directory (<FMEServerDir>\Server).
b. Set WEBSOCKET_ENABLE_SSL=true.
c. Uncomment the WEBSOCKET_KEYSTORE_FILE_PATH directive and set it to ref-
erence the keystore file set in server.xml in step 3. For example:
WEBSOCKET_KEYSTORE_FILE_PATH=<FMEServerDir>/Util-
ities/tomcat/tomcat.keystore
Note: Use forward slashes, which may be different from the path in serv-
er.xml.
d. Uncomment the WEBSOCKET_KEYSTORE_FILE_PASSWORD directive and set it to
reference the keystore file password set in server.xml in step 3. For example:
WEBSOCKET_KEYSTORE_FILE_PASSWORD=password1
Note: Do not enclose the password in quotes.
e. Specify the same settings for the WEBSOCKET_ENABLE_SSL, WEBSOCKET_
KEYSTORE_FILE_PATH, and WEBSOCKET_KEYSTORE_FILE_PASSWORD dir-
ectives in the following files:
l <FMEServerDir>\Server\config\subscribers\websocket.properties
l <FMEServerDir>\Server\config\publishers\websocket.properties
f. In the following files, update the protocol in the value property of the
PROPERTY directive from "ws:" to "wss:"
l <FMESharedResourceDir>\loc-
alization\publishers\websocket\publisherProperties.xml
Securing FMEServer 362
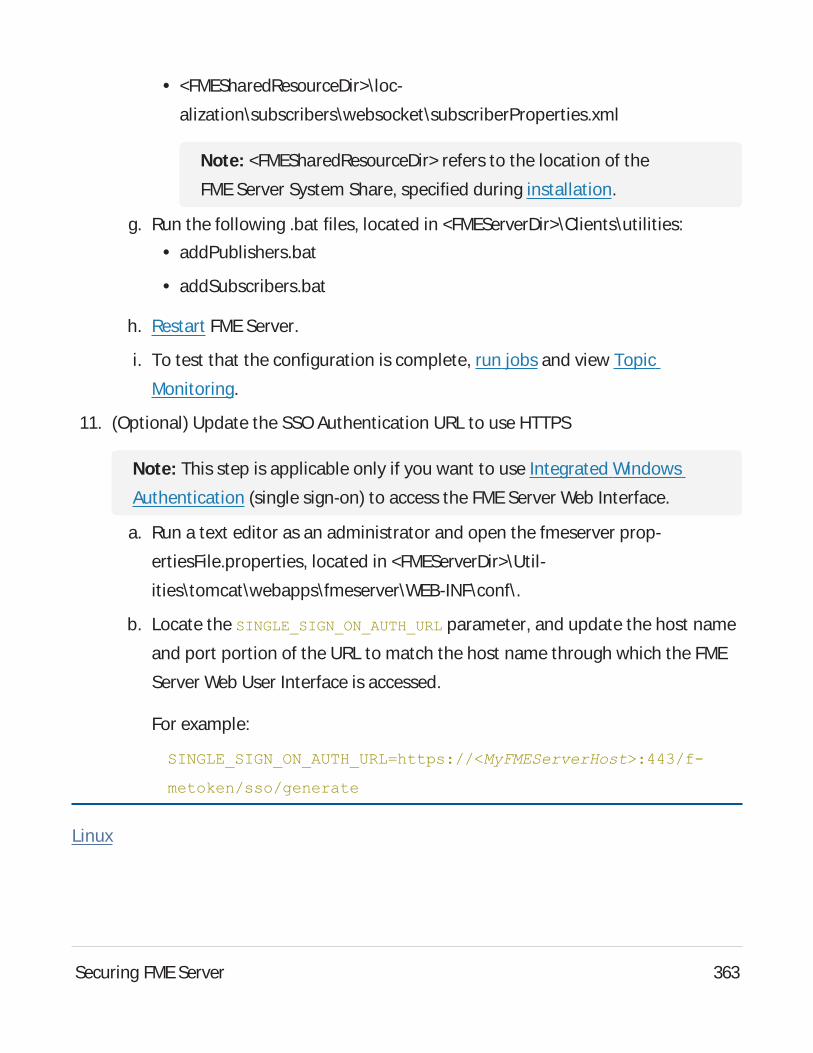
l <FMESharedResourceDir>\loc-
alization\subscribers\websocket\subscriberProperties.xml
Note: <FMESharedResourceDir> refers to the location of the
FME Server System Share, specified during installation.
g. Run the following .bat files, located in <FMEServerDir>\Clients\utilities:l addPublishers.bat
l addSubscribers.bat
h. Restart FME Server.
i. To test that the configuration is complete, run jobs and view Topic
Monitoring.
11. (Optional) Update the SSOAuthentication URL to use HTTPS
Note: This step is applicable only if you want to use Integrated Windows
Authentication (single sign-on) to access the FMEServer Web Interface.
a. Run a text editor as an administrator and open the fmeserver prop-
ertiesFile.properties, located in <FMEServerDir>\Util-
ities\tomcat\webapps\fmeserver\WEB-INF\conf\.
b. Locate the SINGLE_SIGN_ON_AUTH_URL parameter, and update the host name
and port portion of the URL to match the host name through which the FME
Server Web User Interface is accessed.
For example:
SINGLE_SIGN_ON_AUTH_URL=https://<MyFMEServerHost>:443/f-
metoken/sso/generate
Linux
Securing FMEServer 363
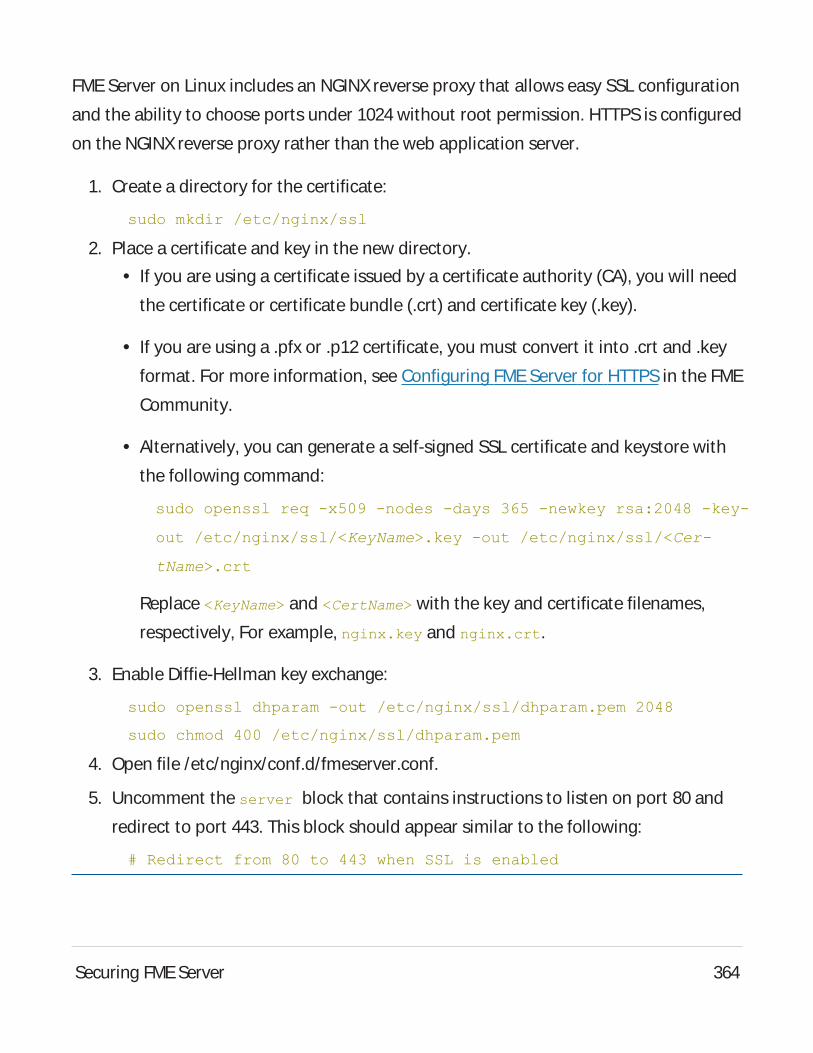
FME Server on Linux includes an NGINXreverse proxy that allows easy SSL configuration
and the ability to choose ports under 1024 without root permission. HTTPSis configured
on the NGINXreverse proxy rather than the web application server.
1. Create a directory for the certificate:
sudo mkdir /etc/nginx/ssl
2. Place a certificate and key in the new directory.l If you are using a certificate issued by a certificate authority (CA), you will need
the certificate or certificate bundle (.crt) and certificate key (.key).
l If you are using a .pfx or .p12 certificate, you must convert it into .crt and .key
format. For more information, see Configuring FMEServer for HTTPSin the FME
Community.
l Alternatively, you can generate a self-signed SSL certificate and keystore with
the following command:
sudo openssl req -x509 -nodes -days 365 -newkey rsa:2048 -key-
out /etc/nginx/ssl/<KeyName>.key -out /etc/nginx/ssl/<Cer-
tName>.crt
Replace <KeyName> and <CertName> with the key and certificate filenames,
respectively, For example, nginx.key and nginx.crt.
3. Enable Diffie-Hellman key exchange:
sudo openssl dhparam -out /etc/nginx/ssl/dhparam.pem 2048
sudo chmod 400 /etc/nginx/ssl/dhparam.pem
4. Open file /etc/nginx/conf.d/fmeserver.conf.
5. Uncomment the server block that contains instructions to listen on port 80 and
redirect to port 443. This block should appear similar to the following:
# Redirect from 80 to 443 when SSL is enabled
Securing FMEServer 364
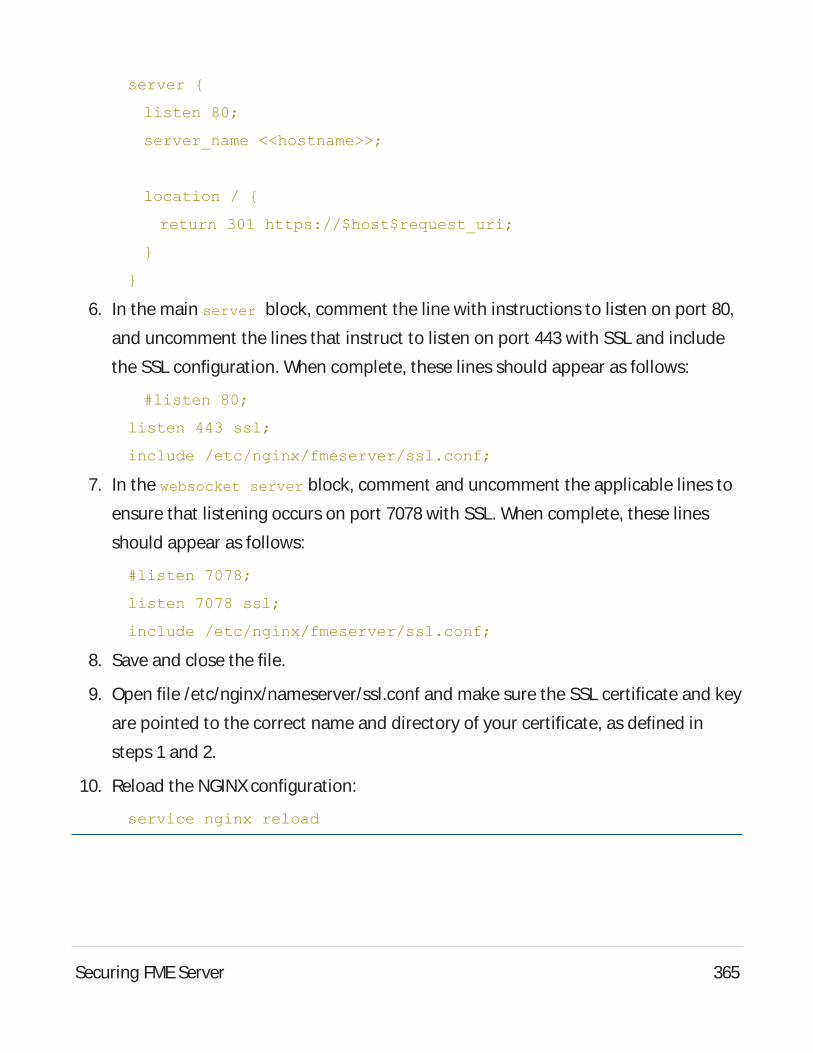
server {
listen 80;
server_name <<hostname>>;
location / {
return 301 https://$host$request_uri;
}
}
6. In the main server block, comment the line with instructions to listen on port 80,
and uncomment the lines that instruct to listen on port 443 with SSL and include
the SSL configuration. When complete, these lines should appear as follows:
#listen 80;
listen 443 ssl;
include /etc/nginx/fmeserver/ssl.conf;
7. In the websocket server block, comment and uncomment the applicable lines to
ensure that listening occurs on port 7078 with SSL. When complete, these lines
should appear as follows:
#listen 7078;
listen 7078 ssl;
include /etc/nginx/fmeserver/ssl.conf;
8. Save and close the file.
9. Open file /etc/nginx/nameserver/ssl.conf and make sure the SSL certificate and key
are pointed to the correct name and directory of your certificate, as defined in
steps 1 and 2.
10. Reload the NGINXconfiguration:
service nginx reload
Securing FMEServer 365
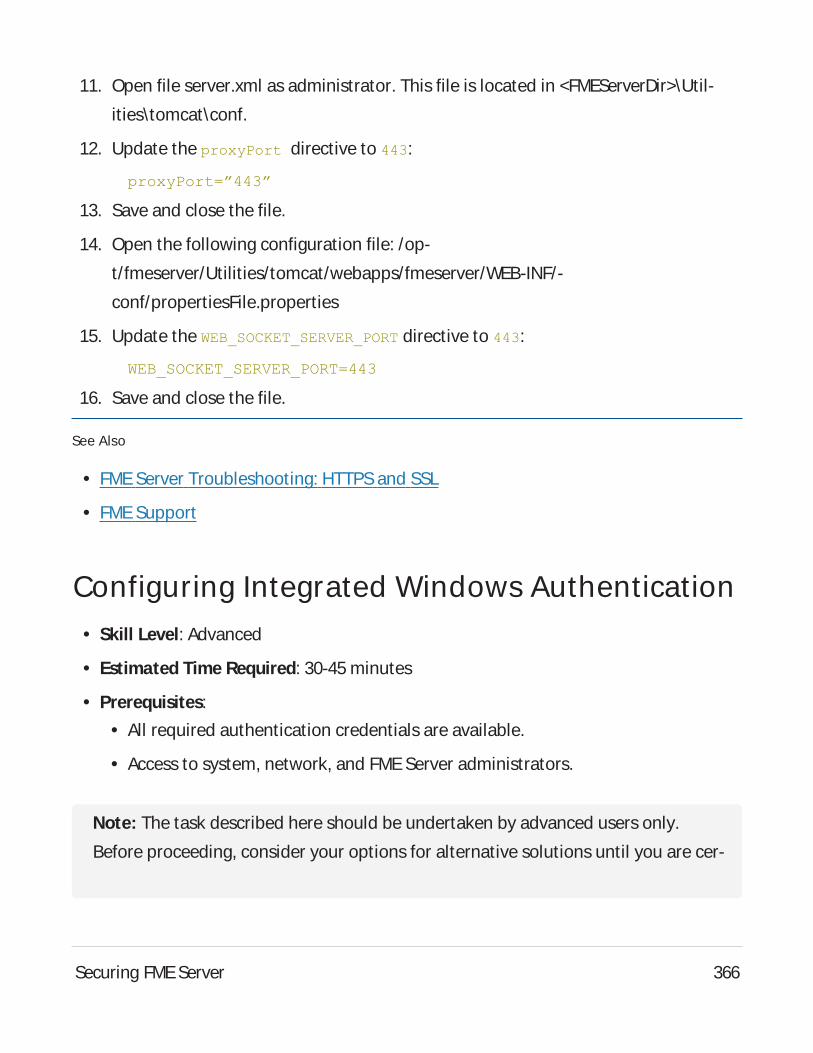
11. Open file server.xml as administrator. This file is located in <FMEServerDir>\Util-
ities\tomcat\conf.
12. Update the proxyPort directive to 443:
proxyPort=”443”
13. Save and close the file.
14. Open the following configuration file: /op-
t/fmeserver/Utilities/tomcat/webapps/fmeserver/WEB-INF/-
conf/propertiesFile.properties
15. Update the WEB_SOCKET_SERVER_PORT directive to 443:
WEB_SOCKET_SERVER_PORT=443
16. Save and close the file.
See Also
l FMEServer Troubleshooting: HTTPSand SSL
l FMESupport
Configuring Integrated Windows Authenticationl Skill Level: Advanced
l Estimated Time Required: 30-45 minutes
l Prerequisites:l All required authentication credentials are available.
l Access to system, network, and FME Server administrators.
Note: The task described here should be undertaken by advanced users only.
Before proceeding, consider your options for alternative solutions until you are cer-
Securing FMEServer 366
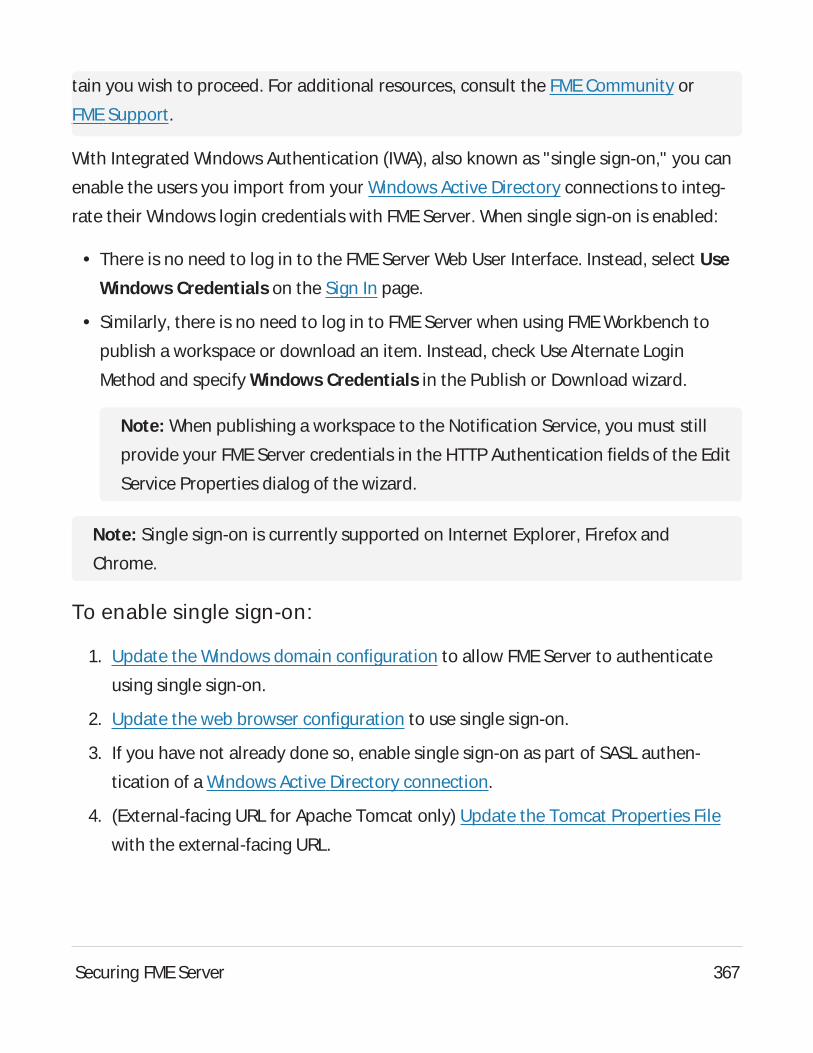
tain you wish to proceed. For additional resources, consult the FMECommunity or
FMESupport.
With Integrated Windows Authentication (IWA), also known as "single sign-on," you can
enable the users you import from your Windows Active Directory connections to integ-
rate their Windows login credentials with FMEServer. When single sign-on is enabled:
l There is no need to log in to the FMEServer Web User Interface. Instead, select Use
Windows Credentialson the Sign In page.
l Similarly, there is no need to log in to FMEServer when using FMEWorkbench to
publish a workspace or download an item. Instead, check Use Alternate Login
Method and specify Windows Credentials in the Publish or Download wizard.
Note: When publishing a workspace to the Notification Service, you must still
provide your FMEServer credentials in the HTTP Authentication fields of the Edit
Service Properties dialog of the wizard.
Note: Single sign-on is currently supported on Internet Explorer, Firefox and
Chrome.
To enable single sign-on:
1. Update the Windows domain configuration to allow FMEServer to authenticate
using single sign-on.
2. Update the web browser configuration to use single sign-on.
3. If you have not already done so, enable single sign-on as part of SASL authen-
tication of a Windows Active Directory connection.
4. (External-facing URL for Apache Tomcat only) Update the Tomcat Properties File
with the external-facing URL.
Securing FMEServer 367
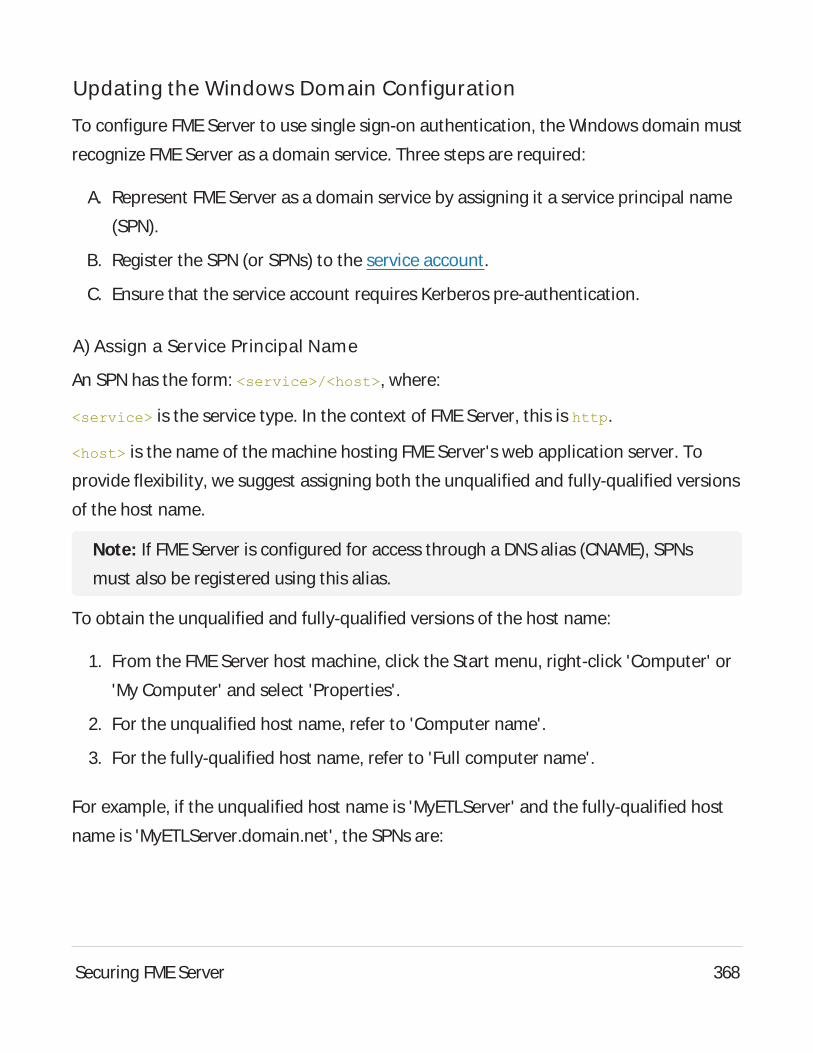
Updating the Windows Domain Configuration
To configure FMEServer to use single sign-on authentication, the Windows domain must
recognize FMEServer as a domain service. Three steps are required:
A. Represent FMEServer as a domain service by assigning it a service principal name
(SPN).
B. Register the SPN (or SPNs) to the service account.
C. Ensure that the service account requires Kerberos pre-authentication.
A) Assign a Service Principal Name
An SPN has the form: <service>/<host>, where:
<service> is the service type. In the context of FMEServer, this is http.
<host> is the name of the machine hosting FMEServer's web application server. To
provide flexibility, we suggest assigning both the unqualified and fully-qualified versions
of the host name.
Note: If FMEServer is configured for access through a DNSalias (CNAME), SPNs
must also be registered using this alias.
To obtain the unqualified and fully-qualified versions of the host name:
1. From the FME Server host machine, click the Start menu, right-click 'Computer' or
'My Computer' and select 'Properties'.
2. For the unqualified host name, refer to 'Computer name'.
3. For the fully-qualified host name, refer to 'Full computer name'.
For example, if the unqualified host name is 'MyETLServer' and the fully-qualified host
name is 'MyETLServer.domain.net', the SPNs are:
Securing FMEServer 368
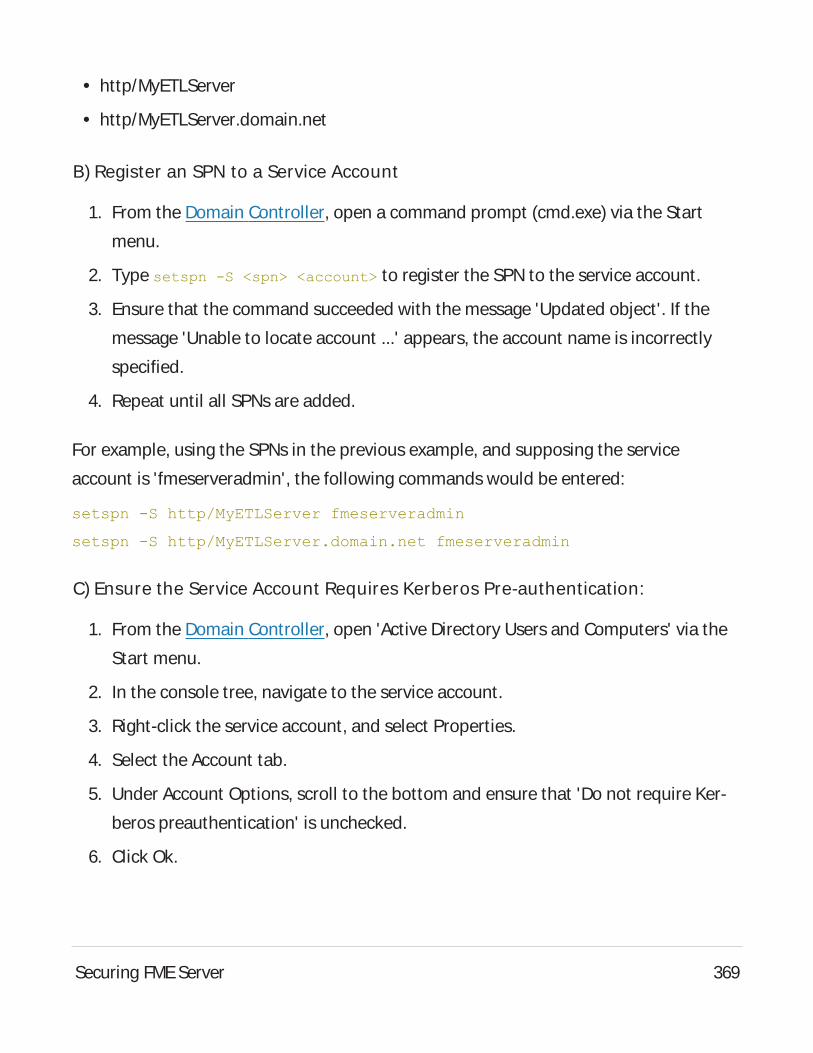
l http/MyETLServer
l http/MyETLServer.domain.net
B) Register an SPN to a Service Account
1. From the Domain Controller, open a command prompt (cmd.exe) via the Start
menu.
2. Type setspn -S <spn> <account> to register the SPN to the service account.
3. Ensure that the command succeeded with the message 'Updated object'. If the
message 'Unable to locate account ...' appears, the account name is incorrectly
specified.
4. Repeat until all SPNs are added.
For example, using the SPNs in the previous example, and supposing the service
account is 'fmeserveradmin', the following commands would be entered:
setspn -S http/MyETLServer fmeserveradmin
setspn -S http/MyETLServer.domain.net fmeserveradmin
C) Ensure the Service Account Requires Kerberos Pre-authentication:
1. From the Domain Controller, open 'Active Directory Users and Computers' via the
Start menu.
2. In the console tree, navigate to the service account.
3. Right-click the service account, and select Properties.
4. Select the Account tab.
5. Under Account Options, scroll to the bottom and ensure that 'Do not require Ker-
beros preauthentication' is unchecked.
6. Click Ok.
Securing FMEServer 369
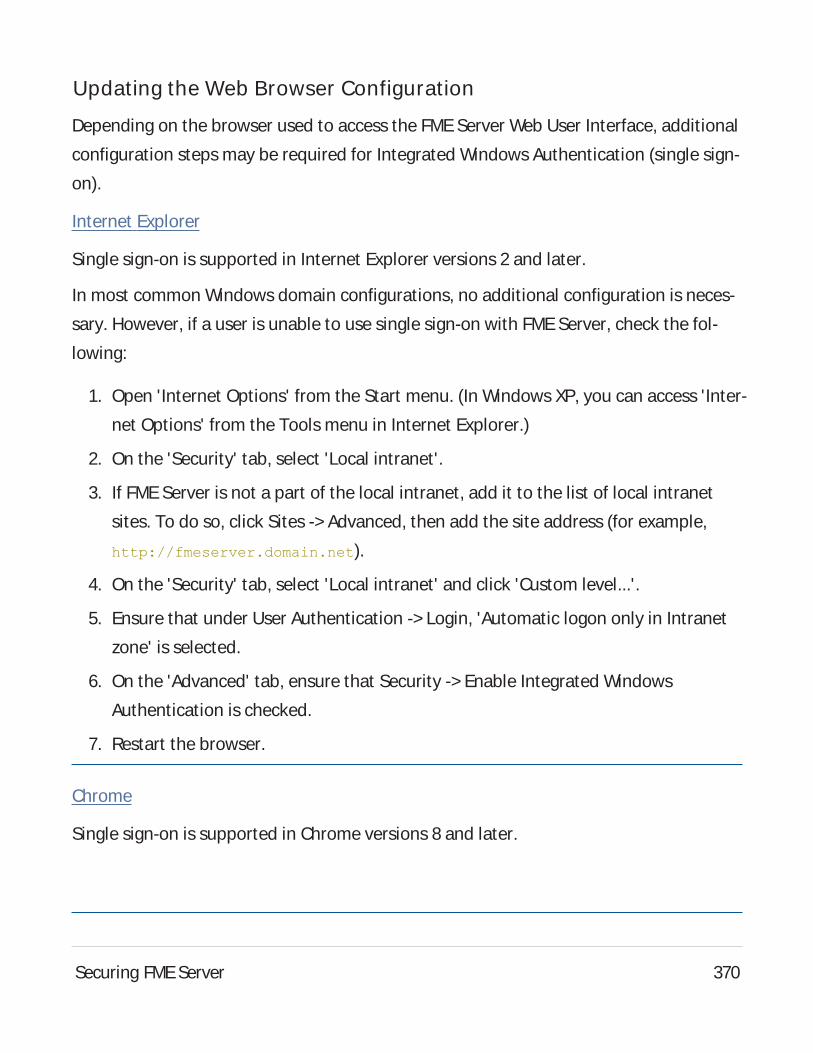
Updating the Web Browser Configuration
Depending on the browser used to access the FMEServer Web User Interface, additional
configuration steps may be required for Integrated Windows Authentication (single sign-
on).
Internet Explorer
Single sign-on is supported in Internet Explorer versions 2 and later.
In most common Windows domain configurations, no additional configuration is neces-
sary. However, if a user is unable to use single sign-on with FMEServer, check the fol-
lowing:
1. Open 'Internet Options' from the Start menu. (In Windows XP, you can access 'Inter-
net Options' from the Tools menu in Internet Explorer.)
2. On the 'Security' tab, select 'Local intranet'.
3. If FMEServer is not a part of the local intranet, add it to the list of local intranet
sites. To do so, click Sites -> Advanced, then add the site address (for example,
http://fmeserver.domain.net).
4. On the 'Security' tab, select 'Local intranet' and click 'Custom level...'.
5. Ensure that under User Authentication -> Login, 'Automatic logon only in Intranet
zone' is selected.
6. On the 'Advanced' tab, ensure that Security -> Enable Integrated Windows
Authentication is checked.
7. Restart the browser.
Chrome
Single sign-on is supported in Chrome versions 8 and later.
Securing FMEServer 370
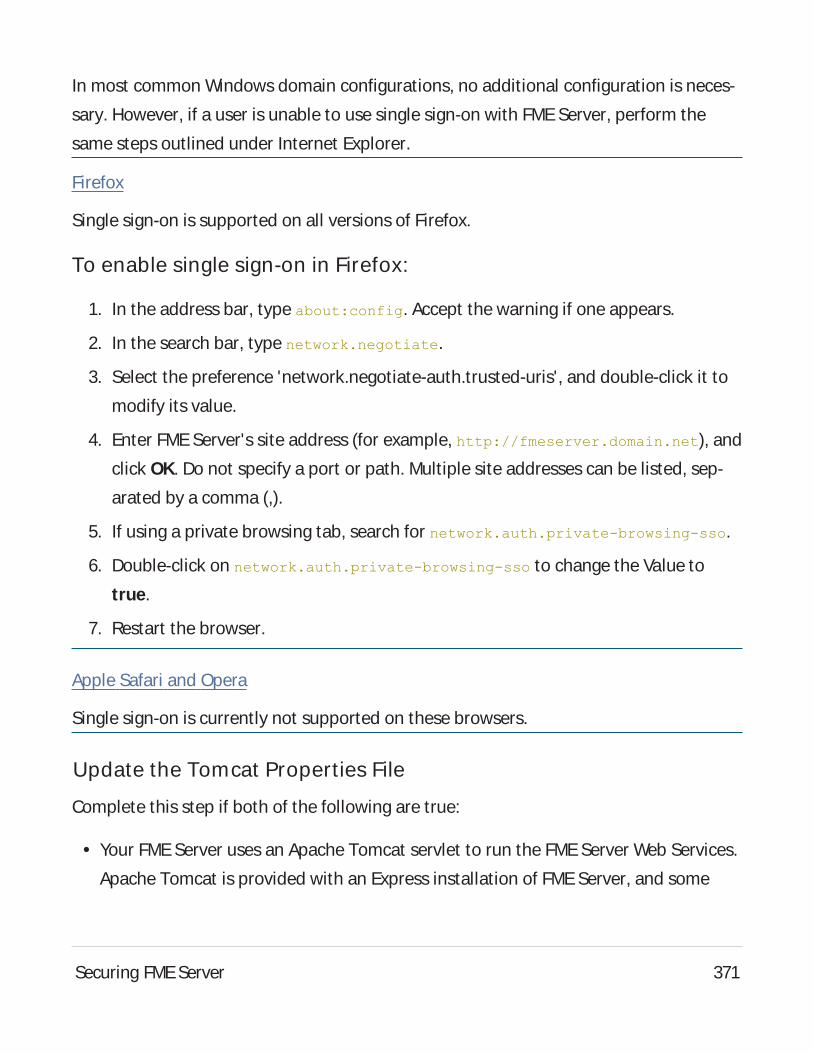
In most common Windows domain configurations, no additional configuration is neces-
sary. However, if a user is unable to use single sign-on with FMEServer, perform the
same steps outlined under Internet Explorer.
Firefox
Single sign-on is supported on all versions of Firefox.
To enable single sign-on in Firefox:
1. In the address bar, type about:config. Accept the warning if one appears.
2. In the search bar, type network.negotiate.
3. Select the preference 'network.negotiate-auth.trusted-uris', and double-click it to
modify its value.
4. Enter FMEServer's site address (for example, http://fmeserver.domain.net), and
click OK. Do not specify a port or path. Multiple site addresses can be listed, sep-
arated by a comma (,).
5. If using a private browsing tab, search for network.auth.private-browsing-sso.
6. Double-click on network.auth.private-browsing-sso to change the Value to
true.
7. Restart the browser.
Apple Safari and Opera
Single sign-on is currently not supported on these browsers.
Update the Tomcat Properties File
Complete this step if both of the following are true:
l Your FMEServer uses an Apache Tomcat servlet to run the FME Server Web Services.
Apache Tomcat is provided with an Express installation of FME Server, and some
Securing FMEServer 371
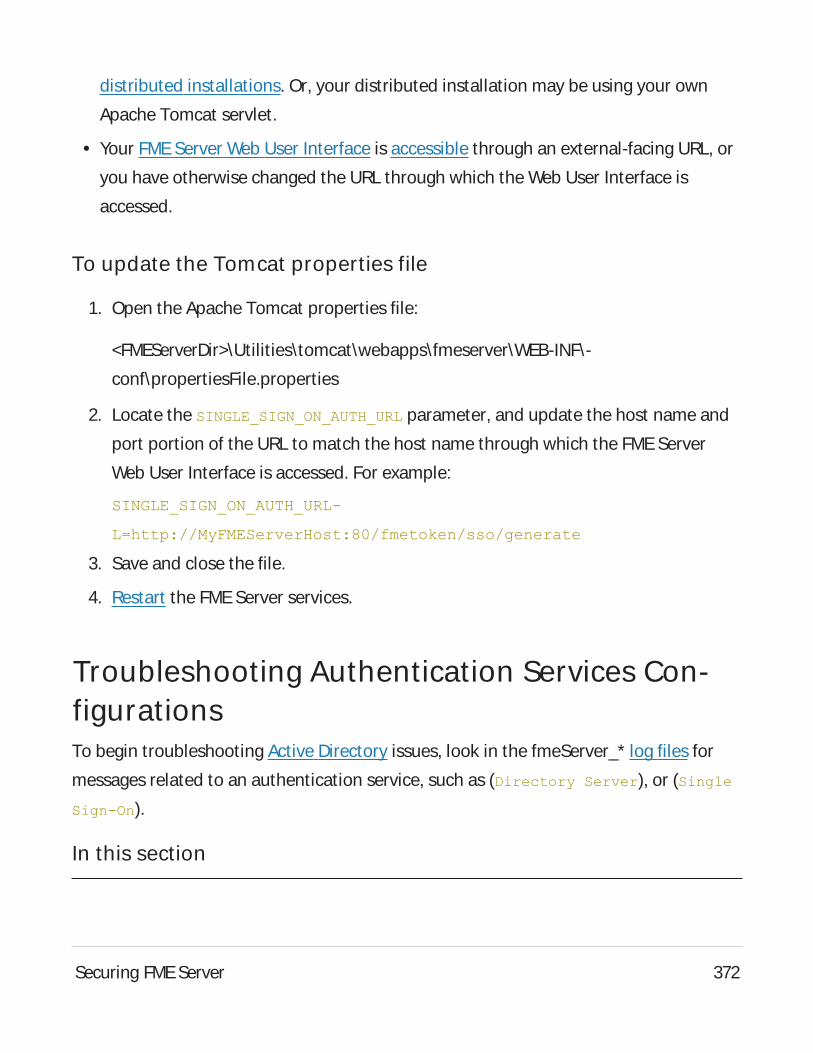
distributed installations. Or, your distributed installation may be using your own
Apache Tomcat servlet.
l Your FMEServer Web User Interface is accessible through an external-facing URL, or
you have otherwise changed the URL through which the Web User Interface is
accessed.
To update the Tomcat properties file
1. Open the Apache Tomcat properties file:
<FMEServerDir>\Utilities\tomcat\webapps\fmeserver\WEB-INF\-
conf\propertiesFile.properties
2. Locate the SINGLE_SIGN_ON_AUTH_URL parameter, and update the host name and
port portion of the URL to match the host name through which the FME Server
Web User Interface is accessed. For example:
SINGLE_SIGN_ON_AUTH_URL-
L=http://MyFMEServerHost:80/fmetoken/sso/generate
3. Save and close the file.
4. Restart the FMEServer services.
Troubleshooting Authentication Services Con-figurationsTo begin troubleshooting Active Directory issues, look in the fmeServer_* log files for
messages related to an authentication service, such as (Directory Server), or (Single
Sign-On).
In this section
Securing FMEServer 372
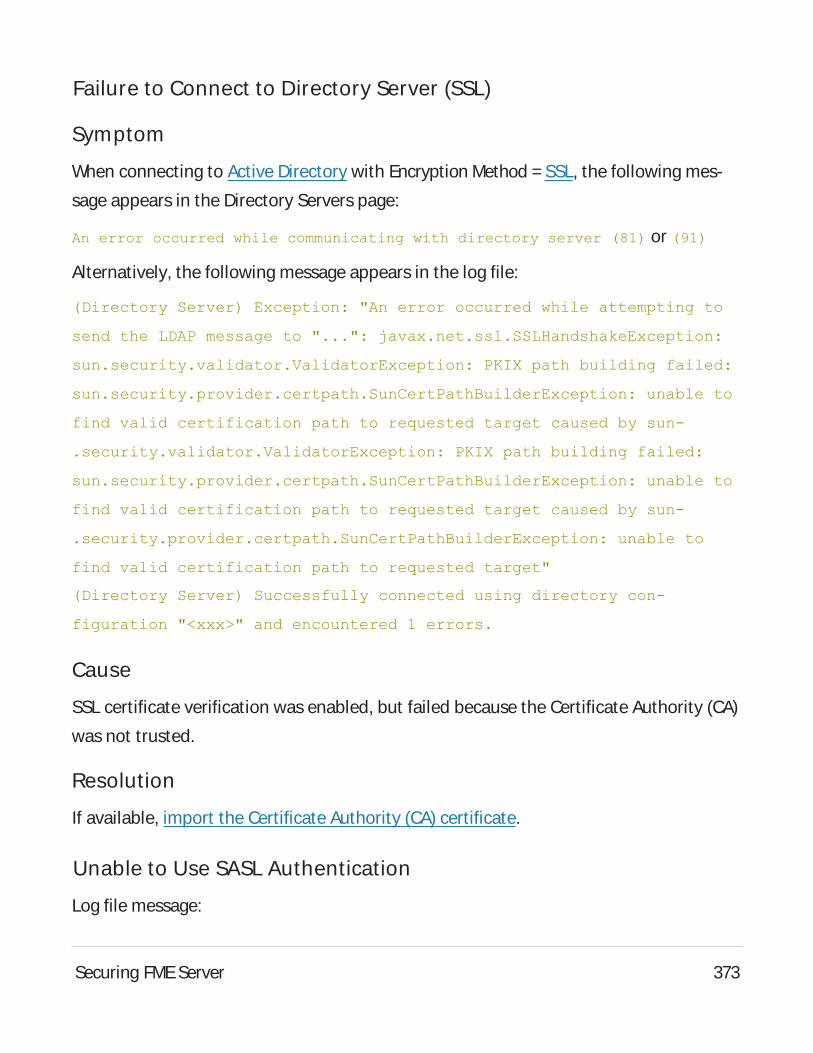
Failure to Connect to Directory Server (SSL)
Symptom
When connecting to Active Directory with Encryption Method = SSL, the following mes-
sage appears in the Directory Servers page:
An error occurred while communicating with directory server (81) or (91)
Alternatively, the following message appears in the log file:
(Directory Server) Exception: "An error occurred while attempting to
send the LDAP message to "...": javax.net.ssl.SSLHandshakeException:
sun.security.validator.ValidatorException: PKIX path building failed:
sun.security.provider.certpath.SunCertPathBuilderException: unable to
find valid certification path to requested target caused by sun-
.security.validator.ValidatorException: PKIX path building failed:
sun.security.provider.certpath.SunCertPathBuilderException: unable to
find valid certification path to requested target caused by sun-
.security.provider.certpath.SunCertPathBuilderException: unable to
find valid certification path to requested target"
(Directory Server) Successfully connected using directory con-
figuration "<xxx>" and encountered 1 errors.
Cause
SSL certificate verification was enabled, but failed because the Certificate Authority (CA)
was not trusted.
Resolution
If available, import the Certificate Authority (CA) certificate.
Unable to Use SASL Authentication
Log file message:
Securing FMEServer 373
(Directory Server) Not using SASL for authentication, because con-
figuration is incomplete.
Cause
Authentication Method = SASL is specified for a Active Directory connection, but the
Realm was not explicitly specified in the form of a fully-qualified domain name (FQDN).
Resolution
Use the Realm setting on the Edit Server Connection page to specify an FQDN.
Unsupported SASL Mechanism
Log file message:
(Directory Server) SASL mechanism "..." is not supported by Directory
Server.
Cause
Authentication Method = SASL is specified for a Active Directory connection, but the spe-
cified SASL mechanism was not supported by the directory server.
Resolution
The SASL field of a directory server connection must be set to an SASL mechanism that
is supported by the directory server.
To see the SASL mechanisms supported by a directory server:
From AD Explorer:
1. Connect to the Active Directory.
2. Right-click the Active Directory root, and select 'Properties...'.
3. Select the 'RootDSEAttributes' tab.
Securing FMEServer 374
4. The supported SASL mechanisms for this Active Directory server are listed under
the 'supportedSASLMechanisms' attribute.
MSDN:
1. Determine the version of Microsoft Windows®Server.
2. The supported SASL mechanisms are listed under in this MSDN article:
http://msdn.microsoft.com/en-us/library/cc223371.aspx.
Single Sign-On Authentication Failure (Incorrect Mechanism)
Log file message:
(Single Sign-On) Client attempted NTLM authentication; single sign-on
authentication supports only Kerberos V5 authentication. Refer to
single sign-on documentation for resolution.
(Single Sign-On) Failed authentication because of an invalid client
token. Refer to single sign-on documentation for resolution.
Cause 1
The service principal name (SPN) is missing.
Resolution 1
See Updating the Windows Domain Configuration for information on how to create and
register a service principal name (SPN).
Cause 2
The client is not using a supported web browser, or is using an incorrectly configured
web browser.
Resolution 2
Securing FMEServer 375
See Updating the Web Browser Configuration for information on supported browsers
and on how to update web browser configurations.
Single Sign-On Authentication Failure (Negotiation Error)
Log file messages (Symptom 1):
(Single Sign-On) Negotiation reported an error: "Failure unspecified
at GSS-API level (Mechanism level: Checksum failed)".
(Single Sign-On) Failed authentication because of an negotiation
error. Refer to single sign-on documentation for resolution.
Log files messages (Symptom 2):
(Single Sign-On) Negotiation reported a defective token from client:
"...".
(Single Sign-On) Failed authentication because of an negotiation
error. Refer to single sign-on documentation for resolution.
Log files messages (Symptom 3):
(Single Sign-On) Negotiation reported an error: "...".
(Single Sign-On) Failed authentication because of an negotiation
error. Refer to single sign-on documentation for resolution.
Cause 1
The service principal name (SPN) wasn't registered to the service account used by FME
Server.
Resolution 1
Ensure that the service account used for SPN registration matches the one specified in
the SSOUsername field of the Active Directory connection. For more information, see
Updating the Windows Domain Configuration.
Cause 2
Securing FMEServer 376
Single sign-on authentication was attempted and failed, and the user does not exist in
the configured Windows domain.
Resolution 2
Ensure that the user account used to log into the client machine is a part of the Win-
dows domain that FMEServer is configured to use.
For example, if FMEServer is configured to use Active Directory for 'Domain1', clients
logged in using a 'Domain2' user account will not be able to authenticate with FME
Server.
Single Sign-On Authentication Failure (Service Account)
Log file message:
(Single Sign-On) Failed authentication using pre-authenticated cre-
dentials (for a service account).
(Single Sign-On) Failed to create server credentials. Ensure that pre-
authenticated credentials (for a service account) are correctly spe-
cified in single sign-on configuration.
Cause 1
The service account used by FMEServer was not correctly specified. The account name
or password may be incorrect, or both.
Resolution 1
Ensure that the service account details are correctly specified in the SSOUsername and
SSOPassword fields of an Active Directory connection.
Cause 2
Authentication Method SASL is not specified, or the SASL Mechanism is not GSSAPI.
Resolution 2
Securing FMEServer 377
SASL must be specified as the Authentication Method and GSSAPI must be specified as
the SASL Mechanism in the Active Directory connection.
See Also
l SASL Authentication
Single Sign-On Authentication Failure (Cross-Domain User)
Log file messages:
(Single Sign-On) Negotiation complete; authentication granted for user
"...".
(Single Sign-On) Failed authentication because user "..." could not be
found in Active Directory.
Cause 1
Single sign-on authentication was attempted and succeeded, but the user does not exist
in the configured Windows domain.
Resolution 1
Ensure that the user account used to log into the client machine is a part of the Win-
dows domain that FMEServer is configured to use.
For example, if FMEServer is configured to use Active Directory for 'Domain1', clients
logged in using a 'Domain2' user account will not be able to authenticate with FME
Server.
Cause 2
Single sign-on authentication was attempted and succeeded, but FMEServer did not
have the right privileges to find the user. This may be caused by the service account set-
ting 'Do not require Kerberos preauthentication'.
Securing FMEServer 378
Resolution 2
Kerberos pre-authentication must be enabled for the service account. See Updating the
Windows Domain Configuration for information on how to configure the service
account.
Single Sign-On Authentication Failure (Same Machine Access)
Log file messages:
(Single Sign-On) Negotiation reported a defective token from client:
"Defective token detected (Mechanism level: GSSHeader did not find the
right tag)".
(Single Sign-On) Failed authentication because of an negotiation
error. Refer to single sign-on documentation for resolution.
Cause
Single sign-on authentication was attempted on the same machine as FMEServer.
Resolution
Use a different machine to access FMEServer.
SASL Authentication Failure 1
Symptom
AActive Directory connection species SASL as Authentication Methodand GSSAPI as
SASL Mechanism, and the following error appears in the log file:
(Directory Server) Exception: "LDAPException(resultCode=82 (local
error), errorMessage='An error occurred while attempting to initialize
the JAAS login context for GSSAPI authentication: javax.se-
curity.auth.login.LoginException: Pre-authentication information was
invalid (24) caused by KrbException: Pre-authentication information
Securing FMEServer 379
was invalid (24) caused by KrbException: Identifier doesn't match
expected value (906)')"
Or
(Directory Server) Exception: "LDAPException(resultCode=82 (local
error), errorMessage='An error occurred while attempting to initialize
the JAAS login context for GSSAPI authentication: javax.se-
curity.auth.login.LoginException: Client not found in Kerberos data-
base (6) caused by KrbException: Client not found in Kerberos database
(6) caused by KrbException: Identifier doesn't match expected value
(906)')"
Cause
The user's login password was incorrectly specified.
Resolution
Specify the correct password.
SASL Authentication Failure 2
Symptom
When using SASL authentication (Kerberos V5), the following error appears in the log
file:
(Directory Server) Authenticating user "..." using SASL mechanism
"GSSAPI" with KDC address "..." and realm "..."...
(Directory Server) Successfully established a new connection to "...".
Above message may appear multiple times.
(Directory Server) Failed to authenticate user.
Cause
Securing FMEServer 380
FMEServer did not have the right privileges to find the user. This may be caused by the
service account setting 'Do not require Kerberos preauthentication'.
Resolution
Kerberos pre-authentication must be enabled for the service account. See Updating the
Windows Domain Configuration for information on how to configure the service
account.
SASL Authentication Failure 3
Symptom
When using SASL authentication (Kerberos V5), the following error appears in the log
file:
(Directory Server) Exception: "LDAPException(resultCode=82 (local
error), errorMessage='An error occurred while attempting to initialize
the JAAS login context for GSSAPI authentication: javax.se-
curity.auth.login.LoginException: Clock skew too great (37) caused by
KrbException: Clock skew too great (37) caused by KrbException: Iden-
tifier doesn't match expected value (906)')"
Cause
The authentication failure is caused by a significant discrepancy in the system time
between the FMEServer host machine and the directory server.
Resolution
Update the system time on one or both systems.
SASL Authentication Failure 4
Symptom
Securing FMEServer 381
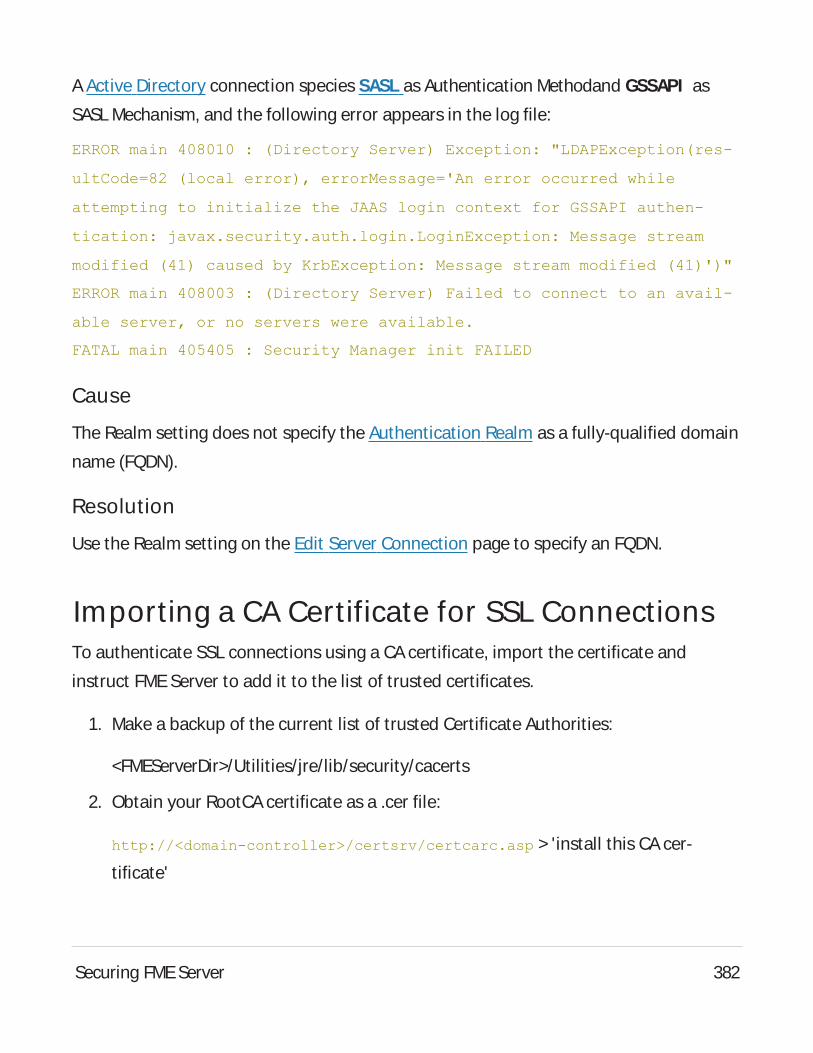
AActive Directory connection species SASL as Authentication Methodand GSSAPI as
SASL Mechanism, and the following error appears in the log file:
ERROR main 408010 : (Directory Server) Exception: "LDAPException(res-
ultCode=82 (local error), errorMessage='An error occurred while
attempting to initialize the JAAS login context for GSSAPI authen-
tication: javax.security.auth.login.LoginException: Message stream
modified (41) caused by KrbException: Message stream modified (41)')"
ERROR main 408003 : (Directory Server) Failed to connect to an avail-
able server, or no servers were available.
FATAL main 405405 : Security Manager init FAILED
Cause
The Realm setting does not specify the Authentication Realm as a fully-qualified domain
name (FQDN).
Resolution
Use the Realm setting on the Edit Server Connection page to specify an FQDN.
Importing a CA Certificate for SSL ConnectionsTo authenticate SSL connections using a CAcertificate, import the certificate and
instruct FME Server to add it to the list of trusted certificates.
1. Make a backup of the current list of trusted Certificate Authorities:
<FMEServerDir>/Utilities/jre/lib/security/cacerts
2. Obtain your RootCAcertificate as a .cer file:
http://<domain-controller>/certsrv/certcarc.asp > 'install this CAcer-
tificate'
Securing FMEServer 382
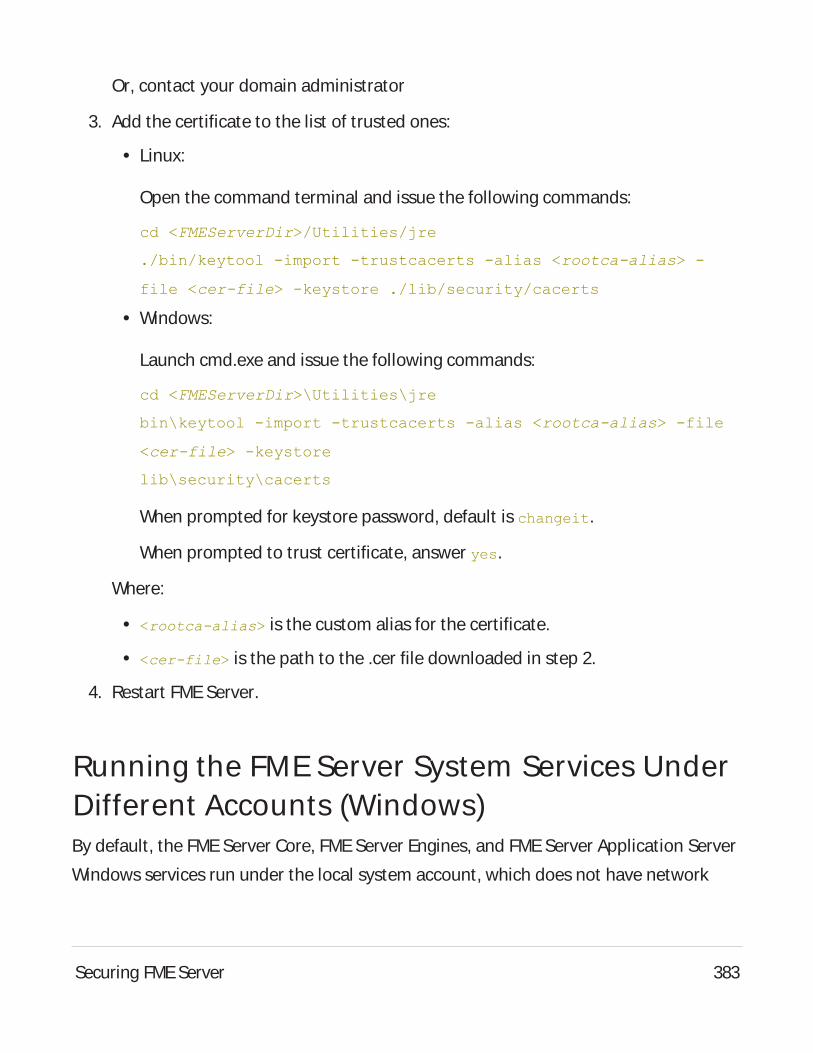
Or, contact your domain administrator
3. Add the certificate to the list of trusted ones:
l Linux:
Open the command terminal and issue the following commands:
cd <FMEServerDir>/Utilities/jre
./bin/keytool -import -trustcacerts -alias <rootca-alias> -
file <cer-file> -keystore ./lib/security/cacerts
l Windows:
Launch cmd.exe and issue the following commands:
cd <FMEServerDir>\Utilities\jre
bin\keytool -import -trustcacerts -alias <rootca-alias> -file
<cer-file> -keystore
lib\security\cacerts
When prompted for keystore password, default is changeit.
When prompted to trust certificate, answer yes.
Where:
l <rootca-alias> is the custom alias for the certificate.
l <cer-file> is the path to the .cer file downloaded in step 2.
4. Restart FMEServer.
Running the FME Server System Services UnderDifferent Accounts (Windows)By default, the FMEServer Core, FME Server Engines, and FME Server Application Server
Windows services run under the local system account, which does not have network
Securing FMEServer 383
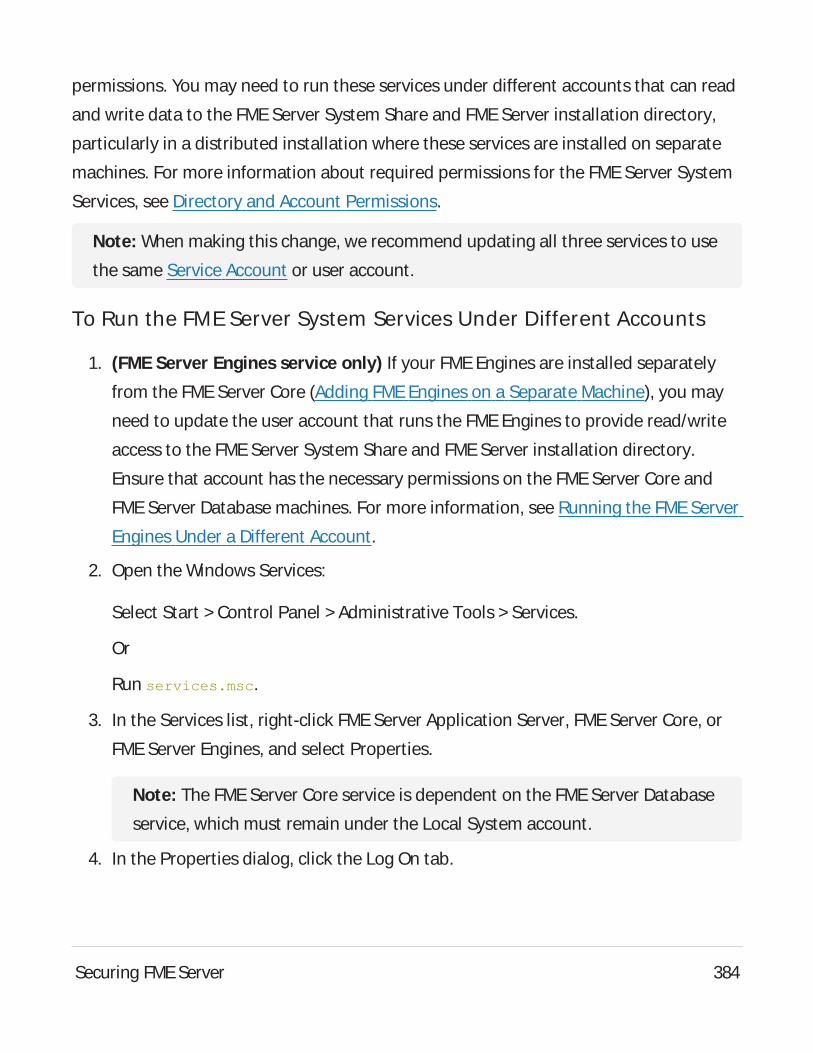
permissions. You may need to run these services under different accounts that can read
and write data to the FME Server System Share and FME Server installation directory,
particularly in a distributed installation where these services are installed on separate
machines. For more information about required permissions for the FMEServer System
Services, see Directory and Account Permissions.
Note: When making this change, we recommend updating all three services to use
the same Service Account or user account.
To Run the FME Server System Services Under Different Accounts
1. (FME Server Engines service only) If your FME Engines are installed separately
from the FME Server Core (Adding FMEEngines on a Separate Machine), you may
need to update the user account that runs the FMEEngines to provide read/write
access to the FME Server System Share and FME Server installation directory.
Ensure that account has the necessary permissions on the FMEServer Core and
FME Server Database machines. For more information, see Running the FME Server
Engines Under a Different Account.
2. Open the Windows Services:
Select Start > Control Panel > Administrative Tools > Services.
Or
Run services.msc.
3. In the Services list, right-click FME Server Application Server, FMEServer Core, or
FME Server Engines, and select Properties.
Note: The FME Server Core service is dependent on the FME Server Database
service, which must remain under the Local System account.
4. In the Properties dialog, click the Log On tab.
Securing FMEServer 384
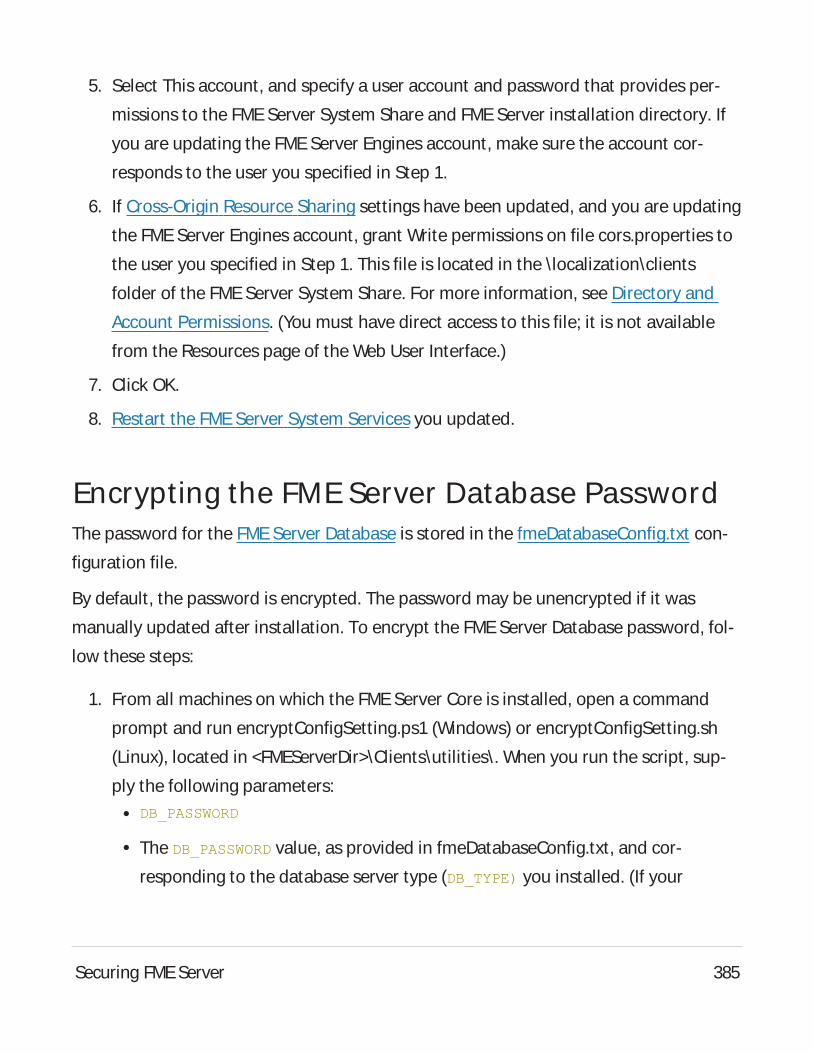
5. Select This account, and specify a user account and password that provides per-
missions to the FMEServer System Share and FME Server installation directory. If
you are updating the FME Server Engines account, make sure the account cor-
responds to the user you specified in Step 1.
6. If Cross-Origin Resource Sharing settings have been updated, and you are updating
the FME Server Engines account, grant Write permissions on file cors.properties to
the user you specified in Step 1. This file is located in the \localization\clients
folder of the FME Server System Share. For more information, see Directory and
Account Permissions. (You must have direct access to this file; it is not available
from the Resources page of the Web User Interface.)
7. Click OK.
8. Restart the FMEServer System Services you updated.
Encrypting the FME Server Database PasswordThe password for the FMEServer Database is stored in the fmeDatabaseConfig.txt con-
figuration file.
By default, the password is encrypted. The password may be unencrypted if it was
manually updated after installation. To encrypt the FME Server Database password, fol-
low these steps:
1. From all machines on which the FME Server Core is installed, open a command
prompt and run encryptConfigSetting.ps1 (Windows) or encryptConfigSetting.sh
(Linux), located in <FMEServerDir>\Clients\utilities\. When you run the script, sup-
ply the following parameters:l DB_PASSWORD
l The DB_PASSWORD value, as provided in fmeDatabaseConfig.txt, and cor-
responding to the database server type (DB_TYPE) you installed. (If your
Securing FMEServer 385
FME Server is an Express installation, your database server (DB_TYPE) is post-
gresql. If your FME Server is a Custom installation, your database server (DB_
TYPE) is either postgresql, sqlserver, or oracle.)
For example:
encryptConfigSetting.ps1 DB_PASSWORD fmeserver
2. Copy the encrypted password that is generated from the command prompt output
and paste it over the unencrypted DB_PASSWORD value in fmeDatabaseConfig.txt.
3. Save fmeDatabaseConfig.txt, and restart FME Server.
WARNING: Any change to System Encryption, including generating a new custom
encryption key, or reverting to default encryption, also affects the FME Server Data-
base password. To ensure this password is based on the current key, you must per-
form these steps again following any changes performed in System Encryption.
Securing FMEServer 386
Other Tasks
Licensing and Administration Tasks
Licensing
Select System Configuration > Licensing.
License files are installed, by default, to: Windows: C:\ProgramData\Safe Soft-
ware\FME Server\licenses Linux: /opt/fmeserver/licensesDynamic Engine (CPU
Usage) licensing is not available for engines on FMECloud.
Automatic Mode (Recommended)
If your FME Server host machine has an internet connection, you can request and install
a license online without any need for downloading and re-uploading a license file.
Note:
Licensing FMEServer over the internet requires no inbound connection. For more
information, see FMEServer Automatic Licensing URLs.
If you purchased credits for Dynamic Engines (CPU Usage), automatic mode only
is supported. Manual mode licensing (below) is not supported.
1. Open the FMEServer Web User Interface as a user assigned to the fmesuperuser
role. If none of your FME Engines are licensed, you will see a prompt to activate
FME Server. Click on the prompt. Otherwise, select System Configuration > Licens-
ing.
Other Tasks 387

2. Click Request New License.
3. Complete the fields on the Request a New License page. If you have a product
Serial Number, be sure to provide it. If not, you will receive a 7-day evaluation
license, which you can extend to 60 days (see below).
Note: In addition to licenses for standard FME Engines, an evaluation license
that is requested in Automatic Mode includes 100 hours of Dynamic Engine
(CPU Usage) credits.
4. Licensing Mode: Select Automatic.
5. Click OK.
6. Amessage indicates that your license is installed, and your available engines
appear momentarily on the Engines page.
Note: If the Serial Number you provided includes Dynamic Engines (CPU
Usage), they are not configured to start by default. You can start and configure
your Dynamic Engines on the Engines page.
Manual Mode
If you prefer not to use an internet connection for licensing, or if your FME Server host
machine does not have an internet connection, use this process to install a license.
Note: If you purchased credits for Dynamic Engines (CPU Usage), manual mode
licensing is not supported. Use automatic mode for licensing (above). For more
information, contact your Safe Software sales representative.
1. Open the FMEServer Web User Interface as a user assigned to the fmesuperuser
role. If none of your FME Server engines are licensed, you will see a prompt to activ-
ate FME Server. Click on the prompt. Otherwise, select System Configuration >
Licensing.
Other Tasks 388
2. Click Request New License.
3. Complete the fields on the Request a New License page. If you have a product
Serial Number, be sure to provide it. If not, you will receive a 7-day evaluation
license, which you can extend to 60 days (see below).
4. Licensing Mode: Select Manual.
5. Click OK. A license request .json file downloads.
6. Email the .json file to [email protected].
7. You will receive an email from Safe Software with a license file, which has a
.fmelic extension. Download the file.
8. Return to the Licensing page. Under Standard Engines, click Upload License File
and select the .fmelic file to upload. Or, drag and drop the .fmelic file onto the
page under Standard Engines. Amessage indicates that it is installed, and your
available engines appear on the Engines page.
Extending an Evaluation License
If you installed a 7-day evaluation license, you should have an email from [email protected]
com that allows you to extend the license to 60 days.
Automatic Mode (Recommended)
If your FME Server host machine has an internet connection, you can extend an eval-
uation license online without any need for downloading and re-uploading a license file.
1. Open the email and click the link as instructed.
2. Aweb page opens indicating the request was successful. Additionally, a link is
provided to download the license file. Click the link to download the file for safe-
keeping.
Other Tasks 389
3. Return to System Configuration > Licensing and click Refresh License. The
license should now be extended accordingly. The EXPIRESfield shows the new
expiry date.
Manual Mode
If you prefer not to use an internet connection for licensing, or if your FME Server host
machine does not have an internet connection, use this process to extend an evaluation
license.
1. Open the email and click the link as instructed.
2. Aweb page opens indicating the request was successful. Additionally, a link is
provided to download the license file. Click the link to download the file.
3. Return to System Configuration > Licensing and click Upload License File. Or,
drag and drop the file onto the page. (You may need to move the license to a loc-
ation where it can be accessed). Amessage indicates that it is installed. The license
should now be extended accordingly. The EXPIRESfield shows the new expiry date.
Problems?
l Contact [email protected].
See Also
l FMEServer Licensing Walk-Through
l FMEServer Automatic Licensing URLs
l FME Engines
Configuring the FME Engine
In this section
Other Tasks 390
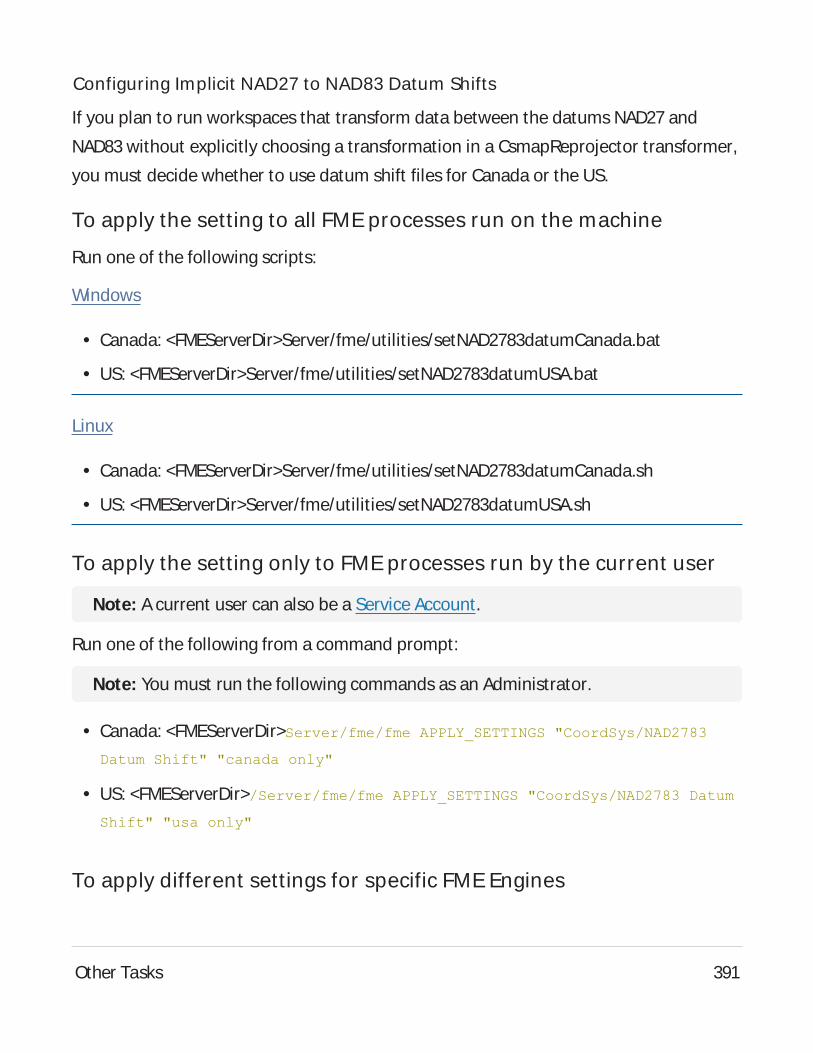
Configuring Implicit NAD27 to NAD83 Datum Shifts
If you plan to run workspaces that transform data between the datums NAD27 and
NAD83 without explicitly choosing a transformation in a CsmapReprojector transformer,
you must decide whether to use datum shift files for Canada or the US.
To apply the setting to all FME processes run on the machine
Run one of the following scripts:
Windows
l Canada: <FMEServerDir>Server/fme/utilities/setNAD2783datumCanada.bat
l US: <FMEServerDir>Server/fme/utilities/setNAD2783datumUSA.bat
Linux
l Canada: <FMEServerDir>Server/fme/utilities/setNAD2783datumCanada.sh
l US: <FMEServerDir>Server/fme/utilities/setNAD2783datumUSA.sh
To apply the setting only to FME processes run by the current user
Note: Acurrent user can also be a Service Account.
Run one of the following from a command prompt:
Note: You must run the following commands as an Administrator.
l Canada: <FMEServerDir>Server/fme/fme APPLY_SETTINGS "CoordSys/NAD2783
Datum Shift" "canada only"
l US: <FMEServerDir>/Server/fme/fme APPLY_SETTINGS "CoordSys/NAD2783 Datum
Shift" "usa only"
To apply different settings for specific FME Engines
Other Tasks 391
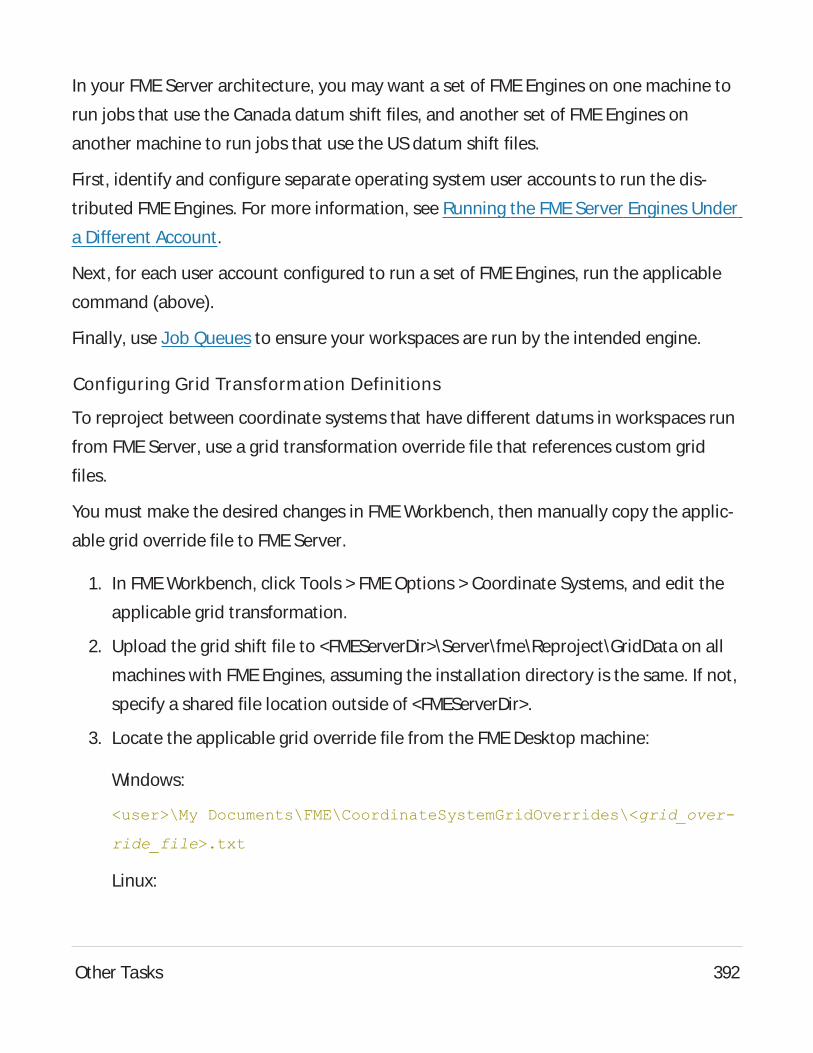
In your FME Server architecture, you may want a set of FME Engines on one machine to
run jobs that use the Canada datum shift files, and another set of FMEEngines on
another machine to run jobs that use the USdatum shift files.
First, identify and configure separate operating system user accounts to run the dis-
tributed FMEEngines. For more information, see Running the FME Server Engines Under
a Different Account.
Next, for each user account configured to run a set of FME Engines, run the applicable
command (above).
Finally, use Job Queues to ensure your workspaces are run by the intended engine.
Configuring Grid Transformation Definitions
To reproject between coordinate systems that have different datums in workspaces run
from FMEServer, use a grid transformation override file that references custom grid
files.
You must make the desired changes in FMEWorkbench, then manually copy the applic-
able grid override file to FMEServer.
1. In FMEWorkbench, click Tools > FME Options > Coordinate Systems, and edit the
applicable grid transformation.
2. Upload the grid shift file to <FMEServerDir>\Server\fme\Reproject\GridData on all
machines with FMEEngines, assuming the installation directory is the same. If not,
specify a shared file location outside of <FMEServerDir>.
3. Locate the applicable grid override file from the FMEDesktop machine:
Windows:
<user>\My Documents\FME\CoordinateSystemGridOverrides\<grid_over-
ride_file>.txt
Linux:
Other Tasks 392
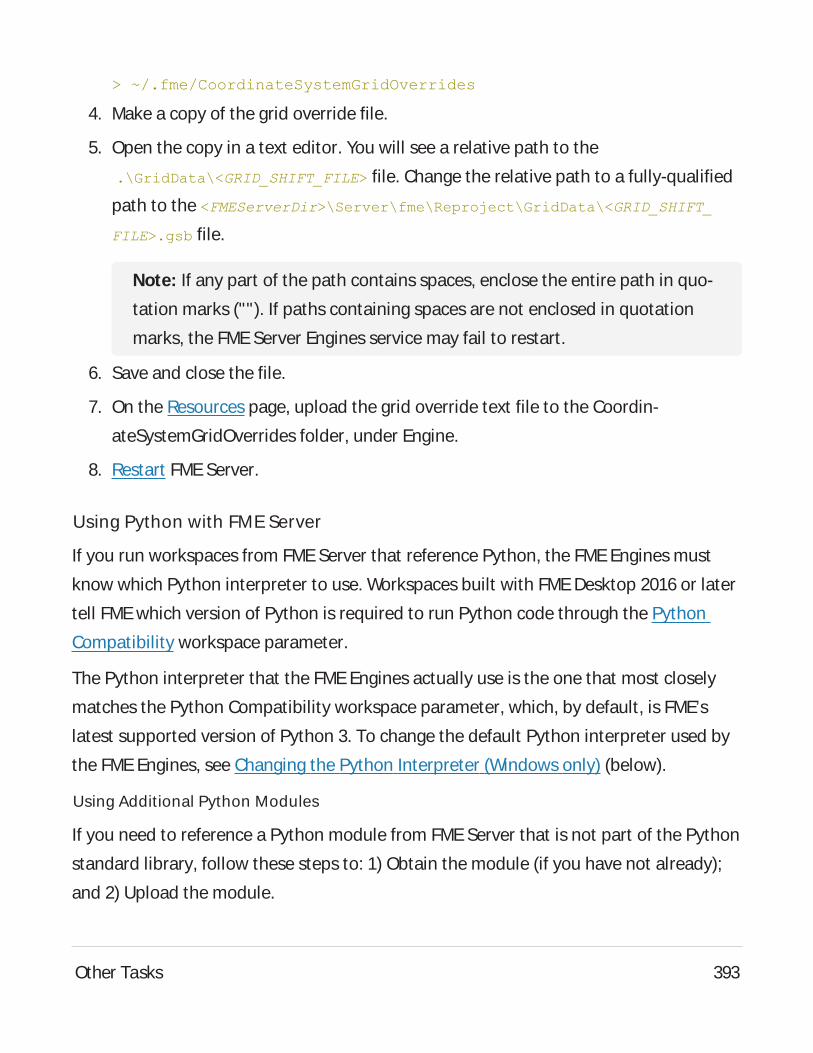
> ~/.fme/CoordinateSystemGridOverrides
4. Make a copy of the grid override file.
5. Open the copy in a text editor. You will see a relative path to the
.\GridData\<GRID_SHIFT_FILE> file. Change the relative path to a fully-qualified
path to the <FMEServerDir>\Server\fme\Reproject\GridData\<GRID_SHIFT_
FILE>.gsb file.
Note: If any part of the path contains spaces, enclose the entire path in quo-
tation marks (""). If paths containing spaces are not enclosed in quotation
marks, the FMEServer Engines service may fail to restart.
6. Save and close the file.
7. On the Resources page, upload the grid override text file to the Coordin-
ateSystemGridOverrides folder, under Engine.
8. Restart FMEServer.
Using Python with FME Server
If you run workspaces from FME Server that reference Python, the FME Engines must
know which Python interpreter to use. Workspaces built with FMEDesktop 2016 or later
tell FME which version of Python is required to run Python code through the Python
Compatibility workspace parameter.
The Python interpreter that the FMEEngines actually use is the one that most closely
matches the Python Compatibility workspace parameter, which, by default, is FME’s
latest supported version of Python 3. To change the default Python interpreter used by
the FMEEngines, see Changing the Python Interpreter (Windows only) (below).
Using Additional Python Modules
If you need to reference a Python module from FMEServer that is not part of the Python
standard library, follow these steps to: 1) Obtain the module (if you have not already);
and 2) Upload the module.
Other Tasks 393
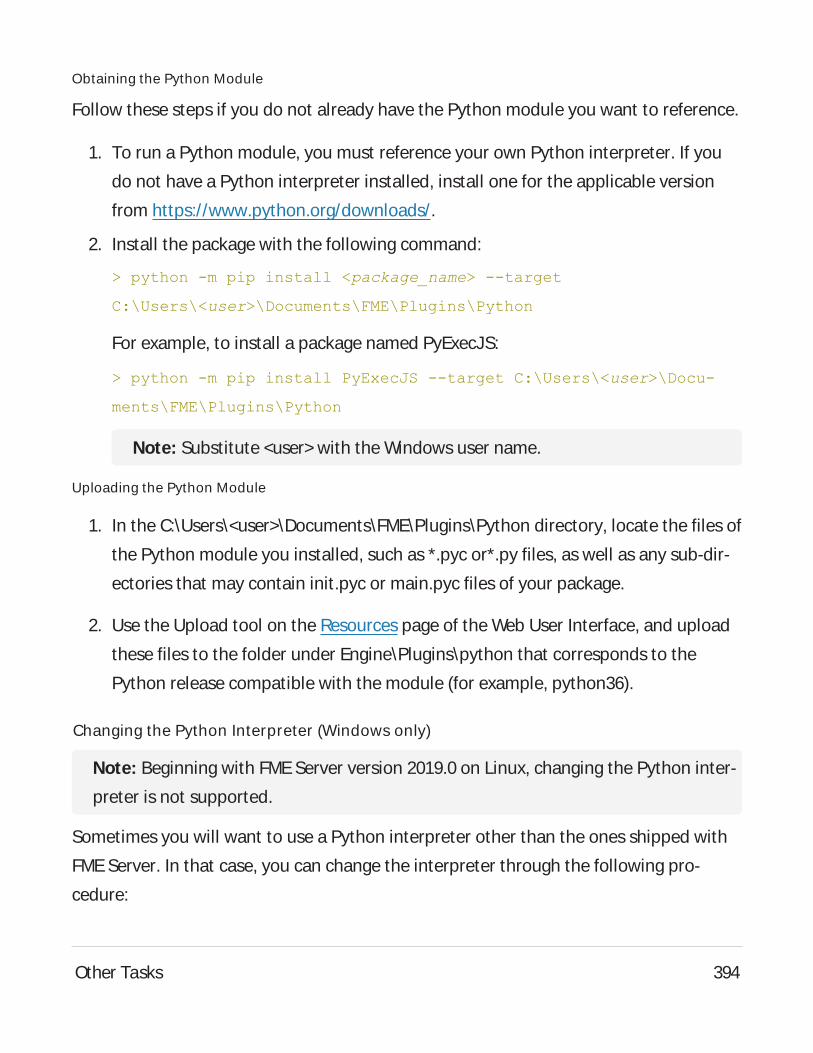
Obtaining the Python Module
Follow these steps if you do not already have the Python module you want to reference.
1. To run a Python module, you must reference your own Python interpreter. If you
do not have a Python interpreter installed, install one for the applicable version
from https://www.python.org/downloads/.
2. Install the package with the following command:
> python -m pip install <package_name> --target
C:\Users\<user>\Documents\FME\Plugins\Python
For example, to install a package named PyExecJS:
> python -m pip install PyExecJS --target C:\Users\<user>\Docu-
ments\FME\Plugins\Python
Note: Substitute <user> with the Windows user name.
Uploading the Python Module
1. In the C:\Users\<user>\Documents\FME\Plugins\Python directory, locate the files of
the Python module you installed, such as *.pyc or*.py files, as well as any sub-dir-
ectories that may contain init.pyc or main.pyc files of your package.
2. Use the Upload tool on the Resources page of the Web User Interface, and upload
these files to the folder under Engine\Plugins\python that corresponds to the
Python release compatible with the module (for example, python36).
Changing the Python Interpreter (Windows only)
Note: Beginning with FME Server version 2019.0 on Linux, changing the Python inter-
preter is not supported.
Sometimes you will want to use a Python interpreter other than the ones shipped with
FMEServer. In that case, you can change the interpreter through the following pro-
cedure:
Other Tasks 394
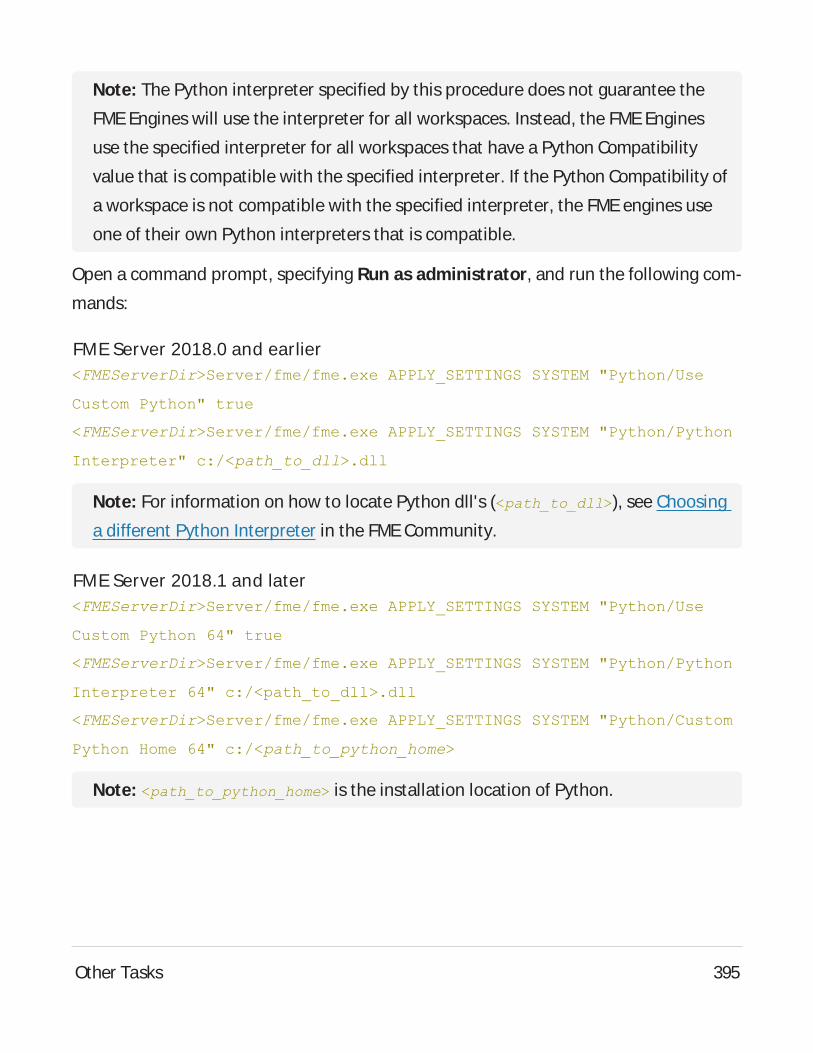
Note: The Python interpreter specified by this procedure does not guarantee the
FMEEngines will use the interpreter for all workspaces. Instead, the FMEEngines
use the specified interpreter for all workspaces that have a Python Compatibility
value that is compatible with the specified interpreter. If the Python Compatibility of
a workspace is not compatible with the specified interpreter, the FME engines use
one of their own Python interpreters that is compatible.
Open a command prompt, specifying Run as administrator, and run the following com-
mands:
FME Server 2018.0 and earlier<FMEServerDir>Server/fme/fme.exe APPLY_SETTINGS SYSTEM "Python/Use
Custom Python" true
<FMEServerDir>Server/fme/fme.exe APPLY_SETTINGS SYSTEM "Python/Python
Interpreter" c:/<path_to_dll>.dll
Note: For information on how to locate Python dll's (<path_to_dll>), see Choosing
a different Python Interpreter in the FMECommunity.
FME Server 2018.1 and later<FMEServerDir>Server/fme/fme.exe APPLY_SETTINGS SYSTEM "Python/Use
Custom Python 64" true
<FMEServerDir>Server/fme/fme.exe APPLY_SETTINGS SYSTEM "Python/Python
Interpreter 64" c:/<path_to_dll>.dll
<FMEServerDir>Server/fme/fme.exe APPLY_SETTINGS SYSTEM "Python/Custom
Python Home 64" c:/<path_to_python_home>
Note: <path_to_python_home> is the installation location of Python.
Other Tasks 395
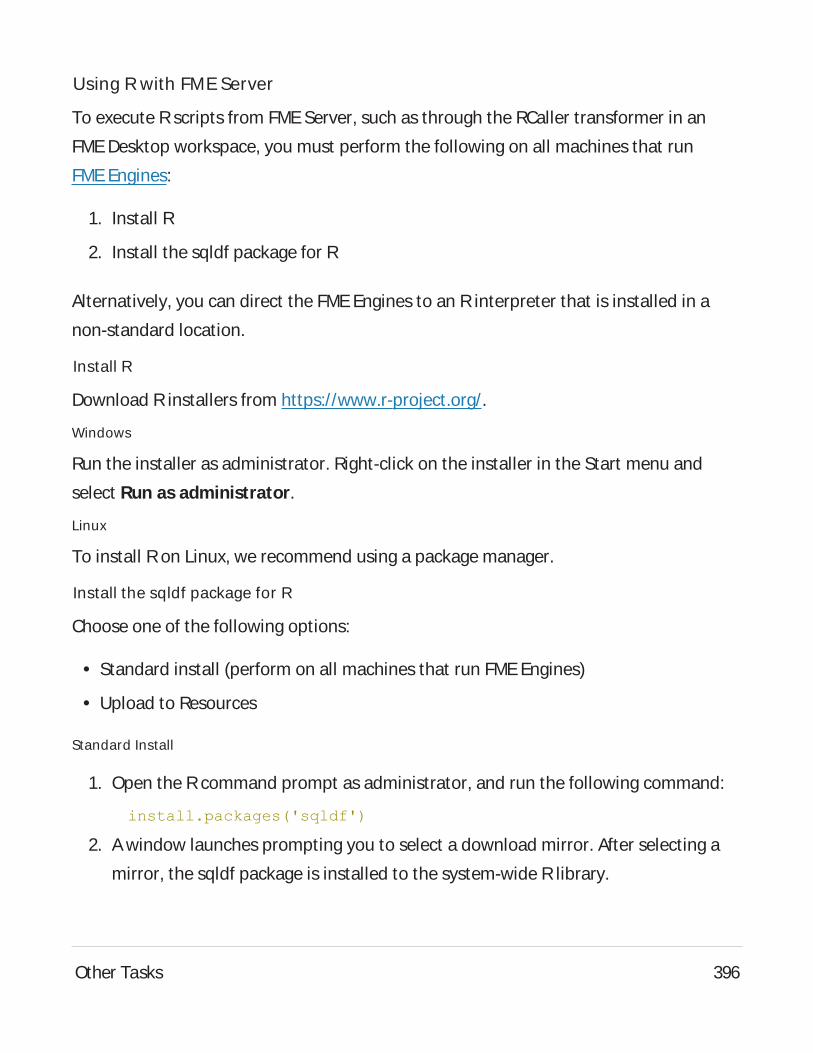
Using R with FME Server
To execute Rscripts from FME Server, such as through the RCaller transformer in an
FME Desktop workspace, you must perform the following on all machines that run
FME Engines:
1. Install R
2. Install the sqldf package for R
Alternatively, you can direct the FME Engines to an Rinterpreter that is installed in a
non-standard location.
Install R
Download Rinstallers from https://www.r-project.org/.
Windows
Run the installer as administrator. Right-click on the installer in the Start menu and
select Run as administrator.
Linux
To install Ron Linux, we recommend using a package manager.
Install the sqldf package for R
Choose one of the following options:
l Standard install (perform on all machines that run FME Engines)
l Upload to Resources
Standard Install
1. Open the Rcommand prompt as administrator, and run the following command:
install.packages('sqldf')
2. Awindow launches prompting you to select a download mirror. After selecting a
mirror, the sqldf package is installed to the system-wide Rlibrary.
Other Tasks 396
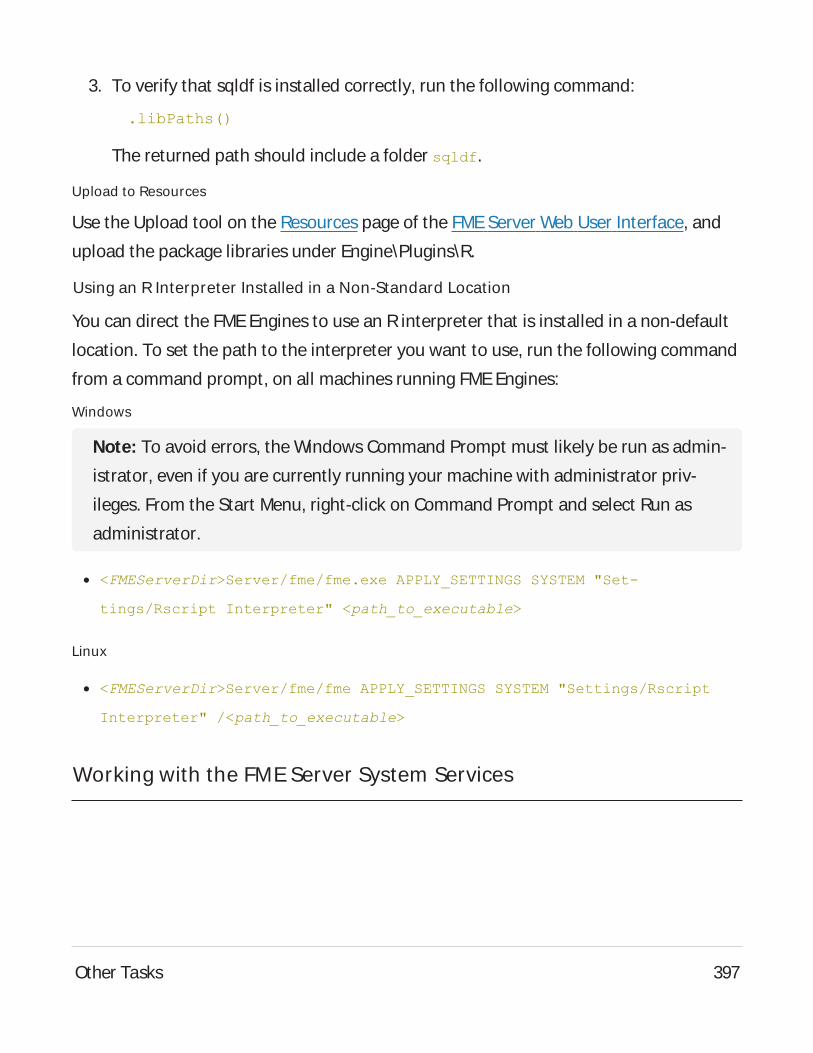
3. To verify that sqldf is installed correctly, run the following command:
.libPaths()
The returned path should include a folder sqldf.
Upload to Resources
Use the Upload tool on the Resources page of the FMEServer Web User Interface, and
upload the package libraries under Engine\Plugins\R.
Using an R Interpreter Installed in a Non-Standard Location
You can direct the FME Engines to use an Rinterpreter that is installed in a non-default
location. To set the path to the interpreter you want to use, run the following command
from a command prompt, on all machines running FME Engines:
Windows
Note: To avoid errors, the Windows Command Prompt must likely be run as admin-
istrator, even if you are currently running your machine with administrator priv-
ileges. From the Start Menu, right-click on Command Prompt and select Run as
administrator.
l <FMEServerDir>Server/fme/fme.exe APPLY_SETTINGS SYSTEM "Set-
tings/Rscript Interpreter" <path_to_executable>
Linux
l <FMEServerDir>Server/fme/fme APPLY_SETTINGS SYSTEM "Settings/Rscript
Interpreter" /<path_to_executable>
Working with the FME Server System Services
Other Tasks 397
About the FME Server System Services
FMEServer is comprised of a series of components, and each component is installed as
a standard Windows service.
FME Server Application Server
On install, if you use the default FMEServer Web Application Server, the service auto-
matically starts at system boot time. If you are using your own web application server, it
is important to note that the FMEServer Web Services are deployed and run by your
web application server, not by FMEServer itself. Ensure that your web application server
is started for users to access any FMEServer web services including the Web User Inter-
faces.
FME Server Core
The FMEServer Core is the main FMEServer service and should always be running. By
default, this service is started at system boot time.
FME Server Database
On install, if you use the default FMEServer Database, it creates a service called FME
Server Database, which automatically starts at system boot time. If you used your own
database, such as Oracle, ensure that the service starts prior to the FME Server Core ser-
vice starting.
FME Server Engines
This service starts and runs the FME Engines.
Starting and Stopping FME Server Manually
Windows
Although the FMEServer System Services start automatically, you can start and stop the
services manually in the following ways:
l From the Services window (the procedure for accessing the services may vary by Win-
dows version):
Other Tasks 398
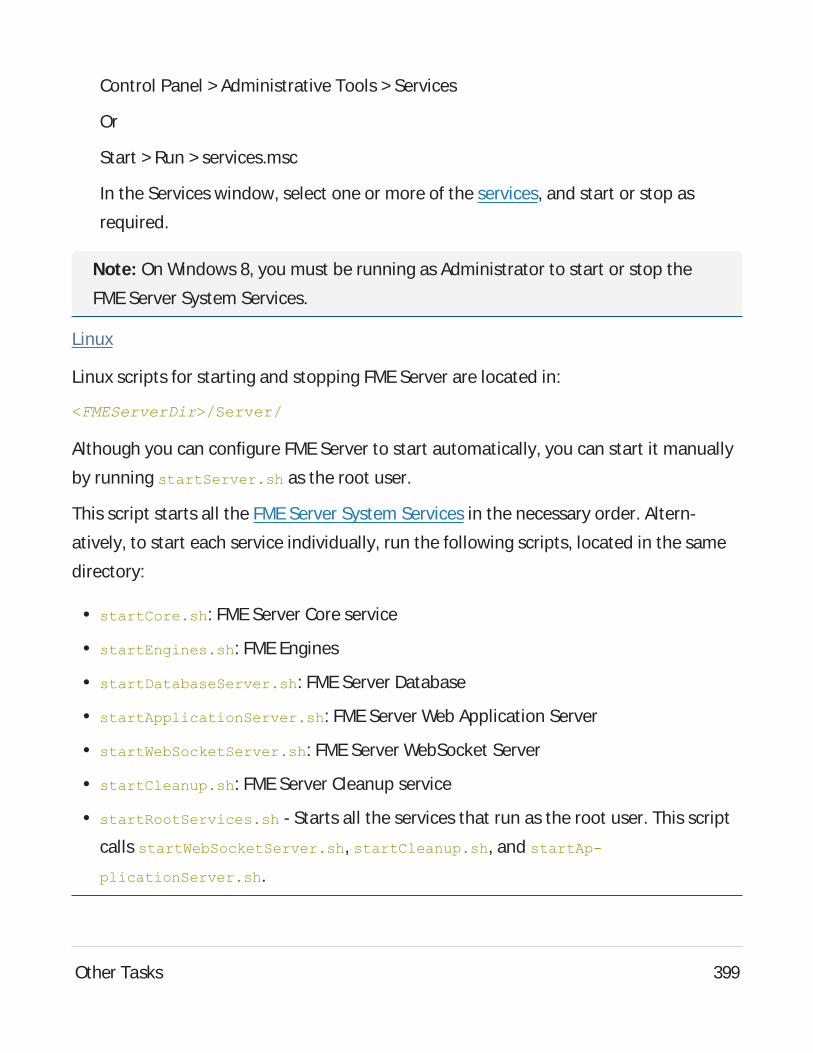
Control Panel > Administrative Tools > Services
Or
Start > Run > services.msc
In the Services window, select one or more of the services, and start or stop as
required.
Note: On Windows 8, you must be running as Administrator to start or stop the
FME Server System Services.
Linux
Linux scripts for starting and stopping FME Server are located in:
<FMEServerDir>/Server/
Although you can configure FMEServer to start automatically, you can start it manually
by running startServer.sh as the root user.
This script starts all the FME Server System Services in the necessary order. Altern-
atively, to start each service individually, run the following scripts, located in the same
directory:
l startCore.sh: FME Server Core service
l startEngines.sh: FMEEngines
l startDatabaseServer.sh: FME Server Database
l startApplicationServer.sh: FMEServer Web Application Server
l startWebSocketServer.sh: FME Server WebSocket Server
l startCleanup.sh: FME Server Cleanup service
l startRootServices.sh - Starts all the services that run as the root user. This script
calls startWebSocketServer.sh, startCleanup.sh, and startAp-
plicationServer.sh.
Other Tasks 399
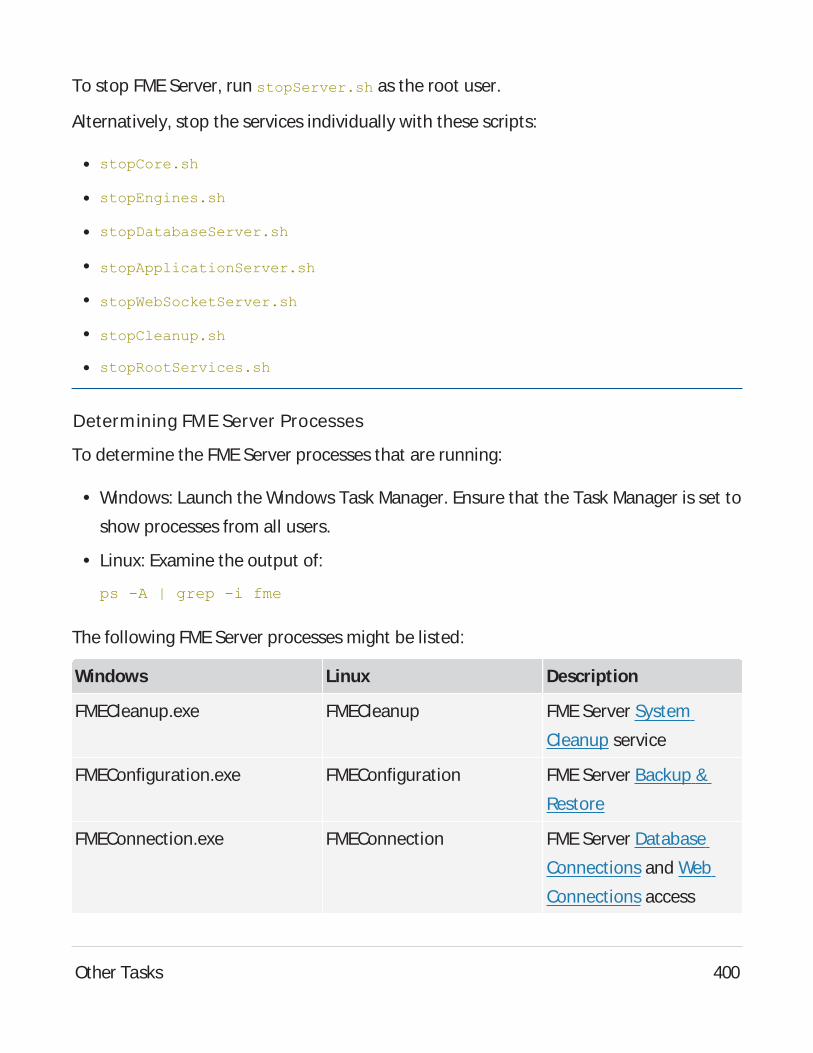
To stop FME Server, run stopServer.sh as the root user.
Alternatively, stop the services individually with these scripts:
l stopCore.sh
l stopEngines.sh
l stopDatabaseServer.sh
l stopApplicationServer.sh
l stopWebSocketServer.sh
l stopCleanup.sh
l stopRootServices.sh
Determining FME Server Processes
To determine the FMEServer processes that are running:
l Windows: Launch the Windows Task Manager. Ensure that the Task Manager is set to
show processes from all users.
l Linux: Examine the output of:
ps -A | grep -i fme
The following FMEServer processes might be listed:
Windows Linux Description
FMECleanup.exe FMECleanup FMEServer System
Cleanup service
FMEConfiguration.exe FMEConfiguration FMEServer Backup &
Restore
FMEConnection.exe FMEConnection FMEServer Database
Connections and Web
Connections access
Other Tasks 400
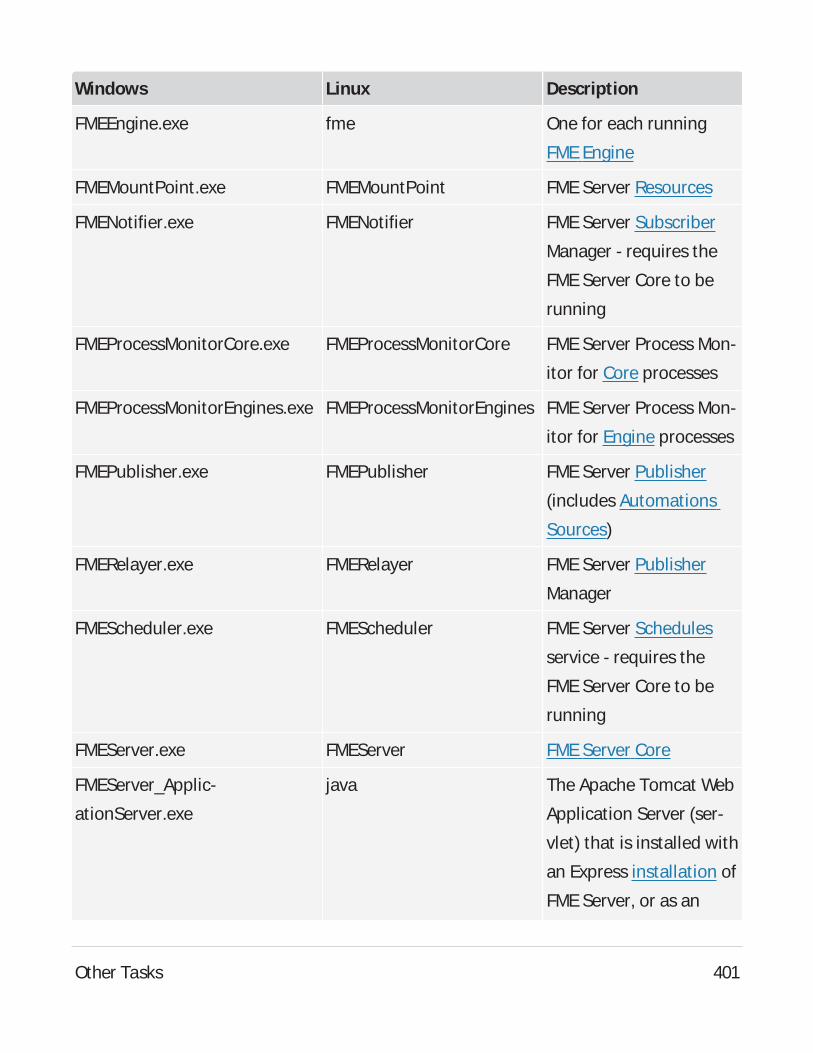
Windows Linux Description
FMEEngine.exe fme One for each running
FMEEngine
FMEMountPoint.exe FMEMountPoint FME Server Resources
FMENotifier.exe FMENotifier FMEServer Subscriber
Manager - requires the
FME Server Core to be
running
FMEProcessMonitorCore.exe FMEProcessMonitorCore FMEServer Process Mon-
itor for Core processes
FMEProcessMonitorEngines.exe FMEProcessMonitorEngines FMEServer Process Mon-
itor for Engine processes
FMEPublisher.exe FMEPublisher FMEServer Publisher
(includes Automations
Sources)
FMERelayer.exe FMERelayer FMEServer Publisher
Manager
FMEScheduler.exe FMEScheduler FMEServer Schedules
service - requires the
FME Server Core to be
running
FMEServer.exe FMEServer FMEServer Core
FMEServer_Applic-
ationServer.exe
java The Apache Tomcat Web
Application Server (ser-
vlet) that is installed with
an Express installation of
FME Server, or as an
Other Tasks 401
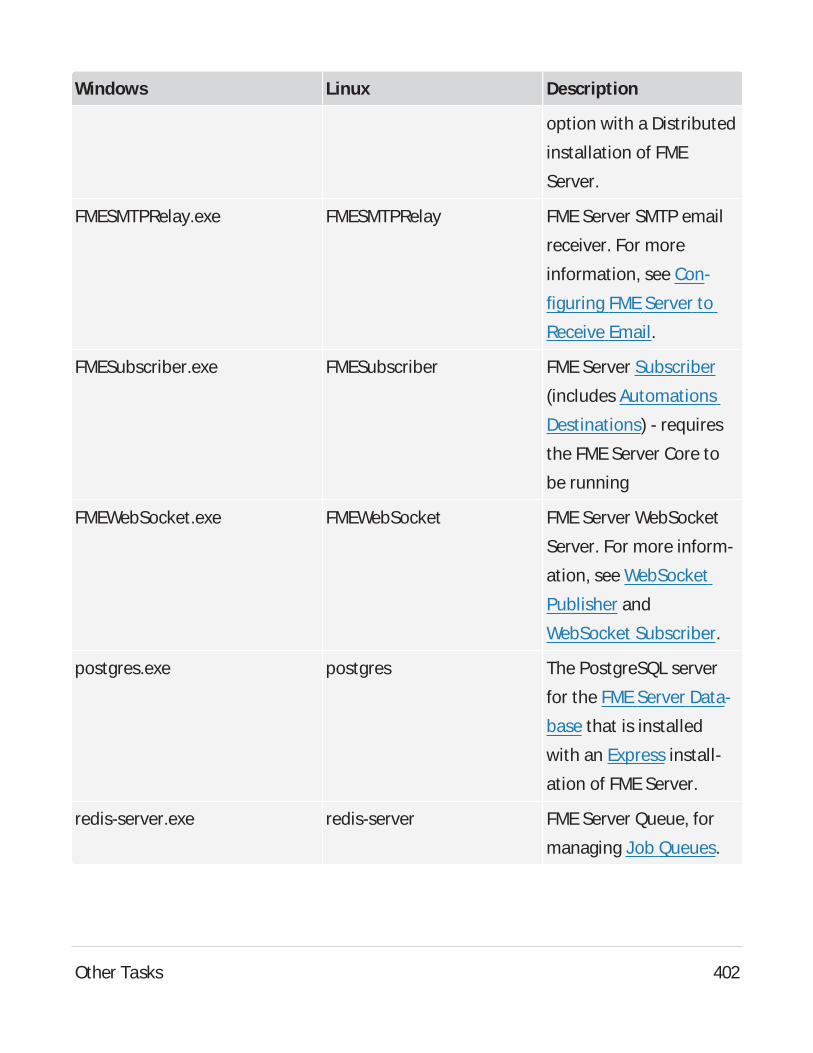
Windows Linux Description
option with a Distributed
installation of FME
Server.
FMESMTPRelay.exe FMESMTPRelay FMEServer SMTP email
receiver. For more
information, see Con-
figuring FMEServer to
Receive Email.
FMESubscriber.exe FMESubscriber FMEServer Subscriber
(includes Automations
Destinations) - requires
the FME Server Core to
be running
FMEWebSocket.exe FMEWebSocket FMEServer WebSocket
Server. For more inform-
ation, see WebSocket
Publisher and
WebSocket Subscriber.
postgres.exe postgres The PostgreSQL server
for the FMEServer Data-
base that is installed
with an Express install-
ation of FME Server.
redis-server.exe redis-server FME Server Queue, for
managing Job Queues.
Other Tasks 402
Configuring FME Server as a System Service (Linux)
You can configure FMEServer as a system service that starts when you start your sys-
tem. You should do this only if you have set up system services before and understand
the different run levels on your system.
WARNING: Configuring scripts to run at start-up on Linux is an advanced task. The
steps for doing so vary, depending on your configuration. Use the steps listed in this
section as a guide only.
FMEServer is composed of a series of components, and each component has its own
scripts. Both systemd and SysVscripts are provided.
Configuring with systemd Scripts
Getting Started
The following FME Server systemd startup scripts are provided upon installation:
l <FMEServerDir>/Server/startup/systemd/fmeserver-appserver.service
l <FMEServerDir>/Server/startup/systemd/fmeserver-cleanup.service
l <FMEServerDir>/Server/startup/systemd/fmeserver-core.service
l <FMEServerDir>/Server/startup/systemd/fmeserver-database.service
l <FMEServerDir>/Server/startup/systemd/fmeserver-engines.service
l <FMEServerDir>/Server/startup/systemd/fmeserver-websocket.service
1. Copy these scripts and place them in the following directory, depending on your
privilege level:
l root privilege: /etc/systemd/system/
l user-level privilege (no system administration rights): /usr/lib/systemd/system/
Other Tasks 403
2. If the Web Application Server component of FME Server is configured for com-
munication on a port under 1024, this service runs as the root user. Open
fmeserver-appserver.service and remove the following lines:
User=fmeserver
Group=fmeserver
3. Create a new folder tomcat in /var/run with fmeserver:fmeserver ownership.
4. Change ownership of tomcat logs in /opt/fmeserver/Utilities/tomcat/logs/ to
fmeserver:fmeserver.
To enable startup scripts to run at system boot time
Run the following command for each script:
systemctl enable *.service
For example:
systemctl enable fmeserver-core.service
To disable startup scripts from running at system boot time
Run the following command for each script:
systemctl disable *.service
For example:
systemctl disable fmeserver-core.service
To start services manually
Run the following command for each script:
systemctl start *.service
For example:
systemctl start fmeserver-core.service
Other Tasks 404
To stop services manually
Run the following command for each script:
systemctl stop *.service
For example:
systemctl stop fmeserver-core.service
Configuring with SysVScripts
Make a copy of the FMEServer startup scripts:
l <FMEServerDir>/Server/startup/SysV/FMEServerAppServer
l <FMEServerDir>/Server/startup/SysV/FMEServerCleanup
l <FMEServerDir>/Server/startup/SysV/FMEServerCore
l <FMEServerDir>/Server/startup/SysV/FMEServerDatabase
l <FMEServerDir>/Server/startup/SysV/FMEServerEngines
l <FMEServerDir>/Server/startup/SysV/FMEServerWebSocket
Place the scripts here:
l /etc/init.d/FMEServerAppServer
l /etc/init.d/FMEServerCleanup
l /etc/init.d/FMEServerCore
l /etc/init.d/FMEServerDatabase
l /etc/init.d/FMEServerEngines
l /etc/init.d/FMEServerWebSocket
From the /etc/init.d/ directory, update permissions on these files with the following
chmod command:
Other Tasks 405
sudo chmod +x FME*
Register the FME Server services with the following command:
sudo update-rc.d FMEServer* defaults
Purging Logs and History
As FMEServer processes jobs, the history of these jobs is stored as records in the repos-
itory database and as log files in the file system. Eventually, the volume of these records
and logs can build up and cause issues, such as slow web interface response time and
low disk space.
To purge log files and job history, use the tools on the System Cleanup page of the Web
User Interface.
Changing the Web Application Server Host Name and Port
Often you install FMEServer and then need to update the web application server host
name or port.
The following instructions assume the Apache Tomcat server that is bundled by default
with an FME Server installation is the one currently in use.
Update Service URLs (For Updating Host Name or Port)
1. Log in to the FMEServer Web User Interface.
2. Navigate to Services.
3. Click on each service to open the Editing Service page.
4. In the URL Pattern field, make the appropriate changes and click OK when done.
Update FME Server Web URL (For Updating Host Name or Port)
On the machine hosting the FME Server core:
Other Tasks 406
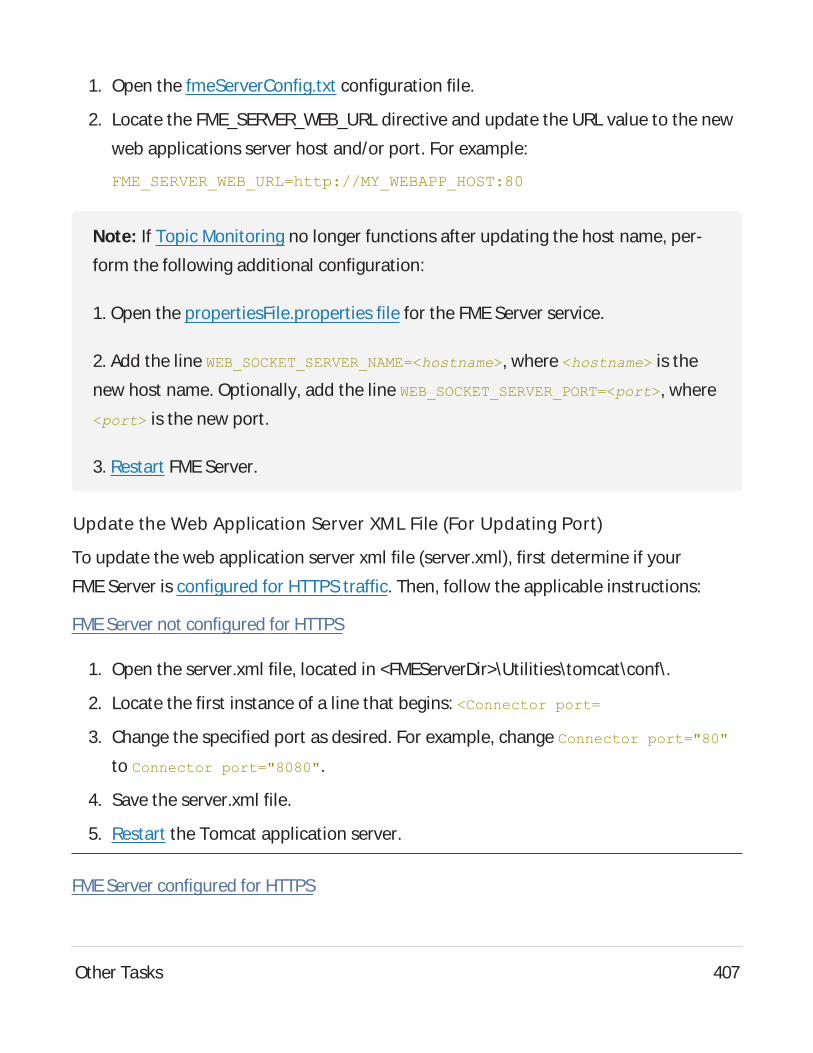
1. Open the fmeServerConfig.txt configuration file.
2. Locate the FME_SERVER_WEB_URL directive and update the URL value to the new
web applications server host and/or port. For example:
FME_SERVER_WEB_URL=http://MY_WEBAPP_HOST:80
Note: If Topic Monitoring no longer functions after updating the host name, per-
form the following additional configuration:
1. Open the propertiesFile.properties file for the FME Server service.
2. Add the line WEB_SOCKET_SERVER_NAME=<hostname>, where <hostname> is the
new host name. Optionally, add the line WEB_SOCKET_SERVER_PORT=<port>, where
<port> is the new port.
3. Restart FME Server.
Update the Web Application Server XML File (For Updating Port)
To update the web application server xml file (server.xml), first determine if your
FME Server is configured for HTTPStraffic. Then, follow the applicable instructions:
FMEServer not configured for HTTPS
1. Open the server.xml file, located in <FMEServerDir>\Utilities\tomcat\conf\.
2. Locate the first instance of a line that begins: <Connector port=
3. Change the specified port as desired. For example, change Connector port="80"
to Connector port="8080".
4. Save the server.xml file.
5. Restart the Tomcat application server.
FMEServer configured for HTTPS
Other Tasks 407
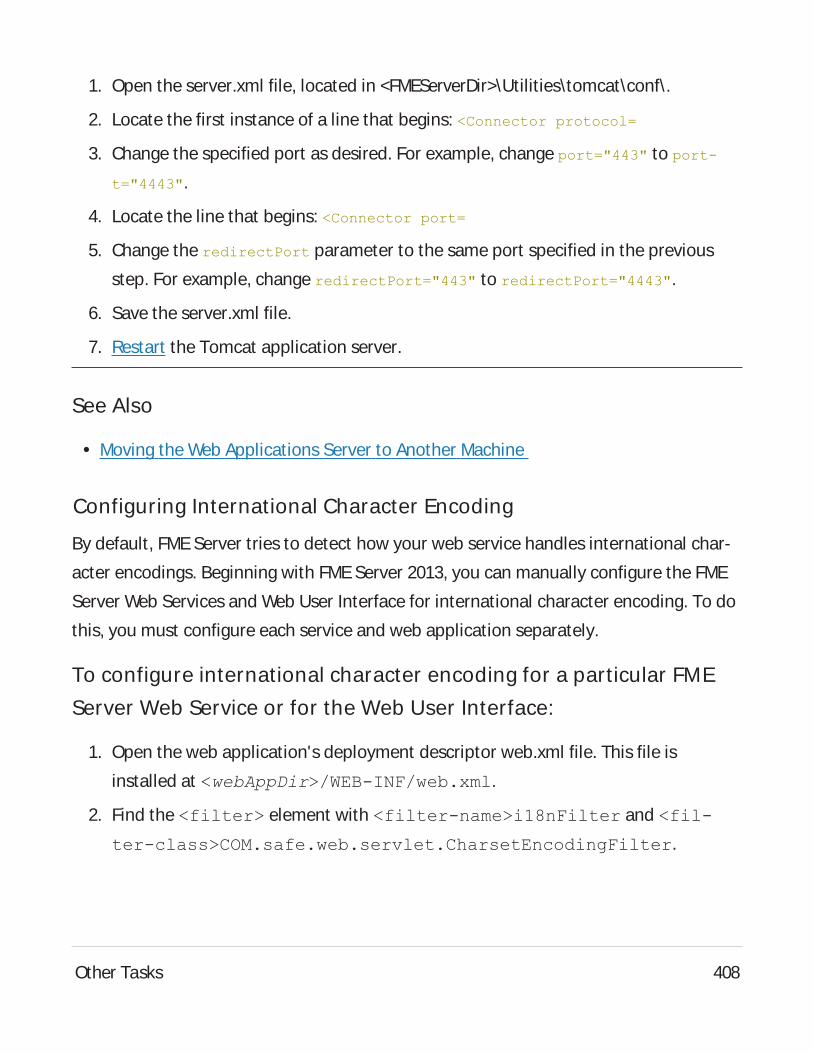
1. Open the server.xml file, located in <FMEServerDir>\Utilities\tomcat\conf\.
2. Locate the first instance of a line that begins: <Connector protocol=
3. Change the specified port as desired. For example, change port="443" to port-
t="4443".
4. Locate the line that begins: <Connector port=
5. Change the redirectPort parameter to the same port specified in the previous
step. For example, change redirectPort="443" to redirectPort="4443".
6. Save the server.xml file.
7. Restart the Tomcat application server.
See Also
l Moving the Web Applications Server to Another Machine
Configuring International Character Encoding
By default, FMEServer tries to detect how your web service handles international char-
acter encodings. Beginning with FMEServer 2013, you can manually configure the FME
Server Web Services and Web User Interface for international character encoding. To do
this, you must configure each service and web application separately.
To configure international character encoding for a particular FME
Server Web Service or for the Web User Interface:
1. Open the web application's deployment descriptor web.xml file. This file is
installed at <webAppDir>/WEB-INF/web.xml.
2. Find the <filter> element with <filter-name>i18nFilter and <fil-
ter-class>COM.safe.web.servlet.CharsetEncodingFilter.
Other Tasks 408

3. Add/modify the <init-param> directives to configure international character encod-
ings for this web application according to the table below:
Parameter
NameType Description
charset string Sets the character set to use. UTF-8 is recommended.
detect-
encodings
boolean “true” to automatically detect encodings. “false” to disable.
auto-
encoded
list A list of comma-separated keywords that specify what
should be encoded by the specified character set (see char-
set). Available keywords:
l querystring – Encode query strings in the URI.
l path – Encode the path component of the URI.
l body – Encode the request body for each request.
For further instructions, see the J2EEServlet Specification v2.5.
Moving the FME Server System Share to Another Machine
The FME Server System Share is the location for storing Repositories and Resources. You
may want to specify a new location for the System Share, and move all of its existing
contents, to another networked machine.
Moving the System Share manually is a complex task that is subject to error. Instead, we
recommend that you perform an upgrade operation (even if you are 'upgrading' to the
same version of FME Server). At the Install procedure (after Backup and Uninstall), select
a Distributed/Fault Tolerant installation. During the install, on the FME Server System
Share dialog, specify the path to the new location. After reinstalling, perform a Restore.
Other Tasks 409
Providing Support for OGC Services
Beginning with FME Server 2016, Safe Software recommends providing Open Geospatial
Consortium (OGC) services by configuring FMEDesktop workspace templates that imple-
ment the OGCstandard, and registering them to the FME Server Data Streaming Service
to provide output. This method provides fuller control over OGCfeatures than OGCser-
vices that were native to FME Server in previous releases.
To get started, workspace templates are available for both the OGCWeb Feature Service
(WFS) and OGCWeb Mapping Service (WMS). You can then configure them to provide
basic services with your data. For instructions and downloads, see the following:
l OGCWFS: How to Create a WFSService Using FMEServer
l OGCWMS: How to Create a WMSService Using FMEServer
Backup, Restore, and Migration Tasks
Migrating an FME Server Configuration
To migrate the configuration of an FMEServer instance to another instance, perform a
backup and restore operation using the tools on the Backup & Restore page of the FME
Server Web User Interface.
Performing Scheduled Backups of an FME Server Configuration
FMEServer provides a workspace that you can configure to perform regular (scheduled)
backups of your Server configuration to an FMEServer configuration (.fsconfig) file.
Note: For information about the contents of a backup, see Backup & Restore.
To Configure a Scheduled Backup
Other Tasks 410
1. Log in to the FMEServer Web User Interface.
2. Select Schedules.
3. Click the Backup_Configuration entry.
4. On the Editing Schedule page, check the Enabled box.
5. Edit other parameters as necessary. See Adding a Scheduled Task for more inform-
ation.
The following published parameters are specific to the Backup_Configuration
schedule:
l Append Date: If Yes, the date and time of the backup is appended to the file-
name.
l Server Username: The user performing the backup. The user must belong to the
the fmesuperuser role.
l Server Password: Password of the user.
l Backup Destination: The file to store the backup. You can specify a Resources
location, or another location that is accessible by the engine running the work-
space. It can refer to a UNCpath.
6. Click OK.
Notifications Tasks
Configuring FME Server to Receive Email
FMEServer can receive email via Simple Mail Transfer Protocol (SMTP) or Internet Mes-
sage Access Protocol (IMAP). Using Automations, you can publish emails to Notification
Service topics using either the Email - SMTP or the Email - IMAP trigger.
Other Tasks 411
SMTP or IMAP?
When deciding between SMTP or IMAP, keep in mind the following:
l IMAP is a pull-based mechanism. The Email (IMAP) Trigger polls an existing IMAP
server (such as imap.gmail.com) for messages. As long as IMAP access is enabled on
the email account, no additional configuration is needed. However, because polling
is conducted at intervals, FME Server may not receive email messages as imme-
diately as those sent over SMTP.
l SMTP is a push-based mechanism. FME Server acts as is its own lightweight SMTP
server, and receives emails directly, rather than polling for them. As a result, emails
may be sent to FME Server topics (and their subscribed workspaces) more imme-
diately than emails delivered over IMAP.
l SMTP functions only on an instance of FMEServer with a proper DNSrecord (that is,
the server is accessible over the internet). If your instance of FMEServer runs locally
or on an intranet, you must use IMAP.
l SMTP is not supported in a fault tolerant installation of FME Server.
Changing the Default SMTP Port (Optional)
By default, SMTP operates over port 25 on Windows and port 7125 on Linux. If you want
to change the default port (non-FMECloud installations only), follow these steps:
Note: Be sure to configure your network firewall settings to allow transmission of
emails to FME Server on the applicable port.
1. Determine the port on the FMEServer Core host that will be used to receive emails.
Note: Be sure to configure your network firewall settings to allow transmission
of emails to FME Server on this port.
2. Open the SMTP publisher configuration file:
Other Tasks 412

<FMEServerDir>\Server\config\publishers\email.properties
3. Locate parameter SMTP_PORT, and update the setting to the desired port. By
default, this parameter is set to port 25 on Windows installations, and 7125 on
Linux.
Note: To specify a port under 1024 on Linux, configure either of the following:
Elevated privilege on the FME Server System Services (run as root). For more
information, see Starting and Stopping FMEServer Manually.
Port forwarding: Configure the FME Server Core to route and forward from a
source port to a destination port. For example, route traffic on port 25 to port
7125.
4. Restart the FMEServer Core service.
Configuring FME Server to Send Email Notifications
FMEServer can send emails when a variety of system events occurs, such as the success
or failure of jobs that are run from FME Server, or when a repository is created.
For more information, see Monitoring FMEServer with Notifications.
Workflow and Resources Tasks
Sending Jobs to Specific Engines with Job Queues
Job queues are a mechanism for sending specific jobs to specific FMEEngines. Job
queues are configured in the FMEServer Web User Interface. For more information, see
Job Queues.
Other Tasks 413
Job Recovery
After FMEServer submits a translation request to an FMEEngine, it monitors the con-
nection to that engine until a response is returned.
If the connection to the engine is lost, or the engine crashes, FMEServer resubmits a job
to the next available FME Engine in the queue.
To prevent FME Server from indefinitely resubmitting a job, the default setting is to
resubmit a job up to three times. This setting is configurable.
Configuring Job Recovery
The MAX_FAILED_TRANSACTION_REQUEST_RETRIES parameter in the fmeServerConfig.txt
configuration file determines the number of times any transaction is resubmitted before
FMEServer stops resending the request. Avalue of < 0 means that no maximum limit is
imposed, and requests are resubmitted indefinitely. Avalue of 0 means that automatic
resubmission is disabled. If this parameter is absent, a default value of 3 is used.
WARNING: Afailed job request may cause an FMEEngine to shut down improperly.
When no maximum limit is imposed, the translation is resent indefinitely, which may
cause repeated FMEEngine failures.
Sharing FME Engine Resources
Workspaces that are run from FMEServer can use custom formats, custom transformers,
and custom coordinate systems in the same way that FMEWorkbench does. There are
three ways to upload these shared custom resources to FMEServer:
l Use the Resources page of the FMEServer Web User Interface: This method makes
custom formats, custom transformers, and custom coordinate systems available to
all workspaces on FMEServer.
Other Tasks 414
l Publish to FMEServer: Makes a custom format or custom transformer available to all
workspaces in the same repository to which it is published.
l Publish to FME Server with a Workspace: This method allows you to add resources
when publishing a workspace. You can upload the resources to a repository or to a
resources folder. If you upload to a resources folder, the resources are available to
all other workspaces on FME Server. If you choose a repository, the resources are
available to all other workspaces in the same repository to which the current work-
space is published.
To publish custom resources to FME Server
1. Open the custom format or custom transformer in FMEWorkbench:
File > Open > Select custom format/transformer
2. Publish the resource to FMEServer as you would publish a workspace.
The resource then becomes available to workspaces within the repository to which
you published it.
To publish custom resources to FME Server when publishing a work-
space
1. Open the workspace you want to publish in FME Workbench.
2. Start the Publish to FME Server wizard:
File > Publish to FME Server
3. On the Publish Workspace dialog, click Select Files.
4. On the Upload Files dialog, click Add Files.
5. Select the resource file you want to include.
6. On the Upload Files dialog, click Change Location.
Other Tasks 415
7. On the Change Upload Location dialog, specify an Upload Directory:
l Upload to Repository: All resources published with the workspace are access-
ible to any user with permission on the same repository. Other workspaces in
the repository can access these resources, provided their respective source
dataset parameters are manually set to point to the resources.
l Upload to a shared resource folder: All resources published with the workspace
will be available to all other workspaces run from FME Server, from any repos-
itory. Resources must be uploaded to the applicable subdirectory under Engine
in order for workspaces to use them. For example, a custom format must be
uploaded to the Engine > Formats folder.
Note: If custom coordinate system files are uploaded to any of the applic-
able Engine subfolders, the FMEServer Engines service must be restarted
before they can be used in a workspace. These include the Coordin-
ateSystemExceptions, CoordinateSystemGridOverrides, Coordin-
ateSystems, and CsmapTransformationExceptionssubfolders.
8. Complete the Publish to FME Server wizard as usual.
Other Tasks 416