Embed Size (px)
Citation preview
eTrust™ CA-ACF2 Security for z/OS and OS/390
Implementation Planning Guide 6.4
SP05
This documentation and related computer software program (hereinafter referred to as the “Documentation”) is for the end user’s informational purposes only and is subject to change or withdrawal by Computer Associates International, Inc. (“CA”) at any time.
This documentation may not be copied, transferred, reproduced, disclosed or duplicated, in whole or in part, without the prior written consent of CA. This documentation is proprietary information of CA and protected by the copyright laws of the United States and international treaties.
Notwithstanding the foregoing, licensed users may print a reasonable number of copies of this documentation for their own internal use, provided that all CA copyright notices and legends are affixed to each reproduced copy. Only authorized employees, consultants, or agents of the user who are bound by the confidentiality provisions of the license for the software are permitted to have access to such copies.
This right to print copies is limited to the period during which the license for the product remains in full force and effect. Should the license terminate for any reason, it shall be the user’s responsibility to return to CA the reproduced copies or to certify to CA that same have been destroyed.
To the extent permitted by applicable law, CA provides this documentation “as is” without warranty of any kind, including without limitation, any implied warranties of merchantability, fitness for a particular purpose or noninfringement. In no event will CA be liable to the end user or any third party for any loss or damage, direct or indirect, from the use of this documentation, including without limitation, lost profits, business interruption, goodwill, or lost data, even if CA is expressly advised of such loss or damage.
The use of any product referenced in this documentation and this documentation is governed by the end user’s applicable license agreement.
The manufacturer of this documentation is Computer Associates International, Inc.
Provided with “Restricted Rights” as set forth in 48 C.F.R. Section 12.212, 48 C.F.R. Sections 52.227-19(c)(1) and (2) or DFARS Section 252.227-7013(c)(1)(ii) or applicable successor provisions.
2003 Computer Associates International, Inc.
All trademarks, trade names, service marks, and logos referenced herein belong to their respective companies.

Contents
Chapter 1: What Is CA-ACF2? Documentation Set........................................................................... 1-1 Command Notation.......................................................................... 1-2 Why CA-ACF2? ............................................................................. 1-3
System Integrity with CA-ACF2 ........................................................... 1-3 Components of CA-ACF2..................................................................... 1-4
CA-ACF2 Databases...................................................................... 1-5 The ACF Command ...................................................................... 1-6 CA-ACF2 WorkStation ................................................................... 1-6 CA-ACF2 Security and Maintenance Reports ............................................... 1-7
Data and Resource Logging Violation Reports........................................... 1-7 Database Maintenance Reports ........................................................ 1-8 Cross-Reference Reports .............................................................. 1-8 CA-Earl ............................................................................. 1-8
Other CA-ACF2 Components ............................................................. 1-9 Modifying CA-ACF2 ......................................................................... 1-9
At What Maintenance Level Should OS/390 Be Operating? ................................. 1-10 General Installation and Maintenance Planning ................................................ 1-10
Other Product Interfaces ................................................................. 1-12 Other Documentation and Publications.................................................... 1-12
Chapter 2: Planning CA-ACF2 Implementation Organizing for Security....................................................................... 2-1
Appointing a Security Administrator (SA) .................................................. 2-2 Security Administration after CA-ACF2 Is Implemented ................................. 2-2
Appointing the Implementation Team (IT).................................................. 2-3 Preparing the Implementation Schedule........................................................ 2-5
Important ............................................................................... 2-5 Sample CA-ACF2 Implementation Schedule ................................................ 2-6
Distributing CA-ACF2 Documentation......................................................... 2-7
Contents iii
Identifying Security Policies, Goals, and Objectives .............................................. 2-9 Identifying Your Local Operating Environment ................................................2-11 Identifying Your Global Operating Environment ...............................................2-15 Selecting CA-ACF2 Options ..................................................................2-16
The User Identification String (UID) .......................................................2-17 Designing the UID ...................................................................2-17 Dynamically Altering the UID ........................................................2-18 Creating the UID ....................................................................2-19
The CA-ACF2 Mode .....................................................................2-20 Boundaries of CA-ACF2 Controls .........................................................2-21 PDS Member-Level Security ..............................................................2-22 Tape Protection..........................................................................2-22 Use of UADS and UADS Conversion ......................................................2-22 CA-ACF2 Exits ..........................................................................2-22
Chapter 3: Implementing CA MAC The MAC Administrator ...................................................................... 3-1 CA MAC Implementation Checklist............................................................ 3-1 Read CA MAC Documentation ................................................................ 3-2 Install CA MAC in QUIET Mode............................................................... 3-3 Determine Your MAC Environment............................................................ 3-3
How Long Are Levels and Categories? ..................................................... 3-4 Will You Use Control Systems? ............................................................ 3-5 Does Your Site Share DASD? .............................................................. 3-5 Change the MODE Setting................................................................. 3-5 Do You Want to Phase In Data Set Labeling? ................................................ 3-6 Accept the Default Settings for Other Fields ................................................. 3-6 Refresh MAC(OPT) OPTIONS Record ...................................................... 3-6
Define Levels, Categories, and Control Systems ................................................. 3-6 Do You Want to Use Control Systems?...................................................... 3-7 Do You Want Virus Protection? ............................................................ 3-7 Should MAC Check Creation Dates? ....................................................... 3-7 Assign Hierarchical Values for Levels ...................................................... 3-7 Accept the Defaults ....................................................................... 3-8 Refresh MAC(CAT) and MAC(LEV) Records................................................ 3-8
Specify MAC Label Options ................................................................... 3-8 Specify Values MAC(OPT) LABELS Record Fields ........................................... 3-9 Refresh MAC(OPT) LABELS Records....................................................... 3-9
iv Implementation Planning Guide
Create MAC User Records .................................................................... 3-9 Create MAC(USR) Records for MAC Administrators and Auditors ........................... 3-9 Determine Whether Users Must Log On Using a Label...................................... 3-10 Specify Values for Integrity Checking ..................................................... 3-11 Refresh MAC(USR) Records.............................................................. 3-11
Create Scope Records for MAC Users ......................................................... 3-11 Refresh MAC(SCP) Records.............................................................. 3-12
Create MAC Project Records ................................................................. 3-12 Refresh MAC(PRJ) Records .............................................................. 3-12
Create MAC Device Records ................................................................. 3-13 Label Selected Devices................................................................... 3-13 Refresh MAC(DEV) Records ............................................................. 3-13
Create MAC Node Records .................................................................. 3-14 Refresh MAC(NDE) Records ............................................................. 3-14
Test MAC in QUIET Mode................................................................... 3-15 Label Catalogs.............................................................................. 3-15 Create Labels for Data Sets................................................................... 3-15
More on Sending Mail ................................................................... 3-17 Migrate to WARN Mode .................................................................... 3-17
Migration Procedure .................................................................... 3-18 Test MAC in WARN Mode .................................................................. 3-18 Fine-tune in WARN Mode ................................................................... 3-19 Migrate to ABORT Mode .................................................................... 3-19
Chapter 4: The First IPL with CA-ACF2 Testing the System ........................................................................... 4-1
Chapter 5: Establishing Initial Logonids The Logonid Record ......................................................................... 5-1 Creating the Logonid......................................................................... 5-2 Adding Logonids to the CA-ACF2 Database.................................................... 5-3 Default Logonids ............................................................................ 5-4
The Batch Default ID ..................................................................... 5-5 The Started Task Default ID............................................................... 5-5
User Logonids............................................................................... 5-5 UADS Considerations .................................................................... 5-7 Batch Users and Special Production IDs .................................................... 5-7
Contents v
Chapter 6: Writing Access Rules What Is an Access Rule? ...................................................................... 6-1 Adding Rules to the CA-ACF2 Database........................................................ 6-2 Writing the First Access Rules ................................................................. 6-3
Constructing the $KEY .................................................................... 6-3 Rule Entry Parameters .................................................................... 6-4 Masking in Access Rules .................................................................. 6-4
Simplifying Access Rule Writing ............................................................... 6-5 Writing Temporary Rules ................................................................. 6-5 Expanding Rule Sets Using NEXTKEY...................................................... 6-6 Expanding Rule Sets Using RULELONG.................................................... 6-6 Delegating Authority to Change a Rule Set.................................................. 6-6 Prewriting Rule Sets ...................................................................... 6-7 Providing PDS Member-level Protection .................................................... 6-7
Chapter 7: Writing Resource Rules The Basic Resource Rule ...................................................................... 7-2
Masking in Resource Rules ................................................................ 7-2 Expanding Rule Sets Using RULELONG.................................................... 7-2
Chapter 8: Converting to Full Security System-Wide Conversion ..................................................................... 8-1
Step 1: QUIET Mode ...................................................................... 8-1 Step 2: LOG Mode ........................................................................ 8-1 Step 3: WARN Mode...................................................................... 8-2 Step 4: ABORT Mode ..................................................................... 8-2
Selective Migration ........................................................................... 8-2 Migrating by Rule Set ..................................................................... 8-3
Using RULE Mode .................................................................... 8-3 Using NEXTKEY ..................................................................... 8-4 Using RULELONG.................................................................... 8-4 Using ACTIVE Date................................................................... 8-4
Migrating by User Group.................................................................. 8-5 Other Transitional Information ................................................................ 8-6
Expanding CA-ACF2 Control.............................................................. 8-6 Creating User IDs ........................................................................ 8-6 User Training ............................................................................ 8-6 Using the CA-ACF2 Reports ............................................................... 8-7
vi Implementation Planning Guide
Chapter 9: Fundamentals Included in Your CA-ACF2 Package
Chapter 10: Command Propagation Facility (CPF) Basic Features .............................................................................. 10-1 Communications Component ................................................................ 10-2 CPF Architecture ........................................................................... 10-2
Implicit and Explicit Targeting ........................................................... 10-2 Synchronous and Asynchronous Processing ............................................... 10-3
Commands Eligible for CPF.................................................................. 10-3 CPF and UNINODE Nodes .................................................................. 10-4 Administrative Authority.................................................................... 10-4 CPF Options................................................................................ 10-5
OPTIONS Record ....................................................................... 10-5 NODEDEF Record ...................................................................... 10-7 GSO Option ............................................................................ 10-9
UNICNTR Logonid Attribute ................................................................ 10-9 CMD-PROP Logonid Privilege ............................................................... 10-9 CA-ACF2 Command Keywords used with CPF............................................... 10-10
LIST Command and CPF ............................................................... 10-10 GATEWAY and UNINODE Processing ...................................................... 10-11 CPF Exit Processing ........................................................................ 10-11 CPF Journal Files .......................................................................... 10-11
SAMPJCL (INITJNL) ................................................................... 10-12 Sample CPF Journal File Output ......................................................... 10-13
CPF and CA Common Services.............................................................. 10-14
Index
Contents vii


Chapter
1 What Is CA-ACF2?
This guide focuses on the initial planning and implementation of CA-ACF2 access control on your OS/390 system. This guide contains suggestions that have been used successfully at many sites. CA-ACF2 lets you tailor these suggestions to your individual security demands.
This chapter provides general information about CA-ACF2 for OS/390. New CA-ACF2 users, or current users who want to review basic information, should read this chapter.
Documentation Set In addition to this guide, there are several other guides that comprise the CA-ACF2 documentation set. For a complete list of the CA-ACF2 documentation set and related documentation, see the Administrator Guide.
The following publications are not produced by Computer Associates but are referenced in this guide or are recommended reading:
Name Catalog Number
MVS/ESA Planning: B1 Security GC28-1800
OS/390 MVS Initialization and Tuning SC28-1751
TSO Extensions Version 2 Customization SC28-1965
What Is CA-ACF2? 1–1
Command Notation
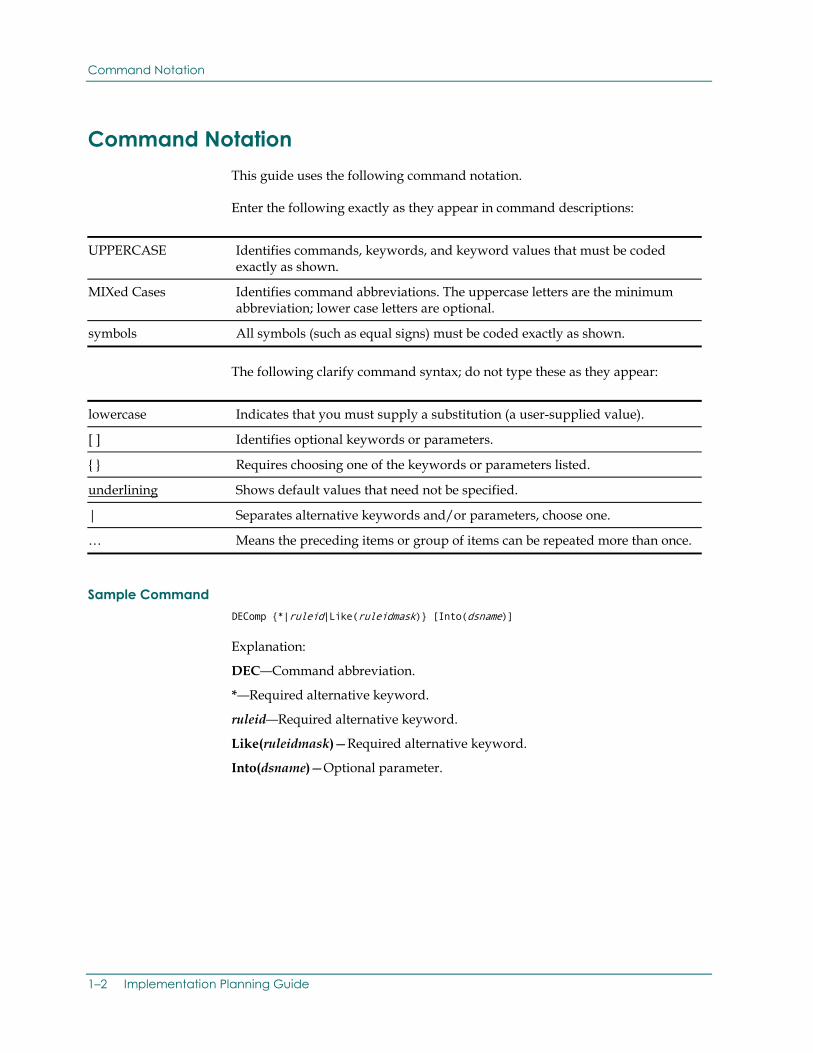
Command Notation This guide uses the following command notation.
Enter the following exactly as they appear in command descriptions:
UPPERCASE Identifies commands, keywords, and keyword values that must be coded exactly as shown.
MIXed Cases Identifies command abbreviations. The uppercase letters are the minimum abbreviation; lower case letters are optional.
symbols All symbols (such as equal signs) must be coded exactly as shown.
The following clarify command syntax; do not type these as they appear:
lowercase Indicates that you must supply a substitution (a user-supplied value).
[ ] Identifies optional keywords or parameters.
{ } Requires choosing one of the keywords or parameters listed.
underlining Shows default values that need not be specified.
| Separates alternative keywords and/or parameters, choose one.
… Means the preceding items or group of items can be repeated more than once.
Sample Command DEComp {*|ruleid|Like(ruleidmask)} [Into(dsname)]
Explanation:
DEC—Command abbreviation.
*—Required alternative keyword.
ruleid—Required alternative keyword.
Like(ruleidmask)—Required alternative keyword.
Into(dsname)—Optional parameter.
1–2 Implementation Planning Guide
Why CA-ACF2?
Why CA-ACF2? CA-ACF2 is a systems software product that helps control the use of computer resources, including system access and data. CA-ACF2 controls these resources by forcing users to enter a logonid and password to access the system. The logonid identifies the user to the system. The password verifies the user’s identity. CA-ACF2 checks for the logonid and matching password in its databases and allows access only to logonids defined to the system.
The CA-ACF2 databases contain information about which logonids can access various system data and resources. CA-ACF2 checks access attempts against this information and allows the access only if the user has been authorized to use the data set. CA-ACF2 creates SMF records of access attempts and other system activity. The CA-ACF2 reporting facility allows you to format and print out these records.
A number of options let you tailor CA-ACF2 controls to your needs. An important aspect of preplanning is to decide which options to use and how to migrate your system from its current level of security to one of full CA-ACF2 security where all data is protected by default.
For additional information on the other CA-ACF2 features, see the Administrator Guide.
System Integrity with CA-ACF2
You can use CA-ACF2 to streamline the administration of your system as well as protect it. Besides greatly reducing unauthorized accesses and similar security exposures, CA-ACF2 also supports a number of management controls. These controls include:
■ Separation of function
■ Individual responsibility and accountability
■ Access to data on a need-to-know basis
■ Detailed auditability of system events
Proper installation of CA-ACF2 with appropriate rules and system options provides comprehensive protection of your system and its resources.
CA-ACF2 uses the System Authorization Facility (SAF) component of OS/390 to secure data and resources. By intercepting all SAF calls by default, CA-ACF2 automatically secures any product that uses these calls.
What Is CA-ACF2? 1–3
Components of CA-ACF2
CA-ACF2 offers further protection through the MAC (Mandatory Access Control) option. With this option enabled, all users and data sets are assigned a trust level. Read and write access is restricted based on a comparison of the trust levels of the user and of the data being accessed. This option prevents unauthorized viewing of trusted data and also prevents viruses that can exist in less trusted data from spreading to more trusted data.
CA-ACF2 also lets you administer security across a network from one node using the command propagation facility (CPF). This simplifies network security administration.
Alternatively, once the system is set up, you can use CA-ACF2 WorkStation (CA-ACF2/WS) to administer your CA-ACF2 databases from your workstation.
In combination with these features, other CA-ACF2 features protect files against tampering and accidental data destruction.
CA-ACF2 supports the OS/390 and OS/390 SYSPLEX operating environments. Support for the XCF communication function allows you to route CA-ACF2 operator commands to one or more connected systems within the SYSPLEX. Support for the XES data sharing function allows you to share CA-ACF2 database records throughout the SYSPLEX for all CA-ACF2 systems.
CA-ACF2 supports the synchronization of database records between CA-ACF2 OS/390 and CA-ACF2 VM systems via two methods. The first method uses shared DASD. The second method uses the new Database Synchronization Component (DSC) of CA-ACF2 OS/390 and CA-ACF2 VM. This method replaces the use of shared DASD in this environment. See the Administrator Guide for OS/390 and VM for additional information on the use of the DSC component.
Components of CA-ACF2 The CA-ACF2 product consists of:
■ The CA-ACF2 databases
■ The ACF command
■ CA-ACF2 Security and Maintenance Reports
■ CA-ACF2 WorkStation
■ Other CA-ACF2 components
This section explains each of these components.
1–4 Implementation Planning Guide
Components of CA-ACF2
CA-ACF2 Databases
The CA-ACF2 databases contain the information about users, data sets, and the system that CA-ACF2 needs to protect your system:
Logonid database—Contains logonid records for all users on the system. These records define each system user in terms of general identification, status, privileges, access history, attributes related to TSO, CICS, IMS, VM, and VSE violation statistics, and so forth.
Rule database—Contains all data set access rules. These rules describe the conditions (environment) for accessing particular data sets, and determine whether access is permitted or prevented for a user or group of users.
Infostorage database—Contains the following records:
■ Cache records—let a site set options for the CA-ACF2 cache facility.
■ CPF records—let a site set command propagation facility options and define how nodes in CPF communicate.
■ Cross-reference records—let a site group sources or resources for CA-ACF2 validation processing.
■ Entry records—let a site define which sources or groups of sources logonids can access the system from, such as terminals.
■ Field records—let a site control access to records based on information in a field in the record. Field records are part of record level protection (RLP).
■ Global system options (GSO) records—specify a site’s CA-ACF2 global system options.
■ Identity records—contain extended user authentication information.
■ Mandatory Access Control (MAC) records—contain the records the MAC component of CA-ACF2 uses to validate access to data.
■ NET records—specify Distributed Database options.
■ Profile records—contain security information extracted by SAF RACROUTE=EXTRACT call.
■ Resource rules—describe conditions (environment) for accessing particular resources such as TSO accounts, IMS transactions, CICS files, programs, or any other resource a site wants to define.
■ Scope records—limit the authority a specially privileged user has over logonid records, access rules, and other CA-ACF2 records.
■ Shift and zone records—define periods of time when access is permitted or prevented. Zone records offset the user’s local time from the executing CPU time.
What Is CA-ACF2? 1–5
Components of CA-ACF2
The ACF Command
The ACF command lets you create and maintain the major components of CA-ACF2. You can use this command to add, change, delete, and display the records described previously. You can use the ACF command and subcommands on line or in batch. The HELP subcommand provides instructions on the use of commands and ISPF panels and descriptions of various fields. See the Administrator Guide for detailed information on how to use the ACF command.
CA-ACF2 WorkStation
CA-ACF2 WorkStation (CA-ACF2/WS) simplifies enterprise-wide security management with advanced graphical administration, auditing, reporting, and monitoring facilities. CA-ACF2 WorkStation combines a fast and easy-to-use Windows-based GUI for single-point administration of all CA-ACF2 systems with centralized monitoring and reporting of security events throughout a heterogeneous, multivendor environment.
CA-ACF2 WorkStation:
■ Enables faster and simpler security administration
■ Provides an easy-to-use, consistent, graphical interface to CA-ACF2 security functions
■ Reduces the learning curve for new CA-ACF2 administrators
■ Provides security administrators with a system-wide, top-down view of events
■ Provides centralized real-time monitoring of security events
■ Indicates administrative authority on GUI
■ Offers additional flexibility through the command line interface
1–6 Implementation Planning Guide
Components of CA-ACF2
CA-ACF2 Security and Maintenance Reports
These reports assist with security maintenance, administration, and auditing. Use these reports to monitor access and security violations. Most reports use data produced by CA-ACF2 and recorded with the IBM System Management Facility (SMF). You can also use CA-Earl (Easy Access Report Language) to run the CA-ACF2 reports. With CA-Earl, you can customize the reports to meet installation-specific reporting needs. For details, see Reporting with CA-Earl. The reports available with CA-ACF2 provide three types of information:
■ Data and resource logging violation reports
■ Database maintenance reports
■ Cross-reference reports
See the Reports and Utilities Guide for complete information on all CA-ACF2 reports.
Data and Resource Logging Violation Reports
ACFRPTCR—TSO Command Statistics Log. TSO command logging and violation records.
ACFRPTDS—Data Set/Program Event Log. Violation records and journaled access requests for data sets and programs.
ACFRPTJL—Restricted Logonid Job Log. All system accesses by logonids with the RESTRICT field. These IDs, usually used by production jobs, do not have an associated password.
ACFRPTPW—Invalid Password/Authority Log. All unsuccessful system access attempts.
ACFRPTRV—Resource Event Log. Loggings, violations, and trace requests related to resources.
ACFRPTST—SAF Trace Report. Output from the SECTRACE command, including RACROUTE parameter lists and environmental information.
ACFRPTPP—The SMF Preprocessing utility. Pre-processes the input SMF data and builds multiple files that are used as input to the other reports. This utility eliminates the need to rerun each report program against all of the SMF data, allowing the individual reports to run more quickly.
ACFRPTST—SECTRACE formatting utility. The CA-ACF2 SAF diagnostic trace, SECTRACE, can optionally write trace records of SAF calls to the system SMF file. The ACFRPTST utility program is used to select the desired records and produce the desired reports.
ACFRPTNV—Environmental report. This report lists important CA-ACF2 operator interactions including the start and stop time of CA-ACF2 and any ACF2 operator commands issued at the console.
What Is CA-ACF2? 1–7
Components of CA-ACF2
ACFRPTOM—OpenEdition report. This report provides OpenEdition system loggings and violations.
MACRPDRV—This report lists logged activity in a Mandatory Access Control (MAC) environment, such as users logging on, table updates, and accesses to data sets.
MACRPDMP—This report provides hex dumps of records and is normally used in diagnostic procedures in a Mandatory Access Control (MAC) environment.
Database Maintenance Reports
ACFRPTEL—Infostorage Update Log. Modifications made to entry records, resource rule sets, and other Infostorage database records.
ACFRPTLL—Logonid Modification Log. Modifications to the Logonid database.
ACFRPTRL—Rule-ID Modification Log. Modifications to the Rule database.
Cross-Reference Reports
ACFRPTIX—Data Set Index Report. Information about changes to access rules that affect a specific data set high-level index.
ACFRPTRX—Logonid Access Report. All access rules that apply to a specific logonid or UID.
ACFRPTSL—Selected Logonid List. All logonid records matching the user-specified selection criteria.
ACFRPTXR—Cross-Reference Report. All users who have access to a specified data set or resource.
CA-Earl
The CA-Earl facility is provided with CA-ACF2. CA-Earl is a powerful, easy-to-use reporting language with straightforward commands. With CA-Earl, you can:
■ Create custom CA-ACF2 reports quickly
■ Combine sequential files created on OS/390 systems and process all the data in a single run
■ Write entirely new reports using advanced features
■ Include local information in SMF records through an SMF preprocessor exit
1–8 Implementation Planning Guide

Modifying CA-ACF2
Other CA-ACF2 Components ISPF Panels—Let you perform the following CA-ACF2 administration online:
■ Compile, decompile, and delete access and resource rules and field records
■ Add, change, delete, and list logonid records
■ Display CA-ACF2 system processing options
■ Run CA-ACF2 reports at the terminal
■ Execute CA-ACF2 utility programs at the terminal
■ Add, change, delete, and list structured infostorage records
Command Propagation Facility—Lets you maintain the CA-ACF2 databases across a network from one specially defined “home node.”
CA-ACF2 Database Recovery—The ACFRECVR utility re-creates one or all of the CA-ACF2 databases if they become damaged. ACFRECVR accepts one or more of the database backup files and selected database maintenance logging records and merges them to create a current database.
Other CA-ACF2 Utilities—We provide many utilities to assist in the initial implementation and installation of CA-ACF2. We also provide utilities to help streamline ongoing CA-ACF2 maintenance activities, recover CA-ACF2 databases, and SMF management.
Modifying CA-ACF2 There are two types of local modifications you should consider: modifications to standard OS/390 components and standard CA-ACF2 components.
Existing or Planned Local Modifications—Many sites modify standard OS/390 components to provide added functions. You should review these local modifications before you install CA-ACF2. In some cases, the local code can perform some security-related function that CA-ACF2 replaces. In these cases, you can remove the local code. In other cases, the code must remain to perform some needed local function and must reside in the same exit or front-end the same intercept point that CA-ACF2 uses. This requires a decision as to which code (CA-ACF2 or the local modification) should gain control first. In general, CA-ACF2 should gain control first because it determines whether the requested function is legitimate. If CA-ACF2 lets the process continue, the local code can perform its function.
What Is CA-ACF2? 1–9
General Installation and Maintenance Planning
Local Modifications to CA-ACF2—CA-ACF2 provides a high level of flexibility to reduce the need for modifications. Yet many sites find new ways of using CA-ACF2 functions and sometimes tailor them beyond what can be done with the provided options. This usually requires producing local code for one or more of the provided CA-ACF2 exits. Most sites find these modifications can wait until the system is installed, tested, and operational. Most sites install CA-ACF2 without using the local exits. While you should consider possible local modifications (due to some special naming conventions or transitional implementation plans) and plan for this during installation planning, you can perform the actual coding and activation of these changes after the initial installation and IPL has established the base system.
At What Maintenance Level Should OS/390 Be Operating?
Each CA-ACF2 distribution tape provides the current requirements for operating system maintenance levels. In general, OS/390 should be at a relatively recent level (maintenance provided by the system hardware vendor applied in six months of the release date). It also should have been running at that level in production a minimum of one week to provide a valid, stable base for CA-ACF2 code installation and testing. See the Getting Started guide for exact system requirements.
General Installation and Maintenance Planning You should be planning for the technical installation of CA-ACF2 and its ongoing systems maintenance concurrently with the general implementation planning. Some of the topics that you should consider in the technical portion are listed in the following. These are in general chronological sequence but, with careful planning and coordination, you can do many of these steps in parallel.
1. Planning and organizing for CA-ACF2 installation, including schedules, responsibility assignments, and check points.
2. Establishing a stable operating system at the minimum required maintenance level.
3. Reviewing special program products (such as data or operational management packages) that already exist on the system and planning for the resolution of any possible conflicts.
4. Reviewing local system modifications and planning for the resolution of any logic or physical (locational) conflicts.
5. Planning for the creation of logonid records so users can access the system. You can create these records from the ISPF panels or by issuing the ACF command and subcommands directly from the TSO Ready prompt. You can also issue the ACF command through the batch facility.
1–10 Implementation Planning Guide
General Installation and Maintenance Planning
6. Planning for and processing the CA-ACF2 distribution tape and steps, such as:
■ Applying maintenance from pertinent genlevel maintenance updates (if any)
■ Installing any necessary CA Common Services for z/OS and OS/390 (formerly know as Unicenter TNG Framework for OS/390 Common Services)
■ Deciding whether to install CA-ACF2 using CA-ACTIVATOR
Unloading the tape is usually done early to obtain other information that you might need to proceed with some of the other steps described here.
7. Selecting the ACFFDR and GSO options (as applicable) and preparing the assemblies and modules for CA-ACF2 processing.
8. Completing the installation process, including:
■ Creating the final target system with all CA-ACF2 modules
■ Making final adjustments for the local running environment
■ Defining and initializing the CA-ACF2 databases or any additional groups of databases
■ IPLing the system (normally in LOG mode)
■ Establishing the initial system users through the logonid record
■ Testing the system and rules
9. Tailoring and testing the CA-ACF2 database recovery procedures.
10. Running and reviewing CA-ACF2 reports.
11. Establishing practices and procedures for:
■ The timely, ongoing application of CA-ACF2 and system maintenance.
■ The periodic review and modification of CA-ACF2 system options (for example, updating the ACFFDR)
■ Migration of CA-ACF2 controls to other areas of your system.
You can get help with your implementation of CA-ACF2 from Computer Associates Global Professional Services (GPS) organization, which can also provide on-site training at your installation. Contact your local Computer Associates sales representative for additional information.
What Is CA-ACF2? 1–11

General Installation and Maintenance Planning
Other Product Interfaces
There might be several other software products running at your site with CA-ACF2. These can include database systems, disk management and archiving systems, tape management systems, sorts, and other utilities and packages. Many of them can continue to operate without any changes or special information related to implementing CA-ACF2. With some software products, however, you may notice some minor differences and might want to consider using special CA-ACF2 interfaces to provide the best overall security level.
Other Documentation and Publications
Interfaces to other products are available through Computer Associates, other CA-ACF2 users, or other software vendors. Review other CA-ACF2 guides (such as the current Systems Programmer Guide) and Computer Associates periodicals (such as Security & Audit News) for the most current information.
We also recommend that you take advantage of Computer Associates’ support facilities available through Internet access. CA-TCC (Total Client Care) functions let you open issues, download fixes, and search for problems, information, and solutions. Access to CA-TCC through the Internet requires that you register. See the Computer Associates web page at http://www.ca.com for more information.
1–12 Implementation Planning Guide
Chapter
2 Planning CA-ACF2 Implementation
This chapter contains the preliminary steps you should consider when planning for total CA-ACF2 security. Information in this chapter includes:
■ Organizing for security
■ Appointing a Security Administrator (SA) to coordinate implementation and administration of CA-ACF2
■ Appointing an Implementation Team (IT) to implement CA-ACF2
■ Preparing an implementation schedule
■ Distributing CA-ACF2 documentation
■ Identifying security policies and goals
■ Identifying the local and global operating environments at your site
■ Selecting options for CA-ACF2 to fit your needs
Organizing for Security The most commonly used approach in organizing sites for CA-ACF2 is to:
■ Appoint someone as the Security Administrator (SA). This is a permanent position. In addition to organizing the implementation of CA-ACF2, the SA manages the information security program for the site. If the size and level of activity at your site warrants, the SA should have the option to assign more people to the information security function (full- or part-time) to work for or with the SA. These assignments can be on a centralized or decentralized basis, according to your requirements.
■ Establish a CA-ACF2 Implementation Team (IT) to help the SA plan, install, and implement CA-ACF2 and any related security practices and procedures. The team can be disbanded after CA-ACF2 is implemented, or kept intact to assist with ongoing security issues.
Most of the effort in implementing and using CA-ACF2 occurs early, during the planning and implementation phases (usually the first few months).
Planning CA-ACF2 Implementation 2–1
Organizing for Security
Appointing a Security Administrator (SA)
The SA serves as the central coordinator for information security and represents a permanent staff position. Although the SA does not have to be a programmer or computer operator, some data processing expertise is desirable. The SA’s responsibility encompasses all phases of implementing CA-ACF2, including:
■ Forming and heading the Implementation Team (IT)
■ Initial planning
■ Selecting CA-ACF2 options
■ Migrating to full security
■ Performing ongoing security administration
The SA should have a relatively autonomous position in the organization to allow for unbiased decisions and enforcement of policies and rules. Thus this should not be a low-level position inside the data processing department. It also should not be an EDP audit position because EDP auditors must independently audit the security system and its implementation and administration. Commitment to data security is vital to achieve a standard level of protection and security enforcement.
Security Administration after CA-ACF2 Is Implemented
After CA-ACF2 controls have been integrated into production systems, the SA must enforce security measures. Ongoing administrative functions for CA-ACF2 include:
■ Updating CA-ACF2 databases
■ Reviewing CA-ACF2 reports to monitor activities on the system
■ Following up on questionable acts or attempted violations based on these reports
After CA-ACF2 is installed, the SA coordinates administration of the system. The SA’s total workload after CA-ACF2 implementation depends on:
■ The volume of work on the system.
■ The degree of centralization or decentralization of CA-ACF2 administrative duties.
■ Site commitment to data security. This affects:
– The level of CA-ACF2 rules
– Follow-up actions taken on violation attempts
– Whether or not you are using special interfaces
2–2 Implementation Planning Guide
Organizing for Security
These administrative functions and responsibilities can be centralized or decentralized. Whether CA-ACF2 administration is centralized or decentralized, and to what degree, depends on your company’s size, structure, and unique needs. CA-ACF2 lets you decide how administration is handled, both initially and on a continuing basis.
You can decentralize the administrative responsibilities by authorizing other people in the organization to fill out forms to request changes to logonid records, access rules, or other CA-ACF2 security controls. The forms can be forwarded to the SA, who decides whether the requests should be granted and performs the updates to CA-ACF2.
You can also decentralize CA-ACF2 administration by allowing some other users limited (scoped) authority to perform functions such as updating logonid records and access rules. You can give these scoped SA’s jurisdiction over limited groups of users, data, or resources. See the “Maintaining Scope Records,” chapter in the Administrator Guide, for information on using this feature.
Appointing the Implementation Team (IT)
The primary function of the Implementation Team (IT) is to properly implement CA-ACF2 and related information security systems and procedures. This is a limited function. Most of the work occurs during the planning and implementation phases. The team often disbands after CA-ACF2 has been successfully implemented and is functioning in ABORT mode.
The Implementation Team, however, can also be useful as an ongoing Information Security Committee to assist the SA in identifying security policies and enforcing or eliminating these policies at different levels. Many sites choose to retain the team and have meetings periodically to review the system, reconsider options, and evaluate overall security measures.
A similar security committee might already exist at your site. If so, you can use this group as the basis for your CA-ACF2 Implementation Team.
The activities of the Implementation Team include:
■ Defining the security policy, based on considerations such as:
– Corporate/system security philosophies
– Organization structure
– How centralized or decentralized CA-ACF2 administration is to be
– Who has what responsibilities and authorizations
– Basic user attributes
■ Defining the user identification string (UID)
Planning CA-ACF2 Implementation 2–3
Organizing for Security
■ Establishing an implementation plan. This includes:
– Selecting system options for CA-ACF2 startup
– Reviewing the site’s naming conventions
– Reviewing technical considerations
– Identifying special local requirements
– Creating initial logonids and access rules
– Overseeing documentation distribution and user training
– Monitoring implementation plan progress
– Resolving conflicts or delays
The Implementation Team normally consists of the SA (as chairperson) and three to eight other persons. They usually represent areas such as:
Systems Maintenance—Usually the systems programmer responsible for installing and maintaining CA-ACF2. This person should be familiar with the operating system, JES, SMP, SYSGENs, and related areas.
Data Center Operations—Someone from operations who is familiar with current naming conventions, production schedules, and normal operations maintenance.
User Support Services—A representative to present the user’s needs and provide communication between the technical and nontechnical personnel.
User Groups—Representatives from these groups (for example, the accounting department) might be included on the IT where user support services people are not available to represent the user’s point of view.
Data Security Officers—If database administrators (DBAs), physical security personnel, or other personnel are already active in the data security area, they can often provide valuable input on current use and future needs of data security.
EDP Audit—A representative from the EDP audit group can help define audit concerns for internal controls and their auditability. An auditor can often suggest why you should use certain options for acceptable levels of control, accountability, and auditability.
Upper Management—If it is not possible to have a member of upper management attend all committee meetings, the SA can represent this group. Or the IT can forward recommendations to upper management for action. This may be required if corporate security policies must be clarified or established.
2–4 Implementation Planning Guide
Preparing the Implementation Schedule
Preparing the Implementation Schedule An early function of the IT is to establish a preliminary CA-ACF2 implementation schedule. This can include only the major points, such as the test initial program load (IPL), the production installation and IPL, and migration to ABORT mode. As the team reviews the CA-ACF2 documentation and identifies additional tasks it needs to perform, add them to the schedule. A good implementation schedule includes a detailed list of tasks, target completion dates for each, and the name of the person responsible for completing that task. The IT should monitor the progress in each area, resolve conflicts, and periodically update the schedule as necessary.
The sample schedule on the next page provides general time frames for the various phases of CA-ACF2 implementation, but you should use specific completion dates wherever possible. The example does not include responsibility assignments because they vary from site to site, depending on the type and number of persons available for the project and the size of the task. Add more detailed tasks as you define them.
The timing for your implementation can vary significantly, depending on the circumstances at your site. Many of these activities can occur concurrently or can proceed at different rates independently. For example, the technical installation and IPL of the target system can occur before or after the less technical activities listed in Weeks 4 and 5. More detailed information on some of these topics, such as what should be done to perform the install or during the first IPL, is presented in later chapters of this guide.
Important
This is a CA-ACF2 implementation schedule, not a CA-ACF2 installation schedule. The installation of CA-ACF2 is merely the activation of the code on your computer. The implementation of a security system includes much more, whether the tool to help automate the security process is CA-ACF2 or some other product. That is why the planning process is so important and why you should use a team of knowledgeable people rather than the one or two persons needed to just install the package.
Planning CA-ACF2 Implementation 2–5
Preparing the Implementation Schedule
Sample CA-ACF2 Implementation Schedule
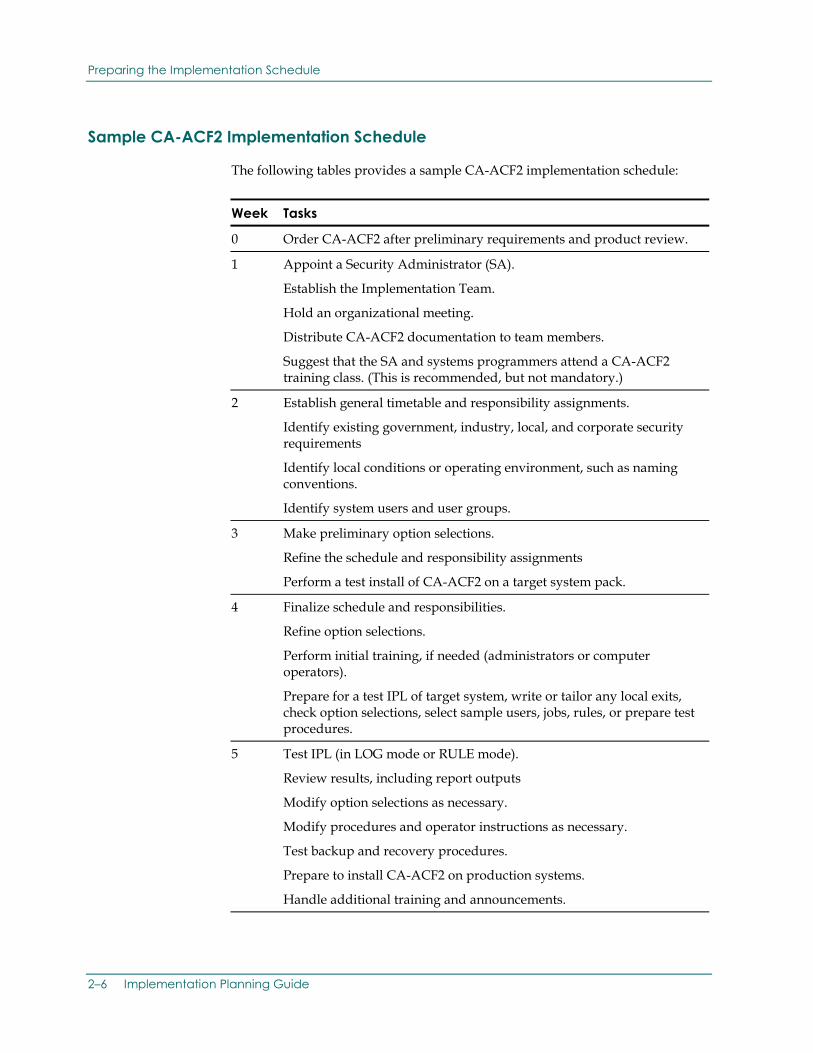
The following tables provides a sample CA-ACF2 implementation schedule:
Week Tasks
0 Order CA-ACF2 after preliminary requirements and product review.
1 Appoint a Security Administrator (SA).
Establish the Implementation Team.
Hold an organizational meeting.
Distribute CA-ACF2 documentation to team members.
Suggest that the SA and systems programmers attend a CA-ACF2 training class. (This is recommended, but not mandatory.)
2 Establish general timetable and responsibility assignments.
Identify existing government, industry, local, and corporate security requirements
Identify local conditions or operating environment, such as naming conventions.
Identify system users and user groups.
3 Make preliminary option selections.
Refine the schedule and responsibility assignments
Perform a test install of CA-ACF2 on a target system pack.
4 Finalize schedule and responsibilities.
Refine option selections.
Perform initial training, if needed (administrators or computer operators).
Prepare for a test IPL of target system, write or tailor any local exits, check option selections, select sample users, jobs, rules, or prepare test procedures.
5 Test IPL (in LOG mode or RULE mode).
Review results, including report outputs
Modify option selections as necessary.
Modify procedures and operator instructions as necessary.
Test backup and recovery procedures.
Prepare to install CA-ACF2 on production systems.
Handle additional training and announcements.
2–6 Implementation Planning Guide
Distributing CA-ACF2 Documentation
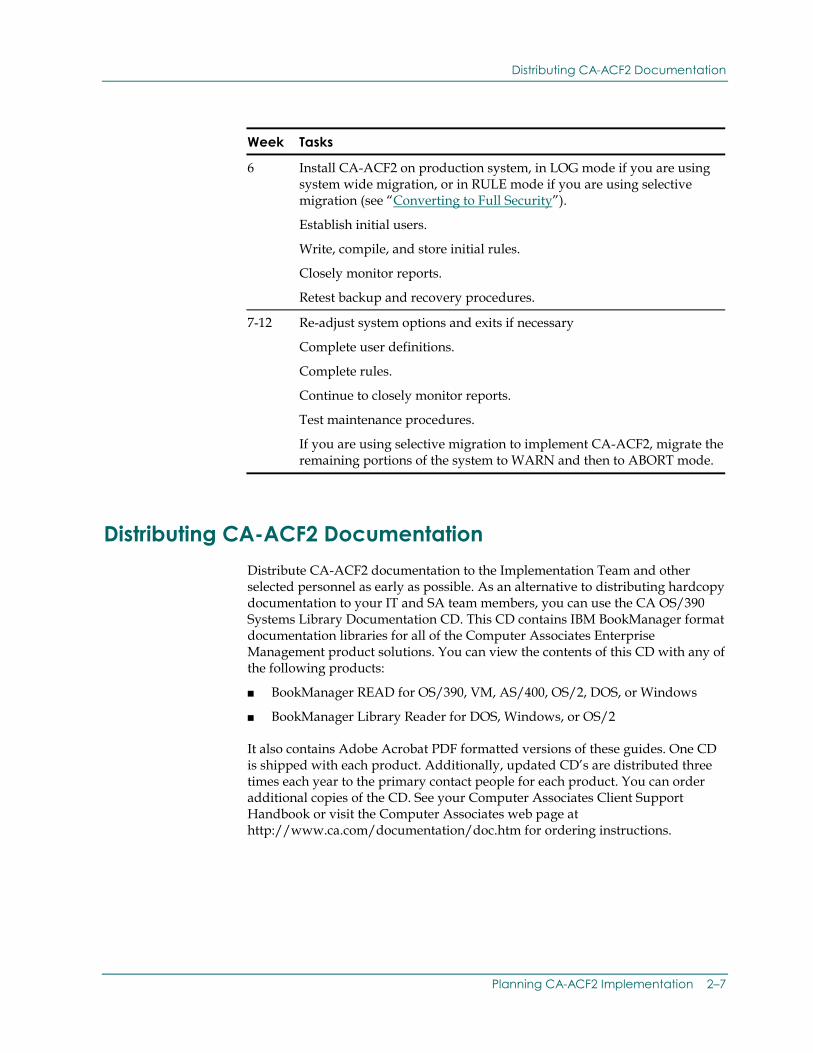
Week Tasks
6 Install CA-ACF2 on production system, in LOG mode if you are using system wide migration, or in RULE mode if you are using selective migration (see “Converting to Full Security”).
Establish initial users.
Write, compile, and store initial rules.
Closely monitor reports.
Retest backup and recovery procedures.
7-12 Re-adjust system options and exits if necessary
Complete user definitions.
Complete rules.
Continue to closely monitor reports.
Test maintenance procedures.
If you are using selective migration to implement CA-ACF2, migrate the remaining portions of the system to WARN and then to ABORT mode.
Distributing CA-ACF2 Documentation Distribute CA-ACF2 documentation to the Implementation Team and other selected personnel as early as possible. As an alternative to distributing hardcopy documentation to your IT and SA team members, you can use the CA OS/390 Systems Library Documentation CD. This CD contains IBM BookManager format documentation libraries for all of the Computer Associates Enterprise Management product solutions. You can view the contents of this CD with any of the following products:
■ BookManager READ for OS/390, VM, AS/400, OS/2, DOS, or Windows
■ BookManager Library Reader for DOS, Windows, or OS/2
It also contains Adobe Acrobat PDF formatted versions of these guides. One CD is shipped with each product. Additionally, updated CD’s are distributed three times each year to the primary contact people for each product. You can order additional copies of the CD. See your Computer Associates Client Support Handbook or visit the Computer Associates web page at http://www.ca.com/documentation/doc.htm for ordering instructions.
Planning CA-ACF2 Implementation 2–7
Distributing CA-ACF2 Documentation
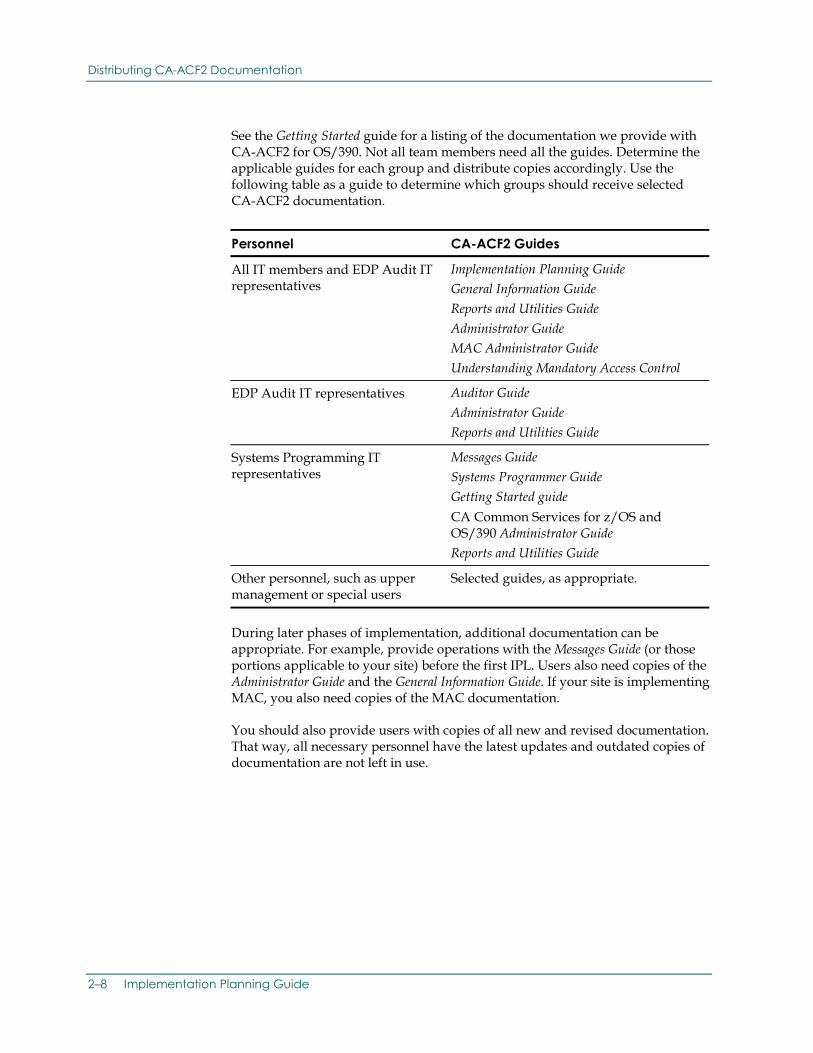
See the Getting Started guide for a listing of the documentation we provide with CA-ACF2 for OS/390. Not all team members need all the guides. Determine the applicable guides for each group and distribute copies accordingly. Use the following table as a guide to determine which groups should receive selected CA-ACF2 documentation.
Personnel CA-ACF2 Guides
All IT members and EDP Audit IT representatives
Implementation Planning Guide General Information Guide Reports and Utilities Guide Administrator Guide MAC Administrator Guide Understanding Mandatory Access Control
EDP Audit IT representatives Auditor Guide Administrator Guide Reports and Utilities Guide
Systems Programming IT representatives
Messages Guide Systems Programmer Guide Getting Started guide CA Common Services for z/OS and OS/390 Administrator Guide Reports and Utilities Guide
Other personnel, such as upper management or special users
Selected guides, as appropriate.
During later phases of implementation, additional documentation can be appropriate. For example, provide operations with the Messages Guide (or those portions applicable to your site) before the first IPL. Users also need copies of the Administrator Guide and the General Information Guide. If your site is implementing MAC, you also need copies of the MAC documentation.
You should also provide users with copies of all new and revised documentation. That way, all necessary personnel have the latest updates and outdated copies of documentation are not left in use.
2–8 Implementation Planning Guide
Identifying Security Policies, Goals, and Objectives
Before you install and activate CA-ACF2, you should review the following:
■ The Command Propagation Facility (CPF). See the Administrator Guide.
■ Planning for backup and recovery. See the Administrator Guide.
■ CA-Earl reporting:
– Reporting with CA-Earl
– CA-Earl documentation set
– ACFRPTPP, the SMF Preprocessor Utility. See the Reports and Utilities Guide.
■ Mandatory access control (MAC), if you are using this facility. See Understanding Mandatory Access Control.
You should also review the ISPF panels in the Reports and Utilities Guide and the Administrator Guide because you can choose to modify these panels to your specific needs.
Identifying Security Policies, Goals, and Objectives The IT should have some idea of your company data security goals and objectives before implementing CA-ACF2. CA-ACF2 is a tool to implement security policies, automate policy enforcement, and help the company achieve its goals. If you do not define these policies, it is very difficult for the IT to choose appropriate CA-ACF2 options and proceed successfully through implementation.
Various factors influence your policies and objectives. These include, but are not limited to, the following areas. Review them for applicability to your site.
Government Regulations—The U.S. federal government has a number of regulations that can impact data security requirements. These include the Privacy Act, Foreign Corrupt Practices Act, SEC and other agency regulations, and various other accounting and reporting requirements. There are also similar regulations in other countries, such as national privacy acts, transborder data flow regulations, and accounting and taxing regulations. Additionally, take into account any state, provincial, or other local regulations. Government regulations for government agencies are often even more encompassing, such as those requiring the use of mandatory access control.
Legal Requirements—Many legal requirements are tied to government regulations, such as requirements about controls over Electronic Fund Transfers. Others can be contractual, such as union agreements (unauthorized employee record accessibility). You can be subject to other requirements if you operate as a service bureau and have contractual agreements with customers about the confidentiality and protection of their data and programs.
Planning CA-ACF2 Implementation 2–9
Identifying Security Policies, Goals, and Objectives
Industry Practices and Agreements—Some industries share certain data, while many highly competitive industries tightly guard much of their data. In some areas, the possibility of industrial espionage can be a factor. Using access control software and personal passwords for individual identities are examples of data security.
Sabotage, White Collar Crime, and Computer Frauds—Weigh threats from external forces (such as activist groups and competition) and internal forces (such as disgruntled employees and opportunists). Other factors that can affect these areas include: How easy is it to convert to cash your available assets using computer fraud? How many people (in collusion) would need to be involved? What are your personnel practices? For example, how are dismissals handled?
Good Business Practices—Use normal business practices (the same practices that your company uses in non-computerized areas) in computerized environments. These include separation of function, a clear line of responsibility and authority, individual accountability, knowing what the control procedures are and that they are in place, knowing who has access to data and records and controlling this access, and various auditability information.
Existing Corporate Policies—Almost every company or agency has some written policies already in place. Many of them do not relate to data or system security. Others are due to the factors previously mentioned and can be reviewed as part of these other areas. Identify and consider all existing policies relating to data security, access control, and computer control auditability when you select CA-ACF2 options and build an overall security plan. Do not overlook future policies because they are probably easier to implement and enforce if you consider them when designing the initial overall plan.
Organizational Impact—Sites usually want to implement data security that is transparent to users. While CA-ACF2 provides options to assist in its implementation and transition phases, these alone do not make security transparent. Normally, a site is changing from little or no data access control to significant controls. This is a big difference that cannot be totally transparent. With the proper planning, education, and phased implementation, CA-ACF2 can alleviate most problems and even create a positive, progressive attitude among users.
The IT can also make organizational decisions about how to implement CA-ACF2. These decisions include separation of function and centralization or decentralization in the administration of CA-ACF2 and related controls.
Procedure Enforcement Needs—CA-ACF2 can also be a valuable aid in enforcing various corporate policies not directly related to data protection. These include items such as naming conventions for user identification. It can help enforce consistent policies throughout the corporation or agency, including different physical locations. The IT should consider these needs when selecting CA-ACF2 options and implementing its controls.
2–10 Implementation Planning Guide
Identifying Your Local Operating Environment
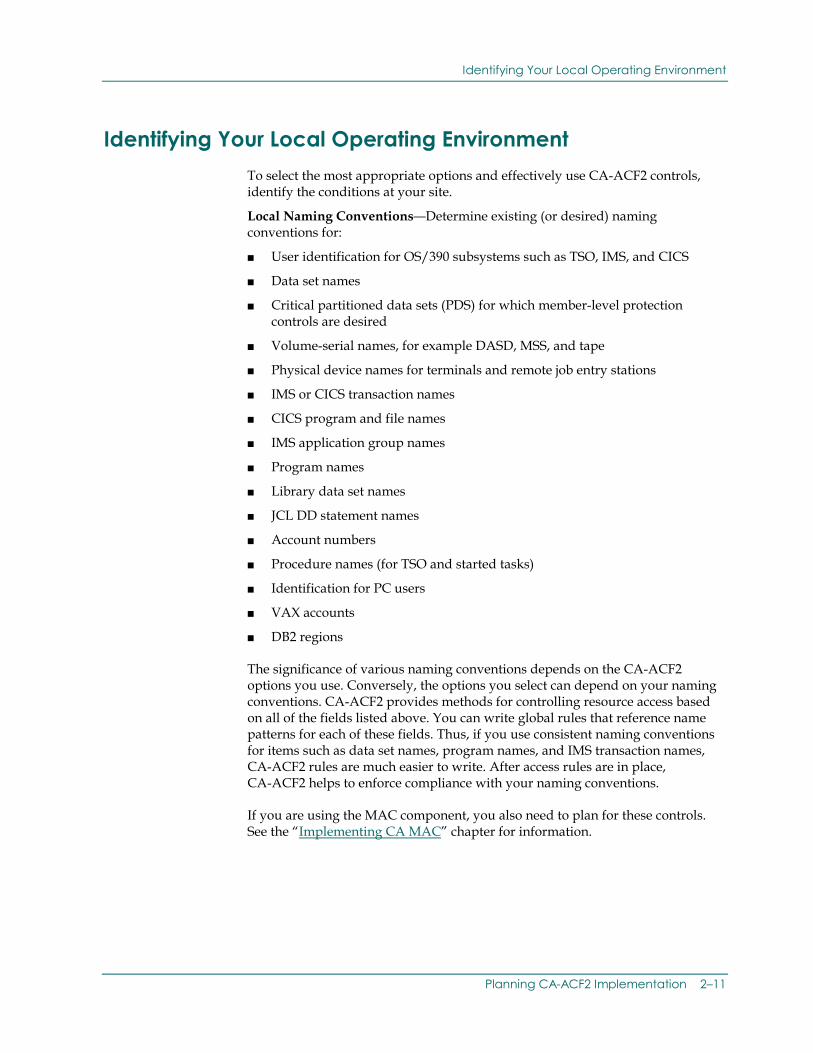
Identifying Your Local Operating Environment To select the most appropriate options and effectively use CA-ACF2 controls, identify the conditions at your site.
Local Naming Conventions—Determine existing (or desired) naming conventions for:
■ User identification for OS/390 subsystems such as TSO, IMS, and CICS
■ Data set names
■ Critical partitioned data sets (PDS) for which member-level protection controls are desired
■ Volume-serial names, for example DASD, MSS, and tape
■ Physical device names for terminals and remote job entry stations
■ IMS or CICS transaction names
■ CICS program and file names
■ IMS application group names
■ Program names
■ Library data set names
■ JCL DD statement names
■ Account numbers
■ Procedure names (for TSO and started tasks)
■ Identification for PC users
■ VAX accounts
■ DB2 regions
The significance of various naming conventions depends on the CA-ACF2 options you use. Conversely, the options you select can depend on your naming conventions. CA-ACF2 provides methods for controlling resource access based on all of the fields listed above. You can write global rules that reference name patterns for each of these fields. Thus, if you use consistent naming conventions for items such as data set names, program names, and IMS transaction names, CA-ACF2 rules are much easier to write. After access rules are in place, CA-ACF2 helps to enforce compliance with your naming conventions.
If you are using the MAC component, you also need to plan for these controls. See the “Implementing CA MAC” chapter for information.
Planning CA-ACF2 Implementation 2–11
Identifying Your Local Operating Environment
Data Set Name High-Level Indexes—Conventions used for high-level index names are important because of the way CA-ACF2 validates an access request. When validating a request, CA-ACF2 compares a value associated with the user (typically the user’s logonid) to the high-level index of the data set being accessed to determine if that user owns the data set. If these values do not match, CA-ACF2 then selects the appropriate rule set and interprets the rule to determine if the requested access should be permitted.
If you are planning to use PDS Member-Level Protection controls to secure critical partitioned data set (PDS) libraries, see the Administrator Guide for specific implementation considerations.
Standard Security Mechanisms—Identify current security mechanisms and decide those that will eventually be replaced and those that will be used with CA-ACF2. Before CA-ACF2 is in system-wide ABORT mode, you can keep all current security mechanisms active. CA-ACF2 does not actually deny data set and resource accesses while in QUIET, LOG, or WARN mode. If you choose to implement the RULE mode option, you can phase in your selection of data sets placed under ABORT mode on a rule set basis. You can activate controls such as CA-ACF2 TSO command limiting independently regardless of the mode CA-ACF2 operates under.
CA-ACF2 uses the System Authorization Facility (SAF) to maintain security on the system. When other products on the system make security-related requests to SAF, CA-ACF2 intercepts the calls and processes them as corresponding CA-ACF2 calls.
Your installation can customize how CA-ACF2 processes SAF calls. For more information, see the Administrator Guide.
CA-ACF2 does not interfere with mechanisms such as OS password protection, expiration date protection, PCF (IBM Program Control Facility), or most other local security mechanisms (for example, those based on checking account numbers or job names in SMF exits). After CA-ACF2 is in ABORT mode, you can replace such mechanisms with CA-ACF2 features. Others you can retain permanently for additional security. For example, CA-ACF2 does not interfere with application-level security checks, such as special processing performed in a batch, IMS, or CICS application program. However, because CA-ACF2 is not designed to replace or supersede these checks, you should retain most application-level checking even after CA-ACF2 is in full ABORT mode. You might use CA-ACF2 to implement these controls in a different way, such as by centralizing control information in CA-ACF2 databases.
User Identifications—Determine whether each system user is uniquely defined to the system. Identify all users and any existing individual or group IDs. Sometimes an entire group of users has a single system identity (for example, a group of IMS operators sharing one terminal). In other cases, a single system user can currently have multiple IDs or passwords for different tasks (for example, a TSO user with multiple TSO user ID, an IMS sign-on ID, and a CICS ID). Establish plans to positively identify each system user with a unique CA-ACF2 logonid and single password.
2–12 Implementation Planning Guide
Identifying Your Local Operating Environment
You must also select a CA-ACF2 User Identification string (UID) format based on your individual ID patterns, and organizational groupings. (See the Selecting CA-ACF2 Options section later in this chapter.)
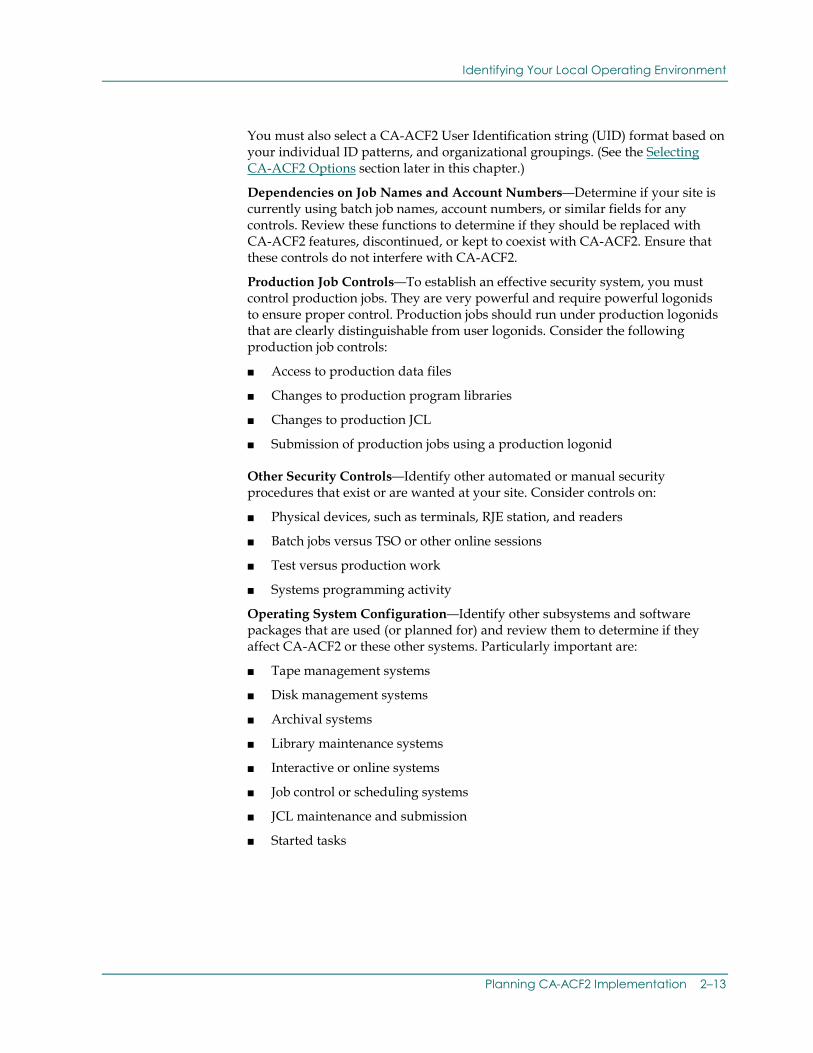
Dependencies on Job Names and Account Numbers—Determine if your site is currently using batch job names, account numbers, or similar fields for any controls. Review these functions to determine if they should be replaced with CA-ACF2 features, discontinued, or kept to coexist with CA-ACF2. Ensure that these controls do not interfere with CA-ACF2.
Production Job Controls—To establish an effective security system, you must control production jobs. They are very powerful and require powerful logonids to ensure proper control. Production jobs should run under production logonids that are clearly distinguishable from user logonids. Consider the following production job controls:
■ Access to production data files
■ Changes to production program libraries
■ Changes to production JCL
■ Submission of production jobs using a production logonid
Other Security Controls—Identify other automated or manual security procedures that exist or are wanted at your site. Consider controls on:
■ Physical devices, such as terminals, RJE station, and readers
■ Batch jobs versus TSO or other online sessions
■ Test versus production work
■ Systems programming activity
Operating System Configuration—Identify other subsystems and software packages that are used (or planned for) and review them to determine if they affect CA-ACF2 or these other systems. Particularly important are:
■ Tape management systems
■ Disk management systems
■ Archival systems
■ Library maintenance systems
■ Interactive or online systems
■ Job control or scheduling systems
■ JCL maintenance and submission
■ Started tasks
Planning CA-ACF2 Implementation 2–13
Identifying Your Local Operating Environment
Non-TSO Interactive Systems—A non-TSO interactive system that is APF-authorized or runs in supervisor key can access all facilities of the CA-ACF2 system. These facilities are:
■ System access validation. Control block descriptor macros define the control blocks that are needed to validate a user to the system. Error messages are returned so that no error code interpretation must be done by the interactive subsystem. You can define additional fields in the logonid record to contain information needed by the subsystem.
■ User control block. Necessary to do data set access validation. All necessary fields in this control block are available after the user is validated by the system.
■ Data set access validation. Done by the subsystem through an SVC call pointing to a parameter list. This list includes the pointer to the user control block and the data set name. Any necessary logging is done by the SVC interface, which provides a return code and message indicating if access is permitted. The subsystem is responsible for issuing the call in the appropriate place and taking the correct action.
■ Logonid record display and alteration. Done by the subsystem. Display or alteration uses an SVC call that points to a parameter list and user control block. Subroutines are provided to decode the user input operands and create the internal format text used for communicating with the central facility and to convert the internal format text into the display format used by the LIST subcommand of the TSO ACF command.
■ Job submission. A JES control statement is available when an authorized interactive system submits a job on behalf of a user. This system becomes authorized by issuing the ACFSET macro with the JOBFROM=YES operand or by using the JOBFROM attribute in the logonid record and the following statement image immediately after the JOB statement: //*JOBFROM logonid/source
If the submitted job has no specified logonid, the one from the JOBFROM statement is used. If the supplied logonid matches the one from the JOBFROM statement, no password is required. The supplied source is propagated with the job to be used for data access control.
■ Cleanup. The referenced access and resource rules are chained off the user control block in the subsystem’s address space. When the user logs off the subsystem, the subsystem must issue a special cleanup call to the CA-ACF2 SVC to release space occupied by these rules and control blocks.
■ Performance. All CA-ACF2 VSAM operations (except for JES) are done in Step Must Continue (SMC) status (all TCBs in the address space are quiesced except for the one that issued the CA-ACF2 SVC). This method can have some negative performance implications for heavily used interactive systems.
2–14 Implementation Planning Guide
Identifying Your Global Operating Environment
To bypass SMC status, issue the ACFSET macro (SMC=NO). If you do this, the interactive system must ensure that the address space is not terminated while a CA-ACF2 VSAM operation is in progress. If the address space does terminate, it can leave control blocks in an unknown state that can require another IPL to correct it.
Because CA-ACF2 SVC routines can generate SMF records, all multitask systems that generate SMF records from other tasks must also run with the SMF=NO operand in effect.
■ System Authorization Facility (SAF). CA-ACF2 automatically intercepts all SAF calls made by other products that use SAF. For additional information on the SAF interface, see the Administrator Guide.
Identifying Your Global Operating Environment With the trend towards decentralized computing, it is highly likely that your system is connected in one way or another to other systems at and/or outside your installation. This can affect how you set up CA-ACF2. Consider the following areas:
SYSPLEX—Is your system part of a SYSPLEX configuration? Are these other systems also protected by CA-ACF2? Will these systems share security definitions? CA-ACF2 allows you the capability of using the XCF Communication Facility to broadcast CA-ACF2 operator commands to all systems within the SYSPLEX. CA-ACF2 also allows you to use the XES Data Sharing component to share CA-ACF2 database components between all systems within the SYSPLEX.
Connected VM/ESA Systems—Do any such systems exist in your environment? If so, are such systems protected by CA-ACF2 VM? Are the security environments consistent between the CA-ACF2 for OS/390 and CA-ACF2 for VM systems and should they be shared? CA-ACF2 uses shared DASD and the Database Synchronization Component (DSC) of CA-ACF2 for OS/390 and CA-ACF2 VM to synchronize CA-ACF2 databases in these environments. The DSC component is a replacement for shared DASD use in the CA-ACF2 for OS/390 to CA-ACF2 VM environment.
DASD-Connected Systems—If you have discrete systems protected by CA-ACF2 and these systems employ the use of shared DASD between the two systems, you can maintain one or more CA-ACF2 databases on a shared volume, sharing the databases between the two systems.
NJE (Network Job Entry) Connectivity—Your local system might be connected via NJE to other systems. These systems might be secured by CA-ACF2, CA-Top Secret, or perhaps even with other security products. You will likely need to identify the connections and any special security specifications for each.
Planning CA-ACF2 Implementation 2–15
Selecting CA-ACF2 Options
Internet/Intranet/FTP Connectivity—OS/390 releases provide native TCP/IP connectivity allowing access to your system from outside the traditional NJE and VTAM environments. You may have special security concerns for some or all of these accesses.
CA-ACF2/WorkStation—WorkStation allows you to administer and monitor multiple systems from a single workstation. You can administer and maintain any of Computer Associates Enterprise Management system solutions from a single workstation.
Password Synchronization—You can choose to consistently maintain password information for interconnected mainframe and non-mainframe systems in use at your installation by using the CA-ACF2 Universal Password Synchronization facility. This facility allows password information to be synchronized in a network of CA-ACF2 and CA Common Services for z/OS and OS/390 managed nodes. A change to a password on one platform will automatically be sent to the other connected systems, assuring your users of synchronized password information throughout your network.
Selecting CA-ACF2 Options You can select CA-ACF2 options to tailor the CA-ACF2 implementation to your needs in several phases. Some options (like the NOSTC field in the OPTS GSO record) must be used for the first IPL. You can select temporary values for other options for transition purposes, to phase CA-ACF2 protection into your system. For example, you can choose to control TSO and batch use of DASD only for the first week, expand to tape protection week two, IMS test region week three, IMS production week four, CICS control after that. You can indicate these choices to CA-ACF2 by setting up various CA-ACF2 parameters.
The IT should review all the CA-ACF2 options and select appropriate values for the first IPL and also those for later use (with target dates for changing the significant ones).
You can further tailor your system with CA-ACF2 exits. The IT should review the various possibilities and combinations. Be sure to consult other guides, such as the General Information Guide, Administrator Guide, Systems Programmer Guide, CICS Support Guide, IMS Support Guide and the IMS Batch Support Guide to study the available options. A few special areas are mentioned in the following.
2–16 Implementation Planning Guide

Selecting CA-ACF2 Options
The User Identification String (UID)
CA-ACF2 builds the UID from fields you select in the logonid record (usually including the logonid itself). These fields contain information about the user, such as location, department, position, project, function, and so on. When a user logs on, CA-ACF2 automatically constructs the UID describing that user. When the user attempts to access a data set or resource, CA-ACF2 checks the UID against the UID or UIDs listed in the rules. If the user’s UID matches the UID in the rule, CA-ACF2 allows or denies the access based on what is defined.
Note: You may see a second reference within CA-ACF2 and IBM documentation to a UID. This is the UNIX user identifier and is used by the OS/390 implementations of UNIX that are called UNIX System Services or OMVS, OpenEdition/MVS, and OpenEdition. The CA-ACF2 UID string and the UNIX UID are two completely separate data controls.
For example, suppose a user with the UID CHPCACC tries to read a data set. If the access rule for that data set (see the “Writing Access Rules”) allows access only to the UID CHPCDEV, the access is denied.
You can mask the UID in a rule to allow or deny access to certain groups of users based on a part of their UID. You do this by specifying some characters in the UID as * (asterisk) or – (dash). These are masking or “wildcard” characters that match any character allowed by CA-ACF2. For example, if the rule for a data set specifies CHPG*** as the UIDs that are allowed access, both CHPCACC and CHPCDEV can access the data. However, NYPCACC and NYPCDEV cannot because the first two characters of their UIDs do not match that in the rule.
Designing the UID
Use the UID to give users access to data based on whether or not the site feels they need it. The UID identifies users based on their job function and other criteria the site considers relevant for determining data access.
■ Decide how you want data access separated: for example, by a user’s location, department, job, and so forth. For example, a company can decide:
– People in the PC, midrange, and mainframe products divisions do not need access to data outside their divisions.
– Most people in the accounting, development, marketing, and documentation areas do not need access to each other’s data.
– Managers in the accounting department, however, need read access to marketing data.
– Publications people need access to development data for the products in their division.
You should include relevant information in the UID.
Planning CA-ACF2 Implementation 2–17
Selecting CA-ACF2 Options
■ Decide naming codes for the divisions you include. For example, the departments might be DEV, ACC, MKT, and so forth. Job functions might be MGR, SUP, DEV, or CLK.
■ Create the UID (see Creating the UID later in this chapter).
■ Write general rules for data and resources allowing access for the groups that need it.
■ Write specific rules denying or allowing exceptions.
Dynamically Altering the UID
You can dynamically alter the UID string using multi-value fields or the GROUP logonid field.
Using Multi-value Fields—CA-ACF2 supports multi-value logonid fields and multi-value UID strings. You can think of a multi-value field as an array or a table that has some number (you control the size) of entries.
Suppose your CA-ACF2 UID string is comprised of two fields, the job function and the logonid name. Frequently installations write access and/or resource rules based solely on the job function. This type of rule writing works if each user is associated with only one job function. However, if your installation has users that serve in multiple concurrent job functions, then this type of rule writing will not work for you. In this case, you would have to write specific rules that include both the project and logonid for the users with multiple job functions, or you would have to create separate logonids for each job function of a particular user. You can address this problem by defining the project field in the logonid record as a multi-value field. Once defined, your security administrator identifies the multiple job functions that the user performs and denotes this by setting the appropriate corresponding values in the multi-value project field in the logonid.
CA-ACF2 for OS/390 validation processing changes slightly to accommodate multi-value UID fields. CA-ACF2 does the initial validation based on the contents of the first value within the multi-value field. If access is allowed using that particular UID string, then no further processing is done. However, if the validation does not allow access, CA-ACF2 obtains the next project value within the multi-value field, alters the UID string accordingly, and retries the validation. This processing continues until access is allowed or until the multi-value UID field contents have been exhausted, at which time access is denied.
For additional information on the use of multi-value logonid fields, see the Getting Started guide. For more information about using multi-value fields in the UID string, see the Getting Started guide and the Administrator Guide.
Using the GROUP Logonid Field—Additionally, you can use the GROUP logonid field to create a UID the user can dynamically alter at system access time. You must include the GROUP logonid field in your UID concatenation. A user can specify at system entry the particular group he or she wants to be associated with and CA-ACF2 validates whether system access is granted as a member of that group.
2–18 Implementation Planning Guide
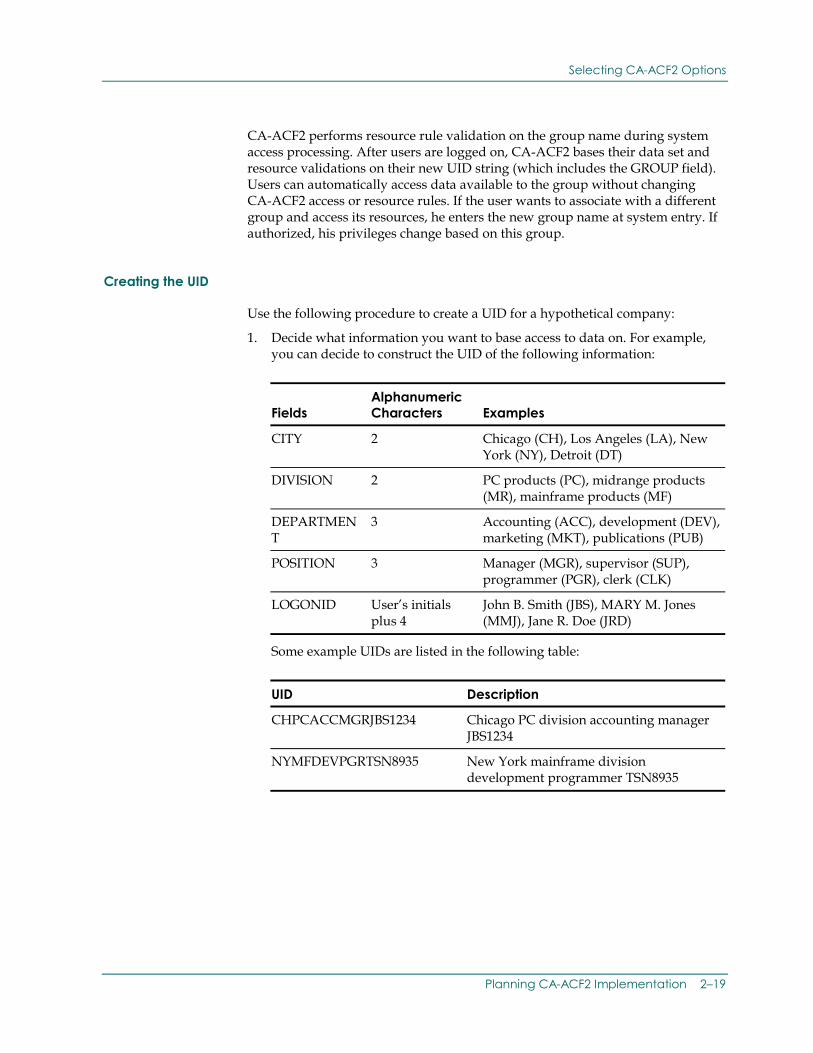
Selecting CA-ACF2 Options
CA-ACF2 performs resource rule validation on the group name during system access processing. After users are logged on, CA-ACF2 bases their data set and resource validations on their new UID string (which includes the GROUP field). Users can automatically access data available to the group without changing CA-ACF2 access or resource rules. If the user wants to associate with a different group and access its resources, he enters the new group name at system entry. If authorized, his privileges change based on this group.
Creating the UID
Use the following procedure to create a UID for a hypothetical company:
1. Decide what information you want to base access to data on. For example, you can decide to construct the UID of the following information:
Fields
Alphanumeric Characters
Examples
CITY 2 Chicago (CH), Los Angeles (LA), New York (NY), Detroit (DT)
DIVISION 2 PC products (PC), midrange products (MR), mainframe products (MF)
DEPARTMENT
3 Accounting (ACC), development (DEV), marketing (MKT), publications (PUB)
POSITION 3 Manager (MGR), supervisor (SUP), programmer (PGR), clerk (CLK)
LOGONID User’s initials plus 4
John B. Smith (JBS), MARY M. Jones (MMJ), Jane R. Doe (JRD)
Some example UIDs are listed in the following table:
UID Description
CHPCACCMGRJBS1234 Chicago PC division accounting manager JBS1234
NYMFDEVPGRTSN8935 New York mainframe division development programmer TSN8935
Planning CA-ACF2 Implementation 2–19
Selecting CA-ACF2 Options
2. Define the appropriate fields in the @CFDE macro. This macro specifies the names, length, type (character, binary, and so forth), and other characteristics of the fields in the logonid record. The @CFDE macro is an assembler macro defined during installation, usually by the systems programmer. See Appendix A, “CA-ACF2 Field Definition Record Generation,” in the Getting Started guide for detailed information about this macro.
If you are using a multi-value field in the UID string, be aware that this field must exist in contiguous storage within the logonid record.
3. Define the structure of the UID using the @UID macro. This record defines which fields appear in the UID and in what order. An example UID might be composed of the CITY, DIV, AREA, and FUNCTION fields followed by the logonid. See Appendix A, “CA-ACF2 Field Definition Record Generation,” in the Getting Started guide for information about this macro.
4. For each user, define the contents of these in the logonid record (see “Maintaining Logonid Records” in the Administrator Guide for information).
The CA-ACF2 Mode
The MODE field in the GSO OPTS record defines what action CA-ACF2 takes when an access request is considered a violation. CA-ACF2 does not actually prevent access to data except in ABORT mode. The other modes can be used during the transition to full security to reduce impact on system performance. The CA-ACF2 modes are:
QUIET—Data set accesses are not validated or logged. Logonid, source, and other validations still take place. You can use this mode until you have written basic access rules for your system to reduce the number of access violations logged.
LOG—Logs data set access violations, but allows access. You can use this mode after you have written basic access rules to generate access violation reports and determine what access rules still need to be written.
WARN—Logs data set access violations, issues warning messages, and allows access. The warning messages alert users that security is implemented on the system and that authorization is required to access the data set. The users can inform the CA-ACF2 security administrator, who can then decide whether or not to give them access to the data set.
ABORT—Prevents unauthorized access to data. This is the default mode setting. ABORT mode also logs violations and issues a violation message to the user.
RULE—Allows you to validate rules for different data sets in different modes while you are migrating to full security. CA-ACF2 checks for a $MODE statement in the rule set when it validates an access request. If there is no $MODE statement in the rule set or if no rule set exists, the system-wide mode specified determines how access rules are processed. See “Converting to Full Security” for more information.
2–20 Implementation Planning Guide
Selecting CA-ACF2 Options
CA-ACF2 does not prevent data access unless one of the following values is in effect:
■ MODE=ABORT
■ MODE=(RULE,...) with an applicable ABORT parameter
The first production IPL is normally done with CA-ACF2 in LOG mode. LOG mode can produce large reports unless rules have been written allowing access to commonly used data sets. Chapter 6, “Writing Access Rules,” shows how to create these basic access rules.
Boundaries of CA-ACF2 Controls
Many CA-ACF2 options are specified in the:
■ Field Definition Record (ACFFDR) macros
■ Online Global System Options (GSO) records
■ MAC records
■ Subsystem option records used by the CA-ACF2 IMS interfaces for batch and IMS/ESA TM (online) access
■ CICS system initialization parameters
However, a number of ACFFDR, GSO, IMS, and CICS parameters affect the overall bounds of CA-ACF2 controls on your system. These include options such as:
■ Whether STCs and other jobs are controlled by CA-ACF2
■ Whether any programs are specially controlled
■ To what degree CA-ACF2 administration is centralized
■ Whether extended user authentication is required for terminal access
■ Whether IMS, CICS, or other user groups are controlled by CA-ACF2
■ Under what mode (LOG or ABORT for IMS, QUIET, LOG, or ABORT for CICS) each IMS, or CICS region is running
■ Whether controls are set for specification of new passwords
Because the values you select for these options can have a significant affect on the scope and completeness of CA-ACF2 controls, the IT should review each of the possible options very carefully. This should include an item-by-item review of each parameter in the Field Definition Record (see the Getting Started guide and the GSO records (see the Administrator Guide). If the optional IMS or CICS interfaces are used, see the appropriate CA-ACF2 guide for complete information about the available control options.
Planning CA-ACF2 Implementation 2–21
Selecting CA-ACF2 Options
PDS Member-Level Security
To use PDS member-level security, the base CA Common Services for z/OS and OS/390 must be installed and active and MVS/ESA 4.3 or above is required. See Notes and Restrictions in Appendix D, “Implementing Member-Level Protection,” in the Administrator Guide for more information.
Tape Protection
CA-ACF2 is shipped with no tape protection as the default. If you plan to protect tapes, you must decide whether to protect them at the data set name level or at the volume-serial level.
If you have a tape management system such as CA-1 or CA-TLMS that retains the entire data set name, you can protect tapes at the data set name level using the GSO records. Specify TAPEDSN in the GSO OPTS record and create appropriate rules.
If you do not have a tape management system that retains the full data set name, specify a dash (–) to protect all volumes. Create appropriate rules for the protection of the volumes.
For detailed information on these records, see “Maintaining Global System Options Records” in the Administrator Guide.
Use of UADS and UADS Conversion
In an MVS/TSO environment, CA-ACF2 runs in a system using the User Attribute Data Set (UADS) or completely bypasses UADS. The advantages of bypassing UADS are faster logon processing and eliminating the need to maintain both UADS and the CA-ACF2 Logonid database. However, CA-ACF2 manages multiple account and procedure structures differently and you must redefine other TSO-related items formerly contained in UADS in the CA-ACF2 database. Therefore, you should review these items carefully. The use of UADS and UADS conversion does not apply to a non-TSO environment.
CA-ACF2 Exits
You can use CA-ACF2 exits to resolve site dependencies or provide specialized transition paths. An example is the Logon Prevalidation exit. This exit can obtain the logonid and password and modify them or reject the logon attempt. All exits are described in the Systems Programmer Guide.
2–22 Implementation Planning Guide
Chapter
3 Implementing CA MAC
Although the CA MAC component is packaged with the CA-ACF2 for OS/390 base product, not every site wants to install and implement CA MAC. This section describes the implementation procedures that you should follow if you plan to use CA MAC.
The MAC Administrator The MAC administrator performs all security-related functions for the MAC component of CA-ACF2. Like a security administrator for the CA-ACF2 for OS/390 base product, the MAC administrator helps plan the implementation of MAC security, moves the system toward full MAC security, and performs ongoing administration of MAC security at a site.
A site can have a separate MAC administrator or have the administrator for the base CA-ACF2 for OS/390 system perform MAC administration. There must be a MAC(USR) record for him that specifies that he has the MACADMIN privilege. In addition to having the MACADMIN privilege in his MAC(USR) record, a MAC administrator must log on with the MACADMIN label to create or maintain MAC records in the Infostorage database.
CA MAC Implementation Checklist Use the following checklist as you complete each step of the implementation process:
Task Complete
Read the CA MAC documentation and understand the effects of mandatory access control on your site.
Install CA MAC in QUIET mode.
Determine your MAC environment.
Define levels, categories, and control systems.
Implementing CA MAC 3–1
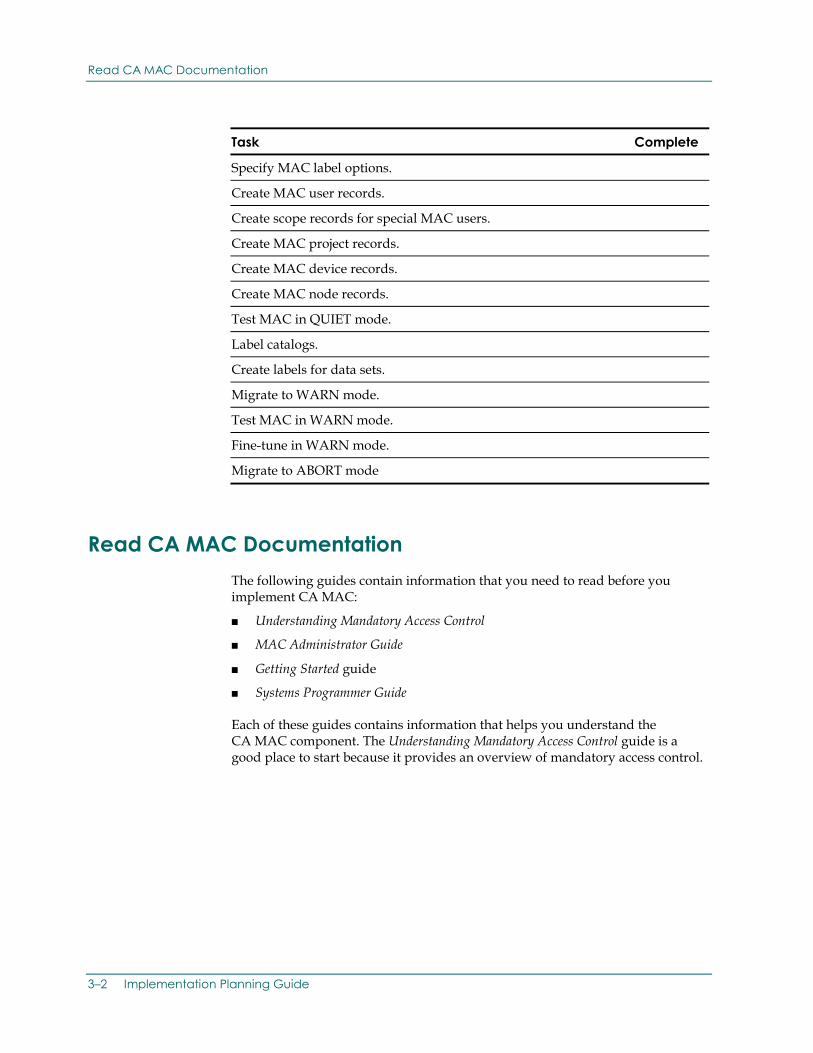
Read CA MAC Documentation
Task Complete
Specify MAC label options.
Create MAC user records.
Create scope records for special MAC users.
Create MAC project records.
Create MAC device records.
Create MAC node records.
Test MAC in QUIET mode.
Label catalogs.
Create labels for data sets.
Migrate to WARN mode.
Test MAC in WARN mode.
Fine-tune in WARN mode.
Migrate to ABORT mode
Read CA MAC Documentation The following guides contain information that you need to read before you implement CA MAC:
■ Understanding Mandatory Access Control
■ MAC Administrator Guide
■ Getting Started guide
■ Systems Programmer Guide
Each of these guides contains information that helps you understand the CA MAC component. The Understanding Mandatory Access Control guide is a good place to start because it provides an overview of mandatory access control.
3–2 Implementation Planning Guide
Install CA MAC in QUIET Mode
Install CA MAC in QUIET Mode Follow the procedures in the Getting Started guide that describe how to install the MAC component as follows:
■ Create a SYS1.PARMLIB member for MAC like the one described in CA MAC Start Parameters in the Getting Started guide.
■ IPL MAC in QUIET mode. In QUIET mode, MAC performs label validation at system entry only. It does not perform label validation for data set opens or access to other system resources. More importantly, MAC does not create default labels for all data sets and devices in QUIET mode as it does in WARN or ABORT modes.
Starting your implementation in QUIET mode provides you time to set up your MAC environment and train your user community in how to use the labels that you create. In WARN or ABORT mode, MAC creates default labels. If you start the MAC component in WARN or ABORT mode, the first IPL lasts as long as it takes MAC to label the data sets on the packs required to IPL your system. This could be hours, depending on the size of your system.
■ After the first IPL in QUIET mode, place an asterisk (*) before the MODE(QUIET) keyword in the CAIMACxx member of SYS1.PARMLIB, changing it into a comment. Until you remove the asterisk, MAC uses the setting of the MODE field of the MAC(OPT) OPTIONS record to control the MAC system mode.
■ Be sure to define your MAC environment before you shut down the system. The default setting of the MODE field in the MAC(OPT) OPTIONS record is ABORT. If you do not change this setting, the next time you IPL, MAC is in ABORT mode.
Determine Your MAC Environment Revise your security policy to include the disclosure and integrity models of CA MAC. Mandatory access control requires that all data (objects) and users (subjects) be labeled. MAC uses these labels to determine access. For example, objects can be any of the following:
■ Printers
■ User-defined devices
■ Disk drives
■ Tape drives
■ Card readers
■ Card punches
Implementing CA MAC 3–3
Determine Your MAC Environment
■ Graphics terminals
■ VTAM nodes
■ Communications lines
■ Communications controllers
■ Channel-to-channel adapters
Subjects can be any of the following:
■ System users
■ Programs or processes
■ Devices
Briefly, the disclosure model states that subjects can read only data at their label or below and that they can write to only data with a label equal to theirs. The integrity model states that subjects can read data at any label, but when they access an object with a lower label, their label sinks to the label of the object. For more detail on these topics, see Understanding Mandatory Access Control.
Your Implementation Team needs to update its security policy and decide how to label the subjects and objects at your site. The MAC(OPT) OPTIONS record (much like the GSO(OPTS) record) determines your MAC environment. The following sections contain information that helps you create an initial MAC(OPT) OPTIONS record. For field descriptions, see the “Defining the MAC Component System Options” chapter in the MAC Administrator Guide.
How Long Are Levels and Categories?
Levels are the hierarchical component of a label. They represent the level of trust an organization places in a user or the level of sensitivity of data. Categories are the nonhierarchical components of labels. They represent departments or projects.
The first decision you must make is how many characters should be in a level and how many characters should be in a category. CA MAC allows levels to be from one to eight characters long. It also allows categories to be from one to eight characters long. However, the length of a category and a control system can be no longer than eight characters, including space for a period as delimiter.
If your site wants to use control systems, then you need to ensure that the length you specify for the CATLEN and CTLLEN fields is no more than seven characters. This forces you to make another decision; will your site use control systems?
3–4 Implementation Planning Guide

Determine Your MAC Environment
Will You Use Control Systems?
CA MAC provides support for control systems. Control systems let you manage categories. They provide your site with the means to use similar category names, yet distinguish these similar category names from each other. The example we use in Understanding Mandatory Access Control is that of a service bureau that manages payroll data for three different companies. All payroll data has a category of PR. The control system identifies the company so that the payroll data for the steel company does not get mixed up with the payroll data for the automobile company.
Your site may not need to implement control systems. However, we recommend that you set the category length (CATLEN field) to six or less. This way you can add control systems at a later date.
If you create all your categories with a length of eight, and decide to implement control systems at a later date, you have to delete all your MAC(CAT) records, then define new records with the same internal values (VALUE field) as the old ones.
Does Your Site Share DASD?
If your site shares DASD with other systems, then accept the defaults for the MAC(OPT) OPTIONS record. The default values for the fields that effect DASD sharing are listed in the following:
■ RESERVE
■ PRTRSRV
If your site does not share DASD, you need to replace the default field settings as follows:
■ ENQUEUE
■ PRTENQ
Additionally, change the value for the XDELAY field to zero.
Change the MODE Setting
The MODE field of the MAC(OPT) OPTIONS record lets you change the MAC component mode without IPLing the system. However, the MAC system checks the MODE parameter of the CAIMACxx member of SYS1.PARMLIB before it checks the setting in the MAC(OPT) OPTIONS record during an IPL. Because you started MAC using the CAIMACxx member, which specified MODE(QUIET), the current running mode is QUIET.
Implementing CA MAC 3–5
Define Levels, Categories, and Control Systems
Before you refresh the MAC(OPT) OPTIONS record, ensure that you have changed the setting of the MODE field to QUIET.
Do You Want to Phase In Data Set Labeling?
As mentioned above, in WARN or ABORT mode, MAC checks to see whether to label all data sets. The field that controls data set labeling is the LABDISK|NOLABDISK field. LABDISK instructs MAC to label all data sets. NOLABDISK tells MAC to not label all data sets. This field is not checked unless the MODE setting is WARN or ABORT.
You can ask, “Why change the setting of the field now if I am running in QUIET mode?” If you want to test MAC by labeling only data sets on certain packs, then you should select NOLABDISK. When you change the MODE setting to WARN, MAC labels only those packs that you define with MAC(DEV) records.
Accept the Default Settings for Other Fields
You can accept the defaults for the remaining fields for your initial implementation.
Refresh MAC(OPT) OPTIONS Record
Before you can create any MAC(CAT), MAC(CTL), or MAC(LEV) records, you must activate the MAC(OPT) OPTIONS record that you created. To make the MAC(OPT) OPTIONS record active, issue the following command from a logonid with the REFRESH privilege: F ACF2,MAC(OPT(OPTIONS))
Define Levels, Categories, and Control Systems After you decide the length for levels, categories, and control system digraphs, you must create a MAC(CTL) record for each control system, a MAC(LEV) record for each level, and a MAC(CAT) record for each category. Chapter 4, “Defining Levels, Control Systems, and Categories,” of the MAC Administrator Guide describes the fields in the records and the implementation considerations. Some important decisions you must make at implementation are described in the following sections.
3–6 Implementation Planning Guide
Define Levels, Categories, and Control Systems
Do You Want to Use Control Systems?
Control systems are not required to run CA MAC. We provide them for your convenience. If you do not want to use control systems, then do not create any MAC(CTL) records.
If you create any MAC(CTL) records, you must refresh them before you create any MAC(CAT) records. To refresh MAC(CTL) records, issue the following command from a logonid with the REFRESH privilege: F ACF2,MAC(CTL)
Do You Want Virus Protection?
If you want MAC to validate a label based on the integrity model, specify I as the value for the TYPE field in MAC(LEV), MAC(CAT), and MAC(CTL) records. If you want MAC to validate a label based on the disclosure model, specify D as the value for the TYPE field in MAC(LEV), MAC(CAT), and MAC(CTL) records. You can specify both I and D for the TYPE field in a MAC(CAT), MAC(CTL), or MAC(LEV) record. Since D is the default, specify REP on the INSERT command when you want the type to be I only; otherwise, you get a type of D and I.
Should MAC Check Creation Dates?
Creation dates, the date your Implementation Team creates a level, category, or control system, let you trace changes to a level, category, or control system in MAC reports. For example, you might create a level with a high level of trust in September 1998 and add higher levels over time. If you specify a value for the CREDATE field, you can trace the history of this record over time.
If you specify a CREDATE, it is checked against the timestamp of any label that uses the level, category, or control system. If the timestamp of the label predates the value specified for CREDATE, CA MAC assumes that the label refers to an old definition that used the same internal value, and rejects access to the label.
If you do not specify a value for CREDATE, MAC does not check the field.
Assign Hierarchical Values for Levels
You should determine the hierarchy of the levels you define at implementation. The VALUE field of the MAC(LEV) record lets you specify a value from 1 to 200. To allow your site maximum flexibility, specify the VALUE field at implementation and leave room between values for expansion.
Implementing CA MAC 3–7
Specify MAC Label Options
For example, if you create three levels (LOW, MEDIUM, and HIGH), select values such as 15 for LOW, 90 for MEDIUM, and 175 for HIGH. These value settings allow expansion for levels below LOW, between LOW and MEDIUM, between MEDIUM and HIGH, and above HIGH.
If you do not specify a value for the VALUE field, MAC assigns one, beginning with 1 and incrementing by one for each new MAC(LEV) record you create. This means that you must create the MAC(LEV) records from lowest to highest. For example, if you want the lowest MAC(LEV) record to have a value of 1, create it first. If you want the next highest MAC(LEV) record to have a value of 2, create it next, and so on. The problem occurs later when you must create a new level and its value must be between 1 and 2.
Accept the Defaults
We strongly recommend specifying the VALUE field when defining levels. Other than the NAME field and the VALUE field, accept the default values for the rest of the fields in the MAC(LEV) and MAC(CAT) records. You must also specify I for the TYPE field if the level or category is for integrity checking.
Refresh MAC(CAT) and MAC(LEV) Records
You must refresh the MAC(CAT) and MAC(LEV) records that you created before you can create MAC records for devices, nodes, printers, or users. To activate the MAC(CAT) and MAC(LEV) records, issue the following commands from a logonid with the REFRESH privilege: F ACF2,MAC(CAT) F ACF2,MAC(LEV)
Specify MAC Label Options Like the MAC(OPT) OPTIONS record, the MAC(OPT) LABELS record lets you specify system options that apply to labels. The values that you specify apply unless a more specific record exists on the system.
For example, the MAC(OPT) LABELS record provides defaults for device labels. The default value for the minimum label for data sets stored on a device (DEVMIN field) is SYSLOW, and the default value for the maximum level (DEVMAXL field) is SYSHIGH. If you specify SYSLOW for DEVMIN and SYSHIGH for DEVMAXL any data set can be stored on that device.
3–8 Implementation Planning Guide
Create MAC User Records
Later, you can create a MAC(DEV) record that specifies the minimum and maximum labels for particular disk packs. Suppose, for example, that you specify that the minimum label for a particular pack (DISK1) is TOPSECRET, and the maximum level is SYSHIGH. Then only data labeled TOPSECRET and above can be stored on that pack. Moreover, only users that log on with the TOPSECRET label can read or write to data sets on that pack. Data with any lower label cannot be stored on that pack.
Specify Values MAC(OPT) LABELS Record Fields
For initial implementation, select the default values for all fields except the following:
DEVMAXL—Specify a value other than the default. If you specify SYSHIGH, then a user can store data labeled from SYSLOW to SYSHIGH on that device. You can specify a value based on the label hierarchy you defined in your security policy and implemented in the MAC(LEV) records that you created.
Refresh MAC(OPT) LABELS Records
You should refresh the MAC(OPT) LABELS record before you proceed to the next step. To activate the MAC(OPT) LABELS record that you created, issue the following command: F ACF2,MAC(OPT(LABELS))
Create MAC User Records One MAC(USR) record is created at installation time for a MAC administrator. By default, this is the ACFUSER logonid. Otherwise, you would not be able to create any MAC records. Depending on your implementation, you may not have to define many more MAC users. This section describes the actions that you should take to let users access the system using a label.
Create MAC(USR) Records for MAC Administrators and Auditors
You must create MAC(USR) records for special MAC users, such as MAC administrators and MAC auditors. For example, without an active MAC(USR) record created for his logonid, a user who is supposed to have the MACADMIN privilege cannot log on using the MACADMIN label.
Implementing CA MAC 3–9
Create MAC User Records
We recommend that you grant at least one user at your site the following privileges:
■ MACADMIN
■ MACAUDIT
■ MACMAINT
■ MACRECLS
If you do create other MAC administrators or auditors, you can scope their authority.
Determine Whether Users Must Log On Using a Label
You do not have to create a MAC(USR) record for each system user. The MAC(OPT) LABELS record sets default values for users that do not log on to the system with a label. If MAC is going to impact only certain departments, or certain types of data, then most users can log on to CA-ACF2 without specifying a label and perform their jobs without any knowledge of MAC.
When users log on without specifying a label, MAC assigns them the value of the USERDEF field (for disclosure labels) or the USERINT field (for integrity labels) in the MAC(OPT) LABELS record. If users log on without specifying a label and try to access data sets with labels that dominate the values specified in the USERMAXC and USERMAXL fields of the MAC(OPT) LABELS record, then you have the following options:
■ If you do not want users to specify labels at logon, specify the labels they need to perform their tasks in the DEFLABEL field of their MAC(USR) records. For example, if USER01 needs to read and write to data labeled TS AA BB CC, then specify DEFLABEL(TS AA BB CC) in the MAC(USR) record for USER01. Then USER01 can access the labeled data sets by entering her logonid and password. No label is required.
■ If you want users to specify labels at logon, then use the following guidelines:
– Create a MAC(USR) record for a user if the label of the data he must access dominates the value of the USERMAXC and USERMAXL fields of the MAC(OPT) LABELS record. Specify values for the MAXCATS and MAXLEVEL fields of the MAC(USR) record for each user affected.
– Create a MAC(USR) record for a user if the label of the data he must access is dominated by the value specified in the USERMIN field of the MAC(OPT) LABELS record. Specify values for the MAXCATS and MAXLEVEL fields of the MAC(USR) record for each user affected.
Remember, your initial MAC mode is QUIET. Therefore, data set labeling and validation are not performed until you migrate to WARN or ABORT mode. You have some time to determine which users need access data with labels higher than SYSLOW.
3–10 Implementation Planning Guide
Create Scope Records for MAC Users
Specify Values for Integrity Checking
If you created MAC(LEV) or MAC(CAT) records for integrity, consider the following points when determining how to specify values in MAC(USR) records:
■ A user does not need to have a MAC(USR) record to log on to the system. MAC assigns the value of the USERINT field in the MAC(OPT) LABELS record at logon to all users who do not have MAC(USR) records.
■ If a user needs write access to a data set, the integrity label of the data set cannot dominate the value specified in the USERINT field of the MAC(OPT) LABELS record. If the data sets he must access dominate the value of the USERINT field, then create a MAC(USR) record for the user and specify a value for the INTLABEL field that dominates the value of the data the user must access. For example, if USER01 must execute jobs that write data with integrity labels of PRODUCTION, then the value of the INTLABEL field in the MAC(USR) record must dominate PRODUCTION.
Refresh MAC(USR) Records
You do not need to refresh MAC(USR) records. MAC(USR) records become active as follows:
■ If the user you created the record for is logged on, the MAC(USR) record takes effect the next time the user logs on to the system.
■ If the user you created the record for is not logged on, the MAC(USR) record takes effect immediately.
Create Scope Records for MAC Users If you want to decentralize your administration of CA MAC, you can create scoped MAC administrators and auditors. You can scope these special users in a variety of ways.
For example, if your site decides to use control systems, you can have one unscoped MAC administrator and a scoped MAC administrator who can only maintain MAC records for the AA control system and another who can only maintain MAC records for the BB control system. The MAC administrator for the AA control system could define MAC(USR) and MAC(DEV) records for that control system, while the MAC administrator for the BB control system could maintain MAC(USR) and MAC(DEV) records for the BB control system. Similarly, you can scope special MAC users by levels and categories.
Implementing CA MAC 3–11
Create MAC Project Records
Scoped MAC administrators can test whether they can create or change MAC records in their scope while MAC is in QUIET mode. You should have all scoped MAC administrators and MAC auditors try to use their privileges before you migrate to WARN or ABORT mode.
Refresh MAC(SCP) Records
You do not need to refresh MAC(SCP) records. MAC(SCP) records become active as follows:
■ If the user you created the record for is logged on, the MAC(SCP) record takes effect the next time the user logs on to the system.
■ If the user you created the record for is not logged on, the MAC(SCP) record takes effect immediately.
Create MAC Project Records One way you might simplify your implementation is to create MAC(PRJ) records that define project labels. Project labels provide users with the ease of entering a one- to eight-character label instead of a series of digraphs for the level and categories they want to access.
For example, the accounts receivable data is labeled CN FN AR and the accounts payable data is labeled CN FN AP. The jobs that a clerk in the Finance department must run to process that data are labeled CN FN AP AR. If these jobs needed to be run weekly, you might want to create a project label for users in the Finance department called FNWEEKLY, with a value of CN FN AP AR. Then any authorized users, those with MAC(USR) records that permitted them access to at least the CN level and the FN, AP, and AR categories, could log on with the label FNWEEKLY instead of entering CN FN AP AR.
Remember, if MAC is still running in QUIET mode, project labels are only validated at logon, not at data set access. You cannot test access to labeled data sets until the system is put into WARN or ABORT mode.
Refresh MAC(PRJ) Records
You should refresh the MAC(PRJ) records before you proceed to the next step. To activate the MAC(PRJ) records that you created, issue the following command: F ACF2,MAC(PRJ)
3–12 Implementation Planning Guide
Create MAC Device Records
Create MAC Device Records The MAC(OPT) LABELS record specifies the default minimum (DEVMIN field) and maximum (DEVMAXC and DEVMAXL fields) labels for devices. However, you probably want to specify different labels for certain DASD devices, printers, or tape drives. Chapter 5, “Defining Object Labels,” in the MAC Administrator Guide describes the fields of the MAC(DEV) record and presents examples of how to create device labels.
Users can adjust their labels by logging off the system and logging on with another label, but devices cannot. It takes intervention by a user or process to change a device label. To reduce the need for intervention, devices defined to MAC can have absolute maximum and minimum and current maximum and minimum values.
Here is why. One user might print data with a high label, such as TOPSECRET, and another might print data labeled PUBLIC. If there is only one printer at the site, the printer must be able to print data in that range. This is why MAC provides absolute and current values for devices.
Label Selected Devices
For your initial implementation of MAC, you might want to label devices that contain sensitive information and those that contain production programs that need to run with a high integrity label. For other DASD devices, you can accept the defaults in the MAC(OPT) LABELS record (DISKLAB and DISKINT fields).
If you specified that you did not want MAC to label all disks (NOLABDISK field in the MAC(OPT) OPTIONS record), then specify NONOLABEL in the MAC(DEV) records for the devices that you want to label.
Remember that the actual labeling of the devices and data sets does not take place until you migrate to WARN or ABORT mode. Creating the MAC(DEV) records before you migrate to WARN or ABORT mode lets you control how MAC labels data at your site.
If you want to begin labeling devices, you can issue the MACRECLS command or use the F MACS,OPEN command to create a MAC VTOC for a DASD volume. Although either of these commands creates a label, MAC does not perform label validation until you change the mode to WARN or ABORT.
Refresh MAC(DEV) Records
You do not need to refresh the MAC(DEV) records. Changes to the records become active immediately.
Implementing CA MAC 3–13
Create MAC Node Records
Create MAC Node Records If your site must communicate with other JES nodes, then you must create MAC(NDE) records for those nodes. Otherwise, MAC does not permit communication when running in ABORT mode.
If you must communicate with other nodes, create MAC(NDE) records for each of the JES nodes that your system communicates with. You can accept the defaults for most of the fields, except the following:
■ Specify MULTIIN
■ Specify MULTIOUT
■ Specify ABSIMAXC, if your site uses categories
■ Specify ABSIMAXL, if your site uses levels
■ Specify ABSOMAXC, if your site uses categories
■ Specify ABSOMAXL, if your site uses levels
■ Specify CURIMAXC, if your site uses categories
■ Specify CURIMAXL, if your site uses levels
■ Specify CUROMAXC, if your site uses categories
■ Specify CUROMAXL, if your site uses levels
You can modify these records further when you have tested your MAC implementation.
As with any MAC records that specify labeling of data sets, the values that you specify for the MAC(NDE) record do not take effect until you migrate to WARN or ABORT mode. In WARN mode, MAC accepts data from other nodes and allow you to send data to other nodes, but issues a warning message and create a logging record if the label of the data is outside the absolute or current values. In ABORT mode, MAC only accepts data labeled in the absolute and current values or send data labeled in the absolute or current values.
Refresh MAC(NDE) Records
You do not need to refresh the MAC(NDE) records. Changes to the records become active immediately.
3–14 Implementation Planning Guide
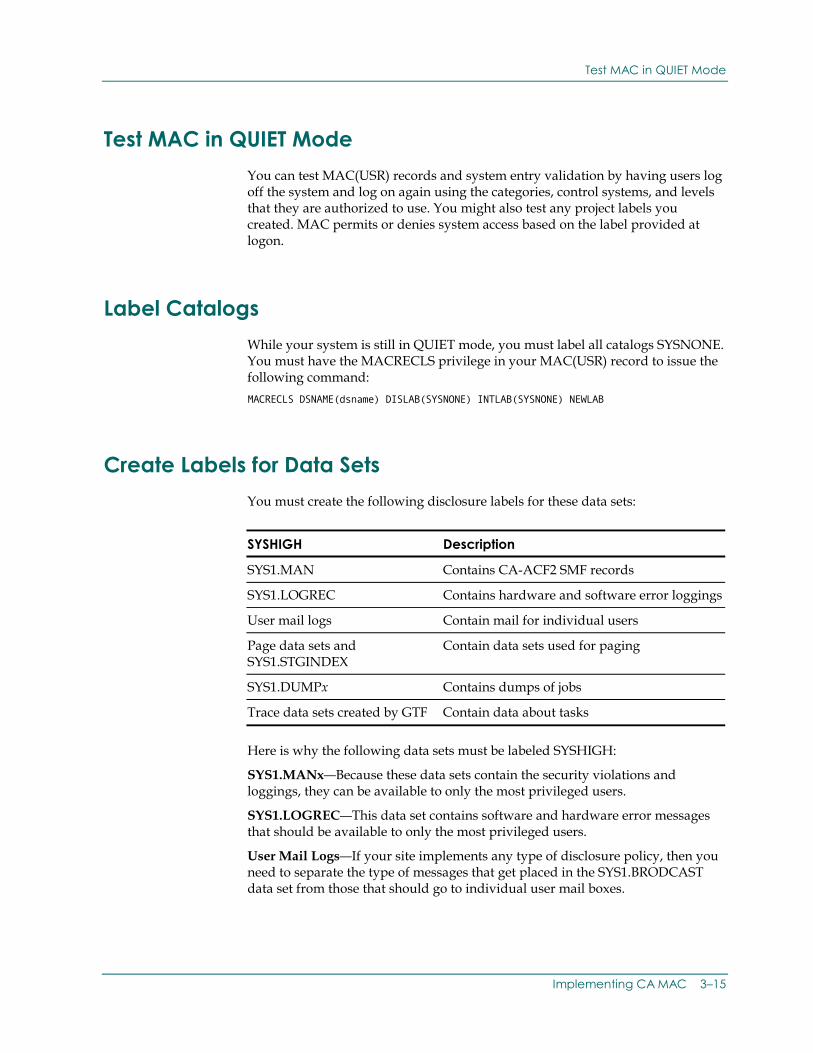
Test MAC in QUIET Mode
Test MAC in QUIET Mode You can test MAC(USR) records and system entry validation by having users log off the system and log on again using the categories, control systems, and levels that they are authorized to use. You might also test any project labels you created. MAC permits or denies system access based on the label provided at logon.
Label Catalogs While your system is still in QUIET mode, you must label all catalogs SYSNONE. You must have the MACRECLS privilege in your MAC(USR) record to issue the following command: MACRECLS DSNAME(dsname) DISLAB(SYSNONE) INTLAB(SYSNONE) NEWLAB
Create Labels for Data Sets You must create the following disclosure labels for these data sets:
SYSHIGH Description
SYS1.MAN Contains CA-ACF2 SMF records
SYS1.LOGREC Contains hardware and software error loggings
User mail logs Contain mail for individual users
Page data sets and SYS1.STGINDEX
Contain data sets used for paging
SYS1.DUMPx Contains dumps of jobs
Trace data sets created by GTF Contain data about tasks
Here is why the following data sets must be labeled SYSHIGH:
SYS1.MANx—Because these data sets contain the security violations and loggings, they can be available to only the most privileged users.
SYS1.LOGREC—This data set contains software and hardware error messages that should be available to only the most privileged users.
User Mail Logs—If your site implements any type of disclosure policy, then you need to separate the type of messages that get placed in the SYS1.BRODCAST data set from those that should go to individual user mail boxes.
Implementing CA MAC 3–15
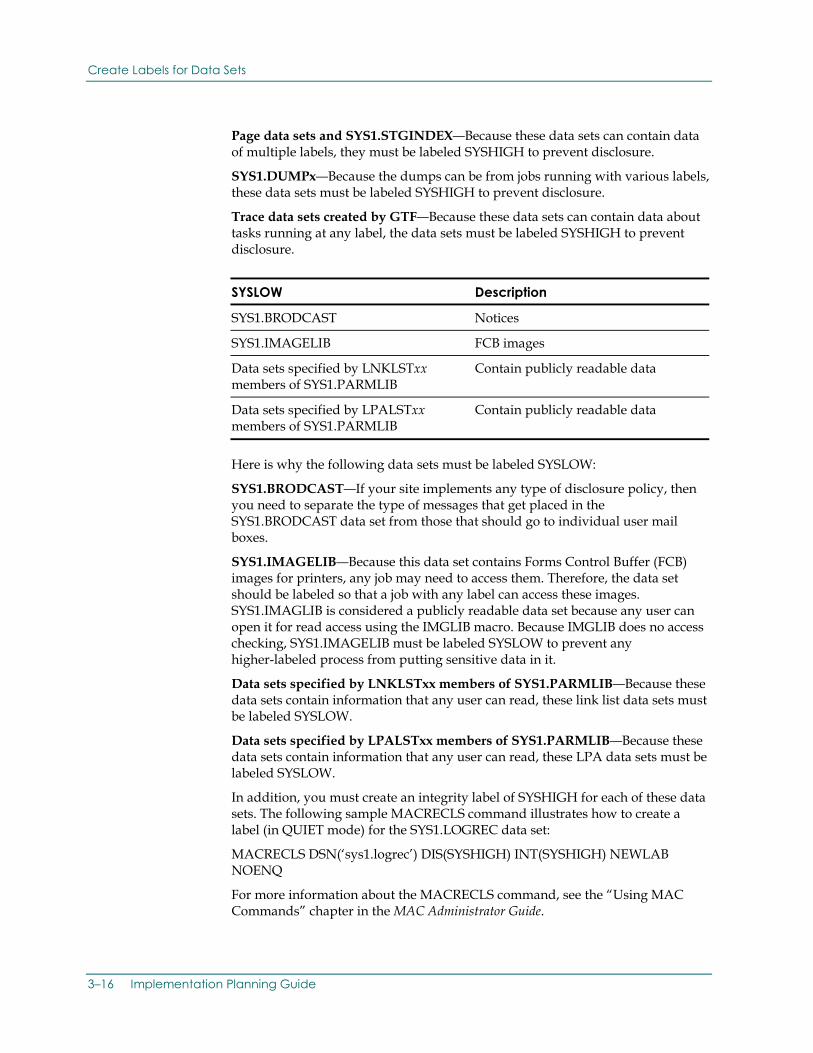
Create Labels for Data Sets
Page data sets and SYS1.STGINDEX—Because these data sets can contain data of multiple labels, they must be labeled SYSHIGH to prevent disclosure.
SYS1.DUMPx—Because the dumps can be from jobs running with various labels, these data sets must be labeled SYSHIGH to prevent disclosure.
Trace data sets created by GTF—Because these data sets can contain data about tasks running at any label, the data sets must be labeled SYSHIGH to prevent disclosure.
SYSLOW Description
SYS1.BRODCAST Notices
SYS1.IMAGELIB FCB images
Data sets specified by LNKLSTxx members of SYS1.PARMLIB
Contain publicly readable data
Data sets specified by LPALSTxx members of SYS1.PARMLIB
Contain publicly readable data
Here is why the following data sets must be labeled SYSLOW:
SYS1.BRODCAST—If your site implements any type of disclosure policy, then you need to separate the type of messages that get placed in the SYS1.BRODCAST data set from those that should go to individual user mail boxes.
SYS1.IMAGELIB—Because this data set contains Forms Control Buffer (FCB) images for printers, any job may need to access them. Therefore, the data set should be labeled so that a job with any label can access these images. SYS1.IMAGLIB is considered a publicly readable data set because any user can open it for read access using the IMGLIB macro. Because IMGLIB does no access checking, SYS1.IMAGELIB must be labeled SYSLOW to prevent any higher-labeled process from putting sensitive data in it.
Data sets specified by LNKLSTxx members of SYS1.PARMLIB—Because these data sets contain information that any user can read, these link list data sets must be labeled SYSLOW.
Data sets specified by LPALSTxx members of SYS1.PARMLIB—Because these data sets contain information that any user can read, these LPA data sets must be labeled SYSLOW.
In addition, you must create an integrity label of SYSHIGH for each of these data sets. The following sample MACRECLS command illustrates how to create a label (in QUIET mode) for the SYS1.LOGREC data set:
MACRECLS DSN(‘sys1.logrec’) DIS(SYSHIGH) INT(SYSHIGH) NEWLAB NOENQ
For more information about the MACRECLS command, see the “Using MAC Commands” chapter in the MAC Administrator Guide.
3–16 Implementation Planning Guide
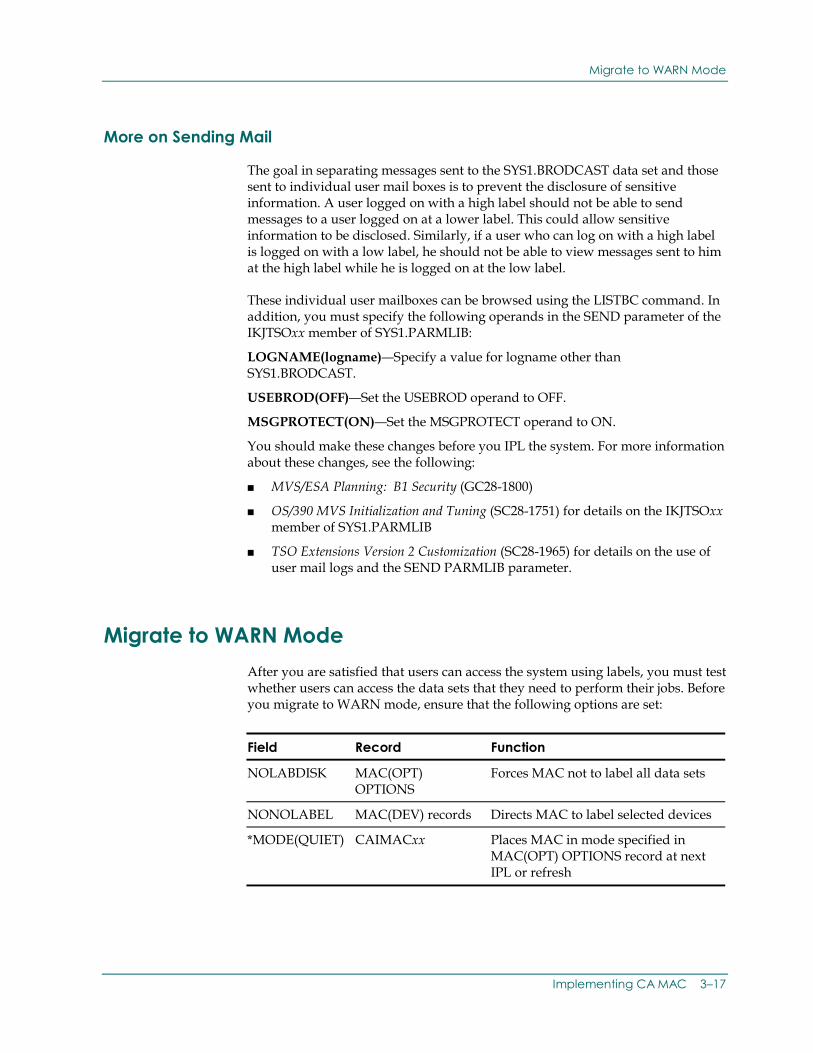
Migrate to WARN Mode
More on Sending Mail
The goal in separating messages sent to the SYS1.BRODCAST data set and those sent to individual user mail boxes is to prevent the disclosure of sensitive information. A user logged on with a high label should not be able to send messages to a user logged on at a lower label. This could allow sensitive information to be disclosed. Similarly, if a user who can log on with a high label is logged on with a low label, he should not be able to view messages sent to him at the high label while he is logged on at the low label.
These individual user mailboxes can be browsed using the LISTBC command. In addition, you must specify the following operands in the SEND parameter of the IKJTSOxx member of SYS1.PARMLIB:
LOGNAME(logname)—Specify a value for logname other than SYS1.BRODCAST.
USEBROD(OFF)—Set the USEBROD operand to OFF.
MSGPROTECT(ON)—Set the MSGPROTECT operand to ON.
You should make these changes before you IPL the system. For more information about these changes, see the following:
■ MVS/ESA Planning: B1 Security (GC28-1800)
■ OS/390 MVS Initialization and Tuning (SC28-1751) for details on the IKJTSOxx member of SYS1.PARMLIB
■ TSO Extensions Version 2 Customization (SC28-1965) for details on the use of user mail logs and the SEND PARMLIB parameter.
Migrate to WARN Mode After you are satisfied that users can access the system using labels, you must test whether users can access the data sets that they need to perform their jobs. Before you migrate to WARN mode, ensure that the following options are set:
Field Record Function
NOLABDISK MAC(OPT) OPTIONS
Forces MAC not to label all data sets
NONOLABEL MAC(DEV) records Directs MAC to label selected devices
*MODE(QUIET) CAIMACxx Places MAC in mode specified in MAC(OPT) OPTIONS record at next IPL or refresh
Implementing CA MAC 3–17
Test MAC in WARN Mode
If any of these settings are incorrect, change them before you migrate to WARN mode.
Migration Procedure
After you have tested system access in QUIET mode, you can migrate to WARN mode. MAC labels data sets according to the settings you specified in the various MAC records you created.
To migrate to WARN mode, use the following procedure:
1. IPL your MAC system.
2. Change the setting of the MODE field of the MAC(OPT) OPTIONS record to MODE(WARN).
3. Stay logged on with the MACADMIN label on a logonid that has the MACADMIN privilege in its MAC(USR) record. This lets you make any changes to MAC records if you must.
4. Issue the following command from a logonid that has the REFRESH privilege: F ACF2,MAC(OPT(OPTIONS))
The MAC component restarts in WARN mode and begin to label data sets according to the options that you specified in the various MAC records. The labeling can take some time depending on the number of data sets that you directed MAC to label.
Test MAC in WARN Mode After your MAC system is running in WARN mode, you should test data set accesses by doing the following:
■ Ask users to log on with their labels and try to access labeled data sets at their label or below.
■ Ask select users to log on with a low label and try to access higher labeled data that they are authorized to access when logged on with the appropriate label.
■ Ask users to send messages to other users at their same label and to lower labels.
■ Monitor user feedback and MAC reports until you are satisfied that your site security policies are being enforced.
3–18 Implementation Planning Guide
Fine-tune in WARN Mode
Fine-tune in WARN Mode Make any adjustments to the settings in the various MAC records. For example, you can decide to test your security policy by implementing MAC for a select group of data sets. You might now decide to label all data sets by setting the LABDISK field of the MAC(OPT) OPTIONS record.
Or perhaps you want to relabel some data sets that got incorrectly labeled. To do this, issue the MACRECLS command from a logonid that has the MACRECLS privilege in its MAC(USR) record.
Migrate to ABORT Mode Follow the same procedure you used to migrate to WARN mode.
Implementing CA MAC 3–19

Chapter
4 The First IPL with CA-ACF2
You should perform the first IPL with CA-ACF2 installed in a test environment. While the entire Implementation Team need not be present, at least the SA and the systems programmer responsible for the CA-ACF2 installation should be present. This chapter provides a checklist of functions you need to test to be sure CA-ACF2 is properly installed.
Testing the System CA-ACF2 startup procedures—Use the command S ACF2 to start CA-ACF2. See “Installing CA-ACF2,” in the Getting Started guide, Step 21, for information.
Alternatively, you can set your system up so that CA-ACF2 starts up automatically. See the discussion of the CAISECxx and CAIACFxx SYS1.PARMLIB members in the Getting Started guide for additional information.
Other startup procedures—Test the startup procedures for other basic systems such as VTAM, TSO, CA-ROSCOE, and other started tasks.
Batch job submission—Use the logonid ACFUSER until the batch default and other IDs are established.
TSO logon procedures—Create logonids for TSO users (see “Establishing Initial Logonids”) and ensure that the users can access the system.
Job processing—Use the ACF SHOW ACTIVE subcommand to display the list of CA-ACF2 intercepts and determine which intercepts are currently active. Run sample jobs to ensure that the intercept points are active (for example, catalog, uncatalog a data set, perform a tape open) and check SHOW ACTIVE again.
ACFFDR options, GSO parameters, and CA-ACF2 intercepts—Use the ACF SHOW subcommands (for example, SHOW STATE, SHOW SYSTEM, SHOW ACF2) to check which ones are active.
CA-ACF2 report generators—Run the report generators (see the Reports and Utilities Guide) to test the jobs themselves and produce reports that can be used to check other processing.
CA-ACF2 backup and recovery procedures—Test the CA-ACF2 backup and recovery procedures. See “Database Recovery,” in the Reports and Utilities Guide for information on these utilities.
The First IPL with CA-ACF2 4–1
Testing the System
CA-ACF2 commands—Test the various CA-ACF2 commands and subcommands to check that they are all working as expected, and to help test and display various logonid and rule-related options.
Other product interfaces—Test CA-ACF2 interfaces for other products on the system (for example, FDR, CA-ASM2, and CA-ROSCOE).
Local exits and modifications—Ensure that local exits and modifications to your system do not create security exposures.
SYSPLEX commands—Define your SYSPLEX definitions, enter a CA-ACF2 operator command, and ensure that this command is sent to all connected and active systems within the SYSPLEX. You can use the F ACF2,SYSPLEX(START) and F ACF2,SYSPLEX(STOP) commands to activate the CA-ACF2 SYSPLEX support once the proper definitions have been made.
CPF—Define your CPF environment, activate CPF, and enter a command. You will get responses indicating that the desired command has been routed to the desired remote systems.
UPS—Define your CPF and TNG environments. Effect a password change on one platform and ensure that this change is then propagated to the connected remote systems.
Review console logs and job logs as well as the CA-ACF2 reports to ensure that all activity is proceeding as expected.
4–2 Implementation Planning Guide
Chapter
5 Establishing Initial Logonids
The logonid is a string of one to eight characters that identifies a user to CA-ACF2 as authorized to use the system. CA-ACF2 requires each user to log on to the system with a unique logonid before he can run any jobs on the system. When a user logs on, CA-ACF2 checks the logonid record, which contains information about that user including his UID, CA-ACF2 privileges, violation and system use statistics, and other information. Started tasks also require logonids if you are controlling them with CA-ACF2. You should define the following logonids soon after the first IPL:
■ The batch job and started task default IDs
■ Individual started task IDs
■ Batch job IDs
■ Special production IDs
■ User IDs
This chapter outlines the steps in establishing logonids. Detailed information can be found in Chapter 3, “Maintaining Logonid Records,” in the Administrator Guide.
The Logonid Record A listing of a typical logonid record looks like this: list pay7777 PAY7777 PAY7777 JANE DOE EXT. 458 PRIVILEGES LEADER TSO ACCESS ACC-CNT(0) ACC-DATE(0) ACC-TIME(0) PASSWORD PSWD-TOD(00/00/00-00:00) TSO TSOACCT(ACCT01) MAIL NOTICES STATISTICS UPD-TOD(00/00/00-00:00) RESTRICTIONS PREFIX(PAY7777)
This illustrates the kind of information that you can specify in the logonid record. The ACF subcommand LIST displays the logonid record for PAY7777.
Establishing Initial Logonids 5–1
Creating the Logonid
The information shown above is:
PAY7777—Identification information for the logonid PAY7777. This field contains the user’s logonid, name, and phone extension. It can also contain other information such as the user’s expanded UID.
Privileges—The user’s CA-ACF2 privileges. This user has LEADER and TSO privileges. See the Administrator Guide for descriptions.
Access—A record of the system accesses the user has made to date, including the date and time of the most recent access.
Password—A record of events related to the user’s password, including invalid password attempts and changes to the password.
TSO—The logonid’s attributes related to TSO.
Statistics—Updates to the logonid record. This field can also contain security violations and other historical information for this logonid.
Restrictions—This logonid has ownership only of data sets beginning with the high-level index PAY7777.
These attributes are described in Chapter 3, “Maintaining Logonid Records,” in the Administrator Guide.
Creating the Logonid If this is a completely new CA-ACF2 installation, you must create the Logonid, Infostorage, and Rules database. The DEFINE job, as documented in the Getting Started guide, is used to allocate and define the data sets used as the primary VSAM clusters, the backup VSAM clusters, and the alternate non-VSAM backup files. A subsequent installation job, the INITIAL job, runs the ACFLINIT program to define a single security logonid, ACFUSER, to the Logonid database. This is the logonid that you will use to initially log on to the system and subsequently create other CA-ACF2 database records.
When you bring the system up for the first time, only one logonid, ACFUSER, is defined in the CA-ACF2 Logonid database. Log on with this ID to define logonids for other users. After you use ACFUSER (the initial logonid) to create the appropriate new logonid records with SECURITY and other powers, you should cancel or suspend ACFUSER and later delete it.
5–2 Implementation Planning Guide
Adding Logonids to the CA-ACF2 Database
Adding Logonids to the CA-ACF2 Database When you create a logonid, you must store it in the CA-ACF2 Logonid database. You can add logonids to the database using three methods:
ISPF panels—You can use the CA-ACF2 ISPF panels to simplify adding, changing, and deleting logonids. Enter ISPF from the TSO Ready prompt and select CA-ACF2 on the ISPF/PDF Primary Option Menu. The CA-ACF2 ISPF Option Selection Menu appears. From this panel, you can access the panels you need and fill in the appropriate data. See the Administrator Guide for detailed information on using the ISPF panels.
ACF command—You can use the ACF command and subcommands to create and maintain access rules. The following INSERT subcommand creates a logonid record for the logonid PAY7777. The indented lines are the system response to the commands typed in. acf ACF set lid LID insert pay7777 name(jane doe) leader - phone(ext.458) password(xxxx) tso tsoacct(acct01) mail notices
If you have a number of users who need similar attributes, you can create one logonid and use it for a model to create the others. This reduces the number of fields you have to type in. You can use a logonid already on the system, or create a model logonid that has the basic attributes your users need.
The following is an example of a model logonid: insert paymodel name(model) job phone(ext.123) password(xxxx) - maxdays(30) tso tsoacct(acct01) mail notices
If you use a model logonid, remember that not all logonid fields are eligible for copying from the model to the new logonid record. Certain logonid privileges such as SECURITY, ACCOUNT, NON-CNCL, and others are not normally copied during INSERT USING processing. Within the distributed ACFFDR module, the @CFDE entries for these fields specifies ZERO=YES. This means that the field is not eligible for copying with INSERT USING processing. To display the specific logonid fields defined on your system that are not copied during INSERT USING copying, issue the SHOW ZEROFLDS subcommand within the ACF command.
Establishing Initial Logonids 5–3
Default Logonids
You can also use the INSERT USING subcommand to create the new logonids. CA-ACF2 uses the logonid you specify to create the new logonid. You can add, change, or delete fields when you create the new logonids. For example, the logonid created below has the LEADER privilege in addition to the attributes of the model logonid PAYMODEL. insert using(paymodel) pay7777 name(jane doe) leader - phone(ext.458) password(xxxx) tsoacct(acct01)
ACFBATCH—The ACFBATCH utility allows you to execute ACF subcommands through the batch facility. For detailed information on using ACFBATCH, see the Reports and Utilities Guide. The following example adds several logonids to the Logonid database. //acfjob EXEC PGM=acfbatch //SYSPRINT DD SYSOUT=A //SYSHELP DD DSN=sys1.help,DISP=SHR //SYSIN DD * SET LID insert using(paymodel) pay7777 name(jane doe) leader - phone(ext.458) tsoacct(acct01) prefix(pay7777) password(xxxx) insert using(paymodel) pay1234 name(john smith) phone(ext.324) - tsoacct(acct02) prefix(pay1234) password(xxxx) insert using(paymodel) pay1235 name(susan jones) phone(ext.346) - tsoacct(acct03) prefix(pay1235) password(xxxx) . . . /*
The example above defines a password for each of the new logonids. As defined by CA-ACF2, the @CFDE entry for the PASSWORD logonid field specifies ZERO=YES. This means that it is not copied from the model to the target logonid during INSERT USING processing.
The PSWD Global System Options (GSO) record contains a PSWDREQ|NOPSWDREQ parameter that controls whether or not a logonid can be inserted without also specifying a password. The default value is PSWDREQ. This indicates that a password is required for all logonids unless the logonid being inserted is also given the RESTRICT or STC privilege. For additional information on CA-ACF2 password controls in the PSWD GSO record, see “Maintaining Global System Options Records,” in the Administrator Guide.
Default Logonids The first few logonids you should establish are the default logonids. These IDs allow jobs without logonid records to use the system. These IDs should have minimal privileges and should be carefully controlled.
5–4 Implementation Planning Guide
User Logonids
The Batch Default ID
The logonid you specify in the DFTLID field (in the GSO OPTS record) is the one CA-ACF2 automatically assigns to any batch job that enters the system without a logonid specified or inherited. This logonid requires the RESTRICT, JOB, and JCL attributes.
The Started Task Default ID
If you are controlling started tasks with CA-ACF2, specify STC in the GSO OPTS record and specify the default logonid you have selected in the DFTSTC field. Create a logonid record for this logonid. This ID must have the STC attribute, which implies the RESTRICT attribute.
When you specify STC control in the GSO OPTS record, you can establish logonid records for each individual authorized STC procedure name in addition to the DFTSTC logonid. (The procedure name is the external procedure name, that is, the member name used on the START command.) These logonids also need the STC and RESTRICT attributes. Some can also require NON-CNCL, SECURITY, and ACCOUNT privileges.
Similarly, if you are using the IMS or CICS interfaces, create the appropriate default logonid records as described in the applicable CA-ACF2 documentation.
User Logonids If you have any online systems that are immediately controlled by CA-ACF2 (such as TSO and, optionally, CA-ROSCOE, WYLBUR, CICS, and IMS), you need to establish CA-ACF2 logonid records for the current users before they can log or sign on to the system. These logonids should not have the RESTRICT attribute but should instead require passwords. Following are other attributes these logonids should have or may need. For detailed information on logonid fields, see “Maintaining Logonid Records,” in the Administrator Guide.
Identification—Identifies the user to the system. Fields include:
■ Logonid—The ID that identifies the user to the system. This is the key to the logonid record.
■ NAME—The user’s name.
■ PHONE—The user’s phone number or extension.
Establishing Initial Logonids 5–5
User Logonids
■ Site-defined fields (optional)—Other fields, including multi-value fields, defined in the @UID macro of ACFFDR. These fields can identify the user by position, department, location, project, and so on. They can be used by CA-ACF2 to construct the extended user identification string (UID).
■ PASSWORD—Contains the user’s password. (This field never appears when the logonid record is listed.)
User privileges—Allow the user to access resources and perform functions on the system. These should be limited to what users need to perform their job functions. Some privileges your users may need are:
■ CICS—Access to Customer Information Control System (CICS)
■ IMS—Access to Information Management System (IMS)
■ JOB—Ability to run batch jobs
■ JCL—Ability to submit JCL
■ TSO—Access to TSO facility.
PREFIX—Restricts data ownership to the high-level index(es) specified.
Statistics—Cause information collected about the user’s activity on the system to be displayed when the logonid is listed. You can watch accesses, violations, and other activities of the user.
Administrative privileges—Allow a user to perform various functions in CA-ACF2. These privileges include:
■ SECURITY—All security functions except creating or deleting logonids.
■ ACCOUNT—Creating or deleting logonids, but not changing them.
■ AUDIT—Viewing all fields and running reports.
■ LEADER—Viewing and changing certain logonid fields.
■ CONSULT—Viewing logonid and other fields. Used for “help desk”
■ USER—Has none of the above privileges. Can change their own passwords. This privilege is automatically assigned to all logonids.
It is also possible to dynamically assign any logonid privilege (SECURITY, ACCOUNT, NON-CNCL, AUDIT, and so forth) by means of the CA-ACF2 Dynamic Logonid Privilege facility. This means that you can grant these special privileges based on CA-ACF2 generalized resource rules, allowing you to take into account standard CA-ACF2 facilities, such as SHIFT, SOURCE, ZONE, UID, and so forth in determining whether access to the special privilege should be granted. For additional information, see Providing Dynamic Logonid Privileges in “Controlling System Entry,” in the Administrator Guide.
5–6 Implementation Planning Guide

User Logonids
UADS Considerations
If you are bypassing UADS, you must establish several other TSO-related fields for each TSO user. CA-ACF2 provides a sample UADS conversion CLIST to help convert each existing TSO user (defined with a TSO user ID on UADS) to a CA-ACF2 user by creating comparable CA-ACF2 logonid records. You should test and modify the CLIST ahead of time, and execute it soon after the first CA-ACF2 IPL to establish TSO users as valid system users. You also have to manually update some of these logonid records (to assign special privileges, such as security administrators). When you bypass UADS, you can alter the GSO TSO record to establish default values for TSO users.
Batch Users and Special Production IDs
You must also establish other logonid records for batch users or special production IDs in the CA-ACF2 Logonid database before they can be used to submit jobs. The sooner you establish and use specific logonids, the sooner the CA-ACF2 reports contain specific information about individual system users (versus the default logonids) and the easier it is to use the report information to write rules and to research and follow up on potential problems.
Establishing Initial Logonids 5–7

Chapter
6 Writing Access Rules
The SA and other personnel who are authorized to write rules should read this chapter. Access rules are CA-ACF2 records that you define to allow users access to data sets and programs on the system based on the fields specified in their logonids. When a user attempts to access a data set or program, CA-ACF2 checks the Rule database for a rule allowing the access. If no rule is found, CA-ACF2 denies the access.
Although CA-ACF2 does not abend jobs in any mode except ABORT, it writes an SMF record for every access it determines to be unauthorized. This can create large reports and impede the performance of the operating system. You can write a few general rules before CA-ACF2 startup allowing access to commonly used data such as the high-level index SYS1. The remaining records on the reports are easier to review and you can use them to determine what rules still need to be written. Later, you can review the initial general rules and refine them if necessary.
This chapter describes:
■ Understanding access rules
■ Adding rules to the CA-ACF2 Rule database
■ Creating basic access rules
■ Some ways to simplify preliminary rule writing and maintenance
What Is an Access Rule? CA-ACF2 validates access to data by comparing the privileges in the user’s logonid to the environment and users specified in the access rule. The environment can include such conditions for data access as the UID, the source of the access, the date and time of the access, and other criteria.
This is an example of a typical access rule set: $KEY(test) work.master UID(tfintec) READ(A) WRITE(L) ALLOC(P)
Writing Access Rules 6–1
Adding Rules to the CA-ACF2 Database
This basic rule set consists of:
$KEY(test)—The high-level index of the data sets that the rule applies to. This is a control statement and must be the first line of the rule set.
work.master—The data set name that the rule applies to. This and the following lines are rule entries and are optional.
UID(tfintec)—The users allowed or denied access to this data set. The default is all UIDs, (UID(-)).
READ(A) WRITE(L) ALLOC(P)—The permissions granted to the users specified above. These users are allowed to read and write to the data sets. Write accesses are logged. Attempts to allocate data sets are denied and logged as violations.
This rule set provides only the basic access permissions used in most rule sets. Actual rule sets can contain several data sets (using a mask) and specify access for several UIDs. They can also specify other access conditions such as the date, time, and source of the access request.
Adding Rules to the CA-ACF2 Database When you create an access rule, you must store it in the CA-ACF2 Rule database before the rule becomes active. You can use three methods to store rules in the database:
The ACF command—You can use the ACF command and subcommands to create and maintain access rules. See the Administrator Guide for details.
ISPF Panels—You can use the CA-ACF2 ISPF panels to simplify writing, changing, and deleting access rules. Enter ISPF from the TSO Ready prompt and select CA-ACF2 on the ISPF/PDF Primary Option Menu. The CA-ACF2 ISPF Option Selection Menu appears. From this panel, you can access the panels you need and fill in the appropriate data. See the Administrator Guide for detailed information on using the ISPF panels.
ACFBATCH and ACFCOMP utilities—You can add individual rule sets to the database in batch with the ACFBATCH utility or add groups of rules stored in a PDS using the ACFCOMP utility. These utilities are described in the Reports and Utilities Guide.
For additional information on the fields in rule records and the syntax of writing rules, and for additional hints on rule writing, see the Administrator Guide.
ACFNRULE Utility—CA-ACF2 also provides the ACFNRULE command that can create a new access or resource rule, or update an existing access or resource rule. For additional information on ACFNRULE, see the Administrator Guide and the Reports and Utilities Guide.
6–2 Implementation Planning Guide
Writing the First Access Rules
Writing the First Access Rules The most general, permissive rule set that can be written for a high-level index is a one-rule entry that applies to all data set names with that high-level index and permits all access levels by anyone under any conditions. A rule set for a high-level index of TEST requires only two lines in the PDS member (or two lines entered directly with the COMPILE subcommand) as follows: $KEY(test) – R(A) W(A) A(A) E(A)
Because no UIDs are specified in this rule entry, the permissions apply to all users accessing any of the data sets with a high-level index of TEST. The data set name is represented by the masking symbol – (dash), which means that all data sets with a high-level index of TEST are covered by this rule set. (See Masking in Access Rules later in this chapter.) The permissions indicated by R(A) W(A) A(A) E(A) specify that reading, writing (updating), allocating (creating, scratching, cataloging, renaming, etc.) and executing are all allowed.
If your site has numerous accesses to test data sets whose high-level index names are TEST, compiling and storing this one rule record eliminates all SMF records and CA-ACF2 reports for all accesses to these data sets. However, from a security point of view, this rule is too general to be a good permanent rule. You should use this technique selectively and only as a transition aid to reduce report volume.
When you are ready to write more specific rules for the data sets, you can remove this rule or change the access from ALLOW to LOG. This causes accesses to the data sets to be logged again. You can print CA-ACF2 reports of the data set name accesses and use them to decide what specific rules need to be written.
Constructing the $KEY
The first entry in every rule set is $KEY(value), where value is a data set high-level index (such as TEST). This defines which data sets the rule applies to. When a user requests access to a data set, CA-ACF2 checks for a rule with a $KEY that matches the data set high-level index.
Additional control statements allow you to define ownership of data, select different modes for different rule sets, delegate authority to change the rule set, and so on. See the Administrator Guide for detailed information.
Writing Access Rules 6–3
Writing the First Access Rules
Rule Entry Parameters
All rule input entry lines begin in column two. The rule entry must begin with a data set name specifying what data set or data sets the rule applies to. Other parameters are optional. Rule entries usually include:
■ The UIDs allowed access to the data set
■ Accesses (READ, WRITE, EXECute, ALLOCate)
■ CA-ACF2 action when a user requests access (Allow, Log, or Prevent)
Other rule entry parameters allow you to specify environment and other conditions required for access to data sets. For information on other parameters, see the Administrator Guide.
Masking in Access Rules
Masking allows you to select a series of items, such as data sets or programs that have similar characters in their names. Instead of selecting each item individually, you can use a mask composed of a common root name and masking symbols. This allows you to write one rule that applies to many data sets.
A masking symbol is a “wild card” character that represents any other character that can be included in the name of an item. CA-ACF2 supports two masking symbols: the asterisk (*) and the dash (—).
The example at the beginning of this section uses a dash as a masking symbol for the data set name. This means that the rule entry applies to any data set name with the high-level index in the $KEY (in this case, TEST). For example, this can include the following: TEST.DATA TEST.ACCT.PGMG.COBOL TEST.A.B.C.D TEST.WEEKLY.PAYROLL.G0000V03
The permissions of R(A), W(A), A(A), and E(A) state that reading, writing (updating), allocating (creating, scratching, cataloging, renaming, and so forth), and executing (running programs out of TEST.– libraries) are all allowed.
Because there is no UID specified in the rule, the permissions specified apply to any user accessing any TEST data set names. If you wanted to limit the use of data set names with the high-level index of TEST to certain users you can use a mask with the UID parameter. For example, enter the following to limit use of TEST data set names to programmers: $KEY(test) – R(A) W(A) A(A) E(A) UID(***pgm)
6–4 Implementation Planning Guide
Simplifying Access Rule Writing
This rule allows only users whose UIDs have PGM as the fourth, fifth, and sixth characters to access the TEST data sets. For example, UIDs that start with CHIPGM and NYCPGM are allowed read, write, allocate, and execute access to the data sets. Access attempts by UIDs CHIACC and NYCACC are denied and logged.
Simplifying Access Rule Writing CA-ACF2 provides several features that simplify the creation of access rules:
■ Temporary rules
■ The %CHANGE and %RCHANGE control statements in the rule set
■ The NEXTKEY parameter that allows you to expand or combine rule sets
■ The ACFCOMP utility that allows you to use the batch facility to add multiple rule sets to the database
You can also use the ACFNRULE command to create a new or update an existing access or resource rule. For additional information, see the Administrator Guide and the Reports and Utilities Guide.
Writing Temporary Rules
You can use the FOR and UNTIL operands in a rule set to specify a time limit after which the rule is no longer effective. The FOR operand allows you to create a rule that automatically expires after a number of days. For example, you could enter the previous TEST rule as: $KEY(TEST) – FOR(30) R(A) W(A) A(A) E(A)
This rule, when compiled and stored by CA-ACF2, automatically expires 30 days later. With no rule left allowing everyone access at that point, accesses to TEST data sets again appear on the logging reports. The security administrator does not need to go back and redefine the initial rule.
Based on logging reports, you can write additional rules and redefine existing rules until you feel that most rules are completed. You can use WARN mode as an additional period to refine rules before you implement full ABORT mode. A detailed discussion of these modes, and ideas on selective phasing of different rule sets through modes, can be found in Chapter 8, “Converting to Full Security,” in this guide.
Writing Access Rules 6–5
Simplifying Access Rule Writing
Expanding Rule Sets Using NEXTKEY
Your site can have particular high-level indexes under which numerous data sets exist (such as SYS1). The NEXTKEY feature of the CA-ACF2 data set access rule set enables you to split what might be a very large rule set into smaller rule sets or, conversely, merge multiple rule sets to one central rule. See the chapter entitled, “Maintaining Access Rules,” in the Administrator Guide for details on the use of NEXTKEY in access rule writing.
Expanding Rule Sets Using RULELONG
If you use NEXTKEY to accommodate rules greater than 4K in size, consider using the RULELONG option of the GSO OPTS record instead. This option allows you to increase rule record size from 4K to a maximum of 32K. When you use RULELONG, you must redefine your CA-ACF2 database. See the Administrator Guide for details about the RULELONG option of the GSO OPTS record and for more information about how to expand the size of your database.
Delegating Authority to Change a Rule Set
You can authorize other users to change a rule set later by including %CHANGE or %RCHANGE control statements, followed by a UID mask, in the rule set. These statements must be placed after the $KEY, but before the rule input entry lines. %CHANGE allows the users whose UIDs match the mask to replace or delete the rule set. %RCHANGE allows the UIDs specified to change rule entries, but not control statements, in the rule set. A rule with the %CHANGE statement looks like this: $KEY(test) %CHANGE chipgmabc – R(A) W(A) A(A) E(A) UID(***pgm–)
This rule allows the user CHIPGMABC to change any part of the rule set.
You can disable the %CHANGE and %RCHANGE control statements by specifying NOCHANGE in the GSO RULEOPTS record. CA-ACF2 then ignores these two control statements when it encounters them in rules. See the “Maintaining Global Systems Options Records” chapter in the Administrator Guide for information on this record.
6–6 Implementation Planning Guide
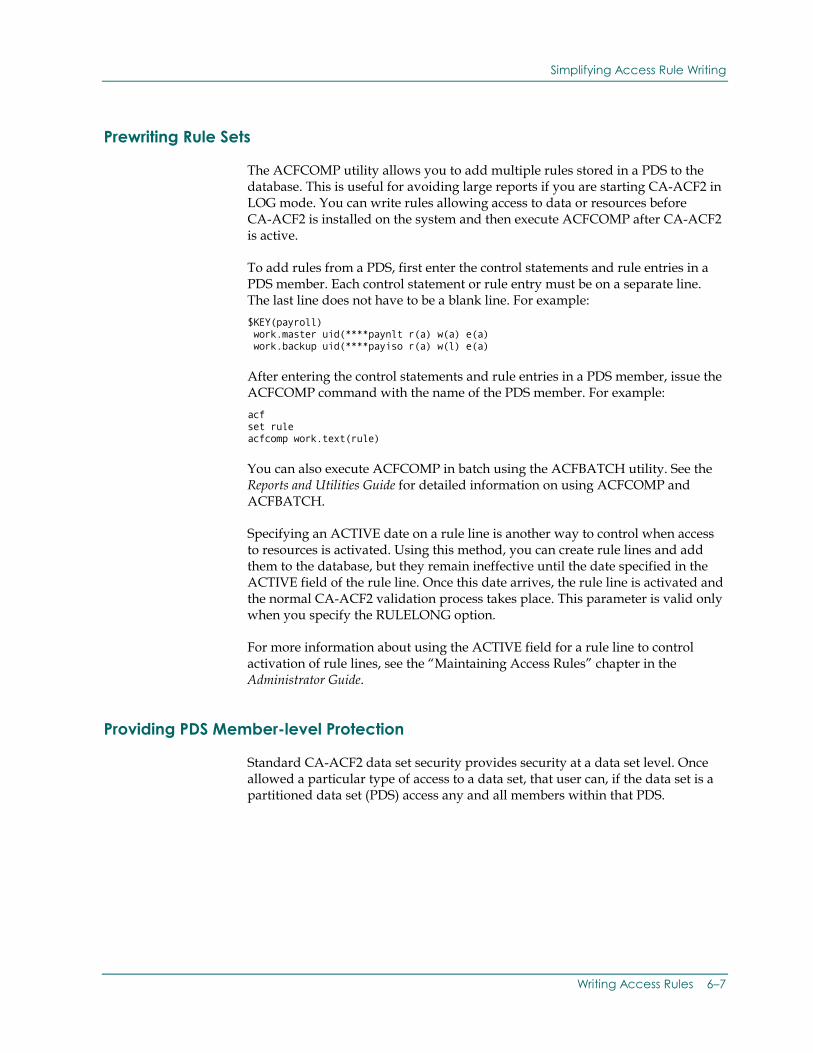
Simplifying Access Rule Writing
Prewriting Rule Sets
The ACFCOMP utility allows you to add multiple rules stored in a PDS to the database. This is useful for avoiding large reports if you are starting CA-ACF2 in LOG mode. You can write rules allowing access to data or resources before CA-ACF2 is installed on the system and then execute ACFCOMP after CA-ACF2 is active.
To add rules from a PDS, first enter the control statements and rule entries in a PDS member. Each control statement or rule entry must be on a separate line. The last line does not have to be a blank line. For example: $KEY(payroll) work.master uid(****paynlt r(a) w(a) e(a) work.backup uid(****payiso r(a) w(l) e(a)
After entering the control statements and rule entries in a PDS member, issue the ACFCOMP command with the name of the PDS member. For example: acf set rule acfcomp work.text(rule)
You can also execute ACFCOMP in batch using the ACFBATCH utility. See the Reports and Utilities Guide for detailed information on using ACFCOMP and ACFBATCH.
Specifying an ACTIVE date on a rule line is another way to control when access to resources is activated. Using this method, you can create rule lines and add them to the database, but they remain ineffective until the date specified in the ACTIVE field of the rule line. Once this date arrives, the rule line is activated and the normal CA-ACF2 validation process takes place. This parameter is valid only when you specify the RULELONG option.
For more information about using the ACTIVE field for a rule line to control activation of rule lines, see the “Maintaining Access Rules” chapter in the Administrator Guide.
Providing PDS Member-level Protection
Standard CA-ACF2 data set security provides security at a data set level. Once allowed a particular type of access to a data set, that user can, if the data set is a partitioned data set (PDS) access any and all members within that PDS.
Writing Access Rules 6–7
Simplifying Access Rule Writing
There may be critical PDS libraries on your system for which these standard data set level controls are not sufficient. For these libraries, CA-ACF2 PDS member-level protection can be used to provide additional access security down to the individual member name level. Using resource rules, CA-ACF2 secures the member name. You identify which libraries are to be secured with PDS member-level protection controls through the PDS Global System Options (GSO) record. For additional information, see PDS Member-level Protection List (PDS) and Implementing Member-level Protection in the “Maintaining Global System Options Records” chapter in the Administrator Guide.
6–8 Implementation Planning Guide
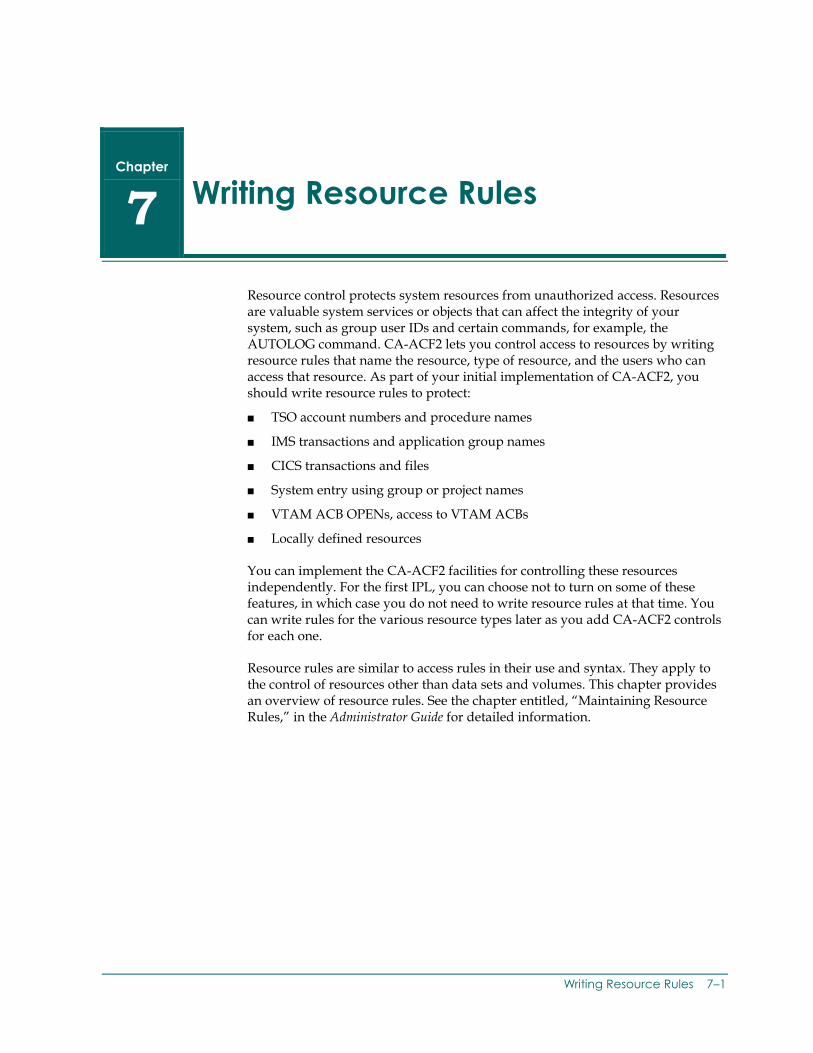
Chapter
7 Writing Resource Rules
Resource control protects system resources from unauthorized access. Resources are valuable system services or objects that can affect the integrity of your system, such as group user IDs and certain commands, for example, the AUTOLOG command. CA-ACF2 lets you control access to resources by writing resource rules that name the resource, type of resource, and the users who can access that resource. As part of your initial implementation of CA-ACF2, you should write resource rules to protect:
■ TSO account numbers and procedure names
■ IMS transactions and application group names
■ CICS transactions and files
■ System entry using group or project names
■ VTAM ACB OPENs, access to VTAM ACBs
■ Locally defined resources
You can implement the CA-ACF2 facilities for controlling these resources independently. For the first IPL, you can choose not to turn on some of these features, in which case you do not need to write resource rules at that time. You can write rules for the various resource types later as you add CA-ACF2 controls for each one.
Resource rules are similar to access rules in their use and syntax. They apply to the control of resources other than data sets and volumes. This chapter provides an overview of resource rules. See the chapter entitled, “Maintaining Resource Rules,” in the Administrator Guide for detailed information.
Writing Resource Rules 7–1
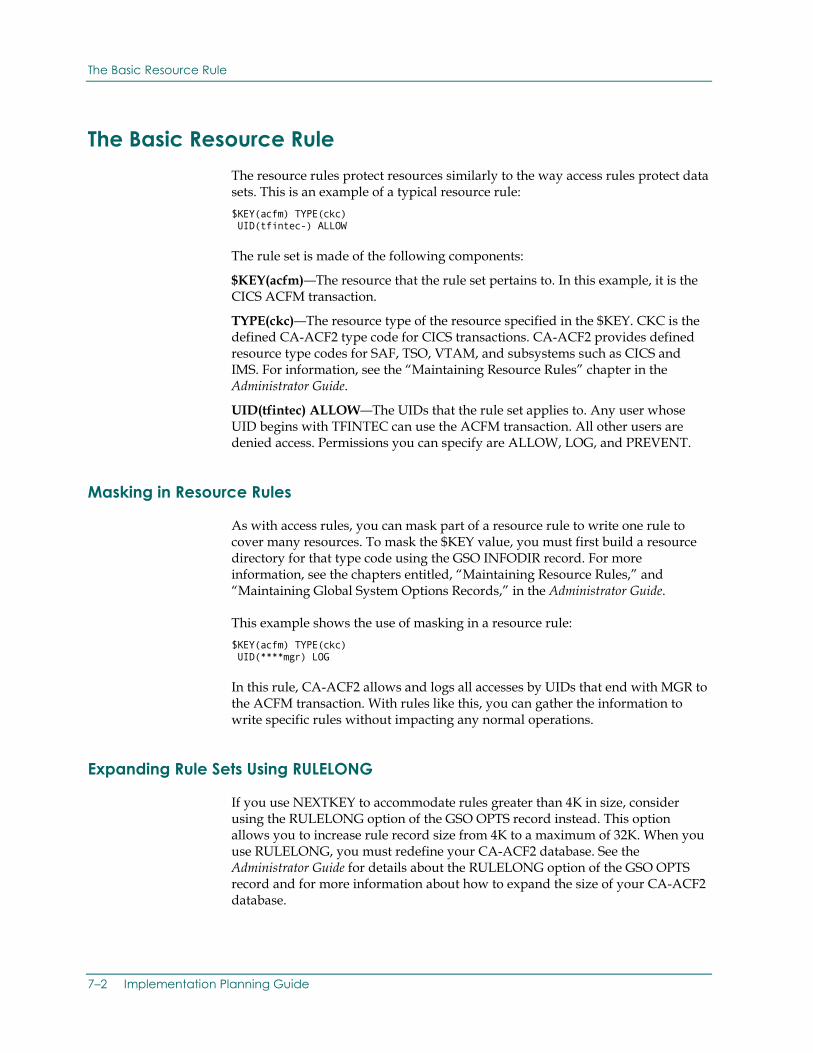
The Basic Resource Rule
7–2 Implementation Planning Guide
The Basic Resource Rule The resource rules protect resources similarly to the way access rules protect data sets. This is an example of a typical resource rule: $KEY(acfm) TYPE(ckc) UID(tfintec-) ALLOW
The rule set is made of the following components:
$KEY(acfm)—The resource that the rule set pertains to. In this example, it is the CICS ACFM transaction.
TYPE(ckc)—The resource type of the resource specified in the $KEY. CKC is the defined CA-ACF2 type code for CICS transactions. CA-ACF2 provides defined resource type codes for SAF, TSO, VTAM, and subsystems such as CICS and IMS. For information, see the “Maintaining Resource Rules” chapter in the Administrator Guide.
UID(tfintec) ALLOW—The UIDs that the rule set applies to. Any user whose UID begins with TFINTEC can use the ACFM transaction. All other users are denied access. Permissions you can specify are ALLOW, LOG, and PREVENT.
Masking in Resource Rules
As with access rules, you can mask part of a resource rule to write one rule to cover many resources. To mask the $KEY value, you must first build a resource directory for that type code using the GSO INFODIR record. For more information, see the chapters entitled, “Maintaining Resource Rules,” and “Maintaining Global System Options Records,” in the Administrator Guide.
This example shows the use of masking in a resource rule: $KEY(acfm) TYPE(ckc) UID(****mgr) LOG
In this rule, CA-ACF2 allows and logs all accesses by UIDs that end with MGR to the ACFM transaction. With rules like this, you can gather the information to write specific rules without impacting any normal operations.
Expanding Rule Sets Using RULELONG
If you use NEXTKEY to accommodate rules greater than 4K in size, consider using the RULELONG option of the GSO OPTS record instead. This option allows you to increase rule record size from 4K to a maximum of 32K. When you use RULELONG, you must redefine your CA-ACF2 database. See the Administrator Guide for details about the RULELONG option of the GSO OPTS record and for more information about how to expand the size of your CA-ACF2 database.
Chapter
8 Converting to Full Security
The design philosophy of CA-ACF2 states that all data and resources are protected by default. CA-ACF2 is shipped with a default mode of ABORT. However, you can phase in data protection gradually, enabling you to implement access control with minimal disruption to the daily activities on the system.
There are two methods that you can use to convert from an environment with no security to one with full security under CA-ACF2. These are system-wide conversion and selective migration. Both methods are explained in this chapter.
System-Wide Conversion Your whole site can migrate to full security at the same time using the CA-ACF2 mode settings specified in the GSO OPTS record. Do this in the following steps:
Step 1: QUIET Mode
QUIET mode lets you write access rules while CA-ACF2 is active. CA-ACF2 validates system accesses, but does not validate or log any data set or resource accesses. This eliminates loggings during the early stages of CA-ACF2 rule writing.
Alternatively, you can write basic access rules (see “Writing Access Rules”) before the first IPL and start CA-ACF2 in LOG mode.
Step 2: LOG Mode
LOG mode simulates full data and resource protection without actually preventing access. In LOG mode, CA-ACF2 checks all access attempts against the rules on the database and logs violations. When you have written basic access rules, you can use this mode to verify that authorized users can access specific data and that unauthorized access are prevented when CA-ACF2 is in ABORT mode.
Converting to Full Security 8–1
Selective Migration
You can run the CA-ACF2 reports to examine the loggings. From these reports, you can determine which access rules still need to be written or changed. You should consult with data owners to determine whether the accesses are valid.
You can also use a decentralized administration with multiple SA’s writing rules (each for his own department or group).
Step 3: WARN Mode
WARN mode functions the same way as LOG mode, except that CA-ACF2 issues a warning message to any user who violates an access rule. With each warning message, CA-ACF2 also sends a site-supplied warning message. This message instructs the user that in the future this access will be denied if the data owner or security administrator does not change the rule to allow access. The users can then notify the data owner or SA that they need access to the data.
Use WARN mode only for a limited period of time (two weeks is a reasonable guideline) to ensure that you refine rules as necessary. During that time, users have a chance to request any needed changes before migrating to ABORT mode and causing abends. If you run CA-ACF2 too long in WARN mode, users tend to ignore the messages and become impatient with the system.
Step 4: ABORT Mode
In ABORT mode, CA-ACF2 validates all requests for access to data or resources and prevents and logs unauthorized access attempts. If no rule exists allowing access to a data set or resource, the access is denied. This is the final and normal mode of operation.
Selective Migration Many sites use an alternative conversion method to place CA-ACF2 into RULE mode at an early stage, then allow or log specific requests using the $MODE control statement in the rule sets. The mode enforced for a given access is determined by any of the following:
■ Migration by rule set
■ Migration by user group
■ Local criteria
■ A combination of the above
This lets you selectively phase in protection for different groups (departments or geographical locations) or for different data (production versus test).
8–2 Implementation Planning Guide
Selective Migration
Migrating by Rule Set
Two standard CA-ACF2 features enable migration based on information in the applicable rule set. These are RULE mode and NEXTKEY.
Using RULE Mode
To activate RULE mode for access rules, specify RULE mode in the GSO OPTS record. You need to specify these three parameters:
RULE—Tells CA-ACF2 to use the mode specified in the $MODE control statement of the rule, if there is one.
norule—Tells CA-ACF2 what mode to use if there is no rule set applying to a data set or resource being accessed.
no$mode—Tells CA-ACF2 what mode to use if there is a rule set, but no $MODE statement in the rule set.
The mode specified in the rule sets, the norule setting, and the no$mode settings can be QUIET, LOG, WARN, or ABORT. For example, you can set the mode for data access validation in the GSO OPTS record to MODE(RULE,ABORT,ABORT).
For example, user TESTER requests write access to data set PAYROLL.PROD.MASTER and access to this data set is controlled by the following CA-ACF2 rule (UIDs at this site consist of the logonid preceded by three other characters): $KEY(PAYROLL) $MODE(LOG) PROD.TEST UID(***TESTER) R(A) W(A) A(A) E(A) PROD.MASTER UID(***TESTER) R(A) W(P) A(P) E(A)
Even though the applicable rule (PROD.MASTER) indicates that TESTER is prevented from writing to the data set (that is, W(P)), the $MODE(LOG) control statement causes the access to be permitted but also logged. If $MODE(QUIET) was set, access would be permitted and not logged. Similarly, the access would have been prevented if $MODE(ABORT) was set.
Also, if the rule set did not contain a $MODE control statement (as shown in the following), access would be denied, because ABORT is the default when no $MODE control statement is specified: $KEY(PAYROLL) PROD.TEST UID(***TESTER) R(A) W(A) A(A) E(A) PROD.MASTER UID(***TESTER) R(A) W(P) E(A) A(P)
Converting to Full Security 8–3
Selective Migration
The “norule” MODE value (ABORT) applies if no rule set for the high-level index (PAYROLL) is found. You can leave RULE mode and place all data under full CA-ACF2 security by changing the MODE field of the GSO OPTS record to ABORT. The $MODE values in a rule set have no effect on processing if the MODE field of the GSO OPTS record is set to anything other than RULE.
Using NEXTKEY
The NEXTKEY feature lets you split a rule set into several smaller rule sets, each of which can contain their own $MODE. For more details about NEXTKEY, see the Administrator Guide.
For example: $KEY(PAYROLL) $MODE(LOG) MASTER.– NEXTKEY(MASTER) TEST.– UID(***TESTER) R(A) $KEY(MASTER) $PREFIX(PAYROLL.MASTER) $MODE(ABORT) SHOP1 UID(***PRODO1) R(A)
All data sets beginning PAYROLL.MASTER are protected in ABORT mode, while any invalid PAYROLL.TEST data set access is logged.
Using RULELONG
If you use NEXTKEY to accommodate rules greater than 4K in size, consider using the RULELONG option of the GSO OPTS record instead. This option allows you to increase rule record size from 4K to a maximum of 32K. When you use RULELONG, you must redefine your CA-ACF2 database. See the Administrator Guide for details about the RULELONG option of the GSO OPTS record and for more information about how to expand the size of your CA-ACF2 database.
Using ACTIVE Date
Specifying an ACTIVE date on a rule line is another way to control when access to resources is activated. Using this method, you can create rule lines and add them to the database, but they remain ineffective until the date specified in the ACTIVE field of the rule line. Once this date arrives, the rule line is activated and the normal CA-ACF2 validation process takes place. This parameter is valid only when you specify the RULELONG option.
For more information about using the ACTIVE field for a rule line to control activation of rule lines, see the chapters entitled, “Maintaining Access Rules,” and “Maintaining Resource Rules,” in the Administrator Guide.
8–4 Implementation Planning Guide

Selective Migration
Migrating by User Group
Many sites convert to full CA-ACF2 security based on internal groupings (by department or unit, for example). CA-ACF2 provides a number of standard features to make this process easier.
Using the UID to migrate by user group—If the user identification string (UID) includes a group field, you can use CA-ACF2 rule sets to migrate. For example, if your UID is defined as site, job code, department, and logonid, you can write rules based on a combination of these fields. With appropriate rule writing, CA-ACF2 controls all data accesses by users with a job code of OS (for Operations Scheduler), while accesses by job code PA (for Programmer Analyst) users remain unaffected. CA-ACF2 easily accommodates other combinations.
Using local exits to migrate by user group—If the UID does not include appropriate group fields as outlined above, you can write a user exit. The exit routine can use information in the logonid record, information in the applicable access rule set, or both. CA-ACF2 provides a number of validation exit points.
Using the logonid to migrate by user group—To use the logonid record technique, you can use one of the standard CA-ACF2 defined fields of the logonid record or you can add a local field for this purpose. For example, you could add a field called MIGRATE (with ALLOW, LOG, WARN, ABORT values) to the installation portion of the logonid record. Use an exit routine to determine whether and how CA-ACF2 access rules validate the access. The exit could treat all data accesses by users with a particular attribute as if they were in ABORT mode, while accesses by other users without the attribute can proceed in LOG mode.
Using access rules to migrate by user group—You can also use access rule sets to implement migration by user group. CA-ACF2 provides the $USERDATA and $OWNER control statements in the access rules for site-specified data. Standard CA-ACF2 routines do not use them. For example, a user exit can check these control statements and allow an access request, deny the request, or let CA-ACF2 decide whether access is authorized.
There is also a DATA parameter available for each individual access rule entry. You can use this parameter to include information for each individual rule entry. A user exit routine can interrogate the field and determine how to handle the access.
Combining methods—By combining various methods, you can accommodate most approaches for conversion to full CA-ACF2 security. Standard features, such as RULE mode and NEXTKEY, are easy to use and require no local coding. User exit routines are available for unique site requirements.
Converting to Full Security 8–5
Other Transitional Information
When combining different migration techniques, you should ensure that the required method takes precedence where overlapping occurs. For example, migrating by index level using RULE mode, you can place files owned by MAINT in ABORT mode. CA-ACF2 prevents access to a MAINT file if a violation occurs. However, that same user can be outside the migration by user group method. The user exit routine should enforce the correct choice out of the possible combinations.
Other Transitional Information During these phases (such as LOG, WARN, and ABORT modes), other activity is taking place besides rule writing.
Expanding CA-ACF2 Control
Review the system-wide options selected in the ACFFDR and GSO records and modify them as you reach various implementation schedule points. You should bring additional areas under CA-ACF2 control if they were not defined initially, such as subsystems like IMS.
Creating User IDs
You should identify all users, assign them unique logonids, and define them to CA-ACF2. You must determine and define their privileges. For example, instruct users to issue their logonids and passwords at logon time. They may need some instruction on recovery procedures and new CA-ACF2 commands and messages, or both. You can also define individual IDs for STCs.
User Training
In decentralized environments, you can provide additional user training in rule writing and using CA-ACF2 commands. Refer them to the CA-ACF2 documentation.
8–6 Implementation Planning Guide
Other Transitional Information
Using the CA-ACF2 Reports
Throughout the migration phases and on a continuing basis after you have reached full ABORT mode, you should print and review the CA-ACF2 reports. These reports are very useful in the early phases to help you write rules and define user privileges. As soon as you establish certain privileges and rules (even in LOG mode), the reports identify violations that you should research and take appropriate action. On an ongoing basis, these reports can be an invaluable aid in detecting security threats.
Converting to Full Security 8–7

Chapter
9 Fundamentals Included in Your CA-ACF2 Package
When you receive CA-ACF2, you should receive the following:
CA-ACF2 Documentation—The Implementation Planning Guide represents only one of the guides we provide in the CA-ACF2 for OS/390 documentation set. For a complete list of all the guides included in this package, see the “Introduction” chapter of the Administrator Guide. In addition to these guides, we periodically distribute other support documentation. These are explained later in this section.
Servicepack Maintenance Updates—These contain announcements of relatively severe problems (and their fixes) when we feel it is inappropriate to wait until a new version is issued. The servicepack maintenance update numbering system is ServicePack 00, followed by SP01, SP02, and so on.
Support Documentation—Security and Audit News is a quarterly newsletter that announces forthcoming security product changes and events, reports on the latest features, introduces new ideas and activities, and informs clients of currently developing projects and user information.
Installation Tape and Distribution Tape—This tape contains the basic system and its related utilities, such as report generators and installation procedures. It also contains interfaces to other vendors’ products and many useful execs to help you implement CA-ACF2 quickly.
Announcements—Periodically, announcements and information are mailed to CA clients. These announcements include information on upcoming training classes and user conferences, official holiday schedules, documentation rates (for extra copies), and questionnaires. These mailings are sent to all customers that receive standard CA-ACF2 documentation.
New Product Versions on Servicepacks—You can also find this information and much more on the Computer Associates web page at http://www.ca.com. From this site, you can access CA-TCC (Total Client Care), a comprehensive user support function that allows you to open product support issues, communicate with support personnel, download product solutions and fixes, obtain information about new product versions and genlevels, and search product support databases. You can also automatically receive notification of critical hyper maintenance from the product support groups. Access to CA-TCC requires that you supply a user ID and password; you will obtain these when you register for CA-TCC. Follow the directions under the support icon on the Computer Associates home page.
Fundamentals Included in Your CA-ACF2 Package 9–1

Chapter
10 Command Propagation Facility (CPF)
The Command Propagation Facility (CPF) lets sites administer CA-ACF2 databases across VTAM-networked systems by propagating ACF commands and user-initiated changes such as passwords and suspensions to all or selected nodes within that network. Also, passwords can be synchronized with CA Common Services nodes using TCPIP.
The following sections explain how to implement CPF for your site by providing:
■ An overview of the CPF architecture and components
■ Detailed descriptions of the CPF Infostorage records and command keywords
■ An in-depth discussion of the consequences and administration of default routing nodes
■ Examples of how the OPTIONS record setting and command keywords interact when a command is issued
■ A description of the CPF Journal files
■ A discussion of how user accountability is maintained when CPF processing is in place
■ A description of how CPF can synchronize security information in a multi-platform environment managed by CA Common Services for z/OS and OS/390
Basic Features The Command Propagation Facility provides the security environment with:
■ Routing Logonid, Rule, and Infostorage administration to all or selected nodes within the OS/390 network
■ Optional synchronous or asynchronous remote command execution
■ Automatic updates of passwords on all defined nodes
Command Propagation Facility (CPF) 10–1
Communications Component
■ Propagation of user-initiated suspensions for exceeding the PASSLMT value
■ Optional Journal files (SYSOUT, tape or disk) to log commands transmitted to and responses received from remote nodes
Communications Component CPF uses the CAICCI component of CA Common Services for z/OS and OS/390 to communicate information between network nodes. CAICCI provides logging and recovery services that assure the timely delivery of requests. If a node is unavailable at the time a CPF request is made, CAICCI records the request in its LOGGER database and forwards the request to the correct node when it becomes available. Node, in the CPF context, refers to the unique identifier assigned to the node when it is defined using CAICCI. Node is not the same as the VTAM APPLID, although they can share the same name. For more information about CAICCI, see the CA Common Services for z/OS and OS/390.
CPF Architecture To use CPF, the administrator must first be aware of all remote CPUs and the logonids defined to them. Most logonid databases are essentially identical; those defined at one site can be defined to a remote site as well. Databases that are not identical have additional users or different attributes that must be taken into account. Keeping the databases synchronized can be a difficult task for administrators responsible for maintaining user information. If this is the case, you may want to consider using automatic propagation based on default nodes (DFTCMD) for logonids.
Implicit and Explicit Targeting
CPF allows you to automatically synchronize CA-ACF2 database changes on multiple nodes through the propagation of ACF commands as well as user-initiated changes such as suspension and password changes. Security administration propagation can be implicit (by using the CPF OPTIONS record) or explicit (by using the ACF command keywords to set propagation rules on a command-by-command basis).
The designated CPF OPTIONS record values determine the implicit target nodes to be used when a command is issued from that particular node. For example, if the CPF options for nodeA identify implicit target nodes of nodeB, nodeC, and nodeD, whenever a command is issued from nodeA, that command is automatically sent to nodeB, nodeC, and nodeD.
10–2 Implementation Planning Guide
Commands Eligible for CPF
By using the CPF command keywords, an administrator can override targets designated by the CPF options. For example, even though the CPF options for nodeA identify implicit targets of nodeB, nodeC, and nodeD, the administrator can use the TARGET keyword to indicate that a particular command should only be propagated to nodeB.
Synchronous and Asynchronous Processing
In addition to designating target nodes for a command, you can also indicate how that command is processed. By using the appropriate OPTIONS record parameters and command keywords you can cause processing to occur on a synchronous or asynchronous basis. What this means is:
Synchronous—Allows the ACF command to execute simultaneously throughout the network. CA-ACF2 waits for the command response to return from the remote node before continuing.
Asynchronous—Allows the ACF command to execute on a selective basis throughout the network. This means that CA-ACF2 does not have to wait for a response from each node to resume processing.
All commands transmitted through the network are retained on the CAICCI LOGGER file until the remote node has received them. If a remote node is not available at the time a command is transmitted via synchronous processing, the command is retained on the LOGGER file and a message indicating this is returned to the issuing user. The command is executed on the remote node when the remote node becomes active.
These options are independent and can be used separately or together. The synchronous or asynchronous processing of commands and the specific nodes that are targeted are initially determined by which options are set on the CPF OPTIONS record. Later, these values can be changed using the appropriate ACF command keywords. For more details, see CPF Options and CA-ACF2 Command Keywords used with CPF later in this chapter.
Note: All CPF communications can be journaled so that the results of the commands can be viewed later.
Commands Eligible for CPF All commands that involve the creation, modification, and deletion of logonids and non-compiled records are eligible for CPF. This includes INSERT, CHANGE, DELETE, and LIST. Compiled records can be eligible for CPF when using the RECKEY command. The COMPILE, DECOMPILE, STORE, SET, and SHOW commands are not transmitted to remote nodes via CPF.
Command Propagation Facility (CPF) 10–3
CPF and UNINODE Nodes
CPF and UNINODE Nodes Normally, CPF ships all commands eligible for propagation to all nodes in the current target list. However, there are two exceptions to this rule. Both apply to nodes defined as Unicenter nodes. A Unicenter node is defined with the UNINODE attribute on the CPF NODEDEF record. If a command is entered that affects a logonid, the command will be propagated to Unicenter nodes only if the logonid has the UNICNTR attribute set. Unicenter nodes often have a subset of the OS/390 logonids defined. This exception prevents commands that would be rejected from being sent through the network. The second exception is similar. Only commands entered in LID or ACF modes are sent to Unicenter nodes. Unicenter does not recognize commands entered in other modes. This also helps to reduce the amount of network traffic to the Unicenter machines.
Administrative Authority In all cases, administrative authority and scope of the administrator is verified at the sending and target nodes before the command is successfully executed on the target node. This is an important level of control over remote administration.
In addition to propagating changes, CPF allows the administrator to view the contents of the CA-ACF2 databases on remote nodes. This viewing is completely secure since the user’s scope is verified at both locations, allowing the administrator or auditor to review the security information for which he or she is responsible at all nodes in the CPF domain. CPF also encrypts the data that it sends between the nodes.
CPF propagated administration executes on the remote system using the authority and scope of the user as defined in the remote system, and not using the authority and scope of the user from the originating system. For example, if a user who is defined with the SECURITY attribute on one system propagates an ACF command to a system where that user is defined without the SECURITY attribute, then the command is limited to the non-SECURITY authority.
User-initiated password changes at system entry that are propagated via CPF cause the user’s password to change at each node where the change is sent.
10–4 Implementation Planning Guide
CPF Options
CPF Options CA-ACF2 provides two CPF CONTROL records, OPTIONS and NODEDEF, that govern the user of CPF and enable distributed security to be maintained efficiently. In addition to the CPF CONTROL records, CPF must be selected on the GSO OPTS CONTROL record before CA-ACF2 can start CPF. Explanations of these records follow.
OPTIONS Record
The OPTIONS record specifies:
■ The name of the current node (called home)
■ A value to specify the number of days a request is held on the CAICCI LOGGER database
■ A default target node for command propagation
■ A default node for password synchronization
■ Four flags that define the type of processing the home node performs
The OPTIONS record also defines the names of the inbound and outbound journal files and an indicator that specifies whether the journal process will start when CPF starts.
HOME (current node)—Identifies the eight-character name of the node that this record resides on. This field corresponds to the SYSID control option defined in the CAIENF parameter file. For more information about the SYSID control option, see the CA Common Services for z/OS and OS/390.
LOGDAYS (days)—Specifies the number of days undelivered commands reside on the CAICCI LOGGER database at this node.
DFTCMD (node1,node2,...)—Identifies the remote CA-ACF2 node from and/or to which CPF can propagate commands. CA-ACF2 commands are not automatically executed on the HOME node. The HOME node must be in this target list if you wish to have commands execute on the HOME node while CPF is active. The nodes in this list can be masked using standard CA-ACF2 masking rules.
DFTPSW (node1,node2,...)—Identifies the remote CA-ACF2 nodes from and/or to which CPF can synchronize passwords. Password synchronization takes place after the password has been changed on the HOME node so the HOME node does not need to be placed in the DFTPSW node list. The nodes in this list can be masked using standard CA-ACF2 masking rules.
Command Propagation Facility (CPF) 10–5
CPF Options
CMDWAIT|NOCMDWAIT—Defines the default type of processing that takes place on this node. CMDWAIT specifies that commands are processed on a synchronous basis, requiring the user to wait for commands to complete on all specified nodes before the local command completes. NOCMDWAIT specifies that processing is asynchronous. The local user receives control when the command has been written to the CAICCI LOGGER database, not when the command has processed and returned from the remote node. This parameter has no effect on password synchronization. Password synchronization is always processed asynchronously. This parameter can be overridden by the CPFWAIT|NOCPFWAIT parameter on individual CA-ACF2 commands. NOCMDWAIT is the default.
PSWDSYNC|NOPSWDSYNC—Specifies whether this node sends password synchronization requests through the CPF network. You may run command propagation without running password synchronization. NOPSWDSYNC is the default.
RCVUND|NORCVUND—Indicates whether or not the local node receives commands issued from a remote node that has not been defined via a NODEDEF record. The default is NORCVUND, the local node does not receive commands from undefined remote nodes.
COMMAND|NOCOMMAND—Indicates whether this node sends command propagation requests through the CPF network. You may run command propagation without password synchronization. NOCOMMAND is the default.
JRNLRECV(datasetname)—Defines the name of the journal file that contains all inbound requests from remote nodes and the responses to the requests. This data set must be predefined and cataloged. The data set is dynamically allocated by CA-ACF2. It should not be added to the ACF2 started procedure, and should not be the same as the one defined in JRNLSEND. The journal files cannot be shared among different nodes.
JRNLSEND(datasetname)—Defines the name of the journal file that contains all outbound requests from this node and the responses to the requests. This data set must be predefined and cataloged. The data set is dynamically allocated by CA-ACF2. It should not be added to the ACF2 started procedure, and should not be the same as the one defined in JRNLRECV. The journal files cannot be shared among different nodes.
JOURNAL|NOJOURNAL—Indicates that the journal file processing should start when CPF starts. If you do not want to start journal file processing when CPF starts, you can start the journal file process at any time using the following command: F ACF2,CPF(JOURNAL)
Journal file processing can be terminated at any time using the following command: F ACF2,CPF(NOJOURNAL)
10–6 Implementation Planning Guide
CPF Options
NODEDEF Record
NODEDEF records define the remote CPF nodes to the local node. A NODEDEF record should be defined for each remote node that participates in the CPF network. The NODEDEF record defines whether the local node accepts commands or password propagation from the remote node. NODEDEF records also define whether the local node can send requests to the remote node. A description area is also available to permit comments describing the node. The node of the NODEDEF definition refers to the SYSID parameter of the remote node. There must be a NODE parameter that matches this node in the CAIENF parameters. This node must also be defined in the CAIENF CONNECT parameter on this node.
NODEDEF.qual—Specifies a unique name for this NODEDEF record. More importantly, the qualifier after any period must be the same as the node name defined to CAICCI. The qualifier can be up to nine characters, and must immediately follow the characters NODEDEF. If you use a period (.) as part of the qualifier string for the record name, CA-ACF2 counts it as one of the nine characters.
OUTCMD|NOOUTCMD—Defines whether commands can be sent to the node identified in the qualifier. OUTCMD specifies that commands can be sent to the node identified in the qualifier.
For example, to enter commands at the New York node to change a logonid record in the Chicago database, OUTCMD must be specified in the NODEDEF record for Chicago that resides in the New York Infostorage database. In addition, INCMD must be specified in the NODEDEF record for the New York node that resides in the Chicago Infostorage database to process the command on the Chicago system.
NOOUTCMD specifies that no commands can be sent from this node to the other node identified in the qualifier. NOOUTCMD is the default.
INCMD|NOINCMD—Defines whether commands can be received from the node identified in the qualifier. INCMD specifies that commands issued from the node identified in the qualifier can be received.
For example, to enter commands at the New York node to change a logonid record in the Chicago database, INCMD must be specified in the NODEDEF record for the New York node that resides in the Chicago Infostorage database. In addition, OUTCMD must be specified in the NODEDEF record for Chicago that resides in the New York Infostorage database.
NOINCMD specifies that no commands can be received on this node from the other node identified in the qualifier. NOINCMD is the default.
DESC(description)—Lets you enter up to 20 characters of data. We recommend that you use this field to describe the CPF processing or the full node name.
Command Propagation Facility (CPF) 10–7
CPF Options
GATEWAY|NOGATEWAY—Identifies this node as a GATEWAY node. When CPF receives a command from a GATEWAY or UNINODE node, the request is executed then forwarded to all other defined nodes. When processing requests from non-GATEWAY nodes, the request is executed then forwarded to all GATEWAY or UNINODE nodes.
UNINODE|NOUNINODE—Identifies this node as a Unicenter node. All Unicenter nodes must be designated as UNINODE nodes. When CPF receives a command from a GATEWAY or UNINODE node, the request is executed then forwarded to all other defined nodes. When processing requests from non-GATEWAY nodes, the request is executed and then forwarded to all GATEWAY or UNINODE nodes.
The UNINODE indicator restricts CPF to sending commands entered while in LID or ACF mode. Also, commands that refer to logonids without the UNICNTR attribute set are not sent to nodes with the UNINODE attribute set. This indicator has no effect on password synchronization requests.
VM|NOVM—Identifies the node in this NODEDEF record as a VM operating system node. Specifying this keyword in the NODEDEF record enables the Database Synchronization Component of CA-ACF2 for OS/390 to communicate with the Database Synchronization Component of CA-ACF2 for VM.
VMLIDS|NOVMLIDS—Defines whether or not the Database Synchronization Component will propagate logonid changes to and accept logonid changes from the VM node defined by this NODEDEF record. VMLIDS specifies that logonid changes will be propagated to and accepted from the VM node defined by this NODEDEF record. NOVMLIDS specifies that logonid changes will not be propagated to or accepted from the VM node defined by this NODEDEF record.
VMRULE|NOVMRULE—Defines whether or not the Database Synchronization Component will propagate updated access rules to and accept updated access rules from the VM node defined by this NODEDEF record. VMRULE specifies that updated access rules will be propagated to and accepted from the VM node defined by this NODEDEF record. NOVMRULE specifies that updated access rules will not be propagated to or accepted from the VM node defined by this NODEDEF record.
VMINFO|NOVMINFO—Defines whether or not the Database Synchronization Component will propagate updated infostorage records to and accept updated infostorage records from the VM node defined by this NODEDEF record. VMINFO specifies that updated infostorage records will be propagated to and accepted from the VM node defined by this NODEDEF record. NOVMINFO specifies that updated infostorage records will not be propagated to or accepted from the VM node defined by this NODEDEF record.
Note: The VMLID|NOVMLID, VMRULE|NOVMRULE, and VMINFO|NOVMINFO keywords work in conjunction with the INCMD|NOINCMD keywords. The Database Synchronization Component uses the command processing thread of CPF. INCMD|NOINCMD must be first set correctly to use these options.
10–8 Implementation Planning Guide
UNICNTR Logonid Attribute
VMLACCES|NOVMLACCES—Specifies whether updates to logonid records due to logons are synchronized. If you specify NOVMLACCES, logonid updates are not synchronized unless the password is changed during logon. If the password is changed, the update is synchronized according to the VMLIDS|NOVMLIDS setting.
VM1ADAY|NOVM1ADAY—Specifies whether to limit updates to logonid records under the VMLACCES setting to just once a day. If NOVMLACCES is specified, the VM1ADAY setting is ignored.
GSO Option
A new option has been added to the GSO OPTS CONTROL record to allow sites to set up their CPF network before CA-ACF2 attempts to use CPF. Once the network has been defined and CAICCI has been set up, this flag needs to be set in the OPTS record.
CPF|NOCPF—Indicates that CA-ACF2 starts the CPF network the next time CA-ACF2 is started or the next time the following operator command is issued: F ACF2,CPF(START)
UNICNTR Logonid Attribute The UNICNTR attribute has been added to the logonid to reduce the amount of network traffic generated by CPF-UPS communications. Set this attribute on all logonids that also have a related userid on a Unicenter platform.
UNICNTR|NOUNICNTR Indicates this user also resides on the CA Common Services platform. When set, CPF will allow commands referring to this logonid to be sent to nodes defined to CPF as UNINODEs.
CMD-PROP Logonid Privilege The CMD-PROP privilege has been added for logonids. This privilege allows CA-ACF2 users to override the DFTCMD setting in the CPF OPTIONS CONTROL record with the TARGET parameter of the ACF command. If NOCMD-PROP is set and you try to use the TARGET parameter, you receive a message that your logonid lacks the necessary authorization to perform that function and access is denied.
CMD-PROP|NOCMD-PROP—Indicates whether the user can use the TARGET parameter or the SET TARGET command to override the global target list. NOCMD-PROP is the default.
Command Propagation Facility (CPF) 10–9
CA-ACF2 Command Keywords used with CPF
The SET TARGET(node1,node2,...) command allows users with the CMD-PROP privilege to override the default command propagation target list. This command frees the user from having to override the target on individual commands.
CA-ACF2 Command Keywords used with CPF The CA-ACF2 commands that can be used with CPF are LIST, CHANGE, INSERT and DELETE. COMPILE, STORE and SHOW commands are not currently supported through CPF. These keywords override the values specified in the CPF OPTIONS CONTROL record. The CPF keywords that can be used with these commands are:
TARGET(node1,node2,...)—Identifies each node to which a command can be propagated. The TARGET nodes can be masked using standard CA-ACF2 masking rules.
TARGET()—Indicates that the command processes at the HOME node only.
TARGET(=)—Indicates that the command processes at the HOME node only (same as TARGET() ).
TARGET(?)—Indicates that the command processes at default target nodes as defined in the DFTCMD parameter of the CPF OPTIONS CONTROL record.
CPFWAIT|NOCPFWAIT—Sets the processing mode for the command being issued. CPFWAIT selects synchronous processing. NOCPFWAIT selects asynchronous processing. This parameter overrides the CMDWAIT|NOCMDWAIT setting in the CPF OPTIONS CONTROL record.
LIST Command and CPF
The CA-ACF2 Command Propagation Facility is used as a means to synchronize logonids and infostorage commands throughout the network. Imagine a network with five nodes. A user needs to look at a logonid and gets five identical versions returned.
Since these records are identical in most cases, the LIST command has a special property. It is not propagated to remote nodes unless the TARGET keyword is explicitly added to the command. This reduces the amount of redundant information passed through the CPF network.
10–10 Implementation Planning Guide
GATEWAY and UNINODE Processing
GATEWAY and UNINODE Processing When a NODEDEF record has the GATEWAY attribute or the UNINODE attribute or both attributes, the normal GATEWAY processing rules will apply. When processing a request from a GATEWAY or UNINODE node, the request is passed to all other nodes. When processing from a non-GATEWAY node, the request is passed to all GATEWAY and UNINODE nodes.
The rules will be slightly different when sending requests to nodes defined with the UNINODE indicator. When running command propagation, only requests made in LID or ACF mode will be sent to UNINODE nodes. To further restrict the traffic to CA Common Services nodes, requests pertaining to logonids will only be sent if the logonid being processed has the UNICNTR attribute set. Any request that is not sent due to these rules will generate a journal record.
CPF Exit Processing A new CPF exit has been added to provide the ability to restrict the requests that are sent through CPF. The new exit, CPFEXIT, is provided with the ACF mode, the command name, the record key, and a list of nodes where the request is to be sent. The exit has the ability to prevent or allow the request to be sent. The exit cannot override the target list by adding nodes. See the Systems Programmer Guide for details on the CPF exit.
CPF Journal Files CPF uses journal files to provide a historical record of command traffic to and from CA-ACF2. CPF uses one journal file for inbound requests from remote nodes and one journal file for outbound requests to remote nodes. All responses are journaled in the same file that contains the request. The journal files are defined in the CPF OPTIONS record via the JRNLRECV and JRNLSEND parameters. The journal files must be created and initialized prior to starting the CPF journal processing. Use the supplied INITJNL job in the SAMPJCL library to create each of the CPF journal files. The use of the CPF journal files is optional. You can choose to run without the journal files by setting the NOJOURNAL attribute on the CPF OPTIONS record. You may start and stop the journal file processing at any time as long as you define the data set name in the JRNLSEND and JRNLRECV parameters of the CPF OPTIONS record.
Command Propagation Facility (CPF) 10–11
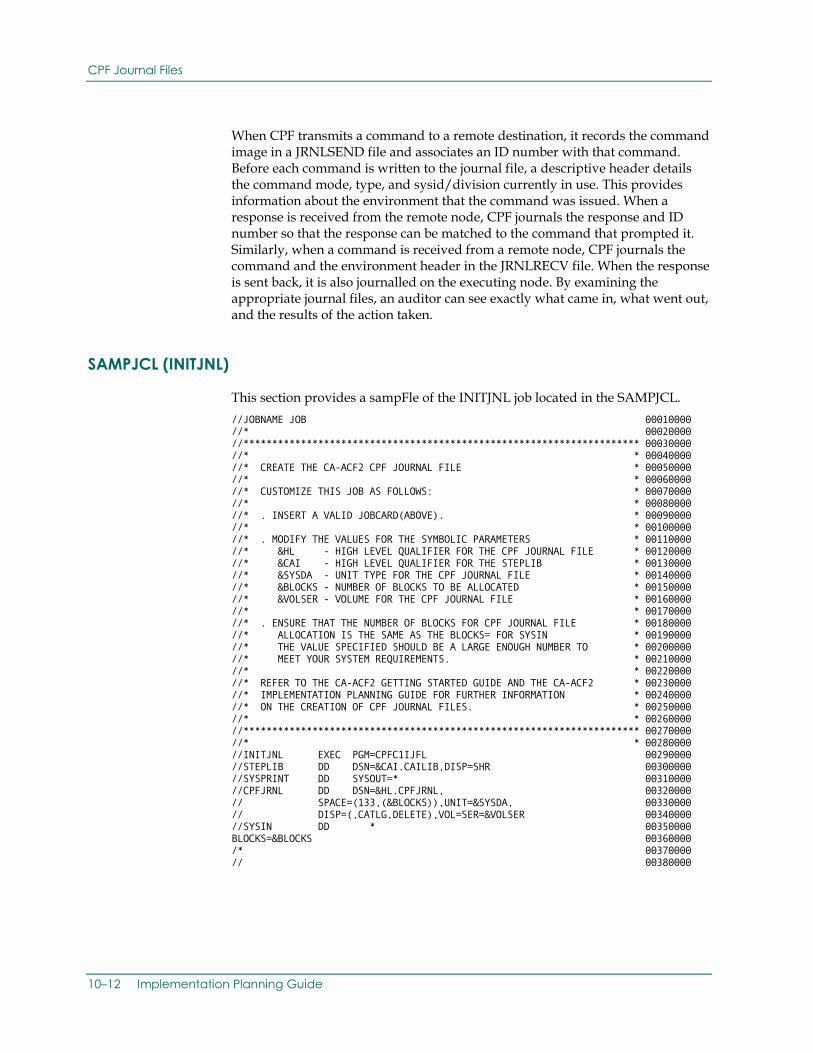
CPF Journal Files
When CPF transmits a command to a remote destination, it records the command image in a JRNLSEND file and associates an ID number with that command. Before each command is written to the journal file, a descriptive header details the command mode, type, and sysid/division currently in use. This provides information about the environment that the command was issued. When a response is received from the remote node, CPF journals the response and ID number so that the response can be matched to the command that prompted it. Similarly, when a command is received from a remote node, CPF journals the command and the environment header in the JRNLRECV file. When the response is sent back, it is also journalled on the executing node. By examining the appropriate journal files, an auditor can see exactly what came in, what went out, and the results of the action taken.
SAMPJCL (INITJNL)
This section provides a sampFle of the INITJNL job located in the SAMPJCL. //JOBNAME JOB 00010000 //* 00020000 //********************************************************************* 00030000 //* * 00040000 //* CREATE THE CA-ACF2 CPF JOURNAL FILE * 00050000 //* * 00060000 //* CUSTOMIZE THIS JOB AS FOLLOWS: * 00070000 //* * 00080000 //* . INSERT A VALID JOBCARD(ABOVE). * 00090000 //* * 00100000 //* . MODIFY THE VALUES FOR THE SYMBOLIC PARAMETERS * 00110000 //* &HL - HIGH LEVEL QUALIFIER FOR THE CPF JOURNAL FILE * 00120000 //* &CAI - HIGH LEVEL QUALIFIER FOR THE STEPLIB * 00130000 //* &SYSDA - UNIT TYPE FOR THE CPF JOURNAL FILE * 00140000 //* &BLOCKS - NUMBER OF BLOCKS TO BE ALLOCATED * 00150000 //* &VOLSER - VOLUME FOR THE CPF JOURNAL FILE * 00160000 //* * 00170000 //* . ENSURE THAT THE NUMBER OF BLOCKS FOR CPF JOURNAL FILE * 00180000 //* ALLOCATION IS THE SAME AS THE BLOCKS= FOR SYSIN * 00190000 //* THE VALUE SPECIFIED SHOULD BE A LARGE ENOUGH NUMBER TO * 00200000 //* MEET YOUR SYSTEM REQUIREMENTS. * 00210000 //* * 00220000 //* REFER TO THE CA-ACF2 GETTING STARTED GUIDE AND THE CA-ACF2 * 00230000 //* IMPLEMENTATION PLANNING GUIDE FOR FURTHER INFORMATION * 00240000 //* ON THE CREATION OF CPF JOURNAL FILES. * 00250000 //* * 00260000 //********************************************************************* 00270000 //* * 00280000 //INITJNL EXEC PGM=CPFC1IJFL 00290000 //STEPLIB DD DSN=&CAI.CAILIB,DISP=SHR 00300000 //SYSPRINT DD SYSOUT=* 00310000 //CPFJRNL DD DSN=&HL.CPFJRNL, 00320000 // SPACE=(133,(&BLOCKS)),UNIT=&SYSDA, 00330000 // DISP=(,CATLG,DELETE),VOL=SER=&VOLSER 00340000 //SYSIN DD * 00350000 BLOCKS=&BLOCKS 00360000 /* 00370000 // 00380000
10–12 Implementation Planning Guide
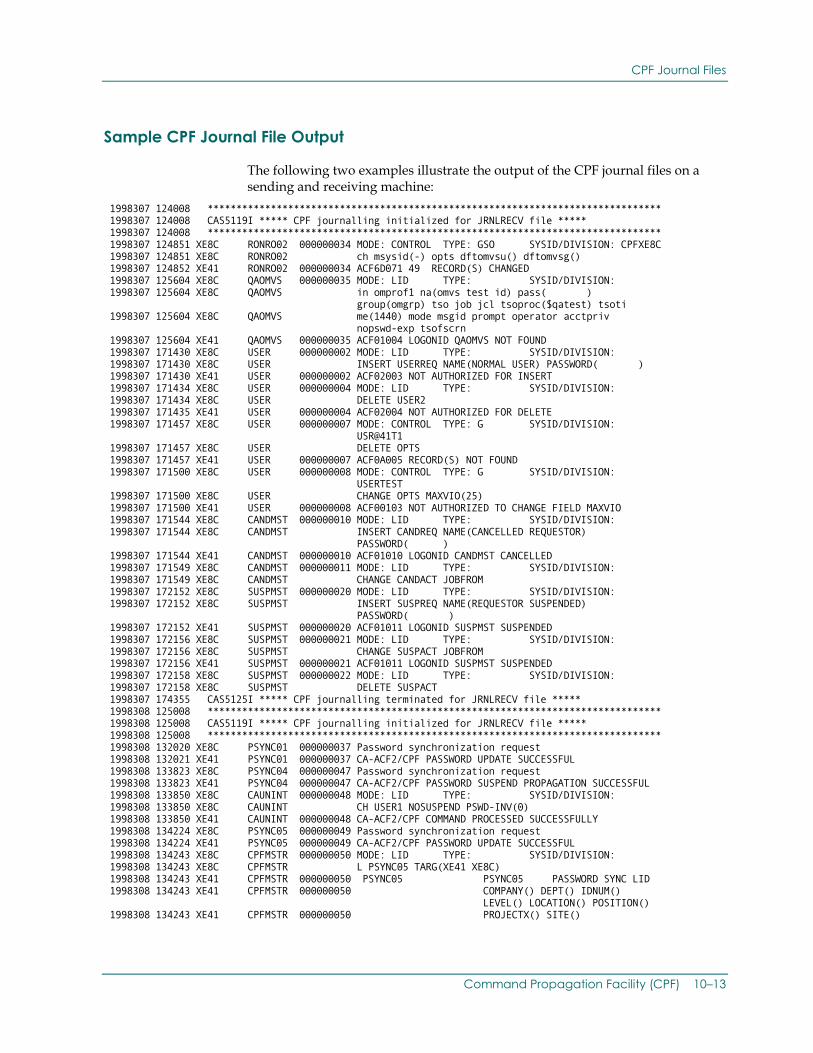
CPF Journal Files
Sample CPF Journal File Output
The following two examples illustrate the output of the CPF journal files on a sending and receiving machine:
1998307 124008 ******************************************************************************* 1998307 124008 CAS5119I ***** CPF journalling initialized for JRNLRECV file ***** 1998307 124008 ******************************************************************************* 1998307 124851 XE8C RONRO02 000000034 MODE: CONTROL TYPE: GSO SYSID/DIVISION: CPFXE8C 1998307 124851 XE8C RONRO02 ch msysid(-) opts dftomvsu() dftomvsg() 1998307 124852 XE41 RONRO02 000000034 ACF6D071 49 RECORD(S) CHANGED 1998307 125604 XE8C QAOMVS 000000035 MODE: LID TYPE: SYSID/DIVISION: 1998307 125604 XE8C QAOMVS in omprof1 na(omvs test id) pass( ) group(omgrp) tso job jcl tsoproc($qatest) tsoti 1998307 125604 XE8C QAOMVS me(1440) mode msgid prompt operator acctpriv nopswd-exp tsofscrn 1998307 125604 XE41 QAOMVS 000000035 ACF01004 LOGONID QAOMVS NOT FOUND 1998307 171430 XE8C USER 000000002 MODE: LID TYPE: SYSID/DIVISION: 1998307 171430 XE8C USER INSERT USERREQ NAME(NORMAL USER) PASSWORD( ) 1998307 171430 XE41 USER 000000002 ACF02003 NOT AUTHORIZED FOR INSERT 1998307 171434 XE8C USER 000000004 MODE: LID TYPE: SYSID/DIVISION: 1998307 171434 XE8C USER DELETE USER2 1998307 171435 XE41 USER 000000004 ACF02004 NOT AUTHORIZED FOR DELETE 1998307 171457 XE8C USER 000000007 MODE: CONTROL TYPE: G SYSID/DIVISION: USR@41T1 1998307 171457 XE8C USER DELETE OPTS 1998307 171457 XE41 USER 000000007 ACF0A005 RECORD(S) NOT FOUND 1998307 171500 XE8C USER 000000008 MODE: CONTROL TYPE: G SYSID/DIVISION: USERTEST 1998307 171500 XE8C USER CHANGE OPTS MAXVIO(25) 1998307 171500 XE41 USER 000000008 ACF00103 NOT AUTHORIZED TO CHANGE FIELD MAXVIO 1998307 171544 XE8C CANDMST 000000010 MODE: LID TYPE: SYSID/DIVISION: 1998307 171544 XE8C CANDMST INSERT CANDREQ NAME(CANCELLED REQUESTOR) PASSWORD( ) 1998307 171544 XE41 CANDMST 000000010 ACF01010 LOGONID CANDMST CANCELLED 1998307 171549 XE8C CANDMST 000000011 MODE: LID TYPE: SYSID/DIVISION: 1998307 171549 XE8C CANDMST CHANGE CANDACT JOBFROM 1998307 172152 XE8C SUSPMST 000000020 MODE: LID TYPE: SYSID/DIVISION: 1998307 172152 XE8C SUSPMST INSERT SUSPREQ NAME(REQUESTOR SUSPENDED) PASSWORD( ) 1998307 172152 XE41 SUSPMST 000000020 ACF01011 LOGONID SUSPMST SUSPENDED 1998307 172156 XE8C SUSPMST 000000021 MODE: LID TYPE: SYSID/DIVISION: 1998307 172156 XE8C SUSPMST CHANGE SUSPACT JOBFROM 1998307 172156 XE41 SUSPMST 000000021 ACF01011 LOGONID SUSPMST SUSPENDED 1998307 172158 XE8C SUSPMST 000000022 MODE: LID TYPE: SYSID/DIVISION: 1998307 172158 XE8C SUSPMST DELETE SUSPACT 1998307 174355 CAS5125I ***** CPF journalling terminated for JRNLRECV file ***** 1998308 125008 ******************************************************************************* 1998308 125008 CAS5119I ***** CPF journalling initialized for JRNLRECV file ***** 1998308 125008 ******************************************************************************* 1998308 132020 XE8C PSYNC01 000000037 Password synchronization request 1998308 132021 XE41 PSYNC01 000000037 CA-ACF2/CPF PASSWORD UPDATE SUCCESSFUL 1998308 133823 XE8C PSYNC04 000000047 Password synchronization request 1998308 133823 XE41 PSYNC04 000000047 CA-ACF2/CPF PASSWORD SUSPEND PROPAGATION SUCCESSFUL 1998308 133850 XE8C CAUNINT 000000048 MODE: LID TYPE: SYSID/DIVISION: 1998308 133850 XE8C CAUNINT CH USER1 NOSUSPEND PSWD-INV(0) 1998308 133850 XE41 CAUNINT 000000048 CA-ACF2/CPF COMMAND PROCESSED SUCCESSFULLY 1998308 134224 XE8C PSYNC05 000000049 Password synchronization request 1998308 134224 XE41 PSYNC05 000000049 CA-ACF2/CPF PASSWORD UPDATE SUCCESSFUL 1998308 134243 XE8C CPFMSTR 000000050 MODE: LID TYPE: SYSID/DIVISION: 1998308 134243 XE8C CPFMSTR L PSYNC05 TARG(XE41 XE8C) 1998308 134243 XE41 CPFMSTR 000000050 PSYNC05 PSYNC05 PASSWORD SYNC LID 1998308 134243 XE41 CPFMSTR 000000050 COMPANY() DEPT() IDNUM() LEVEL() LOCATION() POSITION() 1998308 134243 XE41 CPFMSTR 000000050 PROJECTX() SITE()
Command Propagation Facility (CPF) 10–13
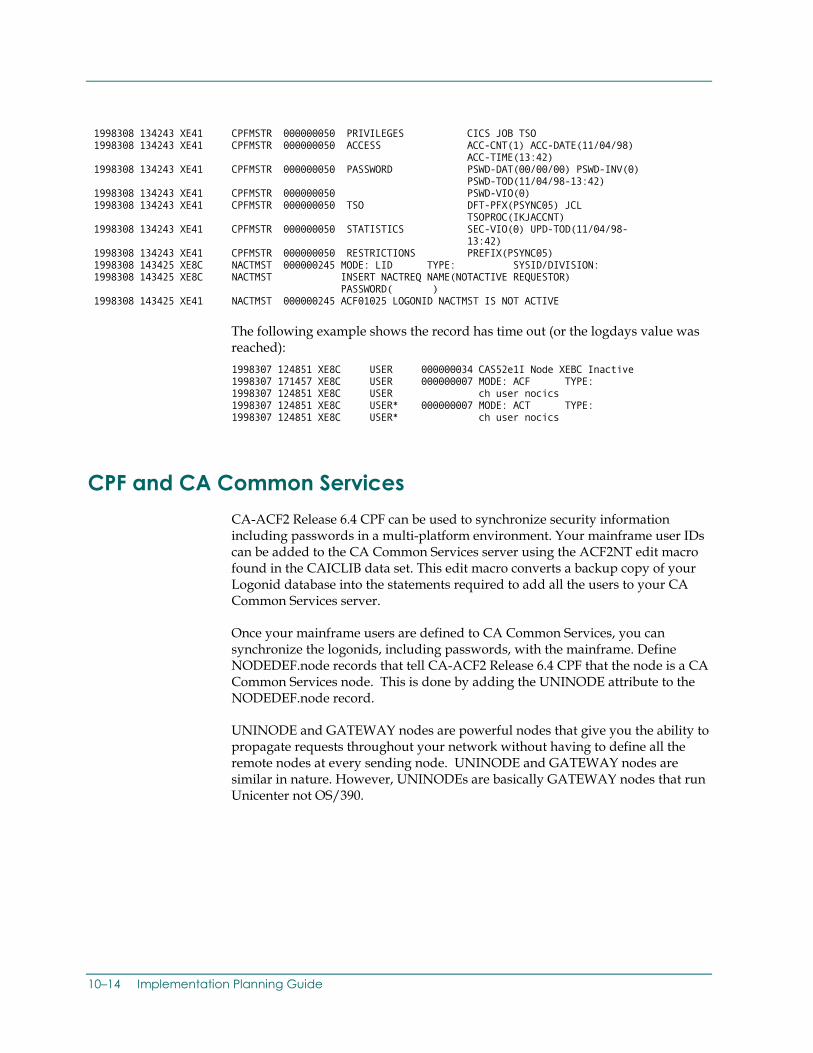
1998308 134243 XE41 CPFMSTR 000000050 PRIVILEGES CICS JOB TSO 1998308 134243 XE41 CPFMSTR 000000050 ACCESS ACC-CNT(1) ACC-DATE(11/04/98) ACC-TIME(13:42) 1998308 134243 XE41 CPFMSTR 000000050 PASSWORD PSWD-DAT(00/00/00) PSWD-INV(0) PSWD-TOD(11/04/98-13:42) 1998308 134243 XE41 CPFMSTR 000000050 PSWD-VIO(0) 1998308 134243 XE41 CPFMSTR 000000050 TSO DFT-PFX(PSYNC05) JCL TSOPROC(IKJACCNT) 1998308 134243 XE41 CPFMSTR 000000050 STATISTICS SEC-VIO(0) UPD-TOD(11/04/98- 13:42) 1998308 134243 XE41 CPFMSTR 000000050 RESTRICTIONS PREFIX(PSYNC05) 1998308 143425 XE8C NACTMST 000000245 MODE: LID TYPE: SYSID/DIVISION: 1998308 143425 XE8C NACTMST INSERT NACTREQ NAME(NOTACTIVE REQUESTOR) PASSWORD( ) 1998308 143425 XE41 NACTMST 000000245 ACF01025 LOGONID NACTMST IS NOT ACTIVE
The following example shows the record has time out (or the logdays value was reached): 1998307 124851 XE8C USER 000000034 CAS52e1I Node XEBC Inactive 1998307 171457 XE8C USER 000000007 MODE: ACF TYPE: 1998307 124851 XE8C USER ch user nocics 1998307 124851 XE8C USER* 000000007 MODE: ACT TYPE: 1998307 124851 XE8C USER* ch user nocics
CPF and CA Common Services CA-ACF2 Release 6.4 CPF can be used to synchronize security information including passwords in a multi-platform environment. Your mainframe user IDs can be added to the CA Common Services server using the ACF2NT edit macro found in the CAICLIB data set. This edit macro converts a backup copy of your Logonid database into the statements required to add all the users to your CA Common Services server.
Once your mainframe users are defined to CA Common Services, you can synchronize the logonids, including passwords, with the mainframe. Define NODEDEF.node records that tell CA-ACF2 Release 6.4 CPF that the node is a CA Common Services node. This is done by adding the UNINODE attribute to the NODEDEF.node record.
UNINODE and GATEWAY nodes are powerful nodes that give you the ability to propagate requests throughout your network without having to define all the remote nodes at every sending node. UNINODE and GATEWAY nodes are similar in nature. However, UNINODEs are basically GATEWAY nodes that run Unicenter not OS/390.
10–14 Implementation Planning Guide
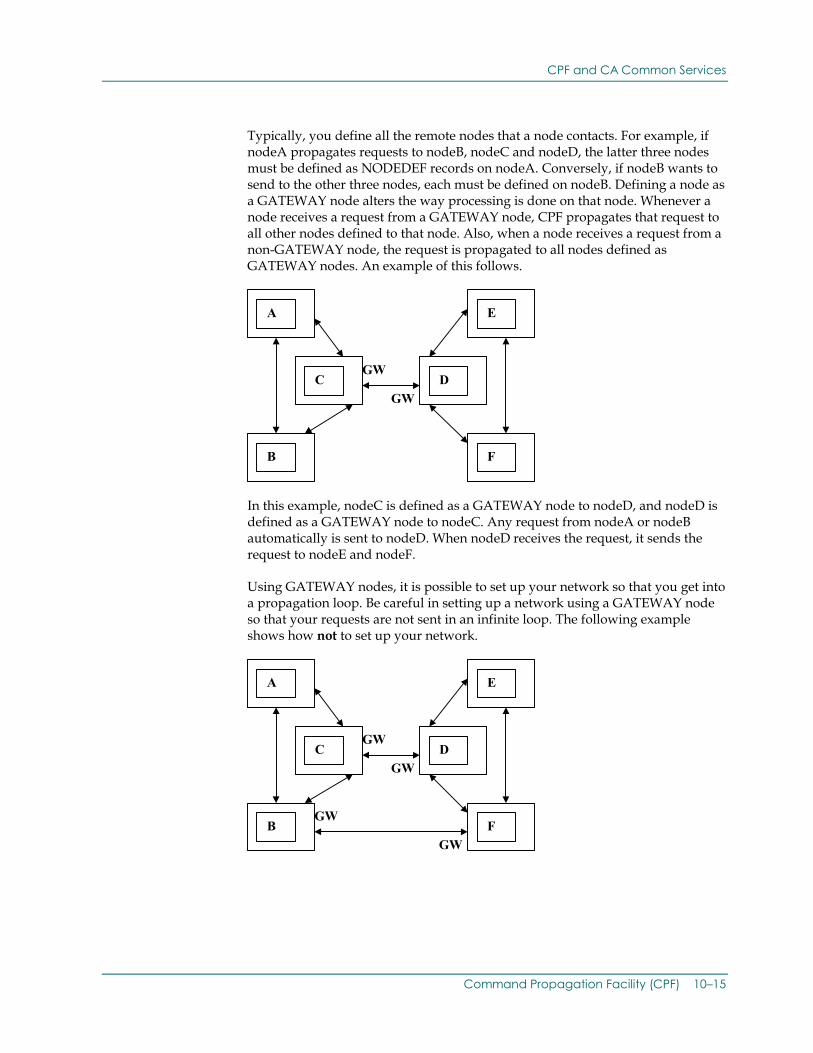
CPF and CA Common Services
Typically, you define all the remote nodes that a node contacts. For example, if nodeA propagates requests to nodeB, nodeC and nodeD, the latter three nodes must be defined as NODEDEF records on nodeA. Conversely, if nodeB wants to send to the other three nodes, each must be defined on nodeB. Defining a node as a GATEWAY node alters the way processing is done on that node. Whenever a node receives a request from a GATEWAY node, CPF propagates that request to all other nodes defined to that node. Also, when a node receives a request from a non-GATEWAY node, the request is propagated to all nodes defined as GATEWAY nodes. An example of this follows.
A E
C D
B F
GW
GW
In this example, nodeC is defined as a GATEWAY node to nodeD, and nodeD is defined as a GATEWAY node to nodeC. Any request from nodeA or nodeB automatically is sent to nodeD. When nodeD receives the request, it sends the request to nodeE and nodeF.
Using GATEWAY nodes, it is possible to set up your network so that you get into a propagation loop. Be careful in setting up a network using a GATEWAY node so that your requests are not sent in an infinite loop. The following example shows how not to set up your network.
A E
C D
B F
GW
GW
GW
GW
Command Propagation Facility (CPF) 10–15
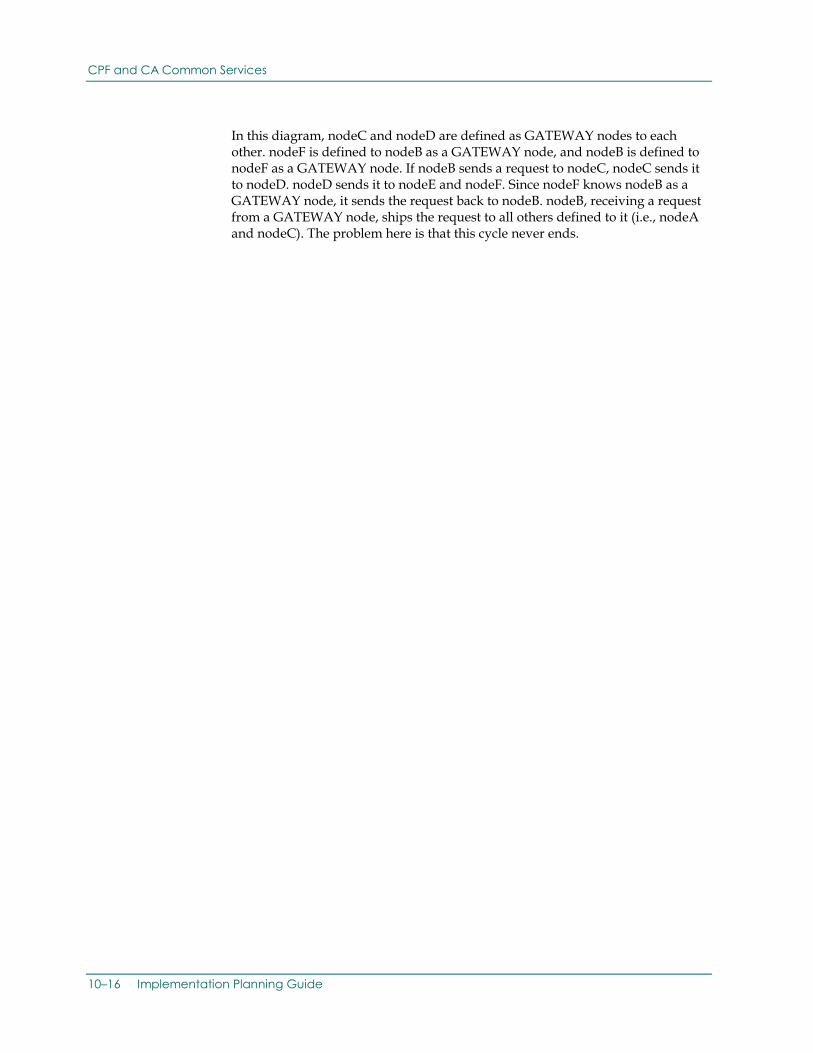
CPF and CA Common Services
In this diagram, nodeC and nodeD are defined as GATEWAY nodes to each other. nodeF is defined to nodeB as a GATEWAY node, and nodeB is defined to nodeF as a GATEWAY node. If nodeB sends a request to nodeC, nodeC sends it to nodeD. nodeD sends it to nodeE and nodeF. Since nodeF knows nodeB as a GATEWAY node, it sends the request back to nodeB. nodeB, receiving a request from a GATEWAY node, ships the request to all others defined to it (i.e., nodeA and nodeC). The problem here is that this cycle never ends.
10–16 Implementation Planning Guide
Index
ACTIVE parameter, 8-4
Administrative authority $ verifying with CPF, 10-4
Announcements, 9-1 $KEY control statement access rules, 6-3 Appointing a security administrator, 2-2
$PREFIX control statement Architecture access rules, 6-3 of CPF, 10-2
Asynchronous processing with CPF, 10-3
% Attributes of CPF NODEDEF record, 10-7 of CPF OPTIONS record, 10-5 %CHANGE control statement
access rules, 6-3
B A
Batch default logonid, 5-4 ABORT mode, 8-2 Batch users, 5-7
during conversion, 8-2 MAC implementation, 3-19
C Access rules adding to the database, 6-2 components, 6-2
CA-ACF2 described, 6-1, 6-3 databases described, 1-5 example, 6-3, 6-5 expanding controls, 8-6 general information, 6-1 report types, 1-7 masking, 6-4 reports, 1-7 rule entries, 6-4 SAF interface, 2-12 simplifying rule writing, 6-5
writing, 6-3 CA-ACF2 exits, 2-23 writing temporary rules, 6-5
CA-ACF2 options ACF command using PDS member-level security, 2-22
general information, 1-6 CA-ACF2 WorkStation synchronous and asynchronous processing with
CPF, 10-3 described, 1-6
CA-ACF2/WS ACF commands global environment considerations, 2-16 keywords used with CPF, 10-10
Index–1
CA Common Services communications component, 10-2 password synchronization, 2-16 CONTROL records, 10-5
CPFEXIT, 10-11 CA Common Services GATEWAY and UNINODE processing, 10-11 and CPF, 10-14 GSO option field, 10-9 journal file sample output, 10-13 CA-Earl journal files, 10-11 described, 1-8 NODEDEF record, 10-7
CAICCI LOGGER file, 10-3 OPTIONS record, 10-5 OPTIONS record, CA-ACF2 command keywords, 10-10
Catalogs and MAC, 3-15
Categories overview, 10-1 implementation, 3-4, 3-6, 3-7, 3-8 SET TARGET command, 10-10 specifying length of, 3-4 setting TARGET keyword in the OPTIONS
record, 10-2 Centralized environment synchronous processing, 10-3 administrative functions, 2-3 UNICNTR logonid attribute, 10-9
CHANGE command UNINODE nodes, 10-4 CPF, 10-3 using LIST command, 10-10
verifying administrative authority, 10-4 CMD-PROP logonid privilege, 10-9 CPF NODEDEF record, 10-4 Command notation, 1-2
attributes, 10-7 Command Propagation Facility (CPF). See CPF
CPF OPTIONS record Commands attributes, 10-5
SET TARGET, 10-10 CA-ACF2 command keywords, 10-10 synchronous and asynchronous processing, 10-3 Components TARGET keyword, 10-3 CPF communications, 10-2
CPFEXIT, 10-11 Components of CA-ACF2 CA-Earl, 1-8 Creation dates database recovery, 1-9 implementation, 3-7 described, 1-4 types of reports, 1-7 utilities, 1-9 D
Control systems implementation, 3-5 DASD specifying length of, 3-5 global environment considerations, 2-15
Control Systems Data sets implementation, 3-6, 3-7, 3-8 labeling, 3-6
naming conventions, 2-11 Conversion required labels, 3-15 system-wide, 8-1
Database Synchronization Component, 10-8 Converting to CA-ACF2, methods, 8-1 Databases CPF
described, 1-5 and CA Common Services, 10-14 synchronizing in a global environment, 2-15 architecture, 10-2 synchronizing with CPF, 10-2 asynchronous processing, 10-3 viewing contents on remote nodes, 10-4 basic features, 10-1
CA-ACF2 command keywords, 10-10 Datasets CMD-PROP logonid privilege, 10-9 required labels, 3-16 commands eligible for processing, 10-3
Index–2 Implementation Planning Guide
G Decentralization environment, administrative functions, 2-3
GATEWAY attribute, NODEDEF record, 10-14 Default labels for catalogs, 3-15 GATEWAY field for data sets, 3-15, 3-16 NODEDEF record, 10-8
Default protection, 1-3 GATEWAY, CPF processing, 10-11 Defaults for MAC records, 3-8 GENLEVEL updates, 9-1 DELETE command Global System Options (GSO) CPF, 10-3 selection, 2-16 DESC field GROUP field NODEDEF record, 10-7 logonid record
UID considerations, 2-19 Distributing documentation, 2-8
GSO Distribution tape CPF field, 10-9 installation, 9-1
planning, 1-10
Documentation H distributing, 2-8
DSC component HELP subcommand use in global environments, 2-15
described, 1-6
E I Environment
Identifying security policies, 2-9 global considerations, 2-15 local considerations, 2-11 IKJTSOxx member and MAC, 3-17
Examples Implementation resource rule, 7-1 CA MAC component, 3-1, 3-2, 3-3, 3-4, 3-5, 3-6,
3-7, 3-8, 3-9 writing temporary rules, 6-5 CA MAC Component, 3-9, 3-10, 3-11, 3-12, 3-13, 3-14, 3-15, 3-16, 3-17, 3-18, 3-19
Exits CPFEXIT, 10-11
checklist for CA MAC, 3-1 distributing documentation, 2-8 planning, 2-1
F schedule, 2-5 schedule example, 2-6 selecting a team, 2-3 Forms control buffer (FCB) images, required label,
3-16 Implementation team assisting the SA, 2-3 FTP described, 2-1 global environment considerations, 2-16 establishing, 2-1 functions, 2-1, 2-3
INCMD field, NODEDEF record, 10-7
Index high-level, 2-12
Index–3

Initial program load (IPL), general information, 4-1 Levels implementation, 3-6, 3-7, 3-8 INITJNL, 10-12
LIST command INSERT command CPF, 10-3 CPF, 10-3 LISTBC command and MAC, 3-17 INSERT subcommand
example, 5-3 LOG mode, 8-1 during conversion, 8-1 Installation
tape, 9-1 Logonid attributes CPF, UNICNTR, 10-9 Installing
CA-ACF2 general information, 1-10 Logonid privilege, CMD-PROP, 10-9
Integrity model Logonid records and user labels, 3-11 adding to the database, 5-3 implementation, 3-7 building, 5-1
creating, 5-2 Internet default, 5-4 global environment considerations, 2-16 example of creating, 5-3 user, 5-5 Intranet
global environment considerations, 2-16 Logonids described, 1-3 IPL multi-value fields, 2-18 general information, 4-1
M J
MAC administrators JOURNAL field implementation, 3-1, 3-10 OPTIONS record, 10-6 scoping, 3-12
Journal files, CPF, 10-11 MAC auditors
JRNLRECV field implementation, 3-10 OPTIONS record, 10-6 scoping, 3-12
JRNLSEND field MAC modes OPTIONS record, 10-6 ABORT, 3-19
implementation, 3-3 QUIET, 3-3
L WARN, 3-18, 3-19
MAC records Labels implementation, 3-6, 3-7, 3-8
and integrity checking, 3-11 refreshing, 3-6, 3-8, 3-9, 3-11, 3-12, 3-13, 3-14, 3-15 defaults, 3-9, 3-10, 3-11
MAC users for catalogs, 3-15 creating labels defaults, 3-9 for data sets, 3-16 scoping, 3-12 for datasets, 3-15
for devices, 3-13 MAC(CAT) records for nodes, 3-14, 3-15 implementation, 3-6, 3-7, 3-8 for projects, 3-12
MAC(CTL) records integrity, 3-17 implementation, 3-6, 3-7, 3-8 specifying at logon, 3-10
Index–4 Implementation Planning Guide
MAC(DEV) records Modifying CA-ACF2, 1-9 and MAC(OPT) LABELS record, 3-13 Multi-value logonid fields, 2-18 and MAC(OPT) OPTIONS record, 3-13 implementation, 3-13, 3-14
MAC(LEV) records N implementation, 3-6, 3-7, 3-8
MAC(NDE) records Naming conventions implementation, 3-14, 3-15 determining, 2-11
MAC(OPT )OPTIONS records NEXTKEY parameter implementation, 3-5, 3-6 access rules, 6-6
using, 8-4 MAC(OPT) LABELS records and MAC(DEV) records, 3-13 NJE implementation, 3-9 global environment considerations, 2-15
MAC(OPT) OPTIONS records NODEDEF record, 10-7 and MAC (DEV) records, 3-13 fields, 10-7 implementation, 3-3, 3-4, 3-5, 3-6 GATEWAY attribute, 10-14
UNINODE attribute, 10-4, 10-14 MAC(PRJ) records implementation, 3-12, 3-13
MAC(SCP) records O implementation, 3-12
MAC(USR) records Operations personnel, implementation team, 2-4 implementation, 3-9, 3-10, 3-11
Options MAC(USR) records, implementation, 3-10 administration centralization, 2-22
CA-ACF2 SAF interface, 2-22 Maintaining CA-ACF2,general information, 1-10 CICS mode, 2-22
Management controls supported by CA-ACF2, 1-3 GSO, 2-22 IMS mode, 2-22 Masking program controls, 2-22 in access rules, 6-4 system mode, 2-22 in resource rules, 7-2 user group control, 2-22 sample, 7-2
OS/390 Member-level protection, 2-22, 6-7 maintenance level, 1-10
Methods of conversion, selective migration, 8-2 OS/390 systems
Migrating to CA-ACF2 global environment considerations, 2-15 by user group, 8-5
Other product interfaces general information, 8-6 described, 1-12 rule set basis, 8-3, 8-4
OUTCMD field, NODEDEF record, 10-7 Migration selective, 8-2
Modes P and MAC, 3-5 described, 2-21
Passwords during conversion, 8-1 described, 1-3 for CA MAC, 3-3 global environment considerations, 2-16 in implementation schedule, 2-6
phasing in, 2-6 PDS Member-level protection, 6-7 sequence, 2-6
Index–5
S PDS member-level security using, 2-22
SAMPJCL (INITJNL), 10-12 Planning general information, 1-10, 2-8 Sample
CPF journal file output, 10-13 Production logonid records, 5-7
Scheduling Project labels CA-ACF2 implementation, 2-5 implementation, 3-12
Scope records Protection by default for MAC administrators, 3-12 described, 1-3 for MAC auditors, 3-12
Security Administrator Q described, 2-1
functions, 2-3 Qualifiers Security goals
NODEDEF record, 10-7 factors to consider, 2-9 QUIET mode, 8-1 Security objectives
general information, 2-9
Security policies,identifying, 2-9 R Selective migration, 8-2
Remote nodes SET TARGET command, CPF, 10-10 CPF processing, 10-15
Shared DASD Reports, 8-7 and MAC, 3-5 RESDIR record Special production IDs, 5-7
masking described, 7-2 Started tasks
Resource rules logonid records, 5-5 example, 7-1
STC field expanding, 7-2 logonid record, 5-5 masking
described, 7-2 Synchronizing databases using CPF, 10-2 writing, 7-1
Synchronous processing with CPF, 10-3 RESTRICT attribute, logonid record, 5-5
Syntax RULE mode command notation, 1-2
activating for access rules, 8-3 SYSHIGH, 3-15 migration by rule set, 8-3
SYSLOW, 3-15, 3-16 RULELONG option access rules, 6-6 SYSNONE, 3-15 migration by rule set, 8-4 resource rules, 7-2 SYSPLEX
global environment considerations, 2-15 Rules simplifying writing, 6-5 System integrity with CA-ACF2, 1-3
Index–6 Implementation Planning Guide
Index–7
T
Tape protection, 2-23
TARGET keyword use with CPF, 10-3
Testing CA-ACF2, checklist, 4-1
Time table, CA-ACF2 implementation, 2-6
Training, time table, 2-6
U
UADS, 2-23
UADS considerations, 5-7
UNICNTR field, logonid attribute, 10-9
UNINODE attribute, NODEDEF record, 10-14
UNINODE field NODEDEF record, 10-8
UNINODE, CPF processing, 10-11
Universal Password Synchronization facility described, 2-16
User Attribute Data Set described, 2-23
User groups migrating, 8-5
User identification string (UID) format, 2-16 general information, 2-12 multi-value UID string, 2-18 to dynamically alter, 2-19
User support, member of IT, 2-4
User training, 8-6
Users creating ids, 8-6
V
Values for levels, 3-7
VM field NODEDEF record, 10-8
VM/ESA systems global environment considerations, 2-15
VM1ADAY field NODEDEF record, 10-9
VMINFO field NODEDEF record, 10-8
VMLACCES field NODEDEF record, 10-9
VMLIDS field NODEDEF record, 10-8
VMRULE field NODEDEF record, 10-8
W
WARN mode during conversion, 8-2 MAC implementaion, 3-18, 3-19
Writing access rules, 6-3