Embed Size (px)
Citation preview

Wiki Guide PDF

DmC TrailersUniverseWeaponsGameplayEnemiesItemsUniverse
Characters Dante
Locations

Starter Guide
BOOOOOOOOOOOOOOOORING GAME GO AWAY FANS!!!!!!!!!!!!!!!!!!!!!!!!!!!!!!!!!!!!!!!!!!!!!!!!!!!!!!!!!!!!!1
Upgrading Guide
For those who get overwhelmed with all the upgrades available, or for those who are struggling with how they should level up Dante, here are a few tips on making things easier.
The first tip may be the most obvious. Play past missions over and over until you get enough White Orbs for upgrading. The more upgrades, the stronger Dante will become.
Which Weapons and Abilities should Dante upgrade first? Well, it's important to complete the second mission to get a few key weapons and abilities unlocked for upgrading. After that, the best choices to make things easier are:
Demon EvadeDemon Evade, Level 2Trinity Smash for the ArbiterTrinity Smash, Level 2 for the ArbiterJudgement, Level 2 for the Arbiter
Using those will make things quite a bit easier, and you may even get an SSS Rating on your first battle when using those combos. All you need to do is evade an enemy attack at the right moment to boost power, then use Trinity Smash. This should boost Dante's offense quite a bit, and the evasion helps a bit with defense.
When it comes to health, Dante will only have ten health units from the start. Using Health Crosses will add another unit to the overall health bar. Health Crosses can be bought with Red Orbs at Divinity Statues, but they will increase in price each time one is bought. Try completing Secret Missions to earn a Health Cross Fragment, which is one fourth of a Health Cross. If you're ready to buy a Health Cross from the Divinity Statue, it's best to do so during a mission when your health is low. Buying a Health Cross will completely restore your health and add a unit without it reducing your overall mission score.
As time goes on, keep upgrading and using different combos, weapons, and abilities to keep things fresh and fun.
Red Orb - Gathering tips
<div class="gh-blue-box"Introduction</div>
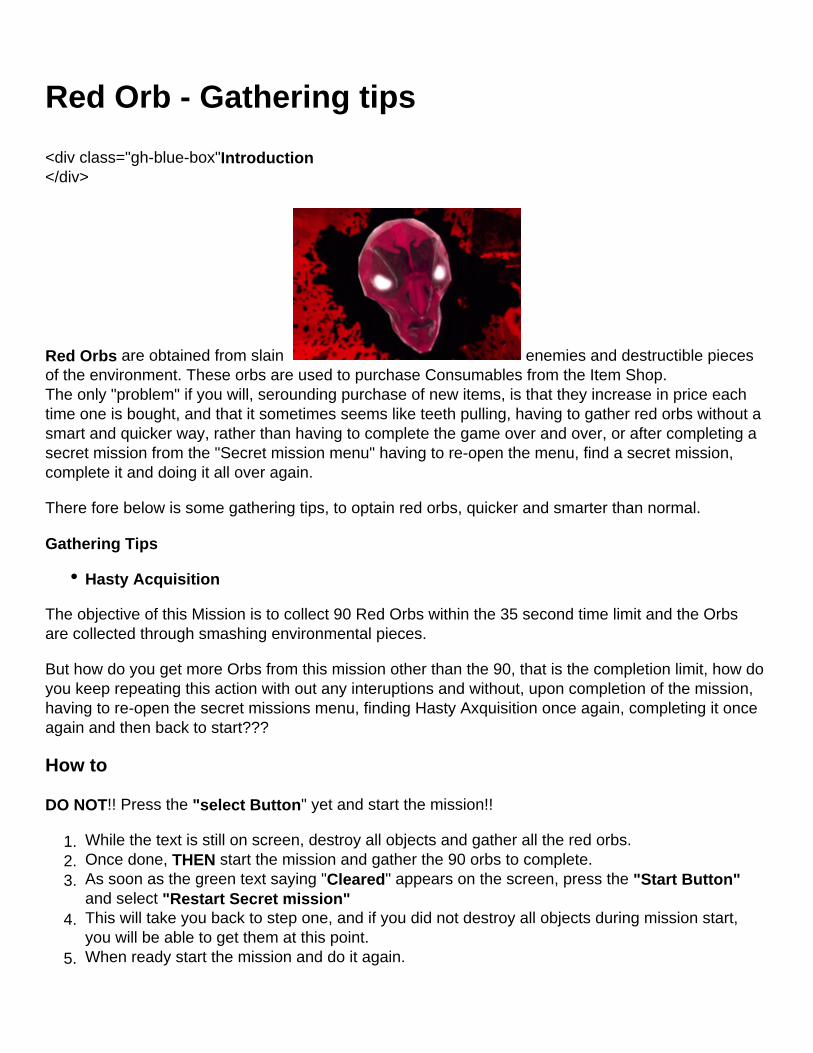
Red Orbs are obtained from slain enemies and destructible pieces of the environment. These orbs are used to purchase Consumables from the Item Shop. The only "problem" if you will, serounding purchase of new items, is that they increase in price each time one is bought, and that it sometimes seems like teeth pulling, having to gather red orbs without a smart and quicker way, rather than having to complete the game over and over, or after completing a secret mission from the "Secret mission menu" having to re-open the menu, find a secret mission, complete it and doing it all over again.
There fore below is some gathering tips, to optain red orbs, quicker and smarter than normal.
Gathering Tips
Hasty Acquisition
The objective of this Mission is to collect 90 Red Orbs within the 35 second time limit and the Orbs are collected through smashing environmental pieces.
But how do you get more Orbs from this mission other than the 90, that is the completion limit, how do you keep repeating this action with out any interuptions and without, upon completion of the mission, having to re-open the secret missions menu, finding Hasty Axquisition once again, completing it once again and then back to start???
How to
DO NOT!! Press the "select Button" yet and start the mission!!
1. While the text is still on screen, destroy all objects and gather all the red orbs.2. Once done, THEN start the mission and gather the 90 orbs to complete.3. As soon as the green text saying "Cleared" appears on the screen, press the "Start Button"
and select "Restart Secret mission"4. This will take you back to step one, and if you did not destroy all objects during mission start,
you will be able to get them at this point.5. When ready start the mission and do it again.
If willing and patient enough to repeat this tip, it should get you a good amount of orbs in a short time.
Aprox: 15 Minuts = 5000Red Orbs
OBS! : During Step 3, even though it says "unsaved mission progress will not be saved if you restart" or something like that, you still keep all the red orbs you have gathered, both before and after starting the mission!)
Informations and Locations
Are the Missions not availlable in the Secret Missions Menu? Not able to find location? Click link below!
Secret Missions
Difficulty Levels
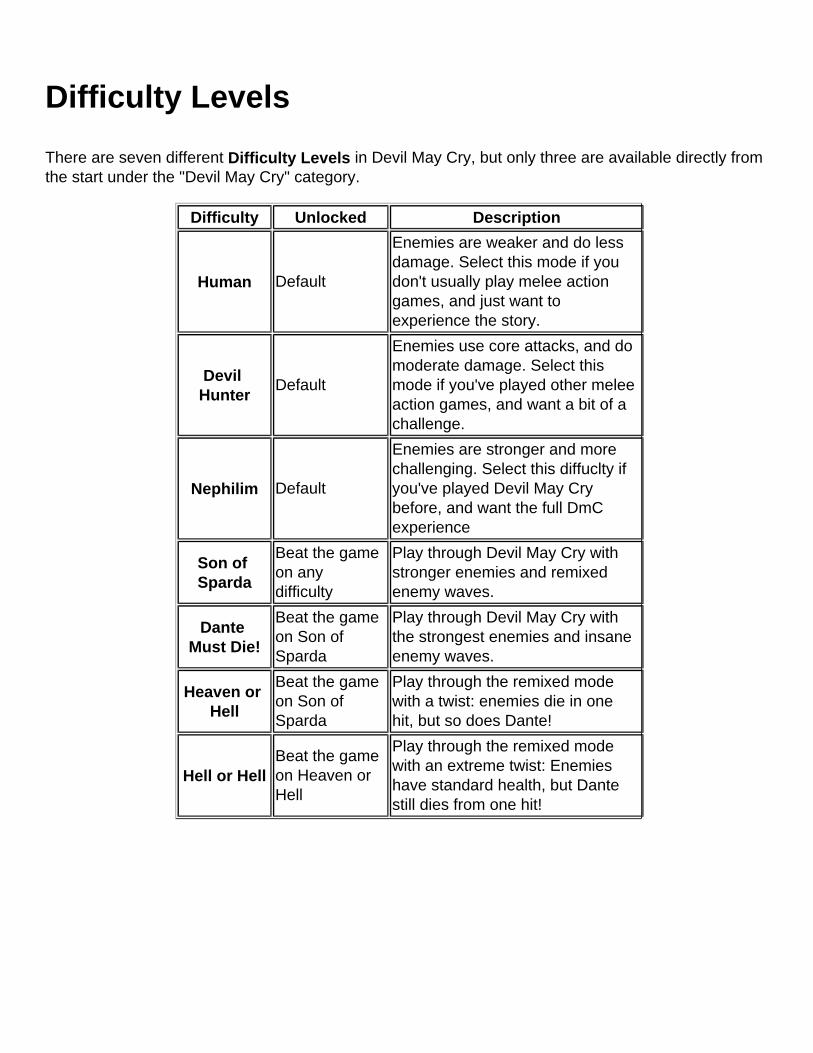
There are seven different Difficulty Levels in Devil May Cry, but only three are available directly from the start under the "Devil May Cry" category.
Difficulty Unlocked Description
Human Default
Enemies are weaker and do less damage. Select this mode if you don't usually play melee action games, and just want to experience the story.
Devil Hunter
Default
Enemies use core attacks, and do moderate damage. Select this mode if you've played other melee action games, and want a bit of a challenge.
Nephilim Default
Enemies are stronger and more challenging. Select this diffuclty if you've played Devil May Cry before, and want the full DmC experience
Son of Sparda
Beat the game on any difficulty
Play through Devil May Cry with stronger enemies and remixed enemy waves.
Dante Must Die!
Beat the game on Son of Sparda
Play through Devil May Cry with the strongest enemies and insane enemy waves.
Heaven or Hell
Beat the game on Son of Sparda
Play through the remixed mode with a twist: enemies die in one hit, but so does Dante!
Hell or HellBeat the game on Heaven or Hell
Play through the remixed mode with an extreme twist: Enemies have standard health, but Dante still dies from one hit!
Style Ranks
Style Ranks are a way of rating how well a player does during a mission. There are five categories that determine the overall Style Rank.
Style Points
How many points are earned from combat during the mission. The more stylish your fighting, the higher the points. Style Points are given a rank just like the overall Style Rank. There are seven ranks in total:
SSSensationalSSadisticSavageAnarchicBrutalCruelDirty
The letter(s) will gradually fill up during battle. Each letter is a multiplier to the Style Points earned in combos. D = 2x, C = 3x, and so on to 8x.
Fight in various ways to fill up the meter inside the letter until it reaches the next level. Using abilities and various weapon combos will easily increase the style rating. Using the same combo within a short time will lessen the value. Try killing enemies without taking damage, parrying, evading, using different combos, using aerial combos, getting environmental kills, and more.
If Dante is hit during battle, the rank will get knocked down two letters.
Time
The Mission Time is how quickly the mission is completed.
This category will add a multiplier to the Style Points for a Final Score.
Completion
Completion is how many of the Collectibles were found during the mission. Pausing the mission will show how many Keys, Secret Doors, and Lost Souls are in the mission.
This category will add a multiplier to the Style Points for a Final Score.
Items Used

How many items were used from the item screen.
This category can only reduce your score by 100,000 Points for each item used.
Deaths
How many times Dante died in battle. Falling off the edge of a cliff or something of that nature doesn't count towards this category, but it will weaken Dante. Only the health meter being completely drained counts as an actual death.
This category can only reduce your score by 10% each death.
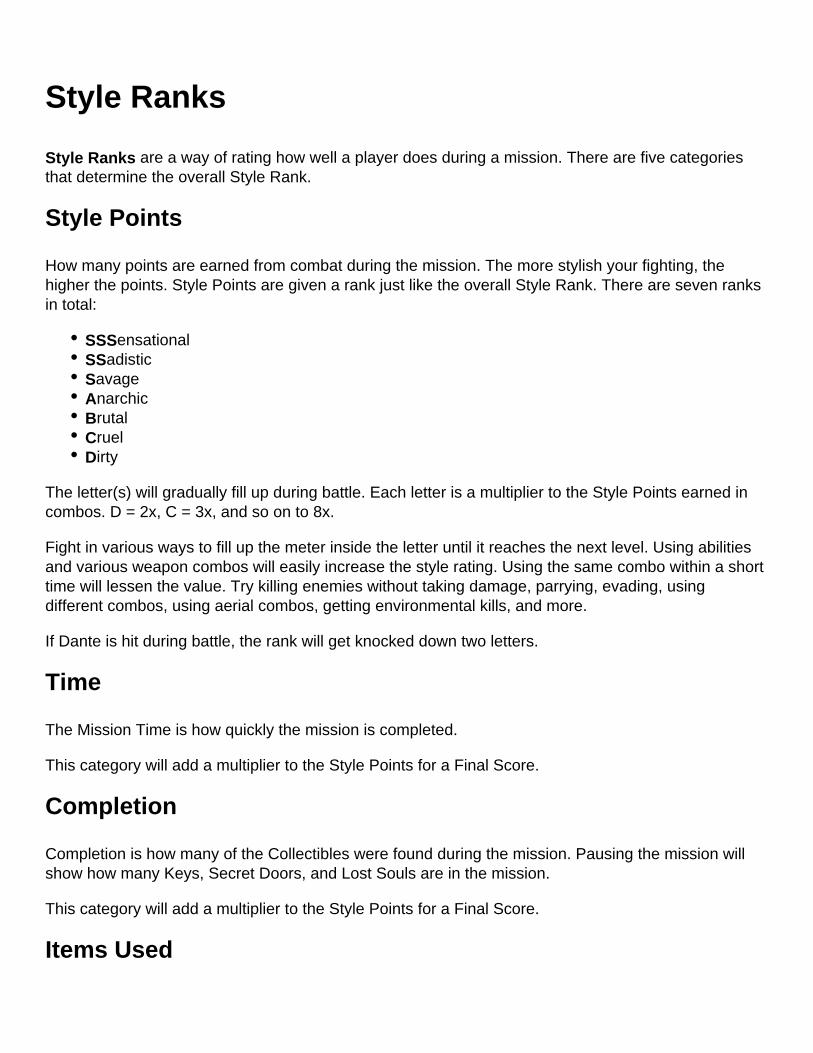
Divinity Statues
Divinity Statues
Divinity Statues are big statues found during missions that act as Item and Upgrade Shops. These shops can also be used in between missions.
Ability and Weapon Upgrades
Upgrades are an integral part of DmC. Kill enemies during missions to collect White Orbs. The White Orbs will gradually fill Dante's upgrade bar -- which is more of a circle. Once the bar is filled, one upgrade can be purchased.
Weapon upgrades can be tried out before purchasing
Both Abilities and Weapons can be upgraded. Abilities are Dante's core skills, which are useful in both combat and traversal. However, only select abilities will be available for upgrading at each mission. In addition to that, certain abilities can only be bought after a previous ability is known.
Weapon upgrades are slightly different than Ability upgrades. All core upgrades for a weapon are available once the weapon is obtained. After a core weapon upgrade is purchased, a level 2, level 3, or new upgrade based on the core upgrade can be made. The level 2, 3, and sub-upgrades increase the core upgrade's ability in some way or another
Item Shops
As stated earlier, Divinity Statues are also used as Item Shops. Consumables can be bought using Red Orbs. After being purchased the item will be stored in the item menu, which can be accessed when the game is paused. Only a select number of each item can be held at a time. The max amount can be between three and ten.
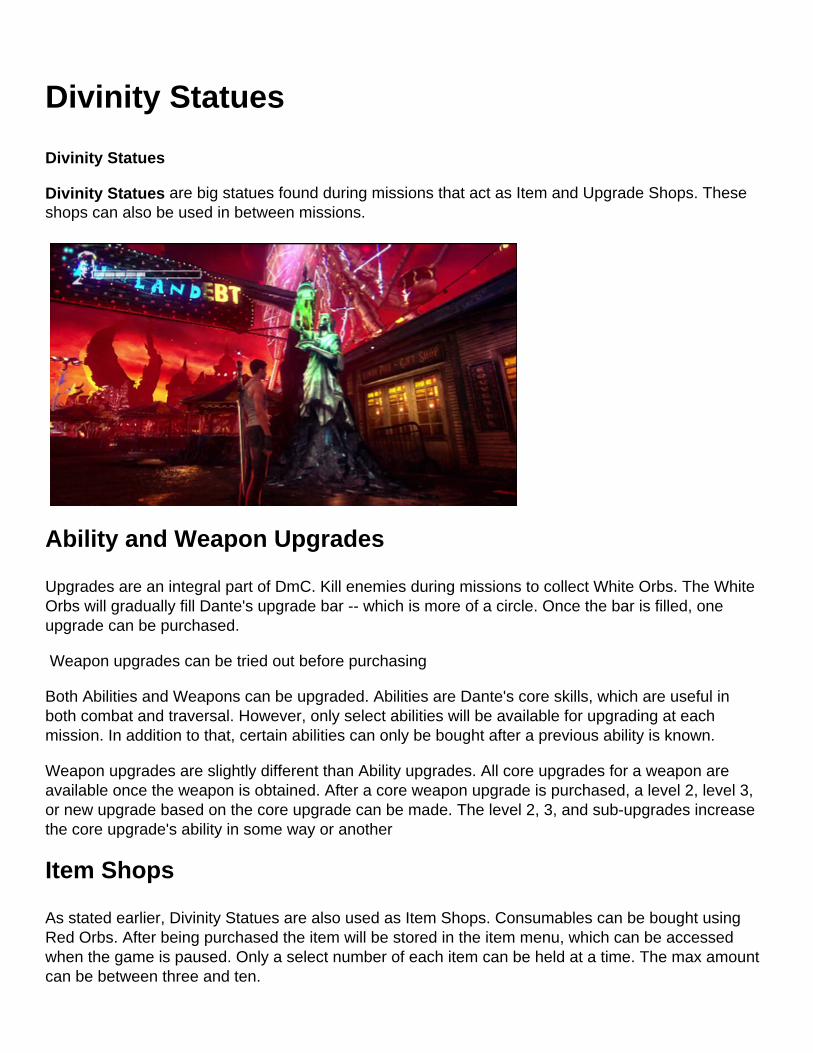
Orbs
DmC: Devil May Cry features four different types of Orbs, each with their own function.
Red Orbs
Red Orbs are obtained from slain enemies and destructible pieces of the environment. These orbs are used to purchase Consumables from the Item Shop.
White Orbs
White Orbs are obtained from slain enemies and end mission bonuses. These orbs fill the upgrade bar, which is then used at the Upgrade Shop to purchase new Abilities and combos.
Green Orbs
Green Orbs are obtained from slain enemies and green pods on walls. They will fill up a portion of your health bar automatically, but they're not as common as the other orbs, wth the exception of the Gold Orb being the rarest.
Gold Orbs
Gold Orbs can be purchased from the Item Shop for 400 Red Orbs, or found during a mission. These orbs can be used upon death to resurrect Dante.
Unlike the other two orbs, only three Gold Orbs can be held at one time.
Items
There are a number of Items that can be bought and used during or after a mission in DmC: Devil May Cry. During a mission, items can be either found out in the world or bought from Divinity Statues. Items can also be bought in between missions.
Go to the Item Section in the pause menu to find and use the items at any given time. These items can either be found during a mission or bought at Item Shops.
Items Cost Description
Small Vital Star 200Restores five units of Dante's Health. (Max 10)
Large Vital Star400600
Restores all of Dante's Health. (Max 10)
Small Devil Trigger Star
200Restores some of Dante's Devil Trigger. (Max 10)
Large Devil Trigger Star
400Restores all of Dante's Devil Trigger. (Max 10)
Gold Orb 400Can be used to resurrect from death. (Max 3)
Health Cross Fragment
N/ACollect four to create a Health Cross.
Health Cross
1,0002,0003,5005,0007,500
Increases Dante's maximum Health by 10%. (Max 6)
Devil Trigger Cross
1,0005,00010,000
Increases Dante's maximum Devil Trigger by 20$. (Max 3)
Weapons
DmC: Devil May Cry contains nine weapons, each with their own special moves and upgrades. Each weapon can be upgraded at a Divinity Statue once each time the upgrade bar is filled with enough White Orbs.
One weapon will be available from the get go (Rebellion), and one other will be available shortly after (Ebony & Ivory). The others will become available through natural progression.
Demon Weapons
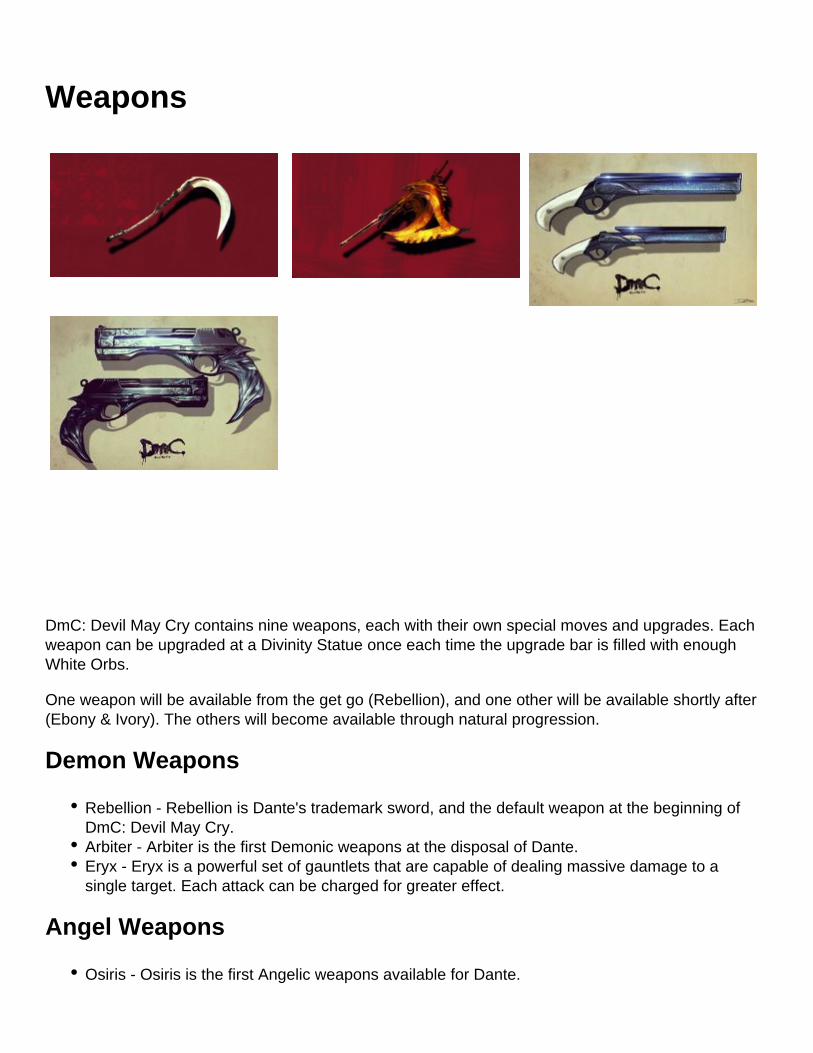
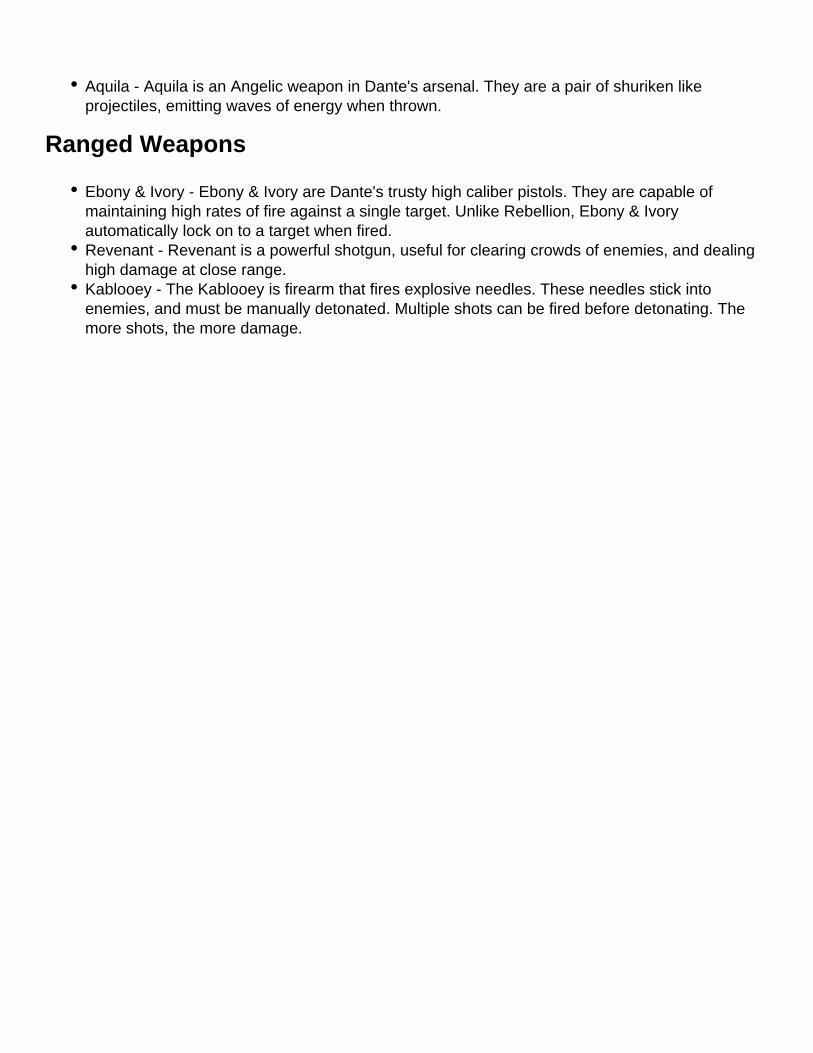
Rebellion - Rebellion is Dante's trademark sword, and the default weapon at the beginning of DmC: Devil May Cry.Arbiter - Arbiter is the first Demonic weapons at the disposal of Dante.Eryx - Eryx is a powerful set of gauntlets that are capable of dealing massive damage to a single target. Each attack can be charged for greater effect.
Angel Weapons
Osiris - Osiris is the first Angelic weapons available for Dante.
Aquila - Aquila is an Angelic weapon in Dante's arsenal. They are a pair of shuriken like projectiles, emitting waves of energy when thrown.
Ranged Weapons
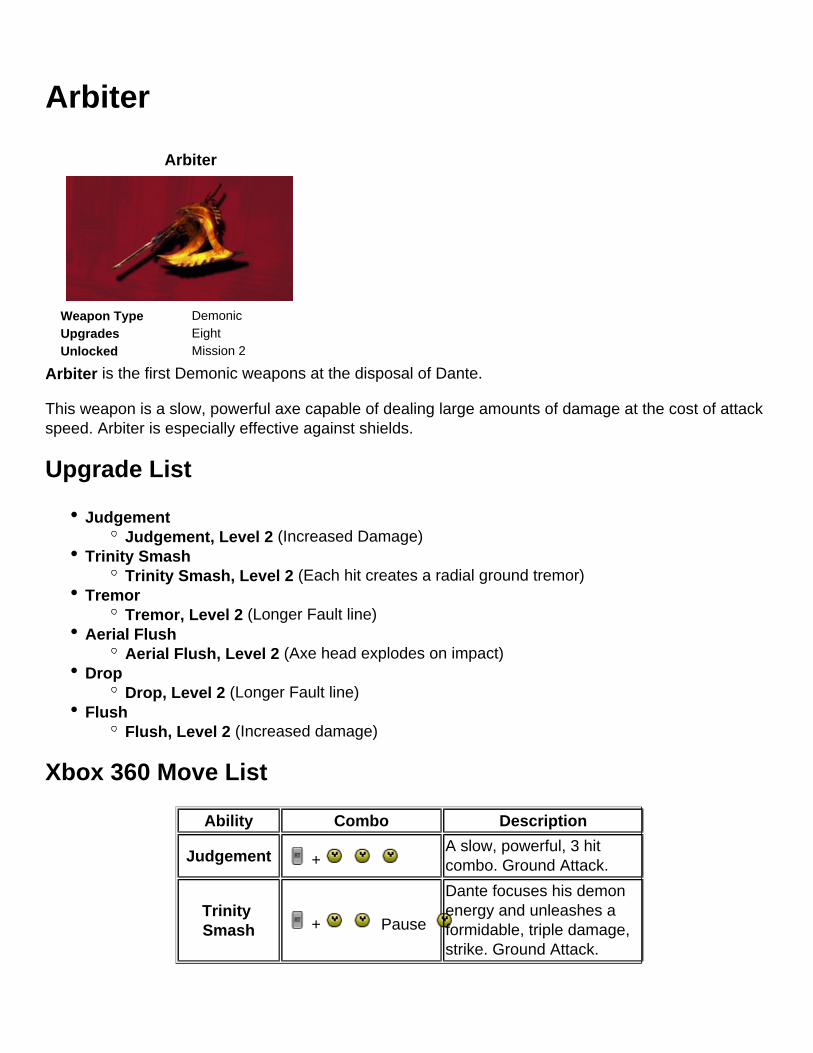
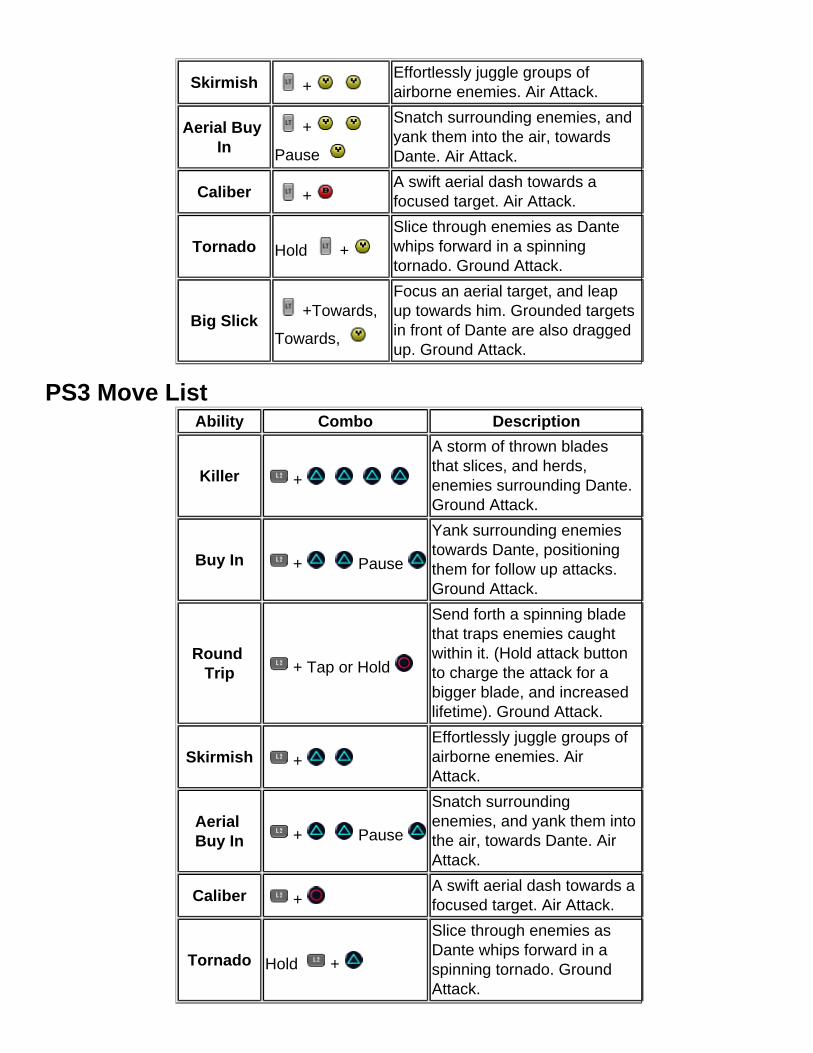
Ebony & Ivory - Ebony & Ivory are Dante's trusty high caliber pistols. They are capable of maintaining high rates of fire against a single target. Unlike Rebellion, Ebony & Ivory automatically lock on to a target when fired.Revenant - Revenant is a powerful shotgun, useful for clearing crowds of enemies, and dealing high damage at close range.Kablooey - The Kablooey is firearm that fires explosive needles. These needles stick into enemies, and must be manually detonated. Multiple shots can be fired before detonating. The more shots, the more damage.
Arbiter
Arbiter
Weapon Type DemonicUpgrades EightUnlocked Mission 2
Arbiter is the first Demonic weapons at the disposal of Dante.
This weapon is a slow, powerful axe capable of dealing large amounts of damage at the cost of attack speed. Arbiter is especially effective against shields.
Upgrade List
JudgementJudgement, Level 2 (Increased Damage)
Trinity SmashTrinity Smash, Level 2 (Each hit creates a radial ground tremor)
TremorTremor, Level 2 (Longer Fault line)
Aerial FlushAerial Flush, Level 2 (Axe head explodes on impact)
DropDrop, Level 2 (Longer Fault line)
FlushFlush, Level 2 (Increased damage)
Xbox 360 Move List
Ability Combo Description
Judgement +A slow, powerful, 3 hit combo. Ground Attack.
Trinity Smash + Pause
Dante focuses his demon energy and unleashes a formidable, triple damage, strike. Ground Attack.

Tremor +
Smashes the axe into the floor with power enough to crack the earth. Enemies standing on the fault line are launched into the air. Ground Attack.
Aerial Flush +
Hurl the axe at targets below Dante. The weight of the axe makes it impossible to aim this attack upwards. Air Attack.
Drop +
Drop from the sky with a thunderous strike that cracks the earth. Enemies standing on the fault line are launched into the air. Air Attack.
Flush +Towards,Towards,
Hurl the axe head at distant targets. The weight of the axe makes it impossible to aim this attack upwards.
PS3 Move ListAbility Combo Description
Judgement +A slow, powerful, 3 hit combo. Ground Attack.
Trinity Smash
+
Pause
Dante focuses his demon energy and unleashes a formidable, triple damage, strike. Ground Attack.
Tremor +
Smashes the axe into the floor with power enough to crack the earth. Enemies standing on the fault line are launched into the air. Ground Attack.
Aerial Flush +
Hurl the axe at targets below Dante. The weight of the axe makes it impossible to aim this attack upwards. Air Attack.
Drop +
Drop from the sky with a thunderous strike that cracks the earth. Enemies standing on the fault line are launched into the air. Air Attack.

Flush + Towards,
Towards,
Hurl the axe head at distant targets. The weight of the axe makes it impossible to aim this attack upwards.

Aquila
Aquila
Weapon Type AngelicUpgrades TwelveUnlocked Mission 10
Aquila is a lightning fast, dual wielded Angelic weapon. Their long range, and sweeping attacks, make them devastating against large groups of weak enemies. Aquila can quickly take down the barriers of Witches. These are also needed to help collect all Collectibles.
Aquila is the name of a Christian Mercenary, along with his wife Pricilla, written in the New Testament. The two are strong figures in the Christian faith. Aquila is also the name of a constellation, and means "Eagle" in Latin. The constellation itself depicts and eagle carrying Zeus' lightning bolts.
Upgrade List
KillerKiller, Level 2 (Increased combo range)
Buy InBuy In, Level 2 (More enemies can be pulled in)
Round TripRound Trip, Level 2 (Increased blade lifetime)
SkirmishSkirmish, Level 2 (Increased combo range)
Aerial Buy InAerial Buy In, Level 2 (More enemies can be pulled in)
CaliberCaliber, Level 2 (Increased dash range)
TornadoTornado, Level 2 (Can be maintained for longer when holding attack button)
Big SlickBig Slick, Level 2 (Increased range)
Xbox 360 Move List
Ability Combo Description
Killer +
A storm of thrown blades that slices, and herds, enemies surrounding Dante. Ground Attack.
Buy In+
Pause
Yank surrounding enemies towards Dante, positioning them for follow up attacks. Ground Attack.
Round Trip
+ Tap or
Hold
Send forth a spinning blade that traps enemies caught within it. (Hold attack button to charge the attack for a bigger blade, and increased lifetime). Ground Attack.
Skirmish +Effortlessly juggle groups of airborne enemies. Air Attack.
Aerial Buy In
+
Pause
Snatch surrounding enemies, and yank them into the air, towards Dante. Air Attack.
Caliber +A swift aerial dash towards a focused target. Air Attack.
Tornado Hold +
Slice through enemies as Dante whips forward in a spinning tornado. Ground Attack.
Big Slick+Towards,
Towards,
Focus an aerial target, and leap up towards him. Grounded targets in front of Dante are also dragged up. Ground Attack.
PS3 Move ListAbility Combo Description
Killer +
A storm of thrown blades that slices, and herds, enemies surrounding Dante. Ground Attack.
Buy In + Pause
Yank surrounding enemies towards Dante, positioning them for follow up attacks. Ground Attack.
Round Trip + Tap or Hold
Send forth a spinning blade that traps enemies caught within it. (Hold attack button to charge the attack for a bigger blade, and increased lifetime). Ground Attack.
Skirmish +
Effortlessly juggle groups of airborne enemies. Air Attack.
Aerial Buy In + Pause
Snatch surrounding enemies, and yank them into the air, towards Dante. Air Attack.
Caliber +A swift aerial dash towards a focused target. Air Attack.
Tornado Hold +
Slice through enemies as Dante whips forward in a spinning tornado. Ground Attack.

Big Slick +Towards,Towards,
Focus an aerial target, and leap up towards him. Grounded targets in front of Dante are also dragged up. Ground Attack.
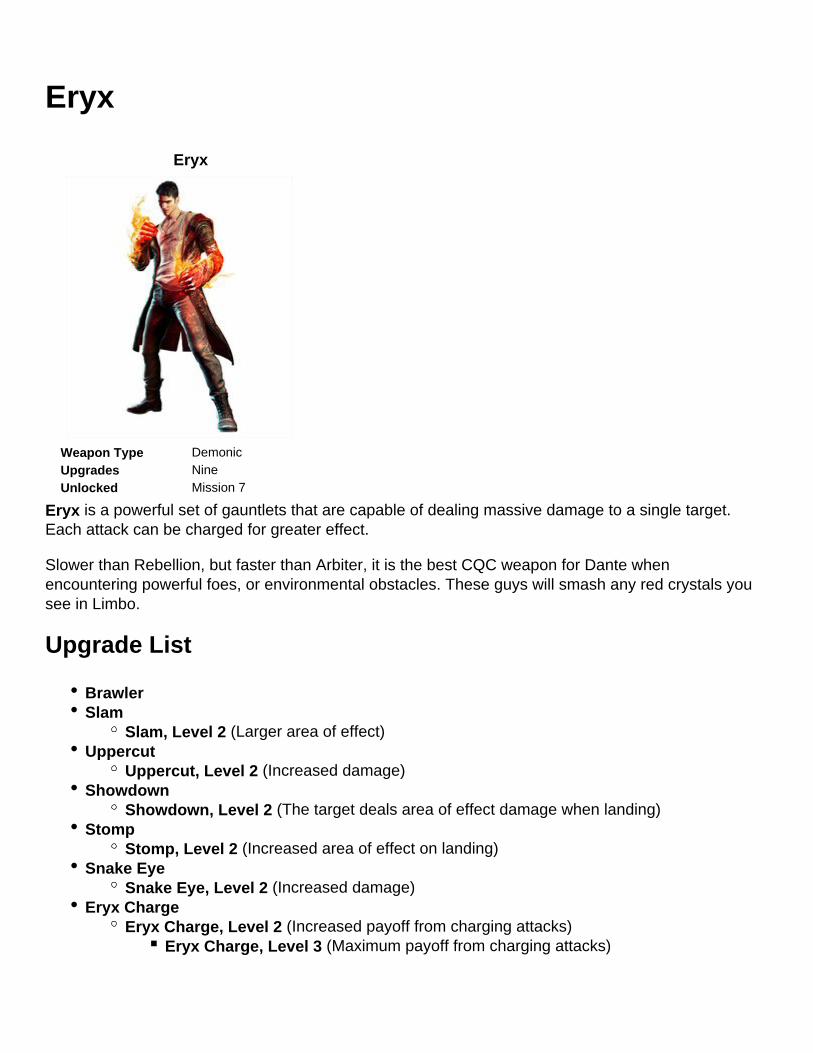
Eryx
Eryx
Weapon Type DemonicUpgrades NineUnlocked Mission 7
Eryx is a powerful set of gauntlets that are capable of dealing massive damage to a single target. Each attack can be charged for greater effect.
Slower than Rebellion, but faster than Arbiter, it is the best CQC weapon for Dante when encountering powerful foes, or environmental obstacles. These guys will smash any red crystals you see in Limbo.
Upgrade List
BrawlerSlam
Slam, Level 2 (Larger area of effect)Uppercut
Uppercut, Level 2 (Increased damage)Showdown
Showdown, Level 2 (The target deals area of effect damage when landing)Stomp
Stomp, Level 2 (Increased area of effect on landing)Snake Eye
Snake Eye, Level 2 (Increased damage)Eryx Charge
Eryx Charge, Level 2 (Increased payoff from charging attacks) Eryx Charge, Level 3 (Maximum payoff from charging attacks)
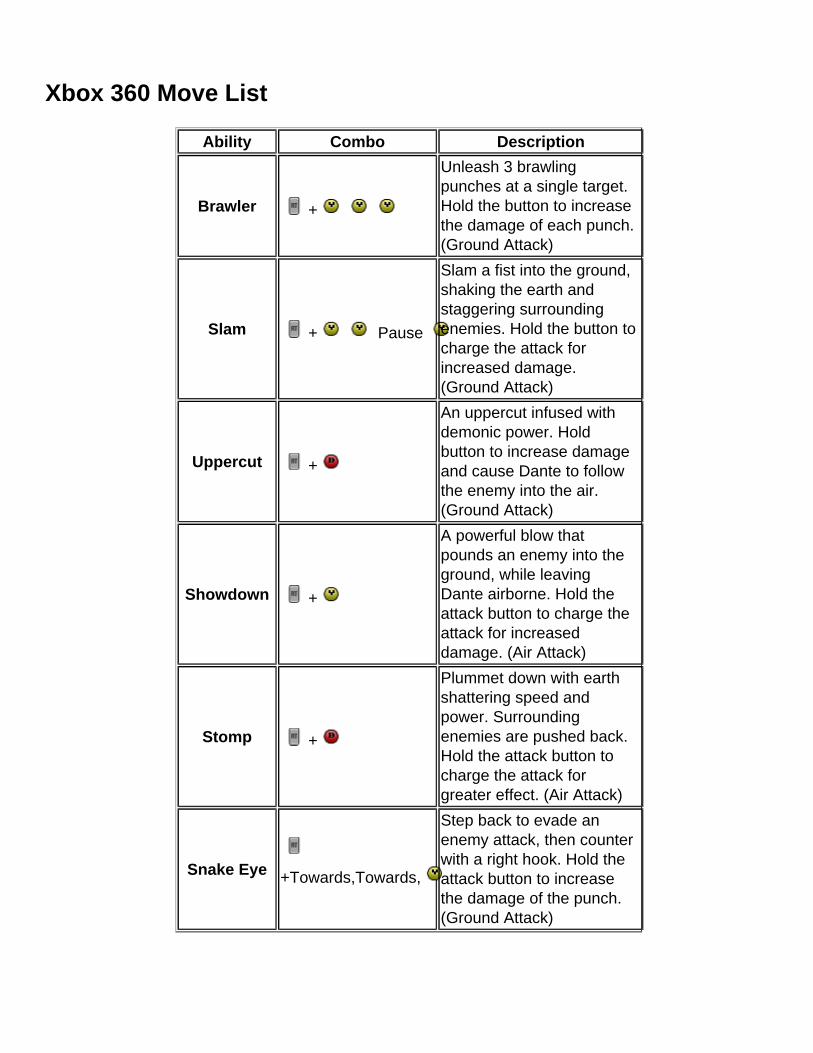
Xbox 360 Move List
Ability Combo Description
Brawler +
Unleash 3 brawling punches at a single target. Hold the button to increase the damage of each punch. (Ground Attack)
Slam + Pause
Slam a fist into the ground, shaking the earth and staggering surrounding enemies. Hold the button to charge the attack for increased damage. (Ground Attack)
Uppercut +
An uppercut infused with demonic power. Hold button to increase damage and cause Dante to follow the enemy into the air. (Ground Attack)
Showdown +
A powerful blow that pounds an enemy into the ground, while leaving Dante airborne. Hold the attack button to charge the attack for increased damage. (Air Attack)
Stomp +
Plummet down with earth shattering speed and power. Surrounding enemies are pushed back. Hold the attack button to charge the attack for greater effect. (Air Attack)
Snake Eye +Towards,Towards,
Step back to evade an enemy attack, then counter with a right hook. Hold the attack button to increase the damage of the punch. (Ground Attack)
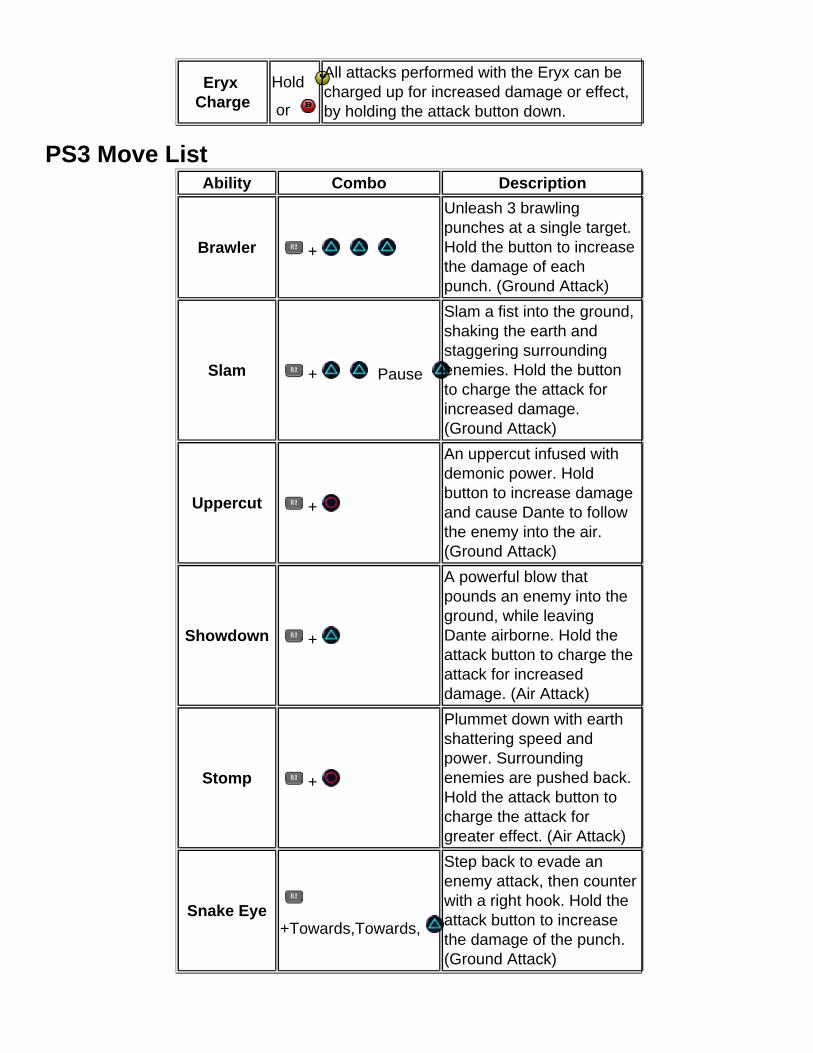
Eryx Charge
Hold
or
All attacks performed with the Eryx can be charged up for increased damage or effect, by holding the attack button down.
PS3 Move ListAbility Combo Description
Brawler +
Unleash 3 brawling punches at a single target. Hold the button to increase the damage of each punch. (Ground Attack)
Slam + Pause
Slam a fist into the ground, shaking the earth and staggering surrounding enemies. Hold the button to charge the attack for increased damage. (Ground Attack)
Uppercut +
An uppercut infused with demonic power. Hold button to increase damage and cause Dante to follow the enemy into the air. (Ground Attack)
Showdown +
A powerful blow that pounds an enemy into the ground, while leaving Dante airborne. Hold the attack button to charge the attack for increased damage. (Air Attack)
Stomp +
Plummet down with earth shattering speed and power. Surrounding enemies are pushed back. Hold the attack button to charge the attack for greater effect. (Air Attack)
Snake Eye+Towards,Towards,
Step back to evade an enemy attack, then counter with a right hook. Hold the attack button to increase the damage of the punch. (Ground Attack)

Eryx Charge
Hold
or
All attacks performed with the Eryx can be charged up for increased damage or effect, by holding the attack button down.
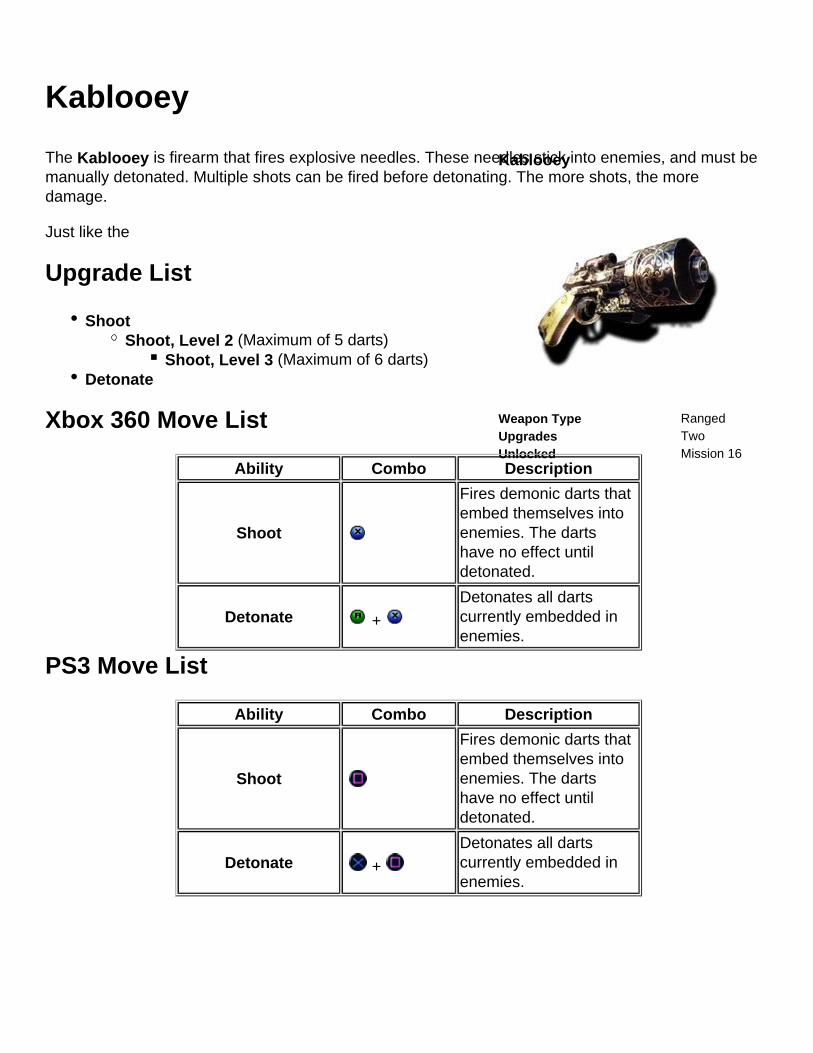
Kablooey
Kablooey
Weapon Type RangedUpgrades TwoUnlocked Mission 16
The Kablooey is firearm that fires explosive needles. These needles stick into enemies, and must be manually detonated. Multiple shots can be fired before detonating. The more shots, the more damage.
Just like the
Upgrade List
ShootShoot, Level 2 (Maximum of 5 darts)
Shoot, Level 3 (Maximum of 6 darts)Detonate
Xbox 360 Move List
Ability Combo Description
Shoot
Fires demonic darts that embed themselves into enemies. The darts have no effect until detonated.
Detonate +
Detonates all darts currently embedded in enemies.
PS3 Move List
Ability Combo Description
Shoot
Fires demonic darts that embed themselves into enemies. The darts have no effect until detonated.
Detonate +
Detonates all darts currently embedded in enemies.
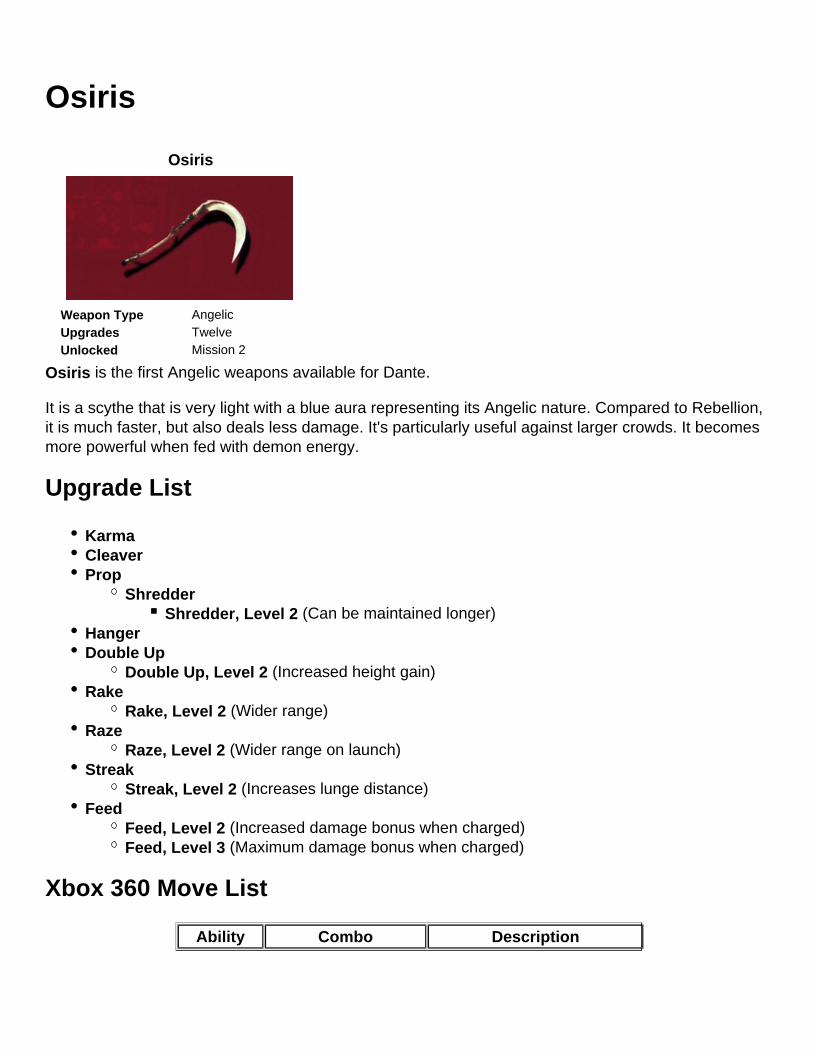
Osiris
Osiris
Weapon Type AngelicUpgrades TwelveUnlocked Mission 2
Osiris is the first Angelic weapons available for Dante.
It is a scythe that is very light with a blue aura representing its Angelic nature. Compared to Rebellion, it is much faster, but also deals less damage. It's particularly useful against larger crowds. It becomes more powerful when fed with demon energy.
Upgrade List
KarmaCleaverProp
ShredderShredder, Level 2 (Can be maintained longer)
HangerDouble Up
Double Up, Level 2 (Increased height gain)Rake
Rake, Level 2 (Wider range)Raze
Raze, Level 2 (Wider range on launch)Streak
Streak, Level 2 (Increases lunge distance)Feed
Feed, Level 2 (Increased damage bonus when charged)Feed, Level 3 (Maximum damage bonus when charged)
Xbox 360 Move List
Ability Combo Description
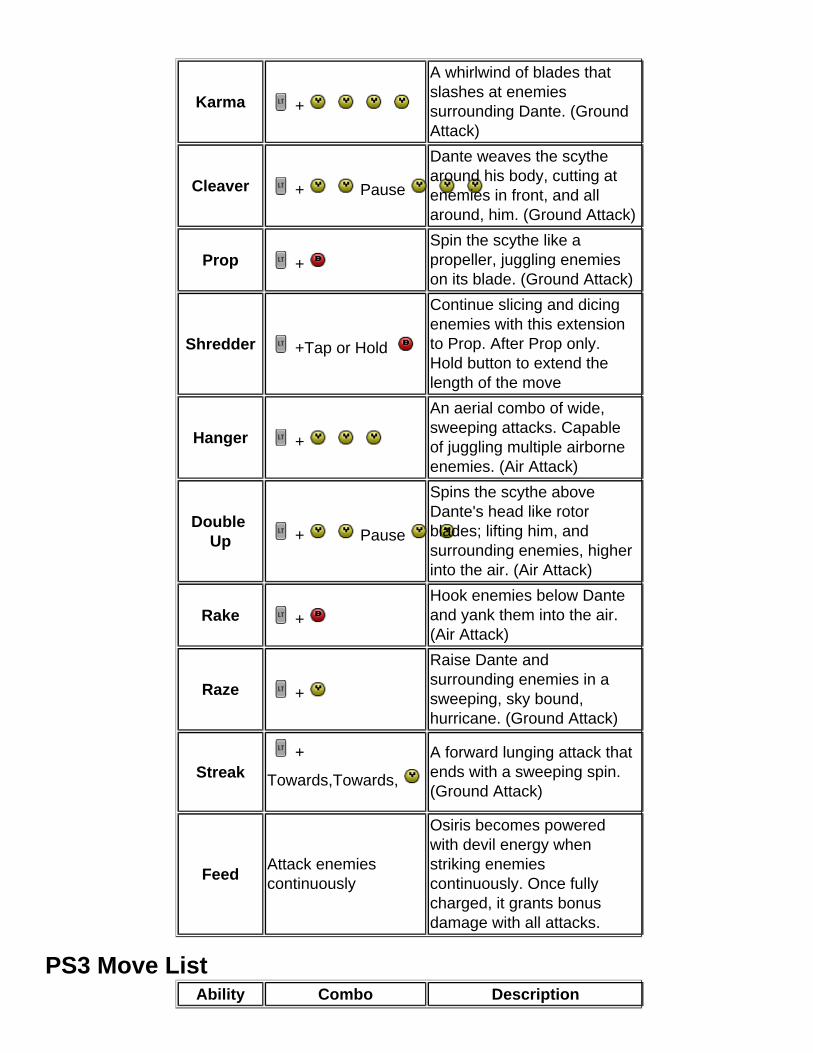
Karma +
A whirlwind of blades that slashes at enemies surrounding Dante. (Ground Attack)
Cleaver + Pause
Dante weaves the scythe around his body, cutting at enemies in front, and all around, him. (Ground Attack)
Prop +
Spin the scythe like a propeller, juggling enemies on its blade. (Ground Attack)
Shredder +Tap or Hold
Continue slicing and dicing enemies with this extension to Prop. After Prop only. Hold button to extend the length of the move
Hanger +
An aerial combo of wide, sweeping attacks. Capable of juggling multiple airborne enemies. (Air Attack)
Double Up + Pause
Spins the scythe above Dante's head like rotor blades; lifting him, and surrounding enemies, higher into the air. (Air Attack)
Rake +
Hook enemies below Dante and yank them into the air. (Air Attack)
Raze +
Raise Dante and surrounding enemies in a sweeping, sky bound, hurricane. (Ground Attack)
Streak+
Towards,Towards,
A forward lunging attack that ends with a sweeping spin. (Ground Attack)
FeedAttack enemies continuously
Osiris becomes powered with devil energy when striking enemies continuously. Once fully charged, it grants bonus damage with all attacks.
PS3 Move ListAbility Combo Description
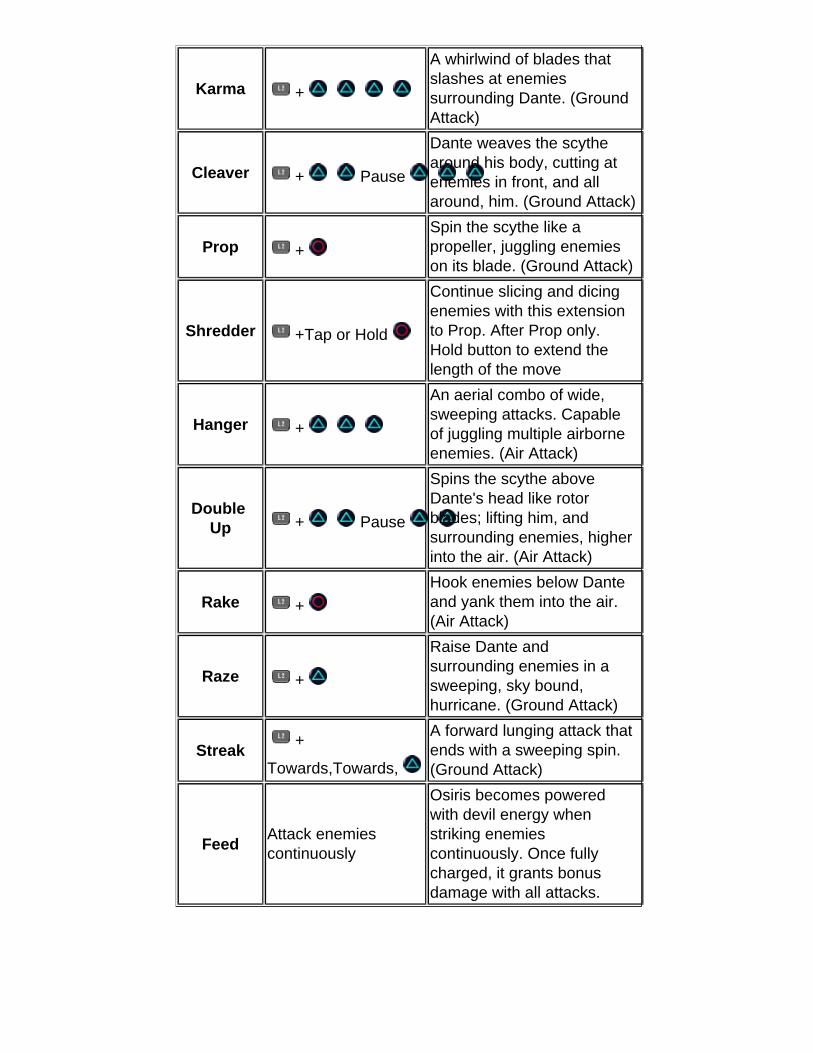
Karma +
A whirlwind of blades that slashes at enemies surrounding Dante. (Ground Attack)
Cleaver + Pause
Dante weaves the scythe around his body, cutting at enemies in front, and all around, him. (Ground Attack)
Prop +
Spin the scythe like a propeller, juggling enemies on its blade. (Ground Attack)
Shredder +Tap or Hold
Continue slicing and dicing enemies with this extension to Prop. After Prop only. Hold button to extend the length of the move
Hanger +
An aerial combo of wide, sweeping attacks. Capable of juggling multiple airborne enemies. (Air Attack)
Double Up + Pause
Spins the scythe above Dante's head like rotor blades; lifting him, and surrounding enemies, higher into the air. (Air Attack)
Rake +
Hook enemies below Dante and yank them into the air. (Air Attack)
Raze +
Raise Dante and surrounding enemies in a sweeping, sky bound, hurricane. (Ground Attack)
Streak+
Towards,Towards,
A forward lunging attack that ends with a sweeping spin. (Ground Attack)
FeedAttack enemies continuously
Osiris becomes powered with devil energy when striking enemies continuously. Once fully charged, it grants bonus damage with all attacks.
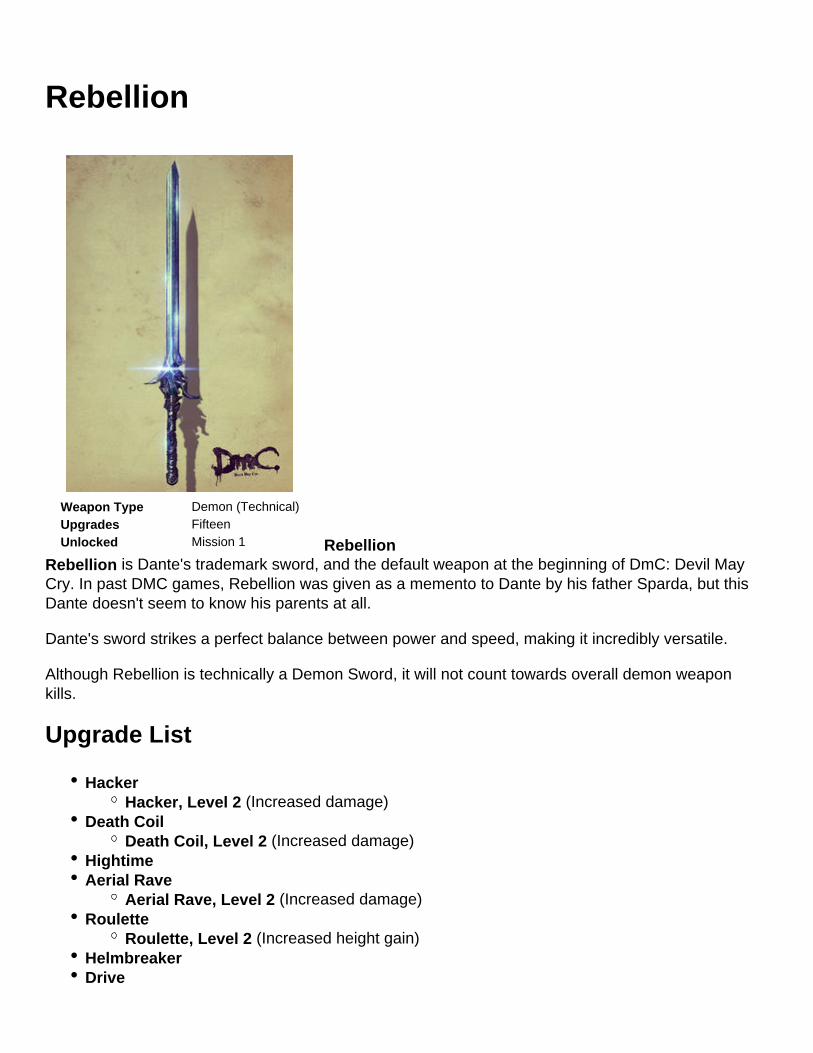
Rebellion
Weapon Type Demon (Technical)Upgrades FifteenUnlocked Mission 1 Rebellion
Rebellion is Dante's trademark sword, and the default weapon at the beginning of DmC: Devil May Cry. In past DMC games, Rebellion was given as a memento to Dante by his father Sparda, but this Dante doesn't seem to know his parents at all.
Dante's sword strikes a perfect balance between power and speed, making it incredibly versatile.
Although Rebellion is technically a Demon Sword, it will not count towards overall demon weapon kills.
Upgrade List
HackerHacker, Level 2 (Increased damage)
Death CoilDeath Coil, Level 2 (Increased damage)
HightimeAerial Rave
Aerial Rave, Level 2 (Increased damage)Roulette
Roulette, Level 2 (Increased height gain)HelmbreakerDrive
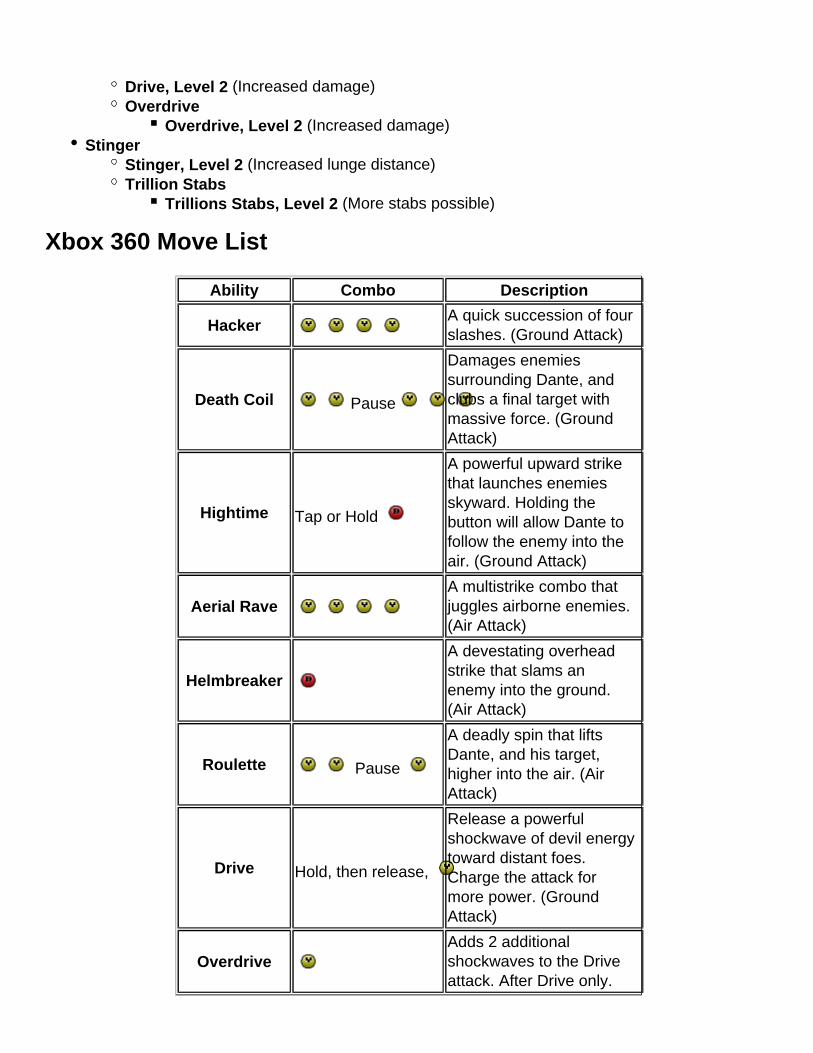
Drive, Level 2 (Increased damage)Overdrive
Overdrive, Level 2 (Increased damage)Stinger
Stinger, Level 2 (Increased lunge distance)Trillion Stabs
Trillions Stabs, Level 2 (More stabs possible)
Xbox 360 Move List
Ability Combo Description
HackerA quick succession of four slashes. (Ground Attack)
Death Coil Pause
Damages enemies surrounding Dante, and clubs a final target with massive force. (Ground Attack)
Hightime Tap or Hold
A powerful upward strike that launches enemies skyward. Holding the button will allow Dante to follow the enemy into the air. (Ground Attack)
Aerial RaveA multistrike combo that juggles airborne enemies. (Air Attack)
Helmbreaker
A devestating overhead strike that slams an enemy into the ground. (Air Attack)
Roulette Pause
A deadly spin that lifts Dante, and his target, higher into the air. (Air Attack)
Drive Hold, then release,
Release a powerful shockwave of devil energy toward distant foes. Charge the attack for more power. (Ground Attack)
OverdriveAdds 2 additional shockwaves to the Drive attack. After Drive only.
Stinger Towards,Towards,
Cover great distance with a high speed, lunging stab. (Ground Attack)
Trillion Stabs Mash
A blinding flurry of lightning fast stabs. After Stinger only.
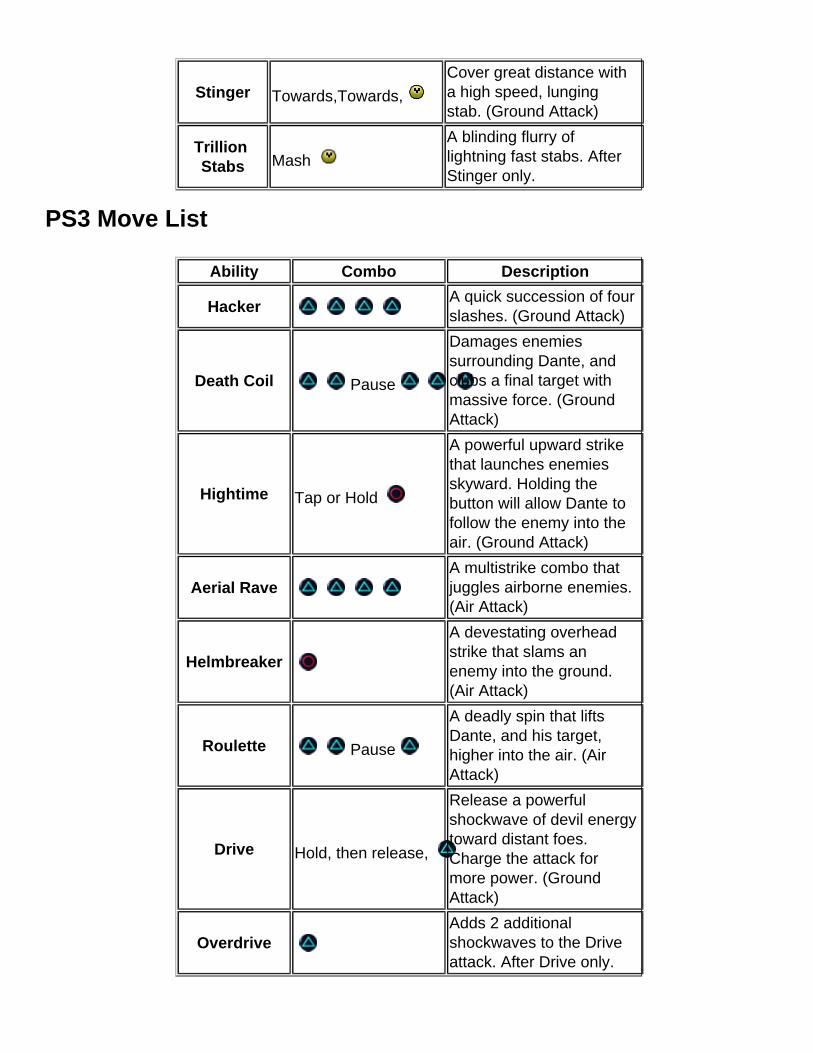
PS3 Move List
Ability Combo Description
HackerA quick succession of four slashes. (Ground Attack)
Death Coil Pause
Damages enemies surrounding Dante, and clubs a final target with massive force. (Ground Attack)
Hightime Tap or Hold
A powerful upward strike that launches enemies skyward. Holding the button will allow Dante to follow the enemy into the air. (Ground Attack)
Aerial RaveA multistrike combo that juggles airborne enemies. (Air Attack)
Helmbreaker
A devestating overhead strike that slams an enemy into the ground. (Air Attack)
Roulette Pause
A deadly spin that lifts Dante, and his target, higher into the air. (Air Attack)
Drive Hold, then release,
Release a powerful shockwave of devil energy toward distant foes. Charge the attack for more power. (Ground Attack)
OverdriveAdds 2 additional shockwaves to the Drive attack. After Drive only.

Stinger Towards,Towards,
Cover great distance with a high speed, lunging stab. (Ground Attack)
Trillion Stabs Mash
A blinding flurry of lightning fast stabs. After Stinger only.
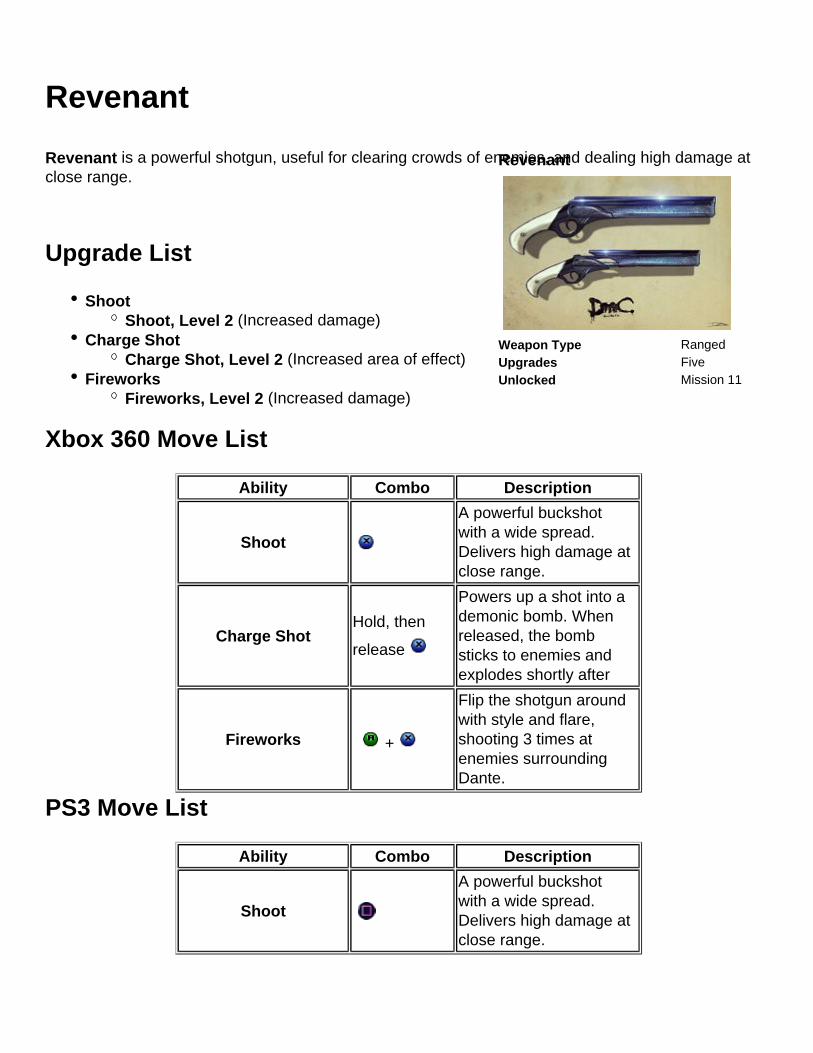
Revenant
Revenant
Weapon Type RangedUpgrades FiveUnlocked Mission 11
Revenant is a powerful shotgun, useful for clearing crowds of enemies, and dealing high damage at close range.
Upgrade List
ShootShoot, Level 2 (Increased damage)
Charge ShotCharge Shot, Level 2 (Increased area of effect)
FireworksFireworks, Level 2 (Increased damage)
Xbox 360 Move List
Ability Combo Description
Shoot
A powerful buckshot with a wide spread. Delivers high damage at close range.
Charge ShotHold, then
release
Powers up a shot into a demonic bomb. When released, the bomb sticks to enemies and explodes shortly after
Fireworks +
Flip the shotgun around with style and flare, shooting 3 times at enemies surrounding Dante.
PS3 Move List
Ability Combo Description
Shoot
A powerful buckshot with a wide spread. Delivers high damage at close range.

Charge ShotHold, then
release
Powers up a shot into a demonic bomb. When released, the bomb sticks to enemies and explodes shortly after
Fireworks +
Flip the shotgun around with style and flare, shooting 3 times at enemies surrounding Dante.
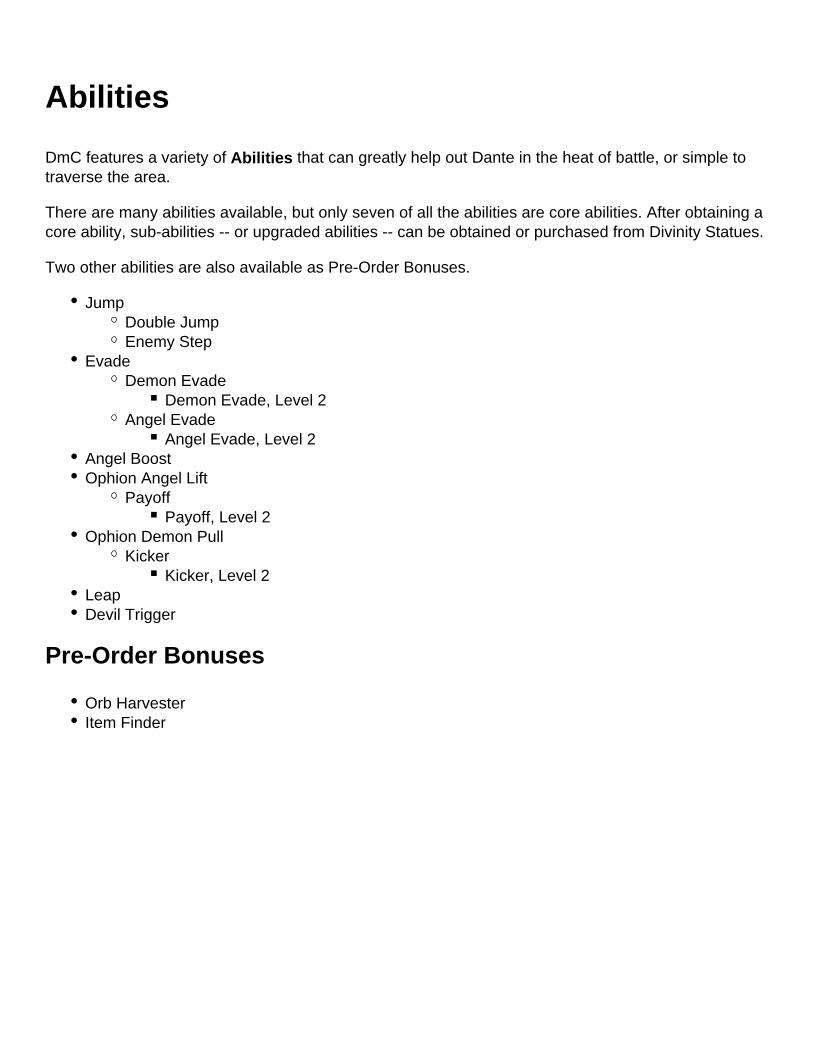
Abilities
DmC features a variety of Abilities that can greatly help out Dante in the heat of battle, or simple to traverse the area.
There are many abilities available, but only seven of all the abilities are core abilities. After obtaining a core ability, sub-abilities -- or upgraded abilities -- can be obtained or purchased from Divinity Statues.
Two other abilities are also available as Pre-Order Bonuses.
Jump Double JumpEnemy Step
Evade Demon Evade
Demon Evade, Level 2Angel Evade
Angel Evade, Level 2Angel BoostOphion Angel Lift
Payoff Payoff, Level 2
Ophion Demon Pull Kicker
Kicker, Level 2LeapDevil Trigger
Pre-Order Bonuses
Orb HarvesterItem Finder
Jump
Jump is one of three basic Abilities Dante will know from the start of the game. Just as the name implies, this ability allows Dante to Jump.
Console Command
Xbox 360
Playstation 3
Upgrades
After Jump is obtained, one ability upgrade can be purchased, while the other is unlocked by default.
Double Jump
Double Jump is an upgrade to the original Jump Ability. Like Jump, Double Jump is available from the start of the game.
This ability summons a demonic platform allowing Dante to jump a second time in the air. All you need to do is click Jump two times.
Enemy Step
Enemy Step is an upgrade to the original Jump Ability. This ability becomes available during Mission 1.
The Enemy Step ability allows Dante to jump off enemy while in the air. Doing so resets aerial abilities such as Double Jump and Aerial Evade. All you need to do is click Jump when above an enemy.
Evade
Evade is one of three basic Abilities Dante will know from the start of the game. Just as the name implies, this is a simple dodge or evade maneuver. It can be done on the ground or in mid-air. Performing a perfect evade will add to the Style Points.
Console Command
Xbox 360 or
Playstation 3 or
Upgrades
Evade can be upgraded to two different abilities, each with their own upgrade.
Demon Evade
Fueled by adrenaline, Dante's damage output is boosted after the precisely timed, last minute demon evade. This ability is available during Mission 2.
The second level of Demon Evade is an increased damage bonus.
Console Command
Xbox 360 + or
Playstation 3 + or
Angel Evade
Dante phases through Limbo,, granting additional evade distance and invulnerable time. This ability is available during Mission 2.
This second level of Angel Evade is an increased phase distance.
Console Command
Xbox 360 + or
Playstation 3 + or
Ophion Demon Pull
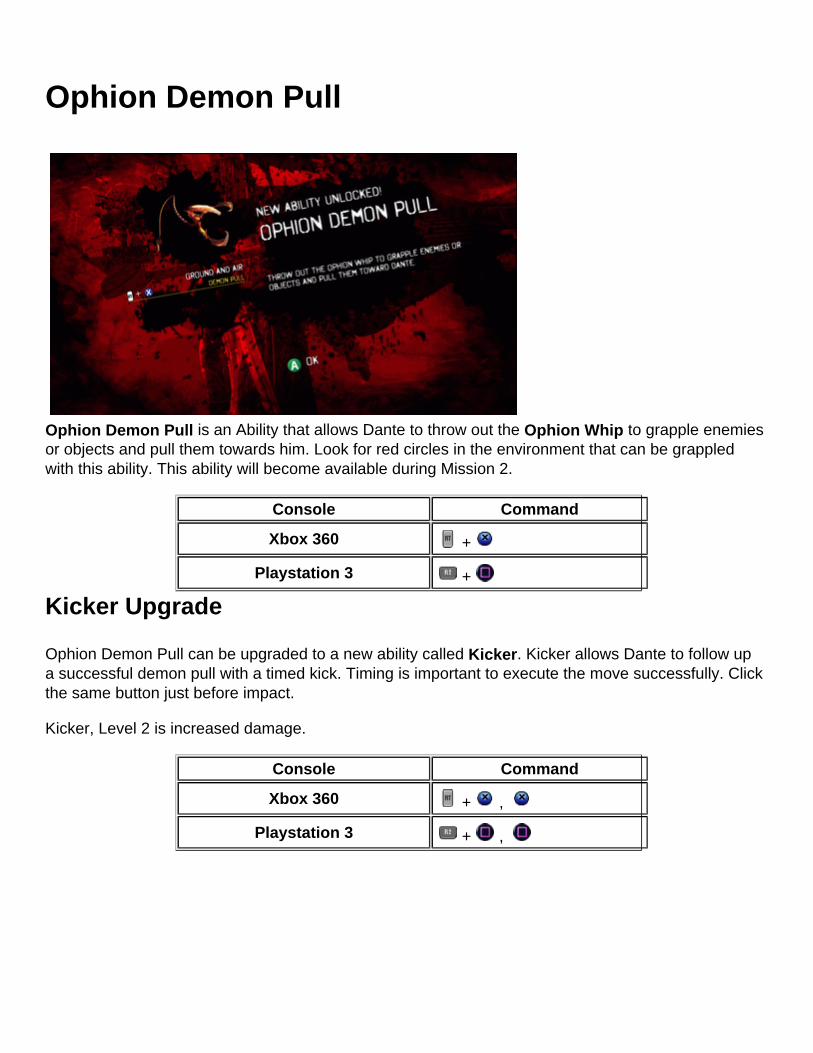
Ophion Demon Pull is an Ability that allows Dante to throw out the Ophion Whip to grapple enemies or objects and pull them towards him. Look for red circles in the environment that can be grappled with this ability. This ability will become available during Mission 2.
Console Command
Xbox 360 +
Playstation 3 +
Kicker Upgrade
Ophion Demon Pull can be upgraded to a new ability called Kicker. Kicker allows Dante to follow up a successful demon pull with a timed kick. Timing is important to execute the move successfully. Click the same button just before impact.
Kicker, Level 2 is increased damage.
Console Command
Xbox 360 + ,
Playstation 3 + ,
Ophion Angel Lift
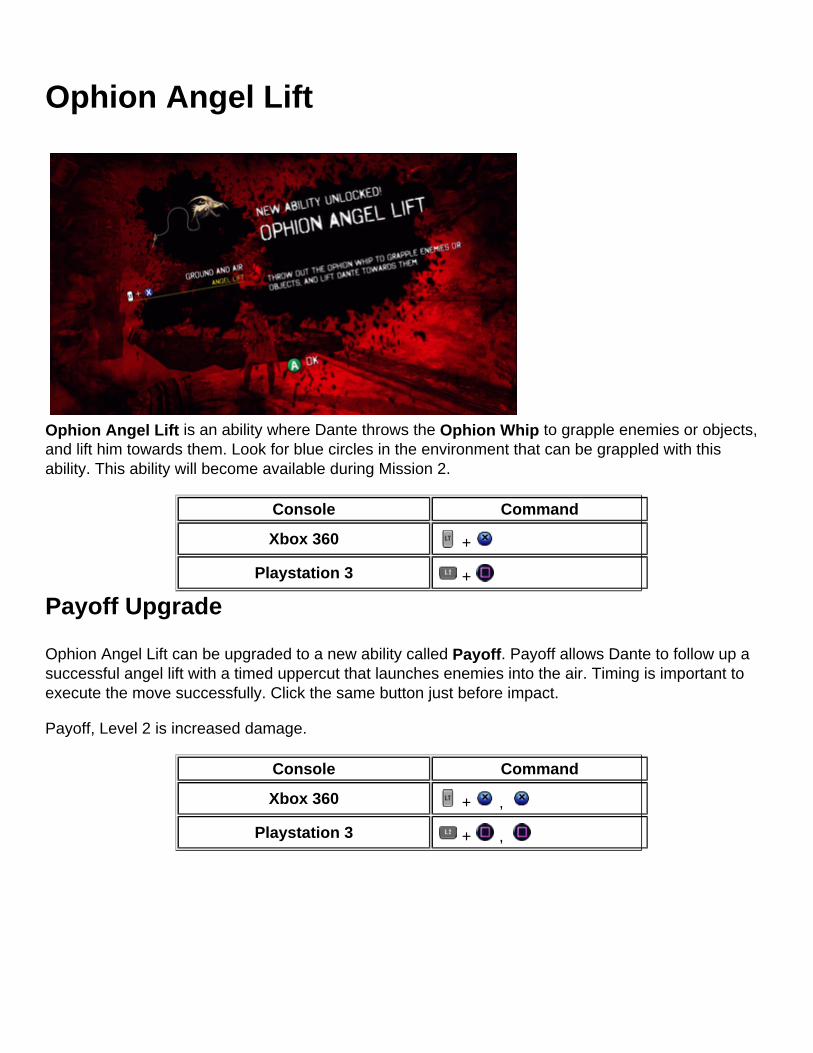
Ophion Angel Lift is an ability where Dante throws the Ophion Whip to grapple enemies or objects, and lift him towards them. Look for blue circles in the environment that can be grappled with this ability. This ability will become available during Mission 2.
Console Command
Xbox 360 +
Playstation 3 +
Payoff Upgrade
Ophion Angel Lift can be upgraded to a new ability called Payoff. Payoff allows Dante to follow up a successful angel lift with a timed uppercut that launches enemies into the air. Timing is important to execute the move successfully. Click the same button just before impact.
Payoff, Level 2 is increased damage.
Console Command
Xbox 360 + ,
Playstation 3 + ,
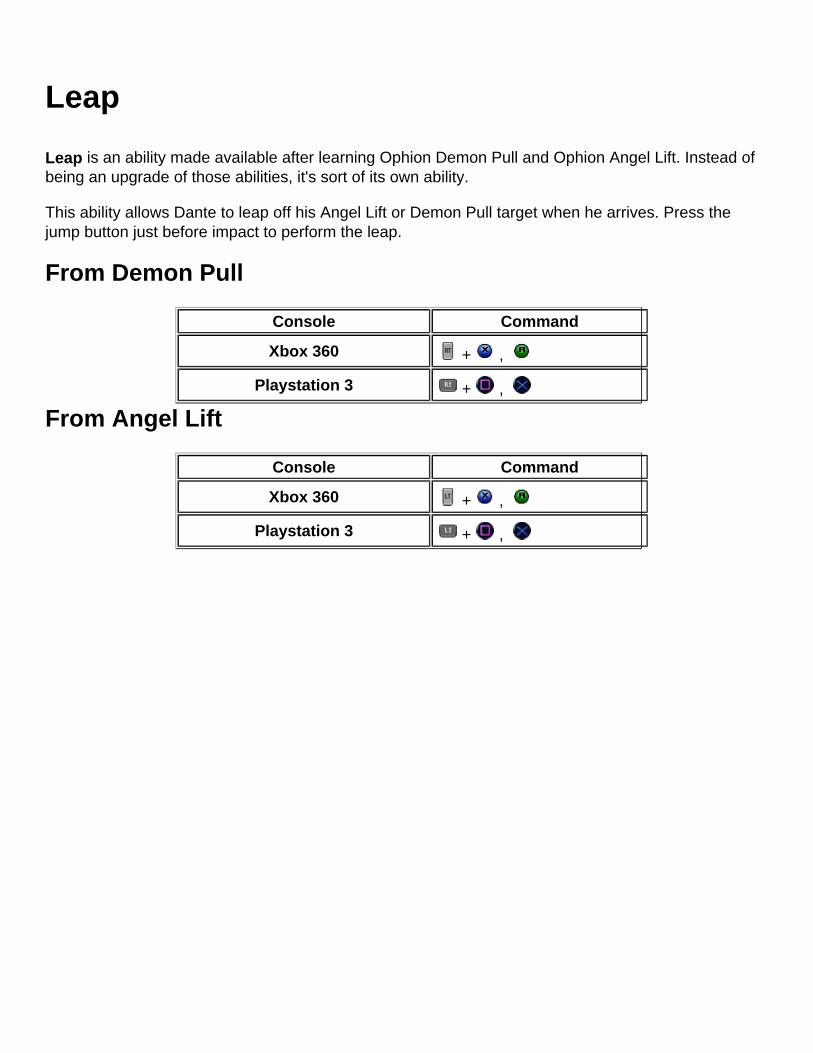
Leap
Leap is an ability made available after learning Ophion Demon Pull and Ophion Angel Lift. Instead of being an upgrade of those abilities, it's sort of its own ability.
This ability allows Dante to leap off his Angel Lift or Demon Pull target when he arrives. Press the jump button just before impact to perform the leap.
From Demon Pull
Console Command
Xbox 360 + ,
Playstation 3 + ,
From Angel Lift
Console Command
Xbox 360 + ,
Playstation 3 + ,
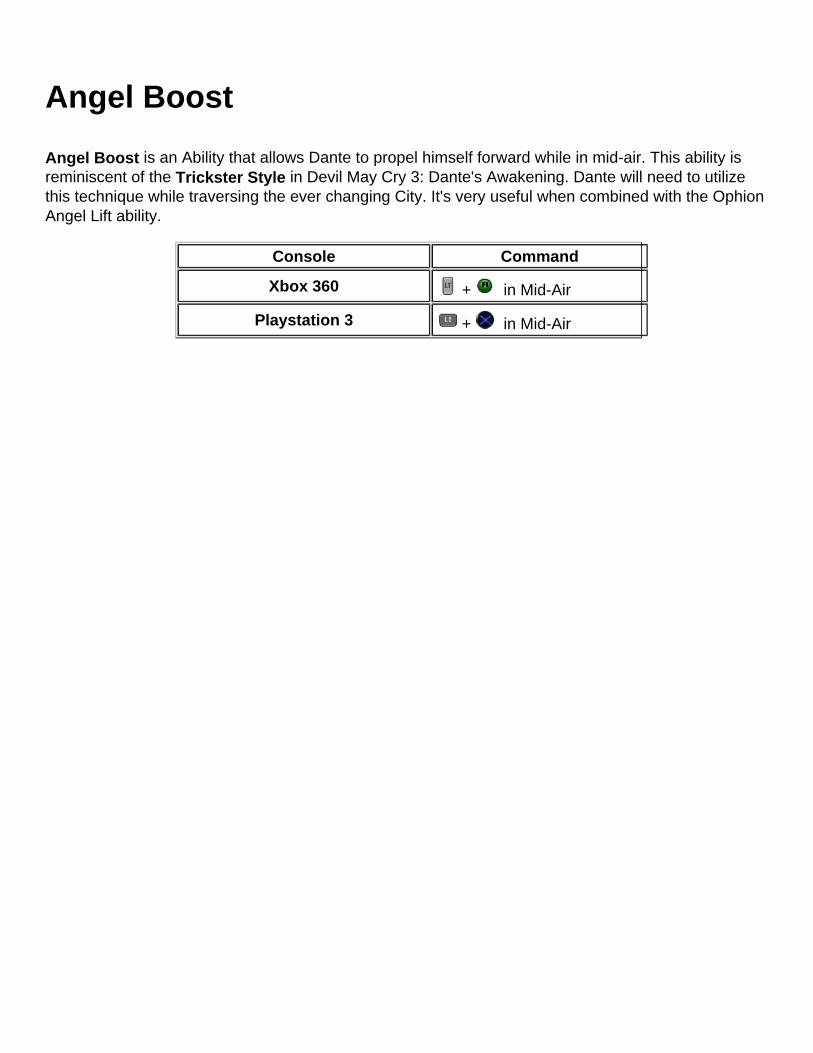
Angel Boost
Angel Boost is an Ability that allows Dante to propel himself forward while in mid-air. This ability is reminiscent of the Trickster Style in Devil May Cry 3: Dante's Awakening. Dante will need to utilize this technique while traversing the ever changing City. It's very useful when combined with the Ophion Angel Lift ability.
Console Command
Xbox 360 + in Mid-Air
Playstation 3 + in Mid-Air
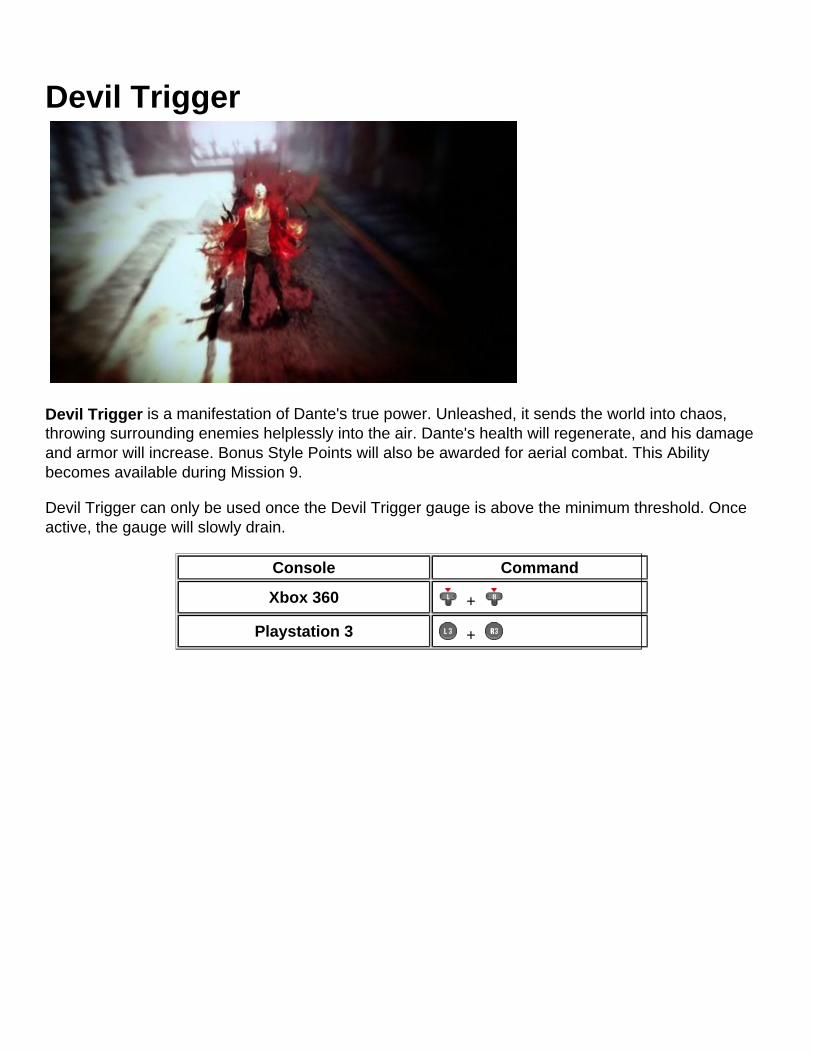
Devil Trigger
Devil Trigger is a manifestation of Dante's true power. Unleashed, it sends the world into chaos, throwing surrounding enemies helplessly into the air. Dante's health will regenerate, and his damage and armor will increase. Bonus Style Points will also be awarded for aerial combat. This Ability becomes available during Mission 9.
Devil Trigger can only be used once the Devil Trigger gauge is above the minimum threshold. Once active, the gauge will slowly drain.
Console Command
Xbox 360 +
Playstation 3 +

Orb Harvester
Orb Harvester is an Amazon Pre-Order Bonus Ability. This allows Dante to obtain more Red Orbs in combat, as well as having a larger radius of collecting.

Item Finder
Item Finder is a Best Buy Pre-Order Bonus Ability. This allows Dante to find the three types of Collectibles throughout the environment.
Walkthrough
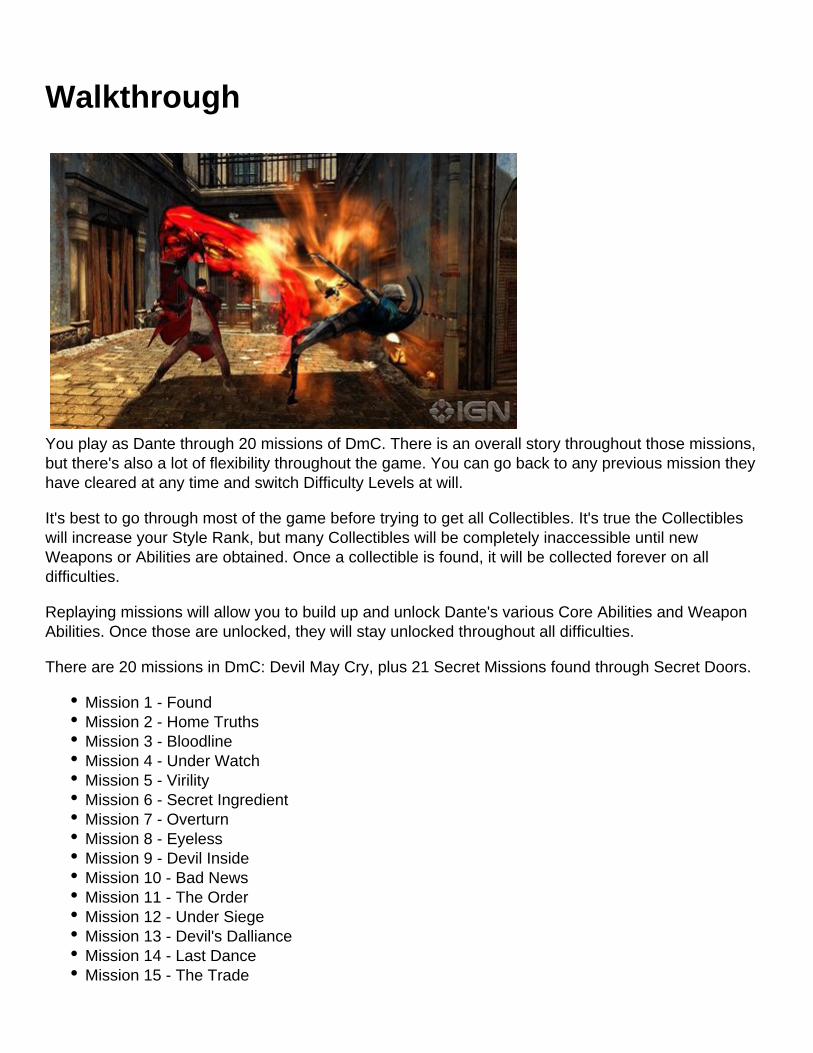
You play as Dante through 20 missions of DmC. There is an overall story throughout those missions, but there's also a lot of flexibility throughout the game. You can go back to any previous mission they have cleared at any time and switch Difficulty Levels at will.
It's best to go through most of the game before trying to get all Collectibles. It's true the Collectibles will increase your Style Rank, but many Collectibles will be completely inaccessible until new Weapons or Abilities are obtained. Once a collectible is found, it will be collected forever on all difficulties.
Replaying missions will allow you to build up and unlock Dante's various Core Abilities and Weapon Abilities. Once those are unlocked, they will stay unlocked throughout all difficulties.
There are 20 missions in DmC: Devil May Cry, plus 21 Secret Missions found through Secret Doors.
Mission 1 - FoundMission 2 - Home TruthsMission 3 - BloodlineMission 4 - Under WatchMission 5 - VirilityMission 6 - Secret IngredientMission 7 - OverturnMission 8 - EyelessMission 9 - Devil InsideMission 10 - Bad NewsMission 11 - The OrderMission 12 - Under SiegeMission 13 - Devil's DallianceMission 14 - Last DanceMission 15 - The Trade

Mission 16 - The PlanMission 17 - Furnace of SoulsMission 18 - Demon's DenMission 19 - Face of the DemonMission 20 - The End
Mission 1 - Found
Mission 1 – Found contains one Key, one Secret Door, and six Lost Souls.
Video Walkthrough
Dante is introduced and pulled into Limbo as we begin our DMC: Devil May Cry Walkthrough. You can also get the It's Only The Rain Achievement / Trophy here.
The Pier
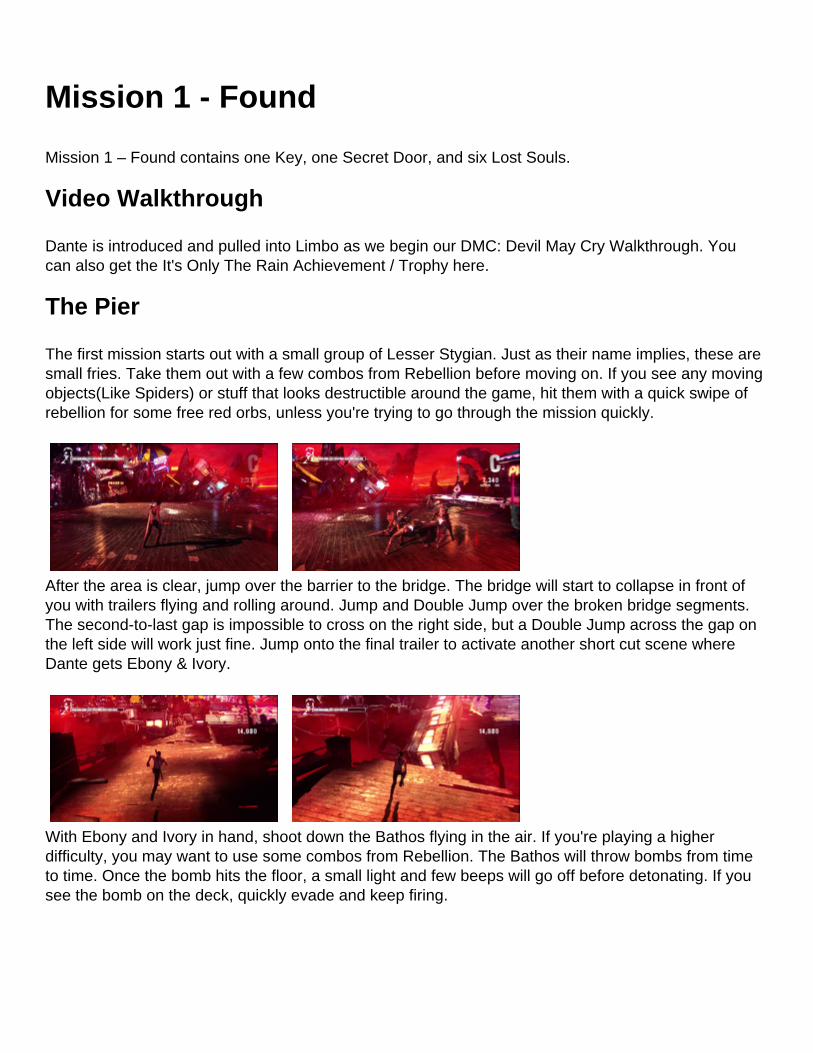
The first mission starts out with a small group of Lesser Stygian. Just as their name implies, these are small fries. Take them out with a few combos from Rebellion before moving on. If you see any moving objects(Like Spiders) or stuff that looks destructible around the game, hit them with a quick swipe of rebellion for some free red orbs, unless you're trying to go through the mission quickly.
After the area is clear, jump over the barrier to the bridge. The bridge will start to collapse in front of you with trailers flying and rolling around. Jump and Double Jump over the broken bridge segments. The second-to-last gap is impossible to cross on the right side, but a Double Jump across the gap on the left side will work just fine. Jump onto the final trailer to activate another short cut scene where Dante gets Ebony & Ivory.
With Ebony and Ivory in hand, shoot down the Bathos flying in the air. If you're playing a higher difficulty, you may want to use some combos from Rebellion. The Bathos will throw bombs from time to time. Once the bomb hits the floor, a small light and few beeps will go off before detonating. If you see the bomb on the deck, quickly evade and keep firing.
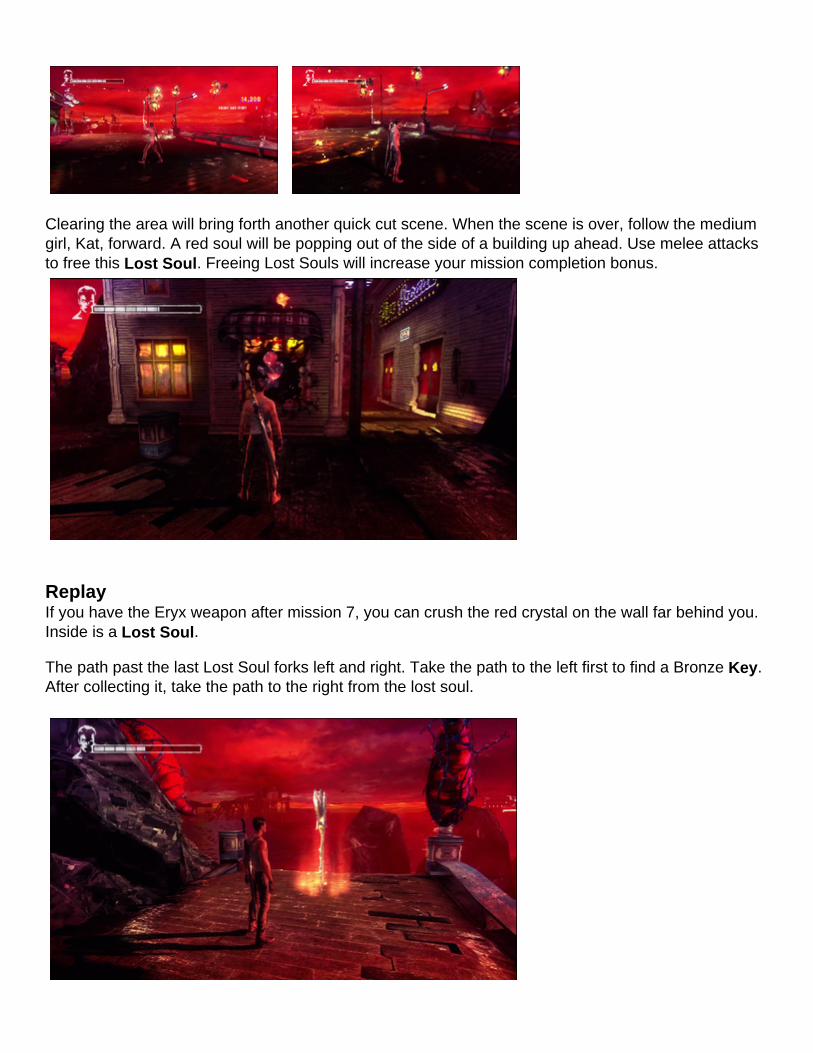
Clearing the area will bring forth another quick cut scene. When the scene is over, follow the medium girl, Kat, forward. A red soul will be popping out of the side of a building up ahead. Use melee attacks to free this Lost Soul. Freeing Lost Souls will increase your mission completion bonus.
ReplayIf you have the Eryx weapon after mission 7, you can crush the red crystal on the wall far behind you. Inside is a Lost Soul.
The path past the last Lost Soul forks left and right. Take the path to the left first to find a Bronze Key. After collecting it, take the path to the right from the lost soul.

The path to the right will pit Dante against more Lesser Stygian near a carnival ride. Launching the Stygian up using the Hightime Move will send them into the ride for a quick kill. Only press the Hightime button to launch them up. If you hold the button, you will jump into the air with them. Get ten kills with the carnival ride to unlock the It's only the rain achievement / trophy.
Continue through the newly opened area. Go down the path until you find a Gold Orb. Gold Orbs are used to resurrect Dante. Find the merry-go-round, and look around the corner to the right. A Small Vital Star can be found in the back. Vital Stars are used to restore Dante's health.
ReplayIf you come back after Mission 2, you can use your Ophion Angel Lift Ability to hook on the circles to the left. The three circles will take you to a Lost Soul in the back.
Up ahead is a Divinity Statue. These statues are used to buy Items or Abilities during a mission. Upgrade Points are used to unlock new abilities and combat moves, and Red Orbs are used to buy items.
When you're ready, continue to the next area. A quick cut scene will play where Dante gets his jacket. After the scene, more Lesser Stygian and Bathos will appear. Clearing the enemies will bring back the really big demon called a Hunter. The Hunter will use some sort of claw gun that forms a giant hand from the ground. Evade the hand that appears from the ground and make your way into the fun house to the right.
The Fun House
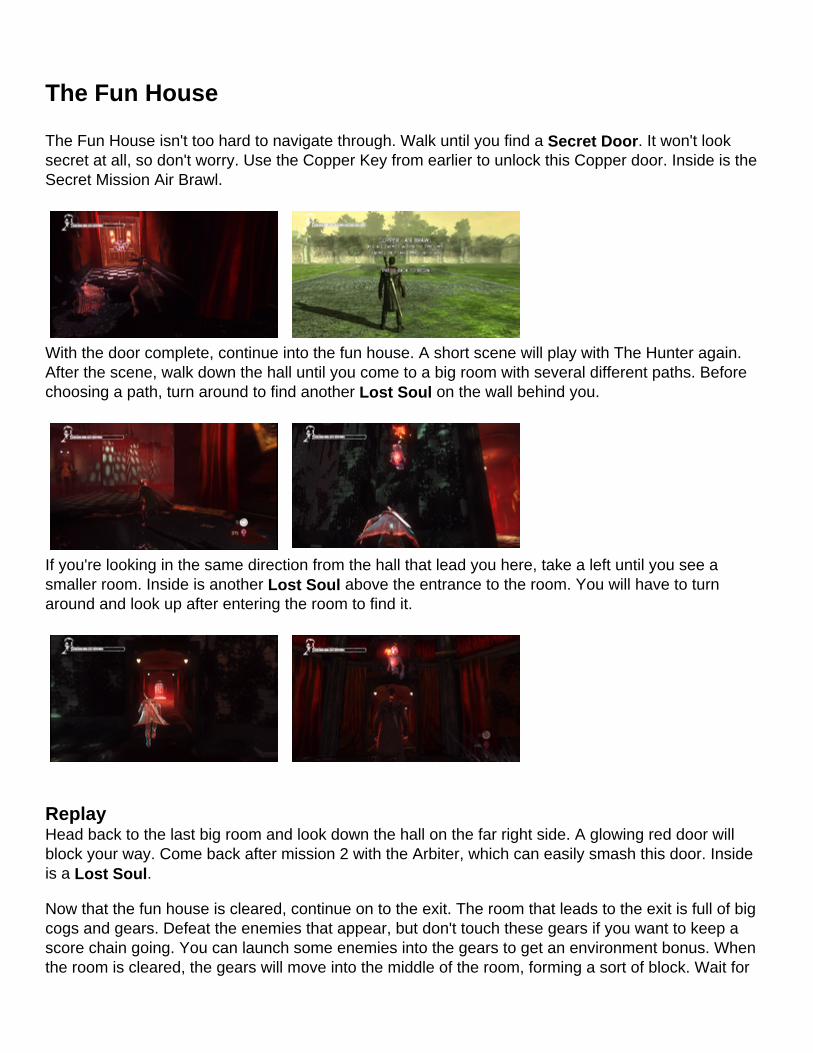
The Fun House isn't too hard to navigate through. Walk until you find a Secret Door. It won't look secret at all, so don't worry. Use the Copper Key from earlier to unlock this Copper door. Inside is the Secret Mission Air Brawl.
With the door complete, continue into the fun house. A short scene will play with The Hunter again. After the scene, walk down the hall until you come to a big room with several different paths. Before choosing a path, turn around to find another Lost Soul on the wall behind you.
If you're looking in the same direction from the hall that lead you here, take a left until you see a smaller room. Inside is another Lost Soul above the entrance to the room. You will have to turn around and look up after entering the room to find it.
ReplayHead back to the last big room and look down the hall on the far right side. A glowing red door will block your way. Come back after mission 2 with the Arbiter, which can easily smash this door. Inside is a Lost Soul.
Now that the fun house is cleared, continue on to the exit. The room that leads to the exit is full of big cogs and gears. Defeat the enemies that appear, but don't touch these gears if you want to keep a score chain going. You can launch some enemies into the gears to get an environment bonus. When the room is cleared, the gears will move into the middle of the room, forming a sort of block. Wait for
some gears to move away on their own, and jump over other sets of gears. Exit back out to the pier.
The Pier Part 2
Near the fun house exit is another Divinity Statue. Purchase more upgrades if you like. When ready, continue on. Jump and double jump across the gaps until you reach an area where small buildings lift off the ground. This area has many street lamps that will shrink when you get near them. Slice each lamp to get a few red orbs.
Boss Battle: Hunter
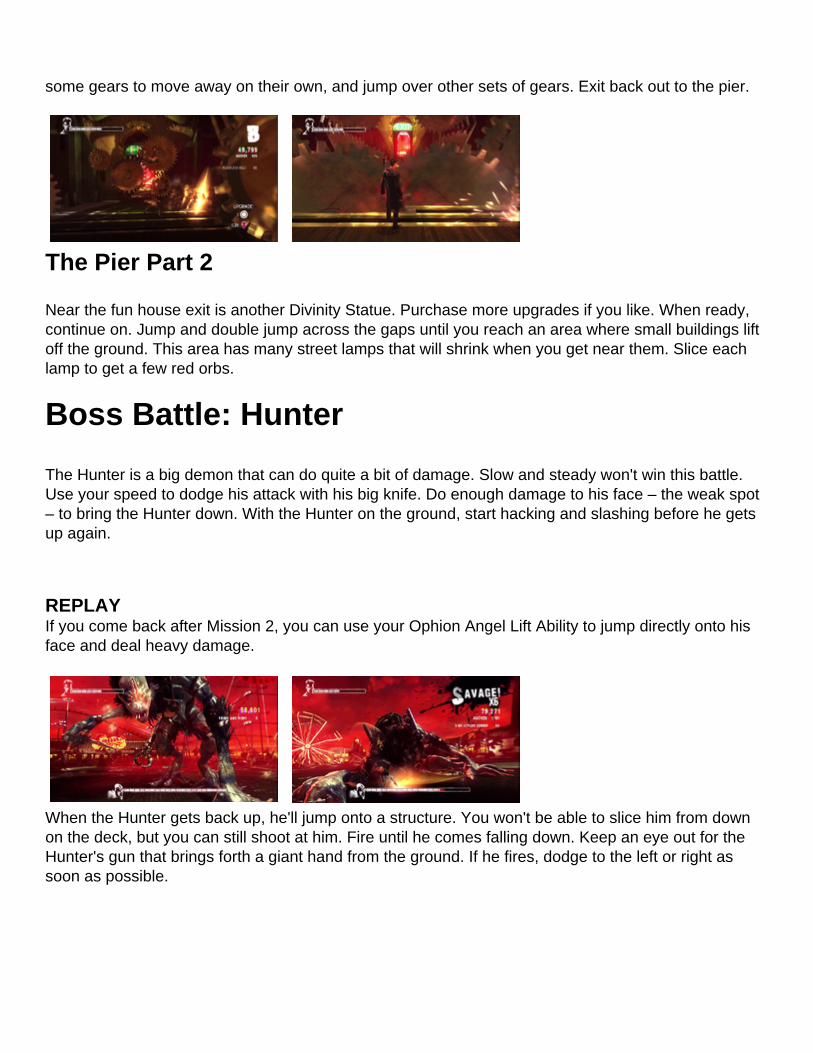
The Hunter is a big demon that can do quite a bit of damage. Slow and steady won't win this battle. Use your speed to dodge his attack with his big knife. Do enough damage to his face – the weak spot – to bring the Hunter down. With the Hunter on the ground, start hacking and slashing before he gets up again.
REPLAYIf you come back after Mission 2, you can use your Ophion Angel Lift Ability to jump directly onto his face and deal heavy damage.
When the Hunter gets back up, he'll jump onto a structure. You won't be able to slice him from down on the deck, but you can still shoot at him. Fire until he comes falling down. Keep an eye out for the Hunter's gun that brings forth a giant hand from the ground. If he fires, dodge to the left or right as soon as possible.
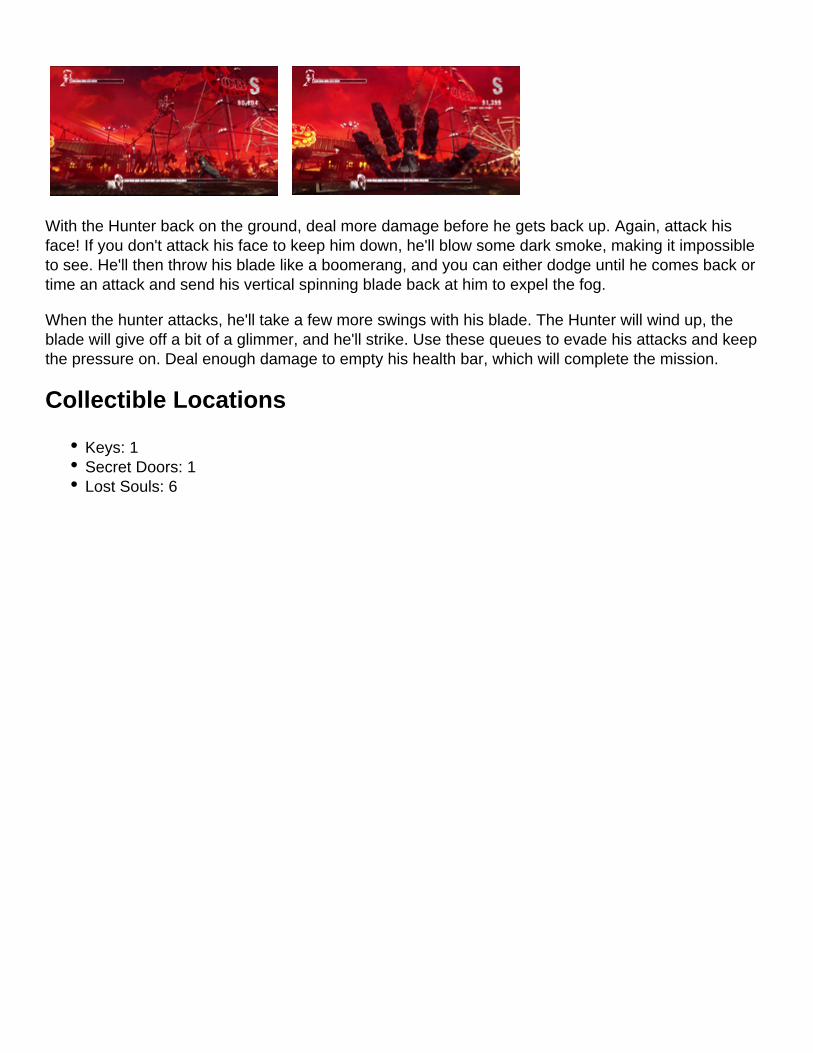
With the Hunter back on the ground, deal more damage before he gets back up. Again, attack his face! If you don't attack his face to keep him down, he'll blow some dark smoke, making it impossible to see. He'll then throw his blade like a boomerang, and you can either dodge until he comes back or time an attack and send his vertical spinning blade back at him to expel the fog.
When the hunter attacks, he'll take a few more swings with his blade. The Hunter will wind up, the blade will give off a bit of a glimmer, and he'll strike. Use these queues to evade his attacks and keep the pressure on. Deal enough damage to empty his health bar, which will complete the mission.
Collectible Locations
Keys: 1Secret Doors: 1Lost Souls: 6
Mission 2 - Home Truths
Mission 2 – Home Truths contains Two Keys, Two Secret Doors, Nine Lost Souls.
Video Walkthrough
Dante is introduced to Vergil and a new friend who try to open his eyes to what's really going on.
Mansion
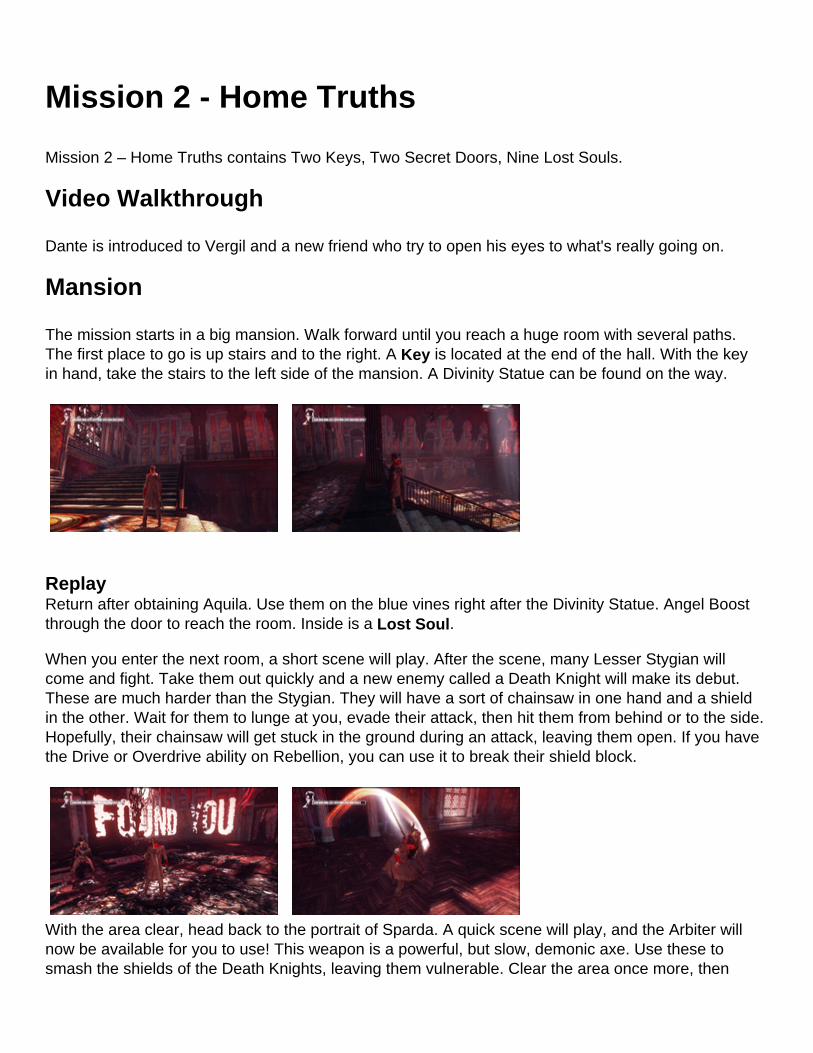
The mission starts in a big mansion. Walk forward until you reach a huge room with several paths. The first place to go is up stairs and to the right. A Key is located at the end of the hall. With the key in hand, take the stairs to the left side of the mansion. A Divinity Statue can be found on the way.
ReplayReturn after obtaining Aquila. Use them on the blue vines right after the Divinity Statue. Angel Boost through the door to reach the room. Inside is a Lost Soul.
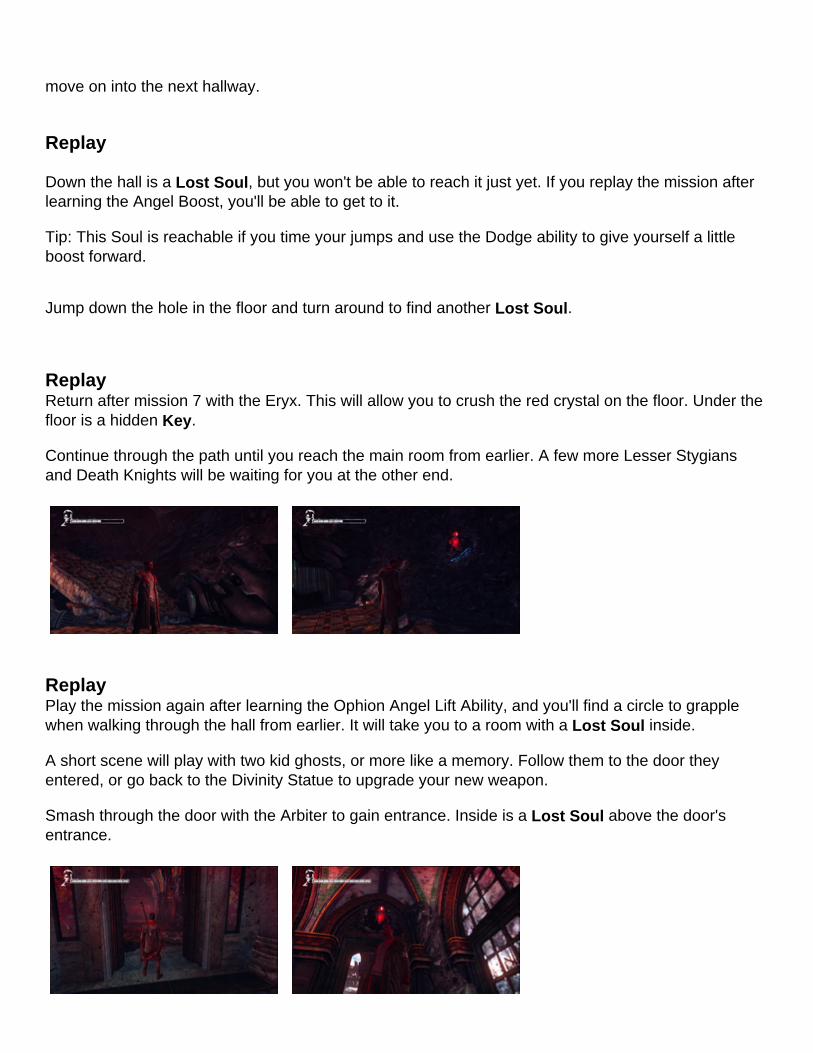
When you enter the next room, a short scene will play. After the scene, many Lesser Stygian will come and fight. Take them out quickly and a new enemy called a Death Knight will make its debut. These are much harder than the Stygian. They will have a sort of chainsaw in one hand and a shield in the other. Wait for them to lunge at you, evade their attack, then hit them from behind or to the side. Hopefully, their chainsaw will get stuck in the ground during an attack, leaving them open. If you have the Drive or Overdrive ability on Rebellion, you can use it to break their shield block.
With the area clear, head back to the portrait of Sparda. A quick scene will play, and the Arbiter will now be available for you to use! This weapon is a powerful, but slow, demonic axe. Use these to smash the shields of the Death Knights, leaving them vulnerable. Clear the area once more, then
move on into the next hallway.
Replay
Down the hall is a Lost Soul, but you won't be able to reach it just yet. If you replay the mission after learning the Angel Boost, you'll be able to get to it.
Tip: This Soul is reachable if you time your jumps and use the Dodge ability to give yourself a little boost forward.
Jump down the hole in the floor and turn around to find another Lost Soul.
ReplayReturn after mission 7 with the Eryx. This will allow you to crush the red crystal on the floor. Under the floor is a hidden Key.
Continue through the path until you reach the main room from earlier. A few more Lesser Stygians and Death Knights will be waiting for you at the other end.
ReplayPlay the mission again after learning the Ophion Angel Lift Ability, and you'll find a circle to grapple when walking through the hall from earlier. It will take you to a room with a Lost Soul inside.
A short scene will play with two kid ghosts, or more like a memory. Follow them to the door they entered, or go back to the Divinity Statue to upgrade your new weapon.
Smash through the door with the Arbiter to gain entrance. Inside is a Lost Soul above the door's entrance.
ReplayPlay the mission again after obtaining the Osiris. You'll see a sort of door with blue vines surrounding it. Use the Osiris to tear the vines down. Inside is a Lost Soul.
Continue to the next room where more Death Knights will be headed. Take them out with your Arbiter, and another cut scene will play.
Dream World
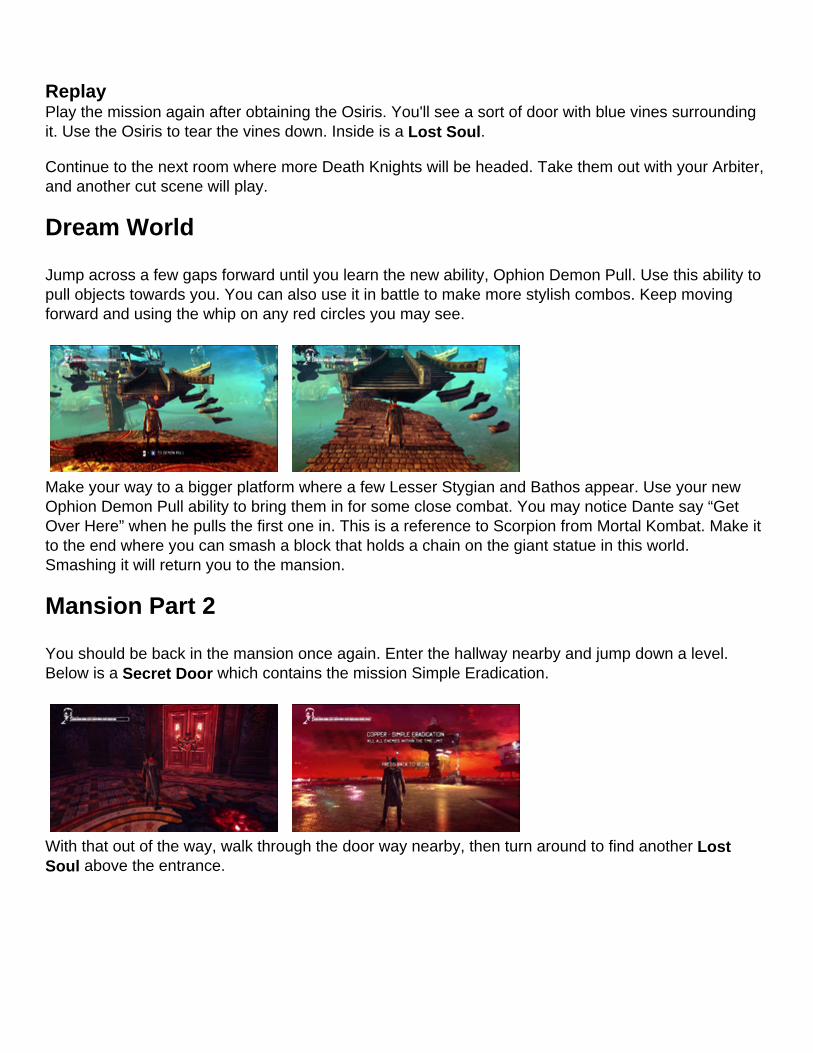
Jump across a few gaps forward until you learn the new ability, Ophion Demon Pull. Use this ability to pull objects towards you. You can also use it in battle to make more stylish combos. Keep moving forward and using the whip on any red circles you may see.
Make your way to a bigger platform where a few Lesser Stygian and Bathos appear. Use your new Ophion Demon Pull ability to bring them in for some close combat. You may notice Dante say “Get Over Here” when he pulls the first one in. This is a reference to Scorpion from Mortal Kombat. Make it to the end where you can smash a block that holds a chain on the giant statue in this world. Smashing it will return you to the mansion.
Mansion Part 2
You should be back in the mansion once again. Enter the hallway nearby and jump down a level. Below is a Secret Door which contains the mission Simple Eradication.
With that out of the way, walk through the door way nearby, then turn around to find another Lost Soul above the entrance.
Use your Demon Pull ability to pull forth a few platforms. Use these platforms to make it across the hall to the next area. A memory of a lady will appear and walk to the right. Follow her to an open room.
The room will break apart and Bathos with shields will appear! Don't worry, you can easily rip their shields away with the Demon Pull ability. The fight shouldn't be too tough. Clear out the enemies and make your way up the stair case. At the top is another door that can be smashed by the Arbiter. Inside is a Divinity Statue.
Continue to the next room with the portrait of Dante's mother. A quick flash back will occur, then more demons will appear. Clear them out with all you know. A tip may or may not appear called the block breaker. Use the Demon Pull ability when a demon like the Death Knight is blocking your attacks to break his block.
Approach the portrait of Eva to receive a new weapon called Osiris. Give it a test run against the Lesser Stygian that appear.
Return to the hall you came from. Before following the ghost to the right, break down the door to the left with your new Angelic weapon. Use the lift attack to cut through the vines. Inside is another Lost Soul above the door.
Exit out and continue back down the hall. The hall will open back out to the big room that ripped apart earlier. Cross the platforms until you reach the last one. Use the demon pull ability to bring forth another platform, then use the ability again to bring you directly to the door. Smash the door open with your demon weapon. Through the door is another set of vines that can only be sliced with your angelic weapon.

ReplayBefore going too far ahead, look for a path with a Lost Soul at the end. It shouldn't be too hard to find. Use your Angel Boost ability to reach the Lost Soul without falling in the hole. To the right of the soul is a Copper Secret Door. This leads to the Stylish Victory Secret Mission.
Go back to the hall from earlier and continue to the next room. A demonic door will block your path. Like usual, break it down with your demonic weapon. Through the door is a library. Walk to the blue rose on the floor for another cut scene.
Dream World Return
Walk to the edge of the platform. A short scene will play where Dante obtains the Ophion Angel Lift ability. It's very similar to the Demon Pull ability. Try it out right now to make it across the gaps. Towards the end you'll have to execute angel lift after angel lift to make it across a very big gap. If you don't do another angel lift in time, you'll fall and return to the spot just before the multiple circles.
A bit further ahead are some enemies. The difference between the angel lift and the demon pull with enemies is that the angel lift takes you to the enemy, while the demon pull brings the enemy to you. Try the angel lift to fight right next to the various demons.
Next is a little tricky platforming. You'll need to use the Angel Lift, Angel Lift, then Demon Pull to bring forth another platform. At the end of the path is another door way that leads back to the mansion.
Mansion Part 3
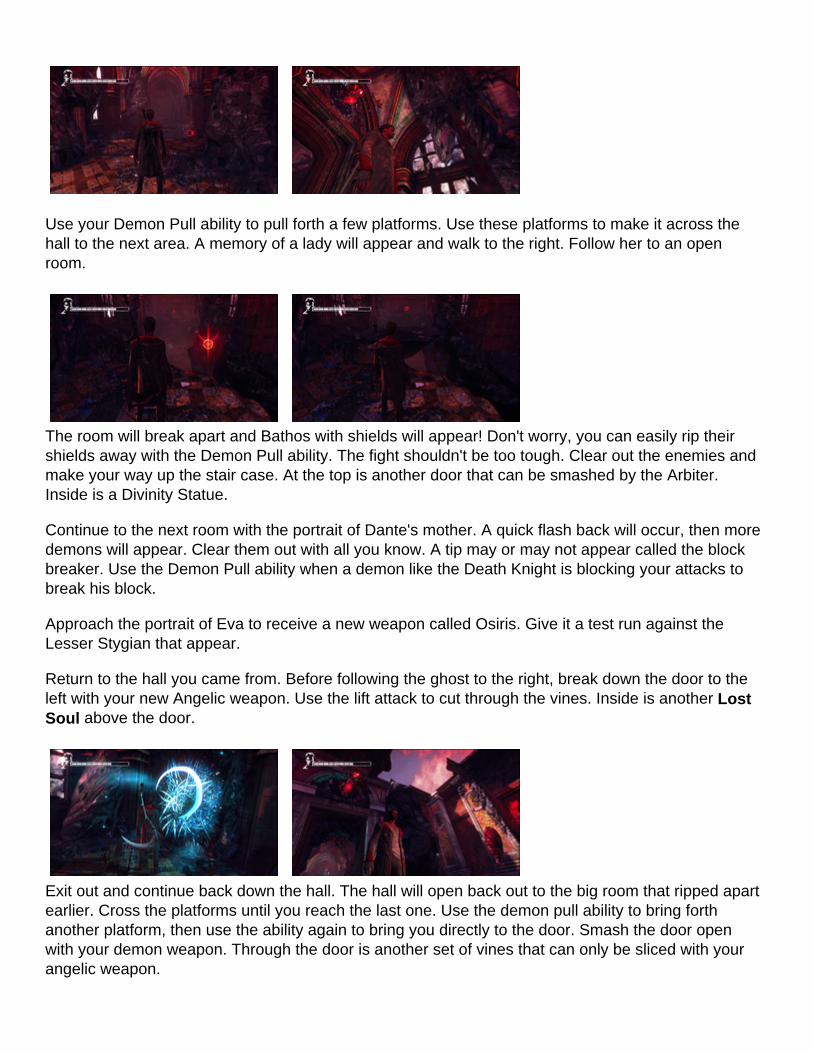
Upon returning, Dante will face another shield Bathos. The game should tell you a way to launch ranged projectiles back at the enemy. Just use the launch attack at the right time to perform this. Clear out the library of enemies before moving on.
When ready, make a dash to the exit. Use your Angel Lift and Demon Pull abilities to make it across the gaps. When you reach the hall to the exit, everything will start crumbling. Run to the exit, but don't fall through any of the holes in the floor.
Collectible Locations
Keys: 2Secret Doors: 2Lost Souls: 9
Mission 3 - Bloodline
Mission 3 – Bloodline contains One Key, One Secret Door, and Three Lost Souls.
Video Walkthrough
Dante is once again pulled into Limbo and needs to defend himself... by chopping some people in half.
If you've completed the game once this is also a great location to get the Where does the time go? Achievement / Trophy.
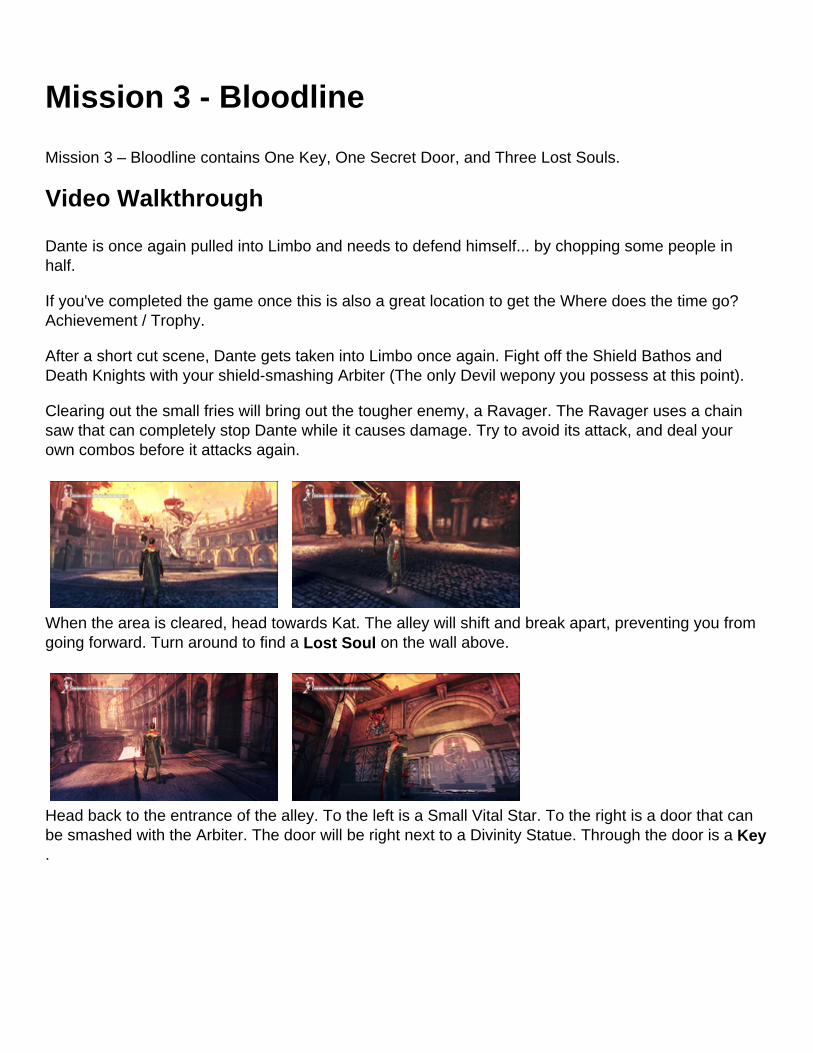
After a short cut scene, Dante gets taken into Limbo once again. Fight off the Shield Bathos and Death Knights with your shield-smashing Arbiter (The only Devil wepony you possess at this point).
Clearing out the small fries will bring out the tougher enemy, a Ravager. The Ravager uses a chain saw that can completely stop Dante while it causes damage. Try to avoid its attack, and deal your own combos before it attacks again.
When the area is cleared, head towards Kat. The alley will shift and break apart, preventing you from going forward. Turn around to find a Lost Soul on the wall above.
Head back to the entrance of the alley. To the left is a Small Vital Star. To the right is a door that can be smashed with the Arbiter. The door will be right next to a Divinity Statue. Through the door is a Key.
Re-entering the main area will bring forth more of the same enemies from earlier. Take them out once more, and some grappling circles will appear.
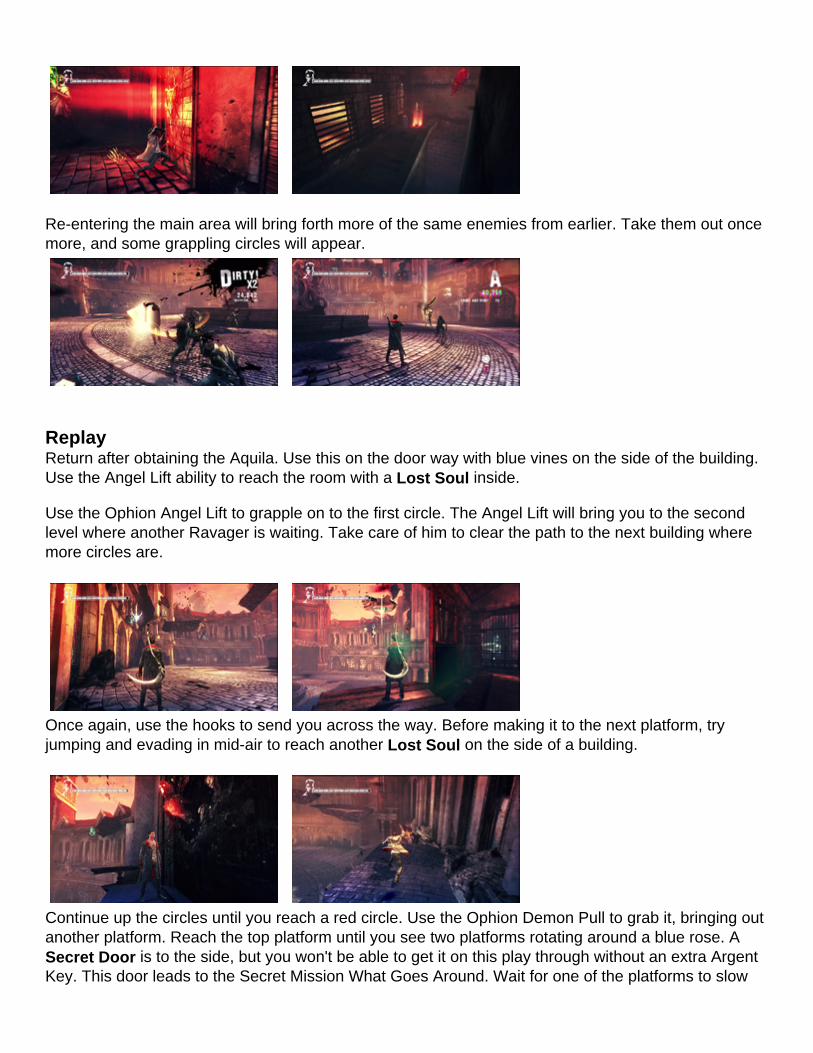
ReplayReturn after obtaining the Aquila. Use this on the door way with blue vines on the side of the building. Use the Angel Lift ability to reach the room with a Lost Soul inside.
Use the Ophion Angel Lift to grapple on to the first circle. The Angel Lift will bring you to the second level where another Ravager is waiting. Take care of him to clear the path to the next building where more circles are.
Once again, use the hooks to send you across the way. Before making it to the next platform, try jumping and evading in mid-air to reach another Lost Soul on the side of a building.
Continue up the circles until you reach a red circle. Use the Ophion Demon Pull to grab it, bringing out another platform. Reach the top platform until you see two platforms rotating around a blue rose. A Secret Door is to the side, but you won't be able to get it on this play through without an extra Argent Key. This door leads to the Secret Mission What Goes Around. Wait for one of the platforms to slow
down and flatten before you jump to it and the blue rose on the other end.
Dream World
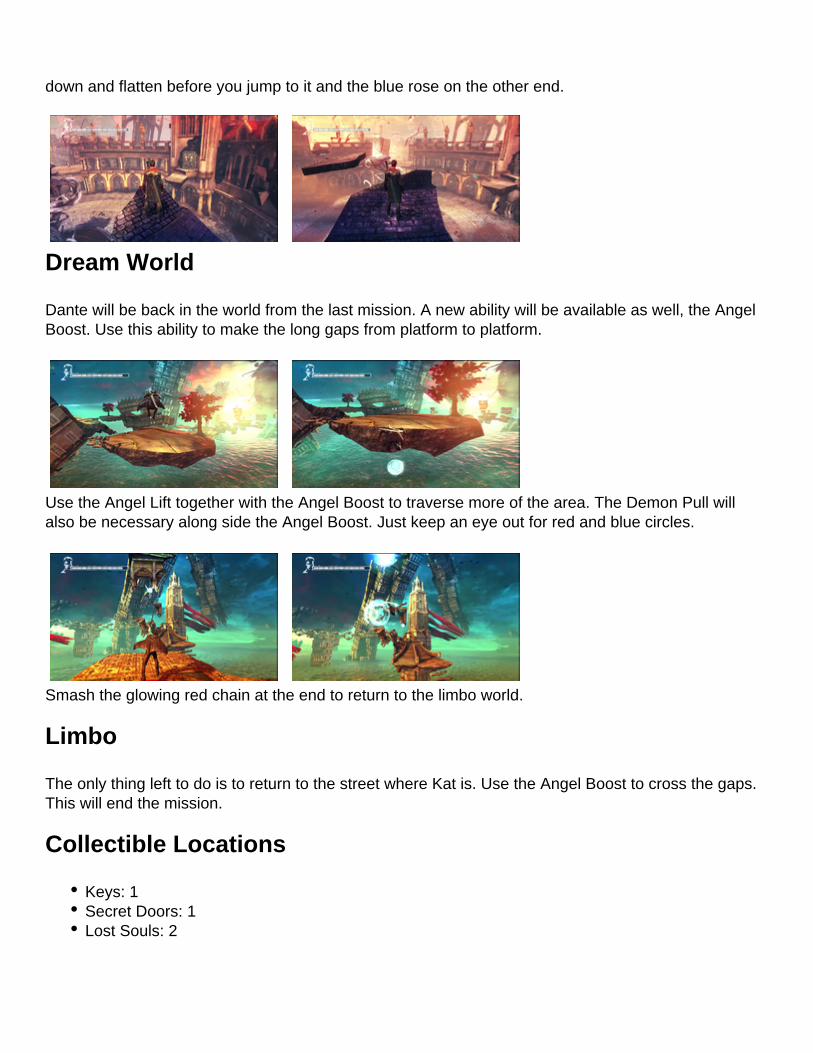
Dante will be back in the world from the last mission. A new ability will be available as well, the Angel Boost. Use this ability to make the long gaps from platform to platform.
Use the Angel Lift together with the Angel Boost to traverse more of the area. The Demon Pull will also be necessary along side the Angel Boost. Just keep an eye out for red and blue circles.
Smash the glowing red chain at the end to return to the limbo world.
Limbo
The only thing left to do is to return to the street where Kat is. Use the Angel Boost to cross the gaps. This will end the mission.
Collectible Locations
Keys: 1Secret Doors: 1Lost Souls: 2
Mission 4 - Under Watch
Mission 4 – Devil Hunter contains two Keys, two Secret Doors, and eight Lost Souls.
Video Walkthrough
Dante continues into Mission 4: Under Watch where walls come in to crush him and he learns more about his enemy.
Like usual, Dante gets pulled into Limbo at the beginning of the mission. You'll have to fight a few Stygian and a Ravager. These were the same enemies as the last mission, so things shouldn't be too difficult.
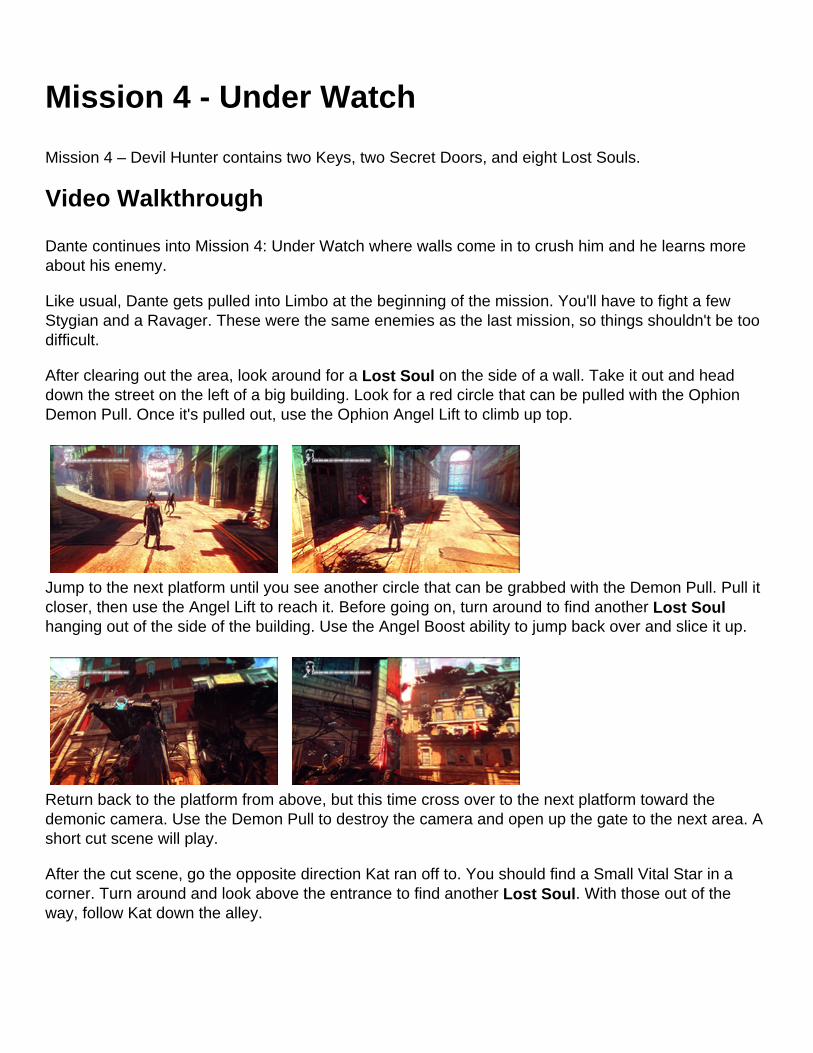
After clearing out the area, look around for a Lost Soul on the side of a wall. Take it out and head down the street on the left of a big building. Look for a red circle that can be pulled with the Ophion Demon Pull. Once it's pulled out, use the Ophion Angel Lift to climb up top.
Jump to the next platform until you see another circle that can be grabbed with the Demon Pull. Pull it closer, then use the Angel Lift to reach it. Before going on, turn around to find another Lost Soulhanging out of the side of the building. Use the Angel Boost ability to jump back over and slice it up.
Return back to the platform from above, but this time cross over to the next platform toward the demonic camera. Use the Demon Pull to destroy the camera and open up the gate to the next area. A short cut scene will play.
After the cut scene, go the opposite direction Kat ran off to. You should find a Small Vital Star in a corner. Turn around and look above the entrance to find another Lost Soul. With those out of the way, follow Kat down the alley.
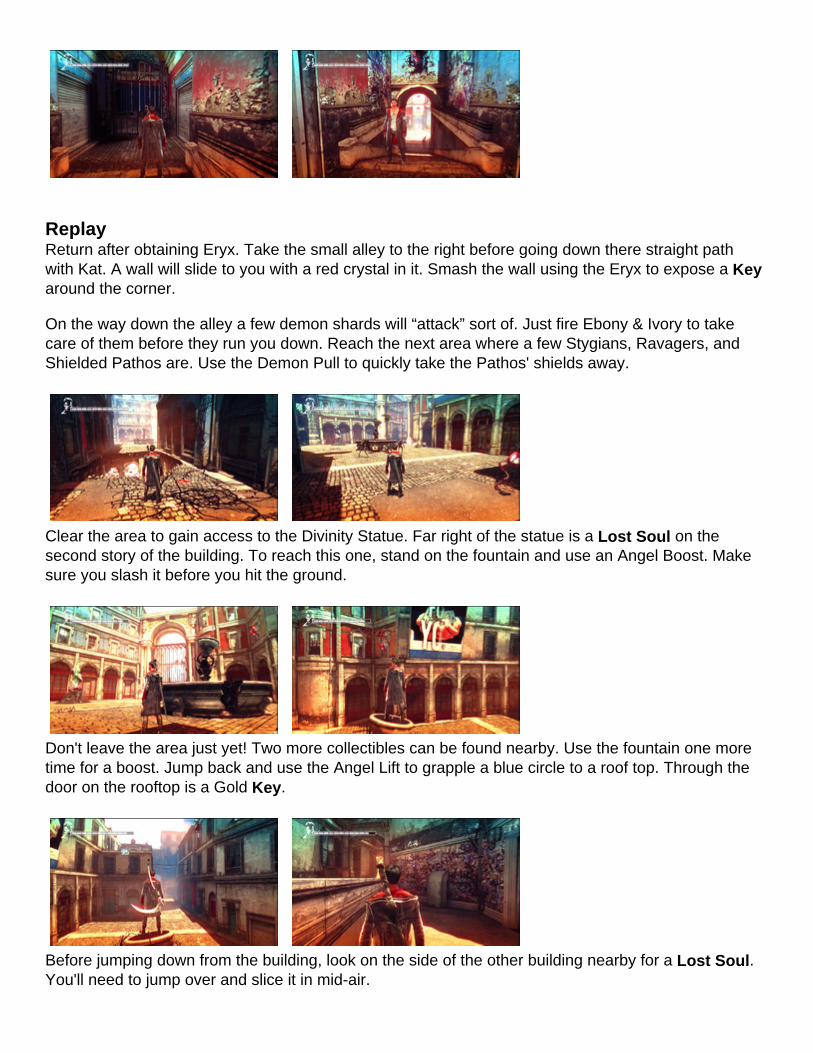
ReplayReturn after obtaining Eryx. Take the small alley to the right before going down there straight path with Kat. A wall will slide to you with a red crystal in it. Smash the wall using the Eryx to expose a Keyaround the corner.
On the way down the alley a few demon shards will “attack” sort of. Just fire Ebony & Ivory to take care of them before they run you down. Reach the next area where a few Stygians, Ravagers, and Shielded Pathos are. Use the Demon Pull to quickly take the Pathos' shields away.
Clear the area to gain access to the Divinity Statue. Far right of the statue is a Lost Soul on the second story of the building. To reach this one, stand on the fountain and use an Angel Boost. Make sure you slash it before you hit the ground.
Don't leave the area just yet! Two more collectibles can be found nearby. Use the fountain one more time for a boost. Jump back and use the Angel Lift to grapple a blue circle to a roof top. Through the door on the rooftop is a Gold Key.
Before jumping down from the building, look on the side of the other building nearby for a Lost Soul. You'll need to jump over and slice it in mid-air.
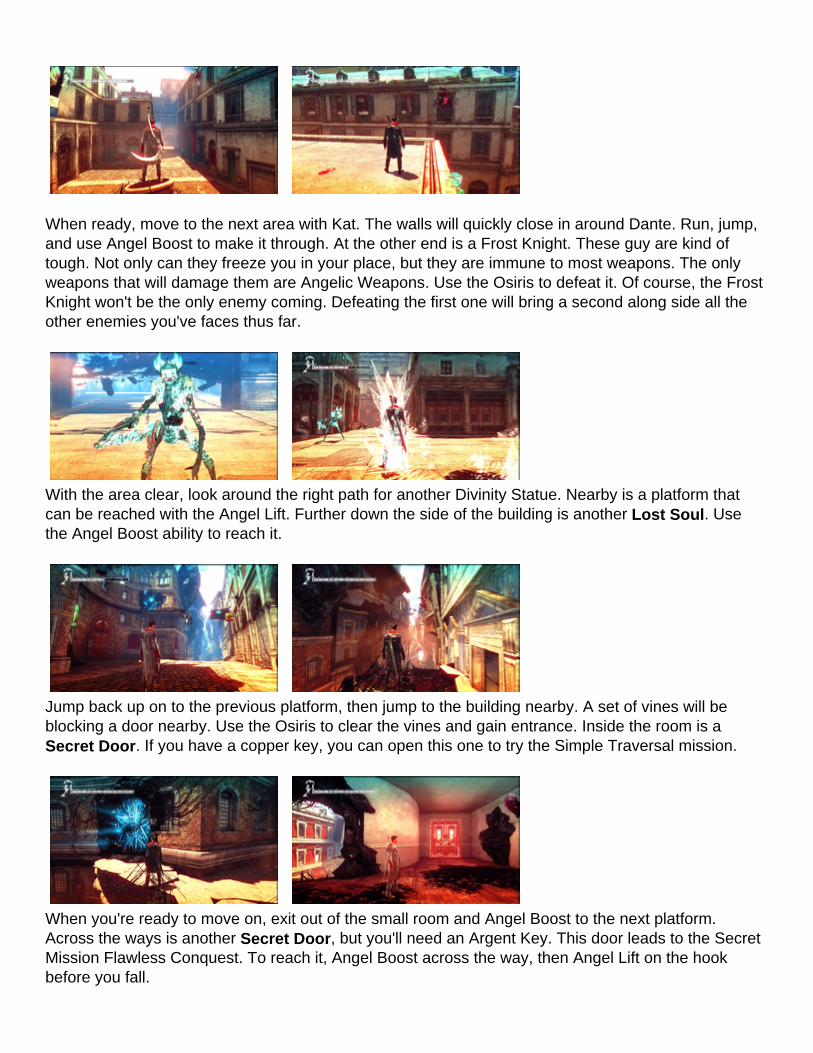
When ready, move to the next area with Kat. The walls will quickly close in around Dante. Run, jump, and use Angel Boost to make it through. At the other end is a Frost Knight. These guy are kind of tough. Not only can they freeze you in your place, but they are immune to most weapons. The only weapons that will damage them are Angelic Weapons. Use the Osiris to defeat it. Of course, the Frost Knight won't be the only enemy coming. Defeating the first one will bring a second along side all the other enemies you've faces thus far.
With the area clear, look around the right path for another Divinity Statue. Nearby is a platform that can be reached with the Angel Lift. Further down the side of the building is another Lost Soul. Use the Angel Boost ability to reach it.
Jump back up on to the previous platform, then jump to the building nearby. A set of vines will be blocking a door nearby. Use the Osiris to clear the vines and gain entrance. Inside the room is a Secret Door. If you have a copper key, you can open this one to try the Simple Traversal mission.
When you're ready to move on, exit out of the small room and Angel Boost to the next platform. Across the ways is another Secret Door, but you'll need an Argent Key. This door leads to the Secret Mission Flawless Conquest. To reach it, Angel Boost across the way, then Angel Lift on the hook before you fall.
Kat will help you out with the next area. Follow her around the corner where she'll spray paint a red circle that can be grappled with the Demon Pull ability. Pull it to create a bit of a boost to the next few red circles above. Use the Demon Pull to bring out a few more platforms ahead. Double Jump to reach them.
Make your way to the roof top ahead. A glowing red door can be found on the roof top. Smash it with the Arbiter to find a Lost Soul inside. Exit out of the room and look across to the other building to find another Lost Soul.
After clearing out the souls, jump back on to the roof and destroy the next demon camera. A few more enemies will spawn above and below. Take out the Pathos above and the Stygians below.
Defeating all the enemies here will open up the path to the next area. All the walls of the buildings will start closing in around you. Run, Angel Boost, and Angel Lift whenever necessary to clear the area quickly before you get crushed.
At the end of the path are more of the same enemies. Defeat the Pathos, Stygians, Ravagers, and Frost Knights. With the area clear, a new enemy will appear, the Tyrant. The Tyrant is a very tough demon. Weapons won't damage him up front. Evade his attacks and use the Demon Pull on his back to take him down. With the Tyrant on the ground, attack him as much as possible. After enough damage, you will be able to use the Angel Lift instead of the Demon Pull on his back. Do enough damage to him from behind to put him down for good.
The last thing to do is escape Limbo. Jump and Angel Boost from platform to platform. Eventually, a few blue circles will appear for your Angel Lift ability. Use them to escape.
Collectible Locations
Keys: 2Secret Doors: 2Lost Souls: 8
Mission 5 - Virility
Mission 5 – Virility contains Two Keys, Two Secret Doors, and Six Lost Souls.
Video Walkthrough
Dante and Kat infiltrate the Virility plant and work their way toward stopping people from drinking Slurm.
Room 1
Follow Kat around the Virility facility for a while. Don't worry, you won't miss any collectibles. Walk until she sets down a rift to reach Limbo.
Traversing the Limbo Virility Factory can be confusing. Use Demon Pulls and Angel Lifts to jump from platform to platform. A few Angel Boosts may be necessary to reach long jumps, as well.
It looks like there are two paths that sort of intertwine. Try to take the left path until you Demon Pull a few platforms over. Look for an Angel Lift circle above and behind the Demon Pull Red Circle. Angel lift yourself over until you reach a Lost Soul.
From the Lost Soul spot, jump down to a big platform. A few Shielded Pathos and Stygians will appear here, but nothing too difficult.
Eventually, the paths will lead to a big crate. Use Angel Lift and Demon Pull to open the crate, then Angel Boost inside. The area will contain a new enemy called a Hell Knight. Similar to the Frost Knight, the Hell Knight can only be damaged by one type of weapon. Use your demonic weapon, Arbiter, to take him out. Hell Knight will swing his sword, or he will put it into the ground and cause a sort of eruption around him. This eruption is called “Ground Inferno.” If you're in Demon mode, Ground Inferno will not damage you. Defeat the Hell Knight to bring a few reinforcements, including a Tyrant.
Just like the last mission with the Tyrant, avoid his attacks and use the Demon Pull ability on him from behind. The Demon Pull will send him to the ground, allowing you to attack for a short time. When the Tyrant is damaged enough, use the Angel Lift on his back to go right up to him for more damage.
When the area is clear, look through a chain link fence for a Key. It's really simple to get it. Jump up the shipping crates to the right of the fence, and walk into the back to find the key.
Before going through the passage to the next room, go to the edge of the platform that overlooks the entire room you climbed up. Jump and [[Angel Boost] out towards an Angel Lift circle, and use it to reach another Lost Soul. Angel Boost and Angel Lift back to the platform after collecting it.
Next, go through the big passage to the left of the chain link fence. A Divinity Statue can be found inside. Climb up the wooden crates on the right side of the hall that leads to the next room. “Stupidity” should be labeled on the boxes. At the top left is a Bronze Secret Door. This door leads to the secret mission Demonic Conflict.
With the door clear, continue through the hall until you see a few Demon Shards. Like usual, shoot them down before they try to roll you over. If they don't explode before they attack, dodge them.
Room 2
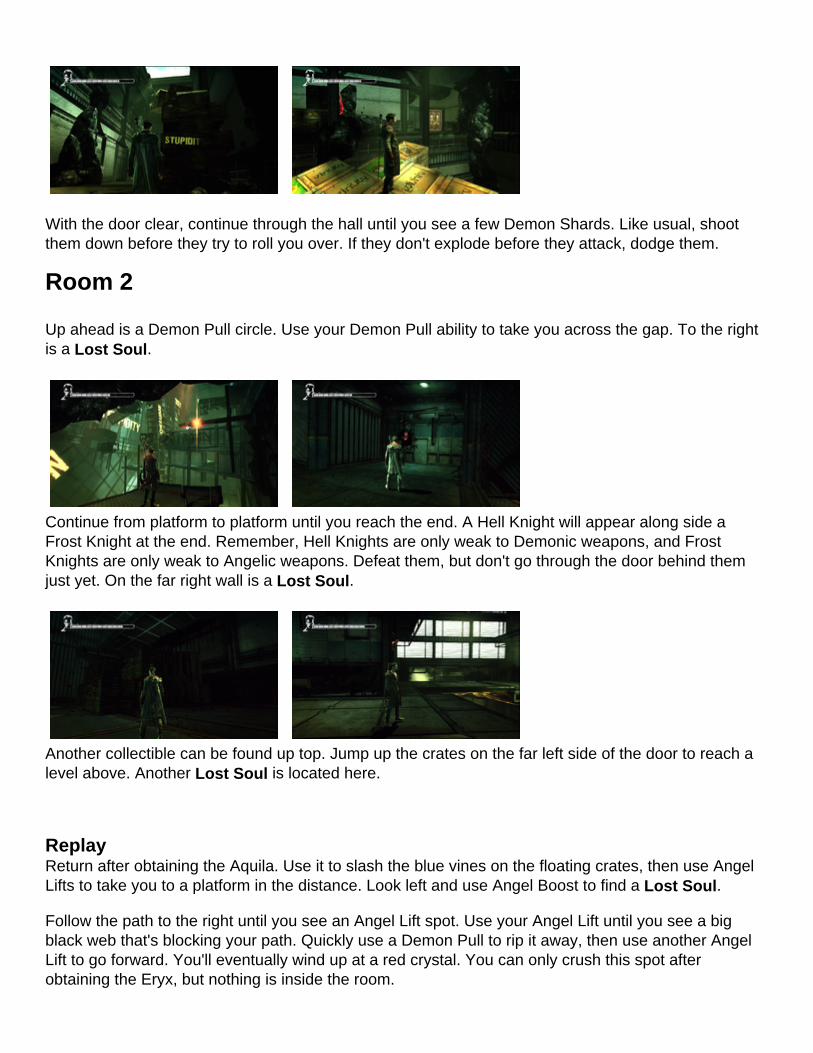
Up ahead is a Demon Pull circle. Use your Demon Pull ability to take you across the gap. To the right is a Lost Soul.
Continue from platform to platform until you reach the end. A Hell Knight will appear along side a Frost Knight at the end. Remember, Hell Knights are only weak to Demonic weapons, and Frost Knights are only weak to Angelic weapons. Defeat them, but don't go through the door behind them just yet. On the far right wall is a Lost Soul.
Another collectible can be found up top. Jump up the crates on the far left side of the door to reach a level above. Another Lost Soul is located here.
ReplayReturn after obtaining the Aquila. Use it to slash the blue vines on the floating crates, then use Angel Lifts to take you to a platform in the distance. Look left and use Angel Boost to find a Lost Soul.
Follow the path to the right until you see an Angel Lift spot. Use your Angel Lift until you see a big black web that's blocking your path. Quickly use a Demon Pull to rip it away, then use another Angel Lift to go forward. You'll eventually wind up at a red crystal. You can only crush this spot after obtaining the Eryx, but nothing is inside the room.
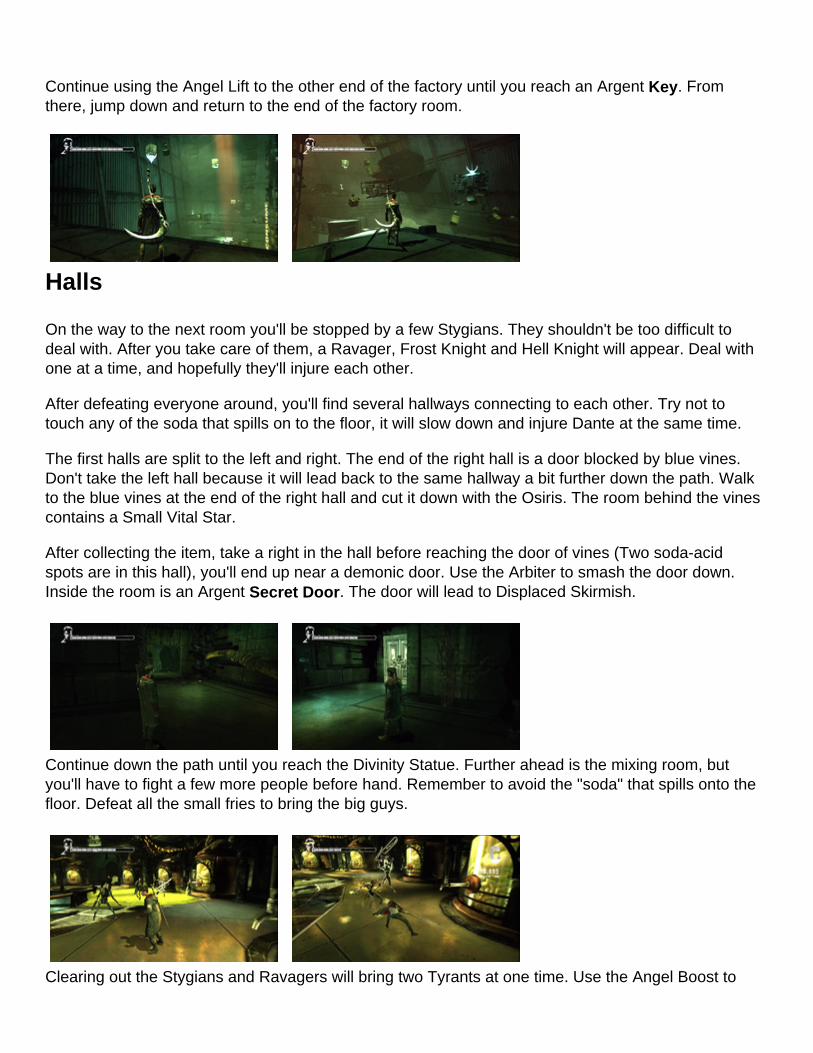
Continue using the Angel Lift to the other end of the factory until you reach an Argent Key. From there, jump down and return to the end of the factory room.
Halls
On the way to the next room you'll be stopped by a few Stygians. They shouldn't be too difficult to deal with. After you take care of them, a Ravager, Frost Knight and Hell Knight will appear. Deal with one at a time, and hopefully they'll injure each other.
After defeating everyone around, you'll find several hallways connecting to each other. Try not to touch any of the soda that spills on to the floor, it will slow down and injure Dante at the same time.
The first halls are split to the left and right. The end of the right hall is a door blocked by blue vines. Don't take the left hall because it will lead back to the same hallway a bit further down the path. Walk to the blue vines at the end of the right hall and cut it down with the Osiris. The room behind the vines contains a Small Vital Star.
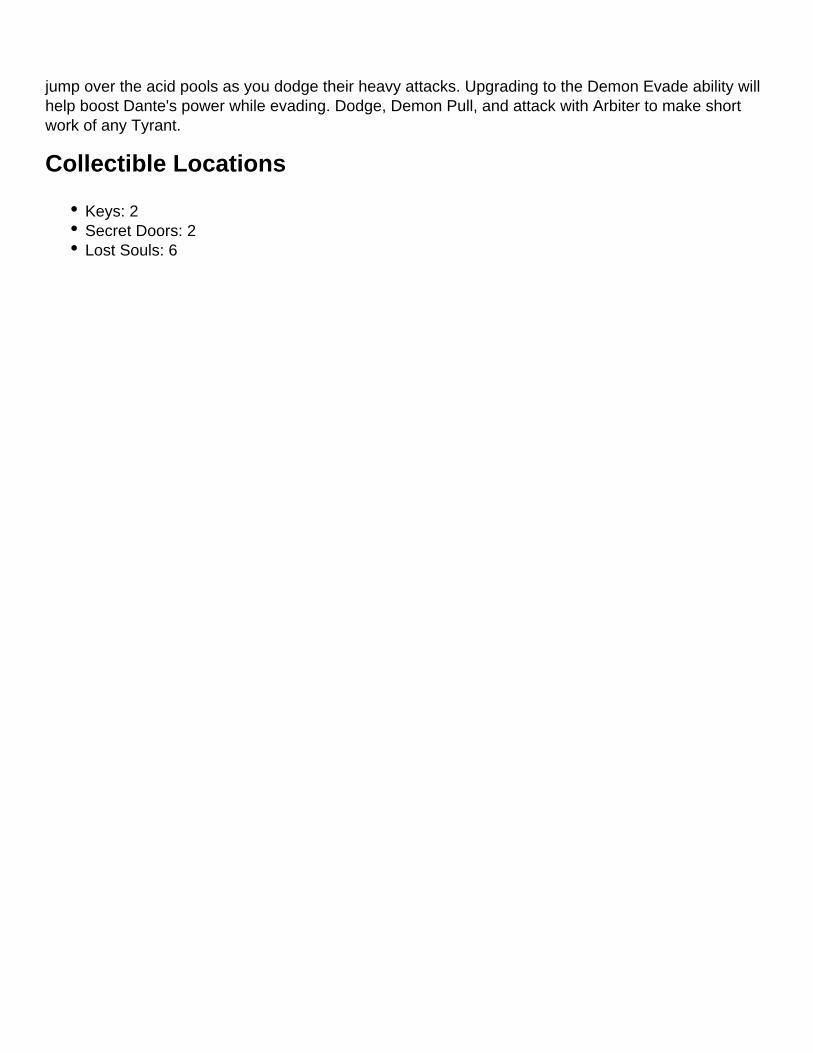
After collecting the item, take a right in the hall before reaching the door of vines (Two soda-acid spots are in this hall), you'll end up near a demonic door. Use the Arbiter to smash the door down. Inside the room is an Argent Secret Door. The door will lead to Displaced Skirmish.
Continue down the path until you reach the Divinity Statue. Further ahead is the mixing room, but you'll have to fight a few more people before hand. Remember to avoid the "soda" that spills onto the floor. Defeat all the small fries to bring the big guys.
Clearing out the Stygians and Ravagers will bring two Tyrants at one time. Use the Angel Boost to
jump over the acid pools as you dodge their heavy attacks. Upgrading to the Demon Evade ability will help boost Dante's power while evading. Dodge, Demon Pull, and attack with Arbiter to make short work of any Tyrant.
Collectible Locations
Keys: 2Secret Doors: 2Lost Souls: 6
Mission 6 - Secret Ingredient
Mission 6 – Secret Ingredient contains One Key, One Secret Door, and Two Lost Souls.
Video Walkthrough
Not only can you get the A man with guts and honor Achievement / Trophy here, but you can also help Dante cut up the Succubus Boss.
Ventilation System
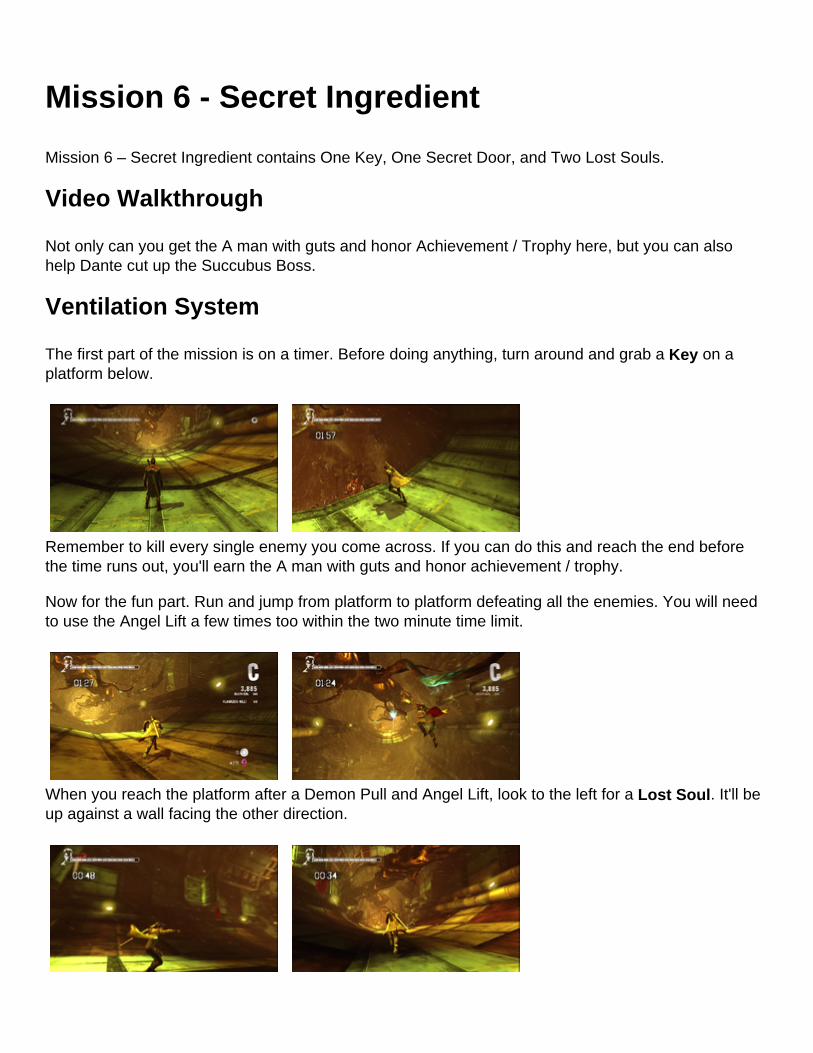
The first part of the mission is on a timer. Before doing anything, turn around and grab a Key on a platform below.
Remember to kill every single enemy you come across. If you can do this and reach the end before the time runs out, you'll earn the A man with guts and honor achievement / trophy.
Now for the fun part. Run and jump from platform to platform defeating all the enemies. You will need to use the Angel Lift a few times too within the two minute time limit.
When you reach the platform after a Demon Pull and Angel Lift, look to the left for a Lost Soul. It'll be up against a wall facing the other direction.
Keep running to the end. The final thing you need to do is use a Demon Pull on a door. Do this before the time runs out and you're good. Walk through the small tunnel to the entrance way of a new area.
Entrance Way
Look directly to the left for another Lost Soul on a pillar. It shouldn't be too hard to find.
Up ahead is a Divinity Statue. Upgrade or buy any items you may need. Before going through the door, look to the left for a Secret Door. This leads to the secret mission Rapid Descent.
Boss Battle: Succubus
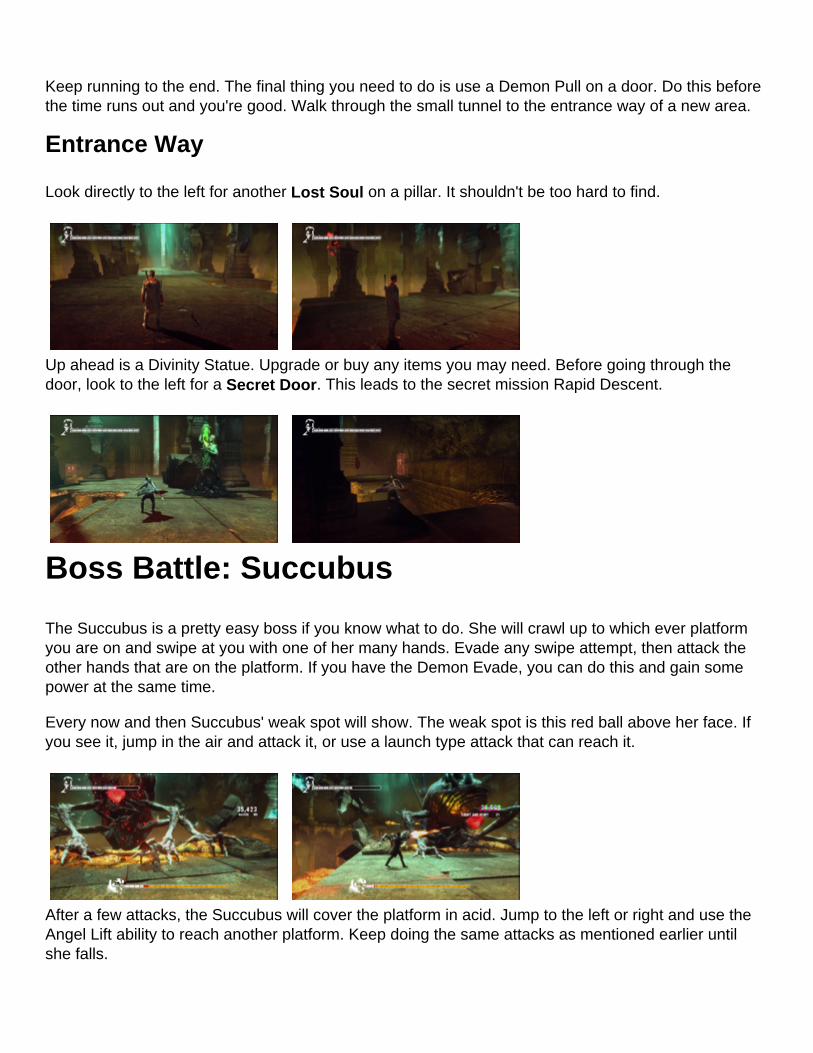
The Succubus is a pretty easy boss if you know what to do. She will crawl up to which ever platform you are on and swipe at you with one of her many hands. Evade any swipe attempt, then attack the other hands that are on the platform. If you have the Demon Evade, you can do this and gain some power at the same time.
Every now and then Succubus' weak spot will show. The weak spot is this red ball above her face. If you see it, jump in the air and attack it, or use a launch type attack that can reach it.
After a few attacks, the Succubus will cover the platform in acid. Jump to the left or right and use the Angel Lift ability to reach another platform. Keep doing the same attacks as mentioned earlier until she falls.
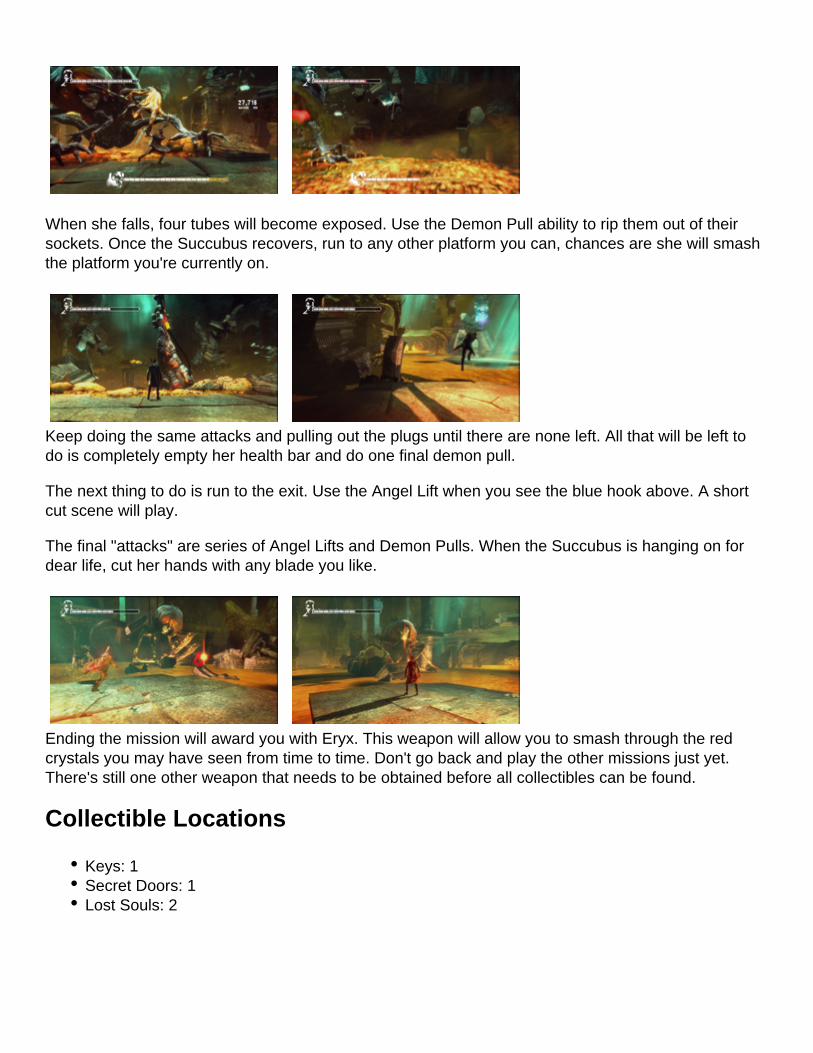
When she falls, four tubes will become exposed. Use the Demon Pull ability to rip them out of their sockets. Once the Succubus recovers, run to any other platform you can, chances are she will smash the platform you're currently on.
Keep doing the same attacks and pulling out the plugs until there are none left. All that will be left to do is completely empty her health bar and do one final demon pull.
The next thing to do is run to the exit. Use the Angel Lift when you see the blue hook above. A short cut scene will play.
The final "attacks" are series of Angel Lifts and Demon Pulls. When the Succubus is hanging on for dear life, cut her hands with any blade you like.
Ending the mission will award you with Eryx. This weapon will allow you to smash through the red crystals you may have seen from time to time. Don't go back and play the other missions just yet. There's still one other weapon that needs to be obtained before all collectibles can be found.
Collectible Locations
Keys: 1Secret Doors: 1Lost Souls: 2
Mission 7 - Overturn
Mission 7 – Overturn contains Three Keys, Two Secret Doors, and Eight Lost Souls.
Video Walkthrough
Dante and Kat meet up with Vergil and begin their assault on the tower.
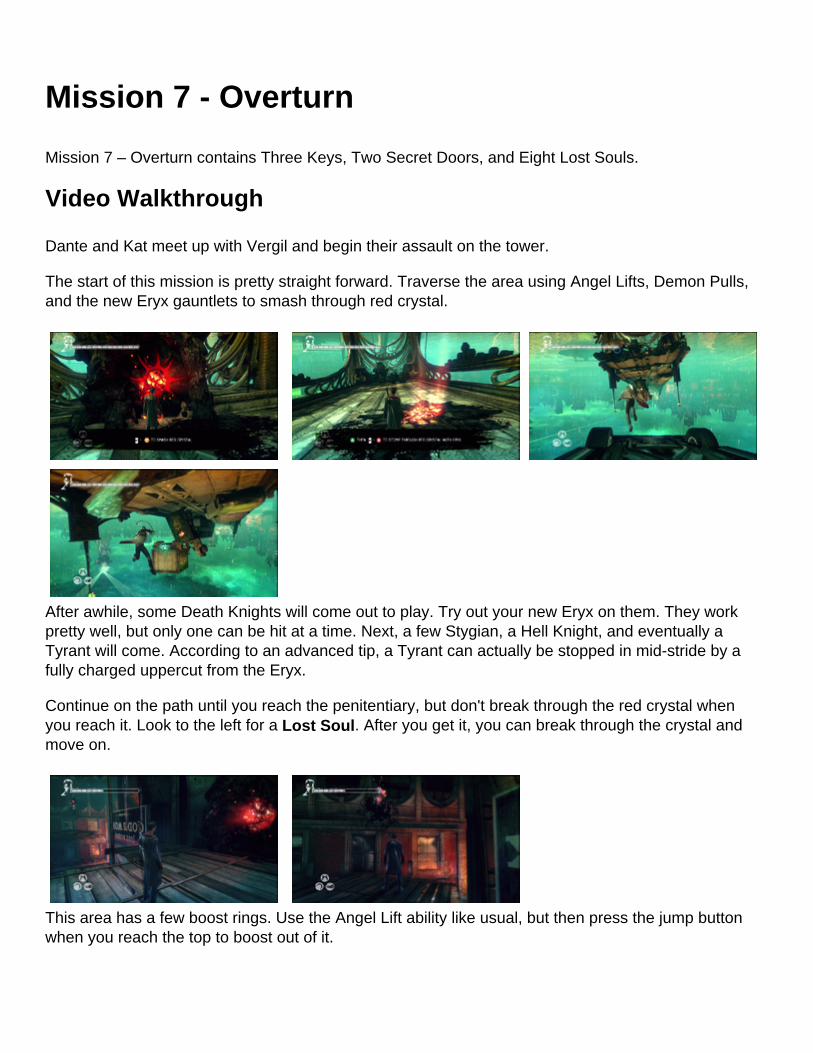
The start of this mission is pretty straight forward. Traverse the area using Angel Lifts, Demon Pulls, and the new Eryx gauntlets to smash through red crystal.
After awhile, some Death Knights will come out to play. Try out your new Eryx on them. They work pretty well, but only one can be hit at a time. Next, a few Stygian, a Hell Knight, and eventually a Tyrant will come. According to an advanced tip, a Tyrant can actually be stopped in mid-stride by a fully charged uppercut from the Eryx.
Continue on the path until you reach the penitentiary, but don't break through the red crystal when you reach it. Look to the left for a Lost Soul. After you get it, you can break through the crystal and move on.
This area has a few boost rings. Use the Angel Lift ability like usual, but then press the jump button when you reach the top to boost out of it.
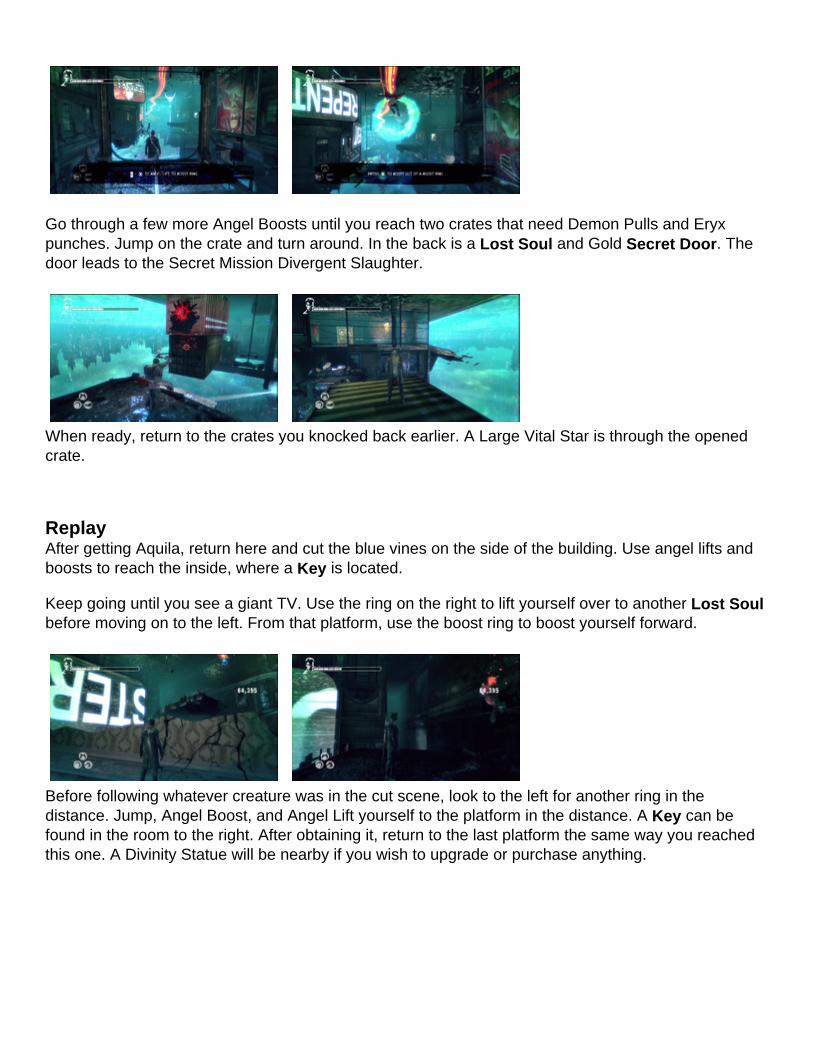
Go through a few more Angel Boosts until you reach two crates that need Demon Pulls and Eryx punches. Jump on the crate and turn around. In the back is a Lost Soul and Gold Secret Door. The door leads to the Secret Mission Divergent Slaughter.
When ready, return to the crates you knocked back earlier. A Large Vital Star is through the opened crate.
ReplayAfter getting Aquila, return here and cut the blue vines on the side of the building. Use angel lifts and boosts to reach the inside, where a Key is located.
Keep going until you see a giant TV. Use the ring on the right to lift yourself over to another Lost Soulbefore moving on to the left. From that platform, use the boost ring to boost yourself forward.
Before following whatever creature was in the cut scene, look to the left for another ring in the distance. Jump, Angel Boost, and Angel Lift yourself to the platform in the distance. A Key can be found in the room to the right. After obtaining it, return to the last platform the same way you reached this one. A Divinity Statue will be nearby if you wish to upgrade or purchase anything.
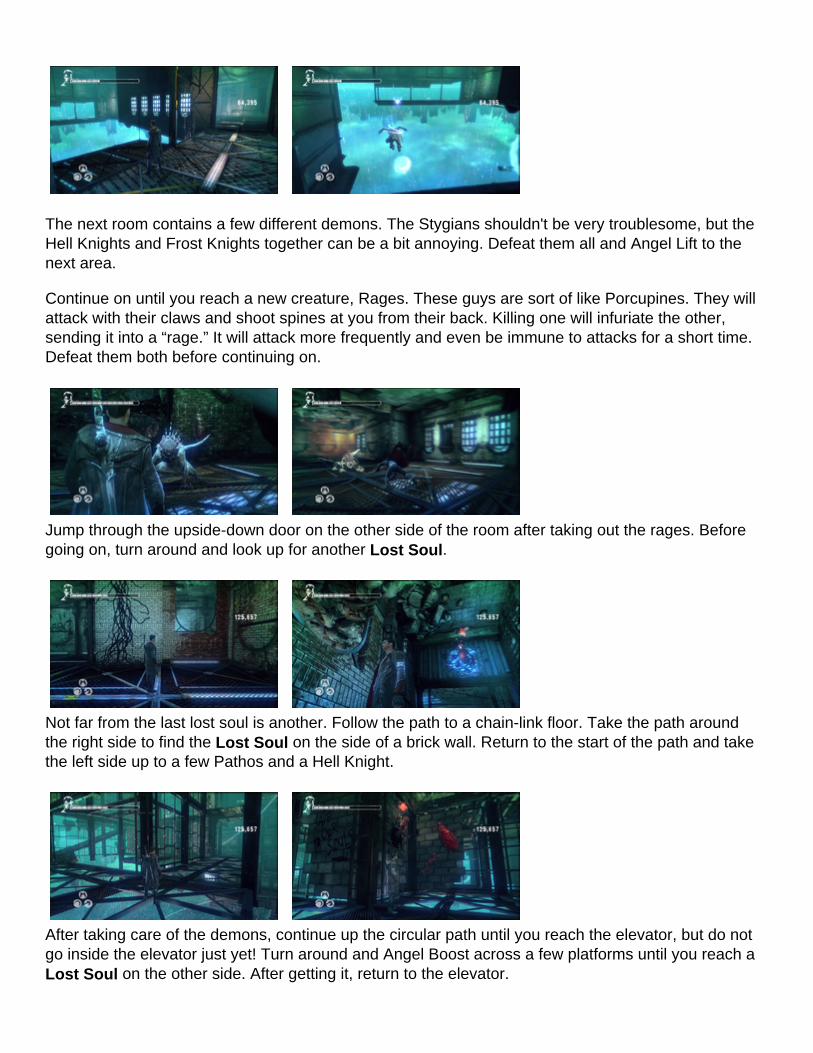
The next room contains a few different demons. The Stygians shouldn't be very troublesome, but the Hell Knights and Frost Knights together can be a bit annoying. Defeat them all and Angel Lift to the next area.
Continue on until you reach a new creature, Rages. These guys are sort of like Porcupines. They will attack with their claws and shoot spines at you from their back. Killing one will infuriate the other, sending it into a “rage.” It will attack more frequently and even be immune to attacks for a short time. Defeat them both before continuing on.
Jump through the upside-down door on the other side of the room after taking out the rages. Before going on, turn around and look up for another Lost Soul.
Not far from the last lost soul is another. Follow the path to a chain-link floor. Take the path around the right side to find the Lost Soul on the side of a brick wall. Return to the start of the path and take the left side up to a few Pathos and a Hell Knight.
After taking care of the demons, continue up the circular path until you reach the elevator, but do not go inside the elevator just yet! Turn around and Angel Boost across a few platforms until you reach a Lost Soul on the other side. After getting it, return to the elevator.
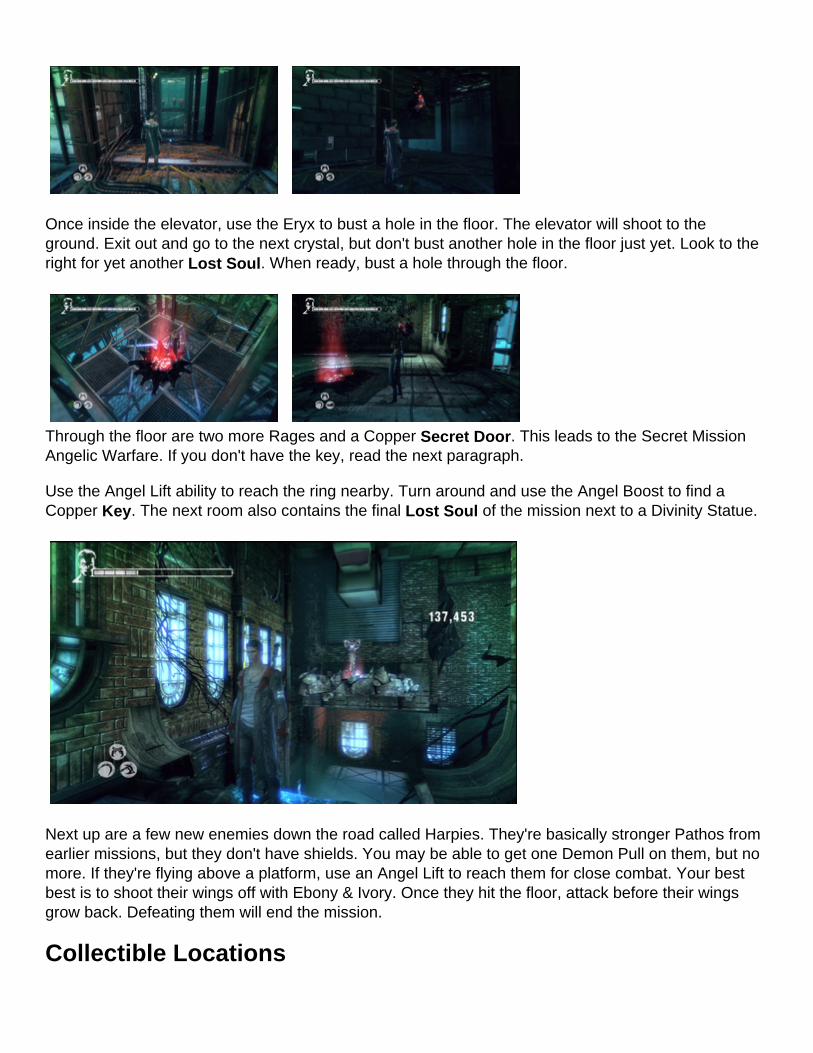
Once inside the elevator, use the Eryx to bust a hole in the floor. The elevator will shoot to the ground. Exit out and go to the next crystal, but don't bust another hole in the floor just yet. Look to the right for yet another Lost Soul. When ready, bust a hole through the floor.
Through the floor are two more Rages and a Copper Secret Door. This leads to the Secret Mission Angelic Warfare. If you don't have the key, read the next paragraph.
Use the Angel Lift ability to reach the ring nearby. Turn around and use the Angel Boost to find a Copper Key. The next room also contains the final Lost Soul of the mission next to a Divinity Statue.
Next up are a few new enemies down the road called Harpies. They're basically stronger Pathos from earlier missions, but they don't have shields. You may be able to get one Demon Pull on them, but no more. If they're flying above a platform, use an Angel Lift to reach them for close combat. Your best best is to shoot their wings off with Ebony & Ivory. Once they hit the floor, attack before their wings grow back. Defeating them will end the mission.
Collectible Locations

Keys: 3Secret Doors: 2Lost Souls: 8
Mission 8 - Eyeless
Mission 8 – Eyeless contains One Key, Two Secret Doors, and Five Lost Souls
Video Walkthrough
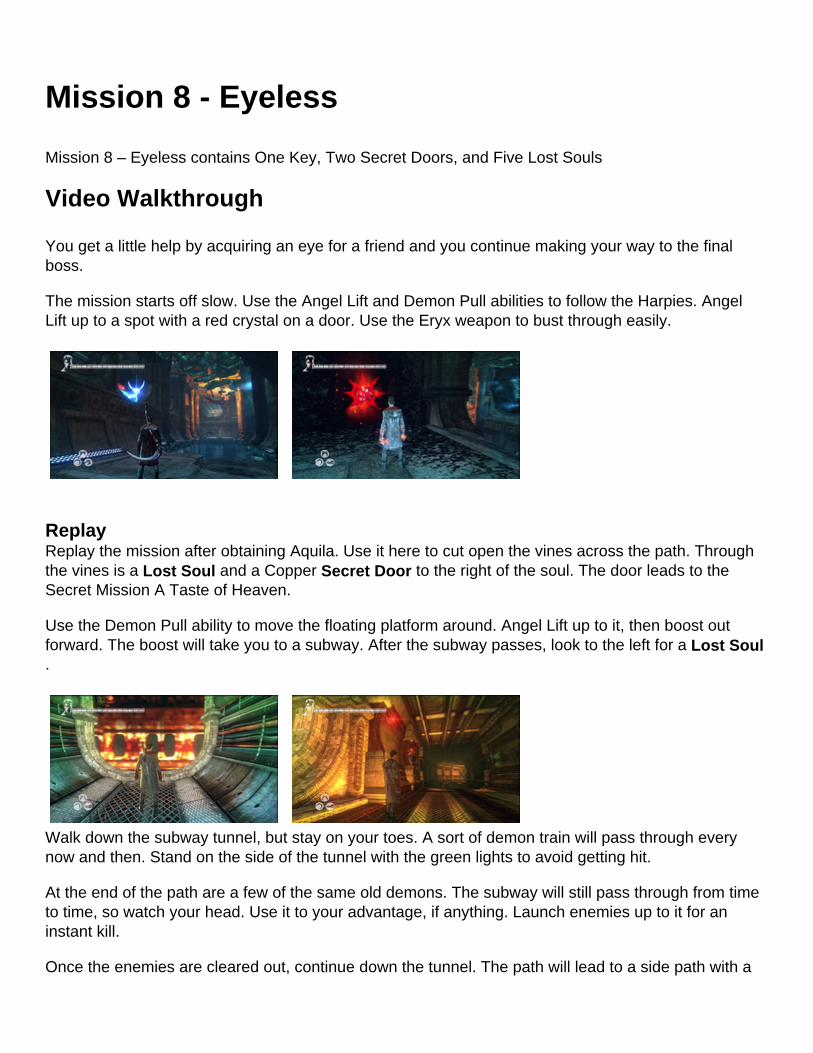
You get a little help by acquiring an eye for a friend and you continue making your way to the final boss.
The mission starts off slow. Use the Angel Lift and Demon Pull abilities to follow the Harpies. Angel Lift up to a spot with a red crystal on a door. Use the Eryx weapon to bust through easily.
ReplayReplay the mission after obtaining Aquila. Use it here to cut open the vines across the path. Through the vines is a Lost Soul and a Copper Secret Door to the right of the soul. The door leads to the Secret Mission A Taste of Heaven.
Use the Demon Pull ability to move the floating platform around. Angel Lift up to it, then boost out forward. The boost will take you to a subway. After the subway passes, look to the left for a Lost Soul.
Walk down the subway tunnel, but stay on your toes. A sort of demon train will pass through every now and then. Stand on the side of the tunnel with the green lights to avoid getting hit.
At the end of the path are a few of the same old demons. The subway will still pass through from time to time, so watch your head. Use it to your advantage, if anything. Launch enemies up to it for an instant kill.
Once the enemies are cleared out, continue down the tunnel. The path will lead to a side path with a
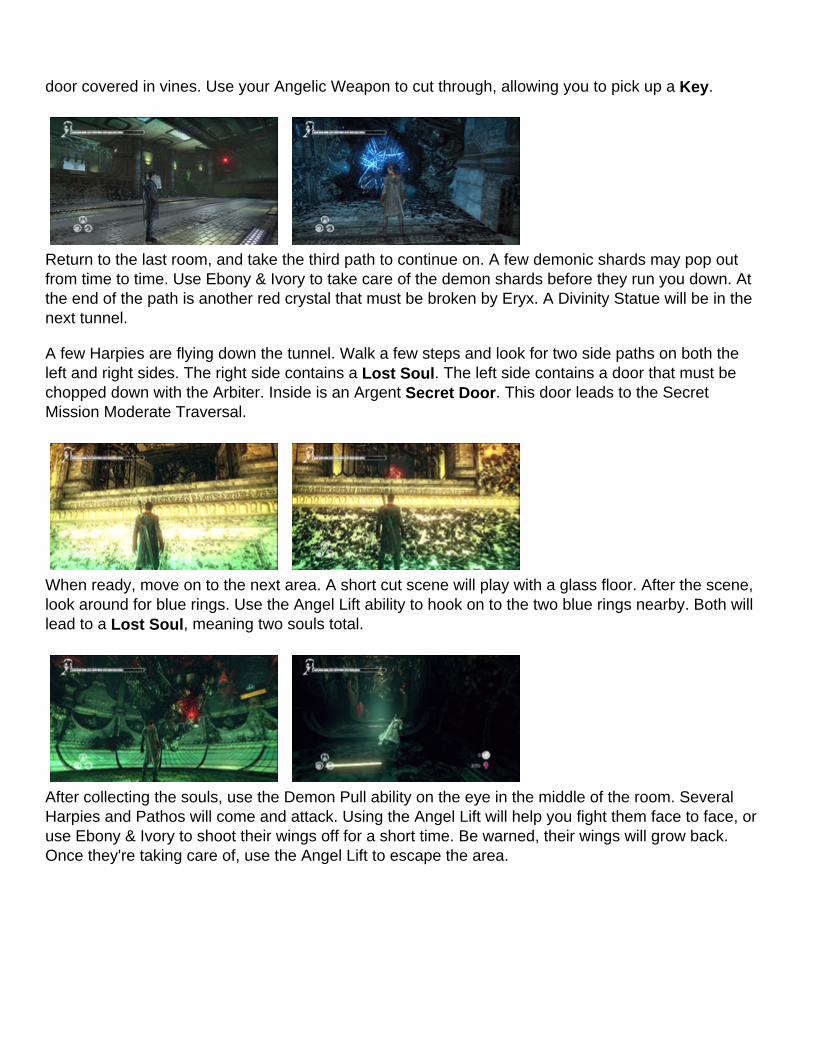
door covered in vines. Use your Angelic Weapon to cut through, allowing you to pick up a Key.
Return to the last room, and take the third path to continue on. A few demonic shards may pop out from time to time. Use Ebony & Ivory to take care of the demon shards before they run you down. At the end of the path is another red crystal that must be broken by Eryx. A Divinity Statue will be in the next tunnel.
A few Harpies are flying down the tunnel. Walk a few steps and look for two side paths on both the left and right sides. The right side contains a Lost Soul. The left side contains a door that must be chopped down with the Arbiter. Inside is an Argent Secret Door. This door leads to the Secret Mission Moderate Traversal.
When ready, move on to the next area. A short cut scene will play with a glass floor. After the scene, look around for blue rings. Use the Angel Lift ability to hook on to the two blue rings nearby. Both will lead to a Lost Soul, meaning two souls total.
After collecting the souls, use the Demon Pull ability on the eye in the middle of the room. Several Harpies and Pathos will come and attack. Using the Angel Lift will help you fight them face to face, or use Ebony & Ivory to shoot their wings off for a short time. Be warned, their wings will grow back. Once they're taking care of, use the Angel Lift to escape the area.
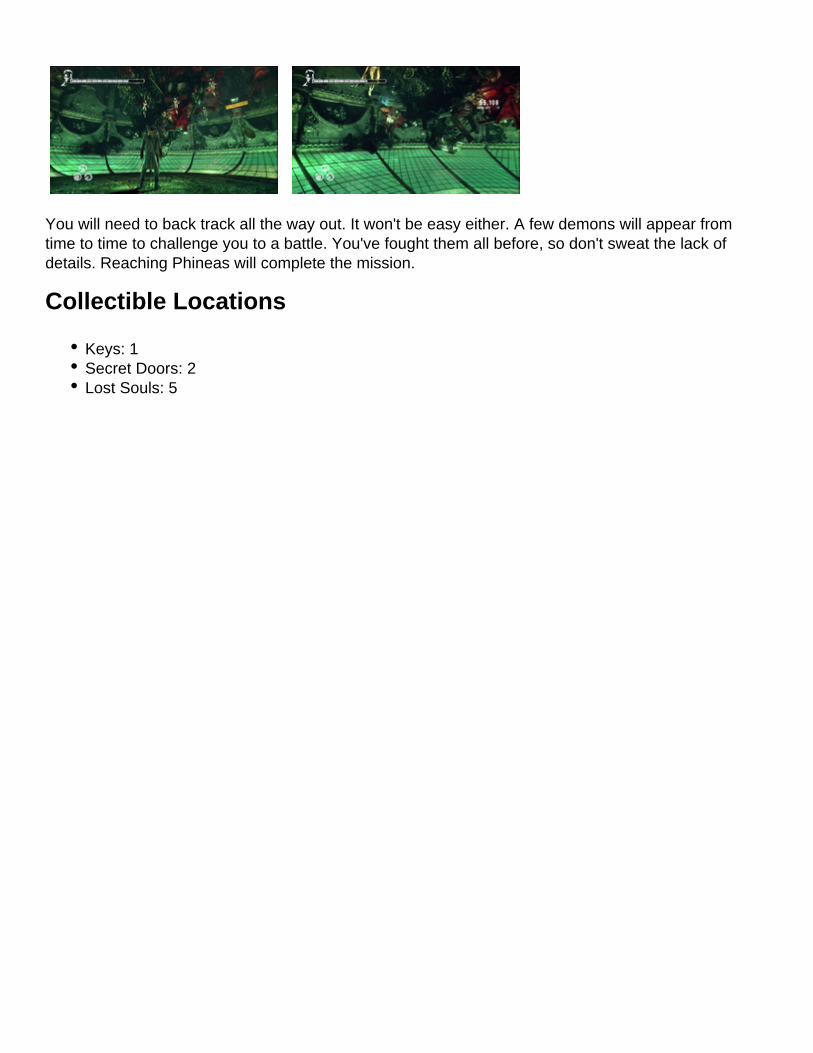
You will need to back track all the way out. It won't be easy either. A few demons will appear from time to time to challenge you to a battle. You've fought them all before, so don't sweat the lack of details. Reaching Phineas will complete the mission.
Collectible Locations
Keys: 1Secret Doors: 2Lost Souls: 5
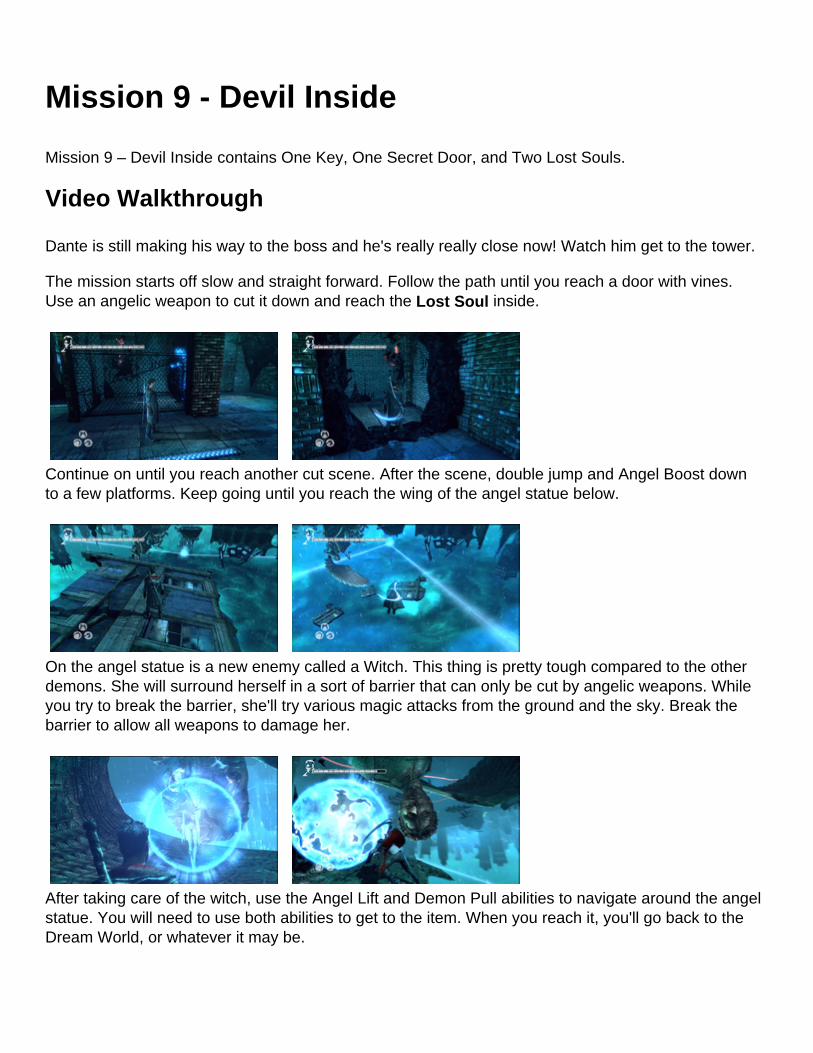
Mission 9 - Devil Inside
Mission 9 – Devil Inside contains One Key, One Secret Door, and Two Lost Souls.
Video Walkthrough
Dante is still making his way to the boss and he's really really close now! Watch him get to the tower.
The mission starts off slow and straight forward. Follow the path until you reach a door with vines. Use an angelic weapon to cut it down and reach the Lost Soul inside.
Continue on until you reach another cut scene. After the scene, double jump and Angel Boost down to a few platforms. Keep going until you reach the wing of the angel statue below.
On the angel statue is a new enemy called a Witch. This thing is pretty tough compared to the other demons. She will surround herself in a sort of barrier that can only be cut by angelic weapons. While you try to break the barrier, she'll try various magic attacks from the ground and the sky. Break the barrier to allow all weapons to damage her.
After taking care of the witch, use the Angel Lift and Demon Pull abilities to navigate around the angel statue. You will need to use both abilities to get to the item. When you reach it, you'll go back to the Dream World, or whatever it may be.
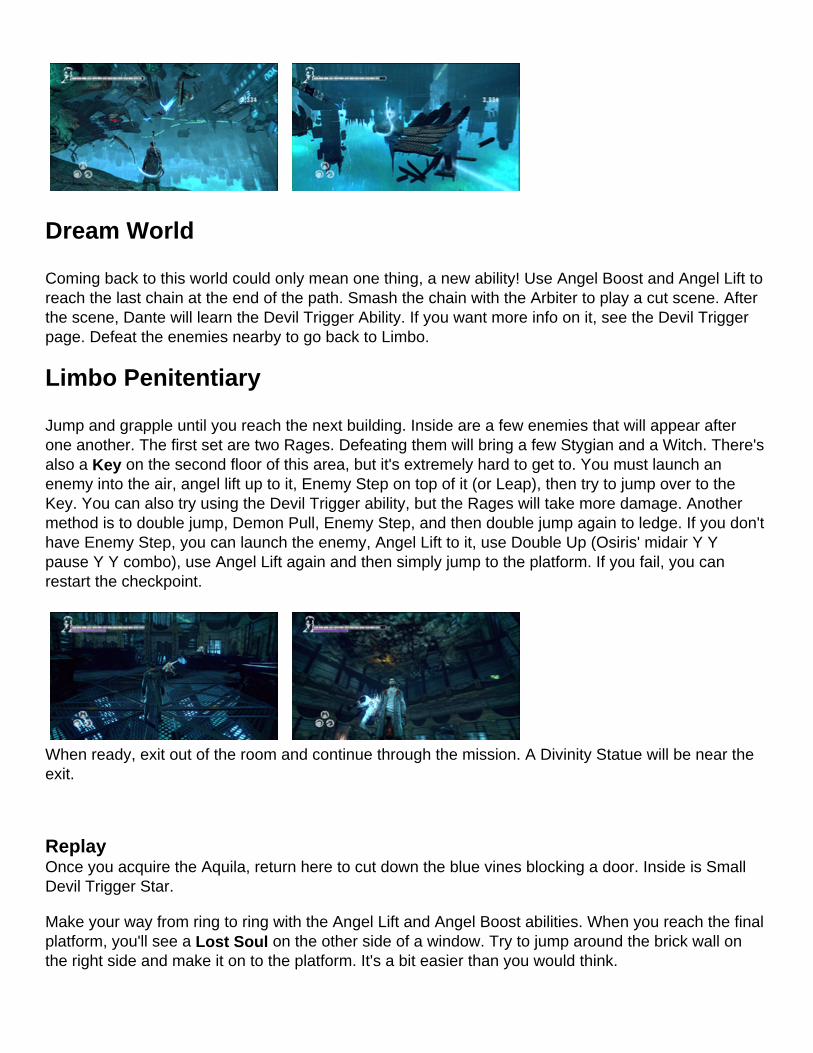
Dream World
Coming back to this world could only mean one thing, a new ability! Use Angel Boost and Angel Lift to reach the last chain at the end of the path. Smash the chain with the Arbiter to play a cut scene. After the scene, Dante will learn the Devil Trigger Ability. If you want more info on it, see the Devil Trigger page. Defeat the enemies nearby to go back to Limbo.
Limbo Penitentiary
Jump and grapple until you reach the next building. Inside are a few enemies that will appear after one another. The first set are two Rages. Defeating them will bring a few Stygian and a Witch. There's also a Key on the second floor of this area, but it's extremely hard to get to. You must launch an enemy into the air, angel lift up to it, Enemy Step on top of it (or Leap), then try to jump over to the Key. You can also try using the Devil Trigger ability, but the Rages will take more damage. Another method is to double jump, Demon Pull, Enemy Step, and then double jump again to ledge. If you don't have Enemy Step, you can launch the enemy, Angel Lift to it, use Double Up (Osiris' midair Y Y pause Y Y combo), use Angel Lift again and then simply jump to the platform. If you fail, you can restart the checkpoint.
When ready, exit out of the room and continue through the mission. A Divinity Statue will be near the exit.
ReplayOnce you acquire the Aquila, return here to cut down the blue vines blocking a door. Inside is Small Devil Trigger Star.
Make your way from ring to ring with the Angel Lift and Angel Boost abilities. When you reach the final platform, you'll see a Lost Soul on the other side of a window. Try to jump around the brick wall on the right side and make it on to the platform. It's a bit easier than you would think.
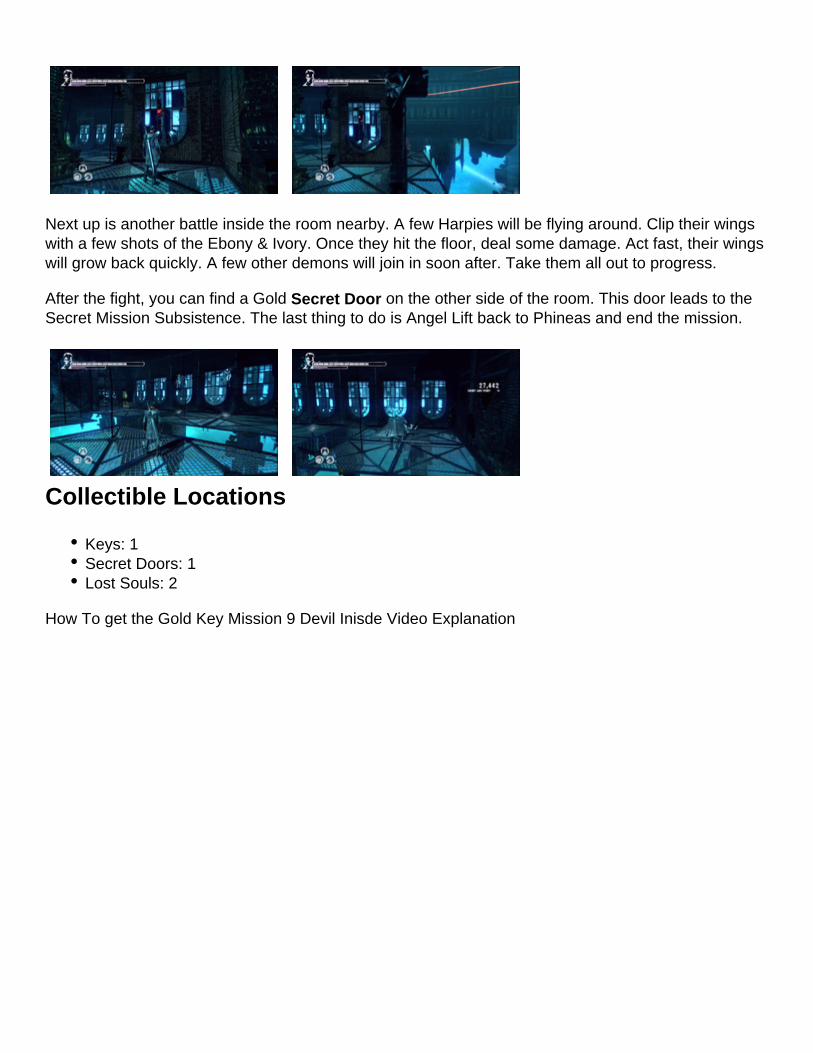
Next up is another battle inside the room nearby. A few Harpies will be flying around. Clip their wings with a few shots of the Ebony & Ivory. Once they hit the floor, deal some damage. Act fast, their wings will grow back quickly. A few other demons will join in soon after. Take them all out to progress.
After the fight, you can find a Gold Secret Door on the other side of the room. This door leads to the Secret Mission Subsistence. The last thing to do is Angel Lift back to Phineas and end the mission.
Collectible Locations
Keys: 1Secret Doors: 1Lost Souls: 2
How To get the Gold Key Mission 9 Devil Inisde Video Explanation
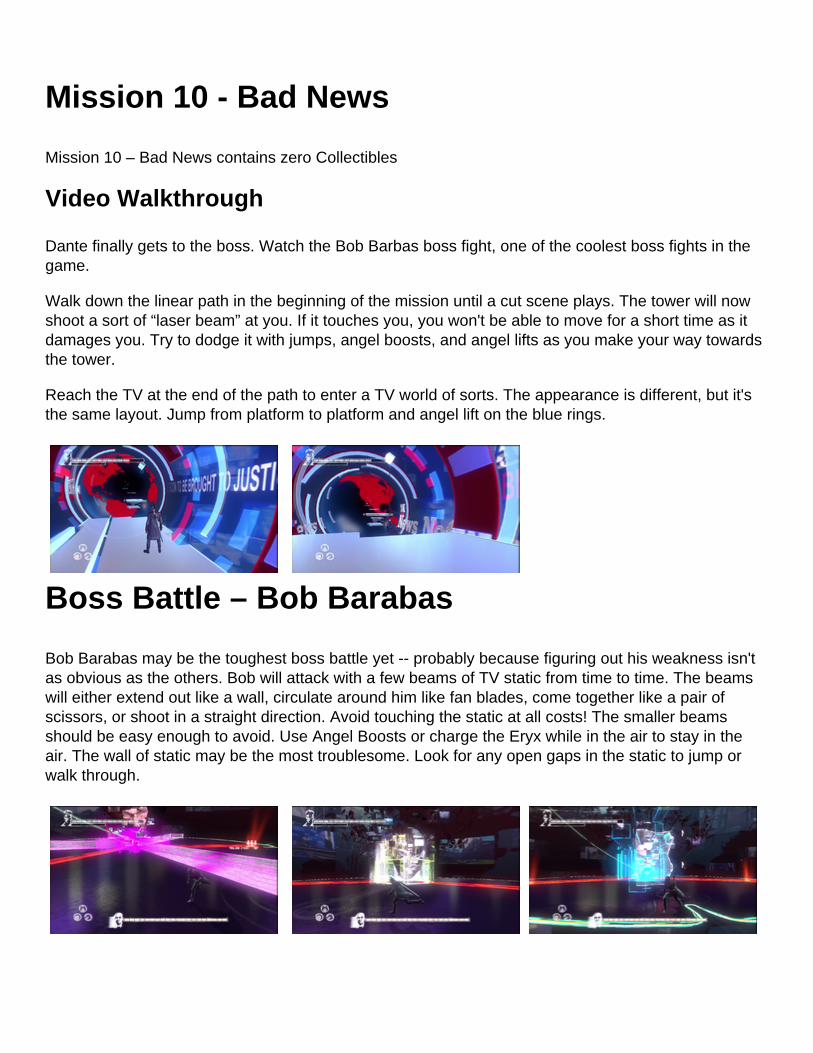
Mission 10 - Bad News
Mission 10 – Bad News contains zero Collectibles
Video Walkthrough
Dante finally gets to the boss. Watch the Bob Barbas boss fight, one of the coolest boss fights in the game.
Walk down the linear path in the beginning of the mission until a cut scene plays. The tower will now shoot a sort of “laser beam” at you. If it touches you, you won't be able to move for a short time as it damages you. Try to dodge it with jumps, angel boosts, and angel lifts as you make your way towards the tower.
Reach the TV at the end of the path to enter a TV world of sorts. The appearance is different, but it's the same layout. Jump from platform to platform and angel lift on the blue rings.
Boss Battle – Bob Barabas
Bob Barabas may be the toughest boss battle yet -- probably because figuring out his weakness isn't as obvious as the others. Bob will attack with a few beams of TV static from time to time. The beams will either extend out like a wall, circulate around him like fan blades, come together like a pair of scissors, or shoot in a straight direction. Avoid touching the static at all costs! The smaller beams should be easy enough to avoid. Use Angel Boosts or charge the Eryx while in the air to stay in the air. The wall of static may be the most troublesome. Look for any open gaps in the static to jump or walk through.
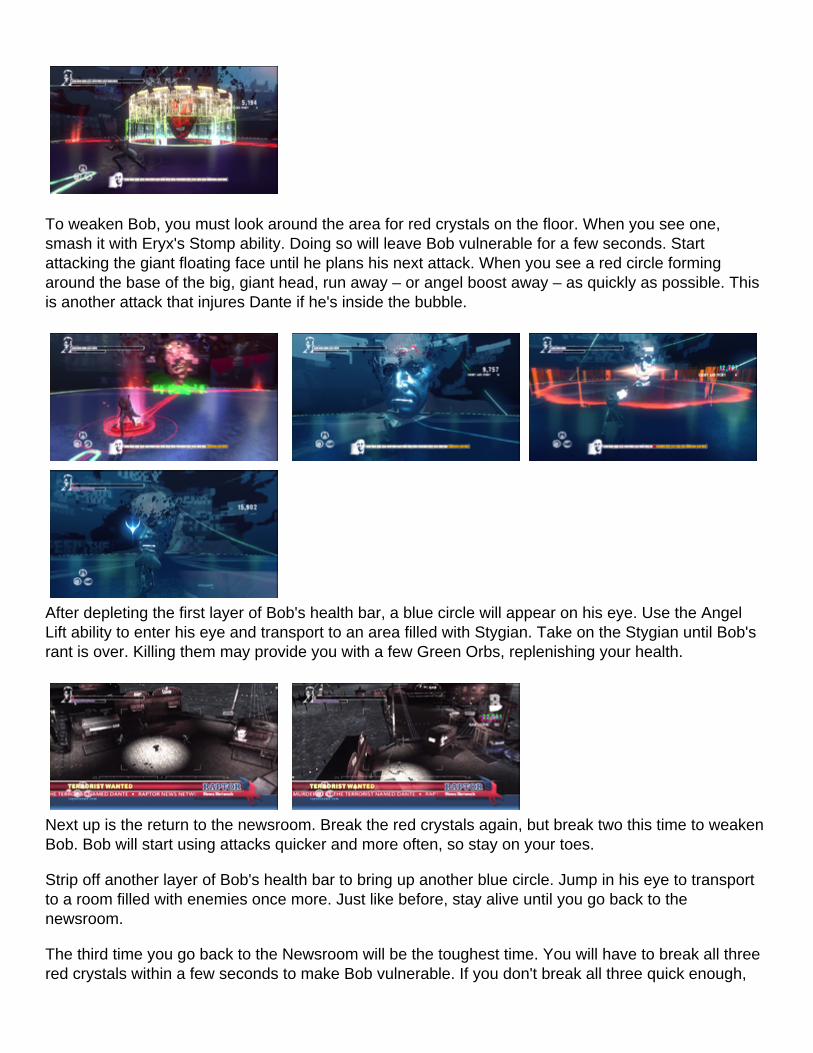
To weaken Bob, you must look around the area for red crystals on the floor. When you see one, smash it with Eryx's Stomp ability. Doing so will leave Bob vulnerable for a few seconds. Start attacking the giant floating face until he plans his next attack. When you see a red circle forming around the base of the big, giant head, run away – or angel boost away – as quickly as possible. This is another attack that injures Dante if he's inside the bubble.
After depleting the first layer of Bob's health bar, a blue circle will appear on his eye. Use the Angel Lift ability to enter his eye and transport to an area filled with Stygian. Take on the Stygian until Bob's rant is over. Killing them may provide you with a few Green Orbs, replenishing your health.
Next up is the return to the newsroom. Break the red crystals again, but break two this time to weaken Bob. Bob will start using attacks quicker and more often, so stay on your toes.
Strip off another layer of Bob's health bar to bring up another blue circle. Jump in his eye to transport to a room filled with enemies once more. Just like before, stay alive until you go back to the newsroom.
The third time you go back to the Newsroom will be the toughest time. You will have to break all three red crystals within a few seconds to make Bob vulnerable. If you don't break all three quick enough,

the others will regenerate. Take off the last layer of health to defeat Bob, and earn the brand new Aquila weapon!
With the Aquila in hand, you can go back and play all the other missions to collect the remaining Collectibles!
Collectibles: None
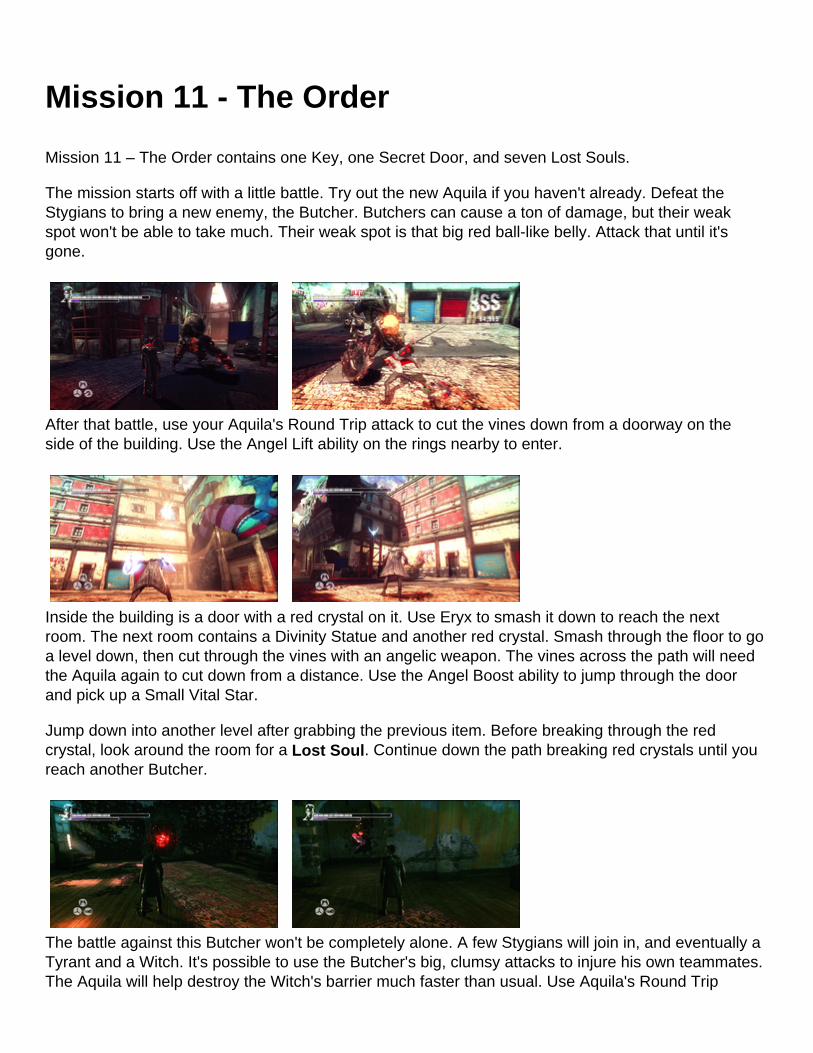
Mission 11 - The Order
Mission 11 – The Order contains one Key, one Secret Door, and seven Lost Souls.
The mission starts off with a little battle. Try out the new Aquila if you haven't already. Defeat the Stygians to bring a new enemy, the Butcher. Butchers can cause a ton of damage, but their weak spot won't be able to take much. Their weak spot is that big red ball-like belly. Attack that until it's gone.
After that battle, use your Aquila's Round Trip attack to cut the vines down from a doorway on the side of the building. Use the Angel Lift ability on the rings nearby to enter.
Inside the building is a door with a red crystal on it. Use Eryx to smash it down to reach the next room. The next room contains a Divinity Statue and another red crystal. Smash through the floor to go a level down, then cut through the vines with an angelic weapon. The vines across the path will need the Aquila again to cut down from a distance. Use the Angel Boost ability to jump through the door and pick up a Small Vital Star.
Jump down into another level after grabbing the previous item. Before breaking through the red crystal, look around the room for a Lost Soul. Continue down the path breaking red crystals until you reach another Butcher.
The battle against this Butcher won't be completely alone. A few Stygians will join in, and eventually a Tyrant and a Witch. It's possible to use the Butcher's big, clumsy attacks to injure his own teammates. The Aquila will help destroy the Witch's barrier much faster than usual. Use Aquila's Round Trip
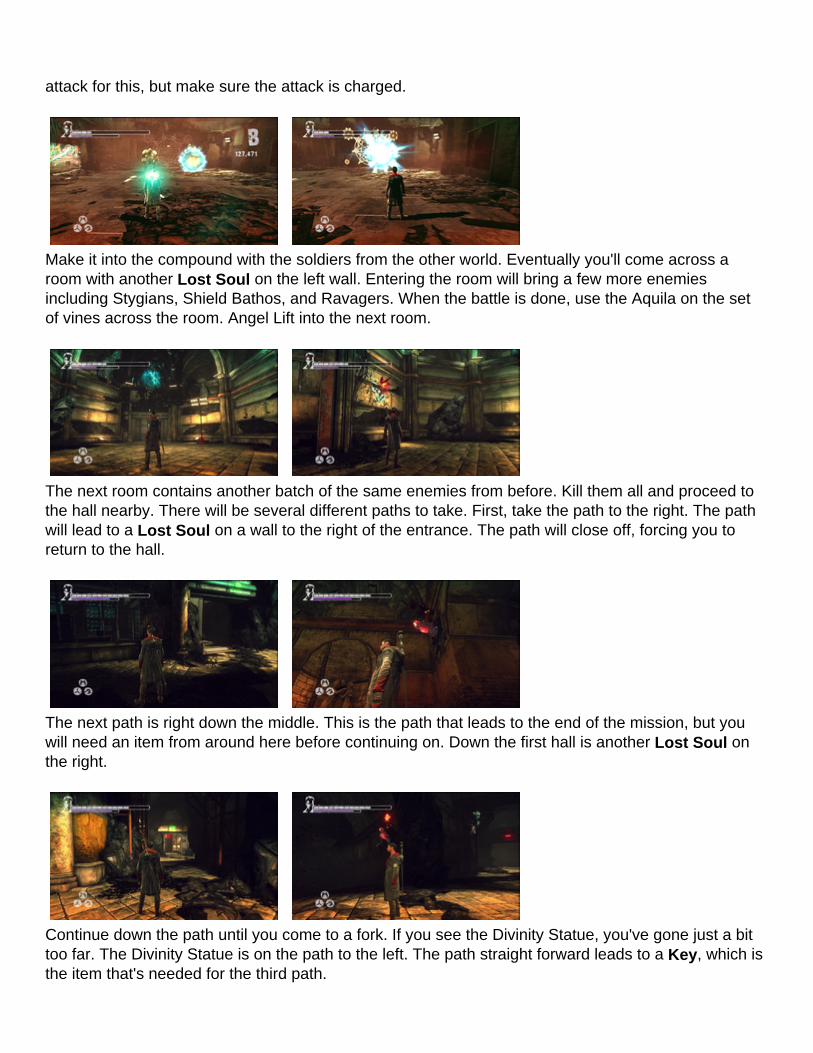
attack for this, but make sure the attack is charged.
Make it into the compound with the soldiers from the other world. Eventually you'll come across a room with another Lost Soul on the left wall. Entering the room will bring a few more enemies including Stygians, Shield Bathos, and Ravagers. When the battle is done, use the Aquila on the set of vines across the room. Angel Lift into the next room.
The next room contains another batch of the same enemies from before. Kill them all and proceed to the hall nearby. There will be several different paths to take. First, take the path to the right. The path will lead to a Lost Soul on a wall to the right of the entrance. The path will close off, forcing you to return to the hall.
The next path is right down the middle. This is the path that leads to the end of the mission, but you will need an item from around here before continuing on. Down the first hall is another Lost Soul on the right.
Continue down the path until you come to a fork. If you see the Divinity Statue, you've gone just a bit too far. The Divinity Statue is on the path to the left. The path straight forward leads to a Key, which is the item that's needed for the third path.
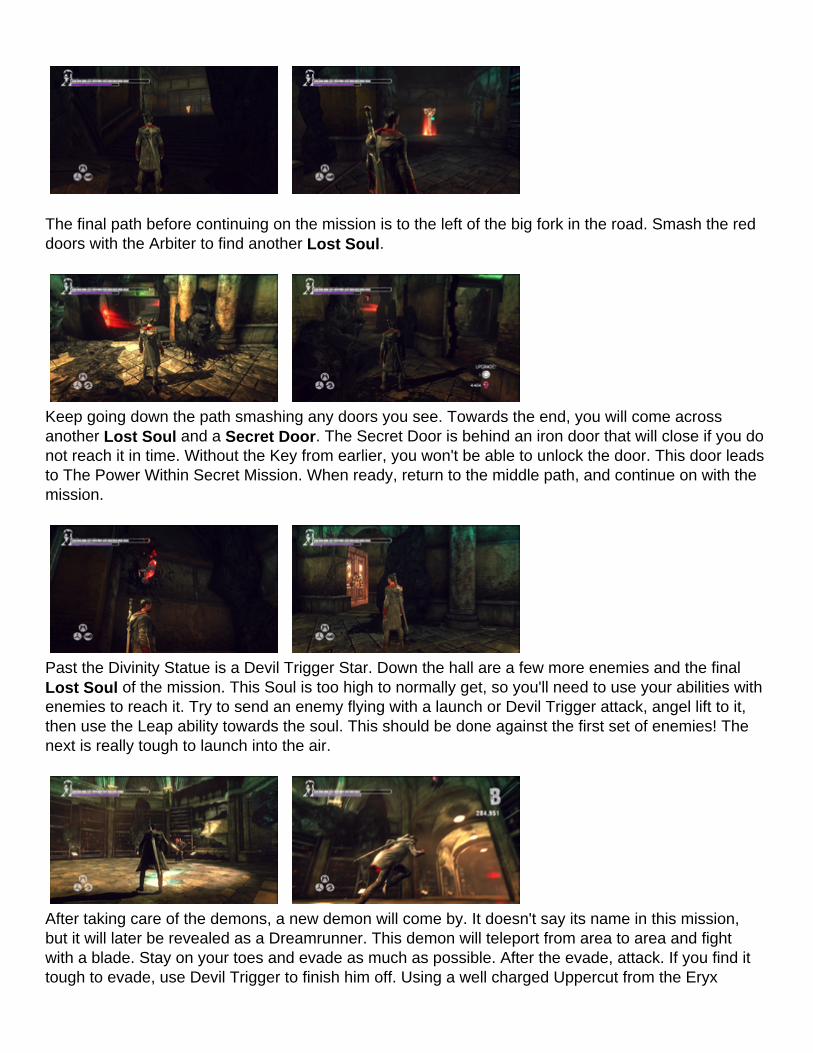
The final path before continuing on the mission is to the left of the big fork in the road. Smash the red doors with the Arbiter to find another Lost Soul.
Keep going down the path smashing any doors you see. Towards the end, you will come across another Lost Soul and a Secret Door. The Secret Door is behind an iron door that will close if you do not reach it in time. Without the Key from earlier, you won't be able to unlock the door. This door leads to The Power Within Secret Mission. When ready, return to the middle path, and continue on with the mission.
Past the Divinity Statue is a Devil Trigger Star. Down the hall are a few more enemies and the final Lost Soul of the mission. This Soul is too high to normally get, so you'll need to use your abilities with enemies to reach it. Try to send an enemy flying with a launch or Devil Trigger attack, angel lift to it, then use the Leap ability towards the soul. This should be done against the first set of enemies! The next is really tough to launch into the air.
After taking care of the demons, a new demon will come by. It doesn't say its name in this mission, but it will later be revealed as a Dreamrunner. This demon will teleport from area to area and fight with a blade. Stay on your toes and evade as much as possible. After the evade, attack. If you find it tough to evade, use Devil Trigger to finish him off. Using a well charged Uppercut from the Eryx
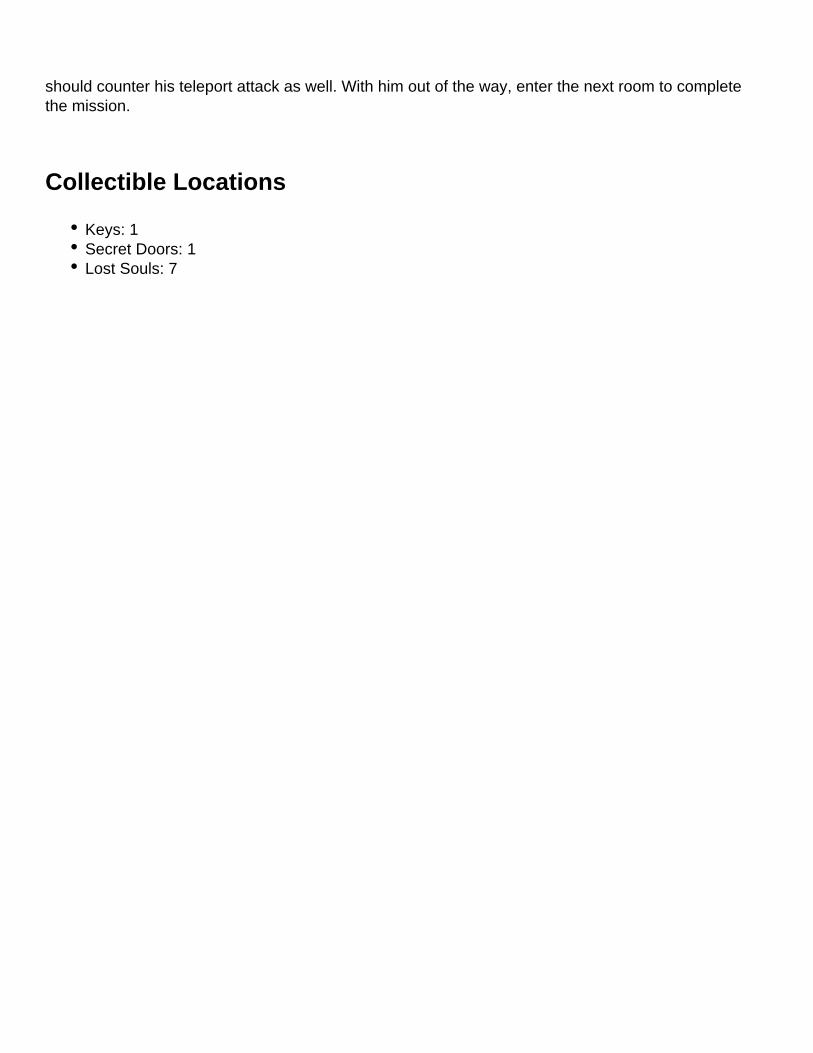
should counter his teleport attack as well. With him out of the way, enter the next room to complete the mission.
Collectible Locations
Keys: 1Secret Doors: 1Lost Souls: 7
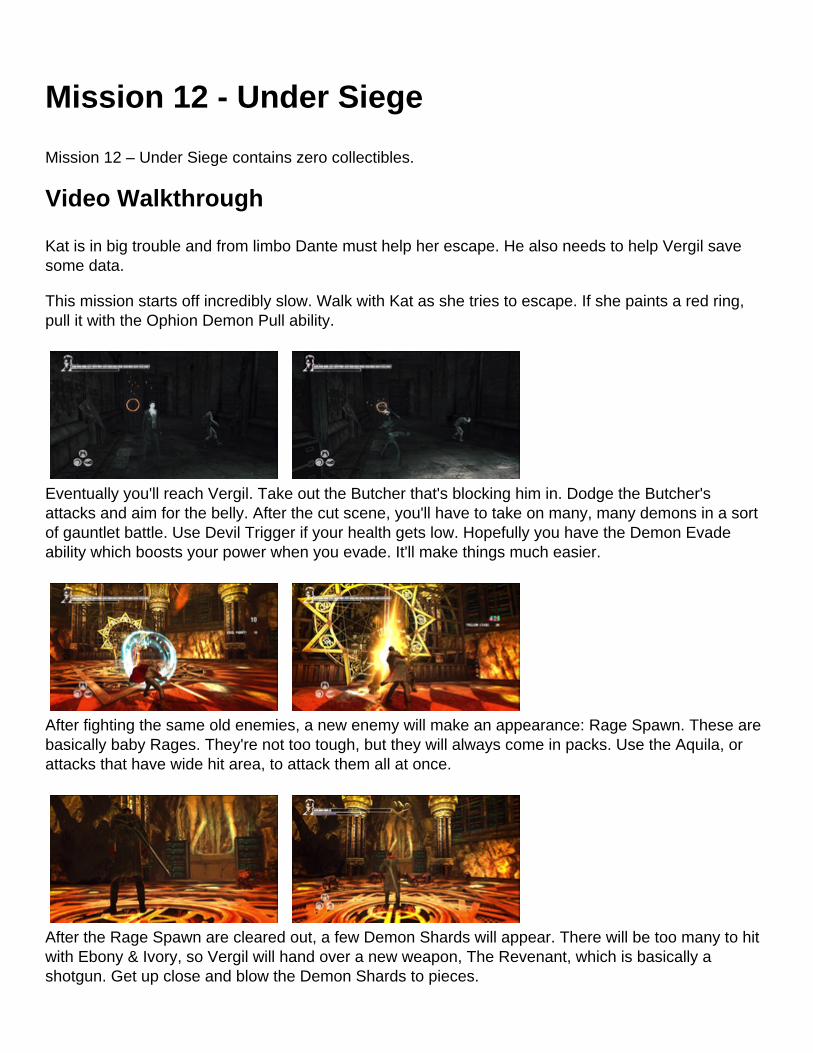
Mission 12 - Under Siege
Mission 12 – Under Siege contains zero collectibles.
Video Walkthrough
Kat is in big trouble and from limbo Dante must help her escape. He also needs to help Vergil save some data.
This mission starts off incredibly slow. Walk with Kat as she tries to escape. If she paints a red ring, pull it with the Ophion Demon Pull ability.
Eventually you'll reach Vergil. Take out the Butcher that's blocking him in. Dodge the Butcher's attacks and aim for the belly. After the cut scene, you'll have to take on many, many demons in a sort of gauntlet battle. Use Devil Trigger if your health gets low. Hopefully you have the Demon Evade ability which boosts your power when you evade. It'll make things much easier.
After fighting the same old enemies, a new enemy will make an appearance: Rage Spawn. These are basically baby Rages. They're not too tough, but they will always come in packs. Use the Aquila, or attacks that have wide hit area, to attack them all at once.
After the Rage Spawn are cleared out, a few Demon Shards will appear. There will be too many to hit with Ebony & Ivory, so Vergil will hand over a new weapon, The Revenant, which is basically a shotgun. Get up close and blow the Demon Shards to pieces.
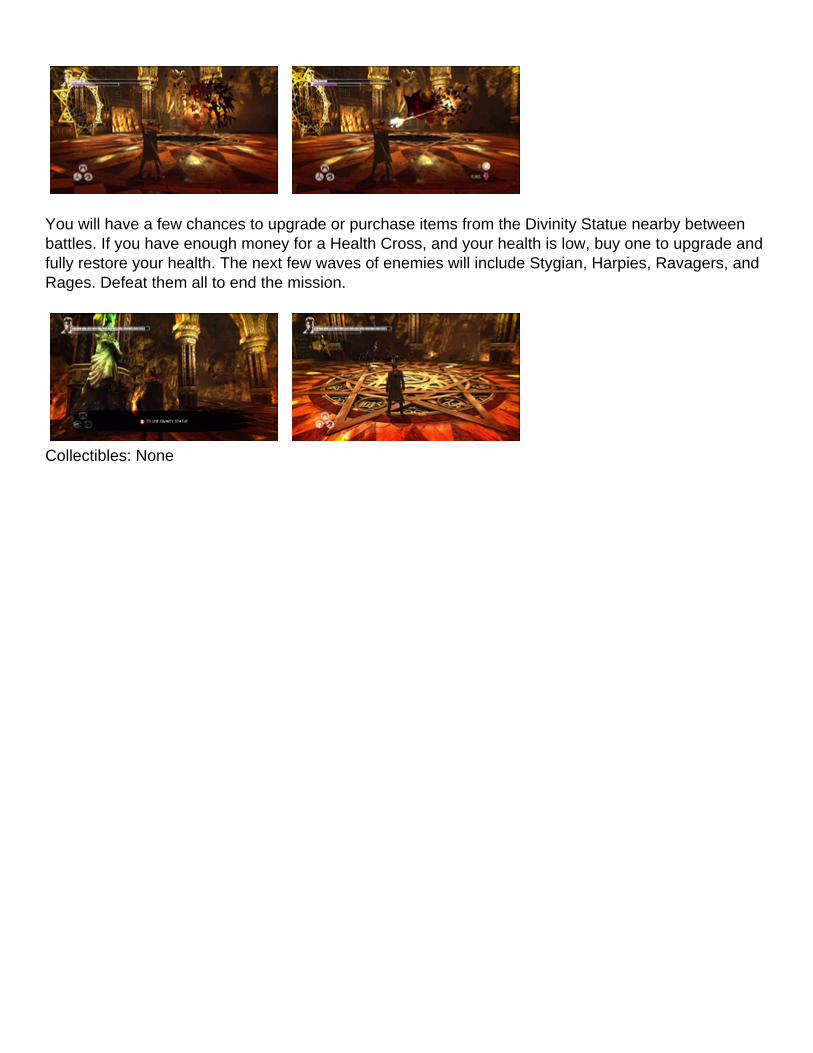
You will have a few chances to upgrade or purchase items from the Divinity Statue nearby between battles. If you have enough money for a Health Cross, and your health is low, buy one to upgrade and fully restore your health. The next few waves of enemies will include Stygian, Harpies, Ravagers, and Rages. Defeat them all to end the mission.
Collectibles: None
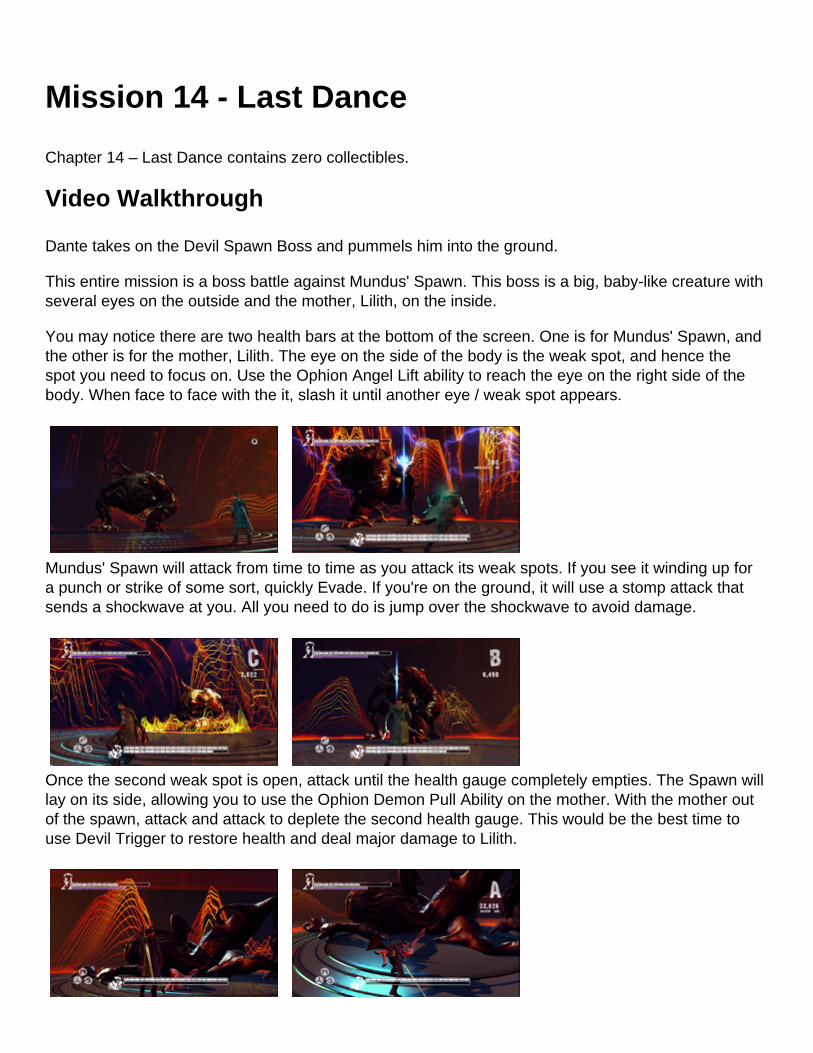
Mission 14 - Last Dance
Chapter 14 – Last Dance contains zero collectibles.
Video Walkthrough
Dante takes on the Devil Spawn Boss and pummels him into the ground.
This entire mission is a boss battle against Mundus' Spawn. This boss is a big, baby-like creature with several eyes on the outside and the mother, Lilith, on the inside.
You may notice there are two health bars at the bottom of the screen. One is for Mundus' Spawn, and the other is for the mother, Lilith. The eye on the side of the body is the weak spot, and hence the spot you need to focus on. Use the Ophion Angel Lift ability to reach the eye on the right side of the body. When face to face with the it, slash it until another eye / weak spot appears.
Mundus' Spawn will attack from time to time as you attack its weak spots. If you see it winding up for a punch or strike of some sort, quickly Evade. If you're on the ground, it will use a stomp attack that sends a shockwave at you. All you need to do is jump over the shockwave to avoid damage.
Once the second weak spot is open, attack until the health gauge completely empties. The Spawn will lay on its side, allowing you to use the Ophion Demon Pull Ability on the mother. With the mother out of the spawn, attack and attack to deplete the second health gauge. This would be the best time to use Devil Trigger to restore health and deal major damage to Lilith.
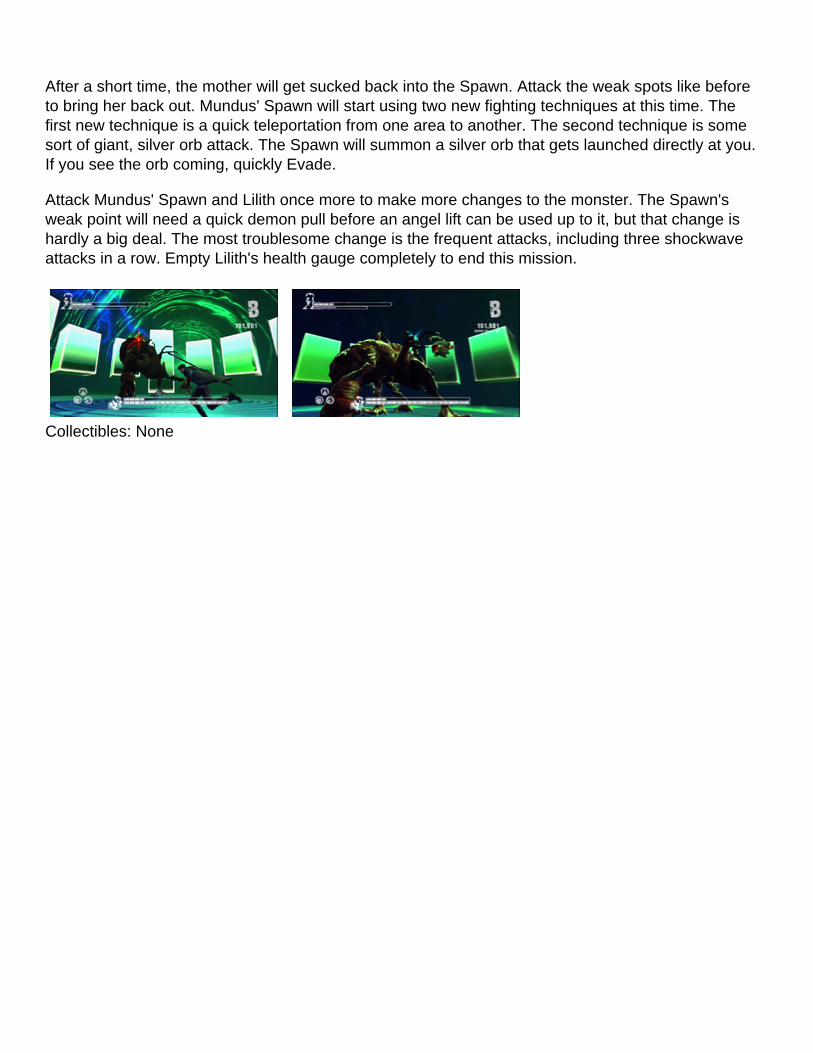
After a short time, the mother will get sucked back into the Spawn. Attack the weak spots like before to bring her back out. Mundus' Spawn will start using two new fighting techniques at this time. The first new technique is a quick teleportation from one area to another. The second technique is some sort of giant, silver orb attack. The Spawn will summon a silver orb that gets launched directly at you. If you see the orb coming, quickly Evade.
Attack Mundus' Spawn and Lilith once more to make more changes to the monster. The Spawn's weak point will need a quick demon pull before an angel lift can be used up to it, but that change is hardly a big deal. The most troublesome change is the frequent attacks, including three shockwave attacks in a row. Empty Lilith's health gauge completely to end this mission.
Collectibles: None
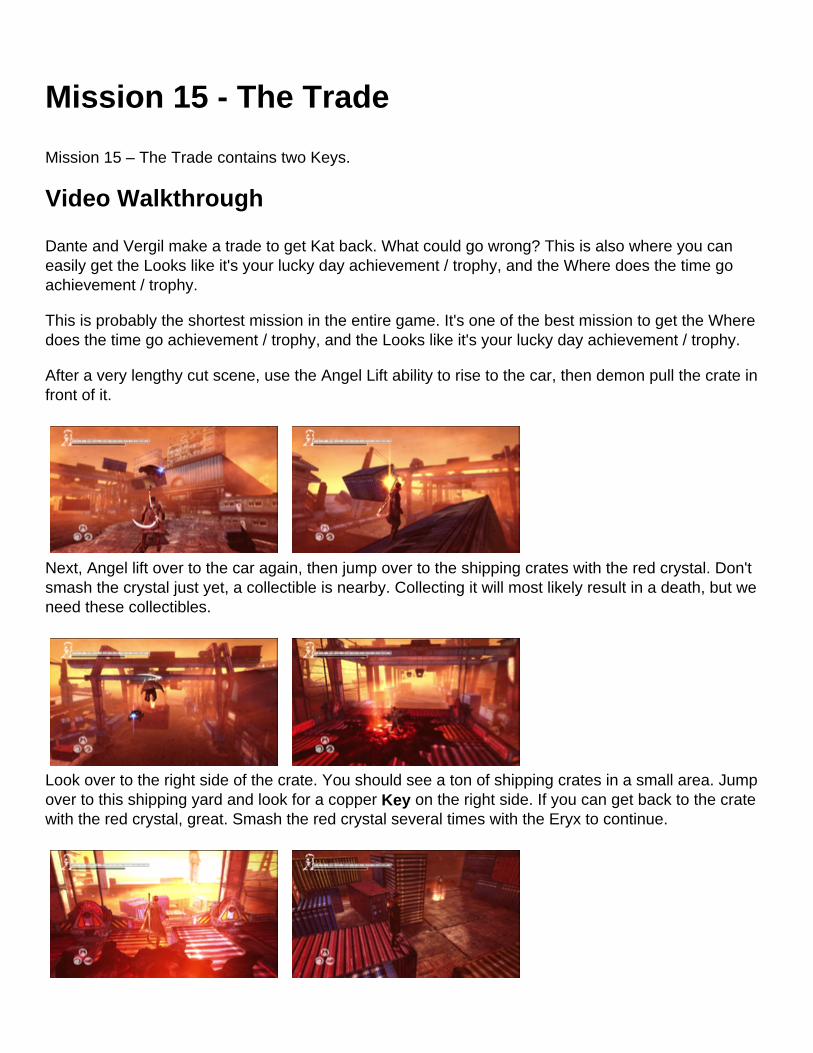
Mission 15 - The Trade
Mission 15 – The Trade contains two Keys.
Video Walkthrough
Dante and Vergil make a trade to get Kat back. What could go wrong? This is also where you can easily get the Looks like it's your lucky day achievement / trophy, and the Where does the time go achievement / trophy.
This is probably the shortest mission in the entire game. It's one of the best mission to get the Where does the time go achievement / trophy, and the Looks like it's your lucky day achievement / trophy.
After a very lengthy cut scene, use the Angel Lift ability to rise to the car, then demon pull the crate in front of it.
Next, Angel lift over to the car again, then jump over to the shipping crates with the red crystal. Don't smash the crystal just yet, a collectible is nearby. Collecting it will most likely result in a death, but we need these collectibles.
Look over to the right side of the crate. You should see a ton of shipping crates in a small area. Jump over to this shipping yard and look for a copper Key on the right side. If you can get back to the crate with the red crystal, great. Smash the red crystal several times with the Eryx to continue.
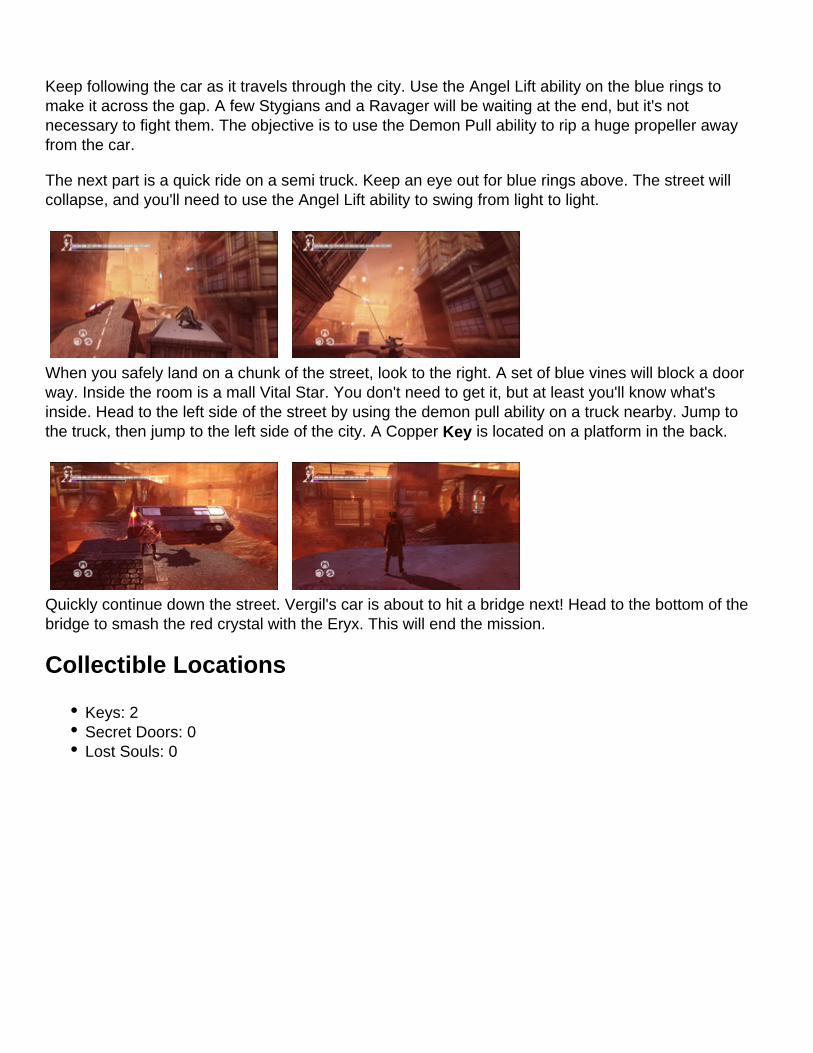
Keep following the car as it travels through the city. Use the Angel Lift ability on the blue rings to make it across the gap. A few Stygians and a Ravager will be waiting at the end, but it's not necessary to fight them. The objective is to use the Demon Pull ability to rip a huge propeller away from the car.
The next part is a quick ride on a semi truck. Keep an eye out for blue rings above. The street will collapse, and you'll need to use the Angel Lift ability to swing from light to light.
When you safely land on a chunk of the street, look to the right. A set of blue vines will block a door way. Inside the room is a mall Vital Star. You don't need to get it, but at least you'll know what's inside. Head to the left side of the street by using the demon pull ability on a truck nearby. Jump to the truck, then jump to the left side of the city. A Copper Key is located on a platform in the back.
Quickly continue down the street. Vergil's car is about to hit a bridge next! Head to the bottom of the bridge to smash the red crystal with the Eryx. This will end the mission.
Collectible Locations
Keys: 2Secret Doors: 0Lost Souls: 0
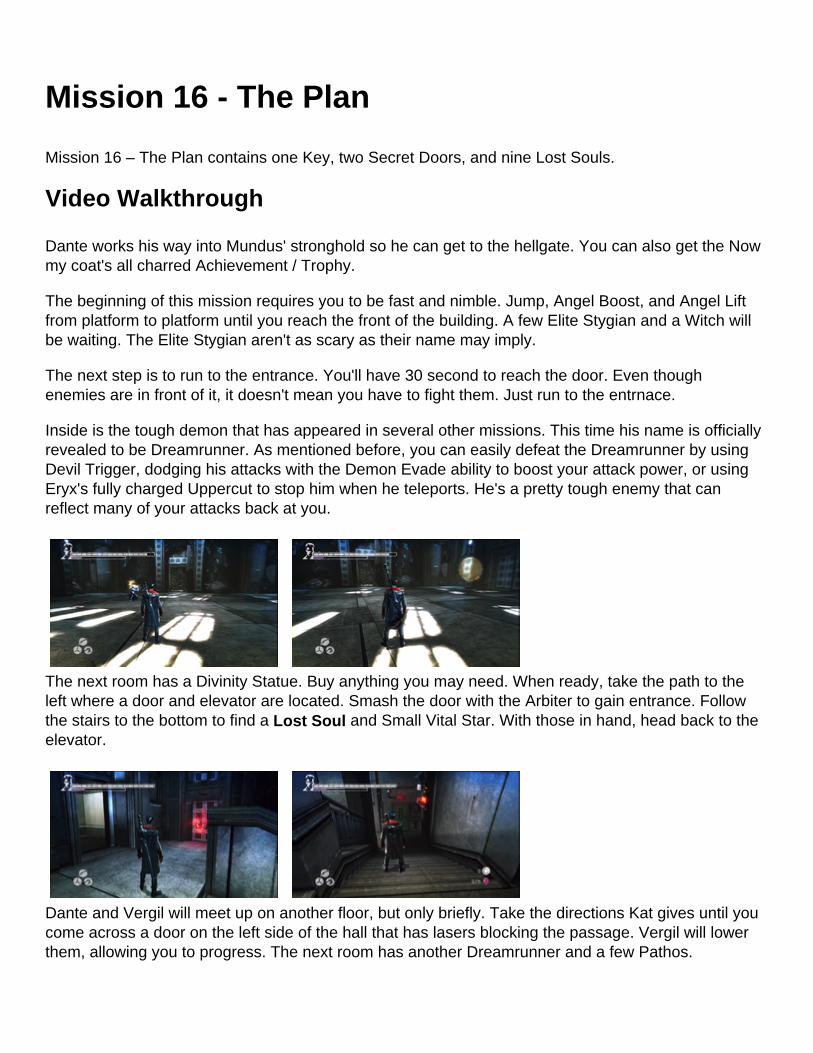
Mission 16 - The Plan
Mission 16 – The Plan contains one Key, two Secret Doors, and nine Lost Souls.
Video Walkthrough
Dante works his way into Mundus' stronghold so he can get to the hellgate. You can also get the Now my coat's all charred Achievement / Trophy.
The beginning of this mission requires you to be fast and nimble. Jump, Angel Boost, and Angel Lift from platform to platform until you reach the front of the building. A few Elite Stygian and a Witch will be waiting. The Elite Stygian aren't as scary as their name may imply.
The next step is to run to the entrance. You'll have 30 second to reach the door. Even though enemies are in front of it, it doesn't mean you have to fight them. Just run to the entrnace.
Inside is the tough demon that has appeared in several other missions. This time his name is officially revealed to be Dreamrunner. As mentioned before, you can easily defeat the Dreamrunner by using Devil Trigger, dodging his attacks with the Demon Evade ability to boost your attack power, or using Eryx's fully charged Uppercut to stop him when he teleports. He's a pretty tough enemy that can reflect many of your attacks back at you.
The next room has a Divinity Statue. Buy anything you may need. When ready, take the path to the left where a door and elevator are located. Smash the door with the Arbiter to gain entrance. Follow the stairs to the bottom to find a Lost Soul and Small Vital Star. With those in hand, head back to the elevator.
Dante and Vergil will meet up on another floor, but only briefly. Take the directions Kat gives until you come across a door on the left side of the hall that has lasers blocking the passage. Vergil will lower them, allowing you to progress. The next room has another Dreamrunner and a few Pathos.
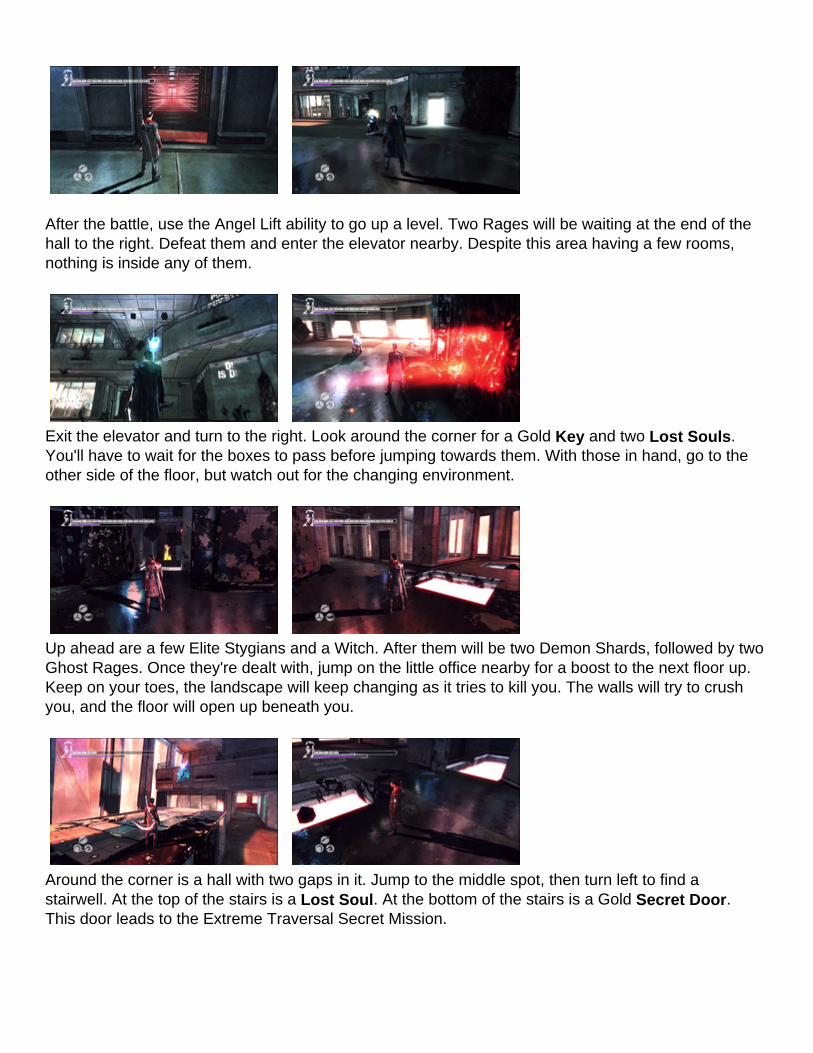
After the battle, use the Angel Lift ability to go up a level. Two Rages will be waiting at the end of the hall to the right. Defeat them and enter the elevator nearby. Despite this area having a few rooms, nothing is inside any of them.
Exit the elevator and turn to the right. Look around the corner for a Gold Key and two Lost Souls. You'll have to wait for the boxes to pass before jumping towards them. With those in hand, go to the other side of the floor, but watch out for the changing environment.
Up ahead are a few Elite Stygians and a Witch. After them will be two Demon Shards, followed by two Ghost Rages. Once they're dealt with, jump on the little office nearby for a boost to the next floor up. Keep on your toes, the landscape will keep changing as it tries to kill you. The walls will try to crush you, and the floor will open up beneath you.
Around the corner is a hall with two gaps in it. Jump to the middle spot, then turn left to find a stairwell. At the top of the stairs is a Lost Soul. At the bottom of the stairs is a Gold Secret Door. This door leads to the Extreme Traversal Secret Mission.
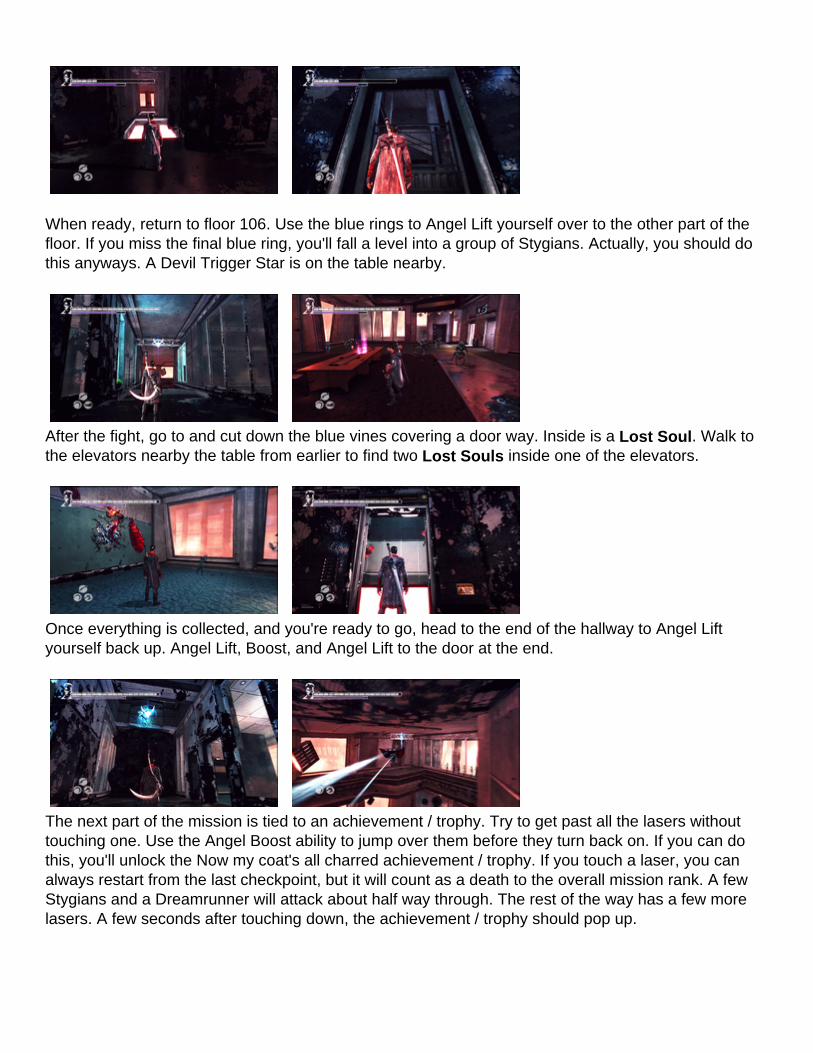
When ready, return to floor 106. Use the blue rings to Angel Lift yourself over to the other part of the floor. If you miss the final blue ring, you'll fall a level into a group of Stygians. Actually, you should do this anyways. A Devil Trigger Star is on the table nearby.
After the fight, go to and cut down the blue vines covering a door way. Inside is a Lost Soul. Walk to the elevators nearby the table from earlier to find two Lost Souls inside one of the elevators.
Once everything is collected, and you're ready to go, head to the end of the hallway to Angel Lift yourself back up. Angel Lift, Boost, and Angel Lift to the door at the end.
The next part of the mission is tied to an achievement / trophy. Try to get past all the lasers without touching one. Use the Angel Boost ability to jump over them before they turn back on. If you can do this, you'll unlock the Now my coat's all charred achievement / trophy. If you touch a laser, you can always restart from the last checkpoint, but it will count as a death to the overall mission rank. A few Stygians and a Dreamrunner will attack about half way through. The rest of the way has a few more lasers. A few seconds after touching down, the achievement / trophy should pop up.
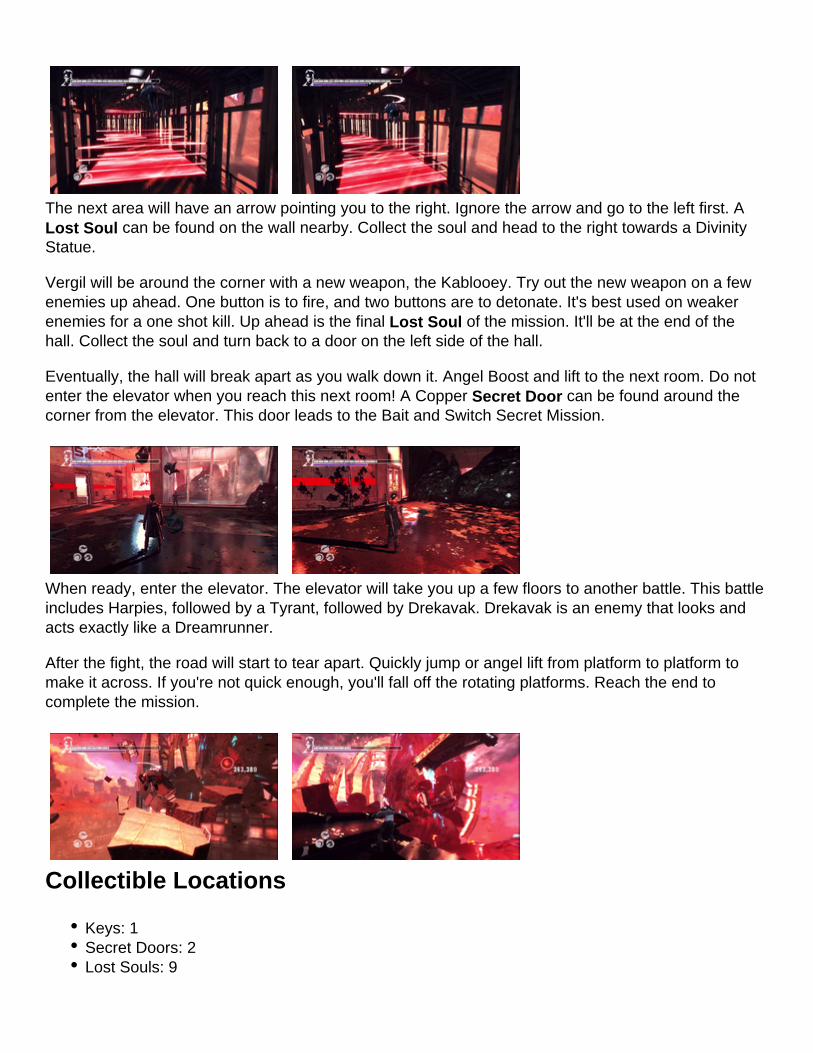
The next area will have an arrow pointing you to the right. Ignore the arrow and go to the left first. A Lost Soul can be found on the wall nearby. Collect the soul and head to the right towards a Divinity Statue.
Vergil will be around the corner with a new weapon, the Kablooey. Try out the new weapon on a few enemies up ahead. One button is to fire, and two buttons are to detonate. It's best used on weaker enemies for a one shot kill. Up ahead is the final Lost Soul of the mission. It'll be at the end of the hall. Collect the soul and turn back to a door on the left side of the hall.
Eventually, the hall will break apart as you walk down it. Angel Boost and lift to the next room. Do not enter the elevator when you reach this next room! A Copper Secret Door can be found around the corner from the elevator. This door leads to the Bait and Switch Secret Mission.
When ready, enter the elevator. The elevator will take you up a few floors to another battle. This battle includes Harpies, followed by a Tyrant, followed by Drekavak. Drekavak is an enemy that looks and acts exactly like a Dreamrunner.
After the fight, the road will start to tear apart. Quickly jump or angel lift from platform to platform to make it across. If you're not quick enough, you'll fall off the rotating platforms. Reach the end to complete the mission.
Collectible Locations
Keys: 1Secret Doors: 2Lost Souls: 9

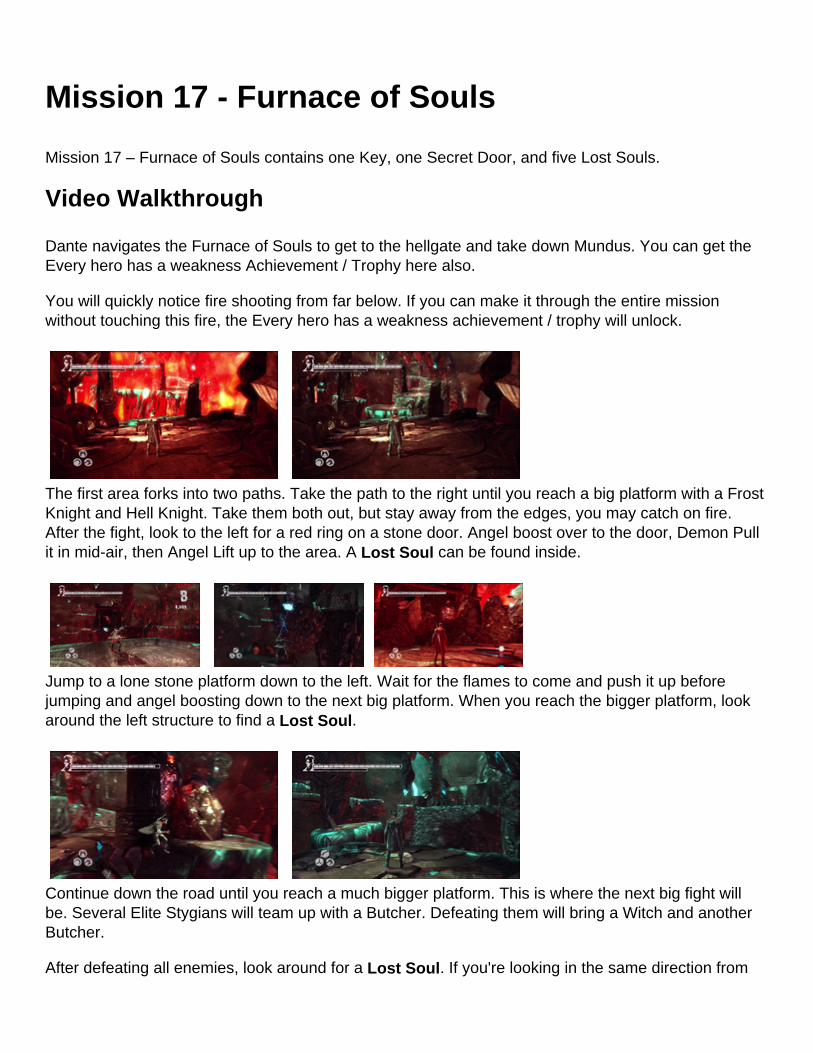
Mission 17 - Furnace of Souls
Mission 17 – Furnace of Souls contains one Key, one Secret Door, and five Lost Souls.
Video Walkthrough
Dante navigates the Furnace of Souls to get to the hellgate and take down Mundus. You can get the Every hero has a weakness Achievement / Trophy here also.
You will quickly notice fire shooting from far below. If you can make it through the entire mission without touching this fire, the Every hero has a weakness achievement / trophy will unlock.
The first area forks into two paths. Take the path to the right until you reach a big platform with a Frost Knight and Hell Knight. Take them both out, but stay away from the edges, you may catch on fire. After the fight, look to the left for a red ring on a stone door. Angel boost over to the door, Demon Pull it in mid-air, then Angel Lift up to the area. A Lost Soul can be found inside.
Jump to a lone stone platform down to the left. Wait for the flames to come and push it up before jumping and angel boosting down to the next big platform. When you reach the bigger platform, look around the left structure to find a Lost Soul.
Continue down the road until you reach a much bigger platform. This is where the next big fight will be. Several Elite Stygians will team up with a Butcher. Defeating them will bring a Witch and another Butcher.
After defeating all enemies, look around for a Lost Soul. If you're looking in the same direction from
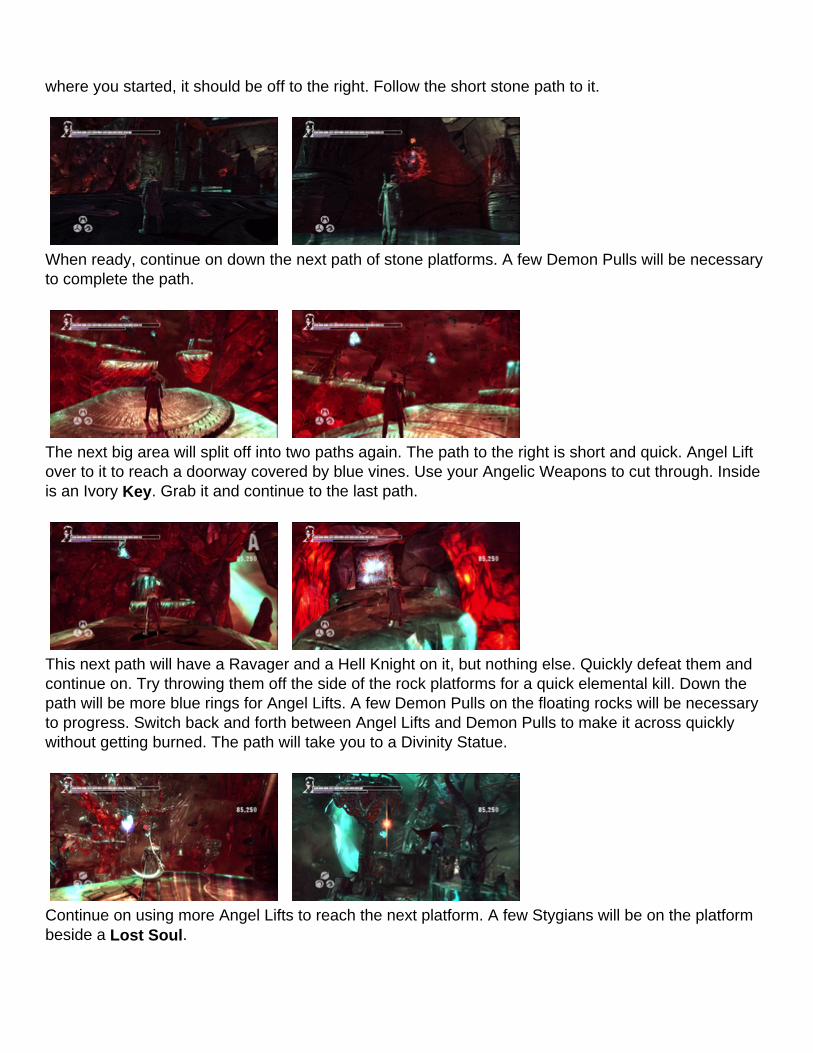
where you started, it should be off to the right. Follow the short stone path to it.
When ready, continue on down the next path of stone platforms. A few Demon Pulls will be necessary to complete the path.
The next big area will split off into two paths again. The path to the right is short and quick. Angel Lift over to it to reach a doorway covered by blue vines. Use your Angelic Weapons to cut through. Inside is an Ivory Key. Grab it and continue to the last path.
This next path will have a Ravager and a Hell Knight on it, but nothing else. Quickly defeat them and continue on. Try throwing them off the side of the rock platforms for a quick elemental kill. Down the path will be more blue rings for Angel Lifts. A few Demon Pulls on the floating rocks will be necessary to progress. Switch back and forth between Angel Lifts and Demon Pulls to make it across quickly without getting burned. The path will take you to a Divinity Statue.
Continue on using more Angel Lifts to reach the next platform. A few Stygians will be on the platform beside a Lost Soul.
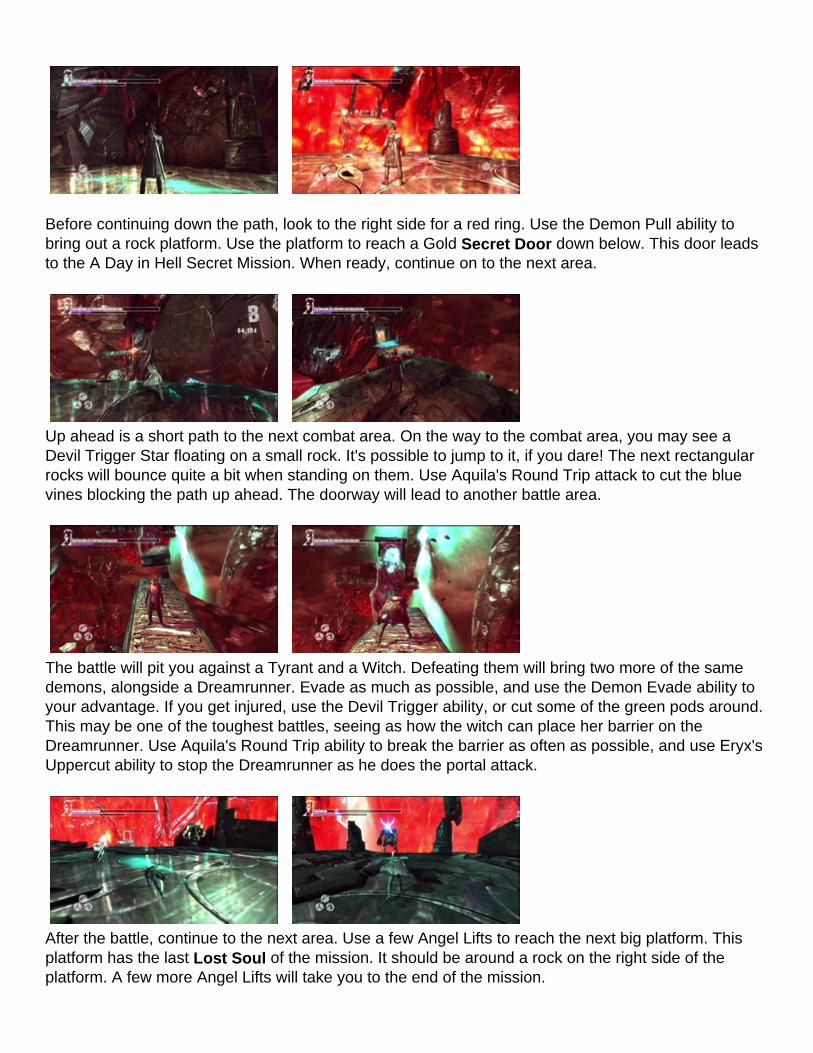
Before continuing down the path, look to the right side for a red ring. Use the Demon Pull ability to bring out a rock platform. Use the platform to reach a Gold Secret Door down below. This door leads to the A Day in Hell Secret Mission. When ready, continue on to the next area.
Up ahead is a short path to the next combat area. On the way to the combat area, you may see a Devil Trigger Star floating on a small rock. It's possible to jump to it, if you dare! The next rectangular rocks will bounce quite a bit when standing on them. Use Aquila's Round Trip attack to cut the blue vines blocking the path up ahead. The doorway will lead to another battle area.
The battle will pit you against a Tyrant and a Witch. Defeating them will bring two more of the same demons, alongside a Dreamrunner. Evade as much as possible, and use the Demon Evade ability to your advantage. If you get injured, use the Devil Trigger ability, or cut some of the green pods around. This may be one of the toughest battles, seeing as how the witch can place her barrier on the Dreamrunner. Use Aquila's Round Trip ability to break the barrier as often as possible, and use Eryx's Uppercut ability to stop the Dreamrunner as he does the portal attack.
After the battle, continue to the next area. Use a few Angel Lifts to reach the next big platform. This platform has the last Lost Soul of the mission. It should be around a rock on the right side of the platform. A few more Angel Lifts will take you to the end of the mission.

Collectible Locations
Keys: 1Secret Doors: 1Lost Souls: 5
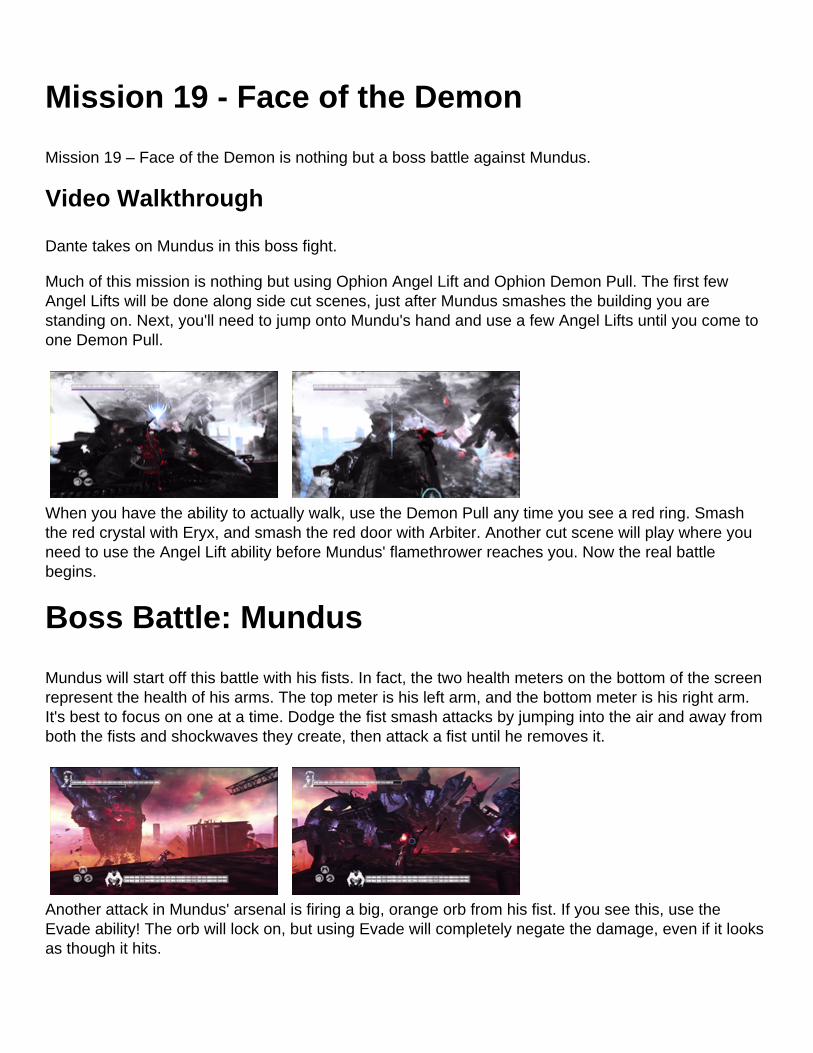
Mission 19 - Face of the Demon
Mission 19 – Face of the Demon is nothing but a boss battle against Mundus.
Video Walkthrough
Dante takes on Mundus in this boss fight.
Much of this mission is nothing but using Ophion Angel Lift and Ophion Demon Pull. The first few Angel Lifts will be done along side cut scenes, just after Mundus smashes the building you are standing on. Next, you'll need to jump onto Mundu's hand and use a few Angel Lifts until you come to one Demon Pull.
When you have the ability to actually walk, use the Demon Pull any time you see a red ring. Smash the red crystal with Eryx, and smash the red door with Arbiter. Another cut scene will play where you need to use the Angel Lift ability before Mundus' flamethrower reaches you. Now the real battle begins.
Boss Battle: Mundus
Mundus will start off this battle with his fists. In fact, the two health meters on the bottom of the screen represent the health of his arms. The top meter is his left arm, and the bottom meter is his right arm. It's best to focus on one at a time. Dodge the fist smash attacks by jumping into the air and away from both the fists and shockwaves they create, then attack a fist until he removes it.
Another attack in Mundus' arsenal is firing a big, orange orb from his fist. If you see this, use the Evade ability! The orb will lock on, but using Evade will completely negate the damage, even if it looks as though it hits.
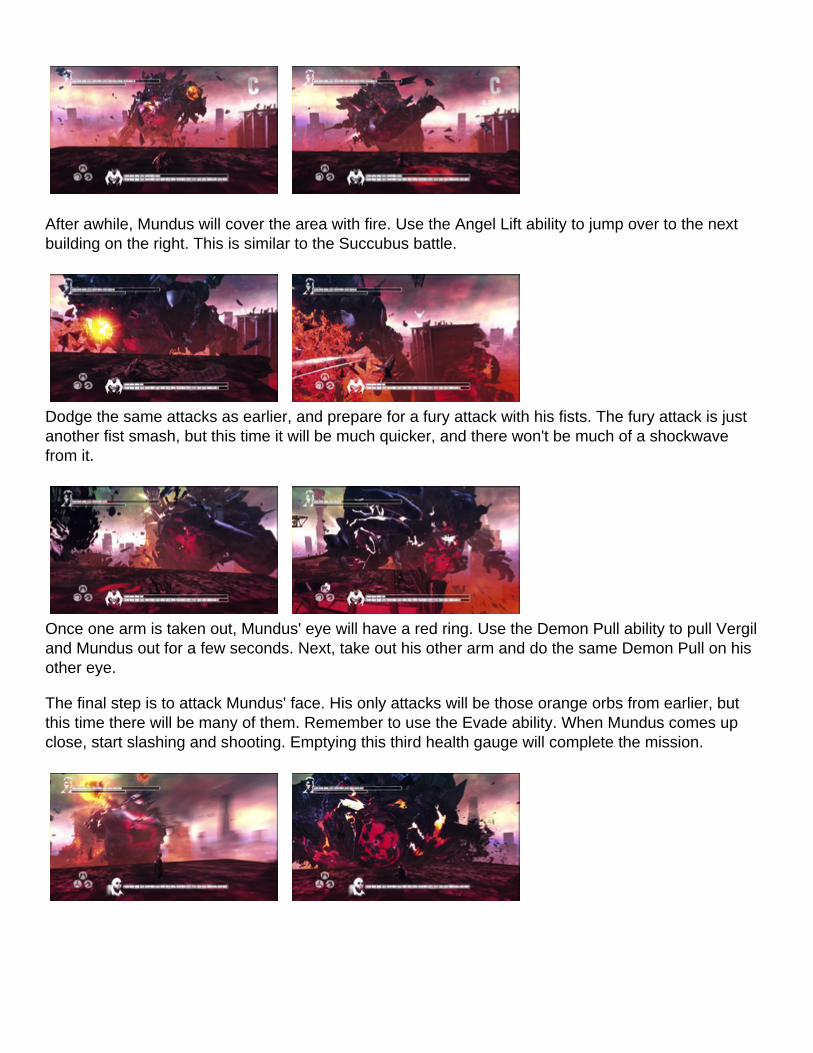
After awhile, Mundus will cover the area with fire. Use the Angel Lift ability to jump over to the next building on the right. This is similar to the Succubus battle.
Dodge the same attacks as earlier, and prepare for a fury attack with his fists. The fury attack is just another fist smash, but this time it will be much quicker, and there won't be much of a shockwave from it.
Once one arm is taken out, Mundus' eye will have a red ring. Use the Demon Pull ability to pull Vergil and Mundus out for a few seconds. Next, take out his other arm and do the same Demon Pull on his other eye.
The final step is to attack Mundus' face. His only attacks will be those orange orbs from earlier, but this time there will be many of them. Remember to use the Evade ability. When Mundus comes up close, start slashing and shooting. Emptying this third health gauge will complete the mission.
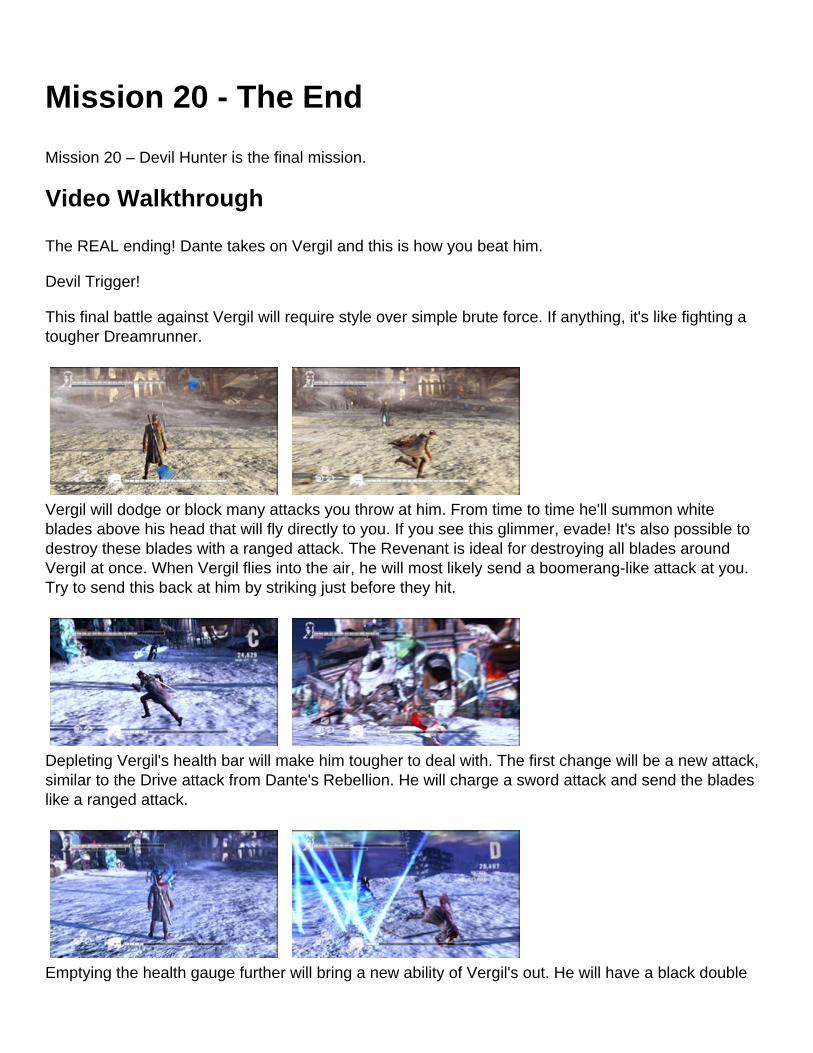
Mission 20 - The End
Mission 20 – Devil Hunter is the final mission.
Video Walkthrough
The REAL ending! Dante takes on Vergil and this is how you beat him.
Devil Trigger!
This final battle against Vergil will require style over simple brute force. If anything, it's like fighting a tougher Dreamrunner.
Vergil will dodge or block many attacks you throw at him. From time to time he'll summon white blades above his head that will fly directly to you. If you see this glimmer, evade! It's also possible to destroy these blades with a ranged attack. The Revenant is ideal for destroying all blades around Vergil at once. When Vergil flies into the air, he will most likely send a boomerang-like attack at you. Try to send this back at him by striking just before they hit.
Depleting Vergil's health bar will make him tougher to deal with. The first change will be a new attack, similar to the Drive attack from Dante's Rebellion. He will charge a sword attack and send the blades like a ranged attack.
Emptying the health gauge further will bring a new ability of Vergil's out. He will have a black double

that attacks by his side. Twice the Vergil means twice the attacks. Dodge as much as possible, and keep lowering his health. Try using the Demon Evade to power up an attack.
When Vergil's health gets to the minimum, his double will guard his weakened body. All attacks will be blocked as he slowly regains health. Use the Devil Trigger ability to send the double flying. Attack the true Vergil to end the match, and the game.
Secret Missions
Secret Missions are those found through Secret Doors. These missions are quick, and usually timed challenges. The doors must be located during a mission, along with the corresponding Key to open in. For example, only Copper Keys can open Copper Doors. There are Copper, Gold, Argent, and Ivory. Once a Secret Door is unlocked, the Secret Mission will be available at the Secret Missions menu from the Main Menu. You will not need to go to the Secret Door each time.
Items cannot be used during a Secret Mission. Each time the mission is started, Dante's health will be fully restored, and the Devil Trigger gauge will be completely empty.
Complete all of the missions to earn the Let's welcome chaos! achievement / trophy.
Air BrawlSimple TraversalSimple EradicationDemonic ConflictAngelic WarfareRapid DescentA Taste of HeavenStylish VictoryBait and SwitchThe Power WithinWhat Goes AroundModerate TraversalFlawless ConquestColossal TriumphHasty AcquisitionDisplaced SkirmishDivergent SlaughterExtreme TraversalA Day in HellSubsistenceShenanigans
Air Brawl
Air Brawl is a Secret Mission found in Mission 1 - Found. More specifically, it can be found in the fun house. The objective of Air Brawl is to kill all the enemies within 1:20, but they can only be injured and killed if they are airborne. Simply launch them into the air and perform combos before they hit the floor.
Tips
Upgrade various weapon's moves to use in the air.

Simple Traversal
Simple Traversal is a secret mission located in Mission 4 - Under Watch. The objective is to reach the goal within the time limit, which is 60 seconds.
Simple Eradication
Simple Eradication is a Secret Mission located in Mission 2 - Home Truths. The objective is to kill all six enemies within the 60 second time limit.
Tips
Use powerful moves or combos that hit a wide radius. The Demon Evade ability will increase damage.
Demonic Conflict
Demonic Conflict is a Secret Mission located Mission 11 - The Order. The objective of this mission is to kill all five the enemies within the one minute and twenty second time limit using only Demonic Weapons. Demonic weapons include the Arbiter and Eryx.
Tips
The best thing to do is use the Demon Evade ability to charge up Dante's power, then use the Arbiter to deal massive damage within a small area. The Eryx is not recommended, seeing as how it can only kill one demon at a time.

Angelic Warfare
Angelic Warfare is a Secret Mission located in Mission 7 - Overturn. The objective of this mission is to kill all ten enemies within the one minute and twenty second time limit using only Angelic Weapons. Angelic weapons include the Osiris and Aquila.
Tips

Rapid Descent
Rapid Descent is a Secret Mission located in Mission 6 - Secret Ingredient. The objective of this mission is to hit all twenty black and white checkpoints within the one minute and twenty second time limit.
Tips

A Taste of Heaven
A Taste of Heaven is a Secret Mission located in Mission 8 - Eyeless. The objective of this mission is to kill all 11 enemies within the one minute and twenty second time limit. The catch is both Dante and the Demons will die within one hit.
Tips
Stylish Victory
Stylish Victory is a Secret Mission located in Mission 2 - Home Truths. The objective of this mission is to get an S Battle Rank within the two minute time limit.
Tips
If you've followed our Sensational! tips, this can be done quickly.
Purchase the Demon Evade Ability, the Trinity Smash combo for the Arbiter, and Trinity Smash Level 2. Evade with the Demon Evade Ability just before a demon hits to power up Dante, then use the Trinity Smash combo to instantly get a SSS Rank. It's that simple!
Bait and Switch
Bait and Switch is a Secret Mission located in Mission 16 - The Plan. The objective of this mission is to kill all three enemies within the one minute and thirty second time limit. The catch is demons only die if the Demon Evade ability is active.
Tips
Demon Evade is an upgrade from the regular Evade ability. Evade a split second before an enemy attacks while holding down RT/R2 to get a boost of power, then attack. The boost in power only lasts a few seconds.
The Power Within
The Power Within is a Secret Mission located in Mission 11 - The Order. The objective of this mission is to kill all enemies before the Devil Trigger gauge empties. Killing enemies will restore some of the Devil Trigger.
Tips
Use the Ophion Angel Lift ability to jump from enemy to enemy in the air. Wide range attacks from the Aquila will help kill quickly as well.

What Goes Around
What Goes Around is a Secret Mission located in Mission 3 - Bloodline. The objective of this mission is to kill all enemies within the one minute and ten second time limit. The catch is enemies only take damage from other enemy's attacks!
Tips
This mission is a bit simpler than it sounds. All you need to do is use the Ophion Demon Pull ability to pull a demon into the bombs thrown by Bathos. Make sure the Stygians are killed before the Bathos, or they won't be able to die.
Moderate Traversal
Moderate Traversal is a Secret Mission located in Mission 8 - Eyeless. The objective of this mission is to reach the goal within the one minute and thirty second time limit.
Tips

Flawless Conquest
Flawless Conquest is a Secret Mission located in Mission 4 - Under Watch. The objective of this mission is to kill all five enemies without taking any damage.
Tips
Colossal Triumph
Colossal Triumph is a Secret Mission located in Mission - . The objective of this mission is to kill the Tyrant within the 45 second time limit.
Tips
The Easiest way to accomplish this is to avoid his first attack with a Demon Evade, powering up Dante's attack. Pull the Tyrant down from behind with the Ophion Demon Pull Ability, then use the Trinity Smash attack from the Arbiter to kill it. Demon Evade, Level 2 and Trinity Smash, Level 2 would make killing the tyrant much quicker.
Hasty Acquisition
Hasty Acquisition is a Secret Mission located in Mission 13 - Devil's Dalliance. The objective of this Mission is to collect 90 Red Orbs within the 35 second time limit. Orbs are collected through smashing environmental pieces.
Tips
Using attacks that have long ranges are ideal for this mission. You will not be able to reach the three ends of the street within the time limit.
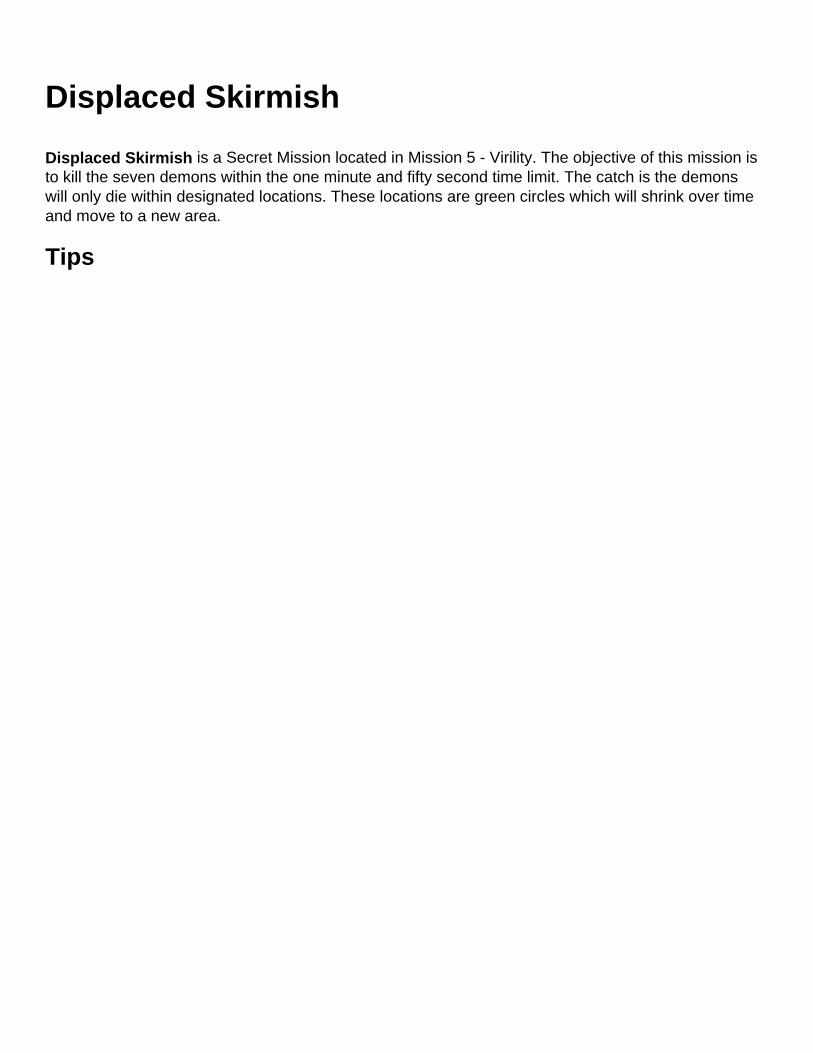
Displaced Skirmish
Displaced Skirmish is a Secret Mission located in Mission 5 - Virility. The objective of this mission is to kill the seven demons within the one minute and fifty second time limit. The catch is the demons will only die within designated locations. These locations are green circles which will shrink over time and move to a new area.
Tips
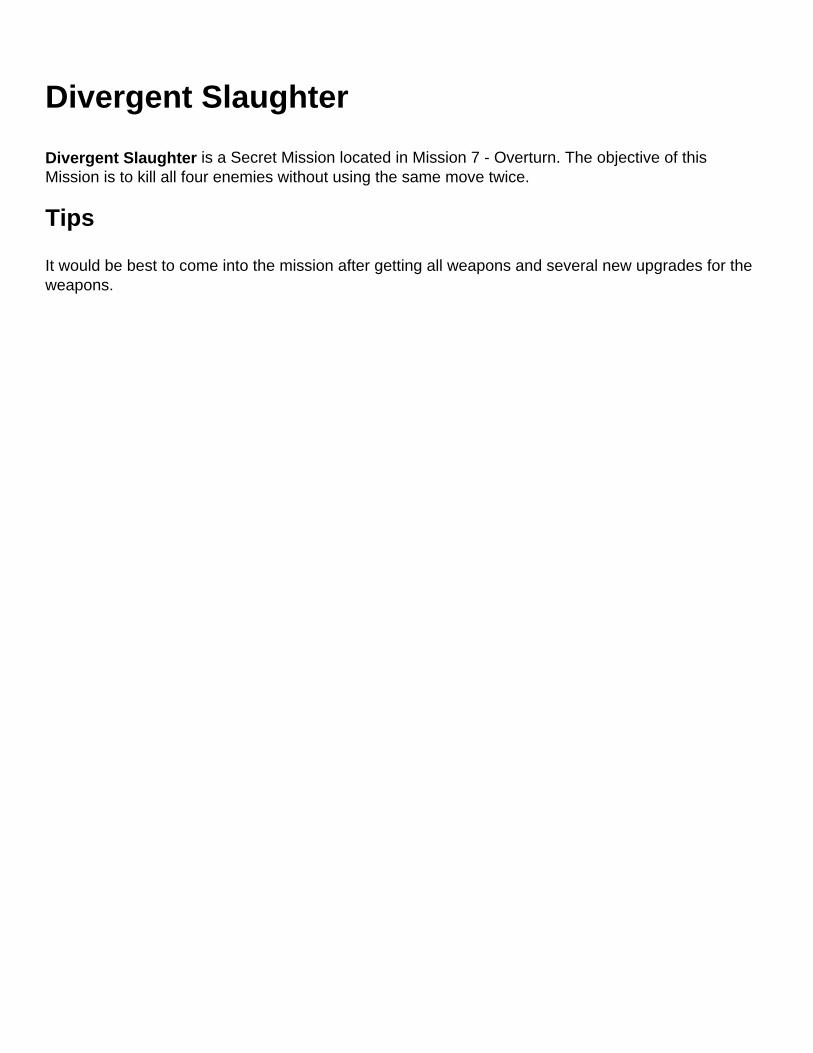
Divergent Slaughter
Divergent Slaughter is a Secret Mission located in Mission 7 - Overturn. The objective of this Mission is to kill all four enemies without using the same move twice.
Tips
It would be best to come into the mission after getting all weapons and several new upgrades for the weapons.

Extreme Traversal
Extreme Traversal is a Secret Mission located in Mission 16 - The Plan. The objective of this Mission is to reach the goal within the one minute and forty second time limit.
Tips

A Day in Hell
A Day in Hell is a Secret Mission located in Mission 17 - Furnace of Souls. The objective of this Mission is to kill all seven enemies. The catch is Dante dies in one hit!
Tips
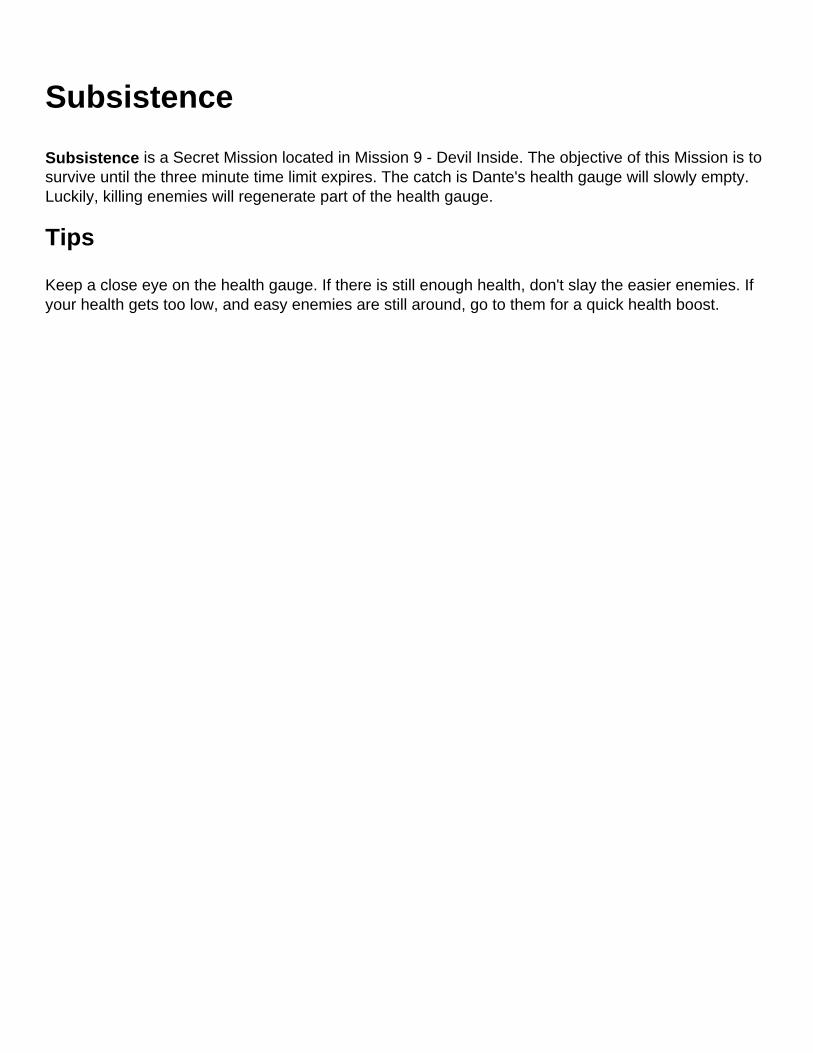
Subsistence
Subsistence is a Secret Mission located in Mission 9 - Devil Inside. The objective of this Mission is to survive until the three minute time limit expires. The catch is Dante's health gauge will slowly empty. Luckily, killing enemies will regenerate part of the health gauge.
Tips
Keep a close eye on the health gauge. If there is still enough health, don't slay the easier enemies. If your health gets too low, and easy enemies are still around, go to them for a quick health boost.
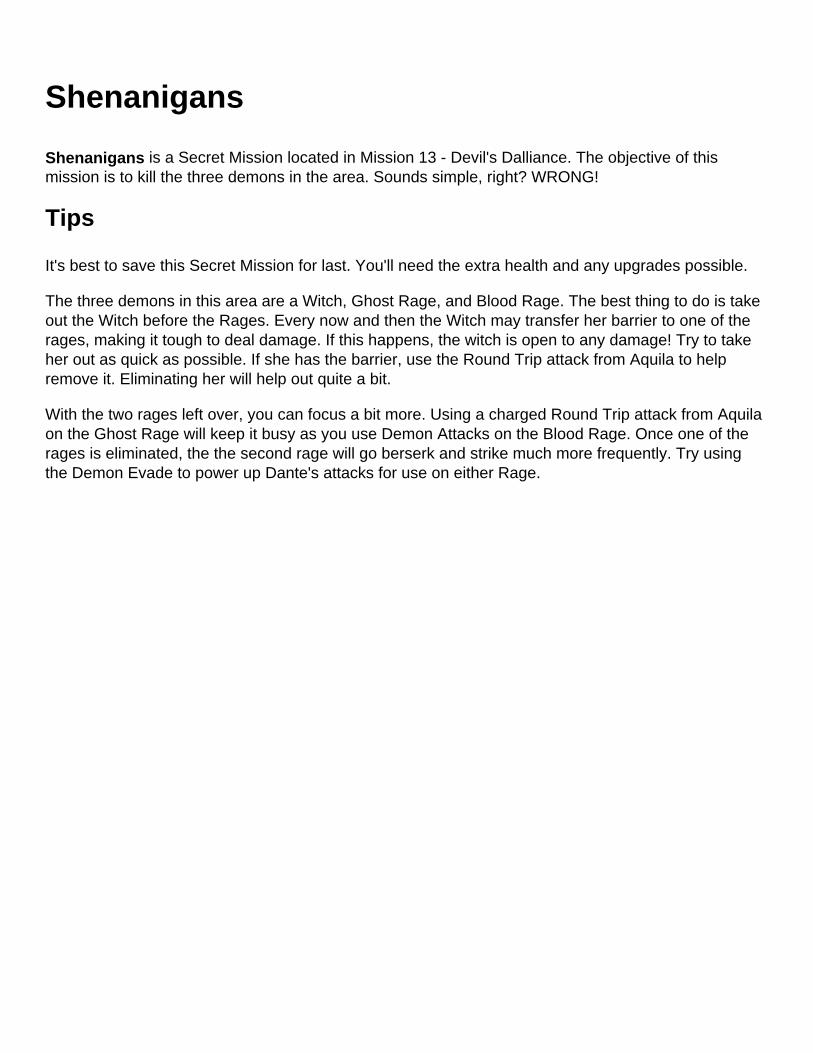
Shenanigans
Shenanigans is a Secret Mission located in Mission 13 - Devil's Dalliance. The objective of this mission is to kill the three demons in the area. Sounds simple, right? WRONG!
Tips
It's best to save this Secret Mission for last. You'll need the extra health and any upgrades possible.
The three demons in this area are a Witch, Ghost Rage, and Blood Rage. The best thing to do is take out the Witch before the Rages. Every now and then the Witch may transfer her barrier to one of the rages, making it tough to deal damage. If this happens, the witch is open to any damage! Try to take her out as quick as possible. If she has the barrier, use the Round Trip attack from Aquila to help remove it. Eliminating her will help out quite a bit.
With the two rages left over, you can focus a bit more. Using a charged Round Trip attack from Aquila on the Ghost Rage will keep it busy as you use Demon Attacks on the Blood Rage. Once one of the rages is eliminated, the the second rage will go berserk and strike much more frequently. Try using the Demon Evade to power up Dante's attacks for use on either Rage.

SSS Ranking Guide
DmC : Devil May Cry : SSS Ranking Guide
Nephilim Walkthrough
Nephilm Mode As Dante :
1. Mission 1 - Found2. Mission 2 - Home Truths3. Mission 3 - Bloodline4. Mission 4 - Underwatch5. Mission 5 - Virility6. Mission 6 - Secret Ingredient7. Mission 7 - Overturned8. Mission 8 - Eyeless9. Mission 9 - Devil Inside
10. Mission 10 - Bad News11. Mission 11 - The Order12. Mission 12 - Undersiege13. Mission 13- Devil's Dalliance14. Mission 14 - Last Dance15. Mission 15 - The Trade16. Mission 16 - The Plan17. Mission 17 - Furnace of Souls18. Mission 18 - Demon's Den
Mission 1 - Nephilm Mode
How to beat Hunter in 5 seconds with SSSAwesome Devil Trigger CombosAll weapons on mission 1check it out and rock the Devil May Cry !
Mission 2 - Nephilm Mode
Arbiter Attacks VS Death Knights Rack up Style points Break shields with Arbiter Judgment followed by Trinity smashDemonic evade and get used to doing itRemember time is of the essence as well.

Mission 3 - Nephilim Mode
Shielded Bathos, and Pathos appear in this level. Pathos fire beams of light with a hard to dodge patternOPHION PULL 2x times Then follow up with HACKER.Forget about style points vs these guys just get them out of the way.
Mission 4 - Nephilim Mode
Difficult Level to triple SSSAt least 320,000 Style PointsUnder 11:00 Time100% CompletionRemember Tyrants can be knocked down with Eryx.Although Rebellion attacks like stinger combined with Kablooey AFTER a demonic evade; can cache up style like crazy !
Mission 5 - Nephilim Mode
Make sure to refer to the collectibles section of this wiki.You will need 100 % completion rates to SSS every mission,take advantage of this easy to use wiki.Be quick in this missionAdvice on frost knights, Is to try and attack them first. Use high powered attacks. Get your OSIRIS feed up if possible then a demonic evade.Follow the above tactic should save you lots of time and get Dante more style points for the SSS.
Mission 6 - Nephilim Mode
Succubus Boss battle # 2 very excellent .Most importantly to know is that you can continue to gain points on the succubus before landing the final blow.You will see how at the end of the video.around 150k style points is needed for SSS rankAim for around 5:00 minutes to net the SSS time rank100 % completion is a must.
Mission 7 - Nephilim Mode
Dealing with Tyrants can be a major problem.My tactic is to Use kablooey which can be seen in video or mission 8 video. It can get up to 40k style points or moreTo use the Kablooey tactic, you must fire off a level 3 kablooey. It should hold 6 darts. Fire these into a TYRANT, while it's back is turned. When it charges at Dante, demonic evade.Devil Trigger, then Quickly Detonate for AWESOME.
Mission 8 - Nephilim Mode
180,000 Estimate on Style points needed for SSS rank. 9:00 or less for SSS in time100% Completion Please see collectibles section of this wiki for in - depth walkthrough on ALL the secret missions, lost souls, keys and doors.Watch the end of the video for the TYRANT Kablooey tactic which can gain HUGE amounts of Style points !
Mission 9 - Nephilim Mode
We are going to meet Witch enemies here.As well as encounter dual Rage enemiesChaining high combinations on witches could be a problem.Although for rages, the TYRANT or KABLOOEY tactic into a devil trigger works excellent ! That alone should rack enough points for SSS rank !
Mission 10 - Nephilim Mode
Boss # 3 Bob Barbas, Newscaster from HELL.Remember to use ERYX on the red floor points .Key to getting a SSS rank, is when your "inside" Barbas.Demonic Evade the Stygians, and Chain your combos.
Bob Barbas moves analysis
Warp - This will bring Dante into battle with other enemies. Defeat all of the enemies to escape. Energy Fields - Bob Barbas shoots a ton of these early on. They are difficult to dodge. To Dodge the fields, make sure to go through the YELLOW box or portal. It is the only safe escape. Light Blast - Blue lines of energy and sound will come from the mouth of Barbas, doing MASSIVE damage to Dante. Avoid them by dodge/ jump at all costs.

Mission 11 - Nephilim Mode
Aim for 340,000 StyleUnder 11:00 Minutes100% Completion
Mission 12 - Nephilim Mode
350,000 Style points11:00 Minutes and under100% completion ( nothing to collect)Pre level area counts to time.

Mission 13 - Nephilim Mode
Mission 14 - Nephilim Mode
1. Your going to want to angel boost to the right quick. Latch onto the angel points and Use HACKER as many times as possbile.
2. Grab the eye and do the same thing. 3. One trick is to hit the hands or body of the Mundus spawn,then come in with attacks on the blue
points and Lilith. This will build your SSS style meter, just don't waste to much time and avoid being hit which would break chains.

Mission 15 - Nephilim Mode

Mission 16 - Nephilim Mode
Hell or Hell Walkthrough
Mission 18
Mission 18 is one of, if not the hardest mission on Hell and Hell difficulty to get a SSS rank. To get a SSS rank you will need around 14,200,000 score which if you have a SSS rank for time and completion means you should be aiming for at least 220,000 style.
First, go into the top right cave from the entrance. While in this cave try and get at least 75,000 and preferably finish of the last enemy with a SSS rank while taking no more than a single hit. Finishing with a SSS rank may allow you to rush to the next room before your style counter completely disappears, allowing you to get more style in the next room. From here, go to any cave except the top left one since it probably won't give you much style. Once the top left cave is the only one remaining you need to have at least 180,000 style. To keep your style up, don't be afraid to use a devil star, it has a minor penalty of 10,000 points which wont affect a score much that is measuring in the millions. It could also allow you to keep your style up especialy when fighting of the samurai's and the witches. If you fail to meet the requirements for any one of these steps your best option would be to restart the level so that you don't waste any more time on a failed run. Once all the caves are cleared head back to the main area and link the system. The symbols are always in the same order to it could help to learn the combination before attempting this.
This difficulty on this mission will be challenging even for the highly skilled DmC players. SSS ranking this mission on Hell and Hell difficulty will make the other missions seem like childs play. This strategy also works on Son of Sparda difficulty, where the SSS requirements are almost as strict.
Collectibles
DmC: Devil May Cry features three different kind of Collectibles. These Collectibles are:
Lost SoulsKeysSecret Doors
The Keys and Secret Doors will have different names from time to time, but they all fall under the same category of Keys and Secret Doors.
Pause the game during a mission to see how many of each collectible can be found in the particular mission. After the collectible is found, they will be removed from any replays of the mission. Many collectibles can only be reached and found after playing through the game and collecting special Abilities.
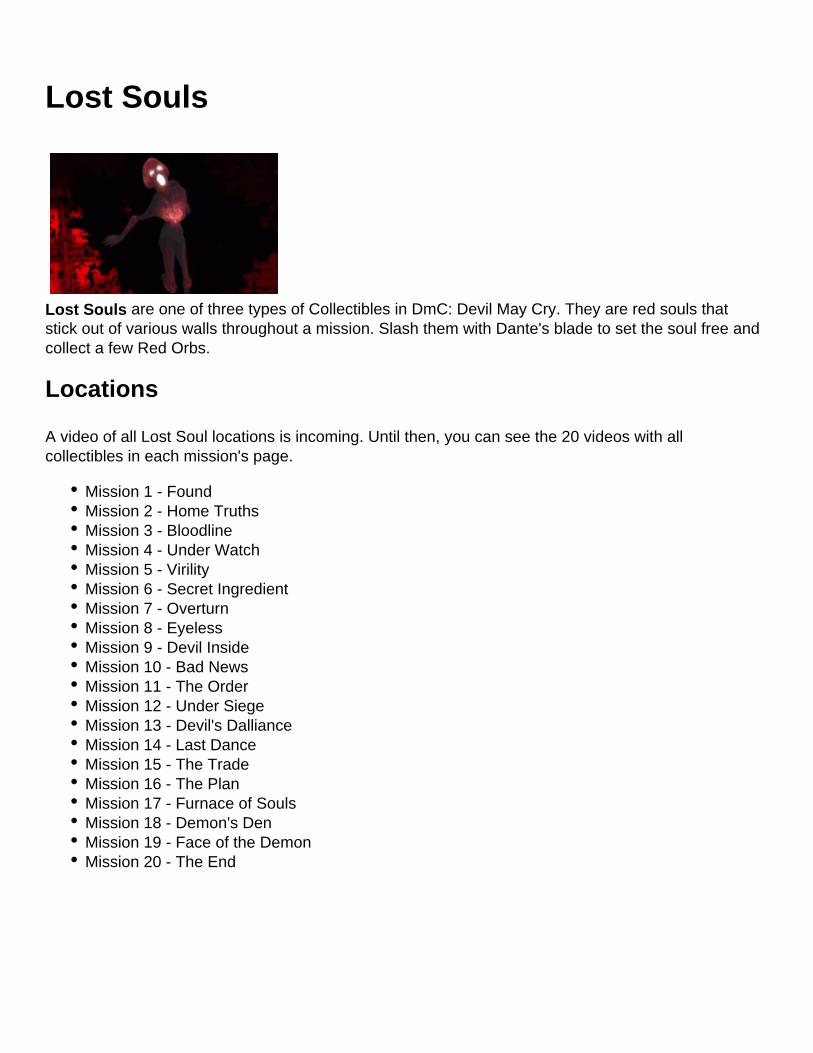
Lost Souls
Lost Souls are one of three types of Collectibles in DmC: Devil May Cry. They are red souls that stick out of various walls throughout a mission. Slash them with Dante's blade to set the soul free and collect a few Red Orbs.
Locations
A video of all Lost Soul locations is incoming. Until then, you can see the 20 videos with all collectibles in each mission's page.
Mission 1 - FoundMission 2 - Home TruthsMission 3 - BloodlineMission 4 - Under WatchMission 5 - VirilityMission 6 - Secret IngredientMission 7 - OverturnMission 8 - EyelessMission 9 - Devil InsideMission 10 - Bad NewsMission 11 - The OrderMission 12 - Under SiegeMission 13 - Devil's DallianceMission 14 - Last DanceMission 15 - The TradeMission 16 - The PlanMission 17 - Furnace of SoulsMission 18 - Demon's DenMission 19 - Face of the DemonMission 20 - The End
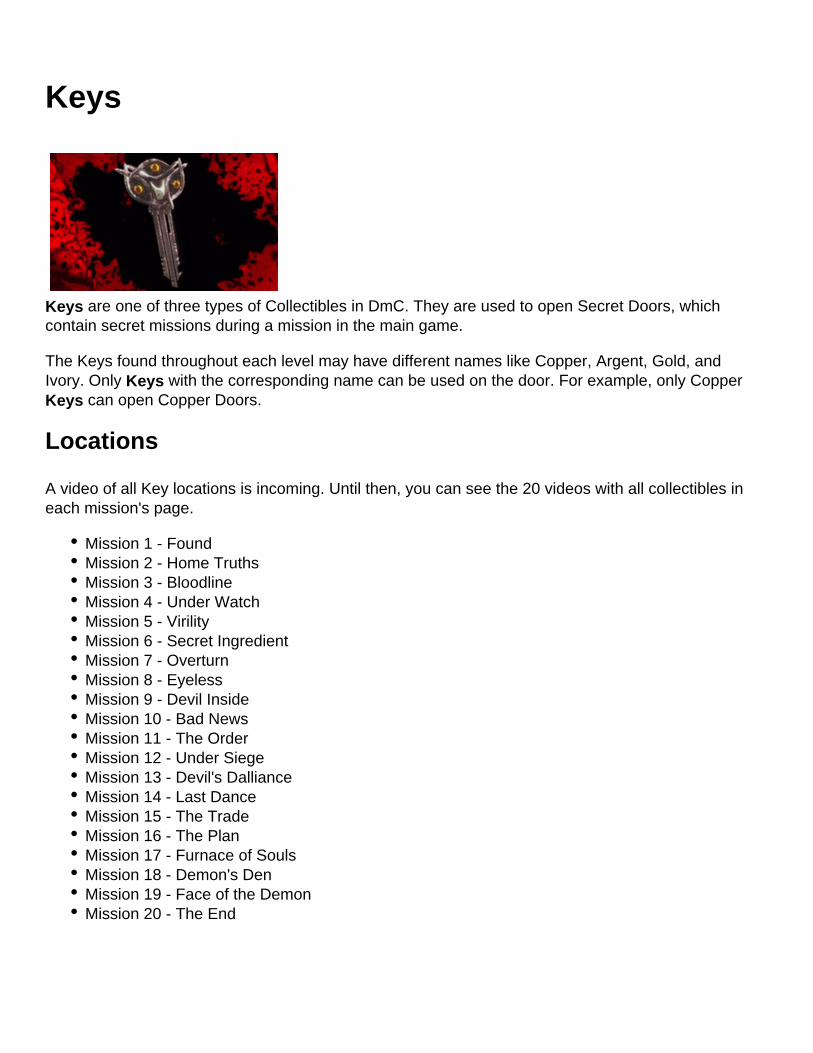
Keys
Keys are one of three types of Collectibles in DmC. They are used to open Secret Doors, which contain secret missions during a mission in the main game.
The Keys found throughout each level may have different names like Copper, Argent, Gold, and Ivory. Only Keys with the corresponding name can be used on the door. For example, only Copper Keys can open Copper Doors.
Locations
A video of all Key locations is incoming. Until then, you can see the 20 videos with all collectibles in each mission's page.
Mission 1 - FoundMission 2 - Home TruthsMission 3 - BloodlineMission 4 - Under WatchMission 5 - VirilityMission 6 - Secret IngredientMission 7 - OverturnMission 8 - EyelessMission 9 - Devil InsideMission 10 - Bad NewsMission 11 - The OrderMission 12 - Under SiegeMission 13 - Devil's DallianceMission 14 - Last DanceMission 15 - The TradeMission 16 - The PlanMission 17 - Furnace of SoulsMission 18 - Demon's DenMission 19 - Face of the DemonMission 20 - The End
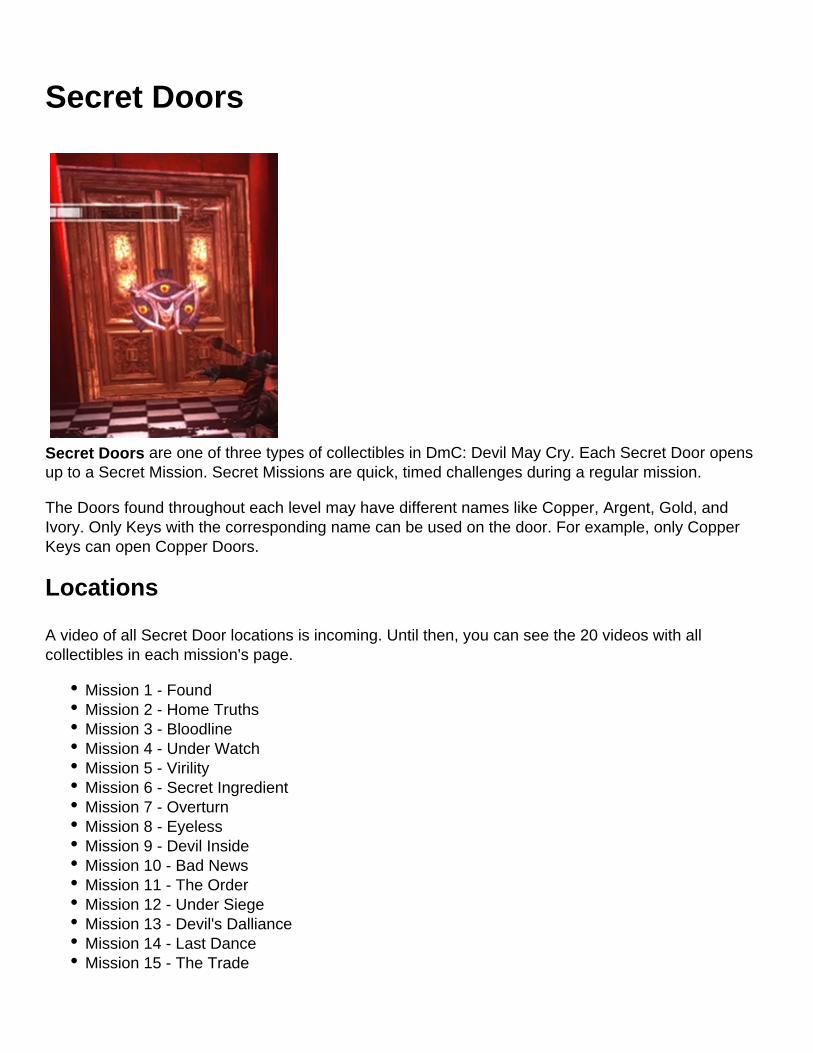
Secret Doors
Secret Doors are one of three types of collectibles in DmC: Devil May Cry. Each Secret Door opens up to a Secret Mission. Secret Missions are quick, timed challenges during a regular mission.
The Doors found throughout each level may have different names like Copper, Argent, Gold, and Ivory. Only Keys with the corresponding name can be used on the door. For example, only Copper Keys can open Copper Doors.
Locations
A video of all Secret Door locations is incoming. Until then, you can see the 20 videos with all collectibles in each mission's page.
Mission 1 - FoundMission 2 - Home TruthsMission 3 - BloodlineMission 4 - Under WatchMission 5 - VirilityMission 6 - Secret IngredientMission 7 - OverturnMission 8 - EyelessMission 9 - Devil InsideMission 10 - Bad NewsMission 11 - The OrderMission 12 - Under SiegeMission 13 - Devil's DallianceMission 14 - Last DanceMission 15 - The Trade

Mission 16 - The PlanMission 17 - Furnace of SoulsMission 18 - Demon's DenMission 19 - Face of the DemonMission 20 - The End
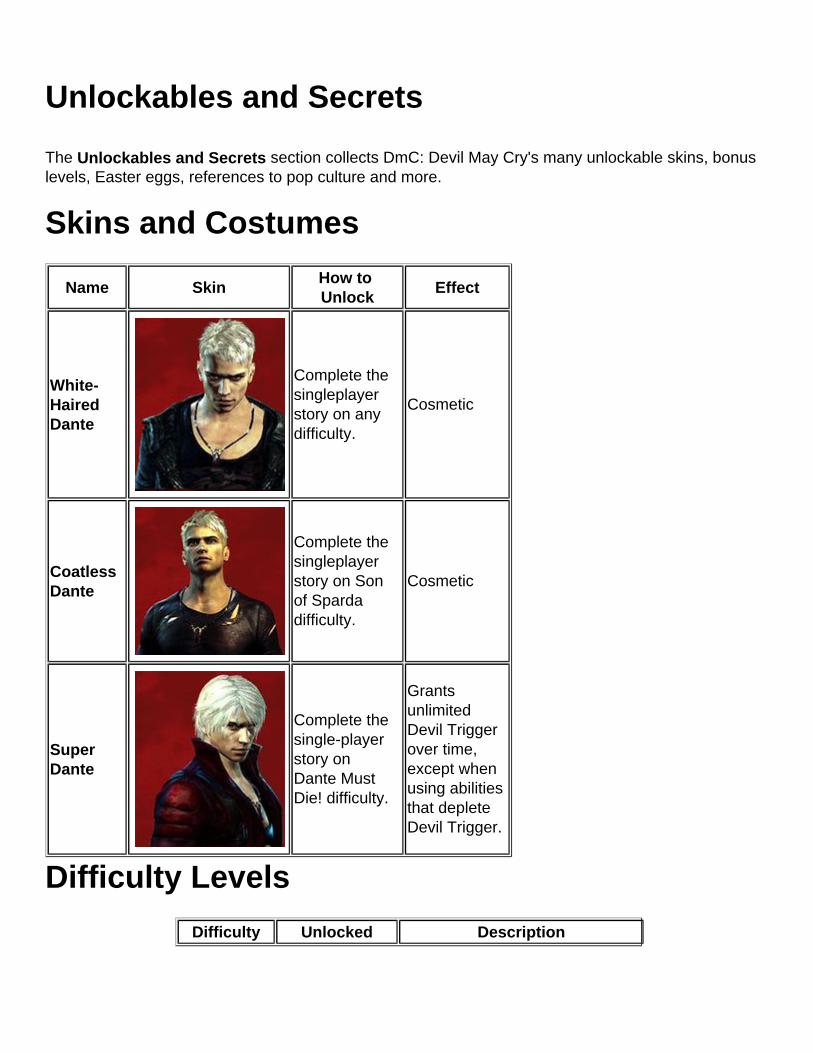
Unlockables and Secrets
The Unlockables and Secrets section collects DmC: Devil May Cry's many unlockable skins, bonus levels, Easter eggs, references to pop culture and more.
Skins and Costumes
Name SkinHow to Unlock
Effect
White-Haired Dante
Complete the singleplayer story on any difficulty.
Cosmetic
Coatless Dante
Complete the singleplayer story on Son of Sparda difficulty.
Cosmetic
Super Dante
Complete the single-player story on Dante Must Die! difficulty.
Grants unlimited Devil Trigger over time, except when using abilities that deplete Devil Trigger.
Difficulty Levels
Difficulty Unlocked Description
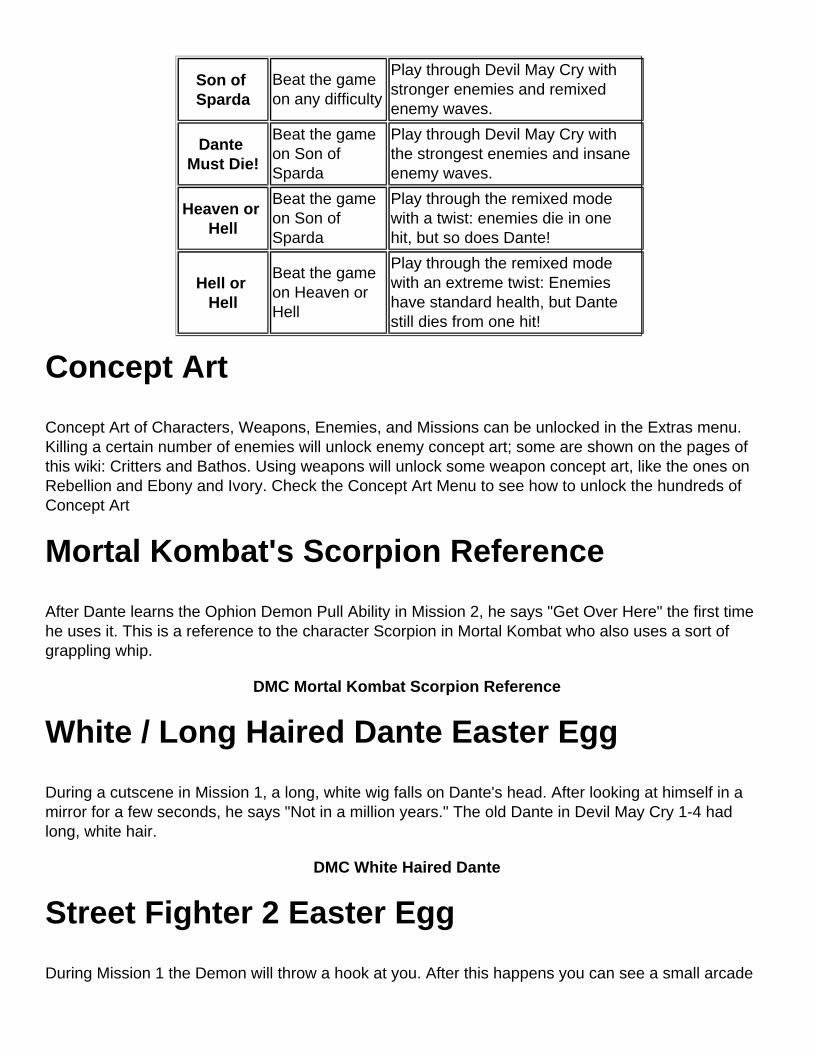
Son of Sparda
Beat the game on any difficulty
Play through Devil May Cry with stronger enemies and remixed enemy waves.
Dante Must Die!
Beat the game on Son of Sparda
Play through Devil May Cry with the strongest enemies and insane enemy waves.
Heaven or Hell
Beat the game on Son of Sparda
Play through the remixed mode with a twist: enemies die in one hit, but so does Dante!
Hell or Hell
Beat the game on Heaven or Hell
Play through the remixed mode with an extreme twist: Enemies have standard health, but Dante still dies from one hit!
Concept Art
Concept Art of Characters, Weapons, Enemies, and Missions can be unlocked in the Extras menu. Killing a certain number of enemies will unlock enemy concept art; some are shown on the pages of this wiki: Critters and Bathos. Using weapons will unlock some weapon concept art, like the ones on Rebellion and Ebony and Ivory. Check the Concept Art Menu to see how to unlock the hundreds of Concept Art
Mortal Kombat's Scorpion Reference
After Dante learns the Ophion Demon Pull Ability in Mission 2, he says "Get Over Here" the first time he uses it. This is a reference to the character Scorpion in Mortal Kombat who also uses a sort of grappling whip.
DMC Mortal Kombat Scorpion Reference
White / Long Haired Dante Easter Egg
During a cutscene in Mission 1, a long, white wig falls on Dante's head. After looking at himself in a mirror for a few seconds, he says "Not in a million years." The old Dante in Devil May Cry 1-4 had long, white hair.
DMC White Haired Dante
Street Fighter 2 Easter Egg
During Mission 1 the Demon will throw a hook at you. After this happens you can see a small arcade

area where Ryu and Ken are standing ready to fight on what looks like a Street Fighter 2 machine.
DLC
This section collects the various forms of DLC for DmC: Devil May Cry. DLC stands for Downloadable Content, and is digitally downloaded content saved to a system's hard drive. Downloadable Content usually requires a payment before it can be downloaded, but some DLC is completely free to all users.
Bloody Palace
Bloody Palace Mode will be available (free / no charge) after launch for PlayStation 3, Xbox 360 and PC versions of Devil May Cry.
Bloody Palace Mode is unlocked upon completion of the main game. It consists of over 100 levels of demons, enemies, and five bosses. The goal is to clear the mode as quickly as possible, and with the highest combo score.
(Source: Capcom Unity)
Vergil's Downfall
Experience a brand new chapter of the DmC: Devil May Cry adventure with Vergil's Downfall, the untold story of Dante's twin brother Vergil which will be downloadable from XBLA and PSN. Vergil's Downfall offers fans the opportunity to play as one of the most wanted Devil May Cry characters, Vergil, in an all new storyline with fresh gameplay including new weapons, combos, enemies, and locations.
Vergil's Downfall will be available after launch for 720 MS points (XBLA) and $8.99 on PlayStation Network. North American consumers who pre-order DmC: Devil May Cry at GameStop or EB Canada will receive a redeemable code to access Vergil's Downfall at no charge when the content becomes available.
The release is only known to be in Quarter 1 of 2013.
Pre-Order Bonuses
DmC: Devil May Cry has three retailer exclusive pre-orders bundles that feature skins for Dante's weapon cache. Each DmC pre-order packages also includes orbs for upgrading Dante's abilities as you see fit. These bonuses will come in the form of a code that can be entered in the Playstation Store or Xbox Marketplace as DLC.
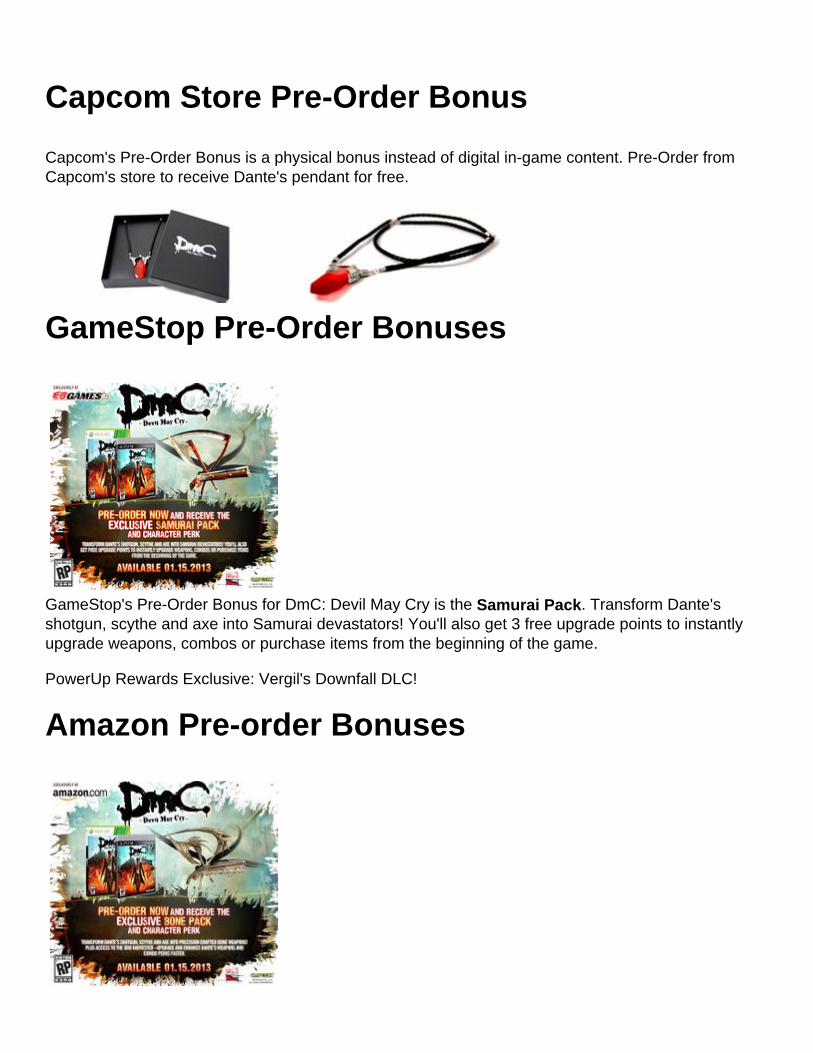
Capcom Store Pre-Order Bonus
Capcom's Pre-Order Bonus is a physical bonus instead of digital in-game content. Pre-Order from Capcom's store to receive Dante's pendant for free.
GameStop Pre-Order Bonuses
GameStop's Pre-Order Bonus for DmC: Devil May Cry is the Samurai Pack. Transform Dante's shotgun, scythe and axe into Samurai devastators! You'll also get 3 free upgrade points to instantly upgrade weapons, combos or purchase items from the beginning of the game.
PowerUp Rewards Exclusive: Vergil's Downfall DLC!
Amazon Pre-order Bonuses
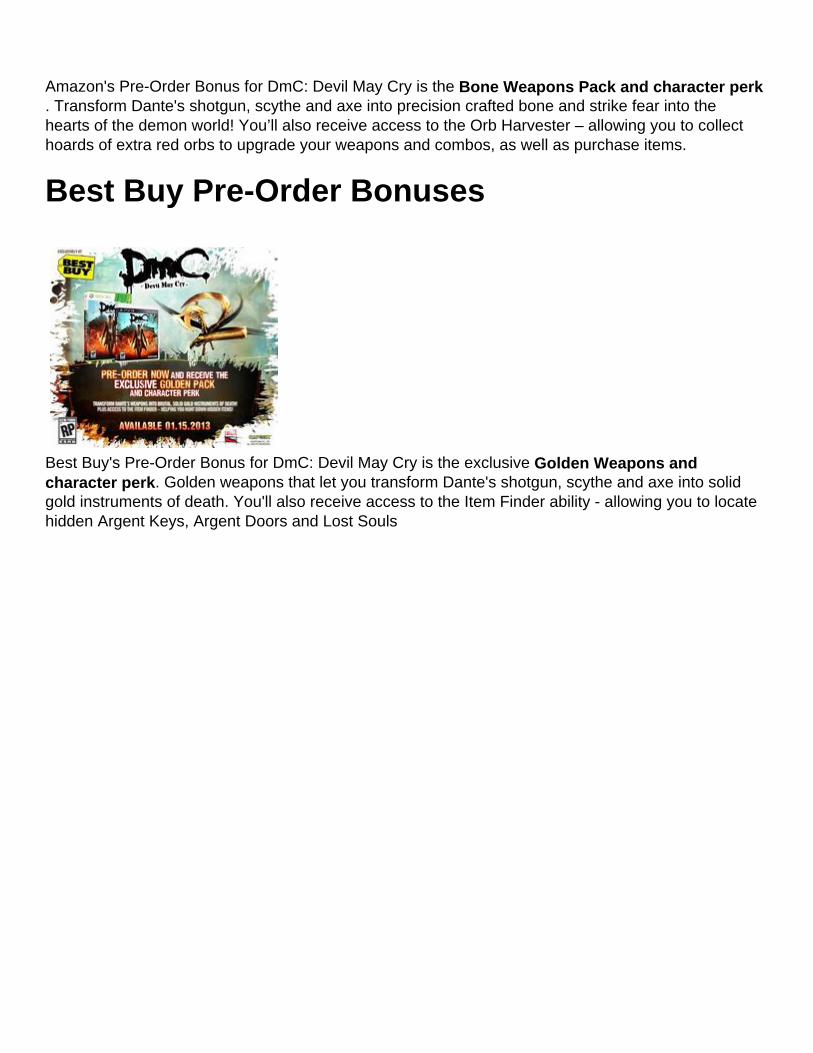
Amazon's Pre-Order Bonus for DmC: Devil May Cry is the Bone Weapons Pack and character perk. Transform Dante's shotgun, scythe and axe into precision crafted bone and strike fear into the hearts of the demon world! You’ll also receive access to the Orb Harvester – allowing you to collect hoards of extra red orbs to upgrade your weapons and combos, as well as purchase items.
Best Buy Pre-Order Bonuses
Best Buy's Pre-Order Bonus for DmC: Devil May Cry is the exclusive Golden Weapons and character perk. Golden weapons that let you transform Dante's shotgun, scythe and axe into solid gold instruments of death. You'll also receive access to the Item Finder ability - allowing you to locate hidden Argent Keys, Argent Doors and Lost Souls

Pre-Order Bonuses
DmC: Devil May Cry has three retailer exclusive pre-orders bundles that feature skins for Dante's weapon cache. Each DmC pre-order packages also includes orbs for upgrading Dante's abilities as you see fit. These bonuses will come in the form of a code that can be entered in the Playstation Store or Xbox Marketplace as DLC.
Capcom Store Pre-Order Bonus
Capcom's Pre-Order Bonus is a physical bonus instead of digital in-game content. Pre-Order from Capcom's store to receive Dante's pendant for free.
GameStop Pre-Order Bonuses
GameStop's Pre-Order Bonus for DmC: Devil May Cry is the Samurai Pack. Transform Dante's shotgun, scythe and axe into Samurai devastators! You'll also get 3 free upgrade points to instantly upgrade weapons, combos or purchase items from the beginning of the game.
PowerUp Rewards Exclusive: Vergil's Downfall DLC!
Amazon Pre-order Bonuses
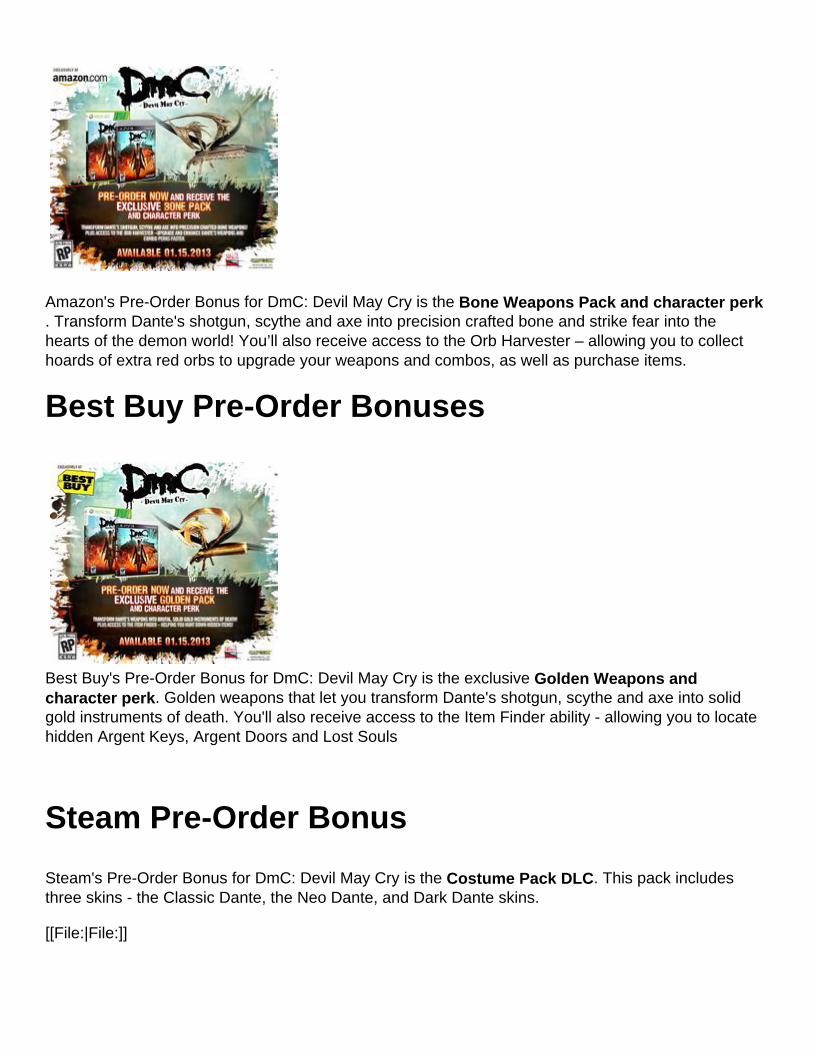
Amazon's Pre-Order Bonus for DmC: Devil May Cry is the Bone Weapons Pack and character perk. Transform Dante's shotgun, scythe and axe into precision crafted bone and strike fear into the hearts of the demon world! You’ll also receive access to the Orb Harvester – allowing you to collect hoards of extra red orbs to upgrade your weapons and combos, as well as purchase items.
Best Buy Pre-Order Bonuses
Best Buy's Pre-Order Bonus for DmC: Devil May Cry is the exclusive Golden Weapons and character perk. Golden weapons that let you transform Dante's shotgun, scythe and axe into solid gold instruments of death. You'll also receive access to the Item Finder ability - allowing you to locate hidden Argent Keys, Argent Doors and Lost Souls
Steam Pre-Order Bonus
Steam's Pre-Order Bonus for DmC: Devil May Cry is the Costume Pack DLC. This pack includes three skins - the Classic Dante, the Neo Dante, and Dark Dante skins.
[[File:|File:]]
Bloody Palace
Bloody Palace Mode will be available (free / no charge) in February for PlayStation 3, Xbox 360 and PC versions of Devil May Cry.
Bloody Palace Mode is unlocked upon completion of the main game. It consists of over 100 levels of demons, enemies, and five bosses. The goal is to clear the mode as quickly as possible, and with the highest combo score.
(Source: Capcom Unity)
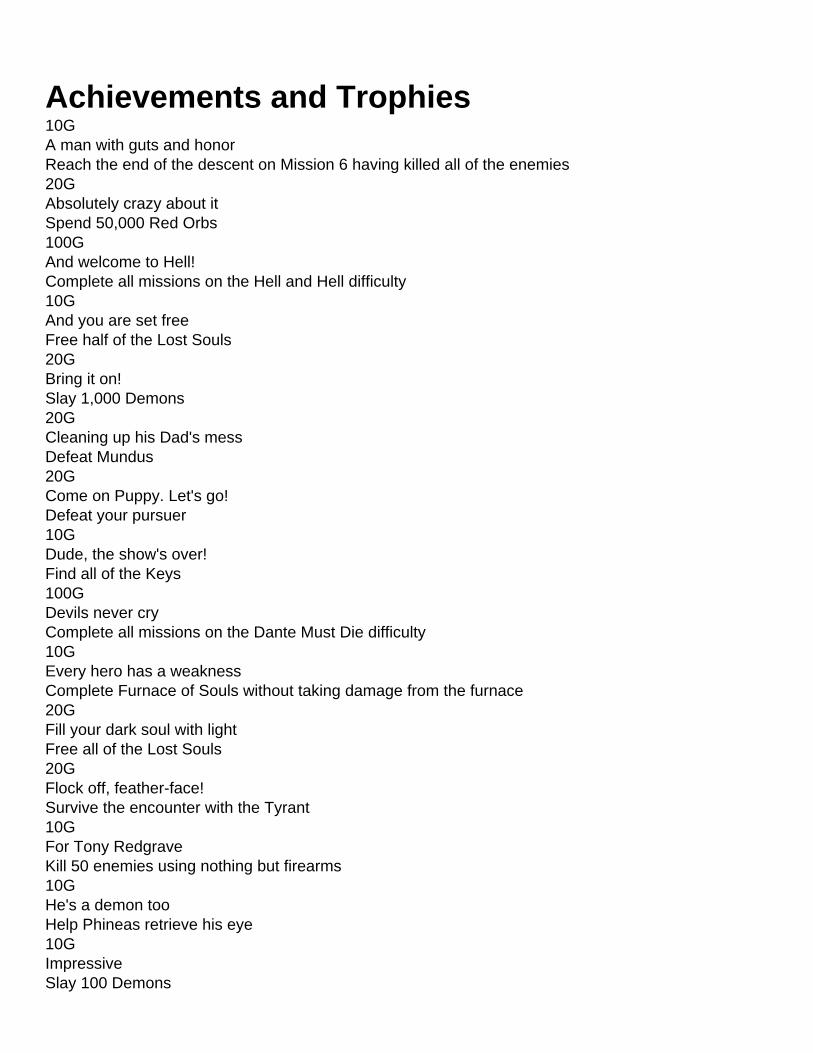
Achievements and Trophies10GA man with guts and honorReach the end of the descent on Mission 6 having killed all of the enemies20GAbsolutely crazy about itSpend 50,000 Red Orbs100GAnd welcome to Hell!Complete all missions on the Hell and Hell difficulty10GAnd you are set freeFree half of the Lost Souls20GBring it on!Slay 1,000 Demons20GCleaning up his Dad's messDefeat Mundus20GCome on Puppy. Let's go!Defeat your pursuer10GDude, the show's over!Find all of the Keys100GDevils never cryComplete all missions on the Dante Must Die difficulty10GEvery hero has a weaknessComplete Furnace of Souls without taking damage from the furnace20GFill your dark soul with lightFree all of the Lost Souls20GFlock off, feather-face!Survive the encounter with the Tyrant10GFor Tony RedgraveKill 50 enemies using nothing but firearms10GHe's a demon tooHelp Phineas retrieve his eye10GImpressiveSlay 100 Demons

10GIn the name of my fatherKill 100 enemies using nothing but Demon weapons10GIt's got to stay in the familyAcquire Arbiter10GIt's only the rainKill 10 enemies by pushing them into the Hurricane ride on Mission 120GIt's showtime. Come on!Earn 1,500 Style Bonuses10GIt's time to finish this!Help Vergil open the Vault80GJackpot!Complete all missions on the Nephilim difficulty with a SSS rank40GKeeps getting better and betterGain a 100% completion rank on all missions (difficulty doesn't matter)10GLet's welcome chaos!Open all of the Secret Doors10GLet's rock, baby!Upgrade Dante's health to maximum10GLooks like it's your lucky dayComplete a level without taking any damage30GLooks like we have a winnerSlay 5,000 Demons10GMore than just a few sparksAcquire Revenant20GNo talking!Acquire Aquila10GNow my coat's all charredNavigate the Sky Bridge on Mission 16 without hitting the lasers50GOne hell of a party!Complete all of the Secret Missions10GOnly kind of gift worth givingAcquire the Angel Boost abilityPlatinum Trophy

Playstation 3 only. Complete all DmC Devil May Cry trophies.10GPower... Give me more power!Purchase all of Dante's combat upgrades10GSensational!Gain a SSS Style Rank during combat10GStylish!Complete a mission with a SSS rank40GThe end? Don't bet on itComplete the final mission on Human, Devil Hunter or Nephilim difficulty10GThing drives me crazyAquire Osiris10GThe baby sure can pack a punchAcquire Eryx10GThis is my kind of rainSpend 10,000 Red Orbs10GThis is what I live for!Complete all missions on the Heaven or Hell difficulty20GThis party's just getting crazy!Complete 10 Secret Missions10GTime to go to work guys!Purchase your first upgrade40GToo easy!Complete all missions on the Son of Sparda difficulty20GWhatever, LadyDefeat Mundus' Spawn10GWhere does the time go?Complete a level with 2 minutes or less on the clock10GYou are not a Human, are you?Acquire the Devil Trigger ability.10GYou can't handle itUpgrade Dante's Devil Trigger to maximum10GYou'll never have her fireKill 100 enemies using nothing but Angel weapons
10GYou're not going to shoot meAcquire Kablooey
DLC: Vergil's Downfall
The achievement values are placeholders and will be fixed when details surface.
10GI need more power!Complete Vergil's downfall on Son of Sparda difficulty.10GI'll try it your way for onceComplete all missions on Vergil's downfall on the Nephilim difficulty with a SSS rank.10GI've come to retrieve my powerAcquire all of Vergil's health, Devil trigger, and combat upgrades.10GMight controls everythingGain a 100% completion rank on all missions in Vergil's downfall (difficulty doesn't matter).10GNow I'm a little motivated!Complete Vergil's downfall on Heaven or Hell difficulty.10GOur souls are not at odds brotherComplete Vergil's downfall.10GThis is the power of Sparda!Complete Vergil's downfall on Vergil Must Die difficulty.10GWe have an uninvited guestDefeat a Wisp.10GYou don't belong hereDefeat an Imprisoner.10GYou're not worthy as my opponentComplete Vergil's downfall on Hell or Hell difficulty.
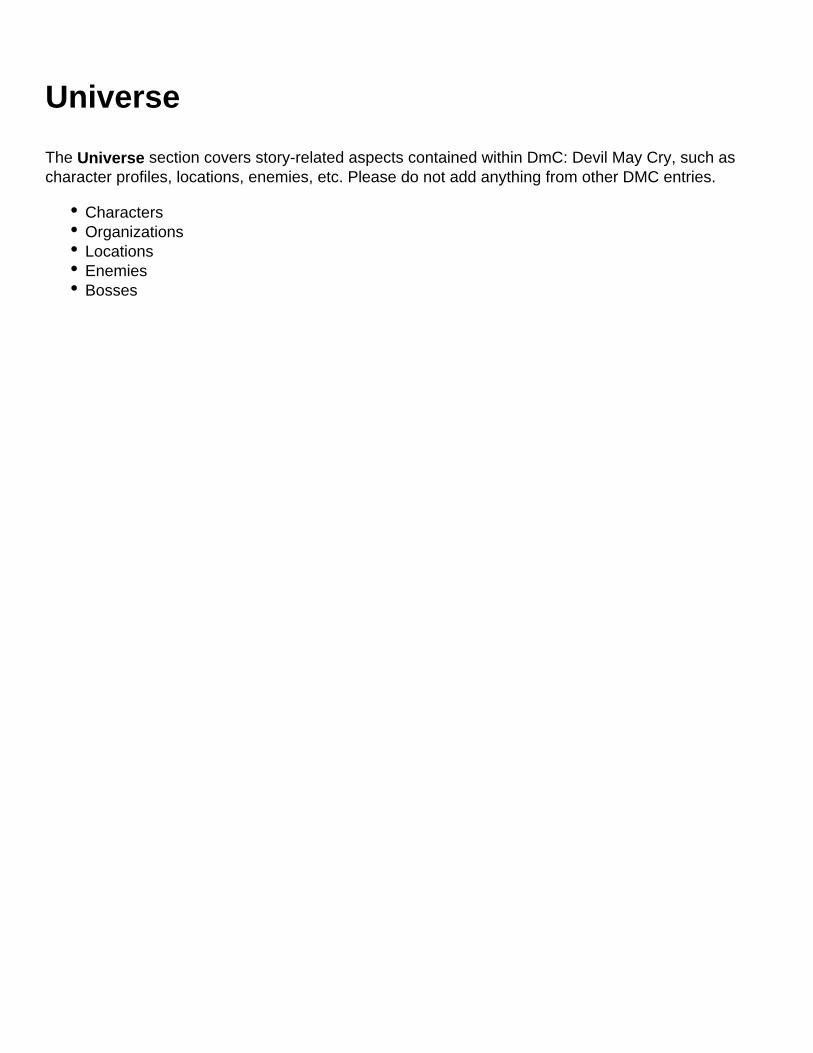
Universe
The Universe section covers story-related aspects contained within DmC: Devil May Cry, such as character profiles, locations, enemies, etc. Please do not add anything from other DMC entries.
CharactersOrganizationsLocationsEnemiesBosses
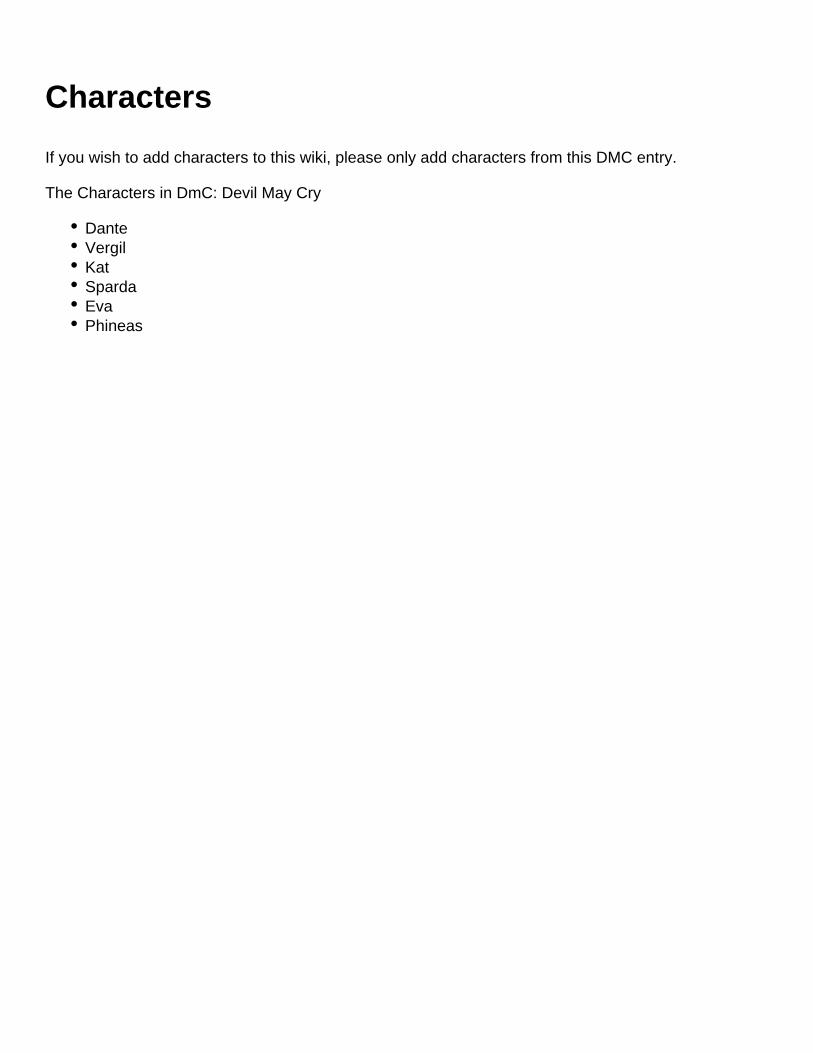
Characters
If you wish to add characters to this wiki, please only add characters from this DMC entry.
The Characters in DmC: Devil May Cry
DanteVergilKatSpardaEvaPhineas
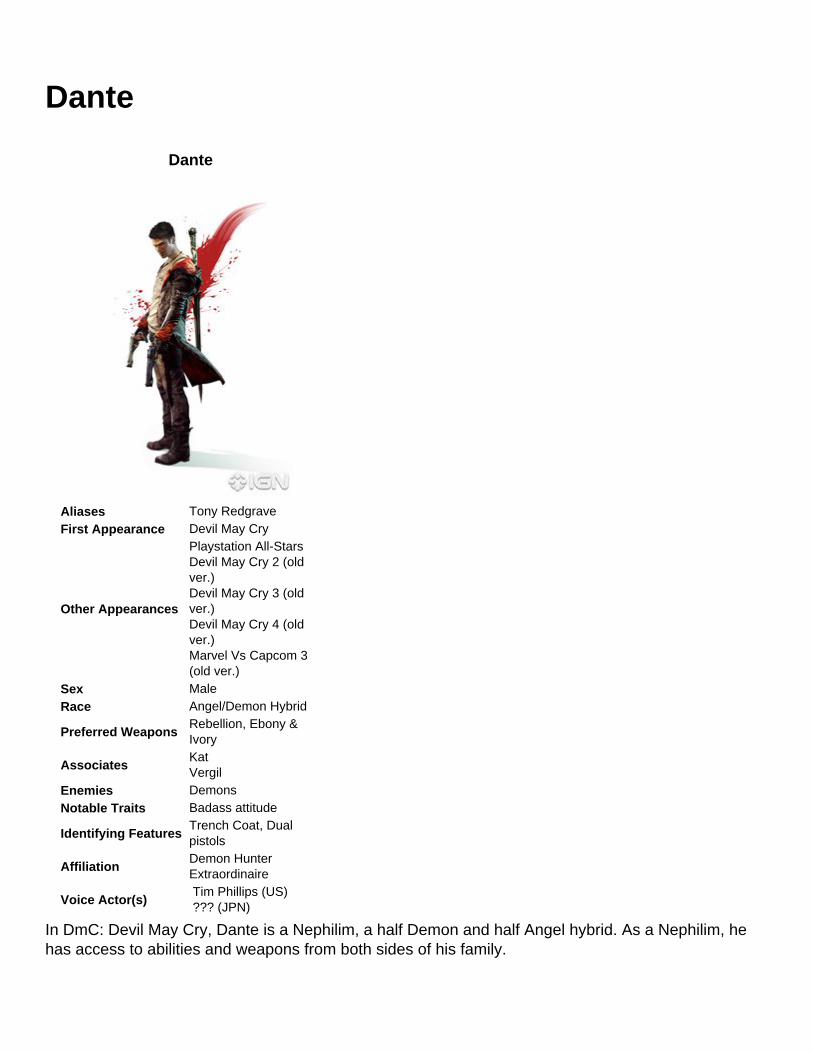
Dante
Dante
Aliases Tony RedgraveFirst Appearance Devil May Cry
Other Appearances
Playstation All-StarsDevil May Cry 2 (old ver.)Devil May Cry 3 (old ver.)Devil May Cry 4 (old ver.)Marvel Vs Capcom 3 (old ver.)
Sex MaleRace Angel/Demon Hybrid
Preferred WeaponsRebellion, Ebony & Ivory
AssociatesKatVergil
Enemies DemonsNotable Traits Badass attitude
Identifying FeaturesTrench Coat, Dual pistols
AffiliationDemon Hunter Extraordinaire
Voice Actor(s) Tim Phillips (US) ??? (JPN)
In DmC: Devil May Cry, Dante is a Nephilim, a half Demon and half Angel hybrid. As a Nephilim, he has access to abilities and weapons from both sides of his family.

At the start of DmC: Devil May Cry, Dante is unable to remember anything before seven years old. He is tracked down by his twin brother Vergil, leader of the mysterious Order, who helps him remember his past. He remembers that his father was the demon warrior Sparda and his mother was an angel, named Eva.
Demons and angels have always been at war, so love between the two was forbidden. Mundus, the king of Demons, found this out and killed their mother. As for their father, he was banished forever, never to return.
Vergil tells Dante that only Nephilim have the ability to kill a Demon King; thus they are the only ones that can take down Mundus. And so Dante's quest for revenge begins...
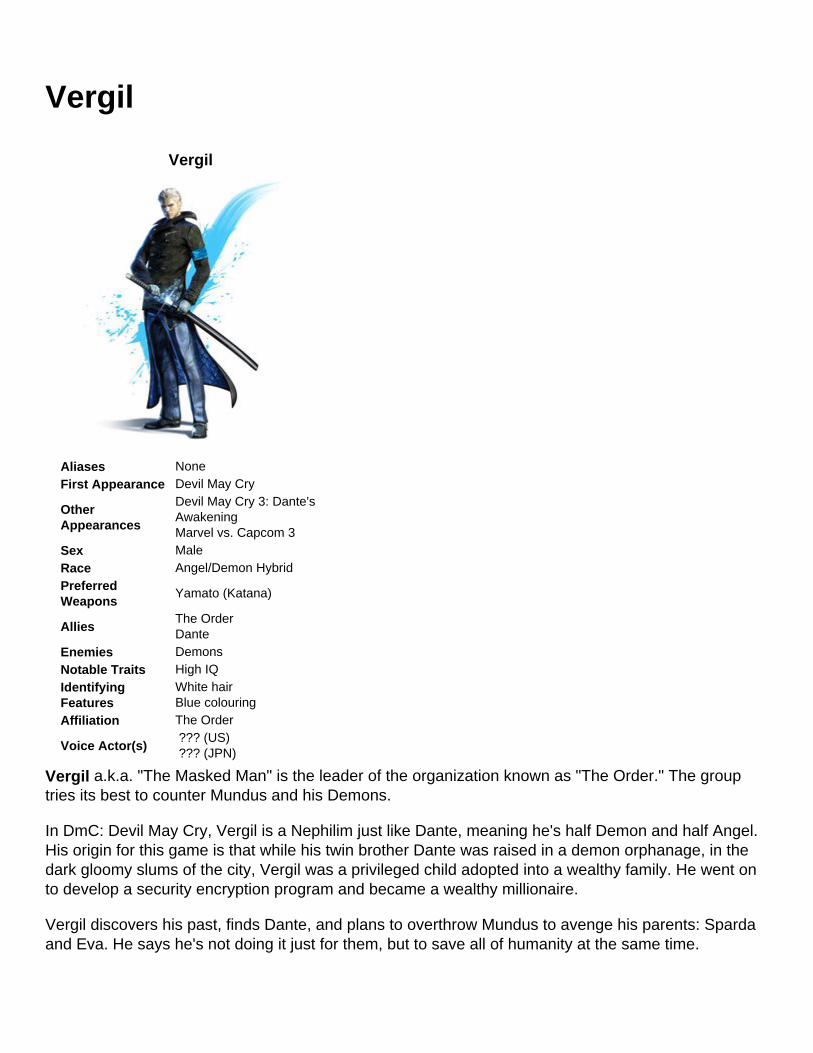
Vergil
Vergil
Aliases NoneFirst Appearance Devil May Cry
Other Appearances
Devil May Cry 3: Dante's AwakeningMarvel vs. Capcom 3
Sex MaleRace Angel/Demon HybridPreferred Weapons
Yamato (Katana)
AlliesThe OrderDante
Enemies DemonsNotable Traits High IQIdentifying Features
White hairBlue colouring
Affiliation The Order
Voice Actor(s) ??? (US) ??? (JPN)
Vergil a.k.a. "The Masked Man" is the leader of the organization known as "The Order." The group tries its best to counter Mundus and his Demons.
In DmC: Devil May Cry, Vergil is a Nephilim just like Dante, meaning he's half Demon and half Angel. His origin for this game is that while his twin brother Dante was raised in a demon orphanage, in the dark gloomy slums of the city, Vergil was a privileged child adopted into a wealthy family. He went on to develop a security encryption program and became a wealthy millionaire.
Vergil discovers his past, finds Dante, and plans to overthrow Mundus to avenge his parents: Sparda and Eva. He says he's not doing it just for them, but to save all of humanity at the same time.
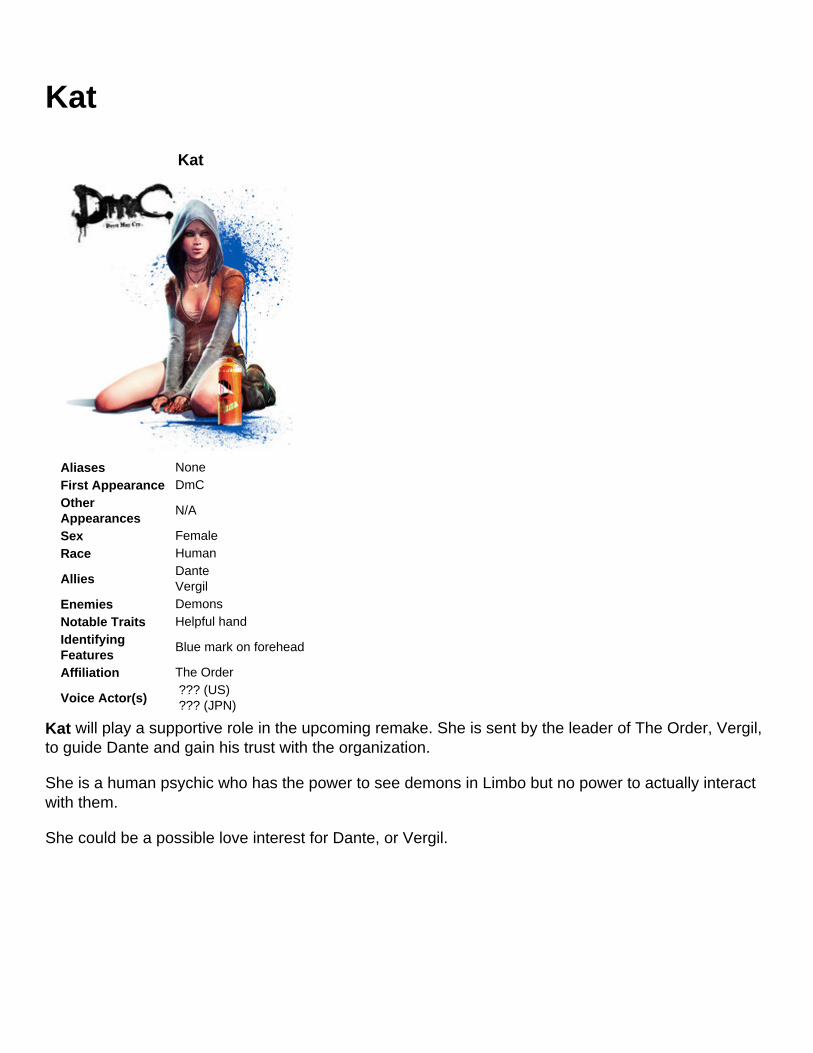
Kat
Kat
Aliases NoneFirst Appearance DmCOther Appearances
N/A
Sex FemaleRace Human
AlliesDanteVergil
Enemies DemonsNotable Traits Helpful handIdentifying Features
Blue mark on forehead
Affiliation The Order
Voice Actor(s) ??? (US) ??? (JPN)
Kat will play a supportive role in the upcoming remake. She is sent by the leader of The Order, Vergil, to guide Dante and gain his trust with the organization.
She is a human psychic who has the power to see demons in Limbo but no power to actually interact with them.
She could be a possible love interest for Dante, or Vergil.
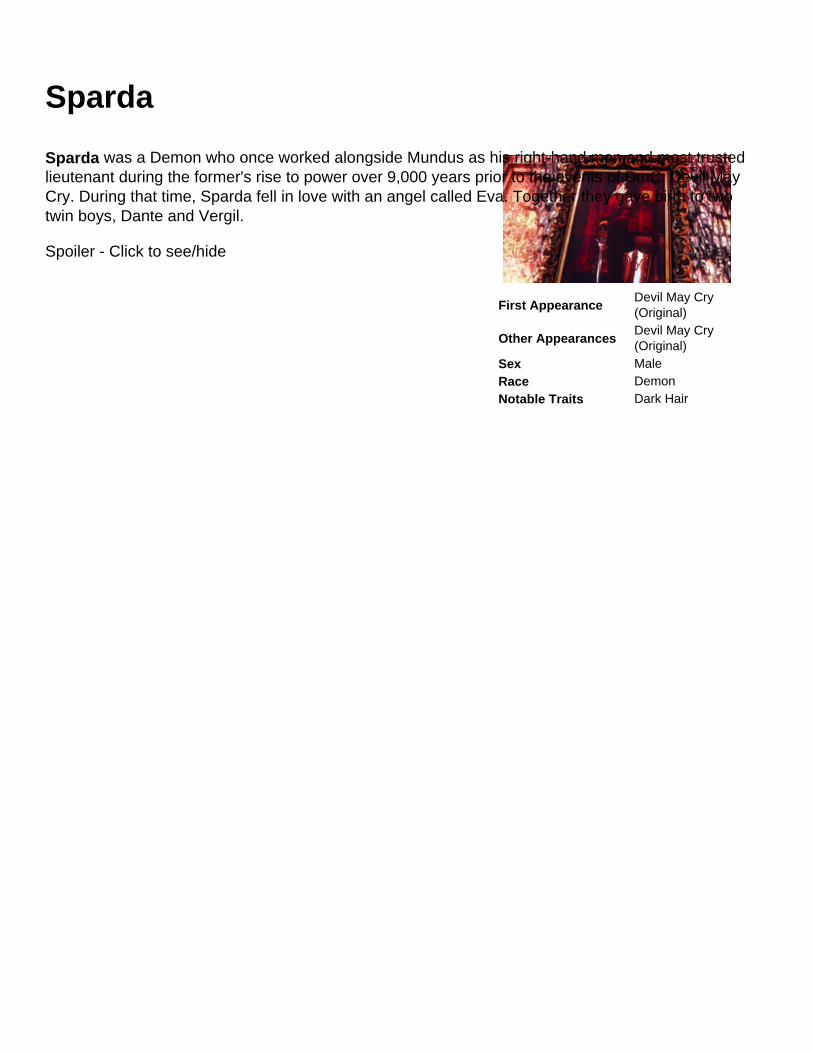
Sparda
First AppearanceDevil May Cry (Original)
Other AppearancesDevil May Cry (Original)
Sex MaleRace DemonNotable Traits Dark Hair
Sparda was a Demon who once worked alongside Mundus as his right-hand man and most trusted lieutenant during the former's rise to power over 9,000 years prior to the events of DmC: Devil May Cry. During that time, Sparda fell in love with an angel called Eva. Together they gave birth to two twin boys, Dante and Vergil.
Spoiler - Click to see/hide
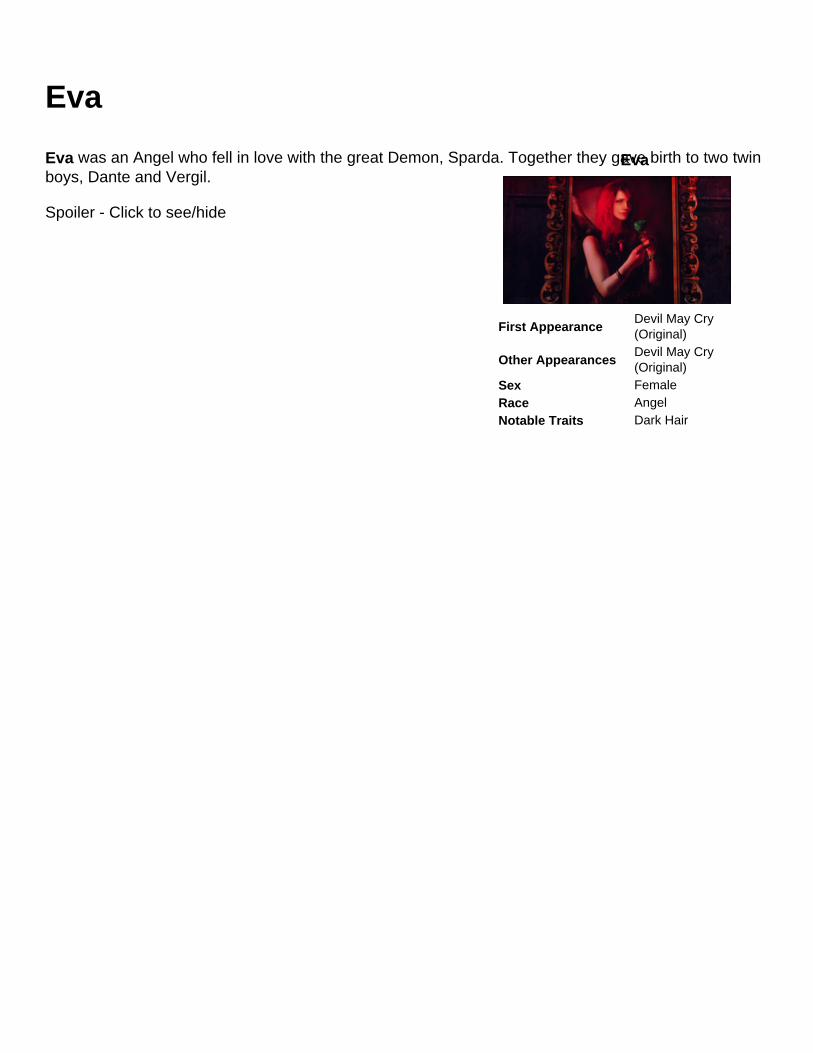
Eva
Eva
First AppearanceDevil May Cry (Original)
Other AppearancesDevil May Cry (Original)
Sex FemaleRace AngelNotable Traits Dark Hair
Eva was an Angel who fell in love with the great Demon, Sparda. Together they gave birth to two twin boys, Dante and Vergil.
Spoiler - Click to see/hide
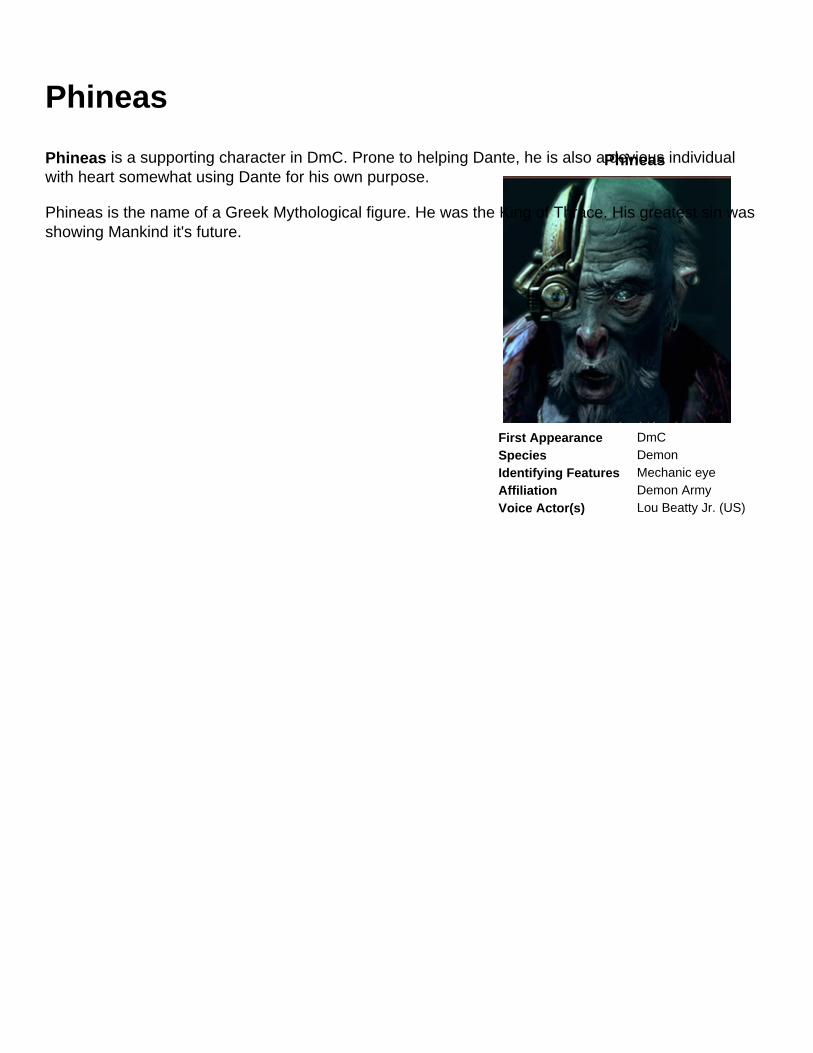
Phineas
Phineas
First Appearance DmCSpecies DemonIdentifying Features Mechanic eyeAffiliation Demon ArmyVoice Actor(s) Lou Beatty Jr. (US)
Phineas is a supporting character in DmC. Prone to helping Dante, he is also a devious individual with heart somewhat using Dante for his own purpose.
Phineas is the name of a Greek Mythological figure. He was the King of Thrace. His greatest sin was showing Mankind it's future.

Locations
Locations in DmC
Limbo CityVirility Factory

Virility Factory
Virility Factory
First Appearance DmC
Notable TraitsOpposite affects then advertised
Identifying Features Energy drinkAffiliation Demons
Virility Factory is where the demons mass produce an energy drink that has negative effects on humans as opposed to the advertised positive ones.
Spoiler - Click to see/hide

Organizations
Two organizations are in the spotlight in DmC: Devil May Cry. These organizations are:
The OrderRaptor News Network
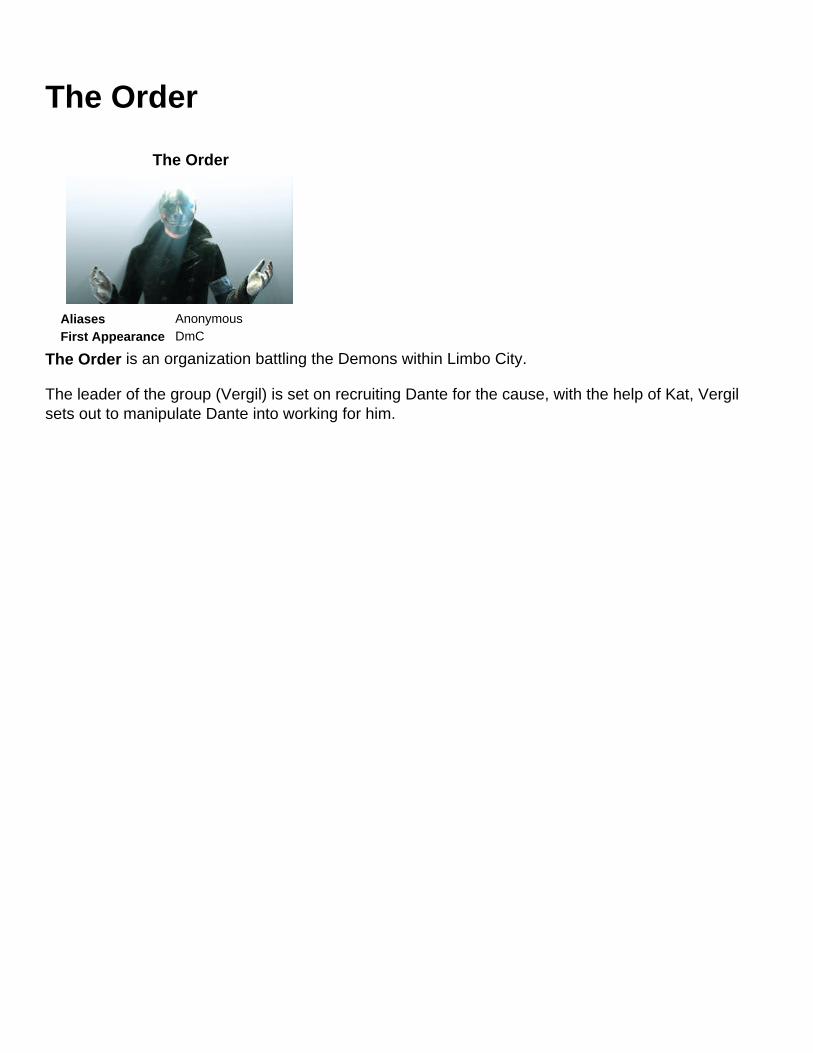
The Order
The Order
Aliases AnonymousFirst Appearance DmC
The Order is an organization battling the Demons within Limbo City.
The leader of the group (Vergil) is set on recruiting Dante for the cause, with the help of Kat, Vergil sets out to manipulate Dante into working for him.

Raptor News NetworkRaptor News Network
...image align center...First Appearance DmCAllies DemonsEnemies The Order<br>Dante
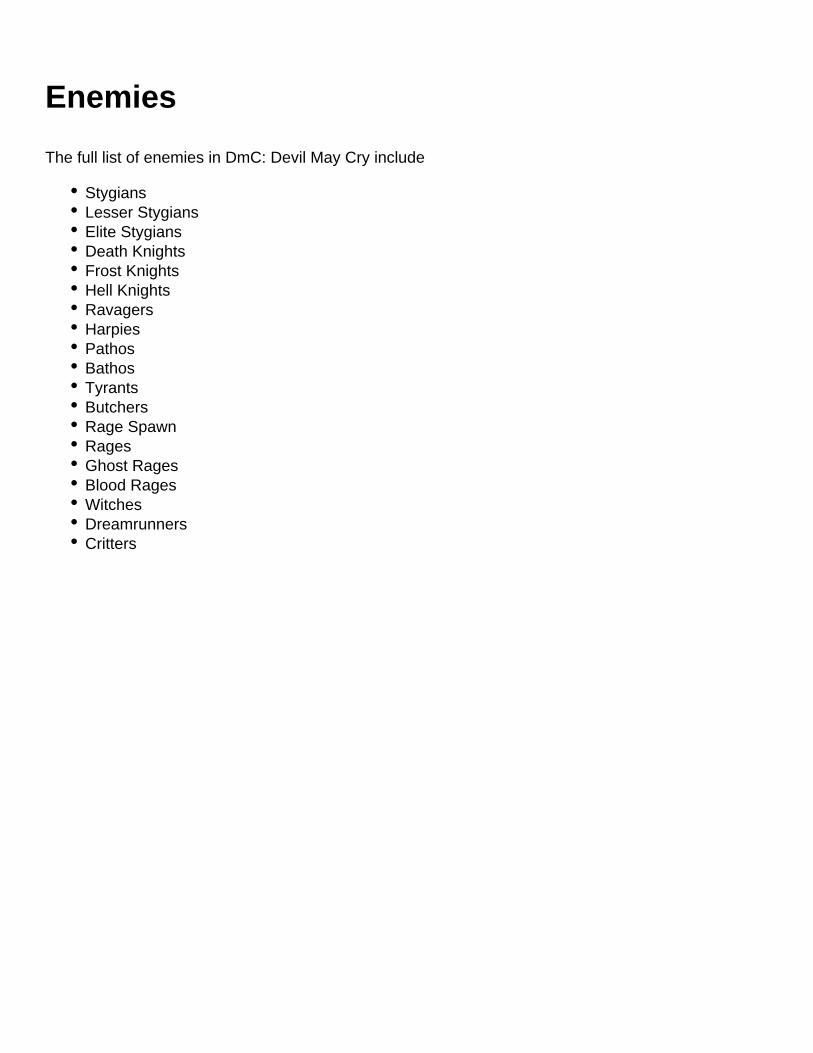
Enemies
The full list of enemies in DmC: Devil May Cry include
StygiansLesser StygiansElite StygiansDeath KnightsFrost KnightsHell KnightsRavagersHarpiesPathosBathosTyrantsButchersRage SpawnRagesGhost RagesBlood RagesWitchesDreamrunnersCritters
Bathos
First Appearance DmCPreferred Weapons CrossbowAllies Demons
EnemiesThe OrderDante
Identifying Features Cherub bodyAffiliation Demon Army
BathosBathos are demonic cherub with limited attacks. In battle it will throw timed explosives that beep and flash before detonating. It also carries a shield occasionally that Dante will have to tear away.
Bathos are negligable alone, and simply annoyances in bigger skirmishes. Simple triangle combos with your favorite weapon will do the trick, as well as concentrated fire from Ebony & Ivory or Revenant. Theire explosives can be countered, knocking it back to its source, as well.
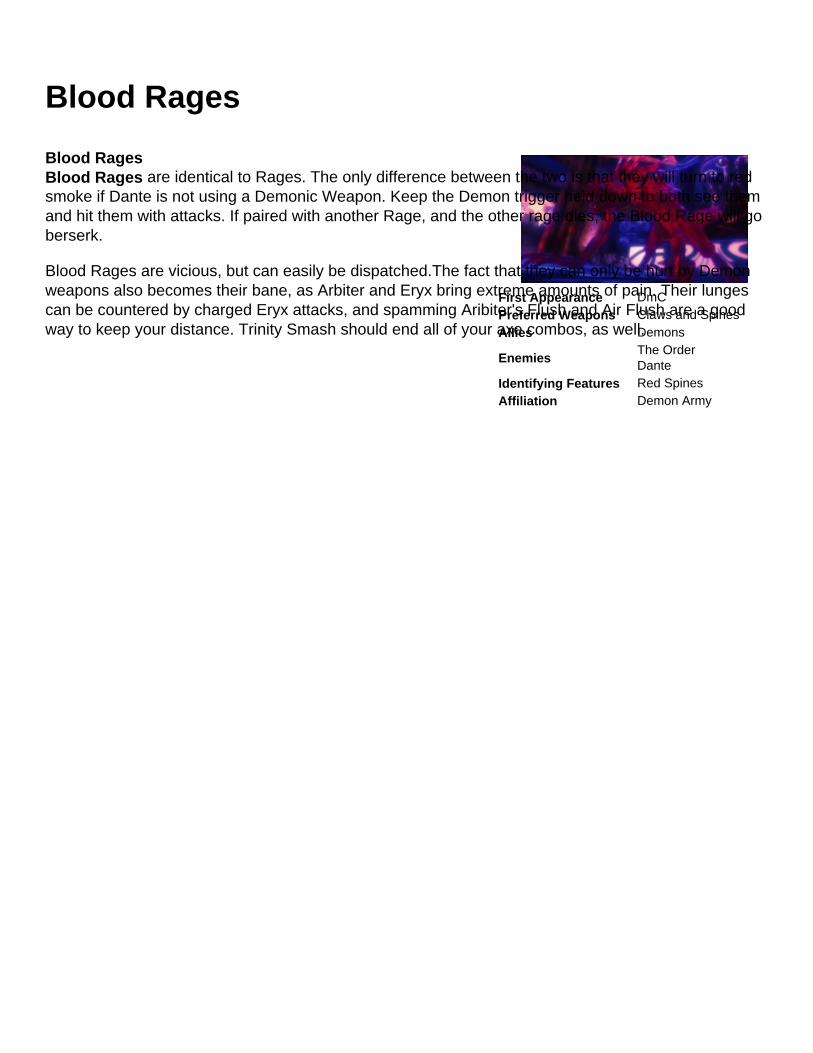
Blood Rages
First Appearance DmCPreferred Weapons Claws and SpinesAllies Demons
EnemiesThe OrderDante
Identifying Features Red SpinesAffiliation Demon Army
Blood RagesBlood Rages are identical to Rages. The only difference between the two is that they will turn to red smoke if Dante is not using a Demonic Weapon. Keep the Demon trigger held down to both see them and hit them with attacks. If paired with another Rage, and the other rage dies, the Blood Rage will go berserk.
Blood Rages are vicious, but can easily be dispatched.The fact that they can only be hurt by Demon weapons also becomes their bane, as Arbiter and Eryx bring extreme amounts of pain. Their lunges can be countered by charged Eryx attacks, and spamming Aribiter's Flush and Air Flush are a good way to keep your distance. Trinity Smash should end all of your axe combos, as well.
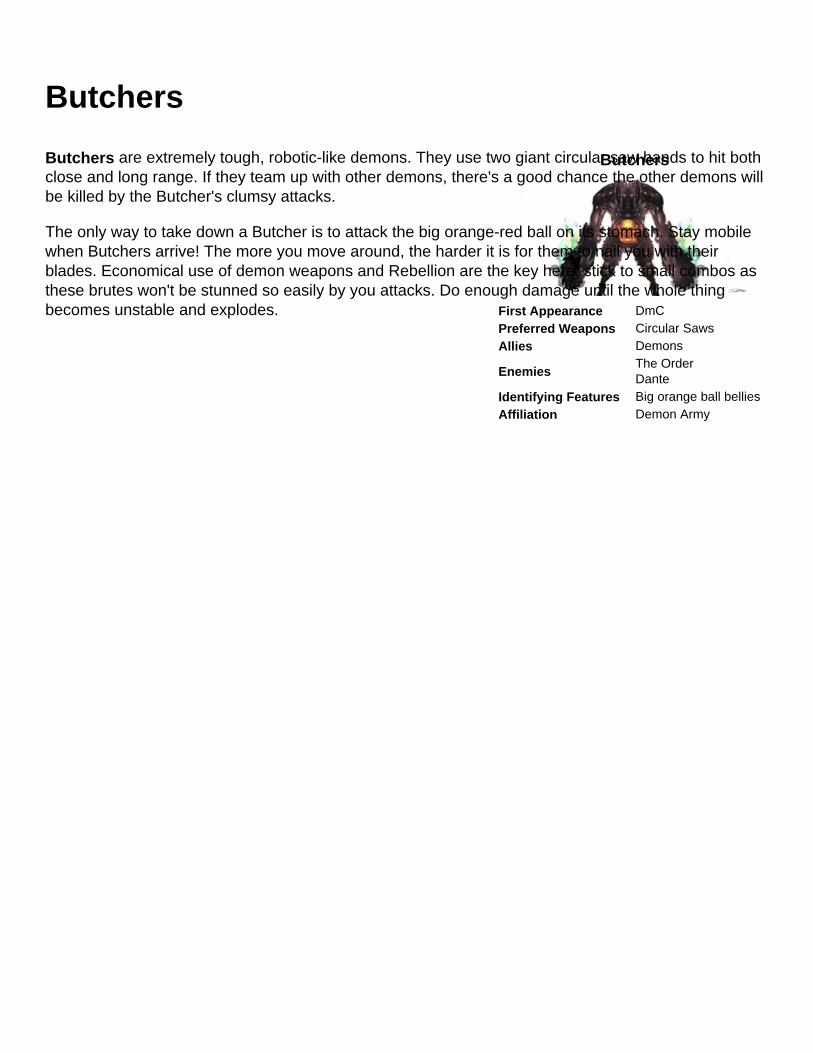
Butchers
Butchers
First Appearance DmCPreferred Weapons Circular SawsAllies Demons
EnemiesThe OrderDante
Identifying Features Big orange ball belliesAffiliation Demon Army
Butchers are extremely tough, robotic-like demons. They use two giant circular saw hands to hit both close and long range. If they team up with other demons, there's a good chance the other demons will be killed by the Butcher's clumsy attacks.
The only way to take down a Butcher is to attack the big orange-red ball on its stomach. Stay mobile when Butchers arrive! The more you move around, the harder it is for them to nail you with their blades. Economical use of demon weapons and Rebellion are the key here; stick to small combos as these brutes won't be stunned so easily by you attacks. Do enough damage until the whole thing becomes unstable and explodes.

Critters
Critters
First Appearance DmCPreferred Weapons NoneAllies Demons
EnemiesThe OrderDante
Notable Traits Robotic shellIdentifying Features Spider-like bodyAffiliation Demon Army
Critters are small, spider-like enemies that crawl around the environment. They don't seem to do any damage, but they will release Red Orbs.
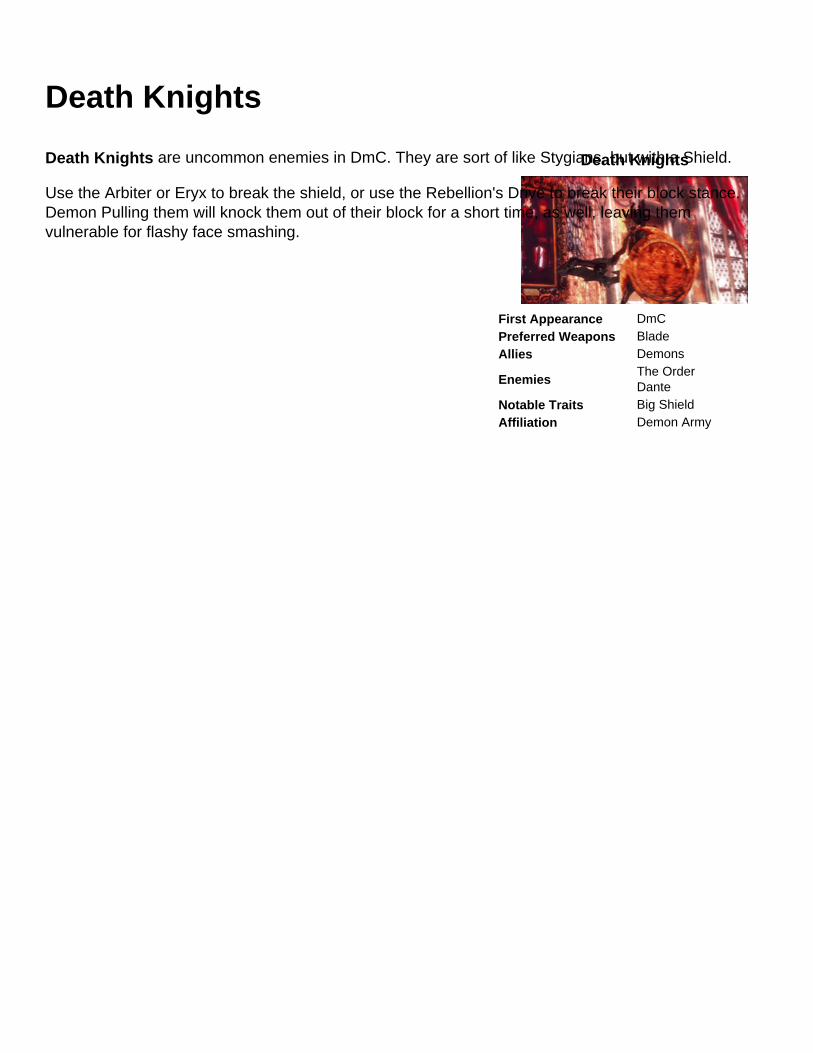
Death Knights
Death Knights
First Appearance DmCPreferred Weapons BladeAllies Demons
EnemiesThe OrderDante
Notable Traits Big ShieldAffiliation Demon Army
Death Knights are uncommon enemies in DmC. They are sort of like Stygians, but with a Shield.
Use the Arbiter or Eryx to break the shield, or use the Rebellion's Drive to break their block stance. Demon Pulling them will knock them out of their block for a short time, as well, leaving them vulnerable for flashy face smashing.
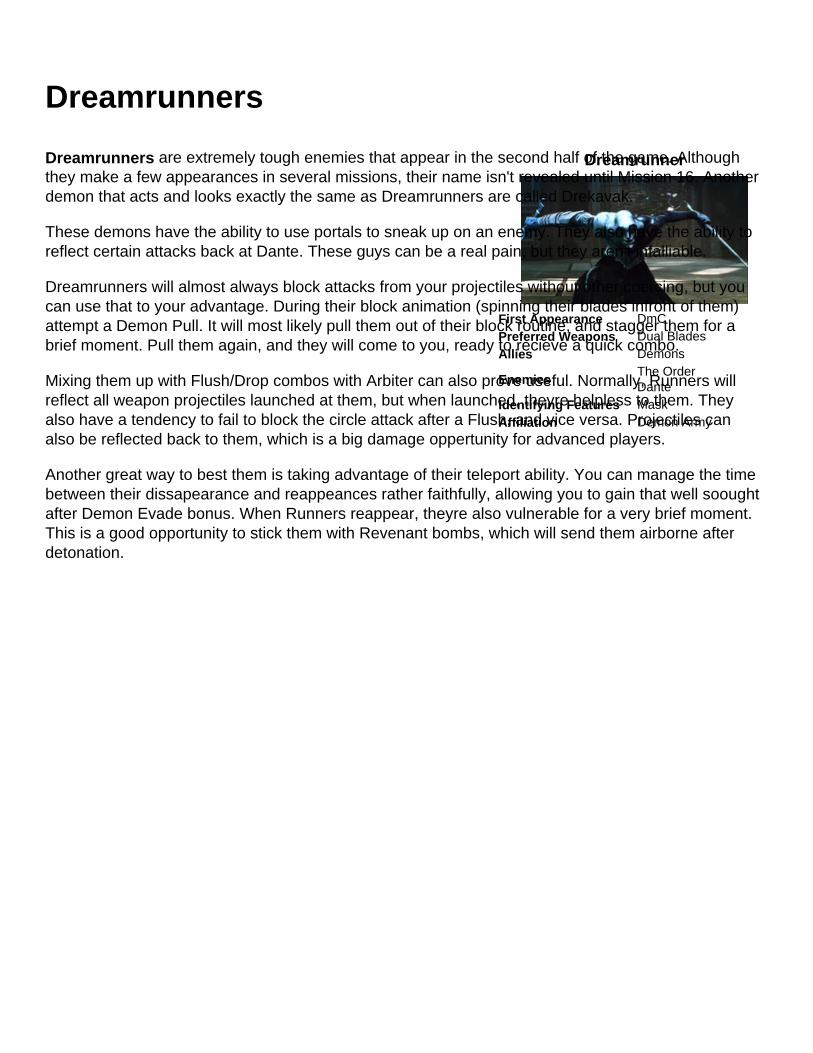
Dreamrunners
Dreamrunner
First Appearance DmCPreferred Weapons Dual BladesAllies Demons
EnemiesThe OrderDante
Identifying Features MaskAffiliation Demon Army
Dreamrunners are extremely tough enemies that appear in the second half of the game. Although they make a few appearances in several missions, their name isn't revealed until Mission 16. Another demon that acts and looks exactly the same as Dreamrunners are called Drekavak.
These demons have the ability to use portals to sneak up on an enemy. They also have the ability to reflect certain attacks back at Dante. These guys can be a real pain, but they aren't infalliable.
Dreamrunners will almost always block attacks from your projectiles without other coercing, but you can use that to your advantage. During their block animation (spinning their blades infront of them) attempt a Demon Pull. It will most likely pull them out of their block routine, and stagger them for a brief moment. Pull them again, and they will come to you, ready to recieve a quick combo.
Mixing them up with Flush/Drop combos with Arbiter can also prove useful. Normally, Runners will reflect all weapon projectiles launched at them, but when launched, theyre helpless to them. They also have a tendency to fail to block the circle attack after a Flush, and vice versa. Projectiles can also be reflected back to them, which is a big damage oppertunity for advanced players.
Another great way to best them is taking advantage of their teleport ability. You can manage the time between their dissapearance and reappeances rather faithfully, allowing you to gain that well soought after Demon Evade bonus. When Runners reappear, theyre also vulnerable for a very brief moment. This is a good opportunity to stick them with Revenant bombs, which will send them airborne after detonation.
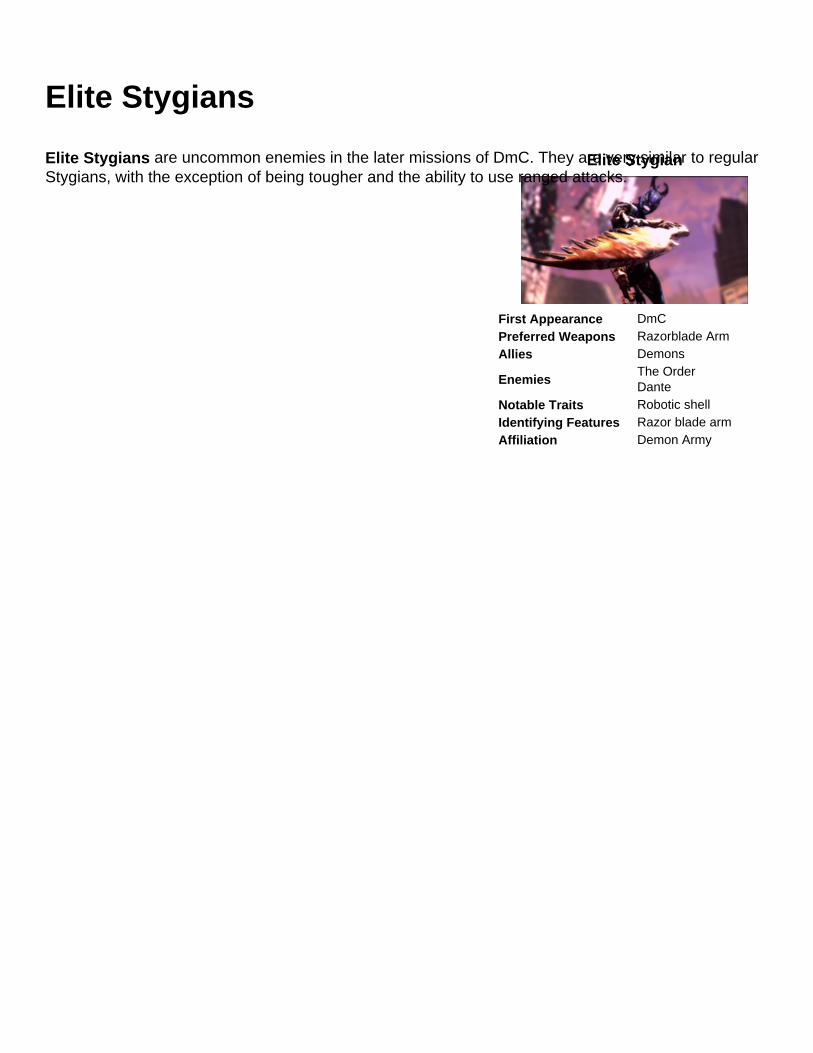
Elite Stygians
Elite Stygian
First Appearance DmCPreferred Weapons Razorblade ArmAllies Demons
EnemiesThe OrderDante
Notable Traits Robotic shellIdentifying Features Razor blade armAffiliation Demon Army
Elite Stygians are uncommon enemies in the later missions of DmC. They are very similar to regular Stygians, with the exception of being tougher and the ability to use ranged attacks.
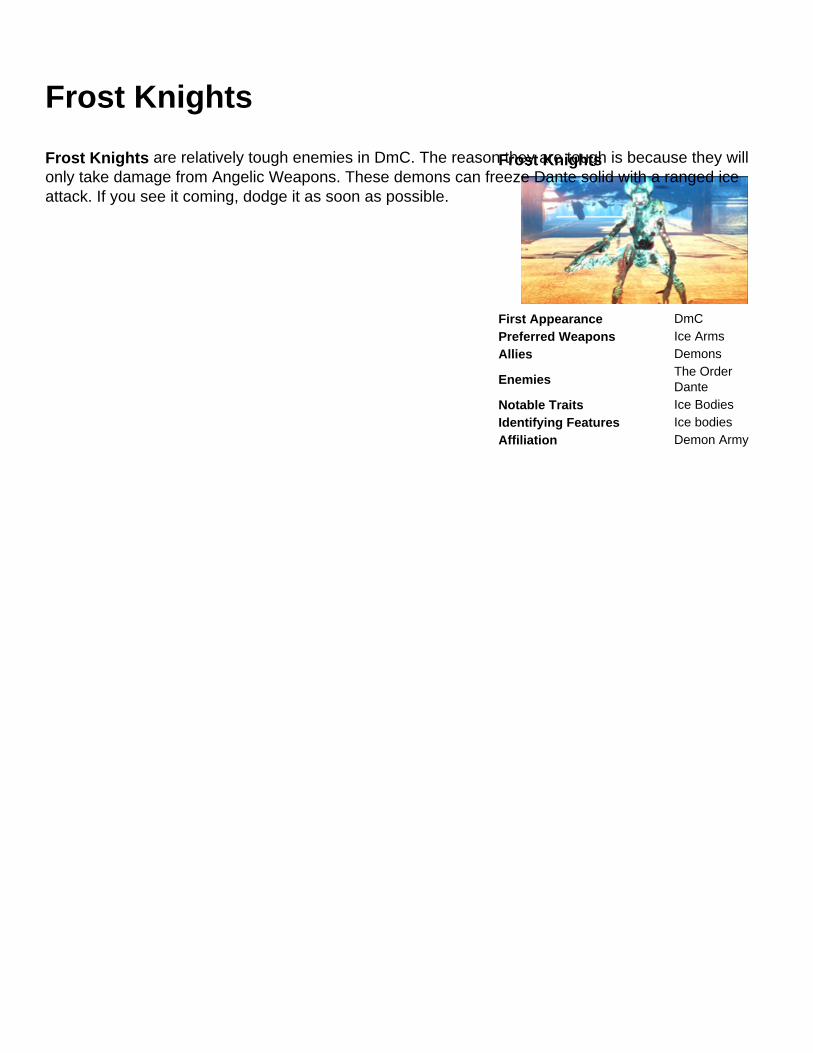
Frost Knights
Frost Knights
First Appearance DmCPreferred Weapons Ice ArmsAllies Demons
EnemiesThe OrderDante
Notable Traits Ice BodiesIdentifying Features Ice bodiesAffiliation Demon Army
Frost Knights are relatively tough enemies in DmC. The reason they are tough is because they will only take damage from Angelic Weapons. These demons can freeze Dante solid with a ranged ice attack. If you see it coming, dodge it as soon as possible.
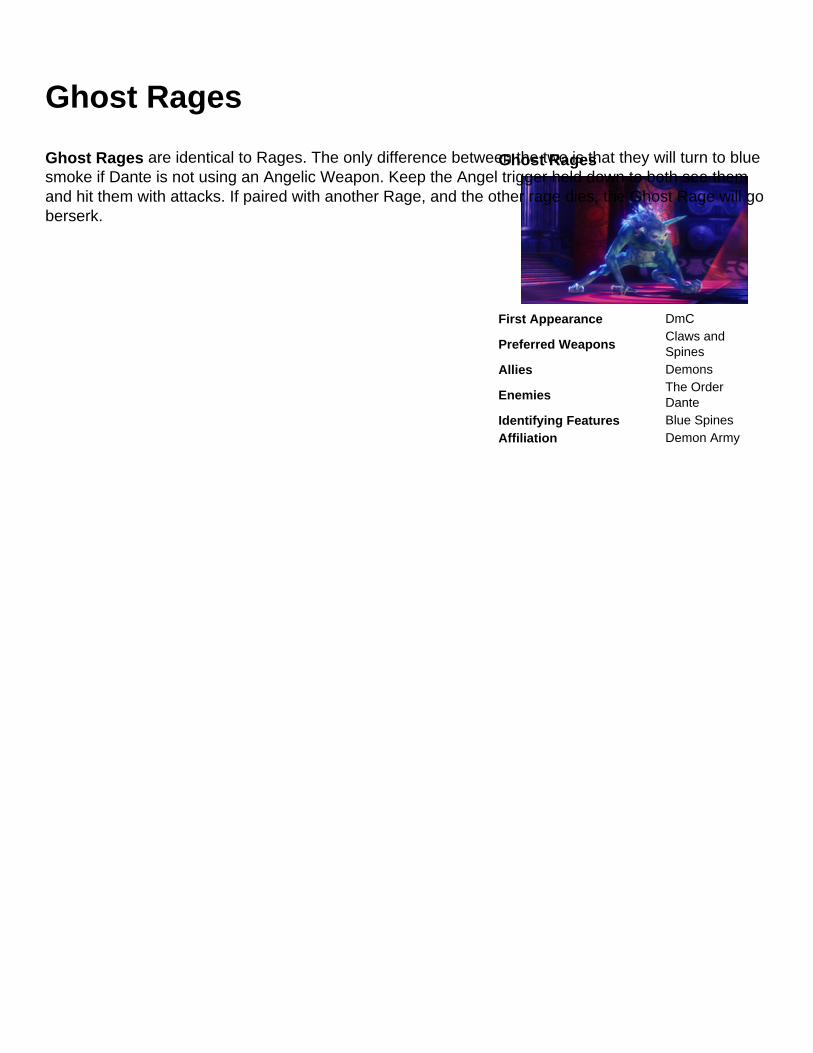
Ghost Rages
Ghost Rages
First Appearance DmC
Preferred WeaponsClaws and Spines
Allies Demons
EnemiesThe OrderDante
Identifying Features Blue SpinesAffiliation Demon Army
Ghost Rages are identical to Rages. The only difference between the two is that they will turn to blue smoke if Dante is not using an Angelic Weapon. Keep the Angel trigger held down to both see them and hit them with attacks. If paired with another Rage, and the other rage dies, the Ghost Rage will go berserk.
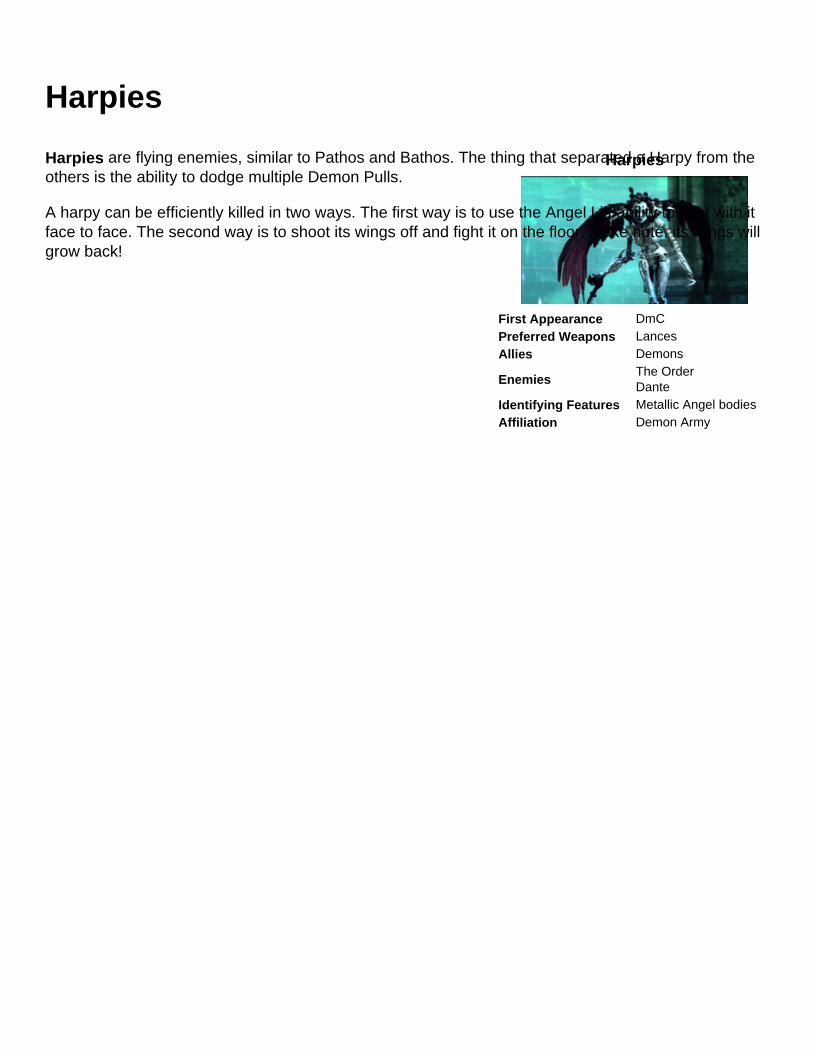
Harpies
Harpies
First Appearance DmCPreferred Weapons LancesAllies Demons
EnemiesThe OrderDante
Identifying Features Metallic Angel bodiesAffiliation Demon Army
Harpies are flying enemies, similar to Pathos and Bathos. The thing that separated a Harpy from the others is the ability to dodge multiple Demon Pulls.
A harpy can be efficiently killed in two ways. The first way is to use the Angel Lift ability to fight with it face to face. The second way is to shoot its wings off and fight it on the floor. Make note, its wings will grow back!

Hell Knights
Death Knights
First Appearance DmCPreferred Weapons BladeAllies Demons
EnemiesThe OrderDante
Notable Traits Fire BodyAffiliation Demon Army
Hell Knights are tough enemies in DmC. They can only be damage by Demonic weapons like the Arbiter; everything else will do absolutely no damage. The Hell Knight has two attacks: a sword attack and the Ground Inferno. The Ground Inferno is when the Hell Knight plunges his sword into the ground, causing a wide radius to set on fire. If Dante is in demon mode when this happens, it will not cause any damage.
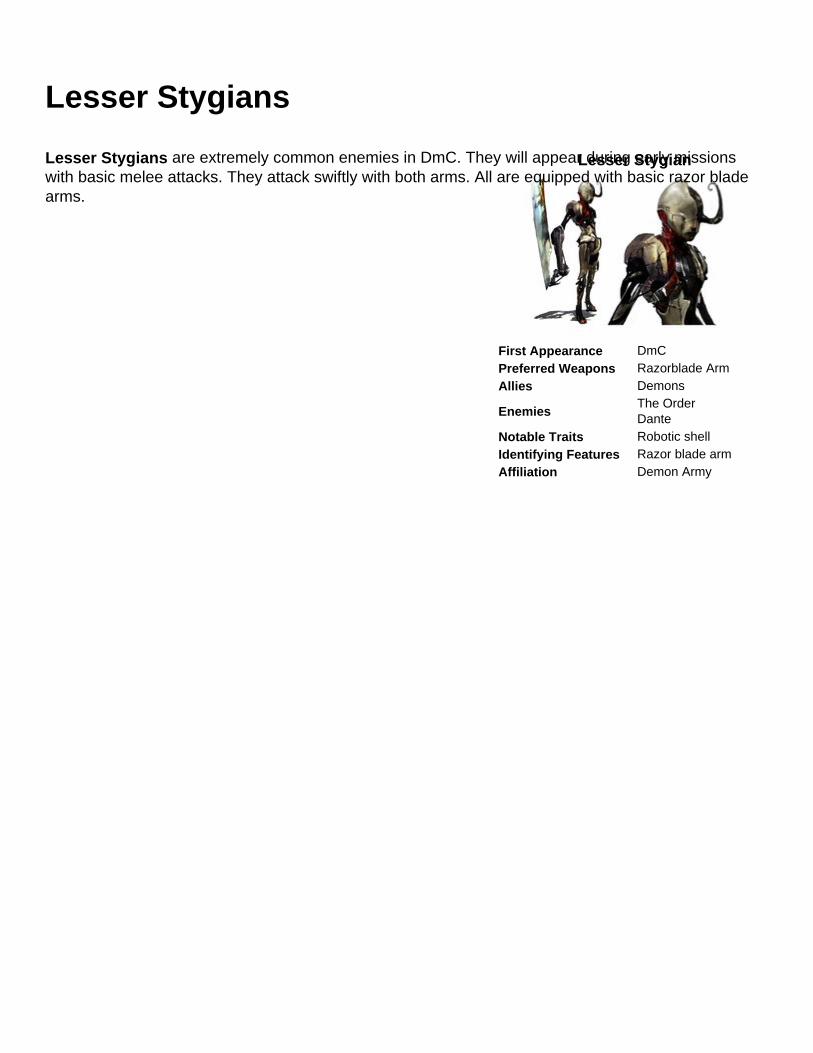
Lesser Stygians
Lesser Stygian
First Appearance DmCPreferred Weapons Razorblade ArmAllies Demons
EnemiesThe OrderDante
Notable Traits Robotic shellIdentifying Features Razor blade armAffiliation Demon Army
Lesser Stygians are extremely common enemies in DmC. They will appear during early missions with basic melee attacks. They attack swiftly with both arms. All are equipped with basic razor blade arms.
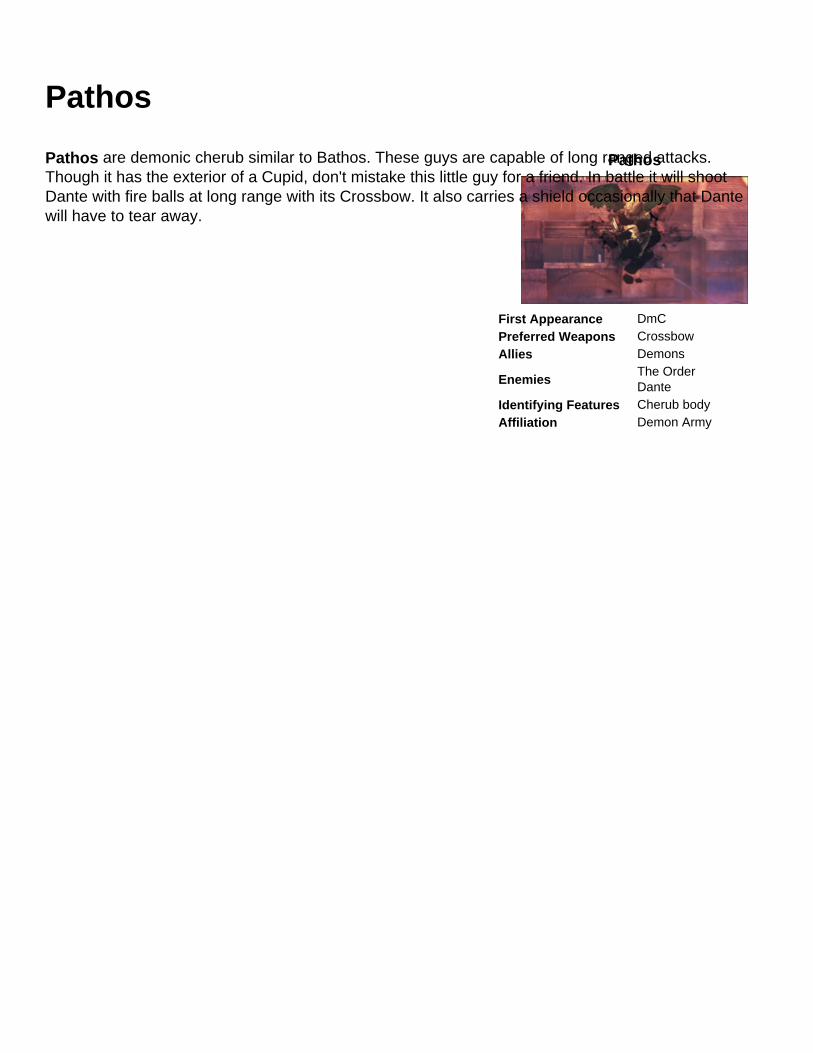
Pathos
Pathos
First Appearance DmCPreferred Weapons CrossbowAllies Demons
EnemiesThe OrderDante
Identifying Features Cherub bodyAffiliation Demon Army
Pathos are demonic cherub similar to Bathos. These guys are capable of long ranged attacks. Though it has the exterior of a Cupid, don't mistake this little guy for a friend. In battle it will shoot Dante with fire balls at long range with its Crossbow. It also carries a shield occasionally that Dante will have to tear away.
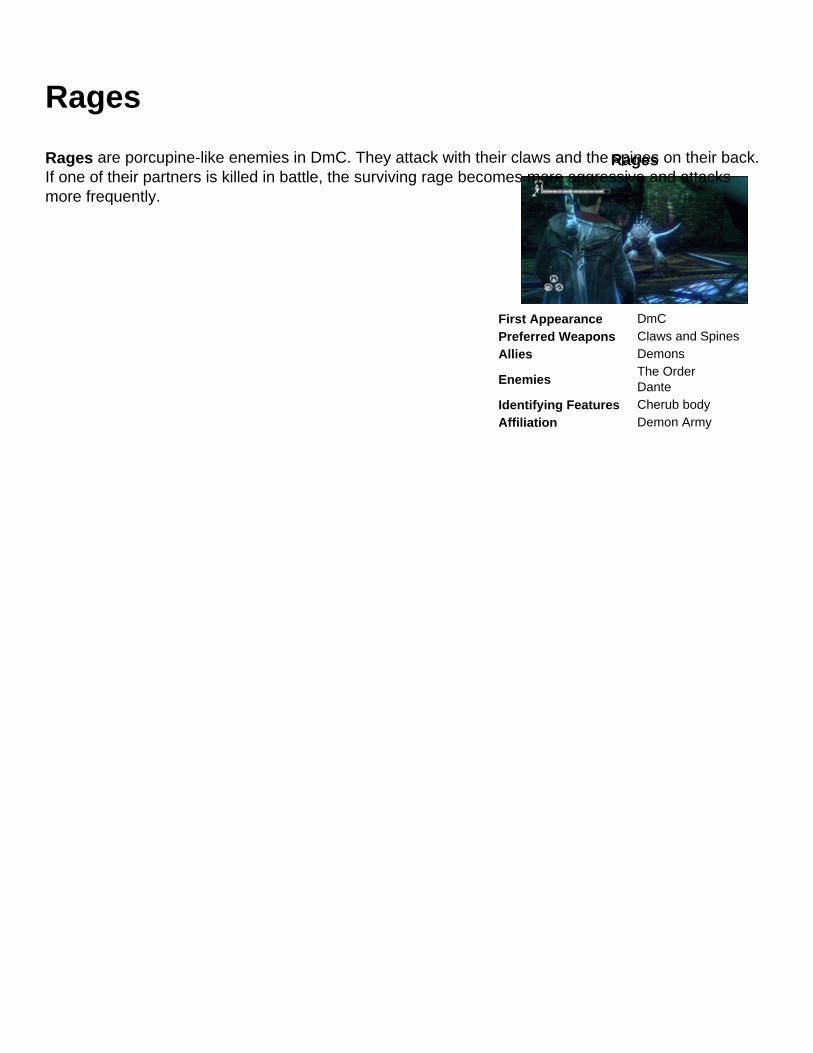
Rages
Rages
First Appearance DmCPreferred Weapons Claws and SpinesAllies Demons
EnemiesThe OrderDante
Identifying Features Cherub bodyAffiliation Demon Army
Rages are porcupine-like enemies in DmC. They attack with their claws and the spines on their back. If one of their partners is killed in battle, the surviving rage becomes more aggressive and attacks more frequently.
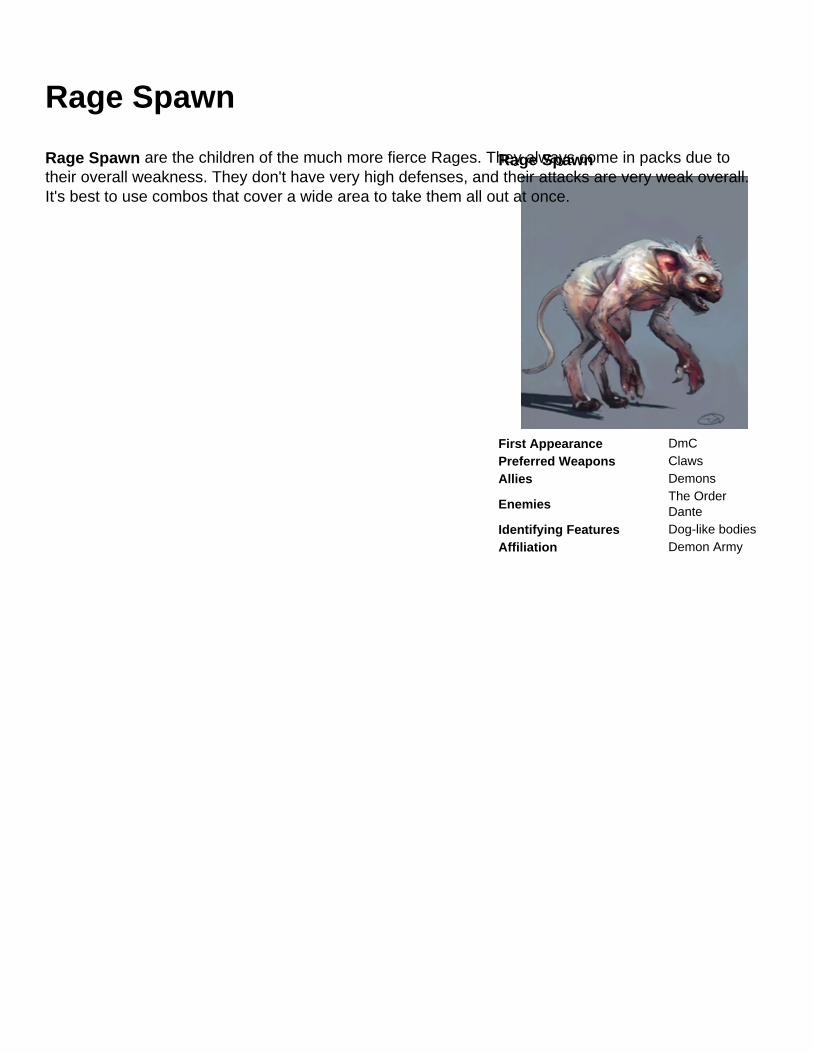
Rage Spawn
Rage Spawn
First Appearance DmCPreferred Weapons ClawsAllies Demons
EnemiesThe OrderDante
Identifying Features Dog-like bodiesAffiliation Demon Army
Rage Spawn are the children of the much more fierce Rages. They always come in packs due to their overall weakness. They don't have very high defenses, and their attacks are very weak overall. It's best to use combos that cover a wide area to take them all out at once.
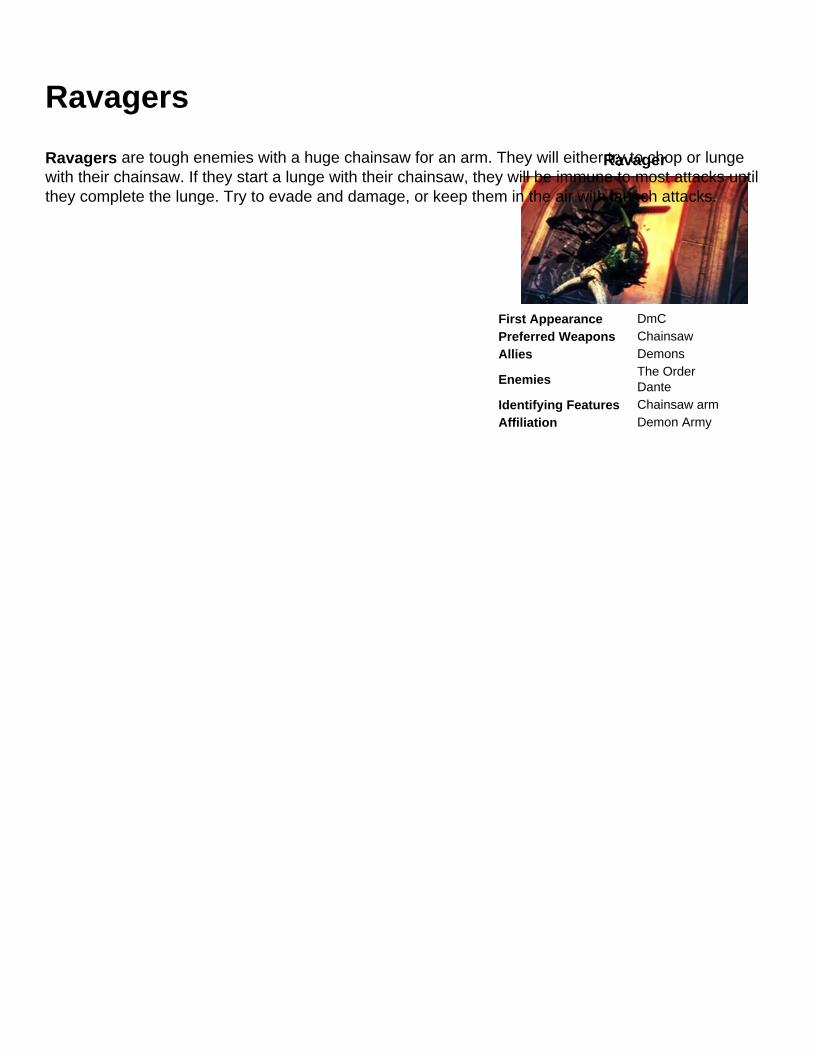
Ravagers
Ravager
First Appearance DmCPreferred Weapons ChainsawAllies Demons
EnemiesThe OrderDante
Identifying Features Chainsaw armAffiliation Demon Army
Ravagers are tough enemies with a huge chainsaw for an arm. They will either try to chop or lunge with their chainsaw. If they start a lunge with their chainsaw, they will be immune to most attacks until they complete the lunge. Try to evade and damage, or keep them in the air with launch attacks.
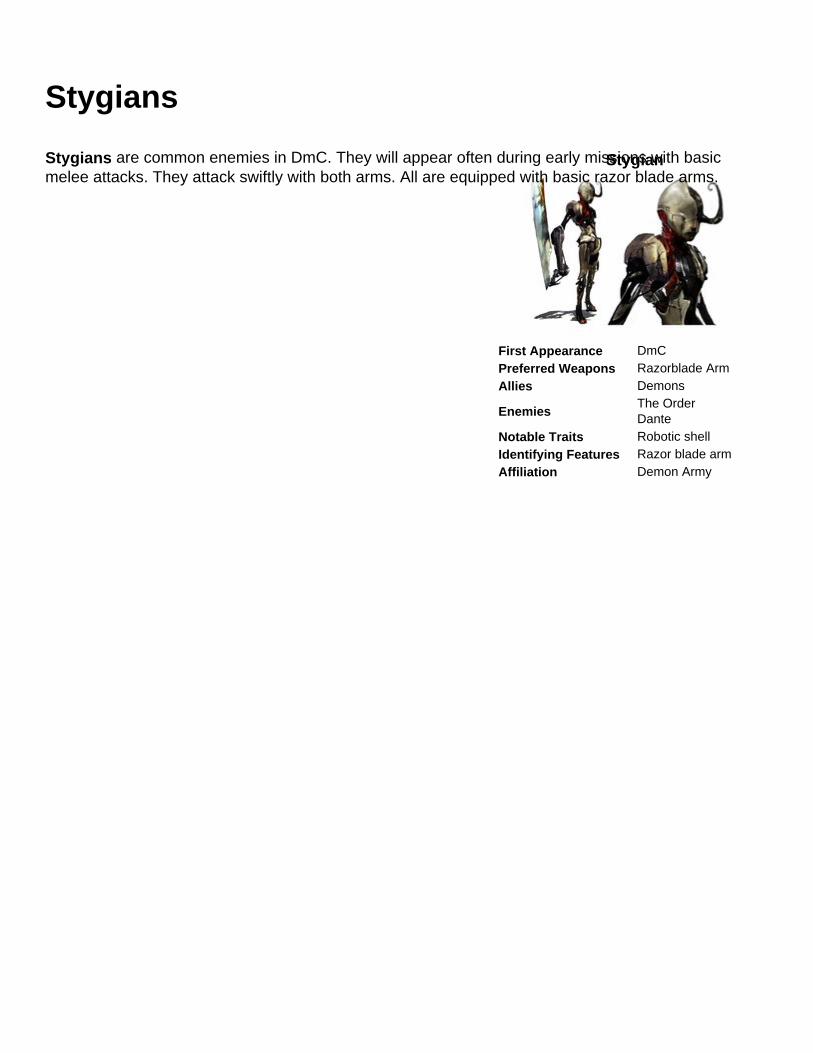
Stygians
Stygian
First Appearance DmCPreferred Weapons Razorblade ArmAllies Demons
EnemiesThe OrderDante
Notable Traits Robotic shellIdentifying Features Razor blade armAffiliation Demon Army
Stygians are common enemies in DmC. They will appear often during early missions with basic melee attacks. They attack swiftly with both arms. All are equipped with basic razor blade arms.
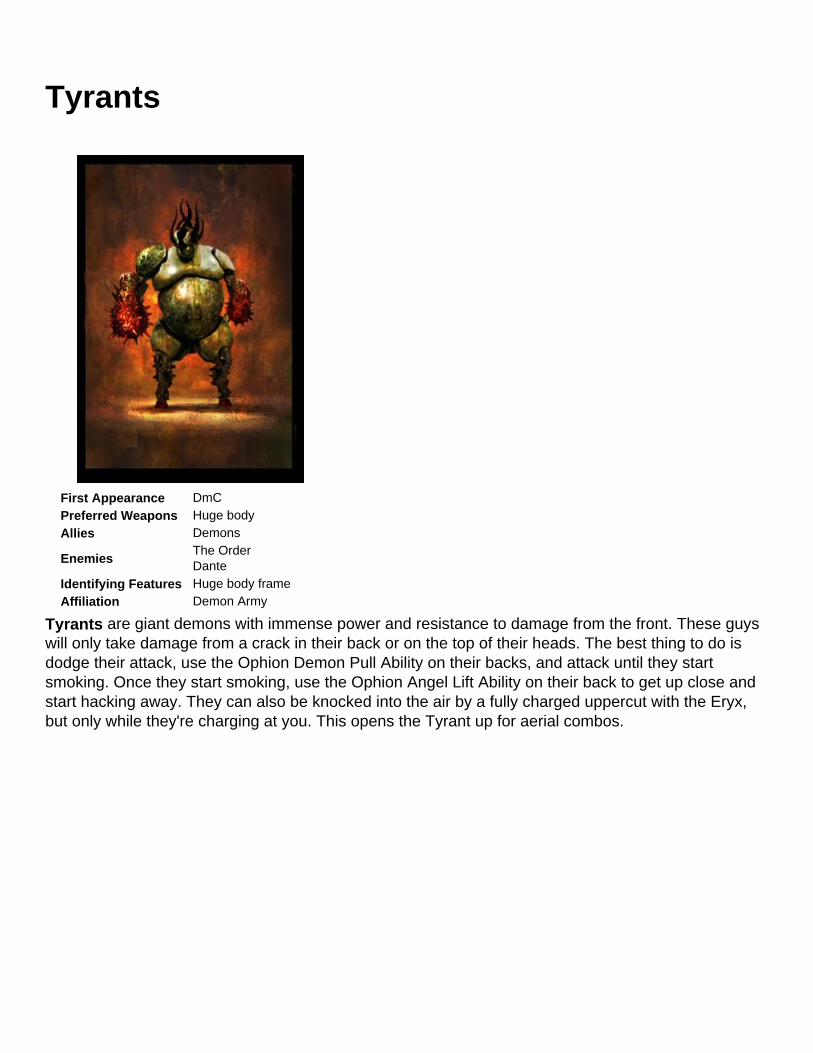
Tyrants
First Appearance DmCPreferred Weapons Huge bodyAllies Demons
EnemiesThe OrderDante
Identifying Features Huge body frameAffiliation Demon Army
Tyrants are giant demons with immense power and resistance to damage from the front. These guys will only take damage from a crack in their back or on the top of their heads. The best thing to do is dodge their attack, use the Ophion Demon Pull Ability on their backs, and attack until they start smoking. Once they start smoking, use the Ophion Angel Lift Ability on their back to get up close and start hacking away. They can also be knocked into the air by a fully charged uppercut with the Eryx, but only while they're charging at you. This opens the Tyrant up for aerial combos.
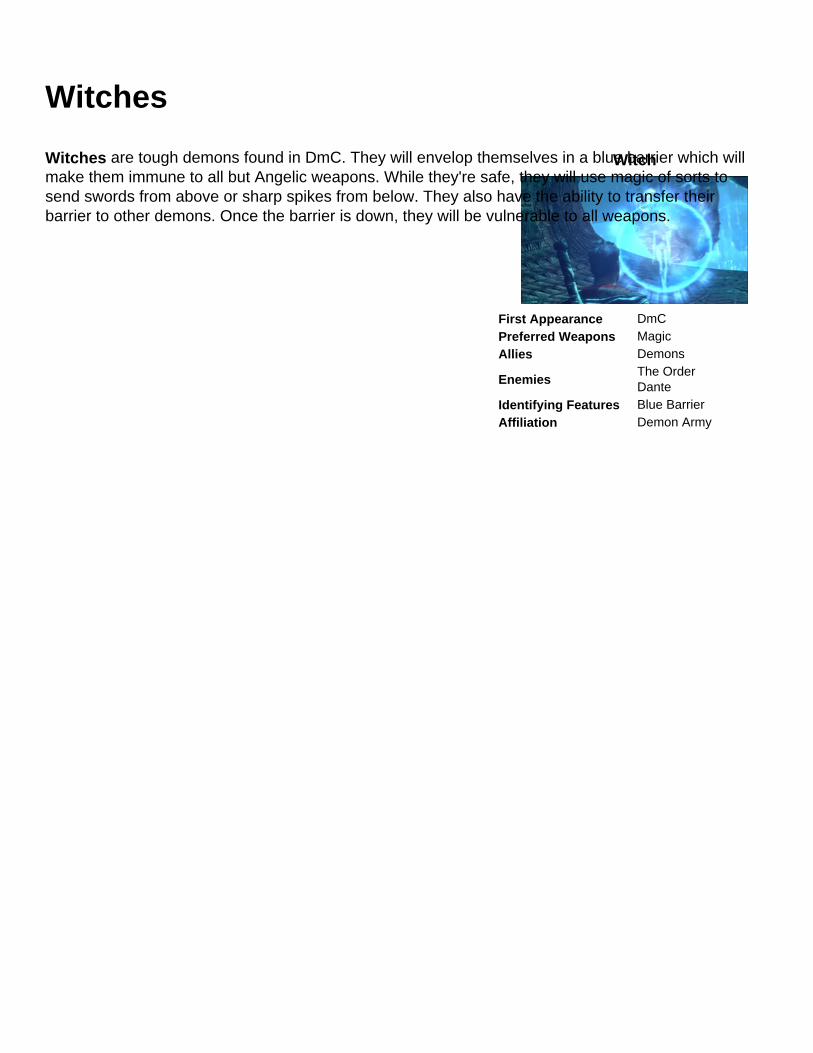
Witches
Witch
First Appearance DmCPreferred Weapons MagicAllies Demons
EnemiesThe OrderDante
Identifying Features Blue BarrierAffiliation Demon Army
Witches are tough demons found in DmC. They will envelop themselves in a blue barrier which will make them immune to all but Angelic weapons. While they're safe, they will use magic of sorts to send swords from above or sharp spikes from below. They also have the ability to transfer their barrier to other demons. Once the barrier is down, they will be vulnerable to all weapons.
Bosses
The full list of Bosses found in DmC: Devil May Cry include:
HunterSuccubusBob BarbasMundus' SpawnMundus
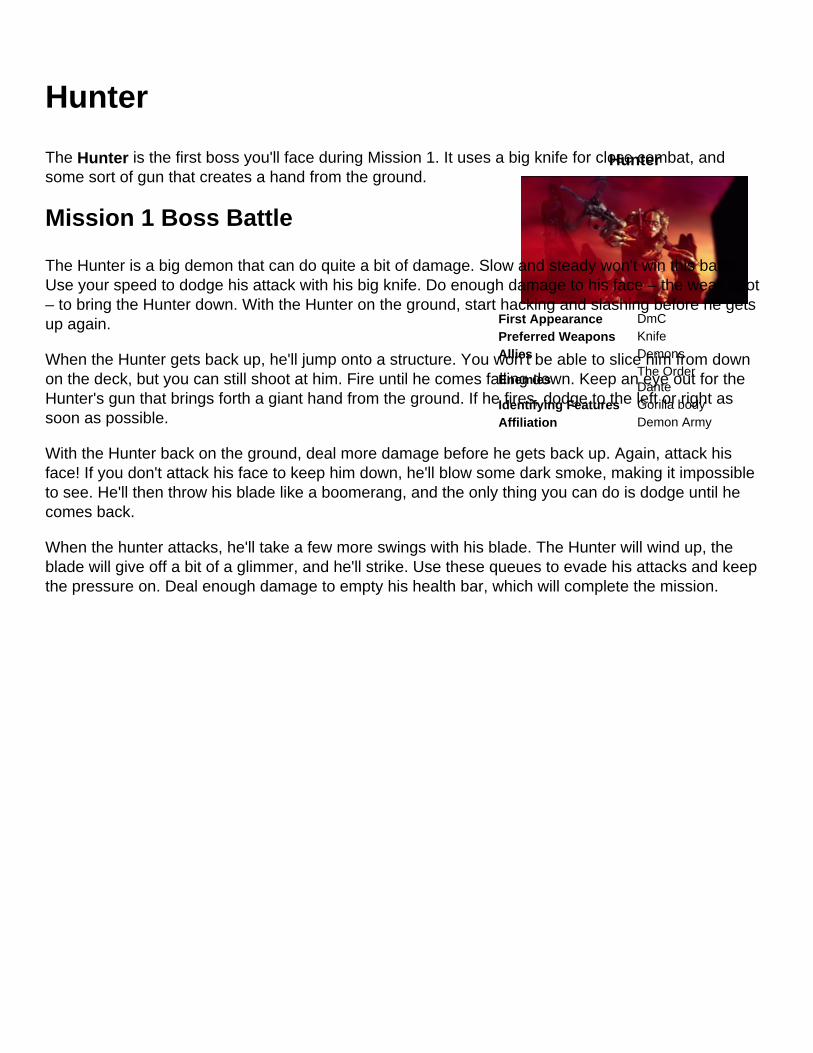
Hunter
Hunter
First Appearance DmCPreferred Weapons KnifeAllies Demons
EnemiesThe OrderDante
Identifying Features Gorilla bodyAffiliation Demon Army
The Hunter is the first boss you'll face during Mission 1. It uses a big knife for close combat, and some sort of gun that creates a hand from the ground.
Mission 1 Boss Battle
The Hunter is a big demon that can do quite a bit of damage. Slow and steady won't win this battle. Use your speed to dodge his attack with his big knife. Do enough damage to his face – the weak spot – to bring the Hunter down. With the Hunter on the ground, start hacking and slashing before he gets up again.
When the Hunter gets back up, he'll jump onto a structure. You won't be able to slice him from down on the deck, but you can still shoot at him. Fire until he comes falling down. Keep an eye out for the Hunter's gun that brings forth a giant hand from the ground. If he fires, dodge to the left or right as soon as possible.
With the Hunter back on the ground, deal more damage before he gets back up. Again, attack his face! If you don't attack his face to keep him down, he'll blow some dark smoke, making it impossible to see. He'll then throw his blade like a boomerang, and the only thing you can do is dodge until he comes back.
When the hunter attacks, he'll take a few more swings with his blade. The Hunter will wind up, the blade will give off a bit of a glimmer, and he'll strike. Use these queues to evade his attacks and keep the pressure on. Deal enough damage to empty his health bar, which will complete the mission.
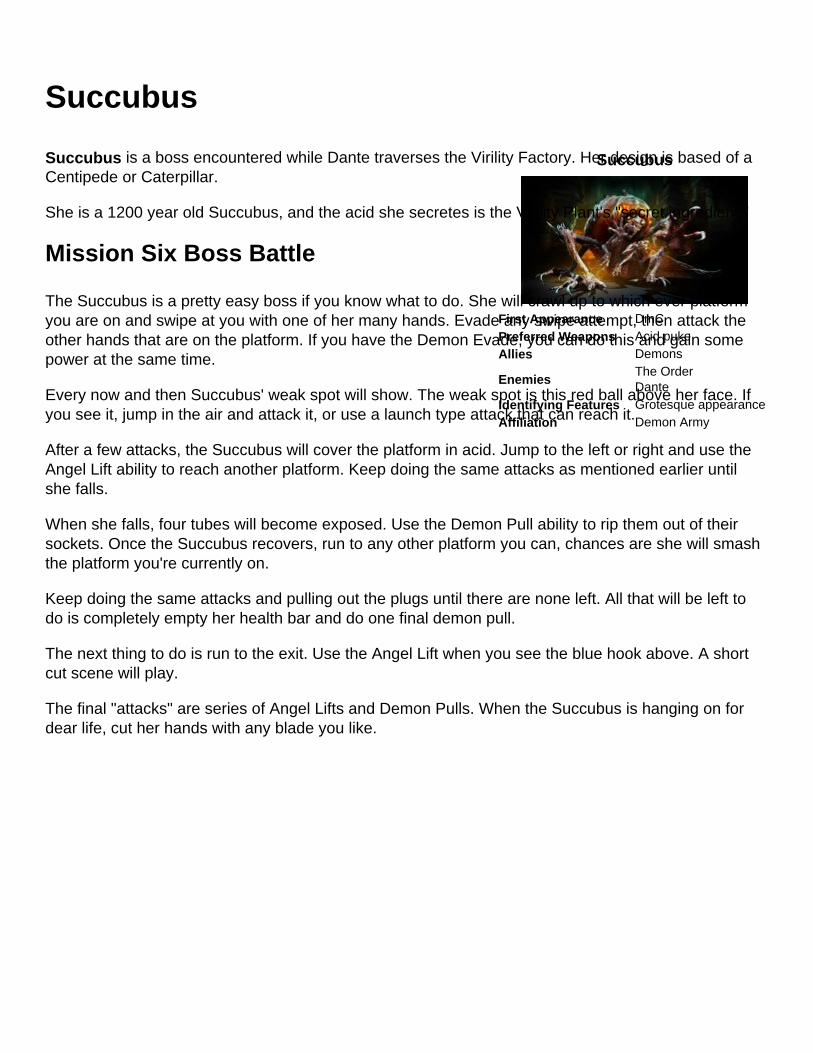
Succubus
Succubus
First Appearance DmCPreferred Weapons Acid pukeAllies Demons
EnemiesThe OrderDante
Identifying Features Grotesque appearanceAffiliation Demon Army
Succubus is a boss encountered while Dante traverses the Virility Factory. Her design is based of a Centipede or Caterpillar.
She is a 1200 year old Succubus, and the acid she secretes is the Virility Plant's "secret ingredient."
Mission Six Boss Battle
The Succubus is a pretty easy boss if you know what to do. She will crawl up to which ever platform you are on and swipe at you with one of her many hands. Evade any swipe attempt, then attack the other hands that are on the platform. If you have the Demon Evade, you can do this and gain some power at the same time.
Every now and then Succubus' weak spot will show. The weak spot is this red ball above her face. If you see it, jump in the air and attack it, or use a launch type attack that can reach it.
After a few attacks, the Succubus will cover the platform in acid. Jump to the left or right and use the Angel Lift ability to reach another platform. Keep doing the same attacks as mentioned earlier until she falls.
When she falls, four tubes will become exposed. Use the Demon Pull ability to rip them out of their sockets. Once the Succubus recovers, run to any other platform you can, chances are she will smash the platform you're currently on.
Keep doing the same attacks and pulling out the plugs until there are none left. All that will be left to do is completely empty her health bar and do one final demon pull.
The next thing to do is run to the exit. Use the Angel Lift when you see the blue hook above. A short cut scene will play.
The final "attacks" are series of Angel Lifts and Demon Pulls. When the Succubus is hanging on for dear life, cut her hands with any blade you like.
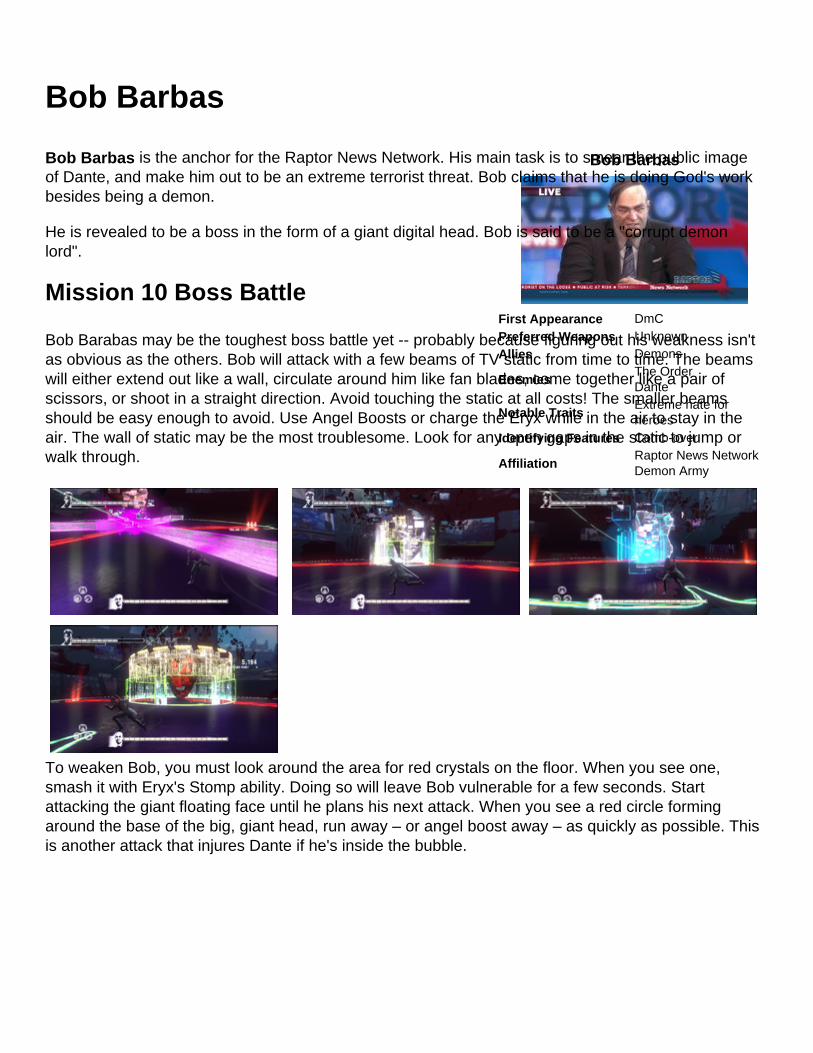
Bob Barbas
Bob Barbas
First Appearance DmCPreferred Weapons UnknownAllies Demons
EnemiesThe OrderDante
Notable TraitsExtreme hate for heroes
Identifying Features Comb-over
AffiliationRaptor News NetworkDemon Army
Bob Barbas is the anchor for the Raptor News Network. His main task is to smear the public image of Dante, and make him out to be an extreme terrorist threat. Bob claims that he is doing God's work besides being a demon.
He is revealed to be a boss in the form of a giant digital head. Bob is said to be a "corrupt demon lord".
Mission 10 Boss Battle
Bob Barabas may be the toughest boss battle yet -- probably because figuring out his weakness isn't as obvious as the others. Bob will attack with a few beams of TV static from time to time. The beams will either extend out like a wall, circulate around him like fan blades, come together like a pair of scissors, or shoot in a straight direction. Avoid touching the static at all costs! The smaller beams should be easy enough to avoid. Use Angel Boosts or charge the Eryx while in the air to stay in the air. The wall of static may be the most troublesome. Look for any open gaps in the static to jump or walk through.
To weaken Bob, you must look around the area for red crystals on the floor. When you see one, smash it with Eryx's Stomp ability. Doing so will leave Bob vulnerable for a few seconds. Start attacking the giant floating face until he plans his next attack. When you see a red circle forming around the base of the big, giant head, run away – or angel boost away – as quickly as possible. This is another attack that injures Dante if he's inside the bubble.
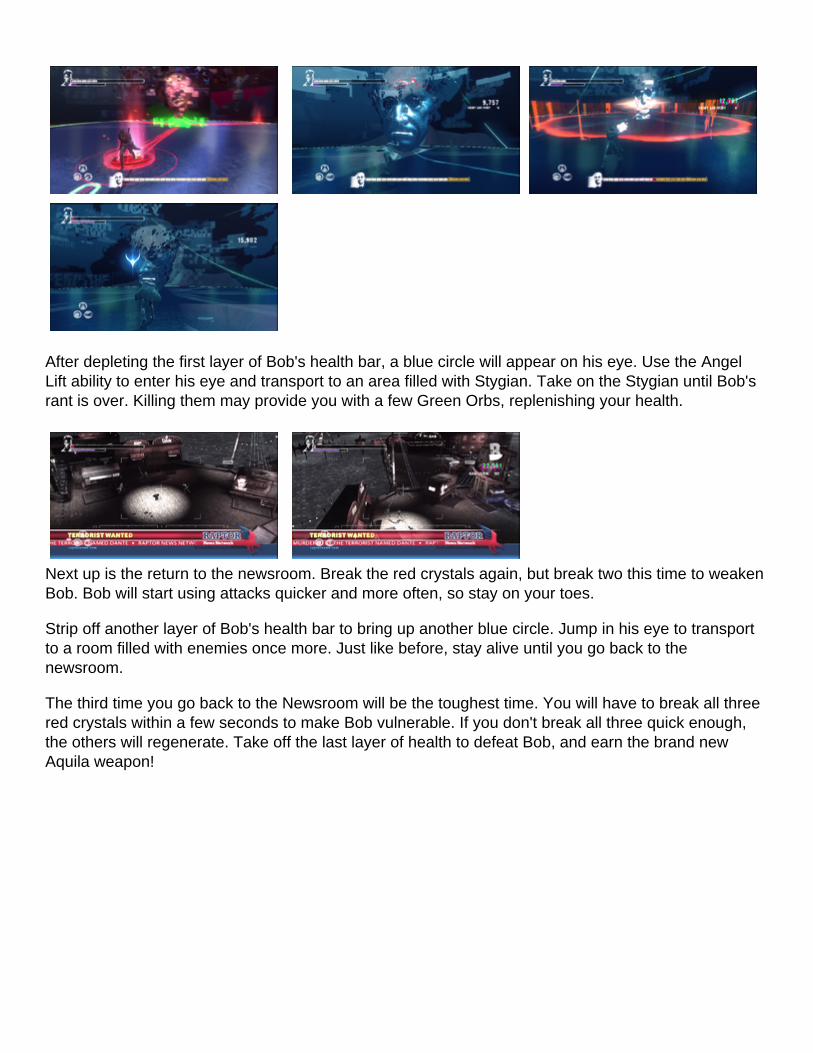
After depleting the first layer of Bob's health bar, a blue circle will appear on his eye. Use the Angel Lift ability to enter his eye and transport to an area filled with Stygian. Take on the Stygian until Bob's rant is over. Killing them may provide you with a few Green Orbs, replenishing your health.
Next up is the return to the newsroom. Break the red crystals again, but break two this time to weaken Bob. Bob will start using attacks quicker and more often, so stay on your toes.
Strip off another layer of Bob's health bar to bring up another blue circle. Jump in his eye to transport to a room filled with enemies once more. Just like before, stay alive until you go back to the newsroom.
The third time you go back to the Newsroom will be the toughest time. You will have to break all three red crystals within a few seconds to make Bob vulnerable. If you don't break all three quick enough, the others will regenerate. Take off the last layer of health to defeat Bob, and earn the brand new Aquila weapon!
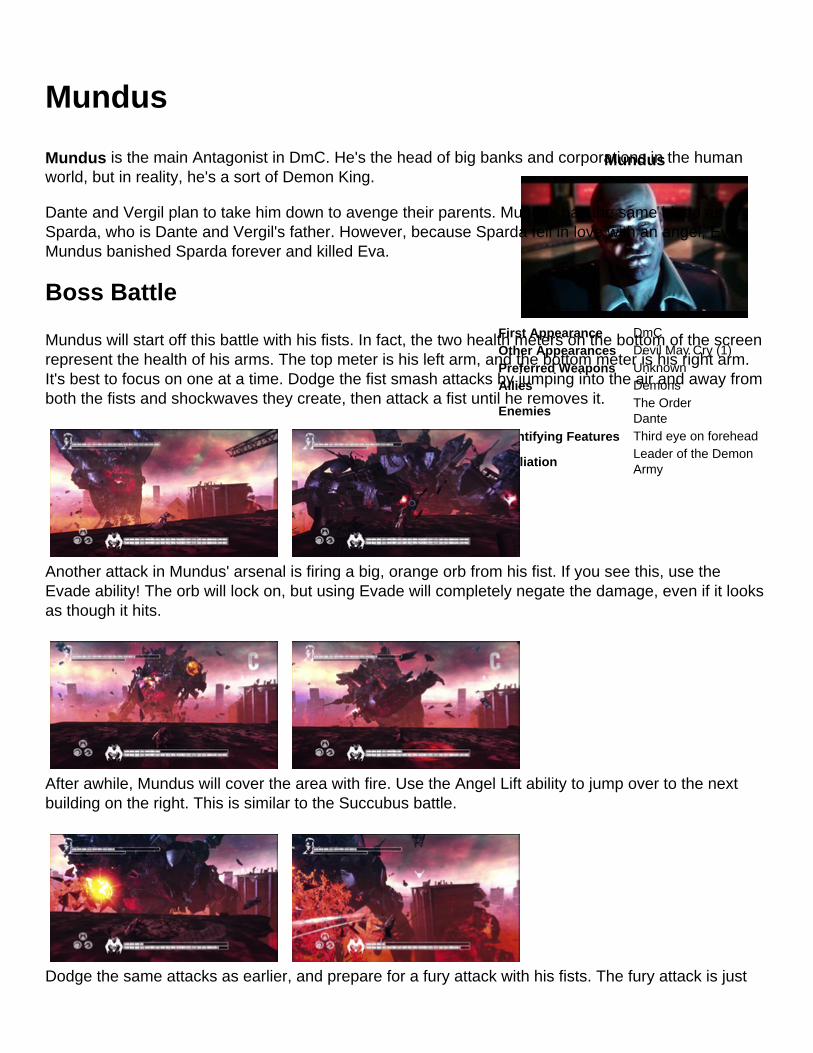
Mundus
Mundus
First Appearance DmCOther Appearances Devil May Cry (1)Preferred Weapons UnknownAllies Demons
EnemiesThe OrderDante
Identifying Features Third eye on forehead
AffiliationLeader of the Demon Army
Mundus is the main Antagonist in DmC. He's the head of big banks and corporations in the human world, but in reality, he's a sort of Demon King.
Dante and Vergil plan to take him down to avenge their parents. Mundus has the same blood as Sparda, who is Dante and Vergil's father. However, because Sparda fell in love with an angel, Eva, Mundus banished Sparda forever and killed Eva.
Boss Battle
Mundus will start off this battle with his fists. In fact, the two health meters on the bottom of the screen represent the health of his arms. The top meter is his left arm, and the bottom meter is his right arm. It's best to focus on one at a time. Dodge the fist smash attacks by jumping into the air and away from both the fists and shockwaves they create, then attack a fist until he removes it.
Another attack in Mundus' arsenal is firing a big, orange orb from his fist. If you see this, use the Evade ability! The orb will lock on, but using Evade will completely negate the damage, even if it looks as though it hits.
After awhile, Mundus will cover the area with fire. Use the Angel Lift ability to jump over to the next building on the right. This is similar to the Succubus battle.
Dodge the same attacks as earlier, and prepare for a fury attack with his fists. The fury attack is just
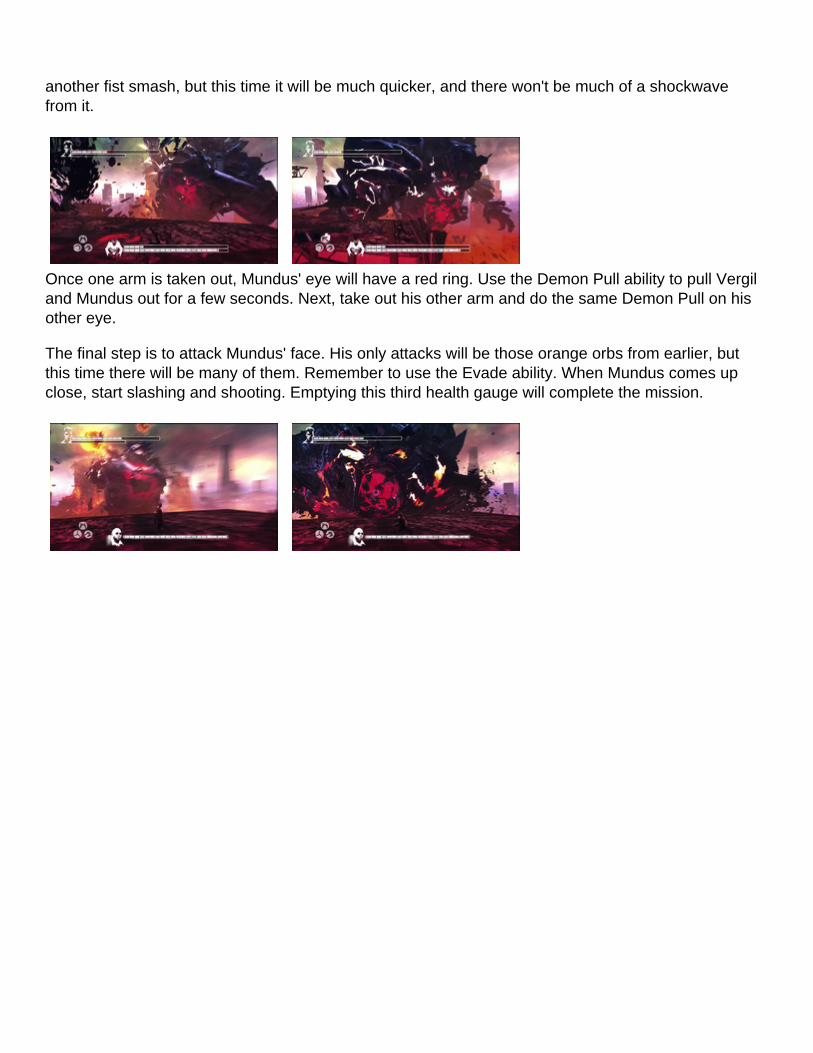
another fist smash, but this time it will be much quicker, and there won't be much of a shockwave from it.
Once one arm is taken out, Mundus' eye will have a red ring. Use the Demon Pull ability to pull Vergil and Mundus out for a few seconds. Next, take out his other arm and do the same Demon Pull on his other eye.
The final step is to attack Mundus' face. His only attacks will be those orange orbs from earlier, but this time there will be many of them. Remember to use the Evade ability. When Mundus comes up close, start slashing and shooting. Emptying this third health gauge will complete the mission.

DmC Trailers
Here are a few trailers for DmC you shouldn't miss.
IGN Rewind Theater: DmC Debut Trailer
Click this link to see the videohttp://www.ign.com/videos/2011/12/01/devil-may-cry-dmc-gameplay
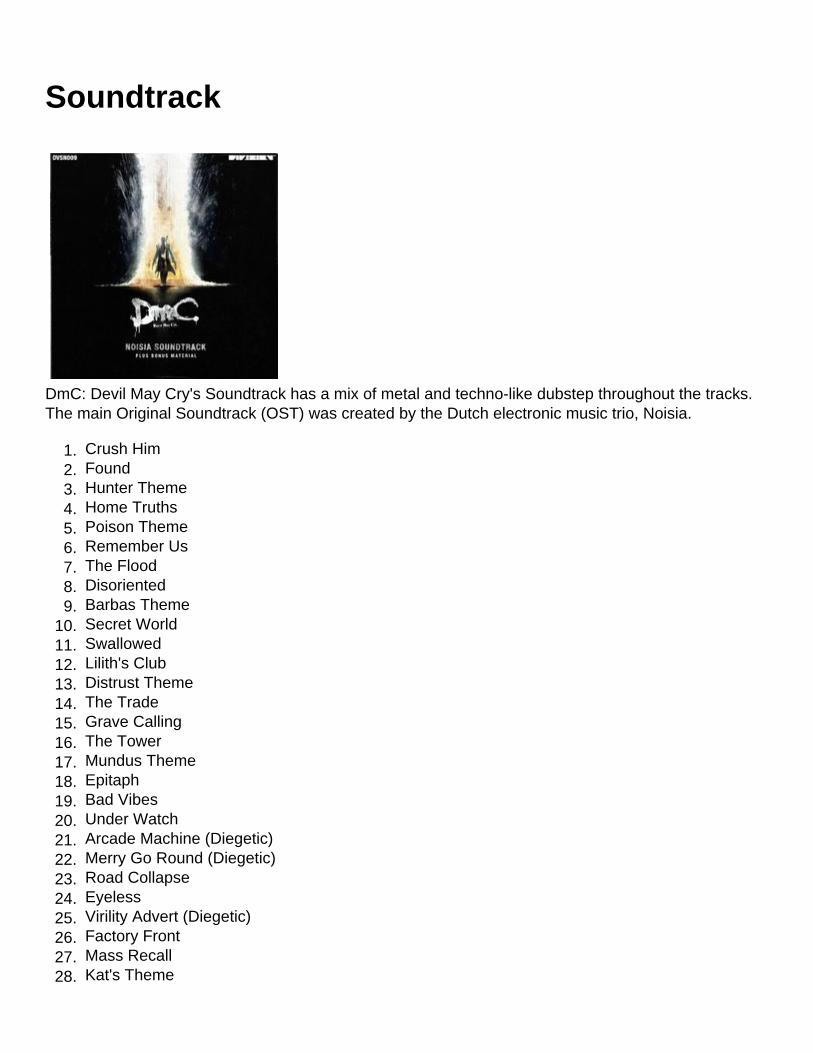
Soundtrack
DmC: Devil May Cry's Soundtrack has a mix of metal and techno-like dubstep throughout the tracks. The main Original Soundtrack (OST) was created by the Dutch electronic music trio, Noisia.
1. Crush Him2. Found3. Hunter Theme4. Home Truths5. Poison Theme6. Remember Us7. The Flood8. Disoriented9. Barbas Theme
10. Secret World11. Swallowed12. Lilith's Club13. Distrust Theme14. The Trade15. Grave Calling16. The Tower17. Mundus Theme18. Epitaph19. Bad Vibes20. Under Watch21. Arcade Machine (Diegetic)22. Merry Go Round (Diegetic)23. Road Collapse24. Eyeless25. Virility Advert (Diegetic)26. Factory Front27. Mass Recall28. Kat's Theme
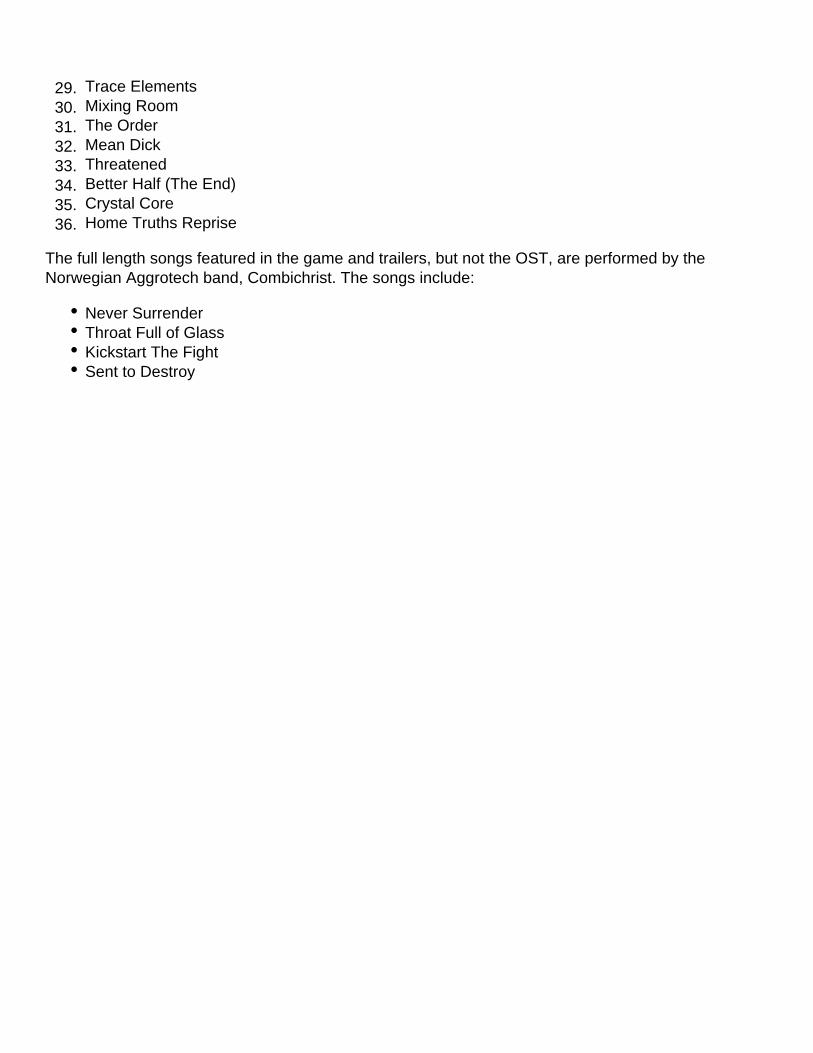
29. Trace Elements30. Mixing Room31. The Order32. Mean Dick33. Threatened34. Better Half (The End)35. Crystal Core36. Home Truths Reprise
The full length songs featured in the game and trailers, but not the OST, are performed by the Norwegian Aggrotech band, Combichrist. The songs include:
Never SurrenderThroat Full of GlassKickstart The FightSent to Destroy

Frequently Asked Questions
Who is developing DmC?
Ninja Theory is developing DmC; they are based in Cambridge, England and have developed games such as Kung Fu Chaos (as Just Add Monsters) (2003), Heavenly Sword (2007), Enslaved: Odyssey To The West (2010) and Heavenly Sword 2 (Canceled). Capcom has confirmed that team members who've helped develop previous Devil May Cry titles, including former co-director Hideaki Itsuno, have been assigned to ensure that the "Devil May Cry DNA" remains intact.
Is this a sequel or tie-in to any of the previous Devil May Cry games in the series?
DmC will not follow the same story as the previous numbered series. It is an origin story of an alternate Universe Dante. It has been described as a "quasi-prequel."
What's Dante's story in DmC then?
The images of Dante's younger self depict a brash rebel who has no respect for authority or society. He's aware of his supernatural abilities, yet he is not quite human nor demon. He straddles this line between worlds, and is pursued by both the government and actual demons.
According to Capcom, "this split personality has a real impact on gameplay with Dante being able to call upon Angel and Demon abilities at will, transforming his Rebellion sword on the fly to dramatically affect both combat and movement."
Will combos still be a major part of combat?
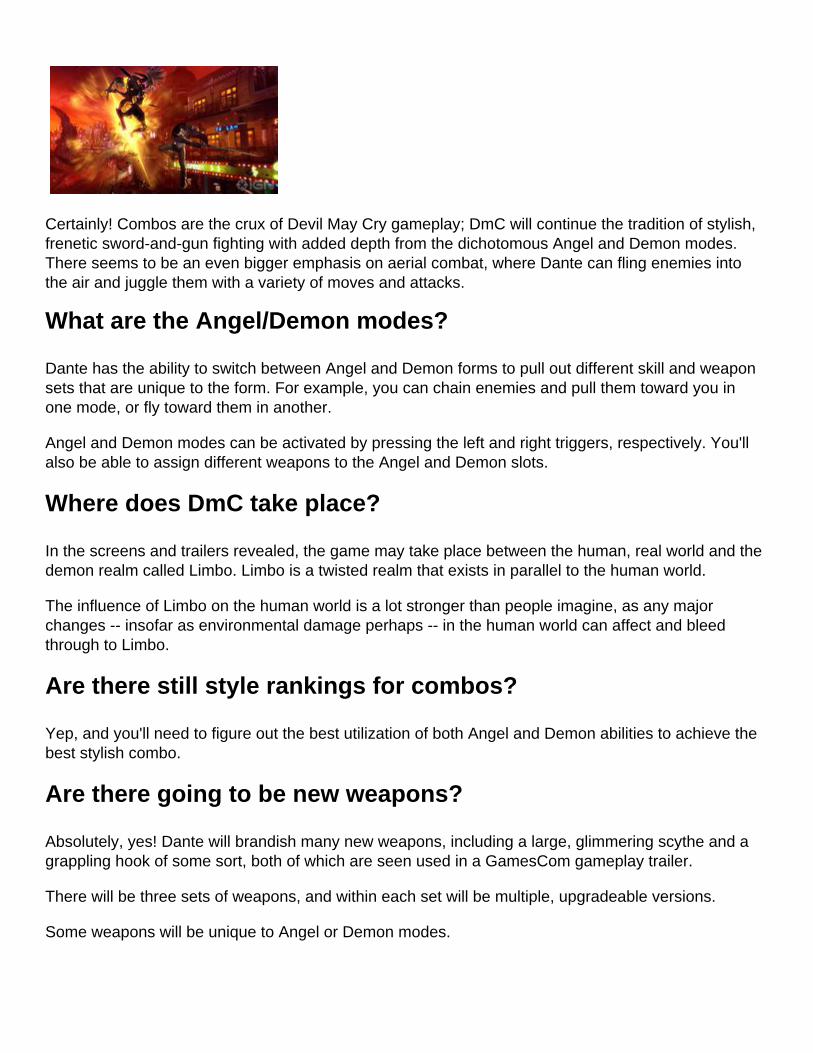
Certainly! Combos are the crux of Devil May Cry gameplay; DmC will continue the tradition of stylish, frenetic sword-and-gun fighting with added depth from the dichotomous Angel and Demon modes. There seems to be an even bigger emphasis on aerial combat, where Dante can fling enemies into the air and juggle them with a variety of moves and attacks.
What are the Angel/Demon modes?
Dante has the ability to switch between Angel and Demon forms to pull out different skill and weapon sets that are unique to the form. For example, you can chain enemies and pull them toward you in one mode, or fly toward them in another.
Angel and Demon modes can be activated by pressing the left and right triggers, respectively. You'll also be able to assign different weapons to the Angel and Demon slots.
Where does DmC take place?
In the screens and trailers revealed, the game may take place between the human, real world and the demon realm called Limbo. Limbo is a twisted realm that exists in parallel to the human world.
The influence of Limbo on the human world is a lot stronger than people imagine, as any major changes -- insofar as environmental damage perhaps -- in the human world can affect and bleed through to Limbo.
Are there still style rankings for combos?
Yep, and you'll need to figure out the best utilization of both Angel and Demon abilities to achieve the best stylish combo.
Are there going to be new weapons?
Absolutely, yes! Dante will brandish many new weapons, including a large, glimmering scythe and a grappling hook of some sort, both of which are seen used in a GamesCom gameplay trailer.
There will be three sets of weapons, and within each set will be multiple, upgradeable versions.
Some weapons will be unique to Angel or Demon modes.
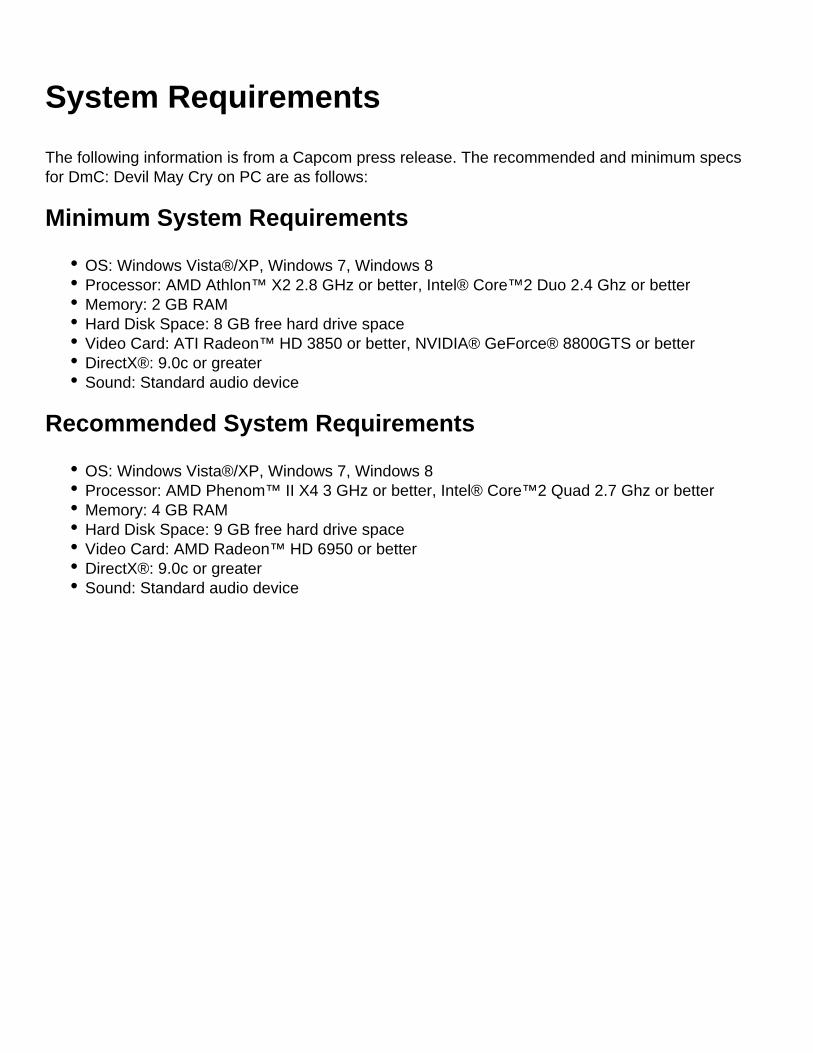
System Requirements
The following information is from a Capcom press release. The recommended and minimum specs for DmC: Devil May Cry on PC are as follows:
Minimum System Requirements
OS: Windows Vista®/XP, Windows 7, Windows 8Processor: AMD Athlon™ X2 2.8 GHz or better, Intel® Core™2 Duo 2.4 Ghz or betterMemory: 2 GB RAMHard Disk Space: 8 GB free hard drive spaceVideo Card: ATI Radeon™ HD 3850 or better, NVIDIA® GeForce® 8800GTS or betterDirectX®: 9.0c or greaterSound: Standard audio device
Recommended System Requirements
OS: Windows Vista®/XP, Windows 7, Windows 8Processor: AMD Phenom™ II X4 3 GHz or better, Intel® Core™2 Quad 2.7 Ghz or betterMemory: 4 GB RAMHard Disk Space: 9 GB free hard drive spaceVideo Card: AMD Radeon™ HD 6950 or betterDirectX®: 9.0c or greaterSound: Standard audio device


![[WIKI] Harpoon (Missile) - baixardoc](https://img.dokumen.tips/doc/110x75/63365a5062e2e08d490373a8/wiki-harpoon-missile-baixardoc.jpg)

