Embed Size (px)
Citation preview
Dell EMC Storage SystemsCLI Guide for the metro node appliance
7.0 Service Pack 1
September 2021

Notes, cautions, and warnings
NOTE: A NOTE indicates important information that helps you make better use of your product.
CAUTION: A CAUTION indicates either potential damage to hardware or loss of data and tells you how to avoid
the problem.
WARNING: A WARNING indicates a potential for property damage, personal injury, or death.
© 2021 Dell Inc. or its subsidiaries. All rights reserved. Dell, EMC, and other trademarks are trademarks of Dell Inc. or its subsidiaries. Othertrademarks may be trademarks of their respective owners.
Chapter 1: Introduction................................................................................................................. 9Preface...................................................................................................................................................................................9
Chapter 2: Using the VPlexcli.......................................................................................................12Logging into the CLI.......................................................................................................................................................... 12Password Policies.............................................................................................................................................................. 13
Valid Password Characters........................................................................................................................................ 13Logging out from the CLI.................................................................................................................................................14CLI context tree................................................................................................................................................................. 14Context tree searching..................................................................................................................................................... 14Navigate the CLI context tree........................................................................................................................................ 15
pushd and popd commands....................................................................................................................................... 16Where am I in the context tree?.............................................................................................................................. 16
Using CLI commands.........................................................................................................................................................18Page output................................................................................................................................................................... 18Tab completion............................................................................................................................................................. 19Wildcards........................................................................................................................................................................19Names............................................................................................................................................................................. 21Specifying addresses...................................................................................................................................................21Command globbing......................................................................................................................................................22Positional command arguments............................................................................................................................... 22Search command history........................................................................................................................................... 23View command history............................................................................................................................................... 23Get help......................................................................................................................................................................... 23
Chapter 3: Commands................................................................................................................. 24advadm dismantle..............................................................................................................................................................28alias....................................................................................................................................................................................... 29array claim............................................................................................................................................................................31array forget.........................................................................................................................................................................32array re-discover............................................................................................................................................................... 33array used-by..................................................................................................................................................................... 35back-end degraded list.....................................................................................................................................................37back-end degraded recover............................................................................................................................................38batch-migrate cancel....................................................................................................................................................... 39batch-migrate check-plan...............................................................................................................................................40batch-migrate clean.......................................................................................................................................................... 41batch-migrate commit......................................................................................................................................................43batch-migrate create-plan.............................................................................................................................................. 44batch-migrate pause........................................................................................................................................................ 46batch-migrate remove......................................................................................................................................................47batch-migrate resume......................................................................................................................................................48batch-migrate start.......................................................................................................................................................... 49batch-migrate summary................................................................................................................................................... 51
Contents
Contents 3
capture begin..................................................................................................................................................................... 53capture end.........................................................................................................................................................................54capture pause.................................................................................................................................................................... 55capture replay.................................................................................................................................................................... 55capture resume..................................................................................................................................................................56cd...........................................................................................................................................................................................57cluster add.......................................................................................................................................................................... 58cluster configdump........................................................................................................................................................... 59cluster expel....................................................................................................................................................................... 60cluster forget......................................................................................................................................................................62cluster show-remote-devices........................................................................................................................................ 63cluster shutdown...............................................................................................................................................................65cluster status......................................................................................................................................................................67cluster summary................................................................................................................................................................ 69cluster unexpel....................................................................................................................................................................71collect-diagnostics............................................................................................................................................................ 73configuration get-product-type..................................................................................................................................... 74configuration join-clusters...............................................................................................................................................75configuration metadata-backup.....................................................................................................................................76configuration show-meta-volume-candidates............................................................................................................78configuration upgrade-meta-slot-count...................................................................................................................... 79connectivity director........................................................................................................................................................ 80connectivity list all............................................................................................................................................................. 81connectivity list directors................................................................................................................................................82connectivity list initiators................................................................................................................................................ 83connectivity list storage-volumes................................................................................................................................. 84connectivity show............................................................................................................................................................. 85connectivity validate-be.................................................................................................................................................. 86connectivity validate-local-com.....................................................................................................................................88consistency-group add-virtual-volumes...................................................................................................................... 89consistency-group choose-winner.................................................................................................................................91consistency-group convert-to-local............................................................................................................................. 93consistency-group create............................................................................................................................................... 94consistency-group destroy............................................................................................................................................. 96consistency-group list-eligible-virtual-volumes..........................................................................................................97consistency-group remove-virtual-volumes............................................................................................................... 98consistency-group resolve-conflicting-detach.......................................................................................................... 99consistency-group resume-at-loser............................................................................................................................ 102consistency-group set-detach-rule no-automatic-winner.................................................................................... 104consistency-group set-detach-rule winner............................................................................................................... 105consistency-group summary.........................................................................................................................................106date..................................................................................................................................................................................... 107describe.............................................................................................................................................................................. 107device attach-mirror....................................................................................................................................................... 108device collapse.................................................................................................................................................................. 110device detach-mirror........................................................................................................................................................ 111device mirror-isolation auto-unisolation disable........................................................................................................115device mirror-isolation auto-unisolation enable........................................................................................................ 116device mirror-isolation disable....................................................................................................................................... 118device mirror-isolation enable.......................................................................................................................................120
4 Contents

device mirror-isolation show..........................................................................................................................................121device resume-link-down............................................................................................................................................... 123device resume-link-up.................................................................................................................................................... 125device resurrect-dead-storage-volumes................................................................................................................... 126director commission........................................................................................................................................................ 127director decommission....................................................................................................................................................128director fc-port-stats..................................................................................................................................................... 129director firmware show-banks..................................................................................................................................... 130director forget................................................................................................................................................................... 131director passwd................................................................................................................................................................132director ping...................................................................................................................................................................... 133director shutdown........................................................................................................................................................... 134director tracepath........................................................................................................................................................... 136director uptime................................................................................................................................................................. 136dirs....................................................................................................................................................................................... 137disconnect......................................................................................................................................................................... 138dm migration cancel........................................................................................................................................................ 139dm migration clean.......................................................................................................................................................... 140dm migration commit....................................................................................................................................................... 141dm migration pause......................................................................................................................................................... 142dm migration remove...................................................................................................................................................... 143dm migration resume...................................................................................................................................................... 144dm migration start........................................................................................................................................................... 145drill-down........................................................................................................................................................................... 147ds dd convert-to-local.................................................................................................................................................... 149ds dd create...................................................................................................................................................................... 150ds dd declare-winner...................................................................................................................................................... 152ds dd destroy.................................................................................................................................................................... 153ds dd remove-all-rules.................................................................................................................................................... 153ds dd set-log..................................................................................................................................................................... 154ds rule destroy..................................................................................................................................................................156ds rule island-containing.................................................................................................................................................157ds rule-set copy............................................................................................................................................................... 158ds rule-set create............................................................................................................................................................ 159ds rule-set destroy.......................................................................................................................................................... 160ds rule-set what-if............................................................................................................................................................161ds summary....................................................................................................................................................................... 162exec..................................................................................................................................................................................... 167exit.......................................................................................................................................................................................168export initiator-port discovery..................................................................................................................................... 169export initiator-port register.......................................................................................................................................... 171export initiator-port register-host............................................................................................................................... 172export initiator-port show-logins................................................................................................................................. 173export initiator-port unregister.....................................................................................................................................174export port summary...................................................................................................................................................... 175export storage-view addinitiatorport.......................................................................................................................... 177export storage-view addport........................................................................................................................................ 178export storage-view addvirtualvolume....................................................................................................................... 179export storage-view checkconfig.................................................................................................................................181export storage-view create...........................................................................................................................................182
Contents 5
export storage-view destroy.........................................................................................................................................183export storage-view find............................................................................................................................................... 184export storage-view find-unmapped-volumes......................................................................................................... 186export storage-view map...............................................................................................................................................186export storage-view removeinitiatorport................................................................................................................... 187export storage-view removeport.................................................................................................................................188export storage-view removevirtualvolume................................................................................................................189export storage-view show-powerpath-interfaces.................................................................................................. 190export storage-view summary...................................................................................................................................... 191export target-port renamewwns................................................................................................................................. 192extent create.................................................................................................................................................................... 193extent destroy.................................................................................................................................................................. 194extent summary............................................................................................................................................................... 195find.......................................................................................................................................................................................197front-end-performance-stats start............................................................................................................................. 198front-end-performance-stats status.......................................................................................................................... 199front-end-performance-stats stop............................................................................................................................. 199getsysinfo......................................................................................................................................................................... 200health-check..................................................................................................................................................................... 201help..................................................................................................................................................................................... 207history................................................................................................................................................................................208local-device create......................................................................................................................................................... 209local-device destroy........................................................................................................................................................ 212local-device summary..................................................................................................................................................... 213log filter create................................................................................................................................................................. 214log filter destroy...............................................................................................................................................................216log filter list....................................................................................................................................................................... 216log source create............................................................................................................................................................. 217log source destroy........................................................................................................................................................... 218log source list....................................................................................................................................................................219logging-volume add-mirror........................................................................................................................................... 220logging-volume create................................................................................................................................................... 220logging-volume detach-mirror..................................................................................................................................... 224logging-volume destroy................................................................................................................................................. 226logical-unit forget............................................................................................................................................................227ls..........................................................................................................................................................................................228meta-volume attach-mirror.......................................................................................................................................... 230meta-volume backup.......................................................................................................................................................231meta-volume create....................................................................................................................................................... 232meta-volume destroy.....................................................................................................................................................235meta-volume detach-mirror......................................................................................................................................... 236meta-volume move.........................................................................................................................................................238meta-volume verify-on-disk-consistency................................................................................................................. 238monitor add-console-sink............................................................................................................................................. 240monitor add-file-sink....................................................................................................................................................... 241monitor collect.................................................................................................................................................................243monitor create................................................................................................................................................................. 244monitor destroy............................................................................................................................................................... 246monitor get-stats............................................................................................................................................................ 247monitor remove-sink...................................................................................................................................................... 248
6 Contents
monitor stat-list...............................................................................................................................................................249ndu pre-check..................................................................................................................................................................250ndu pre-config-upgrade................................................................................................................................................ 250ndu recover....................................................................................................................................................................... 251ndu start............................................................................................................................................................................252ndu status......................................................................................................................................................................... 254plugin addurl.....................................................................................................................................................................256plugin listurl...................................................................................................................................................................... 256plugin register.................................................................................................................................................................. 257popd................................................................................................................................................................................... 258pushd................................................................................................................................................................................. 259rebuild set-transfer-size................................................................................................................................................260rebuild show-transfer-size............................................................................................................................................ 261rebuild status....................................................................................................................................................................262report capacity-clusters................................................................................................................................................263report capacity-hosts.................................................................................................................................................... 264rm........................................................................................................................................................................................266schedule add.................................................................................................................................................................... 266schedule list......................................................................................................................................................................267schedule modify.............................................................................................................................................................. 268schedule remove............................................................................................................................................................. 269scheduleSYR add.............................................................................................................................................................270scheduleSYR list............................................................................................................................................................... 271scheduleSYR remove...................................................................................................................................................... 271script.................................................................................................................................................................................. 272sessions............................................................................................................................................................................. 273set....................................................................................................................................................................................... 274set topology......................................................................................................................................................................278show-use-hierarchy........................................................................................................................................................280sms dump...........................................................................................................................................................................281source................................................................................................................................................................................ 282storage-tool dismantle...................................................................................................................................................283storage-tool compose....................................................................................................................................................284storage-volume auto-unbanish-interval.....................................................................................................................287storage-volume claim.....................................................................................................................................................288storage-volume claimingwizard....................................................................................................................................291storage-volume find-array............................................................................................................................................ 294storage-volume forget...................................................................................................................................................295storage-volume list-banished.......................................................................................................................................296storage-volume list-thin-capable................................................................................................................................ 297storage-volume resurrect............................................................................................................................................. 298storage-volume summary............................................................................................................................................. 300storage-volume unbanish..............................................................................................................................................303storage-volume unclaim................................................................................................................................................ 305storage-volume used-by............................................................................................................................................... 306syrcollect...........................................................................................................................................................................307tree..................................................................................................................................................................................... 308unalias................................................................................................................................................................................ 309validate-system-configuration......................................................................................................................................310version.................................................................................................................................................................................311
Contents 7
virtual-volume create......................................................................................................................................................314virtual-volume destroy....................................................................................................................................................319virtual-volume expand................................................................................................................................................... 320virtual-volume list-thin...................................................................................................................................................323virtual-volume re-initialize.............................................................................................................................................324virtual-volume set-thin-enabled.................................................................................................................................. 325virtual-volume summary................................................................................................................................................ 326wait.....................................................................................................................................................................................329webserver......................................................................................................................................................................... 330
Index..........................................................................................................................................331
8 Contents
Introduction
Topics:
• Preface
PrefaceAs part of an effort to improve its product lines, Dell EMC periodically releases revisions of its software and hardware.Therefore, some functions described in this document might not be supported by all versions of the software or hardwarecurrently in use. The product release notes provide the most up-to-date information on product features.
Contact your Dell EMC technical support professional if a product does not function properly or does not function as describedin this document.
NOTE: This document was accurate at publication time. Go to Dell EMC Online Support (https://www.dell.com/support)
to ensure that you are using the latest version of this document.
Purpose
This document is part of the VPLEX documentation set, and describes the VPLEX features and use cases, configuration options,VPLEX software and its upgrade, and the hardware overview.
Audience
This guide is intended for use by customers who wish to understand the software and hardware features of VPLEX, the usecases of VPLEX, product offerings, and the configuration options.
Related documents (available on Dell EMC Online Support and SolVe) include:
● Release Notes for the metro node appliance● Product Guide or the metro node appliance● Metro node Hardware Installation Guide● Configuration and Installation Guide for the metro node appliance● Security Configuration Guide for the metro node appliance● CLI Reference Guide for the metro node appliance● Administration Guide for the metro node appliance● Online Help for the metro node appliance● REST API v2 for the metro node appliance● Open Source Licenses Guide for the metro node appliance● Hardware Reference Guide for the metro node appliance● Procedures provided through the SolVe
Special notice conventions used in this document
Dell EMC uses the following conventions for special notices:
CAUTION: Indicates a hazardous situation which, if not avoided, will result in death or serious injury.
CAUTION: Indicates a hazardous situation which, if not avoided, could result in death or serious injury.
1
Introduction 9
CAUTION: Indicates a hazardous situation which, if not avoided, could result in minor or moderate injury.
NOTE: Addresses practices not related to personal injury.
NOTE: Presents information that is important, but not hazard-related.
Typographical conventions
Dell EMC uses the following type style conventions in this document:
Table 1. Typographical conventions
Bold Used for names of interface elements, such as names of windows, dialog boxes, buttons,fields, tab names, key names, and menu paths (what the user specifically selects or clicks)
italic Used for full titles of publications referenced in text
Monospace Used for:● System code● System output, such as an error message or script● Pathnames, filenames, prompts, and syntax● Commands and options
Monospace italic Used for variables
Monospace bold Used for user input
[ ] Square brackets enclose optional values
| Vertical bar indicates alternate selections - the bar means "or"
{ } Braces enclose content that the user must specify, such as x or y or z
... Ellipses indicate nonessential information omitted from the example
Where to get help
Dell EMC support, product, and licensing information can be obtained as follows:
Product information
For documentation, release notes, software updates, or information about Dell EMC products, go to Dell EMC Online Support athttps://www.dell.com/support.
Technical support
Go to Dell EMC Online Support and click Support. You will see several options for contacting Dell EMC Technical Support. Notethat to open a service request, you must have a valid support agreement. Contact your Dell EMC sales representative for detailsabout obtaining a valid support agreement or with questions about your account.
Online communities
Visit Dell EMC Community Network (DECN) at https://www.dell.com/community/Dell-Community/ct-p/English for peercontacts, conversations, and content on product support and solutions. Interactively engage online with customers, partners,and certified professionals for all Dell EMC products.
10 Introduction

Your comments
Your suggestions will help us continue to improve the accuracy, organization, and overall quality of the user publications. Sendyour opinions of this document to [email protected].
Introduction 11
Using the VPlexcli
Topics:
• Logging into the CLI• Password Policies• Logging out from the CLI• CLI context tree• Context tree searching• Navigate the CLI context tree• Using CLI commands
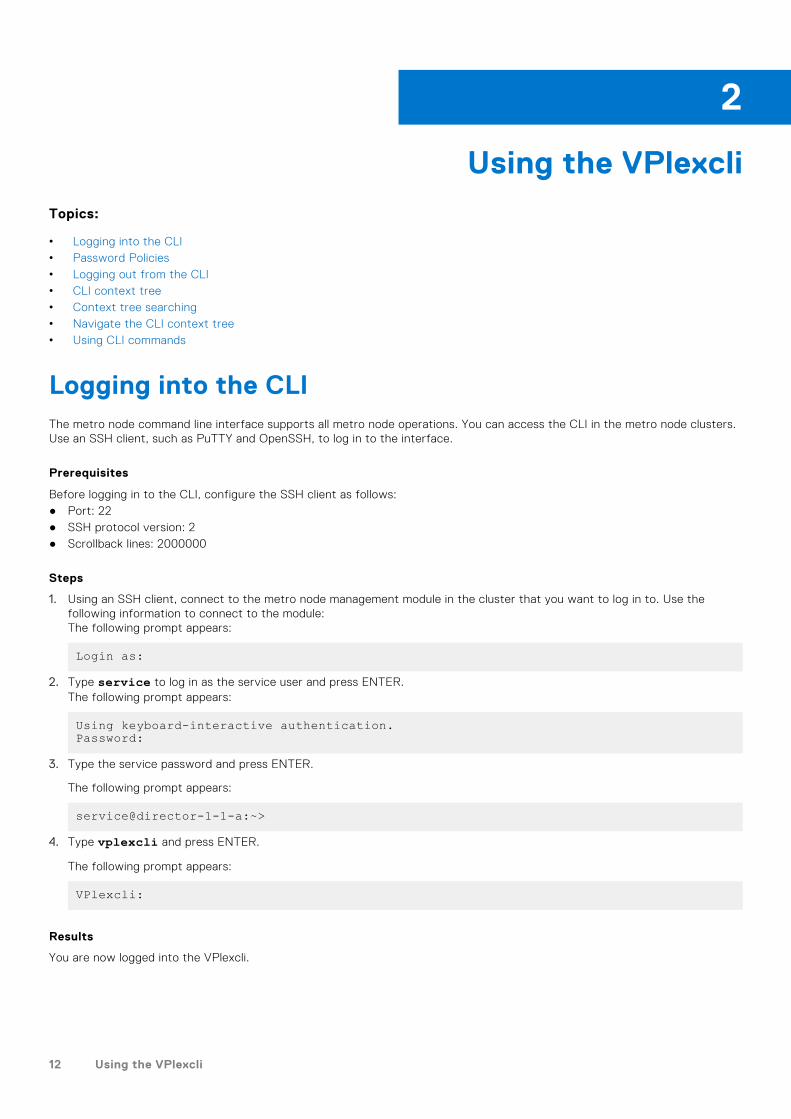
Logging into the CLIThe metro node command line interface supports all metro node operations. You can access the CLI in the metro node clusters.Use an SSH client, such as PuTTY and OpenSSH, to log in to the interface.
Prerequisites
Before logging in to the CLI, configure the SSH client as follows:● Port: 22● SSH protocol version: 2● Scrollback lines: 2000000
Steps
1. Using an SSH client, connect to the metro node management module in the cluster that you want to log in to. Use thefollowing information to connect to the module:The following prompt appears:
Login as:
2. Type service to log in as the service user and press ENTER.The following prompt appears:
Using keyboard-interactive authentication.Password:
3. Type the service password and press ENTER.
The following prompt appears:
service@director-1-1-a:~>
4. Type vplexcli and press ENTER.
The following prompt appears:
VPlexcli:
Results
You are now logged into the VPlexcli.
2
12 Using the VPlexcli
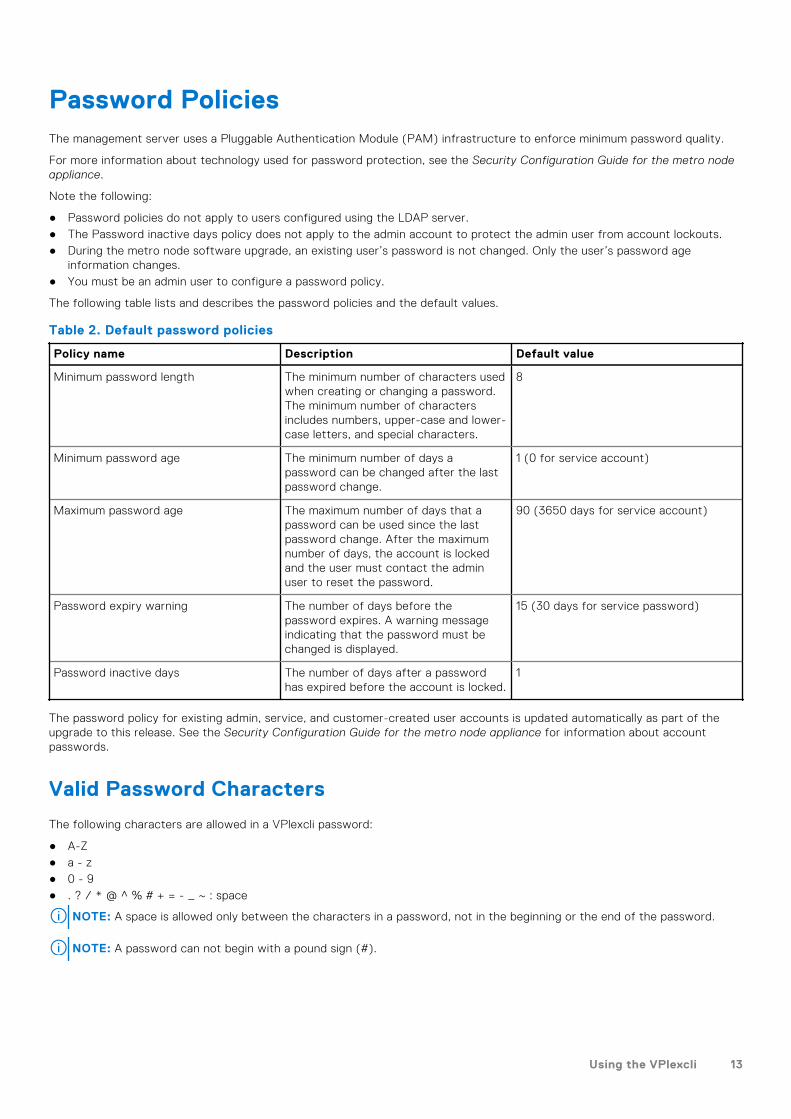
Password PoliciesThe management server uses a Pluggable Authentication Module (PAM) infrastructure to enforce minimum password quality.
For more information about technology used for password protection, see the Security Configuration Guide for the metro nodeappliance.
Note the following:
● Password policies do not apply to users configured using the LDAP server.● The Password inactive days policy does not apply to the admin account to protect the admin user from account lockouts.● During the metro node software upgrade, an existing user’s password is not changed. Only the user’s password age
information changes.● You must be an admin user to configure a password policy.
The following table lists and describes the password policies and the default values.
Table 2. Default password policies
Policy name Description Default value
Minimum password length The minimum number of characters usedwhen creating or changing a password.The minimum number of charactersincludes numbers, upper-case and lower-case letters, and special characters.
8
Minimum password age The minimum number of days apassword can be changed after the lastpassword change.
1 (0 for service account)
Maximum password age The maximum number of days that apassword can be used since the lastpassword change. After the maximumnumber of days, the account is lockedand the user must contact the adminuser to reset the password.
90 (3650 days for service account)
Password expiry warning The number of days before thepassword expires. A warning messageindicating that the password must bechanged is displayed.
15 (30 days for service password)
Password inactive days The number of days after a passwordhas expired before the account is locked.
1
The password policy for existing admin, service, and customer-created user accounts is updated automatically as part of theupgrade to this release. See the Security Configuration Guide for the metro node appliance for information about accountpasswords.
Valid Password Characters
The following characters are allowed in a VPlexcli password:
● A-Z● a - z● 0 - 9● . ? / * @ ^ % # + = - _ ~ : space
NOTE: A space is allowed only between the characters in a password, not in the beginning or the end of the password.
NOTE: A password can not begin with a pound sign (#).
Using the VPlexcli 13
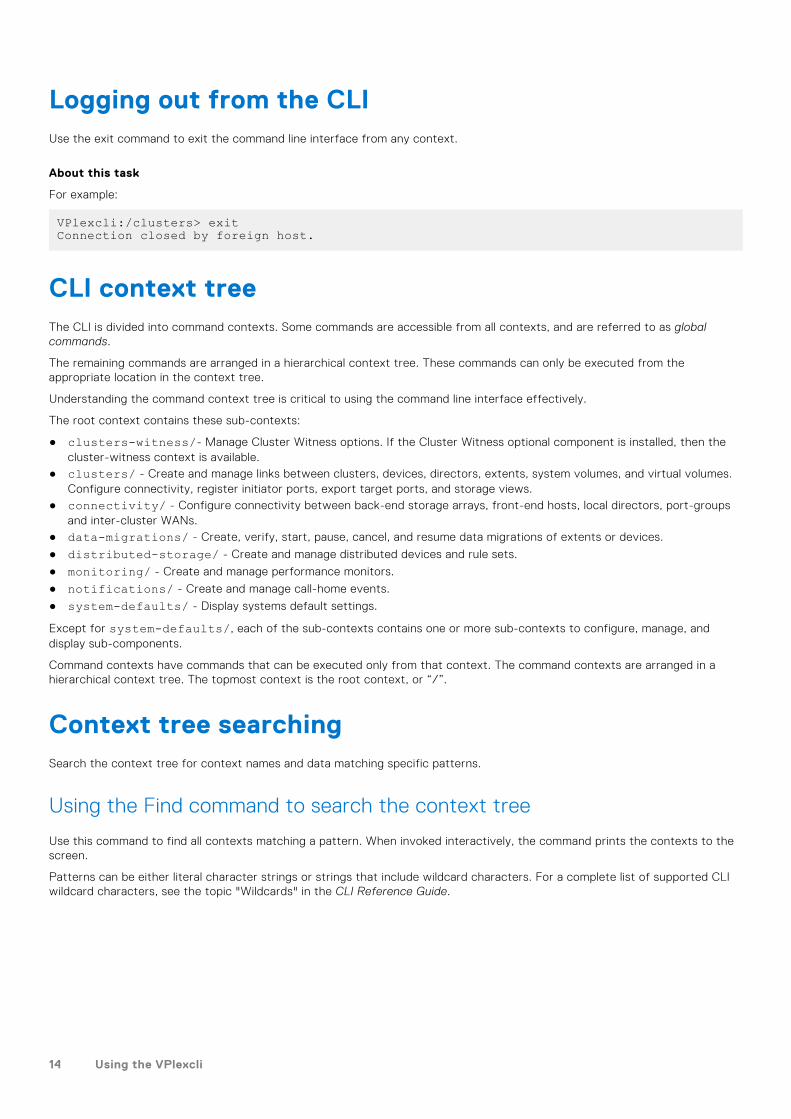
Logging out from the CLIUse the exit command to exit the command line interface from any context.
About this task
For example:
VPlexcli:/clusters> exitConnection closed by foreign host.
CLI context treeThe CLI is divided into command contexts. Some commands are accessible from all contexts, and are referred to as globalcommands.
The remaining commands are arranged in a hierarchical context tree. These commands can only be executed from theappropriate location in the context tree.
Understanding the command context tree is critical to using the command line interface effectively.
The root context contains these sub-contexts:
● clusters-witness/- Manage Cluster Witness options. If the Cluster Witness optional component is installed, then thecluster-witness context is available.
● clusters/ - Create and manage links between clusters, devices, directors, extents, system volumes, and virtual volumes.Configure connectivity, register initiator ports, export target ports, and storage views.
● connectivity/ - Configure connectivity between back-end storage arrays, front-end hosts, local directors, port-groupsand inter-cluster WANs.
● data-migrations/ - Create, verify, start, pause, cancel, and resume data migrations of extents or devices.
● distributed-storage/ - Create and manage distributed devices and rule sets.
● monitoring/ - Create and manage performance monitors.
● notifications/ - Create and manage call-home events.
● system-defaults/ - Display systems default settings.
Except for system-defaults/, each of the sub-contexts contains one or more sub-contexts to configure, manage, anddisplay sub-components.
Command contexts have commands that can be executed only from that context. The command contexts are arranged in ahierarchical context tree. The topmost context is the root context, or “/”.
Context tree searchingSearch the context tree for context names and data matching specific patterns.
Using the Find command to search the context tree
Use this command to find all contexts matching a pattern. When invoked interactively, the command prints the contexts to thescreen.
Patterns can be either literal character strings or strings that include wildcard characters. For a complete list of supported CLIwildcard characters, see the topic "Wildcards" in the CLI Reference Guide.
14 Using the VPlexcli
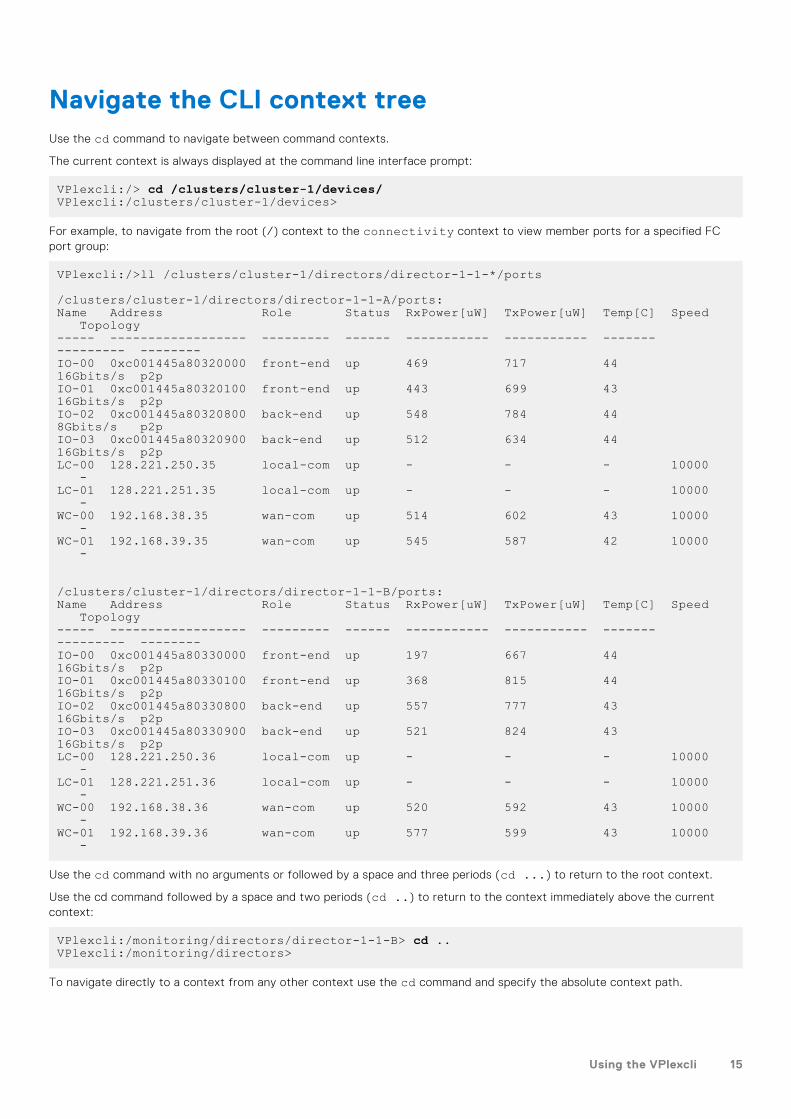
Navigate the CLI context treeUse the cd command to navigate between command contexts.
The current context is always displayed at the command line interface prompt:
VPlexcli:/> cd /clusters/cluster-1/devices/VPlexcli:/clusters/cluster-1/devices>
For example, to navigate from the root (/) context to the connectivity context to view member ports for a specified FCport group:
VPlexcli:/>ll /clusters/cluster-1/directors/director-1-1-*/ports
/clusters/cluster-1/directors/director-1-1-A/ports: Name Address Role Status RxPower[uW] TxPower[uW] Temp[C] Speed Topology----- ------------------ --------- ------ ----------- ----------- ------- --------- --------IO-00 0xc001445a80320000 front-end up 469 717 44 16Gbits/s p2pIO-01 0xc001445a80320100 front-end up 443 699 43 16Gbits/s p2pIO-02 0xc001445a80320800 back-end up 548 784 44 8Gbits/s p2pIO-03 0xc001445a80320900 back-end up 512 634 44 16Gbits/s p2pLC-00 128.221.250.35 local-com up - - - 10000 -LC-01 128.221.251.35 local-com up - - - 10000 -WC-00 192.168.38.35 wan-com up 514 602 43 10000 -WC-01 192.168.39.35 wan-com up 545 587 42 10000 -
/clusters/cluster-1/directors/director-1-1-B/ports: Name Address Role Status RxPower[uW] TxPower[uW] Temp[C] Speed Topology----- ------------------ --------- ------ ----------- ----------- ------- --------- --------IO-00 0xc001445a80330000 front-end up 197 667 44 16Gbits/s p2pIO-01 0xc001445a80330100 front-end up 368 815 44 16Gbits/s p2pIO-02 0xc001445a80330800 back-end up 557 777 43 16Gbits/s p2pIO-03 0xc001445a80330900 back-end up 521 824 43 16Gbits/s p2pLC-00 128.221.250.36 local-com up - - - 10000 -LC-01 128.221.251.36 local-com up - - - 10000 -WC-00 192.168.38.36 wan-com up 520 592 43 10000 -WC-01 192.168.39.36 wan-com up 577 599 43 10000 -
Use the cd command with no arguments or followed by a space and three periods (cd ...) to return to the root context.
Use the cd command followed by a space and two periods (cd ..) to return to the context immediately above the currentcontext:
VPlexcli:/monitoring/directors/director-1-1-B> cd ..VPlexcli:/monitoring/directors>
To navigate directly to a context from any other context use the cd command and specify the absolute context path.
Using the VPlexcli 15
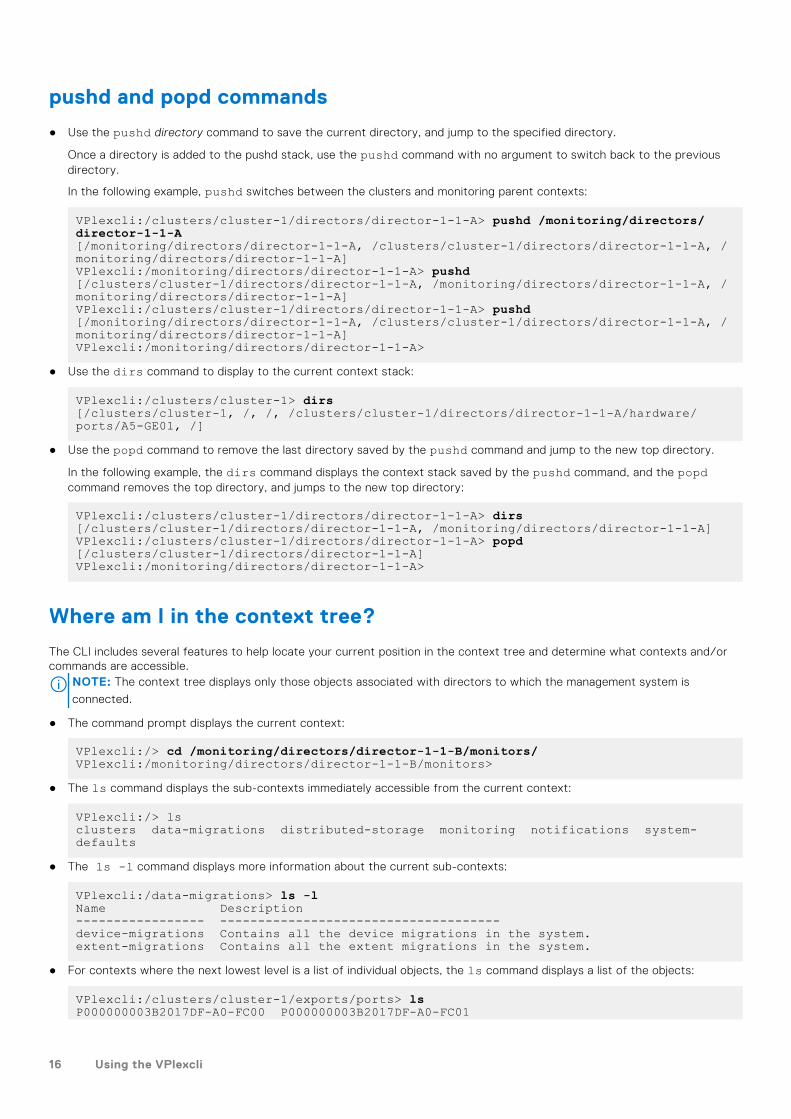
pushd and popd commands
● Use the pushd directory command to save the current directory, and jump to the specified directory.
Once a directory is added to the pushd stack, use the pushd command with no argument to switch back to the previousdirectory.
In the following example, pushd switches between the clusters and monitoring parent contexts:
VPlexcli:/clusters/cluster-1/directors/director-1-1-A> pushd /monitoring/directors/director-1-1-A[/monitoring/directors/director-1-1-A, /clusters/cluster-1/directors/director-1-1-A, /monitoring/directors/director-1-1-A]VPlexcli:/monitoring/directors/director-1-1-A> pushd[/clusters/cluster-1/directors/director-1-1-A, /monitoring/directors/director-1-1-A, /monitoring/directors/director-1-1-A]VPlexcli:/clusters/cluster-1/directors/director-1-1-A> pushd[/monitoring/directors/director-1-1-A, /clusters/cluster-1/directors/director-1-1-A, /monitoring/directors/director-1-1-A]VPlexcli:/monitoring/directors/director-1-1-A>
● Use the dirs command to display to the current context stack:
VPlexcli:/clusters/cluster-1> dirs[/clusters/cluster-1, /, /, /clusters/cluster-1/directors/director-1-1-A/hardware/ports/A5-GE01, /]
● Use the popd command to remove the last directory saved by the pushd command and jump to the new top directory.
In the following example, the dirs command displays the context stack saved by the pushd command, and the popdcommand removes the top directory, and jumps to the new top directory:
VPlexcli:/clusters/cluster-1/directors/director-1-1-A> dirs[/clusters/cluster-1/directors/director-1-1-A, /monitoring/directors/director-1-1-A]VPlexcli:/clusters/cluster-1/directors/director-1-1-A> popd[/clusters/cluster-1/directors/director-1-1-A]VPlexcli:/monitoring/directors/director-1-1-A>
Where am I in the context tree?
The CLI includes several features to help locate your current position in the context tree and determine what contexts and/orcommands are accessible.
NOTE: The context tree displays only those objects associated with directors to which the management system is
connected.
● The command prompt displays the current context:
VPlexcli:/> cd /monitoring/directors/director-1-1-B/monitors/VPlexcli:/monitoring/directors/director-1-1-B/monitors>
● The ls command displays the sub-contexts immediately accessible from the current context:
VPlexcli:/> lsclusters data-migrations distributed-storage monitoring notifications system-defaults
● The ls -l command displays more information about the current sub-contexts:
VPlexcli:/data-migrations> ls -lName Description----------------- -------------------------------------device-migrations Contains all the device migrations in the system.extent-migrations Contains all the extent migrations in the system.
● For contexts where the next lowest level is a list of individual objects, the ls command displays a list of the objects:
VPlexcli:/clusters/cluster-1/exports/ports> lsP000000003B2017DF-A0-FC00 P000000003B2017DF-A0-FC01
16 Using the VPlexcli
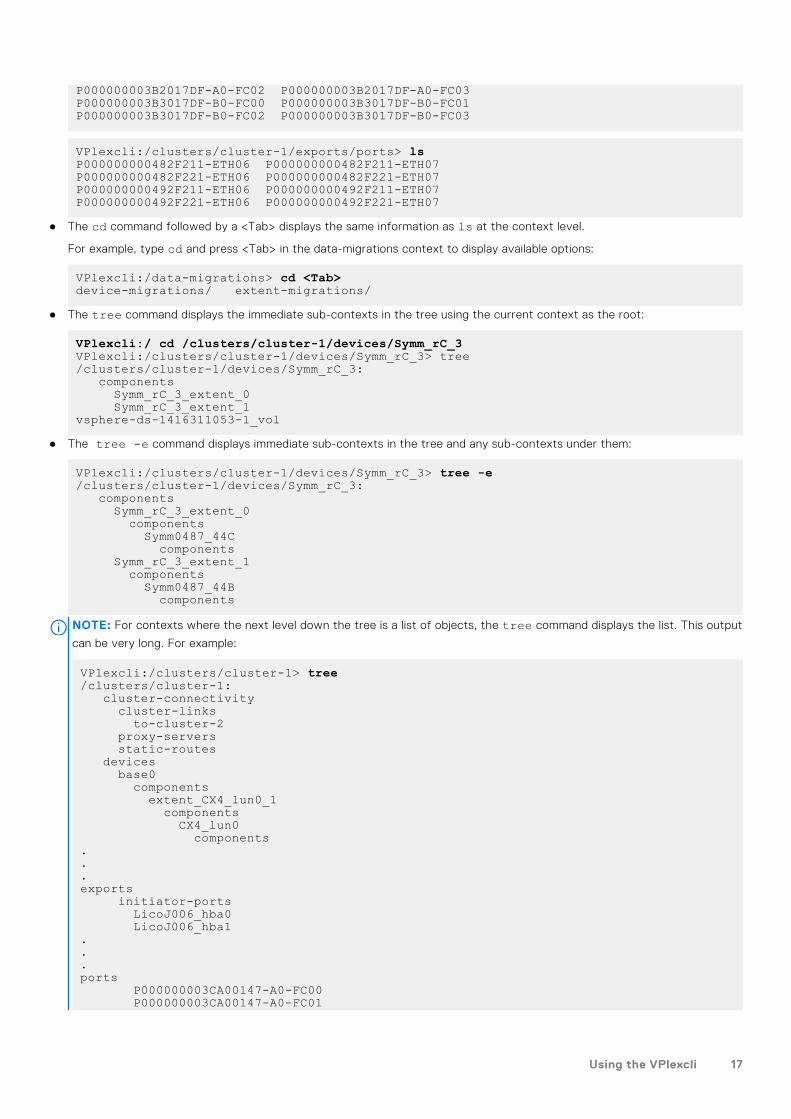
P000000003B2017DF-A0-FC02 P000000003B2017DF-A0-FC03P000000003B3017DF-B0-FC00 P000000003B3017DF-B0-FC01P000000003B3017DF-B0-FC02 P000000003B3017DF-B0-FC03
VPlexcli:/clusters/cluster-1/exports/ports> lsP000000000482F211-ETH06 P000000000482F211-ETH07P000000000482F221-ETH06 P000000000482F221-ETH07P000000000492F211-ETH06 P000000000492F211-ETH07P000000000492F221-ETH06 P000000000492F221-ETH07
● The cd command followed by a <Tab> displays the same information as ls at the context level.
For example, type cd and press <Tab> in the data-migrations context to display available options:
VPlexcli:/data-migrations> cd <Tab>device-migrations/ extent-migrations/
● The tree command displays the immediate sub-contexts in the tree using the current context as the root:
VPlexcli:/ cd /clusters/cluster-1/devices/Symm_rC_3VPlexcli:/clusters/cluster-1/devices/Symm_rC_3> tree/clusters/cluster-1/devices/Symm_rC_3: components Symm_rC_3_extent_0 Symm_rC_3_extent_1vsphere-ds-1416311053-1_vol
● The tree -e command displays immediate sub-contexts in the tree and any sub-contexts under them:
VPlexcli:/clusters/cluster-1/devices/Symm_rC_3> tree -e/clusters/cluster-1/devices/Symm_rC_3: components Symm_rC_3_extent_0 components Symm0487_44C components Symm_rC_3_extent_1 components Symm0487_44B components
NOTE: For contexts where the next level down the tree is a list of objects, the tree command displays the list. This output
can be very long. For example:
VPlexcli:/clusters/cluster-1> tree/clusters/cluster-1: cluster-connectivity cluster-links to-cluster-2 proxy-servers static-routes devices base0 components extent_CX4_lun0_1 components CX4_lun0 components...exports initiator-ports LicoJ006_hba0 LicoJ006_hba1...ports P000000003CA00147-A0-FC00 P000000003CA00147-A0-FC01
Using the VPlexcli 17
.
.
.storage-views LicoJ009 LicoJ013 storage-elements extents extent_CX4_Logging_1
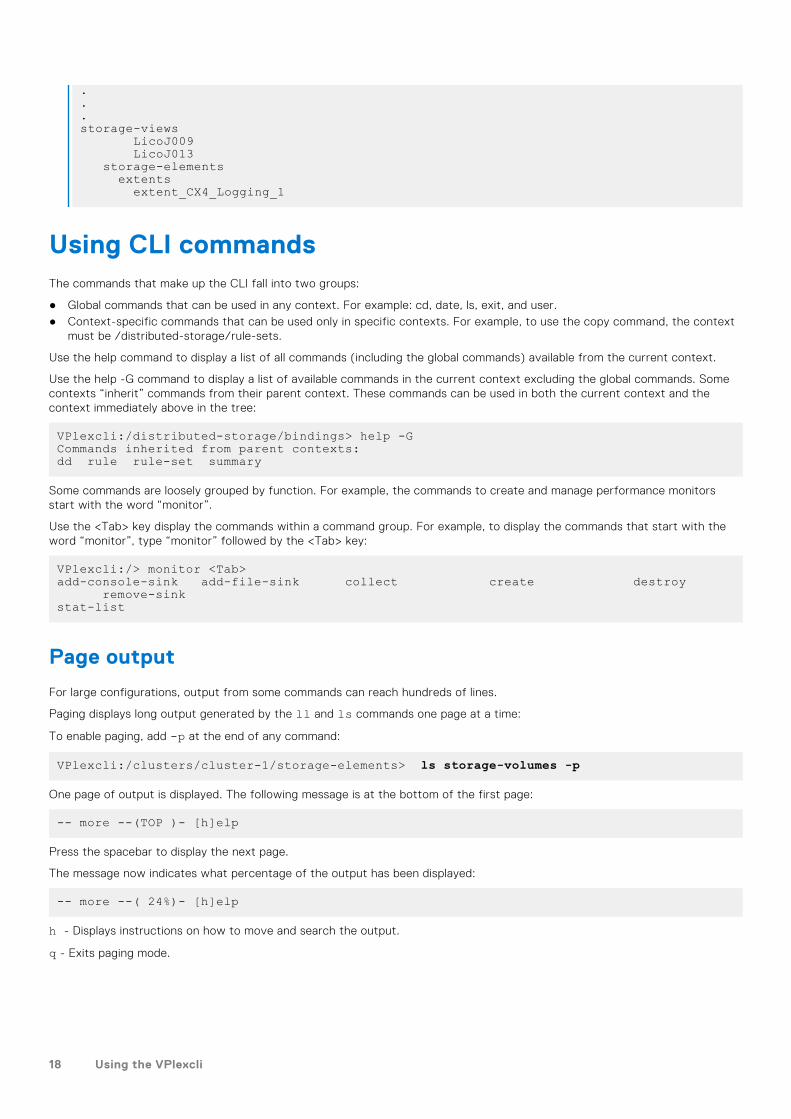
Using CLI commandsThe commands that make up the CLI fall into two groups:
● Global commands that can be used in any context. For example: cd, date, ls, exit, and user.● Context-specific commands that can be used only in specific contexts. For example, to use the copy command, the context
must be /distributed-storage/rule-sets.
Use the help command to display a list of all commands (including the global commands) available from the current context.
Use the help -G command to display a list of available commands in the current context excluding the global commands. Somecontexts “inherit” commands from their parent context. These commands can be used in both the current context and thecontext immediately above in the tree:
VPlexcli:/distributed-storage/bindings> help -GCommands inherited from parent contexts:dd rule rule-set summary
Some commands are loosely grouped by function. For example, the commands to create and manage performance monitorsstart with the word “monitor”.
Use the <Tab> key display the commands within a command group. For example, to display the commands that start with theword “monitor”, type “monitor” followed by the <Tab> key:
VPlexcli:/> monitor <Tab>add-console-sink add-file-sink collect create destroy remove-sinkstat-list
Page output
For large configurations, output from some commands can reach hundreds of lines.
Paging displays long output generated by the ll and ls commands one page at a time:
To enable paging, add -p at the end of any command:
VPlexcli:/clusters/cluster-1/storage-elements> ls storage-volumes -p
One page of output is displayed. The following message is at the bottom of the first page:
-- more --(TOP )- [h]elp
Press the spacebar to display the next page.
The message now indicates what percentage of the output has been displayed:
-- more --( 24%)- [h]elp
h - Displays instructions on how to move and search the output.
q - Exits paging mode.
18 Using the VPlexcli
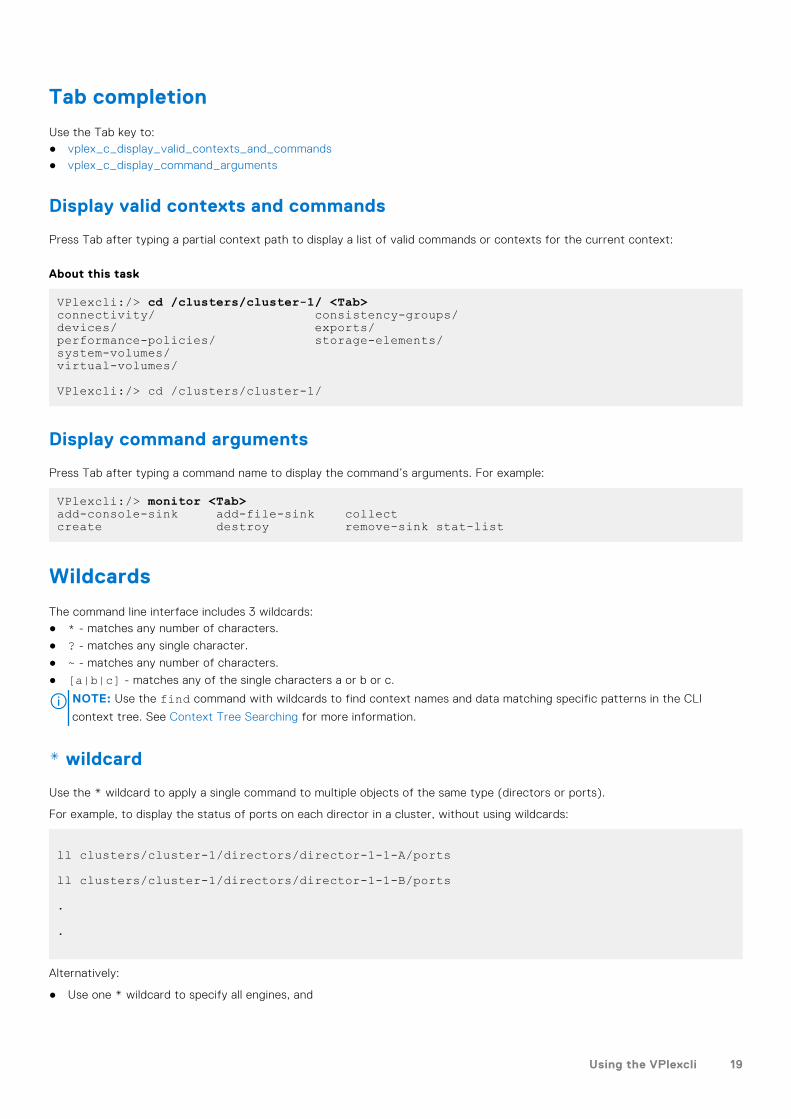
Tab completion
Use the Tab key to:● vplex_c_display_valid_contexts_and_commands● vplex_c_display_command_arguments
Display valid contexts and commands
Press Tab after typing a partial context path to display a list of valid commands or contexts for the current context:
About this task
VPlexcli:/> cd /clusters/cluster-1/ <Tab>connectivity/ consistency-groups/devices/ exports/performance-policies/ storage-elements/system-volumes/ virtual-volumes/
VPlexcli:/> cd /clusters/cluster-1/
Display command arguments
Press Tab after typing a command name to display the command’s arguments. For example:
VPlexcli:/> monitor <Tab>add-console-sink add-file-sink collectcreate destroy remove-sink stat-list
Wildcards
The command line interface includes 3 wildcards:● * - matches any number of characters.
● ? - matches any single character.
● ~ - matches any number of characters.
● [a|b|c] - matches any of the single characters a or b or c.
NOTE: Use the find command with wildcards to find context names and data matching specific patterns in the CLI
context tree. See Context Tree Searching for more information.
* wildcard
Use the * wildcard to apply a single command to multiple objects of the same type (directors or ports).
For example, to display the status of ports on each director in a cluster, without using wildcards:
ll clusters/cluster-1/directors/director-1-1-A/ports
ll clusters/cluster-1/directors/director-1-1-B/ports
.
.
Alternatively:
● Use one * wildcard to specify all engines, and
Using the VPlexcli 19
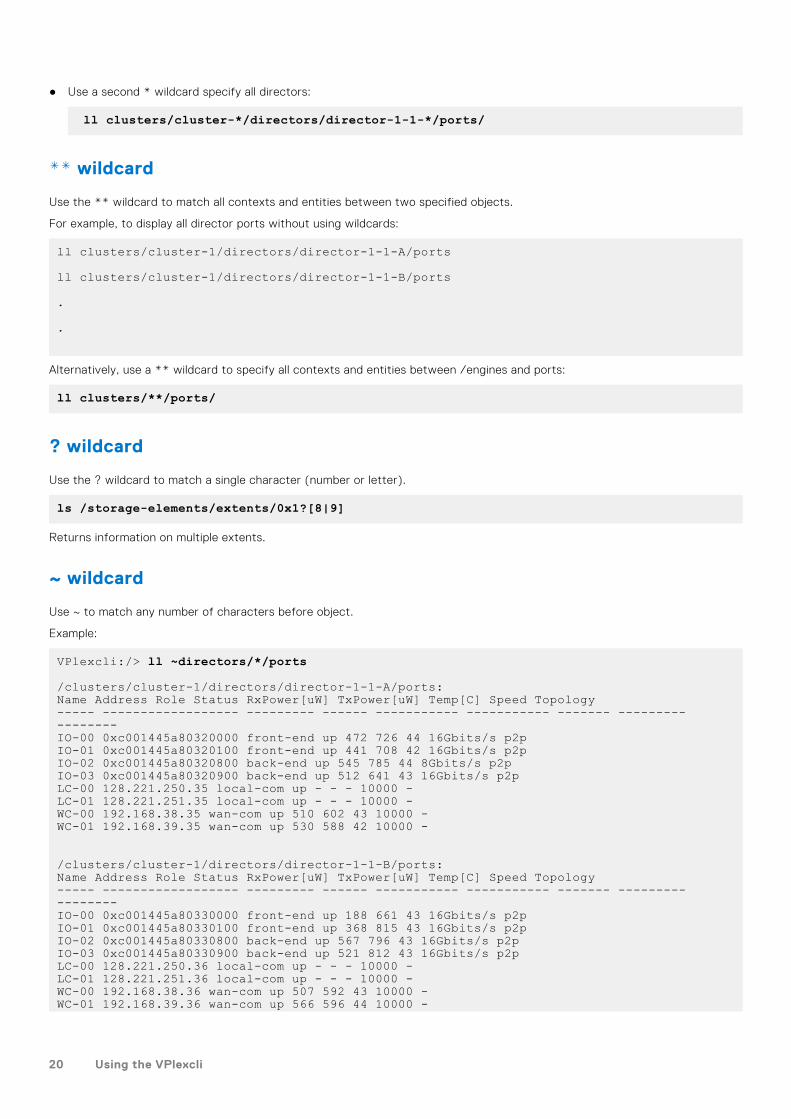
● Use a second * wildcard specify all directors:
ll clusters/cluster-*/directors/director-1-1-*/ports/
** wildcard
Use the ** wildcard to match all contexts and entities between two specified objects.
For example, to display all director ports without using wildcards:
ll clusters/cluster-1/directors/director-1-1-A/ports
ll clusters/cluster-1/directors/director-1-1-B/ports
.
.
Alternatively, use a ** wildcard to specify all contexts and entities between /engines and ports:
ll clusters/**/ports/
? wildcard
Use the ? wildcard to match a single character (number or letter).
ls /storage-elements/extents/0x1?[8|9]
Returns information on multiple extents.
~ wildcard
Use ~ to match any number of characters before object.
Example:
VPlexcli:/> ll ~directors/*/ports
/clusters/cluster-1/directors/director-1-1-A/ports:Name Address Role Status RxPower[uW] TxPower[uW] Temp[C] Speed Topology----- ------------------ --------- ------ ----------- ----------- ------- --------- --------IO-00 0xc001445a80320000 front-end up 472 726 44 16Gbits/s p2pIO-01 0xc001445a80320100 front-end up 441 708 42 16Gbits/s p2pIO-02 0xc001445a80320800 back-end up 545 785 44 8Gbits/s p2pIO-03 0xc001445a80320900 back-end up 512 641 43 16Gbits/s p2pLC-00 128.221.250.35 local-com up - - - 10000 -LC-01 128.221.251.35 local-com up - - - 10000 -WC-00 192.168.38.35 wan-com up 510 602 43 10000 -WC-01 192.168.39.35 wan-com up 530 588 42 10000 -
/clusters/cluster-1/directors/director-1-1-B/ports:Name Address Role Status RxPower[uW] TxPower[uW] Temp[C] Speed Topology----- ------------------ --------- ------ ----------- ----------- ------- --------- --------IO-00 0xc001445a80330000 front-end up 188 661 43 16Gbits/s p2pIO-01 0xc001445a80330100 front-end up 368 815 43 16Gbits/s p2pIO-02 0xc001445a80330800 back-end up 567 796 43 16Gbits/s p2pIO-03 0xc001445a80330900 back-end up 521 812 43 16Gbits/s p2pLC-00 128.221.250.36 local-com up - - - 10000 -LC-01 128.221.251.36 local-com up - - - 10000 -WC-00 192.168.38.36 wan-com up 507 592 43 10000 -WC-01 192.168.39.36 wan-com up 566 596 44 10000 -
20 Using the VPlexcli
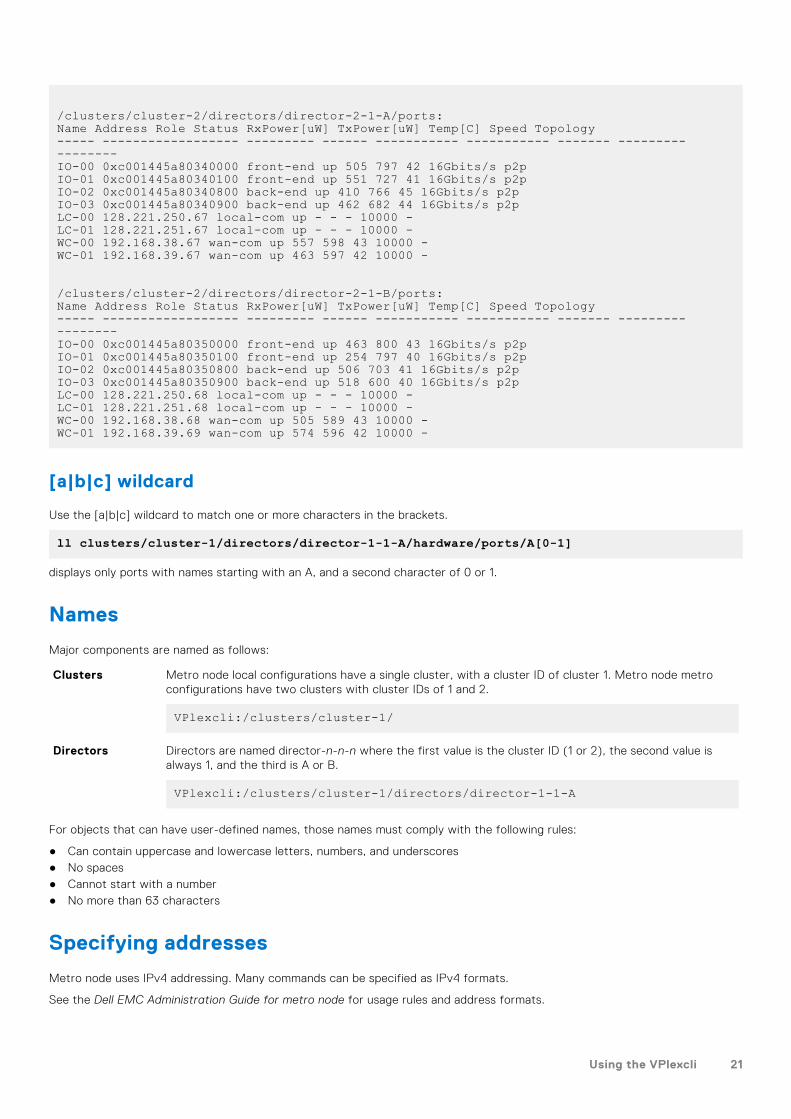
/clusters/cluster-2/directors/director-2-1-A/ports:Name Address Role Status RxPower[uW] TxPower[uW] Temp[C] Speed Topology----- ------------------ --------- ------ ----------- ----------- ------- --------- --------IO-00 0xc001445a80340000 front-end up 505 797 42 16Gbits/s p2pIO-01 0xc001445a80340100 front-end up 551 727 41 16Gbits/s p2pIO-02 0xc001445a80340800 back-end up 410 766 45 16Gbits/s p2pIO-03 0xc001445a80340900 back-end up 462 682 44 16Gbits/s p2pLC-00 128.221.250.67 local-com up - - - 10000 -LC-01 128.221.251.67 local-com up - - - 10000 -WC-00 192.168.38.67 wan-com up 557 598 43 10000 -WC-01 192.168.39.67 wan-com up 463 597 42 10000 -
/clusters/cluster-2/directors/director-2-1-B/ports:Name Address Role Status RxPower[uW] TxPower[uW] Temp[C] Speed Topology----- ------------------ --------- ------ ----------- ----------- ------- --------- --------IO-00 0xc001445a80350000 front-end up 463 800 43 16Gbits/s p2pIO-01 0xc001445a80350100 front-end up 254 797 40 16Gbits/s p2pIO-02 0xc001445a80350800 back-end up 506 703 41 16Gbits/s p2pIO-03 0xc001445a80350900 back-end up 518 600 40 16Gbits/s p2pLC-00 128.221.250.68 local-com up - - - 10000 -LC-01 128.221.251.68 local-com up - - - 10000 -WC-00 192.168.38.68 wan-com up 505 589 43 10000 -WC-01 192.168.39.69 wan-com up 574 596 42 10000 -
[a|b|c] wildcard
Use the [a|b|c] wildcard to match one or more characters in the brackets.
ll clusters/cluster-1/directors/director-1-1-A/hardware/ports/A[0-1]
displays only ports with names starting with an A, and a second character of 0 or 1.
Names
Major components are named as follows:
Clusters Metro node local configurations have a single cluster, with a cluster ID of cluster 1. Metro node metroconfigurations have two clusters with cluster IDs of 1 and 2.
VPlexcli:/clusters/cluster-1/
Directors Directors are named director-n-n-n where the first value is the cluster ID (1 or 2), the second value isalways 1, and the third is A or B.
VPlexcli:/clusters/cluster-1/directors/director-1-1-A
For objects that can have user-defined names, those names must comply with the following rules:
● Can contain uppercase and lowercase letters, numbers, and underscores● No spaces● Cannot start with a number● No more than 63 characters
Specifying addresses
Metro node uses IPv4 addressing. Many commands can be specified as IPv4 formats.
See the Dell EMC Administration Guide for metro node for usage rules and address formats.
Using the VPlexcli 21
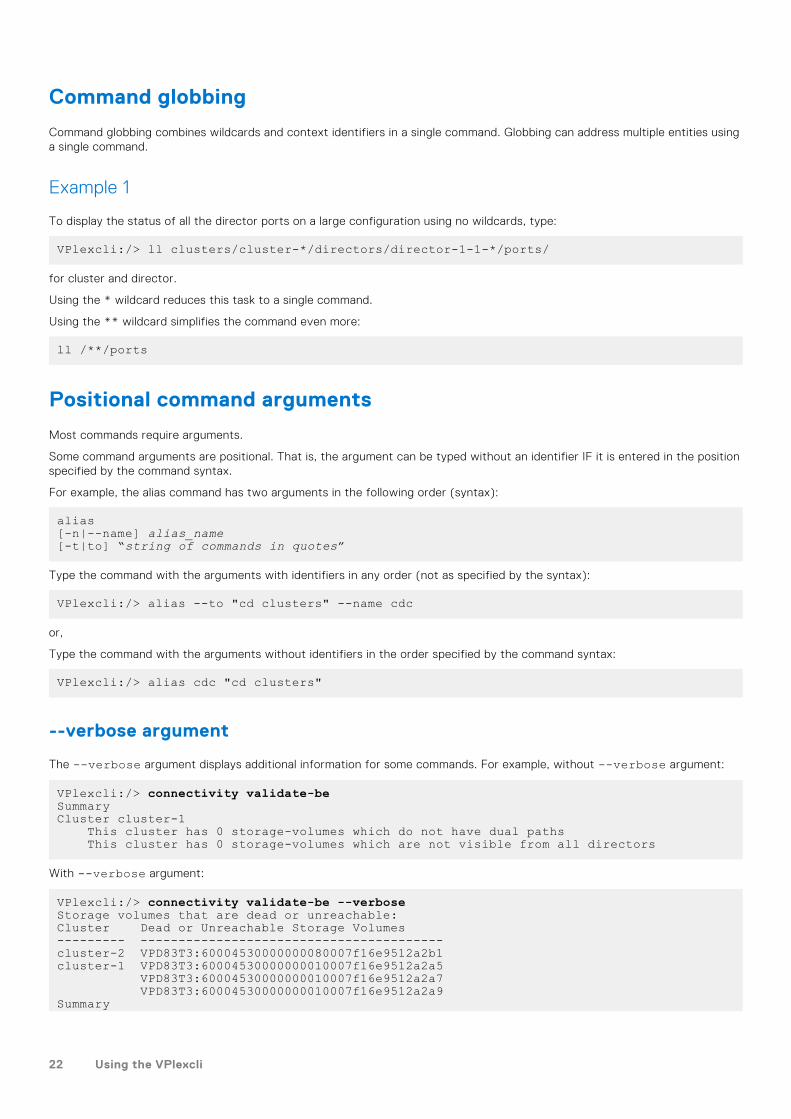
Command globbing
Command globbing combines wildcards and context identifiers in a single command. Globbing can address multiple entities usinga single command.
Example 1
To display the status of all the director ports on a large configuration using no wildcards, type:
VPlexcli:/> ll clusters/cluster-*/directors/director-1-1-*/ports/
for cluster and director.
Using the * wildcard reduces this task to a single command.
Using the ** wildcard simplifies the command even more:
ll /**/ports
Positional command arguments
Most commands require arguments.
Some command arguments are positional. That is, the argument can be typed without an identifier IF it is entered in the positionspecified by the command syntax.
For example, the alias command has two arguments in the following order (syntax):
alias [-n|--name] alias_name[-t|to] “string of commands in quotes”
Type the command with the arguments with identifiers in any order (not as specified by the syntax):
VPlexcli:/> alias --to "cd clusters" --name cdc
or,
Type the command with the arguments without identifiers in the order specified by the command syntax:
VPlexcli:/> alias cdc "cd clusters"
--verbose argument
The --verbose argument displays additional information for some commands. For example, without --verbose argument:
VPlexcli:/> connectivity validate-beSummaryCluster cluster-1 This cluster has 0 storage-volumes which do not have dual paths This cluster has 0 storage-volumes which are not visible from all directors
With --verbose argument:
VPlexcli:/> connectivity validate-be --verboseStorage volumes that are dead or unreachable:Cluster Dead or Unreachable Storage Volumes--------- ----------------------------------------cluster-2 VPD83T3:60004530000000080007f16e9512a2b1cluster-1 VPD83T3:60004530000000010007f16e9512a2a5 VPD83T3:60004530000000010007f16e9512a2a7 VPD83T3:60004530000000010007f16e9512a2a9Summary
22 Using the VPlexcli

Cluster cluster-2 This cluster has 1 storage-volumes which are dead or unreachable This cluster has 0 storage-volumes which do not have dual paths This cluster has 0 storage-volumes which are not visible from all directorsCluster cluster-1 This cluster has 3 storage-volumes which are dead or unreachable This cluster has 0 storage-volumes which do not have dual paths This cluster has 0 storage-volumes which are not visible from all directors
Search command history
● To display the last commands typed, press the up arrow key.● To search for a command typed in the current CLI session, press Ctrl-r.
The reverse search prompt is displayed:
(reverse-i-search)'':
Type the first letter of the command to search for. After you type the first letter, the search tool displays a list of possiblematches.
View command history
Use the up arrow key to display the last command typed.
Use the up arrow key, multiple times to display recent command history.
Use the history command to display a complete list of commands executed in the current session:
VPlexcli:> history0 extent unclaim *1 ls2 ls -l3 extent claim *4 ls5 ls -l6 ls -la
Use the history nn command to display the last nn entries in the list:
VPlexcli:/clusters/cluster-1> history 22478 ls storage-volumes -p479 cd clusters/cluster-1/480 ls storage-volumes481 cd storage-elements/482 ls storage-volumes -p
Get help
● Use the help or? command with no arguments to display all the commands available in the current context, including globalcommands.
● Use the help or ? command with -G argument to display all the commands available in the current context, excludingglobal commands:
VPlexcli:/clusters> help -GCommands specific to this context and below:add configdump expel forget show-remote-devices shutdown summary unexpel
● Use the help command or command --help to display help for the specified command.
Using the VPlexcli 23

Commands
Topics:
• advadm dismantle• alias• array claim• array forget• array re-discover• array used-by• back-end degraded list• back-end degraded recover• batch-migrate cancel• batch-migrate check-plan• batch-migrate clean• batch-migrate commit• batch-migrate create-plan• batch-migrate pause• batch-migrate remove• batch-migrate resume• batch-migrate start• batch-migrate summary• capture begin• capture end• capture pause• capture replay• capture resume• cd• cluster add• cluster configdump• cluster expel• cluster forget• cluster show-remote-devices• cluster shutdown• cluster status• cluster summary• cluster unexpel• collect-diagnostics• configuration get-product-type• configuration join-clusters• configuration metadata-backup• configuration show-meta-volume-candidates• configuration upgrade-meta-slot-count• connectivity director• connectivity list all• connectivity list directors• connectivity list initiators• connectivity list storage-volumes• connectivity show• connectivity validate-be• connectivity validate-local-com
3
24 Commands
• consistency-group add-virtual-volumes• consistency-group choose-winner• consistency-group convert-to-local• consistency-group create• consistency-group destroy• consistency-group list-eligible-virtual-volumes• consistency-group remove-virtual-volumes• consistency-group resolve-conflicting-detach• consistency-group resume-at-loser• consistency-group set-detach-rule no-automatic-winner• consistency-group set-detach-rule winner• consistency-group summary• date• describe• device attach-mirror• device collapse• device detach-mirror• device mirror-isolation auto-unisolation disable• device mirror-isolation auto-unisolation enable• device mirror-isolation disable• device mirror-isolation enable• device mirror-isolation show• device resume-link-down• device resume-link-up• device resurrect-dead-storage-volumes• director commission• director decommission• director fc-port-stats• director firmware show-banks• director forget• director passwd• director ping• director shutdown• director tracepath• director uptime• dirs• disconnect• dm migration cancel• dm migration clean• dm migration commit• dm migration pause• dm migration remove• dm migration resume• dm migration start• drill-down• ds dd convert-to-local• ds dd create• ds dd declare-winner• ds dd destroy• ds dd remove-all-rules• ds dd set-log• ds rule destroy• ds rule island-containing• ds rule-set copy• ds rule-set create• ds rule-set destroy
Commands 25
• ds rule-set what-if• ds summary• exec• exit• export initiator-port discovery• export initiator-port register• export initiator-port register-host• export initiator-port show-logins• export initiator-port unregister• export port summary• export storage-view addinitiatorport• export storage-view addport• export storage-view addvirtualvolume• export storage-view checkconfig• export storage-view create• export storage-view destroy• export storage-view find• export storage-view find-unmapped-volumes• export storage-view map• export storage-view removeinitiatorport• export storage-view removeport• export storage-view removevirtualvolume• export storage-view show-powerpath-interfaces• export storage-view summary• export target-port renamewwns• extent create• extent destroy• extent summary• find• front-end-performance-stats start• front-end-performance-stats status• front-end-performance-stats stop• getsysinfo• health-check• help• history• local-device create• local-device destroy• local-device summary• log filter create• log filter destroy• log filter list• log source create• log source destroy• log source list• logging-volume add-mirror• logging-volume create• logging-volume detach-mirror• logging-volume destroy• logical-unit forget• ls• meta-volume attach-mirror• meta-volume backup• meta-volume create• meta-volume destroy• meta-volume detach-mirror
26 Commands
• meta-volume move• meta-volume verify-on-disk-consistency• monitor add-console-sink• monitor add-file-sink• monitor collect• monitor create• monitor destroy• monitor get-stats• monitor remove-sink• monitor stat-list• ndu pre-check• ndu pre-config-upgrade• ndu recover• ndu start• ndu status• plugin addurl• plugin listurl• plugin register• popd• pushd• rebuild set-transfer-size• rebuild show-transfer-size• rebuild status• report capacity-clusters• report capacity-hosts• rm• schedule add• schedule list• schedule modify• schedule remove• scheduleSYR add• scheduleSYR list• scheduleSYR remove• script• sessions• set• set topology• show-use-hierarchy• sms dump• source• storage-tool dismantle• storage-tool compose• storage-volume auto-unbanish-interval• storage-volume claim• storage-volume claimingwizard• storage-volume find-array• storage-volume forget• storage-volume list-banished• storage-volume list-thin-capable• storage-volume resurrect• storage-volume summary• storage-volume unbanish• storage-volume unclaim• storage-volume used-by• syrcollect• tree
Commands 27

• unalias• validate-system-configuration• version• virtual-volume create• virtual-volume destroy• virtual-volume expand• virtual-volume list-thin• virtual-volume re-initialize• virtual-volume set-thin-enabled• virtual-volume summary• wait• webserver
advadm dismantleDismantles storage objects down to the storage-volume level, and optionally unclaims the storage volumes.
Contexts
All contexts.
Syntax
advadm dismantle[-r|--devices] context path,context path
[-v|--virtual-volumes] context path,context path
[--unclaim-storage-volumes] [-f|--force]
Arguments
Required arguments
[-r|--devices] contextpath,context path...
One or more devices to dismantle. Entries must be separated by commas. You can useglob patterns.
[-v|--virtual-volumes]context path,context path...
One or more virtual volumes to dismantle. Entries must be separated by commas. Youcan use glob patterns.
Optional Arguments
--unclaim-storage-volumes Unclaim the storage volumes after the dismantle is completed.
[-f | --force] Force the dismantle without asking for confirmation. Allows the command to be runfrom a non-interactive script.
Description
To dismantle a virtual volume, the specified volume must:
● Not be exported to a storage view.● Not a member of a consistency group
virtual volume exported through a storage view or belonging to a consistency group are not eligible to be dismantled. Thecommand skips any volumes that are not eligible for dismantle, prints a message listing skipped volumes, and dismantles thosevolumes that are eligible.
28 Commands
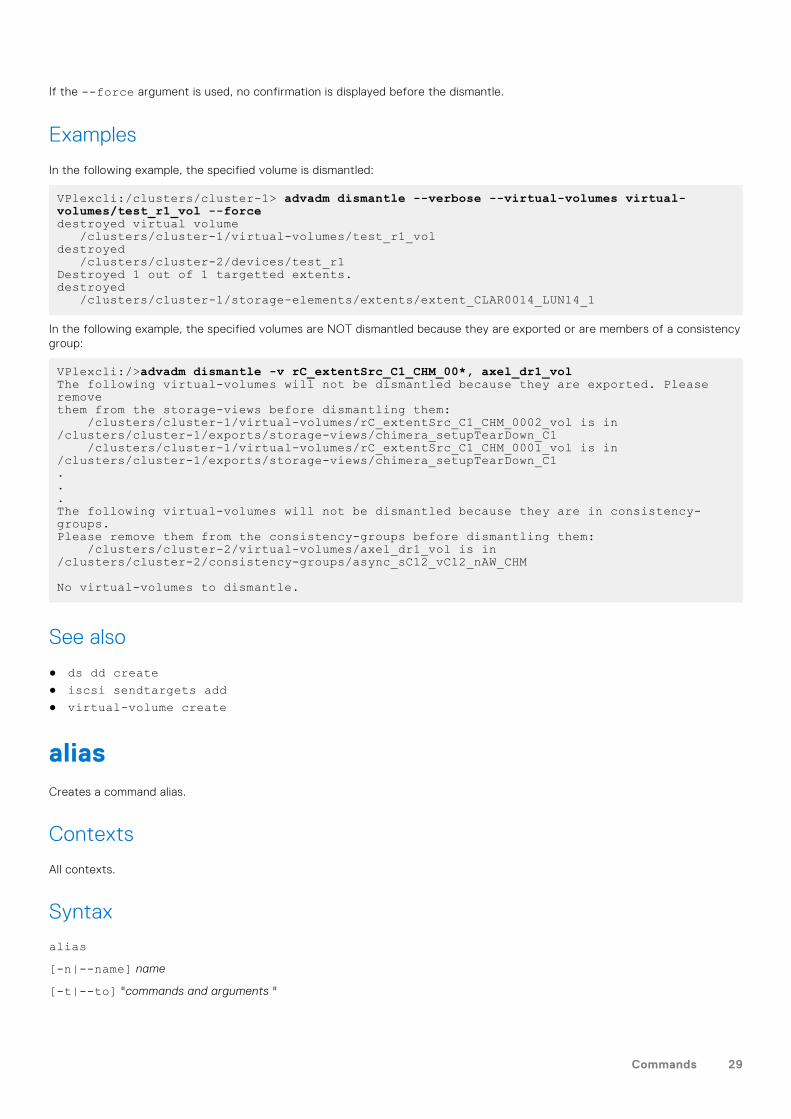
If the --force argument is used, no confirmation is displayed before the dismantle.
Examples
In the following example, the specified volume is dismantled:
VPlexcli:/clusters/cluster-1> advadm dismantle --verbose --virtual-volumes virtual-volumes/test_r1_vol --forcedestroyed virtual volume /clusters/cluster-1/virtual-volumes/test_r1_vol destroyed /clusters/cluster-2/devices/test_r1 Destroyed 1 out of 1 targetted extents. destroyed /clusters/cluster-1/storage-elements/extents/extent_CLAR0014_LUN14_1
In the following example, the specified volumes are NOT dismantled because they are exported or are members of a consistencygroup:
VPlexcli:/>advadm dismantle -v rC_extentSrc_C1_CHM_00*, axel_dr1_vol The following virtual-volumes will not be dismantled because they are exported. Please remove them from the storage-views before dismantling them: /clusters/cluster-1/virtual-volumes/rC_extentSrc_C1_CHM_0002_vol is in /clusters/cluster-1/exports/storage-views/chimera_setupTearDown_C1 /clusters/cluster-1/virtual-volumes/rC_extentSrc_C1_CHM_0001_vol is in /clusters/cluster-1/exports/storage-views/chimera_setupTearDown_C1 . . . The following virtual-volumes will not be dismantled because they are in consistency-groups. Please remove them from the consistency-groups before dismantling them: /clusters/cluster-2/virtual-volumes/axel_dr1_vol is in /clusters/cluster-2/consistency-groups/async_sC12_vC12_nAW_CHM
No virtual-volumes to dismantle.
See also
● ds dd create● iscsi sendtargets add● virtual-volume create
aliasCreates a command alias.
Contexts
All contexts.
Syntax
alias[-n|--name] name
[-t|--to] "commands and arguments "
Commands 29
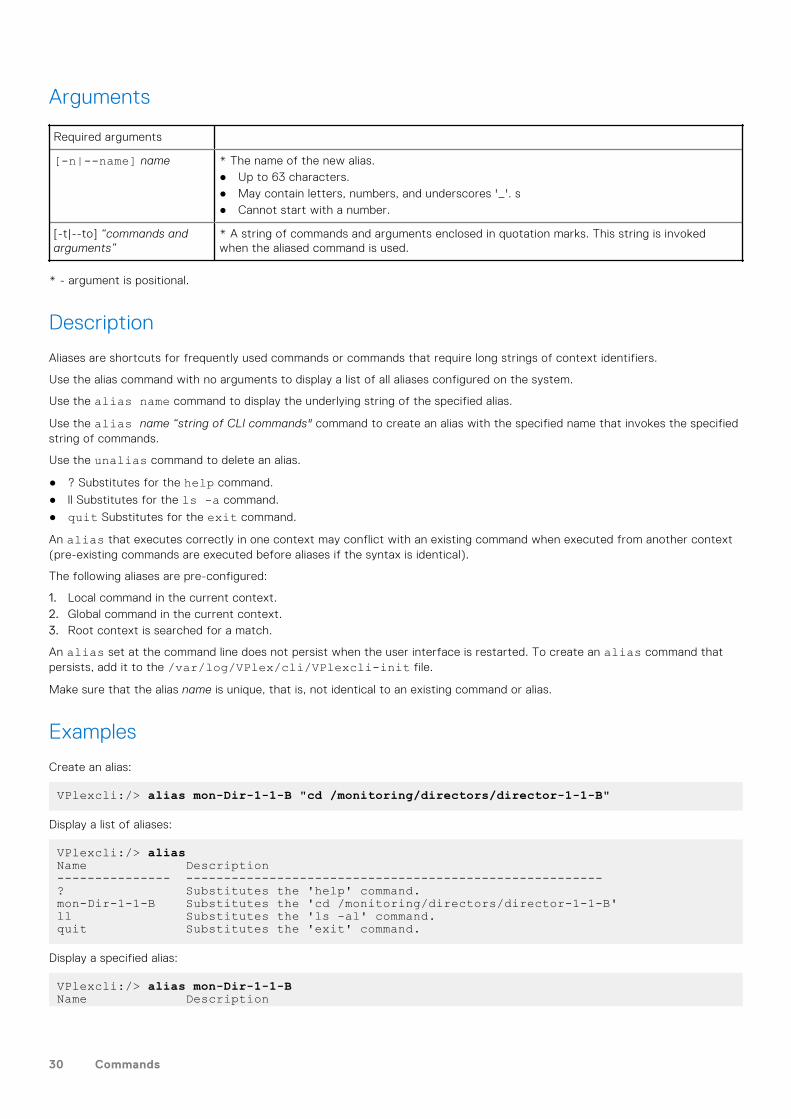
Arguments
Required arguments
[-n|--name] name * The name of the new alias.● Up to 63 characters.● May contain letters, numbers, and underscores '_'. s● Cannot start with a number.
[-t|--to] “commands andarguments”
* A string of commands and arguments enclosed in quotation marks. This string is invokedwhen the aliased command is used.
* - argument is positional.
Description
Aliases are shortcuts for frequently used commands or commands that require long strings of context identifiers.
Use the alias command with no arguments to display a list of all aliases configured on the system.
Use the alias name command to display the underlying string of the specified alias.
Use the alias name “string of CLI commands" command to create an alias with the specified name that invokes the specifiedstring of commands.
Use the unalias command to delete an alias.
● ? Substitutes for the help command.
● ll Substitutes for the ls -a command.
● quit Substitutes for the exit command.
An alias that executes correctly in one context may conflict with an existing command when executed from another context(pre-existing commands are executed before aliases if the syntax is identical).
The following aliases are pre-configured:
1. Local command in the current context.2. Global command in the current context.3. Root context is searched for a match.
An alias set at the command line does not persist when the user interface is restarted. To create an alias command thatpersists, add it to the /var/log/VPlex/cli/VPlexcli-init file.
Make sure that the alias name is unique, that is, not identical to an existing command or alias.
Examples
Create an alias:
VPlexcli:/> alias mon-Dir-1-1-B "cd /monitoring/directors/director-1-1-B"
Display a list of aliases:
VPlexcli:/> aliasName Description--------------- -------------------------------------------------------? Substitutes the 'help' command.mon-Dir-1-1-B Substitutes the 'cd /monitoring/directors/director-1-1-B'll Substitutes the 'ls -al' command.quit Substitutes the 'exit' command.
Display a specified alias:
VPlexcli:/> alias mon-Dir-1-1-BName Description
30 Commands
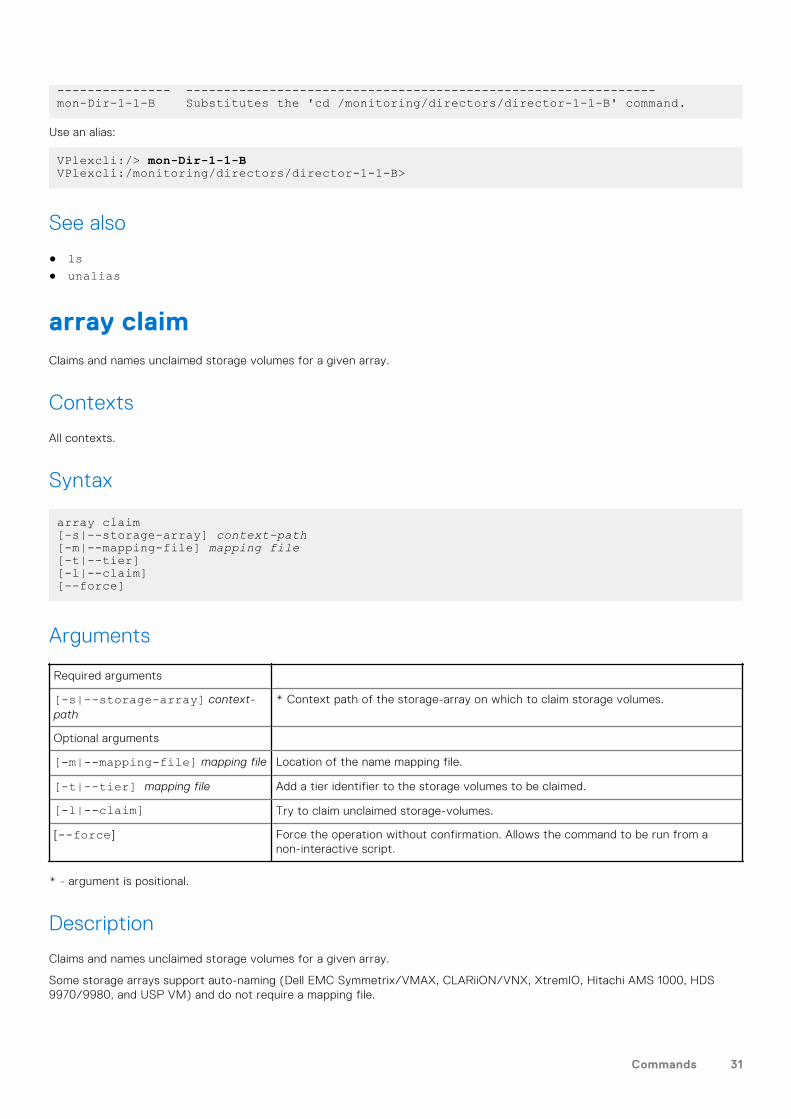
--------------- --------------------------------------------------------------mon-Dir-1-1-B Substitutes the 'cd /monitoring/directors/director-1-1-B' command.
Use an alias:
VPlexcli:/> mon-Dir-1-1-BVPlexcli:/monitoring/directors/director-1-1-B>
See also
● ls● unalias
array claimClaims and names unclaimed storage volumes for a given array.
Contexts
All contexts.
Syntax
array claim[-s|--storage-array] context-path[-m|--mapping-file] mapping file[-t|--tier][-l|--claim][--force]
Arguments
Required arguments
[-s|--storage-array] context-path
* Context path of the storage-array on which to claim storage volumes.
Optional arguments
[-m|--mapping-file] mapping file Location of the name mapping file.
[-t|--tier] mapping file Add a tier identifier to the storage volumes to be claimed.
[-l|--claim] Try to claim unclaimed storage-volumes.
[--force] Force the operation without confirmation. Allows the command to be run from anon-interactive script.
* - argument is positional.
Description
Claims and names unclaimed storage volumes for a given array.
Some storage arrays support auto-naming (Dell EMC Symmetrix/VMAX, CLARiiON/VNX, XtremIO, Hitachi AMS 1000, HDS9970/9980, and USP VM) and do not require a mapping file.
Commands 31
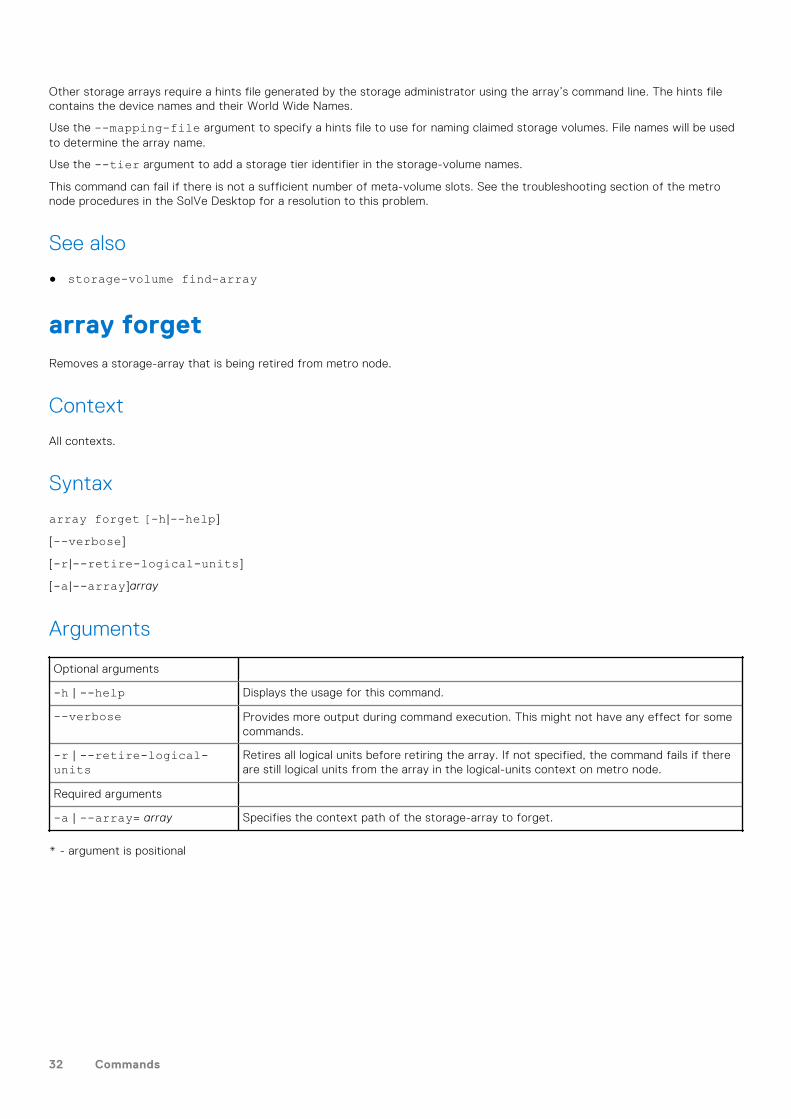
Other storage arrays require a hints file generated by the storage administrator using the array’s command line. The hints filecontains the device names and their World Wide Names.
Use the --mapping-file argument to specify a hints file to use for naming claimed storage volumes. File names will be usedto determine the array name.
Use the --tier argument to add a storage tier identifier in the storage-volume names.
This command can fail if there is not a sufficient number of meta-volume slots. See the troubleshooting section of the metronode procedures in the SolVe Desktop for a resolution to this problem.
See also
● storage-volume find-array
array forgetRemoves a storage-array that is being retired from metro node.
Context
All contexts.
Syntax
array forget [-h|--help]
[--verbose]
[-r|--retire-logical-units]
[-a|--array]array
Arguments
Optional arguments
-h | --help Displays the usage for this command.
--verbose Provides more output during command execution. This might not have any effect for somecommands.
-r | --retire-logical-units
Retires all logical units before retiring the array. If not specified, the command fails if thereare still logical units from the array in the logical-units context on metro node.
Required arguments
-a | --array= array Specifies the context path of the storage-array to forget.
* - argument is positional
32 Commands
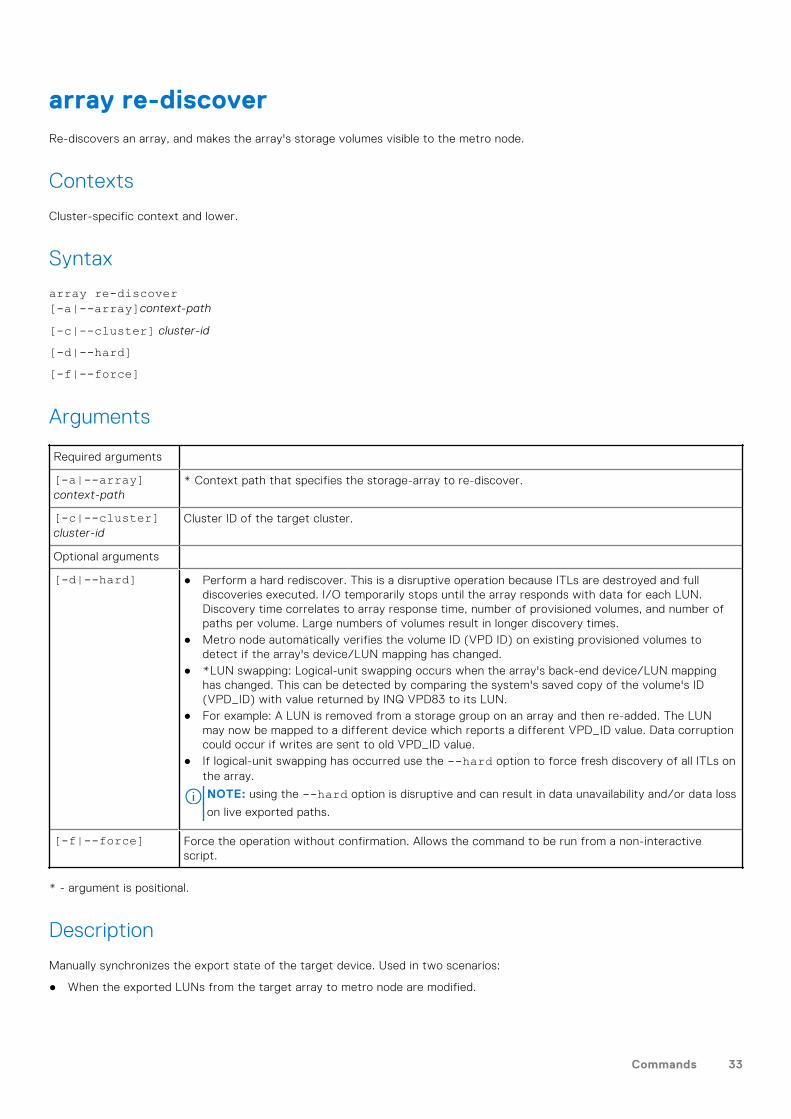
array re-discoverRe-discovers an array, and makes the array's storage volumes visible to the metro node.
Contexts
Cluster-specific context and lower.
Syntax
array re-discover[-a|--array]context-path
[-c|--cluster] cluster-id
[-d|--hard][-f|--force]
Arguments
Required arguments
[-a|--array]context-path
* Context path that specifies the storage-array to re-discover.
[-c|--cluster]cluster-id
Cluster ID of the target cluster.
Optional arguments
[-d|--hard] ● Perform a hard rediscover. This is a disruptive operation because ITLs are destroyed and fulldiscoveries executed. I/O temporarily stops until the array responds with data for each LUN.Discovery time correlates to array response time, number of provisioned volumes, and number ofpaths per volume. Large numbers of volumes result in longer discovery times.
● Metro node automatically verifies the volume ID (VPD ID) on existing provisioned volumes todetect if the array's device/LUN mapping has changed.
● *LUN swapping: Logical-unit swapping occurs when the array's back-end device/LUN mappinghas changed. This can be detected by comparing the system's saved copy of the volume's ID(VPD_ID) with value returned by INQ VPD83 to its LUN.
● For example: A LUN is removed from a storage group on an array and then re-added. The LUNmay now be mapped to a different device which reports a different VPD_ID value. Data corruptioncould occur if writes are sent to old VPD_ID value.
● If logical-unit swapping has occurred use the --hard option to force fresh discovery of all ITLs onthe array.
NOTE: using the --hard option is disruptive and can result in data unavailability and/or data loss
on live exported paths.
[-f|--force] Force the operation without confirmation. Allows the command to be run from a non-interactivescript.
* - argument is positional.
Description
Manually synchronizes the export state of the target device. Used in two scenarios:
● When the exported LUNs from the target array to metro node are modified.
Commands 33
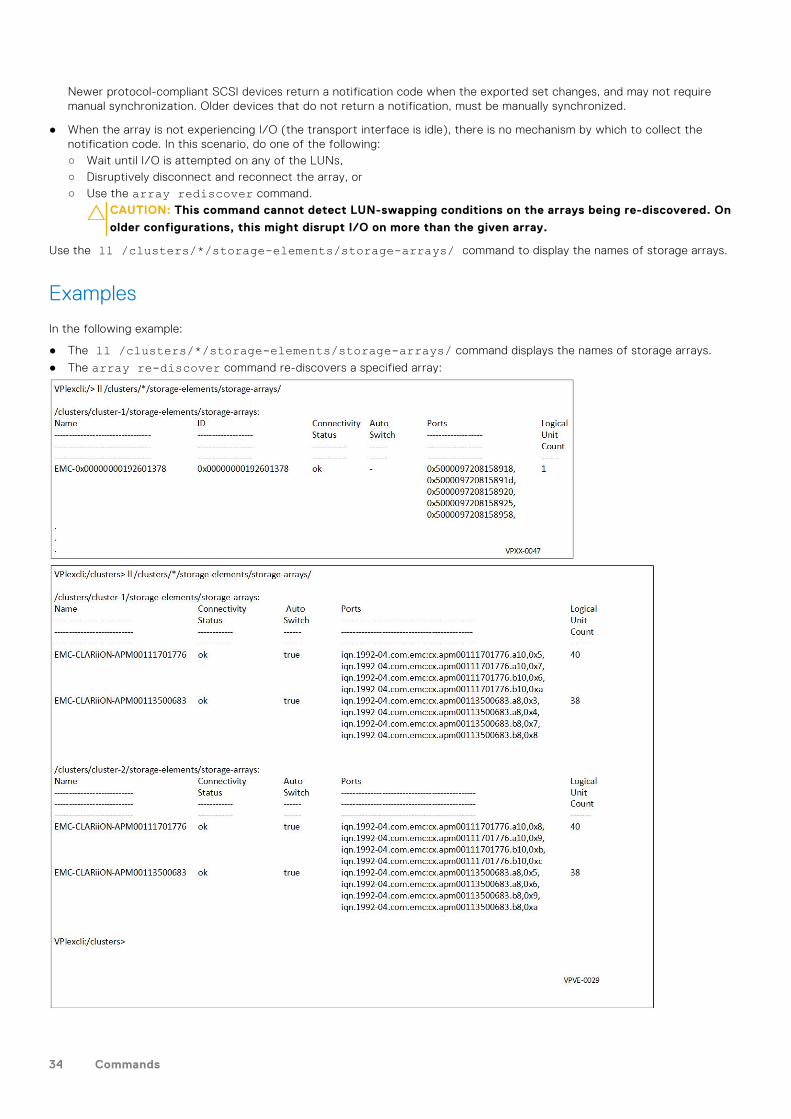
Newer protocol-compliant SCSI devices return a notification code when the exported set changes, and may not requiremanual synchronization. Older devices that do not return a notification, must be manually synchronized.
● When the array is not experiencing I/O (the transport interface is idle), there is no mechanism by which to collect thenotification code. In this scenario, do one of the following:○ Wait until I/O is attempted on any of the LUNs,○ Disruptively disconnect and reconnect the array, or○ Use the array rediscover command.
CAUTION: This command cannot detect LUN-swapping conditions on the arrays being re-discovered. On
older configurations, this might disrupt I/O on more than the given array.
Use the ll /clusters/*/storage-elements/storage-arrays/ command to display the names of storage arrays.
Examples
In the following example:
● The ll /clusters/*/storage-elements/storage-arrays/ command displays the names of storage arrays.
● The array re-discover command re-discovers a specified array:
34 Commands
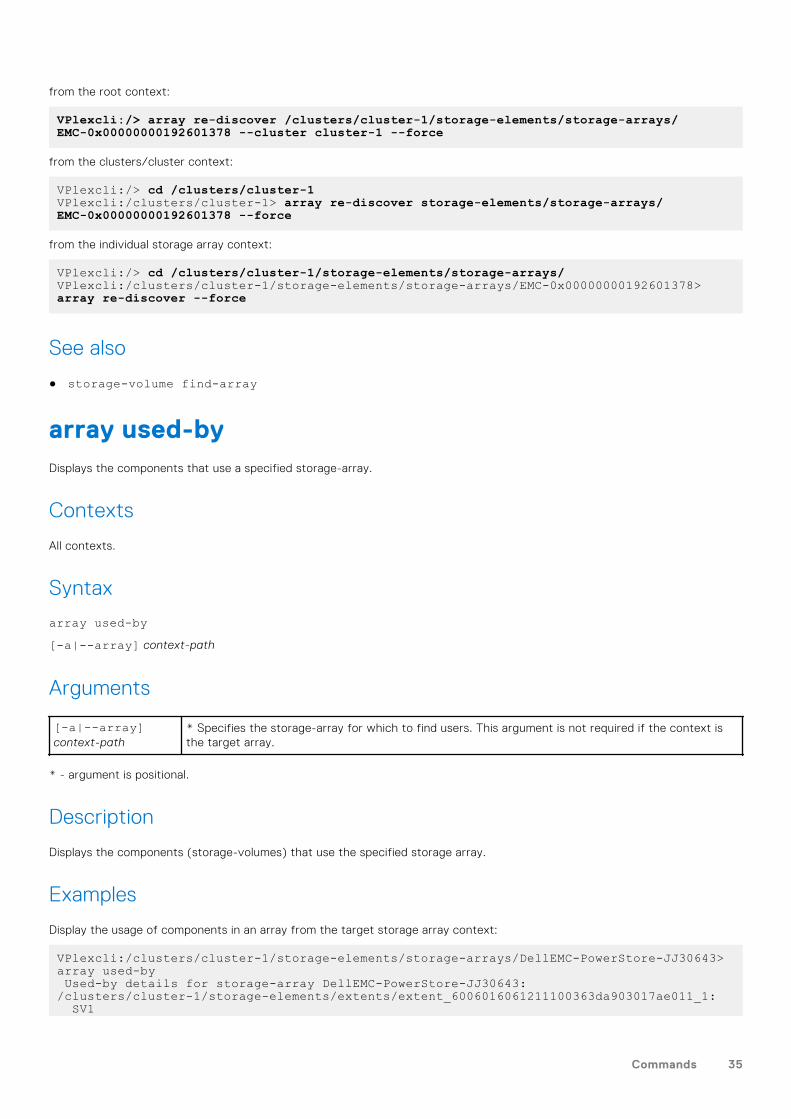
from the root context:
VPlexcli:/> array re-discover /clusters/cluster-1/storage-elements/storage-arrays/ EMC-0x00000000192601378 --cluster cluster-1 --force
from the clusters/cluster context:
VPlexcli:/> cd /clusters/cluster-1VPlexcli:/clusters/cluster-1> array re-discover storage-elements/storage-arrays/EMC-0x00000000192601378 --force
from the individual storage array context:
VPlexcli:/> cd /clusters/cluster-1/storage-elements/storage-arrays/VPlexcli:/clusters/cluster-1/storage-elements/storage-arrays/EMC-0x00000000192601378> array re-discover --force
See also
● storage-volume find-array
array used-byDisplays the components that use a specified storage-array.
Contexts
All contexts.
Syntax
array used-by[-a|--array] context-path
Arguments
[-a|--array]context-path
* Specifies the storage-array for which to find users. This argument is not required if the context isthe target array.
* - argument is positional.
Description
Displays the components (storage-volumes) that use the specified storage array.
Examples
Display the usage of components in an array from the target storage array context:
VPlexcli:/clusters/cluster-1/storage-elements/storage-arrays/DellEMC-PowerStore-JJ30643> array used-by Used-by details for storage-array DellEMC-PowerStore-JJ30643:/clusters/cluster-1/storage-elements/extents/extent_6006016061211100363da903017ae011_1: SV1
Commands 35
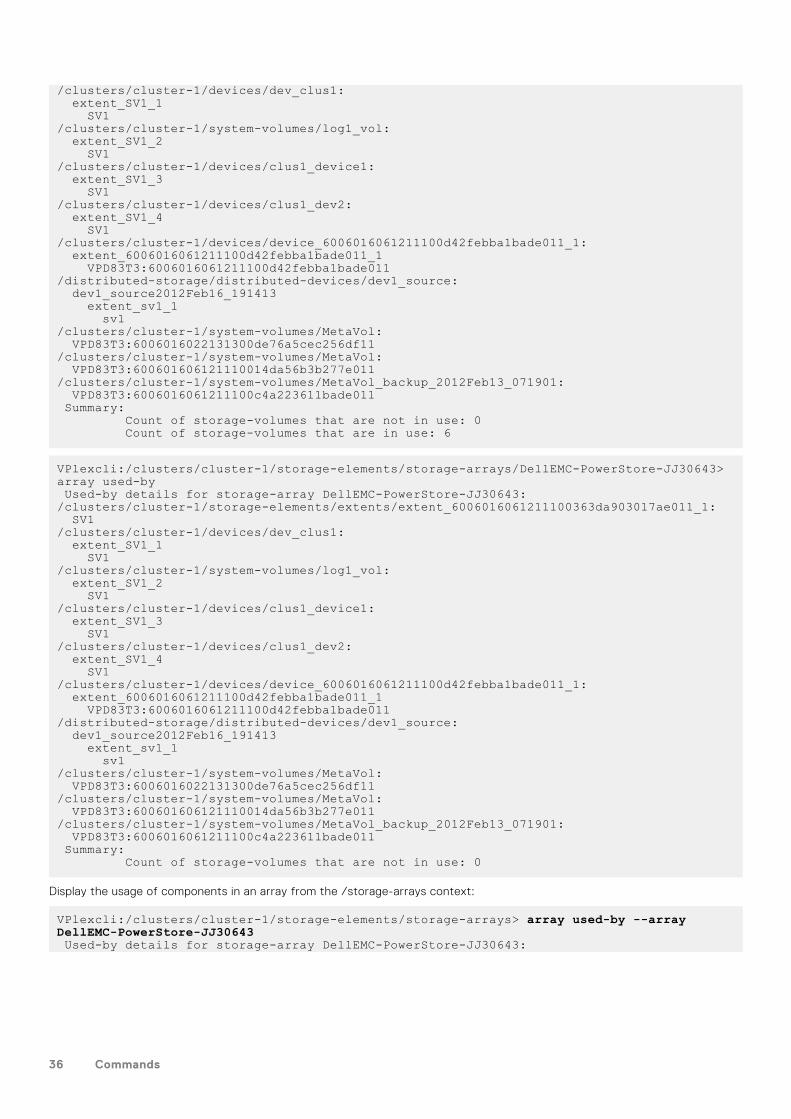
/clusters/cluster-1/devices/dev_clus1: extent_SV1_1 SV1/clusters/cluster-1/system-volumes/log1_vol: extent_SV1_2 SV1/clusters/cluster-1/devices/clus1_device1: extent_SV1_3 SV1/clusters/cluster-1/devices/clus1_dev2: extent_SV1_4 SV1/clusters/cluster-1/devices/device_6006016061211100d42febba1bade011_1: extent_6006016061211100d42febba1bade011_1 VPD83T3:6006016061211100d42febba1bade011/distributed-storage/distributed-devices/dev1_source: dev1_source2012Feb16_191413 extent_sv1_1 sv1/clusters/cluster-1/system-volumes/MetaVol: VPD83T3:6006016022131300de76a5cec256df11/clusters/cluster-1/system-volumes/MetaVol: VPD83T3:600601606121110014da56b3b277e011/clusters/cluster-1/system-volumes/MetaVol_backup_2012Feb13_071901: VPD83T3:6006016061211100c4a223611bade011 Summary: Count of storage-volumes that are not in use: 0 Count of storage-volumes that are in use: 6
VPlexcli:/clusters/cluster-1/storage-elements/storage-arrays/DellEMC-PowerStore-JJ30643> array used-by Used-by details for storage-array DellEMC-PowerStore-JJ30643:/clusters/cluster-1/storage-elements/extents/extent_6006016061211100363da903017ae011_1: SV1/clusters/cluster-1/devices/dev_clus1: extent_SV1_1 SV1/clusters/cluster-1/system-volumes/log1_vol: extent_SV1_2 SV1/clusters/cluster-1/devices/clus1_device1: extent_SV1_3 SV1/clusters/cluster-1/devices/clus1_dev2: extent_SV1_4 SV1/clusters/cluster-1/devices/device_6006016061211100d42febba1bade011_1: extent_6006016061211100d42febba1bade011_1 VPD83T3:6006016061211100d42febba1bade011/distributed-storage/distributed-devices/dev1_source: dev1_source2012Feb16_191413 extent_sv1_1 sv1/clusters/cluster-1/system-volumes/MetaVol: VPD83T3:6006016022131300de76a5cec256df11/clusters/cluster-1/system-volumes/MetaVol: VPD83T3:600601606121110014da56b3b277e011/clusters/cluster-1/system-volumes/MetaVol_backup_2012Feb13_071901: VPD83T3:6006016061211100c4a223611bade011 Summary: Count of storage-volumes that are not in use: 0
Display the usage of components in an array from the /storage-arrays context:
VPlexcli:/clusters/cluster-1/storage-elements/storage-arrays> array used-by --array DellEMC-PowerStore-JJ30643 Used-by details for storage-array DellEMC-PowerStore-JJ30643:
36 Commands
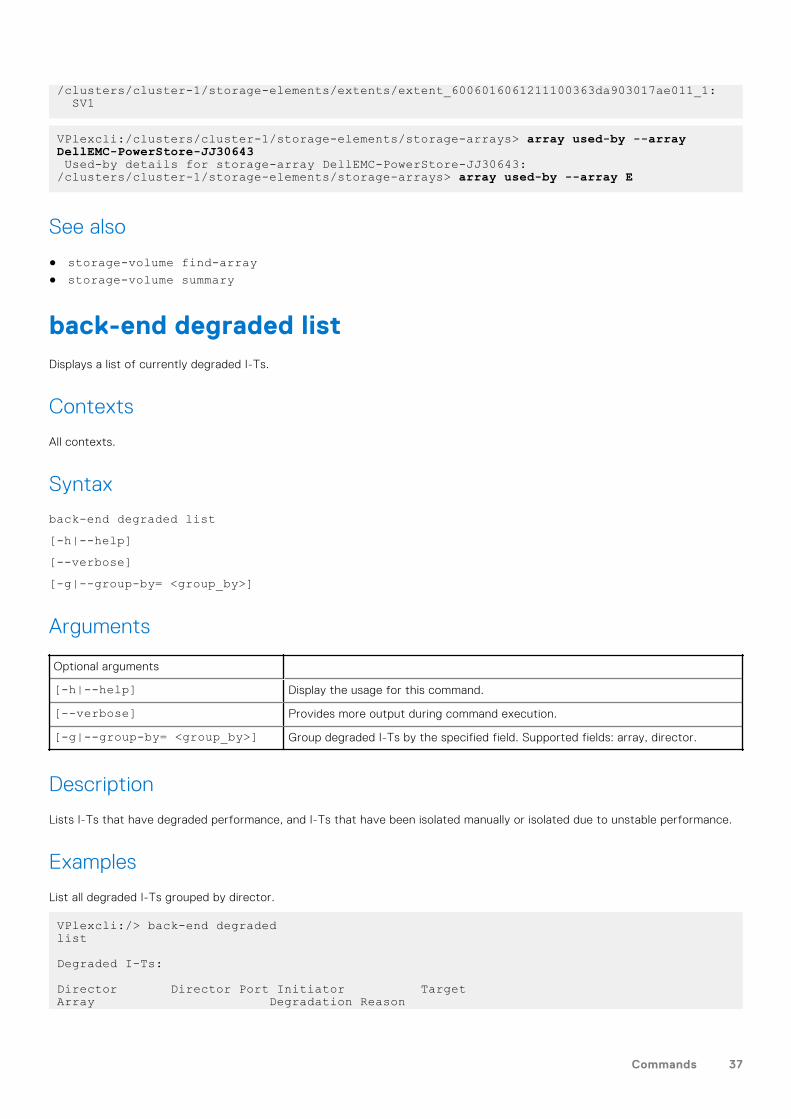
/clusters/cluster-1/storage-elements/extents/extent_6006016061211100363da903017ae011_1: SV1
VPlexcli:/clusters/cluster-1/storage-elements/storage-arrays> array used-by --array DellEMC-PowerStore-JJ30643 Used-by details for storage-array DellEMC-PowerStore-JJ30643:/clusters/cluster-1/storage-elements/storage-arrays> array used-by --array E
See also
● storage-volume find-array● storage-volume summary
back-end degraded listDisplays a list of currently degraded I-Ts.
Contexts
All contexts.
Syntax
back-end degraded list[-h|--help][--verbose][-g|--group-by= <group_by>]
Arguments
Optional arguments
[-h|--help] Display the usage for this command.
[--verbose] Provides more output during command execution.
[-g|--group-by= <group_by>] Group degraded I-Ts by the specified field. Supported fields: array, director.
Description
Lists I-Ts that have degraded performance, and I-Ts that have been isolated manually or isolated due to unstable performance.
Examples
List all degraded I-Ts grouped by director.
VPlexcli:/> back-end degraded list Degraded I-Ts:
Director Director Port Initiator Target Array Degradation Reason
Commands 37

-------------- ------------- ------------------ ------------------ --------------------------- ------------------director-1-1-A A1-FC00 0xc00144878bda0800 0x5000144260321e00 EMC-Invista-rc-surry-1 Manually isolated A1-FC01 0xc00144878bda0900 0x5006016547e01af9 EMC-CLARiiON-APM00164919257 Manually isolateddirector-1-1-B B1-FC01 0xc00144878bda8900 0x5006016547e01af9 EMC-CLARiiON-APM00164919257 Manually isolated
List all degraded I-Ts grouped by array
VPlexcli:/> back-end degraded list --group-by array Degraded I-Ts: Array Director Director Port Initiator Target Degradation Reason--------------------------- -------------- ------------- ------------------ ------------------ ------------------EMC-CLARiiON-APM00164919257 director-1-1-A A1-FC01 0xc00144878bda0900 0x5006016547e01af9 Manually isolated director-1-1-B B1-FC01 0xc00144878bda8900 0x5006016547e01af9 Manually isolatedEMC-Invista-rc-surry-1 director-1-1-A A1-FC00 0xc00144878bda0800 0x5000144260321e00 Manually isolated
See also
back-end degraded recover
back-end degraded recoverRecovers the specified degraded I-Ts.
Contexts
All contexts.
Syntax
back-end degraded recover[-h|--help][--verbose][-p|--paths= <paths>][--all]
Arguments
Optional arguments
[-h|--help] Display the usage for this command.
[--verbose] Provides more output during command execution.
[-p|--paths= <paths>] The degraded I-Ts to recover. Each I-T must be expressed as a pair in the form"(<initiator>,<target>)".
38 Commands
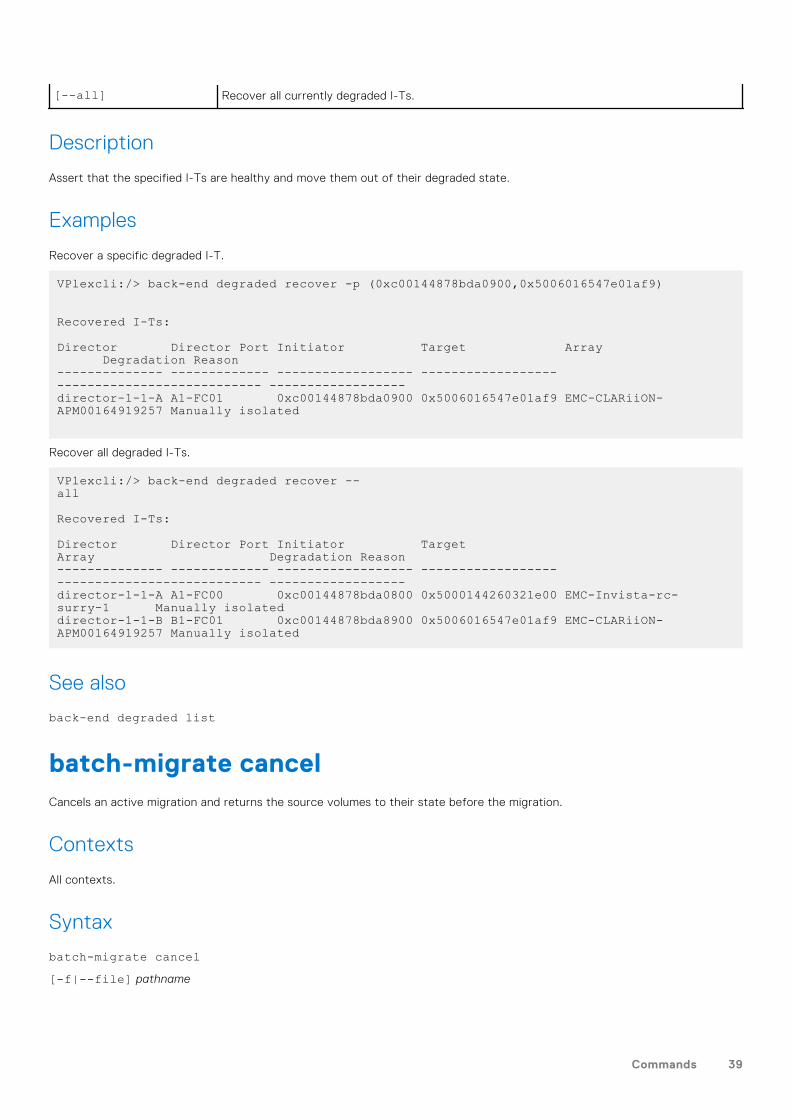
[--all] Recover all currently degraded I-Ts.
Description
Assert that the specified I-Ts are healthy and move them out of their degraded state.
Examples
Recover a specific degraded I-T.
VPlexcli:/> back-end degraded recover -p (0xc00144878bda0900,0x5006016547e01af9) Recovered I-Ts:
Director Director Port Initiator Target Array Degradation Reason-------------- ------------- ------------------ ------------------ --------------------------- ------------------director-1-1-A A1-FC01 0xc00144878bda0900 0x5006016547e01af9 EMC-CLARiiON-APM00164919257 Manually isolated
Recover all degraded I-Ts.
VPlexcli:/> back-end degraded recover --all Recovered I-Ts: Director Director Port Initiator Target Array Degradation Reason-------------- ------------- ------------------ ------------------ --------------------------- ------------------director-1-1-A A1-FC00 0xc00144878bda0800 0x5000144260321e00 EMC-Invista-rc-surry-1 Manually isolateddirector-1-1-B B1-FC01 0xc00144878bda8900 0x5006016547e01af9 EMC-CLARiiON-APM00164919257 Manually isolated
See also
back-end degraded list
batch-migrate cancelCancels an active migration and returns the source volumes to their state before the migration.
Contexts
All contexts.
Syntax
batch-migrate cancel[-f|--file] pathname
Commands 39
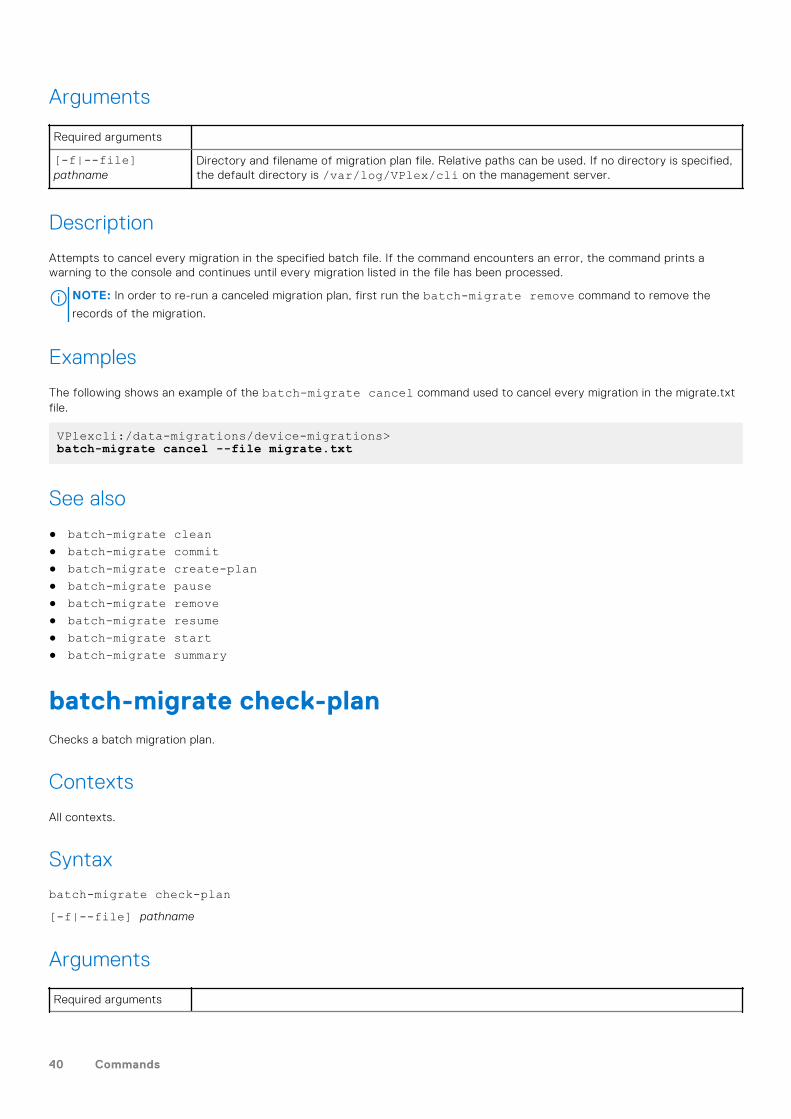
Arguments
Required arguments
[-f|--file]pathname
Directory and filename of migration plan file. Relative paths can be used. If no directory is specified,the default directory is /var/log/VPlex/cli on the management server.
Description
Attempts to cancel every migration in the specified batch file. If the command encounters an error, the command prints awarning to the console and continues until every migration listed in the file has been processed.
NOTE: In order to re-run a canceled migration plan, first run the batch-migrate remove command to remove the
records of the migration.
Examples
The following shows an example of the batch-migrate cancel command used to cancel every migration in the migrate.txtfile.
VPlexcli:/data-migrations/device-migrations>batch-migrate cancel --file migrate.txt
See also
● batch-migrate clean● batch-migrate commit● batch-migrate create-plan● batch-migrate pause● batch-migrate remove● batch-migrate resume● batch-migrate start● batch-migrate summary
batch-migrate check-planChecks a batch migration plan.
Contexts
All contexts.
Syntax
batch-migrate check-plan[-f|--file] pathname
Arguments
Required arguments
40 Commands
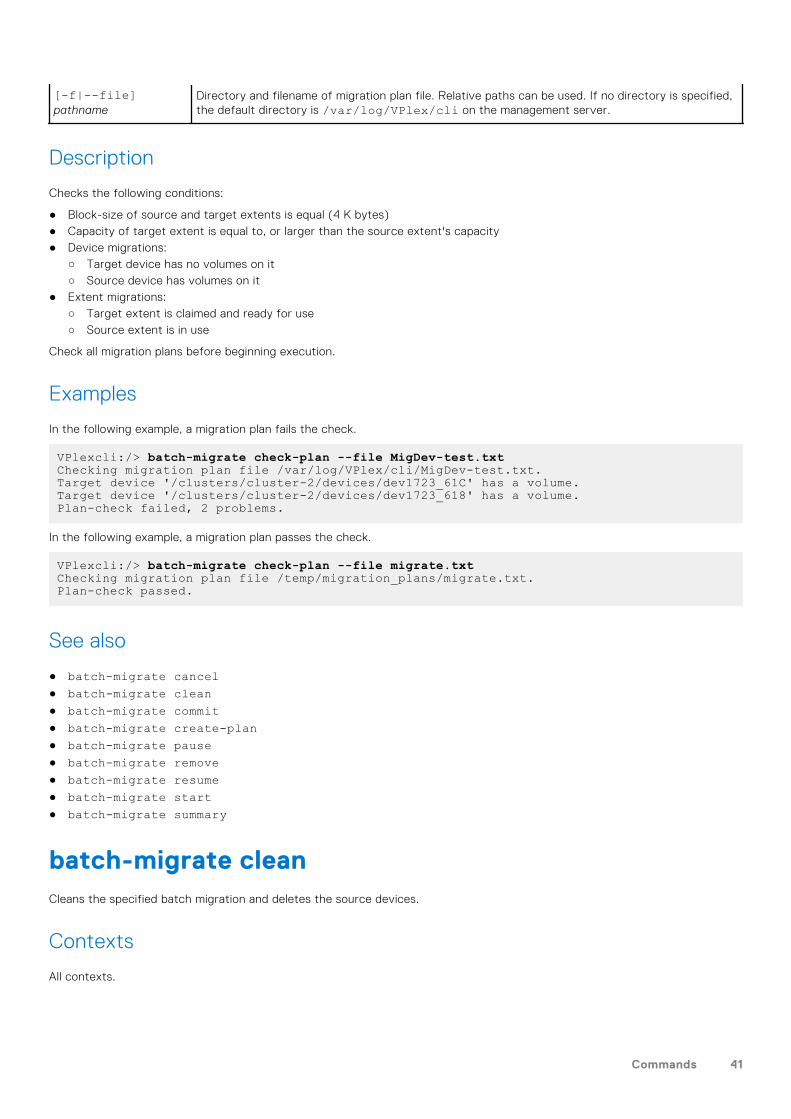
[-f|--file]pathname
Directory and filename of migration plan file. Relative paths can be used. If no directory is specified,the default directory is /var/log/VPlex/cli on the management server.
Description
Checks the following conditions:
● Block-size of source and target extents is equal (4 K bytes)● Capacity of target extent is equal to, or larger than the source extent's capacity● Device migrations:
○ Target device has no volumes on it○ Source device has volumes on it
● Extent migrations:○ Target extent is claimed and ready for use○ Source extent is in use
Check all migration plans before beginning execution.
Examples
In the following example, a migration plan fails the check.
VPlexcli:/> batch-migrate check-plan --file MigDev-test.txtChecking migration plan file /var/log/VPlex/cli/MigDev-test.txt.Target device '/clusters/cluster-2/devices/dev1723_61C' has a volume.Target device '/clusters/cluster-2/devices/dev1723_618' has a volume.Plan-check failed, 2 problems.
In the following example, a migration plan passes the check.
VPlexcli:/> batch-migrate check-plan --file migrate.txtChecking migration plan file /temp/migration_plans/migrate.txt.Plan-check passed.
See also
● batch-migrate cancel● batch-migrate clean● batch-migrate commit● batch-migrate create-plan● batch-migrate pause● batch-migrate remove● batch-migrate resume● batch-migrate start● batch-migrate summary
batch-migrate cleanCleans the specified batch migration and deletes the source devices.
Contexts
All contexts.
Commands 41
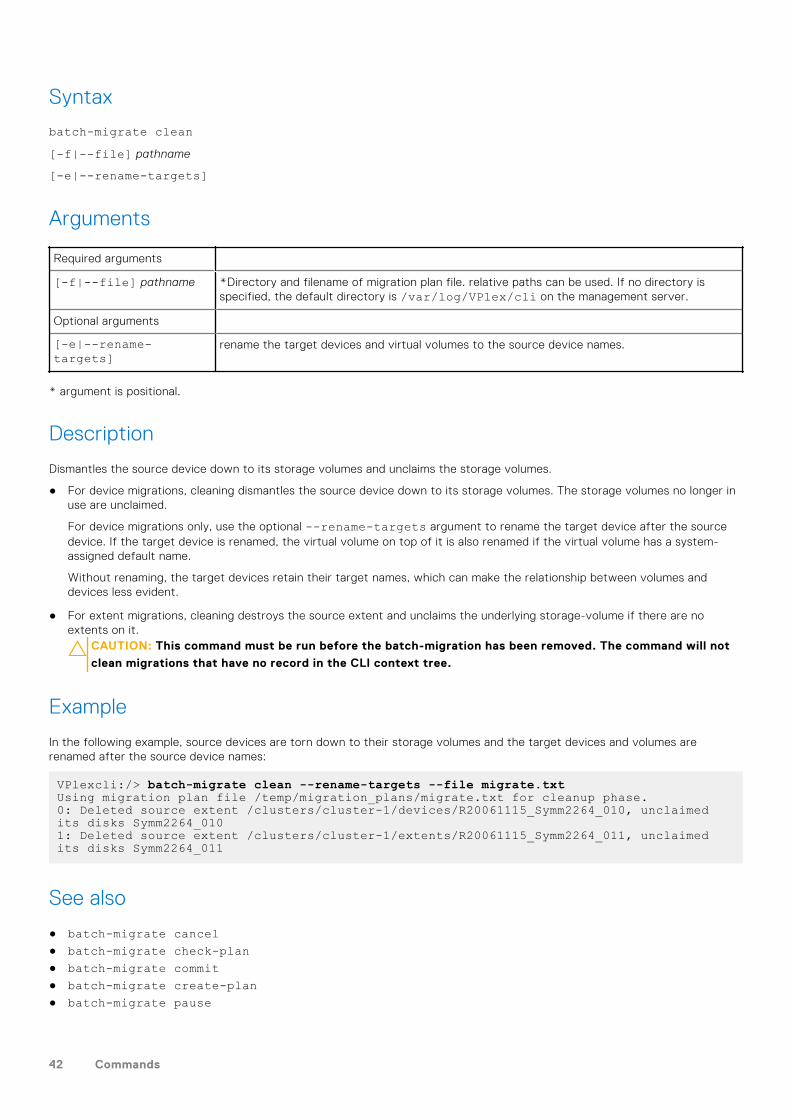
Syntax
batch-migrate clean[-f|--file] pathname
[-e|--rename-targets]
Arguments
Required arguments
[-f|--file] pathname *Directory and filename of migration plan file. relative paths can be used. If no directory isspecified, the default directory is /var/log/VPlex/cli on the management server.
Optional arguments
[-e|--rename-targets]
rename the target devices and virtual volumes to the source device names.
* argument is positional.
Description
Dismantles the source device down to its storage volumes and unclaims the storage volumes.
● For device migrations, cleaning dismantles the source device down to its storage volumes. The storage volumes no longer inuse are unclaimed.
For device migrations only, use the optional --rename-targets argument to rename the target device after the sourcedevice. If the target device is renamed, the virtual volume on top of it is also renamed if the virtual volume has a system-assigned default name.
Without renaming, the target devices retain their target names, which can make the relationship between volumes anddevices less evident.
● For extent migrations, cleaning destroys the source extent and unclaims the underlying storage-volume if there are noextents on it.
CAUTION: This command must be run before the batch-migration has been removed. The command will not
clean migrations that have no record in the CLI context tree.
Example
In the following example, source devices are torn down to their storage volumes and the target devices and volumes arerenamed after the source device names:
VPlexcli:/> batch-migrate clean --rename-targets --file migrate.txtUsing migration plan file /temp/migration_plans/migrate.txt for cleanup phase.0: Deleted source extent /clusters/cluster-1/devices/R20061115_Symm2264_010, unclaimed its disks Symm2264_0101: Deleted source extent /clusters/cluster-1/extents/R20061115_Symm2264_011, unclaimed its disks Symm2264_011
See also
● batch-migrate cancel● batch-migrate check-plan● batch-migrate commit● batch-migrate create-plan● batch-migrate pause
42 Commands
● batch-migrate remove
batch-migrate commitCommits the specified batch migration.
Contexts
All contexts.
Syntax
batch-migrate commit[-f|--file] pathname
Arguments
Required argument
[-f|--file]pathname
*Directory and filename of migration plan file. relative paths can be used. if no directory is specified,the default directory is /var/log/VPlex/clion the management server.
Description
Attempts to commit every migration in the batch. Migrations in the batch cannot be committed until all the migrations arecomplete.
If the command encounters an error, the command displays a warning continues until every migration has been processed.
The batch migration process inserts a temporary RAID 1 structure above the source devices/extents with the target devices/extents as an out-of-date leg of the RAID. Migration can be understood as the synchronization of the out-of-date leg (thetarget).
After the migration is complete, the commit step detaches the source leg of the temporary RAID and removes the RAID.
The virtual volume, device, or extent is identical to the one before the migration except that the source device/extent isreplaced with the target device/extent.
In order to clean a migration job, you must first commit the job.
Use the batch-migrate summary command to verify that the migration has completed with no errors before committingthe migration.
Examples
This example commits a list of batch migrations specified in BSO_19.
VPlexcli:/> batch-migrate commit --file BSO_19
See also
● batch-migrate cancel● batch-migrate check-plan● batch-migrate clean● batch-migrate create-plan
Commands 43
● batch-migrate remove
batch-migrate create-planCreates a batch migration plan file.
Contexts
All contexts.
Syntax
batch-migrate create-plan[-f|--sources] local-devices
[-t|--targets] local-devices
[--file] pathname
[--force]
Arguments
Required arguments
[-f|--sources] local-devices
* List of local-devices to migrate virtual volumes from. May contain wildcards.
[-t|--targets] local-devices
* List of local-devices to migrate the source virtual volumes to. May contain wildcards.
--file pathname * Directory and filename of migration plan file. Relative paths can be used. If no directory isspecified, the default directory is /var/log/VPlex/cli on the management server.
Optional arguments
--force Forces an existing plan file with the same name to be overwritten.
* - argument is positional.
Description
The following rules apply to the batch-migrate create-plan command:
● The source and target extents must be typed as a comma-separated list, where each element is allowed to containwildcards.
● If this is an extent migration, the source and target cluster must be the same.● If this is a device migration, the source and target clusters can be different.● The source and target can be either local-devices or extents. Mixed migrations from local-device to extent and vice versa
are not allowed.● The command attempts to create a valid migration plan from the source devices/extents to the target devices/extents.
If there are source devices/extents that cannot be included in the plan, the command prints a warning to the console, butstill creates the plan.
● Review the plan and make any necessary changes before starting the batch migration.
44 Commands
Examples
Example: perform a batch migration
1. Create a migration plan.
Use the batch-migrate create-plan command to create a plan to migrate the volumes on all the devices at cluster-1to the storage at cluster-2:
VPlexcli:/> batch-migrate create-plan migrate.txt --sources /clusters/cluster-1/devices/* --targets /clusters/cluster-2/devices/*
2. Use the batch-migrate check-plan command to check the plan:
VPlexcli:/> batch-migrate check-plan migrate.txt
If problems are found, correct the errors and re-run the command until the plan-check passes.
3. Use the batch-migrate start command to start the migration:
VPlexcli:/> batch-migrate start migrate.txt4. Wait for the migration to finish:
Use the batch-migrate summary command to monitor the status of the migration:
VPlexcli:/> batch-migrate summary migrate.txtProcessed 10 migrations from batch migration BR0:committed: 0complete: 10in-progress: 0paused: 0error: 0cancelled: 0no-record: 0
5. When all the migrations are complete, use the batch-migrate commit command to commit the migration:
VPlexcli:/> batch-migrate commit migrate.txt
The source volumes now reside on the target devices.
6. Use batch-migrate clean to clean the migration:
VPlexcli:/> batch-migrate clean --rename-targets --file migrate.txt
This dismantles the source devices down to their storage volumes and renames the target devices and volumes using thesource device names.
7. Use the batch-migrate remove command to remove the record of the migration:
VPlexcli:/> batch-migrate remove migrate.txt
Example: Pause/resume an in-progress batch migration
VPlexcli:/> batch-migrate pause migrate.txtVPlexcli:/> batch-migrate resume migrate.txt
A batch-migration can be canceled at any-time, until the point it is committed.
Cancel and restart a batch migration:
VPlexcli:/> batch-migrate cancel migrate.txtVPlexcli:/> batch-migrate remove migrate.txtVPlexcli:/> batch-migrate start migrate.txt
Commands 45
See also
● batch-migrate cancel● batch-migrate check-plan● batch-migrate clean● batch-migrate commit● batch-migrate pause● batch-migrate remove● batch-migrate resume● batch-migrate start● batch-migrate summary
batch-migrate pausePauses the specified batch migration.
Contexts
All contexts.
Syntax
batch-migrate pause[--file] pathname
Arguments
Required arguments
--file pathname Directory and filename of migration plan file. Relative paths can be used. If no directory is specified, thedefault directory is /var/log/VPlex/cli on the management server.
Description
Pauses every migration in the batch. If the command encounters an error, the command prints a warning and continues untilevery migration has been processed.
You can pause active migrations (a migration that has been started) and resume that migration at a later time.
● Pause an active migration to release bandwidth for host I/O during periods of peak traffic.
Use the batch-migrate pause --file pathname command to pause the specified active migration.
● Resume the migration during periods of low I/O.
Use the batch-migrate resume --file pathname command to resume the specified paused migration.
Examples
The following example pauses all of the migrations listed in BSO_19.
VPlexcli:/> batch-migrate pause --file BS0_19
46 Commands
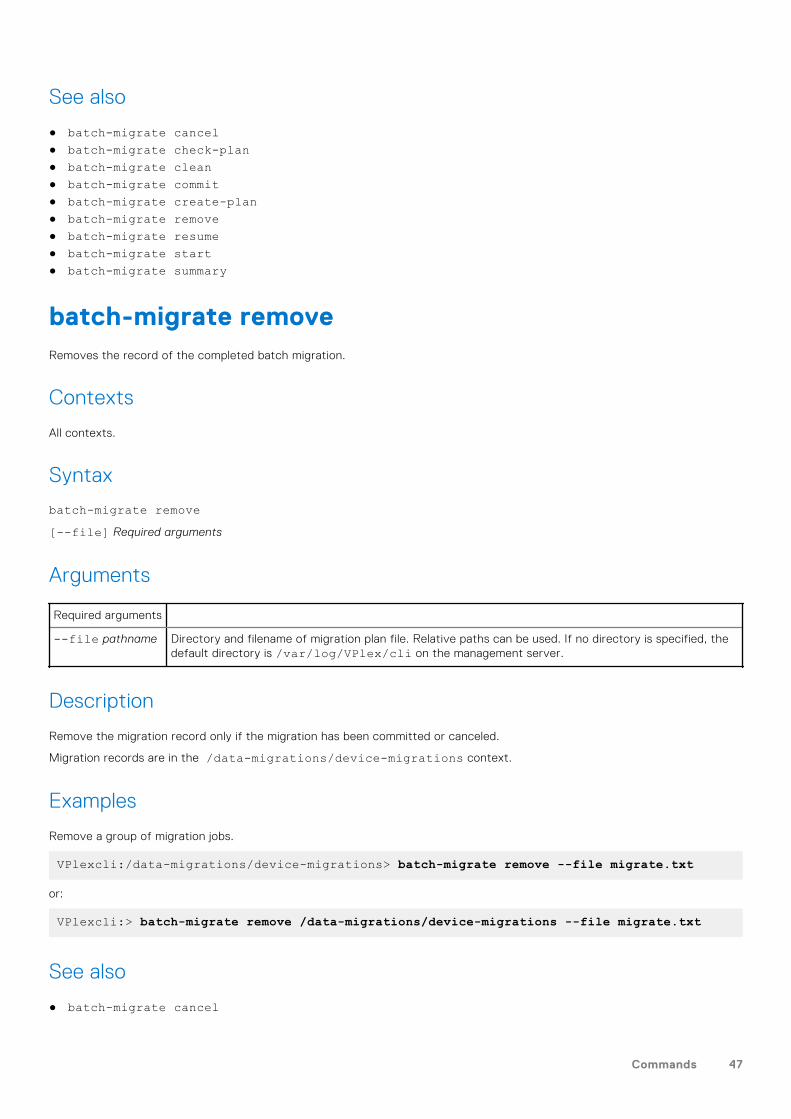
See also
● batch-migrate cancel● batch-migrate check-plan● batch-migrate clean● batch-migrate commit● batch-migrate create-plan● batch-migrate remove● batch-migrate resume● batch-migrate start● batch-migrate summary
batch-migrate removeRemoves the record of the completed batch migration.
Contexts
All contexts.
Syntax
batch-migrate remove[--file] Required arguments
Arguments
Required arguments
--file pathname Directory and filename of migration plan file. Relative paths can be used. If no directory is specified, thedefault directory is /var/log/VPlex/cli on the management server.
Description
Remove the migration record only if the migration has been committed or canceled.
Migration records are in the /data-migrations/device-migrations context.
Examples
Remove a group of migration jobs.
VPlexcli:/data-migrations/device-migrations> batch-migrate remove --file migrate.txt
or:
VPlexcli:> batch-migrate remove /data-migrations/device-migrations --file migrate.txt
See also
● batch-migrate cancel
Commands 47
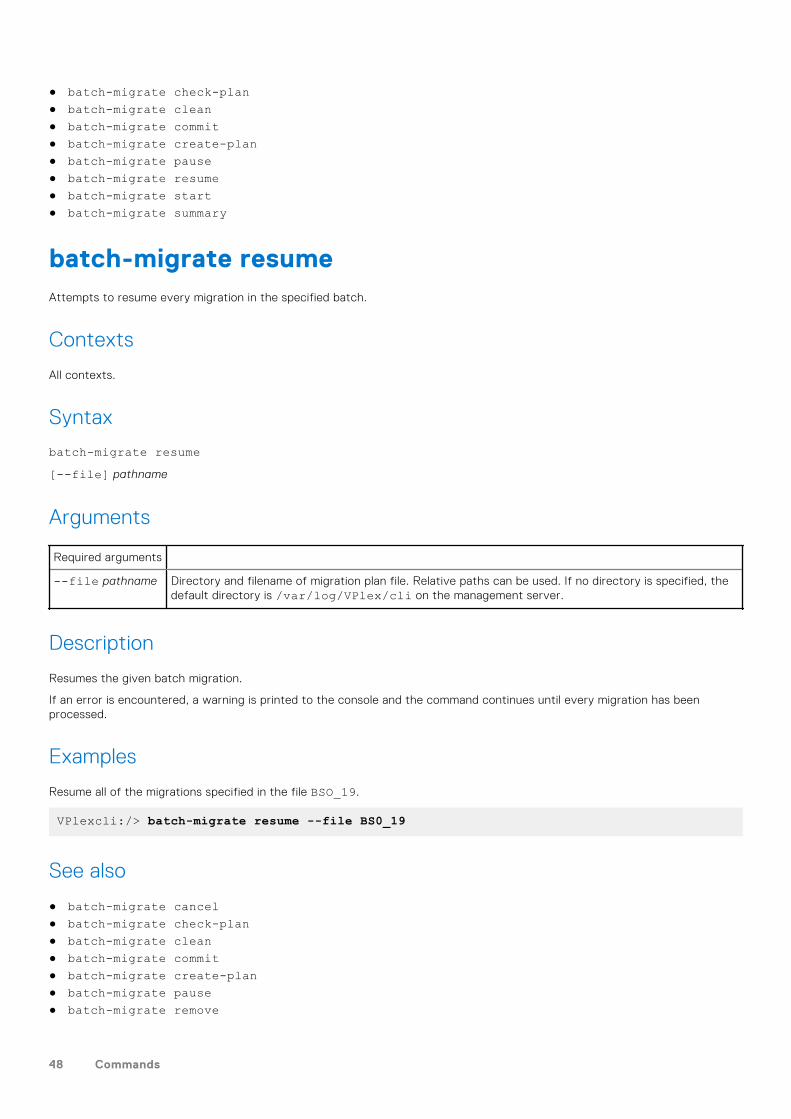
● batch-migrate check-plan● batch-migrate clean● batch-migrate commit● batch-migrate create-plan● batch-migrate pause● batch-migrate resume● batch-migrate start● batch-migrate summary
batch-migrate resumeAttempts to resume every migration in the specified batch.
Contexts
All contexts.
Syntax
batch-migrate resume[--file] pathname
Arguments
Required arguments
--file pathname Directory and filename of migration plan file. Relative paths can be used. If no directory is specified, thedefault directory is /var/log/VPlex/cli on the management server.
Description
Resumes the given batch migration.
If an error is encountered, a warning is printed to the console and the command continues until every migration has beenprocessed.
Examples
Resume all of the migrations specified in the file BSO_19.
VPlexcli:/> batch-migrate resume --file BS0_19
See also
● batch-migrate cancel● batch-migrate check-plan● batch-migrate clean● batch-migrate commit● batch-migrate create-plan● batch-migrate pause● batch-migrate remove
48 Commands
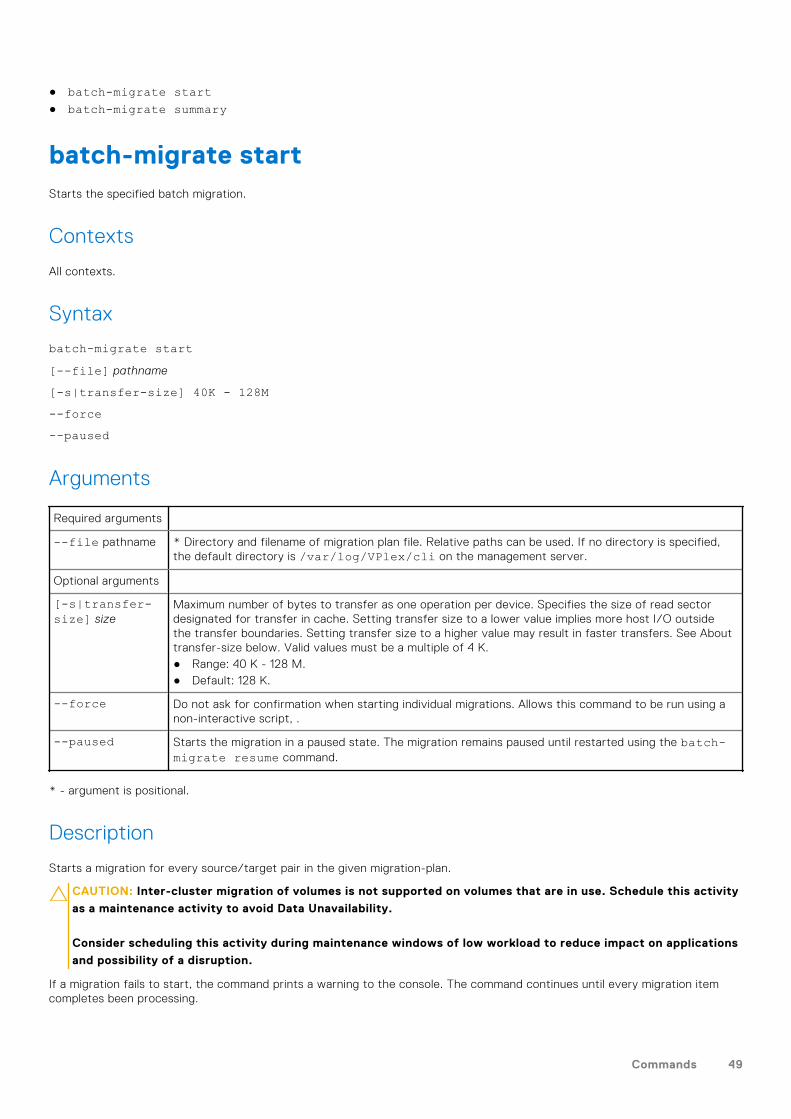
● batch-migrate start● batch-migrate summary
batch-migrate startStarts the specified batch migration.
Contexts
All contexts.
Syntax
batch-migrate start[--file] pathname
[-s|transfer-size] 40K - 128M--force--paused
Arguments
Required arguments
--file pathname * Directory and filename of migration plan file. Relative paths can be used. If no directory is specified,the default directory is /var/log/VPlex/cli on the management server.
Optional arguments
[-s|transfer-size] size
Maximum number of bytes to transfer as one operation per device. Specifies the size of read sectordesignated for transfer in cache. Setting transfer size to a lower value implies more host I/O outsidethe transfer boundaries. Setting transfer size to a higher value may result in faster transfers. See Abouttransfer-size below. Valid values must be a multiple of 4 K.● Range: 40 K - 128 M.● Default: 128 K.
--force Do not ask for confirmation when starting individual migrations. Allows this command to be run using anon-interactive script, .
--paused Starts the migration in a paused state. The migration remains paused until restarted using the batch-migrate resume command.
* - argument is positional.
Description
Starts a migration for every source/target pair in the given migration-plan.
CAUTION: Inter-cluster migration of volumes is not supported on volumes that are in use. Schedule this activity
as a maintenance activity to avoid Data Unavailability.
Consider scheduling this activity during maintenance windows of low workload to reduce impact on applications
and possibility of a disruption.
If a migration fails to start, the command prints a warning to the console. The command continues until every migration itemcompletes been processing.
Commands 49
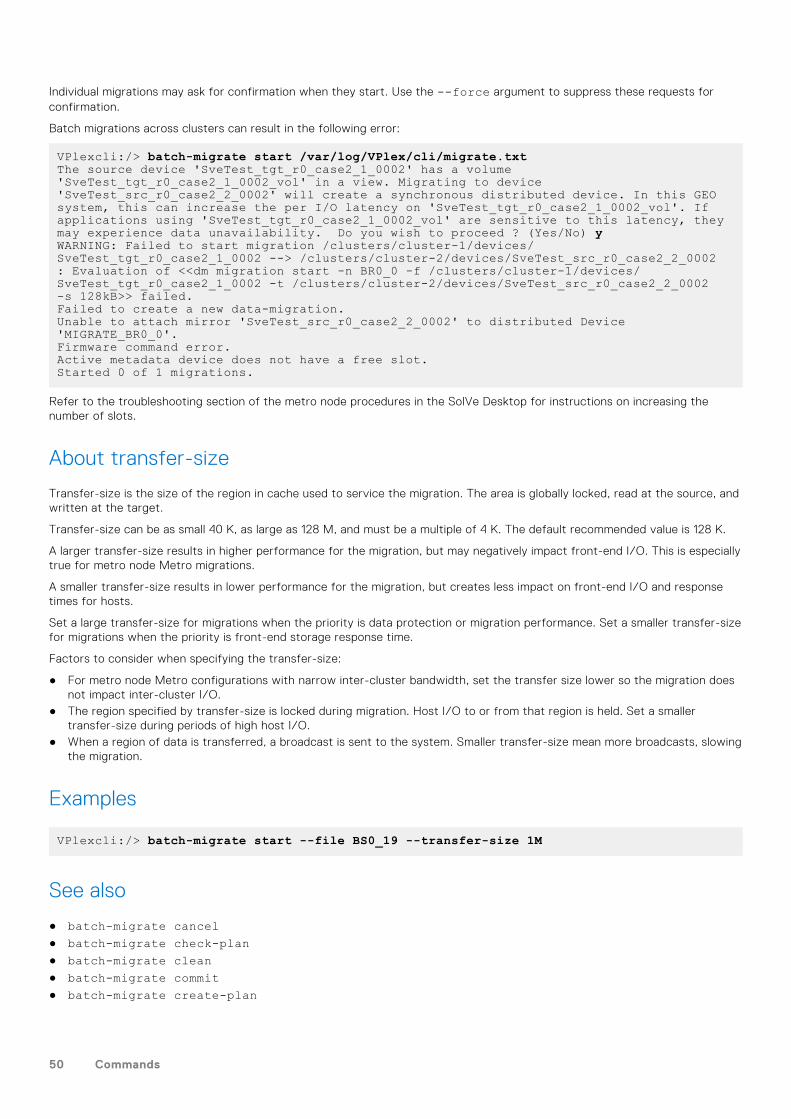
Individual migrations may ask for confirmation when they start. Use the --force argument to suppress these requests forconfirmation.
Batch migrations across clusters can result in the following error:
VPlexcli:/> batch-migrate start /var/log/VPlex/cli/migrate.txtThe source device 'SveTest_tgt_r0_case2_1_0002' has a volume 'SveTest_tgt_r0_case2_1_0002_vol' in a view. Migrating to device 'SveTest_src_r0_case2_2_0002' will create a synchronous distributed device. In this GEO system, this can increase the per I/O latency on 'SveTest_tgt_r0_case2_1_0002_vol'. If applications using 'SveTest_tgt_r0_case2_1_0002_vol' are sensitive to this latency, they may experience data unavailability. Do you wish to proceed ? (Yes/No) yWARNING: Failed to start migration /clusters/cluster-1/devices/SveTest_tgt_r0_case2_1_0002 --> /clusters/cluster-2/devices/SveTest_src_r0_case2_2_0002 : Evaluation of <<dm migration start -n BR0_0 -f /clusters/cluster-1/devices/SveTest_tgt_r0_case2_1_0002 -t /clusters/cluster-2/devices/SveTest_src_r0_case2_2_0002 -s 128kB>> failed.Failed to create a new data-migration.Unable to attach mirror 'SveTest_src_r0_case2_2_0002' to distributed Device 'MIGRATE_BR0_0'.Firmware command error.Active metadata device does not have a free slot.Started 0 of 1 migrations.
Refer to the troubleshooting section of the metro node procedures in the SolVe Desktop for instructions on increasing thenumber of slots.
About transfer-size
Transfer-size is the size of the region in cache used to service the migration. The area is globally locked, read at the source, andwritten at the target.
Transfer-size can be as small 40 K, as large as 128 M, and must be a multiple of 4 K. The default recommended value is 128 K.
A larger transfer-size results in higher performance for the migration, but may negatively impact front-end I/O. This is especiallytrue for metro node Metro migrations.
A smaller transfer-size results in lower performance for the migration, but creates less impact on front-end I/O and responsetimes for hosts.
Set a large transfer-size for migrations when the priority is data protection or migration performance. Set a smaller transfer-sizefor migrations when the priority is front-end storage response time.
Factors to consider when specifying the transfer-size:
● For metro node Metro configurations with narrow inter-cluster bandwidth, set the transfer size lower so the migration doesnot impact inter-cluster I/O.
● The region specified by transfer-size is locked during migration. Host I/O to or from that region is held. Set a smallertransfer-size during periods of high host I/O.
● When a region of data is transferred, a broadcast is sent to the system. Smaller transfer-size mean more broadcasts, slowingthe migration.
Examples
VPlexcli:/> batch-migrate start --file BS0_19 --transfer-size 1M
See also
● batch-migrate cancel● batch-migrate check-plan● batch-migrate clean● batch-migrate commit● batch-migrate create-plan
50 Commands
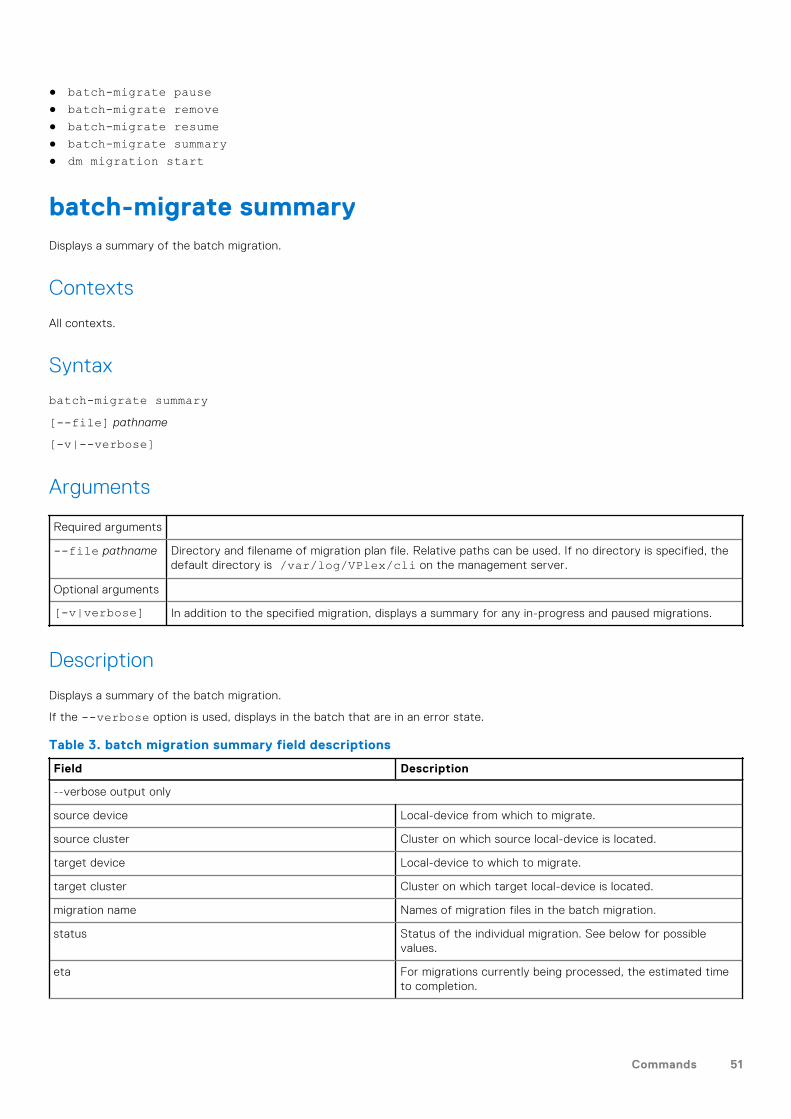
● batch-migrate pause● batch-migrate remove● batch-migrate resume● batch-migrate summary● dm migration start
batch-migrate summaryDisplays a summary of the batch migration.
Contexts
All contexts.
Syntax
batch-migrate summary[--file] pathname
[-v|--verbose]
Arguments
Required arguments
--file pathname Directory and filename of migration plan file. Relative paths can be used. If no directory is specified, thedefault directory is /var/log/VPlex/cli on the management server.
Optional arguments
[-v|verbose] In addition to the specified migration, displays a summary for any in-progress and paused migrations.
Description
Displays a summary of the batch migration.
If the --verbose option is used, displays in the batch that are in an error state.
Table 3. batch migration summary field descriptions
Field Description
--verbose output only
source device Local-device from which to migrate.
source cluster Cluster on which source local-device is located.
target device Local-device to which to migrate.
target cluster Cluster on which target local-device is located.
migration name Names of migration files in the batch migration.
status Status of the individual migration. See below for possiblevalues.
eta For migrations currently being processed, the estimated timeto completion.
Commands 51
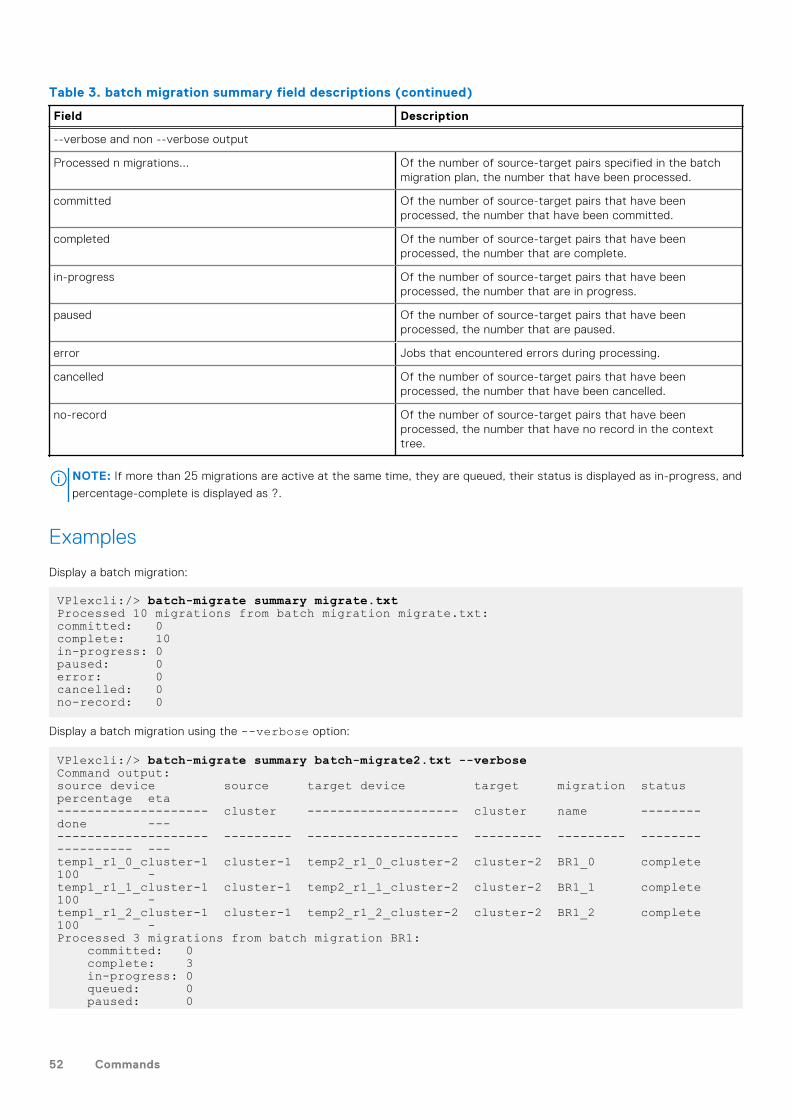
Table 3. batch migration summary field descriptions (continued)
Field Description
--verbose and non --verbose output
Processed n migrations... Of the number of source-target pairs specified in the batchmigration plan, the number that have been processed.
committed Of the number of source-target pairs that have beenprocessed, the number that have been committed.
completed Of the number of source-target pairs that have beenprocessed, the number that are complete.
in-progress Of the number of source-target pairs that have beenprocessed, the number that are in progress.
paused Of the number of source-target pairs that have beenprocessed, the number that are paused.
error Jobs that encountered errors during processing.
cancelled Of the number of source-target pairs that have beenprocessed, the number that have been cancelled.
no-record Of the number of source-target pairs that have beenprocessed, the number that have no record in the contexttree.
NOTE: If more than 25 migrations are active at the same time, they are queued, their status is displayed as in-progress, and
percentage-complete is displayed as ?.
Examples
Display a batch migration:
VPlexcli:/> batch-migrate summary migrate.txtProcessed 10 migrations from batch migration migrate.txt:committed: 0complete: 10in-progress: 0paused: 0error: 0cancelled: 0no-record: 0
Display a batch migration using the --verbose option:
VPlexcli:/> batch-migrate summary batch-migrate2.txt --verboseCommand output:source device source target device target migration status percentage eta-------------------- cluster -------------------- cluster name -------- done ----------------------- --------- -------------------- --------- --------- -------- ---------- ---temp1_r1_0_cluster-1 cluster-1 temp2_r1_0_cluster-2 cluster-2 BR1_0 complete 100 -temp1_r1_1_cluster-1 cluster-1 temp2_r1_1_cluster-2 cluster-2 BR1_1 complete 100 -temp1_r1_2_cluster-1 cluster-1 temp2_r1_2_cluster-2 cluster-2 BR1_2 complete 100 -Processed 3 migrations from batch migration BR1: committed: 0 complete: 3 in-progress: 0 queued: 0 paused: 0
52 Commands
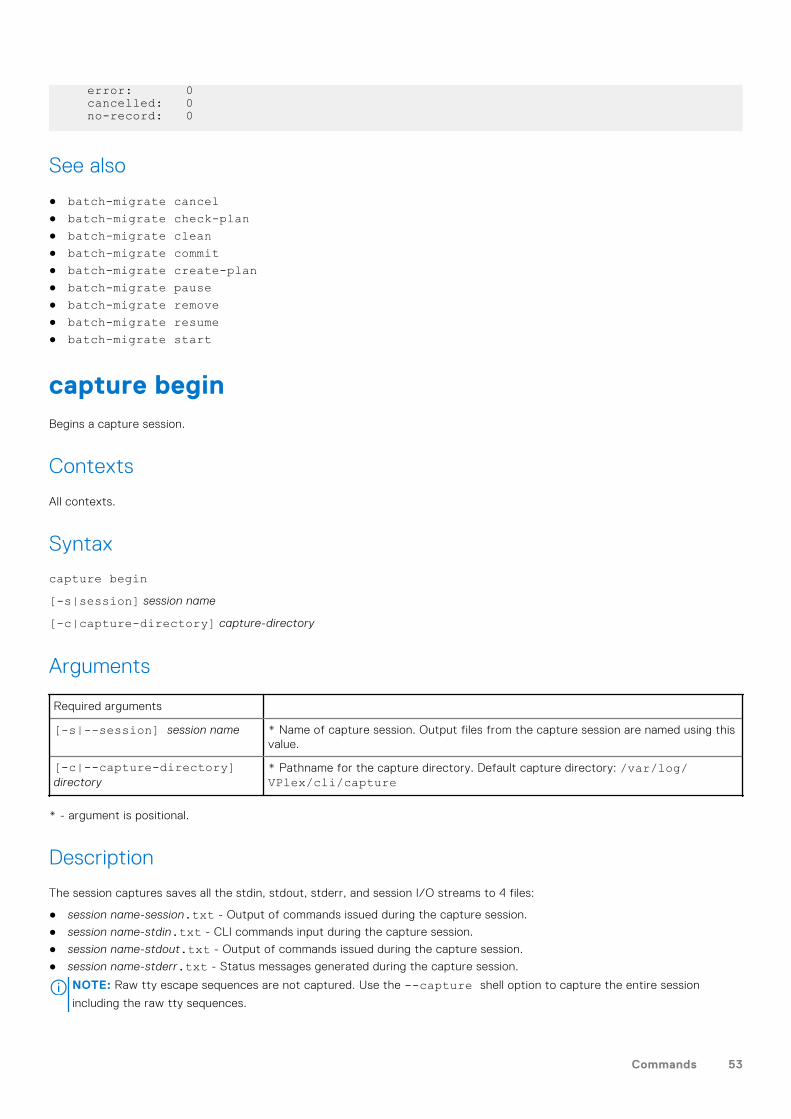
error: 0 cancelled: 0 no-record: 0
See also
● batch-migrate cancel● batch-migrate check-plan● batch-migrate clean● batch-migrate commit● batch-migrate create-plan● batch-migrate pause● batch-migrate remove● batch-migrate resume● batch-migrate start
capture beginBegins a capture session.
Contexts
All contexts.
Syntax
capture begin[-s|session] session name
[-c|capture-directory] capture-directory
Arguments
Required arguments
[-s|--session] session name * Name of capture session. Output files from the capture session are named using thisvalue.
[-c|--capture-directory]directory
* Pathname for the capture directory. Default capture directory: /var/log/VPlex/cli/capture
* - argument is positional.
Description
The session captures saves all the stdin, stdout, stderr, and session I/O streams to 4 files:
● session name-session.txt - Output of commands issued during the capture session.
● session name-stdin.txt - CLI commands input during the capture session.
● session name-stdout.txt - Output of commands issued during the capture session.
● session name-stderr.txt - Status messages generated during the capture session.
NOTE: Raw tty escape sequences are not captured. Use the --capture shell option to capture the entire session
including the raw tty sequences.
Commands 53
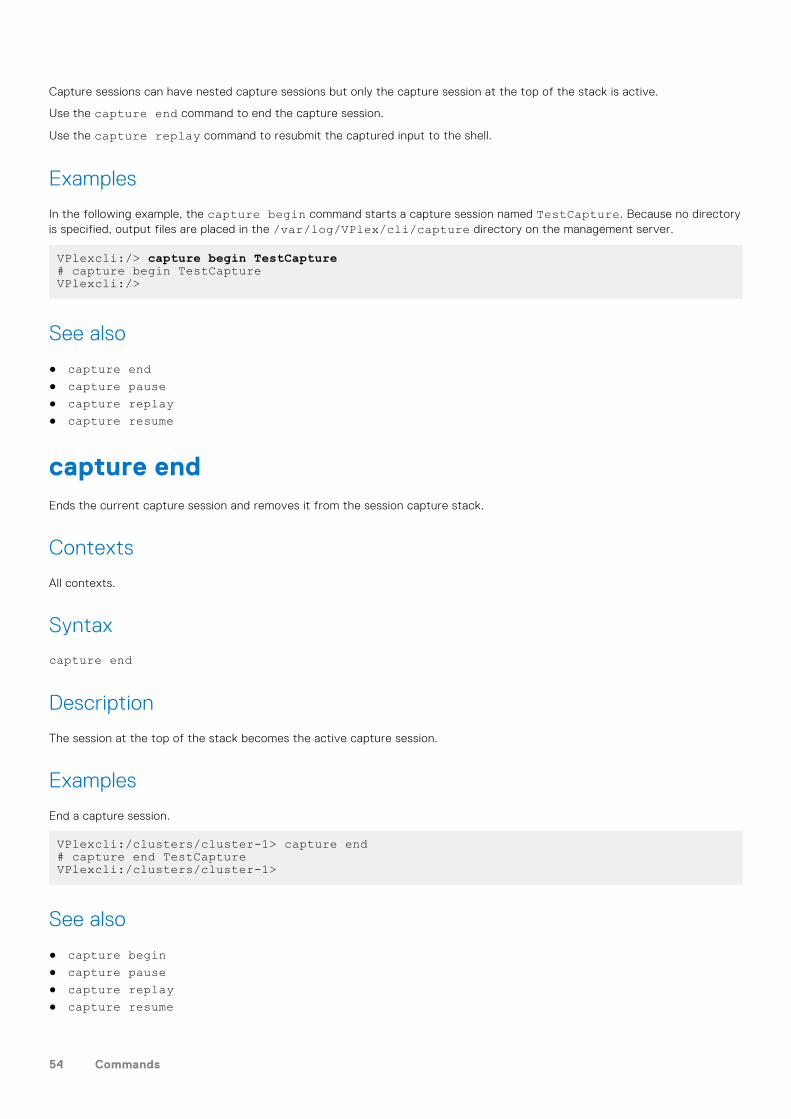
Capture sessions can have nested capture sessions but only the capture session at the top of the stack is active.
Use the capture end command to end the capture session.
Use the capture replay command to resubmit the captured input to the shell.
Examples
In the following example, the capture begin command starts a capture session named TestCapture. Because no directoryis specified, output files are placed in the /var/log/VPlex/cli/capture directory on the management server.
VPlexcli:/> capture begin TestCapture# capture begin TestCaptureVPlexcli:/>
See also
● capture end● capture pause● capture replay● capture resume
capture endEnds the current capture session and removes it from the session capture stack.
Contexts
All contexts.
Syntax
capture end
Description
The session at the top of the stack becomes the active capture session.
Examples
End a capture session.
VPlexcli:/clusters/cluster-1> capture end# capture end TestCaptureVPlexcli:/clusters/cluster-1>
See also
● capture begin● capture pause● capture replay● capture resume
54 Commands
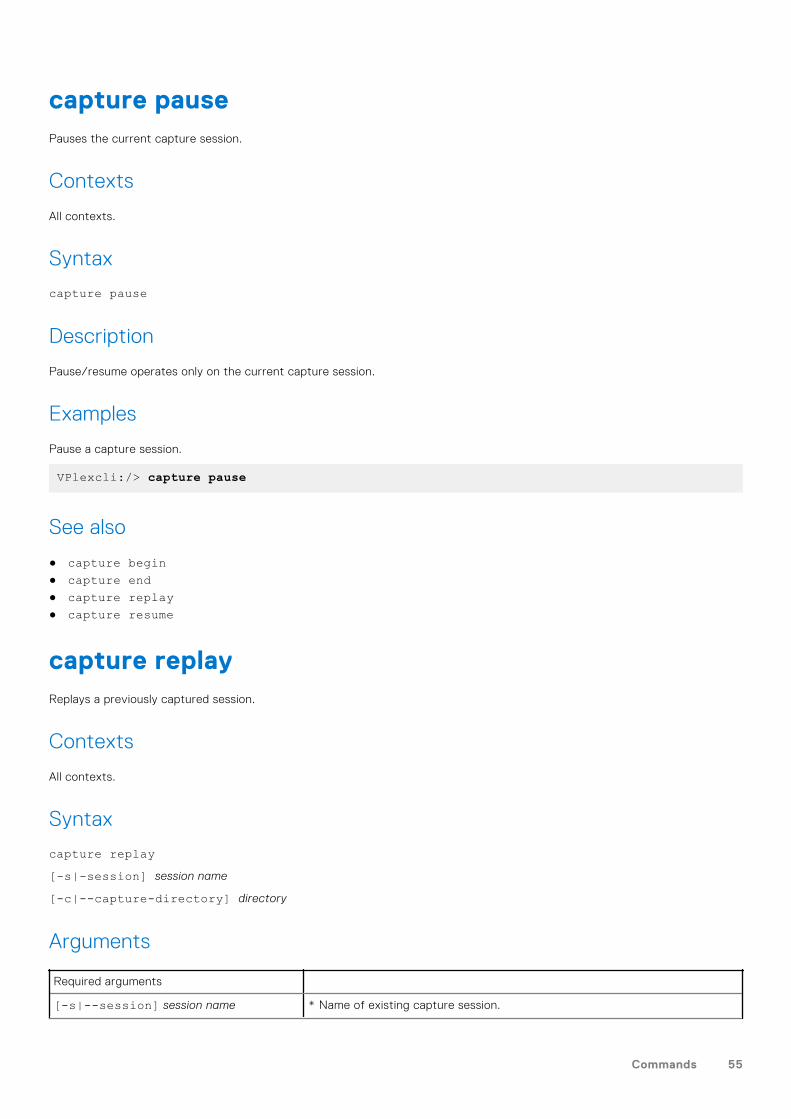
capture pausePauses the current capture session.
Contexts
All contexts.
Syntax
capture pause
Description
Pause/resume operates only on the current capture session.
Examples
Pause a capture session.
VPlexcli:/> capture pause
See also
● capture begin● capture end● capture replay● capture resume
capture replayReplays a previously captured session.
Contexts
All contexts.
Syntax
capture replay[-s|-session] session name
[-c|--capture-directory] directory
Arguments
Required arguments
[-s|--session] session name * Name of existing capture session.
Commands 55
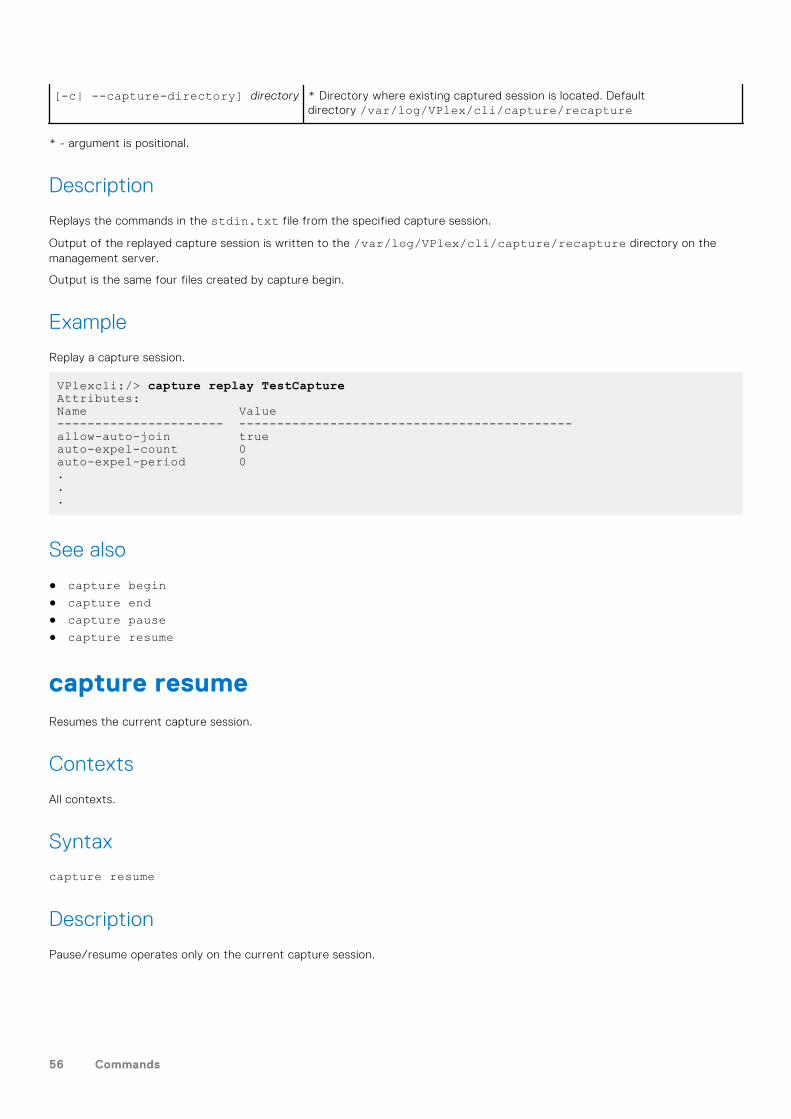
[-c| --capture-directory] directory * Directory where existing captured session is located. Defaultdirectory /var/log/VPlex/cli/capture/recapture
* - argument is positional.
Description
Replays the commands in the stdin.txt file from the specified capture session.
Output of the replayed capture session is written to the /var/log/VPlex/cli/capture/recapture directory on themanagement server.
Output is the same four files created by capture begin.
Example
Replay a capture session.
VPlexcli:/> capture replay TestCaptureAttributes:Name Value---------------------- --------------------------------------------allow-auto-join trueauto-expel-count 0auto-expel-period 0...
See also
● capture begin● capture end● capture pause● capture resume
capture resumeResumes the current capture session.
Contexts
All contexts.
Syntax
capture resume
Description
Pause/resume operates only on the current capture session.
56 Commands
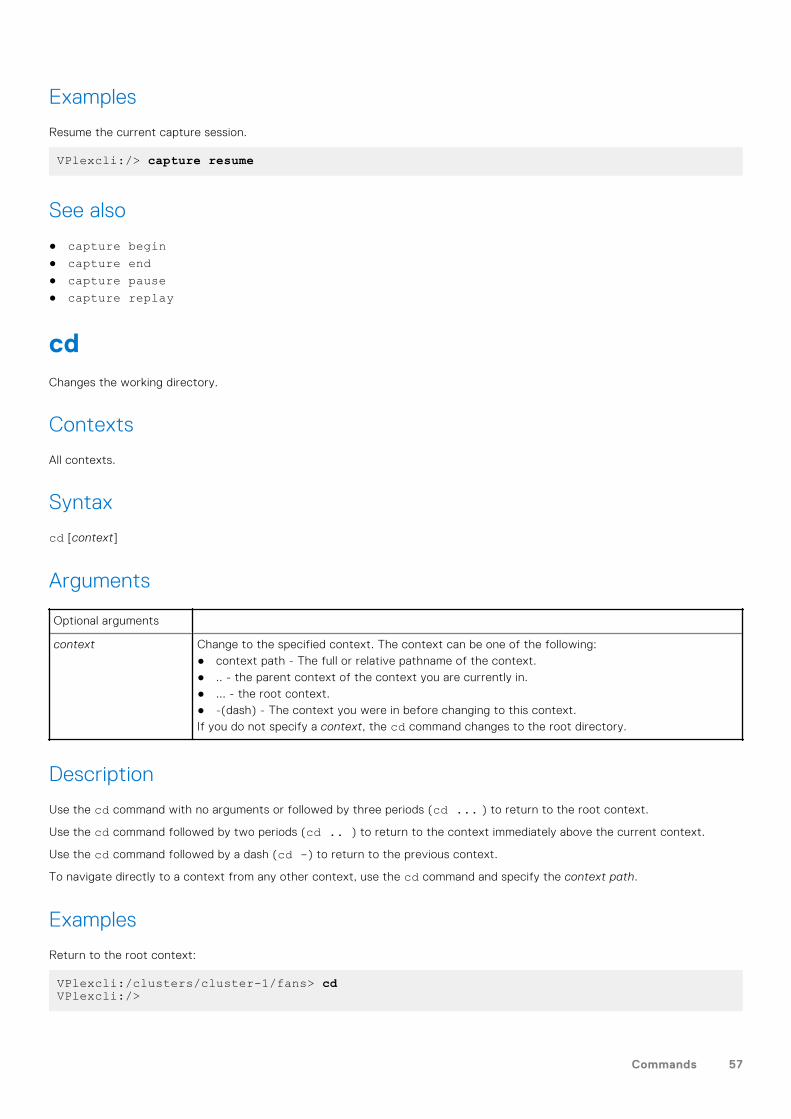
Examples
Resume the current capture session.
VPlexcli:/> capture resume
See also
● capture begin● capture end● capture pause● capture replay
cdChanges the working directory.
Contexts
All contexts.
Syntax
cd [context]
Arguments
Optional arguments
context Change to the specified context. The context can be one of the following:● context path - The full or relative pathname of the context.● .. - the parent context of the context you are currently in.● ... - the root context.● -(dash) - The context you were in before changing to this context.If you do not specify a context, the cd command changes to the root directory.
Description
Use the cd command with no arguments or followed by three periods (cd ... ) to return to the root context.
Use the cd command followed by two periods (cd .. ) to return to the context immediately above the current context.
Use the cd command followed by a dash (cd -) to return to the previous context.
To navigate directly to a context from any other context, use the cd command and specify the context path.
Examples
Return to the root context:
VPlexcli:/clusters/cluster-1/fans> cdVPlexcli:/>
Commands 57
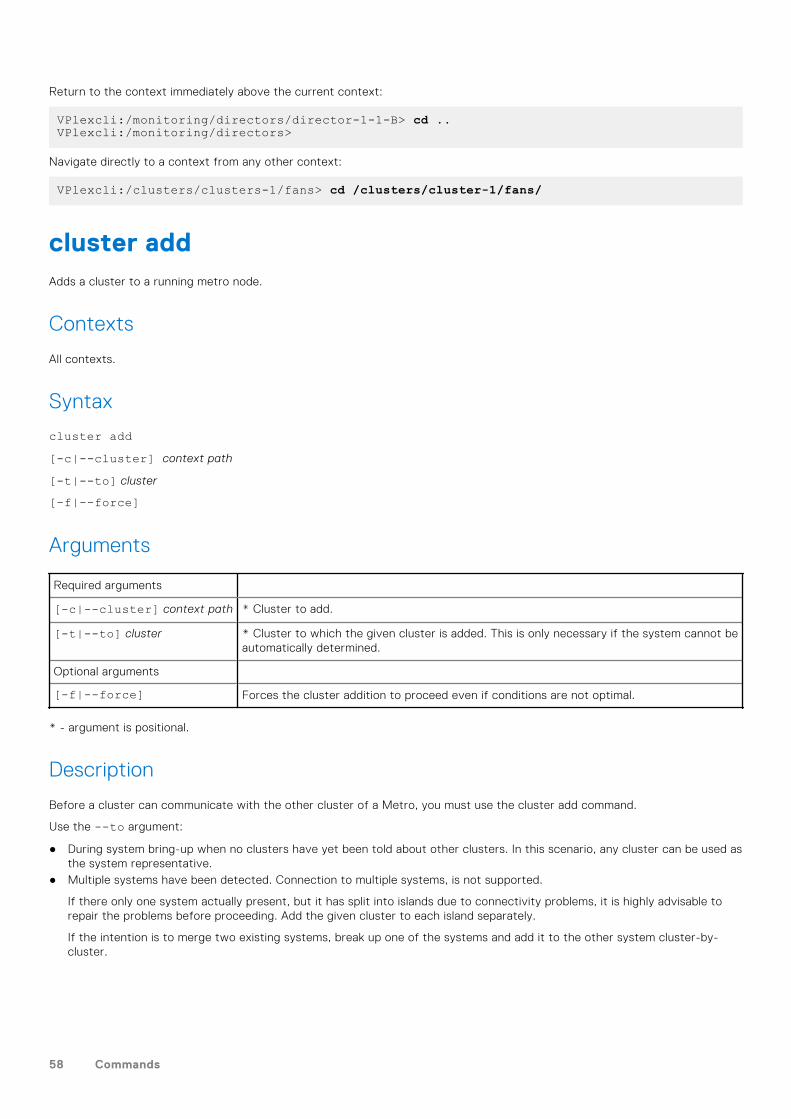
Return to the context immediately above the current context:
VPlexcli:/monitoring/directors/director-1-1-B> cd ..VPlexcli:/monitoring/directors>
Navigate directly to a context from any other context:
VPlexcli:/clusters/clusters-1/fans> cd /clusters/cluster-1/fans/
cluster addAdds a cluster to a running metro node.
Contexts
All contexts.
Syntax
cluster add[-c|--cluster] context path
[-t|--to] cluster
[-f|--force]
Arguments
Required arguments
[-c|--cluster] context path * Cluster to add.
[-t|--to] cluster * Cluster to which the given cluster is added. This is only necessary if the system cannot beautomatically determined.
Optional arguments
[-f|--force] Forces the cluster addition to proceed even if conditions are not optimal.
* - argument is positional.
Description
Before a cluster can communicate with the other cluster of a Metro, you must use the cluster add command.
Use the --to argument:
● During system bring-up when no clusters have yet been told about other clusters. In this scenario, any cluster can be used asthe system representative.
● Multiple systems have been detected. Connection to multiple systems, is not supported.
If there only one system actually present, but it has split into islands due to connectivity problems, it is highly advisable torepair the problems before proceeding. Add the given cluster to each island separately.
If the intention is to merge two existing systems, break up one of the systems and add it to the other system cluster-by-cluster.
58 Commands
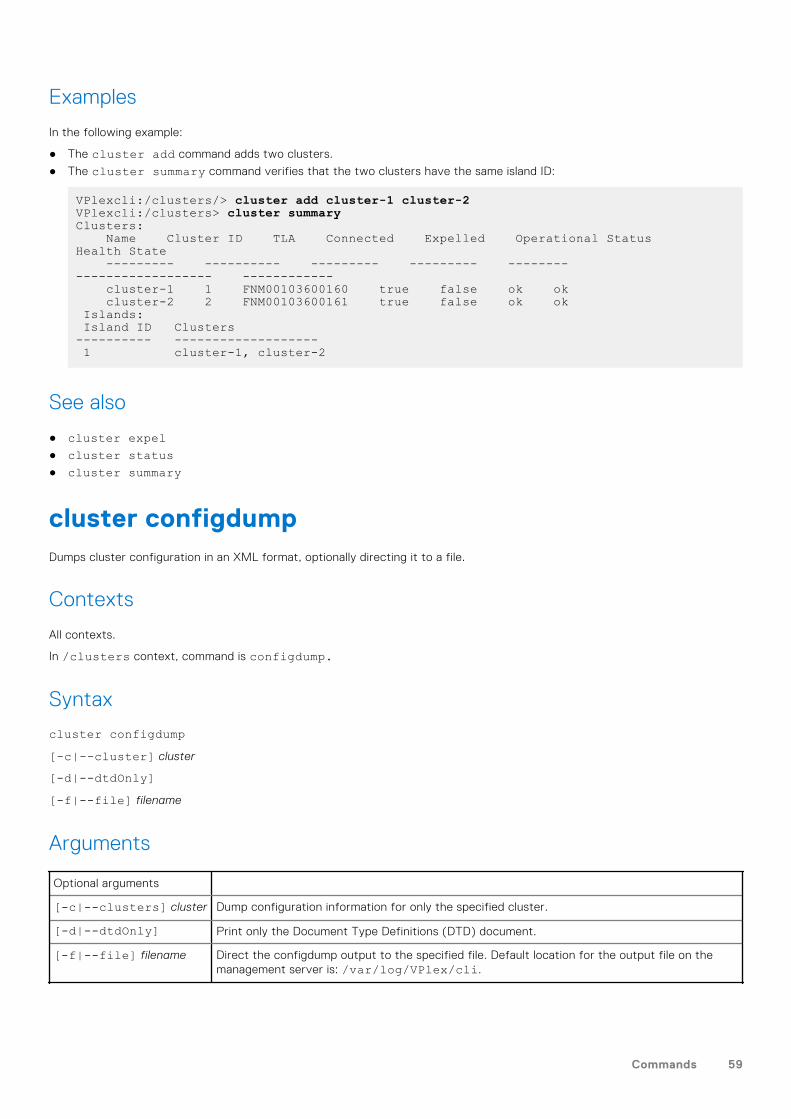
Examples
In the following example:
● The cluster add command adds two clusters.
● The cluster summary command verifies that the two clusters have the same island ID:
VPlexcli:/clusters/> cluster add cluster-1 cluster-2VPlexcli:/clusters> cluster summaryClusters: Name Cluster ID TLA Connected Expelled Operational Status Health State --------- ---------- --------- --------- -------- ------------------ ------------ cluster-1 1 FNM00103600160 true false ok ok cluster-2 2 FNM00103600161 true false ok ok Islands: Island ID Clusters---------- ------------------- 1 cluster-1, cluster-2
See also
● cluster expel● cluster status● cluster summary
cluster configdumpDumps cluster configuration in an XML format, optionally directing it to a file.
Contexts
All contexts.
In /clusters context, command is configdump.
Syntax
cluster configdump[-c|--cluster] cluster
[-d|--dtdOnly][-f|--file] filename
Arguments
Optional arguments
[-c|--clusters] cluster Dump configuration information for only the specified cluster.
[-d|--dtdOnly] Print only the Document Type Definitions (DTD) document.
[-f|--file] filename Direct the configdump output to the specified file. Default location for the output file on themanagement server is: /var/log/VPlex/cli.
Commands 59
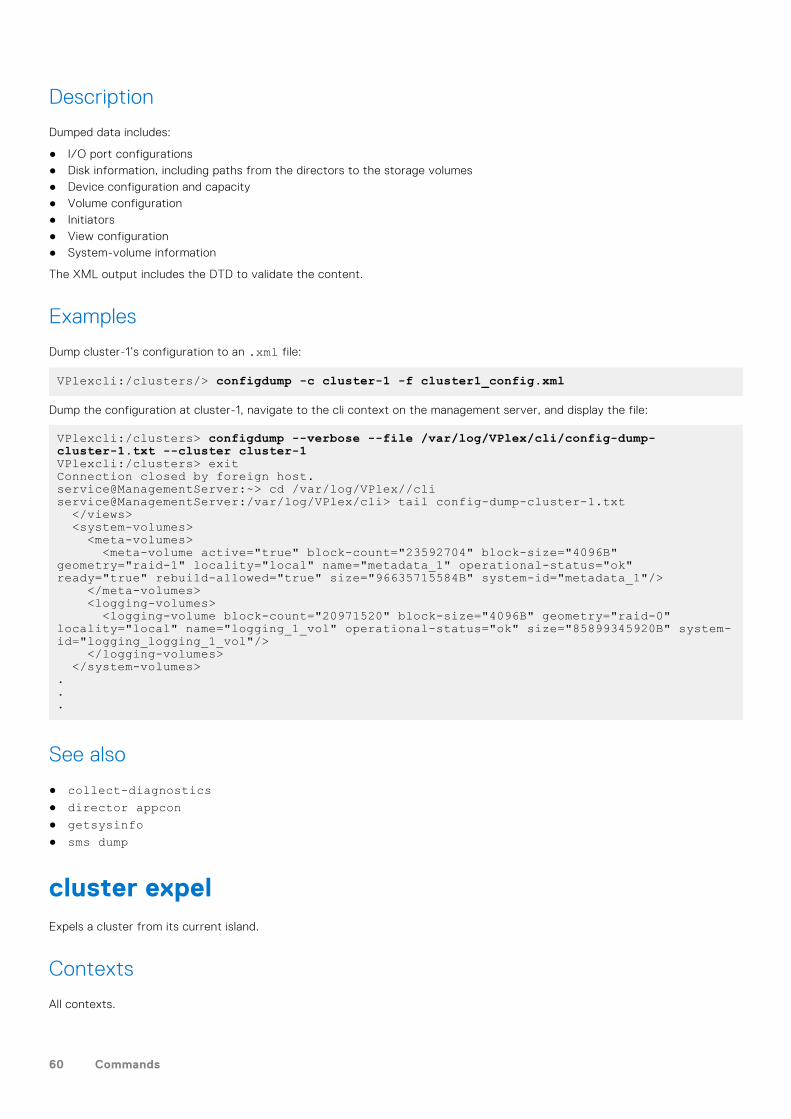
Description
Dumped data includes:
● I/O port configurations● Disk information, including paths from the directors to the storage volumes● Device configuration and capacity● Volume configuration● Initiators● View configuration● System-volume information
The XML output includes the DTD to validate the content.
Examples
Dump cluster-1’s configuration to an .xml file:
VPlexcli:/clusters/> configdump -c cluster-1 -f cluster1_config.xml
Dump the configuration at cluster-1, navigate to the cli context on the management server, and display the file:
VPlexcli:/clusters> configdump --verbose --file /var/log/VPlex/cli/config-dump-cluster-1.txt --cluster cluster-1VPlexcli:/clusters> exitConnection closed by foreign host.service@ManagementServer:~> cd /var/log/VPlex//cliservice@ManagementServer:/var/log/VPlex/cli> tail config-dump-cluster-1.txt </views> <system-volumes> <meta-volumes> <meta-volume active="true" block-count="23592704" block-size="4096B" geometry="raid-1" locality="local" name="metadata_1" operational-status="ok" ready="true" rebuild-allowed="true" size="96635715584B" system-id="metadata_1"/> </meta-volumes> <logging-volumes> <logging-volume block-count="20971520" block-size="4096B" geometry="raid-0" locality="local" name="logging_1_vol" operational-status="ok" size="85899345920B" system-id="logging_logging_1_vol"/> </logging-volumes> </system-volumes>...
See also
● collect-diagnostics● director appcon● getsysinfo● sms dump
cluster expelExpels a cluster from its current island.
Contexts
All contexts.
60 Commands
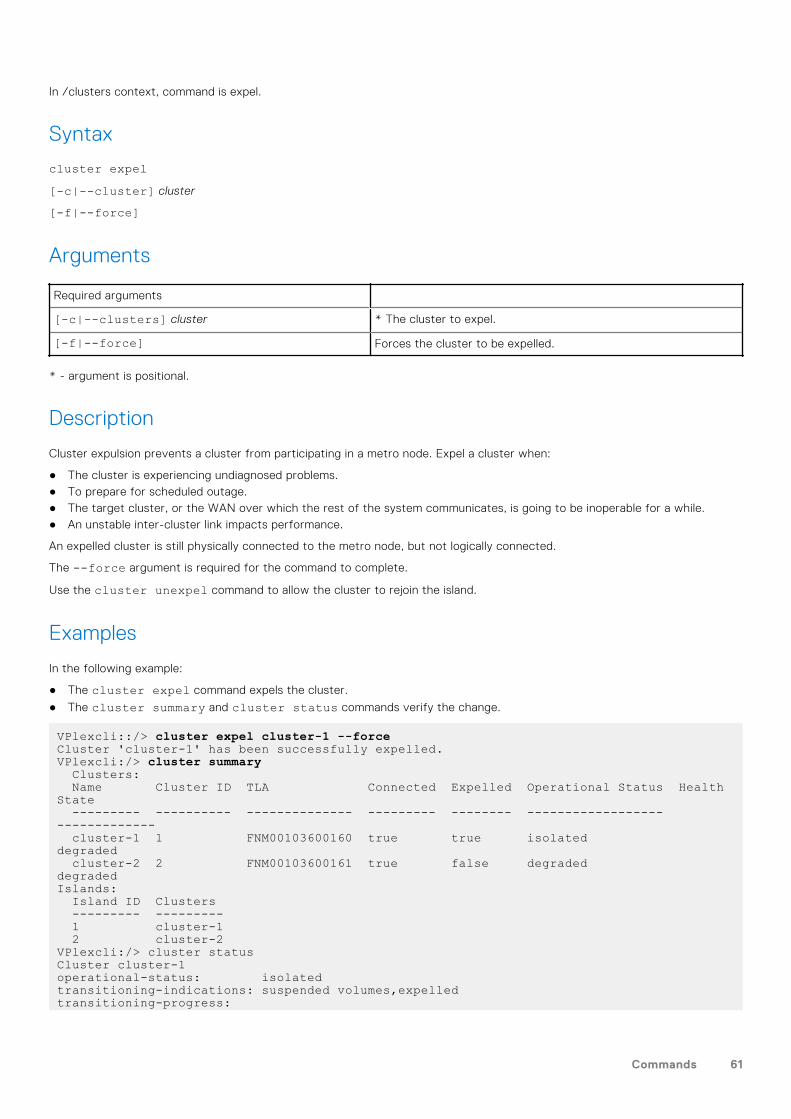
In /clusters context, command is expel.
Syntax
cluster expel[-c|--cluster] cluster
[-f|--force]
Arguments
Required arguments
[-c|--clusters] cluster * The cluster to expel.
[-f|--force] Forces the cluster to be expelled.
* - argument is positional.
Description
Cluster expulsion prevents a cluster from participating in a metro node. Expel a cluster when:
● The cluster is experiencing undiagnosed problems.● To prepare for scheduled outage.● The target cluster, or the WAN over which the rest of the system communicates, is going to be inoperable for a while.● An unstable inter-cluster link impacts performance.
An expelled cluster is still physically connected to the metro node, but not logically connected.
The --force argument is required for the command to complete.
Use the cluster unexpel command to allow the cluster to rejoin the island.
Examples
In the following example:
● The cluster expel command expels the cluster.
● The cluster summary and cluster status commands verify the change.
VPlexcli::/> cluster expel cluster-1 --forceCluster 'cluster-1' has been successfully expelled.VPlexcli:/> cluster summary Clusters: Name Cluster ID TLA Connected Expelled Operational Status Health State --------- ---------- -------------- --------- -------- ------------------ ------------- cluster-1 1 FNM00103600160 true true isolated degraded cluster-2 2 FNM00103600161 true false degraded degradedIslands: Island ID Clusters --------- --------- 1 cluster-1 2 cluster-2VPlexcli:/> cluster statusCluster cluster-1operational-status: isolatedtransitioning-indications: suspended volumes,expelledtransitioning-progress:
Commands 61
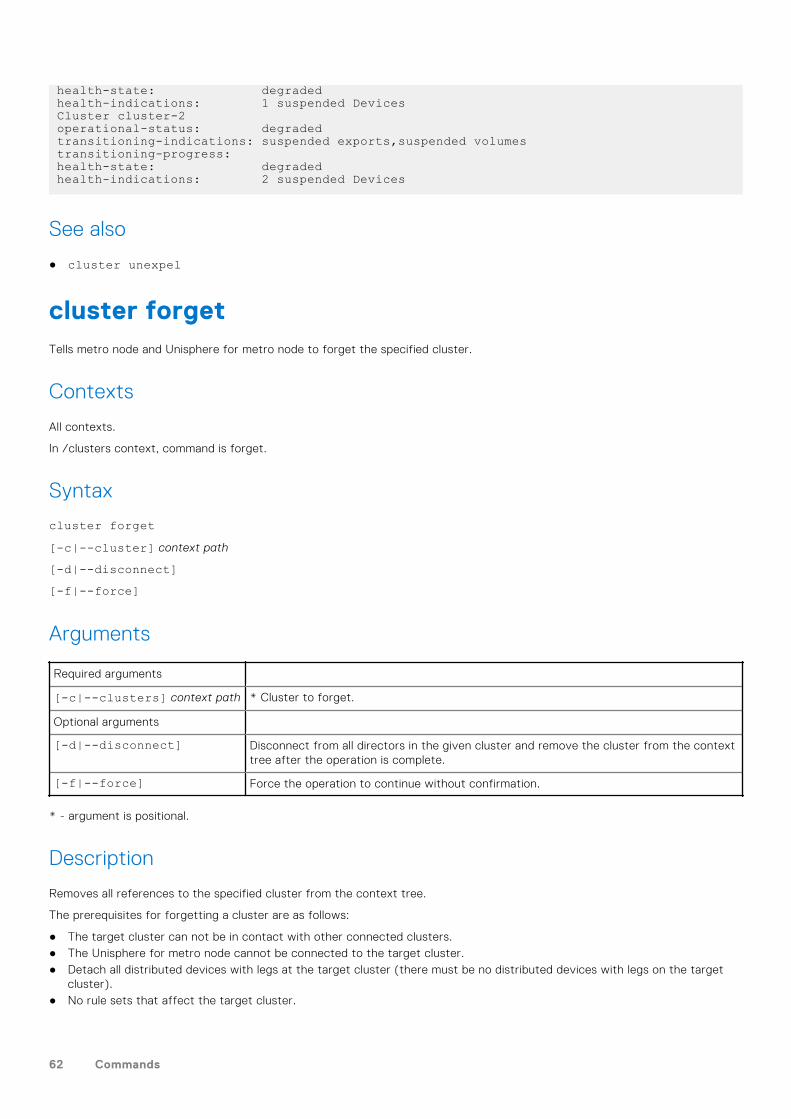
health-state: degradedhealth-indications: 1 suspended DevicesCluster cluster-2operational-status: degradedtransitioning-indications: suspended exports,suspended volumestransitioning-progress:health-state: degradedhealth-indications: 2 suspended Devices
See also
● cluster unexpel
cluster forgetTells metro node and Unisphere for metro node to forget the specified cluster.
Contexts
All contexts.
In /clusters context, command is forget.
Syntax
cluster forget[-c|--cluster] context path
[-d|--disconnect][-f|--force]
Arguments
Required arguments
[-c|--clusters] context path * Cluster to forget.
Optional arguments
[-d|--disconnect] Disconnect from all directors in the given cluster and remove the cluster from the contexttree after the operation is complete.
[-f|--force] Force the operation to continue without confirmation.
* - argument is positional.
Description
Removes all references to the specified cluster from the context tree.
The prerequisites for forgetting a cluster are as follows:
● The target cluster can not be in contact with other connected clusters.● The Unisphere for metro node cannot be connected to the target cluster.● Detach all distributed devices with legs at the target cluster (there must be no distributed devices with legs on the target
cluster).● No rule sets that affect the target cluster.
62 Commands
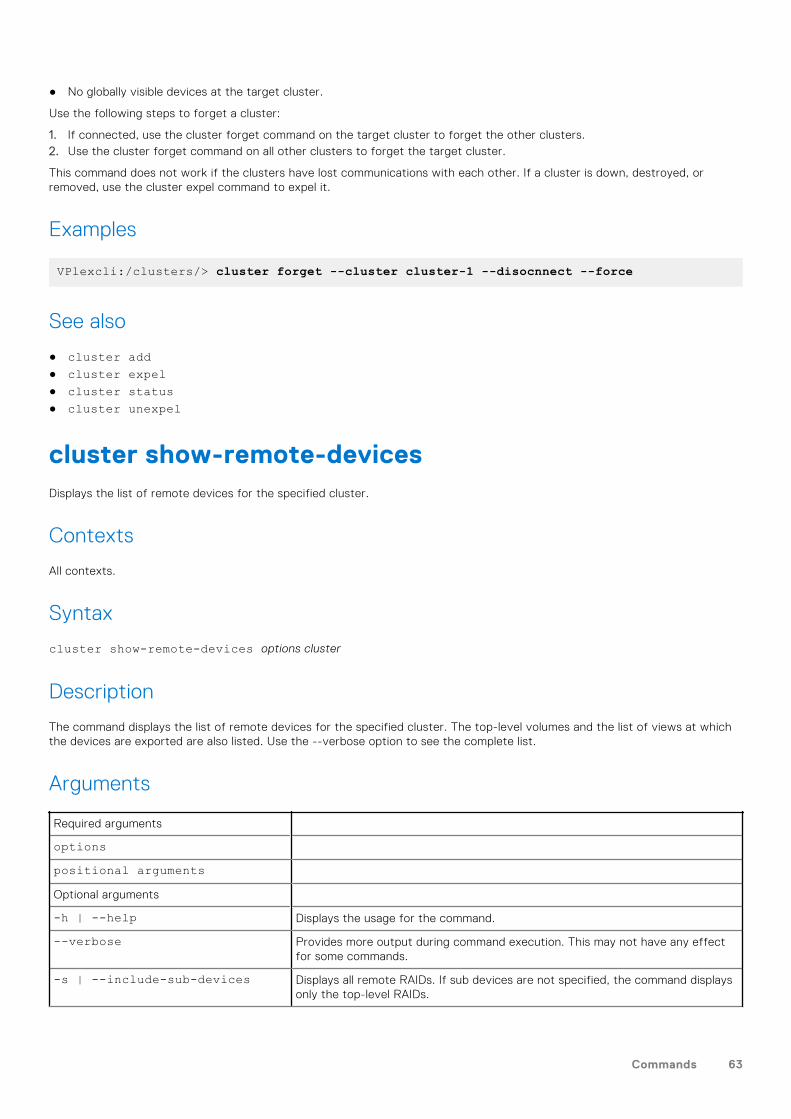
● No globally visible devices at the target cluster.
Use the following steps to forget a cluster:
1. If connected, use the cluster forget command on the target cluster to forget the other clusters.2. Use the cluster forget command on all other clusters to forget the target cluster.
This command does not work if the clusters have lost communications with each other. If a cluster is down, destroyed, orremoved, use the cluster expel command to expel it.
Examples
VPlexcli:/clusters/> cluster forget --cluster cluster-1 --disocnnect --force
See also
● cluster add● cluster expel● cluster status● cluster unexpel
cluster show-remote-devicesDisplays the list of remote devices for the specified cluster.
Contexts
All contexts.
Syntax
cluster show-remote-devices options cluster
Description
The command displays the list of remote devices for the specified cluster. The top-level volumes and the list of views at whichthe devices are exported are also listed. Use the --verbose option to see the complete list.
Arguments
Required arguments
optionspositional argumentsOptional arguments
-h | --help Displays the usage for the command.
--verbose Provides more output during command execution. This may not have any effectfor some commands.
-s | --include-sub-devices Displays all remote RAIDs. If sub devices are not specified, the command displaysonly the top-level RAIDs.
Commands 63
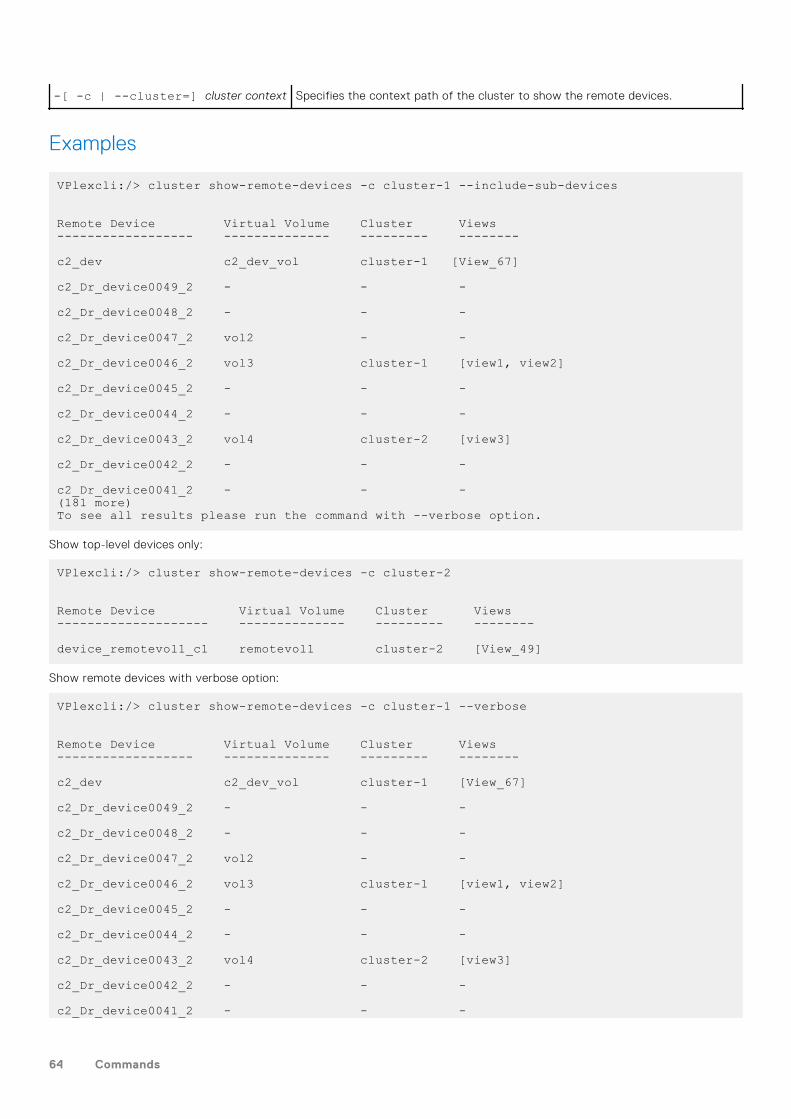
-[ -c | --cluster=] cluster context Specifies the context path of the cluster to show the remote devices.
Examples
VPlexcli:/> cluster show-remote-devices -c cluster-1 --include-sub-devices Remote Device Virtual Volume Cluster Views------------------ -------------- --------- --------
c2_dev c2_dev_vol cluster-1 [View_67]
c2_Dr_device0049_2 - - -
c2_Dr_device0048_2 - - -
c2_Dr_device0047_2 vol2 - -
c2_Dr_device0046_2 vol3 cluster-1 [view1, view2]
c2_Dr_device0045_2 - - -
c2_Dr_device0044_2 - - -
c2_Dr_device0043_2 vol4 cluster-2 [view3]
c2_Dr_device0042_2 - - -
c2_Dr_device0041_2 - - -(181 more)To see all results please run the command with --verbose option.
Show top-level devices only:
VPlexcli:/> cluster show-remote-devices -c cluster-2 Remote Device Virtual Volume Cluster Views-------------------- -------------- --------- --------
device_remotevol1_c1 remotevol1 cluster-2 [View_49]
Show remote devices with verbose option:
VPlexcli:/> cluster show-remote-devices -c cluster-1 --verbose Remote Device Virtual Volume Cluster Views------------------ -------------- --------- --------
c2_dev c2_dev_vol cluster-1 [View_67]
c2_Dr_device0049_2 - - -
c2_Dr_device0048_2 - - -
c2_Dr_device0047_2 vol2 - -
c2_Dr_device0046_2 vol3 cluster-1 [view1, view2]
c2_Dr_device0045_2 - - -
c2_Dr_device0044_2 - - -
c2_Dr_device0043_2 vol4 cluster-2 [view3]
c2_Dr_device0042_2 - - -
c2_Dr_device0041_2 - - -
64 Commands
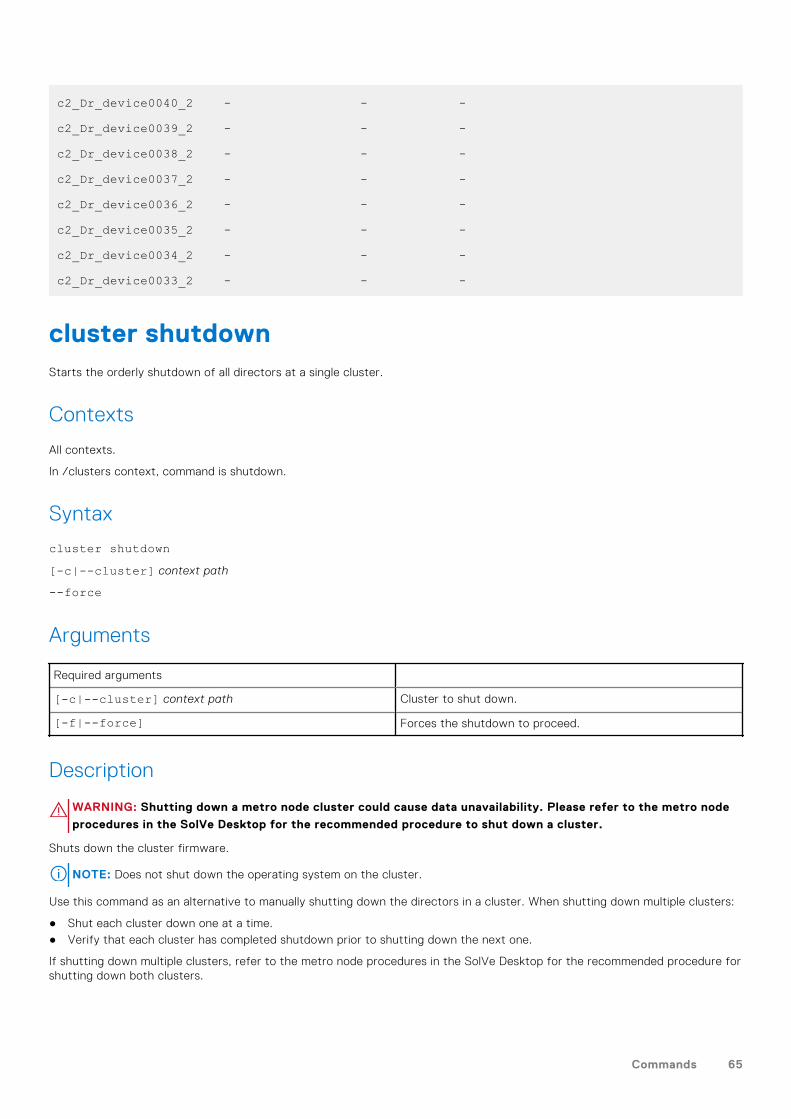
c2_Dr_device0040_2 - - -
c2_Dr_device0039_2 - - -
c2_Dr_device0038_2 - - -
c2_Dr_device0037_2 - - -
c2_Dr_device0036_2 - - -
c2_Dr_device0035_2 - - -
c2_Dr_device0034_2 - - -
c2_Dr_device0033_2 - - -
cluster shutdownStarts the orderly shutdown of all directors at a single cluster.
Contexts
All contexts.
In /clusters context, command is shutdown.
Syntax
cluster shutdown[-c|--cluster] context path
--force
Arguments
Required arguments
[-c|--cluster] context path Cluster to shut down.
[-f|--force] Forces the shutdown to proceed.
Description
WARNING: Shutting down a metro node cluster could cause data unavailability. Please refer to the metro node
procedures in the SolVe Desktop for the recommended procedure to shut down a cluster.
Shuts down the cluster firmware.
NOTE: Does not shut down the operating system on the cluster.
Use this command as an alternative to manually shutting down the directors in a cluster. When shutting down multiple clusters:
● Shut each cluster down one at a time.● Verify that each cluster has completed shutdown prior to shutting down the next one.
If shutting down multiple clusters, refer to the metro node procedures in the SolVe Desktop for the recommended procedure forshutting down both clusters.
Commands 65
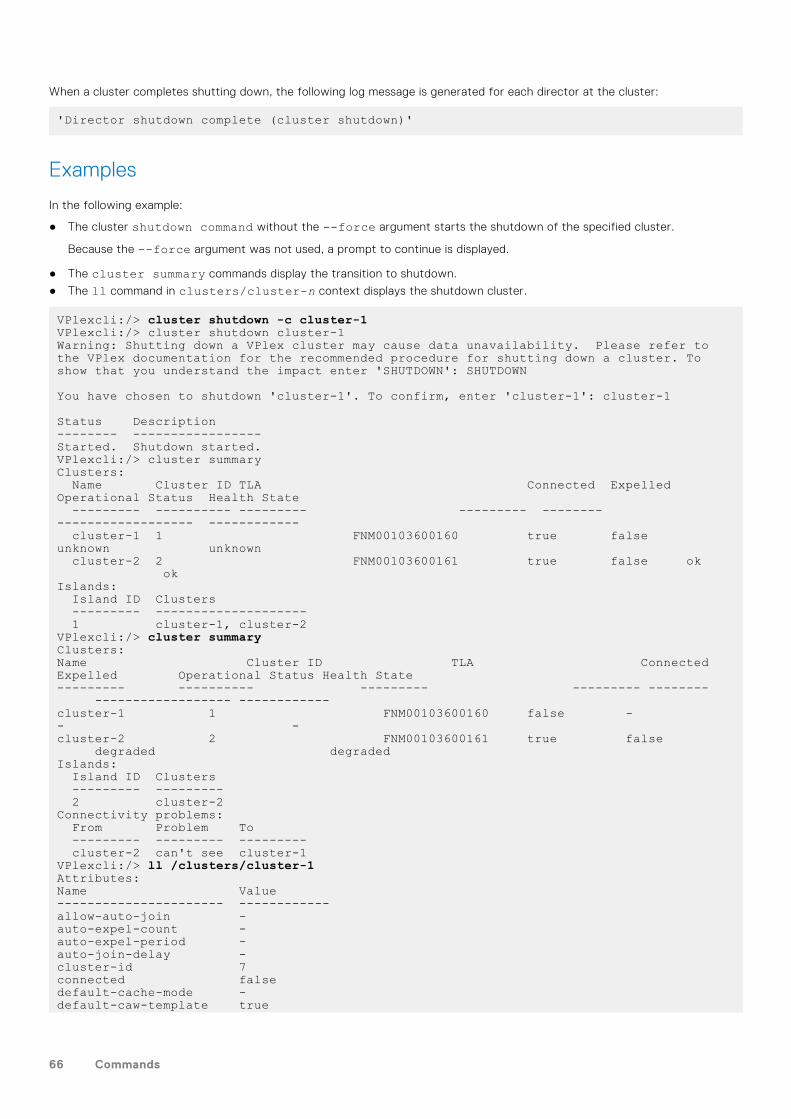
When a cluster completes shutting down, the following log message is generated for each director at the cluster:
'Director shutdown complete (cluster shutdown)'
Examples
In the following example:
● The cluster shutdown command without the --force argument starts the shutdown of the specified cluster.
Because the --force argument was not used, a prompt to continue is displayed.
● The cluster summary commands display the transition to shutdown.
● The ll command in clusters/cluster-n context displays the shutdown cluster.
VPlexcli:/> cluster shutdown -c cluster-1VPlexcli:/> cluster shutdown cluster-1 Warning: Shutting down a VPlex cluster may cause data unavailability. Please refer to the VPlex documentation for the recommended procedure for shutting down a cluster. To show that you understand the impact enter 'SHUTDOWN': SHUTDOWN You have chosen to shutdown 'cluster-1'. To confirm, enter 'cluster-1': cluster-1
Status Description-------- -----------------Started. Shutdown started.VPlexcli:/> cluster summaryClusters: Name Cluster ID TLA Connected Expelled Operational Status Health State --------- ---------- --------- --------- -------- ------------------ ------------ cluster-1 1 FNM00103600160 true false unknown unknown cluster-2 2 FNM00103600161 true false ok okIslands: Island ID Clusters --------- -------------------- 1 cluster-1, cluster-2VPlexcli:/> cluster summaryClusters:Name Cluster ID TLA Connected Expelled Operational Status Health State--------- ---------- --------- --------- -------- ------------------ ------------cluster-1 1 FNM00103600160 false - - -cluster-2 2 FNM00103600161 true false degraded degradedIslands: Island ID Clusters --------- --------- 2 cluster-2Connectivity problems: From Problem To --------- --------- --------- cluster-2 can't see cluster-1VPlexcli:/> ll /clusters/cluster-1Attributes:Name Value---------------------- ------------allow-auto-join -auto-expel-count -auto-expel-period -auto-join-delay -cluster-id 7connected falsedefault-cache-mode -default-caw-template true
66 Commands
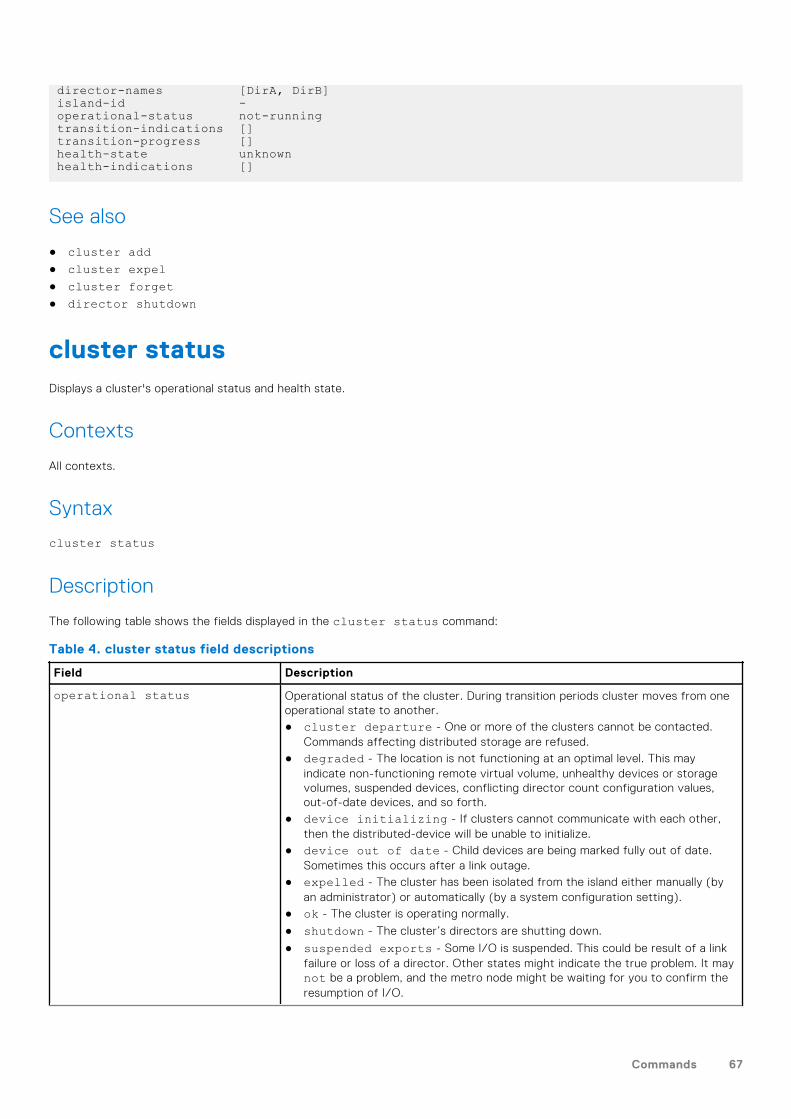
director-names [DirA, DirB]island-id -operational-status not-runningtransition-indications []transition-progress []health-state unknownhealth-indications []
See also
● cluster add● cluster expel● cluster forget● director shutdown
cluster statusDisplays a cluster's operational status and health state.
Contexts
All contexts.
Syntax
cluster status
Description
The following table shows the fields displayed in the cluster status command:
Table 4. cluster status field descriptions
Field Description
operational status Operational status of the cluster. During transition periods cluster moves from oneoperational state to another.● cluster departure - One or more of the clusters cannot be contacted.
Commands affecting distributed storage are refused.● degraded - The location is not functioning at an optimal level. This may
indicate non-functioning remote virtual volume, unhealthy devices or storagevolumes, suspended devices, conflicting director count configuration values,out-of-date devices, and so forth.
● device initializing - If clusters cannot communicate with each other,then the distributed-device will be unable to initialize.
● device out of date - Child devices are being marked fully out of date.Sometimes this occurs after a link outage.
● expelled - The cluster has been isolated from the island either manually (byan administrator) or automatically (by a system configuration setting).
● ok - The cluster is operating normally.
● shutdown - The cluster’s directors are shutting down.
● suspended exports - Some I/O is suspended. This could be result of a linkfailure or loss of a director. Other states might indicate the true problem. It maynot be a problem, and the metro node might be waiting for you to confirm theresumption of I/O.
Commands 67
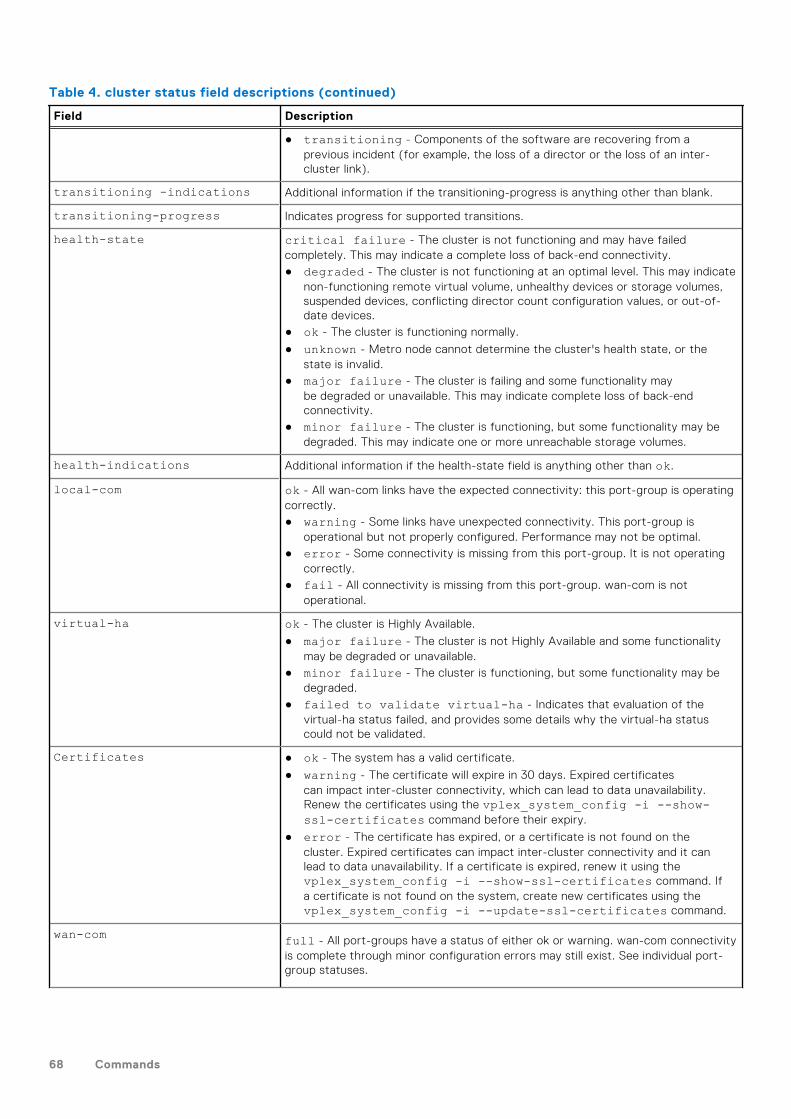
Table 4. cluster status field descriptions (continued)
Field Description
● transitioning - Components of the software are recovering from aprevious incident (for example, the loss of a director or the loss of an inter-cluster link).
transitioning -indications Additional information if the transitioning-progress is anything other than blank.
transitioning-progress Indicates progress for supported transitions.
health-state critical failure - The cluster is not functioning and may have failedcompletely. This may indicate a complete loss of back-end connectivity.● degraded - The cluster is not functioning at an optimal level. This may indicate
non-functioning remote virtual volume, unhealthy devices or storage volumes,suspended devices, conflicting director count configuration values, or out-of-date devices.
● ok - The cluster is functioning normally.
● unknown - Metro node cannot determine the cluster's health state, or thestate is invalid.
● major failure - The cluster is failing and some functionality maybe degraded or unavailable. This may indicate complete loss of back-endconnectivity.
● minor failure - The cluster is functioning, but some functionality may bedegraded. This may indicate one or more unreachable storage volumes.
health-indications Additional information if the health-state field is anything other than ok.
local-com ok - All wan-com links have the expected connectivity: this port-group is operatingcorrectly.● warning - Some links have unexpected connectivity. This port-group is
operational but not properly configured. Performance may not be optimal.● error - Some connectivity is missing from this port-group. It is not operating
correctly.● fail - All connectivity is missing from this port-group. wan-com is not
operational.
virtual-ha ok - The cluster is Highly Available.
● major failure - The cluster is not Highly Available and some functionalitymay be degraded or unavailable.
● minor failure - The cluster is functioning, but some functionality may bedegraded.
● failed to validate virtual-ha - Indicates that evaluation of thevirtual-ha status failed, and provides some details why the virtual-ha statuscould not be validated.
Certificates ● ok - The system has a valid certificate.
● warning - The certificate will expire in 30 days. Expired certificatescan impact inter-cluster connectivity, which can lead to data unavailability.Renew the certificates using the vplex_system_config -i --show-ssl-certificates command before their expiry.
● error - The certificate has expired, or a certificate is not found on thecluster. Expired certificates can impact inter-cluster connectivity and it canlead to data unavailability. If a certificate is expired, renew it using thevplex_system_config -i --show-ssl-certificates command. Ifa certificate is not found on the system, create new certificates using thevplex_system_config -i --update-ssl-certificates command.
wan-com full - All port-groups have a status of either ok or warning. wan-com connectivityis complete through minor configuration errors may still exist. See individual port-group statuses.
68 Commands
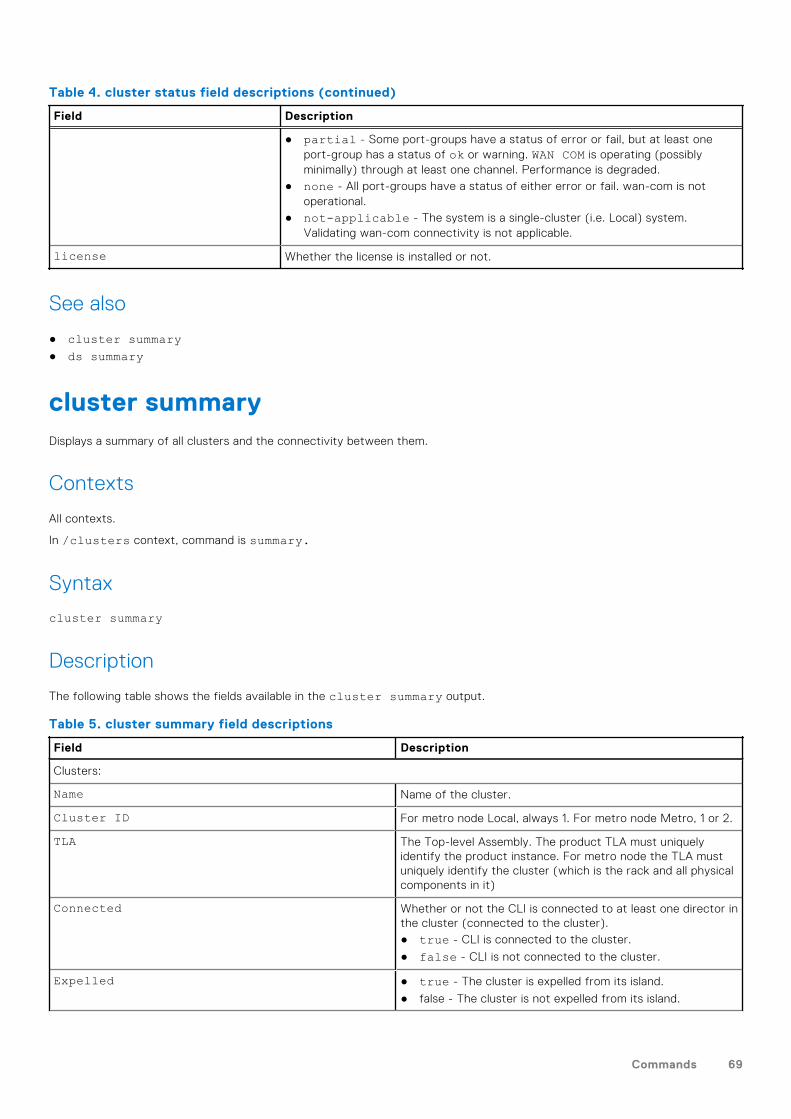
Table 4. cluster status field descriptions (continued)
Field Description
● partial - Some port-groups have a status of error or fail, but at least oneport-group has a status of ok or warning. WAN COM is operating (possiblyminimally) through at least one channel. Performance is degraded.
● none - All port-groups have a status of either error or fail. wan-com is notoperational.
● not-applicable - The system is a single-cluster (i.e. Local) system.Validating wan-com connectivity is not applicable.
license Whether the license is installed or not.
See also
● cluster summary● ds summary
cluster summaryDisplays a summary of all clusters and the connectivity between them.
Contexts
All contexts.
In /clusters context, command is summary.
Syntax
cluster summary
Description
The following table shows the fields available in the cluster summary output.
Table 5. cluster summary field descriptions
Field Description
Clusters:
Name Name of the cluster.
Cluster ID For metro node Local, always 1. For metro node Metro, 1 or 2.
TLA The Top-level Assembly. The product TLA must uniquelyidentify the product instance. For metro node the TLA mustuniquely identify the cluster (which is the rack and all physicalcomponents in it)
Connected Whether or not the CLI is connected to at least one director inthe cluster (connected to the cluster).● true - CLI is connected to the cluster.
● false - CLI is not connected to the cluster.
Expelled ● true - The cluster is expelled from its island.
● false - The cluster is not expelled from its island.
Commands 69
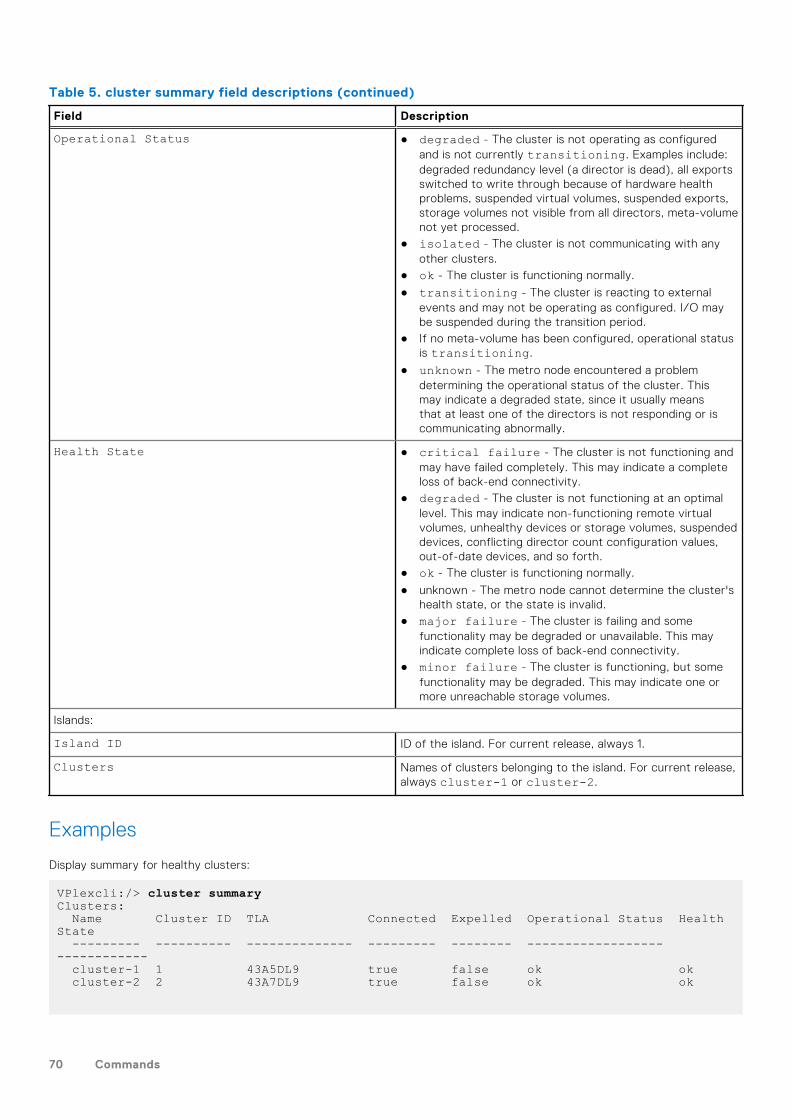
Table 5. cluster summary field descriptions (continued)
Field Description
Operational Status ● degraded - The cluster is not operating as configuredand is not currently transitioning. Examples include:degraded redundancy level (a director is dead), all exportsswitched to write through because of hardware healthproblems, suspended virtual volumes, suspended exports,storage volumes not visible from all directors, meta-volumenot yet processed.
● isolated - The cluster is not communicating with anyother clusters.
● ok - The cluster is functioning normally.
● transitioning - The cluster is reacting to externalevents and may not be operating as configured. I/O maybe suspended during the transition period.
● If no meta-volume has been configured, operational statusis transitioning.
● unknown - The metro node encountered a problemdetermining the operational status of the cluster. Thismay indicate a degraded state, since it usually meansthat at least one of the directors is not responding or iscommunicating abnormally.
Health State ● critical failure - The cluster is not functioning andmay have failed completely. This may indicate a completeloss of back-end connectivity.
● degraded - The cluster is not functioning at an optimallevel. This may indicate non-functioning remote virtualvolumes, unhealthy devices or storage volumes, suspendeddevices, conflicting director count configuration values,out-of-date devices, and so forth.
● ok - The cluster is functioning normally.
● unknown - The metro node cannot determine the cluster'shealth state, or the state is invalid.
● major failure - The cluster is failing and somefunctionality may be degraded or unavailable. This mayindicate complete loss of back-end connectivity.
● minor failure - The cluster is functioning, but somefunctionality may be degraded. This may indicate one ormore unreachable storage volumes.
Islands:
Island ID ID of the island. For current release, always 1.
Clusters Names of clusters belonging to the island. For current release,always cluster-1 or cluster-2.
Examples
Display summary for healthy clusters:
VPlexcli:/> cluster summaryClusters: Name Cluster ID TLA Connected Expelled Operational Status Health State --------- ---------- -------------- --------- -------- ------------------ ------------ cluster-1 1 43A5DL9 true false ok ok cluster-2 2 43A7DL9 true false ok ok
70 Commands
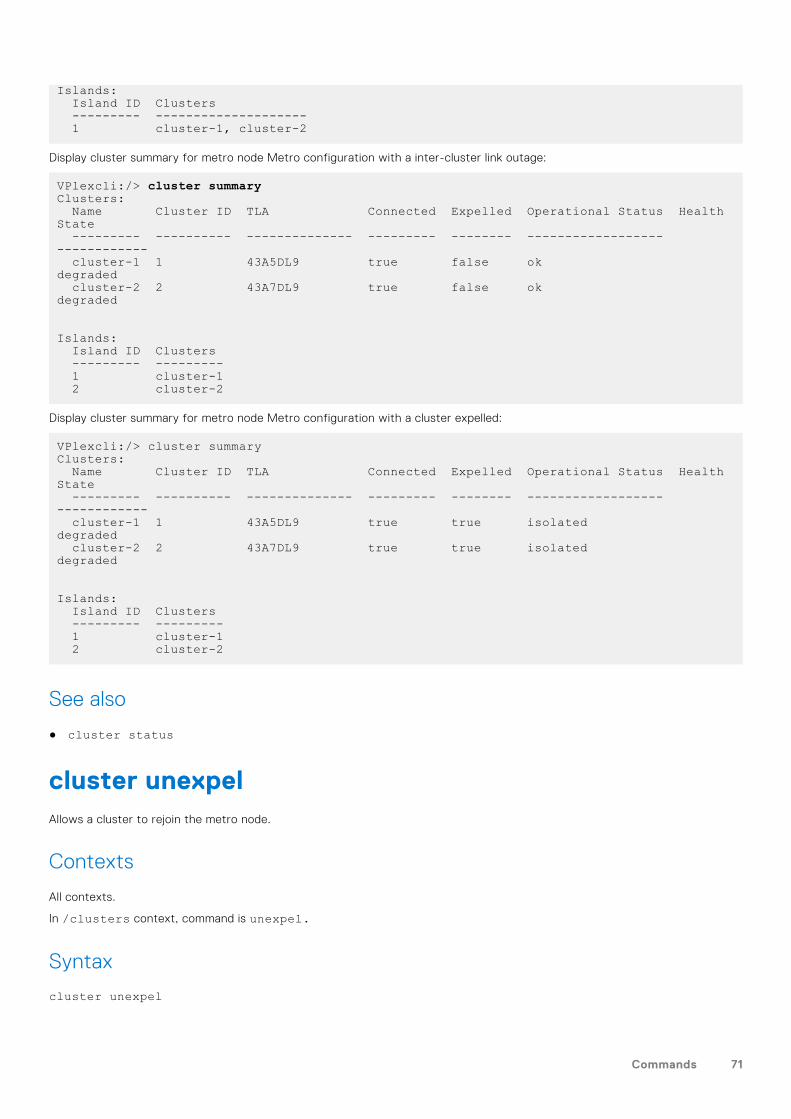
Islands: Island ID Clusters --------- -------------------- 1 cluster-1, cluster-2
Display cluster summary for metro node Metro configuration with a inter-cluster link outage:
VPlexcli:/> cluster summaryClusters: Name Cluster ID TLA Connected Expelled Operational Status Health State --------- ---------- -------------- --------- -------- ------------------ ------------ cluster-1 1 43A5DL9 true false ok degraded cluster-2 2 43A7DL9 true false ok degraded
Islands: Island ID Clusters --------- --------- 1 cluster-1 2 cluster-2
Display cluster summary for metro node Metro configuration with a cluster expelled:
VPlexcli:/> cluster summaryClusters: Name Cluster ID TLA Connected Expelled Operational Status Health State --------- ---------- -------------- --------- -------- ------------------ ------------ cluster-1 1 43A5DL9 true true isolated degraded cluster-2 2 43A7DL9 true true isolated degraded
Islands: Island ID Clusters --------- --------- 1 cluster-1 2 cluster-2
See also
● cluster status
cluster unexpelAllows a cluster to rejoin the metro node.
Contexts
All contexts.
In /clusters context, command is unexpel.
Syntax
cluster unexpel
Commands 71
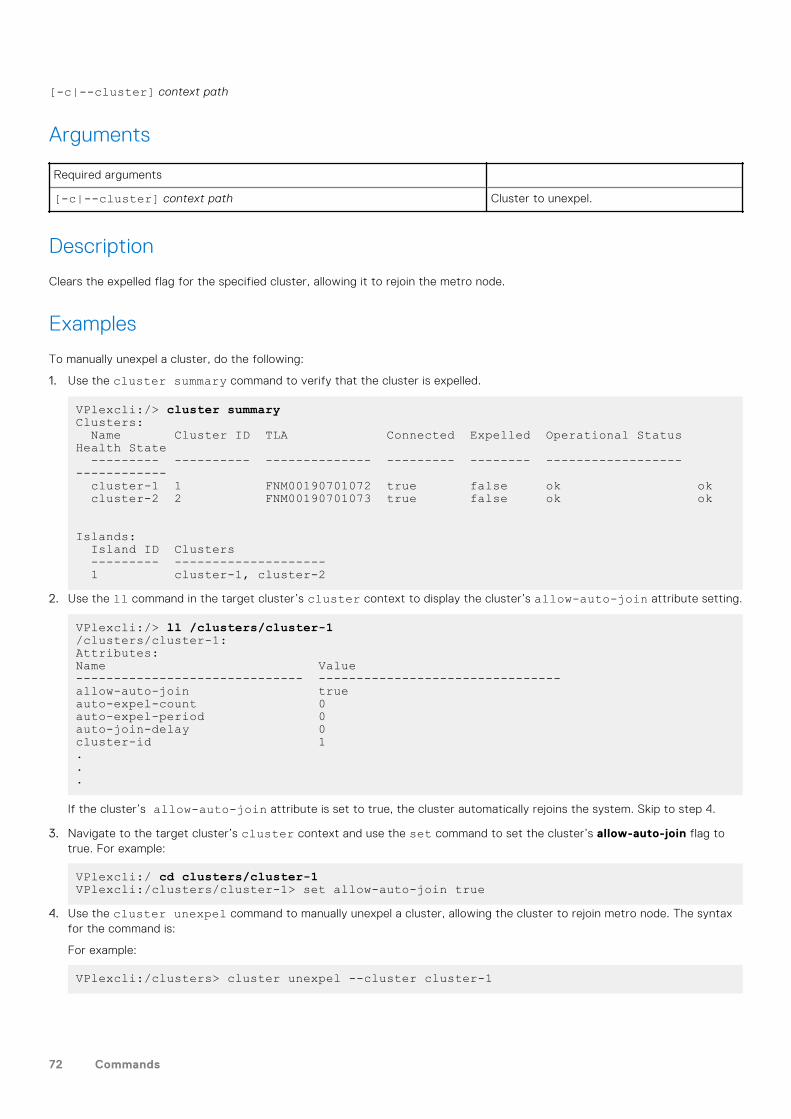
[-c|--cluster] context path
Arguments
Required arguments
[-c|--cluster] context path Cluster to unexpel.
Description
Clears the expelled flag for the specified cluster, allowing it to rejoin the metro node.
Examples
To manually unexpel a cluster, do the following:
1. Use the cluster summary command to verify that the cluster is expelled.
VPlexcli:/> cluster summaryClusters: Name Cluster ID TLA Connected Expelled Operational Status Health State --------- ---------- -------------- --------- -------- ------------------ ------------ cluster-1 1 FNM00190701072 true false ok ok cluster-2 2 FNM00190701073 true false ok ok
Islands: Island ID Clusters --------- -------------------- 1 cluster-1, cluster-2
2. Use the ll command in the target cluster’s cluster context to display the cluster’s allow-auto-join attribute setting.
VPlexcli:/> ll /clusters/cluster-1/clusters/cluster-1:Attributes:Name Value------------------------------ --------------------------------allow-auto-join trueauto-expel-count 0auto-expel-period 0auto-join-delay 0cluster-id 1...
If the cluster’s allow-auto-join attribute is set to true, the cluster automatically rejoins the system. Skip to step 4.
3. Navigate to the target cluster’s cluster context and use the set command to set the cluster’s allow-auto-join flag totrue. For example:
VPlexcli:/ cd clusters/cluster-1VPlexcli:/clusters/cluster-1> set allow-auto-join true
4. Use the cluster unexpel command to manually unexpel a cluster, allowing the cluster to rejoin metro node. The syntaxfor the command is:
For example:
VPlexcli:/clusters> cluster unexpel --cluster cluster-1
72 Commands
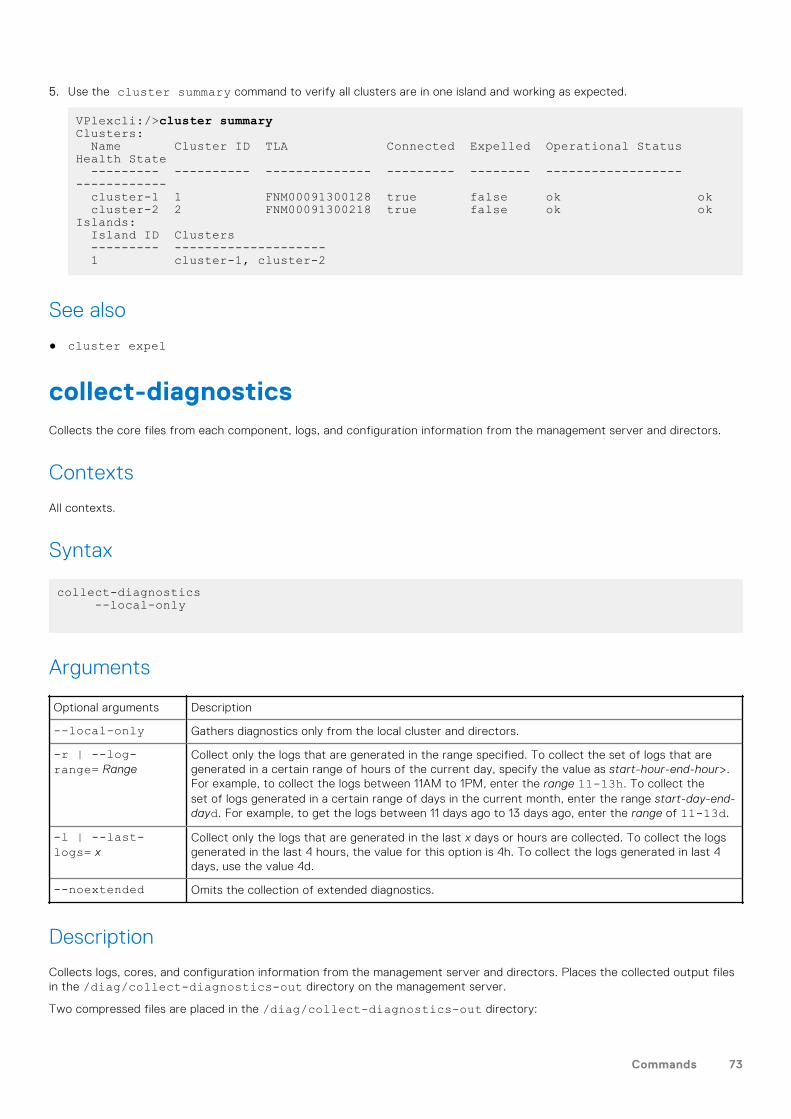
5. Use the cluster summary command to verify all clusters are in one island and working as expected.
VPlexcli:/>cluster summaryClusters: Name Cluster ID TLA Connected Expelled Operational Status Health State --------- ---------- -------------- --------- -------- ------------------ ------------ cluster-1 1 FNM00091300128 true false ok ok cluster-2 2 FNM00091300218 true false ok okIslands: Island ID Clusters --------- -------------------- 1 cluster-1, cluster-2
See also
● cluster expel
collect-diagnosticsCollects the core files from each component, logs, and configuration information from the management server and directors.
Contexts
All contexts.
Syntax
collect-diagnostics --local-only
Arguments
Optional arguments Description
--local-only Gathers diagnostics only from the local cluster and directors.
-r | --log-range= Range
Collect only the logs that are generated in the range specified. To collect the set of logs that aregenerated in a certain range of hours of the current day, specify the value as start-hour-end-hour>.For example, to collect the logs between 11AM to 1PM, enter the range 11-13h. To collect theset of logs generated in a certain range of days in the current month, enter the range start-day-end-dayd. For example, to get the logs between 11 days ago to 13 days ago, enter the range of 11-13d.
-l | --last-logs= x
Collect only the logs that are generated in the last x days or hours are collected. To collect the logsgenerated in the last 4 hours, the value for this option is 4h. To collect the logs generated in last 4days, use the value 4d.
--noextended Omits the collection of extended diagnostics.
Description
Collects logs, cores, and configuration information from the management server and directors. Places the collected output filesin the /diag/collect-diagnostics-out directory on the management server.
Two compressed files are placed in the /diag/collect-diagnostics-out directory:
Commands 73

● <tla>-<cluster>-diag-ext-<datetime>.tar.gz- Contains java heap dump, fast trace dump, two latest core files,and two latest core files ( if --noextended is used, then no core file is collected).
● <tla>-<cluster>-diag-<datetime>.tar.gz - Contains everything else including a direcotry, /opt/recoverpointwhich contains the RecoverPoint splitter logs in a .zip file (vpsplitter.log.xx, vpsplitter.log.periodic_env, andvpsplitter.log.current_env).
NOTE: If --noextended is used, then this file is not available.
NOTE: The collect-diagnostics must be run as the service user to collect all the available files. For this, the VPlexcli
command must be invoked as the service user.
Best practice is to collect both files. The extended file is large, and thus takes some time to transfer.
Recommended practice is to transfer the base file (tla-diagnostics-timestamp.tar.gz) first and begin analysis whilewaiting for the extended file to transfer.
NOTE: On metro node Metro configurations, collect-diagnostics must be invoked from each management server in order to
collect complete diagnostics. The management server diagnostics files are only collected for the local cluster.
The director diagnostics are retrieved from ALL directors in a metro node Metro unless the --local-only argument is used.
All trace files under the folder /cores/nsfw-trace/ on each director will be copied and put in the collected diagnostics.
CAUTION: In metro node Metro configurations, run the collect-diagnostics command on each management
server, but NOT at the same time. Even if you use the --local-only argument, do not run the command on
both management servers at the same time.
If you know the time period in which an event happened, you can collect a subset of logs based on time period. This reduces thetime to collect diagnostics. Use the --log-range and --last-logs arguments to collect a subset of diagnostics.
Remove files created by collect-diagnostics from the management server as soon as possible to avoid filling management serverdisk partitions.
Example
Collect diagnostics for the entire cluster:
VPlexcli:/> collect-diagnostics
If this is a metro configuration, then run it on each cluster independently.
VPlexcli:/> collect-diagnostics --noextended
Collect diagnostics, omitting trace files on the directors and the management server console heap, and send the output to thedefault directory.
See also
● cluster configdump● director appdump● getsysinfo● sms dump
configuration get-product-typeDisplays the metro node product type (Local or Metro).
Contexts
All contexts.
74 Commands
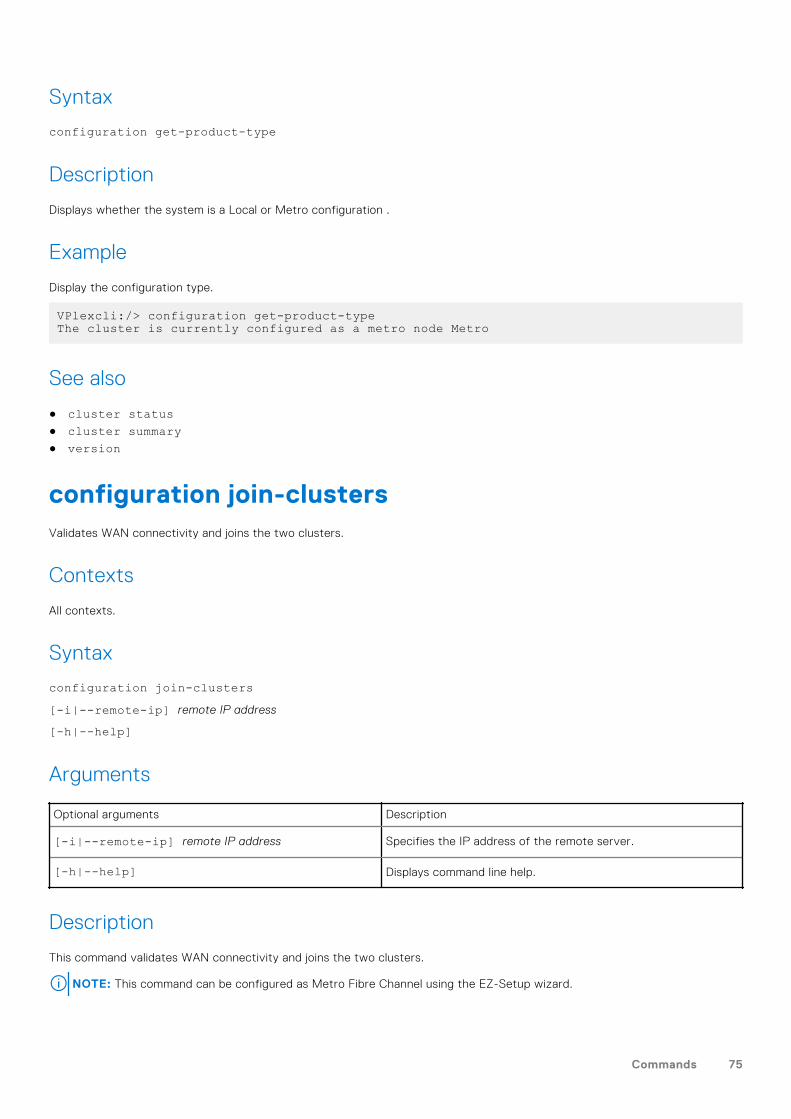
Syntax
configuration get-product-type
Description
Displays whether the system is a Local or Metro configuration .
Example
Display the configuration type.
VPlexcli:/> configuration get-product-typeThe cluster is currently configured as a metro node Metro
See also
● cluster status● cluster summary● version
configuration join-clustersValidates WAN connectivity and joins the two clusters.
Contexts
All contexts.
Syntax
configuration join-clusters[-i|--remote-ip] remote IP address
[-h|--help]
Arguments
Optional arguments Description
[-i|--remote-ip] remote IP address Specifies the IP address of the remote server.
[-h|--help] Displays command line help.
Description
This command validates WAN connectivity and joins the two clusters.
NOTE: This command can be configured as Metro Fibre Channel using the EZ-Setup wizard.
Commands 75
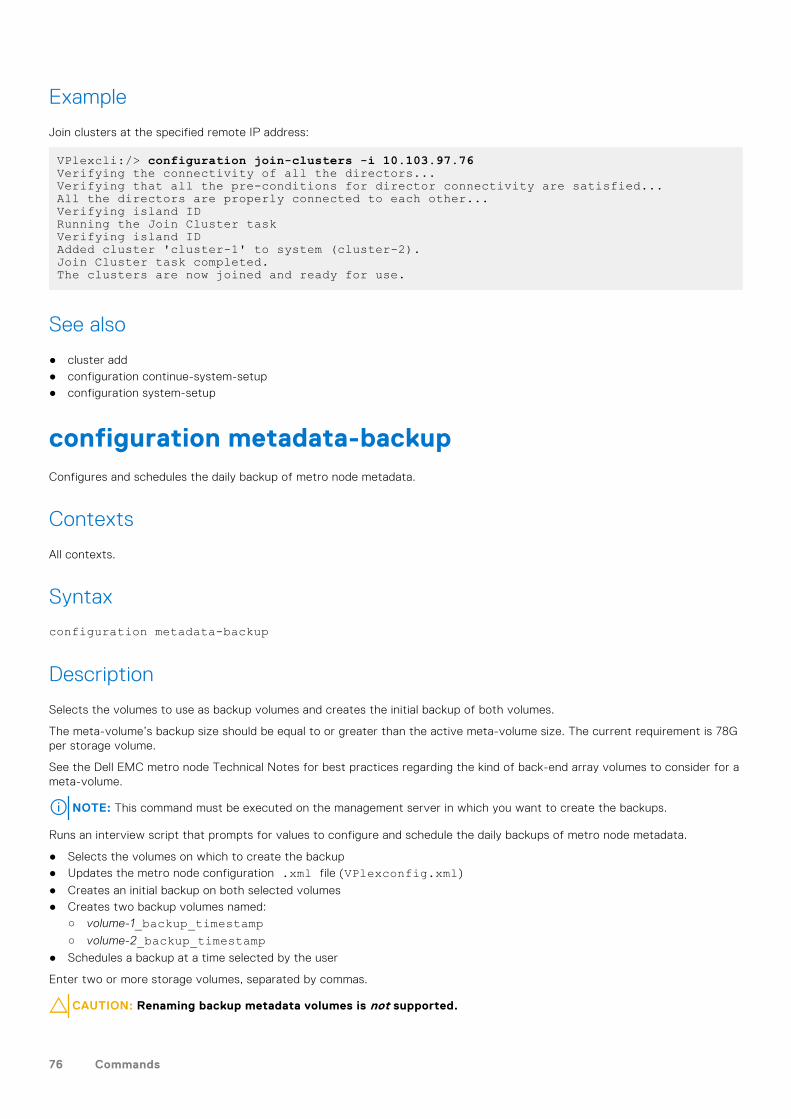
Example
Join clusters at the specified remote IP address:
VPlexcli:/> configuration join-clusters -i 10.103.97.76Verifying the connectivity of all the directors...Verifying that all the pre-conditions for director connectivity are satisfied...All the directors are properly connected to each other...Verifying island IDRunning the Join Cluster taskVerifying island IDAdded cluster 'cluster-1' to system (cluster-2).Join Cluster task completed.The clusters are now joined and ready for use.
See also
● cluster add● configuration continue-system-setup● configuration system-setup
configuration metadata-backupConfigures and schedules the daily backup of metro node metadata.
Contexts
All contexts.
Syntax
configuration metadata-backup
Description
Selects the volumes to use as backup volumes and creates the initial backup of both volumes.
The meta-volume’s backup size should be equal to or greater than the active meta-volume size. The current requirement is 78Gper storage volume.
See the Dell EMC metro node Technical Notes for best practices regarding the kind of back-end array volumes to consider for ameta-volume.
NOTE: This command must be executed on the management server in which you want to create the backups.
Runs an interview script that prompts for values to configure and schedule the daily backups of metro node metadata.
● Selects the volumes on which to create the backup● Updates the metro node configuration .xml file (VPlexconfig.xml)
● Creates an initial backup on both selected volumes● Creates two backup volumes named:
○ volume-1_backup_timestamp○ volume-2_backup_timestamp
● Schedules a backup at a time selected by the user
Enter two or more storage volumes, separated by commas.
CAUTION: Renaming backup metadata volumes is not supported.
76 Commands
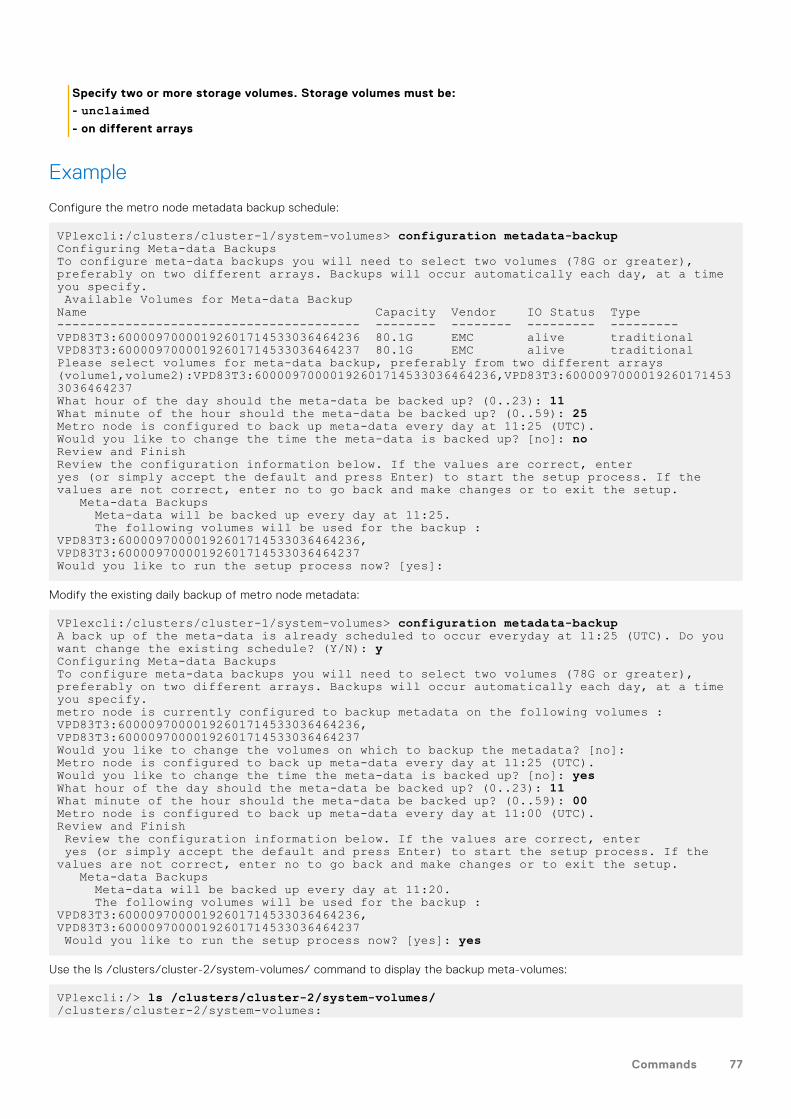
Specify two or more storage volumes. Storage volumes must be:
- unclaimed- on different arrays
Example
Configure the metro node metadata backup schedule:
VPlexcli:/clusters/cluster-1/system-volumes> configuration metadata-backupConfiguring Meta-data BackupsTo configure meta-data backups you will need to select two volumes (78G or greater), preferably on two different arrays. Backups will occur automatically each day, at a time you specify. Available Volumes for Meta-data BackupName Capacity Vendor IO Status Type---------------------------------------- -------- -------- --------- ---------VPD83T3:60000970000192601714533036464236 80.1G EMC alive traditionalVPD83T3:60000970000192601714533036464237 80.1G EMC alive traditionalPlease select volumes for meta-data backup, preferably from two different arrays (volume1,volume2):VPD83T3:60000970000192601714533036464236,VPD83T3:60000970000192601714533036464237What hour of the day should the meta-data be backed up? (0..23): 11What minute of the hour should the meta-data be backed up? (0..59): 25Metro node is configured to back up meta-data every day at 11:25 (UTC).Would you like to change the time the meta-data is backed up? [no]: noReview and FinishReview the configuration information below. If the values are correct, enteryes (or simply accept the default and press Enter) to start the setup process. If the values are not correct, enter no to go back and make changes or to exit the setup. Meta-data Backups Meta-data will be backed up every day at 11:25. The following volumes will be used for the backup : VPD83T3:60000970000192601714533036464236,VPD83T3:60000970000192601714533036464237Would you like to run the setup process now? [yes]:
Modify the existing daily backup of metro node metadata:
VPlexcli:/clusters/cluster-1/system-volumes> configuration metadata-backupA back up of the meta-data is already scheduled to occur everyday at 11:25 (UTC). Do you want change the existing schedule? (Y/N): yConfiguring Meta-data BackupsTo configure meta-data backups you will need to select two volumes (78G or greater), preferably on two different arrays. Backups will occur automatically each day, at a time you specify.metro node is currently configured to backup metadata on the following volumes : VPD83T3:60000970000192601714533036464236,VPD83T3:60000970000192601714533036464237Would you like to change the volumes on which to backup the metadata? [no]:Metro node is configured to back up meta-data every day at 11:25 (UTC).Would you like to change the time the meta-data is backed up? [no]: yesWhat hour of the day should the meta-data be backed up? (0..23): 11What minute of the hour should the meta-data be backed up? (0..59): 00Metro node is configured to back up meta-data every day at 11:00 (UTC).Review and Finish Review the configuration information below. If the values are correct, enter yes (or simply accept the default and press Enter) to start the setup process. If the values are not correct, enter no to go back and make changes or to exit the setup. Meta-data Backups Meta-data will be backed up every day at 11:20. The following volumes will be used for the backup : VPD83T3:60000970000192601714533036464236,VPD83T3:60000970000192601714533036464237 Would you like to run the setup process now? [yes]: yes
Use the ls /clusters/cluster-2/system-volumes/ command to display the backup meta-volumes:
VPlexcli:/> ls /clusters/cluster-2/system-volumes//clusters/cluster-2/system-volumes:
Commands 77
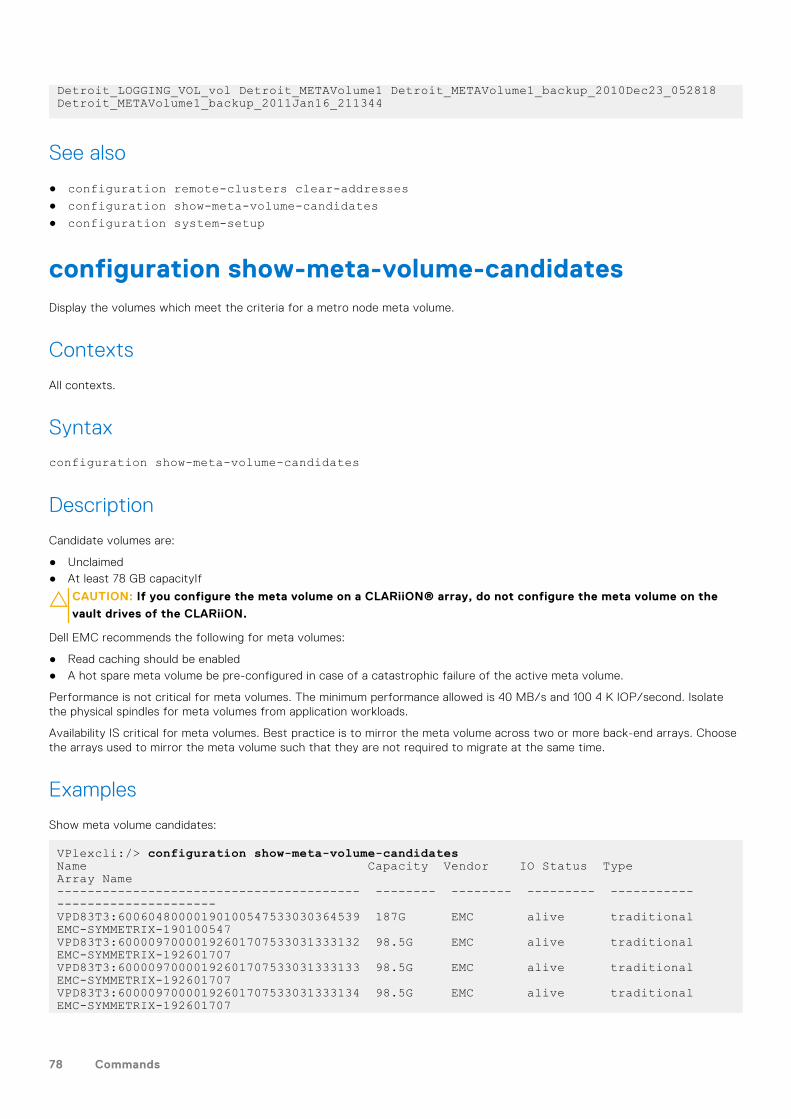
Detroit_LOGGING_VOL_vol Detroit_METAVolume1 Detroit_METAVolume1_backup_2010Dec23_052818 Detroit_METAVolume1_backup_2011Jan16_211344
See also
● configuration remote-clusters clear-addresses● configuration show-meta-volume-candidates● configuration system-setup
configuration show-meta-volume-candidatesDisplay the volumes which meet the criteria for a metro node meta volume.
Contexts
All contexts.
Syntax
configuration show-meta-volume-candidates
Description
Candidate volumes are:
● Unclaimed● At least 78 GB capacityIf
CAUTION: If you configure the meta volume on a CLARiiON® array, do not configure the meta volume on the
vault drives of the CLARiiON.
Dell EMC recommends the following for meta volumes:
● Read caching should be enabled● A hot spare meta volume be pre-configured in case of a catastrophic failure of the active meta volume.
Performance is not critical for meta volumes. The minimum performance allowed is 40 MB/s and 100 4 K IOP/second. Isolatethe physical spindles for meta volumes from application workloads.
Availability IS critical for meta volumes. Best practice is to mirror the meta volume across two or more back-end arrays. Choosethe arrays used to mirror the meta volume such that they are not required to migrate at the same time.
Examples
Show meta volume candidates:
VPlexcli:/> configuration show-meta-volume-candidatesName Capacity Vendor IO Status Type Array Name---------------------------------------- -------- -------- --------- ----------- ---------------------VPD83T3:60060480000190100547533030364539 187G EMC alive traditional EMC-SYMMETRIX-190100547VPD83T3:60000970000192601707533031333132 98.5G EMC alive traditional EMC-SYMMETRIX-192601707VPD83T3:60000970000192601707533031333133 98.5G EMC alive traditional EMC-SYMMETRIX-192601707VPD83T3:60000970000192601707533031333134 98.5G EMC alive traditional EMC-SYMMETRIX-192601707
78 Commands
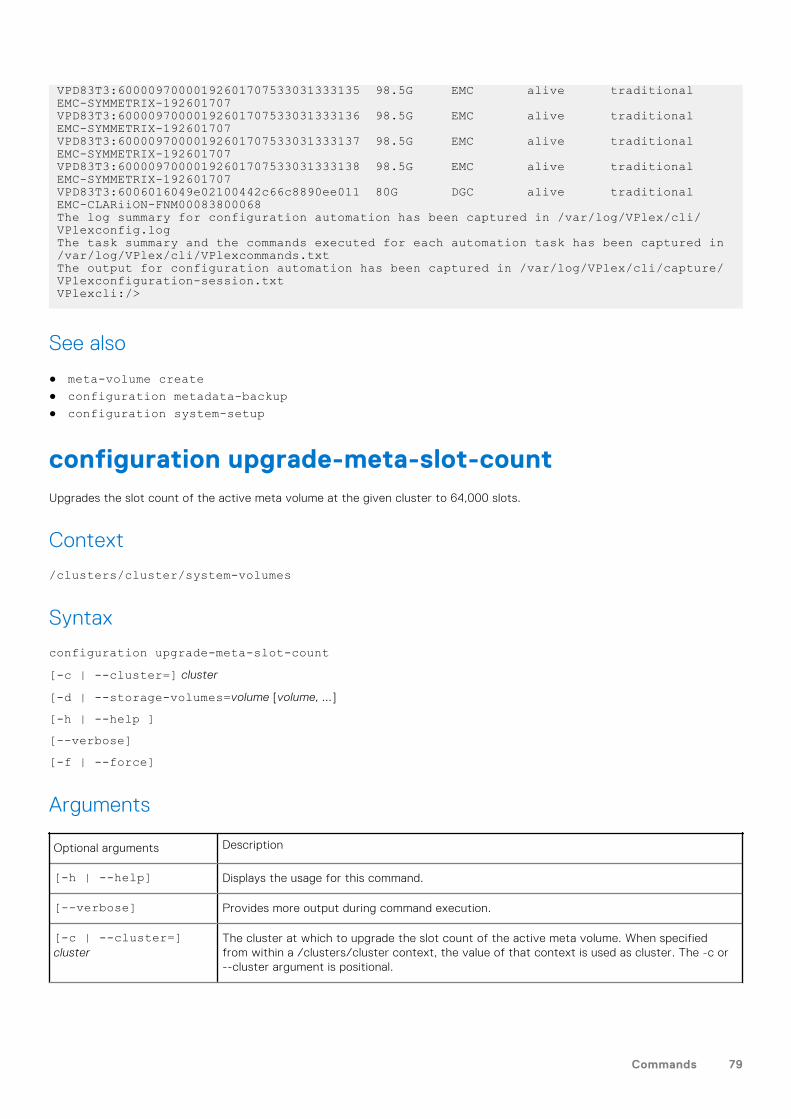
VPD83T3:60000970000192601707533031333135 98.5G EMC alive traditional EMC-SYMMETRIX-192601707VPD83T3:60000970000192601707533031333136 98.5G EMC alive traditional EMC-SYMMETRIX-192601707VPD83T3:60000970000192601707533031333137 98.5G EMC alive traditional EMC-SYMMETRIX-192601707VPD83T3:60000970000192601707533031333138 98.5G EMC alive traditional EMC-SYMMETRIX-192601707VPD83T3:6006016049e02100442c66c8890ee011 80G DGC alive traditional EMC-CLARiiON-FNM00083800068The log summary for configuration automation has been captured in /var/log/VPlex/cli/VPlexconfig.logThe task summary and the commands executed for each automation task has been captured in /var/log/VPlex/cli/VPlexcommands.txtThe output for configuration automation has been captured in /var/log/VPlex/cli/capture/VPlexconfiguration-session.txtVPlexcli:/>
See also
● meta-volume create● configuration metadata-backup● configuration system-setup
configuration upgrade-meta-slot-countUpgrades the slot count of the active meta volume at the given cluster to 64,000 slots.
Context
/clusters/cluster/system-volumes
Syntax
configuration upgrade-meta-slot-count[-c | --cluster=] cluster
[-d | --storage-volumes=volume [volume, ...]
[-h | --help ][--verbose][-f | --force]
Arguments
Optional arguments Description
[-h | --help] Displays the usage for this command.
[--verbose] Provides more output during command execution.
[-c | --cluster=]cluster
The cluster at which to upgrade the slot count of the active meta volume. When specifiedfrom within a /clusters/cluster context, the value of that context is used as cluster. The -c or--cluster argument is positional.
Commands 79
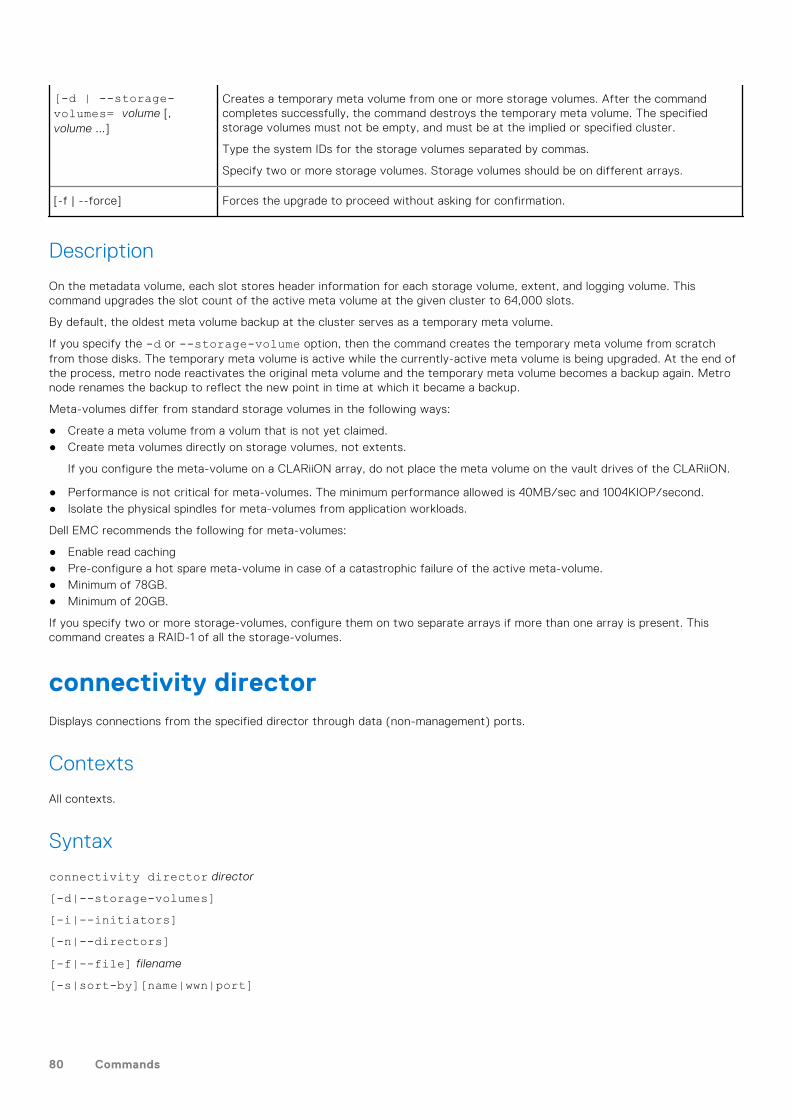
[-d | --storage-volumes= volume [,volume ...]
Creates a temporary meta volume from one or more storage volumes. After the commandcompletes successfully, the command destroys the temporary meta volume. The specifiedstorage volumes must not be empty, and must be at the implied or specified cluster.
Type the system IDs for the storage volumes separated by commas.
Specify two or more storage volumes. Storage volumes should be on different arrays.
[-f | --force] Forces the upgrade to proceed without asking for confirmation.
Description
On the metadata volume, each slot stores header information for each storage volume, extent, and logging volume. Thiscommand upgrades the slot count of the active meta volume at the given cluster to 64,000 slots.
By default, the oldest meta volume backup at the cluster serves as a temporary meta volume.
If you specify the -d or --storage-volume option, then the command creates the temporary meta volume from scratchfrom those disks. The temporary meta volume is active while the currently-active meta volume is being upgraded. At the end ofthe process, metro node reactivates the original meta volume and the temporary meta volume becomes a backup again. Metronode renames the backup to reflect the new point in time at which it became a backup.
Meta-volumes differ from standard storage volumes in the following ways:
● Create a meta volume from a volum that is not yet claimed.● Create meta volumes directly on storage volumes, not extents.
If you configure the meta-volume on a CLARiiON array, do not place the meta volume on the vault drives of the CLARiiON.
● Performance is not critical for meta-volumes. The minimum performance allowed is 40MB/sec and 1004KIOP/second.● Isolate the physical spindles for meta-volumes from application workloads.
Dell EMC recommends the following for meta-volumes:
● Enable read caching● Pre-configure a hot spare meta-volume in case of a catastrophic failure of the active meta-volume.● Minimum of 78GB.● Minimum of 20GB.
If you specify two or more storage-volumes, configure them on two separate arrays if more than one array is present. Thiscommand creates a RAID-1 of all the storage-volumes.
connectivity directorDisplays connections from the specified director through data (non-management) ports.
Contexts
All contexts.
Syntax
connectivity director director
[-d|--storage-volumes][-i|--initiators][-n|--directors][-f|--file] filename
[-s|sort-by][name|wwn|port]
80 Commands
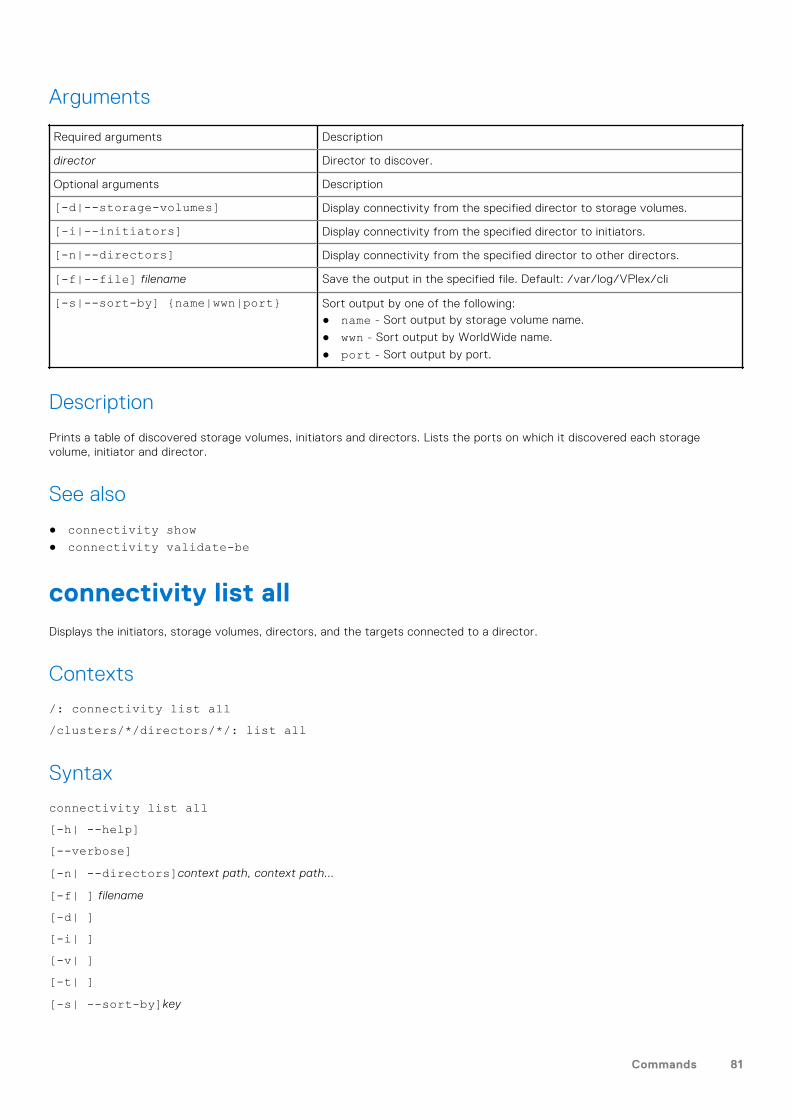
Arguments
Required arguments Description
director Director to discover.
Optional arguments Description
[-d|--storage-volumes] Display connectivity from the specified director to storage volumes.
[-i|--initiators] Display connectivity from the specified director to initiators.
[-n|--directors] Display connectivity from the specified director to other directors.
[-f|--file] filename Save the output in the specified file. Default: /var/log/VPlex/cli
[-s|--sort-by] {name|wwn|port} Sort output by one of the following:● name - Sort output by storage volume name.
● wwn - Sort output by WorldWide name.
● port - Sort output by port.
Description
Prints a table of discovered storage volumes, initiators and directors. Lists the ports on which it discovered each storagevolume, initiator and director.
See also
● connectivity show● connectivity validate-be
connectivity list allDisplays the initiators, storage volumes, directors, and the targets connected to a director.
Contexts
/: connectivity list all/clusters/*/directors/*/: list all
Syntax
connectivity list all[-h| --help][--verbose][-n| --directors]context path, context path...
[-f| ] filename
[-d| ][-i| ][-v| ][-t| ][-s| --sort-by]key
Commands 81
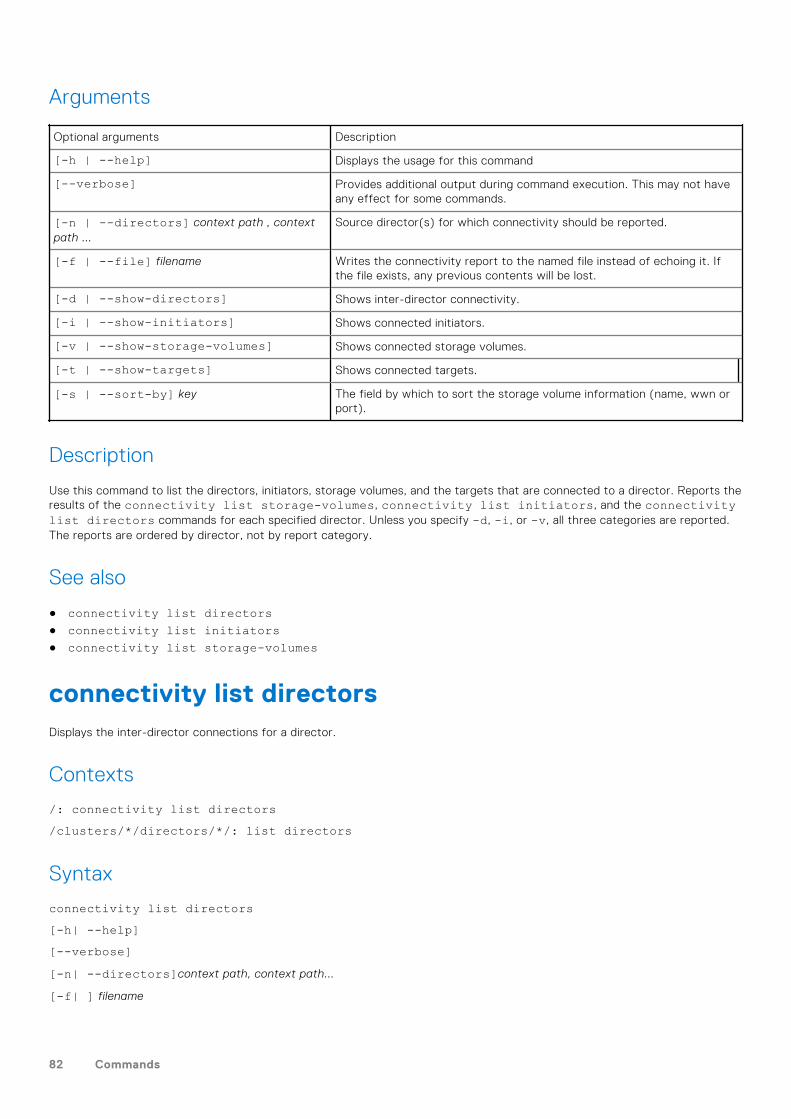
Arguments
Optional arguments Description
[-h | --help] Displays the usage for this command
[--verbose] Provides additional output during command execution. This may not haveany effect for some commands.
[-n | --directors] context path , contextpath ...
Source director(s) for which connectivity should be reported.
[-f | --file] filename Writes the connectivity report to the named file instead of echoing it. Ifthe file exists, any previous contents will be lost.
[-d | --show-directors] Shows inter-director connectivity.
[-i | --show-initiators] Shows connected initiators.
[-v | --show-storage-volumes] Shows connected storage volumes.
[-t | --show-targets] Shows connected targets.
[-s | --sort-by] key The field by which to sort the storage volume information (name, wwn orport).
Description
Use this command to list the directors, initiators, storage volumes, and the targets that are connected to a director. Reports theresults of the connectivity list storage-volumes, connectivity list initiators, and the connectivitylist directors commands for each specified director. Unless you specify -d, -i, or -v, all three categories are reported.The reports are ordered by director, not by report category.
See also
● connectivity list directors● connectivity list initiators● connectivity list storage-volumes
connectivity list directorsDisplays the inter-director connections for a director.
Contexts
/: connectivity list directors/clusters/*/directors/*/: list directors
Syntax
connectivity list directors[-h| --help][--verbose][-n| --directors]context path, context path...
[-f| ] filename
82 Commands
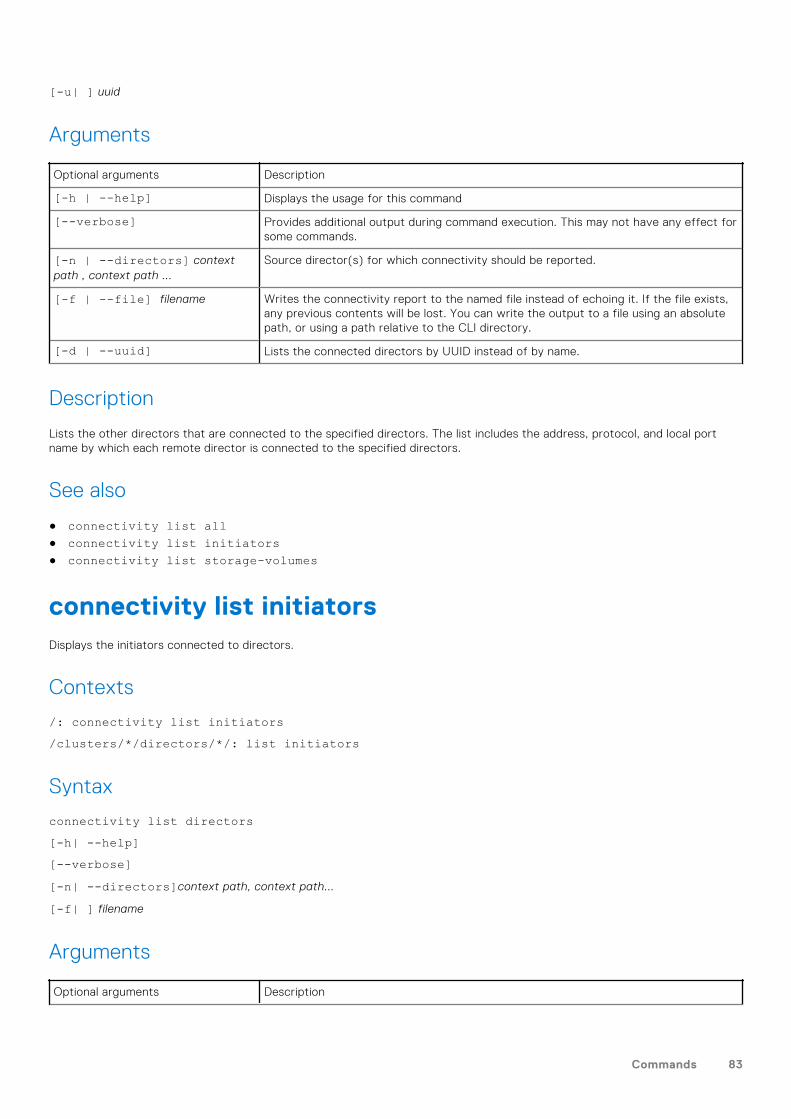
[-u| ] uuid
Arguments
Optional arguments Description
[-h | --help] Displays the usage for this command
[--verbose] Provides additional output during command execution. This may not have any effect forsome commands.
[-n | --directors] contextpath , context path ...
Source director(s) for which connectivity should be reported.
[-f | --file] filename Writes the connectivity report to the named file instead of echoing it. If the file exists,any previous contents will be lost. You can write the output to a file using an absolutepath, or using a path relative to the CLI directory.
[-d | --uuid] Lists the connected directors by UUID instead of by name.
Description
Lists the other directors that are connected to the specified directors. The list includes the address, protocol, and local portname by which each remote director is connected to the specified directors.
See also
● connectivity list all● connectivity list initiators● connectivity list storage-volumes
connectivity list initiatorsDisplays the initiators connected to directors.
Contexts
/: connectivity list initiators/clusters/*/directors/*/: list initiators
Syntax
connectivity list directors[-h| --help][--verbose][-n| --directors]context path, context path...
[-f| ] filename
Arguments
Optional arguments Description
Commands 83
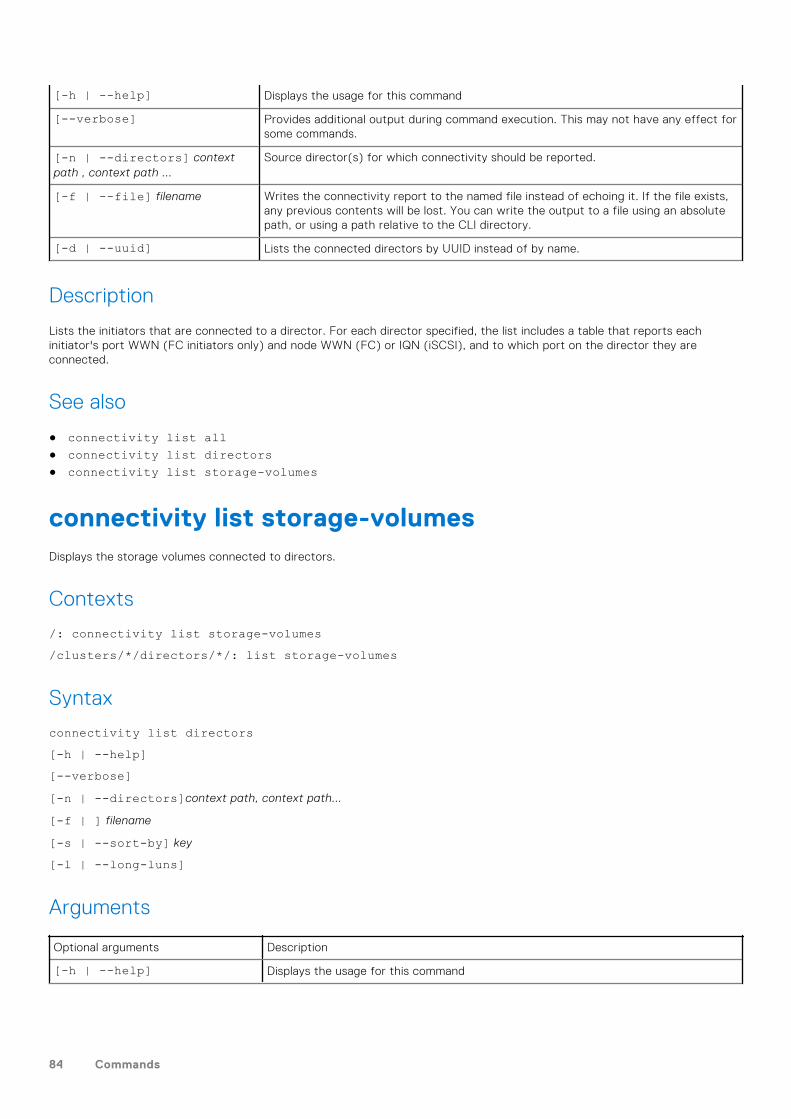
[-h | --help] Displays the usage for this command
[--verbose] Provides additional output during command execution. This may not have any effect forsome commands.
[-n | --directors] contextpath , context path ...
Source director(s) for which connectivity should be reported.
[-f | --file] filename Writes the connectivity report to the named file instead of echoing it. If the file exists,any previous contents will be lost. You can write the output to a file using an absolutepath, or using a path relative to the CLI directory.
[-d | --uuid] Lists the connected directors by UUID instead of by name.
Description
Lists the initiators that are connected to a director. For each director specified, the list includes a table that reports eachinitiator's port WWN (FC initiators only) and node WWN (FC) or IQN (iSCSI), and to which port on the director they areconnected.
See also
● connectivity list all● connectivity list directors● connectivity list storage-volumes
connectivity list storage-volumesDisplays the storage volumes connected to directors.
Contexts
/: connectivity list storage-volumes/clusters/*/directors/*/: list storage-volumes
Syntax
connectivity list directors[-h | --help][--verbose][-n | --directors]context path, context path...
[-f | ] filename
[-s | --sort-by] key
[-l | --long-luns]
Arguments
Optional arguments Description
[-h | --help] Displays the usage for this command
84 Commands
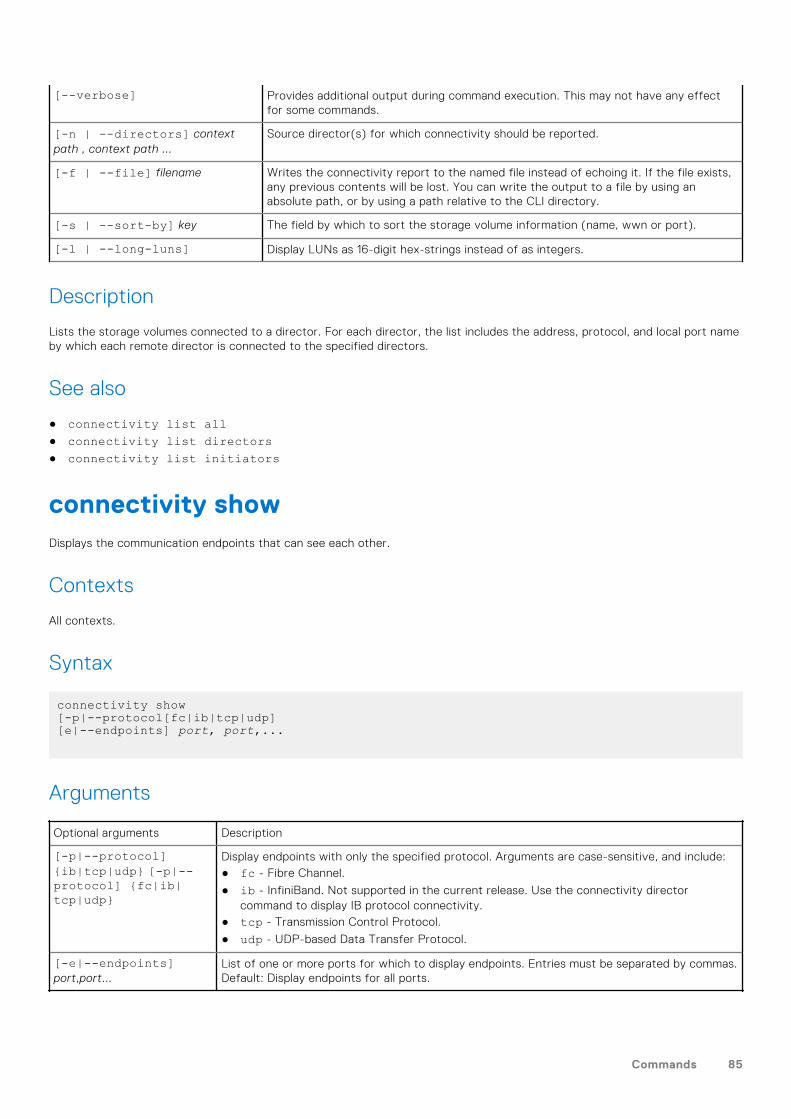
[--verbose] Provides additional output during command execution. This may not have any effectfor some commands.
[-n | --directors] contextpath , context path ...
Source director(s) for which connectivity should be reported.
[-f | --file] filename Writes the connectivity report to the named file instead of echoing it. If the file exists,any previous contents will be lost. You can write the output to a file by using anabsolute path, or by using a path relative to the CLI directory.
[-s | --sort-by] key The field by which to sort the storage volume information (name, wwn or port).
[-l | --long-luns] Display LUNs as 16-digit hex-strings instead of as integers.
Description
Lists the storage volumes connected to a director. For each director, the list includes the address, protocol, and local port nameby which each remote director is connected to the specified directors.
See also
● connectivity list all● connectivity list directors● connectivity list initiators
connectivity showDisplays the communication endpoints that can see each other.
Contexts
All contexts.
Syntax
connectivity show[-p|--protocol[fc|ib|tcp|udp][e|--endpoints] port, port,...
Arguments
Optional arguments Description
[-p|--protocol]{ib|tcp|udp} [-p|--protocol] {fc|ib|tcp|udp}
Display endpoints with only the specified protocol. Arguments are case-sensitive, and include:● fc - Fibre Channel.
● ib - InfiniBand. Not supported in the current release. Use the connectivity directorcommand to display IB protocol connectivity.
● tcp - Transmission Control Protocol.
● udp - UDP-based Data Transfer Protocol.
[-e|--endpoints]port,port...
List of one or more ports for which to display endpoints. Entries must be separated by commas.Default: Display endpoints for all ports.
Commands 85
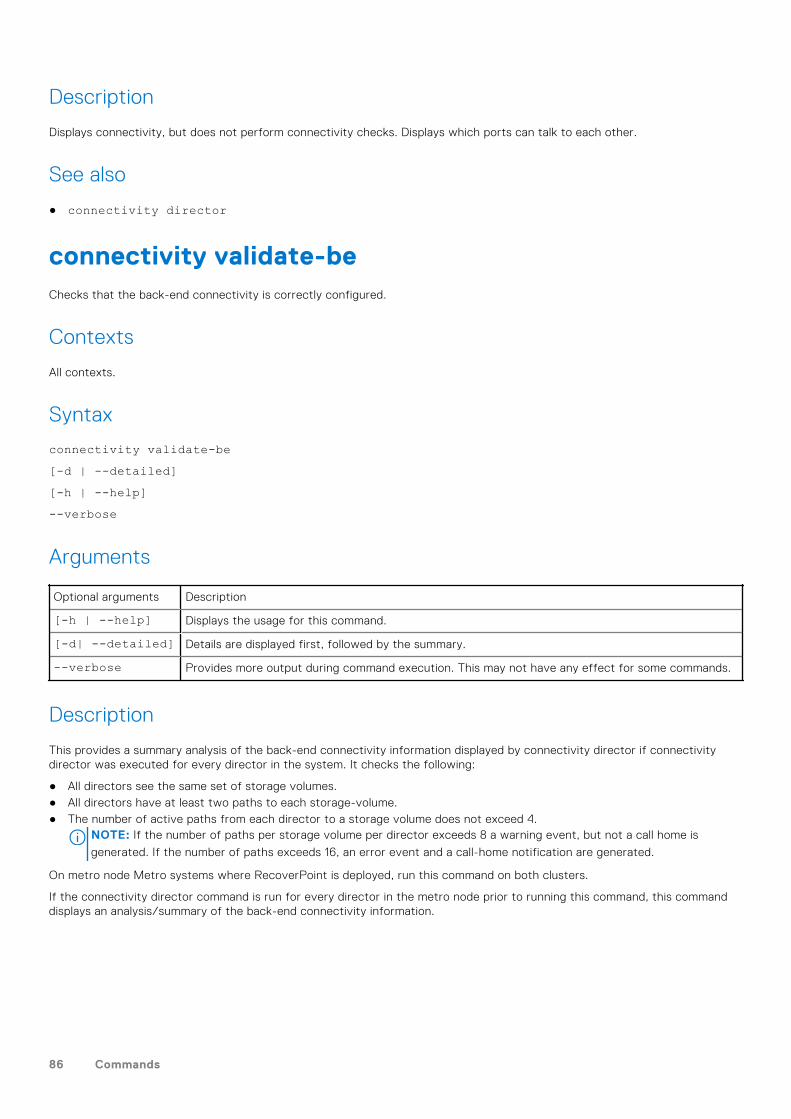
Description
Displays connectivity, but does not perform connectivity checks. Displays which ports can talk to each other.
See also
● connectivity director
connectivity validate-beChecks that the back-end connectivity is correctly configured.
Contexts
All contexts.
Syntax
connectivity validate-be[-d | --detailed][-h | --help]--verbose
Arguments
Optional arguments Description
[-h | --help] Displays the usage for this command.
[-d| --detailed] Details are displayed first, followed by the summary.
--verbose Provides more output during command execution. This may not have any effect for some commands.
Description
This provides a summary analysis of the back-end connectivity information displayed by connectivity director if connectivitydirector was executed for every director in the system. It checks the following:
● All directors see the same set of storage volumes.● All directors have at least two paths to each storage-volume.● The number of active paths from each director to a storage volume does not exceed 4.
NOTE: If the number of paths per storage volume per director exceeds 8 a warning event, but not a call home is
generated. If the number of paths exceeds 16, an error event and a call-home notification are generated.
On metro node Metro systems where RecoverPoint is deployed, run this command on both clusters.
If the connectivity director command is run for every director in the metro node prior to running this command, this commanddisplays an analysis/summary of the back-end connectivity information.
86 Commands
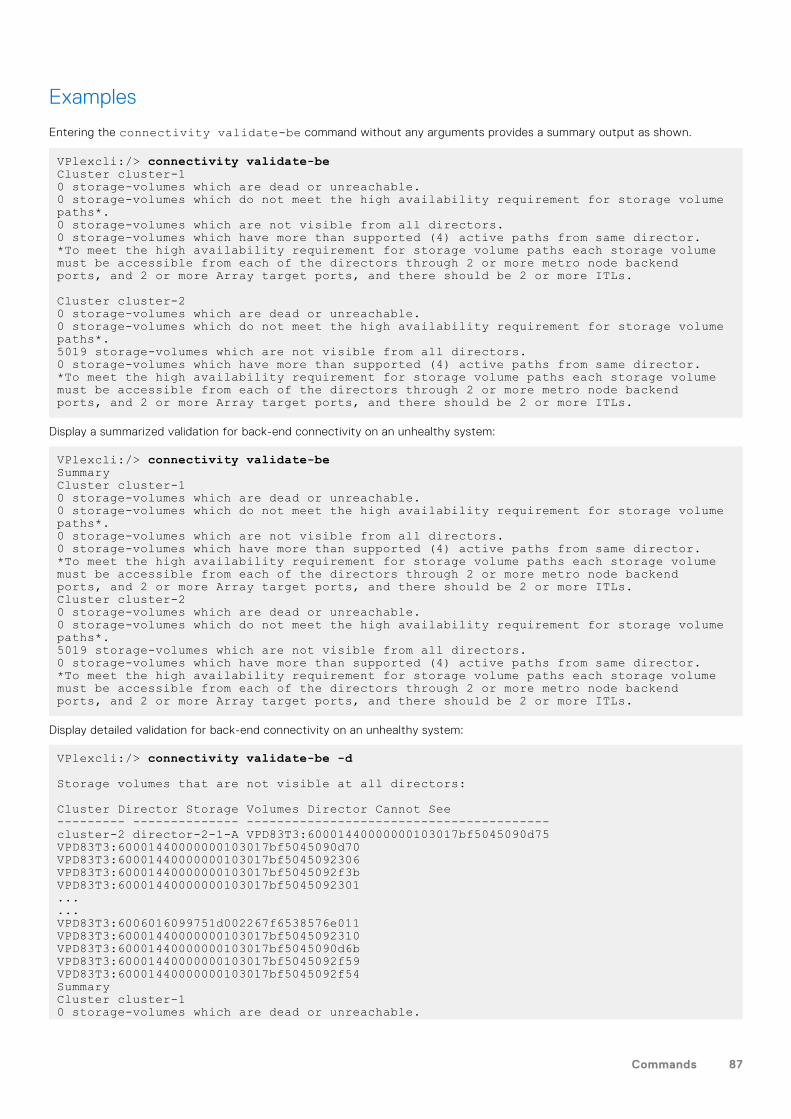
Examples
Entering the connectivity validate-be command without any arguments provides a summary output as shown.
VPlexcli:/> connectivity validate-be Cluster cluster-1 0 storage-volumes which are dead or unreachable. 0 storage-volumes which do not meet the high availability requirement for storage volume paths*. 0 storage-volumes which are not visible from all directors. 0 storage-volumes which have more than supported (4) active paths from same director. *To meet the high availability requirement for storage volume paths each storage volume must be accessible from each of the directors through 2 or more metro node backend ports, and 2 or more Array target ports, and there should be 2 or more ITLs.
Cluster cluster-20 storage-volumes which are dead or unreachable.0 storage-volumes which do not meet the high availability requirement for storage volume paths*.5019 storage-volumes which are not visible from all directors. 0 storage-volumes which have more than supported (4) active paths from same director.*To meet the high availability requirement for storage volume paths each storage volume must be accessible from each of the directors through 2 or more metro node backend ports, and 2 or more Array target ports, and there should be 2 or more ITLs.
Display a summarized validation for back-end connectivity on an unhealthy system:
VPlexcli:/> connectivity validate-beSummary Cluster cluster-1 0 storage-volumes which are dead or unreachable. 0 storage-volumes which do not meet the high availability requirement for storage volume paths*. 0 storage-volumes which are not visible from all directors. 0 storage-volumes which have more than supported (4) active paths from same director. *To meet the high availability requirement for storage volume paths each storage volume must be accessible from each of the directors through 2 or more metro node backend ports, and 2 or more Array target ports, and there should be 2 or more ITLs.Cluster cluster-2 0 storage-volumes which are dead or unreachable. 0 storage-volumes which do not meet the high availability requirement for storage volume paths*. 5019 storage-volumes which are not visible from all directors. 0 storage-volumes which have more than supported (4) active paths from same director. *To meet the high availability requirement for storage volume paths each storage volume must be accessible from each of the directors through 2 or more metro node backend ports, and 2 or more Array target ports, and there should be 2 or more ITLs.
Display detailed validation for back-end connectivity on an unhealthy system:
VPlexcli:/> connectivity validate-be -d
Storage volumes that are not visible at all directors:
Cluster Director Storage Volumes Director Cannot See --------- -------------- ---------------------------------------- cluster-2 director-2-1-A VPD83T3:60001440000000103017bf5045090d75 VPD83T3:60001440000000103017bf5045090d70 VPD83T3:60001440000000103017bf5045092306 VPD83T3:60001440000000103017bf5045092f3b VPD83T3:60001440000000103017bf5045092301 ... ... VPD83T3:6006016099751d002267f6538576e011 VPD83T3:60001440000000103017bf5045092310 VPD83T3:60001440000000103017bf5045090d6b VPD83T3:60001440000000103017bf5045092f59 VPD83T3:60001440000000103017bf5045092f54SummaryCluster cluster-10 storage-volumes which are dead or unreachable.
Commands 87
0 storage-volumes which do not meet the high availability requirement for storage volume paths*.0 storage-volumes which are not visible from all directors.0 storage-volumes which have more than supported (4) active paths from same director.*To meet the high availability requirement for storage volume paths each storage volume must be accessible from each of the directors through 2 or more metro node backend ports, and 2 or more Array target ports, and there should be 2 or more ITLs.Cluster cluster-2 0 storage-volumes which are dead or unreachable. 0 storage-volumes which do not meet the high availability requirement for storage volume paths*. 5019 storage-volumes which are not visible from all directors. 0 storage-volumes which have more than supported (4) active paths from same director. *To meet the high availability requirement for storage volume paths each storage volume must be accessible from each of the directors through 2 or more metro node backend ports, and 2 or more Array target ports, and there should be 2 or more ITLs.
See also
● connectivity director● connectivity show● connectivity validate-local-com● connectivity validate-wan-com● health-check● validate-system-configuration
connectivity validate-local-comValidates that the actual connectivity over local-com matches the expected connectivity.
Contexts
All contexts.
Syntax
connectivity validate-local-com[-c|--cluster] context path[-e|--show-expected][-p|--protocol] communication protocol[-h|--help][--verbose]
Arguments
Optional arguments Description
[-c|--cluster] context-path
path of the cluster where local-com should be validated.
[-e|--show-expected] Prints the expected connectivity map instead of comparing it to the actual connectivity.
[-p|--protocol]communication-protocol
Specifies the protocol used for local-com (Fibre Channel or UDP). If not specified, thecommand attempts to determine the protocol based on the local-com ports in the system.
[-h|--help] Displays command line help.
88 Commands
[--verbose] Provides more output during command execution. This may not have any effect for somecommands.
Description
Verifies the expected local-com connectivity. This command assembles a list of expected local-com connectivity, compares itto the actual local-com connectivity, and reports any missing or extra connections. This command verifies only IP- or FibreChannel-based local-com connectivity.
Expected connectivity is determined by collecting all ports whose role is local-com and verifying that each port in a port-grouphas connectivity to every other port in the same port-group.
When both Fibre Channel and IP ports with role local-com are present, the smaller subset is discarded and the protocol of theremaining ports is assumed to be the correct protocol.
See also
● connectivity director● connectivity show● connectivity validate-be● connectivity validate-wan-com● health-check● validate-system-configuration
consistency-group add-virtual-volumesAdds one or more virtual volume to a consistency group.
Contexts
All contexts.
In /clusters/cluster-n/consistency-groups/group-name context, command is add-virtual-volumes
Syntax
consistency-group add-virtual-volumes
[-v|--virtual-volumes] virtual-volume, virtual-volume, ...
[-g|--consistency-group] consistency-group
Arguments
Required arguments
[-v|--virtual-volumes]virtual-volume,virtual-volume,...
* List of one or more comma-separated glob patterns or context paths of the virtual volumeto add.
[-g|--consistency-group] consistency-group
* Context path of the consistency group to which to add the specified virtual volume. If thecurrent context is a consistency-group or below, then that consistency group is the default.Otherwise, this argument is required.
* - argument is positional.
Commands 89
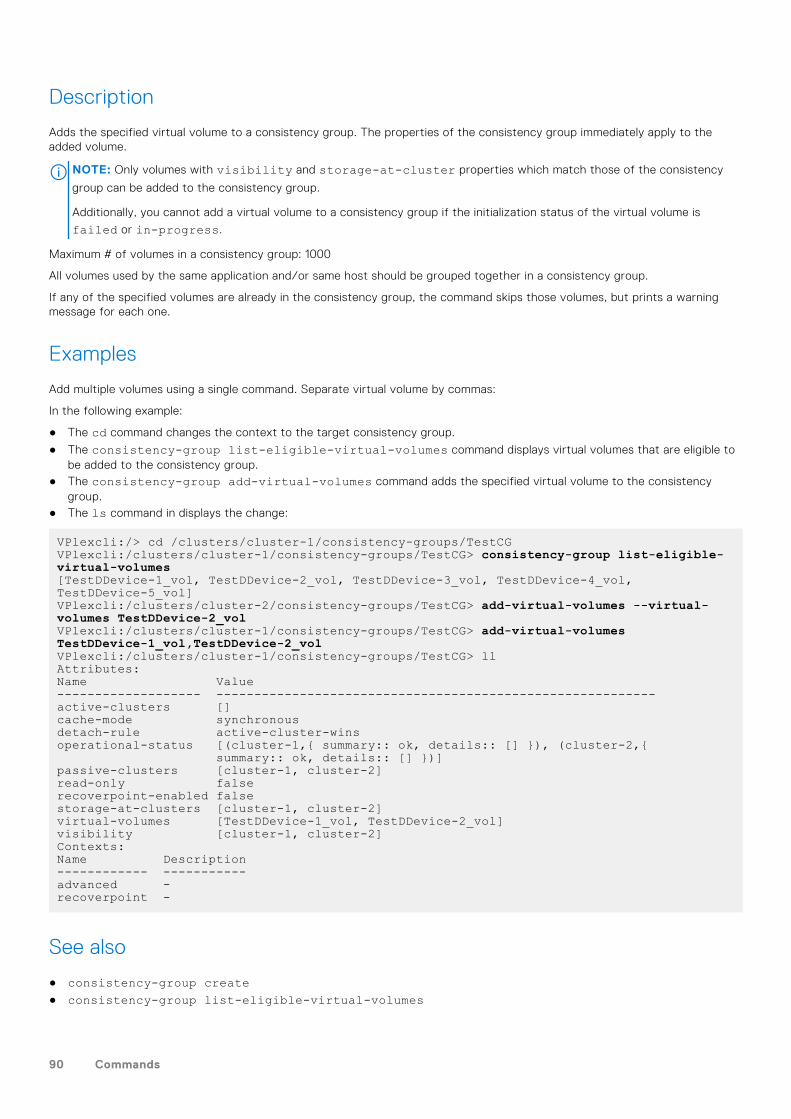
Description
Adds the specified virtual volume to a consistency group. The properties of the consistency group immediately apply to theadded volume.
NOTE: Only volumes with visibility and storage-at-cluster properties which match those of the consistency
group can be added to the consistency group.
Additionally, you cannot add a virtual volume to a consistency group if the initialization status of the virtual volume is
failed or in-progress.
Maximum # of volumes in a consistency group: 1000
All volumes used by the same application and/or same host should be grouped together in a consistency group.
If any of the specified volumes are already in the consistency group, the command skips those volumes, but prints a warningmessage for each one.
Examples
Add multiple volumes using a single command. Separate virtual volume by commas:
In the following example:
● The cd command changes the context to the target consistency group.
● The consistency-group list-eligible-virtual-volumes command displays virtual volumes that are eligible tobe added to the consistency group.
● The consistency-group add-virtual-volumes command adds the specified virtual volume to the consistencygroup.
● The ls command in displays the change:
VPlexcli:/> cd /clusters/cluster-1/consistency-groups/TestCGVPlexcli:/clusters/cluster-1/consistency-groups/TestCG> consistency-group list-eligible-virtual-volumes[TestDDevice-1_vol, TestDDevice-2_vol, TestDDevice-3_vol, TestDDevice-4_vol, TestDDevice-5_vol]VPlexcli:/clusters/cluster-2/consistency-groups/TestCG> add-virtual-volumes --virtual-volumes TestDDevice-2_vol VPlexcli:/clusters/cluster-1/consistency-groups/TestCG> add-virtual-volumes TestDDevice-1_vol,TestDDevice-2_volVPlexcli:/clusters/cluster-1/consistency-groups/TestCG> llAttributes:Name Value------------------- ----------------------------------------------------------active-clusters []cache-mode synchronousdetach-rule active-cluster-winsoperational-status [(cluster-1,{ summary:: ok, details:: [] }), (cluster-2,{ summary:: ok, details:: [] })]passive-clusters [cluster-1, cluster-2]read-only falserecoverpoint-enabled falsestorage-at-clusters [cluster-1, cluster-2]virtual-volumes [TestDDevice-1_vol, TestDDevice-2_vol]visibility [cluster-1, cluster-2]Contexts:Name Description------------ -----------advanced -recoverpoint -
See also
● consistency-group create● consistency-group list-eligible-virtual-volumes
90 Commands
● consistency-group remove-virtual-volumes● Dell EMC Administration Guide for metro node
consistency-group choose-winnerSelects a winning cluster during an inter-cluster link failure.
Contexts
All contexts.
In /clusters/cluster-n/consistency-groups/group-name context, command is choose winner.
Syntax
consistency-group choose-winner[-c|--cluster] cluster
[-g|--consistency-group] consistency-group
[-f|--force]
Arguments
Required arguments
[-c|--cluster] cluster *The cluster on which to roll back and resume I/O.
[-g|--consistency-group]consistency-group
* Context path of the consistency group on which to roll back and resume I/O.
Optional arguments
[-f|--force] Do not prompt for confirmation. Allows this command to be run using a non-interactivescript.
* - argument is positional.
Description
Use the choose-winner command when:
● I/O must be resumed on a cluster during a link outage● The selected cluster has not yet detached its peer● The detach-rules require manual intervention
The selected cluster will detach its peer cluster and resume I/O.
CAUTION: When the clusters cannot communicate, it is possible to use this command to select both clusters as
the winning cluster (conflicting detach). In a conflicting detach, both clusters resume I/O independently.
When the inter-cluster link heals in such a situation, manual intervention is required to pick a winning cluster.
The data image of the winning cluster will be used to make the clusters consistent again. Any changes at the
losing cluster during the link outage are discarded.
Do not use this command to specify more than one cluster as the winner.
Commands 91
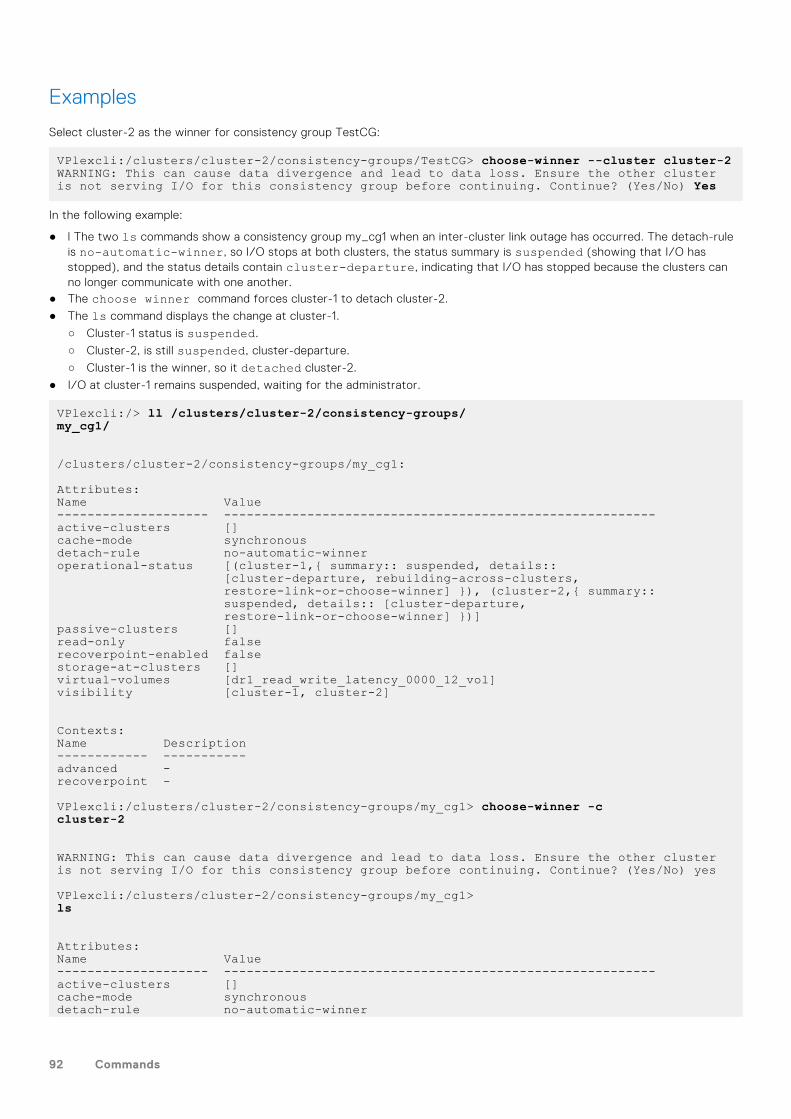
Examples
Select cluster-2 as the winner for consistency group TestCG:
VPlexcli:/clusters/cluster-2/consistency-groups/TestCG> choose-winner --cluster cluster-2WARNING: This can cause data divergence and lead to data loss. Ensure the other cluster is not serving I/O for this consistency group before continuing. Continue? (Yes/No) Yes
In the following example:
● l The two ls commands show a consistency group my_cg1 when an inter-cluster link outage has occurred. The detach-ruleis no-automatic-winner, so I/O stops at both clusters, the status summary is suspended (showing that I/O hasstopped), and the status details contain cluster-departure, indicating that I/O has stopped because the clusters canno longer communicate with one another.
● The choose winner command forces cluster-1 to detach cluster-2.
● The ls command displays the change at cluster-1.
○ Cluster-1 status is suspended.
○ Cluster-2, is still suspended, cluster-departure.
○ Cluster-1 is the winner, so it detached cluster-2.
● I/O at cluster-1 remains suspended, waiting for the administrator.
VPlexcli:/> ll /clusters/cluster-2/consistency-groups/my_cg1/ /clusters/cluster-2/consistency-groups/my_cg1: Attributes: Name Value -------------------- --------------------------------------------------------- active-clusters [] cache-mode synchronous detach-rule no-automatic-winner operational-status [(cluster-1,{ summary:: suspended, details:: [cluster-departure, rebuilding-across-clusters, restore-link-or-choose-winner] }), (cluster-2,{ summary:: suspended, details:: [cluster-departure, restore-link-or-choose-winner] })] passive-clusters [] read-only false recoverpoint-enabled false storage-at-clusters [] virtual-volumes [dr1_read_write_latency_0000_12_vol] visibility [cluster-1, cluster-2] Contexts: Name Description ------------ ----------- advanced - recoverpoint - VPlexcli:/clusters/cluster-2/consistency-groups/my_cg1> choose-winner -c cluster-2 WARNING: This can cause data divergence and lead to data loss. Ensure the other cluster is not serving I/O for this consistency group before continuing. Continue? (Yes/No) yes VPlexcli:/clusters/cluster-2/consistency-groups/my_cg1> ls Attributes: Name Value -------------------- --------------------------------------------------------- active-clusters [] cache-mode synchronous detach-rule no-automatic-winner
92 Commands
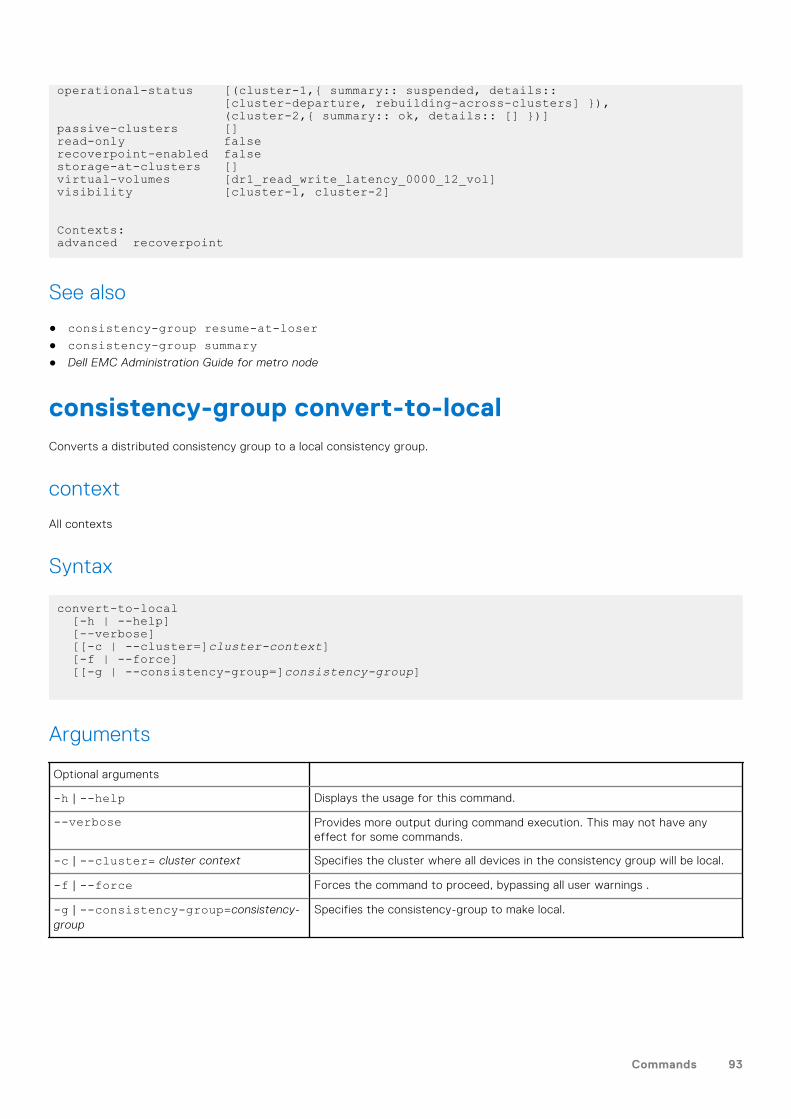
operational-status [(cluster-1,{ summary:: suspended, details:: [cluster-departure, rebuilding-across-clusters] }), (cluster-2,{ summary:: ok, details:: [] })] passive-clusters [] read-only false recoverpoint-enabled false storage-at-clusters [] virtual-volumes [dr1_read_write_latency_0000_12_vol] visibility [cluster-1, cluster-2] Contexts: advanced recoverpoint
See also
● consistency-group resume-at-loser● consistency-group summary● Dell EMC Administration Guide for metro node
consistency-group convert-to-localConverts a distributed consistency group to a local consistency group.
context
All contexts
Syntax
convert-to-local [-h | --help] [--verbose] [[-c | --cluster=]cluster-context] [-f | --force] [[-g | --consistency-group=]consistency-group]
Arguments
Optional arguments
-h | --help Displays the usage for this command.
--verbose Provides more output during command execution. This may not have anyeffect for some commands.
-c | --cluster= cluster context Specifies the cluster where all devices in the consistency group will be local.
-f | --force Forces the command to proceed, bypassing all user warnings .
-g | --consistency-group=consistency-group
Specifies the consistency-group to make local.
Commands 93
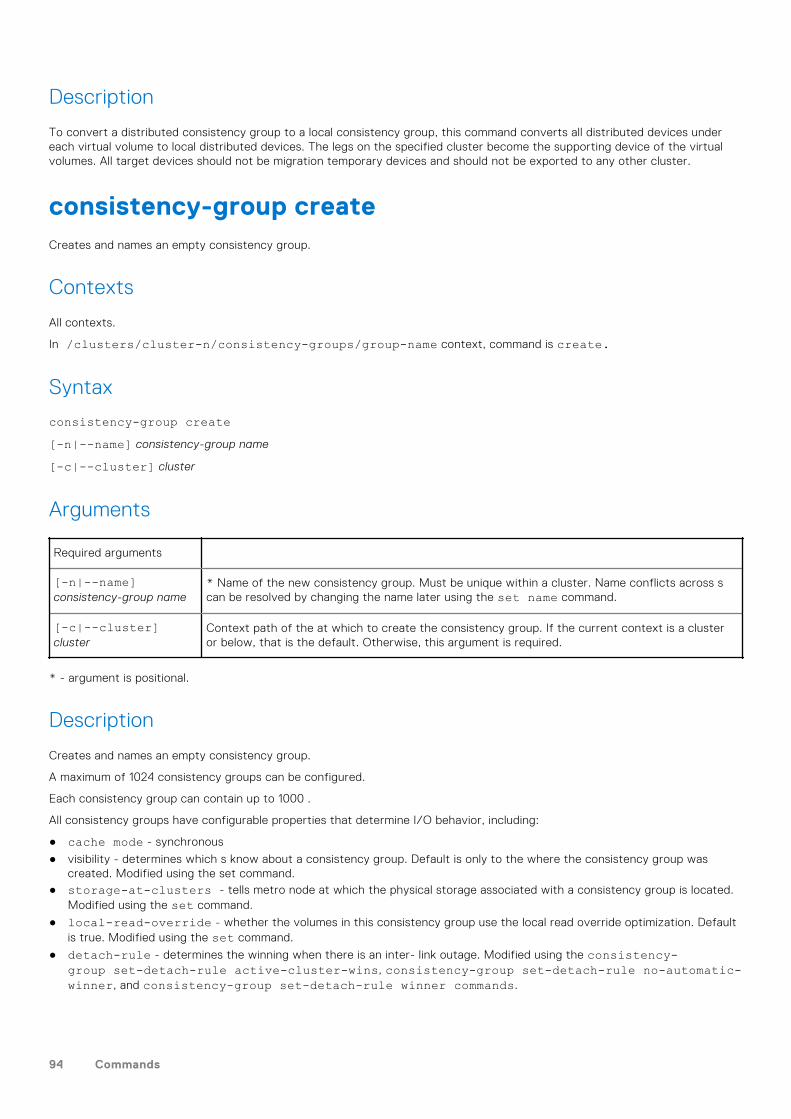
Description
To convert a distributed consistency group to a local consistency group, this command converts all distributed devices undereach virtual volume to local distributed devices. The legs on the specified cluster become the supporting device of the virtualvolumes. All target devices should not be migration temporary devices and should not be exported to any other cluster.
consistency-group createCreates and names an empty consistency group.
Contexts
All contexts.
In /clusters/cluster-n/consistency-groups/group-name context, command is create.
Syntax
consistency-group create[-n|--name] consistency-group name
[-c|--cluster] cluster
Arguments
Required arguments
[-n|--name]consistency-group name
* Name of the new consistency group. Must be unique within a cluster. Name conflicts across scan be resolved by changing the name later using the set name command.
[-c|--cluster]cluster
Context path of the at which to create the consistency group. If the current context is a clusteror below, that is the default. Otherwise, this argument is required.
* - argument is positional.
Description
Creates and names an empty consistency group.
A maximum of 1024 consistency groups can be configured.
Each consistency group can contain up to 1000 .
All consistency groups have configurable properties that determine I/O behavior, including:
● cache mode - synchronous
● visibility - determines which s know about a consistency group. Default is only to the where the consistency group wascreated. Modified using the set command.
● storage-at-clusters - tells metro node at which the physical storage associated with a consistency group is located.Modified using the set command.
● local-read-override - whether the volumes in this consistency group use the local read override optimization. Defaultis true. Modified using the set command.
● detach-rule - determines the winning when there is an inter- link outage. Modified using the consistency-group set-detach-rule active-cluster-wins, consistency-group set-detach-rule no-automatic-winner, and consistency-group set-detach-rule winner commands.
94 Commands
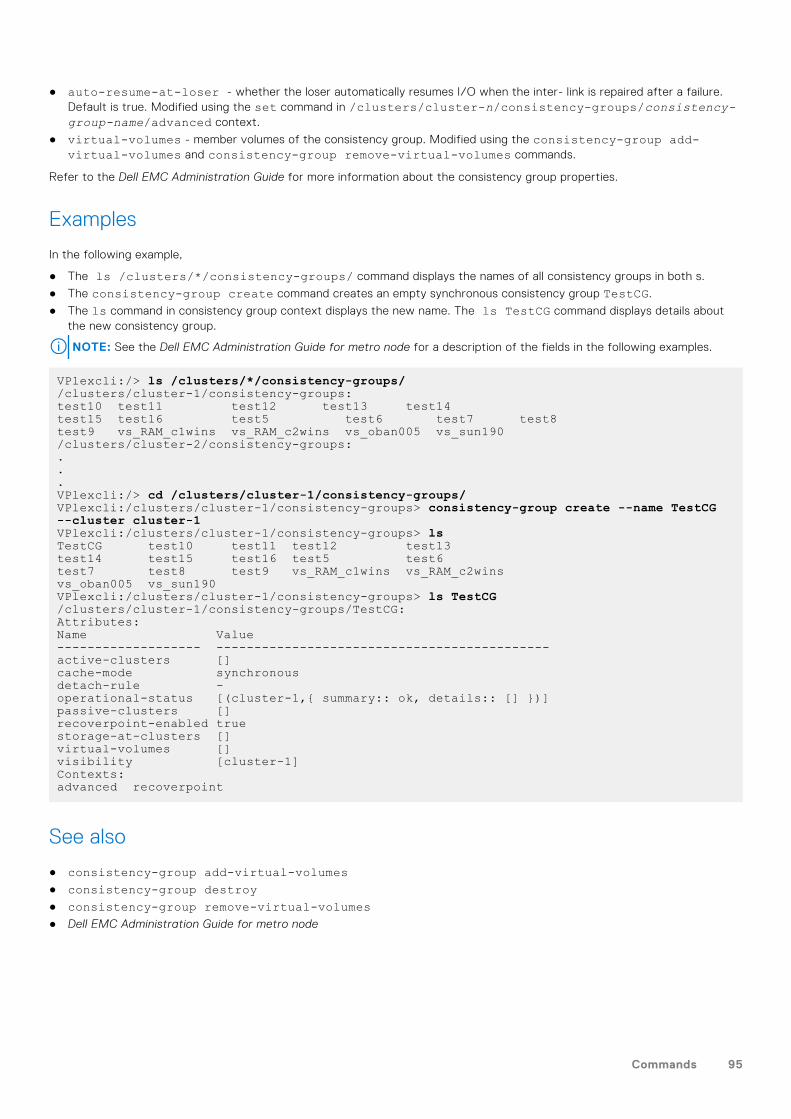
● auto-resume-at-loser - whether the loser automatically resumes I/O when the inter- link is repaired after a failure.Default is true. Modified using the set command in /clusters/cluster-n/consistency-groups/consistency-group-name/advanced context.
● virtual-volumes - member volumes of the consistency group. Modified using the consistency-group add-virtual-volumes and consistency-group remove-virtual-volumes commands.
Refer to the Dell EMC Administration Guide for more information about the consistency group properties.
Examples
In the following example,
● The ls /clusters/*/consistency-groups/ command displays the names of all consistency groups in both s.
● The consistency-group create command creates an empty synchronous consistency group TestCG.
● The ls command in consistency group context displays the new name. The ls TestCG command displays details aboutthe new consistency group.
NOTE: See the Dell EMC Administration Guide for metro node for a description of the fields in the following examples.
VPlexcli:/> ls /clusters/*/consistency-groups//clusters/cluster-1/consistency-groups:test10 test11 test12 test13 test14test15 test16 test5 test6 test7 test8test9 vs_RAM_c1wins vs_RAM_c2wins vs_oban005 vs_sun190/clusters/cluster-2/consistency-groups:...VPlexcli:/> cd /clusters/cluster-1/consistency-groups/VPlexcli:/clusters/cluster-1/consistency-groups> consistency-group create --name TestCG --cluster cluster-1VPlexcli:/clusters/cluster-1/consistency-groups> lsTestCG test10 test11 test12 test13test14 test15 test16 test5 test6test7 test8 test9 vs_RAM_c1wins vs_RAM_c2winsvs_oban005 vs_sun190VPlexcli:/clusters/cluster-1/consistency-groups> ls TestCG/clusters/cluster-1/consistency-groups/TestCG:Attributes:Name Value------------------- --------------------------------------------active-clusters []cache-mode synchronousdetach-rule -operational-status [(cluster-1,{ summary:: ok, details:: [] })]passive-clusters []recoverpoint-enabled truestorage-at-clusters []virtual-volumes []visibility [cluster-1]Contexts:advanced recoverpoint
See also
● consistency-group add-virtual-volumes● consistency-group destroy● consistency-group remove-virtual-volumes● Dell EMC Administration Guide for metro node
Commands 95
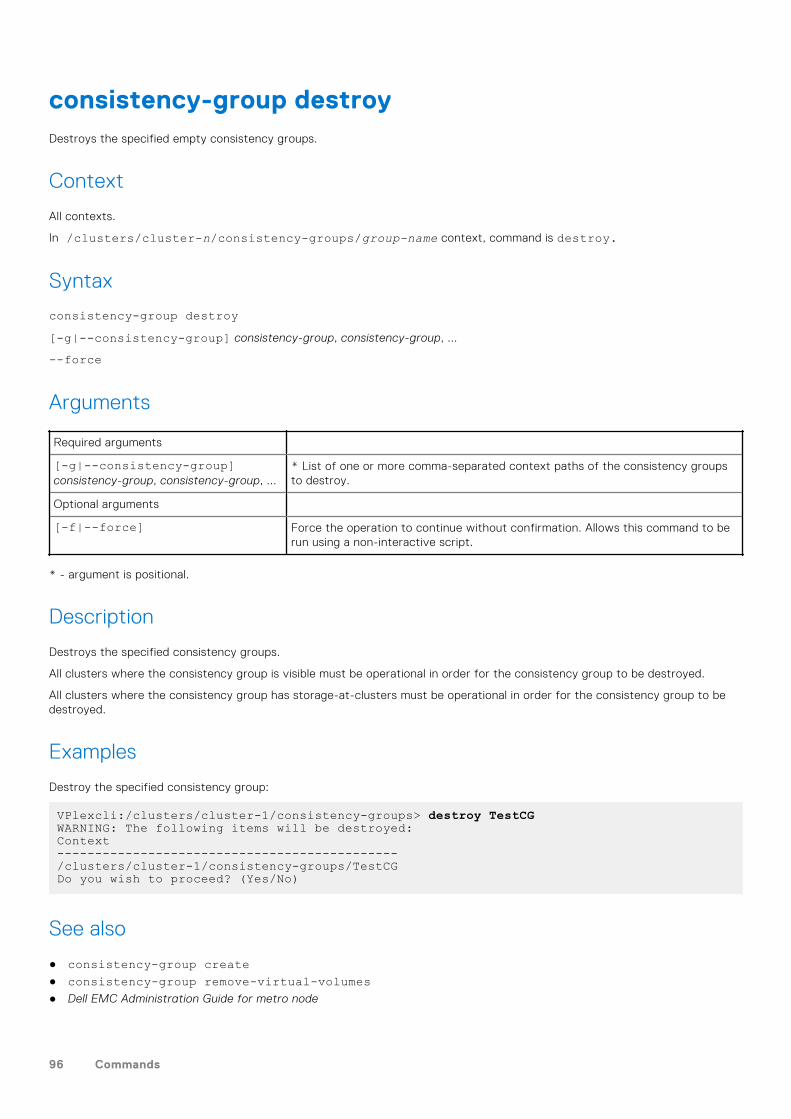
consistency-group destroyDestroys the specified empty consistency groups.
Context
All contexts.
In /clusters/cluster-n/consistency-groups/group-name context, command is destroy.
Syntax
consistency-group destroy[-g|--consistency-group] consistency-group, consistency-group, ...
--force
Arguments
Required arguments
[-g|--consistency-group]consistency-group, consistency-group, ...
* List of one or more comma-separated context paths of the consistency groupsto destroy.
Optional arguments
[-f|--force] Force the operation to continue without confirmation. Allows this command to berun using a non-interactive script.
* - argument is positional.
Description
Destroys the specified consistency groups.
All clusters where the consistency group is visible must be operational in order for the consistency group to be destroyed.
All clusters where the consistency group has storage-at-clusters must be operational in order for the consistency group to bedestroyed.
Examples
Destroy the specified consistency group:
VPlexcli:/clusters/cluster-1/consistency-groups> destroy TestCGWARNING: The following items will be destroyed:Context---------------------------------------------/clusters/cluster-1/consistency-groups/TestCGDo you wish to proceed? (Yes/No)
See also
● consistency-group create● consistency-group remove-virtual-volumes● Dell EMC Administration Guide for metro node
96 Commands
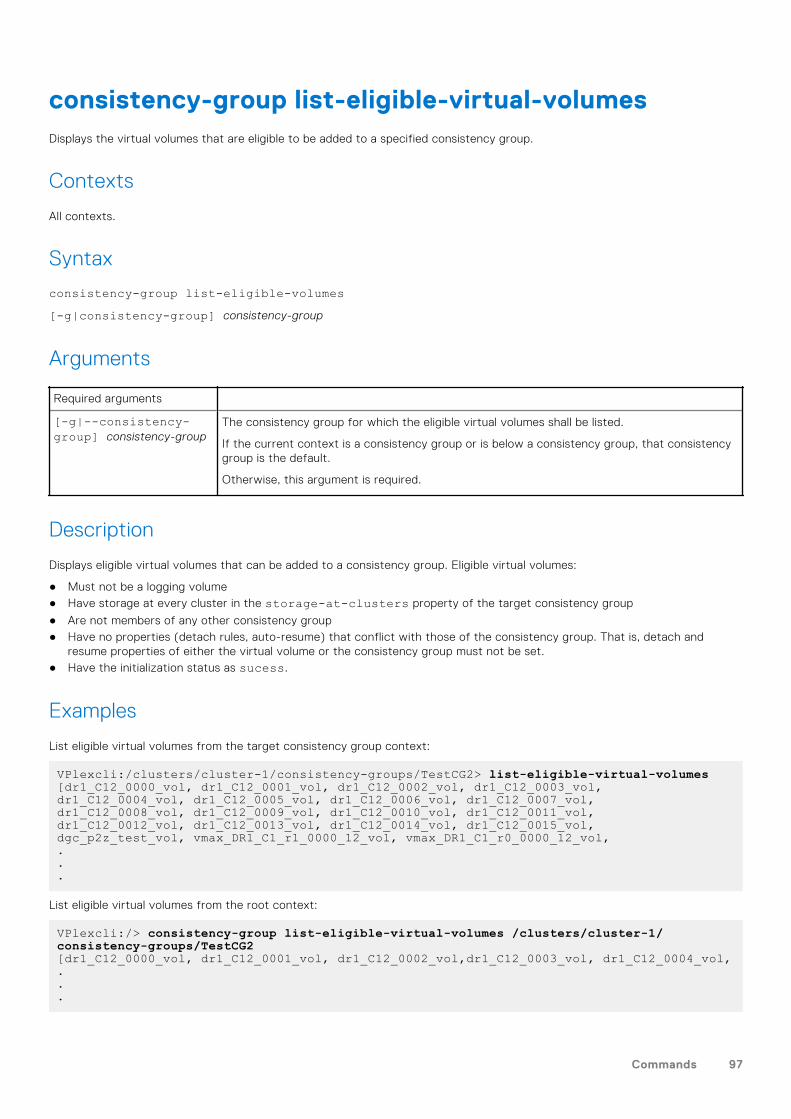
consistency-group list-eligible-virtual-volumesDisplays the virtual volumes that are eligible to be added to a specified consistency group.
Contexts
All contexts.
Syntax
consistency-group list-eligible-volumes[-g|consistency-group] consistency-group
Arguments
Required arguments
[-g|--consistency-group] consistency-group
The consistency group for which the eligible virtual volumes shall be listed.
If the current context is a consistency group or is below a consistency group, that consistencygroup is the default.
Otherwise, this argument is required.
Description
Displays eligible virtual volumes that can be added to a consistency group. Eligible virtual volumes:
● Must not be a logging volume● Have storage at every cluster in the storage-at-clusters property of the target consistency group
● Are not members of any other consistency group● Have no properties (detach rules, auto-resume) that conflict with those of the consistency group. That is, detach and
resume properties of either the virtual volume or the consistency group must not be set.● Have the initialization status as sucess.
Examples
List eligible virtual volumes from the target consistency group context:
VPlexcli:/clusters/cluster-1/consistency-groups/TestCG2> list-eligible-virtual-volumes[dr1_C12_0000_vol, dr1_C12_0001_vol, dr1_C12_0002_vol, dr1_C12_0003_vol, dr1_C12_0004_vol, dr1_C12_0005_vol, dr1_C12_0006_vol, dr1_C12_0007_vol, dr1_C12_0008_vol, dr1_C12_0009_vol, dr1_C12_0010_vol, dr1_C12_0011_vol, dr1_C12_0012_vol, dr1_C12_0013_vol, dr1_C12_0014_vol, dr1_C12_0015_vol, dgc_p2z_test_vol, vmax_DR1_C1_r1_0000_12_vol, vmax_DR1_C1_r0_0000_12_vol,...
List eligible virtual volumes from the root context:
VPlexcli:/> consistency-group list-eligible-virtual-volumes /clusters/cluster-1/consistency-groups/TestCG2[dr1_C12_0000_vol, dr1_C12_0001_vol, dr1_C12_0002_vol,dr1_C12_0003_vol, dr1_C12_0004_vol,...
Commands 97
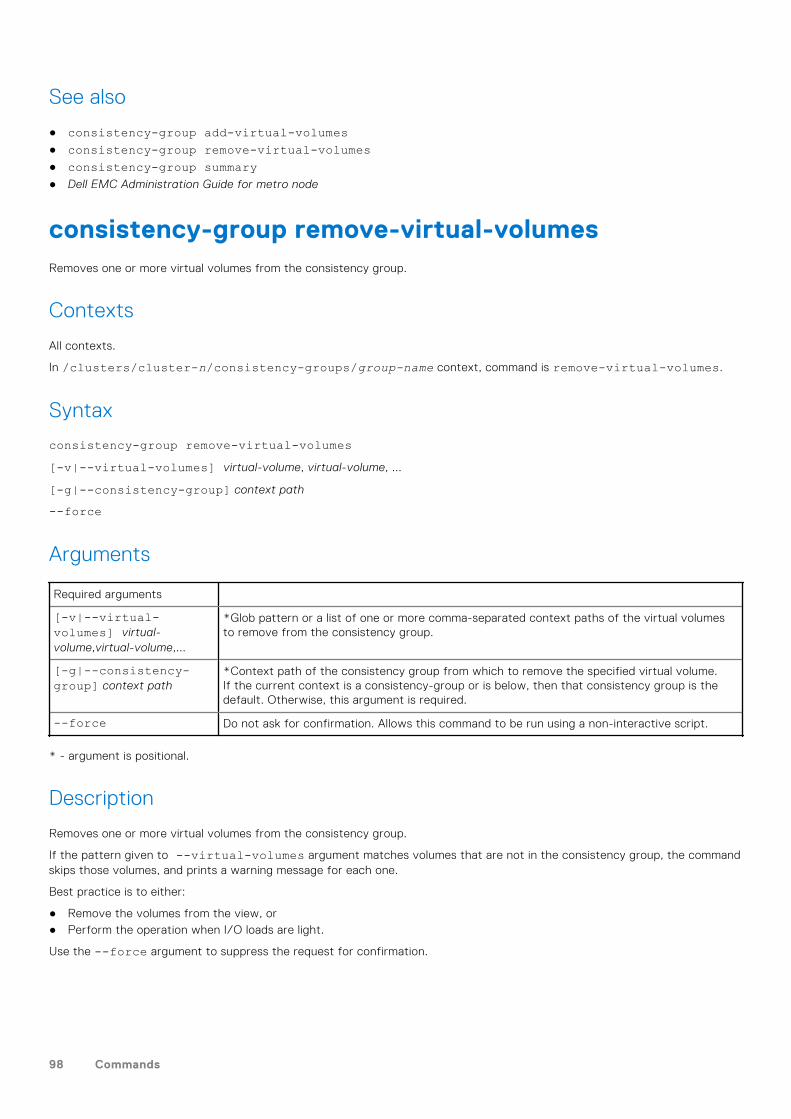
See also
● consistency-group add-virtual-volumes● consistency-group remove-virtual-volumes● consistency-group summary● Dell EMC Administration Guide for metro node
consistency-group remove-virtual-volumesRemoves one or more virtual volumes from the consistency group.
Contexts
All contexts.
In /clusters/cluster-n/consistency-groups/group-name context, command is remove-virtual-volumes.
Syntax
consistency-group remove-virtual-volumes[-v|--virtual-volumes] virtual-volume, virtual-volume, ...
[-g|--consistency-group] context path
--force
Arguments
Required arguments
[-v|--virtual-volumes] virtual-volume,virtual-volume,...
*Glob pattern or a list of one or more comma-separated context paths of the virtual volumesto remove from the consistency group.
[-g|--consistency-group] context path
*Context path of the consistency group from which to remove the specified virtual volume.If the current context is a consistency-group or is below, then that consistency group is thedefault. Otherwise, this argument is required.
--force Do not ask for confirmation. Allows this command to be run using a non-interactive script.
* - argument is positional.
Description
Removes one or more virtual volumes from the consistency group.
If the pattern given to --virtual-volumes argument matches volumes that are not in the consistency group, the commandskips those volumes, and prints a warning message for each one.
Best practice is to either:
● Remove the volumes from the view, or● Perform the operation when I/O loads are light.
Use the --force argument to suppress the request for confirmation.
98 Commands
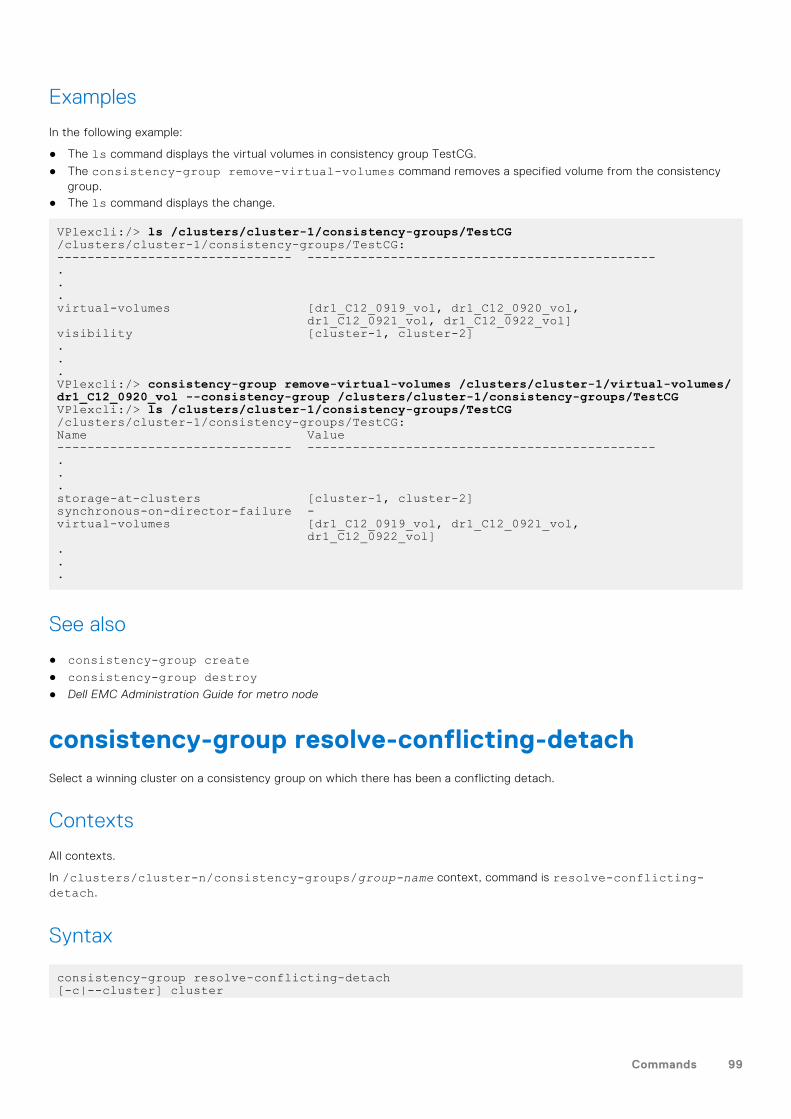
Examples
In the following example:
● The ls command displays the virtual volumes in consistency group TestCG.
● The consistency-group remove-virtual-volumes command removes a specified volume from the consistencygroup.
● The ls command displays the change.
VPlexcli:/> ls /clusters/cluster-1/consistency-groups/TestCG/clusters/cluster-1/consistency-groups/TestCG:------------------------------- ----------------------------------------------...virtual-volumes [dr1_C12_0919_vol, dr1_C12_0920_vol, dr1_C12_0921_vol, dr1_C12_0922_vol]visibility [cluster-1, cluster-2]...VPlexcli:/> consistency-group remove-virtual-volumes /clusters/cluster-1/virtual-volumes/dr1_C12_0920_vol --consistency-group /clusters/cluster-1/consistency-groups/TestCGVPlexcli:/> ls /clusters/cluster-1/consistency-groups/TestCG/clusters/cluster-1/consistency-groups/TestCG:Name Value------------------------------- ----------------------------------------------...storage-at-clusters [cluster-1, cluster-2]synchronous-on-director-failure -virtual-volumes [dr1_C12_0919_vol, dr1_C12_0921_vol, dr1_C12_0922_vol]...
See also
● consistency-group create● consistency-group destroy● Dell EMC Administration Guide for metro node
consistency-group resolve-conflicting-detachSelect a winning cluster on a consistency group on which there has been a conflicting detach.
Contexts
All contexts.
In /clusters/cluster-n/consistency-groups/group-name context, command is resolve-conflicting-detach.
Syntax
consistency-group resolve-conflicting-detach[-c|--cluster] cluster
Commands 99
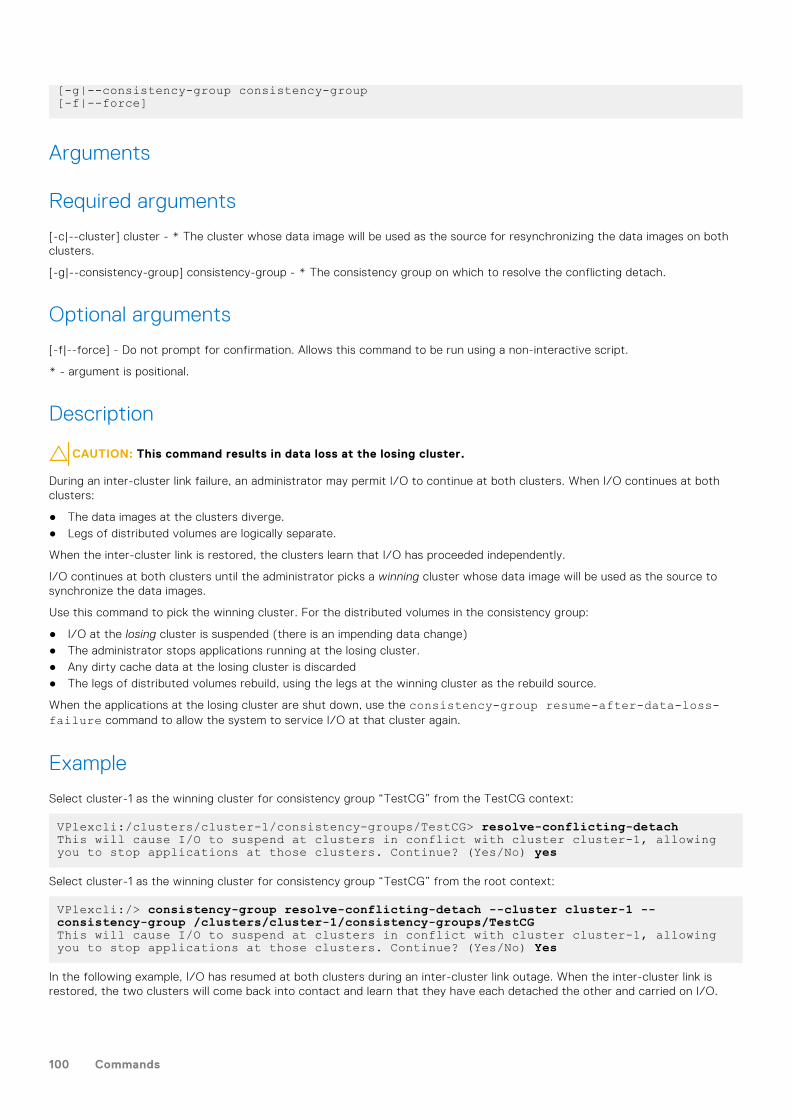
[-g|--consistency-group consistency-group[-f|--force]
Arguments
Required arguments
[-c|--cluster] cluster - * The cluster whose data image will be used as the source for resynchronizing the data images on bothclusters.
[-g|--consistency-group] consistency-group - * The consistency group on which to resolve the conflicting detach.
Optional arguments
[-f|--force] - Do not prompt for confirmation. Allows this command to be run using a non-interactive script.
* - argument is positional.
Description
CAUTION: This command results in data loss at the losing cluster.
During an inter-cluster link failure, an administrator may permit I/O to continue at both clusters. When I/O continues at bothclusters:
● The data images at the clusters diverge.● Legs of distributed volumes are logically separate.
When the inter-cluster link is restored, the clusters learn that I/O has proceeded independently.
I/O continues at both clusters until the administrator picks a winning cluster whose data image will be used as the source tosynchronize the data images.
Use this command to pick the winning cluster. For the distributed volumes in the consistency group:
● I/O at the losing cluster is suspended (there is an impending data change)● The administrator stops applications running at the losing cluster.● Any dirty cache data at the losing cluster is discarded● The legs of distributed volumes rebuild, using the legs at the winning cluster as the rebuild source.
When the applications at the losing cluster are shut down, use the consistency-group resume-after-data-loss-failure command to allow the system to service I/O at that cluster again.
Example
Select cluster-1 as the winning cluster for consistency group “TestCG” from the TestCG context:
VPlexcli:/clusters/cluster-1/consistency-groups/TestCG> resolve-conflicting-detachThis will cause I/O to suspend at clusters in conflict with cluster cluster-1, allowing you to stop applications at those clusters. Continue? (Yes/No) yes
Select cluster-1 as the winning cluster for consistency group “TestCG” from the root context:
VPlexcli:/> consistency-group resolve-conflicting-detach --cluster cluster-1 --consistency-group /clusters/cluster-1/consistency-groups/TestCGThis will cause I/O to suspend at clusters in conflict with cluster cluster-1, allowing you to stop applications at those clusters. Continue? (Yes/No) Yes
In the following example, I/O has resumed at both clusters during an inter-cluster link outage. When the inter-cluster link isrestored, the two clusters will come back into contact and learn that they have each detached the other and carried on I/O.
100 Commands
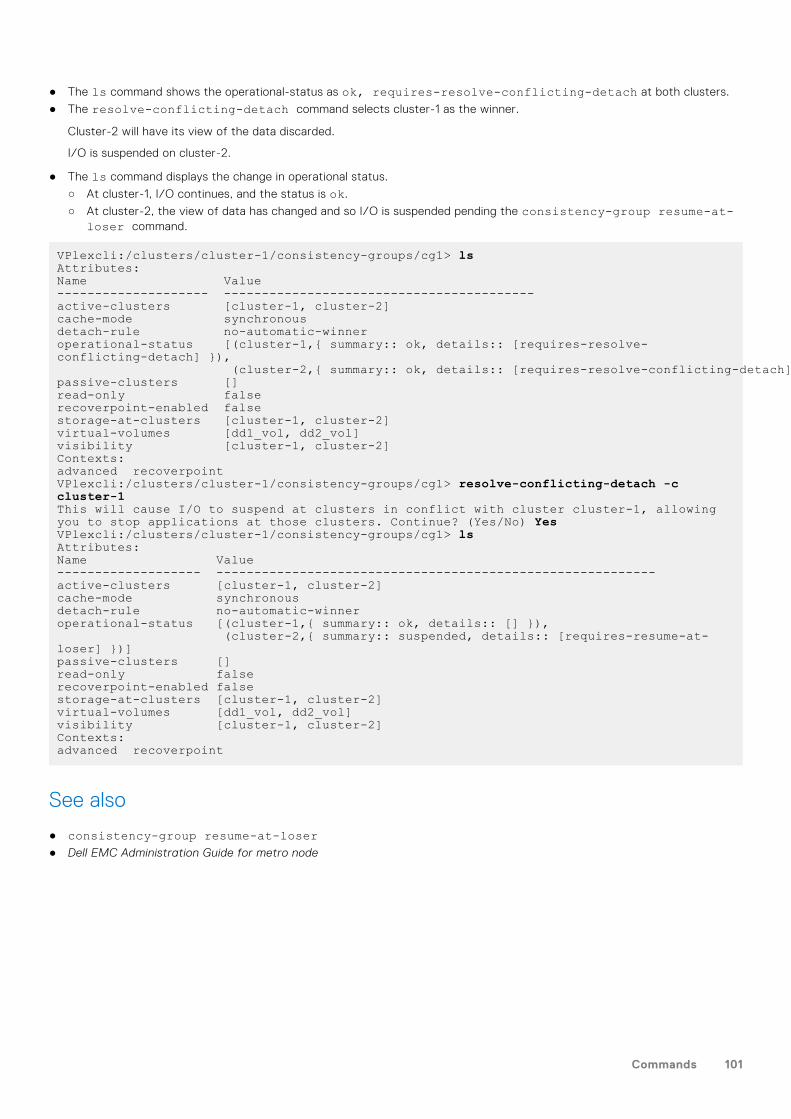
● The ls command shows the operational-status as ok, requires-resolve-conflicting-detach at both clusters.
● The resolve-conflicting-detach command selects cluster-1 as the winner.
Cluster-2 will have its view of the data discarded.
I/O is suspended on cluster-2.
● The ls command displays the change in operational status.
○ At cluster-1, I/O continues, and the status is ok.
○ At cluster-2, the view of data has changed and so I/O is suspended pending the consistency-group resume-at-loser command.
VPlexcli:/clusters/cluster-1/consistency-groups/cg1> lsAttributes:Name Value-------------------- -----------------------------------------active-clusters [cluster-1, cluster-2]cache-mode synchronousdetach-rule no-automatic-winneroperational-status [(cluster-1,{ summary:: ok, details:: [requires-resolve-conflicting-detach] }), (cluster-2,{ summary:: ok, details:: [requires-resolve-conflicting-detach] })]passive-clusters []read-only falserecoverpoint-enabled falsestorage-at-clusters [cluster-1, cluster-2]virtual-volumes [dd1_vol, dd2_vol]visibility [cluster-1, cluster-2]Contexts:advanced recoverpointVPlexcli:/clusters/cluster-1/consistency-groups/cg1> resolve-conflicting-detach -c cluster-1This will cause I/O to suspend at clusters in conflict with cluster cluster-1, allowing you to stop applications at those clusters. Continue? (Yes/No) YesVPlexcli:/clusters/cluster-1/consistency-groups/cg1> lsAttributes:Name Value------------------- ----------------------------------------------------------active-clusters [cluster-1, cluster-2]cache-mode synchronousdetach-rule no-automatic-winneroperational-status [(cluster-1,{ summary:: ok, details:: [] }), (cluster-2,{ summary:: suspended, details:: [requires-resume-at-loser] })]passive-clusters []read-only falserecoverpoint-enabled falsestorage-at-clusters [cluster-1, cluster-2]virtual-volumes [dd1_vol, dd2_vol]visibility [cluster-1, cluster-2]Contexts:advanced recoverpoint
See also
● consistency-group resume-at-loser● Dell EMC Administration Guide for metro node
Commands 101
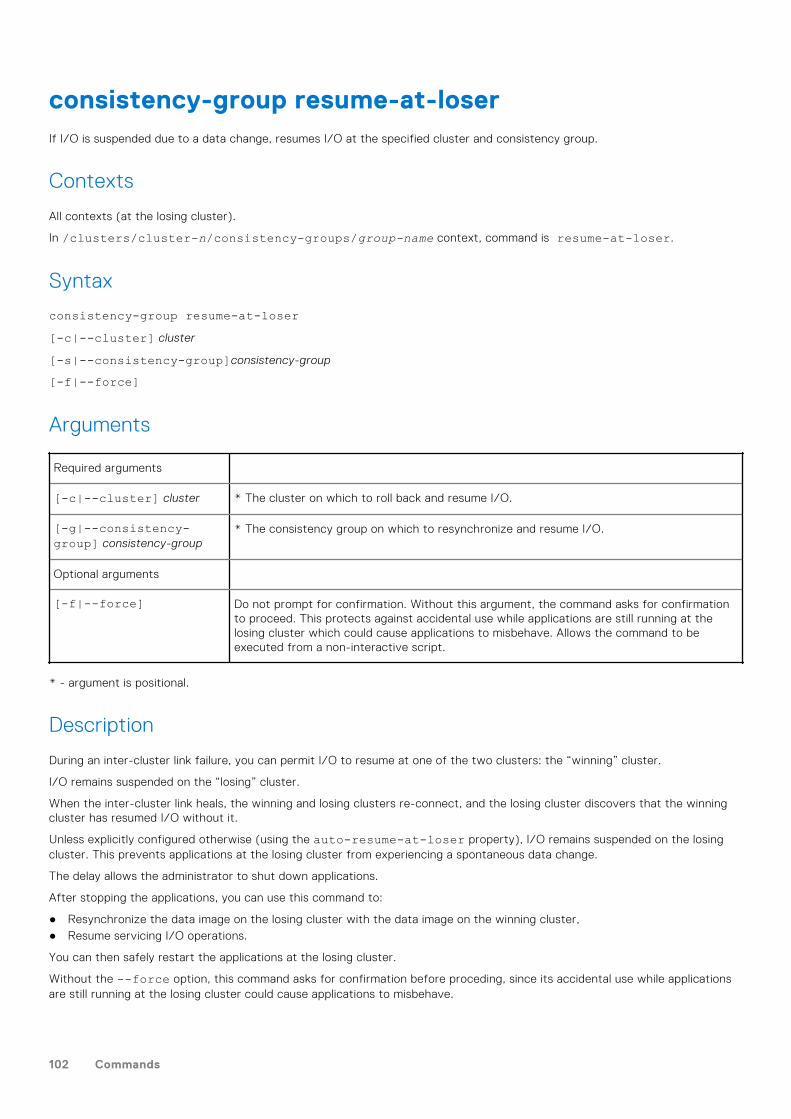
consistency-group resume-at-loserIf I/O is suspended due to a data change, resumes I/O at the specified cluster and consistency group.
Contexts
All contexts (at the losing cluster).
In /clusters/cluster-n/consistency-groups/group-name context, command is resume-at-loser.
Syntax
consistency-group resume-at-loser[-c|--cluster] cluster
[-s|--consistency-group]consistency-group
[-f|--force]
Arguments
Required arguments
[-c|--cluster] cluster * The cluster on which to roll back and resume I/O.
[-g|--consistency-group] consistency-group
* The consistency group on which to resynchronize and resume I/O.
Optional arguments
[-f|--force] Do not prompt for confirmation. Without this argument, the command asks for confirmationto proceed. This protects against accidental use while applications are still running at thelosing cluster which could cause applications to misbehave. Allows the command to beexecuted from a non-interactive script.
* - argument is positional.
Description
During an inter-cluster link failure, you can permit I/O to resume at one of the two clusters: the “winning” cluster.
I/O remains suspended on the “losing” cluster.
When the inter-cluster link heals, the winning and losing clusters re-connect, and the losing cluster discovers that the winningcluster has resumed I/O without it.
Unless explicitly configured otherwise (using the auto-resume-at-loser property), I/O remains suspended on the losingcluster. This prevents applications at the losing cluster from experiencing a spontaneous data change.
The delay allows the administrator to shut down applications.
After stopping the applications, you can use this command to:
● Resynchronize the data image on the losing cluster with the data image on the winning cluster,● Resume servicing I/O operations.
You can then safely restart the applications at the losing cluster.
Without the --force option, this command asks for confirmation before proceding, since its accidental use while applicationsare still running at the losing cluster could cause applications to misbehave.
102 Commands
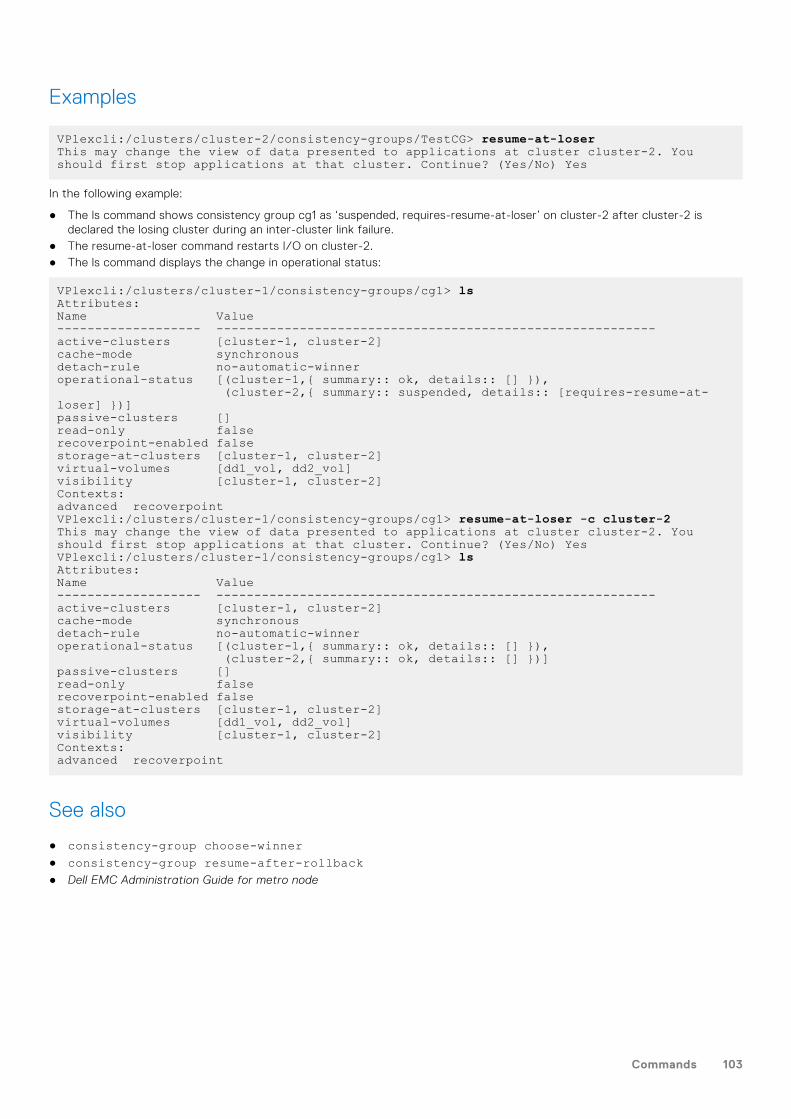
Examples
VPlexcli:/clusters/cluster-2/consistency-groups/TestCG> resume-at-loserThis may change the view of data presented to applications at cluster cluster-2. You should first stop applications at that cluster. Continue? (Yes/No) Yes
In the following example:
● The ls command shows consistency group cg1 as ‘suspended, requires-resume-at-loser’ on cluster-2 after cluster-2 isdeclared the losing cluster during an inter-cluster link failure.
● The resume-at-loser command restarts I/O on cluster-2.● The ls command displays the change in operational status:
VPlexcli:/clusters/cluster-1/consistency-groups/cg1> lsAttributes:Name Value------------------- ----------------------------------------------------------active-clusters [cluster-1, cluster-2]cache-mode synchronousdetach-rule no-automatic-winneroperational-status [(cluster-1,{ summary:: ok, details:: [] }), (cluster-2,{ summary:: suspended, details:: [requires-resume-at-loser] })]passive-clusters []read-only falserecoverpoint-enabled falsestorage-at-clusters [cluster-1, cluster-2]virtual-volumes [dd1_vol, dd2_vol]visibility [cluster-1, cluster-2]Contexts:advanced recoverpointVPlexcli:/clusters/cluster-1/consistency-groups/cg1> resume-at-loser -c cluster-2This may change the view of data presented to applications at cluster cluster-2. You should first stop applications at that cluster. Continue? (Yes/No) YesVPlexcli:/clusters/cluster-1/consistency-groups/cg1> lsAttributes:Name Value------------------- ----------------------------------------------------------active-clusters [cluster-1, cluster-2]cache-mode synchronousdetach-rule no-automatic-winneroperational-status [(cluster-1,{ summary:: ok, details:: [] }), (cluster-2,{ summary:: ok, details:: [] })]passive-clusters []read-only falserecoverpoint-enabled falsestorage-at-clusters [cluster-1, cluster-2]virtual-volumes [dd1_vol, dd2_vol]visibility [cluster-1, cluster-2]Contexts:advanced recoverpoint
See also
● consistency-group choose-winner● consistency-group resume-after-rollback● Dell EMC Administration Guide for metro node
Commands 103
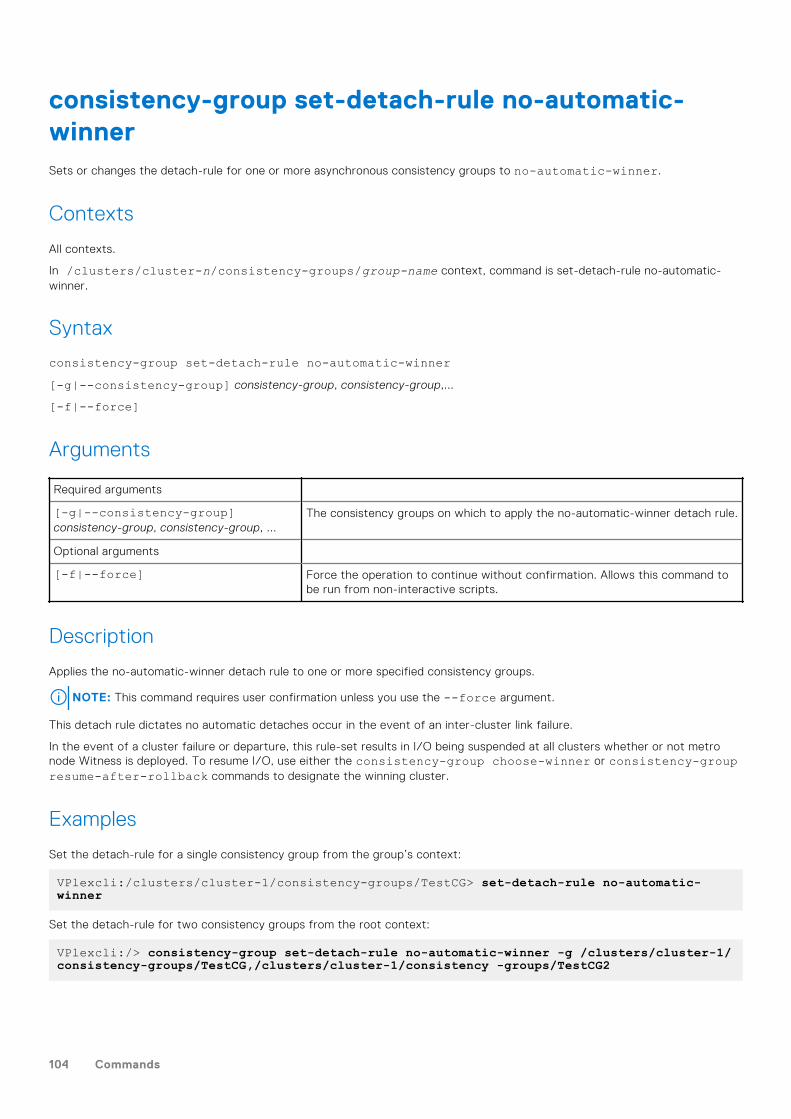
consistency-group set-detach-rule no-automatic-winnerSets or changes the detach-rule for one or more asynchronous consistency groups to no-automatic-winner.
Contexts
All contexts.
In /clusters/cluster-n/consistency-groups/group-name context, command is set-detach-rule no-automatic-winner.
Syntax
consistency-group set-detach-rule no-automatic-winner[-g|--consistency-group] consistency-group, consistency-group,...
[-f|--force]
Arguments
Required arguments
[-g|--consistency-group]consistency-group, consistency-group, ...
The consistency groups on which to apply the no-automatic-winner detach rule.
Optional arguments
[-f|--force] Force the operation to continue without confirmation. Allows this command tobe run from non-interactive scripts.
Description
Applies the no-automatic-winner detach rule to one or more specified consistency groups.
NOTE: This command requires user confirmation unless you use the --force argument.
This detach rule dictates no automatic detaches occur in the event of an inter-cluster link failure.
In the event of a cluster failure or departure, this rule-set results in I/O being suspended at all clusters whether or not metronode Witness is deployed. To resume I/O, use either the consistency-group choose-winner or consistency-groupresume-after-rollback commands to designate the winning cluster.
Examples
Set the detach-rule for a single consistency group from the group’s context:
VPlexcli:/clusters/cluster-1/consistency-groups/TestCG> set-detach-rule no-automatic-winner
Set the detach-rule for two consistency groups from the root context:
VPlexcli:/> consistency-group set-detach-rule no-automatic-winner -g /clusters/cluster-1/consistency-groups/TestCG,/clusters/cluster-1/consistency -groups/TestCG2
104 Commands
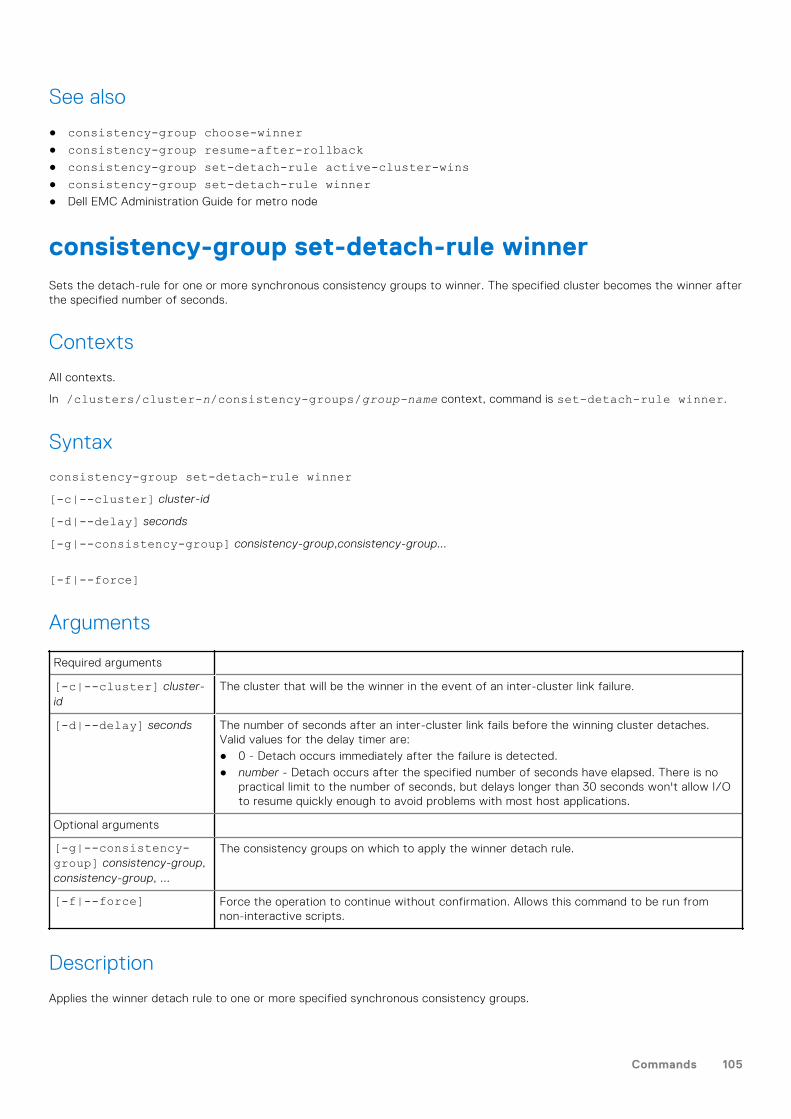
See also
● consistency-group choose-winner● consistency-group resume-after-rollback● consistency-group set-detach-rule active-cluster-wins● consistency-group set-detach-rule winner● Dell EMC Administration Guide for metro node
consistency-group set-detach-rule winnerSets the detach-rule for one or more synchronous consistency groups to winner. The specified cluster becomes the winner afterthe specified number of seconds.
Contexts
All contexts.
In /clusters/cluster-n/consistency-groups/group-name context, command is set-detach-rule winner.
Syntax
consistency-group set-detach-rule winner[-c|--cluster] cluster-id
[-d|--delay] seconds
[-g|--consistency-group] consistency-group,consistency-group...
[-f|--force]
Arguments
Required arguments
[-c|--cluster] cluster-id
The cluster that will be the winner in the event of an inter-cluster link failure.
[-d|--delay] seconds The number of seconds after an inter-cluster link fails before the winning cluster detaches.Valid values for the delay timer are:● 0 - Detach occurs immediately after the failure is detected.● number - Detach occurs after the specified number of seconds have elapsed. There is no
practical limit to the number of seconds, but delays longer than 30 seconds won't allow I/Oto resume quickly enough to avoid problems with most host applications.
Optional arguments
[-g|--consistency-group] consistency-group,consistency-group, ...
The consistency groups on which to apply the winner detach rule.
[-f|--force] Force the operation to continue without confirmation. Allows this command to be run fromnon-interactive scripts.
Description
Applies the winner detach rule to one or more specified synchronous consistency groups.
Commands 105

NOTE: This command requires user confirmation unless the --force argument is used.
In the event of a cluster failure or departure, this rule-set results in I/O continuing on the selected cluster only. I/O will besuspended at all other clusters. If metro node Witness is deployed it will overrides this selection if the selected cluster has failed.
Examples
Set the detach-rule for a single consistency group from the group’s context:
VPlexcli:/clusters/cluster-1/consistency-groups/TestCG> set-detach-rule winner --cluster cluster-1 --delay 5s
Set the detach-rule for two consistency groups from the root context:
VPlexcli:/> consistency-group set-detach-rule winner --cluster cluster-1 --delay 5s --consistency-groups TestCG, TestCG2
See also
● consistency-group set-detach-rule active-cluster-wins● consistency-group set-detach-rule no-automatic-winner● Dell EMC Administration Guide for metro node
consistency-group summaryDisplays a summary of all the consistency groups with a state other than OK.
Contexts
All contexts.
Syntax
consistency-group summary
Description
Displays all the consistency groups with a state other than 'OK' and the consistency groups at the risk of a rollback.
Example
Display a summary of unhealthy consistency groups:
VPlexcli:/> consistency-group summary1 consistency groups have status not 'OK'.Consistency Goup Operational Status Status Active PassiveName ------------------ Detailed Cluster Cluster------------------ ------------------ ------------- ----------- -----------GRP3 Suspended0 consistency groups have risk of roll back.
106 Commands
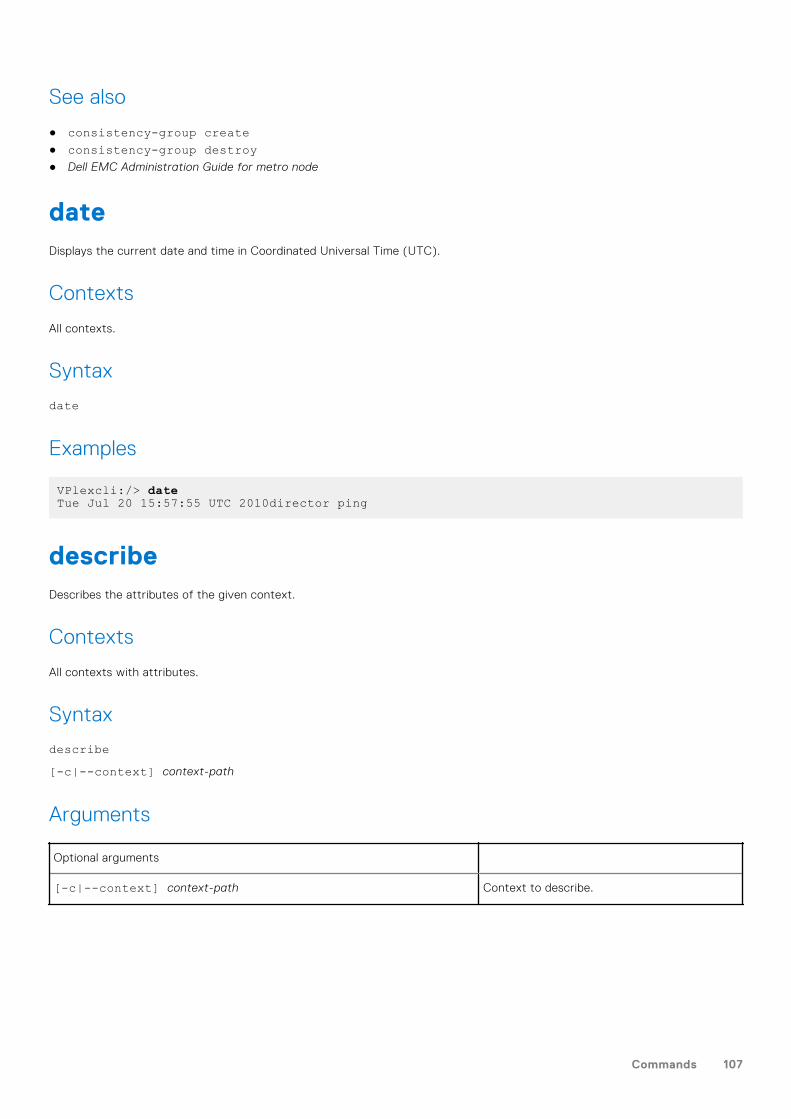
See also
● consistency-group create● consistency-group destroy● Dell EMC Administration Guide for metro node
dateDisplays the current date and time in Coordinated Universal Time (UTC).
Contexts
All contexts.
Syntax
date
Examples
VPlexcli:/> dateTue Jul 20 15:57:55 UTC 2010director ping
describeDescribes the attributes of the given context.
Contexts
All contexts with attributes.
Syntax
describe[-c|--context] context-path
Arguments
Optional arguments
[-c|--context] context-path Context to describe.
Commands 107
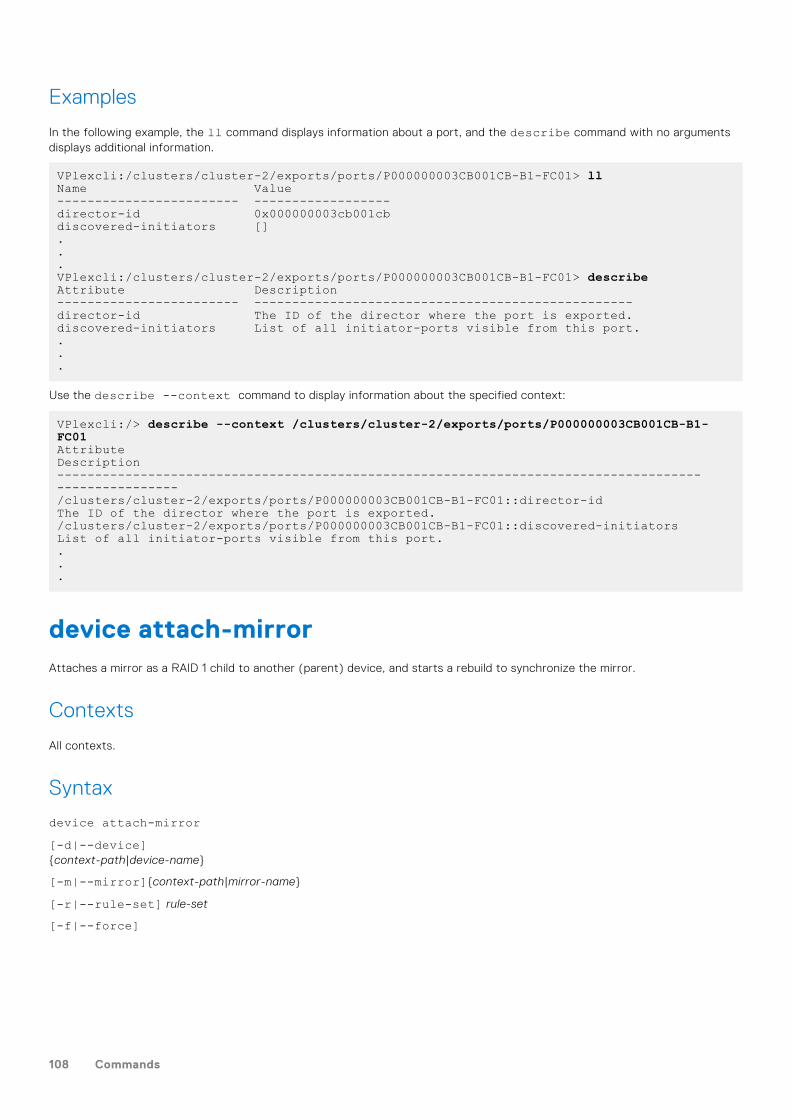
Examples
In the following example, the ll command displays information about a port, and the describe command with no argumentsdisplays additional information.
VPlexcli:/clusters/cluster-2/exports/ports/P000000003CB001CB-B1-FC01> llName Value------------------------ ------------------director-id 0x000000003cb001cbdiscovered-initiators []...VPlexcli:/clusters/cluster-2/exports/ports/P000000003CB001CB-B1-FC01> describeAttribute Description------------------------ --------------------------------------------------director-id The ID of the director where the port is exported.discovered-initiators List of all initiator-ports visible from this port....
Use the describe --context command to display information about the specified context:
VPlexcli:/> describe --context /clusters/cluster-2/exports/ports/P000000003CB001CB-B1-FC01Attribute Description------------------------------------------------------------------------------------- ----------------/clusters/cluster-2/exports/ports/P000000003CB001CB-B1-FC01::director-id The ID of the director where the port is exported./clusters/cluster-2/exports/ports/P000000003CB001CB-B1-FC01::discovered-initiators List of all initiator-ports visible from this port....
device attach-mirrorAttaches a mirror as a RAID 1 child to another (parent) device, and starts a rebuild to synchronize the mirror.
Contexts
All contexts.
Syntax
device attach-mirror[-d|--device]{context-path|device-name}
[-m|--mirror]{context-path|mirror-name}
[-r|--rule-set] rule-set
[-f|--force]
108 Commands
Arguments
Required arguments
[-d|--device]context-path ordevice-name
* Name or context path of the device to which to attach the mirror. Does not have to be a top-leveldevice. If the device name is used, verify that the name is unique throughout the metro node, includinglocal devices on other clusters.
Optional arguments
[-m|--mirror]context-path ormirror-name
* Name or context path of the mirror to detach. Does not need to be a top-level device. If the name ofa device is used, ensure the device name is not ambiguous, For example, ensure that the same devicename is not used by local devices in different clusters.
[-r|--rule-set]rule-set
Rule-set to apply to the distributed device that is created when a mirror is added to a local device.
[-f|--force] When --force is set, do not ask for confirmation when attaching a mirror. Allows this command tobe run using a non-interactive script. If the --force argument is not used, prompts for confirmationin two circumstances when the mirror is remote and the parent device must be transformed into adistributed device.
* - argument is positional.
Description
If the parent device is a RAID 0 or RAID C, it is converted to a RAID 1.
If the parent device and mirror device are from different clusters, a distributed device is created.
A storage-volume extent cannot be used as a mirror if the parent device is a distributed-device, or if the parent device is at adifferent cluster than the storage-volume extent.
If you do not specify the --rule-set argument, metro node assigns a default rule-set to the distributed device as follows:
● If the parent device has a volume, the distributed device inherits the rule-set of the (exported) parent.● If the parent device does not have a volume, the cluster that is local to the management server is assumed to be the winner.
Once determined, metro node displays a notice as to which rule-set the created distributed-device has been assigned.
When attaching a remote mirror to a local device, or when attaching a new mirror to a distributed device, both operationsconsume slots. Both scenarios result in the same following error message:
VPlexcli:/clusters/cluster-2/storage-elements/extents> device attach-mirror -d rhyan_dr_test -m rhyan_mig_src_0000device attach-mirror: Evaluation of <<device attach-mirror -d dr_test -m mig_src_0000>> failed.cause: Unable to attach mirror 'mig_src_0000' to device 'dr_test'.cause: Unable to attach mirror 'mig_src_0000' to distributed Device 'dr_test'.cause: Firmware command error.cause: Active metadata device does not have a free slot.
Refer to the troubleshooting section of the metro node procedures in the SolVe Desktop for instructions on increasing thenumber of slots.
NOTE: If the RAID 1 device is added to a consistency group, the consistency group’s detach rule overrides the device’s
detach rule.
Use the rebuild status command to display the rebuild’s progress.
● The rule set that will be applied to the new distributed device potentially allows conflicting detaches.
Homogeneous array requirement for thin volumes
To preserve thinness of the new RAID-1 device where the parent device is created on a thin volume and is thin-capable, themirror device must be created from the same storage-array-family as the parent device. If the user tries to attach a mirror leg
Commands 109
from a dissimilar array-family, the command displays a warning that the thin-capability of the RAID-1 device will be lost and itcan render the virtual volume to be thin disabled. The following is an example of the warning message:
VPlexcli:/> device attach-mirror --device xio_device --mirror vnx_deviceThin-capability is only supported with homogeneous storage-array types. The top-level device'xio_device' is supported by XtremIO but the mirror 'vnx_device' is supported by CLARiiON.Since XtremIO and CLARiiON are not homogeneous, the top-level device will lose thin-capabilityafter the new mirror is attached. Do you wish to proceed? (Yes/No) No
device attach-mirror: Evaluation of <<device attach-mirror --device xio_device --mirror vnx_device>> failed.cause: Unable to attach mirror 'vnx_device' to device 'xio_device'.cause: Operation was halted by the user
VPlexcli:/>
Example
Attach a mirror without specifying a rule-set (allow metro node to select the rule-set):
VPlexcli:/clusters/cluster-1/devices> virtual-volume create test_r0c_1VPlexcli:/clusters/cluster-1/devices> device attach-mirror --device test_r0c_1 --mirror test_r0c_2Distributed device 'regression_r0c_1' is using rule-set 'cluster-1-detaches'.
Attach a mirror:
VPlexcli:/> device attach-mirror --device /clusters/cluster-1/devices/site1device0 --mirror /clusters/cluster-1/devices/site1mirror
See also
● consistency-group set-detach-rule winner● device detach-mirror● rebuild status
device collapseCollapses a one-legged device until a device with two or more children is reached.
Contexts
All contexts.
Syntax
device collapse[-d|--device] [context-path|device-name]
110 Commands
Arguments
Required arguments
[-d|--device][context-path|device-name]
* Name or context path of the device to collapse.
Does not have to be a top-level device. If the device name is used, verify that the name is uniquethroughout the metro node, including local devices on other clusters.
* - argument is positional.
Description
If a RAID 1 device is left with only a single child (after removing other children), use the device collapse command tocollapse the remaining structure. For example:
If RAID 1 device “A” has two child RAID 1 devices “B” and “C”, and child device “C” is removed, A is now a one-legged device,but with an extra layer of abstraction:
A | B ../ \..
Use device collapse to remove this extra layer, and change the structure into:
A ../ \..
Applicable to one-legged devices that are not top-level.
Examples
VPlexcli:/clusters/cluster-1/devices> device collapse --device /clusters/cluster-1/devices/A
device detach-mirrorRemoves (detaches) a mirror from a RAID-1 device.
Contexts
All contexts.
Syntax
device detach-mirror[-d|--device] [context-path|device-name]
[-m|--mirror] [context-path|mirror-name]
[-s|--slot] slot-number
[-i|--discard][-f|--force]
Commands 111
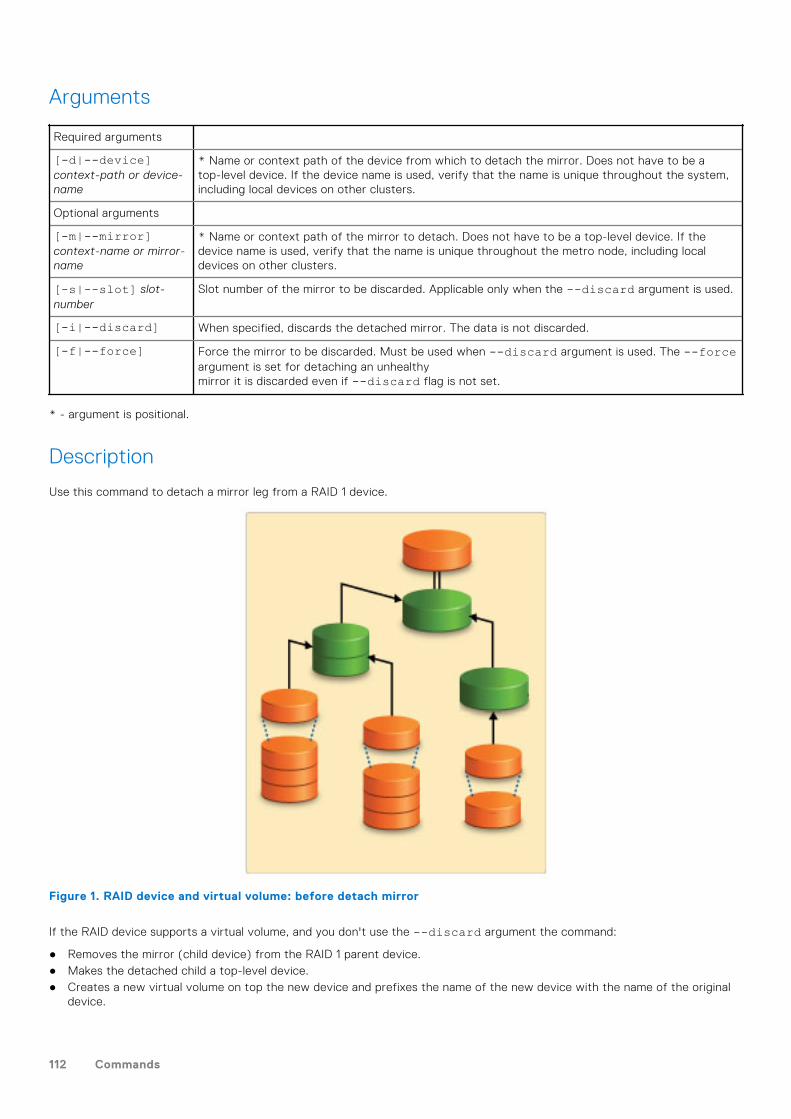
Arguments
Required arguments
[-d|--device]context-path or device-name
* Name or context path of the device from which to detach the mirror. Does not have to be atop-level device. If the device name is used, verify that the name is unique throughout the system,including local devices on other clusters.
Optional arguments
[-m|--mirror]context-name or mirror-name
* Name or context path of the mirror to detach. Does not have to be a top-level device. If thedevice name is used, verify that the name is unique throughout the metro node, including localdevices on other clusters.
[-s|--slot] slot-number
Slot number of the mirror to be discarded. Applicable only when the --discard argument is used.
[-i|--discard] When specified, discards the detached mirror. The data is not discarded.
[-f|--force] Force the mirror to be discarded. Must be used when --discard argument is used. The --forceargument is set for detaching an unhealthymirror it is discarded even if --discard flag is not set.
* - argument is positional.
Description
Use this command to detach a mirror leg from a RAID 1 device.
Figure 1. RAID device and virtual volume: before detach mirror
If the RAID device supports a virtual volume, and you don't use the --discard argument the command:
● Removes the mirror (child device) from the RAID 1 parent device.● Makes the detached child a top-level device.● Creates a new virtual volume on top the new device and prefixes the name of the new device with the name of the original
device.
112 Commands
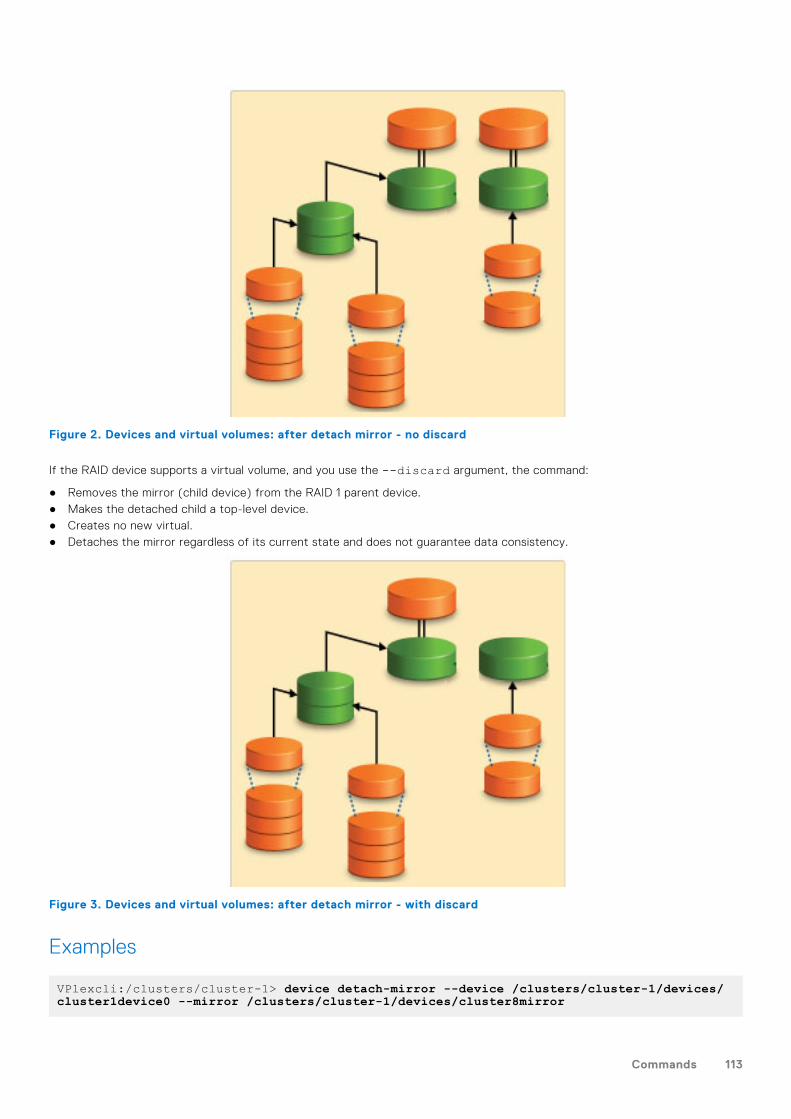
Figure 2. Devices and virtual volumes: after detach mirror - no discard
If the RAID device supports a virtual volume, and you use the --discard argument, the command:
● Removes the mirror (child device) from the RAID 1 parent device.● Makes the detached child a top-level device.● Creates no new virtual.● Detaches the mirror regardless of its current state and does not guarantee data consistency.
Figure 3. Devices and virtual volumes: after detach mirror - with discard
Examples
VPlexcli:/clusters/cluster-1> device detach-mirror --device /clusters/cluster-1/devices/cluster1device0 --mirror /clusters/cluster-1/devices/cluster8mirror
Commands 113
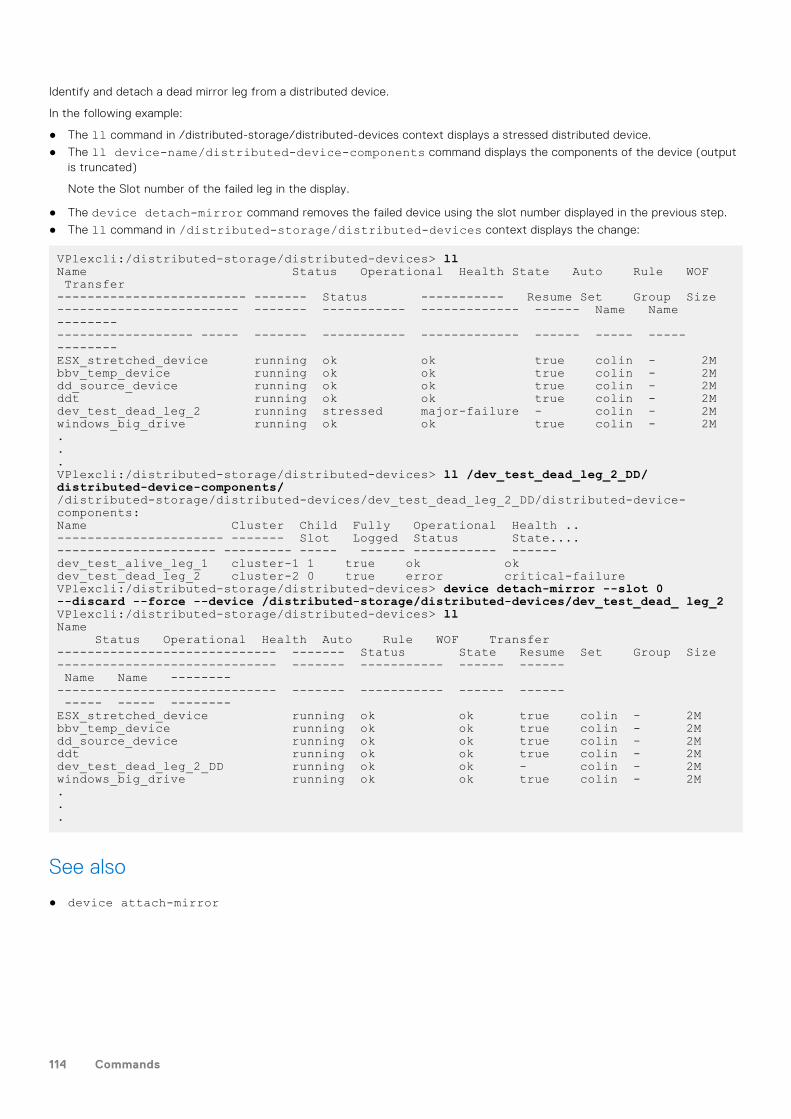
Identify and detach a dead mirror leg from a distributed device.
In the following example:
● The ll command in /distributed-storage/distributed-devices context displays a stressed distributed device.
● The ll device-name/distributed-device-components command displays the components of the device (outputis truncated)
Note the Slot number of the failed leg in the display.
● The device detach-mirror command removes the failed device using the slot number displayed in the previous step.
● The ll command in /distributed-storage/distributed-devices context displays the change:
VPlexcli:/distributed-storage/distributed-devices> llName Status Operational Health State Auto Rule WOF Transfer------------------------- ------- Status ----------- Resume Set Group Size------------------------ ------- ----------- ------------- ------ Name Name -------------------------- ----- ------- ----------- ------------- ------ ----- ----- --------ESX_stretched_device running ok ok true colin - 2Mbbv_temp_device running ok ok true colin - 2Mdd_source_device running ok ok true colin - 2Mddt running ok ok true colin - 2Mdev_test_dead_leg_2 running stressed major-failure - colin - 2Mwindows_big_drive running ok ok true colin - 2M...VPlexcli:/distributed-storage/distributed-devices> ll /dev_test_dead_leg_2_DD/distributed-device-components//distributed-storage/distributed-devices/dev_test_dead_leg_2_DD/distributed-device-components:Name Cluster Child Fully Operational Health ..---------------------- ------- Slot Logged Status State....--------------------- --------- ----- ------ ----------- ------dev_test_alive_leg_1 cluster-1 1 true ok okdev_test_dead_leg_2 cluster-2 0 true error critical-failureVPlexcli:/distributed-storage/distributed-devices> device detach-mirror --slot 0 --discard --force --device /distributed-storage/distributed-devices/dev_test_dead_ leg_2VPlexcli:/distributed-storage/distributed-devices> llName Status Operational Health Auto Rule WOF Transfer----------------------------- ------- Status State Resume Set Group Size----------------------------- ------- ----------- ------ ------ Name Name ------------------------------------- ------- ----------- ------ ------ ----- ----- --------ESX_stretched_device running ok ok true colin - 2Mbbv_temp_device running ok ok true colin - 2Mdd_source_device running ok ok true colin - 2Mddt running ok ok true colin - 2Mdev_test_dead_leg_2_DD running ok ok - colin - 2Mwindows_big_drive running ok ok true colin - 2M...
See also
● device attach-mirror
114 Commands
device mirror-isolation auto-unisolation disableDisables mirror auto-unisolation.
Contexts
All contexts.
Syntax
device mirror-isolation auto-unisolation disable[-f|--force][-h|--help][--verbose]
Arguments
Optional arguments
[-f|--force] Forces the operation to continue without confirmation.
[-h|--help] Displays command line help.
[--verbose] Provides more output during command execution. This may not have any effect for some commands.
Description
Mirror isolation provides a mechanism to automatically unisolate mirrors that were previously isolated. When mirror isolationfeature is enabled, disabling mirror auto-unisolation will prevent the system from automatically unisolating any isolated mirrorswhose underlying storage-volume’s performance is now in the acceptable range.
For the option to manually unisolate the mirror, follow the troubleshooting procedure for metro node in the SolVe Desktop.
Examples
Shows the result when the command is executed on all clusters when mirror isolation is disabled:
VPlexcli:/> device mirror-isolation auto-unisolation disableMirror isolation provides a mechanism to automatically unisolate mirrors that were previously isolated. This operation will prevent the system from automatically unisolating the underlying storage-volumes once their performance is in the acceptable range. You can manually unisolate the mirror by following the troubleshooting procedure.Continue to disable auto-unisolation? (Yes/No) yAuto-unisolation is disabled on clusters cluster-1,cluster-2.
Shows the command executed with the --force option, when the mirror-isolation feature is disabled:
VPlexcli:/> device mirror-isolation auto-unisolation disable -fMirror isolation is not enabled on clusters cluster-1,cluster-2.Mirror isolation provides a mechanism to automatically unisolate mirrors that were previously isolated. When mirror isolation is enabled, this operation will prevent the system from automatically unisolating the underlying storage-volumes once their performance is in the acceptable range. You can manually unisolate the mirror by following the troubleshooting procedure.Auto-unisolation is disabled on clusters cluster-1,cluster-2.
Commands 115
Shows auto-unisolation was not disabled because the feature is not supported:
VPlexcli:/> device mirror-isolation auto-unisolation disableMirror isolation is not enabled on clusters cluster-1,cluster-2.Mirror isolation provides a mechanism to automatically unisolate mirrors that were previously isolated. When mirror isolation is enabled, this operation will prevent the system from automatically unisolating the underlying storage-volumes once their performance is in the acceptable range. You can manually unisolate the mirror by following the troubleshooting procedure.Continue to disable auto-unisolation? (Yes/No) ydevice mirror-isolation auto-unisolation disable: Evaluation of <<device mirror-isolationauto-unisolation disable>> failed.cause: Could not disable auto unisolation.cause: Could not disable auto unisolation. Modifying auto unisolation is not supported by this version of firmware.
Shows auto-unisolation failed because one cluster is not available:
VPlexcli:/> device mirror-isolation auto-unisolation disabledevice mirror-isolation auto-unisolation disable: Evaluation of <<device mirror-isolation auto-unisolation disable>> failed.cause: Could not disable auto unisolation.cause: Firmware command error.cause: communication error recently.
See also
● device mirror-isolation auto-unisolation enable● device mirror-isolation disable● device mirror-isolation enable● device mirror-isolation show● Dell EMC Administration Guide for metro node● Dell EMC metro node Procedures in SolVe Desktop
device mirror-isolation auto-unisolation enableEnables mirror auto-unisolation.
Contexts
All contexts.
Syntax
device mirror-isolation auto-unisolation enable[-h|--help][--verbose]
Arguments
Optional arguments
[-h|--help] Displays command line help.
116 Commands
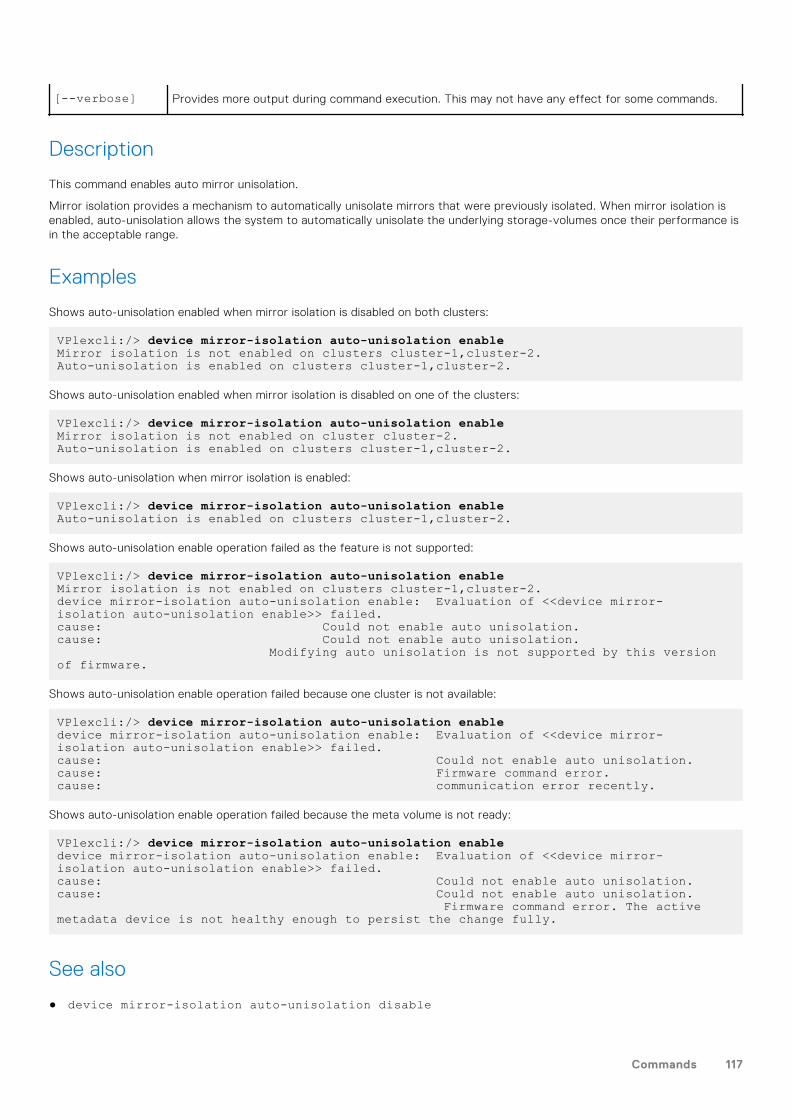
[--verbose] Provides more output during command execution. This may not have any effect for some commands.
Description
This command enables auto mirror unisolation.
Mirror isolation provides a mechanism to automatically unisolate mirrors that were previously isolated. When mirror isolation isenabled, auto-unisolation allows the system to automatically unisolate the underlying storage-volumes once their performance isin the acceptable range.
Examples
Shows auto-unisolation enabled when mirror isolation is disabled on both clusters:
VPlexcli:/> device mirror-isolation auto-unisolation enableMirror isolation is not enabled on clusters cluster-1,cluster-2.Auto-unisolation is enabled on clusters cluster-1,cluster-2.
Shows auto-unisolation enabled when mirror isolation is disabled on one of the clusters:
VPlexcli:/> device mirror-isolation auto-unisolation enableMirror isolation is not enabled on cluster cluster-2.Auto-unisolation is enabled on clusters cluster-1,cluster-2.
Shows auto-unisolation when mirror isolation is enabled:
VPlexcli:/> device mirror-isolation auto-unisolation enableAuto-unisolation is enabled on clusters cluster-1,cluster-2.
Shows auto-unisolation enable operation failed as the feature is not supported:
VPlexcli:/> device mirror-isolation auto-unisolation enableMirror isolation is not enabled on clusters cluster-1,cluster-2.device mirror-isolation auto-unisolation enable: Evaluation of <<device mirror-isolation auto-unisolation enable>> failed.cause: Could not enable auto unisolation.cause: Could not enable auto unisolation. Modifying auto unisolation is not supported by this version of firmware.
Shows auto-unisolation enable operation failed because one cluster is not available:
VPlexcli:/> device mirror-isolation auto-unisolation enabledevice mirror-isolation auto-unisolation enable: Evaluation of <<device mirror-isolation auto-unisolation enable>> failed.cause: Could not enable auto unisolation.cause: Firmware command error.cause: communication error recently.
Shows auto-unisolation enable operation failed because the meta volume is not ready:
VPlexcli:/> device mirror-isolation auto-unisolation enabledevice mirror-isolation auto-unisolation enable: Evaluation of <<device mirror-isolation auto-unisolation enable>> failed.cause: Could not enable auto unisolation.cause: Could not enable auto unisolation. Firmware command error. The active metadata device is not healthy enough to persist the change fully.
See also
● device mirror-isolation auto-unisolation disable
Commands 117
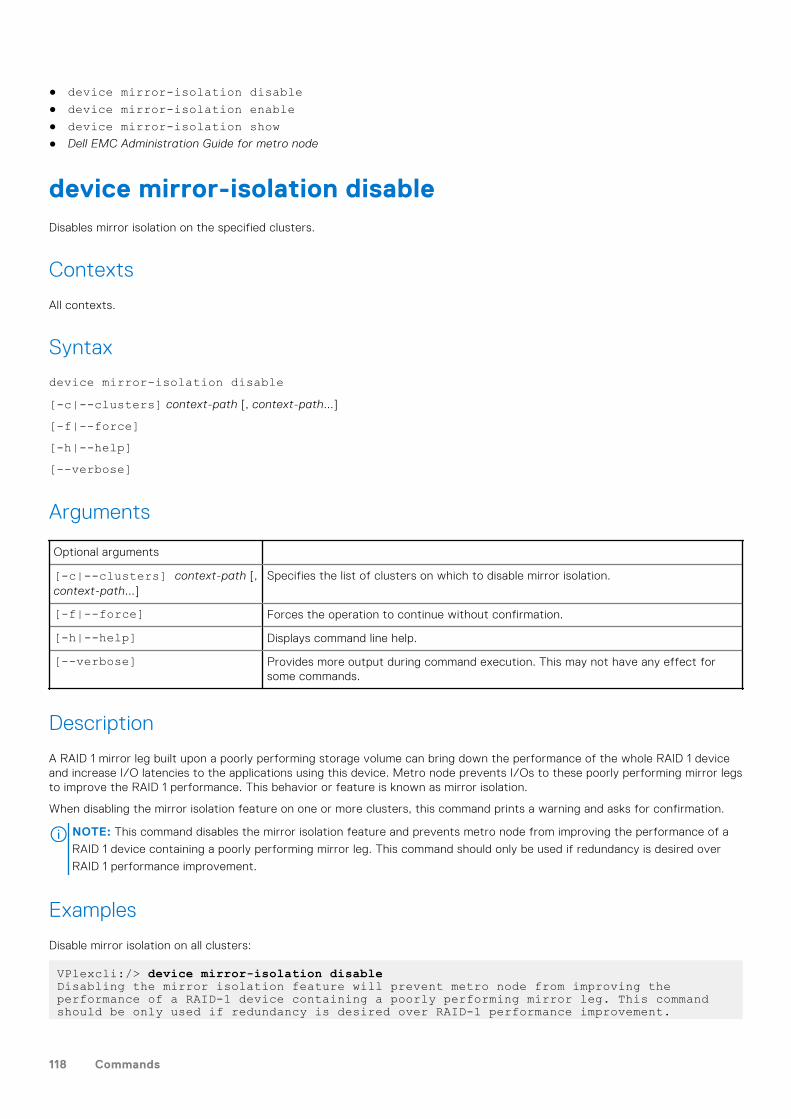
● device mirror-isolation disable● device mirror-isolation enable● device mirror-isolation show● Dell EMC Administration Guide for metro node
device mirror-isolation disableDisables mirror isolation on the specified clusters.
Contexts
All contexts.
Syntax
device mirror-isolation disable[-c|--clusters] context-path [, context-path...]
[-f|--force][-h|--help][--verbose]
Arguments
Optional arguments
[-c|--clusters] context-path [,context-path...]
Specifies the list of clusters on which to disable mirror isolation.
[-f|--force] Forces the operation to continue without confirmation.
[-h|--help] Displays command line help.
[--verbose] Provides more output during command execution. This may not have any effect forsome commands.
Description
A RAID 1 mirror leg built upon a poorly performing storage volume can bring down the performance of the whole RAID 1 deviceand increase I/O latencies to the applications using this device. Metro node prevents I/Os to these poorly performing mirror legsto improve the RAID 1 performance. This behavior or feature is known as mirror isolation.
When disabling the mirror isolation feature on one or more clusters, this command prints a warning and asks for confirmation.
NOTE: This command disables the mirror isolation feature and prevents metro node from improving the performance of a
RAID 1 device containing a poorly performing mirror leg. This command should only be used if redundancy is desired over
RAID 1 performance improvement.
Examples
Disable mirror isolation on all clusters:
VPlexcli:/> device mirror-isolation disableDisabling the mirror isolation feature will prevent metro node from improving the performance of a RAID-1 device containing a poorly performing mirror leg. This command should be only used if redundancy is desired over RAID-1 performance improvement.
118 Commands
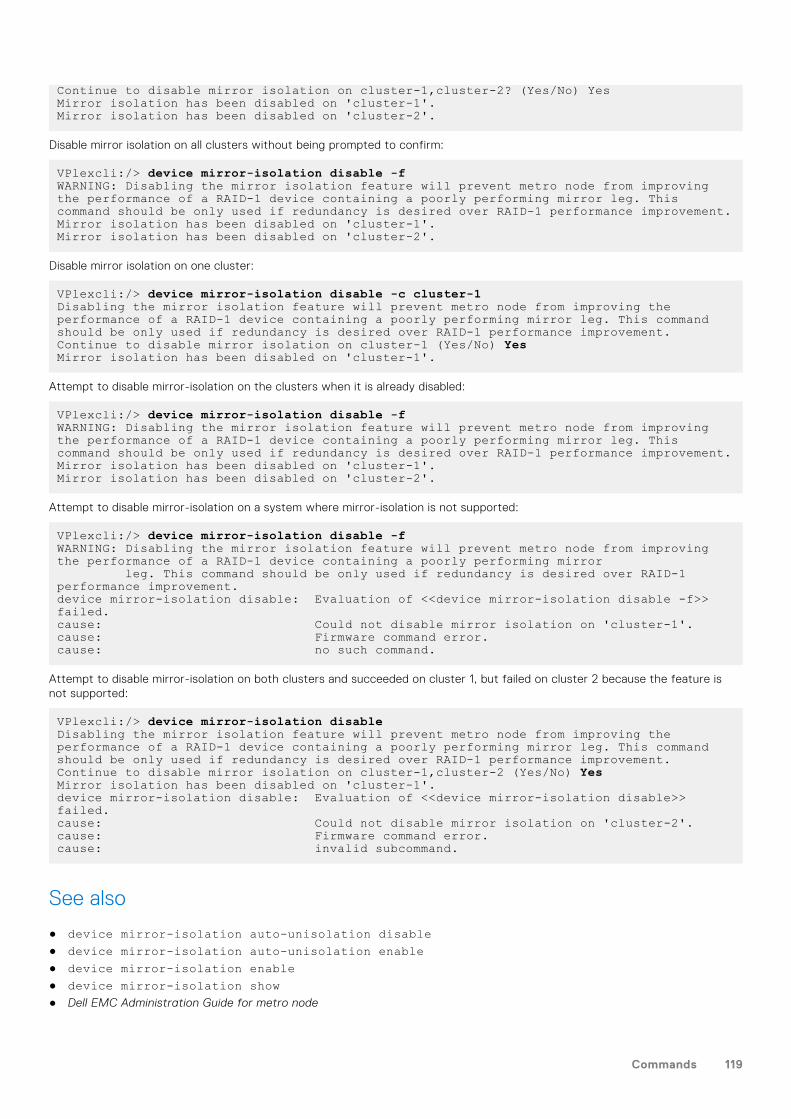
Continue to disable mirror isolation on cluster-1,cluster-2? (Yes/No) YesMirror isolation has been disabled on 'cluster-1'.Mirror isolation has been disabled on 'cluster-2'.
Disable mirror isolation on all clusters without being prompted to confirm:
VPlexcli:/> device mirror-isolation disable -fWARNING: Disabling the mirror isolation feature will prevent metro node from improving the performance of a RAID-1 device containing a poorly performing mirror leg. This command should be only used if redundancy is desired over RAID-1 performance improvement.Mirror isolation has been disabled on 'cluster-1'.Mirror isolation has been disabled on 'cluster-2'.
Disable mirror isolation on one cluster:
VPlexcli:/> device mirror-isolation disable -c cluster-1Disabling the mirror isolation feature will prevent metro node from improving the performance of a RAID-1 device containing a poorly performing mirror leg. This command should be only used if redundancy is desired over RAID-1 performance improvement.Continue to disable mirror isolation on cluster-1 (Yes/No) YesMirror isolation has been disabled on 'cluster-1'.
Attempt to disable mirror-isolation on the clusters when it is already disabled:
VPlexcli:/> device mirror-isolation disable -fWARNING: Disabling the mirror isolation feature will prevent metro node from improving the performance of a RAID-1 device containing a poorly performing mirror leg. This command should be only used if redundancy is desired over RAID-1 performance improvement.Mirror isolation has been disabled on 'cluster-1'.Mirror isolation has been disabled on 'cluster-2'.
Attempt to disable mirror-isolation on a system where mirror-isolation is not supported:
VPlexcli:/> device mirror-isolation disable -fWARNING: Disabling the mirror isolation feature will prevent metro node from improving the performance of a RAID-1 device containing a poorly performing mirror leg. This command should be only used if redundancy is desired over RAID-1 performance improvement.device mirror-isolation disable: Evaluation of <<device mirror-isolation disable -f>> failed.cause: Could not disable mirror isolation on 'cluster-1'.cause: Firmware command error.cause: no such command.
Attempt to disable mirror-isolation on both clusters and succeeded on cluster 1, but failed on cluster 2 because the feature isnot supported:
VPlexcli:/> device mirror-isolation disableDisabling the mirror isolation feature will prevent metro node from improving the performance of a RAID-1 device containing a poorly performing mirror leg. This command should be only used if redundancy is desired over RAID-1 performance improvement.Continue to disable mirror isolation on cluster-1,cluster-2 (Yes/No) YesMirror isolation has been disabled on 'cluster-1'.device mirror-isolation disable: Evaluation of <<device mirror-isolation disable>> failed.cause: Could not disable mirror isolation on 'cluster-2'.cause: Firmware command error.cause: invalid subcommand.
See also
● device mirror-isolation auto-unisolation disable● device mirror-isolation auto-unisolation enable● device mirror-isolation enable● device mirror-isolation show● Dell EMC Administration Guide for metro node
Commands 119
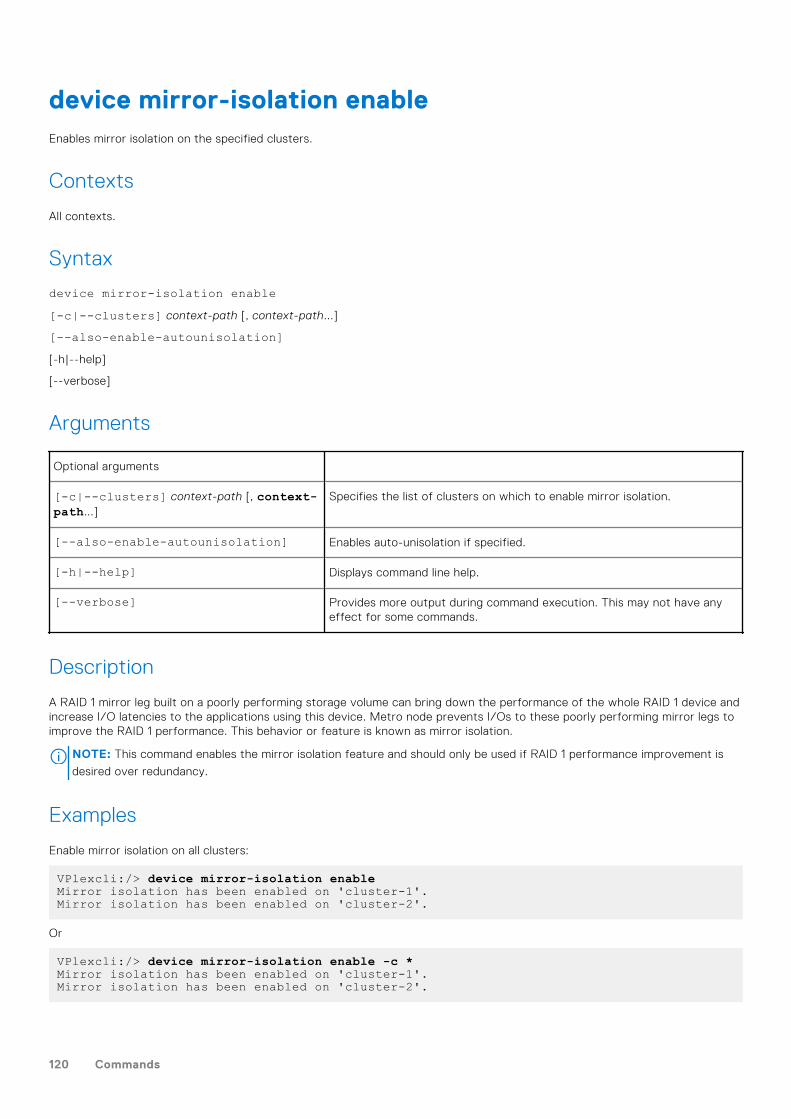
device mirror-isolation enableEnables mirror isolation on the specified clusters.
Contexts
All contexts.
Syntax
device mirror-isolation enable[-c|--clusters] context-path [, context-path...]
[--also-enable-autounisolation][-h|--help]
[--verbose]
Arguments
Optional arguments
[-c|--clusters] context-path [, context-path...]
Specifies the list of clusters on which to enable mirror isolation.
[--also-enable-autounisolation] Enables auto-unisolation if specified.
[-h|--help] Displays command line help.
[--verbose] Provides more output during command execution. This may not have anyeffect for some commands.
Description
A RAID 1 mirror leg built on a poorly performing storage volume can bring down the performance of the whole RAID 1 device andincrease I/O latencies to the applications using this device. Metro node prevents I/Os to these poorly performing mirror legs toimprove the RAID 1 performance. This behavior or feature is known as mirror isolation.
NOTE: This command enables the mirror isolation feature and should only be used if RAID 1 performance improvement is
desired over redundancy.
Examples
Enable mirror isolation on all clusters:
VPlexcli:/> device mirror-isolation enableMirror isolation has been enabled on 'cluster-1'.Mirror isolation has been enabled on 'cluster-2'.
Or
VPlexcli:/> device mirror-isolation enable -c *Mirror isolation has been enabled on 'cluster-1'.Mirror isolation has been enabled on 'cluster-2'.
120 Commands
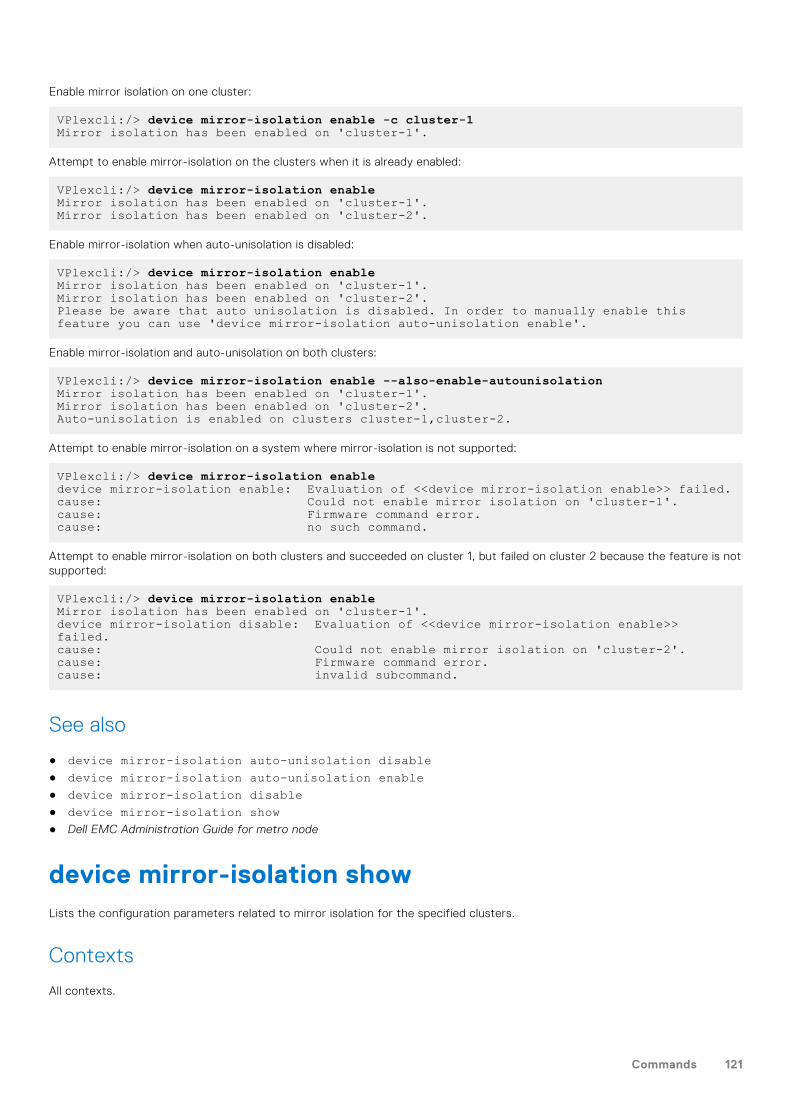
Enable mirror isolation on one cluster:
VPlexcli:/> device mirror-isolation enable -c cluster-1Mirror isolation has been enabled on 'cluster-1'.
Attempt to enable mirror-isolation on the clusters when it is already enabled:
VPlexcli:/> device mirror-isolation enableMirror isolation has been enabled on 'cluster-1'.Mirror isolation has been enabled on 'cluster-2'.
Enable mirror-isolation when auto-unisolation is disabled:
VPlexcli:/> device mirror-isolation enableMirror isolation has been enabled on 'cluster-1'.Mirror isolation has been enabled on 'cluster-2'.Please be aware that auto unisolation is disabled. In order to manually enable this feature you can use 'device mirror-isolation auto-unisolation enable'.
Enable mirror-isolation and auto-unisolation on both clusters:
VPlexcli:/> device mirror-isolation enable --also-enable-autounisolationMirror isolation has been enabled on 'cluster-1'.Mirror isolation has been enabled on 'cluster-2'.Auto-unisolation is enabled on clusters cluster-1,cluster-2.
Attempt to enable mirror-isolation on a system where mirror-isolation is not supported:
VPlexcli:/> device mirror-isolation enabledevice mirror-isolation enable: Evaluation of <<device mirror-isolation enable>> failed.cause: Could not enable mirror isolation on 'cluster-1'.cause: Firmware command error.cause: no such command.
Attempt to enable mirror-isolation on both clusters and succeeded on cluster 1, but failed on cluster 2 because the feature is notsupported:
VPlexcli:/> device mirror-isolation enableMirror isolation has been enabled on 'cluster-1'.device mirror-isolation disable: Evaluation of <<device mirror-isolation enable>> failed.cause: Could not enable mirror isolation on 'cluster-2'.cause: Firmware command error.cause: invalid subcommand.
See also
● device mirror-isolation auto-unisolation disable● device mirror-isolation auto-unisolation enable● device mirror-isolation disable● device mirror-isolation show● Dell EMC Administration Guide for metro node
device mirror-isolation showLists the configuration parameters related to mirror isolation for the specified clusters.
Contexts
All contexts.
Commands 121
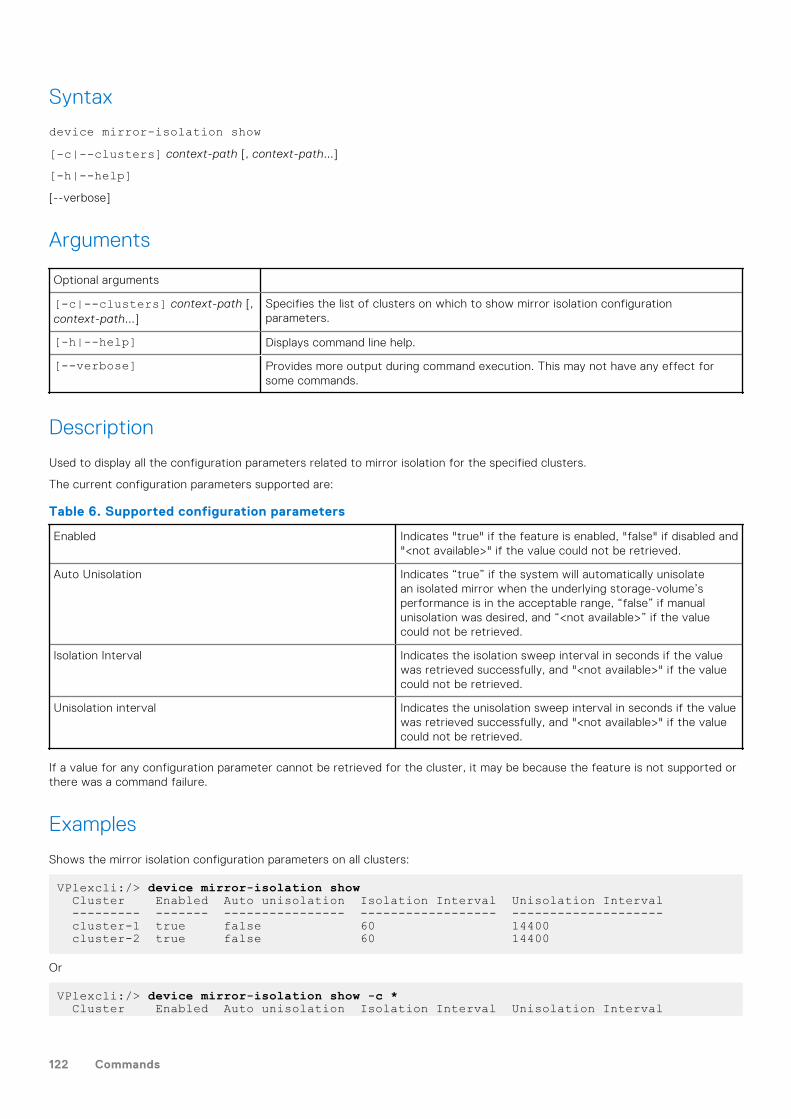
Syntax
device mirror-isolation show[-c|--clusters] context-path [, context-path...]
[-h|--help][--verbose]
Arguments
Optional arguments
[-c|--clusters] context-path [,context-path...]
Specifies the list of clusters on which to show mirror isolation configurationparameters.
[-h|--help] Displays command line help.
[--verbose] Provides more output during command execution. This may not have any effect forsome commands.
Description
Used to display all the configuration parameters related to mirror isolation for the specified clusters.
The current configuration parameters supported are:
Table 6. Supported configuration parameters
Enabled Indicates "true" if the feature is enabled, "false" if disabled and"<not available>" if the value could not be retrieved.
Auto Unisolation Indicates “true” if the system will automatically unisolatean isolated mirror when the underlying storage-volume’sperformance is in the acceptable range, “false” if manualunisolation was desired, and “<not available>” if the valuecould not be retrieved.
Isolation Interval Indicates the isolation sweep interval in seconds if the valuewas retrieved successfully, and "<not available>" if the valuecould not be retrieved.
Unisolation interval Indicates the unisolation sweep interval in seconds if the valuewas retrieved successfully, and "<not available>" if the valuecould not be retrieved.
If a value for any configuration parameter cannot be retrieved for the cluster, it may be because the feature is not supported orthere was a command failure.
Examples
Shows the mirror isolation configuration parameters on all clusters:
VPlexcli:/> device mirror-isolation show Cluster Enabled Auto unisolation Isolation Interval Unisolation Interval --------- ------- ---------------- ------------------ -------------------- cluster-1 true false 60 14400 cluster-2 true false 60 14400
Or
VPlexcli:/> device mirror-isolation show -c * Cluster Enabled Auto unisolation Isolation Interval Unisolation Interval
122 Commands
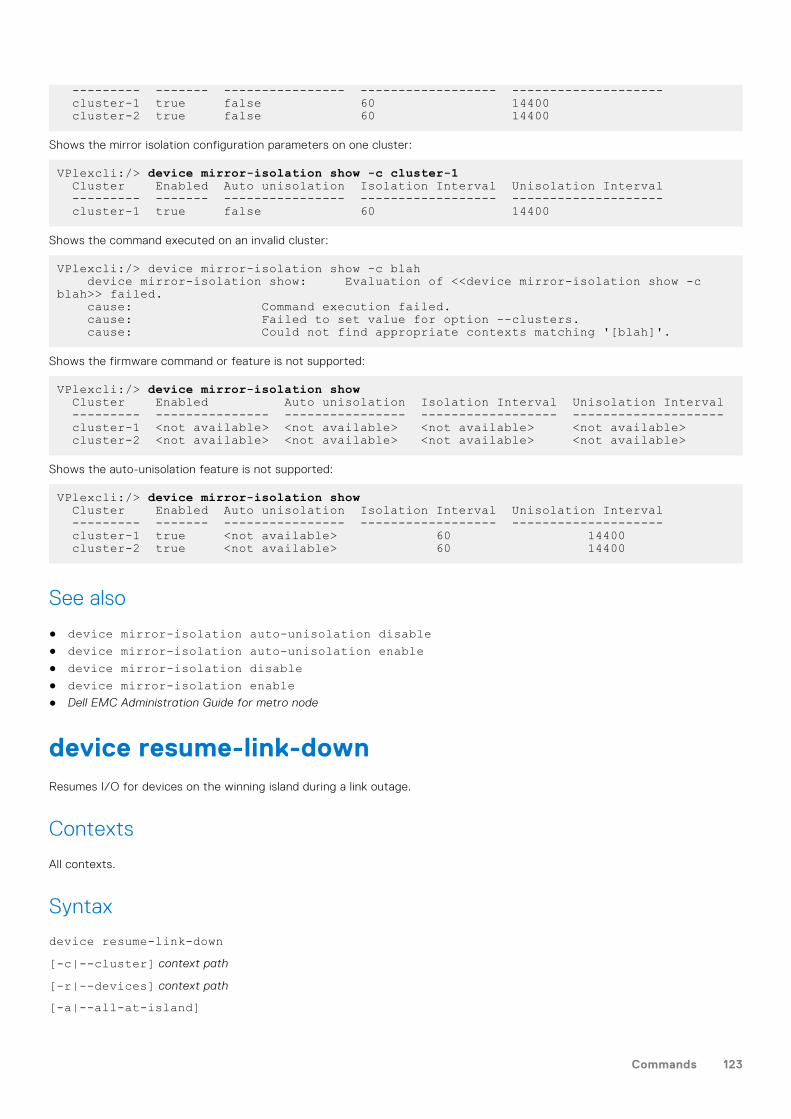
--------- ------- ---------------- ------------------ -------------------- cluster-1 true false 60 14400 cluster-2 true false 60 14400
Shows the mirror isolation configuration parameters on one cluster:
VPlexcli:/> device mirror-isolation show -c cluster-1 Cluster Enabled Auto unisolation Isolation Interval Unisolation Interval --------- ------- ---------------- ------------------ -------------------- cluster-1 true false 60 14400
Shows the command executed on an invalid cluster:
VPlexcli:/> device mirror-isolation show -c blah device mirror-isolation show: Evaluation of <<device mirror-isolation show -c blah>> failed. cause: Command execution failed. cause: Failed to set value for option --clusters. cause: Could not find appropriate contexts matching '[blah]'.
Shows the firmware command or feature is not supported:
VPlexcli:/> device mirror-isolation show Cluster Enabled Auto unisolation Isolation Interval Unisolation Interval --------- --------------- ---------------- ------------------ -------------------- cluster-1 <not available> <not available> <not available> <not available> cluster-2 <not available> <not available> <not available> <not available>
Shows the auto-unisolation feature is not supported:
VPlexcli:/> device mirror-isolation show Cluster Enabled Auto unisolation Isolation Interval Unisolation Interval --------- ------- ---------------- ------------------ -------------------- cluster-1 true <not available> 60 14400 cluster-2 true <not available> 60 14400
See also
● device mirror-isolation auto-unisolation disable● device mirror-isolation auto-unisolation enable● device mirror-isolation disable● device mirror-isolation enable● Dell EMC Administration Guide for metro node
device resume-link-downResumes I/O for devices on the winning island during a link outage.
Contexts
All contexts.
Syntax
device resume-link-down[-c|--cluster] context path
[-r|--devices] context path
[-a|--all-at-island]
Commands 123
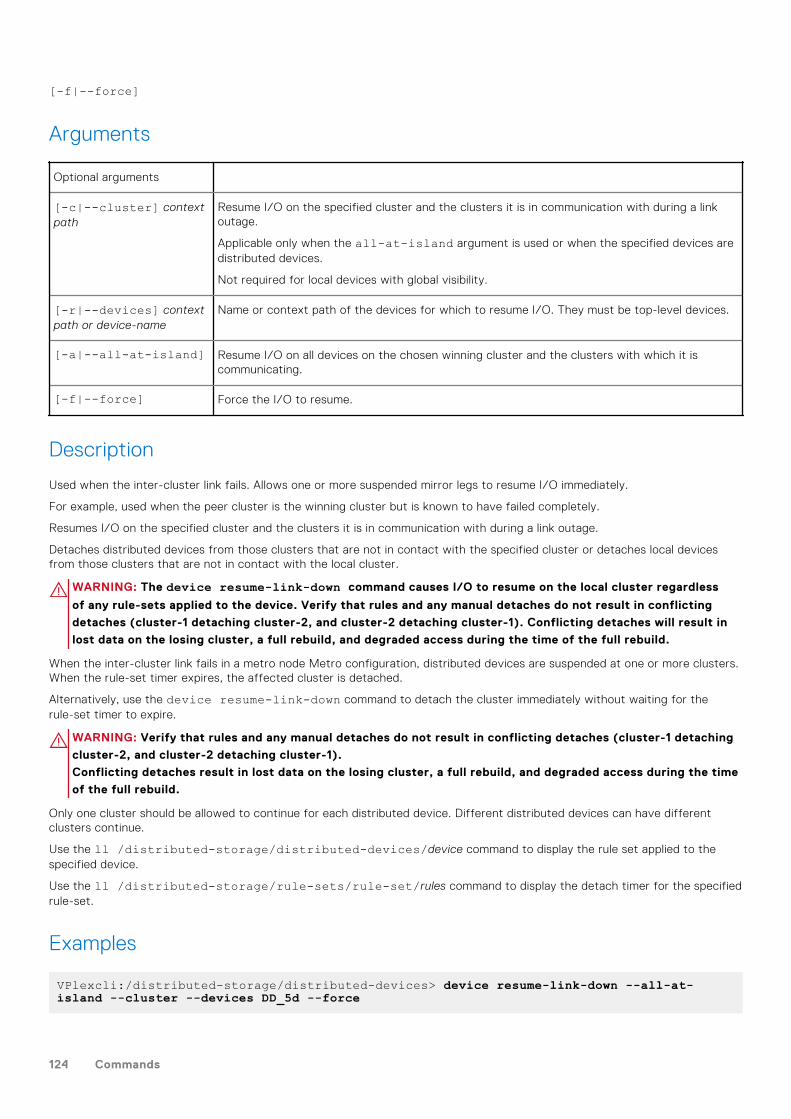
[-f|--force]
Arguments
Optional arguments
[-c|--cluster] contextpath
Resume I/O on the specified cluster and the clusters it is in communication with during a linkoutage.
Applicable only when the all-at-island argument is used or when the specified devices aredistributed devices.
Not required for local devices with global visibility.
[-r|--devices] contextpath or device-name
Name or context path of the devices for which to resume I/O. They must be top-level devices.
[-a|--all-at-island] Resume I/O on all devices on the chosen winning cluster and the clusters with which it iscommunicating.
[-f|--force] Force the I/O to resume.
Description
Used when the inter-cluster link fails. Allows one or more suspended mirror legs to resume I/O immediately.
For example, used when the peer cluster is the winning cluster but is known to have failed completely.
Resumes I/O on the specified cluster and the clusters it is in communication with during a link outage.
Detaches distributed devices from those clusters that are not in contact with the specified cluster or detaches local devicesfrom those clusters that are not in contact with the local cluster.
WARNING: The device resume-link-down command causes I/O to resume on the local cluster regardless
of any rule-sets applied to the device. Verify that rules and any manual detaches do not result in conflicting
detaches (cluster-1 detaching cluster-2, and cluster-2 detaching cluster-1). Conflicting detaches will result in
lost data on the losing cluster, a full rebuild, and degraded access during the time of the full rebuild.
When the inter-cluster link fails in a metro node Metro configuration, distributed devices are suspended at one or more clusters.When the rule-set timer expires, the affected cluster is detached.
Alternatively, use the device resume-link-down command to detach the cluster immediately without waiting for therule-set timer to expire.
WARNING: Verify that rules and any manual detaches do not result in conflicting detaches (cluster-1 detaching
cluster-2, and cluster-2 detaching cluster-1).
Conflicting detaches result in lost data on the losing cluster, a full rebuild, and degraded access during the time
of the full rebuild.
Only one cluster should be allowed to continue for each distributed device. Different distributed devices can have differentclusters continue.
Use the ll /distributed-storage/distributed-devices/device command to display the rule set applied to thespecified device.
Use the ll /distributed-storage/rule-sets/rule-set/rules command to display the detach timer for the specifiedrule-set.
Examples
VPlexcli:/distributed-storage/distributed-devices> device resume-link-down --all-at-island --cluster --devices DD_5d --force
124 Commands
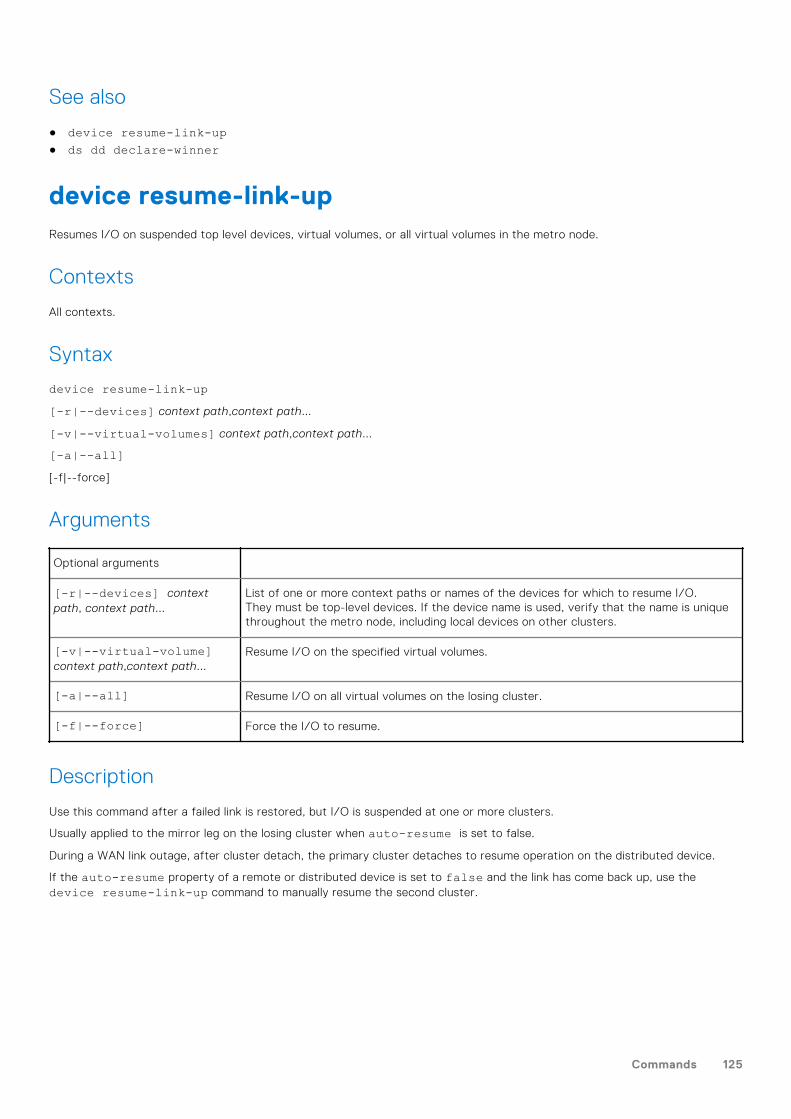
See also
● device resume-link-up● ds dd declare-winner
device resume-link-upResumes I/O on suspended top level devices, virtual volumes, or all virtual volumes in the metro node.
Contexts
All contexts.
Syntax
device resume-link-up[-r|--devices] context path,context path...
[-v|--virtual-volumes] context path,context path...
[-a|--all][-f|--force]
Arguments
Optional arguments
[-r|--devices] contextpath, context path...
List of one or more context paths or names of the devices for which to resume I/O.They must be top-level devices. If the device name is used, verify that the name is uniquethroughout the metro node, including local devices on other clusters.
[-v|--virtual-volume]context path,context path...
Resume I/O on the specified virtual volumes.
[-a|--all] Resume I/O on all virtual volumes on the losing cluster.
[-f|--force] Force the I/O to resume.
Description
Use this command after a failed link is restored, but I/O is suspended at one or more clusters.
Usually applied to the mirror leg on the losing cluster when auto-resume is set to false.
During a WAN link outage, after cluster detach, the primary cluster detaches to resume operation on the distributed device.
If the auto-resume property of a remote or distributed device is set to false and the link has come back up, use thedevice resume-link-up command to manually resume the second cluster.
Commands 125
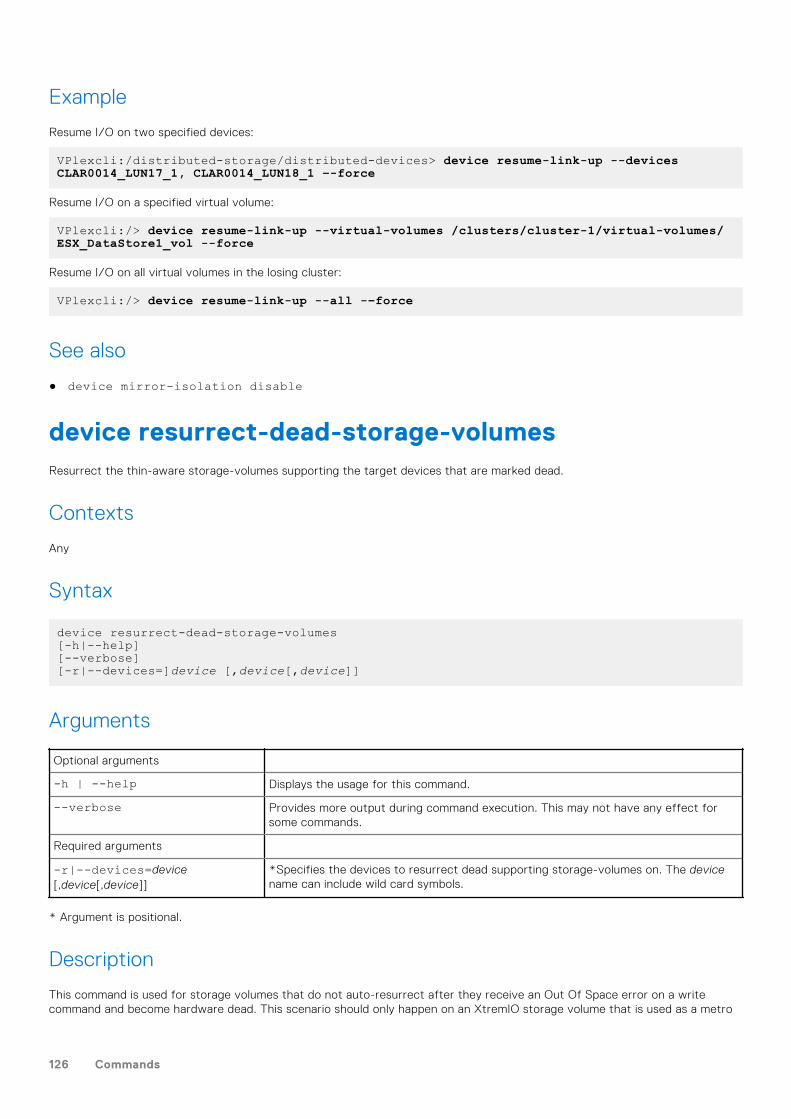
Example
Resume I/O on two specified devices:
VPlexcli:/distributed-storage/distributed-devices> device resume-link-up --devices CLAR0014_LUN17_1, CLAR0014_LUN18_1 –-force
Resume I/O on a specified virtual volume:
VPlexcli:/> device resume-link-up --virtual-volumes /clusters/cluster-1/virtual-volumes/ESX_DataStore1_vol --force
Resume I/O on all virtual volumes in the losing cluster:
VPlexcli:/> device resume-link-up --all -–force
See also
● device mirror-isolation disable
device resurrect-dead-storage-volumesResurrect the thin-aware storage-volumes supporting the target devices that are marked dead.
Contexts
Any
Syntax
device resurrect-dead-storage-volumes[-h|--help][--verbose][-r|--devices=]device [,device[,device]]
Arguments
Optional arguments
-h | --help Displays the usage for this command.
--verbose Provides more output during command execution. This may not have any effect forsome commands.
Required arguments
-r|--devices=device[,device[,device]]
*Specifies the devices to resurrect dead supporting storage-volumes on. The devicename can include wild card symbols.
* Argument is positional.
Description
This command is used for storage volumes that do not auto-resurrect after they receive an Out Of Space error on a writecommand and become hardware dead. This scenario should only happen on an XtremIO storage volume that is used as a metro
126 Commands
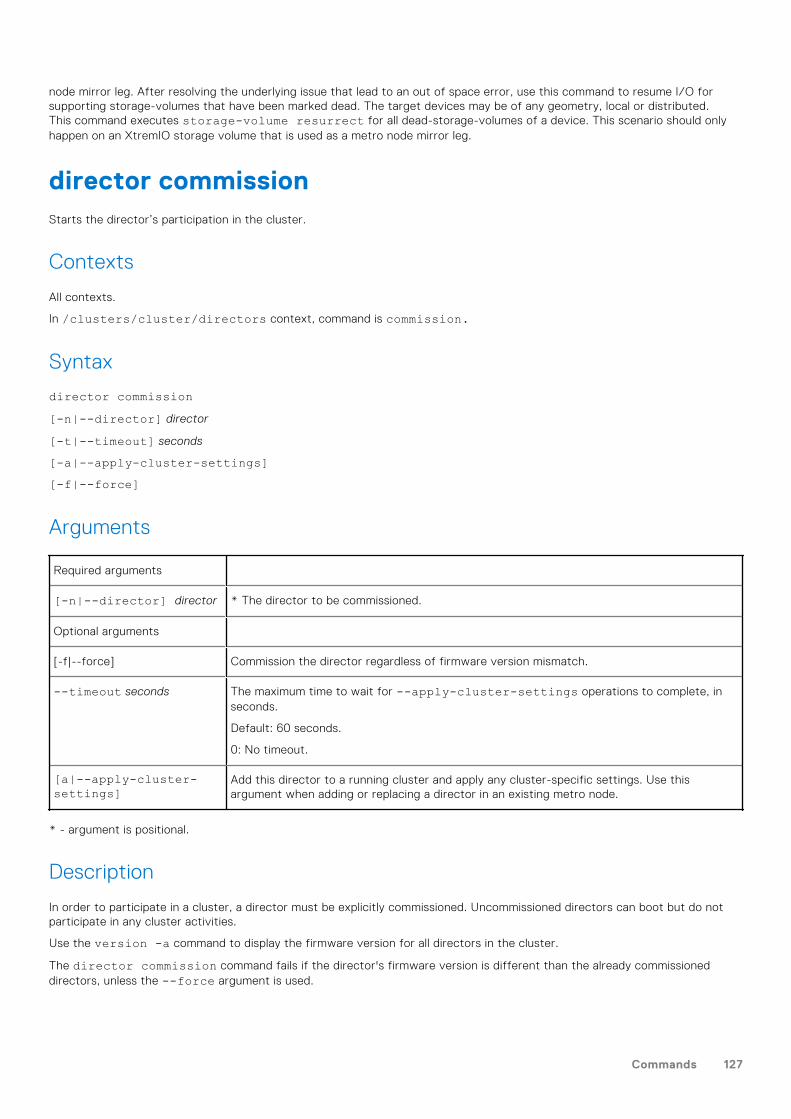
node mirror leg. After resolving the underlying issue that lead to an out of space error, use this command to resume I/O forsupporting storage-volumes that have been marked dead. The target devices may be of any geometry, local or distributed.This command executes storage-volume resurrect for all dead-storage-volumes of a device. This scenario should onlyhappen on an XtremIO storage volume that is used as a metro node mirror leg.
director commissionStarts the director’s participation in the cluster.
Contexts
All contexts.
In /clusters/cluster/directors context, command is commission.
Syntax
director commission[-n|--director] director
[-t|--timeout] seconds
[-a|--apply-cluster-settings][-f|--force]
Arguments
Required arguments
[-n|--director] director * The director to be commissioned.
Optional arguments
[-f|--force] Commission the director regardless of firmware version mismatch.
--timeout seconds The maximum time to wait for --apply-cluster-settings operations to complete, inseconds.
Default: 60 seconds.
0: No timeout.
[a|--apply-cluster-settings]
Add this director to a running cluster and apply any cluster-specific settings. Use thisargument when adding or replacing a director in an existing metro node.
* - argument is positional.
Description
In order to participate in a cluster, a director must be explicitly commissioned. Uncommissioned directors can boot but do notparticipate in any cluster activities.
Use the version -a command to display the firmware version for all directors in the cluster.
The director commission command fails if the director's firmware version is different than the already commissioneddirectors, unless the --force argument is used.
Commands 127
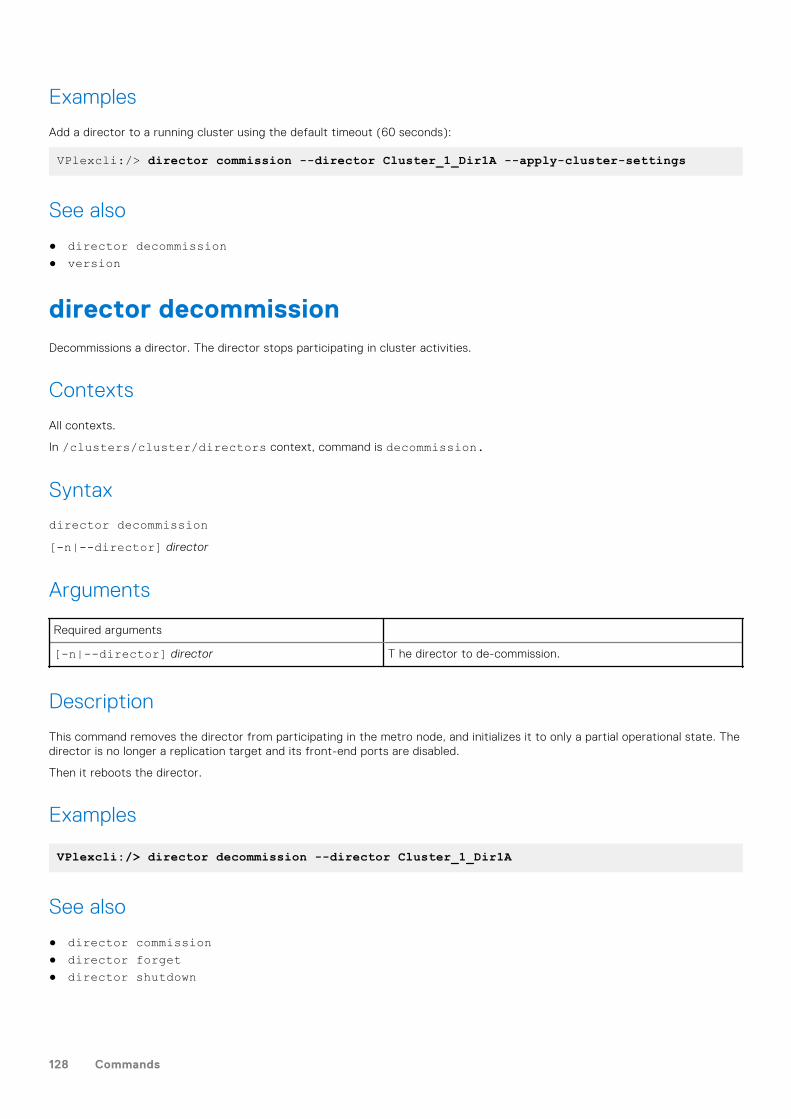
Examples
Add a director to a running cluster using the default timeout (60 seconds):
VPlexcli:/> director commission --director Cluster_1_Dir1A --apply-cluster-settings
See also
● director decommission● version
director decommissionDecommissions a director. The director stops participating in cluster activities.
Contexts
All contexts.
In /clusters/cluster/directors context, command is decommission.
Syntax
director decommission[-n|--director] director
Arguments
Required arguments
[-n|--director] director T he director to de-commission.
Description
This command removes the director from participating in the metro node, and initializes it to only a partial operational state. Thedirector is no longer a replication target and its front-end ports are disabled.
Then it reboots the director.
Examples
VPlexcli:/> director decommission --director Cluster_1_Dir1A
See also
● director commission● director forget● director shutdown
128 Commands
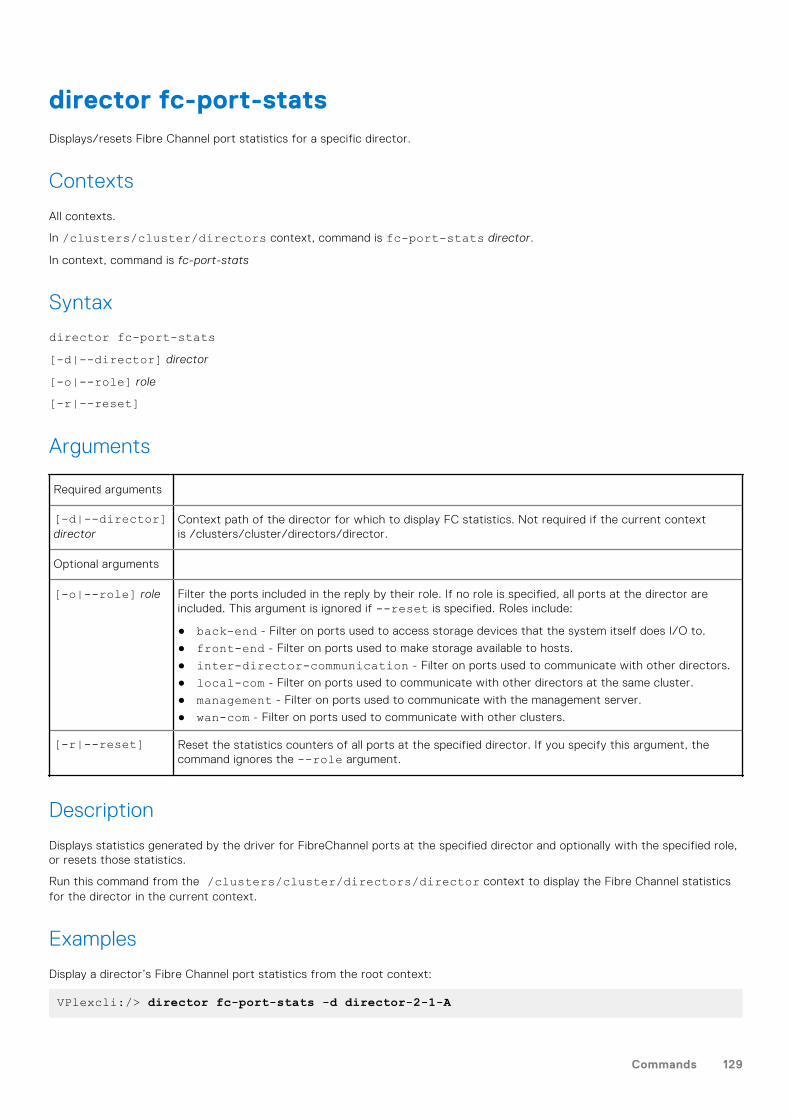
director fc-port-statsDisplays/resets Fibre Channel port statistics for a specific director.
Contexts
All contexts.
In /clusters/cluster/directors context, command is fc-port-stats director.
In context, command is fc-port-stats
Syntax
director fc-port-stats[-d|--director] director
[-o|--role] role
[-r|--reset]
Arguments
Required arguments
[-d|--director]director
Context path of the director for which to display FC statistics. Not required if the current contextis /clusters/cluster/directors/director.
Optional arguments
[-o|--role] role Filter the ports included in the reply by their role. If no role is specified, all ports at the director areincluded. This argument is ignored if --reset is specified. Roles include:
● back-end - Filter on ports used to access storage devices that the system itself does I/O to.
● front-end - Filter on ports used to make storage available to hosts.
● inter-director-communication - Filter on ports used to communicate with other directors.
● local-com - Filter on ports used to communicate with other directors at the same cluster.
● management - Filter on ports used to communicate with the management server.
● wan-com - Filter on ports used to communicate with other clusters.
[-r|--reset] Reset the statistics counters of all ports at the specified director. If you specify this argument, thecommand ignores the --role argument.
Description
Displays statistics generated by the driver for FibreChannel ports at the specified director and optionally with the specified role,or resets those statistics.
Run this command from the /clusters/cluster/directors/director context to display the Fibre Channel statisticsfor the director in the current context.
Examples
Display a director’s Fibre Channel port statistics from the root context:
VPlexcli:/> director fc-port-stats -d director-2-1-A
Commands 129
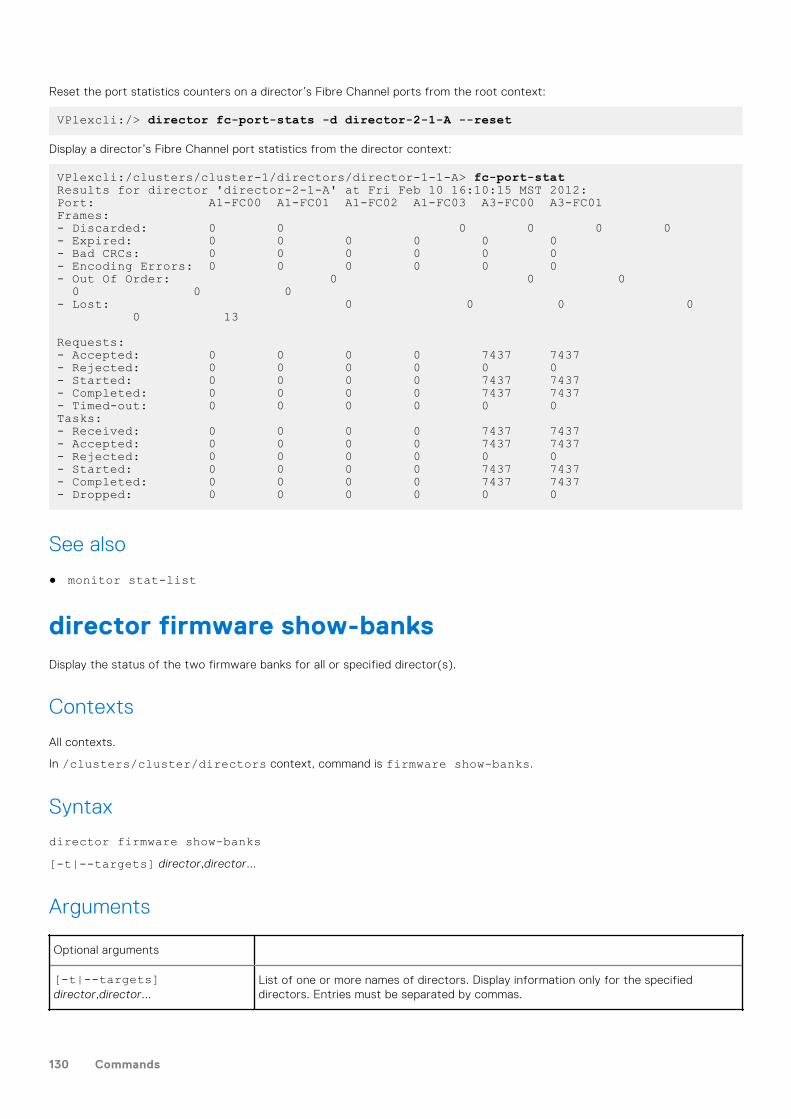
Reset the port statistics counters on a director’s Fibre Channel ports from the root context:
VPlexcli:/> director fc-port-stats -d director-2-1-A --reset
Display a director’s Fibre Channel port statistics from the director context:
VPlexcli:/clusters/cluster-1/directors/director-1-1-A> fc-port-statResults for director 'director-2-1-A' at Fri Feb 10 16:10:15 MST 2012:Port: A1-FC00 A1-FC01 A1-FC02 A1-FC03 A3-FC00 A3-FC01Frames:- Discarded: 0 0 0 0 0 0- Expired: 0 0 0 0 0 0- Bad CRCs: 0 0 0 0 0 0- Encoding Errors: 0 0 0 0 0 0- Out Of Order: 0 0 0 0 0 0 - Lost: 0 0 0 0 0 13
Requests:- Accepted: 0 0 0 0 7437 7437- Rejected: 0 0 0 0 0 0- Started: 0 0 0 0 7437 7437- Completed: 0 0 0 0 7437 7437- Timed-out: 0 0 0 0 0 0Tasks:- Received: 0 0 0 0 7437 7437- Accepted: 0 0 0 0 7437 7437- Rejected: 0 0 0 0 0 0- Started: 0 0 0 0 7437 7437- Completed: 0 0 0 0 7437 7437- Dropped: 0 0 0 0 0 0
See also
● monitor stat-list
director firmware show-banksDisplay the status of the two firmware banks for all or specified director(s).
Contexts
All contexts.
In /clusters/cluster/directors context, command is firmware show-banks.
Syntax
director firmware show-banks[-t|--targets] director,director...
Arguments
Optional arguments
[-t|--targets]director,director...
List of one or more names of directors. Display information only for the specifieddirectors. Entries must be separated by commas.
130 Commands
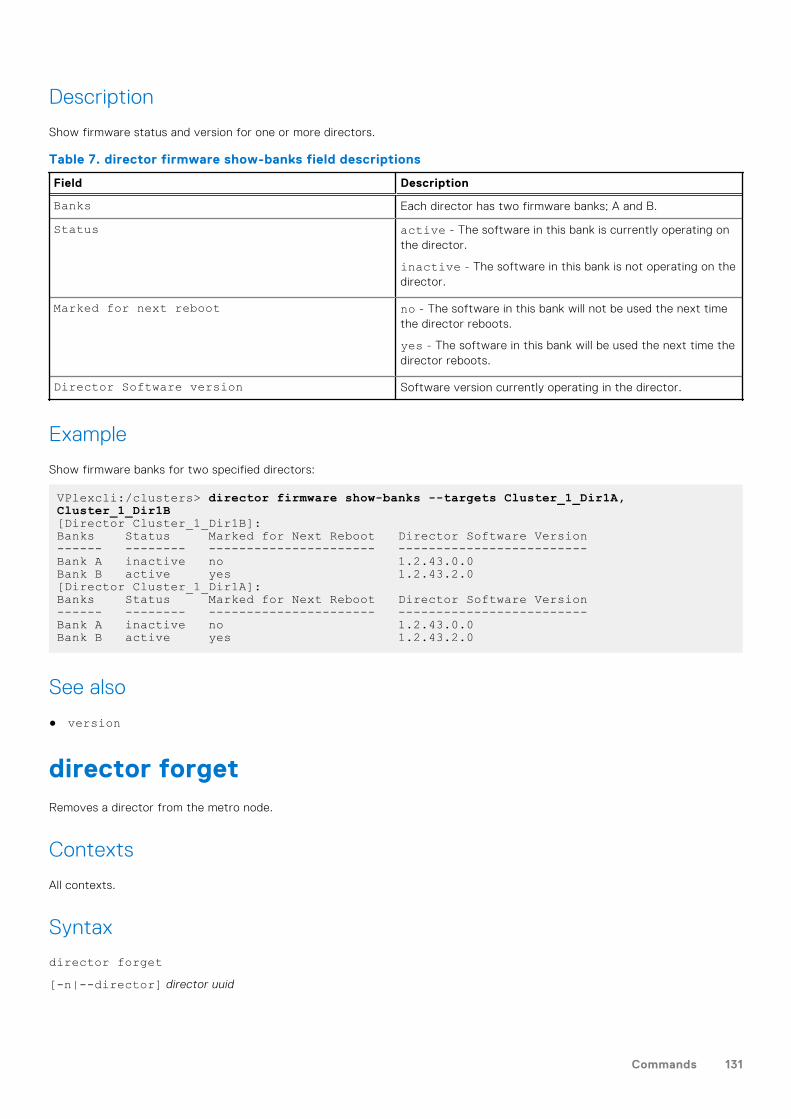
Description
Show firmware status and version for one or more directors.
Table 7. director firmware show-banks field descriptions
Field Description
Banks Each director has two firmware banks; A and B.
Status active - The software in this bank is currently operating onthe director.
inactive - The software in this bank is not operating on thedirector.
Marked for next reboot no - The software in this bank will not be used the next timethe director reboots.
yes - The software in this bank will be used the next time thedirector reboots.
Director Software version Software version currently operating in the director.
Example
Show firmware banks for two specified directors:
VPlexcli:/clusters> director firmware show-banks --targets Cluster_1_Dir1A, Cluster_1_Dir1B[Director Cluster_1_Dir1B]:Banks Status Marked for Next Reboot Director Software Version------ -------- ---------------------- -------------------------Bank A inactive no 1.2.43.0.0Bank B active yes 1.2.43.2.0[Director Cluster_1_Dir1A]:Banks Status Marked for Next Reboot Director Software Version------ -------- ---------------------- -------------------------Bank A inactive no 1.2.43.0.0Bank B active yes 1.2.43.2.0
See also
● version
director forgetRemoves a director from the metro node.
Contexts
All contexts.
Syntax
director forget[-n|--director] director uuid
Commands 131
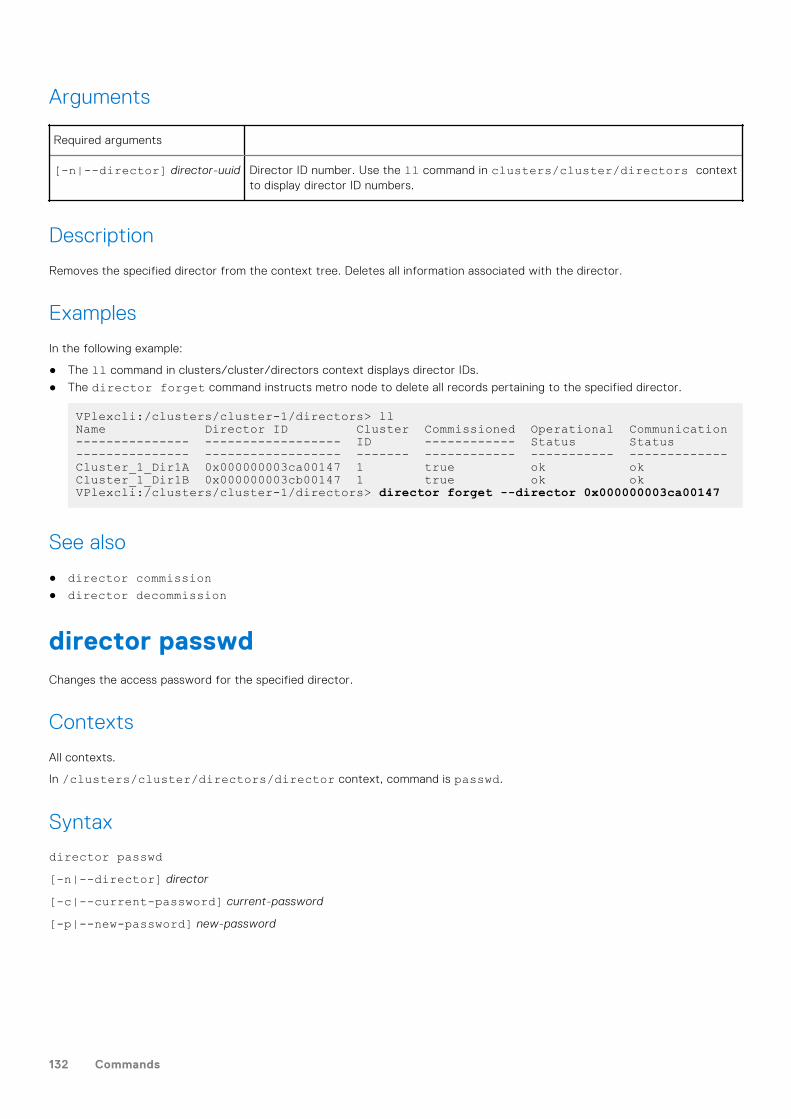
Arguments
Required arguments
[-n|--director] director-uuid Director ID number. Use the ll command in clusters/cluster/directors contextto display director ID numbers.
Description
Removes the specified director from the context tree. Deletes all information associated with the director.
Examples
In the following example:
● The ll command in clusters/cluster/directors context displays director IDs.
● The director forget command instructs metro node to delete all records pertaining to the specified director.
VPlexcli:/clusters/cluster-1/directors> llName Director ID Cluster Commissioned Operational Communication--------------- ------------------ ID ------------ Status Status--------------- ------------------ ------- ------------ ----------- -------------Cluster_1_Dir1A 0x000000003ca00147 1 true ok okCluster_1_Dir1B 0x000000003cb00147 1 true ok okVPlexcli:/clusters/cluster-1/directors> director forget --director 0x000000003ca00147
See also
● director commission● director decommission
director passwdChanges the access password for the specified director.
Contexts
All contexts.
In /clusters/cluster/directors/director context, command is passwd.
Syntax
director passwd[-n|--director] director
[-c|--current-password] current-password
[-p|--new-password] new-password
132 Commands
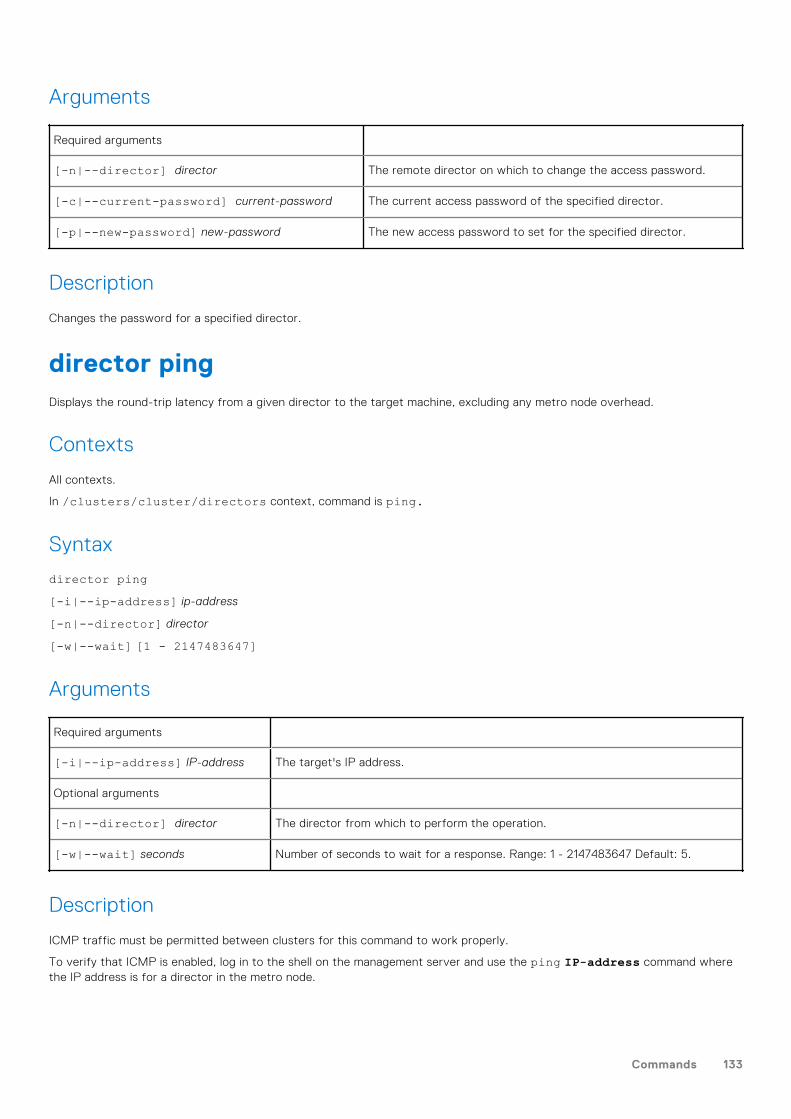
Arguments
Required arguments
[-n|--director] director The remote director on which to change the access password.
[-c|--current-password] current-password The current access password of the specified director.
[-p|--new-password] new-password The new access password to set for the specified director.
Description
Changes the password for a specified director.
director pingDisplays the round-trip latency from a given director to the target machine, excluding any metro node overhead.
Contexts
All contexts.
In /clusters/cluster/directors context, command is ping.
Syntax
director ping[-i|--ip-address] ip-address
[-n|--director] director
[-w|--wait] [1 - 2147483647]
Arguments
Required arguments
[-i|--ip-address] IP-address The target's IP address.
Optional arguments
[-n|--director] director The director from which to perform the operation.
[-w|--wait] seconds Number of seconds to wait for a response. Range: 1 - 2147483647 Default: 5.
Description
ICMP traffic must be permitted between clusters for this command to work properly.
To verify that ICMP is enabled, log in to the shell on the management server and use the ping IP-address command wherethe IP address is for a director in the metro node.
Commands 133
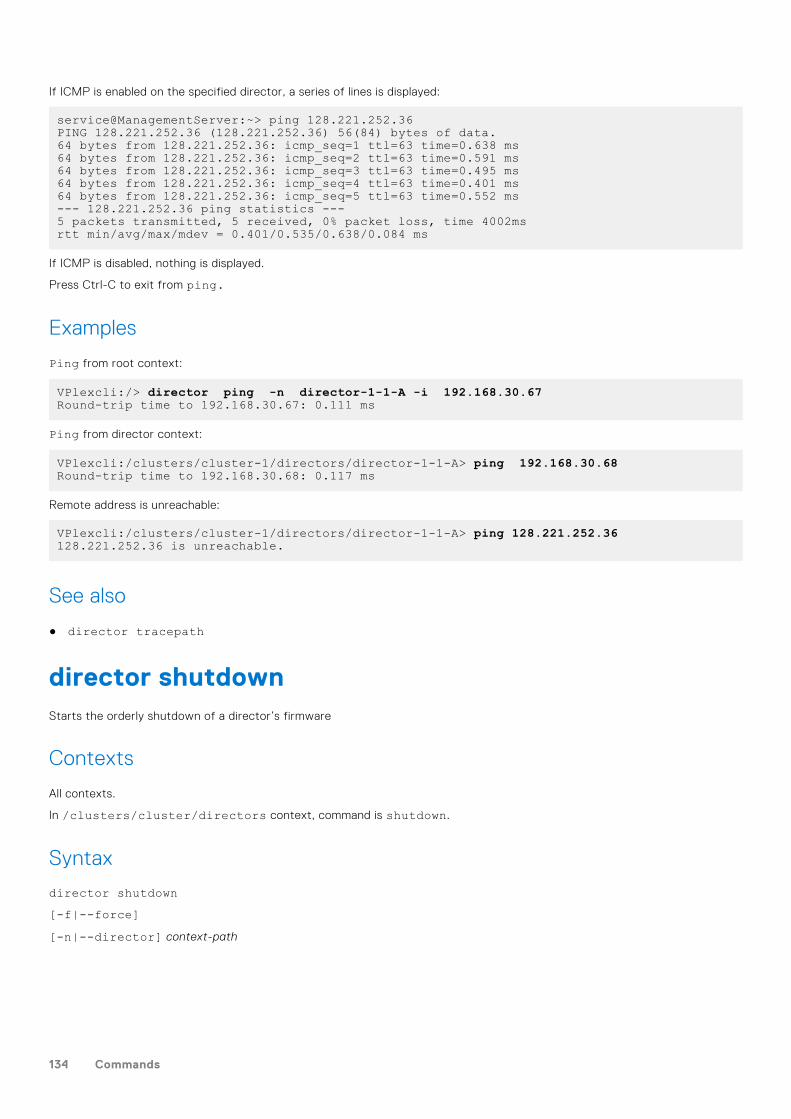
If ICMP is enabled on the specified director, a series of lines is displayed:
service@ManagementServer:~> ping 128.221.252.36PING 128.221.252.36 (128.221.252.36) 56(84) bytes of data.64 bytes from 128.221.252.36: icmp_seq=1 ttl=63 time=0.638 ms64 bytes from 128.221.252.36: icmp_seq=2 ttl=63 time=0.591 ms64 bytes from 128.221.252.36: icmp_seq=3 ttl=63 time=0.495 ms64 bytes from 128.221.252.36: icmp_seq=4 ttl=63 time=0.401 ms64 bytes from 128.221.252.36: icmp_seq=5 ttl=63 time=0.552 ms--- 128.221.252.36 ping statistics ---5 packets transmitted, 5 received, 0% packet loss, time 4002msrtt min/avg/max/mdev = 0.401/0.535/0.638/0.084 ms
If ICMP is disabled, nothing is displayed.
Press Ctrl-C to exit from ping.
Examples
Ping from root context:
VPlexcli:/> director ping -n director-1-1-A -i 192.168.30.67Round-trip time to 192.168.30.67: 0.111 ms
Ping from director context:
VPlexcli:/clusters/cluster-1/directors/director-1-1-A> ping 192.168.30.68Round-trip time to 192.168.30.68: 0.117 ms
Remote address is unreachable:
VPlexcli:/clusters/cluster-1/directors/director-1-1-A> ping 128.221.252.36128.221.252.36 is unreachable.
See also
● director tracepath
director shutdownStarts the orderly shutdown of a director’s firmware
Contexts
All contexts.
In /clusters/cluster/directors context, command is shutdown.
Syntax
director shutdown[-f|--force][-n|--director] context-path
134 Commands
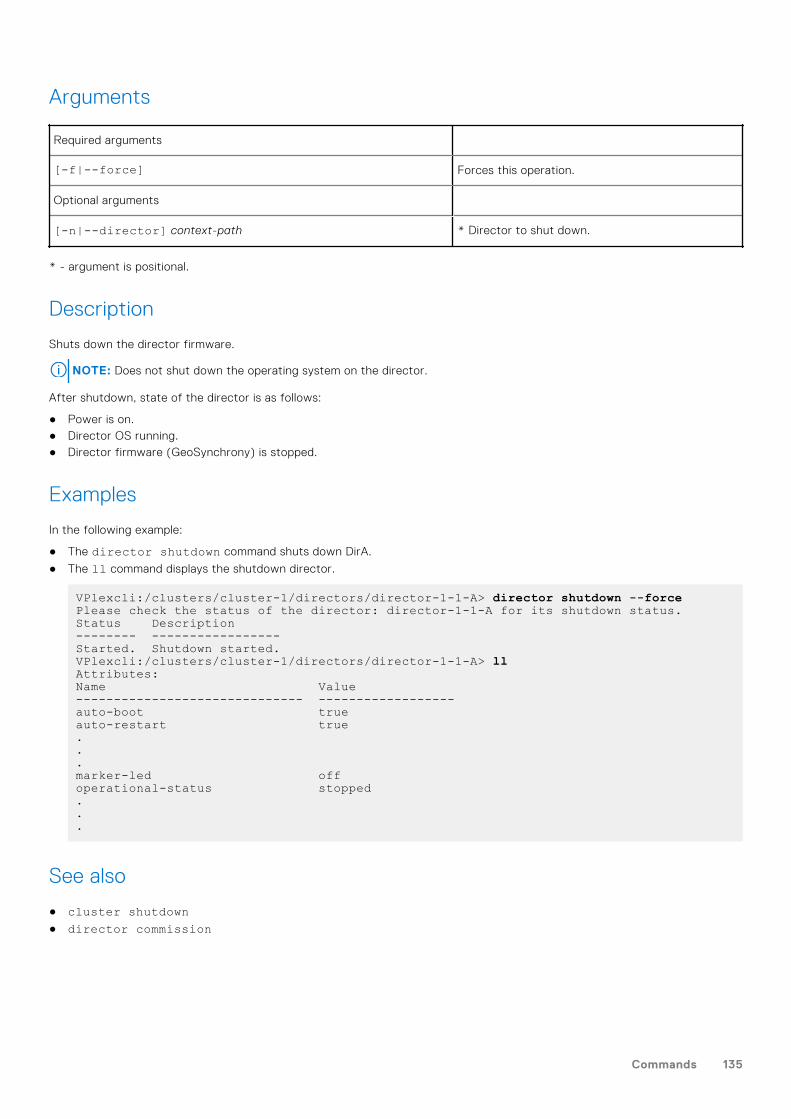
Arguments
Required arguments
[-f|--force] Forces this operation.
Optional arguments
[-n|--director] context-path * Director to shut down.
* - argument is positional.
Description
Shuts down the director firmware.
NOTE: Does not shut down the operating system on the director.
After shutdown, state of the director is as follows:
● Power is on.● Director OS running.● Director firmware (GeoSynchrony) is stopped.
Examples
In the following example:
● The director shutdown command shuts down DirA.
● The ll command displays the shutdown director.
VPlexcli:/clusters/cluster-1/directors/director-1-1-A> director shutdown --forcePlease check the status of the director: director-1-1-A for its shutdown status.Status Description-------- -----------------Started. Shutdown started.VPlexcli:/clusters/cluster-1/directors/director-1-1-A> llAttributes:Name Value------------------------------ ------------------auto-boot trueauto-restart true...marker-led offoperational-status stopped...
See also
● cluster shutdown● director commission
Commands 135
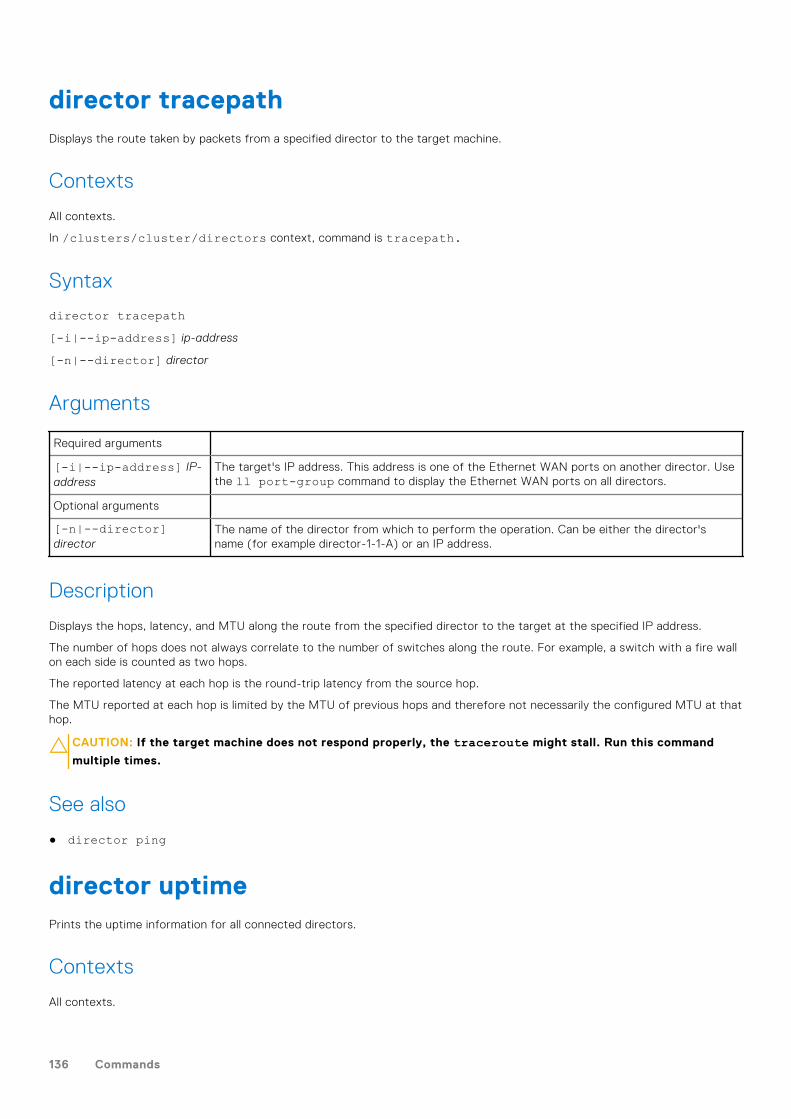
director tracepathDisplays the route taken by packets from a specified director to the target machine.
Contexts
All contexts.
In /clusters/cluster/directors context, command is tracepath.
Syntax
director tracepath[-i|--ip-address] ip-address
[-n|--director] director
Arguments
Required arguments
[-i|--ip-address] IP-address
The target's IP address. This address is one of the Ethernet WAN ports on another director. Usethe ll port-group command to display the Ethernet WAN ports on all directors.
Optional arguments
[-n|--director]director
The name of the director from which to perform the operation. Can be either the director'sname (for example director-1-1-A) or an IP address.
Description
Displays the hops, latency, and MTU along the route from the specified director to the target at the specified IP address.
The number of hops does not always correlate to the number of switches along the route. For example, a switch with a fire wallon each side is counted as two hops.
The reported latency at each hop is the round-trip latency from the source hop.
The MTU reported at each hop is limited by the MTU of previous hops and therefore not necessarily the configured MTU at thathop.
CAUTION: If the target machine does not respond properly, the traceroute might stall. Run this command
multiple times.
See also
● director ping
director uptimePrints the uptime information for all connected directors.
Contexts
All contexts.
136 Commands
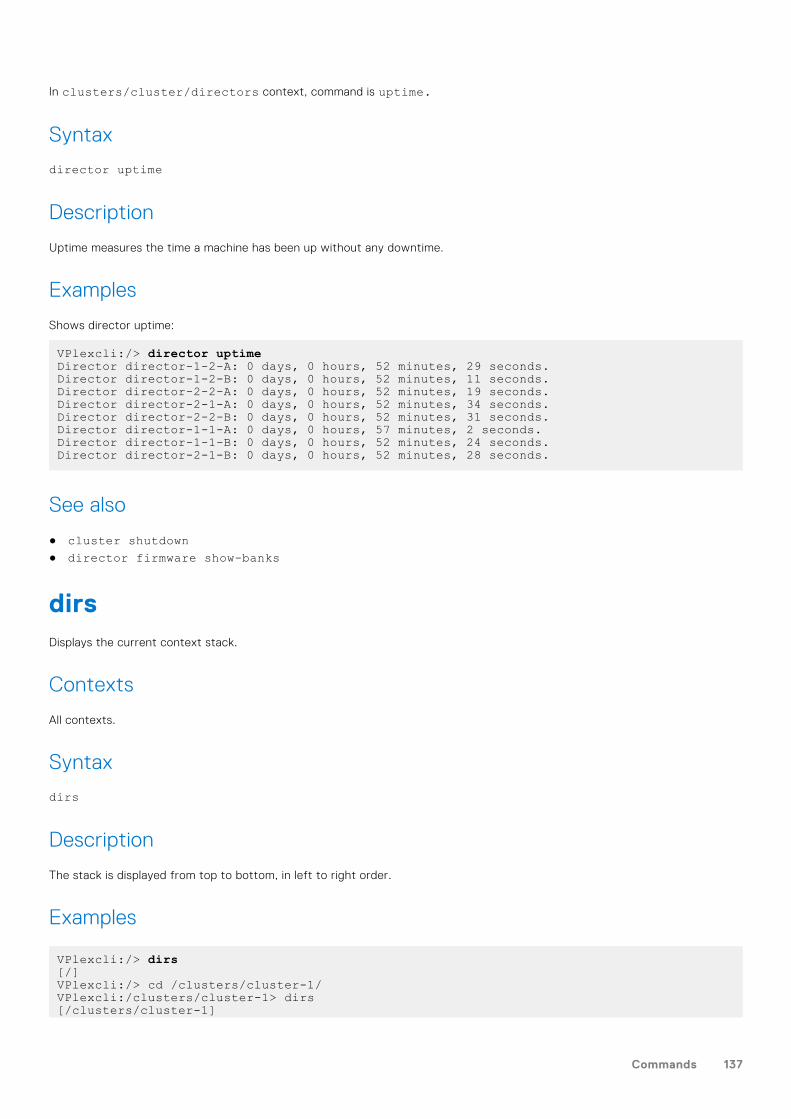
In clusters/cluster/directors context, command is uptime.
Syntax
director uptime
Description
Uptime measures the time a machine has been up without any downtime.
Examples
Shows director uptime:
VPlexcli:/> director uptimeDirector director-1-2-A: 0 days, 0 hours, 52 minutes, 29 seconds.Director director-1-2-B: 0 days, 0 hours, 52 minutes, 11 seconds.Director director-2-2-A: 0 days, 0 hours, 52 minutes, 19 seconds.Director director-2-1-A: 0 days, 0 hours, 52 minutes, 34 seconds.Director director-2-2-B: 0 days, 0 hours, 52 minutes, 31 seconds.Director director-1-1-A: 0 days, 0 hours, 57 minutes, 2 seconds.Director director-1-1-B: 0 days, 0 hours, 52 minutes, 24 seconds.Director director-2-1-B: 0 days, 0 hours, 52 minutes, 28 seconds.
See also
● cluster shutdown● director firmware show-banks
dirsDisplays the current context stack.
Contexts
All contexts.
Syntax
dirs
Description
The stack is displayed from top to bottom, in left to right order.
Examples
VPlexcli:/> dirs[/]VPlexcli:/> cd /clusters/cluster-1/VPlexcli:/clusters/cluster-1> dirs[/clusters/cluster-1]
Commands 137
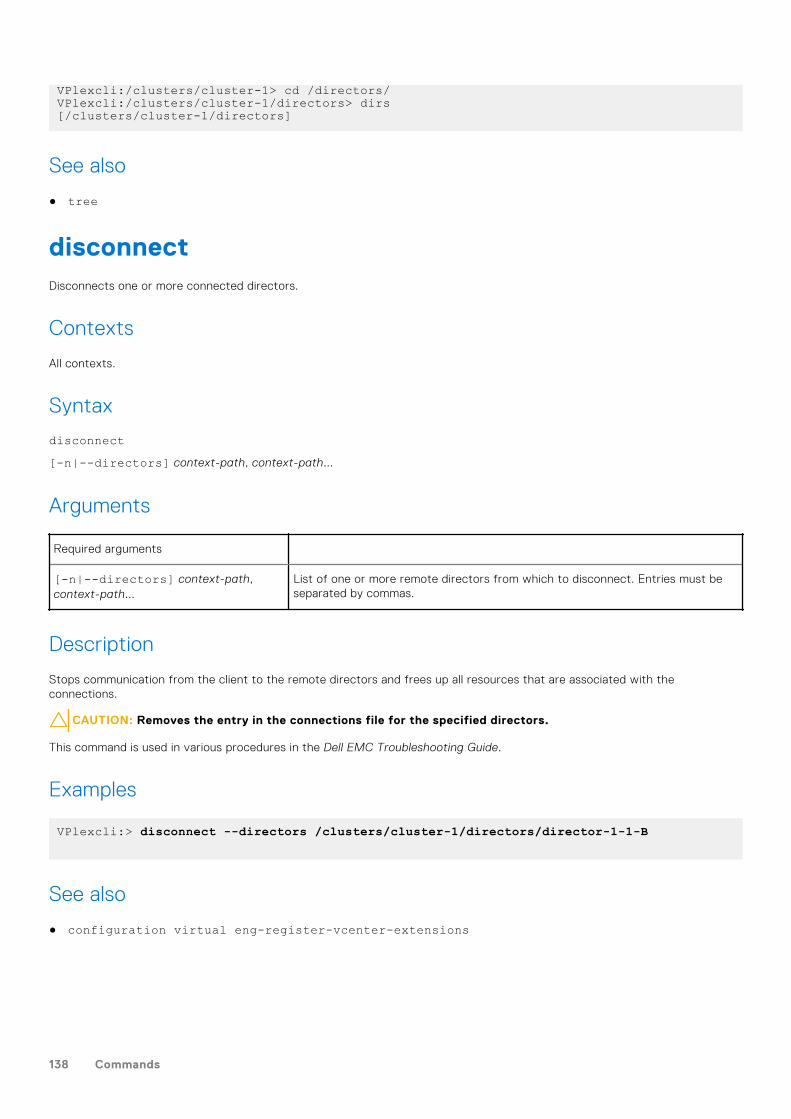
VPlexcli:/clusters/cluster-1> cd /directors/VPlexcli:/clusters/cluster-1/directors> dirs[/clusters/cluster-1/directors]
See also
● tree
disconnectDisconnects one or more connected directors.
Contexts
All contexts.
Syntax
disconnect[-n|--directors] context-path, context-path...
Arguments
Required arguments
[-n|--directors] context-path,context-path...
List of one or more remote directors from which to disconnect. Entries must beseparated by commas.
Description
Stops communication from the client to the remote directors and frees up all resources that are associated with theconnections.
CAUTION: Removes the entry in the connections file for the specified directors.
This command is used in various procedures in the Dell EMC Troubleshooting Guide.
Examples
VPlexcli:> disconnect --directors /clusters/cluster-1/directors/director-1-1-B
See also
● configuration virtual eng-register-vcenter-extensions
138 Commands
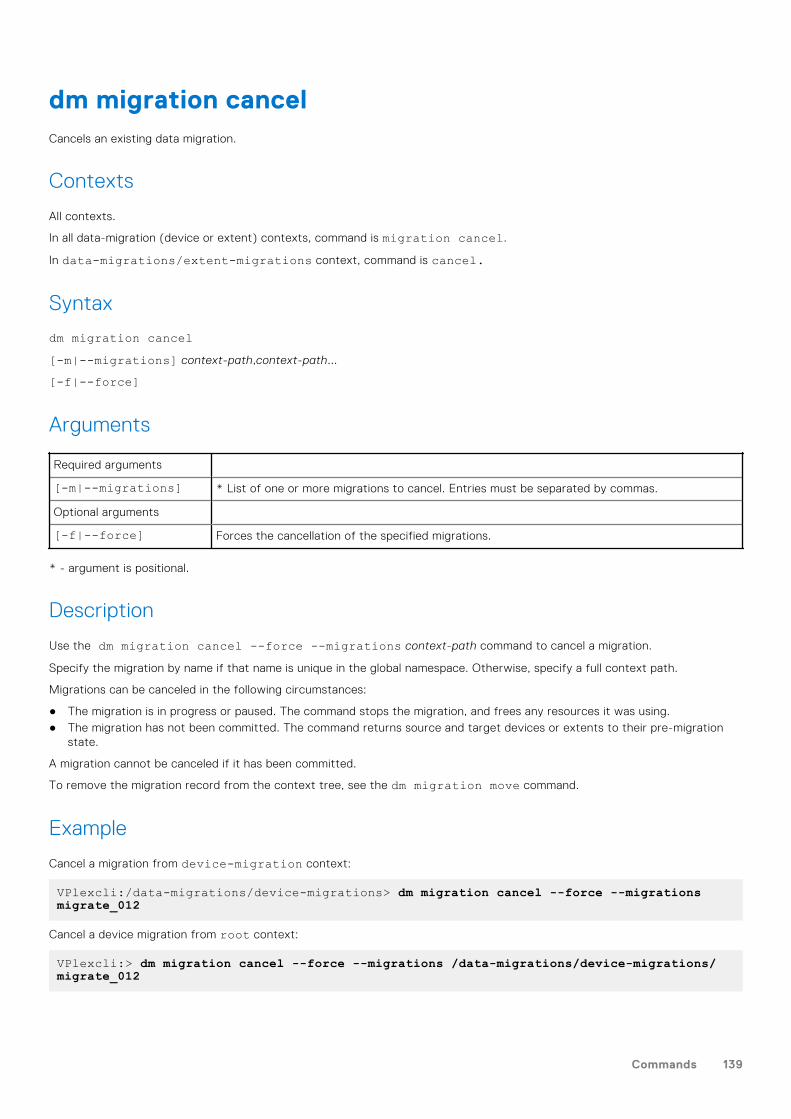
dm migration cancelCancels an existing data migration.
Contexts
All contexts.
In all data-migration (device or extent) contexts, command is migration cancel.
In data-migrations/extent-migrations context, command is cancel.
Syntax
dm migration cancel[-m|--migrations] context-path,context-path...
[-f|--force]
Arguments
Required arguments
[-m|--migrations] * List of one or more migrations to cancel. Entries must be separated by commas.
Optional arguments
[-f|--force] Forces the cancellation of the specified migrations.
* - argument is positional.
Description
Use the dm migration cancel --force --migrations context-path command to cancel a migration.
Specify the migration by name if that name is unique in the global namespace. Otherwise, specify a full context path.
Migrations can be canceled in the following circumstances:
● The migration is in progress or paused. The command stops the migration, and frees any resources it was using.● The migration has not been committed. The command returns source and target devices or extents to their pre-migration
state.
A migration cannot be canceled if it has been committed.
To remove the migration record from the context tree, see the dm migration move command.
Example
Cancel a migration from device-migration context:
VPlexcli:/data-migrations/device-migrations> dm migration cancel --force --migrations migrate_012
Cancel a device migration from root context:
VPlexcli:> dm migration cancel --force --migrations /data-migrations/device-migrations/migrate_012
Commands 139
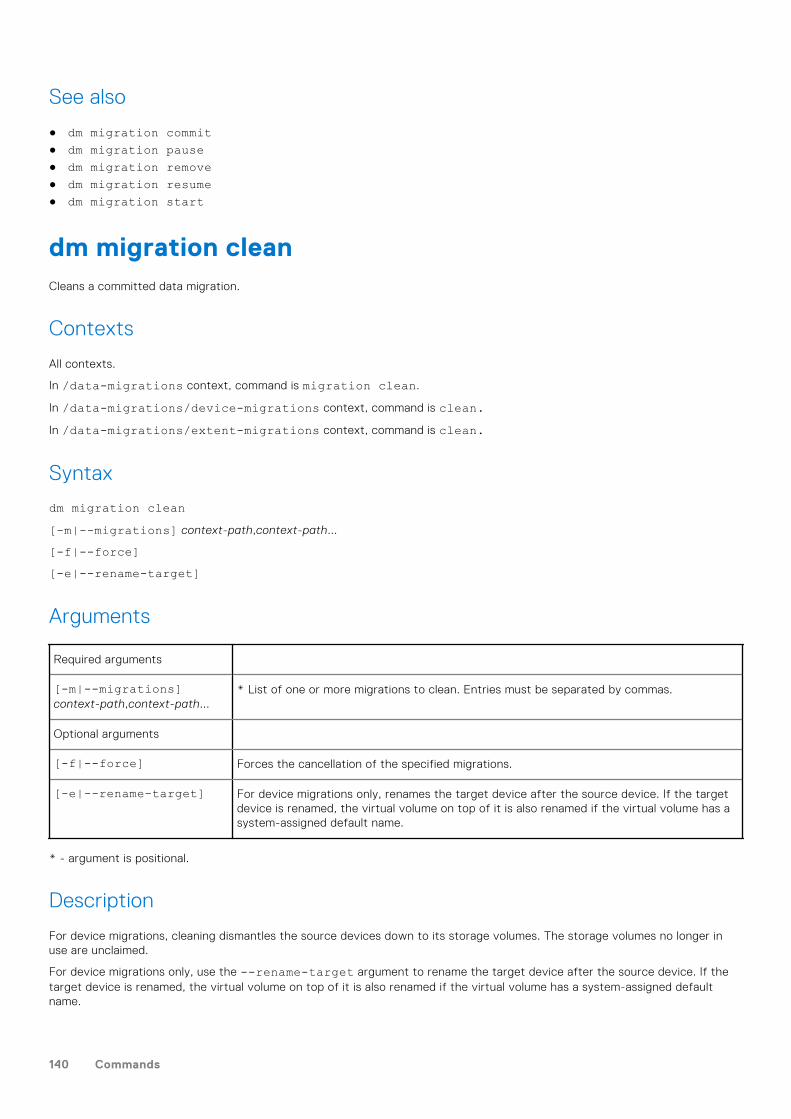
See also
● dm migration commit● dm migration pause● dm migration remove● dm migration resume● dm migration start
dm migration cleanCleans a committed data migration.
Contexts
All contexts.
In /data-migrations context, command is migration clean.
In /data-migrations/device-migrations context, command is clean.In /data-migrations/extent-migrations context, command is clean.
Syntax
dm migration clean[-m|--migrations] context-path,context-path...
[-f|--force][-e|--rename-target]
Arguments
Required arguments
[-m|--migrations]context-path,context-path...
* List of one or more migrations to clean. Entries must be separated by commas.
Optional arguments
[-f|--force] Forces the cancellation of the specified migrations.
[-e|--rename-target] For device migrations only, renames the target device after the source device. If the targetdevice is renamed, the virtual volume on top of it is also renamed if the virtual volume has asystem-assigned default name.
* - argument is positional.
Description
For device migrations, cleaning dismantles the source devices down to its storage volumes. The storage volumes no longer inuse are unclaimed.
For device migrations only, use the --rename-target argument to rename the target device after the source device. If thetarget device is renamed, the virtual volume on top of it is also renamed if the virtual volume has a system-assigned defaultname.
140 Commands
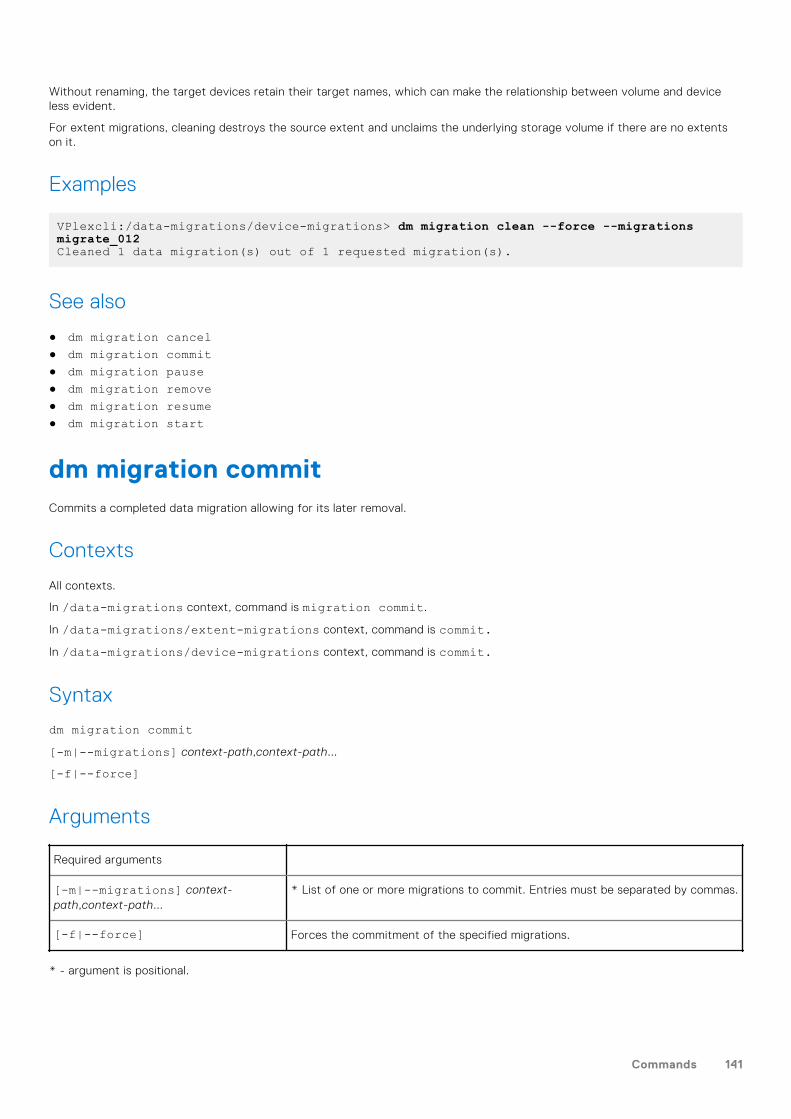
Without renaming, the target devices retain their target names, which can make the relationship between volume and deviceless evident.
For extent migrations, cleaning destroys the source extent and unclaims the underlying storage volume if there are no extentson it.
Examples
VPlexcli:/data-migrations/device-migrations> dm migration clean --force --migrations migrate_012Cleaned 1 data migration(s) out of 1 requested migration(s).
See also
● dm migration cancel● dm migration commit● dm migration pause● dm migration remove● dm migration resume● dm migration start
dm migration commitCommits a completed data migration allowing for its later removal.
Contexts
All contexts.
In /data-migrations context, command is migration commit.
In /data-migrations/extent-migrations context, command is commit.In /data-migrations/device-migrations context, command is commit.
Syntax
dm migration commit[-m|--migrations] context-path,context-path...
[-f|--force]
Arguments
Required arguments
[-m|--migrations] context-path,context-path...
* List of one or more migrations to commit. Entries must be separated by commas.
[-f|--force] Forces the commitment of the specified migrations.
* - argument is positional.
Commands 141
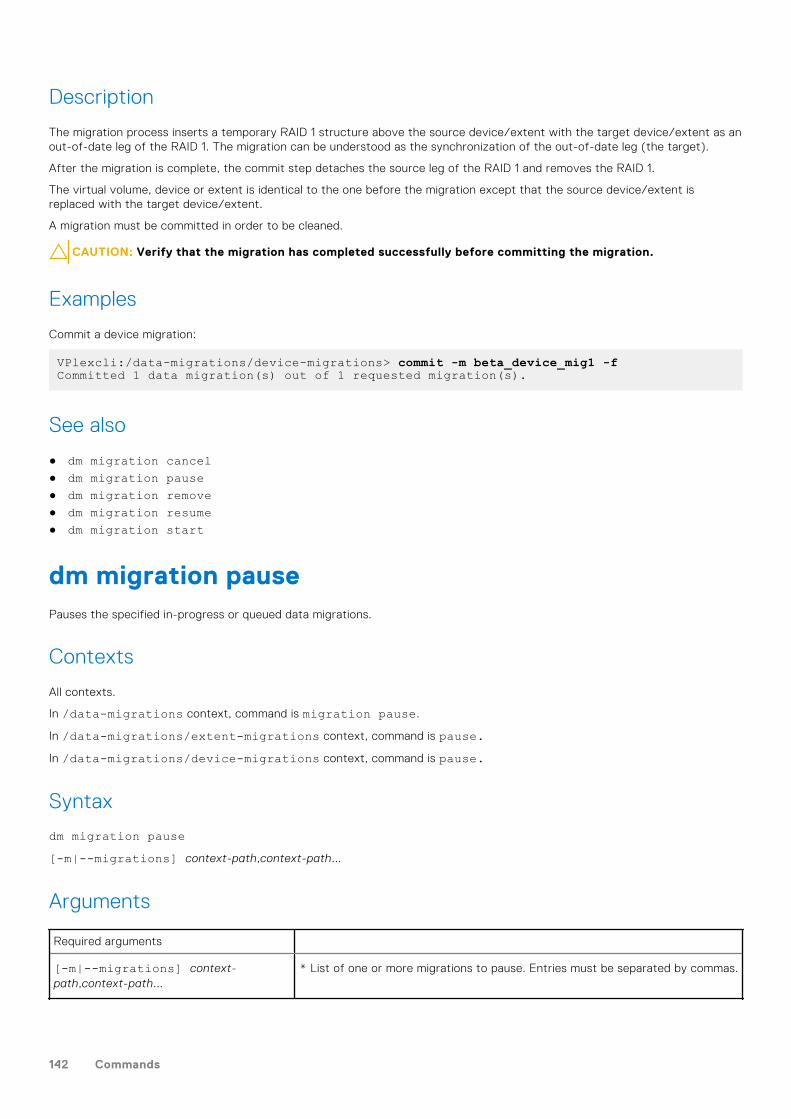
Description
The migration process inserts a temporary RAID 1 structure above the source device/extent with the target device/extent as anout-of-date leg of the RAID 1. The migration can be understood as the synchronization of the out-of-date leg (the target).
After the migration is complete, the commit step detaches the source leg of the RAID 1 and removes the RAID 1.
The virtual volume, device or extent is identical to the one before the migration except that the source device/extent isreplaced with the target device/extent.
A migration must be committed in order to be cleaned.
CAUTION: Verify that the migration has completed successfully before committing the migration.
Examples
Commit a device migration:
VPlexcli:/data-migrations/device-migrations> commit -m beta_device_mig1 -fCommitted 1 data migration(s) out of 1 requested migration(s).
See also
● dm migration cancel● dm migration pause● dm migration remove● dm migration resume● dm migration start
dm migration pausePauses the specified in-progress or queued data migrations.
Contexts
All contexts.
In /data-migrations context, command is migration pause.
In /data-migrations/extent-migrations context, command is pause.In /data-migrations/device-migrations context, command is pause.
Syntax
dm migration pause[-m|--migrations] context-path,context-path...
Arguments
Required arguments
[-m|--migrations] context-path,context-path...
* List of one or more migrations to pause. Entries must be separated by commas.
142 Commands
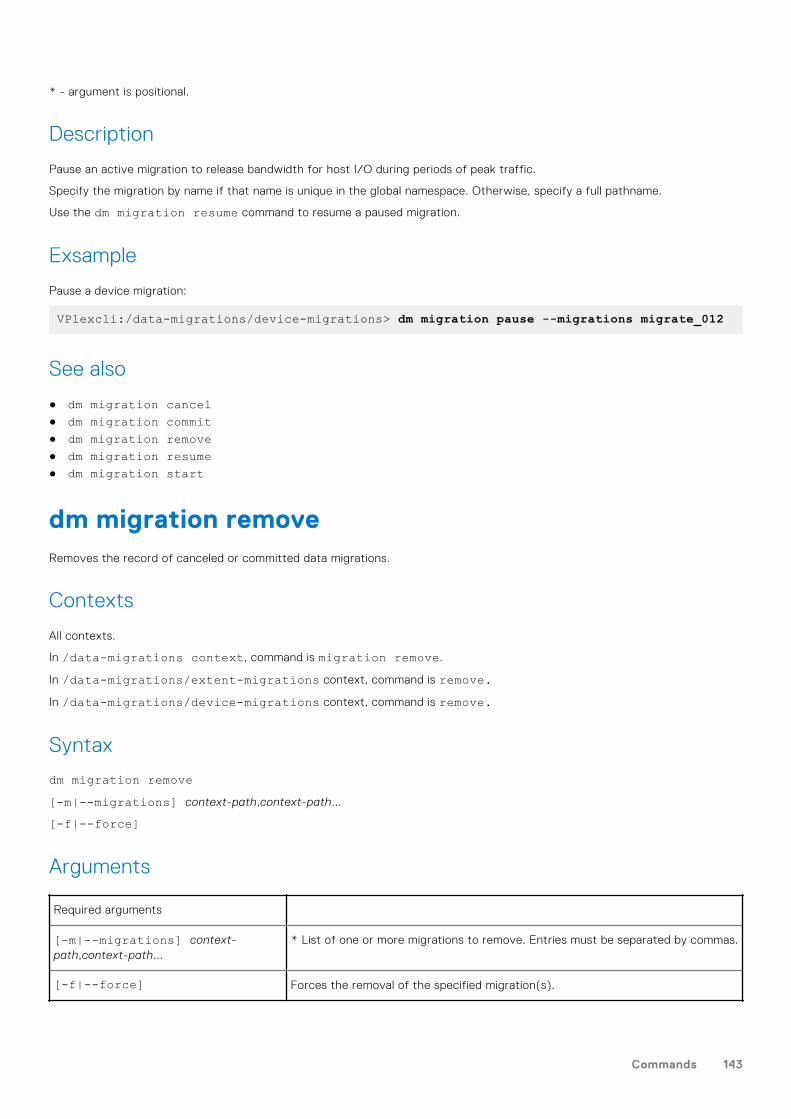
* - argument is positional.
Description
Pause an active migration to release bandwidth for host I/O during periods of peak traffic.
Specify the migration by name if that name is unique in the global namespace. Otherwise, specify a full pathname.
Use the dm migration resume command to resume a paused migration.
Exsample
Pause a device migration:
VPlexcli:/data-migrations/device-migrations> dm migration pause --migrations migrate_012
See also
● dm migration cancel● dm migration commit● dm migration remove● dm migration resume● dm migration start
dm migration removeRemoves the record of canceled or committed data migrations.
Contexts
All contexts.
In /data-migrations context, command is migration remove.
In /data-migrations/extent-migrations context, command is remove.In /data-migrations/device-migrations context, command is remove.
Syntax
dm migration remove[-m|--migrations] context-path,context-path...
[-f|--force]
Arguments
Required arguments
[-m|--migrations] context-path,context-path...
* List of one or more migrations to remove. Entries must be separated by commas.
[-f|--force] Forces the removal of the specified migration(s).
Commands 143
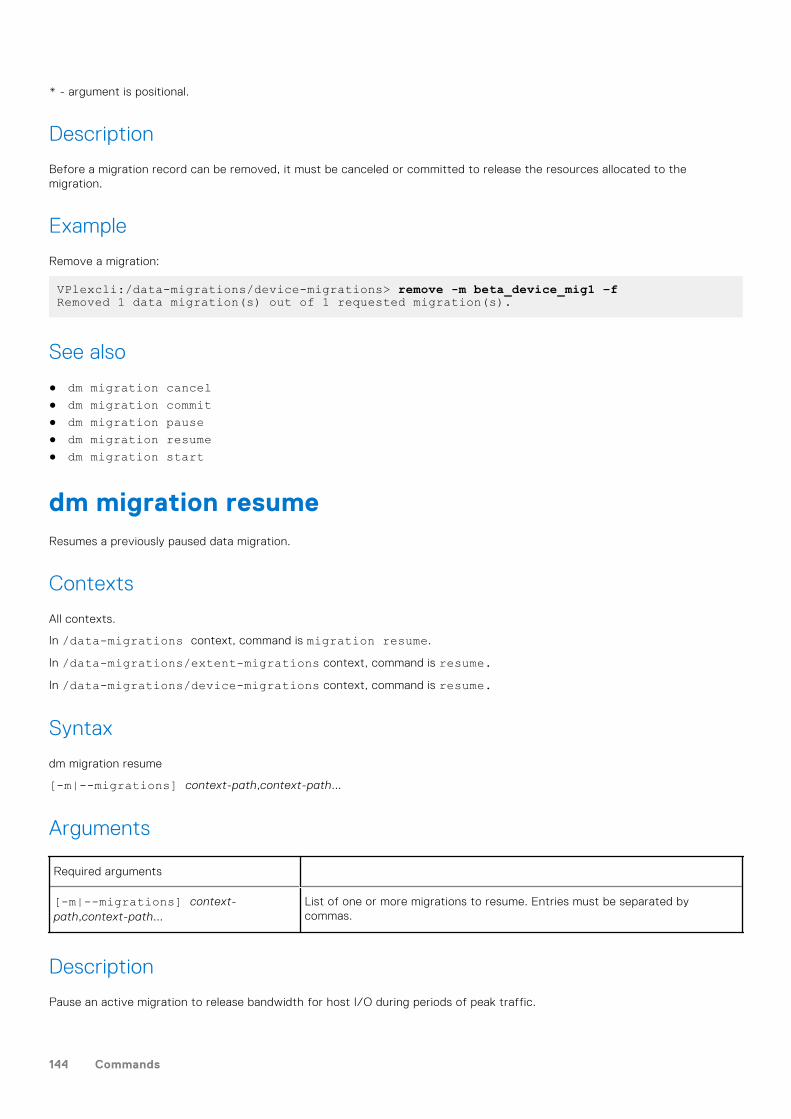
* - argument is positional.
Description
Before a migration record can be removed, it must be canceled or committed to release the resources allocated to themigration.
Example
Remove a migration:
VPlexcli:/data-migrations/device-migrations> remove -m beta_device_mig1 –fRemoved 1 data migration(s) out of 1 requested migration(s).
See also
● dm migration cancel● dm migration commit● dm migration pause● dm migration resume● dm migration start
dm migration resumeResumes a previously paused data migration.
Contexts
All contexts.
In /data-migrations context, command is migration resume.
In /data-migrations/extent-migrations context, command is resume.In /data-migrations/device-migrations context, command is resume.
Syntax
dm migration resume
[-m|--migrations] context-path,context-path...
Arguments
Required arguments
[-m|--migrations] context-path,context-path...
List of one or more migrations to resume. Entries must be separated bycommas.
Description
Pause an active migration to release bandwidth for host I/O during periods of peak traffic.
144 Commands
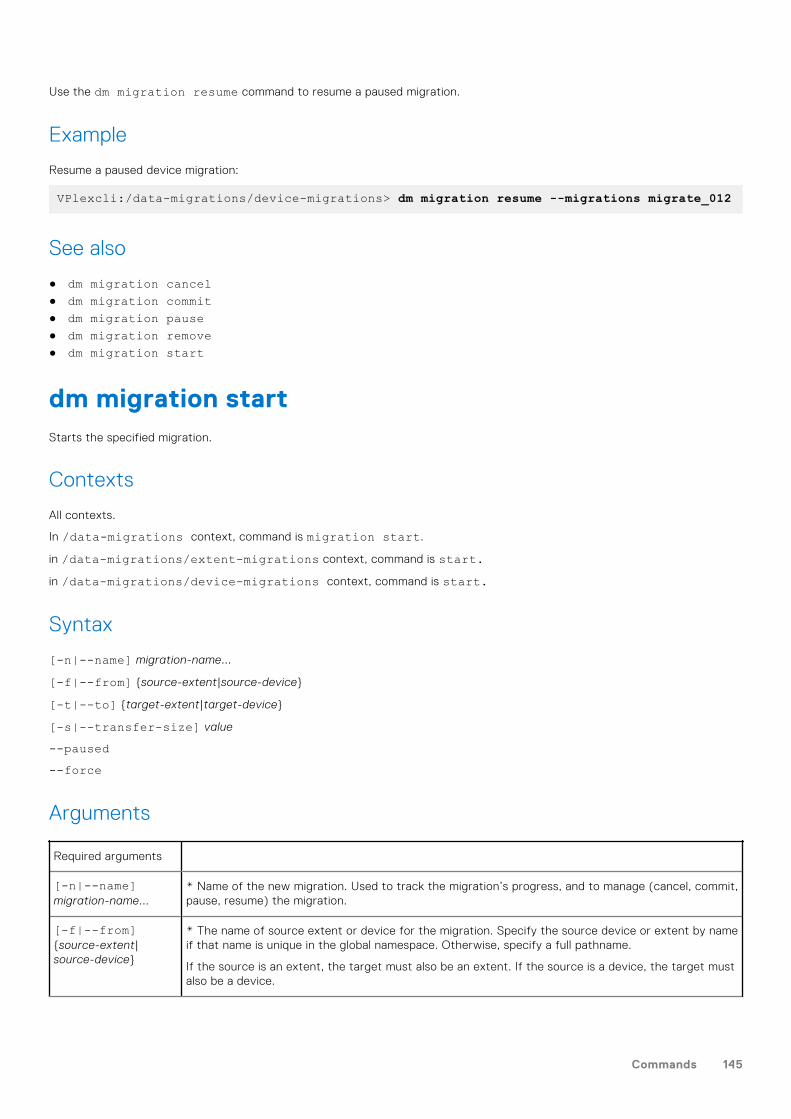
Use the dm migration resume command to resume a paused migration.
Example
Resume a paused device migration:
VPlexcli:/data-migrations/device-migrations> dm migration resume --migrations migrate_012
See also
● dm migration cancel● dm migration commit● dm migration pause● dm migration remove● dm migration start
dm migration startStarts the specified migration.
Contexts
All contexts.
In /data-migrations context, command is migration start.
in /data-migrations/extent-migrations context, command is start.in /data-migrations/device-migrations context, command is start.
Syntax
[-n|--name] migration-name...
[-f|--from] {source-extent|source-device}
[-t|--to] {target-extent|target-device}
[-s|--transfer-size] value
--paused--force
Arguments
Required arguments
[-n|--name]migration-name...
* Name of the new migration. Used to track the migration’s progress, and to manage (cancel, commit,pause, resume) the migration.
[-f|--from]{source-extent|source-device}
* The name of source extent or device for the migration. Specify the source device or extent by nameif that name is unique in the global namespace. Otherwise, specify a full pathname.
If the source is an extent, the target must also be an extent. If the source is a device, the target mustalso be a device.
Commands 145
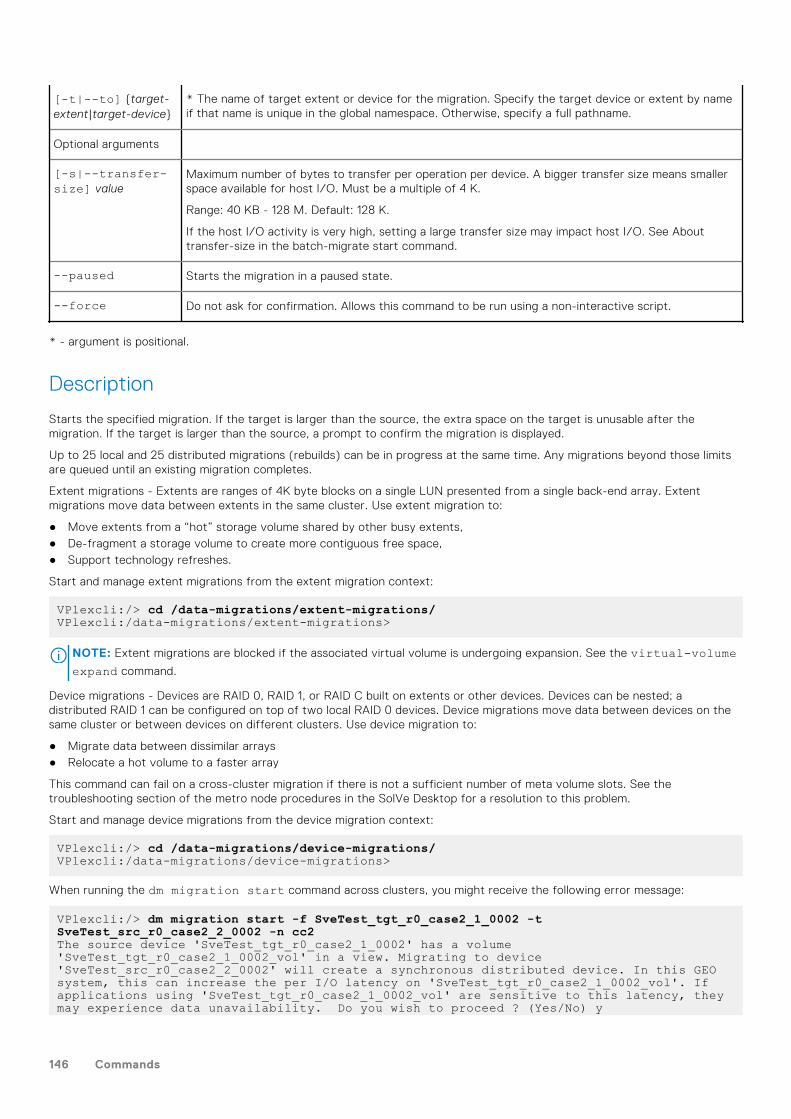
[-t|--to] {target-extent|target-device}
* The name of target extent or device for the migration. Specify the target device or extent by nameif that name is unique in the global namespace. Otherwise, specify a full pathname.
Optional arguments
[-s|--transfer-size] value
Maximum number of bytes to transfer per operation per device. A bigger transfer size means smallerspace available for host I/O. Must be a multiple of 4 K.
Range: 40 KB - 128 M. Default: 128 K.
If the host I/O activity is very high, setting a large transfer size may impact host I/O. See Abouttransfer-size in the batch-migrate start command.
--paused Starts the migration in a paused state.
--force Do not ask for confirmation. Allows this command to be run using a non-interactive script.
* - argument is positional.
Description
Starts the specified migration. If the target is larger than the source, the extra space on the target is unusable after themigration. If the target is larger than the source, a prompt to confirm the migration is displayed.
Up to 25 local and 25 distributed migrations (rebuilds) can be in progress at the same time. Any migrations beyond those limitsare queued until an existing migration completes.
Extent migrations - Extents are ranges of 4K byte blocks on a single LUN presented from a single back-end array. Extentmigrations move data between extents in the same cluster. Use extent migration to:
● Move extents from a “hot” storage volume shared by other busy extents,● De-fragment a storage volume to create more contiguous free space,● Support technology refreshes.
Start and manage extent migrations from the extent migration context:
VPlexcli:/> cd /data-migrations/extent-migrations/VPlexcli:/data-migrations/extent-migrations>
NOTE: Extent migrations are blocked if the associated virtual volume is undergoing expansion. See the virtual-volumeexpand command.
Device migrations - Devices are RAID 0, RAID 1, or RAID C built on extents or other devices. Devices can be nested; adistributed RAID 1 can be configured on top of two local RAID 0 devices. Device migrations move data between devices on thesame cluster or between devices on different clusters. Use device migration to:
● Migrate data between dissimilar arrays● Relocate a hot volume to a faster array
This command can fail on a cross-cluster migration if there is not a sufficient number of meta volume slots. See thetroubleshooting section of the metro node procedures in the SolVe Desktop for a resolution to this problem.
Start and manage device migrations from the device migration context:
VPlexcli:/> cd /data-migrations/device-migrations/VPlexcli:/data-migrations/device-migrations>
When running the dm migration start command across clusters, you might receive the following error message:
VPlexcli:/> dm migration start -f SveTest_tgt_r0_case2_1_0002 -t SveTest_src_r0_case2_2_0002 -n cc2The source device 'SveTest_tgt_r0_case2_1_0002' has a volume 'SveTest_tgt_r0_case2_1_0002_vol' in a view. Migrating to device 'SveTest_src_r0_case2_2_0002' will create a synchronous distributed device. In this GEO system, this can increase the per I/O latency on 'SveTest_tgt_r0_case2_1_0002_vol'. If applications using 'SveTest_tgt_r0_case2_1_0002_vol' are sensitive to this latency, they may experience data unavailability. Do you wish to proceed ? (Yes/No) y
146 Commands
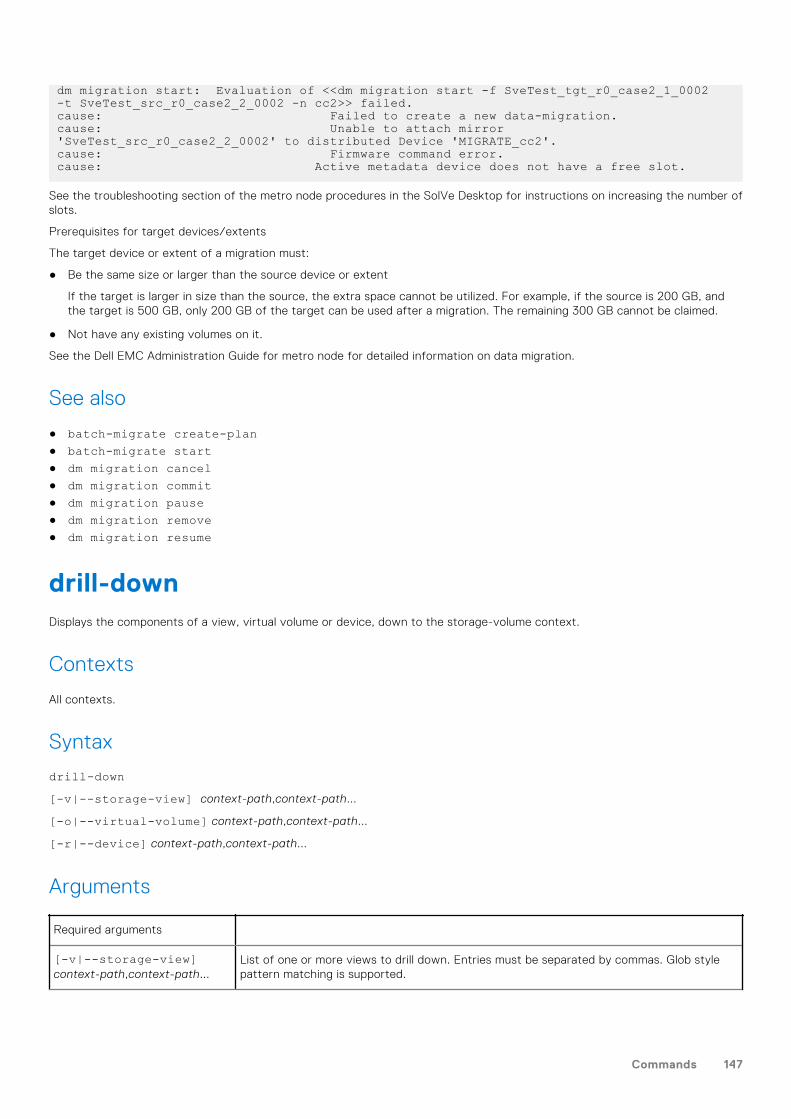
dm migration start: Evaluation of <<dm migration start -f SveTest_tgt_r0_case2_1_0002 -t SveTest_src_r0_case2_2_0002 -n cc2>> failed.cause: Failed to create a new data-migration.cause: Unable to attach mirror 'SveTest_src_r0_case2_2_0002' to distributed Device 'MIGRATE_cc2'.cause: Firmware command error.cause: Active metadata device does not have a free slot.
See the troubleshooting section of the metro node procedures in the SolVe Desktop for instructions on increasing the number ofslots.
Prerequisites for target devices/extents
The target device or extent of a migration must:
● Be the same size or larger than the source device or extent
If the target is larger in size than the source, the extra space cannot be utilized. For example, if the source is 200 GB, andthe target is 500 GB, only 200 GB of the target can be used after a migration. The remaining 300 GB cannot be claimed.
● Not have any existing volumes on it.
See the Dell EMC Administration Guide for metro node for detailed information on data migration.
See also
● batch-migrate create-plan● batch-migrate start● dm migration cancel● dm migration commit● dm migration pause● dm migration remove● dm migration resume
drill-downDisplays the components of a view, virtual volume or device, down to the storage-volume context.
Contexts
All contexts.
Syntax
drill-down[-v|--storage-view] context-path,context-path...
[-o|--virtual-volume] context-path,context-path...
[-r|--device] context-path,context-path...
Arguments
Required arguments
[-v|--storage-view]context-path,context-path...
List of one or more views to drill down. Entries must be separated by commas. Glob stylepattern matching is supported.
Commands 147
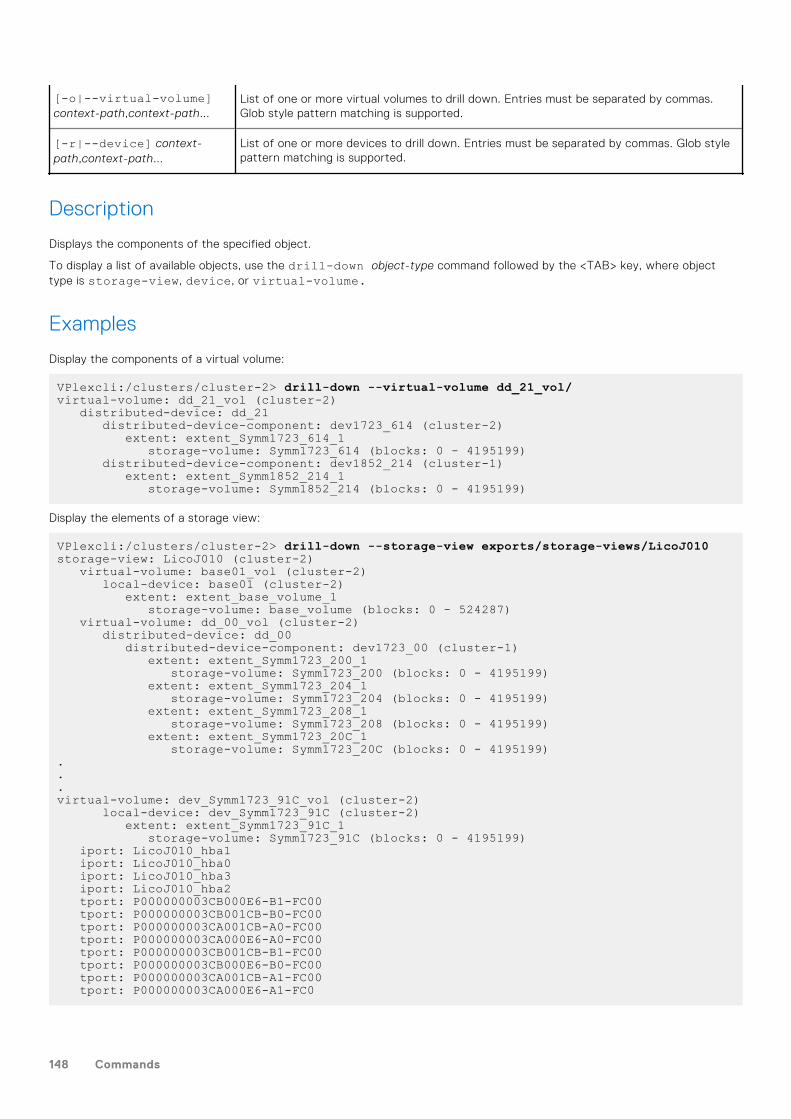
[-o|--virtual-volume]context-path,context-path...
List of one or more virtual volumes to drill down. Entries must be separated by commas.Glob style pattern matching is supported.
[-r|--device] context-path,context-path...
List of one or more devices to drill down. Entries must be separated by commas. Glob stylepattern matching is supported.
Description
Displays the components of the specified object.
To display a list of available objects, use the drill-down object-type command followed by the <TAB> key, where objecttype is storage-view, device, or virtual-volume.
Examples
Display the components of a virtual volume:
VPlexcli:/clusters/cluster-2> drill-down --virtual-volume dd_21_vol/virtual-volume: dd_21_vol (cluster-2) distributed-device: dd_21 distributed-device-component: dev1723_614 (cluster-2) extent: extent_Symm1723_614_1 storage-volume: Symm1723_614 (blocks: 0 - 4195199) distributed-device-component: dev1852_214 (cluster-1) extent: extent_Symm1852_214_1 storage-volume: Symm1852_214 (blocks: 0 - 4195199)
Display the elements of a storage view:
VPlexcli:/clusters/cluster-2> drill-down --storage-view exports/storage-views/LicoJ010storage-view: LicoJ010 (cluster-2) virtual-volume: base01_vol (cluster-2) local-device: base01 (cluster-2) extent: extent_base_volume_1 storage-volume: base_volume (blocks: 0 - 524287) virtual-volume: dd_00_vol (cluster-2) distributed-device: dd_00 distributed-device-component: dev1723_00 (cluster-1) extent: extent_Symm1723_200_1 storage-volume: Symm1723_200 (blocks: 0 - 4195199) extent: extent_Symm1723_204_1 storage-volume: Symm1723_204 (blocks: 0 - 4195199) extent: extent_Symm1723_208_1 storage-volume: Symm1723_208 (blocks: 0 - 4195199) extent: extent_Symm1723_20C_1 storage-volume: Symm1723_20C (blocks: 0 - 4195199)...virtual-volume: dev_Symm1723_91C_vol (cluster-2) local-device: dev_Symm1723_91C (cluster-2) extent: extent_Symm1723_91C_1 storage-volume: Symm1723_91C (blocks: 0 - 4195199) iport: LicoJ010_hba1 iport: LicoJ010_hba0 iport: LicoJ010_hba3 iport: LicoJ010_hba2 tport: P000000003CB000E6-B1-FC00 tport: P000000003CB001CB-B0-FC00 tport: P000000003CA001CB-A0-FC00 tport: P000000003CA000E6-A0-FC00 tport: P000000003CB001CB-B1-FC00 tport: P000000003CB000E6-B0-FC00 tport: P000000003CA001CB-A1-FC00 tport: P000000003CA000E6-A1-FC0
148 Commands
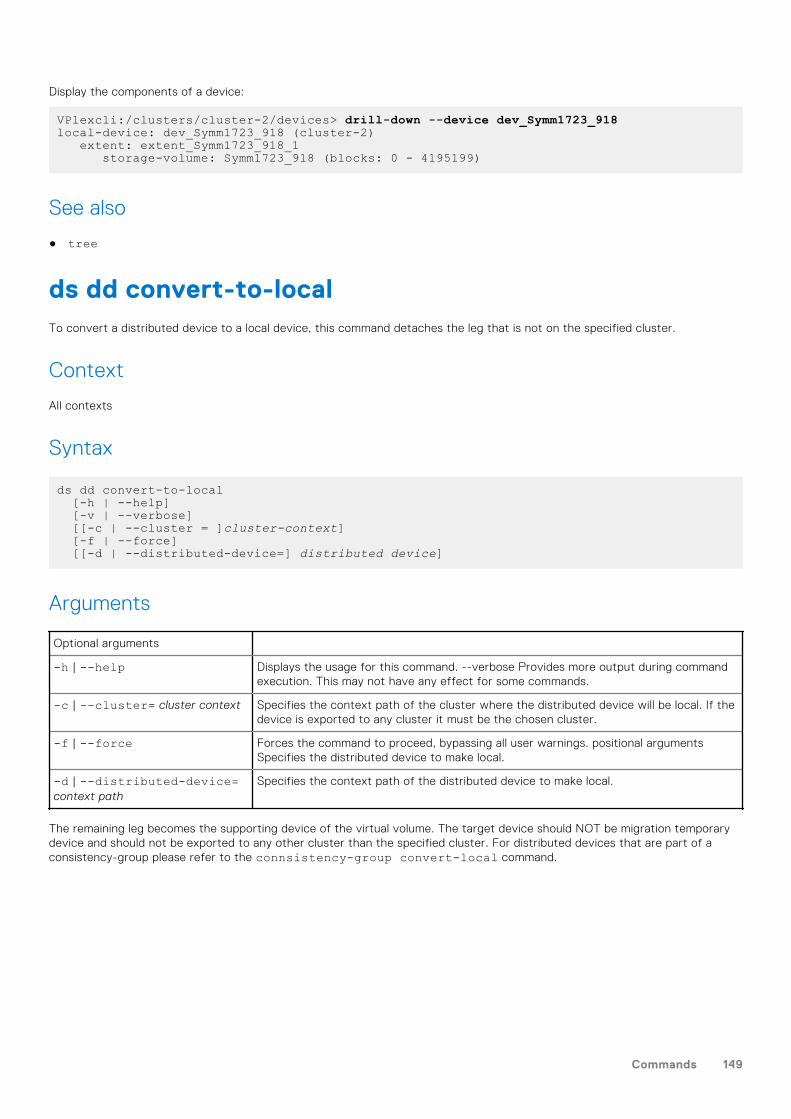
Display the components of a device:
VPlexcli:/clusters/cluster-2/devices> drill-down --device dev_Symm1723_918local-device: dev_Symm1723_918 (cluster-2) extent: extent_Symm1723_918_1 storage-volume: Symm1723_918 (blocks: 0 - 4195199)
See also
● tree
ds dd convert-to-localTo convert a distributed device to a local device, this command detaches the leg that is not on the specified cluster.
Context
All contexts
Syntax
ds dd convert-to-local [-h | --help] [-v | --verbose] [[-c | --cluster = ]cluster-context] [-f | --force] [[-d | --distributed-device=] distributed device]
Arguments
Optional arguments
-h | --help Displays the usage for this command. --verbose Provides more output during commandexecution. This may not have any effect for some commands.
-c | --cluster= cluster context Specifies the context path of the cluster where the distributed device will be local. If thedevice is exported to any cluster it must be the chosen cluster.
-f | --force Forces the command to proceed, bypassing all user warnings. positional argumentsSpecifies the distributed device to make local.
-d | --distributed-device=context path
Specifies the context path of the distributed device to make local.
The remaining leg becomes the supporting device of the virtual volume. The target device should NOT be migration temporarydevice and should not be exported to any other cluster than the specified cluster. For distributed devices that are part of aconsistency-group please refer to the connsistency-group convert-local command.
Commands 149
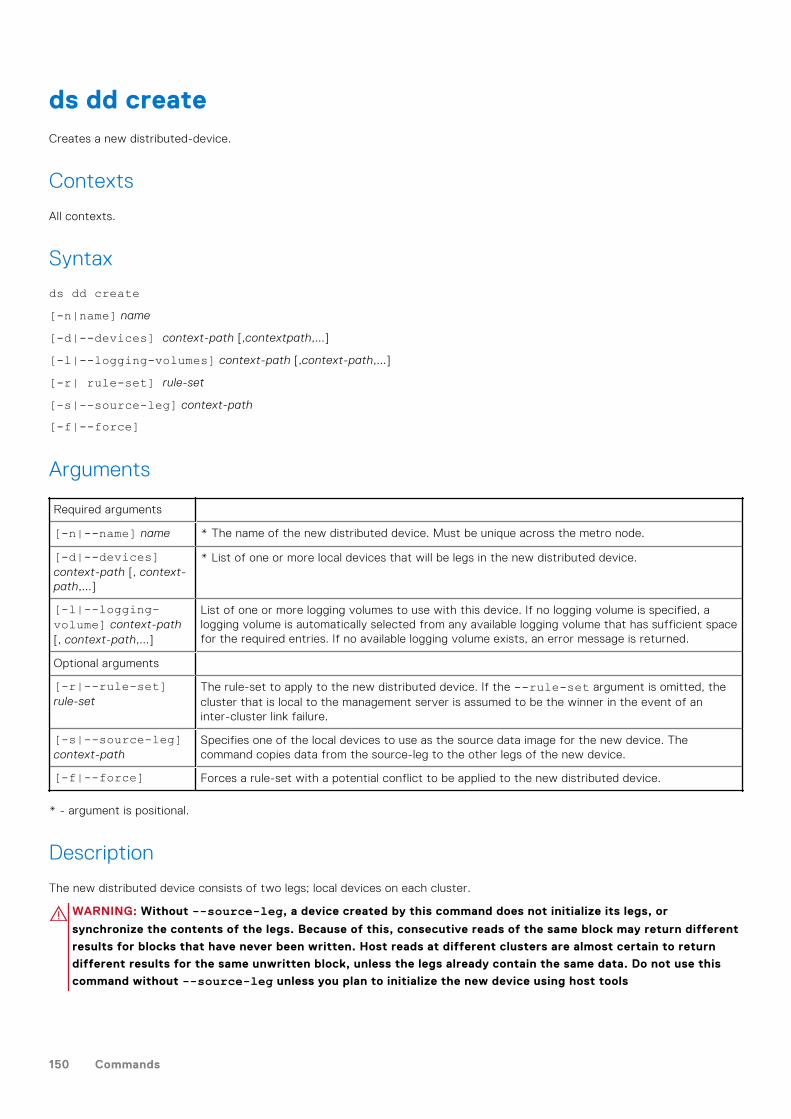
ds dd createCreates a new distributed-device.
Contexts
All contexts.
Syntax
ds dd create[-n|name] name
[-d|--devices] context-path [,contextpath,...]
[-l|--logging-volumes] context-path [,context-path,...]
[-r| rule-set] rule-set
[-s|--source-leg] context-path
[-f|--force]
Arguments
Required arguments
[-n|--name] name * The name of the new distributed device. Must be unique across the metro node.
[-d|--devices]context-path [, context-path,...]
* List of one or more local devices that will be legs in the new distributed device.
[-l|--logging-volume] context-path[, context-path,...]
List of one or more logging volumes to use with this device. If no logging volume is specified, alogging volume is automatically selected from any available logging volume that has sufficient spacefor the required entries. If no available logging volume exists, an error message is returned.
Optional arguments
[-r|--rule-set]rule-set
The rule-set to apply to the new distributed device. If the --rule-set argument is omitted, thecluster that is local to the management server is assumed to be the winner in the event of aninter-cluster link failure.
[-s|--source-leg]context-path
Specifies one of the local devices to use as the source data image for the new device. Thecommand copies data from the source-leg to the other legs of the new device.
[-f|--force] Forces a rule-set with a potential conflict to be applied to the new distributed device.
* - argument is positional.
Description
The new distributed device consists of two legs; local devices on each cluster.
WARNING: Without --source-leg, a device created by this command does not initialize its legs, or
synchronize the contents of the legs. Because of this, consecutive reads of the same block may return different
results for blocks that have never been written. Host reads at different clusters are almost certain to return
different results for the same unwritten block, unless the legs already contain the same data. Do not use this
command without --source-leg unless you plan to initialize the new device using host tools
150 Commands
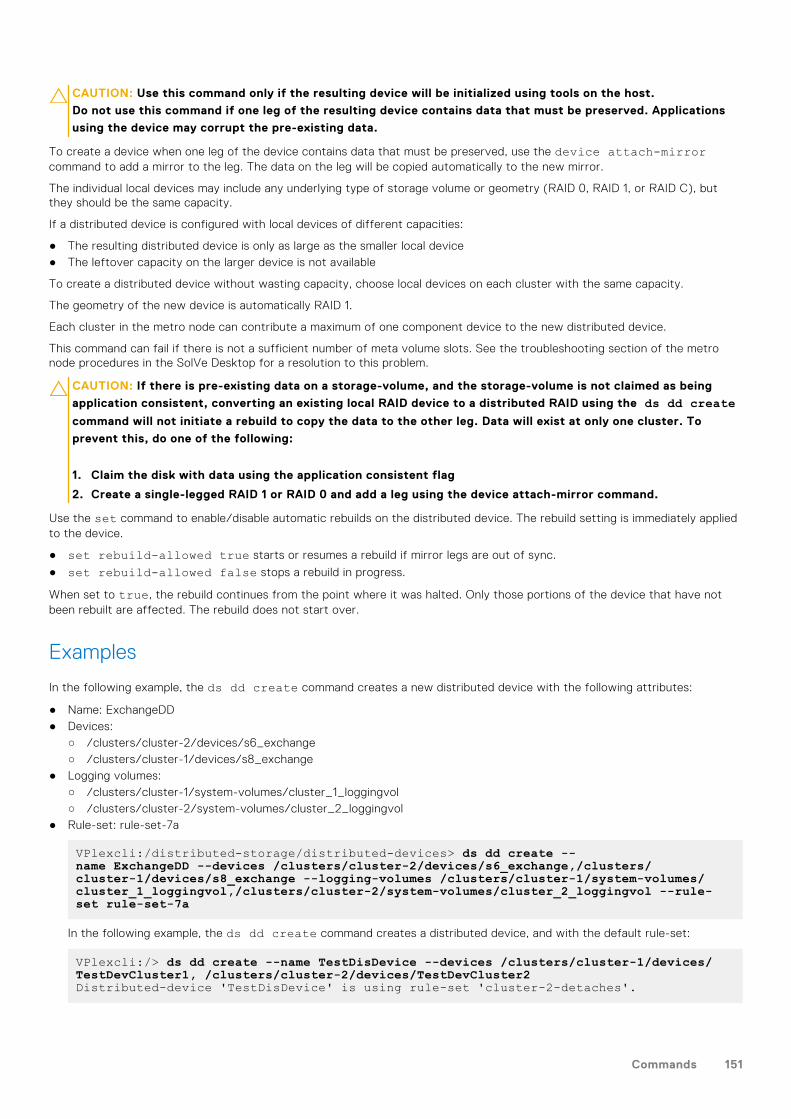
CAUTION: Use this command only if the resulting device will be initialized using tools on the host.
Do not use this command if one leg of the resulting device contains data that must be preserved. Applications
using the device may corrupt the pre-existing data.
To create a device when one leg of the device contains data that must be preserved, use the device attach-mirrorcommand to add a mirror to the leg. The data on the leg will be copied automatically to the new mirror.
The individual local devices may include any underlying type of storage volume or geometry (RAID 0, RAID 1, or RAID C), butthey should be the same capacity.
If a distributed device is configured with local devices of different capacities:
● The resulting distributed device is only as large as the smaller local device● The leftover capacity on the larger device is not available
To create a distributed device without wasting capacity, choose local devices on each cluster with the same capacity.
The geometry of the new device is automatically RAID 1.
Each cluster in the metro node can contribute a maximum of one component device to the new distributed device.
This command can fail if there is not a sufficient number of meta volume slots. See the troubleshooting section of the metronode procedures in the SolVe Desktop for a resolution to this problem.
CAUTION: If there is pre-existing data on a storage-volume, and the storage-volume is not claimed as being
application consistent, converting an existing local RAID device to a distributed RAID using the ds dd createcommand will not initiate a rebuild to copy the data to the other leg. Data will exist at only one cluster. To
prevent this, do one of the following:
1. Claim the disk with data using the application consistent flag
2. Create a single-legged RAID 1 or RAID 0 and add a leg using the device attach-mirror command.
Use the set command to enable/disable automatic rebuilds on the distributed device. The rebuild setting is immediately appliedto the device.
● set rebuild-allowed true starts or resumes a rebuild if mirror legs are out of sync.
● set rebuild-allowed false stops a rebuild in progress.
When set to true, the rebuild continues from the point where it was halted. Only those portions of the device that have notbeen rebuilt are affected. The rebuild does not start over.
Examples
In the following example, the ds dd create command creates a new distributed device with the following attributes:
● Name: ExchangeDD● Devices:
○ /clusters/cluster-2/devices/s6_exchange○ /clusters/cluster-1/devices/s8_exchange
● Logging volumes:○ /clusters/cluster-1/system-volumes/cluster_1_loggingvol○ /clusters/cluster-2/system-volumes/cluster_2_loggingvol
● Rule-set: rule-set-7a
VPlexcli:/distributed-storage/distributed-devices> ds dd create --name ExchangeDD --devices /clusters/cluster-2/devices/s6_exchange,/clusters/cluster-1/devices/s8_exchange --logging-volumes /clusters/cluster-1/system-volumes/cluster_1_loggingvol,/clusters/cluster-2/system-volumes/cluster_2_loggingvol --rule-set rule-set-7a
In the following example, the ds dd create command creates a distributed device, and with the default rule-set:
VPlexcli:/> ds dd create --name TestDisDevice --devices /clusters/cluster-1/devices/TestDevCluster1, /clusters/cluster-2/devices/TestDevCluster2Distributed-device 'TestDisDevice' is using rule-set 'cluster-2-detaches'.
Commands 151
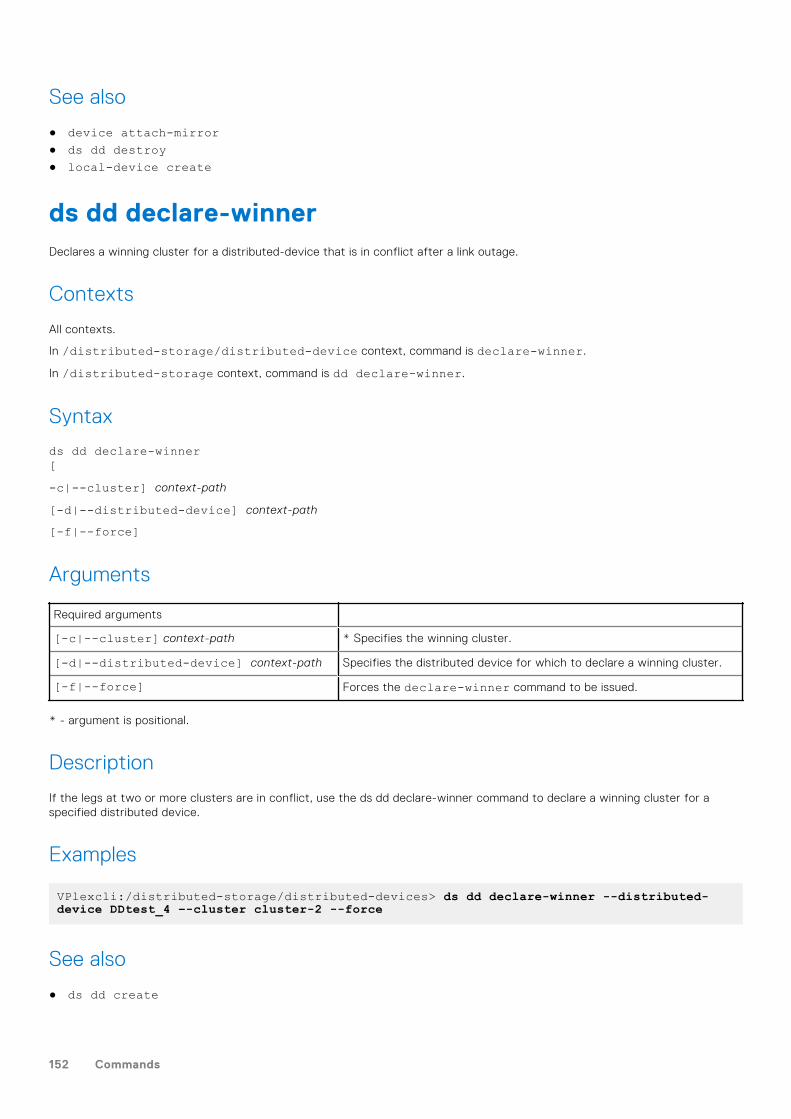
See also
● device attach-mirror● ds dd destroy● local-device create
ds dd declare-winnerDeclares a winning cluster for a distributed-device that is in conflict after a link outage.
Contexts
All contexts.
In /distributed-storage/distributed-device context, command is declare-winner.
In /distributed-storage context, command is dd declare-winner.
Syntax
ds dd declare-winner[-c|--cluster] context-path
[-d|--distributed-device] context-path
[-f|--force]
Arguments
Required arguments
[-c|--cluster] context-path * Specifies the winning cluster.
[-d|--distributed-device] context-path Specifies the distributed device for which to declare a winning cluster.
[-f|--force] Forces the declare-winner command to be issued.
* - argument is positional.
Description
If the legs at two or more clusters are in conflict, use the ds dd declare-winner command to declare a winning cluster for aspecified distributed device.
Examples
VPlexcli:/distributed-storage/distributed-devices> ds dd declare-winner --distributed-device DDtest_4 –-cluster cluster-2 --force
See also
● ds dd create
152 Commands
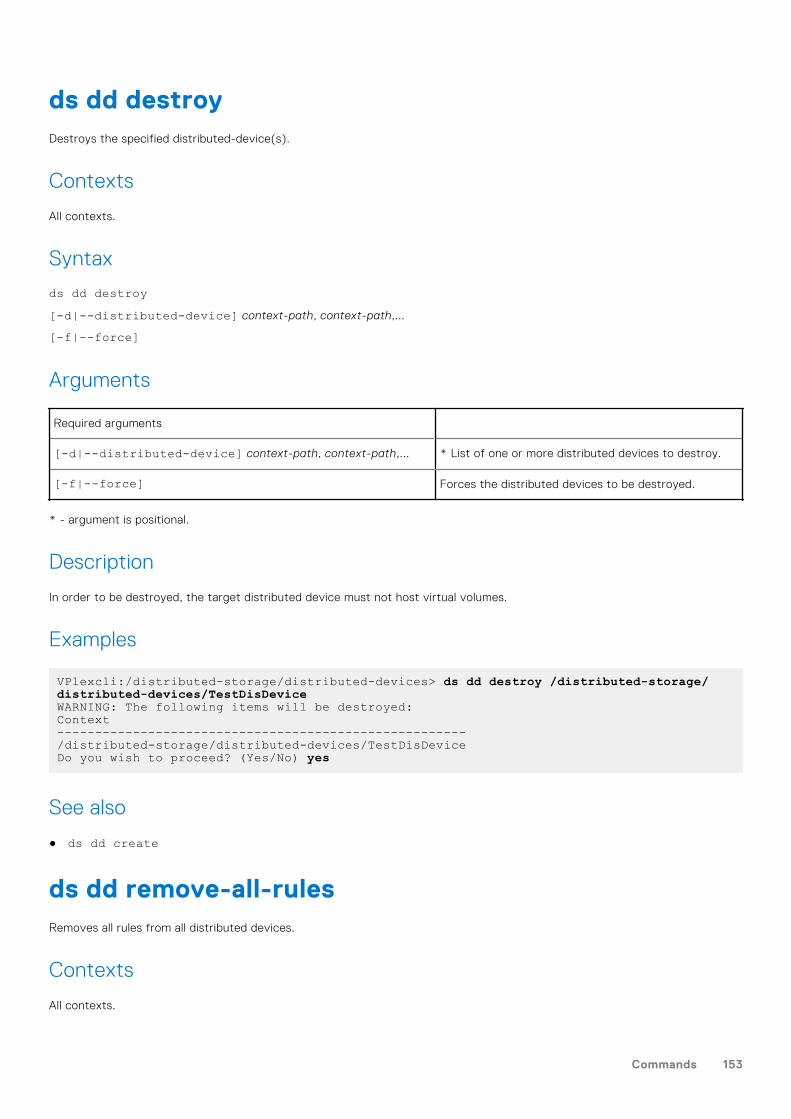
ds dd destroyDestroys the specified distributed-device(s).
Contexts
All contexts.
Syntax
ds dd destroy[-d|--distributed-device] context-path, context-path,...
[-f|--force]
Arguments
Required arguments
[-d|--distributed-device] context-path, context-path,... * List of one or more distributed devices to destroy.
[-f|--force] Forces the distributed devices to be destroyed.
* - argument is positional.
Description
In order to be destroyed, the target distributed device must not host virtual volumes.
Examples
VPlexcli:/distributed-storage/distributed-devices> ds dd destroy /distributed-storage/distributed-devices/TestDisDeviceWARNING: The following items will be destroyed:Context------------------------------------------------------/distributed-storage/distributed-devices/TestDisDeviceDo you wish to proceed? (Yes/No) yes
See also
● ds dd create
ds dd remove-all-rulesRemoves all rules from all distributed devices.
Contexts
All contexts.
Commands 153
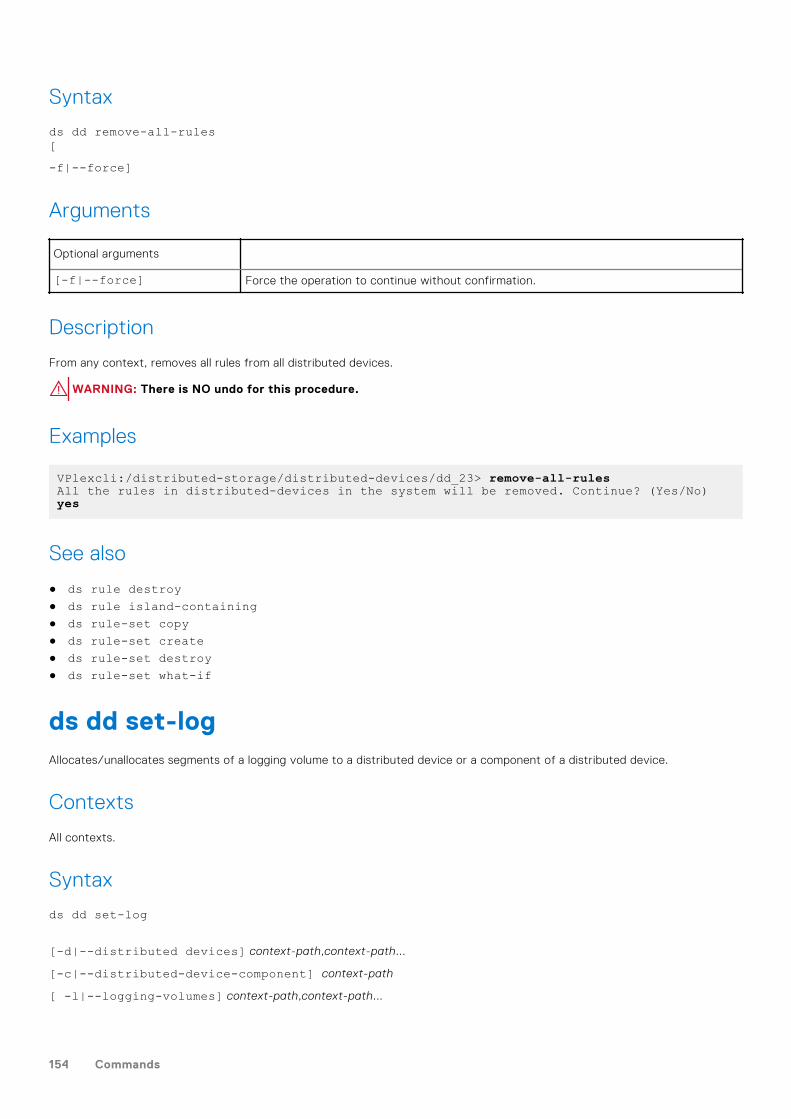
Syntax
ds dd remove-all-rules[-f|--force]
Arguments
Optional arguments
[-f|--force] Force the operation to continue without confirmation.
Description
From any context, removes all rules from all distributed devices.
WARNING: There is NO undo for this procedure.
Examples
VPlexcli:/distributed-storage/distributed-devices/dd_23> remove-all-rulesAll the rules in distributed-devices in the system will be removed. Continue? (Yes/No) yes
See also
● ds rule destroy● ds rule island-containing● ds rule-set copy● ds rule-set create● ds rule-set destroy● ds rule-set what-if
ds dd set-logAllocates/unallocates segments of a logging volume to a distributed device or a component of a distributed device.
Contexts
All contexts.
Syntax
ds dd set-log
[-d|--distributed devices] context-path,context-path...
[-c|--distributed-device-component] context-path
[ -l|--logging-volumes] context-path,context-path...
154 Commands
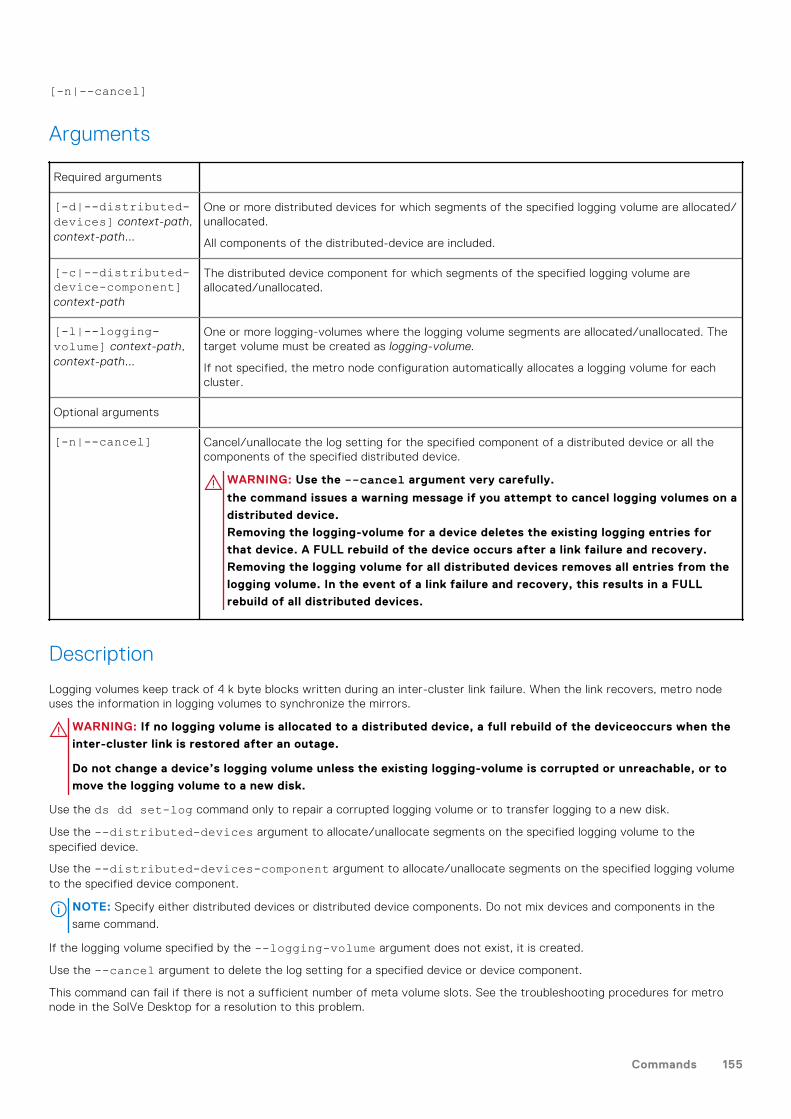
[-n|--cancel]
Arguments
Required arguments
[-d|--distributed-devices] context-path,context-path...
One or more distributed devices for which segments of the specified logging volume are allocated/unallocated.
All components of the distributed-device are included.
[-c|--distributed-device-component]context-path
The distributed device component for which segments of the specified logging volume areallocated/unallocated.
[-l|--logging-volume] context-path,context-path...
One or more logging-volumes where the logging volume segments are allocated/unallocated. Thetarget volume must be created as logging-volume.
If not specified, the metro node configuration automatically allocates a logging volume for eachcluster.
Optional arguments
[-n|--cancel] Cancel/unallocate the log setting for the specified component of a distributed device or all thecomponents of the specified distributed device.
WARNING: Use the --cancel argument very carefully.
the command issues a warning message if you attempt to cancel logging volumes on a
distributed device.
Removing the logging-volume for a device deletes the existing logging entries for
that device. A FULL rebuild of the device occurs after a link failure and recovery.
Removing the logging volume for all distributed devices removes all entries from the
logging volume. In the event of a link failure and recovery, this results in a FULL
rebuild of all distributed devices.
Description
Logging volumes keep track of 4 k byte blocks written during an inter-cluster link failure. When the link recovers, metro nodeuses the information in logging volumes to synchronize the mirrors.
WARNING: If no logging volume is allocated to a distributed device, a full rebuild of the deviceoccurs when the
inter-cluster link is restored after an outage.
Do not change a device’s logging volume unless the existing logging-volume is corrupted or unreachable, or to
move the logging volume to a new disk.
Use the ds dd set-log command only to repair a corrupted logging volume or to transfer logging to a new disk.
Use the --distributed-devices argument to allocate/unallocate segments on the specified logging volume to thespecified device.
Use the --distributed-devices-component argument to allocate/unallocate segments on the specified logging volumeto the specified device component.
NOTE: Specify either distributed devices or distributed device components. Do not mix devices and components in the
same command.
If the logging volume specified by the --logging-volume argument does not exist, it is created.
Use the --cancel argument to delete the log setting for a specified device or device component.
This command can fail if there is not a sufficient number of meta volume slots. See the troubleshooting procedures for metronode in the SolVe Desktop for a resolution to this problem.
Commands 155
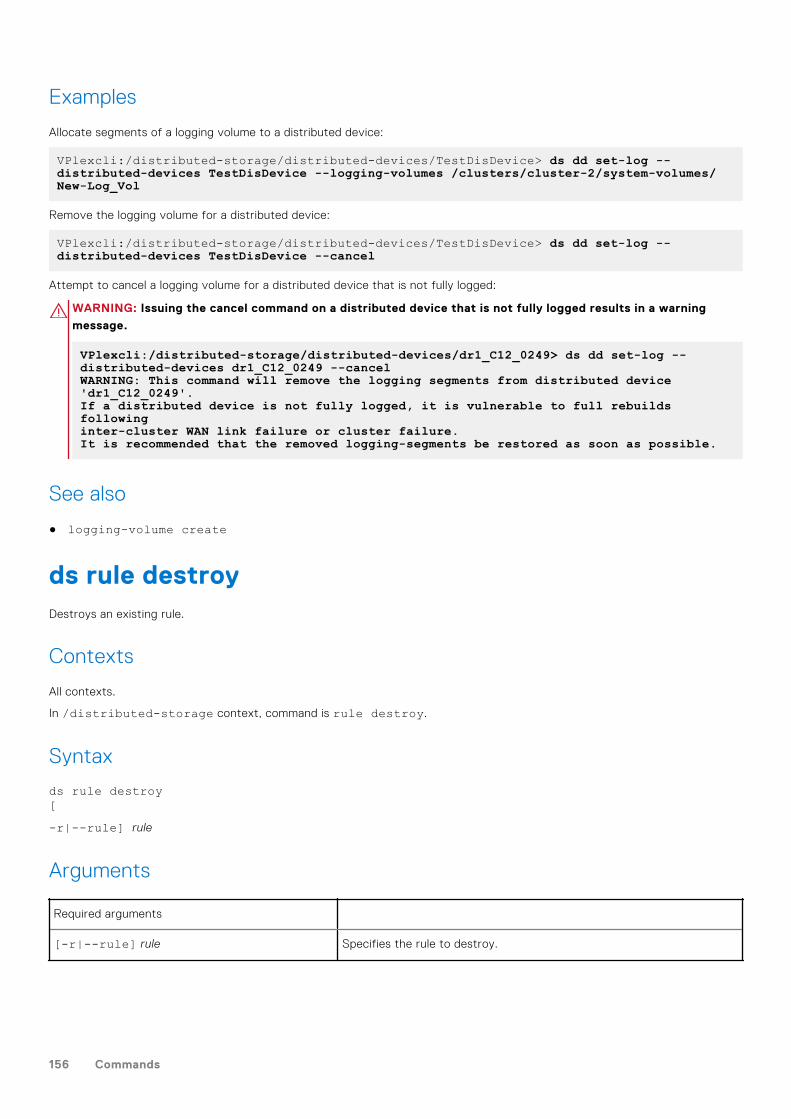
Examples
Allocate segments of a logging volume to a distributed device:
VPlexcli:/distributed-storage/distributed-devices/TestDisDevice> ds dd set-log --distributed-devices TestDisDevice --logging-volumes /clusters/cluster-2/system-volumes/New-Log_Vol
Remove the logging volume for a distributed device:
VPlexcli:/distributed-storage/distributed-devices/TestDisDevice> ds dd set-log --distributed-devices TestDisDevice --cancel
Attempt to cancel a logging volume for a distributed device that is not fully logged:
WARNING: Issuing the cancel command on a distributed device that is not fully logged results in a warning
message.
VPlexcli:/distributed-storage/distributed-devices/dr1_C12_0249> ds dd set-log --distributed-devices dr1_C12_0249 --cancelWARNING: This command will remove the logging segments from distributed device 'dr1_C12_0249'.If a distributed device is not fully logged, it is vulnerable to full rebuilds followinginter-cluster WAN link failure or cluster failure.It is recommended that the removed logging-segments be restored as soon as possible.
See also
● logging-volume create
ds rule destroyDestroys an existing rule.
Contexts
All contexts.
In /distributed-storage context, command is rule destroy.
Syntax
ds rule destroy[-r|--rule] rule
Arguments
Required arguments
[-r|--rule] rule Specifies the rule to destroy.
156 Commands
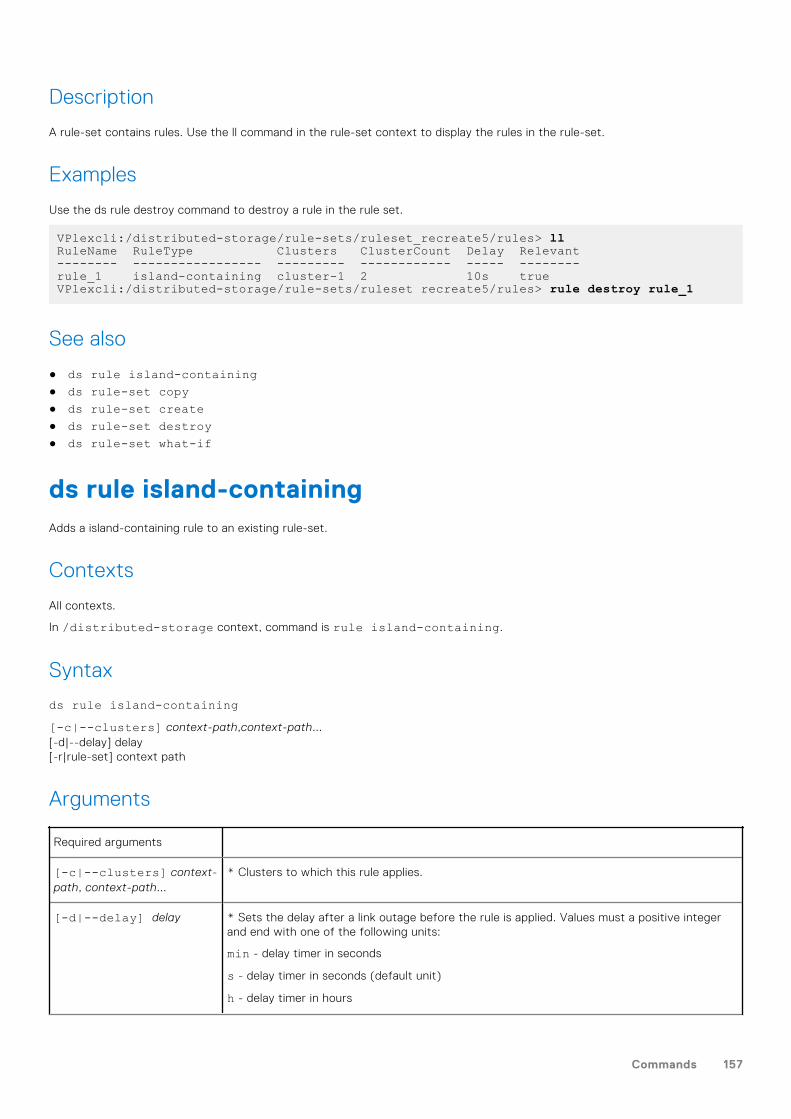
Description
A rule-set contains rules. Use the ll command in the rule-set context to display the rules in the rule-set.
Examples
Use the ds rule destroy command to destroy a rule in the rule set.
VPlexcli:/distributed-storage/rule-sets/ruleset_recreate5/rules> llRuleName RuleType Clusters ClusterCount Delay Relevant-------- ----------------- --------- ------------ ----- --------rule_1 island-containing cluster-1 2 10s trueVPlexcli:/distributed-storage/rule-sets/ruleset recreate5/rules> rule destroy rule_1
See also
● ds rule island-containing● ds rule-set copy● ds rule-set create● ds rule-set destroy● ds rule-set what-if
ds rule island-containingAdds a island-containing rule to an existing rule-set.
Contexts
All contexts.
In /distributed-storage context, command is rule island-containing.
Syntax
ds rule island-containing[-c|--clusters] context-path,context-path...[-d|--delay] delay[-r|rule-set] context path
Arguments
Required arguments
[-c|--clusters] context-path, context-path...
* Clusters to which this rule applies.
[-d|--delay] delay * Sets the delay after a link outage before the rule is applied. Values must a positive integerand end with one of the following units:
min - delay timer in seconds
s - delay timer in seconds (default unit)
h - delay timer in hours
Commands 157
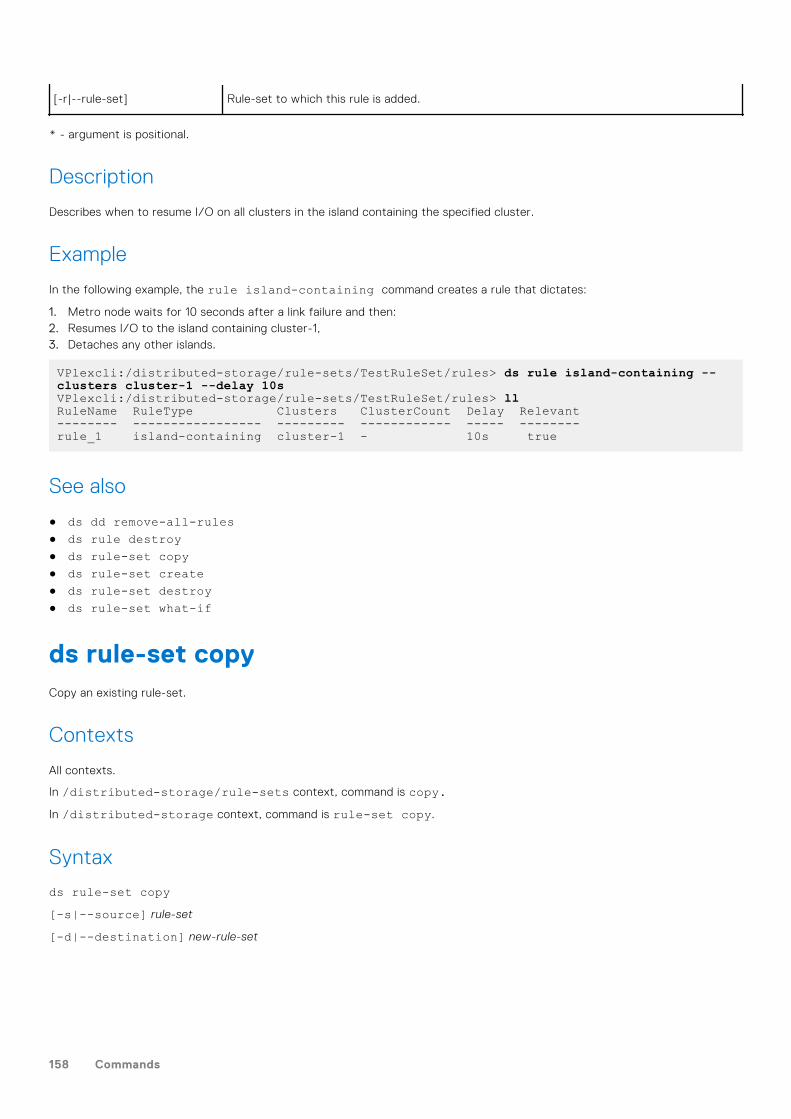
[-r|--rule-set] Rule-set to which this rule is added.
* - argument is positional.
Description
Describes when to resume I/O on all clusters in the island containing the specified cluster.
Example
In the following example, the rule island-containing command creates a rule that dictates:
1. Metro node waits for 10 seconds after a link failure and then:2. Resumes I/O to the island containing cluster-1,3. Detaches any other islands.
VPlexcli:/distributed-storage/rule-sets/TestRuleSet/rules> ds rule island-containing --clusters cluster-1 --delay 10sVPlexcli:/distributed-storage/rule-sets/TestRuleSet/rules> llRuleName RuleType Clusters ClusterCount Delay Relevant-------- ----------------- --------- ------------ ----- --------rule_1 island-containing cluster-1 - 10s true
See also
● ds dd remove-all-rules● ds rule destroy● ds rule-set copy● ds rule-set create● ds rule-set destroy● ds rule-set what-if
ds rule-set copyCopy an existing rule-set.
Contexts
All contexts.
In /distributed-storage/rule-sets context, command is copy.In /distributed-storage context, command is rule-set copy.
Syntax
ds rule-set copy[-s|--source] rule-set
[-d|--destination] new-rule-set
158 Commands
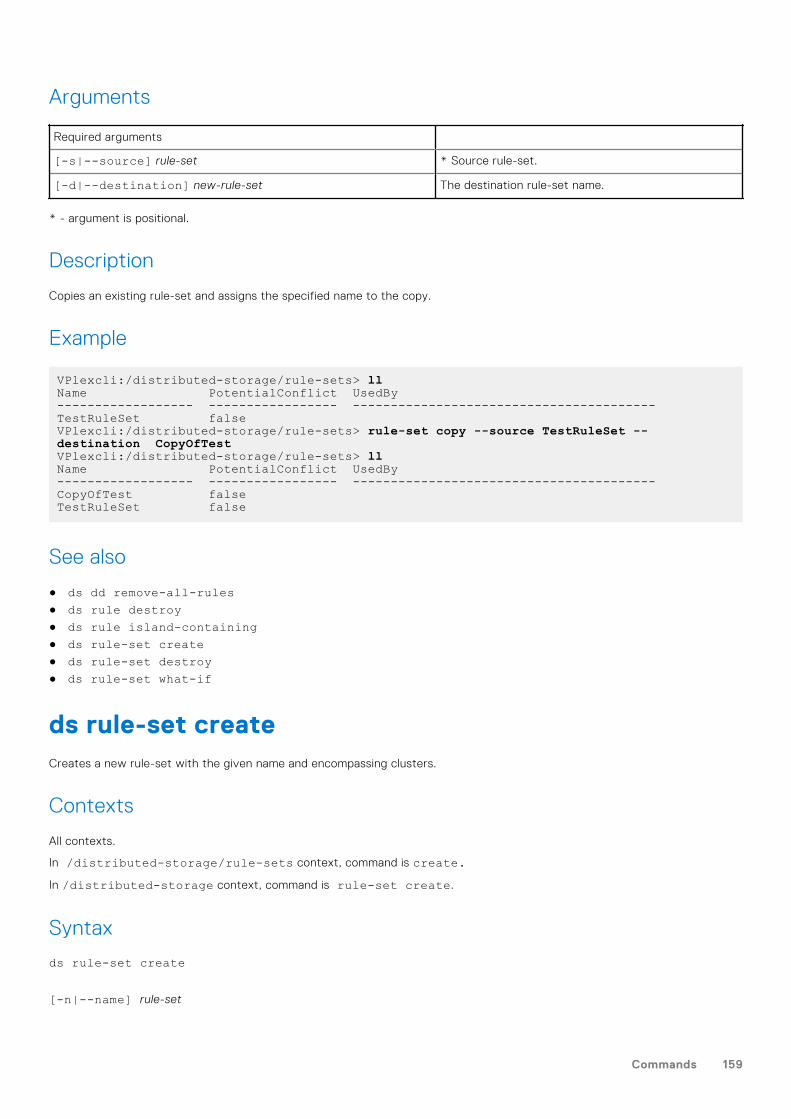
Arguments
Required arguments
[-s|--source] rule-set * Source rule-set.
[-d|--destination] new-rule-set The destination rule-set name.
* - argument is positional.
Description
Copies an existing rule-set and assigns the specified name to the copy.
Example
VPlexcli:/distributed-storage/rule-sets> llName PotentialConflict UsedBy------------------ ----------------- ----------------------------------------TestRuleSet falseVPlexcli:/distributed-storage/rule-sets> rule-set copy --source TestRuleSet --destination CopyOfTestVPlexcli:/distributed-storage/rule-sets> llName PotentialConflict UsedBy------------------ ----------------- ----------------------------------------CopyOfTest falseTestRuleSet false
See also
● ds dd remove-all-rules● ds rule destroy● ds rule island-containing● ds rule-set create● ds rule-set destroy● ds rule-set what-if
ds rule-set createCreates a new rule-set with the given name and encompassing clusters.
Contexts
All contexts.
In /distributed-storage/rule-sets context, command is create.In /distributed-storage context, command is rule-set create.
Syntax
ds rule-set create
[-n|--name] rule-set
Commands 159
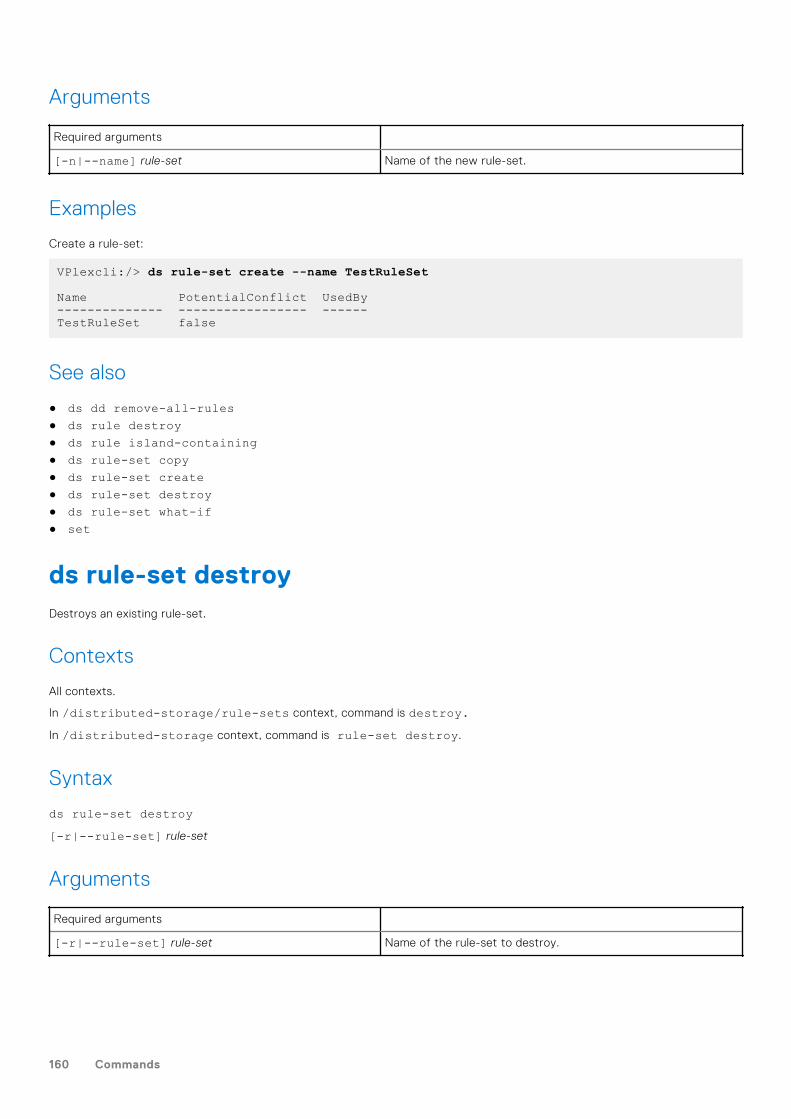
Arguments
Required arguments
[-n|--name] rule-set Name of the new rule-set.
Examples
Create a rule-set:
VPlexcli:/> ds rule-set create --name TestRuleSet
Name PotentialConflict UsedBy-------------- ----------------- ------TestRuleSet false
See also
● ds dd remove-all-rules● ds rule destroy● ds rule island-containing● ds rule-set copy● ds rule-set create● ds rule-set destroy● ds rule-set what-if● set
ds rule-set destroyDestroys an existing rule-set.
Contexts
All contexts.
In /distributed-storage/rule-sets context, command is destroy.In /distributed-storage context, command is rule-set destroy.
Syntax
ds rule-set destroy[-r|--rule-set] rule-set
Arguments
Required arguments
[-r|--rule-set] rule-set Name of the rule-set to destroy.
160 Commands
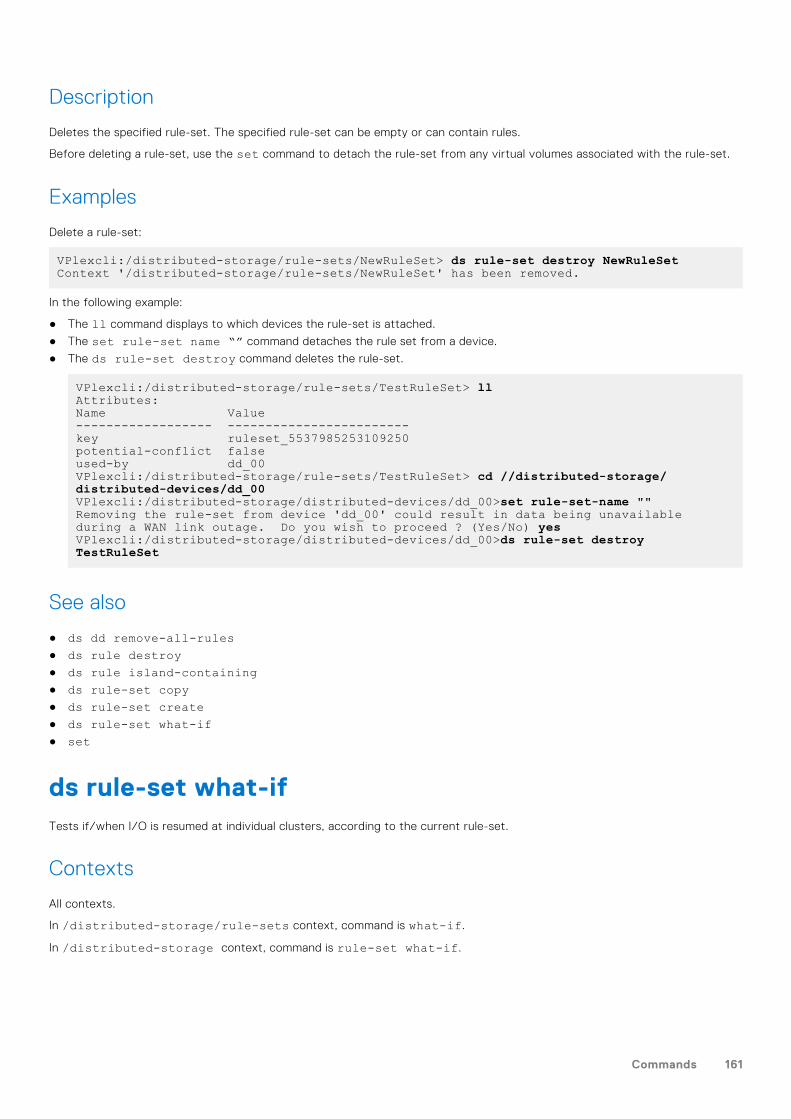
Description
Deletes the specified rule-set. The specified rule-set can be empty or can contain rules.
Before deleting a rule-set, use the set command to detach the rule-set from any virtual volumes associated with the rule-set.
Examples
Delete a rule-set:
VPlexcli:/distributed-storage/rule-sets/NewRuleSet> ds rule-set destroy NewRuleSetContext '/distributed-storage/rule-sets/NewRuleSet' has been removed.
In the following example:
● The ll command displays to which devices the rule-set is attached.
● The set rule-set name “” command detaches the rule set from a device.
● The ds rule-set destroy command deletes the rule-set.
VPlexcli:/distributed-storage/rule-sets/TestRuleSet> llAttributes:Name Value------------------ ------------------------key ruleset_5537985253109250potential-conflict falseused-by dd_00VPlexcli:/distributed-storage/rule-sets/TestRuleSet> cd //distributed-storage/distributed-devices/dd_00VPlexcli:/distributed-storage/distributed-devices/dd_00>set rule-set-name ""Removing the rule-set from device 'dd_00' could result in data being unavailable during a WAN link outage. Do you wish to proceed ? (Yes/No) yesVPlexcli:/distributed-storage/distributed-devices/dd_00>ds rule-set destroy TestRuleSet
See also
● ds dd remove-all-rules● ds rule destroy● ds rule island-containing● ds rule-set copy● ds rule-set create● ds rule-set what-if● set
ds rule-set what-ifTests if/when I/O is resumed at individual clusters, according to the current rule-set.
Contexts
All contexts.
In /distributed-storage/rule-sets context, command is what-if.
In /distributed-storage context, command is rule-set what-if.
Commands 161

Syntax
ds rule-set what-if[-i|--islands] “cluster-1,cluster-2”
[-r|--rule-set] context-path
Arguments
Required arguments
[-i|--islands] “cluster-1,cluster-2” List of islands, in quotes. The clusters are separated by commas, the islands by aspace.
[-r|--rule-set] context-path Context path of the rule-set used in the what-if scenario.
Description
This command supports only two clusters and one island.
Examples
Test a rule-set:
VPlexcli:/distributed-storage/rule-sets> ds rule-set what-if --islands "cluster-1,cluster-2" --rule-set TestRuleSetIO does not stop.
See also
● ds dd remove-all-rules● ds rule destroy● ds rule island-containing● ds rule-set copy● ds rule-set create● ds rule-set destroy
ds summaryDisplay summary information about distributed devices.
Contexts
All contexts.
In /distributed-storage context, command is summary.
Syntax
ds summary
162 Commands
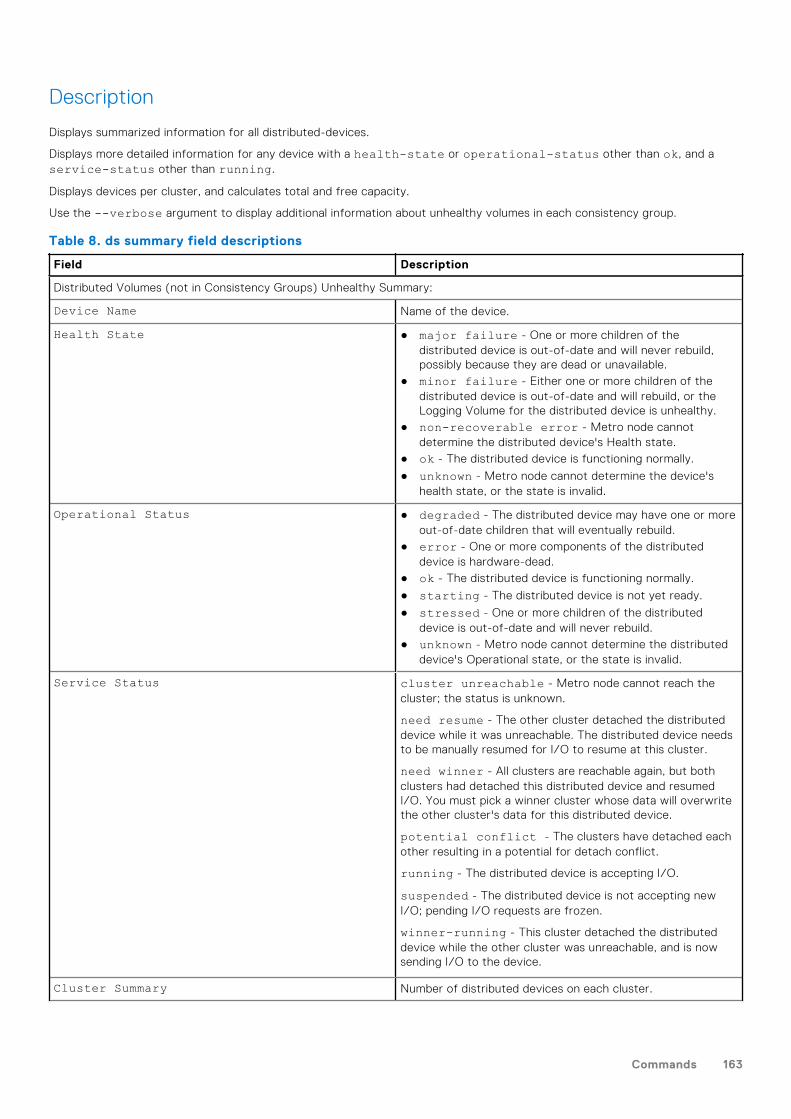
Description
Displays summarized information for all distributed-devices.
Displays more detailed information for any device with a health-state or operational-status other than ok, and aservice-status other than running.
Displays devices per cluster, and calculates total and free capacity.
Use the --verbose argument to display additional information about unhealthy volumes in each consistency group.
Table 8. ds summary field descriptions
Field Description
Distributed Volumes (not in Consistency Groups) Unhealthy Summary:
Device Name Name of the device.
Health State ● major failure - One or more children of thedistributed device is out-of-date and will never rebuild,possibly because they are dead or unavailable.
● minor failure - Either one or more children of thedistributed device is out-of-date and will rebuild, or theLogging Volume for the distributed device is unhealthy.
● non-recoverable error - Metro node cannotdetermine the distributed device's Health state.
● ok - The distributed device is functioning normally.
● unknown - Metro node cannot determine the device'shealth state, or the state is invalid.
Operational Status ● degraded - The distributed device may have one or moreout-of-date children that will eventually rebuild.
● error - One or more components of the distributeddevice is hardware-dead.
● ok - The distributed device is functioning normally.
● starting - The distributed device is not yet ready.
● stressed - One or more children of the distributeddevice is out-of-date and will never rebuild.
● unknown - Metro node cannot determine the distributeddevice's Operational state, or the state is invalid.
Service Status cluster unreachable - Metro node cannot reach thecluster; the status is unknown.
need resume - The other cluster detached the distributeddevice while it was unreachable. The distributed device needsto be manually resumed for I/O to resume at this cluster.
need winner - All clusters are reachable again, but bothclusters had detached this distributed device and resumedI/O. You must pick a winner cluster whose data will overwritethe other cluster's data for this distributed device.
potential conflict - The clusters have detached eachother resulting in a potential for detach conflict.
running - The distributed device is accepting I/O.
suspended - The distributed device is not accepting newI/O; pending I/O requests are frozen.
winner-running - This cluster detached the distributeddevice while the other cluster was unreachable, and is nowsending I/O to the device.
Cluster Summary Number of distributed devices on each cluster.
Commands 163
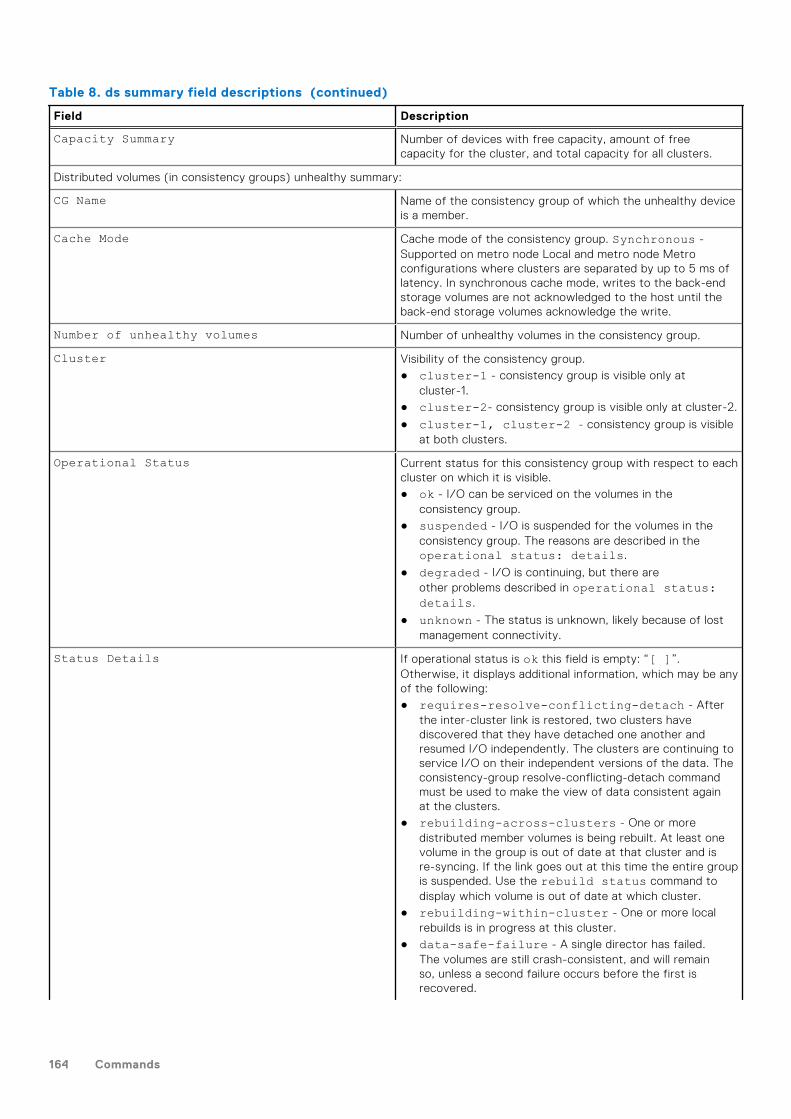
Table 8. ds summary field descriptions (continued)
Field Description
Capacity Summary Number of devices with free capacity, amount of freecapacity for the cluster, and total capacity for all clusters.
Distributed volumes (in consistency groups) unhealthy summary:
CG Name Name of the consistency group of which the unhealthy deviceis a member.
Cache Mode Cache mode of the consistency group. Synchronous -Supported on metro node Local and metro node Metroconfigurations where clusters are separated by up to 5 ms oflatency. In synchronous cache mode, writes to the back-endstorage volumes are not acknowledged to the host until theback-end storage volumes acknowledge the write.
Number of unhealthy volumes Number of unhealthy volumes in the consistency group.
Cluster Visibility of the consistency group.● cluster-1 - consistency group is visible only at
cluster-1.● cluster-2- consistency group is visible only at cluster-2.
● cluster-1, cluster-2 - consistency group is visibleat both clusters.
Operational Status Current status for this consistency group with respect to eachcluster on which it is visible.● ok - I/O can be serviced on the volumes in the
consistency group.● suspended - I/O is suspended for the volumes in the
consistency group. The reasons are described in theoperational status: details.
● degraded - I/O is continuing, but there areother problems described in operational status:details.
● unknown - The status is unknown, likely because of lostmanagement connectivity.
Status Details If operational status is ok this field is empty: “[ ]”.Otherwise, it displays additional information, which may be anyof the following:● requires-resolve-conflicting-detach - After
the inter-cluster link is restored, two clusters havediscovered that they have detached one another andresumed I/O independently. The clusters are continuing toservice I/O on their independent versions of the data. Theconsistency-group resolve-conflicting-detach commandmust be used to make the view of data consistent againat the clusters.
● rebuilding-across-clusters - One or moredistributed member volumes is being rebuilt. At least onevolume in the group is out of date at that cluster and isre-syncing. If the link goes out at this time the entire groupis suspended. Use the rebuild status command todisplay which volume is out of date at which cluster.
● rebuilding-within-cluster - One or more localrebuilds is in progress at this cluster.
● data-safe-failure - A single director has failed.The volumes are still crash-consistent, and will remainso, unless a second failure occurs before the first isrecovered.
164 Commands
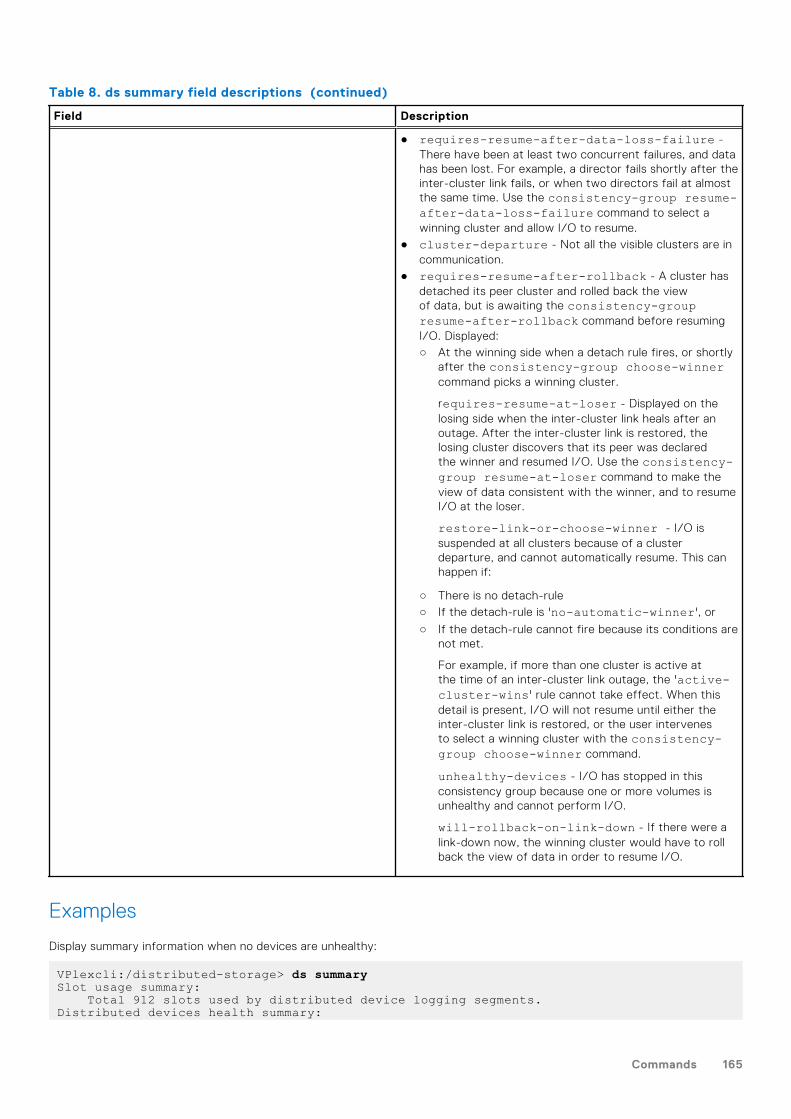
Table 8. ds summary field descriptions (continued)
Field Description
● requires-resume-after-data-loss-failure -There have been at least two concurrent failures, and datahas been lost. For example, a director fails shortly after theinter-cluster link fails, or when two directors fail at almostthe same time. Use the consistency-group resume-after-data-loss-failure command to select awinning cluster and allow I/O to resume.
● cluster-departure - Not all the visible clusters are incommunication.
● requires-resume-after-rollback - A cluster hasdetached its peer cluster and rolled back the viewof data, but is awaiting the consistency-groupresume-after-rollback command before resumingI/O. Displayed:○ At the winning side when a detach rule fires, or shortly
after the consistency-group choose-winnercommand picks a winning cluster.
requires-resume-at-loser - Displayed on thelosing side when the inter-cluster link heals after anoutage. After the inter-cluster link is restored, thelosing cluster discovers that its peer was declaredthe winner and resumed I/O. Use the consistency-group resume-at-loser command to make theview of data consistent with the winner, and to resumeI/O at the loser.
restore-link-or-choose-winner - I/O issuspended at all clusters because of a clusterdeparture, and cannot automatically resume. This canhappen if:
○ There is no detach-rule○ If the detach-rule is 'no-automatic-winner', or
○ If the detach-rule cannot fire because its conditions arenot met.
For example, if more than one cluster is active atthe time of an inter-cluster link outage, the 'active-cluster-wins' rule cannot take effect. When thisdetail is present, I/O will not resume until either theinter-cluster link is restored, or the user intervenesto select a winning cluster with the consistency-group choose-winner command.
unhealthy-devices - I/O has stopped in thisconsistency group because one or more volumes isunhealthy and cannot perform I/O.
will-rollback-on-link-down - If there were alink-down now, the winning cluster would have to rollback the view of data in order to resume I/O.
Examples
Display summary information when no devices are unhealthy:
VPlexcli:/distributed-storage> ds summarySlot usage summary: Total 912 slots used by distributed device logging segments.Distributed devices health summary:
Commands 165
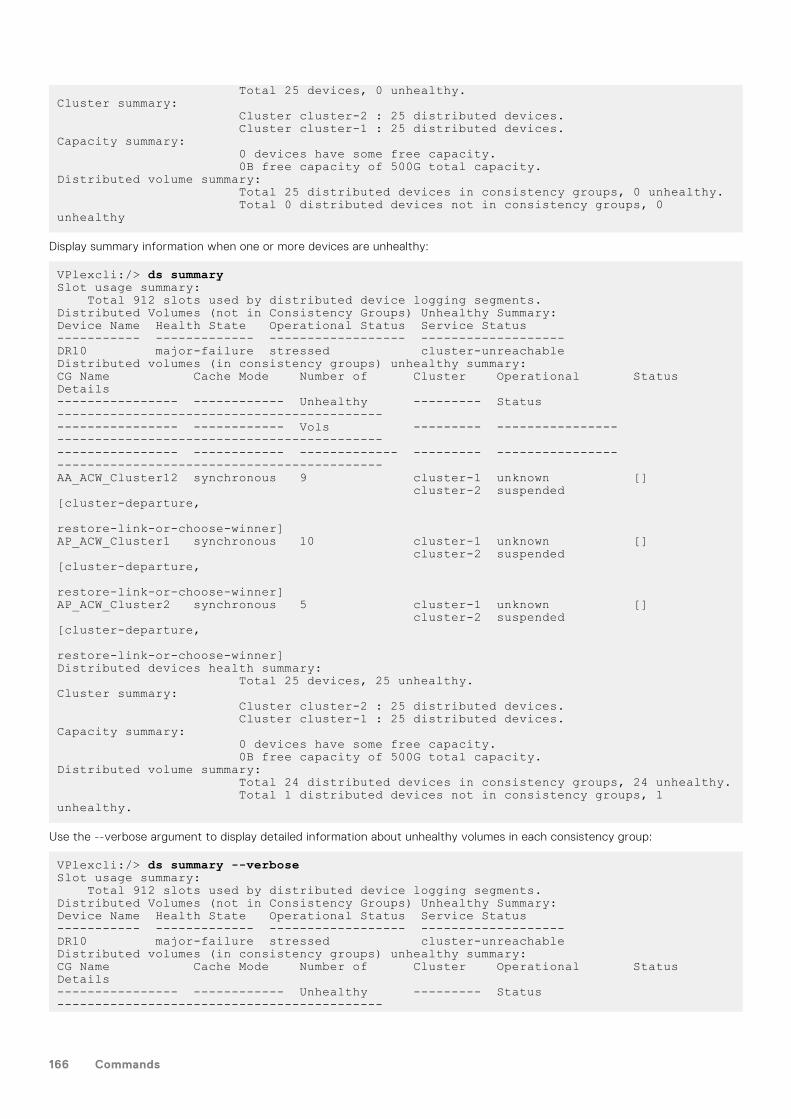
Total 25 devices, 0 unhealthy.Cluster summary: Cluster cluster-2 : 25 distributed devices. Cluster cluster-1 : 25 distributed devices.Capacity summary: 0 devices have some free capacity. 0B free capacity of 500G total capacity.Distributed volume summary: Total 25 distributed devices in consistency groups, 0 unhealthy. Total 0 distributed devices not in consistency groups, 0 unhealthy
Display summary information when one or more devices are unhealthy:
VPlexcli:/> ds summarySlot usage summary: Total 912 slots used by distributed device logging segments.Distributed Volumes (not in Consistency Groups) Unhealthy Summary:Device Name Health State Operational Status Service Status----------- ------------- ------------------ -------------------DR10 major-failure stressed cluster-unreachableDistributed volumes (in consistency groups) unhealthy summary:CG Name Cache Mode Number of Cluster Operational Status Details---------------- ------------ Unhealthy --------- Status ----------------------------------------------------------- ------------ Vols --------- ---------------- ----------------------------------------------------------- ------------ ------------- --------- ---------------- -------------------------------------------AA_ACW_Cluster12 synchronous 9 cluster-1 unknown [] cluster-2 suspended [cluster-departure, restore-link-or-choose-winner]AP_ACW_Cluster1 synchronous 10 cluster-1 unknown [] cluster-2 suspended [cluster-departure, restore-link-or-choose-winner]AP_ACW_Cluster2 synchronous 5 cluster-1 unknown [] cluster-2 suspended [cluster-departure, restore-link-or-choose-winner]Distributed devices health summary: Total 25 devices, 25 unhealthy.Cluster summary: Cluster cluster-2 : 25 distributed devices. Cluster cluster-1 : 25 distributed devices.Capacity summary: 0 devices have some free capacity. 0B free capacity of 500G total capacity.Distributed volume summary: Total 24 distributed devices in consistency groups, 24 unhealthy. Total 1 distributed devices not in consistency groups, 1 unhealthy.
Use the --verbose argument to display detailed information about unhealthy volumes in each consistency group:
VPlexcli:/> ds summary --verboseSlot usage summary: Total 912 slots used by distributed device logging segments.Distributed Volumes (not in Consistency Groups) Unhealthy Summary:Device Name Health State Operational Status Service Status----------- ------------- ------------------ -------------------DR10 major-failure stressed cluster-unreachableDistributed volumes (in consistency groups) unhealthy summary:CG Name Cache Mode Number of Cluster Operational Status Details---------------- ------------ Unhealthy --------- Status -------------------------------------------
166 Commands
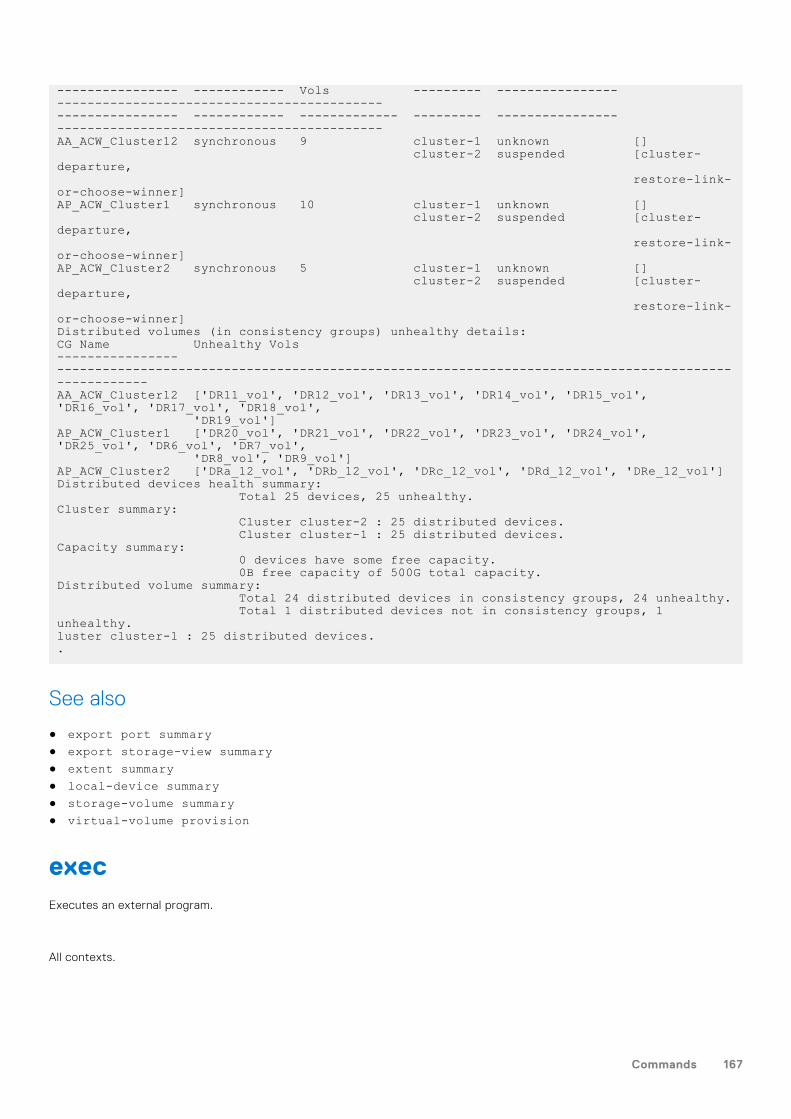
---------------- ------------ Vols --------- ---------------- ----------------------------------------------------------- ------------ ------------- --------- ---------------- -------------------------------------------AA_ACW_Cluster12 synchronous 9 cluster-1 unknown [] cluster-2 suspended [cluster-departure, restore-link-or-choose-winner]AP_ACW_Cluster1 synchronous 10 cluster-1 unknown [] cluster-2 suspended [cluster-departure, restore-link-or-choose-winner]AP_ACW_Cluster2 synchronous 5 cluster-1 unknown [] cluster-2 suspended [cluster-departure, restore-link-or-choose-winner]Distributed volumes (in consistency groups) unhealthy details:CG Name Unhealthy Vols---------------- -----------------------------------------------------------------------------------------------------AA_ACW_Cluster12 ['DR11_vol', 'DR12_vol', 'DR13_vol', 'DR14_vol', 'DR15_vol', 'DR16_vol', 'DR17_vol', 'DR18_vol', 'DR19_vol']AP_ACW_Cluster1 ['DR20_vol', 'DR21_vol', 'DR22_vol', 'DR23_vol', 'DR24_vol', 'DR25_vol', 'DR6_vol', 'DR7_vol', 'DR8_vol', 'DR9_vol']AP_ACW_Cluster2 ['DRa_12_vol', 'DRb_12_vol', 'DRc_12_vol', 'DRd_12_vol', 'DRe_12_vol']Distributed devices health summary: Total 25 devices, 25 unhealthy.Cluster summary: Cluster cluster-2 : 25 distributed devices. Cluster cluster-1 : 25 distributed devices.Capacity summary: 0 devices have some free capacity. 0B free capacity of 500G total capacity.Distributed volume summary: Total 24 distributed devices in consistency groups, 24 unhealthy. Total 1 distributed devices not in consistency groups, 1 unhealthy.luster cluster-1 : 25 distributed devices..
See also
● export port summary● export storage-view summary● extent summary● local-device summary● storage-volume summary● virtual-volume provision
execExecutes an external program.
All contexts.
Commands 167
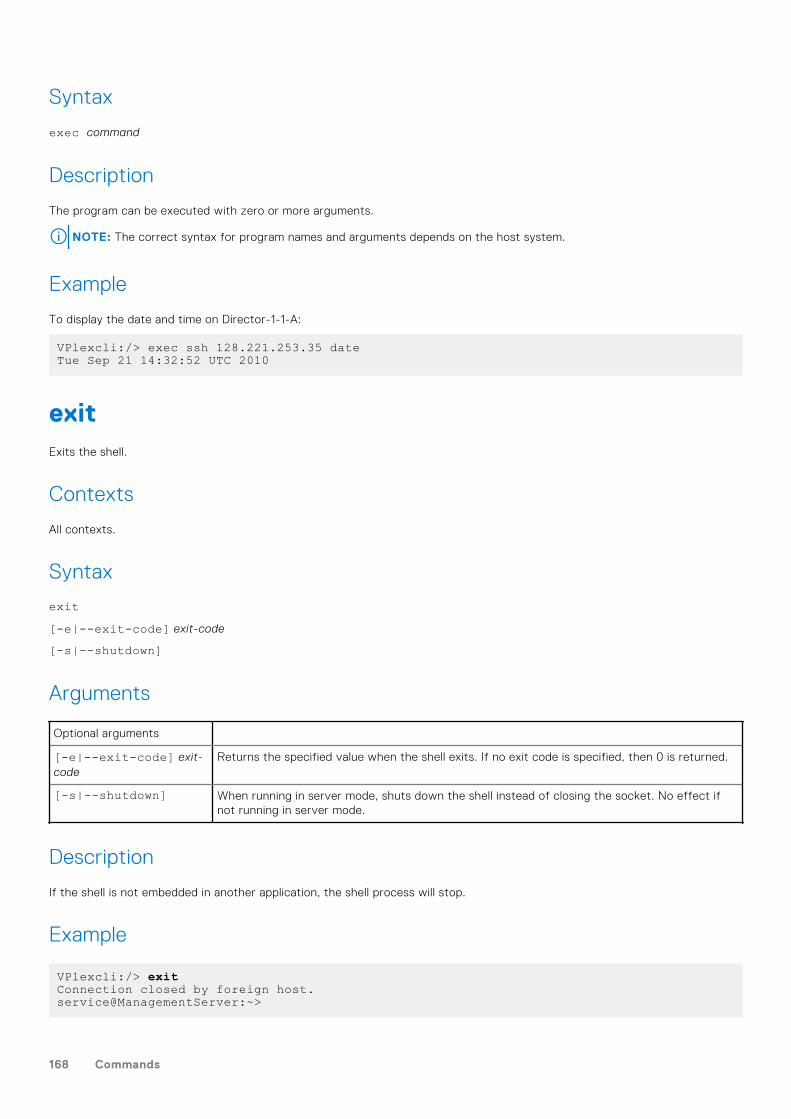
Syntax
exec command
Description
The program can be executed with zero or more arguments.
NOTE: The correct syntax for program names and arguments depends on the host system.
Example
To display the date and time on Director-1-1-A:
VPlexcli:/> exec ssh 128.221.253.35 dateTue Sep 21 14:32:52 UTC 2010
exitExits the shell.
Contexts
All contexts.
Syntax
exit[-e|--exit-code] exit-code
[-s|--shutdown]
Arguments
Optional arguments
[-e|--exit-code] exit-code
Returns the specified value when the shell exits. If no exit code is specified, then 0 is returned.
[-s|--shutdown] When running in server mode, shuts down the shell instead of closing the socket. No effect ifnot running in server mode.
Description
If the shell is not embedded in another application, the shell process will stop.
Example
VPlexcli:/> exitConnection closed by foreign host.service@ManagementServer:~>
168 Commands
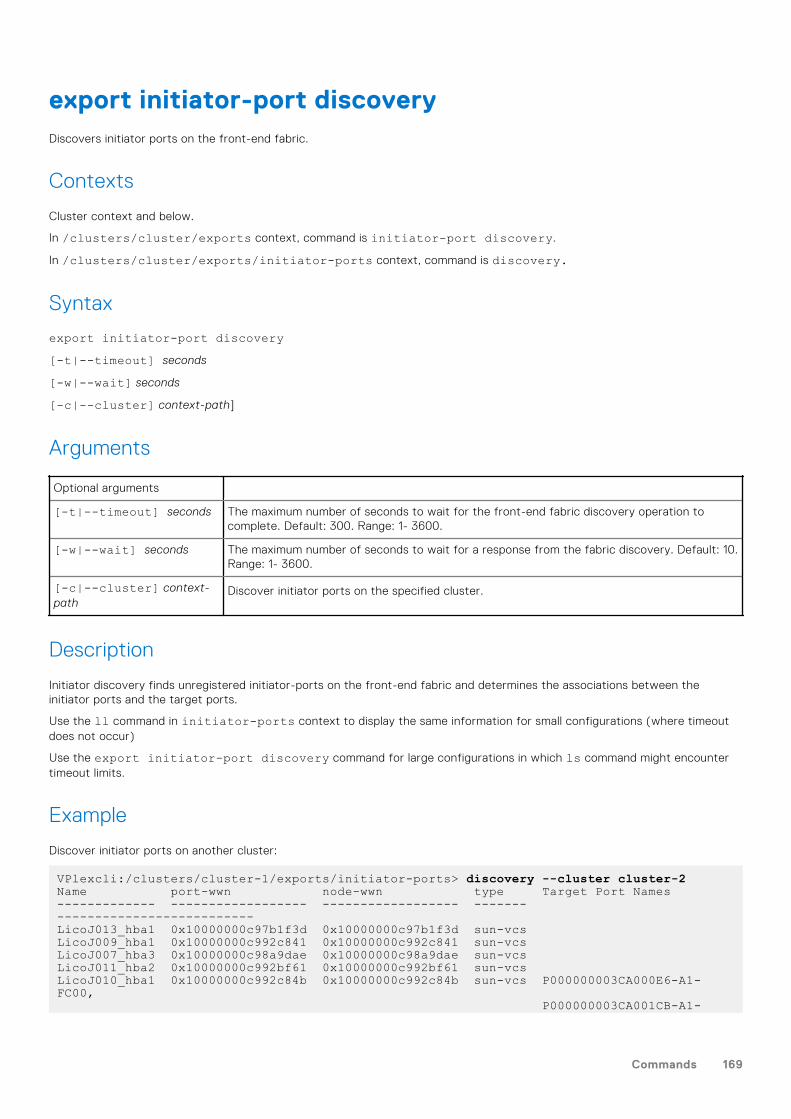
export initiator-port discoveryDiscovers initiator ports on the front-end fabric.
Contexts
Cluster context and below.
In /clusters/cluster/exports context, command is initiator-port discovery.
In /clusters/cluster/exports/initiator-ports context, command is discovery.
Syntax
export initiator-port discovery[-t|--timeout] seconds
[-w|--wait] seconds
[-c|--cluster] context-path]
Arguments
Optional arguments
[-t|--timeout] seconds The maximum number of seconds to wait for the front-end fabric discovery operation tocomplete. Default: 300. Range: 1- 3600.
[-w|--wait] seconds The maximum number of seconds to wait for a response from the fabric discovery. Default: 10.Range: 1- 3600.
[-c|--cluster] context-path
Discover initiator ports on the specified cluster.
Description
Initiator discovery finds unregistered initiator-ports on the front-end fabric and determines the associations between theinitiator ports and the target ports.
Use the ll command in initiator-ports context to display the same information for small configurations (where timeoutdoes not occur)
Use the export initiator-port discovery command for large configurations in which ls command might encountertimeout limits.
Example
Discover initiator ports on another cluster:
VPlexcli:/clusters/cluster-1/exports/initiator-ports> discovery --cluster cluster-2Name port-wwn node-wwn type Target Port Names------------- ------------------ ------------------ ------- --------------------------LicoJ013_hba1 0x10000000c97b1f3d 0x10000000c97b1f3d sun-vcsLicoJ009_hba1 0x10000000c992c841 0x10000000c992c841 sun-vcsLicoJ007_hba3 0x10000000c98a9dae 0x10000000c98a9dae sun-vcsLicoJ011_hba2 0x10000000c992bf61 0x10000000c992bf61 sun-vcsLicoJ010_hba1 0x10000000c992c84b 0x10000000c992c84b sun-vcs P000000003CA000E6-A1-FC00, P000000003CA001CB-A1-
Commands 169
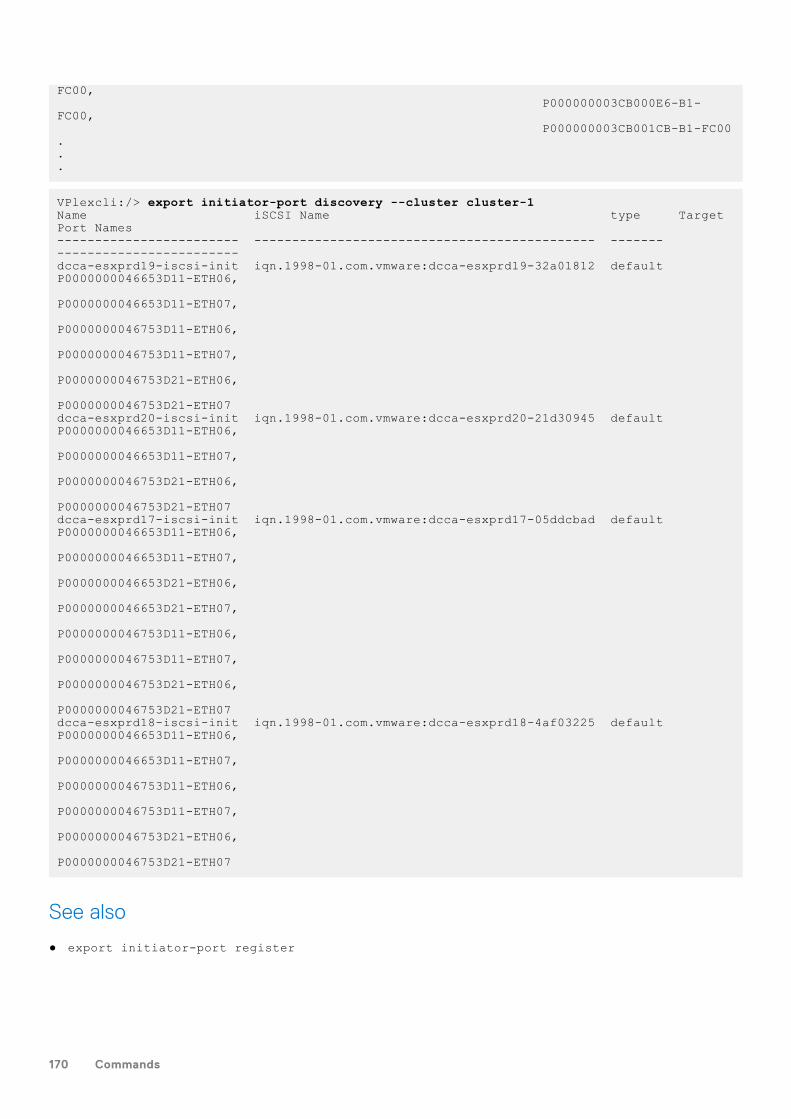
FC00, P000000003CB000E6-B1-FC00, P000000003CB001CB-B1-FC00...
VPlexcli:/> export initiator-port discovery --cluster cluster-1 Name iSCSI Name type Target Port Names ------------------------ --------------------------------------------- ------- ------------------------ dcca-esxprd19-iscsi-init iqn.1998-01.com.vmware:dcca-esxprd19-32a01812 default P0000000046653D11-ETH06, P0000000046653D11-ETH07, P0000000046753D11-ETH06, P0000000046753D11-ETH07, P0000000046753D21-ETH06, P0000000046753D21-ETH07 dcca-esxprd20-iscsi-init iqn.1998-01.com.vmware:dcca-esxprd20-21d30945 default P0000000046653D11-ETH06, P0000000046653D11-ETH07, P0000000046753D21-ETH06, P0000000046753D21-ETH07 dcca-esxprd17-iscsi-init iqn.1998-01.com.vmware:dcca-esxprd17-05ddcbad default P0000000046653D11-ETH06, P0000000046653D11-ETH07, P0000000046653D21-ETH06, P0000000046653D21-ETH07, P0000000046753D11-ETH06, P0000000046753D11-ETH07, P0000000046753D21-ETH06, P0000000046753D21-ETH07 dcca-esxprd18-iscsi-init iqn.1998-01.com.vmware:dcca-esxprd18-4af03225 default P0000000046653D11-ETH06, P0000000046653D11-ETH07, P0000000046753D11-ETH06, P0000000046753D11-ETH07, P0000000046753D21-ETH06, P0000000046753D21-ETH07
See also
● export initiator-port register
170 Commands
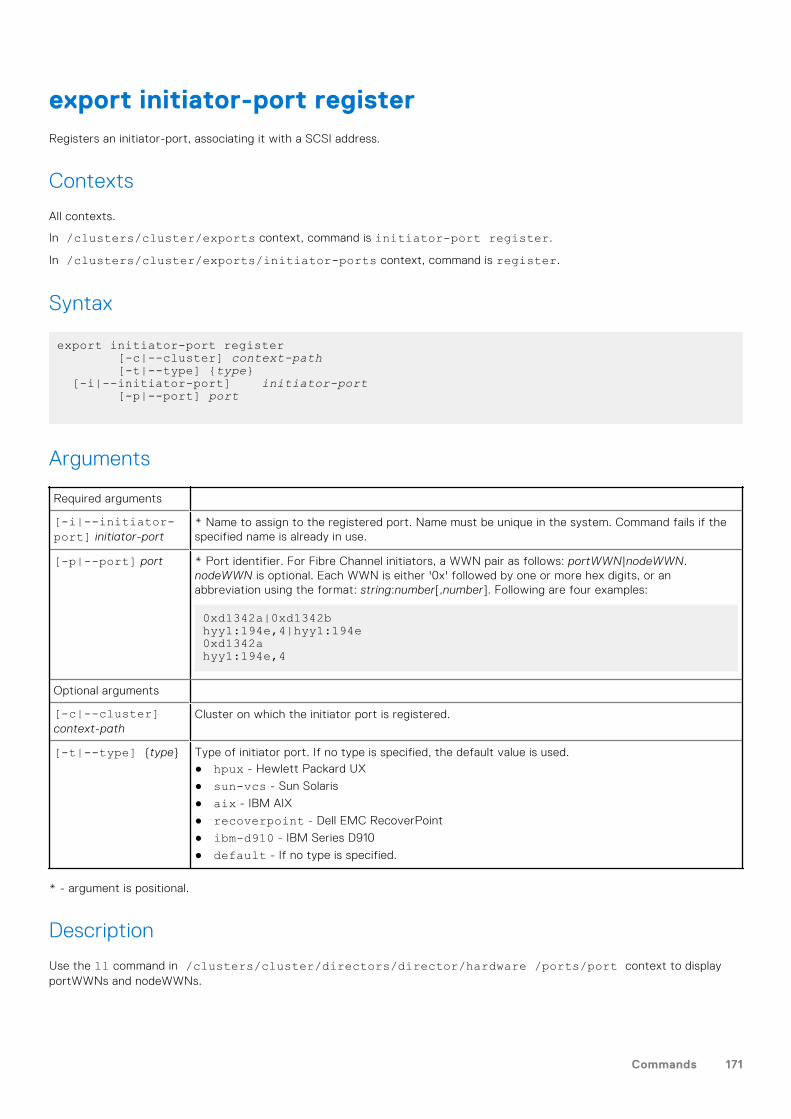
export initiator-port registerRegisters an initiator-port, associating it with a SCSI address.
Contexts
All contexts.
In /clusters/cluster/exports context, command is initiator-port register.
In /clusters/cluster/exports/initiator-ports context, command is register.
Syntax
export initiator-port register [-c|--cluster] context-path [-t|--type] {type} [-i|--initiator-port] initiator-port [-p|--port] port
Arguments
Required arguments
[-i|--initiator-port] initiator-port
* Name to assign to the registered port. Name must be unique in the system. Command fails if thespecified name is already in use.
[-p|--port] port * Port identifier. For Fibre Channel initiators, a WWN pair as follows: portWWN|nodeWWN.nodeWWN is optional. Each WWN is either '0x' followed by one or more hex digits, or anabbreviation using the format: string:number[,number]. Following are four examples:
0xd1342a|0xd1342bhyy1:194e,4|hyy1:194e0xd1342ahyy1:194e,4
Optional arguments
[-c|--cluster]context-path
Cluster on which the initiator port is registered.
[-t|--type] {type} Type of initiator port. If no type is specified, the default value is used.● hpux - Hewlett Packard UX
● sun-vcs - Sun Solaris
● aix - IBM AIX
● recoverpoint - Dell EMC RecoverPoint
● ibm-d910 - IBM Series D910
● default - If no type is specified.
* - argument is positional.
Description
Use the ll command in /clusters/cluster/directors/director/hardware /ports/port context to displayportWWNs and nodeWWNs.
Commands 171
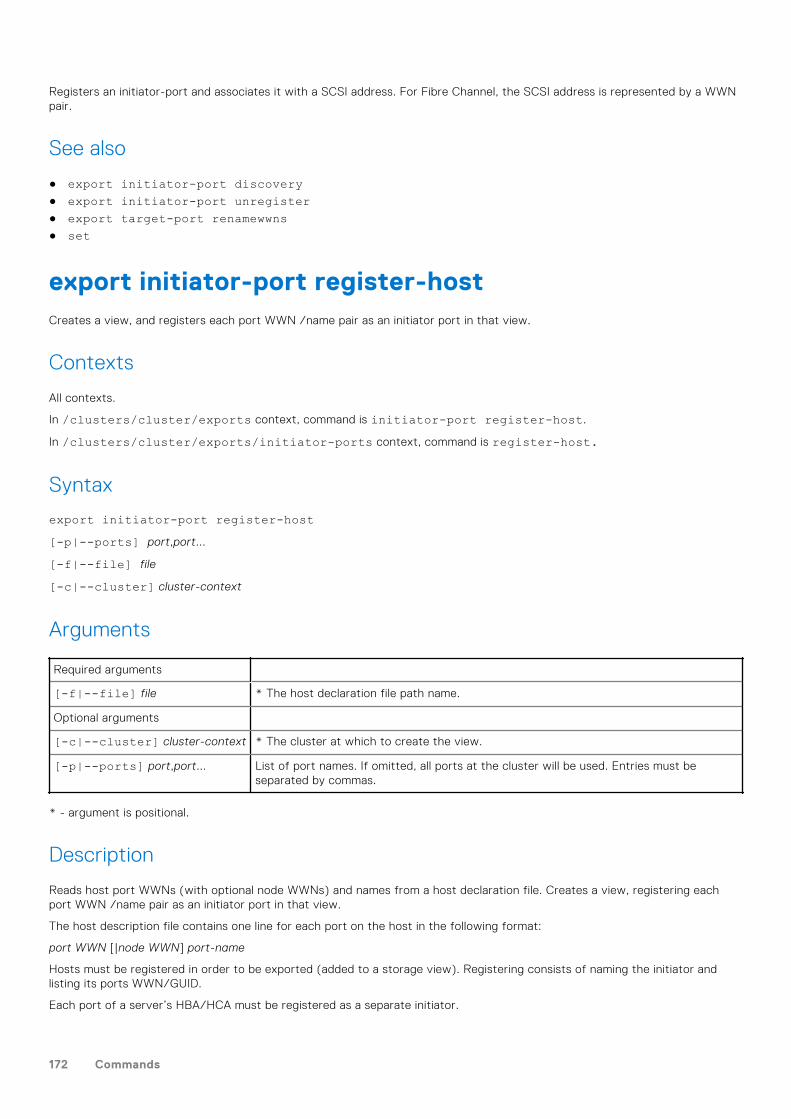
Registers an initiator-port and associates it with a SCSI address. For Fibre Channel, the SCSI address is represented by a WWNpair.
See also
● export initiator-port discovery● export initiator-port unregister● export target-port renamewwns● set
export initiator-port register-hostCreates a view, and registers each port WWN /name pair as an initiator port in that view.
Contexts
All contexts.
In /clusters/cluster/exports context, command is initiator-port register-host.
In /clusters/cluster/exports/initiator-ports context, command is register-host.
Syntax
export initiator-port register-host[-p|--ports] port,port...
[-f|--file] file
[-c|--cluster] cluster-context
Arguments
Required arguments
[-f|--file] file * The host declaration file path name.
Optional arguments
[-c|--cluster] cluster-context * The cluster at which to create the view.
[-p|--ports] port,port... List of port names. If omitted, all ports at the cluster will be used. Entries must beseparated by commas.
* - argument is positional.
Description
Reads host port WWNs (with optional node WWNs) and names from a host declaration file. Creates a view, registering eachport WWN /name pair as an initiator port in that view.
The host description file contains one line for each port on the host in the following format:
port WWN [|node WWN] port-name
Hosts must be registered in order to be exported (added to a storage view). Registering consists of naming the initiator andlisting its ports WWN/GUID.
Each port of a server’s HBA/HCA must be registered as a separate initiator.
172 Commands
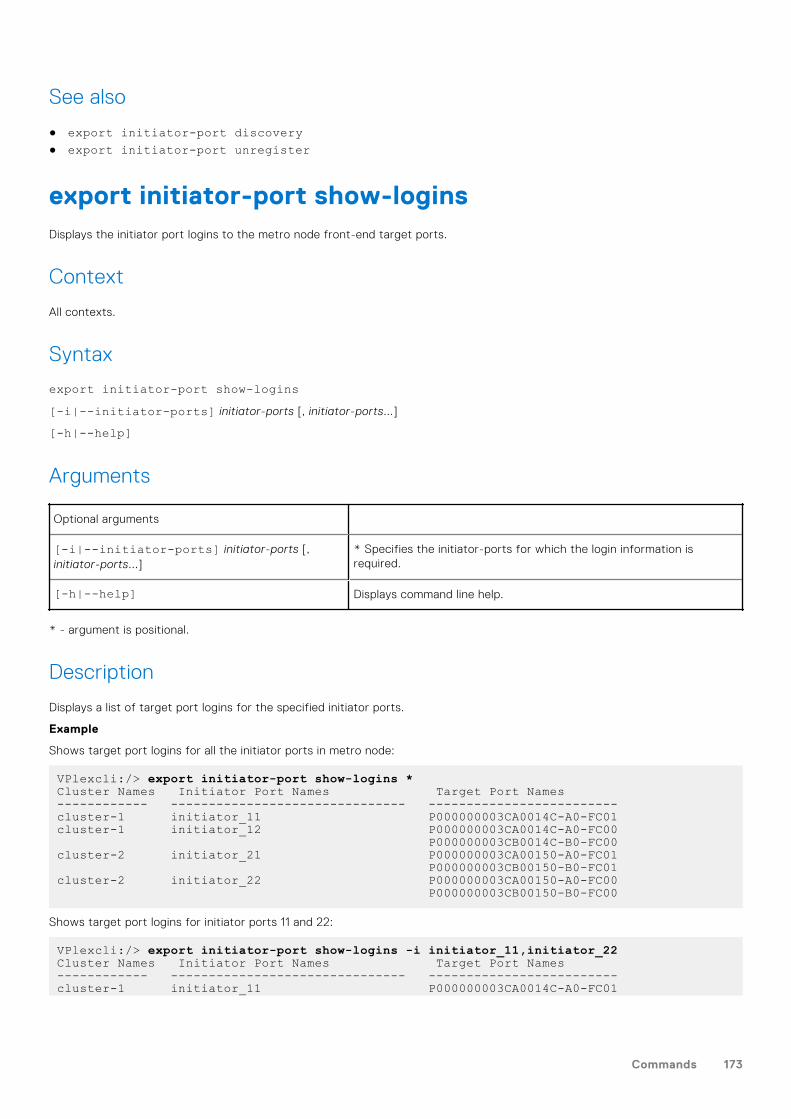
See also
● export initiator-port discovery● export initiator-port unregister
export initiator-port show-loginsDisplays the initiator port logins to the metro node front-end target ports.
Context
All contexts.
Syntax
export initiator-port show-logins[-i|--initiator-ports] initiator-ports [, initiator-ports...]
[-h|--help]
Arguments
Optional arguments
[-i|--initiator-ports] initiator-ports [,initiator-ports...]
* Specifies the initiator-ports for which the login information isrequired.
[-h|--help] Displays command line help.
* - argument is positional.
Description
Displays a list of target port logins for the specified initiator ports.
Example
Shows target port logins for all the initiator ports in metro node:
VPlexcli:/> export initiator-port show-logins *Cluster Names Initiator Port Names Target Port Names------------ ------------------------------- -------------------------cluster-1 initiator_11 P000000003CA0014C-A0-FC01cluster-1 initiator_12 P000000003CA0014C-A0-FC00 P000000003CB0014C-B0-FC00cluster-2 initiator_21 P000000003CA00150-A0-FC01 P000000003CB00150-B0-FC01cluster-2 initiator_22 P000000003CA00150-A0-FC00 P000000003CB00150-B0-FC00
Shows target port logins for initiator ports 11 and 22:
VPlexcli:/> export initiator-port show-logins -i initiator_11,initiator_22Cluster Names Initiator Port Names Target Port Names------------ ------------------------------- -------------------------cluster-1 initiator_11 P000000003CA0014C-A0-FC01
Commands 173
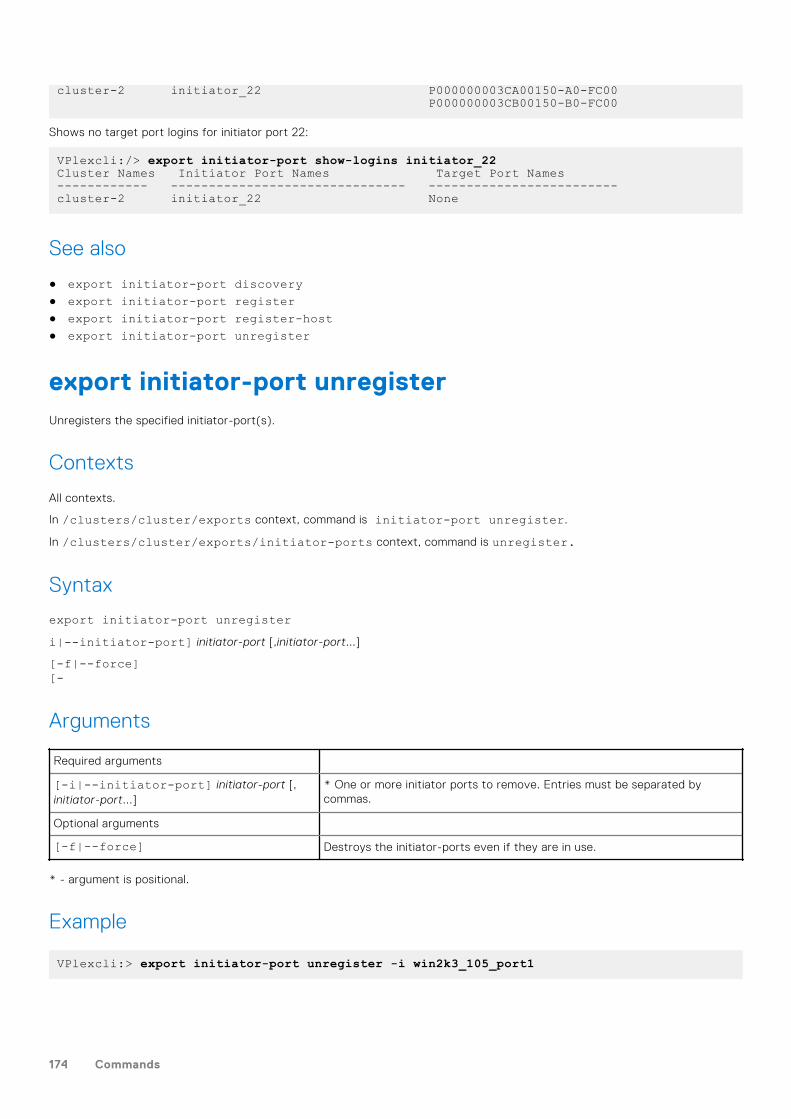
cluster-2 initiator_22 P000000003CA00150-A0-FC00 P000000003CB00150-B0-FC00
Shows no target port logins for initiator port 22:
VPlexcli:/> export initiator-port show-logins initiator_22Cluster Names Initiator Port Names Target Port Names------------ ------------------------------- -------------------------cluster-2 initiator_22 None
See also
● export initiator-port discovery● export initiator-port register● export initiator-port register-host● export initiator-port unregister
export initiator-port unregisterUnregisters the specified initiator-port(s).
Contexts
All contexts.
In /clusters/cluster/exports context, command is initiator-port unregister.
In /clusters/cluster/exports/initiator-ports context, command is unregister.
Syntax
export initiator-port unregisteri|--initiator-port] initiator-port [,initiator-port...]
[-f|--force][-
Arguments
Required arguments
[-i|--initiator-port] initiator-port [,initiator-port...]
* One or more initiator ports to remove. Entries must be separated bycommas.
Optional arguments
[-f|--force] Destroys the initiator-ports even if they are in use.
* - argument is positional.
Example
VPlexcli:> export initiator-port unregister -i win2k3_105_port1
174 Commands
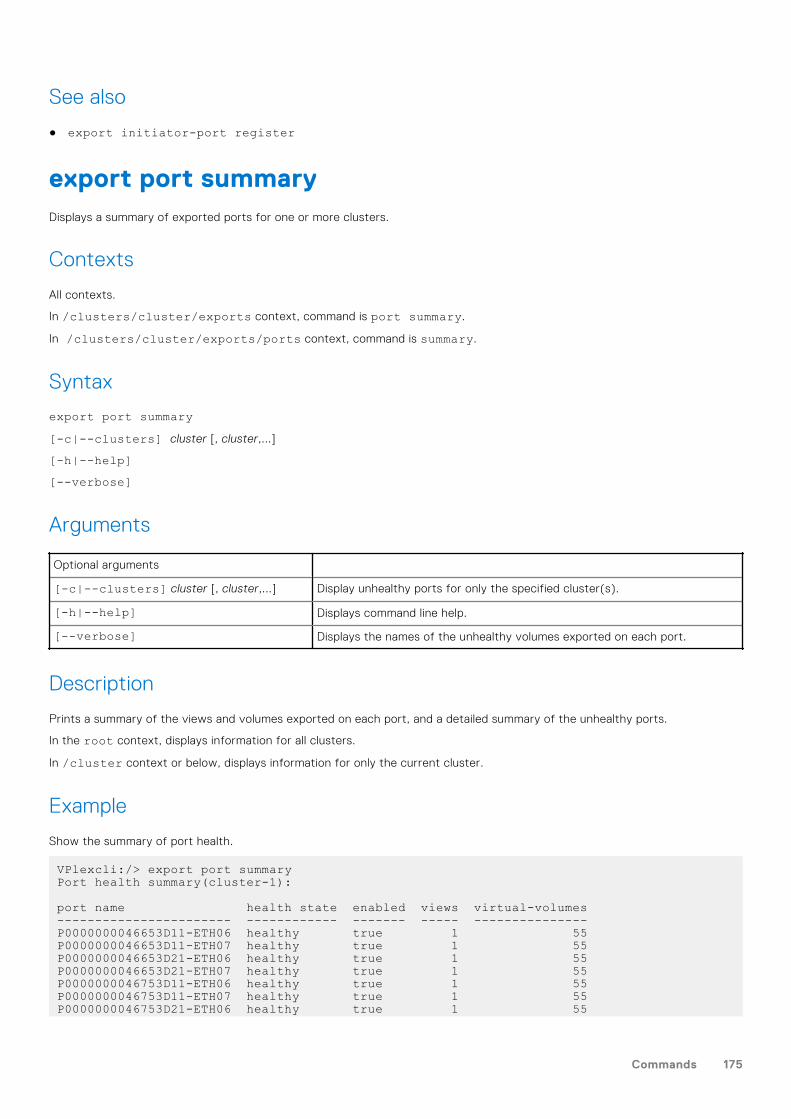
See also
● export initiator-port register
export port summaryDisplays a summary of exported ports for one or more clusters.
Contexts
All contexts.
In /clusters/cluster/exports context, command is port summary.
In /clusters/cluster/exports/ports context, command is summary.
Syntax
export port summary[-c|--clusters] cluster [, cluster,...]
[-h|--help][--verbose]
Arguments
Optional arguments
[-c|--clusters] cluster [, cluster,...] Display unhealthy ports for only the specified cluster(s).
[-h|--help] Displays command line help.
[--verbose] Displays the names of the unhealthy volumes exported on each port.
Description
Prints a summary of the views and volumes exported on each port, and a detailed summary of the unhealthy ports.
In the root context, displays information for all clusters.
In /cluster context or below, displays information for only the current cluster.
Example
Show the summary of port health.
VPlexcli:/> export port summary Port health summary(cluster-1): port name health state enabled views virtual-volumes ----------------------- ------------ ------- ----- --------------- P0000000046653D11-ETH06 healthy true 1 55 P0000000046653D11-ETH07 healthy true 1 55 P0000000046653D21-ETH06 healthy true 1 55 P0000000046653D21-ETH07 healthy true 1 55 P0000000046753D11-ETH06 healthy true 1 55 P0000000046753D11-ETH07 healthy true 1 55 P0000000046753D21-ETH06 healthy true 1 55
Commands 175
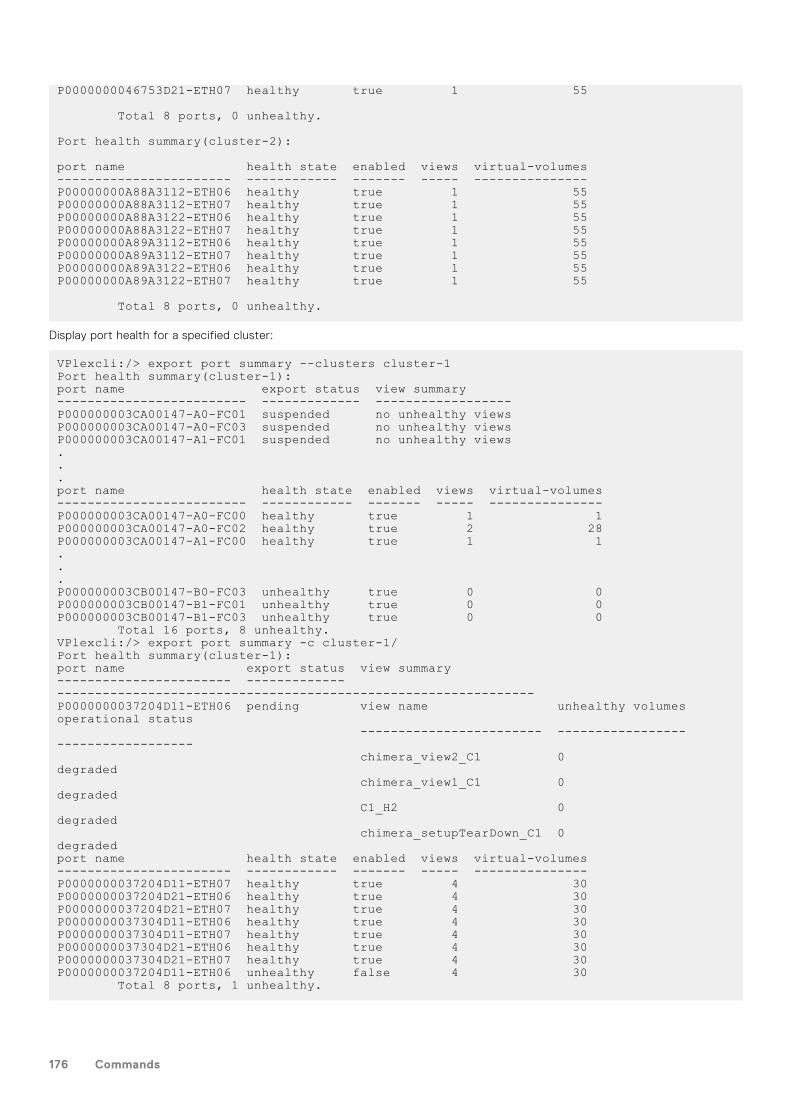
P0000000046753D21-ETH07 healthy true 1 55 Total 8 ports, 0 unhealthy. Port health summary(cluster-2): port name health state enabled views virtual-volumes ----------------------- ------------ ------- ----- --------------- P00000000A88A3112-ETH06 healthy true 1 55 P00000000A88A3112-ETH07 healthy true 1 55 P00000000A88A3122-ETH06 healthy true 1 55 P00000000A88A3122-ETH07 healthy true 1 55 P00000000A89A3112-ETH06 healthy true 1 55 P00000000A89A3112-ETH07 healthy true 1 55 P00000000A89A3122-ETH06 healthy true 1 55 P00000000A89A3122-ETH07 healthy true 1 55 Total 8 ports, 0 unhealthy.
Display port health for a specified cluster:
VPlexcli:/> export port summary --clusters cluster-1Port health summary(cluster-1):port name export status view summary------------------------- ------------- ------------------P000000003CA00147-A0-FC01 suspended no unhealthy viewsP000000003CA00147-A0-FC03 suspended no unhealthy viewsP000000003CA00147-A1-FC01 suspended no unhealthy views...port name health state enabled views virtual-volumes------------------------- ------------ ------- ----- ---------------P000000003CA00147-A0-FC00 healthy true 1 1P000000003CA00147-A0-FC02 healthy true 2 28P000000003CA00147-A1-FC00 healthy true 1 1...P000000003CB00147-B0-FC03 unhealthy true 0 0P000000003CB00147-B1-FC01 unhealthy true 0 0P000000003CB00147-B1-FC03 unhealthy true 0 0 Total 16 ports, 8 unhealthy.VPlexcli:/> export port summary -c cluster-1/Port health summary(cluster-1):port name export status view summary----------------------- ------------- ---------------------------------------------------------------P0000000037204D11-ETH06 pending view name unhealthy volumes operational status ------------------------ ----------------- ------------------ chimera_view2_C1 0 degraded chimera_view1_C1 0 degraded C1_H2 0 degraded chimera_setupTearDown_C1 0 degradedport name health state enabled views virtual-volumes----------------------- ------------ ------- ----- ---------------P0000000037204D11-ETH07 healthy true 4 30P0000000037204D21-ETH06 healthy true 4 30P0000000037204D21-ETH07 healthy true 4 30P0000000037304D11-ETH06 healthy true 4 30P0000000037304D11-ETH07 healthy true 4 30P0000000037304D21-ETH06 healthy true 4 30P0000000037304D21-ETH07 healthy true 4 30P0000000037204D11-ETH06 unhealthy false 4 30 Total 8 ports, 1 unhealthy.
176 Commands
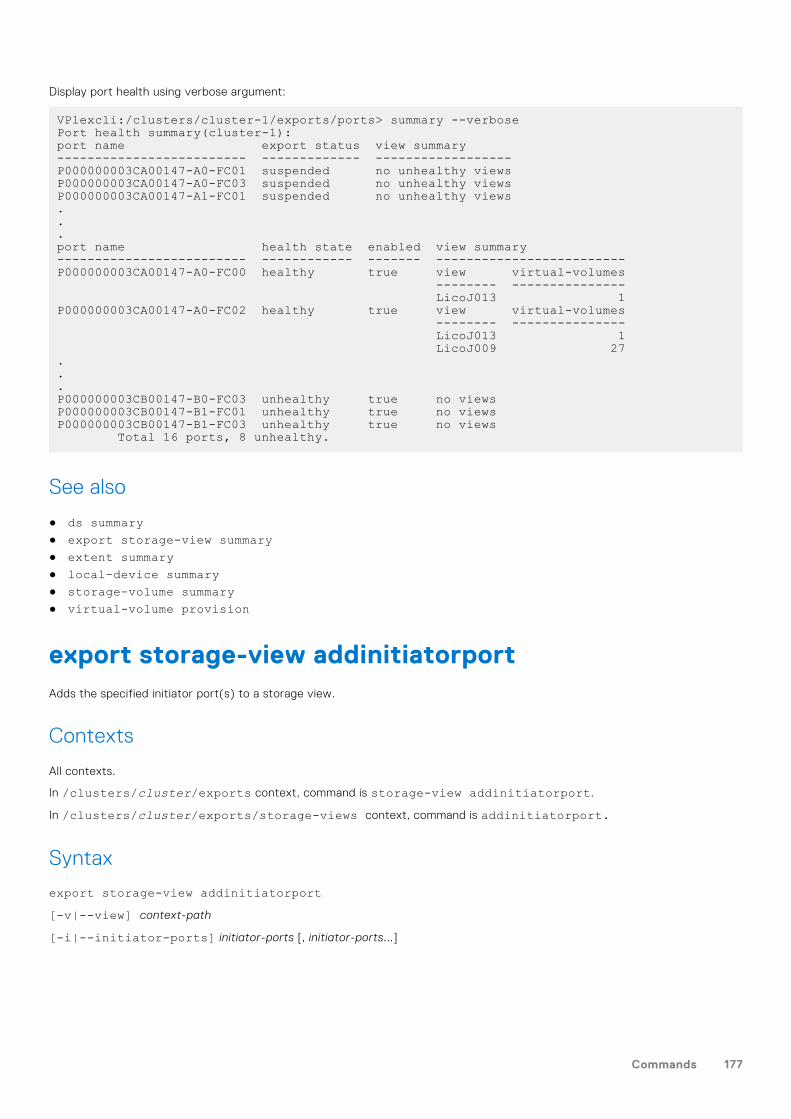
Display port health using verbose argument:
VPlexcli:/clusters/cluster-1/exports/ports> summary --verbosePort health summary(cluster-1):port name export status view summary------------------------- ------------- ------------------P000000003CA00147-A0-FC01 suspended no unhealthy viewsP000000003CA00147-A0-FC03 suspended no unhealthy viewsP000000003CA00147-A1-FC01 suspended no unhealthy views...port name health state enabled view summary------------------------- ------------ ------- -------------------------P000000003CA00147-A0-FC00 healthy true view virtual-volumes -------- --------------- LicoJ013 1P000000003CA00147-A0-FC02 healthy true view virtual-volumes -------- --------------- LicoJ013 1 LicoJ009 27...P000000003CB00147-B0-FC03 unhealthy true no viewsP000000003CB00147-B1-FC01 unhealthy true no viewsP000000003CB00147-B1-FC03 unhealthy true no views Total 16 ports, 8 unhealthy.
See also
● ds summary● export storage-view summary● extent summary● local-device summary● storage-volume summary● virtual-volume provision
export storage-view addinitiatorportAdds the specified initiator port(s) to a storage view.
Contexts
All contexts.
In /clusters/cluster/exports context, command is storage-view addinitiatorport.
In /clusters/cluster/exports/storage-views context, command is addinitiatorport.
Syntax
export storage-view addinitiatorport[-v|--view] context-path
[-i|--initiator-ports] initiator-ports [, initiator-ports...]
Commands 177
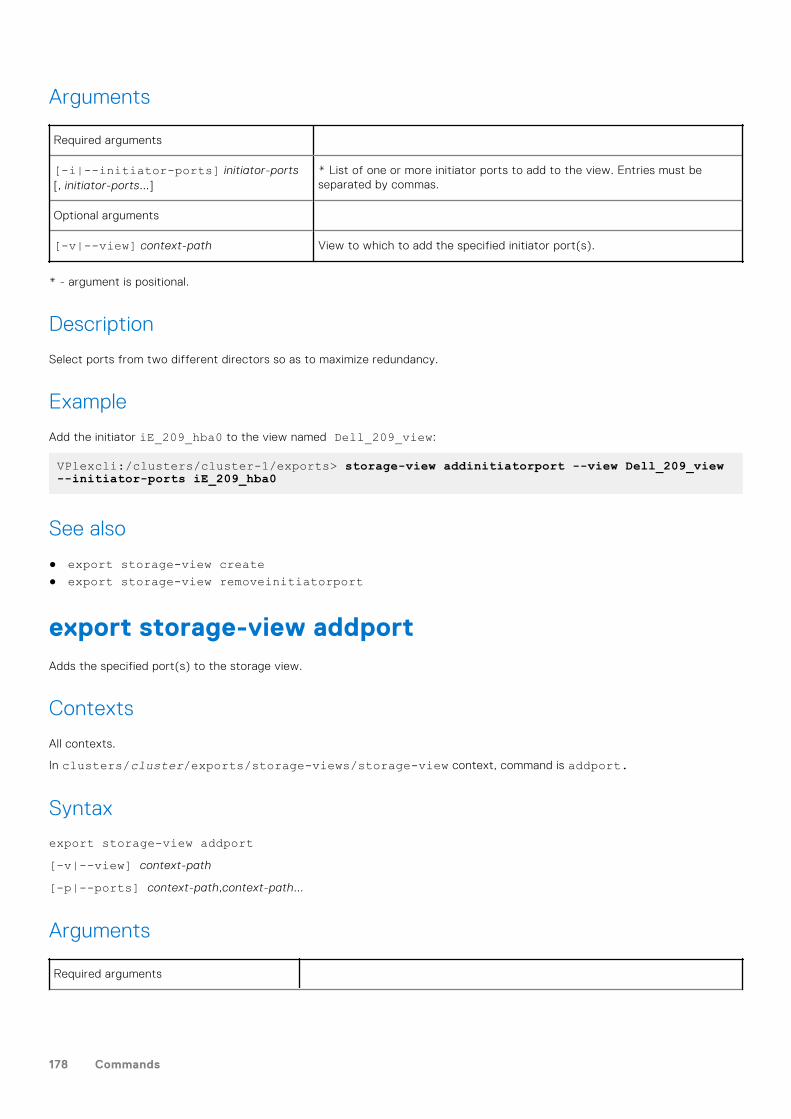
Arguments
Required arguments
[-i|--initiator-ports] initiator-ports[, initiator-ports...]
* List of one or more initiator ports to add to the view. Entries must beseparated by commas.
Optional arguments
[-v|--view] context-path View to which to add the specified initiator port(s).
* - argument is positional.
Description
Select ports from two different directors so as to maximize redundancy.
Example
Add the initiator iE_209_hba0 to the view named Dell_209_view:
VPlexcli:/clusters/cluster-1/exports> storage-view addinitiatorport --view Dell_209_view --initiator-ports iE_209_hba0
See also
● export storage-view create● export storage-view removeinitiatorport
export storage-view addportAdds the specified port(s) to the storage view.
Contexts
All contexts.
In clusters/cluster/exports/storage-views/storage-view context, command is addport.
Syntax
export storage-view addport[-v|--view] context-path
[-p|--ports] context-path,context-path...
Arguments
Required arguments
178 Commands
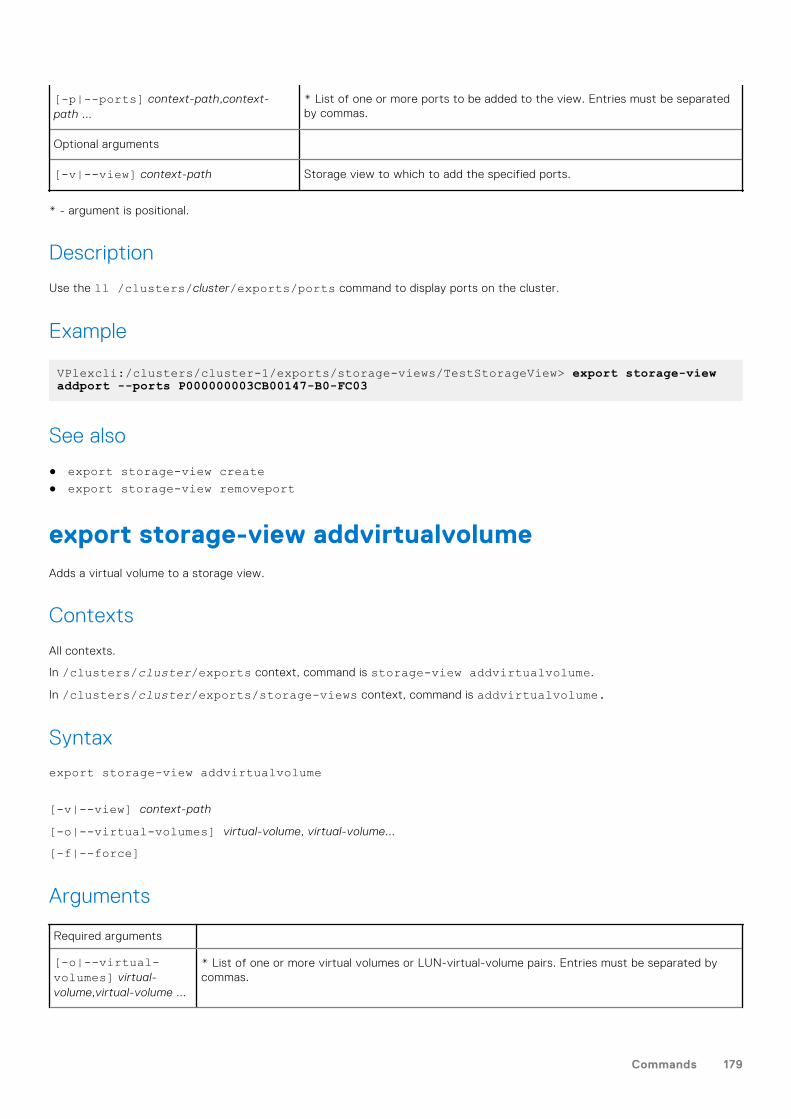
[-p|--ports] context-path,context-path ...
* List of one or more ports to be added to the view. Entries must be separatedby commas.
Optional arguments
[-v|--view] context-path Storage view to which to add the specified ports.
* - argument is positional.
Description
Use the ll /clusters/cluster/exports/ports command to display ports on the cluster.
Example
VPlexcli:/clusters/cluster-1/exports/storage-views/TestStorageView> export storage-view addport --ports P000000003CB00147-B0-FC03
See also
● export storage-view create● export storage-view removeport
export storage-view addvirtualvolumeAdds a virtual volume to a storage view.
Contexts
All contexts.
In /clusters/cluster/exports context, command is storage-view addvirtualvolume.
In /clusters/cluster/exports/storage-views context, command is addvirtualvolume.
Syntax
export storage-view addvirtualvolume
[-v|--view] context-path
[-o|--virtual-volumes] virtual-volume, virtual-volume...
[-f|--force]
Arguments
Required arguments
[-o|--virtual-volumes] virtual-volume,virtual-volume ...
* List of one or more virtual volumes or LUN-virtual-volume pairs. Entries must be separated bycommas.
Commands 179
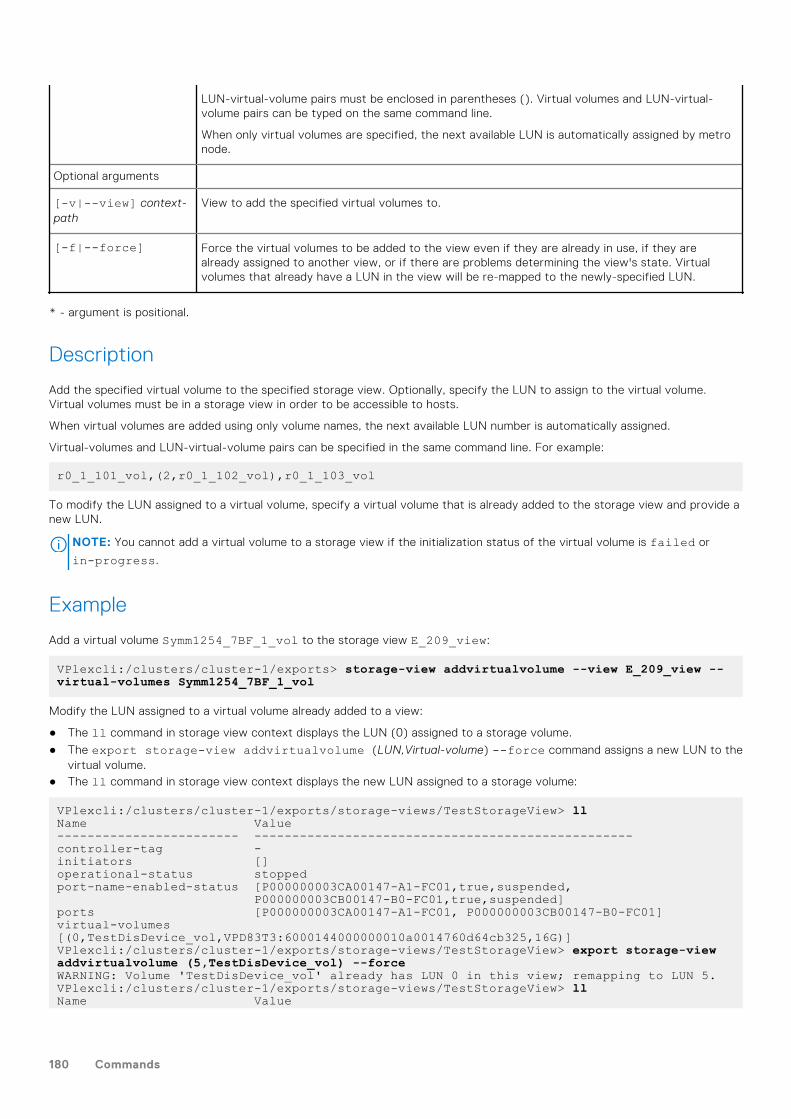
LUN-virtual-volume pairs must be enclosed in parentheses (). Virtual volumes and LUN-virtual-volume pairs can be typed on the same command line.
When only virtual volumes are specified, the next available LUN is automatically assigned by metronode.
Optional arguments
[-v|--view] context-path
View to add the specified virtual volumes to.
[-f|--force] Force the virtual volumes to be added to the view even if they are already in use, if they arealready assigned to another view, or if there are problems determining the view's state. Virtualvolumes that already have a LUN in the view will be re-mapped to the newly-specified LUN.
* - argument is positional.
Description
Add the specified virtual volume to the specified storage view. Optionally, specify the LUN to assign to the virtual volume.Virtual volumes must be in a storage view in order to be accessible to hosts.
When virtual volumes are added using only volume names, the next available LUN number is automatically assigned.
Virtual-volumes and LUN-virtual-volume pairs can be specified in the same command line. For example:
r0_1_101_vol,(2,r0_1_102_vol),r0_1_103_vol
To modify the LUN assigned to a virtual volume, specify a virtual volume that is already added to the storage view and provide anew LUN.
NOTE: You cannot add a virtual volume to a storage view if the initialization status of the virtual volume is failed or
in-progress.
Example
Add a virtual volume Symm1254_7BF_1_vol to the storage view E_209_view:
VPlexcli:/clusters/cluster-1/exports> storage-view addvirtualvolume --view E_209_view --virtual-volumes Symm1254_7BF_1_vol
Modify the LUN assigned to a virtual volume already added to a view:
● The ll command in storage view context displays the LUN (0) assigned to a storage volume.
● The export storage-view addvirtualvolume (LUN,Virtual-volume) --force command assigns a new LUN to thevirtual volume.
● The ll command in storage view context displays the new LUN assigned to a storage volume:
VPlexcli:/clusters/cluster-1/exports/storage-views/TestStorageView> llName Value------------------------ --------------------------------------------------controller-tag -initiators []operational-status stoppedport-name-enabled-status [P000000003CA00147-A1-FC01,true,suspended, P000000003CB00147-B0-FC01,true,suspended]ports [P000000003CA00147-A1-FC01, P000000003CB00147-B0-FC01]virtual-volumes [(0,TestDisDevice_vol,VPD83T3:6000144000000010a0014760d64cb325,16G)]VPlexcli:/clusters/cluster-1/exports/storage-views/TestStorageView> export storage-view addvirtualvolume (5,TestDisDevice_vol) --forceWARNING: Volume 'TestDisDevice_vol' already has LUN 0 in this view; remapping to LUN 5.VPlexcli:/clusters/cluster-1/exports/storage-views/TestStorageView> llName Value
180 Commands
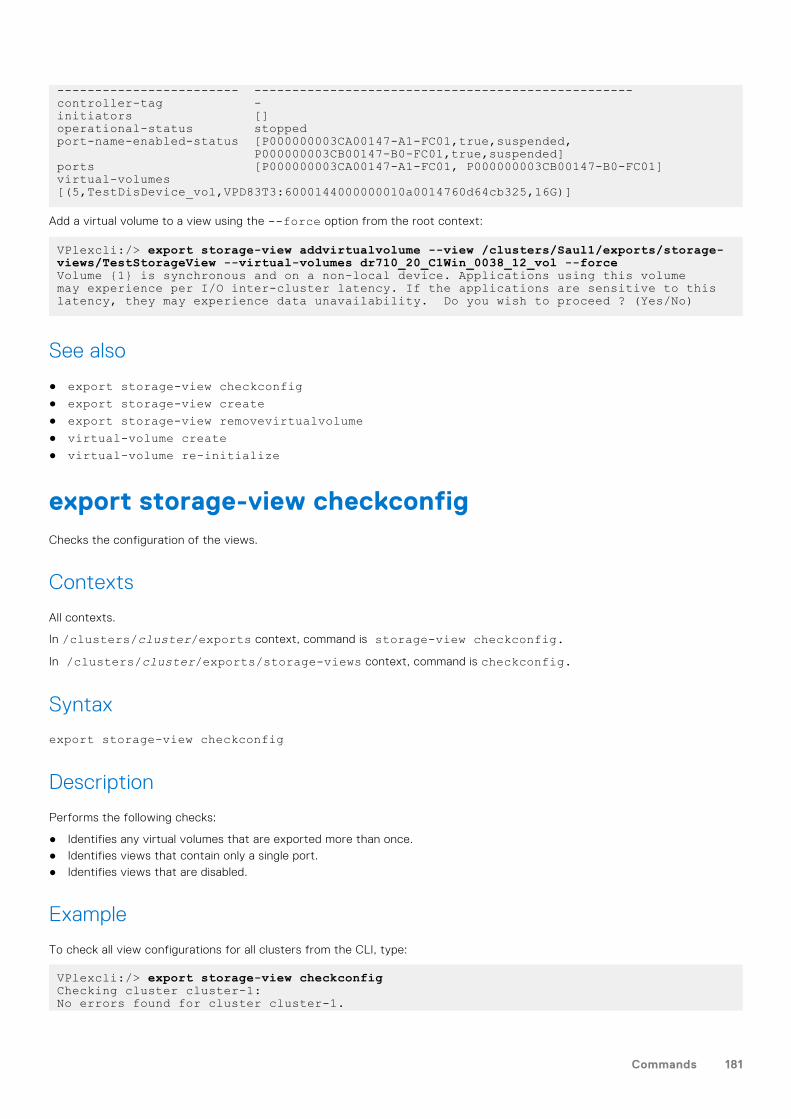
------------------------ --------------------------------------------------controller-tag -initiators []operational-status stoppedport-name-enabled-status [P000000003CA00147-A1-FC01,true,suspended, P000000003CB00147-B0-FC01,true,suspended]ports [P000000003CA00147-A1-FC01, P000000003CB00147-B0-FC01]virtual-volumes [(5,TestDisDevice_vol,VPD83T3:6000144000000010a0014760d64cb325,16G)]
Add a virtual volume to a view using the --force option from the root context:
VPlexcli:/> export storage-view addvirtualvolume --view /clusters/Saul1/exports/storage-views/TestStorageView --virtual-volumes dr710_20_C1Win_0038_12_vol --forceVolume {1} is synchronous and on a non-local device. Applications using this volume may experience per I/O inter-cluster latency. If the applications are sensitive to this latency, they may experience data unavailability. Do you wish to proceed ? (Yes/No)
See also
● export storage-view checkconfig● export storage-view create● export storage-view removevirtualvolume● virtual-volume create● virtual-volume re-initialize
export storage-view checkconfigChecks the configuration of the views.
Contexts
All contexts.
In /clusters/cluster/exports context, command is storage-view checkconfig.In /clusters/cluster/exports/storage-views context, command is checkconfig.
Syntax
export storage-view checkconfig
Description
Performs the following checks:
● Identifies any virtual volumes that are exported more than once.● Identifies views that contain only a single port.● Identifies views that are disabled.
Example
To check all view configurations for all clusters from the CLI, type:
VPlexcli:/> export storage-view checkconfigChecking cluster cluster-1:No errors found for cluster cluster-1.
Commands 181
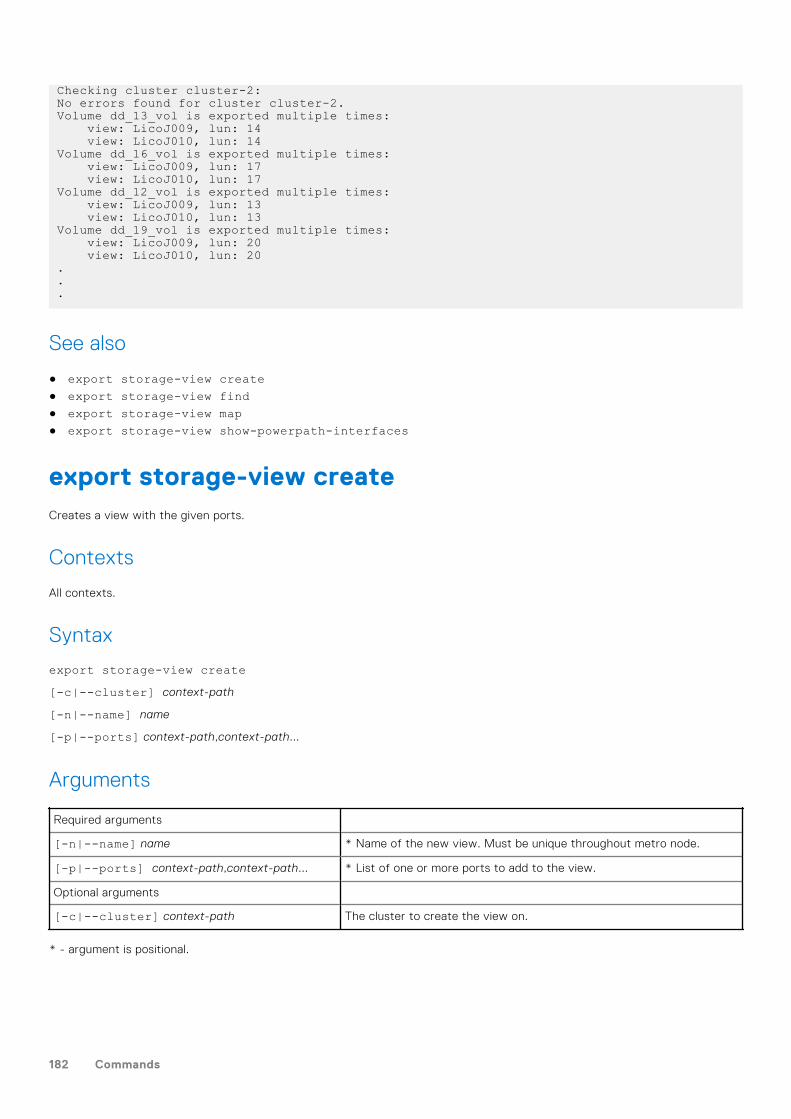
Checking cluster cluster-2:No errors found for cluster cluster-2.Volume dd_13_vol is exported multiple times: view: LicoJ009, lun: 14 view: LicoJ010, lun: 14Volume dd_16_vol is exported multiple times: view: LicoJ009, lun: 17 view: LicoJ010, lun: 17Volume dd_12_vol is exported multiple times: view: LicoJ009, lun: 13 view: LicoJ010, lun: 13Volume dd_19_vol is exported multiple times: view: LicoJ009, lun: 20 view: LicoJ010, lun: 20...
See also
● export storage-view create● export storage-view find● export storage-view map● export storage-view show-powerpath-interfaces
export storage-view createCreates a view with the given ports.
Contexts
All contexts.
Syntax
export storage-view create[-c|--cluster] context-path
[-n|--name] name
[-p|--ports] context-path,context-path...
Arguments
Required arguments
[-n|--name] name * Name of the new view. Must be unique throughout metro node.
[-p|--ports] context-path,context-path... * List of one or more ports to add to the view.
Optional arguments
[-c|--cluster] context-path The cluster to create the view on.
* - argument is positional.
182 Commands
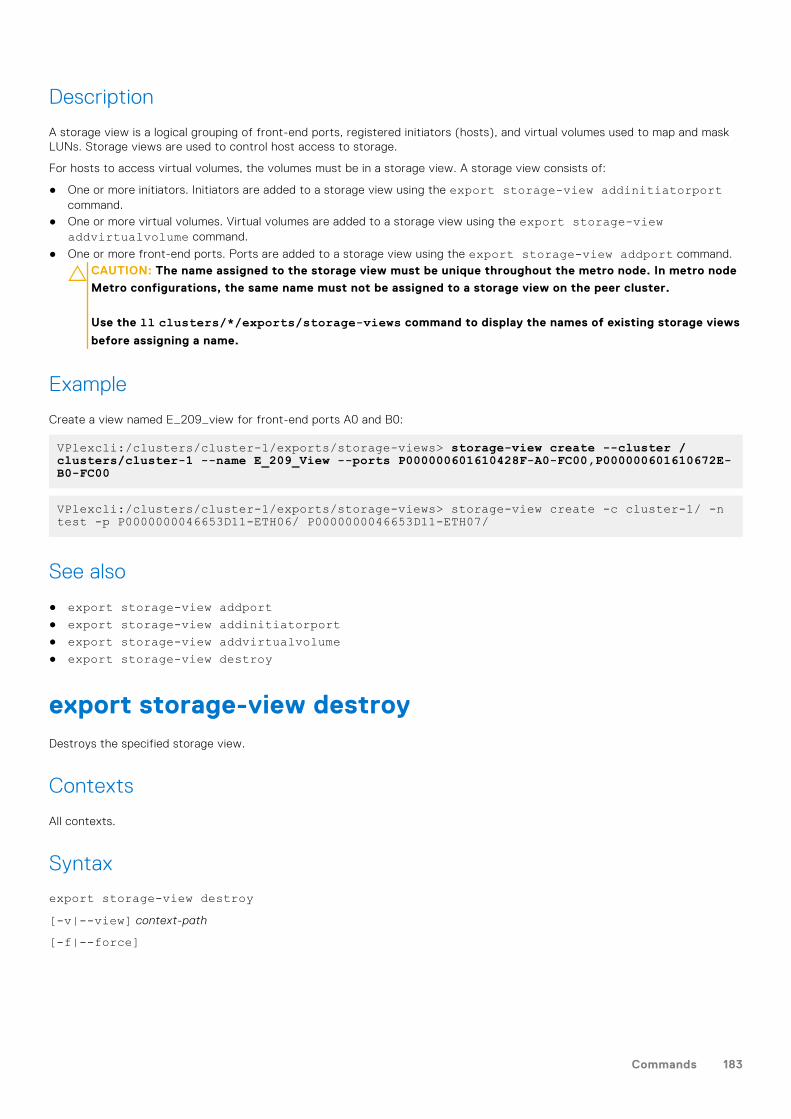
Description
A storage view is a logical grouping of front-end ports, registered initiators (hosts), and virtual volumes used to map and maskLUNs. Storage views are used to control host access to storage.
For hosts to access virtual volumes, the volumes must be in a storage view. A storage view consists of:
● One or more initiators. Initiators are added to a storage view using the export storage-view addinitiatorportcommand.
● One or more virtual volumes. Virtual volumes are added to a storage view using the export storage-viewaddvirtualvolume command.
● One or more front-end ports. Ports are added to a storage view using the export storage-view addport command.CAUTION: The name assigned to the storage view must be unique throughout the metro node. In metro node
Metro configurations, the same name must not be assigned to a storage view on the peer cluster.
Use the ll clusters/*/exports/storage-views command to display the names of existing storage views
before assigning a name.
Example
Create a view named E_209_view for front-end ports A0 and B0:
VPlexcli:/clusters/cluster-1/exports/storage-views> storage-view create --cluster /clusters/cluster-1 --name E_209_View --ports P000000601610428F-A0-FC00,P000000601610672E-B0-FC00
VPlexcli:/clusters/cluster-1/exports/storage-views> storage-view create -c cluster-1/ -n test -p P0000000046653D11-ETH06/ P0000000046653D11-ETH07/
See also
● export storage-view addport● export storage-view addinitiatorport● export storage-view addvirtualvolume● export storage-view destroy
export storage-view destroyDestroys the specified storage view.
Contexts
All contexts.
Syntax
export storage-view destroy[-v|--view] context-path
[-f|--force]
Commands 183
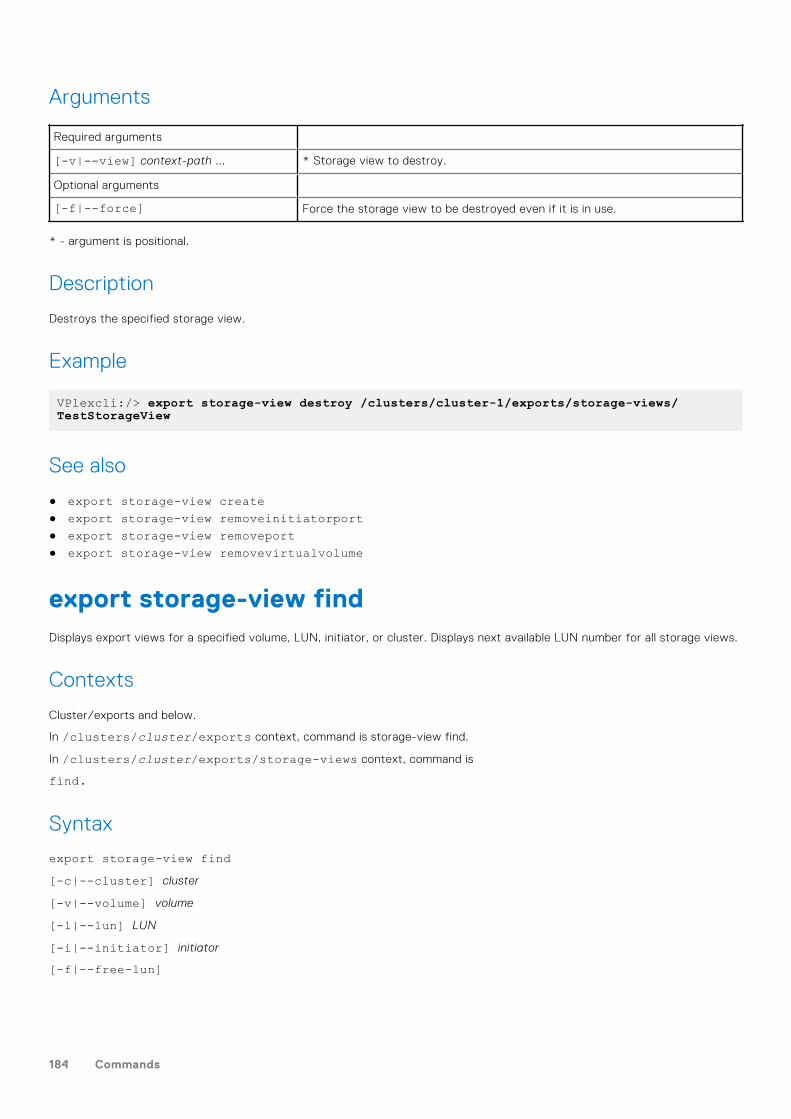
Arguments
Required arguments
[-v|--view] context-path ... * Storage view to destroy.
Optional arguments
[-f|--force] Force the storage view to be destroyed even if it is in use.
* - argument is positional.
Description
Destroys the specified storage view.
Example
VPlexcli:/> export storage-view destroy /clusters/cluster-1/exports/storage-views/TestStorageView
See also
● export storage-view create● export storage-view removeinitiatorport● export storage-view removeport● export storage-view removevirtualvolume
export storage-view findDisplays export views for a specified volume, LUN, initiator, or cluster. Displays next available LUN number for all storage views.
Contexts
Cluster/exports and below.
In /clusters/cluster/exports context, command is storage-view find.
In /clusters/cluster/exports/storage-views context, command is
find.
Syntax
export storage-view find[-c|--cluster] cluster
[-v|--volume] volume
[-l|--lun] LUN
[-i|--initiator] initiator
[-f|--free-lun]
184 Commands
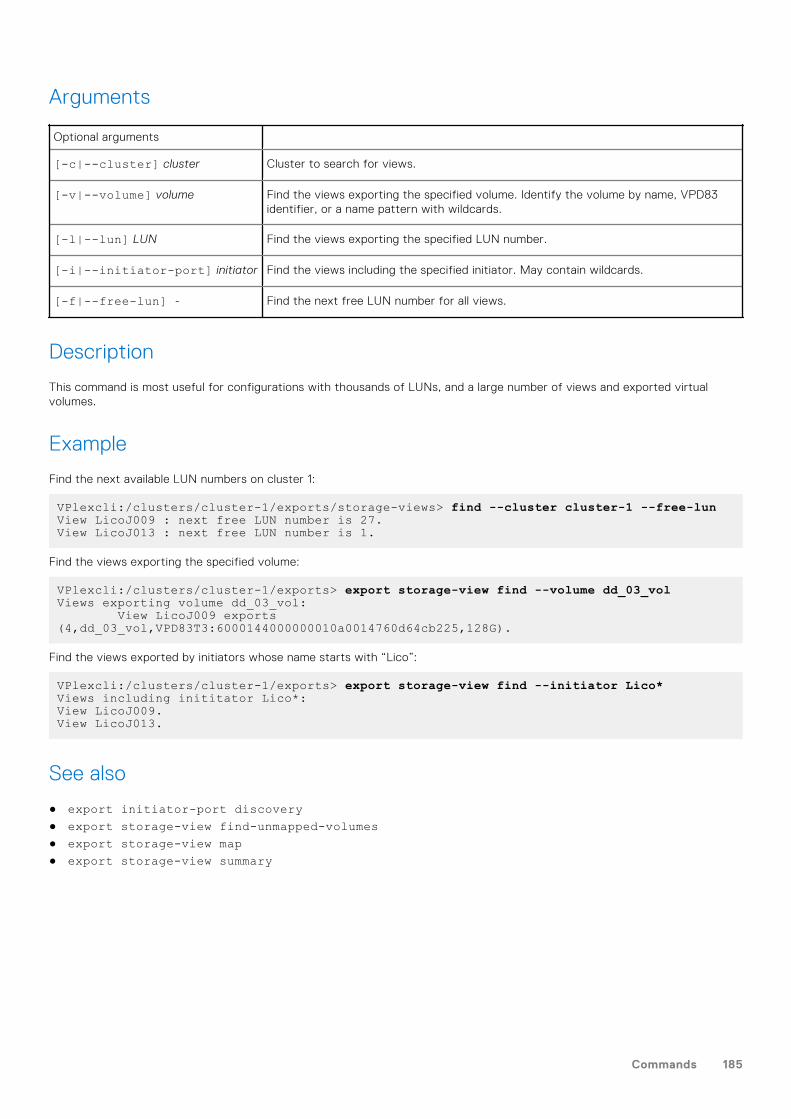
Arguments
Optional arguments
[-c|--cluster] cluster Cluster to search for views.
[-v|--volume] volume Find the views exporting the specified volume. Identify the volume by name, VPD83identifier, or a name pattern with wildcards.
[-l|--lun] LUN Find the views exporting the specified LUN number.
[-i|--initiator-port] initiator Find the views including the specified initiator. May contain wildcards.
[-f|--free-lun] - Find the next free LUN number for all views.
Description
This command is most useful for configurations with thousands of LUNs, and a large number of views and exported virtualvolumes.
Example
Find the next available LUN numbers on cluster 1:
VPlexcli:/clusters/cluster-1/exports/storage-views> find --cluster cluster-1 --free-lunView LicoJ009 : next free LUN number is 27.View LicoJ013 : next free LUN number is 1.
Find the views exporting the specified volume:
VPlexcli:/clusters/cluster-1/exports> export storage-view find --volume dd_03_volViews exporting volume dd_03_vol: View LicoJ009 exports (4,dd_03_vol,VPD83T3:6000144000000010a0014760d64cb225,128G).
Find the views exported by initiators whose name starts with “Lico”:
VPlexcli:/clusters/cluster-1/exports> export storage-view find --initiator Lico*Views including inititator Lico*:View LicoJ009.View LicoJ013.
See also
● export initiator-port discovery● export storage-view find-unmapped-volumes● export storage-view map● export storage-view summary
Commands 185

export storage-view find-unmapped-volumesDisplays unexported virtual volumes.
Contexts
All contexts.
Syntax
export storage-view find-unmapped-volumes[-c|--cluster] cluster
Arguments
Required arguments
[-c|--cluster] cluster Cluster for which to display unexported storage volumes.
Description
Displays unexported virtual volumes in the specified cluster.
Displays the remote (on the other cluster) virtual volumes which are unexported.
See also
● export storage-view addvirtualvolume● export-storage-view removevirtualvolume
export storage-view mapDisplays all the virtual volumes that are exported to the storage view.
Contexts
All contexts.
In /clusters/cluster/exports context, command is storage-view map.
In /clusters/cluster/exports/storage-views context, command is map.
Syntax
export storage-view map[-v|--views] view,view...
[-f|--file] filename
186 Commands
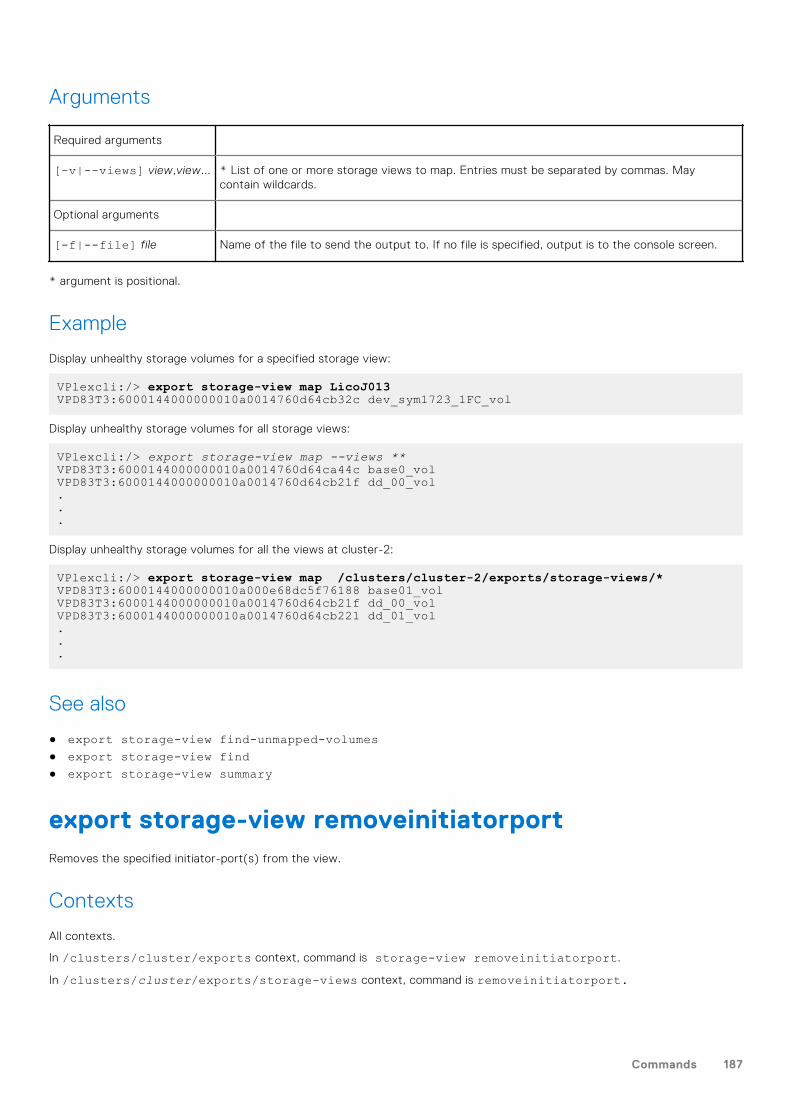
Arguments
Required arguments
[-v|--views] view,view... * List of one or more storage views to map. Entries must be separated by commas. Maycontain wildcards.
Optional arguments
[-f|--file] file Name of the file to send the output to. If no file is specified, output is to the console screen.
* argument is positional.
Example
Display unhealthy storage volumes for a specified storage view:
VPlexcli:/> export storage-view map LicoJ013VPD83T3:6000144000000010a0014760d64cb32c dev_sym1723_1FC_vol
Display unhealthy storage volumes for all storage views:
VPlexcli:/> export storage-view map --views **VPD83T3:6000144000000010a0014760d64ca44c base0_volVPD83T3:6000144000000010a0014760d64cb21f dd_00_vol...
Display unhealthy storage volumes for all the views at cluster-2:
VPlexcli:/> export storage-view map /clusters/cluster-2/exports/storage-views/*VPD83T3:6000144000000010a000e68dc5f76188 base01_volVPD83T3:6000144000000010a0014760d64cb21f dd_00_volVPD83T3:6000144000000010a0014760d64cb221 dd_01_vol...
See also
● export storage-view find-unmapped-volumes● export storage-view find● export storage-view summary
export storage-view removeinitiatorportRemoves the specified initiator-port(s) from the view.
Contexts
All contexts.
In /clusters/cluster/exports context, command is storage-view removeinitiatorport.
In /clusters/cluster/exports/storage-views context, command is removeinitiatorport.
Commands 187
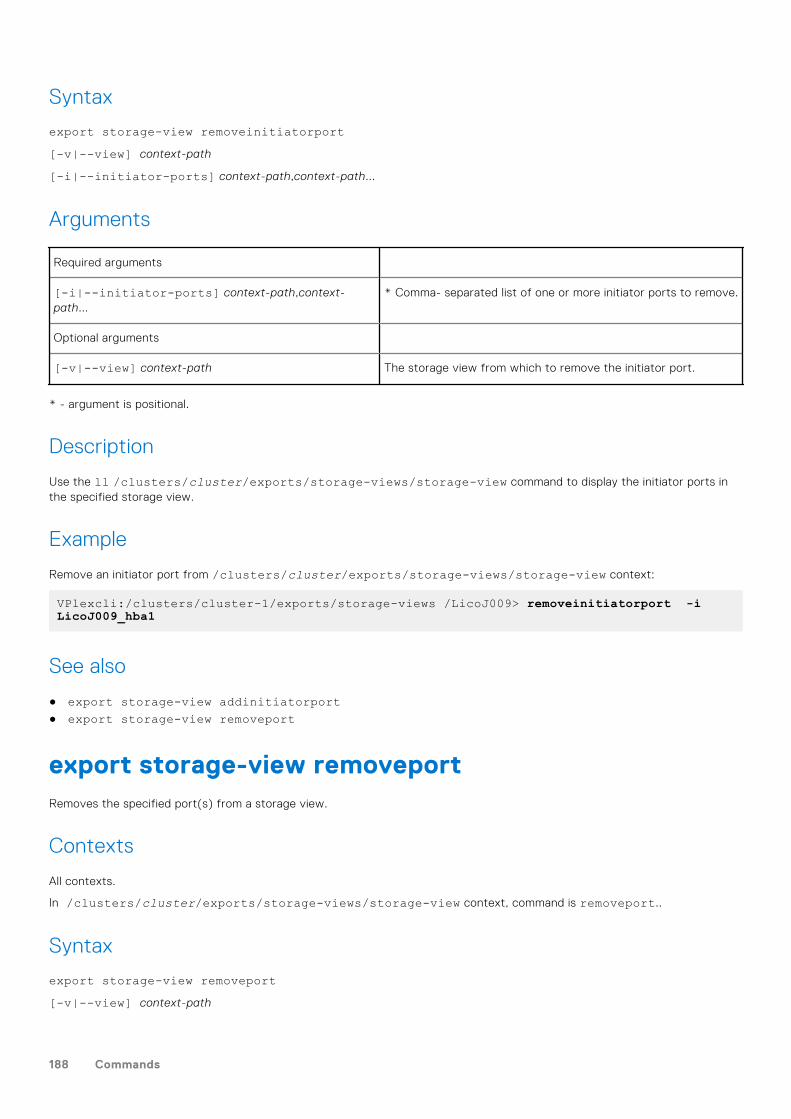
Syntax
export storage-view removeinitiatorport[-v|--view] context-path
[-i|--initiator-ports] context-path,context-path...
Arguments
Required arguments
[-i|--initiator-ports] context-path,context-path...
* Comma- separated list of one or more initiator ports to remove.
Optional arguments
[-v|--view] context-path The storage view from which to remove the initiator port.
* - argument is positional.
Description
Use the ll /clusters/cluster/exports/storage-views/storage-view command to display the initiator ports inthe specified storage view.
Example
Remove an initiator port from /clusters/cluster/exports/storage-views/storage-view context:
VPlexcli:/clusters/cluster-1/exports/storage-views /LicoJ009> removeinitiatorport -i LicoJ009_hba1
See also
● export storage-view addinitiatorport● export storage-view removeport
export storage-view removeportRemoves the specified port(s) from a storage view.
Contexts
All contexts.
In /clusters/cluster/exports/storage-views/storage-view context, command is removeport..
Syntax
export storage-view removeport[-v|--view] context-path
188 Commands
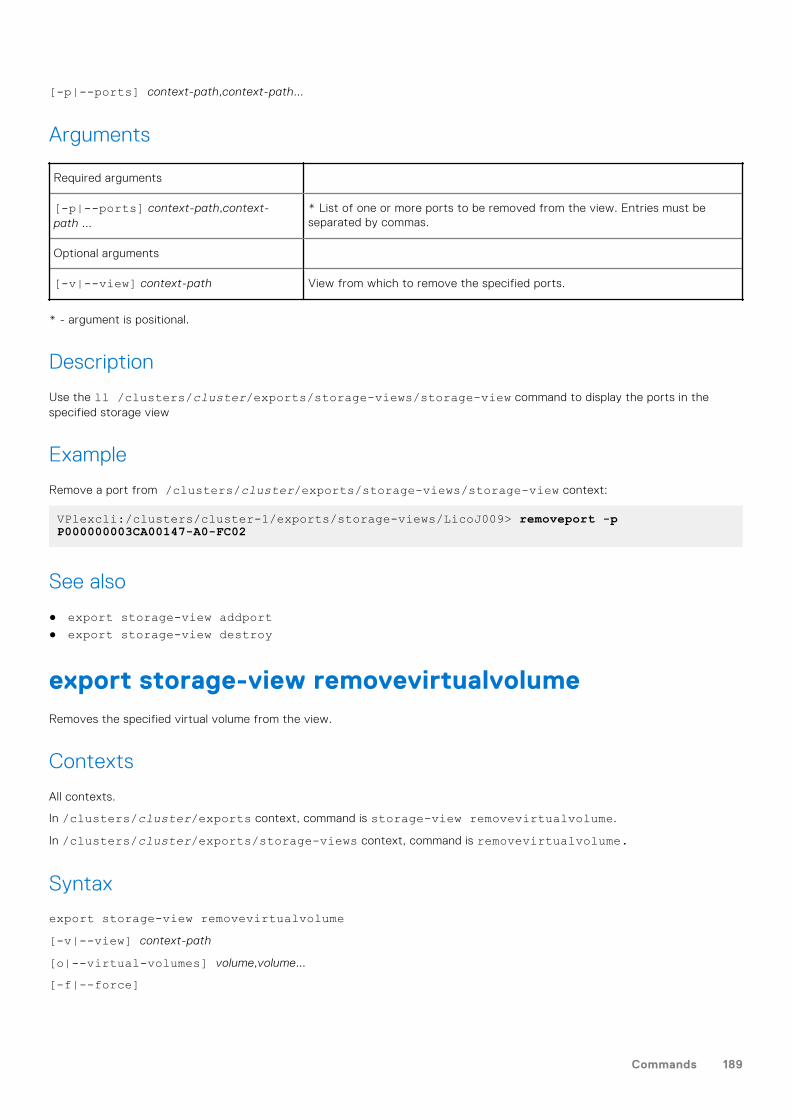
[-p|--ports] context-path,context-path...
Arguments
Required arguments
[-p|--ports] context-path,context-path ...
* List of one or more ports to be removed from the view. Entries must beseparated by commas.
Optional arguments
[-v|--view] context-path View from which to remove the specified ports.
* - argument is positional.
Description
Use the ll /clusters/cluster/exports/storage-views/storage-view command to display the ports in thespecified storage view
Example
Remove a port from /clusters/cluster/exports/storage-views/storage-view context:
VPlexcli:/clusters/cluster-1/exports/storage-views/LicoJ009> removeport -p P000000003CA00147-A0-FC02
See also
● export storage-view addport● export storage-view destroy
export storage-view removevirtualvolumeRemoves the specified virtual volume from the view.
Contexts
All contexts.
In /clusters/cluster/exports context, command is storage-view removevirtualvolume.
In /clusters/cluster/exports/storage-views context, command is removevirtualvolume.
Syntax
export storage-view removevirtualvolume[-v|--view] context-path
[o|--virtual-volumes] volume,volume...
[-f|--force]
Commands 189

Arguments
Required arguments
[-o|--virtual-volumes]volume,volume ...
* List of one or more virtual volumes to be removed from the view. Entries must beseparated by commas.
Optional arguments
[-f|--force] Force the virtual volumes to be removed from the view even if the specified LUNs are inuse, the view is live, or some of the virtual volumes do not exist in the view.
[-v|--view] context-path View from which to remove the specified virtual volumes.
* - argument is positional.
Description
Use the ll /clusters/cluster/exports/storage-views/storage-view command to display the virtual volumes inthe specified storage view
Example
Delete a virtual volume from the specified storage view, even though the storage view is active:
VPlexcli:/clusters/cluster-1/exports/storage-views> removevirtualvolume --view E209_View --virtual-volume (1,test3211_r0_vol) --forceWARNING: The storage-view 'E209_View' is a live storage-view and is exporting storage through the following initiator ports:'iE209_hba1_b', 'iE209_hba0'. Performing this operation may affect hosts' storage-view of storage. Proceeding anyway.
See also
● export storage-view addvirtualvolume● export storage-view destroy
export storage-view show-powerpath-interfacesDisplays the mapping between PowerPath® interfaces and the metro node system ports.
Contexts
clusters/cluster context and below.
Syntax
export storage-view show-powerpath-interfaces [-c|--cluster] context-path
190 Commands
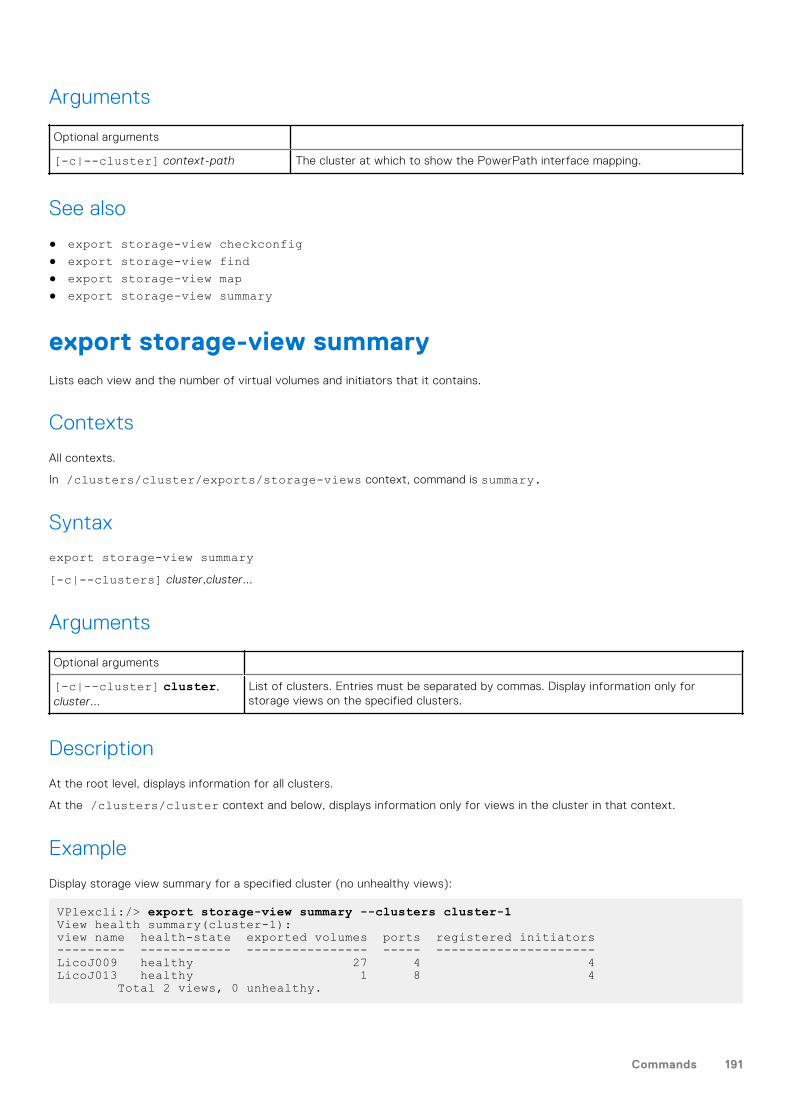
Arguments
Optional arguments
[-c|--cluster] context-path The cluster at which to show the PowerPath interface mapping.
See also
● export storage-view checkconfig● export storage-view find● export storage-view map● export storage-view summary
export storage-view summaryLists each view and the number of virtual volumes and initiators that it contains.
Contexts
All contexts.
In /clusters/cluster/exports/storage-views context, command is summary.
Syntax
export storage-view summary[-c|--clusters] cluster,cluster...
Arguments
Optional arguments
[-c|--cluster] cluster,cluster...
List of clusters. Entries must be separated by commas. Display information only forstorage views on the specified clusters.
Description
At the root level, displays information for all clusters.
At the /clusters/cluster context and below, displays information only for views in the cluster in that context.
Example
Display storage view summary for a specified cluster (no unhealthy views):
VPlexcli:/> export storage-view summary --clusters cluster-1View health summary(cluster-1):view name health-state exported volumes ports registered initiators--------- ------------ ---------------- ----- ---------------------LicoJ009 healthy 27 4 4LicoJ013 healthy 1 8 4 Total 2 views, 0 unhealthy.
Commands 191
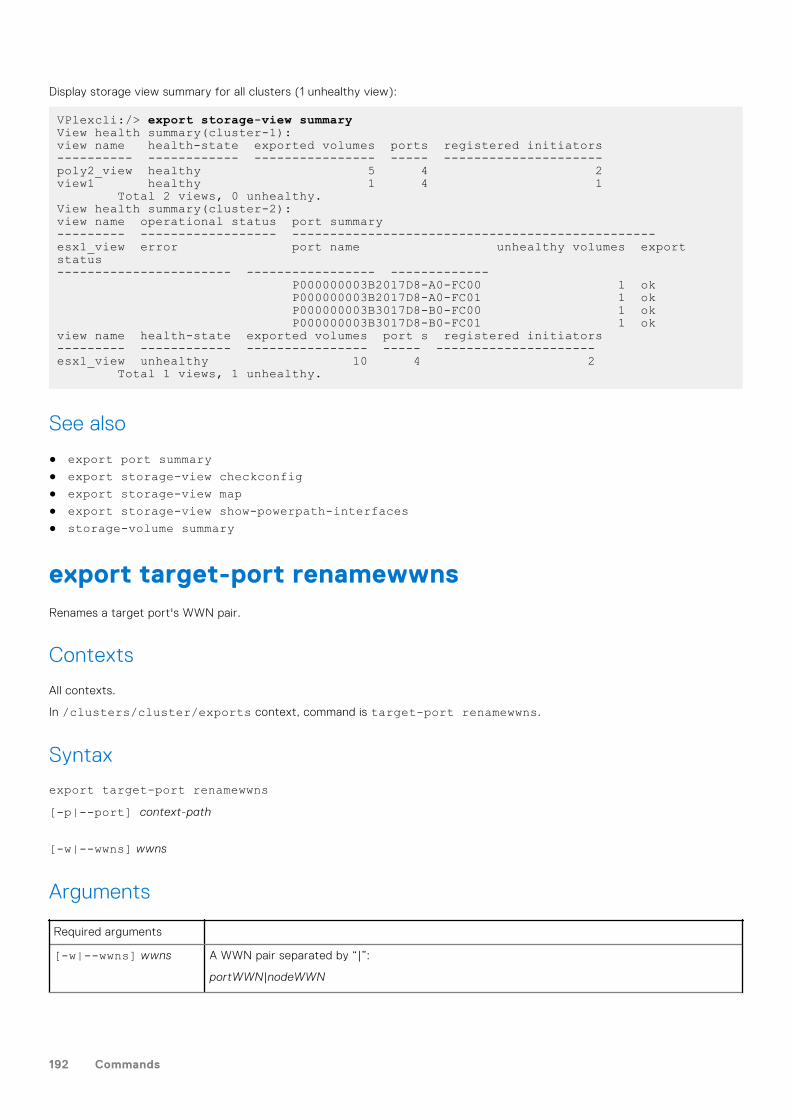
Display storage view summary for all clusters (1 unhealthy view):
VPlexcli:/> export storage-view summaryView health summary(cluster-1):view name health-state exported volumes ports registered initiators---------- ------------ ---------------- ----- ---------------------poly2_view healthy 5 4 2view1 healthy 1 4 1 Total 2 views, 0 unhealthy.View health summary(cluster-2):view name operational status port summary--------- ------------------ ------------------------------------------------esx1_view error port name unhealthy volumes export status----------------------- ----------------- ------------- P000000003B2017D8-A0-FC00 1 ok P000000003B2017D8-A0-FC01 1 ok P000000003B3017D8-B0-FC00 1 ok P000000003B3017D8-B0-FC01 1 okview name health-state exported volumes port s registered initiators--------- ------------ ---------------- ----- ---------------------esx1_view unhealthy 10 4 2 Total 1 views, 1 unhealthy.
See also
● export port summary● export storage-view checkconfig● export storage-view map● export storage-view show-powerpath-interfaces● storage-volume summary
export target-port renamewwnsRenames a target port's WWN pair.
Contexts
All contexts.
In /clusters/cluster/exports context, command is target-port renamewwns.
Syntax
export target-port renamewwns[-p|--port] context-path
[-w|--wwns] wwns
Arguments
Required arguments
[-w|--wwns] wwns A WWN pair separated by “|”:
portWWN|nodeWWN
192 Commands
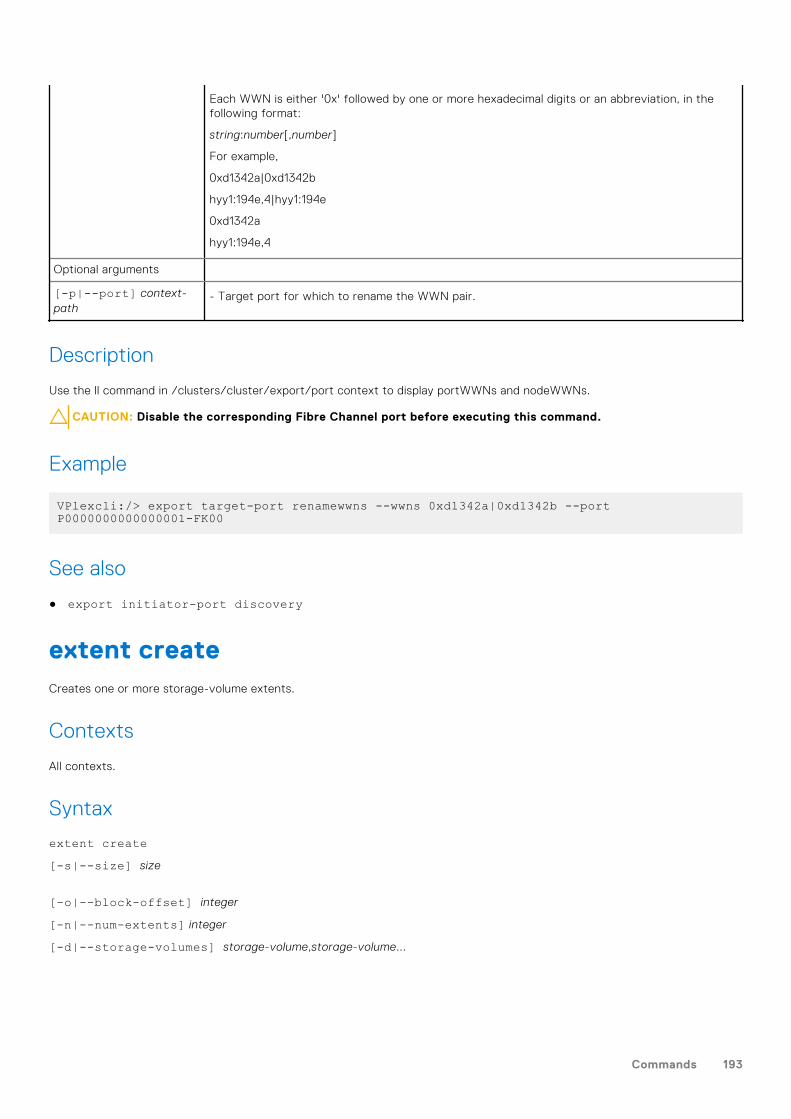
Each WWN is either '0x' followed by one or more hexadecimal digits or an abbreviation, in thefollowing format:
string:number[,number]
For example,
0xd1342a|0xd1342b
hyy1:194e,4|hyy1:194e
0xd1342a
hyy1:194e,4
Optional arguments
[-p|--port] context-path
- Target port for which to rename the WWN pair.
Description
Use the ll command in /clusters/cluster/export/port context to display portWWNs and nodeWWNs.
CAUTION: Disable the corresponding Fibre Channel port before executing this command.
Example
VPlexcli:/> export target-port renamewwns --wwns 0xd1342a|0xd1342b --port P0000000000000001-FK00
See also
● export initiator-port discovery
extent createCreates one or more storage-volume extents.
Contexts
All contexts.
Syntax
extent create[-s|--size] size
[-o|--block-offset] integer
[-n|--num-extents] integer
[-d|--storage-volumes] storage-volume,storage-volume...
Commands 193
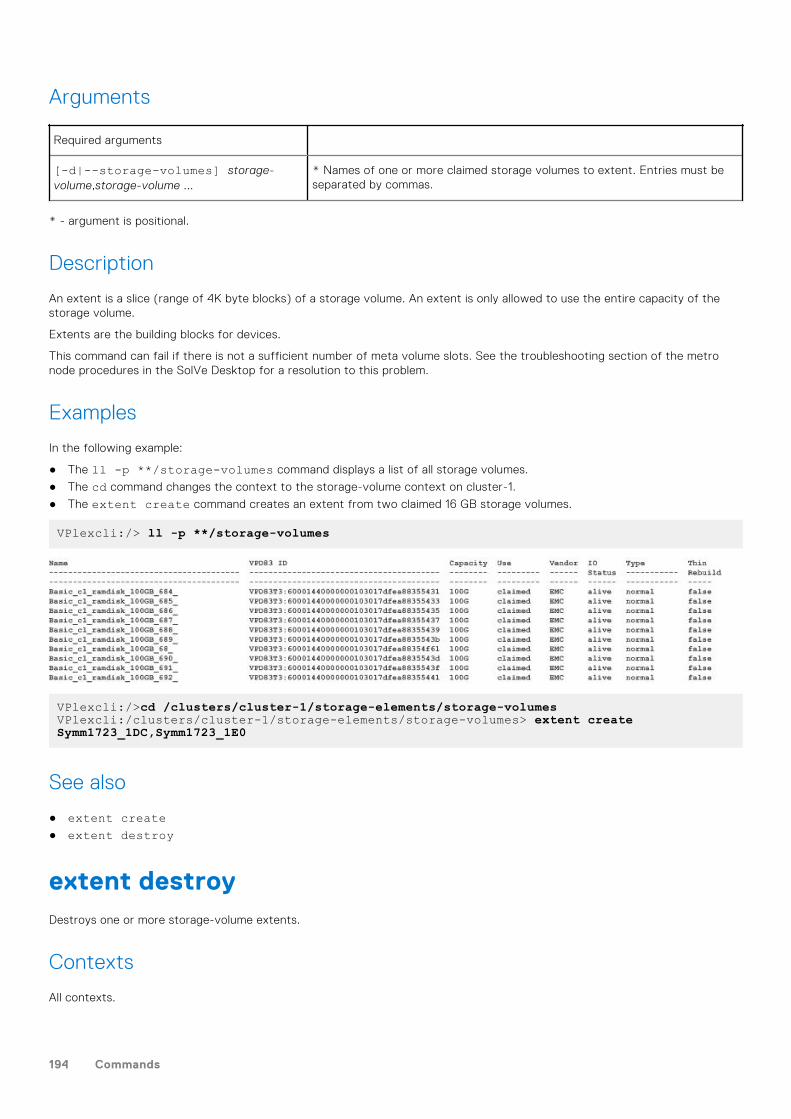
Arguments
Required arguments
[-d|--storage-volumes] storage-volume,storage-volume ...
* Names of one or more claimed storage volumes to extent. Entries must beseparated by commas.
* - argument is positional.
Description
An extent is a slice (range of 4K byte blocks) of a storage volume. An extent is only allowed to use the entire capacity of thestorage volume.
Extents are the building blocks for devices.
This command can fail if there is not a sufficient number of meta volume slots. See the troubleshooting section of the metronode procedures in the SolVe Desktop for a resolution to this problem.
Examples
In the following example:
● The ll -p **/storage-volumes command displays a list of all storage volumes.
● The cd command changes the context to the storage-volume context on cluster-1.
● The extent create command creates an extent from two claimed 16 GB storage volumes.
VPlexcli:/> ll -p **/storage-volumes
VPlexcli:/>cd /clusters/cluster-1/storage-elements/storage-volumesVPlexcli:/clusters/cluster-1/storage-elements/storage-volumes> extent create Symm1723_1DC,Symm1723_1E0
See also
● extent create● extent destroy
extent destroyDestroys one or more storage-volume extents.
Contexts
All contexts.
194 Commands
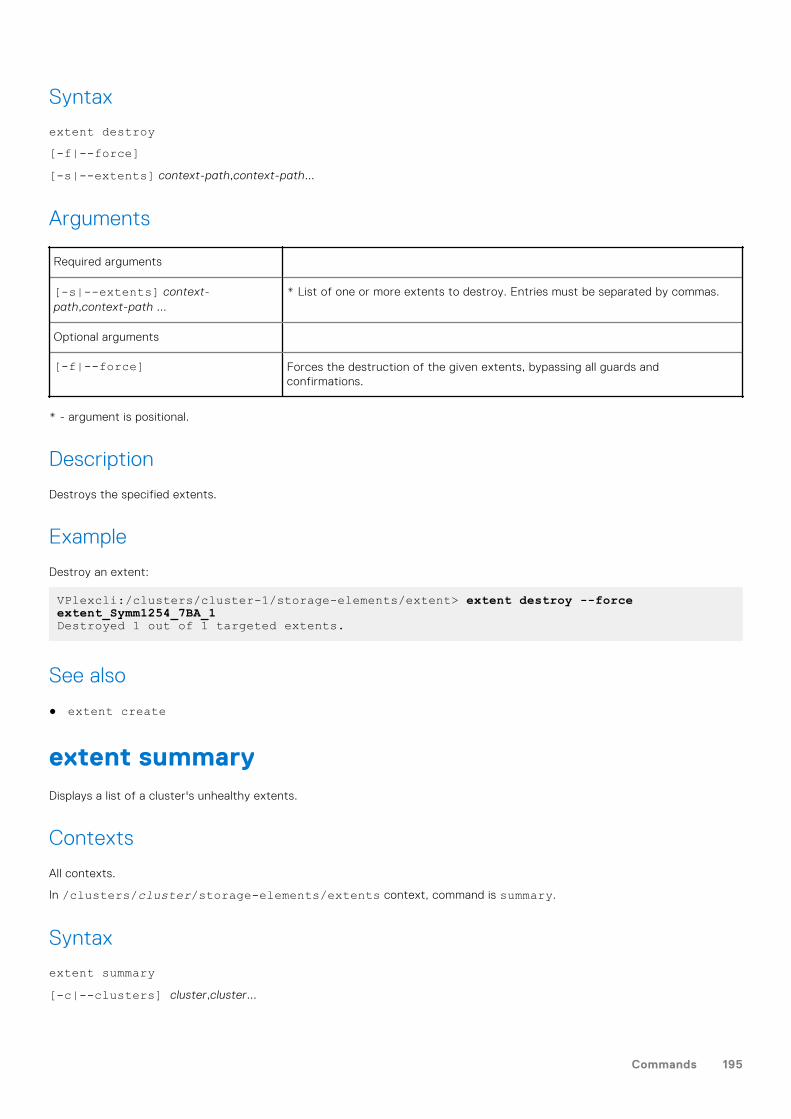
Syntax
extent destroy[-f|--force][-s|--extents] context-path,context-path...
Arguments
Required arguments
[-s|--extents] context-path,context-path ...
* List of one or more extents to destroy. Entries must be separated by commas.
Optional arguments
[-f|--force] Forces the destruction of the given extents, bypassing all guards andconfirmations.
* - argument is positional.
Description
Destroys the specified extents.
Example
Destroy an extent:
VPlexcli:/clusters/cluster-1/storage-elements/extent> extent destroy --force extent_Symm1254_7BA_1Destroyed 1 out of 1 targeted extents.
See also
● extent create
extent summaryDisplays a list of a cluster's unhealthy extents.
Contexts
All contexts.
In /clusters/cluster/storage-elements/extents context, command is summary.
Syntax
extent summary[-c|--clusters] cluster,cluster...
Commands 195
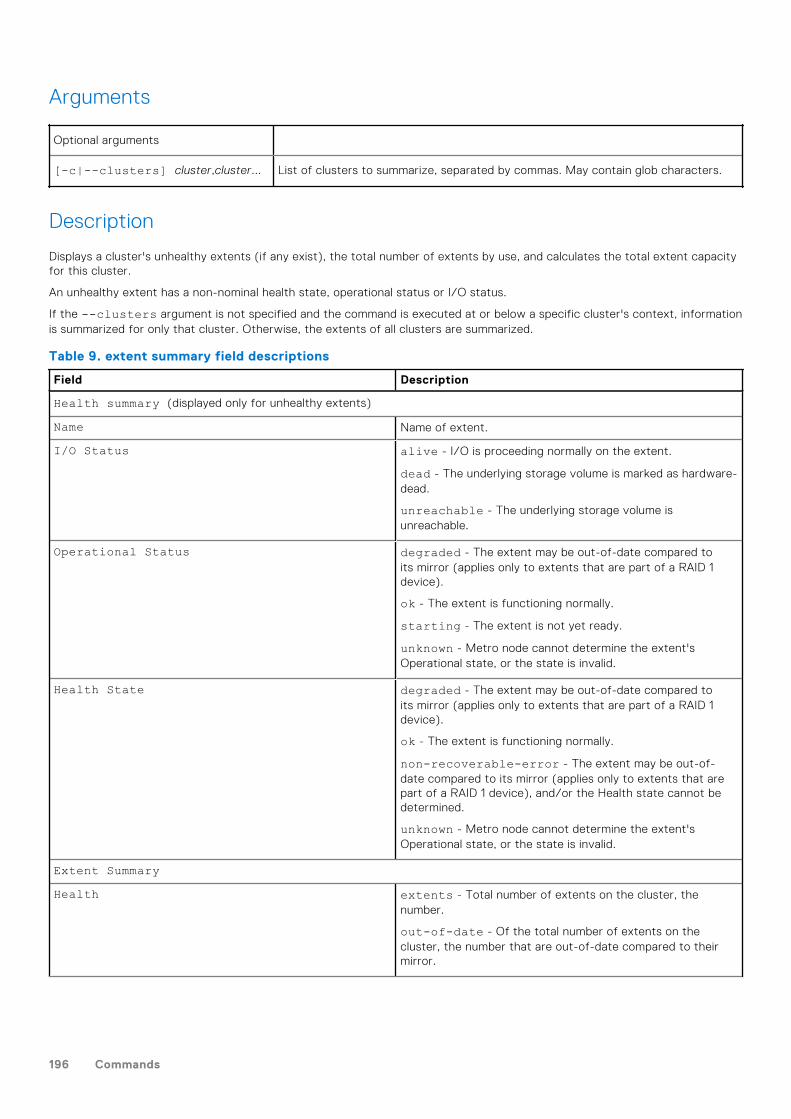
Arguments
Optional arguments
[-c|--clusters] cluster,cluster... List of clusters to summarize, separated by commas. May contain glob characters.
Description
Displays a cluster's unhealthy extents (if any exist), the total number of extents by use, and calculates the total extent capacityfor this cluster.
An unhealthy extent has a non-nominal health state, operational status or I/O status.
If the --clusters argument is not specified and the command is executed at or below a specific cluster's context, informationis summarized for only that cluster. Otherwise, the extents of all clusters are summarized.
Table 9. extent summary field descriptions
Field Description
Health summary (displayed only for unhealthy extents)
Name Name of extent.
I/O Status alive - I/O is proceeding normally on the extent.
dead - The underlying storage volume is marked as hardware-dead.
unreachable - The underlying storage volume isunreachable.
Operational Status degraded - The extent may be out-of-date compared toits mirror (applies only to extents that are part of a RAID 1device).
ok - The extent is functioning normally.
starting - The extent is not yet ready.
unknown - Metro node cannot determine the extent'sOperational state, or the state is invalid.
Health State degraded - The extent may be out-of-date compared toits mirror (applies only to extents that are part of a RAID 1device).
ok - The extent is functioning normally.
non-recoverable-error - The extent may be out-of-date compared to its mirror (applies only to extents that arepart of a RAID 1 device), and/or the Health state cannot bedetermined.
unknown - Metro node cannot determine the extent'sOperational state, or the state is invalid.
Extent SummaryHealth extents - Total number of extents on the cluster, the
number.
out-of-date - Of the total number of extents on thecluster, the number that are out-of-date compared to theirmirror.
196 Commands
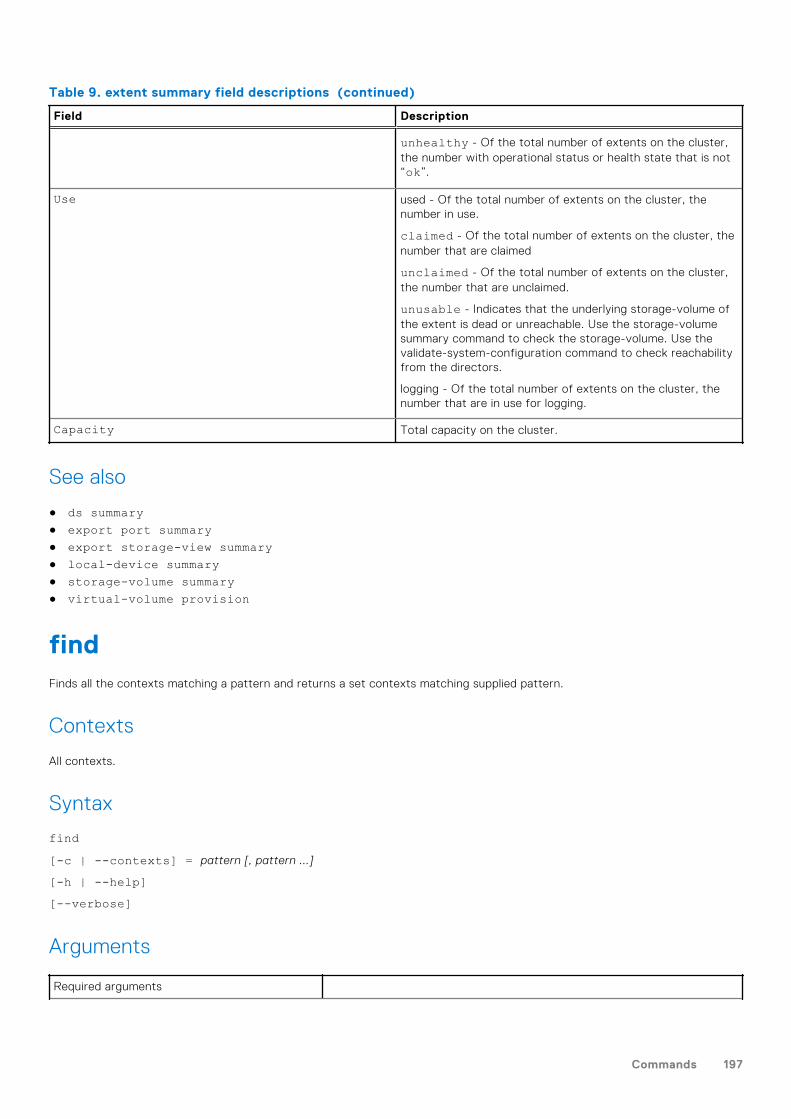
Table 9. extent summary field descriptions (continued)
Field Description
unhealthy - Of the total number of extents on the cluster,the number with operational status or health state that is not“ok”.
Use used - Of the total number of extents on the cluster, thenumber in use.
claimed - Of the total number of extents on the cluster, thenumber that are claimed
unclaimed - Of the total number of extents on the cluster,the number that are unclaimed.
unusable - Indicates that the underlying storage-volume ofthe extent is dead or unreachable. Use the storage-volumesummary command to check the storage-volume. Use thevalidate-system-configuration command to check reachabilityfrom the directors.
logging - Of the total number of extents on the cluster, thenumber that are in use for logging.
Capacity Total capacity on the cluster.
See also
● ds summary● export port summary● export storage-view summary● local-device summary● storage-volume summary● virtual-volume provision
findFinds all the contexts matching a pattern and returns a set contexts matching supplied pattern.
Contexts
All contexts.
Syntax
find[-c | --contexts] = pattern [, pattern ...]
[-h | --help][--verbose]
Arguments
Required arguments
Commands 197
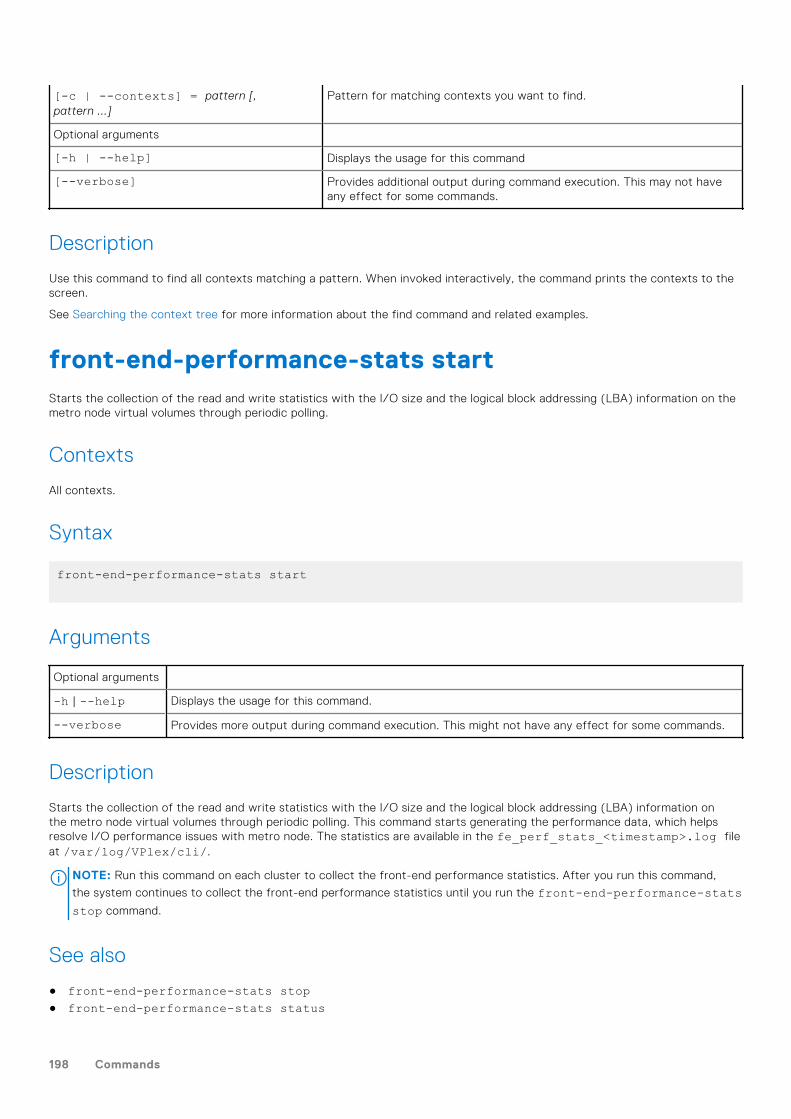
[-c | --contexts] = pattern [,pattern ...]
Pattern for matching contexts you want to find.
Optional arguments
[-h | --help] Displays the usage for this command
[--verbose] Provides additional output during command execution. This may not haveany effect for some commands.
Description
Use this command to find all contexts matching a pattern. When invoked interactively, the command prints the contexts to thescreen.
See Searching the context tree for more information about the find command and related examples.
front-end-performance-stats startStarts the collection of the read and write statistics with the I/O size and the logical block addressing (LBA) information on themetro node virtual volumes through periodic polling.
Contexts
All contexts.
Syntax
front-end-performance-stats start
Arguments
Optional arguments
-h | --help Displays the usage for this command.
--verbose Provides more output during command execution. This might not have any effect for some commands.
Description
Starts the collection of the read and write statistics with the I/O size and the logical block addressing (LBA) information onthe metro node virtual volumes through periodic polling. This command starts generating the performance data, which helpsresolve I/O performance issues with metro node. The statistics are available in the fe_perf_stats_<timestamp>.log fileat /var/log/VPlex/cli/.
NOTE: Run this command on each cluster to collect the front-end performance statistics. After you run this command,
the system continues to collect the front-end performance statistics until you run the front-end-performance-statsstop command.
See also
● front-end-performance-stats stop● front-end-performance-stats status
198 Commands
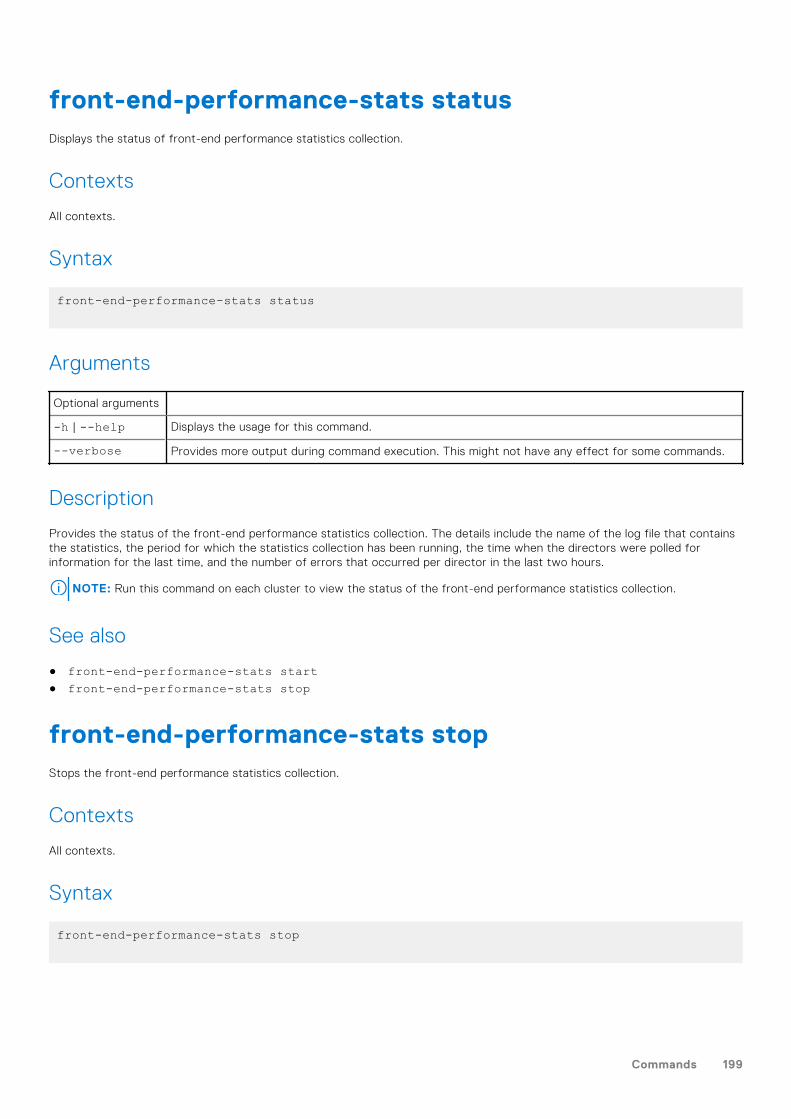
front-end-performance-stats statusDisplays the status of front-end performance statistics collection.
Contexts
All contexts.
Syntax
front-end-performance-stats status
Arguments
Optional arguments
-h | --help Displays the usage for this command.
--verbose Provides more output during command execution. This might not have any effect for some commands.
Description
Provides the status of the front-end performance statistics collection. The details include the name of the log file that containsthe statistics, the period for which the statistics collection has been running, the time when the directors were polled forinformation for the last time, and the number of errors that occurred per director in the last two hours.
NOTE: Run this command on each cluster to view the status of the front-end performance statistics collection.
See also
● front-end-performance-stats start● front-end-performance-stats stop
front-end-performance-stats stopStops the front-end performance statistics collection.
Contexts
All contexts.
Syntax
front-end-performance-stats stop
Commands 199
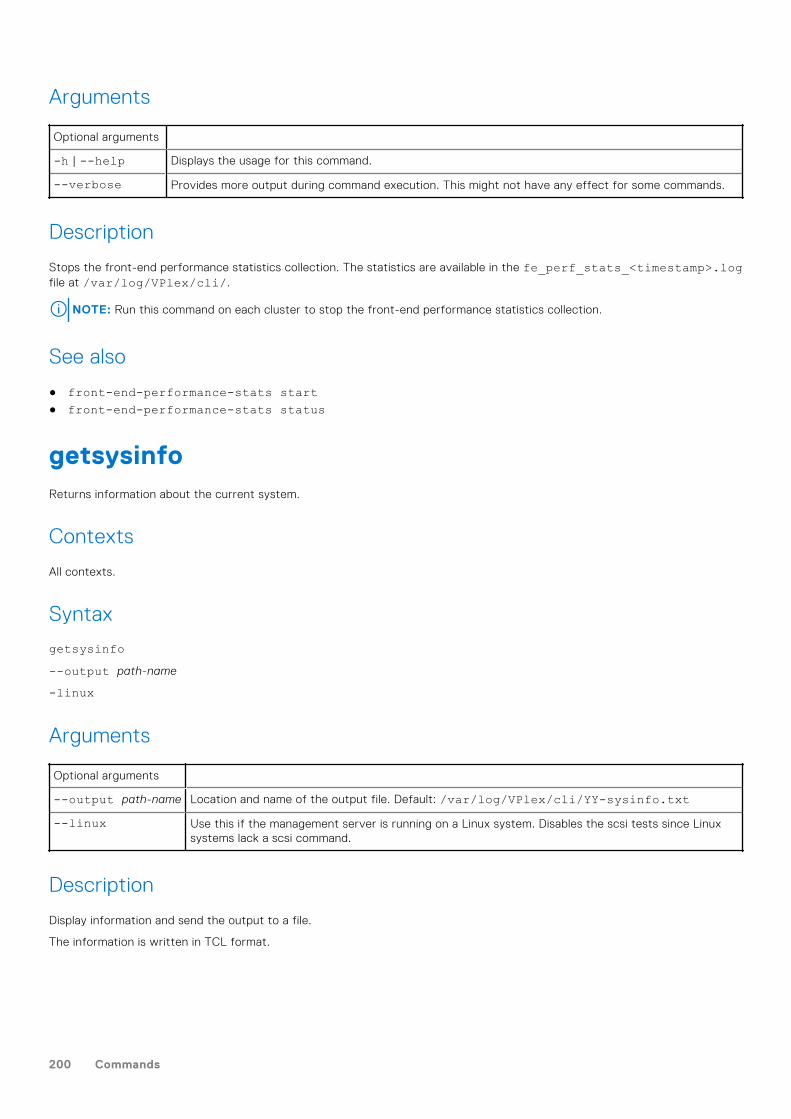
Arguments
Optional arguments
-h | --help Displays the usage for this command.
--verbose Provides more output during command execution. This might not have any effect for some commands.
Description
Stops the front-end performance statistics collection. The statistics are available in the fe_perf_stats_<timestamp>.logfile at /var/log/VPlex/cli/.
NOTE: Run this command on each cluster to stop the front-end performance statistics collection.
See also
● front-end-performance-stats start● front-end-performance-stats status
getsysinfoReturns information about the current system.
Contexts
All contexts.
Syntax
getsysinfo--output path-name
-linux
Arguments
Optional arguments
--output path-name Location and name of the output file. Default: /var/log/VPlex/cli/YY-sysinfo.txt--linux Use this if the management server is running on a Linux system. Disables the scsi tests since Linux
systems lack a scsi command.
Description
Display information and send the output to a file.
The information is written in TCL format.
200 Commands
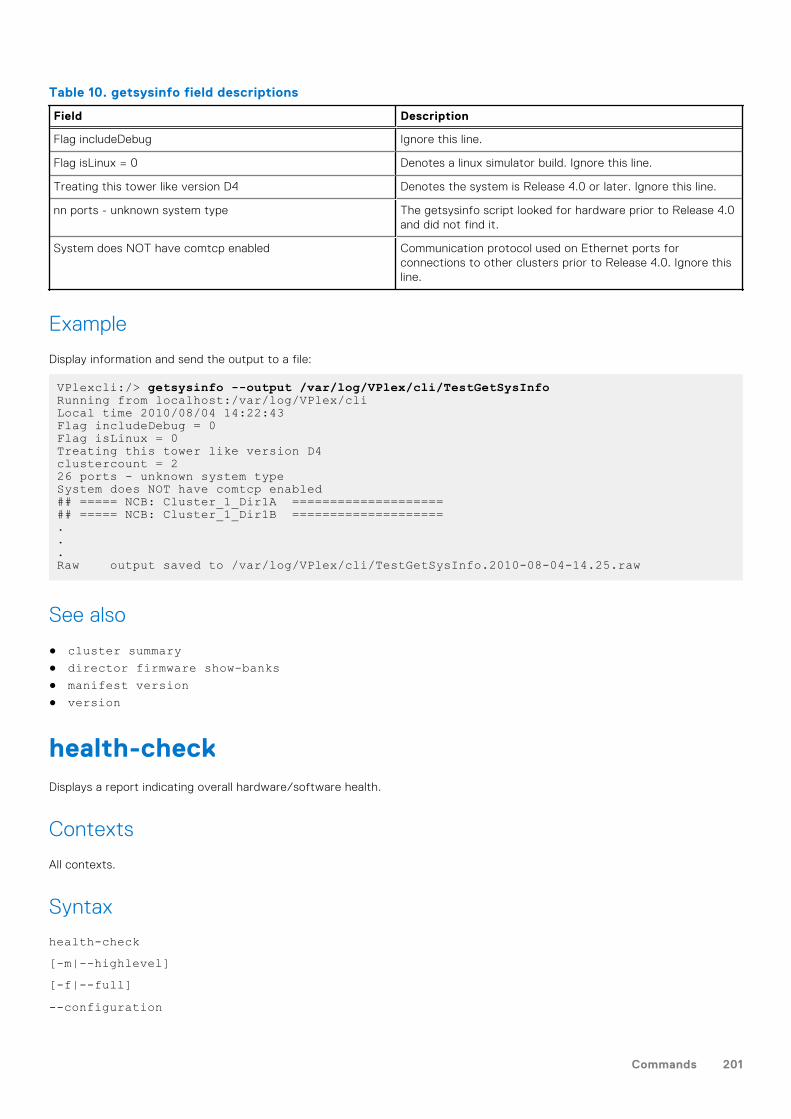
Table 10. getsysinfo field descriptions
Field Description
Flag includeDebug Ignore this line.
Flag isLinux = 0 Denotes a linux simulator build. Ignore this line.
Treating this tower like version D4 Denotes the system is Release 4.0 or later. Ignore this line.
nn ports - unknown system type The getsysinfo script looked for hardware prior to Release 4.0and did not find it.
System does NOT have comtcp enabled Communication protocol used on Ethernet ports forconnections to other clusters prior to Release 4.0. Ignore thisline.
Example
Display information and send the output to a file:
VPlexcli:/> getsysinfo --output /var/log/VPlex/cli/TestGetSysInfoRunning from localhost:/var/log/VPlex/cliLocal time 2010/08/04 14:22:43Flag includeDebug = 0Flag isLinux = 0Treating this tower like version D4clustercount = 226 ports - unknown system typeSystem does NOT have comtcp enabled## ===== NCB: Cluster_1_Dir1A ====================## ===== NCB: Cluster_1_Dir1B ====================...Raw output saved to /var/log/VPlex/cli/TestGetSysInfo.2010-08-04-14.25.raw
See also
● cluster summary● director firmware show-banks● manifest version● version
health-checkDisplays a report indicating overall hardware/software health.
Contexts
All contexts.
Syntax
health-check[-m|--highlevel][-f|--full]--configuration
Commands 201
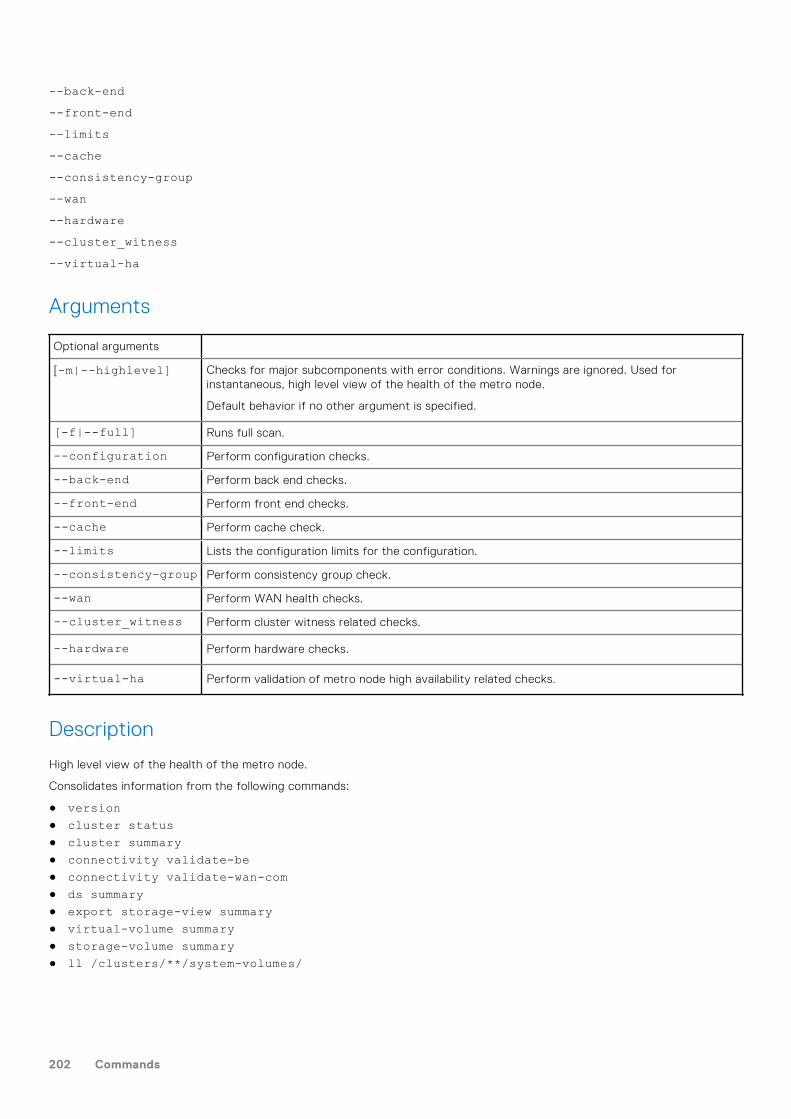
--back-end--front-end--limits--cache--consistency-group--wan--hardware--cluster_witness--virtual-ha
Arguments
Optional arguments
[-m|--highlevel] Checks for major subcomponents with error conditions. Warnings are ignored. Used forinstantaneous, high level view of the health of the metro node.
Default behavior if no other argument is specified.
[-f|--full] Runs full scan.
--configuration Perform configuration checks.
--back-end Perform back end checks.
--front-end Perform front end checks.
--cache Perform cache check.
--limits Lists the configuration limits for the configuration.
--consistency-group Perform consistency group check.
--wan Perform WAN health checks.
--cluster_witness Perform cluster witness related checks.
--hardware Perform hardware checks.
--virtual-ha Perform validation of metro node high availability related checks.
Description
High level view of the health of the metro node.
Consolidates information from the following commands:
● version● cluster status● cluster summary● connectivity validate-be● connectivity validate-wan-com● ds summary● export storage-view summary● virtual-volume summary● storage-volume summary● ll /clusters/**/system-volumes/
202 Commands
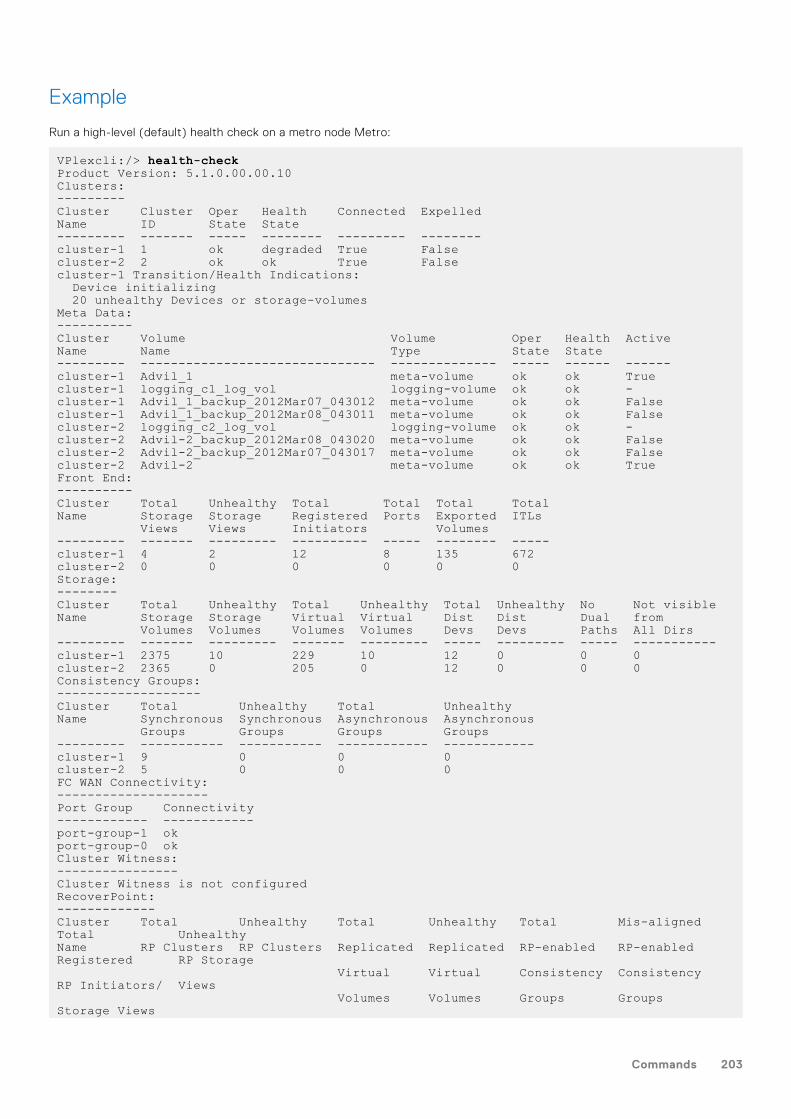
Example
Run a high-level (default) health check on a metro node Metro:
VPlexcli:/> health-checkProduct Version: 5.1.0.00.00.10Clusters:---------Cluster Cluster Oper Health Connected ExpelledName ID State State--------- ------- ----- -------- --------- --------cluster-1 1 ok degraded True Falsecluster-2 2 ok ok True Falsecluster-1 Transition/Health Indications: Device initializing 20 unhealthy Devices or storage-volumesMeta Data:----------Cluster Volume Volume Oper Health ActiveName Name Type State State--------- ------------------------------- -------------- ----- ------ ------cluster-1 Advil_1 meta-volume ok ok Truecluster-1 logging_c1_log_vol logging-volume ok ok -cluster-1 Advil_1_backup_2012Mar07_043012 meta-volume ok ok Falsecluster-1 Advil_1_backup_2012Mar08_043011 meta-volume ok ok Falsecluster-2 logging_c2_log_vol logging-volume ok ok -cluster-2 Advil-2_backup_2012Mar08_043020 meta-volume ok ok Falsecluster-2 Advil-2_backup_2012Mar07_043017 meta-volume ok ok Falsecluster-2 Advil-2 meta-volume ok ok TrueFront End:----------Cluster Total Unhealthy Total Total Total TotalName Storage Storage Registered Ports Exported ITLs Views Views Initiators Volumes--------- ------- --------- ---------- ----- -------- -----cluster-1 4 2 12 8 135 672cluster-2 0 0 0 0 0 0Storage:--------Cluster Total Unhealthy Total Unhealthy Total Unhealthy No Not visibleName Storage Storage Virtual Virtual Dist Dist Dual from Volumes Volumes Volumes Volumes Devs Devs Paths All Dirs--------- ------- --------- ------- --------- ----- --------- ----- -----------cluster-1 2375 10 229 10 12 0 0 0cluster-2 2365 0 205 0 12 0 0 0Consistency Groups:-------------------Cluster Total Unhealthy Total UnhealthyName Synchronous Synchronous Asynchronous Asynchronous Groups Groups Groups Groups--------- ----------- ----------- ------------ ------------cluster-1 9 0 0 0cluster-2 5 0 0 0FC WAN Connectivity:--------------------Port Group Connectivity------------ ------------port-group-1 okport-group-0 okCluster Witness:----------------Cluster Witness is not configuredRecoverPoint:-------------Cluster Total Unhealthy Total Unhealthy Total Mis-aligned Total UnhealthyName RP Clusters RP Clusters Replicated Replicated RP-enabled RP-enabled Registered RP Storage Virtual Virtual Consistency Consistency RP Initiators/ Views Volumes Volumes Groups Groups Storage Views
Commands 203
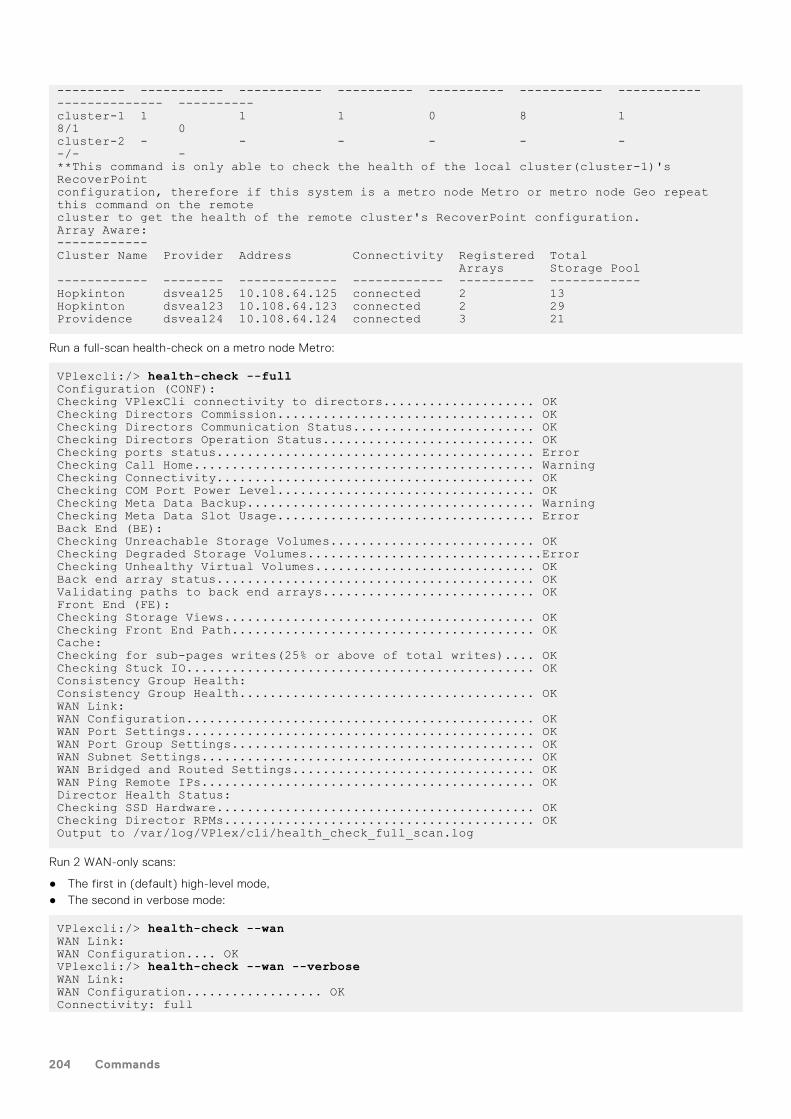
--------- ----------- ----------- ---------- ---------- ----------- ----------- -------------- ----------cluster-1 1 1 1 0 8 1 8/1 0cluster-2 - - - - - - -/- -**This command is only able to check the health of the local cluster(cluster-1)'s RecoverPointconfiguration, therefore if this system is a metro node Metro or metro node Geo repeat this command on the remotecluster to get the health of the remote cluster's RecoverPoint configuration.Array Aware:------------Cluster Name Provider Address Connectivity Registered Total Arrays Storage Pool------------ -------- ------------- ------------ ---------- ------------Hopkinton dsvea125 10.108.64.125 connected 2 13Hopkinton dsvea123 10.108.64.123 connected 2 29Providence dsvea124 10.108.64.124 connected 3 21
Run a full-scan health-check on a metro node Metro:
VPlexcli:/> health-check --fullConfiguration (CONF):Checking VPlexCli connectivity to directors.................... OKChecking Directors Commission.................................. OKChecking Directors Communication Status........................ OKChecking Directors Operation Status............................ OKChecking ports status.......................................... ErrorChecking Call Home............................................. WarningChecking Connectivity.......................................... OKChecking COM Port Power Level.................................. OKChecking Meta Data Backup...................................... WarningChecking Meta Data Slot Usage.................................. ErrorBack End (BE):Checking Unreachable Storage Volumes........................... OKChecking Degraded Storage Volumes...............................Error Checking Unhealthy Virtual Volumes............................. OKBack end array status.......................................... OKValidating paths to back end arrays............................ OKFront End (FE):Checking Storage Views......................................... OKChecking Front End Path........................................ OKCache:Checking for sub-pages writes(25% or above of total writes).... OKChecking Stuck IO.............................................. OKConsistency Group Health:Consistency Group Health....................................... OKWAN Link:WAN Configuration.............................................. OKWAN Port Settings.............................................. OKWAN Port Group Settings........................................ OKWAN Subnet Settings............................................ OKWAN Bridged and Routed Settings................................ OKWAN Ping Remote IPs............................................ OKDirector Health Status:Checking SSD Hardware.......................................... OKChecking Director RPMs......................................... OKOutput to /var/log/VPlex/cli/health_check_full_scan.log
Run 2 WAN-only scans:
● The first in (default) high-level mode,● The second in verbose mode:
VPlexcli:/> health-check --wanWAN Link:WAN Configuration.... OKVPlexcli:/> health-check --wan --verboseWAN Link:WAN Configuration.................. OKConnectivity: full
204 Commands
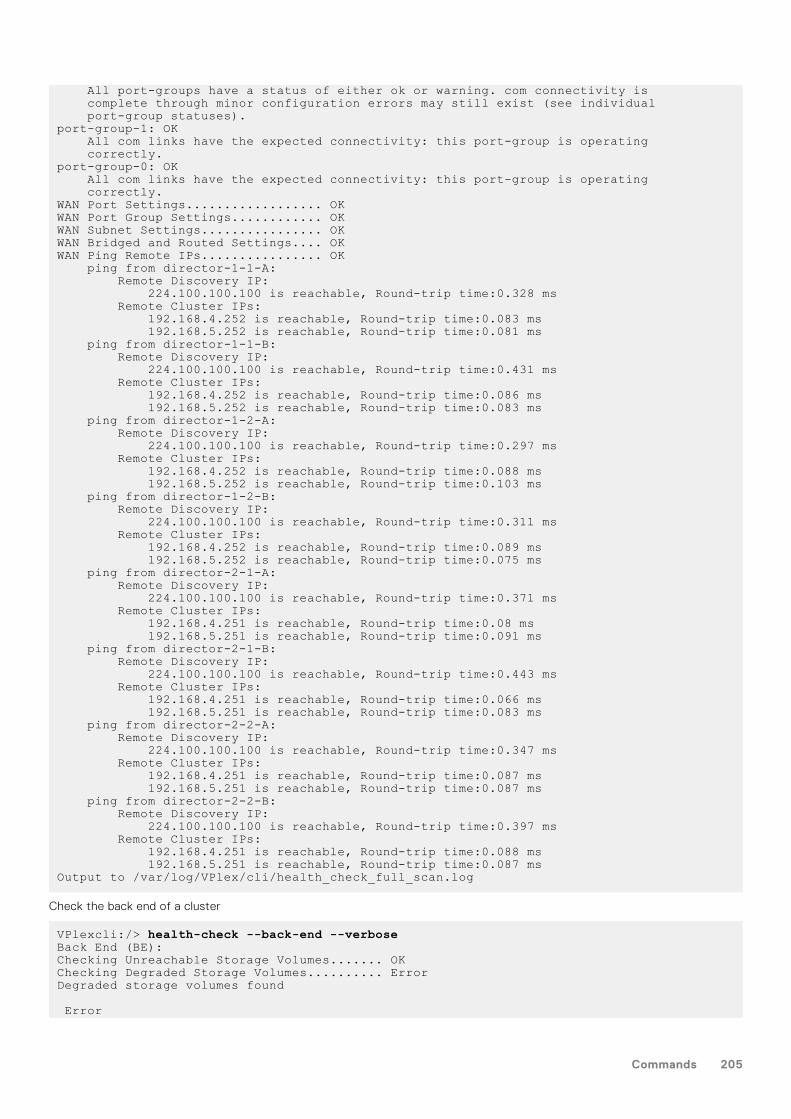
All port-groups have a status of either ok or warning. com connectivity is complete through minor configuration errors may still exist (see individual port-group statuses).port-group-1: OK All com links have the expected connectivity: this port-group is operating correctly.port-group-0: OK All com links have the expected connectivity: this port-group is operating correctly.WAN Port Settings.................. OKWAN Port Group Settings............ OKWAN Subnet Settings................ OKWAN Bridged and Routed Settings.... OKWAN Ping Remote IPs................ OK ping from director-1-1-A: Remote Discovery IP: 224.100.100.100 is reachable, Round-trip time:0.328 ms Remote Cluster IPs: 192.168.4.252 is reachable, Round-trip time:0.083 ms 192.168.5.252 is reachable, Round-trip time:0.081 ms ping from director-1-1-B: Remote Discovery IP: 224.100.100.100 is reachable, Round-trip time:0.431 ms Remote Cluster IPs: 192.168.4.252 is reachable, Round-trip time:0.086 ms 192.168.5.252 is reachable, Round-trip time:0.083 ms ping from director-1-2-A: Remote Discovery IP: 224.100.100.100 is reachable, Round-trip time:0.297 ms Remote Cluster IPs: 192.168.4.252 is reachable, Round-trip time:0.088 ms 192.168.5.252 is reachable, Round-trip time:0.103 ms ping from director-1-2-B: Remote Discovery IP: 224.100.100.100 is reachable, Round-trip time:0.311 ms Remote Cluster IPs: 192.168.4.252 is reachable, Round-trip time:0.089 ms 192.168.5.252 is reachable, Round-trip time:0.075 ms ping from director-2-1-A: Remote Discovery IP: 224.100.100.100 is reachable, Round-trip time:0.371 ms Remote Cluster IPs: 192.168.4.251 is reachable, Round-trip time:0.08 ms 192.168.5.251 is reachable, Round-trip time:0.091 ms ping from director-2-1-B: Remote Discovery IP: 224.100.100.100 is reachable, Round-trip time:0.443 ms Remote Cluster IPs: 192.168.4.251 is reachable, Round-trip time:0.066 ms 192.168.5.251 is reachable, Round-trip time:0.083 ms ping from director-2-2-A: Remote Discovery IP: 224.100.100.100 is reachable, Round-trip time:0.347 ms Remote Cluster IPs: 192.168.4.251 is reachable, Round-trip time:0.087 ms 192.168.5.251 is reachable, Round-trip time:0.087 ms ping from director-2-2-B: Remote Discovery IP: 224.100.100.100 is reachable, Round-trip time:0.397 ms Remote Cluster IPs: 192.168.4.251 is reachable, Round-trip time:0.088 ms 192.168.5.251 is reachable, Round-trip time:0.087 msOutput to /var/log/VPlex/cli/health_check_full_scan.log
Check the back end of a cluster
VPlexcli:/> health-check --back-end --verboseBack End (BE):Checking Unreachable Storage Volumes....... OKChecking Degraded Storage Volumes.......... ErrorDegraded storage volumes found
Error
Commands 205
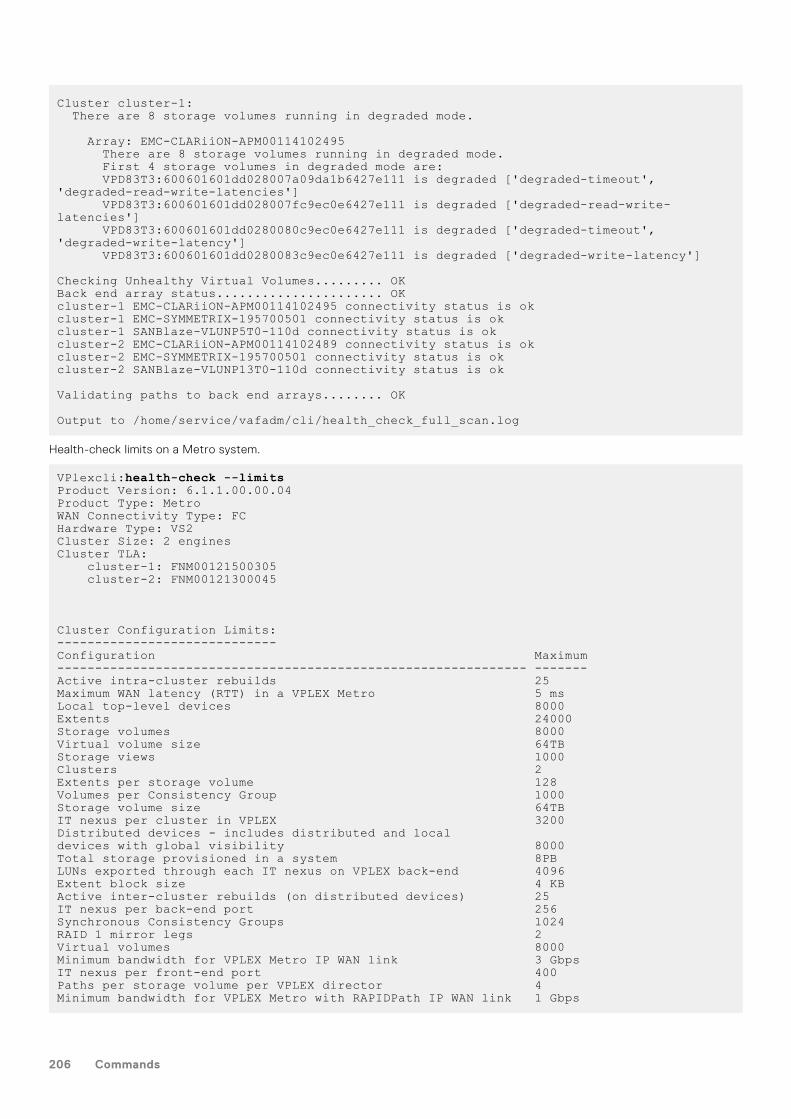
Cluster cluster-1: There are 8 storage volumes running in degraded mode. Array: EMC-CLARiiON-APM00114102495 There are 8 storage volumes running in degraded mode. First 4 storage volumes in degraded mode are: VPD83T3:600601601dd028007a09da1b6427e111 is degraded ['degraded-timeout', 'degraded-read-write-latencies'] VPD83T3:600601601dd028007fc9ec0e6427e111 is degraded ['degraded-read-write-latencies'] VPD83T3:600601601dd0280080c9ec0e6427e111 is degraded ['degraded-timeout', 'degraded-write-latency'] VPD83T3:600601601dd0280083c9ec0e6427e111 is degraded ['degraded-write-latency']
Checking Unhealthy Virtual Volumes......... OKBack end array status...................... OKcluster-1 EMC-CLARiiON-APM00114102495 connectivity status is okcluster-1 EMC-SYMMETRIX-195700501 connectivity status is okcluster-1 SANBlaze-VLUNP5T0-110d connectivity status is okcluster-2 EMC-CLARiiON-APM00114102489 connectivity status is okcluster-2 EMC-SYMMETRIX-195700501 connectivity status is okcluster-2 SANBlaze-VLUNP13T0-110d connectivity status is ok
Validating paths to back end arrays........ OK
Output to /home/service/vafadm/cli/health_check_full_scan.log
Health-check limits on a Metro system.
VPlexcli:health-check --limitsProduct Version: 6.1.1.00.00.04Product Type: MetroWAN Connectivity Type: FCHardware Type: VS2Cluster Size: 2 enginesCluster TLA: cluster-1: FNM00121500305 cluster-2: FNM00121300045
Cluster Configuration Limits:-----------------------------Configuration Maximum-------------------------------------------------------------- -------Active intra-cluster rebuilds 25Maximum WAN latency (RTT) in a VPLEX Metro 5 msLocal top-level devices 8000Extents 24000Storage volumes 8000Virtual volume size 64TBStorage views 1000Clusters 2Extents per storage volume 128Volumes per Consistency Group 1000Storage volume size 64TBIT nexus per cluster in VPLEX 3200Distributed devices - includes distributed and local devices with global visibility 8000Total storage provisioned in a system 8PBLUNs exported through each IT nexus on VPLEX back-end 4096Extent block size 4 KBActive inter-cluster rebuilds (on distributed devices) 25IT nexus per back-end port 256Synchronous Consistency Groups 1024RAID 1 mirror legs 2Virtual volumes 8000Minimum bandwidth for VPLEX Metro IP WAN link 3 GbpsIT nexus per front-end port 400Paths per storage volume per VPLEX director 4Minimum bandwidth for VPLEX Metro with RAPIDPath IP WAN link 1 Gbps
206 Commands
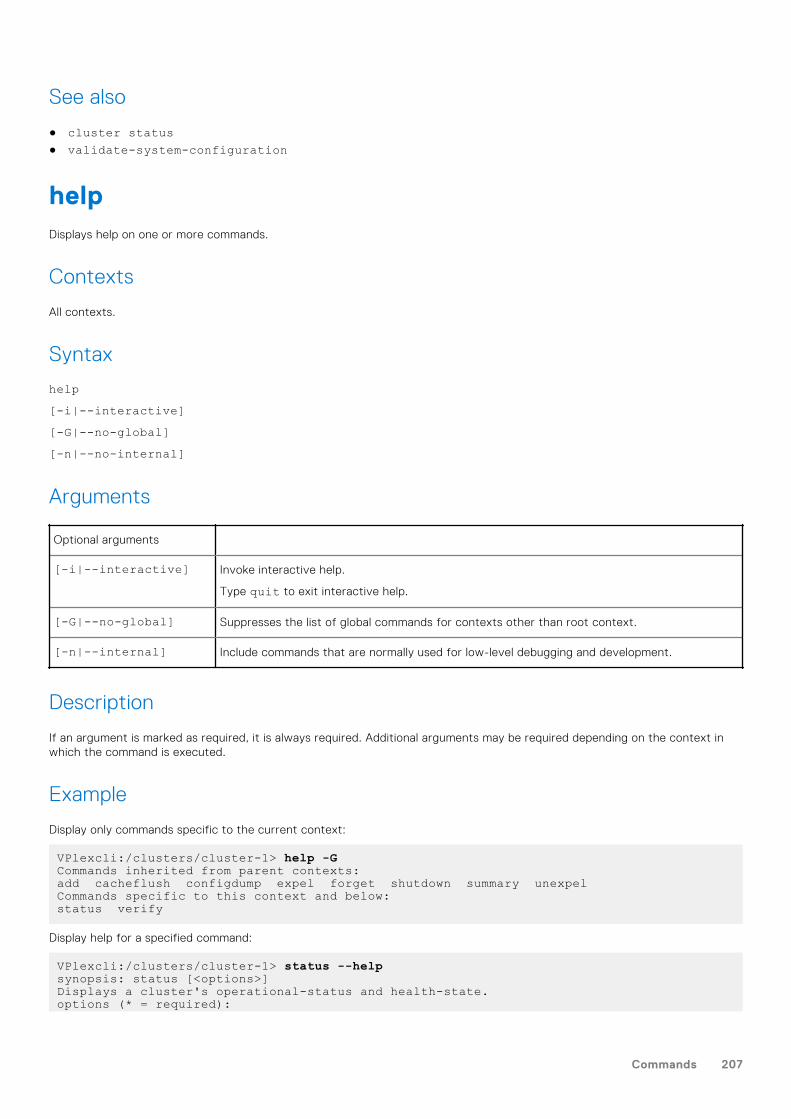
See also
● cluster status● validate-system-configuration
helpDisplays help on one or more commands.
Contexts
All contexts.
Syntax
help[-i|--interactive][-G|--no-global][-n|--no-internal]
Arguments
Optional arguments
[-i|--interactive] Invoke interactive help.
Type quit to exit interactive help.
[-G|--no-global] Suppresses the list of global commands for contexts other than root context.
[-n|--internal] Include commands that are normally used for low-level debugging and development.
Description
If an argument is marked as required, it is always required. Additional arguments may be required depending on the context inwhich the command is executed.
Example
Display only commands specific to the current context:
VPlexcli:/clusters/cluster-1> help -GCommands inherited from parent contexts:add cacheflush configdump expel forget shutdown summary unexpelCommands specific to this context and below:status verify
Display help for a specified command:
VPlexcli:/clusters/cluster-1> status --helpsynopsis: status [<options>]Displays a cluster's operational-status and health-state.options (* = required):
Commands 207
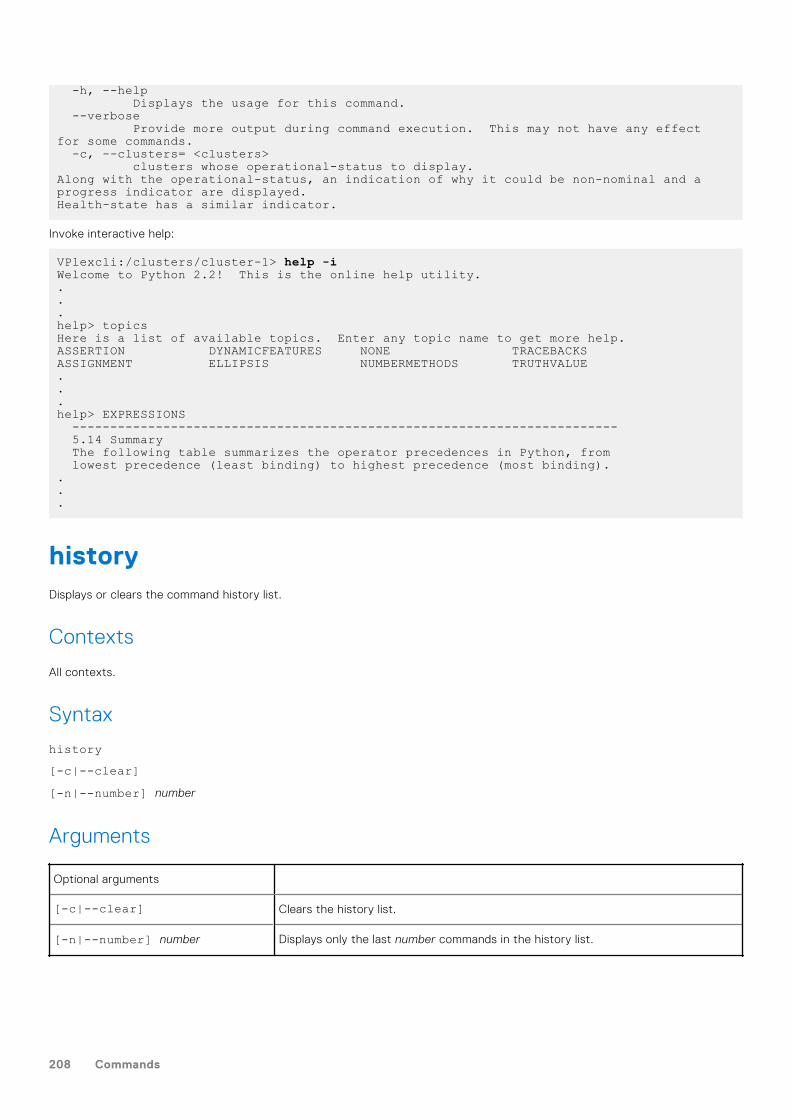
-h, --help Displays the usage for this command. --verbose Provide more output during command execution. This may not have any effect for some commands. -c, --clusters= <clusters> clusters whose operational-status to display.Along with the operational-status, an indication of why it could be non-nominal and a progress indicator are displayed.Health-state has a similar indicator.
Invoke interactive help:
VPlexcli:/clusters/cluster-1> help -iWelcome to Python 2.2! This is the online help utility....help> topicsHere is a list of available topics. Enter any topic name to get more help.ASSERTION DYNAMICFEATURES NONE TRACEBACKSASSIGNMENT ELLIPSIS NUMBERMETHODS TRUTHVALUE...help> EXPRESSIONS ------------------------------------------------------------------------ 5.14 Summary The following table summarizes the operator precedences in Python, from lowest precedence (least binding) to highest precedence (most binding)....
historyDisplays or clears the command history list.
Contexts
All contexts.
Syntax
history[-c|--clear][-n|--number] number
Arguments
Optional arguments
[-c|--clear] Clears the history list.
[-n|--number] number Displays only the last number commands in the history list.
208 Commands
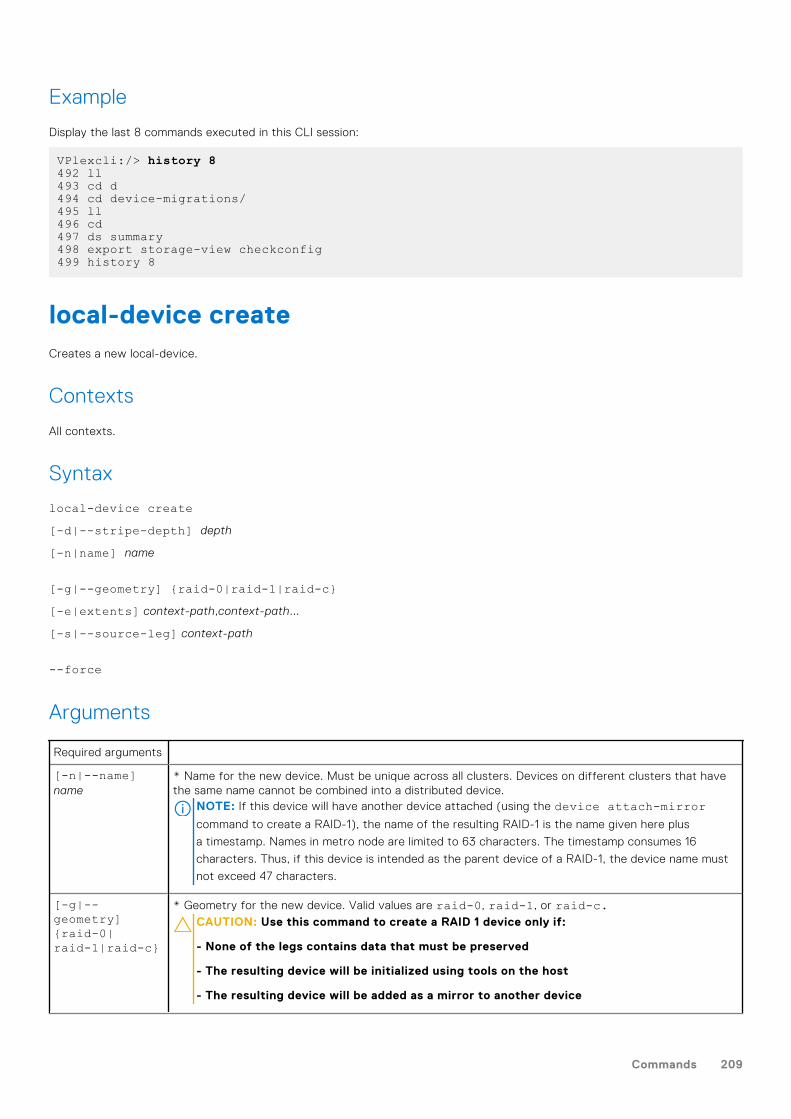
Example
Display the last 8 commands executed in this CLI session:
VPlexcli:/> history 8492 ll493 cd d494 cd device-migrations/495 ll496 cd497 ds summary498 export storage-view checkconfig499 history 8
local-device createCreates a new local-device.
Contexts
All contexts.
Syntax
local-device create[-d|--stripe-depth] depth
[-n|name] name
[-g|--geometry] {raid-0|raid-1|raid-c}[-e|extents] context-path,context-path...
[-s|--source-leg] context-path
--force
Arguments
Required arguments
[-n|--name]name
* Name for the new device. Must be unique across all clusters. Devices on different clusters that havethe same name cannot be combined into a distributed device.
NOTE: If this device will have another device attached (using the device attach-mirrorcommand to create a RAID-1), the name of the resulting RAID-1 is the name given here plus
a timestamp. Names in metro node are limited to 63 characters. The timestamp consumes 16
characters. Thus, if this device is intended as the parent device of a RAID-1, the device name must
not exceed 47 characters.
[-g|--geometry]{raid-0|raid-1|raid-c}
* Geometry for the new device. Valid values are raid-0, raid-1, or raid-c.CAUTION: Use this command to create a RAID 1 device only if:
- None of the legs contains data that must be preserved
- The resulting device will be initialized using tools on the host
- The resulting device will be added as a mirror to another device
Commands 209
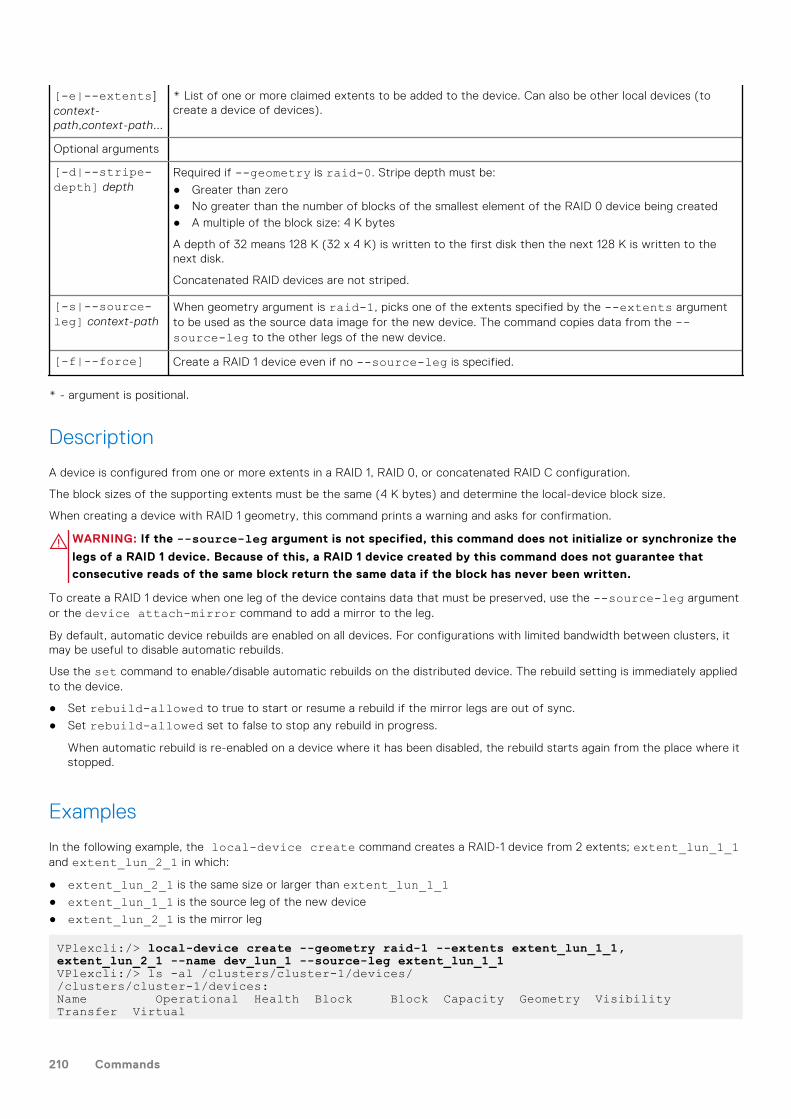
[-e|--extents]context-path,context-path...
* List of one or more claimed extents to be added to the device. Can also be other local devices (tocreate a device of devices).
Optional arguments
[-d|--stripe-depth] depth
Required if --geometry is raid-0. Stripe depth must be:
● Greater than zero● No greater than the number of blocks of the smallest element of the RAID 0 device being created● A multiple of the block size: 4 K bytes
A depth of 32 means 128 K (32 x 4 K) is written to the first disk then the next 128 K is written to thenext disk.
Concatenated RAID devices are not striped.
[-s|--source-leg] context-path
When geometry argument is raid-1, picks one of the extents specified by the --extents argumentto be used as the source data image for the new device. The command copies data from the --source-leg to the other legs of the new device.
[-f|--force] Create a RAID 1 device even if no --source-leg is specified.
* - argument is positional.
Description
A device is configured from one or more extents in a RAID 1, RAID 0, or concatenated RAID C configuration.
The block sizes of the supporting extents must be the same (4 K bytes) and determine the local-device block size.
When creating a device with RAID 1 geometry, this command prints a warning and asks for confirmation.
WARNING: If the --source-leg argument is not specified, this command does not initialize or synchronize the
legs of a RAID 1 device. Because of this, a RAID 1 device created by this command does not guarantee that
consecutive reads of the same block return the same data if the block has never been written.
To create a RAID 1 device when one leg of the device contains data that must be preserved, use the --source-leg argumentor the device attach-mirror command to add a mirror to the leg.
By default, automatic device rebuilds are enabled on all devices. For configurations with limited bandwidth between clusters, itmay be useful to disable automatic rebuilds.
Use the set command to enable/disable automatic rebuilds on the distributed device. The rebuild setting is immediately appliedto the device.
● Set rebuild-allowed to true to start or resume a rebuild if the mirror legs are out of sync.
● Set rebuild-allowed set to false to stop any rebuild in progress.
When automatic rebuild is re-enabled on a device where it has been disabled, the rebuild starts again from the place where itstopped.
Examples
In the following example, the local-device create command creates a RAID-1 device from 2 extents; extent_lun_1_1and extent_lun_2_1 in which:
● extent_lun_2_1 is the same size or larger than extent_lun_1_1● extent_lun_1_1 is the source leg of the new device
● extent_lun_2_1 is the mirror leg
VPlexcli:/> local-device create --geometry raid-1 --extents extent_lun_1_1, extent_lun_2_1 --name dev_lun_1 --source-leg extent_lun_1_1VPlexcli:/> ls -al /clusters/cluster-1/devices//clusters/cluster-1/devices:Name Operational Health Block Block Capacity Geometry Visibility Transfer Virtual
210 Commands
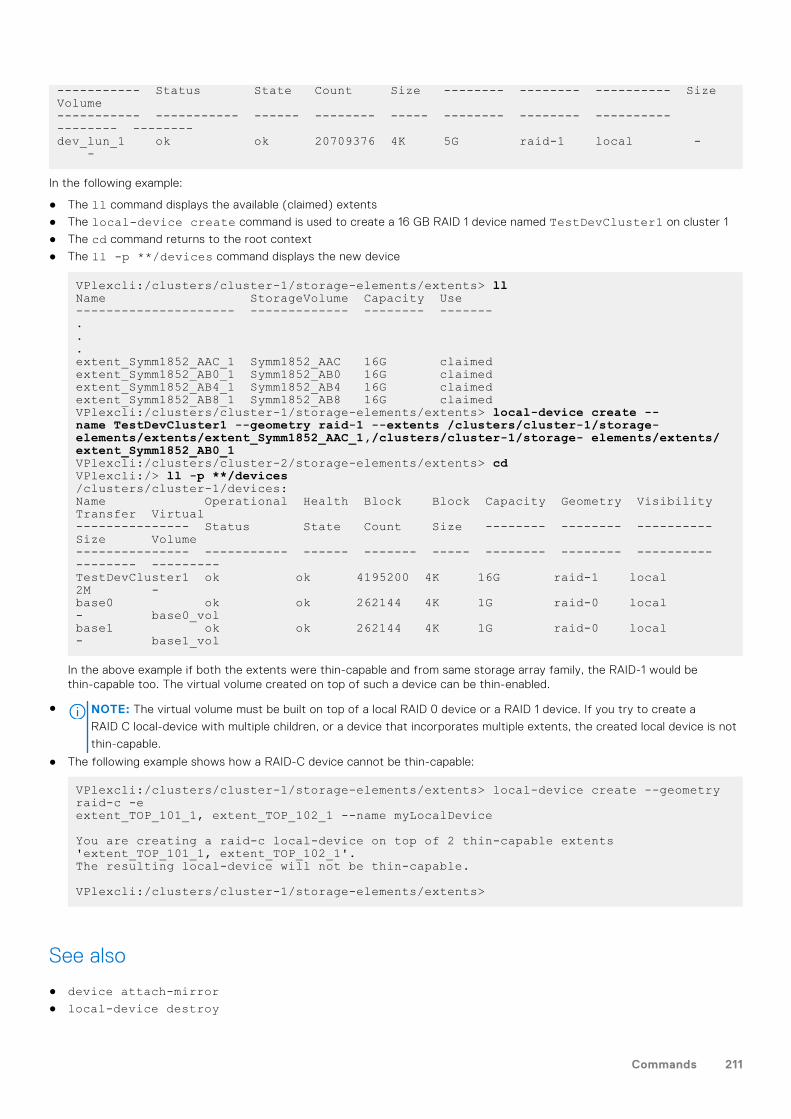
----------- Status State Count Size -------- -------- ---------- Size Volume----------- ----------- ------ -------- ----- -------- -------- ---------- -------- --------dev_lun_1 ok ok 20709376 4K 5G raid-1 local - -
In the following example:
● The ll command displays the available (claimed) extents
● The local-device create command is used to create a 16 GB RAID 1 device named TestDevCluster1 on cluster 1
● The cd command returns to the root context
● The ll -p **/devices command displays the new device
VPlexcli:/clusters/cluster-1/storage-elements/extents> llName StorageVolume Capacity Use--------------------- ------------- -------- -------...extent_Symm1852_AAC_1 Symm1852_AAC 16G claimedextent_Symm1852_AB0_1 Symm1852_AB0 16G claimedextent_Symm1852_AB4_1 Symm1852_AB4 16G claimedextent_Symm1852_AB8_1 Symm1852_AB8 16G claimedVPlexcli:/clusters/cluster-1/storage-elements/extents> local-device create --name TestDevCluster1 --geometry raid-1 --extents /clusters/cluster-1/storage-elements/extents/extent_Symm1852_AAC_1,/clusters/cluster-1/storage- elements/extents/extent_Symm1852_AB0_1VPlexcli:/clusters/cluster-2/storage-elements/extents> cdVPlexcli:/> ll -p **/devices/clusters/cluster-1/devices:Name Operational Health Block Block Capacity Geometry Visibility Transfer Virtual--------------- Status State Count Size -------- -------- ---------- Size Volume--------------- ----------- ------ ------- ----- -------- -------- ---------- -------- ---------TestDevCluster1 ok ok 4195200 4K 16G raid-1 local 2M -base0 ok ok 262144 4K 1G raid-0 local - base0_volbase1 ok ok 262144 4K 1G raid-0 local - base1_vol
In the above example if both the extents were thin-capable and from same storage array family, the RAID-1 would bethin-capable too. The virtual volume created on top of such a device can be thin-enabled.
● NOTE: The virtual volume must be built on top of a local RAID 0 device or a RAID 1 device. If you try to create a
RAID C local-device with multiple children, or a device that incorporates multiple extents, the created local device is not
thin-capable.
● The following example shows how a RAID-C device cannot be thin-capable:
VPlexcli:/clusters/cluster-1/storage-elements/extents> local-device create --geometry raid-c -e extent_TOP_101_1, extent_TOP_102_1 --name myLocalDevice
You are creating a raid-c local-device on top of 2 thin-capable extents 'extent_TOP_101_1, extent_TOP_102_1'.The resulting local-device will not be thin-capable.
VPlexcli:/clusters/cluster-1/storage-elements/extents>
See also
● device attach-mirror● local-device destroy
Commands 211
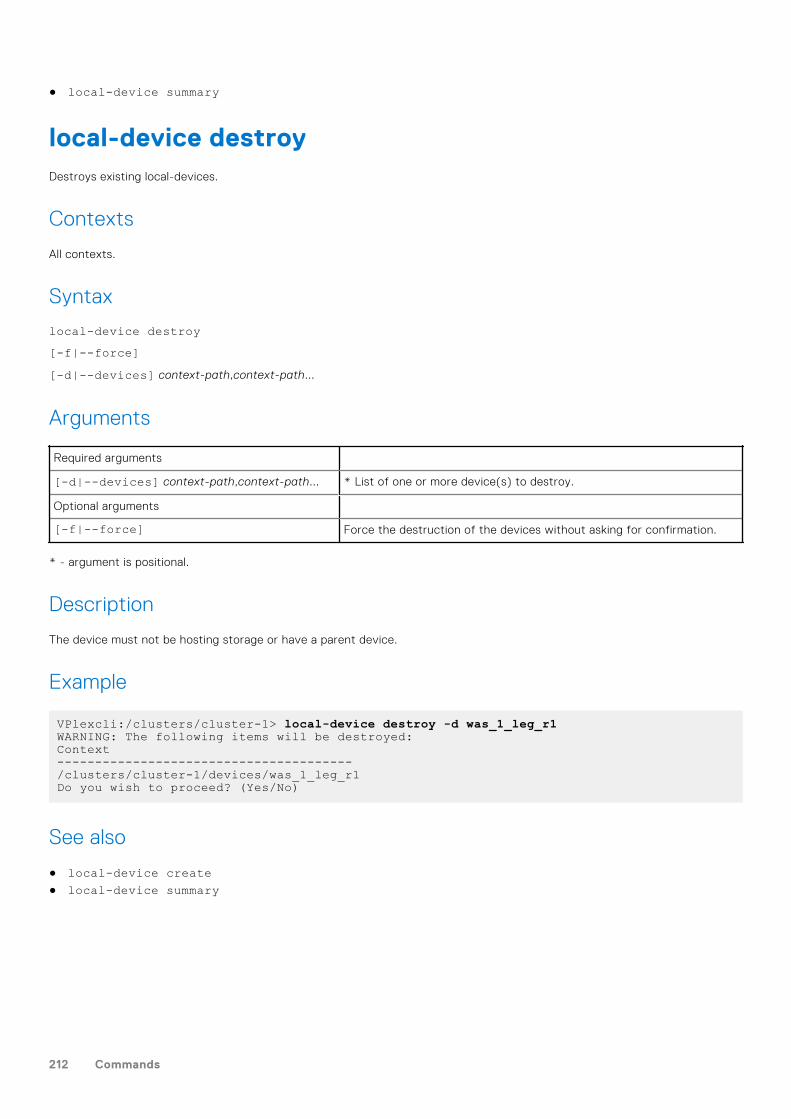
● local-device summary
local-device destroyDestroys existing local-devices.
Contexts
All contexts.
Syntax
local-device destroy[-f|--force][-d|--devices] context-path,context-path...
Arguments
Required arguments
[-d|--devices] context-path,context-path... * List of one or more device(s) to destroy.
Optional arguments
[-f|--force] Force the destruction of the devices without asking for confirmation.
* - argument is positional.
Description
The device must not be hosting storage or have a parent device.
Example
VPlexcli:/clusters/cluster-1> local-device destroy -d was_1_leg_r1WARNING: The following items will be destroyed:Context---------------------------------------/clusters/cluster-1/devices/was_1_leg_r1Do you wish to proceed? (Yes/No)
See also
● local-device create● local-device summary
212 Commands
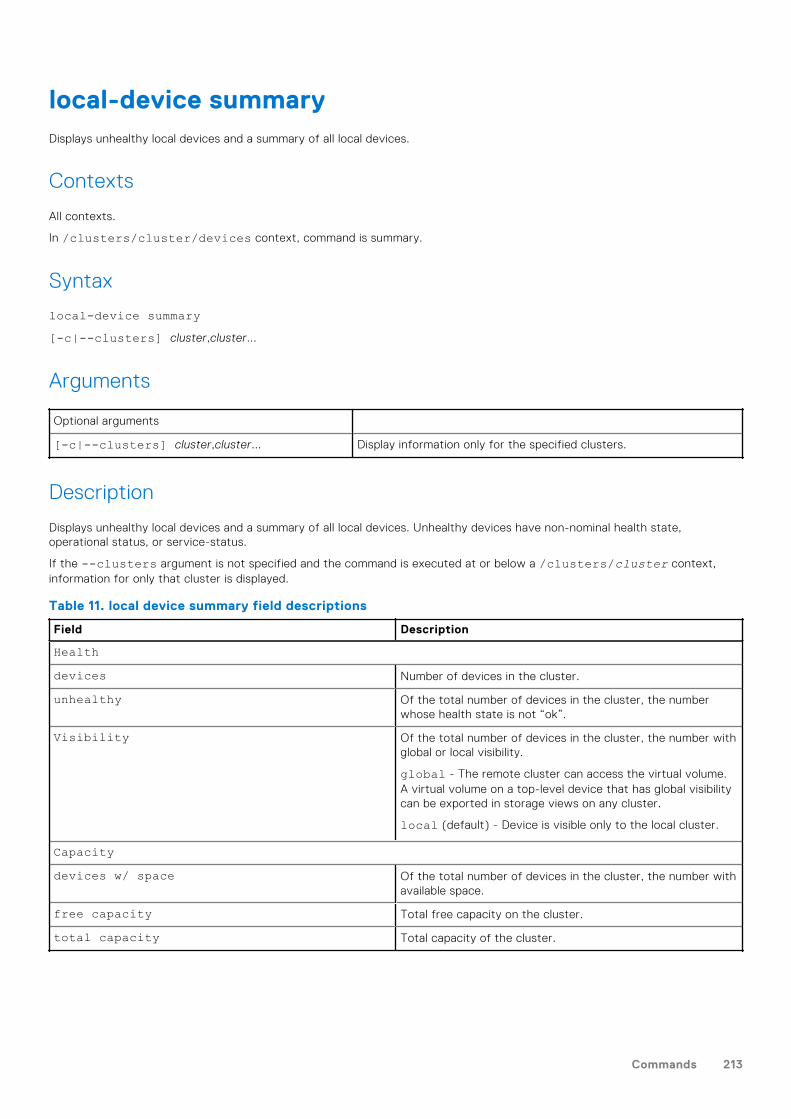
local-device summaryDisplays unhealthy local devices and a summary of all local devices.
Contexts
All contexts.
In /clusters/cluster/devices context, command is summary.
Syntax
local-device summary[-c|--clusters] cluster,cluster...
Arguments
Optional arguments
[-c|--clusters] cluster,cluster... Display information only for the specified clusters.
Description
Displays unhealthy local devices and a summary of all local devices. Unhealthy devices have non-nominal health state,operational status, or service-status.
If the --clusters argument is not specified and the command is executed at or below a /clusters/cluster context,information for only that cluster is displayed.
Table 11. local device summary field descriptions
Field Description
Healthdevices Number of devices in the cluster.
unhealthy Of the total number of devices in the cluster, the numberwhose health state is not “ok”.
Visibility Of the total number of devices in the cluster, the number withglobal or local visibility.
global - The remote cluster can access the virtual volume.A virtual volume on a top-level device that has global visibilitycan be exported in storage views on any cluster.
local (default) - Device is visible only to the local cluster.
Capacitydevices w/ space Of the total number of devices in the cluster, the number with
available space.
free capacity Total free capacity on the cluster.
total capacity Total capacity of the cluster.
Commands 213
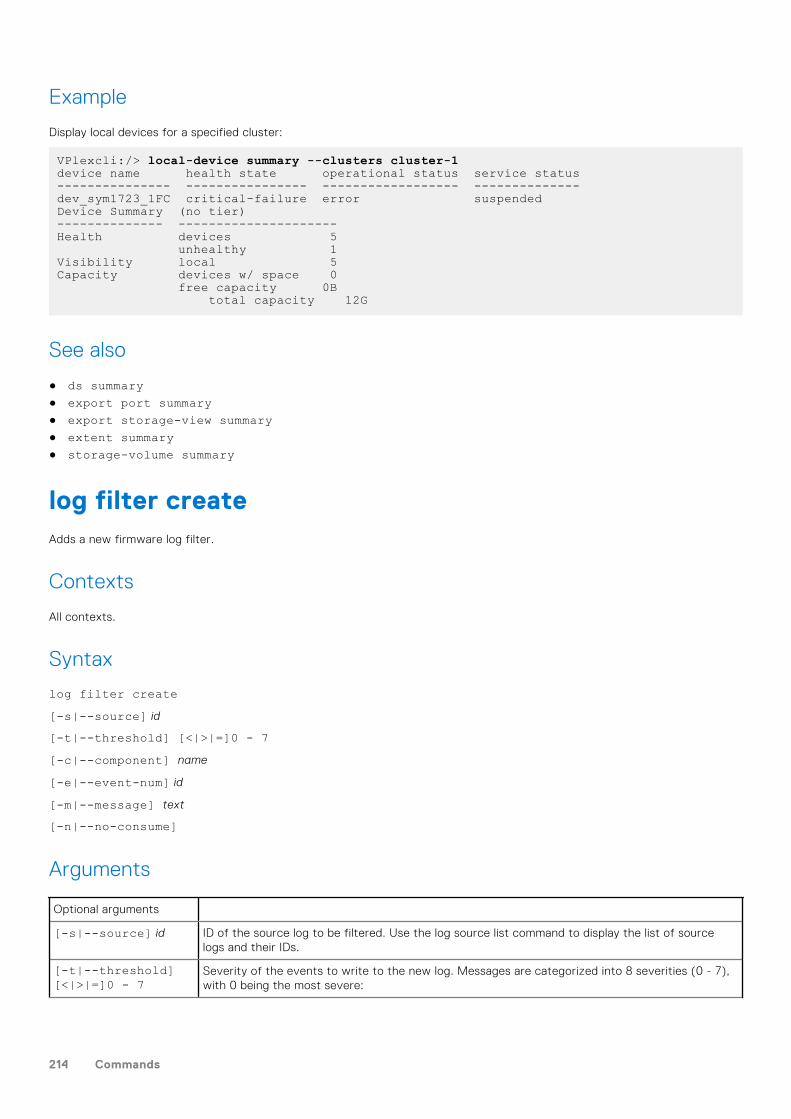
Example
Display local devices for a specified cluster:
VPlexcli:/> local-device summary --clusters cluster-1device name health state operational status service status--------------- ---------------- ------------------ --------------dev_sym1723_1FC critical-failure error suspendedDevice Summary (no tier)-------------- ---------------------Health devices 5 unhealthy 1Visibility local 5Capacity devices w/ space 0 free capacity 0B total capacity 12G
See also
● ds summary● export port summary● export storage-view summary● extent summary● storage-volume summary
log filter createAdds a new firmware log filter.
Contexts
All contexts.
Syntax
log filter create[-s|--source] id
[-t|--threshold] [<|>|=]0 - 7[-c|--component] name
[-e|--event-num] id
[-m|--message] text
[-n|--no-consume]
Arguments
Optional arguments
[-s|--source] id ID of the source log to be filtered. Use the log source list command to display the list of sourcelogs and their IDs.
[-t|--threshold][<|>|=]0 - 7
Severity of the events to write to the new log. Messages are categorized into 8 severities (0 - 7),with 0 being the most severe:
214 Commands
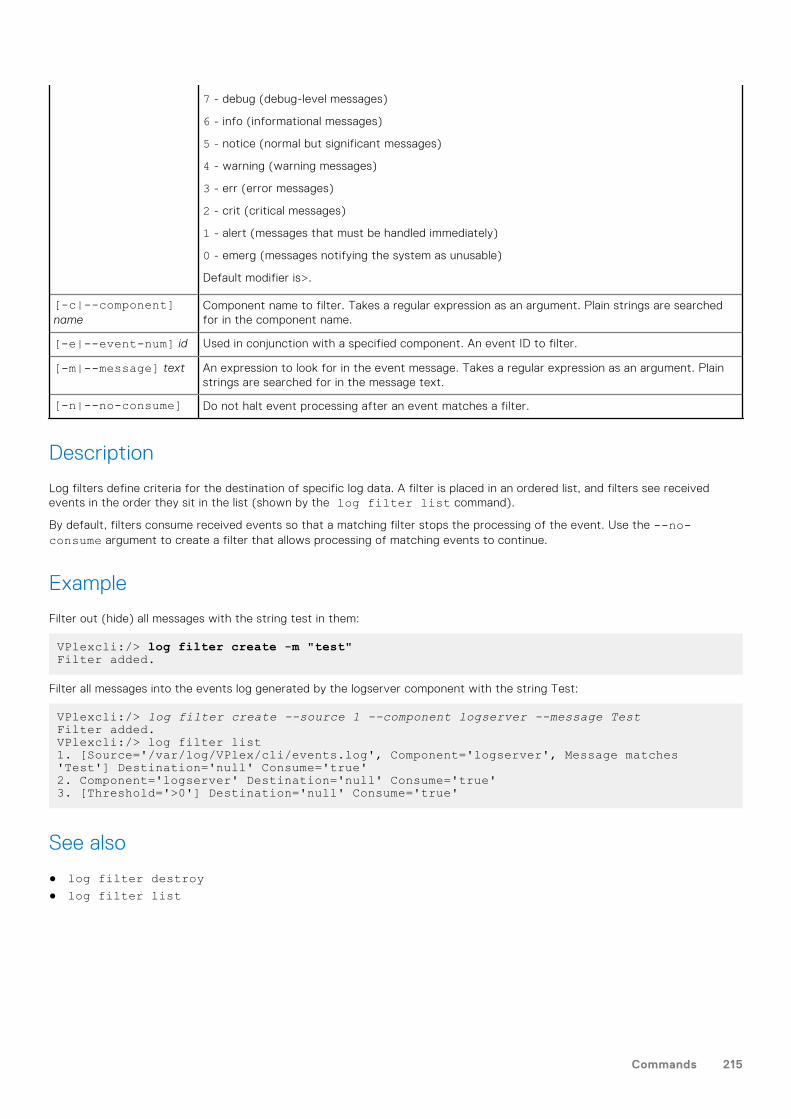
7 - debug (debug-level messages)
6 - info (informational messages)
5 - notice (normal but significant messages)
4 - warning (warning messages)
3 - err (error messages)
2 - crit (critical messages)
1 - alert (messages that must be handled immediately)
0 - emerg (messages notifying the system as unusable)
Default modifier is>.
[-c|--component]name
Component name to filter. Takes a regular expression as an argument. Plain strings are searchedfor in the component name.
[-e|--event-num] id Used in conjunction with a specified component. An event ID to filter.
[-m|--message] text An expression to look for in the event message. Takes a regular expression as an argument. Plainstrings are searched for in the message text.
[-n|--no-consume] Do not halt event processing after an event matches a filter.
Description
Log filters define criteria for the destination of specific log data. A filter is placed in an ordered list, and filters see receivedevents in the order they sit in the list (shown by the log filter list command).
By default, filters consume received events so that a matching filter stops the processing of the event. Use the --no-consume argument to create a filter that allows processing of matching events to continue.
Example
Filter out (hide) all messages with the string test in them:
VPlexcli:/> log filter create -m "test"Filter added.
Filter all messages into the events log generated by the logserver component with the string Test:
VPlexcli:/> log filter create --source 1 --component logserver --message TestFilter added.VPlexcli:/> log filter list1. [Source='/var/log/VPlex/cli/events.log', Component='logserver', Message matches 'Test'] Destination='null' Consume='true'2. Component='logserver' Destination='null' Consume='true'3. [Threshold='>0'] Destination='null' Consume='true'
See also
● log filter destroy● log filter list
Commands 215
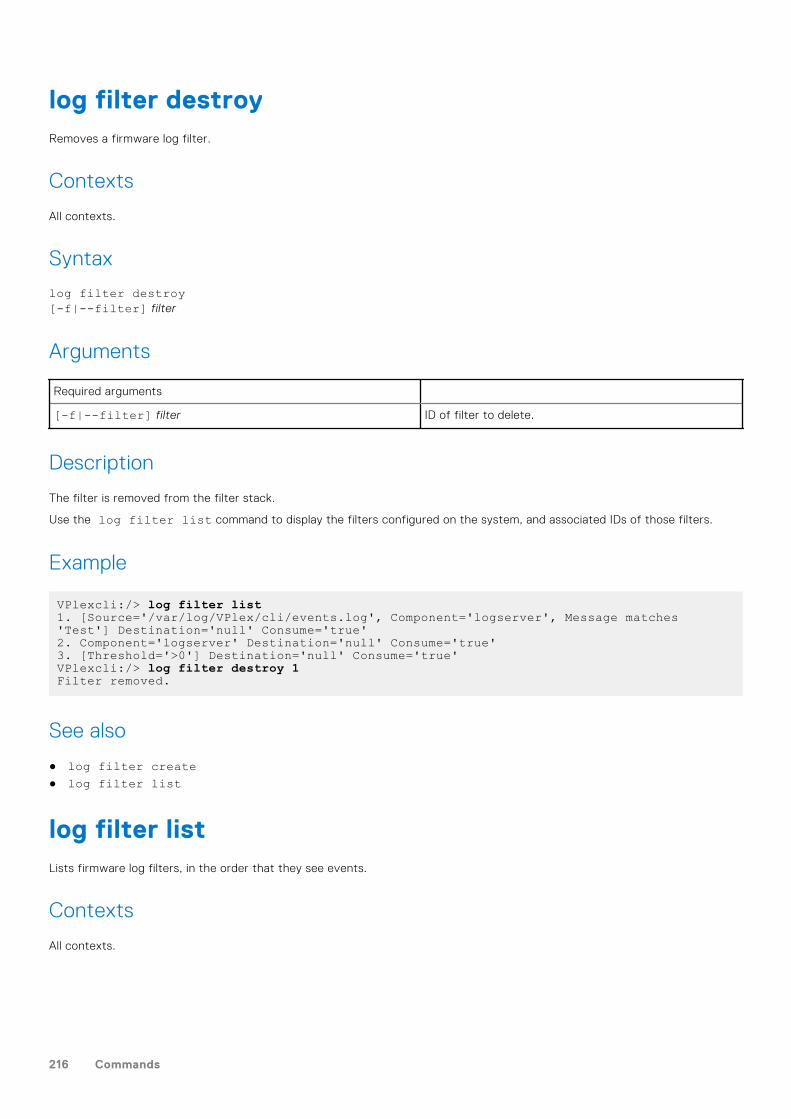
log filter destroyRemoves a firmware log filter.
Contexts
All contexts.
Syntax
log filter destroy[-f|--filter] filter
Arguments
Required arguments
[-f|--filter] filter ID of filter to delete.
Description
The filter is removed from the filter stack.
Use the log filter list command to display the filters configured on the system, and associated IDs of those filters.
Example
VPlexcli:/> log filter list1. [Source='/var/log/VPlex/cli/events.log', Component='logserver', Message matches 'Test'] Destination='null' Consume='true'2. Component='logserver' Destination='null' Consume='true'3. [Threshold='>0'] Destination='null' Consume='true'VPlexcli:/> log filter destroy 1Filter removed.
See also
● log filter create● log filter list
log filter listLists firmware log filters, in the order that they see events.
Contexts
All contexts.
216 Commands
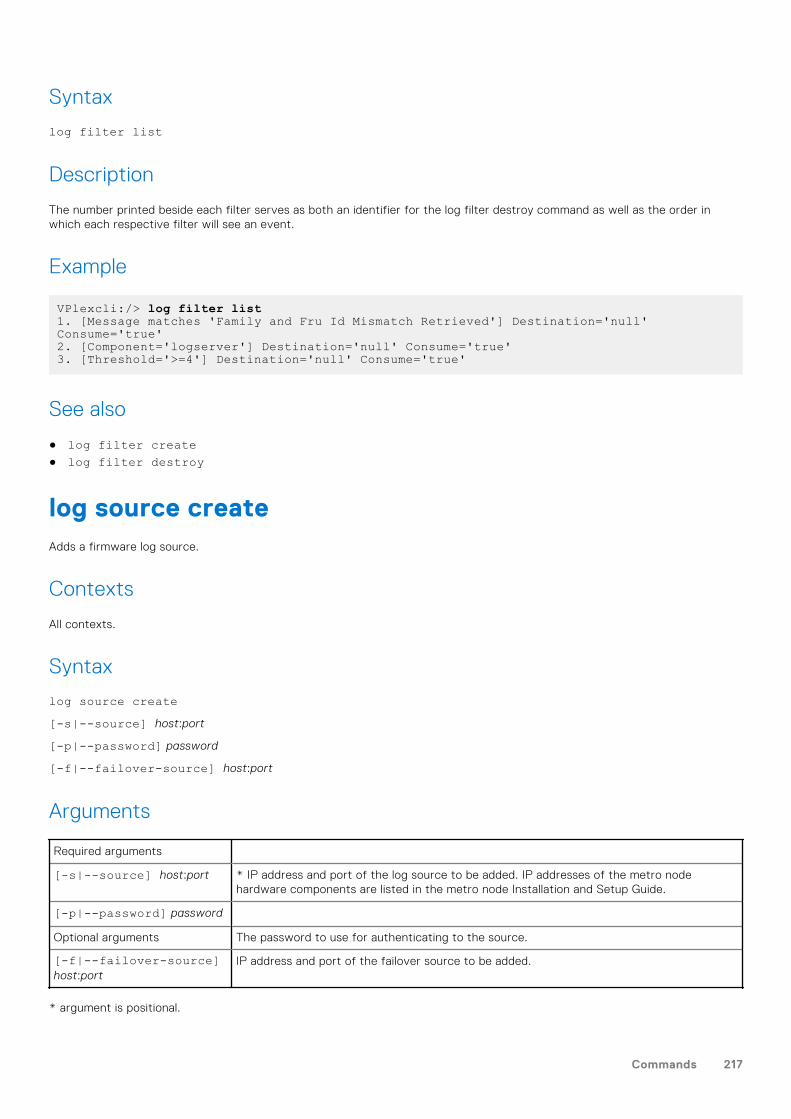
Syntax
log filter list
Description
The number printed beside each filter serves as both an identifier for the log filter destroy command as well as the order inwhich each respective filter will see an event.
Example
VPlexcli:/> log filter list1. [Message matches 'Family and Fru Id Mismatch Retrieved'] Destination='null' Consume='true'2. [Component='logserver'] Destination='null' Consume='true'3. [Threshold='>=4'] Destination='null' Consume='true'
See also
● log filter create● log filter destroy
log source createAdds a firmware log source.
Contexts
All contexts.
Syntax
log source create[-s|--source] host:port
[-p|--password] password
[-f|--failover-source] host:port
Arguments
Required arguments
[-s|--source] host:port * IP address and port of the log source to be added. IP addresses of the metro nodehardware components are listed in the metro node Installation and Setup Guide.
[-p|--password] password
Optional arguments The password to use for authenticating to the source.
[-f|--failover-source]host:port
IP address and port of the failover source to be added.
* argument is positional.
Commands 217
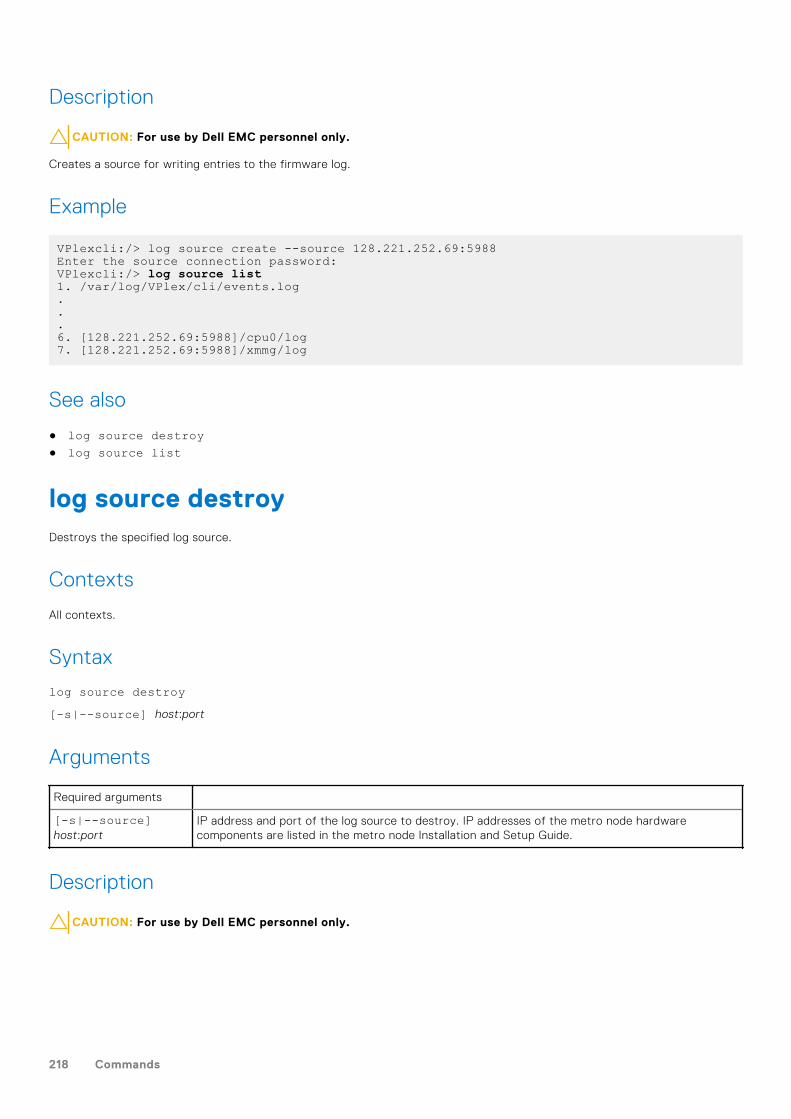
Description
CAUTION: For use by Dell EMC personnel only.
Creates a source for writing entries to the firmware log.
Example
VPlexcli:/> log source create --source 128.221.252.69:5988Enter the source connection password:VPlexcli:/> log source list1. /var/log/VPlex/cli/events.log...6. [128.221.252.69:5988]/cpu0/log7. [128.221.252.69:5988]/xmmg/log
See also
● log source destroy● log source list
log source destroyDestroys the specified log source.
Contexts
All contexts.
Syntax
log source destroy[-s|--source] host:port
Arguments
Required arguments
[-s|--source]host:port
IP address and port of the log source to destroy. IP addresses of the metro node hardwarecomponents are listed in the metro node Installation and Setup Guide.
Description
CAUTION: For use by Dell EMC personnel only.
218 Commands
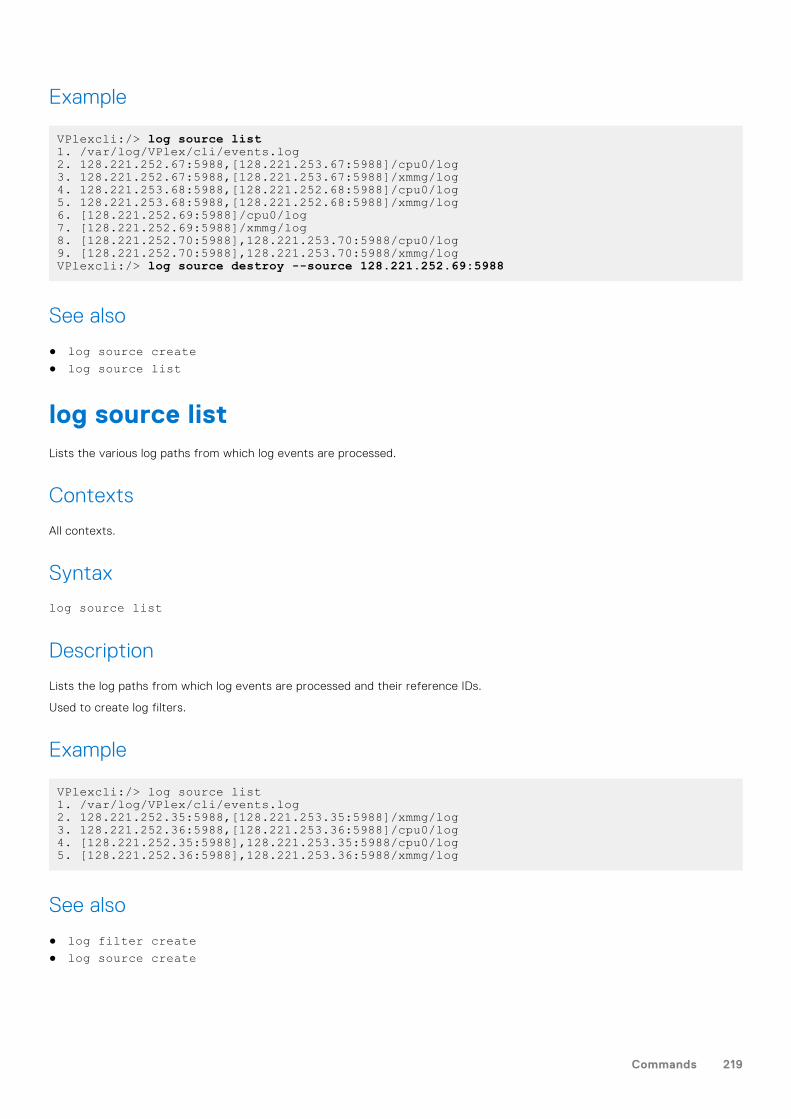
Example
VPlexcli:/> log source list1. /var/log/VPlex/cli/events.log2. 128.221.252.67:5988,[128.221.253.67:5988]/cpu0/log3. 128.221.252.67:5988,[128.221.253.67:5988]/xmmg/log4. 128.221.253.68:5988,[128.221.252.68:5988]/cpu0/log5. 128.221.253.68:5988,[128.221.252.68:5988]/xmmg/log6. [128.221.252.69:5988]/cpu0/log7. [128.221.252.69:5988]/xmmg/log8. [128.221.252.70:5988],128.221.253.70:5988/cpu0/log9. [128.221.252.70:5988],128.221.253.70:5988/xmmg/logVPlexcli:/> log source destroy --source 128.221.252.69:5988
See also
● log source create● log source list
log source listLists the various log paths from which log events are processed.
Contexts
All contexts.
Syntax
log source list
Description
Lists the log paths from which log events are processed and their reference IDs.
Used to create log filters.
Example
VPlexcli:/> log source list1. /var/log/VPlex/cli/events.log2. 128.221.252.35:5988,[128.221.253.35:5988]/xmmg/log3. 128.221.252.36:5988,[128.221.253.36:5988]/cpu0/log4. [128.221.252.35:5988],128.221.253.35:5988/cpu0/log5. [128.221.252.36:5988],128.221.253.36:5988/xmmg/log
See also
● log filter create● log source create
Commands 219
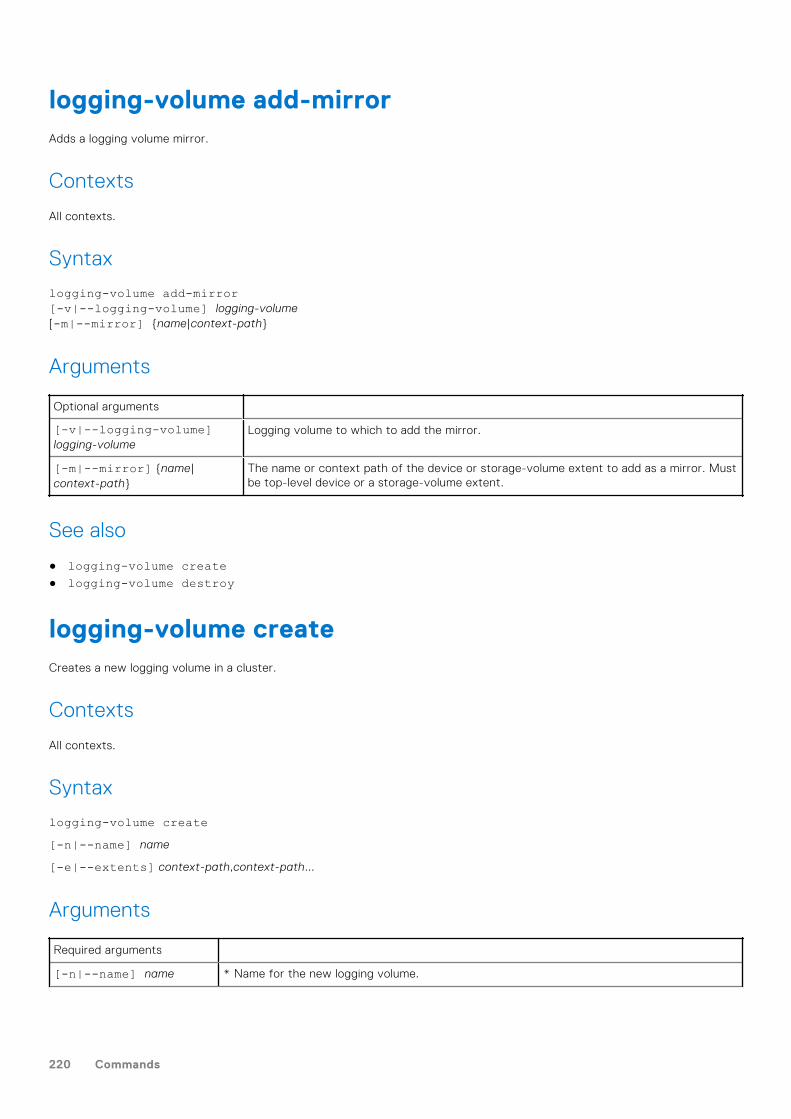
logging-volume add-mirrorAdds a logging volume mirror.
Contexts
All contexts.
Syntax
logging-volume add-mirror[-v|--logging-volume] logging-volume[-m|--mirror] {name|context-path}
Arguments
Optional arguments
[-v|--logging-volume]logging-volume
Logging volume to which to add the mirror.
[-m|--mirror] {name|context-path}
The name or context path of the device or storage-volume extent to add as a mirror. Mustbe top-level device or a storage-volume extent.
See also
● logging-volume create● logging-volume destroy
logging-volume createCreates a new logging volume in a cluster.
Contexts
All contexts.
Syntax
logging-volume create[-n|--name] name
[-e|--extents] context-path,context-path...
Arguments
Required arguments
[-n|--name] name * Name for the new logging volume.
220 Commands
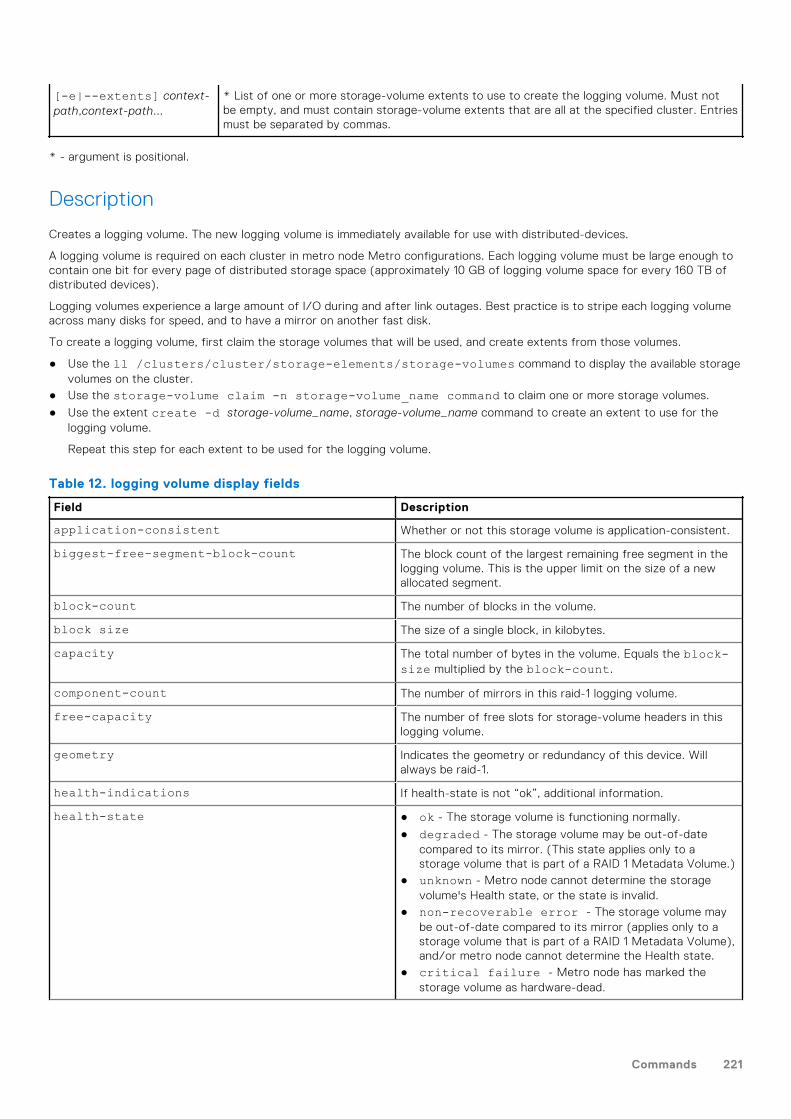
[-e|--extents] context-path,context-path...
* List of one or more storage-volume extents to use to create the logging volume. Must notbe empty, and must contain storage-volume extents that are all at the specified cluster. Entriesmust be separated by commas.
* - argument is positional.
Description
Creates a logging volume. The new logging volume is immediately available for use with distributed-devices.
A logging volume is required on each cluster in metro node Metro configurations. Each logging volume must be large enough tocontain one bit for every page of distributed storage space (approximately 10 GB of logging volume space for every 160 TB ofdistributed devices).
Logging volumes experience a large amount of I/O during and after link outages. Best practice is to stripe each logging volumeacross many disks for speed, and to have a mirror on another fast disk.
To create a logging volume, first claim the storage volumes that will be used, and create extents from those volumes.
● Use the ll /clusters/cluster/storage-elements/storage-volumes command to display the available storagevolumes on the cluster.
● Use the storage-volume claim -n storage-volume_name command to claim one or more storage volumes.
● Use the extent create -d storage-volume_name, storage-volume_name command to create an extent to use for thelogging volume.
Repeat this step for each extent to be used for the logging volume.
Table 12. logging volume display fields
Field Description
application-consistent Whether or not this storage volume is application-consistent.
biggest-free-segment-block-count The block count of the largest remaining free segment in thelogging volume. This is the upper limit on the size of a newallocated segment.
block-count The number of blocks in the volume.
block size The size of a single block, in kilobytes.
capacity The total number of bytes in the volume. Equals the block-size multiplied by the block-count.
component-count The number of mirrors in this raid-1 logging volume.
free-capacity The number of free slots for storage-volume headers in thislogging volume.
geometry Indicates the geometry or redundancy of this device. Willalways be raid-1.
health-indications If health-state is not “ok”, additional information.
health-state ● ok - The storage volume is functioning normally.
● degraded - The storage volume may be out-of-datecompared to its mirror. (This state applies only to astorage volume that is part of a RAID 1 Metadata Volume.)
● unknown - Metro node cannot determine the storagevolume's Health state, or the state is invalid.
● non-recoverable error - The storage volume maybe out-of-date compared to its mirror (applies only to astorage volume that is part of a RAID 1 Metadata Volume),and/or metro node cannot determine the Health state.
● critical failure - Metro node has marked thestorage volume as hardware-dead.
Commands 221
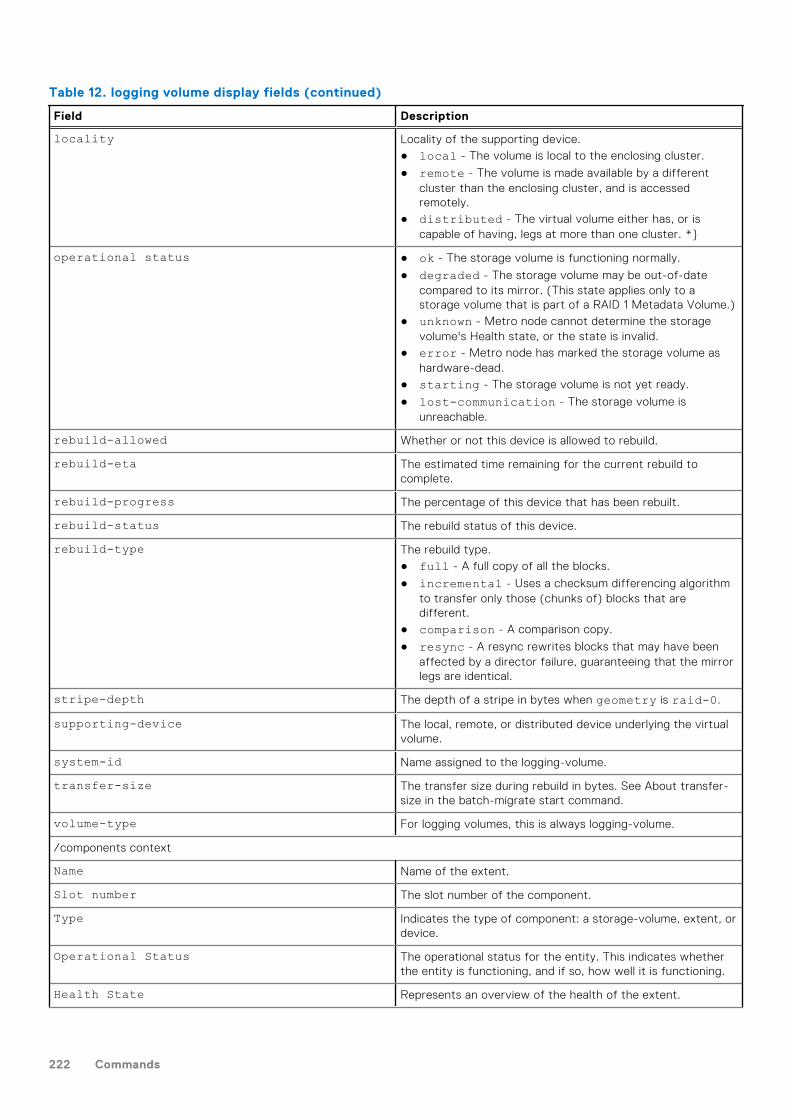
Table 12. logging volume display fields (continued)
Field Description
locality Locality of the supporting device.● local - The volume is local to the enclosing cluster.
● remote - The volume is made available by a differentcluster than the enclosing cluster, and is accessedremotely.
● distributed - The virtual volume either has, or iscapable of having, legs at more than one cluster. *}
operational status ● ok - The storage volume is functioning normally.
● degraded - The storage volume may be out-of-datecompared to its mirror. (This state applies only to astorage volume that is part of a RAID 1 Metadata Volume.)
● unknown - Metro node cannot determine the storagevolume's Health state, or the state is invalid.
● error - Metro node has marked the storage volume ashardware-dead.
● starting - The storage volume is not yet ready.
● lost-communication - The storage volume isunreachable.
rebuild-allowed Whether or not this device is allowed to rebuild.
rebuild-eta The estimated time remaining for the current rebuild tocomplete.
rebuild-progress The percentage of this device that has been rebuilt.
rebuild-status The rebuild status of this device.
rebuild-type The rebuild type.● full - A full copy of all the blocks.
● incremental - Uses a checksum differencing algorithmto transfer only those (chunks of) blocks that aredifferent.
● comparison - A comparison copy.
● resync - A resync rewrites blocks that may have beenaffected by a director failure, guaranteeing that the mirrorlegs are identical.
stripe-depth The depth of a stripe in bytes when geometry is raid-0.
supporting-device The local, remote, or distributed device underlying the virtualvolume.
system-id Name assigned to the logging-volume.
transfer-size The transfer size during rebuild in bytes. See About transfer-size in the batch-migrate start command.
volume-type For logging volumes, this is always logging-volume.
/components context
Name Name of the extent.
Slot number The slot number of the component.
Type Indicates the type of component: a storage-volume, extent, ordevice.
Operational Status The operational status for the entity. This indicates whetherthe entity is functioning, and if so, how well it is functioning.
Health State Represents an overview of the health of the extent.
222 Commands
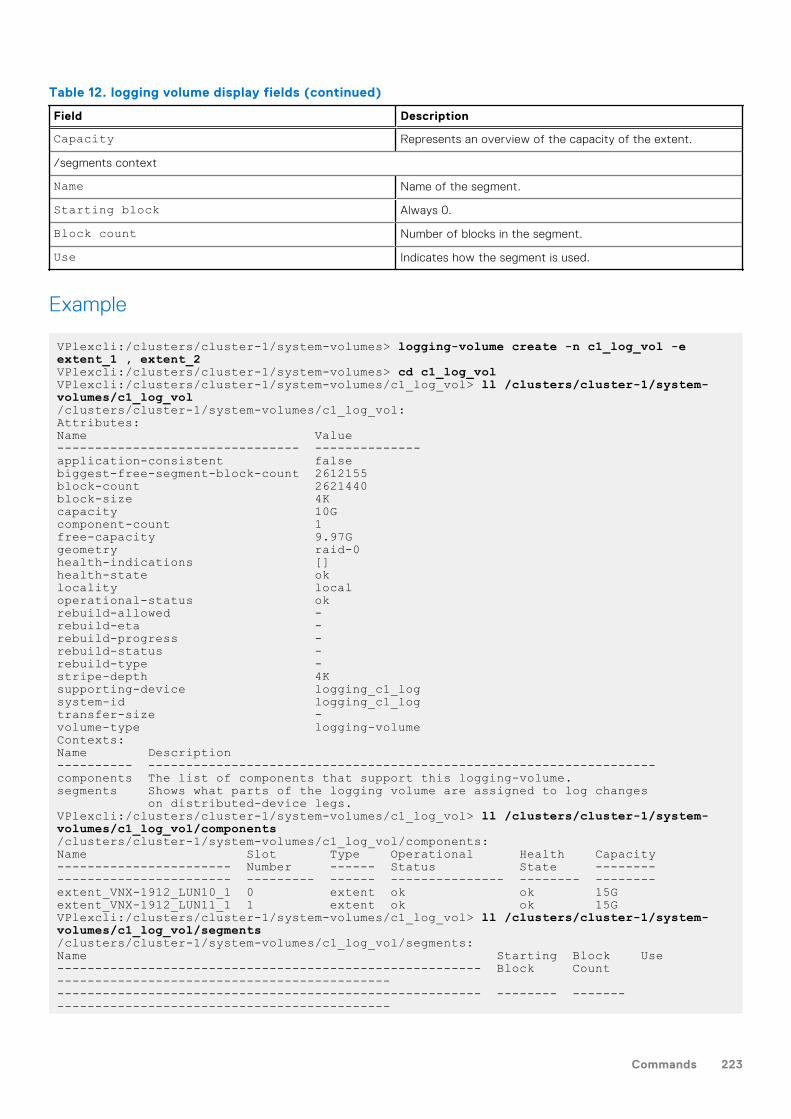
Table 12. logging volume display fields (continued)
Field Description
Capacity Represents an overview of the capacity of the extent.
/segments context
Name Name of the segment.
Starting block Always 0.
Block count Number of blocks in the segment.
Use Indicates how the segment is used.
Example
VPlexcli:/clusters/cluster-1/system-volumes> logging-volume create -n c1_log_vol -e extent_1 , extent_2VPlexcli:/clusters/cluster-1/system-volumes> cd c1_log_volVPlexcli:/clusters/cluster-1/system-volumes/c1_log_vol> ll /clusters/cluster-1/system-volumes/c1_log_vol/clusters/cluster-1/system-volumes/c1_log_vol:Attributes:Name Value-------------------------------- --------------application-consistent falsebiggest-free-segment-block-count 2612155block-count 2621440block-size 4Kcapacity 10Gcomponent-count 1free-capacity 9.97Ggeometry raid-0health-indications []health-state oklocality localoperational-status okrebuild-allowed -rebuild-eta -rebuild-progress -rebuild-status -rebuild-type -stripe-depth 4Ksupporting-device logging_c1_logsystem-id logging_c1_logtransfer-size -volume-type logging-volumeContexts:Name Description---------- -------------------------------------------------------------------components The list of components that support this logging-volume.segments Shows what parts of the logging volume are assigned to log changes on distributed-device legs.VPlexcli:/clusters/cluster-1/system-volumes/c1_log_vol> ll /clusters/cluster-1/system-volumes/c1_log_vol/components/clusters/cluster-1/system-volumes/c1_log_vol/components:Name Slot Type Operational Health Capacity----------------------- Number ------ Status State ------------------------------- --------- ------ --------------- -------- --------extent_VNX-1912_LUN10_1 0 extent ok ok 15Gextent_VNX-1912_LUN11_1 1 extent ok ok 15GVPlexcli:/clusters/cluster-1/system-volumes/c1_log_vol> ll /clusters/cluster-1/system-volumes/c1_log_vol/segments/clusters/cluster-1/system-volumes/c1_log_vol/segments:Name Starting Block Use-------------------------------------------------------- Block Count ---------------------------------------------------------------------------------------------------- -------- ------- --------------------------------------------
Commands 223
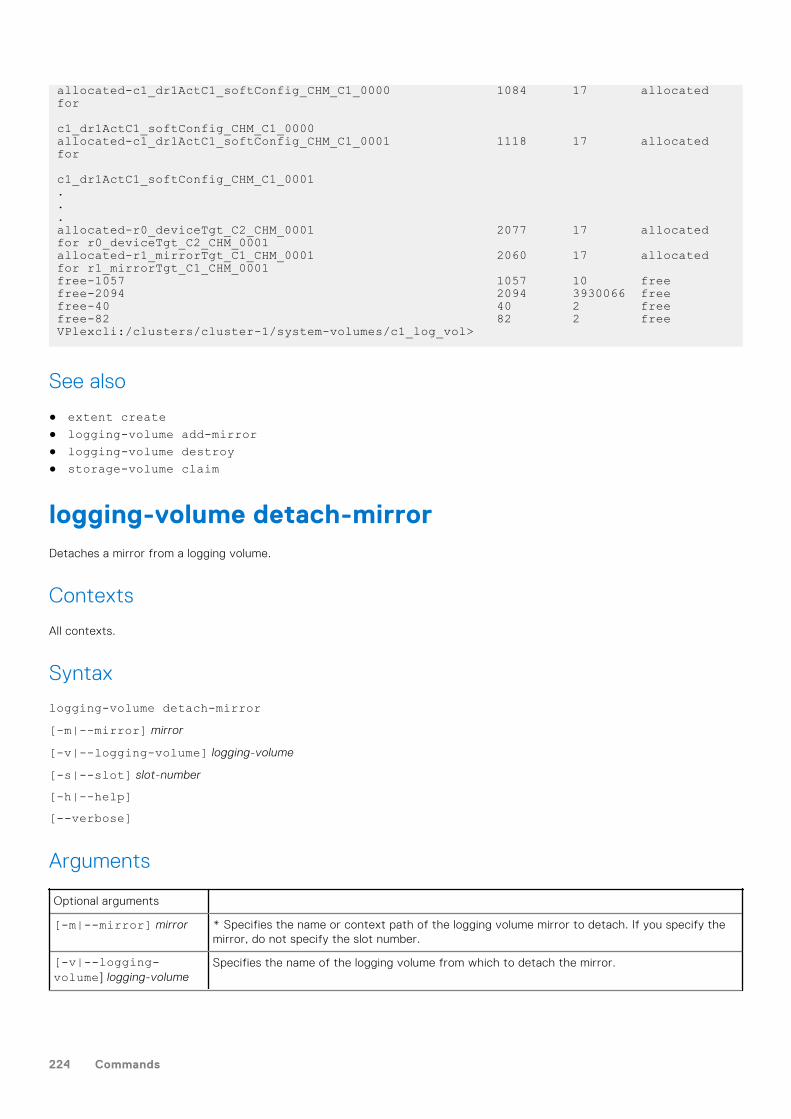
allocated-c1_dr1ActC1_softConfig_CHM_C1_0000 1084 17 allocated for c1_dr1ActC1_softConfig_CHM_C1_0000allocated-c1_dr1ActC1_softConfig_CHM_C1_0001 1118 17 allocated for c1_dr1ActC1_softConfig_CHM_C1_0001...allocated-r0_deviceTgt_C2_CHM_0001 2077 17 allocated for r0_deviceTgt_C2_CHM_0001allocated-r1_mirrorTgt_C1_CHM_0001 2060 17 allocated for r1_mirrorTgt_C1_CHM_0001free-1057 1057 10 freefree-2094 2094 3930066 freefree-40 40 2 freefree-82 82 2 freeVPlexcli:/clusters/cluster-1/system-volumes/c1_log_vol>
See also
● extent create● logging-volume add-mirror● logging-volume destroy● storage-volume claim
logging-volume detach-mirrorDetaches a mirror from a logging volume.
Contexts
All contexts.
Syntax
logging-volume detach-mirror[-m|--mirror] mirror
[-v|--logging-volume] logging-volume
[-s|--slot] slot-number
[-h|--help][--verbose]
Arguments
Optional arguments
[-m|--mirror] mirror * Specifies the name or context path of the logging volume mirror to detach. If you specify themirror, do not specify the slot number.
[-v|--logging-volume] logging-volume
Specifies the name of the logging volume from which to detach the mirror.
224 Commands
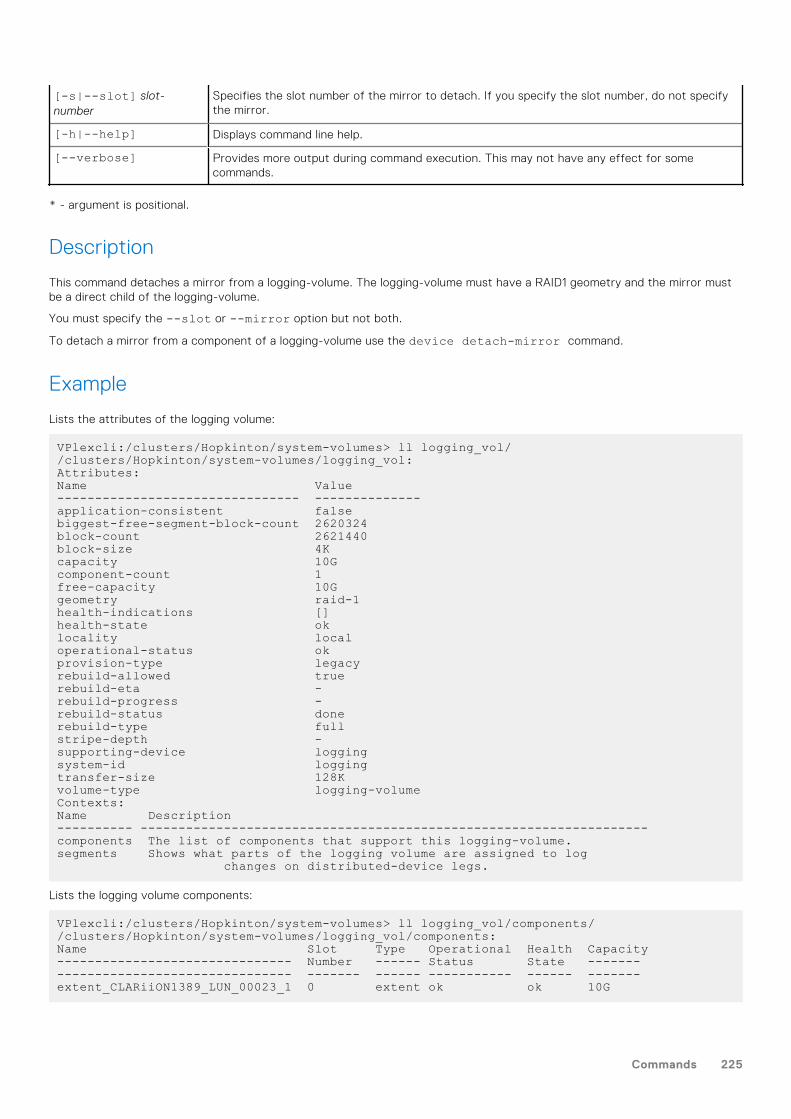
[-s|--slot] slot-number
Specifies the slot number of the mirror to detach. If you specify the slot number, do not specifythe mirror.
[-h|--help] Displays command line help.
[--verbose] Provides more output during command execution. This may not have any effect for somecommands.
* - argument is positional.
Description
This command detaches a mirror from a logging-volume. The logging-volume must have a RAID1 geometry and the mirror mustbe a direct child of the logging-volume.
You must specify the --slot or --mirror option but not both.
To detach a mirror from a component of a logging-volume use the device detach-mirror command.
Example
Lists the attributes of the logging volume:
VPlexcli:/clusters/Hopkinton/system-volumes> ll logging_vol//clusters/Hopkinton/system-volumes/logging_vol:Attributes:Name Value-------------------------------- --------------application-consistent falsebiggest-free-segment-block-count 2620324block-count 2621440block-size 4Kcapacity 10Gcomponent-count 1free-capacity 10Ggeometry raid-1health-indications []health-state oklocality localoperational-status okprovision-type legacyrebuild-allowed truerebuild-eta -rebuild-progress -rebuild-status donerebuild-type fullstripe-depth -supporting-device loggingsystem-id loggingtransfer-size 128Kvolume-type logging-volumeContexts:Name Description---------- -------------------------------------------------------------------components The list of components that support this logging-volume.segments Shows what parts of the logging volume are assigned to log changes on distributed-device legs.
Lists the logging volume components:
VPlexcli:/clusters/Hopkinton/system-volumes> ll logging_vol/components//clusters/Hopkinton/system-volumes/logging_vol/components:Name Slot Type Operational Health Capacity------------------------------- Number ------ Status State -------------------------------------- ------- ------ ----------- ------ -------extent_CLARiiON1389_LUN_00023_1 0 extent ok ok 10G
Commands 225
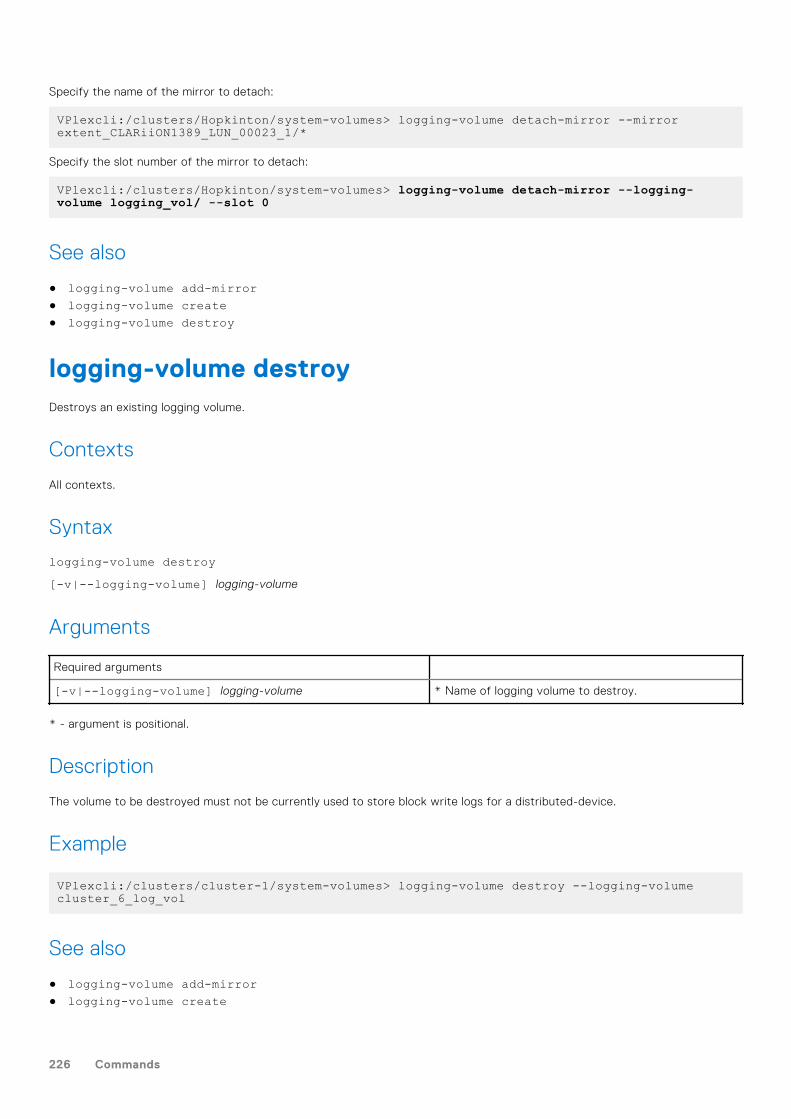
Specify the name of the mirror to detach:
VPlexcli:/clusters/Hopkinton/system-volumes> logging-volume detach-mirror --mirror extent_CLARiiON1389_LUN_00023_1/*
Specify the slot number of the mirror to detach:
VPlexcli:/clusters/Hopkinton/system-volumes> logging-volume detach-mirror --logging-volume logging_vol/ --slot 0
See also
● logging-volume add-mirror● logging-volume create● logging-volume destroy
logging-volume destroyDestroys an existing logging volume.
Contexts
All contexts.
Syntax
logging-volume destroy[-v|--logging-volume] logging-volume
Arguments
Required arguments
[-v|--logging-volume] logging-volume * Name of logging volume to destroy.
* - argument is positional.
Description
The volume to be destroyed must not be currently used to store block write logs for a distributed-device.
Example
VPlexcli:/clusters/cluster-1/system-volumes> logging-volume destroy --logging-volume cluster_6_log_vol
See also
● logging-volume add-mirror● logging-volume create
226 Commands
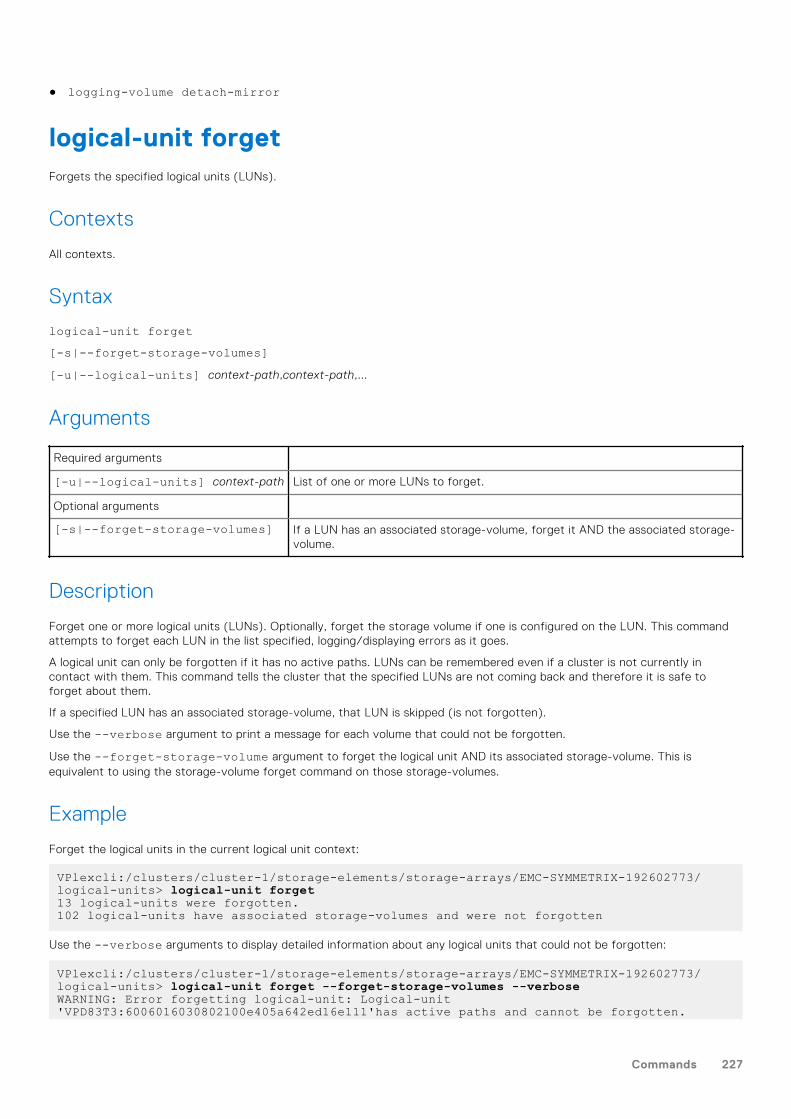
● logging-volume detach-mirror
logical-unit forgetForgets the specified logical units (LUNs).
Contexts
All contexts.
Syntax
logical-unit forget[-s|--forget-storage-volumes][-u|--logical-units] context-path,context-path,...
Arguments
Required arguments
[-u|--logical-units] context-path List of one or more LUNs to forget.
Optional arguments
[-s|--forget-storage-volumes] If a LUN has an associated storage-volume, forget it AND the associated storage-volume.
Description
Forget one or more logical units (LUNs). Optionally, forget the storage volume if one is configured on the LUN. This commandattempts to forget each LUN in the list specified, logging/displaying errors as it goes.
A logical unit can only be forgotten if it has no active paths. LUNs can be remembered even if a cluster is not currently incontact with them. This command tells the cluster that the specified LUNs are not coming back and therefore it is safe toforget about them.
If a specified LUN has an associated storage-volume, that LUN is skipped (is not forgotten).
Use the --verbose argument to print a message for each volume that could not be forgotten.
Use the --forget-storage-volume argument to forget the logical unit AND its associated storage-volume. This isequivalent to using the storage-volume forget command on those storage-volumes.
Example
Forget the logical units in the current logical unit context:
VPlexcli:/clusters/cluster-1/storage-elements/storage-arrays/EMC-SYMMETRIX-192602773/logical-units> logical-unit forget13 logical-units were forgotten.102 logical-units have associated storage-volumes and were not forgotten
Use the --verbose arguments to display detailed information about any logical units that could not be forgotten:
VPlexcli:/clusters/cluster-1/storage-elements/storage-arrays/EMC-SYMMETRIX-192602773/logical-units> logical-unit forget --forget-storage-volumes --verboseWARNING: Error forgetting logical-unit: Logical-unit 'VPD83T3:6006016030802100e405a642ed16e111'has active paths and cannot be forgotten.
Commands 227
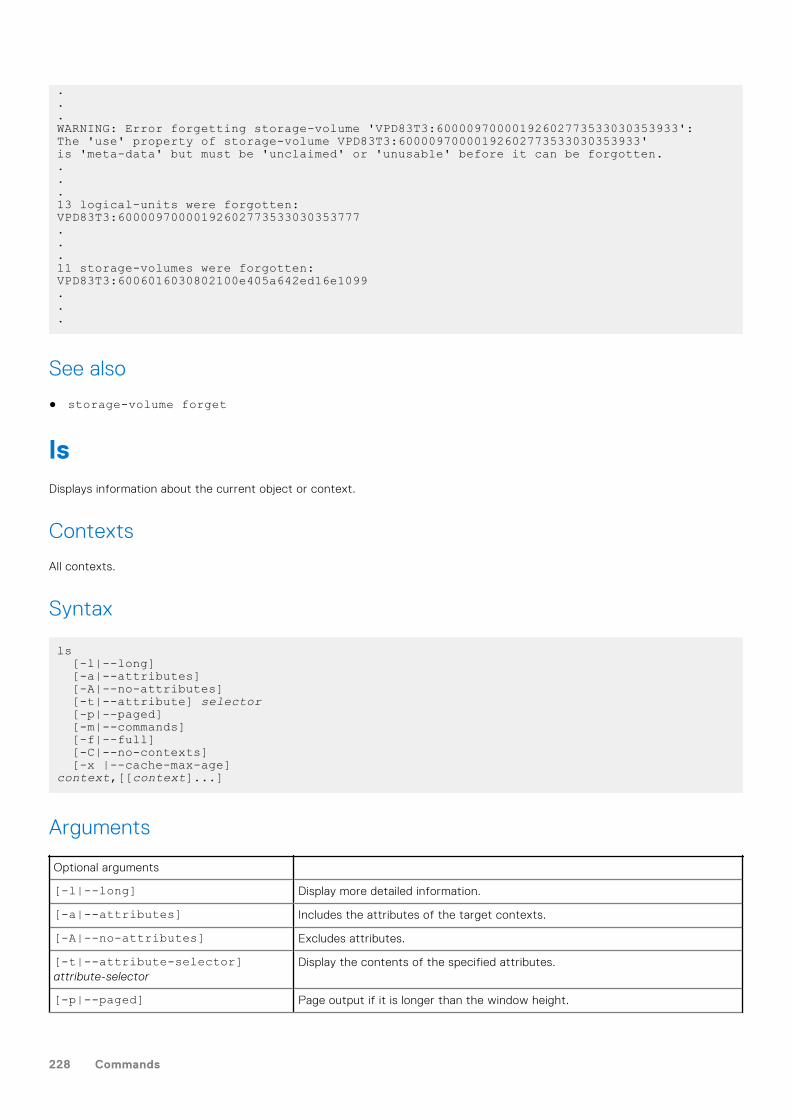
.
.
.WARNING: Error forgetting storage-volume 'VPD83T3:60000970000192602773533030353933': The 'use' property of storage-volume VPD83T3:60000970000192602773533030353933' is 'meta-data' but must be 'unclaimed' or 'unusable' before it can be forgotten....13 logical-units were forgotten:VPD83T3:60000970000192602773533030353777...11 storage-volumes were forgotten:VPD83T3:6006016030802100e405a642ed16e1099...
See also
● storage-volume forget
lsDisplays information about the current object or context.
Contexts
All contexts.
Syntax
ls [-l|--long] [-a|--attributes] [-A|--no-attributes] [-t|--attribute] selector [-p|--paged] [-m|--commands] [-f|--full] [-C|--no-contexts] [-x |--cache-max-age]context,[[context]...]
Arguments
Optional arguments
[-l|--long] Display more detailed information.
[-a|--attributes] Includes the attributes of the target contexts.
[-A|--no-attributes] Excludes attributes.
[-t|--attribute-selector]attribute-selector
Display the contents of the specified attributes.
[-p|--paged] Page output if it is longer than the window height.
228 Commands
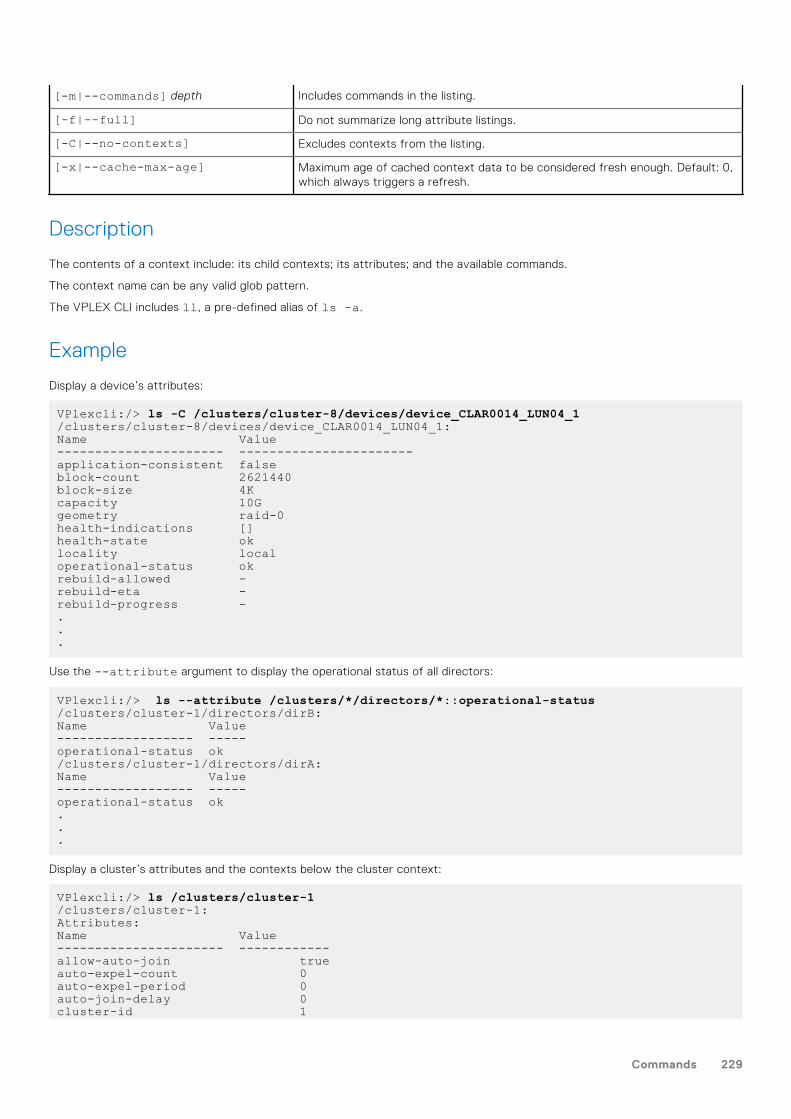
[-m|--commands] depth Includes commands in the listing.
[-f|--full] Do not summarize long attribute listings.
[-C|--no-contexts] Excludes contexts from the listing.
[-x|--cache-max-age] Maximum age of cached context data to be considered fresh enough. Default: 0,which always triggers a refresh.
Description
The contents of a context include: its child contexts; its attributes; and the available commands.
The context name can be any valid glob pattern.
The VPLEX CLI includes ll, a pre-defined alias of ls -a.
Example
Display a device’s attributes:
VPlexcli:/> ls -C /clusters/cluster-8/devices/device_CLAR0014_LUN04_1/clusters/cluster-8/devices/device_CLAR0014_LUN04_1:Name Value---------------------- -----------------------application-consistent falseblock-count 2621440block-size 4Kcapacity 10Ggeometry raid-0health-indications []health-state oklocality localoperational-status okrebuild-allowed -rebuild-eta -rebuild-progress -...
Use the --attribute argument to display the operational status of all directors:
VPlexcli:/> ls --attribute /clusters/*/directors/*::operational-status/clusters/cluster-1/directors/dirB:Name Value------------------ -----operational-status ok/clusters/cluster-1/directors/dirA:Name Value------------------ -----operational-status ok...
Display a cluster’s attributes and the contexts below the cluster context:
VPlexcli:/> ls /clusters/cluster-1/clusters/cluster-1:Attributes:Name Value---------------------- ------------allow-auto-join trueauto-expel-count 0auto-expel-period 0auto-join-delay 0cluster-id 1
Commands 229
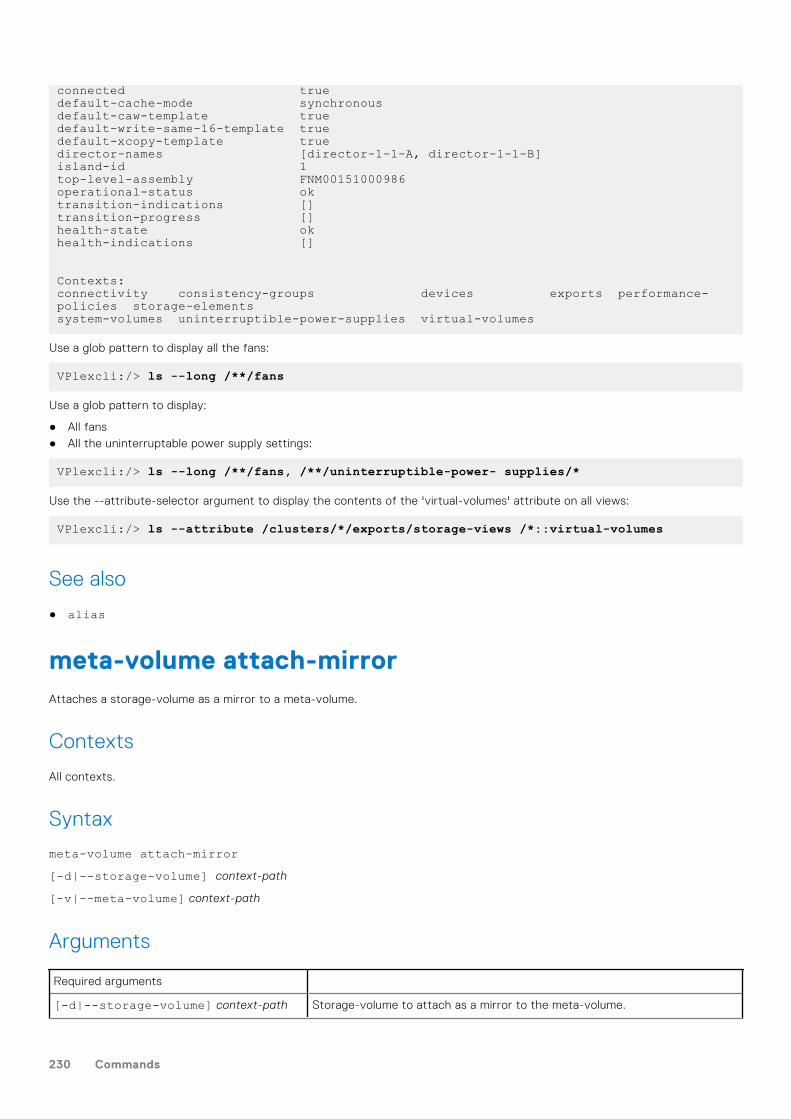
connected truedefault-cache-mode synchronousdefault-caw-template truedefault-write-same-16-template truedefault-xcopy-template truedirector-names [director-1-1-A, director-1-1-B]island-id 1top-level-assembly FNM00151000986operational-status oktransition-indications []transition-progress []health-state okhealth-indications [] Contexts: connectivity consistency-groups devices exports performance-policies storage-elementssystem-volumes uninterruptible-power-supplies virtual-volumes
Use a glob pattern to display all the fans:
VPlexcli:/> ls --long /**/fans
Use a glob pattern to display:
● All fans● All the uninterruptable power supply settings:
VPlexcli:/> ls --long /**/fans, /**/uninterruptible-power- supplies/*
Use the --attribute-selector argument to display the contents of the 'virtual-volumes' attribute on all views:
VPlexcli:/> ls --attribute /clusters/*/exports/storage-views /*::virtual-volumes
See also
● alias
meta-volume attach-mirrorAttaches a storage-volume as a mirror to a meta-volume.
Contexts
All contexts.
Syntax
meta-volume attach-mirror[-d|--storage-volume] context-path
[-v|--meta-volume] context-path
Arguments
Required arguments
[-d|--storage-volume] context-path Storage-volume to attach as a mirror to the meta-volume.
230 Commands

[v|--meta-volume] context-path Meta-volume to which the storage volume should be attached as a mirror.
Description
Creates a mirror and backup of the specified meta-volume. The specified storage volumes must be:
● Not empty.● At the implied or specified cluster.● Unclaimed.● 78 GB or larger.● 20 GB or larger.
Dell EMC recommends you create a mirror and a backup of the meta-volume using at least two disks from two different arrays.
NOTE: You can attach a mirrorwhen the meta-volume is first created by specifying two storage volumes.
Example
Attach storage volume VPD83T3:6…ade11 as a mirror to the existing meta-volume _dmx:
VPlexcli:/clusters/cluster-1/directors> meta-volume attach-mirror --storage-volume VPD83T3:6006016023901d00484f496fa07ade11 --meta-volume _dmx-volume _dmx is created at /clusters/cluster-1/system-volumes.
See also
● meta-volume detach-mirror
meta-volume backupCreates a new meta-volume and writes the current in-memory system data to the new meta-volume without activating it.
Contexts
All contexts.
Syntax
meta-volume backup[-d|--storage-volumes] context-path,context-path...
[-c|--cluster] context-path
[-f|--force]
Arguments
Required arguments
[-d|--storage-volume] context-path
* List of two or more storage volumes to use in creating the backup meta-volume. The specifiedstorage-volumes must be:● Not empty● At the implied or specified cluster
Commands 231
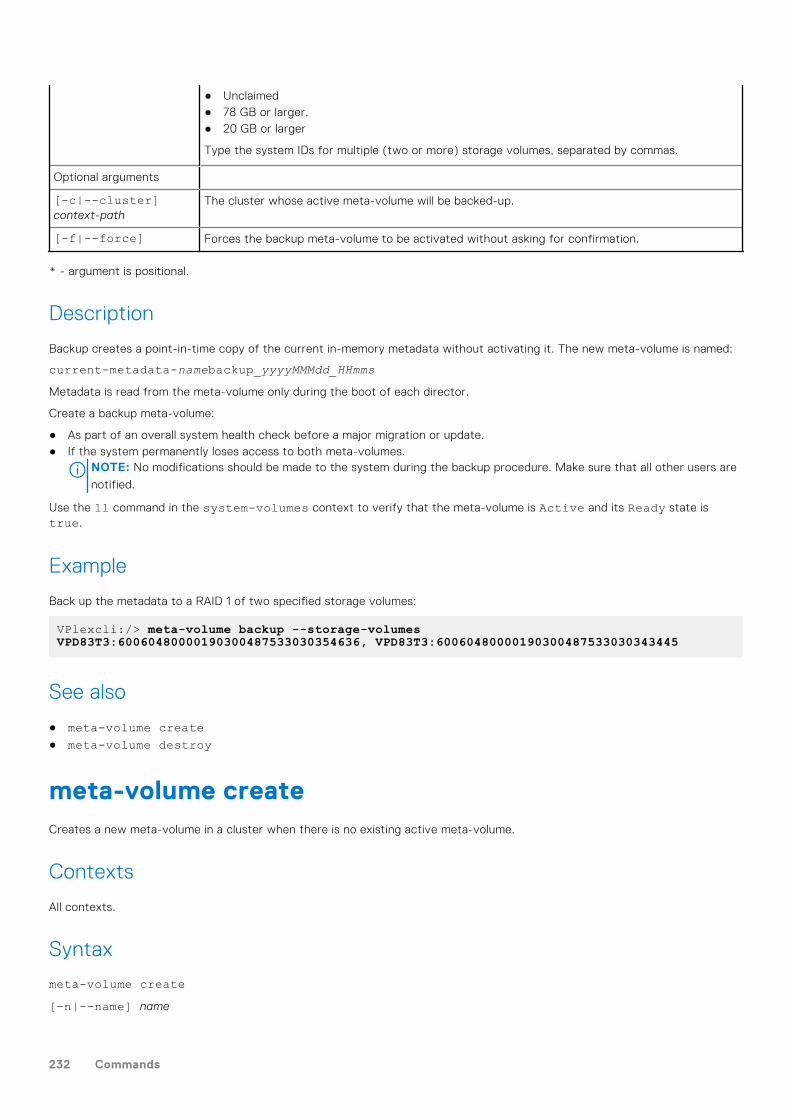
● Unclaimed● 78 GB or larger.● 20 GB or larger
Type the system IDs for multiple (two or more) storage volumes, separated by commas.
Optional arguments
[-c|--cluster]context-path
The cluster whose active meta-volume will be backed-up.
[-f|--force] Forces the backup meta-volume to be activated without asking for confirmation.
* - argument is positional.
Description
Backup creates a point-in-time copy of the current in-memory metadata without activating it. The new meta-volume is named:
current-metadata-namebackup_yyyyMMMdd_HHmmsMetadata is read from the meta-volume only during the boot of each director.
Create a backup meta-volume:
● As part of an overall system health check before a major migration or update.● If the system permanently loses access to both meta-volumes.
NOTE: No modifications should be made to the system during the backup procedure. Make sure that all other users are
notified.
Use the ll command in the system-volumes context to verify that the meta-volume is Active and its Ready state istrue.
Example
Back up the metadata to a RAID 1 of two specified storage volumes:
VPlexcli:/> meta-volume backup --storage-volumes VPD83T3:60060480000190300487533030354636, VPD83T3:60060480000190300487533030343445
See also
● meta-volume create● meta-volume destroy
meta-volume createCreates a new meta-volume in a cluster when there is no existing active meta-volume.
Contexts
All contexts.
Syntax
meta-volume create[-n|--name] name
232 Commands
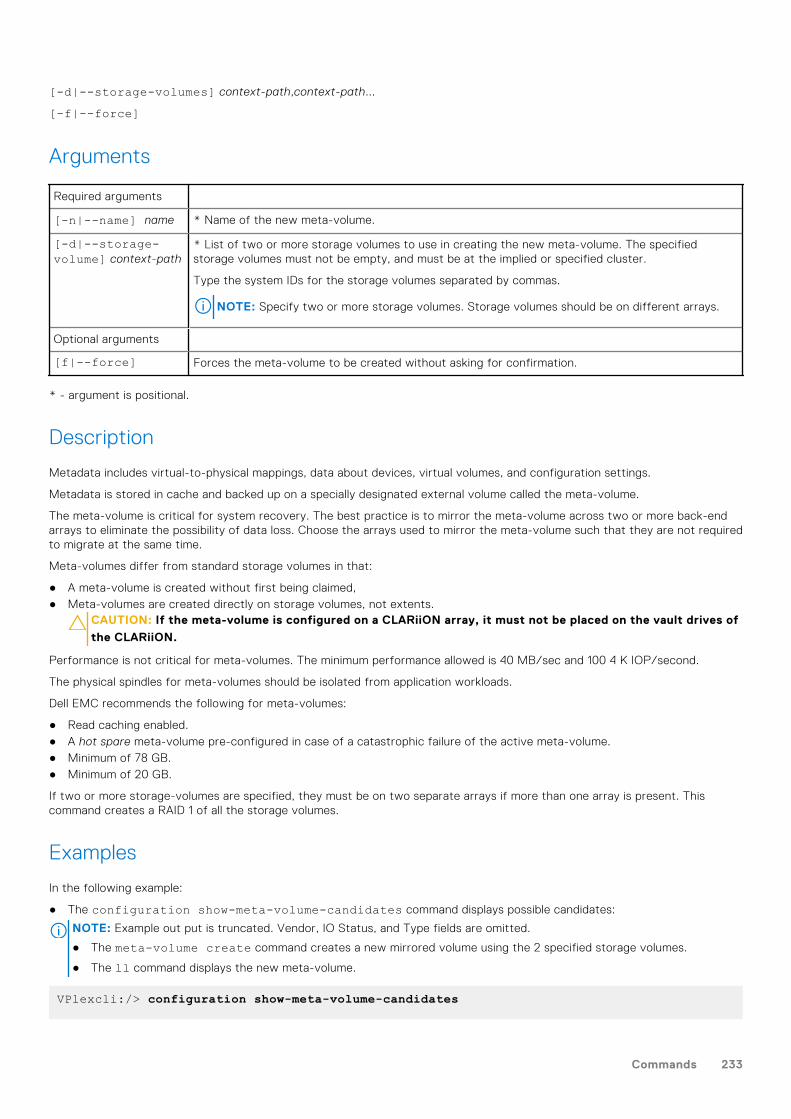
[-d|--storage-volumes] context-path,context-path...
[-f|--force]
Arguments
Required arguments
[-n|--name] name * Name of the new meta-volume.
[-d|--storage-volume] context-path
* List of two or more storage volumes to use in creating the new meta-volume. The specifiedstorage volumes must not be empty, and must be at the implied or specified cluster.
Type the system IDs for the storage volumes separated by commas.
NOTE: Specify two or more storage volumes. Storage volumes should be on different arrays.
Optional arguments
[f|--force] Forces the meta-volume to be created without asking for confirmation.
* - argument is positional.
Description
Metadata includes virtual-to-physical mappings, data about devices, virtual volumes, and configuration settings.
Metadata is stored in cache and backed up on a specially designated external volume called the meta-volume.
The meta-volume is critical for system recovery. The best practice is to mirror the meta-volume across two or more back-endarrays to eliminate the possibility of data loss. Choose the arrays used to mirror the meta-volume such that they are not requiredto migrate at the same time.
Meta-volumes differ from standard storage volumes in that:
● A meta-volume is created without first being claimed,● Meta-volumes are created directly on storage volumes, not extents.
CAUTION: If the meta-volume is configured on a CLARiiON array, it must not be placed on the vault drives of
the CLARiiON.
Performance is not critical for meta-volumes. The minimum performance allowed is 40 MB/sec and 100 4 K IOP/second.
The physical spindles for meta-volumes should be isolated from application workloads.
Dell EMC recommends the following for meta-volumes:
● Read caching enabled.● A hot spare meta-volume pre-configured in case of a catastrophic failure of the active meta-volume.● Minimum of 78 GB.● Minimum of 20 GB.
If two or more storage-volumes are specified, they must be on two separate arrays if more than one array is present. Thiscommand creates a RAID 1 of all the storage volumes.
Examples
In the following example:
● The configuration show-meta-volume-candidates command displays possible candidates:
NOTE: Example out put is truncated. Vendor, IO Status, and Type fields are omitted.
● The meta-volume create command creates a new mirrored volume using the 2 specified storage volumes.
● The ll command displays the new meta-volume.
VPlexcli:/> configuration show-meta-volume-candidates
Commands 233
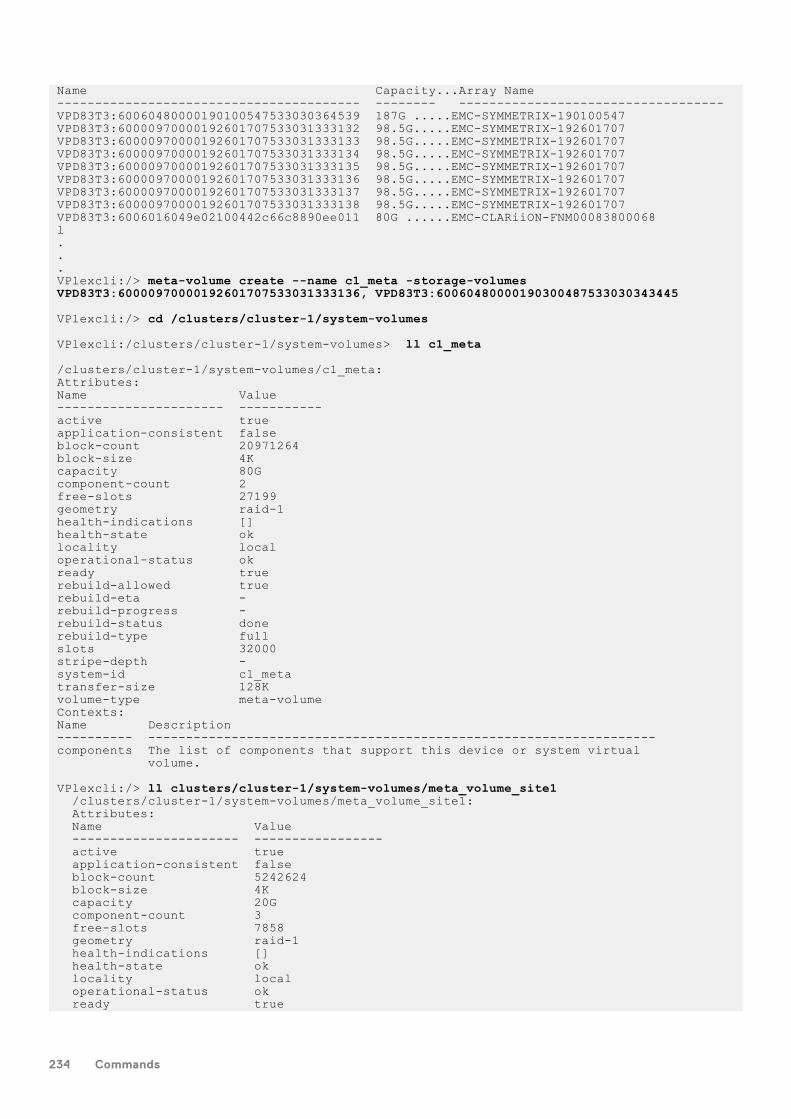
Name Capacity...Array Name---------------------------------------- -------- -----------------------------------VPD83T3:60060480000190100547533030364539 187G .....EMC-SYMMETRIX-190100547VPD83T3:60000970000192601707533031333132 98.5G.....EMC-SYMMETRIX-192601707VPD83T3:60000970000192601707533031333133 98.5G.....EMC-SYMMETRIX-192601707VPD83T3:60000970000192601707533031333134 98.5G.....EMC-SYMMETRIX-192601707VPD83T3:60000970000192601707533031333135 98.5G.....EMC-SYMMETRIX-192601707VPD83T3:60000970000192601707533031333136 98.5G.....EMC-SYMMETRIX-192601707VPD83T3:60000970000192601707533031333137 98.5G.....EMC-SYMMETRIX-192601707VPD83T3:60000970000192601707533031333138 98.5G.....EMC-SYMMETRIX-192601707VPD83T3:6006016049e02100442c66c8890ee011 80G ......EMC-CLARiiON-FNM00083800068l...VPlexcli:/> meta-volume create --name c1_meta -storage-volumes VPD83T3:60000970000192601707533031333136, VPD83T3:60060480000190300487533030343445
VPlexcli:/> cd /clusters/cluster-1/system-volumes
VPlexcli:/clusters/cluster-1/system-volumes> ll c1_meta
/clusters/cluster-1/system-volumes/c1_meta:Attributes:Name Value---------------------- -----------active trueapplication-consistent falseblock-count 20971264block-size 4Kcapacity 80Gcomponent-count 2free-slots 27199geometry raid-1health-indications []health-state oklocality localoperational-status okready truerebuild-allowed truerebuild-eta -rebuild-progress -rebuild-status donerebuild-type fullslots 32000stripe-depth -system-id c1_metatransfer-size 128Kvolume-type meta-volumeContexts:Name Description---------- -------------------------------------------------------------------components The list of components that support this device or system virtual volume.
VPlexcli:/> ll clusters/cluster-1/system-volumes/meta_volume_site1 /clusters/cluster-1/system-volumes/meta_volume_site1: Attributes: Name Value ---------------------- ----------------- active true application-consistent false block-count 5242624 block-size 4K capacity 20G component-count 3 free-slots 7858 geometry raid-1 health-indications [] health-state ok locality local operational-status ok ready true
234 Commands
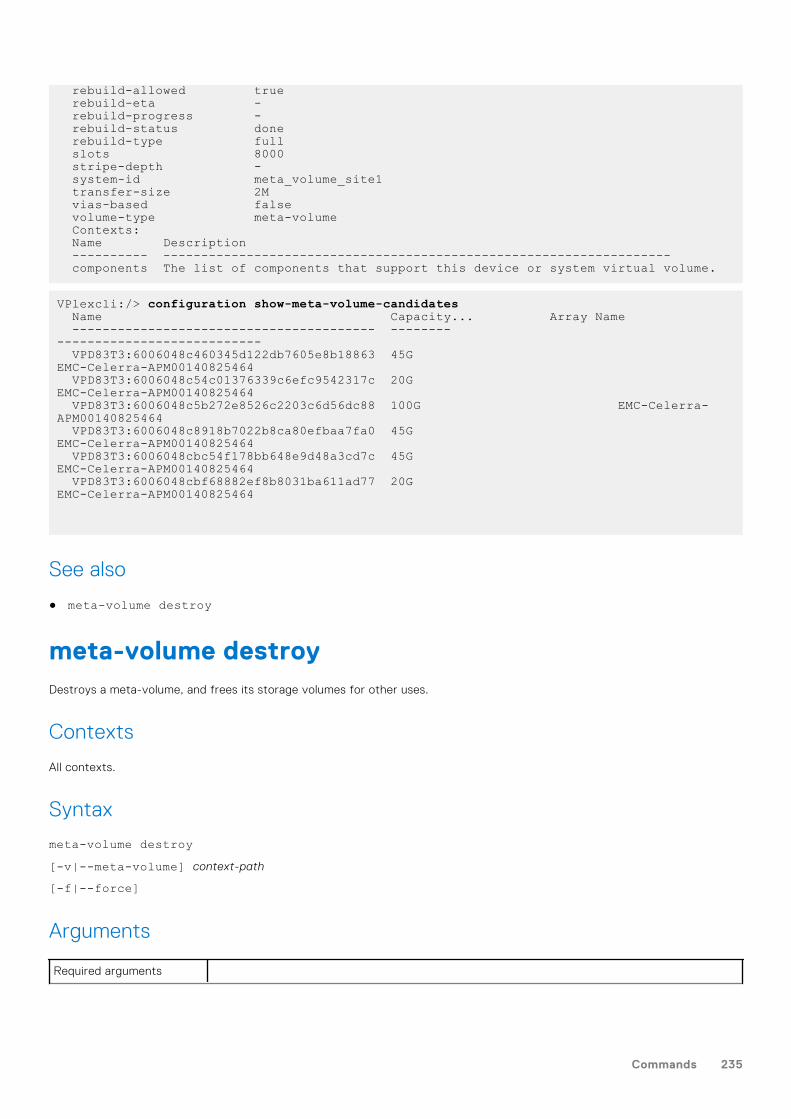
rebuild-allowed true rebuild-eta - rebuild-progress - rebuild-status done rebuild-type full slots 8000 stripe-depth - system-id meta_volume_site1 transfer-size 2M vias-based false volume-type meta-volume Contexts: Name Description ---------- ------------------------------------------------------------------- components The list of components that support this device or system virtual volume.
VPlexcli:/> configuration show-meta-volume-candidates Name Capacity... Array Name ---------------------------------------- -------- --------------------------- VPD83T3:6006048c460345d122db7605e8b18863 45G EMC-Celerra-APM00140825464 VPD83T3:6006048c54c01376339c6efc9542317c 20G EMC-Celerra-APM00140825464 VPD83T3:6006048c5b272e8526c2203c6d56dc88 100G EMC-Celerra-APM00140825464 VPD83T3:6006048c8918b7022b8ca80efbaa7fa0 45G EMC-Celerra-APM00140825464 VPD83T3:6006048cbc54f178bb648e9d48a3cd7c 45G EMC-Celerra-APM00140825464 VPD83T3:6006048cbf68882ef8b8031ba611ad77 20G EMC-Celerra-APM00140825464
See also
● meta-volume destroy
meta-volume destroyDestroys a meta-volume, and frees its storage volumes for other uses.
Contexts
All contexts.
Syntax
meta-volume destroy[-v|--meta-volume] context-path
[-f|--force]
Arguments
Required arguments
Commands 235
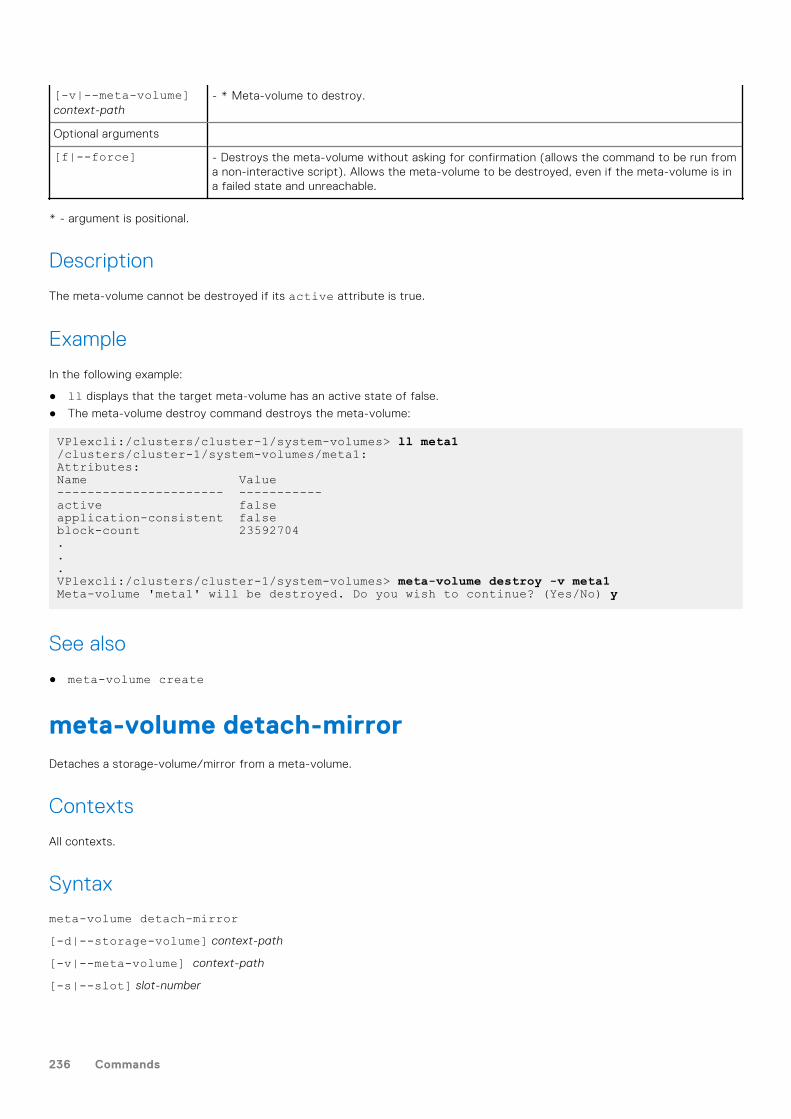
[-v|--meta-volume]context-path
- * Meta-volume to destroy.
Optional arguments
[f|--force] - Destroys the meta-volume without asking for confirmation (allows the command to be run froma non-interactive script). Allows the meta-volume to be destroyed, even if the meta-volume is ina failed state and unreachable.
* - argument is positional.
Description
The meta-volume cannot be destroyed if its active attribute is true.
Example
In the following example:
● ll displays that the target meta-volume has an active state of false.
● The meta-volume destroy command destroys the meta-volume:
VPlexcli:/clusters/cluster-1/system-volumes> ll meta1/clusters/cluster-1/system-volumes/meta1:Attributes:Name Value---------------------- -----------active falseapplication-consistent falseblock-count 23592704...VPlexcli:/clusters/cluster-1/system-volumes> meta-volume destroy -v meta1Meta-volume 'meta1' will be destroyed. Do you wish to continue? (Yes/No) y
See also
● meta-volume create
meta-volume detach-mirrorDetaches a storage-volume/mirror from a meta-volume.
Contexts
All contexts.
Syntax
meta-volume detach-mirror[-d|--storage-volume] context-path
[-v|--meta-volume] context-path
[-s|--slot] slot-number
236 Commands
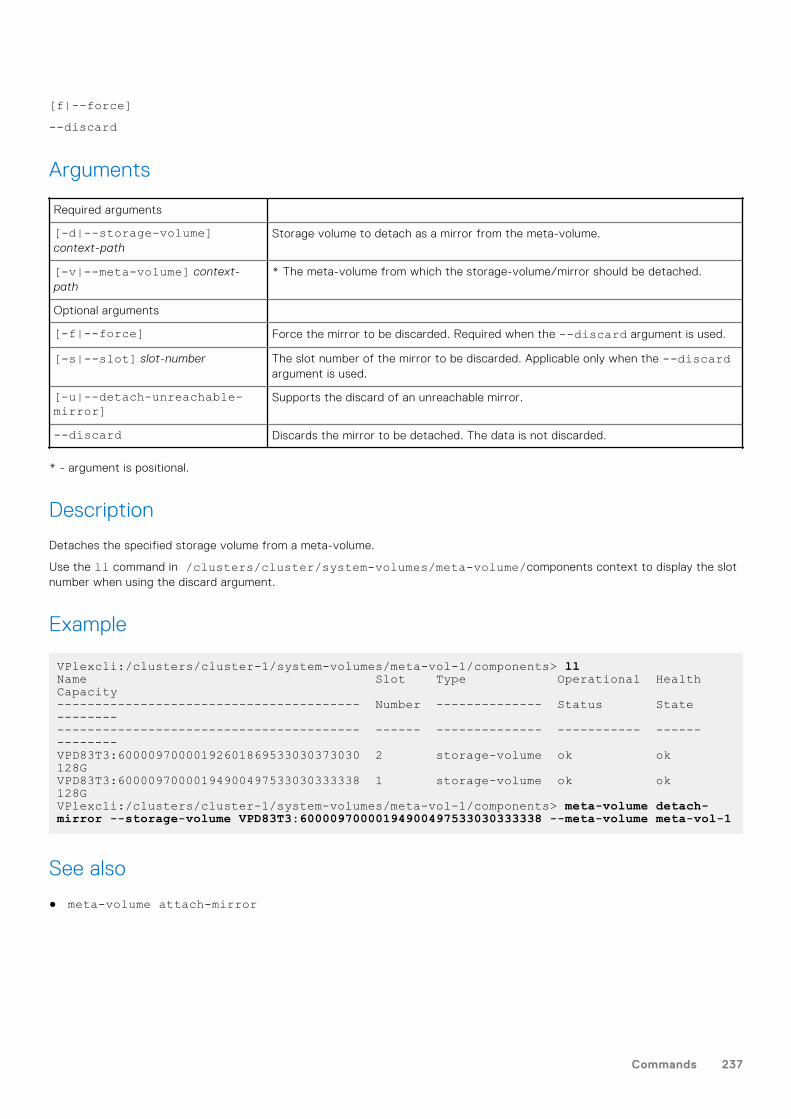
[f|--force]--discard
Arguments
Required arguments
[-d|--storage-volume]context-path
Storage volume to detach as a mirror from the meta-volume.
[-v|--meta-volume] context-path
* The meta-volume from which the storage-volume/mirror should be detached.
Optional arguments
[-f|--force] Force the mirror to be discarded. Required when the --discard argument is used.
[-s|--slot] slot-number The slot number of the mirror to be discarded. Applicable only when the --discardargument is used.
[-u|--detach-unreachable-mirror]
Supports the discard of an unreachable mirror.
--discard Discards the mirror to be detached. The data is not discarded.
* - argument is positional.
Description
Detaches the specified storage volume from a meta-volume.
Use the ll command in /clusters/cluster/system-volumes/meta-volume/components context to display the slotnumber when using the discard argument.
Example
VPlexcli:/clusters/cluster-1/system-volumes/meta-vol-1/components> llName Slot Type Operational Health Capacity---------------------------------------- Number -------------- Status State ------------------------------------------------ ------ -------------- ----------- ------ --------VPD83T3:60000970000192601869533030373030 2 storage-volume ok ok 128GVPD83T3:60000970000194900497533030333338 1 storage-volume ok ok 128GVPlexcli:/clusters/cluster-1/system-volumes/meta-vol-1/components> meta-volume detach-mirror --storage-volume VPD83T3:60000970000194900497533030333338 --meta-volume meta-vol-1
See also
● meta-volume attach-mirror
Commands 237
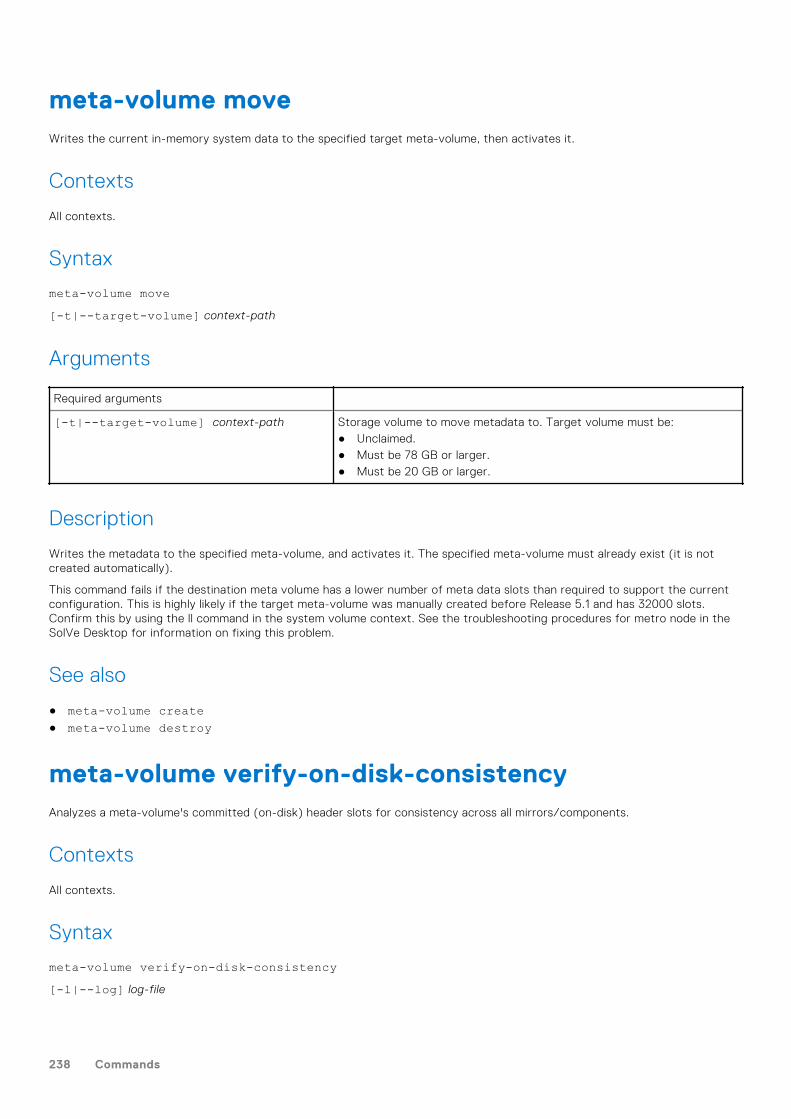
meta-volume moveWrites the current in-memory system data to the specified target meta-volume, then activates it.
Contexts
All contexts.
Syntax
meta-volume move[-t|--target-volume] context-path
Arguments
Required arguments
[-t|--target-volume] context-path Storage volume to move metadata to. Target volume must be:● Unclaimed.● Must be 78 GB or larger.● Must be 20 GB or larger.
Description
Writes the metadata to the specified meta-volume, and activates it. The specified meta-volume must already exist (it is notcreated automatically).
This command fails if the destination meta volume has a lower number of meta data slots than required to support the currentconfiguration. This is highly likely if the target meta-volume was manually created before Release 5.1 and has 32000 slots.Confirm this by using the ll command in the system volume context. See the troubleshooting procedures for metro node in theSolVe Desktop for information on fixing this problem.
See also
● meta-volume create● meta-volume destroy
meta-volume verify-on-disk-consistencyAnalyzes a meta-volume's committed (on-disk) header slots for consistency across all mirrors/components.
Contexts
All contexts.
Syntax
meta-volume verify-on-disk-consistency[-l|--log] log-file
238 Commands
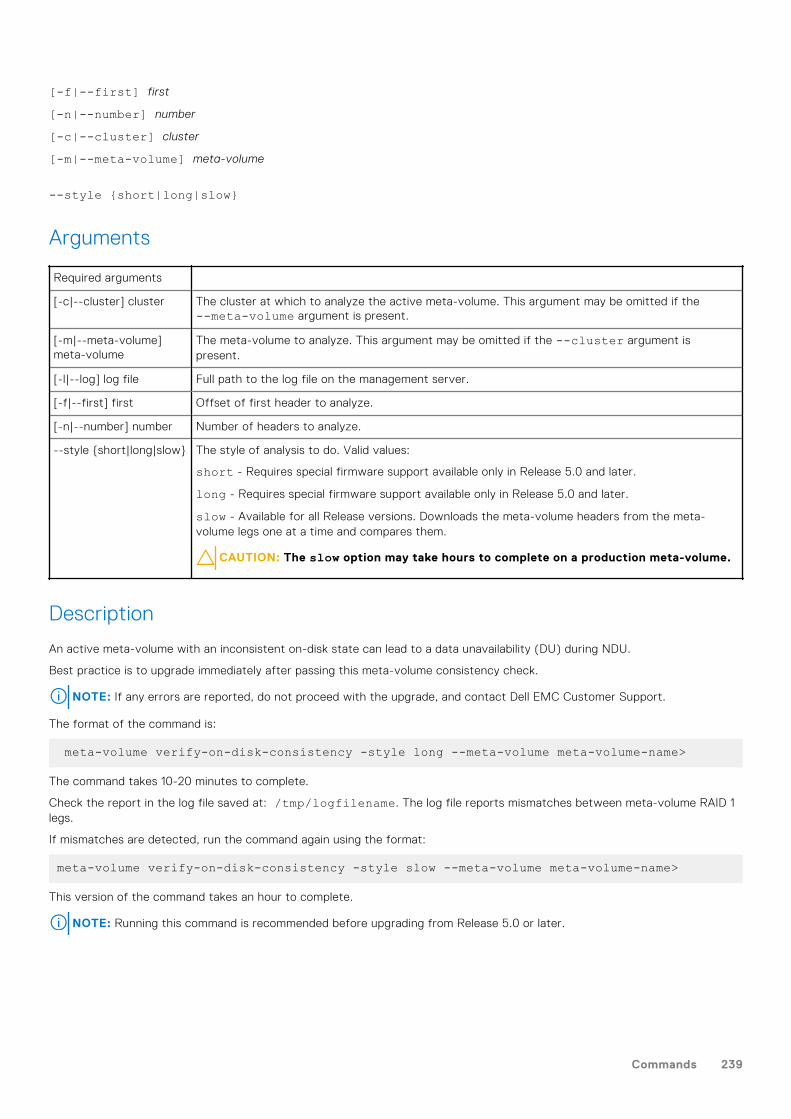
[-f|--first] first
[-n|--number] number
[-c|--cluster] cluster
[-m|--meta-volume] meta-volume
--style {short|long|slow}
Arguments
Required arguments
[-c|--cluster] cluster The cluster at which to analyze the active meta-volume. This argument may be omitted if the--meta-volume argument is present.
[-m|--meta-volume]meta-volume
The meta-volume to analyze. This argument may be omitted if the --cluster argument ispresent.
[-l|--log] log file Full path to the log file on the management server.
[-f|--first] first Offset of first header to analyze.
[-n|--number] number Number of headers to analyze.
--style {short|long|slow} The style of analysis to do. Valid values:
short - Requires special firmware support available only in Release 5.0 and later.
long - Requires special firmware support available only in Release 5.0 and later.
slow - Available for all Release versions. Downloads the meta-volume headers from the meta-volume legs one at a time and compares them.
CAUTION: The slow option may take hours to complete on a production meta-volume.
Description
An active meta-volume with an inconsistent on-disk state can lead to a data unavailability (DU) during NDU.
Best practice is to upgrade immediately after passing this meta-volume consistency check.
NOTE: If any errors are reported, do not proceed with the upgrade, and contact Dell EMC Customer Support.
The format of the command is:
meta-volume verify-on-disk-consistency -style long --meta-volume meta-volume-name>
The command takes 10-20 minutes to complete.
Check the report in the log file saved at: /tmp/logfilename. The log file reports mismatches between meta-volume RAID 1legs.
If mismatches are detected, run the command again using the format:
meta-volume verify-on-disk-consistency -style slow --meta-volume meta-volume-name>
This version of the command takes an hour to complete.
NOTE: Running this command is recommended before upgrading from Release 5.0 or later.
Commands 239
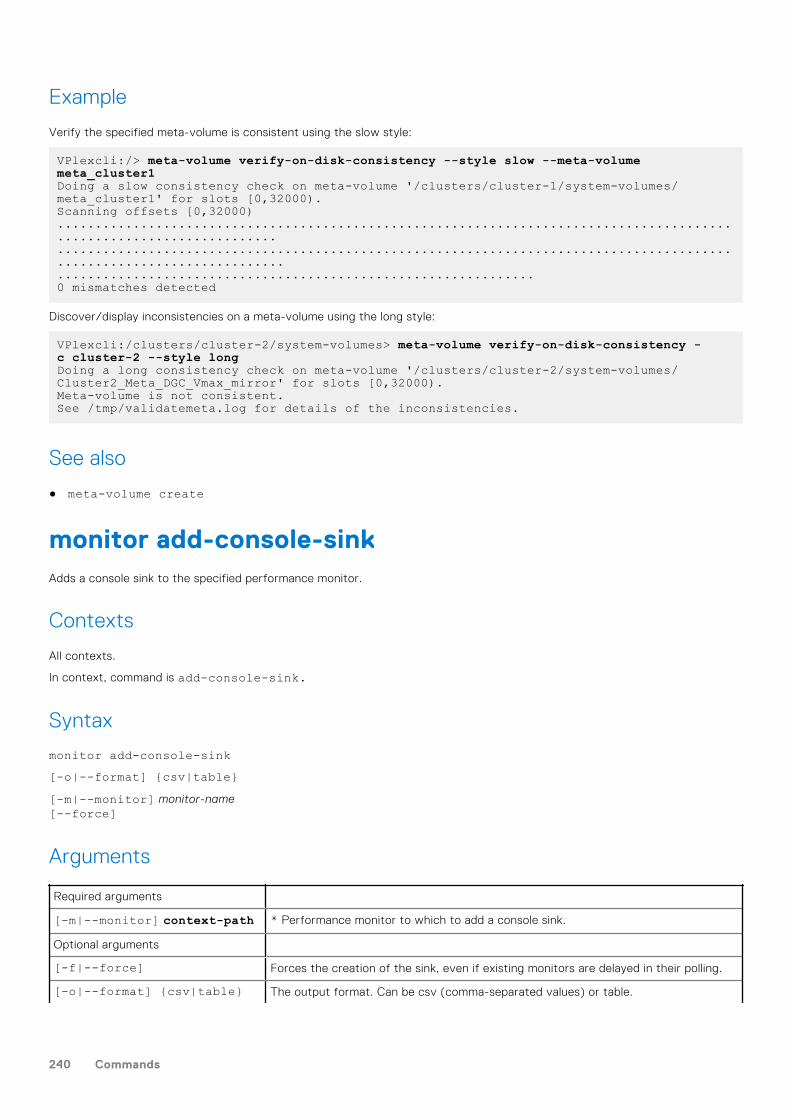
Example
Verify the specified meta-volume is consistent using the slow style:
VPlexcli:/> meta-volume verify-on-disk-consistency --style slow --meta-volume meta_cluster1Doing a slow consistency check on meta-volume '/clusters/cluster-1/system-volumes/meta_cluster1' for slots [0,32000).Scanning offsets [0,32000)............................................................................................................................................................................................................................................................................................................0 mismatches detected
Discover/display inconsistencies on a meta-volume using the long style:
VPlexcli:/clusters/cluster-2/system-volumes> meta-volume verify-on-disk-consistency -c cluster-2 --style longDoing a long consistency check on meta-volume '/clusters/cluster-2/system-volumes/Cluster2_Meta_DGC_Vmax_mirror' for slots [0,32000).Meta-volume is not consistent.See /tmp/validatemeta.log for details of the inconsistencies.
See also
● meta-volume create
monitor add-console-sinkAdds a console sink to the specified performance monitor.
Contexts
All contexts.
In context, command is add-console-sink.
Syntax
monitor add-console-sink[-o|--format] {csv|table}[-m|--monitor] monitor-name[--force]
Arguments
Required arguments
[-m|--monitor] context-path * Performance monitor to which to add a console sink.
Optional arguments
[-f|--force] Forces the creation of the sink, even if existing monitors are delayed in their polling.
[-o|--format] {csv|table} The output format. Can be csv (comma-separated values) or table.
240 Commands
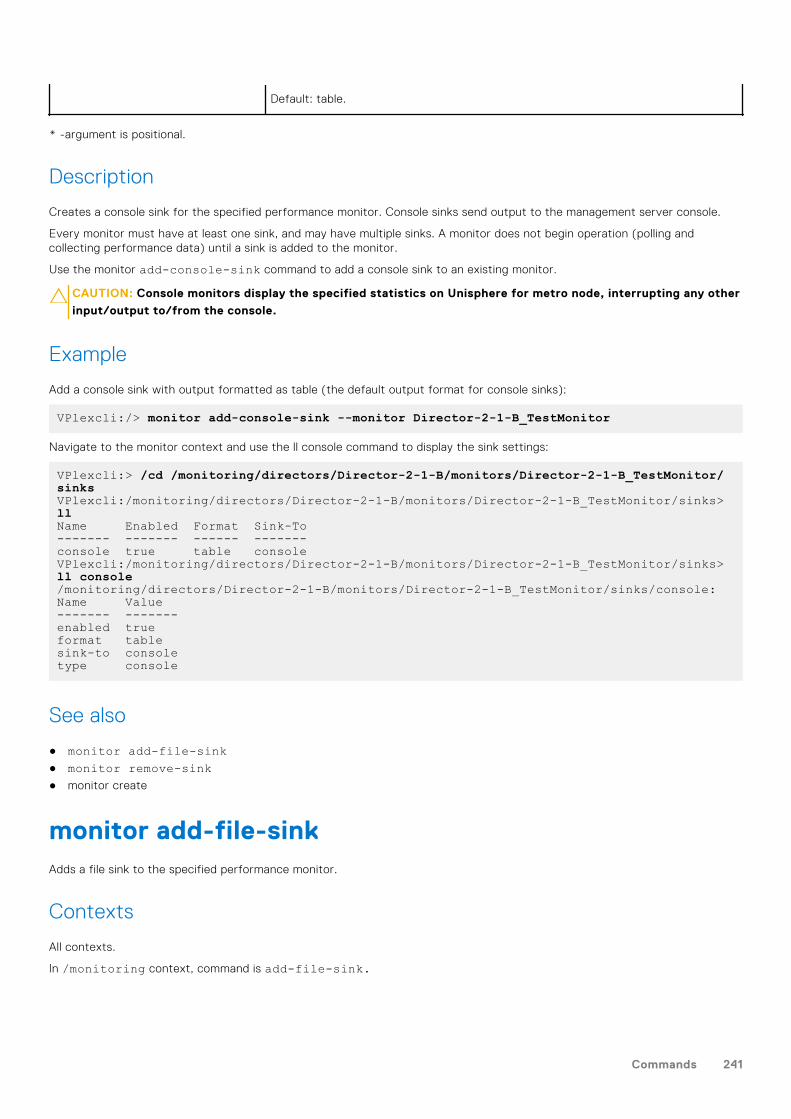
Default: table.
* -argument is positional.
Description
Creates a console sink for the specified performance monitor. Console sinks send output to the management server console.
Every monitor must have at least one sink, and may have multiple sinks. A monitor does not begin operation (polling andcollecting performance data) until a sink is added to the monitor.
Use the monitor add-console-sink command to add a console sink to an existing monitor.
CAUTION: Console monitors display the specified statistics on Unisphere for metro node, interrupting any other
input/output to/from the console.
Example
Add a console sink with output formatted as table (the default output format for console sinks):
VPlexcli:/> monitor add-console-sink --monitor Director-2-1-B_TestMonitor
Navigate to the monitor context and use the ll console command to display the sink settings:
VPlexcli:> /cd /monitoring/directors/Director-2-1-B/monitors/Director-2-1-B_TestMonitor/sinksVPlexcli:/monitoring/directors/Director-2-1-B/monitors/Director-2-1-B_TestMonitor/sinks> llName Enabled Format Sink-To------- ------- ------ -------console true table consoleVPlexcli:/monitoring/directors/Director-2-1-B/monitors/Director-2-1-B_TestMonitor/sinks> ll console/monitoring/directors/Director-2-1-B/monitors/Director-2-1-B_TestMonitor/sinks/console:Name Value------- -------enabled trueformat tablesink-to consoletype console
See also
● monitor add-file-sink● monitor remove-sink● monitor create
monitor add-file-sinkAdds a file sink to the specified performance monitor.
Contexts
All contexts.
In /monitoring context, command is add-file-sink.
Commands 241
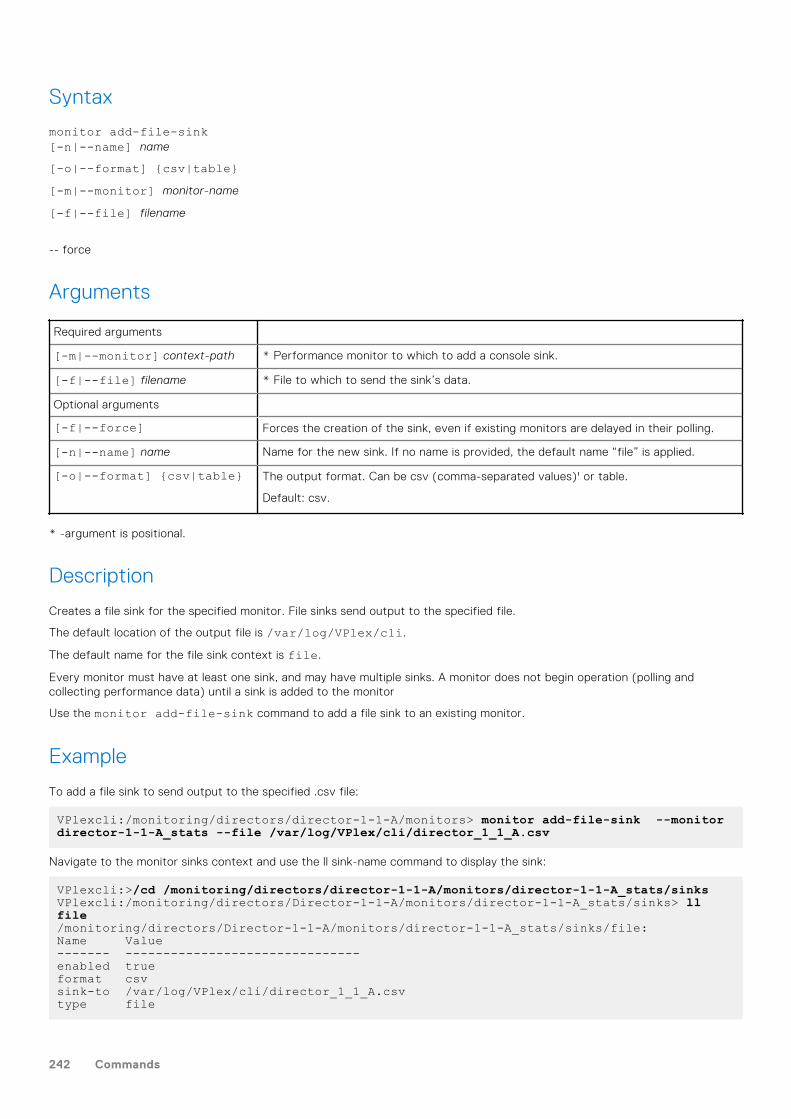
Syntax
monitor add-file-sink[-n|--name] name
[-o|--format] {csv|table}[-m|--monitor] monitor-name
[-f|--file] filename
-- force
Arguments
Required arguments
[-m|--monitor] context-path * Performance monitor to which to add a console sink.
[-f|--file] filename * File to which to send the sink’s data.
Optional arguments
[-f|--force] Forces the creation of the sink, even if existing monitors are delayed in their polling.
[-n|--name] name Name for the new sink. If no name is provided, the default name “file” is applied.
[-o|--format] {csv|table} The output format. Can be csv (comma-separated values)' or table.
Default: csv.
* -argument is positional.
Description
Creates a file sink for the specified monitor. File sinks send output to the specified file.
The default location of the output file is /var/log/VPlex/cli.
The default name for the file sink context is file.
Every monitor must have at least one sink, and may have multiple sinks. A monitor does not begin operation (polling andcollecting performance data) until a sink is added to the monitor
Use the monitor add-file-sink command to add a file sink to an existing monitor.
Example
To add a file sink to send output to the specified .csv file:
VPlexcli:/monitoring/directors/director-1-1-A/monitors> monitor add-file-sink --monitor director-1-1-A_stats --file /var/log/VPlex/cli/director_1_1_A.csv
Navigate to the monitor sinks context and use the ll sink-name command to display the sink:
VPlexcli:>/cd /monitoring/directors/director-1-1-A/monitors/director-1-1-A_stats/sinksVPlexcli:/monitoring/directors/Director-1-1-A/monitors/director-1-1-A_stats/sinks> ll file/monitoring/directors/Director-1-1-A/monitors/director-1-1-A_stats/sinks/file:Name Value------- -------------------------------enabled trueformat csvsink-to /var/log/VPlex/cli/director_1_1_A.csvtype file
242 Commands
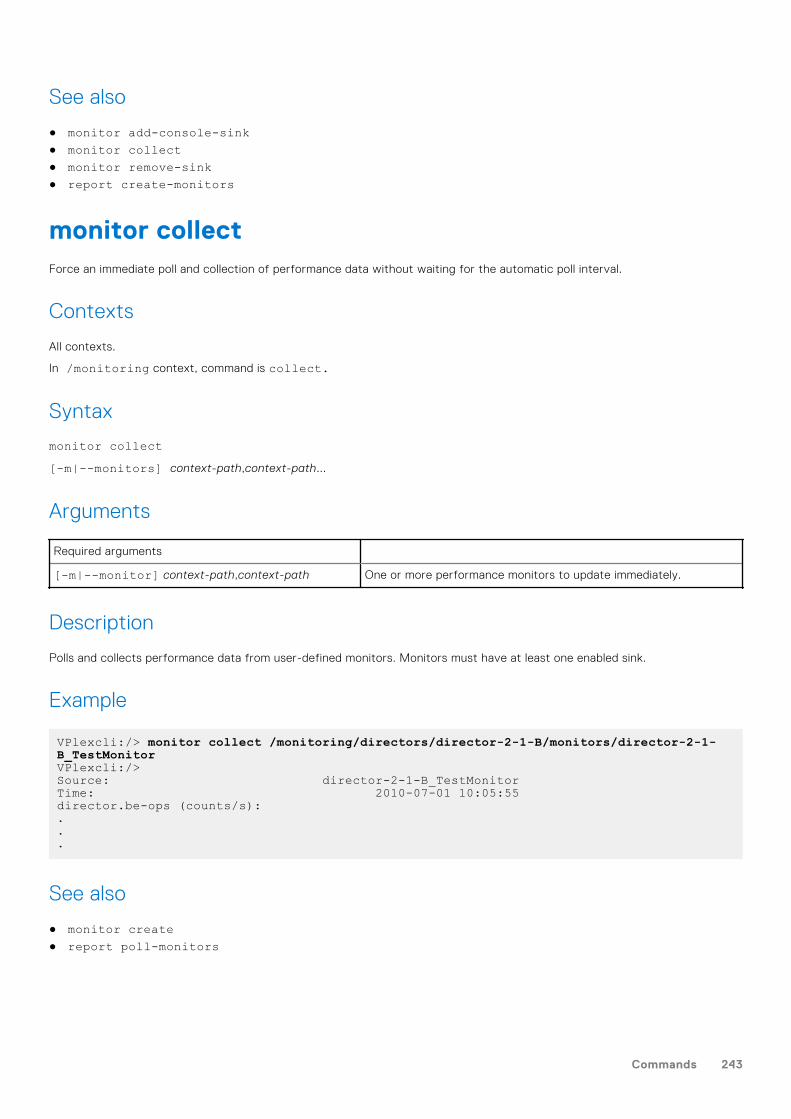
See also
● monitor add-console-sink● monitor collect● monitor remove-sink● report create-monitors
monitor collectForce an immediate poll and collection of performance data without waiting for the automatic poll interval.
Contexts
All contexts.
In /monitoring context, command is collect.
Syntax
monitor collect[-m|--monitors] context-path,context-path...
Arguments
Required arguments
[-m|--monitor] context-path,context-path One or more performance monitors to update immediately.
Description
Polls and collects performance data from user-defined monitors. Monitors must have at least one enabled sink.
Example
VPlexcli:/> monitor collect /monitoring/directors/director-2-1-B/monitors/director-2-1-B_TestMonitorVPlexcli:/>Source: director-2-1-B_TestMonitorTime: 2010-07-01 10:05:55director.be-ops (counts/s):...
See also
● monitor create● report poll-monitors
Commands 243
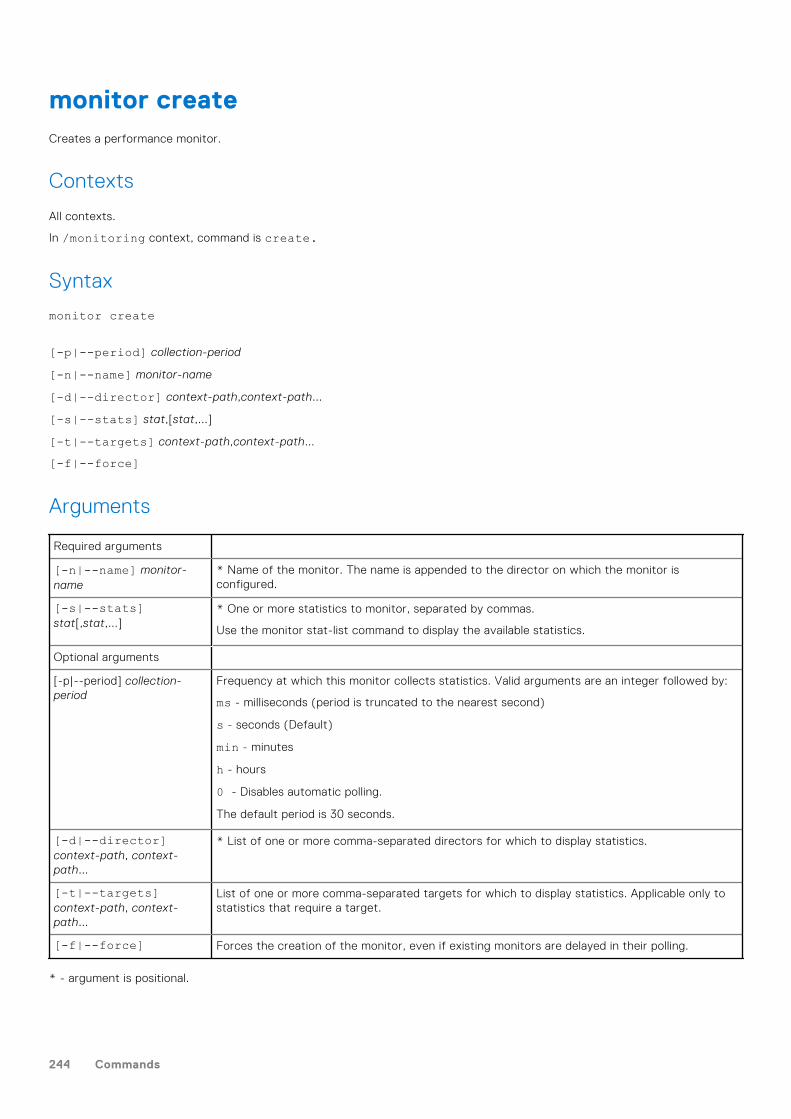
monitor createCreates a performance monitor.
Contexts
All contexts.
In /monitoring context, command is create.
Syntax
monitor create
[-p|--period] collection-period
[-n|--name] monitor-name
[-d|--director] context-path,context-path...
[-s|--stats] stat,[stat,...]
[-t|--targets] context-path,context-path...
[-f|--force]
Arguments
Required arguments
[-n|--name] monitor-name
* Name of the monitor. The name is appended to the director on which the monitor isconfigured.
[-s|--stats]stat[,stat,...]
* One or more statistics to monitor, separated by commas.
Use the monitor stat-list command to display the available statistics.
Optional arguments
[-p|--period] collection-period
Frequency at which this monitor collects statistics. Valid arguments are an integer followed by:
ms - milliseconds (period is truncated to the nearest second)
s - seconds (Default)
min - minutes
h - hours
0 - Disables automatic polling.
The default period is 30 seconds.
[-d|--director]context-path, context-path...
* List of one or more comma-separated directors for which to display statistics.
[-t|--targets]context-path, context-path...
List of one or more comma-separated targets for which to display statistics. Applicable only tostatistics that require a target.
[-f|--force] Forces the creation of the monitor, even if existing monitors are delayed in their polling.
* - argument is positional.
244 Commands
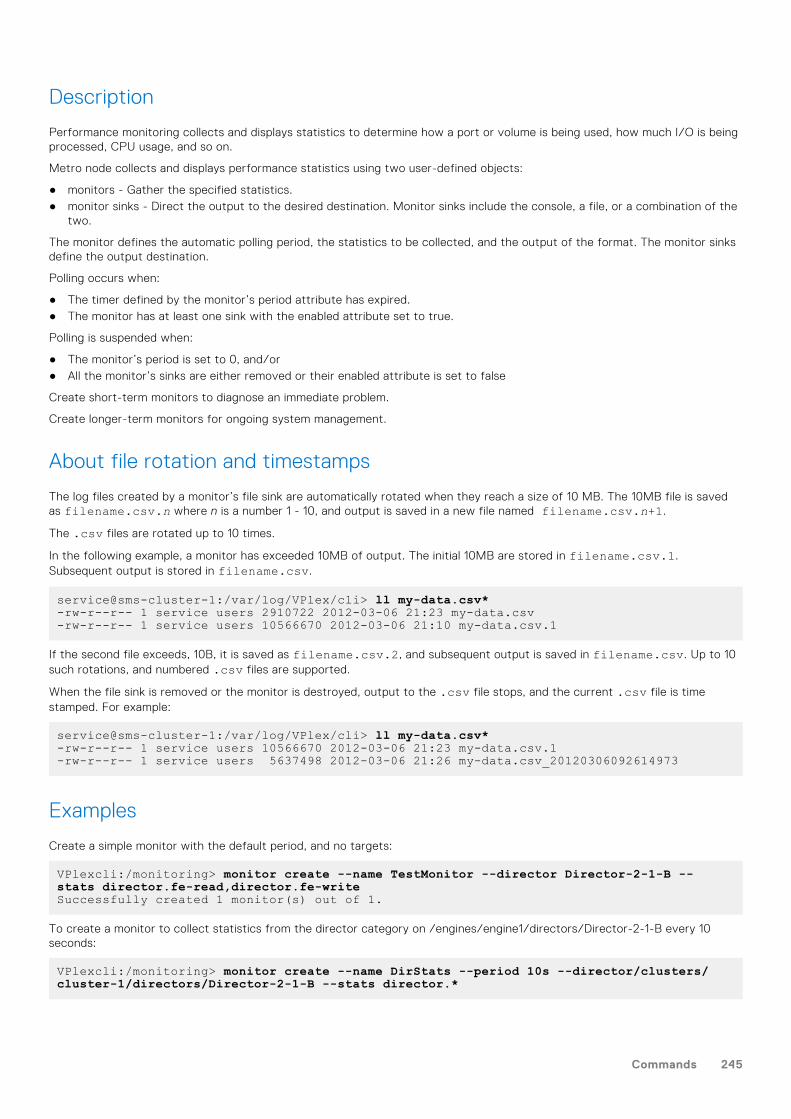
Description
Performance monitoring collects and displays statistics to determine how a port or volume is being used, how much I/O is beingprocessed, CPU usage, and so on.
Metro node collects and displays performance statistics using two user-defined objects:
● monitors - Gather the specified statistics.● monitor sinks - Direct the output to the desired destination. Monitor sinks include the console, a file, or a combination of the
two.
The monitor defines the automatic polling period, the statistics to be collected, and the output of the format. The monitor sinksdefine the output destination.
Polling occurs when:
● The timer defined by the monitor’s period attribute has expired.● The monitor has at least one sink with the enabled attribute set to true.
Polling is suspended when:
● The monitor’s period is set to 0, and/or● All the monitor’s sinks are either removed or their enabled attribute is set to false
Create short-term monitors to diagnose an immediate problem.
Create longer-term monitors for ongoing system management.
About file rotation and timestamps
The log files created by a monitor’s file sink are automatically rotated when they reach a size of 10 MB. The 10MB file is savedas filename.csv.n where n is a number 1 - 10, and output is saved in a new file named filename.csv.n+1.
The .csv files are rotated up to 10 times.
In the following example, a monitor has exceeded 10MB of output. The initial 10MB are stored in filename.csv.1.Subsequent output is stored in filename.csv.
service@sms-cluster-1:/var/log/VPlex/cli> ll my-data.csv*-rw-r--r-- 1 service users 2910722 2012-03-06 21:23 my-data.csv-rw-r--r-- 1 service users 10566670 2012-03-06 21:10 my-data.csv.1
If the second file exceeds, 10B, it is saved as filename.csv.2, and subsequent output is saved in filename.csv. Up to 10such rotations, and numbered .csv files are supported.
When the file sink is removed or the monitor is destroyed, output to the .csv file stops, and the current .csv file is timestamped. For example:
service@sms-cluster-1:/var/log/VPlex/cli> ll my-data.csv*-rw-r--r-- 1 service users 10566670 2012-03-06 21:23 my-data.csv.1-rw-r--r-- 1 service users 5637498 2012-03-06 21:26 my-data.csv_20120306092614973
Examples
Create a simple monitor with the default period, and no targets:
VPlexcli:/monitoring> monitor create --name TestMonitor --director Director-2-1-B --stats director.fe-read,director.fe-writeSuccessfully created 1 monitor(s) out of 1.
To create a monitor to collect statistics from the director category on /engines/engine1/directors/Director-2-1-B every 10seconds:
VPlexcli:/monitoring> monitor create --name DirStats --period 10s --director/clusters/cluster-1/directors/Director-2-1-B --stats director.*
Commands 245
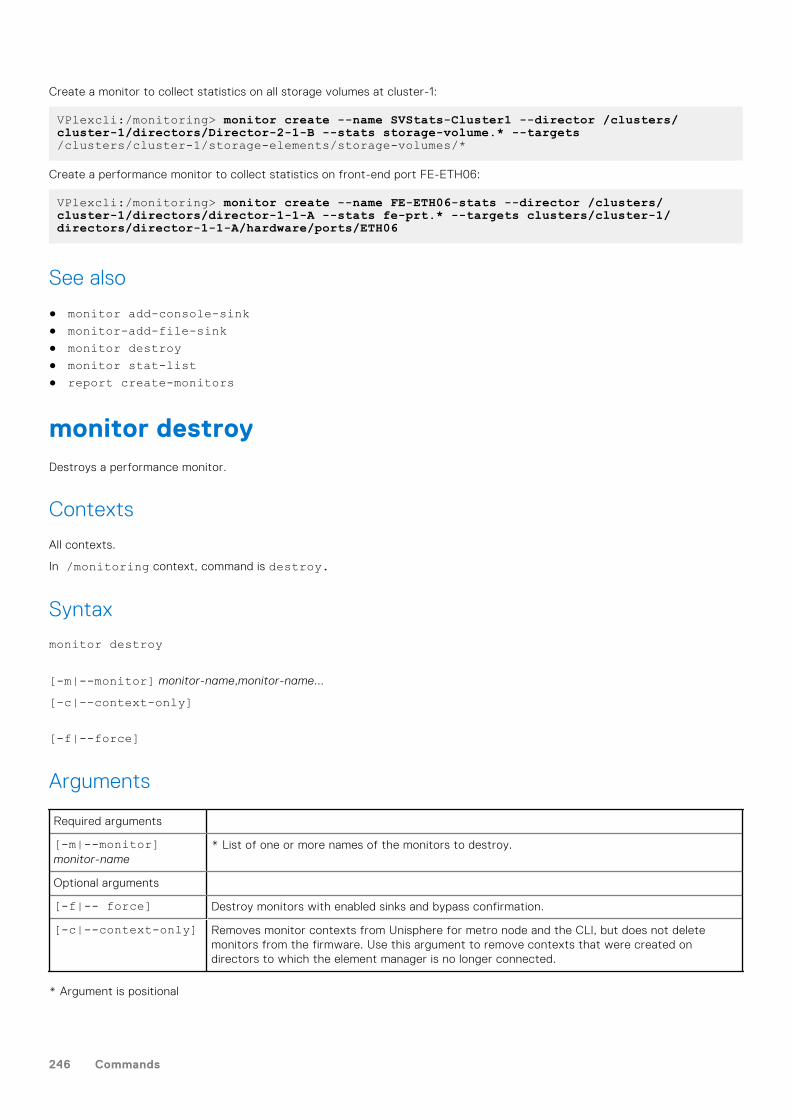
Create a monitor to collect statistics on all storage volumes at cluster-1:
VPlexcli:/monitoring> monitor create --name SVStats-Cluster1 --director /clusters/cluster-1/directors/Director-2-1-B --stats storage-volume.* --targets/clusters/cluster-1/storage-elements/storage-volumes/*
Create a performance monitor to collect statistics on front-end port FE-ETH06:
VPlexcli:/monitoring> monitor create --name FE-ETH06-stats --director /clusters/cluster-1/directors/director-1-1-A --stats fe-prt.* --targets clusters/cluster-1/directors/director-1-1-A/hardware/ports/ETH06
See also
● monitor add-console-sink● monitor-add-file-sink● monitor destroy● monitor stat-list● report create-monitors
monitor destroyDestroys a performance monitor.
Contexts
All contexts.
In /monitoring context, command is destroy.
Syntax
monitor destroy
[-m|--monitor] monitor-name,monitor-name...
[-c|--context-only]
[-f|--force]
Arguments
Required arguments
[-m|--monitor]monitor-name
* List of one or more names of the monitors to destroy.
Optional arguments
[-f|-- force] Destroy monitors with enabled sinks and bypass confirmation.
[-c|--context-only] Removes monitor contexts from Unisphere for metro node and the CLI, but does not deletemonitors from the firmware. Use this argument to remove contexts that were created ondirectors to which the element manager is no longer connected.
* Argument is positional
246 Commands
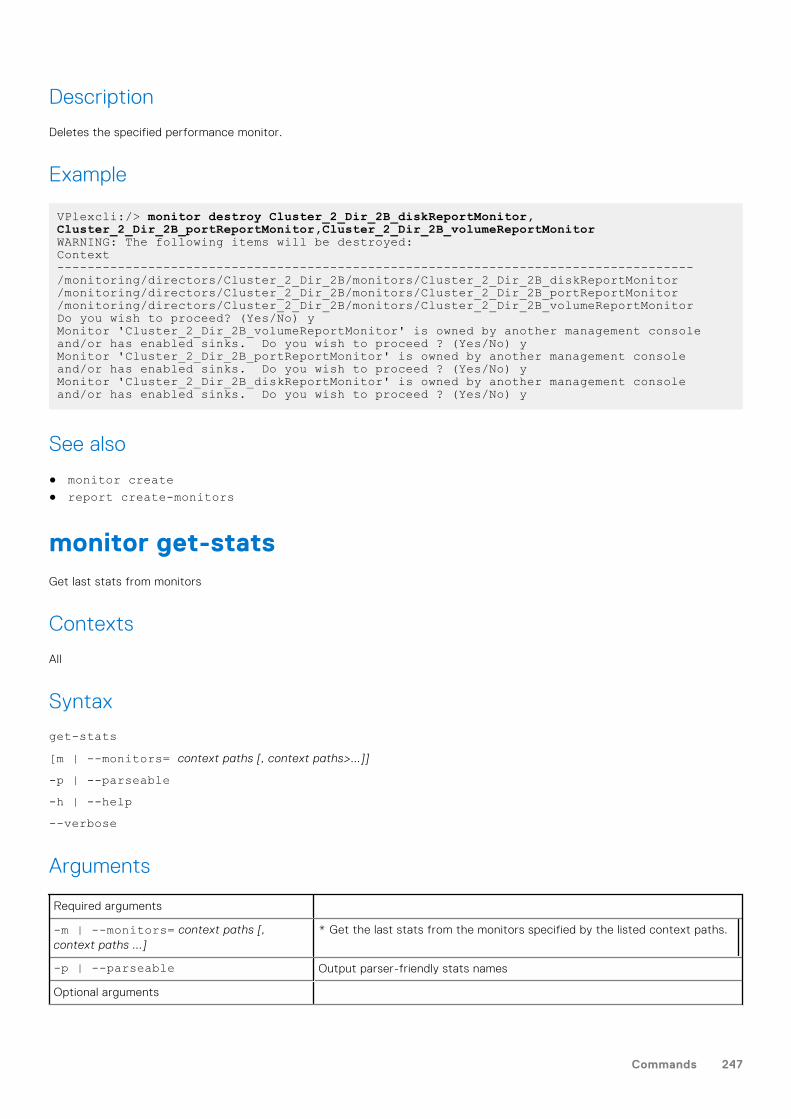
Description
Deletes the specified performance monitor.
Example
VPlexcli:/> monitor destroy Cluster_2_Dir_2B_diskReportMonitor, Cluster_2_Dir_2B_portReportMonitor,Cluster_2_Dir_2B_volumeReportMonitorWARNING: The following items will be destroyed:Context------------------------------------------------------------------------------------/monitoring/directors/Cluster_2_Dir_2B/monitors/Cluster_2_Dir_2B_diskReportMonitor/monitoring/directors/Cluster_2_Dir_2B/monitors/Cluster_2_Dir_2B_portReportMonitor/monitoring/directors/Cluster_2_Dir_2B/monitors/Cluster_2_Dir_2B_volumeReportMonitorDo you wish to proceed? (Yes/No) yMonitor 'Cluster_2_Dir_2B_volumeReportMonitor' is owned by another management console and/or has enabled sinks. Do you wish to proceed ? (Yes/No) yMonitor 'Cluster_2_Dir_2B_portReportMonitor' is owned by another management console and/or has enabled sinks. Do you wish to proceed ? (Yes/No) yMonitor 'Cluster_2_Dir_2B_diskReportMonitor' is owned by another management console and/or has enabled sinks. Do you wish to proceed ? (Yes/No) y
See also
● monitor create● report create-monitors
monitor get-statsGet last stats from monitors
Contexts
All
Syntax
get-stats[m | --monitors= context paths [, context paths>...]]
-p | --parseable-h | --help--verbose
Arguments
Required arguments
-m | --monitors= context paths [,context paths ...]
* Get the last stats from the monitors specified by the listed context paths.
-p | --parseable Output parser-friendly stats names
Optional arguments
Commands 247
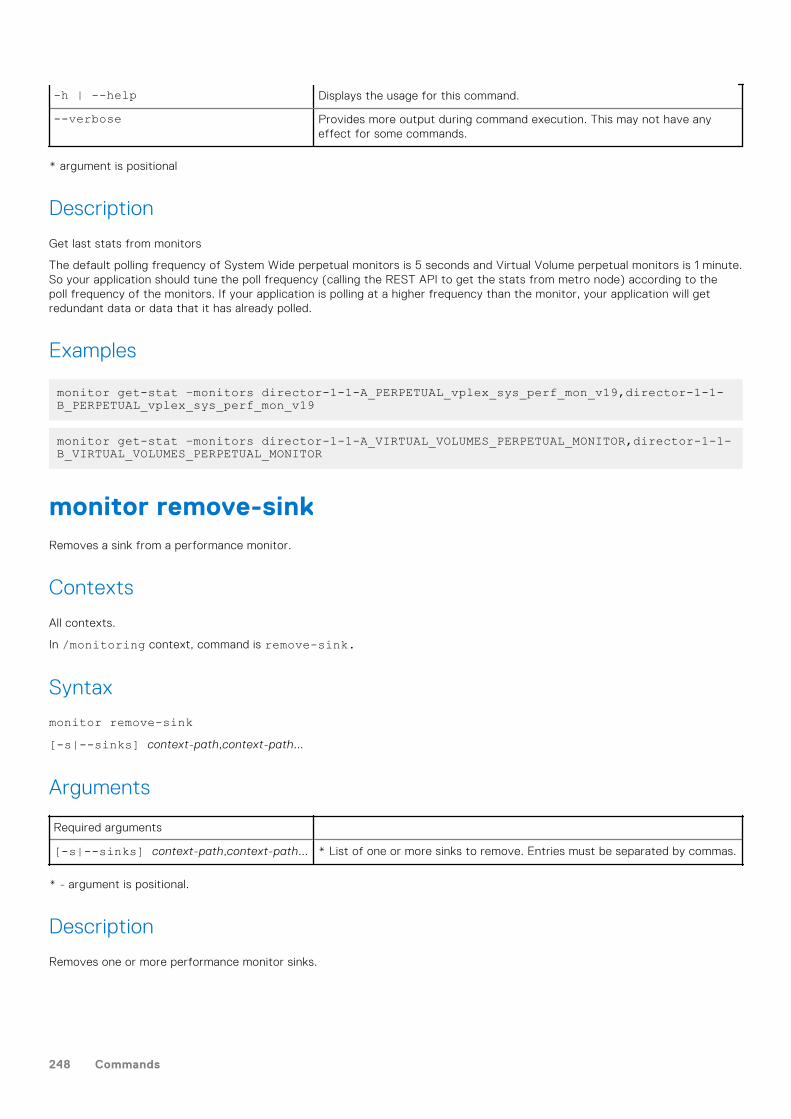
-h | --help Displays the usage for this command.
--verbose Provides more output during command execution. This may not have anyeffect for some commands.
* argument is positional
Description
Get last stats from monitors
The default polling frequency of System Wide perpetual monitors is 5 seconds and Virtual Volume perpetual monitors is 1 minute.So your application should tune the poll frequency (calling the REST API to get the stats from metro node) according to thepoll frequency of the monitors. If your application is polling at a higher frequency than the monitor, your application will getredundant data or data that it has already polled.
Examples
monitor get-stat –monitors director-1-1-A_PERPETUAL_vplex_sys_perf_mon_v19,director-1-1-B_PERPETUAL_vplex_sys_perf_mon_v19
monitor get-stat –monitors director-1-1-A_VIRTUAL_VOLUMES_PERPETUAL_MONITOR,director-1-1-B_VIRTUAL_VOLUMES_PERPETUAL_MONITOR
monitor remove-sinkRemoves a sink from a performance monitor.
Contexts
All contexts.
In /monitoring context, command is remove-sink.
Syntax
monitor remove-sink[-s|--sinks] context-path,context-path...
Arguments
Required arguments
[-s|--sinks] context-path,context-path... * List of one or more sinks to remove. Entries must be separated by commas.
* - argument is positional.
Description
Removes one or more performance monitor sinks.
248 Commands
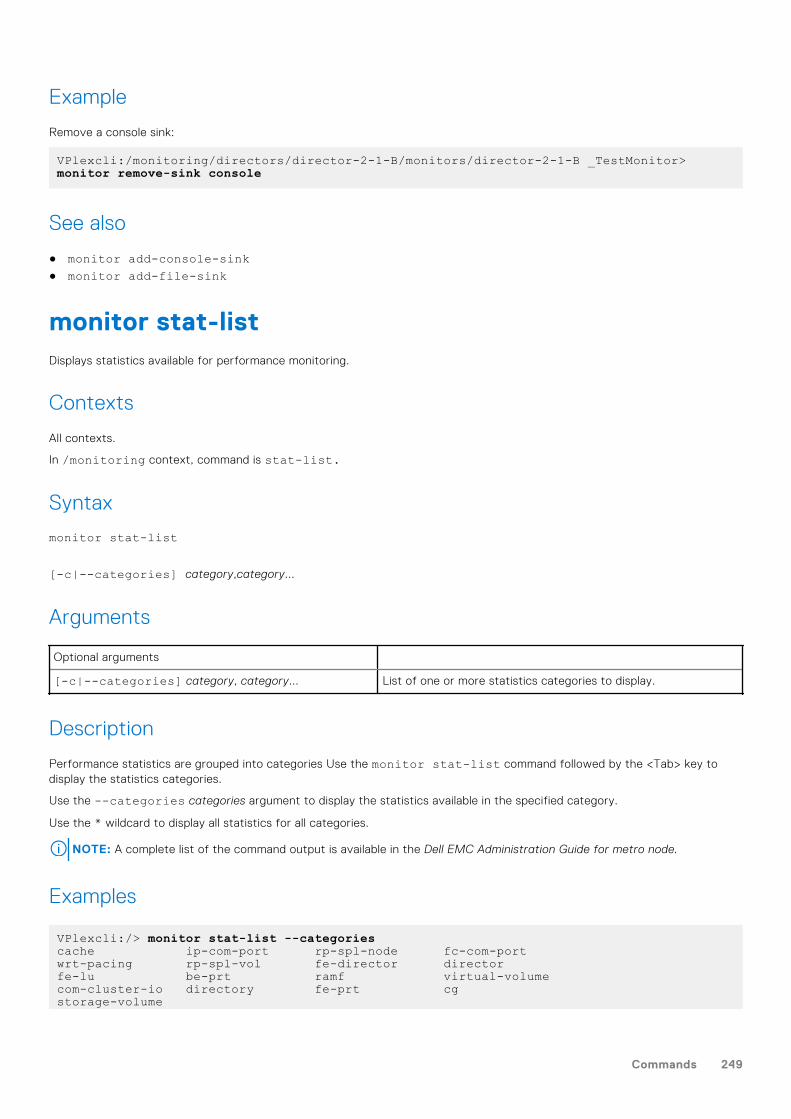
Example
Remove a console sink:
VPlexcli:/monitoring/directors/director-2-1-B/monitors/director-2-1-B _TestMonitor> monitor remove-sink console
See also
● monitor add-console-sink● monitor add-file-sink
monitor stat-listDisplays statistics available for performance monitoring.
Contexts
All contexts.
In /monitoring context, command is stat-list.
Syntax
monitor stat-list
[-c|--categories] category,category...
Arguments
Optional arguments
[-c|--categories] category, category... List of one or more statistics categories to display.
Description
Performance statistics are grouped into categories Use the monitor stat-list command followed by the <Tab> key todisplay the statistics categories.
Use the --categories categories argument to display the statistics available in the specified category.
Use the * wildcard to display all statistics for all categories.
NOTE: A complete list of the command output is available in the Dell EMC Administration Guide for metro node.
Examples
VPlexcli:/> monitor stat-list --categoriescache ip-com-port rp-spl-node fc-com-portwrt-pacing rp-spl-vol fe-director directorfe-lu be-prt ramf virtual-volumecom-cluster-io directory fe-prt cgstorage-volume
Commands 249
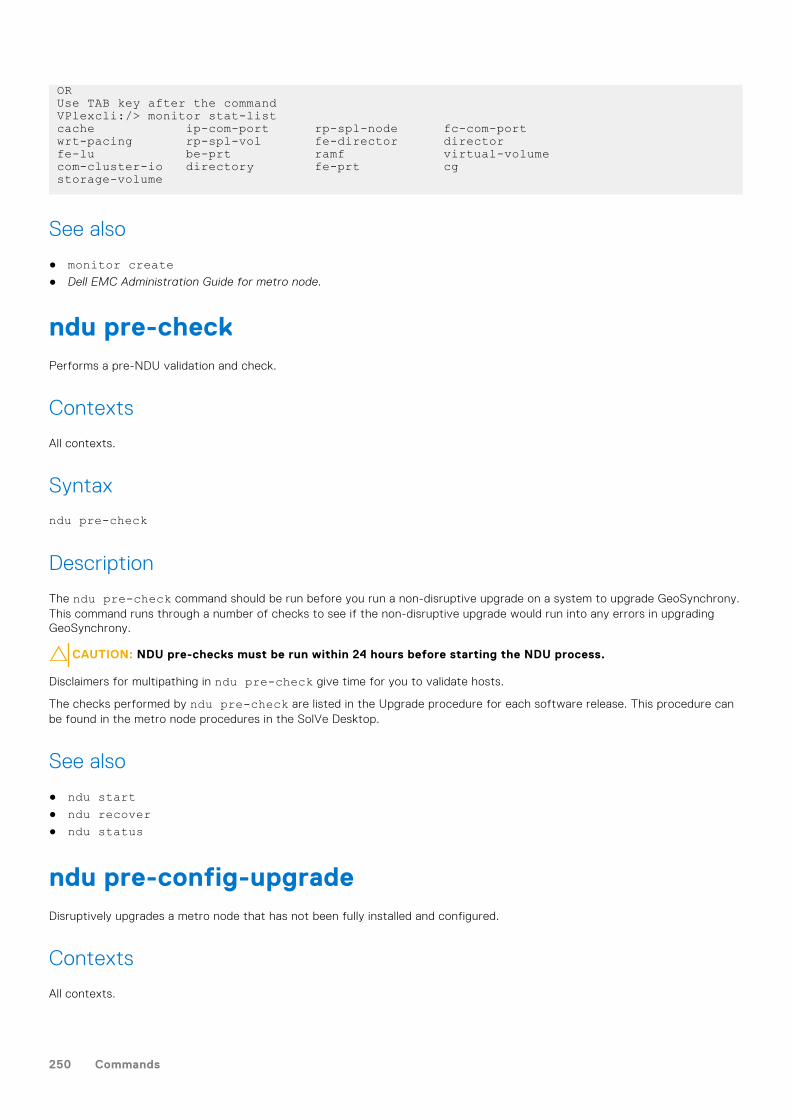
ORUse TAB key after the commandVPlexcli:/> monitor stat-listcache ip-com-port rp-spl-node fc-com-portwrt-pacing rp-spl-vol fe-director directorfe-lu be-prt ramf virtual-volumecom-cluster-io directory fe-prt cgstorage-volume
See also
● monitor create● Dell EMC Administration Guide for metro node.
ndu pre-checkPerforms a pre-NDU validation and check.
Contexts
All contexts.
Syntax
ndu pre-check
Description
The ndu pre-check command should be run before you run a non-disruptive upgrade on a system to upgrade GeoSynchrony.This command runs through a number of checks to see if the non-disruptive upgrade would run into any errors in upgradingGeoSynchrony.
CAUTION: NDU pre-checks must be run within 24 hours before starting the NDU process.
Disclaimers for multipathing in ndu pre-check give time for you to validate hosts.
The checks performed by ndu pre-check are listed in the Upgrade procedure for each software release. This procedure canbe found in the metro node procedures in the SolVe Desktop.
See also
● ndu start● ndu recover● ndu status
ndu pre-config-upgradeDisruptively upgrades a metro node that has not been fully installed and configured.
Contexts
All contexts.
250 Commands
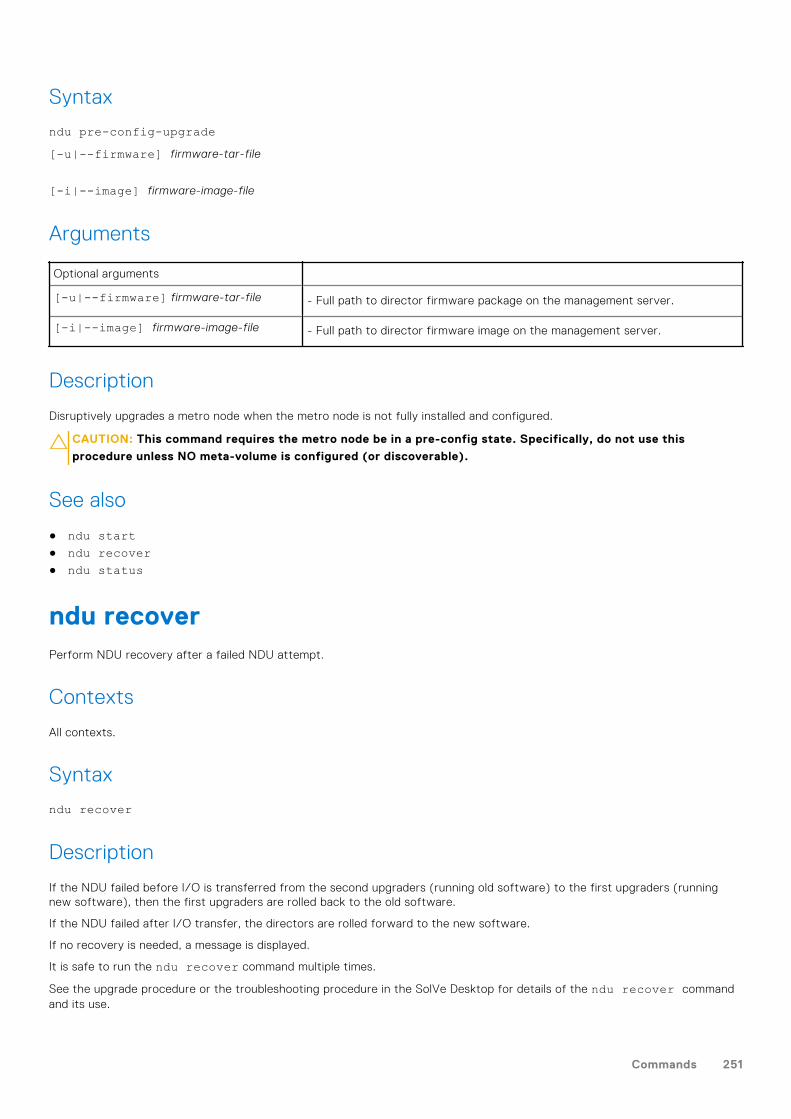
Syntax
ndu pre-config-upgrade[-u|--firmware] firmware-tar-file
[-i|--image] firmware-image-file
Arguments
Optional arguments
[-u|--firmware] firmware-tar-file - Full path to director firmware package on the management server.
[-i|--image] firmware-image-file - Full path to director firmware image on the management server.
Description
Disruptively upgrades a metro node when the metro node is not fully installed and configured.
CAUTION: This command requires the metro node be in a pre-config state. Specifically, do not use this
procedure unless NO meta-volume is configured (or discoverable).
See also
● ndu start● ndu recover● ndu status
ndu recoverPerform NDU recovery after a failed NDU attempt.
Contexts
All contexts.
Syntax
ndu recover
Description
If the NDU failed before I/O is transferred from the second upgraders (running old software) to the first upgraders (runningnew software), then the first upgraders are rolled back to the old software.
If the NDU failed after I/O transfer, the directors are rolled forward to the new software.
If no recovery is needed, a message is displayed.
It is safe to run the ndu recover command multiple times.
See the upgrade procedure or the troubleshooting procedure in the SolVe Desktop for details of the ndu recover commandand its use.
Commands 251
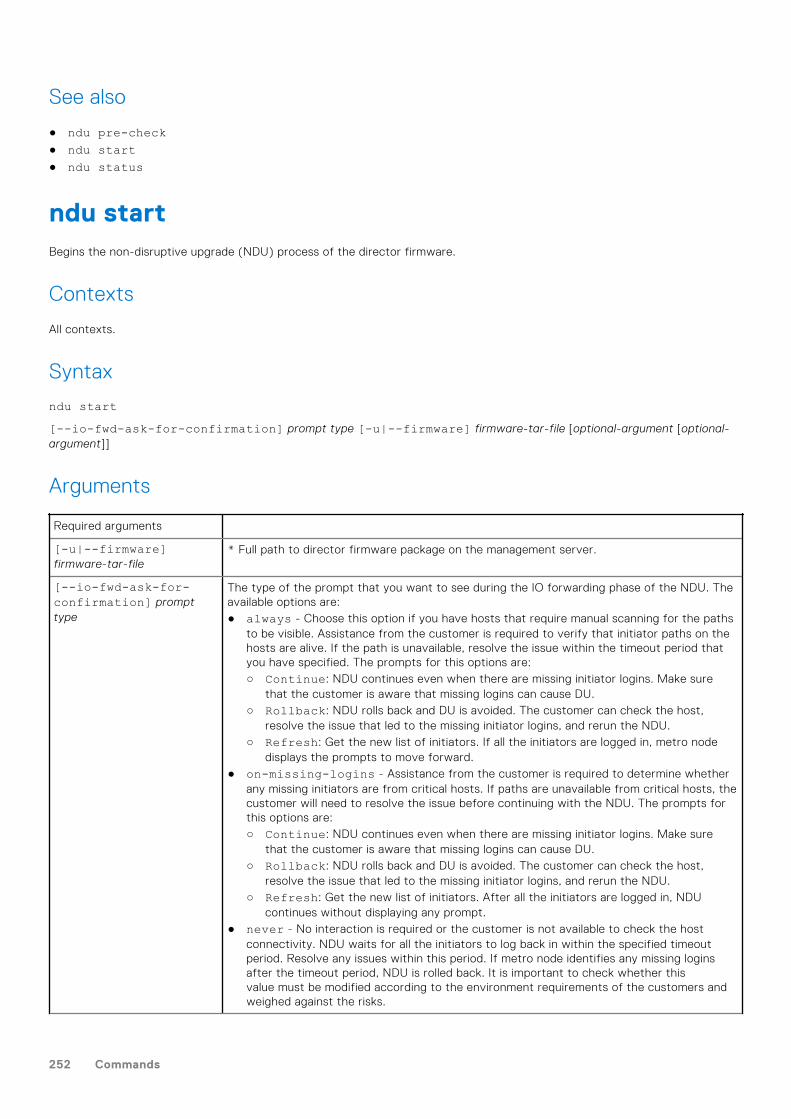
See also
● ndu pre-check● ndu start● ndu status
ndu startBegins the non-disruptive upgrade (NDU) process of the director firmware.
Contexts
All contexts.
Syntax
ndu start[--io-fwd-ask-for-confirmation] prompt type [-u|--firmware] firmware-tar-file [optional-argument [optional-argument]]
Arguments
Required arguments
[-u|--firmware]firmware-tar-file
* Full path to director firmware package on the management server.
[--io-fwd-ask-for-confirmation] prompttype
The type of the prompt that you want to see during the IO forwarding phase of the NDU. Theavailable options are:● always - Choose this option if you have hosts that require manual scanning for the paths
to be visible. Assistance from the customer is required to verify that initiator paths on thehosts are alive. If the path is unavailable, resolve the issue within the timeout period thatyou have specified. The prompts for this options are:○ Continue: NDU continues even when there are missing initiator logins. Make sure
that the customer is aware that missing logins can cause DU.○ Rollback: NDU rolls back and DU is avoided. The customer can check the host,
resolve the issue that led to the missing initiator logins, and rerun the NDU.○ Refresh: Get the new list of initiators. If all the initiators are logged in, metro node
displays the prompts to move forward.● on-missing-logins - Assistance from the customer is required to determine whether
any missing initiators are from critical hosts. If paths are unavailable from critical hosts, thecustomer will need to resolve the issue before continuing with the NDU. The prompts forthis options are:○ Continue: NDU continues even when there are missing initiator logins. Make sure
that the customer is aware that missing logins can cause DU.○ Rollback: NDU rolls back and DU is avoided. The customer can check the host,
resolve the issue that led to the missing initiator logins, and rerun the NDU.○ Refresh: Get the new list of initiators. After all the initiators are logged in, NDU
continues without displaying any prompt.● never - No interaction is required or the customer is not available to check the host
connectivity. NDU waits for all the initiators to log back in within the specified timeoutperiod. Resolve any issues within this period. If metro node identifies any missing loginsafter the timeout period, NDU is rolled back. It is important to check whether thisvalue must be modified according to the environment requirements of the customers andweighed against the risks.
252 Commands
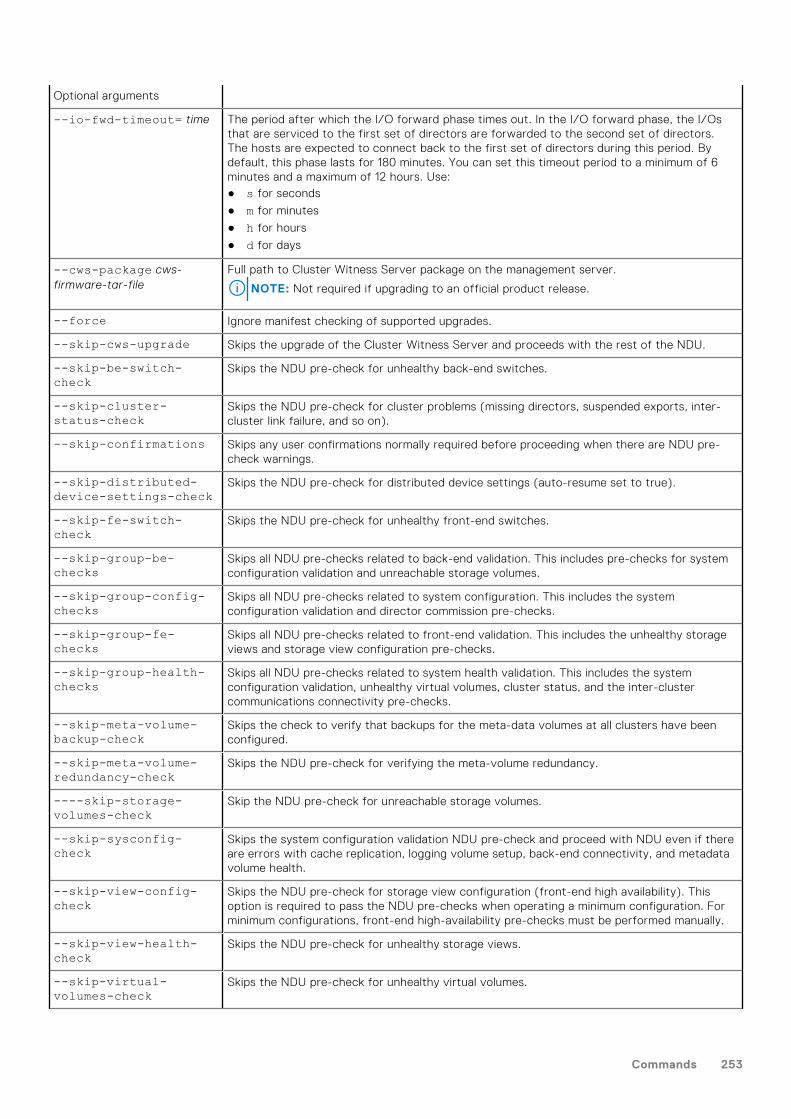
Optional arguments
--io-fwd-timeout= time The period after which the I/O forward phase times out. In the I/O forward phase, the I/Osthat are serviced to the first set of directors are forwarded to the second set of directors.The hosts are expected to connect back to the first set of directors during this period. Bydefault, this phase lasts for 180 minutes. You can set this timeout period to a minimum of 6minutes and a maximum of 12 hours. Use:● s for seconds
● m for minutes
● h for hours
● d for days
--cws-package cws-firmware-tar-file
Full path to Cluster Witness Server package on the management server.
NOTE: Not required if upgrading to an official product release.
--force Ignore manifest checking of supported upgrades.
--skip-cws-upgrade Skips the upgrade of the Cluster Witness Server and proceeds with the rest of the NDU.
--skip-be-switch-check
Skips the NDU pre-check for unhealthy back-end switches.
--skip-cluster-status-check
Skips the NDU pre-check for cluster problems (missing directors, suspended exports, inter-cluster link failure, and so on).
--skip-confirmations Skips any user confirmations normally required before proceeding when there are NDU pre-check warnings.
--skip-distributed-device-settings-check
Skips the NDU pre-check for distributed device settings (auto-resume set to true).
--skip-fe-switch-check
Skips the NDU pre-check for unhealthy front-end switches.
--skip-group-be-checks
Skips all NDU pre-checks related to back-end validation. This includes pre-checks for systemconfiguration validation and unreachable storage volumes.
--skip-group-config-checks
Skips all NDU pre-checks related to system configuration. This includes the systemconfiguration validation and director commission pre-checks.
--skip-group-fe-checks
Skips all NDU pre-checks related to front-end validation. This includes the unhealthy storageviews and storage view configuration pre-checks.
--skip-group-health-checks
Skips all NDU pre-checks related to system health validation. This includes the systemconfiguration validation, unhealthy virtual volumes, cluster status, and the inter-clustercommunications connectivity pre-checks.
--skip-meta-volume-backup-check
Skips the check to verify that backups for the meta-data volumes at all clusters have beenconfigured.
--skip-meta-volume-redundancy-check
Skips the NDU pre-check for verifying the meta-volume redundancy.
----skip-storage-volumes-check
Skip the NDU pre-check for unreachable storage volumes.
--skip-sysconfig-check
Skips the system configuration validation NDU pre-check and proceed with NDU even if thereare errors with cache replication, logging volume setup, back-end connectivity, and metadatavolume health.
--skip-view-config-check
Skips the NDU pre-check for storage view configuration (front-end high availability). Thisoption is required to pass the NDU pre-checks when operating a minimum configuration. Forminimum configurations, front-end high-availability pre-checks must be performed manually.
--skip-view-health-check
Skips the NDU pre-check for unhealthy storage views.
--skip-virtual-volumes-check
Skips the NDU pre-check for unhealthy virtual volumes.
Commands 253
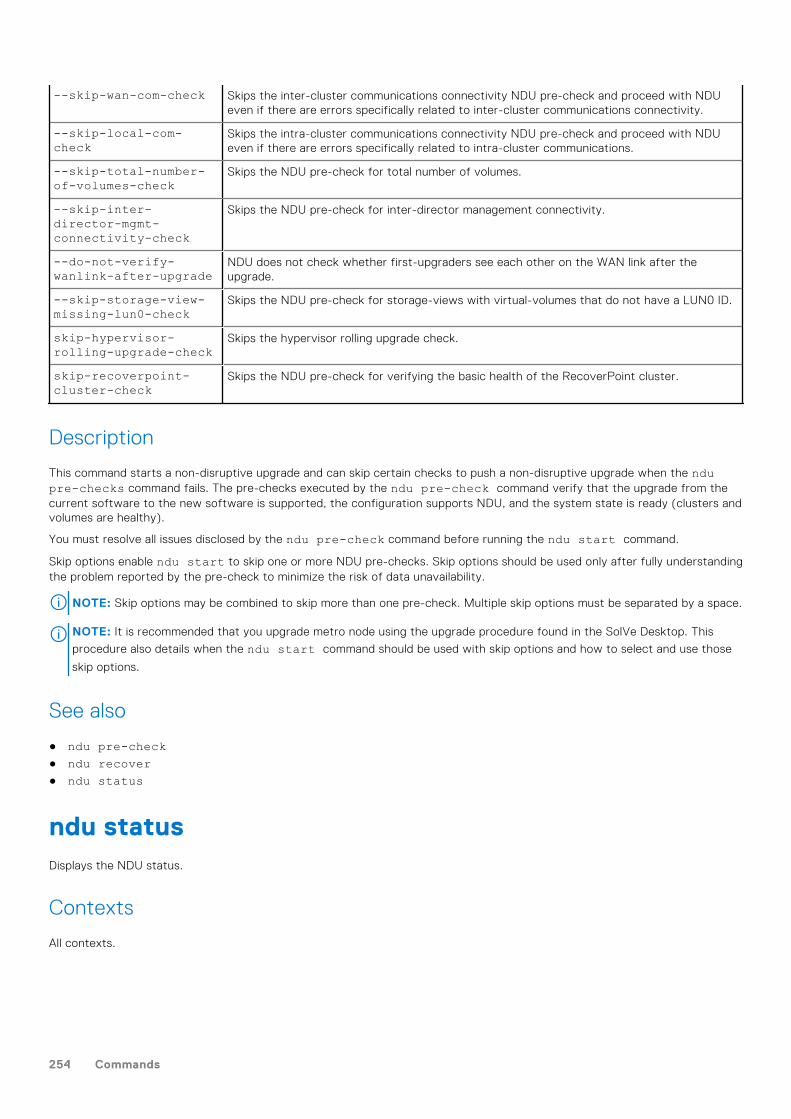
--skip-wan-com-check Skips the inter-cluster communications connectivity NDU pre-check and proceed with NDUeven if there are errors specifically related to inter-cluster communications connectivity.
--skip-local-com-check
Skips the intra-cluster communications connectivity NDU pre-check and proceed with NDUeven if there are errors specifically related to intra-cluster communications.
--skip-total-number-of-volumes-check
Skips the NDU pre-check for total number of volumes.
--skip-inter-director-mgmt-connectivity-check
Skips the NDU pre-check for inter-director management connectivity.
--do-not-verify-wanlink-after-upgrade
NDU does not check whether first-upgraders see each other on the WAN link after theupgrade.
--skip-storage-view-missing-lun0-check
Skips the NDU pre-check for storage-views with virtual-volumes that do not have a LUN0 ID.
skip-hypervisor-rolling-upgrade-check
Skips the hypervisor rolling upgrade check.
skip-recoverpoint-cluster-check
Skips the NDU pre-check for verifying the basic health of the RecoverPoint cluster.
Description
This command starts a non-disruptive upgrade and can skip certain checks to push a non-disruptive upgrade when the ndupre-checks command fails. The pre-checks executed by the ndu pre-check command verify that the upgrade from thecurrent software to the new software is supported, the configuration supports NDU, and the system state is ready (clusters andvolumes are healthy).
You must resolve all issues disclosed by the ndu pre-check command before running the ndu start command.
Skip options enable ndu start to skip one or more NDU pre-checks. Skip options should be used only after fully understandingthe problem reported by the pre-check to minimize the risk of data unavailability.
NOTE: Skip options may be combined to skip more than one pre-check. Multiple skip options must be separated by a space.
NOTE: It is recommended that you upgrade metro node using the upgrade procedure found in the SolVe Desktop. This
procedure also details when the ndu start command should be used with skip options and how to select and use those
skip options.
See also
● ndu pre-check● ndu recover● ndu status
ndu statusDisplays the NDU status.
Contexts
All contexts.
254 Commands
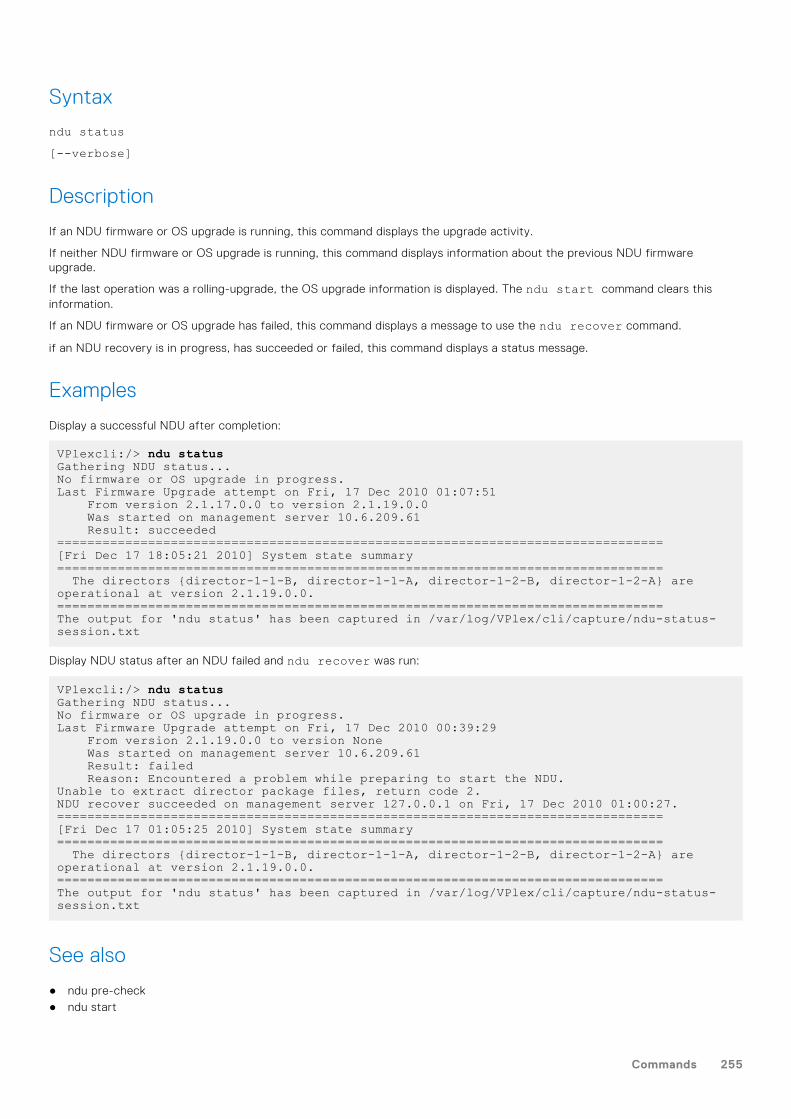
Syntax
ndu status[--verbose]
Description
If an NDU firmware or OS upgrade is running, this command displays the upgrade activity.
If neither NDU firmware or OS upgrade is running, this command displays information about the previous NDU firmwareupgrade.
If the last operation was a rolling-upgrade, the OS upgrade information is displayed. The ndu start command clears thisinformation.
If an NDU firmware or OS upgrade has failed, this command displays a message to use the ndu recover command.
if an NDU recovery is in progress, has succeeded or failed, this command displays a status message.
Examples
Display a successful NDU after completion:
VPlexcli:/> ndu statusGathering NDU status...No firmware or OS upgrade in progress.Last Firmware Upgrade attempt on Fri, 17 Dec 2010 01:07:51 From version 2.1.17.0.0 to version 2.1.19.0.0 Was started on management server 10.6.209.61 Result: succeeded================================================================================[Fri Dec 17 18:05:21 2010] System state summary================================================================================ The directors {director-1-1-B, director-1-1-A, director-1-2-B, director-1-2-A} are operational at version 2.1.19.0.0.================================================================================The output for 'ndu status' has been captured in /var/log/VPlex/cli/capture/ndu-status-session.txt
Display NDU status after an NDU failed and ndu recover was run:
VPlexcli:/> ndu statusGathering NDU status...No firmware or OS upgrade in progress.Last Firmware Upgrade attempt on Fri, 17 Dec 2010 00:39:29 From version 2.1.19.0.0 to version None Was started on management server 10.6.209.61 Result: failed Reason: Encountered a problem while preparing to start the NDU.Unable to extract director package files, return code 2.NDU recover succeeded on management server 127.0.0.1 on Fri, 17 Dec 2010 01:00:27.================================================================================[Fri Dec 17 01:05:25 2010] System state summary================================================================================ The directors {director-1-1-B, director-1-1-A, director-1-2-B, director-1-2-A} are operational at version 2.1.19.0.0.================================================================================The output for 'ndu status' has been captured in /var/log/VPlex/cli/capture/ndu-status-session.txt
See also
● ndu pre-check● ndu start
Commands 255
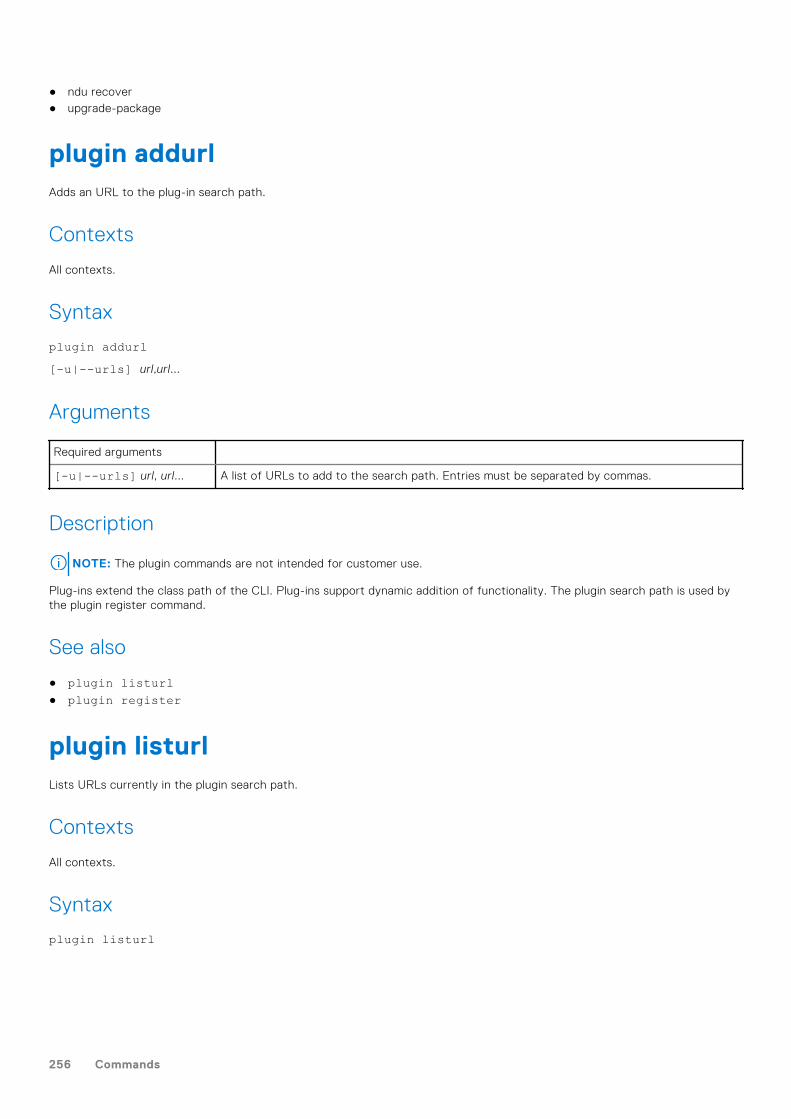
● ndu recover● upgrade-package
plugin addurlAdds an URL to the plug-in search path.
Contexts
All contexts.
Syntax
plugin addurl[-u|--urls] url,url...
Arguments
Required arguments
[-u|--urls] url, url... A list of URLs to add to the search path. Entries must be separated by commas.
Description
NOTE: The plugin commands are not intended for customer use.
Plug-ins extend the class path of the CLI. Plug-ins support dynamic addition of functionality. The plugin search path is used bythe plugin register command.
See also
● plugin listurl● plugin register
plugin listurlLists URLs currently in the plugin search path.
Contexts
All contexts.
Syntax
plugin listurl
256 Commands

Description
The search path URLs are those locations added to the plugin search path using the plugin addurl command.
NOTE: The plugin commands are not intended for customer use.
Example
VPlexcli:/> plugin listurlfile:/opt/emc/VPlex/jython2.2/LibExt/AutoBundles/prodscripts.jar, file:/opt/emc/VPlex/apache-tomcat-6.0.x/bin/commons-daemon.jar, file:/opt/emc/VPlex/apache-tomcat-6.0.x/bin/bootstrap.jar, file:/opt/emc/VPlex/apache-tomcat-6.0.x/bin/tomcat-juli.jar, file:/opt/emc/VPlex/apache-tomcat-6.0.x/lib/tomcat-i18n-es.jar, file:/opt/emc/VPlex/apache-tomcat-6.0.x/lib/tomcat-juli-adapters.jar, file:/opt/emc/VPlex/apache-tomcat-6.0.x/lib/catalina-tribes.jar, file:/opt/emc/VPlex/apache-tomcat-6.0.x/lib/servlet-api.jar, file:/opt/emc/VPlex/apache-tomcat-6.0.x/lib/tomcat-coyote.jar, file:/opt/emc/VPlex/apache-tomcat-6.0.x/lib/realm-adapter.jar, file:/opt/emc/VPlex/apache-tomcat-6.0.x/lib/catalina-ha.jar, file:/opt/emc/VPlex/apache-tomcat-6.0.x/lib/jasper-jdt.jar, file:/opt/emc/VPlex/apache-tomcat-6.0.x/lib/catalina.jar, file:/opt/emc/VPlex/apache-tomcat-6.0.x/lib/catalina-ant.jar, file:/opt/emc/VPlex/apache-tomcat-6.0.x/lib/jsp-api.jar, file:/opt/emc/VPlex/apache-tomcat-6.0.x/lib/annotations-api.jar, file:/opt/emc/VPlex/apache-tomcat-6.0.x/lib/jasper-el.jar, file:/opt/emc/VPlex/apache-tomcat-6.0.x/lib/jasper.jar, file:/opt/emc/VPlex/apache-tomcat-6.0.x/lib/tomcat-i18n-ja.jar, file:/opt/emc/VPlex/apache-tomcat-6.0.x/lib/el-api.jar, file:/opt/emc/VPlex/apache-tomcat-6.0.x/lib/tomcat-i18n-fr.jar, file:/opt/emc/VPlex/apache-tomcat-6.0.x/lib/tomcat-dbcp.jar
See also
● plugin addurl● plugin register
plugin registerRegisters a shell plugin by class name.
Contexts
All contexts.
Syntax
plugin register[-c|--classes] class-name[,class-name ...]
Arguments
Required arguments
[-c|--classes] class-name[, class-name... ] A list of plugin classes. Entries must be separated by commas.
Commands 257
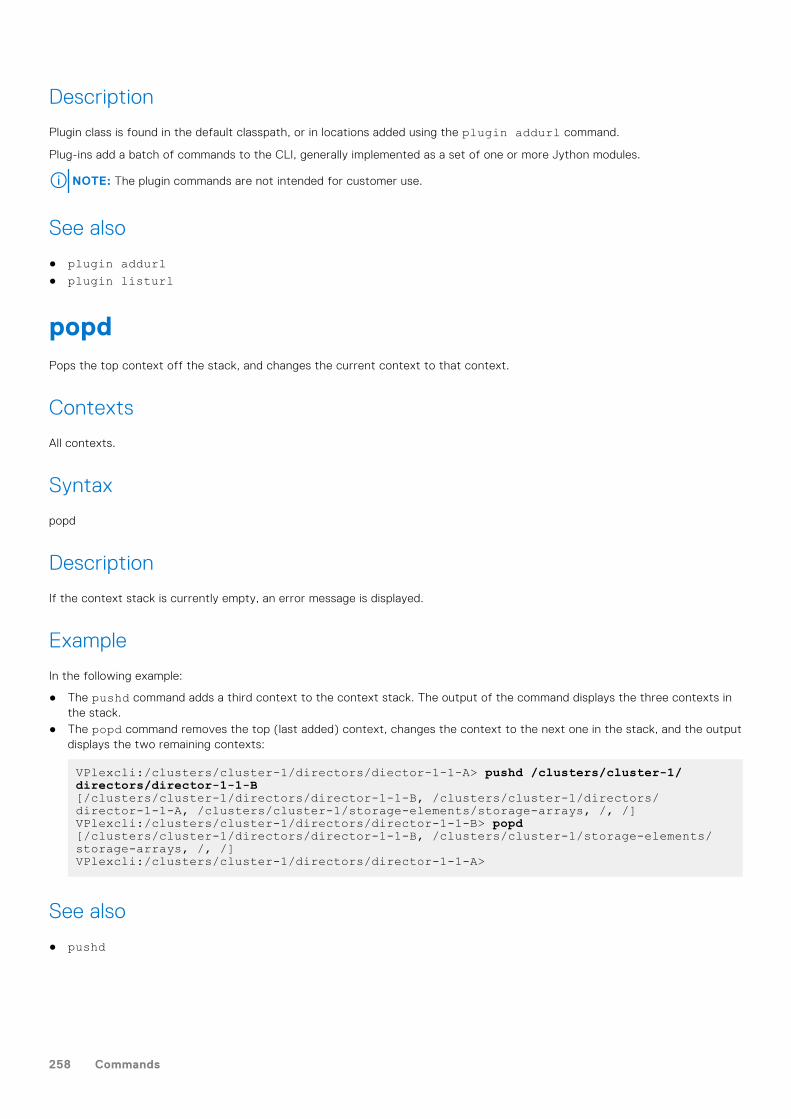
Description
Plugin class is found in the default classpath, or in locations added using the plugin addurl command.
Plug-ins add a batch of commands to the CLI, generally implemented as a set of one or more Jython modules.
NOTE: The plugin commands are not intended for customer use.
See also
● plugin addurl● plugin listurl
popdPops the top context off the stack, and changes the current context to that context.
Contexts
All contexts.
Syntax
popd
Description
If the context stack is currently empty, an error message is displayed.
Example
In the following example:
● The pushd command adds a third context to the context stack. The output of the command displays the three contexts inthe stack.
● The popd command removes the top (last added) context, changes the context to the next one in the stack, and the outputdisplays the two remaining contexts:
VPlexcli:/clusters/cluster-1/directors/diector-1-1-A> pushd /clusters/cluster-1/directors/director-1-1-B[/clusters/cluster-1/directors/director-1-1-B, /clusters/cluster-1/directors/director-1-1-A, /clusters/cluster-1/storage-elements/storage-arrays, /, /]VPlexcli:/clusters/cluster-1/directors/director-1-1-B> popd[/clusters/cluster-1/directors/director-1-1-B, /clusters/cluster-1/storage-elements/storage-arrays, /, /]VPlexcli:/clusters/cluster-1/directors/director-1-1-A>
See also
● pushd
258 Commands
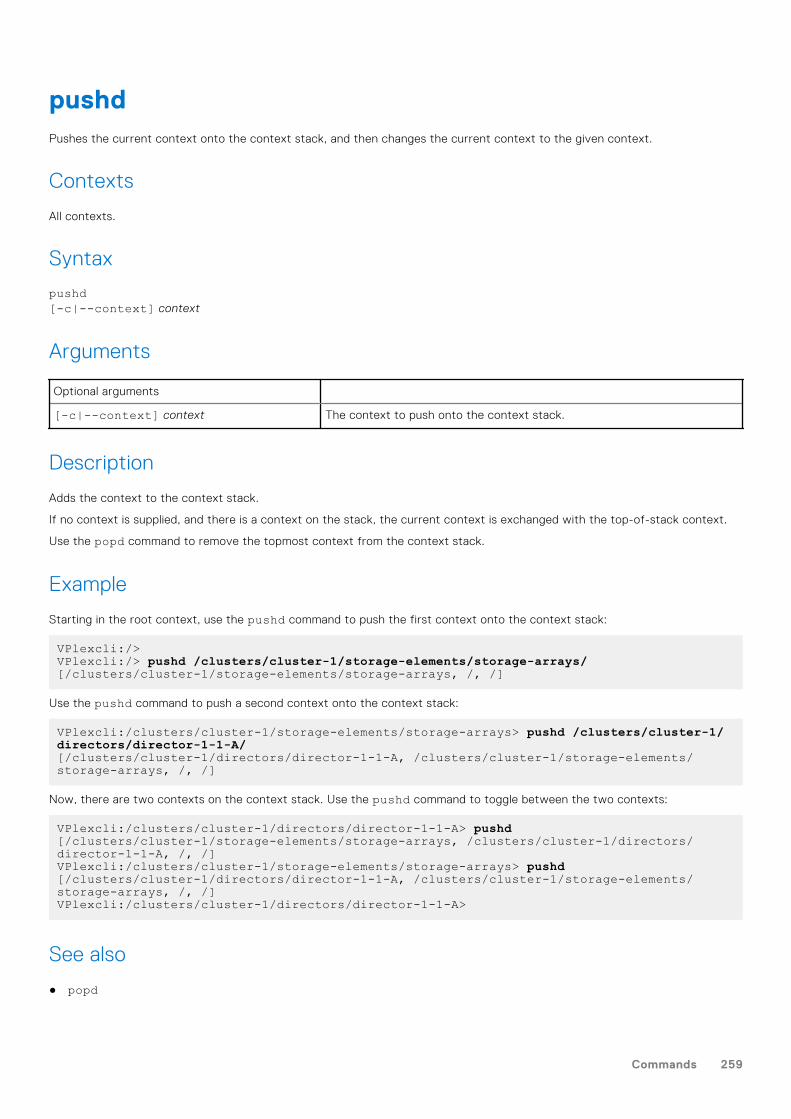
pushdPushes the current context onto the context stack, and then changes the current context to the given context.
Contexts
All contexts.
Syntax
pushd[-c|--context] context
Arguments
Optional arguments
[-c|--context] context The context to push onto the context stack.
Description
Adds the context to the context stack.
If no context is supplied, and there is a context on the stack, the current context is exchanged with the top-of-stack context.
Use the popd command to remove the topmost context from the context stack.
Example
Starting in the root context, use the pushd command to push the first context onto the context stack:
VPlexcli:/> VPlexcli:/> pushd /clusters/cluster-1/storage-elements/storage-arrays/[/clusters/cluster-1/storage-elements/storage-arrays, /, /]
Use the pushd command to push a second context onto the context stack:
VPlexcli:/clusters/cluster-1/storage-elements/storage-arrays> pushd /clusters/cluster-1/directors/director-1-1-A/[/clusters/cluster-1/directors/director-1-1-A, /clusters/cluster-1/storage-elements/storage-arrays, /, /]
Now, there are two contexts on the context stack. Use the pushd command to toggle between the two contexts:
VPlexcli:/clusters/cluster-1/directors/director-1-1-A> pushd[/clusters/cluster-1/storage-elements/storage-arrays, /clusters/cluster-1/directors/director-1-1-A, /, /]VPlexcli:/clusters/cluster-1/storage-elements/storage-arrays> pushd[/clusters/cluster-1/directors/director-1-1-A, /clusters/cluster-1/storage-elements/storage-arrays, /, /]VPlexcli:/clusters/cluster-1/directors/director-1-1-A>
See also
● popd
Commands 259
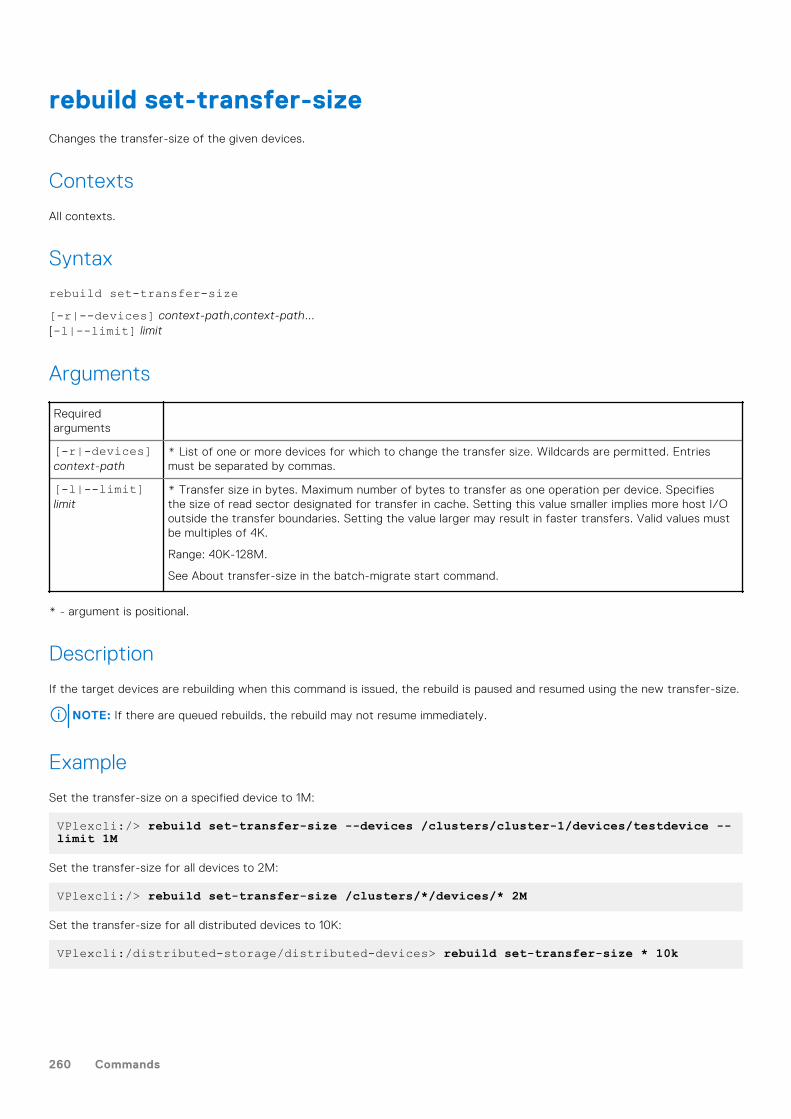
rebuild set-transfer-sizeChanges the transfer-size of the given devices.
Contexts
All contexts.
Syntax
rebuild set-transfer-size[-r|--devices] context-path,context-path...[-l|--limit] limit
Arguments
Requiredarguments
[-r|-devices]context-path
* List of one or more devices for which to change the transfer size. Wildcards are permitted. Entriesmust be separated by commas.
[-l|--limit]limit
* Transfer size in bytes. Maximum number of bytes to transfer as one operation per device. Specifiesthe size of read sector designated for transfer in cache. Setting this value smaller implies more host I/Ooutside the transfer boundaries. Setting the value larger may result in faster transfers. Valid values mustbe multiples of 4K.
Range: 40K-128M.
See About transfer-size in the batch-migrate start command.
* - argument is positional.
Description
If the target devices are rebuilding when this command is issued, the rebuild is paused and resumed using the new transfer-size.
NOTE: If there are queued rebuilds, the rebuild may not resume immediately.
Example
Set the transfer-size on a specified device to 1M:
VPlexcli:/> rebuild set-transfer-size --devices /clusters/cluster-1/devices/testdevice --limit 1M
Set the transfer-size for all devices to 2M:
VPlexcli:/> rebuild set-transfer-size /clusters/*/devices/* 2M
Set the transfer-size for all distributed devices to 10K:
VPlexcli:/distributed-storage/distributed-devices> rebuild set-transfer-size * 10k
260 Commands
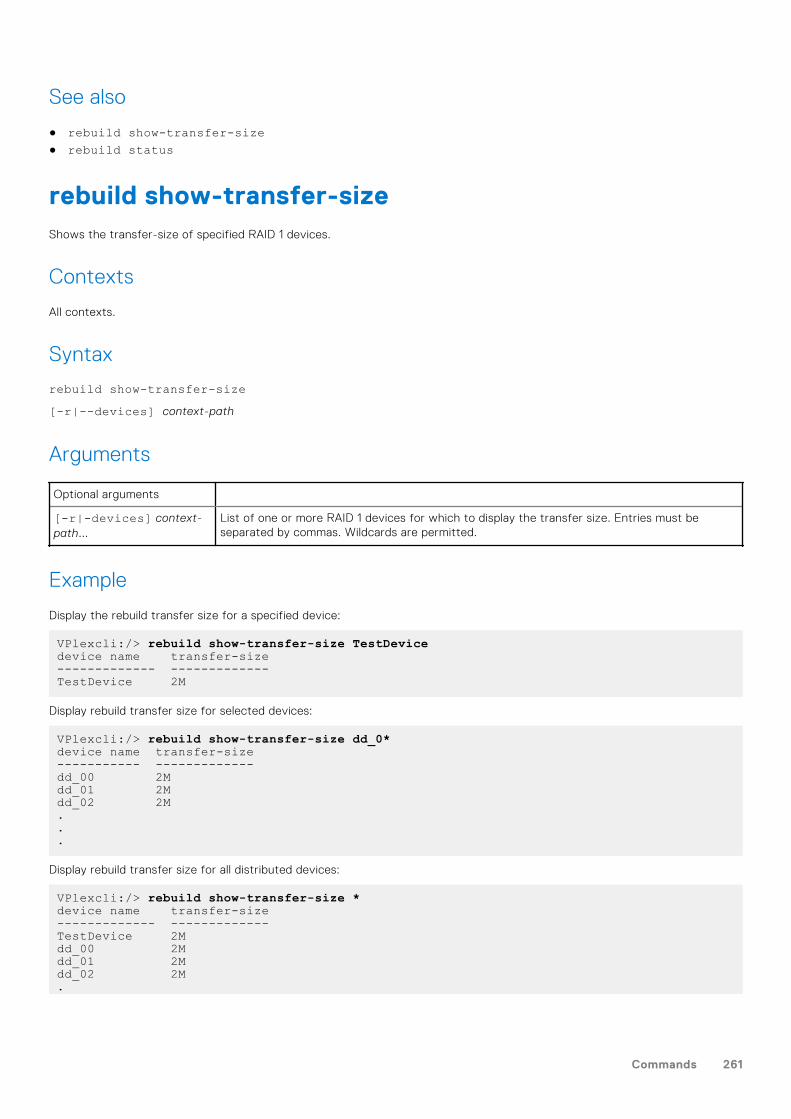
See also
● rebuild show-transfer-size● rebuild status
rebuild show-transfer-sizeShows the transfer-size of specified RAID 1 devices.
Contexts
All contexts.
Syntax
rebuild show-transfer-size[-r|--devices] context-path
Arguments
Optional arguments
[-r|-devices] context-path...
List of one or more RAID 1 devices for which to display the transfer size. Entries must beseparated by commas. Wildcards are permitted.
Example
Display the rebuild transfer size for a specified device:
VPlexcli:/> rebuild show-transfer-size TestDevicedevice name transfer-size------------- -------------TestDevice 2M
Display rebuild transfer size for selected devices:
VPlexcli:/> rebuild show-transfer-size dd_0*device name transfer-size----------- -------------dd_00 2Mdd_01 2Mdd_02 2M...
Display rebuild transfer size for all distributed devices:
VPlexcli:/> rebuild show-transfer-size *device name transfer-size------------- -------------TestDevice 2Mdd_00 2Mdd_01 2Mdd_02 2M.
Commands 261
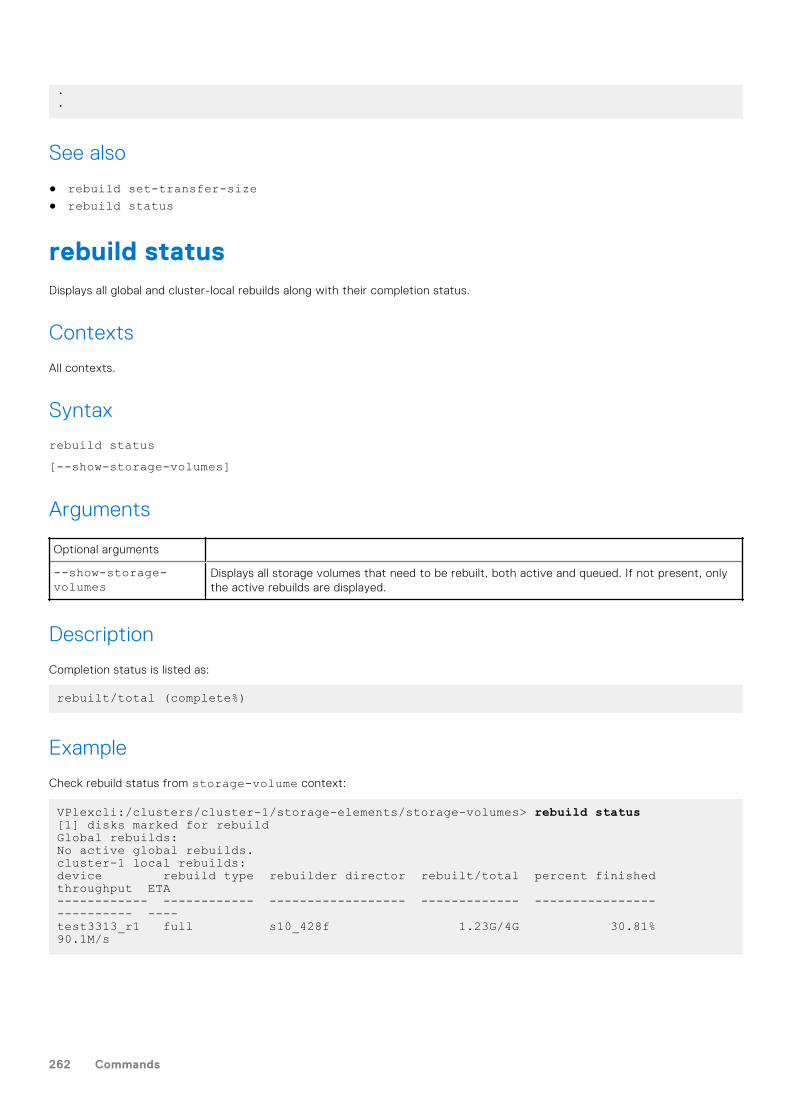
.
.
See also
● rebuild set-transfer-size● rebuild status
rebuild statusDisplays all global and cluster-local rebuilds along with their completion status.
Contexts
All contexts.
Syntax
rebuild status[--show-storage-volumes]
Arguments
Optional arguments
--show-storage-volumes
Displays all storage volumes that need to be rebuilt, both active and queued. If not present, onlythe active rebuilds are displayed.
Description
Completion status is listed as:
rebuilt/total (complete%)
Example
Check rebuild status from storage-volume context:
VPlexcli:/clusters/cluster-1/storage-elements/storage-volumes> rebuild status[1] disks marked for rebuildGlobal rebuilds:No active global rebuilds.cluster-1 local rebuilds:device rebuild type rebuilder director rebuilt/total percent finished throughput ETA------------ ------------ ------------------ ------------- ---------------- ---------- ----test3313_r1 full s10_428f 1.23G/4G 30.81% 90.1M/s
262 Commands
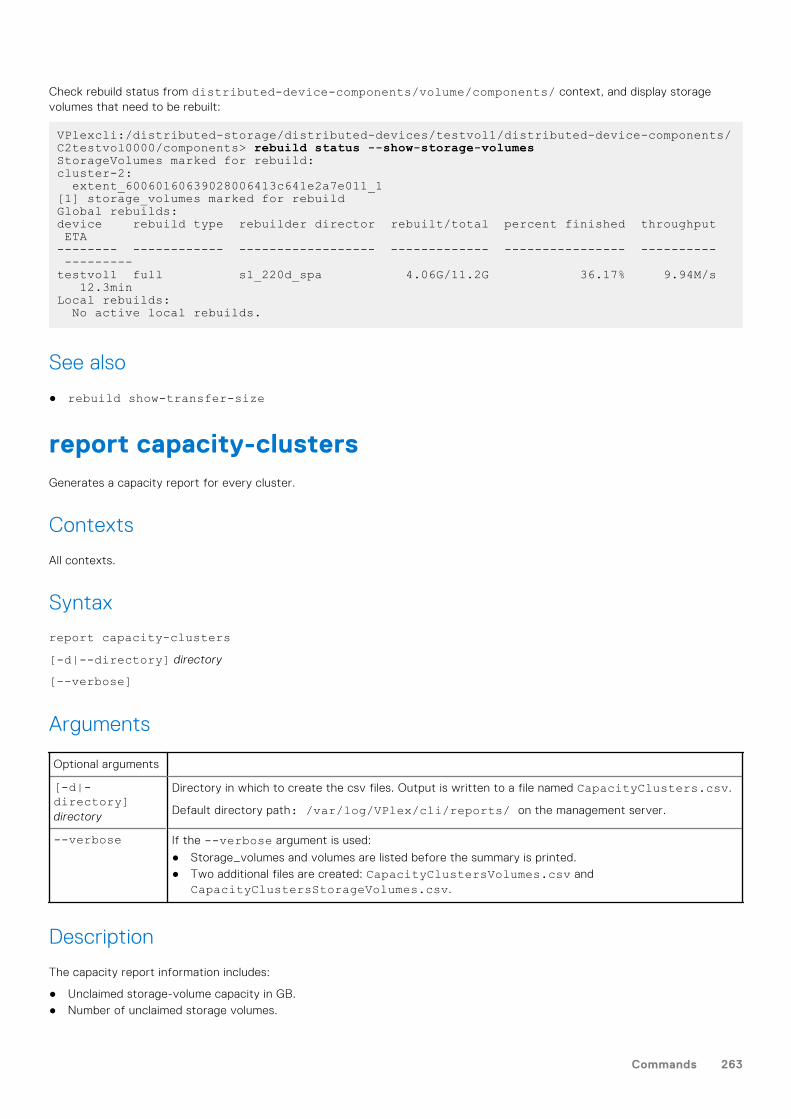
Check rebuild status from distributed-device-components/volume/components/ context, and display storagevolumes that need to be rebuilt:
VPlexcli:/distributed-storage/distributed-devices/testvol1/distributed-device-components/C2testvol0000/components> rebuild status --show-storage-volumesStorageVolumes marked for rebuild:cluster-2: extent_60060160639028006413c641e2a7e011_1[1] storage_volumes marked for rebuildGlobal rebuilds:device rebuild type rebuilder director rebuilt/total percent finished throughput ETA-------- ------------ ------------------ ------------- ---------------- ---------- ---------testvol1 full s1_220d_spa 4.06G/11.2G 36.17% 9.94M/s 12.3minLocal rebuilds: No active local rebuilds.
See also
● rebuild show-transfer-size
report capacity-clustersGenerates a capacity report for every cluster.
Contexts
All contexts.
Syntax
report capacity-clusters[-d|--directory] directory
[--verbose]
Arguments
Optional arguments
[-d|-directory]directory
Directory in which to create the csv files. Output is written to a file named CapacityClusters.csv.
Default directory path: /var/log/VPlex/cli/reports/ on the management server.
--verbose If the --verbose argument is used:
● Storage_volumes and volumes are listed before the summary is printed.● Two additional files are created: CapacityClustersVolumes.csv and
CapacityClustersStorageVolumes.csv.
Description
The capacity report information includes:
● Unclaimed storage-volume capacity in GB.● Number of unclaimed storage volumes.
Commands 263
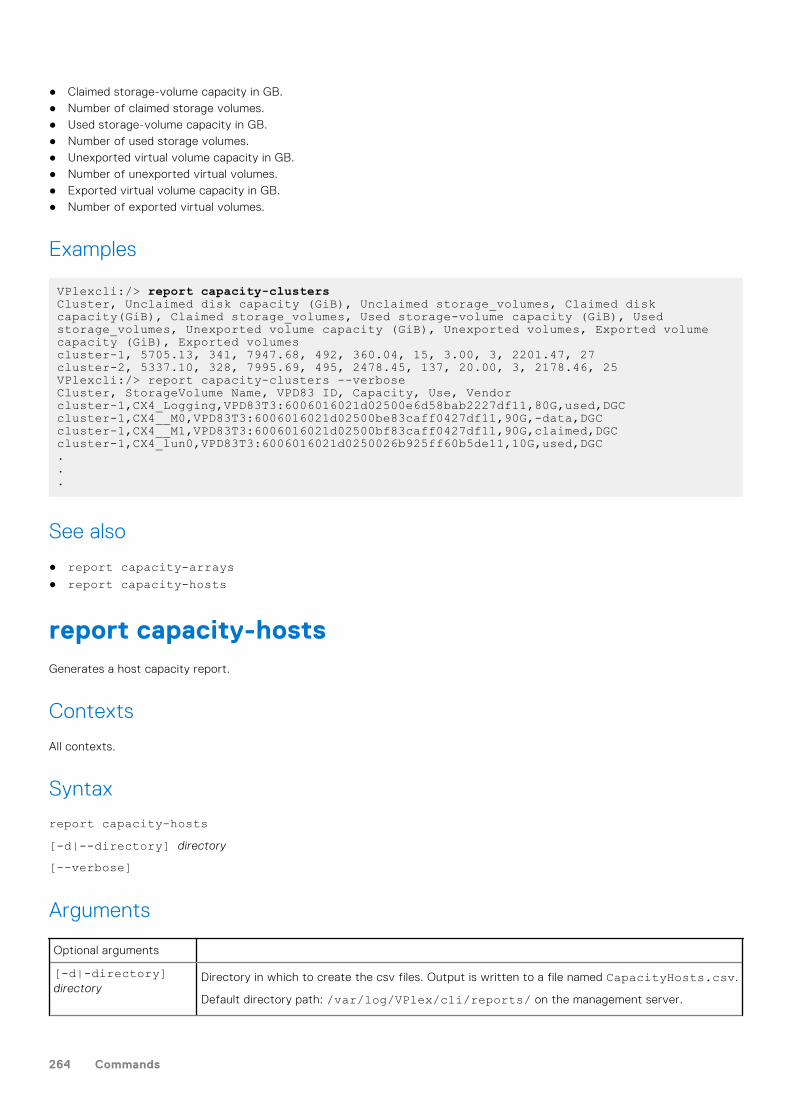
● Claimed storage-volume capacity in GB.● Number of claimed storage volumes.● Used storage-volume capacity in GB.● Number of used storage volumes.● Unexported virtual volume capacity in GB.● Number of unexported virtual volumes.● Exported virtual volume capacity in GB.● Number of exported virtual volumes.
Examples
VPlexcli:/> report capacity-clustersCluster, Unclaimed disk capacity (GiB), Unclaimed storage_volumes, Claimed disk capacity(GiB), Claimed storage_volumes, Used storage-volume capacity (GiB), Used storage_volumes, Unexported volume capacity (GiB), Unexported volumes, Exported volume capacity (GiB), Exported volumescluster-1, 5705.13, 341, 7947.68, 492, 360.04, 15, 3.00, 3, 2201.47, 27cluster-2, 5337.10, 328, 7995.69, 495, 2478.45, 137, 20.00, 3, 2178.46, 25VPlexcli:/> report capacity-clusters --verboseCluster, StorageVolume Name, VPD83 ID, Capacity, Use, Vendorcluster-1,CX4_Logging,VPD83T3:6006016021d02500e6d58bab2227df11,80G,used,DGCcluster-1,CX4__M0,VPD83T3:6006016021d02500be83caff0427df11,90G,-data,DGCcluster-1,CX4__M1,VPD83T3:6006016021d02500bf83caff0427df11,90G,claimed,DGCcluster-1,CX4_lun0,VPD83T3:6006016021d0250026b925ff60b5de11,10G,used,DGC...
See also
● report capacity-arrays● report capacity-hosts
report capacity-hostsGenerates a host capacity report.
Contexts
All contexts.
Syntax
report capacity-hosts[-d|--directory] directory
[--verbose]
Arguments
Optional arguments
[-d|-directory]directory
Directory in which to create the csv files. Output is written to a file named CapacityHosts.csv.
Default directory path: /var/log/VPlex/cli/reports/ on the management server.
264 Commands
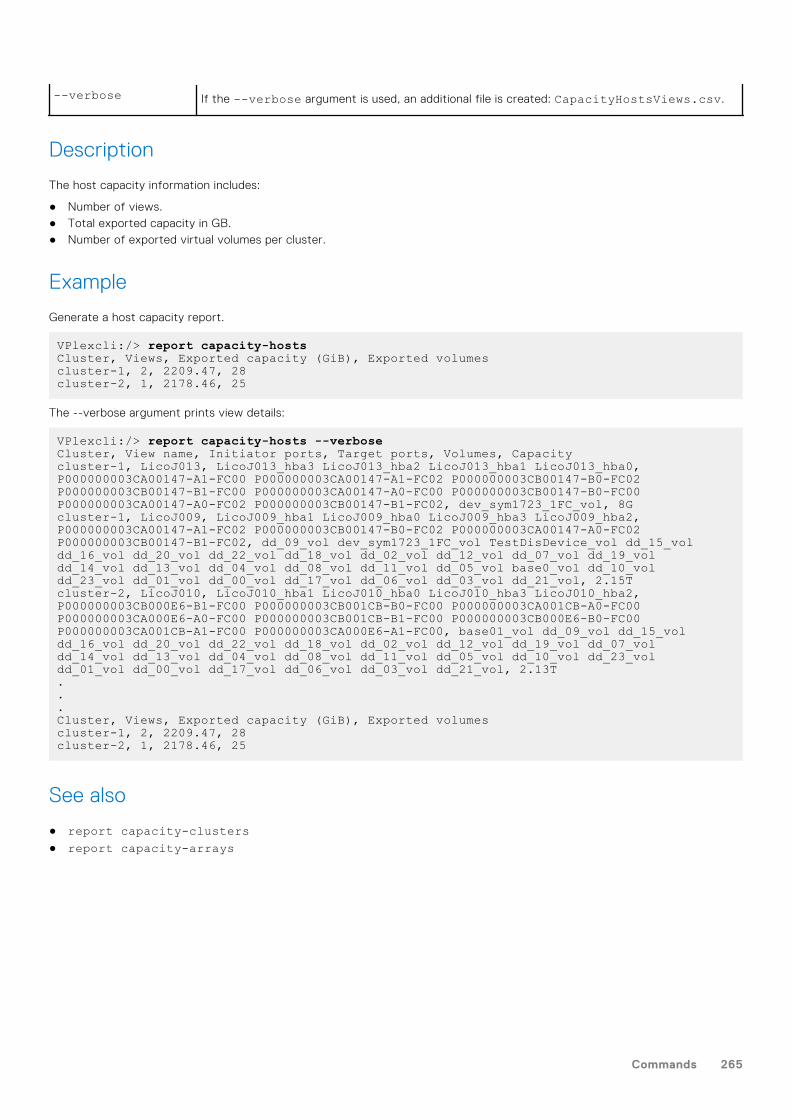
--verbose If the --verbose argument is used, an additional file is created: CapacityHostsViews.csv.
Description
The host capacity information includes:
● Number of views.● Total exported capacity in GB.● Number of exported virtual volumes per cluster.
Example
Generate a host capacity report.
VPlexcli:/> report capacity-hostsCluster, Views, Exported capacity (GiB), Exported volumescluster-1, 2, 2209.47, 28cluster-2, 1, 2178.46, 25
The --verbose argument prints view details:
VPlexcli:/> report capacity-hosts --verboseCluster, View name, Initiator ports, Target ports, Volumes, Capacitycluster-1, LicoJ013, LicoJ013_hba3 LicoJ013_hba2 LicoJ013_hba1 LicoJ013_hba0, P000000003CA00147-A1-FC00 P000000003CA00147-A1-FC02 P000000003CB00147-B0-FC02 P000000003CB00147-B1-FC00 P000000003CA00147-A0-FC00 P000000003CB00147-B0-FC00 P000000003CA00147-A0-FC02 P000000003CB00147-B1-FC02, dev_sym1723_1FC_vol, 8Gcluster-1, LicoJ009, LicoJ009_hba1 LicoJ009_hba0 LicoJ009_hba3 LicoJ009_hba2, P000000003CA00147-A1-FC02 P000000003CB00147-B0-FC02 P000000003CA00147-A0-FC02 P000000003CB00147-B1-FC02, dd_09_vol dev_sym1723_1FC_vol TestDisDevice_vol dd_15_vol dd_16_vol dd_20_vol dd_22_vol dd_18_vol dd_02_vol dd_12_vol dd_07_vol dd_19_vol dd_14_vol dd_13_vol dd_04_vol dd_08_vol dd_11_vol dd_05_vol base0_vol dd_10_vol dd_23_vol dd_01_vol dd_00_vol dd_17_vol dd_06_vol dd_03_vol dd_21_vol, 2.15Tcluster-2, LicoJ010, LicoJ010_hba1 LicoJ010_hba0 LicoJ010_hba3 LicoJ010_hba2, P000000003CB000E6-B1-FC00 P000000003CB001CB-B0-FC00 P000000003CA001CB-A0-FC00 P000000003CA000E6-A0-FC00 P000000003CB001CB-B1-FC00 P000000003CB000E6-B0-FC00 P000000003CA001CB-A1-FC00 P000000003CA000E6-A1-FC00, base01_vol dd_09_vol dd_15_vol dd_16_vol dd_20_vol dd_22_vol dd_18_vol dd_02_vol dd_12_vol dd_19_vol dd_07_vol dd_14_vol dd_13_vol dd_04_vol dd_08_vol dd_11_vol dd_05_vol dd_10_vol dd_23_vol dd_01_vol dd_00_vol dd_17_vol dd_06_vol dd_03_vol dd_21_vol, 2.13T...Cluster, Views, Exported capacity (GiB), Exported volumescluster-1, 2, 2209.47, 28cluster-2, 1, 2178.46, 25
See also
● report capacity-clusters● report capacity-arrays
Commands 265
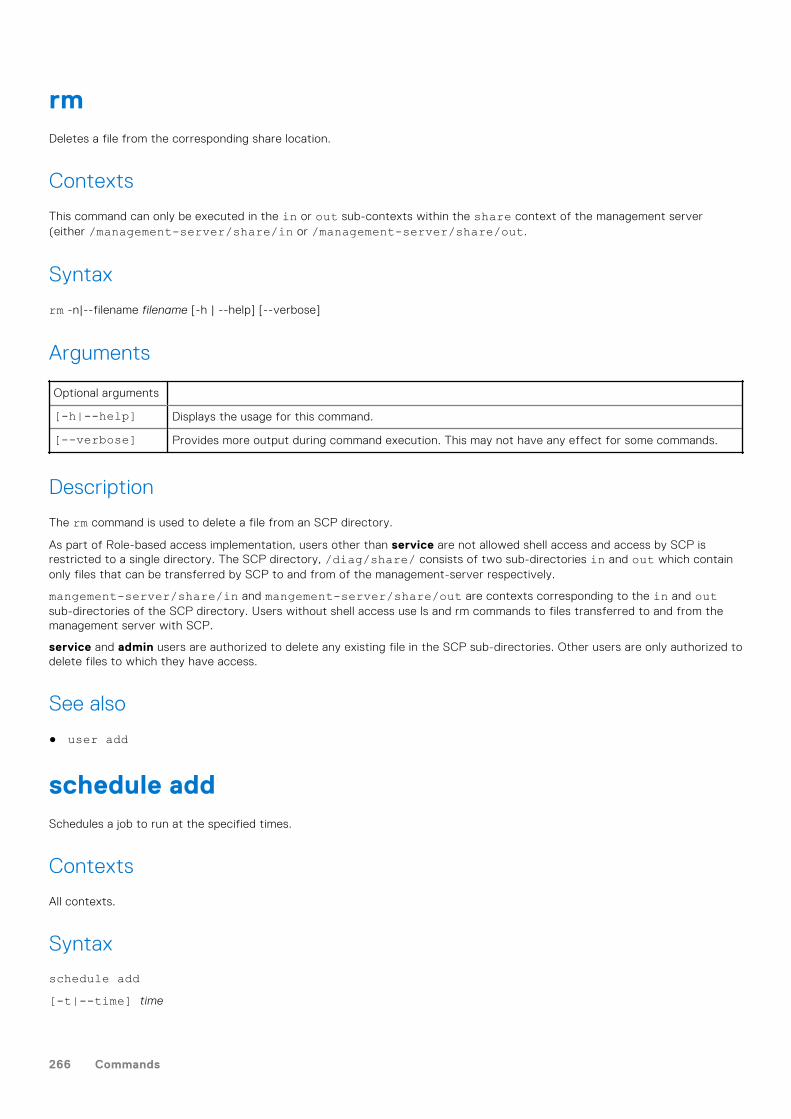
rmDeletes a file from the corresponding share location.
Contexts
This command can only be executed in the in or out sub-contexts within the share context of the management server(either /management-server/share/in or /management-server/share/out.
Syntax
rm -n|--filename filename [-h | --help] [--verbose]
Arguments
Optional arguments
[-h|--help] Displays the usage for this command.
[--verbose] Provides more output during command execution. This may not have any effect for some commands.
Description
The rm command is used to delete a file from an SCP directory.
As part of Role-based access implementation, users other than service are not allowed shell access and access by SCP isrestricted to a single directory. The SCP directory, /diag/share/ consists of two sub-directories in and out which containonly files that can be transferred by SCP to and from of the management-server respectively.
mangement-server/share/in and mangement-server/share/out are contexts corresponding to the in and outsub-directories of the SCP directory. Users without shell access use ls and rm commands to files transferred to and from themanagement server with SCP.
service and admin users are authorized to delete any existing file in the SCP sub-directories. Other users are only authorized todelete files to which they have access.
See also
● user add
schedule addSchedules a job to run at the specified times.
Contexts
All contexts.
Syntax
schedule add[-t|--time] time
266 Commands
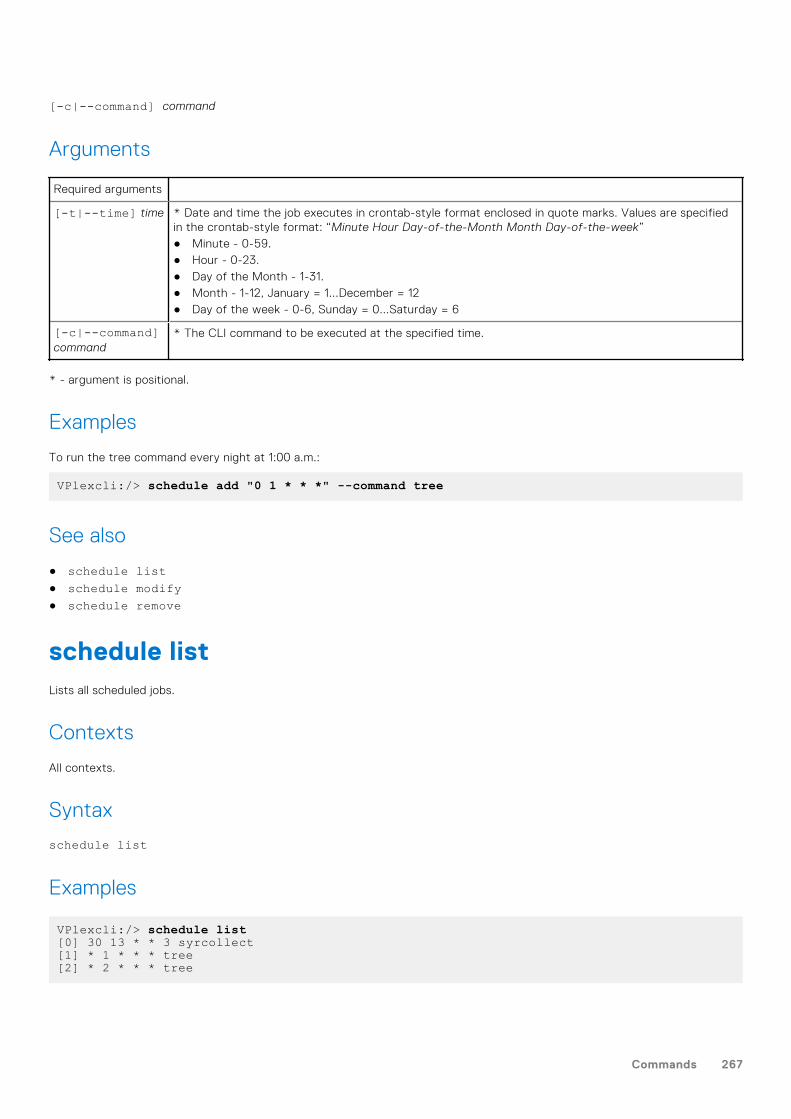
[-c|--command] command
Arguments
Required arguments
[-t|--time] time * Date and time the job executes in crontab-style format enclosed in quote marks. Values are specifiedin the crontab-style format: “Minute Hour Day-of-the-Month Month Day-of-the-week”● Minute - 0-59.● Hour - 0-23.● Day of the Month - 1-31.● Month - 1-12, January = 1...December = 12● Day of the week - 0-6, Sunday = 0...Saturday = 6
[-c|--command]command
* The CLI command to be executed at the specified time.
* - argument is positional.
Examples
To run the tree command every night at 1:00 a.m.:
VPlexcli:/> schedule add "0 1 * * *" --command tree
See also
● schedule list● schedule modify● schedule remove
schedule listLists all scheduled jobs.
Contexts
All contexts.
Syntax
schedule list
Examples
VPlexcli:/> schedule list[0] 30 13 * * 3 syrcollect[1] * 1 * * * tree[2] * 2 * * * tree
Commands 267
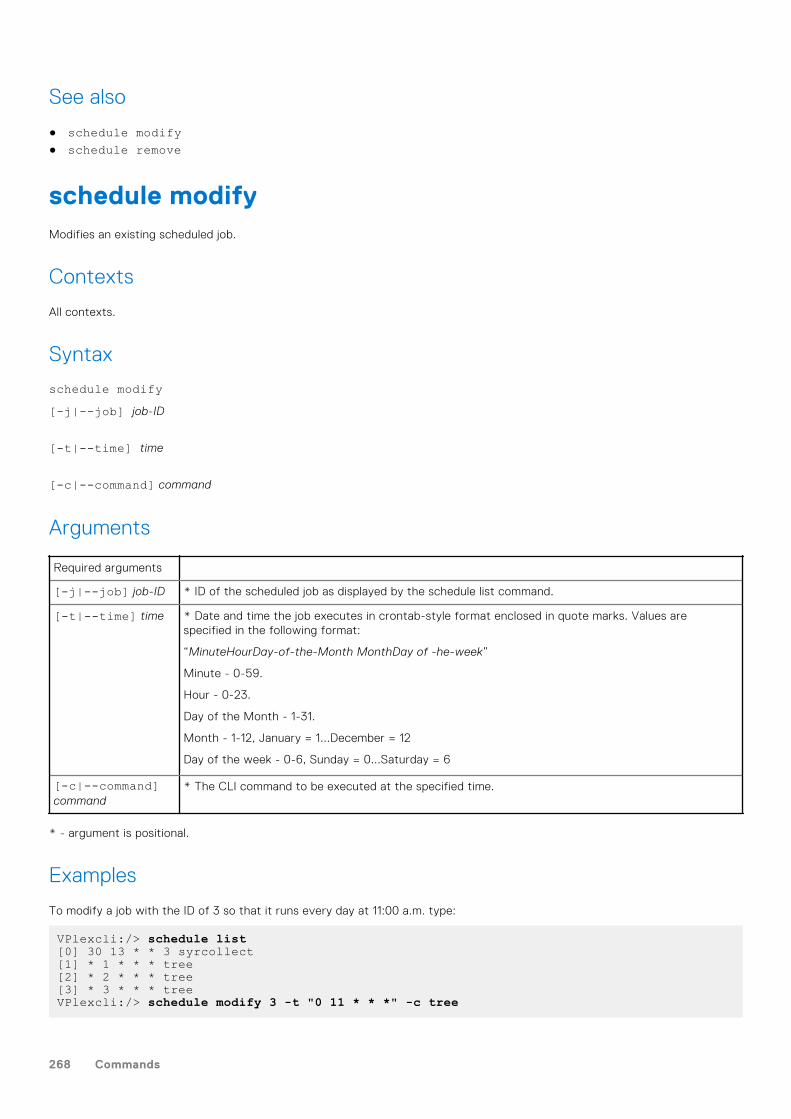
See also
● schedule modify● schedule remove
schedule modifyModifies an existing scheduled job.
Contexts
All contexts.
Syntax
schedule modify[-j|--job] job-ID
[-t|--time] time
[-c|--command] command
Arguments
Required arguments
[-j|--job] job-ID * ID of the scheduled job as displayed by the schedule list command.
[-t|--time] time * Date and time the job executes in crontab-style format enclosed in quote marks. Values arespecified in the following format:
“MinuteHourDay-of-the-Month MonthDay of -he-week”
Minute - 0-59.
Hour - 0-23.
Day of the Month - 1-31.
Month - 1-12, January = 1...December = 12
Day of the week - 0-6, Sunday = 0...Saturday = 6
[-c|--command]command
* The CLI command to be executed at the specified time.
* - argument is positional.
Examples
To modify a job with the ID of 3 so that it runs every day at 11:00 a.m. type:
VPlexcli:/> schedule list[0] 30 13 * * 3 syrcollect[1] * 1 * * * tree[2] * 2 * * * tree[3] * 3 * * * treeVPlexcli:/> schedule modify 3 -t "0 11 * * *" -c tree
268 Commands
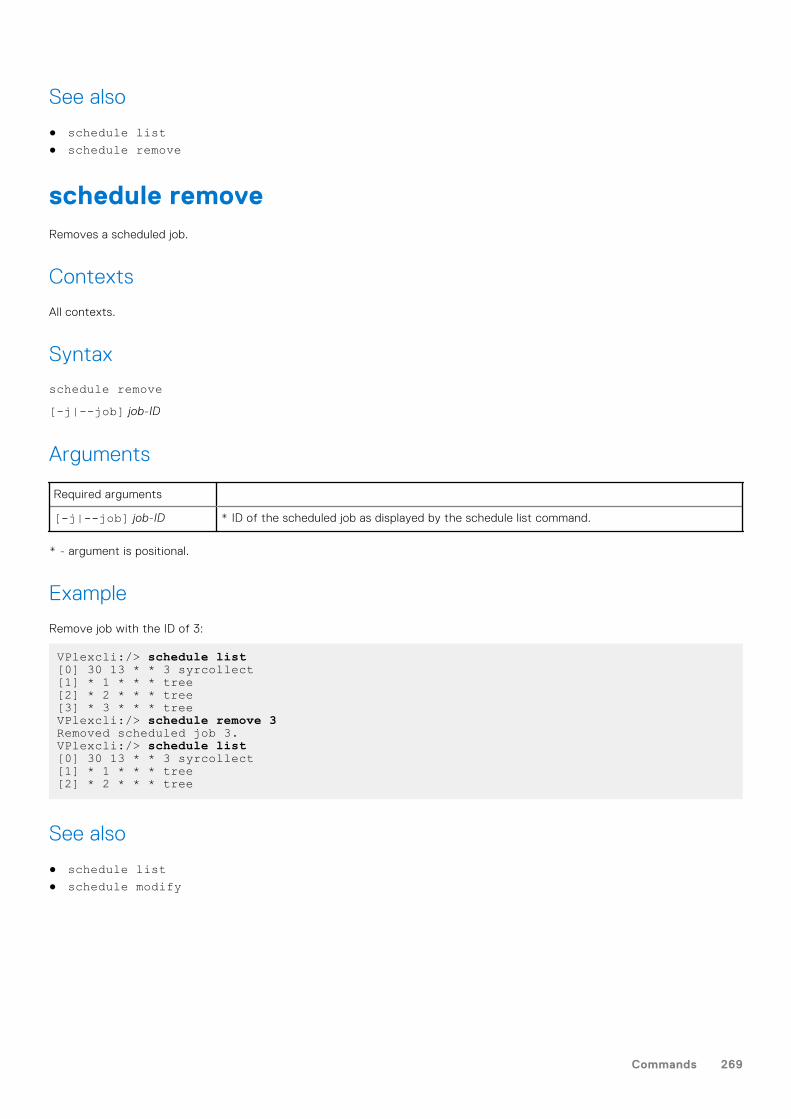
See also
● schedule list● schedule remove
schedule removeRemoves a scheduled job.
Contexts
All contexts.
Syntax
schedule remove[-j|--job] job-ID
Arguments
Required arguments
[-j|--job] job-ID * ID of the scheduled job as displayed by the schedule list command.
* - argument is positional.
Example
Remove job with the ID of 3:
VPlexcli:/> schedule list[0] 30 13 * * 3 syrcollect[1] * 1 * * * tree[2] * 2 * * * tree[3] * 3 * * * treeVPlexcli:/> schedule remove 3Removed scheduled job 3.VPlexcli:/> schedule list[0] 30 13 * * 3 syrcollect[1] * 1 * * * tree[2] * 2 * * * tree
See also
● schedule list● schedule modify
Commands 269
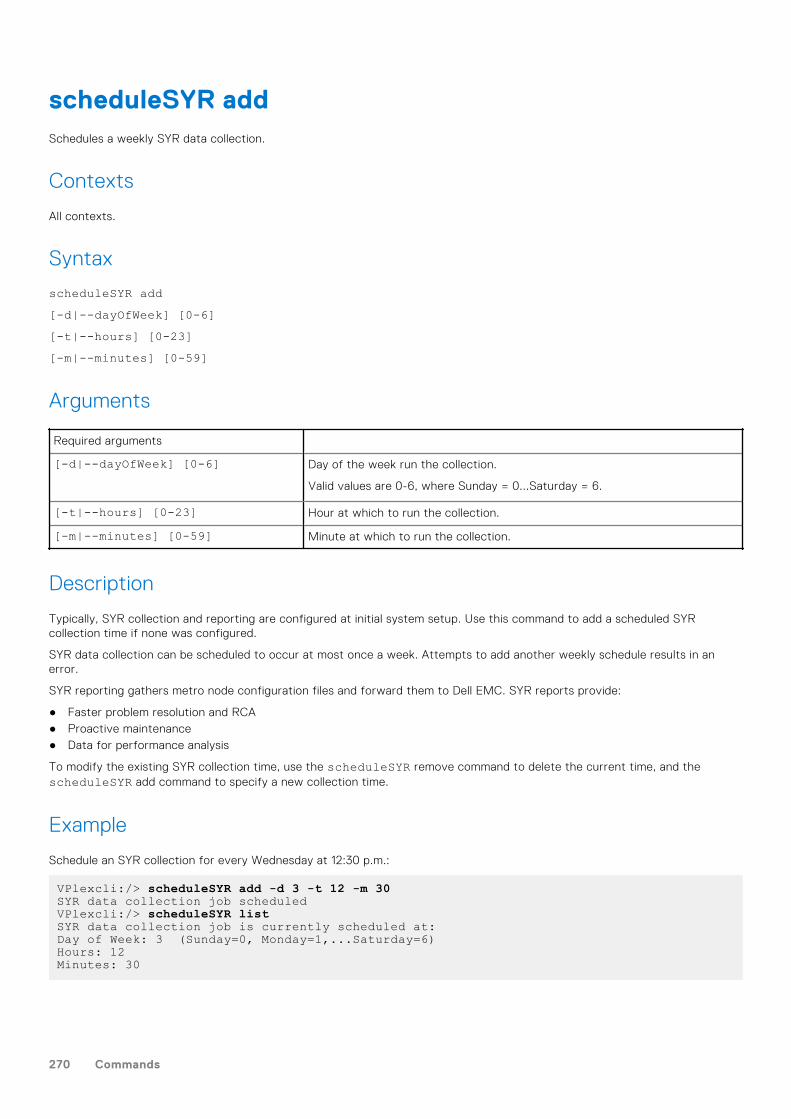
scheduleSYR addSchedules a weekly SYR data collection.
Contexts
All contexts.
Syntax
scheduleSYR add[-d|--dayOfWeek] [0-6][-t|--hours] [0-23][-m|--minutes] [0-59]
Arguments
Required arguments
[-d|--dayOfWeek] [0-6] Day of the week run the collection.
Valid values are 0-6, where Sunday = 0...Saturday = 6.
[-t|--hours] [0-23] Hour at which to run the collection.
[-m|--minutes] [0-59] Minute at which to run the collection.
Description
Typically, SYR collection and reporting are configured at initial system setup. Use this command to add a scheduled SYRcollection time if none was configured.
SYR data collection can be scheduled to occur at most once a week. Attempts to add another weekly schedule results in anerror.
SYR reporting gathers metro node configuration files and forward them to Dell EMC. SYR reports provide:
● Faster problem resolution and RCA● Proactive maintenance● Data for performance analysis
To modify the existing SYR collection time, use the scheduleSYR remove command to delete the current time, and thescheduleSYR add command to specify a new collection time.
Example
Schedule an SYR collection for every Wednesday at 12:30 p.m.:
VPlexcli:/> scheduleSYR add -d 3 -t 12 -m 30SYR data collection job scheduledVPlexcli:/> scheduleSYR listSYR data collection job is currently scheduled at:Day of Week: 3 (Sunday=0, Monday=1,...Saturday=6)Hours: 12Minutes: 30
270 Commands
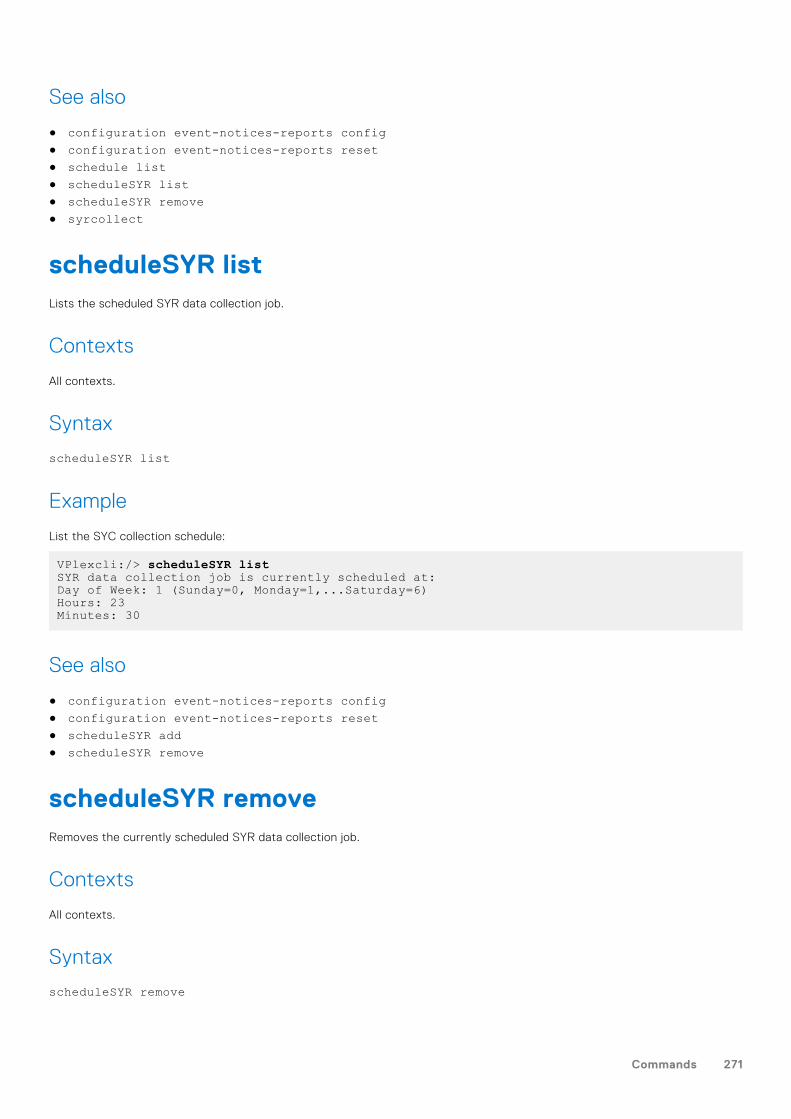
See also
● configuration event-notices-reports config● configuration event-notices-reports reset● schedule list● scheduleSYR list● scheduleSYR remove● syrcollect
scheduleSYR listLists the scheduled SYR data collection job.
Contexts
All contexts.
Syntax
scheduleSYR list
Example
List the SYC collection schedule:
VPlexcli:/> scheduleSYR listSYR data collection job is currently scheduled at:Day of Week: 1 (Sunday=0, Monday=1,...Saturday=6)Hours: 23Minutes: 30
See also
● configuration event-notices-reports config● configuration event-notices-reports reset● scheduleSYR add● scheduleSYR remove
scheduleSYR removeRemoves the currently scheduled SYR data collection job.
Contexts
All contexts.
Syntax
scheduleSYR remove
Commands 271
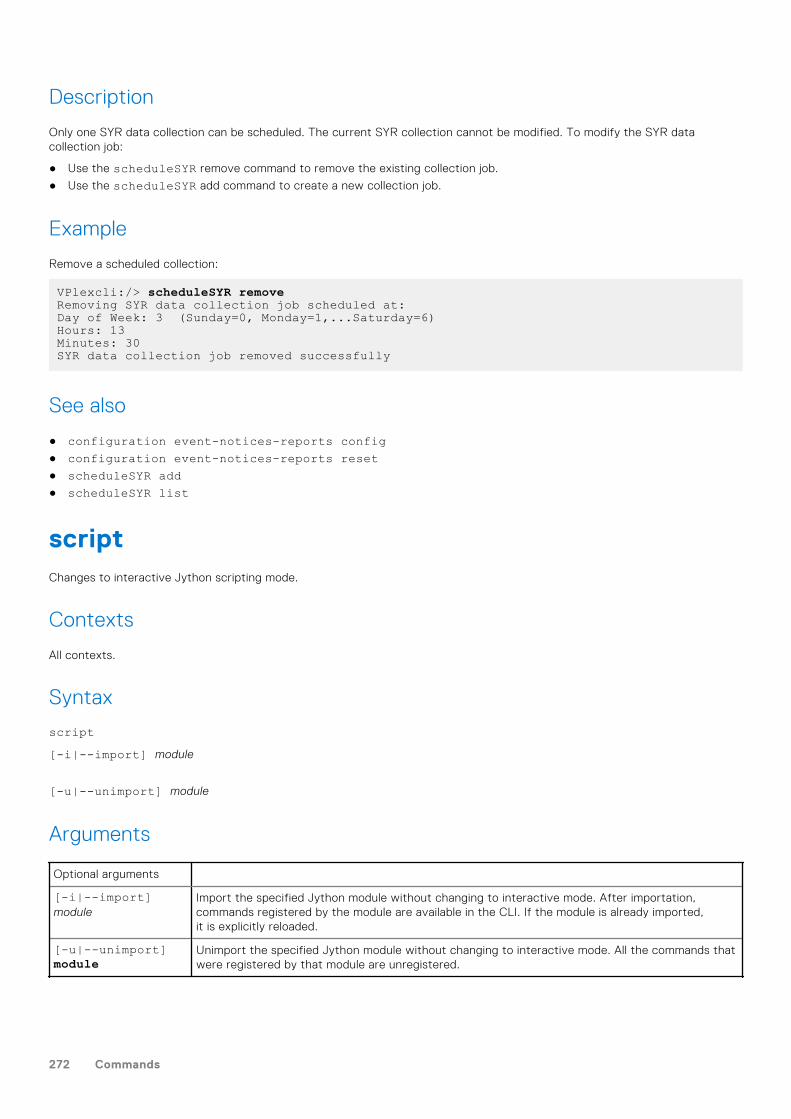
Description
Only one SYR data collection can be scheduled. The current SYR collection cannot be modified. To modify the SYR datacollection job:
● Use the scheduleSYR remove command to remove the existing collection job.
● Use the scheduleSYR add command to create a new collection job.
Example
Remove a scheduled collection:
VPlexcli:/> scheduleSYR removeRemoving SYR data collection job scheduled at:Day of Week: 3 (Sunday=0, Monday=1,...Saturday=6)Hours: 13Minutes: 30SYR data collection job removed successfully
See also
● configuration event-notices-reports config● configuration event-notices-reports reset● scheduleSYR add● scheduleSYR list
scriptChanges to interactive Jython scripting mode.
Contexts
All contexts.
Syntax
script[-i|--import] module
[-u|--unimport] module
Arguments
Optional arguments
[-i|--import]module
Import the specified Jython module without changing to interactive mode. After importation,commands registered by the module are available in the CLI. If the module is already imported,it is explicitly reloaded.
[-u|--unimport]module
Unimport the specified Jython module without changing to interactive mode. All the commands thatwere registered by that module are unregistered.
272 Commands
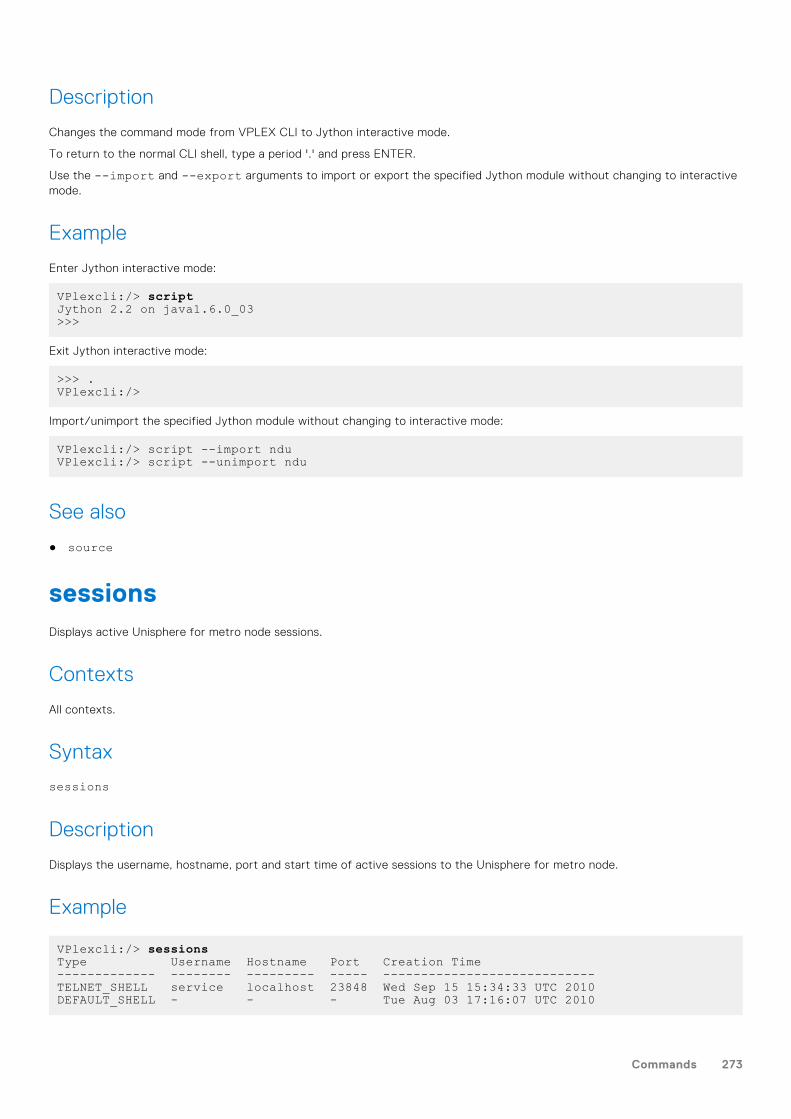
Description
Changes the command mode from VPLEX CLI to Jython interactive mode.
To return to the normal CLI shell, type a period '.' and press ENTER.
Use the --import and --export arguments to import or export the specified Jython module without changing to interactivemode.
Example
Enter Jython interactive mode:
VPlexcli:/> scriptJython 2.2 on java1.6.0_03>>>
Exit Jython interactive mode:
>>> .VPlexcli:/>
Import/unimport the specified Jython module without changing to interactive mode:
VPlexcli:/> script --import nduVPlexcli:/> script --unimport ndu
See also
● source
sessionsDisplays active Unisphere for metro node sessions.
Contexts
All contexts.
Syntax
sessions
Description
Displays the username, hostname, port and start time of active sessions to the Unisphere for metro node.
Example
VPlexcli:/> sessionsType Username Hostname Port Creation Time------------- -------- --------- ----- ----------------------------TELNET_SHELL service localhost 23848 Wed Sep 15 15:34:33 UTC 2010DEFAULT_SHELL - - - Tue Aug 03 17:16:07 UTC 2010
Commands 273
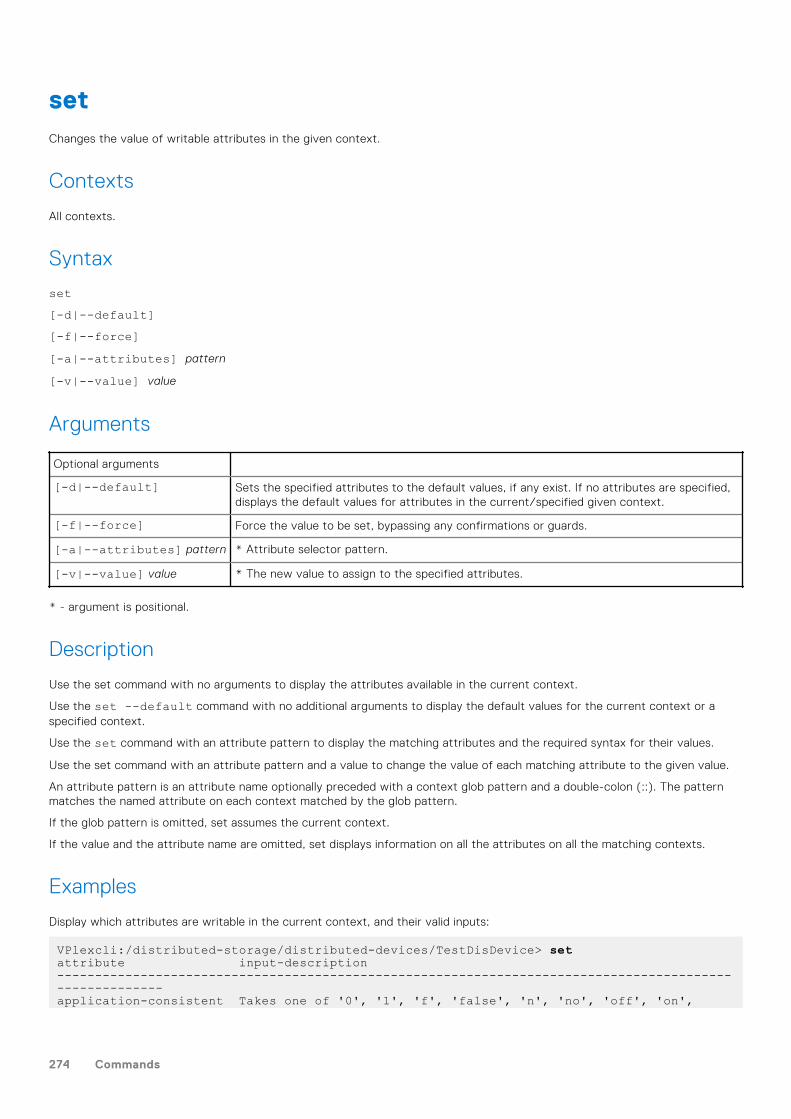
setChanges the value of writable attributes in the given context.
Contexts
All contexts.
Syntax
set[-d|--default][-f|--force][-a|--attributes] pattern
[-v|--value] value
Arguments
Optional arguments
[-d|--default] Sets the specified attributes to the default values, if any exist. If no attributes are specified,displays the default values for attributes in the current/specified given context.
[-f|--force] Force the value to be set, bypassing any confirmations or guards.
[-a|--attributes] pattern * Attribute selector pattern.
[-v|--value] value * The new value to assign to the specified attributes.
* - argument is positional.
Description
Use the set command with no arguments to display the attributes available in the current context.
Use the set --default command with no additional arguments to display the default values for the current context or aspecified context.
Use the set command with an attribute pattern to display the matching attributes and the required syntax for their values.
Use the set command with an attribute pattern and a value to change the value of each matching attribute to the given value.
An attribute pattern is an attribute name optionally preceded with a context glob pattern and a double-colon (::). The patternmatches the named attribute on each context matched by the glob pattern.
If the glob pattern is omitted, set assumes the current context.
If the value and the attribute name are omitted, set displays information on all the attributes on all the matching contexts.
Examples
Display which attributes are writable in the current context, and their valid inputs:
VPlexcli:/distributed-storage/distributed-devices/TestDisDevice> setattribute input-description-------------------------------------------------------------------------------------------------------application-consistent Takes one of '0', '1', 'f', 'false', 'n', 'no', 'off', 'on',
274 Commands
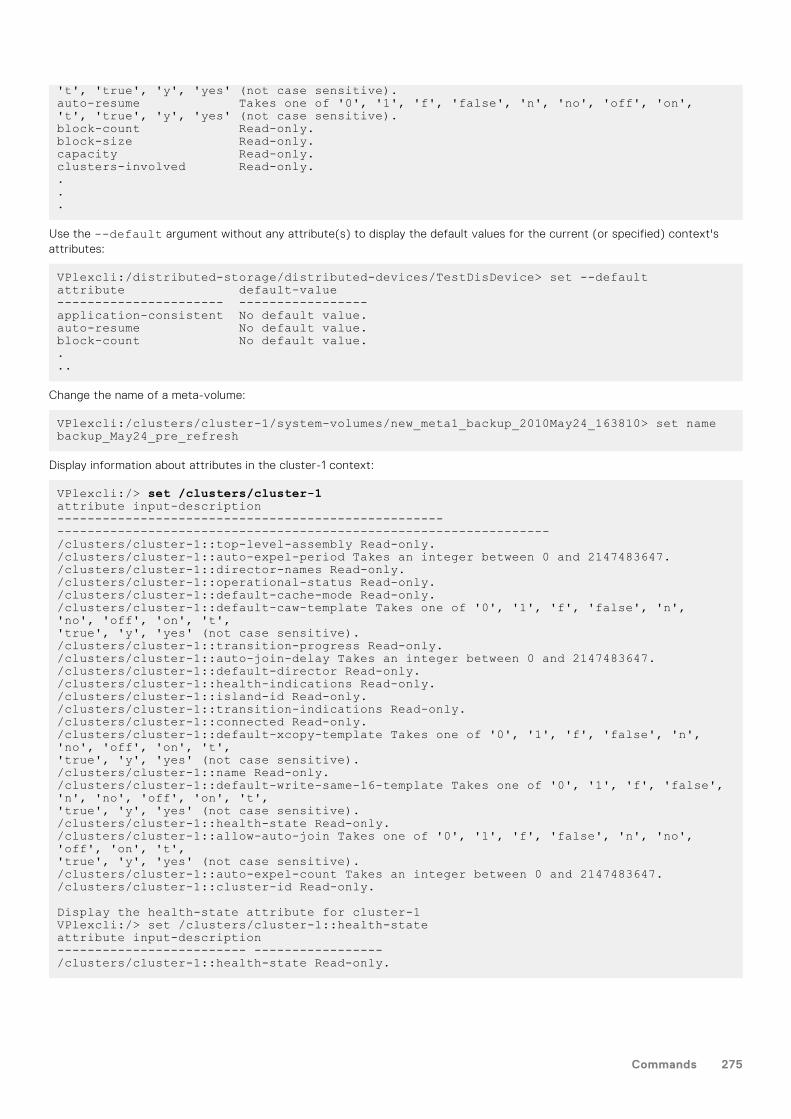
't', 'true', 'y', 'yes' (not case sensitive).auto-resume Takes one of '0', '1', 'f', 'false', 'n', 'no', 'off', 'on', 't', 'true', 'y', 'yes' (not case sensitive).block-count Read-only.block-size Read-only.capacity Read-only.clusters-involved Read-only....
Use the --default argument without any attribute(s) to display the default values for the current (or specified) context'sattributes:
VPlexcli:/distributed-storage/distributed-devices/TestDisDevice> set --defaultattribute default-value---------------------- -----------------application-consistent No default value.auto-resume No default value.block-count No default value....
Change the name of a meta-volume:
VPlexcli:/clusters/cluster-1/system-volumes/new_meta1_backup_2010May24_163810> set name backup_May24_pre_refresh
Display information about attributes in the cluster-1 context:
VPlexcli:/> set /clusters/cluster-1attribute input-description--------------------------------------------------- -----------------------------------------------------------------/clusters/cluster-1::top-level-assembly Read-only./clusters/cluster-1::auto-expel-period Takes an integer between 0 and 2147483647./clusters/cluster-1::director-names Read-only./clusters/cluster-1::operational-status Read-only./clusters/cluster-1::default-cache-mode Read-only./clusters/cluster-1::default-caw-template Takes one of '0', '1', 'f', 'false', 'n', 'no', 'off', 'on', 't','true', 'y', 'yes' (not case sensitive)./clusters/cluster-1::transition-progress Read-only./clusters/cluster-1::auto-join-delay Takes an integer between 0 and 2147483647./clusters/cluster-1::default-director Read-only./clusters/cluster-1::health-indications Read-only./clusters/cluster-1::island-id Read-only./clusters/cluster-1::transition-indications Read-only./clusters/cluster-1::connected Read-only./clusters/cluster-1::default-xcopy-template Takes one of '0', '1', 'f', 'false', 'n', 'no', 'off', 'on', 't','true', 'y', 'yes' (not case sensitive)./clusters/cluster-1::name Read-only./clusters/cluster-1::default-write-same-16-template Takes one of '0', '1', 'f', 'false', 'n', 'no', 'off', 'on', 't','true', 'y', 'yes' (not case sensitive)./clusters/cluster-1::health-state Read-only./clusters/cluster-1::allow-auto-join Takes one of '0', '1', 'f', 'false', 'n', 'no', 'off', 'on', 't','true', 'y', 'yes' (not case sensitive)./clusters/cluster-1::auto-expel-count Takes an integer between 0 and 2147483647./clusters/cluster-1::cluster-id Read-only.
Display the health-state attribute for cluster-1VPlexcli:/> set /clusters/cluster-1::health-stateattribute input-description------------------------- -----------------/clusters/cluster-1::health-state Read-only.
Commands 275
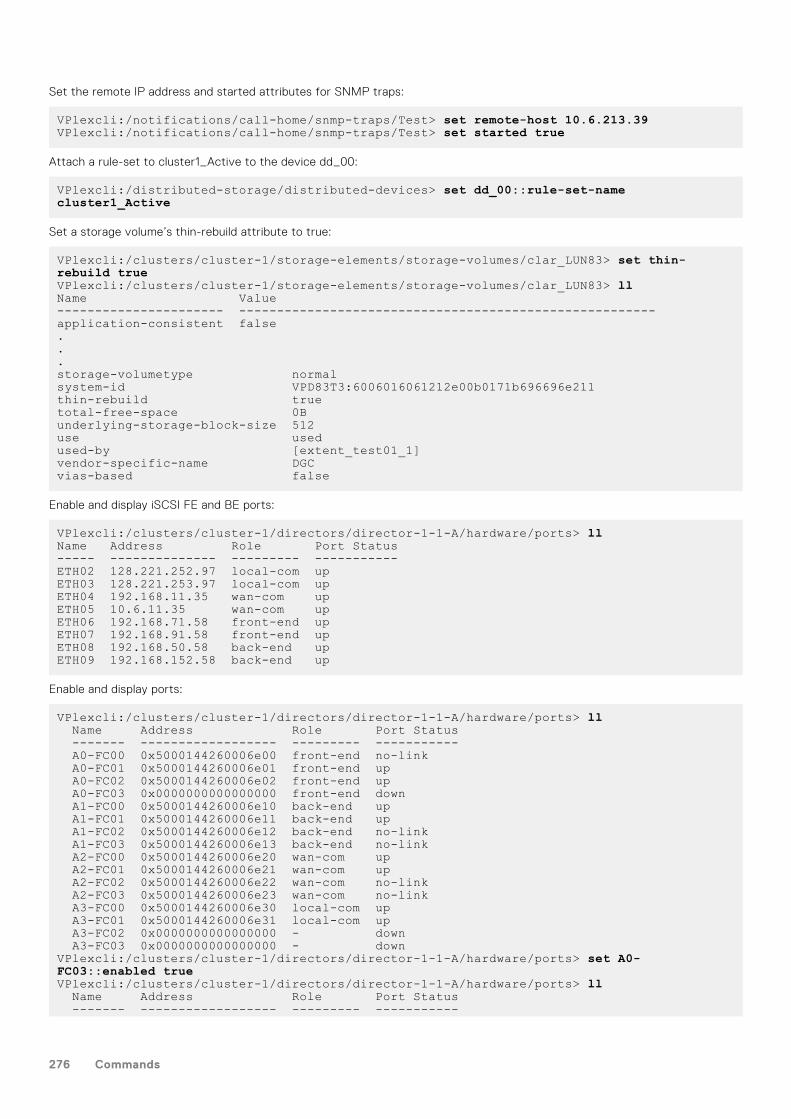
Set the remote IP address and started attributes for SNMP traps:
VPlexcli:/notifications/call-home/snmp-traps/Test> set remote-host 10.6.213.39VPlexcli:/notifications/call-home/snmp-traps/Test> set started true
Attach a rule-set to cluster1_Active to the device dd_00:
VPlexcli:/distributed-storage/distributed-devices> set dd_00::rule-set-name cluster1_Active
Set a storage volume’s thin-rebuild attribute to true:
VPlexcli:/clusters/cluster-1/storage-elements/storage-volumes/clar_LUN83> set thin-rebuild trueVPlexcli:/clusters/cluster-1/storage-elements/storage-volumes/clar_LUN83> llName Value---------------------- -------------------------------------------------------application-consistent false...storage-volumetype normalsystem-id VPD83T3:6006016061212e00b0171b696696e211thin-rebuild truetotal-free-space 0Bunderlying-storage-block-size 512use usedused-by [extent_test01_1]vendor-specific-name DGCvias-based false
Enable and display iSCSI FE and BE ports:
VPlexcli:/clusters/cluster-1/directors/director-1-1-A/hardware/ports> llName Address Role Port Status----- -------------- --------- -----------ETH02 128.221.252.97 local-com upETH03 128.221.253.97 local-com upETH04 192.168.11.35 wan-com upETH05 10.6.11.35 wan-com upETH06 192.168.71.58 front-end upETH07 192.168.91.58 front-end upETH08 192.168.50.58 back-end upETH09 192.168.152.58 back-end up
Enable and display ports:
VPlexcli:/clusters/cluster-1/directors/director-1-1-A/hardware/ports> ll Name Address Role Port Status ------- ------------------ --------- ----------- A0-FC00 0x5000144260006e00 front-end no-link A0-FC01 0x5000144260006e01 front-end up A0-FC02 0x5000144260006e02 front-end up A0-FC03 0x0000000000000000 front-end down A1-FC00 0x5000144260006e10 back-end up A1-FC01 0x5000144260006e11 back-end up A1-FC02 0x5000144260006e12 back-end no-link A1-FC03 0x5000144260006e13 back-end no-link A2-FC00 0x5000144260006e20 wan-com up A2-FC01 0x5000144260006e21 wan-com up A2-FC02 0x5000144260006e22 wan-com no-link A2-FC03 0x5000144260006e23 wan-com no-link A3-FC00 0x5000144260006e30 local-com up A3-FC01 0x5000144260006e31 local-com up A3-FC02 0x0000000000000000 - down A3-FC03 0x0000000000000000 - downVPlexcli:/clusters/cluster-1/directors/director-1-1-A/hardware/ports> set A0-FC03::enabled trueVPlexcli:/clusters/cluster-1/directors/director-1-1-A/hardware/ports> ll Name Address Role Port Status ------- ------------------ --------- -----------
276 Commands
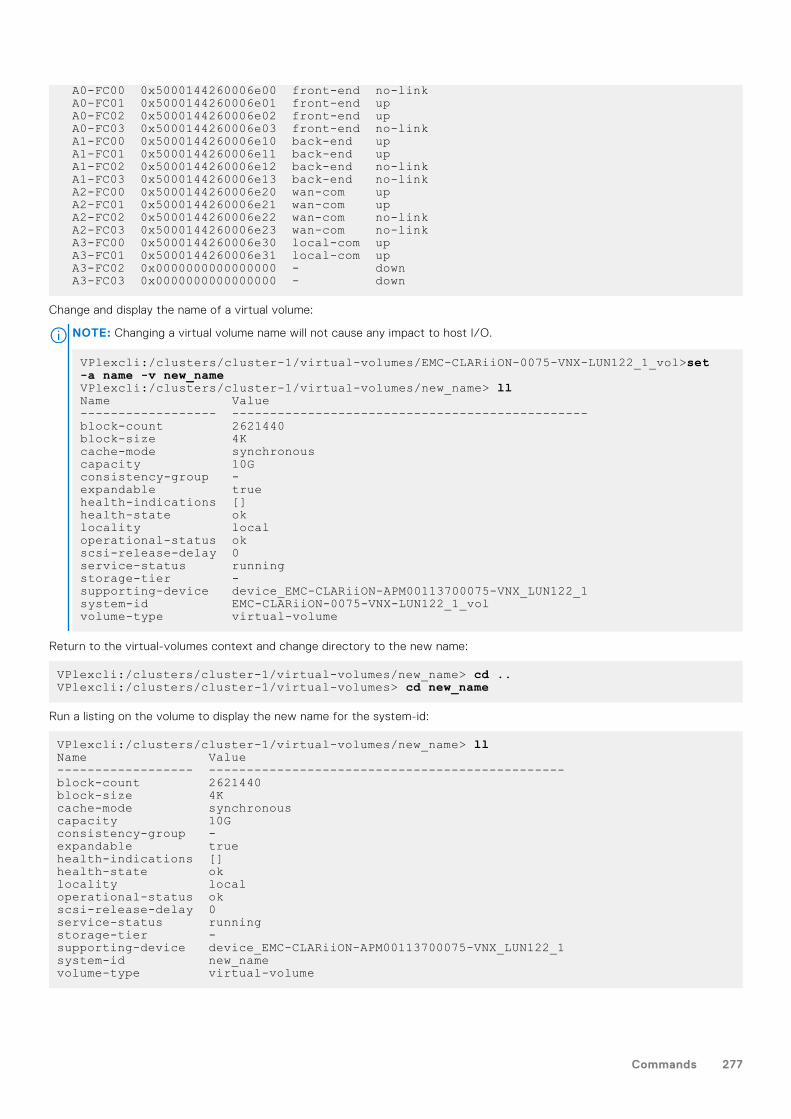
A0-FC00 0x5000144260006e00 front-end no-link A0-FC01 0x5000144260006e01 front-end up A0-FC02 0x5000144260006e02 front-end up A0-FC03 0x5000144260006e03 front-end no-link A1-FC00 0x5000144260006e10 back-end up A1-FC01 0x5000144260006e11 back-end up A1-FC02 0x5000144260006e12 back-end no-link A1-FC03 0x5000144260006e13 back-end no-link A2-FC00 0x5000144260006e20 wan-com up A2-FC01 0x5000144260006e21 wan-com up A2-FC02 0x5000144260006e22 wan-com no-link A2-FC03 0x5000144260006e23 wan-com no-link A3-FC00 0x5000144260006e30 local-com up A3-FC01 0x5000144260006e31 local-com up A3-FC02 0x0000000000000000 - down A3-FC03 0x0000000000000000 - down
Change and display the name of a virtual volume:
NOTE: Changing a virtual volume name will not cause any impact to host I/O.
VPlexcli:/clusters/cluster-1/virtual-volumes/EMC-CLARiiON-0075-VNX-LUN122_1_vol>set -a name -v new_nameVPlexcli:/clusters/cluster-1/virtual-volumes/new_name> llName Value------------------ -----------------------------------------------block-count 2621440block-size 4Kcache-mode synchronouscapacity 10Gconsistency-group -expandable truehealth-indications []health-state oklocality localoperational-status okscsi-release-delay 0service-status runningstorage-tier -supporting-device device_EMC-CLARiiON-APM00113700075-VNX_LUN122_1system-id EMC-CLARiiON-0075-VNX-LUN122_1_volvolume-type virtual-volume
Return to the virtual-volumes context and change directory to the new name:
VPlexcli:/clusters/cluster-1/virtual-volumes/new_name> cd ..VPlexcli:/clusters/cluster-1/virtual-volumes> cd new_name
Run a listing on the volume to display the new name for the system-id:
VPlexcli:/clusters/cluster-1/virtual-volumes/new_name> llName Value------------------ -----------------------------------------------block-count 2621440block-size 4Kcache-mode synchronouscapacity 10Gconsistency-group -expandable truehealth-indications []health-state oklocality localoperational-status okscsi-release-delay 0service-status runningstorage-tier -supporting-device device_EMC-CLARiiON-APM00113700075-VNX_LUN122_1system-id new_namevolume-type virtual-volume
Commands 277
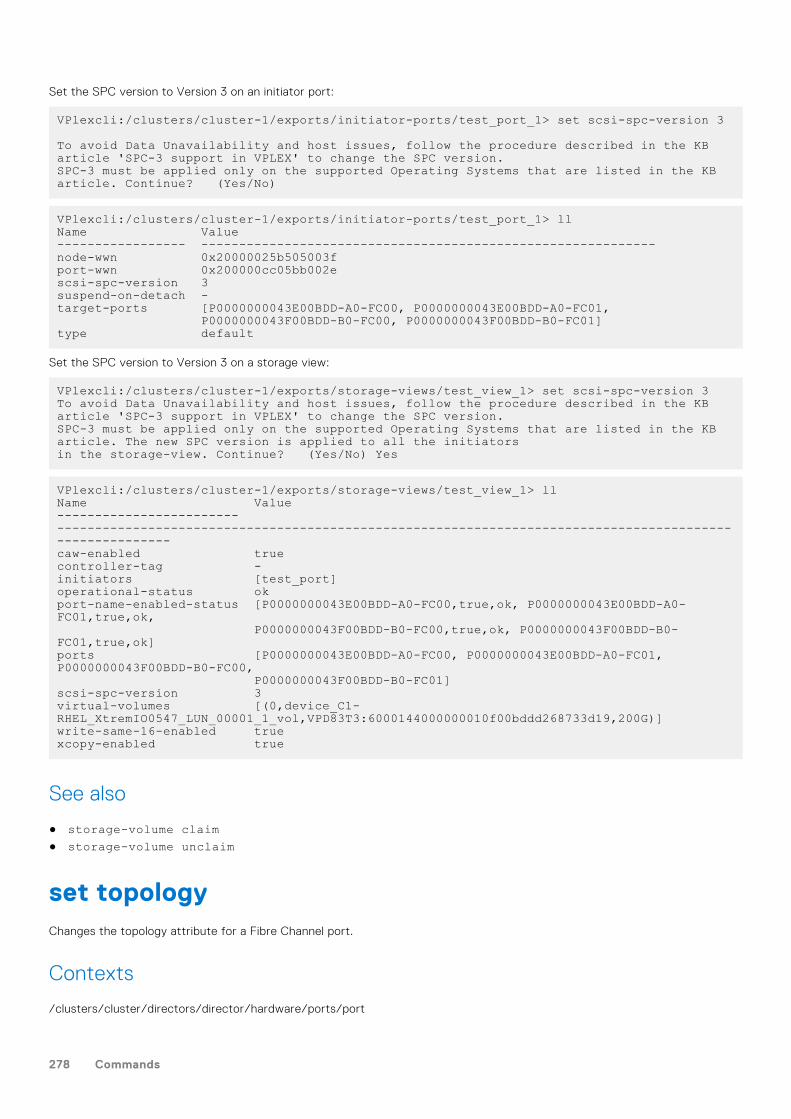
Set the SPC version to Version 3 on an initiator port:
VPlexcli:/clusters/cluster-1/exports/initiator-ports/test_port_1> set scsi-spc-version 3 To avoid Data Unavailability and host issues, follow the procedure described in the KB article 'SPC-3 support in VPLEX' to change the SPC version. SPC-3 must be applied only on the supported Operating Systems that are listed in the KB article. Continue? (Yes/No)
VPlexcli:/clusters/cluster-1/exports/initiator-ports/test_port_1> ll Name Value ----------------- ------------------------------------------------------------ node-wwn 0x20000025b505003f port-wwn 0x200000cc05bb002e scsi-spc-version 3 suspend-on-detach - target-ports [P0000000043E00BDD-A0-FC00, P0000000043E00BDD-A0-FC01, P0000000043F00BDD-B0-FC00, P0000000043F00BDD-B0-FC01] type default
Set the SPC version to Version 3 on a storage view:
VPlexcli:/clusters/cluster-1/exports/storage-views/test_view_1> set scsi-spc-version 3 To avoid Data Unavailability and host issues, follow the procedure described in the KB article 'SPC-3 support in VPLEX' to change the SPC version. SPC-3 must be applied only on the supported Operating Systems that are listed in the KB article. The new SPC version is applied to all the initiators in the storage-view. Continue? (Yes/No) Yes
VPlexcli:/clusters/cluster-1/exports/storage-views/test_view_1> ll Name Value ------------------------ -------------------------------------------------------------------------------------------------------- caw-enabled true controller-tag - initiators [test_port] operational-status ok port-name-enabled-status [P0000000043E00BDD-A0-FC00,true,ok, P0000000043E00BDD-A0-FC01,true,ok, P0000000043F00BDD-B0-FC00,true,ok, P0000000043F00BDD-B0-FC01,true,ok] ports [P0000000043E00BDD-A0-FC00, P0000000043E00BDD-A0-FC01, P0000000043F00BDD-B0-FC00, P0000000043F00BDD-B0-FC01] scsi-spc-version 3 virtual-volumes [(0,device_C1-RHEL_XtremIO0547_LUN_00001_1_vol,VPD83T3:6000144000000010f00bddd268733d19,200G)] write-same-16-enabled true xcopy-enabled true
See also
● storage-volume claim● storage-volume unclaim
set topologyChanges the topology attribute for a Fibre Channel port.
Contexts
/clusters/cluster/directors/director/hardware/ports/port
278 Commands
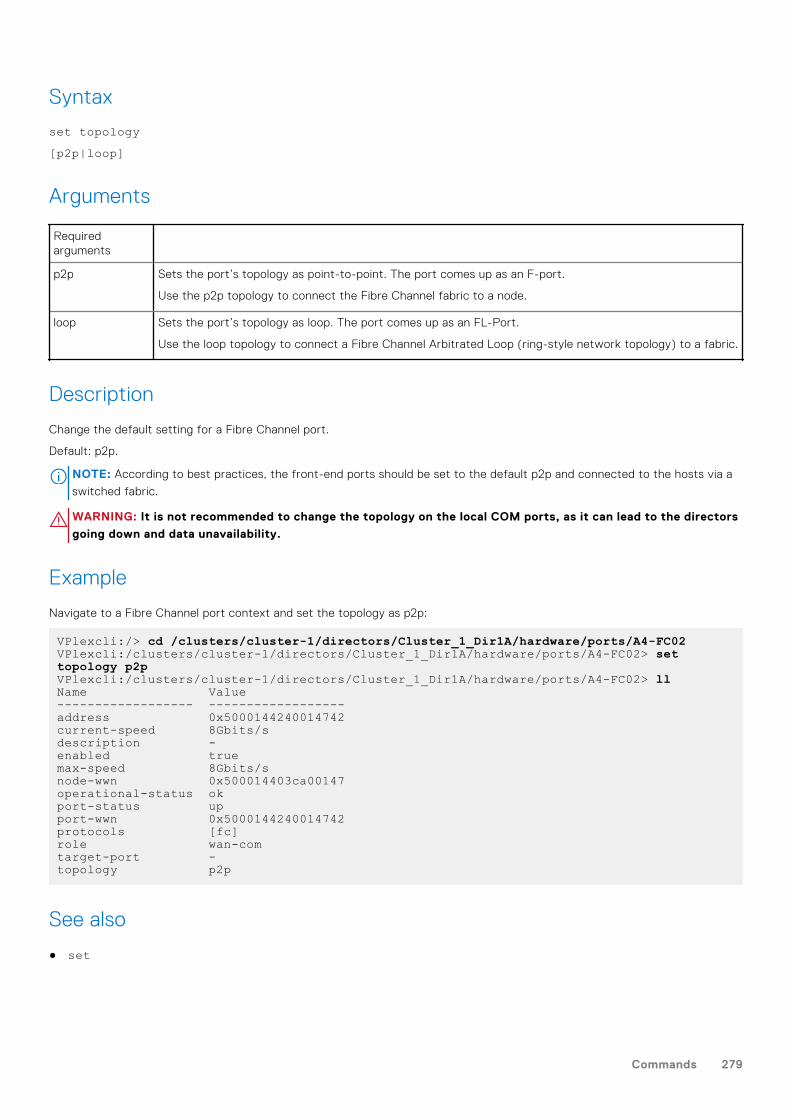
Syntax
set topology[p2p|loop]
Arguments
Requiredarguments
p2p Sets the port’s topology as point-to-point. The port comes up as an F-port.
Use the p2p topology to connect the Fibre Channel fabric to a node.
loop Sets the port’s topology as loop. The port comes up as an FL-Port.
Use the loop topology to connect a Fibre Channel Arbitrated Loop (ring-style network topology) to a fabric.
Description
Change the default setting for a Fibre Channel port.
Default: p2p.
NOTE: According to best practices, the front-end ports should be set to the default p2p and connected to the hosts via a
switched fabric.
WARNING: It is not recommended to change the topology on the local COM ports, as it can lead to the directors
going down and data unavailability.
Example
Navigate to a Fibre Channel port context and set the topology as p2p:
VPlexcli:/> cd /clusters/cluster-1/directors/Cluster_1_Dir1A/hardware/ports/A4-FC02VPlexcli:/clusters/cluster-1/directors/Cluster_1_Dir1A/hardware/ports/A4-FC02> set topology p2pVPlexcli:/clusters/cluster-1/directors/Cluster_1_Dir1A/hardware/ports/A4-FC02> llName Value------------------ ------------------address 0x5000144240014742current-speed 8Gbits/sdescription -enabled truemax-speed 8Gbits/snode-wwn 0x500014403ca00147operational-status okport-status upport-wwn 0x5000144240014742protocols [fc]role wan-comtarget-port -topology p2p
See also
● set
Commands 279
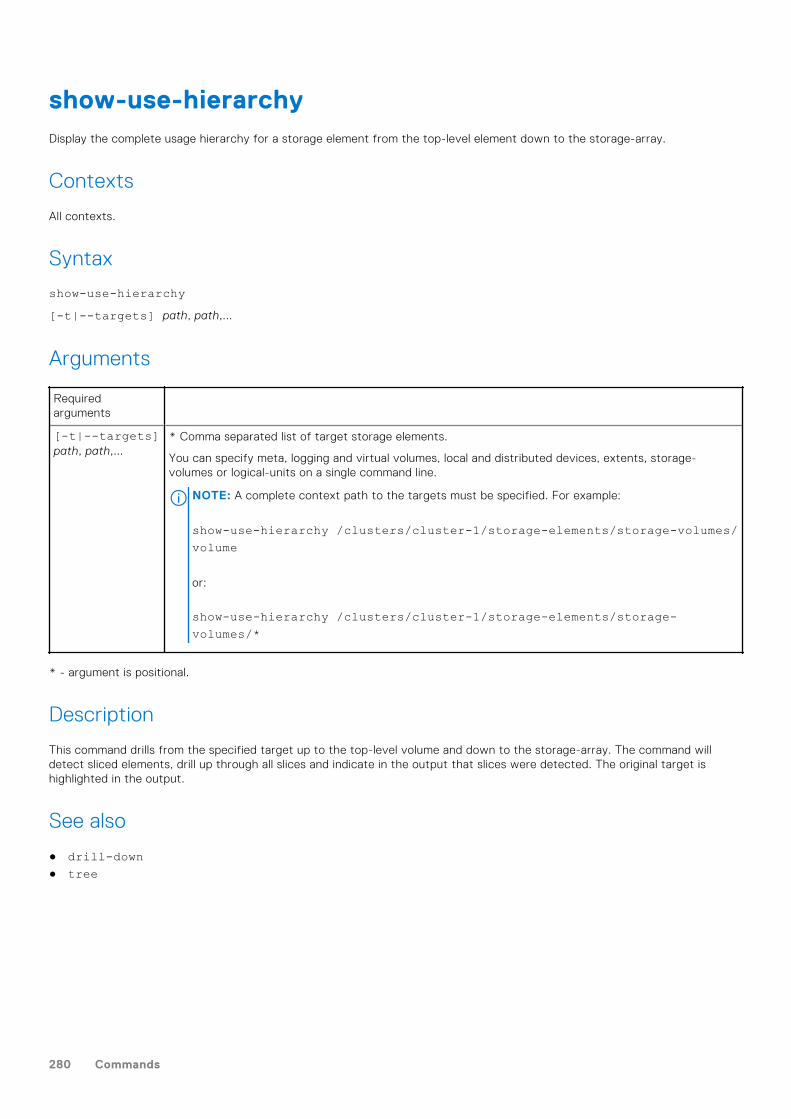
show-use-hierarchyDisplay the complete usage hierarchy for a storage element from the top-level element down to the storage-array.
Contexts
All contexts.
Syntax
show-use-hierarchy[-t|--targets] path, path,...
Arguments
Requiredarguments
[-t|--targets]path, path,...
* Comma separated list of target storage elements.
You can specify meta, logging and virtual volumes, local and distributed devices, extents, storage-volumes or logical-units on a single command line.
NOTE: A complete context path to the targets must be specified. For example:
show-use-hierarchy /clusters/cluster-1/storage-elements/storage-volumes/volume
or:
show-use-hierarchy /clusters/cluster-1/storage-elements/storage-volumes/*
* - argument is positional.
Description
This command drills from the specified target up to the top-level volume and down to the storage-array. The command willdetect sliced elements, drill up through all slices and indicate in the output that slices were detected. The original target ishighlighted in the output.
See also
● drill-down● tree
280 Commands
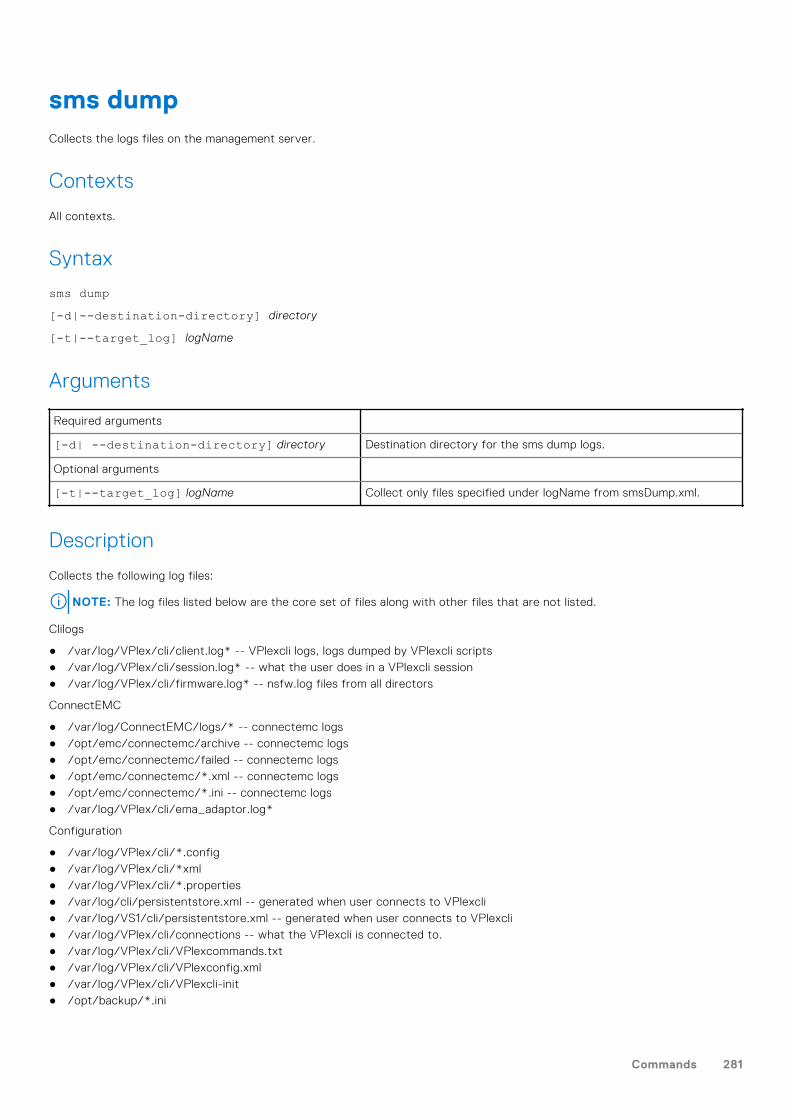
sms dumpCollects the logs files on the management server.
Contexts
All contexts.
Syntax
sms dump[-d|--destination-directory] directory
[-t|--target_log] logName
Arguments
Required arguments
[-d| --destination-directory] directory Destination directory for the sms dump logs.
Optional arguments
[-t|--target_log] logName Collect only files specified under logName from smsDump.xml.
Description
Collects the following log files:
NOTE: The log files listed below are the core set of files along with other files that are not listed.
Clilogs
● /var/log/VPlex/cli/client.log* -- VPlexcli logs, logs dumped by VPlexcli scripts● /var/log/VPlex/cli/session.log* -- what the user does in a VPlexcli session● /var/log/VPlex/cli/firmware.log* -- nsfw.log files from all directors
ConnectEMC
● /var/log/ConnectEMC/logs/* -- connectemc logs● /opt/emc/connectemc/archive -- connectemc logs● /opt/emc/connectemc/failed -- connectemc logs● /opt/emc/connectemc/*.xml -- connectemc logs● /opt/emc/connectemc/*.ini -- connectemc logs● /var/log/VPlex/cli/ema_adaptor.log*
Configuration
● /var/log/VPlex/cli/*.config● /var/log/VPlex/cli/*xml● /var/log/VPlex/cli/*.properties● /var/log/cli/persistentstore.xml -- generated when user connects to VPlexcli● /var/log/VS1/cli/persistentstore.xml -- generated when user connects to VPlexcli● /var/log/VPlex/cli/connections -- what the VPlexcli is connected to.● /var/log/VPlex/cli/VPlexcommands.txt● /var/log/VPlex/cli/VPlexconfig.xml● /var/log/VPlex/cli/VPlexcli-init● /opt/backup/*.ini
Commands 281
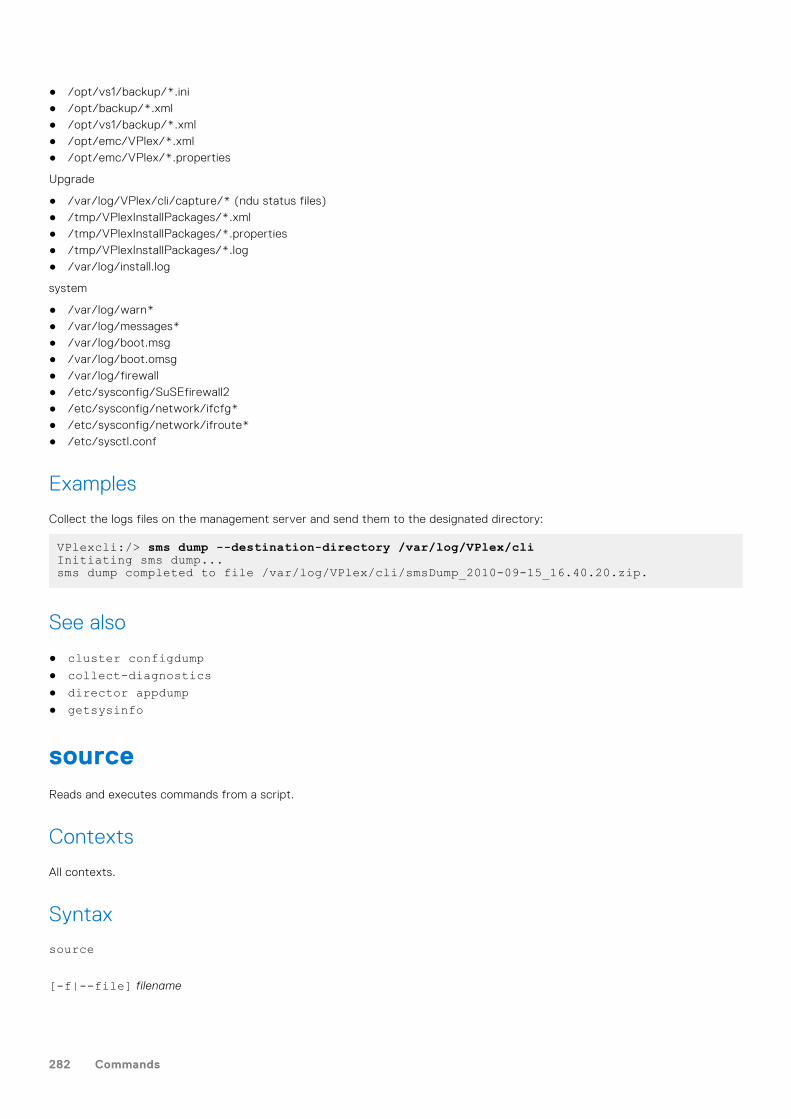
● /opt/vs1/backup/*.ini● /opt/backup/*.xml● /opt/vs1/backup/*.xml● /opt/emc/VPlex/*.xml● /opt/emc/VPlex/*.properties
Upgrade
● /var/log/VPlex/cli/capture/* (ndu status files)● /tmp/VPlexInstallPackages/*.xml● /tmp/VPlexInstallPackages/*.properties● /tmp/VPlexInstallPackages/*.log● /var/log/install.log
system
● /var/log/warn*● /var/log/messages*● /var/log/boot.msg● /var/log/boot.omsg● /var/log/firewall● /etc/sysconfig/SuSEfirewall2● /etc/sysconfig/network/ifcfg*● /etc/sysconfig/network/ifroute*● /etc/sysctl.conf
Examples
Collect the logs files on the management server and send them to the designated directory:
VPlexcli:/> sms dump --destination-directory /var/log/VPlex/cliInitiating sms dump...sms dump completed to file /var/log/VPlex/cli/smsDump_2010-09-15_16.40.20.zip.
See also
● cluster configdump● collect-diagnostics● director appdump● getsysinfo
sourceReads and executes commands from a script.
Contexts
All contexts.
Syntax
source
[-f|--file] filename
282 Commands
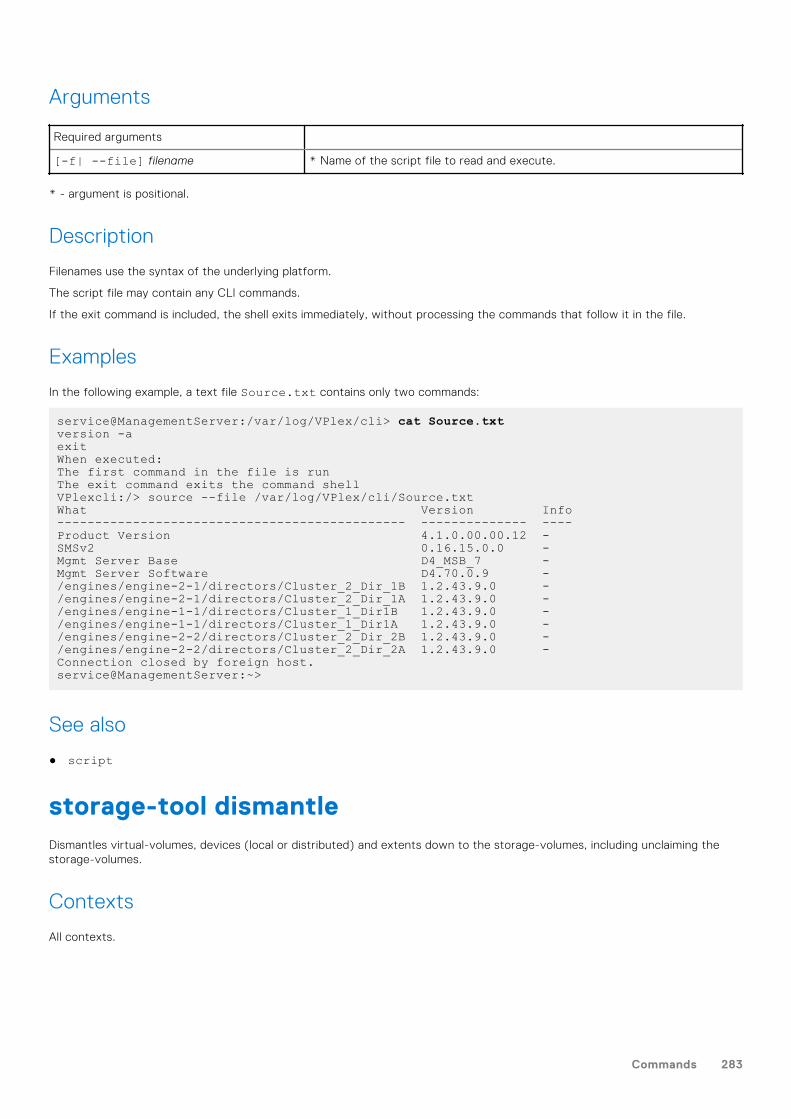
Arguments
Required arguments
[-f| --file] filename * Name of the script file to read and execute.
* - argument is positional.
Description
Filenames use the syntax of the underlying platform.
The script file may contain any CLI commands.
If the exit command is included, the shell exits immediately, without processing the commands that follow it in the file.
Examples
In the following example, a text file Source.txt contains only two commands:
service@ManagementServer:/var/log/VPlex/cli> cat Source.txtversion -aexitWhen executed:The first command in the file is runThe exit command exits the command shellVPlexcli:/> source --file /var/log/VPlex/cli/Source.txtWhat Version Info---------------------------------------------- -------------- ----Product Version 4.1.0.00.00.12 -SMSv2 0.16.15.0.0 -Mgmt Server Base D4_MSB_7 -Mgmt Server Software D4.70.0.9 -/engines/engine-2-1/directors/Cluster_2_Dir_1B 1.2.43.9.0 -/engines/engine-2-1/directors/Cluster_2_Dir_1A 1.2.43.9.0 -/engines/engine-1-1/directors/Cluster_1_Dir1B 1.2.43.9.0 -/engines/engine-1-1/directors/Cluster_1_Dir1A 1.2.43.9.0 -/engines/engine-2-2/directors/Cluster_2_Dir_2B 1.2.43.9.0 -/engines/engine-2-2/directors/Cluster_2_Dir_2A 1.2.43.9.0 -Connection closed by foreign host.service@ManagementServer:~>
See also
● script
storage-tool dismantleDismantles virtual-volumes, devices (local or distributed) and extents down to the storage-volumes, including unclaiming thestorage-volumes.
Contexts
All contexts.
Commands 283
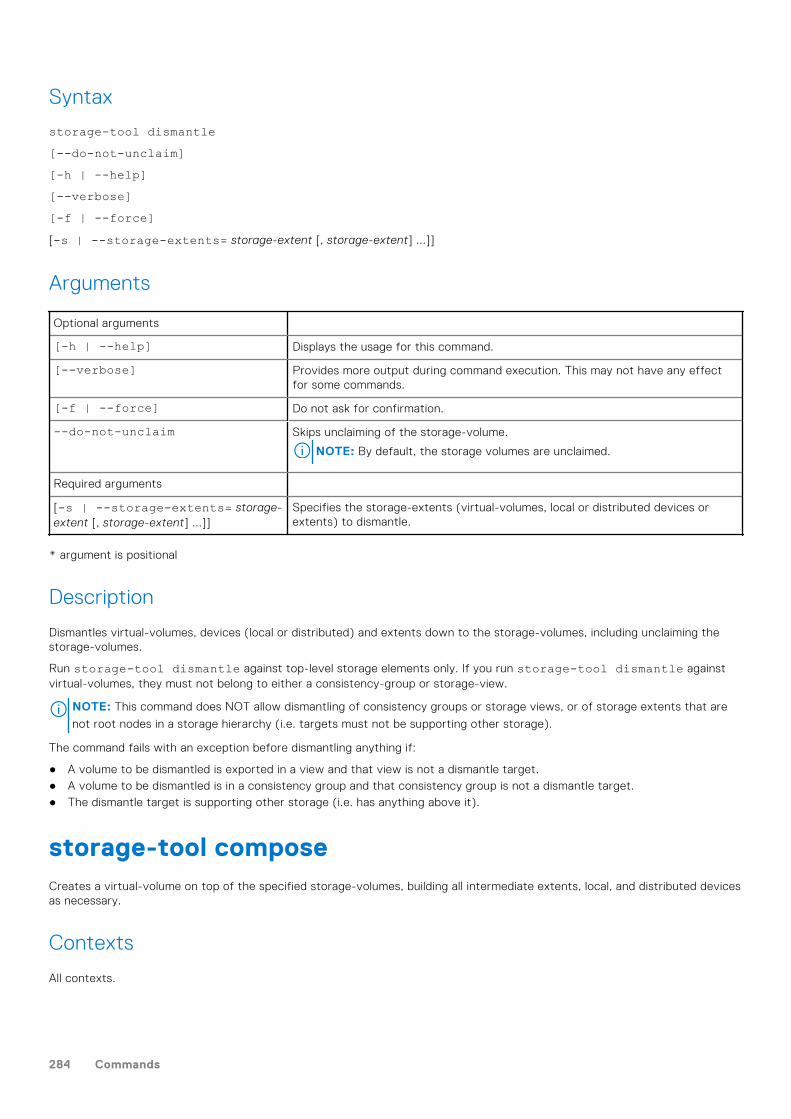
Syntax
storage-tool dismantle[--do-not-unclaim][-h | --help][--verbose][-f | --force][-s | --storage-extents= storage-extent [, storage-extent] ...]]
Arguments
Optional arguments
[-h | --help] Displays the usage for this command.
[--verbose] Provides more output during command execution. This may not have any effectfor some commands.
[-f | --force] Do not ask for confirmation.
--do-not-unclaim Skips unclaiming of the storage-volume.
NOTE: By default, the storage volumes are unclaimed.
Required arguments
[-s | --storage-extents= storage-extent [, storage-extent] ...]]
Specifies the storage-extents (virtual-volumes, local or distributed devices orextents) to dismantle.
* argument is positional
Description
Dismantles virtual-volumes, devices (local or distributed) and extents down to the storage-volumes, including unclaiming thestorage-volumes.
Run storage-tool dismantle against top-level storage elements only. If you run storage-tool dismantle againstvirtual-volumes, they must not belong to either a consistency-group or storage-view.
NOTE: This command does NOT allow dismantling of consistency groups or storage views, or of storage extents that are
not root nodes in a storage hierarchy (i.e. targets must not be supporting other storage).
The command fails with an exception before dismantling anything if:
● A volume to be dismantled is exported in a view and that view is not a dismantle target.● A volume to be dismantled is in a consistency group and that consistency group is not a dismantle target.● The dismantle target is supporting other storage (i.e. has anything above it).
storage-tool composeCreates a virtual-volume on top of the specified storage-volumes, building all intermediate extents, local, and distributed devicesas necessary.
Contexts
All contexts.
284 Commands

Syntax
storage-tool compose[-n|--name] name
[-g|--geometry] {raid-0|raid-1|raid-c}[-d|--storage-volumes] storage-volume [, storage-volume...]
[-m|--source-mirror] source-mirror
[-c|--consistency-group] consistency-group
[-v|--storage-views] storage-view [, storage-view ...]
[-t|--thin][-h|--help][--verbose]
Arguments
Required arguments
[-n|--name] name * Specifies the name for the new virtual volume. Must be unique across the system.
[-g|--geometry]{raid-0 |raid-1|raid-c}
* Specifies the geometry to use for the local devices at each cluster. Valid values are raid-0,raid-1, or raid-c.
Optional arguments
[-d|--storage-volumes] storage-volume[, storage-volume...]
* Specifies a list of storage volumes to build the virtual volume from. These may be claimed, butmust be unused.
[-m|--source-mirror] source-mirror
Specifies the storage volume to use as a source mirror when creating local and distributeddevices.
NOTE: If specified, --source-mirror will be used as a source-mirror when creating local
and distributed RAID 1 devices. This will trigger a rebuild from the source-mirror to all other
mirrors of the RAID 1 device (local and distributed). While the rebuild is in progress the
new virtual volume (and supporting local and/or distributed devices) will be in a degraded
state, which is normal. This option only applies to RAID 1 local or distributed devices. The
--source-mirror may also appear in --storage-volumes.
[-c|--consistency-group] consistency-group
Specifies the context path of a consistency group that the new virtual volume should be addedto. The new virtual-volume’s global geometry must be compatible with the consistency group’sstorage-at-clusters attribute.
[-v|--storage-views] storage-view[, storage-view...]
Specifies the context path of the storage views that the new virtual volume will be added to. Thenew virtual volume’s global geometry must be compatible with the storage view’s locality.
[-t|--thin] Specifies whether the new virtual-volume is thin-enabled or not. The supporting storage-volumesmust be thin-capable in order for a virtual-volume to be thin-enabled. The virtual-volume mustalso have a valid RAID geometry to be thin-enabled.
[-h|--help] Displays command line help.
[--verbose] Provides more help during command execution. This may not have any effect for somecommands.
* - argument is positional.
Commands 285
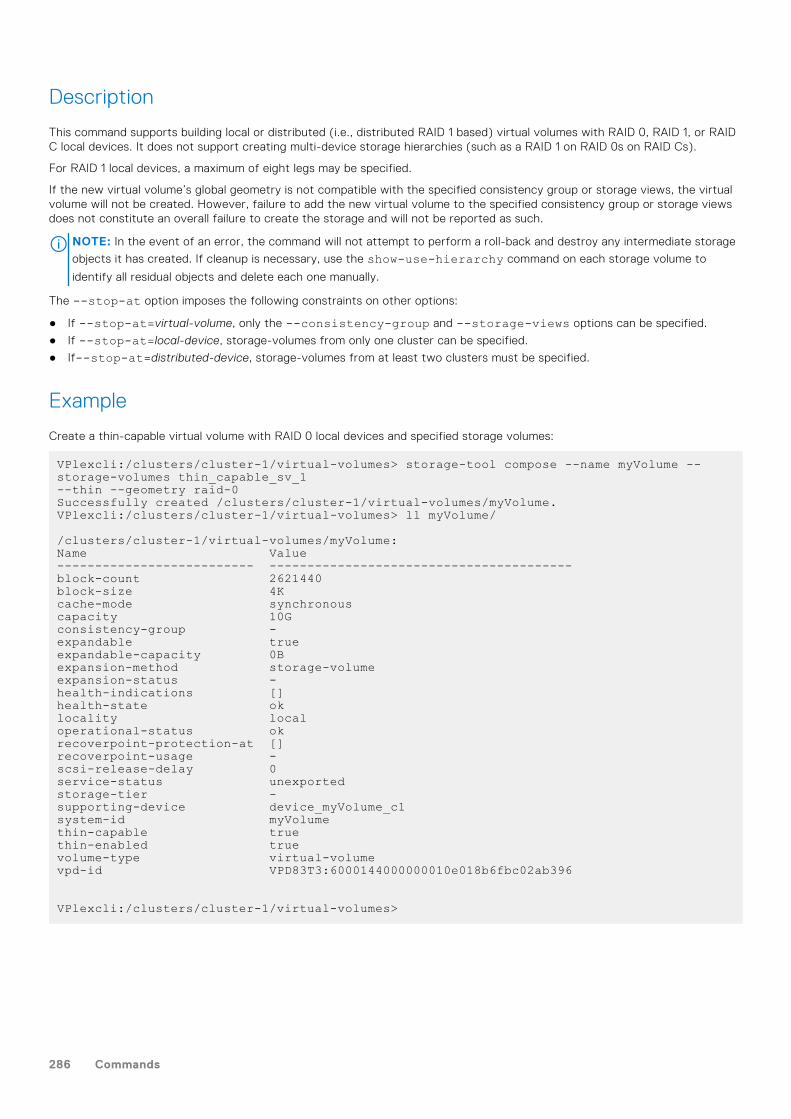
Description
This command supports building local or distributed (i.e., distributed RAID 1 based) virtual volumes with RAID 0, RAID 1, or RAIDC local devices. It does not support creating multi-device storage hierarchies (such as a RAID 1 on RAID 0s on RAID Cs).
For RAID 1 local devices, a maximum of eight legs may be specified.
If the new virtual volume’s global geometry is not compatible with the specified consistency group or storage views, the virtualvolume will not be created. However, failure to add the new virtual volume to the specified consistency group or storage viewsdoes not constitute an overall failure to create the storage and will not be reported as such.
NOTE: In the event of an error, the command will not attempt to perform a roll-back and destroy any intermediate storage
objects it has created. If cleanup is necessary, use the show-use-hierarchy command on each storage volume to
identify all residual objects and delete each one manually.
The --stop-at option imposes the following constraints on other options:
● If --stop-at=virtual-volume, only the --consistency-group and --storage-views options can be specified.
● If --stop-at=local-device, storage-volumes from only one cluster can be specified.
● If--stop-at=distributed-device, storage-volumes from at least two clusters must be specified.
Example
Create a thin-capable virtual volume with RAID 0 local devices and specified storage volumes:
VPlexcli:/clusters/cluster-1/virtual-volumes> storage-tool compose --name myVolume --storage-volumes thin_capable_sv_1--thin --geometry raid-0Successfully created /clusters/cluster-1/virtual-volumes/myVolume.VPlexcli:/clusters/cluster-1/virtual-volumes> ll myVolume/
/clusters/cluster-1/virtual-volumes/myVolume: Name Value-------------------------- ----------------------------------------block-count 2621440block-size 4Kcache-mode synchronouscapacity 10Gconsistency-group -expandable trueexpandable-capacity 0Bexpansion-method storage-volumeexpansion-status -health-indications []health-state oklocality localoperational-status okrecoverpoint-protection-at []recoverpoint-usage -scsi-release-delay 0service-status unexportedstorage-tier -supporting-device device_myVolume_c1system-id myVolumethin-capable truethin-enabled truevolume-type virtual-volumevpd-id VPD83T3:6000144000000010e018b6fbc02ab396
VPlexcli:/clusters/cluster-1/virtual-volumes>
286 Commands
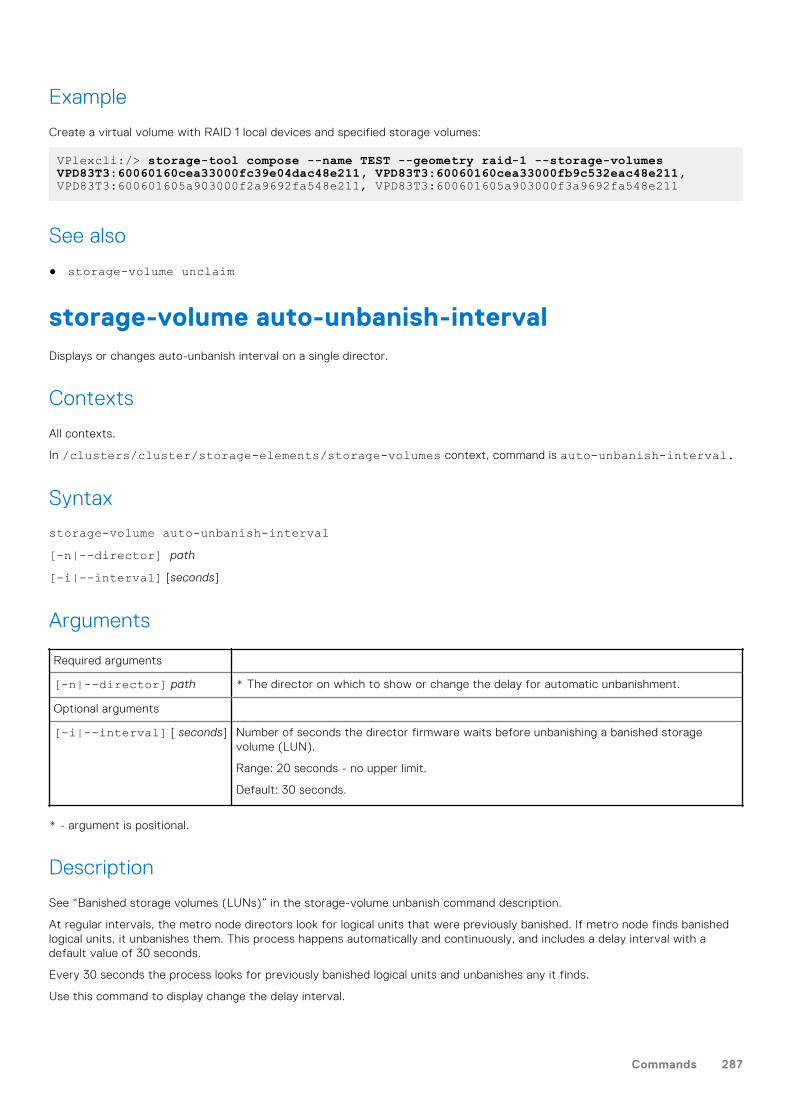
Example
Create a virtual volume with RAID 1 local devices and specified storage volumes:
VPlexcli:/> storage-tool compose --name TEST --geometry raid-1 --storage-volumes VPD83T3:60060160cea33000fc39e04dac48e211, VPD83T3:60060160cea33000fb9c532eac48e211, VPD83T3:600601605a903000f2a9692fa548e211, VPD83T3:600601605a903000f3a9692fa548e211
See also
● storage-volume unclaim
storage-volume auto-unbanish-intervalDisplays or changes auto-unbanish interval on a single director.
Contexts
All contexts.
In /clusters/cluster/storage-elements/storage-volumes context, command is auto-unbanish-interval.
Syntax
storage-volume auto-unbanish-interval[-n|--director] path
[-i|--interval] [seconds]
Arguments
Required arguments
[-n|--director] path * The director on which to show or change the delay for automatic unbanishment.
Optional arguments
[-i|--interval] [ seconds] Number of seconds the director firmware waits before unbanishing a banished storagevolume (LUN).
Range: 20 seconds - no upper limit.
Default: 30 seconds.
* - argument is positional.
Description
See “Banished storage volumes (LUNs)” in the storage-volume unbanish command description.
At regular intervals, the metro node directors look for logical units that were previously banished. If metro node finds banishedlogical units, it unbanishes them. This process happens automatically and continuously, and includes a delay interval with adefault value of 30 seconds.
Every 30 seconds the process looks for previously banished logical units and unbanishes any it finds.
Use this command to display change the delay interval.
Commands 287
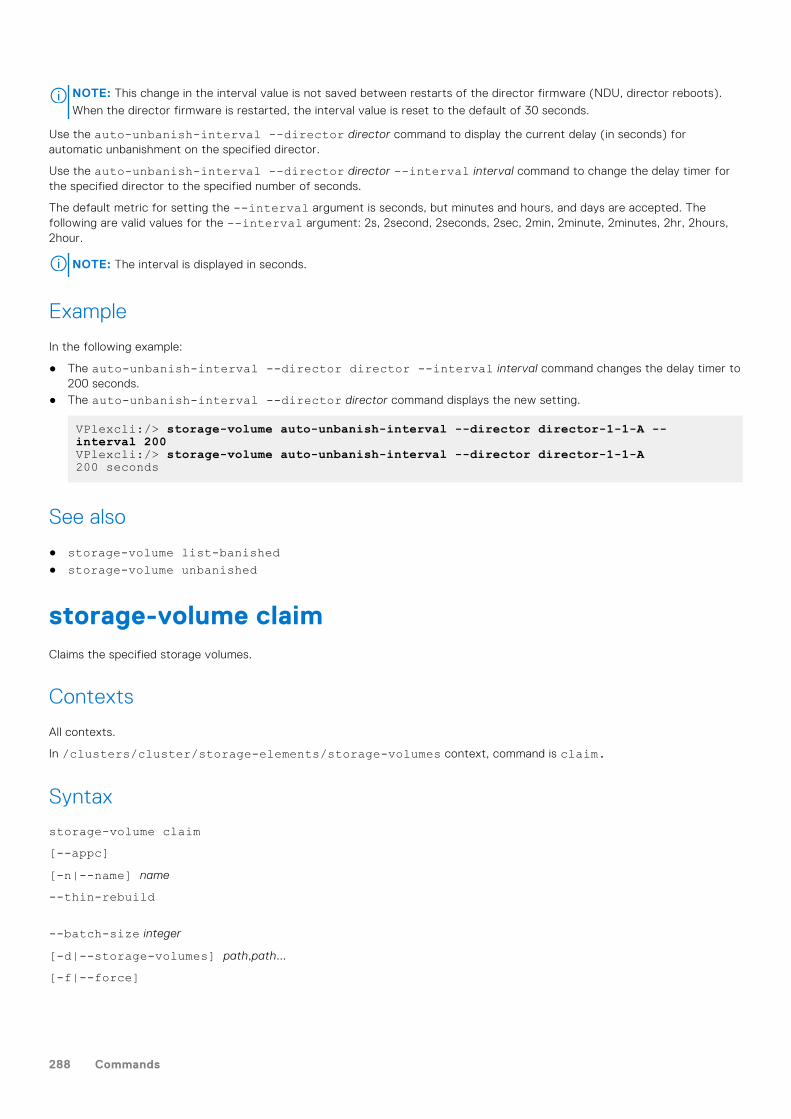
NOTE: This change in the interval value is not saved between restarts of the director firmware (NDU, director reboots).
When the director firmware is restarted, the interval value is reset to the default of 30 seconds.
Use the auto-unbanish-interval --director director command to display the current delay (in seconds) forautomatic unbanishment on the specified director.
Use the auto-unbanish-interval --director director --interval interval command to change the delay timer forthe specified director to the specified number of seconds.
The default metric for setting the --interval argument is seconds, but minutes and hours, and days are accepted. Thefollowing are valid values for the --interval argument: 2s, 2second, 2seconds, 2sec, 2min, 2minute, 2minutes, 2hr, 2hours,2hour.
NOTE: The interval is displayed in seconds.
Example
In the following example:
● The auto-unbanish-interval --director director --interval interval command changes the delay timer to200 seconds.
● The auto-unbanish-interval --director director command displays the new setting.
VPlexcli:/> storage-volume auto-unbanish-interval --director director-1-1-A --interval 200VPlexcli:/> storage-volume auto-unbanish-interval --director director-1-1-A200 seconds
See also
● storage-volume list-banished● storage-volume unbanished
storage-volume claimClaims the specified storage volumes.
Contexts
All contexts.
In /clusters/cluster/storage-elements/storage-volumes context, command is claim.
Syntax
storage-volume claim[--appc][-n|--name] name
--thin-rebuild
--batch-size integer
[-d|--storage-volumes] path,path...
[-f|--force]
288 Commands
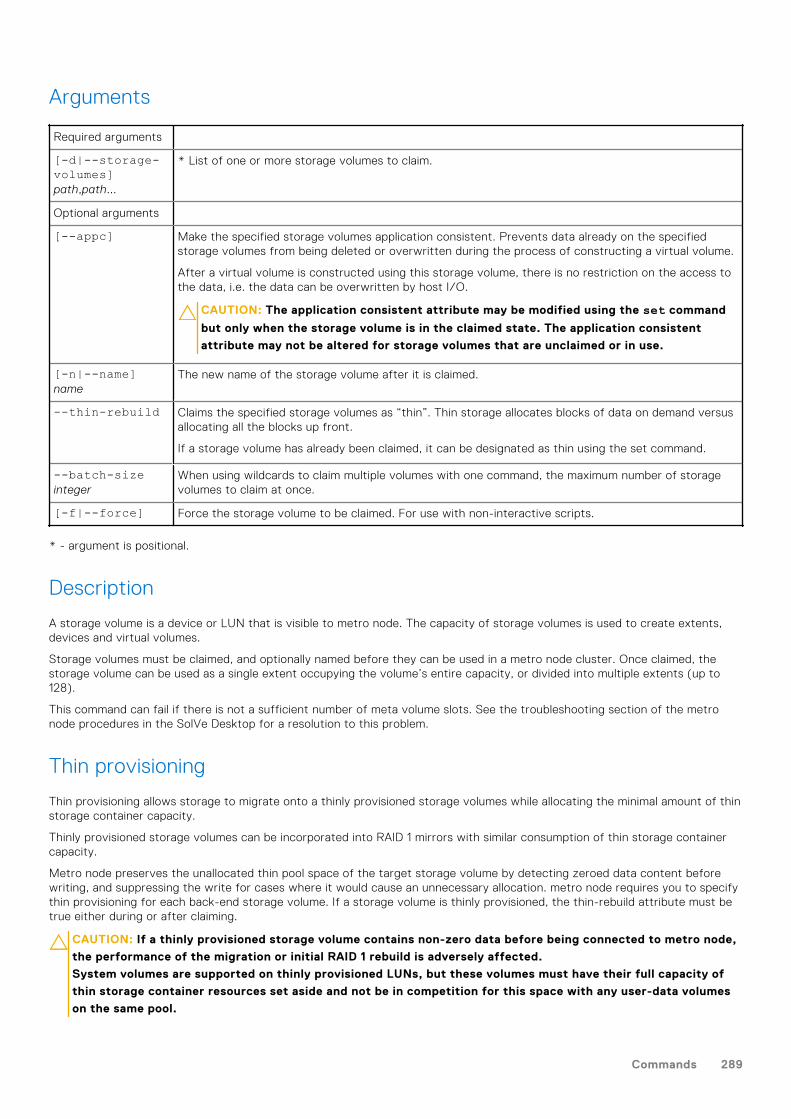
Arguments
Required arguments
[-d|--storage-volumes]path,path...
* List of one or more storage volumes to claim.
Optional arguments
[--appc] Make the specified storage volumes application consistent. Prevents data already on the specifiedstorage volumes from being deleted or overwritten during the process of constructing a virtual volume.
After a virtual volume is constructed using this storage volume, there is no restriction on the access tothe data, i.e. the data can be overwritten by host I/O.
CAUTION: The application consistent attribute may be modified using the set command
but only when the storage volume is in the claimed state. The application consistent
attribute may not be altered for storage volumes that are unclaimed or in use.
[-n|--name]name
The new name of the storage volume after it is claimed.
--thin-rebuild Claims the specified storage volumes as “thin”. Thin storage allocates blocks of data on demand versusallocating all the blocks up front.
If a storage volume has already been claimed, it can be designated as thin using the set command.
--batch-sizeinteger
When using wildcards to claim multiple volumes with one command, the maximum number of storagevolumes to claim at once.
[-f|--force] Force the storage volume to be claimed. For use with non-interactive scripts.
* - argument is positional.
Description
A storage volume is a device or LUN that is visible to metro node. The capacity of storage volumes is used to create extents,devices and virtual volumes.
Storage volumes must be claimed, and optionally named before they can be used in a metro node cluster. Once claimed, thestorage volume can be used as a single extent occupying the volume’s entire capacity, or divided into multiple extents (up to128).
This command can fail if there is not a sufficient number of meta volume slots. See the troubleshooting section of the metronode procedures in the SolVe Desktop for a resolution to this problem.
Thin provisioning
Thin provisioning allows storage to migrate onto a thinly provisioned storage volumes while allocating the minimal amount of thinstorage container capacity.
Thinly provisioned storage volumes can be incorporated into RAID 1 mirrors with similar consumption of thin storage containercapacity.
Metro node preserves the unallocated thin pool space of the target storage volume by detecting zeroed data content beforewriting, and suppressing the write for cases where it would cause an unnecessary allocation. metro node requires you to specifythin provisioning for each back-end storage volume. If a storage volume is thinly provisioned, the thin-rebuild attribute must betrue either during or after claiming.
CAUTION: If a thinly provisioned storage volume contains non-zero data before being connected to metro node,
the performance of the migration or initial RAID 1 rebuild is adversely affected.
System volumes are supported on thinly provisioned LUNs, but these volumes must have their full capacity of
thin storage container resources set aside and not be in competition for this space with any user-data volumes
on the same pool.
Commands 289
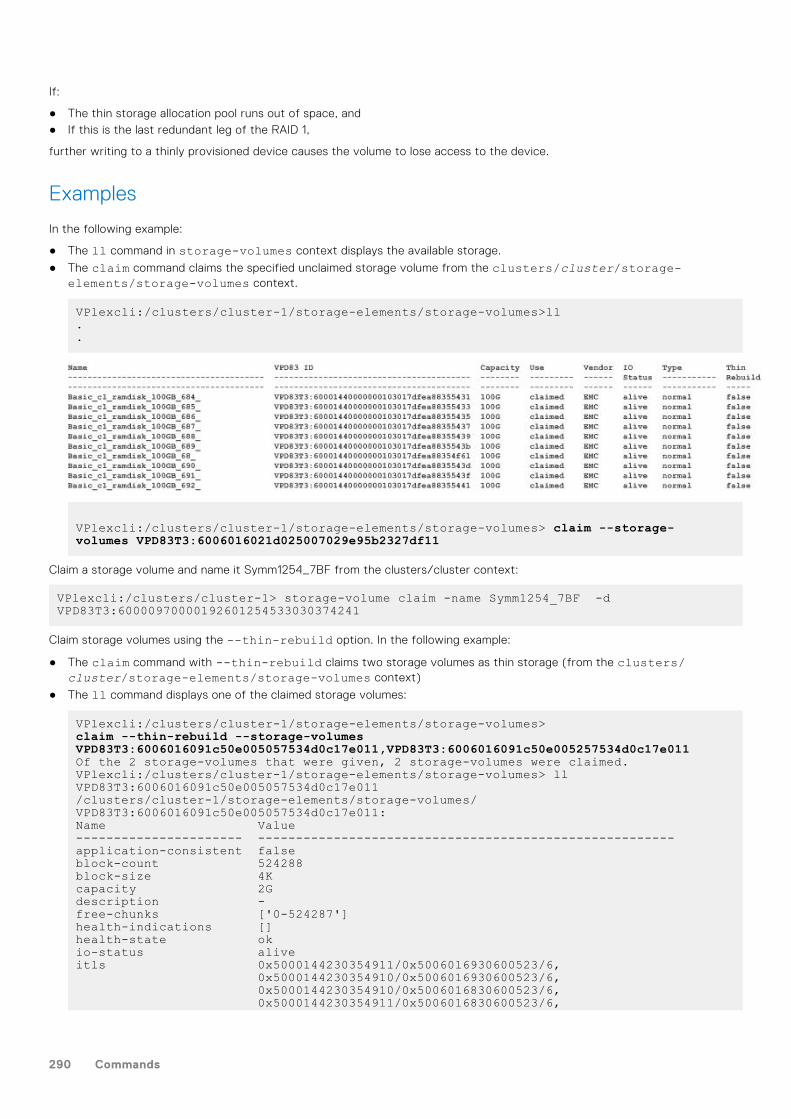
If:
● The thin storage allocation pool runs out of space, and● If this is the last redundant leg of the RAID 1,
further writing to a thinly provisioned device causes the volume to lose access to the device.
Examples
In the following example:
● The ll command in storage-volumes context displays the available storage.
● The claim command claims the specified unclaimed storage volume from the clusters/cluster/storage-elements/storage-volumes context.
VPlexcli:/clusters/cluster-1/storage-elements/storage-volumes>ll..
VPlexcli:/clusters/cluster-1/storage-elements/storage-volumes> claim --storage-volumes VPD83T3:6006016021d025007029e95b2327df11
Claim a storage volume and name it Symm1254_7BF from the clusters/cluster context:
VPlexcli:/clusters/cluster-1> storage-volume claim -name Symm1254_7BF -d VPD83T3:60000970000192601254533030374241
Claim storage volumes using the --thin-rebuild option. In the following example:
● The claim command with --thin-rebuild claims two storage volumes as thin storage (from the clusters/cluster/storage-elements/storage-volumes context)
● The ll command displays one of the claimed storage volumes:
VPlexcli:/clusters/cluster-1/storage-elements/storage-volumes> claim --thin-rebuild --storage-volumes VPD83T3:6006016091c50e005057534d0c17e011,VPD83T3:6006016091c50e005257534d0c17e011Of the 2 storage-volumes that were given, 2 storage-volumes were claimed.VPlexcli:/clusters/cluster-1/storage-elements/storage-volumes> ll VPD83T3:6006016091c50e005057534d0c17e011/clusters/cluster-1/storage-elements/storage-volumes/VPD83T3:6006016091c50e005057534d0c17e011:Name Value---------------------- -------------------------------------------------------application-consistent falseblock-count 524288block-size 4Kcapacity 2Gdescription -free-chunks ['0-524287']health-indications []health-state okio-status aliveitls 0x5000144230354911/0x5006016930600523/6, 0x5000144230354910/0x5006016930600523/6, 0x5000144230354910/0x5006016830600523/6, 0x5000144230354911/0x5006016830600523/6,
290 Commands
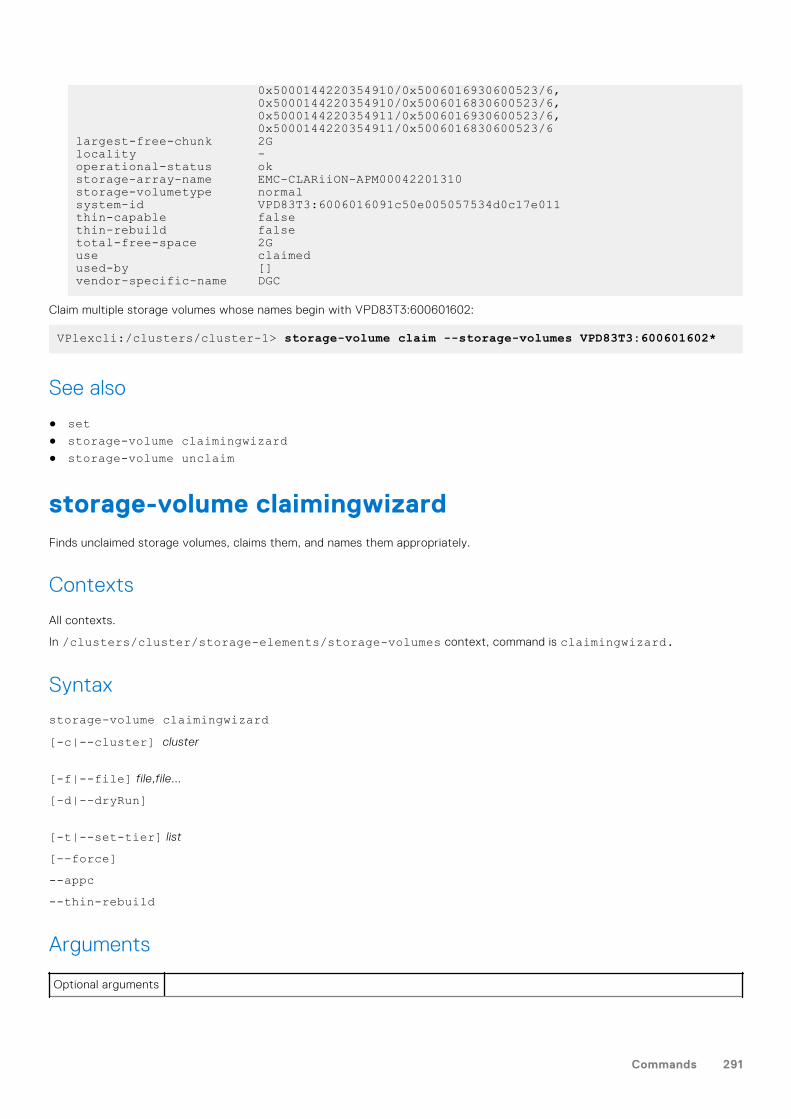
0x5000144220354910/0x5006016930600523/6, 0x5000144220354910/0x5006016830600523/6, 0x5000144220354911/0x5006016930600523/6, 0x5000144220354911/0x5006016830600523/6largest-free-chunk 2Glocality -operational-status okstorage-array-name EMC-CLARiiON-APM00042201310storage-volumetype normalsystem-id VPD83T3:6006016091c50e005057534d0c17e011thin-capable falsethin-rebuild falsetotal-free-space 2Guse claimedused-by []vendor-specific-name DGC
Claim multiple storage volumes whose names begin with VPD83T3:600601602:
VPlexcli:/clusters/cluster-1> storage-volume claim --storage-volumes VPD83T3:600601602*
See also
● set● storage-volume claimingwizard● storage-volume unclaim
storage-volume claimingwizardFinds unclaimed storage volumes, claims them, and names them appropriately.
Contexts
All contexts.
In /clusters/cluster/storage-elements/storage-volumes context, command is claimingwizard.
Syntax
storage-volume claimingwizard[-c|--cluster] cluster
[-f|--file] file,file...
[-d|--dryRun]
[-t|--set-tier] list
[--force]--appc--thin-rebuild
Arguments
Optional arguments
Commands 291
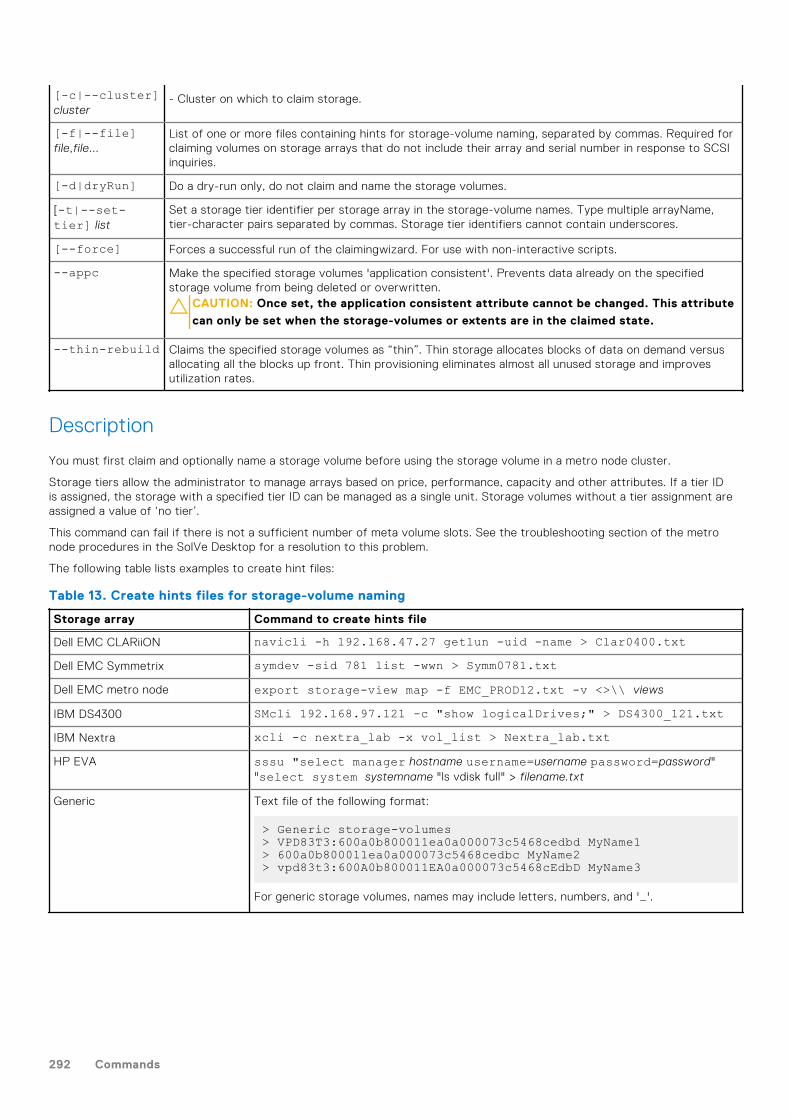
[-c|--cluster]cluster
- Cluster on which to claim storage.
[-f|--file]file,file...
List of one or more files containing hints for storage-volume naming, separated by commas. Required forclaiming volumes on storage arrays that do not include their array and serial number in response to SCSIinquiries.
[-d|dryRun] Do a dry-run only, do not claim and name the storage volumes.
[-t|--set-tier] list
Set a storage tier identifier per storage array in the storage-volume names. Type multiple arrayName,tier-character pairs separated by commas. Storage tier identifiers cannot contain underscores.
[--force] Forces a successful run of the claimingwizard. For use with non-interactive scripts.
--appc Make the specified storage volumes 'application consistent'. Prevents data already on the specifiedstorage volume from being deleted or overwritten.
CAUTION: Once set, the application consistent attribute cannot be changed. This attribute
can only be set when the storage-volumes or extents are in the claimed state.
--thin-rebuild Claims the specified storage volumes as “thin”. Thin storage allocates blocks of data on demand versusallocating all the blocks up front. Thin provisioning eliminates almost all unused storage and improvesutilization rates.
Description
You must first claim and optionally name a storage volume before using the storage volume in a metro node cluster.
Storage tiers allow the administrator to manage arrays based on price, performance, capacity and other attributes. If a tier IDis assigned, the storage with a specified tier ID can be managed as a single unit. Storage volumes without a tier assignment areassigned a value of ‘no tier’.
This command can fail if there is not a sufficient number of meta volume slots. See the troubleshooting section of the metronode procedures in the SolVe Desktop for a resolution to this problem.
The following table lists examples to create hint files:
Table 13. Create hints files for storage-volume naming
Storage array Command to create hints file
Dell EMC CLARiiON navicli -h 192.168.47.27 getlun -uid -name > Clar0400.txtDell EMC Symmetrix symdev -sid 781 list -wwn > Symm0781.txtDell EMC metro node export storage-view map -f EMC_PROD12.txt -v <>\\ views
IBM DS4300 SMcli 192.168.97.121 -c "show logicalDrives;" > DS4300_121.txtIBM Nextra xcli -c nextra_lab -x vol_list > Nextra_lab.txtHP EVA sssu "select manager hostname username=username password=password"
"select system systemname "ls vdisk full" > filename.txt
Generic Text file of the following format:
> Generic storage-volumes> VPD83T3:600a0b800011ea0a000073c5468cedbd MyName1> 600a0b800011ea0a000073c5468cedbc MyName2> vpd83t3:600A0b800011EA0a000073c5468cEdbD MyName3
For generic storage volumes, names may include letters, numbers, and '_'.
292 Commands
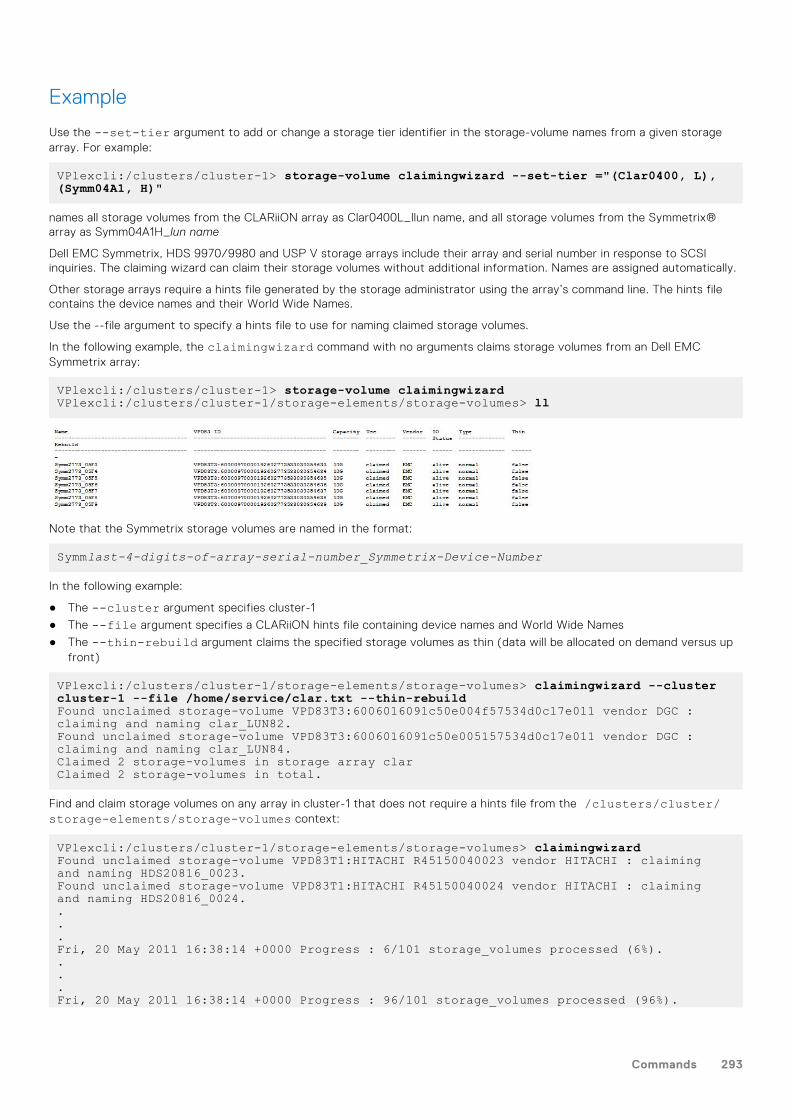
Example
Use the --set-tier argument to add or change a storage tier identifier in the storage-volume names from a given storagearray. For example:
VPlexcli:/clusters/cluster-1> storage-volume claimingwizard --set-tier ="(Clar0400, L), (Symm04A1, H)"
names all storage volumes from the CLARiiON array as Clar0400L_llun name, and all storage volumes from the Symmetrix®array as Symm04A1H_lun name
Dell EMC Symmetrix, HDS 9970/9980 and USP V storage arrays include their array and serial number in response to SCSIinquiries. The claiming wizard can claim their storage volumes without additional information. Names are assigned automatically.
Other storage arrays require a hints file generated by the storage administrator using the array’s command line. The hints filecontains the device names and their World Wide Names.
Use the --file argument to specify a hints file to use for naming claimed storage volumes.
In the following example, the claimingwizard command with no arguments claims storage volumes from an Dell EMCSymmetrix array:
VPlexcli:/clusters/cluster-1> storage-volume claimingwizardVPlexcli:/clusters/cluster-1/storage-elements/storage-volumes> ll
Note that the Symmetrix storage volumes are named in the format:
Symmlast-4-digits-of-array-serial-number_Symmetrix-Device-Number
In the following example:
● The --cluster argument specifies cluster-1
● The --file argument specifies a CLARiiON hints file containing device names and World Wide Names
● The --thin-rebuild argument claims the specified storage volumes as thin (data will be allocated on demand versus upfront)
VPlexcli:/clusters/cluster-1/storage-elements/storage-volumes> claimingwizard --cluster cluster-1 --file /home/service/clar.txt --thin-rebuildFound unclaimed storage-volume VPD83T3:6006016091c50e004f57534d0c17e011 vendor DGC : claiming and naming clar_LUN82.Found unclaimed storage-volume VPD83T3:6006016091c50e005157534d0c17e011 vendor DGC : claiming and naming clar_LUN84.Claimed 2 storage-volumes in storage array clarClaimed 2 storage-volumes in total.
Find and claim storage volumes on any array in cluster-1 that does not require a hints file from the /clusters/cluster/storage-elements/storage-volumes context:
VPlexcli:/clusters/cluster-1/storage-elements/storage-volumes> claimingwizardFound unclaimed storage-volume VPD83T1:HITACHI R45150040023 vendor HITACHI : claiming and naming HDS20816_0023.Found unclaimed storage-volume VPD83T1:HITACHI R45150040024 vendor HITACHI : claiming and naming HDS20816_0024....Fri, 20 May 2011 16:38:14 +0000 Progress : 6/101 storage_volumes processed (6%)....Fri, 20 May 2011 16:38:14 +0000 Progress : 96/101 storage_volumes processed (96%).
Commands 293

.
.
.Claimed 37 storage-volumes in storage array Symm0487Claimed 64 storage-volumes in storage array HDS20816Claimed 101 storage-volumes in total.
See also
● storage-volume claim● storage-volume unclaim
storage-volume find-arraySearches storage arrays for the specified storage-volumes.
Contexts
All contexts.
In /clusters/cluster/storage-elements/storage-volumes context, command is find-array.
Syntax
storage-volume find-array [-d|--opt_s_vol] storage-volume
Arguments
Required arguments
[-d|--opt_s_vol] storage-volume
* Storage volume pattern for which to search. The pattern conforms to glob. The followingpattern symbols are supported: *, ?, [seq], [!seq].
* argument is positional.
Description
Searches all the storage arrays in all clusters for the specified storage volumes.
The search is case-sensitive.
Example
Find all storage arrays for storage volumes in cluster-1:
VPlexcli:/clusters/cluster-1/storage-elements/storage-volumes> find-array *Searching for cluster-1_journalStorage-volume: cluster-1_journal is in: /clusters/cluster-1/storage-elements/storage-arrays/EMC-Invista-14403bSearching for cluster-1_journal_1Storage-volume: cluster-1_journal_1 is in: /clusters/cluster-1/storage-elements/storage-arrays/EMC-Invista-14403bSearching for CLAR1912_10G_Aleve_1_vol_1Storage-volume: CLAR1912_10G_Aleve_1_vol_1 is in: /clusters/cluster-1/storage-elements/
294 Commands
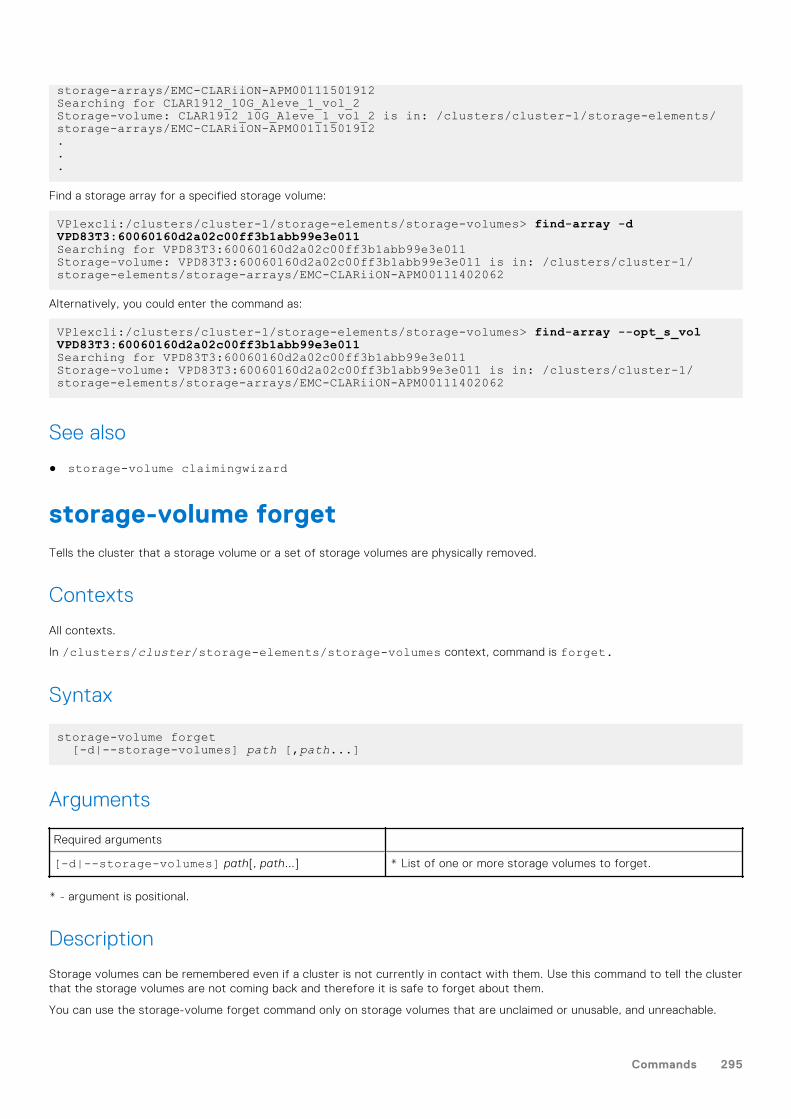
storage-arrays/EMC-CLARiiON-APM00111501912Searching for CLAR1912_10G_Aleve_1_vol_2Storage-volume: CLAR1912_10G_Aleve_1_vol_2 is in: /clusters/cluster-1/storage-elements/storage-arrays/EMC-CLARiiON-APM00111501912...
Find a storage array for a specified storage volume:
VPlexcli:/clusters/cluster-1/storage-elements/storage-volumes> find-array -d VPD83T3:60060160d2a02c00ff3b1abb99e3e011Searching for VPD83T3:60060160d2a02c00ff3b1abb99e3e011Storage-volume: VPD83T3:60060160d2a02c00ff3b1abb99e3e011 is in: /clusters/cluster-1/storage-elements/storage-arrays/EMC-CLARiiON-APM00111402062
Alternatively, you could enter the command as:
VPlexcli:/clusters/cluster-1/storage-elements/storage-volumes> find-array --opt_s_vol VPD83T3:60060160d2a02c00ff3b1abb99e3e011Searching for VPD83T3:60060160d2a02c00ff3b1abb99e3e011Storage-volume: VPD83T3:60060160d2a02c00ff3b1abb99e3e011 is in: /clusters/cluster-1/storage-elements/storage-arrays/EMC-CLARiiON-APM00111402062
See also
● storage-volume claimingwizard
storage-volume forgetTells the cluster that a storage volume or a set of storage volumes are physically removed.
Contexts
All contexts.
In /clusters/cluster/storage-elements/storage-volumes context, command is forget.
Syntax
storage-volume forget [-d|--storage-volumes] path [,path...]
Arguments
Required arguments
[-d|--storage-volumes] path[, path...] * List of one or more storage volumes to forget.
* - argument is positional.
Description
Storage volumes can be remembered even if a cluster is not currently in contact with them. Use this command to tell the clusterthat the storage volumes are not coming back and therefore it is safe to forget about them.
You can use the storage-volume forget command only on storage volumes that are unclaimed or unusable, and unreachable.
Commands 295
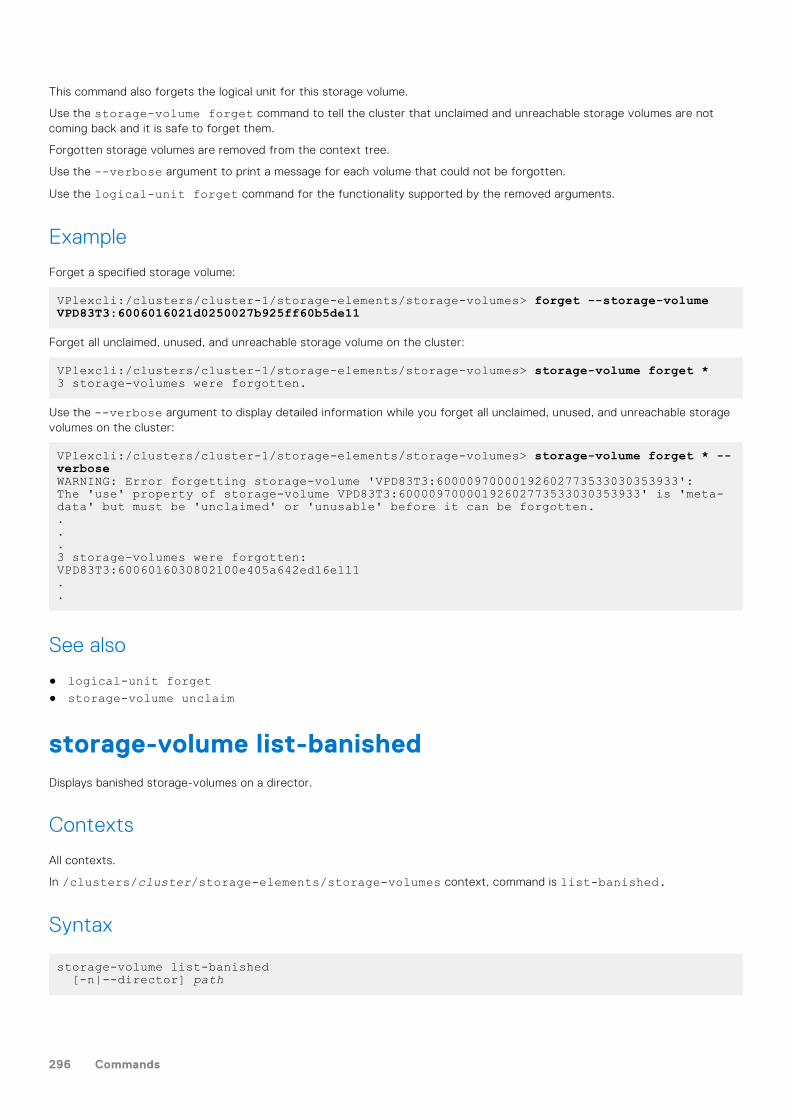
This command also forgets the logical unit for this storage volume.
Use the storage-volume forget command to tell the cluster that unclaimed and unreachable storage volumes are notcoming back and it is safe to forget them.
Forgotten storage volumes are removed from the context tree.
Use the --verbose argument to print a message for each volume that could not be forgotten.
Use the logical-unit forget command for the functionality supported by the removed arguments.
Example
Forget a specified storage volume:
VPlexcli:/clusters/cluster-1/storage-elements/storage-volumes> forget --storage-volume VPD83T3:6006016021d0250027b925ff60b5de11
Forget all unclaimed, unused, and unreachable storage volume on the cluster:
VPlexcli:/clusters/cluster-1/storage-elements/storage-volumes> storage-volume forget *3 storage-volumes were forgotten.
Use the --verbose argument to display detailed information while you forget all unclaimed, unused, and unreachable storagevolumes on the cluster:
VPlexcli:/clusters/cluster-1/storage-elements/storage-volumes> storage-volume forget * --verboseWARNING: Error forgetting storage-volume 'VPD83T3:60000970000192602773533030353933': The 'use' property of storage-volume VPD83T3:60000970000192602773533030353933' is 'meta-data' but must be 'unclaimed' or 'unusable' before it can be forgotten....3 storage-volumes were forgotten:VPD83T3:6006016030802100e405a642ed16e111..
See also
● logical-unit forget● storage-volume unclaim
storage-volume list-banishedDisplays banished storage-volumes on a director.
Contexts
All contexts.
In /clusters/cluster/storage-elements/storage-volumes context, command is list-banished.
Syntax
storage-volume list-banished [-n|--director] path
296 Commands
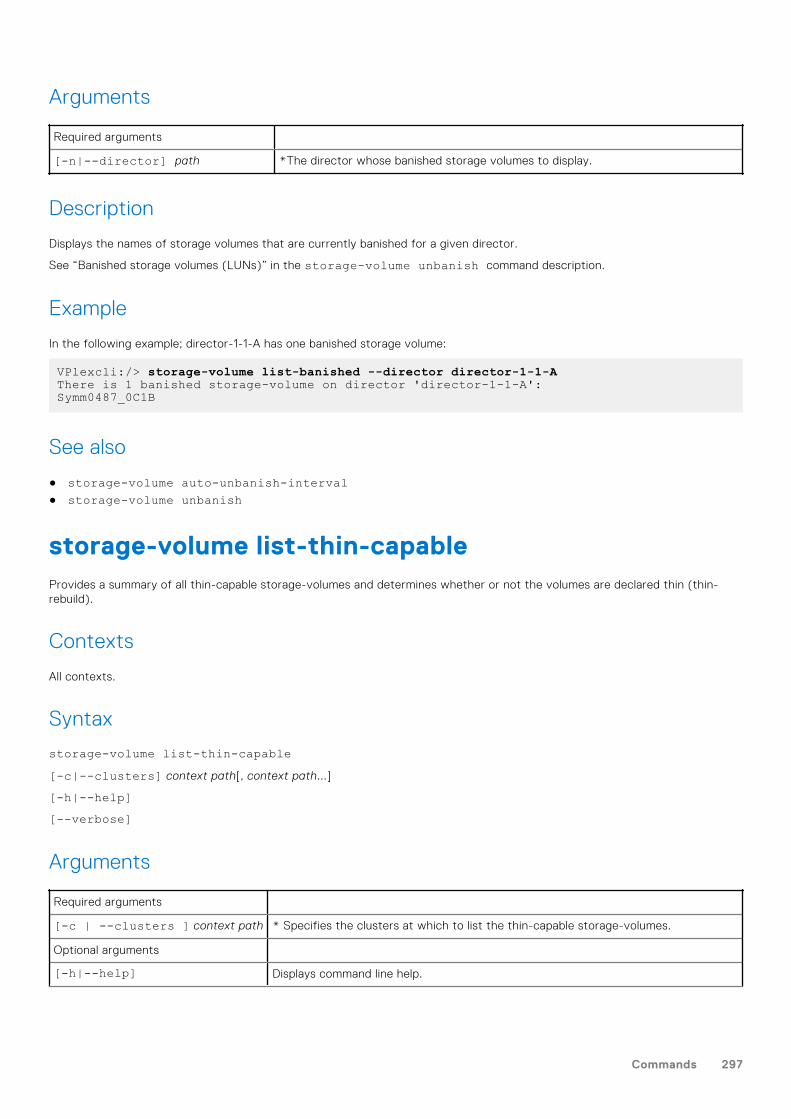
Arguments
Required arguments
[-n|--director] path *The director whose banished storage volumes to display.
Description
Displays the names of storage volumes that are currently banished for a given director.
See “Banished storage volumes (LUNs)” in the storage-volume unbanish command description.
Example
In the following example; director-1-1-A has one banished storage volume:
VPlexcli:/> storage-volume list-banished --director director-1-1-AThere is 1 banished storage-volume on director 'director-1-1-A':Symm0487_0C1B
See also
● storage-volume auto-unbanish-interval● storage-volume unbanish
storage-volume list-thin-capableProvides a summary of all thin-capable storage-volumes and determines whether or not the volumes are declared thin (thin-rebuild).
Contexts
All contexts.
Syntax
storage-volume list-thin-capable[-c|--clusters] context path[, context path...]
[-h|--help][--verbose]
Arguments
Required arguments
[-c | --clusters ] context path * Specifies the clusters at which to list the thin-capable storage-volumes.
Optional arguments
[-h|--help] Displays command line help.
Commands 297
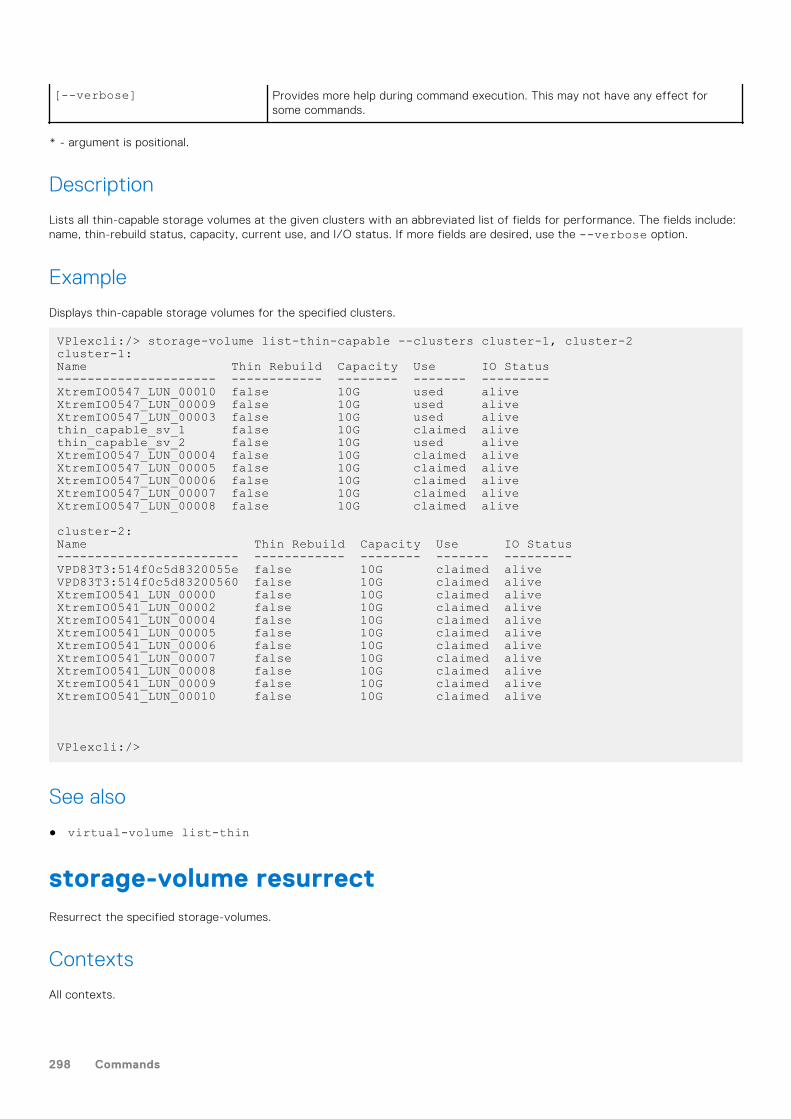
[--verbose] Provides more help during command execution. This may not have any effect forsome commands.
* - argument is positional.
Description
Lists all thin-capable storage volumes at the given clusters with an abbreviated list of fields for performance. The fields include:name, thin-rebuild status, capacity, current use, and I/O status. If more fields are desired, use the --verbose option.
Example
Displays thin-capable storage volumes for the specified clusters.
VPlexcli:/> storage-volume list-thin-capable --clusters cluster-1, cluster-2cluster-1:Name Thin Rebuild Capacity Use IO Status--------------------- ------------ -------- ------- ---------XtremIO0547_LUN_00010 false 10G used aliveXtremIO0547_LUN_00009 false 10G used aliveXtremIO0547_LUN_00003 false 10G used alivethin_capable_sv_1 false 10G claimed alivethin_capable_sv_2 false 10G used aliveXtremIO0547_LUN_00004 false 10G claimed aliveXtremIO0547_LUN_00005 false 10G claimed aliveXtremIO0547_LUN_00006 false 10G claimed aliveXtremIO0547_LUN_00007 false 10G claimed aliveXtremIO0547_LUN_00008 false 10G claimed alive
cluster-2:Name Thin Rebuild Capacity Use IO Status------------------------ ------------ -------- ------- ---------VPD83T3:514f0c5d8320055e false 10G claimed aliveVPD83T3:514f0c5d83200560 false 10G claimed aliveXtremIO0541_LUN_00000 false 10G claimed aliveXtremIO0541_LUN_00002 false 10G claimed aliveXtremIO0541_LUN_00004 false 10G claimed aliveXtremIO0541_LUN_00005 false 10G claimed aliveXtremIO0541_LUN_00006 false 10G claimed aliveXtremIO0541_LUN_00007 false 10G claimed aliveXtremIO0541_LUN_00008 false 10G claimed aliveXtremIO0541_LUN_00009 false 10G claimed aliveXtremIO0541_LUN_00010 false 10G claimed alive
VPlexcli:/>
See also
● virtual-volume list-thin
storage-volume resurrectResurrect the specified storage-volumes.
Contexts
All contexts.
298 Commands
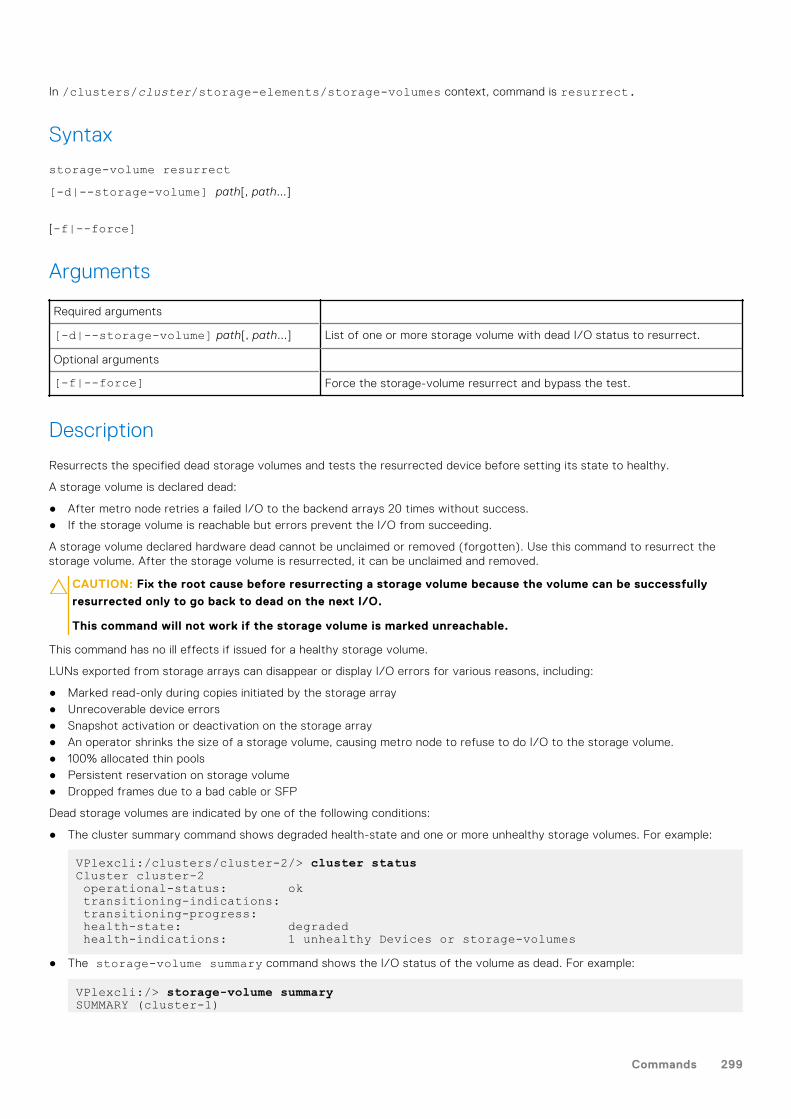
In /clusters/cluster/storage-elements/storage-volumes context, command is resurrect.
Syntax
storage-volume resurrect[-d|--storage-volume] path[, path...]
[-f|--force]
Arguments
Required arguments
[-d|--storage-volume] path[, path...] List of one or more storage volume with dead I/O status to resurrect.
Optional arguments
[-f|--force] Force the storage-volume resurrect and bypass the test.
Description
Resurrects the specified dead storage volumes and tests the resurrected device before setting its state to healthy.
A storage volume is declared dead:
● After metro node retries a failed I/O to the backend arrays 20 times without success.● If the storage volume is reachable but errors prevent the I/O from succeeding.
A storage volume declared hardware dead cannot be unclaimed or removed (forgotten). Use this command to resurrect thestorage volume. After the storage volume is resurrected, it can be unclaimed and removed.
CAUTION: Fix the root cause before resurrecting a storage volume because the volume can be successfully
resurrected only to go back to dead on the next I/O.
This command will not work if the storage volume is marked unreachable.
This command has no ill effects if issued for a healthy storage volume.
LUNs exported from storage arrays can disappear or display I/O errors for various reasons, including:
● Marked read-only during copies initiated by the storage array● Unrecoverable device errors● Snapshot activation or deactivation on the storage array● An operator shrinks the size of a storage volume, causing metro node to refuse to do I/O to the storage volume.● 100% allocated thin pools● Persistent reservation on storage volume● Dropped frames due to a bad cable or SFP
Dead storage volumes are indicated by one of the following conditions:
● The cluster summary command shows degraded health-state and one or more unhealthy storage volumes. For example:
VPlexcli:/clusters/cluster-2/> cluster statusCluster cluster-2 operational-status: ok transitioning-indications: transitioning-progress: health-state: degraded health-indications: 1 unhealthy Devices or storage-volumes
● The storage-volume summary command shows the I/O status of the volume as dead. For example:
VPlexcli:/> storage-volume summarySUMMARY (cluster-1)
Commands 299
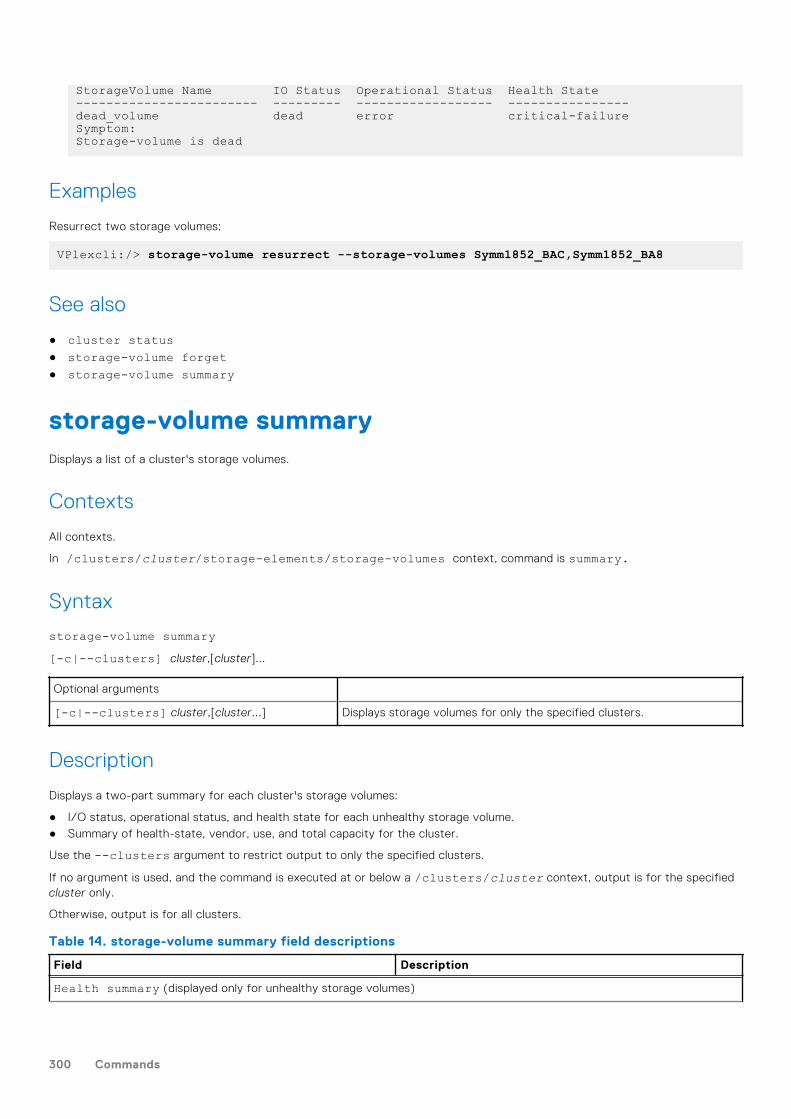
StorageVolume Name IO Status Operational Status Health State------------------------ --------- ------------------ ----------------dead_volume dead error critical-failureSymptom:Storage-volume is dead
Examples
Resurrect two storage volumes:
VPlexcli:/> storage-volume resurrect --storage-volumes Symm1852_BAC,Symm1852_BA8
See also
● cluster status● storage-volume forget● storage-volume summary
storage-volume summaryDisplays a list of a cluster's storage volumes.
Contexts
All contexts.
In /clusters/cluster/storage-elements/storage-volumes context, command is summary.
Syntax
storage-volume summary[-c|--clusters] cluster,[cluster]...
Optional arguments
[-c|--clusters] cluster,[cluster...] Displays storage volumes for only the specified clusters.
Description
Displays a two-part summary for each cluster's storage volumes:
● I/O status, operational status, and health state for each unhealthy storage volume.● Summary of health-state, vendor, use, and total capacity for the cluster.
Use the --clusters argument to restrict output to only the specified clusters.
If no argument is used, and the command is executed at or below a /clusters/cluster context, output is for the specifiedcluster only.
Otherwise, output is for all clusters.
Table 14. storage-volume summary field descriptions
Field Description
Health summary (displayed only for unhealthy storage volumes)
300 Commands
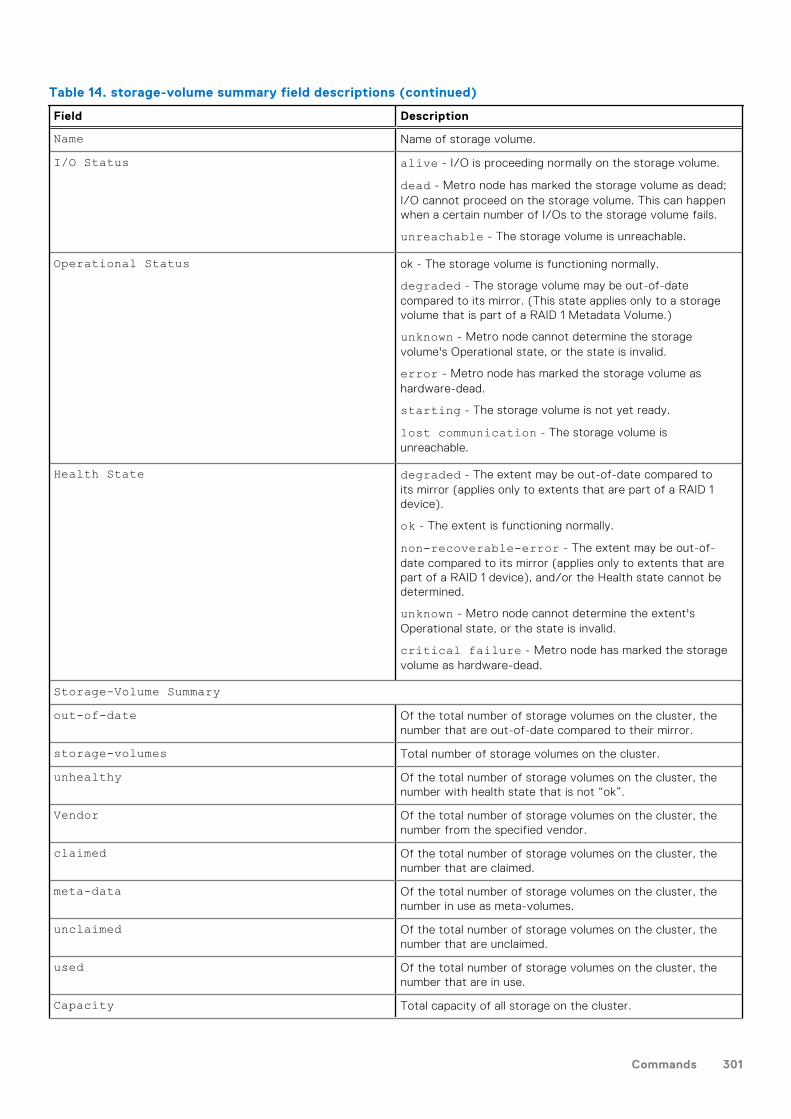
Table 14. storage-volume summary field descriptions (continued)
Field Description
Name Name of storage volume.
I/O Status alive - I/O is proceeding normally on the storage volume.
dead - Metro node has marked the storage volume as dead;I/O cannot proceed on the storage volume. This can happenwhen a certain number of I/Os to the storage volume fails.
unreachable - The storage volume is unreachable.
Operational Status ok - The storage volume is functioning normally.
degraded - The storage volume may be out-of-datecompared to its mirror. (This state applies only to a storagevolume that is part of a RAID 1 Metadata Volume.)
unknown - Metro node cannot determine the storagevolume's Operational state, or the state is invalid.
error - Metro node has marked the storage volume ashardware-dead.
starting - The storage volume is not yet ready.
lost communication - The storage volume isunreachable.
Health State degraded - The extent may be out-of-date compared toits mirror (applies only to extents that are part of a RAID 1device).
ok - The extent is functioning normally.
non-recoverable-error - The extent may be out-of-date compared to its mirror (applies only to extents that arepart of a RAID 1 device), and/or the Health state cannot bedetermined.
unknown - Metro node cannot determine the extent'sOperational state, or the state is invalid.
critical failure - Metro node has marked the storagevolume as hardware-dead.
Storage-Volume Summaryout-of-date Of the total number of storage volumes on the cluster, the
number that are out-of-date compared to their mirror.
storage-volumes Total number of storage volumes on the cluster.
unhealthy Of the total number of storage volumes on the cluster, thenumber with health state that is not “ok”.
Vendor Of the total number of storage volumes on the cluster, thenumber from the specified vendor.
claimed Of the total number of storage volumes on the cluster, thenumber that are claimed.
meta-data Of the total number of storage volumes on the cluster, thenumber in use as meta-volumes.
unclaimed Of the total number of storage volumes on the cluster, thenumber that are unclaimed.
used Of the total number of storage volumes on the cluster, thenumber that are in use.
Capacity Total capacity of all storage on the cluster.
Commands 301
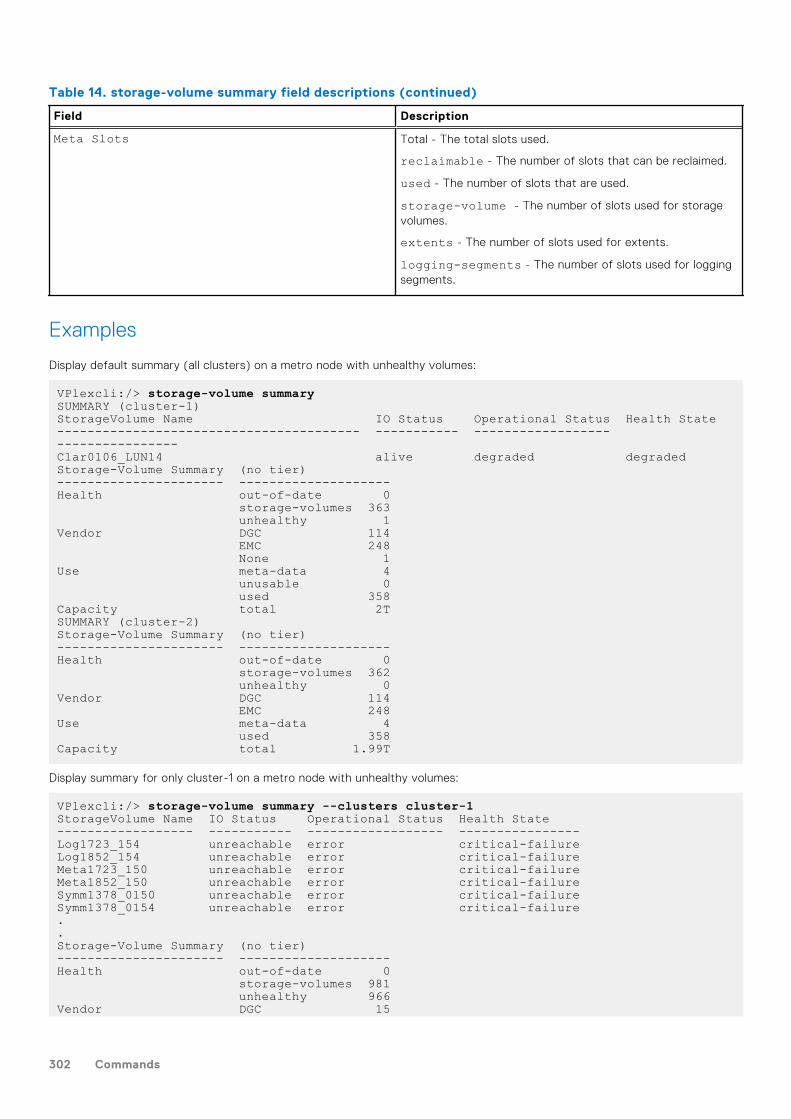
Table 14. storage-volume summary field descriptions (continued)
Field Description
Meta Slots Total - The total slots used.
reclaimable - The number of slots that can be reclaimed.
used - The number of slots that are used.
storage-volume - The number of slots used for storagevolumes.
extents - The number of slots used for extents.
logging-segments - The number of slots used for loggingsegments.
Examples
Display default summary (all clusters) on a metro node with unhealthy volumes:
VPlexcli:/> storage-volume summarySUMMARY (cluster-1)StorageVolume Name IO Status Operational Status Health State---------------------------------------- ----------- ------------------ ----------------Clar0106_LUN14 alive degraded degradedStorage-Volume Summary (no tier)---------------------- --------------------Health out-of-date 0 storage-volumes 363 unhealthy 1Vendor DGC 114 EMC 248 None 1Use meta-data 4 unusable 0 used 358Capacity total 2TSUMMARY (cluster-2)Storage-Volume Summary (no tier)---------------------- --------------------Health out-of-date 0 storage-volumes 362 unhealthy 0Vendor DGC 114 EMC 248Use meta-data 4 used 358Capacity total 1.99T
Display summary for only cluster-1 on a metro node with unhealthy volumes:
VPlexcli:/> storage-volume summary --clusters cluster-1StorageVolume Name IO Status Operational Status Health State------------------ ----------- ------------------ ----------------Log1723_154 unreachable error critical-failureLog1852_154 unreachable error critical-failureMeta1723_150 unreachable error critical-failureMeta1852_150 unreachable error critical-failureSymm1378_0150 unreachable error critical-failureSymm1378_0154 unreachable error critical-failure..Storage-Volume Summary (no tier)---------------------- --------------------Health out-of-date 0 storage-volumes 981 unhealthy 966Vendor DGC 15
302 Commands
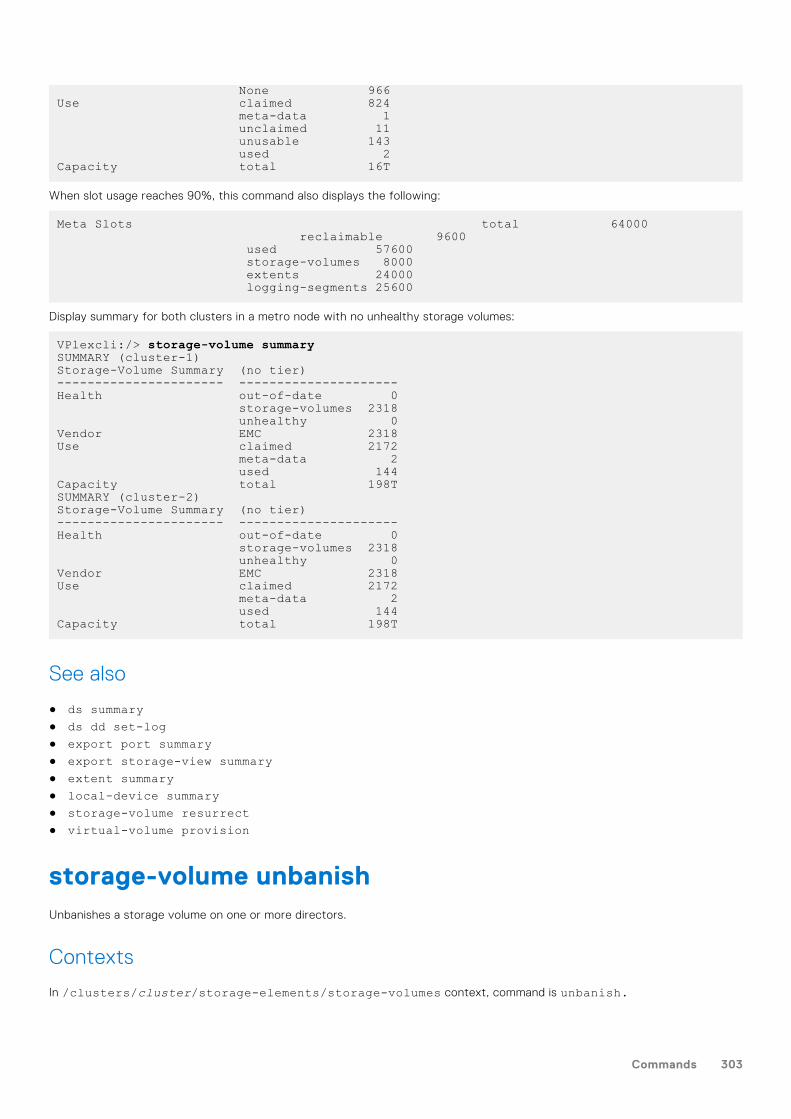
None 966Use claimed 824 meta-data 1 unclaimed 11 unusable 143 used 2Capacity total 16T
When slot usage reaches 90%, this command also displays the following:
Meta Slots total 64000 reclaimable 9600 used 57600 storage-volumes 8000 extents 24000 logging-segments 25600
Display summary for both clusters in a metro node with no unhealthy storage volumes:
VPlexcli:/> storage-volume summarySUMMARY (cluster-1)Storage-Volume Summary (no tier)---------------------- ---------------------Health out-of-date 0 storage-volumes 2318 unhealthy 0Vendor EMC 2318Use claimed 2172 meta-data 2 used 144Capacity total 198TSUMMARY (cluster-2)Storage-Volume Summary (no tier)---------------------- ---------------------Health out-of-date 0 storage-volumes 2318 unhealthy 0Vendor EMC 2318Use claimed 2172 meta-data 2 used 144Capacity total 198T
See also
● ds summary● ds dd set-log● export port summary● export storage-view summary● extent summary● local-device summary● storage-volume resurrect● virtual-volume provision
storage-volume unbanishUnbanishes a storage volume on one or more directors.
Contexts
In /clusters/cluster/storage-elements/storage-volumes context, command is unbanish.
Commands 303
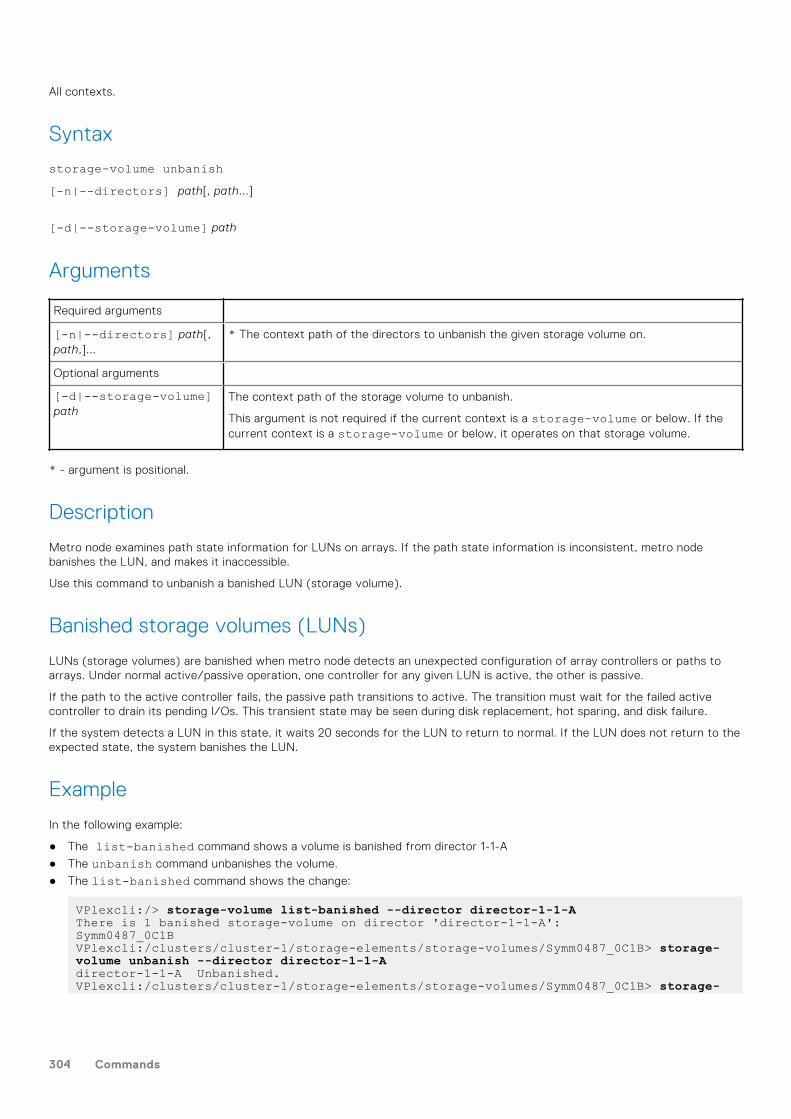
All contexts.
Syntax
storage-volume unbanish[-n|--directors] path[, path...]
[-d|--storage-volume] path
Arguments
Required arguments
[-n|--directors] path[,path,]...
* The context path of the directors to unbanish the given storage volume on.
Optional arguments
[-d|--storage-volume]path
The context path of the storage volume to unbanish.
This argument is not required if the current context is a storage-volume or below. If thecurrent context is a storage-volume or below, it operates on that storage volume.
* - argument is positional.
Description
Metro node examines path state information for LUNs on arrays. If the path state information is inconsistent, metro nodebanishes the LUN, and makes it inaccessible.
Use this command to unbanish a banished LUN (storage volume).
Banished storage volumes (LUNs)
LUNs (storage volumes) are banished when metro node detects an unexpected configuration of array controllers or paths toarrays. Under normal active/passive operation, one controller for any given LUN is active, the other is passive.
If the path to the active controller fails, the passive path transitions to active. The transition must wait for the failed activecontroller to drain its pending I/Os. This transient state may be seen during disk replacement, hot sparing, and disk failure.
If the system detects a LUN in this state, it waits 20 seconds for the LUN to return to normal. If the LUN does not return to theexpected state, the system banishes the LUN.
Example
In the following example:
● The list-banished command shows a volume is banished from director 1-1-A
● The unbanish command unbanishes the volume.
● The list-banished command shows the change:
VPlexcli:/> storage-volume list-banished --director director-1-1-AThere is 1 banished storage-volume on director 'director-1-1-A':Symm0487_0C1BVPlexcli:/clusters/cluster-1/storage-elements/storage-volumes/Symm0487_0C1B> storage-volume unbanish --director director-1-1-Adirector-1-1-A Unbanished.VPlexcli:/clusters/cluster-1/storage-elements/storage-volumes/Symm0487_0C1B> storage-
304 Commands
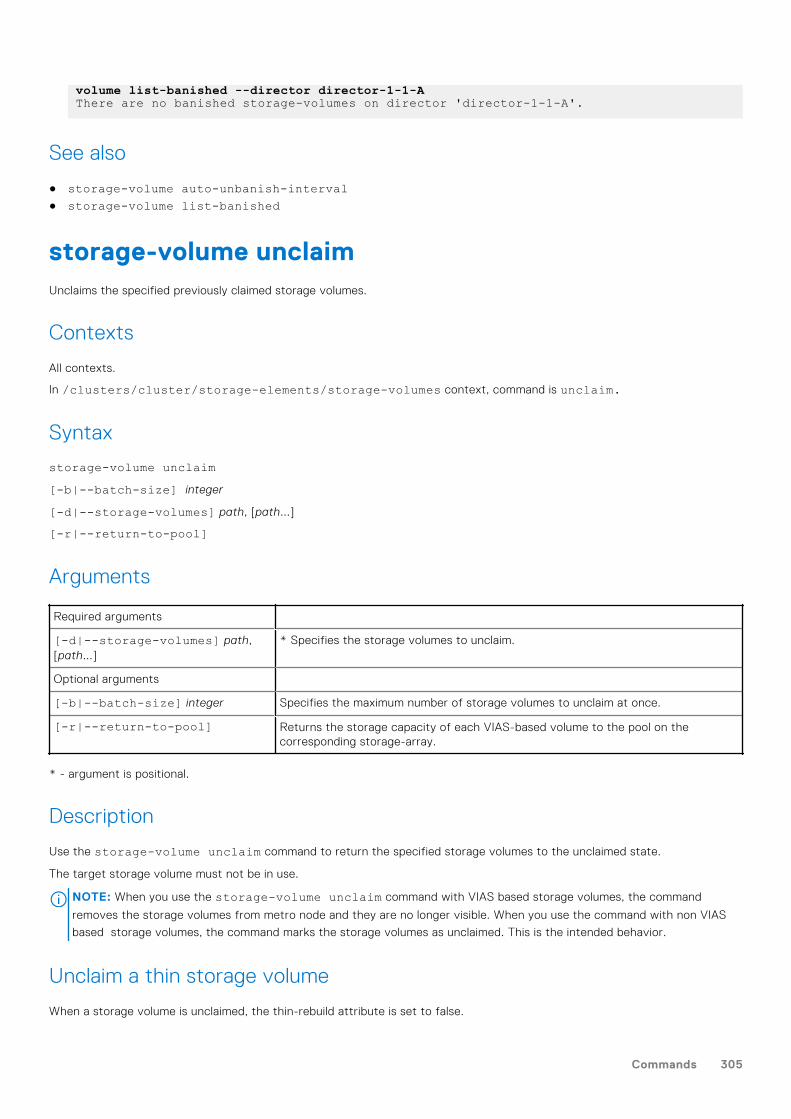
volume list-banished --director director-1-1-AThere are no banished storage-volumes on director 'director-1-1-A'.
See also
● storage-volume auto-unbanish-interval● storage-volume list-banished
storage-volume unclaimUnclaims the specified previously claimed storage volumes.
Contexts
All contexts.
In /clusters/cluster/storage-elements/storage-volumes context, command is unclaim.
Syntax
storage-volume unclaim[-b|--batch-size] integer
[-d|--storage-volumes] path, [path...]
[-r|--return-to-pool]
Arguments
Required arguments
[-d|--storage-volumes] path,[path...]
* Specifies the storage volumes to unclaim.
Optional arguments
[-b|--batch-size] integer Specifies the maximum number of storage volumes to unclaim at once.
[-r|--return-to-pool] Returns the storage capacity of each VIAS-based volume to the pool on thecorresponding storage-array.
* - argument is positional.
Description
Use the storage-volume unclaim command to return the specified storage volumes to the unclaimed state.
The target storage volume must not be in use.
NOTE: When you use the storage-volume unclaim command with VIAS based storage volumes, the command
removes the storage volumes from metro node and they are no longer visible. When you use the command with non VIAS
based storage volumes, the command marks the storage volumes as unclaimed. This is the intended behavior.
Unclaim a thin storage volume
When a storage volume is unclaimed, the thin-rebuild attribute is set to false.
Commands 305
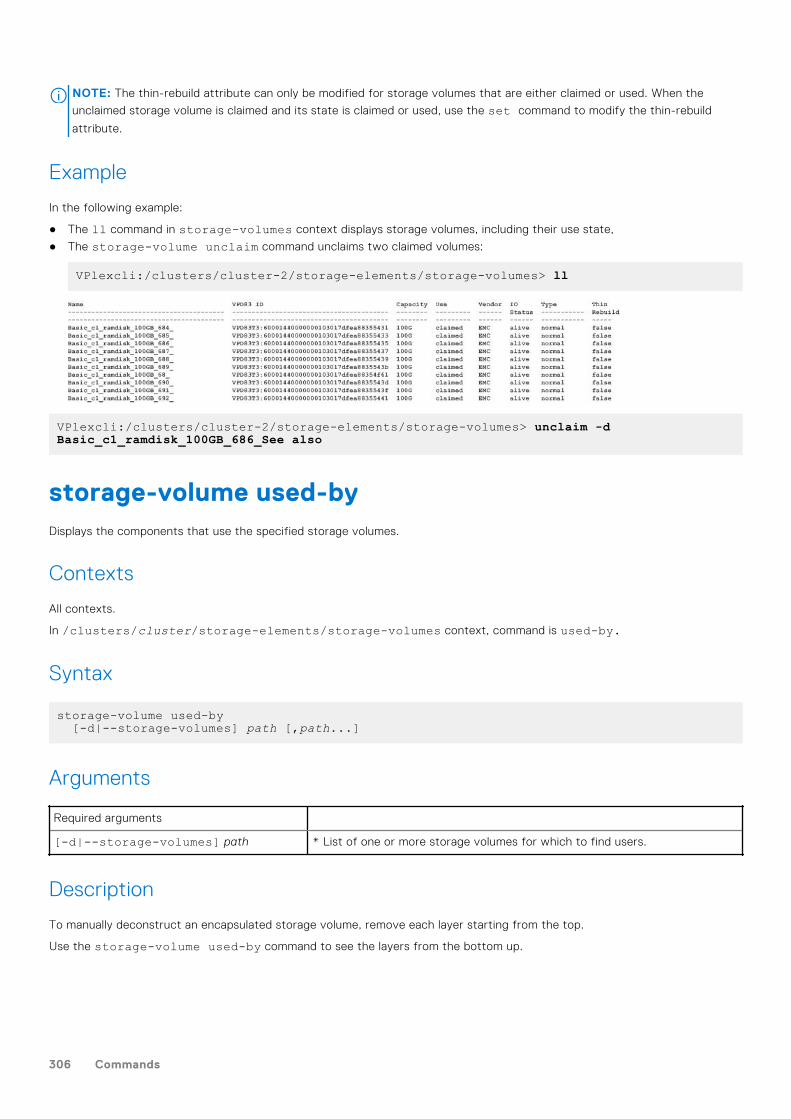
NOTE: The thin-rebuild attribute can only be modified for storage volumes that are either claimed or used. When the
unclaimed storage volume is claimed and its state is claimed or used, use the set command to modify the thin-rebuild
attribute.
Example
In the following example:
● The ll command in storage-volumes context displays storage volumes, including their use state,
● The storage-volume unclaim command unclaims two claimed volumes:
VPlexcli:/clusters/cluster-2/storage-elements/storage-volumes> ll
VPlexcli:/clusters/cluster-2/storage-elements/storage-volumes> unclaim -d Basic_c1_ramdisk_100GB_686_See also
storage-volume used-byDisplays the components that use the specified storage volumes.
Contexts
All contexts.
In /clusters/cluster/storage-elements/storage-volumes context, command is used-by.
Syntax
storage-volume used-by [-d|--storage-volumes] path [,path...]
Arguments
Required arguments
[-d|--storage-volumes] path * List of one or more storage volumes for which to find users.
Description
To manually deconstruct an encapsulated storage volume, remove each layer starting from the top.
Use the storage-volume used-by command to see the layers from the bottom up.
306 Commands
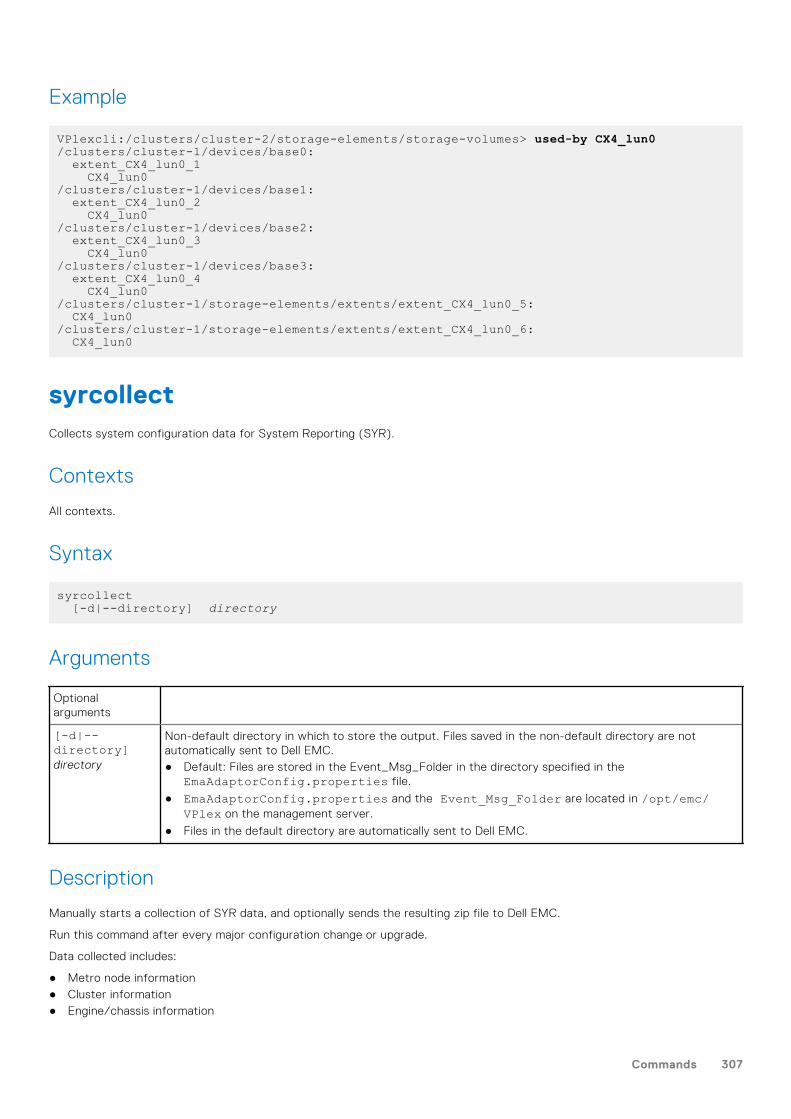
Example
VPlexcli:/clusters/cluster-2/storage-elements/storage-volumes> used-by CX4_lun0/clusters/cluster-1/devices/base0: extent_CX4_lun0_1 CX4_lun0/clusters/cluster-1/devices/base1: extent_CX4_lun0_2 CX4_lun0/clusters/cluster-1/devices/base2: extent_CX4_lun0_3 CX4_lun0/clusters/cluster-1/devices/base3: extent_CX4_lun0_4 CX4_lun0/clusters/cluster-1/storage-elements/extents/extent_CX4_lun0_5: CX4_lun0/clusters/cluster-1/storage-elements/extents/extent_CX4_lun0_6: CX4_lun0
syrcollectCollects system configuration data for System Reporting (SYR).
Contexts
All contexts.
Syntax
syrcollect [-d|--directory] directory
Arguments
Optionalarguments
[-d|--directory]directory
Non-default directory in which to store the output. Files saved in the non-default directory are notautomatically sent to Dell EMC.● Default: Files are stored in the Event_Msg_Folder in the directory specified in the
EmaAdaptorConfig.properties file.
● EmaAdaptorConfig.properties and the Event_Msg_Folder are located in /opt/emc/VPlex on the management server.
● Files in the default directory are automatically sent to Dell EMC.
Description
Manually starts a collection of SYR data, and optionally sends the resulting zip file to Dell EMC.
Run this command after every major configuration change or upgrade.
Data collected includes:
● Metro node information● Cluster information● Engine/chassis information
Commands 307
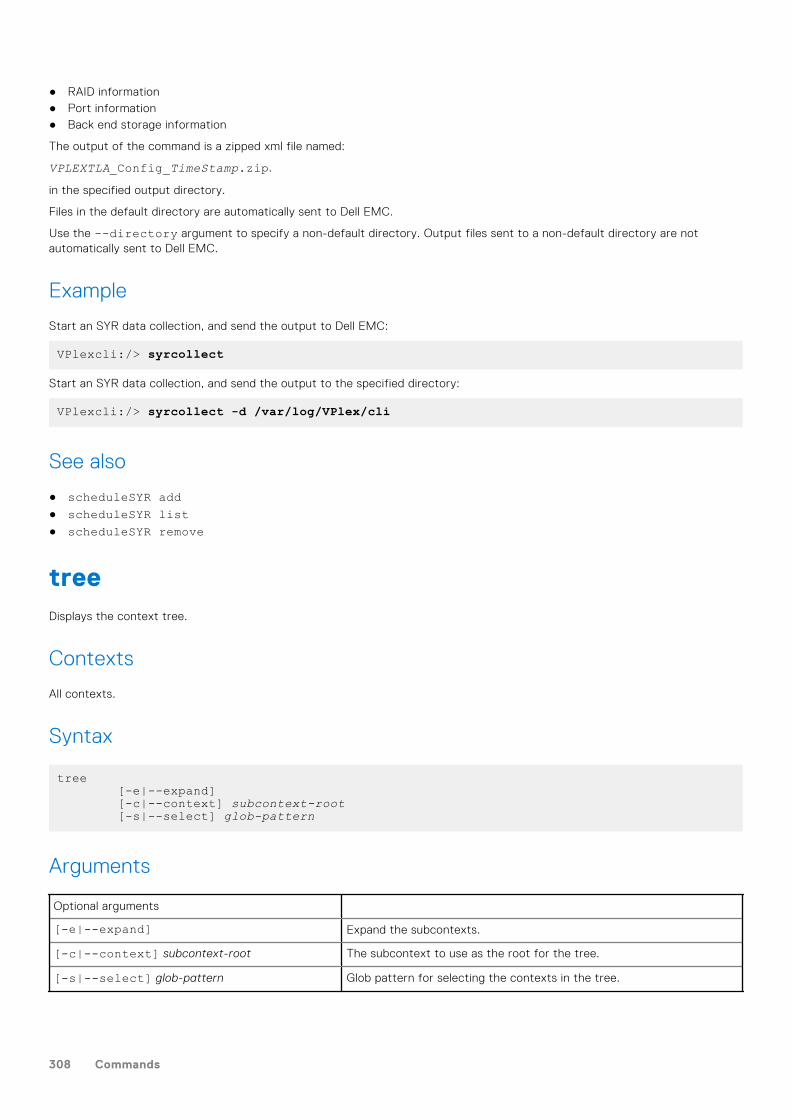
● RAID information● Port information● Back end storage information
The output of the command is a zipped xml file named:
VPLEXTLA_Config_TimeStamp.zip.
in the specified output directory.
Files in the default directory are automatically sent to Dell EMC.
Use the --directory argument to specify a non-default directory. Output files sent to a non-default directory are notautomatically sent to Dell EMC.
Example
Start an SYR data collection, and send the output to Dell EMC:
VPlexcli:/> syrcollect
Start an SYR data collection, and send the output to the specified directory:
VPlexcli:/> syrcollect -d /var/log/VPlex/cli
See also
● scheduleSYR add● scheduleSYR list● scheduleSYR remove
treeDisplays the context tree.
Contexts
All contexts.
Syntax
tree [-e|--expand] [-c|--context] subcontext-root [-s|--select] glob-pattern
Arguments
Optional arguments
[-e|--expand] Expand the subcontexts.
[-c|--context] subcontext-root The subcontext to use as the root for the tree.
[-s|--select] glob-pattern Glob pattern for selecting the contexts in the tree.
308 Commands
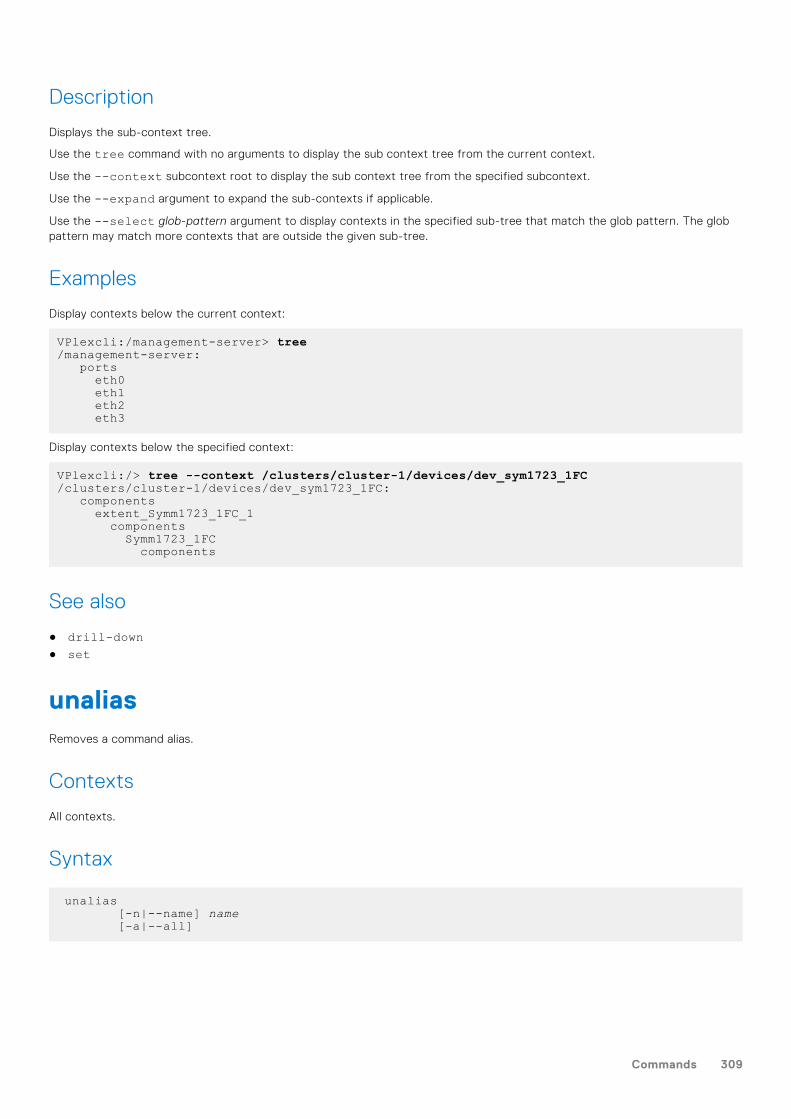
Description
Displays the sub-context tree.
Use the tree command with no arguments to display the sub context tree from the current context.
Use the --context subcontext root to display the sub context tree from the specified subcontext.
Use the --expand argument to expand the sub-contexts if applicable.
Use the --select glob-pattern argument to display contexts in the specified sub-tree that match the glob pattern. The globpattern may match more contexts that are outside the given sub-tree.
Examples
Display contexts below the current context:
VPlexcli:/management-server> tree/management-server: ports eth0 eth1 eth2 eth3
Display contexts below the specified context:
VPlexcli:/> tree --context /clusters/cluster-1/devices/dev_sym1723_1FC/clusters/cluster-1/devices/dev_sym1723_1FC: components extent_Symm1723_1FC_1 components Symm1723_1FC components
See also
● drill-down● set
unaliasRemoves a command alias.
Contexts
All contexts.
Syntax
unalias [-n|--name] name [-a|--all]
Commands 309
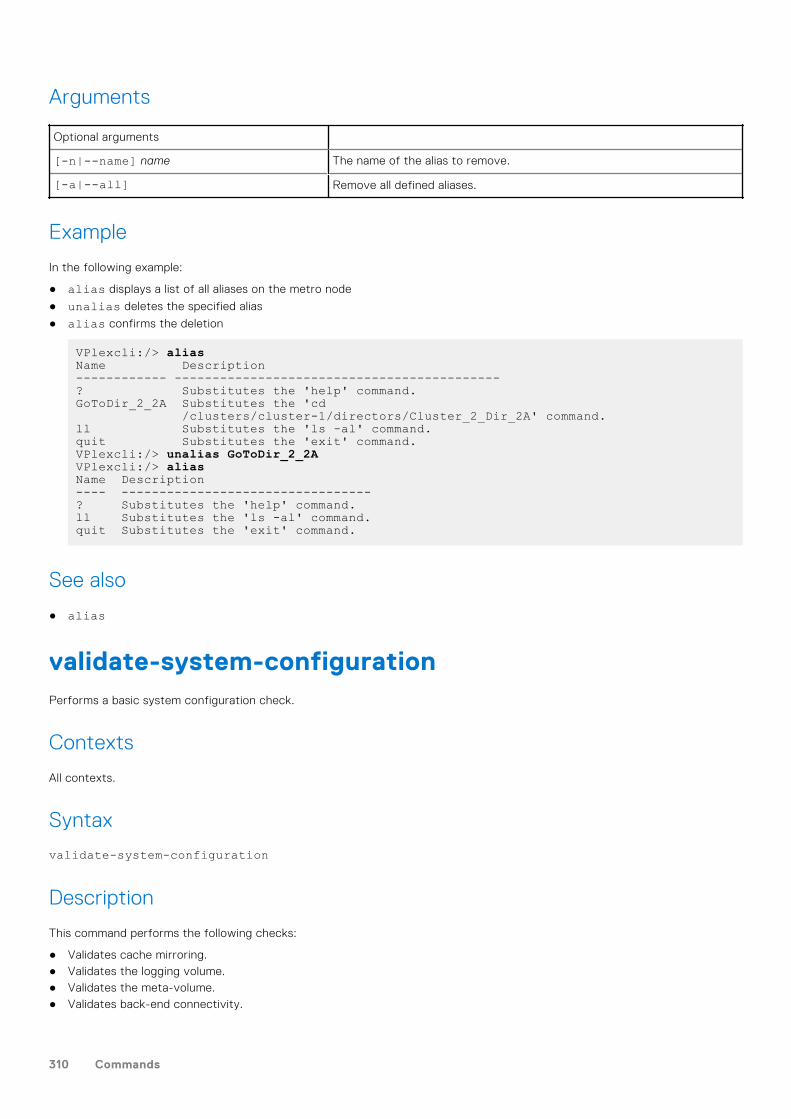
Arguments
Optional arguments
[-n|--name] name The name of the alias to remove.
[-a|--all] Remove all defined aliases.
Example
In the following example:
● alias displays a list of all aliases on the metro node
● unalias deletes the specified alias
● alias confirms the deletion
VPlexcli:/> aliasName Description------------ -------------------------------------------? Substitutes the 'help' command.GoToDir_2_2A Substitutes the 'cd /clusters/cluster-1/directors/Cluster_2_Dir_2A' command.ll Substitutes the 'ls -al' command.quit Substitutes the 'exit' command.VPlexcli:/> unalias GoToDir_2_2AVPlexcli:/> aliasName Description---- ---------------------------------? Substitutes the 'help' command.ll Substitutes the 'ls -al' command.quit Substitutes the 'exit' command.
See also
● alias
validate-system-configurationPerforms a basic system configuration check.
Contexts
All contexts.
Syntax
validate-system-configuration
Description
This command performs the following checks:
● Validates cache mirroring.● Validates the logging volume.● Validates the meta-volume.● Validates back-end connectivity.
310 Commands
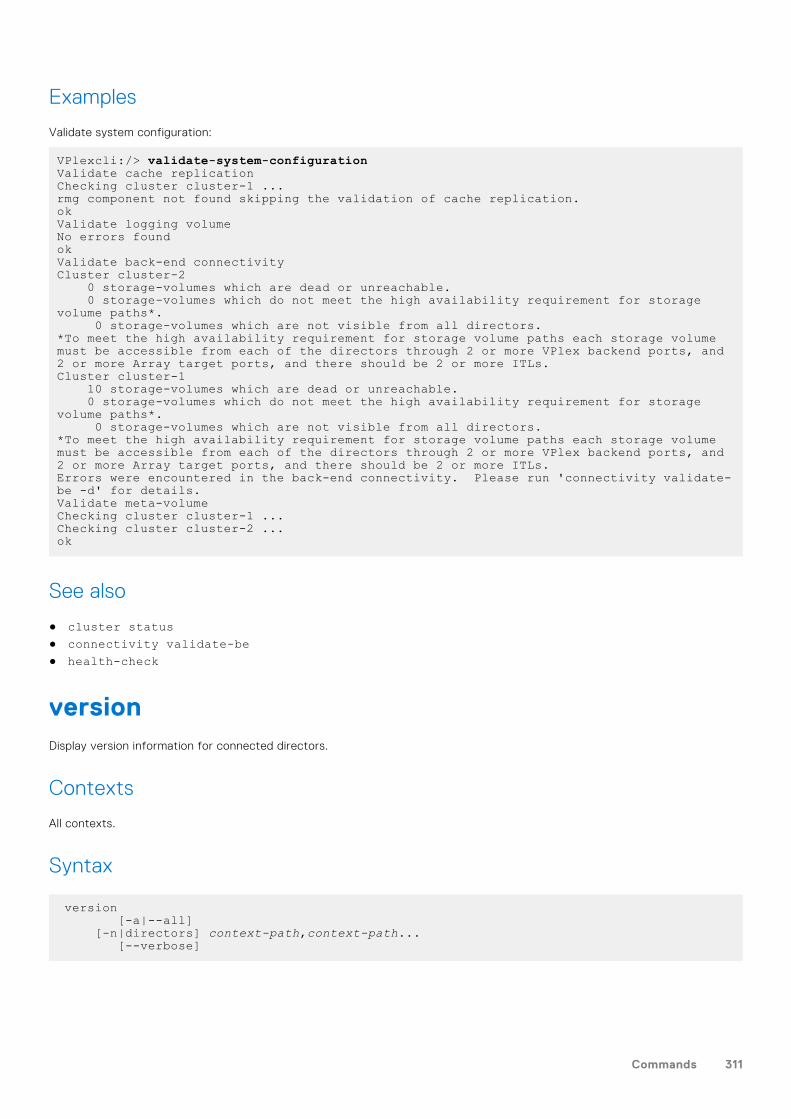
Examples
Validate system configuration:
VPlexcli:/> validate-system-configurationValidate cache replicationChecking cluster cluster-1 ...rmg component not found skipping the validation of cache replication.okValidate logging volumeNo errors foundokValidate back-end connectivityCluster cluster-2 0 storage-volumes which are dead or unreachable. 0 storage-volumes which do not meet the high availability requirement for storage volume paths*. 0 storage-volumes which are not visible from all directors.*To meet the high availability requirement for storage volume paths each storage volume must be accessible from each of the directors through 2 or more VPlex backend ports, and 2 or more Array target ports, and there should be 2 or more ITLs.Cluster cluster-1 10 storage-volumes which are dead or unreachable. 0 storage-volumes which do not meet the high availability requirement for storage volume paths*. 0 storage-volumes which are not visible from all directors.*To meet the high availability requirement for storage volume paths each storage volume must be accessible from each of the directors through 2 or more VPlex backend ports, and 2 or more Array target ports, and there should be 2 or more ITLs.Errors were encountered in the back-end connectivity. Please run 'connectivity validate-be -d' for details.Validate meta-volumeChecking cluster cluster-1 ...Checking cluster cluster-2 ...ok
See also
● cluster status● connectivity validate-be● health-check
versionDisplay version information for connected directors.
Contexts
All contexts.
Syntax
version [-a|--all] [-n|directors] context-path,context-path... [--verbose]
Commands 311
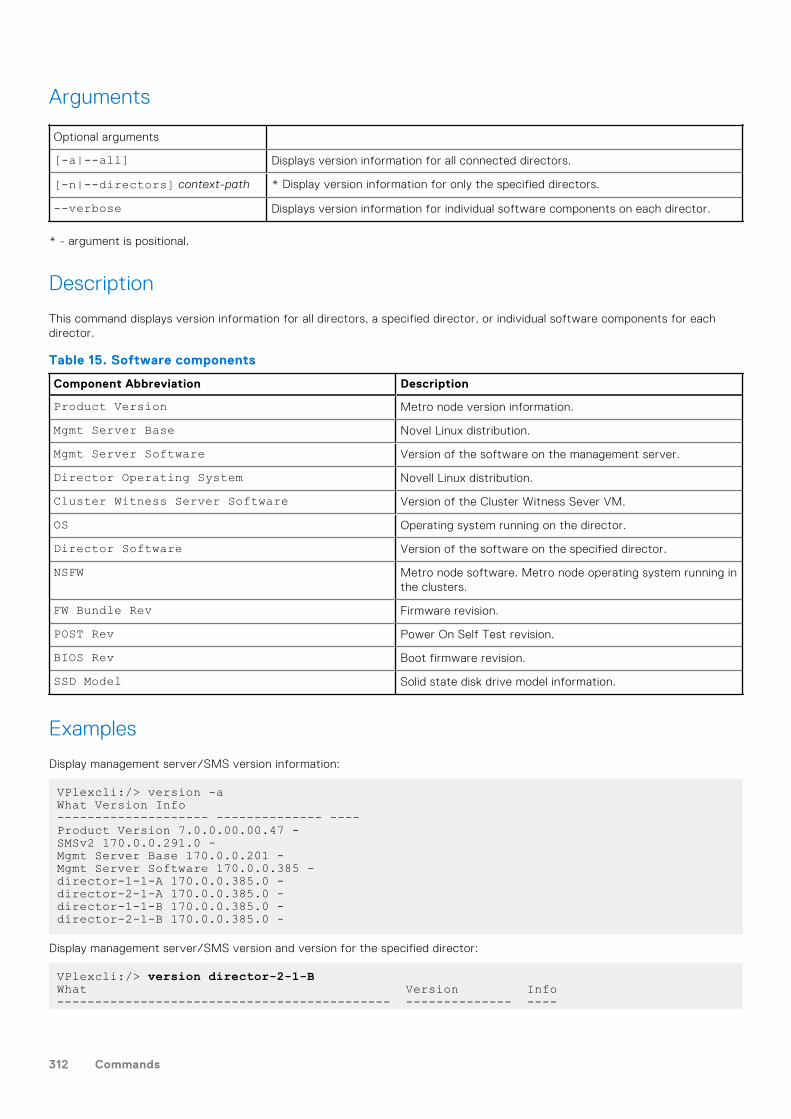
Arguments
Optional arguments
[-a|--all] Displays version information for all connected directors.
[-n|--directors] context-path * Display version information for only the specified directors.
--verbose Displays version information for individual software components on each director.
* - argument is positional.
Description
This command displays version information for all directors, a specified director, or individual software components for eachdirector.
Table 15. Software components
Component Abbreviation Description
Product Version Metro node version information.
Mgmt Server Base Novel Linux distribution.
Mgmt Server Software Version of the software on the management server.
Director Operating System Novell Linux distribution.
Cluster Witness Server Software Version of the Cluster Witness Sever VM.
OS Operating system running on the director.
Director Software Version of the software on the specified director.
NSFW Metro node software. Metro node operating system running inthe clusters.
FW Bundle Rev Firmware revision.
POST Rev Power On Self Test revision.
BIOS Rev Boot firmware revision.
SSD Model Solid state disk drive model information.
Examples
Display management server/SMS version information:
VPlexcli:/> version -aWhat Version Info-------------------- -------------- ----Product Version 7.0.0.00.00.47 -SMSv2 170.0.0.291.0 -Mgmt Server Base 170.0.0.201 -Mgmt Server Software 170.0.0.385 -director-1-1-A 170.0.0.385.0 -director-2-1-A 170.0.0.385.0 -director-1-1-B 170.0.0.385.0 -director-2-1-B 170.0.0.385.0 -
Display management server/SMS version and version for the specified director:
VPlexcli:/> version director-2-1-BWhat Version Info-------------------------------------------- -------------- ----
312 Commands

Product Version 5.4.0.00.00.10 -SMSv2 D35.20.0.10.0 -Mgmt Server Base D35.20.0.1 -Mgmt Server Software D35.20.0.13 -/clusters/cluster-2/directors/director-2-1-B 6.5.54.0.0 -
Display version information for management server, SMS, and all directors:
VPlexcli:/> version -aWhat Version Info-------------------------------------------- -------------- ----Product Version 5.4.0.00.00.10 -SMSv2 D35.20.0.10.0 -Mgmt Server Base D35.20.0.1 -Mgmt Server Software D35.20.0.13 -/clusters/cluster-2/directors/director-2-1-B 6.5.54.0.0 -/clusters/cluster-2/directors/director-2-1-A 6.5.54.0.0 -/clusters/cluster-1/directors/director-1-1-B 6.5.54.0.0 -/clusters/cluster-1/directors/director-1-1-A 6.5.54.0.0 -
Display version information for individual software components on each director. See Software components table below for adescription of the components.
VPlexcli:/> version -a --verboseProduct Version: 5.4.0.00.00.10What: SMSv2Version: D35.20.0.10.0Build time: June 09, 2014 at 11:38:36PM EDTBuild machine: dudleyed05Build OS: Linux version 2.6.27-7-generic on amd64Build compiler: 1.6.0_45Build source: /spgear/spgear_misc/htdocs/harness/release/1795/work/ui/srcWhat: Mgmt Server BaseVersion: D35.20.0.1What: Mgmt Server SoftwareVersion: D35.20.0.13For director /engines/engine-2-1/directors/director-2-1-B:What: O/SVersion: D35.20.0.1 (SLES11)What: Director SoftwareVersion: 6.5.54.0.0What: ECOMVersion: 6.5.1.0.0-0What: VPLEX SplitterVersion: 4.1.b_vplex_D35_00_Ottawa_MR1.10-1What: ZECLVersion: 6.5.52.0.0-0What: ZPEMVersion: 6.5.52.0.0-0What: NSFWVersion: 65.1.54.0-0What: BIOS RevVersion: 08.50What: POST RevVersion: 43.80What: FW Bundle RevVersion: 12.60What: SSD Model: P30056-MTFDBAA056SAL 118032803Version: 0005For director /engines/engine-2-1/directors/director-2-1-A:What: O/SVersion: D35.20.0.1 (SLES11)What: Director SoftwareVersion: 6.5.54.0.0What: ECOMVersion: 6.5.1.0.0-0What: VPLEX SplitterVersion: 4.1.b_vplex_D35_00_Ottawa_MR1.10-1What: ZECLVersion: 6.5.52.0.0-0What: ZPEMVersion: 6.5.52.0.0-0
Commands 313
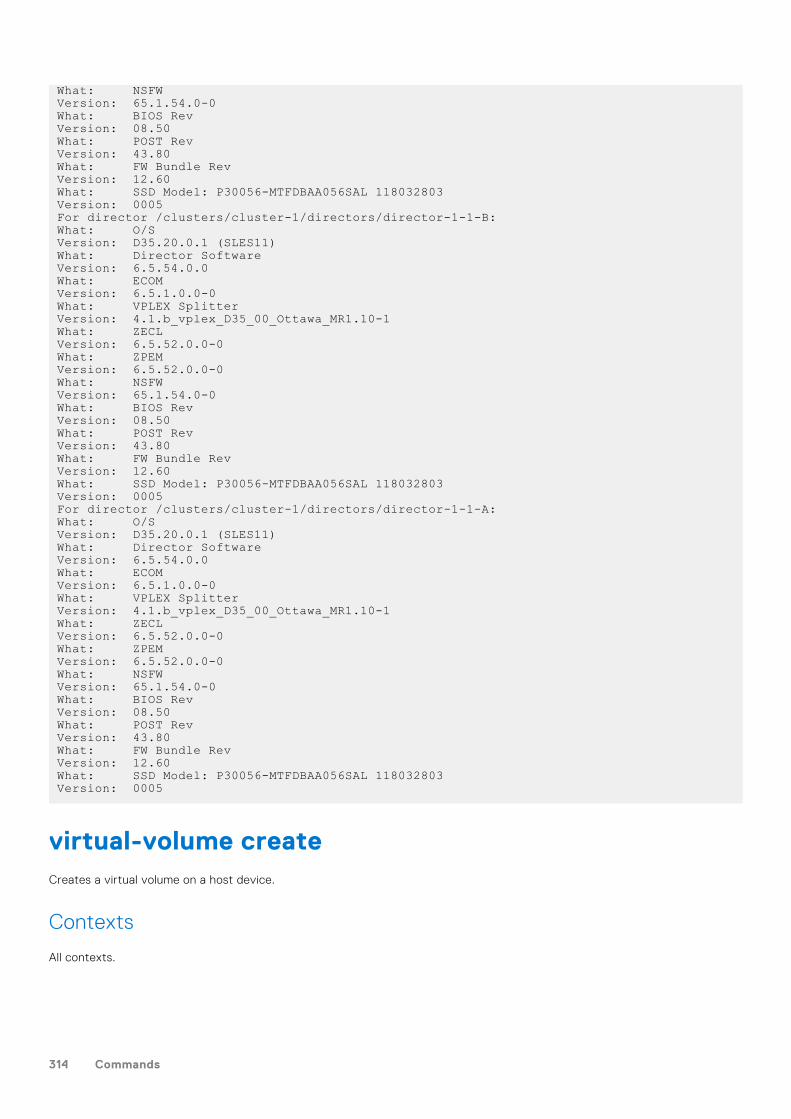
What: NSFWVersion: 65.1.54.0-0What: BIOS RevVersion: 08.50What: POST RevVersion: 43.80What: FW Bundle RevVersion: 12.60What: SSD Model: P30056-MTFDBAA056SAL 118032803Version: 0005For director /clusters/cluster-1/directors/director-1-1-B:What: O/SVersion: D35.20.0.1 (SLES11)What: Director SoftwareVersion: 6.5.54.0.0What: ECOMVersion: 6.5.1.0.0-0What: VPLEX SplitterVersion: 4.1.b_vplex_D35_00_Ottawa_MR1.10-1What: ZECLVersion: 6.5.52.0.0-0What: ZPEMVersion: 6.5.52.0.0-0What: NSFWVersion: 65.1.54.0-0What: BIOS RevVersion: 08.50What: POST RevVersion: 43.80What: FW Bundle RevVersion: 12.60What: SSD Model: P30056-MTFDBAA056SAL 118032803Version: 0005For director /clusters/cluster-1/directors/director-1-1-A:What: O/SVersion: D35.20.0.1 (SLES11)What: Director SoftwareVersion: 6.5.54.0.0What: ECOMVersion: 6.5.1.0.0-0What: VPLEX SplitterVersion: 4.1.b_vplex_D35_00_Ottawa_MR1.10-1What: ZECLVersion: 6.5.52.0.0-0What: ZPEMVersion: 6.5.52.0.0-0What: NSFWVersion: 65.1.54.0-0What: BIOS RevVersion: 08.50What: POST RevVersion: 43.80What: FW Bundle RevVersion: 12.60What: SSD Model: P30056-MTFDBAA056SAL 118032803Version: 0005
virtual-volume createCreates a virtual volume on a host device.
Contexts
All contexts.
314 Commands
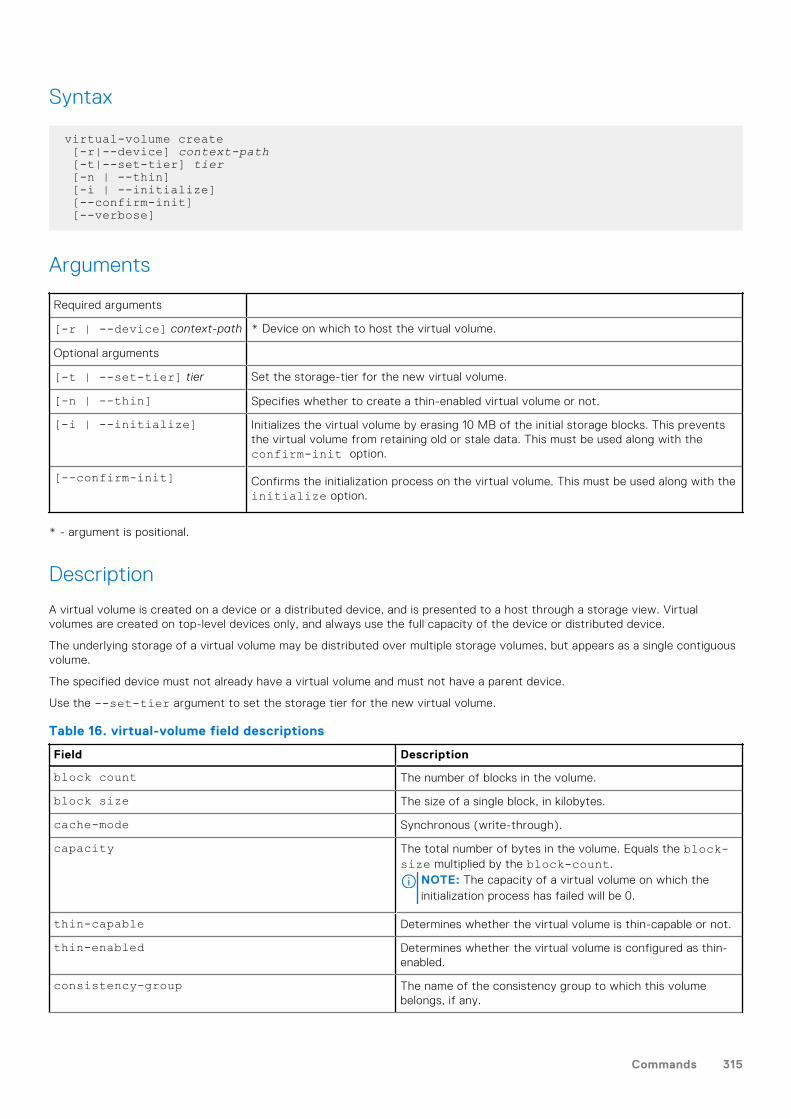
Syntax
virtual-volume create [-r|--device] context-path [-t|--set-tier] tier [-n | --thin] [-i | --initialize] [--confirm-init] [--verbose]
Arguments
Required arguments
[-r | --device] context-path * Device on which to host the virtual volume.
Optional arguments
[-t | --set-tier] tier Set the storage-tier for the new virtual volume.
[-n | --thin] Specifies whether to create a thin-enabled virtual volume or not.
[-i | --initialize] Initializes the virtual volume by erasing 10 MB of the initial storage blocks. This preventsthe virtual volume from retaining old or stale data. This must be used along with theconfirm-init option.
[--confirm-init] Confirms the initialization process on the virtual volume. This must be used along with theinitialize option.
* - argument is positional.
Description
A virtual volume is created on a device or a distributed device, and is presented to a host through a storage view. Virtualvolumes are created on top-level devices only, and always use the full capacity of the device or distributed device.
The underlying storage of a virtual volume may be distributed over multiple storage volumes, but appears as a single contiguousvolume.
The specified device must not already have a virtual volume and must not have a parent device.
Use the --set-tier argument to set the storage tier for the new virtual volume.
Table 16. virtual-volume field descriptions
Field Description
block count The number of blocks in the volume.
block size The size of a single block, in kilobytes.
cache-mode Synchronous (write-through).
capacity The total number of bytes in the volume. Equals the block-size multiplied by the block-count.
NOTE: The capacity of a virtual volume on which theinitialization process has failed will be 0.
thin-capable Determines whether the virtual volume is thin-capable or not.
thin-enabled Determines whether the virtual volume is configured as thin-enabled.
consistency-group The name of the consistency group to which this volumebelongs, if any.
Commands 315
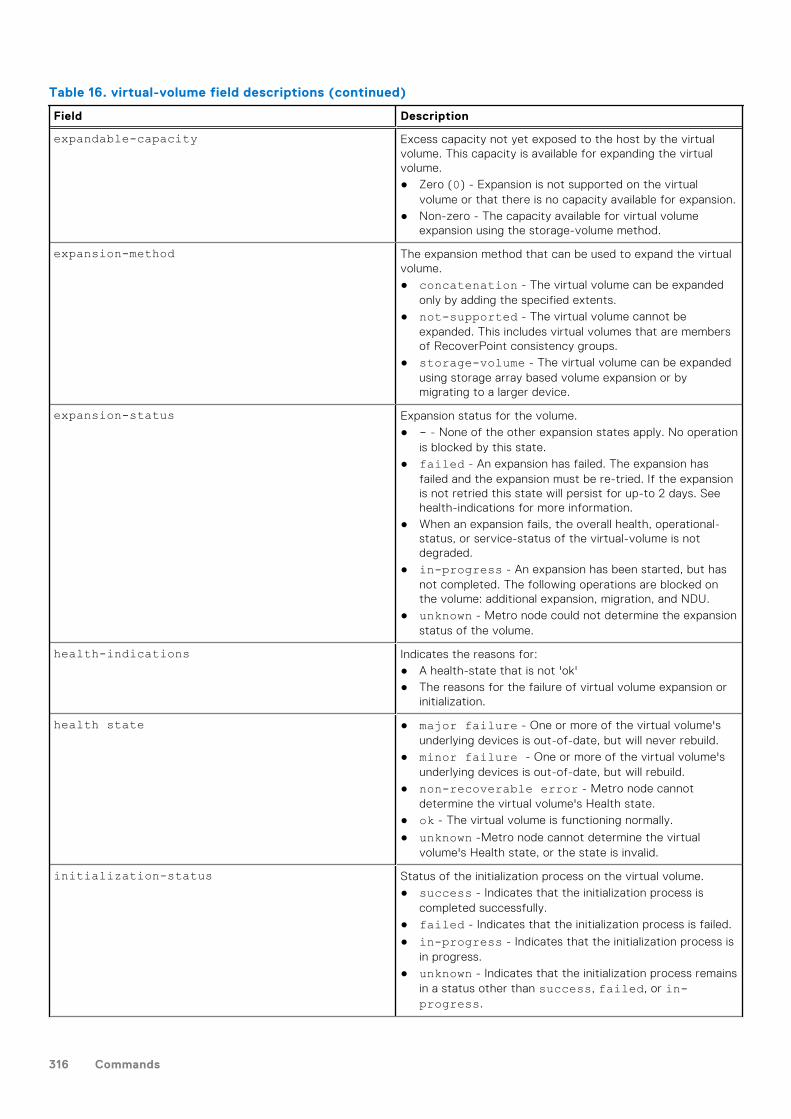
Table 16. virtual-volume field descriptions (continued)
Field Description
expandable-capacity Excess capacity not yet exposed to the host by the virtualvolume. This capacity is available for expanding the virtualvolume.● Zero (0) - Expansion is not supported on the virtual
volume or that there is no capacity available for expansion.● Non-zero - The capacity available for virtual volume
expansion using the storage-volume method.
expansion-method The expansion method that can be used to expand the virtualvolume.● concatenation - The virtual volume can be expanded
only by adding the specified extents.● not-supported - The virtual volume cannot be
expanded. This includes virtual volumes that are membersof RecoverPoint consistency groups.
● storage-volume - The virtual volume can be expandedusing storage array based volume expansion or bymigrating to a larger device.
expansion-status Expansion status for the volume.● - - None of the other expansion states apply. No operation
is blocked by this state.● failed - An expansion has failed. The expansion has
failed and the expansion must be re-tried. If the expansionis not retried this state will persist for up-to 2 days. Seehealth-indications for more information.
● When an expansion fails, the overall health, operational-status, or service-status of the virtual-volume is notdegraded.
● in-progress - An expansion has been started, but hasnot completed. The following operations are blocked onthe volume: additional expansion, migration, and NDU.
● unknown - Metro node could not determine the expansionstatus of the volume.
health-indications Indicates the reasons for:● A health-state that is not 'ok'● The reasons for the failure of virtual volume expansion or
initialization.
health state ● major failure - One or more of the virtual volume'sunderlying devices is out-of-date, but will never rebuild.
● minor failure - One or more of the virtual volume'sunderlying devices is out-of-date, but will rebuild.
● non-recoverable error - Metro node cannotdetermine the virtual volume's Health state.
● ok - The virtual volume is functioning normally.
● unknown -Metro node cannot determine the virtualvolume's Health state, or the state is invalid.
initialization-status Status of the initialization process on the virtual volume.● success - Indicates that the initialization process is
completed successfully.● failed - Indicates that the initialization process is failed.
● in-progress - Indicates that the initialization process isin progress.
● unknown - Indicates that the initialization process remainsin a status other than success, failed, or in-progress.
316 Commands
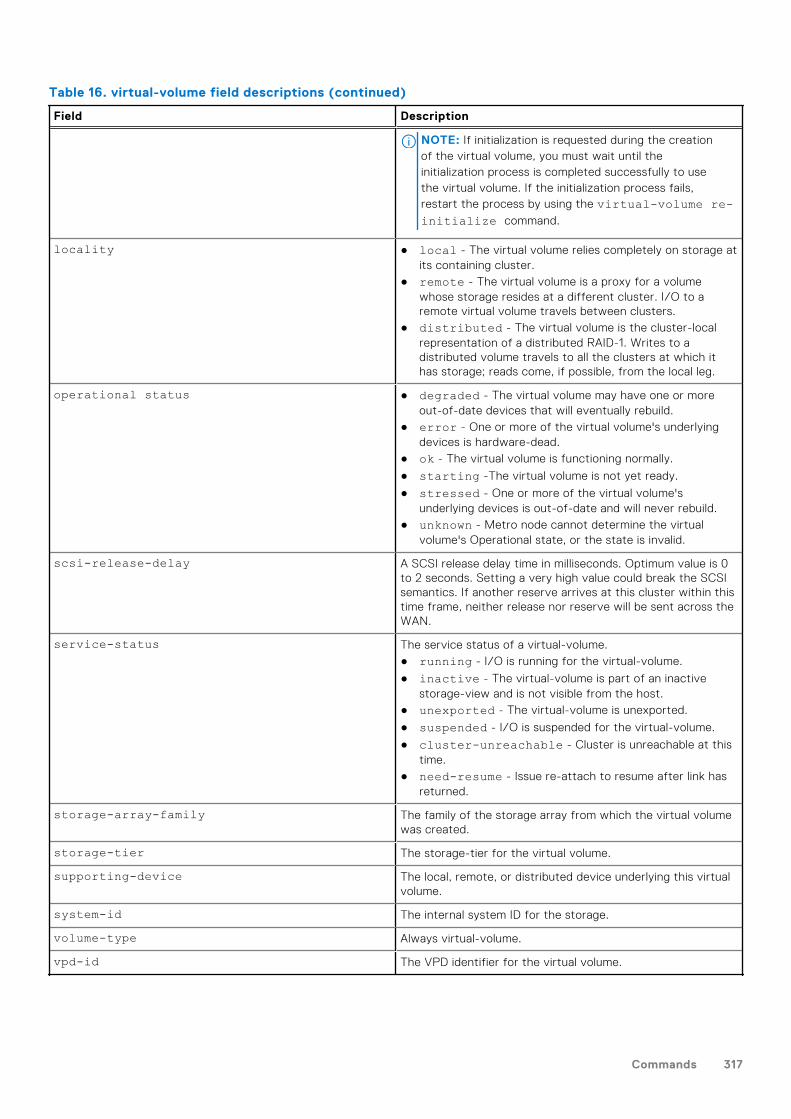
Table 16. virtual-volume field descriptions (continued)
Field Description
NOTE: If initialization is requested during the creationof the virtual volume, you must wait until theinitialization process is completed successfully to usethe virtual volume. If the initialization process fails,restart the process by using the virtual-volume re-initialize command.
locality ● local - The virtual volume relies completely on storage atits containing cluster.
● remote - The virtual volume is a proxy for a volumewhose storage resides at a different cluster. I/O to aremote virtual volume travels between clusters.
● distributed - The virtual volume is the cluster-localrepresentation of a distributed RAID-1. Writes to adistributed volume travels to all the clusters at which ithas storage; reads come, if possible, from the local leg.
operational status ● degraded - The virtual volume may have one or moreout-of-date devices that will eventually rebuild.
● error - One or more of the virtual volume's underlyingdevices is hardware-dead.
● ok - The virtual volume is functioning normally.
● starting -The virtual volume is not yet ready.
● stressed - One or more of the virtual volume'sunderlying devices is out-of-date and will never rebuild.
● unknown - Metro node cannot determine the virtualvolume's Operational state, or the state is invalid.
scsi-release-delay A SCSI release delay time in milliseconds. Optimum value is 0to 2 seconds. Setting a very high value could break the SCSIsemantics. If another reserve arrives at this cluster within thistime frame, neither release nor reserve will be sent across theWAN.
service-status The service status of a virtual-volume.● running - I/O is running for the virtual-volume.
● inactive - The virtual-volume is part of an inactivestorage-view and is not visible from the host.
● unexported - The virtual-volume is unexported.
● suspended - I/O is suspended for the virtual-volume.
● cluster-unreachable - Cluster is unreachable at thistime.
● need-resume - Issue re-attach to resume after link hasreturned.
storage-array-family The family of the storage array from which the virtual volumewas created.
storage-tier The storage-tier for the virtual volume.
supporting-device The local, remote, or distributed device underlying this virtualvolume.
system-id The internal system ID for the storage.
volume-type Always virtual-volume.
vpd-id The VPD identifier for the virtual volume.
Commands 317
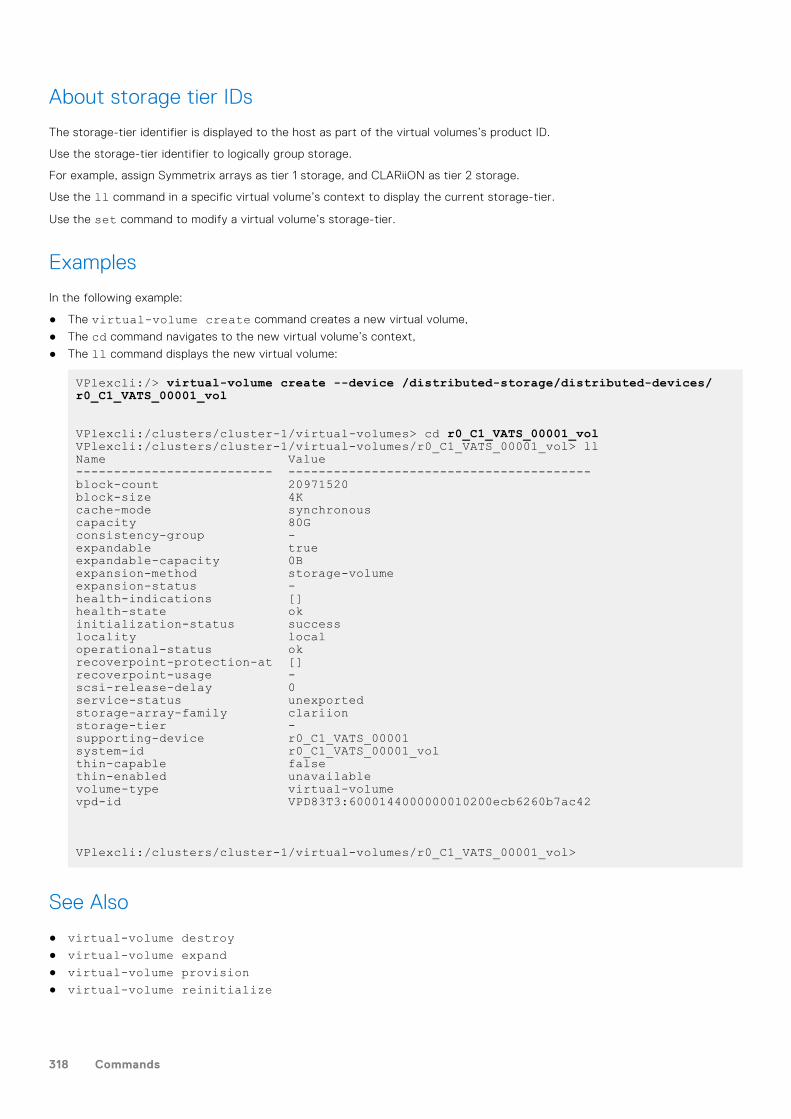
About storage tier IDs
The storage-tier identifier is displayed to the host as part of the virtual volumes’s product ID.
Use the storage-tier identifier to logically group storage.
For example, assign Symmetrix arrays as tier 1 storage, and CLARiiON as tier 2 storage.
Use the ll command in a specific virtual volume’s context to display the current storage-tier.
Use the set command to modify a virtual volume’s storage-tier.
Examples
In the following example:
● The virtual-volume create command creates a new virtual volume,
● The cd command navigates to the new virtual volume’s context,
● The ll command displays the new virtual volume:
VPlexcli:/> virtual-volume create --device /distributed-storage/distributed-devices/r0_C1_VATS_00001_vol
VPlexcli:/clusters/cluster-1/virtual-volumes> cd r0_C1_VATS_00001_volVPlexcli:/clusters/cluster-1/virtual-volumes/r0_C1_VATS_00001_vol> llName Value-------------------------- ----------------------------------------block-count 20971520block-size 4Kcache-mode synchronouscapacity 80Gconsistency-group -expandable trueexpandable-capacity 0Bexpansion-method storage-volumeexpansion-status -health-indications []health-state okinitialization-status successlocality localoperational-status okrecoverpoint-protection-at []recoverpoint-usage -scsi-release-delay 0service-status unexportedstorage-array-family clariionstorage-tier -supporting-device r0_C1_VATS_00001system-id r0_C1_VATS_00001_volthin-capable falsethin-enabled unavailablevolume-type virtual-volumevpd-id VPD83T3:6000144000000010200ecb6260b7ac42
VPlexcli:/clusters/cluster-1/virtual-volumes/r0_C1_VATS_00001_vol>
See Also
● virtual-volume destroy● virtual-volume expand● virtual-volume provision● virtual-volume reinitialize
318 Commands
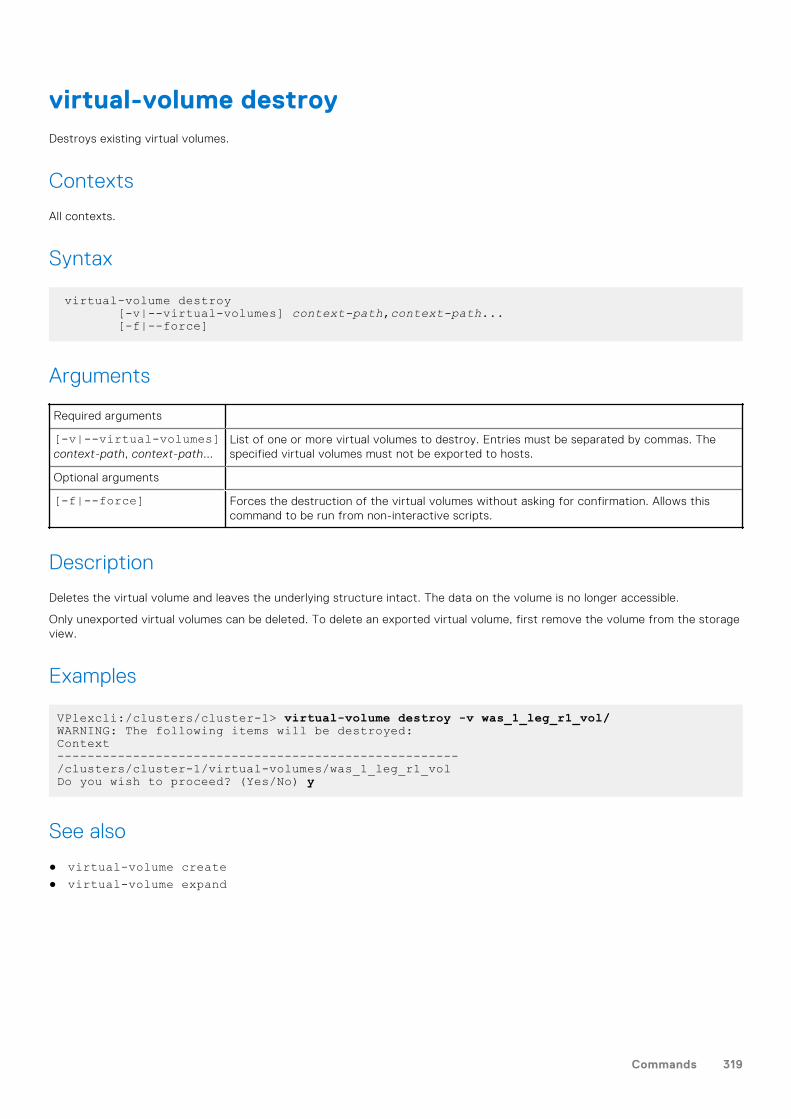
virtual-volume destroyDestroys existing virtual volumes.
Contexts
All contexts.
Syntax
virtual-volume destroy [-v|--virtual-volumes] context-path,context-path... [-f|--force]
Arguments
Required arguments
[-v|--virtual-volumes]context-path, context-path...
List of one or more virtual volumes to destroy. Entries must be separated by commas. Thespecified virtual volumes must not be exported to hosts.
Optional arguments
[-f|--force] Forces the destruction of the virtual volumes without asking for confirmation. Allows thiscommand to be run from non-interactive scripts.
Description
Deletes the virtual volume and leaves the underlying structure intact. The data on the volume is no longer accessible.
Only unexported virtual volumes can be deleted. To delete an exported virtual volume, first remove the volume from the storageview.
Examples
VPlexcli:/clusters/cluster-1> virtual-volume destroy -v was_1_leg_r1_vol/WARNING: The following items will be destroyed:Context-----------------------------------------------------/clusters/cluster-1/virtual-volumes/was_1_leg_r1_volDo you wish to proceed? (Yes/No) y
See also
● virtual-volume create● virtual-volume expand
Commands 319
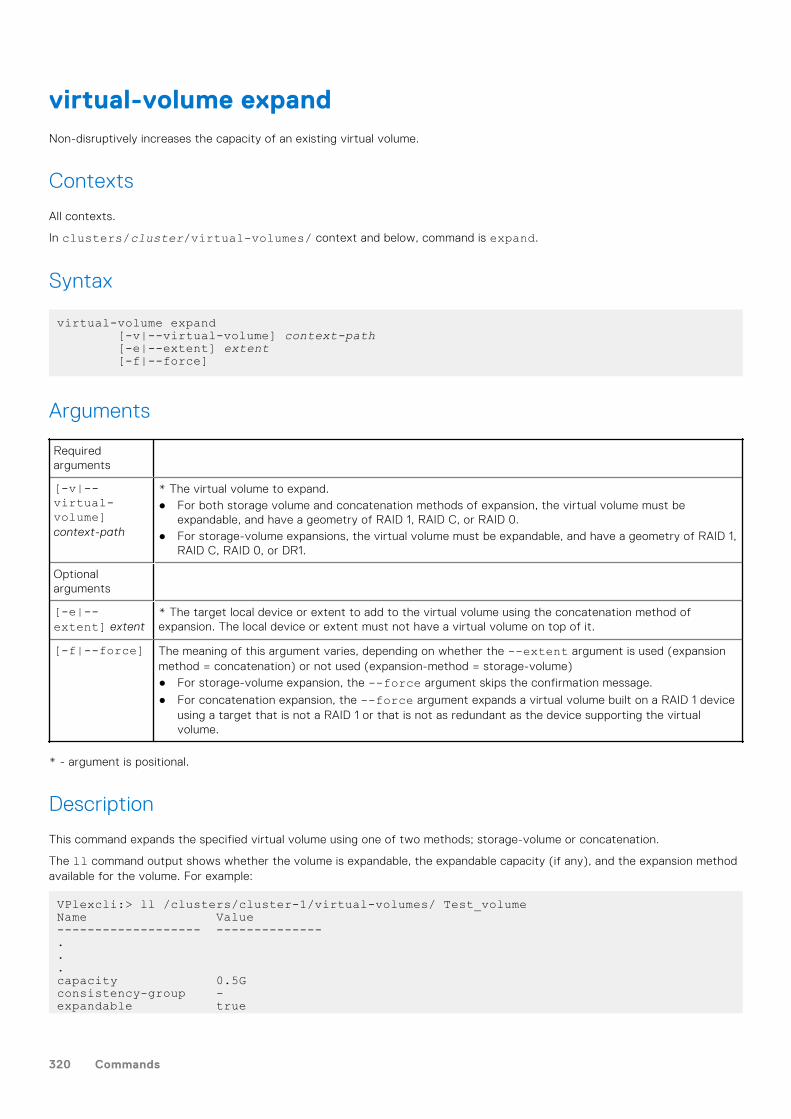
virtual-volume expandNon-disruptively increases the capacity of an existing virtual volume.
Contexts
All contexts.
In clusters/cluster/virtual-volumes/ context and below, command is expand.
Syntax
virtual-volume expand [-v|--virtual-volume] context-path [-e|--extent] extent [-f|--force]
Arguments
Requiredarguments
[-v|--virtual-volume]context-path
* The virtual volume to expand.● For both storage volume and concatenation methods of expansion, the virtual volume must be
expandable, and have a geometry of RAID 1, RAID C, or RAID 0.● For storage-volume expansions, the virtual volume must be expandable, and have a geometry of RAID 1,
RAID C, RAID 0, or DR1.
Optionalarguments
[-e|--extent] extent
* The target local device or extent to add to the virtual volume using the concatenation method ofexpansion. The local device or extent must not have a virtual volume on top of it.
[-f|--force] The meaning of this argument varies, depending on whether the --extent argument is used (expansionmethod = concatenation) or not used (expansion-method = storage-volume)● For storage-volume expansion, the --force argument skips the confirmation message.
● For concatenation expansion, the --force argument expands a virtual volume built on a RAID 1 deviceusing a target that is not a RAID 1 or that is not as redundant as the device supporting the virtualvolume.
* - argument is positional.
Description
This command expands the specified virtual volume using one of two methods; storage-volume or concatenation.
The ll command output shows whether the volume is expandable, the expandable capacity (if any), and the expansion methodavailable for the volume. For example:
VPlexcli:> ll /clusters/cluster-1/virtual-volumes/ Test_volumeName Value------------------- --------------...capacity 0.5Gconsistency-group -expandable true
320 Commands
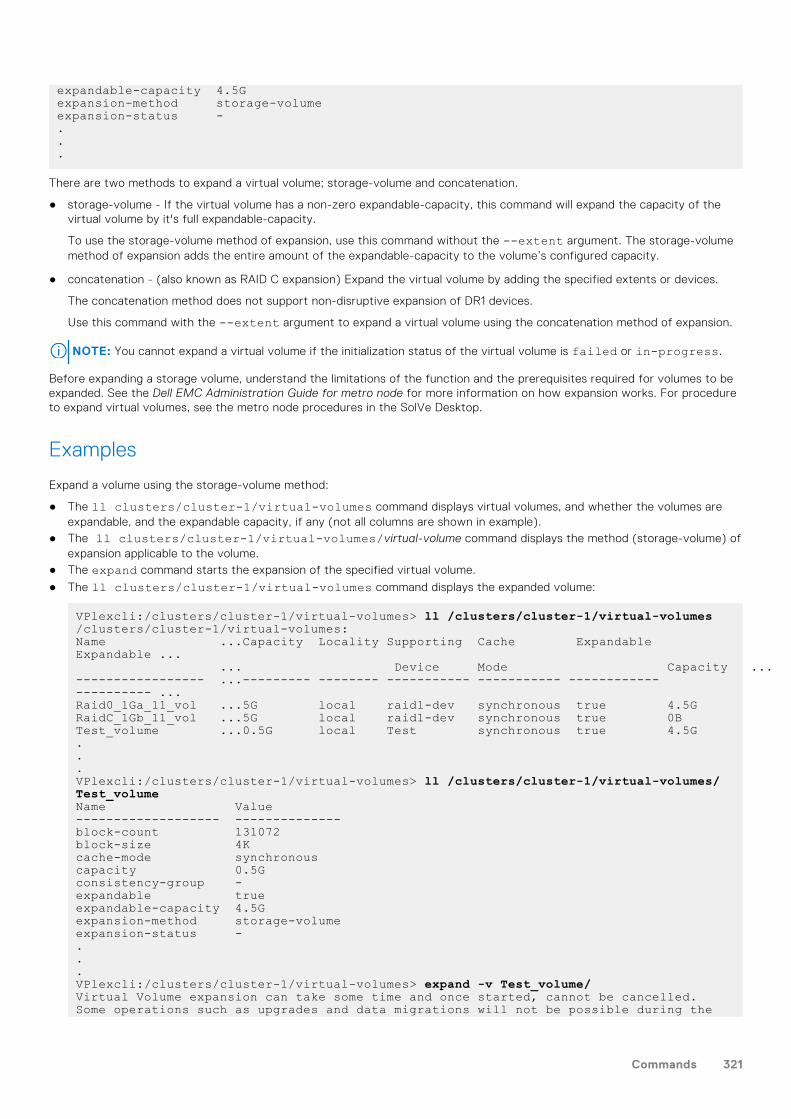
expandable-capacity 4.5Gexpansion-method storage-volumeexpansion-status -...
There are two methods to expand a virtual volume; storage-volume and concatenation.
● storage-volume - If the virtual volume has a non-zero expandable-capacity, this command will expand the capacity of thevirtual volume by it's full expandable-capacity.
To use the storage-volume method of expansion, use this command without the --extent argument. The storage-volumemethod of expansion adds the entire amount of the expandable-capacity to the volume’s configured capacity.
● concatenation - (also known as RAID C expansion) Expand the virtual volume by adding the specified extents or devices.
The concatenation method does not support non-disruptive expansion of DR1 devices.
Use this command with the --extent argument to expand a virtual volume using the concatenation method of expansion.
NOTE: You cannot expand a virtual volume if the initialization status of the virtual volume is failed or in-progress.
Before expanding a storage volume, understand the limitations of the function and the prerequisites required for volumes to beexpanded. See the Dell EMC Administration Guide for metro node for more information on how expansion works. For procedureto expand virtual volumes, see the metro node procedures in the SolVe Desktop.
Examples
Expand a volume using the storage-volume method:
● The ll clusters/cluster-1/virtual-volumes command displays virtual volumes, and whether the volumes areexpandable, and the expandable capacity, if any (not all columns are shown in example).
● The ll clusters/cluster-1/virtual-volumes/virtual-volume command displays the method (storage-volume) ofexpansion applicable to the volume.
● The expand command starts the expansion of the specified virtual volume.
● The ll clusters/cluster-1/virtual-volumes command displays the expanded volume:
VPlexcli:/clusters/cluster-1/virtual-volumes> ll /clusters/cluster-1/virtual-volumes/clusters/cluster-1/virtual-volumes:Name ...Capacity Locality Supporting Cache Expandable Expandable ... ... Device Mode Capacity ...----------------- ...--------- -------- ----------- ----------- ------------ ---------- ...Raid0_1Ga_11_vol ...5G local raid1-dev synchronous true 4.5GRaidC_1Gb_11_vol ...5G local raid1-dev synchronous true 0BTest_volume ...0.5G local Test synchronous true 4.5G...VPlexcli:/clusters/cluster-1/virtual-volumes> ll /clusters/cluster-1/virtual-volumes/ Test_volumeName Value------------------- --------------block-count 131072block-size 4Kcache-mode synchronouscapacity 0.5Gconsistency-group -expandable trueexpandable-capacity 4.5Gexpansion-method storage-volumeexpansion-status -...VPlexcli:/clusters/cluster-1/virtual-volumes> expand -v Test_volume/Virtual Volume expansion can take some time and once started, cannot be cancelled. Some operations such as upgrades and data migrations will not be possible during the
Commands 321

expansion. In some cases hosts and their applications may need to be restarted once the expansion has completed. Do you wish to proceed ? (Yes/No) yesThe expansion of virtual-volume 'Test_volume' has started.VPlexcli:/clusters/cluster-1/virtual-volumes> cd Test_volume/VPlexcli:/clusters/cluster-1/virtual-volumes/Test_volume> llName Value------------------- --------------block-count 131072block-size 4Kcache-mode synchronouscapacity 0.5Gconsistency-group -expandable true expandable-capacity 4.5G expansion-method storage-volume expansion-status in-progress health-indications []...VPlexcli:/clusters/cluster-1/virtual-volumes> ll /clusters/cluster-1/virtual-volumes/clusters/cluster-1/virtual-volumes:Name ...Capacity Locality Supporting Cache Expandable Expandable ... ... Device Mode Capacity ...----------------- ...--------- -------- ----------- ----------- ------------ ---------- ...Raid0_1Ga_11_vol ...5G local raid1-dev synchronous true 4.5GRaidC_1Gb_11_vol ...5G local raid1-dev synchronous true 0BTest_volume ...5G local Test synchronous true 0B...
Expand a virtual volume using the concatenation method:
● The ll clusters/cluster-1/virtual-volumes command displays the available virtual volumes, and whether thevolumes are expandable.
● The ll clusters/cluster-1/virtual-volumes/volume-name command displays that the concatenation methodmust be used to expand the target volume.
● The ll /clusters/cluster-1/storage-elements/extents command displays available extents.
● The virtual-volume expand --virtual-volume virtual-volume --extent extent command adds the specifiedextent to the specified virtual volume:
VPlexcli:/> ll /clusters/cluster-1/virtual-volumes/clusters/cluster-1/virtual-volumes:Name Operational Health ... ... Expandable----------------- Status State ... ... --------------------------- ----------- ------ ... ... ----------Raid0_1Ga_11_vol ok ok ... ... trueRaidC_1Gb_11_vol ok ok ... ... trueRaid1_1Gc_11_vol ok ok ... ... trueTest-Device_vol ok ok ... ... true...VPlexcli:/> ll /clusters/cluster-1/virtual-volumes/Test-Device-volName Value------------------ --------------------------------...expandable trueexpansion-method concatenationhealth-indications []...VPlexcli:/> ll /clusters/cluster-1/storage-elements/extents/clusters/cluster-1/storage-elements/extents:Name StorageVolume Capacity Use
322 Commands

-------------------------------- ----------------------- -------- -------extent_Symm1554Tdev_061D_1 Symm1554Tdev_061D 100G usedextent_Symm1554Tdev_0624_1 Symm1554Tdev_0624 100G usedextent_Symm1554Tdev_0625_1 Symm1554Tdev_0625 100G usedextent_Symm1554_0690_1 Symm1554_0690 8.43G usedextent_Symm1554_0691_1 Symm1554_0691 8.43G usedextent_Symm1554_0692_1 Symm1554_0692 8.43G used...VPlexcli:/> cd /clusters/cluster-1/virtual-volumes/Test-Device_volVPlexcli:/clusters/cluster-1/virtual-volumes/Test-Device_vol> expand --virtual-volume Test-Device_vol --extent ext_Symm1254_7BF_1
See also
● batch-migrate pause● batch-migrate resume● dm migration pause● dm migration resume● virtual-volume create● virtual-volume destroy● Dell EMC Administration Guide for metro node
virtual-volume list-thinLists the virtual volumes at the given clusters with additional thin-property filtering options.
Contexts
All contexts.
Syntax
virtual-volume list-thin-t | --clusters context path -e | --enabled true|false-c | --capable true|false[--verbose]
Arguments
Required arguments
-t | --clusters contextpath
* The target cluster where virtual volumes are listed.
Optional arguments
-e | --enabled true|false Filters volumes with the matching thin-enabled value. The value can be true or false. Ifomitted, the results will match volumes regardless of whether they are thin-enabled or not.
-c | --capable true|false Filters volumes with the matching thin-capable value. The value can be true or false. Ifomitted, the results will match volumes regardless of whether they are thin-capable or not.
[-h|--help] Displays command line help.
Commands 323
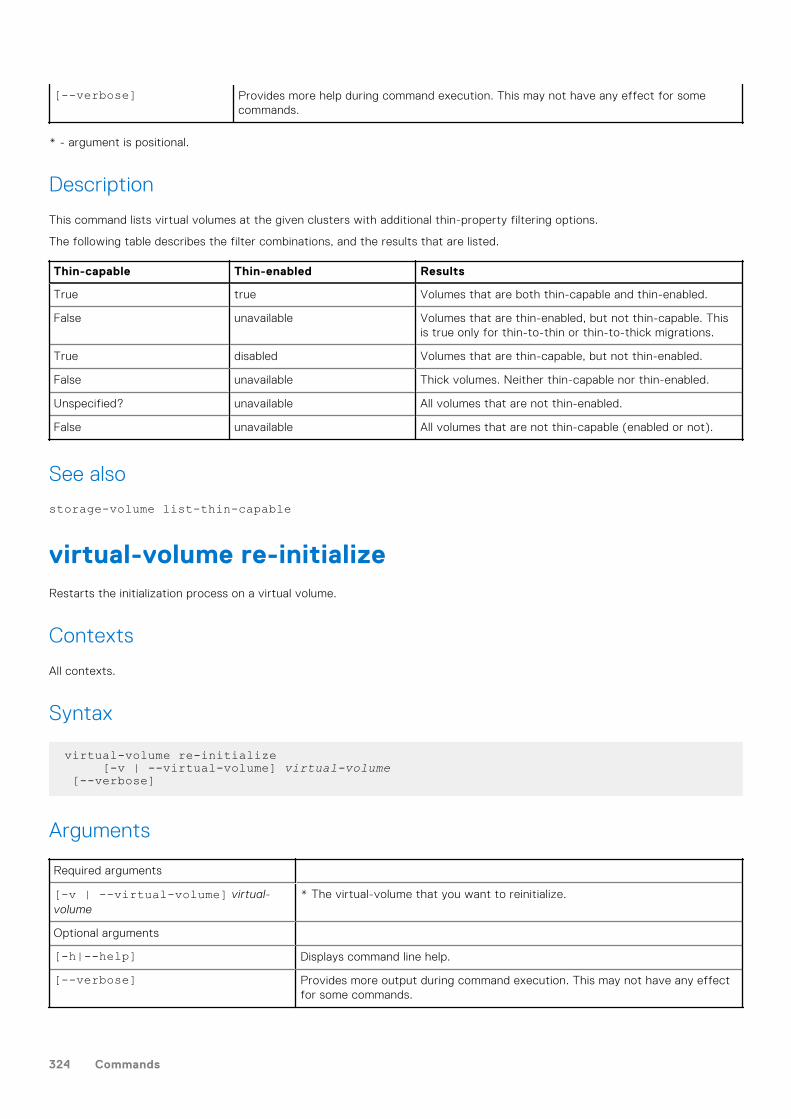
[--verbose] Provides more help during command execution. This may not have any effect for somecommands.
* - argument is positional.
Description
This command lists virtual volumes at the given clusters with additional thin-property filtering options.
The following table describes the filter combinations, and the results that are listed.
Thin-capable Thin-enabled Results
True true Volumes that are both thin-capable and thin-enabled.
False unavailable Volumes that are thin-enabled, but not thin-capable. Thisis true only for thin-to-thin or thin-to-thick migrations.
True disabled Volumes that are thin-capable, but not thin-enabled.
False unavailable Thick volumes. Neither thin-capable nor thin-enabled.
Unspecified? unavailable All volumes that are not thin-enabled.
False unavailable All volumes that are not thin-capable (enabled or not).
See also
storage-volume list-thin-capable
virtual-volume re-initializeRestarts the initialization process on a virtual volume.
Contexts
All contexts.
Syntax
virtual-volume re-initialize [-v | --virtual-volume] virtual-volume [--verbose]
Arguments
Required arguments
[-v | --virtual-volume] virtual-volume
* The virtual-volume that you want to reinitialize.
Optional arguments
[-h|--help] Displays command line help.
[--verbose] Provides more output during command execution. This may not have any effectfor some commands.
324 Commands
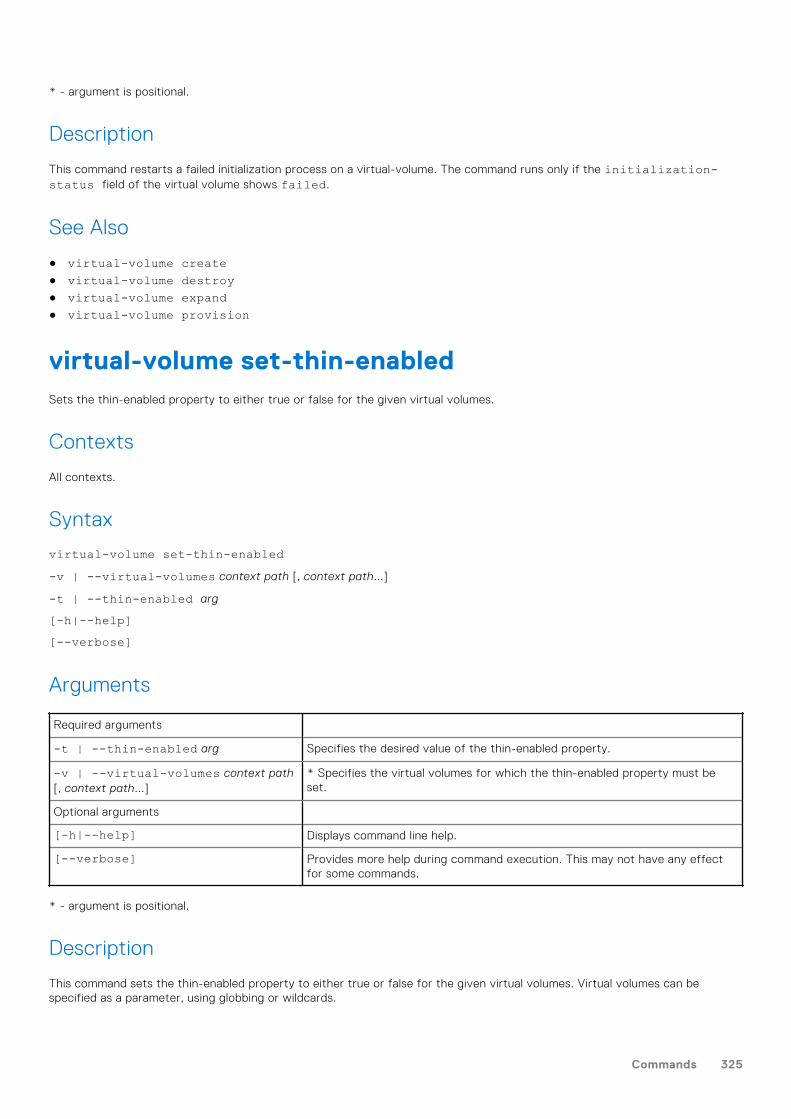
* - argument is positional.
Description
This command restarts a failed initialization process on a virtual-volume. The command runs only if the initialization-status field of the virtual volume shows failed.
See Also
● virtual-volume create● virtual-volume destroy● virtual-volume expand● virtual-volume provision
virtual-volume set-thin-enabledSets the thin-enabled property to either true or false for the given virtual volumes.
Contexts
All contexts.
Syntax
virtual-volume set-thin-enabled-v | --virtual-volumes context path [, context path...]
-t | --thin-enabled arg
[-h|--help][--verbose]
Arguments
Required arguments
-t | --thin-enabled arg Specifies the desired value of the thin-enabled property.
-v | --virtual-volumes context path[, context path...]
* Specifies the virtual volumes for which the thin-enabled property must beset.
Optional arguments
[-h|--help] Displays command line help.
[--verbose] Provides more help during command execution. This may not have any effectfor some commands.
* - argument is positional.
Description
This command sets the thin-enabled property to either true or false for the given virtual volumes. Virtual volumes can bespecified as a parameter, using globbing or wildcards.
Commands 325
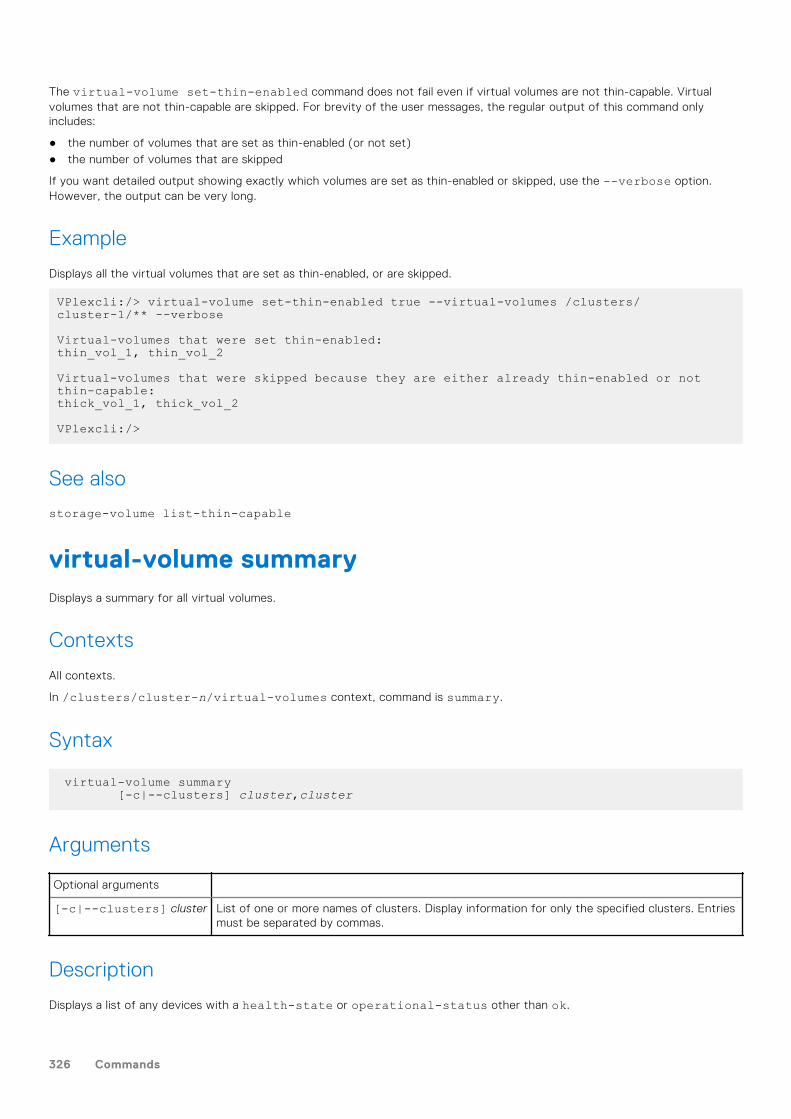
The virtual-volume set-thin-enabled command does not fail even if virtual volumes are not thin-capable. Virtualvolumes that are not thin-capable are skipped. For brevity of the user messages, the regular output of this command onlyincludes:
● the number of volumes that are set as thin-enabled (or not set)● the number of volumes that are skipped
If you want detailed output showing exactly which volumes are set as thin-enabled or skipped, use the --verbose option.However, the output can be very long.
Example
Displays all the virtual volumes that are set as thin-enabled, or are skipped.
VPlexcli:/> virtual-volume set-thin-enabled true --virtual-volumes /clusters/cluster-1/** --verbose
Virtual-volumes that were set thin-enabled:thin_vol_1, thin_vol_2
Virtual-volumes that were skipped because they are either already thin-enabled or not thin-capable:thick_vol_1, thick_vol_2
VPlexcli:/>
See also
storage-volume list-thin-capable
virtual-volume summaryDisplays a summary for all virtual volumes.
Contexts
All contexts.
In /clusters/cluster-n/virtual-volumes context, command is summary.
Syntax
virtual-volume summary [-c|--clusters] cluster,cluster
Arguments
Optional arguments
[-c|--clusters] cluster List of one or more names of clusters. Display information for only the specified clusters. Entriesmust be separated by commas.
Description
Displays a list of any devices with a health-state or operational-status other than ok.
326 Commands
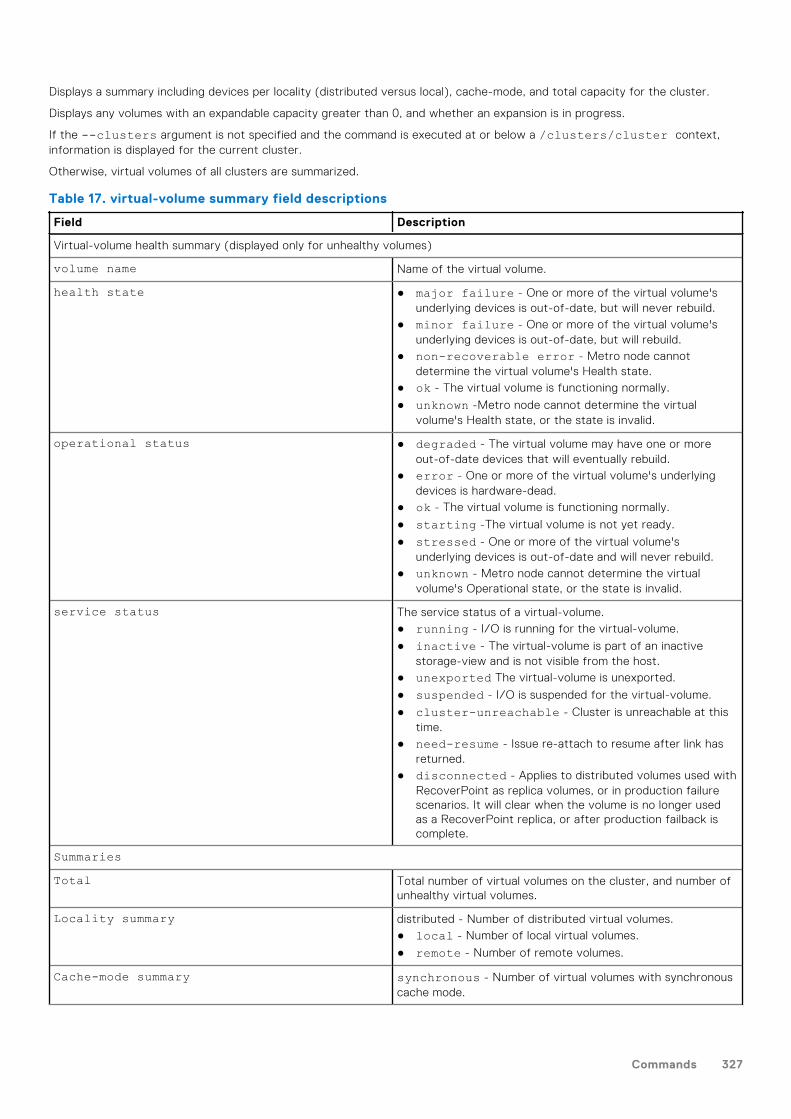
Displays a summary including devices per locality (distributed versus local), cache-mode, and total capacity for the cluster.
Displays any volumes with an expandable capacity greater than 0, and whether an expansion is in progress.
If the --clusters argument is not specified and the command is executed at or below a /clusters/cluster context,information is displayed for the current cluster.
Otherwise, virtual volumes of all clusters are summarized.
Table 17. virtual-volume summary field descriptions
Field Description
Virtual-volume health summary (displayed only for unhealthy volumes)
volume name Name of the virtual volume.
health state ● major failure - One or more of the virtual volume'sunderlying devices is out-of-date, but will never rebuild.
● minor failure - One or more of the virtual volume'sunderlying devices is out-of-date, but will rebuild.
● non-recoverable error - Metro node cannotdetermine the virtual volume's Health state.
● ok - The virtual volume is functioning normally.
● unknown -Metro node cannot determine the virtualvolume's Health state, or the state is invalid.
operational status ● degraded - The virtual volume may have one or moreout-of-date devices that will eventually rebuild.
● error - One or more of the virtual volume's underlyingdevices is hardware-dead.
● ok - The virtual volume is functioning normally.
● starting -The virtual volume is not yet ready.
● stressed - One or more of the virtual volume'sunderlying devices is out-of-date and will never rebuild.
● unknown - Metro node cannot determine the virtualvolume's Operational state, or the state is invalid.
service status The service status of a virtual-volume.● running - I/O is running for the virtual-volume.
● inactive - The virtual-volume is part of an inactivestorage-view and is not visible from the host.
● unexported The virtual-volume is unexported.
● suspended - I/O is suspended for the virtual-volume.
● cluster-unreachable - Cluster is unreachable at thistime.
● need-resume - Issue re-attach to resume after link hasreturned.
● disconnected - Applies to distributed volumes used withRecoverPoint as replica volumes, or in production failurescenarios. It will clear when the volume is no longer usedas a RecoverPoint replica, or after production failback iscomplete.
SummariesTotal Total number of virtual volumes on the cluster, and number of
unhealthy virtual volumes.
Locality summary distributed - Number of distributed virtual volumes.● local - Number of local virtual volumes.
● remote - Number of remote volumes.
Cache-mode summary synchronous - Number of virtual volumes with synchronouscache mode.
Commands 327
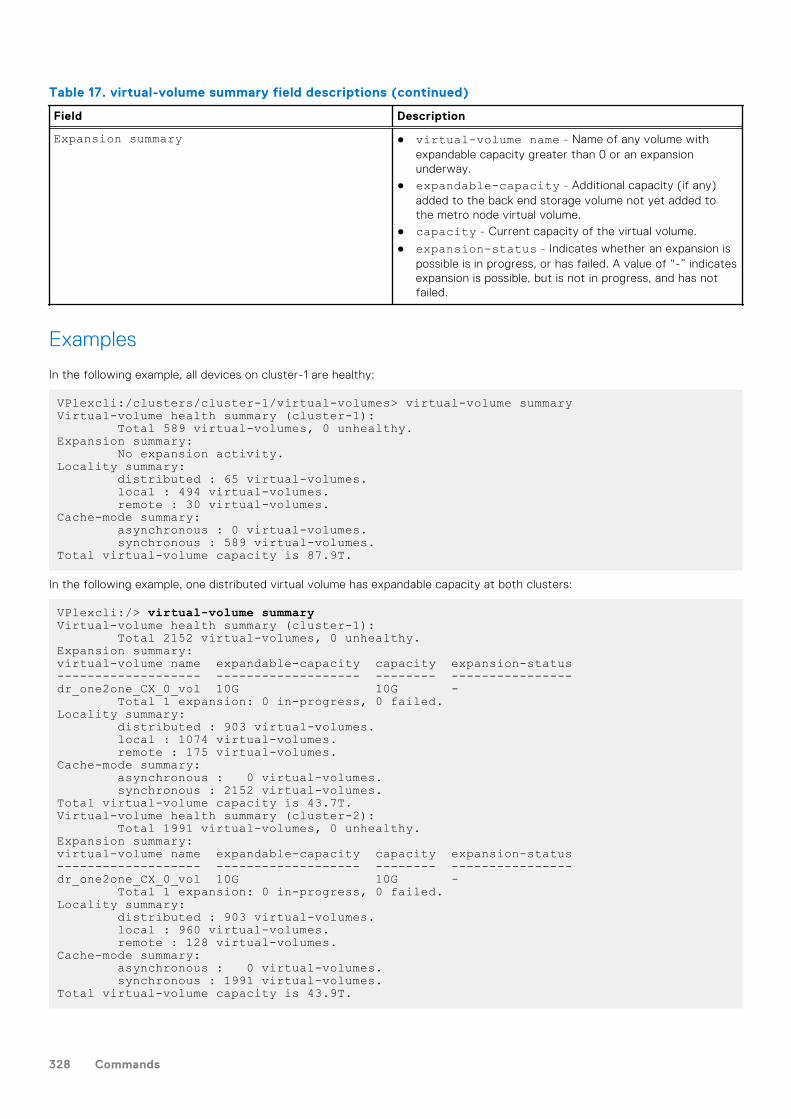
Table 17. virtual-volume summary field descriptions (continued)
Field Description
Expansion summary ● virtual-volume name - Name of any volume withexpandable capacity greater than 0 or an expansionunderway.
● expandable-capacity - Additional capacity (if any)added to the back end storage volume not yet added tothe metro node virtual volume.
● capacity - Current capacity of the virtual volume.
● expansion-status - Indicates whether an expansion ispossible is in progress, or has failed. A value of “-” indicatesexpansion is possible, but is not in progress, and has notfailed.
Examples
In the following example, all devices on cluster-1 are healthy:
VPlexcli:/clusters/cluster-1/virtual-volumes> virtual-volume summaryVirtual-volume health summary (cluster-1): Total 589 virtual-volumes, 0 unhealthy.Expansion summary: No expansion activity.Locality summary: distributed : 65 virtual-volumes. local : 494 virtual-volumes. remote : 30 virtual-volumes.Cache-mode summary: asynchronous : 0 virtual-volumes. synchronous : 589 virtual-volumes.Total virtual-volume capacity is 87.9T.
In the following example, one distributed virtual volume has expandable capacity at both clusters:
VPlexcli:/> virtual-volume summaryVirtual-volume health summary (cluster-1): Total 2152 virtual-volumes, 0 unhealthy.Expansion summary:virtual-volume name expandable-capacity capacity expansion-status------------------- ------------------- -------- ----------------dr_one2one_CX_0_vol 10G 10G - Total 1 expansion: 0 in-progress, 0 failed.Locality summary: distributed : 903 virtual-volumes. local : 1074 virtual-volumes. remote : 175 virtual-volumes.Cache-mode summary: asynchronous : 0 virtual-volumes. synchronous : 2152 virtual-volumes.Total virtual-volume capacity is 43.7T.Virtual-volume health summary (cluster-2): Total 1991 virtual-volumes, 0 unhealthy.Expansion summary:virtual-volume name expandable-capacity capacity expansion-status------------------- ------------------- -------- ----------------dr_one2one_CX_0_vol 10G 10G - Total 1 expansion: 0 in-progress, 0 failed.Locality summary: distributed : 903 virtual-volumes. local : 960 virtual-volumes. remote : 128 virtual-volumes.Cache-mode summary: asynchronous : 0 virtual-volumes. synchronous : 1991 virtual-volumes.Total virtual-volume capacity is 43.9T.
328 Commands

See also
● ds summary● export port summary● export storage-view summary● extent summary● local-device summary
waitCauses a wait until specified context-tree conditions are met.
Contexts
All contexts.
Syntax
wait [-c | --context-list] [, context-list ...] [-a | --attribute= attribute] [-v | --value= value] [-t | --timeout= timeout] [-h | --help] [--verbose]
Arguments
Required arguments
[-c | --context-list] [, context-list ...] Context list, separated by commas
Optional arguments
[-a | --attribute] Attribute name
[-v | --value] Attribute value
[-t | --timeout] Timeout in seconds. Default is twenty seconds (20s)
[-h | --help] Displays the usage for this command
[--verbose] Provides additional output during command execution. This may not have anyeffect for some commands.
Description
If a context-list is provided without an attribute, the command will wait until the contexts in the list exist. If wildcardpatterns are used, the command will wait until at least one context can be resolved for every pattern.
If an attribute and value pair are given, the command will wait until the attribute of every context resolved from context-list has the given value.
The attribute values are compared as strings.
Use the --timeout option to set the timeout in seconds. The default timeout is 20 seconds.
Commands 329
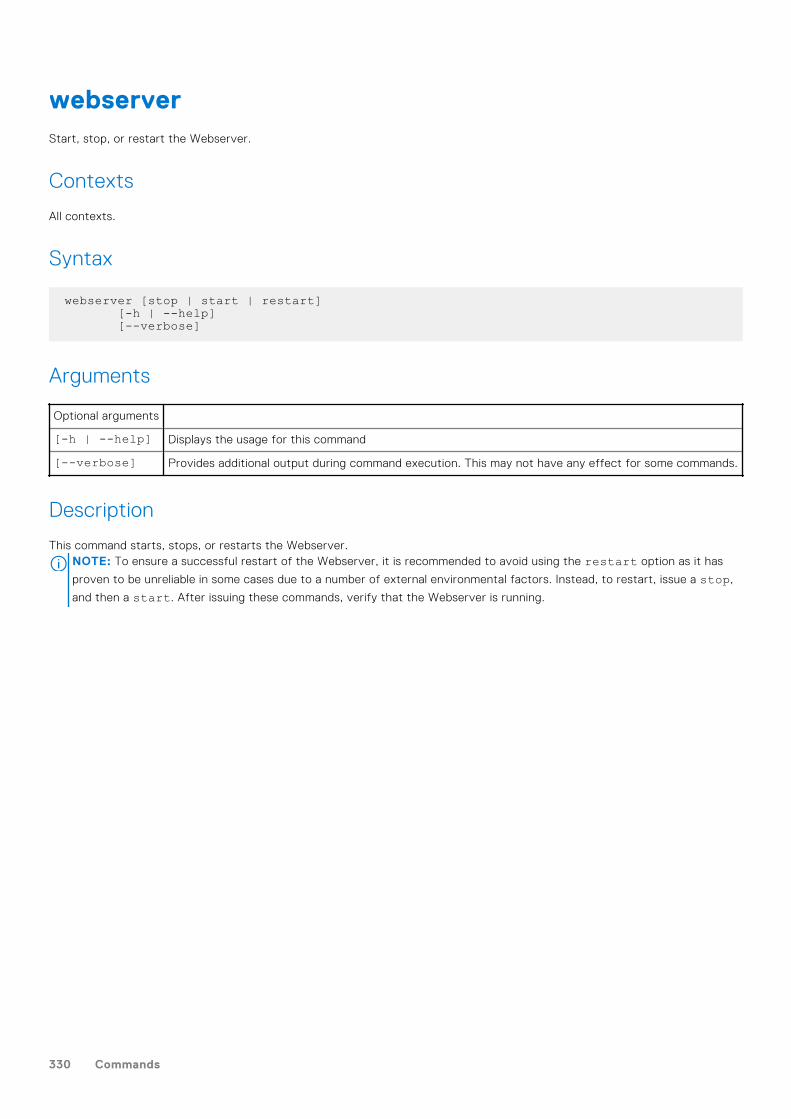
webserverStart, stop, or restart the Webserver.
Contexts
All contexts.
Syntax
webserver [stop | start | restart] [-h | --help] [--verbose]
Arguments
Optional arguments
[-h | --help] Displays the usage for this command
[--verbose] Provides additional output during command execution. This may not have any effect for some commands.
Description
This command starts, stops, or restarts the Webserver.NOTE: To ensure a successful restart of the Webserver, it is recommended to avoid using the restart option as it has
proven to be unreliable in some cases due to a number of external environmental factors. Instead, to restart, issue a stop,
and then a start. After issuing these commands, verify that the Webserver is running.
330 Commands
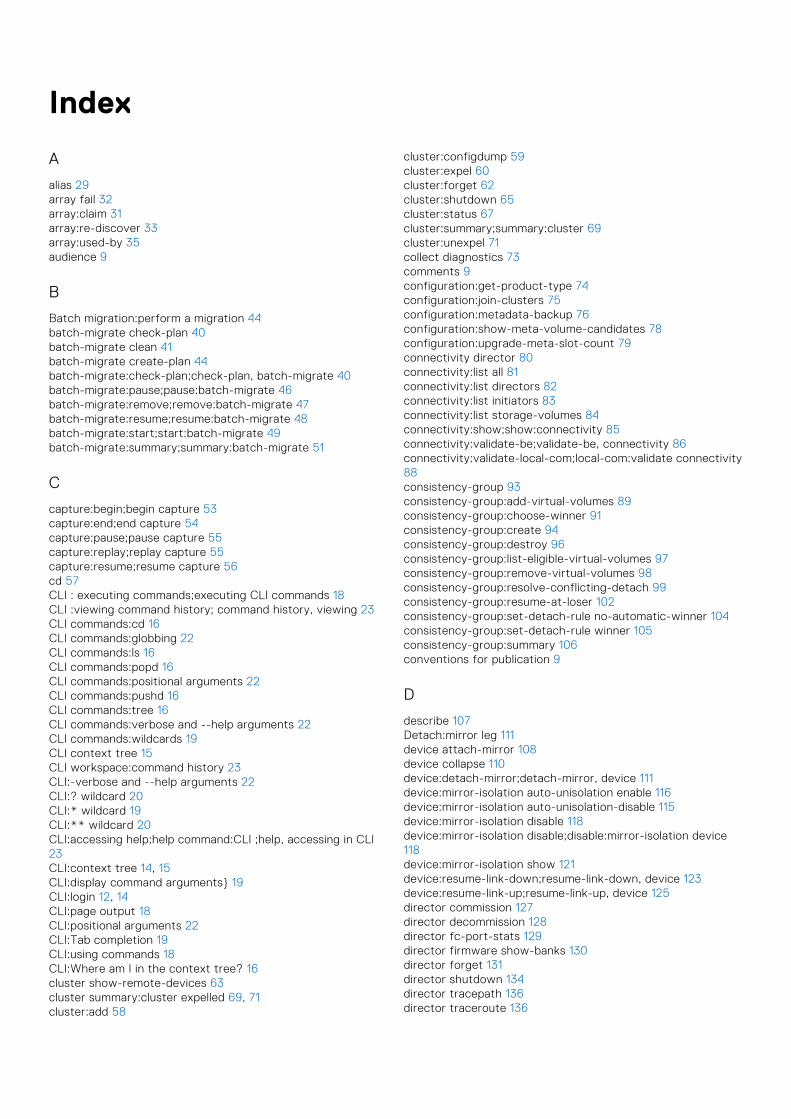
Index
A
alias 29array fail 32array:claim 31array:re-discover 33array:used-by 35audience 9
B
Batch migration:perform a migration 44batch-migrate check-plan 40batch-migrate clean 41batch-migrate create-plan 44batch-migrate:check-plan;check-plan, batch-migrate 40batch-migrate:pause;pause:batch-migrate 46batch-migrate:remove;remove:batch-migrate 47batch-migrate:resume;resume:batch-migrate 48batch-migrate:start;start:batch-migrate 49batch-migrate:summary;summary:batch-migrate 51
C
capture:begin;begin capture 53capture:end;end capture 54capture:pause;pause capture 55capture:replay;replay capture 55capture:resume;resume capture 56cd 57CLI : executing commands;executing CLI commands 18CLI :viewing command history; command history, viewing 23CLI commands:cd 16CLI commands:globbing 22CLI commands:ls 16CLI commands:popd 16CLI commands:positional arguments 22CLI commands:pushd 16CLI commands:tree 16CLI commands:verbose and --help arguments 22CLI commands:wildcards 19CLI context tree 15CLI workspace:command history 23CLI:-verbose and --help arguments 22CLI:? wildcard 20CLI:* wildcard 19CLI:** wildcard 20CLI:accessing help;help command:CLI ;help, accessing in CLI23CLI:context tree 14, 15CLI:display command arguments} 19CLI:login 12, 14CLI:page output 18CLI:positional arguments 22CLI:Tab completion 19CLI:using commands 18CLI:Where am I in the context tree? 16cluster show-remote-devices 63cluster summary:cluster expelled 69, 71cluster:add 58
cluster:configdump 59cluster:expel 60cluster:forget 62cluster:shutdown 65cluster:status 67cluster:summary;summary:cluster 69cluster:unexpel 71collect diagnostics 73comments 9configuration:get-product-type 74configuration:join-clusters 75configuration:metadata-backup 76configuration:show-meta-volume-candidates 78configuration:upgrade-meta-slot-count 79connectivity director 80connectivity:list all 81connectivity:list directors 82connectivity:list initiators 83connectivity:list storage-volumes 84connectivity:show;show:connectivity 85connectivity:validate-be;validate-be, connectivity 86connectivity:validate-local-com;local-com:validate connectivity88consistency-group 93consistency-group:add-virtual-volumes 89consistency-group:choose-winner 91consistency-group:create 94consistency-group:destroy 96consistency-group:list-eligible-virtual-volumes 97consistency-group:remove-virtual-volumes 98consistency-group:resolve-conflicting-detach 99consistency-group:resume-at-loser 102consistency-group:set-detach-rule no-automatic-winner 104consistency-group:set-detach-rule winner 105consistency-group:summary 106conventions for publication 9
D
describe 107Detach:mirror leg 111device attach-mirror 108device collapse 110device:detach-mirror;detach-mirror, device 111device:mirror-isolation auto-unisolation enable 116device:mirror-isolation auto-unisolation-disable 115device:mirror-isolation disable 118device:mirror-isolation disable;disable:mirror-isolation device118device:mirror-isolation show 121device:resume-link-down;resume-link-down, device 123device:resume-link-up;resume-link-up, device 125director commission 127director decommission 128director fc-port-stats 129director firmware show-banks 130director forget 131director shutdown 134director tracepath 136director traceroute 136
director:commission;commission, director 127director:passwd;passwd, director 132director:ping;ping 133director:shutdown;shutdown:director 134dirs 137disconnect 138Display:multiple objects using globs 228Display:object’s attributes 228Display:object’s attributes and contexts 228Display:operational status 228distributed device 149dm migration pause 142dm:migration cancel;migration:cancel;cancel:dm migration 139dm:migration clean;migration:clean;clean, dm migration 140dm:migration commit;migration:commit;commit, dm migration141dm:migration remove;migration:remove;remove:dm migration143dm:migration resume;migration:resume;resume:dm migration144dm:migration start;migration:start;start:dm migration 145drill-down 147ds dd remove-all-rules 153ds summary 162ds:dd create;distributed-storage:dd create;dr:create;distributed-device:create;create:distributed-device 150ds:dd declare-winner;distributed-device:declare-winner;dr:declare-winner;distributed-storage:dd declare-winner;declare-winner, distributed-device 152ds:dd destroy;distributed-storage:dd destroy;distributed-device:destroy;dr:destroy;destroy:distributed-device 153ds:dd set-log;distributed-storage:dd set-log;distributed-device:set-log;dr:set-log;set-log, distributed-device 154ds:rule destroy;distributed-storage:ruledestroy;rule:destroy;destroy:rule 156ds:rule island-containing;distributed-storage:rule island-containing;rule:island-containing;island-containing rule 157ds:rule-set copy;distributed-storage:rule-set copy;rule-set:copy;copy rule-set 158ds:rule-set destroy;distributed-storage:rule-set destroy;rule-set:destroy;destroy:rule-set 160
E
exec 167exit 168export initiator-port discovery;initiatorports:discovering;discovering:initiator ports 169export initiator-port:show-logins 173export target-port renamewwns 192export:initiator-port register-host;register-host, exportinitiator-port;initiator-port:register-host 172export:initiator-port register;initiator-port:register;register:initiator-port 171export:initiator-port unregister;initiator-port:unregister;unregister, initiator-port 174export:port summary;summary:export port;port, exportsummary 175export:target-port renamewwns;target-port,renamewwns;renamewwns, export target-port 192export:viewaddinitiatorport;view:addinitiatorport;addinitiatorport, exportview 177
export:view addport;view:addport;addport, export view 178export:viewaddvirtualvolume;view:addvirtualvolume;addvirtualvolume,export view 179export:view checkconfig;checkconfig, exportview;view:checkconfig 181export:view create;view:create;create:export view 182export:view destroy;view:destroy;destroy:export view 183export:view find-unmapped-volumes;view:find-unmapped-volumes;find-unmapped-volumes, export view 186export:view find;find, export view;view:find 184export:view map;map, export view;view:map 186export:viewremoveinitiatorport;view:removeinitiatorport;removeinitiatorport, export view 187export:view removeport;view:removeport;removeport, exportview 188export:viewremovevirtualvolume;view:removevirtualvolume;removevirtualvolume, export view 189export:view show-powerpath-interfaces;view:show-powerpath-interfaces;show-powerpath-interfaces, exportview 190export:view summary;summary:export view;view:summary 191Extent migrations 145extent:create;create extent 193extent:destroy;destroy:extent 194extent:summary;summary:extent 195extent:unclaim;unclaim extent 200
F
find 14, 197front-end-performance-stats start 198front-end-performance-stats status 199front-end-performance-stats stop 199
G
getsysinfo 200
H
health-check 201help 207history 208
L
license install 209local-device:destroy;destroy:local-device;device:destroy local212local-device:summary;summary:local-device 213log filter create 214log source create 217log source destroy 218log:filter create;create:log filter 214log:filter destroy;destroy:log filter 216log:filter list;list:log filter 216log:source create;create:log source 217log:source destroy;destroy:log source 218log:source list;list:log source 219logging-volume detach-mirror 224
logging-volume:add-mirror;add-mirror, logging-volume 220logging-volume:create;create:logging-volume 220logging-volume:destroy;destroy:logging-volume 224, 226logical-unit forget 227ls;list 228
M
meta-volume:attach-mirror;attach-mirror:meta-volume 230meta-volume:create;create:meta-volume 232meta-volume:destroy;destroy:meta-volume 235meta-volume:move;move, meta-volume 238metadata backup:display backup volumes 76metadata:backup:initial 76metadata:backup:modify schedule 76metadata:modify backup schedule 76metadata:schedule backup 76migrations:device 145migrations:extent 145migrations:prerequisites 145mirror leg:detach 111monitor add;monitor:add 240monitor:add-console-sink; add-console-sink, monitor; sink:add-console 240monitor:add-file-sink;add-file-sink, monitor;sink:add-file 241monitor:collect;collect:monitor 243monitor:create;create:monitor 244monitor:destroy;destroy:monitor 246monitor:remove-sink;remove-sink, monitor;sink:remove 248monitor:stat-list;stat-list, monitor 249
N
Names 21Names:VPLEX components 21ndu pre-check 251ndu pre-config-upgrade 250ndu recover 251ndu start 252ndu status 254NDU:display status 254NDU:pre-config-upgrade 250NDU:pre-ndu validation 250NDU:recover from failed ndu 251NDU:upgrade unconfigured 250
P
plugin:addurl 256plugin:listurl 256plugin:register 257popd 258preface 9provisioning 283pushd 259
R
rebuild:set-transfer-size 260rebuild:show-transfer-size 261rebuild:status 262related documentation 9report:capacity-clusters 263
report:capacity-hosts 264rm 266
S
schedule:add 266schedule:modify 268schedule:remove 269scheduleSYR:add 270scheduleSYR:list 271scheduleSYR:remove 271script, command 272search 14sessions, command 273set 274set topology 278show-use-hierarchy 280sms dump 281source 282statistics 247storage-tool-compose 284storage-volume list-thin-capable 297storage-volume:auto-unbanish-interval 287storage-volume:claim 288storage-volume:claimingwizard 291storage-volume:find-array 294storage-volume:forget 295storage-volume:list-banished 296storage-volume:resurrect 298storage-volume:summary 300storage-volume:unbanish 303storage-volume:unclaim 305storage-volume:used-by 306support information 9syrcollect 307
T
thin volumes 126tree 308
U
unalias 309
V
validate-system-configuration;configuration, validate;system,validate configuration 310version 311virtual-volume list-thin 323virtual-volume set-thin-enabled 325virtual-volume:create 314virtual-volume:destroy 319virtual-volume:expand 320virtual-volume:expand (back end) 320virtual-volume:re-initialize 324virtual-volume:summary 326volume:summary;summary:volume 326
W
Wait 329

Webserver 330wildcard 14