Embed Size (px)
Citation preview
Administration Guide - Solaris File System iDataAgentTABLE OF CONTENTS
OVERVIEWIntroduction
Key FeaturesSimplified Data ManagementPoint-In-Time RecoverySnapProtect BackupBackup and Recovery FailoversEfficient Job Management and ReportingBlock Level Deduplication
Add-On ComponentsSRM for Unix File System1-TouchAdd-On ArchiverContent Indexing and SearchDesktop Browse
Terminology
SYSTEM REQUIREMENTS
SUPPORTED FEATURES
GETTING STARTED
GETTING STARTED - DEPLOYING IN A GLOBAL ZONE OR SOLARIS SERVERWhere to Install
Method 1: Interactive Install
Method 2: Install Software from CommCell Console
GETTING STARTED - DEPLOYING IN A NON-GLOBAL ZONEWhere to Install
Method 1: Interactive InstallMethod 2: Install Software from CommCell Console
GETTING STARTED - DEPLOYMENT ON A CLUSTERWhere to Install
Installing the Solaris File System iDataAgent - Clustered Environment
GETTING STARTED - DEPLOYMENT ON A VERITAS CLUSTERWhere to Install
Installing the Solaris File System iDataAgent - Veritas Clustered Environment
GETTING STARTED CONFIGURATION
GETTING STARTED BACKUPPerform a Backup
GETTING STARTED RESTOREPerform a Restore
ADVANCED
ADVANCED CONFIGURATION
Administration Guide - Solaris File System iDataAgent
Page 1 of 265
Understanding the CommCell Console
Configuring User Defined Backup SetsCreating a Backup Set for On Demand BackupsCreating a Backup Set for Wild Card Support
Configuring User Defined SubclientsCreating a Subclient to Backup Specific FilesCreating a Subclient to Backup Symbolic LinksCreating a Subclient to Backup Raw Devices
Configuring Backups for Hard Links
Configuring Backups of NFS-Mounted File Systems
Configuring Backups for Locked FilesExcluding Locked Files in NFS Mounted File Systems
Configuring Backups for Macintosh Files
Configuring the Locale for Non-ASCII CharactersConfiguring Locale on TotalNet Advanced Server (TAS)
Excluding Job Results Folder from Backups
Including Skipped File Systems in BackupsEnabling Backups for Skipped File SystemsAdding the Skipped File System to Subclient Content
Configuring Filters for BackupsFiltering Files from a BackupConfiguring Exclusions to Filters Deleting a Filter
Configuring the Scan Method for Detecting Changed Files
Configuring the Kernel Parameters
Configuring Multiple Streams for BackupsSetting the Maximum Number of Data readers
Configuring the Index for BackupsCreating a New Index on a Full BackupConverting to a Full Backup on Indexing Failures
Configuring Incremental/Differential Backups using Ctime and Mtime
Configuring Pre/Post Processing for BackupsSetting Up Pre/Post ProcessesSetting Up Post Processes To Run During FailuresTips for Creating Scripts
Configuring Sparse Files for Restores
Modifying an Agent, Backup Set or Subclient
Deleting an Agent, Backup Set or Subclient
ADVANCED BACKUPFull Backups
Incremental Backups
Differential Backups
Synthetic Full BackupsRunning Synthetic Full BackupsRunning an Incremental Backup Before or After a Synthetic Full BackupVerifying Synthetic Full BackupsIgnoring Errors in Synthetic Full BackupsAccelerated Synthetic Full Backups (DASH Full)
Backing up Mount Points
Scheduling A Backup
Performing an On Demand Backup
Managing JobsRestarting JobsControlling Jobs
Additional Options
ADVANCED RESTORE
Administration Guide - Solaris File System iDataAgent
Page 2 of 265
Performing a Direct RestoreRestoring Data Using Regular ExpressionsSupported Wildcards in Regular Expressions
Performing an Out-of-Place RestoreRestoring to Different Folder on the Same ClientRestoring data to a Different Client
Performing a Cross-Platform Restore
Restoring to NFS-Mounted File System
Renaming Files on Restore
Overwriting Data During Restores
Restoring Data Only If It Exists on the Destination
Restoring by JobsRestoring all the data backed up During a JobRestoring Specific Data Backed up during a Job
Restoring From a Failed or Killed Job
Resubmitting a Restore Job
Filtering Data from RestoresSupported Wildcards in Filters
Restoring Data Using a Map FileAdding Files and Folders with Unicode Characters to a Map FileRestoring Using a MAP FileCombining Browse and Restore with the MAP File Restore
Restoring Deleted Files
Setting Up Pre-Post Processes
Restoring Sparse Files
Restoring Raw DevicesRestoring Raw Device Files as Regular Files
Restoring Macintosh FilesSetting Up Resource Fork Data Restore for all Macintosh FilesRestoring Resource Fork Data for a Specific Job
Excluding ACLs from Restores
Restoring Data to Trusted Solaris Systems
Browsing DataLatest DataData Before a Specified TimeData Between a Specified Time
Listing MediaListing Media for a SubclientListing Media for a Backup Set
Scheduling a Restore
Manage Restore JobsRestarting JobsControlling Jobs
Additional Restore Options
DATA AGING
DISASTER RECOVERY Planning for a Disaster Recovery
Disaster Recovery of the Solaris File System
ADDITIONAL OPERATIONSAudit Trail
Storage Policy
Subclient Policy
Schedule Policy
Auxiliary Copy
Administration Guide - Solaris File System iDataAgent
Page 3 of 265

Operation Window
Operating System and Application Upgrades
Global Filters
Erase Backup Data
Uninstalling Components
Online Help Links
BEST PRACTICES
FREQUENTLY ASKED QUESTIONS
TROUBLESHOOTINGBackups
Restores
ADD-ON COMPONENTS
ERASE BACKED UP DATA
1-TOUCH FOR SOLARIS Deployment
Configuration
Recovery
Troubleshooting
ONEPASS AGENTDeployment
Configuration
Archive
Recover
Advanced Configuration
Advanced Archive
Advanced Recover
Troubleshooting
FAQs
DESKTOP BROWSEUser
Administrator
ADVANCED REPORTING
AGENTLESS SRMOverview
Pre-Requisites
Configuration
Reports supported by Agentless SRM
Summaries displayed for Agentless SRM
Considerations
Registry Keys for Agentless SRM
SRM FOR UNIX FILE SYSTEMOverview
Administration Guide - Solaris File System iDataAgent
Page 4 of 265
Configuration
Generate SRM Reports
Send a Notification when an SRM Report Has Run
Getting Started with Unix File System Reports
Report Features
Available Columns
Cost History and Usage Reports
Filter
File Level Analytics
Summaries
Administration Guide - Solaris File System iDataAgent
Page 5 of 265
Overview - Unix/Linux File System iDataAgents
INTRODUCTIONSimpana software provides a simplified end-to-end protection of file system data residing on all the Unix computers in your enterprise. In addition to complete protection of file system data for disaster recovery, it also provides a robust and comprehensive backup and recovery solution with significant speed performance and efficient use of disk and tape drives. It also assists you in full system rebuilds and eliminates recovery failures.
KEY FEATURESThe Unix File System iDataAgents offers the following key features:
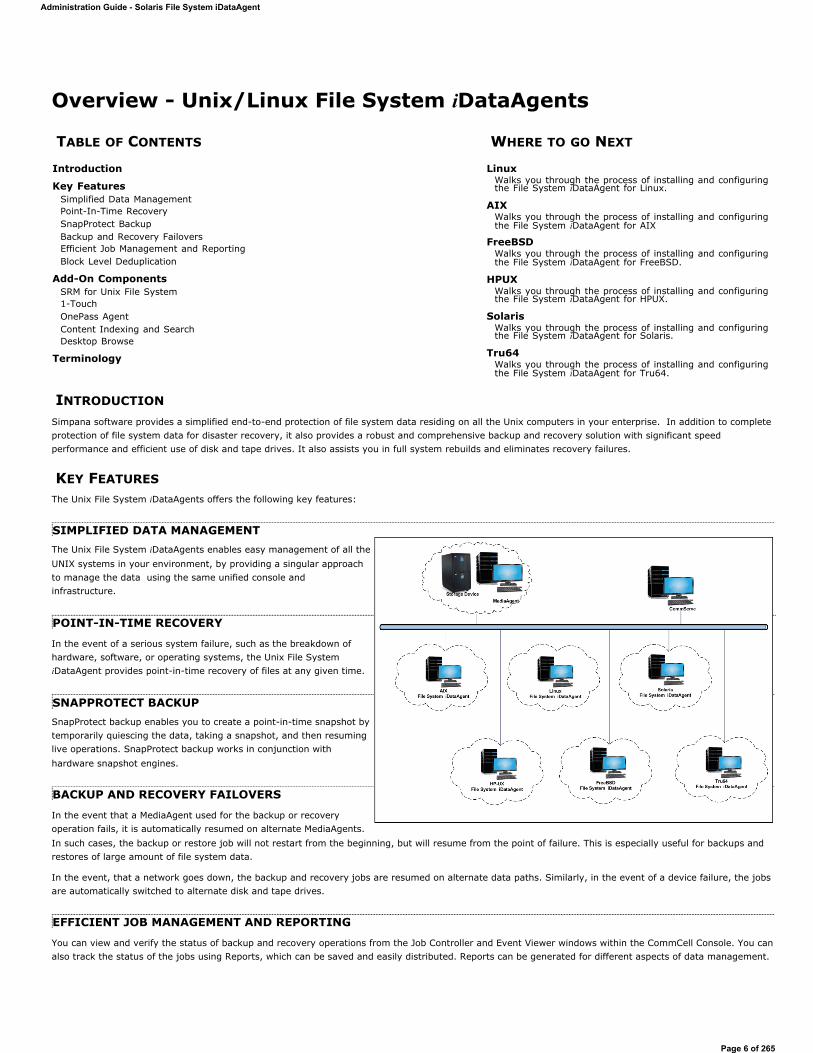
SIMPLIFIED DATA MANAGEMENTThe Unix File System iDataAgents enables easy management of all the UNIX systems in your environment, by providing a singular approach to manage the data using the same unified console and infrastructure.
POINT-IN-TIME RECOVERY
In the event of a serious system failure, such as the breakdown of hardware, software, or operating systems, the Unix File System iDataAgent provides point-in-time recovery of files at any given time.
SNAPPROTECT BACKUPSnapProtect backup enables you to create a point-in-time snapshot by temporarily quiescing the data, taking a snapshot, and then resuming live operations. SnapProtect backup works in conjunction with hardware snapshot engines.
BACKUP AND RECOVERY FAILOVERS
In the event that a MediaAgent used for the backup or recovery operation fails, it is automatically resumed on alternate MediaAgents. In such cases, the backup or restore job will not restart from the beginning, but will resume from the point of failure. This is especially useful for backups and restores of large amount of file system data.
In the event, that a network goes down, the backup and recovery jobs are resumed on alternate data paths. Similarly, in the event of a device failure, the jobs are automatically switched to alternate disk and tape drives.
EFFICIENT JOB MANAGEMENT AND REPORTING
You can view and verify the status of backup and recovery operations from the Job Controller and Event Viewer windows within the CommCell Console. You can also track the status of the jobs using Reports, which can be saved and easily distributed. Reports can be generated for different aspects of data management.
TABLE OF CONTENTS WHERE TO GO NEXT
Introduction
Key FeaturesSimplified Data ManagementPoint-In-Time RecoverySnapProtect BackupBackup and Recovery FailoversEfficient Job Management and ReportingBlock Level Deduplication
Add-On ComponentsSRM for Unix File System1-TouchOnePass AgentContent Indexing and SearchDesktop Browse
Terminology
LinuxWalks you through the process of installing and configuring the File System iDataAgent for Linux.
AIXWalks you through the process of installing and configuring the File System iDataAgent for AIX
FreeBSDWalks you through the process of installing and configuring the File System iDataAgent for FreeBSD.
HPUXWalks you through the process of installing and configuring the File System iDataAgent for HPUX.
SolarisWalks you through the process of installing and configuring the File System iDataAgent for Solaris.
Tru64Walks you through the process of installing and configuring the File System iDataAgent for Tru64.
Administration Guide - Solaris File System iDataAgent
Page 6 of 265
You also have the flexibility to customize the reports to display only the required data and save them to any specified location in different formats. For example, you can create a backup job summary report to view at-a-glance the completed backup jobs.
In addition, you can also schedule these reports to be generated and send them on email without user intervention.
BLOCK LEVEL DEDUPLICATIONDeduplication provides a smarter way of storing data by identifying and eliminating the duplicate items in a data protection operation.
Deduplication at the data block level compares blocks of data against each other. If an object (file, database, etc.) contains blocks of data that are identical to each other, then block level deduplication eliminates storing the redundant data and reduces the size of the object in storage. This way dramatically reduces the backup data copies on both the disk and tapes.
ADD-ON COMPONENTS
SRM FOR UNIX FILE SYSTEMSRM is integrated with UNIX File System iDataAgent to provide several advanced reporting capabilities for your backups. When enabled, backup jobs collect details on the file systems currently being used or not used, the memory and hardware resources consumed, storage usage, and granular file-level analytics.
SRM reports include detailed information on the state of your file system data, including free space, used space, file count, file sizes, directory structure, and many other useful statistics.
In addition, SRM summaries provide a graphical, real-time representation of usage information such as memory and CPU utilization. Optional file-level analytics provides even more granular details at the file-level for optimizing your storage resources.
SRM integration with UNIX File System iDataAgent can be easily enabled with your backups to take advantage of these features.
1-TOUCH1-Touch recovery helps to recover a crashed system in the least amount of time. By automatically rebuilding the operating system, you can recover systems with defective components such as inaccessible volumes or crashed disks. You don't need to reinstall the individual software packages or operating systems manually.
ONEPASS AGENTThe OnePass Agent is an integrated File System agent which backs up and archives the qualified data. It reclaims backup storage space when files and stubs are deleted on the primary storage.
CONTENT INDEXING AND SEARCH
Content Indexing and Search enables users to content index their data and later search the data from a user-friendly web interface. The users can also perform restore operations or other advanced actions on the searched data.
DESKTOP BROWSE
Desktop Browse enables users to browse and restore data from a Web Browser, which provides the facility to access and restore data from anywhere.
TERMINOLOGYThe Unix File System documentation uses the following terminology:
Back to Top
CLIENTThe computer in which the iDataAgent is installed and contains the data to be secured.
BACKUP SETA group of subclients which includes all of the data backed up by the iDataAgent.
SUBCLIENTThe Unix file system data to be backed up.
Administration Guide - Solaris File System iDataAgent
Page 7 of 265
System Requirements - Solaris File System iDataAgent
The following are the requirements for Solaris File System iDataAgent:
CLUSTER - SUPPORT
The software can be installed on a Cluster if clustering is supported by the above-mentioned operating systems.
For information on supported cluster types, see Clustering - Support.
SUPPORTED FILE SYSTEMS
Unix File System (UFS)
VERITAS File System (VxFS)
VERITAS Cluster File System (VxCFS)
AIX HP-UX FreeBSD Linux Solaris Tru64 Supported Features
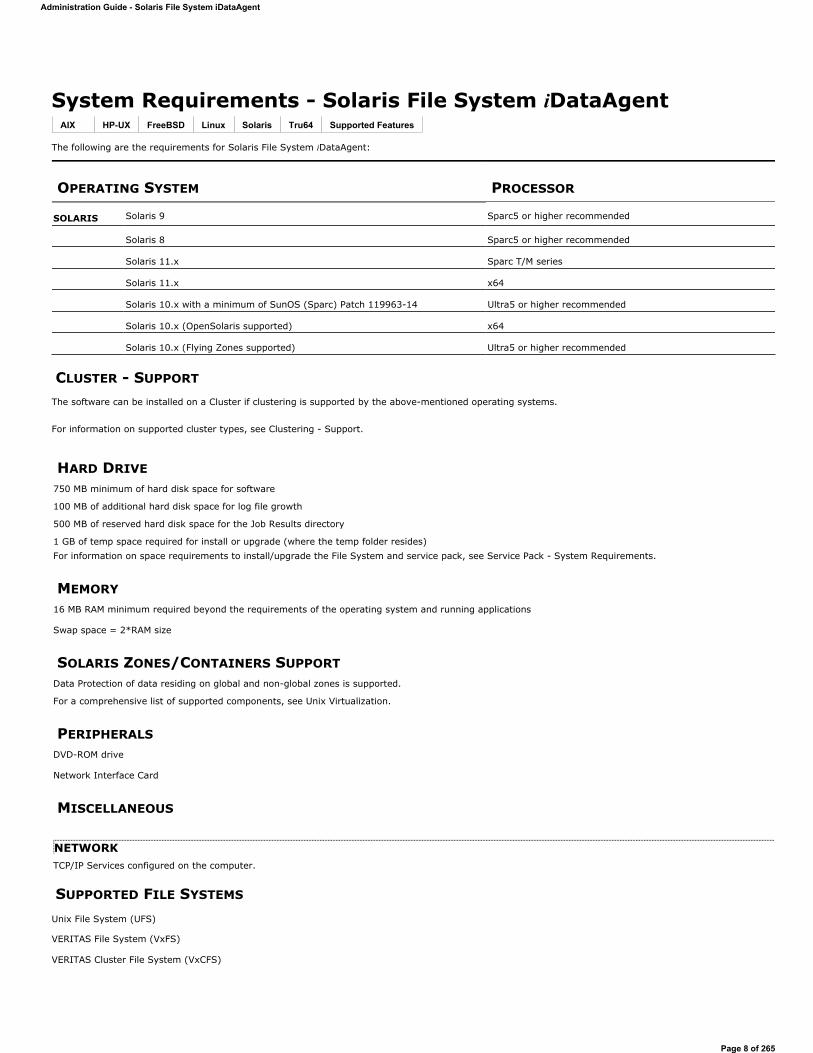
OPERATING SYSTEM PROCESSOR
SOLARIS Solaris 9 Sparc5 or higher recommended
Solaris 8 Sparc5 or higher recommended
Solaris 11.x Sparc T/M series
Solaris 11.x x64
Solaris 10.x with a minimum of SunOS (Sparc) Patch 119963-14 Ultra5 or higher recommended
Solaris 10.x (OpenSolaris supported) x64
Solaris 10.x (Flying Zones supported) Ultra5 or higher recommended
HARD DRIVE750 MB minimum of hard disk space for software
100 MB of additional hard disk space for log file growth
500 MB of reserved hard disk space for the Job Results directory
1 GB of temp space required for install or upgrade (where the temp folder resides)For information on space requirements to install/upgrade the File System and service pack, see Service Pack - System Requirements.
MEMORY16 MB RAM minimum required beyond the requirements of the operating system and running applications
Swap space = 2*RAM size
SOLARIS ZONES/CONTAINERS SUPPORTData Protection of data residing on global and non-global zones is supported.
For a comprehensive list of supported components, see Unix Virtualization.
PERIPHERALSDVD-ROM drive
Network Interface Card
MISCELLANEOUS
NETWORKTCP/IP Services configured on the computer.
Administration Guide - Solaris File System iDataAgent
Page 8 of 265
Zettabyte File System (ZFS)
VOLUME MANAGERS
Veritas Volume Manager (VxVM) 5.0 or higher
Solaris Volume Manager (SVM)
DISCLAIMER
Minor revisions and/or service packs that are released by application and operating system vendors are supported by our software but may not be individually listed in our System Requirements. We will provide information on any known caveat for the revisions and/or service packs. In some cases, these revisions and/or service packs affect the working of our software. Changes to the behavior of our software resulting from an application or operating system revision/service pack may be beyond our control. The older releases of our software may not support the platforms supported in the current release. However, we will make every effort to correct the behavior in the current or future releases when necessary. Please contact your Software Provider for any problem with a specific application or operating system.
Additional considerations regarding minimum requirements and End of Life policies from application and operating system vendors are also applicable
Administration Guide - Solaris File System iDataAgent
Page 9 of 265
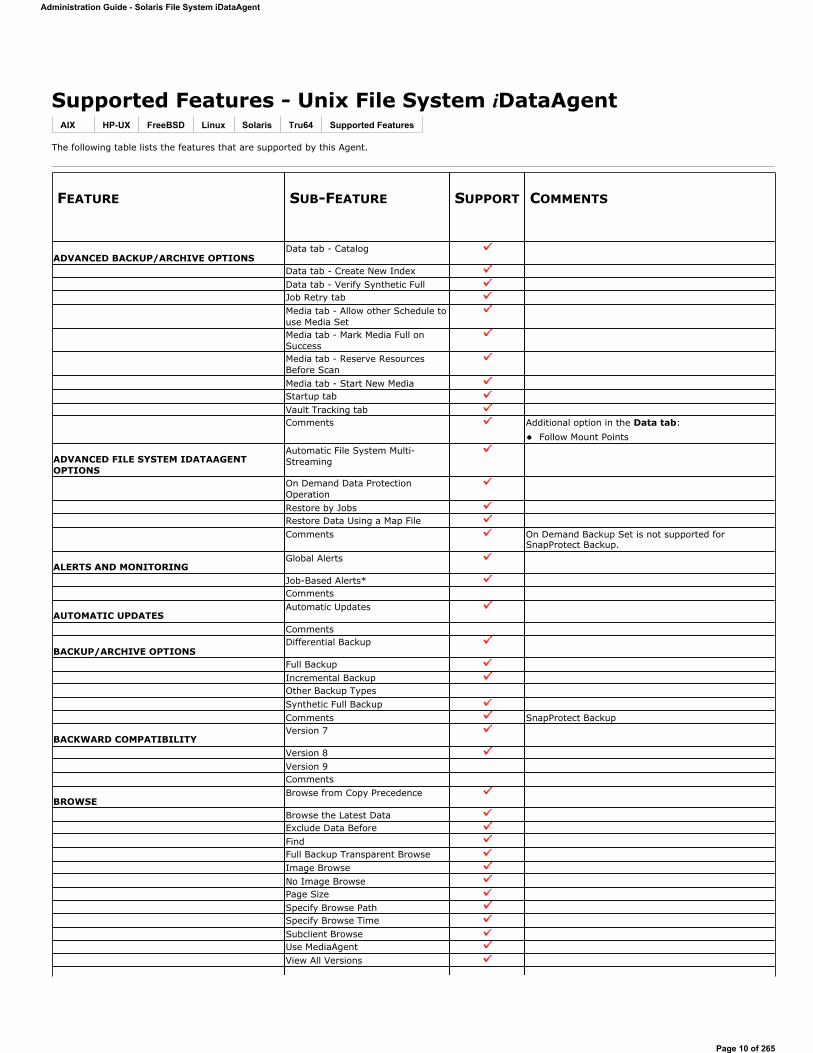
Supported Features - Unix File System iDataAgent
The following table lists the features that are supported by this Agent.
AIX HP-UX FreeBSD Linux Solaris Tru64 Supported Features
FEATURE SUB-FEATURE SUPPORT COMMENTS
ADVANCED BACKUP/ARCHIVE OPTIONSData tab - Catalog
Data tab - Create New IndexData tab - Verify Synthetic FullJob Retry tabMedia tab - Allow other Schedule to use Media SetMedia tab - Mark Media Full on SuccessMedia tab - Reserve Resources Before ScanMedia tab - Start New MediaStartup tabVault Tracking tabComments Additional option in the Data tab:
Follow Mount Points
ADVANCED FILE SYSTEM IDATAAGENT OPTIONS
Automatic File System Multi-Streaming
On Demand Data Protection OperationRestore by JobsRestore Data Using a Map FileComments On Demand Backup Set is not supported for
SnapProtect Backup.
ALERTS AND MONITORING Global Alerts
Job-Based Alerts*Comments
AUTOMATIC UPDATES Automatic Updates
Comments
BACKUP/ARCHIVE OPTIONSDifferential Backup
Full BackupIncremental BackupOther Backup TypesSynthetic Full BackupComments SnapProtect Backup
BACKWARD COMPATIBILITY Version 7
Version 8Version 9Comments
BROWSEBrowse from Copy Precedence
Browse the Latest DataExclude Data BeforeFindFull Backup Transparent BrowseImage BrowseNo Image BrowsePage SizeSpecify Browse PathSpecify Browse TimeSubclient BrowseUse MediaAgentView All Versions
Administration Guide - Solaris File System iDataAgent
Page 10 of 265
Comments
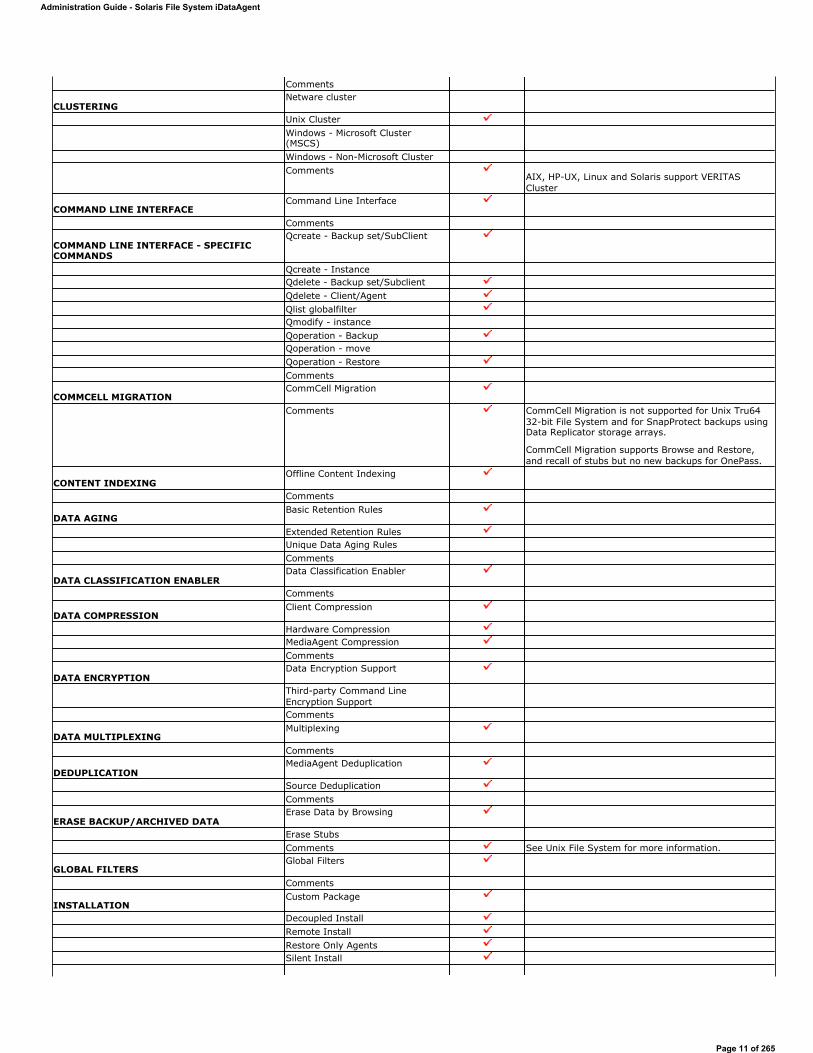
CLUSTERING Netware cluster
Unix ClusterWindows - Microsoft Cluster (MSCS)Windows - Non-Microsoft ClusterComments
AIX, HP-UX, Linux and Solaris support VERITAS Cluster
COMMAND LINE INTERFACECommand Line Interface
Comments
COMMAND LINE INTERFACE - SPECIFIC COMMANDS
Qcreate - Backup set/SubClient
Qcreate - InstanceQdelete - Backup set/SubclientQdelete - Client/AgentQlist globalfilterQmodify - instanceQoperation - BackupQoperation - moveQoperation - RestoreComments
COMMCELL MIGRATION CommCell Migration
Comments CommCell Migration is not supported for Unix Tru64 32-bit File System and for SnapProtect backups using Data Replicator storage arrays.
CommCell Migration supports Browse and Restore, and recall of stubs but no new backups for OnePass.
CONTENT INDEXING Offline Content Indexing
Comments
DATA AGING Basic Retention Rules
Extended Retention RulesUnique Data Aging RulesComments
DATA CLASSIFICATION ENABLER Data Classification Enabler
Comments
DATA COMPRESSION Client Compression
Hardware CompressionMediaAgent CompressionComments
DATA ENCRYPTION Data Encryption Support
Third-party Command Line Encryption SupportComments
DATA MULTIPLEXINGMultiplexing
Comments
DEDUPLICATION MediaAgent Deduplication
Source DeduplicationComments
ERASE BACKUP/ARCHIVED DATA Erase Data by Browsing
Erase StubsComments See Unix File System for more information.
GLOBAL FILTERS Global Filters
Comments
INSTALLATION Custom Package
Decoupled InstallRemote InstallRestore Only AgentsSilent Install
Administration Guide - Solaris File System iDataAgent
Page 11 of 265
Comments
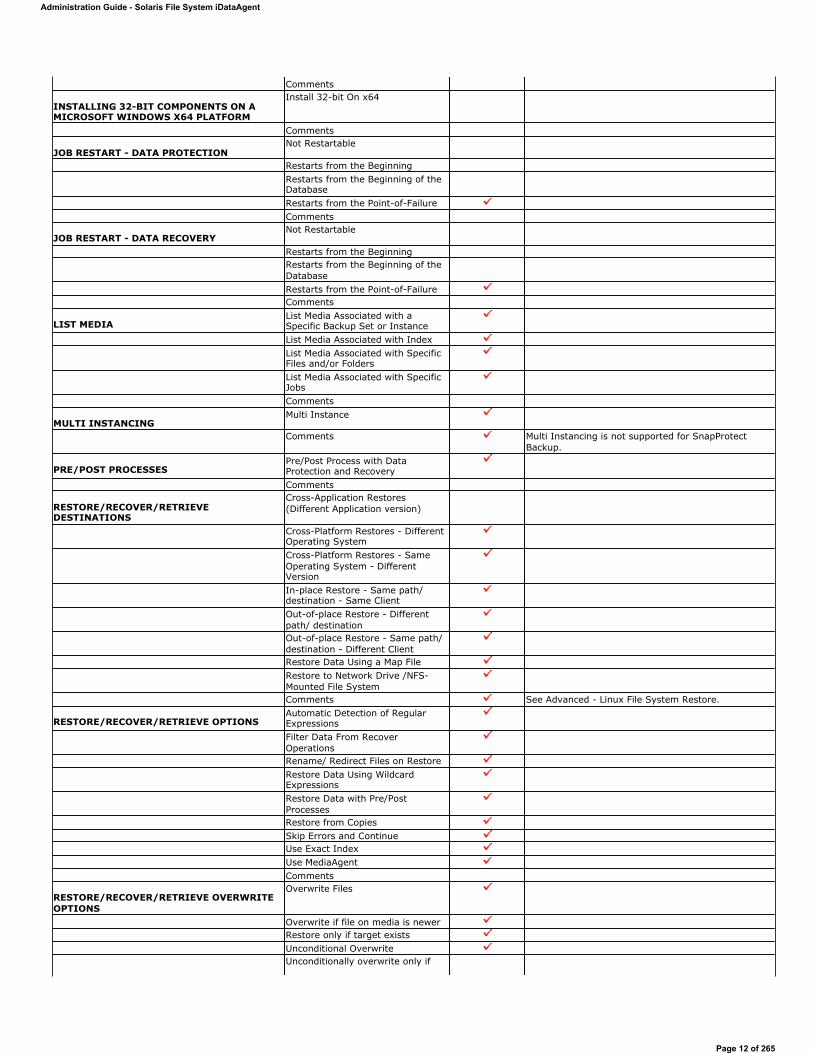
INSTALLING 32-BIT COMPONENTS ON A MICROSOFT WINDOWS X64 PLATFORM
Install 32-bit On x64
Comments
JOB RESTART - DATA PROTECTIONNot Restartable
Restarts from the BeginningRestarts from the Beginning of the DatabaseRestarts from the Point-of-FailureComments
JOB RESTART - DATA RECOVERYNot Restartable
Restarts from the BeginningRestarts from the Beginning of the DatabaseRestarts from the Point-of-FailureComments
LIST MEDIA List Media Associated with a Specific Backup Set or InstanceList Media Associated with IndexList Media Associated with Specific Files and/or FoldersList Media Associated with Specific JobsComments
MULTI INSTANCING Multi Instance
Comments Multi Instancing is not supported for SnapProtect Backup.
PRE/POST PROCESSES Pre/Post Process with Data Protection and RecoveryComments
RESTORE/RECOVER/RETRIEVE DESTINATIONS
Cross-Application Restores (Different Application version)
Cross-Platform Restores - Different Operating SystemCross-Platform Restores - Same Operating System - Different VersionIn-place Restore - Same path/ destination - Same ClientOut-of-place Restore - Different path/ destinationOut-of-place Restore - Same path/ destination - Different ClientRestore Data Using a Map FileRestore to Network Drive /NFS-Mounted File SystemComments See Advanced - Linux File System Restore.
RESTORE/RECOVER/RETRIEVE OPTIONS Automatic Detection of Regular ExpressionsFilter Data From Recover OperationsRename/ Redirect Files on RestoreRestore Data Using Wildcard ExpressionsRestore Data with Pre/Post ProcessesRestore from CopiesSkip Errors and ContinueUse Exact IndexUse MediaAgentComments
RESTORE/RECOVER/RETRIEVE OVERWRITE OPTIONS
Overwrite Files
Overwrite if file on media is newerRestore only if target existsUnconditional OverwriteUnconditionally overwrite only if
Administration Guide - Solaris File System iDataAgent
Page 12 of 265
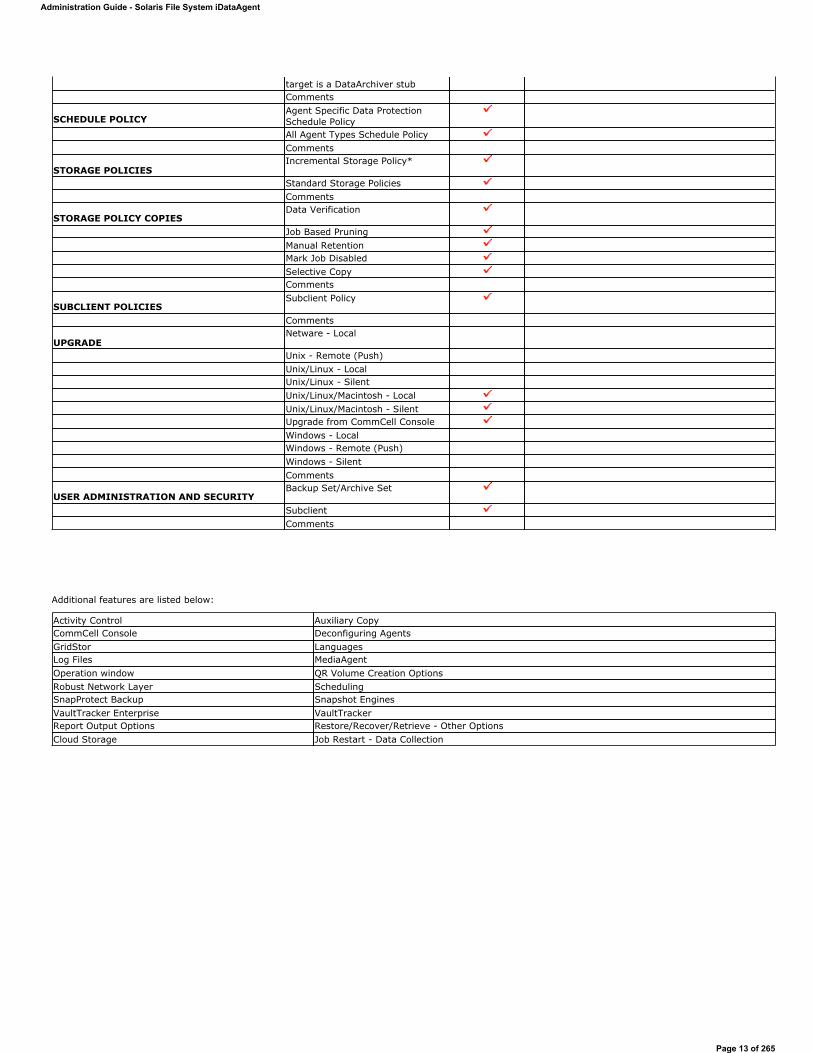
Additional features are listed below:
target is a DataArchiver stubComments
SCHEDULE POLICY Agent Specific Data Protection Schedule PolicyAll Agent Types Schedule PolicyComments
STORAGE POLICIES Incremental Storage Policy*
Standard Storage PoliciesComments
STORAGE POLICY COPIES Data Verification
Job Based PruningManual RetentionMark Job DisabledSelective CopyComments
SUBCLIENT POLICIES Subclient Policy
Comments
UPGRADE Netware - Local
Unix - Remote (Push)Unix/Linux - LocalUnix/Linux - SilentUnix/Linux/Macintosh - LocalUnix/Linux/Macintosh - SilentUpgrade from CommCell ConsoleWindows - LocalWindows - Remote (Push)Windows - SilentComments
USER ADMINISTRATION AND SECURITY Backup Set/Archive Set
SubclientComments
Activity Control Auxiliary Copy CommCell Console Deconfiguring Agents GridStor LanguagesLog Files MediaAgentOperation window QR Volume Creation OptionsRobust Network Layer Scheduling SnapProtect Backup Snapshot EnginesVaultTracker Enterprise VaultTracker Report Output Options Restore/Recover/Retrieve - Other Options Cloud Storage Job Restart - Data Collection
Administration Guide - Solaris File System iDataAgent
Page 13 of 265
Getting Started - Solaris File System - Deploying in a Global Zone or Solaris Server
Use the following steps to install the File System iDataAgent on a Global Zone or a Solaris Server.
WHERE TO INSTALL
Install the software directly on the computer that you wish to protect. This can be one of the following:
Solaris Servers
Computer hosting the global zone
It is recommended to install the software on the global zone to protect non-changing or static data on non-global zones. If the data is dynamic or contains application data, install the software on the non-global zone.
Make sure the computer satisfies the minimum requirements specified in the System Requirements.
METHOD 1: INTERACTIVE INSTALL
INSTALLATION BEFORE YOU BEGIN
The software can be installed using one of the following methods:
METHOD 1: INTERACTIVE INSTALL
Use this procedure to directly install the software from the installation package or a network drive.
METHOD 2: INSTALL SOFTWARE FROM COMMCELL CONSOLE
Use this procedure to remotely install the software on a client computer.
Download Software PackagesDownload the latest software package to perform the install.
System RequirementsVerify that the computer in which you wish to install the software satisfies the System Requirements.
1. Logon to the client computer as root or as a sudo user.
If you are installing the software using a sudo user account, make sure that sudo user account is configured on this computer. For more information, see FAQ - Install.
2. If you are installing the software from CD, run the following command to mount the CD:
mount -r -F hsfs /dev/sr0 /cdromRun the following command from the Software Installation Package or mount point:
./cvpkgadd3. The product banner and other information is displayed.
Press Enter.
4. Read the license agreement. Type y and press Enter.
5. Press Enter. Please select a setup task you want to perform from the list below:Advance options provide extra setup features such as creating custom package, recording/replaying user selections and installing External Data Connector software.1) Install data protection agents on this computer2) Advance options3) Exit this menuYour choice: [1]
6. If your computer is 32-bit, press Enter.
If your computer is 64-bit, see Install Unix Agents on 64-bit Platform for step-by-step procedure.
32 or 64?This machine supports both 32 bit and 64 bit binaries. By default, we will install 32 bit binary set that has full support for all the modules included in this package. Please note that 64 bit binary set currently only support limited modules.1) 32 bit2) 64 bit
Your choice: [1]
7. Press Enter. Certain Simpana packages can be associated with a virtual
Administration Guide - Solaris File System iDataAgent
Page 14 of 265
IP, or in other words, installed on a "virtual machine" belonging to some cluster. At any given time the virtual machine's services and IP address are active on only one of the cluster's servers. The virtual machine can "fail-over" from one server to another, which includes stopping services and deactivating IP address on the first server and activating the IP address/services on the other server.You now have a choice of performing a regular Simpana install on the physical host or installing Simpana on a virtual machine for operation within a cluster.Most users should select "Install on a physical machine" here.1) Install on a physical machine2) Install on a virtual machine3) ExitYour choice: [1]
8. If you have only one network interface, press Enter to accept the default network interface name and continue.
If you have multiple network interfaces, enter the interface name that you wish to use as default, and then press Enter.
The interface names and IP addresses depend on the computer in which the software is installed and may be different from the example shown.
We found one network interface available on your machine. We will associate it with the physical machine being installed, and it will also be used by the CommServe to connect to the physical machine. Note that you will be able to additionally customize Datapipe Interface Pairs used for the backup data traffic later in the Simpana Java GUI.Please check the interface name below, and make connections if necessary:Physical Machine Host Name: [angel.company.com]
9. Press Enter. Please specify the client name for this machine.It does not have to be the network host name: you can enter any word here without spaces. The only requirement is that it must be unique on the CommServe.Physical Machine Client name: [angel]
10. Type the number associated with the Unix File System iDataAgent and press Enter.
Install Simpana on physical machine angelPlease select the Simpana module(s) that you would like to install.[ ] 1) MediaAgent [1301] [CVGxMA][ ] 2) UNIX File System iDataAgent [1101] [CVGxIDA][a=all n=none r=reverse q=quit d=done >=next <=previous ?=help]Enter number(s)/one of "a,n,r,q,d,>,<,?" here:2
11. A confirmation screen will mark your choice with an "X".
Type d for Done, and press Enter.
Install Simpana on physical machine angelPlease select the Simpana module(s) that you would like to install.[ ] 1) MediaAgent [1301] [CVGxMA][X] 2) UNIX File System iDataAgent [1101] [CVGxIDA][a=all n=none r=reverse q=quit d=done >=next <=previous ?=help]Enter number(s)/one of "a,n,r,q,d,>,<,?" here:d
12. Press Enter. Do you want to use the agents for restore only without consuming licenses? [no]
13. Type the appropriate number to install the latest software scripts and press Enter.
Select Download from the software provider website to download the latest software scripts. Make sure you have internet access.
Select Use the one in the installation media to install the software scripts from the package or share from which the installation is currently being performed. Select Use the copy I already have by entering its unix path, to specify the path if you have the software script in an alternate location.
Installation Scripts Pack provides extra functions and latest support and fix performed during setup time. Please specify how you want to get this pack.If you choose to download it from the website now, please make sure you have internet connectivity at this time. This process may take some time depending on the internet connectivity.1) Download from the software provider website.2) Use the one in the installation media3) Use the copy I already have by entering its unix path
Your choice: [1] 2
14. Press Enter.
It is recommended to download the latest Service pack(s). Type Yes and press Enter to automatically install the available updates during installation.
Keep Your Install Up to Date - Latest Service Pack Latest Service Pack provides extra functions and latest support and fix for the packages you are going to install. You can download the latest service pack from software provider website.If you decide to download it from the website now, please make sure you have internet connectivity at this time. This process may take some time depending on the internet connectivity.
Administration Guide - Solaris File System iDataAgent
Page 15 of 265
Do you want to download the latest service pack now? [no]
15.Press Enter to accept the default path.
If you want to specify a different path, type the path and then press Enter.
If you want to install the software binaries to an NFS shared drive, specify the directory on which you have mounted the NFS file system and then press Enter.
In order to make sure that the client computer has read/write access to NFS shared drive, review the steps described in Installing Software Binaries to an NFS Shared Drive.
Do not use the following characters when specifying the path:
!@#$%^&*():/?\
Please specify where you want us to install Simpana binaries.It must be a local directory and there should be at least 176MB of free space available. All files will be installed in a "simpana" subdirectory, so if you enter "/opt", the files will actually be placed into "/opt/simpana".Installation Directory: [/opt]
16. Press Enter to accept the default location.
Enter a path to modify the default location and press Enter. All the modules installed on the computer will store the log files in this directory.
Please specify where you want to keep Simpana log files.It must be a local directory and there should be at least 100MB of free space available. All log files will be created in a "simpana/Log_Files" subdirectory, so if you enter "/var/log", the logs will actually be placed into "/var/log/simpana/Log_Files".Log Directory: [/var/log]
17. Press Enter. Most of Software processes run with root privileges, but some are launched by databases and inherit database access rights. To make sure that registry and log files can be written to by both kinds of processes we can either make such files world-writeable or we can grant write access only to processes belonging to a particular group, e.g. a "simpana" or a "dba" group.We highly recommend now that you create a new user group and enter its name in the next setup screen. If you choose not to assign a dedicated group to Software processes, you will need to specify the access permissions later.If you're planning to backup Oracle DB you should use "dba" group.Would you like to assign a specific group to Software? [yes]
18. Type the Group name and press Enter.
Press Enter again.
Please enter the name of the group which will be assigned to all Software files and on behalf of which all Software processes will run.In most of the cases it's a good idea to create a dedicated "simpana" group. However, if you're planning to use Oracle iDataAgent or SAP Agent, you should enter Oracle's "dba" group here.Group name: sky1REMINDERIf you are planning to install Simpana Informix, DB2, PostgreSQL, Sybase or Lotus Notes iDataAgent, please make sure to include Informix, DB2, etc. users into group "sky1".Press <ENTER> to continue ...
19. Press Enter to accept the default value for Number of Streams.
You can type the Number of Streams that you plan to run at the same time and then press Enter.
Number of StreamsIMPORTANT : Please read install document "Configure Kernel Parameters - Unix/Macintosh" from "Books Online" before you start configuring kernel parameters. Please enter the total number of streams that you plan to run at the same time. We need to make sure that you have enough semaphores and shared memory segments configured in /etc/system.Number of streams [10]
20. Press Enter if you do not want to apply the changes now.
If you want to apply the changes now, type Yes and then press Enter. You will come across this prompt when you install the software on the earlier versions of Solaris.
We now need to modify the /etc/system configuration file on this computer. It is done to make sure that there will be enough shared memory and semaphores available for Simpana programs. Please review the changes below and answer "yes" if you want us to apply them to the /etc/system file. Otherwise, the installation will proceed, the changes will be saved to some other file, and you will have to apply them manually.set shmsys:shminfo_shmmni=8570 (was 7930)set shmsys:shminfo_shmseg=8420 (was 7780)set semsys:seminfo_semmns=10320 (was 9680)set semsys:seminfo_semmni=8570 (was 7930)set semsys:seminfo_semmsl=8570(was 7930)Do you want us to apply these changes now? [no]
21. Press Enter.
You will see this prompt if you have accepted the default no and pressed Enter in the above step.
Changes saved into /etc/system.gal.1744
Press <ENTER> to continue.
Administration Guide - Solaris File System iDataAgent
Page 16 of 265
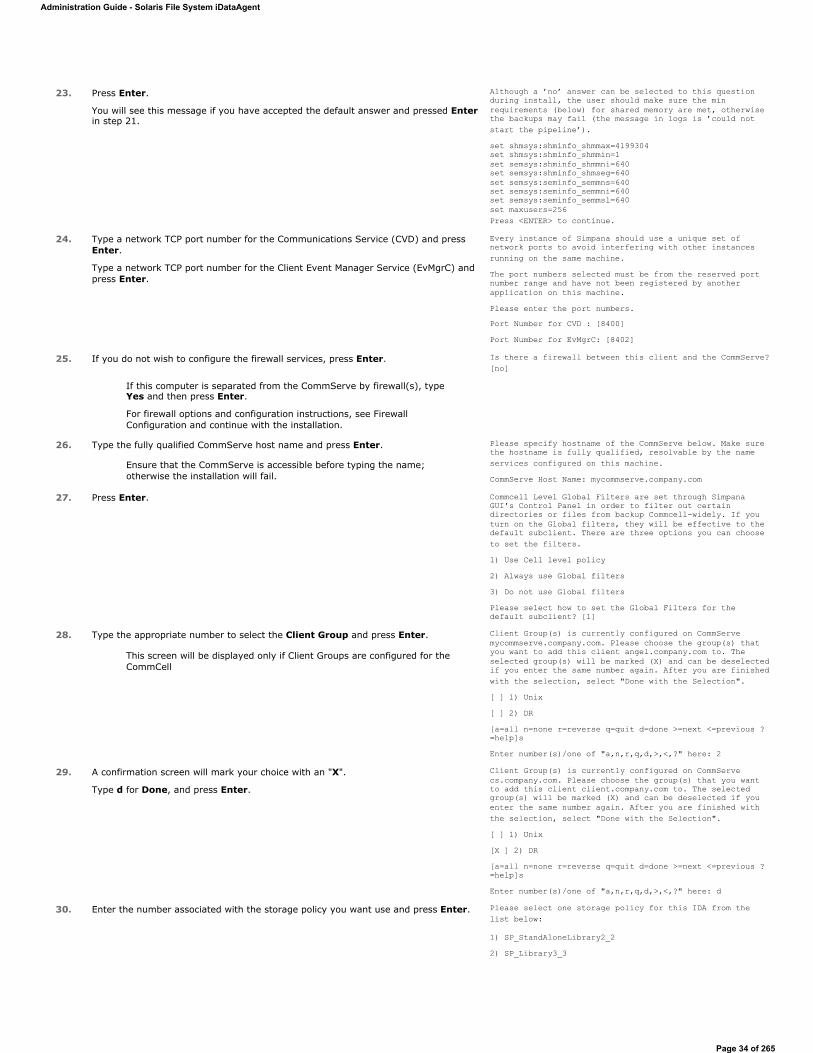
22. Press Enter.
You will see this message if you have accepted the default answer and pressed Enterin step 20.
Although a ’no’ answer can be selected to this question during install, the user should make sure the min requirements (below) for shared memory are met, otherwise the backups may fail (the message in logs is ’could not start the pipeline’).set shmsys:shminfo_shmmax=4199304set shmsys:shminfo_shmmin=1set semsys:shminfo_shmmni=640set semsys:shminfo_shmseg=640set semsys:seminfo_semmns=640set semsys:seminfo_semmni=640set semsys:seminfo_semmsl=640set maxusers=256Press <ENTER> to continue.
23. Type a network TCP port number for the Communications Service (CVD) and press Enter.
Type a network TCP port number for the Client Event Manager Service (EvMgrC) and press Enter.
Every instance of Simpana should use a unique set of network ports to avoid interfering with other instances running on the same machine.The port numbers selected must be from the reserved port number range and have not been registered by another application on this machine.Please enter the port numbers.Port Number for CVD : [8400]Port Number for EvMgrC: [8402]
24. If you do not wish to configure the firewall services, press Enter.
If this computer is separated from the CommServe by firewall(s), type Yes and then press Enter.
For firewall options and configuration instructions, see Firewall Configuration and continue with the installation.
Is there a firewall between this client and the CommServe? [no]
25. Type the fully qualified CommServe host name and press Enter.
Ensure that the CommServe is accessible before typing the name; otherwise the installation will fail.
Please specify hostname of the CommServe below. Make sure the hostname is fully qualified, resolvable by the name services configured on this machine.CommServe Host Name: mycommserve.company.com
26. Press Enter. Commcell Level Global Filters are set through Simpana GUI's Control Panel in order to filter out certain directories or files from backup Commcell-widely. If you turn on the Global filters, they will be effective to the default subclient. There are three options you can choose to set the filters.1) Use Cell level policy2) Always use Global filters3) Do not use Global filtersPlease select how to set the Global Filters for the default subclient? [1]
27. Enter the number associated with the storage policy you want use and press Enter. Please select one storage policy for this IDA from the list below:
1) SP_StandAloneLibrary2_22) SP_Library3_33) SP_MagLibrary4_4
Storage Policy: [1]
If you have not created a storage policy, this message will be displayed.
You may not be prompted for user input.
You can create the Storage Policy later in step 29.
There seem to be no Storage Policies configured on the CommServe. Before you can run any backups of this IDA, you will need to install a MediaAgent, create a Storage Policy and assign it to all subclients..
Adjusting modes and permissions of files
Successfully installed Simpana
28. Type 3 and press Enter. Certain Simpana packages can be associated with a virtual IP, or in other words, installed on a "virtual machine" belonging to some cluster. At any given time the virtual machine's services and IP address are active on only one of the cluster's servers. The virtual machine can "fail-over" from one server to another, which includes stopping services and deactivating IP address on the first server and activating the IP address/services on the other server. Currently you have Simpana installed on physical node angel.company.com.Now you have a choice of either adding another package to the existing installation or configure Simpana on a virtual machine for use in a cluster. 1) Add another package to angel.company.com2) Install Simpana on a virtual machine
Administration Guide - Solaris File System iDataAgent
Page 17 of 265
METHOD 2: INSTALL SOFTWARE FROM COMMCELL CONSOLE
3) ExitYour choice: [3]
If you already selected a storage policy in step 27, proceed to the Configuration section.
If you do not have Storage Policy created, follow the procedure given below.
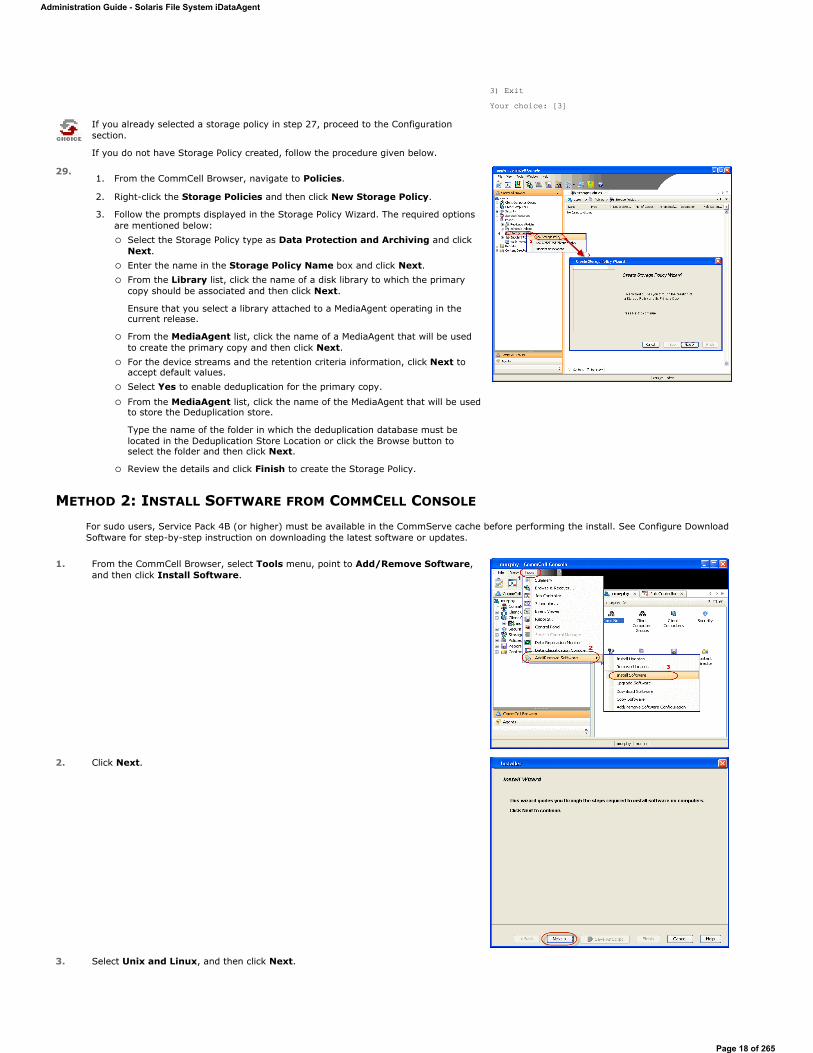
29.1. From the CommCell Browser, navigate to Policies.
2. Right-click the Storage Policies and then click New Storage Policy.
3. Follow the prompts displayed in the Storage Policy Wizard. The required options are mentioned below:
Select the Storage Policy type as Data Protection and Archiving and click Next. Enter the name in the Storage Policy Name box and click Next. From the Library list, click the name of a disk library to which the primary copy should be associated and then click Next.
Ensure that you select a library attached to a MediaAgent operating in the current release.
From the MediaAgent list, click the name of a MediaAgent that will be used to create the primary copy and then click Next. For the device streams and the retention criteria information, click Next to accept default values. Select Yes to enable deduplication for the primary copy.
From the MediaAgent list, click the name of the MediaAgent that will be used to store the Deduplication store.
Type the name of the folder in which the deduplication database must be located in the Deduplication Store Location or click the Browse button to select the folder and then click Next.
Review the details and click Finish to create the Storage Policy.
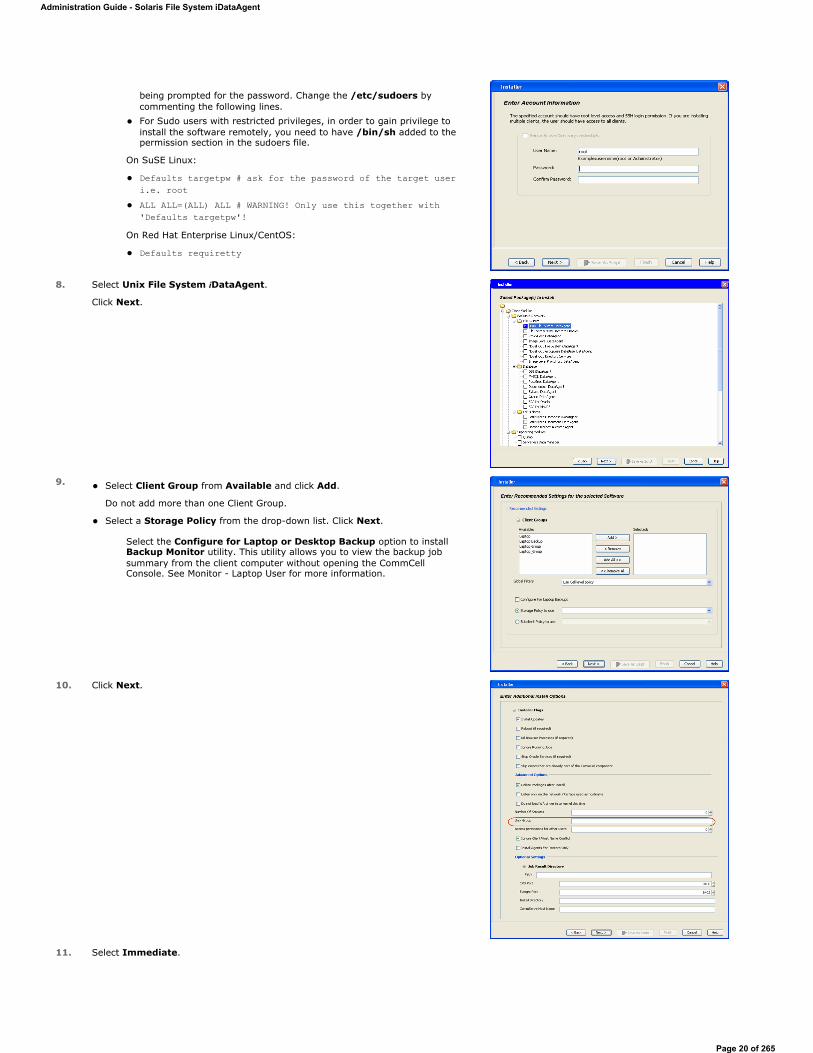
For sudo users, Service Pack 4B (or higher) must be available in the CommServe cache before performing the install. See Configure Download Software for step-by-step instruction on downloading the latest software or updates.
1. From the CommCell Browser, select Tools menu, point to Add/Remove Software, and then click Install Software.
2. Click Next.
3. Select Unix and Linux, and then click Next.
Administration Guide - Solaris File System iDataAgent
Page 18 of 265

4. Select Manually Select Computers ,and then click Next.
5. Enter the fully qualified domain name of the computer in which you wish to install.
For example: apple.domain.company.comThe Unix File System iDataAgent will be installed on this client computer.
Click Next.
6. Click Next.
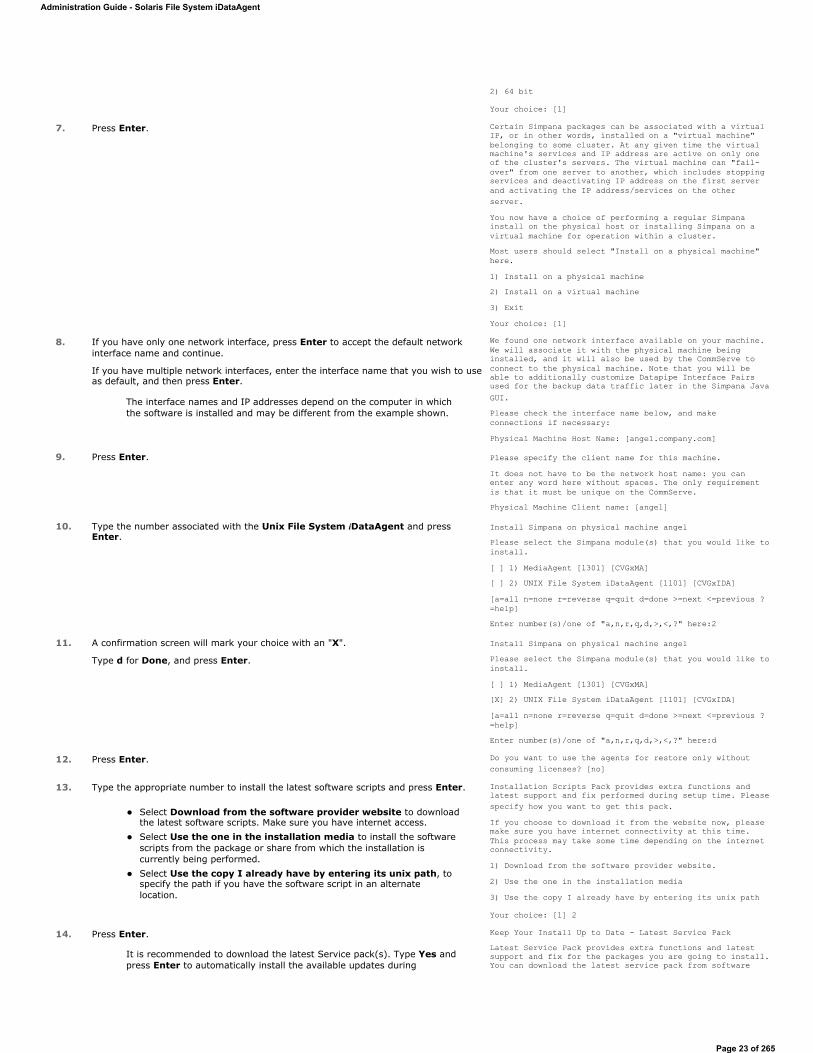
7. Type the User Name and Password of client computer who has administrator or sudo privileges.
Click Next.
If a SUDO user has been created for root access then use visudo to change /etc/sudoers, so that this user can SUDO into ssh without
Administration Guide - Solaris File System iDataAgent
Page 19 of 265
being prompted for the password. Change the /etc/sudoers by commenting the following lines. For Sudo users with restricted privileges, in order to gain privilege to install the software remotely, you need to have /bin/sh added to the permission section in the sudoers file.
On SuSE Linux:
Defaults targetpw # ask for the password of the target user i.e. rootALL ALL=(ALL) ALL # WARNING! Only use this together with 'Defaults targetpw'!
On Red Hat Enterprise Linux/CentOS:
Defaults requiretty
8. Select Unix File System iDataAgent.
Click Next.
9. Select Client Group from Available and click Add.
Do not add more than one Client Group.
Select a Storage Policy from the drop-down list. Click Next.
Select the Configure for Laptop or Desktop Backup option to install Backup Monitor utility. This utility allows you to view the backup job summary from the client computer without opening the CommCell Console. See Monitor - Laptop User for more information.
10. Click Next.
11. Select Immediate.
Administration Guide - Solaris File System iDataAgent
Page 20 of 265

Click Next.
12. Click Finish.
13. You can track the progress of the job from the Job Controller or Event Viewerwindow.
Administration Guide - Solaris File System iDataAgent
Page 21 of 265
Getting Started - Solaris File System - Deploying in a Non-Global Zone
SKIP THIS PAGE IF YOU ARE NOT INSTALLING THIS AGENT ON A NON-GLOBAL ZONE.Click to continue with the deployment.
Use the following steps to install the File System iDataAgent on a Non Global Zone.
WHERE TO INSTALL
Install the software directly on the computer that you wish to protect on a Non-Global Zone.
It is recommended to install the software on the global zone to protect non-changing or static data on non-global zones. If the data is dynamic or contains application data, install the software on the non-global zone.
Make sure the computer satisfies the minimum requirements specified in the System Requirements.
METHOD 1: INTERACTIVE INSTALL
INSTALLATION RELATED TOPICS
The software can be installed using one of the following methods:
METHOD 1: INTERACTIVE INSTALL
Use this procedure to directly install the software from the installation package or a network drive.
METHOD 2: INSTALL SOFTWARE FROM COMMCELL CONSOLE
Use this procedure to remotely install the software on a client computer.
Download Software PackagesDownload the latest software package to perform the install.
System RequirementsVerify that the computer in which you wish to install the software satisfies the System Requirements.
FirewallProvides comprehensive information on firewall.
1. Logon to the client computer as root or as a sudo user.
If you are installing the software using a sudo user account, make sure that sudo user account is configured on this computer. For more information, see FAQ - Install.
2. Mount the installation package on the non-global zone.
mkdir <Non-Global Zone root location>/<Non-Global Zone local directory>mount –F lofs <Global zone software Install package mount point> <Non-Global Zone root location>/<Non-Global Zone local directory>Connect to Non-Global Zone terminalRun the following command from the Software Installation Package or mount point:
./cvpkgadd3. The product banner and other information is displayed.
Press Enter.
4. Read the license agreement. Type y and press Enter.
5. Press Enter. Please select a setup task you want to perform from the list below:Advance options provide extra setup features such as creating custom package, recording/replaying user selections and installing External Data Connector software.1) Install data protection agents on this computer2) Advance options3) Exit this menuYour choice: [1]
6. If your computer is 32-bit, press Enter.
If your computer is 64-bit, see Install Unix Agents on 64-bit Platform for step-by-step procedure.
32 or 64?This machine supports both 32 bit and 64 bit binaries. By default, we will install 32 bit binary set that has full support for all the modules included in this package. Please note that 64 bit binary set currently only support limited modules.1) 32 bit
Administration Guide - Solaris File System iDataAgent
Page 22 of 265
2) 64 bit
Your choice: [1]
7. Press Enter. Certain Simpana packages can be associated with a virtual IP, or in other words, installed on a "virtual machine" belonging to some cluster. At any given time the virtual machine's services and IP address are active on only one of the cluster's servers. The virtual machine can "fail-over" from one server to another, which includes stopping services and deactivating IP address on the first server and activating the IP address/services on the other server.You now have a choice of performing a regular Simpana install on the physical host or installing Simpana on a virtual machine for operation within a cluster.Most users should select "Install on a physical machine" here.1) Install on a physical machine2) Install on a virtual machine3) ExitYour choice: [1]
8. If you have only one network interface, press Enter to accept the default network interface name and continue.
If you have multiple network interfaces, enter the interface name that you wish to use as default, and then press Enter.
The interface names and IP addresses depend on the computer in which the software is installed and may be different from the example shown.
We found one network interface available on your machine. We will associate it with the physical machine being installed, and it will also be used by the CommServe to connect to the physical machine. Note that you will be able to additionally customize Datapipe Interface Pairs used for the backup data traffic later in the Simpana Java GUI.Please check the interface name below, and make connections if necessary:Physical Machine Host Name: [angel.company.com]
9. Press Enter. Please specify the client name for this machine.It does not have to be the network host name: you can enter any word here without spaces. The only requirement is that it must be unique on the CommServe.Physical Machine Client name: [angel]
10. Type the number associated with the Unix File System iDataAgent and press Enter.
Install Simpana on physical machine angelPlease select the Simpana module(s) that you would like to install.[ ] 1) MediaAgent [1301] [CVGxMA][ ] 2) UNIX File System iDataAgent [1101] [CVGxIDA][a=all n=none r=reverse q=quit d=done >=next <=previous ?=help]Enter number(s)/one of "a,n,r,q,d,>,<,?" here:2
11. A confirmation screen will mark your choice with an "X".
Type d for Done, and press Enter.
Install Simpana on physical machine angelPlease select the Simpana module(s) that you would like to install.[ ] 1) MediaAgent [1301] [CVGxMA][X] 2) UNIX File System iDataAgent [1101] [CVGxIDA][a=all n=none r=reverse q=quit d=done >=next <=previous ?=help]Enter number(s)/one of "a,n,r,q,d,>,<,?" here:d
12. Press Enter. Do you want to use the agents for restore only without consuming licenses? [no]
13. Type the appropriate number to install the latest software scripts and press Enter.
Select Download from the software provider website to download the latest software scripts. Make sure you have internet access. Select Use the one in the installation media to install the software scripts from the package or share from which the installation is currently being performed. Select Use the copy I already have by entering its unix path, to specify the path if you have the software script in an alternate location.
Installation Scripts Pack provides extra functions and latest support and fix performed during setup time. Please specify how you want to get this pack.If you choose to download it from the website now, please make sure you have internet connectivity at this time. This process may take some time depending on the internet connectivity.1) Download from the software provider website.2) Use the one in the installation media3) Use the copy I already have by entering its unix path
Your choice: [1] 2
14. Press Enter.
It is recommended to download the latest Service pack(s). Type Yes and press Enter to automatically install the available updates during
Keep Your Install Up to Date - Latest Service Pack Latest Service Pack provides extra functions and latest support and fix for the packages you are going to install. You can download the latest service pack from software
Administration Guide - Solaris File System iDataAgent
Page 23 of 265

installation.provider website.If you decide to download it from the website now, please make sure you have internet connectivity at this time. This process may take some time depending on the internet connectivity.Do you want to download the latest service pack now? [no]
15.Press Enter to accept the default path.
If you want to specify a different path, type the path and then press Enter.
If you want to install the software binaries to an NFS shared drive, specify the directory on which you have mounted the NFS file system and then press Enter.
In order to make sure that the client computer has read/write access to NFS shared drive, review the steps described in Installing Software Binaries to an NFS Shared Drive.
Do not use the following characters when specifying the path:
!@#$%^&*():/?\
Please specify where you want us to install Simpana binaries.It must be a local directory and there should be at least 176MB of free space available. All files will be installed in a "simpana" subdirectory, so if you enter "/opt", the files will actually be placed into "/opt/simpana".Installation Directory: [/opt]
16. Press Enter to accept the default location.
Enter a path to modify the default location and press Enter. All the modules installed on the computer will store the log files in this directory.
Please specify where you want to keep Simpana log files.It must be a local directory and there should be at least 100MB of free space available. All log files will be created in a "simpana/Log_Files" subdirectory, so if you enter "/var/log", the logs will actually be placed into "/var/log/simpana/Log_Files".Log Directory: [/var/log]
17. Type a network TCP port number for the Communications Service (CVD) and press Enter.
Type a network TCP port number for the Client Event Manager Service (EvMgrC) and press Enter.
Please enter the name of the group which will be assigned to all Software files and on behalf of which all Software processes will run.In most of the cases it's a good idea to create a dedicated "simpana" group. However, if you're planning to use Oracle iDataAgent or SAP Agent, you should enter Oracle's "dba" group here.Group name: sky1REMINDERIf you are planning to install Simpana Informix, DB2, PostgreSQL, Sybase or Lotus Notes iDataAgent, please make sure to include Informix, DB2, etc. users into group "sky1".Press <ENTER> to continue ...
18. Type Yes and press Enter. Most of Software processes run with root privileges, but some are launched by databases and inherit database access rights. To make sure that registry and log files can be written to by both kinds of processes we can either make such files world-writeable or we can grant write access only to processes belonging to a particular group, e.g. a "simpana" or a "dba" group.We highly recommend now that you create a new user group and enter its name in the next setup screen. If you choose not to assign a dedicated group to Software processes, you will need to specify the access permissions later.If you're planning to backup Oracle DB you should use "dba" group.Would you like to assign a specific group to Software? [yes]
19. Type the Group name and press Enter.
Press Enter again.
Please enter the name of the group which will be assigned to all Software files and on behalf of which all Software processes will run.In most of the cases it's a good idea to create a dedicated "simpana" group. However, if you're planning to use Oracle iDataAgent or SAP Agent, you should enter Oracle's "dba" group here.Group name: sky1REMINDERIf you are planning to install Simpana Informix, DB2, PostgreSQL, Sybase or Lotus Notes iDataAgent, please make sure to include Informix, DB2, etc. users into group "sky1".Press <ENTER> to continue ...
20. Press Enter to accept the default value for Number of Streams.
You can type the Number of Streams that you plan to run at the same time and then press Enter.
Number of StreamsIMPORTANT : Please read install document "Configure Kernel Parameters - Unix/Macintosh" from "Books Online" before you start configuring kernel parameters. Please enter the total number of streams that you plan to run at the same time. We need to make sure that you have enough semaphores
Administration Guide - Solaris File System iDataAgent
Page 24 of 265
and shared memory segments configured in /etc/system.Number of streams [10]
21. Press Enter if you do not want to apply the changes now.
If you want to apply the changes now, type Yes and then press Enter. You will come across this prompt when you install the software on the earlier versions of Solaris.
We now need to modify the /etc/system configuration file on this computer. It is done to make sure that there will be enough shared memory and semaphores available for Simpana programs. Please review the changes below and answer "yes" if you want us to apply them to the /etc/system file. Otherwise, the installation will proceed, the changes will be saved to some other file, and you will have to apply them manually.set shmsys:shminfo_shmmni=8570 (was 7930)set shmsys:shminfo_shmseg=8420 (was 7780)set semsys:seminfo_semmns=10320 (was 9680)set semsys:seminfo_semmni=8570 (was 7930)set semsys:seminfo_semmsl=8570(was 7930)Do you want us to apply these changes now? [no]
22. Press Enter.
You will see this prompt if you have accepted the default no and pressed Enter in the above step.
Changes saved into /etc/system.gal.1744
Press <ENTER> to continue.
23. Press Enter.
You will see this message if you have accepted the default answer and pressed Enterin step 21.
Although a ’no’ answer can be selected to this question during install, the user should make sure the min requirements (below) for shared memory are met, otherwise the backups may fail (the message in logs is ’could not start the pipeline’).set shmsys:shminfo_shmmax=4199304set shmsys:shminfo_shmmin=1set semsys:shminfo_shmmni=640set semsys:shminfo_shmseg=640set semsys:seminfo_semmns=640set semsys:seminfo_semmni=640set semsys:seminfo_semmsl=640set maxusers=256Press <ENTER> to continue.
24. Type a network TCP port number for the Communications Service (CVD) and press Enter.
Type a network TCP port number for the Client Event Manager Service (EvMgrC) and press Enter.
Every instance of Simpana should use a unique set of network ports to avoid interfering with other instances running on the same machine.The port numbers selected must be from the reserved port number range and have not been registered by another application on this machine.Please enter the port numbers.Port Number for CVD : [8400]Port Number for EvMgrC: [8402]
25. If you do not wish to configure the firewall services, press Enter.
If this computer is separated from the CommServe by firewall(s), type Yes and then press Enter.
For firewall options and configuration instructions, see Firewall Configuration and continue with the installation.
Is there a firewall between this client and the CommServe? [no]
26. Type the fully qualified CommServe host name and press Enter.
Ensure that the CommServe is accessible before typing the name; otherwise the installation will fail.
Please specify hostname of the CommServe below. Make sure the hostname is fully qualified, resolvable by the name services configured on this machine.CommServe Host Name: mycommserve.company.com
27. Press Enter. Commcell Level Global Filters are set through Simpana GUI's Control Panel in order to filter out certain directories or files from backup Commcell-widely. If you turn on the Global filters, they will be effective to the default subclient. There are three options you can choose to set the filters.1) Use Cell level policy2) Always use Global filters3) Do not use Global filtersPlease select how to set the Global Filters for the default subclient? [1]
28. Enter the number associated with the storage policy you want use and press Enter. Please select one storage policy for this IDA from the list below:
1) SP_StandAloneLibrary2_22) SP_Library3_33) SP_MagLibrary4_4
Storage Policy: [1]
If you do not have Storage Policy created, this message will be displayed. There seem to be no Storage Policies configured on the CommServe. Before you can run any backups of this IDA, you
Administration Guide - Solaris File System iDataAgent
Page 25 of 265
METHOD 2: INSTALL SOFTWARE FROM COMMCELL CONSOLE
You may not be prompted for user input.
You can create the Storage Policy later in step 30.
will need to install a MediaAgent, create a Storage Policy and assign it to all subclients..
Adjusting modes and permissions of files
Successfully installed Simpana
29. Type 3 to the Exit option and press Enter.
The installation is now complete.
Certain Simpana packages can be associated with a virtual IP, or in other words, installed on a "virtual machine" belonging to some cluster. At any given time the virtual machine's services and IP address are active on only one of the cluster's servers. The virtual machine can "fail-over" from one server to another, which includes stopping services and deactivating IP address on the first server and activating the IP address/services on the other server. Currently you have Simpana installed on physical node angel.company.com.Now you have a choice of either adding another package to the existing installation or configure Simpana on a virtual machine for use in a cluster. 1) Add another package to angel.company.com2) Install Simpana on a virtual machine3) ExitYour choice: [3]
If you already have a storage policy selected in step 28, proceed to the Configuration section.
If you do not have Storage Policy created, follow the procedure given below.
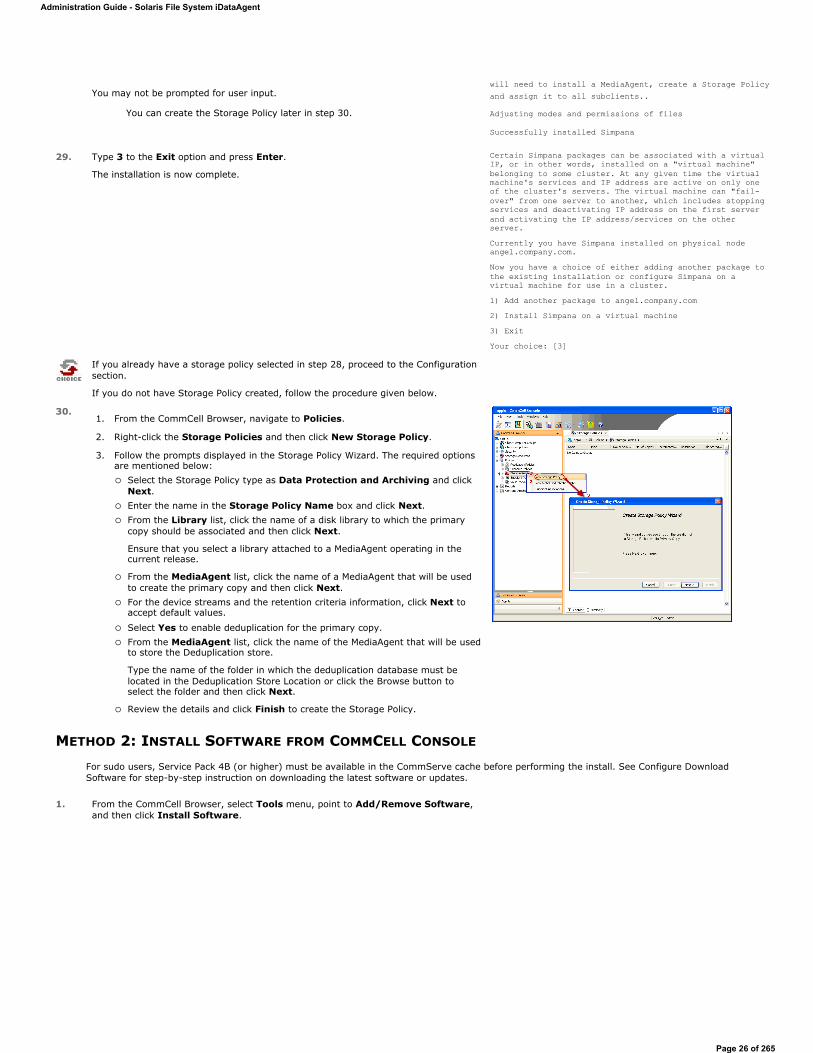
30.1. From the CommCell Browser, navigate to Policies.
2. Right-click the Storage Policies and then click New Storage Policy.
3. Follow the prompts displayed in the Storage Policy Wizard. The required options are mentioned below:
Select the Storage Policy type as Data Protection and Archiving and click Next. Enter the name in the Storage Policy Name box and click Next. From the Library list, click the name of a disk library to which the primary copy should be associated and then click Next.
Ensure that you select a library attached to a MediaAgent operating in the current release.
From the MediaAgent list, click the name of a MediaAgent that will be used to create the primary copy and then click Next. For the device streams and the retention criteria information, click Next to accept default values.
Select Yes to enable deduplication for the primary copy. From the MediaAgent list, click the name of the MediaAgent that will be used to store the Deduplication store.
Type the name of the folder in which the deduplication database must be located in the Deduplication Store Location or click the Browse button to select the folder and then click Next.
Review the details and click Finish to create the Storage Policy.
For sudo users, Service Pack 4B (or higher) must be available in the CommServe cache before performing the install. See Configure Download Software for step-by-step instruction on downloading the latest software or updates.
1. From the CommCell Browser, select Tools menu, point to Add/Remove Software, and then click Install Software.
Administration Guide - Solaris File System iDataAgent
Page 26 of 265

2. Click Next.
3. Select Unix and Linux, and then click Next.
4. Select Manually Select Computers ,and then click Next.
5. Enter the fully qualified domain name of the computer in which you wish to install.
For example: apple.domain.company.comThe Unix File System iDataAgent will be installed on this client computer.
Click Next.
Administration Guide - Solaris File System iDataAgent
Page 27 of 265
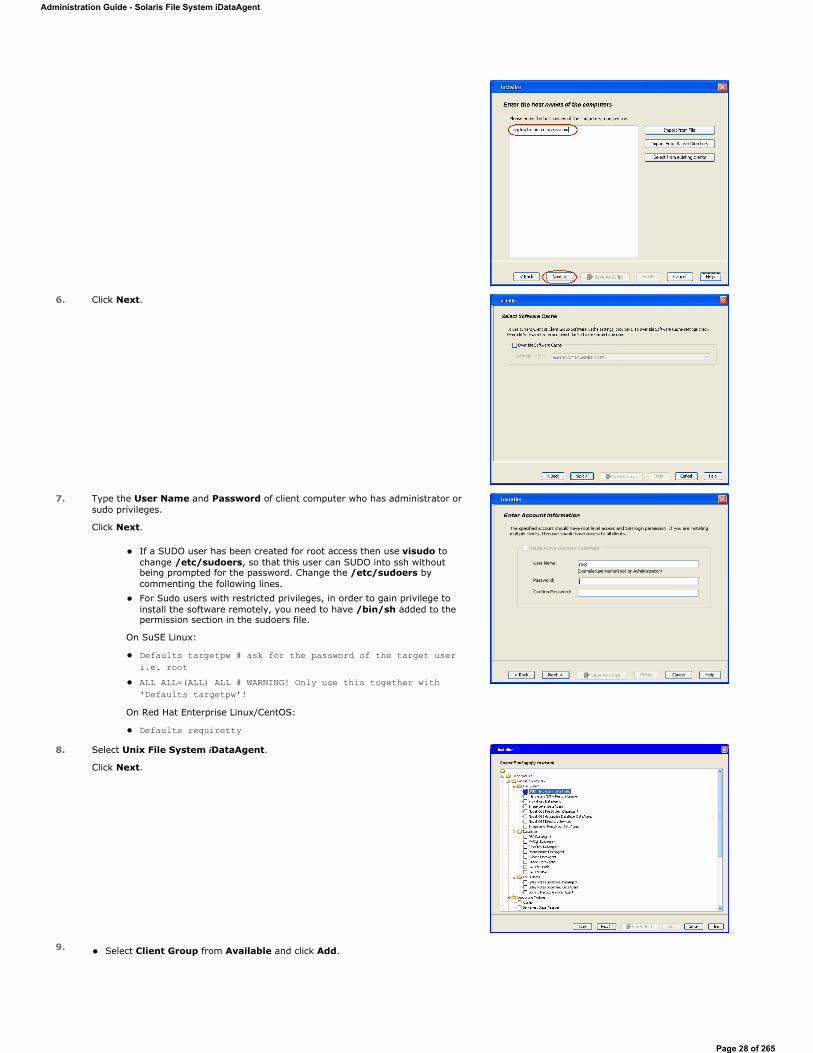
6. Click Next.
7. Type the User Name and Password of client computer who has administrator or sudo privileges.
Click Next.
If a SUDO user has been created for root access then use visudo to change /etc/sudoers, so that this user can SUDO into ssh without being prompted for the password. Change the /etc/sudoers by commenting the following lines. For Sudo users with restricted privileges, in order to gain privilege to install the software remotely, you need to have /bin/sh added to the permission section in the sudoers file.
On SuSE Linux:
Defaults targetpw # ask for the password of the target user i.e. rootALL ALL=(ALL) ALL # WARNING! Only use this together with 'Defaults targetpw'!
On Red Hat Enterprise Linux/CentOS:
Defaults requiretty
8. Select Unix File System iDataAgent.
Click Next.
9. Select Client Group from Available and click Add.
Administration Guide - Solaris File System iDataAgent
Page 28 of 265
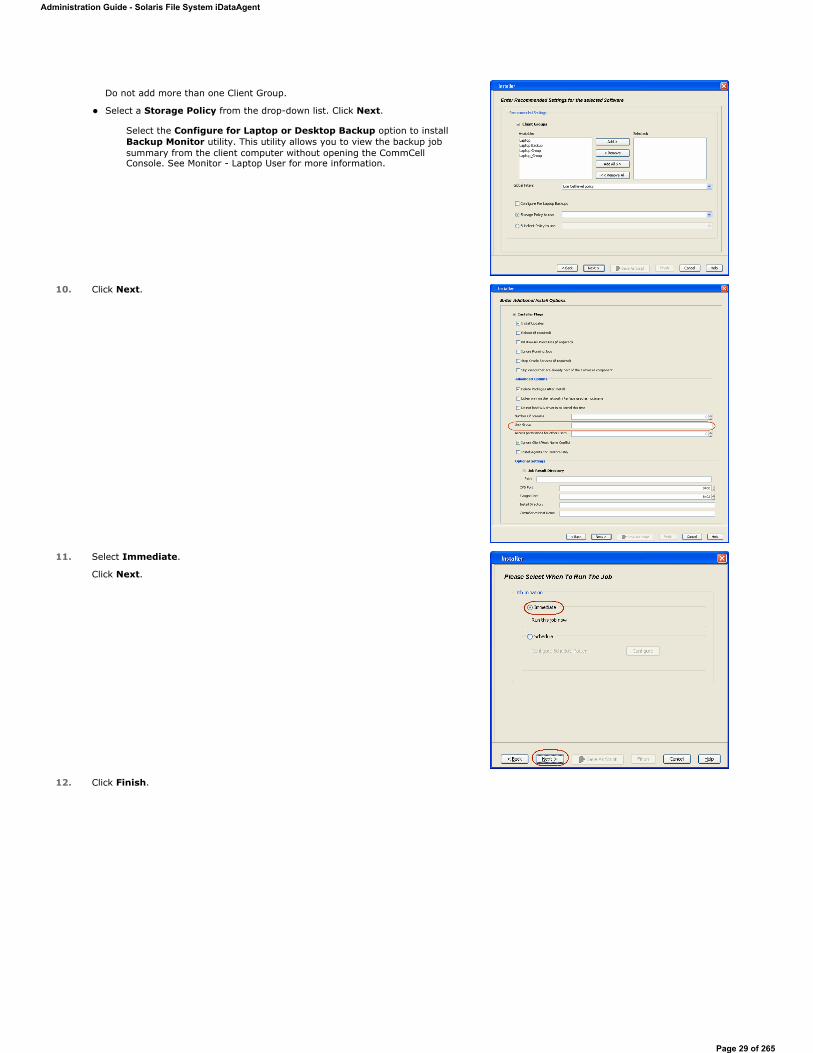
Do not add more than one Client Group.
Select a Storage Policy from the drop-down list. Click Next.
Select the Configure for Laptop or Desktop Backup option to install Backup Monitor utility. This utility allows you to view the backup job summary from the client computer without opening the CommCell Console. See Monitor - Laptop User for more information.
10. Click Next.
11. Select Immediate.
Click Next.
12. Click Finish.
Administration Guide - Solaris File System iDataAgent
Page 29 of 265
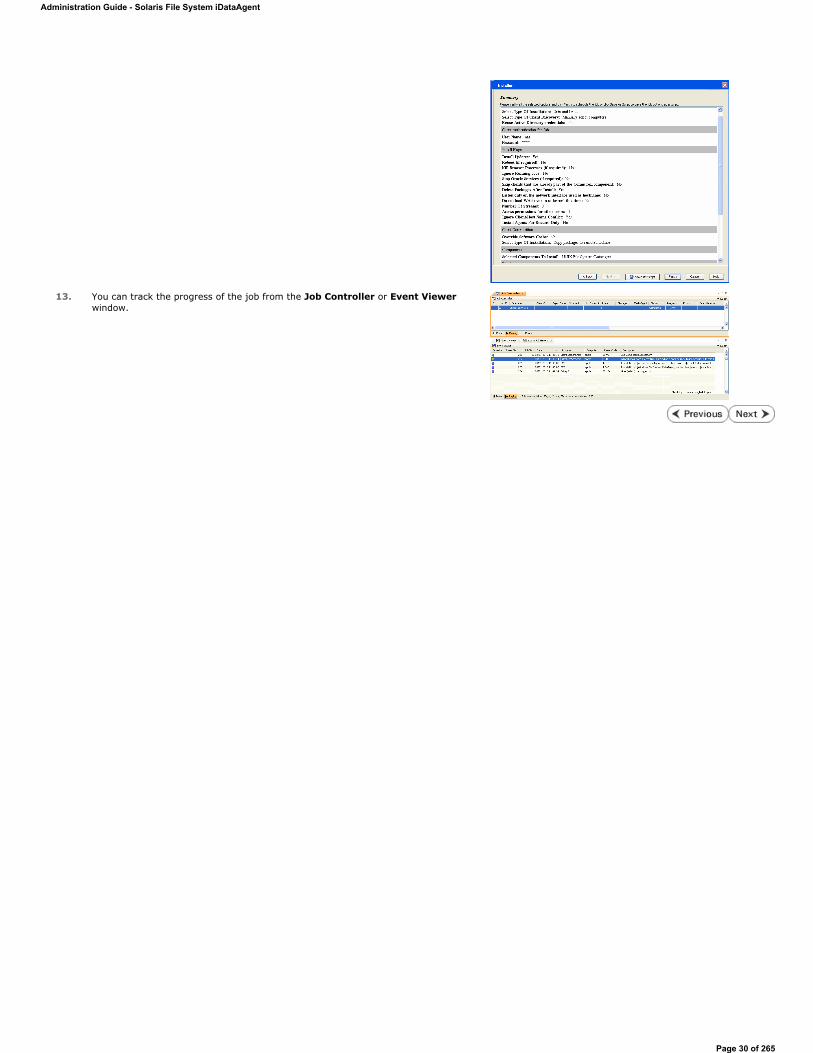
13. You can track the progress of the job from the Job Controller or Event Viewerwindow.
Administration Guide - Solaris File System iDataAgent
Page 30 of 265
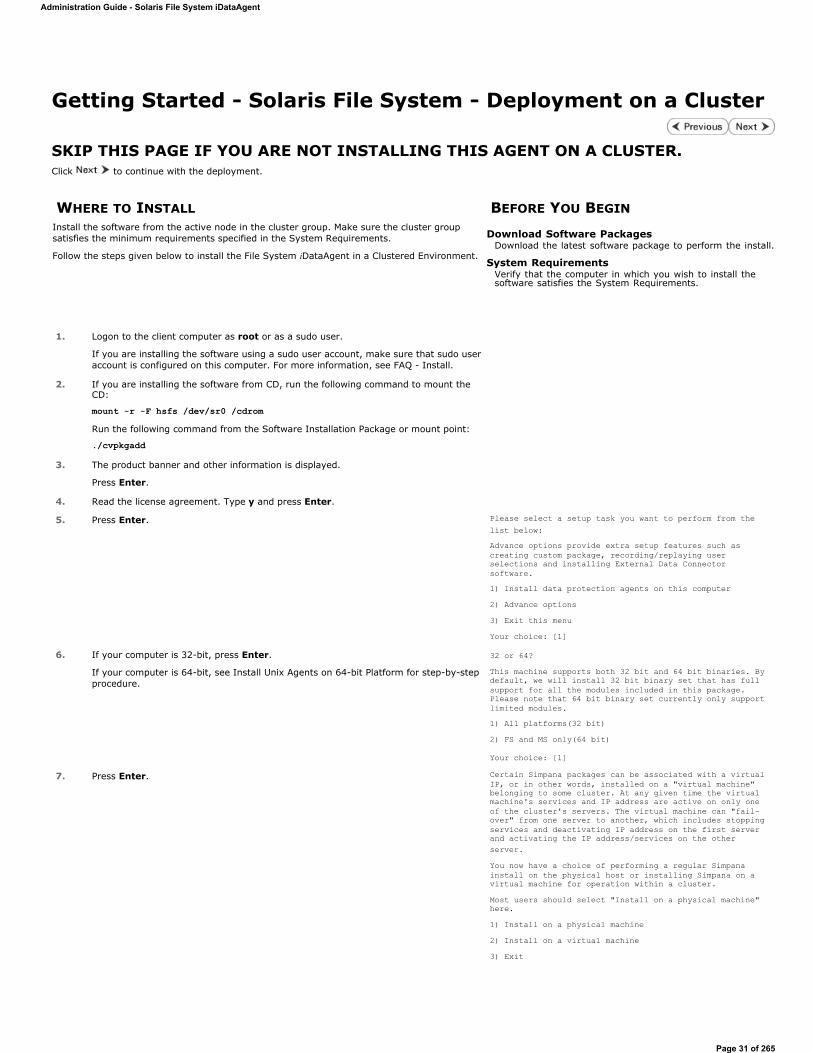
Getting Started - Solaris File System - Deployment on a Cluster
SKIP THIS PAGE IF YOU ARE NOT INSTALLING THIS AGENT ON A CLUSTER.Click to continue with the deployment.
WHERE TO INSTALL BEFORE YOU BEGINInstall the software from the active node in the cluster group. Make sure the cluster group satisfies the minimum requirements specified in the System Requirements.
Follow the steps given below to install the File System iDataAgent in a Clustered Environment.
Download Software PackagesDownload the latest software package to perform the install.
System RequirementsVerify that the computer in which you wish to install the software satisfies the System Requirements.
1. Logon to the client computer as root or as a sudo user.
If you are installing the software using a sudo user account, make sure that sudo user account is configured on this computer. For more information, see FAQ - Install.
2. If you are installing the software from CD, run the following command to mount the CD:
mount -r -F hsfs /dev/sr0 /cdromRun the following command from the Software Installation Package or mount point:
./cvpkgadd3. The product banner and other information is displayed.
Press Enter.
4. Read the license agreement. Type y and press Enter.
5. Press Enter. Please select a setup task you want to perform from the list below:Advance options provide extra setup features such as creating custom package, recording/replaying user selections and installing External Data Connector software.1) Install data protection agents on this computer2) Advance options3) Exit this menuYour choice: [1]
6. If your computer is 32-bit, press Enter.
If your computer is 64-bit, see Install Unix Agents on 64-bit Platform for step-by-step procedure.
32 or 64?This machine supports both 32 bit and 64 bit binaries. By default, we will install 32 bit binary set that has full support for all the modules included in this package. Please note that 64 bit binary set currently only support limited modules.1) All platforms(32 bit)2) FS and MS only(64 bit)
Your choice: [1]
7. Press Enter. Certain Simpana packages can be associated with a virtual IP, or in other words, installed on a "virtual machine" belonging to some cluster. At any given time the virtual machine's services and IP address are active on only one of the cluster's servers. The virtual machine can "fail-over" from one server to another, which includes stopping services and deactivating IP address on the first server and activating the IP address/services on the other server.You now have a choice of performing a regular Simpana install on the physical host or installing Simpana on a virtual machine for operation within a cluster.Most users should select "Install on a physical machine" here.1) Install on a physical machine2) Install on a virtual machine3) Exit
Administration Guide - Solaris File System iDataAgent
Page 31 of 265
Your choice: [1]
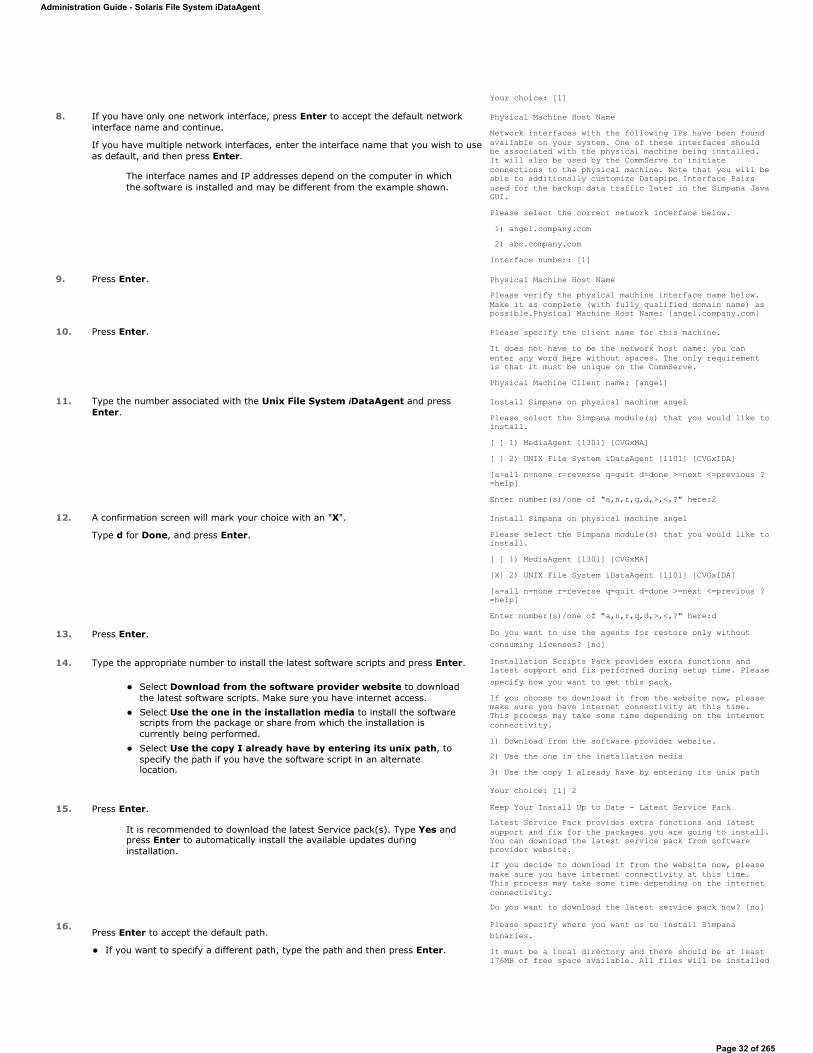
8. If you have only one network interface, press Enter to accept the default network interface name and continue.
If you have multiple network interfaces, enter the interface name that you wish to use as default, and then press Enter.
The interface names and IP addresses depend on the computer in which the software is installed and may be different from the example shown.
Physical Machine Host NameNetwork interfaces with the following IPs have been found available on your system. One of these interfaces should be associated with the physical machine being installed. It will also be used by the CommServe to initiate connections to the physical machine. Note that you will be able to additionally customize Datapipe Interface Pairs used for the backup data traffic later in the Simpana Java GUI.Please select the correct network interface below. 1) angel.company.com 2) abc.company.comInterface number: [1]
9. Press Enter. Physical Machine Host NamePlease verify the physical machine interface name below. Make it as complete (with fully qualified domain name) as possible.Physical Machine Host Name: [angel.company.com]
10. Press Enter. Please specify the client name for this machine.It does not have to be the network host name: you can enter any word here without spaces. The only requirement is that it must be unique on the CommServe.Physical Machine Client name: [angel]
11. Type the number associated with the Unix File System iDataAgent and press Enter.
Install Simpana on physical machine angelPlease select the Simpana module(s) that you would like to install.[ ] 1) MediaAgent [1301] [CVGxMA][ ] 2) UNIX File System iDataAgent [1101] [CVGxIDA][a=all n=none r=reverse q=quit d=done >=next <=previous ?=help]Enter number(s)/one of "a,n,r,q,d,>,<,?" here:2
12. A confirmation screen will mark your choice with an "X".
Type d for Done, and press Enter.
Install Simpana on physical machine angelPlease select the Simpana module(s) that you would like to install.[ ] 1) MediaAgent [1301] [CVGxMA][X] 2) UNIX File System iDataAgent [1101] [CVGxIDA][a=all n=none r=reverse q=quit d=done >=next <=previous ?=help]Enter number(s)/one of "a,n,r,q,d,>,<,?" here:d
13. Press Enter. Do you want to use the agents for restore only without consuming licenses? [no]
14. Type the appropriate number to install the latest software scripts and press Enter.
Select Download from the software provider website to download the latest software scripts. Make sure you have internet access. Select Use the one in the installation media to install the software scripts from the package or share from which the installation is currently being performed. Select Use the copy I already have by entering its unix path, to specify the path if you have the software script in an alternate location.
Installation Scripts Pack provides extra functions and latest support and fix performed during setup time. Please specify how you want to get this pack.If you choose to download it from the website now, please make sure you have internet connectivity at this time. This process may take some time depending on the internet connectivity.1) Download from the software provider website.2) Use the one in the installation media3) Use the copy I already have by entering its unix path
Your choice: [1] 2
15. Press Enter.
It is recommended to download the latest Service pack(s). Type Yes and press Enter to automatically install the available updates during installation.
Keep Your Install Up to Date - Latest Service Pack Latest Service Pack provides extra functions and latest support and fix for the packages you are going to install. You can download the latest service pack from software provider website.If you decide to download it from the website now, please make sure you have internet connectivity at this time. This process may take some time depending on the internet connectivity.Do you want to download the latest service pack now? [no]
16.Press Enter to accept the default path.
If you want to specify a different path, type the path and then press Enter.
Please specify where you want us to install Simpana binaries.It must be a local directory and there should be at least 176MB of free space available. All files will be installed
Administration Guide - Solaris File System iDataAgent
Page 32 of 265
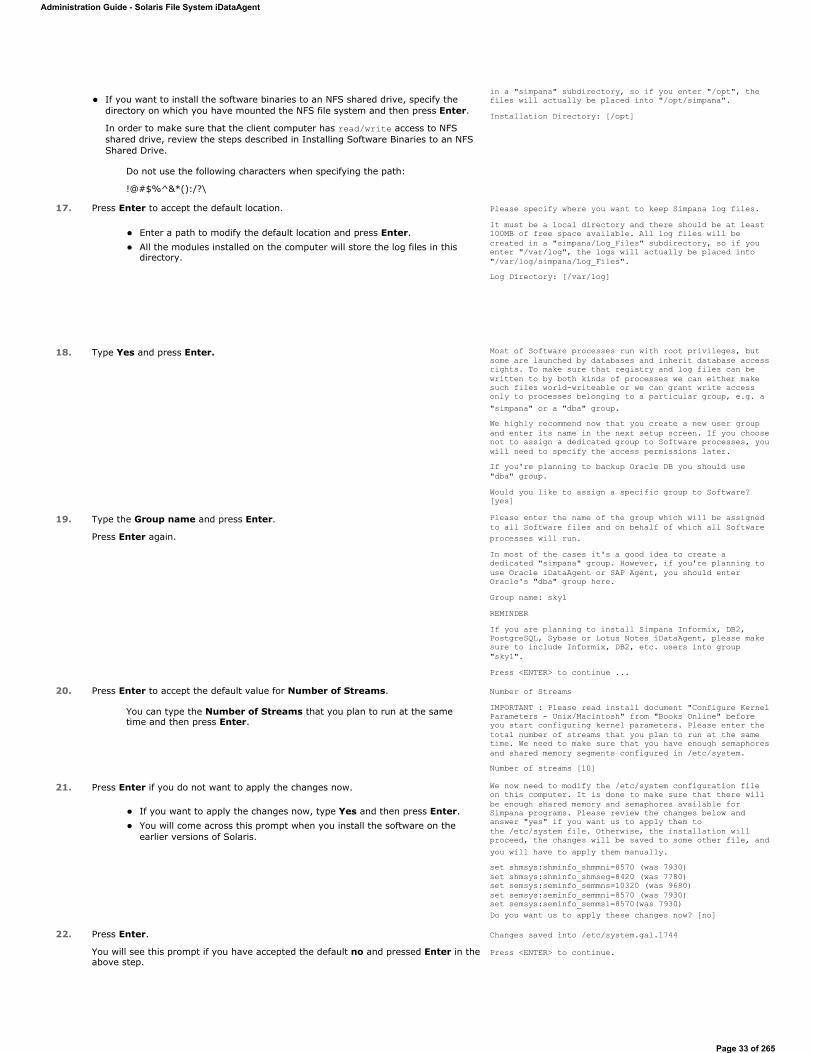
If you want to install the software binaries to an NFS shared drive, specify the directory on which you have mounted the NFS file system and then press Enter.
In order to make sure that the client computer has read/write access to NFS shared drive, review the steps described in Installing Software Binaries to an NFS Shared Drive.
Do not use the following characters when specifying the path:
!@#$%^&*():/?\
in a "simpana" subdirectory, so if you enter "/opt", the files will actually be placed into "/opt/simpana".Installation Directory: [/opt]
17. Press Enter to accept the default location.
Enter a path to modify the default location and press Enter. All the modules installed on the computer will store the log files in this directory.
Please specify where you want to keep Simpana log files.It must be a local directory and there should be at least 100MB of free space available. All log files will be created in a "simpana/Log_Files" subdirectory, so if you enter "/var/log", the logs will actually be placed into "/var/log/simpana/Log_Files".Log Directory: [/var/log]
18. Type Yes and press Enter. Most of Software processes run with root privileges, but some are launched by databases and inherit database access rights. To make sure that registry and log files can be written to by both kinds of processes we can either make such files world-writeable or we can grant write access only to processes belonging to a particular group, e.g. a "simpana" or a "dba" group.We highly recommend now that you create a new user group and enter its name in the next setup screen. If you choose not to assign a dedicated group to Software processes, you will need to specify the access permissions later.If you're planning to backup Oracle DB you should use "dba" group.Would you like to assign a specific group to Software? [yes]
19. Type the Group name and press Enter.
Press Enter again.
Please enter the name of the group which will be assigned to all Software files and on behalf of which all Software processes will run.In most of the cases it's a good idea to create a dedicated "simpana" group. However, if you're planning to use Oracle iDataAgent or SAP Agent, you should enter Oracle's "dba" group here.Group name: sky1REMINDERIf you are planning to install Simpana Informix, DB2, PostgreSQL, Sybase or Lotus Notes iDataAgent, please make sure to include Informix, DB2, etc. users into group "sky1".Press <ENTER> to continue ...
20. Press Enter to accept the default value for Number of Streams.
You can type the Number of Streams that you plan to run at the same time and then press Enter.
Number of StreamsIMPORTANT : Please read install document "Configure Kernel Parameters - Unix/Macintosh" from "Books Online" before you start configuring kernel parameters. Please enter the total number of streams that you plan to run at the same time. We need to make sure that you have enough semaphores and shared memory segments configured in /etc/system.Number of streams [10]
21. Press Enter if you do not want to apply the changes now.
If you want to apply the changes now, type Yes and then press Enter. You will come across this prompt when you install the software on the earlier versions of Solaris.
We now need to modify the /etc/system configuration file on this computer. It is done to make sure that there will be enough shared memory and semaphores available for Simpana programs. Please review the changes below and answer "yes" if you want us to apply them to the /etc/system file. Otherwise, the installation will proceed, the changes will be saved to some other file, and you will have to apply them manually.set shmsys:shminfo_shmmni=8570 (was 7930)set shmsys:shminfo_shmseg=8420 (was 7780)set semsys:seminfo_semmns=10320 (was 9680)set semsys:seminfo_semmni=8570 (was 7930)set semsys:seminfo_semmsl=8570(was 7930)Do you want us to apply these changes now? [no]
22. Press Enter.
You will see this prompt if you have accepted the default no and pressed Enter in the above step.
Changes saved into /etc/system.gal.1744
Press <ENTER> to continue.
Administration Guide - Solaris File System iDataAgent
Page 33 of 265
23. Press Enter.
You will see this message if you have accepted the default answer and pressed Enterin step 21.
Although a ’no’ answer can be selected to this question during install, the user should make sure the min requirements (below) for shared memory are met, otherwise the backups may fail (the message in logs is ’could not start the pipeline’).set shmsys:shminfo_shmmax=4199304set shmsys:shminfo_shmmin=1set semsys:shminfo_shmmni=640set semsys:shminfo_shmseg=640set semsys:seminfo_semmns=640set semsys:seminfo_semmni=640set semsys:seminfo_semmsl=640set maxusers=256Press <ENTER> to continue.
24. Type a network TCP port number for the Communications Service (CVD) and press Enter.
Type a network TCP port number for the Client Event Manager Service (EvMgrC) and press Enter.
Every instance of Simpana should use a unique set of network ports to avoid interfering with other instances running on the same machine.The port numbers selected must be from the reserved port number range and have not been registered by another application on this machine.Please enter the port numbers.Port Number for CVD : [8400]Port Number for EvMgrC: [8402]
25. If you do not wish to configure the firewall services, press Enter.
If this computer is separated from the CommServe by firewall(s), type Yes and then press Enter.
For firewall options and configuration instructions, see Firewall Configuration and continue with the installation.
Is there a firewall between this client and the CommServe? [no]
26. Type the fully qualified CommServe host name and press Enter.
Ensure that the CommServe is accessible before typing the name; otherwise the installation will fail.
Please specify hostname of the CommServe below. Make sure the hostname is fully qualified, resolvable by the name services configured on this machine.CommServe Host Name: mycommserve.company.com
27. Press Enter. Commcell Level Global Filters are set through Simpana GUI's Control Panel in order to filter out certain directories or files from backup Commcell-widely. If you turn on the Global filters, they will be effective to the default subclient. There are three options you can choose to set the filters.1) Use Cell level policy2) Always use Global filters3) Do not use Global filtersPlease select how to set the Global Filters for the default subclient? [1]
28. Type the appropriate number to select the Client Group and press Enter.
This screen will be displayed only if Client Groups are configured for the CommCell
Client Group(s) is currently configured on CommServe mycommserve.company.com. Please choose the group(s) that you want to add this client angel.company.com to. The selected group(s) will be marked (X) and can be deselected if you enter the same number again. After you are finished with the selection, select "Done with the Selection".[ ] 1) Unix[ ] 2) DR[a=all n=none r=reverse q=quit d=done >=next <=previous ?=help]sEnter number(s)/one of "a,n,r,q,d,>,<,?" here: 2
29. A confirmation screen will mark your choice with an "X".
Type d for Done, and press Enter.
Client Group(s) is currently configured on CommServe cs.company.com. Please choose the group(s) that you want to add this client client.company.com to. The selected group(s) will be marked (X) and can be deselected if you enter the same number again. After you are finished with the selection, select "Done with the Selection".[ ] 1) Unix[X ] 2) DR[a=all n=none r=reverse q=quit d=done >=next <=previous ?=help]sEnter number(s)/one of "a,n,r,q,d,>,<,?" here: d
30. Enter the number associated with the storage policy you want use and press Enter. Please select one storage policy for this IDA from the list below:
1) SP_StandAloneLibrary2_22) SP_Library3_3
Administration Guide - Solaris File System iDataAgent
Page 34 of 265
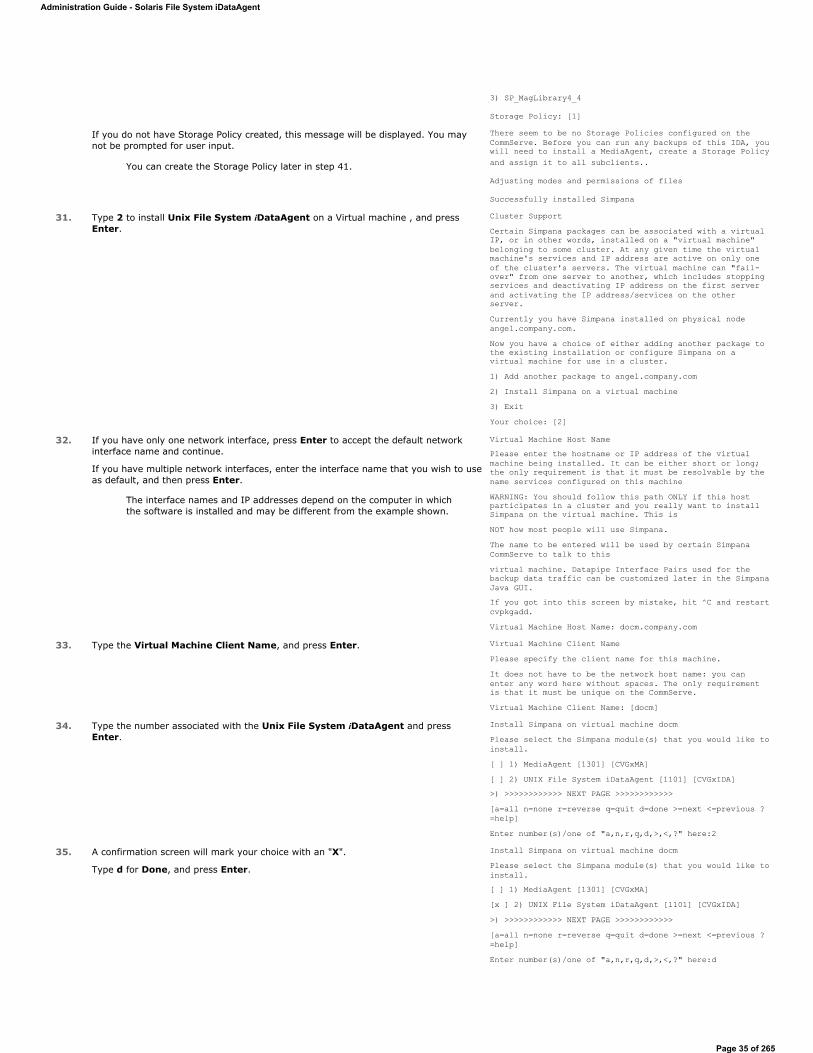
3) SP_MagLibrary4_4
Storage Policy: [1]
If you do not have Storage Policy created, this message will be displayed. You may not be prompted for user input.
You can create the Storage Policy later in step 41.
There seem to be no Storage Policies configured on the CommServe. Before you can run any backups of this IDA, you will need to install a MediaAgent, create a Storage Policy and assign it to all subclients..
Adjusting modes and permissions of files
Successfully installed Simpana
31. Type 2 to install Unix File System iDataAgent on a Virtual machine , and press Enter.
Cluster Support Certain Simpana packages can be associated with a virtual IP, or in other words, installed on a "virtual machine" belonging to some cluster. At any given time the virtual machine's services and IP address are active on only one of the cluster's servers. The virtual machine can "fail-over" from one server to another, which includes stopping services and deactivating IP address on the first server and activating the IP address/services on the other server.Currently you have Simpana installed on physical node angel.company.com.Now you have a choice of either adding another package to the existing installation or configure Simpana on a virtual machine for use in a cluster.1) Add another package to angel.company.com2) Install Simpana on a virtual machine3) ExitYour choice: [2]
32. If you have only one network interface, press Enter to accept the default network interface name and continue.
If you have multiple network interfaces, enter the interface name that you wish to use as default, and then press Enter.
The interface names and IP addresses depend on the computer in which the software is installed and may be different from the example shown.
Virtual Machine Host NamePlease enter the hostname or IP address of the virtual machine being installed. It can be either short or long; the only requirement is that it must be resolvable by the name services configured on this machineWARNING: You should follow this path ONLY if this host participates in a cluster and you really want to install Simpana on the virtual machine. This isNOT how most people will use Simpana.The name to be entered will be used by certain Simpana CommServe to talk to thisvirtual machine. Datapipe Interface Pairs used for the backup data traffic can be customized later in the Simpana Java GUI.If you got into this screen by mistake, hit ^C and restart cvpkgadd.Virtual Machine Host Name: docm.company.com
33. Type the Virtual Machine Client Name, and press Enter. Virtual Machine Client NamePlease specify the client name for this machine.It does not have to be the network host name: you can enter any word here without spaces. The only requirement is that it must be unique on the CommServe.Virtual Machine Client Name: [docm]
34. Type the number associated with the Unix File System iDataAgent and press Enter.
Install Simpana on virtual machine docmPlease select the Simpana module(s) that you would like to install.[ ] 1) MediaAgent [1301] [CVGxMA][ ] 2) UNIX File System iDataAgent [1101] [CVGxIDA]>) >>>>>>>>>>>> NEXT PAGE >>>>>>>>>>>>[a=all n=none r=reverse q=quit d=done >=next <=previous ?=help]Enter number(s)/one of "a,n,r,q,d,>,<,?" here:2
35. A confirmation screen will mark your choice with an "X".
Type d for Done, and press Enter.
Install Simpana on virtual machine docmPlease select the Simpana module(s) that you would like to install.[ ] 1) MediaAgent [1301] [CVGxMA][x ] 2) UNIX File System iDataAgent [1101] [CVGxIDA]>) >>>>>>>>>>>> NEXT PAGE >>>>>>>>>>>>[a=all n=none r=reverse q=quit d=done >=next <=previous ?=help]Enter number(s)/one of "a,n,r,q,d,>,<,?" here:d
Administration Guide - Solaris File System iDataAgent
Page 35 of 265

36. Press Enter. Do you want to use the agents for restore only without consuming licenses? [no]
37. Specify the path for the Job Results directory, and press Enter
If Job Results directory does not exist, it prompts you to create it. Type Yes to create it.
Simpana Job Results Directory Please specify the name for the JobResults directory.Since you are installing Simpana on a virtual machine, the JobResults directory must reside on a shared disk and should have at least 20MB of free space available. The directory will be used to store intermediate data that should be passed from one backup phase to another.JobResults Directory:
38. Enter the number associated with the storage policy you want use and press Enter. Please select one storage policy for this IDA from the list below:
1) SP_StandAloneLibrary2_22) SP_Library3_33) SP_MagLibrary4_4
Storage Policy: [1]
If you do not have Storage Policy created, this message will be displayed. You may not be prompted for user input.
You can create the Storage Policy as shown in step 41.
There seem to be no Storage Policies configured on the CommServe. Before you can run any backups of this IDA, you will need to install a MediaAgent, create a Storage Policy and assign it to all subclients..
Adjusting modes and permissions of files
Successfully installed Simpana
39. Type 4 to the Exit option and press Enter.
The installation is now complete.
Simpana is currently configured on the following virtual/physical machines.Now you have an option of either installing certain Simpana on another virtual machineor adding a new package to the existing installations.1) Add a new package to PM angle(angel.mycompany.com)2) Add a new package to VM docm (docm.mycompany.com)3) Install Simpanapackages on a new virtual machine4) Exit this menuYour choice: [1] 4
40. Type 3 to the Exit option, and press Enter. Install a new Instance?Simpana now supports the concept of instances, each of which can be installed to a separate CommServe and be totally independent of others. Instances are not the same as the virtual machines on a cluster, in fact, you will be given a choice to configure one or more virtual machines later. Contrary to previous releases of Simpana (6.1 and older), all virtual machines installed on the same host now share the same set of binaries and the same set of services.Instances, on the other hand, have unique set of binaries and services and one situation where it is useful is when you want to back up the same host to several CommServes.You already have one instance configured.1) Add agents to existing Instance001 going to CS mycommserve.company.com2) Create a new instance of Simpana3) Exit this menu
Your choice: 3
If you already selected a storage policy in step 30, proceed to the Configuration section.
If you do not have Storage Policy created, follow the procedure given below.
41.1. From the CommCell Browser, navigate to Policies.
2. Right-click the Storage Policies and then click New Storage Policy.
3. Follow the prompts displayed in the Storage Policy Wizard. The required options are mentioned below:
Select the Storage Policy type as Data Protection and Archiving and click Next. Enter the name in the Storage Policy Name box and click Next. From the Library list, click the name of a disk library to which the primary copy should be associated and then click Next.
Ensure that you select a library attached to a MediaAgent operating in the current release.
Administration Guide - Solaris File System iDataAgent
Page 36 of 265
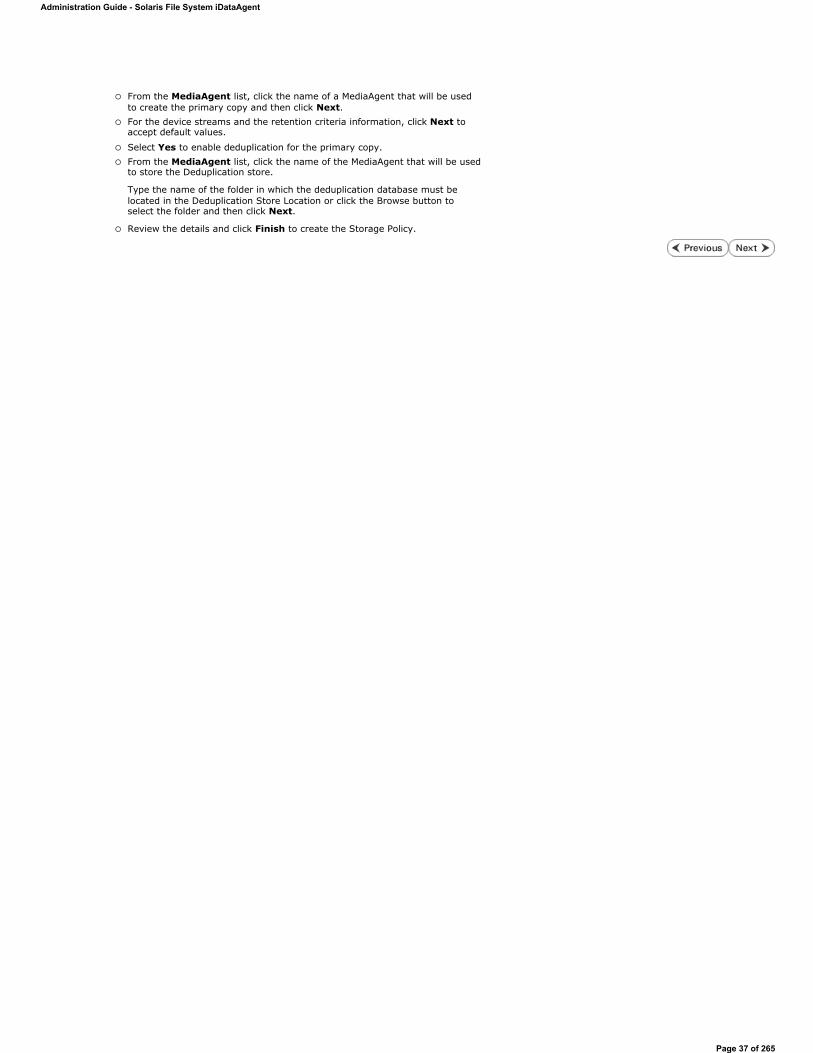
From the MediaAgent list, click the name of a MediaAgent that will be used to create the primary copy and then click Next. For the device streams and the retention criteria information, click Next to accept default values.
Select Yes to enable deduplication for the primary copy. From the MediaAgent list, click the name of the MediaAgent that will be used to store the Deduplication store.
Type the name of the folder in which the deduplication database must be located in the Deduplication Store Location or click the Browse button to select the folder and then click Next.
Review the details and click Finish to create the Storage Policy.
Administration Guide - Solaris File System iDataAgent
Page 37 of 265
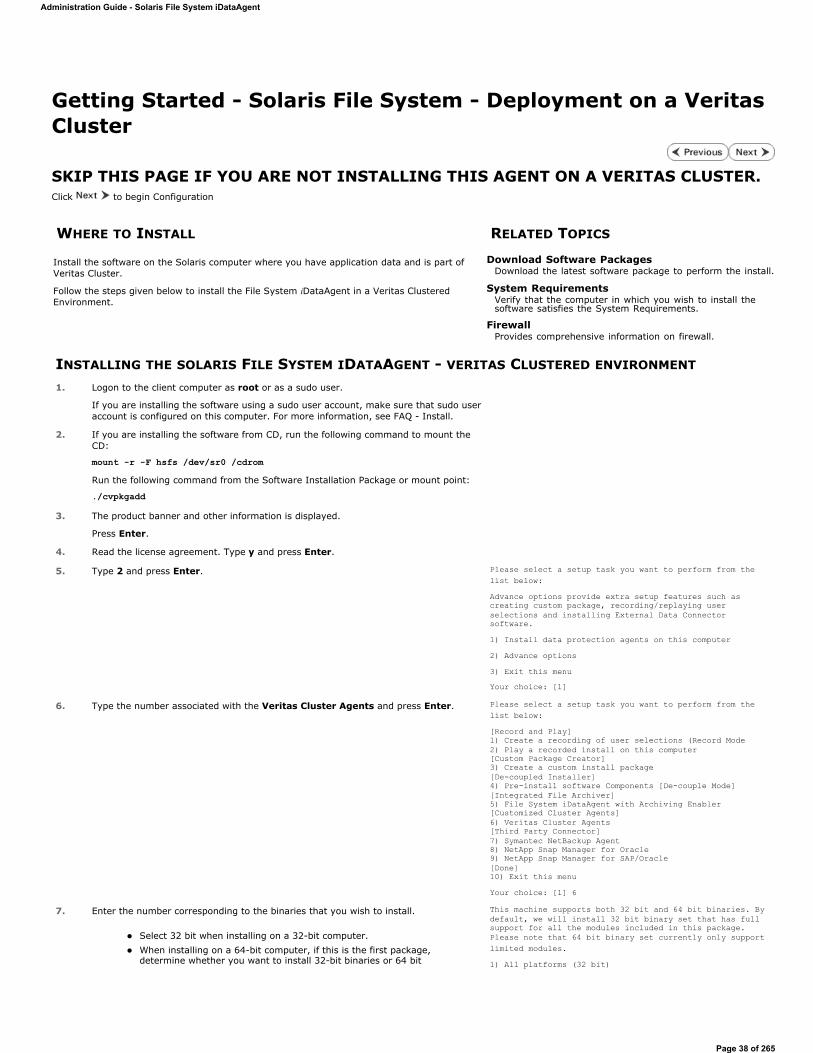
Getting Started - Solaris File System - Deployment on a Veritas Cluster
SKIP THIS PAGE IF YOU ARE NOT INSTALLING THIS AGENT ON A VERITAS CLUSTER.Click to begin Configuration
INSTALLING THE SOLARIS FILE SYSTEM IDATAAGENT - VERITAS CLUSTERED ENVIRONMENT
WHERE TO INSTALL RELATED TOPICS
Install the software on the Solaris computer where you have application data and is part of Veritas Cluster.
Follow the steps given below to install the File System iDataAgent in a Veritas Clustered Environment.
Download Software PackagesDownload the latest software package to perform the install.
System RequirementsVerify that the computer in which you wish to install the software satisfies the System Requirements.
FirewallProvides comprehensive information on firewall.
1. Logon to the client computer as root or as a sudo user.
If you are installing the software using a sudo user account, make sure that sudo user account is configured on this computer. For more information, see FAQ - Install.
2. If you are installing the software from CD, run the following command to mount the CD:
mount -r -F hsfs /dev/sr0 /cdromRun the following command from the Software Installation Package or mount point:
./cvpkgadd3. The product banner and other information is displayed.
Press Enter.
4. Read the license agreement. Type y and press Enter.
5. Type 2 and press Enter. Please select a setup task you want to perform from the list below:Advance options provide extra setup features such as creating custom package, recording/replaying user selections and installing External Data Connector software.1) Install data protection agents on this computer2) Advance options3) Exit this menuYour choice: [1]
6. Type the number associated with the Veritas Cluster Agents and press Enter. Please select a setup task you want to perform from the list below:[Record and Play]1) Create a recording of user selections (Record Mode2) Play a recorded install on this computer[Custom Package Creator]3) Create a custom install package[De-coupled Installer]4) Pre-install software Components [De-couple Mode][Integrated File Archiver]5) File System iDataAgent with Archiving Enabler[Customized Cluster Agents]6) Veritas Cluster Agents[Third Party Connector]7) Symantec NetBackup Agent8) NetApp Snap Manager for Oracle9) NetApp Snap Manager for SAP/Oracle[Done]10) Exit this menuYour choice: [1] 6
7. Enter the number corresponding to the binaries that you wish to install.
Select 32 bit when installing on a 32-bit computer. When installing on a 64-bit computer, if this is the first package, determine whether you want to install 32-bit binaries or 64 bit
This machine supports both 32 bit and 64 bit binaries. By default, we will install 32 bit binary set that has full support for all the modules included in this package. Please note that 64 bit binary set currently only support limited modules.1) All platforms (32 bit)
Administration Guide - Solaris File System iDataAgent
Page 38 of 265
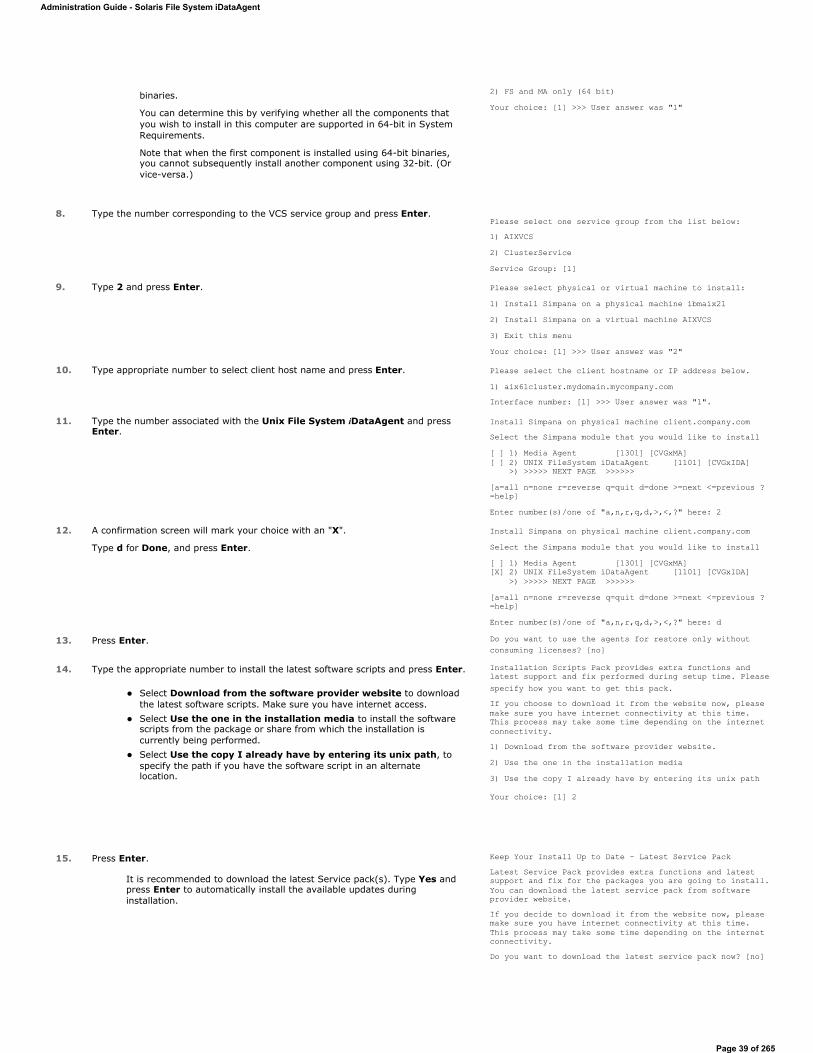
binaries.
You can determine this by verifying whether all the components that you wish to install in this computer are supported in 64-bit in System Requirements.
Note that when the first component is installed using 64-bit binaries, you cannot subsequently install another component using 32-bit. (Or vice-versa.)
2) FS and MA only (64 bit)Your choice: [1] >>> User answer was "1"
8. Type the number corresponding to the VCS service group and press Enter.Please select one service group from the list below:1) AIXVCS2) ClusterServiceService Group: [1]
9. Type 2 and press Enter. Please select physical or virtual machine to install:1) Install Simpana on a physical machine ibmaix212) Install Simpana on a virtual machine AIXVCS3) Exit this menuYour choice: [1] >>> User answer was "2"
10. Type appropriate number to select client host name and press Enter. Please select the client hostname or IP address below.1) aix61cluster.mydomain.mycompany.comInterface number: [1] >>> User answer was "1".
11. Type the number associated with the Unix File System iDataAgent and press Enter.
Install Simpana on physical machine client.company.comSelect the Simpana module that you would like to install[ ] 1) Media Agent [1301] [CVGxMA][ ] 2) UNIX FileSystem iDataAgent [1101] [CVGxIDA] >) >>>>> NEXT PAGE >>>>>>[a=all n=none r=reverse q=quit d=done >=next <=previous ?=help]Enter number(s)/one of "a,n,r,q,d,>,<,?" here: 2
12. A confirmation screen will mark your choice with an "X".
Type d for Done, and press Enter.
Install Simpana on physical machine client.company.comSelect the Simpana module that you would like to install[ ] 1) Media Agent [1301] [CVGxMA][X] 2) UNIX FileSystem iDataAgent [1101] [CVGxIDA] >) >>>>> NEXT PAGE >>>>>>[a=all n=none r=reverse q=quit d=done >=next <=previous ?=help]Enter number(s)/one of "a,n,r,q,d,>,<,?" here: d
13. Press Enter. Do you want to use the agents for restore only without consuming licenses? [no]
14. Type the appropriate number to install the latest software scripts and press Enter.
Select Download from the software provider website to download the latest software scripts. Make sure you have internet access. Select Use the one in the installation media to install the software scripts from the package or share from which the installation is currently being performed. Select Use the copy I already have by entering its unix path, to specify the path if you have the software script in an alternate location.
Installation Scripts Pack provides extra functions and latest support and fix performed during setup time. Please specify how you want to get this pack.If you choose to download it from the website now, please make sure you have internet connectivity at this time. This process may take some time depending on the internet connectivity.1) Download from the software provider website.2) Use the one in the installation media3) Use the copy I already have by entering its unix path
Your choice: [1] 2
15. Press Enter.
It is recommended to download the latest Service pack(s). Type Yes and press Enter to automatically install the available updates during installation.
Keep Your Install Up to Date - Latest Service Pack Latest Service Pack provides extra functions and latest support and fix for the packages you are going to install. You can download the latest service pack from software provider website.If you decide to download it from the website now, please make sure you have internet connectivity at this time. This process may take some time depending on the internet connectivity.Do you want to download the latest service pack now? [no]
Administration Guide - Solaris File System iDataAgent
Page 39 of 265
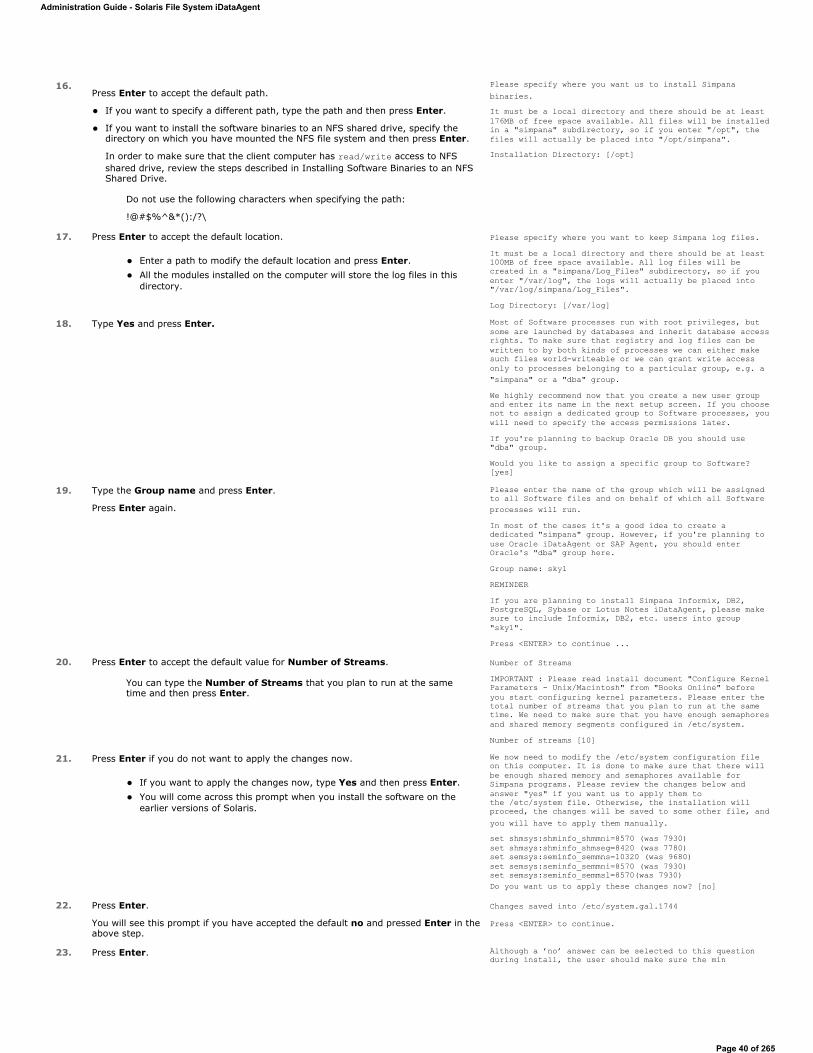
16.Press Enter to accept the default path.
If you want to specify a different path, type the path and then press Enter.
If you want to install the software binaries to an NFS shared drive, specify the directory on which you have mounted the NFS file system and then press Enter.
In order to make sure that the client computer has read/write access to NFS shared drive, review the steps described in Installing Software Binaries to an NFS Shared Drive.
Do not use the following characters when specifying the path:
!@#$%^&*():/?\
Please specify where you want us to install Simpana binaries.It must be a local directory and there should be at least 176MB of free space available. All files will be installed in a "simpana" subdirectory, so if you enter "/opt", the files will actually be placed into "/opt/simpana".Installation Directory: [/opt]
17. Press Enter to accept the default location.
Enter a path to modify the default location and press Enter. All the modules installed on the computer will store the log files in this directory.
Please specify where you want to keep Simpana log files.It must be a local directory and there should be at least 100MB of free space available. All log files will be created in a "simpana/Log_Files" subdirectory, so if you enter "/var/log", the logs will actually be placed into "/var/log/simpana/Log_Files".Log Directory: [/var/log]
18. Type Yes and press Enter. Most of Software processes run with root privileges, but some are launched by databases and inherit database access rights. To make sure that registry and log files can be written to by both kinds of processes we can either make such files world-writeable or we can grant write access only to processes belonging to a particular group, e.g. a "simpana" or a "dba" group.We highly recommend now that you create a new user group and enter its name in the next setup screen. If you choose not to assign a dedicated group to Software processes, you will need to specify the access permissions later.If you're planning to backup Oracle DB you should use "dba" group.Would you like to assign a specific group to Software? [yes]
19. Type the Group name and press Enter.
Press Enter again.
Please enter the name of the group which will be assigned to all Software files and on behalf of which all Software processes will run.In most of the cases it's a good idea to create a dedicated "simpana" group. However, if you're planning to use Oracle iDataAgent or SAP Agent, you should enter Oracle's "dba" group here.Group name: sky1REMINDERIf you are planning to install Simpana Informix, DB2, PostgreSQL, Sybase or Lotus Notes iDataAgent, please make sure to include Informix, DB2, etc. users into group "sky1".Press <ENTER> to continue ...
20. Press Enter to accept the default value for Number of Streams.
You can type the Number of Streams that you plan to run at the same time and then press Enter.
Number of StreamsIMPORTANT : Please read install document "Configure Kernel Parameters - Unix/Macintosh" from "Books Online" before you start configuring kernel parameters. Please enter the total number of streams that you plan to run at the same time. We need to make sure that you have enough semaphores and shared memory segments configured in /etc/system.Number of streams [10]
21. Press Enter if you do not want to apply the changes now.
If you want to apply the changes now, type Yes and then press Enter. You will come across this prompt when you install the software on the earlier versions of Solaris.
We now need to modify the /etc/system configuration file on this computer. It is done to make sure that there will be enough shared memory and semaphores available for Simpana programs. Please review the changes below and answer "yes" if you want us to apply them to the /etc/system file. Otherwise, the installation will proceed, the changes will be saved to some other file, and you will have to apply them manually.set shmsys:shminfo_shmmni=8570 (was 7930)set shmsys:shminfo_shmseg=8420 (was 7780)set semsys:seminfo_semmns=10320 (was 9680)set semsys:seminfo_semmni=8570 (was 7930)set semsys:seminfo_semmsl=8570(was 7930)Do you want us to apply these changes now? [no]
22. Press Enter.
You will see this prompt if you have accepted the default no and pressed Enter in the above step.
Changes saved into /etc/system.gal.1744
Press <ENTER> to continue.
23. Press Enter. Although a ’no’ answer can be selected to this question during install, the user should make sure the min
Administration Guide - Solaris File System iDataAgent
Page 40 of 265
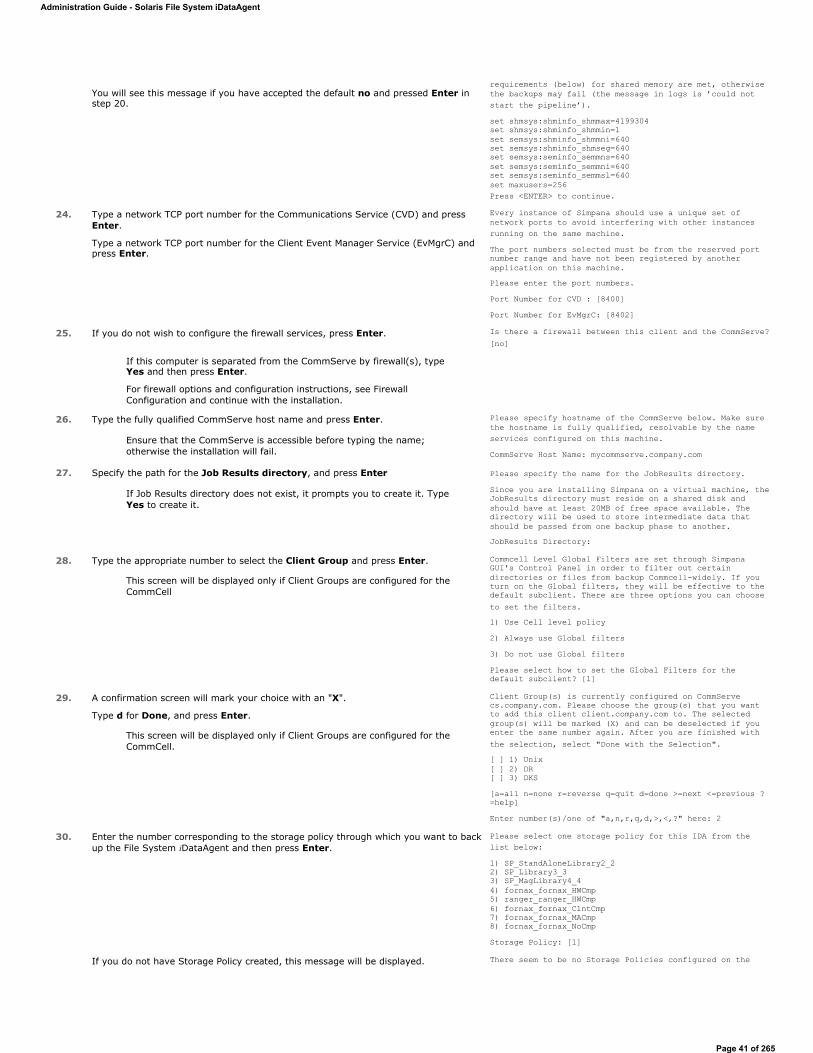
You will see this message if you have accepted the default no and pressed Enter in step 20.
requirements (below) for shared memory are met, otherwise the backups may fail (the message in logs is ’could not start the pipeline’).set shmsys:shminfo_shmmax=4199304set shmsys:shminfo_shmmin=1set semsys:shminfo_shmmni=640set semsys:shminfo_shmseg=640set semsys:seminfo_semmns=640set semsys:seminfo_semmni=640set semsys:seminfo_semmsl=640set maxusers=256Press <ENTER> to continue.
24. Type a network TCP port number for the Communications Service (CVD) and press Enter.
Type a network TCP port number for the Client Event Manager Service (EvMgrC) and press Enter.
Every instance of Simpana should use a unique set of network ports to avoid interfering with other instances running on the same machine.The port numbers selected must be from the reserved port number range and have not been registered by another application on this machine.Please enter the port numbers.Port Number for CVD : [8400]Port Number for EvMgrC: [8402]
25. If you do not wish to configure the firewall services, press Enter.
If this computer is separated from the CommServe by firewall(s), type Yes and then press Enter.
For firewall options and configuration instructions, see Firewall Configuration and continue with the installation.
Is there a firewall between this client and the CommServe? [no]
26. Type the fully qualified CommServe host name and press Enter.
Ensure that the CommServe is accessible before typing the name; otherwise the installation will fail.
Please specify hostname of the CommServe below. Make sure the hostname is fully qualified, resolvable by the name services configured on this machine.CommServe Host Name: mycommserve.company.com
27. Specify the path for the Job Results directory, and press Enter
If Job Results directory does not exist, it prompts you to create it. Type Yes to create it.
Please specify the name for the JobResults directory.Since you are installing Simpana on a virtual machine, the JobResults directory must reside on a shared disk and should have at least 20MB of free space available. The directory will be used to store intermediate data that should be passed from one backup phase to another.JobResults Directory:
28. Type the appropriate number to select the Client Group and press Enter.
This screen will be displayed only if Client Groups are configured for the CommCell
Commcell Level Global Filters are set through Simpana GUI's Control Panel in order to filter out certain directories or files from backup Commcell-widely. If you turn on the Global filters, they will be effective to the default subclient. There are three options you can choose to set the filters.1) Use Cell level policy2) Always use Global filters3) Do not use Global filtersPlease select how to set the Global Filters for the default subclient? [1]
29. A confirmation screen will mark your choice with an "X".
Type d for Done, and press Enter.
This screen will be displayed only if Client Groups are configured for the CommCell.
Client Group(s) is currently configured on CommServe cs.company.com. Please choose the group(s) that you want to add this client client.company.com to. The selected group(s) will be marked (X) and can be deselected if you enter the same number again. After you are finished with the selection, select "Done with the Selection".[ ] 1) Unix[ ] 2) DR[ ] 3) DKS [a=all n=none r=reverse q=quit d=done >=next <=previous ?=help]Enter number(s)/one of "a,n,r,q,d,>,<,?" here: 2
30. Enter the number corresponding to the storage policy through which you want to back up the File System iDataAgent and then press Enter.
Please select one storage policy for this IDA from the list below:1) SP_StandAloneLibrary2_22) SP_Library3_33) SP_MagLibrary4_44) fornax_fornax_HWCmp5) ranger_ranger_HWCmp6) fornax_fornax_ClntCmp7) fornax_fornax_MACmp8) fornax_fornax_NoCmpStorage Policy: [1]
If you do not have Storage Policy created, this message will be displayed. There seem to be no Storage Policies configured on the
Administration Guide - Solaris File System iDataAgent
Page 41 of 265
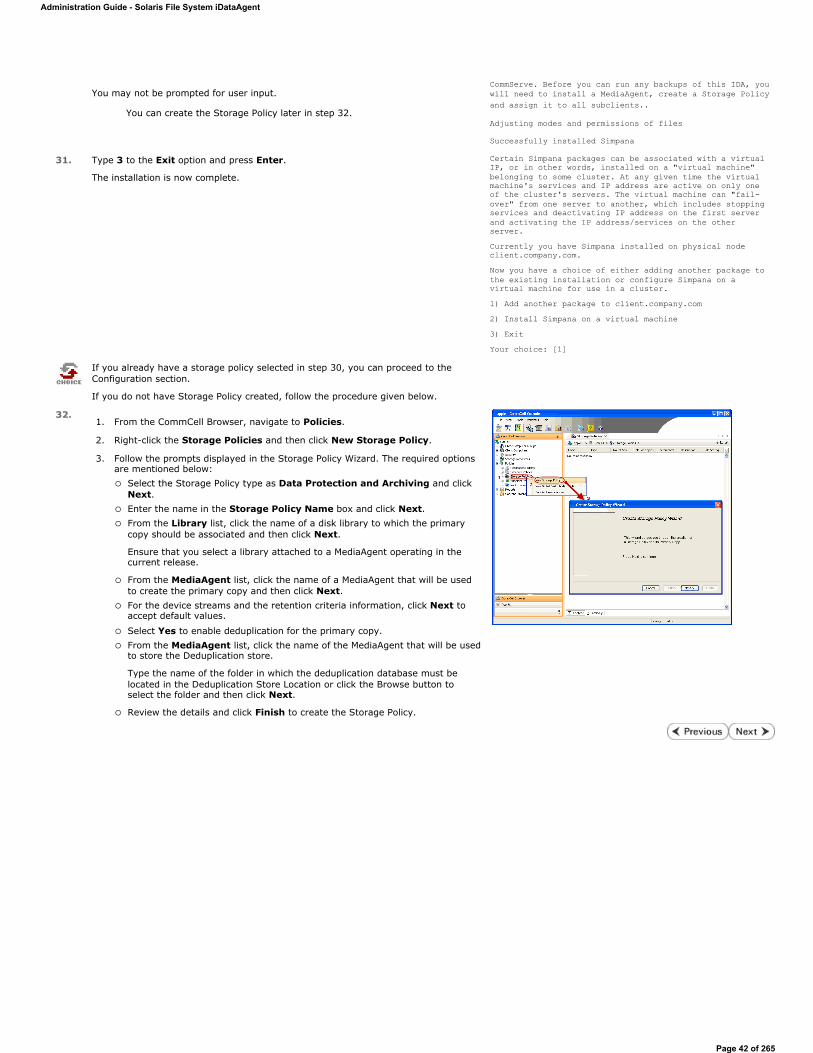
You may not be prompted for user input.
You can create the Storage Policy later in step 32.
CommServe. Before you can run any backups of this IDA, you will need to install a MediaAgent, create a Storage Policy and assign it to all subclients..
Adjusting modes and permissions of files
Successfully installed Simpana
31. Type 3 to the Exit option and press Enter.
The installation is now complete.
Certain Simpana packages can be associated with a virtual IP, or in other words, installed on a "virtual machine" belonging to some cluster. At any given time the virtual machine's services and IP address are active on only one of the cluster's servers. The virtual machine can "fail-over" from one server to another, which includes stopping services and deactivating IP address on the first server and activating the IP address/services on the other server. Currently you have Simpana installed on physical node client.company.com.Now you have a choice of either adding another package to the existing installation or configure Simpana on a virtual machine for use in a cluster.1) Add another package to client.company.com2) Install Simpana on a virtual machine3) ExitYour choice: [1]
If you already have a storage policy selected in step 30, you can proceed to the Configuration section.
If you do not have Storage Policy created, follow the procedure given below.
32.1. From the CommCell Browser, navigate to Policies.
2. Right-click the Storage Policies and then click New Storage Policy.
3. Follow the prompts displayed in the Storage Policy Wizard. The required options are mentioned below:
Select the Storage Policy type as Data Protection and Archiving and click Next. Enter the name in the Storage Policy Name box and click Next. From the Library list, click the name of a disk library to which the primary copy should be associated and then click Next.
Ensure that you select a library attached to a MediaAgent operating in the current release.
From the MediaAgent list, click the name of a MediaAgent that will be used to create the primary copy and then click Next. For the device streams and the retention criteria information, click Next to accept default values.
Select Yes to enable deduplication for the primary copy. From the MediaAgent list, click the name of the MediaAgent that will be used to store the Deduplication store.
Type the name of the folder in which the deduplication database must be located in the Deduplication Store Location or click the Browse button to select the folder and then click Next.
Review the details and click Finish to create the Storage Policy.
Administration Guide - Solaris File System iDataAgent
Page 42 of 265
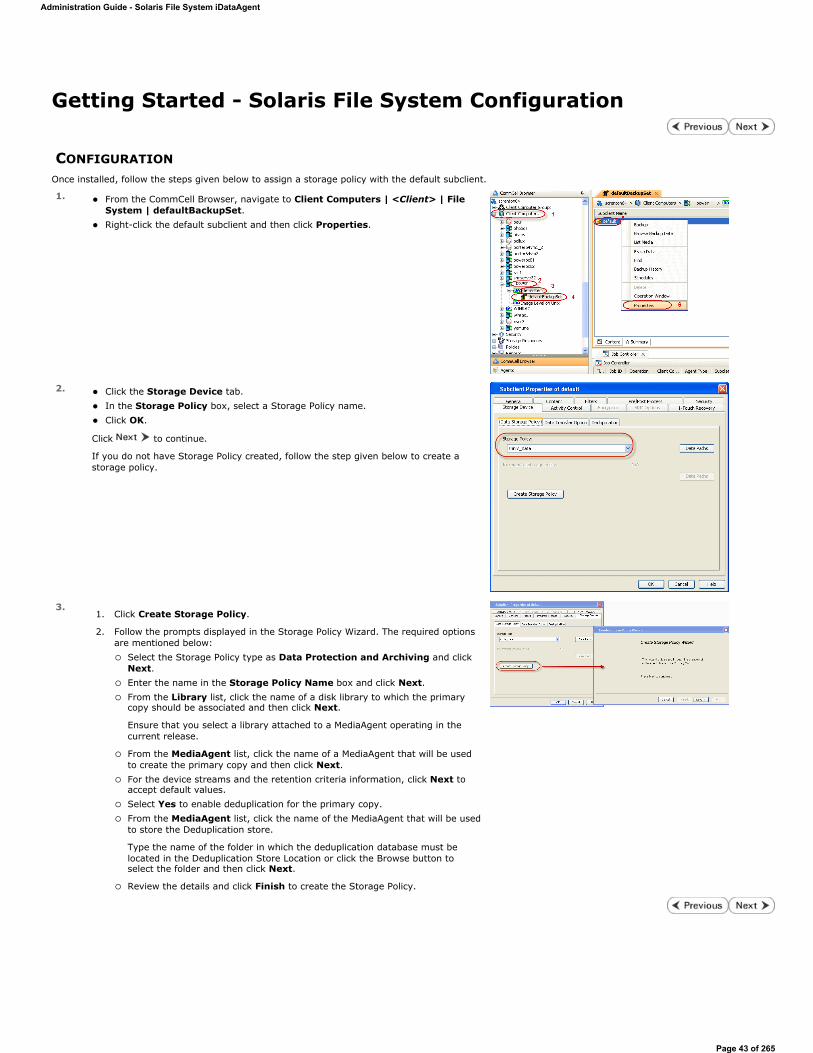
Getting Started - Solaris File System Configuration
CONFIGURATIONOnce installed, follow the steps given below to assign a storage policy with the default subclient.
1. From the CommCell Browser, navigate to Client Computers | <Client> | File System | defaultBackupSet. Right-click the default subclient and then click Properties.
2. Click the Storage Device tab. In the Storage Policy box, select a Storage Policy name. Click OK.
Click to continue.
If you do not have Storage Policy created, follow the step given below to create a storage policy.
3.1. Click Create Storage Policy.
2. Follow the prompts displayed in the Storage Policy Wizard. The required options are mentioned below:
Select the Storage Policy type as Data Protection and Archiving and click Next. Enter the name in the Storage Policy Name box and click Next. From the Library list, click the name of a disk library to which the primary copy should be associated and then click Next.
Ensure that you select a library attached to a MediaAgent operating in the current release.
From the MediaAgent list, click the name of a MediaAgent that will be used to create the primary copy and then click Next. For the device streams and the retention criteria information, click Next to accept default values. Select Yes to enable deduplication for the primary copy. From the MediaAgent list, click the name of the MediaAgent that will be used to store the Deduplication store.
Type the name of the folder in which the deduplication database must be located in the Deduplication Store Location or click the Browse button to select the folder and then click Next.
Review the details and click Finish to create the Storage Policy.
Administration Guide - Solaris File System iDataAgent
Page 43 of 265
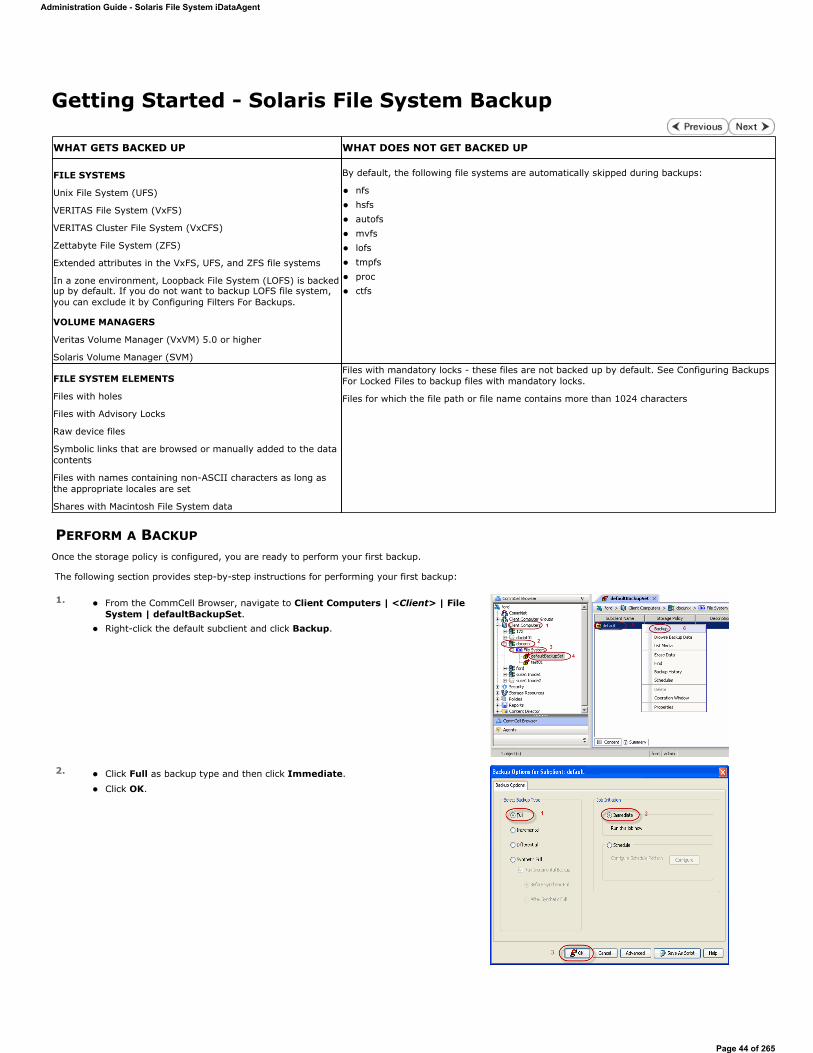
Getting Started - Solaris File System Backup
PERFORM A BACKUPOnce the storage policy is configured, you are ready to perform your first backup.
The following section provides step-by-step instructions for performing your first backup:
WHAT GETS BACKED UP WHAT DOES NOT GET BACKED UP
FILE SYSTEMS
Unix File System (UFS)
VERITAS File System (VxFS)
VERITAS Cluster File System (VxCFS)
Zettabyte File System (ZFS)
Extended attributes in the VxFS, UFS, and ZFS file systems
In a zone environment, Loopback File System (LOFS) is backed up by default. If you do not want to backup LOFS file system, you can exclude it by Configuring Filters For Backups.
VOLUME MANAGERS
Veritas Volume Manager (VxVM) 5.0 or higher
Solaris Volume Manager (SVM)
By default, the following file systems are automatically skipped during backups:
nfs hsfs autofs mvfs lofs tmpfs proc ctfs
FILE SYSTEM ELEMENTS
Files with holes
Files with Advisory Locks
Raw device files
Symbolic links that are browsed or manually added to the data contents
Files with names containing non-ASCII characters as long as the appropriate locales are set
Shares with Macintosh File System data
Files with mandatory locks - these files are not backed up by default. See Configuring Backups For Locked Files to backup files with mandatory locks.
Files for which the file path or file name contains more than 1024 characters
1. From the CommCell Browser, navigate to Client Computers | <Client> | File System | defaultBackupSet. Right-click the default subclient and click Backup.
2. Click Full as backup type and then click Immediate.
Click OK.
Administration Guide - Solaris File System iDataAgent
Page 44 of 265
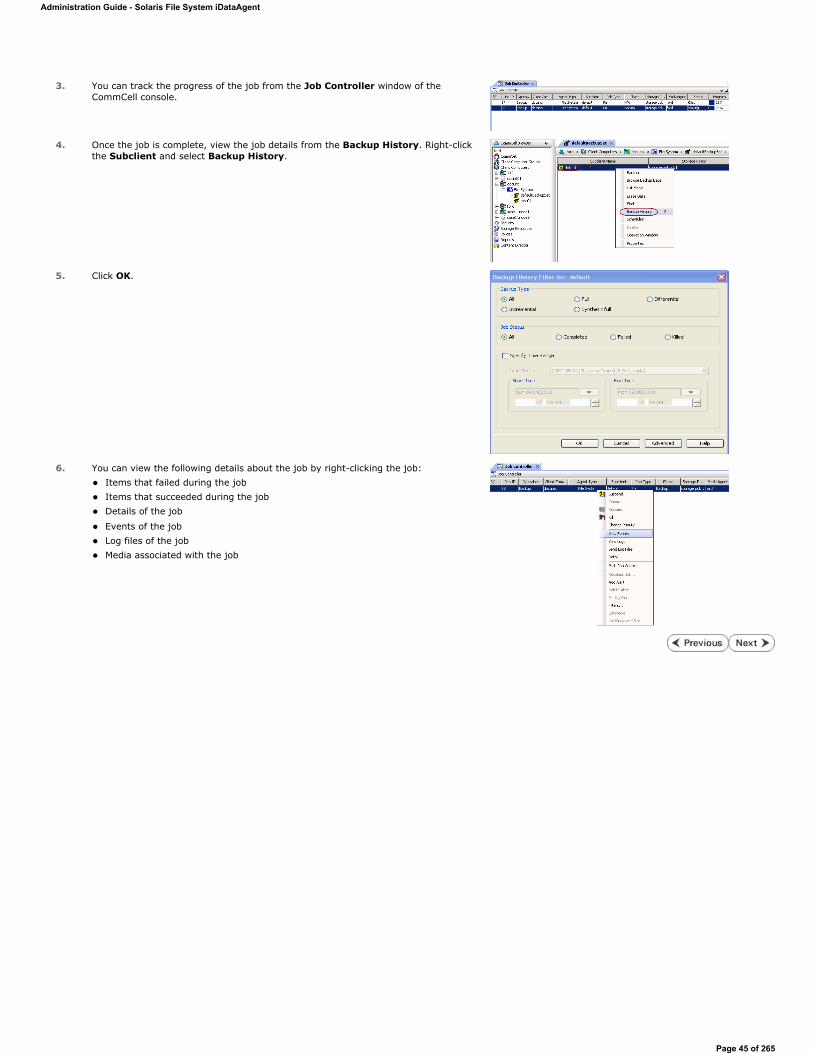
3. You can track the progress of the job from the Job Controller window of the CommCell console.
4. Once the job is complete, view the job details from the Backup History. Right-click the Subclient and select Backup History.
5. Click OK.
6. You can view the following details about the job by right-clicking the job: Items that failed during the job Items that succeeded during the job Details of the job
Events of the job Log files of the job Media associated with the job
Administration Guide - Solaris File System iDataAgent
Page 45 of 265
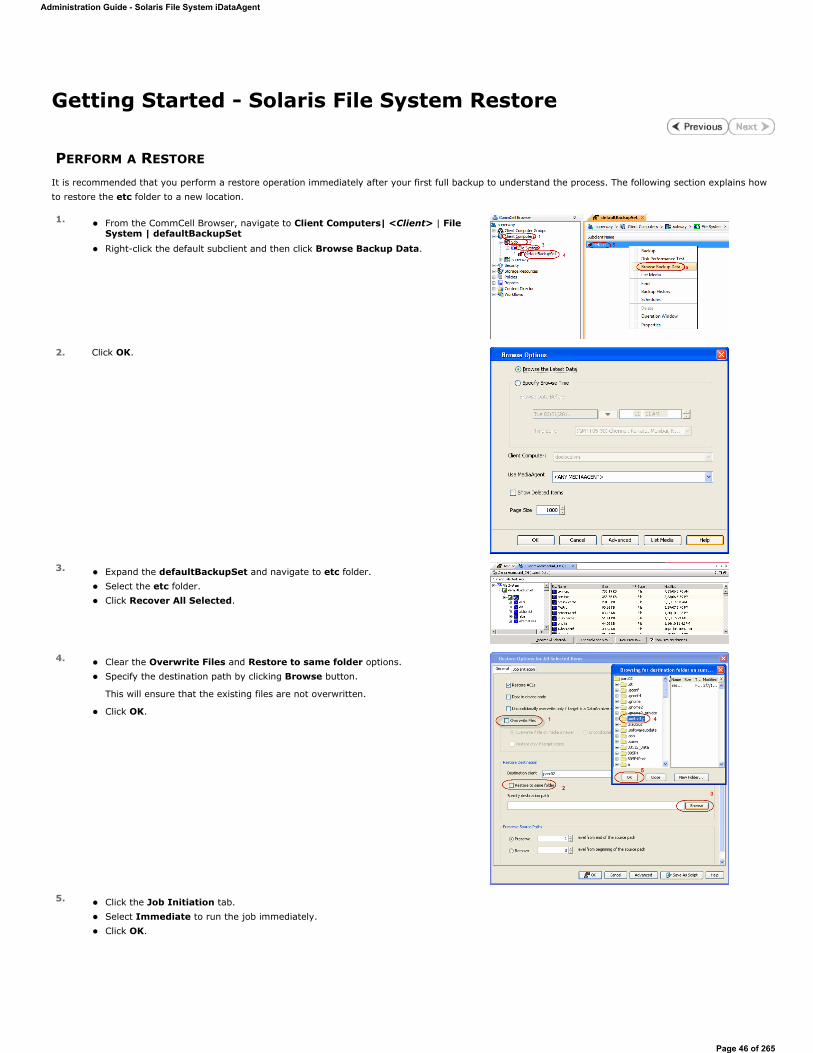
Getting Started - Solaris File System Restore
PERFORM A RESTORE
It is recommended that you perform a restore operation immediately after your first full backup to understand the process. The following section explains how to restore the etc folder to a new location.
1. From the CommCell Browser, navigate to Client Computers| <Client> | File System | defaultBackupSetRight-click the default subclient and then click Browse Backup Data.
2. Click OK.
3. Expand the defaultBackupSet and navigate to etc folder. Select the etc folder. Click Recover All Selected.
4. Clear the Overwrite Files and Restore to same folder options. Specify the destination path by clicking Browse button.
This will ensure that the existing files are not overwritten.
Click OK.
5. Click the Job Initiation tab. Select Immediate to run the job immediately. Click OK.
Administration Guide - Solaris File System iDataAgent
Page 46 of 265
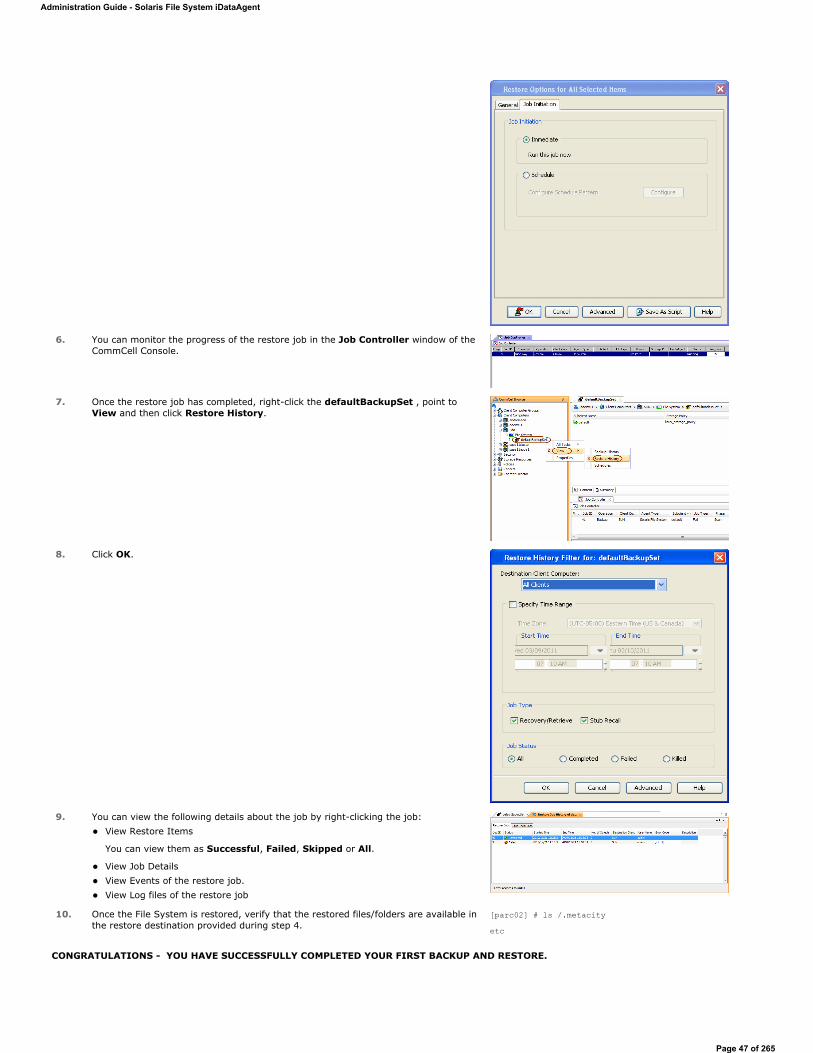
CONGRATULATIONS - YOU HAVE SUCCESSFULLY COMPLETED YOUR FIRST BACKUP AND RESTORE.
6. You can monitor the progress of the restore job in the Job Controller window of the CommCell Console.
7. Once the restore job has completed, right-click the defaultBackupSet , point to View and then click Restore History.
8. Click OK.
9. You can view the following details about the job by right-clicking the job: View Restore Items
You can view them as Successful, Failed, Skipped or All.
View Job Details View Events of the restore job. View Log files of the restore job
10. Once the File System is restored, verify that the restored files/folders are available in the restore destination provided during step 4.
[parc02] # ls /.metacityetc
Administration Guide - Solaris File System iDataAgent
Page 47 of 265
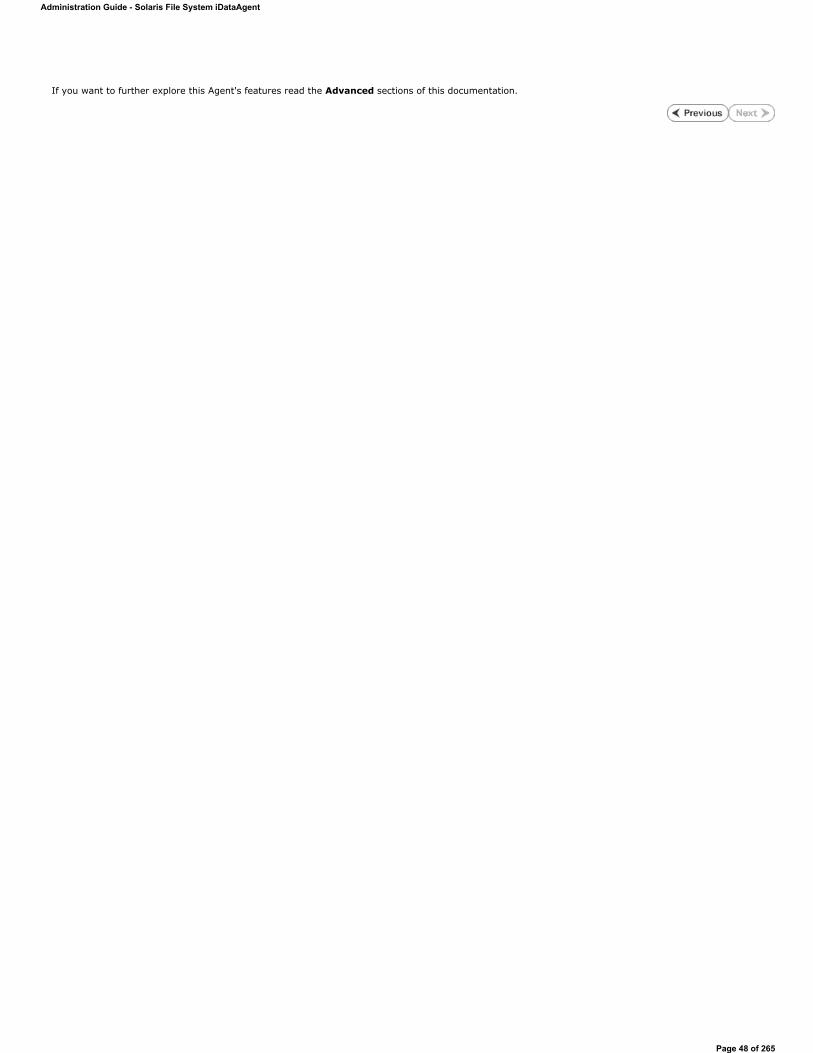
If you want to further explore this Agent's features read the Advanced sections of this documentation.
Administration Guide - Solaris File System iDataAgent
Page 48 of 265
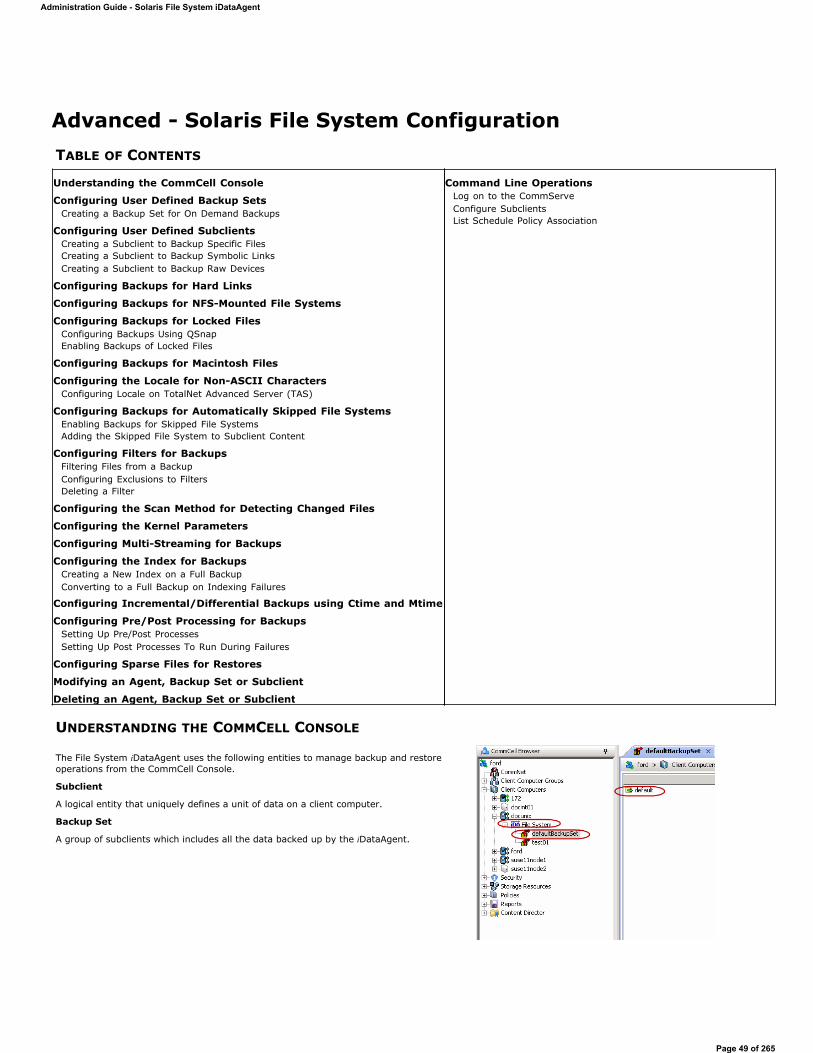
Advanced - Solaris File System ConfigurationTABLE OF CONTENTS
UNDERSTANDING THE COMMCELL CONSOLE
Understanding the CommCell Console
Configuring User Defined Backup SetsCreating a Backup Set for On Demand Backups
Configuring User Defined SubclientsCreating a Subclient to Backup Specific FilesCreating a Subclient to Backup Symbolic LinksCreating a Subclient to Backup Raw Devices
Configuring Backups for Hard Links
Configuring Backups for NFS-Mounted File Systems
Configuring Backups for Locked FilesConfiguring Backups Using QSnapEnabling Backups of Locked Files
Configuring Backups for Macintosh Files
Configuring the Locale for Non-ASCII CharactersConfiguring Locale on TotalNet Advanced Server (TAS)
Configuring Backups for Automatically Skipped File SystemsEnabling Backups for Skipped File SystemsAdding the Skipped File System to Subclient Content
Configuring Filters for BackupsFiltering Files from a BackupConfiguring Exclusions to FiltersDeleting a Filter
Configuring the Scan Method for Detecting Changed Files
Configuring the Kernel Parameters
Configuring Multi-Streaming for Backups
Configuring the Index for BackupsCreating a New Index on a Full BackupConverting to a Full Backup on Indexing Failures
Configuring Incremental/Differential Backups using Ctime and Mtime
Configuring Pre/Post Processing for BackupsSetting Up Pre/Post ProcessesSetting Up Post Processes To Run During Failures
Configuring Sparse Files for Restores
Modifying an Agent, Backup Set or Subclient
Deleting an Agent, Backup Set or Subclient
Command Line OperationsLog on to the CommServeConfigure SubclientsList Schedule Policy Association
The File System iDataAgent uses the following entities to manage backup and restore operations from the CommCell Console.
Subclient
A logical entity that uniquely defines a unit of data on a client computer.
Backup Set
A group of subclients which includes all the data backed up by the iDataAgent.
Administration Guide - Solaris File System iDataAgent
Page 49 of 265
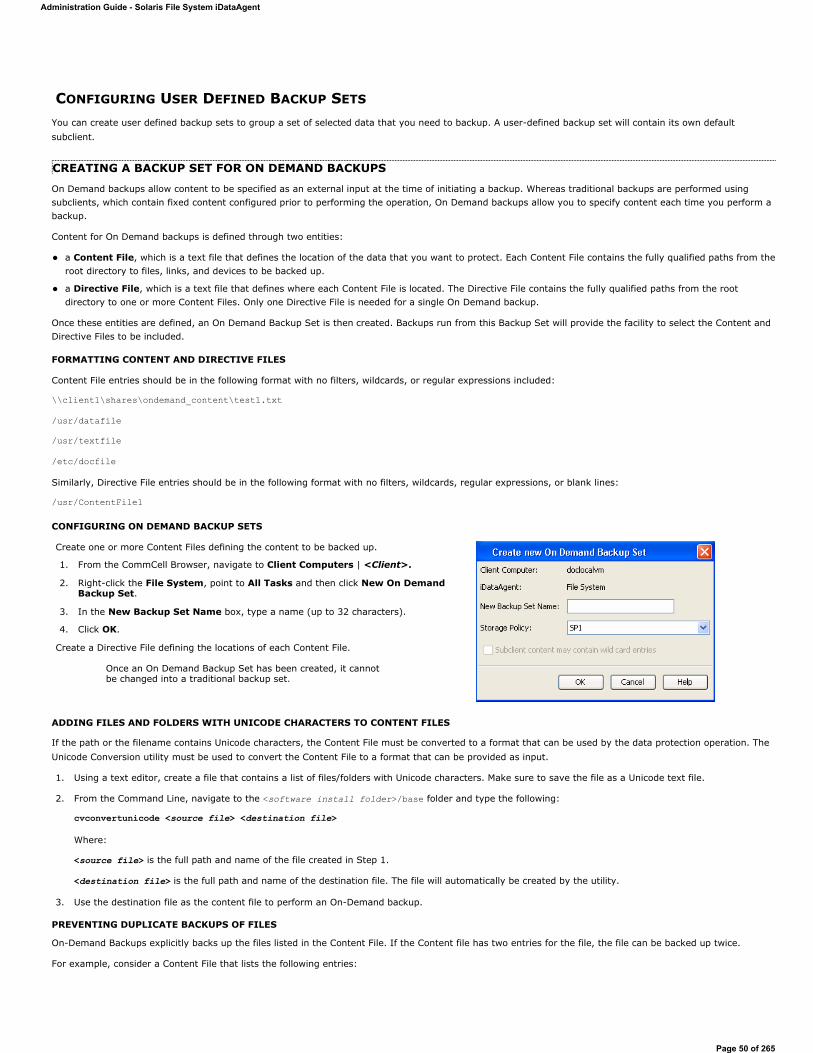
CONFIGURING USER DEFINED BACKUP SETS
You can create user defined backup sets to group a set of selected data that you need to backup. A user-defined backup set will contain its own default subclient.
CREATING A BACKUP SET FOR ON DEMAND BACKUPS
On Demand backups allow content to be specified as an external input at the time of initiating a backup. Whereas traditional backups are performed using subclients, which contain fixed content configured prior to performing the operation, On Demand backups allow you to specify content each time you perform a backup.
Content for On Demand backups is defined through two entities:
a Content File, which is a text file that defines the location of the data that you want to protect. Each Content File contains the fully qualified paths from the root directory to files, links, and devices to be backed up.
a Directive File, which is a text file that defines where each Content File is located. The Directive File contains the fully qualified paths from the root directory to one or more Content Files. Only one Directive File is needed for a single On Demand backup.
Once these entities are defined, an On Demand Backup Set is then created. Backups run from this Backup Set will provide the facility to select the Content and Directive Files to be included.
FORMATTING CONTENT AND DIRECTIVE FILES
Content File entries should be in the following format with no filters, wildcards, or regular expressions included:
\\client1\shares\ondemand_content\test1.txt
/usr/datafile
/usr/textfile
/etc/docfile
Similarly, Directive File entries should be in the following format with no filters, wildcards, regular expressions, or blank lines:
/usr/ContentFile1
CONFIGURING ON DEMAND BACKUP SETS
ADDING FILES AND FOLDERS WITH UNICODE CHARACTERS TO CONTENT FILES
If the path or the filename contains Unicode characters, the Content File must be converted to a format that can be used by the data protection operation. The Unicode Conversion utility must be used to convert the Content File to a format that can be provided as input.
1. Using a text editor, create a file that contains a list of files/folders with Unicode characters. Make sure to save the file as a Unicode text file.
2. From the Command Line, navigate to the <software install folder>/base folder and type the following:
cvconvertunicode <source file> <destination file>
Where:
<source file> is the full path and name of the file created in Step 1.
<destination file> is the full path and name of the destination file. The file will automatically be created by the utility.
3. Use the destination file as the content file to perform an On-Demand backup.
PREVENTING DUPLICATE BACKUPS OF FILES
On-Demand Backups explicitly backs up the files listed in the Content File. If the Content file has two entries for the file, the file can be backed up twice.
For example, consider a Content File that lists the following entries:
Create one or more Content Files defining the content to be backed up.
1. From the CommCell Browser, navigate to Client Computers | <Client>.
2. Right-click the File System, point to All Tasks and then click New On Demand Backup Set.
3. In the New Backup Set Name box, type a name (up to 32 characters).
4. Click OK.
Create a Directive File defining the locations of each Content File.
Once an On Demand Backup Set has been created, it cannot be changed into a traditional backup set.
Administration Guide - Solaris File System iDataAgent
Page 50 of 265
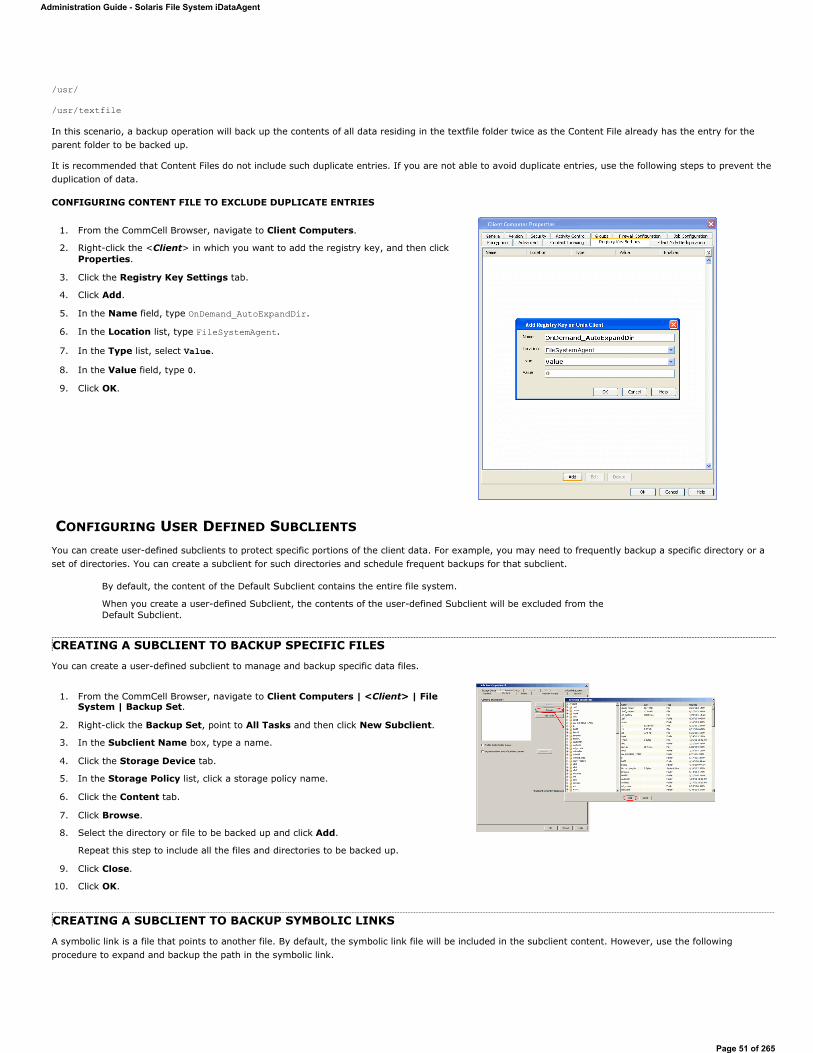
/usr/
/usr/textfile
In this scenario, a backup operation will back up the contents of all data residing in the textfile folder twice as the Content File already has the entry for the parent folder to be backed up.
It is recommended that Content Files do not include such duplicate entries. If you are not able to avoid duplicate entries, use the following steps to prevent the duplication of data.
CONFIGURING CONTENT FILE TO EXCLUDE DUPLICATE ENTRIES
CONFIGURING USER DEFINED SUBCLIENTS
You can create user-defined subclients to protect specific portions of the client data. For example, you may need to frequently backup a specific directory or a set of directories. You can create a subclient for such directories and schedule frequent backups for that subclient.
CREATING A SUBCLIENT TO BACKUP SPECIFIC FILES
You can create a user-defined subclient to manage and backup specific data files.
CREATING A SUBCLIENT TO BACKUP SYMBOLIC LINKS
A symbolic link is a file that points to another file. By default, the symbolic link file will be included in the subclient content. However, use the following procedure to expand and backup the path in the symbolic link.
1. From the CommCell Browser, navigate to Client Computers.
2. Right-click the <Client> in which you want to add the registry key, and then click Properties.
3. Click the Registry Key Settings tab.
4. Click Add.
5. In the Name field, type OnDemand_AutoExpandDir.
6. In the Location list, type FileSystemAgent.
7. In the Type list, select Value.
8. In the Value field, type 0.
9. Click OK.
By default, the content of the Default Subclient contains the entire file system.
When you create a user-defined Subclient, the contents of the user-defined Subclient will be excluded from the Default Subclient.
1. From the CommCell Browser, navigate to Client Computers | <Client> | File System | Backup Set.
2. Right-click the Backup Set, point to All Tasks and then click New Subclient.
3. In the Subclient Name box, type a name.
4. Click the Storage Device tab.
5. In the Storage Policy list, click a storage policy name.
6. Click the Content tab.
7. Click Browse.
8. Select the directory or file to be backed up and click Add.
Repeat this step to include all the files and directories to be backed up.
9. Click Close.
10. Click OK.
Administration Guide - Solaris File System iDataAgent
Page 51 of 265
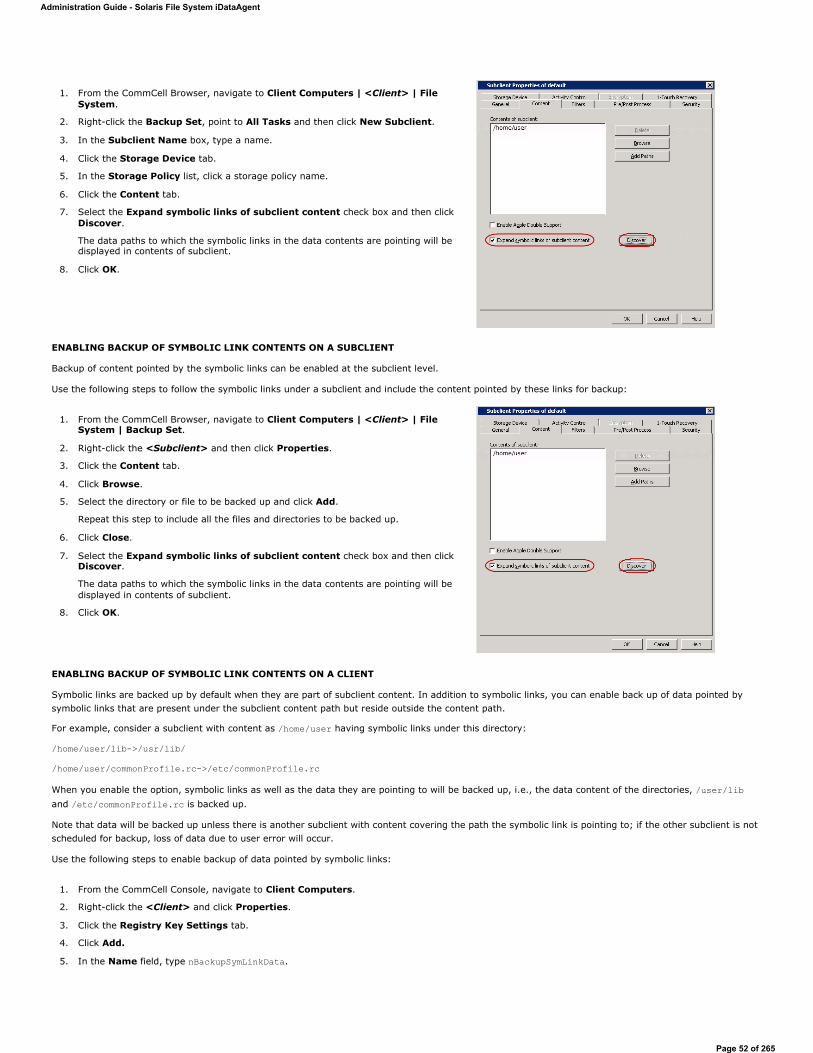
ENABLING BACKUP OF SYMBOLIC LINK CONTENTS ON A SUBCLIENT
Backup of content pointed by the symbolic links can be enabled at the subclient level.
Use the following steps to follow the symbolic links under a subclient and include the content pointed by these links for backup:
ENABLING BACKUP OF SYMBOLIC LINK CONTENTS ON A CLIENT
Symbolic links are backed up by default when they are part of subclient content. In addition to symbolic links, you can enable back up of data pointed by symbolic links that are present under the subclient content path but reside outside the content path.
For example, consider a subclient with content as /home/user having symbolic links under this directory:
/home/user/lib->/usr/lib/
/home/user/commonProfile.rc->/etc/commonProfile.rc
When you enable the option, symbolic links as well as the data they are pointing to will be backed up, i.e., the data content of the directories, /user/liband /etc/commonProfile.rc is backed up.
Note that data will be backed up unless there is another subclient with content covering the path the symbolic link is pointing to; if the other subclient is not scheduled for backup, loss of data due to user error will occur.
Use the following steps to enable backup of data pointed by symbolic links:
1. From the CommCell Browser, navigate to Client Computers | <Client> | File System.
2. Right-click the Backup Set, point to All Tasks and then click New Subclient.
3. In the Subclient Name box, type a name.
4. Click the Storage Device tab.
5. In the Storage Policy list, click a storage policy name.
6. Click the Content tab.
7. Select the Expand symbolic links of subclient content check box and then click Discover.
The data paths to which the symbolic links in the data contents are pointing will be displayed in contents of subclient.
8. Click OK.
1. From the CommCell Browser, navigate to Client Computers | <Client> | File System | Backup Set.
2. Right-click the <Subclient> and then click Properties.
3. Click the Content tab.
4. Click Browse.
5. Select the directory or file to be backed up and click Add.
Repeat this step to include all the files and directories to be backed up.
6. Click Close.
7. Select the Expand symbolic links of subclient content check box and then click Discover.
The data paths to which the symbolic links in the data contents are pointing will be displayed in contents of subclient.
8. Click OK.
1. From the CommCell Console, navigate to Client Computers.
2. Right-click the <Client> and click Properties.
3. Click the Registry Key Settings tab.
4. Click Add.
5. In the Name field, type nBackupSymLinkData.
Administration Guide - Solaris File System iDataAgent
Page 52 of 265
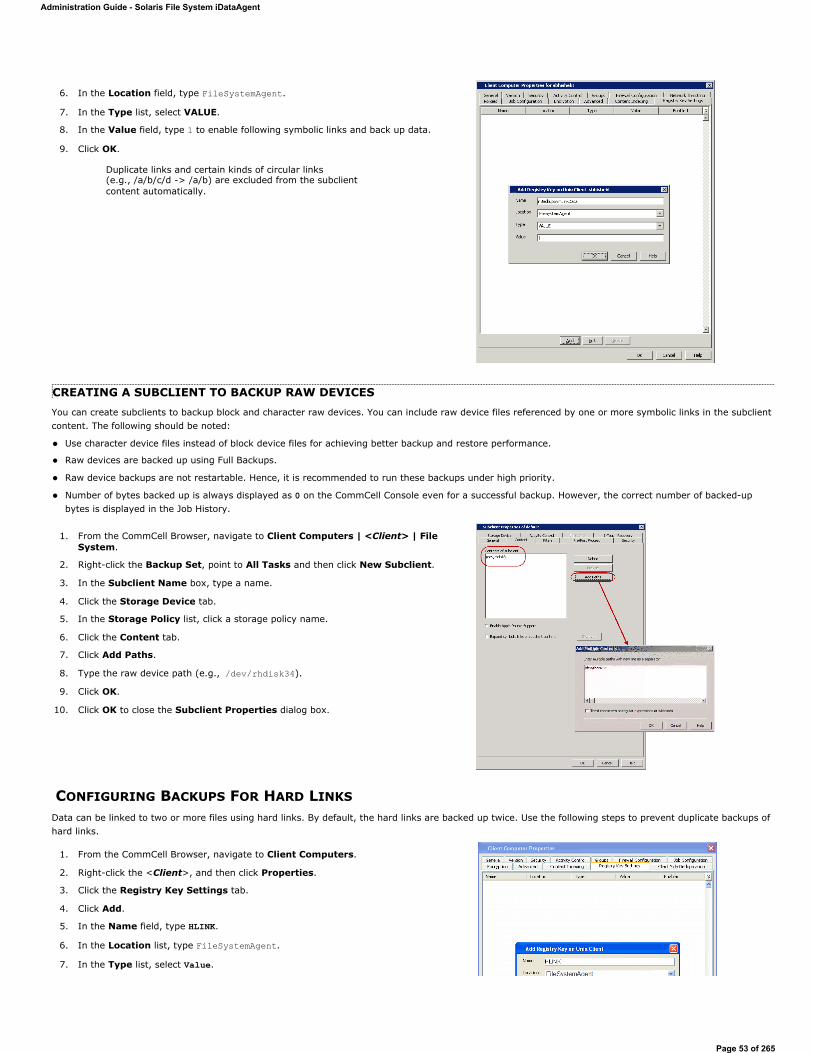
CREATING A SUBCLIENT TO BACKUP RAW DEVICESYou can create subclients to backup block and character raw devices. You can include raw device files referenced by one or more symbolic links in the subclient content. The following should be noted:
Use character device files instead of block device files for achieving better backup and restore performance.
Raw devices are backed up using Full Backups.
Raw device backups are not restartable. Hence, it is recommended to run these backups under high priority.
Number of bytes backed up is always displayed as 0 on the CommCell Console even for a successful backup. However, the correct number of backed-up bytes is displayed in the Job History.
CONFIGURING BACKUPS FOR HARD LINKSData can be linked to two or more files using hard links. By default, the hard links are backed up twice. Use the following steps to prevent duplicate backups of hard links.
6. In the Location field, type FileSystemAgent.
7. In the Type list, select VALUE.
8. In the Value field, type 1 to enable following symbolic links and back up data.
9. Click OK.
Duplicate links and certain kinds of circular links (e.g., /a/b/c/d -> /a/b) are excluded from the subclient content automatically.
1. From the CommCell Browser, navigate to Client Computers | <Client> | File System.
2. Right-click the Backup Set, point to All Tasks and then click New Subclient.
3. In the Subclient Name box, type a name.
4. Click the Storage Device tab.
5. In the Storage Policy list, click a storage policy name.
6. Click the Content tab.
7. Click Add Paths.
8. Type the raw device path (e.g., /dev/rhdisk34).
9. Click OK.
10. Click OK to close the Subclient Properties dialog box.
1. From the CommCell Browser, navigate to Client Computers.
2. Right-click the <Client>, and then click Properties.
3. Click the Registry Key Settings tab.
4. Click Add.
5. In the Name field, type HLINK.
6. In the Location list, type FileSystemAgent.
7. In the Type list, select Value.
Administration Guide - Solaris File System iDataAgent
Page 53 of 265
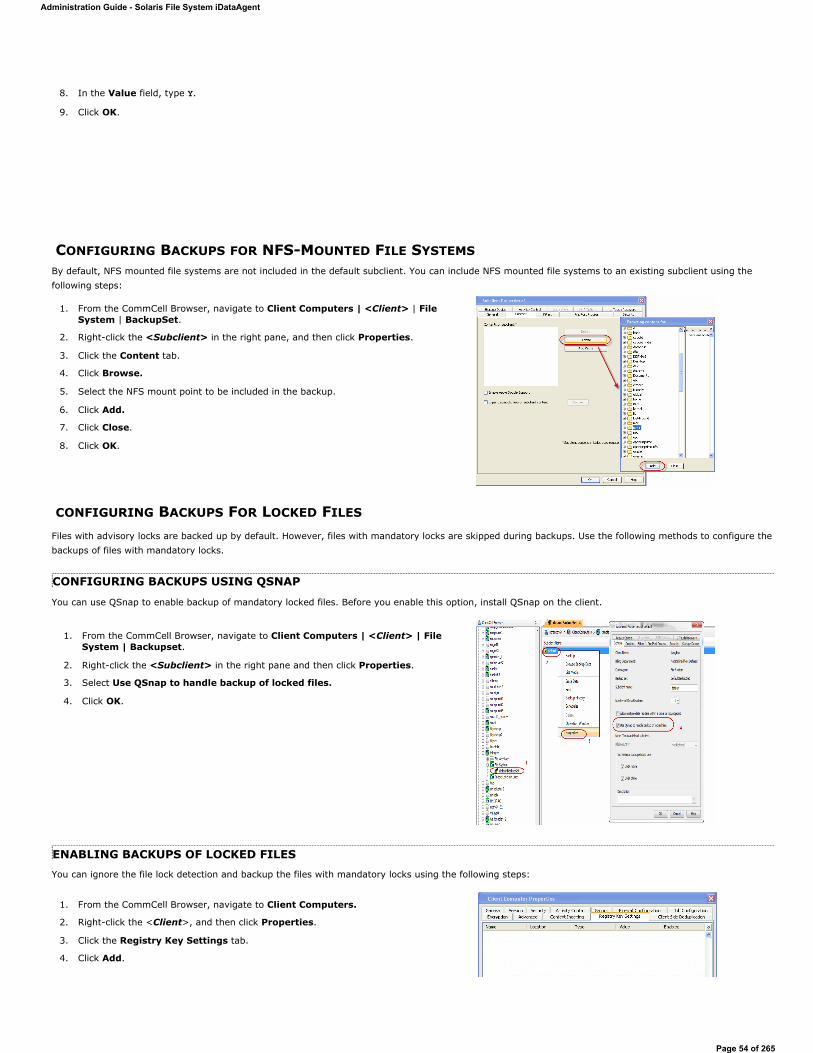
CONFIGURING BACKUPS FOR NFS-MOUNTED FILE SYSTEMSBy default, NFS mounted file systems are not included in the default subclient. You can include NFS mounted file systems to an existing subclient using the following steps:
CONFIGURING BACKUPS FOR LOCKED FILES
Files with advisory locks are backed up by default. However, files with mandatory locks are skipped during backups. Use the following methods to configure the backups of files with mandatory locks.
CONFIGURING BACKUPS USING QSNAP
You can use QSnap to enable backup of mandatory locked files. Before you enable this option, install QSnap on the client.
ENABLING BACKUPS OF LOCKED FILESYou can ignore the file lock detection and backup the files with mandatory locks using the following steps:
8. In the Value field, type Y.
9. Click OK.
1. From the CommCell Browser, navigate to Client Computers | <Client> | File System | BackupSet.
2. Right-click the <Subclient> in the right pane, and then click Properties.
3. Click the Content tab.
4. Click Browse.
5. Select the NFS mount point to be included in the backup.
6. Click Add.
7. Click Close.
8. Click OK.
1. From the CommCell Browser, navigate to Client Computers | <Client> | File System | Backupset.
2. Right-click the <Subclient> in the right pane and then click Properties.
3. Select Use QSnap to handle backup of locked files.
4. Click OK.
1. From the CommCell Browser, navigate to Client Computers.
2. Right-click the <Client>, and then click Properties.
3. Click the Registry Key Settings tab.
4. Click Add.
Administration Guide - Solaris File System iDataAgent
Page 54 of 265
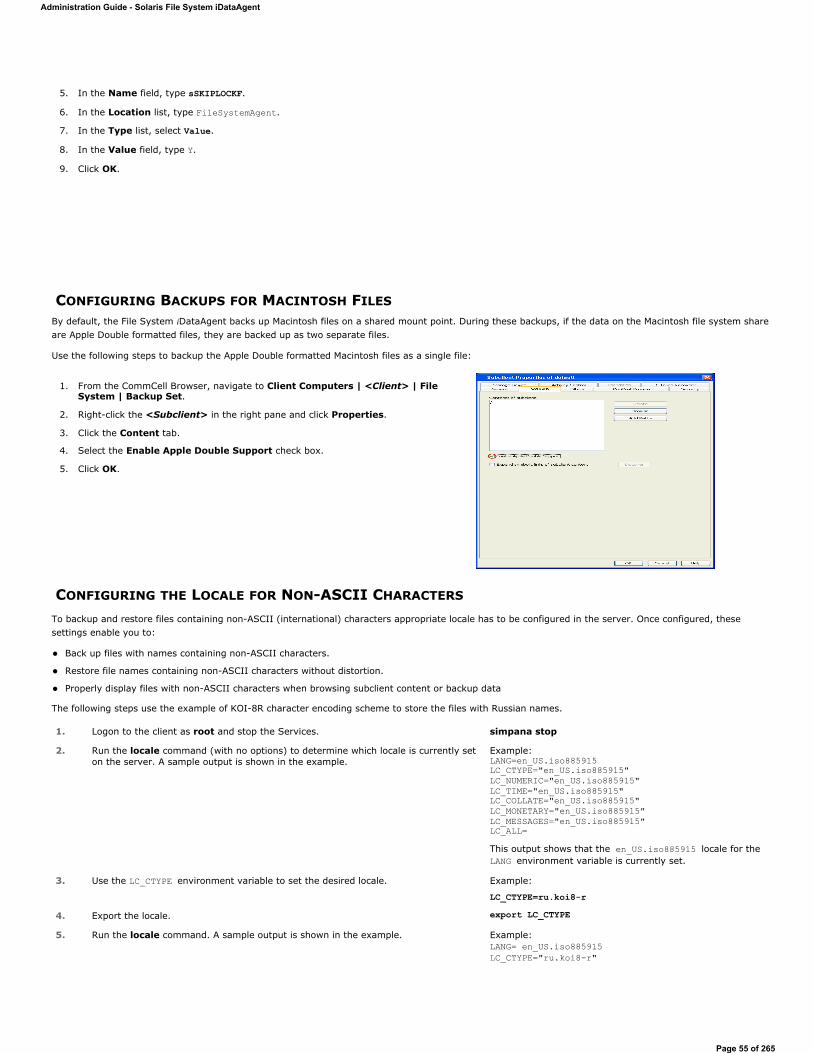
CONFIGURING BACKUPS FOR MACINTOSH FILESBy default, the File System iDataAgent backs up Macintosh files on a shared mount point. During these backups, if the data on the Macintosh file system share are Apple Double formatted files, they are backed up as two separate files.
Use the following steps to backup the Apple Double formatted Macintosh files as a single file:
CONFIGURING THE LOCALE FOR NON-ASCII CHARACTERS
To backup and restore files containing non-ASCII (international) characters appropriate locale has to be configured in the server. Once configured, these settings enable you to:
Back up files with names containing non-ASCII characters.
Restore file names containing non-ASCII characters without distortion.
Properly display files with non-ASCII characters when browsing subclient content or backup data
The following steps use the example of KOI-8R character encoding scheme to store the files with Russian names.
5. In the Name field, type sSKIPLOCKF.
6. In the Location list, type FileSystemAgent.
7. In the Type list, select Value.
8. In the Value field, type Y.
9. Click OK.
1. From the CommCell Browser, navigate to Client Computers | <Client> | File System | Backup Set.
2. Right-click the <Subclient> in the right pane and click Properties.
3. Click the Content tab.
4. Select the Enable Apple Double Support check box.
5. Click OK.
1. Logon to the client as root and stop the Services. simpana stop
2. Run the locale command (with no options) to determine which locale is currently set on the server. A sample output is shown in the example.
Example: LANG=en_US.iso885915LC_CTYPE="en_US.iso885915"LC_NUMERIC="en_US.iso885915"LC_TIME="en_US.iso885915"LC_COLLATE="en_US.iso885915"LC_MONETARY="en_US.iso885915"LC_MESSAGES="en_US.iso885915"LC_ALL= This output shows that the en_US.iso885915 locale for theLANG environment variable is currently set.
3. Use the LC_CTYPE environment variable to set the desired locale. Example:
LC_CTYPE=ru.koi8-r4. Export the locale. export LC_CTYPE5. Run the locale command. A sample output is shown in the example. Example:
LANG= en_US.iso885915LC_CTYPE="ru.koi8-r"
Administration Guide - Solaris File System iDataAgent
Page 55 of 265
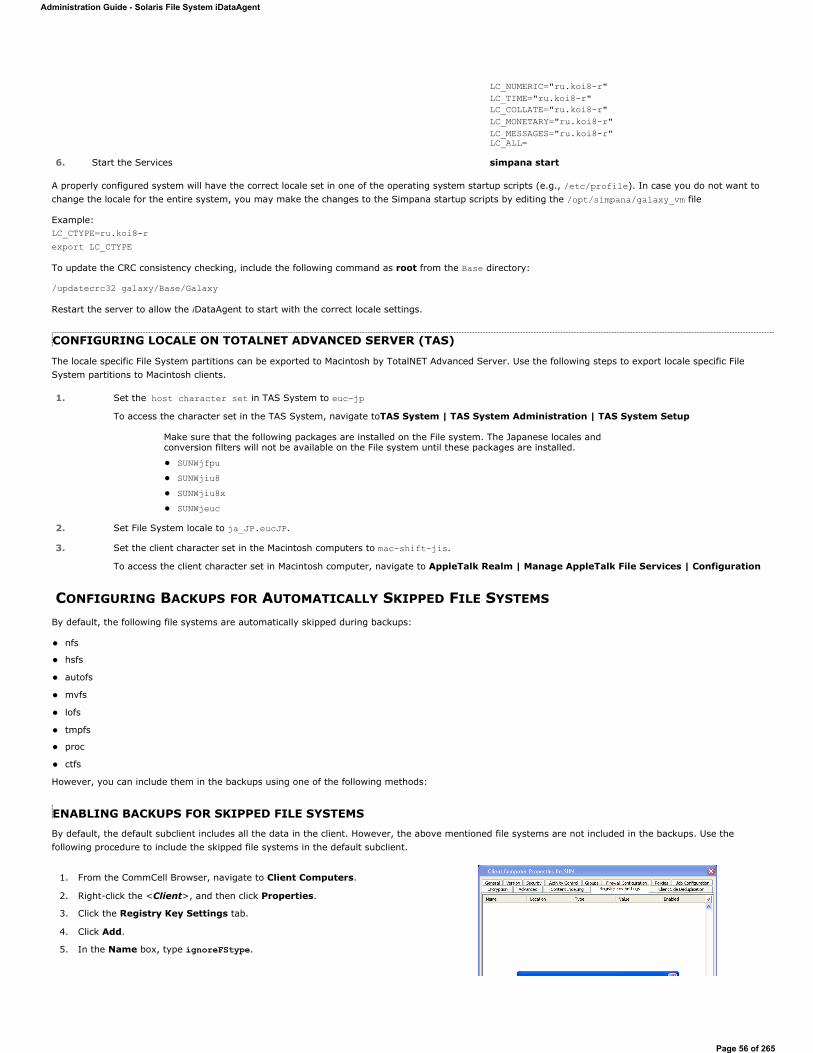
A properly configured system will have the correct locale set in one of the operating system startup scripts (e.g., /etc/profile). In case you do not want to change the locale for the entire system, you may make the changes to the Simpana startup scripts by editing the /opt/simpana/galaxy_vm file
Example:LC_CTYPE=ru.koi8-rexport LC_CTYPE
To update the CRC consistency checking, include the following command as root from the Base directory:
/updatecrc32 galaxy/Base/Galaxy
Restart the server to allow the iDataAgent to start with the correct locale settings.
CONFIGURING LOCALE ON TOTALNET ADVANCED SERVER (TAS)
The locale specific File System partitions can be exported to Macintosh by TotalNET Advanced Server. Use the following steps to export locale specific File System partitions to Macintosh clients.
CONFIGURING BACKUPS FOR AUTOMATICALLY SKIPPED FILE SYSTEMS
By default, the following file systems are automatically skipped during backups:
nfs
hsfs
autofs
mvfs
lofs
tmpfs
proc
ctfs
However, you can include them in the backups using one of the following methods:
ENABLING BACKUPS FOR SKIPPED FILE SYSTEMSBy default, the default subclient includes all the data in the client. However, the above mentioned file systems are not included in the backups. Use the following procedure to include the skipped file systems in the default subclient.
LC_NUMERIC="ru.koi8-r"LC_TIME="ru.koi8-r"LC_COLLATE="ru.koi8-r"LC_MONETARY="ru.koi8-r"LC_MESSAGES="ru.koi8-r"LC_ALL=
6. Start the Services simpana start
1. Set the host character set in TAS System to euc-jpTo access the character set in the TAS System, navigate toTAS System | TAS System Administration | TAS System Setup
Make sure that the following packages are installed on the File system. The Japanese locales and conversion filters will not be available on the File system until these packages are installed.
SUNWjfpuSUNWjiu8SUNWjiu8xSUNWjeuc
2. Set File System locale to ja_JP.eucJP.
3. Set the client character set in the Macintosh computers to mac-shift-jis.
To access the client character set in Macintosh computer, navigate to AppleTalk Realm | Manage AppleTalk File Services | Configuration
1. From the CommCell Browser, navigate to Client Computers.
2. Right-click the <Client>, and then click Properties.
3. Click the Registry Key Settings tab.
4. Click Add.
5. In the Name box, type ignoreFStype.
Administration Guide - Solaris File System iDataAgent
Page 56 of 265
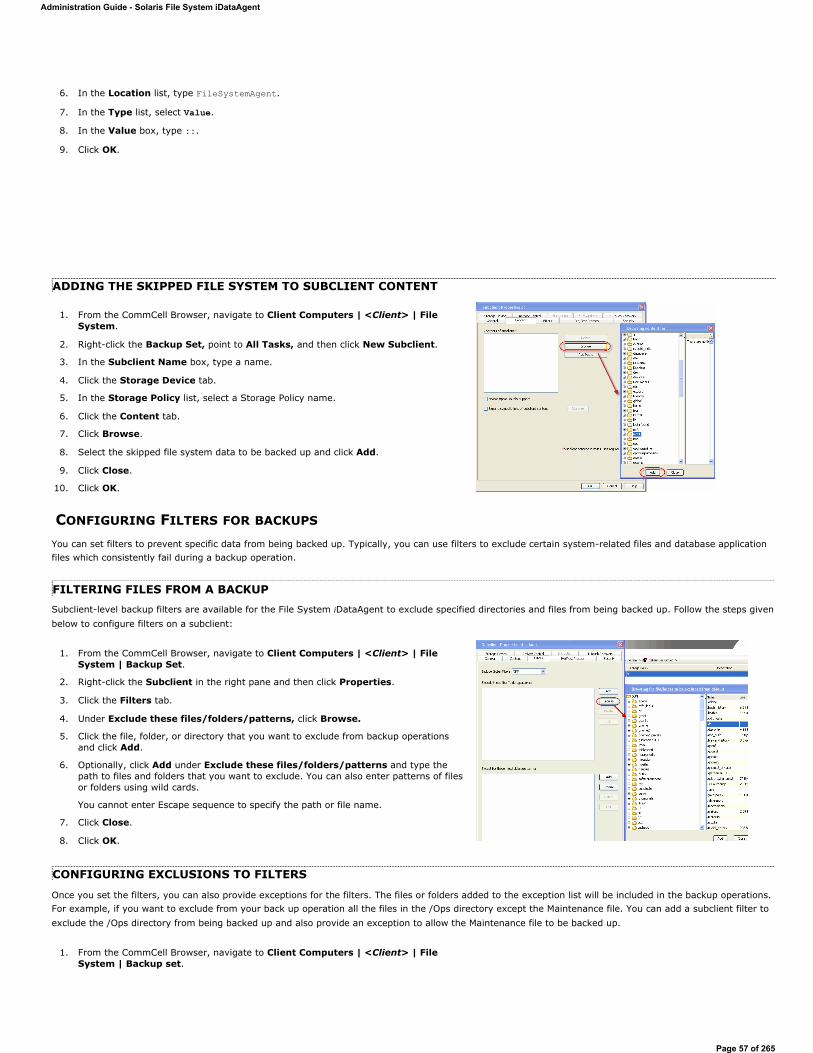
ADDING THE SKIPPED FILE SYSTEM TO SUBCLIENT CONTENT
CONFIGURING FILTERS FOR BACKUPS
You can set filters to prevent specific data from being backed up. Typically, you can use filters to exclude certain system-related files and database application files which consistently fail during a backup operation.
FILTERING FILES FROM A BACKUPSubclient-level backup filters are available for the File System iDataAgent to exclude specified directories and files from being backed up. Follow the steps given below to configure filters on a subclient:
CONFIGURING EXCLUSIONS TO FILTERS
Once you set the filters, you can also provide exceptions for the filters. The files or folders added to the exception list will be included in the backup operations. For example, if you want to exclude from your back up operation all the files in the /Ops directory except the Maintenance file. You can add a subclient filter to exclude the /Ops directory from being backed up and also provide an exception to allow the Maintenance file to be backed up.
6. In the Location list, type FileSystemAgent.
7. In the Type list, select Value.
8. In the Value box, type ::.
9. Click OK.
1. From the CommCell Browser, navigate to Client Computers | <Client> | File System.
2. Right-click the Backup Set, point to All Tasks, and then click New Subclient.
3. In the Subclient Name box, type a name.
4. Click the Storage Device tab.
5. In the Storage Policy list, select a Storage Policy name.
6. Click the Content tab.
7. Click Browse.
8. Select the skipped file system data to be backed up and click Add.
9. Click Close.
10. Click OK.
1. From the CommCell Browser, navigate to Client Computers | <Client> | File System | Backup Set.
2. Right-click the Subclient in the right pane and then click Properties.
3. Click the Filters tab.
4. Under Exclude these files/folders/patterns, click Browse.
5. Click the file, folder, or directory that you want to exclude from backup operations and click Add.
6. Optionally, click Add under Exclude these files/folders/patterns and type the path to files and folders that you want to exclude. You can also enter patterns of files or folders using wild cards.
You cannot enter Escape sequence to specify the path or file name.
7. Click Close.
8. Click OK.
1. From the CommCell Browser, navigate to Client Computers | <Client> | File System | Backup set.
Administration Guide - Solaris File System iDataAgent
Page 57 of 265
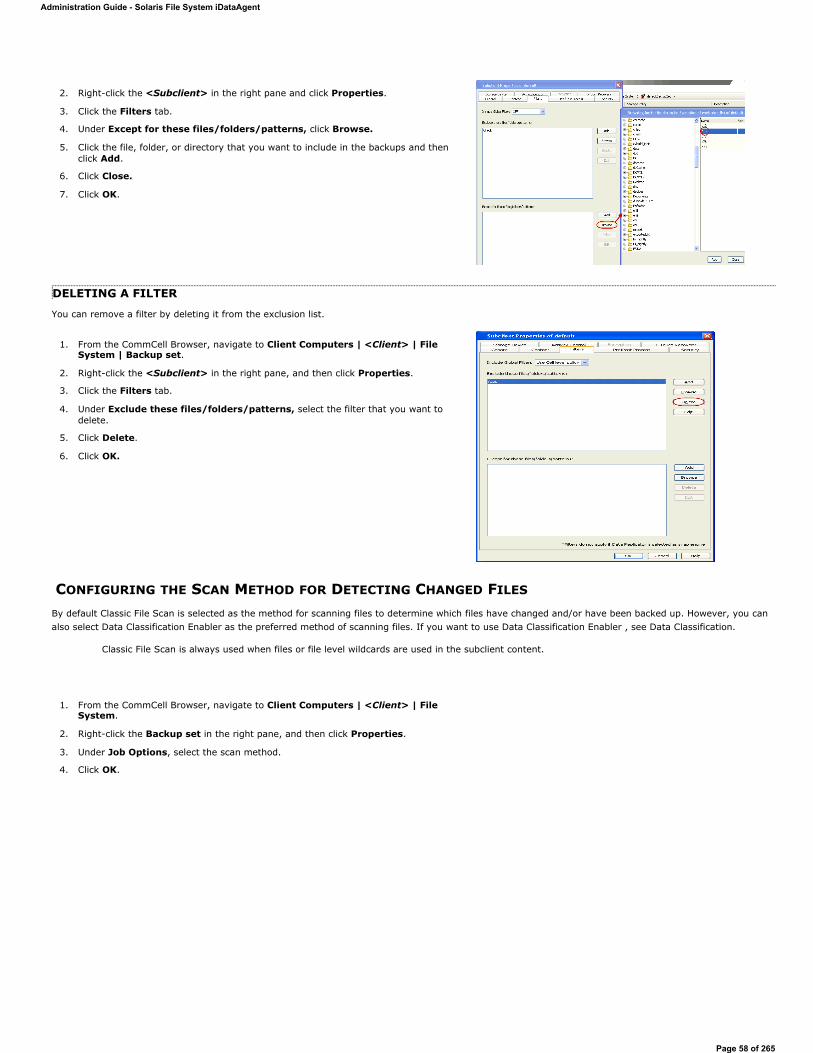
DELETING A FILTER
You can remove a filter by deleting it from the exclusion list.
CONFIGURING THE SCAN METHOD FOR DETECTING CHANGED FILES
By default Classic File Scan is selected as the method for scanning files to determine which files have changed and/or have been backed up. However, you can also select Data Classification Enabler as the preferred method of scanning files. If you want to use Data Classification Enabler , see Data Classification.
2. Right-click the <Subclient> in the right pane and click Properties.
3. Click the Filters tab.
4. Under Except for these files/folders/patterns, click Browse.
5. Click the file, folder, or directory that you want to include in the backups and then click Add.
6. Click Close.
7. Click OK.
1. From the CommCell Browser, navigate to Client Computers | <Client> | File System | Backup set.
2. Right-click the <Subclient> in the right pane, and then click Properties.
3. Click the Filters tab.
4. Under Exclude these files/folders/patterns, select the filter that you want to delete.
5. Click Delete.
6. Click OK.
Classic File Scan is always used when files or file level wildcards are used in the subclient content.
1. From the CommCell Browser, navigate to Client Computers | <Client> | File System.
2. Right-click the Backup set in the right pane, and then click Properties.
3. Under Job Options, select the scan method.
4. Click OK.
Administration Guide - Solaris File System iDataAgent
Page 58 of 265
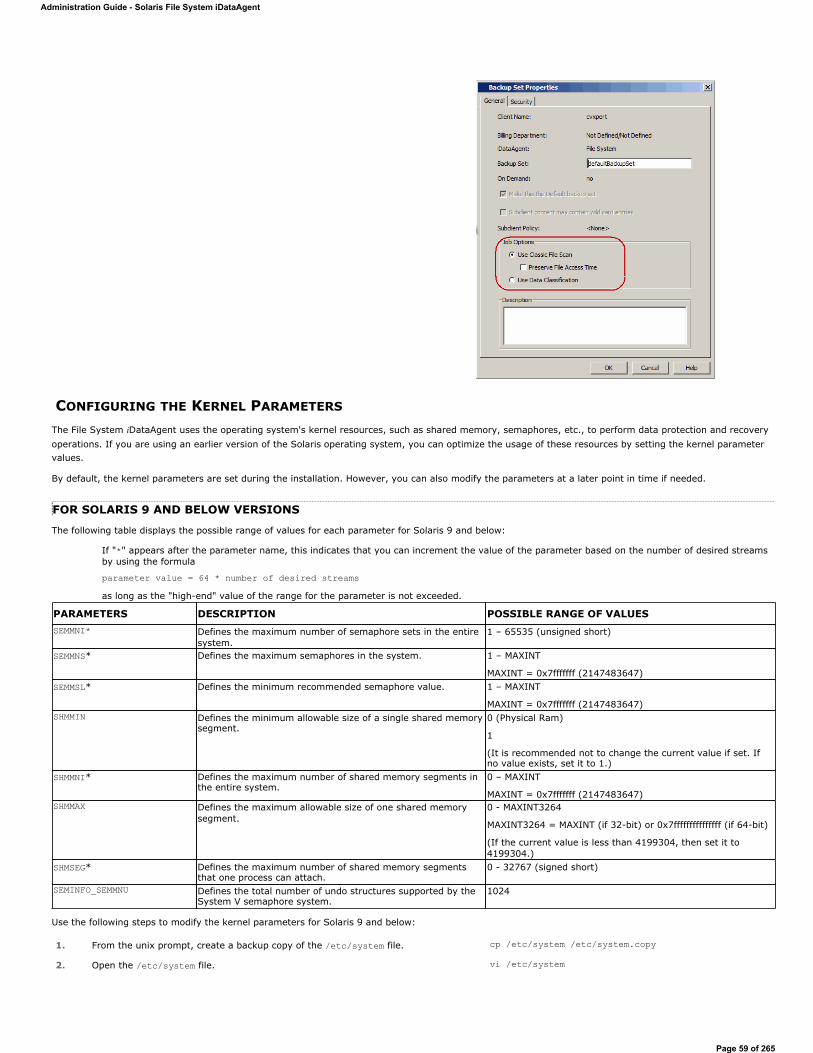
CONFIGURING THE KERNEL PARAMETERS
The File System iDataAgent uses the operating system's kernel resources, such as shared memory, semaphores, etc., to perform data protection and recovery operations. If you are using an earlier version of the Solaris operating system, you can optimize the usage of these resources by setting the kernel parameter values.
By default, the kernel parameters are set during the installation. However, you can also modify the parameters at a later point in time if needed.
FOR SOLARIS 9 AND BELOW VERSIONS
The following table displays the possible range of values for each parameter for Solaris 9 and below:
Use the following steps to modify the kernel parameters for Solaris 9 and below:
If "*" appears after the parameter name, this indicates that you can increment the value of the parameter based on the number of desired streams by using the formula
parameter value = 64 * number of desired streamsas long as the "high-end" value of the range for the parameter is not exceeded.
PARAMETERS DESCRIPTION POSSIBLE RANGE OF VALUESSEMMNI* Defines the maximum number of semaphore sets in the entire
system.1 – 65535 (unsigned short)
SEMMNS* Defines the maximum semaphores in the system. 1 – MAXINT
MAXINT = 0x7fffffff (2147483647)SEMMSL* Defines the minimum recommended semaphore value. 1 – MAXINT
MAXINT = 0x7fffffff (2147483647)SHMMIN Defines the minimum allowable size of a single shared memory
segment.0 (Physical Ram)
1
(It is recommended not to change the current value if set. If no value exists, set it to 1.)
SHMMNI* Defines the maximum number of shared memory segments in the entire system.
0 – MAXINT
MAXINT = 0x7fffffff (2147483647)SHMMAX Defines the maximum allowable size of one shared memory
segment.0 - MAXINT3264
MAXINT3264 = MAXINT (if 32-bit) or 0x7fffffffffffffff (if 64-bit)
(If the current value is less than 4199304, then set it to 4199304.)
SHMSEG* Defines the maximum number of shared memory segments that one process can attach.
0 - 32767 (signed short)
SEMINFO_SEMMNU Defines the total number of undo structures supported by the System V semaphore system.
1024
1. From the unix prompt, create a backup copy of the /etc/system file. cp /etc/system /etc/system.copy
2. Open the /etc/system file. vi /etc/system
Administration Guide - Solaris File System iDataAgent
Page 59 of 265
FOR SOLARIS 10 AND ABOVE VERSIONSThe following table displays the possible range of values for each parameter for Solaris 10 and above:
For Solaris 10 and above, you can use any of the following commands to modify the kernel parameters:
Projmod command
prctl command
Use the following steps to modify the kernel parameters in Solaris 10 and above versions using the projmod command:
Use the following steps to modify the kernel parameters in Solaris 10 and above versions using the prctl command:
CONFIGURING MULTI-STREAMING FOR BACKUPSFile System Multi-Streaming employs multiple data streams per subclient for data protection operations. This enables the subclient's contents to be distributed to all the streams, transmitting them in parallel to the storage media. Hence a subclient whose data is secured using three data streams, utilizes more of the available network resources, and can complete in as little as one third the time that the same data would require using a single stream. You can allocate a
3. Change the desired parameter value as per the range given in the above table.
For example, set the value for semmni parameter to 55680
Use the following formula to calculate the value for the parameter:parameter value = current value + (64 * number of desired streams)
If the client is configured as iDataAgent, be sure to allocate 10 streams per each affected parameter. If the client is configured as a MediaAgent, be sure to allocate at least 100 additional streams per each affected parameter.If the system is configured as both an iDataAgent and a MediaAgent, be sure to consider the sum of the respective parameter values for this purpose.
Example:set semsys:seminfo_semmni=55680
4. Save the /etc/system file. Press the Esc key. Type :wq
5. Restart the computer to allow the changes to take effect.
project.max-shm-memory Defines the total amount of shared memory allowed for a project. [Default = 25% of the physical memory]
It is recommended not to set this value. However, if you have to set the control to accommodate other resource consumers, ensure that the value is not less than 2MB = [2097152].
project.max-shm-ids* Defines the maximum number of shared memory IDs allowed for a project
16777216 [Default = 128]
project.max-sem-ids* Defines the maximum number of semaphores allowed for a project 16777216 [Default = 128]
1. From the unix prompt, type the projmod command.
projmod [-n] [-f filename] [-p projid [-o]] [-c comment] [-a|-s|-r] [-U user [,user...]] [-G group [,group...]] [[-K name[=value[,value...]...]]] [-I new_projectname] project
Example:
projmod -s -K "project.xxx" user.root
2. Change the desired parameter value as per the range given in the above table.
For example, set the value for project.max-shm-ids parameter
Use the following formula to calculate the value for the parameter:parameter value = current value + (64 * number of desired streams)
If the client is configured as iDataAgent, be sure to allocate 10 streams per each affected parameter. If the client is configured as a MediaAgent, be sure to allocate at least 100 additional streams per each affected parameter.If the system is configured as both an iDataAgent and a MediaAgent, be sure to consider the sum of the respective parameter values for this purpose.
Example:
projmod -s -K "project.max-shm-ids=(priv,1280,deny)" user.root
1. From the unix prompt, type the prctl command.
prctl [-P] [-t[basic| privileged| system]] [-n name] [-v value] [-e| d action] [-p pid] [-i idtype] id...
Example:
projmod -n project.xxx -v xxx -r -i project user.root
2. Change the desired parameter value as per the range given in the above table.
For example, set the value for project.max-shm-ids parameter
Use the following formula to calculate the value for the parameter:parameter value = current value + (64 * number of desired streams)
If the client is configured as iDataAgent, be sure to allocate 10 streams per each affected parameter. If the client is configured as a MediaAgent, be sure to allocate at least 100 additional streams per each affected parameter.If the system is configured as both an iDataAgent and a MediaAgent, be sure to consider the sum of the respective parameter values for this purpose.
Example:
prctl -n project.max-shm-ids -v 1280 -r -i project user.root Output:project: 1: user.rootproject.max-shm-ids privileged 1280 - deny -project.max-shm-ids system 16777216 max deny –
Administration Guide - Solaris File System iDataAgent
Page 60 of 265
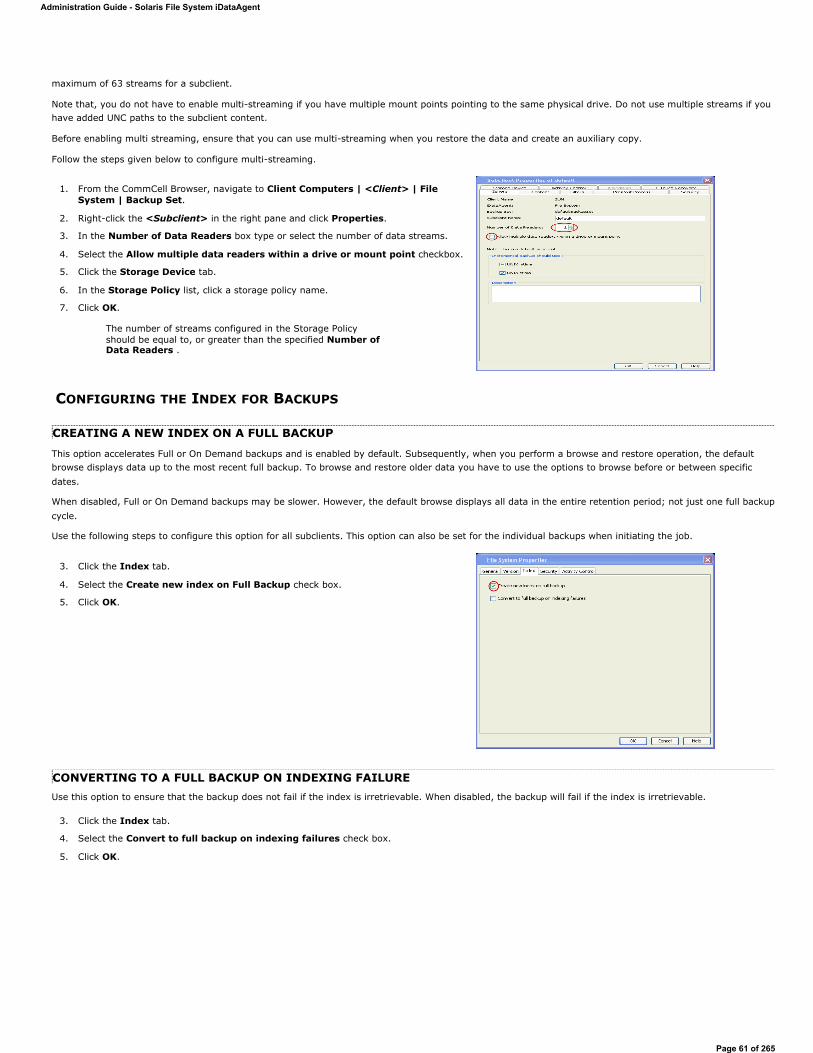
maximum of 63 streams for a subclient.
Note that, you do not have to enable multi-streaming if you have multiple mount points pointing to the same physical drive. Do not use multiple streams if you have added UNC paths to the subclient content.
Before enabling multi streaming, ensure that you can use multi-streaming when you restore the data and create an auxiliary copy.
Follow the steps given below to configure multi-streaming.
CONFIGURING THE INDEX FOR BACKUPS
CREATING A NEW INDEX ON A FULL BACKUP
This option accelerates Full or On Demand backups and is enabled by default. Subsequently, when you perform a browse and restore operation, the default browse displays data up to the most recent full backup. To browse and restore older data you have to use the options to browse before or between specific dates.
When disabled, Full or On Demand backups may be slower. However, the default browse displays all data in the entire retention period; not just one full backup cycle.
Use the following steps to configure this option for all subclients. This option can also be set for the individual backups when initiating the job.
CONVERTING TO A FULL BACKUP ON INDEXING FAILUREUse this option to ensure that the backup does not fail if the index is irretrievable. When disabled, the backup will fail if the index is irretrievable.
1. From the CommCell Browser, navigate to Client Computers | <Client> | File System | Backup Set.
2. Right-click the <Subclient> in the right pane and click Properties.
3. In the Number of Data Readers box type or select the number of data streams.
4. Select the Allow multiple data readers within a drive or mount point checkbox.
5. Click the Storage Device tab.
6. In the Storage Policy list, click a storage policy name.
7. Click OK.
The number of streams configured in the Storage Policy should be equal to, or greater than the specified Number of Data Readers .
3. Click the Index tab.
4. Select the Create new index on Full Backup check box.
5. Click OK.
3. Click the Index tab.
4. Select the Convert to full backup on indexing failures check box.
5. Click OK.
Administration Guide - Solaris File System iDataAgent
Page 61 of 265
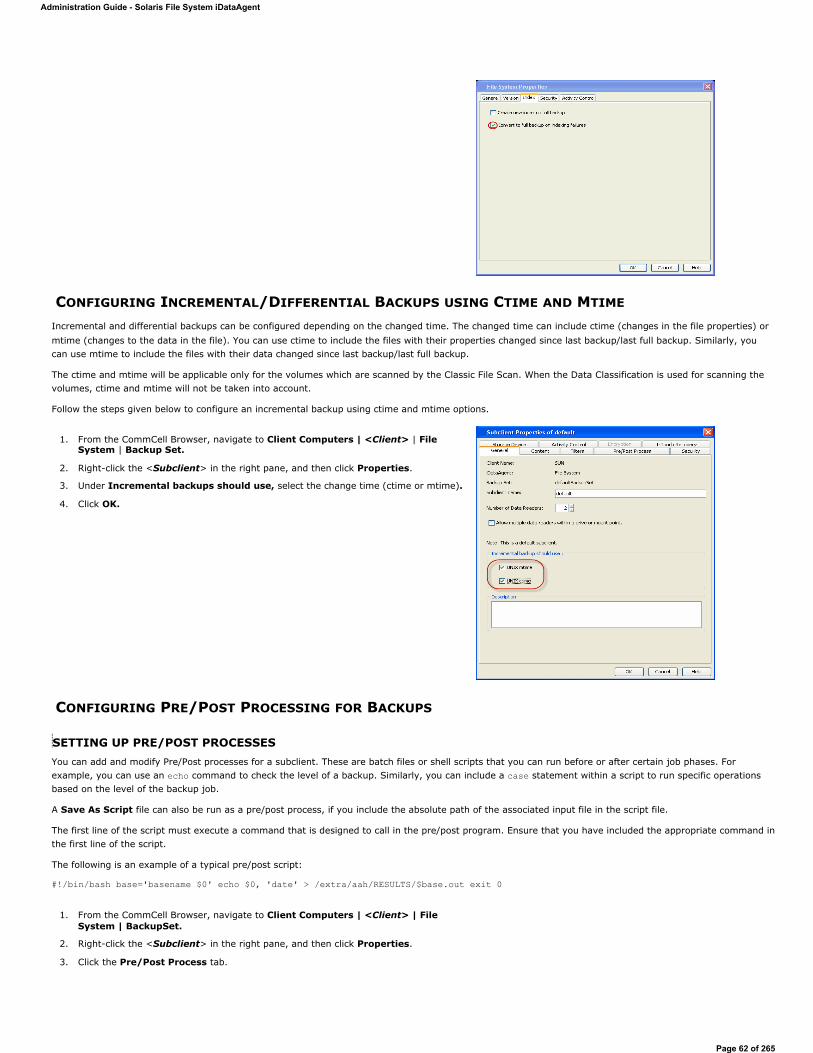
CONFIGURING INCREMENTAL/DIFFERENTIAL BACKUPS USING CTIME AND MTIME
Incremental and differential backups can be configured depending on the changed time. The changed time can include ctime (changes in the file properties) or mtime (changes to the data in the file). You can use ctime to include the files with their properties changed since last backup/last full backup. Similarly, you can use mtime to include the files with their data changed since last backup/last full backup.
The ctime and mtime will be applicable only for the volumes which are scanned by the Classic File Scan. When the Data Classification is used for scanning the volumes, ctime and mtime will not be taken into account.
Follow the steps given below to configure an incremental backup using ctime and mtime options.
CONFIGURING PRE/POST PROCESSING FOR BACKUPS
SETTING UP PRE/POST PROCESSESYou can add and modify Pre/Post processes for a subclient. These are batch files or shell scripts that you can run before or after certain job phases. For example, you can use an echo command to check the level of a backup. Similarly, you can include a case statement within a script to run specific operations based on the level of the backup job.
A Save As Script file can also be run as a pre/post process, if you include the absolute path of the associated input file in the script file.
The first line of the script must execute a command that is designed to call in the pre/post program. Ensure that you have included the appropriate command in the first line of the script.
The following is an example of a typical pre/post script:
#!/bin/bash base='basename $0' echo $0, 'date' > /extra/aah/RESULTS/$base.out exit 0
1. From the CommCell Browser, navigate to Client Computers | <Client> | File System | Backup Set.
2. Right-click the <Subclient> in the right pane, and then click Properties.
3. Under Incremental backups should use, select the change time (ctime or mtime).
4. Click OK.
1. From the CommCell Browser, navigate to Client Computers | <Client> | File System | BackupSet.
2. Right-click the <Subclient> in the right pane, and then click Properties.
3. Click the Pre/Post Process tab.
Administration Guide - Solaris File System iDataAgent
Page 62 of 265
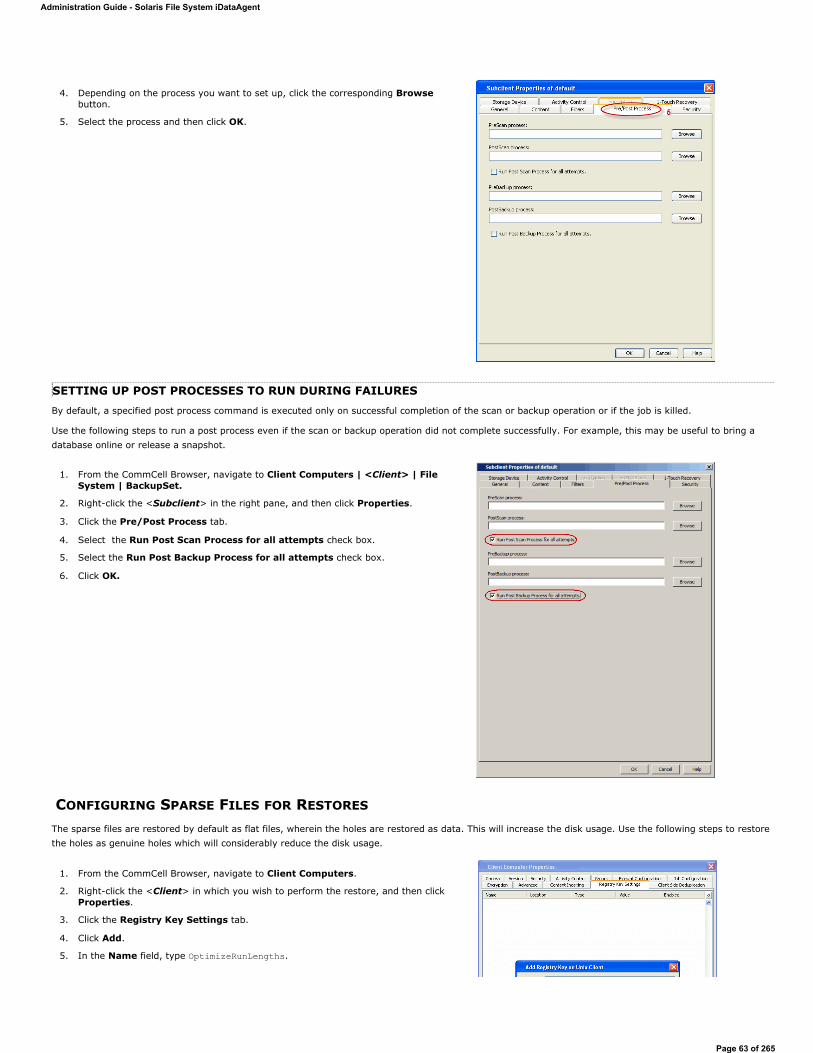
SETTING UP POST PROCESSES TO RUN DURING FAILURESBy default, a specified post process command is executed only on successful completion of the scan or backup operation or if the job is killed.
Use the following steps to run a post process even if the scan or backup operation did not complete successfully. For example, this may be useful to bring a database online or release a snapshot.
CONFIGURING SPARSE FILES FOR RESTORES
The sparse files are restored by default as flat files, wherein the holes are restored as data. This will increase the disk usage. Use the following steps to restore the holes as genuine holes which will considerably reduce the disk usage.
4. Depending on the process you want to set up, click the corresponding Browse button.
5. Select the process and then click OK.
1. From the CommCell Browser, navigate to Client Computers | <Client> | File System | BackupSet.
2. Right-click the <Subclient> in the right pane, and then click Properties.
3. Click the Pre/Post Process tab.
4. Select the Run Post Scan Process for all attempts check box.
5. Select the Run Post Backup Process for all attempts check box.
6. Click OK.
1. From the CommCell Browser, navigate to Client Computers.
2. Right-click the <Client> in which you wish to perform the restore, and then click Properties.
3. Click the Registry Key Settings tab.
4. Click Add.
5. In the Name field, type OptimizeRunLengths.
Administration Guide - Solaris File System iDataAgent
Page 63 of 265
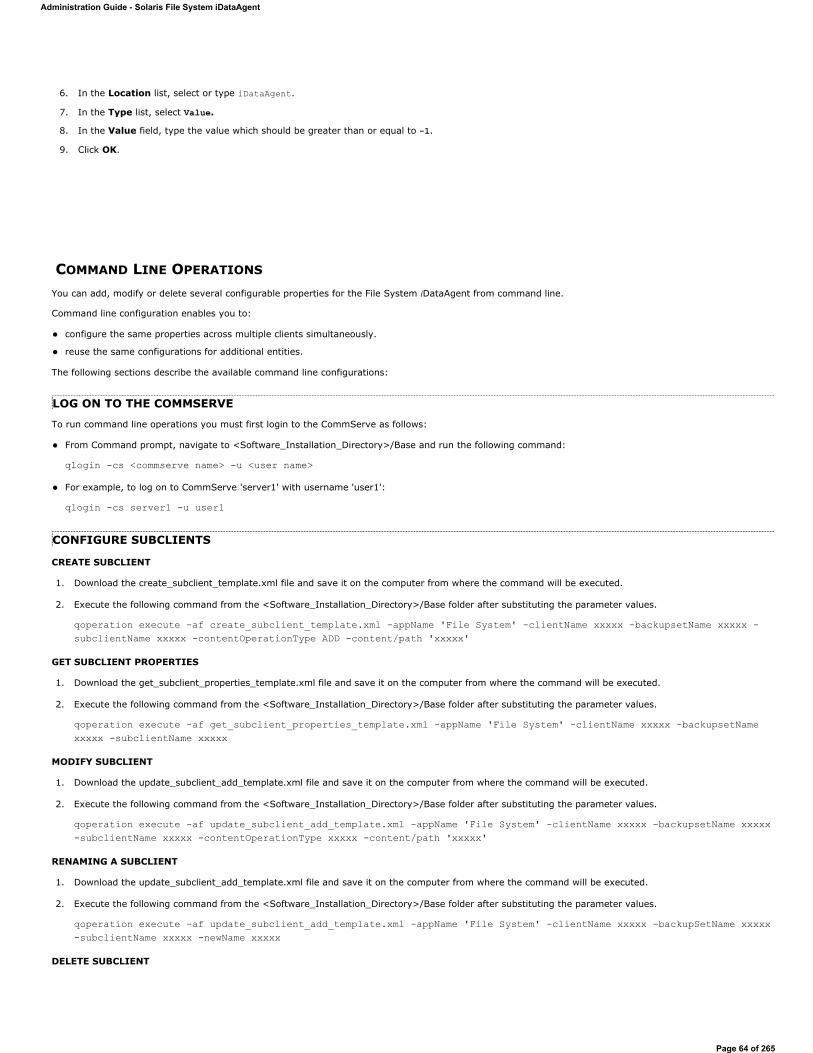
COMMAND LINE OPERATIONS
You can add, modify or delete several configurable properties for the File System iDataAgent from command line.
Command line configuration enables you to:
configure the same properties across multiple clients simultaneously.
reuse the same configurations for additional entities.
The following sections describe the available command line configurations:
LOG ON TO THE COMMSERVE
To run command line operations you must first login to the CommServe as follows:
From Command prompt, navigate to <Software_Installation_Directory>/Base and run the following command:
qlogin -cs <commserve name> -u <user name>
For example, to log on to CommServe 'server1' with username 'user1':
qlogin -cs server1 -u user1
CONFIGURE SUBCLIENTS
CREATE SUBCLIENT
1. Download the create_subclient_template.xml file and save it on the computer from where the command will be executed.
2. Execute the following command from the <Software_Installation_Directory>/Base folder after substituting the parameter values.
qoperation execute -af create_subclient_template.xml -appName 'File System' -clientName xxxxx -backupsetName xxxxx -subclientName xxxxx -contentOperationType ADD -content/path 'xxxxx'
GET SUBCLIENT PROPERTIES
1. Download the get_subclient_properties_template.xml file and save it on the computer from where the command will be executed.
2. Execute the following command from the <Software_Installation_Directory>/Base folder after substituting the parameter values.
qoperation execute -af get_subclient_properties_template.xml -appName 'File System' -clientName xxxxx -backupsetName xxxxx -subclientName xxxxx
MODIFY SUBCLIENT
1. Download the update_subclient_add_template.xml file and save it on the computer from where the command will be executed.
2. Execute the following command from the <Software_Installation_Directory>/Base folder after substituting the parameter values.
qoperation execute -af update_subclient_add_template.xml -appName 'File System' -clientName xxxxx -backupsetName xxxxx -subclientName xxxxx -contentOperationType xxxxx -content/path 'xxxxx'
RENAMING A SUBCLIENT
1. Download the update_subclient_add_template.xml file and save it on the computer from where the command will be executed.
2. Execute the following command from the <Software_Installation_Directory>/Base folder after substituting the parameter values.
qoperation execute -af update_subclient_add_template.xml -appName 'File System' -clientName xxxxx -backupSetName xxxxx -subclientName xxxxx -newName xxxxx
DELETE SUBCLIENT
6. In the Location list, select or type iDataAgent.
7. In the Type list, select Value.
8. In the Value field, type the value which should be greater than or equal to -1.
9. Click OK.
Administration Guide - Solaris File System iDataAgent
Page 64 of 265
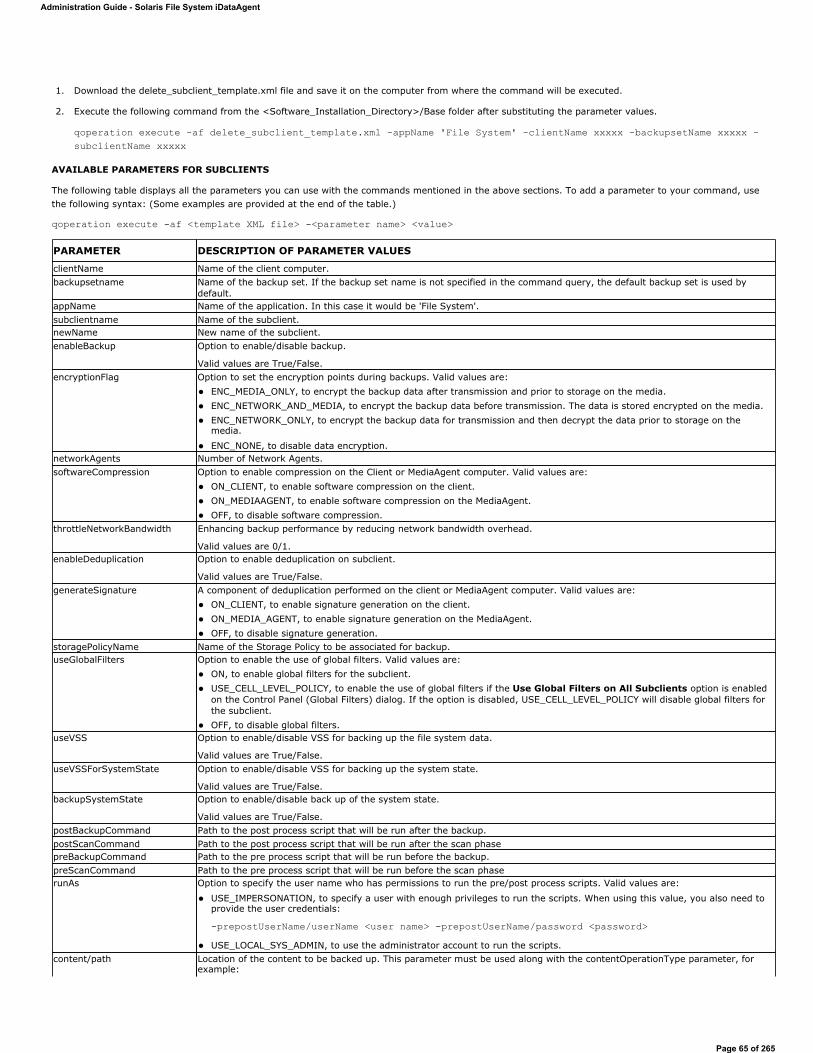
1. Download the delete_subclient_template.xml file and save it on the computer from where the command will be executed.
2. Execute the following command from the <Software_Installation_Directory>/Base folder after substituting the parameter values.
qoperation execute -af delete_subclient_template.xml -appName 'File System' -clientName xxxxx -backupsetName xxxxx -subclientName xxxxx
AVAILABLE PARAMETERS FOR SUBCLIENTS
The following table displays all the parameters you can use with the commands mentioned in the above sections. To add a parameter to your command, use the following syntax: (Some examples are provided at the end of the table.)
qoperation execute -af <template XML file> -<parameter name> <value>
PARAMETER DESCRIPTION OF PARAMETER VALUES
clientName Name of the client computer.backupsetname Name of the backup set. If the backup set name is not specified in the command query, the default backup set is used by
default.appName Name of the application. In this case it would be 'File System'.subclientname Name of the subclient.newName New name of the subclient.enableBackup Option to enable/disable backup.
Valid values are True/False.encryptionFlag Option to set the encryption points during backups. Valid values are:
ENC_MEDIA_ONLY, to encrypt the backup data after transmission and prior to storage on the media. ENC_NETWORK_AND_MEDIA, to encrypt the backup data before transmission. The data is stored encrypted on the media. ENC_NETWORK_ONLY, to encrypt the backup data for transmission and then decrypt the data prior to storage on the media.
ENC_NONE, to disable data encryption. networkAgents Number of Network Agents.softwareCompression Option to enable compression on the Client or MediaAgent computer. Valid values are:
ON_CLIENT, to enable software compression on the client. ON_MEDIAAGENT, to enable software compression on the MediaAgent. OFF, to disable software compression.
throttleNetworkBandwidth Enhancing backup performance by reducing network bandwidth overhead.
Valid values are 0/1.enableDeduplication Option to enable deduplication on subclient.
Valid values are True/False.generateSignature A component of deduplication performed on the client or MediaAgent computer. Valid values are:
ON_CLIENT, to enable signature generation on the client. ON_MEDIA_AGENT, to enable signature generation on the MediaAgent. OFF, to disable signature generation.
storagePolicyName Name of the Storage Policy to be associated for backup.useGlobalFilters Option to enable the use of global filters. Valid values are:
ON, to enable global filters for the subclient. USE_CELL_LEVEL_POLICY, to enable the use of global filters if the Use Global Filters on All Subclients option is enabled on the Control Panel (Global Filters) dialog. If the option is disabled, USE_CELL_LEVEL_POLICY will disable global filters for the subclient. OFF, to disable global filters.
useVSS Option to enable/disable VSS for backing up the file system data.
Valid values are True/False.useVSSForSystemState Option to enable/disable VSS for backing up the system state.
Valid values are True/False.backupSystemState Option to enable/disable back up of the system state.
Valid values are True/False.postBackupCommand Path to the post process script that will be run after the backup.postScanCommand Path to the post process script that will be run after the scan phasepreBackupCommand Path to the pre process script that will be run before the backup.preScanCommand Path to the pre process script that will be run before the scan phaserunAs Option to specify the user name who has permissions to run the pre/post process scripts. Valid values are:
USE_IMPERSONATION, to specify a user with enough privileges to run the scripts. When using this value, you also need to provide the user credentials:
-prepostUserName/userName <user name> -prepostUserName/password <password>USE_LOCAL_SYS_ADMIN, to use the administrator account to run the scripts.
content/path Location of the content to be backed up. This parameter must be used along with the contentOperationType parameter, for example:
Administration Guide - Solaris File System iDataAgent
Page 65 of 265
The following examples show how to add a parameter for a command:
For detailed information on the Subclient parameters see Subclient Properties.
LIST SCHEDULE POLICY ASSOCIATION
1. Download the sched_policy_association_template.xml file and save it on the computer from where the command will be executed.
2. Execute the following command from the <Software_Installation_Directory>/Base folder after substituting the parameter values.
qoperation execute –af sched_policy_association_template.xml –taskName mypolicy
MODIFYING AN AGENT, BACKUP SET OR SUBCLIENT
The following table describes the properties that can be configured from the agent, backup set and subclient levels.
-contentOperationType <value> -content/path '<path value>'content/excludepath Location of the content to be excluded from backup. This parameter must be used along with the contentOperationType
parameter, for example:
-contentOperationType <value> -content/excludepath '<path value>'content/includepath Location of the content to be included in the backup from the excluded list. This parameter must be used along with the
contentOperationType parameter, for example:
-contentOperationType <value> -content/includepath '<path value>'contentOperationType Modification type. Valid values are
ADD, to add content to the subclient OVERWRITE, to overwrite contents to the subclient. DELETE, to delete the contents from the subclient.
Adding Content To update the location for the subclient content, add the 'path' parameter to the following command:
qoperation execute -af update_subclient_add_template.xml -appName 'File System' -clientName client1 -backupSetName backupset1 -subclientName subclient1 -contentOperationType ADD -content/path '/etc'
Setting a Storage Policy To assign a storage policy to a subclient, add the 'storagePolicyName' parameter to the following command:
qoperation execute -af update_subclient_add_template.xml -appName 'File System' -clientName client1 -backupSetName backupset1 -subclientName subclient1 -storagePolicyName sp1
PARAMETER DESCRIPTION OF PARAMETER VALUES
taskName Name of the Schedule Policy to be associated.
OPTION DESCRIPTION RELATED TOPICS
Preserving the File Access Time
This option allows you to prevent the file access time from being changed as a result of running data protection operations on the client. When this option is selected, the file access time will be preserved.
1. From the CommCell Browser, right-click the backup set, and then click Properties.
2. Select the Preserve File Access Time check box.
3. Click OK.
Change Storage Policies You can modify the storage policies in any of the following situations. To include a different media for the backup operation. To use a storage policy with a different retention criteria.
You can change the storage policies from the subclient level.
1. From the CommCell Browser, navigate to Client Computers | <Client> | File System | <Backup Set>
2. Right-click the <user-defined Subclient> in the right pane, and then click Properties.
3. Click the Storage Device tab.
4. Select the Storage policy from the drop-down list.
5. Click OK.
Refer to Storage Policies.
Rename a Backup Set or Subclient
You can rename backup sets and subclients.
Renaming BackupSet:
1. From the CommCell Bowser, navigate to Client Computers | <Client> | File System.
2. Right-click the <Backup Set>, and then click Properties.
3. In the Backup Set box, type a name.
4. Click OK.
Administration Guide - Solaris File System iDataAgent
Page 66 of 265

Renaming subclient:
1. From the CommCell Browser, navigate to Client Computers | <Client> | File System | <Backup Set>.
2. Right-click the <user-defined Subclient>, and then click Properties.
3. In the Storage Policy list, click a storage policy name.
4. Click OK. Data Transfer Options You can efficiently configure the available resources for transferring data secured by data
protection operations from the subclient level. This includes the following: Enable or disable Data Compression either on the client or the MediaAgent. Configure the transfer of data in the network using the options for Network Bandwidth Throttling and Network Agents.
You can configure the data transfer options.
1. From the CommCell Browser, navigate to Client Computers | <Client> | File System | BackupSet.
2. Right-click the <Subclient> in the right pane, and then click Properties.
3. Click the Storage Device tab.
4. Click the Data Transfer Option tab.
5. Choose the appropriate software compression option for this subclient.
6. Select the Throttle Network Bandwidth check box, and set the required bandwidth.
7. Click OK.
Refer to Data Compression and Network Bandwidth Throttling.
View Data Paths You can view the data paths associated with the primary storage policy copy of the selected storage policy or incremental storage policy. You can also modify the data paths including their priority from the subclient level.
1. From the CommCell Browser, navigate to Client Computers | <Client> | File System | BackupSet.
2. Right-click the <Subclient> in the right pane, and then click Properties.
3. Click the Storage Device tab.
4. In the Storage Policy list, click a storage policy name.
5. Click Data Paths. Configure Activity Control
You can enable backup and restore operations from the agent and subclient level. However, you can enable restore operations only from the agent level.
1. From the CommCell Browser, navigate to Client Computers | <Client>
2. Right-click the <Client> or <Subclient> in the right pane, and then click Properties.
3. Click the Activity Control tab and select or clear option(s) as desired.
4. Click OK.
Refer to Activity Control.
Configure User Security You can configure user security from the agent or subclient level.
You can perform the following functions:
Identify the user groups to which this CommCell object is associated. Associate this object with a user group. Disassociate this object from a user group.
1. From the CommCell Browser, right-click the subclient.
2. Click Properties.
3. Click the Security tab.
4. Select the appropriate user groups to which you want to associate to the CommCell object from the Available Groups pane, and then move the user group to the Associated Groups pane.
5. Click OK.
Refer to User Administration and Security.
Enable/Disable Data Encryption
You can enable data encryption from the subclient level. Encryption must be enabled at the client level prior to configuring any instances residing on that client.
1. From the CommCell browser, navigate to Client Computers | <Client> | File System | <Backup Set>
2. Right-click the <Subclient> in the right pane, and then click Properties.
3. Click the Encryption tab and select the desired encryption.
4. Click OK.
Refer to Data Encryption.
View Software Version The Version tab, at the Agent level displays the software version and post-release service
Administration Guide - Solaris File System iDataAgent
Page 67 of 265
DELETING AN AGENT, BACKUP SET OR SUBCLIENT
DELETING AN AGENT
You need to uninstall or DeConfigure the agent software from the client computer before deleting from CommCell Browser. After you delete the client software, you can either leave the corresponding data intact for appropriate action or you can remove the data immediately. If you choose to remove the data immediately, you must delete the agent from the CommCell Browser. If you delete the agent, all of the agent's data is irretrievably lost.
You cannot delete an agent while operations for that agent are running.
1. From the CommCell Browser, navigate to Client Computers | <Client>.
2. Right-click the <Agent>, and then click Delete.
3. A confirmation message is displayed with the following message:
This operation will permanently delete the data backed up from this level and it cannot be restored.
4. Click OK to continue with the deletion operation., or click No to abort the deletion.
DELETING A BACKUP SETConsider the following before deleting a Backup Set:
You cannot delete a default Backup Set.
Schedules associated with the Backup Set are also automatically deleted.
1. From the CommCell Browser, navigate to Client Computers | <Client> | <Agent>.
2. Right-click the <Backup Set>, and then click Delete.
3. A confirmation message is displayed, asking if you want to delete the Backup Set.
Click No to cancel the deletion and retain the Backupset, or click Yes to continue the deletion.
DELETING A SUBCLIENT
Consider the following before deleting a subclient:
You cannot delete a default subclient.
Schedules associated with the subclient are also automatically deleted.
1. From the CommCell Browser, navigate to Client Computers | <Client> | <Agent> | <Backup Set>.
2. Right-click the <subclient> that you want to delete, and then click Delete.
3. A confirmation message is displayed, asking if you want to delete the subclient.
Click No to cancel the deletion and retain the subclient, or click Yes to continue the deletion.
Back to Top
KEYWORDS
and Installed Updates packs and updates installed for the component.
1. From the CommCell Browser, navigate to Client Computers
2. Right-click the <Client> for which you want to view the version and the click Properties.
3. Click the Version tab.
4. Click OK.CommCell Configuration Report
The CommCell Configuration Report provides the properties of the CommServe, MediaAgents, clients, agents, SRM agents, subclients, and storage policies within the CommCell based on the selected filter criteria.
1. From the CommCell Browser, double-click Reports icon.
2. Select CommCell Configuration.
3. Click Run.
Refer to CommCell Configuration.
When you delete an instance or backupset, the associated data is logically deleted and you can no longer access the corresponding data from CommCell Console for recovery purposes.
Refer to the troubleshooting article on Recovering Data Associated with Deleted Clients and Storage Policies for information on how to recover data if you accidentally delete an entity.
Administration Guide - Solaris File System iDataAgent
Page 68 of 265

Apple Double Encoded Support, Classic Scan, Ctime, Hard Links, Hole, Locale for Non-ASCII character, Locked File, NFS Mount, mount point, Mtime, Raw device, Sparse File, Symbolic Link
Administration Guide - Solaris File System iDataAgent
Page 69 of 265
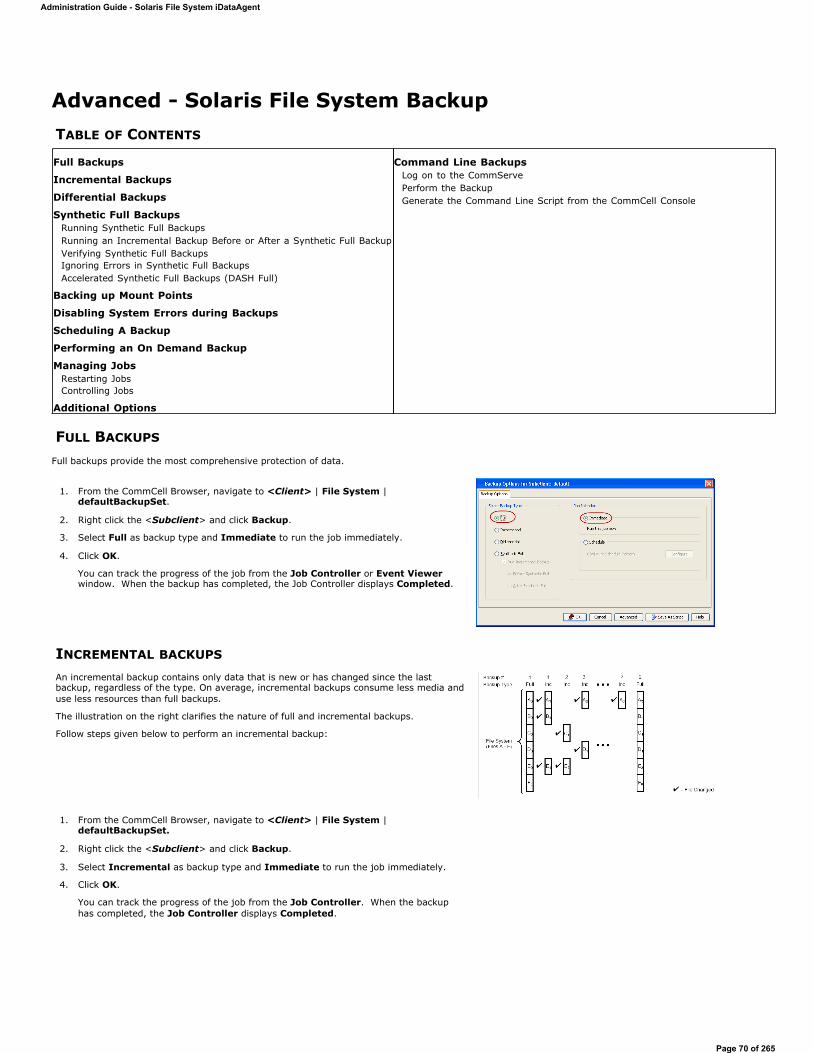
Advanced - Solaris File System Backup TABLE OF CONTENTS
FULL BACKUPS
Full backups provide the most comprehensive protection of data.
INCREMENTAL BACKUPS
Full Backups
Incremental Backups
Differential Backups
Synthetic Full BackupsRunning Synthetic Full BackupsRunning an Incremental Backup Before or After a Synthetic Full BackupVerifying Synthetic Full BackupsIgnoring Errors in Synthetic Full BackupsAccelerated Synthetic Full Backups (DASH Full)
Backing up Mount Points
Disabling System Errors during Backups
Scheduling A Backup
Performing an On Demand Backup
Managing JobsRestarting JobsControlling Jobs
Additional Options
Command Line BackupsLog on to the CommServePerform the BackupGenerate the Command Line Script from the CommCell Console
1. From the CommCell Browser, navigate to <Client> | File System |defaultBackupSet.
2. Right click the <Subclient> and click Backup.
3. Select Full as backup type and Immediate to run the job immediately.
4. Click OK.
You can track the progress of the job from the Job Controller or Event Viewerwindow. When the backup has completed, the Job Controller displays Completed.
An incremental backup contains only data that is new or has changed since the last backup, regardless of the type. On average, incremental backups consume less media and use less resources than full backups.
The illustration on the right clarifies the nature of full and incremental backups.
Follow steps given below to perform an incremental backup:
1. From the CommCell Browser, navigate to <Client> | File System | defaultBackupSet.
2. Right click the <Subclient> and click Backup.
3. Select Incremental as backup type and Immediate to run the job immediately.
4. Click OK.
You can track the progress of the job from the Job Controller. When the backup has completed, the Job Controller displays Completed.
Administration Guide - Solaris File System iDataAgent
Page 70 of 265
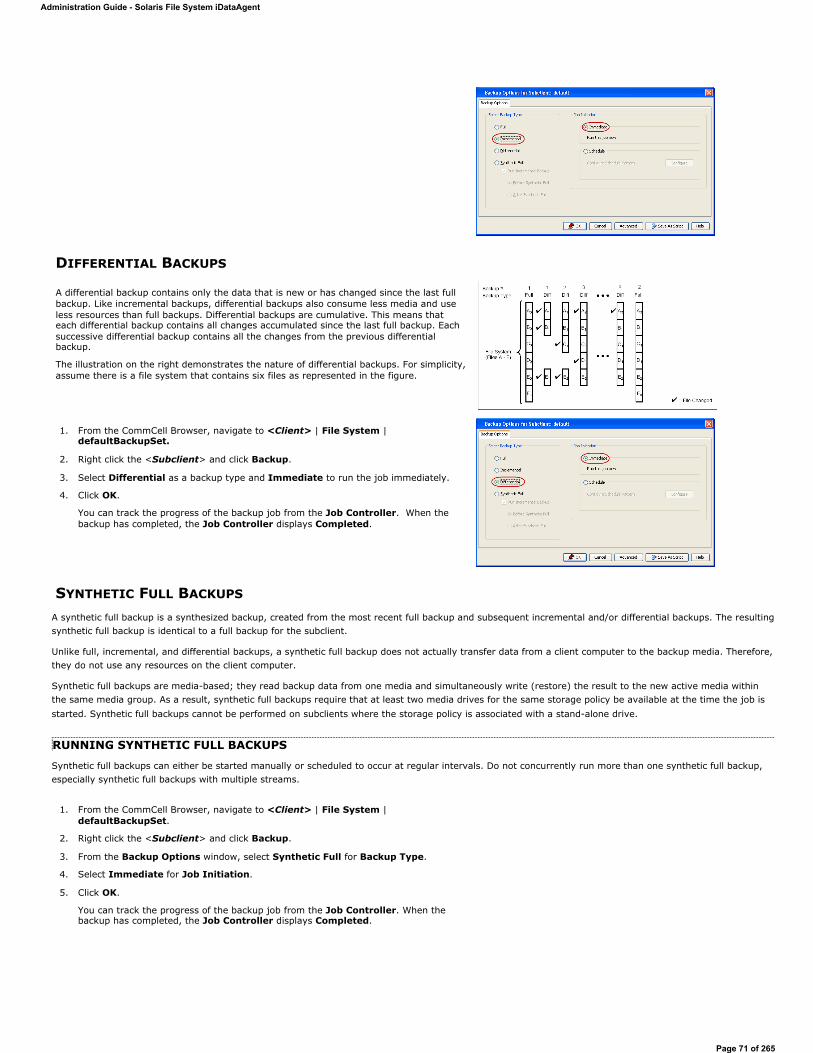
DIFFERENTIAL BACKUPS
SYNTHETIC FULL BACKUPS
A synthetic full backup is a synthesized backup, created from the most recent full backup and subsequent incremental and/or differential backups. The resulting synthetic full backup is identical to a full backup for the subclient.
Unlike full, incremental, and differential backups, a synthetic full backup does not actually transfer data from a client computer to the backup media. Therefore, they do not use any resources on the client computer.
Synthetic full backups are media-based; they read backup data from one media and simultaneously write (restore) the result to the new active media within the same media group. As a result, synthetic full backups require that at least two media drives for the same storage policy be available at the time the job is started. Synthetic full backups cannot be performed on subclients where the storage policy is associated with a stand-alone drive.
RUNNING SYNTHETIC FULL BACKUPS
Synthetic full backups can either be started manually or scheduled to occur at regular intervals. Do not concurrently run more than one synthetic full backup, especially synthetic full backups with multiple streams.
A differential backup contains only the data that is new or has changed since the last full backup. Like incremental backups, differential backups also consume less media and use less resources than full backups. Differential backups are cumulative. This means that each differential backup contains all changes accumulated since the last full backup. Each successive differential backup contains all the changes from the previous differential backup.
The illustration on the right demonstrates the nature of differential backups. For simplicity, assume there is a file system that contains six files as represented in the figure.
1. From the CommCell Browser, navigate to <Client> | File System | defaultBackupSet.
2. Right click the <Subclient> and click Backup.
3. Select Differential as a backup type and Immediate to run the job immediately.
4. Click OK.
You can track the progress of the backup job from the Job Controller. When the backup has completed, the Job Controller displays Completed.
1. From the CommCell Browser, navigate to <Client> | File System | defaultBackupSet.
2. Right click the <Subclient> and click Backup.
3. From the Backup Options window, select Synthetic Full for Backup Type.
4. Select Immediate for Job Initiation.
5. Click OK.
You can track the progress of the backup job from the Job Controller. When the backup has completed, the Job Controller displays Completed.
Administration Guide - Solaris File System iDataAgent
Page 71 of 265
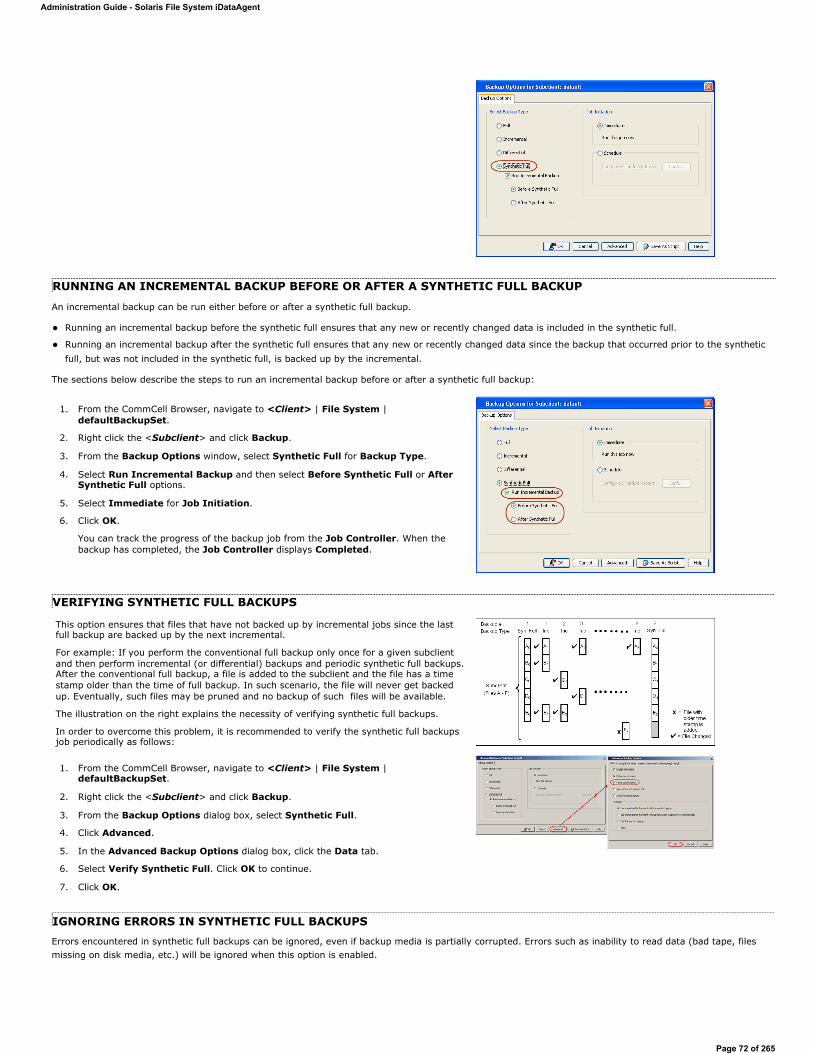
RUNNING AN INCREMENTAL BACKUP BEFORE OR AFTER A SYNTHETIC FULL BACKUP
An incremental backup can be run either before or after a synthetic full backup.
Running an incremental backup before the synthetic full ensures that any new or recently changed data is included in the synthetic full.
Running an incremental backup after the synthetic full ensures that any new or recently changed data since the backup that occurred prior to the synthetic full, but was not included in the synthetic full, is backed up by the incremental.
The sections below describe the steps to run an incremental backup before or after a synthetic full backup:
VERIFYING SYNTHETIC FULL BACKUPS
IGNORING ERRORS IN SYNTHETIC FULL BACKUPSErrors encountered in synthetic full backups can be ignored, even if backup media is partially corrupted. Errors such as inability to read data (bad tape, files missing on disk media, etc.) will be ignored when this option is enabled.
1. From the CommCell Browser, navigate to <Client> | File System | defaultBackupSet.
2. Right click the <Subclient> and click Backup.
3. From the Backup Options window, select Synthetic Full for Backup Type.
4. Select Run Incremental Backup and then select Before Synthetic Full or After Synthetic Full options.
5. Select Immediate for Job Initiation.
6. Click OK.
You can track the progress of the backup job from the Job Controller. When the backup has completed, the Job Controller displays Completed.
This option ensures that files that have not backed up by incremental jobs since the last full backup are backed up by the next incremental.
For example: If you perform the conventional full backup only once for a given subclient and then perform incremental (or differential) backups and periodic synthetic full backups. After the conventional full backup, a file is added to the subclient and the file has a time stamp older than the time of full backup. In such scenario, the file will never get backed up. Eventually, such files may be pruned and no backup of such files will be available.
The illustration on the right explains the necessity of verifying synthetic full backups.
In order to overcome this problem, it is recommended to verify the synthetic full backups job periodically as follows:
1. From the CommCell Browser, navigate to <Client> | File System | defaultBackupSet.
2. Right click the <Subclient> and click Backup.
3. From the Backup Options dialog box, select Synthetic Full.
4. Click Advanced.
5. In the Advanced Backup Options dialog box, click the Data tab.
6. Select Verify Synthetic Full. Click OK to continue.
7. Click OK.
Administration Guide - Solaris File System iDataAgent
Page 72 of 265

ACCELERATED SYNTHETIC FULL BACKUPS (DASH FULL) When a storage policy copy is deduplicated, synthetic full backups can be created in an accelerated mode to significantly reduce the copy duration. This is done by identifying and transferring the data signatures (instead of the data itself) to the target wherever possible.
Learn more...
BACKING UP MOUNT POINTS
Backups follow mount points by default, backing up both the configuration and the data on the mounted volume. You can use another subclient to backup the data on the mounted volume. In such case, you can exclude the data on the mounted volume from the default backup.
DISABLING SYSTEM ERRORS DURING BACKUPS
By default, system errors are displayed during backup operations; for example, file not found. Use the following steps to ignore such specific system errors:
1. From the CommCell Browser, navigate to <Client> | File System | defaultBackupSet.
2. Right click the subclient and click Backup.
3. From the Backup Options dialog box, select Synthetic Full.
4. Click Advanced.
5. In the Advanced Backup Options dialog box, click the Data tab.
6. Select Verify Synthetic Full and then select Ignore Error in Synthetic Full.
7. Click OK to close the Advanced Backup Options dialog box.
8. Click OK .
1. From the CommCell Browser, navigate to <Client> | File System|defaultBackupSet.
2. Right click the default <Subclient> and click Backup.
3. Select Full as backup type and Immediate to run the job immediately.
4. Click Advanced and select the Advanced Backup Options dialog box.
5. In the Advanced Backup Options dialog box, click the Data tab.
6. Select (or clear) Follow Mount Points to include (or exclude) mount point data from the subclient.
7. Click OK.
Depending upon your selection, the mount point data will be included or excluded from the default subclient backup.
When backups are run from multiple nodes on clustered file systems, the same content is backed up multiple times. Backups should be run on only one node to avoid such duplicate content backups. However, the other nodes can also be configured to run backups but make sure that the clustered file system mount point is added to the file system exclusion list of the physical machine's subclients.
For VERITAS Cluster File System, the clustered file system mount point is added automatically to the file system exclusion list when backup is run for the first time on the virtual node/s.
1. From the CommCell Console, navigate to Client Computers.
2. Right-click the <Client>, and then click Properties.
3. Click the Registry Key Settings tab.
4. Click Add.
5. In the Name field, type backupDoNotReportFileError.
6. In the Location list, type FileSystemAgent.
7. In the Type list, select Value.
8. In the Value field, type <errcode1, errcode2, errcode3...> where errcode1, errcode2, errcode3 are error codes to ignore.
For example, 65521.
9. Click OK.
Administration Guide - Solaris File System iDataAgent
Page 73 of 265
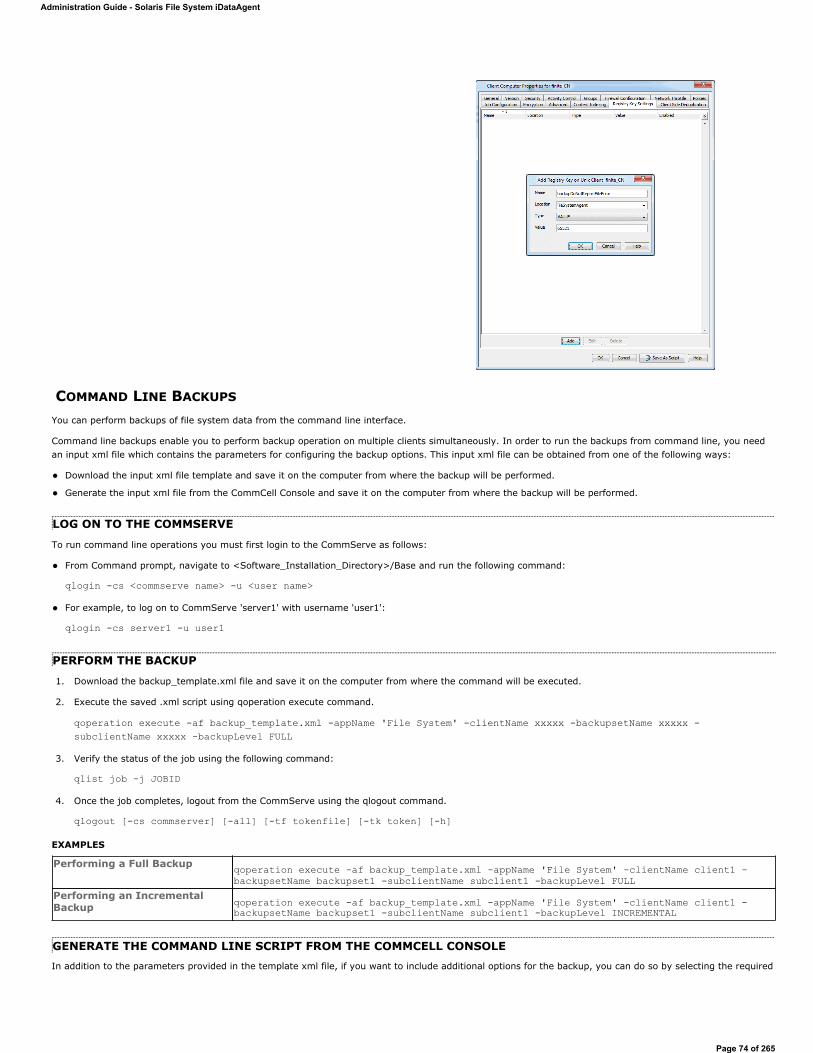
COMMAND LINE BACKUPS
You can perform backups of file system data from the command line interface.
Command line backups enable you to perform backup operation on multiple clients simultaneously. In order to run the backups from command line, you need an input xml file which contains the parameters for configuring the backup options. This input xml file can be obtained from one of the following ways:
Download the input xml file template and save it on the computer from where the backup will be performed.
Generate the input xml file from the CommCell Console and save it on the computer from where the backup will be performed.
LOG ON TO THE COMMSERVE
To run command line operations you must first login to the CommServe as follows:
From Command prompt, navigate to <Software_Installation_Directory>/Base and run the following command:
qlogin -cs <commserve name> -u <user name>
For example, to log on to CommServe 'server1' with username 'user1':
qlogin -cs server1 -u user1
PERFORM THE BACKUP
1. Download the backup_template.xml file and save it on the computer from where the command will be executed.
2. Execute the saved .xml script using qoperation execute command.
qoperation execute -af backup_template.xml -appName 'File System' -clientName xxxxx -backupsetName xxxxx -subclientName xxxxx -backupLevel FULL
3. Verify the status of the job using the following command:
qlist job –j JOBID
4. Once the job completes, logout from the CommServe using the qlogout command.
qlogout [-cs commserver] [-all] [-tf tokenfile] [-tk token] [-h]
EXAMPLES
GENERATE THE COMMAND LINE SCRIPT FROM THE COMMCELL CONSOLEIn addition to the parameters provided in the template xml file, if you want to include additional options for the backup, you can do so by selecting the required
Performing a Full Backup qoperation execute -af backup_template.xml -appName 'File System' -clientName client1 -backupsetName backupset1 -subclientName subclient1 -backupLevel FULL
Performing an Incremental Backup qoperation execute -af backup_template.xml -appName 'File System' -clientName client1 -
backupsetName backupset1 -subclientName subclient1 -backupLevel INCREMENTAL
Administration Guide - Solaris File System iDataAgent
Page 74 of 265
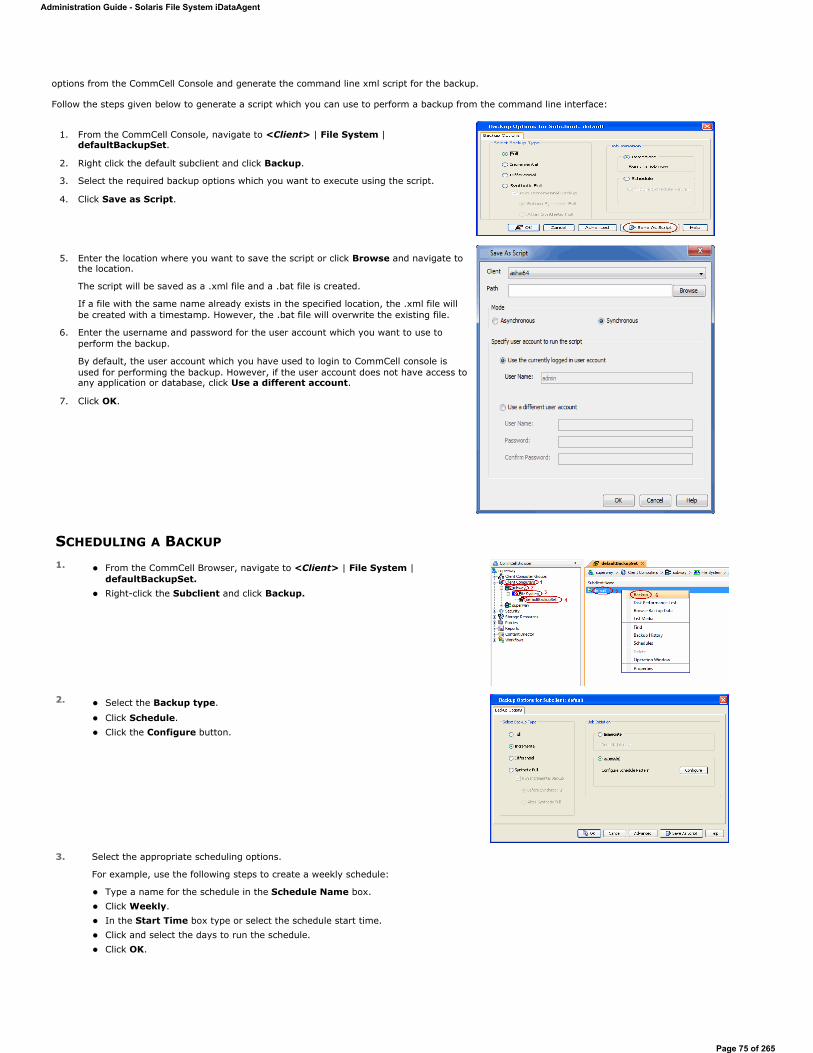
options from the CommCell Console and generate the command line xml script for the backup.
Follow the steps given below to generate a script which you can use to perform a backup from the command line interface:
SCHEDULING A BACKUP
1. From the CommCell Console, navigate to <Client> | File System |defaultBackupSet.
2. Right click the default subclient and click Backup.
3. Select the required backup options which you want to execute using the script.
4. Click Save as Script.
5. Enter the location where you want to save the script or click Browse and navigate to the location.
The script will be saved as a .xml file and a .bat file is created.
If a file with the same name already exists in the specified location, the .xml file will be created with a timestamp. However, the .bat file will overwrite the existing file.
6. Enter the username and password for the user account which you want to use to perform the backup.
By default, the user account which you have used to login to CommCell console is used for performing the backup. However, if the user account does not have access to any application or database, click Use a different account.
7. Click OK.
1. From the CommCell Browser, navigate to <Client> | File System | defaultBackupSet.Right-click the Subclient and click Backup.
2. Select the Backup type.
Click Schedule. Click the Configure button.
3. Select the appropriate scheduling options.
For example, use the following steps to create a weekly schedule:
Type a name for the schedule in the Schedule Name box. Click Weekly. In the Start Time box type or select the schedule start time. Click and select the days to run the schedule. Click OK.
Administration Guide - Solaris File System iDataAgent
Page 75 of 265
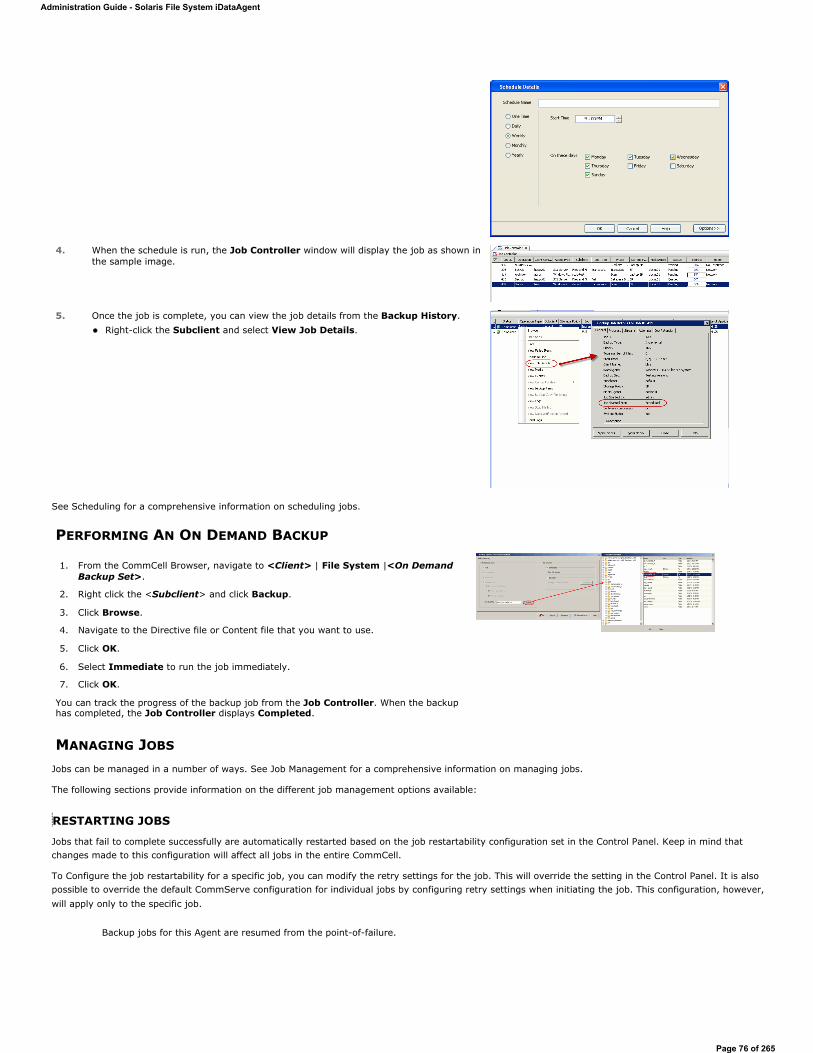
See Scheduling for a comprehensive information on scheduling jobs.
PERFORMING AN ON DEMAND BACKUP
MANAGING JOBS
Jobs can be managed in a number of ways. See Job Management for a comprehensive information on managing jobs.
The following sections provide information on the different job management options available:
RESTARTING JOBS
Jobs that fail to complete successfully are automatically restarted based on the job restartability configuration set in the Control Panel. Keep in mind that changes made to this configuration will affect all jobs in the entire CommCell.
To Configure the job restartability for a specific job, you can modify the retry settings for the job. This will override the setting in the Control Panel. It is also possible to override the default CommServe configuration for individual jobs by configuring retry settings when initiating the job. This configuration, however, will apply only to the specific job.
4. When the schedule is run, the Job Controller window will display the job as shown in the sample image.
5. Once the job is complete, you can view the job details from the Backup History. Right-click the Subclient and select View Job Details.
1. From the CommCell Browser, navigate to <Client> | File System |<On Demand Backup Set>.
2. Right click the <Subclient> and click Backup.
3. Click Browse.
4. Navigate to the Directive file or Content file that you want to use.
5. Click OK.
6. Select Immediate to run the job immediately.
7. Click OK.
You can track the progress of the backup job from the Job Controller. When the backup has completed, the Job Controller displays Completed.
Backup jobs for this Agent are resumed from the point-of-failure.
Administration Guide - Solaris File System iDataAgent
Page 76 of 265
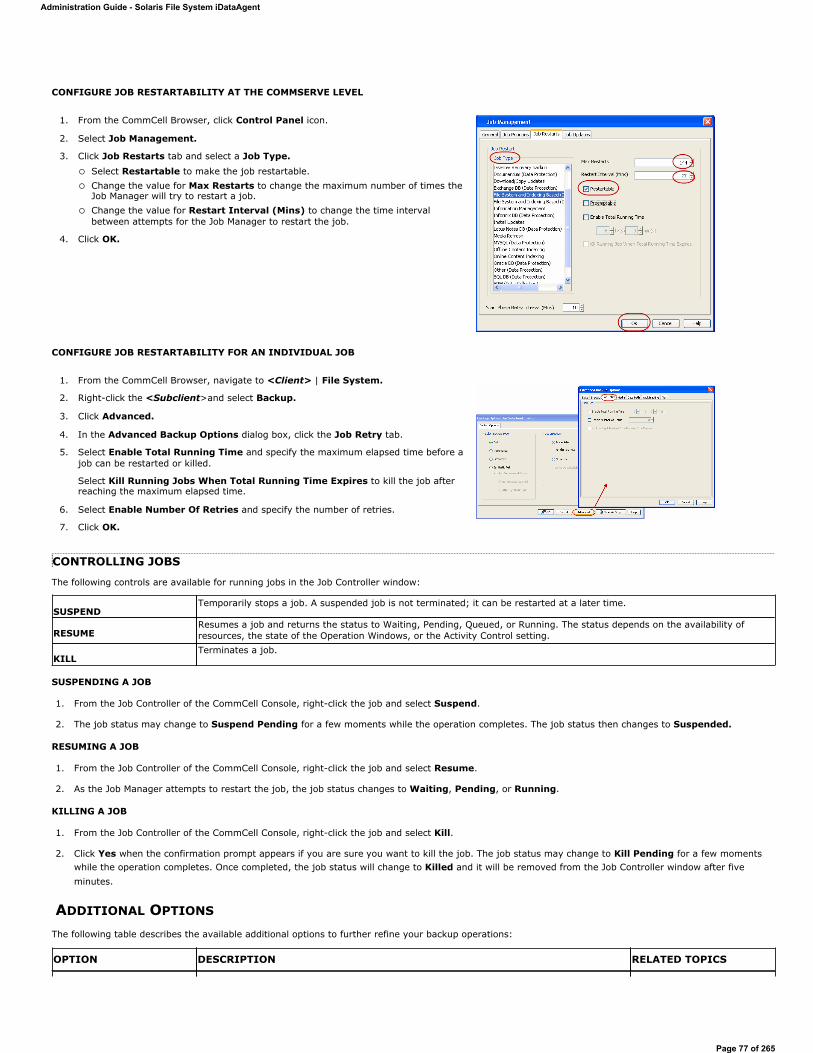
CONFIGURE JOB RESTARTABILITY AT THE COMMSERVE LEVEL
CONFIGURE JOB RESTARTABILITY FOR AN INDIVIDUAL JOB
CONTROLLING JOBS
The following controls are available for running jobs in the Job Controller window:
SUSPENDING A JOB
1. From the Job Controller of the CommCell Console, right-click the job and select Suspend.
2. The job status may change to Suspend Pending for a few moments while the operation completes. The job status then changes to Suspended.
RESUMING A JOB
1. From the Job Controller of the CommCell Console, right-click the job and select Resume.
2. As the Job Manager attempts to restart the job, the job status changes to Waiting, Pending, or Running.
KILLING A JOB
1. From the Job Controller of the CommCell Console, right-click the job and select Kill.
2. Click Yes when the confirmation prompt appears if you are sure you want to kill the job. The job status may change to Kill Pending for a few moments while the operation completes. Once completed, the job status will change to Killed and it will be removed from the Job Controller window after five minutes.
ADDITIONAL OPTIONS
The following table describes the available additional options to further refine your backup operations:
1. From the CommCell Browser, click Control Panel icon.
2. Select Job Management.
3. Click Job Restarts tab and select a Job Type.Select Restartable to make the job restartable. Change the value for Max Restarts to change the maximum number of times the Job Manager will try to restart a job. Change the value for Restart Interval (Mins) to change the time interval between attempts for the Job Manager to restart the job.
4. Click OK.
1. From the CommCell Browser, navigate to <Client> | File System.
2. Right-click the <Subclient>and select Backup.
3. Click Advanced.
4. In the Advanced Backup Options dialog box, click the Job Retry tab.
5. Select Enable Total Running Time and specify the maximum elapsed time before a job can be restarted or killed.
Select Kill Running Jobs When Total Running Time Expires to kill the job after reaching the maximum elapsed time.
6. Select Enable Number Of Retries and specify the number of retries.
7. Click OK.
SUSPENDTemporarily stops a job. A suspended job is not terminated; it can be restarted at a later time.
RESUMEResumes a job and returns the status to Waiting, Pending, Queued, or Running. The status depends on the availability of resources, the state of the Operation Windows, or the Activity Control setting.
KILLTerminates a job.
OPTION DESCRIPTION RELATED TOPICS
Administration Guide - Solaris File System iDataAgent
Page 77 of 265
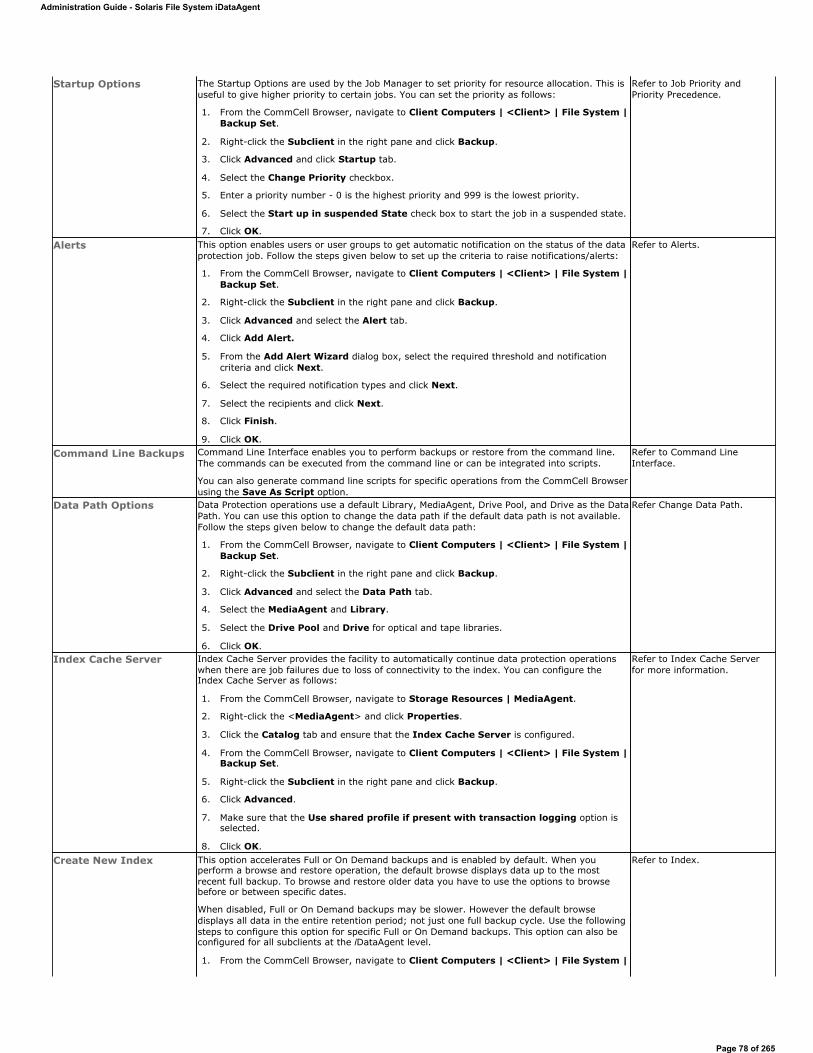
Startup Options The Startup Options are used by the Job Manager to set priority for resource allocation. This is useful to give higher priority to certain jobs. You can set the priority as follows:
1. From the CommCell Browser, navigate to Client Computers | <Client> | File System | Backup Set.
2. Right-click the Subclient in the right pane and click Backup.
3. Click Advanced and click Startup tab.
4. Select the Change Priority checkbox.
5. Enter a priority number - 0 is the highest priority and 999 is the lowest priority.
6. Select the Start up in suspended State check box to start the job in a suspended state.
7. Click OK.
Refer to Job Priority and Priority Precedence.
Alerts This option enables users or user groups to get automatic notification on the status of the data protection job. Follow the steps given below to set up the criteria to raise notifications/alerts:
1. From the CommCell Browser, navigate to Client Computers | <Client> | File System | Backup Set.
2. Right-click the Subclient in the right pane and click Backup.
3. Click Advanced and select the Alert tab.
4. Click Add Alert.
5. From the Add Alert Wizard dialog box, select the required threshold and notification criteria and click Next.
6. Select the required notification types and click Next.
7. Select the recipients and click Next.
8. Click Finish.
9. Click OK.
Refer to Alerts.
Command Line Backups Command Line Interface enables you to perform backups or restore from the command line. The commands can be executed from the command line or can be integrated into scripts.
You can also generate command line scripts for specific operations from the CommCell Browser using the Save As Script option.
Refer to Command Line Interface.
Data Path Options Data Protection operations use a default Library, MediaAgent, Drive Pool, and Drive as the Data Path. You can use this option to change the data path if the default data path is not available. Follow the steps given below to change the default data path:
1. From the CommCell Browser, navigate to Client Computers | <Client> | File System | Backup Set.
2. Right-click the Subclient in the right pane and click Backup.
3. Click Advanced and select the Data Path tab.
4. Select the MediaAgent and Library.
5. Select the Drive Pool and Drive for optical and tape libraries.
6. Click OK.
Refer Change Data Path.
Index Cache Server Index Cache Server provides the facility to automatically continue data protection operations when there are job failures due to loss of connectivity to the index. You can configure the Index Cache Server as follows:
1. From the CommCell Browser, navigate to Storage Resources | MediaAgent.
2. Right-click the <MediaAgent> and click Properties.
3. Click the Catalog tab and ensure that the Index Cache Server is configured.
4. From the CommCell Browser, navigate to Client Computers | <Client> | File System | Backup Set.
5. Right-click the Subclient in the right pane and click Backup.
6. Click Advanced.
7. Make sure that the Use shared profile if present with transaction logging option is selected.
8. Click OK.
Refer to Index Cache Serverfor more information.
Create New Index This option accelerates Full or On Demand backups and is enabled by default. When you perform a browse and restore operation, the default browse displays data up to the most recent full backup. To browse and restore older data you have to use the options to browse before or between specific dates.
When disabled, Full or On Demand backups may be slower. However the default browse displays all data in the entire retention period; not just one full backup cycle. Use the following steps to configure this option for specific Full or On Demand backups. This option can also be configured for all subclients at the iDataAgent level.
1. From the CommCell Browser, navigate to Client Computers | <Client> | File System |
Refer to Index.
Administration Guide - Solaris File System iDataAgent
Page 78 of 265
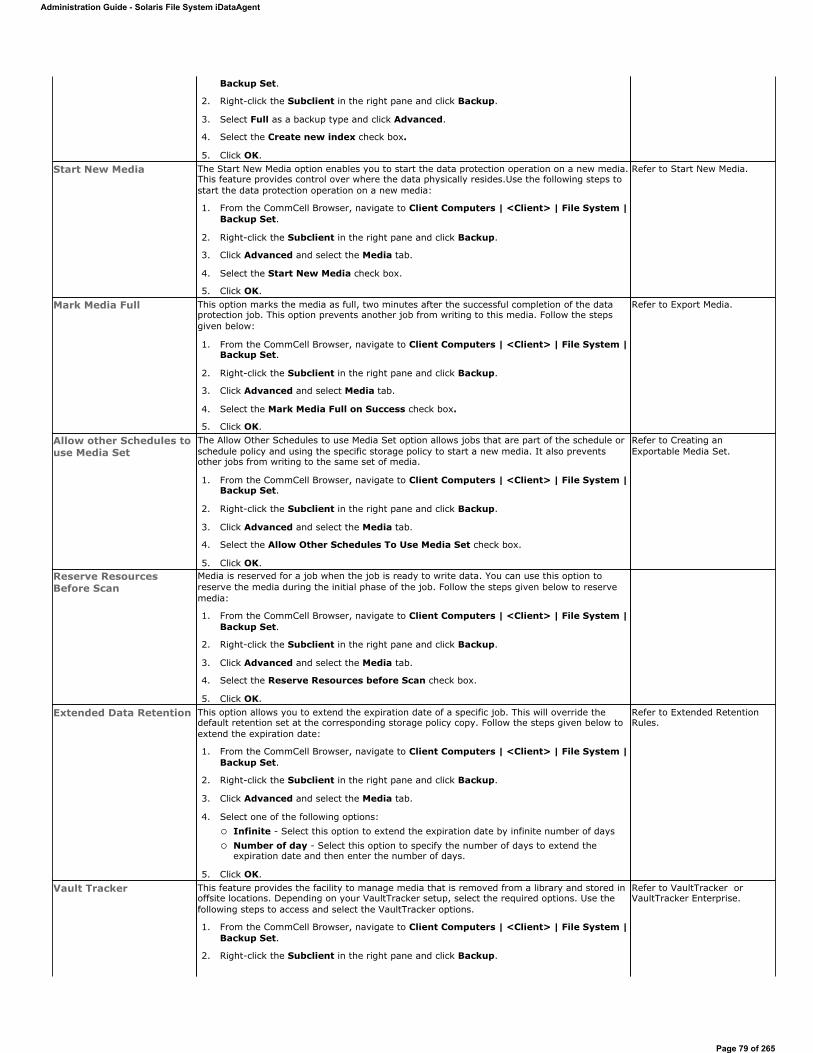
Backup Set.
2. Right-click the Subclient in the right pane and click Backup.
3. Select Full as a backup type and click Advanced.
4. Select the Create new index check box.
5. Click OK. Start New Media The Start New Media option enables you to start the data protection operation on a new media.
This feature provides control over where the data physically resides.Use the following steps to start the data protection operation on a new media:
1. From the CommCell Browser, navigate to Client Computers | <Client> | File System | Backup Set.
2. Right-click the Subclient in the right pane and click Backup.
3. Click Advanced and select the Media tab.
4. Select the Start New Media check box.
5. Click OK.
Refer to Start New Media.
Mark Media Full This option marks the media as full, two minutes after the successful completion of the data protection job. This option prevents another job from writing to this media. Follow the steps given below:
1. From the CommCell Browser, navigate to Client Computers | <Client> | File System | Backup Set.
2. Right-click the Subclient in the right pane and click Backup.
3. Click Advanced and select Media tab.
4. Select the Mark Media Full on Success check box.
5. Click OK.
Refer to Export Media.
Allow other Schedules to use Media Set
The Allow Other Schedules to use Media Set option allows jobs that are part of the schedule or schedule policy and using the specific storage policy to start a new media. It also prevents other jobs from writing to the same set of media.
1. From the CommCell Browser, navigate to Client Computers | <Client> | File System | Backup Set.
2. Right-click the Subclient in the right pane and click Backup.
3. Click Advanced and select the Media tab.
4. Select the Allow Other Schedules To Use Media Set check box.
5. Click OK.
Refer to Creating an Exportable Media Set.
Reserve Resources Before Scan
Media is reserved for a job when the job is ready to write data. You can use this option to reserve the media during the initial phase of the job. Follow the steps given below to reserve media:
1. From the CommCell Browser, navigate to Client Computers | <Client> | File System | Backup Set.
2. Right-click the Subclient in the right pane and click Backup.
3. Click Advanced and select the Media tab.
4. Select the Reserve Resources before Scan check box.
5. Click OK. Extended Data Retention This option allows you to extend the expiration date of a specific job. This will override the
default retention set at the corresponding storage policy copy. Follow the steps given below to extend the expiration date:
1. From the CommCell Browser, navigate to Client Computers | <Client> | File System | Backup Set.
2. Right-click the Subclient in the right pane and click Backup.
3. Click Advanced and select the Media tab.
4. Select one of the following options: Infinite - Select this option to extend the expiration date by infinite number of days Number of day - Select this option to specify the number of days to extend the expiration date and then enter the number of days.
5. Click OK.
Refer to Extended Retention Rules.
Vault Tracker This feature provides the facility to manage media that is removed from a library and stored in offsite locations. Depending on your VaultTracker setup, select the required options. Use the following steps to access and select the VaultTracker options.
1. From the CommCell Browser, navigate to Client Computers | <Client> | File System | Backup Set.
2. Right-click the Subclient in the right pane and click Backup.
Refer to VaultTracker or VaultTracker Enterprise.
Administration Guide - Solaris File System iDataAgent
Page 79 of 265
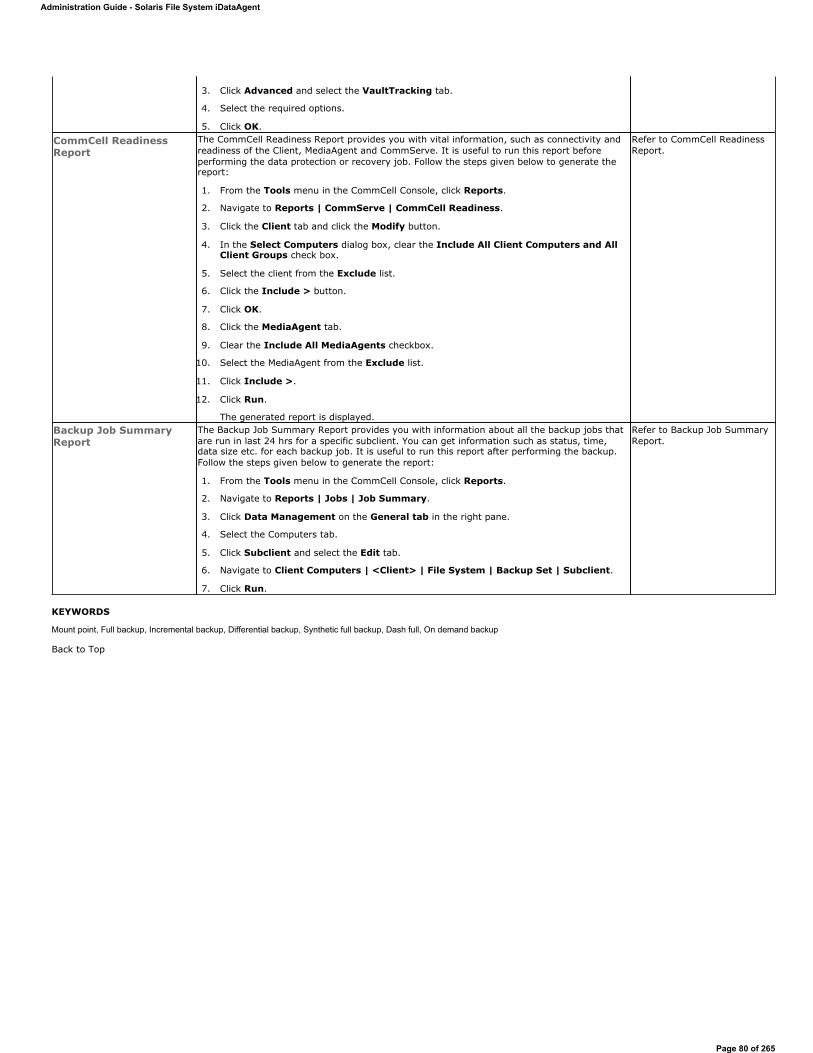
KEYWORDS
Mount point, Full backup, Incremental backup, Differential backup, Synthetic full backup, Dash full, On demand backup
Back to Top
3. Click Advanced and select the VaultTracking tab.
4. Select the required options.
5. Click OK. CommCell Readiness Report
The CommCell Readiness Report provides you with vital information, such as connectivity and readiness of the Client, MediaAgent and CommServe. It is useful to run this report before performing the data protection or recovery job. Follow the steps given below to generate the report:
1. From the Tools menu in the CommCell Console, click Reports.
2. Navigate to Reports | CommServe | CommCell Readiness.
3. Click the Client tab and click the Modify button.
4. In the Select Computers dialog box, clear the Include All Client Computers and All Client Groups check box.
5. Select the client from the Exclude list.
6. Click the Include > button.
7. Click OK.
8. Click the MediaAgent tab.
9. Clear the Include All MediaAgents checkbox.
10. Select the MediaAgent from the Exclude list.
11. Click Include >.
12. Click Run.
The generated report is displayed.
Refer to CommCell Readiness Report.
Backup Job Summary Report
The Backup Job Summary Report provides you with information about all the backup jobs that are run in last 24 hrs for a specific subclient. You can get information such as status, time, data size etc. for each backup job. It is useful to run this report after performing the backup. Follow the steps given below to generate the report:
1. From the Tools menu in the CommCell Console, click Reports.
2. Navigate to Reports | Jobs | Job Summary.
3. Click Data Management on the General tab in the right pane.
4. Select the Computers tab.
5. Click Subclient and select the Edit tab.
6. Navigate to Client Computers | <Client> | File System | Backup Set | Subclient.
7. Click Run.
Refer to Backup Job Summary Report.
Administration Guide - Solaris File System iDataAgent
Page 80 of 265
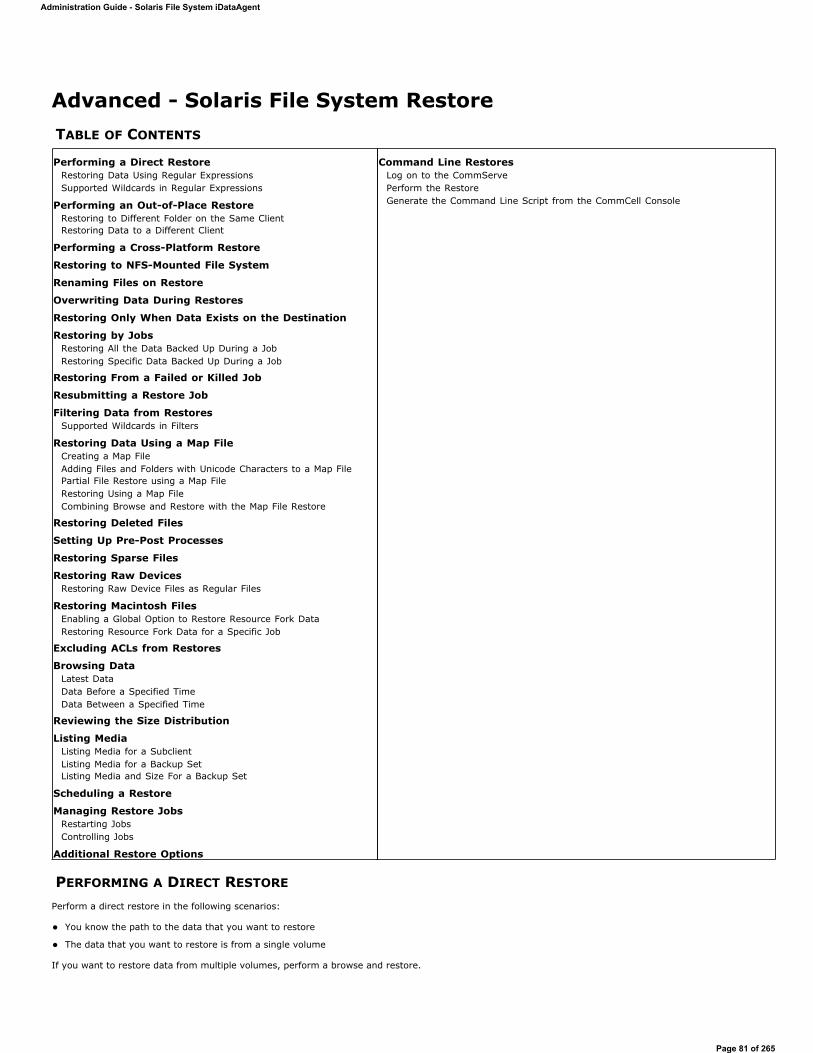
Advanced - Solaris File System RestoreTABLE OF CONTENTS
PERFORMING A DIRECT RESTORE
Perform a direct restore in the following scenarios:
You know the path to the data that you want to restore
The data that you want to restore is from a single volume
If you want to restore data from multiple volumes, perform a browse and restore.
Performing a Direct RestoreRestoring Data Using Regular ExpressionsSupported Wildcards in Regular Expressions
Performing an Out-of-Place RestoreRestoring to Different Folder on the Same ClientRestoring Data to a Different Client
Performing a Cross-Platform Restore
Restoring to NFS-Mounted File System
Renaming Files on Restore
Overwriting Data During Restores
Restoring Only When Data Exists on the Destination
Restoring by JobsRestoring All the Data Backed Up During a JobRestoring Specific Data Backed Up During a Job
Restoring From a Failed or Killed Job
Resubmitting a Restore Job
Filtering Data from RestoresSupported Wildcards in Filters
Restoring Data Using a Map FileCreating a Map FileAdding Files and Folders with Unicode Characters to a Map FilePartial File Restore using a Map FileRestoring Using a Map FileCombining Browse and Restore with the Map File Restore
Restoring Deleted Files
Setting Up Pre-Post Processes
Restoring Sparse Files
Restoring Raw DevicesRestoring Raw Device Files as Regular Files
Restoring Macintosh FilesEnabling a Global Option to Restore Resource Fork DataRestoring Resource Fork Data for a Specific Job
Excluding ACLs from Restores
Browsing DataLatest DataData Before a Specified TimeData Between a Specified Time
Reviewing the Size Distribution
Listing MediaListing Media for a SubclientListing Media for a Backup SetListing Media and Size For a Backup Set
Scheduling a Restore
Managing Restore JobsRestarting JobsControlling Jobs
Additional Restore Options
Command Line RestoresLog on to the CommServePerform the RestoreGenerate the Command Line Script from the CommCell Console
Administration Guide - Solaris File System iDataAgent
Page 81 of 265
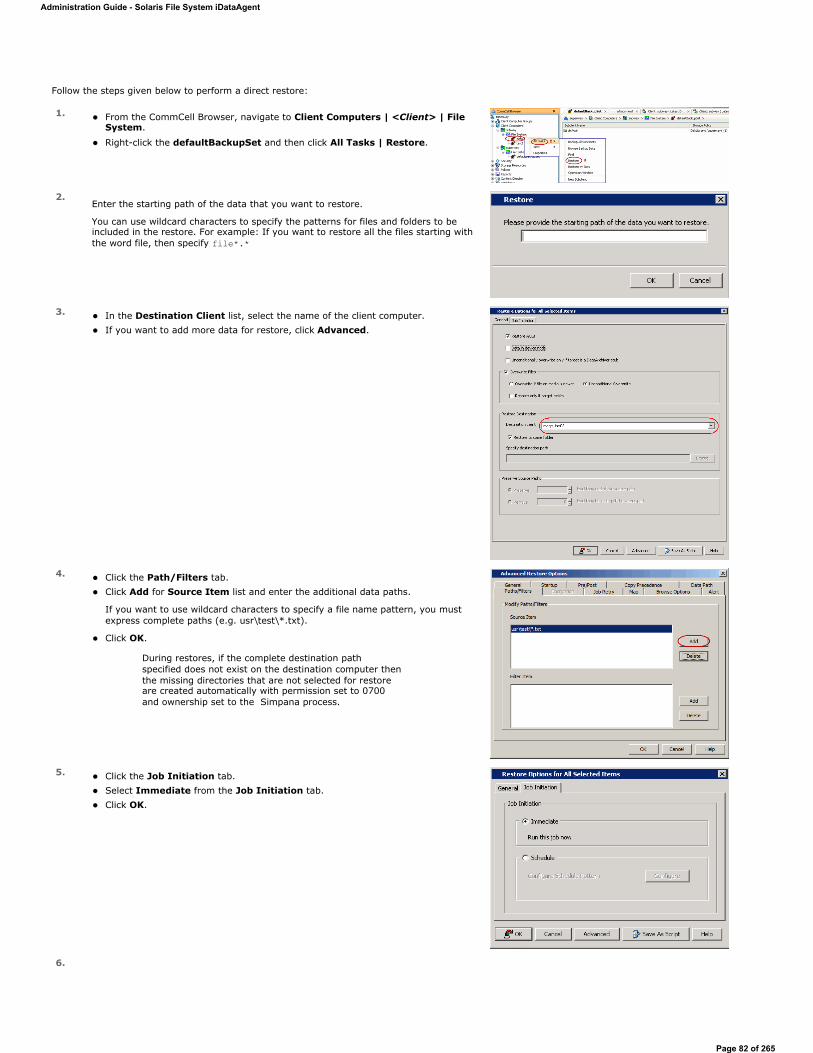
Follow the steps given below to perform a direct restore:
1. From the CommCell Browser, navigate to Client Computers | <Client> | File System.
Right-click the defaultBackupSet and then click All Tasks | Restore.
2.Enter the starting path of the data that you want to restore.
You can use wildcard characters to specify the patterns for files and folders to be included in the restore. For example: If you want to restore all the files starting with the word file, then specify file*.*
3. In the Destination Client list, select the name of the client computer. If you want to add more data for restore, click Advanced.
4. Click the Path/Filters tab. Click Add for Source Item list and enter the additional data paths.
If you want to use wildcard characters to specify a file name pattern, you must express complete paths (e.g. usr\test\*.txt).
Click OK.
During restores, if the complete destination path specified does not exist on the destination computer then the missing directories that are not selected for restore are created automatically with permission set to 0700 and ownership set to the Simpana process.
5. Click the Job Initiation tab. Select Immediate from the Job Initiation tab. Click OK.
6.
Administration Guide - Solaris File System iDataAgent
Page 82 of 265
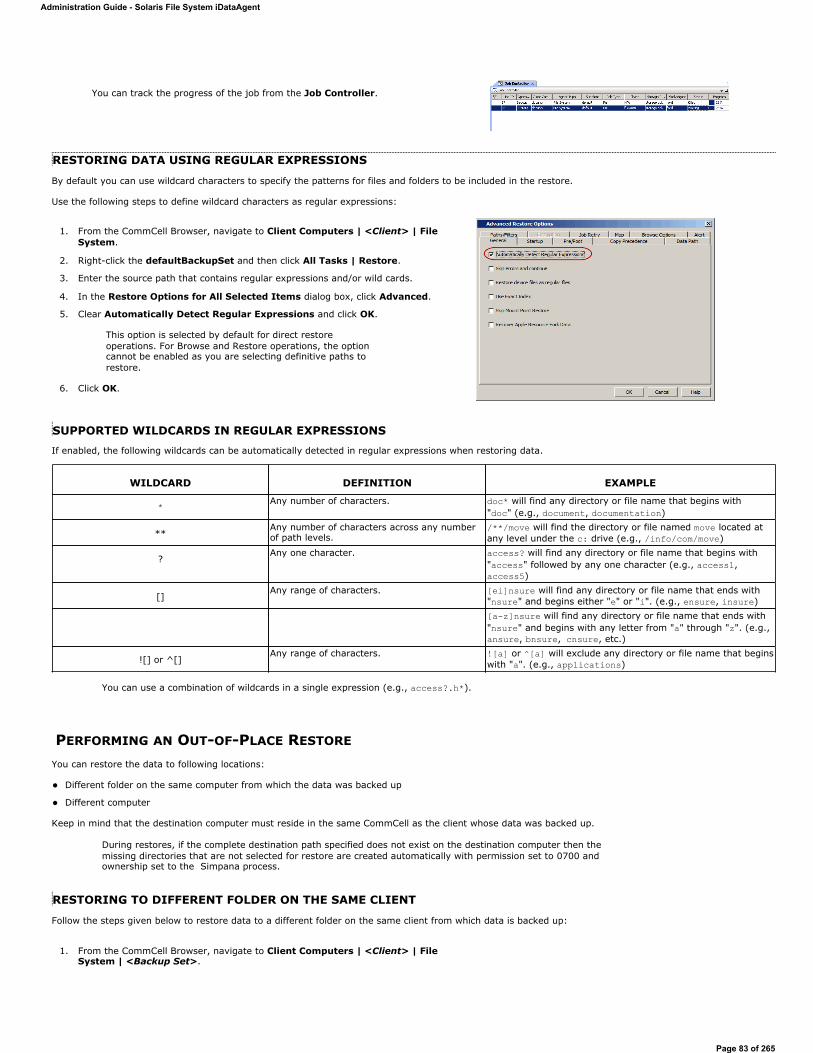
RESTORING DATA USING REGULAR EXPRESSIONS
By default you can use wildcard characters to specify the patterns for files and folders to be included in the restore.
Use the following steps to define wildcard characters as regular expressions:
SUPPORTED WILDCARDS IN REGULAR EXPRESSIONSIf enabled, the following wildcards can be automatically detected in regular expressions when restoring data.
PERFORMING AN OUT-OF-PLACE RESTORE
You can restore the data to following locations:
Different folder on the same computer from which the data was backed up
Different computer
Keep in mind that the destination computer must reside in the same CommCell as the client whose data was backed up.
RESTORING TO DIFFERENT FOLDER ON THE SAME CLIENT
Follow the steps given below to restore data to a different folder on the same client from which data is backed up:
You can track the progress of the job from the Job Controller.
1. From the CommCell Browser, navigate to Client Computers | <Client> | File System.
2. Right-click the defaultBackupSet and then click All Tasks | Restore.
3. Enter the source path that contains regular expressions and/or wild cards.
4. In the Restore Options for All Selected Items dialog box, click Advanced.
5. Clear Automatically Detect Regular Expressions and click OK.
6. Click OK.
This option is selected by default for direct restore operations. For Browse and Restore operations, the option cannot be enabled as you are selecting definitive paths to restore.
WILDCARD DEFINITION EXAMPLE
* Any number of characters. doc* will find any directory or file name that begins with "doc" (e.g., document, documentation)
**Any number of characters across any number of path levels.
/**/move will find the directory or file named move located at any level under the c: drive (e.g., /info/com/move)
?Any one character. access? will find any directory or file name that begins with
"access" followed by any one character (e.g., access1, access5)
[]Any range of characters. [ei]nsure will find any directory or file name that ends with
"nsure" and begins either "e" or "i". (e.g., ensure, insure)[a-z]nsure will find any directory or file name that ends with "nsure" and begins with any letter from "a" through "z". (e.g., ansure, bnsure, cnsure, etc.)
![] or ^[]Any range of characters. ![a] or ^[a] will exclude any directory or file name that begins
with "a". (e.g., applications)
You can use a combination of wildcards in a single expression (e.g., access?.h*).
During restores, if the complete destination path specified does not exist on the destination computer then the missing directories that are not selected for restore are created automatically with permission set to 0700 and ownership set to the Simpana process.
1. From the CommCell Browser, navigate to Client Computers | <Client> | File System | <Backup Set>.
Administration Guide - Solaris File System iDataAgent
Page 83 of 265
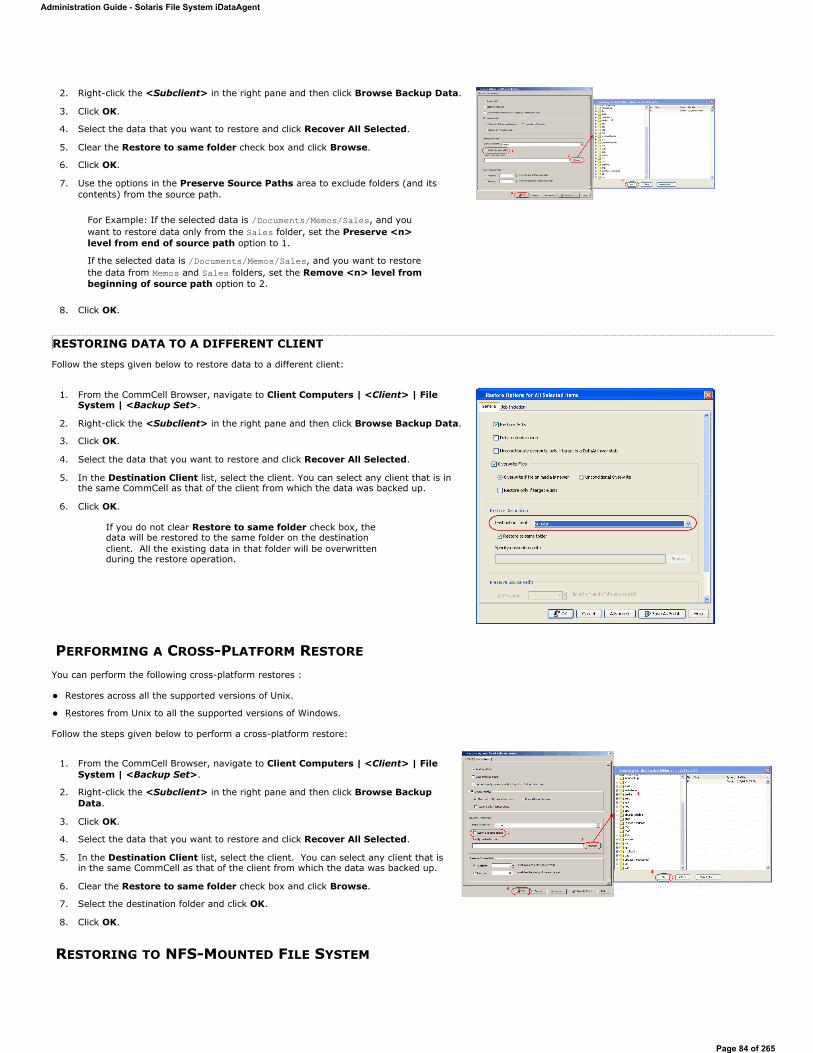
RESTORING DATA TO A DIFFERENT CLIENT
Follow the steps given below to restore data to a different client:
PERFORMING A CROSS-PLATFORM RESTORE
You can perform the following cross-platform restores :
Restores across all the supported versions of Unix.
Restores from Unix to all the supported versions of Windows.
Follow the steps given below to perform a cross-platform restore:
RESTORING TO NFS-MOUNTED FILE SYSTEM
2. Right-click the <Subclient> in the right pane and then click Browse Backup Data.
3. Click OK.
4. Select the data that you want to restore and click Recover All Selected.
5. Clear the Restore to same folder check box and click Browse.
6. Click OK.
7. Use the options in the Preserve Source Paths area to exclude folders (and its contents) from the source path.
For Example: If the selected data is /Documents/Memos/Sales, and you want to restore data only from the Sales folder, set the Preserve <n> level from end of source path option to 1.
If the selected data is /Documents/Memos/Sales, and you want to restore the data from Memos and Sales folders, set the Remove <n> level from beginning of source path option to 2.
8. Click OK.
1. From the CommCell Browser, navigate to Client Computers | <Client> | File System | <Backup Set>.
2. Right-click the <Subclient> in the right pane and then click Browse Backup Data.
3. Click OK.
4. Select the data that you want to restore and click Recover All Selected.
5. In the Destination Client list, select the client. You can select any client that is in the same CommCell as that of the client from which the data was backed up.
6. Click OK.
If you do not clear Restore to same folder check box, the data will be restored to the same folder on the destination client. All the existing data in that folder will be overwritten during the restore operation.
1. From the CommCell Browser, navigate to Client Computers | <Client> | File System | <Backup Set>.
2. Right-click the <Subclient> in the right pane and then click Browse Backup Data.
3. Click OK.
4. Select the data that you want to restore and click Recover All Selected.
5. In the Destination Client list, select the client. You can select any client that is in the same CommCell as that of the client from which the data was backed up.
6. Clear the Restore to same folder check box and click Browse.
7. Select the destination folder and click OK.
8. Click OK.
Administration Guide - Solaris File System iDataAgent
Page 84 of 265
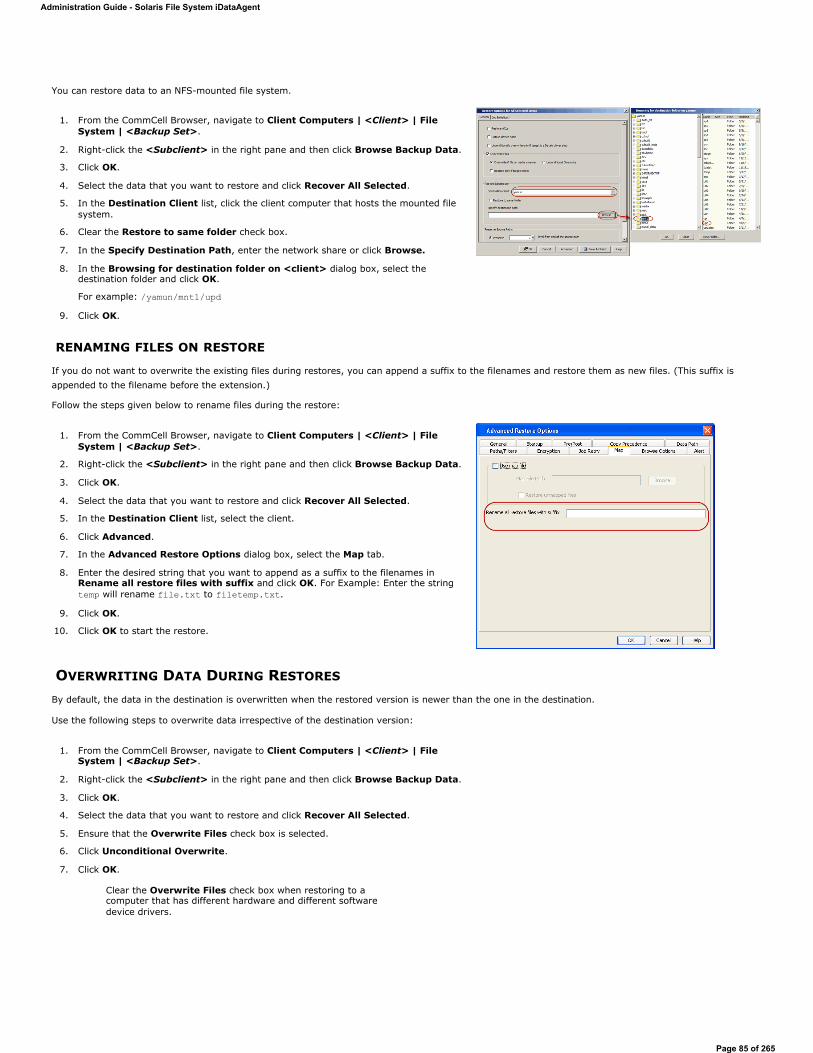
You can restore data to an NFS-mounted file system.
RENAMING FILES ON RESTORE
If you do not want to overwrite the existing files during restores, you can append a suffix to the filenames and restore them as new files. (This suffix is appended to the filename before the extension.)
Follow the steps given below to rename files during the restore:
OVERWRITING DATA DURING RESTORES
By default, the data in the destination is overwritten when the restored version is newer than the one in the destination.
Use the following steps to overwrite data irrespective of the destination version:
1. From the CommCell Browser, navigate to Client Computers | <Client> | File System | <Backup Set>.
2. Right-click the <Subclient> in the right pane and then click Browse Backup Data.
3. Click OK.
4. Select the data that you want to restore and click Recover All Selected.
5. In the Destination Client list, click the client computer that hosts the mounted file system.
6. Clear the Restore to same folder check box.
7. In the Specify Destination Path, enter the network share or click Browse.
8. In the Browsing for destination folder on <client> dialog box, select the destination folder and click OK.
For example: /yamun/mnt1/upd
9. Click OK.
1. From the CommCell Browser, navigate to Client Computers | <Client> | File System | <Backup Set>.
2. Right-click the <Subclient> in the right pane and then click Browse Backup Data.
3. Click OK.
4. Select the data that you want to restore and click Recover All Selected.
5. In the Destination Client list, select the client.
6. Click Advanced.
7. In the Advanced Restore Options dialog box, select the Map tab.
8. Enter the desired string that you want to append as a suffix to the filenames in Rename all restore files with suffix and click OK. For Example: Enter the string temp will rename file.txt to filetemp.txt.
9. Click OK.
10. Click OK to start the restore.
1. From the CommCell Browser, navigate to Client Computers | <Client> | File System | <Backup Set>.
2. Right-click the <Subclient> in the right pane and then click Browse Backup Data.
3. Click OK.
4. Select the data that you want to restore and click Recover All Selected.
5. Ensure that the Overwrite Files check box is selected.
6. Click Unconditional Overwrite.
7. Click OK.
Clear the Overwrite Files check box when restoring to a computer that has different hardware and different software device drivers.
Administration Guide - Solaris File System iDataAgent
Page 85 of 265
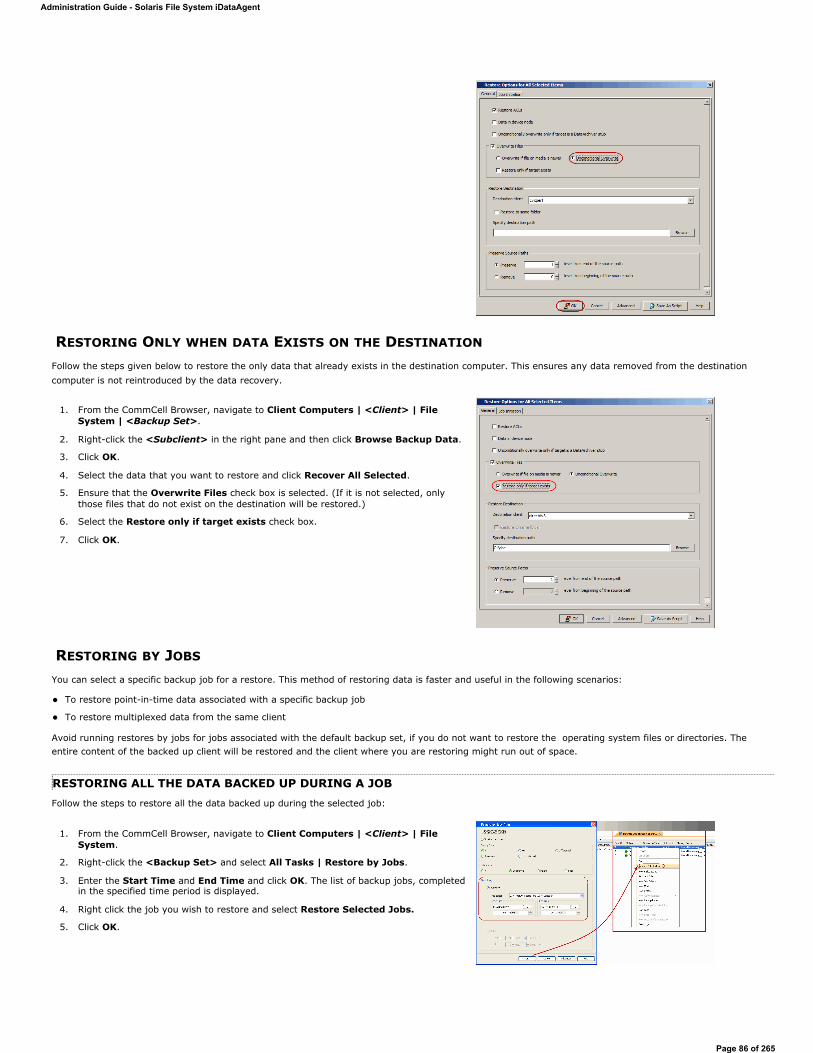
RESTORING ONLY WHEN DATA EXISTS ON THE DESTINATION
Follow the steps given below to restore the only data that already exists in the destination computer. This ensures any data removed from the destination computer is not reintroduced by the data recovery.
RESTORING BY JOBS
You can select a specific backup job for a restore. This method of restoring data is faster and useful in the following scenarios:
To restore point-in-time data associated with a specific backup job
To restore multiplexed data from the same client
Avoid running restores by jobs for jobs associated with the default backup set, if you do not want to restore the operating system files or directories. The entire content of the backed up client will be restored and the client where you are restoring might run out of space.
RESTORING ALL THE DATA BACKED UP DURING A JOBFollow the steps to restore all the data backed up during the selected job:
1. From the CommCell Browser, navigate to Client Computers | <Client> | File System | <Backup Set>.
2. Right-click the <Subclient> in the right pane and then click Browse Backup Data.
3. Click OK.
4. Select the data that you want to restore and click Recover All Selected.
5. Ensure that the Overwrite Files check box is selected. (If it is not selected, only those files that do not exist on the destination will be restored.)
6. Select the Restore only if target exists check box.
7. Click OK.
1. From the CommCell Browser, navigate to Client Computers | <Client> | File System.
2. Right-click the <Backup Set> and select All Tasks | Restore by Jobs.
3. Enter the Start Time and End Time and click OK. The list of backup jobs, completed in the specified time period is displayed.
4. Right click the job you wish to restore and select Restore Selected Jobs.
5. Click OK.
Administration Guide - Solaris File System iDataAgent
Page 86 of 265
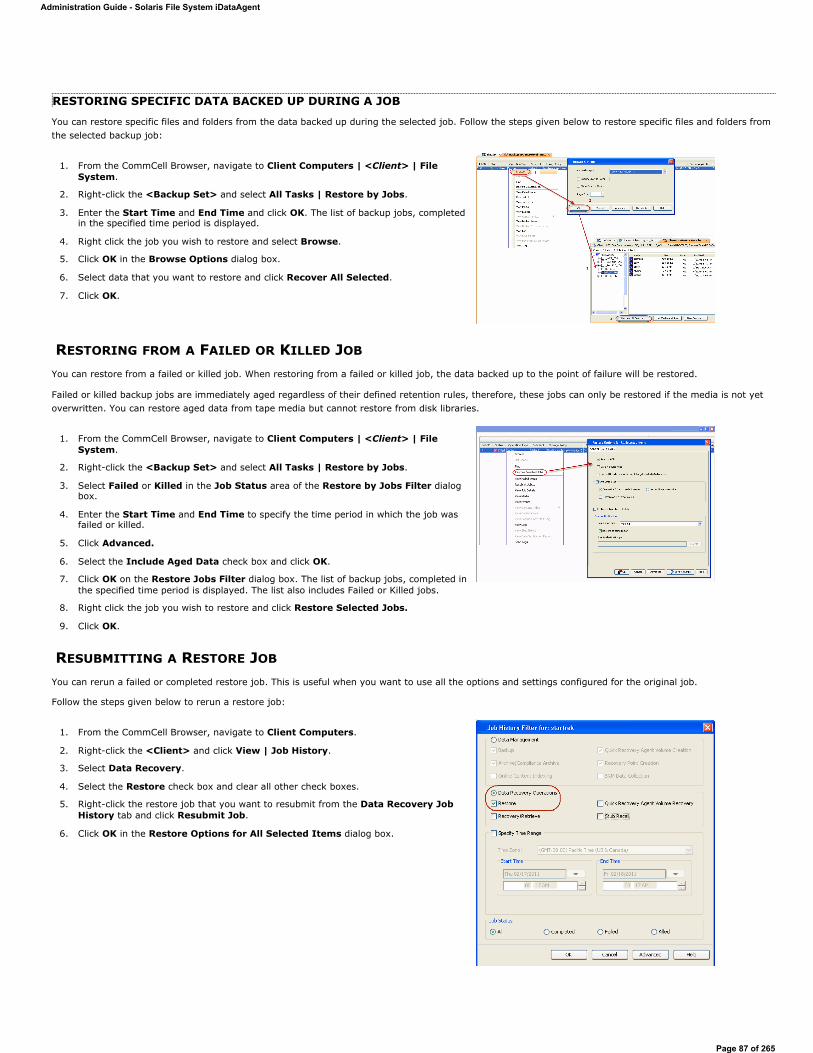
RESTORING SPECIFIC DATA BACKED UP DURING A JOB
You can restore specific files and folders from the data backed up during the selected job. Follow the steps given below to restore specific files and folders from the selected backup job:
RESTORING FROM A FAILED OR KILLED JOB
You can restore from a failed or killed job. When restoring from a failed or killed job, the data backed up to the point of failure will be restored.
Failed or killed backup jobs are immediately aged regardless of their defined retention rules, therefore, these jobs can only be restored if the media is not yet overwritten. You can restore aged data from tape media but cannot restore from disk libraries.
RESUBMITTING A RESTORE JOB
You can rerun a failed or completed restore job. This is useful when you want to use all the options and settings configured for the original job.
Follow the steps given below to rerun a restore job:
1. From the CommCell Browser, navigate to Client Computers | <Client> | File System.
2. Right-click the <Backup Set> and select All Tasks | Restore by Jobs.
3. Enter the Start Time and End Time and click OK. The list of backup jobs, completed in the specified time period is displayed.
4. Right click the job you wish to restore and select Browse.
5. Click OK in the Browse Options dialog box.
6. Select data that you want to restore and click Recover All Selected.
7. Click OK.
1. From the CommCell Browser, navigate to Client Computers | <Client> | File System.
2. Right-click the <Backup Set> and select All Tasks | Restore by Jobs.
3. Select Failed or Killed in the Job Status area of the Restore by Jobs Filter dialog box.
4. Enter the Start Time and End Time to specify the time period in which the job was failed or killed.
5. Click Advanced.
6. Select the Include Aged Data check box and click OK.
7. Click OK on the Restore Jobs Filter dialog box. The list of backup jobs, completed in the specified time period is displayed. The list also includes Failed or Killed jobs.
8. Right click the job you wish to restore and click Restore Selected Jobs.
9. Click OK.
1. From the CommCell Browser, navigate to Client Computers.
2. Right-click the <Client> and click View | Job History.
3. Select Data Recovery.
4. Select the Restore check box and clear all other check boxes.
5. Right-click the restore job that you want to resubmit from the Data Recovery Job History tab and click Resubmit Job.
6. Click OK in the Restore Options for All Selected Items dialog box.
Administration Guide - Solaris File System iDataAgent
Page 87 of 265
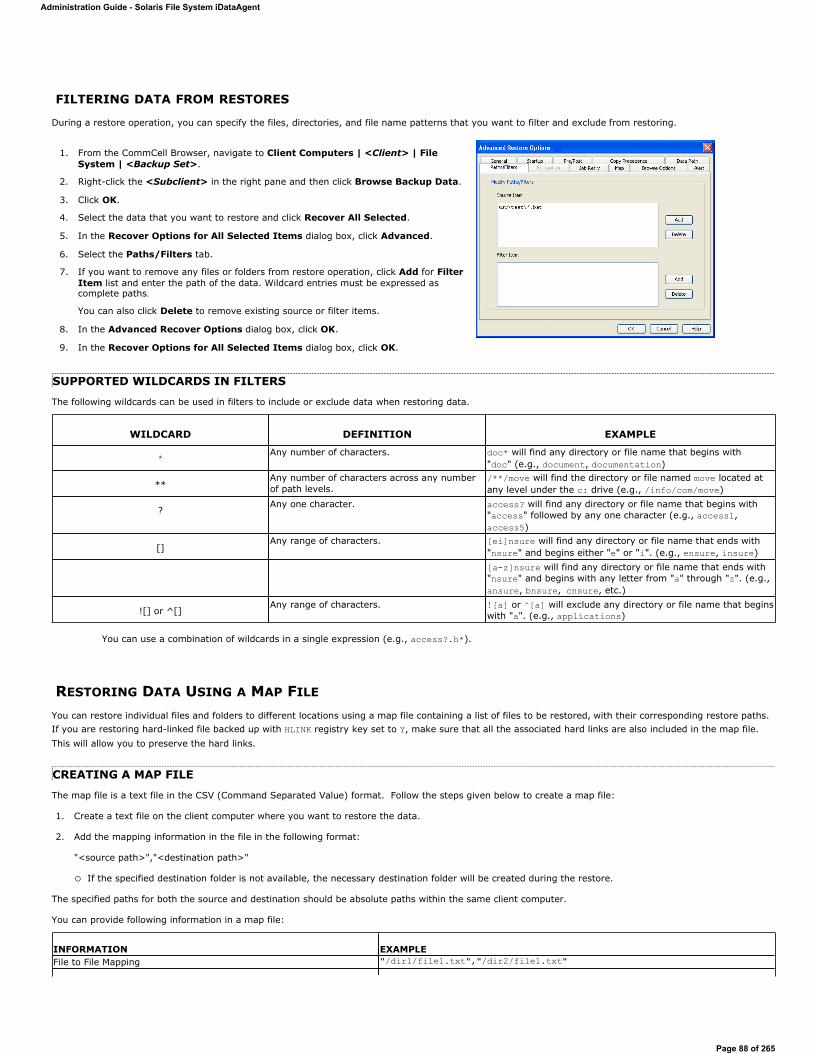
FILTERING DATA FROM RESTORES
During a restore operation, you can specify the files, directories, and file name patterns that you want to filter and exclude from restoring.
SUPPORTED WILDCARDS IN FILTERS
The following wildcards can be used in filters to include or exclude data when restoring data.
RESTORING DATA USING A MAP FILE
You can restore individual files and folders to different locations using a map file containing a list of files to be restored, with their corresponding restore paths. If you are restoring hard-linked file backed up with HLINK registry key set to Y, make sure that all the associated hard links are also included in the map file. This will allow you to preserve the hard links.
CREATING A MAP FILE
The map file is a text file in the CSV (Command Separated Value) format. Follow the steps given below to create a map file:
1. Create a text file on the client computer where you want to restore the data.
2. Add the mapping information in the file in the following format:
"<source path>","<destination path>"
If the specified destination folder is not available, the necessary destination folder will be created during the restore.
The specified paths for both the source and destination should be absolute paths within the same client computer.
You can provide following information in a map file:
1. From the CommCell Browser, navigate to Client Computers | <Client> | File System | <Backup Set>.
2. Right-click the <Subclient> in the right pane and then click Browse Backup Data.
3. Click OK.
4. Select the data that you want to restore and click Recover All Selected.
5. In the Recover Options for All Selected Items dialog box, click Advanced.
6. Select the Paths/Filters tab.
7. If you want to remove any files or folders from restore operation, click Add for Filter Item list and enter the path of the data. Wildcard entries must be expressed as complete paths.
You can also click Delete to remove existing source or filter items.
8. In the Advanced Recover Options dialog box, click OK.
9. In the Recover Options for All Selected Items dialog box, click OK.
WILDCARD DEFINITION EXAMPLE
* Any number of characters. doc* will find any directory or file name that begins with "doc" (e.g., document, documentation)
**Any number of characters across any number of path levels.
/**/move will find the directory or file named move located at any level under the c: drive (e.g., /info/com/move)
?Any one character. access? will find any directory or file name that begins with
"access" followed by any one character (e.g., access1, access5)
[]Any range of characters. [ei]nsure will find any directory or file name that ends with
"nsure" and begins either "e" or "i". (e.g., ensure, insure)[a-z]nsure will find any directory or file name that ends with "nsure" and begins with any letter from "a" through "z". (e.g., ansure, bnsure, cnsure, etc.)
![] or ^[]Any range of characters. ![a] or ^[a] will exclude any directory or file name that begins
with "a". (e.g., applications)
You can use a combination of wildcards in a single expression (e.g., access?.h*).
INFORMATION EXAMPLEFile to File Mapping "/dir1/file1.txt","/dir2/file1.txt"
Administration Guide - Solaris File System iDataAgent
Page 88 of 265
ADDING FILES AND FOLDERS WITH UNICODE CHARACTERS TO A MAP FILE
If the path or the filename contains Unicode characters, the Map File must be converted to a format that can be used by the data protection operation. The Unicode Conversion utility must be used to convert the Map File to a format that can be provided as input.
1. Using a text editor, create a file that contains a list of files/folders with Unicode characters. Make sure to save the file as a Unicode text file.
2. From the Command Line, navigate to the <software install folder>/base folder and type the following:
cvconvertunicode <source file> <destination file>Where:
<source file> is the full path and name of the file created in Step 1.
<destination file> is the full path and name of the destination file. The file will automatically be created by the utility.
3. Use the destination file as the Map File to perform the restore.
PARTIAL FILE RESTORE USING A MAP FILE
Files can be restored partially using a Map file. Multiple files can be added in the Map file for partial restores with specific start/ stop offset values. These restores can be run from the CommCell GUI or from the command line. Partial file restores are supported for:
Index restores
Index Free Restore – Restore By Job
1. Using a text editor, create a text file on the client computer where you want to restore the data.
2. Add the mapping information in the file using the following syntax:
“<source file path>”,“<destination file path>”,<start offset>,<stop offset>
Where:
<start offset> and <stop offset> are values in bytes
For example: “/path1/data1/SRC”,"/path2/data2/DEST”,100,1000
The partial file restore behavior with different mapping options is given below:
RESTORING USING A MAP FILE
Use the following procedure to restore a list of files and folders from a computer and each of these files have a different destination.
Folder to folder mappings "/dir2/info/","/dir4/info/"Drive to drive mappings "/"(root),"/mnt","/usr"Rename files/folder during restore "/dir4/file2.txt","/dir5/file3.txt"Filter certain files "/dir5",""
MAPPING BEHAVIORFile in map, no start offset and no stop offset File will be restored fullyFile in map, only start offset provided File will be restored from <start offset> till the end of the fileFile in map, start and stop offsets provided File will be restored from <start offset> to <stop offset>File in map, start offset provided in invalid format (not a number) Restore will start from the beginning of the fileFile in map, stop offset provided in invalid format (not a number) Restores till the end of the fileFile in map, stop offset value is less than start offset Restores till the end of the fileMap file having duplicate source file entry with different destination location Only the first source file entry will be honoredMap file with folder path, start and stop offsets provided All the files under the folder will honor the start and stop offsets
1. From the CommCell Browser, navigate to Client Computers | <Client> | File System | <Backup Set>.
2. Right-click the <Subclient> in the right pane and then click Browse Backup Data.
3. Click OK.
4. Select the data that you want to restore and click Recover All Selected.
5. Click Advanced.
6. Select the Map tab.
7. Select the Use map file check box and click Browse to navigate to the map file.
8. Clear the Restore unmapped file check box.
9. In the Advanced Recover Options dialog box, click OK.
Administration Guide - Solaris File System iDataAgent
Page 89 of 265

COMBINING BROWSE AND RESTORE WITH THE MAP FILE RESTORE
Use the following procedure to restore a set of files to a specified location with some files within that set to different destinations.
RESTORING DELETED FILES
Follow the steps given below to restore deleted files:
SETTING UP PRE-POST PROCESSES
You can run batch files or shell scripts before and/or after restore jobs. Follow the steps given below to setup a process before or after the restore job
10. Click OK to start the restore.
1. From the CommCell Browser, navigate to Client Computers | <Client> | File System | <Backup Set>.
2. Right-click the <Subclient> in the right pane and then click Browse Backup Data.
3. Click OK.
4. Select the data that you want to restore and click Recover All Selected.
5. Click Advanced.
6. Select the Map tab.
7. Select the Use map file check box and click Browse to navigate to the map file.
8. Select the Restore unmapped file check box.
9. In the Advanced Recover Options dialog box, click OK.
10. In the Recover Options for All Selected Items dialog box, click OK.
1. From the CommCell Browser, navigate to Client Computers | <Client> | File System | <Backup Set>.
2. Right-click the <Subclient> in the right pane and then click Browse Backup Data.
3. Click OK.
4. Select the data that you want to restore and click Recover All Selected.
5. Click Advanced.
6. Select the Browse Options tab.
7. Select the Restore deleted items check box and then select the Specify Time Range check box.
8. Select the time range to restore the files, deleted in that period of time.
9. In the Advanced Recover Options dialog box, click OK.
10. In the Recover Options for All Selected Items dialog box, click OK.
1. From the CommCell Browser, navigate to Client Computers | <Client> | File System | <Backup Set>.
2. Right-click the <Subclient> in the right pane and then click Browse Backup Data.
3. Click OK.
4. Select the data that you want to restore and click Recover All Selected.
Administration Guide - Solaris File System iDataAgent
Page 90 of 265
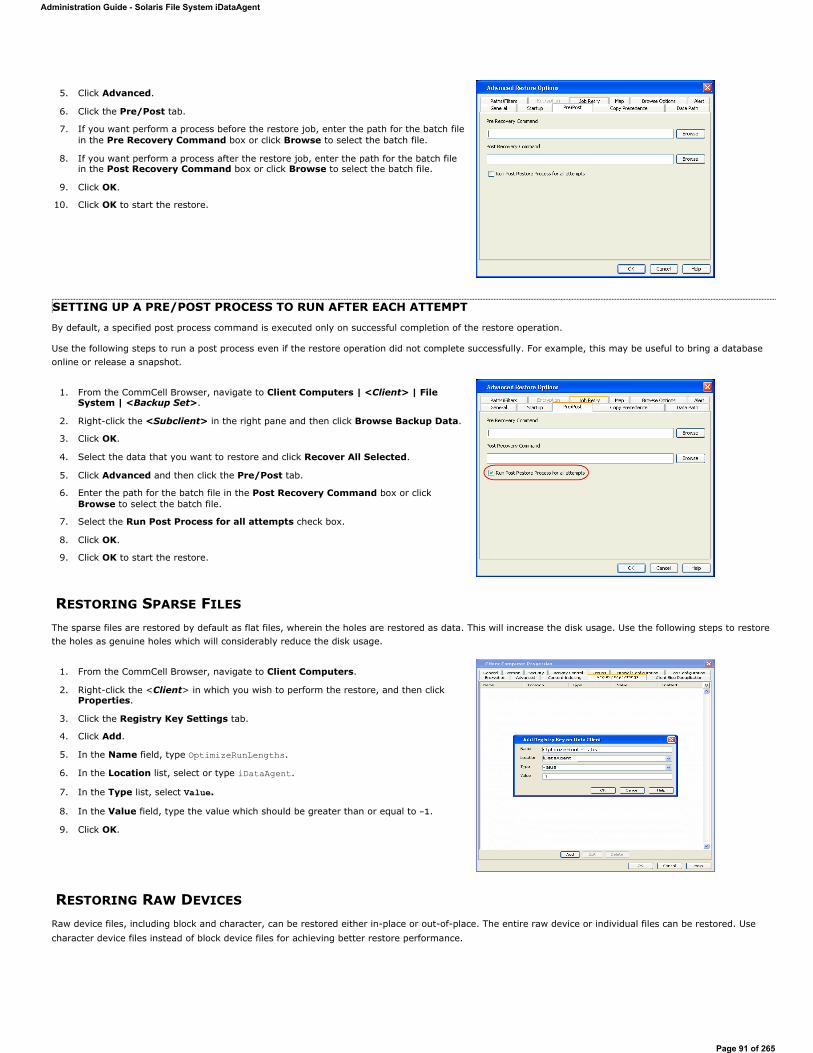
SETTING UP A PRE/POST PROCESS TO RUN AFTER EACH ATTEMPT
By default, a specified post process command is executed only on successful completion of the restore operation.
Use the following steps to run a post process even if the restore operation did not complete successfully. For example, this may be useful to bring a database online or release a snapshot.
RESTORING SPARSE FILES
The sparse files are restored by default as flat files, wherein the holes are restored as data. This will increase the disk usage. Use the following steps to restore the holes as genuine holes which will considerably reduce the disk usage.
RESTORING RAW DEVICES
Raw device files, including block and character, can be restored either in-place or out-of-place. The entire raw device or individual files can be restored. Use character device files instead of block device files for achieving better restore performance.
5. Click Advanced.
6. Click the Pre/Post tab.
7. If you want perform a process before the restore job, enter the path for the batch file in the Pre Recovery Command box or click Browse to select the batch file.
8. If you want perform a process after the restore job, enter the path for the batch file in the Post Recovery Command box or click Browse to select the batch file.
9. Click OK.
10. Click OK to start the restore.
1. From the CommCell Browser, navigate to Client Computers | <Client> | File System | <Backup Set>.
2. Right-click the <Subclient> in the right pane and then click Browse Backup Data.
3. Click OK.
4. Select the data that you want to restore and click Recover All Selected.
5. Click Advanced and then click the Pre/Post tab.
6. Enter the path for the batch file in the Post Recovery Command box or click Browse to select the batch file.
7. Select the Run Post Process for all attempts check box.
8. Click OK.
9. Click OK to start the restore.
1. From the CommCell Browser, navigate to Client Computers.
2. Right-click the <Client> in which you wish to perform the restore, and then click Properties.
3. Click the Registry Key Settings tab.
4. Click Add.
5. In the Name field, type OptimizeRunLengths.
6. In the Location list, select or type iDataAgent.
7. In the Type list, select Value.
8. In the Value field, type the value which should be greater than or equal to -1.
9. Click OK.
Administration Guide - Solaris File System iDataAgent
Page 91 of 265
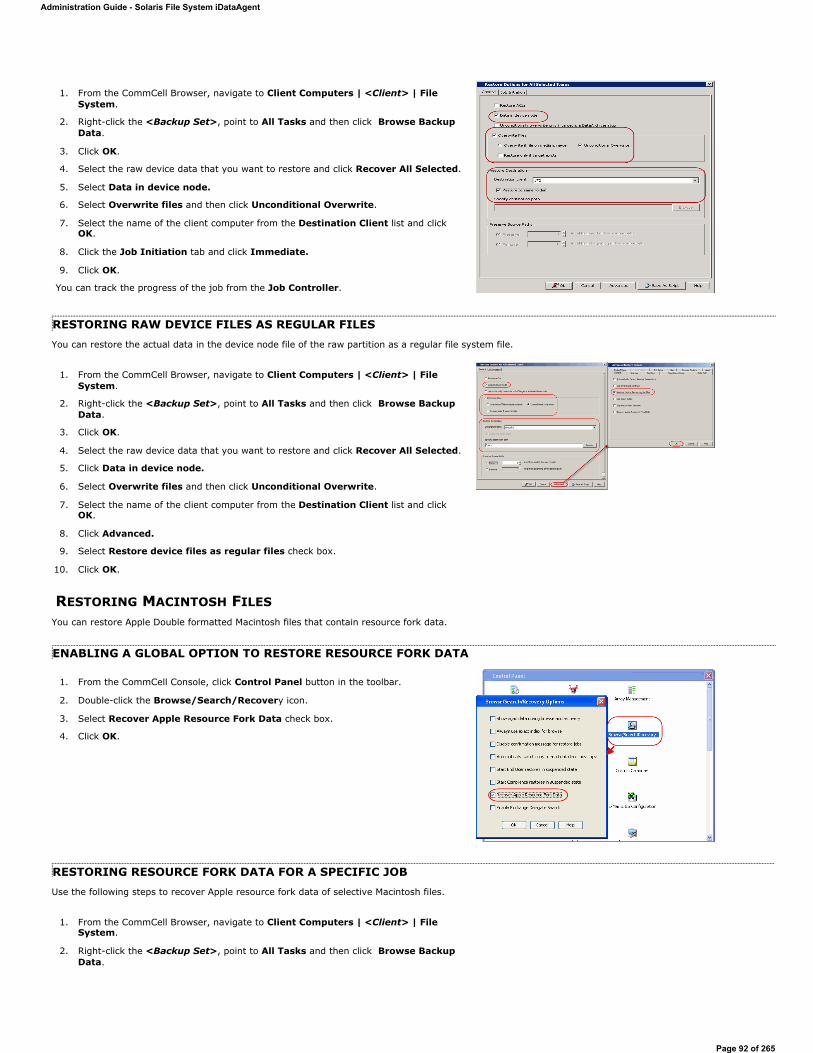
RESTORING RAW DEVICE FILES AS REGULAR FILESYou can restore the actual data in the device node file of the raw partition as a regular file system file.
RESTORING MACINTOSH FILESYou can restore Apple Double formatted Macintosh files that contain resource fork data.
ENABLING A GLOBAL OPTION TO RESTORE RESOURCE FORK DATA
RESTORING RESOURCE FORK DATA FOR A SPECIFIC JOBUse the following steps to recover Apple resource fork data of selective Macintosh files.
1. From the CommCell Browser, navigate to Client Computers | <Client> | File System.
2. Right-click the <Backup Set>, point to All Tasks and then click Browse Backup Data.
3. Click OK.
4. Select the raw device data that you want to restore and click Recover All Selected.
5. Select Data in device node.
6. Select Overwrite files and then click Unconditional Overwrite.
7. Select the name of the client computer from the Destination Client list and click OK.
8. Click the Job Initiation tab and click Immediate.
9. Click OK.
You can track the progress of the job from the Job Controller.
1. From the CommCell Browser, navigate to Client Computers | <Client> | File System.
2. Right-click the <Backup Set>, point to All Tasks and then click Browse Backup Data.
3. Click OK.
4. Select the raw device data that you want to restore and click Recover All Selected.
5. Click Data in device node.
6. Select Overwrite files and then click Unconditional Overwrite.
7. Select the name of the client computer from the Destination Client list and click OK.
8. Click Advanced.
9. Select Restore device files as regular files check box.
10. Click OK.
1. From the CommCell Console, click Control Panel button in the toolbar.
2. Double-click the Browse/Search/Recovery icon.
3. Select Recover Apple Resource Fork Data check box.
4. Click OK.
1. From the CommCell Browser, navigate to Client Computers | <Client> | File System.
2. Right-click the <Backup Set>, point to All Tasks and then click Browse Backup Data.
Administration Guide - Solaris File System iDataAgent
Page 92 of 265
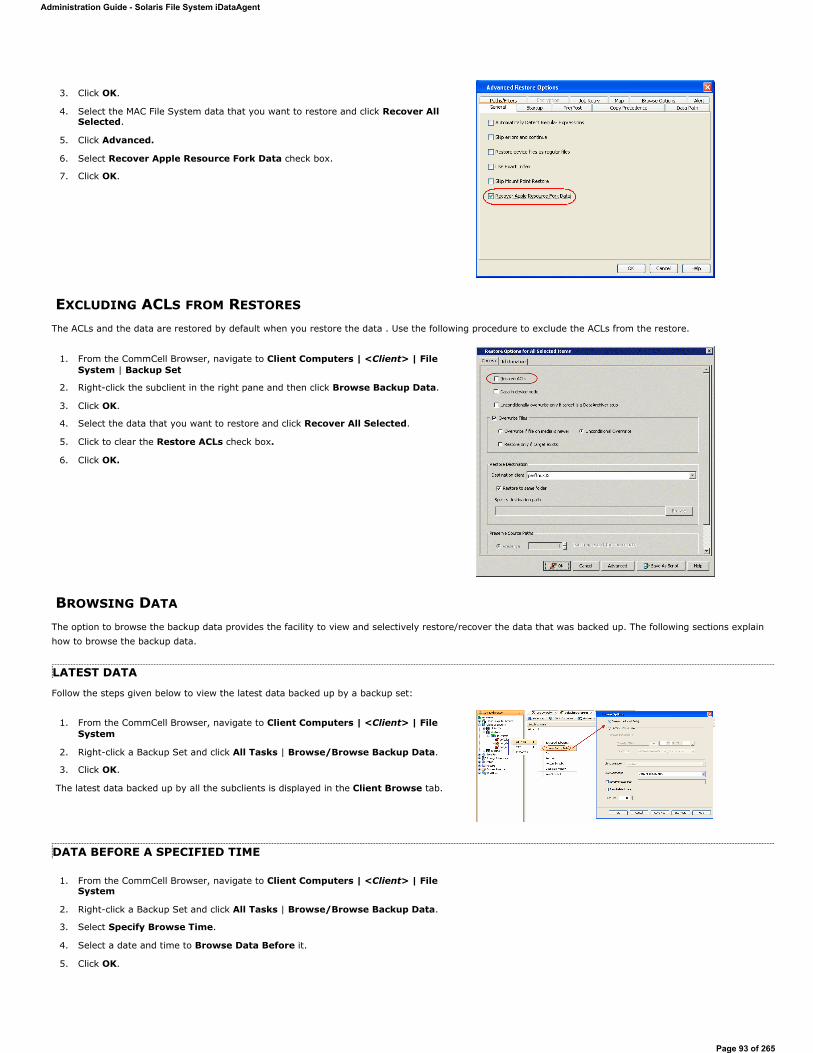
EXCLUDING ACLS FROM RESTORES
The ACLs and the data are restored by default when you restore the data . Use the following procedure to exclude the ACLs from the restore.
BROWSING DATA
The option to browse the backup data provides the facility to view and selectively restore/recover the data that was backed up. The following sections explain how to browse the backup data.
LATEST DATA
Follow the steps given below to view the latest data backed up by a backup set:
DATA BEFORE A SPECIFIED TIME
3. Click OK.
4. Select the MAC File System data that you want to restore and click Recover All Selected.
5. Click Advanced.
6. Select Recover Apple Resource Fork Data check box.
7. Click OK.
1. From the CommCell Browser, navigate to Client Computers | <Client> | File System | Backup Set
2. Right-click the subclient in the right pane and then click Browse Backup Data.
3. Click OK.
4. Select the data that you want to restore and click Recover All Selected.
5. Click to clear the Restore ACLs check box.
6. Click OK.
1. From the CommCell Browser, navigate to Client Computers | <Client> | File System
2. Right-click a Backup Set and click All Tasks | Browse/Browse Backup Data.
3. Click OK.
The latest data backed up by all the subclients is displayed in the Client Browse tab.
1. From the CommCell Browser, navigate to Client Computers | <Client> | File System
2. Right-click a Backup Set and click All Tasks | Browse/Browse Backup Data.
3. Select Specify Browse Time.
4. Select a date and time to Browse Data Before it.
5. Click OK.
Administration Guide - Solaris File System iDataAgent
Page 93 of 265
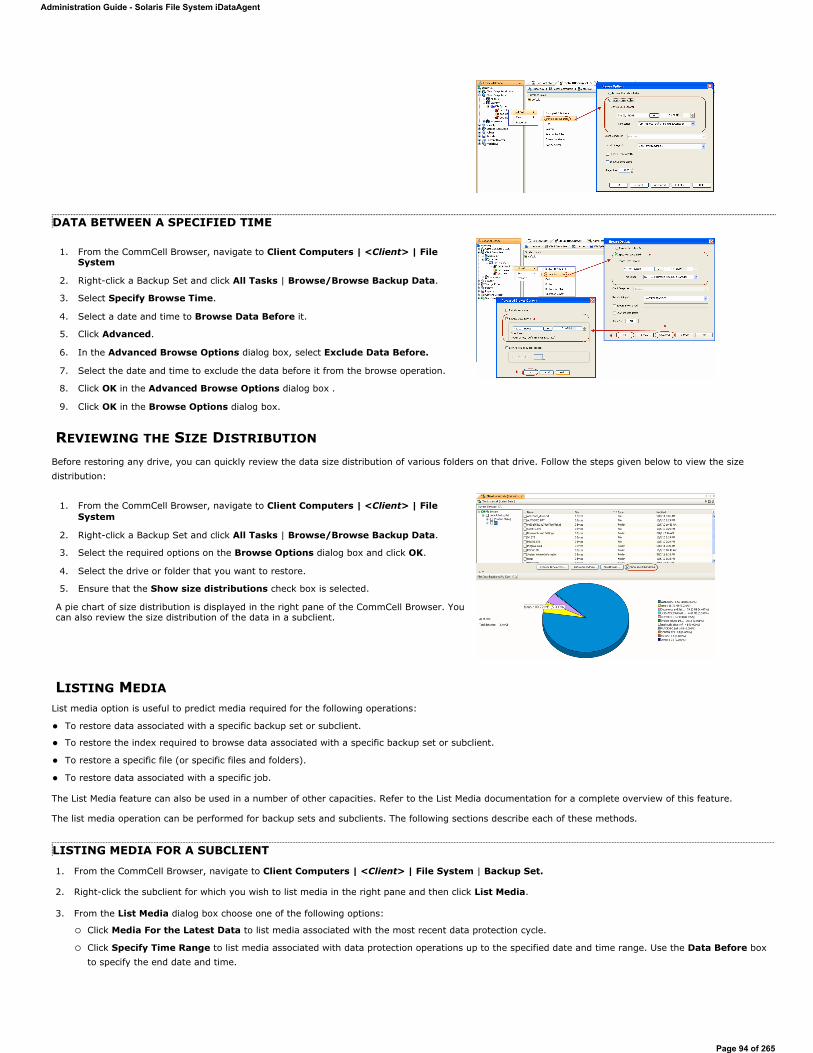
DATA BETWEEN A SPECIFIED TIME
REVIEWING THE SIZE DISTRIBUTION
Before restoring any drive, you can quickly review the data size distribution of various folders on that drive. Follow the steps given below to view the size distribution:
LISTING MEDIAList media option is useful to predict media required for the following operations:
To restore data associated with a specific backup set or subclient.
To restore the index required to browse data associated with a specific backup set or subclient.
To restore a specific file (or specific files and folders).
To restore data associated with a specific job.
The List Media feature can also be used in a number of other capacities. Refer to the List Media documentation for a complete overview of this feature.
The list media operation can be performed for backup sets and subclients. The following sections describe each of these methods.
LISTING MEDIA FOR A SUBCLIENT
1. From the CommCell Browser, navigate to Client Computers | <Client> | File System | Backup Set.
2. Right-click the subclient for which you wish to list media in the right pane and then click List Media.
3. From the List Media dialog box choose one of the following options:
Click Media For the Latest Data to list media associated with the most recent data protection cycle.
Click Specify Time Range to list media associated with data protection operations up to the specified date and time range. Use the Data Before box to specify the end date and time.
1. From the CommCell Browser, navigate to Client Computers | <Client> | File System
2. Right-click a Backup Set and click All Tasks | Browse/Browse Backup Data.
3. Select Specify Browse Time.
4. Select a date and time to Browse Data Before it.
5. Click Advanced.
6. In the Advanced Browse Options dialog box, select Exclude Data Before.
7. Select the date and time to exclude the data before it from the browse operation.
8. Click OK in the Advanced Browse Options dialog box .
9. Click OK in the Browse Options dialog box.
1. From the CommCell Browser, navigate to Client Computers | <Client> | File System
2. Right-click a Backup Set and click All Tasks | Browse/Browse Backup Data.
3. Select the required options on the Browse Options dialog box and click OK.
4. Select the drive or folder that you want to restore.
5. Ensure that the Show size distributions check box is selected.
A pie chart of size distribution is displayed in the right pane of the CommCell Browser. You can also review the size distribution of the data in a subclient.
Administration Guide - Solaris File System iDataAgent
Page 94 of 265
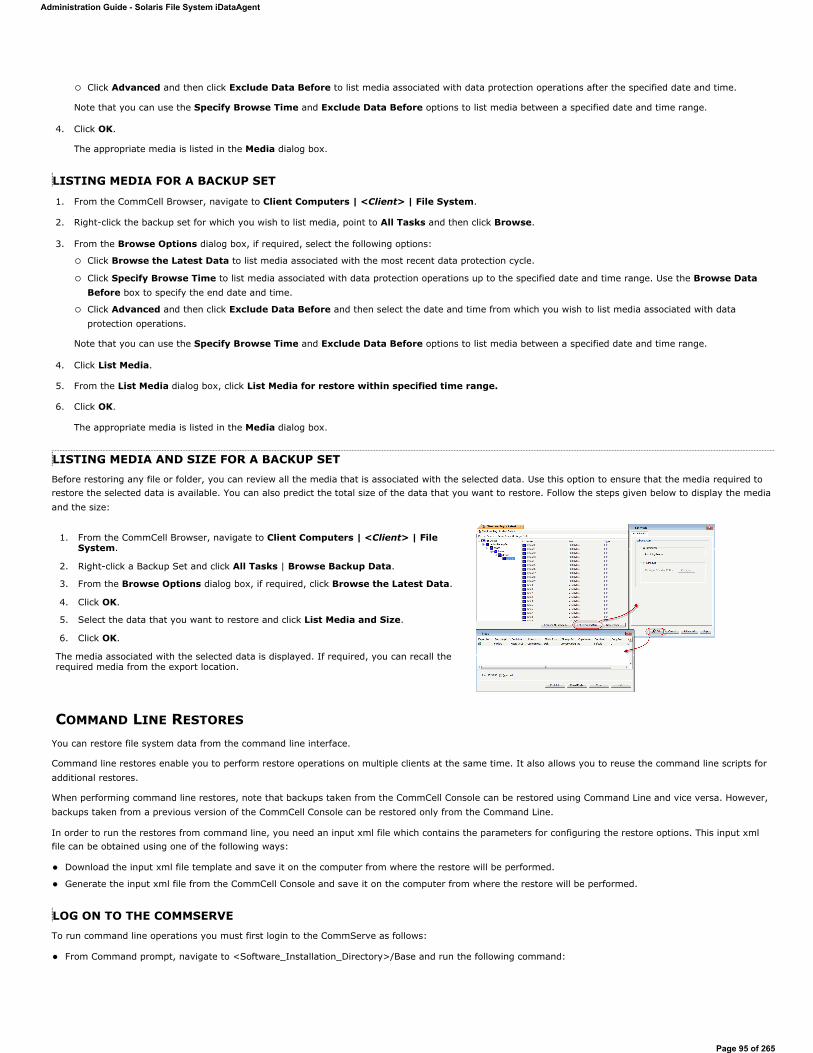
Click Advanced and then click Exclude Data Before to list media associated with data protection operations after the specified date and time.
Note that you can use the Specify Browse Time and Exclude Data Before options to list media between a specified date and time range.
4. Click OK.
The appropriate media is listed in the Media dialog box.
LISTING MEDIA FOR A BACKUP SET
1. From the CommCell Browser, navigate to Client Computers | <Client> | File System.
2. Right-click the backup set for which you wish to list media, point to All Tasks and then click Browse.
3. From the Browse Options dialog box, if required, select the following options:
Click Browse the Latest Data to list media associated with the most recent data protection cycle.
Click Specify Browse Time to list media associated with data protection operations up to the specified date and time range. Use the Browse Data Before box to specify the end date and time.
Click Advanced and then click Exclude Data Before and then select the date and time from which you wish to list media associated with data protection operations.
Note that you can use the Specify Browse Time and Exclude Data Before options to list media between a specified date and time range.
4. Click List Media.
5. From the List Media dialog box, click List Media for restore within specified time range.
6. Click OK.
The appropriate media is listed in the Media dialog box.
LISTING MEDIA AND SIZE FOR A BACKUP SETBefore restoring any file or folder, you can review all the media that is associated with the selected data. Use this option to ensure that the media required to restore the selected data is available. You can also predict the total size of the data that you want to restore. Follow the steps given below to display the media and the size:
COMMAND LINE RESTORES
You can restore file system data from the command line interface.
Command line restores enable you to perform restore operations on multiple clients at the same time. It also allows you to reuse the command line scripts for additional restores.
When performing command line restores, note that backups taken from the CommCell Console can be restored using Command Line and vice versa. However, backups taken from a previous version of the CommCell Console can be restored only from the Command Line.
In order to run the restores from command line, you need an input xml file which contains the parameters for configuring the restore options. This input xml file can be obtained using one of the following ways:
Download the input xml file template and save it on the computer from where the restore will be performed.
Generate the input xml file from the CommCell Console and save it on the computer from where the restore will be performed.
LOG ON TO THE COMMSERVETo run command line operations you must first login to the CommServe as follows:
From Command prompt, navigate to <Software_Installation_Directory>/Base and run the following command:
1. From the CommCell Browser, navigate to Client Computers | <Client> | File System.
2. Right-click a Backup Set and click All Tasks | Browse Backup Data.
3. From the Browse Options dialog box, if required, click Browse the Latest Data.
4. Click OK.
5. Select the data that you want to restore and click List Media and Size.
6. Click OK.
The media associated with the selected data is displayed. If required, you can recall the required media from the export location.
Administration Guide - Solaris File System iDataAgent
Page 95 of 265
qlogin -cs <commserve name> -u <user name>
For example, to log on to CommServe 'server1' with username 'user1':
qlogin -cs server1 -u user1
PERFORM THE RESTORE
1. Download the restore_template.xml file and save it on the computer from where the command will be executed.
2. Execute the saved xml script using qoperation execute command.
qoperation execute -af restore_template.xml -appName 'File System' -clientName xxxxx -backupsetName xxxxx -destPath 'xxxxx' -sourceItem 'xxxxx'
3. Verify the status of the job using the following command:
qlist job –j JOBID
4. Once the job completes, logout from the CommServe using the qlogout command.
qlogout [-cs commserver] [-all] [-tf tokenfile] [-tk token] [-h]
EXAMPLES
GENERATE THE COMMAND LINE SCRIPT FROM THE COMMCELL CONSOLE
In addition to the parameters provided in the template xml file, if you want to include additional options for the restore, you can do so by selecting the required options from the CommCell Console and generate the command line xml script for the restore operation.
Follow the steps given below to generate a script which you can use to perform a restore from the command line interface:
Restoring from a Current Backup qoperation execute -af restore_template.xml -appName 'File System' -clientName client1 -
backupsetName backupset1 -destPath '/etc' -sourceItem '/etc4'Restoring Files to a Point in Time (date) qoperation execute -af restore_template.xml -appName 'File System' -clientName client1 -
backupsetName backupset1 -destPath '/etc' -sourceItem '/etc4' -toTimeValue 2011-11-28Restoring Files to a Point in Time (date and time) qoperation execute -af restore_template.xml -appName 'File System' -clientName client1 -
backupsetName backupset1 -destPath '/etc' -sourceItem '/etc4' -toTimeValue 2011-11-28 15:40:00
Restoring by Jobs qoperation execute -af restore_by_job_template.xml -jobids 52 -sourceItem 2:52 -striplevel 1where:
jobids is the backup job ID
sourceItem is the CommCell D and the backup job ID separated by a colon (':'). By default, the CommCell ID is 2.
striplevel is the number of folder levels to exclude from the source path. This parameter is optional.
For example, if you have a directory structure (source path) as /a/b/c and you select strip level 2, the data will be restored from folder c, while folders a and b are excluded. Ensure that the strip level is always less than the source path level.
1. From the CommCell Browser, navigate to Client Computers | <Client> | File System | <Backup Set>.
2. Right-click the <Subclient> in the right pane and then click Browse Backup Data.
3. Click OK.
4. In the right pane of the Browse window, select the data that you want to restore and click Recover All Selected.
5. Select the required restore options which you want to execute using the script.
6. Click Save as Script.
Administration Guide - Solaris File System iDataAgent
Page 96 of 265
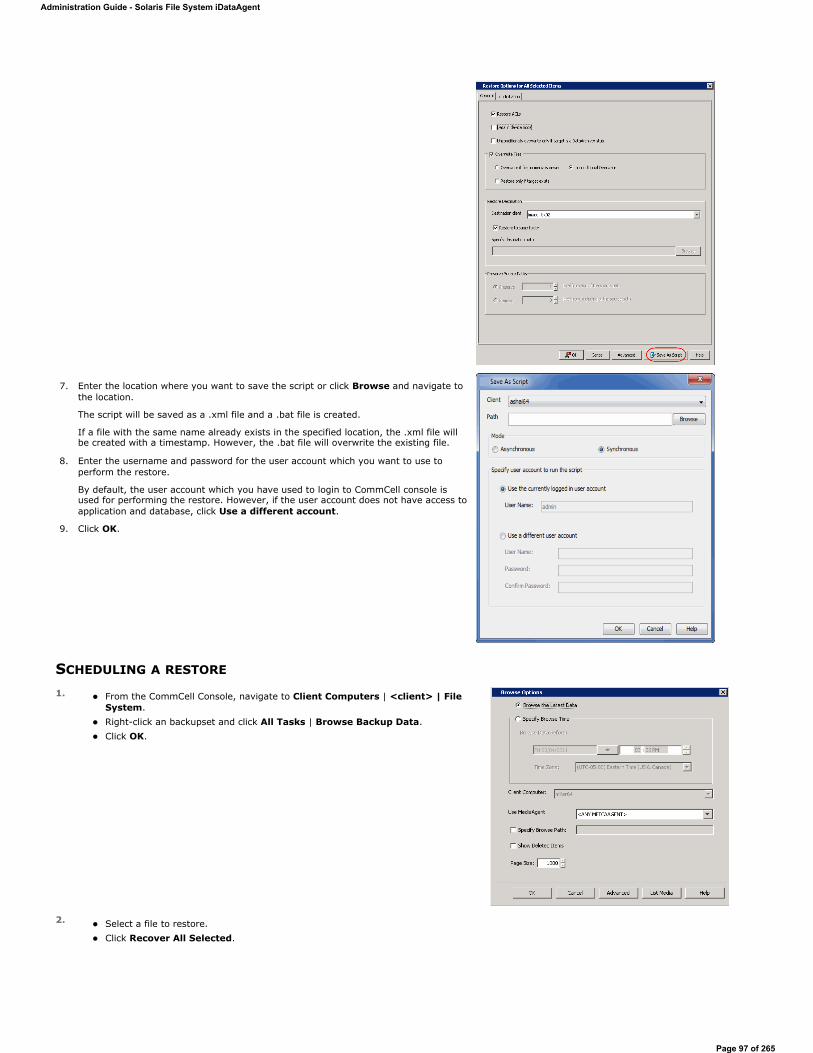
SCHEDULING A RESTORE
7. Enter the location where you want to save the script or click Browse and navigate to the location.
The script will be saved as a .xml file and a .bat file is created.
If a file with the same name already exists in the specified location, the .xml file will be created with a timestamp. However, the .bat file will overwrite the existing file.
8. Enter the username and password for the user account which you want to use to perform the restore.
By default, the user account which you have used to login to CommCell console is used for performing the restore. However, if the user account does not have access to application and database, click Use a different account.
9. Click OK.
1. From the CommCell Console, navigate to Client Computers | <client> | File System. Right-click an backupset and click All Tasks | Browse Backup Data. Click OK.
2. Select a file to restore. Click Recover All Selected.
Administration Guide - Solaris File System iDataAgent
Page 97 of 265
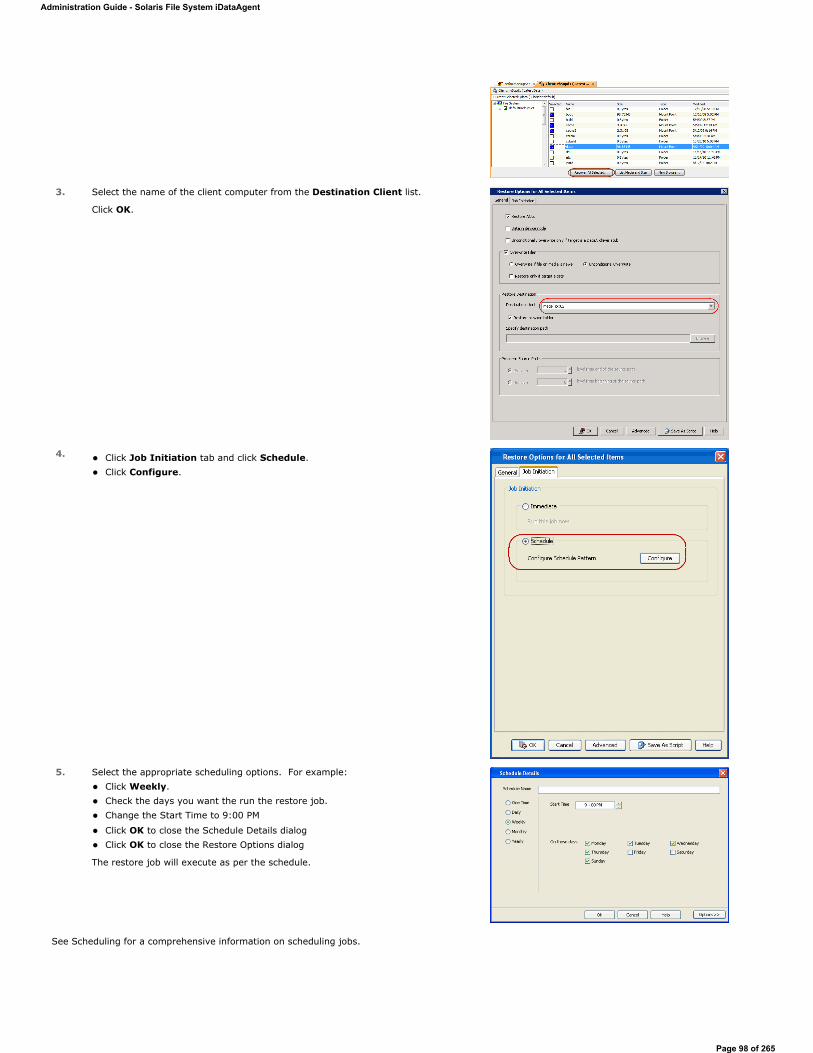
See Scheduling for a comprehensive information on scheduling jobs.
3. Select the name of the client computer from the Destination Client list.
Click OK.
4. Click Job Initiation tab and click Schedule. Click Configure.
5. Select the appropriate scheduling options. For example: Click Weekly. Check the days you want the run the restore job. Change the Start Time to 9:00 PM
Click OK to close the Schedule Details dialog Click OK to close the Restore Options dialog
The restore job will execute as per the schedule.
Administration Guide - Solaris File System iDataAgent
Page 98 of 265
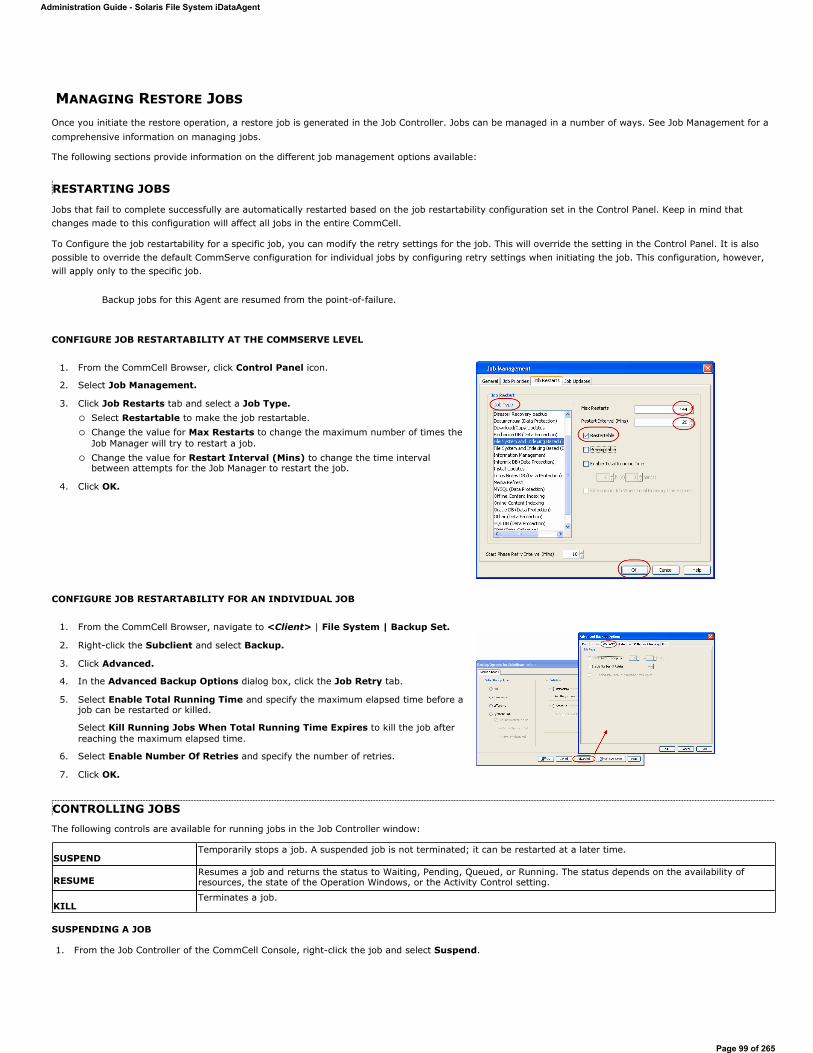
MANAGING RESTORE JOBS
Once you initiate the restore operation, a restore job is generated in the Job Controller. Jobs can be managed in a number of ways. See Job Management for a comprehensive information on managing jobs.
The following sections provide information on the different job management options available:
RESTARTING JOBS
Jobs that fail to complete successfully are automatically restarted based on the job restartability configuration set in the Control Panel. Keep in mind that changes made to this configuration will affect all jobs in the entire CommCell.
To Configure the job restartability for a specific job, you can modify the retry settings for the job. This will override the setting in the Control Panel. It is also possible to override the default CommServe configuration for individual jobs by configuring retry settings when initiating the job. This configuration, however, will apply only to the specific job.
CONFIGURE JOB RESTARTABILITY AT THE COMMSERVE LEVEL
CONFIGURE JOB RESTARTABILITY FOR AN INDIVIDUAL JOB
CONTROLLING JOBSThe following controls are available for running jobs in the Job Controller window:
SUSPENDING A JOB
1. From the Job Controller of the CommCell Console, right-click the job and select Suspend.
Backup jobs for this Agent are resumed from the point-of-failure.
1. From the CommCell Browser, click Control Panel icon.
2. Select Job Management.
3. Click Job Restarts tab and select a Job Type.Select Restartable to make the job restartable. Change the value for Max Restarts to change the maximum number of times the Job Manager will try to restart a job. Change the value for Restart Interval (Mins) to change the time interval between attempts for the Job Manager to restart the job.
4. Click OK.
1. From the CommCell Browser, navigate to <Client> | File System | Backup Set.
2. Right-click the Subclient and select Backup.
3. Click Advanced.
4. In the Advanced Backup Options dialog box, click the Job Retry tab.
5. Select Enable Total Running Time and specify the maximum elapsed time before a job can be restarted or killed.
Select Kill Running Jobs When Total Running Time Expires to kill the job after reaching the maximum elapsed time.
6. Select Enable Number Of Retries and specify the number of retries.
7. Click OK.
SUSPENDTemporarily stops a job. A suspended job is not terminated; it can be restarted at a later time.
RESUMEResumes a job and returns the status to Waiting, Pending, Queued, or Running. The status depends on the availability of resources, the state of the Operation Windows, or the Activity Control setting.
KILLTerminates a job.
Administration Guide - Solaris File System iDataAgent
Page 99 of 265
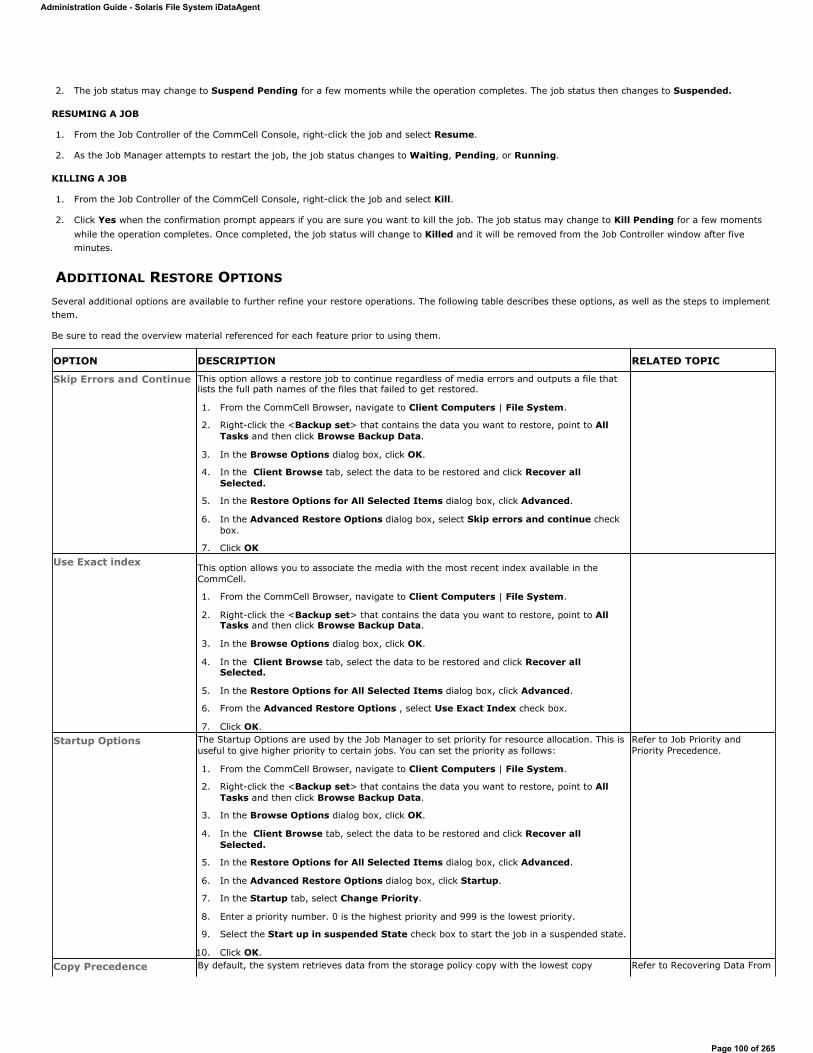
2. The job status may change to Suspend Pending for a few moments while the operation completes. The job status then changes to Suspended.
RESUMING A JOB
1. From the Job Controller of the CommCell Console, right-click the job and select Resume.
2. As the Job Manager attempts to restart the job, the job status changes to Waiting, Pending, or Running.
KILLING A JOB
1. From the Job Controller of the CommCell Console, right-click the job and select Kill.
2. Click Yes when the confirmation prompt appears if you are sure you want to kill the job. The job status may change to Kill Pending for a few moments while the operation completes. Once completed, the job status will change to Killed and it will be removed from the Job Controller window after five minutes.
ADDITIONAL RESTORE OPTIONS
Several additional options are available to further refine your restore operations. The following table describes these options, as well as the steps to implement them.
Be sure to read the overview material referenced for each feature prior to using them.
OPTION DESCRIPTION RELATED TOPIC
Skip Errors and Continue This option allows a restore job to continue regardless of media errors and outputs a file that lists the full path names of the files that failed to get restored.
1. From the CommCell Browser, navigate to Client Computers | File System.
2. Right-click the <Backup set> that contains the data you want to restore, point to All Tasks and then click Browse Backup Data.
3. In the Browse Options dialog box, click OK.
4. In the Client Browse tab, select the data to be restored and click Recover all Selected.
5. In the Restore Options for All Selected Items dialog box, click Advanced.
6. In the Advanced Restore Options dialog box, select Skip errors and continue check box.
7. Click OKUse Exact index This option allows you to associate the media with the most recent index available in the
CommCell.
1. From the CommCell Browser, navigate to Client Computers | File System.
2. Right-click the <Backup set> that contains the data you want to restore, point to All Tasks and then click Browse Backup Data.
3. In the Browse Options dialog box, click OK.
4. In the Client Browse tab, select the data to be restored and click Recover all Selected.
5. In the Restore Options for All Selected Items dialog box, click Advanced.
6. From the Advanced Restore Options , select Use Exact Index check box.
7. Click OK. Startup Options The Startup Options are used by the Job Manager to set priority for resource allocation. This is
useful to give higher priority to certain jobs. You can set the priority as follows:
1. From the CommCell Browser, navigate to Client Computers | File System.
2. Right-click the <Backup set> that contains the data you want to restore, point to All Tasks and then click Browse Backup Data.
3. In the Browse Options dialog box, click OK.
4. In the Client Browse tab, select the data to be restored and click Recover all Selected.
5. In the Restore Options for All Selected Items dialog box, click Advanced.
6. In the Advanced Restore Options dialog box, click Startup.
7. In the Startup tab, select Change Priority.
8. Enter a priority number. 0 is the highest priority and 999 is the lowest priority.
9. Select the Start up in suspended State check box to start the job in a suspended state.
10. Click OK.
Refer to Job Priority and Priority Precedence.
Copy Precedence By default, the system retrieves data from the storage policy copy with the lowest copy Refer to Recovering Data From
Administration Guide - Solaris File System iDataAgent
Page 100 of 265
precedence. If the data was pruned from the primary copy, the system automatically retrieves data from the other copies of the storage policy in the lowest copy precedence to highest copy precedence order. Once the data is found, it is retrieved, and no further copies are checked.
You can retrieve data from a specific storage policy copy (Synchronous Copy or Selective Copy). If data does not exist in the specified copy, the data retrieve operation fails even if the data exists in another copy of the same storage policy. Follow the steps given below to retrieve the data from a a specific storage policy copy:
1. From the CommCell Browser, navigate to Client Computers | File System.
2. Right-click the <Backup set> that contains the data you want to restore, point to All Tasks and then click Browse Backup Data.
3. In the Browse Options dialog box, click OK.
4. In the Client Browse tab, select the data to be restored and click Recover all Selected.
5. In the Restore Options for All Selected Items dialog box, click Advanced.
6. In the Advanced Restore Options dialog box, click Copy Precedence.
7. On the Copy Precedence tab, select the Restore from copy precedence check box.
8. Enter the copy precedence number.
9. Click OK.
Copies.
Data Path Options The data recovery operations use a default Library, MediaAgent, Drive Pool, and Drive as the Data Path. You can use this option to change the data path if the default data path is not available. Follow the steps given below to change the default data path:
1. From the CommCell Browser, navigate to Client Computers | File System.
2. Right-click the <Backup set> that contains the data you want to restore, point to All Tasks and then click Browse Backup Data.
3. In the Browse Options dialog box, click OK.
4. In the Client Browse tab, select the data to be restored and click Recover all Selected.
5. In the Restore Options for All Selected Items dialog box, click Advanced.
6. In the Advanced Restore Options dialog box, click Data Path.
7. On the Data Path tab, select the MediaAgent and Library.
8. Select the Drive Pool and Drive for optical and tape libraries.
9. Select the name of the Proxy server if you wish to restore using a proxy server.
You can select the Proxy server only when you are restoring from a snapshot. This option is not available for a regular restore.
10. Click OK.
Refer to Change Data Path.
EncryptionIf the client's data is encrypted with a pass phrase, you must enter the pass-phrase to start the data recovery operation. Follow the steps given below to enter the pass-phrase:
1. From the CommCell Browser, click Client Computers | File System.
2. Right-click the <Backup set> that contains the data you want to restore, point to All Tasks and then click Browse Backup Data.
3. In the Browse Options dialog box, click OK.
4. In the Client Browse tab, select the data to be restored and click Recover all Selected.
5. In the Restore Options for All Selected Items dialog box, click Advanced.
6. In the Advanced Restore Options dialog box, click Encryption.
7. Enter the Pass Phrase.
8. Click OK.
Refer to Data Encryption.
Alerts This option enables users or user groups to get automatic notification on the status of the data recovery job. Follow the steps given below to set up the criteria to raise notifications/alerts:
1. From the CommCell Browser, click Client Computers | File System.
2. Right-click the <Backup set> that contains the data you want to restore, point to All Tasks and then click Browse Backup Data.
3. In the Browse Options dialog box, click OK.
4. In the Client Browse tab, select the data to be restored and click Recover all Selected.
5. In the Restore Options for All Selected Items dialog box, click Advanced.
6. In the Advanced Restore Options dialog box, click Alerts.
Refer to Alert.
Administration Guide - Solaris File System iDataAgent
Page 101 of 265
KEYWORDS
MAP file, Raw device, Macintosh files, NFS mount, Sparse files, Holes, ACLS, Resource Fork Data
Back to Top
7. Click Add Alert.
8. From the Add Alert Wizard dialog box, select the required threshold and notification criteria and click Next.
9. Select the required notification types and click Next.
10. Select the recipients and click Next.
11. Click Finish.
12. Click OK. Command Line Restores Command Line Interface enables you to perform backups or restore from the command line.
The commands can be executed from the command line or can be integrated into scripts.
You can also generate command line scripts for specific operations from the CommCell Browser using the Save As Script option.
Refer to Command Line Interface.
CommCell Readiness Report
The CommCell Readiness Report provides you with vital information, such as connectivity and readiness of the Client, MediaAgent and CommServe. It is useful to run this report before performing the data protection or recovery job. Follow the steps given below to generate the report:
1. From the Tools menu in the CommCell Console, click Reports.
2. Navigate to Reports | CommServe | CommCell Readiness.
3. Click the Client tab and click the Modify button.
4. In the Select Computers dialog box, clear the Include All Client Computers and All Client Groups check box.
5. Select the client from the Exclude list.
6. Click the Include > button.
7. Click OK.
8. Click the MediaAgent tab.
9. Clear the Include All MediaAgents checkbox.
10. Select the MediaAgent from the Exclude list.
11. Click Include >.
12. Click Run.
The generated report is displayed. Restore Job Summary Report The Restore Job Summary Report provides you with information about all the data recovery
jobs that are run in last 24 hours for a specific client and agent. You can get information such as failure reason, failed objects, job options etc. It is useful to run this report after performing the restore. Follow the steps given below to generate the report:
1. From the Tools menu in the CommCell Console, click Reports.
2. Navigate to Reports | Jobs | Job Summary.
3. Click Data Recovery on the General tab in the right pane.
4. On the Computers tab, select the client and the agent for which you want to run the report.
5. Click Run.
Refer to Restore Job Summary Report.
Administration Guide - Solaris File System iDataAgent
Page 102 of 265
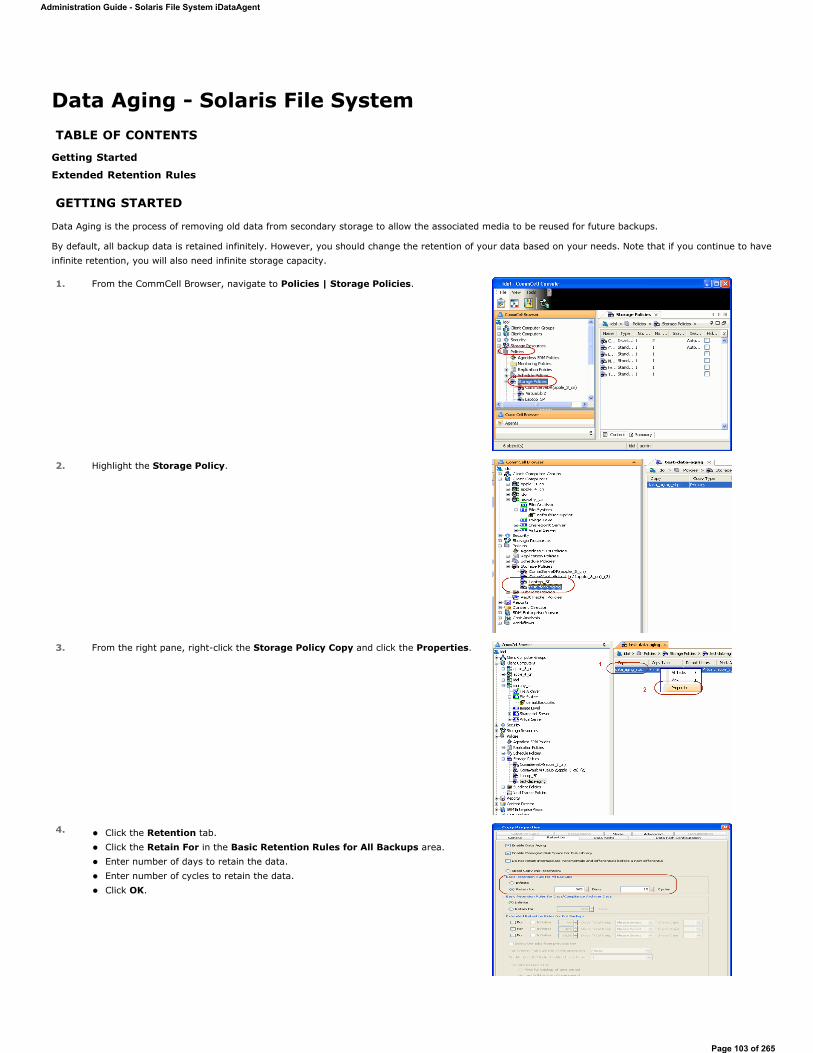
Data Aging - Solaris File SystemTABLE OF CONTENTS
Getting Started
Extended Retention Rules
GETTING STARTED
Data Aging is the process of removing old data from secondary storage to allow the associated media to be reused for future backups.
By default, all backup data is retained infinitely. However, you should change the retention of your data based on your needs. Note that if you continue to have infinite retention, you will also need infinite storage capacity.
1. From the CommCell Browser, navigate to Policies | Storage Policies.
2. Highlight the Storage Policy.
3. From the right pane, right-click the Storage Policy Copy and click the Properties.
4. Click the Retention tab. Click the Retain For in the Basic Retention Rules for All Backups area. Enter number of days to retain the data. Enter number of cycles to retain the data. Click OK.
Administration Guide - Solaris File System iDataAgent
Page 103 of 265
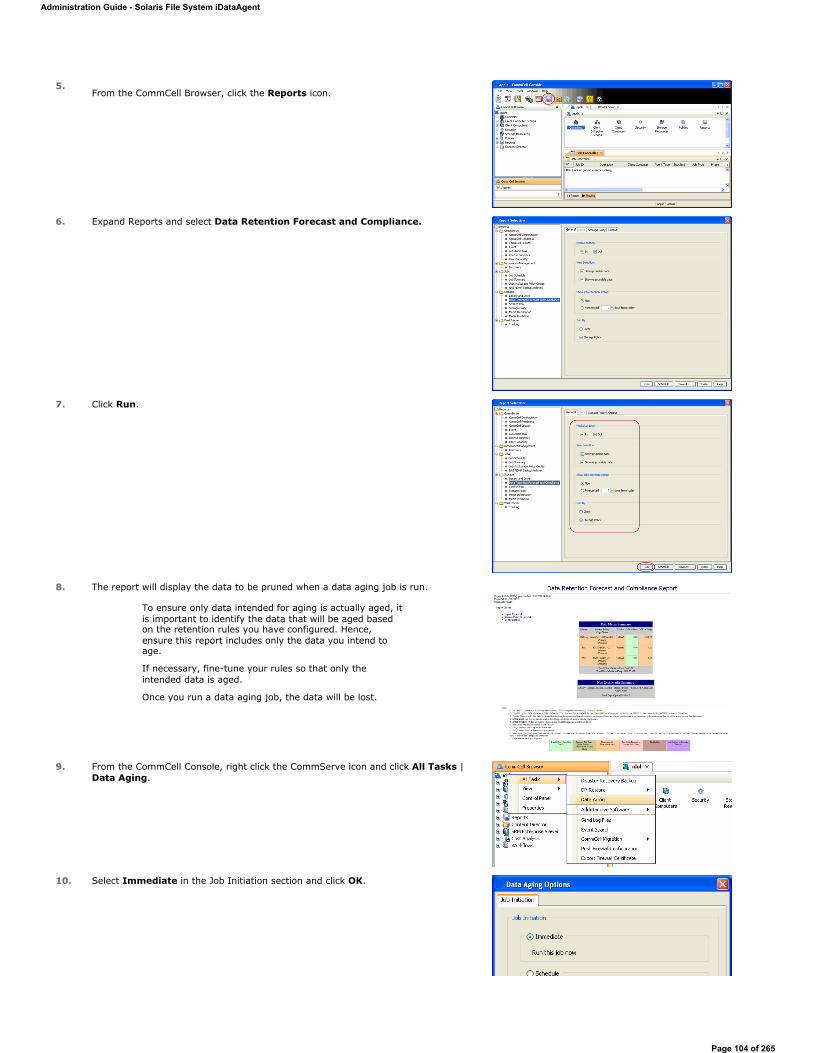
5.From the CommCell Browser, click the Reports icon.
6. Expand Reports and select Data Retention Forecast and Compliance.
7. Click Run.
8. The report will display the data to be pruned when a data aging job is run.
To ensure only data intended for aging is actually aged, it is important to identify the data that will be aged based on the retention rules you have configured. Hence, ensure this report includes only the data you intend to age.
If necessary, fine-tune your rules so that only the intended data is aged.
Once you run a data aging job, the data will be lost.
9. From the CommCell Console, right click the CommServe icon and click All Tasks | Data Aging.
10. Select Immediate in the Job Initiation section and click OK.
Administration Guide - Solaris File System iDataAgent
Page 104 of 265
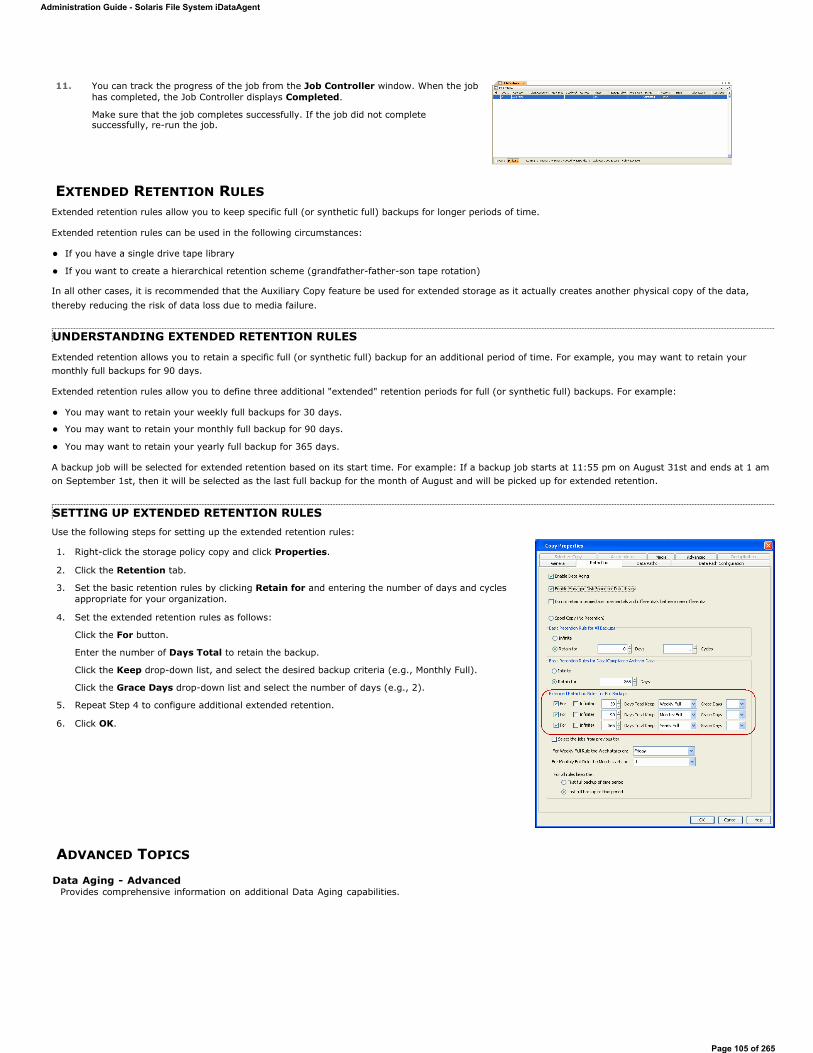
EXTENDED RETENTION RULESExtended retention rules allow you to keep specific full (or synthetic full) backups for longer periods of time.
Extended retention rules can be used in the following circumstances:
If you have a single drive tape library
If you want to create a hierarchical retention scheme (grandfather-father-son tape rotation)
In all other cases, it is recommended that the Auxiliary Copy feature be used for extended storage as it actually creates another physical copy of the data, thereby reducing the risk of data loss due to media failure.
UNDERSTANDING EXTENDED RETENTION RULES
Extended retention allows you to retain a specific full (or synthetic full) backup for an additional period of time. For example, you may want to retain your monthly full backups for 90 days.
Extended retention rules allow you to define three additional "extended" retention periods for full (or synthetic full) backups. For example:
You may want to retain your weekly full backups for 30 days.
You may want to retain your monthly full backup for 90 days.
You may want to retain your yearly full backup for 365 days.
A backup job will be selected for extended retention based on its start time. For example: If a backup job starts at 11:55 pm on August 31st and ends at 1 am on September 1st, then it will be selected as the last full backup for the month of August and will be picked up for extended retention.
SETTING UP EXTENDED RETENTION RULESUse the following steps for setting up the extended retention rules:
11. You can track the progress of the job from the Job Controller window. When the job has completed, the Job Controller displays Completed.
Make sure that the job completes successfully. If the job did not complete successfully, re-run the job.
1. Right-click the storage policy copy and click Properties.
2. Click the Retention tab.
3. Set the basic retention rules by clicking Retain for and entering the number of days and cycles appropriate for your organization.
4. Set the extended retention rules as follows:
Click the For button.
Enter the number of Days Total to retain the backup.
Click the Keep drop-down list, and select the desired backup criteria (e.g., Monthly Full).
Click the Grace Days drop-down list and select the number of days (e.g., 2).
5. Repeat Step 4 to configure additional extended retention.
6. Click OK.
ADVANCED TOPICS
Data Aging - AdvancedProvides comprehensive information on additional Data Aging capabilities.
Administration Guide - Solaris File System iDataAgent
Page 105 of 265
Disaster Recovery - Solaris File SystemTABLE OF CONTENTS
Planning for a Disaster Recovery
Rebuilding the Operating System
Restoring the Solaris File System
PLANNING FOR A DISASTER RECOVERY
Before you begin a disaster recovery, make sure to do the following:
Perform regular backups of the Solaris file system. These backups can be scheduled to run at convenient intervals.
Ensure that the destination client is same as source client while performing a disaster recovery.
Make sure to Install the Solaris Operating System on the system that you want to restore. Make sure to install the Operating System exactly as it existed prior to a hardware or software corruption problem.
The client computer must have a default install partition with the Solaris File System iDataAgent installed on it. Make sure to enable the Networking option. The TCP/IP, hostname, and domain name settings of the default install must match those of the system that you are restoring.
Create and mount a root file system on the system that you want to restore.
REBUILDING THE OPERATING SYSTEM
1. From the Solaris Installation disk, navigate to the appropriate Tools directory.
Example:
s0/Solaris_<ver>/Tools directory
2. Type the command to copy the jump start software to your machine ./setup_install_server -b /opt/boot
3. Type the appropriate command to add each client that you want to boot off of the jump start server.
Example: ./add_* -i 172.19.71.226 -e 8:0:20:7c:89:1a -s pluto8:/jumpstart pluto6 sun4u./add_* -i 172.19.71.227 -e 8:0:20:7d:e6:33 -s pluto8:/jumpstart pluto7 sun4m./add_* -i 172.19.71.224 -e 8:0:20:7c:73:f -s pluto8:/jumpstart pluto4 sun4m
4. Copy <mnt_point>/Solaris_<ver>/Tools/Boot from the disk to a shareable directory
Example:
/jumpstart
5. Modify bootparams to reflect the new root directory /etc/bootparams
6. Modify the hosts to add the hosts needed to communicate with the Solaris File System iDataAgent
Example:
<mnt_point>/Solaris_<ver>/Tools/Boot/.tmp_proto/root/etc/inet/hosts
7. Add the shared memory information to system Example:
<mnt_point>/Solaris_<ver>/Tools/Boot/etc/systemset shmsys:shminfo_shmmax=4199304set shmsys:shminfo_shmmin=1set shmsys:shminfo_shmmni=5824set shmsys:shminfo_shmseg=5824set semsys:seminfo_semmns=5824set semsys:seminfo_semmni=5824set semsys:seminfo_semmsl=5824
8. Add System Services. Example:
<mnt_point>/Solaris_<ver>/Tools/Boot/etc/servicescvd 8400/tcpEvMgrS 8401/tcpEvMgrC 8402/tcp
9. Create symbolic links for required writeable areas. Example:
ln -s ../tmp/root/etc/inet/Galaxy.pkg Galaxy.pkg ln -s /tmp/CommVaultRegistry CommVaultRegistry
10. Restart the computer.
11. Create and mount a /opt file system using an open slice. Example:
swap slice
12. Install the Solaris File System iDataAgent software. If the installer requests updates and the required updates have not been installed on the jump start server, skip the request to add the additional operating system updates.
Administration Guide - Solaris File System iDataAgent
Page 106 of 265
13. Type the command to create partitions/slices on the disk. format14. Type the command to create the root file system.
newfs /dev/dsk/<DriveID>where <DriveID> is the Drive Identifier of the partition where you want to create the root file system.
Example:
newfs /dev/dsk/<root>
15. Type the command to mount the new root file system at /mnt.mount /dev/dsk/<DriveID> /mntwhere <DriveID> is the Drive Identifier of the partition containing the root file system.
Example:
mount /dev/dsk/<root> /mnt
16. Create an empty directory called "proc" on /mnt Example:
mkdir /mnt/proc17. If you have recreated any file systems other than root, type the
command to mount these as well.
mkdir /mnt/<file_system_name>mount /dev/dsk/<DriveID> /mnt/<file_system_name>where <file_system_name> is the name of the file system and <DriveID> is the Drive Identifier of the partition containing the file system.
Example:
mkdir /mnt/<devfs>mount /dev/dsk/<root> /mnt/<devfs>
18. Install the jump start server on the Boot server. cd <jumpstart_install_directory>19. Type the command to unpack miniroot. <miniroot_mnt_dir>=`pwd`/boot20. Type the following commands if the software is installed at /opt:
cd <miniroot_mnt_dir>/etc/ln –s /tmp/simpana/CommVaultRegistry CommVaultRegistryType the following commands if the software is installed at a different directory:
cd <miniroot_mnt_dir>ln –s /tmp/simpana opt/simpanaln –s /tmp/simpana var/log/simpana
21. Pack Miniroot /boot/solaris/bin/root_archive pack sparc.miniroot `pwd`/boot
22. Use Network File System protocol to export a directory with RW(Read/Write) permissions for the client to be recovered.
/export/<mydir> where <mydir> is the name of the directory. Make sure the client gets all required permissions on this directory and its contents.
Example:
/export/<dir1>
23. From the Commcell console, restore CommVaultRegistry and /opt/simpana/* into /export/<mydir> cd to /export/<mydir>
mkdir Log_Filesmv Base32 Basemv iDataAgent32 iDataAgent
If you are using x64 Solaris, then:
mv Base/simpana Base32rm –rf Base iDataAgent
24. On the Client side, perform the following steps: Jumpstart the client using the boot server. Follow the prompts and get to a shell. Bring up all the interfaces.
boot net -sConfigure a default route.
route add default <172.x.x.x> where <172.x.x.x> is the Gateway address
Add the client IP address and hostname to:
/etc/hosts Add the Media Agent and CommServe to:
Administration Guide - Solaris File System iDataAgent
Page 107 of 265
RESTORING THE SOLARIS FILE SYSTEM
/etc/hosts
25. Type the command to create partitions/slices on the disk. fdisk /dev/rdsk/c1d0p026. Type the command to create the root file system.
newfs /dev/dsk/<DriveID>where <DriveID> is the Drive Identifier of the partition where you want to create the root file system.
Example:
newfs /dev/dsk/<root>
27. If ZFS file system is on root partition, perform the following steps to create zpools and file systems:
zpool create –R/a <pool name> where <pool name> is the zpool name created during the initial Solaris install.
zfs create <pool name>/FS1 where <pool name> is the zpool name created during the initial Solaris install and FS1 is the file system name
zfs set mountpoint=<first_mountpoint><pool name>/FS1 where <first_mountpoint> refers to its original mountpoint and FS1 is the file system name
fs create <pool name>/FS2 where <pool name> is the zpool name created during the initial Solaris install and FS2 is the file system name
zfs set mountpoint=<first_mountpoint><pool name>/FS2 where <first_mountpoint> refers to its original mountpoint and <pool name> is the zpool name created during the initial Solaris install.
28. Type the following command to create a dump and swap a file system:
zfs create –V <space required> <fsname> where <fsname> is the filesystem name.
Example:
/export/home
29. Type the following commands to start the Recovery services:
cd /opt/simpanamkdir /opt/simpana/Base/Temp/
. ./galaxy_vm . ./Base/cvprofile svc_ctrl –focus $GALAXY_VM -start cvd svc_ctrl –focus $GALAXY_VM -start EvMgrC svc_ctrl –focus $GALAXY_VM -start cvfwd
30. Set the variable Example:
platform=`uname –i`31. Use the variable as directory, to map it to the correct Boot block.
Type the following command for Solaris 10 Update 6 or above:
installboot –F zfs /a/usr/platform/$platform/lib/fs/zfs/bootblk /dev/rdsk/<boot_disk>
where <boot_disk> is the name of the disk to be booted
Type the following command for Solaris 10 Update 5 or below:
installboot /a/usr/platform/$platform/lib/fs/ufs/bootblk /dev/rdsk/<boot_disk>
where <boot_disk> is the name of the disk to be booted
Type the following command for x86 systems:
installgrub –fm /a/boot/grub/stage1/a/boot/grub/stage2 /dev/rdsk/<boot disk>bootadm update-archive –R /a init 6
32. Restart the computer.
Administration Guide - Solaris File System iDataAgent
Page 108 of 265
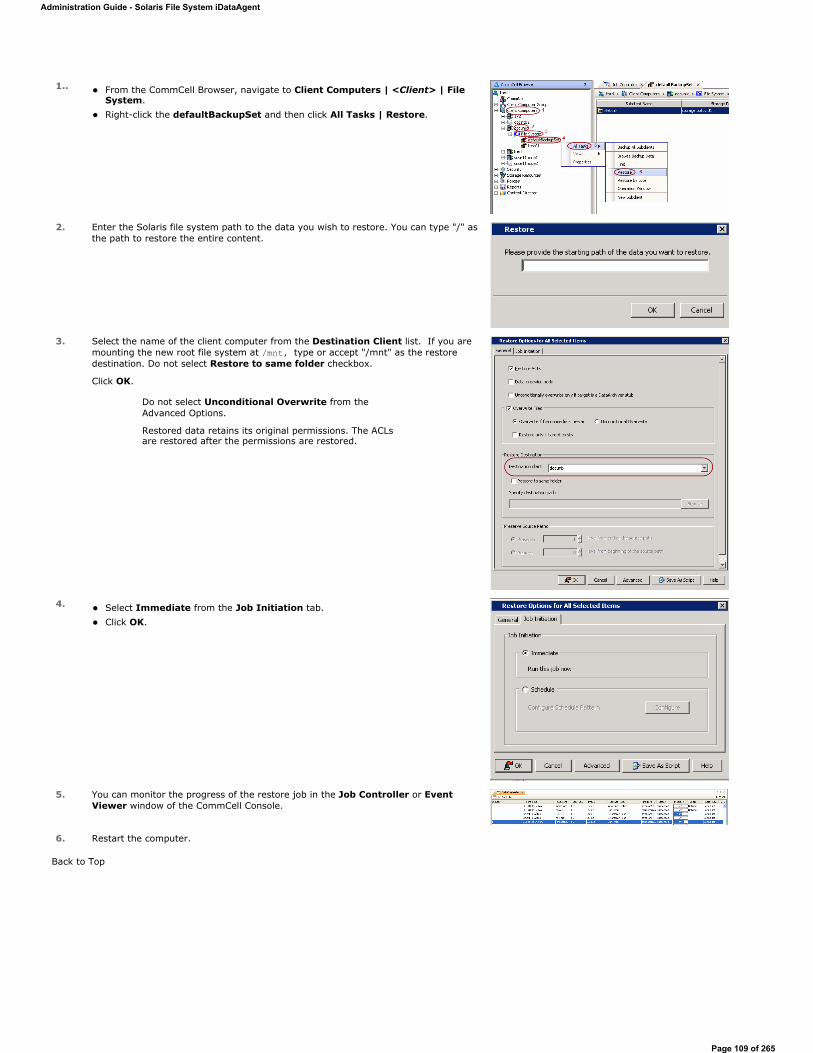
Back to Top
1.. From the CommCell Browser, navigate to Client Computers | <Client> | File System. Right-click the defaultBackupSet and then click All Tasks | Restore.
2. Enter the Solaris file system path to the data you wish to restore. You can type "/" as the path to restore the entire content.
3. Select the name of the client computer from the Destination Client list. If you are mounting the new root file system at /mnt, type or accept "/mnt" as the restore destination. Do not select Restore to same folder checkbox.
Click OK.
Do not select Unconditional Overwrite from the Advanced Options.
Restored data retains its original permissions. The ACLs are restored after the permissions are restored.
4. Select Immediate from the Job Initiation tab. Click OK.
5. You can monitor the progress of the restore job in the Job Controller or Event Viewer window of the CommCell Console.
6. Restart the computer.
Administration Guide - Solaris File System iDataAgent
Page 109 of 265
Additional Operations - Solaris File System
AUDIT TRAIL
The Audit Trail feature allows you to track the operations of users who have access to the CommCell. This capability is useful if a detrimental operation was performed in the CommCell and the source of that operation needs to be determined.
Audit Trail tracks operations according to four severity levels:
Critical: This level records operations that will result in imminent loss of data.
High: This level records operations that may result in loss of data.
Medium: This level records changes to the general configuration of one or more entities. Such changes may produce unintended results when operations are performed.
Low: This level records changes to status, addition of entities, and other operations that have minimal impact on existing CommCell functions.
To set Audit Trail retention periods:
1. From the Tools menu in the CommCell Console, click Control Panel, and then select Audit Trail.
2. From the Audit Trail dialog box, select the desired retention time (in days) for each severity level.
3. Click OK.
STORAGE POLICY
A Storage policy defines the data lifecycle management rules for protected data. Storage policies map data from its original location to a physical storage media and determine its retention period.
1. Expand the Policies node, right-click Storage Policies, and select New Storage Policy.
2. Click Next.
3. Select Data Protection and Archiving to create a regular storage policy or CommServe Disaster Recovery Backup to backup the CommServe database and click Next.
4. Click Next.
5. Enter the name of storage policy and click Next.
6. Enter the name of the primary copy and click Next.
7. From the drop down box, select the default library for the primary copy and click Next.
8. From the drop down box, select the MediaAgent and click Next.
9. Enter number of data streams and set the retention period for the policy and click Next.
10. Click Next.
11. Click Browse, browse to your designated deduplication store location and click Next.
12. Confirm your selections and click Finish.
SUBCLIENT POLICY
TABLE OF CONTENTS
Audit Trail
Storage Policy
Subclient Policy
Schedule Policy
Auxiliary Copy
Operation Window
Operating System and Application Upgrades
Global Filters
Erase Backup Data
Uninstalling Components
Online Help Links
Administration Guide - Solaris File System iDataAgent
Page 110 of 265
Subclient policies allow you to configure multiple subclients within a CommCell from a centralized template. This alleviates the need to manually configure each subclient that shares a similar configuration.
1. Expand the Policies node, right-click Subclient Policies and click New Subclient Policy.
2. Enter policy name in the Name entry field, then select the appropriate file system type from the iDataAgent drop-down list.
3. In the Subclient pane, assign a storage policy for each subclient template by clicking in the drop down box under the Storage Policy column.
4. Click OK.
SCHEDULE POLICY
A schedule policy is a defined schedule or group of schedules for specific operations to be performed on associated objects within the CommCell. When the schedules from a policy are run, the specified operations, (e.g., auxiliary copy, backup, etc.,) will be performed on the associated CommCell objects.
1. Expand the Policies node, right-click Schedule Policies and click Add.
2. Type the Name of the schedule policy.
3. Select the Type of schedule policy.
4. Select the Agent Type.
5. Type a description of the schedule policy.
6. Click Add.
7. Enter a Schedule Name in the Schedule Pattern tab.
8. Click OK.
9. On the Associations tab, select the objects to be associated with the schedule policy.
10. Click OK.
AUXILIARY COPY
An auxiliary copy operation allows you to create secondary copies of data associated with data protection operations, independent of the original copy.
1. Expand the Policies node, right-click storage policy for which you want to perform an auxiliary copy, click All Tasks, and then click Run Auxiliary Copy.
2. If you are starting the auxiliary copy operation from the CommServe level, select the storage policy for which you wish to perform the auxiliary copy.
3. If the source copy is configured with a shared library, select the Source MediaAgent for the auxiliary copy.
4. Click OK to start the auxiliary copy operation. A progress bar displays the progress of the operation.
OPERATION WINDOW
By default, all operations in the CommCell can run for 24 hours. To prevent certain operations from running during certain periods of the day, you can define operation rules so that these operations are disabled during those times.
When operation rules are configured, operations that are started within the time window specified will go to a queued (as opposed to pending) state. Once the time window specified in the operation rule has elapsed, these queued or running operations will resume automatically.
1. In the CommCell Browser, right-click the appropriate entity, click All Tasks, and then click Operation Window.
2. Click Add.
3. From the Operation Window dialog box:
Enter the name of the rule in the Name field.
Select either an administration, data protection (either full or non-full), and/or a data recovery operation from the Operations pane.
4. Click OK.
OPERATING SYSTEM AND APPLICATION UPGRADES
Operating system upgrades are only supported when upgrading from one version of an OS to a different version of the same OS (e.g., Win2003 to Win2008). The two methods of upgrading are:
Seamless Upgrade - This involves uninstalling the Agent software, upgrading the operating system, and then re-installing the Agent software.
If you are starting the auxiliary copy operation from the Storage Policy level, the Storage Policy field is already populated with the name of the Storage Policy you selected.
Administration Guide - Solaris File System iDataAgent
Page 111 of 265
Full OS Replacement - This involves performing a clean install of a new version of the OS, re-installing any application software, then re-installing the CommServe, MediaAgent, and/or Agent software.
For Full OS Replacement, the client computer must be configured to have the CommServe, MediaAgent, and/or Client software re-installed to the same location, the same Fully Qualified Domain Name or short domain name, the same partitions, disk drive format (FAT, NTFS, et. al.), and IP configuration as previously.
Use the following strategy to upgrade the operating system software:
Identify the computers you want to upgrade and the CommCell components installed on each of these computers.
Choose the type of upgrade procedure you want to use on each computer: seamless or full replacement.
CommServe, MediaAgent, and Client computers can be upgraded in any order.
GLOBAL FILTERS
Global Filters are exclusions that filter data from backups across all Agents in a CommCell that support the feature. Global Filters serve as a template for files, folders, and entities that should always be excluded from all (or most) backups in a CommCell, such as temporary data a computer does not retain or data that is recoverable by means other than a restore. This saves space on media and enhances backup performance.
By default, filters configured for a particular subclient override any Global Filters configured for the CommCell. You can, however, configure subclients to include global filters along with any filters already configured for the subclient.
CONFIGURE GLOBAL FILTERS
1. From the CommCell Browser, right-click the CommServe, click Control Panel, and then click Global Filters.
2. Select Use Global Filters on All Subclients.
3. Click Browse to locate the files or folders to be excluded from backups and click OK.
4. Click OK to save your changes.
ENABLE/DISABLE GLOBAL FILTERS FOR A SUBCLIENT
1. From the CommCell Browser, right-click the subclient for which you want to enable Global Filters and click Properties.
2. Click the Filters tab.
3. Select one of the following values from the Include Global Filters list:
ON to enable Global Filters for this subclient.
OFF to disable Global Filters for this subclient.
4. Click OK.
ERASE BACKUP DATA
The Erase Data feature allows you to permanently erase any data that can be backed up.
CONFIGURING ERASE DATA
To erase data, you need to first assign a Filter Storage Policy for Erasing Data. Follow the steps given below to assign a Filter Storage Policy:
1. From the CommCell Browser, right-click the storage policy that you want to use as a filter storage policy, then click Properties.
2. From the General tab of the Storage Policy Properties dialog box, select the Allow Erase Data check box.
3. Click OK.
4. From the CommCell Browser, right-click the File System agent icon and then click Properties.
5. From the Storage Device tab of the agent Properties dialog box, select a filter storage policy from the Filter Storage Policy list.
6. Click OK.
RUNNING AN ERASE DATA JOB
After the configuration has been completed, you can now browse and erase data.
1. From the CommCell Browser, right-click the File System agent, select All Tasks and then click Erase Data By Browsing.
If it is necessary to remove Agent software to facilitate an operating system or application upgrade, do not delete the icon for the Agent from the CommCell Console, or all associated backed up data will be lost.
Administration Guide - Solaris File System iDataAgent
Page 112 of 265
2. You are warned that the data will be permanently removed. Click Yes to continue.
3. From the Erase Data by Browsing dialog box, click Browse.
4. In the Browse Options dialog box, select a browse time range and any advanced browse options, and click OK.
5. From the browse selection window, select the data objects that you want to erase, and click OK.
6. In the Job Initiation tab, select Immediate to run the job immediately.
You can track the progress of the job from the Job Controller or Event Viewer.
UNINSTALLING COMPONENTS
You can uninstall the components using one of the following methods:
METHOD 1: UNINSTALL COMPONENTS USING THE COMMCELL CONSOLE
1. From the CommCell Browser, right-click the desired Client Computer and click All Tasks -> Add/Remove Programs and click Uninstall Software.
2. Uninstall Software Options dialog will appear.
3. In the Uninstall Software tab, select Uninstall All to uninstall all the software packages.
4. In the Job Initiation tab, select Immediate to run the job immediately.
You can track the progress of the job from the Job Controller or Event Viewer.
METHOD 2: UNINSTALL COMPONENTS AT THE CLIENT
You can uninstall the unix components using the cvpkgrm utility.
The following table lists the File System components and their corresponding titles within the uninstall program's selection menu:
When uninstalling a component on a client computer, the following sequence must be used:
1. Uninstall all application components and updates.
2. Uninstall the MediaAgent (if one exists).
3. Uninstall the Base software.
ONLINE HELP LINKS
Use the following links to view the online help for the corresponding tabs in the CommCell Console:
Method 1: Uninstall Components Using the CommCell Console
Method 2: Uninstall Components at the Client
COMPONENT COMPONENT TITLE IN UNINSTALL PROGRAM'S SELECTION MENU
File System iDataAgent CVGxIDAMediaAgent CVGxMABase Module CVGxBase
OPERATIONS ENTITY ONLINE HELP LINKS SUB LINKS
CONFIGURATIONAgent Agent Properties (General)
Agent Properties (Version)
Agent Properties (Index)
Agent Properties (Security)
Agent Properties (Activity Control)
Agent Properties (Storage device)Subclient Subclient Properties (General)
Subclient Properties (Content)
Subclient Properties (Filters)
Subclient Properties (Pre/Post Process)
Subclient Properties (Encryption)
Subclient Properties (Storage Device)
Subclient Properties (Activity Control)
Add Multiple Contents
Administration Guide - Solaris File System iDataAgent
Page 113 of 265
Back to Top
Subclient Properties (1-Touch Recovery)
Subclient Properties (SRM Options)
Subclient Properties (Security)
Subclient Properties (SnapProtect)Backup Set Backup Set (General)
Backup Set (Security)
BACKUPBackup Options Backup Options
Save As Script
Command Line XML Options
Advanced Backup Options
Advanced Backup Options (Data)
Advanced Backup Options (Startup)
Advanced Backup Options (Job Retry)
Advanced Backup Options (Media)
Advanced Backup Options (Data Path)
Advanced Backup Options (VaultTracking)
Advanced Backup Options (Alert)
RESTORERestore Options Restore Options
Job InitiationSave As Script
Command Line XML OptionsAdvanced Restore Options
Advanced Restore Options (General)
Advanced Restore Options (Startup)
Advanced Restore Options (Pre/Post)
Advanced Restore Options (Copy Precedence)
Advanced Restore Options (Data Path)
Advanced Restore Options (Paths/Filters)
Advanced Restore Options (Encryption)
Advanced Restore Options (Job Retry)
Advanced Restore Options (Map)
Advanced Restore Options (Browse Options)
Advanced Restore Options (Alert)
ADVANCED TOPICSProvides comprehensive information on additional capabilities for the following features:
Audit TrailStorage PoliciesStorage Policy CopiesSubclient PoliciesSchedule PolicyAuxiliary CopyOperation WindowErase Backup DataUninstalling Components
Administration Guide - Solaris File System iDataAgent
Page 114 of 265
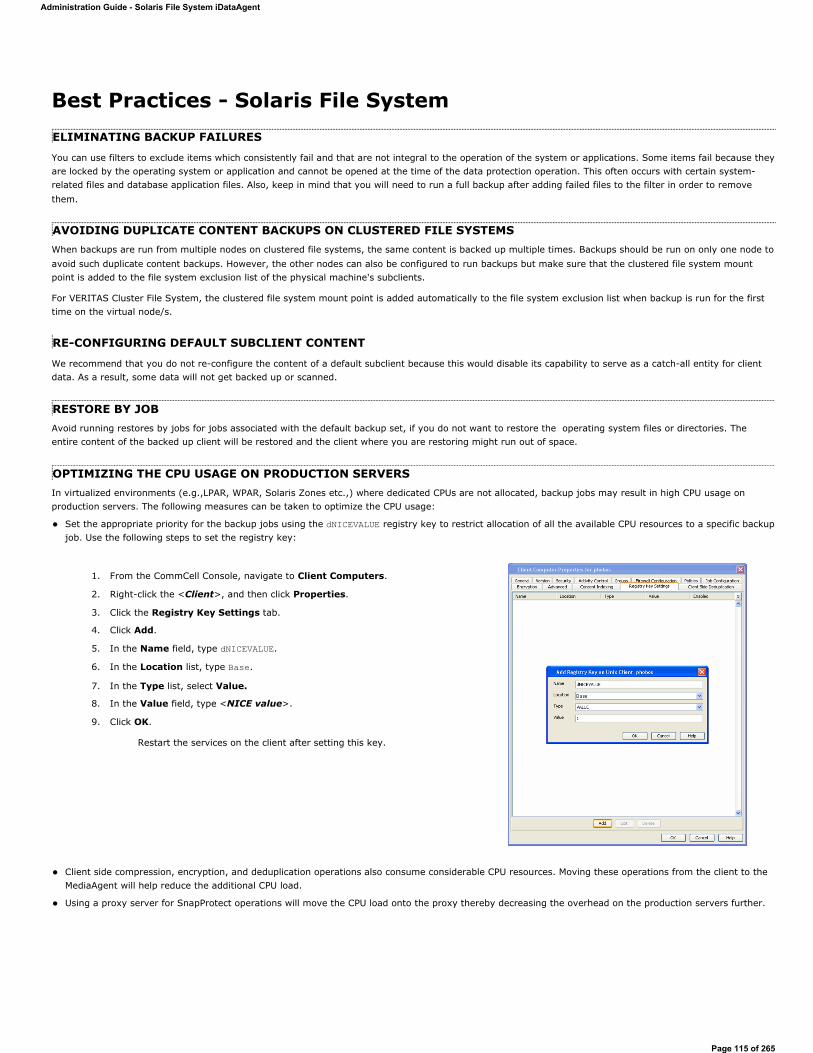
Best Practices - Solaris File SystemELIMINATING BACKUP FAILURES
You can use filters to exclude items which consistently fail and that are not integral to the operation of the system or applications. Some items fail because they are locked by the operating system or application and cannot be opened at the time of the data protection operation. This often occurs with certain system-related files and database application files. Also, keep in mind that you will need to run a full backup after adding failed files to the filter in order to remove them.
AVOIDING DUPLICATE CONTENT BACKUPS ON CLUSTERED FILE SYSTEMSWhen backups are run from multiple nodes on clustered file systems, the same content is backed up multiple times. Backups should be run on only one node to avoid such duplicate content backups. However, the other nodes can also be configured to run backups but make sure that the clustered file system mount point is added to the file system exclusion list of the physical machine's subclients.
For VERITAS Cluster File System, the clustered file system mount point is added automatically to the file system exclusion list when backup is run for the first time on the virtual node/s.
RE-CONFIGURING DEFAULT SUBCLIENT CONTENT
We recommend that you do not re-configure the content of a default subclient because this would disable its capability to serve as a catch-all entity for client data. As a result, some data will not get backed up or scanned.
RESTORE BY JOBAvoid running restores by jobs for jobs associated with the default backup set, if you do not want to restore the operating system files or directories. The entire content of the backed up client will be restored and the client where you are restoring might run out of space.
OPTIMIZING THE CPU USAGE ON PRODUCTION SERVERSIn virtualized environments (e.g.,LPAR, WPAR, Solaris Zones etc.,) where dedicated CPUs are not allocated, backup jobs may result in high CPU usage on production servers. The following measures can be taken to optimize the CPU usage:
Set the appropriate priority for the backup jobs using the dNICEVALUE registry key to restrict allocation of all the available CPU resources to a specific backup job. Use the following steps to set the registry key:
Client side compression, encryption, and deduplication operations also consume considerable CPU resources. Moving these operations from the client to the MediaAgent will help reduce the additional CPU load.
Using a proxy server for SnapProtect operations will move the CPU load onto the proxy thereby decreasing the overhead on the production servers further.
1. From the CommCell Console, navigate to Client Computers.
2. Right-click the <Client>, and then click Properties.
3. Click the Registry Key Settings tab.
4. Click Add.
5. In the Name field, type dNICEVALUE.
6. In the Location list, type Base.
7. In the Type list, select Value.
8. In the Value field, type <NICE value>.
9. Click OK.
Restart the services on the client after setting this key.
Administration Guide - Solaris File System iDataAgent
Page 115 of 265
Frequently Asked Questions - Solaris File SystemCAN WE PROTECT DATA ON NON-GLOBAL ZONES IF THE FILE SYSTEM IDATAAGENT IS INSTALLED ONLY ON THE GLOBAL ZONE?
Yes. We can protect file system data on non-global zones if the File System iDataAgent is installed only on the global zone. However, in order to enable consistent backups of application specific data on the non-global zones, you will need to install the corresponding application specific iDataAgent on the non-global zone.
WHAT PERMISSIONS DOES THE RESTORED DATA ACQUIRE AFTER THE RESTORES?When performing restore operations (other than in-place restores), the restored data assumes the rights (i.e., permissions) of the parent directory.
HOW ARE CASE-SENSITIVE FILES RESTORED FROM UNIX TO WINDOWS CLIENTS?Windows operating system does not maintain case-sensitivity of the file names. Hence, when you perform a cross-platform restore from a Unix client to a Window Client, if there are two case-sensitive files with same name, the case sensitivity of the files are ignored and the files are overwritten. For example, if you are trying to restore files named SAMPLE and sample from Unix to Windows, the file which is restored last will overwrite the first one that was restored.
HOW ARE FILE NAMES WITH \ CHARACTER HANDLED WHEN RESTORING FROM UNIX TO WINDOWS CLIENTS?When you restore a file with a \ character in its name (for example, file\.dat) to a Windows client computer, Windows interprets the \ as a delimiter in the path name and creates a folder on the Windows computer named file, which will contain a file named .dat. However, the contents of the files file\.datand .dat are identical.
WHEN DOES A NON-FULL BACKUP AUTOMATICALLY GET CONVERTED TO A FULL BACKUP?A non-full backup is automatically converted to a full backup in the following situations:
First backup of the subclient.
Re-associating a subclient to another storage policy.
Promote a secondary storage policy copy that is not synchronized with a primary copy (for all the subclients of a storage policy).
If a backup job within the most recent backup cycle is pruned or disabled from a primary copy.
Adding a new content path to the subclient.
If you switch from a SnapProtect backup to a traditional backup or vice versa.
CommCell Migration operation.
WHAT ARE THE TWO TYPES OF FILE LOCKS AND HOW ARE THEY BACKED UP?The Unix file system uses two types of file locks: Advisory locks and Mandatory locks. Files with an advisory locks are available to multiple users and applications. Files with mandatory locks cannot be used by any other user or application other than the current user.
Files with advisory locks are included in the backups by default. On the other hand, files with mandatory locks are skipped during the backup process and their file names and paths are logged to the Backup Job History log. You can use the CommCell Console to examine this log to determine if any files were skipped. The system automatically attempts to obtain any skipped files in the next backup.
You can backup mandatory locks when you install and enable Qsnap. For comprehensive information on configuring backups for files with mandatory locks, see Configuring Backups for Locked Files for step-by-step instructions.
HOW DO WE IDENTIFY AND EXCLUDE FILE SYSTEM TYPES WITHOUT A NAME FROM BACKUPS?File system types that do not have a corresponding name can be identified by their numeric value. The numeric value of such file systems can be found printed in the FileScan.log log file located in the /var/log/simpana/Log_Files/ directory, as shown below.
For example:
Find::GetFsType() - add fstype '391' for '/home' to cache (st_dev:17)
Find::GetFsType() - add fstype 'ext3' for '/testData/uxpermissions' to cache (st_dev:FC08)
This numeric value of file system type from above example can be used in conjunction with the ignoreFStype registry key to skip the file system type from backups.
For example,
ignoreFStype :391:.
WHAT ARE THE FOLDERS/FILES CREATED AND CHANGES DONE DURING INSTALL OF THIS AGENT?
Administration Guide - Solaris File System iDataAgent
Page 116 of 265
PLATFORMS FOLDERS CREATED FILES CREATED OTHER CHANGES
Solaris /opt/simpana/Base/simpana
/usr/bin/simpana
/usr/bin/cvpkgrm
/usr/bin/cvpkgcheck
/usr/sbin/simpana
/usr/sbin/cvpkgrm
/usr/sbin/cvpkgcheck
/usr/bin/cvpkgchg
/usr/sbin/cvpkgchg
/etc/galaxy
/dev/cxbf
/usr/bin/LaunchBrowser $INSDIR/$INSSUBDIR/GUI/LaunchBrowser (only when CVGxGUI is installed)
/usr/bin/console (only when CVGxGUI is installed)
/usr/sbin/console (only when CVGxGUI is installed)
/tmp/.gxsetup directory (during install and after install if failed )
/var/log/.gxsetup directory (after install)
/etc/gxsetup_guid
Driver configuration file to /usr/kernel/drv copied /cxbf.conf Driver to /usr/kernel/drv/amd64 for X86 and /usr/kernel/drv/sparcv9 copiert for Sparc
File /usr/sbin/cvsnap is created (copied from the installation package)
Create file /usr/sbin/cv_vxfreeze.
File /usr/sbin/cv_vxunfreeze is created (copied from the installation package)
File /usr/sbin/cvsnap32 is created (copied from the installation package)
File /usr/sbin/cxbf-bootscript1.rc.example is created
File /usr/sbin/cxbf-bootscript2.rc.example is created
/ Etc /devlink.tab is updated
File /usr/sbin/cxbf-bootscript1.rc is created
File /etc/rc3.d/S66CVCXBF is created
File /etc/rcS.d/S96CVCXBF is created
/etc/system (solaris2.8 and 2.9 only when user selected to modify IPC settings)
/etc/system.gal.$$ (solaris2.8 and 2.9 only; backup if user selected yes for IPC change OR suggested settings if user selected not to change IPC this time; $$ is pid)
The file /etc/rc0 adjusted accordingly (if selected during install)
Startup Scripts: <dir>/S99Galaxy where <dir>=/etc/rc.d/rc<n>.d; /etc/rc<n>.d ; /sbin/rc.d/rc<n>.d ; sbin/rc<n>.d ; /etc/init.d/runlevels/%<n> only if <dir> exists, where <n> is the second field in line “id:2:initdefault:”of /etc/inittab for solaris 10+ if this did not exist in /etc/inittab then we use 3
<dir>/K99Galaxy where <dir>=/etc/rc.d/rc<n>.d; /etc/rc<n>.d ; /sbin/rc.d/rc<n>.d ; sbin/rc<n>.d ; /etc/init.d/runlevels/%<n> only if <dir> exists, where <n> is the second field in line “id:2:initdefault:”of /etc/inittab for solaris 10+ if this did not exist in /etc/inittab then we use 3
Administration Guide - Solaris File System iDataAgent
Page 117 of 265
Troubleshooting - Solaris File System Backup
The following section provides information on some of the troubleshooting scenarios related to backup:
BACKUP FAILURES
PRIORITY OF SIMPANA PROCESSESBy default, Simpana processes runs at default priority on the client computers. If there are available CPU cycles, then Simpana processes will use the available CPU for backup and restore operations. If the CPU is being used by other application or system processes, Simpana processes will not preempt them. In such cases, if you want to give higher priority to other application or system processes, which are running at the default priority, you can modify the priority of Simpana process using the following steps:
Backup Restore
Backup fails The subclient content might have remote scripts with one or more blank lines at the top.
Ensure that you delete the blank lines at the top of any remote scripts.Backup hangs indefinitely Ensure that there are no stale NFS mounts on the server included in the backup.
If there are stale NFS mounts on the server, backups hang indefinitely. This can be avoided by either adding the mounted directory to the exclusion filter of the subclient or ensuring that the NFS mount points are available for backups.
Error while loading shared libraries
On Linux clients, the below error appears when we run any process or service:
<process name>: error while loading shared libraries: <lib>.so: cannot enable executable stack as shared object requires: Permission deniedFor example,
#./ifind -getmnt -all./ifind: error while loading shared libraries: libCvOnTap.so: cannot enable executable stack as shared object requires: Permission deniedAs a workaround, do the following steps:
1. Check if ASL (Atomic Secured Linux) is configured on client.
#uname –r2.6.32.59-17.art.i686.PAE
.art indicates that ASL is configured on the client.
2. Check for the presence of the below logs in /var/log/messages file.
May 24 22:01:08 rhel6 kernel: Aborting coreMay 24 22:01:08 rhel6 kernel: PAX: execution attempt in: <anonymous mapping>, bfc46000-bfc5b000 bffeb000May 24 22:01:08 rhel6 kernel: PAX: terminating task: /usr/libexec/paxtest/mprotstack(mprotstack):13201, uid/euid: 0/0, PC: bfc5acf4, SP: bfc5acdcMay 24 22:01:08 rhel6 kernel: PAX: bytes at PC: c3 1a a3 ae 2b ac 9f ae f4 0f 9f ae 00 00 00 00 f4 0f 9f ae
3. Run the following command.
chpax –ps ../iDataAgent/<process/service>
E.g.:#chpax –ps /opt/simpana/iDataAgent/ifind
1. From the CommCell Console, navigate to Client Computers.
2. Right-click the <Client>, and then click Properties.
3. Click the Registry Key Settings tab.
4. Click Add.
5. In the Name field, type dNICEVALUE.
6. In the Location list, type Base.
7. In the Type list, select Value.
8. In the Value field, type <NICE value>.
9. Click OK.
Restart the services on the client after setting this key.
Administration Guide - Solaris File System iDataAgent
Page 118 of 265
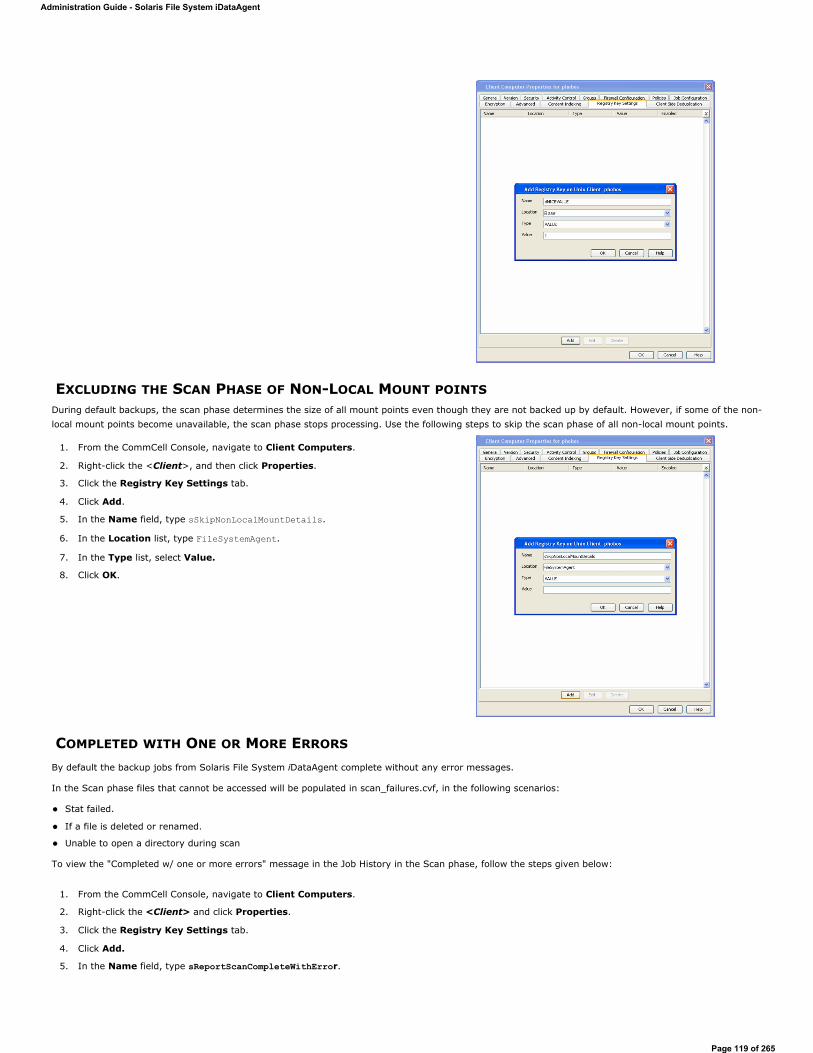
EXCLUDING THE SCAN PHASE OF NON-LOCAL MOUNT POINTSDuring default backups, the scan phase determines the size of all mount points even though they are not backed up by default. However, if some of the non-local mount points become unavailable, the scan phase stops processing. Use the following steps to skip the scan phase of all non-local mount points.
COMPLETED WITH ONE OR MORE ERRORS
By default the backup jobs from Solaris File System iDataAgent complete without any error messages.
In the Scan phase files that cannot be accessed will be populated in scan_failures.cvf, in the following scenarios:
Stat failed.
If a file is deleted or renamed.
Unable to open a directory during scan
To view the "Completed w/ one or more errors" message in the Job History in the Scan phase, follow the steps given below:
1. From the CommCell Console, navigate to Client Computers.
2. Right-click the <Client>, and then click Properties.
3. Click the Registry Key Settings tab.
4. Click Add.
5. In the Name field, type sSkipNonLocalMountDetails.
6. In the Location list, type FileSystemAgent.
7. In the Type list, select Value.
8. Click OK.
1. From the CommCell Console, navigate to Client Computers.
2. Right-click the <Client> and click Properties.
3. Click the Registry Key Settings tab.
4. Click Add.
5. In the Name field, type sReportScanCompleteWithError.
Administration Guide - Solaris File System iDataAgent
Page 119 of 265
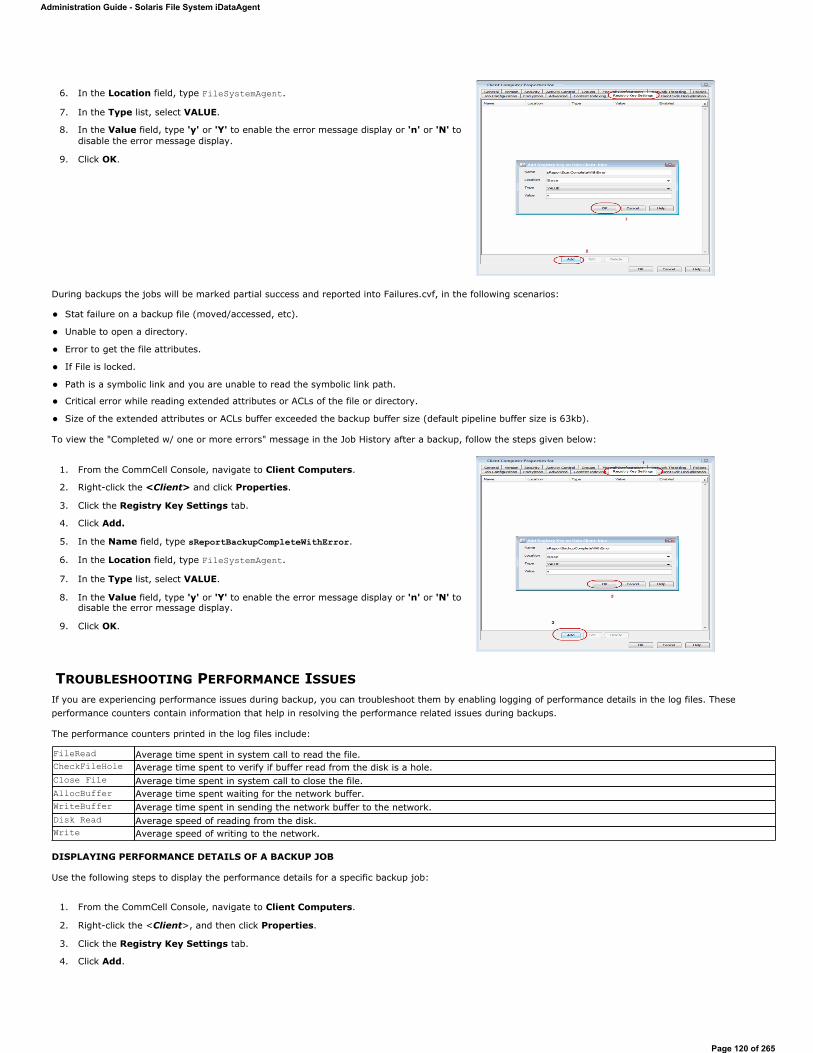
During backups the jobs will be marked partial success and reported into Failures.cvf, in the following scenarios:
Stat failure on a backup file (moved/accessed, etc).
Unable to open a directory.
Error to get the file attributes.
If File is locked.
Path is a symbolic link and you are unable to read the symbolic link path.
Critical error while reading extended attributes or ACLs of the file or directory.
Size of the extended attributes or ACLs buffer exceeded the backup buffer size (default pipeline buffer size is 63kb).
To view the "Completed w/ one or more errors" message in the Job History after a backup, follow the steps given below:
TROUBLESHOOTING PERFORMANCE ISSUESIf you are experiencing performance issues during backup, you can troubleshoot them by enabling logging of performance details in the log files. These performance counters contain information that help in resolving the performance related issues during backups.
The performance counters printed in the log files include:
DISPLAYING PERFORMANCE DETAILS OF A BACKUP JOB
Use the following steps to display the performance details for a specific backup job:
6. In the Location field, type FileSystemAgent.
7. In the Type list, select VALUE.
8. In the Value field, type 'y' or 'Y' to enable the error message display or 'n' or 'N' to disable the error message display.
9. Click OK.
1. From the CommCell Console, navigate to Client Computers.
2. Right-click the <Client> and click Properties.
3. Click the Registry Key Settings tab.
4. Click Add.
5. In the Name field, type sReportBackupCompleteWithError.
6. In the Location field, type FileSystemAgent.
7. In the Type list, select VALUE.
8. In the Value field, type 'y' or 'Y' to enable the error message display or 'n' or 'N' to disable the error message display.
9. Click OK.
FileRead Average time spent in system call to read the file.CheckFileHole Average time spent to verify if buffer read from the disk is a hole.Close File Average time spent in system call to close the file.AllocBuffer Average time spent waiting for the network buffer.WriteBuffer Average time spent in sending the network buffer to the network.Disk Read Average speed of reading from the disk.Write Average speed of writing to the network.
1. From the CommCell Console, navigate to Client Computers.
2. Right-click the <Client>, and then click Properties.
3. Click the Registry Key Settings tab.
4. Click Add.
Administration Guide - Solaris File System iDataAgent
Page 120 of 265
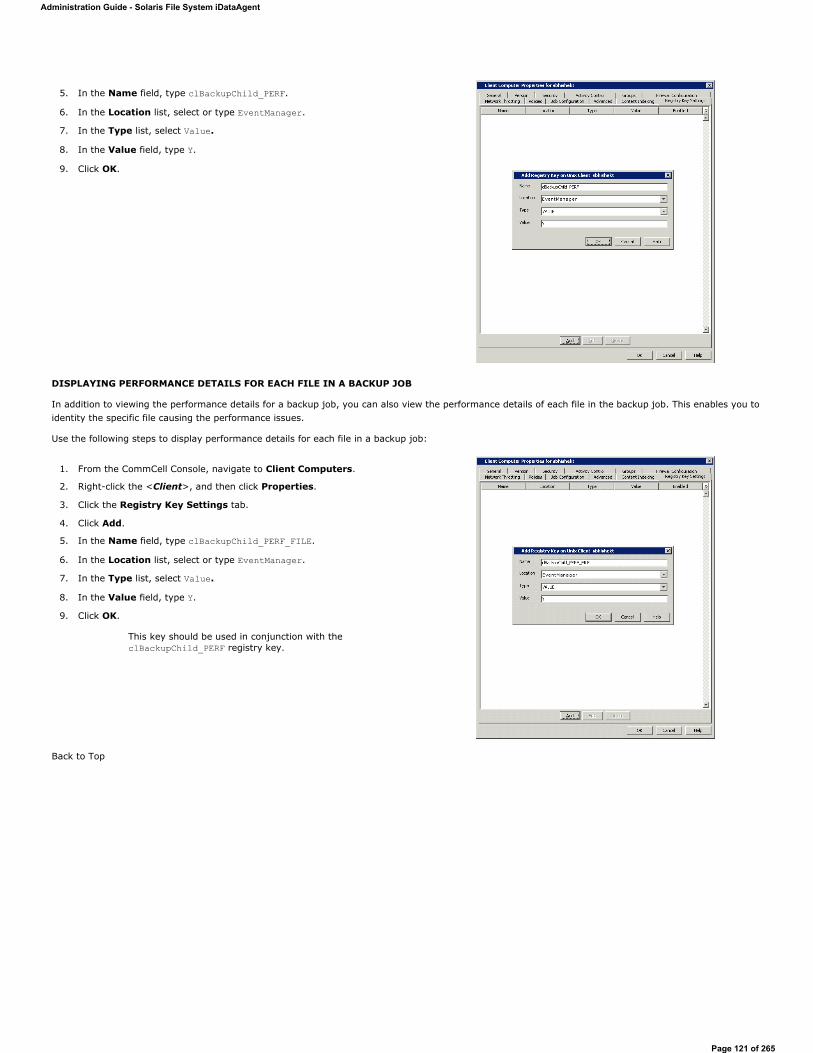
DISPLAYING PERFORMANCE DETAILS FOR EACH FILE IN A BACKUP JOB
In addition to viewing the performance details for a backup job, you can also view the performance details of each file in the backup job. This enables you to identity the specific file causing the performance issues.
Use the following steps to display performance details for each file in a backup job:
Back to Top
5. In the Name field, type clBackupChild_PERF.
6. In the Location list, select or type EventManager.
7. In the Type list, select Value.
8. In the Value field, type Y.
9. Click OK.
1. From the CommCell Console, navigate to Client Computers.
2. Right-click the <Client>, and then click Properties.
3. Click the Registry Key Settings tab.
4. Click Add.
5. In the Name field, type clBackupChild_PERF_FILE.
6. In the Location list, select or type EventManager.
7. In the Type list, select Value.
8. In the Value field, type Y.
9. Click OK.
This key should be used in conjunction with the clBackupChild_PERF registry key.
Administration Guide - Solaris File System iDataAgent
Page 121 of 265
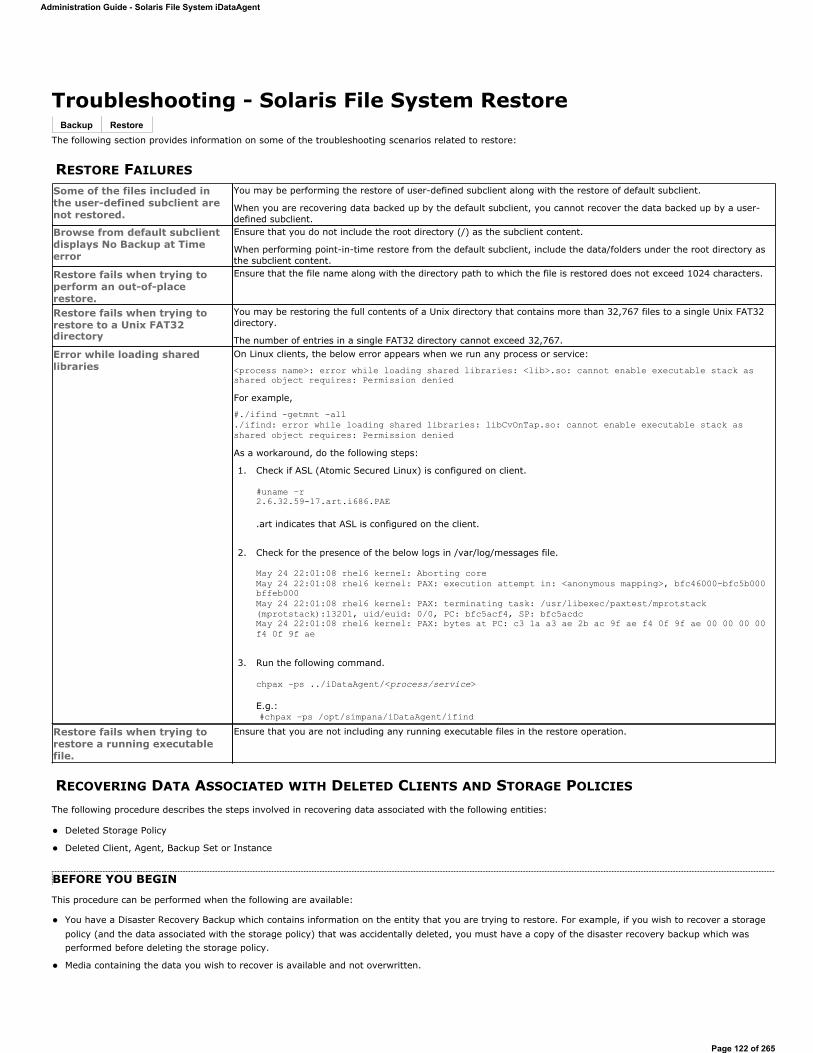
Troubleshooting - Solaris File System Restore
The following section provides information on some of the troubleshooting scenarios related to restore:
RESTORE FAILURES
RECOVERING DATA ASSOCIATED WITH DELETED CLIENTS AND STORAGE POLICIES
The following procedure describes the steps involved in recovering data associated with the following entities:
Deleted Storage Policy
Deleted Client, Agent, Backup Set or Instance
BEFORE YOU BEGIN
This procedure can be performed when the following are available:
You have a Disaster Recovery Backup which contains information on the entity that you are trying to restore. For example, if you wish to recover a storage policy (and the data associated with the storage policy) that was accidentally deleted, you must have a copy of the disaster recovery backup which was performed before deleting the storage policy.
Media containing the data you wish to recover is available and not overwritten.
Backup Restore
Some of the files included in the user-defined subclient are not restored.
You may be performing the restore of user-defined subclient along with the restore of default subclient.
When you are recovering data backed up by the default subclient, you cannot recover the data backed up by a user-defined subclient.
Browse from default subclient displays No Backup at Time error
Ensure that you do not include the root directory (/) as the subclient content.
When performing point-in-time restore from the default subclient, include the data/folders under the root directory as the subclient content.
Restore fails when trying to perform an out-of-place restore.
Ensure that the file name along with the directory path to which the file is restored does not exceed 1024 characters.
Restore fails when trying to restore to a Unix FAT32 directory
You may be restoring the full contents of a Unix directory that contains more than 32,767 files to a single Unix FAT32 directory.
The number of entries in a single FAT32 directory cannot exceed 32,767.Error while loading shared libraries
On Linux clients, the below error appears when we run any process or service:
<process name>: error while loading shared libraries: <lib>.so: cannot enable executable stack as shared object requires: Permission deniedFor example,
#./ifind -getmnt -all./ifind: error while loading shared libraries: libCvOnTap.so: cannot enable executable stack as shared object requires: Permission deniedAs a workaround, do the following steps:
1. Check if ASL (Atomic Secured Linux) is configured on client.
#uname –r2.6.32.59-17.art.i686.PAE
.art indicates that ASL is configured on the client.
2. Check for the presence of the below logs in /var/log/messages file.
May 24 22:01:08 rhel6 kernel: Aborting coreMay 24 22:01:08 rhel6 kernel: PAX: execution attempt in: <anonymous mapping>, bfc46000-bfc5b000 bffeb000May 24 22:01:08 rhel6 kernel: PAX: terminating task: /usr/libexec/paxtest/mprotstack(mprotstack):13201, uid/euid: 0/0, PC: bfc5acf4, SP: bfc5acdcMay 24 22:01:08 rhel6 kernel: PAX: bytes at PC: c3 1a a3 ae 2b ac 9f ae f4 0f 9f ae 00 00 00 00 f4 0f 9f ae
3. Run the following command.
chpax –ps ../iDataAgent/<process/service>
E.g.:#chpax –ps /opt/simpana/iDataAgent/ifind
Restore fails when trying to restore a running executable file.
Ensure that you are not including any running executable files in the restore operation.
Administration Guide - Solaris File System iDataAgent
Page 122 of 265
If a CommCell Migration license was available in the CommServe when the disaster recovery backup was performed, no additional licenses are required. If not, obtain the following licenses:
IP Address Change license
CommCell Migration license
See License Administration for more details.
A standby computer, which will be used temporarily to build a CommServe.
RECOVERING DELETED DATA
1. Locate the latest Disaster Recovery Backup which contains the information on the entity (Storage Policy, Client, Agent, Backup Set or Instance) that you are trying to restore.
You can check the Phase 1 destination for the DR Set or use Restore by Jobs for CommServe DR Data to restore the data.
If the job was pruned and you know the media containing the Disaster Recovery Backup, you can move the media in the Overwrite Protect MediaPool. See Accessing Aged Data for more information. You can then restore the appropriate DR Set associated with the job as described in Restore by Jobs for CommServe DR Data.
If the job is pruned and you do not know the media containing the Disaster Recovery Backup, you can do one of the following:
If you regularly run and have copies of the Data on Media and Aging Forecast report you can check them to see if the appropriate media is available.
2. On a standby computer, install the CommServe software. For more information on installing the CommServe, see CommServe Deployment.
3. Restore the CommServe database using the CommServe Disaster Recovery Tool from the Disaster Recovery Backup described in Step 1. (See Restore a Disaster Recovery Backup for step-by-step instructions.)
4. Verify and ensure that the CommVault Client Event Manager CommVault Communications Service (EvMgrS) is running.
5. If you did not have a CommCell Migration license available in the CommServe when the disaster recovery backup was performed, apply the IP Address Change license and the CommCell Migration license on the standby CommServe. See Activate Licenses for step-by-step instructions.
6. Export the data associated with the affected clients from the standby CommServe as described in Export Data from the Source CommCell.
7. Import the exported data to the main CommServe as described in Import Data on the Destination CommCell.
This will bring back the entity in the CommServe database and the entity will now be visible in the CommCell Browser. (Press F5 to refresh the CommCell Browser if the entity is not displayed after a successful merge.)
8. If you have additional data that was backed up after the disaster recovery backup and before the deletion of the entity, use the procedure described in Import Metadata from a Tape or Optical Media to obtain the necessary information.
9. You can now browse and restore the data from the appropriate entity.
When you start the Command Line Interface to capture data, use the name of the standby CommServe in the -commcell argument.
As a precaution, mark media (tape and optical media) associated with the source CommCell as READ ONLY before performing a data recovery operation in the destination CommCell.
Administration Guide - Solaris File System iDataAgent
Page 123 of 265
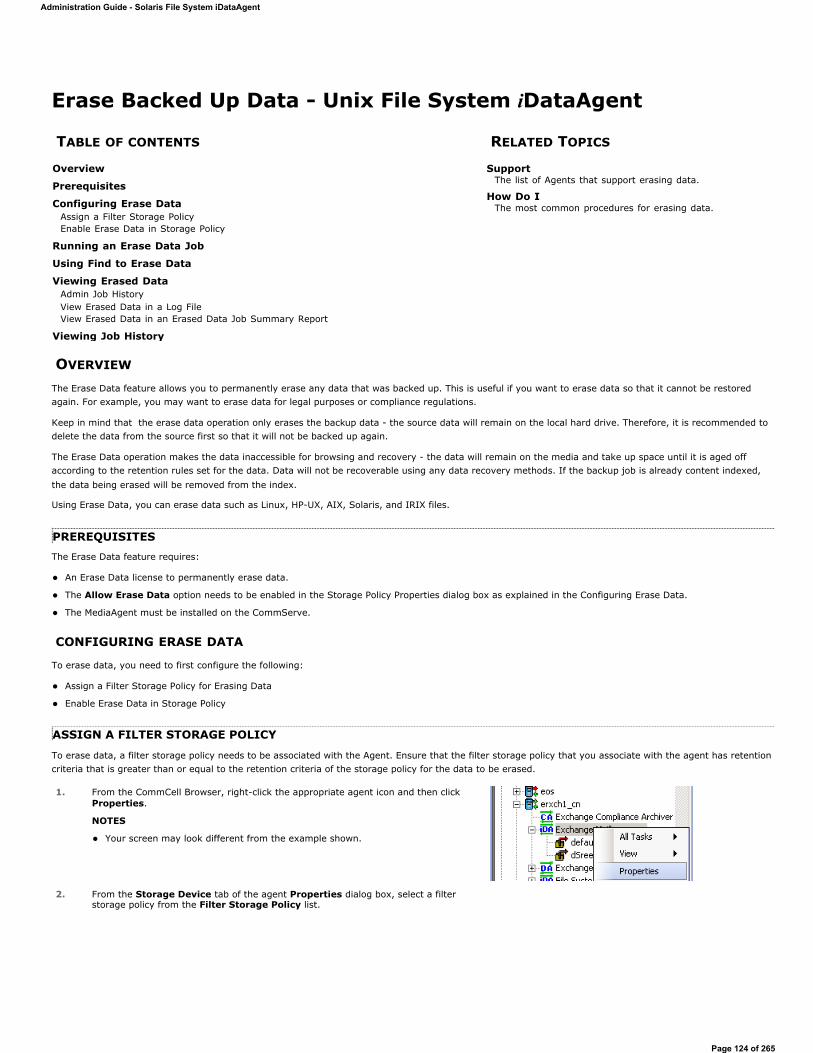
Erase Backed Up Data - Unix File System iDataAgent
OVERVIEW
The Erase Data feature allows you to permanently erase any data that was backed up. This is useful if you want to erase data so that it cannot be restored again. For example, you may want to erase data for legal purposes or compliance regulations.
Keep in mind that the erase data operation only erases the backup data - the source data will remain on the local hard drive. Therefore, it is recommended to delete the data from the source first so that it will not be backed up again.
The Erase Data operation makes the data inaccessible for browsing and recovery - the data will remain on the media and take up space until it is aged off according to the retention rules set for the data. Data will not be recoverable using any data recovery methods. If the backup job is already content indexed, the data being erased will be removed from the index.
Using Erase Data, you can erase data such as Linux, HP-UX, AIX, Solaris, and IRIX files.
PREREQUISITESThe Erase Data feature requires:
An Erase Data license to permanently erase data.
The Allow Erase Data option needs to be enabled in the Storage Policy Properties dialog box as explained in the Configuring Erase Data.
The MediaAgent must be installed on the CommServe.
CONFIGURING ERASE DATA
To erase data, you need to first configure the following:
Assign a Filter Storage Policy for Erasing Data
Enable Erase Data in Storage Policy
ASSIGN A FILTER STORAGE POLICY
To erase data, a filter storage policy needs to be associated with the Agent. Ensure that the filter storage policy that you associate with the agent has retention criteria that is greater than or equal to the retention criteria of the storage policy for the data to be erased.
TABLE OF CONTENTS RELATED TOPICS
Overview
Prerequisites
Configuring Erase DataAssign a Filter Storage PolicyEnable Erase Data in Storage Policy
Running an Erase Data Job
Using Find to Erase Data
Viewing Erased DataAdmin Job HistoryView Erased Data in a Log FileView Erased Data in an Erased Data Job Summary Report
Viewing Job History
SupportThe list of Agents that support erasing data.
How Do IThe most common procedures for erasing data.
1. From the CommCell Browser, right-click the appropriate agent icon and then click Properties.
NOTES
Your screen may look different from the example shown.
2. From the Storage Device tab of the agent Properties dialog box, select a filter storage policy from the Filter Storage Policy list.
Administration Guide - Solaris File System iDataAgent
Page 124 of 265
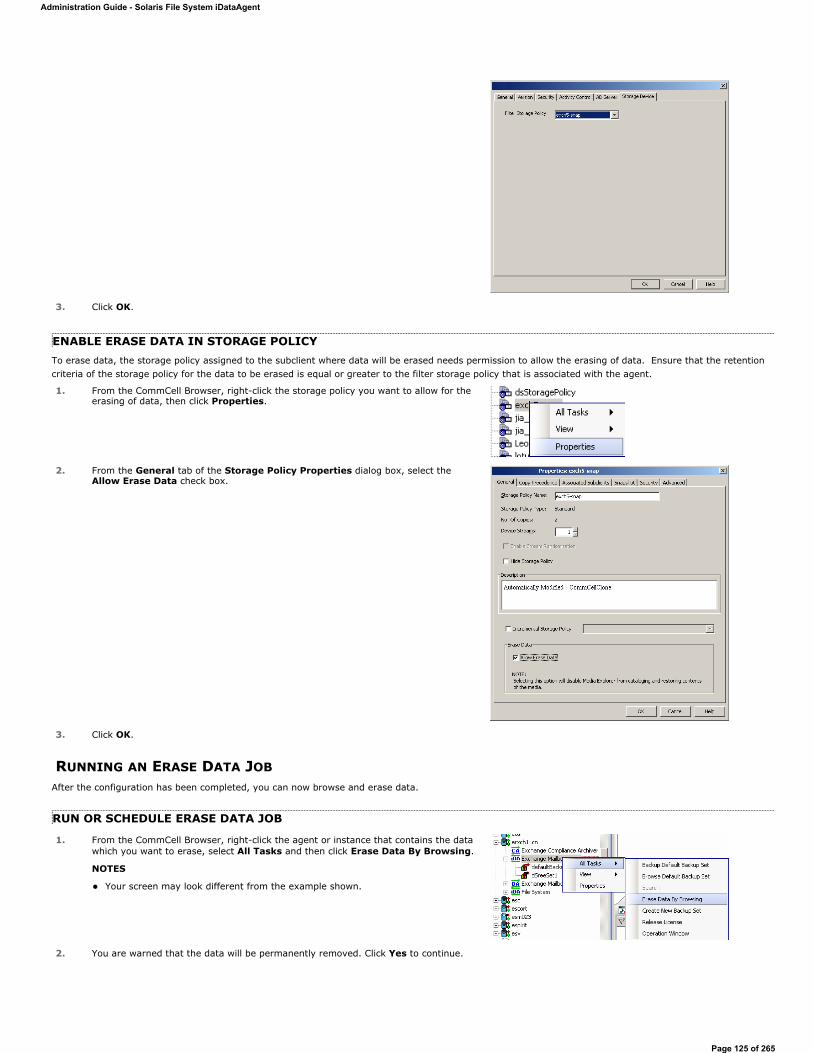
ENABLE ERASE DATA IN STORAGE POLICYTo erase data, the storage policy assigned to the subclient where data will be erased needs permission to allow the erasing of data. Ensure that the retention criteria of the storage policy for the data to be erased is equal or greater to the filter storage policy that is associated with the agent.
RUNNING AN ERASE DATA JOBAfter the configuration has been completed, you can now browse and erase data.
RUN OR SCHEDULE ERASE DATA JOB
3. Click OK.
1. From the CommCell Browser, right-click the storage policy you want to allow for the erasing of data, then click Properties.
2. From the General tab of the Storage Policy Properties dialog box, select the Allow Erase Data check box.
3. Click OK.
1. From the CommCell Browser, right-click the agent or instance that contains the data which you want to erase, select All Tasks and then click Erase Data By Browsing.
NOTES
Your screen may look different from the example shown.
2. You are warned that the data will be permanently removed. Click Yes to continue.
Administration Guide - Solaris File System iDataAgent
Page 125 of 265
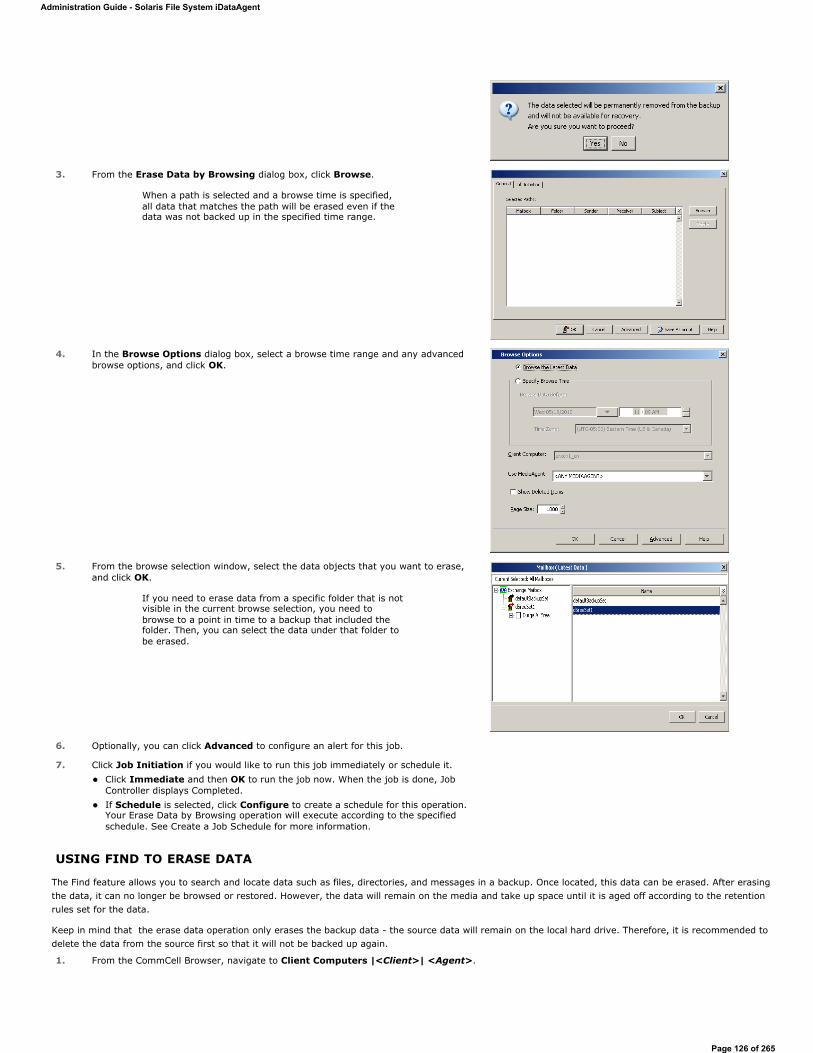
USING FIND TO ERASE DATA
The Find feature allows you to search and locate data such as files, directories, and messages in a backup. Once located, this data can be erased. After erasing the data, it can no longer be browsed or restored. However, the data will remain on the media and take up space until it is aged off according to the retention rules set for the data.
Keep in mind that the erase data operation only erases the backup data - the source data will remain on the local hard drive. Therefore, it is recommended to delete the data from the source first so that it will not be backed up again.
3. From the Erase Data by Browsing dialog box, click Browse.
When a path is selected and a browse time is specified, all data that matches the path will be erased even if the data was not backed up in the specified time range.
4. In the Browse Options dialog box, select a browse time range and any advanced browse options, and click OK.
5. From the browse selection window, select the data objects that you want to erase, and click OK.
If you need to erase data from a specific folder that is not visible in the current browse selection, you need to browse to a point in time to a backup that included the folder. Then, you can select the data under that folder to be erased.
6. Optionally, you can click Advanced to configure an alert for this job.
7. Click Job Initiation if you would like to run this job immediately or schedule it. Click Immediate and then OK to run the job now. When the job is done, Job Controller displays Completed. If Schedule is selected, click Configure to create a schedule for this operation. Your Erase Data by Browsing operation will execute according to the specified schedule. See Create a Job Schedule for more information.
1. From the CommCell Browser, navigate to Client Computers |<Client>| <Agent>.
Administration Guide - Solaris File System iDataAgent
Page 126 of 265
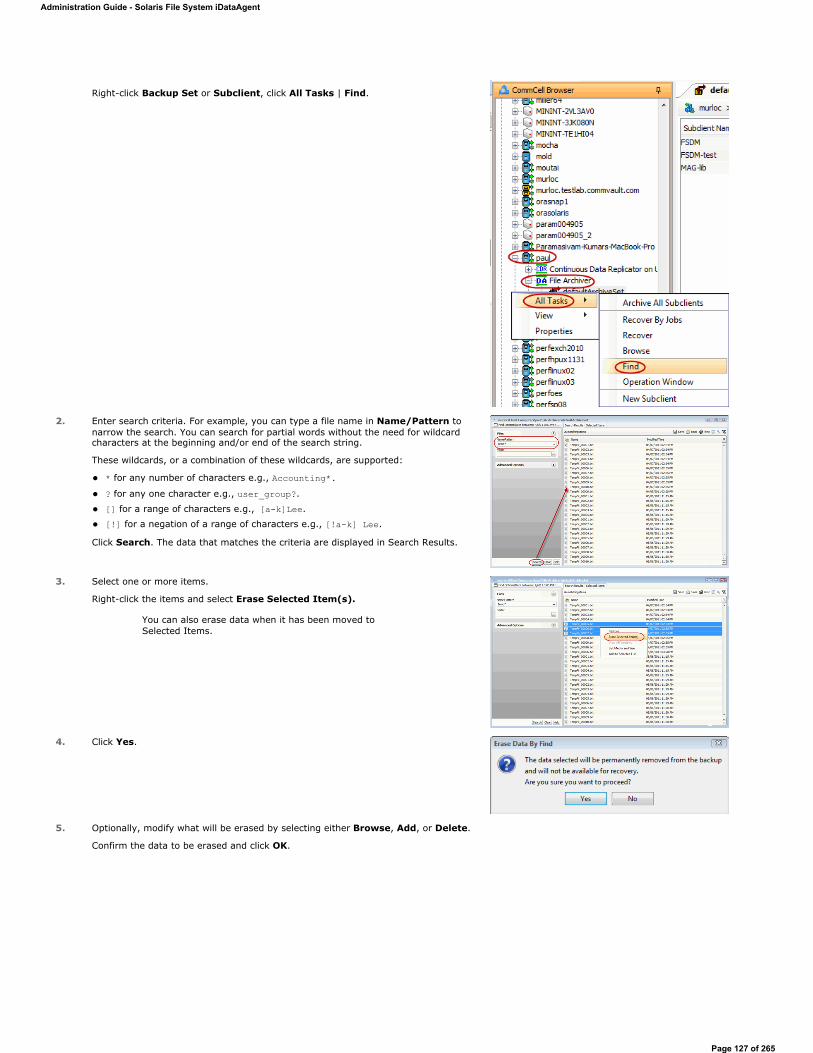
Right-click Backup Set or Subclient, click All Tasks | Find.
2. Enter search criteria. For example, you can type a file name in Name/Pattern to narrow the search. You can search for partial words without the need for wildcard characters at the beginning and/or end of the search string.
These wildcards, or a combination of these wildcards, are supported:
* for any number of characters e.g., Accounting*.? for any one character e.g., user_group?.
[] for a range of characters e.g., [a-k]Lee.
[!] for a negation of a range of characters e.g., [!a-k] Lee.
Click Search. The data that matches the criteria are displayed in Search Results.
3. Select one or more items.
Right-click the items and select Erase Selected Item(s).
You can also erase data when it has been moved to Selected Items.
4. Click Yes.
5. Optionally, modify what will be erased by selecting either Browse, Add, or Delete.
Confirm the data to be erased and click OK.
Administration Guide - Solaris File System iDataAgent
Page 127 of 265

VIEWING ERASED DATA
These features are available to view the data erased.
ADMIN JOB HISTORYYou can view detailed, historical information about the Erase Data jobs in the Admin Job History Filter dialog box.
1. From the CommCell Browser, right-click the CommServe, click View, and then click Admin Job History.
2. From the Admin Job History Filter dialog box, select the filter options that you want to apply and click OK.
3. The Admin Job History dialog box displays with the specified filter options.
4. Click Close.
VIEW ERASED DATA IN A LOG FILEThe files have been erased can be viewed in the SelDelete.log file. For example, TempFil_00008.txt is a file that had been erased:
4836 17a4 10/15 14:37:10 1106 ::main() - 1: '/ext3/fsdm/HW_1/erasedata/TempFil_00008.txt'
1. From the CommCell Browser, right-click a CommServe, MediaAgent, or client computer, click View, and then click Log Files. The Select the Log File to Open window displays.
2. To see a specific log file, either select the log file name from the list or type the name of the log file in the field provided. (In the Files of type field, Log Files (*.log) is displayed by default.) Click Open. The contents of the log file are displayed.
VIEW ERASED DATA IN AN ERASED DATA JOB SUMMARY REPORT
An Administrative Job Summary Report provides details of all the Erase Data jobs.
1. From the CommCell Browser, click the Reports icon.
2. Select Job Summary from the Reports pane of the Report Selection dialog box.
3. From the General tab, select Administrative Jobs and then select Erase Backup/Archived Data.
4. Select the filter criteria to include in the Erase Backup/Archived Data Job Summary Report from the various tabs (e.g., Computers, Selection, Options, Time Range).
5. From the Output tab, select the output format and/or save options for the report.
6. Click one of the following: Run to generate the report immediately, Schedule to schedule the reports for specific times, Save Template to save the report filter options into the My Reports node, or Close to exit the window.
See Erase Backup/Archived Data Job Summary Report for details.
VIEWING JOB HISTORY
Once an erase data job has completed, it may be useful to view specific historical information about the job, such as the following:
Administration Guide - Solaris File System iDataAgent
Page 128 of 265
Items that failed during the job
Items that succeeded during the job
Details of the job
Media associated with the job
Events of the job
Log files of the job.
This information can be viewed in the Job History window. The history provided depends on the entity from which the job history is viewed. For example, viewing job history from the subclient level will yield information for the jobs performed for that subclient. Conversely, viewing job history from the instance level will yield information for jobs run from all subclients within that instance.
To view the backup job history:
1. From the CommCell Browser, right-click the entity (client computer, iDataAgent, instance, or subclient) whose backup history you want to view, click View, and then click View Job History.
2. From the Job History filter window select the filter options, if any, that you want to apply, and then click OK. The system displays the Job History window.
3. Once you have chosen your filter options, they are displayed in the Job History window.
To view the additional options discussed above, right-click the desired job choose the appropriate option.
4. Click OK.
Back to Top
Administration Guide - Solaris File System iDataAgent
Page 129 of 265
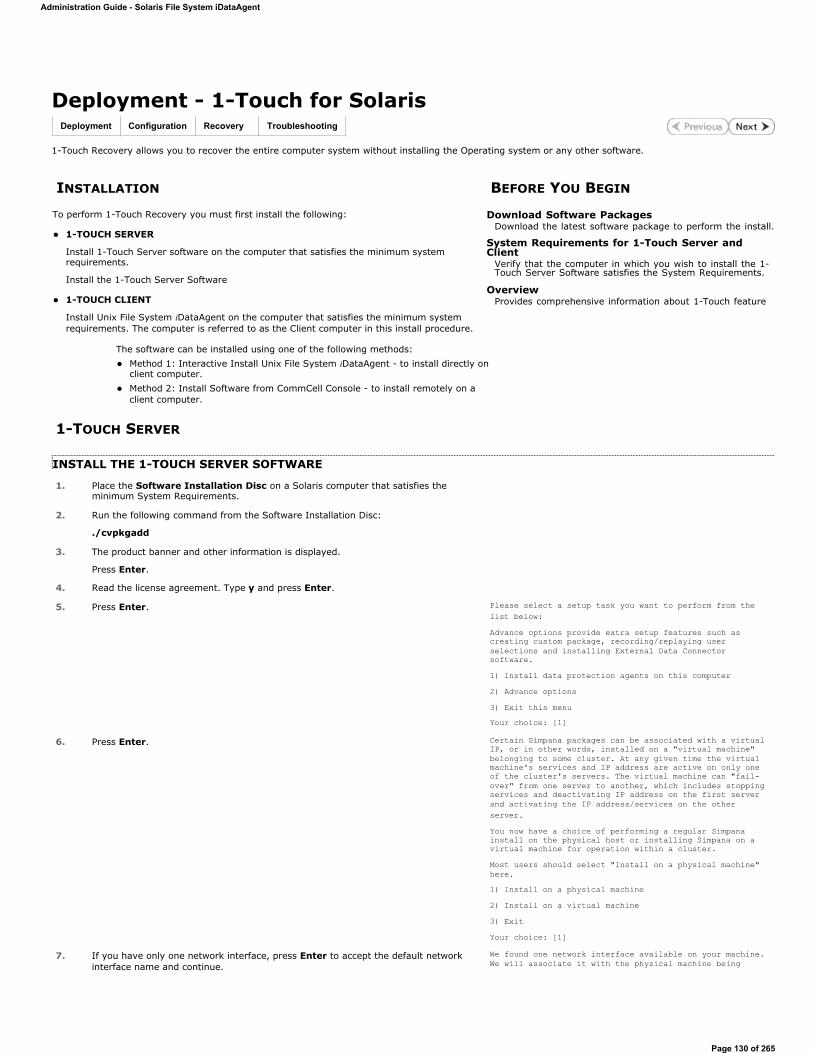
Deployment - 1-Touch for Solaris
1-Touch Recovery allows you to recover the entire computer system without installing the Operating system or any other software.
1-TOUCH SERVER
INSTALL THE 1-TOUCH SERVER SOFTWARE
Deployment Configuration Recovery Troubleshooting
INSTALLATION BEFORE YOU BEGIN
To perform 1-Touch Recovery you must first install the following:
1-TOUCH SERVER
Install 1-Touch Server software on the computer that satisfies the minimum system requirements.
Install the 1-Touch Server Software
1-TOUCH CLIENT
Install Unix File System iDataAgent on the computer that satisfies the minimum system requirements. The computer is referred to as the Client computer in this install procedure.
The software can be installed using one of the following methods: Method 1: Interactive Install Unix File System iDataAgent - to install directly on client computer. Method 2: Install Software from CommCell Console - to install remotely on a client computer.
Download Software PackagesDownload the latest software package to perform the install.
System Requirements for 1-Touch Server and Client
Verify that the computer in which you wish to install the 1-Touch Server Software satisfies the System Requirements.
OverviewProvides comprehensive information about 1-Touch feature
1. Place the Software Installation Disc on a Solaris computer that satisfies the minimum System Requirements.
2. Run the following command from the Software Installation Disc:
./cvpkgadd
3. The product banner and other information is displayed.
Press Enter.
4. Read the license agreement. Type y and press Enter.
5. Press Enter. Please select a setup task you want to perform from the list below:Advance options provide extra setup features such as creating custom package, recording/replaying user selections and installing External Data Connector software.1) Install data protection agents on this computer2) Advance options3) Exit this menuYour choice: [1]
6. Press Enter. Certain Simpana packages can be associated with a virtual IP, or in other words, installed on a "virtual machine" belonging to some cluster. At any given time the virtual machine's services and IP address are active on only one of the cluster's servers. The virtual machine can "fail-over" from one server to another, which includes stopping services and deactivating IP address on the first server and activating the IP address/services on the other server.You now have a choice of performing a regular Simpana install on the physical host or installing Simpana on a virtual machine for operation within a cluster.Most users should select "Install on a physical machine" here.1) Install on a physical machine2) Install on a virtual machine3) ExitYour choice: [1]
7. If you have only one network interface, press Enter to accept the default network interface name and continue.
We found one network interface available on your machine. We will associate it with the physical machine being
Administration Guide - Solaris File System iDataAgent
Page 130 of 265
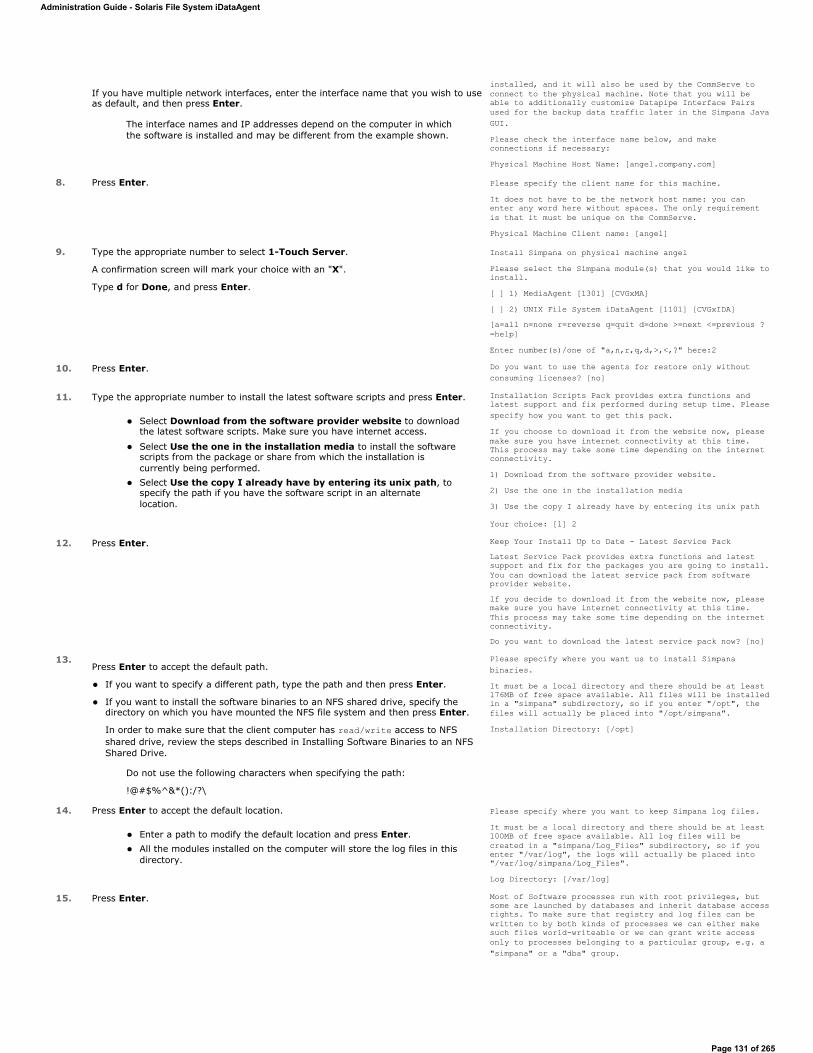
If you have multiple network interfaces, enter the interface name that you wish to use as default, and then press Enter.
The interface names and IP addresses depend on the computer in which the software is installed and may be different from the example shown.
installed, and it will also be used by the CommServe to connect to the physical machine. Note that you will be able to additionally customize Datapipe Interface Pairs used for the backup data traffic later in the Simpana Java GUI.Please check the interface name below, and make connections if necessary:Physical Machine Host Name: [angel.company.com]
8. Press Enter. Please specify the client name for this machine.It does not have to be the network host name: you can enter any word here without spaces. The only requirement is that it must be unique on the CommServe.Physical Machine Client name: [angel]
9. Type the appropriate number to select 1-Touch Server.
A confirmation screen will mark your choice with an "X".
Type d for Done, and press Enter.
Install Simpana on physical machine angelPlease select the Simpana module(s) that you would like to install.[ ] 1) MediaAgent [1301] [CVGxMA][ ] 2) UNIX File System iDataAgent [1101] [CVGxIDA][a=all n=none r=reverse q=quit d=done >=next <=previous ?=help]Enter number(s)/one of "a,n,r,q,d,>,<,?" here:2
10. Press Enter. Do you want to use the agents for restore only without consuming licenses? [no]
11. Type the appropriate number to install the latest software scripts and press Enter.
Select Download from the software provider website to download the latest software scripts. Make sure you have internet access.
Select Use the one in the installation media to install the software scripts from the package or share from which the installation is currently being performed. Select Use the copy I already have by entering its unix path, to specify the path if you have the software script in an alternate location.
Installation Scripts Pack provides extra functions and latest support and fix performed during setup time. Please specify how you want to get this pack.If you choose to download it from the website now, please make sure you have internet connectivity at this time. This process may take some time depending on the internet connectivity.1) Download from the software provider website.2) Use the one in the installation media3) Use the copy I already have by entering its unix path
Your choice: [1] 2
12. Press Enter. Keep Your Install Up to Date - Latest Service Pack Latest Service Pack provides extra functions and latest support and fix for the packages you are going to install. You can download the latest service pack from software provider website.If you decide to download it from the website now, please make sure you have internet connectivity at this time. This process may take some time depending on the internet connectivity.Do you want to download the latest service pack now? [no]
13.Press Enter to accept the default path.
If you want to specify a different path, type the path and then press Enter.
If you want to install the software binaries to an NFS shared drive, specify the directory on which you have mounted the NFS file system and then press Enter.
In order to make sure that the client computer has read/write access to NFS shared drive, review the steps described in Installing Software Binaries to an NFS Shared Drive.
Do not use the following characters when specifying the path:
!@#$%^&*():/?\
Please specify where you want us to install Simpana binaries.It must be a local directory and there should be at least 176MB of free space available. All files will be installed in a "simpana" subdirectory, so if you enter "/opt", the files will actually be placed into "/opt/simpana".Installation Directory: [/opt]
14. Press Enter to accept the default location.
Enter a path to modify the default location and press Enter. All the modules installed on the computer will store the log files in this directory.
Please specify where you want to keep Simpana log files.It must be a local directory and there should be at least 100MB of free space available. All log files will be created in a "simpana/Log_Files" subdirectory, so if you enter "/var/log", the logs will actually be placed into "/var/log/simpana/Log_Files".Log Directory: [/var/log]
15. Press Enter. Most of Software processes run with root privileges, but some are launched by databases and inherit database access rights. To make sure that registry and log files can be written to by both kinds of processes we can either make such files world-writeable or we can grant write access only to processes belonging to a particular group, e.g. a "simpana" or a "dba" group.
Administration Guide - Solaris File System iDataAgent
Page 131 of 265
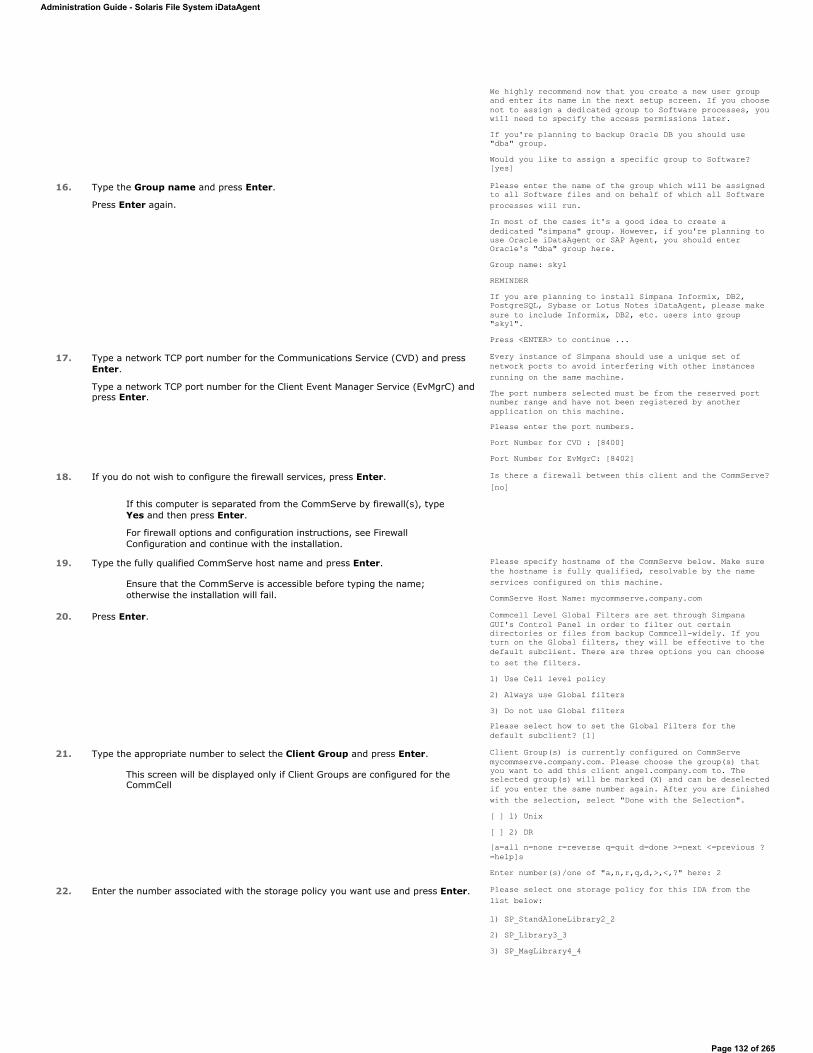
We highly recommend now that you create a new user group and enter its name in the next setup screen. If you choose not to assign a dedicated group to Software processes, you will need to specify the access permissions later.If you're planning to backup Oracle DB you should use "dba" group.Would you like to assign a specific group to Software? [yes]
16. Type the Group name and press Enter.
Press Enter again.
Please enter the name of the group which will be assigned to all Software files and on behalf of which all Software processes will run.In most of the cases it's a good idea to create a dedicated "simpana" group. However, if you're planning to use Oracle iDataAgent or SAP Agent, you should enter Oracle's "dba" group here.Group name: sky1REMINDERIf you are planning to install Simpana Informix, DB2, PostgreSQL, Sybase or Lotus Notes iDataAgent, please make sure to include Informix, DB2, etc. users into group "sky1".Press <ENTER> to continue ...
17. Type a network TCP port number for the Communications Service (CVD) and press Enter.
Type a network TCP port number for the Client Event Manager Service (EvMgrC) and press Enter.
Every instance of Simpana should use a unique set of network ports to avoid interfering with other instances running on the same machine.The port numbers selected must be from the reserved port number range and have not been registered by another application on this machine.Please enter the port numbers.Port Number for CVD : [8400]Port Number for EvMgrC: [8402]
18. If you do not wish to configure the firewall services, press Enter.
If this computer is separated from the CommServe by firewall(s), type Yes and then press Enter.
For firewall options and configuration instructions, see Firewall Configuration and continue with the installation.
Is there a firewall between this client and the CommServe? [no]
19. Type the fully qualified CommServe host name and press Enter.
Ensure that the CommServe is accessible before typing the name; otherwise the installation will fail.
Please specify hostname of the CommServe below. Make sure the hostname is fully qualified, resolvable by the name services configured on this machine.CommServe Host Name: mycommserve.company.com
20. Press Enter. Commcell Level Global Filters are set through Simpana GUI's Control Panel in order to filter out certain directories or files from backup Commcell-widely. If you turn on the Global filters, they will be effective to the default subclient. There are three options you can choose to set the filters.1) Use Cell level policy2) Always use Global filters3) Do not use Global filtersPlease select how to set the Global Filters for the default subclient? [1]
21. Type the appropriate number to select the Client Group and press Enter.
This screen will be displayed only if Client Groups are configured for the CommCell
Client Group(s) is currently configured on CommServe mycommserve.company.com. Please choose the group(s) that you want to add this client angel.company.com to. The selected group(s) will be marked (X) and can be deselected if you enter the same number again. After you are finished with the selection, select "Done with the Selection".[ ] 1) Unix[ ] 2) DR[a=all n=none r=reverse q=quit d=done >=next <=previous ?=help]sEnter number(s)/one of "a,n,r,q,d,>,<,?" here: 2
22. Enter the number associated with the storage policy you want use and press Enter. Please select one storage policy for this IDA from the list below:
1) SP_StandAloneLibrary2_22) SP_Library3_33) SP_MagLibrary4_4
Administration Guide - Solaris File System iDataAgent
Page 132 of 265
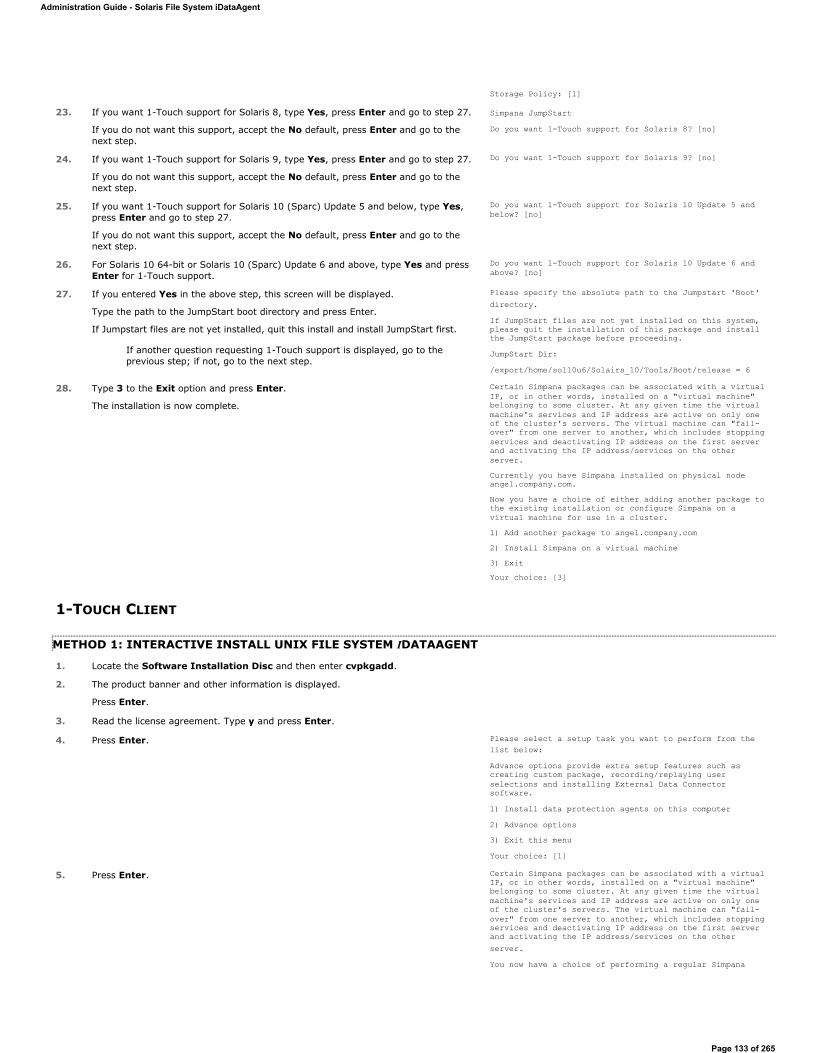
1-TOUCH CLIENT
METHOD 1: INTERACTIVE INSTALL UNIX FILE SYSTEM IDATAAGENT
Storage Policy: [1]
23. If you want 1-Touch support for Solaris 8, type Yes, press Enter and go to step 27.
If you do not want this support, accept the No default, press Enter and go to the next step.
Simpana JumpStartDo you want 1-Touch support for Solaris 8? [no]
24. If you want 1-Touch support for Solaris 9, type Yes, press Enter and go to step 27.
If you do not want this support, accept the No default, press Enter and go to the next step.
Do you want 1-Touch support for Solaris 9? [no]
25. If you want 1-Touch support for Solaris 10 (Sparc) Update 5 and below, type Yes, press Enter and go to step 27.
If you do not want this support, accept the No default, press Enter and go to the next step.
Do you want 1-Touch support for Solaris 10 Update 5 and below? [no]
26. For Solaris 10 64-bit or Solaris 10 (Sparc) Update 6 and above, type Yes and press Enter for 1-Touch support.
Do you want 1-Touch support for Solaris 10 Update 6 and above? [no]
27. If you entered Yes in the above step, this screen will be displayed.
Type the path to the JumpStart boot directory and press Enter.
If Jumpstart files are not yet installed, quit this install and install JumpStart first.
If another question requesting 1-Touch support is displayed, go to the previous step; if not, go to the next step.
Please specify the absolute path to the Jumpstart 'Boot' directory.If JumpStart files are not yet installed on this system, please quit the installation of this package and install the JumpStart package before proceeding.JumpStart Dir:/export/home/sol10u6/Solairs_10/Tools/Boot/release = 6
28. Type 3 to the Exit option and press Enter.
The installation is now complete.
Certain Simpana packages can be associated with a virtual IP, or in other words, installed on a "virtual machine" belonging to some cluster. At any given time the virtual machine's services and IP address are active on only one of the cluster's servers. The virtual machine can "fail-over" from one server to another, which includes stopping services and deactivating IP address on the first server and activating the IP address/services on the other server. Currently you have Simpana installed on physical node angel.company.com.Now you have a choice of either adding another package to the existing installation or configure Simpana on a virtual machine for use in a cluster. 1) Add another package to angel.company.com2) Install Simpana on a virtual machine3) ExitYour choice: [3]
1. Locate the Software Installation Disc and then enter cvpkgadd.
2. The product banner and other information is displayed.
Press Enter.
3. Read the license agreement. Type y and press Enter.
4. Press Enter. Please select a setup task you want to perform from the list below:Advance options provide extra setup features such as creating custom package, recording/replaying user selections and installing External Data Connector software.1) Install data protection agents on this computer2) Advance options3) Exit this menuYour choice: [1]
5. Press Enter. Certain Simpana packages can be associated with a virtual IP, or in other words, installed on a "virtual machine" belonging to some cluster. At any given time the virtual machine's services and IP address are active on only one of the cluster's servers. The virtual machine can "fail-over" from one server to another, which includes stopping services and deactivating IP address on the first server and activating the IP address/services on the other server.You now have a choice of performing a regular Simpana
Administration Guide - Solaris File System iDataAgent
Page 133 of 265
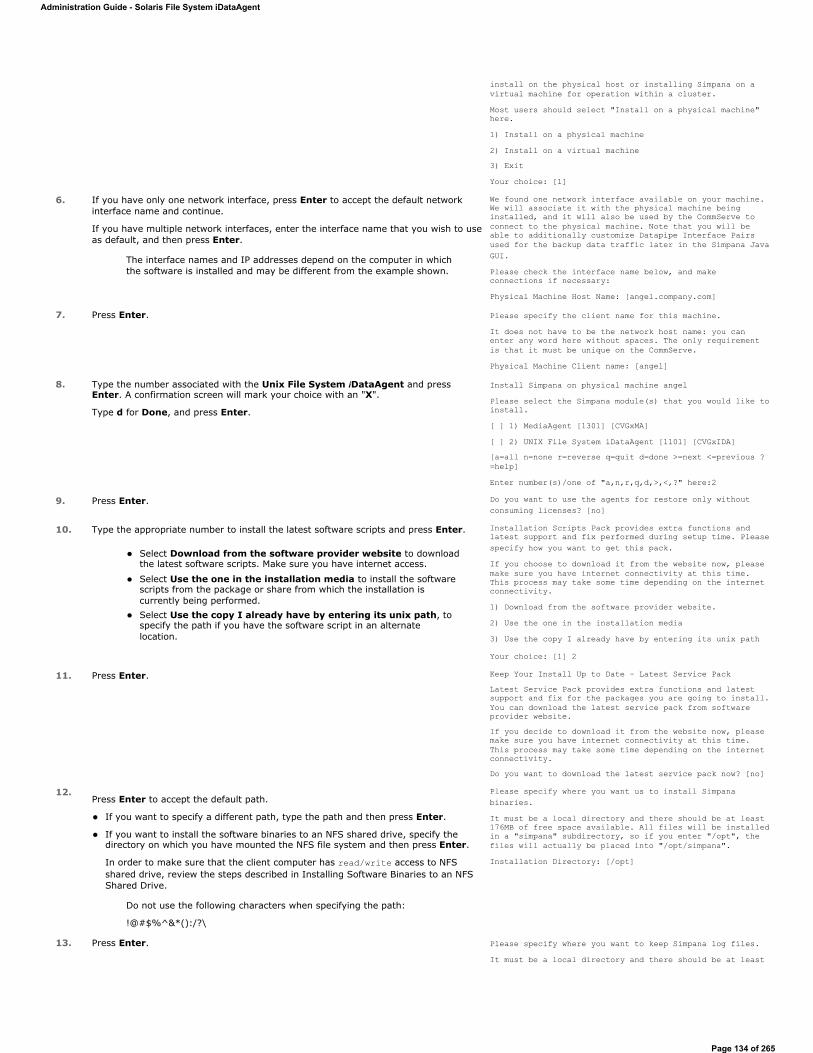
install on the physical host or installing Simpana on a virtual machine for operation within a cluster.Most users should select "Install on a physical machine" here.1) Install on a physical machine2) Install on a virtual machine3) ExitYour choice: [1]
6. If you have only one network interface, press Enter to accept the default network interface name and continue.
If you have multiple network interfaces, enter the interface name that you wish to use as default, and then press Enter.
The interface names and IP addresses depend on the computer in which the software is installed and may be different from the example shown.
We found one network interface available on your machine. We will associate it with the physical machine being installed, and it will also be used by the CommServe to connect to the physical machine. Note that you will be able to additionally customize Datapipe Interface Pairs used for the backup data traffic later in the Simpana Java GUI.Please check the interface name below, and make connections if necessary:Physical Machine Host Name: [angel.company.com]
7. Press Enter. Please specify the client name for this machine.It does not have to be the network host name: you can enter any word here without spaces. The only requirement is that it must be unique on the CommServe.Physical Machine Client name: [angel]
8. Type the number associated with the Unix File System iDataAgent and press Enter. A confirmation screen will mark your choice with an "X".
Type d for Done, and press Enter.
Install Simpana on physical machine angelPlease select the Simpana module(s) that you would like to install.[ ] 1) MediaAgent [1301] [CVGxMA][ ] 2) UNIX File System iDataAgent [1101] [CVGxIDA][a=all n=none r=reverse q=quit d=done >=next <=previous ?=help]Enter number(s)/one of "a,n,r,q,d,>,<,?" here:2
9. Press Enter. Do you want to use the agents for restore only without consuming licenses? [no]
10. Type the appropriate number to install the latest software scripts and press Enter.
Select Download from the software provider website to download the latest software scripts. Make sure you have internet access.
Select Use the one in the installation media to install the software scripts from the package or share from which the installation is currently being performed. Select Use the copy I already have by entering its unix path, to specify the path if you have the software script in an alternate location.
Installation Scripts Pack provides extra functions and latest support and fix performed during setup time. Please specify how you want to get this pack.If you choose to download it from the website now, please make sure you have internet connectivity at this time. This process may take some time depending on the internet connectivity.1) Download from the software provider website.2) Use the one in the installation media3) Use the copy I already have by entering its unix path
Your choice: [1] 2
11. Press Enter. Keep Your Install Up to Date - Latest Service Pack Latest Service Pack provides extra functions and latest support and fix for the packages you are going to install. You can download the latest service pack from software provider website.If you decide to download it from the website now, please make sure you have internet connectivity at this time. This process may take some time depending on the internet connectivity.Do you want to download the latest service pack now? [no]
12.Press Enter to accept the default path.
If you want to specify a different path, type the path and then press Enter.
If you want to install the software binaries to an NFS shared drive, specify the directory on which you have mounted the NFS file system and then press Enter.
In order to make sure that the client computer has read/write access to NFS shared drive, review the steps described in Installing Software Binaries to an NFS Shared Drive.
Do not use the following characters when specifying the path:
!@#$%^&*():/?\
Please specify where you want us to install Simpana binaries.It must be a local directory and there should be at least 176MB of free space available. All files will be installed in a "simpana" subdirectory, so if you enter "/opt", the files will actually be placed into "/opt/simpana".Installation Directory: [/opt]
13. Press Enter. Please specify where you want to keep Simpana log files.It must be a local directory and there should be at least
Administration Guide - Solaris File System iDataAgent
Page 134 of 265
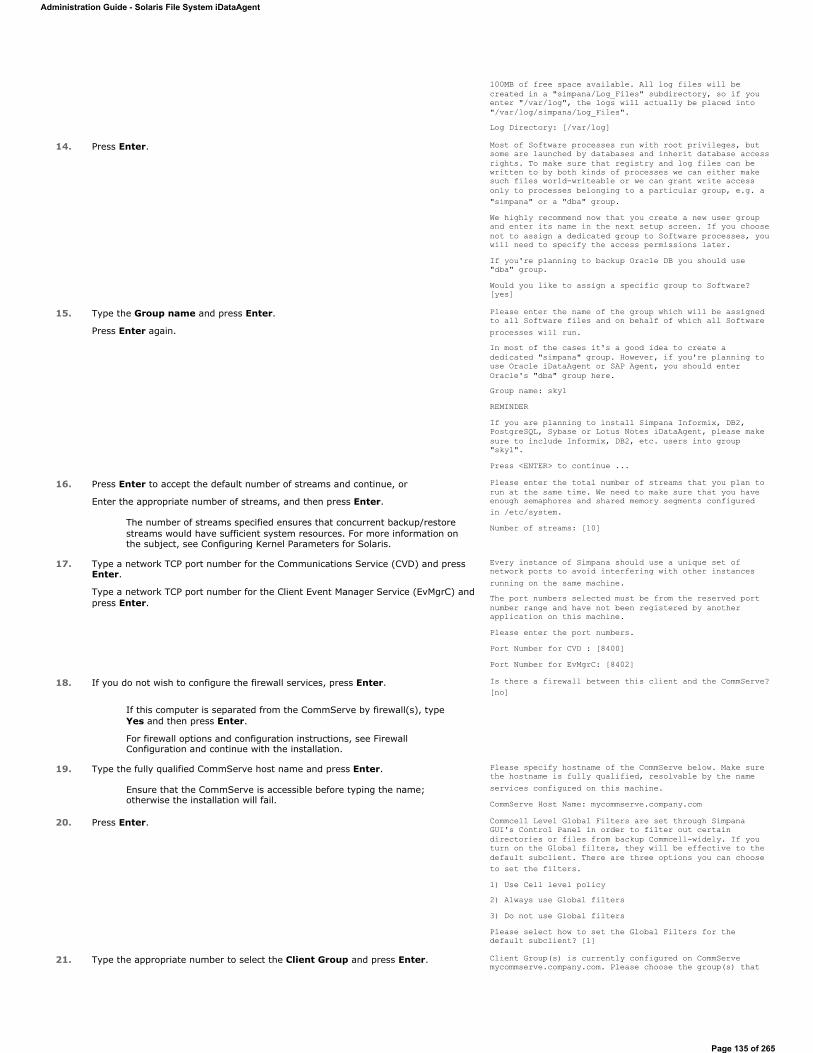
100MB of free space available. All log files will be created in a "simpana/Log_Files" subdirectory, so if you enter "/var/log", the logs will actually be placed into "/var/log/simpana/Log_Files".Log Directory: [/var/log]
14. Press Enter. Most of Software processes run with root privileges, but some are launched by databases and inherit database access rights. To make sure that registry and log files can be written to by both kinds of processes we can either make such files world-writeable or we can grant write access only to processes belonging to a particular group, e.g. a "simpana" or a "dba" group.We highly recommend now that you create a new user group and enter its name in the next setup screen. If you choose not to assign a dedicated group to Software processes, you will need to specify the access permissions later.If you're planning to backup Oracle DB you should use "dba" group.Would you like to assign a specific group to Software? [yes]
15. Type the Group name and press Enter.
Press Enter again.
Please enter the name of the group which will be assigned to all Software files and on behalf of which all Software processes will run.In most of the cases it's a good idea to create a dedicated "simpana" group. However, if you're planning to use Oracle iDataAgent or SAP Agent, you should enter Oracle's "dba" group here.Group name: sky1REMINDERIf you are planning to install Simpana Informix, DB2, PostgreSQL, Sybase or Lotus Notes iDataAgent, please make sure to include Informix, DB2, etc. users into group "sky1".Press <ENTER> to continue ...
16. Press Enter to accept the default number of streams and continue, or
Enter the appropriate number of streams, and then press Enter.
The number of streams specified ensures that concurrent backup/restore streams would have sufficient system resources. For more information on the subject, see Configuring Kernel Parameters for Solaris.
Please enter the total number of streams that you plan to run at the same time. We need to make sure that you have enough semaphores and shared memory segments configured in /etc/system.Number of streams: [10]
17. Type a network TCP port number for the Communications Service (CVD) and press Enter.
Type a network TCP port number for the Client Event Manager Service (EvMgrC) and press Enter.
Every instance of Simpana should use a unique set of network ports to avoid interfering with other instances running on the same machine.The port numbers selected must be from the reserved port number range and have not been registered by another application on this machine.Please enter the port numbers.Port Number for CVD : [8400]Port Number for EvMgrC: [8402]
18. If you do not wish to configure the firewall services, press Enter.
If this computer is separated from the CommServe by firewall(s), type Yes and then press Enter.
For firewall options and configuration instructions, see Firewall Configuration and continue with the installation.
Is there a firewall between this client and the CommServe? [no]
19. Type the fully qualified CommServe host name and press Enter.
Ensure that the CommServe is accessible before typing the name; otherwise the installation will fail.
Please specify hostname of the CommServe below. Make sure the hostname is fully qualified, resolvable by the name services configured on this machine.CommServe Host Name: mycommserve.company.com
20. Press Enter. Commcell Level Global Filters are set through Simpana GUI's Control Panel in order to filter out certain directories or files from backup Commcell-widely. If you turn on the Global filters, they will be effective to the default subclient. There are three options you can choose to set the filters.1) Use Cell level policy2) Always use Global filters3) Do not use Global filtersPlease select how to set the Global Filters for the default subclient? [1]
21. Type the appropriate number to select the Client Group and press Enter. Client Group(s) is currently configured on CommServe mycommserve.company.com. Please choose the group(s) that
Administration Guide - Solaris File System iDataAgent
Page 135 of 265
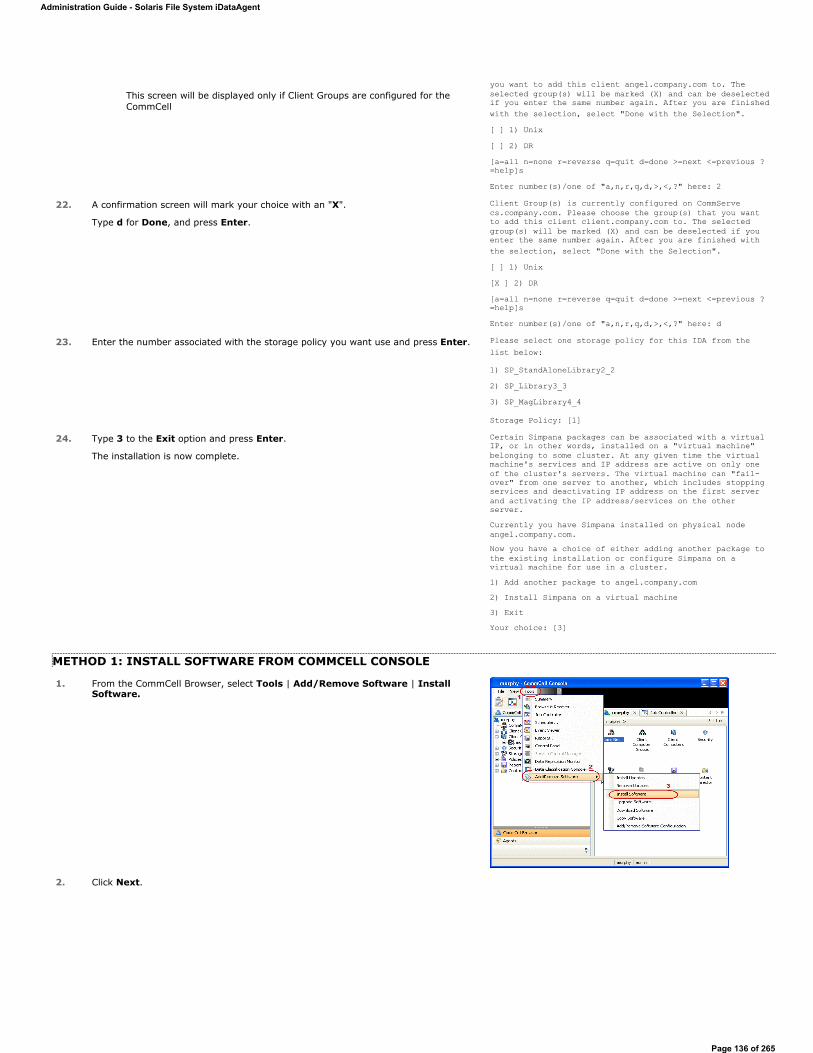
METHOD 1: INSTALL SOFTWARE FROM COMMCELL CONSOLE
This screen will be displayed only if Client Groups are configured for the CommCell
you want to add this client angel.company.com to. The selected group(s) will be marked (X) and can be deselected if you enter the same number again. After you are finished with the selection, select "Done with the Selection".[ ] 1) Unix[ ] 2) DR[a=all n=none r=reverse q=quit d=done >=next <=previous ?=help]sEnter number(s)/one of "a,n,r,q,d,>,<,?" here: 2
22. A confirmation screen will mark your choice with an "X".
Type d for Done, and press Enter.
Client Group(s) is currently configured on CommServe cs.company.com. Please choose the group(s) that you want to add this client client.company.com to. The selected group(s) will be marked (X) and can be deselected if you enter the same number again. After you are finished with the selection, select "Done with the Selection".[ ] 1) Unix[X ] 2) DR[a=all n=none r=reverse q=quit d=done >=next <=previous ?=help]sEnter number(s)/one of "a,n,r,q,d,>,<,?" here: d
23. Enter the number associated with the storage policy you want use and press Enter. Please select one storage policy for this IDA from the list below:
1) SP_StandAloneLibrary2_22) SP_Library3_33) SP_MagLibrary4_4
Storage Policy: [1]
24. Type 3 to the Exit option and press Enter.
The installation is now complete.
Certain Simpana packages can be associated with a virtual IP, or in other words, installed on a "virtual machine" belonging to some cluster. At any given time the virtual machine's services and IP address are active on only one of the cluster's servers. The virtual machine can "fail-over" from one server to another, which includes stopping services and deactivating IP address on the first server and activating the IP address/services on the other server. Currently you have Simpana installed on physical node angel.company.com.Now you have a choice of either adding another package to the existing installation or configure Simpana on a virtual machine for use in a cluster. 1) Add another package to angel.company.com2) Install Simpana on a virtual machine3) ExitYour choice: [3]
1. From the CommCell Browser, select Tools | Add/Remove Software | Install Software.
2. Click Next.
Administration Guide - Solaris File System iDataAgent
Page 136 of 265
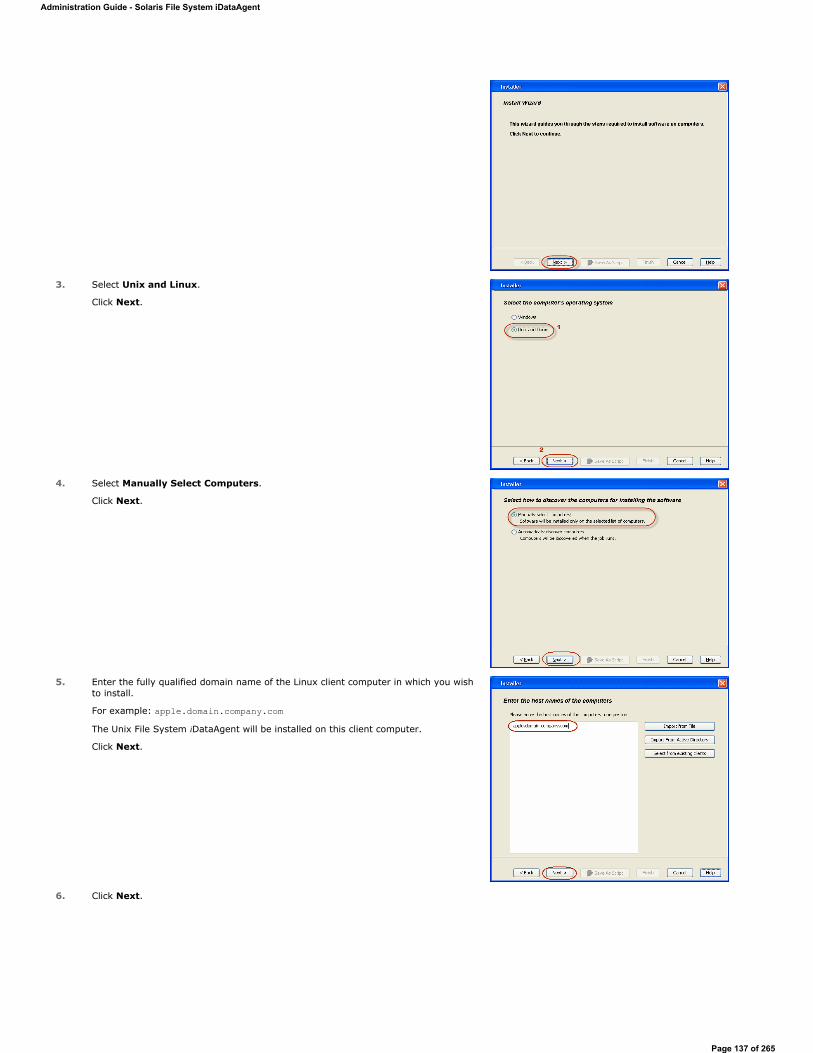
3. Select Unix and Linux.
Click Next.
4. Select Manually Select Computers.
Click Next.
5. Enter the fully qualified domain name of the Linux client computer in which you wish to install.
For example: apple.domain.company.comThe Unix File System iDataAgent will be installed on this client computer.
Click Next.
6. Click Next.
Administration Guide - Solaris File System iDataAgent
Page 137 of 265
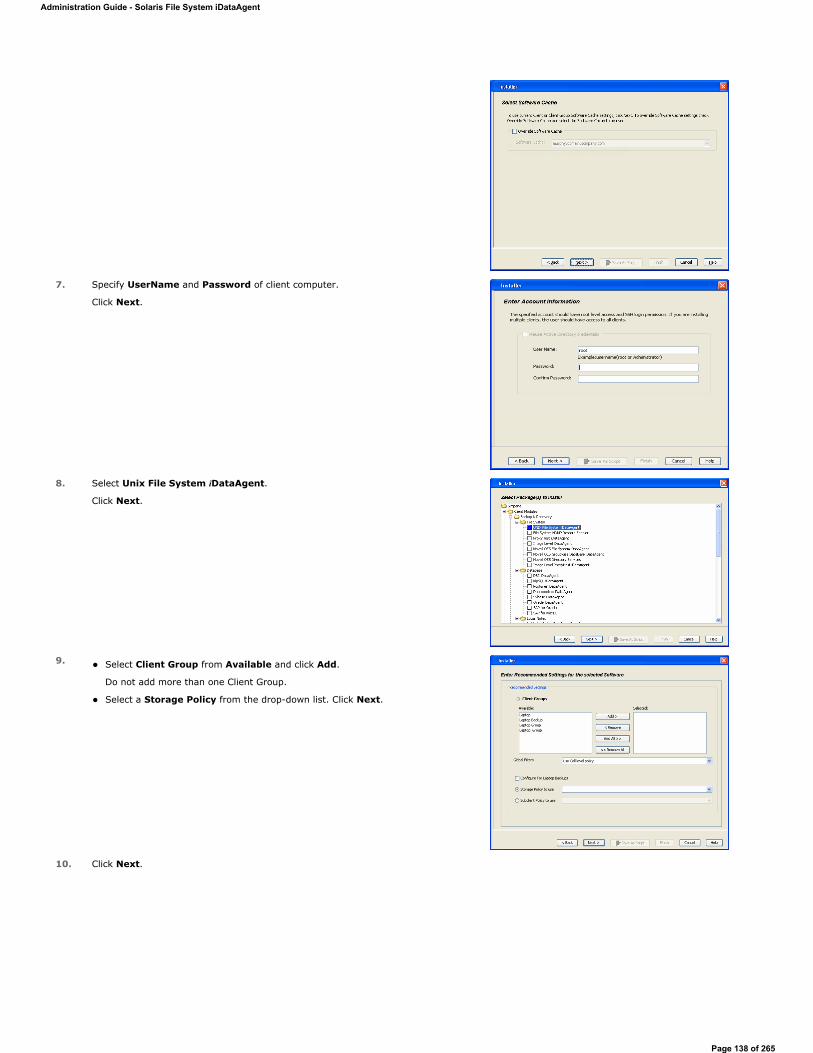
7. Specify UserName and Password of client computer.
Click Next.
8. Select Unix File System iDataAgent.
Click Next.
9. Select Client Group from Available and click Add.
Do not add more than one Client Group.
Select a Storage Policy from the drop-down list. Click Next.
10. Click Next.
Administration Guide - Solaris File System iDataAgent
Page 138 of 265

11. Select Immediate.
Click Next.
12. Click Finish.
13. You can track the progress of the job from the Job Controller or Event Viewerwindow.
14. Once the job is complete, right-click the CommServe computer, click View and then
Administration Guide - Solaris File System iDataAgent
Page 139 of 265
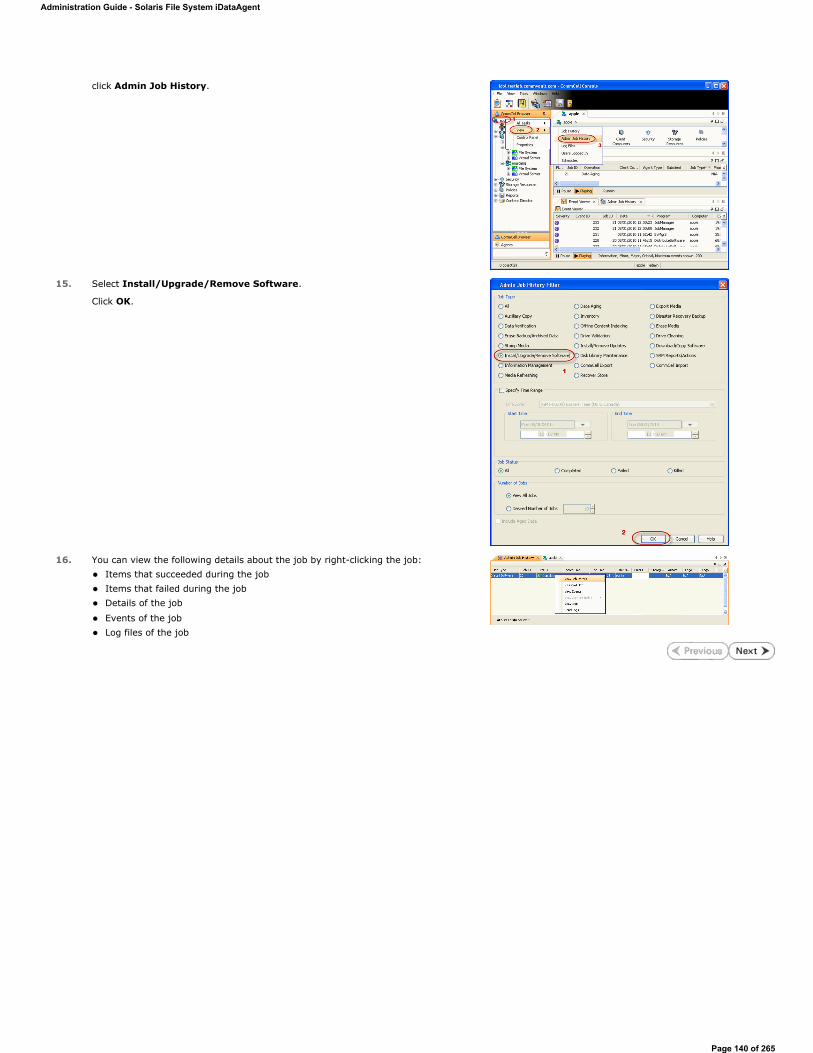
click Admin Job History.
15. Select Install/Upgrade/Remove Software.
Click OK.
16. You can view the following details about the job by right-clicking the job: Items that succeeded during the job Items that failed during the job Details of the job
Events of the job Log files of the job
Administration Guide - Solaris File System iDataAgent
Page 140 of 265

Configuration - 1-Touch for Solaris
TABLE OF CONTENTS
BASIC CONFIGURATION
ENABLE 1-TOUCHAfter you install the File System iDataAgent, follow the steps given below to enable the 1-Touch for the default subclient :
PERFORM A BACKUP
After you enable 1-Touch, perform backups of the default subclient periodically to capture any changes in the client system configuration. Before recovering a client, ensure that you have run at least one full backup of the default subclient.
Deployment Configuration Recovery Troubleshooting
Basic ConfigurationEnable 1-TouchPerform a Backup
1. From the CommCell Console, navigate to <Client> | File System iDataAgent | defaultBackupSet. Right-click the default subclient and click Properties.
2. Click 1-Touch Recovery tab. Select 1-Touch Recovery.
Select the 1-Touch Server from the list. Enter the path to the 1-Touch server Directory. Click OK.
If the 1-Touch client host ID (MAC address) has changed since the most recent 1-Touch backup, be sure to update the client's Ethernet address within the /etc/ethers file on the 1-Touch server. Otherwise, you will not be able to boot the 1-Touch client.
1. From the CommCell Console, navigate to <Client> | File System iDataAgent | defaultBackupSet. Right-click the subclient, and click Backup.
2. Select Full. Select Immediate.
Click OK.
Administration Guide - Solaris File System iDataAgent
Page 141 of 265
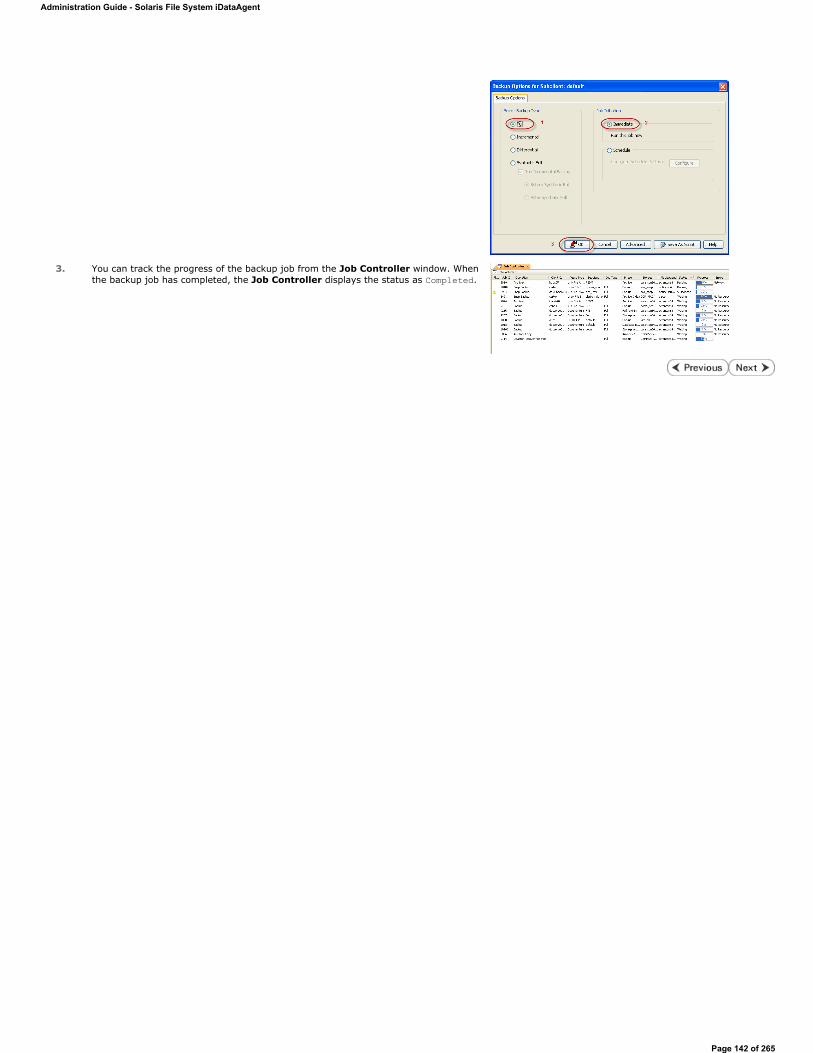
3. You can track the progress of the backup job from the Job Controller window. When the backup job has completed, the Job Controller displays the status as Completed.
Administration Guide - Solaris File System iDataAgent
Page 142 of 265
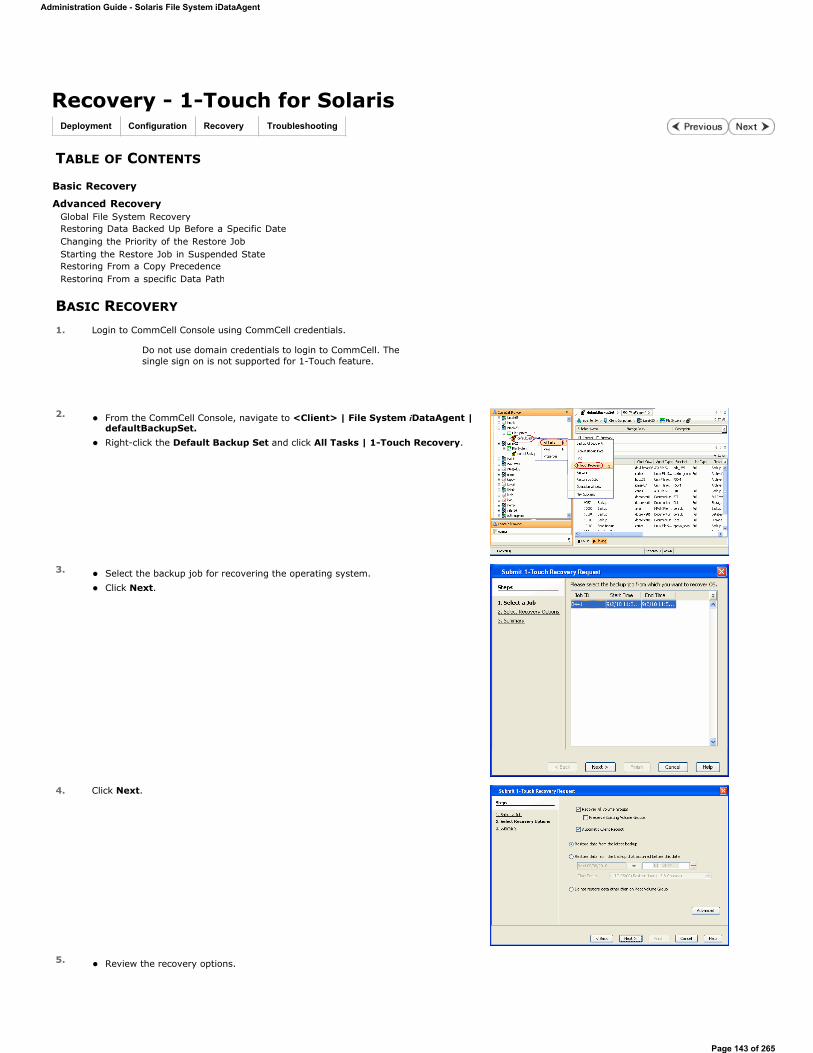
Recovery - 1-Touch for Solaris
TABLE OF CONTENTS
BASIC RECOVERY
Deployment Configuration Recovery Troubleshooting
Basic Recovery
Advanced RecoveryGlobal File System RecoveryRestoring Data Backed Up Before a Specific DateChanging the Priority of the Restore JobStarting the Restore Job in Suspended StateRestoring From a Copy PrecedenceRestoring From a specific Data Path
1. Login to CommCell Console using CommCell credentials.
Do not use domain credentials to login to CommCell. The single sign on is not supported for 1-Touch feature.
2. From the CommCell Console, navigate to <Client> | File System iDataAgent | defaultBackupSet.Right-click the Default Backup Set and click All Tasks | 1-Touch Recovery.
3. Select the backup job for recovering the operating system. Click Next.
4. Click Next.
5. Review the recovery options.
Administration Guide - Solaris File System iDataAgent
Page 143 of 265
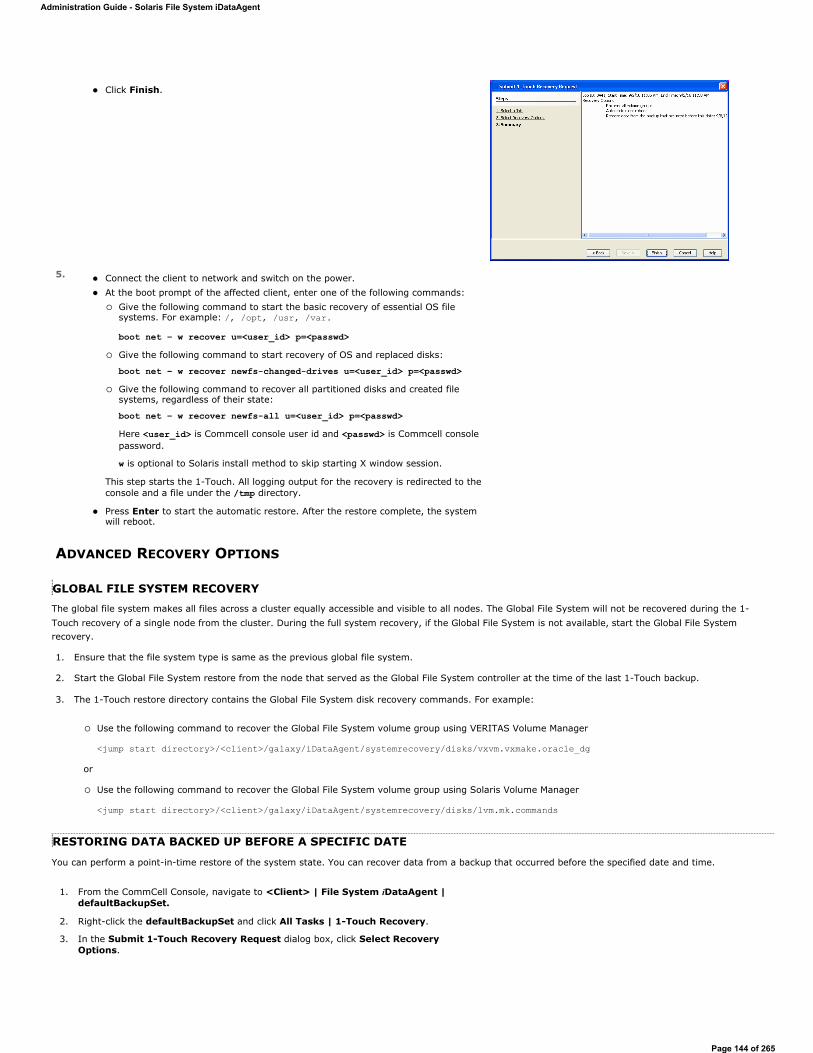
ADVANCED RECOVERY OPTIONS
GLOBAL FILE SYSTEM RECOVERYThe global file system makes all files across a cluster equally accessible and visible to all nodes. The Global File System will not be recovered during the 1-Touch recovery of a single node from the cluster. During the full system recovery, if the Global File System is not available, start the Global File System recovery.
1. Ensure that the file system type is same as the previous global file system.
2. Start the Global File System restore from the node that served as the Global File System controller at the time of the last 1-Touch backup.
3. The 1-Touch restore directory contains the Global File System disk recovery commands. For example:
Use the following command to recover the Global File System volume group using VERITAS Volume Manager
<jump start directory>/<client>/galaxy/iDataAgent/systemrecovery/disks/vxvm.vxmake.oracle_dg
or
Use the following command to recover the Global File System volume group using Solaris Volume Manager
<jump start directory>/<client>/galaxy/iDataAgent/systemrecovery/disks/lvm.mk.commands
RESTORING DATA BACKED UP BEFORE A SPECIFIC DATE
You can perform a point-in-time restore of the system state. You can recover data from a backup that occurred before the specified date and time.
Click Finish.
5. Connect the client to network and switch on the power. At the boot prompt of the affected client, enter one of the following commands:
Give the following command to start the basic recovery of essential OS file systems. For example: /, /opt, /usr, /var.
boot net – w recover u=<user_id> p=<passwd>Give the following command to start recovery of OS and replaced disks:
boot net – w recover newfs-changed-drives u=<user_id> p=<passwd> Give the following command to recover all partitioned disks and created file systems, regardless of their state:
boot net – w recover newfs-all u=<user_id> p=<passwd>Here <user_id> is Commcell console user id and <passwd> is Commcell console password.
w is optional to Solaris install method to skip starting X window session.
This step starts the 1-Touch. All logging output for the recovery is redirected to the console and a file under the /tmp directory.
Press Enter to start the automatic restore. After the restore complete, the system will reboot.
1. From the CommCell Console, navigate to <Client> | File System iDataAgent | defaultBackupSet.
2. Right-click the defaultBackupSet and click All Tasks | 1-Touch Recovery.
3. In the Submit 1-Touch Recovery Request dialog box, click Select Recovery Options.
Administration Guide - Solaris File System iDataAgent
Page 144 of 265
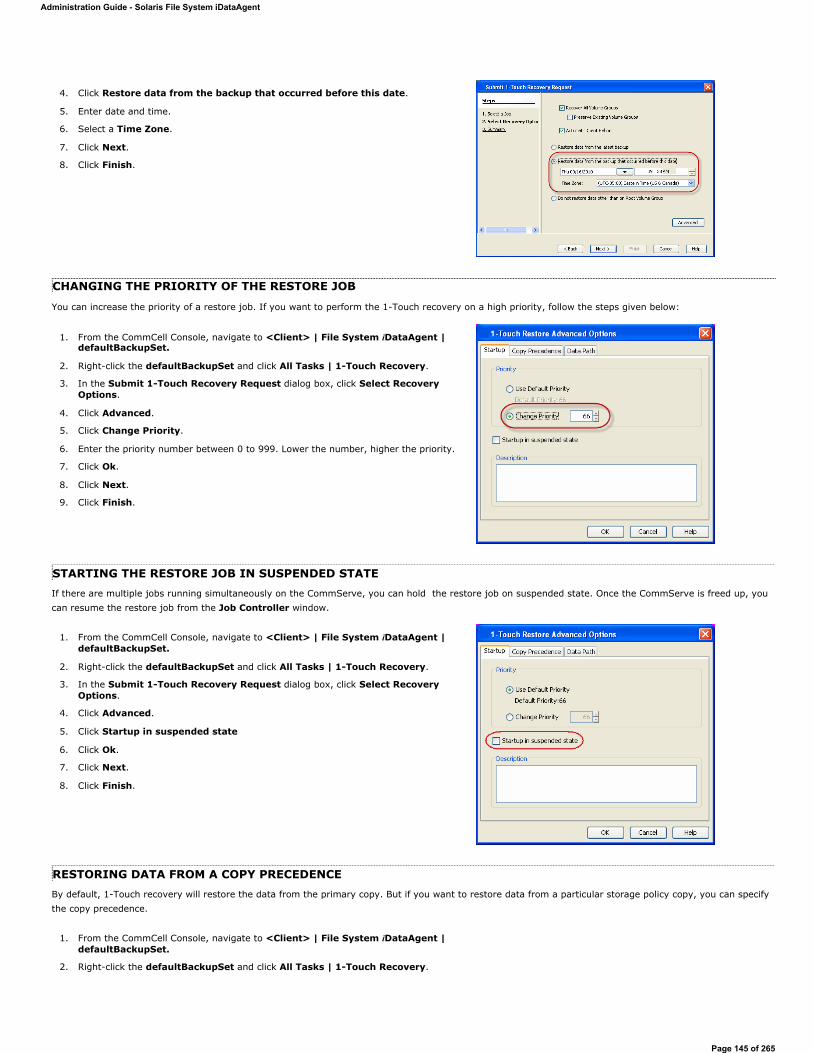
CHANGING THE PRIORITY OF THE RESTORE JOB
You can increase the priority of a restore job. If you want to perform the 1-Touch recovery on a high priority, follow the steps given below:
STARTING THE RESTORE JOB IN SUSPENDED STATEIf there are multiple jobs running simultaneously on the CommServe, you can hold the restore job on suspended state. Once the CommServe is freed up, you can resume the restore job from the Job Controller window.
RESTORING DATA FROM A COPY PRECEDENCEBy default, 1-Touch recovery will restore the data from the primary copy. But if you want to restore data from a particular storage policy copy, you can specify the copy precedence.
4. Click Restore data from the backup that occurred before this date.
5. Enter date and time.
6. Select a Time Zone.
7. Click Next.
8. Click Finish.
1. From the CommCell Console, navigate to <Client> | File System iDataAgent | defaultBackupSet.
2. Right-click the defaultBackupSet and click All Tasks | 1-Touch Recovery.
3. In the Submit 1-Touch Recovery Request dialog box, click Select Recovery Options.
4. Click Advanced.
5. Click Change Priority.
6. Enter the priority number between 0 to 999. Lower the number, higher the priority.
7. Click Ok.
8. Click Next.
9. Click Finish.
1. From the CommCell Console, navigate to <Client> | File System iDataAgent | defaultBackupSet.
2. Right-click the defaultBackupSet and click All Tasks | 1-Touch Recovery.
3. In the Submit 1-Touch Recovery Request dialog box, click Select Recovery Options.
4. Click Advanced.
5. Click Startup in suspended state
6. Click Ok.
7. Click Next.
8. Click Finish.
1. From the CommCell Console, navigate to <Client> | File System iDataAgent | defaultBackupSet.
2. Right-click the defaultBackupSet and click All Tasks | 1-Touch Recovery.
Administration Guide - Solaris File System iDataAgent
Page 145 of 265
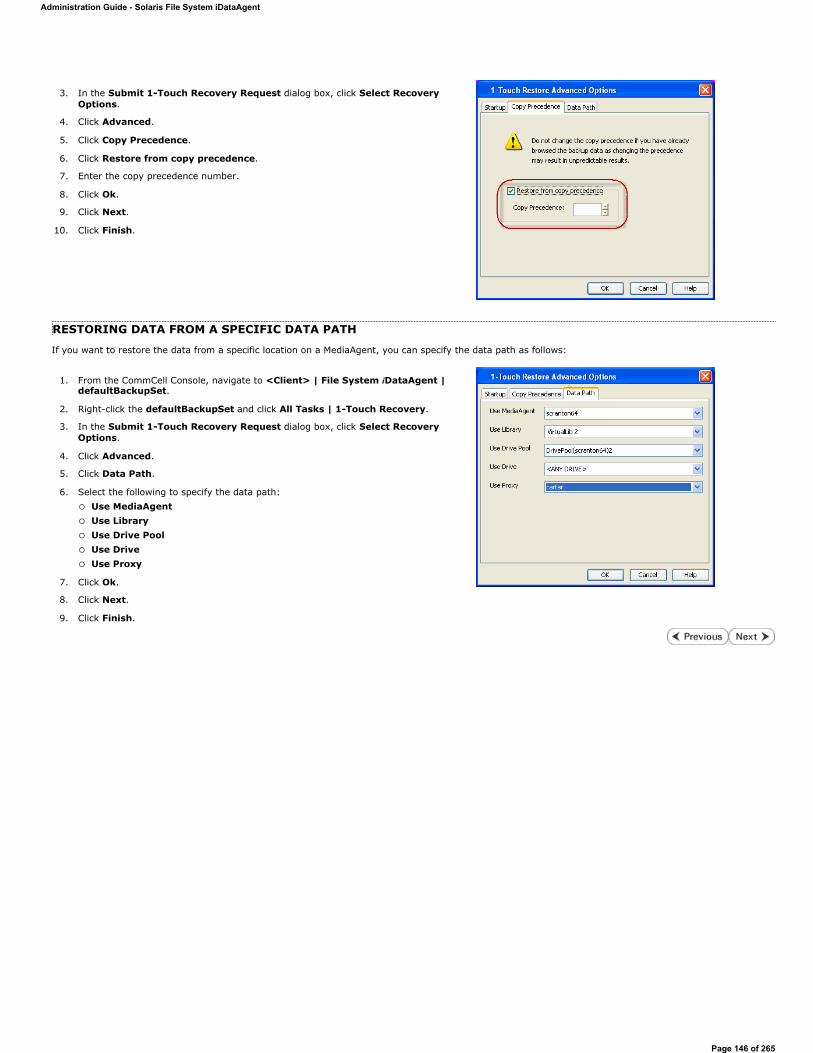
RESTORING DATA FROM A SPECIFIC DATA PATH
If you want to restore the data from a specific location on a MediaAgent, you can specify the data path as follows:
3. In the Submit 1-Touch Recovery Request dialog box, click Select Recovery Options.
4. Click Advanced.
5. Click Copy Precedence.
6. Click Restore from copy precedence.
7. Enter the copy precedence number.
8. Click Ok.
9. Click Next.
10. Click Finish.
1. From the CommCell Console, navigate to <Client> | File System iDataAgent | defaultBackupSet.
2. Right-click the defaultBackupSet and click All Tasks | 1-Touch Recovery.
3. In the Submit 1-Touch Recovery Request dialog box, click Select Recovery Options.
4. Click Advanced.
5. Click Data Path.
6. Select the following to specify the data path: Use MediaAgentUse LibraryUse Drive PoolUse DriveUse Proxy
7. Click Ok.
8. Click Next.
9. Click Finish.
Administration Guide - Solaris File System iDataAgent
Page 146 of 265
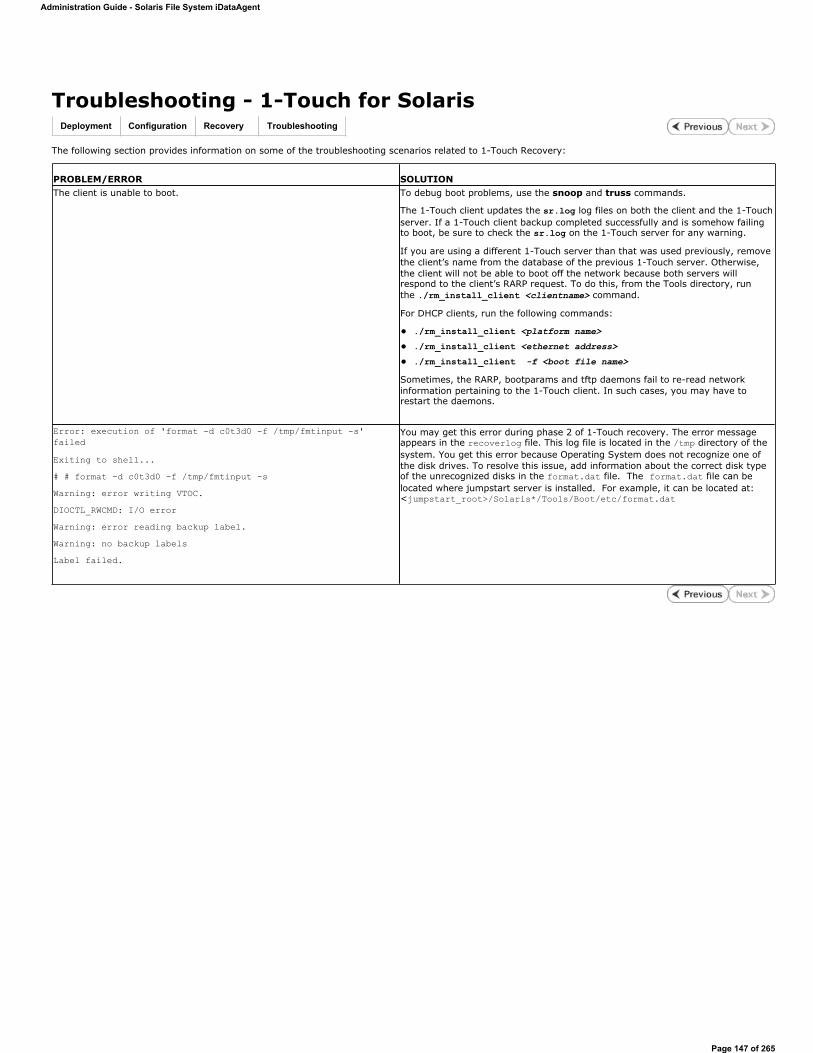
Troubleshooting - 1-Touch for Solaris
The following section provides information on some of the troubleshooting scenarios related to 1-Touch Recovery:
Deployment Configuration Recovery Troubleshooting
PROBLEM/ERROR SOLUTIONThe client is unable to boot. To debug boot problems, use the snoop and truss commands.
The 1-Touch client updates the sr.log log files on both the client and the 1-Touch server. If a 1-Touch client backup completed successfully and is somehow failing to boot, be sure to check the sr.log on the 1-Touch server for any warning.
If you are using a different 1-Touch server than that was used previously, remove the client’s name from the database of the previous 1-Touch server. Otherwise, the client will not be able to boot off the network because both servers will respond to the client’s RARP request. To do this, from the Tools directory, run the ./rm_install_client <clientname> command.
For DHCP clients, run the following commands:
./rm_install_client <platform name>
./rm_install_client <ethernet address>
./rm_install_client -f <boot file name>
Sometimes, the RARP, bootparams and tftp daemons fail to re-read network information pertaining to the 1-Touch client. In such cases, you may have to restart the daemons.
Error: execution of 'format -d c0t3d0 -f /tmp/fmtinput -s' failedExiting to shell...# # format -d c0t3d0 -f /tmp/fmtinput -sWarning: error writing VTOC.DIOCTL_RWCMD: I/O errorWarning: error reading backup label.Warning: no backup labelsLabel failed.
You may get this error during phase 2 of 1-Touch recovery. The error message appears in the recoverlog file. This log file is located in the /tmp directory of the system. You get this error because Operating System does not recognize one of the disk drives. To resolve this issue, add information about the correct disk type of the unrecognized disks in the format.dat file. The format.dat file can be located where jumpstart server is installed. For example, it can be located at: <jumpstart_root>/Solaris*/Tools/Boot/etc/format.dat
Administration Guide - Solaris File System iDataAgent
Page 147 of 265
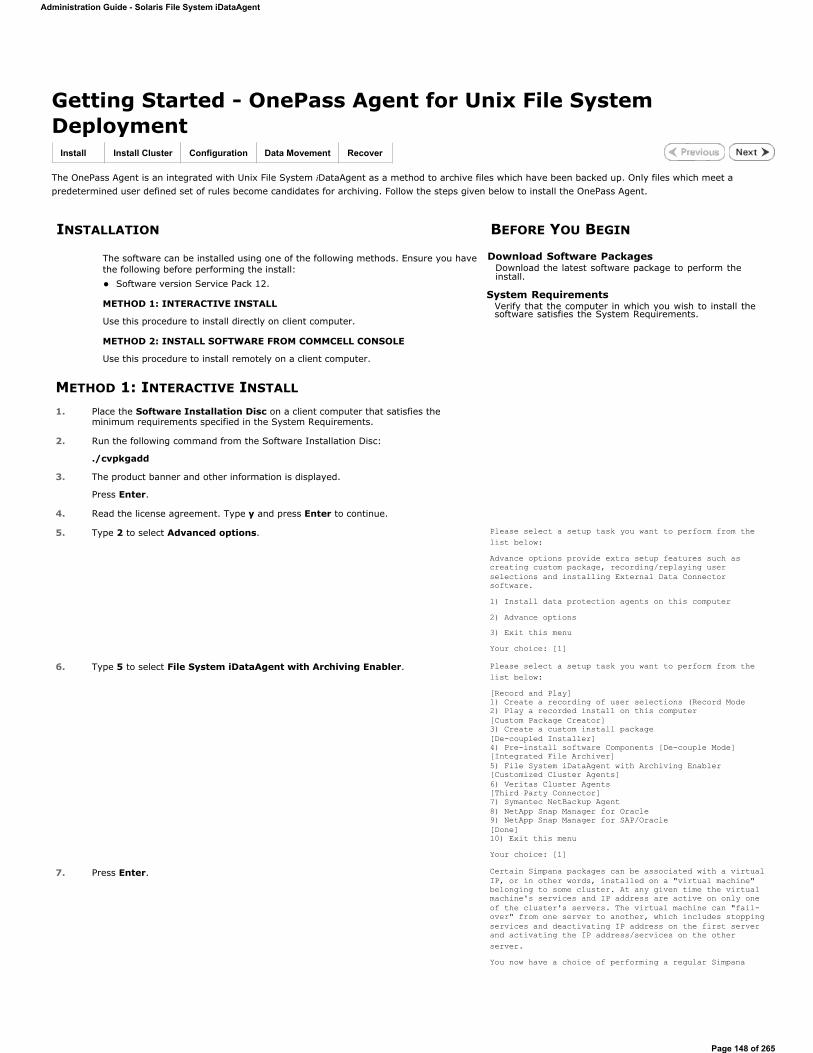
Getting Started - OnePass Agent for Unix File System Deployment
The OnePass Agent is an integrated with Unix File System iDataAgent as a method to archive files which have been backed up. Only files which meet a predetermined user defined set of rules become candidates for archiving. Follow the steps given below to install the OnePass Agent.
METHOD 1: INTERACTIVE INSTALL
Install Install Cluster Configuration Data Movement Recover
INSTALLATION BEFORE YOU BEGIN
The software can be installed using one of the following methods. Ensure you have the following before performing the install:
Software version Service Pack 12.
METHOD 1: INTERACTIVE INSTALL
Use this procedure to install directly on client computer.
METHOD 2: INSTALL SOFTWARE FROM COMMCELL CONSOLE
Use this procedure to install remotely on a client computer.
System RequirementsVerify that the computer in which you wish to install the software satisfies the System Requirements.
Download Software PackagesDownload the latest software package to perform the install.
1. Place the Software Installation Disc on a client computer that satisfies the minimum requirements specified in the System Requirements.
2. Run the following command from the Software Installation Disc:
./cvpkgadd
3. The product banner and other information is displayed.
Press Enter.
4. Read the license agreement. Type y and press Enter to continue.
5. Type 2 to select Advanced options. Please select a setup task you want to perform from the list below:Advance options provide extra setup features such as creating custom package, recording/replaying user selections and installing External Data Connector software.1) Install data protection agents on this computer2) Advance options3) Exit this menuYour choice: [1]
6. Type 5 to select File System iDataAgent with Archiving Enabler. Please select a setup task you want to perform from the list below:[Record and Play]1) Create a recording of user selections (Record Mode2) Play a recorded install on this computer[Custom Package Creator]3) Create a custom install package[De-coupled Installer]4) Pre-install software Components [De-couple Mode][Integrated File Archiver]5) File System iDataAgent with Archiving Enabler[Customized Cluster Agents]6) Veritas Cluster Agents[Third Party Connector]7) Symantec NetBackup Agent8) NetApp Snap Manager for Oracle9) NetApp Snap Manager for SAP/Oracle[Done]10) Exit this menuYour choice: [1]
7. Press Enter. Certain Simpana packages can be associated with a virtual IP, or in other words, installed on a "virtual machine" belonging to some cluster. At any given time the virtual machine's services and IP address are active on only one of the cluster's servers. The virtual machine can "fail-over" from one server to another, which includes stopping services and deactivating IP address on the first server and activating the IP address/services on the other server.You now have a choice of performing a regular Simpana
Administration Guide - Solaris File System iDataAgent
Page 148 of 265
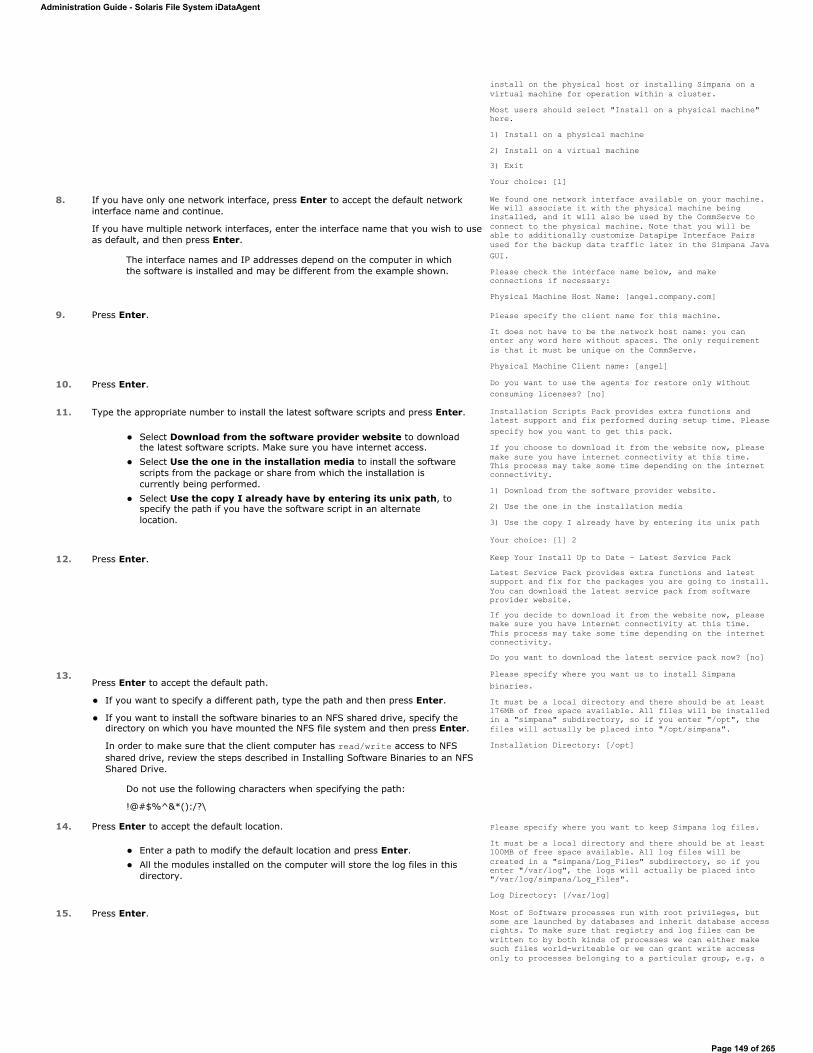
install on the physical host or installing Simpana on a virtual machine for operation within a cluster.Most users should select "Install on a physical machine" here.1) Install on a physical machine2) Install on a virtual machine3) ExitYour choice: [1]
8. If you have only one network interface, press Enter to accept the default network interface name and continue.
If you have multiple network interfaces, enter the interface name that you wish to use as default, and then press Enter.
The interface names and IP addresses depend on the computer in which the software is installed and may be different from the example shown.
We found one network interface available on your machine. We will associate it with the physical machine being installed, and it will also be used by the CommServe to connect to the physical machine. Note that you will be able to additionally customize Datapipe Interface Pairs used for the backup data traffic later in the Simpana Java GUI.Please check the interface name below, and make connections if necessary:Physical Machine Host Name: [angel.company.com]
9. Press Enter. Please specify the client name for this machine.It does not have to be the network host name: you can enter any word here without spaces. The only requirement is that it must be unique on the CommServe.Physical Machine Client name: [angel]
10. Press Enter. Do you want to use the agents for restore only without consuming licenses? [no]
11. Type the appropriate number to install the latest software scripts and press Enter.
Select Download from the software provider website to download the latest software scripts. Make sure you have internet access. Select Use the one in the installation media to install the software scripts from the package or share from which the installation is currently being performed. Select Use the copy I already have by entering its unix path, to specify the path if you have the software script in an alternate location.
Installation Scripts Pack provides extra functions and latest support and fix performed during setup time. Please specify how you want to get this pack.If you choose to download it from the website now, please make sure you have internet connectivity at this time. This process may take some time depending on the internet connectivity.1) Download from the software provider website.2) Use the one in the installation media3) Use the copy I already have by entering its unix path
Your choice: [1] 2
12. Press Enter. Keep Your Install Up to Date - Latest Service Pack Latest Service Pack provides extra functions and latest support and fix for the packages you are going to install. You can download the latest service pack from software provider website.If you decide to download it from the website now, please make sure you have internet connectivity at this time. This process may take some time depending on the internet connectivity.Do you want to download the latest service pack now? [no]
13.Press Enter to accept the default path.
If you want to specify a different path, type the path and then press Enter.
If you want to install the software binaries to an NFS shared drive, specify the directory on which you have mounted the NFS file system and then press Enter.
In order to make sure that the client computer has read/write access to NFS shared drive, review the steps described in Installing Software Binaries to an NFS Shared Drive.
Do not use the following characters when specifying the path:
!@#$%^&*():/?\
Please specify where you want us to install Simpana binaries.It must be a local directory and there should be at least 176MB of free space available. All files will be installed in a "simpana" subdirectory, so if you enter "/opt", the files will actually be placed into "/opt/simpana".Installation Directory: [/opt]
14. Press Enter to accept the default location.
Enter a path to modify the default location and press Enter. All the modules installed on the computer will store the log files in this directory.
Please specify where you want to keep Simpana log files.It must be a local directory and there should be at least 100MB of free space available. All log files will be created in a "simpana/Log_Files" subdirectory, so if you enter "/var/log", the logs will actually be placed into "/var/log/simpana/Log_Files".Log Directory: [/var/log]
15. Press Enter. Most of Software processes run with root privileges, but some are launched by databases and inherit database access rights. To make sure that registry and log files can be written to by both kinds of processes we can either make such files world-writeable or we can grant write access only to processes belonging to a particular group, e.g. a
Administration Guide - Solaris File System iDataAgent
Page 149 of 265
"simpana" or a "dba" group.We highly recommend now that you create a new user group and enter its name in the next setup screen. If you choose not to assign a dedicated group to Software processes, you will need to specify the access permissions later.If you're planning to backup Oracle DB you should use "dba" group.Would you like to assign a specific group to Software? [yes]
16. If you indicated Yes in the previous step, you will be prompted for the group name that must be used to launch processes.
Enter the group name and then press Enter.
Please enter the name of the group which will be assigned to all Software files and on behalf of which all Software processes will run.In most of the cases it's a good idea to create a dedicated "simpana" group. However, if you're planning to use Oracle iDataAgent or SAP Agent, you should enter Oracle's "dba" group here.Group name: sky1REMINDERIf you are planning to install Simpana Informix, DB2, PostgreSQL, Sybase or Lotus Notes iDataAgent, please make sure to include Informix, DB2, etc. users into group "sky1".Press <ENTER> to continue ...
17. Type a network TCP port number for the Communications Service (CVD) and press Enter.
Type a network TCP port number for the Client Event Manager Service (EvMgrC) and press Enter.
Every instance of Simpana should use a unique set of network ports to avoid interfering with other instances running on the same machine.The port numbers selected must be from the reserved port number range and have not been registered by another application on this machine.Please enter the port numbers.Port Number for CVD : [8400]Port Number for EvMgrC: [8402]
18. If this computer and the CommServe is separated by a firewall, type Yes and then press Enter to continue.
For firewall options and configuration instructions, see Firewall Configuration and continue with the installation.
If you do not wish to configure the firewall services, type No and then press Enter to continue.
Is there a firewall between this client and the CommServe? [no]
19. Type the fully qualified CommServe host name and press Enter.
Ensure that the CommServe is accessible before typing the name; otherwise the installation will fail.
Please specify hostname of the CommServe below. Make sure the hostname is fully qualified, resolvable by the name services configured on this machine.CommServe Host Name: mycommserve.company.com
20. Press Enter. Commcell Level Global Filters are set through Simpana GUI's Control Panel in order to filter out certain directories or files from backup Commcell-widely. If you turn on the Global filters, they will be effective to the default subclient. There are three options you can choose to set the filters.1) Use Cell level policy2) Always use Global filters3) Do not use Global filtersPlease select how to set the Global Filters for the default subclient? [1]
21. Type the appropriate number to select the Client Group and press Enter.
This screen will be displayed only if Client Groups are configured for the CommCell
Client Group(s) is currently configured on CommServe mycommserve.company.com. Please choose the group(s) that you want to add this client angel.company.com to. The selected group(s) will be marked (X) and can be deselected if you enter the same number again. After you are finished with the selection, select "Done with the Selection".[ ] 1) Unix[ ] 2) DR[a=all n=none r=reverse q=quit d=done >=next <=previous ?=help]sEnter number(s)/one of "a,n,r,q,d,>,<,?" here: 2
22. Enter the number corresponding to the storage policy through which you want to back up the File System iDataAgent and press Enter.
Please select one storage policy for this IDA from the list below:
1) SP_StandAloneLibrary2_22) SP_Library3_33) SP_MagLibrary4_4
Administration Guide - Solaris File System iDataAgent
Page 150 of 265
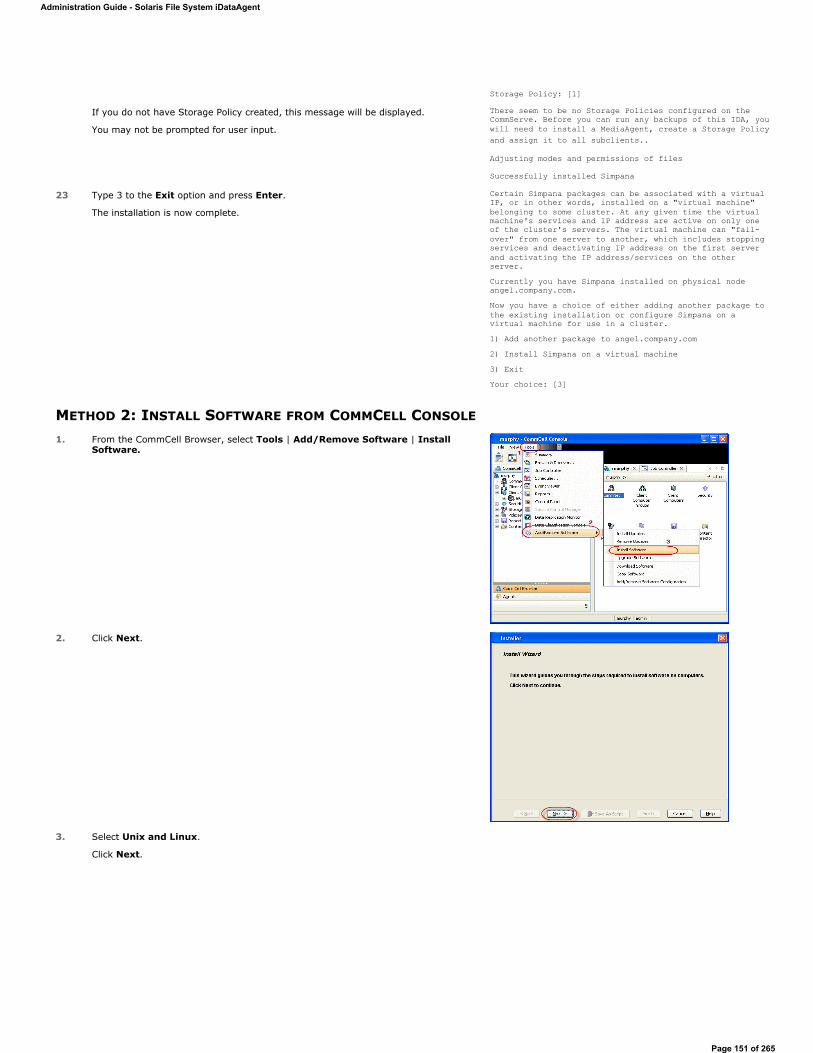
METHOD 2: INSTALL SOFTWARE FROM COMMCELL CONSOLE
Storage Policy: [1]
If you do not have Storage Policy created, this message will be displayed.
You may not be prompted for user input.
There seem to be no Storage Policies configured on the CommServe. Before you can run any backups of this IDA, you will need to install a MediaAgent, create a Storage Policy and assign it to all subclients..
Adjusting modes and permissions of files
Successfully installed Simpana
23 Type 3 to the Exit option and press Enter.
The installation is now complete.
Certain Simpana packages can be associated with a virtual IP, or in other words, installed on a "virtual machine" belonging to some cluster. At any given time the virtual machine's services and IP address are active on only one of the cluster's servers. The virtual machine can "fail-over" from one server to another, which includes stopping services and deactivating IP address on the first server and activating the IP address/services on the other server. Currently you have Simpana installed on physical node angel.company.com.Now you have a choice of either adding another package to the existing installation or configure Simpana on a virtual machine for use in a cluster. 1) Add another package to angel.company.com2) Install Simpana on a virtual machine3) ExitYour choice: [3]
1. From the CommCell Browser, select Tools | Add/Remove Software | Install Software.
2. Click Next.
3. Select Unix and Linux.
Click Next.
Administration Guide - Solaris File System iDataAgent
Page 151 of 265
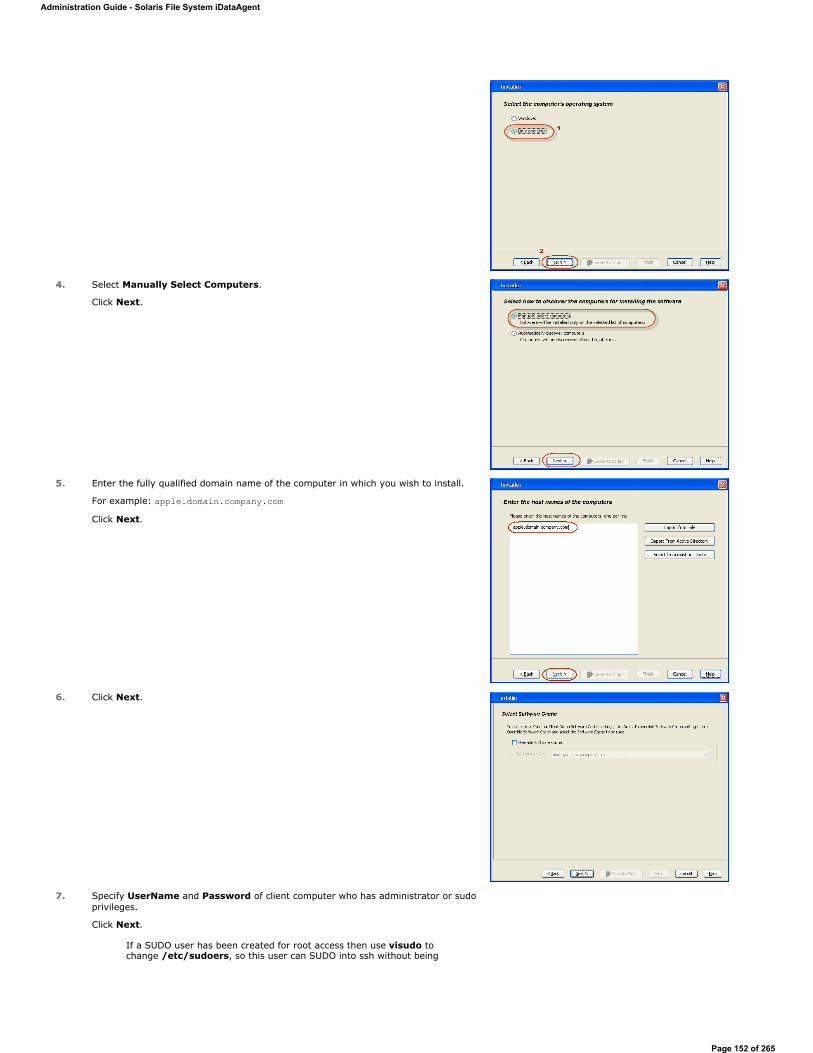
4. Select Manually Select Computers.
Click Next.
5. Enter the fully qualified domain name of the computer in which you wish to install.
For example: apple.domain.company.comClick Next.
6. Click Next.
7. Specify UserName and Password of client computer who has administrator or sudo privileges.
Click Next.
If a SUDO user has been created for root access then use visudo to change /etc/sudoers, so this user can SUDO into ssh without being
Administration Guide - Solaris File System iDataAgent
Page 152 of 265
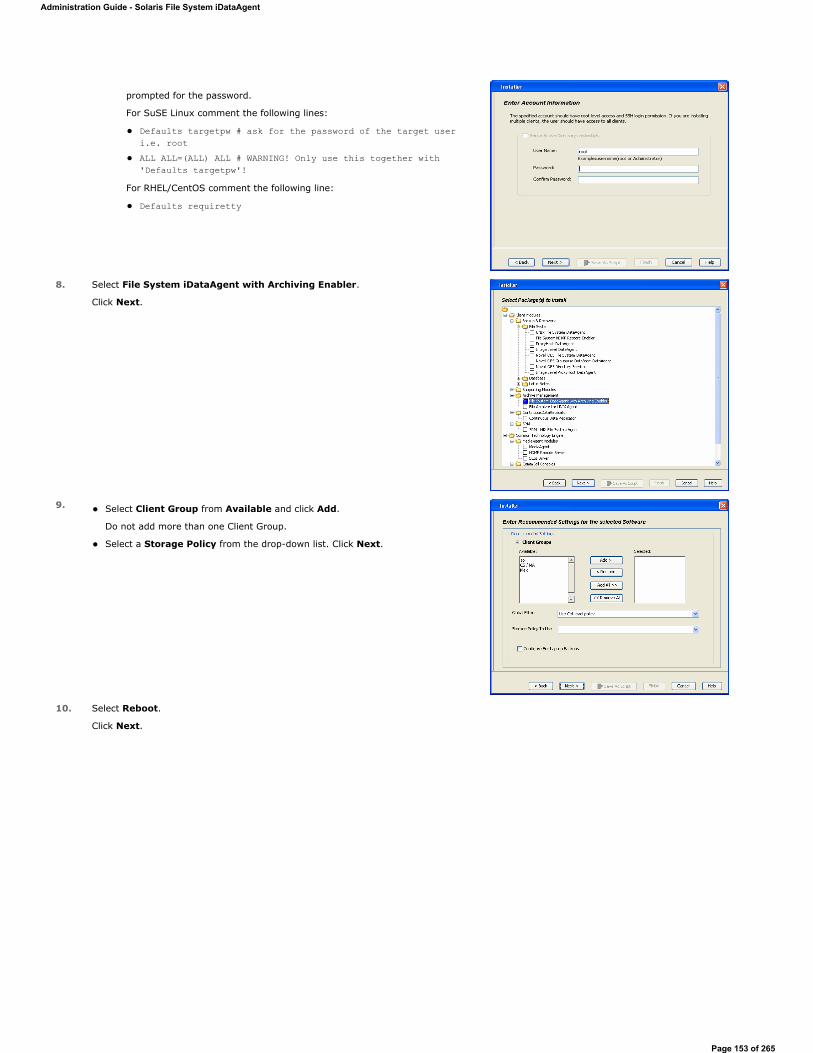
prompted for the password.
For SuSE Linux comment the following lines:
Defaults targetpw # ask for the password of the target user i.e. rootALL ALL=(ALL) ALL # WARNING! Only use this together with 'Defaults targetpw'!
For RHEL/CentOS comment the following line:
Defaults requiretty
8. Select File System iDataAgent with Archiving Enabler.
Click Next.
9. Select Client Group from Available and click Add.
Do not add more than one Client Group.
Select a Storage Policy from the drop-down list. Click Next.
10. Select Reboot.
Click Next.
Administration Guide - Solaris File System iDataAgent
Page 153 of 265
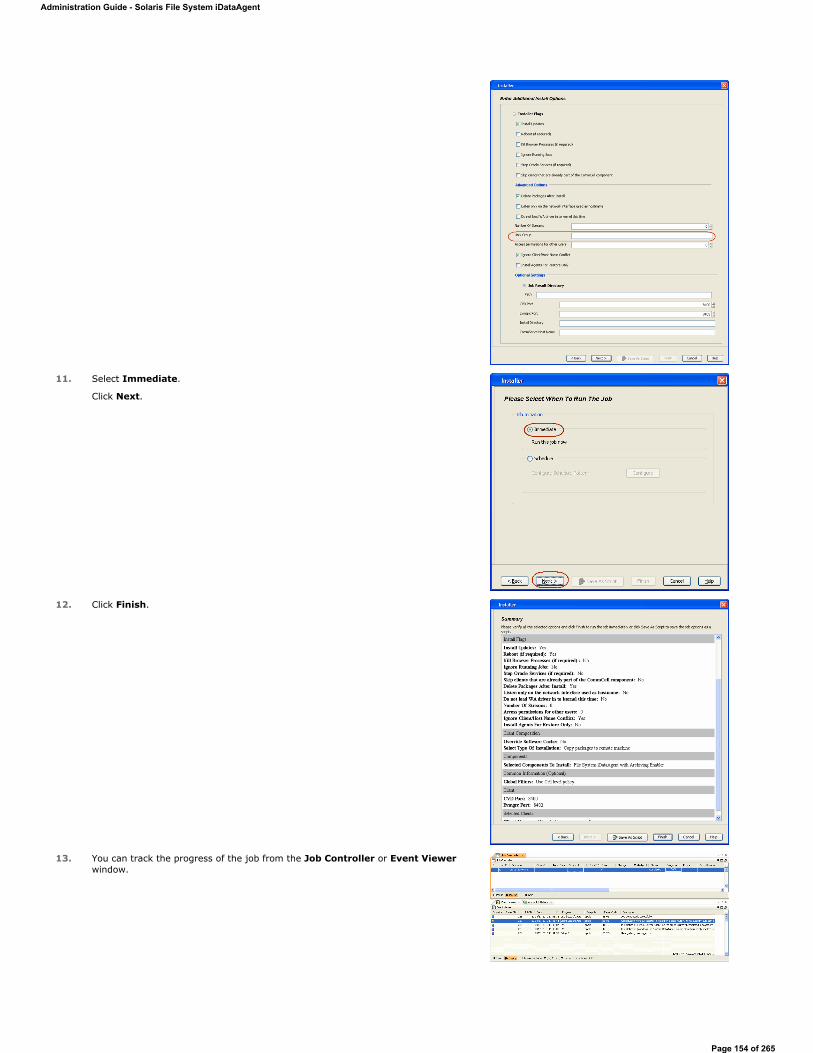
11. Select Immediate.
Click Next.
12. Click Finish.
13. You can track the progress of the job from the Job Controller or Event Viewerwindow.
Administration Guide - Solaris File System iDataAgent
Page 154 of 265
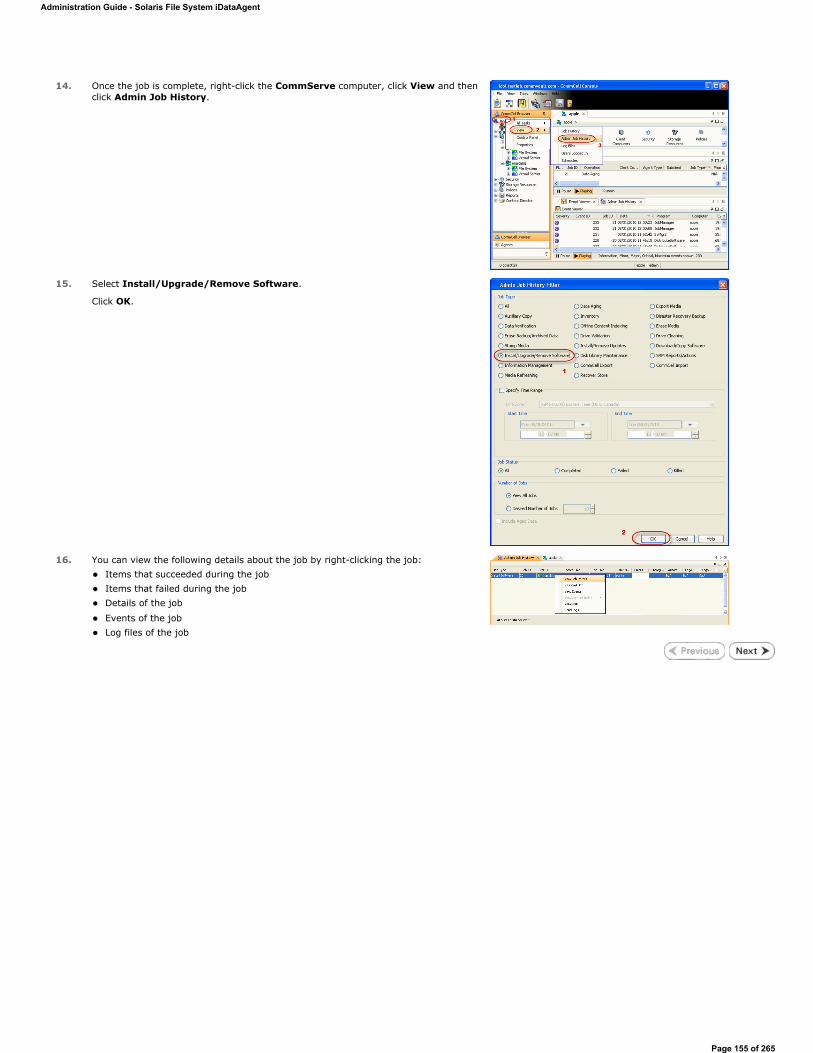
14. Once the job is complete, right-click the CommServe computer, click View and then click Admin Job History.
15. Select Install/Upgrade/Remove Software.
Click OK.
16. You can view the following details about the job by right-clicking the job: Items that succeeded during the job Items that failed during the job Details of the job
Events of the job Log files of the job
Administration Guide - Solaris File System iDataAgent
Page 155 of 265
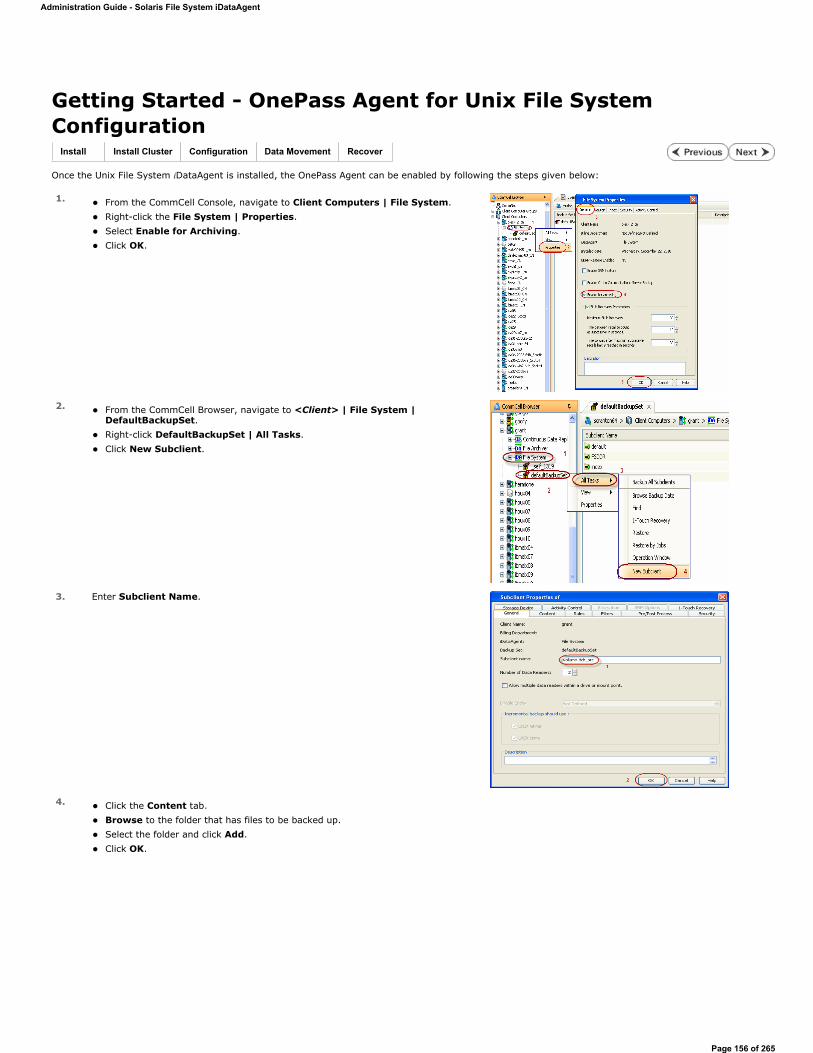
Getting Started - OnePass Agent for Unix File System Configuration
Once the Unix File System iDataAgent is installed, the OnePass Agent can be enabled by following the steps given below:
Install Install Cluster Configuration Data Movement Recover
1. From the CommCell Console, navigate to Client Computers | File System. Right-click the File System | Properties. Select Enable for Archiving. Click OK.
2. From the CommCell Browser, navigate to <Client> | File System | DefaultBackupSet. Right-click DefaultBackupSet | All Tasks. Click New Subclient.
3. Enter Subclient Name.
4. Click the Content tab. Browse to the folder that has files to be backed up. Select the folder and click Add.Click OK.
Administration Guide - Solaris File System iDataAgent
Page 156 of 265
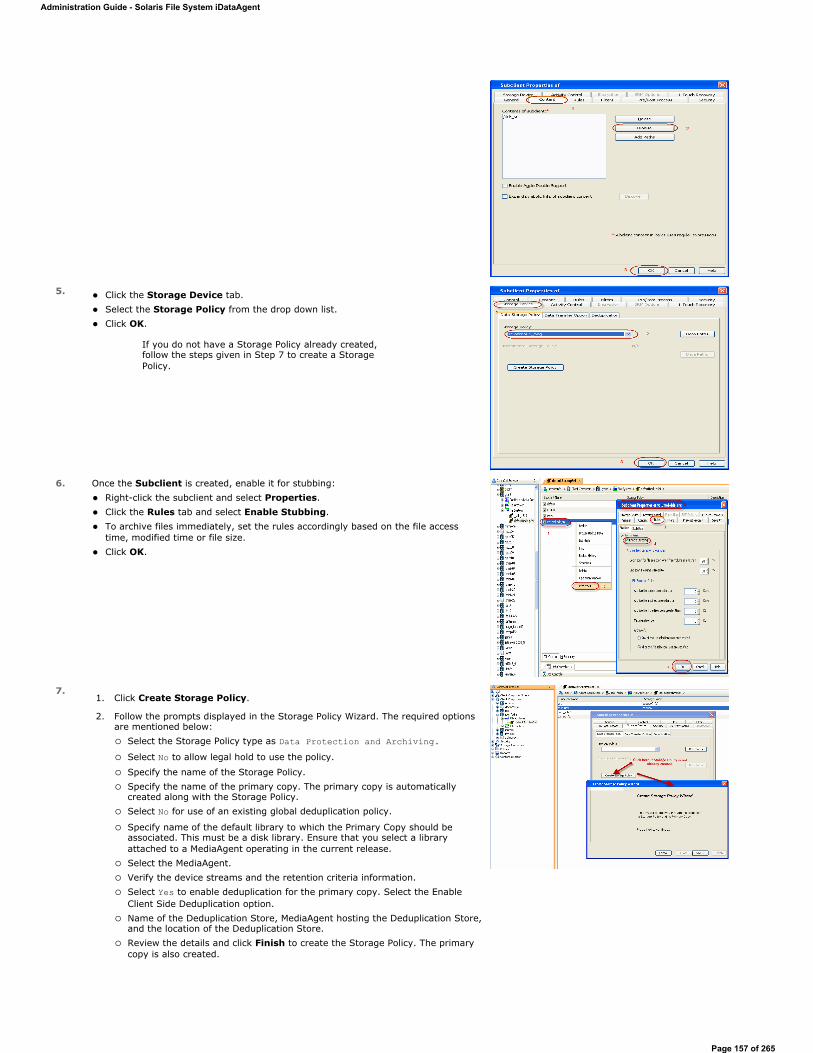
5. Click the Storage Device tab. Select the Storage Policy from the drop down list. Click OK.
If you do not have a Storage Policy already created, follow the steps given in Step 7 to create a Storage Policy.
6. Once the Subclient is created, enable it for stubbing: Right-click the subclient and select Properties. Click the Rules tab and select Enable Stubbing. To archive files immediately, set the rules accordingly based on the file access time, modified time or file size. Click OK.
7.1. Click Create Storage Policy.
2. Follow the prompts displayed in the Storage Policy Wizard. The required options are mentioned below:
Select the Storage Policy type as Data Protection and Archiving.Select No to allow legal hold to use the policy.
Specify the name of the Storage Policy. Specify the name of the primary copy. The primary copy is automatically created along with the Storage Policy. Select No for use of an existing global deduplication policy.
Specify name of the default library to which the Primary Copy should be associated. This must be a disk library. Ensure that you select a library attached to a MediaAgent operating in the current release. Select the MediaAgent. Verify the device streams and the retention criteria information. Select Yes to enable deduplication for the primary copy. Select the Enable Client Side Deduplication option. Name of the Deduplication Store, MediaAgent hosting the Deduplication Store, and the location of the Deduplication Store. Review the details and click Finish to create the Storage Policy. The primary copy is also created.
Administration Guide - Solaris File System iDataAgent
Page 157 of 265
3. Return to Step 5 to associate the Storage Policy to the subclient.
Administration Guide - Solaris File System iDataAgent
Page 158 of 265
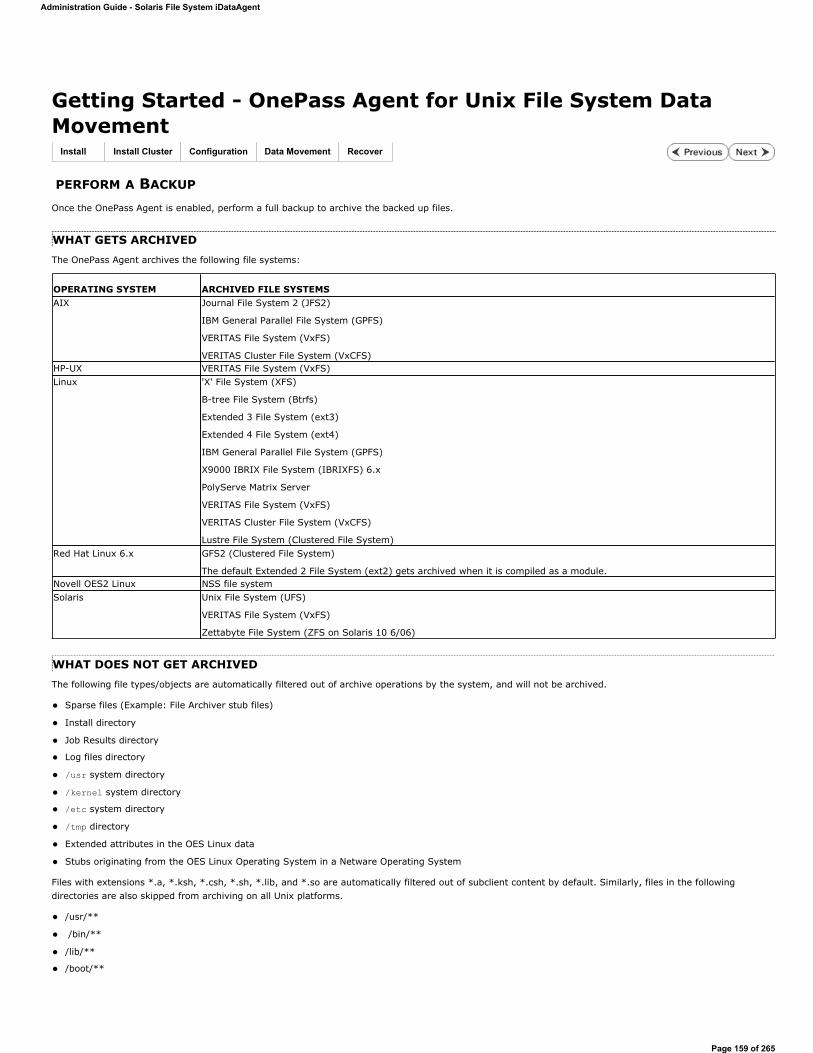
Getting Started - OnePass Agent for Unix File System Data Movement
PERFORM A BACKUP
Once the OnePass Agent is enabled, perform a full backup to archive the backed up files.
WHAT GETS ARCHIVEDThe OnePass Agent archives the following file systems:
WHAT DOES NOT GET ARCHIVEDThe following file types/objects are automatically filtered out of archive operations by the system, and will not be archived.
Sparse files (Example: File Archiver stub files)
Install directory
Job Results directory
Log files directory
/usr system directory
/kernel system directory
/etc system directory
/tmp directory
Extended attributes in the OES Linux data
Stubs originating from the OES Linux Operating System in a Netware Operating System
Files with extensions *.a, *.ksh, *.csh, *.sh, *.lib, and *.so are automatically filtered out of subclient content by default. Similarly, files in the following directories are also skipped from archiving on all Unix platforms.
/usr/**
/bin/**
/lib/**
/boot/**
Install Install Cluster Configuration Data Movement Recover
OPERATING SYSTEM ARCHIVED FILE SYSTEMSAIX Journal File System 2 (JFS2)
IBM General Parallel File System (GPFS)
VERITAS File System (VxFS)
VERITAS Cluster File System (VxCFS) HP-UX VERITAS File System (VxFS)Linux 'X' File System (XFS)
B-tree File System (Btrfs)
Extended 3 File System (ext3)
Extended 4 File System (ext4)
IBM General Parallel File System (GPFS)
X9000 IBRIX File System (IBRIXFS) 6.x
PolyServe Matrix Server
VERITAS File System (VxFS)
VERITAS Cluster File System (VxCFS)
Lustre File System (Clustered File System)Red Hat Linux 6.x GFS2 (Clustered File System)
The default Extended 2 File System (ext2) gets archived when it is compiled as a module. Novell OES2 Linux NSS file systemSolaris Unix File System (UFS)
VERITAS File System (VxFS)
Zettabyte File System (ZFS on Solaris 10 6/06)
Administration Guide - Solaris File System iDataAgent
Page 159 of 265
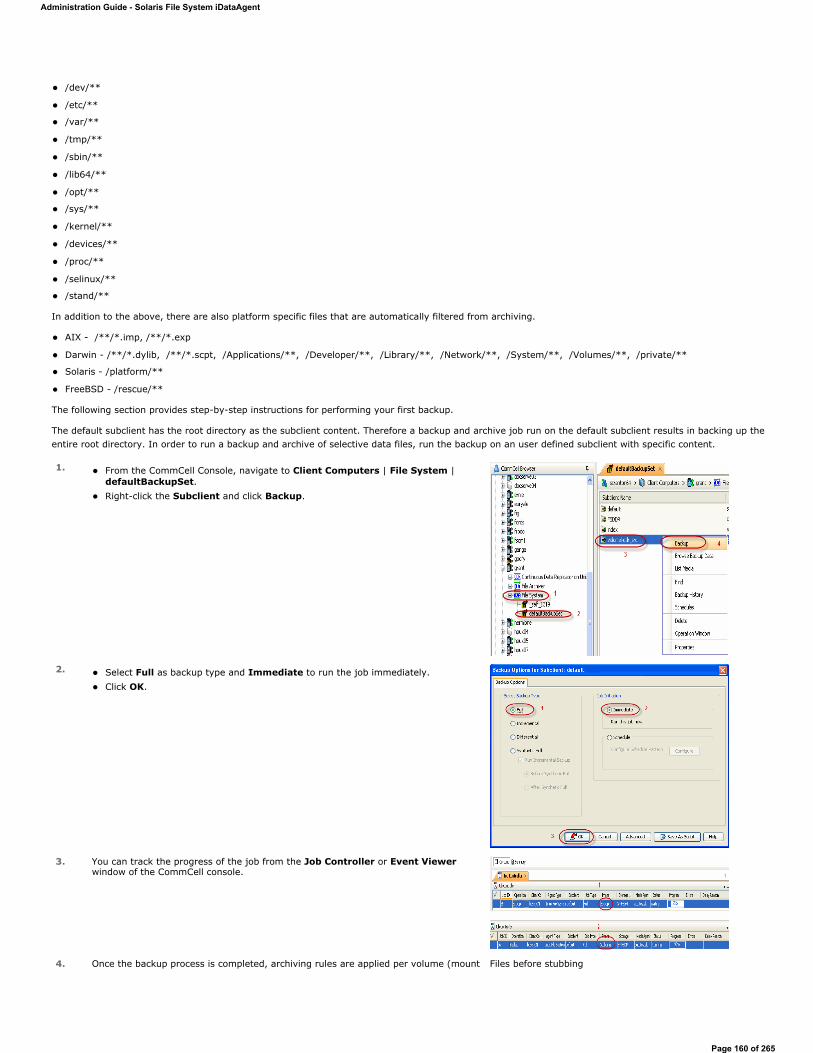
/dev/**
/etc/**
/var/**
/tmp/**
/sbin/**
/lib64/**
/opt/**
/sys/**
/kernel/**
/devices/**
/proc/**
/selinux/**
/stand/**
In addition to the above, there are also platform specific files that are automatically filtered from archiving.
AIX - /**/*.imp, /**/*.exp
Darwin - /**/*.dylib, /**/*.scpt, /Applications/**, /Developer/**, /Library/**, /Network/**, /System/**, /Volumes/**, /private/**
Solaris - /platform/**
FreeBSD - /rescue/**
The following section provides step-by-step instructions for performing your first backup.
The default subclient has the root directory as the subclient content. Therefore a backup and archive job run on the default subclient results in backing up the entire root directory. In order to run a backup and archive of selective data files, run the backup on an user defined subclient with specific content.
1. From the CommCell Console, navigate to Client Computers | File System | defaultBackupSet. Right-click the Subclient and click Backup.
2. Select Full as backup type and Immediate to run the job immediately. Click OK.
3. You can track the progress of the job from the Job Controller or Event Viewerwindow of the CommCell console.
4. Once the backup process is completed, archiving rules are applied per volume (mount Files before stubbing
Administration Guide - Solaris File System iDataAgent
Page 160 of 265
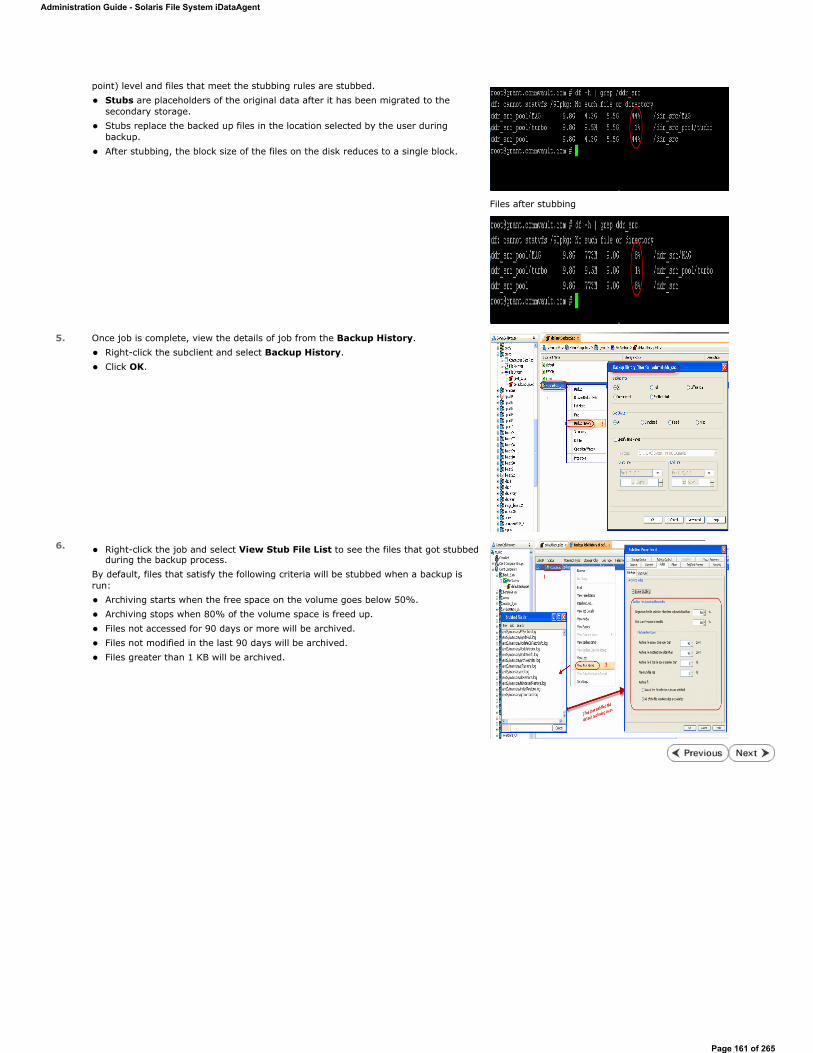
point) level and files that meet the stubbing rules are stubbed. Stubs are placeholders of the original data after it has been migrated to the secondary storage. Stubs replace the backed up files in the location selected by the user during backup. After stubbing, the block size of the files on the disk reduces to a single block.
Files after stubbing
5. Once job is complete, view the details of job from the Backup History. Right-click the subclient and select Backup History. Click OK.
6. Right-click the job and select View Stub File List to see the files that got stubbed during the backup process.
By default, files that satisfy the following criteria will be stubbed when a backup is run:
Archiving starts when the free space on the volume goes below 50%. Archiving stops when 80% of the volume space is freed up. Files not accessed for 90 days or more will be archived. Files not modified in the last 90 days will be archived. Files greater than 1 KB will be archived.
Administration Guide - Solaris File System iDataAgent
Page 161 of 265
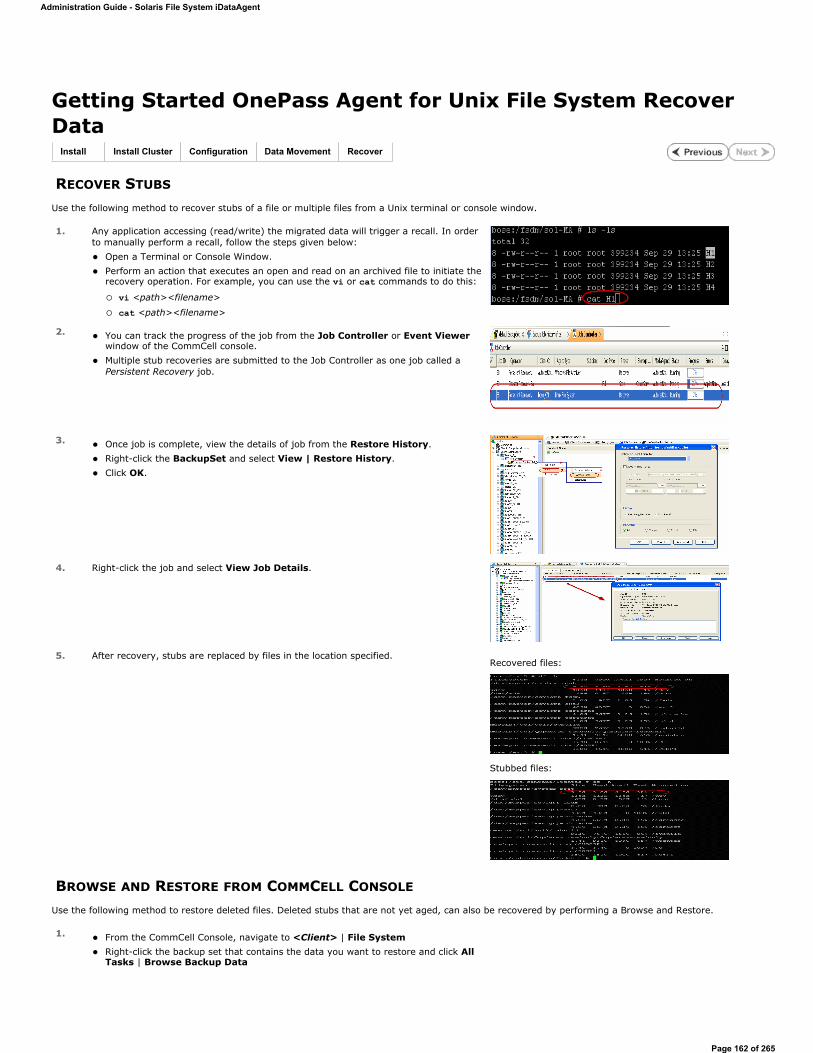
Getting Started OnePass Agent for Unix File System Recover Data
RECOVER STUBS
Use the following method to recover stubs of a file or multiple files from a Unix terminal or console window.
BROWSE AND RESTORE FROM COMMCELL CONSOLE
Use the following method to restore deleted files. Deleted stubs that are not yet aged, can also be recovered by performing a Browse and Restore.
Install Install Cluster Configuration Data Movement Recover
1. Any application accessing (read/write) the migrated data will trigger a recall. In order to manually perform a recall, follow the steps given below:
Open a Terminal or Console Window. Perform an action that executes an open and read on an archived file to initiate the recovery operation. For example, you can use the vi or cat commands to do this:
vi <path><filename>
cat <path><filename>
2. You can track the progress of the job from the Job Controller or Event Viewerwindow of the CommCell console. Multiple stub recoveries are submitted to the Job Controller as one job called a Persistent Recovery job.
3. Once job is complete, view the details of job from the Restore History. Right-click the BackupSet and select View | Restore History. Click OK.
4. Right-click the job and select View Job Details.
5. After recovery, stubs are replaced by files in the location specified. Recovered files:
Stubbed files:
1. From the CommCell Console, navigate to <Client> | File SystemRight-click the backup set that contains the data you want to restore and click All Tasks | Browse Backup Data
Administration Guide - Solaris File System iDataAgent
Page 162 of 265
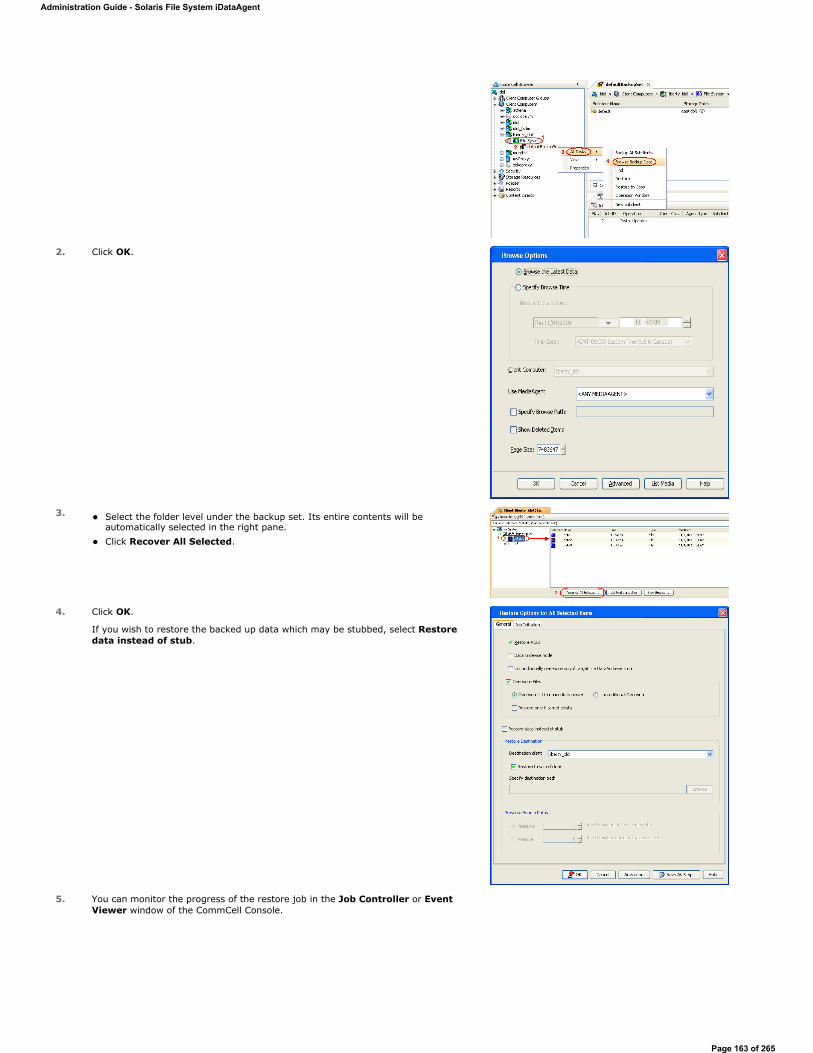
2. Click OK.
3. Select the folder level under the backup set. Its entire contents will be automatically selected in the right pane. Click Recover All Selected.
4. Click OK.
If you wish to restore the backed up data which may be stubbed, select Restore data instead of stub.
5. You can monitor the progress of the restore job in the Job Controller or Event Viewer window of the CommCell Console.
Administration Guide - Solaris File System iDataAgent
Page 163 of 265
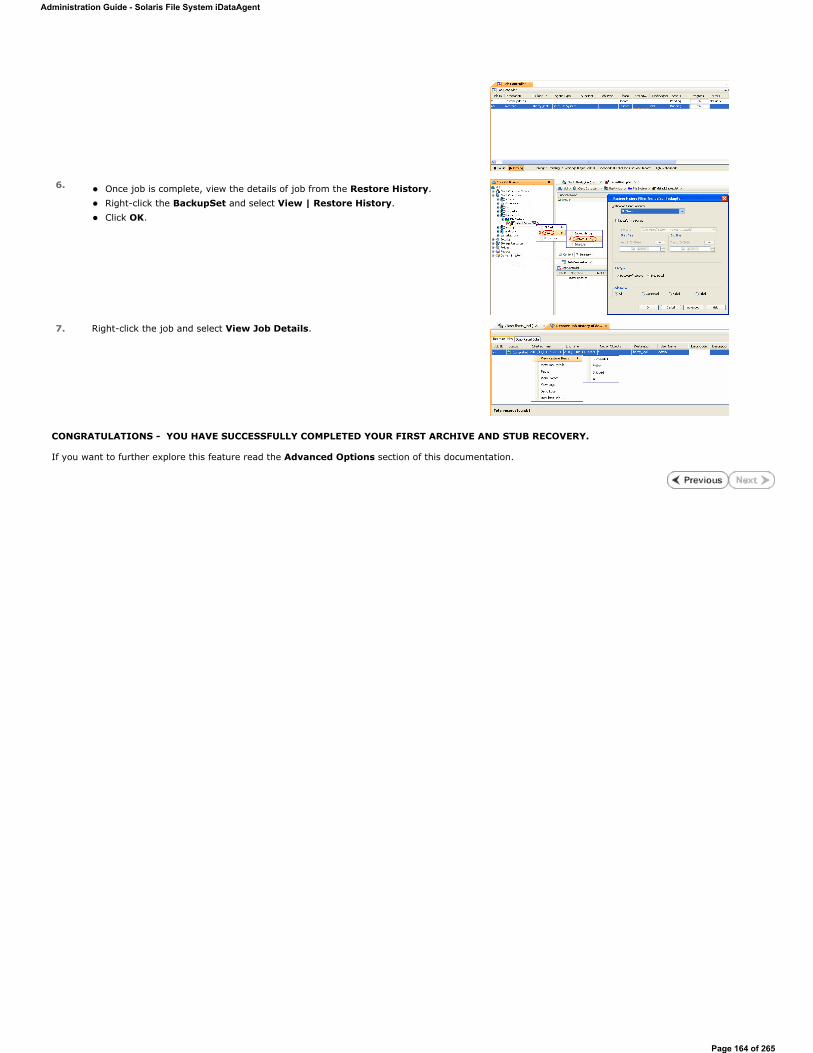
CONGRATULATIONS - YOU HAVE SUCCESSFULLY COMPLETED YOUR FIRST ARCHIVE AND STUB RECOVERY.
If you want to further explore this feature read the Advanced Options section of this documentation.
6. Once job is complete, view the details of job from the Restore History. Right-click the BackupSet and select View | Restore History. Click OK.
7. Right-click the job and select View Job Details.
Administration Guide - Solaris File System iDataAgent
Page 164 of 265
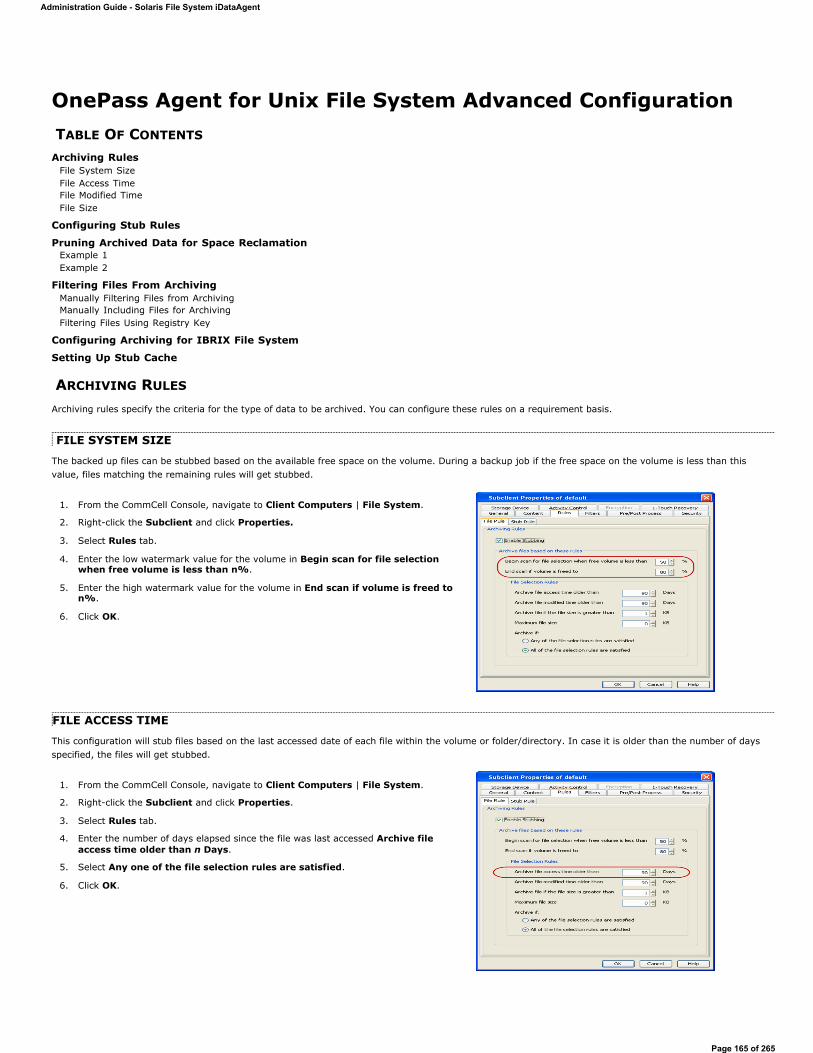
OnePass Agent for Unix File System Advanced ConfigurationTABLE OF CONTENTS
Archiving RulesFile System SizeFile Access TimeFile Modified TimeFile Size
Configuring Stub Rules
Pruning Archived Data for Space ReclamationExample 1Example 2
Filtering Files From ArchivingManually Filtering Files from ArchivingManually Including Files for ArchivingFiltering Files Using Registry Key
Configuring Archiving for IBRIX File System
Setting Up Stub Cache
ARCHIVING RULES
Archiving rules specify the criteria for the type of data to be archived. You can configure these rules on a requirement basis.
FILE SYSTEM SIZE
The backed up files can be stubbed based on the available free space on the volume. During a backup job if the free space on the volume is less than this value, files matching the remaining rules will get stubbed.
FILE ACCESS TIME
This configuration will stub files based on the last accessed date of each file within the volume or folder/directory. In case it is older than the number of days specified, the files will get stubbed.
1. From the CommCell Console, navigate to Client Computers | File System.
2. Right-click the Subclient and click Properties.
3. Select Rules tab.
4. Enter the low watermark value for the volume in Begin scan for file selection when free volume is less than n%.
5. Enter the high watermark value for the volume in End scan if volume is freed to n%.
6. Click OK.
1. From the CommCell Console, navigate to Client Computers | File System.
2. Right-click the Subclient and click Properties.
3. Select Rules tab.
4. Enter the number of days elapsed since the file was last accessed Archive file access time older than n Days.
5. Select Any one of the file selection rules are satisfied.
6. Click OK.
Administration Guide - Solaris File System iDataAgent
Page 165 of 265

FILE MODIFIED TIME
This configuration will stub files based on the last modified date of each file within the volume or folder/directory.
FILE SIZEThis configuration will stub files based on the file size. If a file size within a scanned volume or folder/directory is in between the two limit values set, it will get stubbed.
CONFIGURING STUB RULES
By default, the stubs are deleted 730 days from the day of stubbing when you enable the Prune archived items option. However, you can set the number of days after which the stubs will be pruned using the following steps:
1. From the CommCell Console, navigate to Client Computers | File System.
2. In the right pane right-click the Subclient and click Properties.
3. Click the Rules tab.
4. Select the Stub Rule tab and make sure that the Prune archived items checkbox is enabled.
5. You can enter the number of days after which the stubs will be pruned.
6. Click OK.
1. From the CommCell Console, navigate to Client Computers | File System.
2. Right-click the Subclient and click Properties.
3. Select Rules tab.
4. Enter the number of days elapsed since the file was last modified Archive file modified time older than n Days.
5. Select Any one of the file selection rules are satisfied.
6. Click OK.
1. From the CommCell Console, navigate to Client Computers | File System.
2. Right-click the Subclient and click Properties.
3. Select Rules tab.
4. Enter the minimum file size in Archive file if size is greater than n KB.
5. Enter the maximum file size in Maximum file size.
6. Select All of the file selection rules are satisfied.
7. Click OK.
For Example:
To archive files more than 5KB but less than 20KB:
Enter 5 KB in Archive file if size is greater than n KB. Enter 20 KB in Maximum file size.
These options can be used individually or in combination to specify a range.
Administration Guide - Solaris File System iDataAgent
Page 166 of 265

PRUNING ARCHIVED DATA FOR SPACE RECLAMATION
Archived data is pruned and secondary storage space is reclaimed based on the stub retention setting and the storage policy cycle - based retention criteria. Running a synthetic full backup can reduce space on the secondary storage for deleted stubs that meet the expiration criteria. Running data-aging can reclaim space on the secondary storage by pruning the expired backup jobs. The following section describes two scenarios for space reclamation:
EXAMPLE 1
By default stub retention is set to 730 days from the Stub Rules tab and the Storage Policy retention is set for 2 cycles and 15 days. The following procedure demonstrates the reduction in the secondary storage usage:
EXAMPLE 2
In order to reclaim space on secondary storage by completely removing the archived data and their stubs, follow the steps given below:
Pre-requisites
Stub retention has been set to n days from Subclient properties Stub Rule tab.
Storage Policy retention has been set to x cycles and y days.
A few backup cycles have been completed.
1. Run a few backup jobs. This will lead to stub generation of the data meeting the defined archiving rules. The subsequent incremental backup will backup these stubs. Delete a few stubs. Perform an incremental backup operation. The time-interval between this incremental backup and the subsequent synthetic full will be calculated as the number of days specified in the retention criteria. The deleted stubs meeting the retention criteria will get expired . For example, if a user has set 20 days for pruning archived items, the deleted stubs will expire after 20 days. Run synthetic full backup with Check for Deleted Stub option selected in the advanced tab. The expired stubs and the corresponding data would not get backed up in this operation. From the backup job history, verify the backup file list. Ensure that the deleted stubs and their corresponding data are no longer included in the synthetic full backup image. Note that space on secondary storage has been freed up by pruning of expired stubs and their corresponding data by running a synthetic full backup.
2. The following procedure demonstrates the reclamation of secondary storage space: Run backup jobs to generate 2 backup cycles. Wait for the last job of the first cycle to expire (based on the Storage Policy retention, which is 15 days by default). Run a Synthetic full backup. Running the synthetic full job will start the third backup cycle and will render the first cycle prune-able. Run a data aging job. Notice that the secondary storage space occupied by the first backup cycle has been reclaimed.
1. Change the stub retention to a minimum of 1 day from Subclient properties Stub Rule tab..
2. Change the storage policy retention setting to 2 cycles and 15 days.
3. Delete the unwanted stubs.
Administration Guide - Solaris File System iDataAgent
Page 167 of 265
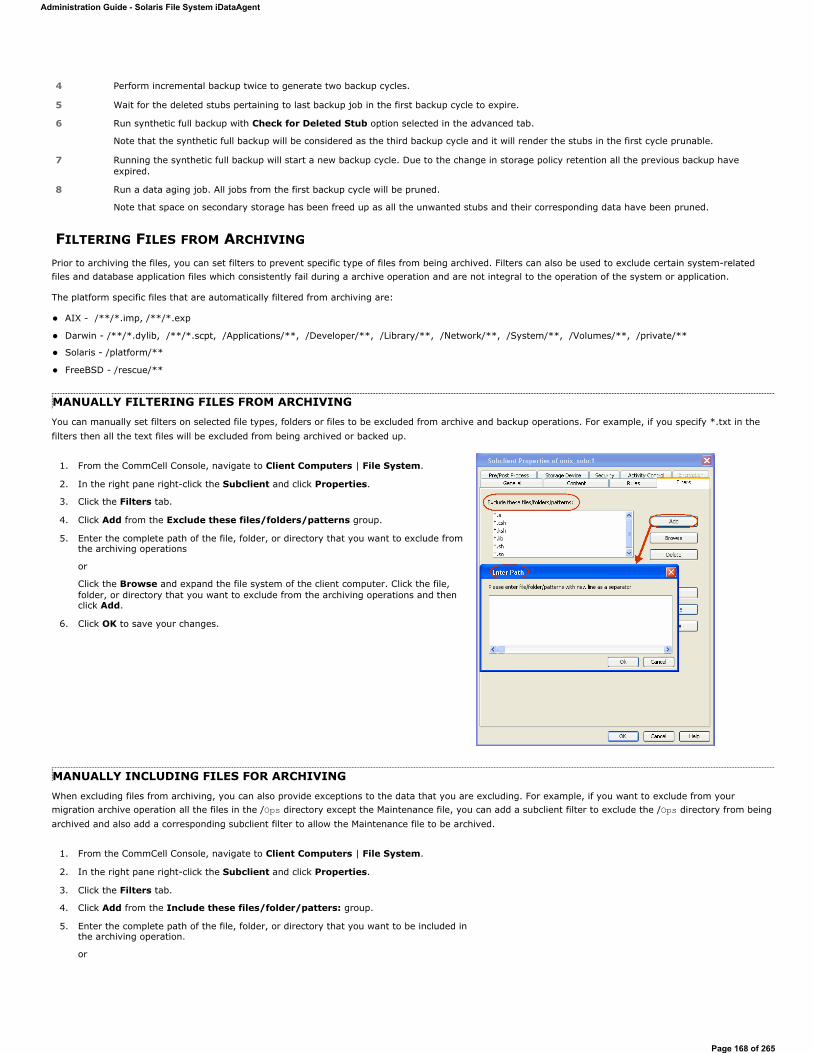
FILTERING FILES FROM ARCHIVING
Prior to archiving the files, you can set filters to prevent specific type of files from being archived. Filters can also be used to exclude certain system-related files and database application files which consistently fail during a archive operation and are not integral to the operation of the system or application.
The platform specific files that are automatically filtered from archiving are:
AIX - /**/*.imp, /**/*.exp
Darwin - /**/*.dylib, /**/*.scpt, /Applications/**, /Developer/**, /Library/**, /Network/**, /System/**, /Volumes/**, /private/**
Solaris - /platform/**
FreeBSD - /rescue/**
MANUALLY FILTERING FILES FROM ARCHIVINGYou can manually set filters on selected file types, folders or files to be excluded from archive and backup operations. For example, if you specify *.txt in the filters then all the text files will be excluded from being archived or backed up.
MANUALLY INCLUDING FILES FOR ARCHIVINGWhen excluding files from archiving, you can also provide exceptions to the data that you are excluding. For example, if you want to exclude from your migration archive operation all the files in the /Ops directory except the Maintenance file, you can add a subclient filter to exclude the /Ops directory from being archived and also add a corresponding subclient filter to allow the Maintenance file to be archived.
4 Perform incremental backup twice to generate two backup cycles.
5 Wait for the deleted stubs pertaining to last backup job in the first backup cycle to expire.
6 Run synthetic full backup with Check for Deleted Stub option selected in the advanced tab.
Note that the synthetic full backup will be considered as the third backup cycle and it will render the stubs in the first cycle prunable.
7 Running the synthetic full backup will start a new backup cycle. Due to the change in storage policy retention all the previous backup have expired.
8 Run a data aging job. All jobs from the first backup cycle will be pruned.
Note that space on secondary storage has been freed up as all the unwanted stubs and their corresponding data have been pruned.
1. From the CommCell Console, navigate to Client Computers | File System.
2. In the right pane right-click the Subclient and click Properties.
3. Click the Filters tab.
4. Click Add from the Exclude these files/folders/patterns group.
5. Enter the complete path of the file, folder, or directory that you want to exclude from the archiving operations
or
Click the Browse and expand the file system of the client computer. Click the file, folder, or directory that you want to exclude from the archiving operations and then click Add.
6. Click OK to save your changes.
1. From the CommCell Console, navigate to Client Computers | File System.
2. In the right pane right-click the Subclient and click Properties.
3. Click the Filters tab.
4. Click Add from the Include these files/folder/patters: group.
5. Enter the complete path of the file, folder, or directory that you want to be included in the archiving operation.
or
Administration Guide - Solaris File System iDataAgent
Page 168 of 265
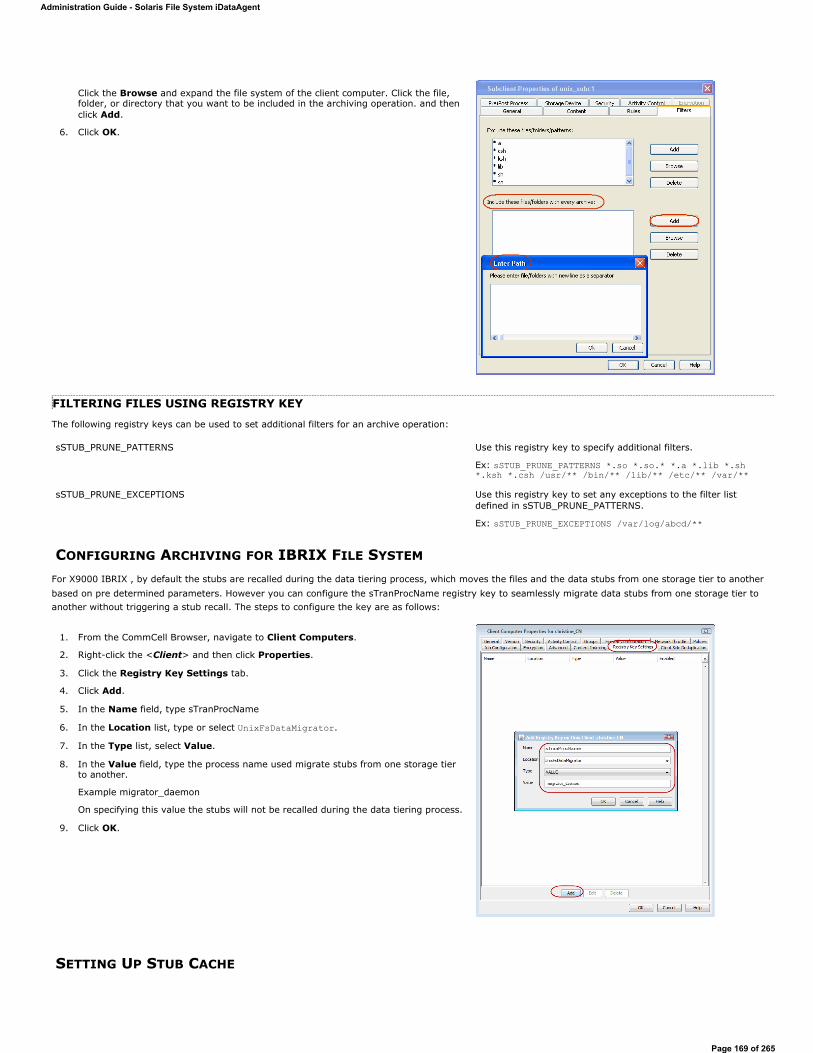
FILTERING FILES USING REGISTRY KEY
The following registry keys can be used to set additional filters for an archive operation:
CONFIGURING ARCHIVING FOR IBRIX FILE SYSTEM
For X9000 IBRIX , by default the stubs are recalled during the data tiering process, which moves the files and the data stubs from one storage tier to another based on pre determined parameters. However you can configure the sTranProcName registry key to seamlessly migrate data stubs from one storage tier to another without triggering a stub recall. The steps to configure the key are as follows:
SETTING UP STUB CACHE
Click the Browse and expand the file system of the client computer. Click the file, folder, or directory that you want to be included in the archiving operation. and then click Add.
6. Click OK.
sSTUB_PRUNE_PATTERNS Use this registry key to specify additional filters.
Ex: sSTUB_PRUNE_PATTERNS *.so *.so.* *.a *.lib *.sh *.ksh *.csh /usr/** /bin/** /lib/** /etc/** /var/**
sSTUB_PRUNE_EXCEPTIONS Use this registry key to set any exceptions to the filter list defined in sSTUB_PRUNE_PATTERNS.
Ex: sSTUB_PRUNE_EXCEPTIONS /var/log/abcd/**
1. From the CommCell Browser, navigate to Client Computers.
2. Right-click the <Client> and then click Properties.
3. Click the Registry Key Settings tab.
4. Click Add.
5. In the Name field, type sTranProcName
6. In the Location list, type or select UnixFsDataMigrator.
7. In the Type list, select Value.
8. In the Value field, type the process name used migrate stubs from one storage tier to another.
Example migrator_daemon
On specifying this value the stubs will not be recalled during the data tiering process.
9. Click OK.
Administration Guide - Solaris File System iDataAgent
Page 169 of 265
After recalling the files, you can re-archive the recalled files by preserving them in a stub cache. The recalled file will be re-archived from the cache if the file meets the archiving rules and has not been modified after the recall. The following registry keys allow you to set the stub cache and re-stub the recalled files from the cache memory.
Back to Top
nUSE_STUB_CACHE This key allows a file to be re-stubbed after recall by preserving it in cache memory.
dSTUB_CACHE_ROOT By default the stubs are cached under , /opt/simpana/stubcache folder. Use this key to specify a different location of the root folder for the File Archiver stub cache.
Administration Guide - Solaris File System iDataAgent
Page 170 of 265
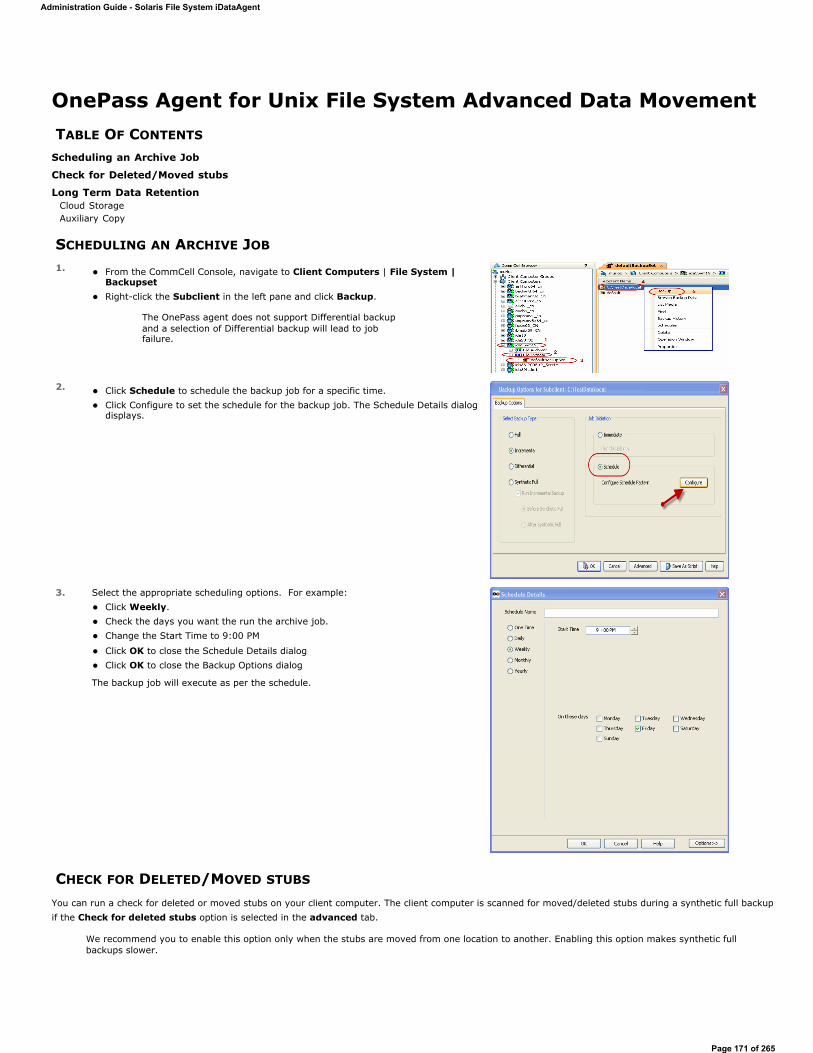
OnePass Agent for Unix File System Advanced Data MovementTABLE OF CONTENTS
Scheduling an Archive Job
Check for Deleted/Moved stubs
Long Term Data RetentionCloud StorageAuxiliary Copy
SCHEDULING AN ARCHIVE JOB
CHECK FOR DELETED/MOVED STUBS
You can run a check for deleted or moved stubs on your client computer. The client computer is scanned for moved/deleted stubs during a synthetic full backup if the Check for deleted stubs option is selected in the advanced tab.
1. From the CommCell Console, navigate to Client Computers | File System | BackupsetRight-click the Subclient in the left pane and click Backup.
The OnePass agent does not support Differential backup and a selection of Differential backup will lead to job failure.
2. Click Schedule to schedule the backup job for a specific time. Click Configure to set the schedule for the backup job. The Schedule Details dialog displays.
3. Select the appropriate scheduling options. For example: Click Weekly. Check the days you want the run the archive job. Change the Start Time to 9:00 PM
Click OK to close the Schedule Details dialog Click OK to close the Backup Options dialog
The backup job will execute as per the schedule.
We recommend you to enable this option only when the stubs are moved from one location to another. Enabling this option makes synthetic full backups slower.
Administration Guide - Solaris File System iDataAgent
Page 171 of 265
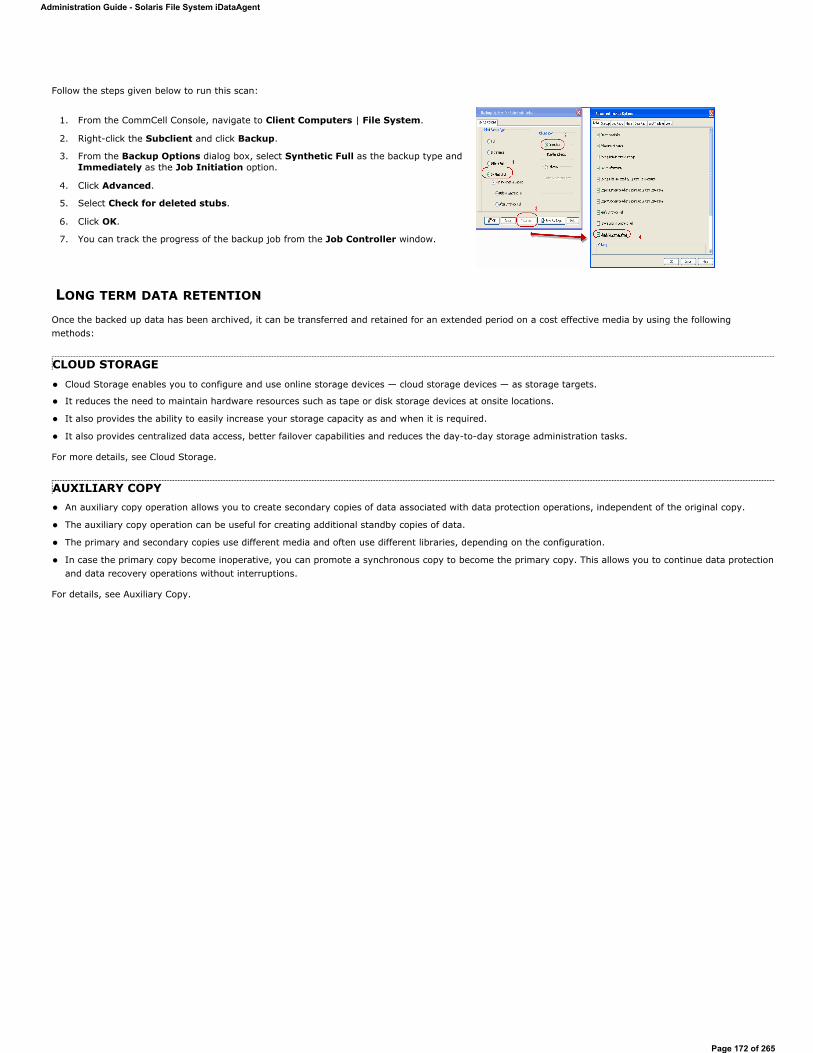
Follow the steps given below to run this scan:
LONG TERM DATA RETENTION
Once the backed up data has been archived, it can be transferred and retained for an extended period on a cost effective media by using the following methods:
CLOUD STORAGECloud Storage enables you to configure and use online storage devices — cloud storage devices — as storage targets.
It reduces the need to maintain hardware resources such as tape or disk storage devices at onsite locations.
It also provides the ability to easily increase your storage capacity as and when it is required.
It also provides centralized data access, better failover capabilities and reduces the day-to-day storage administration tasks.
For more details, see Cloud Storage.
AUXILIARY COPYAn auxiliary copy operation allows you to create secondary copies of data associated with data protection operations, independent of the original copy.
The auxiliary copy operation can be useful for creating additional standby copies of data.
The primary and secondary copies use different media and often use different libraries, depending on the configuration.
In case the primary copy become inoperative, you can promote a synchronous copy to become the primary copy. This allows you to continue data protection and data recovery operations without interruptions.
For details, see Auxiliary Copy.
1. From the CommCell Console, navigate to Client Computers | File System.
2. Right-click the Subclient and click Backup.
3. From the Backup Options dialog box, select Synthetic Full as the backup type andImmediately as the Job Initiation option.
4. Click Advanced.
5. Select Check for deleted stubs.
6. Click OK.
7. You can track the progress of the backup job from the Job Controller window.
Administration Guide - Solaris File System iDataAgent
Page 172 of 265
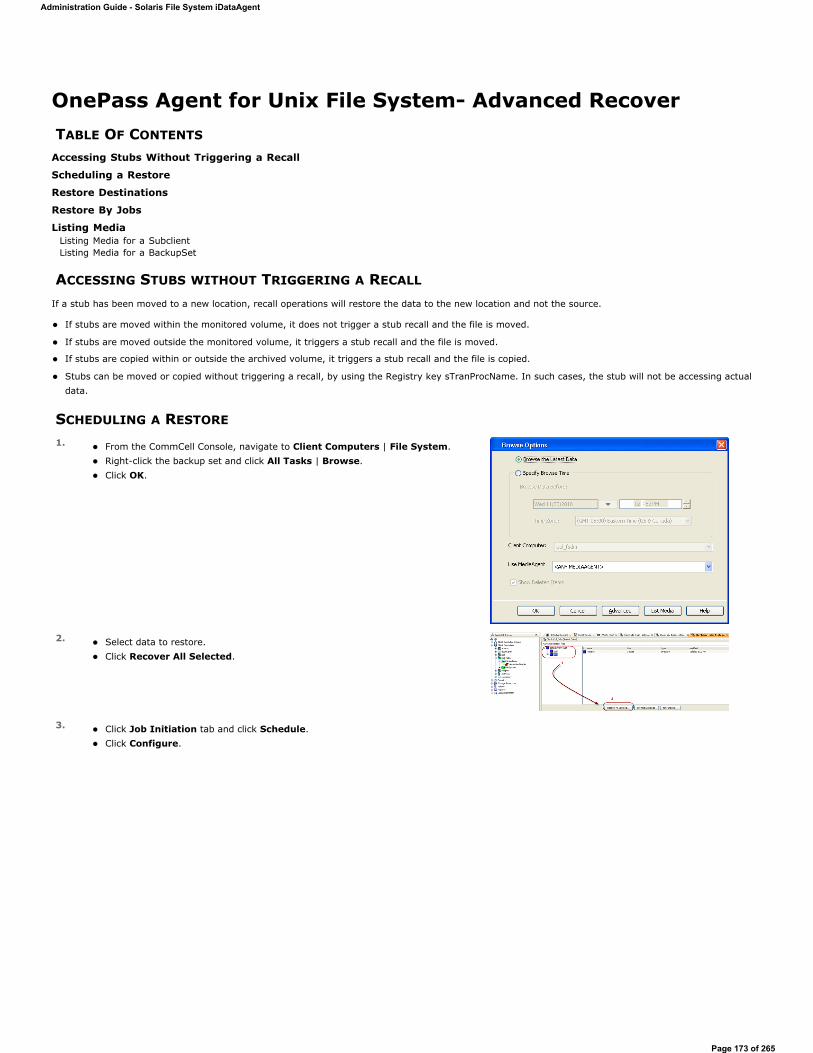
OnePass Agent for Unix File System- Advanced RecoverTABLE OF CONTENTS
Accessing Stubs Without Triggering a Recall
Scheduling a Restore
Restore Destinations
Restore By Jobs
Listing MediaListing Media for a SubclientListing Media for a BackupSet
ACCESSING STUBS WITHOUT TRIGGERING A RECALL
If a stub has been moved to a new location, recall operations will restore the data to the new location and not the source.
If stubs are moved within the monitored volume, it does not trigger a stub recall and the file is moved.
If stubs are moved outside the monitored volume, it triggers a stub recall and the file is moved.
If stubs are copied within or outside the archived volume, it triggers a stub recall and the file is copied.
Stubs can be moved or copied without triggering a recall, by using the Registry key sTranProcName. In such cases, the stub will not be accessing actual data.
SCHEDULING A RESTORE
1. From the CommCell Console, navigate to Client Computers | File System. Right-click the backup set and click All Tasks | Browse. Click OK.
2. Select data to restore. Click Recover All Selected.
3. Click Job Initiation tab and click Schedule. Click Configure.
Administration Guide - Solaris File System iDataAgent
Page 173 of 265
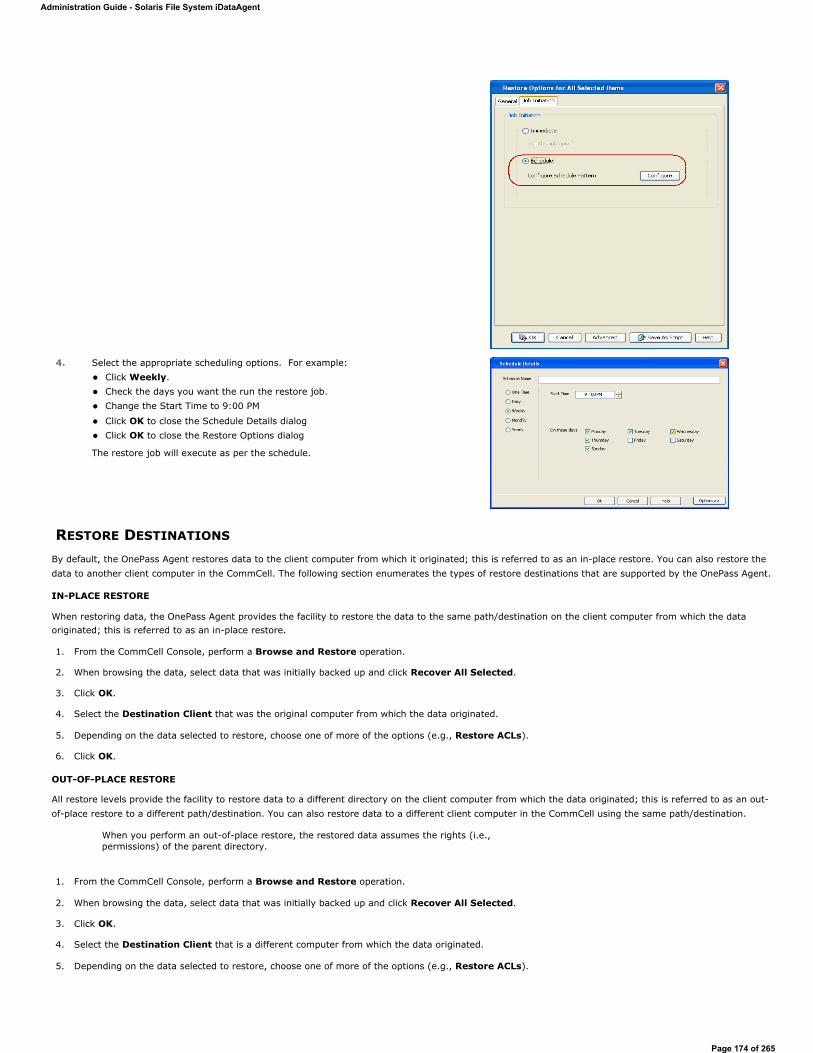
RESTORE DESTINATIONS
By default, the OnePass Agent restores data to the client computer from which it originated; this is referred to as an in-place restore. You can also restore the data to another client computer in the CommCell. The following section enumerates the types of restore destinations that are supported by the OnePass Agent.
IN-PLACE RESTORE
When restoring data, the OnePass Agent provides the facility to restore the data to the same path/destination on the client computer from which the data originated; this is referred to as an in-place restore.
1. From the CommCell Console, perform a Browse and Restore operation.
2. When browsing the data, select data that was initially backed up and click Recover All Selected.
3. Click OK.
4. Select the Destination Client that was the original computer from which the data originated.
5. Depending on the data selected to restore, choose one of more of the options (e.g., Restore ACLs).
6. Click OK.
OUT-OF-PLACE RESTORE
All restore levels provide the facility to restore data to a different directory on the client computer from which the data originated; this is referred to as an out-of-place restore to a different path/destination. You can also restore data to a different client computer in the CommCell using the same path/destination.
1. From the CommCell Console, perform a Browse and Restore operation.
2. When browsing the data, select data that was initially backed up and click Recover All Selected.
3. Click OK.
4. Select the Destination Client that is a different computer from which the data originated.
5. Depending on the data selected to restore, choose one of more of the options (e.g., Restore ACLs).
4. Select the appropriate scheduling options. For example: Click Weekly. Check the days you want the run the restore job. Change the Start Time to 9:00 PM
Click OK to close the Schedule Details dialog Click OK to close the Restore Options dialog
The restore job will execute as per the schedule.
When you perform an out-of-place restore, the restored data assumes the rights (i.e., permissions) of the parent directory.
Administration Guide - Solaris File System iDataAgent
Page 174 of 265
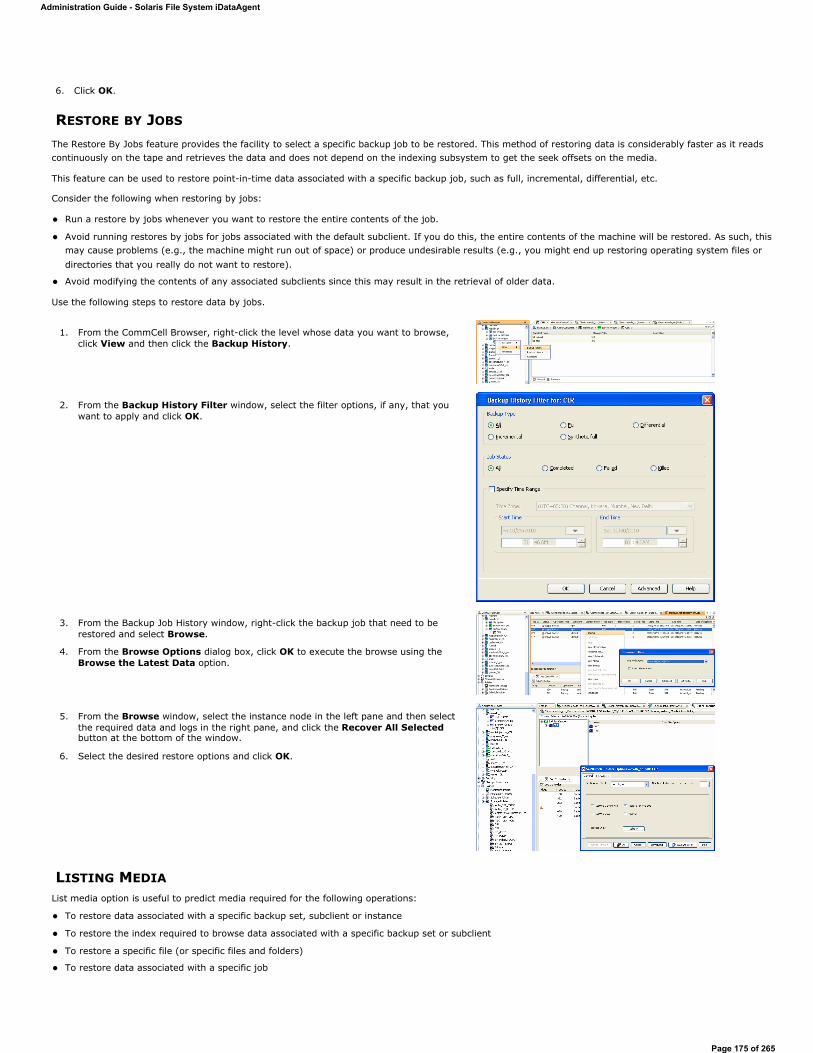
6. Click OK.
RESTORE BY JOBS
The Restore By Jobs feature provides the facility to select a specific backup job to be restored. This method of restoring data is considerably faster as it reads continuously on the tape and retrieves the data and does not depend on the indexing subsystem to get the seek offsets on the media.
This feature can be used to restore point-in-time data associated with a specific backup job, such as full, incremental, differential, etc.
Consider the following when restoring by jobs:
Run a restore by jobs whenever you want to restore the entire contents of the job.
Avoid running restores by jobs for jobs associated with the default subclient. If you do this, the entire contents of the machine will be restored. As such, this may cause problems (e.g., the machine might run out of space) or produce undesirable results (e.g., you might end up restoring operating system files or directories that you really do not want to restore).
Avoid modifying the contents of any associated subclients since this may result in the retrieval of older data.
Use the following steps to restore data by jobs.
LISTING MEDIAList media option is useful to predict media required for the following operations:
To restore data associated with a specific backup set, subclient or instance
To restore the index required to browse data associated with a specific backup set or subclient
To restore a specific file (or specific files and folders)
To restore data associated with a specific job
1. From the CommCell Browser, right-click the level whose data you want to browse, click View and then click the Backup History.
2. From the Backup History Filter window, select the filter options, if any, that you want to apply and click OK.
3. From the Backup Job History window, right-click the backup job that need to be restored and select Browse.
4. From the Browse Options dialog box, click OK to execute the browse using the Browse the Latest Data option.
5. From the Browse window, select the instance node in the left pane and then select the required data and logs in the right pane, and click the Recover All Selected button at the bottom of the window.
6. Select the desired restore options and click OK.
Administration Guide - Solaris File System iDataAgent
Page 175 of 265
The list media operation can be performed for instances, backup sets, and subclients. The following sections describe each of these methods.
The List Media feature can also be used in a number of other capacities. Refer to the List Media documentation for a complete overview of this feature.
LISTING MEDIA FOR A SUBCLIENT
1. From the CommCell Browser, right-click the subclient for which you wish to list media and then click List Media.
2. From the List Media dialog box choose one of the following options:
Click Media For the Latest Data to list media associated with the most recent data protection cycle.
Click Specify Time Range to list media associated with data protection operations up to the specified date and time range.
Use the Data Before box to specify the end date and time.
Click Advanced and then click Exclude Data Before to list media associated with data protection operations after the specified date and time.
Note that you can use the Specify Browse Time and Exclude Data Before options to list media between a specified date and time range.
3. Click OK.
The appropriate media is listed in the Media dialog box.
LISTING MEDIA FOR A BACKUP SET
1. From the CommCell Browser, right-click the backup set for which you wish to list media, click All Tasks and then click Browse.
2. From the Browse Options dialog box, if required, select the following options:
Click Browse the Latest Data to list media associated with the most recent data protection cycle.
Click Specify Browse Time to list media associated with data protection operations up to the specified date and time range.
Use the Browse Data Before box to specify the end date and time.
Click Advanced and then click Exclude Data Before and then select the date and time from which you wish to list media associated with data protection operations.
Note that you can use the Specify Browse Time and Exclude Data Before options to list media between a specified date and time range.
3. Click List Media.
4. From the List Media dialog box, click List Media for restore within specified time range and click OK.
The appropriate media is listed in the Media dialog box.
Administration Guide - Solaris File System iDataAgent
Page 176 of 265
Troubleshooting - OnePass Agent for Unix File SystemThe following section provides information on some of the troubleshooting scenarios
BACKUP OF SUBCLIENTS USING ONEPASS AGENT WILL FAIL IF THE STORAGE POLICY IT WAS USINGBEFORE RUNNING A NEW SYNTHETIC FULL BACKUP IS DELETED.
By default the OnePass Agent uses a synthetic full forever incremental design. If you want to change the storage policy being used, you should re-assign the policy, run a new synthetic full (this will get the data from the older policy). The older storage policy should only be deleted after running the new synthetic full.
If the older storage policy is accidentally deleted before running a synthetic full backup, follow the steps given below to allow for new backups to run:
1. Create a new backup set.
2. Configure subclient with the same content path as that of the old subclient.
3. Associate the new subclient to the new storage policy.
4. Run a backup.
INCREMENTAL BACKUPS GOING TO A PENDING STATE WITH THE "NO ARCHIVE DATA" ERRORMESSAGE
This message will be displayed if the full backup associated with the subclient is deleted.
It is recommended to create a new subclient, assign the same content and run full and incremental backups.
SYNTHETIC FULL BACKUPS FAILING WITH "NO INCREMENTAL JOB RAN" ERROR MESSAGE
This message will be displayed if you run a synthetic full backup after deleting the most recent synthetic full with no 'new' incremental backups in-between.
Re-run the synthetic full backup and the error will message will not be displayed again.
The first backup will be full, but all subsequent backups will be incremental.
Administration Guide - Solaris File System iDataAgent
Page 177 of 265
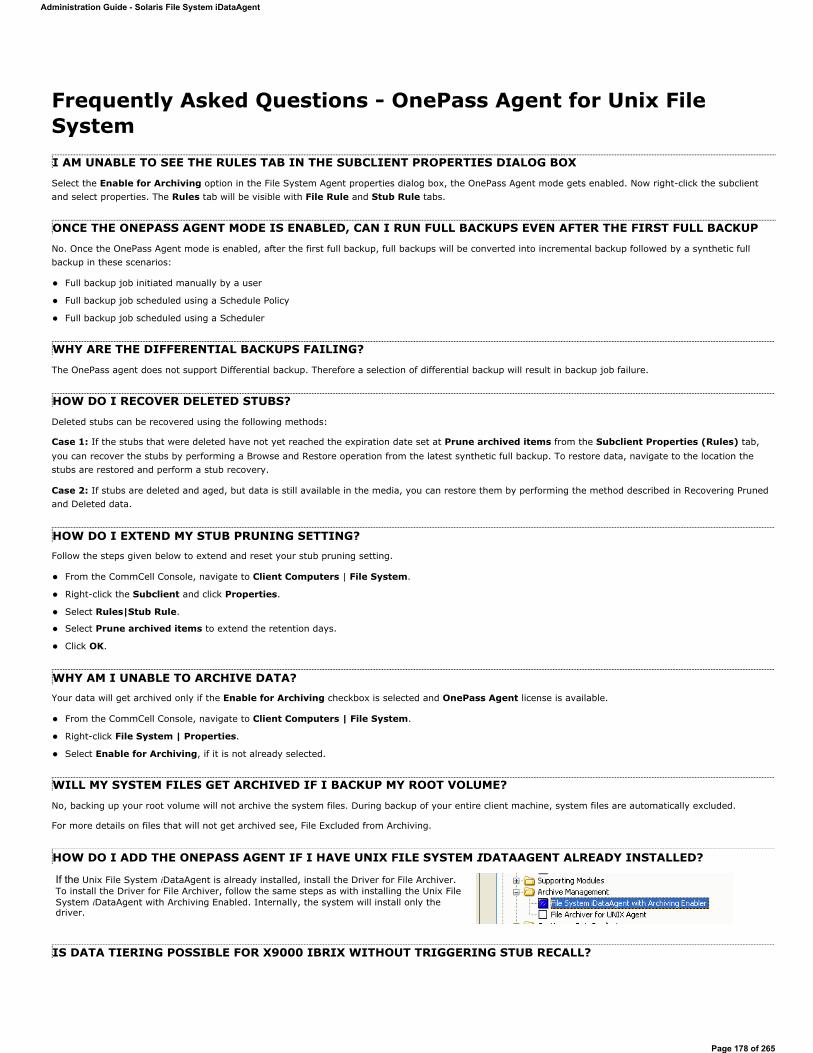
Frequently Asked Questions - OnePass Agent for Unix File SystemI AM UNABLE TO SEE THE RULES TAB IN THE SUBCLIENT PROPERTIES DIALOG BOX
Select the Enable for Archiving option in the File System Agent properties dialog box, the OnePass Agent mode gets enabled. Now right-click the subclient and select properties. The Rules tab will be visible with File Rule and Stub Rule tabs.
ONCE THE ONEPASS AGENT MODE IS ENABLED, CAN I RUN FULL BACKUPS EVEN AFTER THE FIRST FULL BACKUP
No. Once the OnePass Agent mode is enabled, after the first full backup, full backups will be converted into incremental backup followed by a synthetic full backup in these scenarios:
Full backup job initiated manually by a user
Full backup job scheduled using a Schedule Policy
Full backup job scheduled using a Scheduler
WHY ARE THE DIFFERENTIAL BACKUPS FAILING?
The OnePass agent does not support Differential backup. Therefore a selection of differential backup will result in backup job failure.
HOW DO I RECOVER DELETED STUBS?
Deleted stubs can be recovered using the following methods:
Case 1: If the stubs that were deleted have not yet reached the expiration date set at Prune archived items from the Subclient Properties (Rules) tab, you can recover the stubs by performing a Browse and Restore operation from the latest synthetic full backup. To restore data, navigate to the location the stubs are restored and perform a stub recovery.
Case 2: If stubs are deleted and aged, but data is still available in the media, you can restore them by performing the method described in Recovering Pruned and Deleted data.
HOW DO I EXTEND MY STUB PRUNING SETTING?Follow the steps given below to extend and reset your stub pruning setting.
From the CommCell Console, navigate to Client Computers | File System.
Right-click the Subclient and click Properties.
Select Rules|Stub Rule.
Select Prune archived items to extend the retention days.
Click OK.
WHY AM I UNABLE TO ARCHIVE DATA?Your data will get archived only if the Enable for Archiving checkbox is selected and OnePass Agent license is available.
From the CommCell Console, navigate to Client Computers | File System.
Right-click File System | Properties.
Select Enable for Archiving, if it is not already selected.
WILL MY SYSTEM FILES GET ARCHIVED IF I BACKUP MY ROOT VOLUME?
No, backing up your root volume will not archive the system files. During backup of your entire client machine, system files are automatically excluded.
For more details on files that will not get archived see, File Excluded from Archiving.
HOW DO I ADD THE ONEPASS AGENT IF I HAVE UNIX FILE SYSTEM IDATAAGENT ALREADY INSTALLED?
IS DATA TIERING POSSIBLE FOR X9000 IBRIX WITHOUT TRIGGERING STUB RECALL?
If the Unix File System iDataAgent is already installed, install the Driver for File Archiver. To install the Driver for File Archiver, follow the same steps as with installing the Unix File System iDataAgent with Archiving Enabled. Internally, the system will install only the driver.
Administration Guide - Solaris File System iDataAgent
Page 178 of 265

For X9000 IBRIX, data tiering process allows seamless movement of data from one storage tier to another depending upon its relevance, usage and other pre-determined parameters. In case there are data archiver stubs available in any storage tier, the data tiering process triggers a stub recall.
In order to successfully process data tiering, it is recommended to configure sTranProcName key on the computer that has the archiver agent installed. For details, see Configuring Archiving for X9000 IBRIX.
WHY ARE THE RECALLS SLOW?The recall process may become slow when old data is not aged off. Therefore it is recommended to schedule Synthetic Full backups at regular intervals so that the archived items are aged off based on their retention criteria.
Administration Guide - Solaris File System iDataAgent
Page 179 of 265
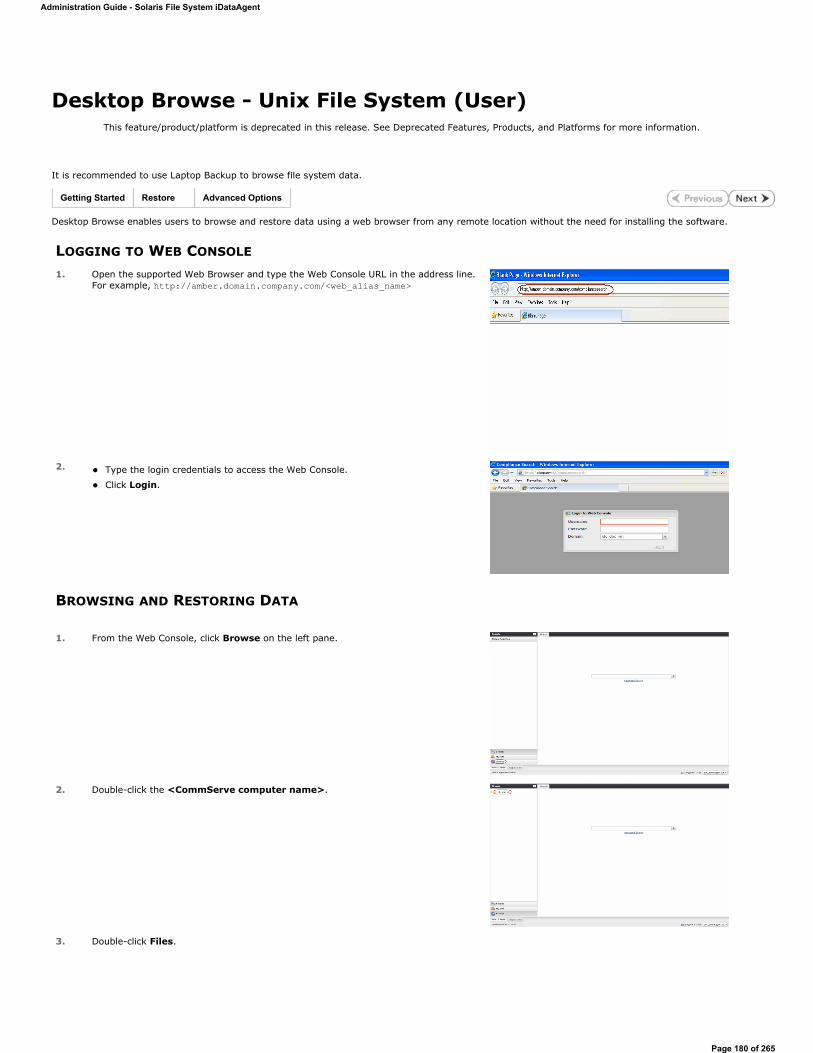
Desktop Browse - Unix File System (User)
It is recommended to use Laptop Backup to browse file system data.
Desktop Browse enables users to browse and restore data using a web browser from any remote location without the need for installing the software.
LOGGING TO WEB CONSOLE
BROWSING AND RESTORING DATA
This feature/product/platform is deprecated in this release. See Deprecated Features, Products, and Platforms for more information.
Getting Started Restore Advanced Options
1. Open the supported Web Browser and type the Web Console URL in the address line. For example, http://amber.domain.company.com/<web_alias_name>
2. Type the login credentials to access the Web Console.
Click Login.
1. From the Web Console, click Browse on the left pane.
2. Double-click the <CommServe computer name>.
3. Double-click Files.
Administration Guide - Solaris File System iDataAgent
Page 180 of 265
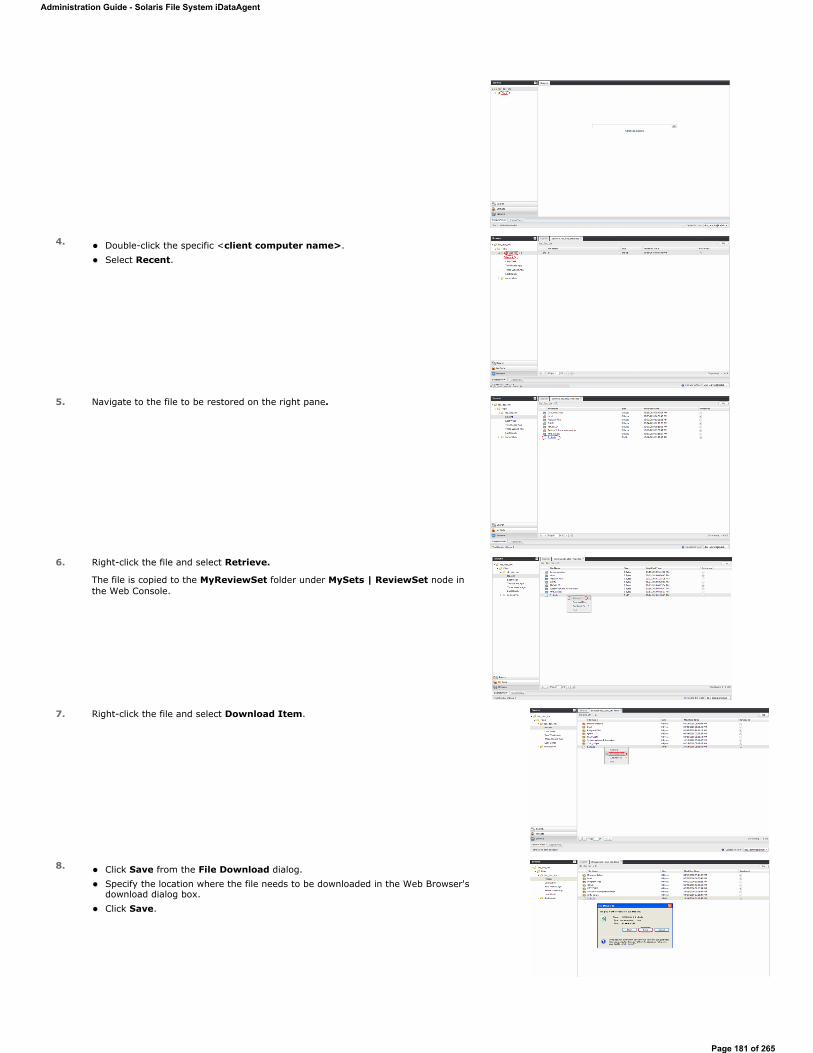
4. Double-click the specific <client computer name>. Select Recent.
5. Navigate to the file to be restored on the right pane.
6. Right-click the file and select Retrieve.
The file is copied to the MyReviewSet folder under MySets | ReviewSet node in the Web Console.
7. Right-click the file and select Download Item.
8. Click Save from the File Download dialog. Specify the location where the file needs to be downloaded in the Web Browser's download dialog box. Click Save.
Administration Guide - Solaris File System iDataAgent
Page 181 of 265

Administration Guide - Solaris File System iDataAgent
Page 182 of 265
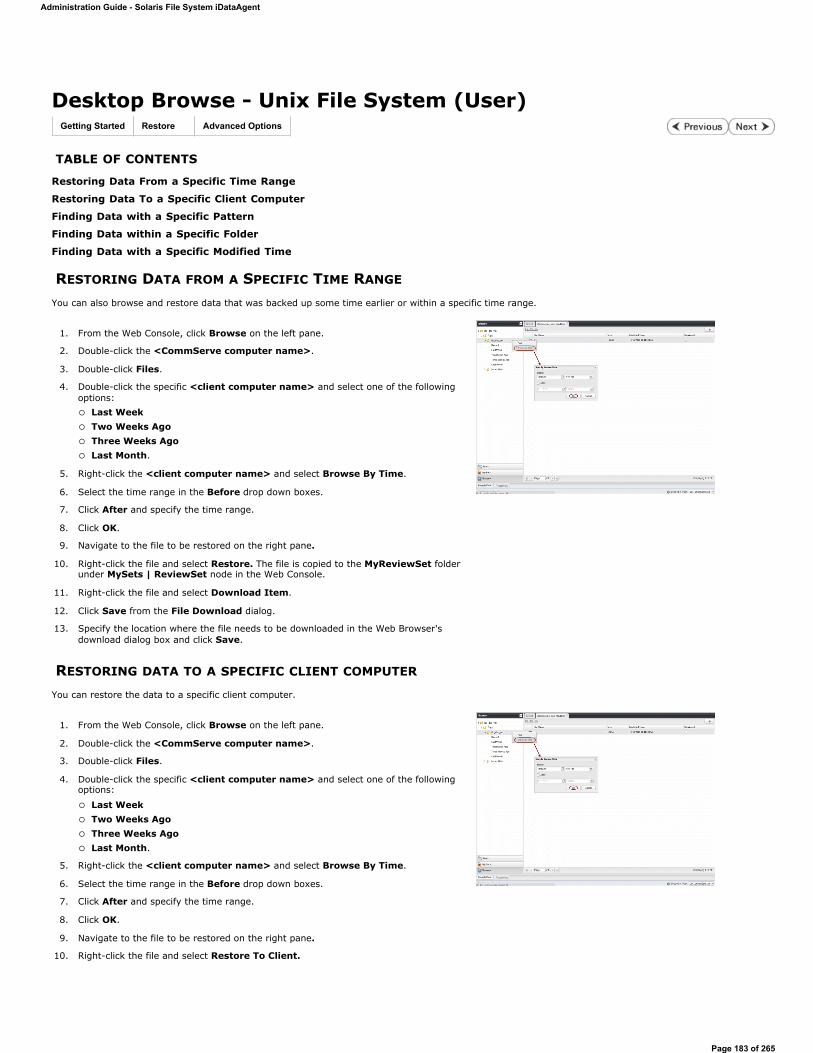
Desktop Browse - Unix File System (User)
TABLE OF CONTENTS
Restoring Data From a Specific Time Range
Restoring Data To a Specific Client Computer
Finding Data with a Specific Pattern
Finding Data within a Specific Folder
Finding Data with a Specific Modified Time
RESTORING DATA FROM A SPECIFIC TIME RANGE
You can also browse and restore data that was backed up some time earlier or within a specific time range.
RESTORING DATA TO A SPECIFIC CLIENT COMPUTER
You can restore the data to a specific client computer.
Getting Started Restore Advanced Options
1. From the Web Console, click Browse on the left pane.
2. Double-click the <CommServe computer name>.
3. Double-click Files.
4. Double-click the specific <client computer name> and select one of the following options:
Last WeekTwo Weeks AgoThree Weeks AgoLast Month.
5. Right-click the <client computer name> and select Browse By Time.
6. Select the time range in the Before drop down boxes.
7. Click After and specify the time range.
8. Click OK.
9. Navigate to the file to be restored on the right pane.
10. Right-click the file and select Restore. The file is copied to the MyReviewSet folder under MySets | ReviewSet node in the Web Console.
11. Right-click the file and select Download Item.
12. Click Save from the File Download dialog.
13. Specify the location where the file needs to be downloaded in the Web Browser's download dialog box and click Save.
1. From the Web Console, click Browse on the left pane.
2. Double-click the <CommServe computer name>.
3. Double-click Files.
4. Double-click the specific <client computer name> and select one of the following options:
Last WeekTwo Weeks AgoThree Weeks AgoLast Month.
5. Right-click the <client computer name> and select Browse By Time.
6. Select the time range in the Before drop down boxes.
7. Click After and specify the time range.
8. Click OK.
9. Navigate to the file to be restored on the right pane.
10. Right-click the file and select Restore To Client.
Administration Guide - Solaris File System iDataAgent
Page 183 of 265
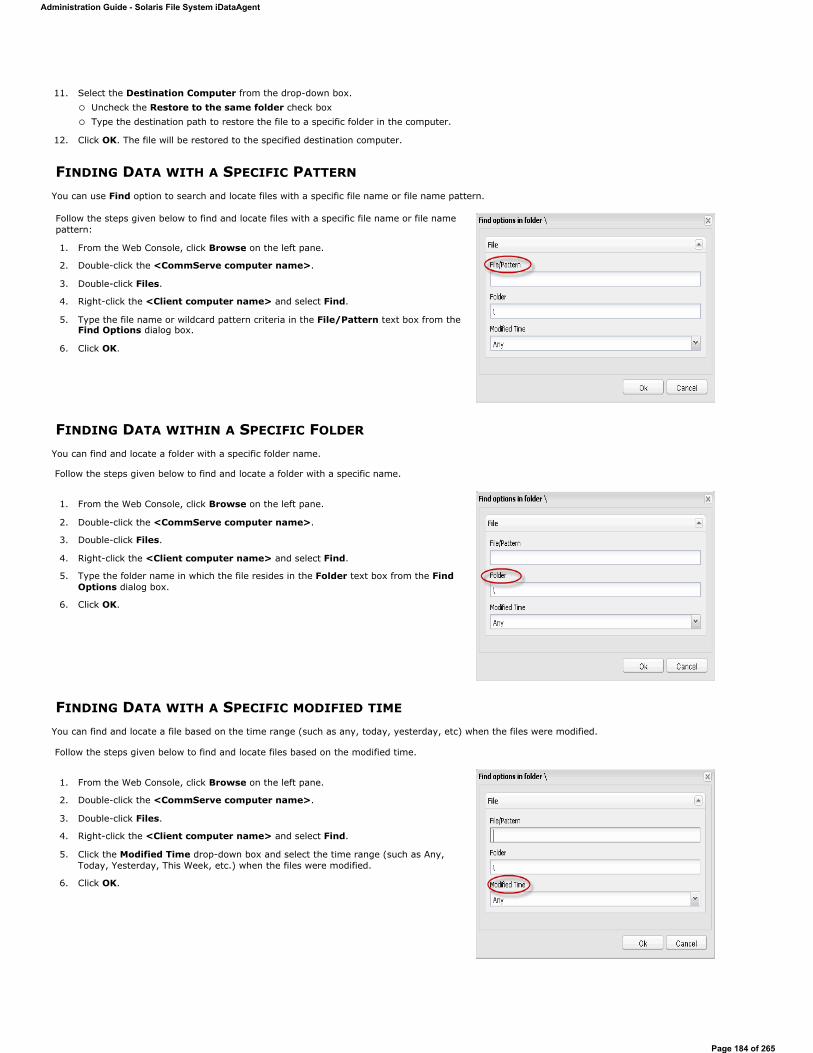
FINDING DATA WITH A SPECIFIC PATTERN
You can use Find option to search and locate files with a specific file name or file name pattern.
FINDING DATA WITHIN A SPECIFIC FOLDER
You can find and locate a folder with a specific folder name.
Follow the steps given below to find and locate a folder with a specific name.
FINDING DATA WITH A SPECIFIC MODIFIED TIME
You can find and locate a file based on the time range (such as any, today, yesterday, etc) when the files were modified.
Follow the steps given below to find and locate files based on the modified time.
11. Select the Destination Computer from the drop-down box. Uncheck the Restore to the same folder check box Type the destination path to restore the file to a specific folder in the computer.
12. Click OK. The file will be restored to the specified destination computer.
Follow the steps given below to find and locate files with a specific file name or file name pattern:
1. From the Web Console, click Browse on the left pane.
2. Double-click the <CommServe computer name>.
3. Double-click Files.
4. Right-click the <Client computer name> and select Find.
5. Type the file name or wildcard pattern criteria in the File/Pattern text box from the Find Options dialog box.
6. Click OK.
1. From the Web Console, click Browse on the left pane.
2. Double-click the <CommServe computer name>.
3. Double-click Files.
4. Right-click the <Client computer name> and select Find.
5. Type the folder name in which the file resides in the Folder text box from the Find Options dialog box.
6. Click OK.
1. From the Web Console, click Browse on the left pane.
2. Double-click the <CommServe computer name>.
3. Double-click Files.
4. Right-click the <Client computer name> and select Find.
5. Click the Modified Time drop-down box and select the time range (such as Any, Today, Yesterday, This Week, etc.) when the files were modified.
6. Click OK.
Administration Guide - Solaris File System iDataAgent
Page 184 of 265

Administration Guide - Solaris File System iDataAgent
Page 185 of 265
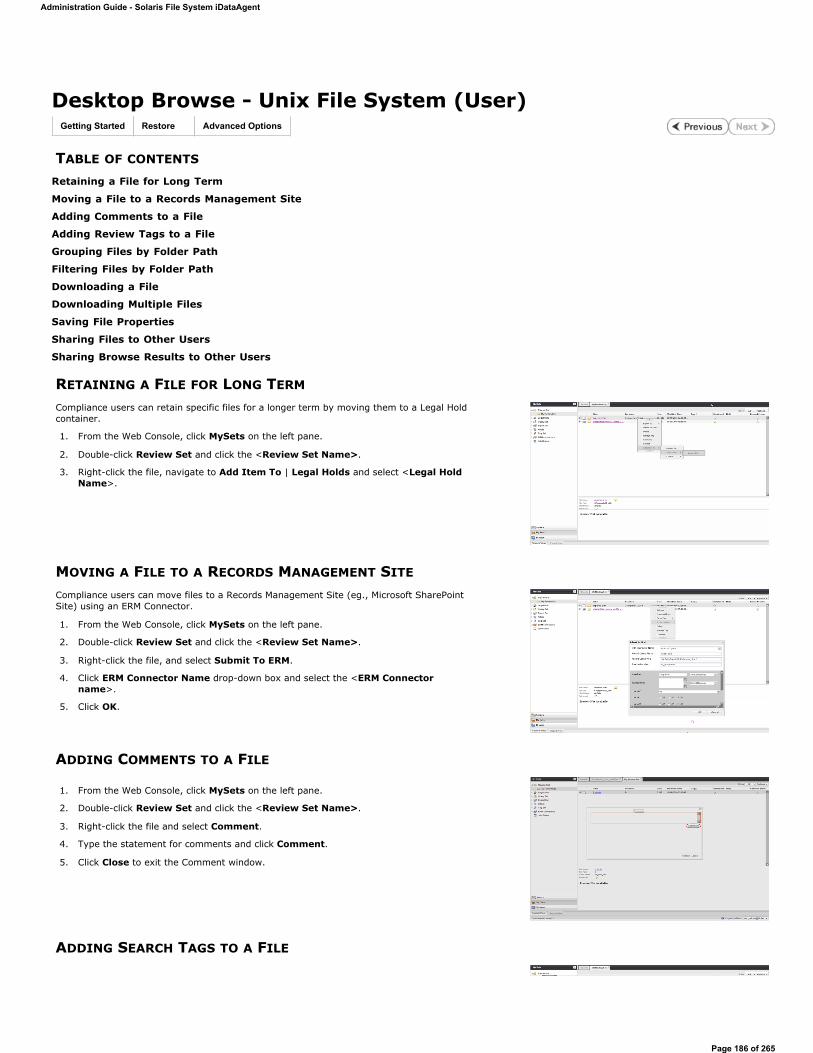
Desktop Browse - Unix File System (User)
TABLE OF CONTENTS
Retaining a File for Long Term
Moving a File to a Records Management Site
Adding Comments to a File
Adding Review Tags to a File
Grouping Files by Folder Path
Filtering Files by Folder Path
Downloading a File
Downloading Multiple Files
Saving File Properties
Sharing Files to Other Users
Sharing Browse Results to Other Users
RETAINING A FILE FOR LONG TERM
MOVING A FILE TO A RECORDS MANAGEMENT SITE
ADDING COMMENTS TO A FILE
ADDING SEARCH TAGS TO A FILE
Getting Started Restore Advanced Options
Compliance users can retain specific files for a longer term by moving them to a Legal Hold container.
1. From the Web Console, click MySets on the left pane.
2. Double-click Review Set and click the <Review Set Name>.
3. Right-click the file, navigate to Add Item To | Legal Holds and select <Legal Hold Name>.
Compliance users can move files to a Records Management Site (eg., Microsoft SharePoint Site) using an ERM Connector.
1. From the Web Console, click MySets on the left pane.
2. Double-click Review Set and click the <Review Set Name>.
3. Right-click the file, and select Submit To ERM.
4. Click ERM Connector Name drop-down box and select the <ERM Connector name>.
5. Click OK.
1. From the Web Console, click MySets on the left pane.
2. Double-click Review Set and click the <Review Set Name>.
3. Right-click the file and select Comment.
4. Type the statement for comments and click Comment.
5. Click Close to exit the Comment window.
Administration Guide - Solaris File System iDataAgent
Page 186 of 265
GROUPING FILES BY FOLDER PATH
FILTERING FILES BY FOLDER PATH
DOWNLOADING A FILE
DOWNLOADING MULTIPLE FILES
Compliance users can apply review tags to a file to facilitate easy search based on tags at a later point of time.
1. From the Web Console, click MySets on the left pane.
2. Double-click Review Set and click the <Review Set Name>.
3. Right-click the file and select Manage Tags.
4. On the Manage Tag(s) window, select the tag to apply.
5. Click Apply Tags.
1. From the Web Browser, click My Sets on the left pane.
2. Double-click Review Set, and then click the desired <Review Set name>/<Legal Hold Set Name>.
3. On the Group By menu, click Folder Path.
1. From the Web Browser, click My Sets on the left pane.
2. Double-click Review Set, and then click the desired <Review Set Name>/<Legal Hold Set Name>
3. On the Filter menu, click Folder Path.
4. On the right pane, select the folder path.
5. Click Apply.
You can click the Clear button on the right pane to clear all the selected folder paths. To clear a specific selected folder path, click the cross-mark symbol corresponding to the selected folder path on the right pane.
1. From the Web Console, click MySets on the left pane.
2. Double-click Review Set and click the <Review Set Name>.
3. Right-click the file and select Download Item.
4. Specify the location where the file needs to be downloaded in the Web Browser's download dialog box.
In order to download multiple files, you can export the selected files/folder to a compressed file format (CAB format) and then download the CAB file to your computer.
1. From the Web Console, click MySets on the left pane.
2. Double-click Review Set and click the <Review Set Name>.
3. Right-click the file and select Export To | CAB.
4. Specify the Download Name.
5. Select the Select Export Set.
6. Click OK. The selected file(s) are moved to the selected Export Set with the given name.
7. Click MySets | Export Set.
8. Click the Export Set which contains the CAB file.
9. Right-click the CAB file and select Download.
10. Click Save from the File Download dialog box.
Administration Guide - Solaris File System iDataAgent
Page 187 of 265
SAVING FILE PROPERTIES
SHARING FILES TO OTHER USERS
SHARING BROWSE RESULTS TO OTHER USERSWhen browsing data, you can share the browse results with other users.
1. From the Web Console, click Browse.
2. Navigate to the client computer to be browsed.
3. Copy the URL of the browse result page from the browser's address bar and email to other users.
When the recipient users open the URL, they can directly view the browse result page as soon as they login to the Web Console.
11. Navigate to the location where you want to download the file.
12. Click OK.
You can save the properties of all the files in a reviewset as an XML file to you local computer.
1. From the Web Console, click MySets on the left pane.
2. Double-click Review Set.
3. Right-click the <Review Set Name> and select Save to XML.
4. Click Save from the File Download dialog.
5. Navigate to the location where you want to save the file.
6. Click OK.
You can share and assign access permissions to all the files in your Review Set folder to selected users.
1. From the Web Console, click MySets on the left pane.
2. Double-click Review Set and click the <Review Set Name>.
3. Right-click the review set and select Shares.
4. Click Add.
5. Select the user/user groups from the Select User or Group window.
6. Click OK.
7. Select Allow check box to assign the respective privileges.
8. Click OK.
Administration Guide - Solaris File System iDataAgent
Page 188 of 265

Desktop Browse - Unix File System (Administrator)
It is recommended to use Laptop Backup to browse file system data.
Desktop Browse enables users to browse data from an user-friendly Web interface from any remote location. To enable Desktop Browse operations, you need to first install the Web Search Server and the Web Search Client. The Web Search Server and Web Search Client can be installed on the same computer or on different computers.
Ensure you have the following before performing the install:
Software version or higher.
INSTALLING THE WEB SEARCH SERVER AND WEB SEARCH CLIENT
This feature/product/platform is deprecated in this release. See Deprecated Features, Products, and Platforms for more information.
Install Setup
1. Ensure that the IIS is installed on the CommServe computer before installing the Web Search Server and Web Search Client.
2. Run Setup.exe from Software Installation Discs on the CommServe computer.
3. Select the required language.
Click Next.
4. Select the option to install software on this computer.
NOTES
The options that appear on this screen depend on the computer in which the software is being installed.
5. Click Next.
6. Click OK.
Administration Guide - Solaris File System iDataAgent
Page 189 of 265
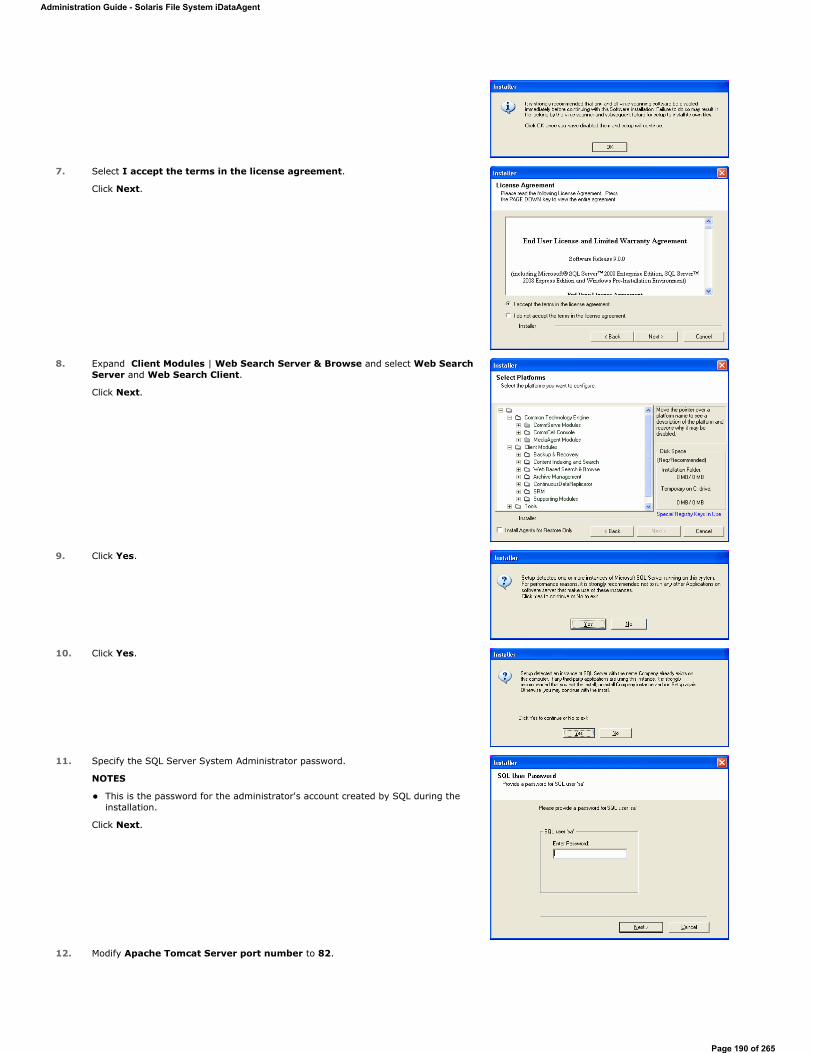
7. Select I accept the terms in the license agreement.
Click Next.
8. Expand Client Modules | Web Search Server & Browse and select Web Search Server and Web Search Client.
Click Next.
9. Click Yes.
10. Click Yes.
11. Specify the SQL Server System Administrator password.
NOTES
This is the password for the administrator's account created by SQL during the installation.
Click Next.
12. Modify Apache Tomcat Server port number to 82.
Administration Guide - Solaris File System iDataAgent
Page 190 of 265
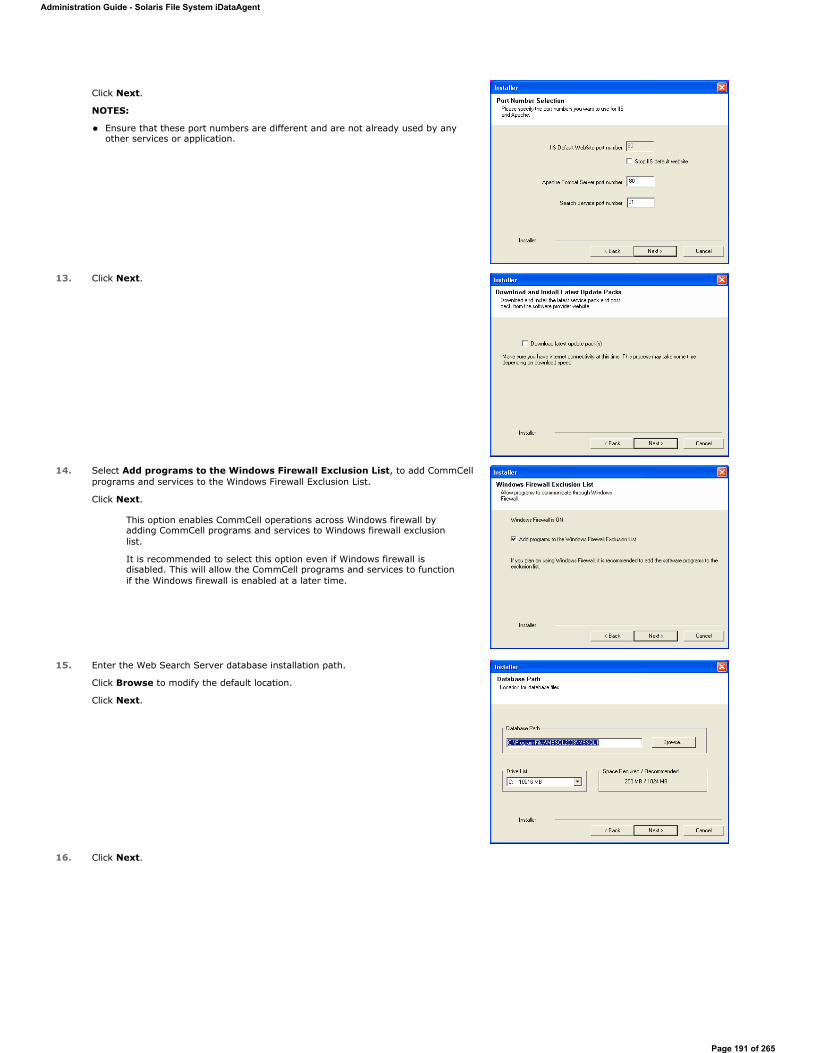
Click Next.
NOTES:
Ensure that these port numbers are different and are not already used by any other services or application.
13. Click Next.
14. Select Add programs to the Windows Firewall Exclusion List, to add CommCell programs and services to the Windows Firewall Exclusion List.
Click Next.
This option enables CommCell operations across Windows firewall by adding CommCell programs and services to Windows firewall exclusion list.
It is recommended to select this option even if Windows firewall is disabled. This will allow the CommCell programs and services to function if the Windows firewall is enabled at a later time.
15. Enter the Web Search Server database installation path.
Click Browse to modify the default location.
Click Next.
16. Click Next.
Administration Guide - Solaris File System iDataAgent
Page 191 of 265

17. Click Yes.
18. Click OK.
19. Click Next.
20. Click Next.
21. Click Reboot to finish the installation.
Administration Guide - Solaris File System iDataAgent
Page 192 of 265
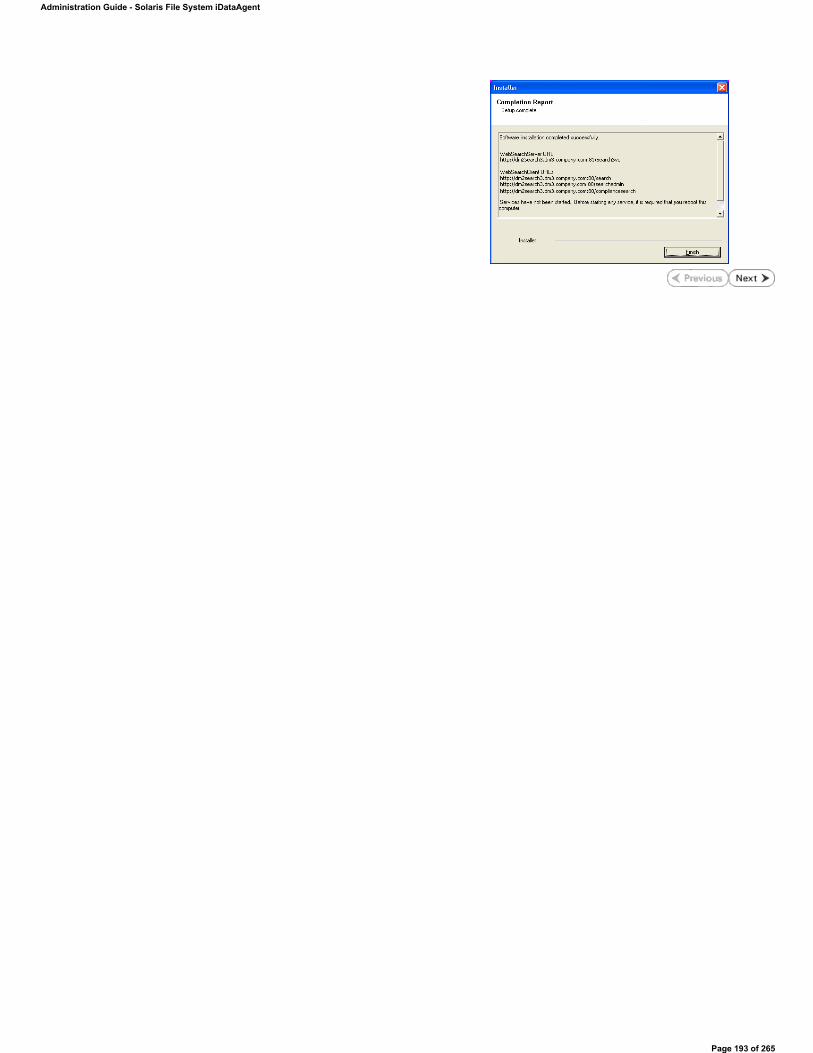
Administration Guide - Solaris File System iDataAgent
Page 193 of 265
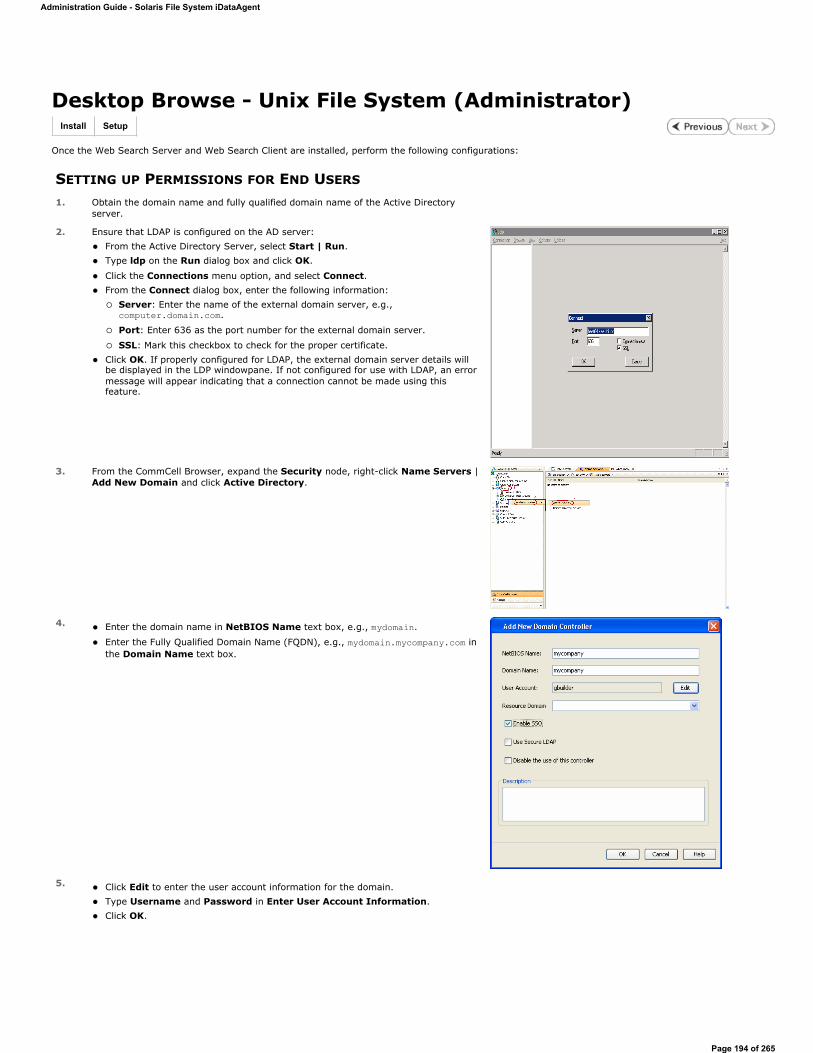
Desktop Browse - Unix File System (Administrator)
Once the Web Search Server and Web Search Client are installed, perform the following configurations:
SETTING UP PERMISSIONS FOR END USERS
Install Setup
1. Obtain the domain name and fully qualified domain name of the Active Directory server.
2. Ensure that LDAP is configured on the AD server: From the Active Directory Server, select Start | Run. Type ldp on the Run dialog box and click OK.
Click the Connections menu option, and select Connect. From the Connect dialog box, enter the following information:
Server: Enter the name of the external domain server, e.g., computer.domain.com.
Port: Enter 636 as the port number for the external domain server.
SSL: Mark this checkbox to check for the proper certificate. Click OK. If properly configured for LDAP, the external domain server details will be displayed in the LDP windowpane. If not configured for use with LDAP, an error message will appear indicating that a connection cannot be made using this feature.
3. From the CommCell Browser, expand the Security node, right-click Name Servers |Add New Domain and click Active Directory.
4. Enter the domain name in NetBIOS Name text box, e.g., mydomain.
Enter the Fully Qualified Domain Name (FQDN), e.g., mydomain.mycompany.com in the Domain Name text box.
5. Click Edit to enter the user account information for the domain. Type Username and Password in Enter User Account Information. Click OK.
Administration Guide - Solaris File System iDataAgent
Page 194 of 265

6. Select Use Secure LDAP to enable the secure Lightweight Directory Access Protocol (LDAP) with the external domain. Click OK.
7. Once you have registered the Domain Controller, restart the IIS services on the Web Search Server.
From your CommServe computer, click the Start button on the Windows task bar and then click Administrative Tools. Click Services. In the Services window, select and right-click IIS Admin Service and click Restart. Restart Other Services dialog will be displayed, click Yes.
8. From the CommCell Browser, expand the Security node, right-click CommCell User Groups and select New User Group.
9. Type the user group name in Name text box.
Type a description on the user group in Description box. Click Capabilities tab.
Administration Guide - Solaris File System iDataAgent
Page 195 of 265
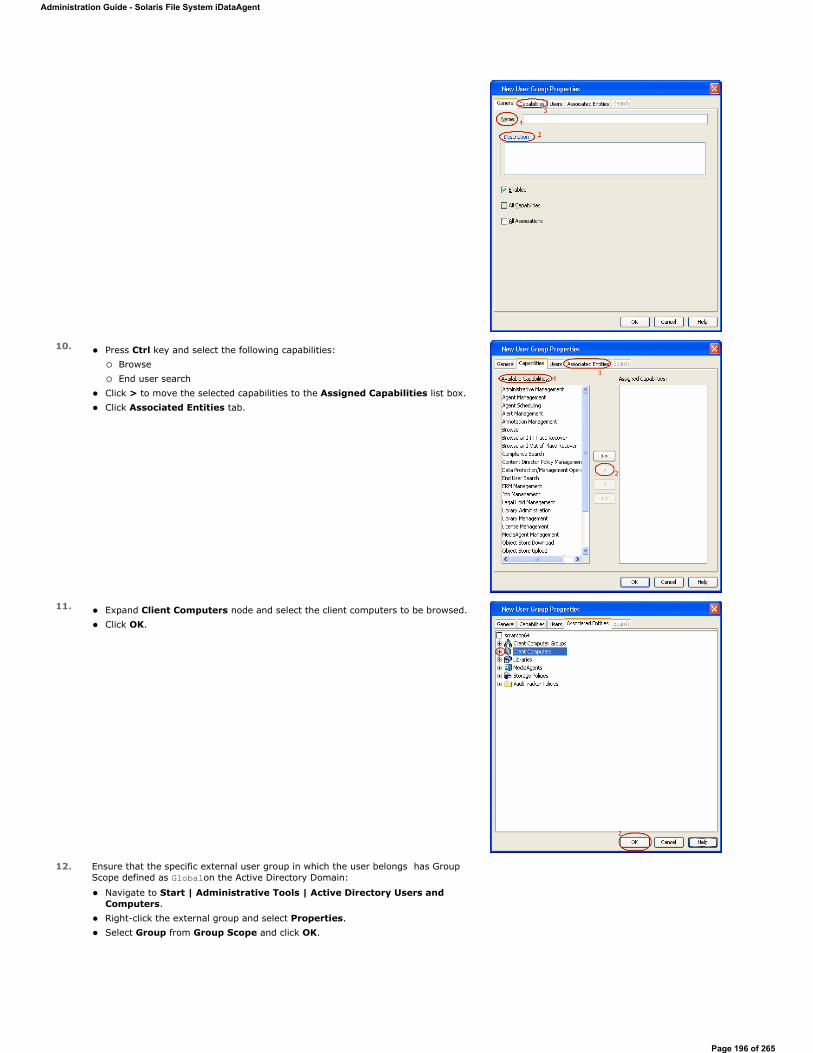
10. Press Ctrl key and select the following capabilities: Browse End user search
Click > to move the selected capabilities to the Assigned Capabilities list box. Click Associated Entities tab.
11. Expand Client Computers node and select the client computers to be browsed. Click OK.
12. Ensure that the specific external user group in which the user belongs has Group Scope defined as Globalon the Active Directory Domain:
Navigate to Start | Administrative Tools | Active Directory Users and Computers. Right-click the external group and select Properties. Select Group from Group Scope and click OK.
Administration Guide - Solaris File System iDataAgent
Page 196 of 265
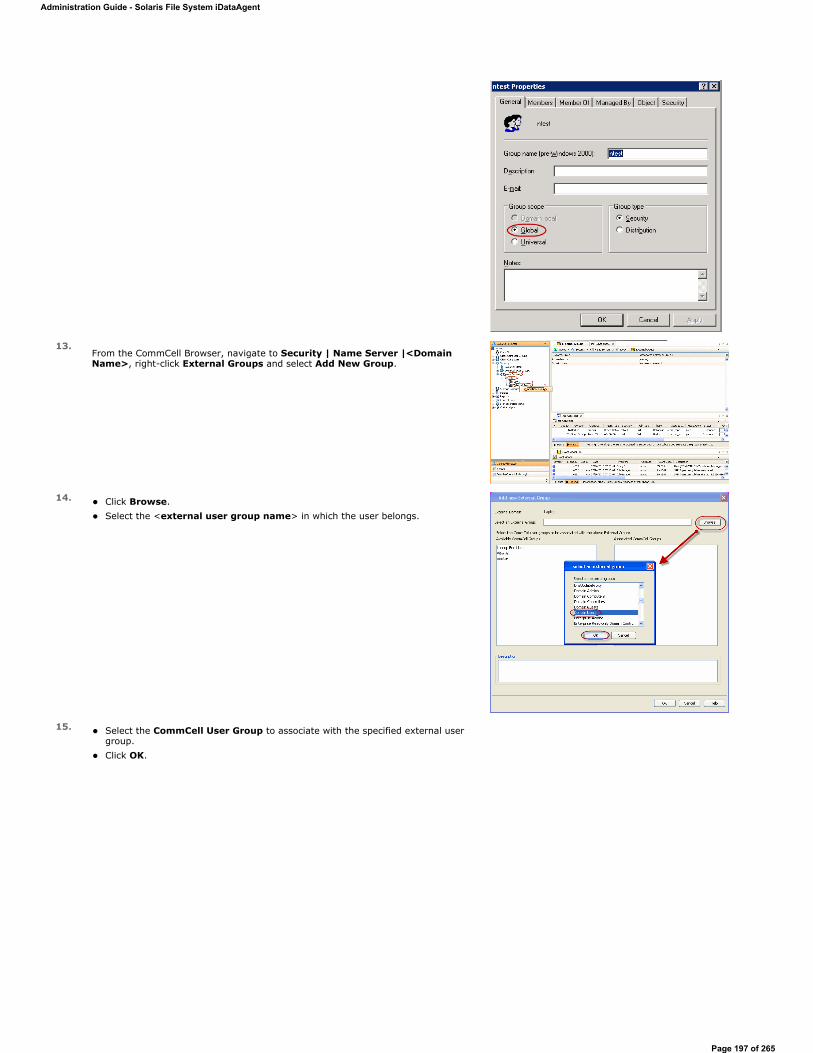
13.From the CommCell Browser, navigate to Security | Name Server |<Domain Name>, right-click External Groups and select Add New Group.
14. Click Browse. Select the <external user group name> in which the user belongs.
15. Select the CommCell User Group to associate with the specified external user group. Click OK.
Administration Guide - Solaris File System iDataAgent
Page 197 of 265
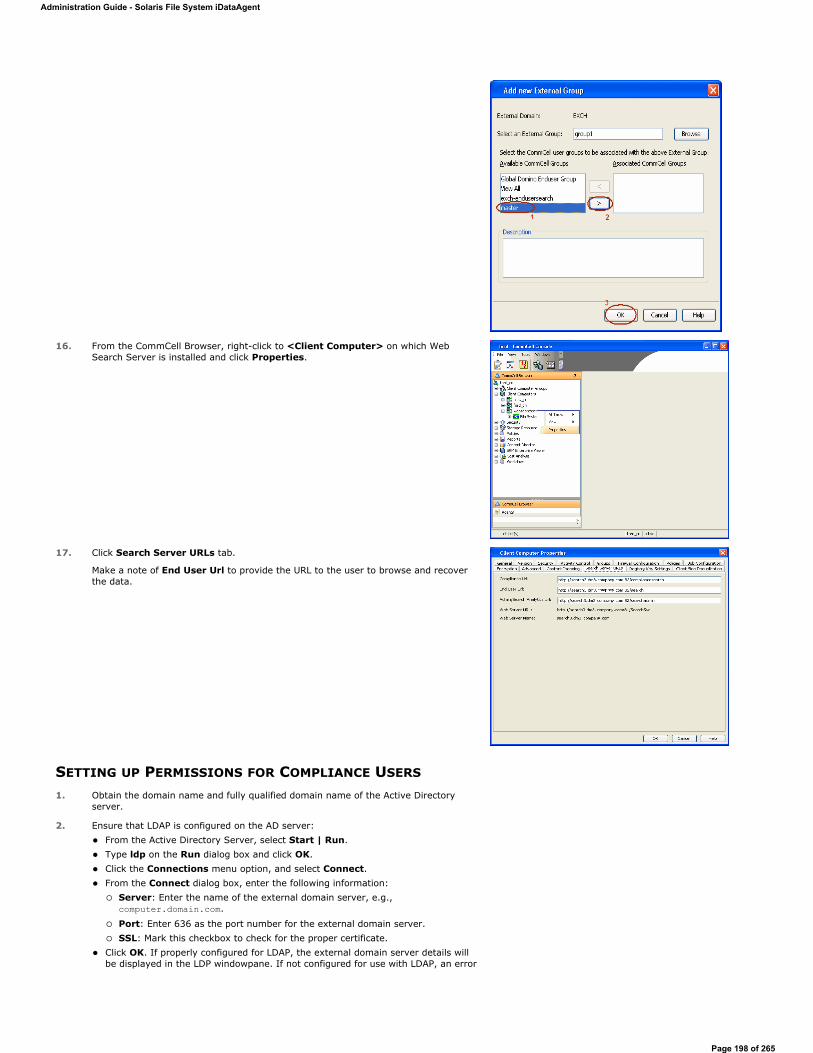
SETTING UP PERMISSIONS FOR COMPLIANCE USERS
16. From the CommCell Browser, right-click to <Client Computer> on which Web Search Server is installed and click Properties.
17. Click Search Server URLs tab.
Make a note of End User Url to provide the URL to the user to browse and recover the data.
1. Obtain the domain name and fully qualified domain name of the Active Directory server.
2. Ensure that LDAP is configured on the AD server: From the Active Directory Server, select Start | Run. Type ldp on the Run dialog box and click OK. Click the Connections menu option, and select Connect. From the Connect dialog box, enter the following information:
Server: Enter the name of the external domain server, e.g., computer.domain.com.
Port: Enter 636 as the port number for the external domain server. SSL: Mark this checkbox to check for the proper certificate.
Click OK. If properly configured for LDAP, the external domain server details will be displayed in the LDP windowpane. If not configured for use with LDAP, an error
Administration Guide - Solaris File System iDataAgent
Page 198 of 265
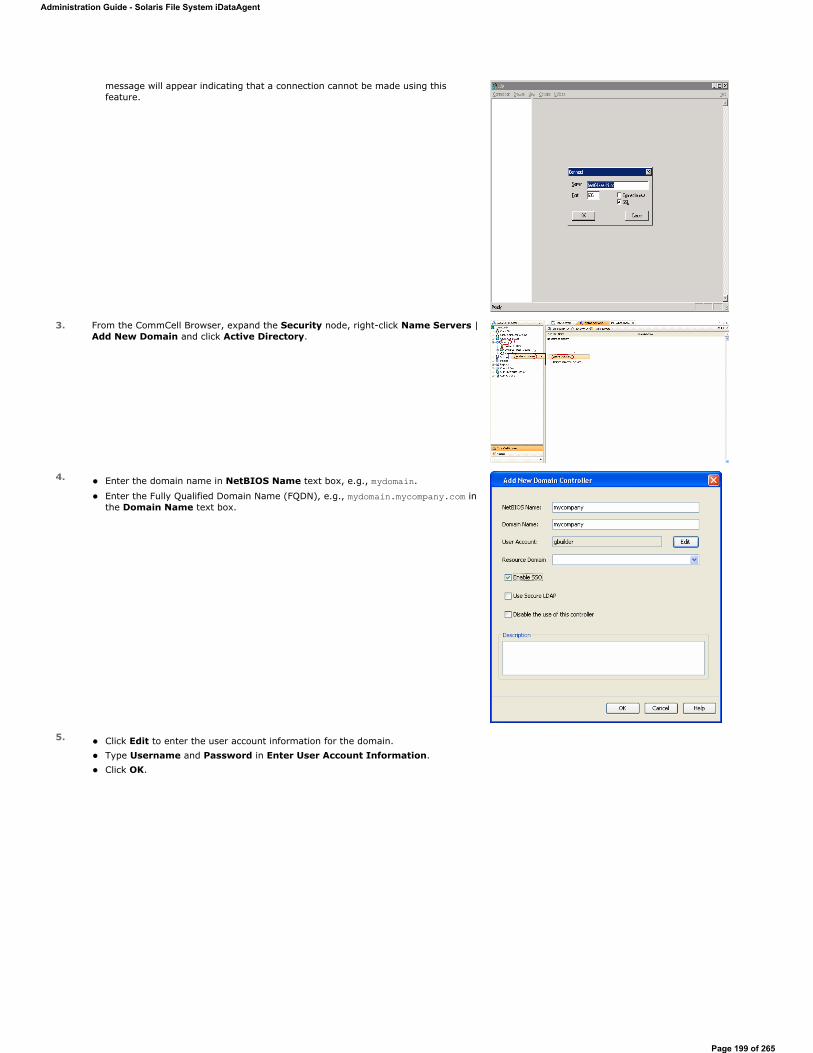
message will appear indicating that a connection cannot be made using this feature.
3. From the CommCell Browser, expand the Security node, right-click Name Servers |Add New Domain and click Active Directory.
4. Enter the domain name in NetBIOS Name text box, e.g., mydomain.
Enter the Fully Qualified Domain Name (FQDN), e.g., mydomain.mycompany.com in the Domain Name text box.
5. Click Edit to enter the user account information for the domain. Type Username and Password in Enter User Account Information. Click OK.
Administration Guide - Solaris File System iDataAgent
Page 199 of 265
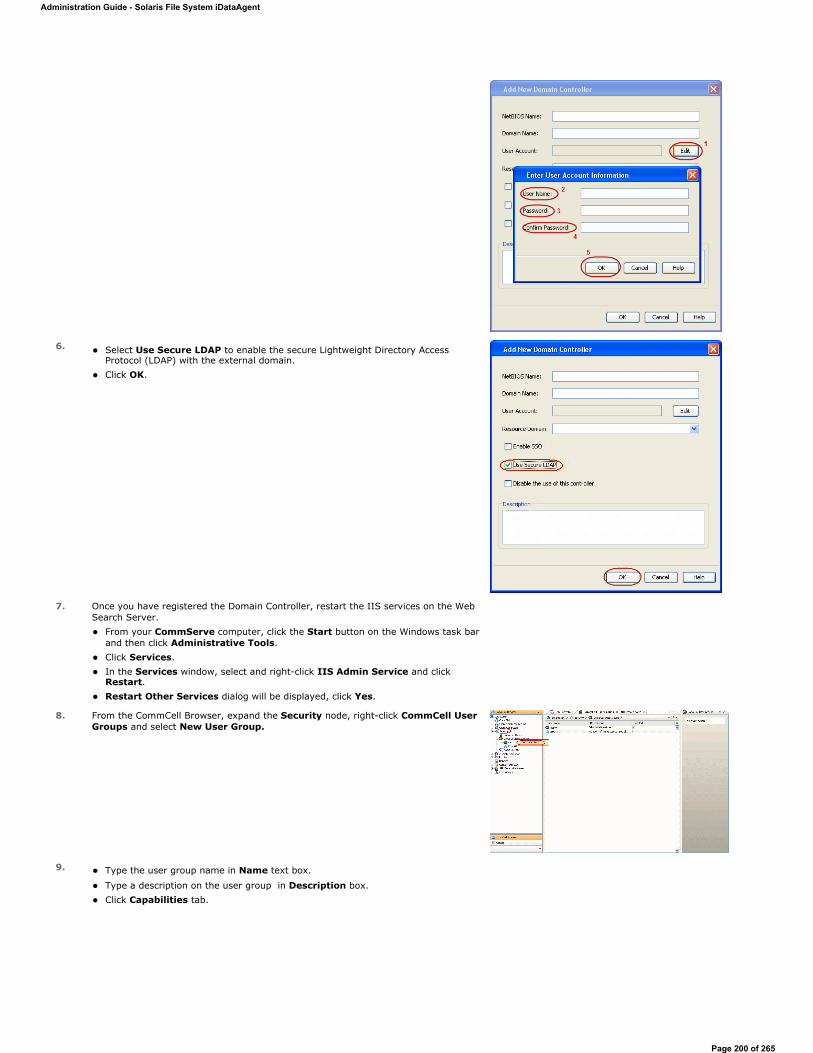
6. Select Use Secure LDAP to enable the secure Lightweight Directory Access Protocol (LDAP) with the external domain. Click OK.
7. Once you have registered the Domain Controller, restart the IIS services on the Web Search Server.
From your CommServe computer, click the Start button on the Windows task bar and then click Administrative Tools. Click Services. In the Services window, select and right-click IIS Admin Service and click Restart. Restart Other Services dialog will be displayed, click Yes.
8. From the CommCell Browser, expand the Security node, right-click CommCell User Groups and select New User Group.
9. Type the user group name in Name text box.
Type a description on the user group in Description box. Click Capabilities tab.
Administration Guide - Solaris File System iDataAgent
Page 200 of 265
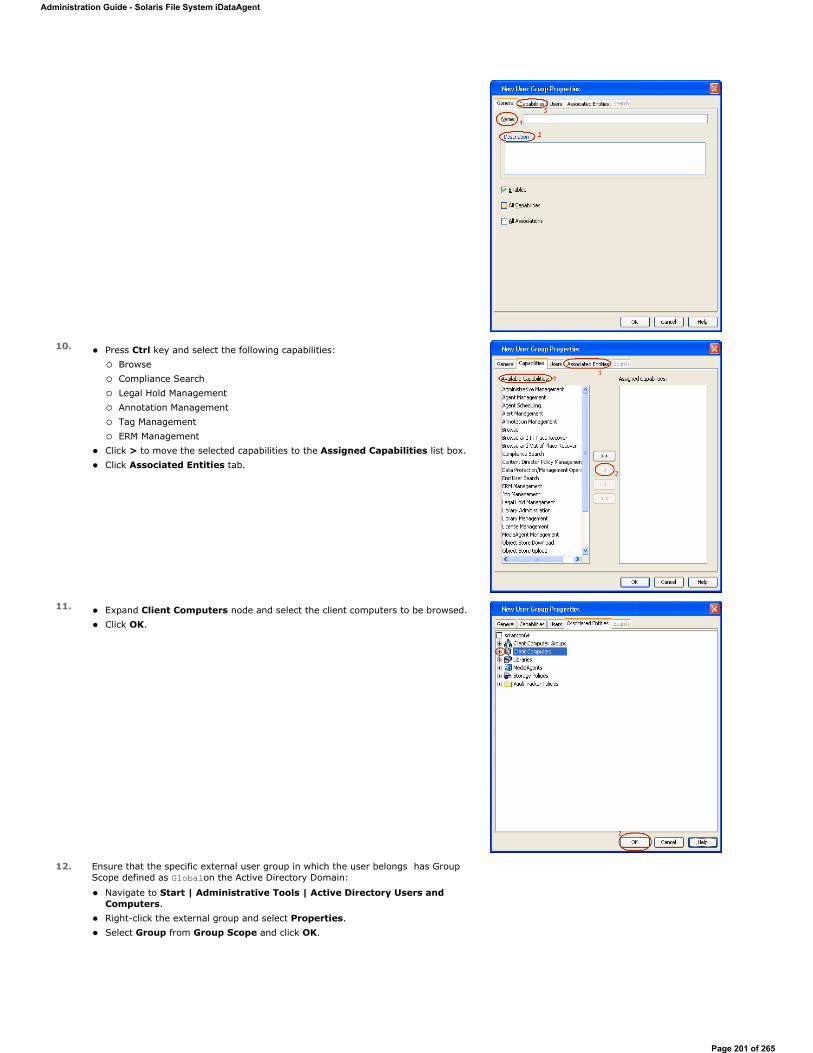
10. Press Ctrl key and select the following capabilities: Browse Compliance Search Legal Hold Management Annotation Management Tag Management ERM Management
Click > to move the selected capabilities to the Assigned Capabilities list box. Click Associated Entities tab.
11. Expand Client Computers node and select the client computers to be browsed. Click OK.
12. Ensure that the specific external user group in which the user belongs has Group Scope defined as Globalon the Active Directory Domain:
Navigate to Start | Administrative Tools | Active Directory Users and Computers. Right-click the external group and select Properties. Select Group from Group Scope and click OK.
Administration Guide - Solaris File System iDataAgent
Page 201 of 265

13.From the CommCell Browser, navigate to Security | Name Server |<Domain Name>, right-click External Groups and select Add New Group.
14. Click Browse. Select the <external user group name> in which the user belongs.
15. Select the CommCell User Group to associate with the specified external user group. Click OK.
Administration Guide - Solaris File System iDataAgent
Page 202 of 265
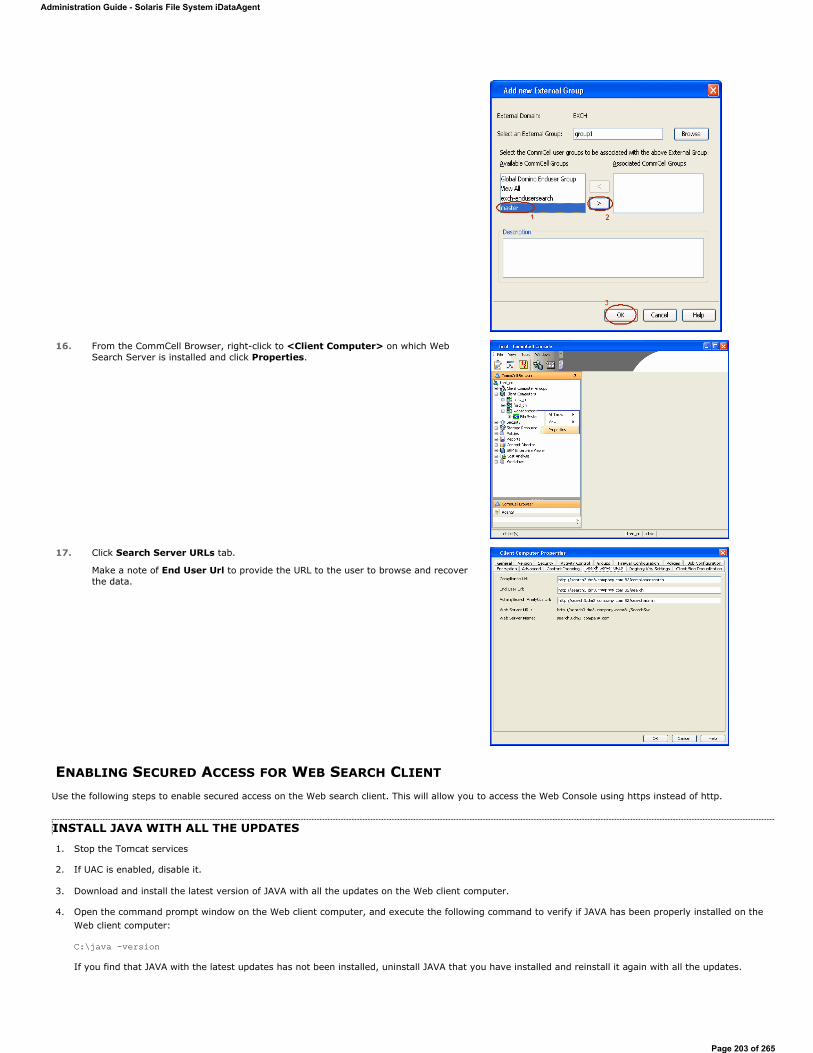
ENABLING SECURED ACCESS FOR WEB SEARCH CLIENT
Use the following steps to enable secured access on the Web search client. This will allow you to access the Web Console using https instead of http.
INSTALL JAVA WITH ALL THE UPDATES
1. Stop the Tomcat services
2. If UAC is enabled, disable it.
3. Download and install the latest version of JAVA with all the updates on the Web client computer.
4. Open the command prompt window on the Web client computer, and execute the following command to verify if JAVA has been properly installed on the Web client computer:
C:\java -version
If you find that JAVA with the latest updates has not been installed, uninstall JAVA that you have installed and reinstall it again with all the updates.
16. From the CommCell Browser, right-click to <Client Computer> on which Web Search Server is installed and click Properties.
17. Click Search Server URLs tab.
Make a note of End User Url to provide the URL to the user to browse and recover the data.
Administration Guide - Solaris File System iDataAgent
Page 203 of 265

Navigate to the command prompt on the Web client computer, and run the command specified in step 4 to verify if JAVA has been installed successfully.
Skip this step if the updates are installed successfully.
5. Start Tomcat services. If the Tomcat fails to start, point the JVM manually to Tomcat using the following steps:
Open the command prompt window on the Web client computer, navigate to <PRODUCT_INSTALL_PATH>\Apache\bin folder and execute the following command:
C:\<PRODUCT_INSTALL_PATH>\Apache\bin>tomcat6w.exe //ES//GxTomcatInstance001
where, Instance001 is the instance installed on the WebClient computer.
On the Tomcat Services Instance properties dialog box, click the Java tab, and clear the Use default check box.
Restart Tomcat services
CONFIGURE SSL ON THE TOMCAT SERVERUse the following steps for configuring SSL (Secure Socket layer) on the Tomcat Server:
1. Navigate to command prompt and run the following command:
C:\Program Files\Java\jre6\bin>keytool -genkey -alias cvtomcat -keyalg RSA -keystore "C:\Program Files\company\product\Apache\cert\keystore"
2. Backup the server.xml file located in <product_install_path>\Apache\conf before making any changes to it.
3. In order to setup a JAVA JSSE connector to support SSL, search for the following entry in the server.xml:
<Listener className="org.apache.catalina.core.AprLifecycleListener" SSLEngine="on" />
Modify the above entry as following:
<Listener className="org.apache.catalina.core.AprLifecycleListener" SSLEngine="off" />
4. Add the following entry to the server.xml file:
<Connector port="443" protocol="org.apache.coyote.http11.Http11NioProtocol" SSLEnabled="true" maxThreads="150" scheme="https" secure="true" clientAuth="false" keystoreFile="C:/Program Files/CommVault/Simpana/Apache/cert/keystore" keystorePass="mnoettomcat" sslProtocol="TLS" />
5. Save the server.xml file, and restart the Tomcat services.
Administration Guide - Solaris File System iDataAgent
Page 204 of 265
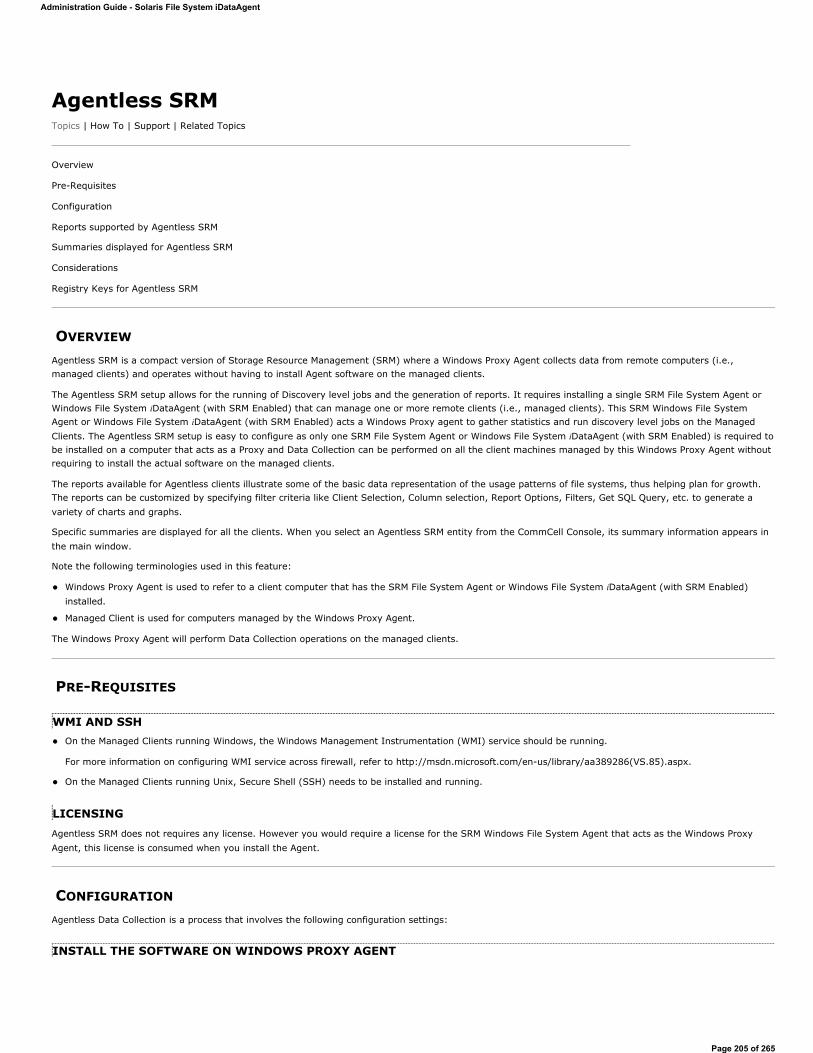
Agentless SRMTopics | How To | Support | Related Topics
Overview
Pre-Requisites
Configuration
Reports supported by Agentless SRM
Summaries displayed for Agentless SRM
Considerations
Registry Keys for Agentless SRM
OVERVIEW
Agentless SRM is a compact version of Storage Resource Management (SRM) where a Windows Proxy Agent collects data from remote computers (i.e., managed clients) and operates without having to install Agent software on the managed clients.
The Agentless SRM setup allows for the running of Discovery level jobs and the generation of reports. It requires installing a single SRM File System Agent or Windows File System iDataAgent (with SRM Enabled) that can manage one or more remote clients (i.e., managed clients). This SRM Windows File System Agent or Windows File System iDataAgent (with SRM Enabled) acts a Windows Proxy agent to gather statistics and run discovery level jobs on the Managed Clients. The Agentless SRM setup is easy to configure as only one SRM File System Agent or Windows File System iDataAgent (with SRM Enabled) is required to be installed on a computer that acts as a Proxy and Data Collection can be performed on all the client machines managed by this Windows Proxy Agent without requiring to install the actual software on the managed clients.
The reports available for Agentless clients illustrate some of the basic data representation of the usage patterns of file systems, thus helping plan for growth. The reports can be customized by specifying filter criteria like Client Selection, Column selection, Report Options, Filters, Get SQL Query, etc. to generate a variety of charts and graphs.
Specific summaries are displayed for all the clients. When you select an Agentless SRM entity from the CommCell Console, its summary information appears in the main window.
Note the following terminologies used in this feature:
Windows Proxy Agent is used to refer to a client computer that has the SRM File System Agent or Windows File System iDataAgent (with SRM Enabled) installed.
Managed Client is used for computers managed by the Windows Proxy Agent.
The Windows Proxy Agent will perform Data Collection operations on the managed clients.
PRE-REQUISITES
WMI AND SSHOn the Managed Clients running Windows, the Windows Management Instrumentation (WMI) service should be running.
For more information on configuring WMI service across firewall, refer to http://msdn.microsoft.com/en-us/library/aa389286(VS.85).aspx.
On the Managed Clients running Unix, Secure Shell (SSH) needs to be installed and running.
LICENSINGAgentless SRM does not requires any license. However you would require a license for the SRM Windows File System Agent that acts as the Windows Proxy Agent, this license is consumed when you install the Agent.
CONFIGURATION
Agentless Data Collection is a process that involves the following configuration settings:
INSTALL THE SOFTWARE ON WINDOWS PROXY AGENT
Administration Guide - Solaris File System iDataAgent
Page 205 of 265
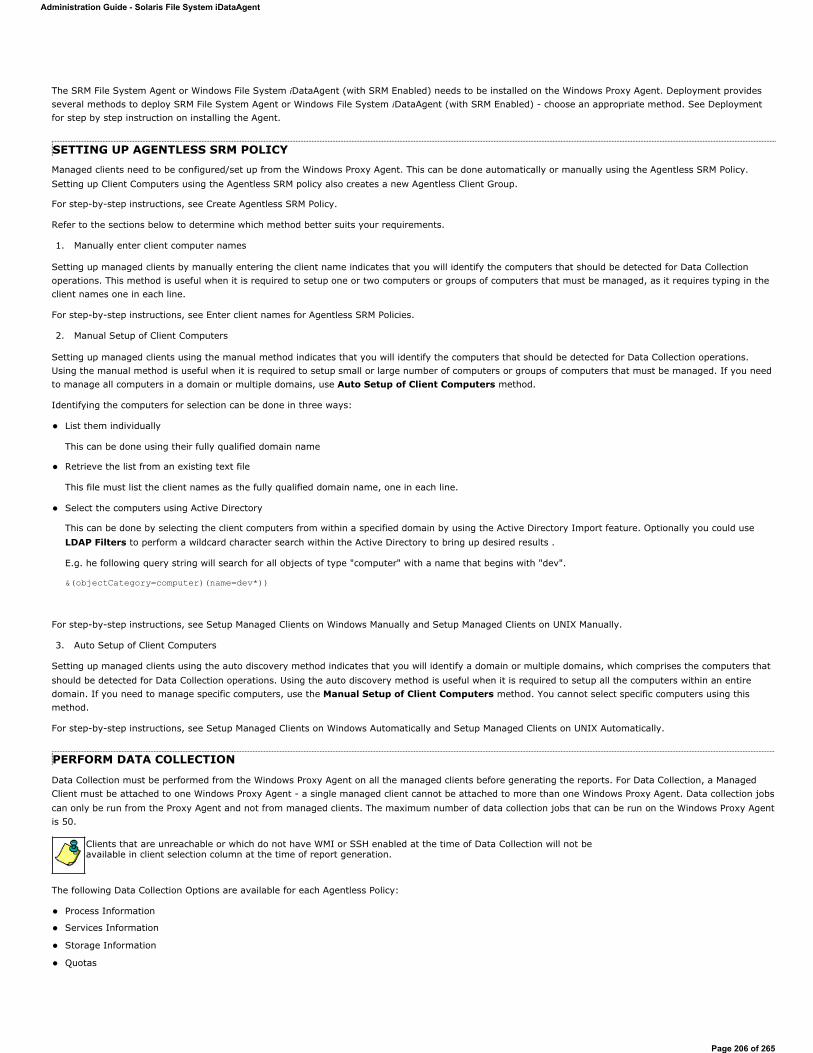
The SRM File System Agent or Windows File System iDataAgent (with SRM Enabled) needs to be installed on the Windows Proxy Agent. Deployment provides several methods to deploy SRM File System Agent or Windows File System iDataAgent (with SRM Enabled) - choose an appropriate method. See Deploymentfor step by step instruction on installing the Agent.
SETTING UP AGENTLESS SRM POLICYManaged clients need to be configured/set up from the Windows Proxy Agent. This can be done automatically or manually using the Agentless SRM Policy. Setting up Client Computers using the Agentless SRM policy also creates a new Agentless Client Group.
For step-by-step instructions, see Create Agentless SRM Policy.
Refer to the sections below to determine which method better suits your requirements.
1. Manually enter client computer names
Setting up managed clients by manually entering the client name indicates that you will identify the computers that should be detected for Data Collection operations. This method is useful when it is required to setup one or two computers or groups of computers that must be managed, as it requires typing in the client names one in each line.
For step-by-step instructions, see Enter client names for Agentless SRM Policies.
2. Manual Setup of Client Computers
Setting up managed clients using the manual method indicates that you will identify the computers that should be detected for Data Collection operations. Using the manual method is useful when it is required to setup small or large number of computers or groups of computers that must be managed. If you need to manage all computers in a domain or multiple domains, use Auto Setup of Client Computers method.
Identifying the computers for selection can be done in three ways:
List them individually
This can be done using their fully qualified domain name
Retrieve the list from an existing text file
This file must list the client names as the fully qualified domain name, one in each line.
Select the computers using Active Directory
This can be done by selecting the client computers from within a specified domain by using the Active Directory Import feature. Optionally you could use LDAP Filters to perform a wildcard character search within the Active Directory to bring up desired results .
E.g. he following query string will search for all objects of type "computer" with a name that begins with "dev".
&(objectCategory=computer)(name=dev*))
For step-by-step instructions, see Setup Managed Clients on Windows Manually and Setup Managed Clients on UNIX Manually.
3. Auto Setup of Client Computers
Setting up managed clients using the auto discovery method indicates that you will identify a domain or multiple domains, which comprises the computers that should be detected for Data Collection operations. Using the auto discovery method is useful when it is required to setup all the computers within an entire domain. If you need to manage specific computers, use the Manual Setup of Client Computers method. You cannot select specific computers using this method.
For step-by-step instructions, see Setup Managed Clients on Windows Automatically and Setup Managed Clients on UNIX Automatically.
PERFORM DATA COLLECTION
Data Collection must be performed from the Windows Proxy Agent on all the managed clients before generating the reports. For Data Collection, a Managed Client must be attached to one Windows Proxy Agent - a single managed client cannot be attached to more than one Windows Proxy Agent. Data collection jobs can only be run from the Proxy Agent and not from managed clients. The maximum number of data collection jobs that can be run on the Windows Proxy Agent is 50.
The following Data Collection Options are available for each Agentless Policy:
Process Information
Services Information
Storage Information
Quotas
Clients that are unreachable or which do not have WMI or SSH enabled at the time of Data Collection will not be available in client selection column at the time of report generation.
Administration Guide - Solaris File System iDataAgent
Page 206 of 265
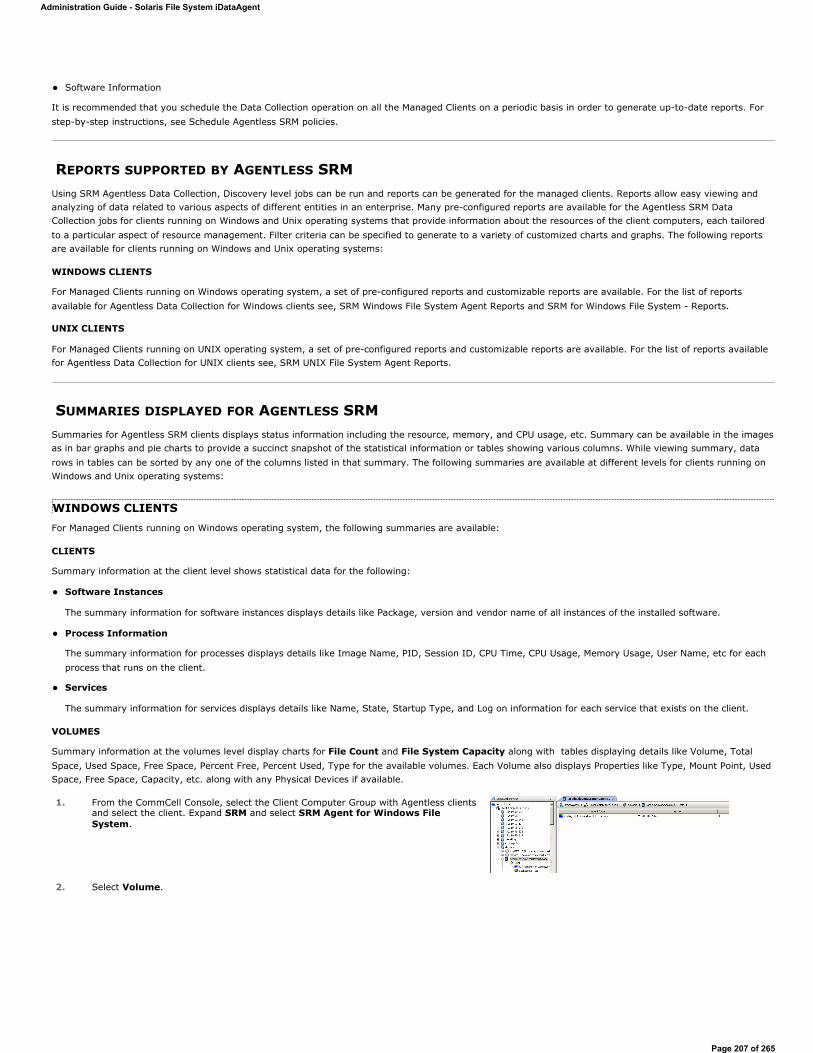
Software Information
It is recommended that you schedule the Data Collection operation on all the Managed Clients on a periodic basis in order to generate up-to-date reports. For step-by-step instructions, see Schedule Agentless SRM policies.
REPORTS SUPPORTED BY AGENTLESS SRMUsing SRM Agentless Data Collection, Discovery level jobs can be run and reports can be generated for the managed clients. Reports allow easy viewing and analyzing of data related to various aspects of different entities in an enterprise. Many pre-configured reports are available for the Agentless SRM Data Collection jobs for clients running on Windows and Unix operating systems that provide information about the resources of the client computers, each tailored to a particular aspect of resource management. Filter criteria can be specified to generate to a variety of customized charts and graphs. The following reports are available for clients running on Windows and Unix operating systems:
WINDOWS CLIENTS
For Managed Clients running on Windows operating system, a set of pre-configured reports and customizable reports are available. For the list of reports available for Agentless Data Collection for Windows clients see, SRM Windows File System Agent Reports and SRM for Windows File System - Reports.
UNIX CLIENTS
For Managed Clients running on UNIX operating system, a set of pre-configured reports and customizable reports are available. For the list of reports available for Agentless Data Collection for UNIX clients see, SRM UNIX File System Agent Reports.
SUMMARIES DISPLAYED FOR AGENTLESS SRMSummaries for Agentless SRM clients displays status information including the resource, memory, and CPU usage, etc. Summary can be available in the images as in bar graphs and pie charts to provide a succinct snapshot of the statistical information or tables showing various columns. While viewing summary, data rows in tables can be sorted by any one of the columns listed in that summary. The following summaries are available at different levels for clients running on Windows and Unix operating systems:
WINDOWS CLIENTSFor Managed Clients running on Windows operating system, the following summaries are available:
CLIENTS
Summary information at the client level shows statistical data for the following:
Software Instances
The summary information for software instances displays details like Package, version and vendor name of all instances of the installed software.
Process Information
The summary information for processes displays details like Image Name, PID, Session ID, CPU Time, CPU Usage, Memory Usage, User Name, etc for each process that runs on the client.
Services
The summary information for services displays details like Name, State, Startup Type, and Log on information for each service that exists on the client.
VOLUMES
Summary information at the volumes level display charts for File Count and File System Capacity along with tables displaying details like Volume, Total Space, Used Space, Free Space, Percent Free, Percent Used, Type for the available volumes. Each Volume also displays Properties like Type, Mount Point, Used Space, Free Space, Capacity, etc. along with any Physical Devices if available.
1. From the CommCell Console, select the Client Computer Group with Agentless clients and select the client. Expand SRM and select SRM Agent for Windows File System.
2. Select Volume.
Administration Guide - Solaris File System iDataAgent
Page 207 of 265
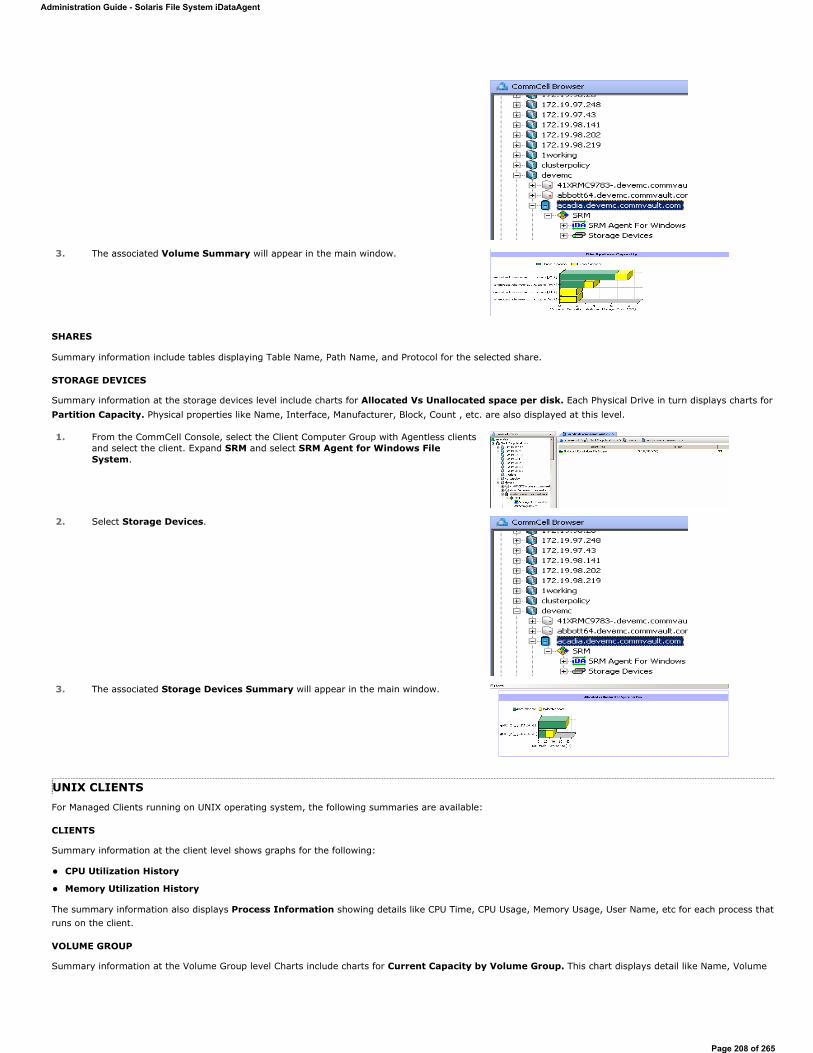
SHARES
Summary information include tables displaying Table Name, Path Name, and Protocol for the selected share.
STORAGE DEVICES
Summary information at the storage devices level include charts for Allocated Vs Unallocated space per disk. Each Physical Drive in turn displays charts for Partition Capacity. Physical properties like Name, Interface, Manufacturer, Block, Count , etc. are also displayed at this level.
UNIX CLIENTSFor Managed Clients running on UNIX operating system, the following summaries are available:
CLIENTS
Summary information at the client level shows graphs for the following:
CPU Utilization History
Memory Utilization History
The summary information also displays Process Information showing details like CPU Time, CPU Usage, Memory Usage, User Name, etc for each process that runs on the client.
VOLUME GROUP
Summary information at the Volume Group level Charts include charts for Current Capacity by Volume Group. This chart displays detail like Name, Volume
3. The associated Volume Summary will appear in the main window.
1. From the CommCell Console, select the Client Computer Group with Agentless clients and select the client. Expand SRM and select SRM Agent for Windows File System.
2. Select Storage Devices.
3. The associated Storage Devices Summary will appear in the main window.
Administration Guide - Solaris File System iDataAgent
Page 208 of 265
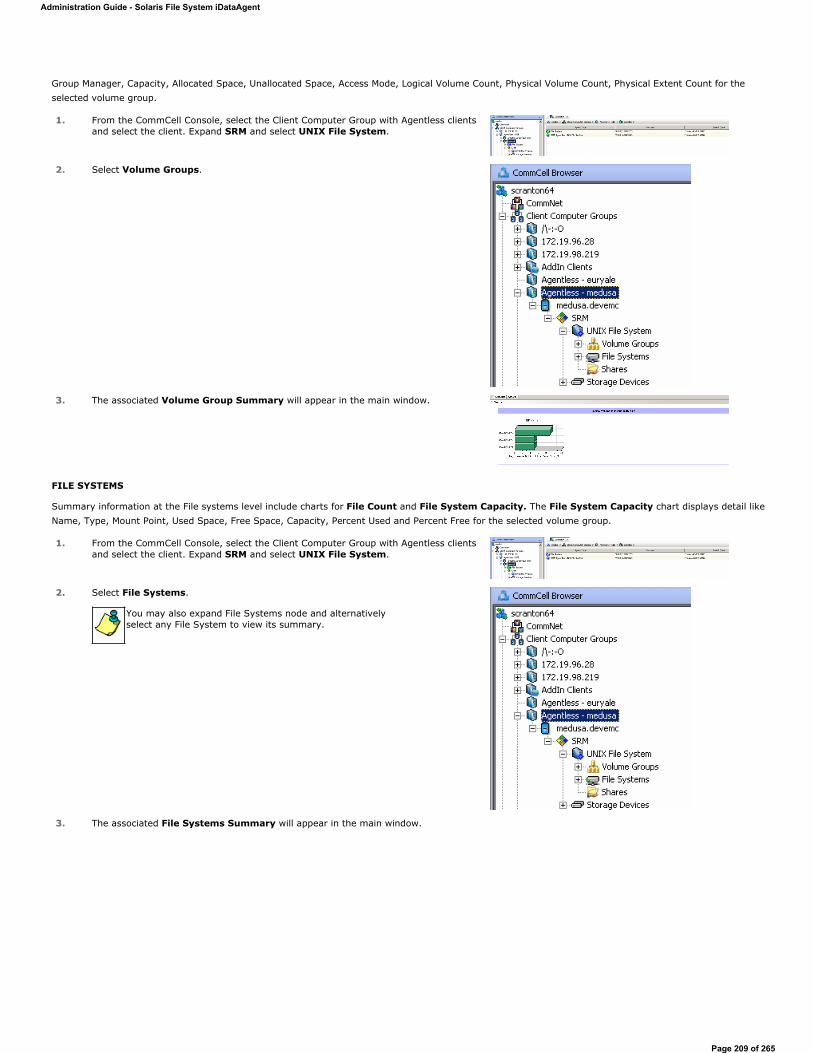
Group Manager, Capacity, Allocated Space, Unallocated Space, Access Mode, Logical Volume Count, Physical Volume Count, Physical Extent Count for the selected volume group.
FILE SYSTEMS
Summary information at the File systems level include charts for File Count and File System Capacity. The File System Capacity chart displays detail like Name, Type, Mount Point, Used Space, Free Space, Capacity, Percent Used and Percent Free for the selected volume group.
1. From the CommCell Console, select the Client Computer Group with Agentless clients and select the client. Expand SRM and select UNIX File System.
2. Select Volume Groups.
3. The associated Volume Group Summary will appear in the main window.
1. From the CommCell Console, select the Client Computer Group with Agentless clients and select the client. Expand SRM and select UNIX File System.
2. Select File Systems.
You may also expand File Systems node and alternatively select any File System to view its summary.
3. The associated File Systems Summary will appear in the main window.
Administration Guide - Solaris File System iDataAgent
Page 209 of 265
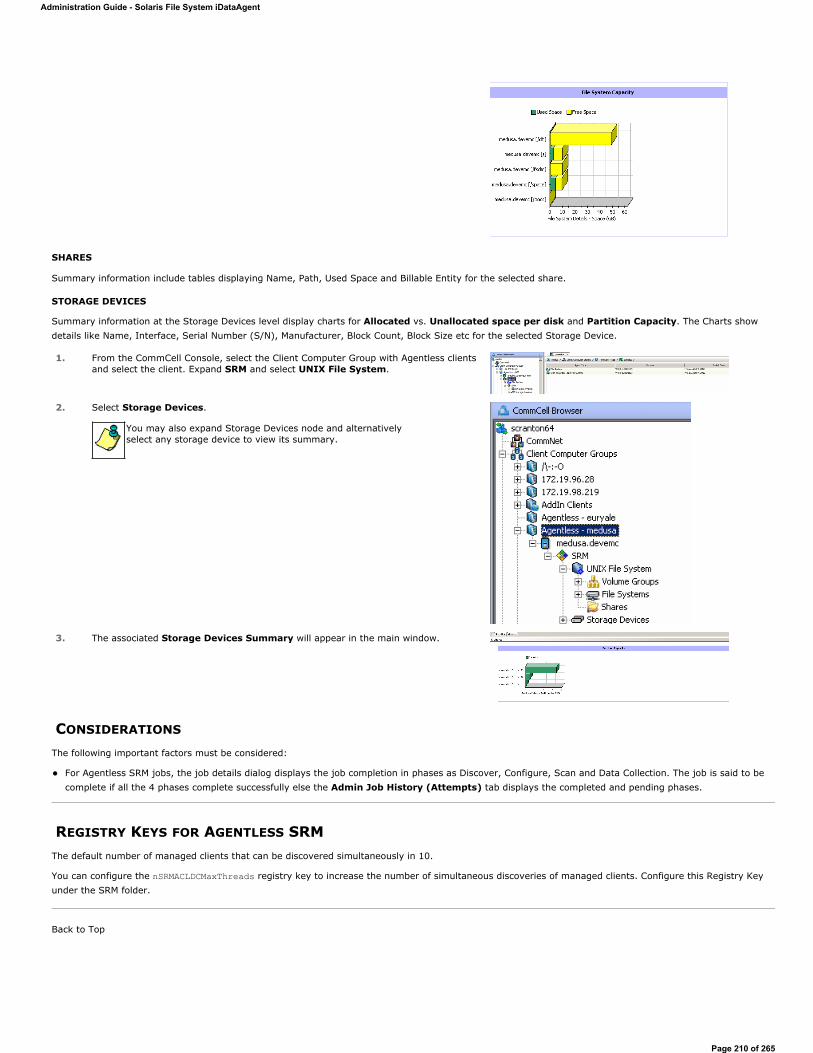
SHARES
Summary information include tables displaying Name, Path, Used Space and Billable Entity for the selected share.
STORAGE DEVICES
Summary information at the Storage Devices level display charts for Allocated vs. Unallocated space per disk and Partition Capacity. The Charts show details like Name, Interface, Serial Number (S/N), Manufacturer, Block Count, Block Size etc for the selected Storage Device.
CONSIDERATIONS
The following important factors must be considered:
For Agentless SRM jobs, the job details dialog displays the job completion in phases as Discover, Configure, Scan and Data Collection. The job is said to be complete if all the 4 phases complete successfully else the Admin Job History (Attempts) tab displays the completed and pending phases.
REGISTRY KEYS FOR AGENTLESS SRMThe default number of managed clients that can be discovered simultaneously in 10.
You can configure the nSRMACLDCMaxThreads registry key to increase the number of simultaneous discoveries of managed clients. Configure this Registry Key under the SRM folder.
Back to Top
1. From the CommCell Console, select the Client Computer Group with Agentless clients and select the client. Expand SRM and select UNIX File System.
2. Select Storage Devices.
You may also expand Storage Devices node and alternatively select any storage device to view its summary.
3. The associated Storage Devices Summary will appear in the main window.
Administration Guide - Solaris File System iDataAgent
Page 210 of 265
SRM for UNIX File System - Reports
TABLE OF CONTENTS
Overview
ConfigurationEnable SRM for all backupsRun a Backup
Generate SRM ReportsRunning a ReportScheduling a ReportSaving a Report
Send a Notification when an SRM Report Has Run
Getting Started with Unix File System ReportsCapacity by File SystemCurrent File System UsageCurrent File System Usage by Subclient
OVERVIEW
Managing storage resources is a critical job for any organization, which can be challenging because these resources are distributed across the network. SRMUNIX File System reports provide a sleek, versatile, and easy-to-use reporting framework that enables you to easily and effectively choose, view, and analyze vital data. Customized reporting is available through the selection of filter criteria e.g., individual columns, specific clients, specific client computer groups, report options, and SQL Queries, a SRM UNIX File System report helps you to:
Assess used and free storage space to provide improved capacity planning.
Track historical storage utilization for performance trending and proactively anticipate future resource needs.
CONFIGURATION
If SRM feature is enabled, SRM reports can be generated for all backup data as soon as the first full backup job has completed. Be sure to perform the following before generating reports:
GENERATE SRM REPORTS
The sections below discuss running, scheduling, and saving a report.
Basic Advanced Filters Summaries
OPTION DESCRIPTION
Enable SRM for all backups SRM can be enabled from the Agent levels for the iDataAgent. When Enable SRM is selected at the Agent level, SRM options get enabled for all subclients.
1. From the CommCell Browser, right-click the iDataAgent for which you want to enable SRM feature and select Properties.
2. Enable SRM must be selected from the General tab.
A Discovery and Analysis Data Collection job is automatically set when you enable SRM.
3. Then confirm your selection by clicking OK. Run a Backup A full backup contains all the data that comprises a subclient's contents. If a client computer has multiple agents
installed, then the subclients of each agent require a full backup in order to secure all of the data on that client. If a new subclient is added, a full backup is required on all subclients in order to maintain file level detail integrity.
1. To perform a full backup, right-click the subclient, and click Backup in the CommCell Browser.
One of the following options must be selected from the Backup Options dialog box:
Backup Type:Select Full. Backup Schedule: Select Immediate if you want to run the backup now. Granular Recovery: Select Enable Granular Recovery if you intend to restore individual files and folders from a disk or volume-level backup.
2. Then confirm your changes by clicking OK.
You can track the progress of the backup job from the Job Controller window. When the backup has completed, the Job Controller displays Completed.
After performing a first full backup you may select any other backup type for performing Data Collection operations.
Administration Guide - Solaris File System iDataAgent
Page 211 of 265
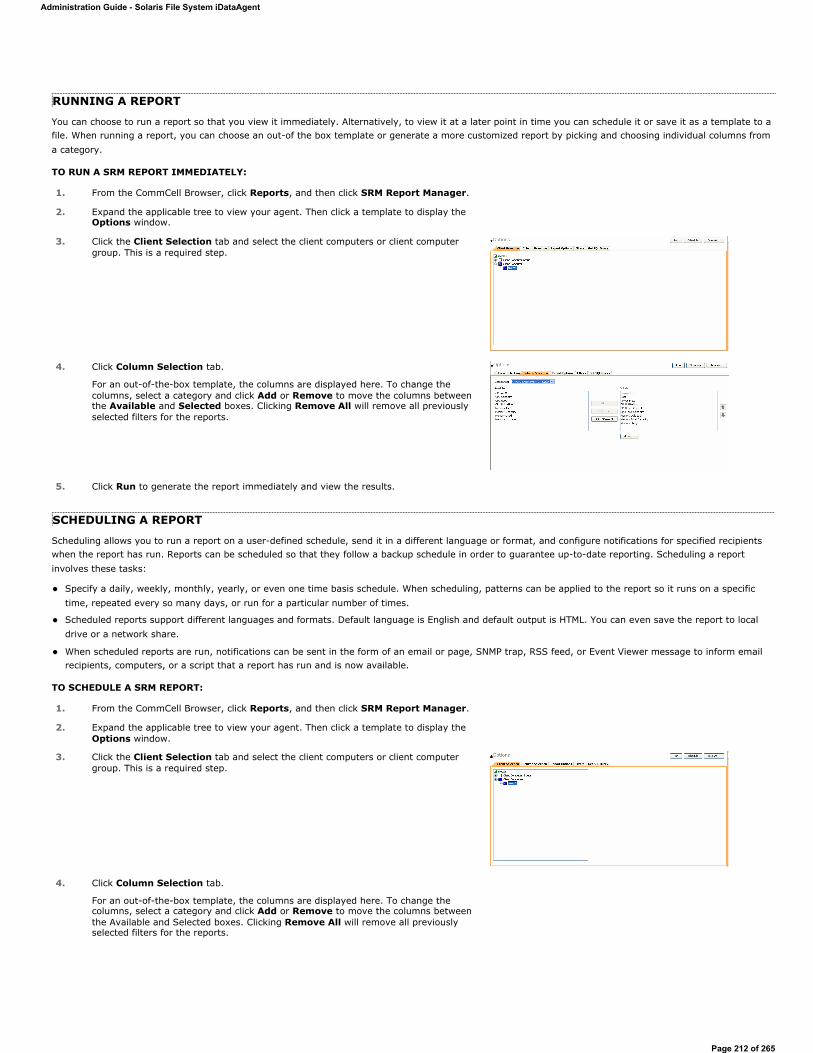
RUNNING A REPORT
You can choose to run a report so that you view it immediately. Alternatively, to view it at a later point in time you can schedule it or save it as a template to a file. When running a report, you can choose an out-of the box template or generate a more customized report by picking and choosing individual columns from a category.
TO RUN A SRM REPORT IMMEDIATELY:
SCHEDULING A REPORT
Scheduling allows you to run a report on a user-defined schedule, send it in a different language or format, and configure notifications for specified recipients when the report has run. Reports can be scheduled so that they follow a backup schedule in order to guarantee up-to-date reporting. Scheduling a report involves these tasks:
Specify a daily, weekly, monthly, yearly, or even one time basis schedule. When scheduling, patterns can be applied to the report so it runs on a specific time, repeated every so many days, or run for a particular number of times.
Scheduled reports support different languages and formats. Default language is English and default output is HTML. You can even save the report to local drive or a network share.
When scheduled reports are run, notifications can be sent in the form of an email or page, SNMP trap, RSS feed, or Event Viewer message to inform email recipients, computers, or a script that a report has run and is now available.
TO SCHEDULE A SRM REPORT:
1. From the CommCell Browser, click Reports, and then click SRM Report Manager.
2. Expand the applicable tree to view your agent. Then click a template to display the Options window.
3. Click the Client Selection tab and select the client computers or client computer group. This is a required step.
4. Click Column Selection tab.
For an out-of-the-box template, the columns are displayed here. To change the columns, select a category and click Add or Remove to move the columns between the Available and Selected boxes. Clicking Remove All will remove all previously selected filters for the reports.
5. Click Run to generate the report immediately and view the results.
1. From the CommCell Browser, click Reports, and then click SRM Report Manager.
2. Expand the applicable tree to view your agent. Then click a template to display the Options window.
3. Click the Client Selection tab and select the client computers or client computer group. This is a required step.
4. Click Column Selection tab.
For an out-of-the-box template, the columns are displayed here. To change the columns, select a category and click Add or Remove to move the columns between the Available and Selected boxes. Clicking Remove All will remove all previously selected filters for the reports.
Administration Guide - Solaris File System iDataAgent
Page 212 of 265
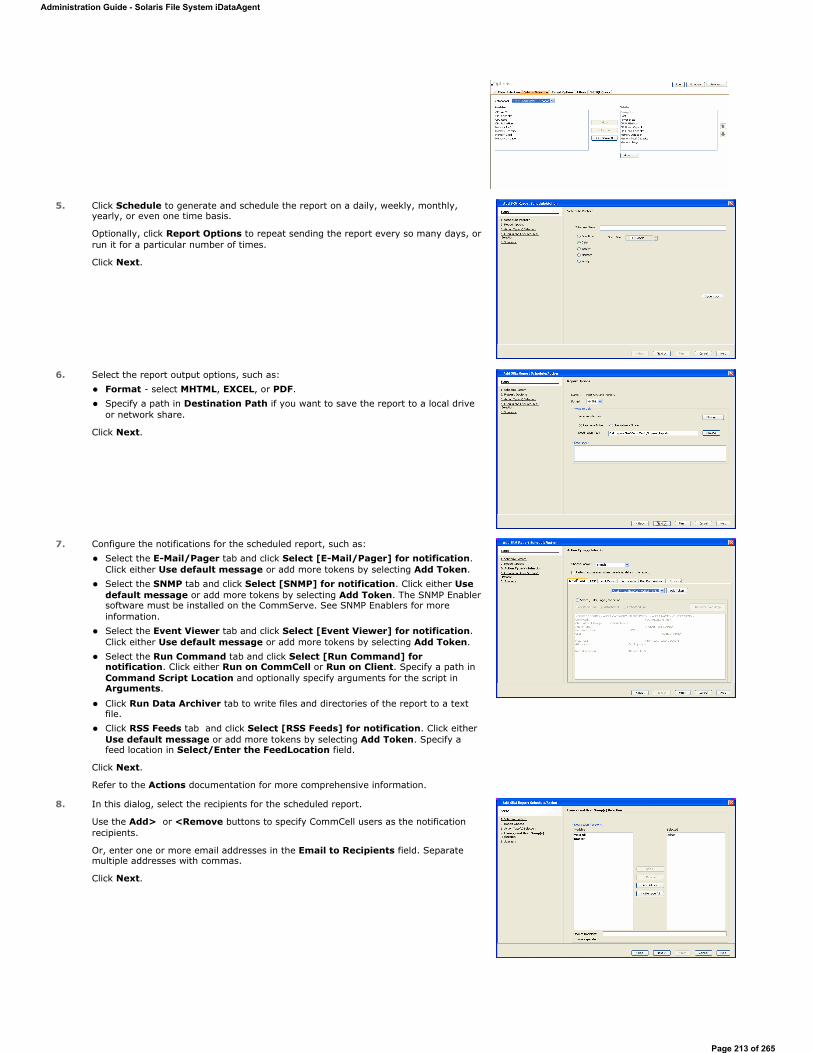
5. Click Schedule to generate and schedule the report on a daily, weekly, monthly, yearly, or even one time basis.
Optionally, click Report Options to repeat sending the report every so many days, or run it for a particular number of times.
Click Next.
6. Select the report output options, such as: Format - select MHTML, EXCEL, or PDF. Specify a path in Destination Path if you want to save the report to a local drive or network share.
Click Next.
7. Configure the notifications for the scheduled report, such as: Select the E-Mail/Pager tab and click Select [E-Mail/Pager] for notification. Click either Use default message or add more tokens by selecting Add Token. Select the SNMP tab and click Select [SNMP] for notification. Click either Use default message or add more tokens by selecting Add Token. The SNMP Enabler software must be installed on the CommServe. See SNMP Enablers for more information. Select the Event Viewer tab and click Select [Event Viewer] for notification. Click either Use default message or add more tokens by selecting Add Token. Select the Run Command tab and click Select [Run Command] for notification. Click either Run on CommCell or Run on Client. Specify a path in Command Script Location and optionally specify arguments for the script in Arguments.
Click Run Data Archiver tab to write files and directories of the report to a text file. Click RSS Feeds tab and click Select [RSS Feeds] for notification. Click either Use default message or add more tokens by selecting Add Token. Specify a feed location in Select/Enter the FeedLocation field.
Click Next.
Refer to the Actions documentation for more comprehensive information.
8. In this dialog, select the recipients for the scheduled report.
Use the Add> or <Remove buttons to specify CommCell users as the notification recipients.
Or, enter one or more email addresses in the Email to Recipients field. Separate multiple addresses with commas.
Click Next.
Administration Guide - Solaris File System iDataAgent
Page 213 of 265
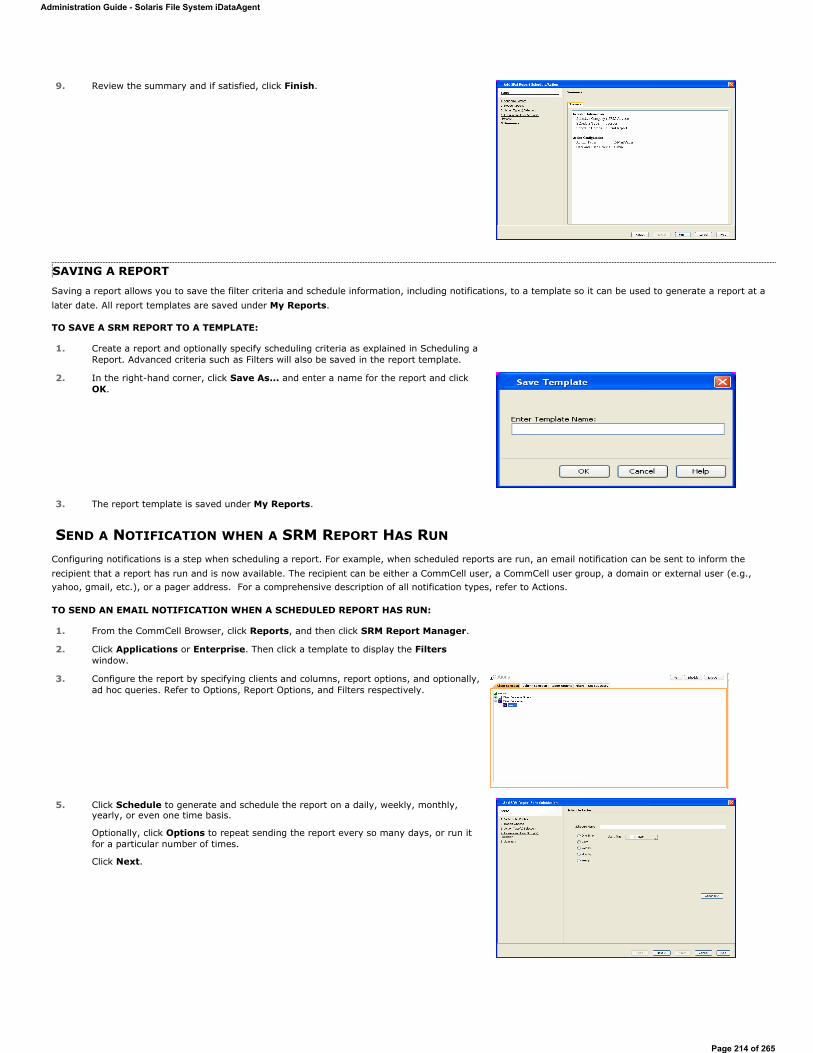
SAVING A REPORTSaving a report allows you to save the filter criteria and schedule information, including notifications, to a template so it can be used to generate a report at a later date. All report templates are saved under My Reports.
TO SAVE A SRM REPORT TO A TEMPLATE:
SEND A NOTIFICATION WHEN A SRM REPORT HAS RUN
Configuring notifications is a step when scheduling a report. For example, when scheduled reports are run, an email notification can be sent to inform the recipient that a report has run and is now available. The recipient can be either a CommCell user, a CommCell user group, a domain or external user (e.g., yahoo, gmail, etc.), or a pager address. For a comprehensive description of all notification types, refer to Actions.
TO SEND AN EMAIL NOTIFICATION WHEN A SCHEDULED REPORT HAS RUN:
9. Review the summary and if satisfied, click Finish.
1. Create a report and optionally specify scheduling criteria as explained in Scheduling a Report. Advanced criteria such as Filters will also be saved in the report template.
2. In the right-hand corner, click Save As... and enter a name for the report and click OK.
3. The report template is saved under My Reports.
1. From the CommCell Browser, click Reports, and then click SRM Report Manager.
2. Click Applications or Enterprise. Then click a template to display the Filterswindow.
3. Configure the report by specifying clients and columns, report options, and optionally, ad hoc queries. Refer to Options, Report Options, and Filters respectively.
5. Click Schedule to generate and schedule the report on a daily, weekly, monthly, yearly, or even one time basis.
Optionally, click Options to repeat sending the report every so many days, or run it for a particular number of times.
Click Next.
Administration Guide - Solaris File System iDataAgent
Page 214 of 265
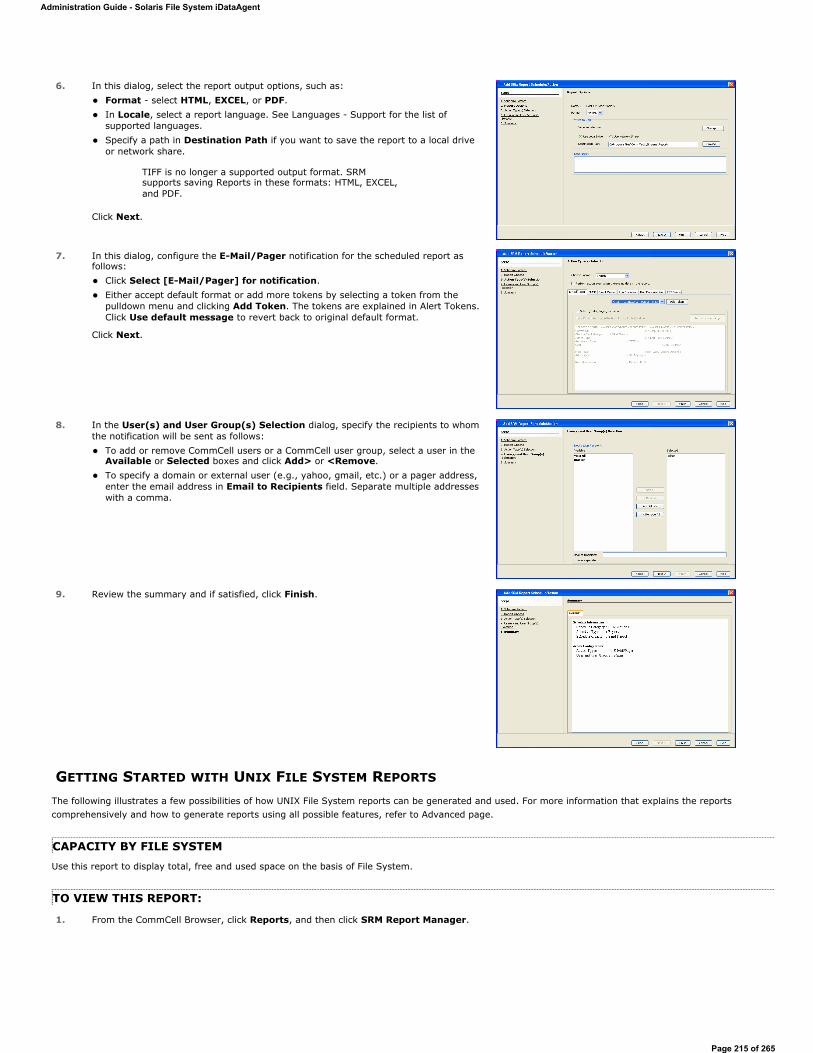
GETTING STARTED WITH UNIX FILE SYSTEM REPORTS
The following illustrates a few possibilities of how UNIX File System reports can be generated and used. For more information that explains the reports comprehensively and how to generate reports using all possible features, refer to Advanced page.
CAPACITY BY FILE SYSTEMUse this report to display total, free and used space on the basis of File System.
TO VIEW THIS REPORT:
6. In this dialog, select the report output options, such as: Format - select HTML, EXCEL, or PDF. In Locale, select a report language. See Languages - Support for the list of supported languages. Specify a path in Destination Path if you want to save the report to a local drive or network share.
Click Next.
TIFF is no longer a supported output format. SRM supports saving Reports in these formats: HTML, EXCEL, and PDF.
7. In this dialog, configure the E-Mail/Pager notification for the scheduled report as follows:
Click Select [E-Mail/Pager] for notification. Either accept default format or add more tokens by selecting a token from the pulldown menu and clicking Add Token. The tokens are explained in Alert Tokens. Click Use default message to revert back to original default format.
Click Next.
8. In the User(s) and User Group(s) Selection dialog, specify the recipients to whom the notification will be sent as follows:
To add or remove CommCell users or a CommCell user group, select a user in the Available or Selected boxes and click Add> or <Remove. To specify a domain or external user (e.g., yahoo, gmail, etc.) or a pager address, enter the email address in Email to Recipients field. Separate multiple addresses with a comma.
9. Review the summary and if satisfied, click Finish.
1. From the CommCell Browser, click Reports, and then click SRM Report Manager.
Administration Guide - Solaris File System iDataAgent
Page 215 of 265
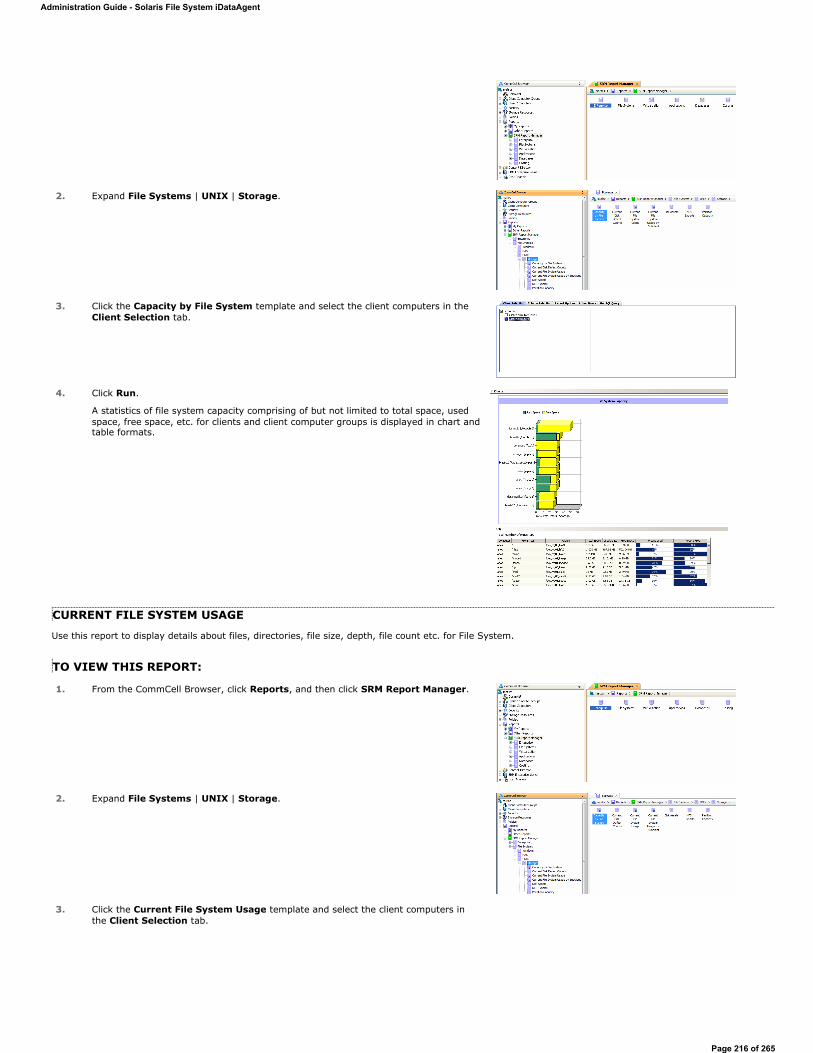
CURRENT FILE SYSTEM USAGE
Use this report to display details about files, directories, file size, depth, file count etc. for File System.
TO VIEW THIS REPORT:
2. Expand File Systems | UNIX | Storage.
3. Click the Capacity by File System template and select the client computers in the Client Selection tab.
4. Click Run.
A statistics of file system capacity comprising of but not limited to total space, used space, free space, etc. for clients and client computer groups is displayed in chart and table formats.
1. From the CommCell Browser, click Reports, and then click SRM Report Manager.
2. Expand File Systems | UNIX | Storage.
3. Click the Current File System Usage template and select the client computers in the Client Selection tab.
Administration Guide - Solaris File System iDataAgent
Page 216 of 265
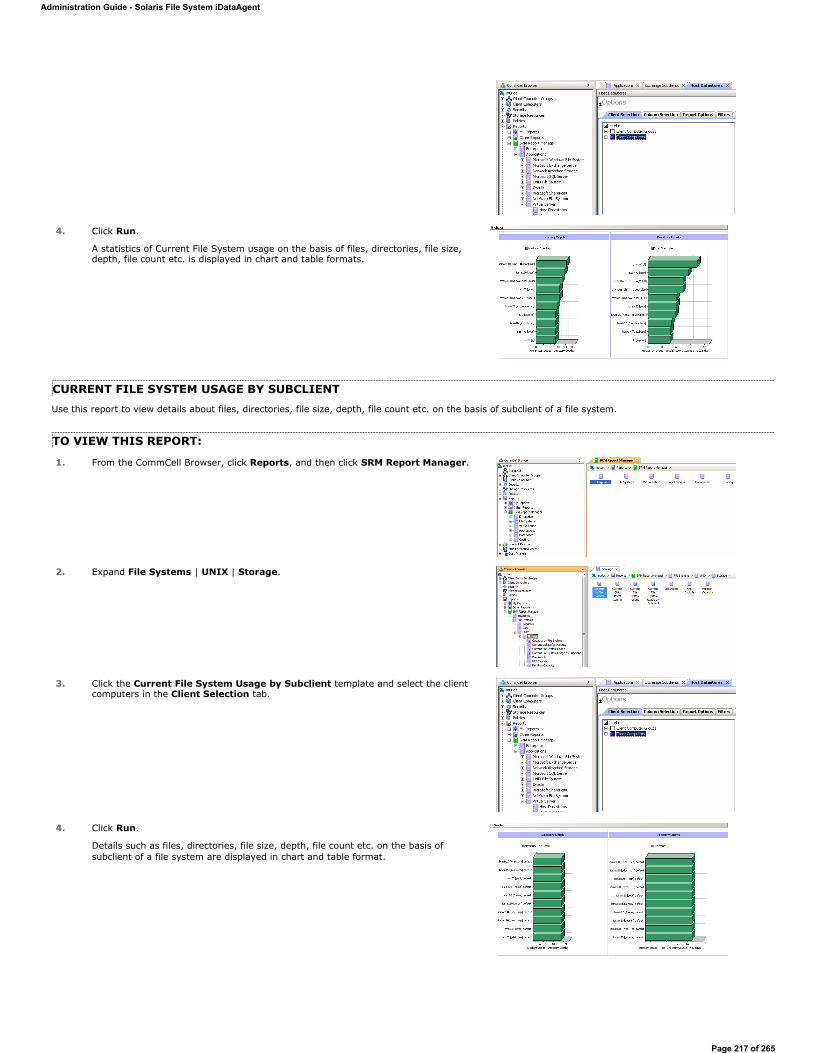
CURRENT FILE SYSTEM USAGE BY SUBCLIENTUse this report to view details about files, directories, file size, depth, file count etc. on the basis of subclient of a file system.
TO VIEW THIS REPORT:
4. Click Run.
A statistics of Current File System usage on the basis of files, directories, file size, depth, file count etc. is displayed in chart and table formats.
1. From the CommCell Browser, click Reports, and then click SRM Report Manager.
2. Expand File Systems | UNIX | Storage.
3. Click the Current File System Usage by Subclient template and select the client computers in the Client Selection tab.
4. Click Run.
Details such as files, directories, file size, depth, file count etc. on the basis of subclient of a file system are displayed in chart and table format.
Administration Guide - Solaris File System iDataAgent
Page 217 of 265

Back to Top
Administration Guide - Solaris File System iDataAgent
Page 218 of 265
SRM for UNIX File System - Reports
TABLE OF CONTENTS
Overview
Report FeaturesOptionsReport OptionsFiltersActionsForecastingCopy Chart
Cost History and Usage Reports
Support
OVERVIEW
SRM reporting provides a sleek, versatile, and easy-to-use reporting framework that enables you to easily and effectively choose, view, and analyze vital data. Enterprise and application-based reports can be rapidly generated with out-of-the-box templates or customized with filter criteria. Reports can be run immediately or scheduled to run daily, weekly, monthly, etc.
In essence, SRM UNIX File System reports provide these features:
Templates of predefined columns are provided so that a report can be generated quickly. The columns are preselected but can be adjusted as needed.
Filter criteria. Reports can be customized according to particular criteria, such as client or client group, the columns to display in the report, etc.
Report options control how the data is displayed in a report or chart. You can control the data size units, number of rows to display in an entire report or before a page break, sorting order, etc.
Advanced features, such as Ad hoc SQL queries is another type of filter criteria that can also be applied to further refine the report.
When scheduled, reports can be saved and shared in various formats (HTML, Excel, PDF) or in different languages.
Notifications. When scheduled reports are run, notifications can be sent in the form of an email or page, SNMP trap, RSS feed, Event Viewer message to inform email recipients, computers, or a script that a report has run and is now available.
Cost Analysis reports are available to provide Cost History and Usage History information (e.g., Cost History by Application, Usage History by Application). Data for these reports are compiled at regular intervals by a background process on the SRM Server.
The following sections describe the SRM UNIX File System reporting features in more detail.
REPORT FEATURES
The following features are provided by SRM Reports.
OPTIONS
Out-of-the box templates provide pre-selected columns and can be run immediately after selecting clients or client computer groups. To generate a customized report, you can start with a template and then alter the pre-selected columns by adding or removing the columns. Note that when selecting clients, SRM data collection must be enabled and a full backup needs to have run for the Agent in order to have up-to-date information presented in the report.
TO FILTER A SRM REPORT:
Basic Advanced Filters Summaries
Pay particular attention when specifying filter criteria. Selecting criteria judiciously will aid in generating a useful report. Otherwise, the report may be too cumbersome and cluttered.
1. From the CommCell Browser, click Reports, and then click SRM Report Manager.
2. Expand the applicable tree to view your agent. Then select your agent and click a template to display the Options window.
3. Click the Client Selection tab and select the client computers or client computer group. This is a required step.
Administration Guide - Solaris File System iDataAgent
Page 219 of 265
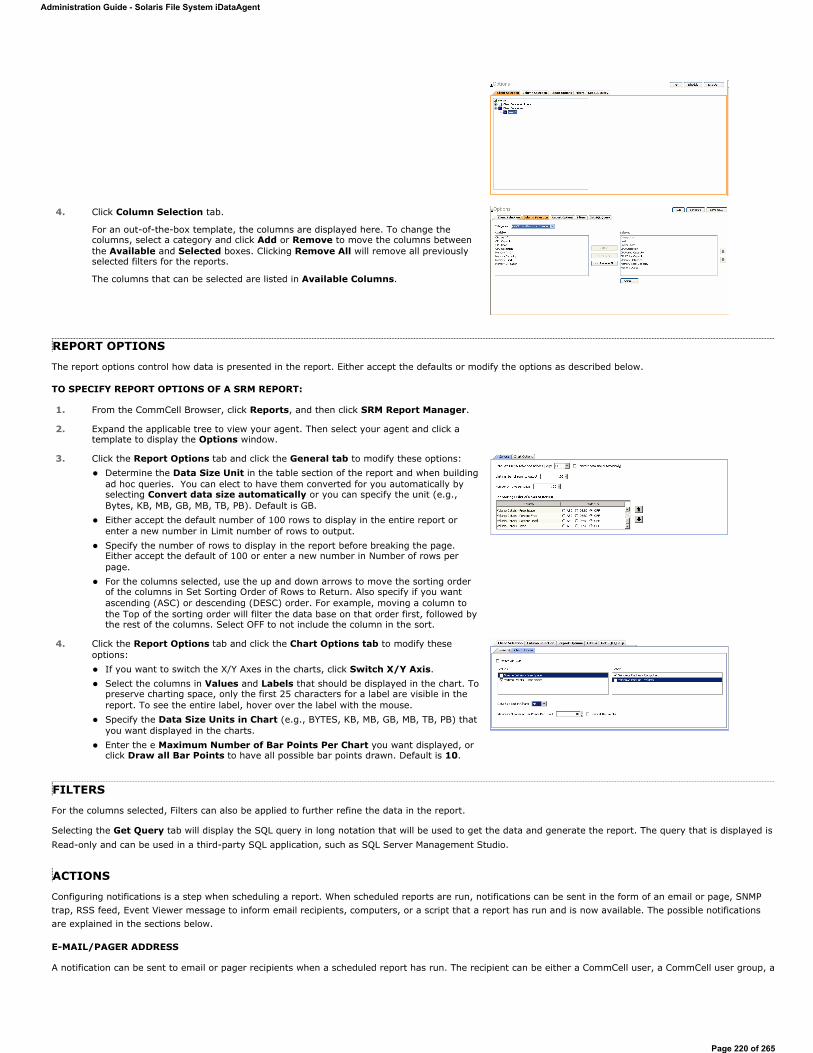
REPORT OPTIONS
The report options control how data is presented in the report. Either accept the defaults or modify the options as described below.
TO SPECIFY REPORT OPTIONS OF A SRM REPORT:
FILTERS
For the columns selected, Filters can also be applied to further refine the data in the report.
Selecting the Get Query tab will display the SQL query in long notation that will be used to get the data and generate the report. The query that is displayed is Read-only and can be used in a third-party SQL application, such as SQL Server Management Studio.
ACTIONS
Configuring notifications is a step when scheduling a report. When scheduled reports are run, notifications can be sent in the form of an email or page, SNMP trap, RSS feed, Event Viewer message to inform email recipients, computers, or a script that a report has run and is now available. The possible notifications are explained in the sections below.
E-MAIL/PAGER ADDRESS
A notification can be sent to email or pager recipients when a scheduled report has run. The recipient can be either a CommCell user, a CommCell user group, a
4. Click Column Selection tab.
For an out-of-the-box template, the columns are displayed here. To change the columns, select a category and click Add or Remove to move the columns between the Available and Selected boxes. Clicking Remove All will remove all previously selected filters for the reports.
The columns that can be selected are listed in Available Columns.
1. From the CommCell Browser, click Reports, and then click SRM Report Manager.
2. Expand the applicable tree to view your agent. Then select your agent and click a template to display the Options window.
3. Click the Report Options tab and click the General tab to modify these options: Determine the Data Size Unit in the table section of the report and when building ad hoc queries. You can elect to have them converted for you automatically by selecting Convert data size automatically or you can specify the unit (e.g., Bytes, KB, MB, GB, MB, TB, PB). Default is GB. Either accept the default number of 100 rows to display in the entire report or enter a new number in Limit number of rows to output. Specify the number of rows to display in the report before breaking the page. Either accept the default of 100 or enter a new number in Number of rows per page. For the columns selected, use the up and down arrows to move the sorting order of the columns in Set Sorting Order of Rows to Return. Also specify if you want ascending (ASC) or descending (DESC) order. For example, moving a column to the Top of the sorting order will filter the data base on that order first, followed by the rest of the columns. Select OFF to not include the column in the sort.
4. Click the Report Options tab and click the Chart Options tab to modify these options:
If you want to switch the X/Y Axes in the charts, click Switch X/Y Axis. Select the columns in Values and Labels that should be displayed in the chart. To preserve charting space, only the first 25 characters for a label are visible in the report. To see the entire label, hover over the label with the mouse. Specify the Data Size Units in Chart (e.g., BYTES, KB, MB, GB, MB, TB, PB) that you want displayed in the charts. Enter the e Maximum Number of Bar Points Per Chart you want displayed, or click Draw all Bar Points to have all possible bar points drawn. Default is 10.
Administration Guide - Solaris File System iDataAgent
Page 220 of 265
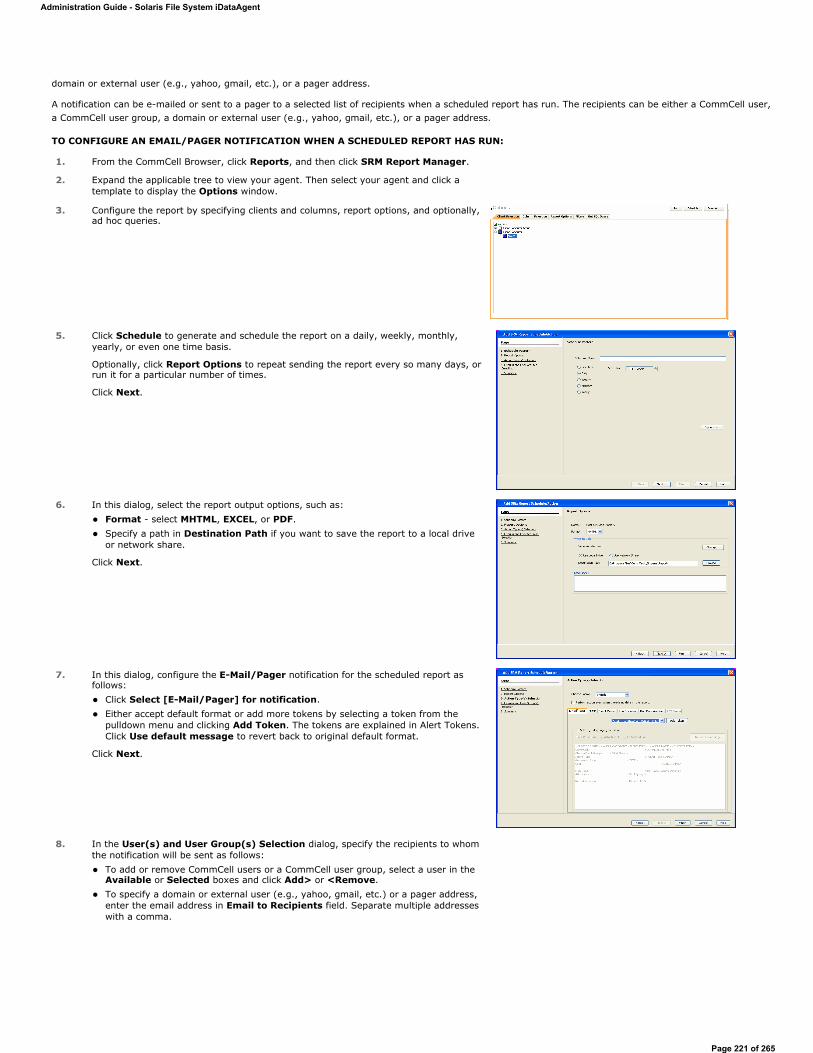
domain or external user (e.g., yahoo, gmail, etc.), or a pager address.
A notification can be e-mailed or sent to a pager to a selected list of recipients when a scheduled report has run. The recipients can be either a CommCell user, a CommCell user group, a domain or external user (e.g., yahoo, gmail, etc.), or a pager address.
TO CONFIGURE AN EMAIL/PAGER NOTIFICATION WHEN A SCHEDULED REPORT HAS RUN:
1. From the CommCell Browser, click Reports, and then click SRM Report Manager.
2. Expand the applicable tree to view your agent. Then select your agent and click a template to display the Options window.
3. Configure the report by specifying clients and columns, report options, and optionally, ad hoc queries.
5. Click Schedule to generate and schedule the report on a daily, weekly, monthly, yearly, or even one time basis.
Optionally, click Report Options to repeat sending the report every so many days, or run it for a particular number of times.
Click Next.
6. In this dialog, select the report output options, such as: Format - select MHTML, EXCEL, or PDF. Specify a path in Destination Path if you want to save the report to a local drive or network share.
Click Next.
7. In this dialog, configure the E-Mail/Pager notification for the scheduled report as follows:
Click Select [E-Mail/Pager] for notification. Either accept default format or add more tokens by selecting a token from the pulldown menu and clicking Add Token. The tokens are explained in Alert Tokens. Click Use default message to revert back to original default format.
Click Next.
8. In the User(s) and User Group(s) Selection dialog, specify the recipients to whom the notification will be sent as follows:
To add or remove CommCell users or a CommCell user group, select a user in the Available or Selected boxes and click Add> or <Remove. To specify a domain or external user (e.g., yahoo, gmail, etc.) or a pager address, enter the email address in Email to Recipients field. Separate multiple addresses with a comma.
Administration Guide - Solaris File System iDataAgent
Page 221 of 265
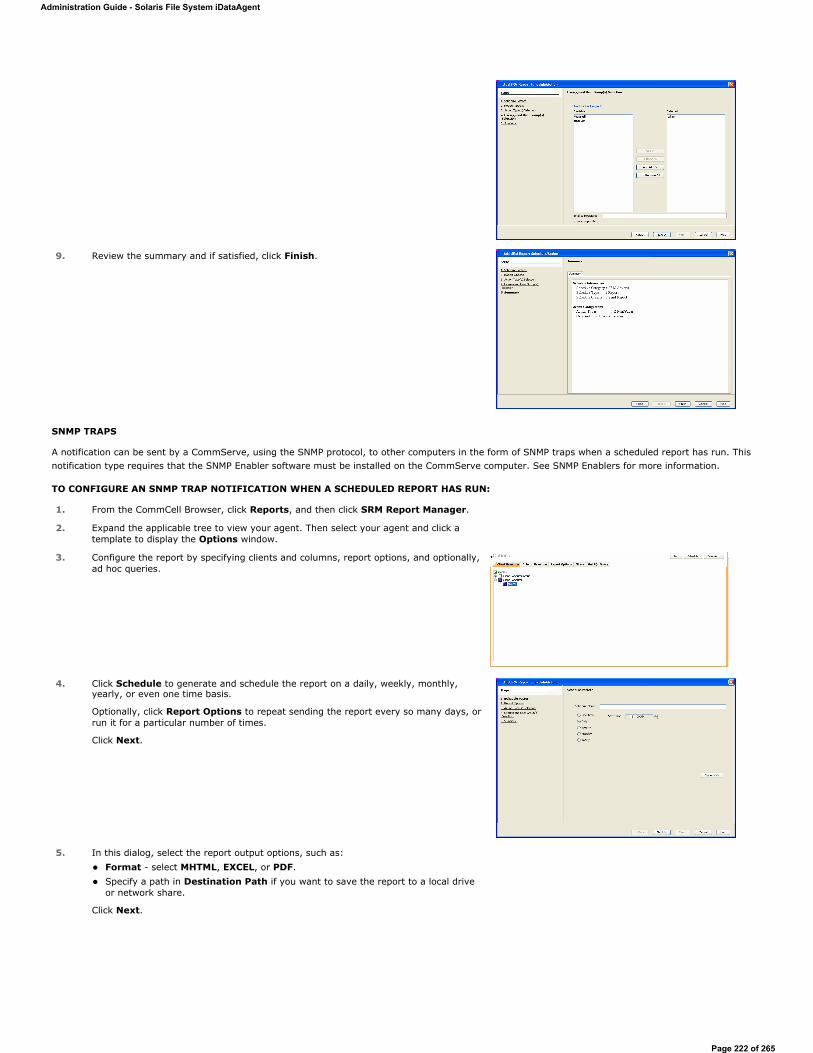
SNMP TRAPS
A notification can be sent by a CommServe, using the SNMP protocol, to other computers in the form of SNMP traps when a scheduled report has run. This notification type requires that the SNMP Enabler software must be installed on the CommServe computer. See SNMP Enablers for more information.
TO CONFIGURE AN SNMP TRAP NOTIFICATION WHEN A SCHEDULED REPORT HAS RUN:
9. Review the summary and if satisfied, click Finish.
1. From the CommCell Browser, click Reports, and then click SRM Report Manager.
2. Expand the applicable tree to view your agent. Then select your agent and click a template to display the Options window.
3. Configure the report by specifying clients and columns, report options, and optionally, ad hoc queries.
4. Click Schedule to generate and schedule the report on a daily, weekly, monthly, yearly, or even one time basis.
Optionally, click Report Options to repeat sending the report every so many days, or run it for a particular number of times.
Click Next.
5. In this dialog, select the report output options, such as: Format - select MHTML, EXCEL, or PDF. Specify a path in Destination Path if you want to save the report to a local drive or network share.
Click Next.
Administration Guide - Solaris File System iDataAgent
Page 222 of 265
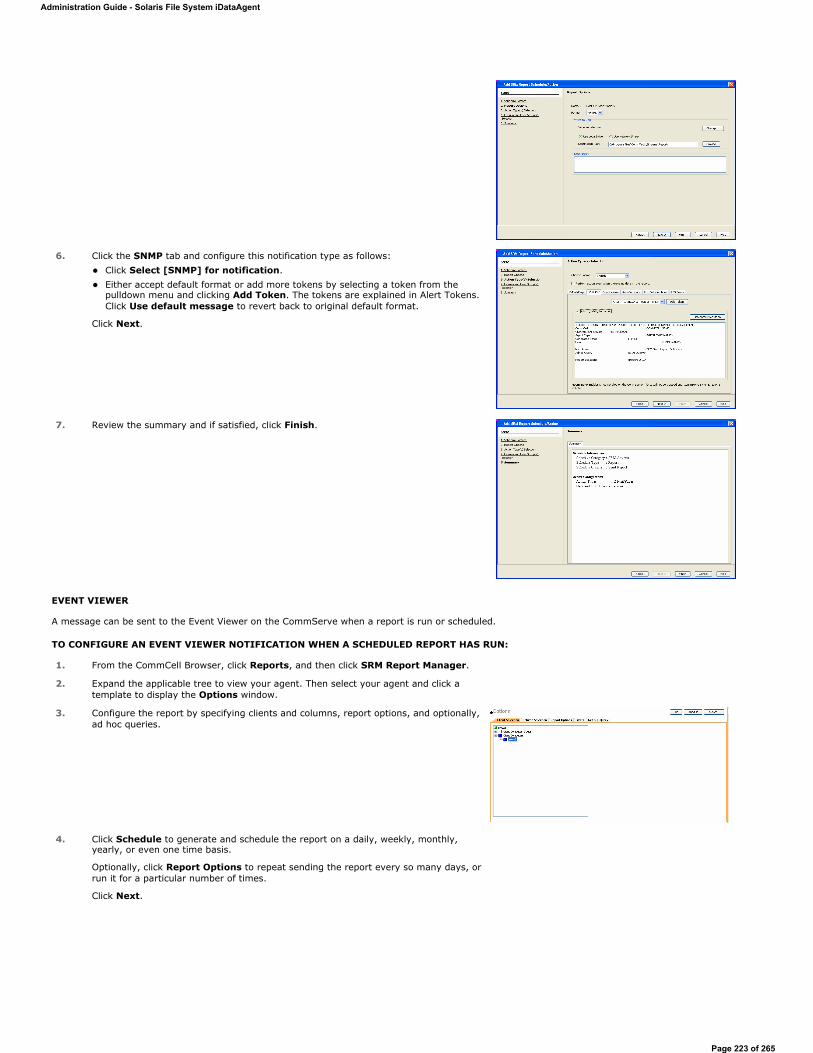
EVENT VIEWER
A message can be sent to the Event Viewer on the CommServe when a report is run or scheduled.
TO CONFIGURE AN EVENT VIEWER NOTIFICATION WHEN A SCHEDULED REPORT HAS RUN:
6. Click the SNMP tab and configure this notification type as follows: Click Select [SNMP] for notification. Either accept default format or add more tokens by selecting a token from the pulldown menu and clicking Add Token. The tokens are explained in Alert Tokens. Click Use default message to revert back to original default format.
Click Next.
7. Review the summary and if satisfied, click Finish.
1. From the CommCell Browser, click Reports, and then click SRM Report Manager.
2. Expand the applicable tree to view your agent. Then select your agent and click a template to display the Options window.
3. Configure the report by specifying clients and columns, report options, and optionally, ad hoc queries.
4. Click Schedule to generate and schedule the report on a daily, weekly, monthly, yearly, or even one time basis.
Optionally, click Report Options to repeat sending the report every so many days, or run it for a particular number of times.
Click Next.
Administration Guide - Solaris File System iDataAgent
Page 223 of 265
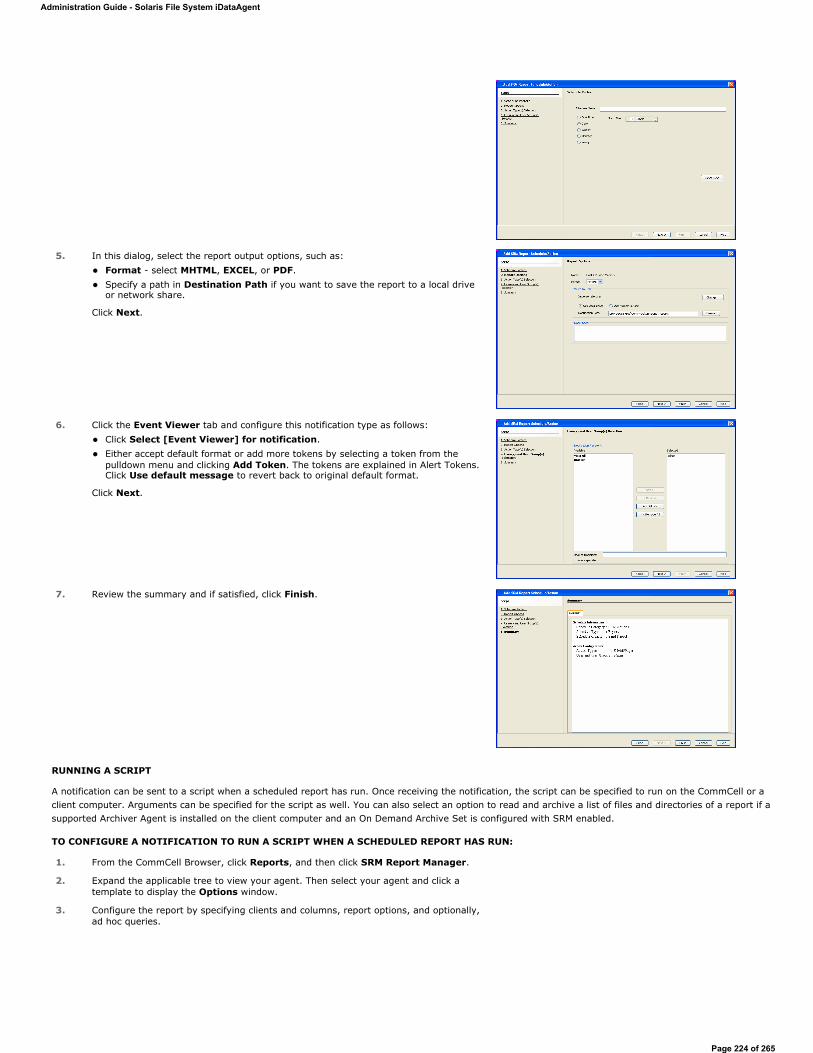
RUNNING A SCRIPT
A notification can be sent to a script when a scheduled report has run. Once receiving the notification, the script can be specified to run on the CommCell or a client computer. Arguments can be specified for the script as well. You can also select an option to read and archive a list of files and directories of a report if a supported Archiver Agent is installed on the client computer and an On Demand Archive Set is configured with SRM enabled.
TO CONFIGURE A NOTIFICATION TO RUN A SCRIPT WHEN A SCHEDULED REPORT HAS RUN:
5. In this dialog, select the report output options, such as: Format - select MHTML, EXCEL, or PDF. Specify a path in Destination Path if you want to save the report to a local drive or network share.
Click Next.
6. Click the Event Viewer tab and configure this notification type as follows: Click Select [Event Viewer] for notification. Either accept default format or add more tokens by selecting a token from the pulldown menu and clicking Add Token. The tokens are explained in Alert Tokens. Click Use default message to revert back to original default format.
Click Next.
7. Review the summary and if satisfied, click Finish.
1. From the CommCell Browser, click Reports, and then click SRM Report Manager.
2. Expand the applicable tree to view your agent. Then select your agent and click a template to display the Options window.
3. Configure the report by specifying clients and columns, report options, and optionally, ad hoc queries.
Administration Guide - Solaris File System iDataAgent
Page 224 of 265
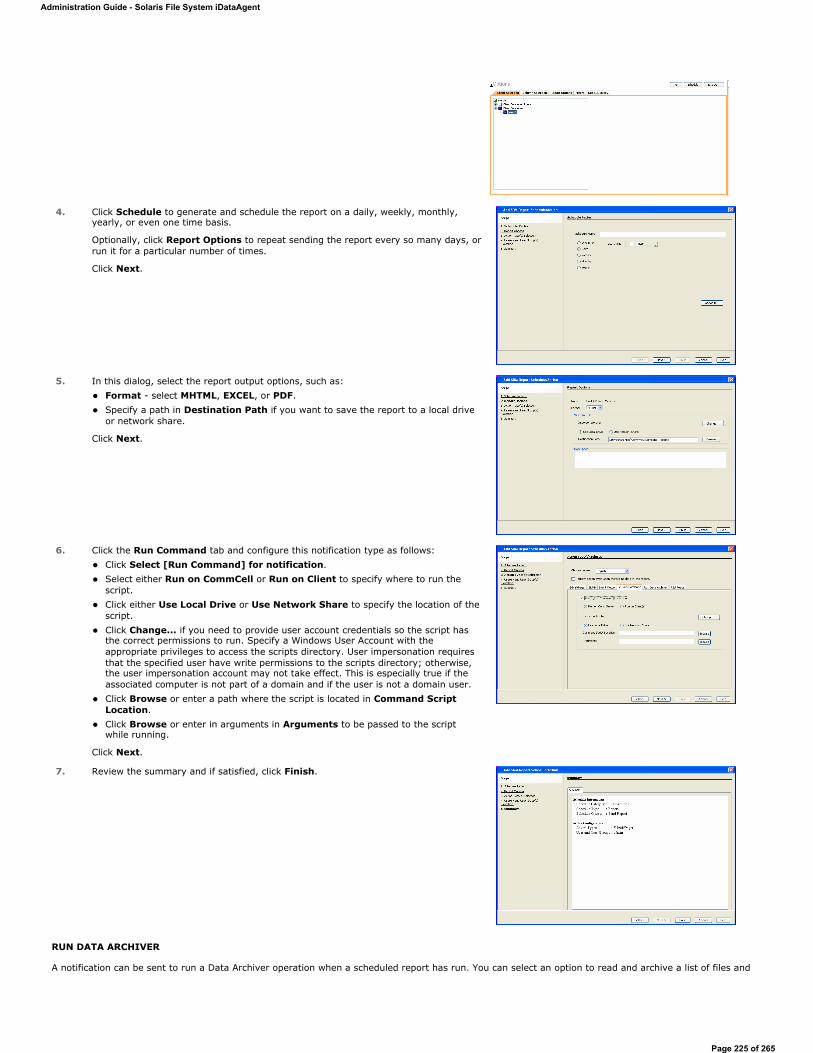
RUN DATA ARCHIVER
A notification can be sent to run a Data Archiver operation when a scheduled report has run. You can select an option to read and archive a list of files and
4. Click Schedule to generate and schedule the report on a daily, weekly, monthly, yearly, or even one time basis.
Optionally, click Report Options to repeat sending the report every so many days, or run it for a particular number of times.
Click Next.
5. In this dialog, select the report output options, such as: Format - select MHTML, EXCEL, or PDF. Specify a path in Destination Path if you want to save the report to a local drive or network share.
Click Next.
6. Click the Run Command tab and configure this notification type as follows: Click Select [Run Command] for notification. Select either Run on CommCell or Run on Client to specify where to run the script. Click either Use Local Drive or Use Network Share to specify the location of the script. Click Change... if you need to provide user account credentials so the script has the correct permissions to run. Specify a Windows User Account with the appropriate privileges to access the scripts directory. User impersonation requires that the specified user have write permissions to the scripts directory; otherwise, the user impersonation account may not take effect. This is especially true if the associated computer is not part of a domain and if the user is not a domain user. Click Browse or enter a path where the script is located in Command Script Location. Click Browse or enter in arguments in Arguments to be passed to the script while running.
Click Next.
7. Review the summary and if satisfied, click Finish.
Administration Guide - Solaris File System iDataAgent
Page 225 of 265
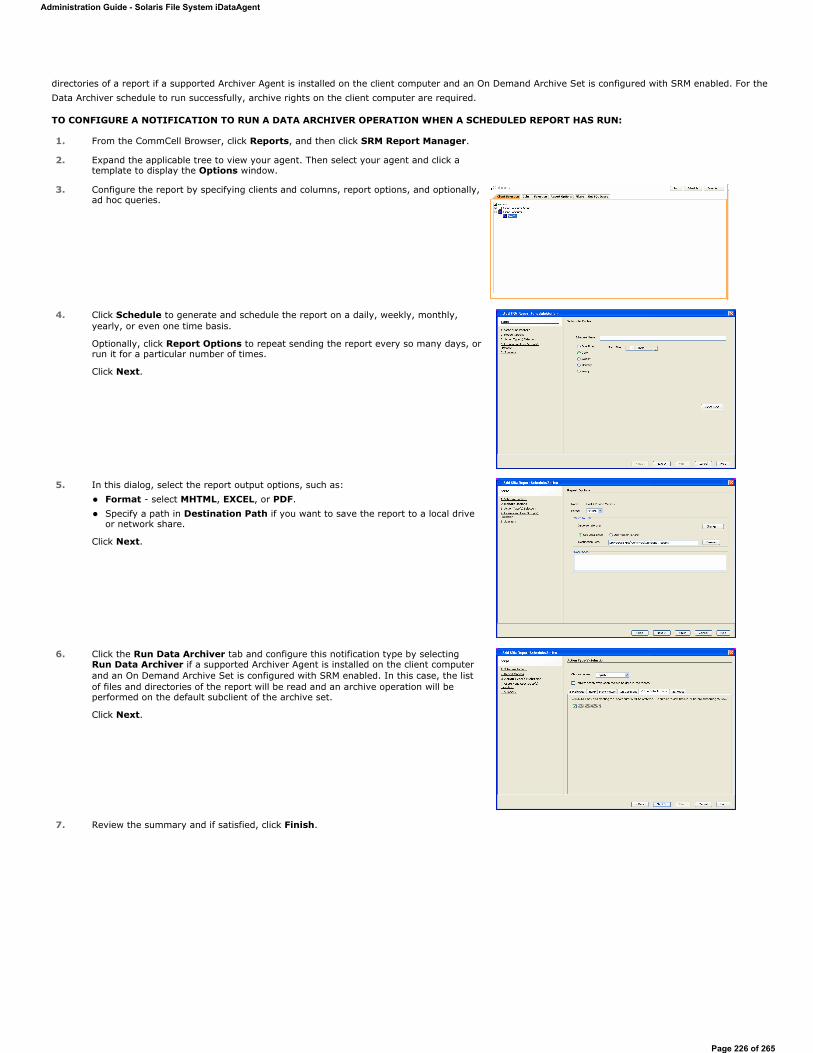
directories of a report if a supported Archiver Agent is installed on the client computer and an On Demand Archive Set is configured with SRM enabled. For the Data Archiver schedule to run successfully, archive rights on the client computer are required.
TO CONFIGURE A NOTIFICATION TO RUN A DATA ARCHIVER OPERATION WHEN A SCHEDULED REPORT HAS RUN:
1. From the CommCell Browser, click Reports, and then click SRM Report Manager.
2. Expand the applicable tree to view your agent. Then select your agent and click a template to display the Options window.
3. Configure the report by specifying clients and columns, report options, and optionally, ad hoc queries.
4. Click Schedule to generate and schedule the report on a daily, weekly, monthly, yearly, or even one time basis.
Optionally, click Report Options to repeat sending the report every so many days, or run it for a particular number of times.
Click Next.
5. In this dialog, select the report output options, such as: Format - select MHTML, EXCEL, or PDF. Specify a path in Destination Path if you want to save the report to a local drive or network share.
Click Next.
6. Click the Run Data Archiver tab and configure this notification type by selecting Run Data Archiver if a supported Archiver Agent is installed on the client computer and an On Demand Archive Set is configured with SRM enabled. In this case, the list of files and directories of the report will be read and an archive operation will be performed on the default subclient of the archive set.
Click Next.
7. Review the summary and if satisfied, click Finish.
Administration Guide - Solaris File System iDataAgent
Page 226 of 265
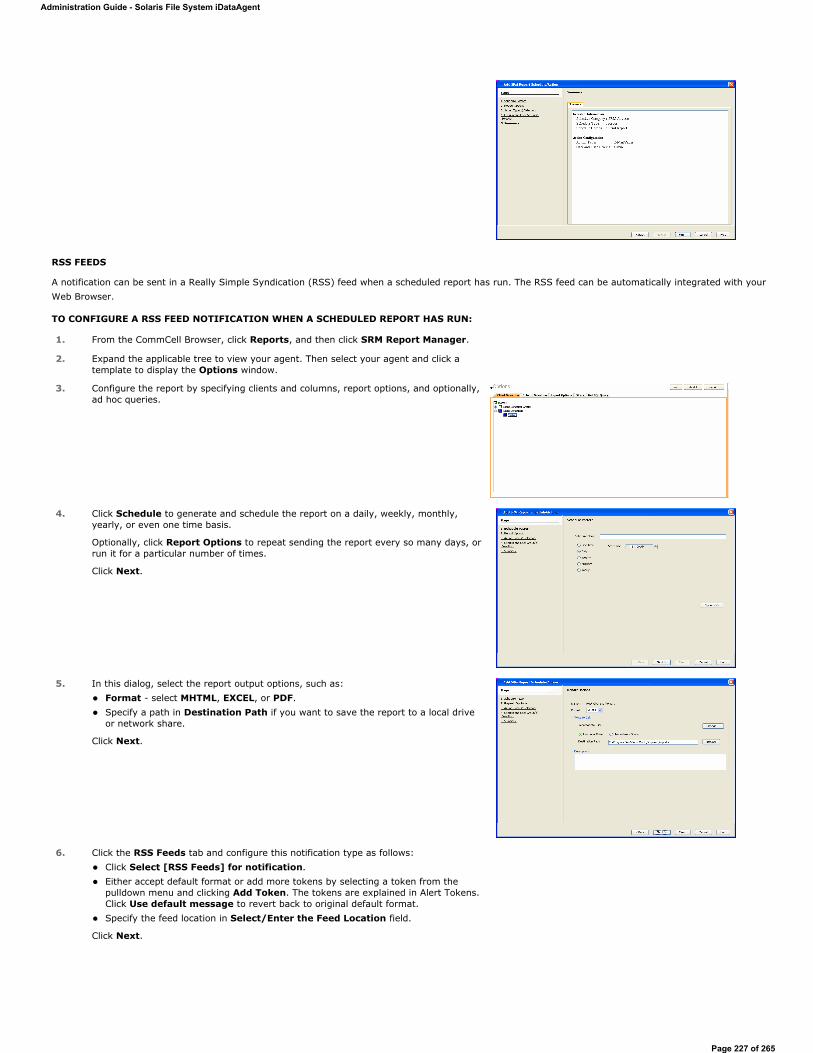
RSS FEEDS
A notification can be sent in a Really Simple Syndication (RSS) feed when a scheduled report has run. The RSS feed can be automatically integrated with your Web Browser.
TO CONFIGURE A RSS FEED NOTIFICATION WHEN A SCHEDULED REPORT HAS RUN:
1. From the CommCell Browser, click Reports, and then click SRM Report Manager.
2. Expand the applicable tree to view your agent. Then select your agent and click a template to display the Options window.
3. Configure the report by specifying clients and columns, report options, and optionally, ad hoc queries.
4. Click Schedule to generate and schedule the report on a daily, weekly, monthly, yearly, or even one time basis.
Optionally, click Report Options to repeat sending the report every so many days, or run it for a particular number of times.
Click Next.
5. In this dialog, select the report output options, such as: Format - select MHTML, EXCEL, or PDF. Specify a path in Destination Path if you want to save the report to a local drive or network share.
Click Next.
6. Click the RSS Feeds tab and configure this notification type as follows: Click Select [RSS Feeds] for notification. Either accept default format or add more tokens by selecting a token from the pulldown menu and clicking Add Token. The tokens are explained in Alert Tokens. Click Use default message to revert back to original default format. Specify the feed location in Select/Enter the Feed Location field.
Click Next.
Administration Guide - Solaris File System iDataAgent
Page 227 of 265
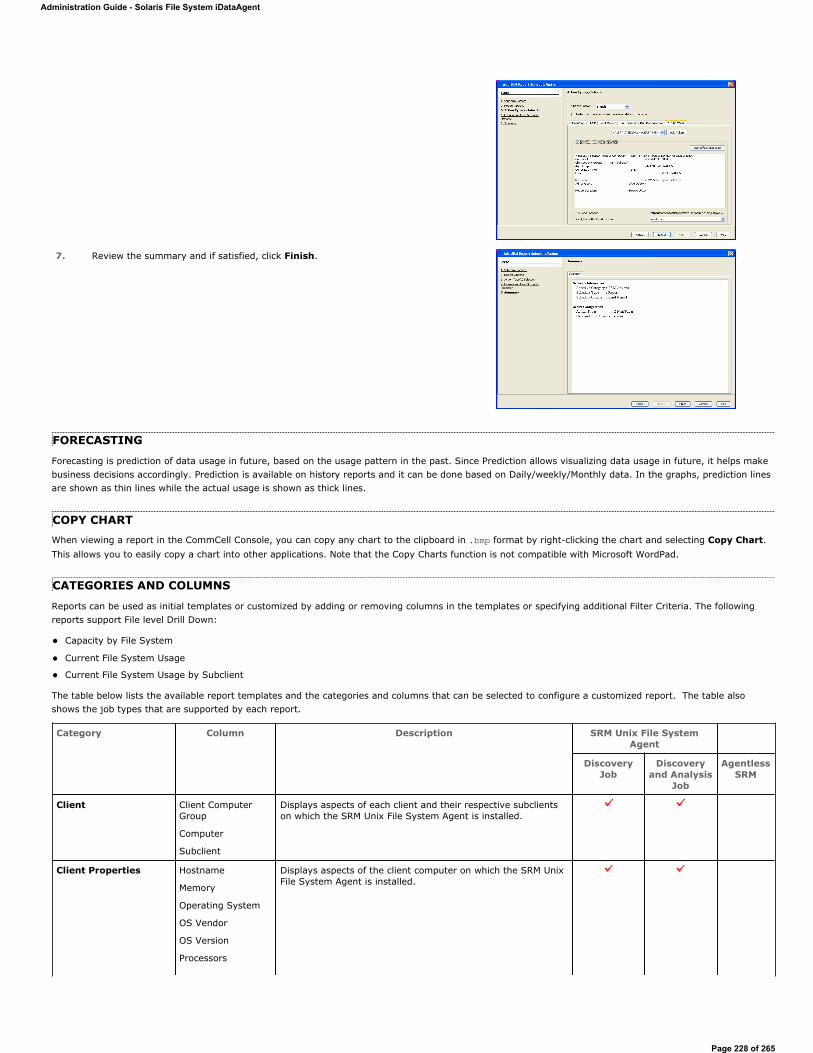
FORECASTING
Forecasting is prediction of data usage in future, based on the usage pattern in the past. Since Prediction allows visualizing data usage in future, it helps make business decisions accordingly. Prediction is available on history reports and it can be done based on Daily/weekly/Monthly data. In the graphs, prediction lines are shown as thin lines while the actual usage is shown as thick lines.
COPY CHARTWhen viewing a report in the CommCell Console, you can copy any chart to the clipboard in .bmp format by right-clicking the chart and selecting Copy Chart. This allows you to easily copy a chart into other applications. Note that the Copy Charts function is not compatible with Microsoft WordPad.
CATEGORIES AND COLUMNS
Reports can be used as initial templates or customized by adding or removing columns in the templates or specifying additional Filter Criteria. The following reports support File level Drill Down:
Capacity by File System
Current File System Usage
Current File System Usage by Subclient
The table below lists the available report templates and the categories and columns that can be selected to configure a customized report. The table also shows the job types that are supported by each report.
7. Review the summary and if satisfied, click Finish.
Category Column Description SRM Unix File System Agent
Discovery Job
Discovery and Analysis
Job
Agentless SRM
Client Client Computer Group
Computer
Subclient
Displays aspects of each client and their respective subclients on which the SRM Unix File System Agent is installed.
Client Properties Hostname
Memory
Operating System
OS Vendor
OS Version
Processors
Displays aspects of the client computer on which the SRM Unix File System Agent is installed.
Administration Guide - Solaris File System iDataAgent
Page 228 of 265
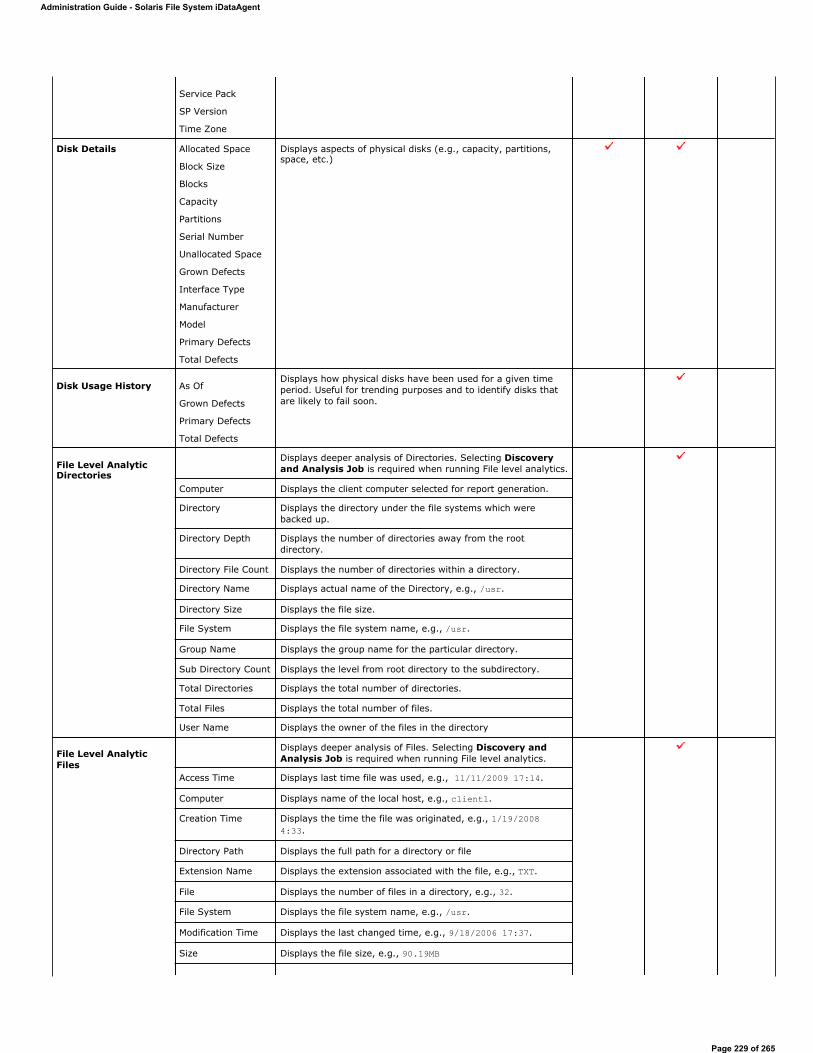
Service Pack
SP Version
Time Zone
Disk Details Allocated Space
Block Size
Blocks
Capacity
Partitions
Serial Number
Unallocated Space
Grown Defects
Interface Type
Manufacturer
Model
Primary Defects
Total Defects
Displays aspects of physical disks (e.g., capacity, partitions, space, etc.)
Disk Usage History As Of
Grown Defects
Primary Defects
Total Defects
Displays how physical disks have been used for a given time period. Useful for trending purposes and to identify disks that are likely to fail soon.
File Level Analytic Directories
Displays deeper analysis of Directories. Selecting Discovery and Analysis Job is required when running File level analytics.
Computer Displays the client computer selected for report generation.
Directory Displays the directory under the file systems which were backed up.
Directory Depth Displays the number of directories away from the root directory.
Directory File Count Displays the number of directories within a directory.
Directory Name Displays actual name of the Directory, e.g., /usr.
Directory Size Displays the file size.
File System Displays the file system name, e.g., /usr.
Group Name Displays the group name for the particular directory.
Sub Directory Count Displays the level from root directory to the subdirectory.
Total Directories Displays the total number of directories.
Total Files Displays the total number of files.
User Name Displays the owner of the files in the directory
File Level AnalyticFiles
Displays deeper analysis of Files. Selecting Discovery and Analysis Job is required when running File level analytics.
Access Time Displays last time file was used, e.g., 11/11/2009 17:14.
Computer Displays name of the local host, e.g., client1.
Creation Time Displays the time the file was originated, e.g., 1/19/2008 4:33.
Directory Path Displays the full path for a directory or file
Extension Name Displays the extension associated with the file, e.g., TXT.
File Displays the number of files in a directory, e.g., 32.
File System Displays the file system name, e.g., /usr.
Modification Time Displays the last changed time, e.g., 9/18/2006 17:37.
Size Displays the file size, e.g., 90.19MB
Administration Guide - Solaris File System iDataAgent
Page 229 of 265
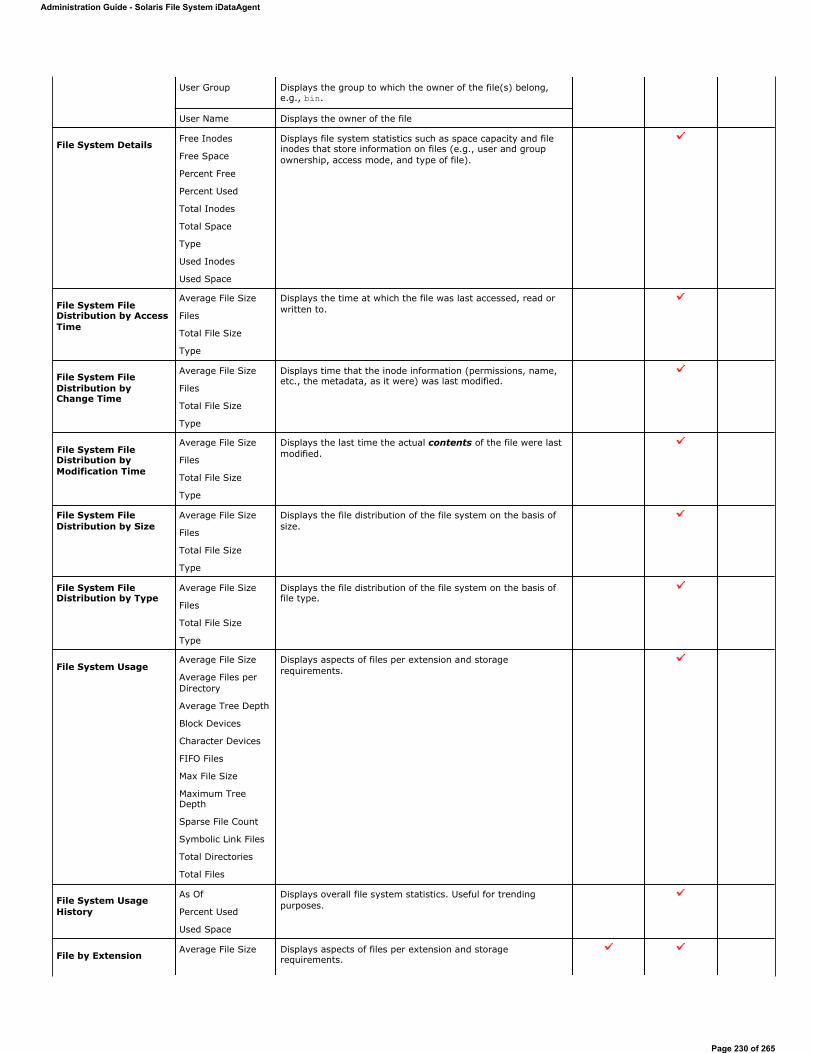
User Group Displays the group to which the owner of the file(s) belong, e.g., bin.
User Name Displays the owner of the file
File System DetailsFree Inodes
Free Space
Percent Free
Percent Used
Total Inodes
Total Space
Type
Used Inodes
Used Space
Displays file system statistics such as space capacity and file inodes that store information on files (e.g., user and group ownership, access mode, and type of file).
File System File Distribution by Access Time
Average File Size
Files
Total File Size
Type
Displays the time at which the file was last accessed, read or written to.
File System File Distribution by Change Time
Average File Size
Files
Total File Size
Type
Displays time that the inode information (permissions, name, etc., the metadata, as it were) was last modified.
File System File Distribution by Modification Time
Average File Size
Files
Total File Size
Type
Displays the last time the actual contents of the file were last modified.
File System File Distribution by Size
Average File Size
Files
Total File Size
Type
Displays the file distribution of the file system on the basis of size.
File System File Distribution by Type
Average File Size
Files
Total File Size
Type
Displays the file distribution of the file system on the basis of file type.
File System UsageAverage File Size
Average Files per Directory
Average Tree Depth
Block Devices
Character Devices
FIFO Files
Max File Size
Maximum Tree Depth
Sparse File Count
Symbolic Link Files
Total Directories
Total Files
Displays aspects of files per extension and storage requirements.
File System Usage History
As Of
Percent Used
Used Space
Displays overall file system statistics. Useful for trending purposes.
File by ExtensionAverage File Size Displays aspects of files per extension and storage
requirements.
Administration Guide - Solaris File System iDataAgent
Page 230 of 265
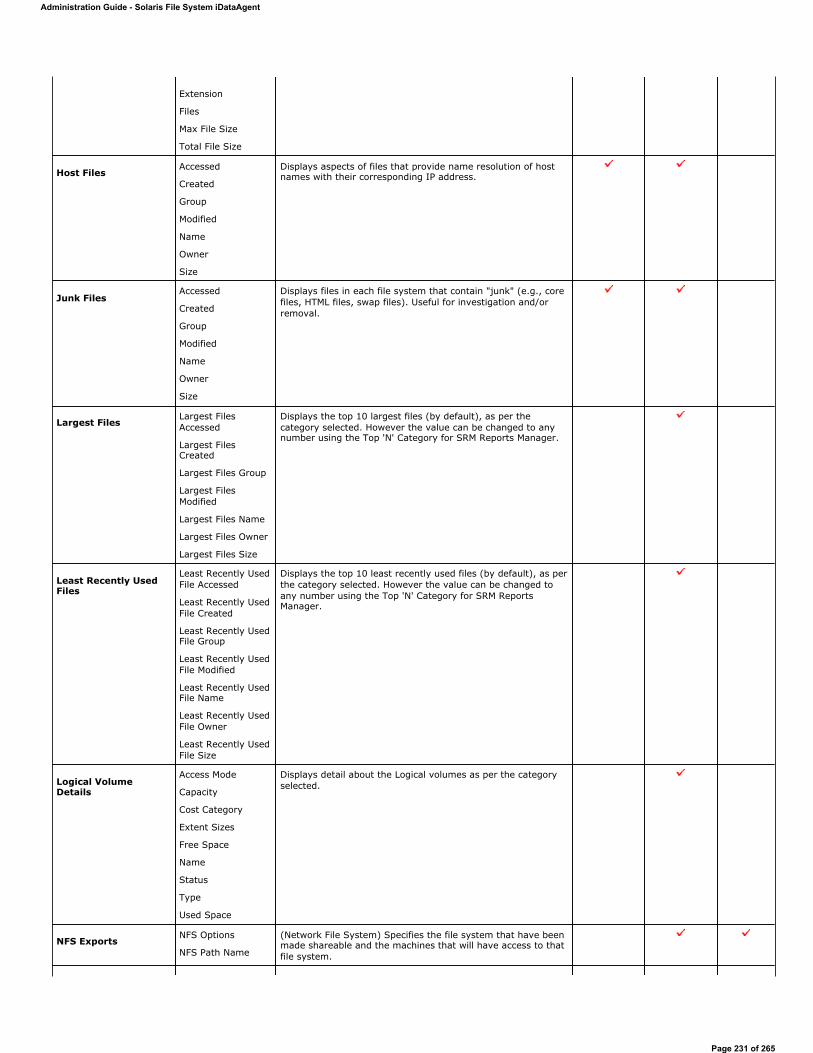
Extension
Files
Max File Size
Total File Size
Host Files Accessed
Created
Group
Modified
Name
Owner
Size
Displays aspects of files that provide name resolution of host names with their corresponding IP address.
Junk FilesAccessed
Created
Group
Modified
Name
Owner
Size
Displays files in each file system that contain "junk" (e.g., core files, HTML files, swap files). Useful for investigation and/or removal.
Largest FilesLargest Files Accessed
Largest Files Created
Largest Files Group
Largest Files Modified
Largest Files Name
Largest Files Owner
Largest Files Size
Displays the top 10 largest files (by default), as per the category selected. However the value can be changed to any number using the Top 'N' Category for SRM Reports Manager.
Least Recently Used Files
Least Recently Used File Accessed
Least Recently Used File Created
Least Recently Used File Group
Least Recently Used File Modified
Least Recently Used File Name
Least Recently Used File Owner
Least Recently Used File Size
Displays the top 10 least recently used files (by default), as per the category selected. However the value can be changed to any number using the Top 'N' Category for SRM Reports Manager.
Logical Volume Details
Access Mode
Capacity
Cost Category
Extent Sizes
Free Space
Name
Status
Type
Used Space
Displays detail about the Logical volumes as per the category selected.
NFS ExportsNFS Options
NFS Path Name
(Network File System) Specifies the file system that have been made shareable and the machines that will have access to that file system.
Administration Guide - Solaris File System iDataAgent
Page 231 of 265
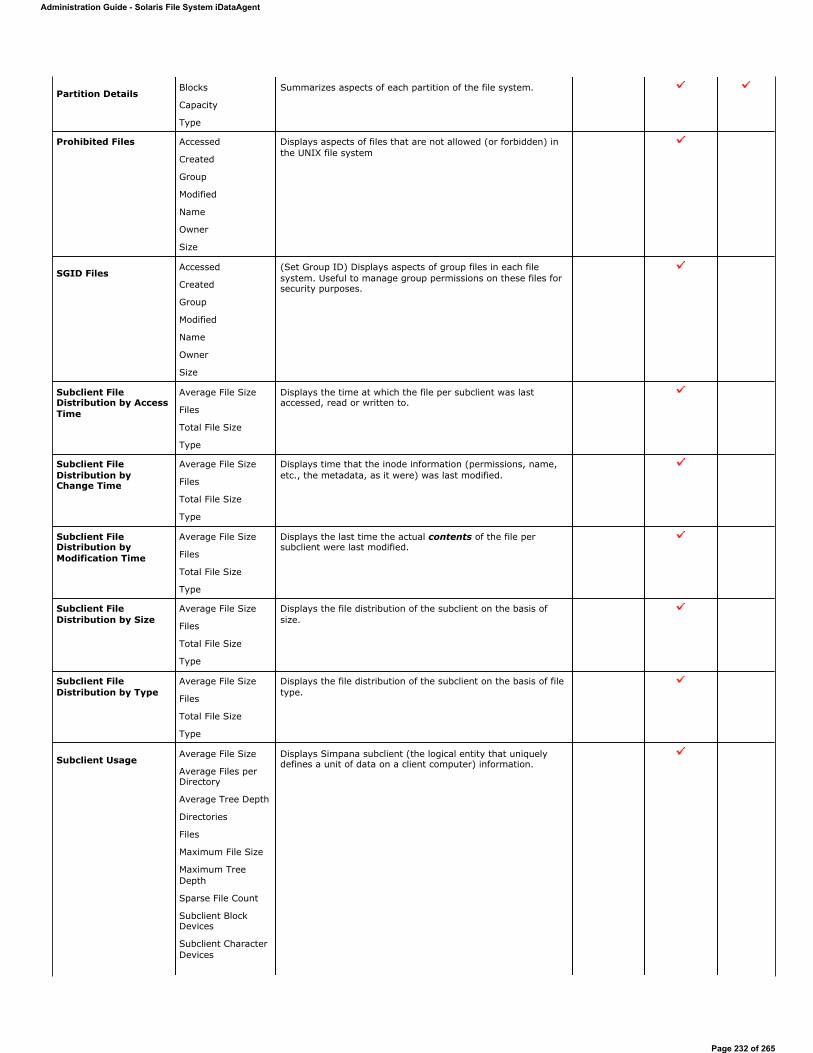
Partition Details Blocks
Capacity
Type
Summarizes aspects of each partition of the file system.
Prohibited Files Accessed
Created
Group
Modified
Name
Owner
Size
Displays aspects of files that are not allowed (or forbidden) in the UNIX file system
SGID Files Accessed
Created
Group
Modified
Name
Owner
Size
(Set Group ID) Displays aspects of group files in each file system. Useful to manage group permissions on these files for security purposes.
Subclient File Distribution by Access Time
Average File Size
Files
Total File Size
Type
Displays the time at which the file per subclient was last accessed, read or written to.
Subclient File Distribution by Change Time
Average File Size
Files
Total File Size
Type
Displays time that the inode information (permissions, name, etc., the metadata, as it were) was last modified.
Subclient File Distribution by Modification Time
Average File Size
Files
Total File Size
Type
Displays the last time the actual contents of the file per subclient were last modified.
Subclient File Distribution by Size
Average File Size
Files
Total File Size
Type
Displays the file distribution of the subclient on the basis of size.
Subclient File Distribution by Type
Average File Size
Files
Total File Size
Type
Displays the file distribution of the subclient on the basis of file type.
Subclient Usage Average File Size
Average Files per Directory
Average Tree Depth
Directories
Files
Maximum File Size
Maximum Tree Depth
Sparse File Count
Subclient Block Devices
Subclient Character Devices
Displays Simpana subclient (the logical entity that uniquely defines a unit of data on a client computer) information.
Administration Guide - Solaris File System iDataAgent
Page 232 of 265
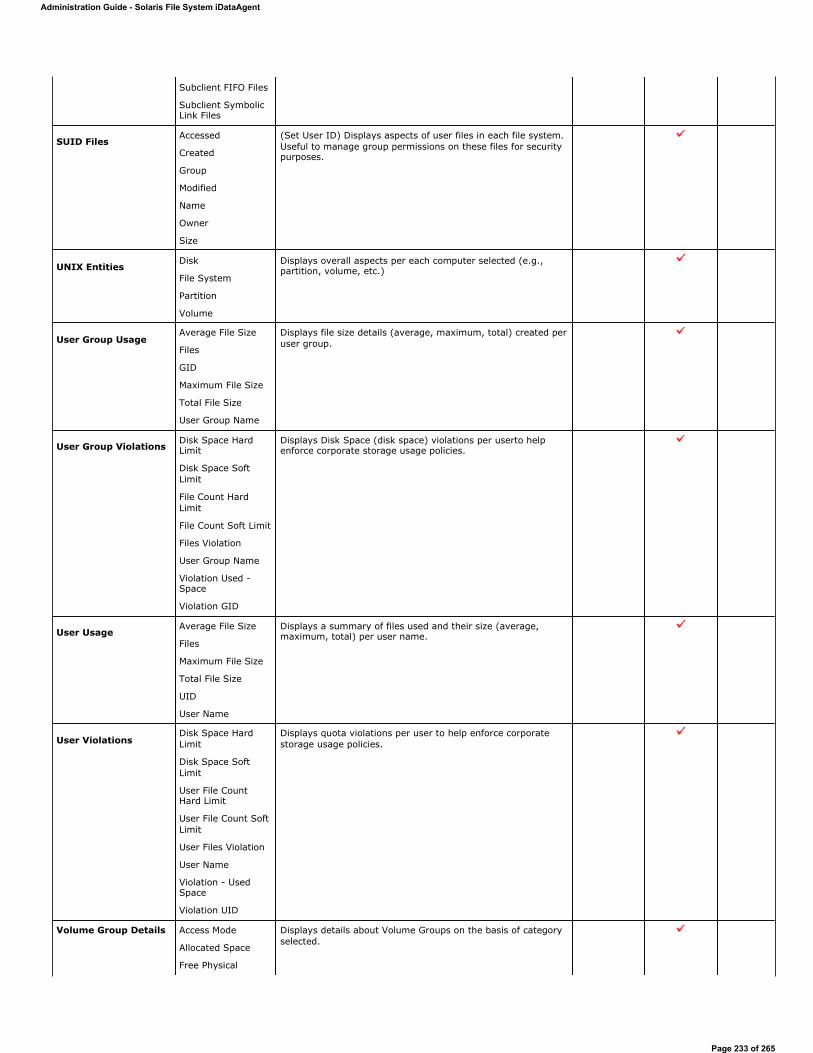
Subclient FIFO Files
Subclient Symbolic Link Files
SUID FilesAccessed
Created
Group
Modified
Name
Owner
Size
(Set User ID) Displays aspects of user files in each file system. Useful to manage group permissions on these files for security purposes.
UNIX EntitiesDisk
File System
Partition
Volume
Displays overall aspects per each computer selected (e.g., partition, volume, etc.)
User Group UsageAverage File Size
Files
GID
Maximum File Size
Total File Size
User Group Name
Displays file size details (average, maximum, total) created per user group.
User Group Violations Disk Space Hard Limit
Disk Space Soft Limit
File Count Hard Limit
File Count Soft Limit
Files Violation
User Group Name
Violation Used -Space
Violation GID
Displays Disk Space (disk space) violations per userto help enforce corporate storage usage policies.
User UsageAverage File Size
Files
Maximum File Size
Total File Size
UID
User Name
Displays a summary of files used and their size (average, maximum, total) per user name.
User ViolationsDisk Space Hard Limit
Disk Space Soft Limit
User File Count Hard Limit
User File Count Soft Limit
User Files Violation
User Name
Violation - Used Space
Violation UID
Displays quota violations per user to help enforce corporate storage usage policies.
Volume Group Details Access Mode
Allocated Space
Free Physical
Displays details about Volume Groups on the basis of category selected.
Administration Guide - Solaris File System iDataAgent
Page 233 of 265
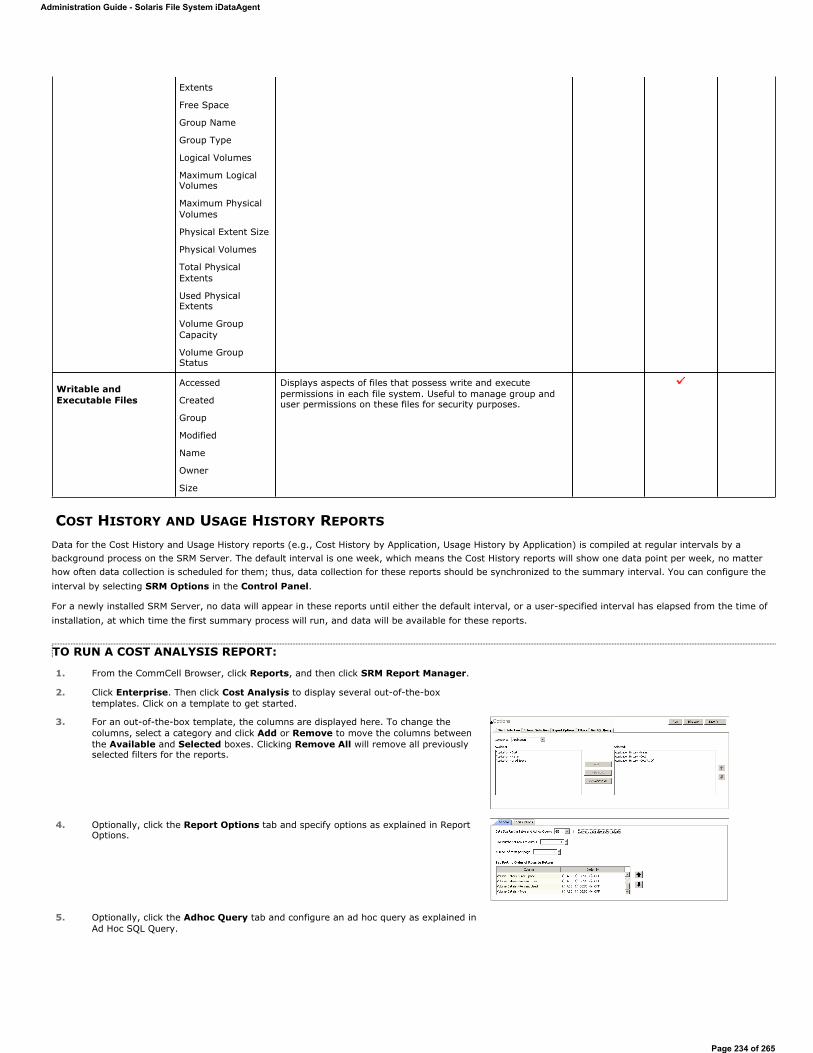
COST HISTORY AND USAGE HISTORY REPORTS
Data for the Cost History and Usage History reports (e.g., Cost History by Application, Usage History by Application) is compiled at regular intervals by a background process on the SRM Server. The default interval is one week, which means the Cost History reports will show one data point per week, no matter how often data collection is scheduled for them; thus, data collection for these reports should be synchronized to the summary interval. You can configure the interval by selecting SRM Options in the Control Panel.
For a newly installed SRM Server, no data will appear in these reports until either the default interval, or a user-specified interval has elapsed from the time of installation, at which time the first summary process will run, and data will be available for these reports.
TO RUN A COST ANALYSIS REPORT:
Extents
Free Space
Group Name
Group Type
Logical Volumes
Maximum Logical Volumes
Maximum Physical Volumes
Physical Extent Size
Physical Volumes
Total Physical Extents
Used Physical Extents
Volume Group Capacity
Volume Group Status
Writable and Executable Files
Accessed
Created
Group
Modified
Name
Owner
Size
Displays aspects of files that possess write and execute permissions in each file system. Useful to manage group and user permissions on these files for security purposes.
1. From the CommCell Browser, click Reports, and then click SRM Report Manager.
2. Click Enterprise. Then click Cost Analysis to display several out-of-the-box templates. Click on a template to get started.
3. For an out-of-the-box template, the columns are displayed here. To change the columns, select a category and click Add or Remove to move the columns between the Available and Selected boxes. Clicking Remove All will remove all previously selected filters for the reports.
4. Optionally, click the Report Options tab and specify options as explained in Report Options.
5. Optionally, click the Adhoc Query tab and configure an ad hoc query as explained in Ad Hoc SQL Query.
Administration Guide - Solaris File System iDataAgent
Page 234 of 265
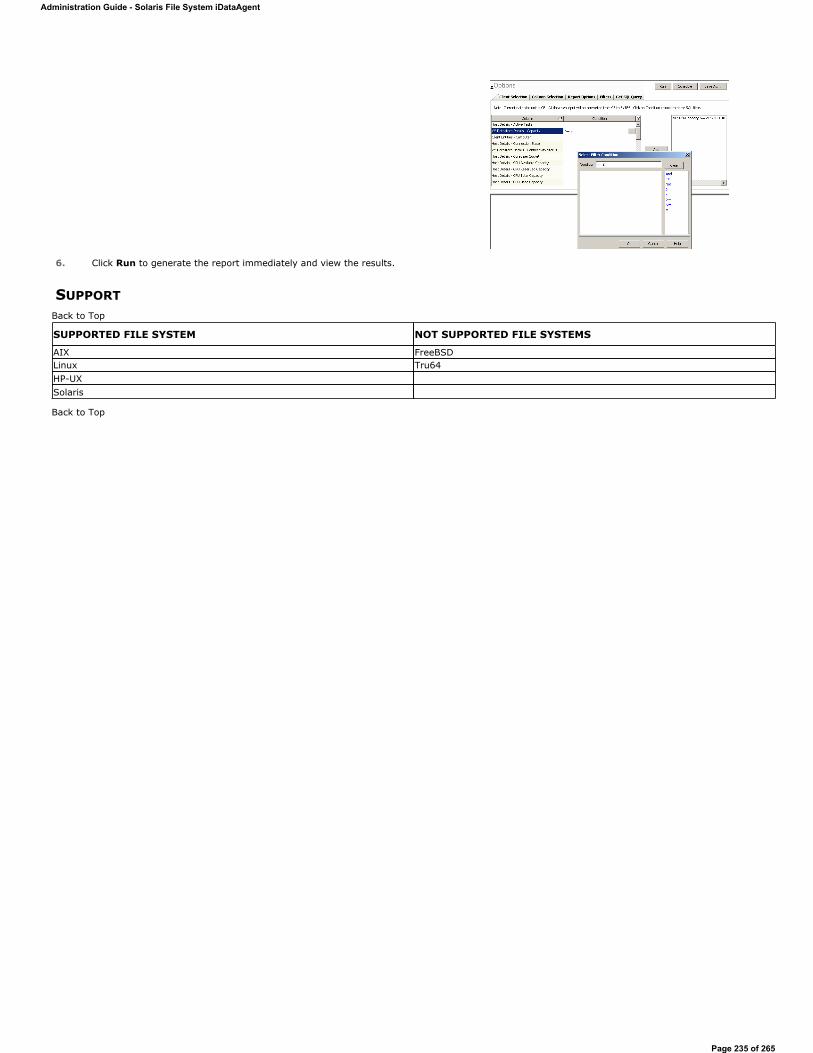
SUPPORT
Back to Top
6. Click Run to generate the report immediately and view the results.
Back to Top
SUPPORTED FILE SYSTEM NOT SUPPORTED FILE SYSTEMS
AIX FreeBSDLinux Tru64HP-UXSolaris
Administration Guide - Solaris File System iDataAgent
Page 235 of 265
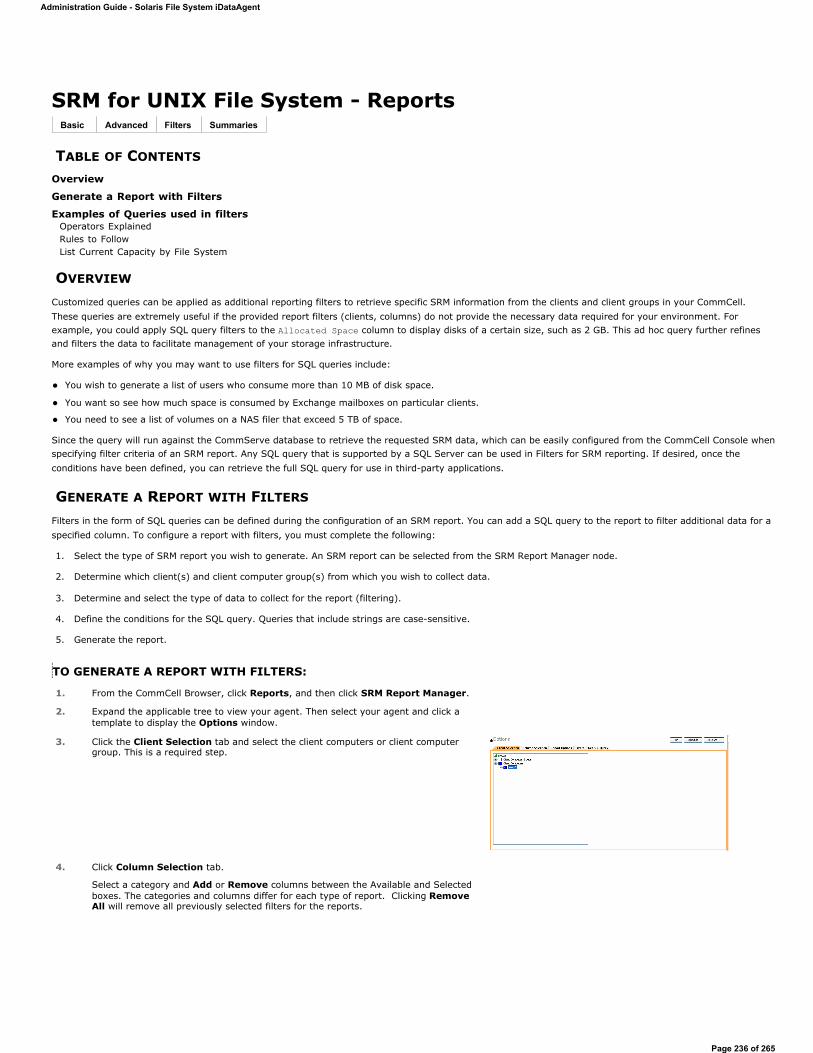
SRM for UNIX File System - Reports
TABLE OF CONTENTS
Overview
Generate a Report with Filters
Examples of Queries used in filtersOperators ExplainedRules to FollowList Current Capacity by File System
OVERVIEW
Customized queries can be applied as additional reporting filters to retrieve specific SRM information from the clients and client groups in your CommCell. These queries are extremely useful if the provided report filters (clients, columns) do not provide the necessary data required for your environment. For example, you could apply SQL query filters to the Allocated Space column to display disks of a certain size, such as 2 GB. This ad hoc query further refines and filters the data to facilitate management of your storage infrastructure.
More examples of why you may want to use filters for SQL queries include:
You wish to generate a list of users who consume more than 10 MB of disk space.
You want so see how much space is consumed by Exchange mailboxes on particular clients.
You need to see a list of volumes on a NAS filer that exceed 5 TB of space.
Since the query will run against the CommServe database to retrieve the requested SRM data, which can be easily configured from the CommCell Console when specifying filter criteria of an SRM report. Any SQL query that is supported by a SQL Server can be used in Filters for SRM reporting. If desired, once the conditions have been defined, you can retrieve the full SQL query for use in third-party applications.
GENERATE A REPORT WITH FILTERS
Filters in the form of SQL queries can be defined during the configuration of an SRM report. You can add a SQL query to the report to filter additional data for a specified column. To configure a report with filters, you must complete the following:
1. Select the type of SRM report you wish to generate. An SRM report can be selected from the SRM Report Manager node.
2. Determine which client(s) and client computer group(s) from which you wish to collect data.
3. Determine and select the type of data to collect for the report (filtering).
4. Define the conditions for the SQL query. Queries that include strings are case-sensitive.
5. Generate the report.
TO GENERATE A REPORT WITH FILTERS:
Basic Advanced Filters Summaries
1. From the CommCell Browser, click Reports, and then click SRM Report Manager.
2. Expand the applicable tree to view your agent. Then select your agent and click a template to display the Options window.
3. Click the Client Selection tab and select the client computers or client computer group. This is a required step.
4. Click Column Selection tab.
Select a category and Add or Remove columns between the Available and Selected boxes. The categories and columns differ for each type of report. Clicking Remove All will remove all previously selected filters for the reports.
Administration Guide - Solaris File System iDataAgent
Page 236 of 265
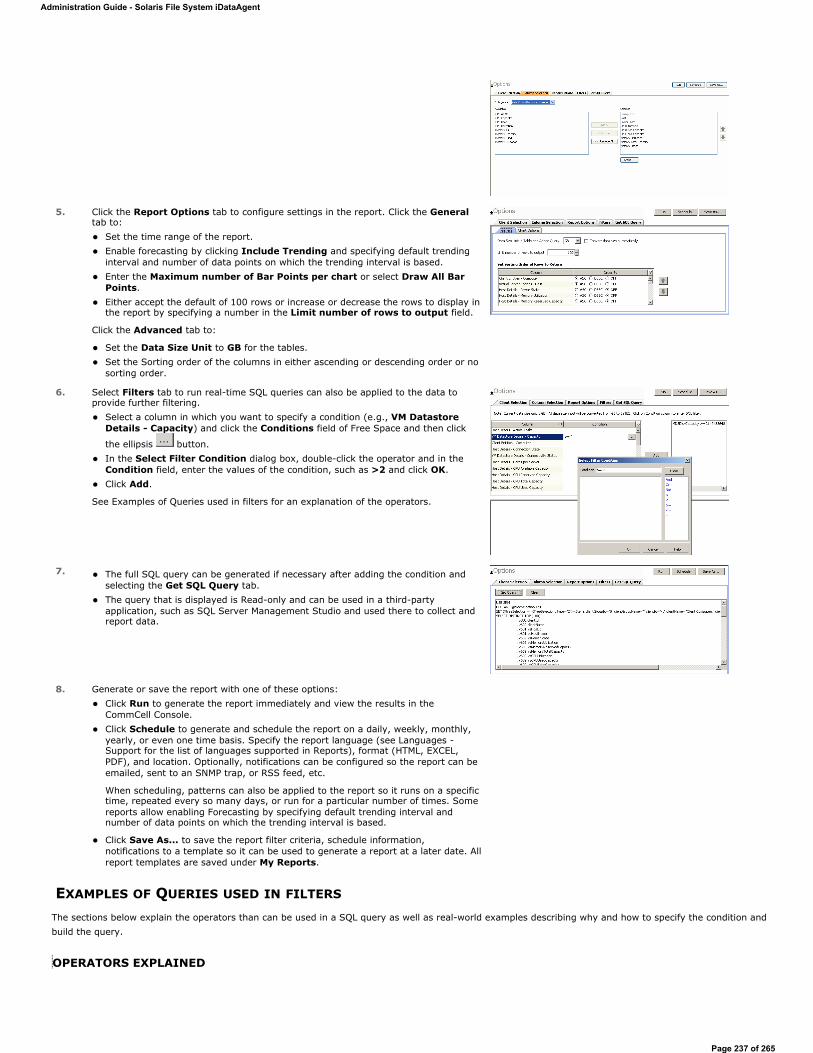
EXAMPLES OF QUERIES USED IN FILTERS
The sections below explain the operators than can be used in a SQL query as well as real-world examples describing why and how to specify the condition and build the query.
OPERATORS EXPLAINED
5. Click the Report Options tab to configure settings in the report. Click the Generaltab to:
Set the time range of the report. Enable forecasting by clicking Include Trending and specifying default trending interval and number of data points on which the trending interval is based. Enter the Maximum number of Bar Points per chart or select Draw All Bar Points. Either accept the default of 100 rows or increase or decrease the rows to display in the report by specifying a number in the Limit number of rows to output field.
Click the Advanced tab to:
Set the Data Size Unit to GB for the tables. Set the Sorting order of the columns in either ascending or descending order or no sorting order.
6. Select Filters tab to run real-time SQL queries can also be applied to the data to provide further filtering.
Select a column in which you want to specify a condition (e.g., VM Datastore Details - Capacity) and click the Conditions field of Free Space and then click
the ellipsis button. In the Select Filter Condition dialog box, double-click the operator and in the Condition field, enter the values of the condition, such as >2 and click OK. Click Add.
See Examples of Queries used in filters for an explanation of the operators.
7. The full SQL query can be generated if necessary after adding the condition and selecting the Get SQL Query tab. The query that is displayed is Read-only and can be used in a third-party application, such as SQL Server Management Studio and used there to collect and report data.
8. Generate or save the report with one of these options: Click Run to generate the report immediately and view the results in the CommCell Console. Click Schedule to generate and schedule the report on a daily, weekly, monthly, yearly, or even one time basis. Specify the report language (see Languages -Support for the list of languages supported in Reports), format (HTML, EXCEL, PDF), and location. Optionally, notifications can be configured so the report can be emailed, sent to an SNMP trap, or RSS feed, etc.
When scheduling, patterns can also be applied to the report so it runs on a specific time, repeated every so many days, or run for a particular number of times. Some reports allow enabling Forecasting by specifying default trending interval and number of data points on which the trending interval is based.
Click Save As... to save the report filter criteria, schedule information, notifications to a template so it can be used to generate a report at a later date. All report templates are saved under My Reports.
Administration Guide - Solaris File System iDataAgent
Page 237 of 265

The following explains the operators that can be used in filters using SQL queries. Examples for each are provided. Queries that include strings are case-sensitive.
OPERATOR DESCRIPTION EXAMPLE
And Is a binary operator that operates on two operands (data that is manipulated by the operator).
Works with both numeric and string queries. Displays a result if both operands are TRUE and no result is displayed if either is FALSE.
Display a computer group that starts with B and ends with M (e.g., Birmingham).
1. Select Client Computer Group column.
2. Enter this query: Starts With B And Ends With M
Or Is a binary operator that operates on two operands (data that is manipulated by the operator).
Works with both numeric and string queries. Displays a result if either operand is TRUE and no result is displayed if both are FALSE.
Display a computer that starts with B or starts with M (e.g., Birmingham, Milwaukee).
1. Select Computer column.
2. Enter this query: Starts With B Or Starts With M
Not An operation on logical values that changes true to false, and false to true. The NOT operator inverts the result of a comparison expression or a logical expression.
The specified condition must be false in order to view a result. Example: Display a computer that does not have less that < 4 GB of used space. Therefore, only computers with 4 or more GB of used space will be displayed.
Display a computer that does not have less that < 4 GB of used space.
1.Click Report Options tab and set data size unit to GB.
2. Select Used Space column.
3. Enter this query: Not < 4Like The LIKE operator is used in character string comparisons with pattern matching.
It can contain the special wild-card pattern matching characters percent -- '%' and underscore -- '_'. Underscore matches any single character. Percent matches zero or more characters.
Display a computer that contains eng characters in its name to identify computers in the engineering department.
1. Select Computer column.
2. Enter this query: %eng%Starts With The Starts With operator is used in character string comparisons with pattern matching. All names of computers in the
engineering department use the convention of eng_. Display all computers that start with E to list computers in the engineering department.
1. Select Computer column.
2. Enter this query: Starts With E
Ends With The Ends With operator is used in character string comparisons with pattern matching. All names of computers in the System Test department use the convention of system_test. Display a computer that ends with T to list computers in the system_test department.
1. Select Computer column.
2. Enter this query: Ends With T
> (Greater Than) A comparison operator that tests whether two expressions are the same.
Works with only numeric queries.
Display file sizes that are larger than 2 GB.
1. Click Report Options tab and set data size unit to GB.
2. Select Maximum Size column.
3. Enter this query: > 2< (Less Than) A comparison operator that tests whether two expressions are the same.
Works with only numeric queries.
Display file sizes that are less than 4 GB.
1. Click Report Options tab and set data size unit to GB.
2. Select Maximum Size column.
3. Enter this query: < 4
Administration Guide - Solaris File System iDataAgent
Page 238 of 265
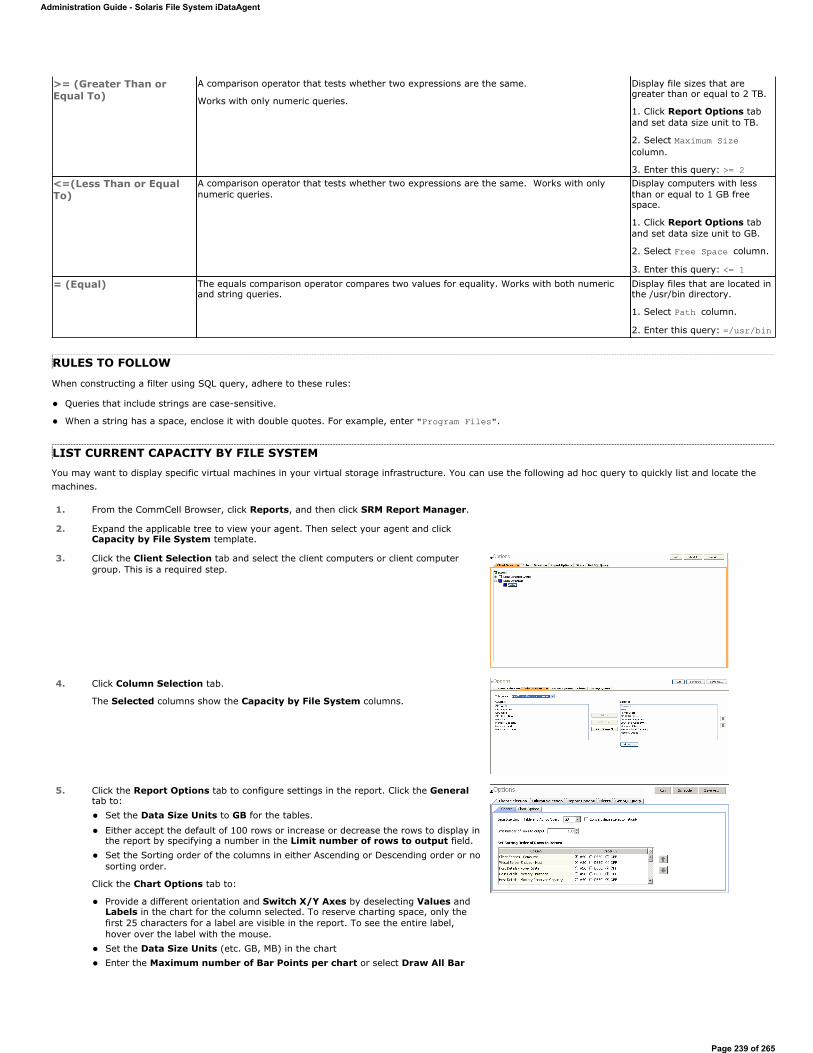
RULES TO FOLLOW
When constructing a filter using SQL query, adhere to these rules:
Queries that include strings are case-sensitive.
When a string has a space, enclose it with double quotes. For example, enter "Program Files".
LIST CURRENT CAPACITY BY FILE SYSTEMYou may want to display specific virtual machines in your virtual storage infrastructure. You can use the following ad hoc query to quickly list and locate the machines.
>= (Greater Than or Equal To)
A comparison operator that tests whether two expressions are the same.
Works with only numeric queries.
Display file sizes that are greater than or equal to 2 TB.
1. Click Report Options tab and set data size unit to TB.
2. Select Maximum Size column.
3. Enter this query: >= 2<=(Less Than or Equal To)
A comparison operator that tests whether two expressions are the same. Works with only numeric queries.
Display computers with less than or equal to 1 GB free space.
1. Click Report Options tab and set data size unit to GB.
2. Select Free Space column.
3. Enter this query: <= 1= (Equal) The equals comparison operator compares two values for equality. Works with both numeric
and string queries. Display files that are located in the /usr/bin directory.
1. Select Path column.
2. Enter this query: =/usr/bin
1. From the CommCell Browser, click Reports, and then click SRM Report Manager.
2. Expand the applicable tree to view your agent. Then select your agent and click Capacity by File System template.
3. Click the Client Selection tab and select the client computers or client computer group. This is a required step.
4. Click Column Selection tab.
The Selected columns show the Capacity by File System columns.
5. Click the Report Options tab to configure settings in the report. Click the Generaltab to:
Set the Data Size Units to GB for the tables.
Either accept the default of 100 rows or increase or decrease the rows to display in the report by specifying a number in the Limit number of rows to output field. Set the Sorting order of the columns in either Ascending or Descending order or no sorting order.
Click the Chart Options tab to:
Provide a different orientation and Switch X/Y Axes by deselecting Values and Labels in the chart for the column selected. To reserve charting space, only the first 25 characters for a label are visible in the report. To see the entire label, hover over the label with the mouse. Set the Data Size Units (etc. GB, MB) in the chart Enter the Maximum number of Bar Points per chart or select Draw All Bar
Administration Guide - Solaris File System iDataAgent
Page 239 of 265
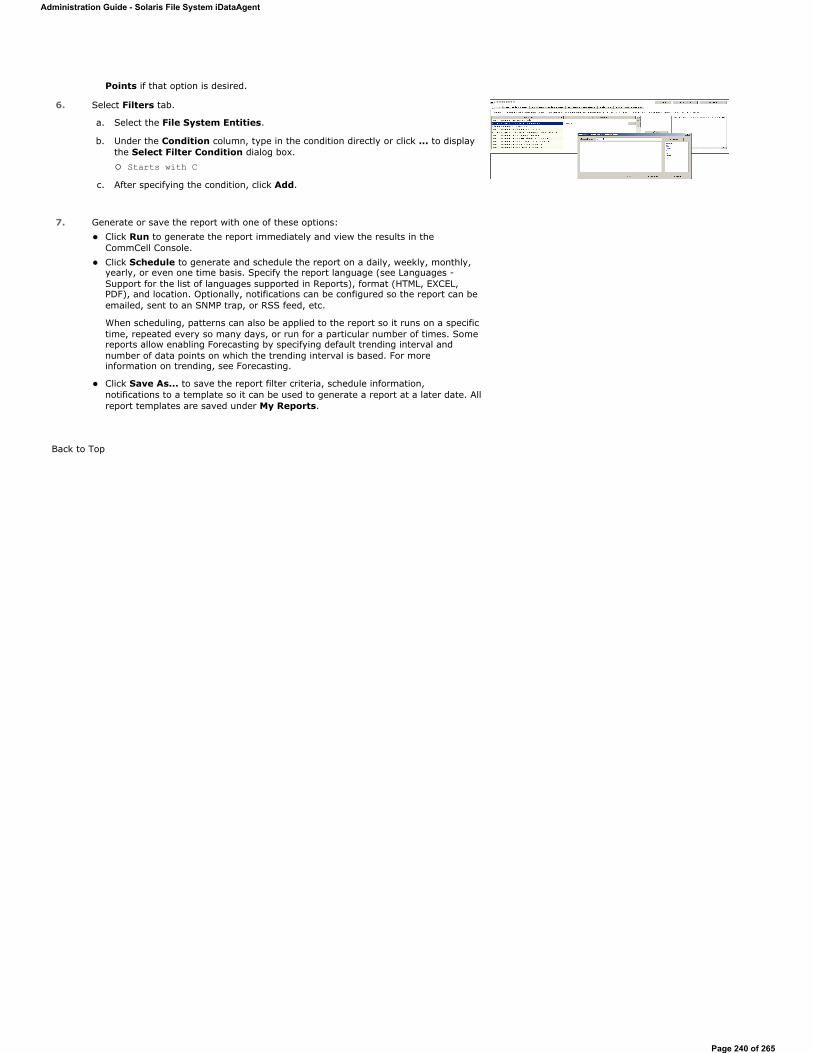
Back to Top
Points if that option is desired.
6. Select Filters tab.
a. Select the File System Entities.
b. Under the Condition column, type in the condition directly or click ... to display the Select Filter Condition dialog box.
Starts with C c. After specifying the condition, click Add.
7. Generate or save the report with one of these options: Click Run to generate the report immediately and view the results in the CommCell Console. Click Schedule to generate and schedule the report on a daily, weekly, monthly, yearly, or even one time basis. Specify the report language (see Languages -Support for the list of languages supported in Reports), format (HTML, EXCEL, PDF), and location. Optionally, notifications can be configured so the report can be emailed, sent to an SNMP trap, or RSS feed, etc.
When scheduling, patterns can also be applied to the report so it runs on a specific time, repeated every so many days, or run for a particular number of times. Some reports allow enabling Forecasting by specifying default trending interval and number of data points on which the trending interval is based. For more information on trending, see Forecasting.
Click Save As... to save the report filter criteria, schedule information, notifications to a template so it can be used to generate a report at a later date. All report templates are saved under My Reports.
Administration Guide - Solaris File System iDataAgent
Page 240 of 265
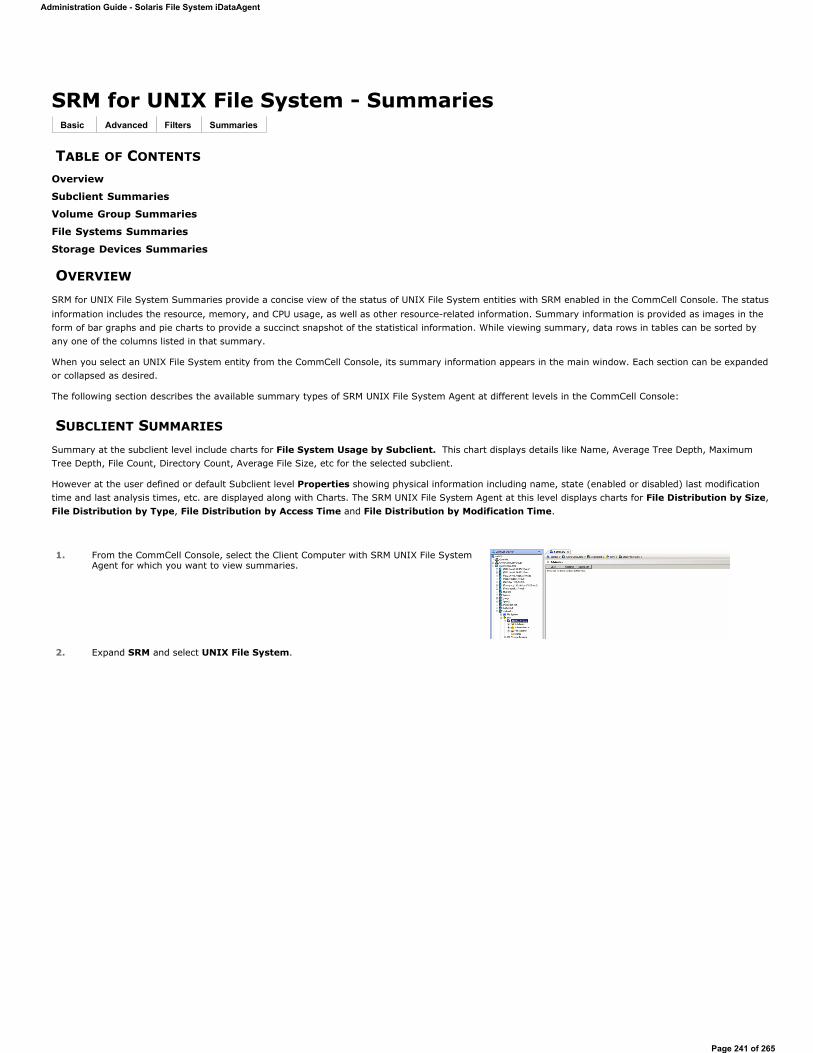
SRM for UNIX File System - Summaries
TABLE OF CONTENTS
Overview
Subclient Summaries
Volume Group Summaries
File Systems Summaries
Storage Devices Summaries
OVERVIEW
SRM for UNIX File System Summaries provide a concise view of the status of UNIX File System entities with SRM enabled in the CommCell Console. The status information includes the resource, memory, and CPU usage, as well as other resource-related information. Summary information is provided as images in the form of bar graphs and pie charts to provide a succinct snapshot of the statistical information. While viewing summary, data rows in tables can be sorted by any one of the columns listed in that summary.
When you select an UNIX File System entity from the CommCell Console, its summary information appears in the main window. Each section can be expanded or collapsed as desired.
The following section describes the available summary types of SRM UNIX File System Agent at different levels in the CommCell Console:
SUBCLIENT SUMMARIES
Summary at the subclient level include charts for File System Usage by Subclient. This chart displays details like Name, Average Tree Depth, Maximum Tree Depth, File Count, Directory Count, Average File Size, etc for the selected subclient.
However at the user defined or default Subclient level Properties showing physical information including name, state (enabled or disabled) last modification time and last analysis times, etc. are displayed along with Charts. The SRM UNIX File System Agent at this level displays charts for File Distribution by Size, File Distribution by Type, File Distribution by Access Time and File Distribution by Modification Time.
Basic Advanced Filters Summaries
1. From the CommCell Console, select the Client Computer with SRM UNIX File System Agent for which you want to view summaries.
2. Expand SRM and select UNIX File System.
Administration Guide - Solaris File System iDataAgent
Page 241 of 265
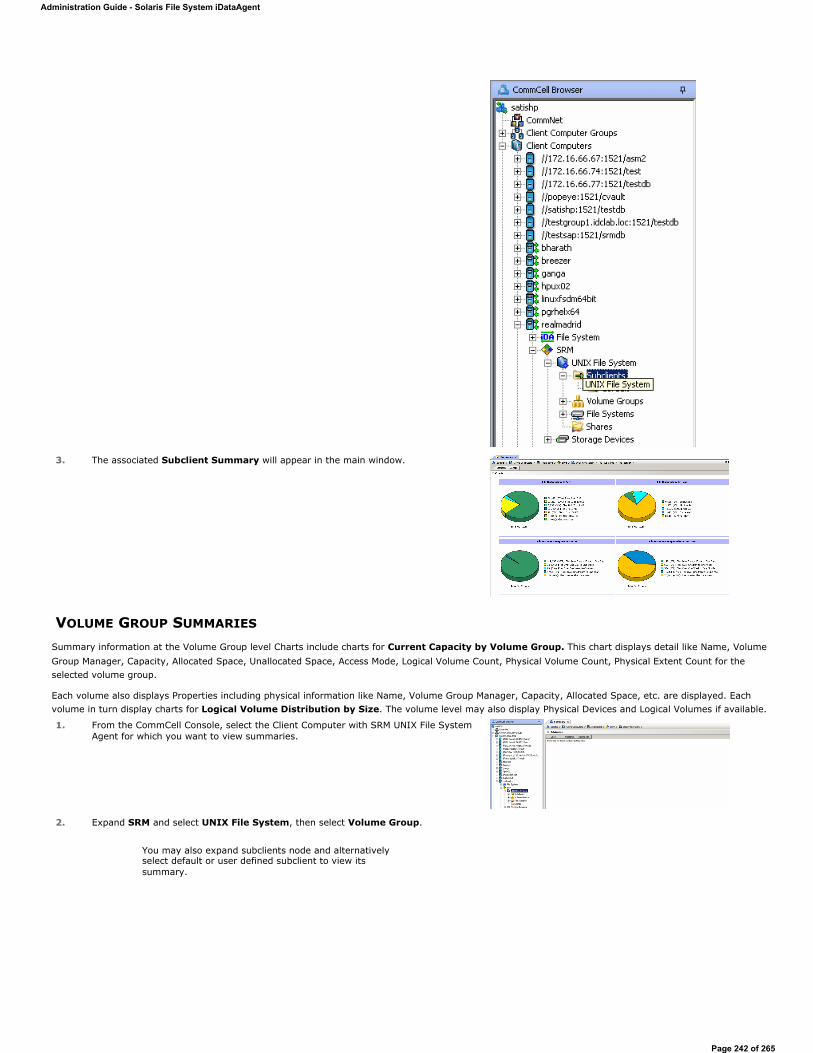
VOLUME GROUP SUMMARIES
Summary information at the Volume Group level Charts include charts for Current Capacity by Volume Group. This chart displays detail like Name, Volume Group Manager, Capacity, Allocated Space, Unallocated Space, Access Mode, Logical Volume Count, Physical Volume Count, Physical Extent Count for the selected volume group.
Each volume also displays Properties including physical information like Name, Volume Group Manager, Capacity, Allocated Space, etc. are displayed. Each volume in turn display charts for Logical Volume Distribution by Size. The volume level may also display Physical Devices and Logical Volumes if available.
3. The associated Subclient Summary will appear in the main window.
1. From the CommCell Console, select the Client Computer with SRM UNIX File System Agent for which you want to view summaries.
2. Expand SRM and select UNIX File System, then select Volume Group.
You may also expand subclients node and alternatively select default or user defined subclient to view its summary.
Administration Guide - Solaris File System iDataAgent
Page 242 of 265
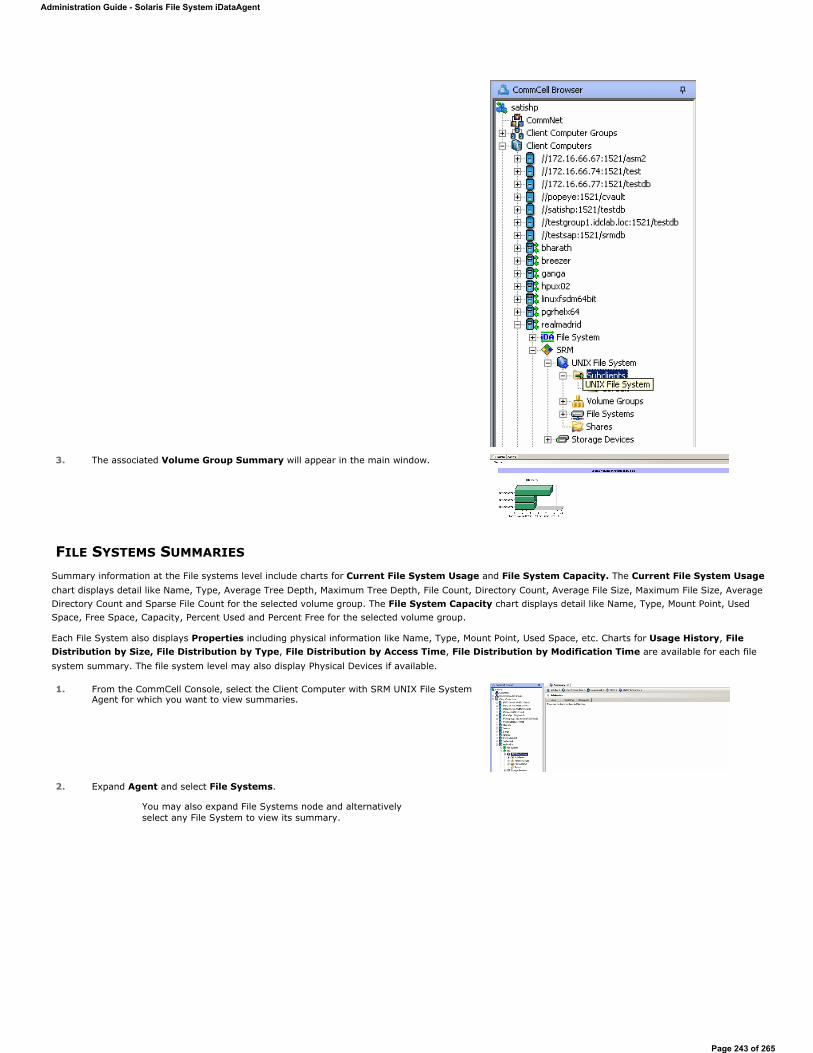
FILE SYSTEMS SUMMARIES
Summary information at the File systems level include charts for Current File System Usage and File System Capacity. The Current File System Usagechart displays detail like Name, Type, Average Tree Depth, Maximum Tree Depth, File Count, Directory Count, Average File Size, Maximum File Size, Average Directory Count and Sparse File Count for the selected volume group. The File System Capacity chart displays detail like Name, Type, Mount Point, Used Space, Free Space, Capacity, Percent Used and Percent Free for the selected volume group.
Each File System also displays Properties including physical information like Name, Type, Mount Point, Used Space, etc. Charts for Usage History, File Distribution by Size, File Distribution by Type, File Distribution by Access Time, File Distribution by Modification Time are available for each file system summary. The file system level may also display Physical Devices if available.
3. The associated Volume Group Summary will appear in the main window.
1. From the CommCell Console, select the Client Computer with SRM UNIX File System Agent for which you want to view summaries.
2. Expand Agent and select File Systems.
You may also expand File Systems node and alternatively select any File System to view its summary.
Administration Guide - Solaris File System iDataAgent
Page 243 of 265
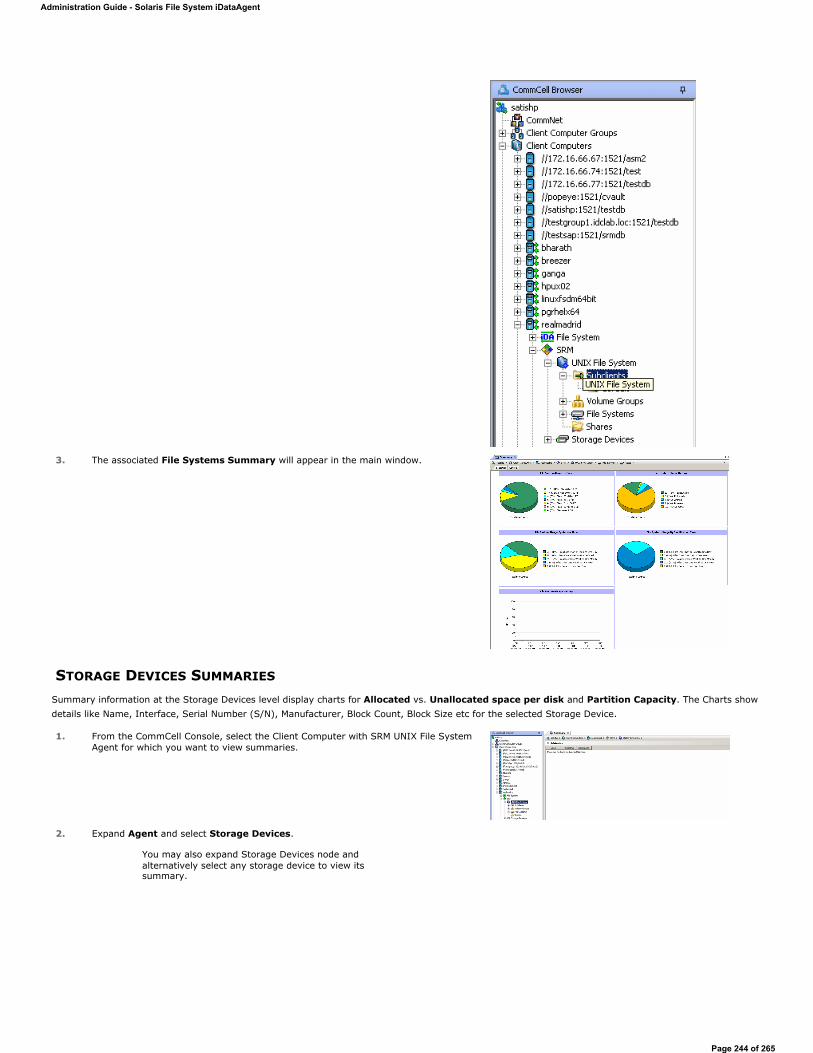
STORAGE DEVICES SUMMARIES
Summary information at the Storage Devices level display charts for Allocated vs. Unallocated space per disk and Partition Capacity. The Charts show details like Name, Interface, Serial Number (S/N), Manufacturer, Block Count, Block Size etc for the selected Storage Device.
3. The associated File Systems Summary will appear in the main window.
1. From the CommCell Console, select the Client Computer with SRM UNIX File System Agent for which you want to view summaries.
2. Expand Agent and select Storage Devices.
You may also expand Storage Devices node and alternatively select any storage device to view its summary.
Administration Guide - Solaris File System iDataAgent
Page 244 of 265
3. The associated Storage Devices Summary will appear in the main window.
Administration Guide - Solaris File System iDataAgent
Page 245 of 265
Online Help Topics
Agent Properties (General)Use this dialog box to obtain or provide general and/or user account information for the agent.
Client Name
Displays the name of the client computer on which this Agent is installed.
Billing Department
Displays the name of the billing department, when the Agent is associated with a billing department.
iDataAgent
Displays the identity of the Agent that is installed on the client computer.
Installed date
Displays the date on which the Agent was installed or upgraded on the client computer.
NDMP Restore Enabled
This feature is applicable to Solaris, AIX and Linux iDataAgents. This option specifies whether the NDMP Restore Enabler was installed with the iDataAgent.
YES indicates that the enabler is installed and the client is an available destination for the restore of data from a Network Attached Storage (NAS) client.
NO indicates that the enabler is not installed and the client is not an available destination for the restore of data from a NAS client.
Enable SRM feature
Select this option to Enable SRM Options.
Description
Use this field to enter a description about the entity. This description can include information about the entity's content, cautionary notes, etc.
Back to Top
Agent Properties (Version)Use this dialog box to view the software version.
Version
Displays the Agent software version installed on the computer.
Agent Properties (Index) Use this tab to establish the parameters for creating new index during backups by the agent.
Create new index on full backup
Specifies whether the system will create a new index with each full backup. If cleared, all backups build upon the index from the previous backup.
Convert to full backup on indexing failures
Specifies whether the system will create a new index if the index is irretrievable and whether, for agents that support non-full backup types, the system will convert the backup to a full backup. If cleared, the backup will fail if the index is irretrievable.
SecurityUse this tab to:
Identify the user groups to which this CommCell object is associated.
Associate this object with a user group.
Disassociate this object from a user group.
Available Groups
Administration Guide - Solaris File System iDataAgent
Page 246 of 265
Displays the names of the user groups that are not associated with this CommCell object.
Associated Groups
Displays the names of user groups that are associated with this CommCell object.
Agent Properties (Activity Control)Use this dialog box to enable or disable backups and restores on a selected subclient.
If data management and data recovery operations are disabled at the client computer group or client level, then these operations below these levels will be disabled. If data management / data recovery operations are enabled at the client computer group or client level, then these operations below these levels will be enabled.
Enable Backup
Specifies whether Backups will occur from this agent or subclient. .
If cleared:
Backup operations from this agent or subclient cannot be started and are skipped.
Running and waiting data management operations for this agent or subclient run to completion.
Stopped data management operations for this agent or subclient cannot be resumed until this option is enabled.
Pending data management operations for this agent or subclient do not run until this option is enabled.
Enable Restore
Specifies whether Restores will occur from this agent or subclient. .
If cleared:
Restore operations from this agent or subclient cannot be started and are skipped.
Running and waiting data recovery operations for this agent or subclient run to completion.
Stopped data recovery operations for this agent or subclient cannot be resumed until this option is enabled.
Pending data recovery operations for this agent or subclient do not run until this option is enabled.
Agent Properties (Storage Device)Use this tab to view or change the filter storage policy for Erase Data by Browsing.
Filter Storage Policy
Displays the filter storage policy for Erase Data by Browsing that is associated with this agent. To associate a filter storage policy to a new agent or to change the filter storage policy associated with an existing agent, click one in the list.
Subclient Properties (General)Use this tab to add, modify or view general information on the selected subclient.
Client Name
Displays the name of the Client computer to which this subclient belongs.
Billing Department
Displays the name of the billing department, when the subclient is associated with a billing department. For more information on Billing and Costing See the CommNet Books Online.
iDataAgent
Displays the name of the Agent to which this subclient belongs.
Backup Set
Displays the name of the Backup Set to which this subclient belongs.
Subclient Name
Displays the name of this Subclient. You can use this space to enter or modify the name of the subclient.
Administration Guide - Solaris File System iDataAgent
Page 247 of 265
Number of Data Readers
Use this space to specify the number of simultaneous backup data streams allowed for this subclient. For best performance, this should be set no higher than the number of physical drives that hold this subclient's data, except for specialized hardware such as RAID. For more information, see Automatic File System Multi-Streaming in Books Online.
Allow multiple data readers within a drive or mount point
Select this option to specify whether multiple data reads are allowed for Unix mount point during backups on this subclient. This option enables the subclient's contents to be distributed to all the streams, transmitting them in parallel to the storage media. Hence, a subclient whose data is secured using three data streams, utilizes more of the available network resources and can complete in as little as one third the time that the same data would require using a single stream.
Billable Entity
Select the name of the Billable Entity assigned to this subclient.
Incremental backup should use
UNIX mtime
Select this option to determine which files are selected for incremental backup by changes in the mtime timestamp.
UNIX ctime
Select this option to determine which files are selected for incremental backup by changes in the ctime timestamp.
Description
Use this field to enter a description about the entity. This description can include information about the entity's content, cautionary notes, etc.
Back to Top
Subclient Properties (Content)Use this tab to add, modify or view the contents of a selected subclient.
Contents of subclient
Displays a list of paths of data/workspaces/categories/documents/folders included as content for this subclient. Special characters (such as "\" "/" "." ",") represent content of the default subclient, that is not assigned to other subclients within the backup set.
When a symbolic link is included in the subclient content, the target of the symbolic link along with the link itself can be displayed.
Delete
Click to delete the selected path/data/folder from the Contents list for this subclient.
Browse
Click to browse for new content that you want to add to this subclient.
Add Paths
Click to enter new content path(s).
Enable Apple Double Support
The File System iDataAgent backs up Apple Double formatted files as two separate files. Selecting this option will allow you to backup the Apple Double formatted Macintosh files as a single file.
Expand symbolic links of subclient content
Select this option to to expand and backup the data paths in the symbolic links of the subclient content.
Discover
Click to display the data paths to which the symbolic links in the subclient content's data are pointing.
You do not have to enable multi-streaming if you have multiple mount points pointing to the same physical drive.
When you select Use Data Classification in Backup Set Properties, it is recommended not to select "UNIX mtime" and "UNIX ctime" options in this properties box as Incremental Backups for Data Classification scan does not support these options.
Instead of clicking Discover, wait until the backup completes and then refresh the subclient. Then go to Contents of subclient. The data contents for the symbolic links should be displayed.
Administration Guide - Solaris File System iDataAgent
Page 248 of 265
Back to Top
Subclient Properties (Filters)Use this dialog box to add or edit data paths to be filtered out of the subclient content and to specify exceptions to the exclusion list.
Include Global Filters
Displays a list of options for enabling or disabling Global Filters which can be used in addition to the filters set at the subclient level to exclude data from data protection operations for this subclient. To change the setting, select one of the following values from the list:
OFF - Disables Global Filters for this subclient.
ON - Enables Global Filters for this subclient.
Use Cell Level Policy - Enables or disables Global Filters for this subclient depending on whether the Use Global Filters on All Subclients option is enabled or disabled on the Control Panel (Global Filters) dialog. If the Use Global Filters on All Subclients option is enabled, then the Use Cell Level Policy option will enable Global Filters on this subclient. If the Use Global Filters on All Subclients option is disabled, then the Use Cell Level Policy option will disable Global Filters on this subclient.
Exclude these files/folders/directories/patterns
Use this space to add specified file extension(s) for attachment(s) that you want to exclude from data protection operations for this subclient.
Except for these files/folders/directories/patterns
Use this space to add specified entries that will be included in data protection operations for this subclient in cases where a parent object is listed in the Exclude filter. Wildcards are supported for exception filters. See Supported Wildcards for more information.
Add
Click to manually add an entry to be included in, or excluded from, data protection operations for this subclient.
Browse
Click to browse for an entry to be included in, or excluded from, data protection operations for this subclient.
Edit
Click to manually edit an entry to be included in, or excluded from, data protection operations for this subclient.
Delete
Click to delete a selected filter entry.
Back to Top
Subclient Properties (Pre/Post Process)Use the Pre/Post Process tab to add, modify or view Pre/Post processes for the selected subclient.
PreScan process
Displays the name/path of the scan process that you want to run before the respective phase. You can use this space to add or modify PreScan processes for a subclient. These are batch files or shell scripts that you can run before or after certain job phases. For example, you can include a case statement within a script to run specific operations based on the level of the backup job. Click Browse to search for and select the name/path of the process. The system allows the use of spaces in the name/path, provided they begin with an opening quotation mark and end with a closing quotation mark.
PostScan process
Displays the name/path of the scan process that you want to run after the respective phase. You can use this space to add or modify PostScan processes for a subclient. Click Browse to search for and select the name/path of the process. The system allows the use of spaces in the name/path, provided they begin with an opening quotation mark and end with a closing quotation mark.
Run Post Scan Process for all attempts
Specifies whether this process will execute for all attempts to run the phase. Selecting this option will execute the post scan for all attempts to run the phase, including situations where the job phase is interrupted, suspended, or fails. Otherwise, when the checkbox is cleared the post scan process will only execute for successful, killed, or failed jobs.
Pre Backup process
Displays the name/path of the backup that you want to run before the respective phase. You can use this space to enter a path for the backup process that will
Administration Guide - Solaris File System iDataAgent
Page 249 of 265
execute before this phase on the subclient . Click Browse to search for and select the name/path of the process. The system allows the use of spaces in the name/path, provided they begin with an opening quotation mark and end with a closing quotation mark.
Post Backup process
Displays the name/path of the backup process that you want to run after the respective phase. You can use this space to enter a path for the backup process that will execute after this phase on the subclient. Click Browse to search for and select the name/path of the process. The system allows the use of spaces in the name/path, provided they begin with an opening quotation mark and end with a closing quotation mark.
Run Post Backup Process for all attempts
Specifies whether this process will execute for all attempts to run the phase. Selecting this option will execute the post backup process for all attempts to run the phase, including situations where the job phase is interrupted, suspended, or fails. Otherwise, when the checkbox is cleared the specified process will only execute for successful, killed, or failed jobs.
PreSnap process
Displays the name/path of the Snap process that you want to run before the respective phase. You can use this space to add or modify PreSnap processes for a subclient. Click Browse to search for and select the name/path of the process. The system allows the use of spaces in the name/path, provided they begin with an opening quotation mark and end with a closing quotation mark.
PostSnap process
Displays the name/path of the Snap process that you want to run after the respective phase. You can use this space to add or modify PostSnap processes for a subclient. Click Browse to search for and select the name/path of the process. The system allows the use of spaces in the name/path, provided they begin with an opening quotation mark and end with a closing quotation mark.
On Source
Specifies whether the PreSnap/PostSnap process will execute on the source computer.
On Proxy
Specifies whether the PreSnap/PostSnap process will execute on the proxy computer.
Back to Top
Subclient Properties (Encryption)Use this dialog box to select the data encryption options for the selected subclient content for operations run from the CommCell Console.
None
When selected, no encryption will take place during a data protection operations.
Media Only (MediaAgent Side)
When selected, for data protection operations, data is transmitted without encryption and then encrypted prior to storage. During data recovery operations, data is decrypted by the client.
Network and Media (Agent Side)
When selected, for data protection operations, data is encrypted before transmission and is stored encrypted on the media. During data recovery operations, data is decrypted by the client.
Network Only (Agent Encrypts, MediaAgent Decrypts)
When selected, for data protection operations, data is encrypted for transmission and then decrypted prior to storage on the media. During data recovery operations, data is encrypted by the MediaAgent and then decrypted in the client.
Storage DeviceUse this dialog box to establish the storage device related settings on the selected subclient. Note that all the options described in this help may not be available and only the options displayed in the dialog box are applicable to the agent or enabler for which the information is being displayed.
The following tabs are displayed:
(Data) Storage Policy
Data Transfer Option
Deduplication
STORAGE POLICY
Administration Guide - Solaris File System iDataAgent
Page 250 of 265
Use this tab to select or view storage policy settings on the selected subclient.
Data/Database/Transaction Log Storage Policy
Displays the storage policy to which this subclient is currently associated. To associate a storage policy to a new subclient or to change the storage policy associated with an existing subclient, click one in the list.
Incremental Storage Policy
Displays the name of the Incremental Storage Policy associated with this subclient, if the storage policy has the Incremental Storage Policy option enabled.
Data Paths
Click to view or modify the data paths associated with the primary storage policy copy of the selected storage policy.
Number of Data/Database/Transaction Log Backup Streams
Displays the number of streams used for backup operations. To change the number of streams, click one in the list. For DB2 DPF, be sure to set the appropriate number of streams for each database partition by double-clicking the appropriate Stream space and typing the desired number.
Client/Instance/Status/Stream
Displays the names of the instances according to current backup priority along with other associated information that are included in the Oracle RAC node. To change the backup priority of the instances, click the instance name as appropriate and use the directional arrows provided.
Maximum Backup Streams
For Informix, displays the maximum number of streams used for database backup operations, which is determined from the ONCONFIG file. The number of streams for backups cannot be set currently from the CommCell Console. Instead, you must set the BAR_MAX_BACKUP parameter in the $ONCONFIG file on the Informix client. Also, the number of streams specified by the storage policy must be greater than or equal to the number specified by the BAR_MAX_BACKUP parameter.
Data Threshold Streams
For Oracle RAC, specifies whether to run the backup job immediately when the total number of reserved streams is greater than or equal to the value in this field. If you click this option, use the space provided to change this value if desired.
Create Storage Policy
Click to launch the Create a Storage Policy wizard. Once the storage policy has been created, it will be displayed in the list of storage policies to which the selected subclient can be associated.
Buffer Size
Use this space to specify the size (in 4 KB pages) of each buffer to be used for building the backup image. The minimum value is 8, and the default value is 1024. If you select value 0, the value of the backbufz database manager configuration parameter will be used as the buffer allocation size.
DATA TRANSFER OPTION
Use this tab to establish the options for data transfer. Note that all the options described in this help may not be available and only the options displayed in the dialog box are applicable to the agent for which the information is being displayed.
Software Compression
Indicates whether software compression for the subclient or instance is enabled or disabled, and if enabled whether it is performed on the client or MediaAgent computer.
On Client
Click to enable software compression on the client computer.
On MediaAgent
Click to enable software compression on the MediaAgent computer.
Use Storage Policy Settings
Click to use the settings enabled on deduplicated storage policy copy.
This option applies when subclient is associated with a storage policy copy that is deduplicated. See Copy Properties (Deduplication) - Advanced tab for compression settings on deduplicated storage policy copy.
Off
Click to disable software compression.
Note that hardware compression has priority over the software compression. Hardware compression is established in the Data Path Properties dialog box. The above software compression option will take effect when the data path is associated with a disk library, or when hardware compression is disabled in the data path associated with tape libraries.
Administration Guide - Solaris File System iDataAgent
Page 251 of 265
Resource Tuning
Indicates the processes used by the client to transfer data based and whether bandwidth throttling is enabled or not.
Network Agents
Specifies the number of data pipes/processes that the client uses to transfer data over a network. Increasing this value may provide better throughput if the network and the network configuration in your environment can support it. On non-UNIX computers, the default value is 2 and a maximum of 4 can be established if necessary. On UNIX computers the default value is 1 and a maximum of 2 can be established if necessary.
Throttle Network Bandwidth (MB/HR)
Specifies whether the backup throughput is controlled or not. (By default this option is not selected and therefore the throughput is not controlled). When selected, use the space to specify a value for the throughput. By default, this is set to 500. The minimum value is 1 and there is no limit to the maximum value. (In this case the backup throughput will be restricted to the maximum bandwidth on the network.)
Use this option to set the backup throughput, based on the network bandwidth in your environment. Use this option to reduce the backup throughput, so that the entire network bandwidth is not consumed, especially in slow links. Increasing this value will end up consuming the bandwidth with the maximum throughput limited to the network bandwidth capability.
Note that throttling is done on a per Network Agent basis.
Application Read Size
This option specifies the amount of application data (such as SQL data, Windows File System data, and virtual machine data) backup jobs will read for each unit transferred to the MediaAgent.
The default value for this options is 64KB; however, this value may be increased to reduce the amount of data read from the given application, which in turn reduces the amount of I/O operations performed against it. As a result, overall backup performance may increase. However, backup memory usage may also increase, which may inadvertently consume additional resources from the application. Thus, it is recommended that this value be set at either the default value or match the block size directed by the application.
DEDUPLICATION
Use this tab to establish the options for deduplication on the subclient. It indicates whether deduplication for the subclient is enabled or disabled, and if enabled whether the signature generation (a component of deduplication) is performed on the client or MediaAgent computer.
Note that deduplication is supported on disk storage devices. So the deduplication options are applicable only if the subclient is associated with a Storage Policy containing disk storage.
On Client
Click to enable signature generation on the client computer.
On MediaAgent
Click to enable signature generation on the MediaAgent computer.
Back to Top
Subclient Properties (Activity Control)Use this dialog box to enable or disable backups on a selected subclient.
Enable Backup
Specifies whether backups will occur from this subclient.
If cleared:
Backups from this subclient cannot be started and are skipped.
Running and waiting backups for this subclient run to completion.
Stopped backups for this subclient cannot be resumed until this option is enabled.
Pending backups for this subclient do not run until this option is enabled.
(Job states are indicated in the Job Controller.)
Subclient Properties (1-Touch Recovery)
For non-deduplicated storage policy copy, select On Client or On MediaAgent options to turn on compression, depending upon your environment.
Administration Guide - Solaris File System iDataAgent
Page 252 of 265

Use this tab to establish 1-Touch Recovery items. Note that all the options described in this help may not be available and only the options displayed in the dialog box are applicable to the agent for which the information is being displayed.
1-Touch Recovery
Click to configure this subclient with 1-Touch Recovery options.
1-Touch server
Displays the name of the server that will be used as the 1-Touch (boot) server for this client. You can use this space to add or modify the name of the 1-Touch server. The server must reside within the same subnet as the client. If the server name is changed, the client's name must be manually removed from the previous 1-Touch server's database.
1-Touch server directory
Displays the name of the directory on the 1-Touch server where the files required to boot the client in case of a crash are stored. You can use this space to add or modify the 1-Touch server directory.
For 1-Touch for AIX, this is the directory where the NIM Master environment is set up and installed.
For 1-Touch for HP-UX, this is the directory where the HP-UX Ignite Server files are installed.
For 1-Touch for Solaris, this is the directory where the Solaris JumpStart files are installed.
Subclient Properties (SRM Options)Use this dialog box to specify the Data Collection requirements.
SRM Data Collection
This option will be enabled if Enable SRM feature option is selected in the agent's Properties tab.
Discovery
Select this option for the collection of less detailed information for the client.
SecurityUse this dialog box to:
Identify the user groups to which this CommCell object is associated.
Associate this object with a user group.
Disassociate this object from a user group.
Available Groups
Displays the names of the user groups that are not associated with this CommCell object.
Associated Groups
Displays the names of user groups that are associated with this CommCell object.
Automatically add New Users to the "View All" Group (CommServe Level Only)
Specifies that all new users will automatically be added to the View All user group. This group allows users to view all CommCell objects, regardless of the associations of the other user groups they belong to.
Require Authentication for Agent Installation (CommServe Level Only)
Enable this option to prompt users for authentication for any agent installation on the CommCell.
Client Owners
Specify a user to allow CommCell user access to this client computer through CommCell Console and allow permission to run Web Console browse and restore operations on this client. Each user must be listed in a separate line.
Subclient Properties (SnapProtect Operations)SnapProtect Backup with hardware Snap Engines | SnapProtect Backup with Data Replicator
Use this tab to enable SnapProtect backup and to establish the options for SnapProtect backup operation, for the selected subclient.
Administration Guide - Solaris File System iDataAgent
Page 253 of 265
These options are available if you select a hardware Snap Engine. Note that all the options described in this help may not be available and only the options displayed in the dialog box are applicable to the agent for which the information is being displayed.
SnapProtect
Specifies whether SnapProtect backup for the selected subclient is enabled or disabled.
Available Snap Engines
Lists the available snapshot engine vendors. To select a snapshot engine vendor, click the pull-down arrow and click the one that you want to use.
Enter Array Credentials
Click to access the Array Management dialog box, which enables you to add or modify access information for a array.
Use Proxy
Use this list to specify the name of the proxy server that will be used for performing the SnapProtect backup operations.
Use source if proxy is unreachable
Select to use the source machine for SnapProtect backup if the proxy client is not available.
Use RMAN for Tape Movement
Select to use RMAN for movement to media operations.
Allow multiple data readers within a drive or mount point
Specifies whether multiple data reads are allowed for a single physical drive or mount point during backups on this subclient. It is recommended that this option is selected for specialized hardware such as RAID, or possibly in the case of spanned volumes. For more information, see Automatic File System Multi-Streaming in Books Online.
Number of Data Readers for Backup Copy
Use this space to specify the number of simultaneous backup data streams allowed for this subclient, during the movement to media operation. For best performance, this should be set no higher than the number of physical drives that hold this subclient's data, except for specialized hardware such as RAID.
Back to Top
Backup Set Properties (General)Use this dialog box to define a New Backup Set or view and modify the properties of an existing Backup Set.
Client Name
Displays the name of the Client computer to which this Backup Set belongs.
Billing Department
Displays the name of the billing department, when the backup set is associated with a billing department. For more information on Billing and Costing See the CommNet Books Online.
iDataAgent
Displays the name of the iDataAgent to which this backup set belongs.
Backup Set
When creating a new Backup Set, type the name of the Backup Set.
For an existing Backup Set, the name of the Backup Set is displayed.
On Demand
Displays whether the selected backup set is an On Demand Backup Set.
Make this the Default backup set
Use this option to define the selected backup set as the default or a user-defined backup set. Selecting this option asserts this backup set as the default. The previously designated default backup set is automatically reallocated as a user-defined backup set. Clearing this option, is accomplished by opening the Backup Set Properties dialog box of some other backup set and clicking this option there, thereby designating that backup set as the default.
Subclient Content may contain Wildcard Entries
This option can be enabled or disabled only during backup set creation. This option allows you to select the files with specified extensions that can be backed up during the backup operation.
Subclient Policy
Administration Guide - Solaris File System iDataAgent
Page 254 of 265
Displays the name of the Subclient Policy associated with this backup set. If no Subclient Policy is associated with this backup set, it will display <None>.
Job Options
Use Classic File Scan
Select to specify that the classic file scan is used to determine whether files have been modified for all subclients within the backup set.
Preserve File Access Time
if selected, the file access time is preserved and therefore not modified at the time of backup. Selecting this option may increase the time required to complete a backup.
Use Data Classification
Select to specify that the Data Classification Enabler is used to determine whether files have been modified for all subclients within the backup set.
Description
Use this field to enter a description about the entity. This description can include information about the entity's content, cautionary notes, etc.
Back to Top
SecurityUse this dialog box to:
Associate this object with a user group.
Disassociate this object from a user group.
Available Groups
Displays the names of the user groups that are not associated with this CommCell object.
Associated Groups
Displays the names of user groups that are associated with this CommCell object.
Backup OptionsUse this dialog box to schedule or immediately run a backup job.
Select Backup Type
Full
Specifies the job as a Full backup, which backs up all data for the selected subclient(s).
Incremental
Specifies the job as an Incremental backup, which backs up only that portion of the data that is new or has changed since the last backup.
Differential
Specifies the job as a Differential backup, which backs up only that portion of the data that is new or has changed since the last full backup.
Synthetic Full
Specifies the job as a Synthetic Full backup, which creates a Full backup from existing backup data for the selected subclient or backup set (if applicable). The Synthetic Full backup consolidates the backup data; it does not actually back up data from the client computer.
Run Incremental Backup
Specifies the options for running an Incremental backup either immediately before a Synthetic Full backup or immediately after a successfully completed Synthetic Full backup when selected. When cleared, an Incremental backup is not automatically run either immediately before or after the Synthetic Full backup.
Before Synthetic Full: Specifies the operation will back up any data that is new or changed since the previous backup in order to have it included as part of the Synthetic Full backup.
After Synthetic Full: Specifies the operation will back up any data that is new or changed since the backup that occurred prior to the Synthetic Full backup.
Job Initiation
Administration Guide - Solaris File System iDataAgent
Page 255 of 265

Run Immediately
Specifies this job will run immediately.
Schedule
Specifies this job will be scheduled. Click Configure to specify the schedule details.
Advanced
Click to select advanced backup options, such as follow mount points, catalog, start new media, mark media as full etc.
Save As Script
Click to open the Save As Script dialog, which allows you to save this operation and the selected options as a script file (in XML format). The script can later be executed from the Command Line Interface using qoperation execute command.
When you save an operation as a script, each option in the dialog will have a corresponding xml parameter in the script file. When executing the script, you can modify the value for any of these XML parameters as per need.
To view the XML values for each of the options in the dialog, see the following:
Command Line XML Options for Unix File System iDataAgents
Back to Top
Advanced Backup Options (Data)Use this tab to select advanced backup data options for the backup operation.
Create new index
Specifies the system will create a new index with a full or On Demand data protection operations. Selecting this option will cause the following to occur for this job only:
full backup transparent browse capability will be disabled, if it is supported by the agent.
override the Create new index on full backup option on the Agent Properties (Index) tab
for an On Demand Data Protection operation, override the Set index cycle to every nn backup jobs setting in the Subclient Properties (General) tab of the default subclient.
Follow Mount Points
When you select this option, the mount point data from the subclient will be included in the backup. When you clear this option, the mount point data will be excluded from the subclient backup.
Catalog
Use this section to select index cache sharing and granular restartability options for the job. Note that these options are not applicable for the disaster recovery data protection.
Use shared profile if present with transaction logging
Select this option if you wish to use the shared index cache profile of the MediaAgent (if configured) to save a copy of the job's index cache for index cache sharing with transaction logging feature for granular job restartbility.
Shared profile with transaction logging provides job restartability in failover situations. This is a recommended configuration.
Use shared profile if present without transaction logging
Select this option if you wish to use the shared index cache profile of the MediaAgent (if configured) to save a copy of the index cache for index cache sharing without transaction logging feature for granular job restartbility. This is not a recommended configuration.
Use transaction logging
Select this option to use transaction logging feature to provide granular job restartbility (without using shared profile for index cache sharing).
None
Select this option to use neither shared profile nor transaction logging.
StartupSelect from the following options. Note that all the options described in this help may not be available and only the options displayed in the dialog box are applicable to the operation for which the information is being displayed.
Administration Guide - Solaris File System iDataAgent
Page 256 of 265
Priority
Use Default Priority
If selected, the default priority for this type of job will be used in determining how the Job Manager will allocate resources for this job.
Change Priority
Use this option to manually specify the priority for the job, between 0 (highest priority) and 999 (lowest priority). The Job Manager will use the priority setting when allocating the required resources. This is useful if you have jobs that are very important and must complete, or jobs that can be moved to a lower priority.
Start up in suspended state
Specifies that this job will start in the Job Controller in a suspended state and cannot run until the job is manually resumed using the Resume option. This option can be used to add a level of manual control when a job is started. For example, you could schedule jobs to start in the suspended state and then choose which scheduled jobs complete by resuming the operation started in the suspended state.
Description
Use this field to enter a description about the entity. This description can include information about the entity's content, cautionary notes, etc.
Job RetryNote that all the options described in this help may not be available and only the options displayed in the dialog box are applicable to the agent or operation for which the information is being displayed.
Enable Total Running Time
The maximum elapsed time, in hours and minutes, from the time that the job is created. When the specified maximum elapsed time is reached, as long as the job is in the "Running" state, it will continue; if the job is not in the "Running" state when the specified time is reached, Job Manager will kill the job.
Enable Number of Retries
The number of times that Job Manager will attempt to restart the job. Once the maximum number of retry attempts has been reached, if the job has still not restarted successfully, Job Manager will kill the job. Note that this job-based setting will not be valid if restartability has been turned off in the Job Management Control Panel.
Kill Running Jobs When Total Running Time Expires
Option to kill the job when the specified Total Running Time has elapsed, even if its state is "Running". This option is available only if you have specified a Total Running Time.
Advanced Backup Options (Media)You can select advanced backup media options for the operation.
Start New Media
This option starts the backup/migration/archive operation on a new media, which causes the following to occur:
If removable media is used, the current active media is marked as Appendable and a new media is used for the backup/migration/archive.
If disk media is used, a new volume folder is created for the backup/migration/archive.
If cleared, the operation automatically uses the current active media or volume.
Mark Media Full after Successful Operation
This option marks media full, 2 minutes after the completion of the backup/archive operation. If any jobs are initiated within the 2 minutes, they are allowed to write to the media. If the job was associated with the prior media, new media (such as a new tape) will be used for subsequent jobs.
Allow other Schedule to use Media Set
This option allows jobs that are part of a schedule policy or schedule and using a specific storage policy to start a new media and also prevent other jobs from writing to the set of media. It is available only when the Start New Media and Mark Media Full options are enabled, and can be used in the following situations:
When one scheduled job initiates several jobs and you only want to start new media on the first job.
When you want to target specific backups to a media, or a set of media if multiple streams are used.
Reserve Resources Before Scan
Administration Guide - Solaris File System iDataAgent
Page 257 of 265
Normally, media is reserved for a job before the operation phase (backup or archive). When selected, this option will reserve the media before the scan phase. This reserves the media earlier because the scan phase precedes the operation phase.
Extend Job Retention
Infinite: Select this option to retain this job indefinitely.
Number of Days: Select this option to prune this job after the number of days specified.
Storage Policy Default: Select this option to apply the retention rules of the associated storage policy, which is the default option.
Advanced Backup Options (Data Path)Select the data path to be used for the backup/archive operation.
Ensure that the Library, MediaAgent, Drive Pool, and Drive selected for this operation is available online and is a part of the associated Storage Policy.
Use MediaAgent
Specifies the name of the MediaAgent that will be used to perform the backup operation. If necessary, you can change the name of the MediaAgent.
For example, if the library is shared and you wish to use a specific MediaAgent (instead of the system selected MediaAgent, or a MediaAgent which may be idle, or less critical) or if you know that the library attached to the specified MediaAgent.
Use Library
Specifies the name of the library that will be used to perform the backup operation. Use this option when you wish to backup to a specific library.
Use Drive Pool
Specifies the name of the Drive Pool that will be used to perform the backup operation. Use this option when you wish to backup using a specific Drive Pool.
Use Drive
Specifies the name of the Drive that will be used to perform the backup operation. Use this option when you wish to backup using a specific Drive from the selected Drive Pool.
Vault TrackingSelect options to export and track media, using Vault Tracker.
Export media after the job finishes
Specifies the media used by the data protection operation and media with the specific Media Status (if specified) will be exported and tracked by Vault Tracker.
Exclude Media Not Copied
When selected, allows you to exclude media with jobs that have to be copied.
Media Status
All
Click to select all media. Clear this option to select media with a specific status.
Active
Click to select media with its status marked as active.
Full
Click to select media with its status marked as full.
Overwrite Protected
Click to select media with its status marked as read-only .
Bad
Click to select media with its status marked as bad.
Vault Tracking Options will be displayed only when a Vault Tracker license is available in the CommServe.
Vault Tracking options are only applicable for data protection operations using a storage policy associated with a library containing removable media (e.g., tape, optical or stand-alone.)
Administration Guide - Solaris File System iDataAgent
Page 258 of 265
Export Location
Specifies the destination location and lists the stationary locations entered using the Export Location Details dialog box.
Track Transit
Specifies that transit information must be tracked, and lists the transit locations entered using the Export Location Details dialog box.
Use Virtual Mail Slots
Specifies the exported media is stored within the library in the virtual mail slots defined in the Library Properties (Media) dialog box.
Filter Media By Retention
Specifies that the system must automatically filter media based on whether the media has extended retention jobs or not.
Media with extended retention job(s)
Specifies that media with at least one extended retention job will be exported.
Media with no extended retention job(s)
Specifies that media with no extended retention jobs will be exported.
AlertUse this tab to configure an alert for a schedule policy.
Configure Alert
Alert
The currently configured Alert.
Add/Modify Alert
When clicked, opens the Alert Wizard to configure alerts for this operation.
Delete Alert
When clicked, deletes any existing alerts that are already configured.
Restore Options (General)Use this dialog box to control how the specified data is to be restored.
Restore ACLs
Specifies that the data will be restored with the original ACLs and therefore its original security attributes. Clear this option to restore without ACLs and consequently the data assumes the ACLs of the parent directory.
Data in device node
Specifies that Unix raw devices can be restored to either another raw device or a file. When selected, this activates the Unconditional Overwrite option, which is required for raw device restores to complete successfully.
Unconditionally overwrite only if target is a DataArchiver stub
If selected, this option will unconditionally overwrite a DataArchiver stub during restore.
Overwrite
Overwrite if file on media is newer
If selected, this option will overwrite the existing file with the file that was backed up/archived to the media provided the backed up/archived file is newer than the existing file.
Unconditional Overwrite
Specifies whether the restored data is unconditionally written to the specified location.
If cleared:
Files/directories whose names are the same as those in the restore path and where the backed up data is as old or older are not restored.
files/directories whose names are the same as those in the restore path and where the backed up data is newer are restored.
Files/directories whose names are different from those in the restore path are restored.
Administration Guide - Solaris File System iDataAgent
Page 259 of 265

Restore only if target exists
If selected, this option will only restore files that currently exist in the restore path. Files that exist on the media but not in the restore path will not be restored.
Restore Destination
Destination Client/Computer/Server
Displays the name of the client computer to which the selected data will be restored. To change the destination computer, select one from the list. The list includes clients:
Which are established as clients within the CommCell.
Clients with Operating Systems that support the cross-platform restore operation from this client. (Refer to the topic titled Cross Platform Restore Operations in Books Online for additional information.)
By default, data is restored to the same computer from which it was backed up.
Restore to Same Folder
Specifies whether the restore operation will restore data to the same folder from which it was backed up in the Destination Computer. (Clear this option to restore to a different path and activate the Destination folder box.)
Browse
Click to select a path for the Destination folder.
Preserve Source Paths
Specifies the action taken when the data is restored to another destination. The options are available only when the Restore to Same Paths option is cleared.
Preserve n levels from end of source path
Specifies whether the restore operation must keep the specified number of levels at the end of source path of the selected data. For example, if the selected data is Documents\Memos\Sales, this option is set to 1 and the Destination folder is temp, the data will be restored as \temp\Sales.
Advanced
Click to select additional restore options.
Save As Script
Click to open the Save As Script dialog, which allows you to save this operation and the selected options as a script file (in XML format). The script can later be executed from the Command Line Interface using qoperation execute command.
When you save an operation as a script, each option in the dialog will have a corresponding xml parameter in the script file. When executing the script, you can modify the value for any of these XML parameters as per need.
To view the XML values for each of the options in the dialog, see the following:
Command Line XML Options for Unix File System iDataAgents
Back to Top
Job InitiationSelect from the following options. Note that all the options described in this help may not be available and only the options displayed in the dialog box are applicable to the operation for which the information is being displayed.
Immediate
Run This Job Now
Specifies this job will run immediately.
Schedule
Specifies this job will be scheduled. When you click Configure, the Schedule Details dialog box will open and allow you to configure the schedule pattern.
Avoid using this option whenever you run a Restore by Jobs. Otherwise, an older version of the files might be retrieved.
However, if this option is used to restore a file in a path that contains any valid wildcard expression (e.g., Documents\**\Sales), the default value of 1 for the option cannot be changed. Therefore, only the last found occurrence of the file is restored, and the restores for all the other occurrences of the file are overwritten.
Administration Guide - Solaris File System iDataAgent
Page 260 of 265
Advanced Restore Options (General)Use this dialog box to access additional restore options.
Automatically Detect Regular Expressions
This option allows you to use wildcard characters to specify the patterns for files and folders to be included in the restore. When selected, the system will recognize supported regular expressions (wildcards) in the specified Source Path. When cleared, the system will read the specified Source Path as literal.
Skip Errors and Continue
This option allows a restore job to continue regardless of media errors and outputs a file that lists the full path names of the files that failed to get restored.
Restore device files as regular files
This option allows you to restore the actual data in the device node file of the raw partition to a regular file system file.
Use Exact Index
This option allows you to associate the media with the most recent index available in the CommCell.
Skip MountPoint Restore
Specifies whether to filter out mount points that are part of the backup data during the file system restore. When enabled, the file system restore will filter out the mount points from the backed up data. When disabled, mount points will also be restored during the file system restore.
Recover Apple Resource Fork Data
Specifies whether to restore encoded Apple resource fork data to your non-Macintosh file system.
Enforce Label Checking on Trusted Solaris
This option applies only to Solaris File System iDataAgent. This option specifies whether to check the label for the associated Solaris zone during a restore to a Trusted Solaris 10 system and therefore control whether the data will be restored to this system. If this option is enabled, this label is checked, and if the destination for the restored data is a zone other than the zone where the data was originally included, the restore will not complete successfully. If the option is disabled for this scenario, the data will be restored to the specified destination (zone).
This option is enabled by default if the destination client is a Solaris 10 client or higher except for scheduled restores following an upgrade, and it is not displayed if the source client is a non-Solaris client. The option is disabled for all other scenarios.
Back to Top
StartupSelect from the following options. Note that all the options described in this help may not be available and only the options displayed in the dialog box are applicable to the operation for which the information is being displayed.
Priority
Use Default Priority
If selected, the default priority for this type of job will be used in determining how the Job Manager will allocate resources for this job.
Change Priority
Use this option to manually specify the priority for the job, between 0 (highest priority) and 999 (lowest priority). The Job Manager will use the priority setting when allocating the required resources. This is useful if you have jobs that are very important and must complete, or jobs that can be moved to a lower priority.
Start up in suspended state
Specifies that this job will start in the Job Controller in a suspended state and cannot run until the job is manually resumed using the Resume option. This option can be used to add a level of manual control when a job is started. For example, you could schedule jobs to start in the suspended state and then choose which scheduled jobs complete by resuming the operation started in the suspended state.
Description
Use this field to enter a description about the entity. This description can include information about the entity's content, cautionary notes, etc.
This option is selected by default for direct restore operations. For Browse and Restore operations, the option cannot be enabled as you are selecting definitive paths to restore.
Administration Guide - Solaris File System iDataAgent
Page 261 of 265
Advanced Restore Options (Pre/Post)Use this tab to establish pre/post processes for restore jobs.
Pre Recovery Command:
Displays the name/path of the process to run before the restore. You can use this space to enter a path for the backup process that will execute before this phase on the subclient . Click Browse to search for and select the name/path of the process. The system allows the use of spaces in the name/path, provided they begin with an opening quotation mark and end with a closing quotation mark.
Post Recovery Command:
Displays the name/path of the process to run after the restore. You can use this space to enter a path for the backup process that will execute before this phase on the subclient . Click Browse to search for and select the name/path of the process. The system allows the use of spaces in the name/path, provided they begin with an opening quotation mark and end with a closing quotation mark.
Run Post Restore Process for all attempts
Specifies whether this process will execute for all attempts to run the phase. Selecting this option will execute the specified process for all attempts to run the phase, including situations where the job phase is interrupted, suspended, or fails. Otherwise, when the checkbox is cleared the specified process will only execute for successful, killed, or failed jobs.
Advanced Restore Options (Copy Precedence)Choose the copy from which you wish to recover or retrieve. Select from the following options:
Restore from copy precedence
When selected, the system recovers or retrieves data from the selected storage policy copy (Synchronous Copy or Selective Copy). If data does not exist in the specified copy, the data recovery or retrieve operation fails even if the data exists in another copy of the same storage policy.
When cleared, (or by default) the system recovers or retrieves data from the storage policy copy with the lowest copy precedence. If the data was pruned from the primary copy, the system automatically recovers or retrieves from the other copies of the storage policy in the following order:
1. Lowest copy precedence to highest copy precedence among all synchronous copies.
2. Lowest copy precedence to highest copy precedence among all selective copies (if your agent supports selective copies).
Once the data is found, it is recovered or retrieved, and no further copies are checked.
Copy Precedence
When selected, the system recovers or retrieves data from the copy with the specified precedence number.
Advanced Restore Options (Data Path)Select the data path for the restore/recovery operation. You can specify the MediaAgent, Library, Drive Pool, and Drive from which the restore operation must be performed.
Use MediaAgent
Specifies the name of the MediaAgent that will be used to perform the restore operation. If necessary, you can change the name of the MediaAgent.
For example, if the library is shared and you wish to use a specific MediaAgent (instead of the system selected MediaAgent, or a MediaAgent which may be idle, or less critical) or if you know that the media containing the data you wish to restore is available in the library attached to the specified MediaAgent.
If the media containing the data is not available in the tape/optical library attached to the MediaAgent, the system will automatically prompt you to insert the appropriate media. In the case of a disk library, the operation will fail if the requested data is not available in the disk library attached to the specified MediaAgent.
Use Library
Specifies the name of the library that will be used to perform the restore operation. Use this option when you wish to restore using a specific library.
For example, if you know that the media containing the data you wish to restore is available in a specific library.
Use Drive Pool
Specifies the name of the Drive Pool that will be used to perform the restore operation. Use this option when you wish to restore using a specific Drive Pool.
To restore NAS data, select the drive pool type that was used to perform the backup, i.e., if a drive pool associated with an NDMP Remote Server was used to
Administration Guide - Solaris File System iDataAgent
Page 262 of 265
perform the backup, select a drive pool associated with an NDMP Remote Server. Similarly, if an NDMP drive pool was used, specify an NDMP drive pool.
Use Drive
Specifies the name of the drive in the drive pool that will be used to perform the restore operation. Use this option when you wish to restore using a specific Drive in the Drive Pool.
Use Proxy
Specifies the name of the proxy server that will be used to perform the restore operation. Use this option when you wish to restore using a proxy server.
Advanced Restore Options (Paths/Filters)Modify Paths/Filters
Use this tab to modify the the paths of the selected data.
Source Item
Displays the data that is to be restored. If you previously browsed and selected backed up data for restoration, this pane lists the paths of the selected data. Click the Add button to type the path of the data to be restored. Select a listed path and click the Delete button to remove the path of data to be restored.
Filter Item
Displays the data that is to be filtered from the restore/recovery. If you previously browsed the backup data and deselected files/folders/directories that are children of Source Item directories, then this pane lists the paths of the selected data. You can use this space along with the Add button to exclude manually the path of data to be restored/recovered. You can also select an entry in this space and use the Delete button to remove a selected entry.
You can also use wildcard characters within this pane to specify file name patterns that you want to exclude from the restore/recover operation. The supported wildcard characters are:
* = any number or characters
? = any one character
[] = any range or set of characters
When wildcard characters are utilized in the filter path, they are automatically detected by the system. In the event that the actual file, folder, or directory name in the filter path contains a character that can be used as a wildcard, you can override wildcard auto-detection by adding an exclamation mark as the first character of your path (e.g., !/company/[test] for Unix-based systems). In these example, rather than treating the square brackets as a wildcard, the system would look for (and exclude from the restore/recovery) a folder or directory named [test].
Advanced Restore Options (Encryption)Pass-Phrase
Enter the pass-phrase that is currently assigned to the client, whose data you are restoring. Note that if you have changed the pass-phrase since you secured the client data, you need to provide the new pass-phrase here, not the old one.
Re-enter Pass-Phrase
Re-enter the pass-phrase for confirmation.
If you attempt an immediate restore of encrypted data that was pass-phrase protected without entering the pass-phrase here, the restore operation will fail.
If you have an exported pass-phrase set up, and you enter the pass-phrase under Decryption, you over-ride (not overwrite) the client properties pass-phrase. Thus, if you enter the pass-phrase incorrectly, the restore does not complete successfully.
Job RetryNote that all the options described in this help may not be available and only the options displayed in the dialog box are applicable to the agent or operation for which the information is being displayed.
Enable Total Running Time
The maximum elapsed time, in hours and minutes, from the time that the job is created. When the specified maximum elapsed time is reached, as long as the job is in the "Running" state, it will continue; if the job is not in the "Running" state when the specified time is reached, Job Manager will kill the job.
Enable Number of Retries
The number of times that Job Manager will attempt to restart the job. Once the maximum number of retry attempts has been reached, if the job has still not
Administration Guide - Solaris File System iDataAgent
Page 263 of 265
restarted successfully, Job Manager will kill the job. Note that this job-based setting will not be valid if restartability has been turned off in the Job Management Control Panel.
Kill Running Jobs When Total Running Time Expires
Option to kill the job when the specified Total Running Time has elapsed, even if its state is "Running". This option is available only if you have specified a Total Running Time.
Advanced Restore Options (Map)Specify the restore of individual files to a specified destination using an external map file. The map file provides the list of files to be restored and the destination to which the files are to be restored. (See Restore Data Using a Map File in Books Online for detailed information.)
Use map file
Specifies whether the restore operation must be performed using a mapping file. Enable this option to specify the map file.
Map File Path
Specifies the name of the map file. Use the space to enter the path and name of the map file. Use the browse button to browse and select the appropriate map file.
Restore unmapped files
Specifies whether the restore operation must restore the unmapped files that were selected for restore, to the specified restore destination. i.e., in-place restore or out-of-place restore. Clear this option to restore only those files that are included in the specified map file.
Rename all restore files with suffix
Specify a common suffix to be added to each file as it is restored. For Windows platforms, this suffix is appended to the filename (i.e., before the extension); for Unix/Mac platforms, the suffix is appended after the extension.
Advanced Recover Options (Browse Options)Use this dialog box to specify advanced restore options.
Restore Deleted Items
Specifies that the restore/recovery operation will include data that was secured during all backup/archive operations, including deleted items.
Specify Time Range
Specifies to restore/recover data within a specified time zone and time threshold. Select the checkbox to enable this option. Clearing the checkbox disables this option. If this option is enabled, set the following parameters:
Time Zone - Restores/recovers only those jobs within a specified time zone. Click the pull-down list and click the desired time zone.
Start Time - Displays the start time for the restore/recovery operation. Click the pull-down arrow and click a date; use the up and down arrows to specify a time.
End Time - Displays the end time for the restore/recovery operation. Click the pull-down arrow and click a date; use the up and down arrows to specify a time.
AlertUse this tab to configure an alert for a schedule policy.
Configure Alert
Alert
The currently configured Alert.
Add/Modify Alert
When clicked, opens the Alert Wizard to configure alerts for this operation.
Delete Alert
When clicked, deletes any existing alerts that are already configured.
Security
Administration Guide - Solaris File System iDataAgent
Page 264 of 265
Use this dialog box to:
Associate this object with a user group.
Disassociate this object from a user group.
Available Groups
Displays the names of the user groups that are not associated with this CommCell object.
Associated Groups
Displays the names of user groups that are associated with this CommCell object.
Administration Guide - Solaris File System iDataAgent
Page 265 of 265


