Embed Size (px)
Citation preview

ADVANCED SHAREPOINT 2013 SITE ADMINISTRATION
Course: SharePoint 2013 for Administrators and IT Pro's | Akrura Technologies
By : Isha Kapoor
SharePoint MVP, Author, Trainer and Founder
http://www.akruratechnologies.com/
http://www.learningsharepoint.com/ | @LearningSP
SharePoint

OUTLINE…• Understand Master Page gallery and Web Part gallery
• WebParts in SharePoint
• Managing SharePoint Pages - Adding\Removing and Importing\Exporting WebParts, Creating Custom Error pages (404 FileNotFound pages) and WebPart Pages
• Introduction to SharePoint 2013 Design Manager
• Creating and Modifying Master Pages in SharePoint 2013
• Adding a Custom Master Page - Convert HTML Master page to SharePoint Master Page using Design Manager.
• Creating Custom Layout Pages in SharePoint 2013
• SharePoint 2013 Composed Look - Creating Custom Themes in SharePoint 2013

UNDERSTAND MASTER PAGE GALLERY AND WEB PART GALLERYWhat is a Master Page Gallery?Master Page gallery in a SharePoint site is a Gallery or Library where all the Master Pages and Layout Pages for a Site Collection are stored.
A Master Page gallery is generally located at the Site Collection settings; but each Subsites\Site can individually set their own Master Page (that’s picked up from the top Master Page Gallery).
What is a WebPart Gallery?Similar to Master Page gallery, a WebPart Gallery is a repository of Webparts that can be used in a Site Collection (at any Sub level). All the WebPart’s in a Site are added in this Gallery first and then users can drag and drop them onto various pages at different levels within a Site Collection.
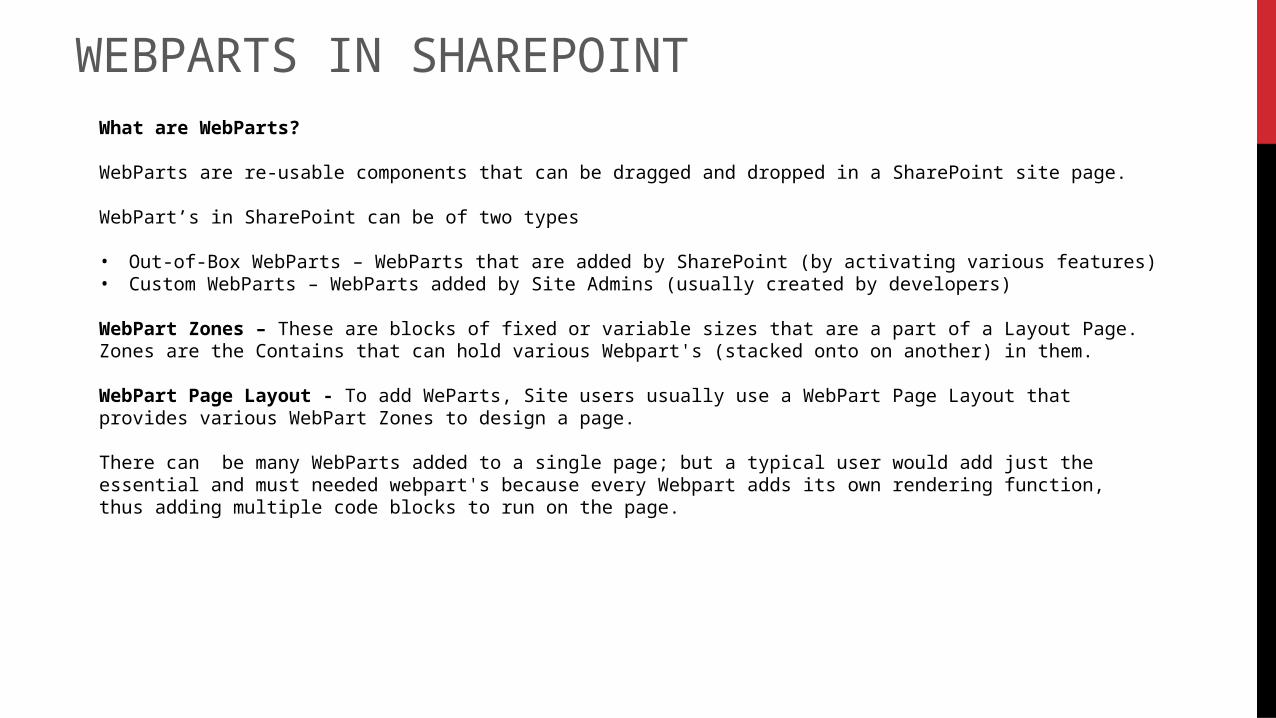
What are WebParts?
WebParts are re-usable components that can be dragged and dropped in a SharePoint site page.
WebPart’s in SharePoint can be of two types
• Out-of-Box WebParts – WebParts that are added by SharePoint (by activating various features)• Custom WebParts – WebParts added by Site Admins (usually created by developers)
WebPart Zones – These are blocks of fixed or variable sizes that are a part of a Layout Page. Zones are the Contains that can hold various Webpart's (stacked onto on another) in them.
WebPart Page Layout - To add WeParts, Site users usually use a WebPart Page Layout that provides various WebPart Zones to design a page.
There can be many WebParts added to a single page; but a typical user would add just the essential and must needed webpart's because every Webpart adds its own rendering function, thus adding multiple code blocks to run on the page.
WEBPARTS IN SHAREPOINT

MANAGING SHAREPOINT PAGES - Adding\Removing WebParts - Users with at least Contribute access can add\remove WebPart to a Page by using the Insert button -> Webpart's menu in the Page Ribbon.
Webpart's are arranged into Categories and they can be inserted in any Page Layout on the site.
Importing\Exporting WebParts - To save the web part and use it again, you must export the web part and then import it to the other page. Following is the process to do that.
Export a Web Part - Exporting a web part involves saving the web part’s settings as a file to your computer.
Note : Not all web parts support this option, and in some web parts, the owner of the page may choose to disable this option.
Import a Web Part –
1. To import a web part that you have previously saved to your computer, open the page in editing mode and click the page properties -> Import webpart.
2. When the dialog with the list of files appears, select a web part from your computer and the upload it.
3. Finally drag and drop the webpart onto the page.
When you select the webpart to be added to the page , the Webpart gets added in a WebPart gallery.
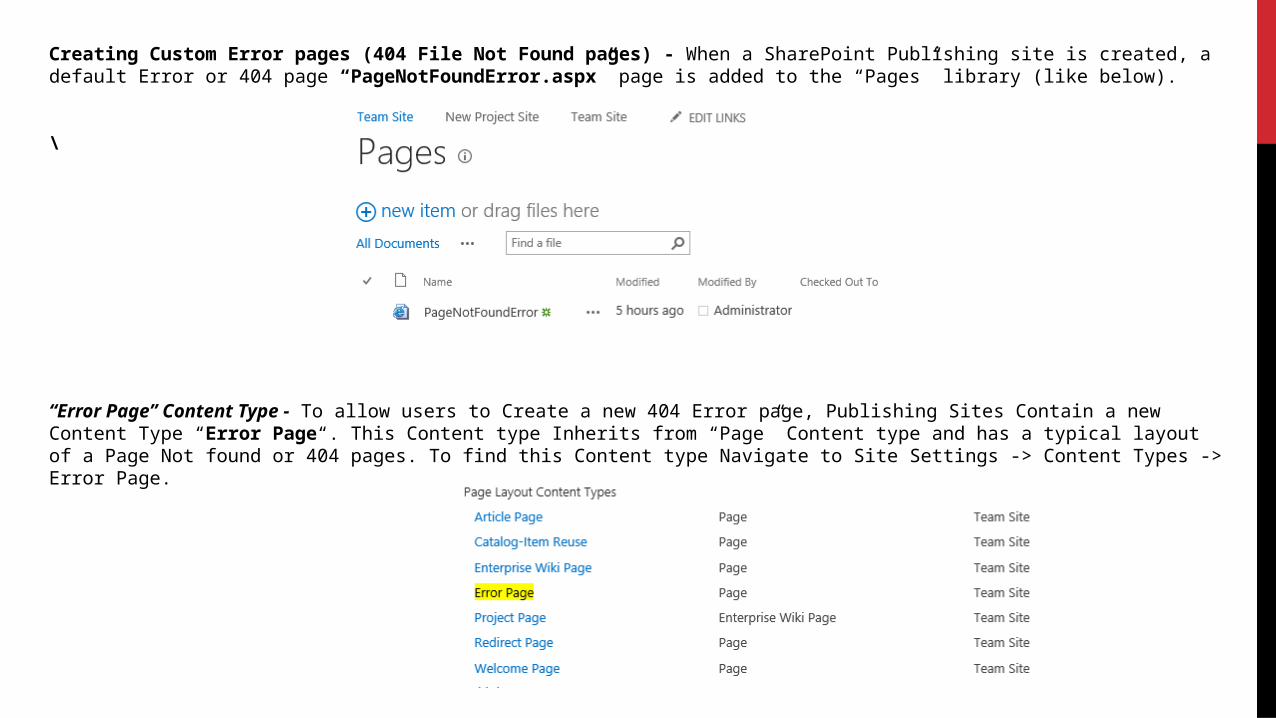
Creating Custom Error pages (404 File Not Found pages) - When a SharePoint Publishing site is created, a default Error or 404 page “PageNotFoundError.aspx” page is added to the “Pages” library (like below).
\
“Error Page” Content Type - To allow users to Create a new 404 Error page, Publishing Sites Contain a new Content Type “Error Page“. This Content type Inherits from “Page” Content type and has a typical layout of a Page Not found or 404 pages. To find this Content type Navigate to Site Settings -> Content Types -> Error Page.

INTRODUCTION TO SHAREPOINT 2013 DESIGN MANAGER What is Design Manager?
“Design Manger” is a new feature added in SharePoint 2013 with which Site Admins can Convert a simple HTML Template into a SharePoint Master Page, Create a Layout Page, Get Code Snippets for SharePoint Components, Manage Design Templates, CSS files and more..
Lets look at some of the Features & Benefits of using Design Manager.
1. Design Manager can only be used on Publishing sites(or sites with Publishing Feature turned-on).2. You can Navigate to Design Manager from Site Settings menu and from Site Settings Page under Look and Feel.3. You can upload the entire Design Package using “Import Design Package” option or you can Create Design Package using “Create Design Package” option.4. You can Manage Device Channels – Create and Edit Channels.5. Upload an HTML Master Page and Create a minimal master page.6. Create an Edit Page Layouts.7. Edit Display Templates.8. Change Site and System Master Page9. Lets you Preview Master Pages, Layout Pages and navigate to Snippet Gallery.10. Lets you get Code from Snippet Gallery(for SharePoint Components) to be added to Master Pages & Layouts.
To begin with, consider Mapping Master Page Gallery as a Network drive. Opening Master Page Gallery as Explorer would let you Copy and Paste the design files that you can use in Design Manager.
See Example : SharePoint 2013 Design Manager Tutorials
ADDING A CUSTOM MASTER PAGE - CONVERT HTML MASTER PAGE TO SHAREPOINT MASTER PAGE USING DESIGN MANAGER.
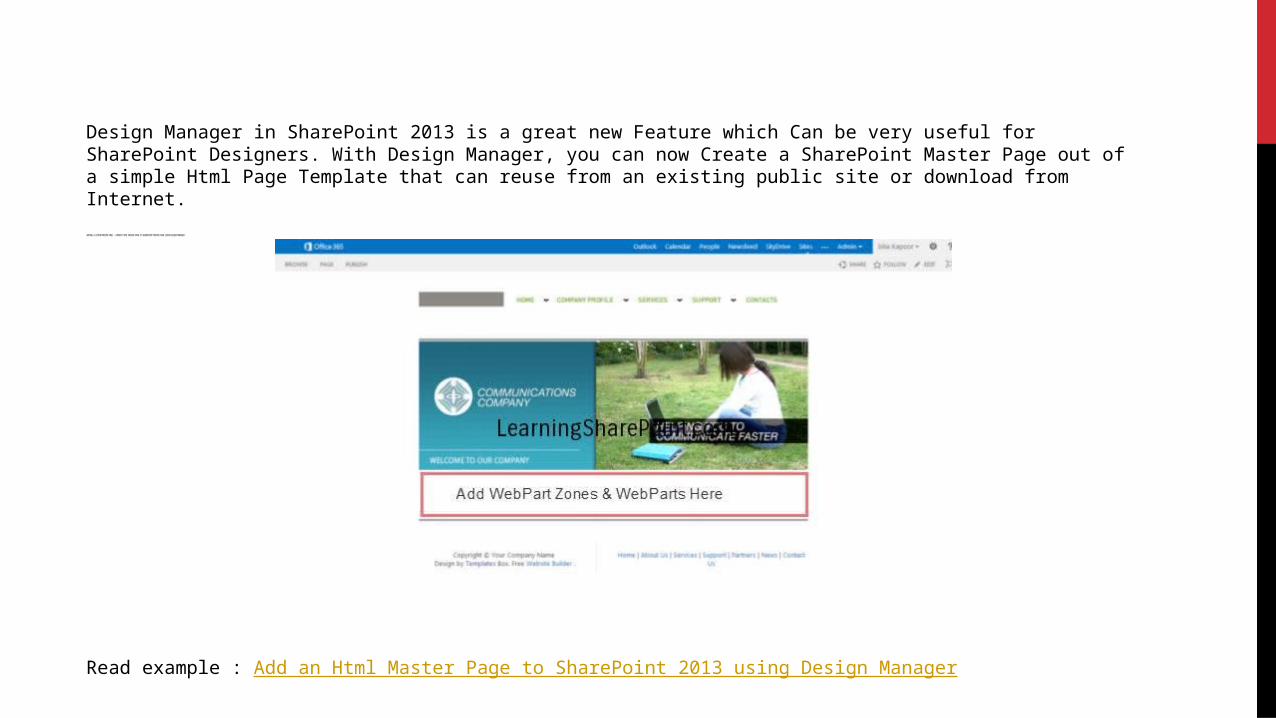
Design Manager in SharePoint 2013 is a great new Feature which Can be very useful for SharePoint Designers. With Design Manager, you can now Create a SharePoint Master Page out of a simple Html Page Template that can reuse from an existing public site or download from Internet.
Read example : Add an Html Master Page to SharePoint 2013 using Design Manager

CREATING CUSTOM LAYOUT PAGES IN SHAREPOINT 2013
Layout Pages - A Layout is a design of a page that fits into a Master Page to complete the Page.
A Layout can be created using SharePoint Designer, Design Manager and Visual Studio.
With the new Design Manager, users can Create a Layout (from an existing one) and then edit it in one of the editors like Notepad. Once the layout is Created and Uploaded to Master Page Gallery, users can edit the generated html file in an editor of their choice and upload it back to the Master Page Gallery.
Creating a Layout with Design Manager is much easier than creating them in a SharePoint Designer or Visual studio. See the detailed example at Create a Custom Page Layout in SharePoint 2013

All the Page Layouts should be fit in a common Master page selected for your site.
There are many Layouts available Out-of-box in a SharePoint site. These layouts can be used to create various pages.

CUSTOMIZING SITE’S LOOK AND NAVIGATION
Master Page - Master page in SharePoint sites contributes to a common outline of a SharePoint page. It consists of Header,Logo,
Top & Left navigation, breadcrumbs, ribbon and footer. There are various Master Pages available Out-of-box to switch the basic look of your site.
Themes - Besides Master Page, another option in SharePoint that can change the look and feel of your site is Themes. Themes are design templates that you can apply to your site to brand your site instantly.
SHAREPOINT 2013 COMPOSED LOOK - CREATING CUSTOM THEMES IN SHAREPOINT 2013In SharePoint 2013, the theming engine was highly improved. You can Create Custom Themes by Creating Color palettes and Font Schemes, and upload them to the Out-of-Box Themes Gallery.
Themes in SharePoint 2013 are defined two XML files:
SPColor.xml - defines the color palette, in which slots now have semantic names so that it’s more clear what UI elements will be affected when you change a color value. Also, themes now support setting opacity.
SPFont.xml - defines the font scheme and supports multiple languages, web-safe fonts, and web fonts.
How it Works - The Theming model uses Comment-style markup in the CSS and then replaces parts of the CSS based on parameters such as fonts and color schemes that users select.
Theme Gallery – Theme Gallery Contains the list of Color Palettes and Font Schemes that are make up Themes in SharePoint 2013. SharePoint looks in the 15 folder (/_catalogs/theme/15/) to determine the available Color palettes and Font schemes.
To access the Theme Gallery navigate to Site Settings -> under Web Designer Galleries -> Themes.

Composed Look – A Composed Look is a List where Structure and Components of a Theme are defined.
You can define the following for a Theme -
• Color palette
• Font Scheme
• Background Image
• Master Page
Theme Gallery VS Composed Look – Theme Gallery Contains Core files that make a Theme – SPColor.xml and SPFont.xml whereas Composed look Contains Links to these files in a structured way.
See the detailed Example at Create Custom Theme in SharePoint 2013 (Step-by-Step Tutorial)
Migrating Themes from SharePoint 2010 - SharePoint 2013 does not support “THMX” Themes that are Created in SharePoint 2010. If you are looking to migrate a Custom Theme from SharePoint 2010 to SharePoint 2013, you would have to re-design the Theme with new structure, defined by XML files – SPColor.xml and SPFont.xml and then apply to the new SharePoint 2013 site.
Please Note - The Custom theme from SharePoint 2010 after upgrade will remain in place but the theme will no longer be applied to the site, and the site reverts to the default theme.

WE ARE HERE TO HELP.
Questions?