Embed Size (px)
Citation preview

Joe SsekonoWeb Developer
Novariss
X-TAG WITH WEB COMPONENTS

X-TAG WITH WEB COMPONENTS
X-Tag Web Components

HOW MUCH DO YOU KNOWABOUT THE WEB AND YOUR
BROWSER?

YOUR BROWSER WILL DO MORE
Evolution of the web standards have redefinedHTML alongside CSS and JavaScript!

HOW IT WAS DONE
Class names define intended purpose of HTMLelement...
<div class="header"></div><div class="nav"></div><div class="section"></div><div class="footer"></div>

HOW IT IS DONE
Purpose oriented HTML tags...
<header></header><nav></nav><section></section><footer></footer>

I WILL NEED ALL THOSE FILES
Building and reusing a widget requires replication ofHTML, CSS and JavaScript code :(

CUSTOM ELEMENTS COME TO THERESCUE
Create and reuse widgets or web components inweb documents and web applications

WEB COMPONENTS RIDE ON 4KEY FEATURES
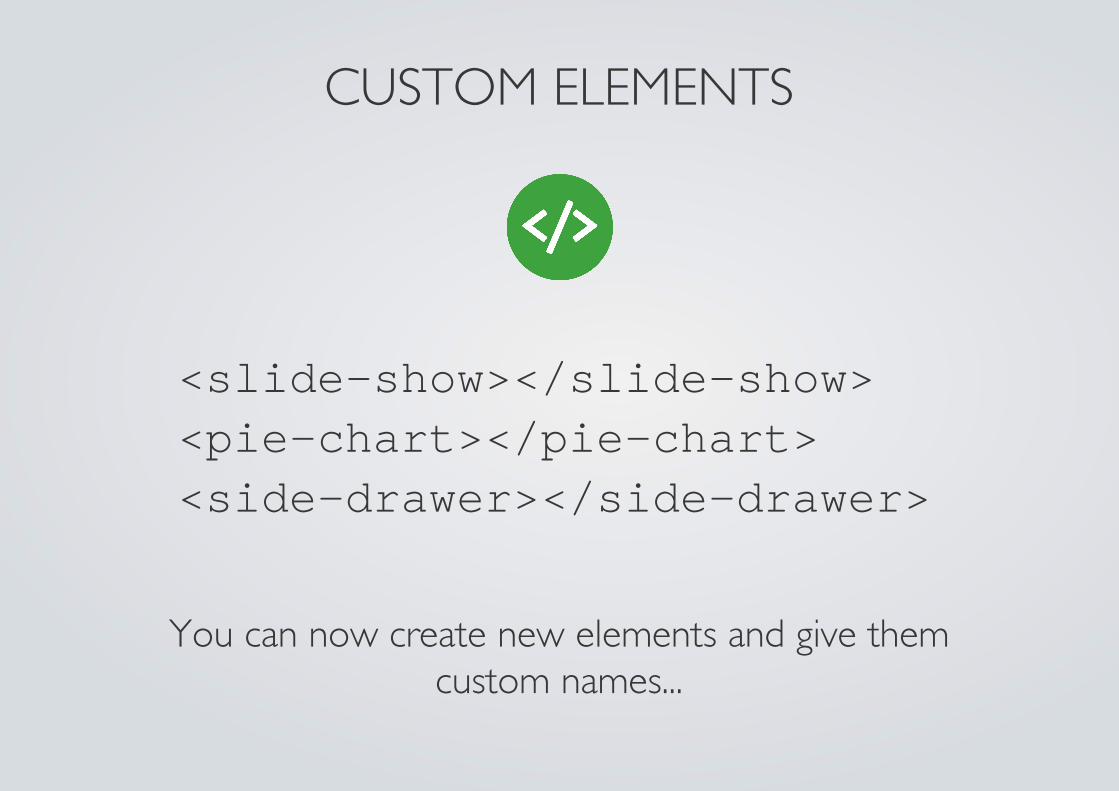
CUSTOM ELEMENTS
You can now create new elements and give themcustom names...
<slideshow></slideshow><piechart></piechart><sidedrawer></sidedrawer>
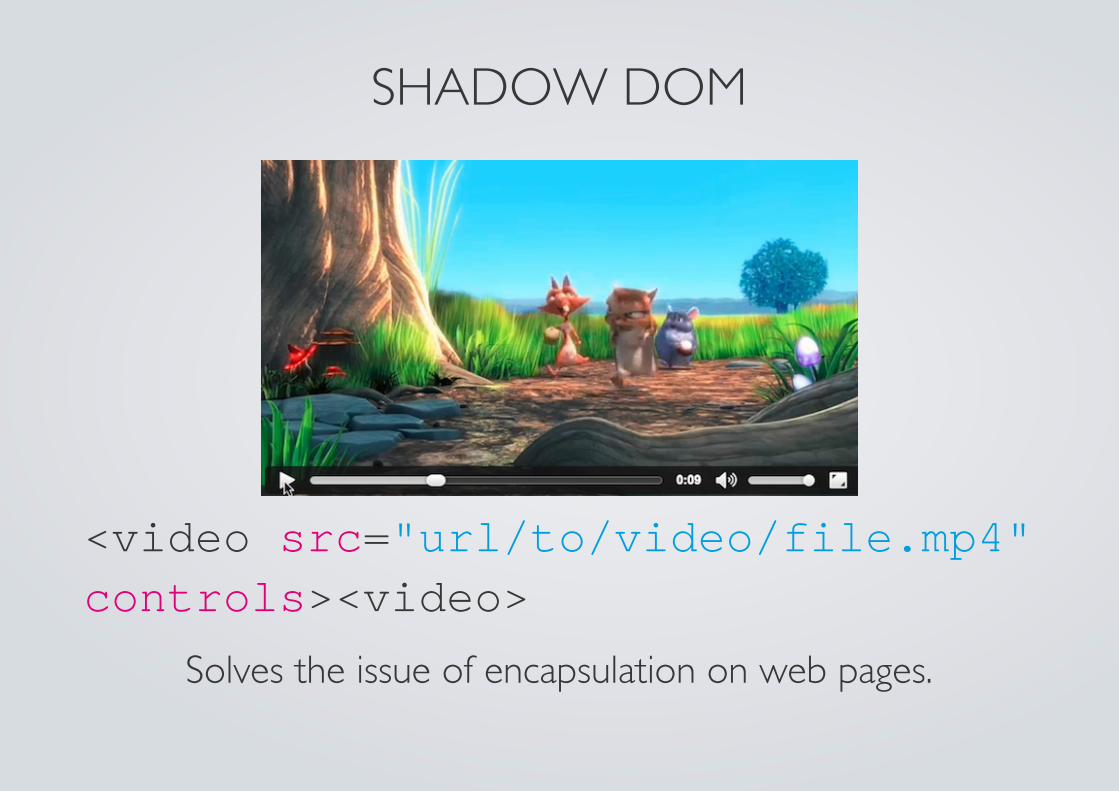
SHADOW DOM
Solves the issue of encapsulation on web pages.
<video src="url/to/video/file.mp4"controls><video>
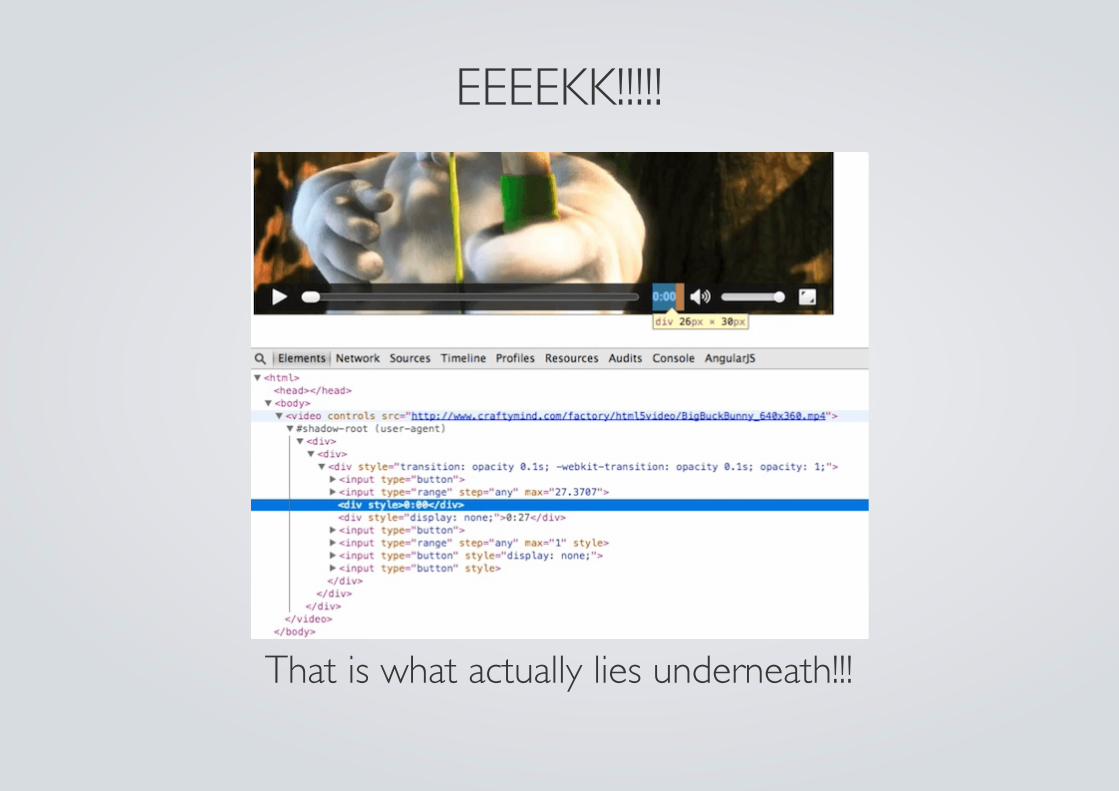
EEEEKK!!!!!
That is what actually lies underneath!!!

HTML TEMPLATES
Templates will remain inert until they are clonedand inserted into the DOM.
web-document.html custom-element.html

HTML IMPORTS
Easily use web components as a one-line import.Everthing else is bundled within!!!
<link rel="import"href="bower_components/brick/dist/brick.html">

BROWSER SUPPORT
Native browser support is available only for a fewweb browsers... :(

BROWSER SUPPORT
But Web Components provides polyfills for"evergreen" browsers :)

I WANT TO LEARN MORE ABOUT WEBCOMPONENTS
Understand it in depth :)
www.webcomponents.org

X-THUG...OOOPS!!! X-TAG :)
JavaScript library that brings web components' customelements compatibilities to modern browsers.

X-TAG CUSTOM ELEMENTS WITH BRICK
<brickdeck><brickflipbox>
<bricklayoutflex="5"></bricklayout>
A collection of components designed for easy andquick building of web applications' user interfaces.

HOW DO WE USE THESEELEMENTS?

INSTALL BRICK
You can always contribute back to the project...
bower install mozbrick/brick
Install using bower package manager
git clone https://github.com/mozbrick/brick.git
Or clone the project from github

IMPORT LIBRARY AND TEMPLATE
Place this in the <head> of your html document
<script
src="bower_components/brick/dist/platf
orm/platform.js"></script>
<link rel="import"
href="bower_components/brick/dist/bric
k.html">

USE CUSTOM ELEMENT
Place the custom element tag in the <body> ofyour html document like you would do with other
HTML tags.
<body>
<brickdeck transitiontype="slideup">
<brickcard>First content</brickcard>
<brickcard>Second content</brickcard>
</brickdeck>
</body>

I WANT MORE!!! HOW DO ICREATE A CUSTOM ELEMENT?

DOWNLOAD AND INSTALL LIBRARY
This X-Tag library comes along withwebcomponents.js
https://github.com/xtag/core
Download zip or clone the project from githuband place it in your project root directory.

CREATE TEMPLATE
Name template file after the custom elementname. It should have a hyphen!!!
italic-string.html

ADD CORE LIBRARY TO TEMPLATE
Place this in the <head> of your html document
<script src="<script src="core
master/dist/xtag
core.js"></script>"></script>

CREATE AND DEFINE THE ELEMENT'SSHADOW DOM AND BEHAVIOR
Place this in the <head> of your html document
<script>(function()
xtag.register('italicstring', lifecycle:
created: function() this.innerHTML = "<i style='color:" + this.textColor + ";'>" + this.innerHTML + "</i>";
,accessors:
textColor: attribute: object: this.textColor
,methods:
changeToRed: function() var italicElement = this.querySelector("i");italicElement.style.color = "red";
,events:
'click:delegate(i)': function(e) console.log("click event is fired.");
);)();</script>
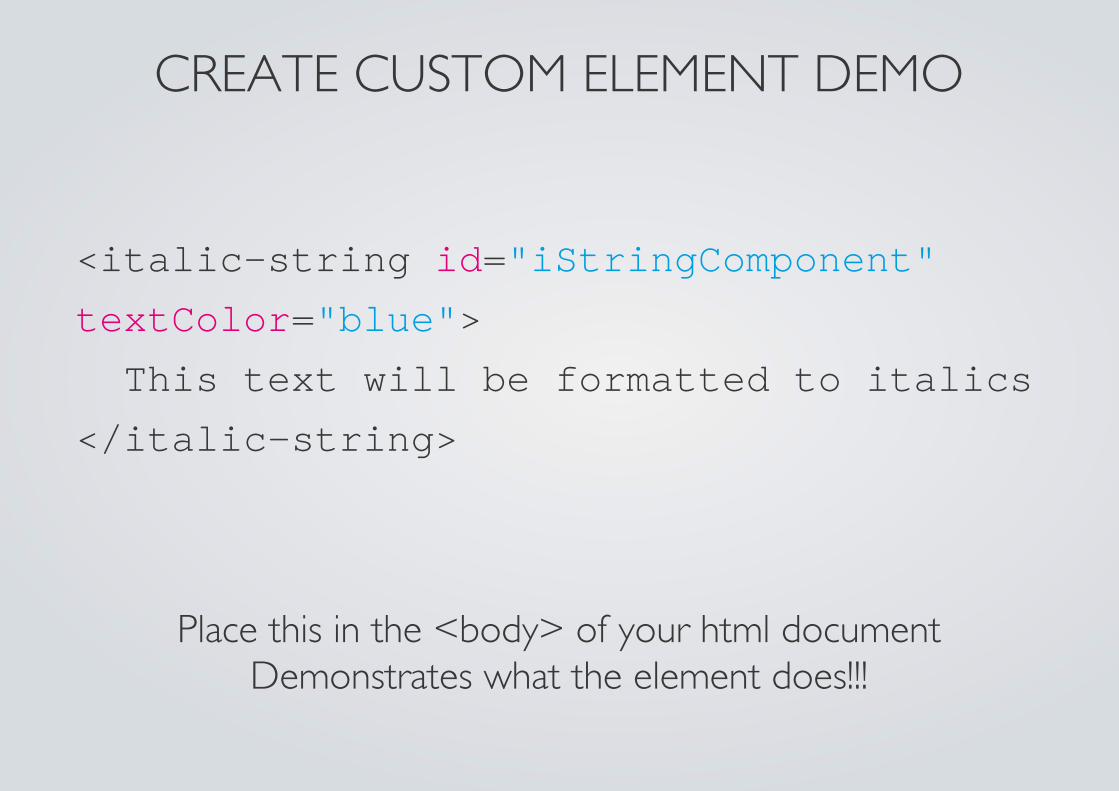
<italicstring id="iStringComponent"
textColor="blue">
This text will be formatted to italics
</italicstring>
CREATE CUSTOM ELEMENT DEMO
Place this in the <body> of your html documentDemonstrates what the element does!!!

YOU CAN NOW USER OR SHAREYOUR CUSTOM ELEMENT :)

I WANT TO LEARN MORE ABOUT X-TAGAND BRICK
Understand it in depth :)
www.x-tags.org | www.x-tag.readme.io
www.brick.mozilla.io
Learning Web ComponentDevelopment - Patel, Sandeep Kumar

THE WAND HAS BEEN PASSED ONTO YOU. GO DO SOME GOOD!!!