Embed Size (px)
Citation preview
The Art of the Straight Razor Shave
A Basic Guide
by
Christopher Moss
Copyright © 2005 Christopher Moss. A! rights reserved.
Table of Contents
Chapter 1: Why Bother?
Chapter 2: The Razor
Chapter 3: Honing, Stropping and Care of your razor
Chapter 4: The Preparation
Chapter 5: The Badger Brush, Hard Soaps and Creams
Chapter 6: The Shave
Chapter 7: Aftermath
Appendix: Useful web links
DisclaimerUsed sensibly and carefully, a straight razor is an excellent means of shaving. Without due care and attention, it is possible to injure yourself, just as with any sharp edged object. If you try out the shaving method described herein, be aware that I make no guarantee, implied or otherwise, that you won’t manage to cut yourself. You will. But you will learn and become proficient, and then you will only rarely nick yourself. Never leave a straight razor where small chil-dren, or even unsuspecting adults, might come across it and pick it up. Use your common sense!
Chapter 1Why Bother?
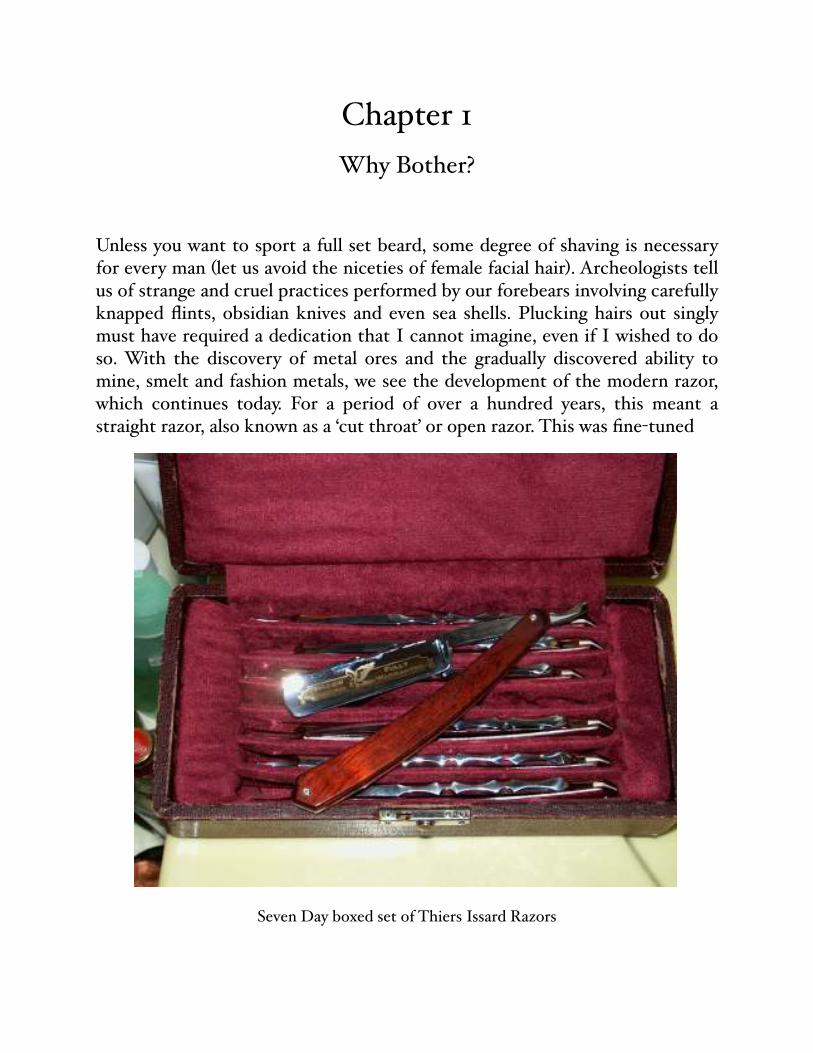
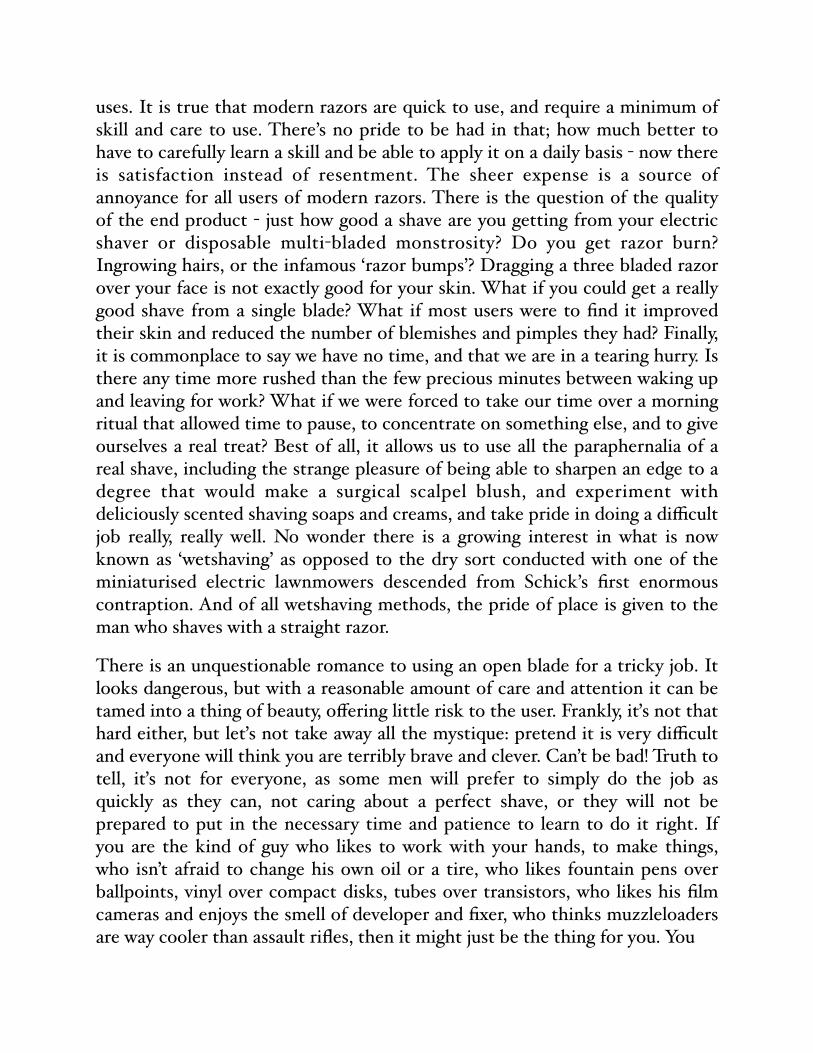
Unless you want to sport a full set beard, some degree of shaving is necessary for every man (let us avoid the niceties of female facial hair). Archeologists tell us of strange and cruel practices performed by our forebears involving carefully knapped flints, obsidian knives and even sea shells. Plucking hairs out singly must have required a dedication that I cannot imagine, even if I wished to do so. With the discovery of metal ores and the gradually discovered ability to mine, smelt and fashion metals, we see the development of the modern razor, which continues today. For a period of over a hundred years, this meant a straight razor, also known as a ‘cut throať or open razor. This was fine-tuned
Seven Day boxed set of Thiers Issard Razors
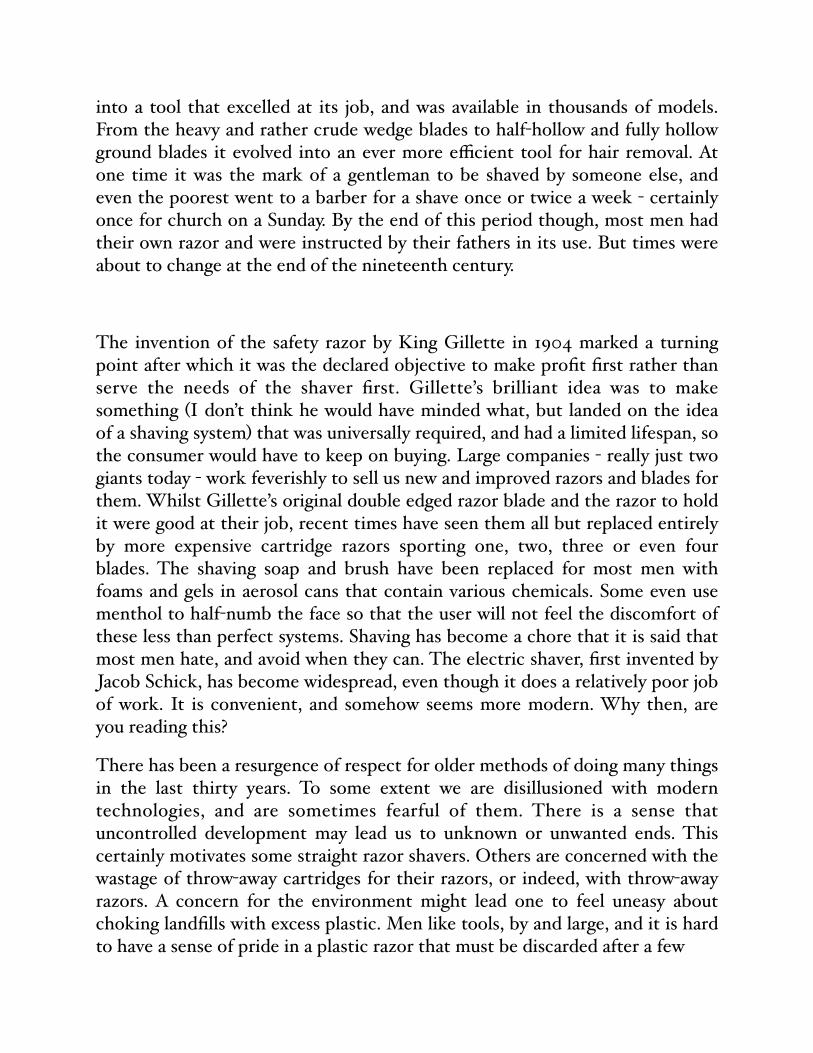
into a tool that excelled at its job, and was available in thousands of models. From the heavy and rather crude wedge blades to half-hollow and fully hollow ground blades it evolved into an ever more efficient tool for hair removal. At one time it was the mark of a gentleman to be shaved by someone else, and even the poorest went to a barber for a shave once or twice a week - certainly once for church on a Sunday. By the end of this period though, most men had their own razor and were instructed by their fathers in its use. But times were about to change at the end of the nineteenth century.
The invention of the safety razor by King Gillette in 1904 marked a turning point after which it was the declared objective to make profit first rather than serve the needs of the shaver first. Gillette’s brilliant idea was to make something (I don’t think he would have minded what, but landed on the idea of a shaving system) that was universally required, and had a limited lifespan, so the consumer would have to keep on buying. Large companies - really just two giants today - work feverishly to sell us new and improved razors and blades for them. Whilst Gillette’s original double edged razor blade and the razor to hold it were good at their job, recent times have seen them all but replaced entirely by more expensive cartridge razors sporting one, two, three or even four blades. The shaving soap and brush have been replaced for most men with foams and gels in aerosol cans that contain various chemicals. Some even use menthol to half-numb the face so that the user will not feel the discomfort of these less than perfect systems. Shaving has become a chore that it is said that most men hate, and avoid when they can. The electric shaver, first invented by Jacob Schick, has become widespread, even though it does a relatively poor job of work. It is convenient, and somehow seems more modern. Why then, are you reading this?
There has been a resurgence of respect for older methods of doing many things in the last thirty years. To some extent we are disillusioned with modern technologies, and are sometimes fearful of them. There is a sense that uncontrolled development may lead us to unknown or unwanted ends. This certainly motivates some straight razor shavers. Others are concerned with the wastage of throw-away cartridges for their razors, or indeed, with throw-away razors. A concern for the environment might lead one to feel uneasy about choking landfills with excess plastic. Men like tools, by and large, and it is hard to have a sense of pride in a plastic razor that must be discarded after a few
uses. It is true that modern razors are quick to use, and require a minimum of skill and care to use. There’s no pride to be had in that; how much better to have to carefully learn a skill and be able to apply it on a daily basis - now there is satisfaction instead of resentment. The sheer expense is a source of annoyance for all users of modern razors. There is the question of the quality of the end product - just how good a shave are you getting from your electric shaver or disposable multi-bladed monstrosity? Do you get razor burn? Ingrowing hairs, or the infamous ‘razor bumps’? Dragging a three bladed razor over your face is not exactly good for your skin. What if you could get a really good shave from a single blade? What if most users were to find it improved their skin and reduced the number of blemishes and pimples they had? Finally, it is commonplace to say we have no time, and that we are in a tearing hurry. Is there any time more rushed than the few precious minutes between waking up and leaving for work? What if we were forced to take our time over a morning ritual that allowed time to pause, to concentrate on something else, and to give ourselves a real treat? Best of all, it allows us to use all the paraphernalia of a real shave, including the strange pleasure of being able to sharpen an edge to a degree that would make a surgical scalpel blush, and experiment with deliciously scented shaving soaps and creams, and take pride in doing a difficult job really, really well. No wonder there is a growing interest in what is now known as ‘wetshaving’ as opposed to the dry sort conducted with one of the miniaturised electric lawnmowers descended from Schick’s first enormous contraption. And of all wetshaving methods, the pride of place is given to the man who shaves with a straight razor.
There is an unquestionable romance to using an open blade for a tricky job. It looks dangerous, but with a reasonable amount of care and attention it can be tamed into a thing of beauty, offering little risk to the user. Frankly, iťs not that hard either, but leťs not take away all the mystique: pretend it is very difficult and everyone will think you are terribly brave and clever. Can’t be bad! Truth to tell, iťs not for everyone, as some men will prefer to simply do the job as quickly as they can, not caring about a perfect shave, or they will not be prepared to put in the necessary time and patience to learn to do it right. If you are the kind of guy who likes to work with your hands, to make things, who isn’t afraid to change his own oil or a tire, who likes fountain pens over ballpoints, vinyl over compact disks, tubes over transistors, who likes his film cameras and enjoys the smell of developer and fixer, who thinks muzzleloaders are way cooler than assault rifles, then it might just be the thing for you. You
won’t know till you give it a try. If you are tempted, be prepared to spend several months getting the hang of it, and depending on your skills probably longer still until you have honing down pat. Having advice on tap, and the support of a community of users is almost essential to keeping going through the rough patches. With internet access, there are many such helpers ready and able to advise you when you get stuck. Here I have to insert a plug for the best straight razor resource on the web, which is a Yahoo! group called Straightrazorplace. The first thing you should do after reading this is to go and join this group, and don’t be afraid to ask questions as beginners are welcome. The group was founded by a gentleman named Lynn Abrams, who has done more than anyone to bring back the straight razor way of shaving. Other groups have split off from this as the word has spread, and others still are concerned with wetshaving in general, or with the associated soaps and creams. I’ll list some useful links at the end. All in all, even if you never meet another straight razor user in person, you will be part of an online community that has some really nice people in it.
Chapter 2The Razor
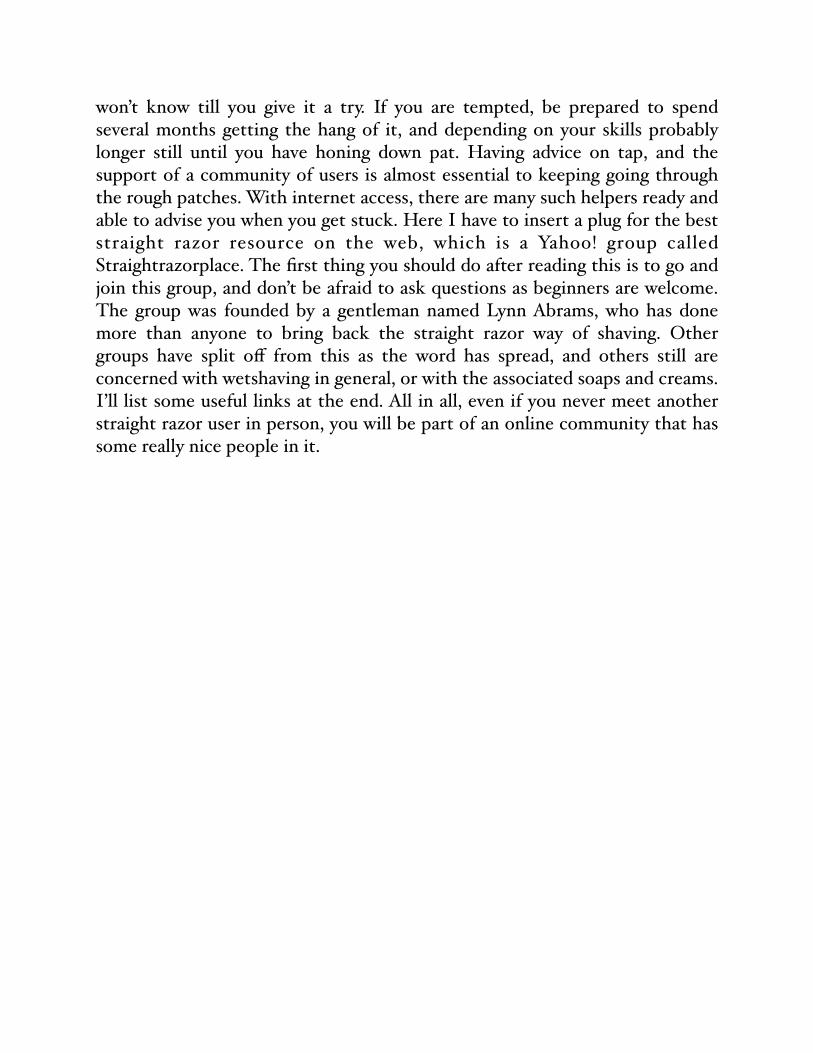
In order to be able to talk about straight razors, we have to agree on some terminology for the various parts of their anatomy. In the photo below these parts are named. This is a basic razor, similar to most that you will find, except for the blade, which is made of damascus steel
The blade will usually be made of carbon steel, but sometimes you will come across stainless steel blades. Most users would agree that the carbon steel is easier to hone, achieves a sharper edge and is more prone to rust. Stainless steel is harder to hone, and generally doesn’t ever get quite so sharp, and is less
prone to rusting - it still can and needs the same care to avoid this. Rarely, razors like the one in the photo are made with true damascus steel blades, but these are not for the beginner since the extreme hardness of this steel makes honing a challenge, and they are also very expensive. The handle, or scales, might be made of plastic, wood, celluloid, bone, horn, ivory (old razors only), steel, or even mother of pearl. This is where razor manufacturers could go to town, producing ever more beautiful scales to attract customers. For now, we will leave these matters to collectors, as the quality of the blade has to be the first consideration for a user, and especially so for a new user. As well as the kind of steel, a razor will have its blade described by width from spine to edge, and this is traditionally expressed in eighths of an inch. The commonest size is 5/8” though some will prefer a bigger broader blade up to 7/8” or rarely 8/8”. Narrower blades of 4/8” are easily found, and a few even smaller than this. A broader blade will allow more lather to accumulate on the blade before you have to pause and rinse or wipe it off, but will be less nimble at getting into awkward spots such as under your nose. Some men find the heavier blades to be better shavers as they encourage the shaver to allow the weight of the blade to do the work - more on this later.
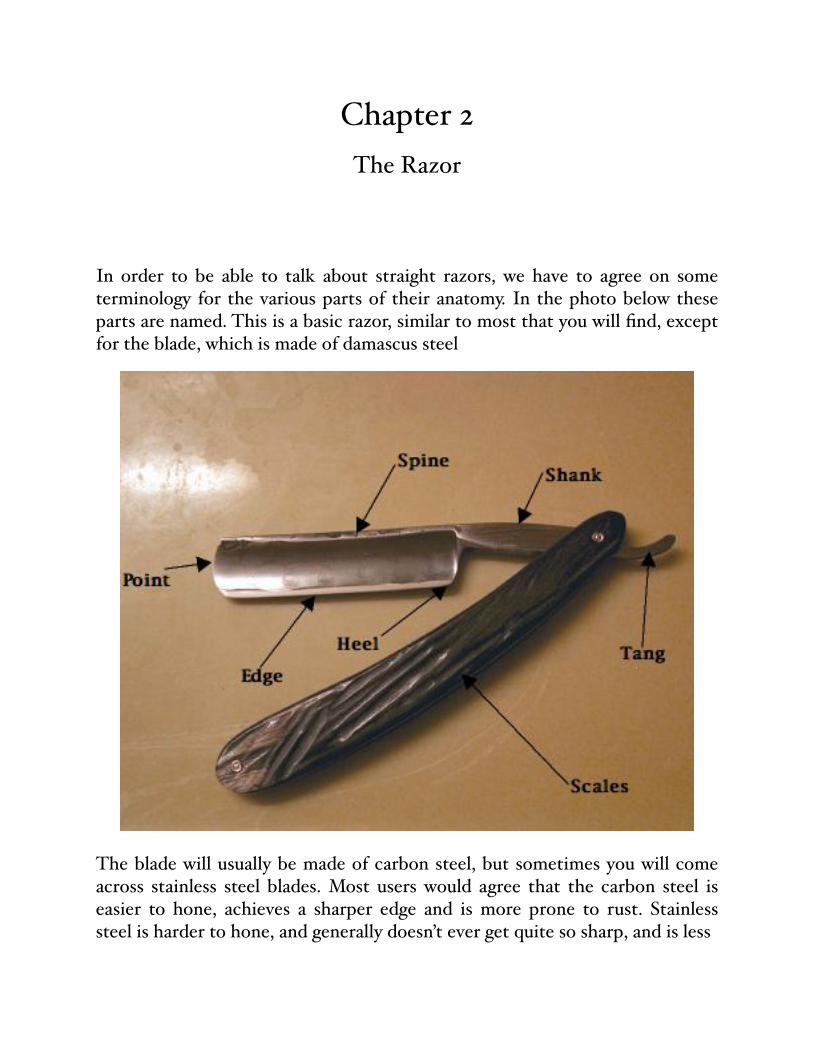
The point of the blade can be shaped in several styles, the commonest being the round point and the square po int (or ‘spike’), but there are a l so ha l f - round , oblique, notched and French points. The sharp corner on the square point razor is useful for exact work, say, around the edge of a moustache, but it is also easy to cut
yourself with, so most beginners will want a round point as this is more forgiving.
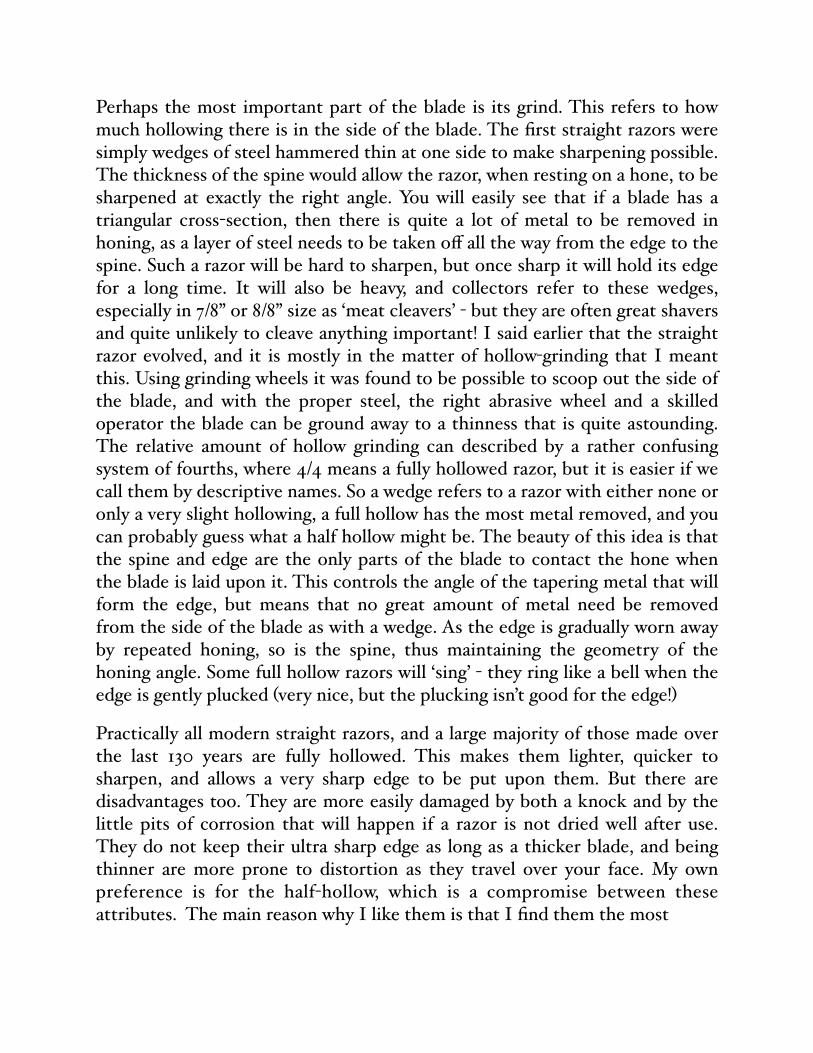
Perhaps the most important part of the blade is its grind. This refers to how much hollowing there is in the side of the blade. The first straight razors were simply wedges of steel hammered thin at one side to make sharpening possible. The thickness of the spine would allow the razor, when resting on a hone, to be sharpened at exactly the right angle. You will easily see that if a blade has a triangular cross-section, then there is quite a lot of metal to be removed in honing, as a layer of steel needs to be taken off all the way from the edge to the spine. Such a razor will be hard to sharpen, but once sharp it will hold its edge for a long time. It will also be heavy, and collectors refer to these wedges, especially in 7/8” or 8/8” size as ‘meat cleavers’ - but they are often great shavers and quite unlikely to cleave anything important! I said earlier that the straight razor evolved, and it is mostly in the matter of hollow-grinding that I meant this. Using grinding wheels it was found to be possible to scoop out the side of the blade, and with the proper steel, the right abrasive wheel and a skilled operator the blade can be ground away to a thinness that is quite astounding. The relative amount of hollow grinding can described by a rather confusing system of fourths, where 4/4 means a fully hollowed razor, but it is easier if we call them by descriptive names. So a wedge refers to a razor with either none or only a very slight hollowing, a full hollow has the most metal removed, and you can probably guess what a half hollow might be. The beauty of this idea is that the spine and edge are the only parts of the blade to contact the hone when the blade is laid upon it. This controls the angle of the tapering metal that will form the edge, but means that no great amount of metal need be removed from the side of the blade as with a wedge. As the edge is gradually worn away by repeated honing, so is the spine, thus maintaining the geometry of the honing angle. Some full hollow razors will ‘sing’ - they ring like a bell when the edge is gently plucked (very nice, but the plucking isn’t good for the edge!)
Practically all modern straight razors, and a large majority of those made over the last 130 years are fully hollowed. This makes them lighter, quicker to sharpen, and allows a very sharp edge to be put upon them. But there are disadvantages too. They are more easily damaged by both a knock and by the little pits of corrosion that will happen if a razor is not dried well after use. They do not keep their ultra sharp edge as long as a thicker blade, and being thinner are more prone to distortion as they travel over your face. My own preference is for the half-hollow, which is a compromise between these attributes. The main reason why I like them is that I find them the most
comfortable razors to shave with, which I believe to be a result of the thicker blade distorting less.
So how does a beginner choose his first razor? This is plainly of the utmost importance, as you will either persevere and learn the art or give up depending on the quality of your experiences with your first straight razor. You certainly shouldn’t do as I did, and buy a brand new razor - and a stainless steel one at that! I don’t claim to have tamed that beast by my superior powers - I gave up on it pretty quickly and did the smart thing. I bought an old razor from an experienced straight razor user on Straightrazorplace. If you want to start with a real razor, this is definitely the way to do it (yes, there is an alternative, but just wait a minute). You will not get a pretty razor this way, though you may think it so since iťs yours! What you will get is one that has been honed for you, and this is most important. Learning the straight razor shave may take from a few weeks to a few months before you feel confident and can do a reliably quick and close shave, but learning to hone is harder still. Straight razors are still being manufactured, but are not ready to shave with as they leave the factory, whatever the packaging may say! Trying to shave with a blunt razor is simply torture, and you won’t want to come back for more. If your razor has been sharpened by someone who has the knack of it, you won’t have this worry, and you will have a benchmark to compare with as you try to hone another razor on your own. The only way to buy a new razor, and avoid this problem is to buy it from Classic Shaving (see appendix for the website) and have them send it via their sharpening service (consisting of the aforementioned Mr Abrams). You’ll have no worries at all if you do that. Once you know how to hone, you can start looking for razors in antique shops, flea markets, garage sales, and like everything else, on eBay. Iťs rather hard to avoid acquiring rather too many of them, and this will lead your loved ones to question your sanity, but by this time you won’t care anyway. I know.
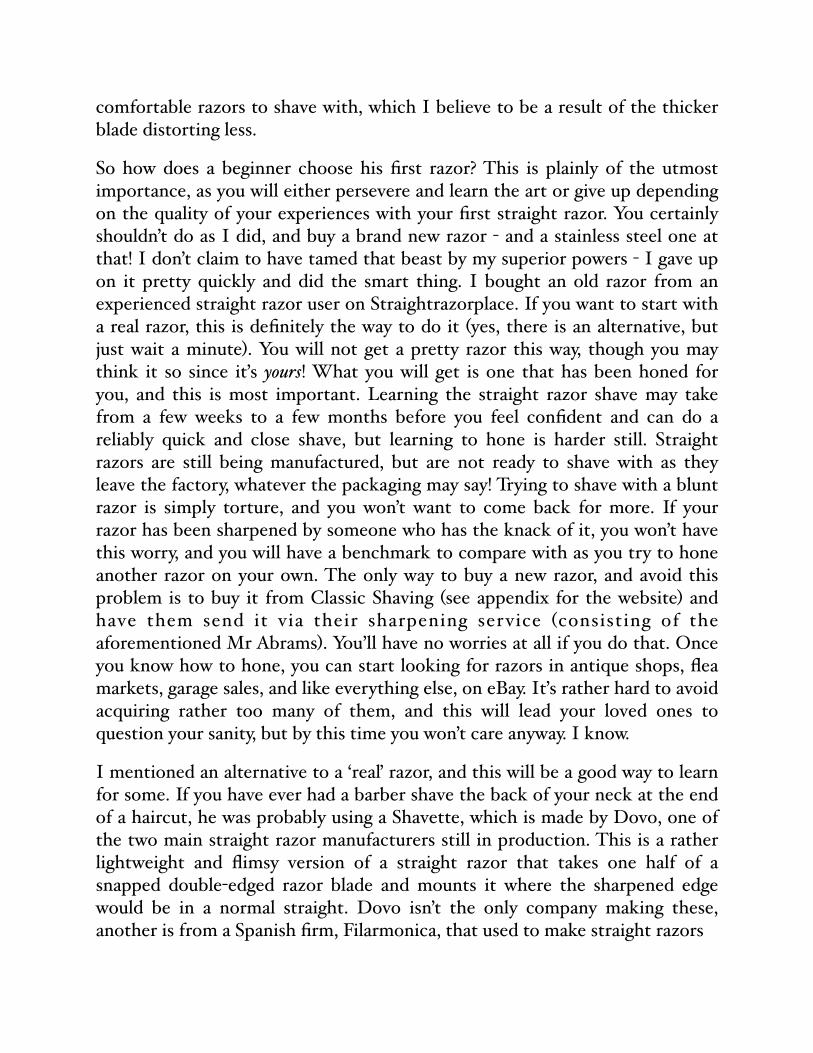
I mentioned an alternative to a ‘reaľ razor, and this will be a good way to learn for some. If you have ever had a barber shave the back of your neck at the end of a haircut, he was probably using a Shavette, which is made by Dovo, one of the two main straight razor manufacturers still in production. This is a rather lightweight and flimsy version of a straight razor that takes one half of a snapped double-edged razor blade and mounts it where the sharpened edge would be in a normal straight. Dovo isn’t the only company making these, another is from a Spanish firm, Filarmonica, that used to make straight razors
and still supplies their version of this device to barber supply houses. There is also a much more expensive disposable blade straight from Japan, the Feather Razor, that is meant for those who intend to continue using a straight without the bother of honing and stropping. It uses its own proprietary blades. The Shavette is easily bought and is quite cheap. Classic Shaving sell them for less than $30 US. It will let the beginner try his hand at a straight shave with no worries about sharpness. Once again, there is always a ‘buť - in this case it has to be said that the Shavette is very light, and a double-edge blade is very sharp. You will manage to make a few little cuts with it because of this combination, but if used carefully it can give the flavour of a straight shave for very little outlay. Some users strongly recommend them for beginners, but I would suggest that you might as well use the real thing from the start. If you are going to be a straight shaver you are going to have to learn to hone sooner or later, so why waste time? Talking of which....
Chapter 3Honing, Stropping and Caring
for your Straight Razor
Assuming you are going to do as I have advised, and buy a ready-honed razor you may want to skip this part until after the shaving part, which is the bit you can’t wait to get into. But if you are an organised kind of guy, and are doing all the research first, here we go....
The basic principle of honing is that the razor’s blade must be gently laid flat on a hone, and moved with the edge foremost. It really is that simple. And yet, it really is that complicated too. Everything else follows from this.
Leťs begin with the hone. The hone that you already have for sharpening your knives is no good at all here. It will be far too coarse, and it probably isn’t flat. You will have to buy a hone of some sort, and there are three main ways you can go. Firstly, a modern wetstone from a woodworking shop, such as that made by Norton (the 4,000/8,000 combination would be best) or Shapton will be fairly easily found. These must be well wetted in cold water before use, and the coarser side is used first, and then the finer. The razor is placed on the hone holding it on the shank by thumb and forefinger, and slid along the surface with the sharp edge leading. Because the blade is longer than the width of the stone, it is necessary either to angle the blade so it fits across the width of the stone, or draw the blade downwards as it travels along the stone, or simply move the blade on alternate passes across the stone, so that the heel is sharpened, and then the point. A wider stone can be bought which avoids this. Both the spine and the edge must stay in contact with the hone at all times. On reaching the end of the hone, stop whilst the blade is still on the hone, and roll the razor over on its spine so that the edge is now facing the other way and go back in the other direction. One pass in each direction (a ‘round trip’) counts as one stroke of the hone. The main thing is to maintain even contact with the surface, with as little pressure as possible being used to do so. The harder you press, the less sharp your razor. The knack of doing this is what takes more time to learn than any other part of straight razor shaving.
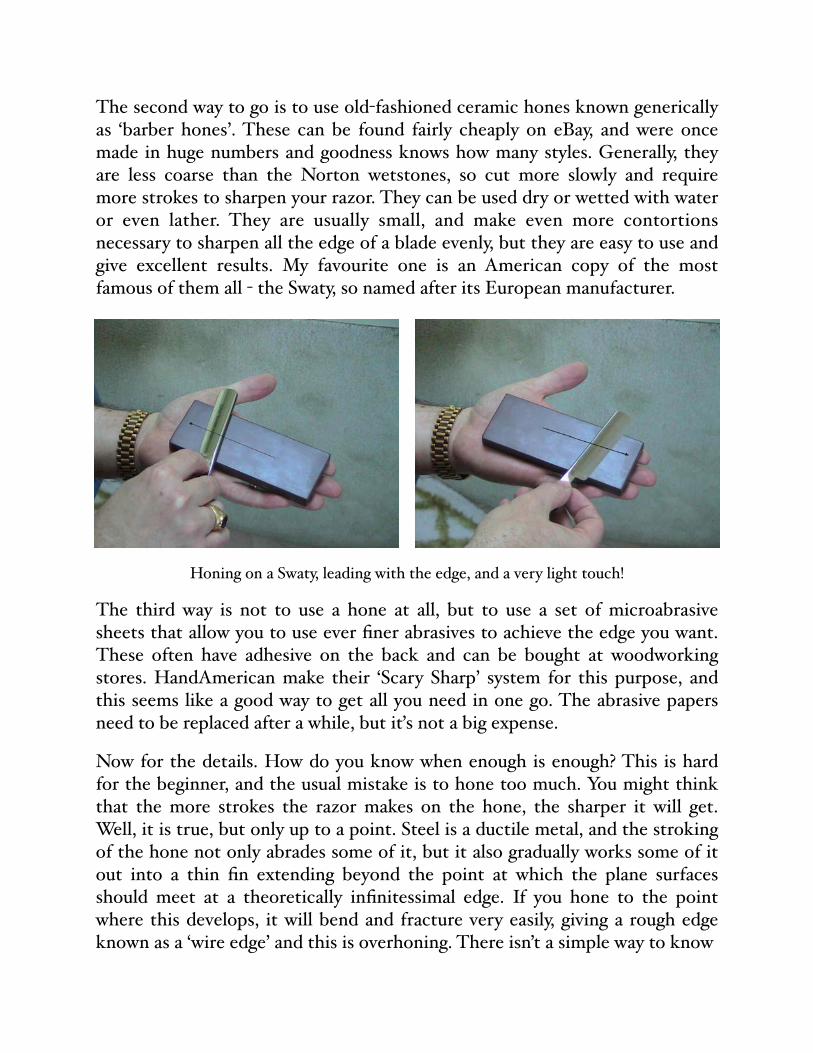
The second way to go is to use old-fashioned ceramic hones known generically as ‘barber hones’. These can be found fairly cheaply on eBay, and were once made in huge numbers and goodness knows how many styles. Generally, they are less coarse than the Norton wetstones, so cut more slowly and require more strokes to sharpen your razor. They can be used dry or wetted with water or even lather. They are usually small, and make even more contortions necessary to sharpen all the edge of a blade evenly, but they are easy to use and give excellent results. My favourite one is an American copy of the most famous of them all - the Swaty, so named after its European manufacturer.
Honing on a Swaty, leading with the edge, and a very light touch!
The third way is not to use a hone at all, but to use a set of microabrasive sheets that allow you to use ever finer abrasives to achieve the edge you want. These often have adhesive on the back and can be bought at woodworking stores. HandAmerican make their ‘Scary Sharp’ system for this purpose, and this seems like a good way to get all you need in one go. The abrasive papers need to be replaced after a while, but iťs not a big expense.
Now for the details. How do you know when enough is enough? This is hard for the beginner, and the usual mistake is to hone too much. You might think that the more strokes the razor makes on the hone, the sharper it will get. Well, it is true, but only up to a point. Steel is a ductile metal, and the stroking of the hone not only abrades some of it, but it also gradually works some of it out into a thin fin extending beyond the point at which the plane surfaces should meet at a theoretically infinitessimal edge. If you hone to the point where this develops, it will bend and fracture very easily, giving a rough edge known as a ‘wire edge’ and this is overhoning. There isn’t a simple way to know
when you have done enough; the best way is to hone, shave, hone and shave until it seems as good as it needs to be. Some people pluck a hair from their head and use it to draw across the edge and see if it catches and is cut, but this doesn’t translate well into shave-worthiness, as an overhoned edge will pass this test. The traditional way is to draw the edge of the blade across a wetted thumbnail. If the edge is blunt there will be little drag as the blade doesn’t sink into the nail, whereas when sharp there will be some drag. Iťs true as well, that there is a special feel of the blade on the hone when it is about right - often described as ‘suction’ it is when the flat strip of metal adjacent to the edge is smooth enough to be reluctant to lift away from the hone. Iťs quite subtle, unless you are using the hone with lather, and then is less reliable. An overhoned edge is said to give a gritty stop-and-start sensation when drawn across a nail. I find that I can judge fairly well when a blade is ready for a trial shave by dry shaving some of the hair on the inside of my left forearm. These hairs, which are less tough than beard hair, should fall down easily when they meet the razor’s edge, and you are judging by the amount of resistance to the razor - there should be almost none if the razor is ready to strop and try out on your face.
If you want to get technical, small microscopes are available to aid in honing. A hand-held 10x microscope is cheaply available from Radio Shack, but it is hard to see the wire edge with this, and it can only tell you when you have gone too far. A battery powered hand held 10-60x is also available from the same source, but at full magnification the quality is poor. Bench microscopes are expensive (except for some surprisingly decent USB scopes that connect to your computer) but still are best for confirming when you have overhoned. There really is no good way around this, you just have to learn to get the feel of it. What do you do if you realise you have overhoned? Some advocate back-honing, where the blade is drawn across the hone with the sharp edge trailing instead of leading. I find drawing the blade across a small piece of wood like a matchstick so as to cut a groove across the wood is very good at removing the fin, and allowing a fresh start on the honing. When a razor is well honed, and correctly stropped, you may be able to go several months before having to use the hone again. Each stroke removes a little metal that can’t be put back, so don’t overdo it! Having said that, iťs still true that a straight razor will shave two generations or more if cared for properly.
Keep in the very front of your mind as you hone - Go gently, go slowly and don’t go too far. Good advice for all sorts of situations, but since this isn’t a self-help book we’ll let that thought go!
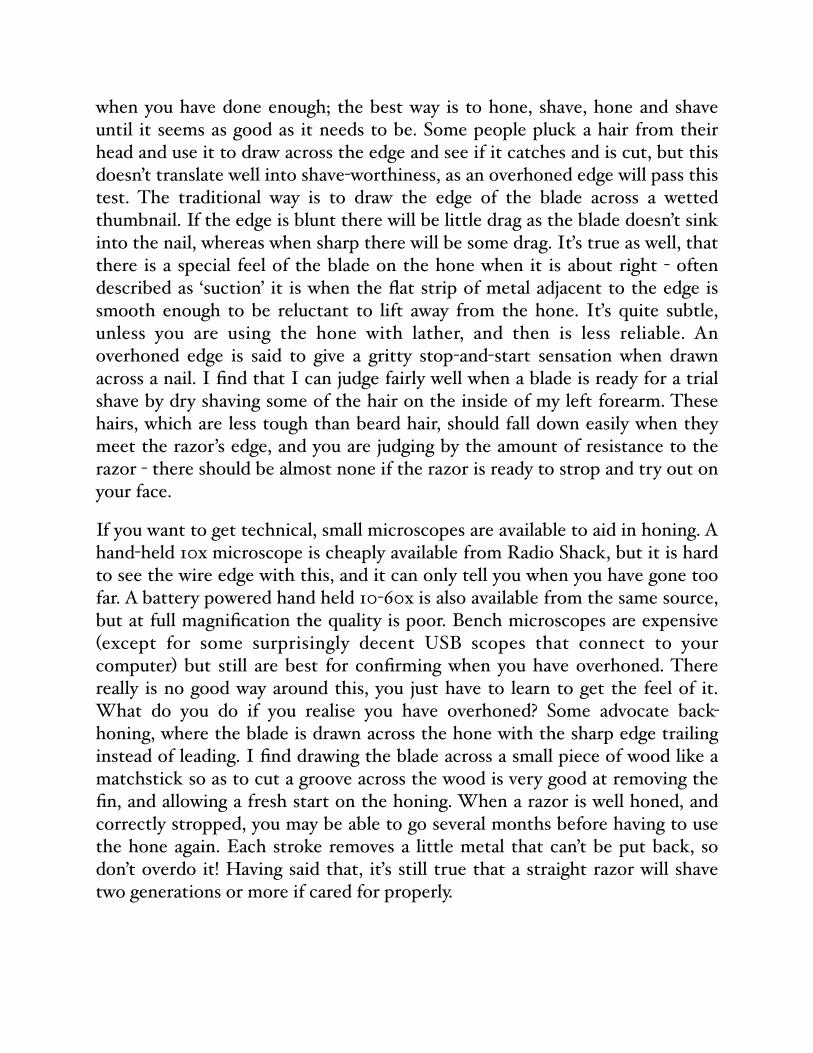
Strops, some different abrasive pastes (plain, chrome oxide, diamond, titanium oxide)
After honing, there is the process of stropping. The strop doesn’t sharpen the edge of the razor at all, but simply aligns the edge keeping the very thin metal all pointing in the same direction. Hanging strops usually consist of two parts, one leather and one canvas or linen. The linen is treated with a fine chalk paste and it does have very mild abrasive properties. The leather may have a dressing on it, but not usually one that contains any abrasive. Chalk, or white paste and the plain tallow known as yellow paste are made by Dovo and can be bought from Classic Shaving. The best way to clean the leather side of the strop is with a liberal application of the kind of waterless hand cleanser used by mechanics to get grease off their hands. This should be massaged into the leather and the surplus wiped off with a paper towel. It will do very well instead of the yellow paste too. It is usual after honing to ignore the linen side and
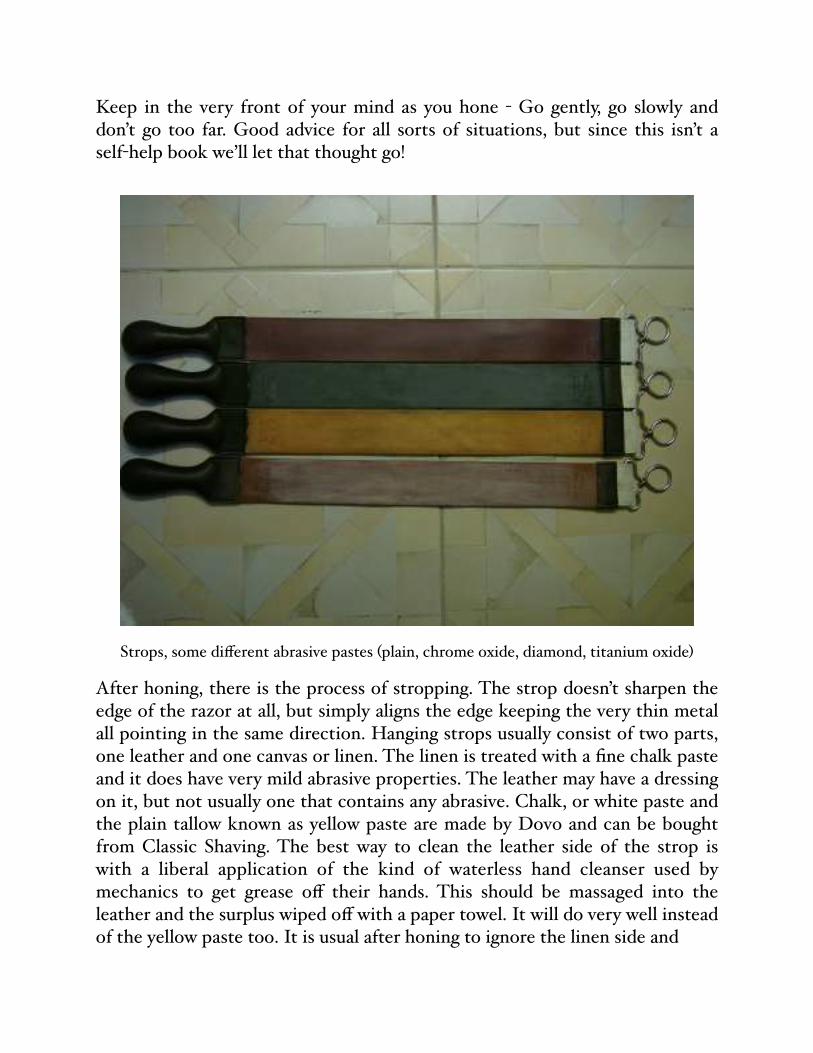
strop on the leather. Between shaves however, the linen side is used before going on to use the leather side. You probably can’t do any harm by over-stropping a razor, as long as your technique is correct. I usually use fifteen round trips on the linen and fifty round trips on the leather. The actual mechanics of stropping are just the opposite of honing. Holding the razor by the shank with your thumb on one side and two or three fingers on the other side, the blade is laid flat on the strop and drawn along it with the sharp edge trailing, NOT leading as when honing. Again it is important that only a light pressure is used, and that the blade stays in contact with the strop both at the spine and at the edge. If the spine lifts off the strop the edge will be bent over and spoilt. The strop must be kept taught, or it will assume a curved shape that will tend to bend the edge out of alignment. A sharp razor will both make a characteristic rasping sound on the leather when stropped, and there will also be some drag which you will come to recognise as a sign of sharpness. Again the razor is rolled over on its spine at the end of a pass to face it in the opposite direction - to do this the shank is rolled between your thumb and fingers just like rolling a pencil. There is no great virtue in doing this very fast, like a barber in a movie, this will tend to mean less control of the razor, and some risk to your strop and fingers.
Stropping on the linen and leather sides of a hanging strop.
Paddle strops have a leather surface mounted on a wood backing that has a handle formed at one end. They are sometimes better for travel, and are also used by some for abrasive pastes. The beginner needs only the hanging strop. Whilst mentioning abrasive pastes, there are many kinds that can be applied to
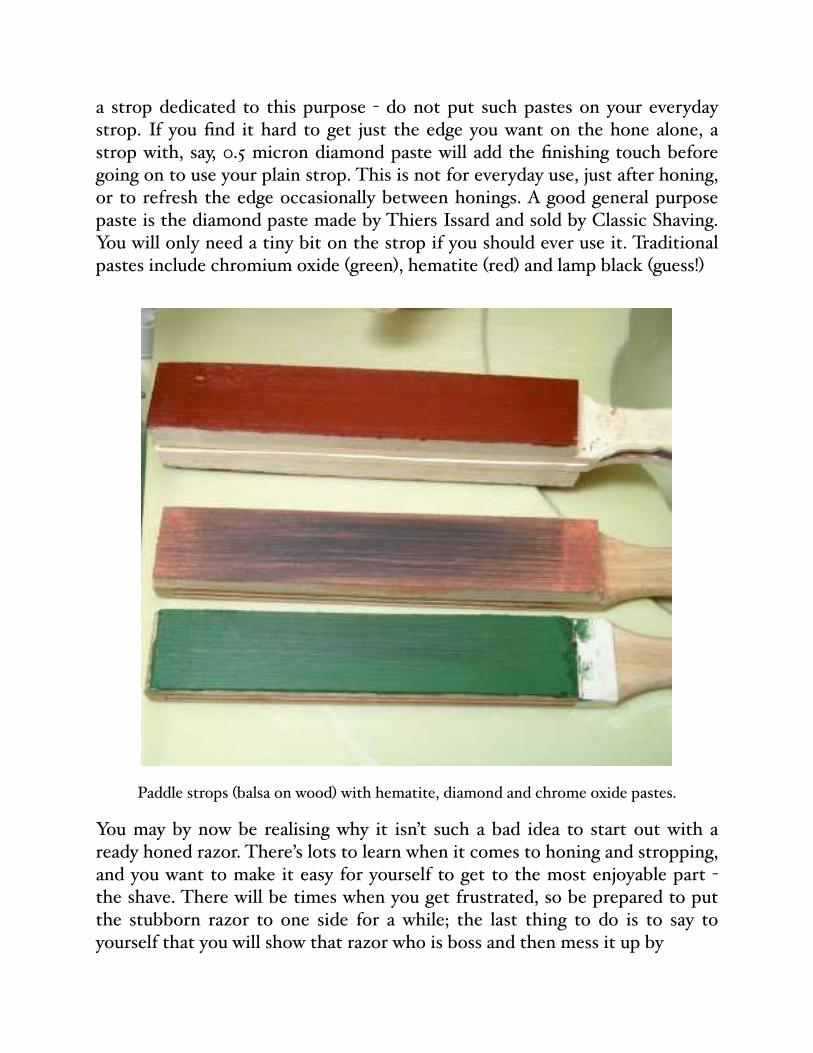
a strop dedicated to this purpose - do not put such pastes on your everyday strop. If you find it hard to get just the edge you want on the hone alone, a strop with, say, 0.5 micron diamond paste will add the finishing touch before going on to use your plain strop. This is not for everyday use, just after honing, or to refresh the edge occasionally between honings. A good general purpose paste is the diamond paste made by Thiers Issard and sold by Classic Shaving. You will only need a tiny bit on the strop if you should ever use it. Traditional pastes include chromium oxide (green), hematite (red) and lamp black (guess!)
Paddle strops (balsa on wood) with hematite, diamond and chrome oxide pastes.
You may by now be realising why it isn’t such a bad idea to start out with a ready honed razor. There’s lots to learn when it comes to honing and stropping, and you want to make it easy for yourself to get to the most enjoyable part - the shave. There will be times when you get frustrated, so be prepared to put the stubborn razor to one side for a while; the last thing to do is to say to yourself that you will show that razor who is boss and then mess it up by
pressing too hard or overhoning. Honing can be a surprisingly relaxing, soothing activity once you know how. Sometimes you will have to resist the temptation to hone for the sake of it and when you get to this point, start on the kitchen knives rather than overhone a razor.
Otherwise the care of a straight razor is largely common sense. If one is to be put away for a while, some light machine oil to prevent rust is a good idea. Bathrooms are humid places, so keeping the razor in the bathroom may encourage rust. After shaving it is imperative the razor be rinsed in hot water (to promote drying) and wiped dry. I hope I need not say to keep them well out of the reach of small fingers - an inquisitive child could suffer serious injury from handling a straight razor.
Chapter 4The Preparation
Did you know that dry hair is tougher to cut than wet? You know how soft and silky your hair can feel after washing it? Well the same is true on your face, and the razor can tell the difference. If you have ever had the treat of a barbershop shave you will know that this begins with hot steamed towels being wrapped around your face to soften the beard. The combination of heat and water is what softens the beard, and the water must penetrate into the hair shafts. This means they must be degreased with soap, and time allowed for the water to soak in. Now iťs not practical to heat wet towels in the microwave and then risk burning your face with them, so what are you going to do instead? If you shower in the morning before shaving then you’re home and dry. Make sure you wash your face with soap and hot water to take skin oils off the hair so the water can get into it. The hotter water the better, and you will find that your face can easily stand water a lot hotter than your hands - try it! DO NOT shave in the shower. Not only will you waste a lot of water, your wet hands will drop a razor. You may feel that the loss of the toe it lands on is a small price to pay, but consider what else may be damaged by the razor as it falls, and worst of all, you will damage the razor. Don’t do it. We aren’t trying to be super quick here, we are trying to make a luxurious ritual out of the shave, and hopping out of the shower with a bleeding toe (or worse) just isn’t dignified. If you choose not to shower before shaving then you will have to do your preparation at the sink.
It should go something like this. First run a sinkful of water as hot as you can stand to put your hand into. Also use hot water to fill your mug with soap in it, or the bowl you use for lathering up shaving cream. Put your brush into the mug or bowl to heat and soak. Wash your face with your usual soap, and then rinse numerous times with handfuls of hot water. If you like you can soak a facecloth in the hot water and wring out the excess. Hold it against your face so that it heats and moistens the skin. It is said to take four minutes for the hair to become saturated with water, but even spending two minutes doing this will help your shave be more comfortable and much closer.
There are some wrinkles that you might use. Some people find an extra softening effect from rubbing a hair conditioner into the beard and leaving it to soak in for a minute and then rinsing. This is just like using one on your hair after washing it. There are some products designed to help the shave that should be mentioned here. Firstly, shave oils are sold for use at this time, and are touted as making the shave smoother. This may be true, but there are concerns that such oils might be damaging to your brush, which is going to shortly be applying lather on top of this. Secondly, an excellent product, Trumper’s Skin Food is sometimes suggested as a pre-shave treatment for sensitive skin. I don’t find it useful to apply to the face before a shave, but do recommend it highly for afterwards. It can be used, as you will see later, to enrich the lather from a hard soap.
The main thing to remember about preparing your face for any wetshave, and especially one as close as a straight razor shave, is that you need lots of very hot water applied long enough to soften the hair of your beard. Keep this in mind and you’ll do well.
Chapter 5The Badger Brush, Hard Soaps and Creams
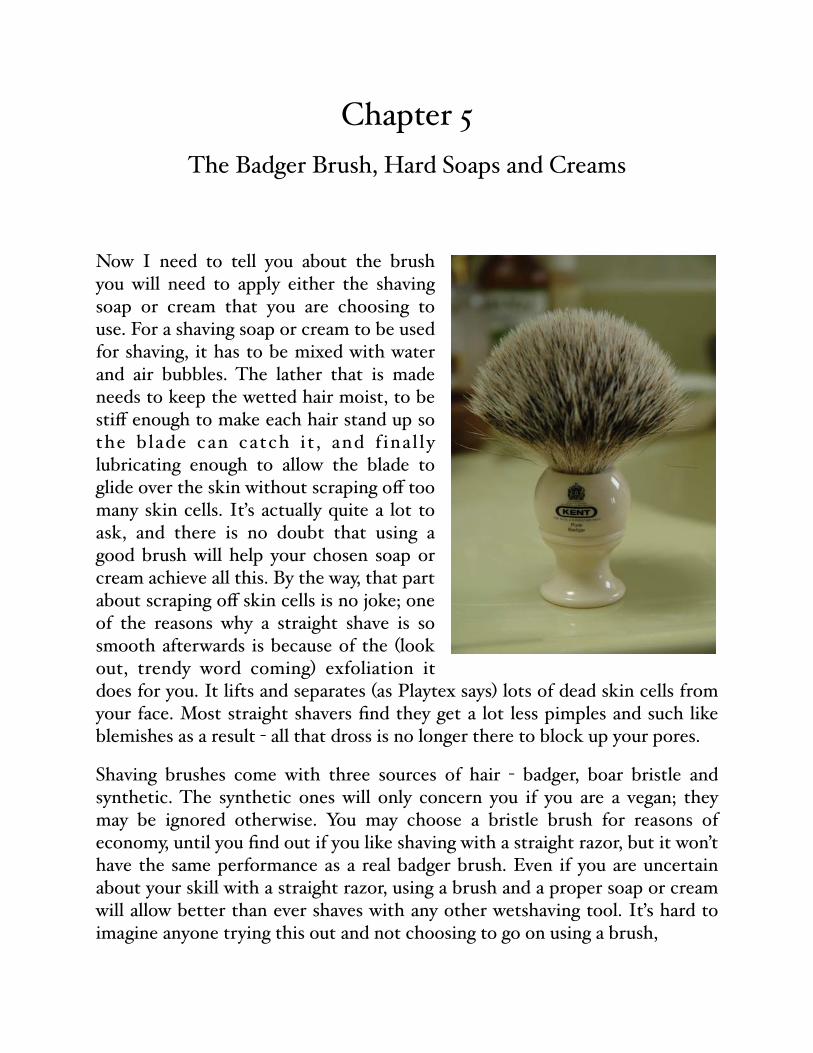
Now I need to tell you about the brush you will need to apply either the shaving soap or cream that you are choosing to use. For a shaving soap or cream to be used for shaving, it has to be mixed with water and air bubbles. The lather that is made needs to keep the wetted hair moist, to be stiff enough to make each hair stand up so the blade can catch it , and f inal l y lubricating enough to allow the blade to glide over the skin without scraping off too many skin cells. Iťs actually quite a lot to ask, and there is no doubt that using a good brush will help your chosen soap or cream achieve all this. By the way, that part about scraping off skin cells is no joke; one of the reasons why a straight shave is so smooth afterwards is because of the (look out, trendy word coming) exfoliation it does for you. It lifts and separates (as Playtex says) lots of dead skin cells from your face. Most straight shavers find they get a lot less pimples and such like blemishes as a result - all that dross is no longer there to block up your pores.
Shaving brushes come with three sources of hair - badger, boar bristle and synthetic. The synthetic ones will only concern you if you are a vegan; they may be ignored otherwise. You may choose a bristle brush for reasons of economy, until you find out if you like shaving with a straight razor, but it won’t have the same performance as a real badger brush. Even if you are uncertain about your skill with a straight razor, using a brush and a proper soap or cream will allow better than ever shaves with any other wetshaving tool. Iťs hard to imagine anyone trying this out and not choosing to go on using a brush,
whatever kind of razor they go on with, so I would recommend a badger brush from the start. The badgers concerned are not the North American badger, or the European, but are from China. Odd sources of meat are used in Chinese cuisine, and if a badger is to be skinned and eaten, we may as well not waste the skin. I am told that they are not endangered. There is no truth to the idea promulgated by one website that sells brushes that the hair is obtained by shearing the badger; these badgers will not be growing another coat at all. But a good quality brush will last for many years of daily use, so iťs not likely you will threaten the species.
Badger hair is available in three grades, and in ascending order of quality these are Pure, Best, and Super (also known as silvertip). The hair comes from different parts of the animals coat, and the better grades hold more water and tend to be softer against your skin. There is a good deal of one-upmanship in the world of badger brushes, and bitter arguments over whether one brand of brush contains true silvertip or not. This need not concern you now: a best or super brush will suit you well. The next question is how big a brush do you need? They come in various sizes, and both too small and too big are worth avoiding. When you think about it, the brush needs to be big enough to work up enough lather to last through your shave, and you may as well know now that this involves more than one passage of the razor; you will be re-lathering and doing it again in different directions. On the other hand, it wastes your soap or cream to make too much lather and then end up rinsing it down the sink. Looked at another way, you need a brush big enough to get a proper hold on with a big wet hand, but not so big you can’t apply lather to your upper lip without getting it up your nose and in your mouth! If you want specific recommendations, a good beginners brush might be the Dovo Handmade, available from Classic Shaving, one of the smaller Saville Row models or a Kent BK4. Vulfix also make very reasonably priced brushes that are well regarded. The handle of your brush is the least important part, but occasionally the most expensive. Simpsons have been known to obtain old pre-ban ivory billiard balls and turn them into handles. By the way, Simpson brushes are among the most expensive, even when no billiard balls are harmed in their manufacture, and a sizeable section of the wetshaving crowd feel that no other brush can be their equal. At the risk of being assassinated by a brush fanatic, I will say that I don’t agree. So there.
To use a brush, it must first be soaked in hot water. Filling the mug in which you keep your shaving soap with hot water and sitting the brush, bristles down, in this while you prep your face is a good way of doing it. If you use cream with a bowl for working it into lather, then fill this with hot water and soak the brush the same way. If you simply like to work up lather on your face then soak the brush in the sink as you wash and prep your face with hot water. Be warned that the first few times you wet the brush it will smell like a wet dog! This delightful scent is soon gone and forgotten, and if you really don’t like it then wash the brush out with any soap or shampoo a couple of times.
Now what are you going to use the brush upon? There’s no law in the world to say you can’t shave with a straight razor and use some foam or gel in a can to do it, but I wouldn’t recommend it. Modern shaving foams and gels are remarkable substances, but they don’t provide much of either of the two essentials for a good shave - water and lubrication. Besides this, you would miss out on one of the special treats of traditional shaving. If you are beginning to feel a bit uncomfortable with the notion of using, God forbid, scented products, relax! For hundreds of years there have been scented shaving soaps and creams, and lots of hairy chested real men have used them. Iťs going to be your loss if you skip this part, so stick with me. I promise you’ll like it.
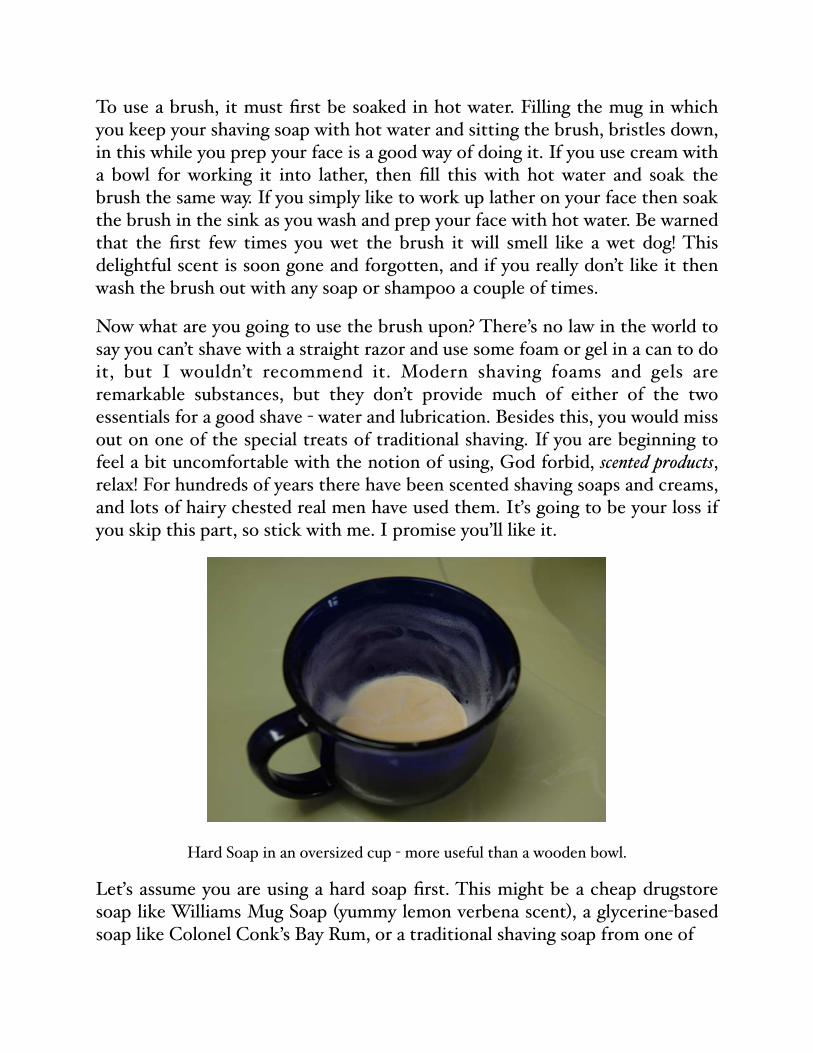
Hard Soap in an oversized cup - more useful than a wooden bowl.
Leťs assume you are using a hard soap first. This might be a cheap drugstore soap like Williams Mug Soap (yummy lemon verbena scent), a glycerine-based soap like Colonel Conk’s Bay Rum, or a traditional shaving soap from one of
the elite British firms like Trumper’s, Truefitt & Hill, or Taylors. Crabtree & Evelyn do a nice sandalwood soap too. My own all-time favourite hard soap is Trumper’s Sandalwood. Back to business - drain the water from your mug, and drain the brush until it stops dripping. You might find with experience that you need to make one or two gentle flicks of the brush to remove excess water at this point. Then start working the brush with a circular motion on the surface of the soap. Some lather with big bubbles in it will soon form. Keep going and as the brush works more air into the lather and breaks up the bubbles you will find that there are smaller and finer bubbles in it. The idea is to keep going until the bubbles are small enough that the lather is a little stiff, and forms peaks that can stand up as you withdraw the brush. If it seems to go too thick and sticky, you haven’t got enough water in the mix, so gather up a few drops on your fingers from the sink and drip them into the lather and rework. Each kind of soap has a certain amount of water that can be worked into the lather before it goes runny, at which point it is no good to us. I find that having hot water in the mug prior to working with the brush allows the surface of the soap to soften a little and it becomes easy to make rich lather. If you are using a glycerine soap you may find you have to limit the exposure of the cake of soap to the hot water, as it will melt away very quickly with too much heat and water. One really neat trick is to put a couple of drops of glycerine from a drugstore, or a couple of drops of Trumper’s Skin Food onto the soap before using the brush. Either will enrich the lather and increase lubrication. With practice you will soon come to know what works best for you. The lather should be slightly shiny, but not really glistening as it goes on your face. It should be thick enough that you can’t see the skin through it, but need not be thicker than this. But before we get into applying it, leťs get the cream users to catch up with us.
Shaving creams for application with a brush are the Rolls Royces of the shaving world. They offer great lubrication and lots of moisturising benefits along with some intoxicating scents. They cost more than hard soaps, but make a great treat even if you don’t see yourself using one daily. They began to be made over one hundred years ago by the top gentlemen’s barbers in London, and have been a success ever since. Usually they come in either a tub or a tube, and a dab about the size of an almond is enough to make all the lather you will need for a great shave. The three T’s (Trumper’s, Taylor’s and Truefitt & Hill) make good examples, as do Coates, and Salter. The shaving cream made by Crabtree & Evelyn isn’t quite up to the same standard, but might be available locally. There
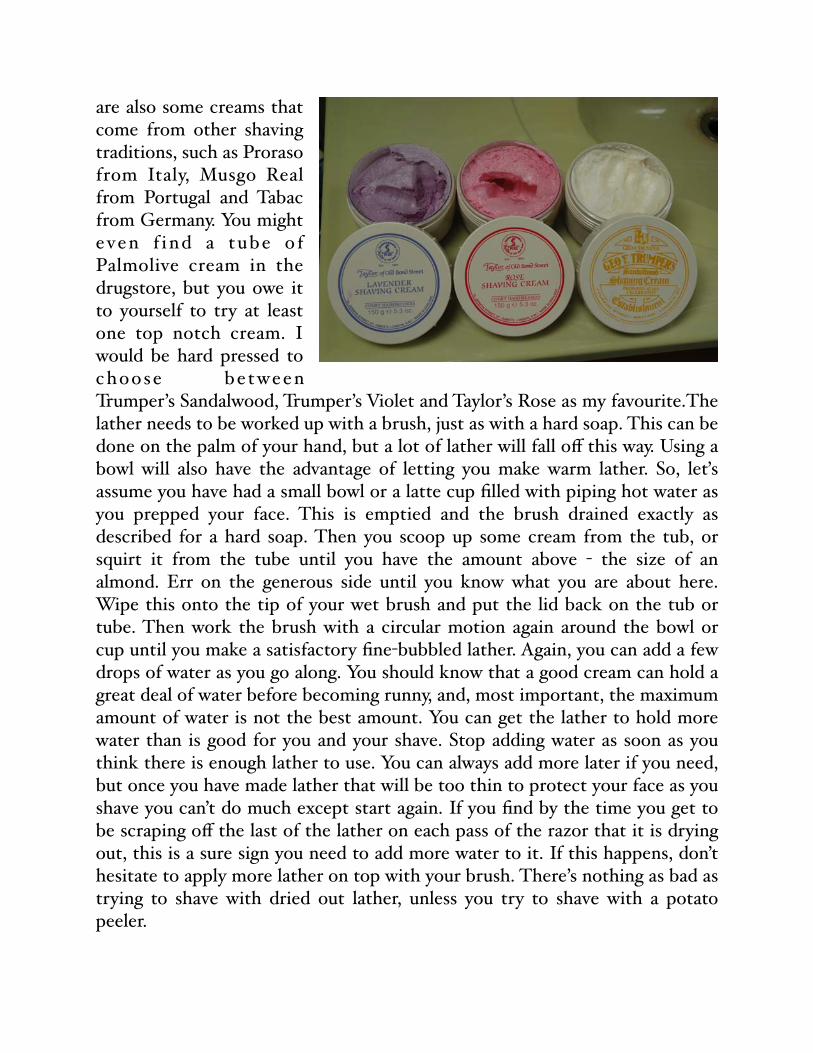
are also some creams that come from other shaving traditions, such as Proraso from Italy, Musgo Real from Portugal and Tabac from Germany. You might e ven f ind a tube o f Palmolive cream in the drugstore, but you owe it to yourself to try at least one top notch cream. I would be hard pressed to choose between Trumper’s Sandalwood, Trumper’s Violet and Taylor’s Rose as my favourite.The lather needs to be worked up with a brush, just as with a hard soap. This can be done on the palm of your hand, but a lot of lather will fall off this way. Using a bowl will also have the advantage of letting you make warm lather. So, leťs assume you have had a small bowl or a latte cup filled with piping hot water as you prepped your face. This is emptied and the brush drained exactly as described for a hard soap. Then you scoop up some cream from the tub, or squirt it from the tube until you have the amount above - the size of an almond. Err on the generous side until you know what you are about here. Wipe this onto the tip of your wet brush and put the lid back on the tub or tube. Then work the brush with a circular motion again around the bowl or cup until you make a satisfactory fine-bubbled lather. Again, you can add a few drops of water as you go along. You should know that a good cream can hold a great deal of water before becoming runny, and, most important, the maximum amount of water is not the best amount. You can get the lather to hold more water than is good for you and your shave. Stop adding water as soon as you think there is enough lather to use. You can always add more later if you need, but once you have made lather that will be too thin to protect your face as you shave you can’t do much except start again. If you find by the time you get to be scraping off the last of the lather on each pass of the razor that it is drying out, this is a sure sign you need to add more water to it. If this happens, don’t hesitate to apply more lather on top with your brush. There’s nothing as bad as trying to shave with dried out lather, unless you try to shave with a potato peeler.
However you made your lather, now iťs time to apply it. Use the brush with gentle circular motions on your face to both apply and work the lather into your beard. This both feels nice, and smells nice! Furthermore, iťs helping to get the lather to soften the beard hairs as much as possible, and working the lather under them to make them stand up so the razor can get at them. Once the lather is distributed all over your face, use a few painting strokes, and twist the brush as you make them, to deposit a thick enough layer so that you can no longer see any skin through the lather. You don’t need to use all the lather in the brush, nor all that in the mug or bowl - you will need some for subsequent passes of the razor.
Ok, you’ve got this far. Iťs time for the moment of truth.
Chapter 6The Shave
This is the biggest thrill, that still gives me a little shiver after all this time - the moment when you put the blade to the skin and get to work. I think everybody must do this with trepidation at first, but it is easier than you think. But before we do that, I’m going to give you a momenťs reprieve. Before you ever get near a straight razor, or any other kind of razor, you should know how the hair grows on your face. There are differences between one guy and the next here, so study your own face. Try rubbing your hand over the beard when you need to shave. Which way does the hair grow? - check which way the greatest ‘stubbliness’ is felt. Usually, this will be downwards on the cheeks, and sideways on the neck, but there may be patches of beard that grow out horizontally along the jawline, and even upwards on the neck. Find out for yourself what happens on your face and neck, otherwise what I say will make little sense to you.
Done it? Good. The reason why you just went through that exercise is so that you can shave the hair properly. Some people are happy to shave with the grain of the hair growth only. This kind of shave will look OK, but feel stubbly. By the middle of the day it won’t look that great, but you might just be happy with that. The next step up is to shave one pass with the grain, and then one across it (after re-lathering, that is). This will look good, and feel good to the examining hand. It is safe to rub your cheek against that of the woman in your life after two passes. There will be stubble by evening, but it will still look decent. The truly obsessional shaver will want to do three passes, with the grain, across it, and a third against it. This will leave a glassy smooth skin that has no stubble even when you rub in any direction, will look fine by evening and will still feel decent to an examining hand in the evening. Now there is a trade off between closeness and comfort. Not all skins will tolerate three passes (remember all those skin cells being scraped off?) To get the closest shave, you need a well-sharpened razor, a well-wetted beard, a lubricating lather, well-applied, and a gentle touch with the razor. Given all of these, which you can achieve with practice, I don’t believe there are too many men who can’t enjoy the ultimate shave. By the way, if you try this protocol with a multiblade cartridge razor, you can expect trouble. If you remember those advertisements showing one blade lifting the hair and the next cutting it, so
that you are cutting the hairs off below skin level, you will realise that this can lead to ingrown hairs, that is, hairs that make a wrong turn trying to grow up to the skin again. These kind of ‘razor bumps’ are like pimples that don’t want to go away, as the hair coils up under the skin. Scarring is the end result. Stick to a single blade and you will be much less likely to see any of these.
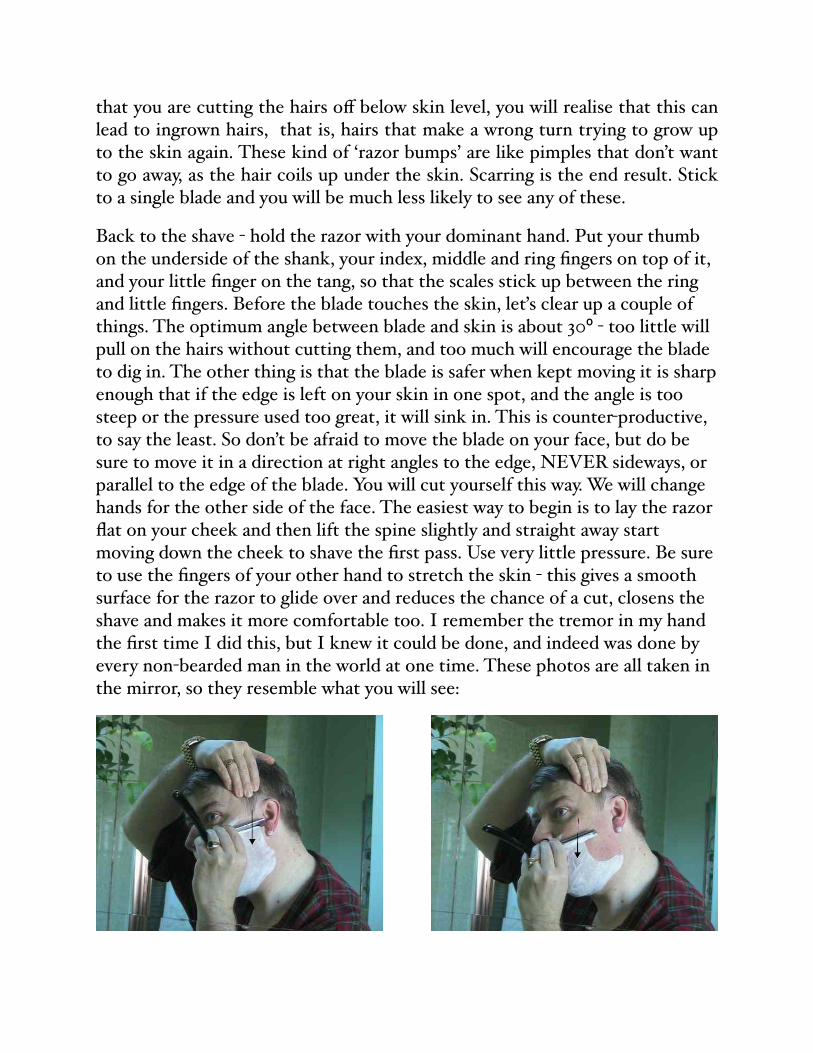
Back to the shave - hold the razor with your dominant hand. Put your thumb on the underside of the shank, your index, middle and ring fingers on top of it, and your little finger on the tang, so that the scales stick up between the ring and little fingers. Before the blade touches the skin, leťs clear up a couple of things. The optimum angle between blade and skin is about 30º - too little will pull on the hairs without cutting them, and too much will encourage the blade to dig in. The other thing is that the blade is safer when kept moving it is sharp enough that if the edge is left on your skin in one spot, and the angle is too steep or the pressure used too great, it will sink in. This is counter-productive, to say the least. So don’t be afraid to move the blade on your face, but do be sure to move it in a direction at right angles to the edge, NEVER sideways, or parallel to the edge of the blade. You will cut yourself this way. We will change hands for the other side of the face. The easiest way to begin is to lay the razor flat on your cheek and then lift the spine slightly and straight away start moving down the cheek to shave the first pass. Use very little pressure. Be sure to use the fingers of your other hand to stretch the skin - this gives a smooth surface for the razor to glide over and reduces the chance of a cut, closens the shave and makes it more comfortable too. I remember the tremor in my hand the first time I did this, but I knew it could be done, and indeed was done by every non-bearded man in the world at one time. These photos are all taken in the mirror, so they resemble what you will see:

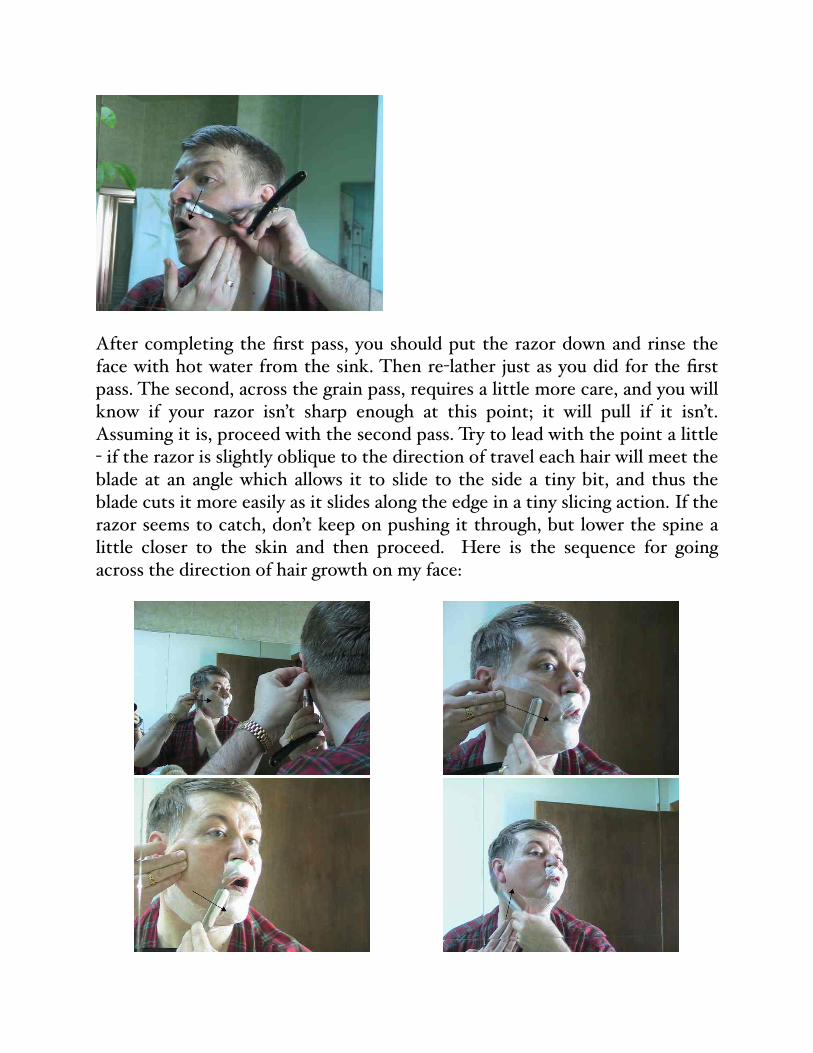
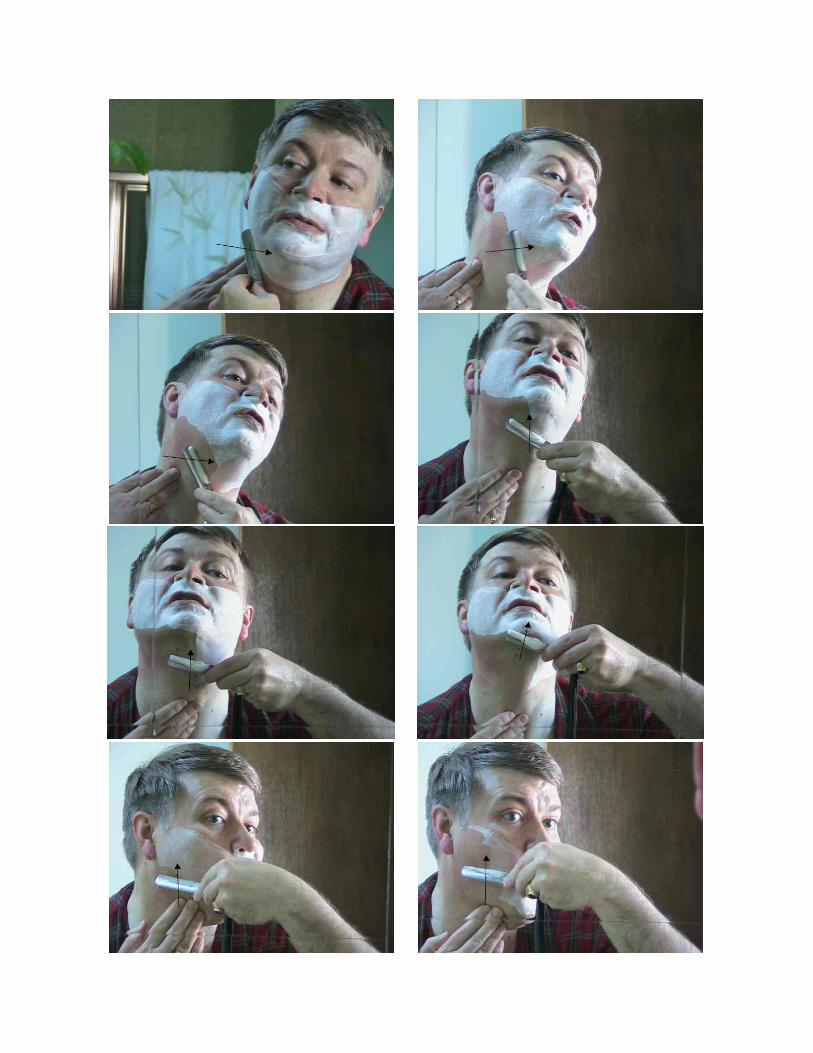
After completing the first pass, you should put the razor down and rinse the face with hot water from the sink. Then re-lather just as you did for the first pass. The second, across the grain pass, requires a little more care, and you will know if your razor isn’t sharp enough at this point; it will pull if it isn’t. Assuming it is, proceed with the second pass. Try to lead with the point a little - if the razor is slightly oblique to the direction of travel each hair will meet the blade at an angle which allows it to slide to the side a tiny bit, and thus the blade cuts it more easily as it slides along the edge in a tiny slicing action. If the razor seems to catch, don’t keep on pushing it through, but lower the spine a little closer to the skin and then proceed. Here is the sequence for going across the direction of hair growth on my face:

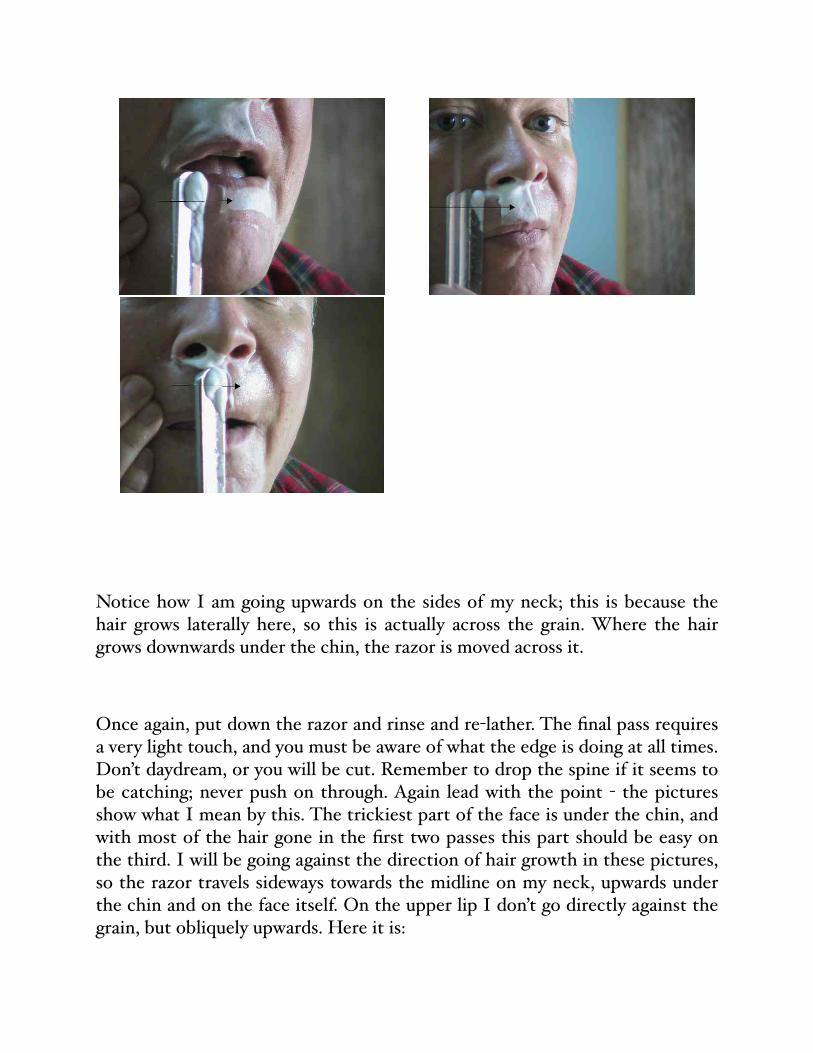
Notice how I am going upwards on the sides of my neck; this is because the hair grows laterally here, so this is actually across the grain. Where the hair grows downwards under the chin, the razor is moved across it.
Once again, put down the razor and rinse and re-lather. The final pass requires a very light touch, and you must be aware of what the edge is doing at all times. Don’t daydream, or you will be cut. Remember to drop the spine if it seems to be catching; never push on through. Again lead with the point - the pictures show what I mean by this. The trickiest part of the face is under the chin, and with most of the hair gone in the first two passes this part should be easy on the third. I will be going against the direction of hair growth in these pictures, so the razor travels sideways towards the midline on my neck, upwards under the chin and on the face itself. On the upper lip I don’t go directly against the grain, but obliquely upwards. Here it is:
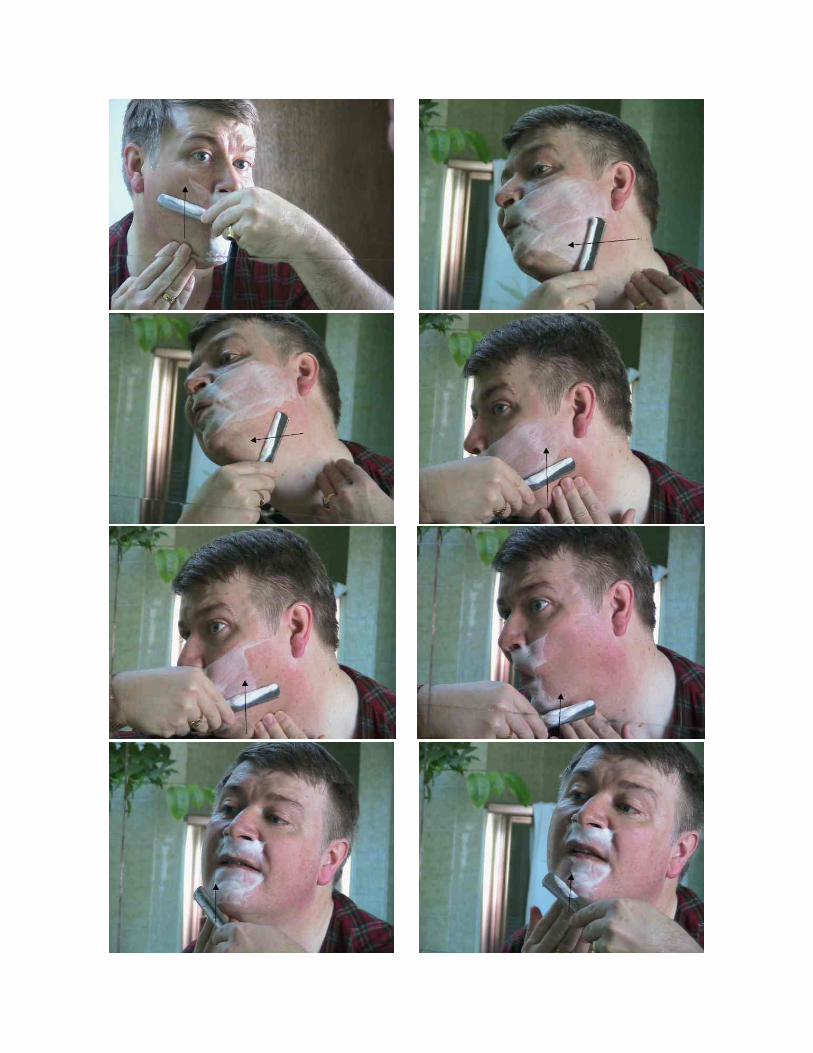
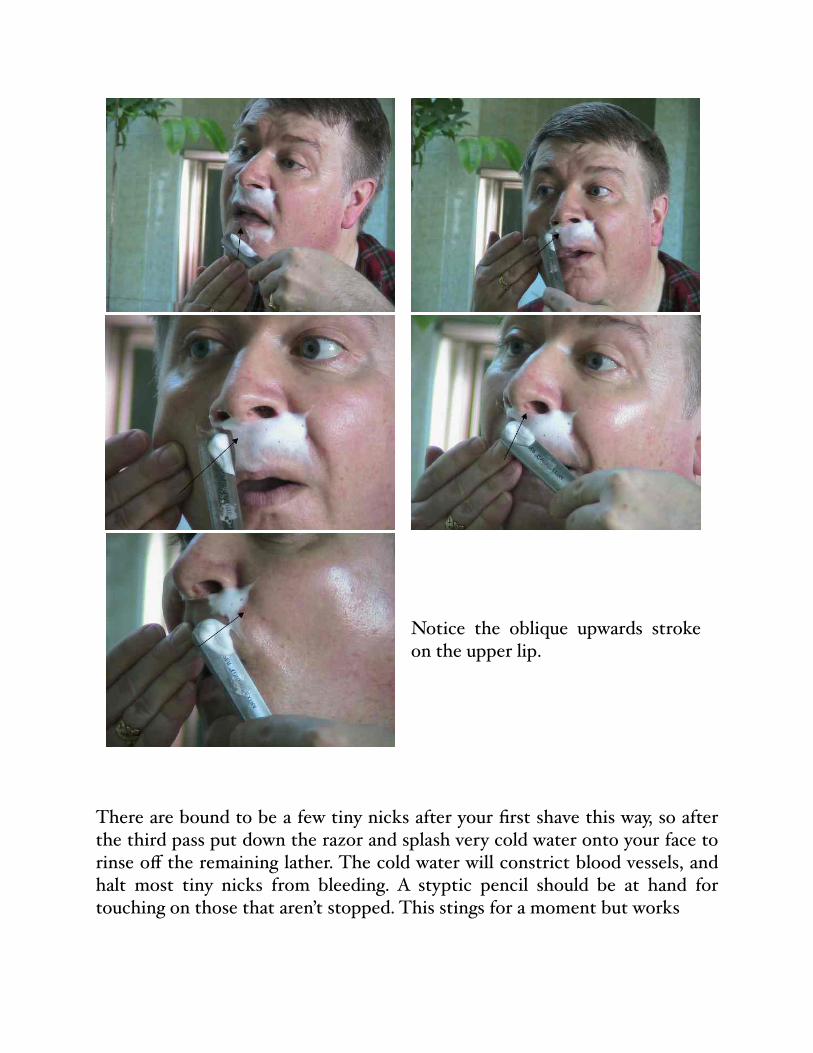
Notice the oblique upwards stroke on the upper lip.
There are bound to be a few tiny nicks after your first shave this way, so after the third pass put down the razor and splash very cold water onto your face to rinse off the remaining lather. The cold water will constrict blood vessels, and halt most tiny nicks from bleeding. A styptic pencil should be at hand for touching on those that aren’t stopped. This stings for a moment but works
well. You will very rarely need it at all once you have the hang of it! Then pat your face dry with a towel.
Rinse out your brush in cold water, and squeeze it to get most of the water out. Flick it vigorously to get out the rest. Either hang the brush up in a stand, or simply stand it upright if you have faith in your science lessons and understand that capillary action will keep the water remaining from sinking down into the knot of the brush. Rinse the razor under the hot tap being very careful to avoid touching the edge against the tap or the sink. A ding of this kind is a major repair on a straight razor and you aren’t ready to undertake that just yet! It doesn’t matter too much whether you strop the razor now, or just before the next shave.
You did it! Hopefully you are still in one piece and not too weak at the knees. Next, we have to finish up with some soothing balm to ensure your skin forgives you for dragging a razor over it.
Chapter 7The Aftermath
As stated above, shaving removes dead skin cells, and up to a point this is a good thing. The lower layers of skin cells might be a little tender when first exposed, and iťs true too that having lots of soap on your face will tend to remove oils from the skin, making it dry. The last thing you need in this situation is a good splash of an alcohol-based aftershave; not only will it hurt, but it will also tend to dry the skin further. If you are going to go on having this kind of fun with a straight razor we have to make sure your face is up to it. So what do you do?
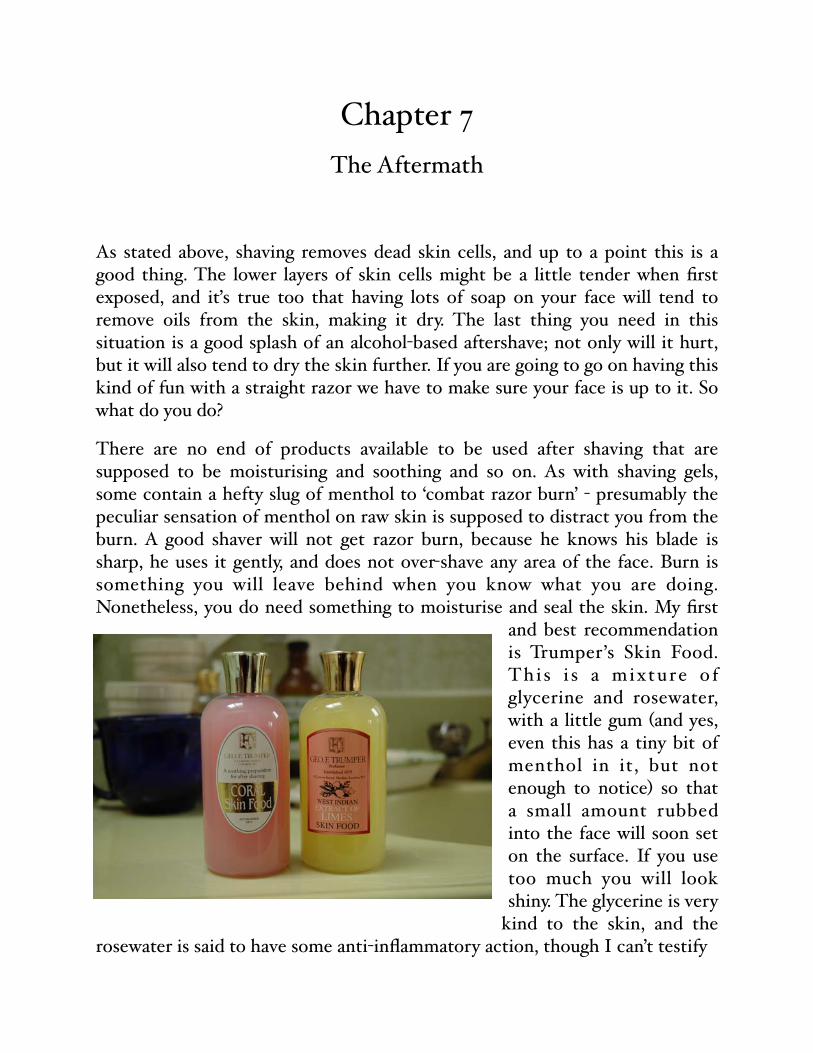
There are no end of products available to be used after shaving that are supposed to be moisturising and soothing and so on. As with shaving gels, some contain a hefty slug of menthol to ‘combat razor burn’ - presumably the peculiar sensation of menthol on raw skin is supposed to distract you from the burn. A good shaver will not get razor burn, because he knows his blade is sharp, he uses it gently, and does not over-shave any area of the face. Burn is something you will leave behind when you know what you are doing. Nonetheless, you do need something to moisturise and seal the skin. My first
and best recommendation is Trumper ’s Skin Food. Thi s i s a mixture o f glycerine and rosewater, with a little gum (and yes, even this has a tiny bit of menthol in it, but not enough to notice) so that a small amount rubbed into the face will soon set on the surface. If you use too much you will look shiny. The glycerine is very
kind to the skin, and the rosewater is said to have some anti-inflammatory action, though I can’t testify
to that. Many folks who get seborrhoea (dry red skin across the nose and onto the cheeks), find that glycerine and rosewater works very nicely for suppressing it, so perhaps iťs true. It comes in two scents - Limes and Coral (which is rose). The latter is by far the better scent to my nose. Once this has dried some people will put a moisturiser on top, but I don’t find it necessary. Another product worth mentioning here is Taylor’s After Shave Gel - the sandalwood is gorgeous. This is a sticky gel that again is used in a small amount to seal the skin. It is less moisturising than the glycerine-based Skin Food, but makes a nice change. The scent of the Skin Food fades within a minute or two, and you will be left mostly with the scent of the shaving soap or cream on your face.
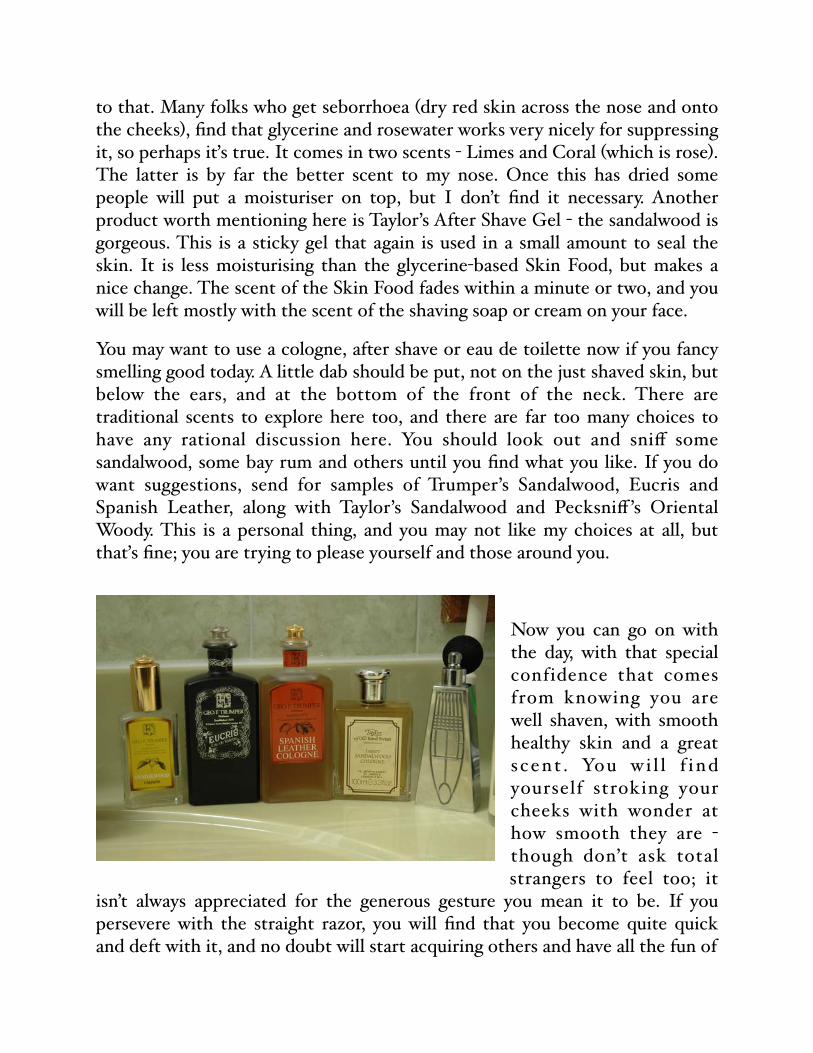
You may want to use a cologne, after shave or eau de toilette now if you fancy smelling good today. A little dab should be put, not on the just shaved skin, but below the ears, and at the bottom of the front of the neck. There are traditional scents to explore here too, and there are far too many choices to have any rational discussion here. You should look out and sniff some sandalwood, some bay rum and others until you find what you like. If you do want suggestions, send for samples of Trumper’s Sandalwood, Eucris and Spanish Leather, along with Taylor’s Sandalwood and Pecksniff’s Oriental Woody. This is a personal thing, and you may not like my choices at all, but thaťs fine; you are trying to please yourself and those around you.
Now you can go on with the day, with that special confidence that comes from knowing you are well shaven, with smooth healthy skin and a great scent . You wi l l f ind yourself stroking your cheeks with wonder at how smooth they are - though don’t ask total strangers to feel too; it
isn’t always appreciated for the generous gesture you mean it to be. If you persevere with the straight razor, you will find that you become quite quick and deft with it, and no doubt will start acquiring others and have all the fun of

trying out different kinds. Some of the best might be old razors that aren’t much to look at, but shave beautifully. Collecting these, and associated items like shaving mugs and brushes can be fun quite apart from the shaving aspect.
So there you have it - the basic straight razor shave. If you’ve read this far, I know you’re interested - so go and get to work!

Appendix
Vendors
Classic Shaving: http://www.classicshaving.com/
QED USA: http://www.qedusa.com/
The Gentleman’s Shop: http://www.gentlemans-shop.com/
Trumper’s: http://www.trumpers.com/index.cfm
Taylors of Old Bond Street: http://www.taylorbondst.co.uk/
Knifecenter: http://www.shavingsupplies.com/
HandAmerican: http://handamerican.com/
Community
StraightRazorplace: http://health.groups.yahoo.com/group/straightrazorplace/
ShaveMy Face: http://www.shavemyface.com/
WetShavers: http://msnusers.com/TheWetshavers/
Straightrazorworld: http://www.straightrazorworld.com
Credits
Photographs: Pippa Moss
Contact Author