Embed Size (px)
DESCRIPTION
FOR HELPING
Citation preview

2013 Release 4
Getting Started Guide
Websense® TRITON™ Cloud Web Secur i ty

©1996–2013, Websense Inc.All rights reserved.10240 Sorrento Valley Rd., San Diego, CA 92121, USAPublished 2013Printed in the United States of America and China.This document may not, in whole or in part, be copied, photocopied, reproduced, translated, or reduced to any electronic medium or machine-readable form without prior consent in writing from Websense Inc.Every effort has been made to ensure the accuracy of this manual. However, Websense Inc., makes no warranties with respect to this documentation and disclaims any implied warranties of merchantability and fitness for a particular purpose. Websense Inc. shall not be liable for any error or for incidental or consequential damages in connection with the furnishing, performance, or use of this manual or the examples herein. The information in this documentation is subject to change without notice.
TrademarksWebsense is a registered trademark of Websense, Inc., in the United States and certain international markets. Websense has numerous other unregistered trademarks in the United States and internationally. All other trademarks are the property of their respective owners.Microsoft, Windows, Windows NT, Windows Server, and Active Directory are either registered trademarks or trademarks of Microsoft Corporation in the United States and/or other countries.Other product names mentioned in this manual may be trademarks or registered trademarks of their respective companies and are the sole property of their respective manufacturers.

Getting Started Guide i
Contents
Chapter 1 Introduction . . . . . . . . . . . . . . . . . . . . . . . . . . . . . . . . . . . . . . . . . . . . . . 1
Further Information . . . . . . . . . . . . . . . . . . . . . . . . . . . . . . . . . . . . . . . . . 1
Getting Started . . . . . . . . . . . . . . . . . . . . . . . . . . . . . . . . . . . . . . . . . . . . . 1
Technical Support. . . . . . . . . . . . . . . . . . . . . . . . . . . . . . . . . . . . . . . . . . . 2
Chapter 2 Requesting a Cloud Web Security Account . . . . . . . . . . . . . . . . . . . . . 3
Existing Cloud Security customers . . . . . . . . . . . . . . . . . . . . . . . . . . . . . 3
New customers . . . . . . . . . . . . . . . . . . . . . . . . . . . . . . . . . . . . . . . . . . . . . 3
Requesting a trial . . . . . . . . . . . . . . . . . . . . . . . . . . . . . . . . . . . . . . . . . . . 3
Logging on to the Cloud Security portal . . . . . . . . . . . . . . . . . . . . . . . . . 4
Recommendations for an evaluation . . . . . . . . . . . . . . . . . . . . . . . . . . . . 5
Chapter 3 Deploying Cloud Web Security . . . . . . . . . . . . . . . . . . . . . . . . . . . . . . . 7
How Cloud Web Security works . . . . . . . . . . . . . . . . . . . . . . . . . . . . . . . 7
Configuring a chained proxy . . . . . . . . . . . . . . . . . . . . . . . . . . . . . . . . . . 9
Configuring browsers to use Cloud Web Security . . . . . . . . . . . . . . . . . . 9
The Cloud Web Security PAC file . . . . . . . . . . . . . . . . . . . . . . . . . . 10Standard PAC file . . . . . . . . . . . . . . . . . . . . . . . . . . . . . . . . . . . . 10Policy-specific PAC file . . . . . . . . . . . . . . . . . . . . . . . . . . . . . . . 10
Configuring Mozilla Firefox . . . . . . . . . . . . . . . . . . . . . . . . . . . . . . . 11Configuring Firefox with Active Directory Group Policy. . . . . . 12
Configuring Internet Explorer. . . . . . . . . . . . . . . . . . . . . . . . . . . . . . 14Turning on Group Policy to configure a Web proxy . . . . . . . . . . 15Turning off the Web proxy using Group Policy . . . . . . . . . . . . . 16
Configuring Safari manually. . . . . . . . . . . . . . . . . . . . . . . . . . . . . . . 17Enabling cookies . . . . . . . . . . . . . . . . . . . . . . . . . . . . . . . . . . . . . . . . 17
Configuring your firewall. . . . . . . . . . . . . . . . . . . . . . . . . . . . . . . . . . . . 18
Chapter 4 Using Chained Proxies . . . . . . . . . . . . . . . . . . . . . . . . . . . . . . . . . . . . . 21
Microsoft ISA Server or Forefront TMG . . . . . . . . . . . . . . . . . . . . . . . . 21
Basic chaining . . . . . . . . . . . . . . . . . . . . . . . . . . . . . . . . . . . . . . . . . . 21Configuring exceptions . . . . . . . . . . . . . . . . . . . . . . . . . . . . . . . . . . . 24Configuring NTLM pass through . . . . . . . . . . . . . . . . . . . . . . . . . . . 26Configuring X-Authenticated-User chaining . . . . . . . . . . . . . . . . . . 27
Blue Coat ProxySG . . . . . . . . . . . . . . . . . . . . . . . . . . . . . . . . . . . . . . . . 28

ii Cloud Security
Contents
Basic chaining . . . . . . . . . . . . . . . . . . . . . . . . . . . . . . . . . . . . . . . . . . 29NTLM chaining. . . . . . . . . . . . . . . . . . . . . . . . . . . . . . . . . . . . . . . . . 29X-Authenticated-User chaining. . . . . . . . . . . . . . . . . . . . . . . . . . . . . 30
Editing the local policy file . . . . . . . . . . . . . . . . . . . . . . . . . . . . . 30Using the Blue Coat graphical Visual Policy Manager . . . . . . . . 31
Squid Proxy . . . . . . . . . . . . . . . . . . . . . . . . . . . . . . . . . . . . . . . . . . . . . . 32
Basic chaining . . . . . . . . . . . . . . . . . . . . . . . . . . . . . . . . . . . . . . . . . . 32NTLM chaining. . . . . . . . . . . . . . . . . . . . . . . . . . . . . . . . . . . . . . . . . 33
Configuring Squid for NTLM authentication . . . . . . . . . . . . . . . 33Forwarding requests to the cloud proxy. . . . . . . . . . . . . . . . . . . . 33Forwarding user information to the cloud proxy . . . . . . . . . . . . . 33
Chapter 5 Adding IP Addresses to Your Policy . . . . . . . . . . . . . . . . . . . . . . . . . . 35
Initial settings . . . . . . . . . . . . . . . . . . . . . . . . . . . . . . . . . . . . . . . . . . . . . 35
Policy selection by IP address . . . . . . . . . . . . . . . . . . . . . . . . . . . . . . . . 35
Chapter 6 Setting Up End-User Authentication . . . . . . . . . . . . . . . . . . . . . . . . . 37
Setting up Web Endpoint . . . . . . . . . . . . . . . . . . . . . . . . . . . . . . . . . . . . 38
Endpoint system requirements . . . . . . . . . . . . . . . . . . . . . . . . . . . . . 39Downloading and distributing the endpoint . . . . . . . . . . . . . . . . . . . 40
For Windows operating system users . . . . . . . . . . . . . . . . . . . . . 41For Mac operating system users . . . . . . . . . . . . . . . . . . . . . . . . . 43
Deploying the endpoint from the cloud service . . . . . . . . . . . . . . . . 45Local users . . . . . . . . . . . . . . . . . . . . . . . . . . . . . . . . . . . . . . . . . . 46Roaming users . . . . . . . . . . . . . . . . . . . . . . . . . . . . . . . . . . . . . . . 46
Updating the endpoint . . . . . . . . . . . . . . . . . . . . . . . . . . . . . . . . . . . . 47Mac operating system users . . . . . . . . . . . . . . . . . . . . . . . . . . . . . 47
Setting up Authentication Service . . . . . . . . . . . . . . . . . . . . . . . . . . . . . 47
Local users. . . . . . . . . . . . . . . . . . . . . . . . . . . . . . . . . . . . . . . . . . . . . 48Roaming users . . . . . . . . . . . . . . . . . . . . . . . . . . . . . . . . . . . . . . . . . . 48
Other end-user authentication options . . . . . . . . . . . . . . . . . . . . . . . . . . 49
End-user identification . . . . . . . . . . . . . . . . . . . . . . . . . . . . . . . . . . . . . . 50
End-user registration . . . . . . . . . . . . . . . . . . . . . . . . . . . . . . . . . . . . . . . 50
Directory synchronization . . . . . . . . . . . . . . . . . . . . . . . . . . . . . . . . . 50End-user self registration . . . . . . . . . . . . . . . . . . . . . . . . . . . . . . . . . 51Bulk registering end-users. . . . . . . . . . . . . . . . . . . . . . . . . . . . . . . . . 51NTLM transparent identification registration . . . . . . . . . . . . . . . . . . 52User identification headers (from third-party proxies) . . . . . . . . . . . 52
Authentication priority and overrides. . . . . . . . . . . . . . . . . . . . . . . . . . . 52
Chapter 7 Working with Remote Users . . . . . . . . . . . . . . . . . . . . . . . . . . . . . . . . 55
How to determine whether a browser is using

Getting Started Guide iii
Contents
Cloud Web Security . . . . . . . . . . . . . . . . . . . . . . . . . . . . . . . . . . . . . . . . 56
Connecting from home . . . . . . . . . . . . . . . . . . . . . . . . . . . . . . . . . . . . . . 57
Solutions . . . . . . . . . . . . . . . . . . . . . . . . . . . . . . . . . . . . . . . . . . . . . . 57Deploy Web Endpoint . . . . . . . . . . . . . . . . . . . . . . . . . . . . . . . . . 57Use a local copy of the PAC file . . . . . . . . . . . . . . . . . . . . . . . . . 57
Connecting from third-party corporate networks . . . . . . . . . . . . . . . . . . 58
Why this may occur: . . . . . . . . . . . . . . . . . . . . . . . . . . . . . . . . . . . . . 58Solution . . . . . . . . . . . . . . . . . . . . . . . . . . . . . . . . . . . . . . . . . . . . . . . 58
Use the PAC file available via port 80. . . . . . . . . . . . . . . . . . . . . 58Use the security solution on the corporate network. . . . . . . . . . . 58
Chapter 8 Next Steps . . . . . . . . . . . . . . . . . . . . . . . . . . . . . . . . . . . . . . . . . . . . . . . 59
Chapter 9 Preparing Your End Users for Deployment . . . . . . . . . . . . . . . . . . . . 61
Web Endpoint . . . . . . . . . . . . . . . . . . . . . . . . . . . . . . . . . . . . . . . . . . 62End-user registration . . . . . . . . . . . . . . . . . . . . . . . . . . . . . . . . . . . . . 62

iv Cloud Security
Contents

1
Getting Started Guide 1
IntroductionGetting Started Guide | Cloud Web Security Solutions
Welcome to the Cloud Web Security Getting Started Guide. Websense® TRITON™ Cloud Web Security is a fully managed service that provides comprehensive and flexible protection against Web threats such as viruses, spyware, and phishing attacks as well as controlling employee Web access.
Cloud Web Security is simple to use and works “out of the box” with a default policy. To make full use of its features, however, you should configure your policy or add new policies. This guide outlines the tasks that you must complete to get Cloud Web Security filtering your Web traffic.
Further Information
Getting Started Guide | Cloud Web Security Solutions
Detailed configuration advice for all Cloud Web Security services is available in the TRITON Cloud Security Help.
The Knowledge Base also contains technical information that is not included in this guide, such as common configuration questions and known issues with workarounds. The Knowledge Base also allows you to search for answers to a question you may have. Enter a search phrase into the entry field and search all categories to see all the articles in a given category. A list of related articles appears.
You should check these resources whenever you experience a problem or have a support question.
Getting Started
Getting Started Guide | Cloud Web Security Solutions
The following steps must be completed before you can use Cloud Web Security. It is important that you follow these in order:
1. Requesting a Cloud Web Security Account.

Introduction
2 Cloud Security
2. Deploying Cloud Web Security (the deployment options you choose may affect which of the following steps are necessary). This includes setting up end-user browsers, and configuring your firewall to allow and enforce Cloud Web Security connectivity.
3. Adding IP Addresses to Your Policy for your Internet gateway.
4. Setting Up End-User Authentication, if required.
Other chapters discuss which proxies are supported, how to set up roaming users, and how to tailor your policy for your organization. The final chapter provides tips for preparing your end users for their new Web security system.
Technical Support
Getting Started Guide | Cloud Web Security Solutions
If you have any questions during the set up phase, please contact your Websense reseller or Websense support. Technical information about Websense products is available online 24 hours a day, including:
latest release information
searchable Websense Knowledge Base
show-me tutorials
product documents
tips
in-depth technical papers
Access support on the Web site at:
http://www.websense.com/content/support.aspx
If you create a MyWebsense account, you are prompted to enter all Websense subscription keys. This helps to ensure ready access to information, alerts, and help relevant to your Websense products and versions.
The best practice is to create your MyWebsense account when you first set up your Cloud Web Security account, so that access is readily available whenever you need support or updates.
For additional questions, fill out the online support form at:
http://www.websense.com/content/contactSupport.aspx

2
Getting Started Guide 3
Requesting a Cloud Web Security Account
Getting Started Guide | Cloud Web Security Solutions
If you are reading this guide, it is likely that you have already either purchased either Cloud Email Security, Cloud Web Security, or both and have a MyWebsense account. If not, see below for details of how to request one.
Existing Cloud Security customers
If you are an existing Websense Cloud Email Security customer or are performing a Cloud Email Security trial, you can request that Cloud Web Security services be added to your account by contacting Websense Sales (contact details at the front of this document) or your Websense reseller. Websense Support notifies you by email when the services are added.
New customers
If you are new to Websense cloud-based services, you can request a trial online. For more information, see Requesting a trial.
Requesting a trial
Getting Started Guide | Cloud Web Security Solutions
1. Go to www.websense.com and click Products, then select Web Security.
2. Click Request a trial.
3. Under Web Security, click Websense Cloud Web Security Gateway.
4. If you already have a MyWebsense account, log in on the page that appears. If you do not have a MyWebsense account, click Register and follow the steps to enter your details, then return to the Free Trials page and click Websense Cloud Web Security Gateway again.
5. Read the terms and conditions by clicking on the link, then check the box confirming you have read them and click Confirm.

Requesting a Cloud Web Security Account
4 Cloud Security
Shortly after you click Confirm, you receive a confirmation email telling you how to proceed.
If you prefer to talk to a representative immediately, inside the U.S., call 1-888-546-1929. Outside the U.S., please visit http://www.websense.com/content/find-a-partner.aspx to locate a reseller.
Logging on to the Cloud Security portal
Getting Started Guide | Cloud Web Security Solutions
When you receive logon information in your confirmation email, log on to the Cloud Security portal by clicking the link that is provided or visiting https://admin.websense.net/portal.
Enter your user name and password into the fields provided. If you are a new customer, you will be asked to change your password and set a password reminder question. You must also accept the terms of your license agreement to proceed.
You can now configure your Cloud Web Security account.
A default policy has been created for you: click Web Security > Policy Management > Policies to access it. This reflects the most commonly chosen policy options.
As a minimum, do the following:
Go to Account Settings > Contacts to add administrator contacts for your account. The administrator contacts can be given logons to the portal and their permissions restricted as necessary.
If you want to synchronize your LDAP directory information with Cloud Web Security to simplify user and group management, go to Account Settings > Directory Synchronization. For more information, refer to the Directory Synchronization Client Administrator’s Guide.
If you wish to use end-user self-registration for identification and reporting purposes, define the domain(s) that you want to associate with your account. You can configure domains at the account level and assign them to one or more policies (for example, if all of your users are on a single email domain and you intend having multiple policies), or define domains within individual policies. Policy-level domains can be associated only to a single policy.
To specify account-level domains, go to Web Security > Settings > Domains.
To specify policy-level domains, go to Web Security > Policy Management > Policies, select your policy, then click the End Users tab.
NoteYou must have port 443 open on your firewall to access the Cloud Security portal.

Getting Started Guide 5
Requesting a Cloud Web Security Account
You can change your account configuration at any time. Refer to the TRITON Cloud Security Help for full instructions on how to configure your account. Click Help in the top right of the portal to access this guide.
Recommendations for an evaluation
Getting Started Guide | Cloud Web Security Solutions
Some of the major benefits of Cloud Web Security over competing solutions are that:
As an on-demand service, it lends itself to small scale evaluation.
It allows rapid expansion of the numbers of users involved at the proof-of-concept stage.
It allows rapid deployment into production after successful completion of the evaluation.
During the initial stages of an evaluation, we recommend that you manually configure a number of Web browsers to access the Cloud Web Security PAC file. Once you are happy that the service works as expected, you can add more users, perhaps by using Active Directory group policy to configure browsers. Alternatively, if you have an existing proxy, you may be able to proxy chain for a subset of users before deploying across the complete organization. See the next chapter, Deploying Cloud Web Security, page 7, for more information.
You can also deploy Web Endpoint for a small number of users to test enforcement and seamless authentication. This feature does not apply to ACE in the Cloud. For more information, see Setting up Web Endpoint, page 38.

Requesting a Cloud Web Security Account
6 Cloud Security

3
Getting Started Guide 7
Deploying Cloud Web Security
Getting Started Guide | Cloud Web Security Solutions
Deploy Cloud Web Security using the following steps:
1. Determine how to direct your Web traffic through the Cloud Web Security service.
In order for the Cloud Web Security service to be effective, your users’ browsers must be configured so that all appropriate requests go through the service. Measures should also be taken to ensure that other applications are prevented from bypassing the service.
If you already have a proxy within your network, you should be able to direct it to use Cloud Web Security in a chained proxy configuration. (See Configuring a chained proxy, page 9.) Otherwise, the browsers themselves must be configured to use the Cloud Web Security proxy. (See Configuring browsers to use Cloud Web Security, page 9.)
2. Configure your firewall to allow the host and port combinations that enable Cloud Web Security to operate correctly. See Configuring your firewall, page 18.
Once you have completed these steps, you can define the IP addresses for which the service will receive Web requests (see Adding IP Addresses to Your Policy, page 35), and choose how to manage your end users.
How Cloud Web Security works
Cloud Web Security operates as a proxy service for HTTP, Secure HTTP (HTTPS), and FTP over HTTP. This means that the browser does not connect directly to the required server (known as the origin server), but instead connects to a Cloud Web Security proxy server, which relays the request to the origin server on behalf of the browser. While doing this, the Cloud Web Security proxy server can examine the

Deploying Cloud Web Security
8 Cloud Security
request and the response, and make decisions such as whether to allow or block the request.
Cloud Web Security Proxy Service
1. Depending on the browser’s configuration, some requests may still go direct to the origin server. This is indicated in the diagram by the “Local server” box, because typically, such servers are local to the browser, inside the firewall.
2. Proxied HTTP requests (those that begin “http://”) are filtered and checked by Cloud Web Security then relayed to the origin server as appropriate.
3. Proxied secure requests (those that begin “https://”) are carried over a tunneled connection. This means that the Cloud Web Security proxy server connects to the origin server on the browser’s behalf, but takes no further part in the conversation, passing data back and forth transparently.
You can choose to enable SSL decryption, in which case the cloud proxy establishes SSL channels with newer browsers (Internet Explorer 8 or later, and Firefox 3.5 or later) for HTTPS sites. This enables the proxy to serve the correct notification page to the user – for example, a block page if the SSL site is in a category that the end user is prevented from accessing.
To implement this feature for your end users, you need a root certificate on each client machine that acts as a Certificate Authority for SSL requests to the cloud proxy. For more information, see the TRITON Cloud Security Help.
4. Where the origin server is an FTP server (i.e., the URL begins “ftp://”), the Cloud Web Security proxy server acts as a gateway, converting the HTTP request sent by the browser into an FTP conversation with the origin server.

Getting Started Guide 9
Deploying Cloud Web Security
Configuring a chained proxy
Getting Started Guide | Cloud Web Security Solutions
If you already have a proxy server that your users’ browsers are configured to use, you should be able to leave the browsers’ settings unchanged and configure your existing proxy to forward all HTTP, HTTPS, and FTP requests to Cloud Web Security. If your proxy is capable of using a PAC file, you can use the one provided by Cloud Web Security. Otherwise, we recommend that you download a copy of the Cloud Web Security PAC file and duplicate its functionality in your proxy’s configuration.
For ACE in the Cloud, configure your existing proxy to generate X-Authenticated-User headers and route traffic to the cloud service. You must also select User identification headers (from third-party proxies) on your Web policy’s Access Control tab in the Cloud Security portal. This removes the need for Cloud Security to identify individual users on the service by allowing the cloud proxy to read user headers sent by the downstream third-party proxy.
For more information about chained proxy configurations, see Using Chained Proxies, page 21.
Configuring browsers to use Cloud Web Security
Getting Started Guide | Cloud Web Security Solutions
If your browsers are to access Cloud Web Security directly (i.e., not through a chained proxy), then we recommend you use a PAC file to configure the browsers.
Cloud Web Security has been tested with most commercially available Web browsers, but for support purposes we recommend you use one of the following:
Mozilla Firefox 4 or higher on all platforms
Microsoft Internet Explorer 7, 8, and 9 on Microsoft Windows platforms
Microsoft Internet Explorer 10 on Windows 8 (not Metro mode)
Safari 3.1 on MacOS X 10.4 (Tiger)
Safari 5.x on MacOS X 10.6
Google Chrome 13 and later
See the follwoing sections for browser configuration instructions (note that Google Chrome uses the settings configured in Internet Explorer):
Configuring Mozilla Firefox, page 11
NoteThe Cloud Web Security PAC file is not static, but is generated to reflect the current settings of your policies. If you make policy changes and are not using the PAC file in your proxy, you may have to change your proxy configuration to match.

Deploying Cloud Web Security
10 Cloud Security
Configuring Internet Explorer, page 14
Configuring Safari manually, page 17
You can also install the Websense Web Endpoint to ensure all Web traffic is routed via the Cloud Web Security proxy. The endpoint also passes authentication information to the cloud proxies, enabling secure transparent authentication. The Web Endpoint feature does not apply to ACE in the Cloud. For more information, see Setting up Web Endpoint, page 38.
The Cloud Web Security PAC file
Getting Started Guide | Cloud Web Security Solutions
A proxy automatic configuration (PAC) file defines how Web browsers choose an appropriate proxy for fetching a given URL. They are preferable to configuring browsers manually, because they can be easily deployed and provide more configurable capabilities than a browser’s own settings.
The PAC file contains a number of global settings and allows you to enter exclusions of your own (for example, intranet sites) that should not use the Cloud Web Security proxy.
All supported browsers have the ability to use PAC files. Users may be instructed how to set this up for themselves. Alternatively, in a Windows environment, you can use an Active Directory Group Policy to configure browsers.
Either way, you must tell the browsers to get their PAC file from the Cloud Web Security service. When configuring browsers to download the PAC file, you can specify either the standard PAC file or a policy-specific PAC file.
Standard PAC file
When a browser requests a PAC file, if Cloud Web Security knows which policy the requester is using, it delivers the PAC file for that policy; otherwise it delivers a standard PAC file. You can retrieve the standard PAC file directly from the following URL:
http://pac.webdefence.global.blackspider.com:8082/proxy.pac
See the TRITON Cloud Security Help for further information.
Policy-specific PAC file
If Cloud Web Security knows which policy the requester is using, it delivers the PAC file specific to that policy. Alternatively, you can specify an alternative, policy-specific PAC file in the browser configuration. This ensures that the user receives the correct PAC file regardless of location. The policy-specific PAC file URL can be found in the General tab for each policy. It looks something like this:
http://pac.webdefence.global.blackspider.com:8082/proxy.pac?p=xxxxxxxx

Getting Started Guide 11
Deploying Cloud Web Security
Configuring Mozilla Firefox
Getting Started Guide | Cloud Web Security Solutions
To configure Firefox manually
1. From the Firefox menu, select Options > Advanced.
2. Select the Network tab.
3. Under Connection, click Settings.
4. Select Automatic proxy configuration URL.
5. Insert the path to the PAC file.
6. Click Reload.
7. Click OK and click OK again to return to the browser.

Deploying Cloud Web Security
12 Cloud Security
Configuring Firefox with Active Directory Group Policy
Getting Started Guide | Cloud Web Security Solutions
The following URL contains information and extensions for Firefox and Group Policy Objects (GPO):
http://sourceforge.net/projects/firefoxadm
We strongly recommend that you read all available documentation before installing the Active Directory extensions for Firefox. The above link provides a download of the FirefoxADM, which is a group of Active Directory Group Policy templates. Once you have downloaded the templates, you can install them all; however, the 2 files that are needed to configure Firefox for Cloud Web Security are:
firefoxlock.adm, which is the administrative template for locking down Firefox settings. See Turning on Group Policy to configure a Web proxy, page 12.
firefox_startup.vbs, which is the startup script for locking down Firefox settings. See Applying the policy, page 13.
Add these 2 files to AD. They are in the main FirefoxADM folder. You should save and extract these files to an easily accessible folder on the machine that you use to edit/create the GPO.
Turning on Group Policy to configure a Web proxy
1. Log on to a server in the domain, and with administrative permissions, open up Start > Programs > Administrative Tools > Active Directory Users & Computers and expand your domain.
2. Right click the top-level domain or Organizational Unit where the policy should be applied, select Properties, then select the Group Policy tab.
3. Create a GPO and give it a meaningful name (Cloud Web Security, for example).
4. Select the newly created GPO and click Edit. Right click Administrative Templates from the Computer Configuration options.
5. Choose Add/Remove Templates. Click Add and browse to the folder where you extracted the firefoxlock.adm file.
6. Click the firefoxlock.adm file and select Open. This installs the firefoxlock.adm template in AD. Click Close in the Add/Remove Templates dialog box, refresh your view and under Computer Configuration > Administrative Templates, you should see a new section called Mozilla Firefox Locked Settings.
7. Double click Mozilla Firefox Locked Settings and double-click Proxy Settings.
WarningFirefox is not the default or supported Web browser for a Microsoft Active Directory domain, therefore to configure this browser through Group Policy, you must install third-party extensions to Group Policy in Active Directory. The following extensions are not supported by Microsoft, nor are they supported and endorsed by Websense.

Getting Started Guide 13
Deploying Cloud Web Security
8. Edit the proxy settings to direct the browsers to pick up settings from the PAC file, then select Locked from the Preference State drop-down.
The Automatic Proxy Configuration URL should point at the PAC file you have chosen to use (see The Cloud Web Security PAC file, page 10 for more details).
Applying the policy
1. In the Cloud Web Security GPO, navigate to User Configuration > Windows Settings > Scripts (logon/logoff) and double-click Logon to open the Logon Properties dialog box.
2. Click Show Files to open the location of any logon scripts for this GPO. This is empty, because this is a new GPO. Leave this window open and navigate to the folder where you extracted the firefox_startup.vbs file (this should be the same folder as the firefoxlock.adm file).
3. Copy firefox_startup.vbs to the empty scripts folder you have previously opened. Close both file locations.
NoteFirefox is not native to Active Directory and even though you have installed an administrative template, it may not be applied the next time GP is refreshed. This is why you should use the firefox_startup.vbs script.

Deploying Cloud Web Security
14 Cloud Security
4. In the Logon Properties dialog box, select Add to open the Add a Script option. Click Browse and you are shown the file you have just placed in the scripts folder. Select the firefox_startup.vbs script, click Open, then OK twice to apply this script to the GPO.
The next time users log onto a machine, this logon script directs their Firefox browsers to pick up the Firefox defaults set up in the earlier sections.
Turning off the Web proxy using Group Policy
1. Open Active Directory Users & Computers.
2. Right-click the top-level domain or organization where the policy was originally applied, Select Properties, then select the Group Policy tab.
3. Select the original GPO (Cloud Web Security) and click Edit.
4. Navigate to User Configuration > Administrative Templates > Mozilla Firefox Default Settings and double-click Proxy Settings.
5. In the Proxy Settings dialog box, select Not Configured then click OK.
This change becomes active next time the client logs on.
Configuring Internet Explorer
Getting Started Guide | Cloud Web Security Solutions
Use the steps below to configure Internet Explorer manually. For instructions on using Group Policy, see Turning on Group Policy to configure a Web proxy, page 15.
1. Go to Tools > Internet Options and click the Connections tab.
2. Click LAN Settings.

Getting Started Guide 15
Deploying Cloud Web Security
3. Clear Automatically detect settings, if selected.
4. To set up a PAC file, select Use automatic configuration script.
5. Enter the location of the PAC file in the Address field (see The Cloud Web Security PAC file, page 10 for more details).
6. Click OK to return to the Internet Options dialog box.
7. You must now configure settings for VPN and dial-up connections. If you do not, it is likely that users’ browsers will fall back to a direct connection.
From the Connections tab, highlight the connection to be configured and click Settings.
8. Apply the same configuration that you set for the LAN connection, as covered in steps 4-6.
Turning on Group Policy to configure a Web proxy
Getting Started Guide | Cloud Web Security Solutions

Deploying Cloud Web Security
16 Cloud Security
Log on to a server in the domain, and with administrative permissions, open up Start > Programs > Administrative Tools > Active Directory Users & Computers and expand your domain.
1. Right click the top-level domain or Organizational Unit where the policy should be applied, select Properties, then select the Group Policy tab.
2. Create a GPO and give it a meaningful name (Cloud Web Security, for example).
3. Edit the GPO from the following location. User configuration > Windows Settings > Internet Explorer Maintenance > Connection > Automatic Browser Configuration.
4. Select Enable Automatic Configuration.
5. Under Auto-proxy URL (.JS, .JVS, or .PAC file), enter the path to the PAC file.
6. In the Automatically configure every field, specify how often the Web browser should query for the auto-configuration. For example, if you enter 240 minutes, every 4 hours the Web browser checks for an updated PAC file. If you leave this field blank or set it to “0”, the Web browser is only configured when it is started.
7. Once the configuration is complete, click OK.
Web clients using Internet Explorer pick up the settings in this GPO the next time that group policy refreshes, which by default is every 90 minutes for clients and every 5 minutes for Domain Controllers (or the next time a user logs off and on again). You can change the refresh interval in the default domain policy, or by going to a particular client and entering the following at a command prompt:
gpupdate /force
Turning off the Web proxy using Group Policy
Getting Started Guide | Cloud Web Security Solutions
If the policy needs to be reversed, it is not as simple as removing the GPO that was originally applied. IE stores proxy settings in the registry, therefore by removing the
Getting Started Guide 17
Deploying Cloud Web Security
policy, you are keeping the same registry settings; it take another “write” session to re-configure the proxy settings. To achieve this follow these steps:
1. Log on to a server in the Domain, and with administrative permissions, open up Start > Programs > Administrative Tools > Active Directory Users & Computers and expand your domain.
2. Right click the top-level domain or Organizational Unit where the policy should be applied, select Properties, then select the Group Policy tab.
3. Select the original GPO (Cloud Web Security) and click Edit.
4. From User configuration > Windows Settings > Internet Explorer Maintenance > Connection > Automatic Browser Configuration, clear Enable Automatic Configuration.
5. From Proxy Settings, clear Enable proxy settings.
6. Click OK and close the GPO.
The clients update the next time Group Policy refreshes or, as described above, use the command line at a particular client to achieve this manually.
Configuring Safari manually
Getting Started Guide | Cloud Web Security Solutions
1. In Safari, go to Safari > Preferences.
2. Click on the Advanced icon.
3. Under Proxies, click Change Settings.
4. For Mac OS 10.5 and under:
For the Configure Proxies option, select Using a PAC file.
In the PAC file URL field, enter the path to the PAC file (See The Cloud Web Security PAC file, page 10).
Click Apply Now.
5. For Mac OS 10.6 and higher:
Under Select a protocol to configure, select Automatic Proxy Configuration.
In the Proxy Configuration File URL field, enter the path to the PAC file (See The Cloud Web Security PAC file, page 10).
Click OK.
6. Close and restart Safari.
Enabling cookies
Getting Started Guide | Cloud Web Security Solutions
For the best user experience, we recommend that you allow end users’ browsers to accept cookies when using Cloud Web Security. If a browser is unable to, or is configured not to accept cookies, the following features do not work:

Deploying Cloud Web Security
18 Cloud Security
Acceptable Use Policy compliance page
Web Endpoint automatic installation
Secure form-based authentication
Single sign-on using Authentication Service or another identity provider
If any of these features are enabled and cookies are not accepted, the browser may get stuck in a loop between the end user’s requested URL and the relevant Cloud Web Security notification page.
Configuring your firewall
Getting Started Guide | Cloud Web Security Solutions
Some host and port combinations must be allowed through your firewall in order for Cloud Web Security to operate correctly. Below is a description of each port.
Port Purpose
8088 Authentication Service. This is required if you are using Websense Authentication Service for seamless user authentication. This service does not apply to ACE in the Cloud.
8004 and 8006
Single sign-on authentication with third-party providers. This does not apply to ACE in the Cloud.
Port 8006 is available for Oracle Identity Federation, and port 8004 is available for PingFederate.
8089 Secure form authentication. This is required if you are using form-based authentication to authenticate end users.
80 Proxy service. This is where the Cloud Web Security service is provided.
PAC file. This is required if your browsers (or proxy) are to fetch their PAC file from Cloud Web Security.
Note that port 8081 is also available for proxy service, and port 8082 is available for PAC files.
Notification page components. The default notification pages refer to style sheets and images served from the Websense Cloud Security platform at http://www.mailcontrol.com. For these pages to appear correctly, this Web site is accessed directly (i.e., not through Cloud Web Security).
Unproxied home page (principally for remote users). Although this service is principally for remote users, you may choose to configure all browsers to use this as their home page. In this case, you need to allow access through your firewall.
Checking browser configuration. This service allows users to check whether their browser settings are correct for accessing the proxy. The site detects whether it has been accessed via Cloud Web Security and returns a page indicating this.
PAC file and proxy service for remote users. Remote users should also use the PAC file address for port 80 if requesting access from a network that has port 8081 or 8082 locked down.
443 Service administration. The Websense administration portal is similarly unproxied. Otherwise, it would be possible for you to accidentally block access and then be unable to rectify the situation.

Getting Started Guide 19
Deploying Cloud Web Security
To guarantee availability, Cloud Web Security uses the Websense global load balancing technology to direct traffic across multiple geographic locations. A client using the service looks up the webdefence.global.blackspider.com record. This record resolves to the IP address of the nearest location of the Cloud Web Security service.
Static users are typically always served by proxies from the Cloud Web Security service closest to them. In the event of localized or Internet-wide connectivity issues, the Websense global load balancing technology automatically routes requests to the next closest location. To make the most of the resilience offered by this infrastructure, users must be allowed to connect to the entire Cloud Web Security network - those IP addresses that the service uses now and those that may be deployed in the future.
If you decide to lock down your firewall, you should permit all the IP address ranges in use by the Cloud Web Security service for all the above ports. These ranges are published in a Knowledge Base article called “Cloud Service cluster IP addresses and port numbers.”
If you block port 80, you may want to add an exception for some PCs (those used by your own IT staff) so that they can use the Cloud Web Security performance monitor. This monitor compares performance through Cloud Web Security against direct connection performance. It needs to be able to connect directly to the target sites.
NoteWebsense is constantly expanding this list as we add new capacity to support our rapidly expanding user base.

Deploying Cloud Web Security
20 Cloud Security

4
Getting Started Guide 21
Using Chained ProxiesGetting Started Guide | Cloud Web Security Solutions
Cloud Web Security has been tested with a number of commercially available proxies in chained proxy configuration. For support purposes, if chained proxy is your chosen deployment method, Websense recommends the use of one of the following:
Microsoft ISA Server or Forefront TMG, page 21
Blue Coat ProxySG, page 28
Squid Proxy, page 32
Microsoft ISA Server or Forefront TMG
Getting Started Guide | Cloud Web Security Solutions
A Microsoft® Internet Security and Acceleration (ISA) Server or Forefront™ Threat Management Gateway (TMG) server can be deployed as a downstream proxy with Cloud Web Security. You can configure proxy chaining in the following ways:
Basic chaining. The ISA server does not perform any authentication before forwarding requests to the cloud proxy. The cloud proxy can perform manual authentication only.
NTLM pass-through. The ISA server is aware of a requirement for NTLM identification but takes no part in the authentication, forwarding requests to the cloud proxy which then performs NTLM identification.
X-Authenticated-User. The ISA server performs user authentication and forwards requests to the cloud proxy using the X-Authenticated-User header.
In this guide, “ISA/TMG” refers to ISA Server and Forefront TMG collectively. When instructions or information differ for the two products, they are referred to specifically as “ISA Server” or “Forefront TMG”.
Basic chaining
Getting Started Guide | Cloud Web Security Solutions
To set up your ISA/TMG server to chain with the upstream cloud proxy, follow the instructions below.
1. Log on to the ISA/TMG server and open the Server Management console.

Using Chained Proxies
22 Cloud Security
2. Under Configuration, open the Networks option and select the Web Chaining tab. Under this tab a default rule is present. Leave this as it is.
3. Click the Tasks tab, then click the Create New Web Chaining Rule link to start the wizard.
4. Give the rule a meaningful name such as Cloud Web Security, and click Next.
5. In the next section, choose the destinations to which this rule applies (in most cases, it applies to external networks).
6. Click Add and select the appropriate network.

Getting Started Guide 23
Using Chained Proxies
7. Click Next to specify how requests are to be handled. This is where you specify that requests be sent to an upstream server (i.e., Cloud Web Security).
8. Select Redirect requests to a specified upstream server and click Next.
9. On the Primary Routing page, specify the address of the Cloud Web Security service: webdefence.global.blackspider.com
10. Specify port 8081 for both Port and SSL. Click Next.

Using Chained Proxies
24 Cloud Security
11. On the Backup Action page, select the appropriate action for your organization. Your choice depends on whether you are willing to allow requests to be served directly, without using Cloud Web Security. Click Next.
12. Review your settings and click Finish.
Configuring exceptions
Getting Started Guide | Cloud Web Security Solutions
If there are any hosts that you do not want to use the proxy service, you must configure an exception for them. Minimally, you should add those hosts that are in the PAC file that is downloaded from the Cloud Web Security service (see The Cloud Web Security PAC file, page 10 for more details).
You should also configure direct access to the Cloud Security portal to allow the following:
Correct display of block pages
End-user self-registration
If you are using the roaming user home page (http://home.webdefence.global.blackspider.com/), that should also be configured as an exception.

Getting Started Guide 25
Using Chained Proxies
1. To configure exceptions, click Firewall Policy, then select Network Objects from the Toolbox.
2. Right-click Domain Name Sets and click New Domain Name Set.
3. Give the new set a name (e.g., Cloud Web Security Unproxied).
In the Domain names included in this set section, add all Cloud Web Security global exceptions (from the Cloud Web Security PAC file). These include the following Microsoft Windows update sites:
download.microsoft.comntservicepack.microsoft.comcdm.microsoft.com

Using Chained Proxies
26 Cloud Security
wustat.windows.comwindowsupdate.microsoft.com*.windowsupdate.microsoft.comupdate.microsoft.com*.update.microsoft.com*.windowsupdate.com
Also, add the following Cloud Security sites:
www.blackspider.com
mailcontrol.com
home.webdefence.global.blackspider.com
webdefence.global.blackspider.com
Include any other exceptions appropriate for your environment.
4. Click OK and Apply changes.
5. Navigate back to the proxy chaining policy you created above, open the policy and click the To tab.
6. In the Exceptions section, click Add.
7. Expand Domain Name Sets, select the domain set you just created (Cloud Web Security Unproxied), and click Add.
8. Click Close on Add Network Entities.
9. Click OK on the Web chaining policy and Apply the changes.
Configuring NTLM pass through
Getting Started Guide | Cloud Web Security Solutions
To chain your ISA/TMG server with the cloud proxy and perform NTLM identification:

Getting Started Guide 27
Using Chained Proxies
1. Follow the steps in Basic chaining, page 21.
2. Log on to the Cloud Security portal.
3. Select Web Security > Policy Management > Policies > policy name > Access Control.
4. Select Authenticate users on first access, then select NTLM transparent identification where possible. For more information, see NTLM identification in the Cloud Security Help.
5. Click Save.
Configuring X-Authenticated-User chaining
Getting Started Guide | Cloud Web Security Solutions
You can pass authentication details from your ISA/TMG server to the cloud proxy via a plug-in from Websense, Inc. This plug-in allows the cloud proxy to read the X-Forwarded-For and X-Authenticated-User headers sent by the downstream ISA/TMG server as part of a proxy chained configuration.
With this setup, end users can be authenticated transparently by the cloud proxy, removing an authentication step and improving performance.
Two versions of the plug-in are available:
Websense-AuthForward32.dll for 32-bit ISA/TMG servers
Websense-AuthForward64.dll for 64-bit ISA/TMG servers.
Zip files for both versions are available for download:
1. Log on to your MyWebsense account.
2. Select the Downloads tab.
3. Select Websense Web Security Gateway from the Product drop-down list.
4. In the list that appears, expand ISA 32-bit plugin for WCG or ISA 64-bit plugin for WCG to see the download details. Click the download link to start the download.
Install the plug-in as follows:
1. Copy the appropriate Websense-AuthForward.dll file (for 32-bit or 64-bit) to the Microsoft ISA/TMG installation directory. The default directory for this file is C:\Program Files\Microsoft ISA Server for ISA server, or C:\Program Files\Microsoft Forefront Threat Management Gateway for ForefrontTMG.
For the 32-bit version, install the following files in the installation directory in addition to Websense-AuthForward32.dll:
X-Forwarded-For Contains the client IP address
X-Authenticated-User When ISA authentication is turned on, this header will be populated with the user domain and username (domain\user).

Using Chained Proxies
28 Cloud Security
Microsoft.VC90.CRT.manifestmsvcm90.dllmsvcp90.dllmsvcr90.dll
2. Open a Windows command prompt and change directory to the installation directory.
3. From the command prompt, type
regsvr32 Websense-AuthForward32.dll
(to register the 32-bit plug-in)
regsvr32 Websense-AuthForward64.dll
(to register the 64-bit plug-in)
4. Verify the plug-in was registered in the ISA/TMG management user interface (Start > Programs > Microsoft ISA Server > ISA Server Management, or Start > Programs > Microsoft Forefront TMG > Microsoft Forefront TMG Management). In the Configuration (for 32-bit) or System (for 64-bit) section, select Add-ins, then click the Web-filter tab. The WsAuthForward plug-in should be listed.
To uninstall the plug-in, run the following command in a Windows command prompt from the ISA/TMG installation directory.
regsvr32 /u Websense-AuthForward32.dll
(to unregister the 32-bit plug-in)
regsvr32 /u Websense-AuthForward64.dll
(to unregister the 64-bit plug-in)
Blue Coat ProxySG
Getting Started Guide | Cloud Web Security Solutions
Blue Coat ProxySG can be deployed as a downstream proxy with Cloud Web Security. You can configure proxy chaining in the following ways:
Basic chaining. The Blue Coat server does not perform any authentication before forwarding requests to the cloud proxy. The cloud proxy can perform manual authentication only.
NTLM pass-through. The Blue Coat server takes no part in authentication, forwarding requests to the cloud proxy which then performs NTLM identification.
X-Authenticated-User. The Blue Coat server performs user authentication and forwards requests to the cloud proxy using the X-Authenticated-User header.

Getting Started Guide 29
Using Chained Proxies
Basic chaining
Getting Started Guide | Cloud Web Security Solutions
In this case, Blue Coat ProxySG forwards requests to the cloud proxy but performs no authentication. End users can be authenticated using manual authentication only: prompting users for a user name and password the first time they access the Internet through a browser.
Use the Blue Coat Management Console to forward requests to the cloud proxy as follows:
1. In the Blue Coat Management Console Configuration tab, select Forwarding > Forwarding Hosts.
2. Select Install from Text Editor from the drop-down, and then click Install.
3. Update the Forwarding Hosts configuration file to point an alias name to webdefence.global.blackspider.com, port 8081. For example, if you choose the alias name ‘Websense_Proxy’, enter the following at the end of the ‘Forwarding host configuration’ section:
fwd_host Websense_Proxy webdefence.global.blackspider.com http=8081
4. Add the following to the end of the ‘Default fail-over sequence’ section:
sequence alias name
replacing alias name with the alias name that you chose in step 3.
5. When you have finished editing, click Install.
6. In the Blue Coat Management Console Configuration tab, click Policy and select Visual Policy Manager. Click Launch.
7. In the Policy menu, select Add Forwarding Layer and enter an appropriate policy name in the Add New Layer dialog box.
8. Select the Forwarding Layer tab that is created. The Source, Destination, and Service column entries should be Any (the default).
9. Right-click the area in the Action column, and select Set.
10. Select the alias name that you created (for example, Websense_Proxy) from the list, and click OK.
11. Right-click the alias name in the Action column and select Edit.
12. Choose the forwarding behavior if your Blue Coat proxy cannot contact the cloud proxy: either to connect directly, or to refuse the browser request.
13. Click OK.
14. Click Install Policy in the Blue Coat Visual Policy Manager.
NTLM chaining
Getting Started Guide | Cloud Web Security Solutions
To chain Blue Coat ProxySG with the cloud proxy and perform NTLM identification:

Using Chained Proxies
30 Cloud Security
1. Follow the steps in Basic chaining, page 29.
2. Log on to the Cloud Security portal.
3. Select Web Security > Policy Management > Policies > policy name > Access Control.
4. Select Authenticate users on first access, then select NTLM transparent identification where possible. For more information, see NTLM identification in the Cloud Security Help.
5. Click Save.
X-Authenticated-User chaining
Getting Started Guide | Cloud Web Security Solutions
You can pass authentication details from your Blue Coat proxy to send X-Forwarded-For and X-Authenticated-User headers to the cloud proxy either by manually editing a policy text file, or defining the policy in Blue Coat Visual Policy Manager.
With this setup, end users can be authenticated transparently by the cloud proxy, removing an authentication step and improving performance.
Note that for Blue Coat to service HTTPS requests properly with the following setup, you must have a Blue Coat SSL license and hardware card.
Editing the local policy file
In the Blue Coat Management Console Configuration tab, click Policy in the left column and select Policy Files. Enter the following code in the current policy text file, using an Install Policy option:
<Proxy>
action.Add[header name for authenticated user](yes)
define action dd[header name for authenticated user]
set(request.x_header.X-Authenticated-User, "WinNT://$(user.domain)/$(user.name)")
end action Add[header name for authenticated user]
action.Add[header name for client IP](yes)
define action dd[header name for client IP]
set(request.x_header.X-Forwarded-For,$(x-client-address))
X-Forwarded-For Contains the client IP address
X-Authenticated-User When Blue Coat authentication is turned on, this header will be populated with the user domain and username (domain\user).

Getting Started Guide 31
Using Chained Proxies
end action Add[header name for client IP]
Using the Blue Coat graphical Visual Policy Manager
Before you configure the Blue Coat header policy, ensure that NTLM authentication is specified in the Blue Coat Visual Policy Manager (Authentication > Windows SSO). Set Websense Cloud Web Security as the forwarding host (in the Blue Coat Management Console Configuration tab, Forwarding > Forwarding Hosts). The address of the Cloud Web Security service is webdefence.global.blackspider.com, port 8081.
In the Blue Coat Management Console Configuration tab, click Policy and select Visual Policy Manager. Click Launch and configure the header policy as follows:
1. In the Policy menu, select Add Web Access Layer and enter an appropriate policy name in the Add New Layer dialog box.
2. Select the Web Access Layer tab that is created.
3. The Source, Destination, Service, and Time column entries should be Any (the default).
4. Right-click the area in the Action column, and select Set.
5. Click New in the Set Action Object dialog box and select Control Request Header from the menu.
6. In the Add Control Request Header Object dialog box, enter a name for the client IP Action object in the Name entry field.
7. Enter X-Forwarded-For in the Header Name entry field.
8. Select the Set value radio button and enter the following value:
$(x-client-address)
9. Click OK.
10. Click New and select Control Request Header again.
11. In the Add Control Request Header Object dialog box, enter a name for the authenticated user information Action object in the Name entry field.
12. Enter X-Authenticated-User in the Header Name entry field.
13. Select the Set value radio button and enter the following value:
WinNT://$(user.domain)/$(user.name)
14. Click OK.
15. Click New and select Combined Action Object from the menu.
16. In the Add Combined Action Object dialog box, enter a name for a proxy chain header in the Name entry field.
17. In the left pane, select the previously created control request headers and click Add.
18. Select the combined action item in the Set Action Object dialog box and click OK.
Click Install Policy in the Blue Coat Visual Policy Manager.

Using Chained Proxies
32 Cloud Security
Squid Proxy
Getting Started Guide | Cloud Web Security Solutions
Cloud Web Security supports the configuration of a chained Squid open source downstream proxy, in the following cases:
Basic chaining
For policies where NTLM is enabled and end users are asked to authenticate for Cloud Web Security
The Squid proxy must be version 3.1.5 or later.
Basic chaining
Getting Started Guide | Cloud Web Security Solutions
In this case, Squid forwards requests to the cloud proxy but performs no authentication. End users can be authenticated using manual authentication only: prompting users for a user name and password the first time they access the Internet through a browser.
Configure Squid to forward requests to the cloud proxy as follows:
1. Define one or more ACLs to identify sites that should be not be filtered through Cloud Web Security. These must include certain service-specific sites, and should include any other sites that are not normally handled through the cloud service. You can identify these sites by examining the service-generated PAC file available at http://webdefence.global.blackspider.com:8082/proxy.pac.
You should also configure direct access to the Cloud Security portal to allow the following:
Correct display of block pages
End-user self-registration
If you are using the roaming user home page (http://home.webdefence.global.blackspider.com/), that should also be configured as an ACL.
The following sites must be included in the ACLs:
acl WBSN dstdomain .mailcontrol.com
acl WBSN dstdomain www.blackspider.com
acl WBSN dstdomain webdefence.global.blackspider.com
always_direct allow WBSN
2. Force all other sites to use the cloud proxy as follows:
never_direct allow all
3. Tell Squid the location of the upstream cloud proxy:
cache_peer webdefence.global.blackspider.com parent 8081 0 no-query default no-digest

Getting Started Guide 33
Using Chained Proxies
NTLM chaining
Getting Started Guide | Cloud Web Security Solutions
The Squid proxy performs local NTLM identification, then forwards the appropriate Proxy-Authorization headers as an NTLM Type 3 message to the cloud proxy for further transparent user authentication. Squid can maintain multiple connections to the cloud proxy, allowing the sharing of connections across users but ensuring that each request is associated with the correct user. When Squid reassigns a connection to another user, only then is a new Proxy-Authorization header sent for that user.
To use this setup, configure Squid to do the following:
1. Perform NTLM authentication.
2. Forward requests to the cloud proxy.
3. Forward user information to the cloud proxy.
Configuring Squid for NTLM authentication
To configure Squid to perform NTLM authentication of users, refer to the Squid documentation:
http://wiki.squid-cache.org/ConfigExamples/Authenticate/Ntlm
Forwarding requests to the cloud proxy
To configure Squid to forward requests to the cloud proxy:
1. Define one or more ACLs to identify sites that should be not be filtered through Cloud Web Security. These must include certain service-specific sites, and should include any other sites that are not normally handled through the cloud service. You can identify these sites by examining the service-generated PAC file available at http://webdefence.global.blackspider.com:8082/proxy.pac.
The following sites must be included in the ACLs:
acl WBSN dstdomain .mailcontrol.com
acl WBSN dstdomain www.blackspider.com
acl WBSN dstdomain webdefence.global.blackspider.com
always_direct allow WBSN
2. Force all other sites to use the cloud proxy as follows:
never_direct allow all
3. Tell Squid the location of the upstream cloud proxy:
cache_peer webdefence.global.blackspider.com parent 8081 0 no-query default no-digest
Forwarding user information to the cloud proxy
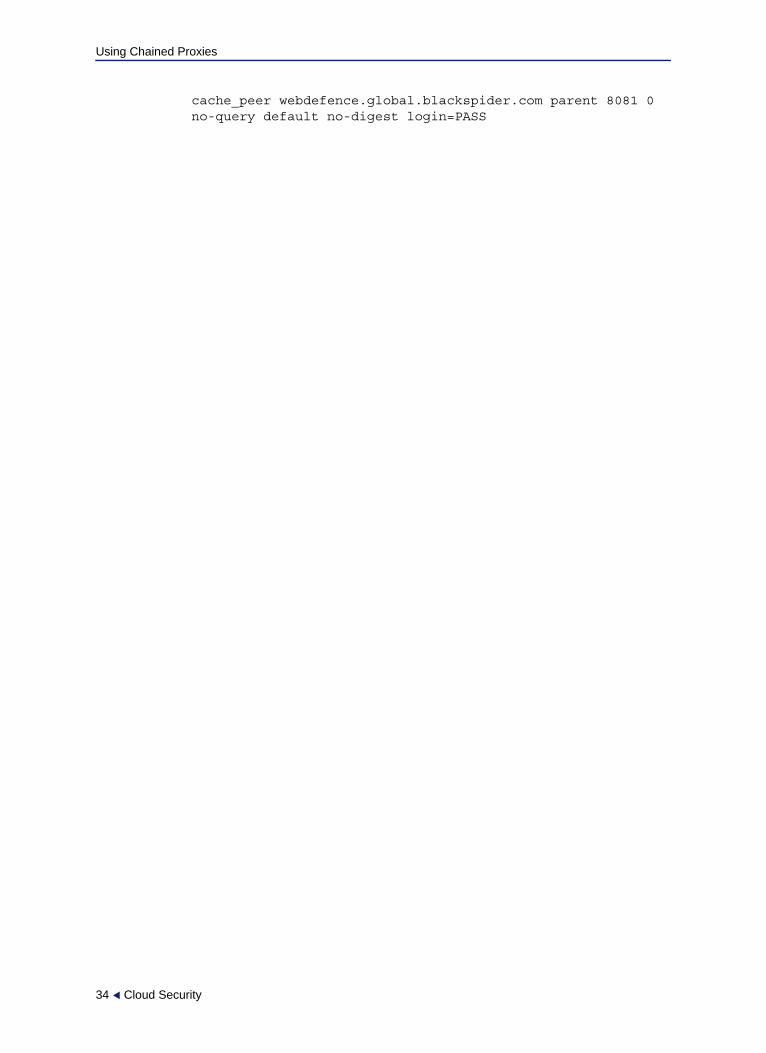
To configure squid to forward user information, add option login=PASS to the cache-peer line:
Using Chained Proxies
34 Cloud Security
cache_peer webdefence.global.blackspider.com parent 8081 0 no-query default no-digest login=PASS

5
Getting Started Guide 35
Adding IP Addresses to Your Policy
Getting Started Guide | Cloud Web Security Solutions
When a Cloud Web Security proxy receives a request, its first task is to identify the correct policy to use. First, it checks the IP address that is the source of the request. Typically, this is the external IP address of your firewall. If this IP address matches a proxied connections setting in a policy, then that policy is used. Alternatively, if you have deployed Web Endpoint, the endpoint passes authentication details to the Cloud proxies, enabling the cloud service to associate the correct policy with the user. Otherwise, the user is invited to log onto the Cloud Web Security service (by an email address that is used as a unique logon name), and the user’s email address is used to find the correct policy.
Initial settings
Getting Started Guide | Cloud Web Security Solutions
In the Cloud Security portal, under Web Security, there is a single policy called DEFAULT. Initially, this policy has no proxied connections. It is possible to use Cloud Web Security like this, but it may be inconvenient because users always have to authenticate and you have to manually invite each user to register on the service.
Policy selection by IP address
Getting Started Guide | Cloud Web Security Solutions
There are two reasons for allowing policy selection by IP address:
To allow users to use the service anonymously - they don’t have to authenticate.
To provide different policies for parts of your organization, each being distinguished by different IP addresses. This is typically used by remote offices with their own Internet gateway and can be used, for example, to delegate user administration and reporting to local support personnel.
To add IP addresses to your policy:
1. Log on to the Cloud Web Security portal.

Adding IP Addresses to Your Policy
36 Cloud Security
2. Go to Web Security > Policy Management > Policies.
3. Select the DEFAULT policy.
4. Select the Connections tab.
5. Click Add under Proxied Connections.
6. Enter a Name and Description for the connection.
7. Select the connection type. A proxied connection can be an IP address, an IP range, or an IP subnet.
8. Enter the IP address, range, or subnet details.
9. Define the connection’s time zone.
Each proxied connection has a time zone setting. If you have a single policy for multiple Internet gateways in different countries, you may want to set each to a different time zone. If all connections are in the same time zone, it is easier to set the time zone for the whole policy on the General tab and leave the connection setting as ‘use policy time zone’.
10. Click Submit.

6
Getting Started Guide 37
Setting Up End-User Authentication
Getting Started Guide | Cloud Web Security Solutions
The Cloud Web Security service works “out of the box” for many organizations. A single policy applied to an organization’s Web traffic provides protection from malware and inappropriate content. Most companies, however, want to tailor the service to align it with their Internet usage policy, which may require granular configuration on a per-user and per-group basis. Also companies usually want to report on the surfing habits of their employees, which requires users to identify themselves.
Authentication and identification options are set up on the Access Control tab within a policy, meaning that you can specify different authentication methods for different end users. Log on to the cloud portal, go to Web Security > Policy Management > Policies, click your policy name, then select Access Control.
Cloud Web Security offers the following options for user identification and authentication:
Installing Web Endpoint on end users’ machines ensures that those users are both authenticated and always filtered by Cloud Web Security.* See Setting up Web Endpoint, page 38.
If you have an on-network identity provider, you can use this to provide secure clientless authentication to Cloud Web Security. Alternatively, Websense Authentication Service can be installed on your network to provide clientless, seamless authentication.* See Setting up Authentication Service, page 47.
You can register your end users with Cloud Web Security to enable NTLM identification, secure form-based authentication, or manual authentication. Alternatively, you can request users to self-register, or identify themselves for NTLM. See End-user registration, page 50.
For ACE in the Cloud, you can select User identification headers (from third-party proxies) to remove the need for Cloud Security to identify individual users on the service by allowing the cloud proxy to read user headers sent by the downstream third-party proxy. See Blue Coat ProxySG, page 28, and Squid Proxy, page 32.
*Does not apply to ACE in the Cloud.

Setting Up End-User Authentication
38 Cloud Security
Setting up Web Endpoint
Getting Started Guide | Cloud Web Security Solutions
This feature does not apply to ACE in the Cloud.
Web Endpoint is designed to provide a seamless experience to end users for authenticating and directing traffic to the Cloud Web Security infrastructure. Administrators can create policies that provide full visibility into inbound and outbound traffic, but that don't restrict use of the device.
The endpoint appends two additional headers into each HTTP request. One header tells Cloud Web Security which version of the endpoint is installed; the other is an encrypted token which identifies the end user. This enables Cloud Web Security to apply the appropriate policy for that user and correctly log reporting data. These headers do not include any domain passwords or other security information, meaning that there is no security risk in using the endpoint. The headers are then stripped from the requests by the Cloud Web Security proxy.
Web Endpoint has been designed to consume minimal CPU, memory, and disk resources. It can be deployed on Windows and Mac operating systems (excludes iOS devices, such as iPhones, iPods, or iPads).
To enable the use of Web Endpoint for some or all of your end users, you must deploy it to those users.
You can deploy Web Endpoint in the following ways:
Windows operating system users
Download the endpoint installation file for Windows and push it manually to selected client machines using your preferred distribution method. For example, you might deploy it using Microsoft Group Policy Object (GPO). Alternatively you can send users a URL from which they can download and install the endpoint themselves.
Deploy the endpoint to the end users in a Web policy directly from the cloud. Each user will be asked to install the endpoint software on their machine when they start a browsing session.
Mac operating system users
Download the endpoint installation package for Mac on individual client machines and launch the installer by double-clicking the package.
Remotely install the endpoint using Apple Remote Desktop software, which distributes the installation package to a group of machines and performs the installation on that group.
If a user does not install the endpoint, he or she is authenticated according to the options you have selected on the Access Control tab for their policy. Websense Authentication Service is used if configured; otherwise the cloud-based service falls back to NTLM identification or basic authentication. The user is again asked to install the endpoint next time they start a browsing session.

Getting Started Guide 39
Setting Up End-User Authentication
The endpoint has a number of key protections against tampering, which should prevent the majority of end users from uninstalling or deleting the endpoint even if they have local administrator rights:
Windows and Mac operating systems
Endpoint files and folders are protected from deletion and cannot be modified, moved, or renamed.
The endpoint process will automatically restart if it is stopped or killed.
A password is required to uninstall the endpoint or stop the endpoint service.
Windows operating systems only
Endpoint registry settings cannot be modified or deleted.
The Service Control command to delete the endpoint service is blocked.
Endpoint system requirements
Getting Started Guide | Cloud Web Security Solutions
Windows operating systems
Web Endpoint is supported on the following 32-bit and 64-bit operating systems:
Windows XP with Service Pack 2 or higher
Windows Vista with Service Pack 1 or higher
Windows 7
The following Web browsers fully support Web endpoint for Windows operating system users.
Internet Explorer 7, 8, and 9
Firefox 3.x and higher
The endpoint can be installed either by GPO or directly from the cloud service. Once installed on these browsers, the endpoint provides user authentication, enforces filtering via Cloud Web Security, and is able to manipulate proxy settings in real time – for example, to temporarily disable itself at public Internet access points to allow a roaming user to complete the billing requirements. Updates directly from the cloud service are also supported.
If your end users have browsers other than those listed above, you can download the endpoint installer and deploy it to those users. Once installed, the endpoint provides user authentication and enforces filtering via Cloud Web Security, but cannot perform proxy manipulation and cannot be updated directly from the cloud service.
NoteEndpoint for the Mac may not currently be enabled for all Cloud Web Security customers.

Setting Up End-User Authentication
40 Cloud Security
The Windows installer is less then 5MB in size, and requires less than 10MB in hard disk space and less than 6MB in memory usage.
Full support means that the browser supports all installation methods, and both Web analysis and filtering and proxy manipulation.
Mac operating systems
Web Endpoint is supported on the following 32-bit and 64-bit operating systems:
Mac OS X v10.6 or 10.7
The following Web browsers fully support Web endpoint on the Mac:
Safari 5.1 or higher
Firefox 8.0 or higher
Google Chrome 15 or higher
If your end users have browsers other than those listed above, you can download the endpoint installer and deploy it to those users. Once installed, the endpoint provides user authentication and enforces filtering via Cloud Web Security. Proxy manipulation is supported.
For Mac end users, no option exists to auto-update the endpoint. You must uninstall the endpoint first.
The installer for the Mac is less than 2MB in size and requires less than 10MB in hard disk space.
Downloading and distributing the endpoint
Getting Started Guide | Cloud Web Security Solutions
Download the latest version of the endpoint from the Web Security > Settings > Endpoint Download page in the Cloud Security portal. If you are using a Windows operating system, the endpoint is available in separate installation packages for 32-bit and 64-bit operating systems.
The endpoint for the Mac consists of only one installation package for both 32-bit and 64-bit operating systems. Note that you do not need to reinstall Web Endpoint for the Mac if you switch between these systems.
Before you can download the installation file or enable deployment from the cloud service, you must define an anti-tampering password to be used to stop the endpoint service or uninstall the endpoint. The password is automatically linked to any deployments of the endpoint, including Web deployments. To set the password, do the following:
1. Under Set Anti-Tampering Password, click Set Password.

Getting Started Guide 41
Setting Up End-User Authentication
2. Enter and confirm your anti-tampering password, then click Submit.
Windows operating system users should note the script command displayed on screen and use it to configure your GPO deployment script or manual installation. This command is in the format:
WSCONTEXT=xxxx
where xxxx is a unique code for your account.
The command is required during installation to associate the endpoint with your customer account and enable your end users to log on transparently.
For Windows operating system users
Getting Started Guide | Cloud Web Security Solutions
Distributing the endpoint via GPO
Follow the steps below to deploy endpoint clients through an Active Directory group policy object (GPO). You need to write different installation scripts for a 32-bit versus a 64-bit operating system. Check in your script to see if the endpoint is installed, because your script should only install the endpoint if it is not already installed.
1. Unzip the downloaded endpoint file to a location of your choice.
2. Create a shared folder (create a folder and turn on sharing in the Properties menu).
3. Create a batch file (.bat) in the shared folder, for example “installmsi.bat”. This can be done in any text editor.
Type the following msiexec command into the batch file and save it.
msiexec /package "\\path\Websense Endpoint.msi" /quiet /norestart WSCONTEXT=xxxx
Where:
path is the path to the unzipped installer
WSCONTEXT=xxxx is the script command noted from the Endpoint Download screen in the portal
4. Test your batch file manually to make sure it runs on other workstations. You can do this by opening the server path to the file on a workstation and attempting to run the file. If the file does not run, check your permissions.
5. Open the Group Policy Management Console (GPMC).
ImportantFor security reasons, Cloud Web Security does not retain a copy of your anti-tampering password. If you forget your password, you can reset it in the portal by entering and confirming a new password. All installed endpoints will be updated to use the new password next time they connect to the Internet.

Setting Up End-User Authentication
42 Cloud Security
6. Create a new (or open an existing) GPO on the organization unit (OU) in which your computer accounts reside. To create a new GPO:
a. In the console tree, right-click Group Policy Objects in the forest and domain in which you want to create a Group Policy object (GPO).
b. Click New.
c. In the New GPO dialog box, specify a name for the new GPO, and the click OK.
7. Open Computer Configuration > Windows Settings > Scripts, and double-click Startup in the right pane of the screen.
8. Click Add.
9. In the Script Name field type the full network path and filename of the script batch file you created in step 2.
10. Click OK.
11. Close the GPMC.
12. Run the gpupdate /force command at the command prompt to refresh the group policy.
The application should be installed on startup. The client may not be fully functional until a reboot occurs.
Installing the endpoint on a single machine
Follow the steps below to deploy an endpoint client on a single machine. Note that you must have administrator rights on the machine.
1. Unzip the downloaded endpoint file to a location on the machine.
2. Open a command-line window, and navigate to the location of the unzipped endpoint files.
3. Enter the following command:
msiexec /package "Websense Endpoint.msi" /norestart WSCONTEXT=xxxx
Where WSCONTEXT=xxxx is the script command noted from the Endpoint Download screen in the portal
4. To confirm the endpoint is installed and running, go to Start > Control Panel > Administrative Tools > Services. Check that “Websense SaaS Service” is present in the Services list, and is started.
Uninstalling the endpoint from Windows
You can uninstall the endpoint by doing the following:
1. Go to Control Panel > Programs and Features, and select Websense Endpoint.
2. Click Uninstall.
3. Click Yes to continue. Then enter the endpoint anti-tampering password that you set in the Cloud Web Security portal.
4. Click OK to begin uninstalling the endpoint.

Getting Started Guide 43
Setting Up End-User Authentication
5. You will receive a confirmation message if the endpoint was successfully uninstalled
You can also uninstall the endpoint through the command line by running this command:
msiexec /uninstall "<path>\Websense Endpoint.msi" /qb /promptrestart XPSWDPXY=xxxx
where <path> is the path to your endpoint package, and xxxx is the anti-tampering password you set in the Cloud Web Security portal.
To stop the endpoint, navigate to the endpoint installation folder and run this command:
wepsvc -stop -password <password> wspxy
replacing <password> with the anti-tampering password.
For Mac operating system users
Getting Started Guide | Cloud Web Security Solutions
To deploy Web Endpoint manually on a single machine, follow these steps:
1. Under Mac Endpoint Client, click on the version number to download the endpoint zip file.
2. When you download the endpoint, it should include the endpoint.pkg file along with a file called HWSConfig.xml, which is specific to your account. This file needs to be in the same directory as the .pkg file for the endpoint to successfully install.
Note that if you wish to use the endpoint over port 80 for proxying and PAC file retrieval, you need to do the following before installing the endpoint:
Ask your endpoint support representative to add the “Send HWS endpoint to port 80” template to your account. You can add this template to specific policies or globally.
Change the HWSConfig line from the following:
<PACFile URL=“http://webdefence.global.blackspider.com:8082/proxy.pac” />
To this:
<PACFile URL=“http://pac.webdefence.global.blackspider.com/proxy.pac” />
By applying this template, you will also move to port 80 any endpoints that are already installed.
ImportantIf you uninstall the endpoint, be sure to restart your operating system or your Web browsing experience may be affected.

Setting Up End-User Authentication
44 Cloud Security
3. Double-click the endpoint package to open an introductory screen for the installer. Click Continue for step-by-step instructions on the installation process.
4. When you reach the “Standard install on Macintosh HD” screen, click Install to begin the installation process.
You must install the endpoint on the local hard disk. You can change the installation location on this screen by clicking Change Install Location ...
5. Enter a user name and password for a user with administrator rights to install the software.
If the installation process fails, check that the HWSConfig.xml file is present and is in the correct format if you have edited it.
6. A confirmation screen informs you if the installation is successful. Click Close.
7. After installation, go to System Preferences > Other.
8. Click the icon for the endpoint program.
This brings you to a page where you can see available components for the version you have installed. You can also do the following:
Save Debug Logs to Desktop
Uninstall Endpoint.
Save Debug Logs to Desktop allows your endpoint support team to quickly access all troubleshooting logs in one place. Clicking it creates an archive file on the Mac desktop beginning with ClientInfo*.zip. If you need to open a support ticket about the endpoint, include this zip file with your request.
Identifying Mac end users of endpoint
When a Mac user is logged into an active directory-based domain, Web Endpoint identifies users in the same way that it does for Windows operating system users. For Mac users not logged into a domain, however, the endpoint formats the user details in Cloud Web Security as mac.local.[local_username]@[local_address].
For example, if you are logged in as “Joe Bloggs,” it might appear as [email protected].
To search for all locally logged-on Mac users, do the following:
1. Go to Web Security > Account Settings > End Users.
2. In the Name field, enter “mac.local*”
3. Click Search.
This brings up a list of all Mac users that are logged on locally.
Changing the policy of a Mac end user
To change the policy of a Mac user, do the following:
1. After searching for all locally logged-on users (see Identifying Mac end users of endpoint, page 44), in the Please select an action ... drop-down menu, select Change Web policy.
2. Choose the policy that you want to move the selected Mac user to.

Getting Started Guide 45
Setting Up End-User Authentication
3. Select each of the displayed Mac users you want to move and click the Go button.
The new policy is applied to these users.
Note that two Mac usernames will be common across all of your Mac users: mac.local.root and mac.local._softwareupdate. These users receive software updates from the internet. It is best practice to limit access by these users to just a few categories, such as Information Technology.
Uninstalling endpoint from the Mac
You can uninstall the endpoint by doing the following:
1. Go to System Preferences > Other, and click the icon for the endpoint software.
2. Click Uninstall Endpoint.
3. Enter the local administrator name and password.
4. Click OK. Then enter the endpoint anti-tampering password that you set in the Cloud Security portal.
5. Click OK to begin uninstalling the endpoint.
6. You will receive a confirmation message if the endpoint was successfully uninstalled
7. Click OK to finish the process.
You can also uninstall the endpoint through the command line:
1. After entering the Mac administrator password, run this command:
sudo wepsvc --uninstall
2. You will be asked for the service password, which is the default password unless the password was changed in the Cloud Security portal.
To stop the endpoint, do the following through the command line:
1. After entering the Mac administrator password, run this command:
sudo wepsvc --stop
2. You will be asked for the service password, which is the default password unless the password was changed in the Cloud Security portal.
Deploying the endpoint from the cloud service
Getting Started Guide | Cloud Web Security Solutions
You can deploy the endpoint on a per-policy basis to either the roaming users or all users in a policy directly from the cloud service.
When you select this option, on the Endpoint tab of a policy in the Cloud Security portal, end users are prompted to install the endpoint next time they open a browser. See Local users, page 46, and Roaming users, page 46. You can customize the text on the first page of the installer to make it clear that the installation is sanctioned by your organization.

Setting Up End-User Authentication
46 Cloud Security
The endpoint installer for Windows operating system users is available in English, French, German, Italian, Spanish, Dutch, Simplified Chinese, and Japanese. The language used for the installation is picked up from the browser settings.
Local users
For Windows operating system users, when the endpoint has been deployed to all users in a policy, an end user opening Internet Explorer or Firefox sees the following:
If the user clicks Install Secure Browsing, they are redirected to an assistance page that explains the installation process for their browser. They then click Continue with the installation to install the endpoint.
If the user clicks Ask me next time, Cloud Web Security falls back to alternative authentication or identification methods if enforced in the Access Control tab for the user’s policy. The endpoint installer will reappear next time the user opens a Web browser.
Roaming users
For Windows operating system users, when the endpoint is deployed to roaming users, the user must first authenticate using their basic authentication credentials, if they have them. If they do not already have credentials, they must self-register with Cloud Web Security (see End-user self registration, page 51).
Once they are registered and have logged in using basic authentication, the endpoint installer starts and the process is the same as for local users. If the user clicks Ask me next time, the user is presented with a manual authentication login page each time they access the Internet as a roaming user, followed by the endpoint installation page.

Getting Started Guide 47
Setting Up End-User Authentication
Updating the endpoint
Getting Started Guide | Cloud Web Security Solutions
For Windows operating system users, the Endpoint tab in Web policies includes an auto-update feature which can automatically deploy newer versions, without desktop administrators getting involved. If you select this option, it applies to all users in the policy who have installed the endpoint, regardless of whether it has been deployed via GPO or directly from the policy, assuming their browser supports deployment from the cloud service.
Mark Automatically update installations when a new version is released on the Endpoint tab if you want to ensure that endpoints on your client machines have the latest version when it is available.
The setting is disabled by default, as most organizations like to control the software on the desktop themselves and test newer versions before deploying them. You may want to enable the option once you have tested the new software so all users (including roaming users) get the latest endpoint installed. Once they have all updated the endpoint, you can then disable updates again.
Note that while an endpoint update is taking place (which can take several minutes), end users will be unable to browse, but will be shown a Web page stating that the endpoint is updating. This page will continue to retry the requested Web page every 10 seconds until the endpoint has finished updating, and will then display the requested page correctly if the user is allowed to access this URL, or alternatively will display a block page.
Mac operating system users
For Mac operating system users, the endpoint for the Mac can automatically deploy newer versions to browsers without involvement from desktop administrators.
Setting up Authentication Service
Getting Started Guide | Cloud Web Security Solutions
This service does not apply to ACE in the Cloud.
Websense Authentication Service is an on-network virtual machine that provides an interface between the Cloud Web Security proxy server and the Microsoft Active Directory or LDAP services used on-premises at your location. All communications between components are secured.
Authentication Service requires installation and configuration on a machine in your network, and setup in the Cloud Security portal. For more information, see the Authentication Service Installation and Configuration Guide.

Setting Up End-User Authentication
48 Cloud Security
Local users
The end user authenticates with the Active Directory/LDAP server within the network, leveraging existing network security. When a user from within the corporate network accesses an external URL, they are redirected to Authentication Service, which authenticates the user with your LDAP directory and generates a SAML assertion to the Cloud Web Security proxy. The user is then directed back to the proxy and the appropriate policy is applied.
During this process, the end user may briefly see an information page stating that they are being redirected for authentication.
All user authentications happen in-network, although users can also authenticate from outside the network via a VPN connection.
Users who have authenticated once do not then have to re-authenticate for subsequent Web browsing sessions, for a period of time defined by the Session Timeout option in the Cloud Security portal.
If either Authentication Service or your directory server are unavailable at the time of the authentication request, end users are authenticated based on the selected options on their policy’s Access Control tab.
Roaming users
When a roaming user accesses the Cloud Web Security proxy from outside their LAN, the user’s domain credentials are requested by the cloud proxy and passed to Authentication Service to be validated against your Active Directory/LDAP server. Once these credentials are verified with Authentication Service, the appropriate policy

Getting Started Guide 49
Setting Up End-User Authentication
is applied for that user. The roaming user does not have to re-authenticate from this IP address until the session times out, as defined by the Session Timeout option in the Cloud Security portal.
If either Authentication Service or your directory server are unavailable at the time of the authentication request, the roaming user is presented with either a secure form or a a basic authentication login page, depending on the options selected on the Access Control tab, with a link that enables the user to self-register if required.
Other end-user authentication options
Getting Started Guide | Cloud Web Security Solutions
End users can use the details entered during registration to authenticate with Cloud Web Security when working remotely or, if forced authentication is configured within the policy, whenever they access the Internet.
For secure form-based authentication, users are asked to authenticate the first time they open a browser. Users who have authenticated once do not then have to re-authenticate for subsequent Web browsing sessions, for a period of time defined by the Session Timeout option on the Access Control tab.

Setting Up End-User Authentication
50 Cloud Security
For basic authentication, users are asked to authenticate when opening a new browser instance. Once authenticated, they are not asked to authenticate again as long as the browser remains open.
End-user identification
Getting Started Guide | Cloud Web Security Solutions
If the policy dictates that NTLM is to be used to identify users unless they are working remotely, end users never have to login, but their surfing habits can be monitored and per-user configuration can be applied. In this case, the users are transparently identified.
End-user registration
Getting Started Guide | Cloud Web Security Solutions
If you do not deploy Web Endpoint or Authentication Service, the following options are available for end-user registration, and subsequent authentication or identification:
Directory synchronization
End-user self registration
Bulk registering end-users
NTLM transparent identification registration
User identification headers (from third-party proxies)
These options are also used as a fallback if either the endpoint or Authentication Service fails. For ACE in the Cloud, if the use of user identification headers (from third-party proxies) fails, NTLM transparent identification is used if defined in the policy.
Note that manual authentication is always used if none of the above methods is available.
Directory synchronization
Getting Started Guide | Cloud Web Security Solutions
Cloud Web Security includes a directory synchronization feature for organizations with an LDAP-compliant directory (such as Active Directory). If you have a directory like this and you use the synchronization feature, you do not need to register end
WarningIf you want to protect remote users, instruct them to log onto the service using their email address and the password with which they registered. NTLM transparent identification is not used when the browser has connected from a remote location.

Getting Started Guide 51
Setting Up End-User Authentication
users. When you synchronize your directory with the cloud service, users are automatically registered.
If directory synchronization includes NTLM IDs, you can enable NTLM identification on the Access Control tab; then your users can use the service immediately after synchronization. This is the easiest way to get users going with the service.
If you enable NTLM identification but for some reason do not synchronize NTLM IDs from your directory, your users are required to self-register and then associate their NTLM IDs with their user accounts on the service.
If you don’t want to use NTLM identification, you can configure the service to send invitations to all newly synchronized users. They can then complete the self-registration process and log in using email address (or name) and password.
Through the directory synchronization feature, you have the option to notify new users that they are protected by the cloud service when they surf the Web.
End-user self registration
Getting Started Guide | Cloud Web Security Solutions
One way to register users is to invite them to self-register. For those using secure form-based or manual authentication, there are 3 steps for individual end-user self registration:
1. You enter your email domains into the policy or account.
2. Users complete stage 1 registration (enter name and email address into a form).
3. Users complete stage 2 registration (create a password).
Users can access the stage 1 registration form at:
https://www.mailcontrol.com/enduser/reg/index.mhtml
or by clicking Register on the default pre-login welcome page or NTLM registration page that is presented when they are forced to identify or authenticate themselves.
Once users have entered their name and email address into the form, they receive an email from Cloud Web Security. This contains a link, that when clicked, takes them to a page where they can complete registration stage 2 by creating a password.
Bulk registering end-users
Getting Started Guide | Cloud Web Security Solutions
Bulk end-user registration simplifies the self-registration process by reducing it from 2 steps to 1. Rather than end users visiting the portal and entering their name and email address into a form, you upload all their names and addresses at once. End users automatically receive email notification once the bulk upload is finished. They can then click a link on the email they receive and create a password on the portal.

Setting Up End-User Authentication
52 Cloud Security
NTLM transparent identification registration
Getting Started Guide | Cloud Web Security Solutions
If you do not have an LDAP directory and your users are using NTLM transparent identification, an additional one-time step is required.
The first time these users send a request to Cloud Web Security, an NTLM registration form appears where they must enter their email address and password. Cloud Web Security associates these user credentials with the NTLM credentials automatically obtained from the browser. This association is saved and the user does not have to complete this step again.
User identification headers (from third-party proxies)
Getting Started Guide | Cloud Web Security Solutions
For ACE in the Cloud, you can use user identification headers (from third-party proxies) to remove the need for Cloud Security to identify individual users on the service by allowing the cloud proxy to read user headers sent by the downstream third-party proxy.
Note that you must have the proxy configured to route traffic to Cloud Security and generate X-Authenticated-User headers.
Authentication priority and overrides
Getting Started Guide | Cloud Web Security Solutions
You can select multiple authentication options for your end users on the Access Control tab of a policy. Note that Web Endpoint and the Authentication Service do not apply to ACE in the Cloud . The options are prioritized as follows:
Web Endpoint is always used if installed on an end user’s machine.
If Web Endpoint is not installed or fails, Authentication Service is used if:
NoteIf you are using directory synchronization and have synchronized NTLM IDs, users are not prompted for this information. Only NTLM users who self-registered, were invited to register, or were bulk registered have to perform this step.
NoteIf you are using user identification headers, you must have synchronized or manually created users in the portal, and you must have a proxy configured to route traffic to Cloud Security and generate X-Authenticated-User headers.

Getting Started Guide 53
Setting Up End-User Authentication
it has been deployed in your network, and
it has been selected on the Access Control tab for the end user’s policy.
If neither Web Endpoint nor Authentication Service is available, the end user is authenticated via either NTLM identification or basic authentication.
Secure form-based authentication is used if:
it has been selected on the Access Control tab, and
the user agent or application requesting authentication supports form-based authentication via an HTML page.
When this option is selected, applications that do not support form-based authentication use basic authentication.
Basic authentication is always used if you have chosen to enforce end-user authentication and none of the other options are either selected or available.
You can also enforce a specific authentication option for certain end users, overriding the authentication settings in the policy, by deploying a PAC file URL in the following format:
http://webdefence.global.blackspider.com:8082/proxy.pac?a=X
The a= parameter controls the authentication option, and X can be one of the following:
We recommend that you deploy PAC files with the a= parameter if you want some of your users in a policy to use Authentication Service, and others to use secure form-based authentication. This is because the two methods use different ports on the cloud service (see Configuring Your Firewall, page 15).
Parameter Description
a=n NTLM identification or basic authentication is used, depending on the policy settings and the browser or application capability.
a=t Authentication is performed using Authentication Service.
If the application or user agent cannot use Authentication Service, NTLM identification or basic authentication is used.
If a remote user cannot log on to Authentication Service, they are given the option to try again or log on using Websense credentials.
a=f Authentication is performed using secure form-based authentication.

Setting Up End-User Authentication
54 Cloud Security

7
Getting Started Guide 55
Working with Remote Users
Getting Started Guide | Cloud Web Security Solutions
Cloud Web Security can protect and monitor users even when they are not in their normal office location, such as when they are travelling. This section describes how Cloud Web Security handles users who are roaming from their network domains.
Cloud Web Security works on the basis of source IP. When the service receives a request, for example www.google.com, Cloud Web Security checks the source IP address of the requests and searches all the customer policies to find the policy with that source IP address. The source IP address is configured as a proxied connection on a policy’s Connections tab in the Cloud Security portal.
If users are roaming, they are most likely either at home, an Internet cafe, a hotel, or an airport. It is unlikely that the IP addresses of these places are configured in any of your proxied connections. In this situation, the roaming user encounters one of the following scenarios:
If the user has a laptop with Web Endpoint installed, the endpoint forces a connection to Cloud Web Security to send authentication and get the PAC file and policy settings appropriate for the user.*
If you have deployed Websense Authentication Service, the roaming user must enter their email address and network password whenever they connect to the cloud proxy. These credentials are verified with Authentication Service and the appropriate policy is applied for that session.*
If neither Web Endpoint nor Authentication Service is in use and the service cannot find the source IP address in any of the customer policies, then Cloud Web Security responds with a logon page stating, “You are connecting from an unrecognized location.” The user has to log on. When they do, Cloud Web Security searches for them in the policies. When it finds the user, the service knows who they are, which policy they are using, and how to filter the request (in other words, whether to allow or block the request).
In order to log on, the user has to be registered. Roaming users must go through the one-time registration process to be covered.
*Does not apply to ACE in the Cloud.
Some browsers exhibit inconsistent behavior in certain circumstances, such as when used in public Internet access points in hotels and airports. If the browser is configured to get the PAC file from the Cloud Web Security service, it is possible that it may not be able to immediately do so. In such situations, some browsers fall back to direct

Working with Remote Users
56 Cloud Security
connections bypassing Cloud Web Security. This can occur in the following situations:
1. The Web browser is launched and the laptop does not have Internet access because it does not have IP connectivity, nor is it connected to another device, such as a router, with IP connectivity. The browser cannot get the PAC file from the Cloud Web Security service. This typically occurs in home office environments.
2. The laptop has full network connectivity but is unable to connect to the Internet because it is located behind a firewall that is preventing this. This typically occurs when the user is connected to a third-party’s network – either corporate or public.
These scenarios are expanded upon in the next sections.
How to determine whether a browser is using Cloud Web Security
Getting Started Guide | Cloud Web Security Solutions
Websense offers a tool to help identify whether a browser has a proxied connection to Cloud Web Security. You can run the tool by clicking the Proxy query page link on the Web Security > Settings > Configuration info page.
The returned page looks like this if you are using the Cloud Web Security proxy:
If you are not using the Cloud Web Security proxy, it looks like this:
This proxy query page link has also been embedded in the Cloud Web Security remote user home page: http://home.webdefence.global.blackspider.com/. This home page is also used to help resolve other challenges associated with remote user connectivity. Websense recommends making this the home page for all remote users.

Getting Started Guide 57
Working with Remote Users
You can customize the remote user home page if required. The URL for the resulting account-specific page is available from your account in the Cloud Security portal. It looks like the figure above, but has an account-specific identifier appended to it.
Connecting from home
Getting Started Guide | Cloud Web Security Solutions
In some circumstances, home users might connect to a network, launch a browser, and find that they are not using Cloud Web Security.
This can happen for two main reasons:
The user launches the browser before the computer receives its IP configuration information.
The computer connects to a network that uses a router that does not have an IP address assigned. This can occur with some Internet connections that use dynamically assigned IP addresses such as some home broadband connections. If the connection hasn’t been used for some time, the router’s lease for its IP address may have expired.
In both of the above cases, the browser tries to get the PAC file and fails. If the computer then gets its IP address immediately after the failure to get the PAC file, the browser then accesses the Internet directly without retrying the PAC file.
Solutions
Deploy Web Endpoint
This feature does not apply to ACE in the Cloud.
Installing the endpoint, either for roaming users or all users, ensures all Web traffic is routed via Cloud Web Security. In the above scenario, Internet access will be denied until the endpoint can access Cloud Web Security to send user authentication and get the PAC file and policy settings appropriate for the user.
For more information, see Setting up Web Endpoint, page 38.
The benefit of this is that use of Cloud Web Security is enforced regardless of delays with network connectivity. The drawback is that Web Endpoint is only available for Windows operating systems.
Use a local copy of the PAC file
Download a copy of the PAC file, save it locally, and configure the browsers to use it. This ensures that the browsers can always access it regardless of network connectivity.
The benefits of this solution are that the users’ browsers are always able to access the PAC file regardless of any delay in the laptop receiving IP configuration, and no user intervention is required. The disadvantage is that you must download the PAC file to

Working with Remote Users
58 Cloud Security
the laptop every time an unproxied destination is added to your Cloud Web Security policy. It is unlikely for this to occur often and you can automate distribution of the PAC file.
Connecting from third-party corporate networks
Getting Started Guide | Cloud Web Security Solutions
When connecting from a third-party corporate network, users most likely are behind a firewall that may restrict Internet connectivity.
Why this may occur:
The laptop is connected to a network behind a firewall that does not allow connectivity using port 8082, and the browser is unable to get the standard PAC file from Cloud Web Security.
The laptop is connected to a network behind a firewall that does not allow connectivity using port 8081, and the browser is not able to communicate with the proxy.
Solution
Use the PAC file available via port 80
If port 8082 is locked down, a URL is available that enables the remote user to access the PAC file and cloud service over port 80. Remote users should also use the PAC file address for port 80 if requesting access from a network that has port 8081 locked down. Even if they can access the PAC file on port 8082, port 8081 is the standard required port to be able to use Cloud Web Security filtering.
This URL is available on the Web Security > Configuration info page, and a policy-specific version is displayed on the General tab of each policy.
Use the security solution on the corporate network
If port 8081 is locked down, it is likely that in this scenario, the organization to whose network the laptop is connected has its own security policy in place and wishes the user to be governed by it, requiring reconfiguration of the laptop. Alternatively some organizations have “public networks” that they provide visitors.

8
Getting Started Guide 59
Next StepsGetting Started Guide | Cloud Web Security Solutions
You should now be directing all Internet traffic through the Cloud Web Security service and be protected from Internet threats. Cloud Web Security works “out of the box,” but to get best use of its features, you probably want to tailor your policy. Specific areas of interest may be:
Creating additional administrators to delegate responsibilities
Setting the time zone for your policies
Customizing your notification pages
Adding internal or other trusted sites to your non-proxied destinations
Adjusting the website category dispositions to suit the nature of your business*
Creating custom categories to allow whitelisting or blacklisting of specific websites*
.Creating groups of users
Creating exceptions to override category dispositions for specified users, groups, and times of day.*
Configuration advice for all of these features and others can be found in the TRITON Cloud Security Help in the Technical Library.
*Does not apply to ACE in the Cloud.
the TRITON Cloud Security Help

Next Steps
60 Cloud Security

9
Getting Started Guide 61
Preparing Your End Users for Deployment
Getting Started Guide | Cloud Web Security Solutions
Before deploying Cloud Web Security, you should inform your users what the service does and how it impacts them. This may even be a legal requirement in some countries. Below is some sample text that you can use in an initial communication. You can also customize the registration email templates and pre-login welcome page, if you are going to use them.
Note that text in italics is instructional and not meant for inclusion in any communication.
Introduction to the Websense® TRITON™ Cloud Web Security service
Cloud Web Security is a Web security service that we have deployed to protect Internet users from computer viruses and other Web-based threats such as spyware. All of our Internet traffic is directed to the Websense data centers where these threats are filtered out and our Internet acceptable use policy is enforced.
Many Web sites exist that contain viruses or inappropriate content that might offend you. Often links to these sites are returned by search engines and you do not realize what you are accessing until you have clicked a link and it is too late. The Websense Cloud Web Security service allows us to block such sites so that you are not exposed to this content.
Internet acceptable use policy
We have published an Internet acceptable use policy that outlines your responsibilities as an individual when using company resources to access the Internet. Websense Cloud Web Security allows us to enforce this policy, report on Web usage and block inappropriate downloads. In the event that a Web site is blocked, you are presented with a Web page explaining why.
We recognize that different people need to access different types of Web sites to perform their jobs, so if sites that you are trying to access are being blocked, please email XXXX, include the Web site address and the reason why you need to access it. The full Web site address can be copied from your browser address bar.
Please click the link below to access our corporate Internet acceptable use policy.

Preparing Your End Users for Deployment
62 Cloud Security
http://link_to_corporate_acceptable_use_policy
Web Endpoint
Getting Started Guide | Cloud Web Security Solutions
Deploying Web Endpoint via the Web
To use the Cloud Web Security service, you will be asked to install a Secure Browsing application next time you open a browser. Follow the instructions in the installer. This application ensures your browsing is always protected by Cloud Web Security, whether inside or outside the office.
End-user registration
Getting Started Guide | Cloud Web Security Solutions
Registering to use Cloud Web Security
To use the Cloud Web Security service, you first need to complete a simple, one-time registration process:
If not using bulk registration
Click the link below. It takes you to the Websense end-user registration portal.https://www.mailcontrol.com/enduser/reg/index.mhtml
Enter your name and email address and click Submit.
When you receive an email from Websense, click the link it contains.
If using bulk registration
You will receive an email containing a link that you should click.
If using basic authentication:
This takes you to the Websense end-user registration portal. Enter the password that you want to use when you access the Web (twice), and click Submit.
Registration is now complete, and you are not required to register again. To check that you are correctly registered, shut down all browsers and open a new one. When you try and access a Web site, you are first asked to log in. Type the email address and password that you used to register with Cloud Web Security and click OK. You may
Note
You may have the option to display a notice to users that informs them of your organization’s acceptable use policy for internet use and asks them to agree to accept its terms before they can continue browsing. You can select how frequently you would like to display the notice. The choices are 1, 7, and 30 days. As with all notification pages, you can tailor the default to meet your needs. See Notification pages in the TRITON Cloud Security Help for Cloud Web Security.

Getting Started Guide 63
Preparing Your End Users for Deployment
want to check the box that invites you to save these login details to simplify future logins.
If using NTLM transparent identification without directory synchronization:
This takes you to the Websense end-user registration portal. Enter the password that you want to use when you access the Web (twice), and click Submit.
Now enter a URL, such as www.websense.com, into your browser address bar and you are presented with the final registration page.
Type the email address and password that you used to register with Cloud Web Security into the appropriate boxes.
If using basic authentication:
Logging in when you access the Web
You need to log in every time you open a new browser to access the Internet. If you leave your browser open, you are not required to log in again. If you need a second browser window, do not launch a new browser. In your existing one, click File > New Window. This opens a new browser session without you having to log in again.
For remote users who use Cloud Web Security with basic authentication when working remotely:
Accessing the Internet when you are not in the office
When you are working in the office, Websense Cloud Web Security is able to recognize that you work for COMPANY NAME and can protect you from Internet threats according to our policy. To ensure that you are still protected when you are not working from the office, when you access the Internet, you are asked to log in. You must use the email address and password that you entered during Cloud Web Security registration before you can continue.
If using user identification headers (from third-party proxies):
Go to the Access Control tab.
Under Authentication Settings, select Authenticate users on first access.
Select User identification headers (from third-party proxies).
You must have synchronized or manually created users in the portal, and you must have a proxy configured to route traffic to Cloud Security and generate X-Authenticated-User headers.

Preparing Your End Users for Deployment
64 Cloud Security


![Skaffold - storage.googleapis.com · [getting-started getting-started] Hello world! [getting-started getting-started] Hello world! [getting-started getting-started] Hello world! 5](https://img.dokumen.tips/doc/110x75/5ec939f2a76a033f091c5ac7/skaffold-getting-started-getting-started-hello-world-getting-started-getting-started.jpg)


