Embed Size (px)
Citation preview

0
Building Construction (CIV 216)
Group 10's Research
PAINTINGS (INTERIOR & EXTERIOR)
& WALLPAPERS
Supervision
Dr. Ahmed Mohamed Saleh
:Prepared by
Group 10
Ahmed Atef Mohamed
Amira Abdullah Yousef
Esraa Hamed
Alaa Ahmed
Aya Mohamed Ahmed
Samar Mohamed
Merna Ahmed Hassan
Hagar Ibrahim Abdullah
Level 2 – Civil Eng. Department

1
Content and Missions
Interior Paintings .............................................................................................. 1
General Definition and types (Amira Abdullah Yousef) ............................. 2
Choosing Paint Color (Ahmed Atef Mohamed) ....................................... 10
Surface Preparation and Tools (Aya Mohamed Ahmed) ....................... 14
Exterior Paintings ............................................................................................ 24
General Definition and Types (Samar Mohamed) ................................... 24
Properties and Paint ways (Esraa Hamed) ................................................ 28
Surface Preparation and tools (Alaa Ahmed) ......................................... 34
Wall Paper ....................................................................................................... 35
General Definition and Properties of wallpaper( Hagar Ebraheem) .... 35
Types , Hanging and removing of wallpaper (Merna Ahmad Hassan )
........................................................................................................................... 39

2
Paintings
Painting a room or your whole house, inside or out, is a popular home
improvement project. New paint can change the mood of a space and
value of your property. increase the
A Brief History of House Painting
One can just imagine the
caveman agonizing over the
choice between “fire soot” grey
and “bison blood” burgundy for
his cave decor. Evidence shows
that mankind has decorated his
far back as living space as
40,000 years ago using what
could be called paint. The
rom material would be made f
natural ingredients too. -all
Prehistoric paint was made -
from colored earth, soot, and organic materials mixed with animal
Recently archeologists discovered a site in South blood and fatty oils.
brown -Africa that indicated that men (or women) used a yellowish
clayey soil based coating which may have been used like paint.
Caveman paints

3
Fast forward to Egypt only about 2,000 years ago. Brightly colored
walls in Dendera have stood the test of time and still look as vivid today
as when they were painted! We don’t know of any modern day paints
that offer that kind of guarantee. The Egyptians created six colors by
mixing oil or fat with lead, earth, animal blood, ground glass or
semiprecious stones. Their palate included white, red, yellow, green,
black and blue. Intricate and elaborate paintings that illustrated their
culture and history were painted along with furnishings and living spaces
of the pharaohs and the ruling classes. Some of the best painting was
reserved for the Egyptian tombs as their belief in the afterlife called for.
House painting became
something to be avoided if you were
a part of the early American
colonies. The Pilgrims considered
painting your house to be a display
of immodesty, wealth and vanity.
The practice was consider immoral
by many and in 1630 a preacher that
decorated his Charlestown home
interior with paint was criminally
charged with sacrilege.
The demand for interior painting
continued despite the puritan objections. Oil and water became the
base that would be mixed with a wide variety of materials including
lead, ground shells, iron or copper oxide, coffee, rice, eggs, fruits, berries
and other vegetation to create many types and colors of paint. Paint
producers cooked up their product despite the fact that it was illegal.
Many homes were elaborately decorated with lifelike murals of sky,
stone and landscape features painted on the walls, paneling, cornices
and ceilings.

4
The painting tools used during these times are very similar to todays
brushes employing wooden handles with various types of hair attached.
Modern brushes use synthetic fibers but the object was the same, to
apply the paint to the surface with the appropriate thickness and stroke
in order to ease the process and achieve the best finished result. Many
of the paints were quite thick and not at all like the easy to apply paint
that we are accustomed to.
In 1718 Marshall Smith invented
a “Machine for the Grinding of
Colors” which sparked a race of
innovation to create the best ways
to grind pigment materials
effectively and actually start
manufacturing paint in a paint mill.
By the mid 1800’s linseed oil began to
be used as a less expensive binding
agent that actually protected wood
that was painted.
In 1866 the first company to
produce ready-to-use paint was
formed, Sherwin-Williams. Harry Sherwin, Alanson Osborn and Edward
Williams formed Sherwin, Williams, & Co. in Cleveland, Ohio. Henry
Sherwin later developed a tin can that consumers could reseal. In 1883,
a competition that continues today started when Benjamin Moore
began operations. The company put much emphasis on the chemistry
to improve the color mixing and production throughout the twentieth
century and were the first to design the computer based color-matching
system that we all are accustomed to back in 1982.

5
Interior and Exterior Paintings
Interior paint is the name given to paint used for walls, ceilings and trim
within a house.
Exterior paint is the name for paint used outside the house on walls—
whether wood, brick, or vinyl or aluminum siding—and trim.
Interior and exterior paint are formulated differently because they
have different conditions and situations. Interior paint is made to be
easy-to-clean and touch up when necessary. Exterior paint is prepared
to be fade- and mildew-resistant and flexible when the surface expands
and contracts due to climate changes. The two types of paint are
specially formulated for their purposes, and are not interchangeable.
Difference between Exterior and Interior Painting

6
Interior Painting
Types of interior paintings
There are several different types of interior wall paints, and the more
you know about appropriate paintable surfaces and the effects that
paint can achieve, the easier it is to make the right choice. It’s also
feasible to mix different types of interior wall paint within a room, but you
should know what you’re doing.
1. Matte Paint
Matte color is the most
common of interior wall paints.
There’s no shine or sheen to the
finish, making it ideal for walls and
ceilings where you don't want any
visual distractions. It’s easy to
apply, although it can often take
more than a single coat to create
a good solid color. Matte paint
can be applied with a brush or
roller and works well covering
imperfections on your walls. This
makes it ideal for older houses.
On the downside, matte paint is
easily marked. Although some marks can be removed with a damp
cloth, matte paint needs regular retouching.
2. Matte Enamel
Matte enamel is very much like
matte paint, but tends to be far
more durable. It’s much easier to
clean and rarely needs retouching,
giving it a great advantage,
especially if you have young
children. It is also excellent for the
kitchen, where you’ll regularly need
to wipe the walls. The visual effect is
very similar to matte paint and it
can be applied in the same way.

7
3. Satin
Satin finish is one of the types
of interior wall paint that many
people know of, but few really
understand. The finish is
somewhere between matte and
gloss and produces a low, soft
sheen. This makes it ideal for areas
where you’ll need to clean the
walls regularly; however, you
shouldn’t use a satin finish where
you have a wall with
imperfections because it will
make them more apparent.
4. Eggshell
An eggshell finish has a shine that’s
extremely subtle but without the same
smoothness as a satin finish. Thus, it
doesn’t highlight imperfections quite
as much, making it a much more
suitable interior wall paint. It’s easy to
apply and can often cover well with a
single coat, making it a better choice
for many people.
Tip: Eggshell and semi-gloss paint both usually cover more surface area
with less paint than matte paint.
8
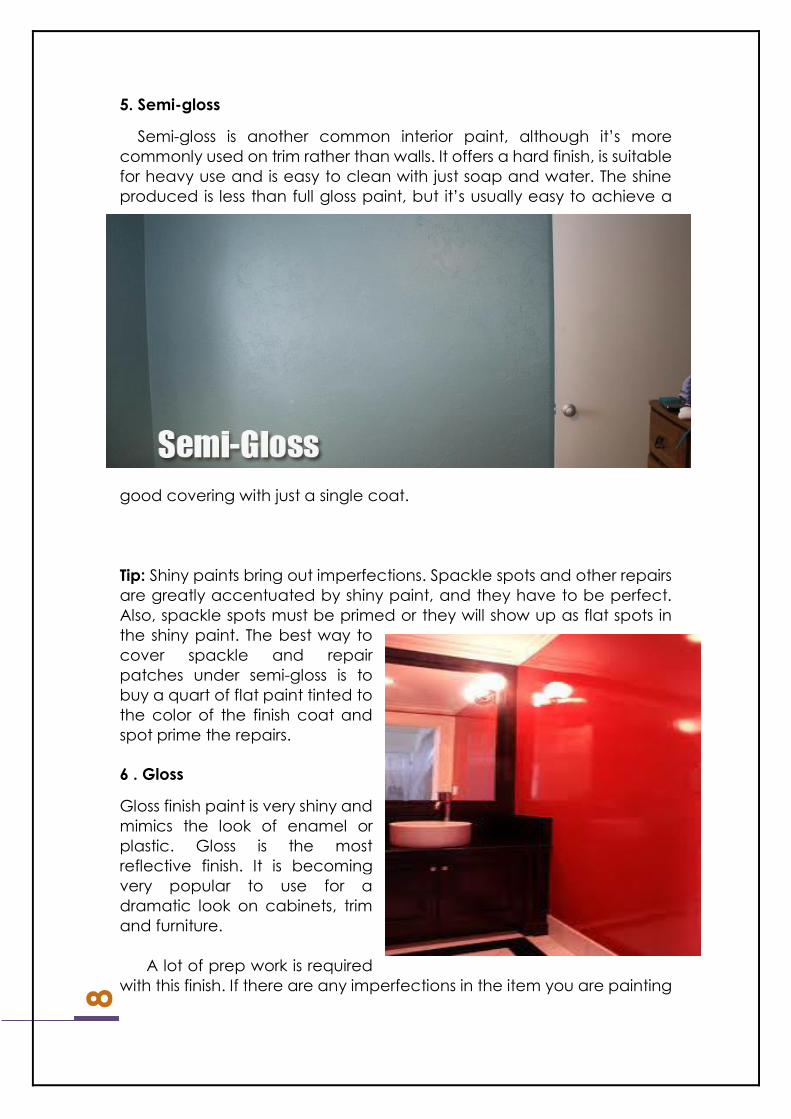
5. Semi-gloss
Semi-gloss is another common interior paint, although it’s more
commonly used on trim rather than walls. It offers a hard finish, is suitable
for heavy use and is easy to clean with just soap and water. The shine
produced is less than full gloss paint, but it’s usually easy to achieve a
good covering with just a single coat.
Tip: Shiny paints bring out imperfections. Spackle spots and other repairs
are greatly accentuated by shiny paint, and they have to be perfect.
Also, spackle spots must be primed or they will show up as flat spots in
the shiny paint. The best way to
cover spackle and repair
patches under semi-gloss is to
buy a quart of flat paint tinted to
the color of the finish coat and
spot prime the repairs.
6 . Gloss
Gloss finish paint is very shiny and
mimics the look of enamel or
plastic. Gloss is the most
reflective finish. It is becoming
very popular to use for a
dramatic look on cabinets, trim
and furniture.
A lot of prep work is required
with this finish. If there are any imperfections in the item you are painting

9
the finish will enhance the problem. That said, gloss is very durable and
will hold up to many cleanings.
Choosing paint colour
Just as with exterior painting, picking the
right color scheme for interior spaces requires
a certain amount of imagination and
creativity. Simply thinking about what color
would look best on a wall isn’t enough to
ensure a positive paint job. Virtually any color
will look good on a surface as long as it is
applied correctly, but choosing the right color
involves looking at an interior space with a
very critical eye.
The floor and ceiling surfaces cannot be
ignored, as they are crucial elements of color
combination. Most ceilings are traditionally
painted white for a number of reasons
— particularly for their ability to keep rooms
looking bright and to avoid taking attention
away from the walls. Lighter ceiling colors can
also help to make a room appear larger and
more open.
Deviating from white ceilings is a great
way to change the overall appearance of a
house, but since darkening a ceiling can steal
some of the light and visually shorten the
height of the room. Ceiling colors should offset
and complement the walls and the floor
instead of calling attention above.
The easiest way to choose a color scheme is
to look through color catalogues or at paint
samples. Most hardware stores and paint depots keep catalogs handy for customers
to take home. Painters should take their time looking at the spaces in these catalogs
and comparing colors to their existing floors, carpets, curtains, blinds, furniture and
decorations. It’s important to look at fabric and upholstery first and then look at the

10
other aspects to see if they coordinate with your color choices. Consider the prominent
color in this coordination for the walls.
Each color has certain properties and psychological effects that can influence the
mood of the interior occupants.
Some of the most popular colors used for interior painting include:
1. Black and gray
black is usually associated with somberness and malignity, it can also represent
sophistication, reverence and physical attraction. Interior designers have
traditionally shunned black paint, but homeowners increasingly choose it for trim
and accents that are meant to be dramatic and striking. Black is the perfect
match and contrast for white, and the amount used can range from trim areas to
an accent wall. With the right furniture and décor, black is ideal for living rooms,
bedrooms and ultra-modern kitchens.
Gray is a timeless color, but it could also be considered drab if not accessorized
with bold colors. Anyone who has grown tired of looking at white paint on walls for
years should consider gray tones. Gray paint is cooler than its white counterpart
11
and more versatile, as it manages to blend well with most decorations. It is an ideal
color for all interior spaces and provides the perfect backdrop for color bursts.
2. Brown
Brown denotes a personality that is earthy, realistic and trustworthy. This classic
earth tone can be applied to living and work areas alike, as it evokes a feeling of
being well-rounded and connected with nature. Terracotta and dark mustard
brown combinations are perfect for Latin American and Santa Fe-style décor.
Brown hues are great for interior spaces that get a lot of sunlight. Lighter shades of
brown, such as beige and taupe, are neutral colors that particularly work well in
homes that are being shown to potential buyers.
3. Green:
The psychological effect of green is largely dependent on the tone or hue. Some
green hues create a positive, natural atmosphere. However, darker hues or pale
olive green can seem militaristic or ill. Multiple shades of green can serve different
purposes and set different moods. Maritime greens are ideal for studios and offices
as they inspire concentration, while cool forest greens can be used in bedrooms
and bathrooms.
4. Red and pink:
red is the color of passion and can create drama in any space. In the past,
interior designers mostly chose red as an accent color, but it is now increasingly
used in stylish living rooms and bedrooms. Flat red is modern and inviting, cherry
red is youthful and darker red conjures up feelings of warmth and loyalty.
Pink is also a soft romantic color, but it can also denote innocence. This is the
traditional color for baby girls, but it's also used in women’s spaces, such as in
makeup rooms, bathrooms and bedrooms. Hot pink must be used with care in
spaces that get a lot of sunlight, as it can make the room feel dark.
5. Yellow:
Yellow is generally a happy color that increases confidence. Similar to gray,
yellow can be very versatile. Pale yellows used in sunlit rooms with flowery
decorations are very inviting, especially in the morning time. Darker yellows can
add warmth to a room even in the winter time. Bright yellows help reduce the
amount of illumination needed in a space and are ideal for any room in the house.

12
6. Orange:
Emotionally speaking, orange is a
very stimulating and happy color.
Pastel oranges are irresistible and
great for interior spaces where skin is
more likely to be exposed, such as
bedrooms and bathrooms. Bright
orange is the antithesis of gray and
can be lively, while darker and burnt
orange tones have a similar effect as
the brown hues and go along great
with southwestern décor.
7. Blue:
Blue is the color of calmness, productivity and masculine sophistication. Baby
blue will always be a popular color choice for young boys, while different hues of
cyan can be used to great effects in children's bathrooms to create an
underwater mood with the right decoration. When applied to a ceiling, a light blue
can conjure images of a cloudless sky and increase the sense of space. Pale and
medium blues can be painted around the house to achieve a cooling effect.
Colour and mood

13
Some important tips for picking paint colour:-
Think about your mood.
Pay attention to lighting.
Add depth with decorative finishes.
Follow the colour wheel.
Play up monochromatic shcemes.
Choose different paint finishes.
Never rely on paint chips alone.
Choose three or more different paint shades
Think about the visual effect you want
Consider your home's architectural style and era.

14
Surface preparation
Improperly prepared surfaces can result in reduced
coatingintegrity and service life. Up to 80% of all coatings failures can be
ted to inadequate surface preparation, which affects directly attribu
coating adhesion
To ensure adhesion of the coating to the substrate and prolong the
service life of the coating system, select and implement the proper
eparation depends on surface preparation. The method of surface pr
the substrate, the environment, and the expected life of the coating
system.
-Precautious:
paint or other contamination to ensure good
adhesion
.
after a rain, during foggy weather, when rain is
predicted, or when the temperature is below 50°F -
unless the coating indicates it can be used down to
35°F. Most coatings are now formulated for low
temperature use.

15
-Preparation steps by surface type:
Aluminum
Remove all oil, grease, dirt, oxide
and other foreign material by
cleaning per SSPC-SP1 Solvent
Cleaning.
Brick
Brick must be free of dirt, loose and
excess mortar, and foreign
material.
All brick should be allowed to
weather for at least one year
followed by wire brushing to
remove efflorescence.
Treat the bare brick with one coat
of Loxon Conditioner.
Block (Cinder and Concrete)
Remove all loose mortar and foreign
material from block. Surface must be free of
laitance, concrete dust, dirt, form release
agents, moisture curing membranes, loose
cement, and hardeners.
Concrete and mortar must be cured at
least 30 days at 75°F.
The pH of the surface should be between 6 and 9.
On tilt-up and poured-in-place concrete, commercial detergents
and abrasive blasting may be necessary to prepare the surface.
Fill bug holes, air pockets, and other voids with a cement patching
compound.
16
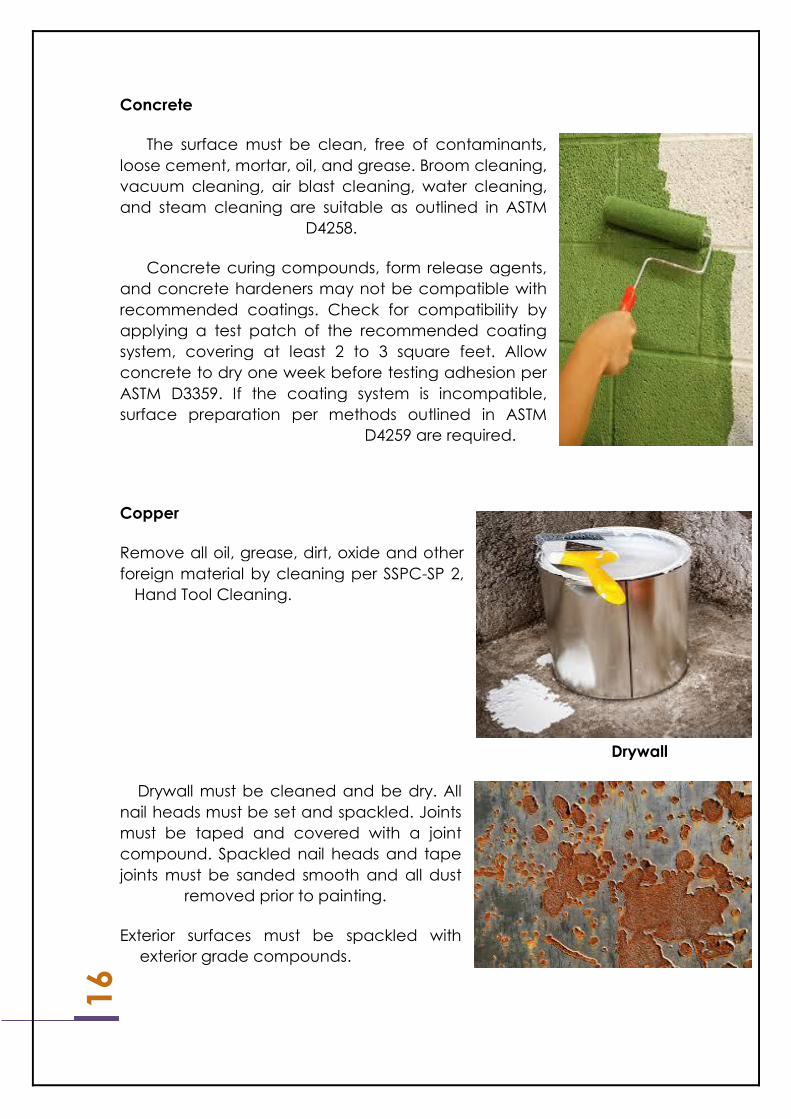
Concrete
The surface must be clean, free of contaminants,
loose cement, mortar, oil, and grease. Broom cleaning,
vacuum cleaning, air blast cleaning, water cleaning,
and steam cleaning are suitable as outlined in ASTM
D4258.
Concrete curing compounds, form release agents,
and concrete hardeners may not be compatible with
recommended coatings. Check for compatibility by
applying a test patch of the recommended coating
system, covering at least 2 to 3 square feet. Allow
concrete to dry one week before testing adhesion per
ASTM D3359. If the coating system is incompatible,
surface preparation per methods outlined in ASTM
D4259 are required.
Copper
Remove all oil, grease, dirt, oxide and other
foreign material by cleaning per SSPC-SP 2,
Hand Tool Cleaning.
Drywall
Drywall must be cleaned and be dry. All
nail heads must be set and spackled. Joints
must be taped and covered with a joint
compound. Spackled nail heads and tape
joints must be sanded smooth and all dust
removed prior to painting.
Exterior surfaces must be spackled with
exterior grade compounds.
17
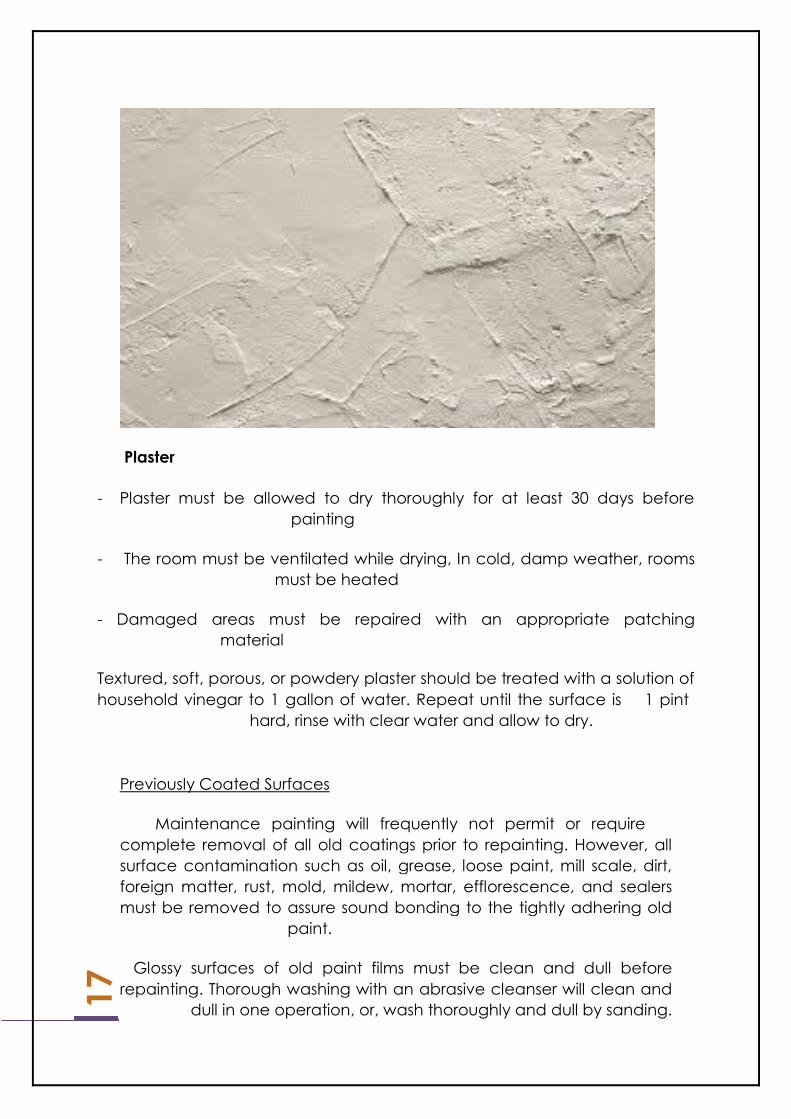
Plaster
- Plaster must be allowed to dry thoroughly for at least 30 days before
painting
- The room must be ventilated while drying, In cold, damp weather, rooms
must be heated
- Damaged areas must be repaired with an appropriate patching
material
Textured, soft, porous, or powdery plaster should be treated with a solution of
1 pint household vinegar to 1 gallon of water. Repeat until the surface is
hard, rinse with clear water and allow to dry.
oated SurfacesPreviously C
Maintenance painting will frequently not permit or require
complete removal of all old coatings prior to repainting. However, all
surface contamination such as oil, grease, loose paint, mill scale, dirt,
foreign matter, rust, mold, mildew, mortar, efflorescence, and sealers
must be removed to assure sound bonding to the tightly adhering old
paint.
Glossy surfaces of old paint films must be clean and dull before
repainting. Thorough washing with an abrasive cleanser will clean and
dull in one operation, or, wash thoroughly and dull by sanding.

18
Recognize that any surface preparation short of total removal of the
old coating may compromise the service length of the system. Check
for compatibility by applying a test patch of the recommended coating
system, covering at least 2 to 3 square feet. Allow surface to dry one
week before testing adhesion per ASTM D3359. If the coating system is
incompatible, complete removal is required (per ASTM 4259, see
Concrete, S-W 5, "Blast Cleaning" above).
Steel - Structural Plate
Steel should be cleaned by
one or more of the nine surface
preparations described below.
These methods were originally
established by the Steel Structures
Council in 1952, and are used
throughout the world for
describing methods for cleaning
structural steel. Visual standards
are available through the Steel
Structures Painting
Council
Steel - Solvent Cleaning
Solvent cleaning is a method for removing all visible oil,
grease, soil, drawing and cutting compounds, and
other soluble contaminants. Solvent cleaning does not
remove rust or mill
scale.
-Change rags and cleaning solution frequently so that
deposits of oil and grease are not spread over
additional areas in the cleaning process. Be sure to
allow adequate ventilation

19
Steel hand tool cleaning
Hand Tool Cleaning removes all loose mill
scale, loose rust, and other detrimental foreign
matter. It is not intended that adherent mill
scale, rust, and paint be removed by this
process.
Wood interior
All finishing lumber and flooring must be
stored in dry, warm rooms to prevent
absorption of moisture, shrinkage, and
roughening of the wood.
All surfaces must be sanded smooth, with
the grain, never across it.
Surface blemishes must be corrected and the
area cleaned of dust before coating.
20
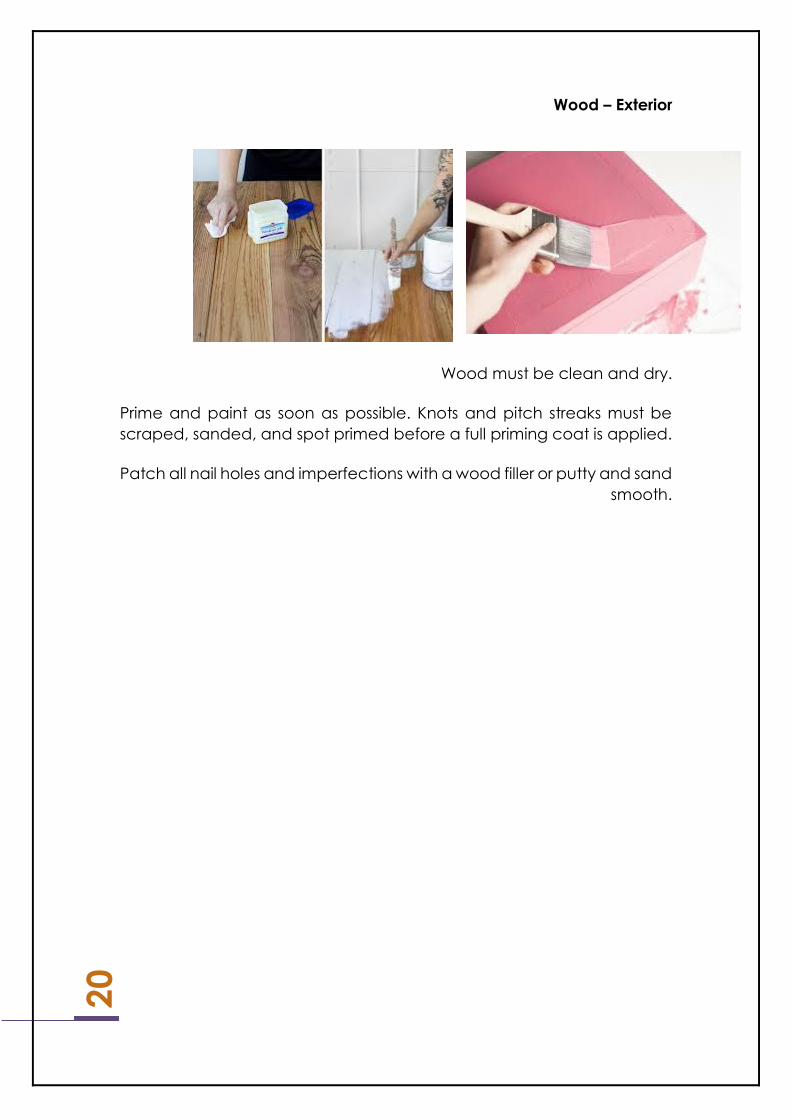
Wood – Exterior
Wood must be clean and dry.
Prime and paint as soon as possible. Knots and pitch streaks must be
scraped, sanded, and spot primed before a full priming coat is applied.
Patch all nail holes and imperfections with a wood filler or putty and sand
smooth.

21
Painting Tools & Supplies
BRUSHES
CHOOSING A HIGH-QUALITY
BRUSH IN THE RIGHT SIZE AND
SHAPE CAN SAVE YOU A LOT OF
TIME LATER. WE CAN HELP YOU
CHOOSE WHICH BRUSH WILL
WORK FOR YOUR PAINTING
PROJECT.
oller Covers, Frames & R
Crafted from a blend of natural
and synthetic fibers, Sherwin-
Williams roller covers eliminate
the splotchy effect left behind by
many other roller cover fibers.
APE & MASKINGT
DROP CLOTHS, PAINTER'S TAPE,
AND MASKING SUPPLIES. WE'VE
GOT ALL THE EXTRAS YOU NEED
TO ENSURE STRAIGHT EDGES AND
PROTECTED SURFACES.
andpaper & AbrasivesC
From small to large sanding jobs,
we carry a variety of sanding
tools, sandpaper sheets, sanding
sponges and sanding screens to
fit your needs.

22
SANDING TOOLS
WHETHER YOU ARE PAINTING A
BARE SURFACE, STRIPPING PAINT
OR BETWEEN COATS, WE HAVE
THE SANDING TOOLS TO GET THE
PROJECT DONE QUICKLY AND
EASILY.
atching & RepairP
Whether you are painting,
staining, or wallpapering, we
have the tapes, patching
compounds, fillers and tools to
give your patching and repair
projects a smooth finish .
LEANING SUPPLIESC
FROM SURFACE PREPARATION TO
CLEANUP, WE CARRY THE
CLEANERS AND CLEANING
SUPPLIES FOR ALL OF YOUR
PAINTING PROJECTS.
Ladders
Extend your reach safely. We
stock Werner ladders in a variety
of lengths and duty ratings to get
your painting needs.
23
OLVENTS & REMOVERSS
REMOVER PRODUCTS
Drywall Compounds & Tools
Browse all of the drywall tools and
joint compounds that you need
for a successful project.
PAINTER'S TOOLS
WHETHER YOU ARE PAINTING,
STAINING OR WALLPAPERING, WE
CARRY THE TOOLS TO GET THE JOB
DONE RIGHT.

24
Exterior Painting
Choosing exterior paints can be complicated because of the wide range of
surfaces. These surfaces include clapboard and aluminum siding, wood
shingles, tar
shingles, cedar
shakes, brick,
concrete block,
stucco, and, of
course, old paint.
On many older
homes, you'll find
a combination of
these surfaces. Fortunately, there is an exterior paint for every type of surface,
and some paints are suitable for more than one surface.
.Types of Exterior Paining
First things first about paint: There are two basic types of paint to choose from,
water-based and oil-based.
Latex and acrylic paints are water-based, while alkyd paints are oil-based, and
both interior paints and exterior paints come in both types.
When it comes to exterior paint, oil-based is better at resisting dirt, but more
commonly water-based latex paint is used
because it tends to be at least as or more durable
than oil-based.
These outdoor-friendly paints are better suited to
handle humidity, temperature changes and other
outdoor factors, and they don't take as long to
dry as alkyds. Paints formulated for outdoor use
contain additives that give them longevity in the
elements -- including resistance to cracking and
dirt resistance, as well as protection from the
damage ultraviolet (UV) rays cause. Many also
have mildewcide as an additive.
Top quality oil-based paints have excellent

25
adhesion characteristics, which means they get a tight grip on the surface
being painted. And good adhesion is essential for a durable paint
job. However, oil-based coatings tend to oxidize and get brittle over time,
which can lead to cracking problems in exterior applications, and yellowing
and chipping problems in interior applications.
but if you decide to use oil-based coatings, be aware that they are more
difficult to apply and clean up after than latex
paints. They also take longer to dry - sometimes,
24 hours or more - so you cannot apply a
second coat as quickly as you can with latex
paint.
Oil-based paints can be used for certain
applications within the home - for example, on
interior trim. But keep in mind that these paints
have noticeably more odor than latex paints.
In order to clean oil-based paint you need to use
harsh chemicals like paint thinner while just a
small amount of detergent and water will
allow you to clean water-
based.
Water-based paints are also not as
durable as oil-based, and aren’t as shiny
Types of oil and water baesd
1. Enamel
Oil-based paint is given the
term "enamel" due to its hardness and
durability. These paints will also include
gloss and semi-gloss finishes and they are
mostly used around windows, doors, and
trim. But Over time this paint can discolor
2. Latex
. Water-based latex paints have always been popular with do-it-yourselfers and
professional painters because of their easy cleanup with plain soap and
water. But today's quality latex paints offer significant performance
advantages as well. compared to oil-based paints, top quality exterior latex
paints have greater durability in the form of better color retention and chalk

26
resistance, so they continue to look good for years. Since they do not tend to
get brittle as oil-based paints do, they have better resistance to
cracking. Latex paints also dry much faster than oil-based paints (typically in
one to six hours), which allows you to quickly apply a second coat.
Quality latex paints that have "100% acrylic" binders are especially durable and
highly flexible. They tend to adhere extremely well to a variety of exterior
surfaces, which means they have greater resistance to troublesome paint
failures like blistering, flaking and peeling, compared with other latex paints
3. Acrylic
This is just another term for water-based house paint, but the binding ingredient
in the paint is acrylic. Acrylic paint can be found in several varieties including
acrylic latex, acrylic enamel, or acrylic latex enamel. Acrylic enamel house
paint is considered as such due to its durability;
it is not a mixture of oil and water-based paint. Always consult the labels of the
paint as not all paint actually contains latex or acrylic despite the name. Also,
remember that the higher the shine, the more imperfections the paint will show.
4. Specialty Paints
Each paint type can have additives included in it. These paints can include
anti-mold and anti-mildew properties as well as fire retardants. Some also have
anti-condensation additives, making them popular in locations like the kitchen.
Oil Based Latex
Durability Excellent adhesion;
better adhesion than
latex on heavily
chalked surfaces
Excellent adhesion to
most substrates; better
elasticity than oil.
Color Retention Not as good as latex;
more likely to chalk and
fade in sunny exposure
Superior resistance to
chalking and fading,
especially when
exposed to bright sun.
Ease of Application More difficult to apply
due to greater "drag,"
Goes on smoothly and
evenly, with less brush
drag.

27
Mildew Resistance Vegetable oil base can
provide nutrients for
mildew growth;so most
products contain
mildewcide to minimize
growth
Less inherent tendency
to grow mildew;
mildewcide additives
discourage mildew
growth, help maintain
fresh appearance.
Versatility Can be used on most
materials, but for new
concrete, stucco and
other masonry, a sealer
or pre-treatment is
required; should not be
applied directly to
galvanized metal.
Can be used on wood,
concrete, stucco, brick,
galvanized metal, vinyl
siding, aluminum siding,
etc
Odor Noticeably more odor
than latex.
Very little odor.
Clean Up Turpentine, paint
thinner or other solvent.
Simple water cleanup.
Drying Time Eight to 24 hours. One to six hours,
permitting quick
recoating.
28
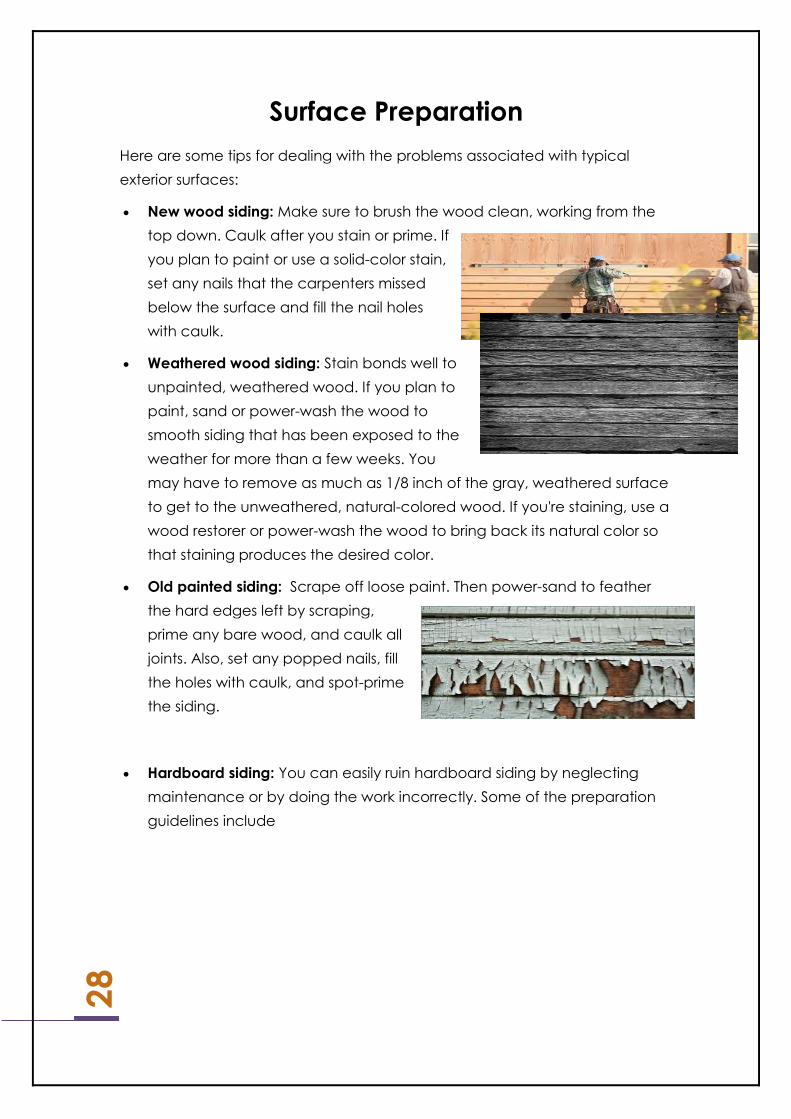
Surface Preparation
Here are some tips for dealing with the problems associated with typical
exterior surfaces:
New wood siding: Make sure to brush the wood clean, working from the
top down. Caulk after you stain or prime. If
you plan to paint or use a solid-color stain,
set any nails that the carpenters missed
below the surface and fill the nail holes
with caulk.
Weathered wood siding: Stain bonds well to
unpainted, weathered wood. If you plan to
paint, sand or power-wash the wood to
smooth siding that has been exposed to the
weather for more than a few weeks. You
may have to remove as much as 1/8 inch of the gray, weathered surface
to get to the unweathered, natural-colored wood. If you're staining, use a
wood restorer or power-wash the wood to bring back its natural color so
that staining produces the desired color.
Old painted siding: Scrape off loose paint. Then power-sand to feather
the hard edges left by scraping,
prime any bare wood, and caulk all
joints. Also, set any popped nails, fill
the holes with caulk, and spot-prime
the siding.
Hardboard siding: You can easily ruin hardboard siding by neglecting
maintenance or by doing the work incorrectly. Some of the preparation
guidelines include

29
Use a 300-degree steam cleaner (a
rental item) or scrub the siding with a
very hot detergent solution.
Lightly sand glossy finishes to remove the
sheen (called scuff sanding), but sand,
scrape, or cut into the surface only as
much as is necessary to correct
problems. Replace or fill badly damaged
areas.
Don't set nails or you'll break the factory-applied protective coating.
New cedar and redwood: New cedar and
redwood bleed tannin. Wash them with a
general cleaning detergent and water
solution before priming them with a stain-
blocking alkyd primer.
Concrete and masonry: Unfinished, fully
cured concrete can be finished with concrete stain or paint after being
cleaned with a power-washer.
Although you can scrape or sand small
areas of peeling paint off concrete or
masonry surfaces, doing so dulls
scrapers and chews up sandpaper
quickly. Consider sandblasting or
stripping with a chemical remover.
Clean out cracks with a wet-dry vacuum or blow out dust with
compressed air before caulking the cracks. Do the same when using a
concrete patch, and mist the surface before applying the patch.
Stucco: In many cases, a masonry cleaner is all you need to renew a
stucco surface. Hose off the loose dirt and, while the surface is still wet,
apply the cleaner to lift the remaining dirt.
Then scrub with a stiff brush. If the stucco
still looks dingy, consider having a stucco
contractor redash the finish.
Power-washing stucco, especially old
stucco, is risky. The force of the water can blast the finish off, turning a
simple cleaning job into a major repair.

30
Glossy finishes: Paint doesn't bond well to glossy surfaces. Sanding is a
time-consuming and especially difficult on detailed areas of trim,
windows, and doors. Brush-on deglosser, available for both oil- and latex-
based paints, is an easier way to dull the surface.
Iron railings and siding: Clean the metal to remove dirt, grime, and oil
before priming with a rust-inhibiting primer. Follow the paint
manufacturer's cleaning guidelines. Generally, you can use a 50-50
vinegar and water solution for all metal except galvanized steel. Clean
new galvanized metal with mineral spirits before priming with special
galvanized metal primer.
Rust often occurs under the paint on these surfaces, causing stains and a
bumpy finish. Eventually, the corrosion flakes off with the finish. You can
eliminate rust by sanding, grinding, or sandblasting. Or, when removing
every last spot of rust is impractical, you can use a wire brush to scrape off
only the loose, flaking rust and then treat the metal with a chemical to
neutralize the corrosion.
Aluminum or vinyl gutters: Avoid painting aluminum and especially vinyl
gutters, if at all possible. If you do paint, scuff-sand for better bonding.
Aluminum siding: A good cleaning is generally all aluminum siding needs
before you paint.

31
Benefits of paint
1) to give an aesthetic view of the surfaces
coated with paint that
2 ) facilitate cleaning of these surfaces.
3 ) The paint gives surfaces protection and the
prevention of the impact of various external
factors.
4 ) propagation of light better , especially if the
paint with a light color .
5 ) to give the feel of rough surfaces or sleek
custom .
Elements or Paint components:
1) the colorful material: a crystalline granules of plastic material or organic
liquid attached to the paint, which in turn required to post them on painted
surfaces, and this powder is the one who earns Paint property (hide surface).
2.) Diluted fluid: liquids are added to the paint and function of facilitating the
process of paint coating, and increase the speed of drying after coating.
3.) Dryers: materials added to the paint, and help to paint bowls quickly after
the painted surfaces.
4.) fluids, paint or oils: These oils are thin and flexible and solid surfaces coated
membrane, these oils about mostly dry quickly.
5.) Solvents: Liquids are used to ease the paint and increase its liquidity to
facilitate the use of the brush.
6-) fillers: have multiple functions most important of which increase the
durability of the paint colors and the distribution of powders (the first element)
in the paint liquid.
7.) matte: materials added to the paint to soften the cost and to improve its
use as well as help in the paint hardener membrane on painted surfaces.
Paint ways:
There are many ways to paint the walls, including:
Oil Painting:
Clean wall first remove the dust and the remains of the
clamshell, using a wire brush or putty knife. It is grinding
the surface with soap dissolved in water.
The paint base layer (endothelium) which consists of
the level of oil, and oil, and zinc by 50, 20.30%
respectively.
Using oil toothpaste (paste Endwell) or putty is ready
surface is covered with a layer or two layers in two
perpendicular directions. After drying putty it is lapping
the surface well.
Oil painting generally a second surface (50% weight,
30% oil, 20% oil) plus the desired color.

32
It is heal defects and Abrasives places putty dry thoroughly after
The surface finish on demand
Painted glossy oil:
It consists of the face (50% oil level ) with a little Alsakatev + (50% weight ) plus
the desired color .
Oil paint ( matte ) : where this face (10 % oil level ) consists + (20% oil Ni ) +
(20% oil ) + (50% weight ) plus color.
Paint lacquers : and are finishing the surface in two ways : The first half matte (
50% Lacquered Ready + 20% Oil + level of 30% Zn) are lapping surface, and
given a face finally ( 90% Lacquered ready +10 % oil ) .
Plastic paint :
The surface washing with liquid ammonia diluted with water by 1%. Then give
an aqueous plastic face ( 60% Plastic Ready +40 % water )
Rolla can be used in the case of oil paint ( matte ) , as well as plastic paint .
Can plastic paint on the walls ( oily preparation ) as previously reported as not
hold paint , plastic prepare , by giving the surface and two coats of plastic (
50% Plastic Ready +50 % water ) plus the desired color , and stir well .
If there was a wall or ceiling has been Chtaibh Balmeses , and intended to
paint the plastic , is being processing defects by using a mixture of gypsum
and Alaspedaj and plastic with water. Emery is these places well . Then paint
the surface of a face or two-sided plastic diluted with water , with the
addition of the desired color and Tkulaibh well using the brush, Rolla If you
want to get a grainy surface. In the case of re- paint and plastic , and the
surface is cleaned , and painted surface generally plastics ( 50% Plastic
Ready +50 % water ) with the addition of the desired color
Glue paint : one of the water based paints , where the paint is made up of
(40% Aspedaj +10 % Glue +50 % water ) and in addition to the desired
color . And the surface being cleaned and established using glue , dissolved
in the water by 1:10 . Mortar glue and then painted face or two-sided , and
can use the brush, or spraying method .
Lime paint : It is the oldest type of paints, commonly used . It is a patriarchal
Water is composed of lime dissolved in the water, with the addition of a little
salt or alum , as well as the desired color. You can use the brush in the paint ,
or spraying method .
33
Wallpaper
Wallpaper was first used in 200 BC in China and was made of rice paper stuck
to the walls in homes. In 1481 AD Jean Bourdichon painted 50 rolls of paper
with angels on a blue background for Louis XI of France. A century later, a
guild of paperhangers was first established in France. In a major development
for wallpaper production, gravure printing was invented by Karl Keitsch in
Austria in 1879 AD.
Wallpaper can provide
Textured relief
Colour and design options
Gloss differentials
Enhanced surfaces for plasterboard by improving the surface strength
and minimising potential defects such as critical light conditions.
And most often an infusion of all of these as well as responding to a
fashion trend.
Most commonly striking wallpaper options are used for key feature areas to
draw attention and create impact, complemented by paint finishes on
adjacent walls, trim and ceiling.
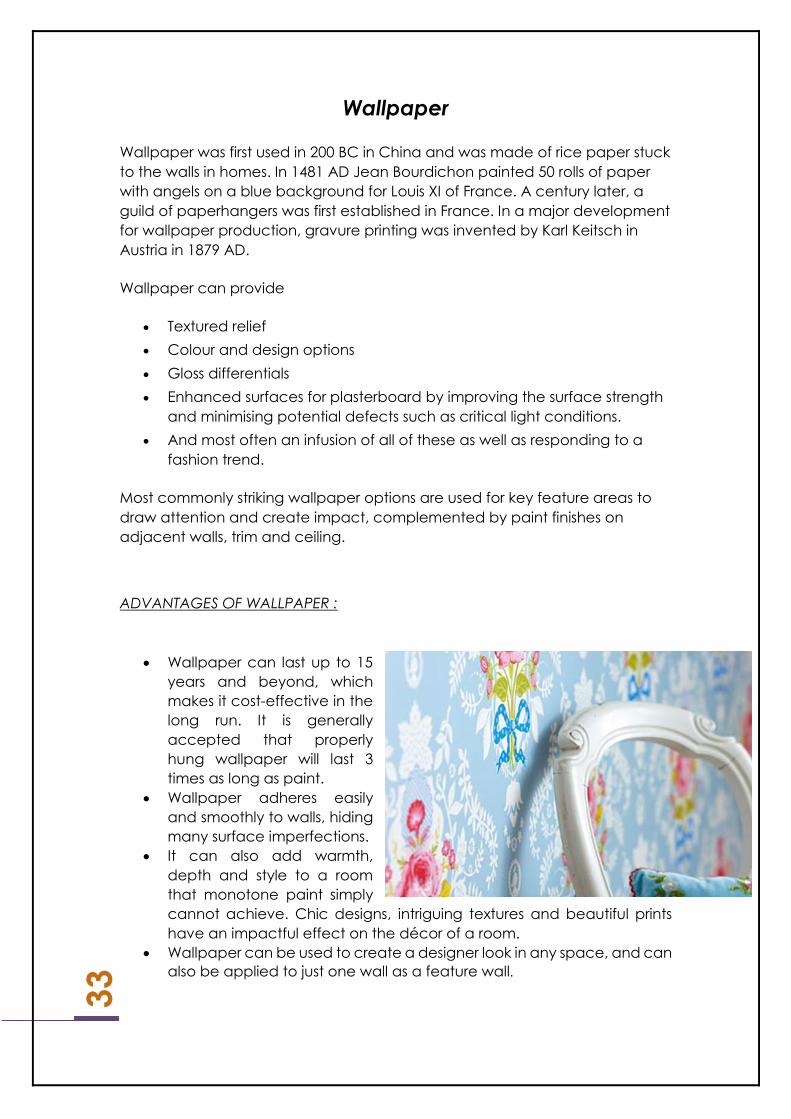
ADVANTAGES OF WALLPAPER :
Wallpaper can last up to 15
years and beyond, which
makes it cost-effective in the
long run. It is generally
accepted that properly
hung wallpaper will last 3
times as long as paint.
Wallpaper adheres easily
and smoothly to walls, hiding
many surface imperfections.
It can also add warmth,
depth and style to a room
that monotone paint simply
cannot achieve. Chic designs, intriguing textures and beautiful prints
have an impactful effect on the décor of a room.
Wallpaper can be used to create a designer look in any space, and can
also be applied to just one wall as a feature wall.

34
DISADVANTAGES OF WALLPAPER:
The process of applying wallpaper to walls is more time consuming than
painting. Then, if you decide that it's time for a change, you can't simply paint
over it or apply a different wallpaper without some prep work. Many of today's
wallpapers (non-woven technology) strip off in large sheets, but some older
wallpapers can be more tedious to remove. Before attempting your first
wallpaper project, you should read up on things like makingsure your first strip
is level, pattern match, and hanging around corners. Our How to Hang section
is a great resource for everything you need to know before you hang your own
wallpaper. We also have a helpful FAQ section on removing wallpaper.
Wallpaper Or Paint?
The differences between wallpaper and paint:
1 - Ease of Application
Between the two, paint is the easier and relatively the "lesser fuss" option.
Investment of a day or two will suffice for a paint job for a standard room, even
though the time taken does depend on the weather. Even though not as
popular in India as the West, but if you feel like it, you can also roll up your
sleeves and paint your walls yourself. Painted walls are also very
accommodating to incoming, newer coats of paint of the same hue. In most
cases, if the surface isn't unusually bad, a new coat of paint can be applied
on to the older one. However, remember that it is advised to always strip the
older colour before painting a new one on top. That is especially true when you
want to paint an erstwhile dark coloured wall into a lighter hue. The stripping of
paint can take another day for a room.
Wallpaper application is a job best tackled by an expert. The process can get
slightly messy and it demands a lot of time and patience. Same holds true for
stripping the wallpaper too. New layer of wallpaper cannot be applied on top
of the existing one. Advances in technology have allowed the latest versions
to be stripped off in bigger chunks, but it remains a tedious affair nonetheless.
2- Durability
Good quality paint on walls, in the right finish, can last you up to 5 years. That
said, it is not uncommon to see paint chipping off or fading in areas of high
usage, exposure to sunlight and traffic sooner than later. Hence, it may need
retouching 3 years or so - lesser for paints in lighter colours.
Wallpaper, on the other hand, will be your long term partner. Experts maintain
that a one-time application will last for around 15 years and beyond.
Wallpaper, however, is not resilient to tearing. Any such mishap will mean that

35
you may need to go through the whole process of stripping and pasting all
over again, which is more tedious than re-painting.
3- Expense
Paint is a widely available resource. The skill of labour necessary is relatively less,
along with the effort and time required. All these factors mean that the overall
cost incurred, in each round of paint job will be relatively lower than that of
wallpapering.
Wallpaper is an expensive, but a one-time investment. As it lasts much longer,
it is actually cheaper in the longer run.
4- Area of the House
Your decision to go either ways should also take into account the area of your
home in question. Wallpaper doesn't fare too well in areas with moisture and
heat like Kitchen and Bathroom. Too much heat can affect the life of paint as
well – not in a positive way.
5- Aesthetics
Both paint and wallpaper can be very efficiently used to suit the aesthetic
appeal of your decor. Textured, stencil print or gradient painted walls to
elegant or quirky wallpapers – in any combination, can be used to serve the
purpose of beautification of your decor. Just let your creative juices flow and
find their own way.
6- Option of customization
Even though there are millions of hues and shades of paint for you to choose
from, you can always go for your personalised colour. Get the precise shade
with just the right mix of the feisty orange, soothing blue with a hint of mysterious
grey – if that's what catches your fancy.
Wallpaper is relatively a new entry in India. Though there is a wide variety
available in stores across the country, finding a vendor who would print out
your design/artwork in the wallpaper quality might prove slightly tricky.
7- Variety

36
There is no dearth of variety in both the cases. Browse one wallpaper
catalogue after another, until the right pattern in the right colour comes your
way. Wallpapers also come in many different finishes – foil printed, embossed
textures, suede etc.
With paint, your choice may be limited to two finishes - glossy and matte.
However, there is a lot that can be achieved with the myriad of colours and
texturing techniques now widely available.
Paint can only provide a color in a very limited spectrum of finishes from matte
to glossy. Wallpaper, on the other hand, comes in a dazzling array of designs
with an incredible selection of beautiful effects like pearl and glitter, raised inks,
suede, gels, beads, foils, embossed silk textures, and natural grasscloth.

37
wallpaper types
Vinyl Wallpapers:
Vinyl Wallpapers are the most widely used
papers on the market, and can be installed in
any room.
Vinyl Wallpapers are generally very easy to
install, easy to remove, and are washable.
Embossed Wallpaper:
The designs are pressed onto a paper backing creating a raised, textured
effect. The embossed textured design tends to hide most wall imperfections.
Therefore, Embossed Wallpapers can be installed over lightly damaged walls.
Embossed Wallpaper can be
installed in any room. Easy to
install, fairly easy to remove.
Embossed Wallpapers are
washable.
Fabric-Backed Vinyl Wallpaper:
They are very durable, and are used in high traffic areas. Backing of
wallpaper is made of weaved woven fabric instead of paper with a plastic
vinyl designed coating on top.This type of wallpaper can be installed over
rough walls. Fabric-Backed Vinyl Wallpapers are perfect for hallways, kids room,
playroom, den, living room, kitchen, bath room, use just about anywhere. Easy
to install, easy to repair, easy to remove in full strips. Fabric Backed Vinyl
Wallpapers are scrub-able.
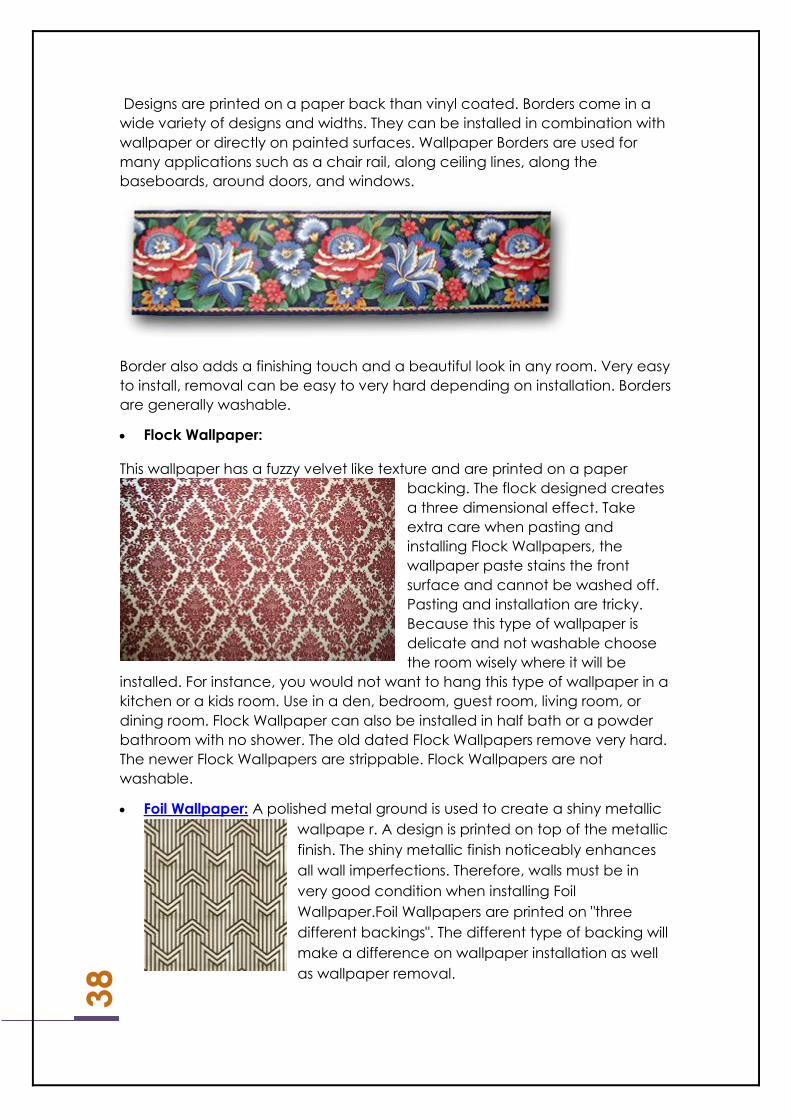
Borders:
38
Designs are printed on a paper back than vinyl coated. Borders come in a
wide variety of designs and widths. They can be installed in combination with
wallpaper or directly on painted surfaces. Wallpaper Borders are used for
many applications such as a chair rail, along ceiling lines, along the
baseboards, around doors, and windows.
Border also adds a finishing touch and a beautiful look in any room. Very easy
to install, removal can be easy to very hard depending on installation. Borders
are generally washable.
Flock Wallpaper:
This wallpaper has a fuzzy velvet like texture and are printed on a paper
backing. The flock designed creates
a three dimensional effect. Take
extra care when pasting and
installing Flock Wallpapers, the
wallpaper paste stains the front
surface and cannot be washed off.
Pasting and installation are tricky.
Because this type of wallpaper is
delicate and not washable choose
the room wisely where it will be
installed. For instance, you would not want to hang this type of wallpaper in a
kitchen or a kids room. Use in a den, bedroom, guest room, living room, or
dining room. Flock Wallpaper can also be installed in half bath or a powder
bathroom with no shower. The old dated Flock Wallpapers remove very hard.
The newer Flock Wallpapers are strippable. Flock Wallpapers are not
washable.
Foil Wallpaper: A polished metal ground is used to create a shiny metallic
wallpape r. A design is printed on top of the metallic
finish. The shiny metallic finish noticeably enhances
all wall imperfections. Therefore, walls must be in
very good condition when installing Foil
Wallpaper.Foil Wallpapers are printed on "three
different backings". The different type of backing will
make a difference on wallpaper installation as well
as wallpaper removal.

39
Fabric-Backed Foil Wallpapers:
This type of wallpaper will hide some wall imperfections. The metallic finish
can crease and wrinkle so take extra care when pasting and installing.
Fabric-Backed Foil Wallpapers are very durable after installation.
Foil Wallpapers are mostly used in kitchens and bathrooms. Easy to remove in
full strips. Fabric-Backed Foil Wallpapers are washable.
Fiberglass-Backed Foil Wallpapers:
Are delicate to install. The metallic
finish will crease and wrinkle so take
extra care when pasting and installing.
Walls must be smooth and in good
condition when installing Fiberglass-
Backed Foil Wallpapers. Foil wallpapers
are mostly used in kitchens and
bathrooms. This type of foil wallpaper is
easy to remove in full strips. Fiberglass-
Backed Foil Wallpapers are washable.
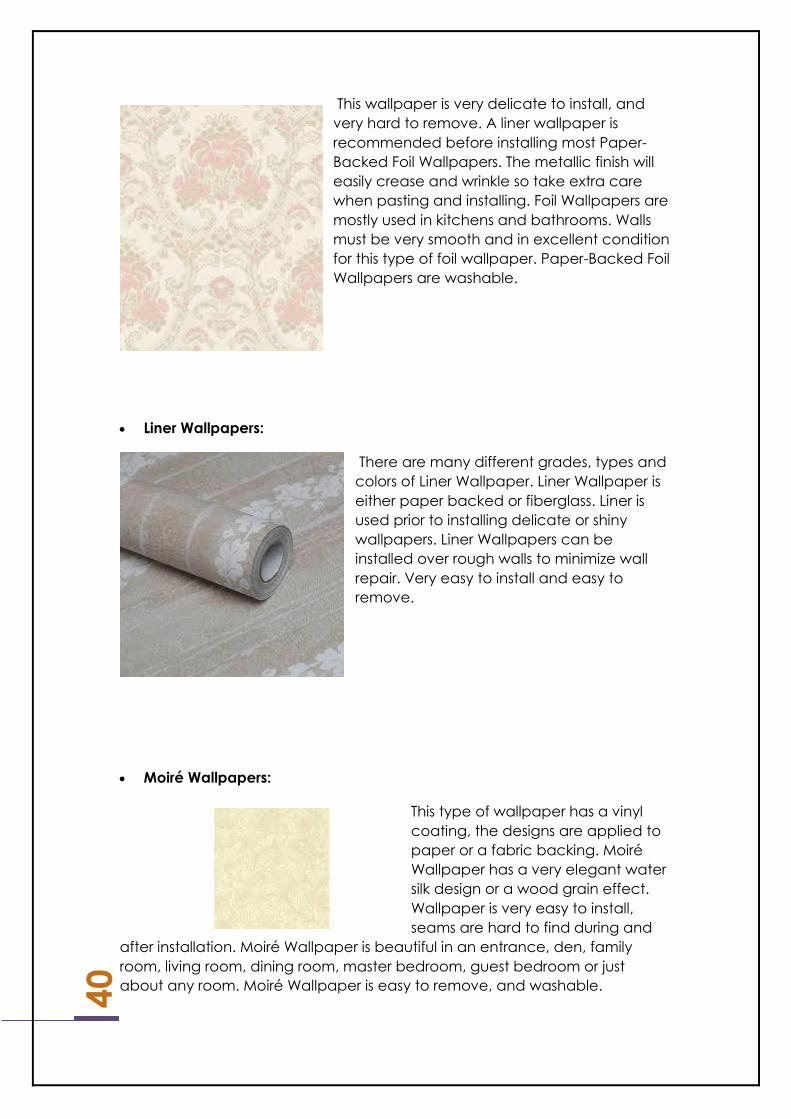
Paper-Backed Foil Wallpapers:
40
This wallpaper is very delicate to install, and
very hard to remove. A liner wallpaper is
recommended before installing most Paper-
Backed Foil Wallpapers. The metallic finish will
easily crease and wrinkle so take extra care
when pasting and installing. Foil Wallpapers are
mostly used in kitchens and bathrooms. Walls
must be very smooth and in excellent condition
for this type of foil wallpaper. Paper-Backed Foil
Wallpapers are washable.
Liner Wallpapers:
There are many different grades, types and
colors of Liner Wallpaper. Liner Wallpaper is
either paper backed or fiberglass. Liner is
used prior to installing delicate or shiny
wallpapers. Liner Wallpapers can be
installed over rough walls to minimize wall
repair. Very easy to install and easy to
remove.
Moiré Wallpapers:
This type of wallpaper has a vinyl
coating, the designs are applied to
paper or a fabric backing. Moiré
Wallpaper has a very elegant water
silk design or a wood grain effect.
Wallpaper is very easy to install,
seams are hard to find during and
after installation. Moiré Wallpaper is beautiful in an entrance, den, family
room, living room, dining room, master bedroom, guest bedroom or just
about any room. Moiré Wallpaper is easy to remove, and washable.

41
Mylar Wallpapers:
This type of wallpaper is printed on a
paper backing. A polyester film is applied
on top of a decorative design making
Mylar Wallpapers washable. This
wallpaper has a wet or shiny
appearance similar to a foil wallpaper.
Mylar Wallpapers easily creases, take
extra care when pasting and installing. A
liner wallpaper is recommended before
installing Mylar Wallpapers. Mylar
wallpaper is mostly used in a kitchen and bathrooms. Walls must be very
smooth and in excellent condition. Wallpaper is fairly easy to remove.
Natural Bamboo Wallpaper:
Natural Bamboo Wallpaper will add a
distinctive look for your house and office.
These handcrafted wallpapers are made
from environmentally friendly natural
products. Natural Bamboo Wallpaper is
made by applying bamboo reeds, or
vines onto a paper backing with glue.
Actual color and texture of wallpaper will
vary slightly from roll to roll. Because
handmade Natural Bamboo Wallpaper
has different variations of color and texture,
they will creat a paneling look on the walls when installed, therefore, seams
will show.
Natural fiber wallpapers are delicate to work with. Take extra care when
pasting and installing Bamboo Wallpaper, the wallpaper adhesive will
definitely, stain the front surface. Natural wallpapers are not washable, this
makes pasting and installation tricky. Natural Bamboo Wallpapers must be
wet to remove, removal is easy to moderate.

42
Natural Grass-Cloth Wallpaper: A natural handcrafted wallpaper, made
by applying grasses or vines onto a
paper backing with glue. Natural fiber
wallpapers are delicate to work with.
Take extra care when pasting and
installing Natural Grass-Cloth Wallpaper,
the wallpaper paste will definitely stain
the front surface. Pasting and installation
are tricky. Natural Grass-Cloth Wallpapers are used in dens, family room,
bedrooms, and dining rooms. Wallpapers natural grass has different color
tones creating a panel look on the walls, seams will show. Grass-Cloth
Wallpapers must be wet to remove, removal is easy to moderate. This
wallpaper is not washable.
Vinyl Grass-Cloth Wallpaper:
Machine made to look like natural grass
wallpapers. Vinyl Grass-Cloth
Wallpapersare printed on a fabric backing
which makes this wallpaper very durable.
There are many colors and textures
available. Due to control when printing
colors tend to blend evenly so seams are
less noticeable. Vinyl Grass-Cloth Wallpaper
can be installed in any room due to their durability and wash ability. This type
of wallpaper can be installed over rough walls. Easy to install, easy to repair,
easy to remove in full strips. Vinyl Grass-Cloth Wallpapers are scrub-able.
Natural Silk Wallpaper:
Threads are applied to a paper
backing, creating a light elegant
texture. This type of wallpaper is very
delicate, a liner wallpaper is
recommended. Take extra care when
pasting and installing Natural Silk
Wallpaper, the wallpaper paste stains
the front surface and cannot be
washed off. Pasting and installation
are tricky, wallpaper removal is easy.
Because this type of wallpaper is very delicate choose the room wisely where
it will be installed. Natural Silk Wallpapers are not washable.

43
Natural String Wallpaper:
Fibers are applied to a paper backing. Depending
on the string size wallpaper texture can be
moderate to a very heavy texture. A liner
wallpaper is recommended for delicate Natural
String Wallpapers, and is not needed for the heaver
textured string papers.Natural String Wallpapers are
very delicate to work with. Take extra care when pasting and installing
Natural String Wallpaper, the wallpaper paste will definitely stain the front
surface and cannot be washed off. Because this type of wallpaper is not
washable choose the room wisely. Pasting and installation are tricky,
wallpaper removal is easy. Natural String Wallpapers are not washable.
Vinyl String Wallpapers: This type of wallpaper is printed on a fabric
backing, making Vinyl String
Wallpapers very durable. There are
many colors and textures available
with Vinyl String Wallpaper. It can be
installed over textured or rough walls.
Vinyl String Wallpaper can be installed
in any room, even high traffic areas.
Very easy to install, seams are easy to
work and hard to find after installation.
Easy to repair, easy to remove in full
strips. Vinyl String Wallpapers are scrub-able.
Nonwoven Wallpapers:
Made of a special blend of natural and synthetic fibers, Nonwoven
Wallpapers are washable and breathable. A large variety of designs and
patterns are available. You cannot go wrong using Nonwoven Wallpapers.

44
The most user friendly wallpapers on the market today, and at the same time
eco-friendly. Nonwoven Wallpapers can be installed in any room, because
they are washable and breathable they are perfect choices for the kitchen
and bathrooms. This type of wallpaper is very easy to install and very easy to
repair. Nonwoven Wallpaper removes totally dry, in full sheets without wall
damage. No wallpaper removal tools or chemicals are needed when
removing this type of wallpaper.
TOOLS YOU WILL NEED TO HANG UNPASTED WALLPAPER:
Paste
Paste Brush or roller
Knife or snap off blade
Level
Sponge & bucket of clean water
Smoothing brush or plastic smoother
Tape Measure
4" - 6" inch Putty knife and or straight edge
A pencil
Step stool
Drop Cloth
GETTING READY TO HANG WALLPAPER
1 - Make sure the walls are clean of all debris and that the surface is smooth.
Spackle and smooth out any holes or rough areas on the walls as they may
affect the final finish of your wallpaper. You should also remove all faceplates
and socket covers before beginning, taking care to turn off power first for
safety.
2 - When deciding where to begin, if hanging wallpaper on all four (4) walls
you ideally want to start in the most inconspicuous corner of the room. Some
examples of an ideal place to start would be in the back corner of the room,
behind a door or a large piece of furniture.
3 - The most crucial step in hanging wallpaper is making sure the first strip is
straight and level. This will impact the rest of the room so it is important to take
your time and do this first step correctly.
4 - Measure out from the corner the width of the paper minus 1/2 inch and
mark with a pencil.

45
5 - Place a level at the mark and draw a straight, vertical line (plumb line).
6 - Every time you reach a corner or start a new wall, follow this procedure to
make sure you are hanging the wallpaper straight.
HOW TO HANG UN-PASTED WALLPAPER
1. If you need to mix the paste first, follow the manufacturer’s instructions
_ Use your brush to apply paste to the wall, evenly distributing it across an
area just larger than one (1) strip at a time
If you are using unpasted wallpaper that requires applying the paste directly
to the backing:
1. If you need to mix the paste first, follow the manufacturer’s instructions
2. Lay the strip of wallpaper face down on your work surface
3. Brush paste on to the top half of your paper and gently fold that
sectionback to meet the middle. Brush paste on the remaining half and fold
the bottom end in to meet the middle.
4. Allow the paper to rest in this "booked" position for 10 minutes while the glue
becomes fully activated and the paper is prepared.
HANGING YOUR FIRST STRIP OF WALLPAPER
1- Start on the least conspicuous wall of the room, where you have previously
used a level to draw your plumb line.
2 - Unfold the top half of the strip and apply to the wall, letting a little bit of
the wallpaper overlap the ceiling and adjoining wall. Make sure your pattern
is right side up!
3 - Slide the paper into position so it lines up on the plumb line that you
created.
4 - Using a wallpaper smoothing tool, gently press the strip to the wall. Be
careful not to stretch the wallpaper while positioning.
5 - Unfold the bottom half and smooth into place.
6 - Smooth the entire strip, working diagonally from the top down and from
the center outward, forcing out any air pockets.
7 - Wash off excess paste with a damp sponge and clean water. Remember
always to use clean water.

46
TRIM WALLPAPER
1 - Using the 6" putty knife as a guide, trim the excess paper along the ceiling
and baseboard with a sharp razor knife. Always use a sharp knife or blade for
every cut and do not to lift your knife when making long cuts.
2 - Wash paste off ceiling and baseboards with a wet sponge and clean
water.
3 - Using the same procedures to cut and apply more wallpaper strips,
matching the pattern to the previous strip.
4 - Touch the edges tightly together, but don’t overlap the strips.
5 - Make a new plumb line on each new wall.
Remove Old Wallpaper:
If you have a previously papered surface, you should strip the wallpaper. This
may even be essential depending on what kind of wallpaper you currently
have and how you want to refinish the walls.
Even so, there are some conditions under which you may decide not to
remove existing wallpaper. You can safely paper over a single layer of
smooth, well-adhered wallpaper if it is free of bubbles, buckles and wrinkles.
You will need to do some prep work, including re-pasting any loose paper,
patching as necessary, cleaning the walls and applying a special primer.
In any case, installation over existing paper is certainly not recommended if:
-You suspect there may be more than a single layer of wallpaper on the
surface.
-The existing wallpaper has a vinyl, foil or plastic film. In this case, the
wallpaper should be removed even if there is only one layer in good
condition. Wallpaper adhesive will not adhere well to these surfaces.
-You are planning to hang vinyl wallpaper. If the previous wallpaper is also
vinyl, the glue between the two papers will not dry well. If the old wallpaper is
not vinyl, the glue under it may get wet and start to mildew.
-The existing wallpaper is grass cloth, burlap or cork.
-You can hear crinkling sounds when running your hand over the surface of
the wall. If you do, the wallpaper has buckled and it needs to be removed.
-If there are tears in the wallpaper at the corners of the walls. When walls
settle, wallpaper sometimes tears in a corner.
If you are planning to paint, you must remove the wallpaper. Paint will seal
the surface and make the wallpaper almost impossible to remove in the
future. In addition, the painted surface will not look as smooth as it could and
your efforts will be wasted.

47
Identify Your Wall Type
It's important to know what kind of walls you have before you begin. The age
of the wall usually determines whether it's drywall or plaster.
Plaster
It's found mostly in homes that are more than 50 years old. In plaster walls,
wood lath is nailed to wood-framed walls and covered with two or three
coats of plaster. These walls are more solid and sound dull if you knock on
them.
Drywall
It's been used in homes for the past 50 years or so. Drywall is a sheet of chalk-
like substance covered with a lightweight cardboard. These sheets are nailed
over wood-framed walls and have a hollow sound when you knock on them.
Drywall is more delicate than plaster, so be careful not to damage the
cardboard facing when using a wallpaper scraping tool.
A Little Prep Work
Before you start to work, you will need to prepare your room. Follow these
steps:
Step 1
Take everything off the walls.
Step 2
Remove decorative objects and knick knacks.
Step 3
Remove as much furniture as possible. Cover what is left.
Step 4
Place old towels along the baseboards. Spread plastic dropcloths over the
towels and tape them to the baseboards. This step will prevent messy scraps
from getting on your floors.
Step 5
Allow a full day for removing paper from an average-sized room.
If you are removing strippable wallpaper and the paper surface of your
drywall comes up too, stop immediately. When this happens, it generally
means that the drywall was not sealed with enough paint. Glue down any
loose pieces and seams that have separated. Fill in uneven areas with non-
shrinking spackling compound. Sand your repairs and apply an oil-based
sealer with an enamel undercoat.
48
To Remove Strippable Wallpaper
Newer wallpapers are strippable, which means they can easily be removed
without water or chemicals. If you know the wallpaper you are trying to
remove was hung in recent years, you may be in luck.
Step 1
At a corner or seam near the bottom of the wall, use a putty knife to pry the
edge of the wallcovering. If it pulls away easily and keeps coming up as you
pull, you have strippable wallpaper and your job should be easy.
Step 2
To remove the paper, simply grab the lower corner of a strip and pull it away
until both corners of the strip are free. Then hold the bottom edge with both
hands and pull until the whole strip is off the wall. Repeat all the way around
the room.
Step 3
If the paper is stubborn, you can help it along by using a razor knife. Hold the
knife perpendicular to the wall and make a series of horizontal strips about 10
inches apart. Then loosen the section of paper and pull it free with your
fingers.
Stripping Wallpaper with Water
For this job, you need a liquid stripper concentrate. Mix with hot water
according to the manufacturer's directions. Apply the mixture to your walls
with a broad brush or a sprayer. Work from top to bottom a section at a time.
Do not try to tackle such a large area that the paper dries before you have a
chance to remove it.
Let the paper soak for a few minutes; then start stripping it away with a
scraper.
Sometimes, you will find old paper that just will not absorb water. When this
happens, scuff the surface with coarse sandpaper or a scoring tool to allow
the water to soak into the paper. Once it is thoroughly soaked, apply the
wetting agent twice more and let it soak for 30 minutes. You will know it is
ready when you can scrape off pieces with your fingernail.
To Remove Peelable Wallpaper
Some wallpapers are peelable, which means that they have a top coat
which comes off just like strippable paper. Once you have peeled off the top
vinyl coat, you will have the backing left. Follow directions for stripping with

49
water to remove the backing. Do not leave the backing on, even if it is in
good condition.
To Remove Washable Wallpaper
The surface that makes washable wallpaper easy to clean also makes it a
little harder to remove. You must break through the plastic film that covers the
paper in order for water to penetrate the paper. Use a scoring tool to create
holes in the wallpaper. Use a spray bottle to soak the paper. Spray water into
the slits so it can work its way behind the covering. Wait about 10 minutes and
then scrape off the paper with a putty knife.
Steam Removal
The last resort for removing wallpaper is to steam-strip. This job is strenuous
because you must steam and strip at the same time. You might want to ask a
friend for help.
A steamer uses boiling water to soften the glue between the wallpaper and
the wall. If you are removing vinyl-coated wallpaper with a steamer, you still
have to use a scoring tool to punch holes in the paper so the steam can
reach the glue.
Rent a steamer instead of purchasing one, since this is not a job you will do
very often. Carefully read the manufacturer's directions, as they may vary
from machine to machine. Basically, the process works this way:
-Make sure the power is off.
-Pour warm water into the reservoir.
-Turn on the machine and wait for the water to boil.
-With your goggles and gloves on, place the stripper's steam pad firmly on the
wallpaper for about 30 seconds. Move the pad and you should see loose
paper. Remove the paper with a scraper.
50

51

52