Embed Size (px)
Citation preview
Soil Management in Home Gardens and
Landscapes

ContentsWhat Is Soil? ........................................................................... 1
Soil Testing ............................................................................. 2
Improving Soil with Organic Matter ....................................... 2
Adjusting Soil pH ................................................................... 4
Preparing Soil for Planting ..................................................... 5
Fertilizing Plants ..................................................................... 6
Seeking Help for Soil Problems .............................................. 8

Proper soil conditions are essential for all stages of crop and plant development. Thus, an understanding of soil and how to manage it is the key to a productive garden and landscape. Although it is possible to grow most plants in most soils, a grower benefits from learning about the interrelationship of a plant and the soil in which it is rooted. The plants you choose to grow will have varying needs and will respond differently to particular types of soil. In addition, the soil may vary in depth, texture, and quality, even from one location to another on the same property. For example, a soil that differs from the native soil may have been brought to a building site for grading and backfilling around the new foundation.
What Is Soil?Soil anchors plant roots and serves as a storehouse for nutri-ents. It consists of minerals, air, water, organic matter, and microorganisms. The mineral portion is made up of small fragments of rocks that have disintegrated from weathering. The organic portion is composed of plant and animal remains in various stages of decomposition. How much water and air a soil contains depends on the soil’s texture and structure. Soil is composed of three basic mineral particles, of three different sizes. Sand is the largest particle, silt is intermedi-ate, and clay is the smallest. The percentage of each in a soil determines the soil’s texture as well as its physical properties (Figure 1). An ideal soil texture consists of equal parts of sand, silt, and clay. Such a soil is referred to as “loam.” Usually, one component predominates, producing a clay loam or a sandy loam.
Simple tests can provide an approximate evaluation of the soil type existing on your property. Clay soils dry slowly and are difficult to cultivate and to work properly. Extremely sandy soils may lack organic matter and may dry out rapidly. The best soil is a happy medium of these two. To check the texture of your soil, take a moist sample be-tween your fingers and rub them together. Sandy soils tend to be harsh and gritty; clay and silt soils are smooth and some-what slippery. Another test is to form a ball of moist soil with your hand. If the ball breaks apart when tapped, the soil is said to be on the sandy side. If the ball remains intact when tapped, the soil probably contains more clay and silt than sand. If the soil is either sticky or plastic, and works through your fingers as you form the ball, considerable clay is present. An alternative soil texture test involves filling a quart jar two-thirds full of water, and gradually adding a sample of soil until the water reaches the top of the jar. Seal, shake, and allow the contents of the jar to settle. Sand will settle first, followed by silt, and then the clay particles. The fine clay particles and organic matter may float. Using a ruler, measure the total depth of soil in the bottom of the container and write down the number of inches of soil. Next, measure each soil type, then divide that soil type by the total, and multiply by 100 to determine the relative percentage of that soil type in the total sample. For example, say 4 inches of total soil were measured. Then, if 3/4 inch of sand was found, divide 0.75 by 4. Multiply the result, 0.1875, by 100 and the percentage of sand is around 19 percent. Compare your results to the soil textural triangle (Figure 1).
Figure 1. Guide for USDA soil textural classification.
100
90
80
70
60
50
40
30
20
10
10090 80 70 60 50 40 30 20 10
100
90
80
70
60
50
40
30
20
10
Perc
ent b
y weig
ht C
lay
Percent by weight Silt
Percent by weight Sand
CLAYCLAY
CLAY LOAM SILTYCLAY LOAM
SANDYCLAY
SANDY CLAY LOAM
SANDYLOAM
SAND SILT
SILTY LOAMLOAMYSAND
LOAMLOAM
SILTYCLAYSILTYCLAY

Soil TestingThe more intensive the gardening, especially in vegetable plots or flower beds, the more important it is to take a soil test. Soil test information is particularly valuable if the ground is being planted for the first time and no knowledge of past soil treat-ment is available. A soil test is also beneficial if you’re developing a perma-nent landscape. The information it provides allows you to incorporate needed materials before planting. Once a land-scape is planted, it is difficult to make significant changes in soil quality. Testing soil every three to five years is usually adequate for tracking the progress of the cultural and fertilization practices recommended from your last soil test. Soil can be sampled any time that the ground is not frozen, although some times are better than others. Sampling in the early spring or late fall assures that you will have the soil test results and recommen-dations prior to buying lime and fertilizer. Late fall sampling will also allow you to beat the rush of commercial growers and farmers, ensuring that you have time to plan your garden or landscaping activities in advance. Sample your soil before buying and applying fertilizer, and avoid sampling immedi-ately after fertilizer applications. A soil probe is the best tool for taking soil samples. Alter-natively, a shovel, trowel, or soil auger can be used (Figure 2). Sample garden soils to the depth of tillage or about 5 to 7 inches. To ensure that the sample is representative of the area, you need a composite sample. Collect small samples from at least five locations in the area and combine them into one sample––a composite sample.
materials potentially dangerous to plants. Such service may be available through other Penn State facilities or private labs. You can obtain soil-testing kits from the Penn State Coop-erative Extension office in your community. There is a small fee for the analysis and for fertilizer recommendations. The kit contains an information sheet for each soil sample, which is necessary for making lime and fertilizer recommendations. Be sure to supply all information requested so that useful recommendations can be prepared. Results and recommenda-tions will be sent to you and your county extension agent. For additional information, consult your county extension office.
Improving Soil with Organic MatterOrganic matter, or humus, is a valuable part of soil. It is the end product of decaying organic matter and the most effec-tive material for improving tilth. When incorporated into soil, humus produces a spongy texture that acts to:
•increasesoilwater-holdingcapacity
•provideneededporespace,whichletsintheairessentialtogood plant growth
•preventtinyparticlesofclayfromcementingthemselvesintoa solid mass when wet or dry, thus making soil more easily penetrated by plant roots
•fillinexcessporespaceinsandysoil,slowingthedrainagerate and increasing water-holding capacity
•regulatesoiltemperature
•releasesmallamountsofnitrogenandothernutrientsforplant use through the process of decay
•increasethecationexchangecapacity(ameasurementofa soil’s ability to hold nutrients), so that soils can hold and release more nutrients
•promotethegrowthofmicroorganisms,whichhelpto condition the soil
Organic matter may be added to soils in the form of ma-nure, compost, peat moss, peat-humus, spent mushroom com-post, and composted sawdust. Very coarse forms of organic matter, such as chopped brush or shredded tree bark, should be composted one or two years before incorporation. Alternatively, organic matter may be produced in a veg-etable garden or flowerbed by planting winter cover crops, green manure crops, or sod when the land is not being used for gardening. This is an effective way to improve soil conditions. Organic materials used alone seldom supply a balanced source of plant nutrients. Most are low in phosphorus, and decaying straw, leaves, grass clippings, and sawdust can temporarily deplete the soil of available nitrogen. Reduced amounts of available nitrogen can damage some short-season vegetables and flowers. Regular applications of organic matter and complete fertil-izer are essential for garden soils used each year. For ornamen-tal plants and turf areas, incorporating adequate organic matter is even more critical since there is only one opportunity to work it into the soil before planting or seeding. Once perma-nent crops are established, it is difficult to incorporate organic matter without injuring plant roots.
The Penn State Agricultural Analytical Services Labora-tory analyzes all soil samples for pH, phosphorus, potassium, magnesium, and calcium. The laboratory is not designed for routine testing of soil for toxic residues or other possible
Soil probe
Garden trowel(Use 1/2" vertical core from center of slice.) Soil auger
Figure 2. Appropriate sampling tools. A shovel or spade would also work, using the center core, as with the trowel.
2
Cover CropsGreen manure crops are plowed under green for their ben-eficial effect on soil. Green manure crops are crops that are easily established and grow rapidly, producing succulent top growth and roots. Green manure crops, such as winter rye, winter wheat, oats, barley, and buckwheat, are often plowed under green for their beneficial effect on soil. They are used on vegetable garden soils that lack tilth and that are low in organic matter. A legume-grass mixture is an effective green manure crop. For quicker results, scatter 1/4 to 11/2 pounds of a complete fertilizer, such as 5-10-5, over each 100 square feet of soil before seeding the green manure or sod crop. Fall cover crops in the vegetable garden, such as annual rye, ryegrass, or spring oats, should be seeded after the last cultiva-tion of the garden in fall. The thick growth of the cover crop will also help smother weeds as seeds attempt to germinate in the fall. Cover crops are not useful, however, in either flower or landscape beds. To plant cover crops, seed about 1/4 pound of either annual ryegrass or spring oats, or 1/2 pound of annual rye per 100 square feet of garden. You should seed ryegrass or oats by September 15 in central Pennsylvania, slightly earlier in north-ern counties. Rye may be seeded later. Early planting gives good coverage and growth. Do not seed a cover crop later than October 1 if early garden crops are to be planted in the spring. The following spring, before growth is knee-high, incorporate the cover crop into the soil.
ManuresDried animal manures supply plant nutrients and are used as an amendment to enrich all soils and crops. They also aid in soil aeration and provide nutrients for microorganisms living in the soil. Various types of dried animal manures are avail-able from garden supply stores. Apply according to package directions. Fresh cattle manure should be applied in fall or winter. For most soils, an application of cattle manure at the rate of 50 to 100 pounds per 100 square feet of garden is adequate. Use a phosphate fertilizer and lime in addition to manure to obtain a better balance of plant nutrients. Work the manure into the soil as soon as possible after spreading. This will help conserve nutrients, hasten decomposition of the manure, and minimize odors. Fresh poultry and sheep manure must be used cautiously, as excessive amounts may damage roots. Mix one pound of triple or concentrated superphosphate with each ten pounds of manure, and incorporate at a rate of ten pounds per 100 square feet of garden.
SawdustSawdust may be used as mulch. Composted sawdust may be incorporated into the soil. If it is incorporated, an application of three to four bushels for each 100 square feet of soil is suggested. Acidity caused by using sawdust in soil is a minor prob-lem. If soil is not already limed to the proper pH, it is a good practice to mix 3/4 pound of ground limestone into each bushel of sawdust.
Plant damage from the use of sawdust is more likely caused by nitrogen deficiency than by acidity. Nitrogen deficiency is most severe when soil microorganisms begin to use soil nitrogen to decompose fresh sawdust. Regardless of how saw-dust is used, some nitrogen also should be applied to the soil. For one bushel of dry sawdust, use any one of the following: one pound of nitrate of soda, 3/4 pound of ammonium sulfate, 1/2 pound of ammonium nitrate, or 1/4 pound of urea. Apply about half the nitrogen to the soil with the sawdust, and put the balance on in one or more applications during the growing season. This helps to reduce nitrogen loss from leaching and supplies a more uniform amount to the soil.
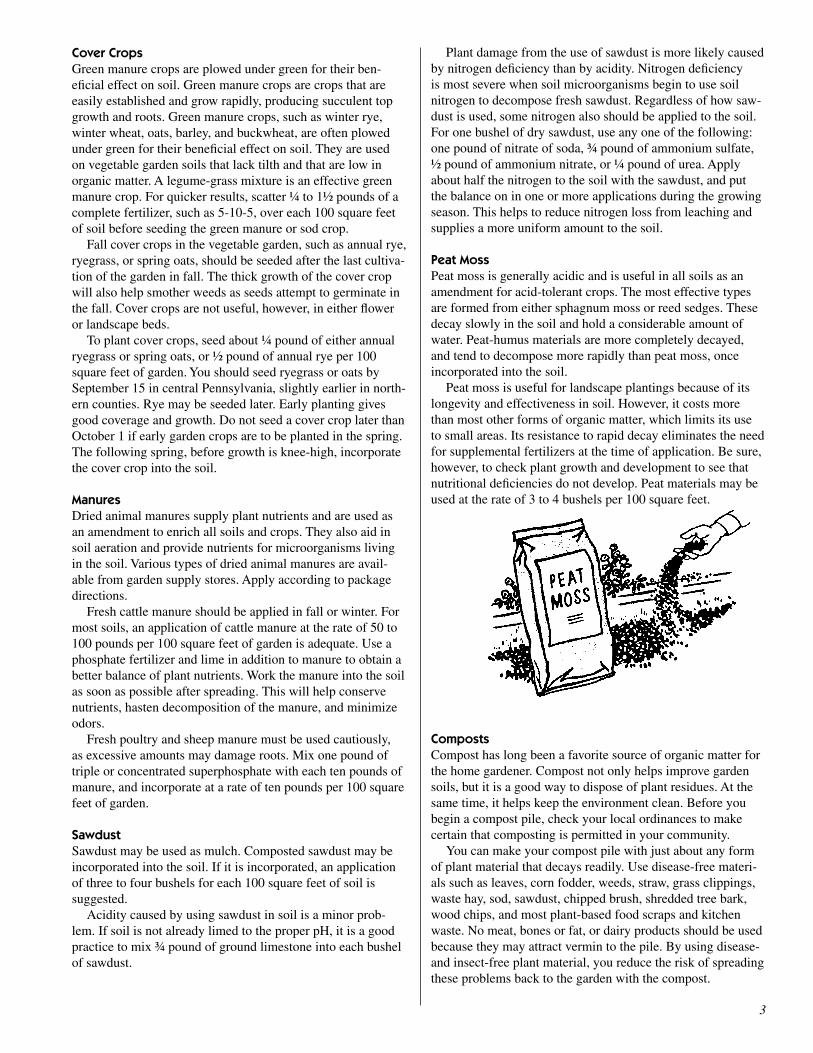
Peat MossPeat moss is generally acidic and is useful in all soils as an amendment for acid-tolerant crops. The most effective types are formed from either sphagnum moss or reed sedges. These decay slowly in the soil and hold a considerable amount of water. Peat-humus materials are more completely decayed, and tend to decompose more rapidly than peat moss, once incorporated into the soil. Peat moss is useful for landscape plantings because of its longevity and effectiveness in soil. However, it costs more than most other forms of organic matter, which limits its use to small areas. Its resistance to rapid decay eliminates the need for supplemental fertilizers at the time of application. Be sure, however, to check plant growth and development to see that nutritional deficiencies do not develop. Peat materials may be used at the rate of 3 to 4 bushels per 100 square feet.
CompostsCompost has long been a favorite source of organic matter for the home gardener. Compost not only helps improve garden soils, but it is a good way to dispose of plant residues. At the same time, it helps keep the environment clean. Before you begin a compost pile, check your local ordinances to make certain that composting is permitted in your community. You can make your compost pile with just about any form of plant material that decays readily. Use disease-free materi-als such as leaves, corn fodder, weeds, straw, grass clippings, waste hay, sod, sawdust, chipped brush, shredded tree bark, wood chips, and most plant-based food scraps and kitchen waste. No meat, bones or fat, or dairy products should be used because they may attract vermin to the pile. By using disease- and insect-free plant material, you reduce the risk of spreading these problems back to the garden with the compost.
3

Compost piles should be constructed in layers (Figure 3). The pile’s length is not important, but its final height should not be more than 5 feet. The initial layer of firmly packed organic material should be 4 to 5 feet wide and about 8 inches deep. Add one pint of complete fertilizer (such as 5-10-5), 1/4 cup of superphosphate, and 1/4 cup of ground limestone per square yard of compost. Finally, add a thin layer of good garden soil to the layer of organic material and fertilizer. Several shovelfuls of soil scattered over the total layer should be adequate in most cases. This thin layer of soil provides the microorganisms necessary to break down and decay the organic layer. The fertilizer and limestone aid the microorganisms and improve the nutritional quality of the final composted product. Add enough water to moisten the entire layer, but don’t saturate the pile. Excessive water inside the pile during the first stages of composting may reduce the decomposition rate. Once the organic matter begins to decay, additional water may be needed, especially once the pile begins to heat. The only precaution to take is during periods of heavy rainfall. If rainfall is excessive, cover the pile to prevent leaching of plant nutrients. After the pile has been started, you can add more layers to produce the final desired height. At the end of the second month, turn the pile to incorporate air, which aids in decompo-sition. After four to six months the process should be complete enough that the compost can be used. Spread and incorporate compost into the soil as you would animal manures. An application of 50 to 100 pounds per 100 square feet is advisable for landscape plantings. In garden areas, the compost may be incorporated at planting or used as mulch and turned under before the next growing season. Spent mushroom compost is a good source of organic matter for conditioning most soil. It is a by-product of the mushroom industry and is available after several crops of mushrooms have been produced. Mushroom compost is gener-ally available in bulk quantities from some of the larger garden centers. Aged mushroom compost is better than fresh material, which tends to be high in soluble salts. Excessive levels of soluble salts (fertilizer residue) can injure young plants. The compost is usually high in phosphorus and low in nitrogen. A 2- to 4-inch layer incorporated into the soil before planting works best.
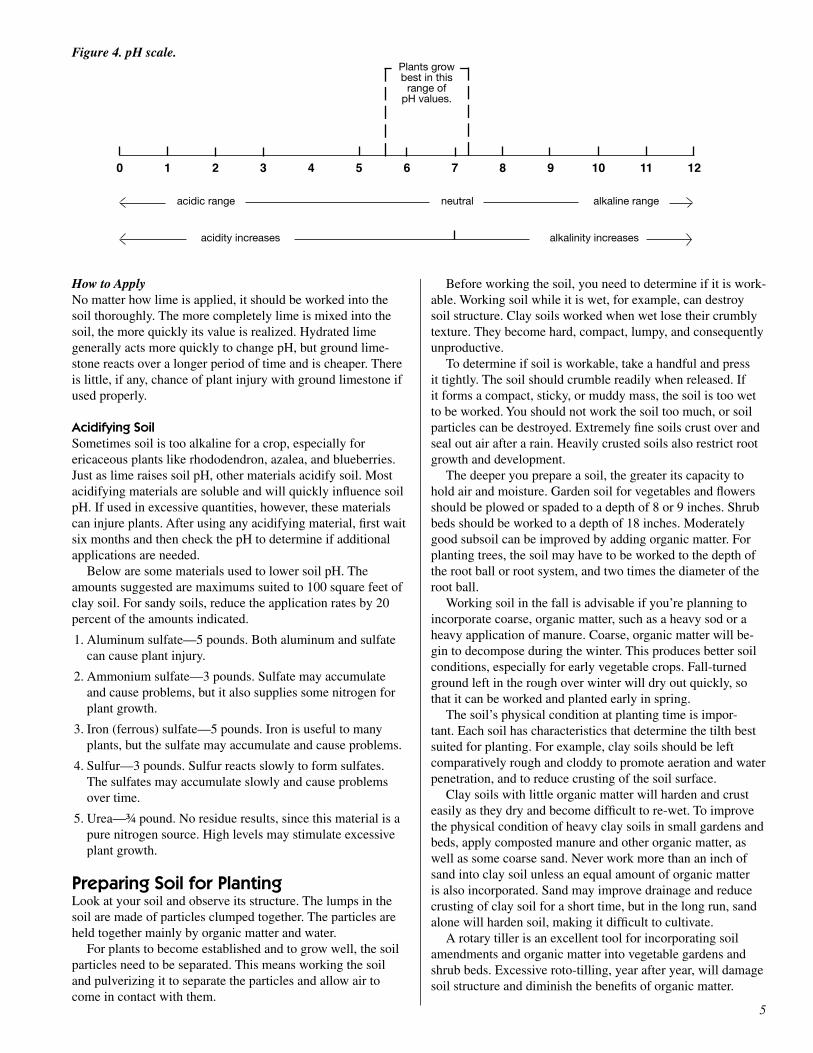
Adjusting Soil pHThe soil pH scale is a standard measurement of acidity. It ranges from zero, the most acidic, to 14, the most alkaline. A value of 7.0 is neutral, neither acidic nor alkaline. Values change by a factor of 10 for each full point on the scale. For example, a soil with a pH of 6.0 is 10 times more acidic than a soil with a pH of 7.0. A soil with a pH of 5.0 is 100 times more acidic than one with a pH of 7.0. Most Pennsylvania soils have a pH between 5.8 and 6.8, with a few extremes at both ends of the scale. Most plants grow best in slightly acidic or alkaline soils, but some ever-green ornamentals require an acidic soil for best growth.
Adding Lime to SoilMost soils require added lime (ground limestone) to neutral-ize acidity and to supply adequate amounts of calcium for plant nourishment. Less acidity in soil also increases the availability of other nutrients. Extremely acidic or alkaline soils tie up most plant nutrients, limiting their usefulness to plants. Adding lime not only reduces soil acidity, it also improves the soil’s physical condition. The calcium in lime reacts with clay particles to strengthen overall soil structure and improve the soil’s ability to drain water. It is important to adjust your soil pH to the specific needs of the crop or plants you are growing. The only reliable way to determine your soil’s pH is by taking a soil test. This will indicate soil pH as well as the amounts of phosphorus, potas-sium, magnesium, and calcium available to plants. Most vegetables, flowers, and ornamentals do well in soils with a pH ranging from 6.2 to 6.8. Acid-tolerant ornamentals (sometimes called ericaceous plants) grow best in soils with a pH of 5.0 to 5.5.
When to ApplyWhen lime is needed, as indicated by a soil test, it should be applied several months ahead of planting time, if possible. In a flower or vegetable garden, a good practice is to apply lime at the end of the growing season. In permanent shrub beds, lime should be worked in during the first turning of soil before planting. The soil pH will not change quickly after lime has been applied. This is why it should be applied several months before crops are planted, especially single- or short-season crops like vegetables and flowers.
How Much to ApplyRelatively little lime is needed to raise the pH of a sandy soil one full point on the pH scale. More lime is required to change the pH of clay soils containing large amounts of organic matter. Once a vegetable or flower garden soil is brought up to a desired pH, incorporating 4 to 41/2 pounds of ground limestone per 100 square feet every four to five years is sufficient. On established landscape beds, it may be neces-sary to add 1 pound per 100 square feet every year or two to allow the lime to work gradually and continually into the soil. A complete soil test every three to four years is advisable.
12 in.
plastic film with holes in top
4 ft.
dish-shaped surface
fertilizer, ground limestone, and soil
organic matter
Figure 3. Compost pile.
6 ft.
soil moundground
level
4
How to Apply No matter how lime is applied, it should be worked into the soil thoroughly. The more completely lime is mixed into the soil, the more quickly its value is realized. Hydrated lime generally acts more quickly to change pH, but ground lime-stone reacts over a longer period of time and is cheaper. There is little, if any, chance of plant injury with ground limestone if used properly.
Acidifying SoilSometimes soil is too alkaline for a crop, especially for ericaceous plants like rhododendron, azalea, and blueberries. Just as lime raises soil pH, other materials acidify soil. Most acidifying materials are soluble and will quickly influence soil pH. If used in excessive quantities, however, these materials can injure plants. After using any acidifying material, first wait six months and then check the pH to determine if additional applications are needed. Below are some materials used to lower soil pH. The amounts suggested are maximums suited to 100 square feet of clay soil. For sandy soils, reduce the application rates by 20 percent of the amounts indicated.
1. Aluminum sulfate—5 pounds. Both aluminum and sulfate can cause plant injury.
2. Ammonium sulfate—3 pounds. Sulfate may accumulate and cause problems, but it also supplies some nitrogen for plant growth.
3. Iron (ferrous) sulfate—5 pounds. Iron is useful to many plants, but the sulfate may accumulate and cause problems.
4. Sulfur—3 pounds. Sulfur reacts slowly to form sulfates. The sulfates may accumulate slowly and cause problems over time.
5. Urea—3/4 pound. No residue results, since this material is a pure nitrogen source. High levels may stimulate excessive plant growth.
Preparing Soil for PlantingLook at your soil and observe its structure. The lumps in the soil are made of particles clumped together. The particles are held together mainly by organic matter and water. For plants to become established and to grow well, the soil particles need to be separated. This means working the soil and pulverizing it to separate the particles and allow air to come in contact with them.
Before working the soil, you need to determine if it is work-able. Working soil while it is wet, for example, can destroy soil structure. Clay soils worked when wet lose their crumbly texture. They become hard, compact, lumpy, and consequently unproductive. To determine if soil is workable, take a handful and press it tightly. The soil should crumble readily when released. If it forms a compact, sticky, or muddy mass, the soil is too wet to be worked. You should not work the soil too much, or soil particles can be destroyed. Extremely fine soils crust over and seal out air after a rain. Heavily crusted soils also restrict root growth and development. The deeper you prepare a soil, the greater its capacity to hold air and moisture. Garden soil for vegetables and flowers should be plowed or spaded to a depth of 8 or 9 inches. Shrub beds should be worked to a depth of 18 inches. Moderately good subsoil can be improved by adding organic matter. For planting trees, the soil may have to be worked to the depth of the root ball or root system, and two times the diameter of the root ball. Working soil in the fall is advisable if you’re planning to incorporate coarse, organic matter, such as a heavy sod or a heavy application of manure. Coarse, organic matter will be-gin to decompose during the winter. This produces better soil conditions, especially for early vegetable crops. Fall-turned ground left in the rough over winter will dry out quickly, so that it can be worked and planted early in spring. The soil’s physical condition at planting time is impor-tant. Each soil has characteristics that determine the tilth best suited for planting. For example, clay soils should be left comparatively rough and cloddy to promote aeration and water penetration, and to reduce crusting of the soil surface. Clay soils with little organic matter will harden and crust easily as they dry and become difficult to re-wet. To improve the physical condition of heavy clay soils in small gardens and beds, apply composted manure and other organic matter, as well as some coarse sand. Never work more than an inch of sand into clay soil unless an equal amount of organic matter is also incorporated. Sand may improve drainage and reduce crusting of clay soil for a short time, but in the long run, sand alone will harden soil, making it difficult to cultivate. A rotary tiller is an excellent tool for incorporating soil amendments and organic matter into vegetable gardens and shrub beds. Excessive roto-tilling, year after year, will damage soil structure and diminish the benefits of organic matter.
Figure 4. pH scale.
acidic range neutral alkaline range
0 1 2 3 4 5 6 7 8 9 10 11 12
acidity increases alkalinity increases
Plants grow best in this
range of pH values.
5

Of course, an iron garden rake is still the best finishing or smoothing tool. It is excellent for pulverizing and leveling garden soils and seed beds.
Fertilizing PlantsNeeded NutrientsAll crops require a well-balanced supply of the major plant nutrients: nitrogen (N), phosphorus (P), potassium (K), mag-nesium (Mg), and calcium (Ca). A “complete” fertilizer is one that contains various amounts of the first three elements (N, P, K). Magnesium may be added to some specialty fertilizers, while calcium usually comes from ground limestone some-times used as filler in commercial fertilizer. This limestone does not replace the additional limestone that may be needed to adjust the soil pH. Plant nutrient availability has much to do with soil pH. Cal-cium, magnesium, manganese, copper, zinc, iron, and boron are normally readily available to plants when the soil pH is 6.0 to 6.5. In overlimed or alkaline soils, boron, manganese, and iron are not available. When soils are acidic (pH lower than 5.5), additional magnesium may be needed. Low pH levels also tie up some calcium and phosphorus, reducing their availability to plants. In addition, magnesium and calcium deficiencies may occur in soils receiving excessive amounts of potash, or in soils with potassium levels in excess of that needed for normal growth. Excessive soil potassium levels suppress plant uptake of cal-cium and magnesium. Minor elements are seldom deficient in soil. Most are already present or are supplied in the form of impurities with commercial fertilizers. If a deficiency of minor elements is suspected, consult your county extension agent before un-dertaking any corrective treatments. Certain minor elements, especially boron, zinc, and manganese, may be toxic to plants if too much is applied. Additional iron may be needed for some acid-tolerant ornamental plants, like rhododendron and azalea. Periodic ap-plications are helpful when adequate amounts are not present in the soil, or the pH is high. Some specialty fertilizers contain iron as a supplement, and soluble formulations of iron can be applied to the soil or sprayed directly on the plant. Fertilizer comes in two basic forms: organic (often called natural) and inorganic (often called chemical or synthetic). Each is equally good, depending on what crop is being grown and how the fertilizer is to be used.
Organic FertilizersOrganic materials originate from living organisms. They are broken down in soil, by bacteria, into inorganic, water-soluble forms. Inorganic materials are mineral salts that are water soluble. They do not need bacteria to make them available to plants. Once the nutrient is converted to the available inorganic material, it is equally useful to the plant, whether it originated from organic matter, inorganic fertilizer, or the weathering of soil. Organic fertilizer in its natural, moist form includes all ani-mal manures and compost made from manure and other plant or animal by-products. Commercial organic fertilizers include dried and pulverized manures, bone meal, slaughterhouse tankage, blood meal, cottonseed meal, and soybean meal.
The following are advantages of using organic fertilizers:
•Theyarelesscausticthaninorganicfertilizerswhenusedinlarge applications.
•Nutrientsareavailablemoreslowlyoveralongerperiodoftime.
•Nutrientsarelesslikelytobeleachedfromthesoil.
•Organicfertilizersmayactassoilamendmentsand conditioners.
The disadvantages are:
•Organicfertilizersgenerallycostmorethaninorganictypes.
•Manyorganicfertilizersarelowinnitrogenandother plant nutrients.
•Someformsneedtobecompostedbeforeuse.
•Nutrientsareinaninsolubleformbeforesoil microorganisms break them down.
Inorganic FertilizersInorganic fertilizers include materials prepared from mineral salts, which contain plant nutrients in combination with other elements. Nitrogen (N), phosphorus (P), and potassium (K) are the three major elements removed from soils in quantity by crops. Thirteen other elements, required in smaller amounts, also are essential for best plant growth. A “complete” fertilizer, one containing all three major ele-ments (N, P, and K), is useful for a variety of soils and crops. Fertilizer formulations suitable for general house and garden use are 5-10-5, 5-10-10, 8-16-8, and 8-24-8. For the most part, fertilizers with a nutrient ratio of 1-2-1 or 1-3-1 for N, P, and K will meet your needs. For planting vegetable and flower transplants or landscape plants, you may wish to use one of the high ratio, water-soluble fertilizers such as 10-55-10 (1:5:1). This is often called a special starter fertilizer. By law, the label on the fertilizer bag or package must indicate the amount of nitrogen, phosphorus, and potassium in the product, and in that order. The larger the percentage, the higher the concentration of nutrients per package. When only one element is deficient in a soil, nonmixed fer-tilizers will do the job. The most important of these nonmixed materials are nitrogen and phosphorus (phosphate) carriers. Nitrogen is available in ammonium nitrate, ammonium sulfate, or urea. Phosphorus (phosphate) is available in superphos-phates or bone meal. Potassium chloride (muriate of potash) or potassium sulfate is sometimes used to provide potassium. Wood ashes also contain some potash (their use and applica-tion is discussed below).
The following are advantages of using inorganic fertilizers:
•Nutrientsaresolubleandquicklyavailable.
•Formulationscancontainrelativelyhighamountsoftotalnutrients.
•Smallamountscanbeappliedtoprovideneedednutrients.
•Inorganicfertilizersarerelativelyinexpensive.
6

The disadvantages are:
•Overfertilizationmayoccur,sinceoftenonlysmallamountsare needed.
•Solublenutrients,inconcentratedsolutions,maybecausticto growing plants.
•Somenutrientsareverysolubleandmaybelostfromtheplant root zone through leaching.
Wood AshesWood ashes are sometimes used as fertilizer material. They contain phosphorus, considerable potassium and calcium, and traces of minor elements. In an unleached form (directly from the stove or fireplace), wood ashes can often do more harm than good if not properly applied. The ash is alkaline; it may raise the soil pH to a point at which other elements are unavailable. A good guideline is to apply dry, unleached wood ashes at a maximum of 3 pounds per 100 square feet of soil surface in a single season.
Application RatesRates of application for mixed fertilizers are governed by a number of different conditions. To be absolutely certain how much fertilizer is needed, take a soil test before the first appli-cation. A soil test not only indicates when and what fertilizer is needed for a given crop, but more important, when fertilizer is not needed. Overfertilization is more serious than under-fertilization. Once nutrients get into the soil, it is impossible to remove them. Also, plants are injured more quickly from excessive nutrients than from an overall nutrient deficiency. Past fertilization and cropping practices, soil type, fertilizer concentration, present crop, and plant needs all influence the amount of fertilizer you need to apply. As a rule, soil in a veg-etable or flower garden that is providing good plant growth, flowering, and fruiting requires 2 to 21/2 pounds of a 5-10-5 or 5-10-10 fertilizer per 100 square feet each year. Permanent landscape plantings can be maintained with 1 to 11/2 pounds of 5-10-10 per 100 square feet each year. In either case, it is advisable to do a soil test every three to four years to establish a record of nutrient content for your soil, and to guide you in supplying the nutrient level needed by the crop(s) being grown.
Application MethodsMethods for applying fertilizer are many and varied. Most plant roots spread considerable distances throughout the soil. Fertilizer applied over a large area is eventually used by plants, but not always at the best time. It is important to have fertilizer in the soil at the proper time and place for maximum absorp-tion by the roots. This concept is most critical for seasonal vegetable and flower crops. In landscape areas, broadcast applications of fertilizer help to retain the initial levels of fertility. The fertilizer should be spread uniformly over the soil surface during late fall or winter. Applying fertilizer at this time enables the nutrients to work gradually into the root zone for the next growing season. Trees planted in lawns frequently receive enough nutrients from a regular lawn fertilizer program. If additional nutrients are needed, they can be broadcast on the soil surface.
Broadcasting is the most common method of applying fertilizers in vegetable gardens. Try to apply the fertilizer uniformly and work it thoroughly into the upper 3 to 4 inches of soil. This method is suited for early, shallow-rooted crops grown in narrow rows, such as peas, radishes, leaf lettuce, and beets. Plowing down fertilizer is useful in heavy clay soils, where it will become available during midseason. The easiest method is to apply the fertilizer evenly over the surface before tilling or spading. This method works well for many deep-rooted crops, such as tomatoes, sweet corn, cabbage, beans, and carrots. Band applications are effective when relatively small amounts of fertilizer are needed. The fertilizer is placed 2 to 3 inches to one side of the seed, and at about the same level as, or slightly lower than, the seed. Band applications are also useful as a supplement to broadcasting or plowing down fertil-izer. Remember that fertilizer placed too near seeds or young plants will cause damage. Side dressing is placing fertilizer on each side of the row after growth has started. The fertilizer is applied in bands 4 to 8 inches away from plants. This method is most effective on sandy soils where the material has a chance to leach into the plants’ root zone. If fertilizer was applied in bands at planting time, side dressing is not suggested. Top dressing is using a readily available nitrogen fertilizer to promote leaf growth. Materials such as urea, nitrate of soda, and ammonium sulfate are water soluble and suitable for this practice. Top dressings are effective on sandy soils and crops such as leaf lettuce, spinach, early cabbage, and broccoli. Take care to keep these materials off of leaves, or the plants may be injured. Starter solutions are water-soluble materials high in phos-phorus. They are used to best advantage when no fertilizer has been placed in the row before planting. Once the plant is set, apply the starter solution to the soil around the roots. Cover the moist area around the plant with dry soil to avoid soil crusting. A combination of methods may be best for getting the most return for your fertilizer dollar. For long-season crops like tomatoes, peppers, and eggplants, you may find it better to incorporate two-thirds of the needed fertilizer, and to side
dress the remainder during the growing season. For short-season crops, half the fertilizer may be incorpo-rated before planting, and the remainder broadcast and worked into the upper 3 inches of soil later in the season.
7
General Purpose Mix
Nitrogen ...........5%Phosphate .....10%Potash ...........15%
5 10 15

Nutrient DeficiencyMost plants express their need for fertilizer through deficiency symptoms, which are rather specific for various nutrients. Generally, plant growth slows down before specific symptoms become apparent. Before assuming a nutrient deficiency is causing a plant problem, consider disease, insects, poor soil conditions, injury from cultivation and/or tools, improper use of fertilizers, water, and weather as possible reasons for the plant’s condition.
Specific deficiencies may have the following symptoms:
•Nitrogen—yellowedorlightergreenleaveswhiletheveinsremain green, especially on the lower part of the plant.
•Phosphorus—purple-tingedleavesandstemsonstuntedplants. (Note: the leaves, stems, and petioles of plants ex-posed to prolonged cool weather may turn purple.)
•Potassium—yellowingandbrowningofedgesonolderleaves.
•Calcium—youngleavesdiebackatthetipandmargins.Terminal buds may die completely.
•Magnesium—olderleavesmaybecomemottledorchlorotic(yellowish), sometimes with dead spots on the leaf.
•Iron—youngleavesarechloroticandmajorveinsintheleafremain dark green.
Deficiency symptoms are difficult to define. If more than one element is lacking, there may be a blending of symptoms. Furthermore, poor soil or cultural conditions can injure the root system. For example, inadequate soil drainage can inhibit root growth, or deep cultivation in a garden can cut plant roots. In both cases, the root system may be inadequate, making the plant incapable of taking in nutrients even when there is an adequate supply in the soil. When a root system is unable to extract nutrients from the soil, a deficiency symptom can ap-pear in the foliage. If nutrient deficiencies are suspected, and proper cultural practices have been followed, it is wise to soil test before add-ing fertilizer. A soil test will indicate which element(s) are lack-ing and how much should be applied to meet the plant’s needs.
Getting the Most from FertilizersTo make the best use of fertilizers, you should:
•testyoursoileverythreetofiveyears
•selectplantssuitableforyoursoil
•besurethesoiliswelldrained
•applylimeandfertilizerasindicatedbysoiltesting
•controlweedgrowth
•useadequateorganicmattertoimprovesoilquality
•avoidovercrowdingplantsinvegetablegardens
•usedisease-resistantvarietiesofseedsandplants
Seeking Help for Soil ProblemsWhen problems develop, it is best to seek assistance while the plants are still growing, or before new ones are planted under the same conditions. Surviving plants will often provide a clue to the cause of the trouble. To wait until a plant has been removed, or until the garden has been prepared for the next crop, is wasting time as well as destroying valuable evidence. Information on past cropping, fertilization, organic matter applications, liming, previous soil test reports, and drainage practices also will help in solving soil problems. Penn State Extension offers a wide variety of publications on topics including landscaping, growing flowers and veg-etables, foods and food safety, nutrition, and much more. For a catalog of available publications, visit your local extension office, go to pubs.cas.psu.edu on the web, or call 814-865-6713.
8

Notes

Penn State College of Agricultural Sciences research and extension programs are funded in part by Pennsylvania counties, the Commonwealth of Pennsylvania, and the U.S. Department of Agriculture. Visit Penn State Extension on the web: extension.psu.edu
This publication is available from the Publications Distribution Center, The Pennsylvania State University, 112 Agricultural Administration Building, University Park, PA 16802. For information telephone 814-865-6713.
This publication is available in alternative media on request.
The Pennsylvania State University is committed to the policy that all persons shall have equal access to programs, facilities, admission, and employment without regard to personal characteristics not related to ability, performance, or qualifications as determined by University policy or by state or federal authorities. It is the policy of the University to maintain an academic and work environment free of discrimi-nation, including harassment. The Pennsylvania State University prohibits discrimination and harassment against any person because of age, ancestry, color, disability or handicap, national origin, race, religious creed, sex, sexual orientation, gender identity, or veteran status. Discrimination or harassment against faculty, staff, or students will not be tolerated at The Pennsylvania State University. Direct all inquiries regarding the nondiscrimination policy to the Affirmative Action Director, The Pennsylvania State University, 328 Boucke Building, Univer-sity Park, PA 16802-5901, Tel 814-865-4700/V, 814-863-1150/TTY.
Produced by Ag Communications and Marketing
© The Pennsylvania State University 2001
Code # UJ234 R4M8/11mpc4038
Prepared by J. Robert Nuss, professor emeritus of ornamental horticulture; David L. Sanford, associate professor of ornamental horticulture; and James C. Sellmer, associate professor of ornamental horticul-ture.