Zoomify HTML5™
Zoomify HTML5 Developer™
Zoomify HTML5 Enterprise™
User’s Guide
Copyright © 1999-2012 Zoomify, Inc.
Zoomify HTML5™ User’s Guide - All Editions
Table of Contents
Chapter I. Welcome to Zoomify ......................................................................................... 3 Zoomify unleashes unlimited resolution ............................................................................ 3 How Zoomify works ........................................................................................................... 4 Zoomify and compression .................................................................................................. 5 Zoomify delivers one-step image prep .............................................................................. 5 Using this Guide ................................................................................................................ 6 Contacting Zoomify Support .............................................................................................. 6
Chapter II. Using Zoomify HTML5 – All Editions ............................................................. 7 Using the Zoomify Image Viewer ....................................................................................... 7 Converting your images into Zoomify Images ................................................................... 7 Adding the Zoomify Image Viewer to your web page ........................................................ 8 Customizing the Zoomify Image Viewer ............................................................................ 8 Advanced customization .................................................................................................... 9 Publishing your content - copying it to your web server .................................................... 9
Chapter III. Elements of the Zoomify HTML5 Products .................................................. 10 Main product folder .......................................................................................................... 10 Documentation folder ....................................................................................................... 10 Converter folder ............................................................................................................... 11 ZoomifyImageExample folders ........................................................................................ 13 Assets folder .................................................................................................................... 13 ViewerSource folder (Developer and Enterprise editions only) ...................................... 13
Chapter IV. Zoomify Image Viewer Features .................................................................. 14 Features as demonstrated by example web pages ........................................................ 14
Chapter V. Advanced Topics ........................................................................................... 40 Editing the Zoomify Image Viewer ................................................................................... 40 Thumbnail support ........................................................................................................... 41
Chapter VI. Troubleshooting ............................................................................................ 43 Troubleshooting image conversion .................................................................................. 43 Troubleshooting image viewing ....................................................................................... 44
Chapter VII. Appendices ................................................................................................... 45 Complementary Zoomify products ................................................................................... 45 Uninstalling Zoomify HTML5 ........................................................................................... 46 Glossary ........................................................................................................................... 46 System requirements and additional resources .............................................................. 47
Copyright © 1999-2012 Zoomify, Inc. - 2 -All Rights Reserved
Zoomify HTML5™ User’s Guide - All Editions
Chapter I. Welcome to Zoomify
Zoomify unleashes unlimited resolution
Zoomify makes high-quality images useful on the Web. The Zoomify family of products quickly converts images of any size or quality to stream for fast initial display and on-demand viewing of fine details!
Zoomify enables publishing of multi-megabyte or even multi-gigabyte photos that can be viewed without any large download. Visitors to your website can interactively zoom-in and explore huge images – of truly high quality – in real-time.
Zoomify’s solutions are geared toward the needs of your website.
- Zoomify HTML5 enables your site visitors to interactively pan and zoom to explore images in detail with only a web browser. Zoomify HTML5 supports web page design flexibility with simple HTML parameters. Zoomify HTML5 Developer adds extensive additional features including layout control, copyright alerting, watermarks, and more – all driven by HTML parameters, along with helpful examples, as well as full editable JavaScript source for the Zoomify Image Viewer for complete customization control. With no Flash or other proprietary technology involved, your Zoomify content works everywhere – even on iOS, Android, and other mobile devices.
- Zoomify Flash delivers the same zoom-and-pan functionality Zoomify HTML5 but adds additional viewing options including slideshows, hotspots, rotation, and other capabilities. Zoomify Flash is available in standard and Developer editions, with the Developer edition adding complete editable Flash source files for all viewers, the Zoomify ActionScript API, a component-based architecture, and detailed developer examples for total creative control.
- Zoomify Enterprise delivers sophisticated image annotation capabilities with the Zoomify Annotation Viewer, and powerful image preparation control with the Zoomify Enterprise Converter which is command-line-drivable, and thus scriptable with your favorite server-side scripting language – PHP, Python, ASP, JSP, etc. Zoomify Enterprise's standard edition supports extensive HTML and XML parameters to allow control of Annotation Viewer features, while the Developer edition adds complete Flash source files to enable complete customization control in any manner your needs require. The Developer edition also adds support for single-image (PFF) storage, a convenience of benefit when managing collections of hundreds or thousands of images which may each be hundreds or thousands of megabytes in size.
All of Zoomify’s solutions never involve any license fees, website traffic limits, or arcane contracts. In short, there are no strings on your images. Simply convert your images to zoom and host on your webserver wherever it may be.
Copyright © 1999-2012 Zoomify, Inc. - 3 -All Rights Reserved
Zoomify HTML5™ User’s Guide - All Editions
How Zoomify works
How does Zoomify work? The Zoomify Converter intelligently converts any image for incremental on-demand access. The Zoomify Image Viewer is then able to display any view of the image – zoomed-in or zoomed-out, and panned left, right, up, or down.
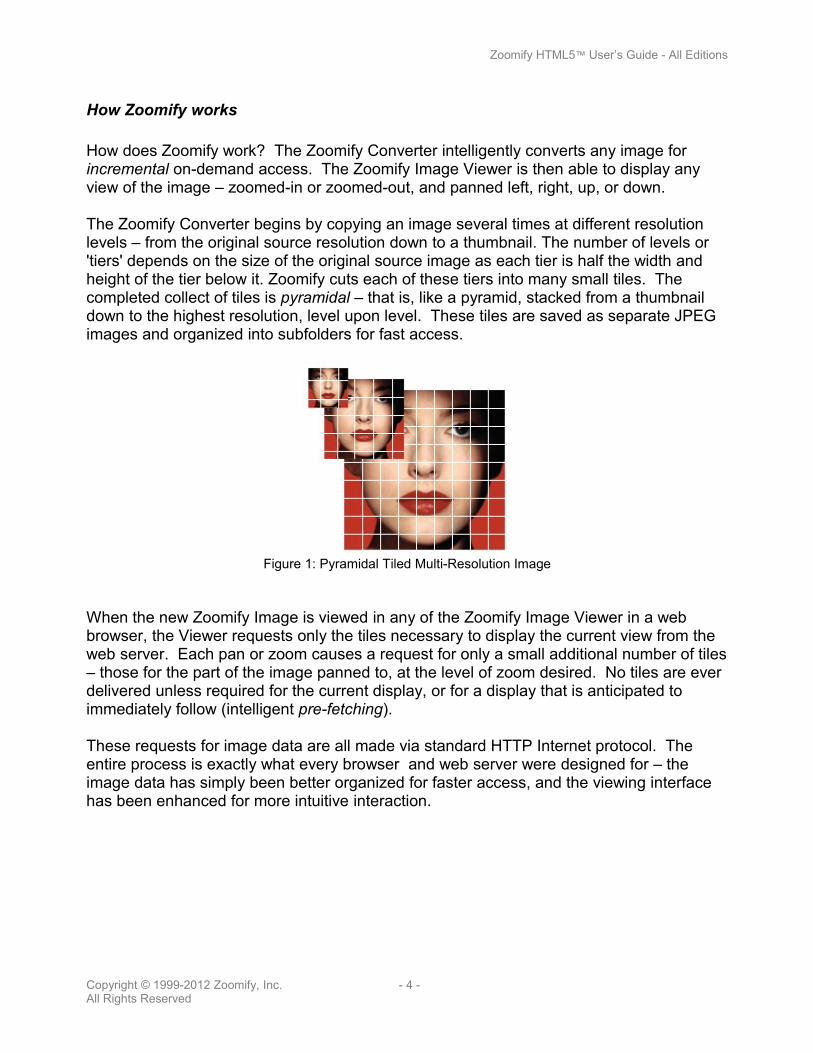
The Zoomify Converter begins by copying an image several times at different resolution levels – from the original source resolution down to a thumbnail. The number of levels or 'tiers' depends on the size of the original source image as each tier is half the width and height of the tier below it. Zoomify cuts each of these tiers into many small tiles. The completed collect of tiles is pyramidal – that is, like a pyramid, stacked from a thumbnail down to the highest resolution, level upon level. These tiles are saved as separate JPEG images and organized into subfolders for fast access.
Figure 1: Pyramidal Tiled Multi-Resolution Image
When the new Zoomify Image is viewed in any of the Zoomify Image Viewer in a web browser, the Viewer requests only the tiles necessary to display the current view from the web server. Each pan or zoom causes a request for only a small additional number of tiles – those for the part of the image panned to, at the level of zoom desired. No tiles are ever delivered unless required for the current display, or for a display that is anticipated to immediately follow (intelligent pre-fetching).
These requests for image data are all made via standard HTTP Internet protocol. The entire process is exactly what every browser and web server were designed for – the image data has simply been better organized for faster access, and the viewing interface has been enhanced for more intuitive interaction.
Copyright © 1999-2012 Zoomify, Inc. - 4 -All Rights Reserved
Zoomify HTML5™ User’s Guide - All Editions
Zoomify and compression
Zoomify’s image streaming approach is complementary to compression because compression reduces the size of data delivered while Zoomify ensures that no unnecessary data is delivered. In fact, Zoomify leverages the complementary benefits of compression by applying JPEG compression to the image tiles within a converted Zoomify Image.
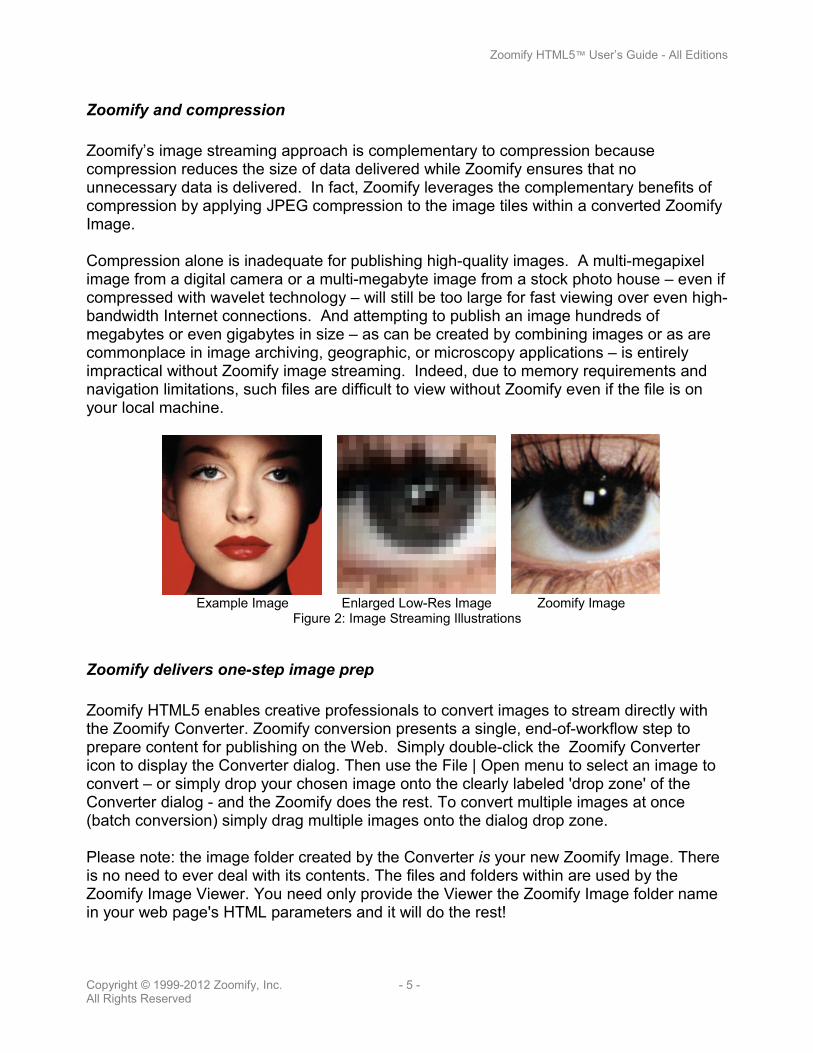
Compression alone is inadequate for publishing high-quality images. A multi-megapixel image from a digital camera or a multi-megabyte image from a stock photo house – even if compressed with wavelet technology – will still be too large for fast viewing over even high-bandwidth Internet connections. And attempting to publish an image hundreds of megabytes or even gigabytes in size – as can be created by combining images or as are commonplace in image archiving, geographic, or microscopy applications – is entirely impractical without Zoomify image streaming. Indeed, due to memory requirements and navigation limitations, such files are difficult to view without Zoomify even if the file is on your local machine.
Example Image Enlarged Low-Res Image Zoomify ImageFigure 2: Image Streaming Illustrations
Zoomify delivers one-step image prep
Zoomify HTML5 enables creative professionals to convert images to stream directly with the Zoomify Converter. Zoomify conversion presents a single, end-of-workflow step to prepare content for publishing on the Web. Simply double-click the Zoomify Converter icon to display the Converter dialog. Then use the File | Open menu to select an image to convert – or simply drop your chosen image onto the clearly labeled 'drop zone' of the Converter dialog - and the Zoomify does the rest. To convert multiple images at once (batch conversion) simply drag multiple images onto the dialog drop zone.
Please note: the image folder created by the Converter is your new Zoomify Image. There is no need to ever deal with its contents. The files and folders within are used by the Zoomify Image Viewer. You need only provide the Viewer the Zoomify Image folder name in your web page's HTML parameters and it will do the rest!
Copyright © 1999-2012 Zoomify, Inc. - 5 -All Rights Reserved

Zoomify HTML5™ User’s Guide - All Editions
Using this Guide
This User's Guide describes the features of Zoomify HTML5. Users unfamiliar with web page editing, high-quality imaging, or Zoomify, will most likely prefer to follow the chapters in the order presented. The chapter entitled “Using Zoomify HTML5” can be read now or referred to once you become more familiar with the Zoomify and its capabilities.
Contacting Zoomify Support
For additional help Zoomify’s outstanding Support Team is standing by. Simply email [email protected] - every effort is made to respond promptly. Standard business hours are 8 a.m. to 5 p.m. Pacific Time. Please be sure to review relevant portions of this Guide prior to contacting us and search the extensive Support FAQ on the Zoomify website at http://www.zoomify.com/support.htm. The Zoomify website is also your best source for the latest updates and other product news.
If reporting a problem, please provide the following information to the best of your ability:
Description: Area of product affected. Application, browser, and operating system behavior.
Errors: Exact wording of any error message displayed.
Steps to reproduce: Exact order of actions leading up to the problemincluding every menu and button choice.
Reproducibility: Is the problem 100% repeatable or intermittent?
Configuration: Platform and model, operating system and version,browser and version, and Zoomify product and version.
We are committed to your successful use of Zoomify HTML5 and Zoomify HTML5 Developer. Thank you for your business.
The Zoomify Team
Copyright © 1999-2012 Zoomify, Inc. - 6 -All Rights Reserved
Zoomify HTML5™ User’s Guide - All Editions
Chapter II. Using Zoomify HTML5 – All Editions
If you’re already familiar with Zoomify’s products or you just want to jump right in, this section is for you. This step-by-step outline will explain how to use the Zoomify Image Viewer, how to create your own Zoomify Images, and even customize the Zoomify Image Viewer – all in a few minutes.
Using the Zoomify Image Viewer
The simplest, fastest introduction to Zoomify requires only a brief tour of the many features of the Zoomify Image Viewer using the example web pages in the main folder of the product download. To use any example (“.htm” file) simply open it in a browser by double-clicking it. You'll see a Zoomify Image and be able to interact with it.
Converting your images into Zoomify Images
The next step in a simple introduction to Zoomify is converting your own image to zoom. To do so, simply double click the Zoomify Converter to open it, then use the File | Open menu to select any TIF, BMP, or JPG image file to convert. During conversion you'll see a display of the conversion in progress. You'll find the Converter application in the Converter subfolder of the product download.
When the conversion completes, you can locate the new folder the Converter has created – your new Zoomify Image – directly next to the original source image (that is, in the same folder as the source image). To most easily see your new Zoomify Image in action, you can copy it into the product folder and temporarily change its name to the name “ZoomifyImageExample”. (You'll need to change the name of the standard example image first to avoid a naming conflict.) The example web pages will then show your image instead of the standard example image.
You can also 'batch convert' images – convert many at once - by simply dragging multiple image files onto the drop zone of the Zoomify Converter dialog. The Converter will then convert multiple image files sequentially. Please ensure that you have enough disk space for both the original images and the newly created Zoomify Image folders.
For the best results when converting images, we recommend that you use an image saved in the bitmap (.bmp) or TIFF (.tif or .tiff) formats as these are uncompressed or losslessly compressed formats. The Zoomify Converter applies JPEG compression. In order to obtain the best possible quality you’ll want to begin with a source image that has not been previously compressed with a ‘lossy’ image format.1
1Zoomify offers built-in support for BMPs (Windows bitmap files), TIFFs, and JPEGs.
Copyright © 1999-2012 Zoomify, Inc. - 7 -All Rights Reserved
Zoomify HTML5™ User’s Guide - All Editions
Adding the Zoomify Image Viewer to your web page
The Zoomify Image Viewer is incredibly simple to use. Adding it to any web page simply requires adding three lines to the page using a text or HTML editor. The first line tells the web page to include the Viewer script file: "ZoomifyImageViewer.js". The second line creates the container element for the Viewer to exist in: for example, "myContainer". And the third line creates the Viewer, tells it the container name, and instructs it to display an image, for example, "ZoomifyImageExample".
Together, the lines look like this:
<head> <script type="text/javascript" src="ZoomifyImageViewer.js"></script> <style type="text/css"> #myContainer { width: 900px; height: 550px } </style> <script type="text/javascript"> Z.showImage("myContainer", "ZoomifyImageExample"); </script> </head>
With those lines in place, the Zoomify Image Viewer can display the desired Zoomify Image anywhere in your web page where you tell it to:
<body> <div id="myContainer"></div> </body>
More detailed information on this simple process is provided in the Zoomify Parameters List document which is included in this product's Documentation folder.
Customizing the Zoomify Image Viewer
The Zoomify Image Viewer included in Zoomify HTML5 supports many HTML parameters. These provide a simple means to customize the Zoomify Image Viewer. Zoomify HTML5 Developer's Zoomify Image Viewer supports numerous additional HTML parameters to allow for more powerful customizations.
Applying these HTML parameters could not be simpler. As noted above, just use any text or HTML editor to edit your web page. For example, the third line seen above:
<script type="text/javascript"> Z.showImage("myContainer", "ZoomifyImageExample"); </script>
can become
<script type="text/javascript"> Z.showImage("myContainer", "ZoomifyImageExample", "zInitialX=1125&zInitialY=1385&zInitialZoom=100"); </script>
This simple change will tell the Zoomify Image Viewer to initially display a view of the ZoomifyImageExample 100 percent zoomed-in and panned to the specified position.
Copyright © 1999-2012 Zoomify, Inc. - 8 -All Rights Reserved
Zoomify HTML5™ User’s Guide - All Editions
All supported HTML parameters are listed and described in the Zoomify Parameters List document in the Documentation folder. Additionally, each product can be seen in action in the many example web pages included in the main folder of each product download.
Advanced customization
Zoomify HTML5 Developer includes complete JavaScript source code for the Zoomify Image Viewer. You can easily edit this in the same text or HTML editor you use for editing your web pages. Detailed information about editing the Zoomify Image Viewer to implement more advanced customizations than the built-in HTML parameters may enable is provided in the Advanced Topics chapter below, under the heading “Editing the Zoomify Image Viewer”.
Publishing your content - copying it to your web server
To publish your Zoomify Image to a website, just copy four things to your webserver:
1. The viewer file “ZoomifyImageViewer.js”.2. Your Zoomify Image folder (the entire folder, not just its contents).3. The Assets folder from the product download (and its subfolders).4. Your web page '.htm' file.
That’s it!
Zoomify's HTML5-based technology is implemented to involve only HTML, JPEGs, and one small JavaScript file – no Flash files or other proprietary technologies are involved. There is therefore no need for any special setup. Publishing really is as simple as copying files to your website – and viewing really is as simple as pointing a web browser at the right web address.
If you haven't already, visit the Zoomify website to see the very same example web pages included in the Zoomify HTML5 and Zoomify HTMl5 Developer products in action: http://www.zoomify.com/html5.htm.
Please note: the Assets folder contains many subfolders. It is easiest to simply upload the entire Assets folder to your web server, however, for basic uses only the folder “Assets/Skins/Default” will be need to be uploaded. The Viewer expects to find a folder named “Assets” containing a folder named “Skins containing a folder named “Default” in the same location as the ZoomifyImageViewer.js file. This holds the small graphics files that are used to create the toolbar of the Zoomify Image Viewer. The files can actually be placed anywhere, however if the above folder structure is not used, the zSkinPath parameter must be used to specify the location of the files. For example, the 'ToolbarSkinned' example web page (Developer and Enterprise products only) uses the zSkinPath parameter to tell the Viewer to use the skin graphics in the Assets/Skins/Dark folder to create a different toolbar look.
Copyright © 1999-2012 Zoomify, Inc. - 9 -All Rights Reserved

Zoomify HTML5™ User’s Guide - All Editions
Chapter III. Elements of the Zoomify HTML5 Products
This chapter provides a brief list of the correct contents of each product download file as viewed after it is unzipped.
Main product folder
Unzipping the product download reveals a single “_READ ME FIRST.txt” file, the Zoomify Image Viewer file “ZoomifyImageViewer.js”, and a selection of example web pages. Note that the Viewer file included here is 'minified' – that is, it has been modified to remove white spaces, comments, and other content not required for use on a website.
Also included are numerous subfolders. The contents of these subfolders is as follows:
Documentation folder
Zoomify HTML5 and Zoomify HTML5 Developer include multiple information resources to assist web designers and developers in most effectively leveraging the features and functionality of the product:
a. Zoomify License Agreement.txt
Terms of use for Zoomify products. Developers, please read this document for appropriate use of Zoomify source code.
b. Zoomify HTML5 User's Guide.pdf
The User’s Guide, this document, provides information on working with Zoomify HTML5 and Zoomify HTML5 Developer.2
c. Zoomify Parameter List.htm
The Parameter List includes helpful descriptions of every HTML parameter supported by the Zoomify Image Viewer as included in the Zoomify HTML5 and Zoomify HTML5 Developer products.
d. Zoomify Function List.htm
The Function List includes descriptions of every JavaScript function included in theZoomify Image Viewer codebase – the file “ZoomifyImageViewer.js”. These descriptions are grouped by function categories including Initialization, Interaction,Core, Object, Event, Get and Set, and Utility.
2 Published in Adobe’s Acrobat format – the reader is free from http://www.adobe.com/.
Copyright © 1999-2012 Zoomify, Inc. - 10 -All Rights Reserved
Zoomify HTML5™ User’s Guide - All Editions
Converter folder
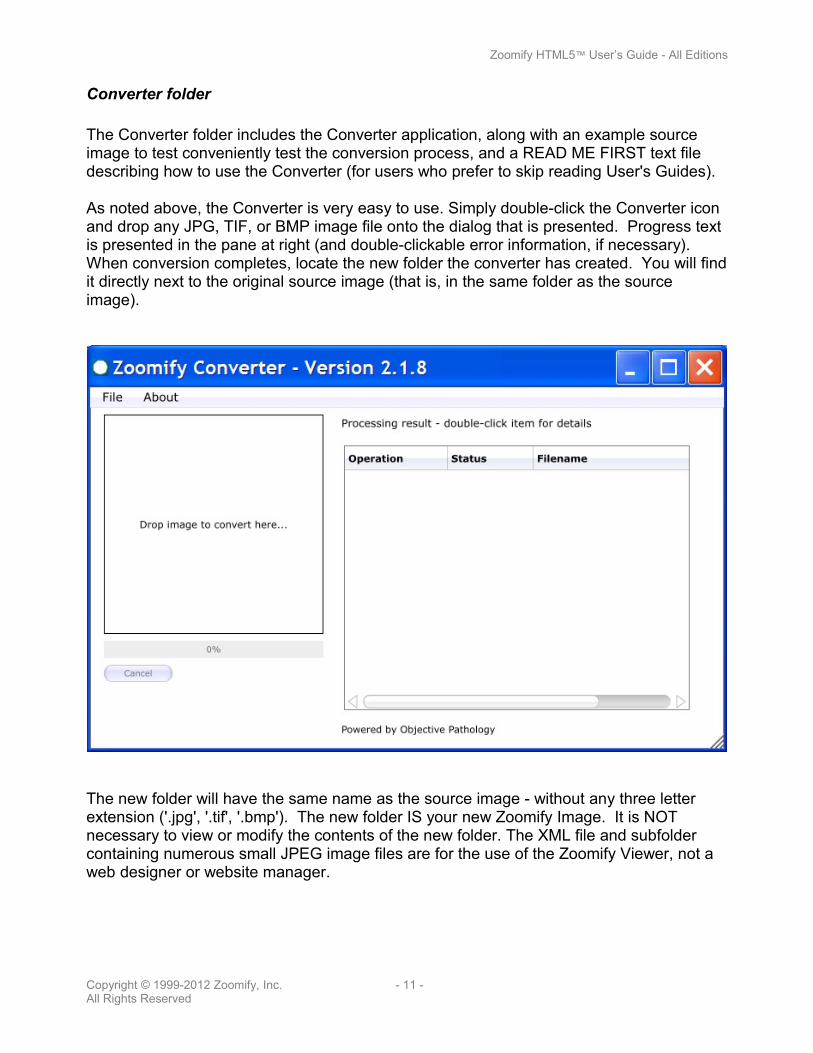
The Converter folder includes the Converter application, along with an example source image to test conveniently test the conversion process, and a READ ME FIRST text file describing how to use the Converter (for users who prefer to skip reading User's Guides).
As noted above, the Converter is very easy to use. Simply double-click the Converter icon and drop any JPG, TIF, or BMP image file onto the dialog that is presented. Progress text is presented in the pane at right (and double-clickable error information, if necessary). When conversion completes, locate the new folder the converter has created. You will find it directly next to the original source image (that is, in the same folder as the source image).
The new folder will have the same name as the source image - without any three letter extension ('.jpg', '.tif', '.bmp'). The new folder IS your new Zoomify Image. It is NOT necessary to view or modify the contents of the new folder. The XML file and subfolder containing numerous small JPEG image files are for the use of the Zoomify Viewer, not a web designer or website manager.
Copyright © 1999-2012 Zoomify, Inc. - 11 -All Rights Reserved
Zoomify HTML5™ User’s Guide - All Editions
Zoomify HTML5 Enterprise also includes the Zoomify Command-Line Converter. To call the command-line converter use this form:
exeName fileToConvert
The converter supports several parameters. Use the exe name without any parameters to see usage information.
Use the parameters in any order, however, always place the filename to be converted after the parameters, at the end of entire command string.
The following parameters are supported:
-b NOT required as there is no user interface to hide.-o To specify foldername or filename for output.-p To specify PFF output rather than folder-based storage
('.pff' will be auto-added to filename if not present).-e Displays list of supported file extensions, separated by semicolons.-i Checks filename and returns 0 if file can be zoomified, >0 otherwise.
Also prints file information.-qnnn Sets JPEG quality from 20 to 100
The Zoomify Command-Line Converter also supports standard exit codes. Use ERRORLEVEL in batch file. 0 = success.
-1 = bad command line options.1 = unrecognized file.2 = bad output file/folder name.3 = input file unreadable.4 = cannot zoomify the input file.5 = zoomify failed.
File size limits: the Zoomify Converter included in the Zoomify HTML5 and Zoomify HTML5 Developer products will convert source files up to 256 megapixels in size. The Zoomify Converters included in the Zoomify HTML5 Enterprise product edition will convert source files up to 768 megapixels in size. Additional Converter editions are available which convert images that exceed these size limits, including an edition that is not limited which will converter images of any size. In addition, editions are available for various Unix and Linux platforms, and which support additional source file formats. For information on these additional Converter editions, please contact Zoomify Support at [email protected]. Detailed information will be added to future releases of this product and the Zoomify website.
Please note: If you are using an operating system that pre-dates Windows XP or OS X v10.5 you may need an earlier version of the Zoomify Converter. Simple contact us at [email protected] and we'll provide one to you.
Copyright © 1999-2012 Zoomify, Inc. - 12 -All Rights Reserved

Zoomify HTML5™ User’s Guide - All Editions
ZoomifyImageExample folders
Example image folders (two or more in the Developer and Enterprise editions) are the used by all of the many example web pages of the product. The example web pages contain the example Image folders' names as they are, without any path. Renaming or moving an example image folder will cause one or more example web pages not to properly display that image. In that case, the names or locations will have to be corrected, or the example web pages will have to be edited to correct the name and/or add a path.
Assets folder
This folder contains the example copyright text file, example custom logo graphic file, skin graphic files, example watermark graphic file, and other support files that allow the many example web pages in the product to work. Developer and Enterprise editions also include support files for Hotspot and Annotation features, respectively.
If the Asset Folder or its contents are moved to a different location relative to the example web page files, the example web page files will not work properly. The references they contain would have to be edited for the examples to work again.
ViewerSource folder (Developer and Enterprise editions only)
This folder contains the ZoomifyImageViewer.js source file in full editable form.
The version of this file approved for use on a production (non-development) website is 'minified' - that is, it has been 'compiled' to remove all white space, comments, unused functions (if any), and other text that is not required for browsers to run the JavaScript. These elements can be helpful when editing the JavaScript but are unnecessary when using it on a website. Minifying reduces the Viewer file size by more than half, thereby speeding downloads and reducing bandwidth requirements.
The Viewer source file can be edited using any text of HTML editor. Further details on this process can be found in the Advanced Topics chapter below, under the heading “Editing the Zoomify Image Viewer”.
After editing the JavaScript source file to customize the Viewer, the source file must be minified before being used on a website. This is necessary to comply with the terms of the Zoomify License Agreement. More information on this process can be found in the READ ME FIRST text file in the ViewerSource folder.
Copyright © 1999-2012 Zoomify, Inc. - 13 -All Rights Reserved
Zoomify HTML5™ User’s Guide - All Editions
Chapter IV. Zoomify Image Viewer Features
Features as demonstrated by example web pages
The Zoomify HTML5 and Zoomify HTML5 Developer products each include numerous example web pages demonstrating the features of the include Zoomify Image Viewer. This section provides a brief description of each example purpose and the HTML parameters used to implement it.
Default values
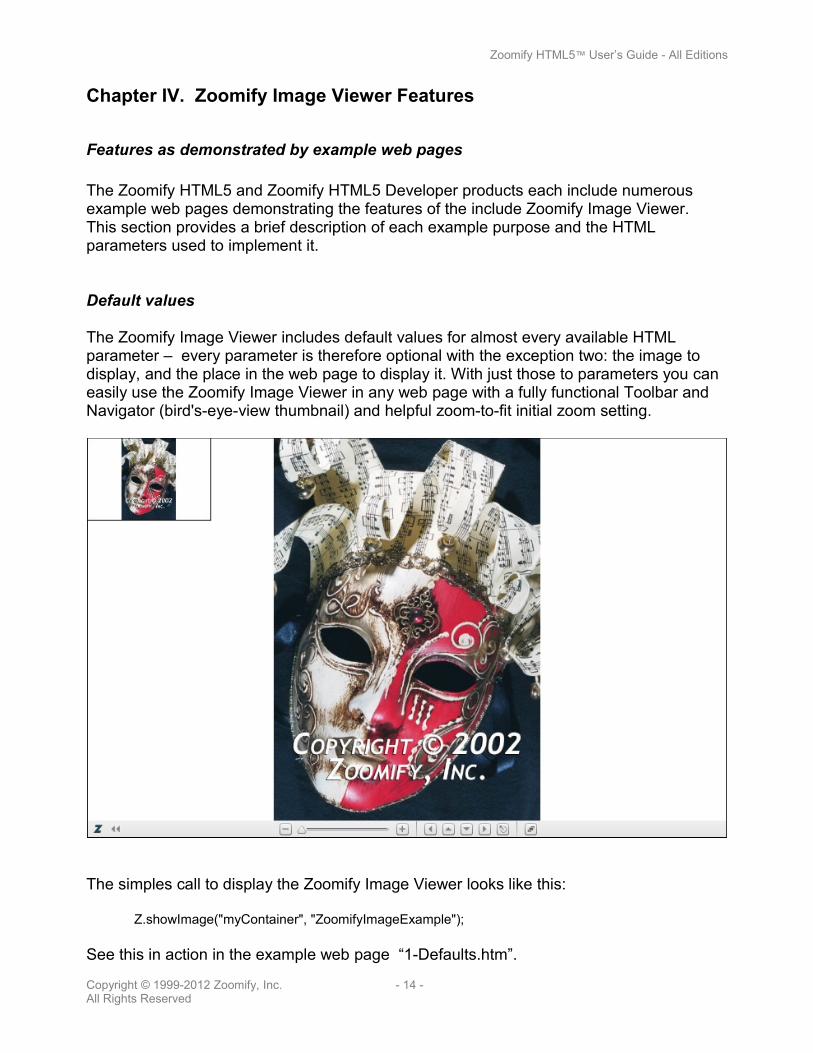
The Zoomify Image Viewer includes default values for almost every available HTML parameter – every parameter is therefore optional with the exception two: the image to display, and the place in the web page to display it. With just those to parameters you can easily use the Zoomify Image Viewer in any web page with a fully functional Toolbar and Navigator (bird's-eye-view thumbnail) and helpful zoom-to-fit initial zoom setting.
The simples call to display the Zoomify Image Viewer looks like this:
Z.showImage("myContainer", "ZoomifyImageExample");
See this in action in the example web page “1-Defaults.htm”.
Copyright © 1999-2012 Zoomify, Inc. - 14 -All Rights Reserved
Zoomify HTML5™ User’s Guide - All Editions
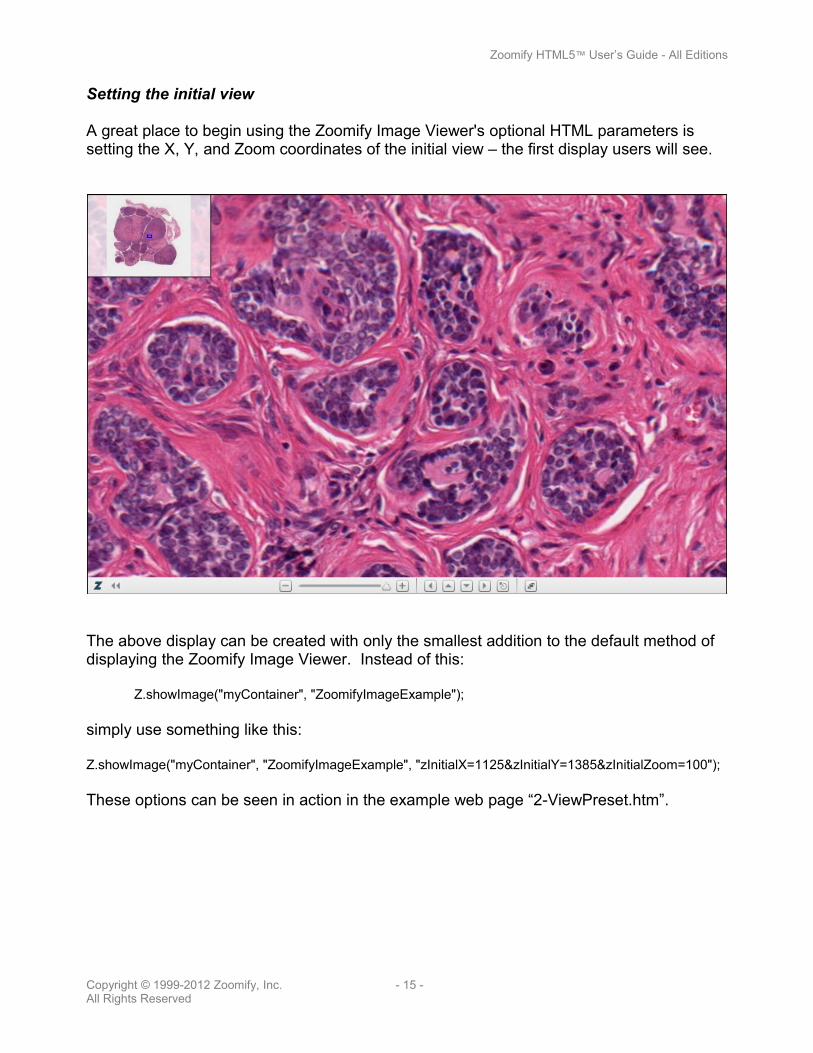
Setting the initial view
A great place to begin using the Zoomify Image Viewer's optional HTML parameters is setting the X, Y, and Zoom coordinates of the initial view – the first display users will see.
The above display can be created with only the smallest addition to the default method of displaying the Zoomify Image Viewer. Instead of this:
Z.showImage("myContainer", "ZoomifyImageExample");
simply use something like this:
Z.showImage("myContainer", "ZoomifyImageExample", "zInitialX=1125&zInitialY=1385&zInitialZoom=100");
These options can be seen in action in the example web page “2-ViewPreset.htm”.
Copyright © 1999-2012 Zoomify, Inc. - 15 -All Rights Reserved
Zoomify HTML5™ User’s Guide - All Editions
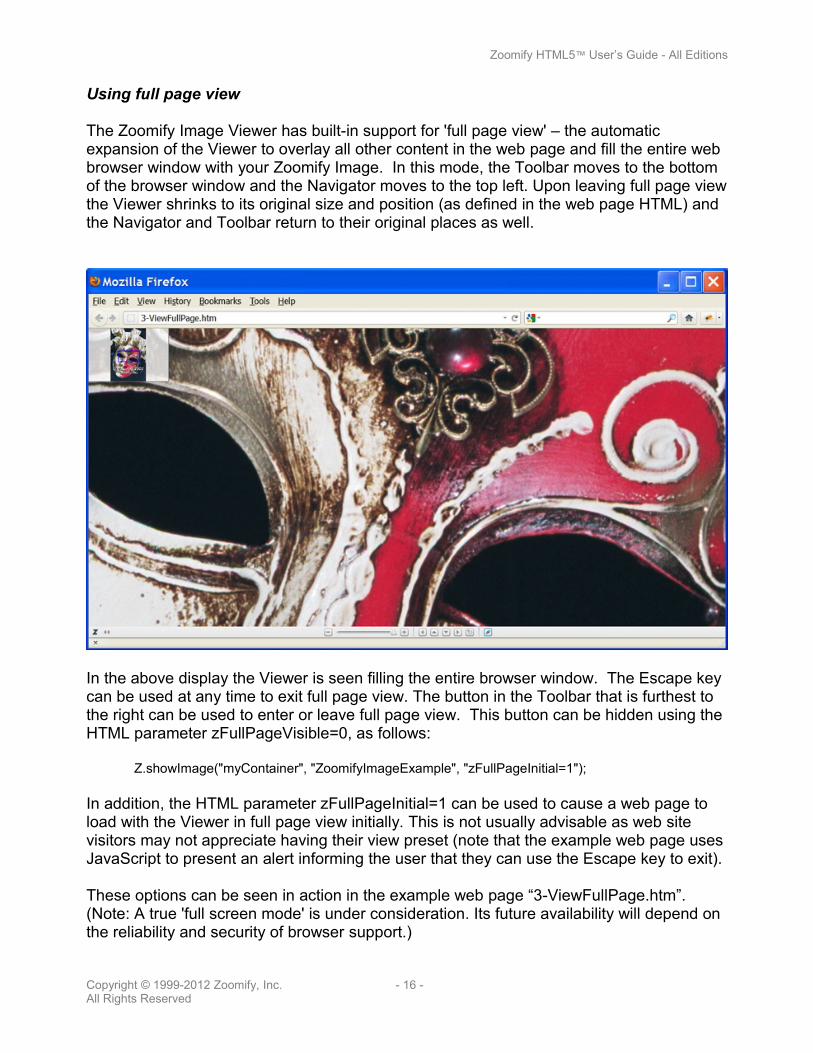
Using full page view
The Zoomify Image Viewer has built-in support for 'full page view' – the automatic expansion of the Viewer to overlay all other content in the web page and fill the entire web browser window with your Zoomify Image. In this mode, the Toolbar moves to the bottom of the browser window and the Navigator moves to the top left. Upon leaving full page view the Viewer shrinks to its original size and position (as defined in the web page HTML) and the Navigator and Toolbar return to their original places as well.
In the above display the Viewer is seen filling the entire browser window. The Escape key can be used at any time to exit full page view. The button in the Toolbar that is furthest to the right can be used to enter or leave full page view. This button can be hidden using the HTML parameter zFullPageVisible=0, as follows:
Z.showImage("myContainer", "ZoomifyImageExample", "zFullPageInitial=1");
In addition, the HTML parameter zFullPageInitial=1 can be used to cause a web page to load with the Viewer in full page view initially. This is not usually advisable as web site visitors may not appreciate having their view preset (note that the example web page uses JavaScript to present an alert informing the user that they can use the Escape key to exit).
These options can be seen in action in the example web page “3-ViewFullPage.htm”.(Note: A true 'full screen mode' is under consideration. Its future availability will depend on the reliability and security of browser support.)
Copyright © 1999-2012 Zoomify, Inc. - 16 -All Rights Reserved
Zoomify HTML5™ User’s Guide - All Editions
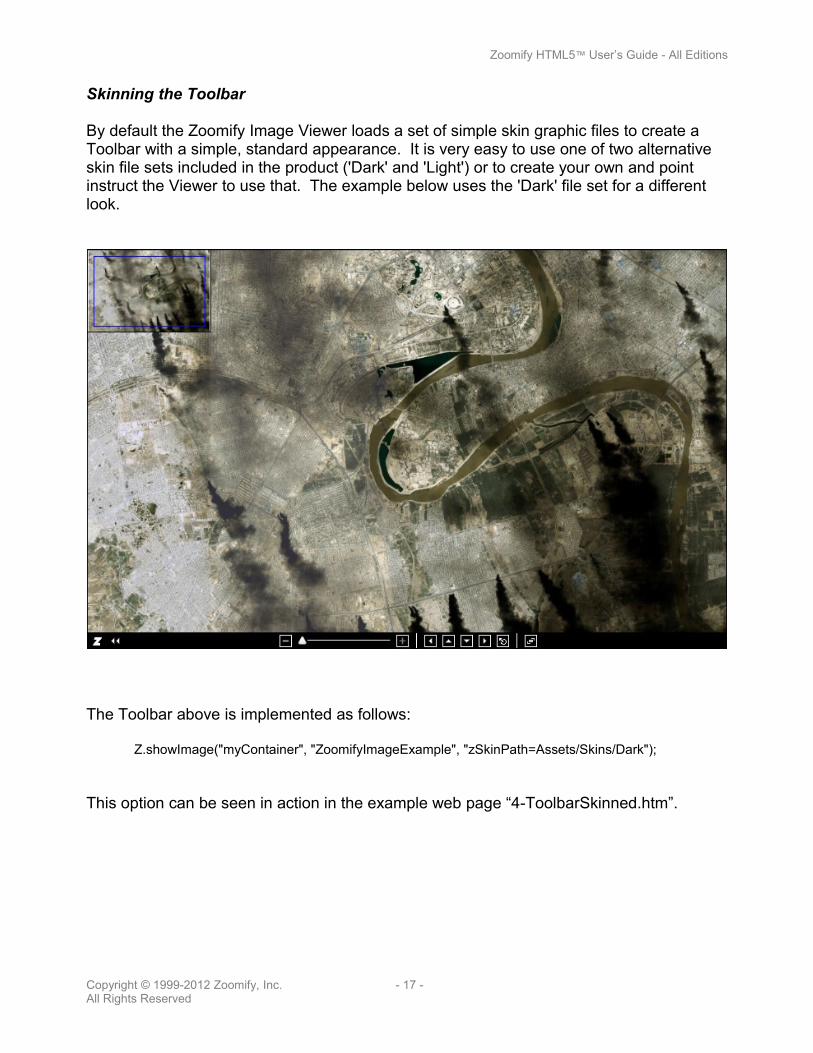
Skinning the Toolbar
By default the Zoomify Image Viewer loads a set of simple skin graphic files to create a Toolbar with a simple, standard appearance. It is very easy to use one of two alternative skin file sets included in the product ('Dark' and 'Light') or to create your own and point instruct the Viewer to use that. The example below uses the 'Dark' file set for a different look.
The Toolbar above is implemented as follows:
Z.showImage("myContainer", "ZoomifyImageExample", "zSkinPath=Assets/Skins/Dark");
This option can be seen in action in the example web page “4-ToolbarSkinned.htm”.
Copyright © 1999-2012 Zoomify, Inc. - 17 -All Rights Reserved
Zoomify HTML5™ User’s Guide - All Editions
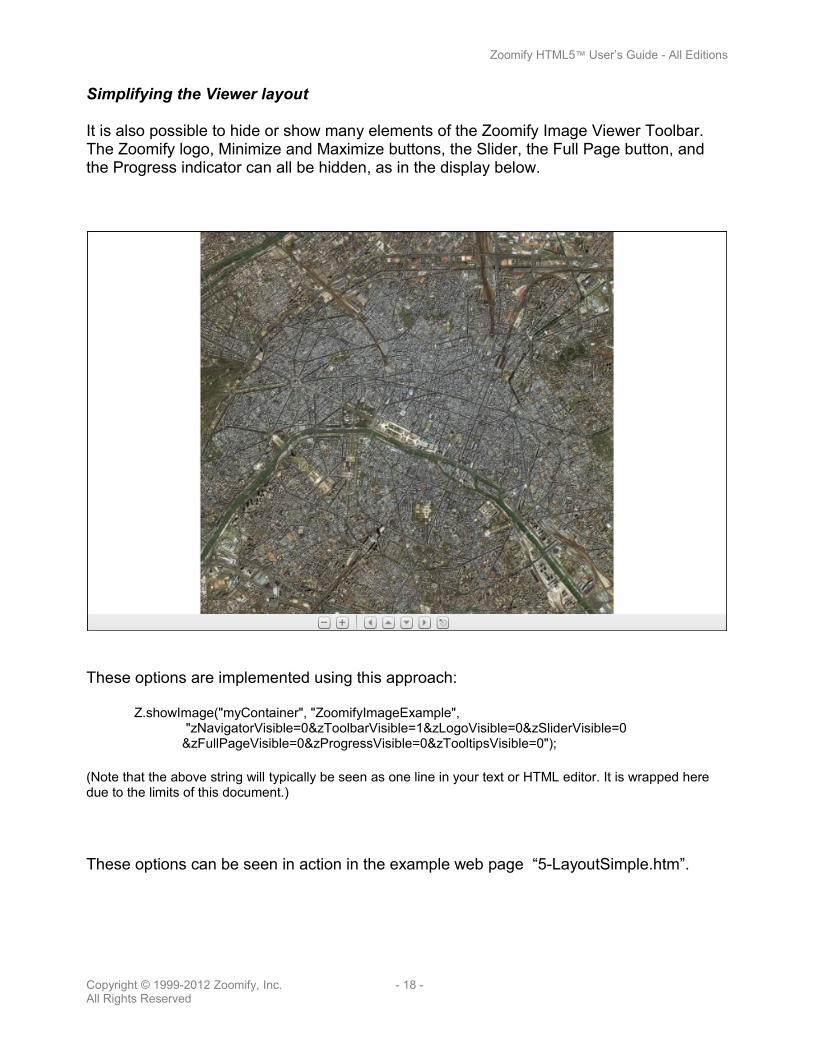
Simplifying the Viewer layout
It is also possible to hide or show many elements of the Zoomify Image Viewer Toolbar. The Zoomify logo, Minimize and Maximize buttons, the Slider, the Full Page button, and the Progress indicator can all be hidden, as in the display below.
These options are implemented using this approach:
Z.showImage("myContainer", "ZoomifyImageExample", "zNavigatorVisible=0&zToolbarVisible=1&zLogoVisible=0&zSliderVisible=0&zFullPageVisible=0&zProgressVisible=0&zTooltipsVisible=0");
(Note that the above string will typically be seen as one line in your text or HTML editor. It is wrapped here due to the limits of this document.)
These options can be seen in action in the example web page “5-LayoutSimple.htm”.
Copyright © 1999-2012 Zoomify, Inc. - 18 -All Rights Reserved
Zoomify HTML5™ User’s Guide - All Editions
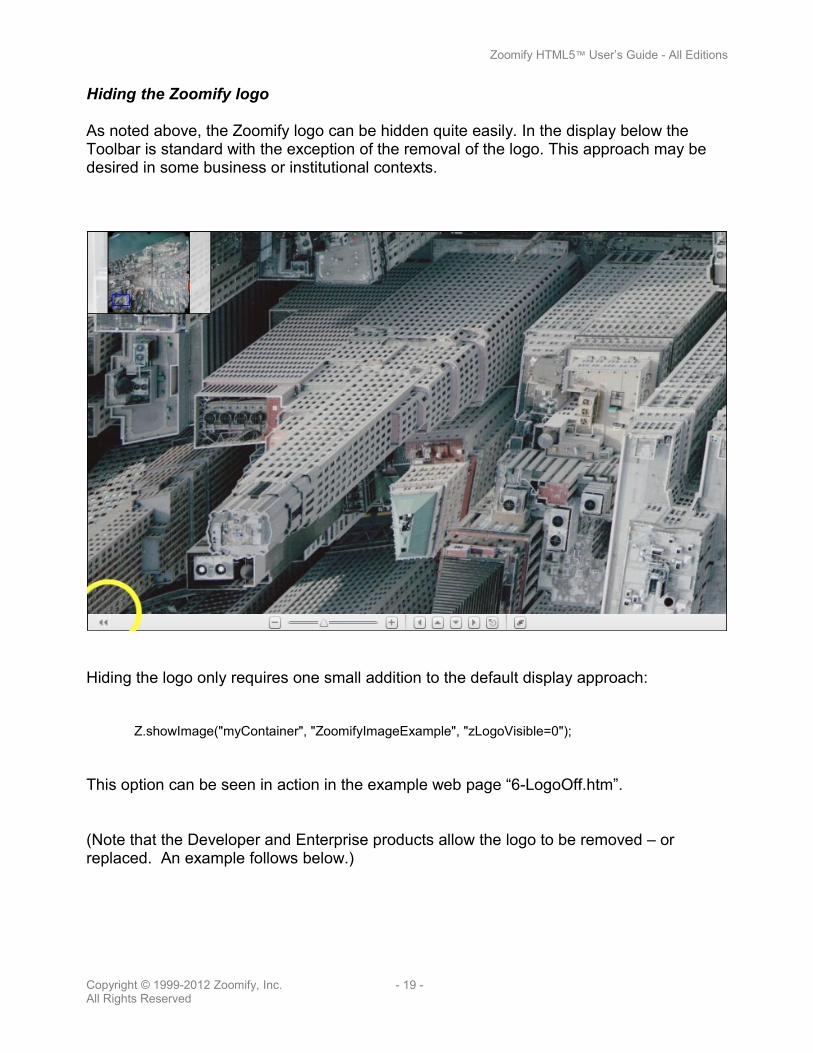
Hiding the Zoomify logo
As noted above, the Zoomify logo can be hidden quite easily. In the display below the Toolbar is standard with the exception of the removal of the logo. This approach may be desired in some business or institutional contexts.
Hiding the logo only requires one small addition to the default display approach:
Z.showImage("myContainer", "ZoomifyImageExample", "zLogoVisible=0");
This option can be seen in action in the example web page “6-LogoOff.htm”.
(Note that the Developer and Enterprise products allow the logo to be removed – or replaced. An example follows below.)
Copyright © 1999-2012 Zoomify, Inc. - 19 -All Rights Reserved
Zoomify HTML5™ User’s Guide - All Editions
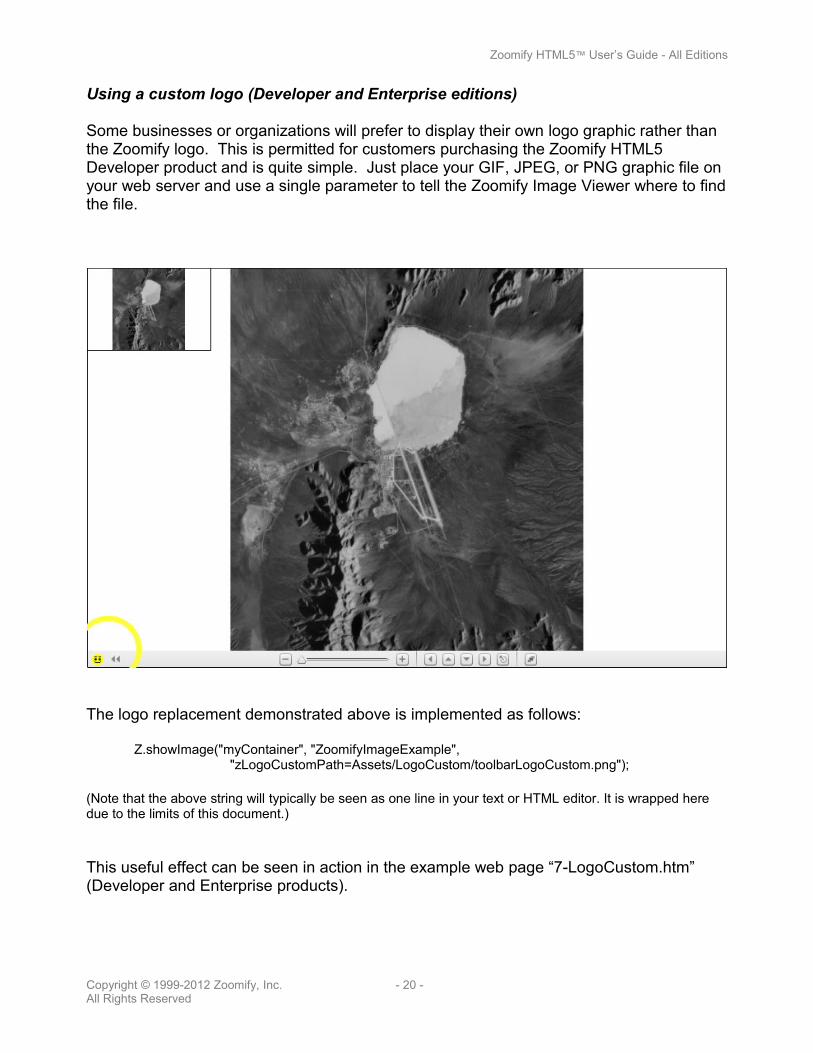
Using a custom logo (Developer and Enterprise editions)
Some businesses or organizations will prefer to display their own logo graphic rather than the Zoomify logo. This is permitted for customers purchasing the Zoomify HTML5 Developer product and is quite simple. Just place your GIF, JPEG, or PNG graphic file on your web server and use a single parameter to tell the Zoomify Image Viewer where to find the file.
The logo replacement demonstrated above is implemented as follows:
Z.showImage("myContainer", "ZoomifyImageExample", "zLogoCustomPath=Assets/LogoCustom/toolbarLogoCustom.png");
(Note that the above string will typically be seen as one line in your text or HTML editor. It is wrapped here due to the limits of this document.)
This useful effect can be seen in action in the example web page “7-LogoCustom.htm” (Developer and Enterprise products).
Copyright © 1999-2012 Zoomify, Inc. - 20 -All Rights Reserved
Zoomify HTML5™ User’s Guide - All Editions
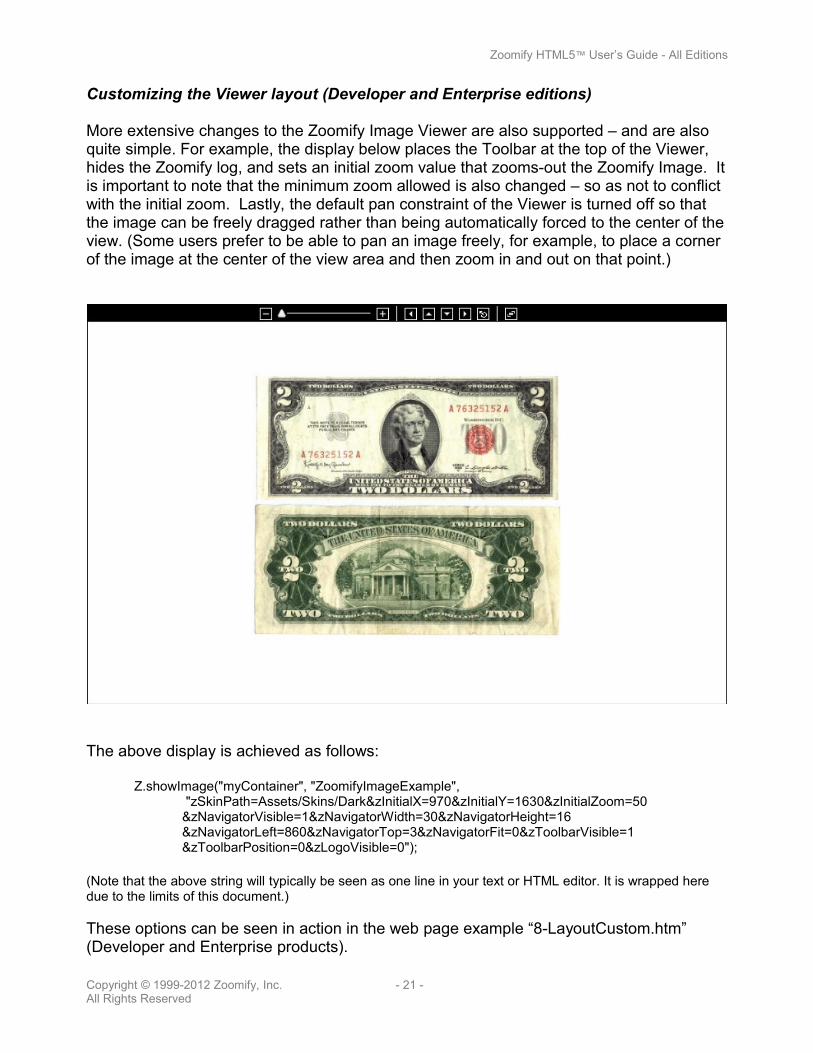
Customizing the Viewer layout (Developer and Enterprise editions)
More extensive changes to the Zoomify Image Viewer are also supported – and are also quite simple. For example, the display below places the Toolbar at the top of the Viewer, hides the Zoomify log, and sets an initial zoom value that zooms-out the Zoomify Image. It is important to note that the minimum zoom allowed is also changed – so as not to conflict with the initial zoom. Lastly, the default pan constraint of the Viewer is turned off so that the image can be freely dragged rather than being automatically forced to the center of the view. (Some users prefer to be able to pan an image freely, for example, to place a corner of the image at the center of the view area and then zoom in and out on that point.)
The above display is achieved as follows:
Z.showImage("myContainer", "ZoomifyImageExample", "zSkinPath=Assets/Skins/Dark&zInitialX=970&zInitialY=1630&zInitialZoom=50&zNavigatorVisible=1&zNavigatorWidth=30&zNavigatorHeight=16&zNavigatorLeft=860&zNavigatorTop=3&zNavigatorFit=0&zToolbarVisible=1&zToolbarPosition=0&zLogoVisible=0");
(Note that the above string will typically be seen as one line in your text or HTML editor. It is wrapped here due to the limits of this document.)
These options can be seen in action in the web page example “8-LayoutCustom.htm” (Developer and Enterprise products).
Copyright © 1999-2012 Zoomify, Inc. - 21 -All Rights Reserved
Zoomify HTML5™ User’s Guide - All Editions
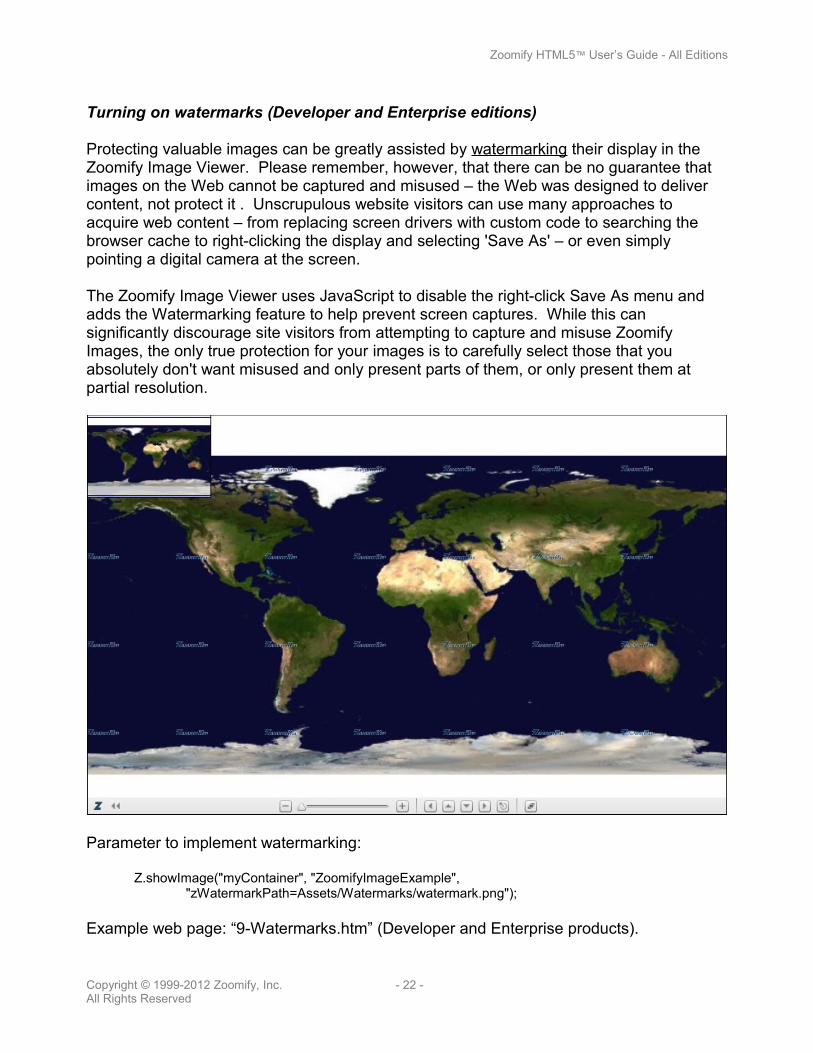
Turning on watermarks (Developer and Enterprise editions)
Protecting valuable images can be greatly assisted by watermarking their display in the Zoomify Image Viewer. Please remember, however, that there can be no guarantee that images on the Web cannot be captured and misused – the Web was designed to deliver content, not protect it . Unscrupulous website visitors can use many approaches to acquire web content – from replacing screen drivers with custom code to searching the browser cache to right-clicking the display and selecting 'Save As' – or even simply pointing a digital camera at the screen.
The Zoomify Image Viewer uses JavaScript to disable the right-click Save As menu and adds the Watermarking feature to help prevent screen captures. While this can significantly discourage site visitors from attempting to capture and misuse Zoomify Images, the only true protection for your images is to carefully select those that you absolutely don't want misused and only present parts of them, or only present them at partial resolution.
Parameter to implement watermarking:
Z.showImage("myContainer", "ZoomifyImageExample", "zWatermarkPath=Assets/Watermarks/watermark.png");
Example web page: “9-Watermarks.htm” (Developer and Enterprise products).
Copyright © 1999-2012 Zoomify, Inc. - 22 -All Rights Reserved
Zoomify HTML5™ User’s Guide - All Editions
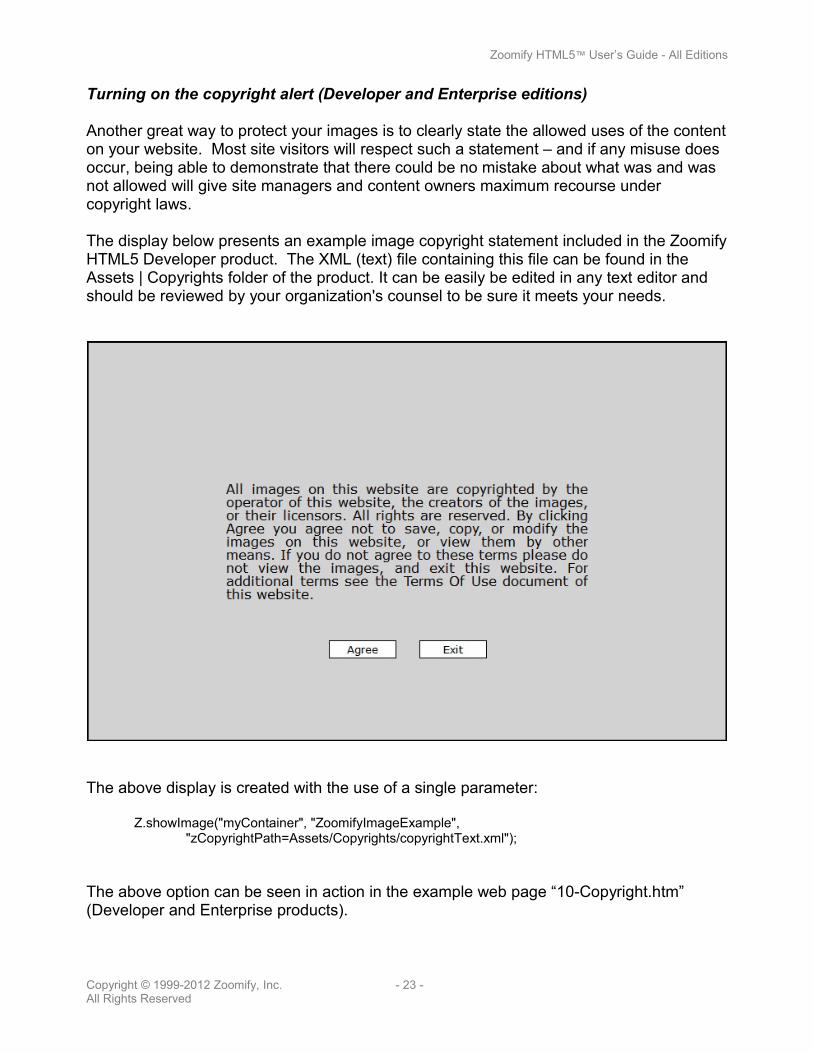
Turning on the copyright alert (Developer and Enterprise editions)
Another great way to protect your images is to clearly state the allowed uses of the content on your website. Most site visitors will respect such a statement – and if any misuse does occur, being able to demonstrate that there could be no mistake about what was and was not allowed will give site managers and content owners maximum recourse under copyright laws.
The display below presents an example image copyright statement included in the Zoomify HTML5 Developer product. The XML (text) file containing this file can be found in the Assets | Copyrights folder of the product. It can be easily be edited in any text editor and should be reviewed by your organization's counsel to be sure it meets your needs.
The above display is created with the use of a single parameter:
Z.showImage("myContainer", "ZoomifyImageExample", "zCopyrightPath=Assets/Copyrights/copyrightText.xml");
The above option can be seen in action in the example web page “10-Copyright.htm” (Developer and Enterprise products).
Copyright © 1999-2012 Zoomify, Inc. - 23 -All Rights Reserved
Zoomify HTML5™ User’s Guide - All Editions
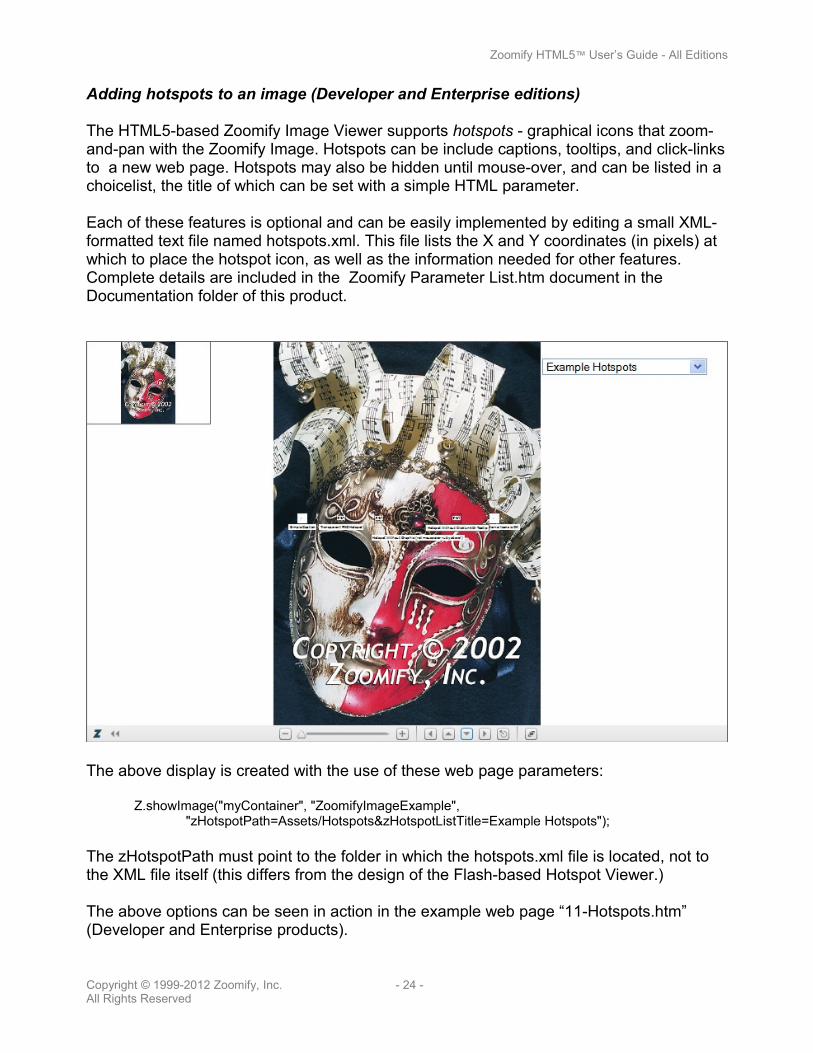
Adding hotspots to an image (Developer and Enterprise editions)
The HTML5-based Zoomify Image Viewer supports hotspots - graphical icons that zoom-and-pan with the Zoomify Image. Hotspots can be include captions, tooltips, and click-links to a new web page. Hotspots may also be hidden until mouse-over, and can be listed in a choicelist, the title of which can be set with a simple HTML parameter.
Each of these features is optional and can be easily implemented by editing a small XML-formatted text file named hotspots.xml. This file lists the X and Y coordinates (in pixels) at which to place the hotspot icon, as well as the information needed for other features. Complete details are included in the Zoomify Parameter List.htm document in the Documentation folder of this product.
The above display is created with the use of these web page parameters:
Z.showImage("myContainer", "ZoomifyImageExample", "zHotspotPath=Assets/Hotspots&zHotspotListTitle=Example Hotspots");
The zHotspotPath must point to the folder in which the hotspots.xml file is located, not to the XML file itself (this differs from the design of the Flash-based Hotspot Viewer.)
The above options can be seen in action in the example web page “11-Hotspots.htm” (Developer and Enterprise products).
Copyright © 1999-2012 Zoomify, Inc. - 24 -All Rights Reserved
Zoomify HTML5™ User’s Guide - All Editions
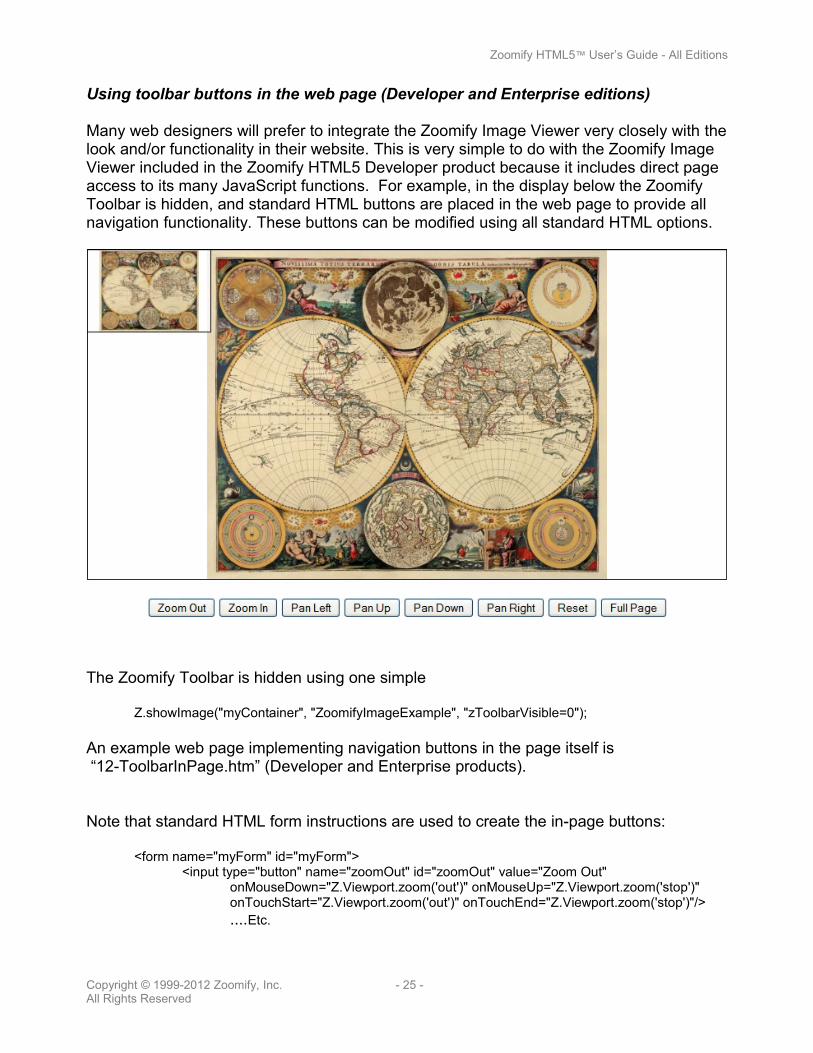
Using toolbar buttons in the web page (Developer and Enterprise editions)
Many web designers will prefer to integrate the Zoomify Image Viewer very closely with the look and/or functionality in their website. This is very simple to do with the Zoomify Image Viewer included in the Zoomify HTML5 Developer product because it includes direct page access to its many JavaScript functions. For example, in the display below the Zoomify Toolbar is hidden, and standard HTML buttons are placed in the web page to provide all navigation functionality. These buttons can be modified using all standard HTML options.
The Zoomify Toolbar is hidden using one simple
Z.showImage("myContainer", "ZoomifyImageExample", "zToolbarVisible=0");
An example web page implementing navigation buttons in the page itself is “12-ToolbarInPage.htm” (Developer and Enterprise products).
Note that standard HTML form instructions are used to create the in-page buttons:
<form name="myForm" id="myForm"><input type="button" name="zoomOut" id="zoomOut" value="Zoom Out"
onMouseDown="Z.Viewport.zoom('out')" onMouseUp="Z.Viewport.zoom('stop')" onTouchStart="Z.Viewport.zoom('out')" onTouchEnd="Z.Viewport.zoom('stop')"/>....Etc.
Copyright © 1999-2012 Zoomify, Inc. - 25 -All Rights Reserved
Zoomify HTML5™ User’s Guide - All Editions
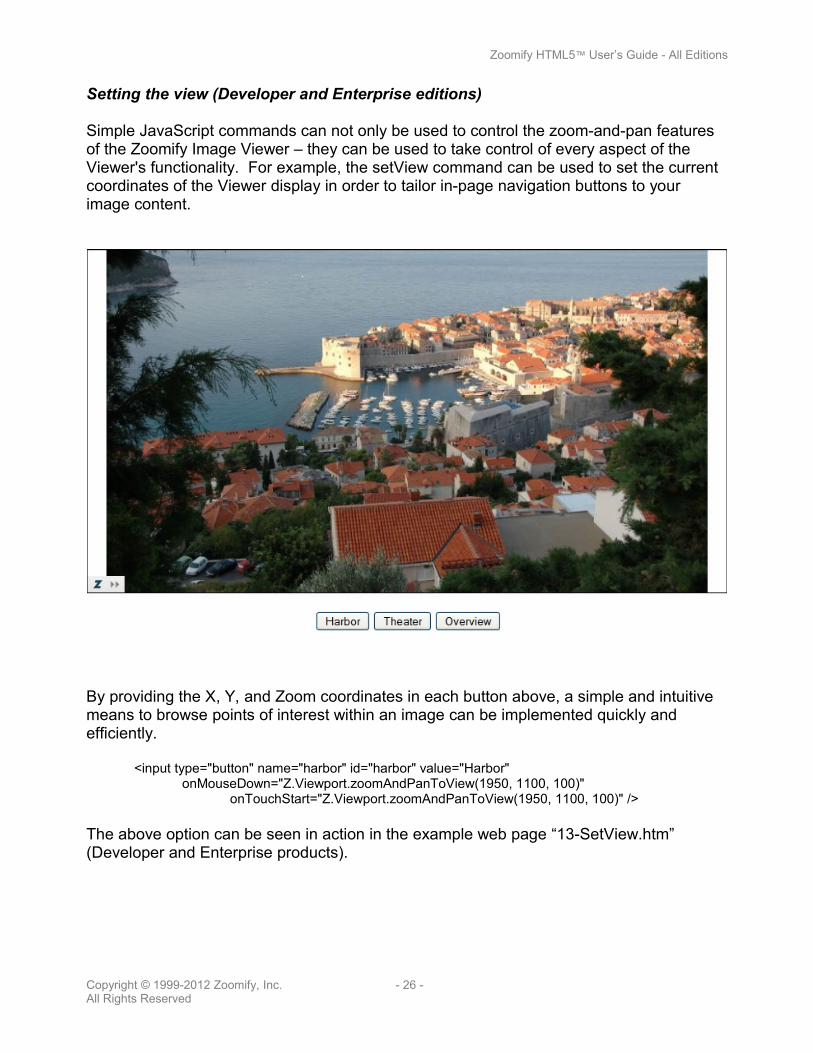
Setting the view (Developer and Enterprise editions)
Simple JavaScript commands can not only be used to control the zoom-and-pan features of the Zoomify Image Viewer – they can be used to take control of every aspect of the Viewer's functionality. For example, the setView command can be used to set the current coordinates of the Viewer display in order to tailor in-page navigation buttons to your image content.
By providing the X, Y, and Zoom coordinates in each button above, a simple and intuitive means to browse points of interest within an image can be implemented quickly and efficiently.
<input type="button" name="harbor" id="harbor" value="Harbor" onMouseDown="Z.Viewport.zoomAndPanToView(1950, 1100, 100)"
onTouchStart="Z.Viewport.zoomAndPanToView(1950, 1100, 100)" />
The above option can be seen in action in the example web page “13-SetView.htm”(Developer and Enterprise products).
Copyright © 1999-2012 Zoomify, Inc. - 26 -All Rights Reserved
Zoomify HTML5™ User’s Guide - All Editions
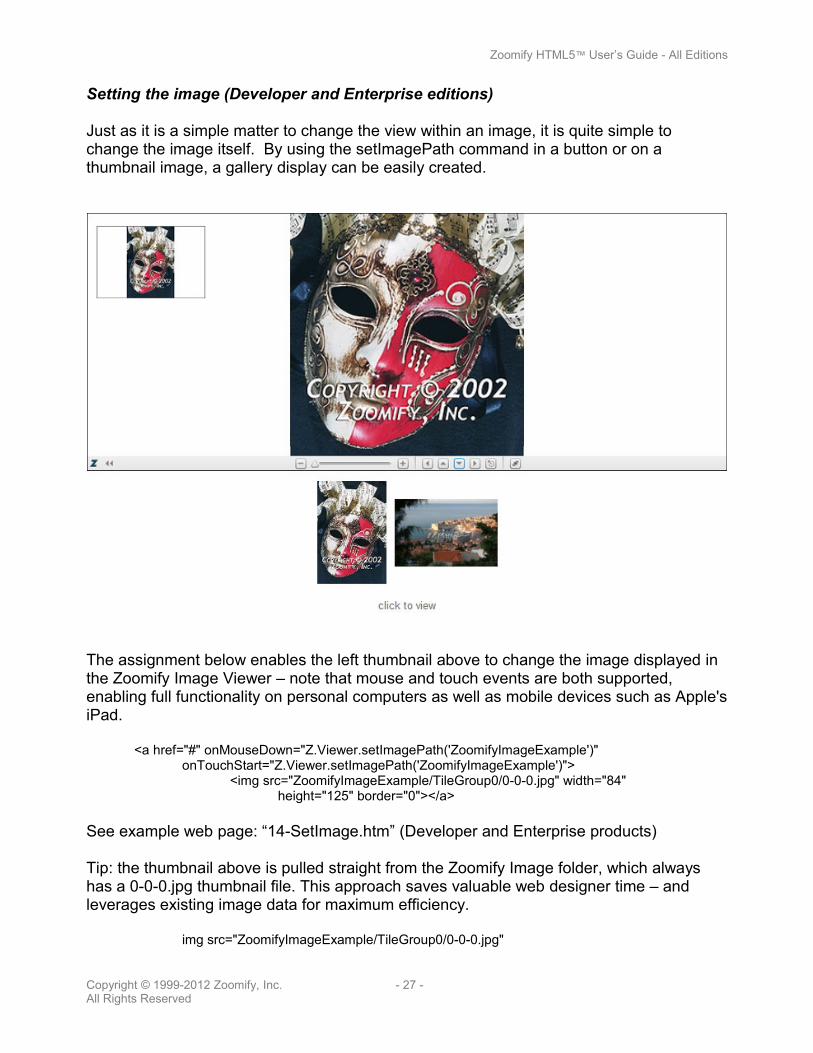
Setting the image (Developer and Enterprise editions)
Just as it is a simple matter to change the view within an image, it is quite simple to change the image itself. By using the setImagePath command in a button or on a thumbnail image, a gallery display can be easily created.
The assignment below enables the left thumbnail above to change the image displayed in the Zoomify Image Viewer – note that mouse and touch events are both supported, enabling full functionality on personal computers as well as mobile devices such as Apple's iPad.
<a href="#" onMouseDown="Z.Viewer.setImagePath('ZoomifyImageExample')"onTouchStart="Z.Viewer.setImagePath('ZoomifyImageExample')">
<img src="ZoomifyImageExample/TileGroup0/0-0-0.jpg" width="84" height="125" border="0"></a>
See example web page: “14-SetImage.htm” (Developer and Enterprise products)
Tip: the thumbnail above is pulled straight from the Zoomify Image folder, which always has a 0-0-0.jpg thumbnail file. This approach saves valuable web designer time – and leverages existing image data for maximum efficiency.
img src="ZoomifyImageExample/TileGroup0/0-0-0.jpg"
Copyright © 1999-2012 Zoomify, Inc. - 27 -All Rights Reserved
Zoomify HTML5™ User’s Guide - All Editions
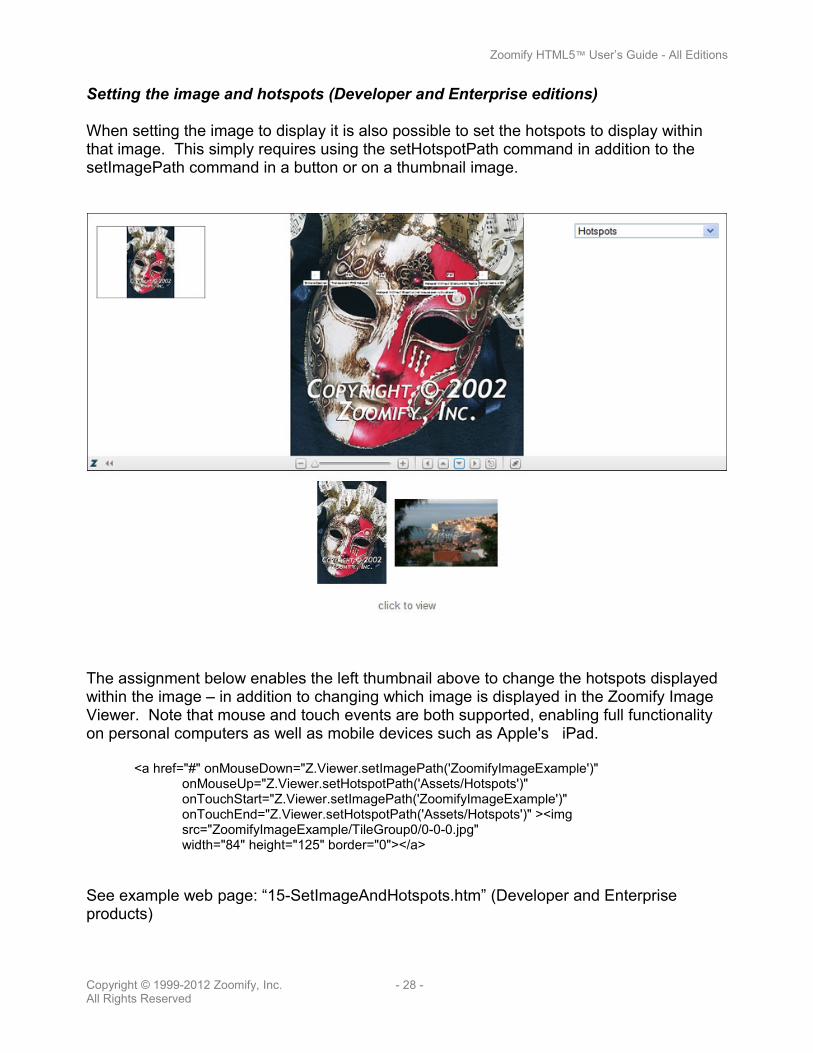
Setting the image and hotspots (Developer and Enterprise editions)
When setting the image to display it is also possible to set the hotspots to display within that image. This simply requires using the setHotspotPath command in addition to the setImagePath command in a button or on a thumbnail image.
The assignment below enables the left thumbnail above to change the hotspots displayed within the image – in addition to changing which image is displayed in the Zoomify Image Viewer. Note that mouse and touch events are both supported, enabling full functionality on personal computers as well as mobile devices such as Apple's iPad.
<a href="#" onMouseDown="Z.Viewer.setImagePath('ZoomifyImageExample')"onMouseUp="Z.Viewer.setHotspotPath('Assets/Hotspots')"onTouchStart="Z.Viewer.setImagePath('ZoomifyImageExample')"onTouchEnd="Z.Viewer.setHotspotPath('Assets/Hotspots')" ><imgsrc="ZoomifyImageExample/TileGroup0/0-0-0.jpg" width="84" height="125" border="0"></a>
See example web page: “15-SetImageAndHotspots.htm” (Developer and Enterprise products)
Copyright © 1999-2012 Zoomify, Inc. - 28 -All Rights Reserved
Zoomify HTML5™ User’s Guide - All Editions
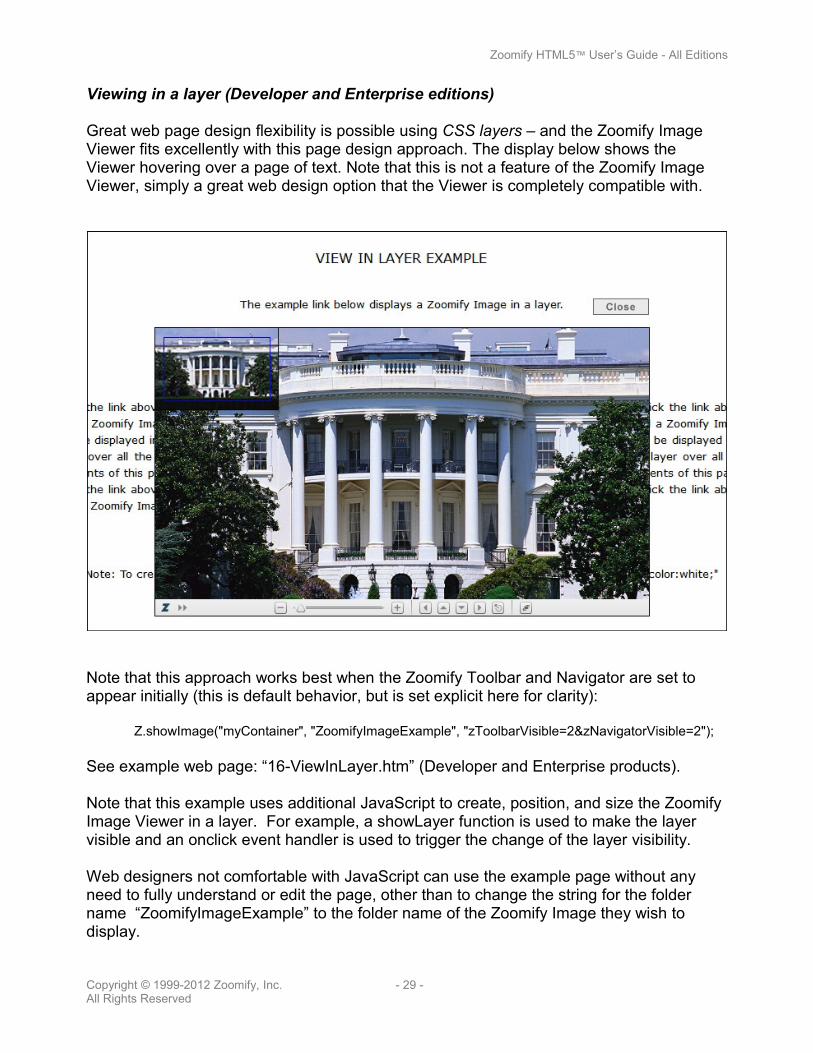
Viewing in a layer (Developer and Enterprise editions)
Great web page design flexibility is possible using CSS layers – and the Zoomify Image Viewer fits excellently with this page design approach. The display below shows the Viewer hovering over a page of text. Note that this is not a feature of the Zoomify Image Viewer, simply a great web design option that the Viewer is completely compatible with.
Note that this approach works best when the Zoomify Toolbar and Navigator are set to appear initially (this is default behavior, but is set explicit here for clarity):
Z.showImage("myContainer", "ZoomifyImageExample", "zToolbarVisible=2&zNavigatorVisible=2");
See example web page: “16-ViewInLayer.htm” (Developer and Enterprise products).
Note that this example uses additional JavaScript to create, position, and size the Zoomify Image Viewer in a layer. For example, a showLayer function is used to make the layer visible and an onclick event handler is used to trigger the change of the layer visibility.
Web designers not comfortable with JavaScript can use the example page without any need to fully understand or edit the page, other than to change the string for the folder name “ZoomifyImageExample” to the folder name of the Zoomify Image they wish to display.
Copyright © 1999-2012 Zoomify, Inc. - 29 -All Rights Reserved
Zoomify HTML5™ User’s Guide - All Editions
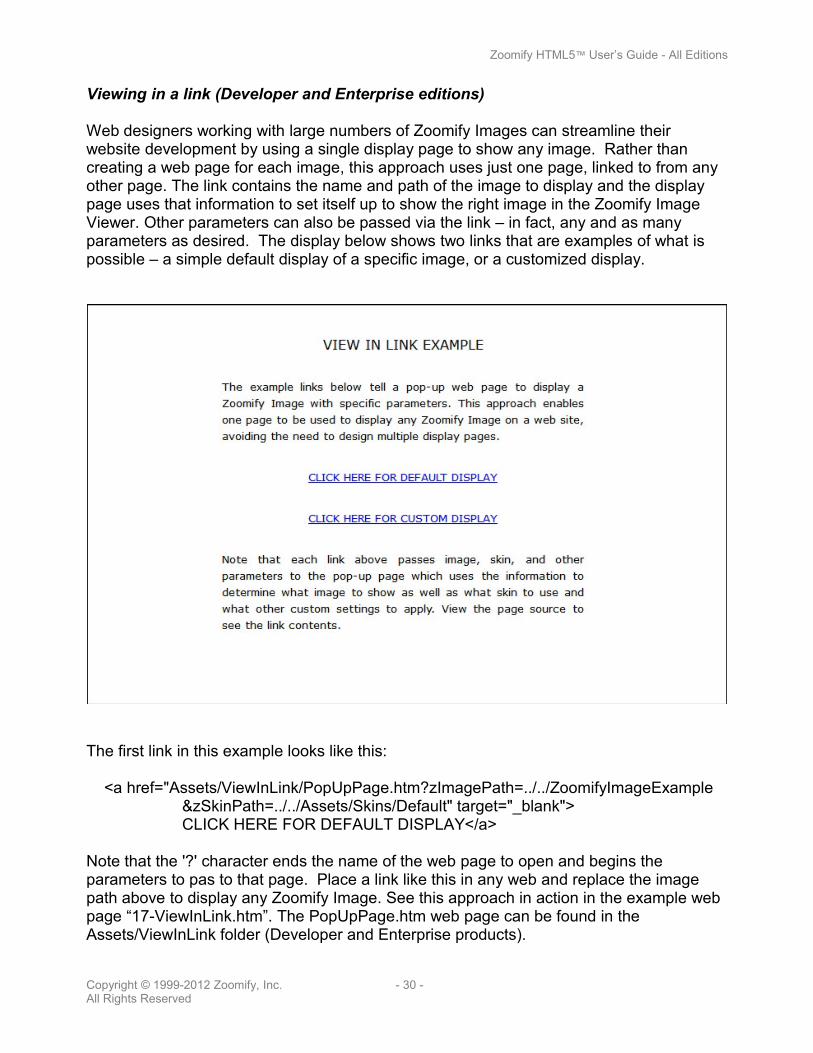
Viewing in a link (Developer and Enterprise editions)
Web designers working with large numbers of Zoomify Images can streamline their website development by using a single display page to show any image. Rather than creating a web page for each image, this approach uses just one page, linked to from any other page. The link contains the name and path of the image to display and the display page uses that information to set itself up to show the right image in the Zoomify Image Viewer. Other parameters can also be passed via the link – in fact, any and as many parameters as desired. The display below shows two links that are examples of what is possible – a simple default display of a specific image, or a customized display.
The first link in this example looks like this:
<a href="Assets/ViewInLink/PopUpPage.htm?zImagePath=../../ZoomifyImageExample&zSkinPath=../../Assets/Skins/Default" target="_blank">CLICK HERE FOR DEFAULT DISPLAY</a>
Note that the '?' character ends the name of the web page to open and begins the parameters to pas to that page. Place a link like this in any web and replace the image path above to display any Zoomify Image. See this approach in action in the example web page “17-ViewInLink.htm”. The PopUpPage.htm web page can be found in the Assets/ViewInLink folder (Developer and Enterprise products).
Copyright © 1999-2012 Zoomify, Inc. - 30 -All Rights Reserved
Zoomify HTML5™ User’s Guide - All Editions
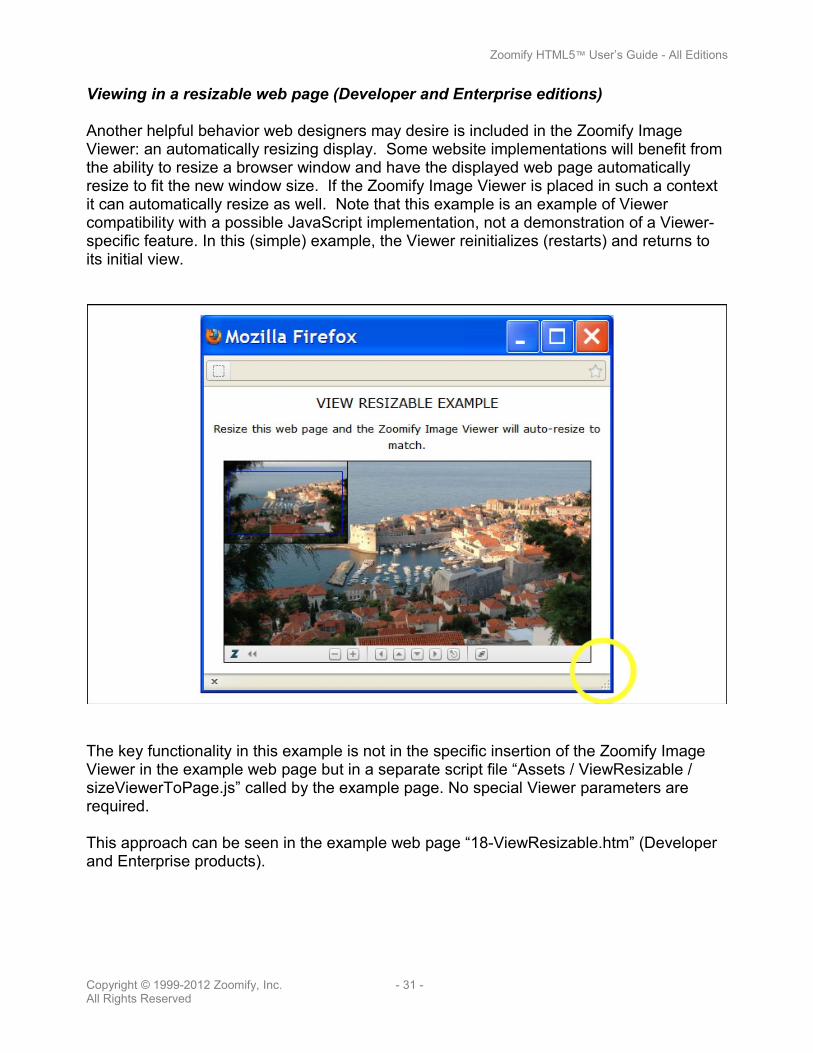
Viewing in a resizable web page (Developer and Enterprise editions)
Another helpful behavior web designers may desire is included in the Zoomify Image Viewer: an automatically resizing display. Some website implementations will benefit from the ability to resize a browser window and have the displayed web page automatically resize to fit the new window size. If the Zoomify Image Viewer is placed in such a context it can automatically resize as well. Note that this example is an example of Viewer compatibility with a possible JavaScript implementation, not a demonstration of a Viewer-specific feature. In this (simple) example, the Viewer reinitializes (restarts) and returns to its initial view.
The key functionality in this example is not in the specific insertion of the Zoomify Image Viewer in the example web page but in a separate script file “Assets / ViewResizable / sizeViewerToPage.js” called by the example page. No special Viewer parameters are required.
This approach can be seen in the example web page “18-ViewResizable.htm” (Developer and Enterprise products).
Copyright © 1999-2012 Zoomify, Inc. - 31 -All Rights Reserved
Zoomify HTML5™ User’s Guide - All Editions
Viewing across domains (Developer and Enterprise editions)
The use of JavaScript to access files is tightly constrained to ensure web site and local system security. Because of this, the Zoomify Image Viewer cannot be used to display a Zoomify Image that is stored on a separate domain from the ZoomifyImageViewer.js file itself. This “same origin” policy is common to many web scripting languages. The term "origin" is defined using the domain name, application layer protocol, and port number of the HTML document running the script. Access is allowed only if all of these values are exactly the same. (These constraints apply whether using relative or absolute paths.)
For example, this Zoomify Image Viewer
http://www.myDomain.com/folder/ZoomifyImageViewer.js
can access Zoomify Image folders here:
http://www.myDomain.com/folderhttp://www.myDomain.com/folder/subfolderhttp://www.myDomain.com/
but not here (different host or protocol):
http://www.otherDomain.comhttp://myDomain.com/folder/ (non-exact match)http://v2.www.myDomain.com/folder/ (non-exact match)http://en.myDomain.com/folder/ (different subdomain)http://www.myDomain.com:81/folder/ (different port)https://www.myDomain.com/folder/ (different protocol)
The Zoomify Image Viewer does provide a partial workaround: the zImageProperties parameter allows the image properties of the Zoomify Image to be included in the initial load of the Viewer. These can be copied directly from the ImageProperties.xml file in the Zoomify Image folder (the included double quotes must be changed to single quotes). This approach removes the need to dynamically load this information. The implementation in the example web page “19-ViewCrossDomain.htm” (Developer and Enterprise products) is as follows:
<script type="text/javascript"> Z.showImage("myContainer", "ZoomifyImageExample", "zImageProperties=<IMAGE_PROPERTIES WIDTH='2080' HEIGHT='3120' NUMTILES='169'
NUMIMAGES='1' VERSION='1.8' TILESIZE='256' />"); </script>
Note: HTML5 provides a method to support extended access - the postMessage interface - which is available in recent browsers. JSONP and cross-origin resource sharing can also be used to enable AJAX-like calls across domains. These options are being explored by Zoomify to potentially provide simpler, safe, cross-domain access in future releases.
Note: local tests will prevent loading access using the “../” 'up-one-level' term in a relative path when testing in some browsers. Use of this term on a web server will not be blocked.
Copyright © 1999-2012 Zoomify, Inc. - 32 -All Rights Reserved
Zoomify HTML5™ User’s Guide - All Editions
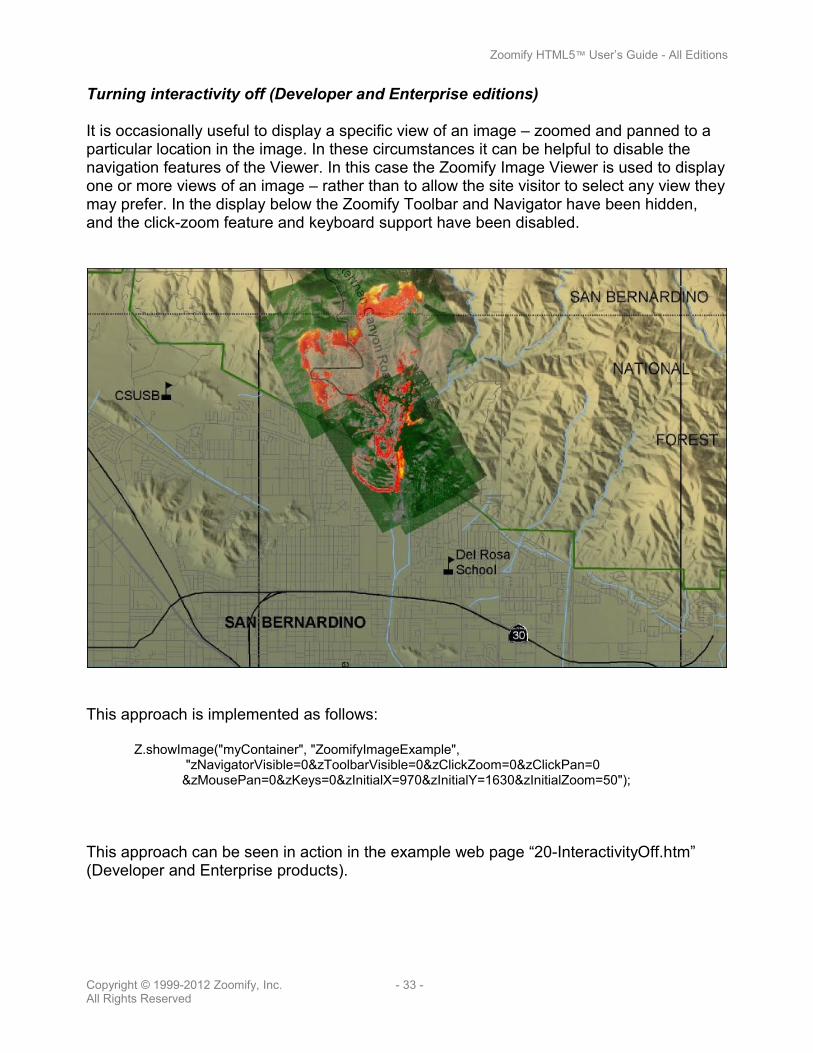
Turning interactivity off (Developer and Enterprise editions)
It is occasionally useful to display a specific view of an image – zoomed and panned to a particular location in the image. In these circumstances it can be helpful to disable the navigation features of the Viewer. In this case the Zoomify Image Viewer is used to display one or more views of an image – rather than to allow the site visitor to select any view they may prefer. In the display below the Zoomify Toolbar and Navigator have been hidden, and the click-zoom feature and keyboard support have been disabled.
This approach is implemented as follows:
Z.showImage("myContainer", "ZoomifyImageExample", "zNavigatorVisible=0&zToolbarVisible=0&zClickZoom=0&zClickPan=0&zMousePan=0&zKeys=0&zInitialX=970&zInitialY=1630&zInitialZoom=50");
This approach can be seen in action in the example web page “20-InteractivityOff.htm” (Developer and Enterprise products).
Copyright © 1999-2012 Zoomify, Inc. - 33 -All Rights Reserved
Zoomify HTML5™ User’s Guide - All Editions
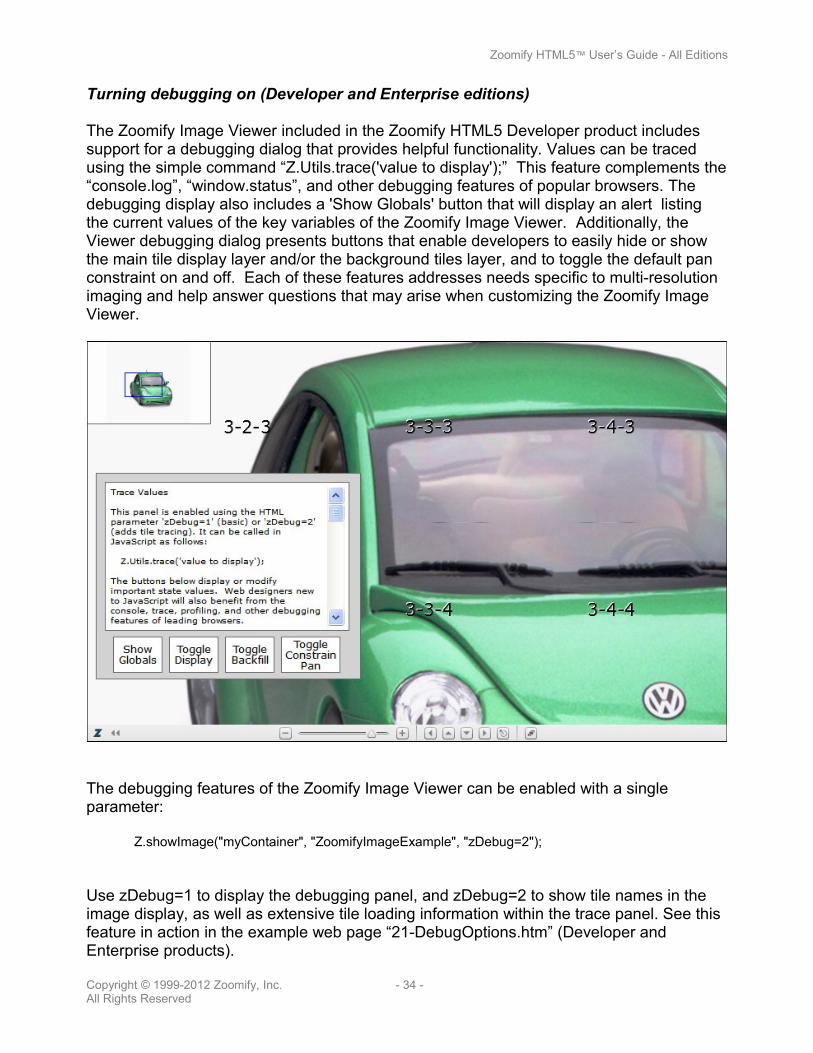
Turning debugging on (Developer and Enterprise editions)
The Zoomify Image Viewer included in the Zoomify HTML5 Developer product includes support for a debugging dialog that provides helpful functionality. Values can be traced using the simple command “Z.Utils.trace('value to display');” This feature complements the “console.log”, “window.status”, and other debugging features of popular browsers. The debugging display also includes a 'Show Globals' button that will display an alert listing the current values of the key variables of the Zoomify Image Viewer. Additionally, the Viewer debugging dialog presents buttons that enable developers to easily hide or show the main tile display layer and/or the background tiles layer, and to toggle the default pan constraint on and off. Each of these features addresses needs specific to multi-resolution imaging and help answer questions that may arise when customizing the Zoomify Image Viewer.
The debugging features of the Zoomify Image Viewer can be enabled with a single parameter:
Z.showImage("myContainer", "ZoomifyImageExample", "zDebug=2");
Use zDebug=1 to display the debugging panel, and zDebug=2 to show tile names in the image display, as well as extensive tile loading information within the trace panel. See this feature in action in the example web page “21-DebugOptions.htm” (Developer and Enterprise products).
Copyright © 1999-2012 Zoomify, Inc. - 34 -All Rights Reserved
Zoomify HTML5™ User’s Guide - All Editions
List of all HTML parameters (Developer and Enterprise editions)
The Zoomify Image Viewer supports many HTML parameters, as demonstrated in the many examples discussed above. The complete list of these parameters along with their value ranges and default, can be found in the document “Zoomify Parameter List.htm” in the Documentation folder of the Zoomify HTML5, Zoomify HTML5 Developer, and Zoomify HTML5 Enterprise products. The document clearly delineates the parameters supported by the Zoomify Image Viewer included in each product edition.
Some web designers will appreciate seeing the many parameters as they appear when applied in a web page. The can all be seen together, therefore, in one example page: “22-AllParameters.htm” (Developer and Enterprise products).
Please note that many of these parameters would rarely, if ever, be used together, as their purposes vary greatly. To place them all in a single web page it is therefore simplest to assign many their default values. This avoids creating a web page example with an odd combination of layout or behavior settings.
Copyright © 1999-2012 Zoomify, Inc. - 35 -All Rights Reserved
Zoomify HTML5™ User’s Guide - All Editions
Adding annotations to an image (Enterprise edition)
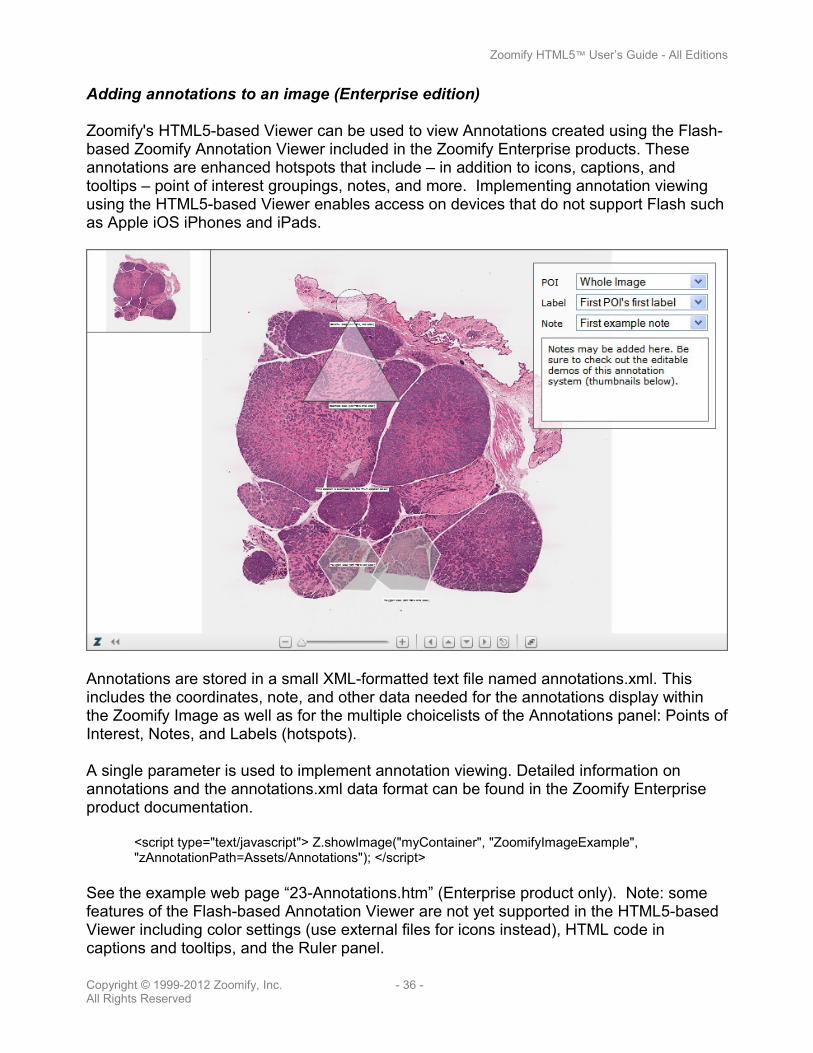
Zoomify's HTML5-based Viewer can be used to view Annotations created using the Flash-based Zoomify Annotation Viewer included in the Zoomify Enterprise products. These annotations are enhanced hotspots that include – in addition to icons, captions, and tooltips – point of interest groupings, notes, and more. Implementing annotation viewing using the HTML5-based Viewer enables access on devices that do not support Flash such as Apple iOS iPhones and iPads.
Annotations are stored in a small XML-formatted text file named annotations.xml. This includes the coordinates, note, and other data needed for the annotations display within the Zoomify Image as well as for the multiple choicelists of the Annotations panel: Points of Interest, Notes, and Labels (hotspots).
A single parameter is used to implement annotation viewing. Detailed information on annotations and the annotations.xml data format can be found in the Zoomify Enterprise product documentation.
<script type="text/javascript"> Z.showImage("myContainer", "ZoomifyImageExample", "zAnnotationPath=Assets/Annotations"); </script>
See the example web page “23-Annotations.htm” (Enterprise product only). Note: some features of the Flash-based Annotation Viewer are not yet supported in the HTML5-based Viewer including color settings (use external files for icons instead), HTML code in captions and tooltips, and the Ruler panel.
Copyright © 1999-2012 Zoomify, Inc. - 36 -All Rights Reserved
Zoomify HTML5™ User’s Guide - All Editions
Editing polygon annotations in an image (Enterprise edition)
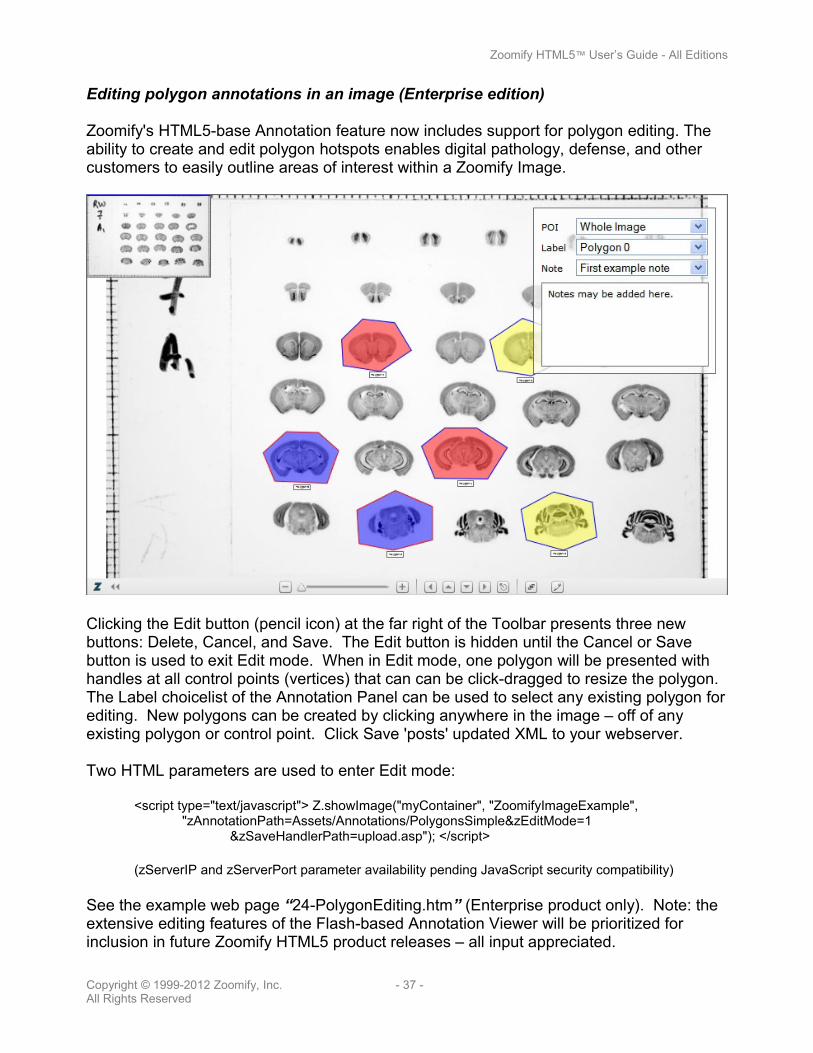
Zoomify's HTML5-base Annotation feature now includes support for polygon editing. The ability to create and edit polygon hotspots enables digital pathology, defense, and other customers to easily outline areas of interest within a Zoomify Image.
Clicking the Edit button (pencil icon) at the far right of the Toolbar presents three new buttons: Delete, Cancel, and Save. The Edit button is hidden until the Cancel or Save button is used to exit Edit mode. When in Edit mode, one polygon will be presented with handles at all control points (vertices) that can can be click-dragged to resize the polygon. The Label choicelist of the Annotation Panel can be used to select any existing polygon for editing. New polygons can be created by clicking anywhere in the image – off of any existing polygon or control point. Click Save 'posts' updated XML to your webserver.
Two HTML parameters are used to enter Edit mode:
<script type="text/javascript"> Z.showImage("myContainer", "ZoomifyImageExample","zAnnotationPath=Assets/Annotations/PolygonsSimple&zEditMode=1
&zSaveHandlerPath=upload.asp"); </script>
(zServerIP and zServerPort parameter availability pending JavaScript security compatibility)
See the example web page “24-PolygonEditing.htm” (Enterprise product only). Note: the extensive editing features of the Flash-based Annotation Viewer will be prioritized for inclusion in future Zoomify HTML5 product releases – all input appreciated.
Copyright © 1999-2012 Zoomify, Inc. - 37 -All Rights Reserved
Zoomify HTML5™ User’s Guide - All Editions
Testing polygon drawing speed (Enterprise edition)
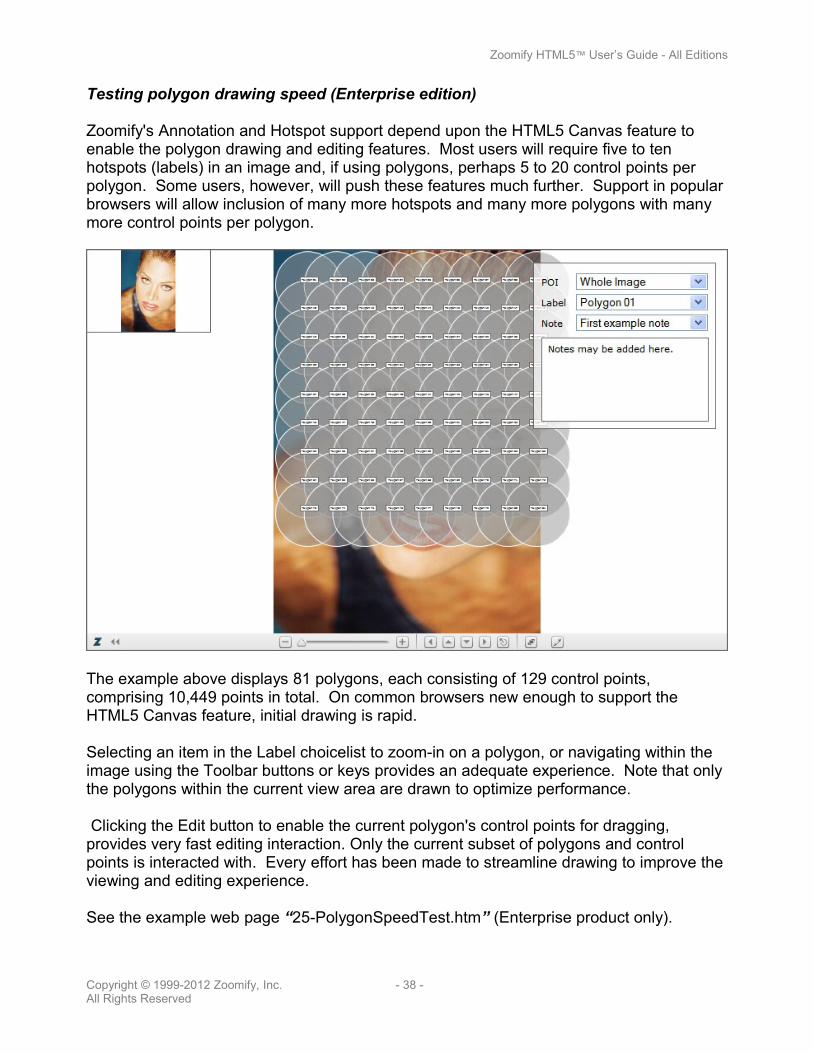
Zoomify's Annotation and Hotspot support depend upon the HTML5 Canvas feature to enable the polygon drawing and editing features. Most users will require five to ten hotspots (labels) in an image and, if using polygons, perhaps 5 to 20 control points per polygon. Some users, however, will push these features much further. Support in popular browsers will allow inclusion of many more hotspots and many more polygons with many more control points per polygon.
The example above displays 81 polygons, each consisting of 129 control points, comprising 10,449 points in total. On common browsers new enough to support the HTML5 Canvas feature, initial drawing is rapid.
Selecting an item in the Label choicelist to zoom-in on a polygon, or navigating within the image using the Toolbar buttons or keys provides an adequate experience. Note that only the polygons within the current view area are drawn to optimize performance.
Clicking the Edit button to enable the current polygon's control points for dragging, provides very fast editing interaction. Only the current subset of polygons and control points is interacted with. Every effort has been made to streamline drawing to improve the viewing and editing experience.
See the example web page “25-PolygonSpeedTest.htm” (Enterprise product only).
Copyright © 1999-2012 Zoomify, Inc. - 38 -All Rights Reserved
Zoomify HTML5™ User’s Guide - All Editions
Viewing a Zoomify Image stored as a single file (Enterprise edition)
The Zoomify Image Viewer included in the Zoomify HTML5 Enterprise product supports storage of images in the Zoomify Image File single-file format in addition to the Zoomify Image Folder format. The single-file storage approach combines the many image tiles of a Zoomify Image into one file with a '.PFF' extension. This approach can simplify storage in a context where large collections of large images are stored and/or are moved frequently.
Note that this approach does require a 'helper application' on the web server, as JavaScript is not able to request the image tiles from within a single file from the webserver (byte-range requests).
Detailed information on the single-file storage option can be found in the Zoomify Enterprise product documentation.
See the example web page “26-SingleFilePFFStorage.htm” (Enterprise product only).
Viewing a Zoomify Image stored as single file with annotations (Enterprise edition)
Annotations can be used with any Zoomify Image, whether stored as a Zoomify Image Folder or using the Zoomify Image File (PFF) single-file format.
For an example of combined use of annotations and single-file storage, see the example web page “27-SingleFilePFFStorageAndAnnotations.htm” (Enterprise product only).
Copyright © 1999-2012 Zoomify, Inc. - 39 -All Rights Reserved
Zoomify HTML5™ User’s Guide - All Editions
Chapter V. Advanced Topics
Editing the Zoomify Image Viewer
The Zoomify Image Viewer provides substantial functionality that addresses the core requirements of important imaging applications. It is expected, however, that JavaScript developers will identify additional functionality and even entirely new imaging applications.
Code organization
To support development by JavaScript developers, Zoomify HTML5 Developer includes complete JavaScript source code in a single file: ZoomifyImageViewer.js. As JavaScript developers will expect, functions are organized in clear component groups: those related to the Viewer as a whole, those relevant to the Viewport, the Toolbar, and the Navigator, functions serving Networking needs, and general Utility functions useful for working with the DOM to identify element dimensions and positions, and perform other basic tasks in a manner compatible with many versions of many browsers.
The code groupings of the Zoomify Image Viewer are demarcated by comment banners:
//:::::::::::::::::::::::::::::::::::::::::::::::::::::::::::::::::::::::::::::::::::::::::::::::://:::::::::::::::::::::::::::::::::: INIT FUNCTIONS ::::::::::::::::::::::::::::::://::::::::::::::::::::::::::::::::::::::::::::::::::::::::::::::::::::::::::::::::::::::::::::::::
Groupings include the following: Initialization, ZoomifyImageViewer, ZoomifyViewport, ZoomifyToolbar, ZoomifyNavigator, NetConnector, and Utils.
Special additions or implementation issues are be called out as well, as follows:
// DEV NOTE: note text here...
Code documentation
The JavaScript source file ZoomifyImageViewer.js, which is included in the Zoomify HTML5 Developer product, is heavily commented. Note that all standard 'minification' tools remove such comments to ensure they have no impact on download speeds during actual use. The Developer product also includes the Zoomify Functions List – a listing of all functions that make-up the Zoomify Image Viewer complete with detailed descriptions.
Copyright © 1999-2012 Zoomify, Inc. - 40 -All Rights Reserved
Zoomify HTML5™ User’s Guide - All Editions
Variable and function names
In an effort to reduce the need for narrative comments, variable and function names are descriptive and, in most cases, self-explanatory.
Errors, strings, defaults, and resourcing
The Zoomify Image Viewer's error messages, Toolbar tooltip strings, and default values are resourced for easy modification and/or international localization in a single function in the Utils code group that is named “getResource”. Similarly, handling of XML parameters has been centralized in the “setParameters” function.
Zoomify is dedicated to making the use of high-quality images commonplace worldwide. Accordingly, every effort has been made to support efficient translation of the Zoomify JavaScript codebase, documentation, and online materials. As additional Zoomify and partner-delivered solutions become available notice will be provided on the Zoomify website at http://www.zoomify.com.
Thumbnail support
The Zoomify solution is completely compatible with common website designs involving a simple thumbnail that links to a pop-up providing a more detailed view.
To implement this site design using any Zoomify Image folder simply refer to the first JPEG tile within the image folder. This file will be named "0-0-0.jpg" and will be located in the folder "TileGroup0". It will be between 128 and 256 pixels in height and width - a common scale for website thumbnails. A standard JPEG reference to this file can easily be embedded within any HTML page. For example: <img src = "../imageFolderName/TileGroup0/0-0-0.jpg" border="0">
Additional resources
The Zoomify HTML5 and Zoomify HTML5 Developer products includes the Zoomify Parameters List document which details all parameters supported by the Zoomify Image Viewer version available in each product.
Copyright © 1999-2012 Zoomify, Inc. - 41 -All Rights Reserved
Zoomify HTML5™ User’s Guide - All Editions
The Zoomify HTML5 Developer product additionally includes the Zoomify Functions List – a listing with descriptions for all functions that make-up the Zoomify Image Viewer.
Finally, the Zoomify Support page provides an extensive Frequently Asked Questions listing with the latest information from Zoomify and our customers and partners. It is available on the Zoomify website: http://www.zoomify.com/support.htm.
Copyright © 1999-2012 Zoomify, Inc. - 42 -All Rights Reserved
Zoomify HTML5™ User’s Guide - All Editions
Chapter VI. Troubleshooting
Troubleshooting image conversion
1. If you receive an error message or the Zoomify Converter unexpectedly quits, you may wish to check the following:
a. Does the directory you’re attempting to write the Zoomify image to (the target directory) have enough disk space? Generally the Zoomify Converter requires two to three times the size of the source image for temporary files when encoding an image. This disk space is freed up after successful conversions.
b. Is the target directory writeable (i.e., not a CD or a directory / disk with limited write permissions). If so, select a target directory that is writeable before proceeding.
2. If conversion is slower than you expected:
a. Are you running the Zoomify on an older OS such as OS 9 or Windows 95, 98, ME, or 2000? We strongly recommend that you run the Zoomify Converter on OS X or Windows 7, Vista, or XP. (Versions supporting Unix/Linux are available separately.)
b. Are you trying to convert an image that is not native to the Zoomify Converter? The Converter supports TIFF, BMP, JPEG, and PNG files natively.3
c. Is your source image on a network drive? We recommend that you copy all images you’d like to encode to a local drive.
d. Is your target directory a network drive? As the Zoomify encoding process is disk-intensive, we recommend that you convert on a local drive.
e. Do you have enough memory?
3. If you still experience problems image conversion, please send an email to [email protected] with details about your environment, including OS, amount of free disk space, available RAM, Zoomify product and version number, the source image format and size, and any other information you believe to be relevant. If we determine that the issue is related to the image itself and not the environment, we may request the image for testing purposes.4
3 For optimal results working with source images in an uncompressed (BMP, TIFF) or 'losslessly' compressed (PNG) source images is recommended rather than working with images in a 'lossy' format such as the popular JPEG format. The Zoomify Converter itself will apply JPEG compression to the tiles created during conversion. When working from lossy compressed source images this would effectively represent a second lossy compression and would introduce the possibility of visible artifacts.4 Zoomify respects intellectual property rights and any image provided to Zoomify will not be used for any other purpose than testing unless otherwise indicated by the copyright holder.
Copyright © 1999-2012 Zoomify, Inc. - 43 -All Rights Reserved
Zoomify HTML5™ User’s Guide - All Editions
Troubleshooting image viewing
1. If you receive an error message when attempting to view a Zoomify Image in a web page the error will typically provide information that will help identify the source of the problem. Examples will include an incorrect image path or an incorrect path to another needed resource such as an XML file for the copyright feature or a graphic file for the watermarking feature.
2. Please note that in some cases browsers will function differently when viewing local content than when viewing content over the web from a webserver. In particular, Microsoft Internet Explorer may present an alert when viewing web content locally and require the user to verify that they wish to do so, and Google Chrome may block dynamic loading of local content unless the user's browser settings are modified. In both cases, viewing content from a web site will not be affected - though viewing the example web pages after downloading this product may be frustrating.
3. In unusual cases an error may result from a very old browser version being in use – a version several versions prior to the current version in most cases.
4. In other cases, a problem may occur without an error message being presented. For example it is possible that an image tile may fail to load, or, it may load but fail to fully fade-in. In these cases the problem could result from a busy or faulty network connection. In cases of faulty functionality, such as when an incorrect tile loads or interactivity functions incorrectly or fails to function, the problem could be a similar to those noted above – viewer confusion due to configuration or network access.
5. Alternatively, the problem could be the result of a genuine bug in the Zoomify Image Viewer – in which case the cause will need to be isolated and addressed by Zoomify. If you experience such a problem, please send an email to [email protected] with details about your environment, including OS, amount of free disk space, available RAM, Zoomify product and version number, and any other information you believe to be relevant. Your support and patience will be greatly appreciated as we do our best to address the issue.
Please also note that the latest information from Zoomify and our customers and partners is available on the Support page on the Zoomify website: http://www.zoomify.com/support.htm.
Copyright © 1999-2012 Zoomify, Inc. - 44 -All Rights Reserved
Zoomify HTML5™ User’s Guide - All Editions
Chapter VII. Appendices
Complementary Zoomify products
1. Zoomify Flash and Zoomify Flash Developer
Zoomify Flash was created for web designers. Use simple HTML or XML parameters to set the initial view, skin the Toolbar, hide the Zoomify logo, size and position components, customize behaviors, and much more! And with ELEVEN viewing alternatives it's simple to create sophisticated slideshow, gallery, or tour presentations, place hotspots in images, compare images side-by-side and more.
Zoomify Flash Developer was created for Flash developers. It includes all the features and functionality of Zoomify Flash plus extensive additional features including complete Flash source code for all eleven Viewers and detailed documentation to get you up to speed quickly. Work with intuitive component property inspectors or directly with the underlying functions. It includes all the access and tools you need to create custom zoom-and-pan applications or integrate high-resolution image viewing in any Flash project.
For more information, please visit: http://www.zoomify.com/flash.htm.
2. Zoomify Enterprise and Zoomify Enterprise Developer
Zoomify Enterprise delivers Zoomify's powerful Annotation Viewer providing sophisticated web-based image annotation with non-destructive Labels, Points Of Interest, Notes, and more. Zoomify Enterprise also includes a command-line-drivable, scriptable version of the Zoomify Converter enabling integrated implementations supporting server-side automation. Zoomify Enterprise is perfect for mission-critical imaging arenas including digital microscopy, defense and security applications, and aerial photography.
Zoomify Enterprise Developer includes all the features and functionality of Zoomify Enterprise plus complete editable Flash source files for the Zoomify Annotation Viewer, complete source code for the Zoomify Servlet, and support and example files for 'PFF single-file' format for simplified storage of your Zoomify Images. Zoomify Enterprise Developer is perfect for applications requiring complete customization control, powerful integration support, or maximum efficiency storage capabilities.
For more information, please visit: http://www.zoomify.com/enterprise.htm.
Copyright © 1999-2012 Zoomify, Inc. - 45 -All Rights Reserved
Zoomify HTML5™ User’s Guide - All Editions
Uninstalling Zoomify HTML5
Uninstalling Zoomify HTML5 is easy – simply delete the Zoomify download folder and nay files that have been manually copied to other locations. No special uninstaller or 'add/remove programs' steps are needed.
Glossary
Compression: Sophisticated means to reduce file size while retaining file information by substituting representations or approximations of the file data for the actual data.
HTML5: Combination and extension of web technologies including HTML and JavaScript intended to support web page markup and multimedia delivery.
JavaScript: Standard scripting language supported by all popular web browsers.
Lossy: Compression that permanently removes image data to reduce file size. Lossless compression, by comparison, keeps all original image data intact.
Metadata: Additional information embedded in an image format (such as a TIFF). May include copyright, author, data, and equipment information.
Multi-resolution: Data file containing multiple levels of quality.
PFF: Zoomify’s single-file, pyramidal, tiled image, storage format.
Pixel: The smallest unit of screen display. A point of color.
Pre-fetching: Intelligent retrieval of data from a web server in anticipation of immediately subsequent views.
Pyramidal image: A data file format containing multiple levels of resolution.
Resolution: The amount of image data available for display. One measure of image quality. Screen equivalent of printer ‘dpi’ (dots per inch).
Tile: Piece of an image at a given resolution.
Wavelet: Highly effective image compression approach enabling maximum reduction in file size while preserving image quality.
Copyright © 1999-2012 Zoomify, Inc. - 46 -All Rights Reserved
Zoomify HTML5™ User’s Guide - All Editions
System requirements and additional resources
Authoring
Hardware, memory, and operating systemWindows XP or newer, OS X 10.5 or newerImage conversion on Unix/Linux requires alternative converter (additional purchase)
Software applicationsAny standard text or HTML editor
Viewing
Hardware, memory, and operating systemAny platform and operating system supporting browsers listed below
Software applicationsRecent or current versions of Google Chrome, Mozilla Firefox, Microsoft Internet Explorer, Opera Software's Opera, or Apple Safari
Additional resources
Companies & OrganizationsZoomify, Inc. www.zoomify.comAdobe, Inc. www.Adobe.com
SoftwareZoomify HTML5 www.zoomify.com/html5.htmZoomify Flash www.zoomify.com/flash.htmZoomify Enterprise www.zoomify.com/enterprise.htmStuffIt Expander www.stuffit.comWinZip Computing Inc.’s WinZip www.winzip.com
Copyright © 1999-2012 Zoomify, Inc. - 47 -All Rights Reserved
Recommended


![[MS-HTML5]: Microsoft Edge / Internet Explorer …MS-HTML5].pdfMicrosoft Edge / Internet Explorer HTML5 ... Microsoft Edge / Internet Explorer HTML5 ... Microsoft Edge / Internet Explorer](https://img.dokumen.tips/doc/110x75/5ad35ecf7f8b9aff738de6d3/ms-html5-microsoft-edge-internet-explorer-ms-html5pdfmicrosoft-edge-.jpg)