User Guide of VidOn Media Center
1. Initial Settings
Initialization comes along with the first bootup. The whole initialization process will take about 3 minutes.
After the process completed, please follow the wizard to do some settings.
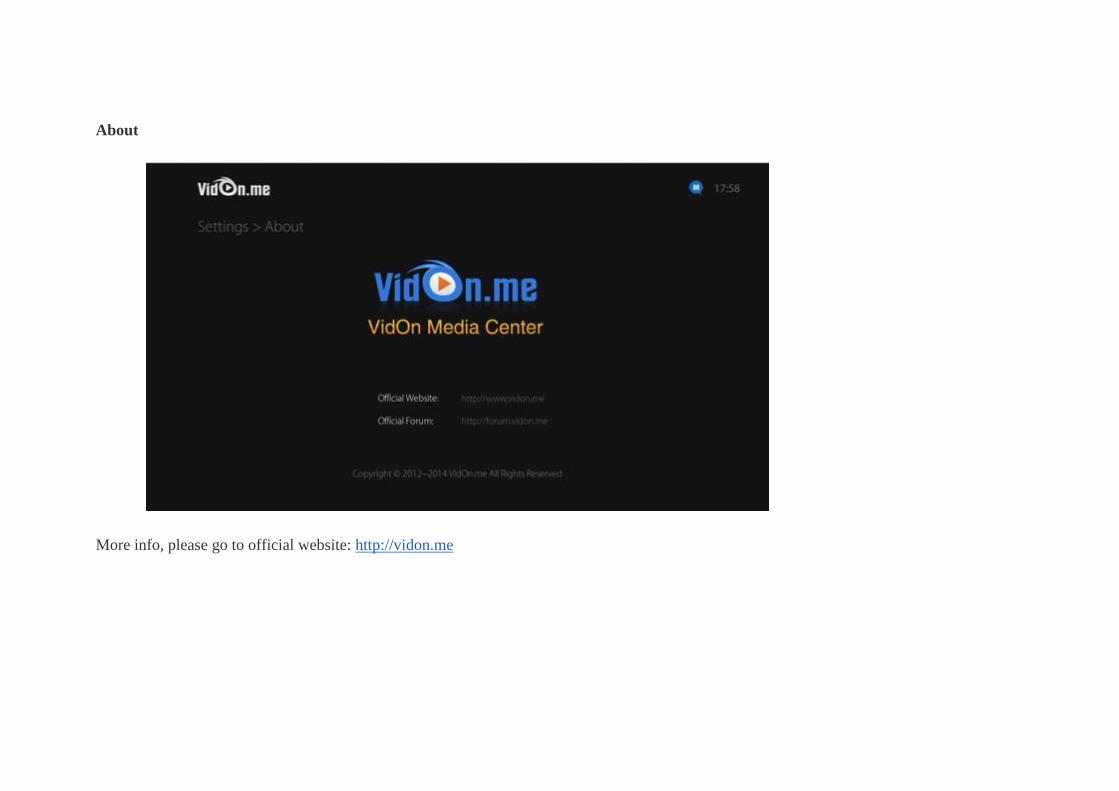
1.1. Language Settings
Set the language for interface:

1.2. Display Settings
Set resolution and size to the screen:

1.3. Network Settings
Set Wi-Fi and wired network connection:
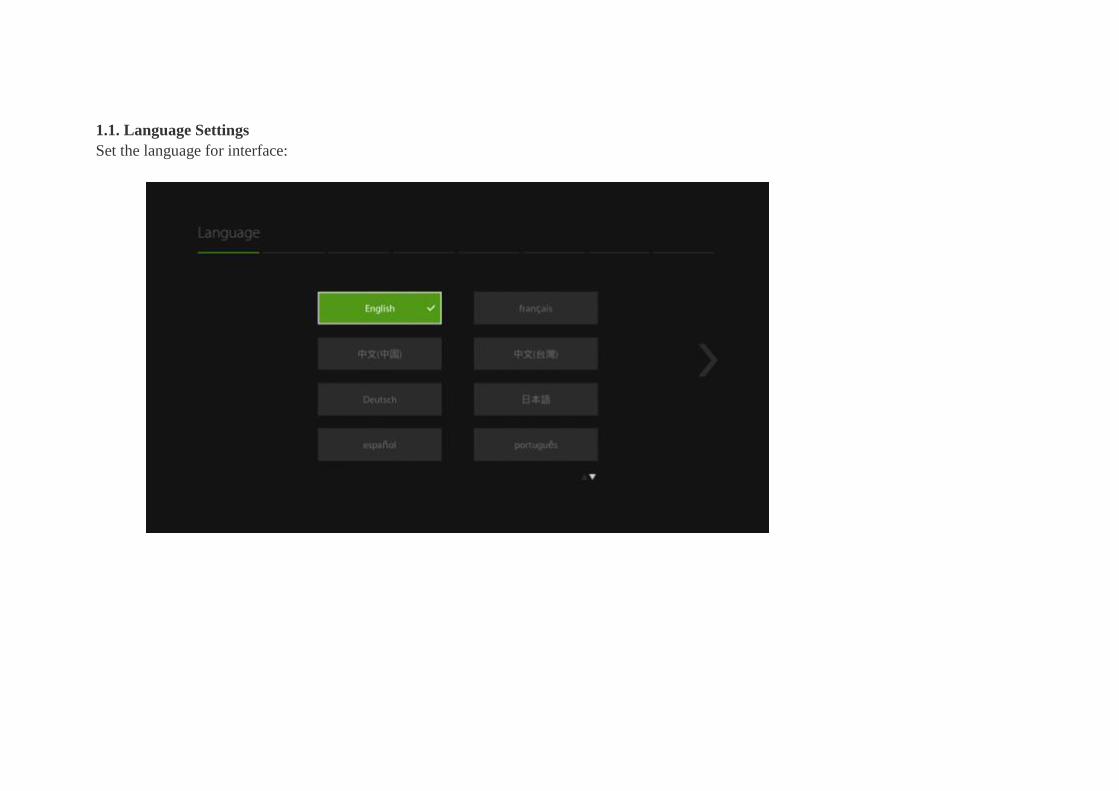
Wi-Fi
Choose Wi-Fi to open Wi-Fi settings screen.

At the left of the screen, you can see all Wi-Fi signals that have been detected. Select the one you want to connect to, then press “OK” button on
the control to connect. A password is required for a protected Wi-Fi. A successful connection will appear like this:

Wired Network
The box will automatically connect to the network after a network cable is plugged in. If you check the “DHCP” box, then IP address will be
automatically obtained.

If you prefer a manual configuration, just uncheck “DHCP” then choose each setting entry to set manually.


A successful connection will appear like this:

1.4. Time Settings
Check the options of “Automatic Time Zone Sync” and “Automatic Time Sync”, then the system will automatically synchronize time zone and
time. If you want to set a time zone or a time, just uncheck the corresponding option.

1.5. Audio Settings
Select an audio output mode from HDMI and S/PDIF. And choose whether to enable passthrough.

1.6. Check for Update
Once a new version is detected, the system will automatically download the update package and install it. If the box is running the newest
version already, then update is not needed.

1.7. User Login
Input the username and password registered on the official website to login to the box. User information will appear after a successful login:
Choose “Switch” to switch the account when needed.
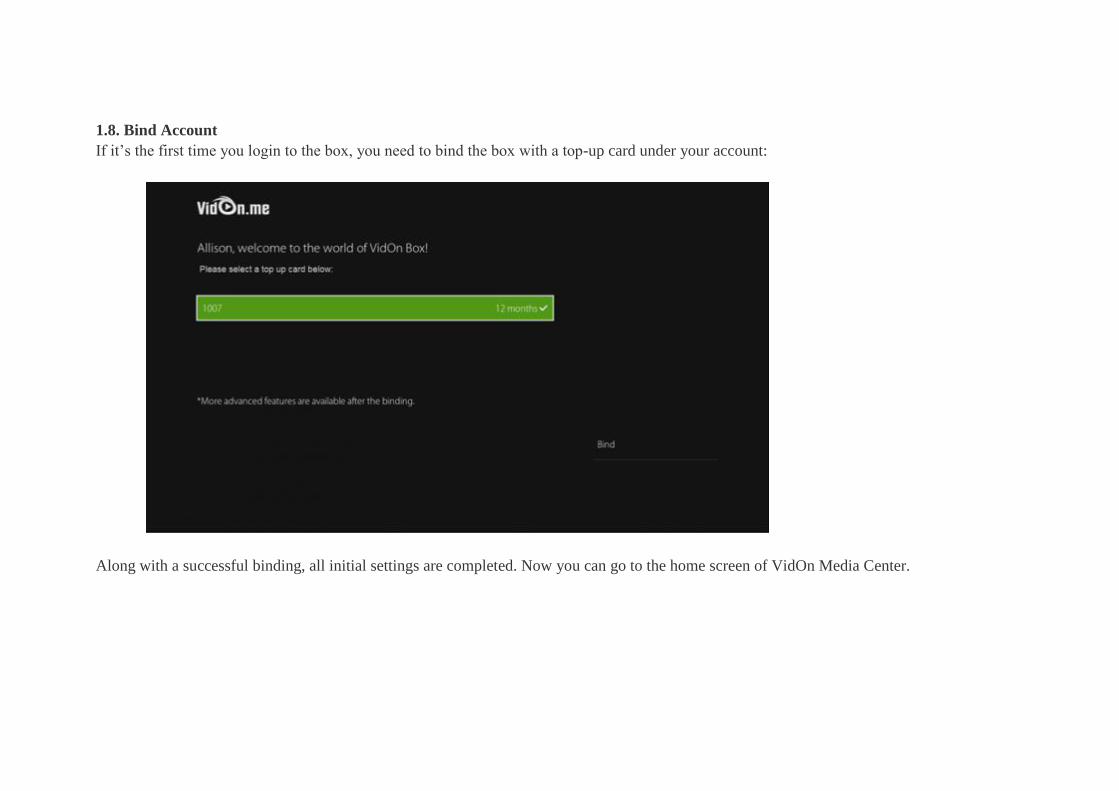
1.8. Bind Account
If it’s the first time you login to the box, you need to bind the box with a top-up card under your account:
Along with a successful binding, all initial settings are completed. Now you can go to the home screen of VidOn Media Center.

2.My Apps

“My Apps” contains all installed apps on the box. Press “OK” button on the control to open a highlighted app. Then press “Menu” button to do
operations like sort and uninstall:

3. Settings

General
General settings include settings to language and device name.

Network
Here you can set Wi-Fi and wired network.

Display
Display settings include settings to screen resolution, screen size, contrast and brightness.

Audio
Here you can set audio output mode and choose whether to enable passthrough or not.

User Center
User Center shows user info and license info.
Choose “Switch” then you are able to switch another account to login. Choose “Top up” and you can top up current account.

Time
Here you can set the time zone and the time.

Advanced
Choose “Advanced” and Android system settings appear.
Power Management
Here you can choose “Shutdown” or “Dormancy” to save power. And you can set the auto shutdown time and screensaver time.

Update
You can choose “Check for Update” to check if there is a new version. Then you can download and install the update package if there is any.

Feedback
If you encounter any problems during the usage, such as crash, reboot, etc, you can send the log to us, which will help us pinpoint and solve the
problems.

System Info
Here you can check info of the current version, hardware info, RAM info and other system related info. You can also do factory reset here.
Recommended