By Declan Fox
Raspberry Pi

As we can’t bring flat screen TVs in to CoderDojo with us we have to find another way of controlling our Raspberry Pi.
Headless operation is when log in to one computer from another.
We are going to use SSH and VNC to connect to our Pi.
Raspberry Pi
What you will need
1. Raspberry Pi
2. SD Card (4GB+)
3. Power source (Android charger)
4. Patch cable(Ethernet cable)
5. Laptop/PC and SD card reader
Headless operation

Step 1.
Download Raspbian Wheezy from http://www.raspberrypi.org/downloads/
Set up SD card

Step2.
Download win32diskimager from http://sourceforge.net/projects/win32diskimager/
Step 3.
Extract the executable from the zip file and run the Win32DiskImager utility
Set up SD card

Step 4.
Select the image file(Raspbian) and unzip it.
Step 5.
Select the drive letter of the SD card in the device box. Be careful to select the correct drive; if you get the wrong one you can destroy your data on the computer's hard disk!
Set up SD card
Step 6.
Click Write and wait for the write to complete.
Step 7.
Exit the imager and eject the SD card.
Set up SD card

Step 1.
Download and install Putty from http://www.chiark.greenend.org.uk/~sgtatham/putty/download.html
Step 2.
Download and install Advanced IP Scanner from http://www.advanced-ip-scanner.com/
Connect your RPi

Step 3.
Connect your Patch cable to your laptop and your Raspberry Pi.
Step 4.
Power up your Raspberry Pi.
Connect your RPi

Step 5.
On your laptop click on the
Start orb >> Control panel >> Network and Internet >> Network and Sharing Centre >> Manage wireless networks
Select your Wi Fi connection and click on adapter Properties.
Connect your RPi

Connect your RPi

On the pop up window click on the sharing tab.
Tick Allow other network users to connect through this computer’s internet connection.
Connect your RPi

Step 6.
Start Advanced IP scanner and click the Scan button.
Your Raspberry Pi should show up on the list of connected devices.
If your Raspberry Pi doesn’t show up you may set up a network bridge.
Connect your RPi

Setting up a network bridge
Make sure that you untick the check box for sharing your connection then follow the instructions here
Then use the ip scanner as before.
Important
Make sure you delete the bridge when you’re finished as it’s a big security risk.
Connect your RPi

Step 7.
Start Putty
Type in your Rpi’s IP address and click open
Raspberry Pi

Step 8.
The default login is pi
The default password is raspberry
Raspberry Pi

You should now be logged into your Raspberry Pi
Raspberry Pi

Next we’re going to set up, and log in to, a remote desktop.
VNC is a graphical desktop sharing system that allows you to remotely control the desktop interface of one computer from another. It transmits the keyboard and mouse events from the controller, and receives updates to the screen over the network from the remote host.
Raspberry Pi

Step 1.
Install TightVNC on your Raspberry Pi
Raspberry Pi

Step 2.
To install TightVNC Viewer on your laptop go to http://www.tightvnc.com/ , download and install the version for your computer.
You just need to install the Viewer only
Raspberry Pi

Step 3.
Start TightVNC on your Raspberry Pi
Take note of the number following raspberrypi this is the number of the desktop, you’ll need
this to connect. Set up a password
Raspberry Pi
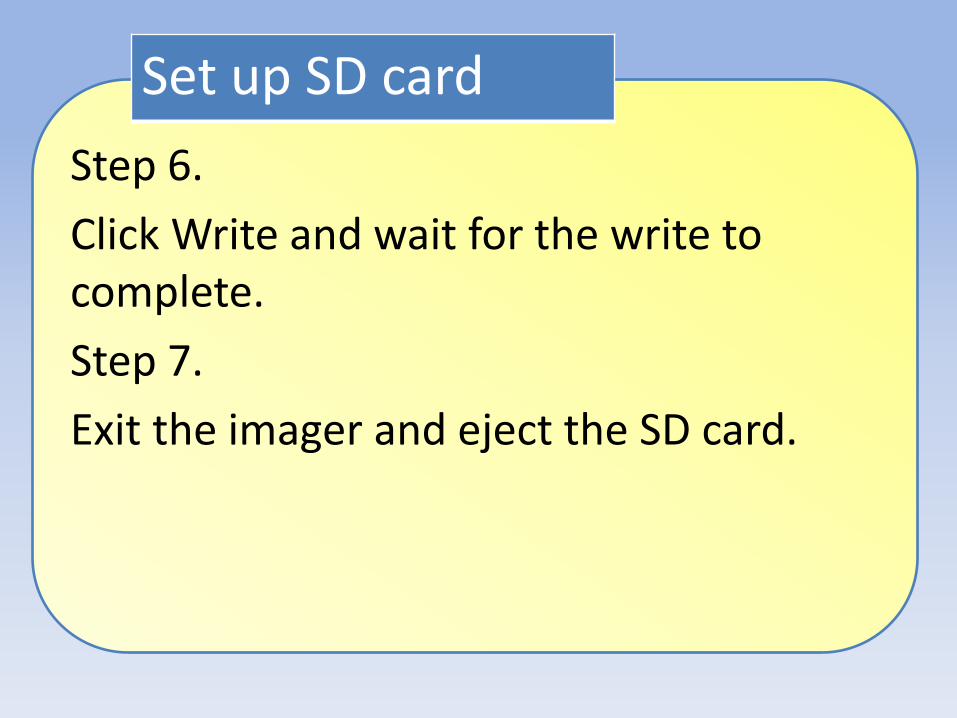
Step 4.
Start TightVNC on your laptop
Enter your ip address followed by your desktop number and click connect.
Raspberry Pi
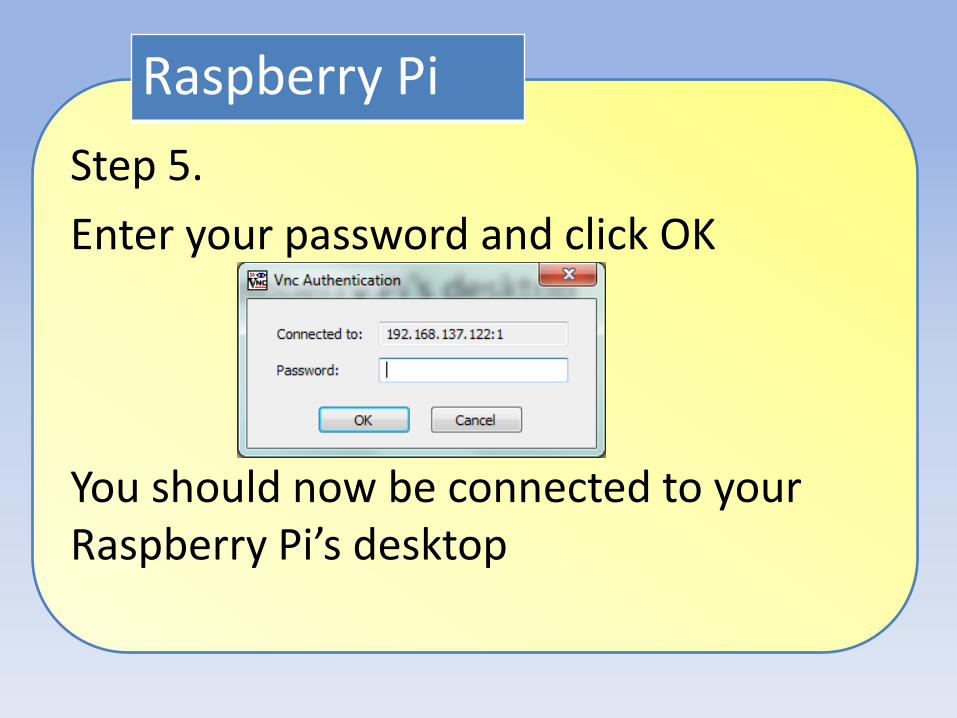
Step 5.
Enter your password and click OK
You should now be connected to your Raspberry Pi’s desktop
Raspberry Pi
Recommended