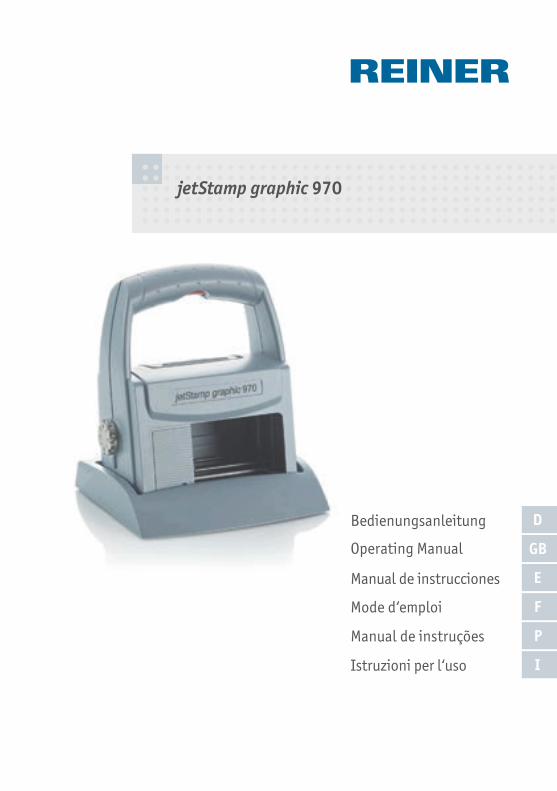
jetStamp graphic 970
D
GB
E
Bedienungsanleitung
Operating Manual
Manual de instrucciones
F
P
I
Mode d‘emploi
Manual de instruções
Istruzioni per l‘uso


1
jetStamp graphic 970
A
12
3
4
5
67

44
jetStamp graphic 970
1 Trigger button2 Battery compartment3 Print carriage4 Base station5 Protective Nozzle Seal6 LED indicator7 Set wheel8 Green charge display9 Micro-USB socket
Operating Elements
10 Plug-in socket �or external trigger11 Folding print cartridge12 Print cartridge13 Lock print cartridge14 Contact print cartridge15 Nozzles16 Sealing tip17 Positioning aids18 Print area
B
11 12 13
C
8
9
10 E 15 17
18
D
14
15
12
5
16

45
jetStamp graphic 970
GB
Set Wheel
The LED indicator marks settings.
On the setting Functions, see “Online Help”, page 57.
To avoid mal�unctions align the settings precisely with the LED display!
To activate Bluetooth, turn the setting wheel 7 to position Online/Bluetooth(see “Bluetooth“, page 54)
Clean
Online/Bluetooth
Functions
Print image 3
Print image 4
Print image 2
Print image 1
LED indicator
O��

46
jetStamp graphic 970
Operating Elements ...........................................................................................44
Set Wheel ........................................................................................................45
Important Notes
Rechargeable Batteries ......................................................................................48
Your Sa� ety
Sa�ety, Description ............................................................................................49
Sa�ety Notes on Rechargeable Batteries.................................................................50
Sa�ety Notes.....................................................................................................51
Secure Handling o� Print Cartridges ......................................................................51
1. Preparation and Taking into Operation
1.1. Commissioning.........................................................................................52
1.2. Inserting Printing Cartridge........................................................................53
1.3. Test Printing ............................................................................................53
1.4. Bluetooth................................................................................................54
1.5. Install PCset graphic So�tware .....................................................................55
1.5.1. System Requirements .....................................................................55
1.5.2. Installing So�tware.........................................................................55
1.6. Firmware update ......................................................................................56
2. The So� tware Application PCset graphic
2.1. Prepare jetStamp graphic 970 �or PCset graphic ...............................................57
2.2. Starting the So�tware ................................................................................57
2.3. Operating Inter�ace...................................................................................58
2.3.1. Menu Commands............................................................................59
2.3.2. Objects ........................................................................................60
2.3.3. Menu Bar......................................................................................61
2.3.4. Additional commands .....................................................................61
2.4. Example Work�low: Generate Print Pattern .....................................................62
2.4.1. Con�igure Print Pattern ...................................................................62
2.4.2. Trans�er Print Pattern to the jetStamp graphic 970 ................................63
2.4.3. Print Print Pattern .........................................................................63
2.5. Date/Clock Time .......................................................................................64
ContentsjetStamp graphic 970

47
jetStamp graphic 970
GB
2.5.1. Presettings ...................................................................................64
2.5.2. Context menu date/clock time object .................................................66
2.6. Numberer ................................................................................................67
2.6.1. Presettings ...................................................................................67
2.6.2. Context menu numberer object .........................................................69
2.7. Barcode ..................................................................................................70
2.7.1. Barcode presettings .......................................................................70
2.7.2. Barcode - continuous numbering/dating ...........................................72
2.7.3. Context menu barcode object ...........................................................73
2.8. External Trigger........................................................................................73
2.8.1. Trigger via USB Inter�ace.................................................................73
2.8.2. Trigger via External Switch...............................................................73
3. Maintenance
3.1. Replace Print Cartridge ..............................................................................74
3.2. Clean Print Cartridge Contacts.....................................................................74
3.3. Cleaning Nozzles.......................................................................................75
3.3.1. Automatic Cleaning o� Nozzles..........................................................75
3.3.2. Manual Nozzle Cleaning ..................................................................76
3.4. Clean Protective Nozzle Seal........................................................................76
3.5. Replace Protective Nozzle Seal.....................................................................76
3.6. Clean Housing ..........................................................................................77
4. Recognising and Removing Inter� erences
4.1. jetStamp graphic 970 does not work .............................................................78
4.2. Reasons �or Rechargeable Batteries Not Being Charged ....................................78
4.3. Visual Signals (LED) ..................................................................................79
4.4. Acoustic Signals .......................................................................................80
5. Technical Data and Accessories
5.1. Rating Plate.............................................................................................81
5.2. Technical Data..........................................................................................82
5.3. Transport and Disposal...............................................................................83
5.4. Accessories..............................................................................................83
6. Contact...........................................................................................................84
7. Index .............................................................................................................85

48
jetStamp graphic 970
Important NotesBe�ore commissioning o� the jetStamp graphic 970, always read the operating instructions andin particular the sa�ety notes with care. This prevents mistakes in handling o� the markingdevice and connected sa�ety risks to keep you sa�e and avoid damage to the device.
Rechargeable BatteriesCharging o� the rechargeable batteries is electronically controlled. This warrants that thebattery cells are charged in the best and protective manner.
Charging
� Charge rechargeable batteries completely be�ore �irst use. Duration approx. three hours.
The rechargeable batteries will not reach their �ull capacity yet a�ter the �irst complete charge.Expect that the regular operating times are not reached.
Reaching � ull capacity
The �ull capacity is reached when the rechargeable batteries are discharged and charged againcompletely several times.

49
jetStamp graphic 970
GB
Your Sa� ety
Sa� ety, DescriptionDANGER
Warnings o� dangers that lead to death or severe injury directly i� not observed.
WARNING
Warnings o� dangers that may lead to death or severe injury i� not observed.
CAUTION
Warnings o� dangers that may lead to injury i� not observed.
NOTICE
Warnings o� dangers that may lead to property damage i� not observed.
� You are asked to per�orm actions here.
Notes and advice to make handling your jetStamp graphic 970 even easier.
Notes on instruction videos.

50
jetStamp graphic 970
Sa� ety Notes on Rechargeable BatteriesRechargeable batteries are subject to wear. A longer service li�e than six months cannot bewarranted.
WARNING
Danger o� explosion at contact with �ire.
� Never throw rechargeable batteries into �ire.
CAUTION
Danger o� injury �rom destruction o� the battery jacket when using unsuitable rechargeablebatteries or non-rechargeable batteries.
� Use only rechargeable batteries intended �or the device!
Type use
Only use the enclosed plug-in mains adapter or a PC USB connection to charge the batteries.
Only use rechargeable batteries (three each) o� the nickel-metal-hydride type(REINER item number: 946 192 - 000), build AA.
Always replace all rechargeable batteries at once.
Non-approved rechargeable batteries may cause damage or �unctional impairment.
� Only use prescribed rechargeable batteries.
Insertion
Observe the polarity o� the rechargeable batteries when inserting it, see icons!
Disposal
Richtlinie 2006/66/EC:Consumers are obliged to return �lat batteries and rechargeable batteries to asuitable collection site.Batteries and rechargeable batteries can be returned �ree o� charge to the intendedcommunity collection points or the point o� sale.The adjacent symbol means:Do not dispose o� batteries or rechargeable batteries with conventional householdwaste.The �ollowing symbols may be located below the sign:Cd = Contains more than 0.002 percent by weight cadmiumHg = Contains more than 0.005 percent by weight mercuryPb = Contains more than 0.004 percent by weight lead.

51
jetStamp graphic 970
GB
Sa� ety NotesWARNING
Danger o� blinding in case o� contact between ink and eyes.
� Never hold the jetStamp graphic 970 with its nozzles pointing at the �ace o� persons!
CAUTION
Danger o� tripping and damage to the device �rom device lines placed �reely in the room.
� Place the device lines so that they do not pose any danger source!NOTICE
This product version is a class A device. This device can cause radio inter�erences in the livingarea. In this case, the operator may be required to take approximate measures.
NOTICE
Damage to the device due to improper transport.
� Only use packaging that provides protection �rom impact and shock to the device!
NOTICE
Damage to the device by moisture.
� Be�ore commissioning, wait until the device has reached room temperatureand is completely dry!
Secure Handling o� Print CartridgesWARNING
Damage to health �rom swallowing the ink.
� Do not swallow!
� Keep the print cartridge away �rom children!

52
jetStamp graphic 970
1. Preparation and Taking into OperationFind a clip on our homepage or at www.reiner.de or youtube.
1.1. Commissioning
The rechargeable batteries must be charged completely be�ore the �irst use.The charging time is approx. 3 hours. The rechargeable batteries are charged whenthe green charge display 8 goes out.
Inserting rechargeable batteries_ Fig. A
Always replace all rechargeable batteries at once. Date, time and counter reading o� thenumbering machine are retained when the rechargeable batteries are removed.
� Open battery compartment 2 .
� Place the textile ribbon �lat across the compartment.
� Ensure correct polarity and insert the rechargeable batteries.
� Close 2 battery compartment.
The textile ribbon serves simpler removal o� the rechargeable batteries.
Charge batteries _ Fig. C
Only connect the device to the PC when the PCset graphic-So�tware was installed(see “Install PCset graphic So tware”, page 54).
Charging at a USB hub without dedicated power supply is not possible.
� Connect the Micro-USB socket o� the device 9 to the mains unit with the USB cable andconnect the mains unit to the mains.

53
jetStamp graphic 970
GB
1.2. Inserting Printing Cartridge
Inserting printing cartridge_ Fig. A + B + D
Depending on ink type used, di��erent Protective Nozzle Seals are required(see “Replace Protective Nozzle Seal”, page 76).
� Put the jetStamp graphic 970 in the base station 4 .
� Turn the setting wheel 7 to position 1.
� Keep the trigger button 1 pushed and take the device �rom the base station 4 .Print carriage 3 moves to the middle position.
� Gently push the lock o� print cartridge 13 to the right, until the print cartridge �lap 11
can be opened.
� Open print cartridge �lap 11 .
� Take new print cartridge 12 �rom the packaging and remove protective �ilm �rom thenozzles 15 .
� Put the jetStamp graphic 970 on a �ixed �lat sur�ace.
� Insert printing cartridge 12 .
� Close the print cartridge �lap 11 .
� Push the trigger button 1 .Print carriage 3 moves to the home position.
1.3. Test Printing
The jetStamp graphic 970 is delivered with 4 �actory-pre-set example print patterns.
WARNING
Danger o� blinding in case o� contact between ink and eyes.
� Never hold the jetStamp graphic 970 with its nozzles 15 pointing at the �ace o� persons!
Test printing_ Fig. A + C
� Turn the setting wheel 7 to position 1.
� Put the device on a level sur�ace to be printed on.
� Press the trigger button 1 .Example print pattern 1 is printed.
GB

54
jetStamp graphic 970
1.4. Bluetooth
Print image 3
Print image 4
Clean
Print image 2
Print image 2
O��
Functions
LED indicator
Online/Bluetooth
Bluetooth cannot be activated while an a USB connection is active.With an activeBluetooth connection, a USB connection cannot be established either.
� To activate Bluetooth at the device, the setting wheel 7 must be turned to positionOnline/Bluetooth.
A jetStamp graphic 970 with the serial number 123 then becomes visible under the name970-000123 �or other Bluetooth devices.
To establish a connection, the actory password “0000“ is needed
I� Bluetooth is active, the battery runtime reduces since Bluetooth is active in standbymode as well.

55
jetStamp graphic 970
GB
1.5. Install PCset graphic So� tware
1.5.1. System Requirements
Supported REINER devices:- jetStamp graphic 970- speed-i-Marker 940
Hardware:- PC with Pentium processor (also compatible) or higher- Graphics adapter with a min. resolution o� 800 × 600 pixels
(at least 256 colours; optimal: TrueColor, 24 Bit, 16.78 million colours)- RAM, at least 32 MB- 10 MB �ree hard disc memory- 1 �ree USB inter�ace
Supported operating systems- Windows 2000, Windows XP, Windows XP 64-Bit- Windows Vista, Windows Vista 64-Bit, Windows 7, Windows 7 64-Bit,
Windows 8, Windows 64-Bit
1.5.2. Installing So� tware
Installation is only possible with administrator rights on the computer.
� Insert PCset graphic-CD into the drive.
� I the installation programme does not start up automatically, start the ile “setup.exe”.
� Observe the installation programme instructions.

56
jetStamp graphic 970
1.6. Firmware updateThe most up to date �irmware �or the jetStamp graphic 970 can be downloaded �rom theREINER website (www.reiner.de).
Be�ore per�orming a �irmware update, trans�er and save the print images on thejetStamp graphic 970 to the PCset graphic. The print images can be damaged duringthe Firmware update.
Ensure that the PCset graphic is installed on your PC but not opened be�ore the�irmware update is started. While the �irmware update is being installed, the jetStampgraphic 970 must not be switched o��.
� Connect Micro USB socket 9 to the PC via the USB cable.
� To activate the device, turn the setting wheel 7 to position 1.
� Unpack “Firmware update“ and start “970 Firmware xxxx.exe“. The irmware is installedautomatically. A�ter a success�ul �irmware update, the PCset graphic can be opened again.

57
jetStamp graphic 970
GB
2. The So� tware Application PCset graphicThe Online Help o� the PCset graphic so�tware contains �urther in�ormation on�unctions and con�iguration options. To open the online help, select the menu entryHelp in the menu Help or push F1.
2.1. Prepare jetStamp graphic 970 � or PCset graphic
Prepare jetStamp graphic 970 � or PCset graphic_ Fig. A + C
For the device to be correctly recognised by the computer, the PCset graphic so�twaremust be installed �irst.
� Connect the micro-USB socket to the computer via the USB cable 9 .
� Turn the set wheel 7 to 1 to activate the device.The PC recognises the jetStamp graphic 970 as a new USB device.The device driver so�tware is installed automatically.
When the device is connected to the PC, the rechargeable batteries arecharged via the USB connection.
2.2. Starting the So� tware� Double-click the REINER PCset graphic icon .
The PCset graphic so�tware is started.

58
jetStamp graphic 970
2.3. Operating Inter� aceThe operating inter�ace is structured in �our areas:
Menu bar with Windows-typical and PCset graphic-speci�ic �unctions
Icon bar
4 lines �or print pattern design
Bar with di��erent status displays
e � g h i
ab
c
d
abc
d
a Menu barb Icon barc Print patternsd Status displayse Cursor position
� Online/O��lineg Device messagesh Ink level displayi Charge display

59
jetStamp graphic 970
GB
2.3.1. Menu Commands
The online help o� the PCset graphic application provides �urther in�ormation on theicon bar, the objects and menu bar.
Icon bar b Command Description
New Resetting the display. Deleting the displayed dra�t.
Settings � ont Display the tab “Font” in the menu “Settings”.
Open File selection menu to load saved print patterns.
Save Saving displayed print patterns as XML �ile.
Grid Activates the grid to align the objects.
Settings Display the tab “Print settings” in the menu “Settings”.
Trans� er The displayed print patterns are trans�erred to thedevice.
Upload Save the print patterns saved in the device�or processing.
Selection For areas that were �astened via the additional �unction“generate graphic”.
� 1. Activate “Selection“.
� 2. With the le�t mouse button pressed down, drag theselection �rame over the desired area.
� 3. Click inside the �rame with the le�t mouse button.The selection can now be edited like a Graphic object.

60
jetStamp graphic 970
2.3.2. Objects
Print patterns are assembled �rom objects o� the �ive object groups described below.Objects can be reely placed by drag and drop (see “Example Work low: Generate PrintPattern“, page 62).
The �ormat o� each object group can be individually con�igured. Menus �or �ormatsettings are called by right-clicking the respective object or in the tab “Format”in the menu bar a . Detailed in ormation (see “Online Help”, page 57).
Icon bar b Command DescriptionText Enter the desired text in the cursor position. Font type and
style depend on the set text �ormat. Double-clicking the textterminates text input mode.
Text can also be inserted via the Windows clipboard(see “Online Help”, page 57“).
The �ont size is adjusted to the grid height automatically whenthe grid is active.
Date/
TimeFont type, style, size and �ormat can be set individually.
Numberingmachine
The numbering machine is used �or continuous numbering.Starting value, step width and direction, �ont type, style andsize can be set.
Barcode The �ormat settings o��er several barcode �ormats.
Graphic A�ter insertion o� a graphical object, a �ile selection windowopens. Select the desired graphic and con irm with “Open”.In�ormation on available image �ormats, resolutions andconversion actors; see “Online Help”, page 57”.

61
jetStamp graphic 970
GB
2.3.3. Menu Bar
In addition to the �unctions in the icon bar, the PCset graphic application also has a menu bar.
The menu bar contains both common, sel�-explanatory standard commands and PCsetgraphic-speci�ic menu commands. The latter usually can also be called via the icons o� theicon bar.
Menu command Description (c�. menu bar a )Save as The dialogue �or saving the print patterns appears.Delete Deletes selected objects.Copy Loads selected contents into the clipboard.Insert Inserts contents �rom the clipboard.Cut Deletes selected contents and sends them to the clipboard.
Online helpHelp with detailed con�iguration notes and operating instructions inelectronic �orm.
In�oVersion in�ormation on the so�tware.When the jetStamp graphic 970 is connected, the in�ormation on model,serial number and �irmware version appear here.
2.3.4. Additional commands
Text and barcode objects can be converted to graphics. Graphics are �ixed and cannotbe moved. Limited editing is possible via the additional unction “Selection”.
Generate graphic
� Click object with the right mouse button.
� Select “Generate graphic”.The object is converted into a graphic.

62
jetStamp graphic 970
2.4. Example Work�low: Generate Print Pattern
Entering own print patterns overwrites all 4 print patterns saved in the device.The �actory pre-installed print patterns can be uploaded into the so�tware and savedas XML iles be ore (see “Menu Commands”, page 59).
2.4.1. Con�igure Print Pattern
Insert Text and Date/Time
� To generate a text object, pull the text icon in line 1 (print pattern 1) with the mouseand release it in the desired position.
� Enter the desired text in the text �ield.
� Doubleclick the text �ield to place the text object.
� To generate a date/time object, pull the date/time icon into line 1 (print pattern 1)with the le�t mouse button.
� Release it in the desired position.

63
jetStamp graphic 970
GB
2.4.2. Trans� er Print Pattern to the jetStamp graphic 970
� Click the icon trans� er .
� Con�irm the �ollowing dialogue window with Yes.
The �ollowing message will appear a�ter a �ew seconds i� the trans�er is success�ul.
� Con�irm message with OK.The print pattern is saved in the jetStamp graphic 970 now and can be printed.
2.4.3. Print Print Pattern
WARNING
Danger o� blinding in case o� contact between ink and eyes.
� Never hold the jetStamp graphic 970 with its nozzles 15 pointing at the �ace o� persons!
Print print pattern_ Fig. A + C
� Turn the setting wheel 7 to position 1.
� Put the device on a level sur�ace to be printed on.
� Push the trigger button 1 .Example print pattern 1 is printed.

64
jetStamp graphic 970
2.5. Date/Clock Time
Up to �ive Date/Clock time objects can be placed(see “Objects“, page 60).
Figure style, ont style, ont size (see “Figure style“, page 65) and �ormat can be set.
The date/clock time �ormat can be globally preset.
Additionally, deviating settings can be per�ormed �or every single date/clock time object(see “Context menu date/clock time object“, page 66).
2.5.1. Presettings
Changed presettings apply to all �uture date/clock time objects.
� Select the tab ormat and click “Date/Clock time“ in the menu bar a .The con�iguration window �or date and clock time appears.
The tab “Date and clock time“ is structured in two areas.- Format �or date and clock time- Figure style

65
jetStamp graphic 970
GB
2.5.1.1. Tab date and time
Format �or date
and time
List o� precon�igured �ormats.
Selection by clicking.
Format Shows the selected �ormat in the dra�t view.
The �ormat can be manually con�igured.
One abbreviation o� a category each �rom the �ollowing table“Format abbreviations“ can be used once each.
Additional characters (also spaces) are inserted by being included insimple apostrophes (’).
For veri ication purposes, whether or not the entered ormat is “OK“ isdisplayed above the input �ield.
Current Shows the current �ormat in the current date.
Format abbreviationdd Day o� the month with two graphics (01 to 31)
MM Day o� the month with two graphics (01 to 12)
MMM Abbreviation o� the month (up to 4 characters)
yy The last two graphics o� the year (00 to 99)
yyyy The complete year (0000 to 9999)
HH Hour with two graphics (00 to 24)
hh Hour with two graphics (00 to 12)
mm Minutes with two graphics (00 to 59)
ss Seconds with two graphics (00 to 59)
tt Two characters �or twelve-hours �ormat with the letters AM or PM
2.5.1.2. Figure style
Selection option between “Figure style1“ and “Figure style 2“.
“Figure style 1“ and “Figure style 2“ can be con igured in the tab “Figure style“ in the menu“Settings“ (see “Menu commands“, page 59).

66
jetStamp graphic 970
2.5.1.3. Tab options
An o set or date and time takes is con igured in the tab “Options“.
The o��set can be used to, e.g., have best-be�ore dates calculated automatically.
� Click into the respective text �ield.
� Enter or select o��set.
� Con�irm with OK.The set values are added to the current system date.The result appears in the con�iguration view o� the imprints c .
2.5.2. Context menu date/clock time object
I a date/clock time object is inserted (see “Objects“, page 60), the con igurationcorresponds to the presettings (see “Presettings“, page 64).
The context menu can be used to individually set each date/clock time object deviating�rom this.
� To open the context menu, right-click the desired date/clock time object.The context menu opens as in the �ollowing �igure.
Date/clock time�ormat
Opens the con�iguration window �or date and clock time(see “Presettings“, page 64) or the selected date/clock time object.
Delete object Deletes the object.

67
jetStamp graphic 970
GB
2.6. NumbererThe numberer is used �or consecutive numbering.
Up to ive numberer objects can be placed (see “Objects“, page 60).
Starting value, repetitions, step width and direction, as well as �igure style, �ont style and ont size (see “Figure style“, page 68) can be set.
The numberers �ormat can be globally preset.
Additionally, deviating settings can be per�ormed �or every single numberer object(see “Context menu numberer object“, page 69).
2.6.1. Presettings
Changed presettings apply to all �uture numberer objects.
� Select the tab ormat and click “Numberer“ in the menu bar a .The con�iguration window �or numberers appears.
The con�iguration window �or numberers is structured in three areas.- Numberer range- Figure circle- Figure style

68
jetStamp graphic 970
2.6.1.1. Numberer range
Step Indicates the interval at which the numberer counts on (e.g. 1,4,7... insteps o� 3).
Repetitions Indicates the number o� repetitions o� an imprint. I�, e.g., the value 3is set, the numberer remains on the same number �or three imprintsbe�ore it counts on.
The repeat �actor can be set �rom 0 to 99.
The numberer switches on at the value 0.
Downwards The numberer can count up (e.g. 10, 11, 12 ...) or down(e.g. 10, 9, 8, ...).
Leading zeroes Leading zeroes can be suppressed or printed (e.g. 5 or 00000005).
The number o� printed digits depends on the maximums set under“number circle“.
2.6.1.2. Figure circle
The number circle de�ines the value range in which a numberer counter.
When the maximum or minimum value is reached (when the numberer counts up or down),the count is continued on the respective other end o� the scale.
Minimum This value marks the lower limit o� the number circle.
Maximum This value marks the upper limit o� the number circle.
Numberer status The current counter reading can be set within the de�ined value range.
2.6.1.3. Figure style
Selection option between “Figure style1“ and “Figure style 2“.
“Figure style 1“ and “Figure style 2“ can be con igured in the tab “Figure style“ in the menu“Settings“ (see “Menu commands“, page 59).

69
jetStamp graphic 970
GB
2.6.2. Context menu numberer object
I a numberer object is inserted (see “Objects“, page 60), the con iguration corresponds tothe presettings (see “Presettings“, page 67).
The context menu can be used to individually set each numberer object deviating �rom this.
� To open the context menu, right-click the desired numberer object.The context menu opens.
Numberer The number o� the selected numberer object (1-5) is displayed.
Link to numbercircle
Each numberer (1-5) is �irst linked to a separate number circle (1-5).
I� several numberer objects are placed, the numberer selected can belinked to the number circle o� another numberer. The dedicated numbercircle is rendered inactive by this.
The link is used to synchronise the counter reading o� di��erentnumberers.
Each printing system o� a linked numberer updates the counter readingo� the shared number circle.
Numberer �ormat Opens the con�iguration window �or numberers(see “Presettings“, page 67) or the selected numberer.
The numberer range (see “Numberer range“, page 68) can also beset deviating �rom each other �or numberers that are linked to a sharednumber circle.
Settings �or the number circle can only be made here when the selectednumberer is linked to the dedicated number circle.
Delete object Deletes the object.

70
jetStamp graphic 970
2.7. BarcodeThe PCset graphic can be used to generate di��erent barcode �ormats.Detailed in ormation (see “Online Help“, page 57).
Barcode type, character sequence, parameters and barcode size can be set.
The barcode object �ormat can be globally preset.
2.7.1. Barcode presettings
Global presettings can be set in the menu bar a via the tab Format “Barcode“
- OR -
Settings o� already-inserted barcode objects can be called via the right mouse button“Barcode Format“.
The con�iguration window �or barcode appears.

71
jetStamp graphic 970
GB
The barcode window is structured in 3 areas:
BarcodeType Select the barcode type �rom the dropdown list.
Character sequence Enter your desired character sequence.
Plain text preview Indicates the character sequence without control characters.
ParameterDisplay plain text Inserts plain text below the barcode. The plain text is the
character sequence that you have entered into the barcodeobject.
Display check �igure Indicates the check �igure additionally in plain text. To beable to use this option, you need to activate display plaintext. The check �igure is the last digit or position o� thebarcode in�ormation.
Start and stop characters: Start and stop characters �rom A - D �or the barcodecoda bar.
Barcode sizeHeight (mm) Barcode height. Can be set �rom 3.5 mm - 13.5 mm.
Module height Height o� the narrowest element in pixels (stroke or gap).Only �or 2D barcodes.
Module width (pixels) Width o� the narrowest element in pixels (stroke or gap).
Module ratio X:1 Ratio o� wide to narrow element in calculation o� the codelength.
Module ratio (2/5 matrix) Start and stop characters �or the barcode type coda bar. Maycontain letters A - D.

72
jetStamp graphic 970
2.7.2. Barcode - continuous numbering/dating
The PCset graphic di��ers between �ixed and variable barcodes. Fixed barcodes do not changetheir content during printing. Variable barcodes are made up o� the text as well as the date/time and/or numberer, which change during printing.
All in all, the variable barcode objects are limited to �our. Fixed barcode objects canbe inserted in any number.
The variable barcodes include the barcode types “2/5 Interleaved“, “Code 39“ and“Code 128 B“.
Only one numberer and/or one date/time can be inserted in each barcode.
At �irst insertion o� a numberer or a date/time object, the presettings o� therespective objects are loaded.
� To generate a barcode object, le�t-click the barcode symbol and pull it into a line tothe desired position.
� Push right mouse button, select context menu “Barcode Format“.The con�iguration window �or barcode appears.
� To insert the numberer, pull it into the character sequence by Drag&Drop.The line “Character sequence“ shows %N or numberer.
� To make the settings �or the numberer, right-click %N or numberer.The context menu opens (see “Numberer“, page 67).Make the desired settings and con�irm with OK.
� To insert the date/time, pull it into the character sequence by Drag&Drop.The line “Character sequence“ shows %D or date/time.
� To make the settings �or the date/time, right-click %D or date/time.The context menu opens (see “Date/time“, page 64).Make the desired settings and con�irm with OK.
� To save the settings made, click OK.
The red dash below the editing �ield determines the inserted position o� the date/timeand numberer object.

73
jetStamp graphic 970
GB
2.7.3. Context menu barcode object
I a barcode object is inserted (see “Objects“ page 60), the con iguration corresponds tothe presettings.
The context menu can be used to individually set each barcode object deviating �rom this.
� To open the context menu, right-click the desired barcode object.The context menu opens as in the �ollowing �igure.
Barcode �ormat To change the barcode �ormat.
Generating graphics Fastens the barcode in the current position. Note: the barcodecannot be processed anymore a�ter �astening.
Delete object Deletes the object.
2.8. External Trigger
REINER optional accessories are available �or external trigger types.See online help �or technical data.
2.8.1. Trigger via USB Inter� ace
� Connect REINER USB trigger cables to Micro-USB socket 9 .
� Set set wheel 7 to the desired print pattern.
� Close contact.Desired print pattern is printed.
2.8.2. Trigger via External Switch
Triggering via external switch uses a galvanically insulated contact.
An external voltage source is required �or triggering.
� Connect the REINER trigger cable to the plug-in socket �or external triggering 10 .
� Set set wheel 7 to the desired print pattern.
� Close contact.The desired print pattern is printed.

74
jetStamp graphic 970
3. Maintenance
3.1. Replace Print CartridgeThe ink level o� the print cartridge can be determined in the status display o�the PCSet graphic so�tware d .
Replace print cartridge_ Fig. A + B + D
Depending on ink type used, di��erent Protective Nozzle Seals are required(see “Replace Protective Nozzle Seal”, page 76).
� Put the jetStamp graphic 970 in the base station 4 .
� Turn the setting wheel 7 to position 1.
� Keep the trigger button 1 pushed and take the device �rom the base station 4 .Print carriage 3 moves to the middle position.
� Slightly push the lock o� print cartridge 13 to the right, until the print cartridge �lap 11
can be opened.
� Open print cartridge �lap 11 .
� Remove print cartridge 12 �rom the device.
� Take new print cartridge 12 �rom the packaging and remove protective �ilm �rom thenozzles 15 .
� Put the jetStamp graphic 970 on a �ixed �lat sur�ace.
� Inserting printing cartridge 12 .
� Closing the print cartridge �lap 11 .
� Push the trigger button 1 .Print carriage 3 moves to the home position.
3.2. Clean Print Cartridge Contacts
Clean print cartridge contacts_ Fig. A + B + D
In rare case, contamination o� the print cartridge contacts 14 may cause de�ective printresults.
� Put the jetStamp graphic 970 in the base station 4 .
� Turn the setting wheel 7 to position 1.
� Keep the trigger button 1 pushed and take the device �rom the base station 4 .Print carriage 3 moves to the middle position.
� Gently push the lock o� print cartridge 13 to the right, until the print cartridge �lap canbe 11 opened.
� Open print cartridge �lap 11 .

75
jetStamp graphic 970
GB
� Remove the print cartridge 12 .
� Clean the print cartridge contacts 14 at the print cartridge 12 and theprint cartridge �lap 11 with a so�t cloth possibly moistened slightly with ethanol (spirit).
� Put down device on a �ixed underground.
� Insert printing cartridge 12 .
� Close the print cartridge �lap 11 .
� Push the trigger button 1 .Print carriage 3 moves to the home position.
3.3. Cleaning NozzlesI� stripes are printed or i� there are any problems with print quality, there may be dry ink atthe nozzles 15 .
Print without stripes:
Print with stripes:
3.3.1. Automatic Cleaning o� Nozzles
WARNING
Danger o� blinding in case o� contact between ink and eyes.
� Never hold the jetStamp graphic 970 with its nozzles 15 pointing at the �ace o� persons!
Trigger automatic cleaning mechanism_ Fig. A + D
A small amount o� ink is ejected �or cleaning o� the nozzles 15 .

76
jetStamp graphic 970
� Take the device �rom the base station and put it on a level sur�ace.
� Turn the setting wheel 7 to position C.
� Push the trigger button 1 .
3.3.2. Manual Nozzle Cleaning
Manual nozzle cleaning_ Fig. D + E
When the automatic nozzle cleaning does not lead to the desired success,we recommend the �ollowing measure:
� To loosen the dried ink, gently wipe a so�t cloth possibly moistened slightly withEthanol (spirit) against the nozzles �or approx. three seconds 15 .
� Dab o�� dissolved ink and wipe the nozzles 15 dry.
3.4. Clean Protective Nozzle Seal
Clean Protective Nozzle Seal_ Fig. A + D
The Protective Nozzle Seal 5 is located in the base station 4 .
� Dab the Protective Nozzle Seal 5 clean with a so�t cloth.
Clean the Protective Nozzle Seal 5 at regular intervals. Replace at strongercontamination or damage.
3.5. Replace Protective Nozzle Seal
Find a clip on our homepage or at www.reiner.de or youtube.
Replace Protective Nozzle Seal_ Fig. A + D
Depending on ink type used, di��erent Protective Nozzle Seals are required.
� Push down the Protective Nozzle Seal 5 slightly at the �ront edge.
� Take it out at the Protective Nozzle Seal tip 16 .
� Insert a new Protective Nozzle Seal into the holder.
� Slightly push down the Protective Nozzle Seal until it latches in the holder.

77
jetStamp graphic 970
GB
3.6. Clean HousingCAUTION
Danger o� electric shock when liquids enter the inside o� the device.
� Pull the mains adapter �rom the socket.
� In�orm specialist dealer or REINER service.
NOTICE
Aggressive cleaning agents may damage the housing sur�ace.
� Do not use abrasives and plastic-dissolving detergents �or cleaning.
� Clean the housing sur�ace o� the device with a so�t cloth i� required. Slightly moisten thecloth in water with mild detergent at stronger contamination.

78
jetStamp graphic 970
4. Recognising and Removing Inter� erences
4.1. jetStamp graphic 970 does not work
Troubleshooting_ Fig. A + C
� Remove the USB cable �rom the jetStamp graphic 970.
� Open battery compartment 2 .
� Remove the rechargeable batteries.
� Wait �or approx. 3 seconds.
� Replace the rechargeable batteries.
� Connect the micro-USB socket o� the device 9 to the computer via the USB cable.
� Turn the setting wheel 7 to position 1.
� Start the PCset graphic.
� Check charge status display i (see “Operating Inter ace“, page 58).
4.2. Reasons � or Rechargeable Batteries Not Being Charged- No rechargeable batteries inserted or rechargeable batteries inserted incorrectly.- Contacts in the battery compartment de�ective.- Temperature o� rechargeable batteries above 40 degrees Celsius.- Rechargeable batteries too old.- Rechargeable batteries de�ective.- Rechargeable batteries completely discharged (deep discharge).
Capacity and service li� e
The rechargeable batteries reach their �ull capacity a�ter several charge/discharge cycles.With increasing age, the rechargeable batteries‘ operating time reduces.
Rechargeable batteries are subject to wear. A longer service li�e than six months cannot bewarranted.

79
jetStamp graphic 970
GB
4.3. Visual Signals (LED)
When the indicator �lashes orange (warning), the status display d
o� the PCset graphic so�tware shows a detailed device message g
(see “Operating Inter ace“, page 58).
LED indicator Condition Cause Removal NotesGreen ReadyGreen Flashing - Device is in
standby mode- Switch o�� and
on again or pushtrigger button 1
- Power saving mode
Orange(warning)
Flashing,interval o� 1
- No or de�ectiveprint cartridge
- Wrong printcartridge
- Ink level writingerror
- Print cartridgenot insertedcorrectly
- Rechargeablebattery empty
- No rechargeablebattery/de�ecti-ve rechargeablebattery
- Print carriagemovementblocked
- Insert printcartridge
- Insert print cart-ridge correctly
- Charge recharge-able battery
- Insert/replacerechargeablebattery
- The detailed causeand removal can bedetermined in thestatus display d o�the PCSet graphicso�tware
Orange(warning)
Flashing,Interval o� 2
- Print cartridgealmost empty
- Check print - Acoustic signal aswell
Orange(warning)
Flashing,Interval o� 3
- Print cartridgeempty
- Replace printcartridge
- Acoustic signal aswell
Orange(warning)
Flashing,Interval o� 4
- jetStamp graphic970 not in thebase station
- Put the jetStampgraphic 970 inthe base station
- The display appearsa�ter 30 seconds o�non-use in standardink, a�ter 10 secondsin MP2 ink and a�ter 6seconds in MP3 ink
- Acoustic signal aswell
Orange(warning)
Flashing,Interval o� 5
- Battery nearly�lat/capacity low
- Charge/replacerechargeablebattery
- Acoustic signal aswell
Red(error)
Flashing,interval o� 1
- Device error - Disconnectdevice �rom thepower supply �orapprox. 3 seconds(includingrechargeable bat-teries and USBconnection)
- I� the error remainsa�ter activation,have the deviceinspected by theREINER support

80
jetStamp graphic 970
4.4. Acoustic Signals
Signal Cause Removal Notes1 sound impulse - When the trigger button
is pushed while the setwheel is in the positionF(see “Online Help”,page 57)
1 sound impulseevery 10 seconds
- No or de�ective printcartridge
- Wrong print cartridge- Ink level writing error- Print cartridge not
inserted correctly- Rechargeable battery
empty- No rechargeable
battery/de�ectiverechargeable battery
- Print carriage move-ment blocked
- Insert printcartridge
- Insert print cart-ridge correctly
- Charge recharge-able battery
- Insert/replacerechargeablebattery
- The detailed cause andremoval can bedetermined in thestatus display o� thePCSet graphic so�tware d
2 sound impulsesevery 30 seconds
- Print cartridge almostempty
- Check print
3 sound impulse - Print cartridge empty - Replace printcartridge
4 sound impulse - jetStamp graphic 970not in the base station
- Put the jetStampgraphic 970 inthe base station
- The display appears a�ter 30seconds o� non-use in stan-dard ink, a�ter 10 seconds inMP2 ink and a�ter 6 secondsin MP3 ink
- Visual signal as well5 sound impulses - Battery nearly �lat/per minute capacity low
- Charge/replacerechargeablebattery

81
jetStamp graphic 970
GB
5. Technical Data and Accessories
5.1. Rating PlateObserve the rating plate be�ore the device is connected.
The rating plate is located on the bottom o� the device.
The �ollowing in�ormation has the �ollowing meaning:
Mod. = Model
S/N = Serial Number
QC. = Quality Control
= jetStamp graphic 970 meets the requirements o� EC directive 2004/108/EC.The device bears the CE marking �or this.
= jetStamp graphic 970 is in accordance with the �ollowing standards orstandardized documentsFCC 47 CFR Ch.1 Part 15 Bluetooth: FCC: R7TAMB2300.
= Sa�ety o� In�ormation Technology Equipment
= jetStamp graphic 970 is produced according to the sa�ety standards IEC/EN 60950-1.
Disposal
Directive 2006/66/EC:Consumers are obliged to return �lat batteries and rechargeable batteries to asuitable collection site.Batteries and rechargeable batteries can be returned �ree o� charge to the intendedcommunity collection points or the point o� sale.The adjacent symbol means:Do not dispose o� batteries or rechargeable batteries with conventional householdwaste.The �ollowing symbols may be located below the sign:Cd = Contains more than 0.002 percent by weight cadmiumHg = Contains more than 0.005 percent by weight mercuryPb = Contains more than 0.004 percent by weight lead
Directive 2002/96/EC (WEEE)Old devices must not be disposed o� in the common household waste but in aspeci�ied acceptance point �or recycling o� electrical and electronic devices.

82
jetStamp graphic 970
5.2. Technical Data
Technical DataDimensions standard device
Dimensions base station
Total height
140 × 160 × 85 mm (W × H × D)
155 × 140 × 30 mm (W × H × D)
175 mm
Weight standard device
Weight base station
approx. 520 g
approx. 480 g
Max. printing range 65 x 12.7 mm (W x H)
Max. printing speed < 1 s/print
Print resolution 300 dpi
Battery capacity at least 1000 prints
Print technology Termal inkjet
Barcode print EAN 8, EAN 13, 2/5 Interleaved, 2/5 Industrial, 2/5Matrix Code 39, Code 39 Full ASCII, Code Codabar, Code93, Code 93 Full ASCIIr, Code 128 B, GS1 128 (EAN 128)
Barcode �or continuous numbering/dating Code 128 B, Code 39, 2/5 Interleaved
Graphics BMP, JPG, TIFF, Gi�
Ambience temperature or operation 10 °C … +40 °C
Recommended ambience temperature �oroperation
16 °C … +32 °C
Humidity or operation 8 % … 80 % relative humidity
Recommended humidity or operation 10 % … 70 % relative humidity
Temperature �or storage 1 °C to +43 °C
Humidity or storage 5 % … 80 % relative humidity
Temperature �or transport -20 °C to +60 °C (up to 12 hours)
Humidity or transport 10 % … 90 % relative humidity
Data trans�er USB
Power supply 3 × AA NiMH rechargeable battery, can be chargedthrough enclosed mains adapter. Input: 100 – 240 VAC,50 – 60 Hz, 0.3 A output: 5 VDC 1 A
Standby time per battery charge approx. 72 hours
Battery charge time approx. three hours
Data retention (independent o� batteries) approx. 10 years
Print capacity per print cartridge approx. 5,000 prints depending on ink and print mode
Protection type IP 20, Degree o� contamination 2, equipment class 3

83
jetStamp graphic 970
GB
5.3. Transport and Disposal
Transport
NOTICE
Damage to the device at improper transport.
� Only use packaging that protects the device �rom impact and hits!
Disposal
Directive 2006/66/EC:Consumers are obliged to return �lat batteries and rechargeable batteries to asuitable collection site.Batteries and rechargeable batteries can be returned �ree o� charge to the intendedcommunity collection points or the point o� sale.The adjacent symbol means:Do not dispose o� batteries or rechargeable batteries with conventional householdwaste.The �ollowing symbols may be located below the sign:Cd = Contains more than 0.002 percent by weight cadmiumHg = Contains more than 0.005 percent by weight mercuryPb = Contains more than 0.004 percent by weight lead
Directive 2002/96/EC WEEE:Old devices must not be disposed o� in the common household waste but in aspeci�ied acceptance point �or recycling o� electrical and electronic devices.
5.4. Accessories
Inkjet cartridges P3-S-BKl Order-N°: 947 100 - 000
Inkjet cartridges P3-MP3-BK
l Order-N°: 947 100 - 120

84
jetStamp graphic 970
6. ContactErnst Reiner GmbH & Co. KG
Baumannstr. 16
78120 Furtwangen/Germany
Phone: +49 7723 657-0
Fax: +49 7723 657-200
Email: [email protected]
www.reiner.de
© 2014 Ernst Reiner GmbH & Co. KG
All rights reserved. Translation, reprint and other reproduction o� these operatinginstructions, even in parts and no matter the �orm, shall require our express written consent.We reserve the right to make content changes to these operating instructions without notice.These operating instructions were drawn up with care; however, we cannot assumeany liability �or any de�ects and errors or resulting consequential damage.

85
jetStamp graphic 970
GB
7. IndexMenu bar ...........................................58Menu command...................................59
OOnline Help........................................57Operating Elements .............................44Operating Inter�ace .............................58
Additional CommandsGenerate Graphic ......................61Selection.................................59
Objects ........................................60Barcode ..................................60Date/Time ...............................60Graphic...................................60Text........................................60
RReplace Print Head ..............................74Replace Seal.......................................76
SSa�ety notes .......................................49Set Wheel ..........................................45Status Displays ...................................58
TTechnical Data ....................................81Test Print ...........................................53Text Object .........................................60Transport...........................................83Troubleshooting..................................78
VVisual Signals (LED).............................79
AAccessories ........................................83Acoustic Signals..................................80
BBarcode.............................................60
CCharge display ....................................58Charge Rechargeable Batteries...............52Contact .............................................84
DDate/Time..........................................60Device Messages..................................58Disposal ............................................83
EExample Work�low ...............................62
Con�igure Print Pattern ...................62Print............................................63Trans�er Print Pattern .....................63
External Trigger ..................................73
GGraphic .............................................60
IInk level Display..................................58Insert Print Head ................................53Insert Rechargeable Batteries................52Install Device Driver ............................57Installing so�tware ..............................55Install PCset graphic............................55Inter�erences .....................................78
MMaintenance ......................................74
Cleaning Housing...........................77Cleaning Nozzles............................75Cleaning Print Head Contacts ...........74Clean Seal ....................................76Replace Print Head.........................74Replace Seal .................................76

Award � orOperationalExcellence
ZN-9
7008
8-00
0-B|
01-2
014
Recommended