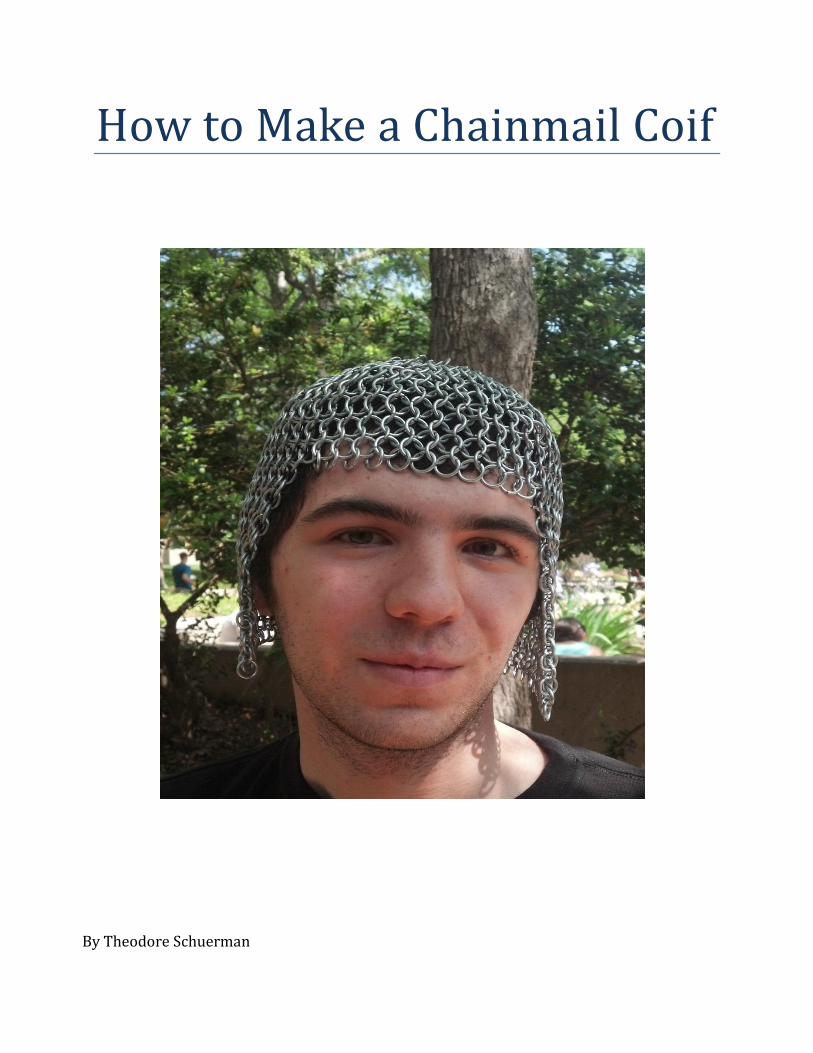
How to Make a Chainmail Coif
By Theodore Schuerman

Table of Contents iii
Table of Contents
Table of Contents ............................................................................................................................................. iii
Introduction to Chainmail ................................................................................................................................. v
History of Chainmail ........................................................................................................................................ v
Chapter 1: Required Materials ......................................................................................................................... 3
Gathering Materials ......................................................................................................................................... 3
Project Cost ......................................................................................................................................................... 4
Chapter 2: Making the Rings ............................................................................................................................. 7
Coiling the Wire ................................................................................................................................................. 7
Cutting the Loops .............................................................................................................................................. 8
Chapter 3: Assembling the Chainmail ........................................................................................................ 11
Bending loops .................................................................................................................................................. 11
Basic Pattern .................................................................................................................................................... 12
Putting Strands Together ........................................................................................................................... 13
Enclosing the Top of the Coif ..................................................................................................................... 14
Conclusion............................................................................................................................................................. 16
Index ....................................................................................................................................................................... 17


Introduction v
Introduction to Chainmail
Why Chainmail is Awesome
Chainmail was used as primary armor for hundreds of years around the world. Though
each region had their own styles, in principle they were all made of linked chains. In the
medieval era it was a valuable item because it was effective light weight armor, and making
it took so much time for craftsmen. With modern weaponry, chainmail’s use as armor is
almost nonexistent but that doesn’t stop people from wearing it at places like Renaissance
fairs of for costumes. In this manual you will learn how to make a chainmail coif. A coif is
the headgear worn by the knights in medieval Europe.

Chapter One
Required
Materials


Chapter 1 3
Chapter 1: Required Materials
Gathering Materials
To make any chainmail piece of armor there are a few things you will be required to
purchase, to make a chainmail coif specifically you will need:
200 feet 14 gauge steel wire
Two pairs of pliers
One pair of vice grips
One electric drill
Eight inch bolt cutters
One 3/8 inch diameter rod (the length does not matter)
Working gloves
Safety glasses
Segmented container( At least three segments)
If you are not quite sure what the the required tools look like refer to Figure 1.1.
Figure 1.1 Image of the tools needed
4 How to Make a Chainmail Coif
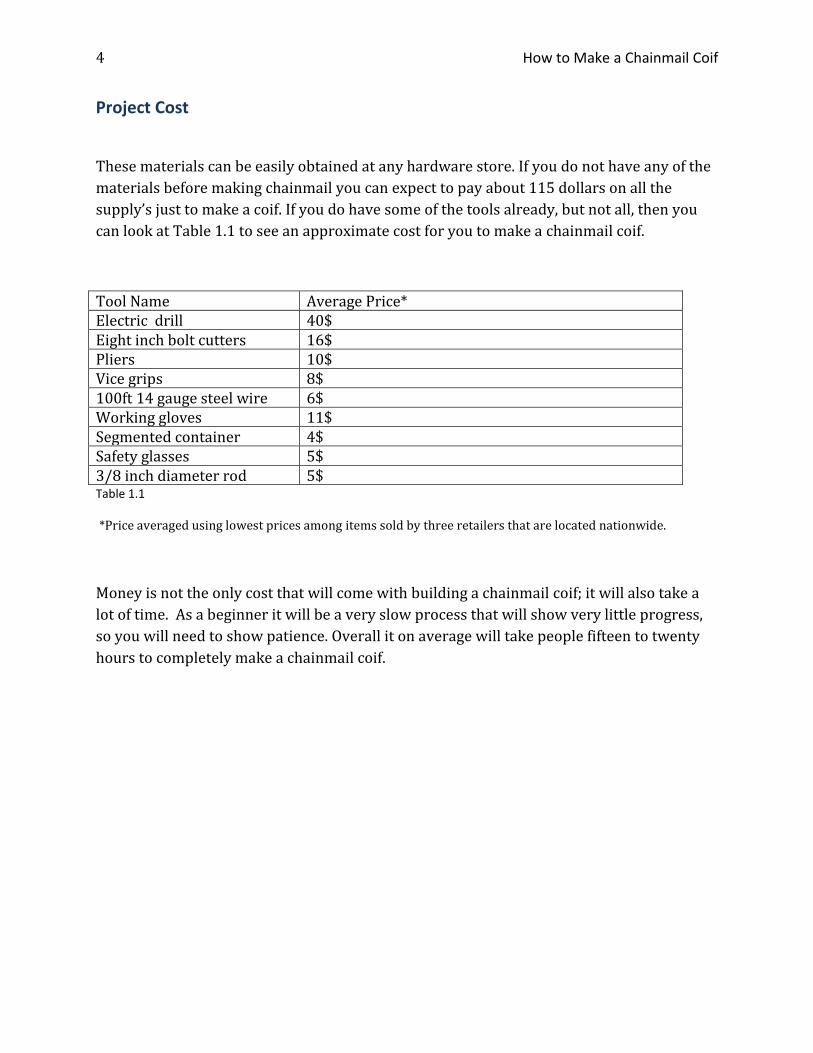
Project Cost
These materials can be easily obtained at any hardware store. If you do not have any of the
materials before making chainmail you can expect to pay about 115 dollars on all the
supply’s just to make a coif. If you do have some of the tools already, but not all, then you
can look at Table 1.1 to see an approximate cost for you to make a chainmail coif.
Tool Name Average Price* Electric drill 40$ Eight inch bolt cutters 16$ Pliers 10$ Vice grips 8$ 100ft 14 gauge steel wire 6$ Working gloves 11$ Segmented container 4$ Safety glasses 5$ 3/8 inch diameter rod 5$ Table 1.1
*Price averaged using lowest prices among items sold by three retailers that are located nationwide.
Money is not the only cost that will come with building a chainmail coif; it will also take a
lot of time. As a beginner it will be a very slow process that will show very little progress,
so you will need to show patience. Overall it on average will take people fifteen to twenty
hours to completely make a chainmail coif.
Chapter 2
Chapter Two
Making the
Rings


Chapter 2 7
In this chapter you will require
the following materials:
Electric Drill
Vice grips
Three eights inch diameter rod
Work gloves
Two hundred feet of 14 gauge
steel wire
Eight inch bolt cutters
Safety glasses
Chapter 2: Making the Rings
Coiling the Wire
Now that you have all your materials, it is time to make the foundation of all chainmail
armor, the metal loops. For this step you will need the electric drill, 3/8 inch rod, the work
gloves, and the vice grips. It might also help to have someone to help you with this part
because it is very difficult to do alone.
1. First put the 3/8 inch rod in the drill where the chuck (the place where you insert
the drill bit).
2. Then take the 200 feet of 14 gauge steel wire and attach the end of the wire on the
end rod closest to the drill with the vice grips. See Figure 2.1 to see how vice grips
are attached.
Figure 2.1 Vice grips attaching wire to rod
8 How to Make a Chainmail Coif
Figure 2.3 Cutting coil
3. You may need a second person for assistance. As one person holds the rod up while
applying a downward force on the wire the other person makes the drill spin.
4. If the wire tangles just cut the wire with the 8 inch bolt cutters and start over.
5. Repeat steps one through five until all 200 feet of wire is coiled.
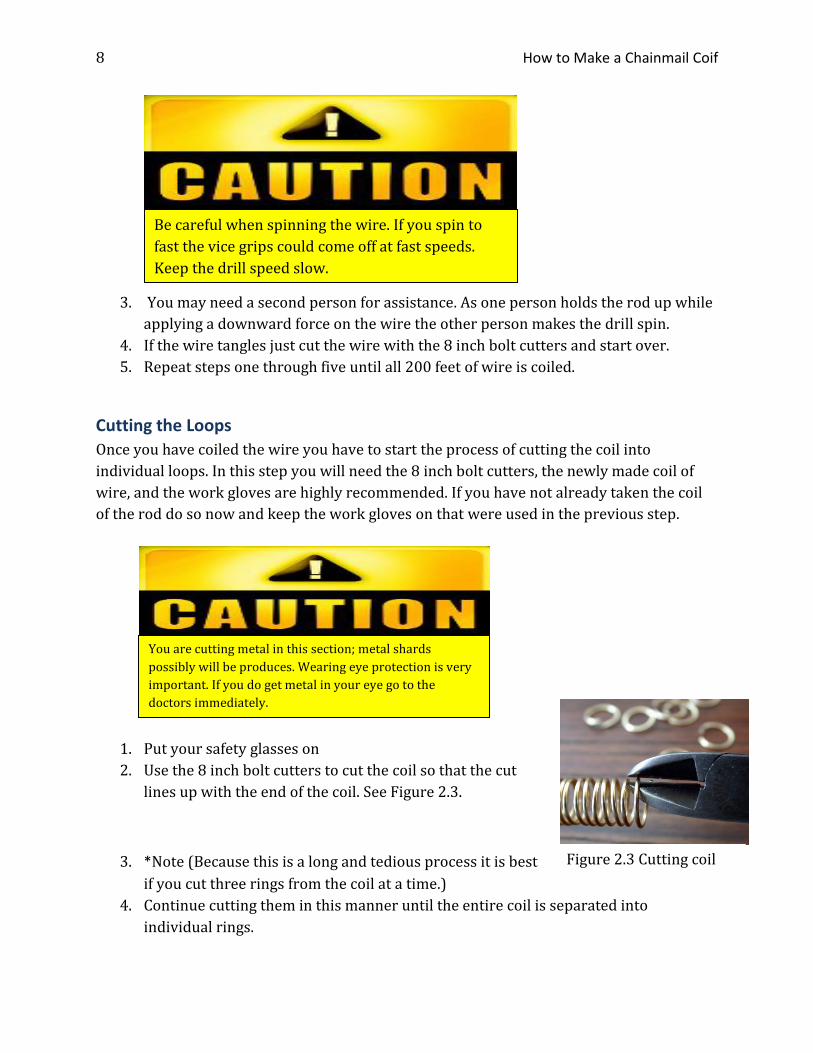
Cutting the Loops
Once you have coiled the wire you have to start the process of cutting the coil into
individual loops. In this step you will need the 8 inch bolt cutters, the newly made coil of
wire, and the work gloves are highly recommended. If you have not already taken the coil
of the rod do so now and keep the work gloves on that were used in the previous step.
1. Put your safety glasses on
2. Use the 8 inch bolt cutters to cut the coil so that the cut
lines up with the end of the coil. See Figure 2.3.
3. *Note (Because this is a long and tedious process it is best
if you cut three rings from the coil at a time.)
4. Continue cutting them in this manner until the entire coil is separated into
individual rings.
Be careful when spinning the wire. If you spin to
fast the vice grips could come off at fast speeds.
Keep the drill speed slow.
You are cutting metal in this section; metal shards
possibly will be produces. Wearing eye protection is very
important. If you do get metal in your eye go to the
doctors immediately.
Chapter 2 7
Chapter Three
Assembling the
Chainmail

Chapter 3 11
In this chapter you will require
the following materials:
Steel rings
Work gloves
Two pairs of pliers
Segmented container
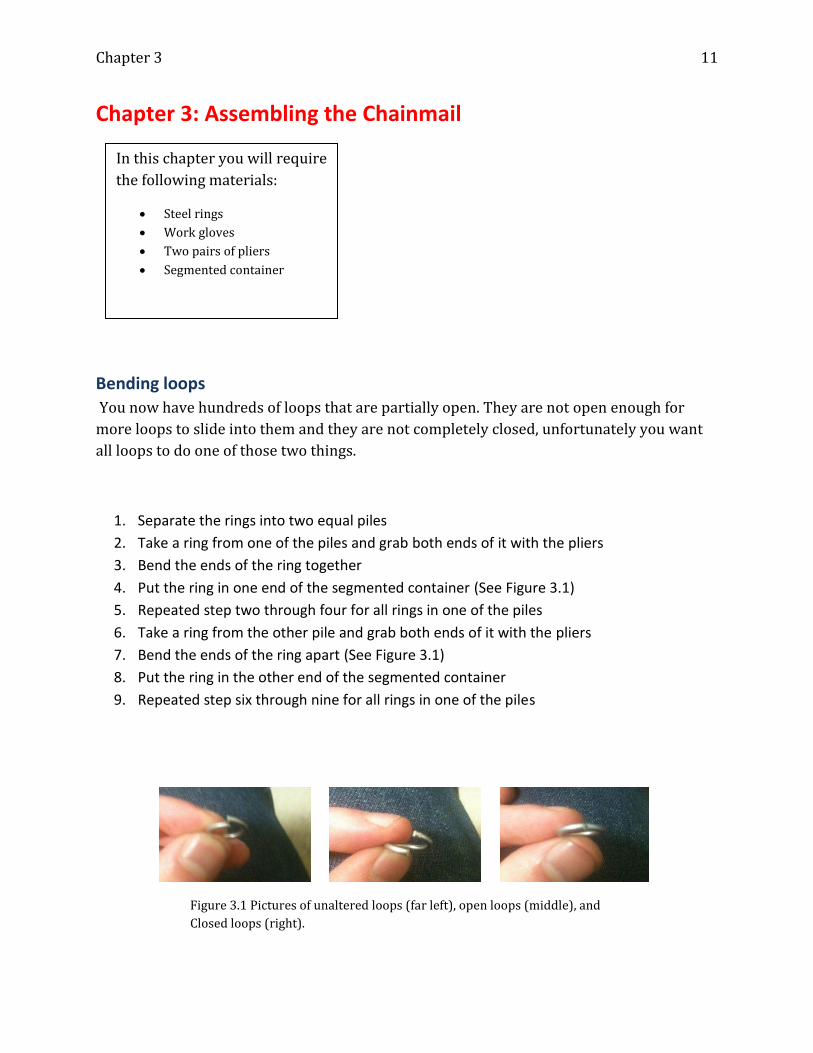
Chapter 3: Assembling the Chainmail
Bending loops
You now have hundreds of loops that are partially open. They are not open enough for
more loops to slide into them and they are not completely closed, unfortunately you want
all loops to do one of those two things.
1. Separate the rings into two equal piles
2. Take a ring from one of the piles and grab both ends of it with the pliers
3. Bend the ends of the ring together
4. Put the ring in one end of the segmented container (See Figure 3.1)
5. Repeated step two through four for all rings in one of the piles
6. Take a ring from the other pile and grab both ends of it with the pliers
7. Bend the ends of the ring apart (See Figure 3.1)
8. Put the ring in the other end of the segmented container
9. Repeated step six through nine for all rings in one of the piles
Figure 3.1 Pictures of unaltered loops (far left), open loops (middle), and
Closed loops (right).
16 How to Make a Chainmail Coif
Figure 3.4 adding an open
ring
Figure 3.5 Extended
strands
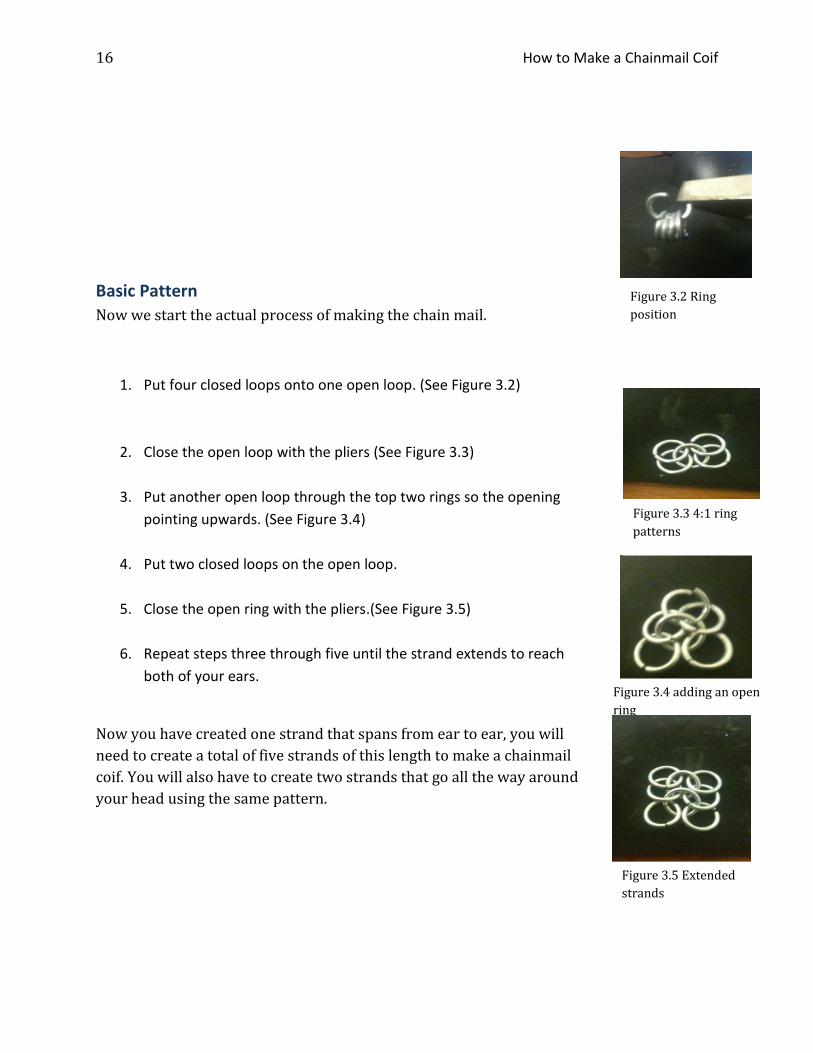
Basic Pattern
Now we start the actual process of making the chain mail.
1. Put four closed loops onto one open loop. (See Figure 3.2)
2. Close the open loop with the pliers (See Figure 3.3)
3. Put another open loop through the top two rings so the opening
pointing upwards. (See Figure 3.4)
4. Put two closed loops on the open loop.
5. Close the open ring with the pliers.(See Figure 3.5)
6. Repeat steps three through five until the strand extends to reach
both of your ears.
Now you have created one strand that spans from ear to ear, you will
need to create a total of five strands of this length to make a chainmail
coif. You will also have to create two strands that go all the way around
your head using the same pattern.
Figure 3.2 Ring
position
Figure 3.3 4:1 ring
patterns
Chapter 3 13
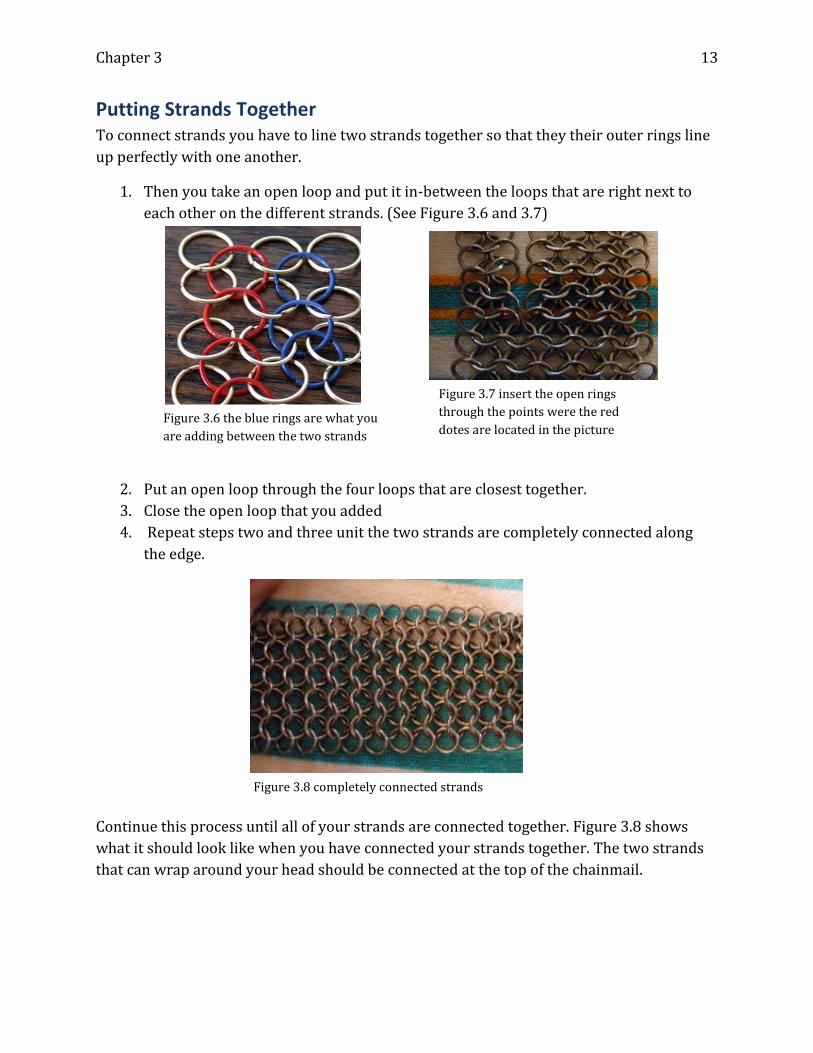
Figure 3.7 insert the open rings
through the points were the red
dotes are located in the picture Figure 3.6 the blue rings are what you
are adding between the two strands
Putting Strands Together To connect strands you have to line two strands together so that they their outer rings line
up perfectly with one another.
1. Then you take an open loop and put it in-between the loops that are right next to
each other on the different strands. (See Figure 3.6 and 3.7)
2. Put an open loop through the four loops that are closest together.
3. Close the open loop that you added
4. Repeat steps two and three unit the two strands are completely connected along
the edge.
Continue this process until all of your strands are connected together. Figure 3.8 shows
what it should look like when you have connected your strands together. The two strands
that can wrap around your head should be connected at the top of the chainmail.
Figure 3.8 completely connected strands
16 How to Make a Chainmail Coif
Figure 3.9 How to
make an
expanding circle.
(Note: this is not
the exact circle we
are making)
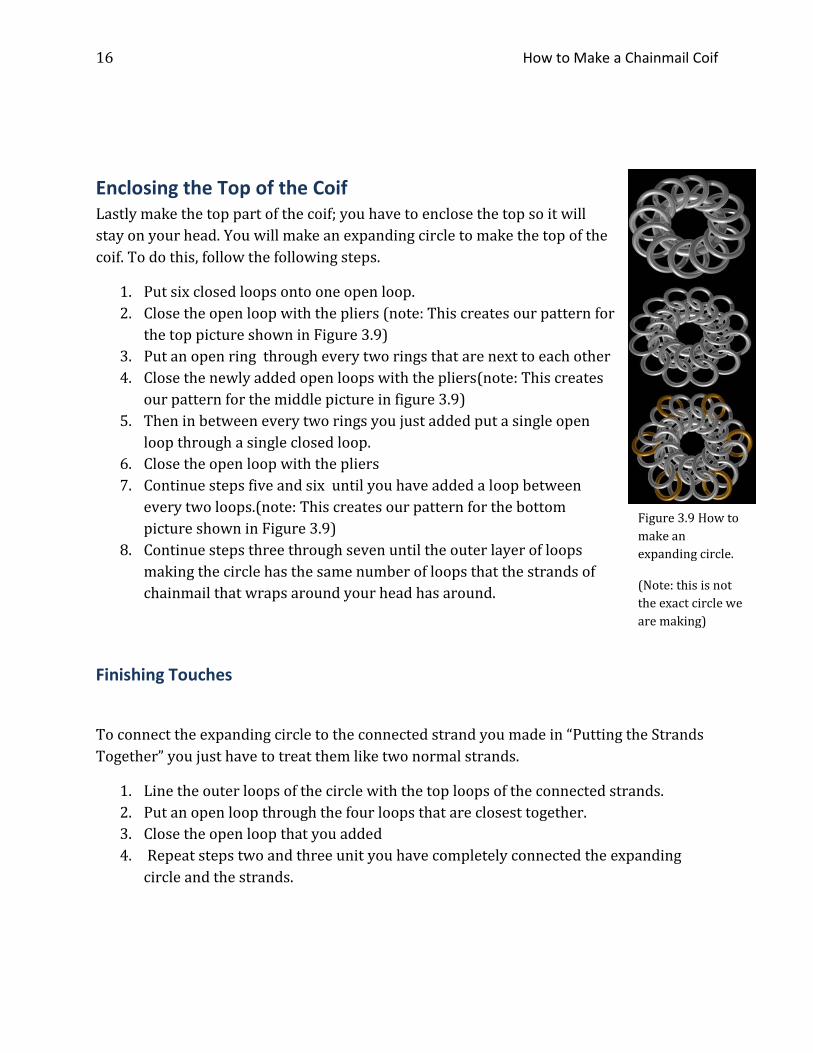
Enclosing the Top of the Coif Lastly make the top part of the coif; you have to enclose the top so it will
stay on your head. You will make an expanding circle to make the top of the
coif. To do this, follow the following steps.
1. Put six closed loops onto one open loop.
2. Close the open loop with the pliers (note: This creates our pattern for
the top picture shown in Figure 3.9)
3. Put an open ring through every two rings that are next to each other
4. Close the newly added open loops with the pliers(note: This creates
our pattern for the middle picture in figure 3.9)
5. Then in between every two rings you just added put a single open
loop through a single closed loop.
6. Close the open loop with the pliers
7. Continue steps five and six until you have added a loop between
every two loops.(note: This creates our pattern for the bottom
picture shown in Figure 3.9)
8. Continue steps three through seven until the outer layer of loops
making the circle has the same number of loops that the strands of
chainmail that wraps around your head has around.
Finishing Touches
To connect the expanding circle to the connected strand you made in “Putting the Strands
Together” you just have to treat them like two normal strands.
1. Line the outer loops of the circle with the top loops of the connected strands.
2. Put an open loop through the four loops that are closest together.
3. Close the open loop that you added
4. Repeat steps two and three unit you have completely connected the expanding
circle and the strands.

Chapter 3 15
16 How to Make a Chainmail Coif
Figure 3.10 Completed
coif
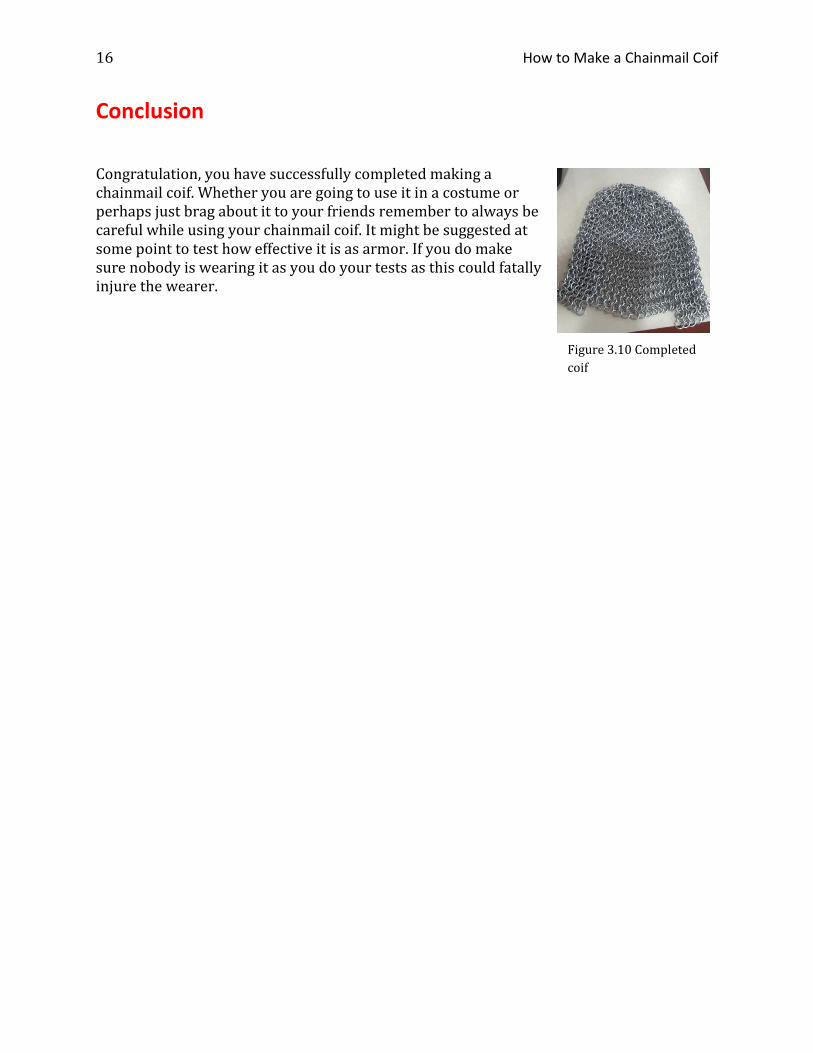
Conclusion
Congratulation, you have successfully completed making a chainmail coif. Whether you are going to use it in a costume or perhaps just brag about it to your friends remember to always be careful while using your chainmail coif. It might be suggested at some point to test how effective it is as armor. If you do make sure nobody is wearing it as you do your tests as this could fatally injure the wearer.

Chapter 3 17
Index 3
3/8 inch diameter rod, 3, 4
A
armor, v, 3, 7, 16
C
chainmail, v, 3, 4, 7, 12, 14, 16
closed loops, 12, 14
coif, v, 3, 4, 12, 14, 16
E
Eight inch bolt cutters, 3, 4
electric drill, 3, 7
O
open loop, 12, 13, 14, 15
P
pliers, 3, 11, 12, 14
S
Segmented container, 3, 4
V
vice grips, 3, 7
W
Working gloves, 3, 4
Recommended