Embed Size (px)
Citation preview
Yuning Hu
Wireless Virtual Joystick
Technology and Communication 2012

Acknowledgement
This thesis project is completed with 4 months of effort. I would like to thank my
supervisor Mr Ghodrat Moghadampour. With a lot of software knowledge learnt
from him, I developed my thesis project successfully.
Besides, I would also like to thank my family, and my friends who supported me
silently behind. Thank you very much!
3
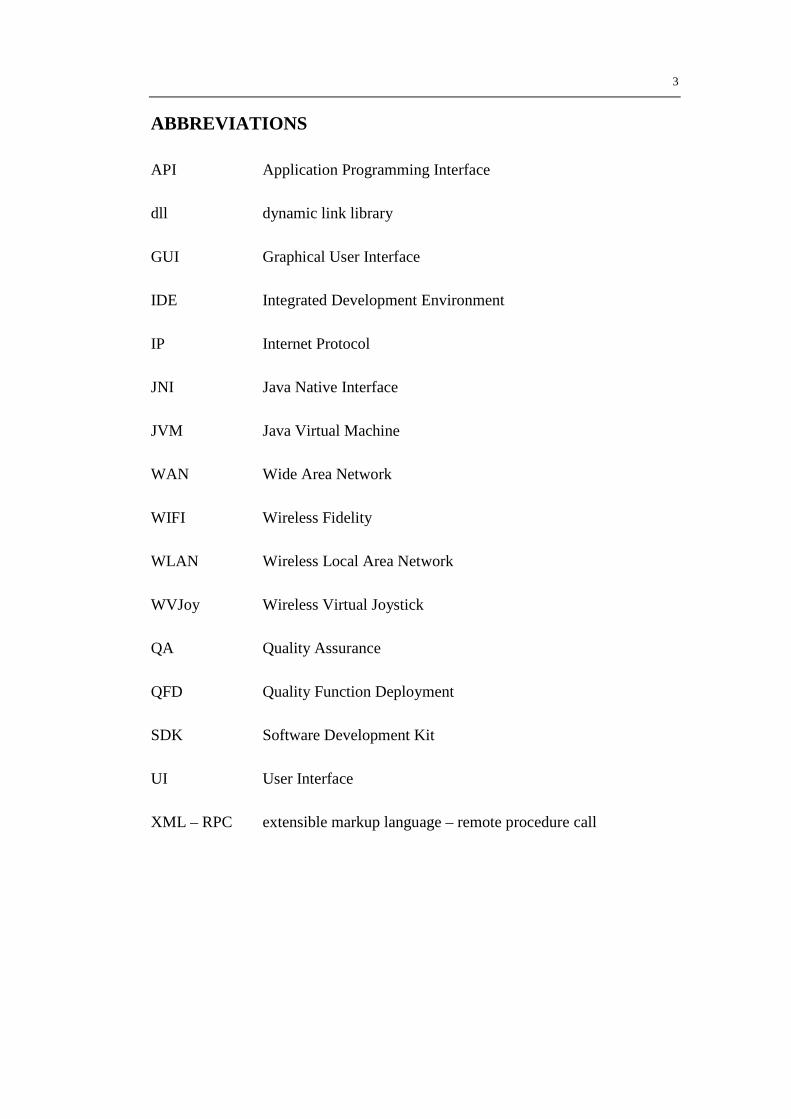
ABBREVIATIONS
API Application Programming Interface
dll dynamic link library
GUI Graphical User Interface
IDE Integrated Development Environment
IP Internet Protocol
JNI Java Native Interface
JVM Java Virtual Machine
WAN Wide Area Network
WIFI Wireless Fidelity
WLAN Wireless Local Area Network
WVJoy Wireless Virtual Joystick
QA Quality Assurance
QFD Quality Function Deployment
SDK Software Development Kit
UI User Interface
XML – RPC extensible markup language – remote procedure call
4
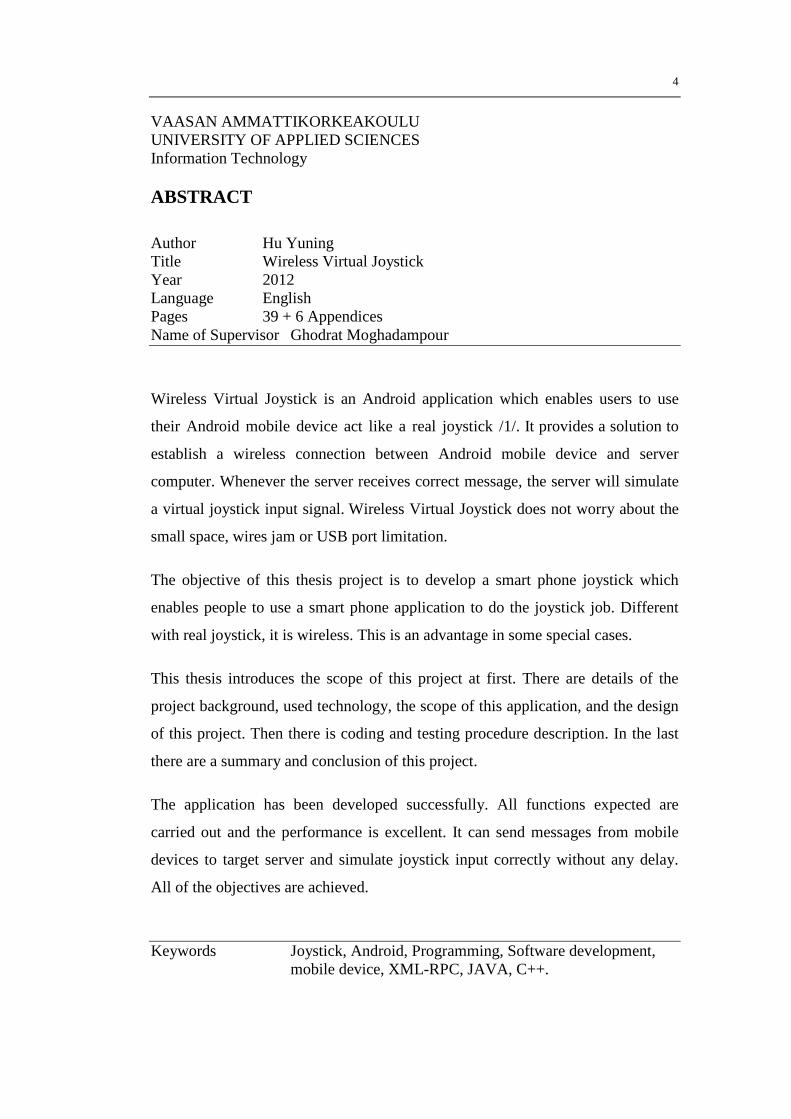
VAASAN AMMATTIKORKEAKOULU UNIVERSITY OF APPLIED SCIENCES Information Technology ABSTRACT
Author Hu Yuning Title Wireless Virtual Joystick Year 2012 Language English Pages 39 + 6 Appendices Name of Supervisor Ghodrat Moghadampour
Wireless Virtual Joystick is an Android application which enables users to use
their Android mobile device act like a real joystick /1/. It provides a solution to
establish a wireless connection between Android mobile device and server
computer. Whenever the server receives correct message, the server will simulate
a virtual joystick input signal. Wireless Virtual Joystick does not worry about the
small space, wires jam or USB port limitation.
The objective of this thesis project is to develop a smart phone joystick which
enables people to use a smart phone application to do the joystick job. Different
with real joystick, it is wireless. This is an advantage in some special cases.
This thesis introduces the scope of this project at first. There are details of the
project background, used technology, the scope of this application, and the design
of this project. Then there is coding and testing procedure description. In the last
there are a summary and conclusion of this project.
The application has been developed successfully. All functions expected are
carried out and the performance is excellent. It can send messages from mobile
devices to target server and simulate joystick input correctly without any delay.
All of the objectives are achieved.
Keywords Joystick, Android, Programming, Software development,
mobile device, XML-RPC, JAVA, C++.
5
Contents ABBREVIATIONS ................................................................................................ 3
ABSTRACT ............................................................................................................ 4
1. INTRODUCTION ............................................................................................ 7
1.1 Background of topic .................................................................................. 7
1.1.1 Software aspect ........................................................................... 7
1.1.2 Hardware aspect .......................................................................... 8
1.1.3 Telecommunication aspect .......................................................... 8
1.2 Motivations ............................................................................................... 9
1.3 Objectives ................................................................................................. 9
1.4 Short description ..................................................................................... 10
1.5 Advantages and disadvantages ............................................................... 10
2. RELEVANT TECHNOLOGIES .................................................................... 12
2.1 Android SDK .......................................................................................... 12
2.2 XML – RPC server ................................................................................. 13
2.3 Generate keyboard input ......................................................................... 13
3. APPLICATION DESCRIPTION ................................................................... 14
3.1 Objective, constraints .............................................................................. 14
3.2 Requirement analysis .............................................................................. 14
3.2.1 QFD of WVJoy ......................................................................... 15
3.2.2 Use-case diagram ...................................................................... 15
3.2.3 Flow chart ................................................................................. 16
4. GUI DESIGN ................................................................................................. 18
4.1 Web service connection information submit activity ............................. 18
4.2 Joystick activity ...................................................................................... 19
5. IMPLEMENTATION .................................................................................... 22
5.1 General description of implementation ................................................... 22
5.2 Implementation of different parts ........................................................... 22
5.2.1 Android application GUI........................................................... 22

6
5.2.2 Web service data communication ............................................. 25
5.2.3 Input signal simulation .............................................................. 26
5.2.4 Message between mobile device and server ............................. 28
6. TESTING ....................................................................................................... 30
6.1 Test cases ................................................................................................ 30
6.2 Detailed description of the procedure in each test case .......................... 31
6.2.1 GUI Test .................................................................................... 31
6.2.2 Web service communication test .............................................. 31
6.2.3 Server input simulation test ....................................................... 32
6.2.4 Compatibility test ...................................................................... 32
6.2.5 Validity test ............................................................................... 32
6.3 Possible improvements after test ............................................................ 33
7. SUMMARY ................................................................................................... 34
7.1 Project implementation procedure .......................................................... 34
7.2 Most challenging part of this project ...................................................... 34
8. CONCLUSIONS ............................................................................................ 36
8.1 Future work, ideas for improving the application ................................... 36
REFERENCES ...................................................................................................... 38
APPENDIX 1 .......................................................................................................... 1
APPENDIX 2 .......................................................................................................... 2
APPENDIX 3 .......................................................................................................... 3
APPENDIX 4 .......................................................................................................... 5
7
1. INTRODUCTION
This project idea is to develop an Android application that can manipulate as a
joystick. It communicates with server computer through web service technology
so that there will be no distance limit.
1.1 Background of topic
The background of this topic can be divided into 3 parts:
Software aspect
Hardware aspect
Telecommunication aspect
1.1.1 Software aspect
First part is the software aspect. There are 2 most popular smart phone operating
systems nowadays. They are iOS and Android /2/. iOS is only support for iPhone,
iPad, and iTouch 3 kinds of Apple company products. Android is open source,
and compatible with many different companies’ products. Almost all smart phone
producers are based on the Android operating system, except Apple and Nokia.
BlackBerry and Symbian were popular a few years ago. But their market share is
going down every day at this moment. Their technology is out of age already.
Based on their design of the operating system, they cannot make a revolution and
follow up the steps of iOS and Android.
Windows Phone is not as popular as iOS or Android /1/, since it is a new system.
Only Nokia Company is focused on the Windows Phone operating system, the
other companies are focusing on Android development, meanwhile, produces few
Windows phone products for different customer needs, too.
There are some other mobile device platforms, but their technology is not mature
and they are not popular in the market.

8
IDC (International Data Corporation) is a famous data analysis company /4/. From
their analysis, it is obviously that Android is the most popular smart phone
operating system at this moment.
Table 1. Top 6 Smartphone Operating Systems, Shipments, and Market Share, Q3 2012 from IDC (Preliminary) (Units in Millions) /5/
Operating System
3Q12 Shipment Volumes
3Q12 Market Share
3Q11 Shipment Volumes
3Q11 Market Share
Year-Over-Year
Change Android 136 75.00% 71 57.50% 91.50% iOS 26.9 14.90% 17.1 13.80% 57.30% BlackBerry 7.7 4.30% 11.8 9.50% -34.70% Symbian 4.1 2.30% 18.1 14.60% -77.30% Windows Phone 7/ Windows Mobile 3.6 2.00% 1.5 1.20% 140.00% Linux 2.8 1.50% 4.1 3.30% -31.70% Others 0 0.00% 0.1 0.10% -100.00% Totals 181.1 100.00% 123.7 100.00% 46.40%
From the user experience to see, Android can meet their needs and easy to use.
This proves the Android system is mature enough already. That is the reason this
thesis project is developed with the Android platform.
1.1.2 Hardware aspect
Second part is the hardware aspect. The Android operating system is compatible
with almost all smart phones nowadays. So there are plenty of choices for Android
mobile devices. No matter which brand of it, most of them have at least 800MHz
CPU and 640*320 touch screens.
Based on this situation, this application is designed for mobile devices which have
at least 640*320 touch screen resolution. There is no requirement for the processor,
but the recommend processor configuration is no less than 800MHz.
1.1.3 Telecommunication aspect
The last part is the telecommunication aspect. To establish a wireless controller
with a mobile device, Bluetooth is possible. But due to its range limit is too small,
9
and it will require a Bluetooth in target computer, that is not convenient. At last,
Bluetooth technique is abandoned in this project.
When 3G network came out a few years ago, smart phone users experienced a lot of
benefit from it. At the same time, smart phone manufacturers realized the need of
the Internet for their customers, all of them had successfully carried out a WIFI
module for every new smart phone. All mobile devices produced currently can
access to wireless routers. WVJoy is based on web service to transmit data from
smart phone to target server computer. 5 years earlier, without the 2G / 2.5G
network, it can hardly perform well, the Internet connection is very unreliable. But
now, the telecommunication technology is mature enough to stand for the data
communication. People can use WIFI connect their mobile device and use the
Internet. Besides, the 3G network can have 100 KB/s download speed, but
WVJoy only need less than 1% of it. Without WIFI, WVJoy can still perform
well.
1.2 Motivations
The original idea of this thesis project was developing a mobile joystick for the
VAMK robot team. But the usage is too limited if there is only an interface to give
the robot server receives commands. It should be able to manipulate as a real
joystick for all kinds of programs, not only for the VAMK robot, but also available
for some other PC programs such as PC games. In the end, Android application was
aimed.
There is no such application can be found in either Android Google Play Store or
iOS App Store at this moment. WVJoy is the first one. This is also an important
motivation.
1.3 Objectives
The objective of this project is to develop an Android application that can remote
controls a target computer, let the computer receives messages from a mobile
device and generates corresponding joystick input without any distance or cable
limit. This is practical in some special cases.
10
Besides, practice self – study ability is also a significant objective. In the process of
doing this project, learning new technology and manage its usage is always
necessary.
1.4 Short description
This project can be divided into 3 parts: mobile device GUI client, communication
between mobile phone and server computer, and invoke virtual joystick and
simulate real joystick signal input.
First part is to make a GUI for the mobile device, which contains 4 arrow buttons, 4
normal buttons, select button and confirm button.
They are simply named with, JoyButtonUp, JoyButtonRight, JoyButtonDown,
JoyButtonLeft, JoyButton1, JoyButton2, JoyButton3, JoyButton4, JoyButton5, and
JoyButton6. Different standard joystick may have different number of buttons.
Consider about the size of touch screen is normally about 3.5 inch at this moment, 6
buttons will be the best design.
The second part contains 2 small parts. Build an Android development environment
with Eclipse /6/, use Java to program an Android web service and transmit
messages to the server /7/. After that, the server returns the corresponding message
to client mobile device.
The third part generates keyboard input at server computer. Java does not good at
kernel program, so there is a dll file integrated in the server to simulate a virtual
keyboard input so that PPJoy can detect it /8/.
The last part is to start PPJoy and load appropriate configuration. PPJoy is a famous
virtual joystick simulator. It can create a virtual joystick device, detect keyboard
input and generate corresponding configured joystick input.
1.5 Advantages and disadvantages
The most important advantages are:
11
Convenient to use. A real joystick is not necessary in daily life, but smart
phone is. WVJoy can provide a solution to use a smart phone to do the
joystick job. It can be used at almost everywhere on the earth.
No distance or cable limitation. Most joysticks are connecting with cable.
Few of them are wireless. But there is a distance limit still. WVJoy do not
have these restrictions.
The most important disadvantages are:
The smart phone device has a lot of restrictions. Battery restriction, sensitive
restriction, and performance restriction.
Network connection is necessary. If the device network is unstable, the
performance will be low.
12
2. RELEVANT TECHNOLOGIES
In this project, programming technique involves Java, Android SDK, web service
XML – RPC, JNI, and C++.
2.1 Android SDK
The first part of this project is developing a GUI for Android application with Java
using the Android SDK. Android SDK can be downloaded from the Android
official website for free.
The IDE for Android development have many choices. The most popular one is
Eclipse.
Before the first time to develop an Android application, download the Android
SDK is necessary. This powerful SDK provides a lot of functions corresponding
to different Android version. In this project, the minimum SDK version equal to 8,
which is corresponds to the Android 2.2.x and higher version. There are a lot of
big changes between these 2.1.x and 2.2.x versions. Android has become very
popular since the Android 2.2.x version. According to the data collected from the
Android developers’ website of in year 2012, more than 96% of Android device
support the 2.2.x or higher version. That is the reason the minimum SDK version
is 8 in this project.
After downloading the Android SDK, Eclipse needs a few steps of setting. The
detailed step can be found in the appendices.
Since this project is going to use the Android application sends message to the
XML – RPC server. A web service XML – RPC API is needed. But different with
normal Java web service, Android needs a special API in order to use XML –
RPC web service. This API is available at Google Code website /9/. Download it
and import it into the project. The preparation of Android development is ready.

13
2.2 XML – RPC server
The second part of this project is the XML – RPC server. It is a normal Java XML –
RPC server. The web service communication will continuously send and receive
messages between Android mobile device and XML – RPC server. The API is
available at Apache official website /10/.
2.3 Generate keyboard input
The last part of this project is using visual studio to write a C++ file that can
perform virtual keyboard input and generate it as dll form. Meanwhile, use JNI, to
integrate the dll file function into the web service XML – RPC server. The server
will generate keyboard input corresponding to message received from client
application. PPJoy will detect keyboard input event and simulate joystick input on
the server computer.

14
3. APPLICATION DESCRIPTION
Analysis with project objectives, constraint factor, requirement, design QFD table,
and use case diagram are significant before start coding.
3.1 Objective, constraints
The objective of this project is to make an Android application which is able to
communicate with XML – RPC server and use the server to generate a keyboard
input event in order to let PPJoy detects corresponding keyboard input and
simulates correct joystick input.
There are a lot of factor constraints this project.
Android mobile device is the most important factor. The screen resolution, the
Android system version, the touch screen function, the 3G module, and network
connection will determine the performance of this project.
The constraint for server computer is not much, any computer installed Win XP or
higher version is able to start the server. But the computer must be able to join the
same network range with the Android mobile device. If the server computer has a
WAN IP, then Android mobile device needs an Internet connection. If the server
computer does not have Internet Access, it has to join a wireless router so that the
mobile device can join the WLAN too and communicates with the server.
Advanced IT professionals who can do the IP / port mapping, can map the server IP
address and port to upper layer connection point. It might help with connecting
Android mobile device to the server sometimes.
3.2 Requirement analysis
The requirement analysis is start by making a QFD table for this project. After the
priority of objective functions has been determined, a use case diagram can
demonstrate different user group’s authority difference.

15
3.2.1 QFD of WVJoy
In this table, it is obvious that the top 5 rows are maximum priority. If any
requirement is not reached, this application will be impossible to run.
The 6th and 7th rows are showing that Wifi and 3G network is not max priority.
But if combine both of them, 3 + 2 = 5 is the maximum priority. It means, the
smart phone or tablet should have at least one of them. Otherwise, the mobile
device cannot use web service to transmit data to the server.
The last 2 rows are telling that server computer does not have to have good
performance. Any normal computer is enough. But the smart phone or tablet
needs better performance. Otherwise the application cannot run very well.
Meanwhile, it is not necessary to have very good performance.
The following table shows the priority of hardware and platform required.
Table 2. QFD table of WVJoy QFD of WVJoy (1min - 5max)
Requirements Importance level Windows XP / Windows 7 5 Android 2.2.x 5 Min screen resolution 640*320 5 Touch screen smartphone 5 network connection for server computer 5 Wifi for smart phone 3 3G for smart phone 1 Server computer hardware performance 1 smart phone hardware performance 4
3.2.2 Use-case diagram
The administrator is the one who has the right to control the server computer. If he
/ she have a mobile device that meets all those requirements mentioned above,
then he / she can do everything. Otherwise, he / she cannot start or stop the
WVJoy Android application.

16
The user is anybody who has the WVJoy Android application. When user gets
server information provided by the administrator, the WVJoy will be able to
connect to the server.
The following chart is a capture of use case diagram.
Figure 1. Use case diagram of WVJoy
3.2.3 Flow chart
There are 3 initiate points in this figure. Normally it starts with the Start web server.
If this step has any problem (only possible when web container crashes), the server
computer owner has to fix it first. Otherwise the whole project will not work.
The following chart is a capture of the flow chart.

17
Figure 2. Flow chart of WVJoy

18
4. GUI DESIGN
There are 2 GUI designed for WVJoy application. When user launch WVJoy
application, the screen will display 2 text fields with hint information and a submit
button. After user filled the web service information, WVJoy will direct to a
joystick GUI.
There is a constraint with the mobile device that the touch screen resolution has to
be at least 640 * 320. This is caused by the design of the joystick GUI. If the
screen resolution is exactly 640 * 320, the UI components will take every corner
of the screen, there is no space left at the border. I suggest using 800 * 480 similar
resolution mobile devices. The UI components will be displayed at perfect
position. If the screen resolution is more than 1200 * 800, those UI components
will look a little bit smaller, and not easy to press at right position.
4.1 Web service connection information submit activity
The first text field is the XML – RPC server url address. The second text field is
the function to be called in the server.
This GUI could be much simpler than this. It could only acquire the IP address
and port number. But in this case, if the server is upgraded later, for example,
develop another XML – RPC server with different functions, WVJoy is not able
to access to the new server. That is the reason there are 2 text fields acquire boring
information.
The following graph is a screen capture of WVJoy connection information
submits GUI.

19
Figure 3. WVJoy Launch Activity GUI
4.2 Joystick activity
There are 10 buttons in this GUI. No “hidden button” exists. 4 direction buttons, 4
normal buttons, 1 select button and 1 confirm button (actually they are just 2 more
normal button, we just get used to call them select button and confirm button).
There are 2 big bold purple circles, they are just background to let this GUI looks
similar to real joystick.
The following graph is a screen capture of the WVJoy joystick GUI.
Figure 4. WVJoy Joystick Activity GUI
20
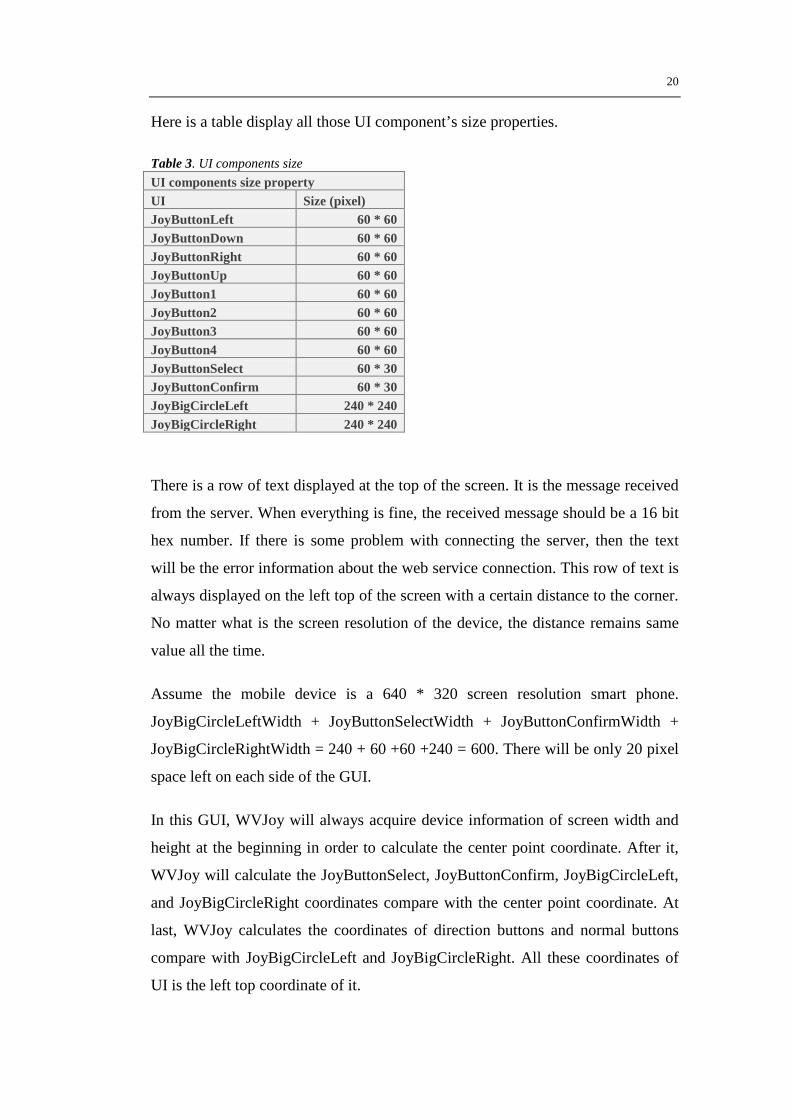
Here is a table display all those UI component’s size properties.
Table 3. UI components size UI components size property UI Size (pixel) JoyButtonLeft 60 * 60 JoyButtonDown 60 * 60 JoyButtonRight 60 * 60 JoyButtonUp 60 * 60 JoyButton1 60 * 60 JoyButton2 60 * 60 JoyButton3 60 * 60 JoyButton4 60 * 60 JoyButtonSelect 60 * 30 JoyButtonConfirm 60 * 30 JoyBigCircleLeft 240 * 240 JoyBigCircleRight 240 * 240
There is a row of text displayed at the top of the screen. It is the message received
from the server. When everything is fine, the received message should be a 16 bit
hex number. If there is some problem with connecting the server, then the text
will be the error information about the web service connection. This row of text is
always displayed on the left top of the screen with a certain distance to the corner.
No matter what is the screen resolution of the device, the distance remains same
value all the time.
Assume the mobile device is a 640 * 320 screen resolution smart phone.
JoyBigCircleLeftWidth + JoyButtonSelectWidth + JoyButtonConfirmWidth +
JoyBigCircleRightWidth = 240 + 60 +60 +240 = 600. There will be only 20 pixel
space left on each side of the GUI.
In this GUI, WVJoy will always acquire device information of screen width and
height at the beginning in order to calculate the center point coordinate. After it,
WVJoy will calculate the JoyButtonSelect, JoyButtonConfirm, JoyBigCircleLeft,
and JoyBigCircleRight coordinates compare with the center point coordinate. At
last, WVJoy calculates the coordinates of direction buttons and normal buttons
compare with JoyBigCircleLeft and JoyBigCircleRight. All these coordinates of
UI is the left top coordinate of it.
21
If the mobile device is 480*240 screen resolution, both JoyBigCircleLeft and
JoyBigCircleRight will miss some part.
This Application supports multi points touch control. The limitation of the number
of point is mostly determined by the mobile device hardware. Some devices can
only support 2 point multi point control, but some devices can support 10 point
multi point control. The application limitation is 5 points. If the device supports
10 points multi point control, WVJoy will only send messages to the server and
tells the information about the first 5 pressed buttons.
22
5. IMPLEMENTATION
Here is the detail of this project development procedure. First part is the general
description of it. The second part will go through with each important code
snippet.
5.1 General description of implementation
In the beginning, 1 month was spent to design the prototype for this project. The
consideration was about smart phone platform selection, mobile device constraint
factors, target server computer operating system requirement, similar usage
application completion, application available period, technology used for
transmitting data between smart phone and target computer, validity and reliability
of this project specifying method, implementation period of this project, and
obstacles there might be
After all these complex factors had been figured out one by one, coding was started
from the smart phone application, to data communication, and to the input signal
simulation. The smart phone application part is the most complex and challenging
part.
5.2 Implementation of different parts
The coding can be separated into 4 parts as follows:
Android application GUI
Web service data communication
Input signal simulation
Message between mobile device and server
5.2.1 Android application GUI
For the first part, the Android application, about a month was spent on learning how
to develop an application for Android. During this time, building development

23
environments for Android, compile and test with downloaded sample projects and
write test application programs was figured out. After that, design a joystick GUI
used 1 week. Android components are able to establish the GUI, but the
performance is really low. It could only generate signal input once every second.
That is not acceptable. In the end, mySurfaceView was the solution to develop the
GUI Activity. Most of Android games are using this method to plot their UI
components, this method is has excellent performance.
After testing with different Android smart phones and Tablets, finally, the design of
Joystick GUI Activity was determined with 640*320 screen resolution size
standard. If the screen resolution is smaller than it, the GUI will be not able to show
all the UI components. If the screen size is exactly 640*320 standard, the GUI will
take full size of the screen. If the screen size is larger than 640*320, there will be
some space left out at each border, it will look better, and all UI components will
still locate at the center of the screen. If the screen resolution is too larger than 640*
320, the UI components will be looking a little bit small and hard to control.
Before plotting these UI components, first of all, acquire the screen size from the
smart phone.
Secondly, calculate its center point coordinate with (screenWidth / 2, screenHeight
/ 2).
Thirdly, give each WVJoy UI component a coordinate comparing with the center
point of the device. Plot them on the canvas.
The following code demonstrates how to acquire screen size and how to draw them
on the canvas.
float centerX=MySurfaceView.screenW/2; float centerY=MySurfaceView.screenH/2; … //draw JoyBigCircleLeft canvas.drawBitmap(joystick_roundImg, pJoyLeftUp1.x, pJoyLeftUp1.y, paint); … //draw button LEFT matrix.setTranslate(pLeft.x, pLeft.y); canvas.drawBitmap(joystick_leftImg[isFocused[JOYSTICK_LEFT]], matrix, paint);
Snippet 1. Acquire screen size and draw UI on the canvas

24
After all those UI components have displayed correctly. WVJoy need to detect
touch event from a mobile device. Whenever the system detects a touch event, no
matter it is a move event or press / release event, call a “position check” function to
figure out if there is a button pressed or released and which button it is.
The following code demonstrates how to detect touch events and how to check
which position is being pressed / released.
//check touch point area public void touch(MotionEvent event){ int pointerCount = event.getPointerCount(); //if touch point more than MAX_TOUCHPOINTS, set pointerCount=MAX_TOUCHPOINTS if (pointerCount > MAX_TOUCHPOINTS) { pointerCount = MAX_TOUCHPOINTS; } … for (int i = 0; i < pointerCount; i++) { float x = event.getX(i); float y = event.getY(i); PointF p = new PointF(x, y); switch (event.getAction()) { case 0: // ACTION_DOWN case 5: // ACTION_POINTER_1_DOWN case 261: // ACTION_POINTER_2_DOWN case 517: // ACTION_POINTER_3_DOWN */ case 2: // ACTION_MOVE if (PositionCheck.inRectangle(p, pLeft, pDown)) { //Do anything you want at JoyButtonLeft … } … }
//check touch point position public static boolean inRectangle(PointF pos, PointF posA, PointF posB) { //check whether touch point in rectangle area or not if (pos.x>posA.x && pos.x<posB.x && pos.y>posA.y && pos.y<posB.y) { return true; }else{ return false; } }
Snippet 2. Specify touch point position
After touch events have been detected, I will set up a button statement parameter
and modify the message which is going to be sent to the server. When button

25
statement changes, the image resource change too so that the button will change a
color and user will understand the button is being pressed down.
The following code shows how to implement these changes.
… else if (PositionCheck.inRectangle(p, pDown, pDownRightBottom)) { //Button down msg |= 0x4000; } … public void updateJoystickStatus(){ if((msg & 0x8000) == 0x8000){ isFocused[JOYSTICK_LEFT]=1; }else{ isFocused[JOYSTICK_LEFT]=0; } … } Snippet 3. update message when button pressed and change button press state
5.2.2 Web service data communication
Android has its own web service API. Different with normal Java web service API,
it is not a packaged jar file. It is a package of source code. I downloaded it from
Google Code and directly imported it into my Android project, and then it works.
The following code demonstrates how to use this API to call the XML - RPC
function and send message to the server. It is integrated in the draw function so that
every time the canvas refreshes, WVJoy will send a message to the server.
//xml rpc connection try{ XMLRPCClient client = new XMLRPCClient(url); showMsg = (String)client.call(xmlRpcService, msg); } catch (XMLRPCException e) { showMsg = e.toString(); }
Snippet 4. Use Android XML - RPC API to build connection with the server
26
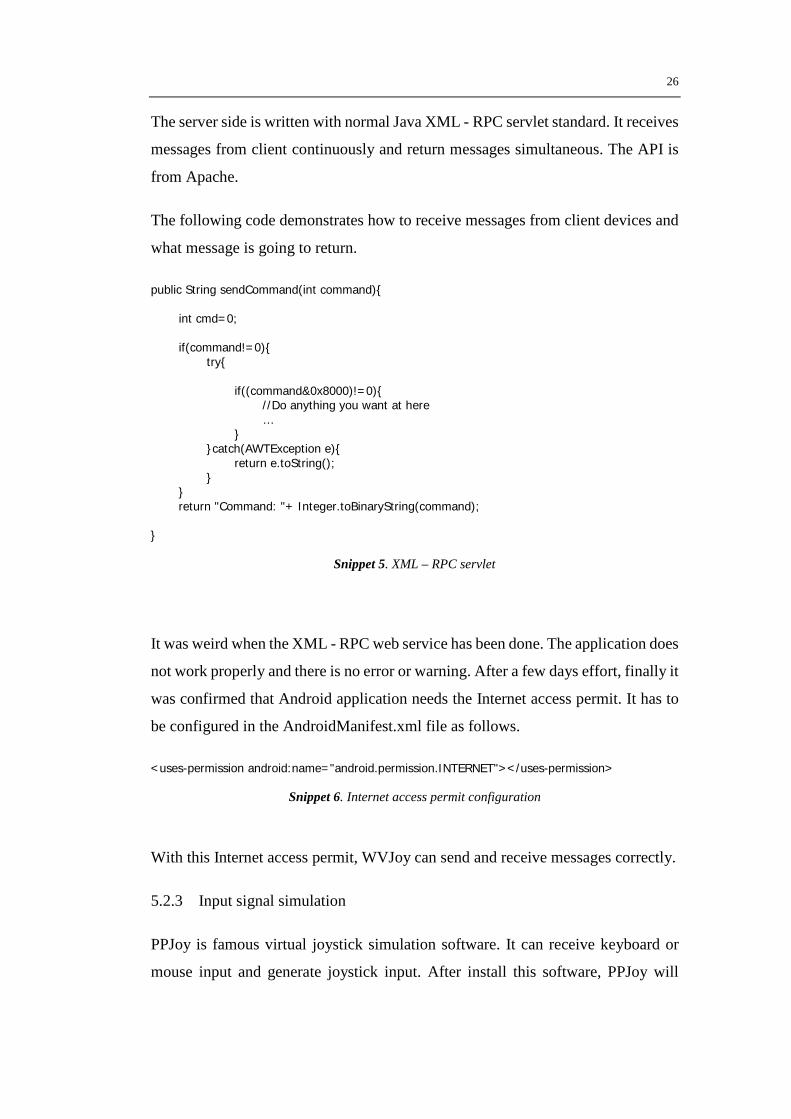
The server side is written with normal Java XML - RPC servlet standard. It receives
messages from client continuously and return messages simultaneous. The API is
from Apache.
The following code demonstrates how to receive messages from client devices and
what message is going to return.
public String sendCommand(int command){ int cmd=0; if(command!=0){ try{ if((command&0x8000)!=0){ //Do anything you want at here … } }catch(AWTException e){ return e.toString(); } } return "Command: "+ Integer.toBinaryString(command); }
Snippet 5. XML – RPC servlet
It was weird when the XML - RPC web service has been done. The application does
not work properly and there is no error or warning. After a few days effort, finally it
was confirmed that Android application needs the Internet access permit. It has to
be configured in the AndroidManifest.xml file as follows.
<uses-permission android:name="android.permission.INTERNET"></uses-permission>
Snippet 6. Internet access permit configuration
With this Internet access permit, WVJoy can send and receive messages correctly.
5.2.3 Input signal simulation
PPJoy is famous virtual joystick simulation software. It can receive keyboard or
mouse input and generate joystick input. After install this software, PPJoy will

27
create a virtual joystick driver in Windows system. If there is any keyboard input on
the target server computer, PPJoy will detect the input and generates joystick input
corresponding to the PPJoyKey configuration.
Java has a function named Robot. It has been available since JDK 1.3 version.
Using this method, it is easy to generate keyboard input at the target server
computer. But there is a problem: it could generate correct text to application files
such as txt file, and docx. But PPJoy could not detect any input signal from it.
Explore the reason is not simple. After a few days, the reason was founded. Java is
based on the JVM and the input is based on the JVM, too. The JVM can detect the
input, but Windows cannot. In the end, a dll file was written in C++ using Visual
Studio in order to replace the Robot function. Put it under C:/Windows/System32/
folder, and use JNI technique to integrate it into the XML – RPC server. It works
well.
The following code demonstrates how does the dll file works and how to call it
from the XML – RPC server.
JNIEXPORT void JNICALL Java_handlers_CommandHandler_kbdEvent(JNIEnv *, jobject, jint i) { keybd_event(i,0,0,0); keybd_event(i,0,KEYEVENTF_KEYUP,0); return; }
Snippet 7. dll file main content
public native void kbdEvent(int command); static{ System.loadLibrary("kbdEvent"); } … if((command&0x8000)!=0){ //in windows.h, VK_LEFT=0x25, it will generate a direction left keyboard press and release event cmd=0x25; kbdEvent(cmd); } …
Snippet 8. XML – RPC servlet use JNI to load dll file and call its function
28
5.2.4 Message between mobile device and server
Even though there is no need to write a virtual joystick driver for Windows system,
Understands how does a virtual joystick work is significant. In this project, the
message format definition was borrowed from the joystick driver signal input
message format. The message between mobile device and server is a 16 bits binary
variable (unsigned int) and it changes in String format when transmitting to the
server. The first 4 bits are corresponding to buttonLeft, buttonDown, buttonRight,
and buttonUp. The next 4 bits are button0, button1, button2, button3. The following
2 bits are button4, and button5. Normally it is known as switch button and confirm
button. There are 6 bits left still. They are not in use at this moment. They are
designed for extended keys. If there is a need to improve this GUI, put more buttons
there, this “protocol” does not need any modification. Directly add some buttons,
and use the rest bits to transfer commands is enough.
When no key is pressed, the message is always 0000 0000 0000 0000.
When button left and button0 are pressed, the message is 1000 1000 0000 0000.
After the server receives messages correctly from a client, it will return a same
message. If there is any connection error or warning, the server will return the error
or waning detail to the mobile device client and the joystick GUI will display it at
the top of the screen.
This command message transferring is triggered every time the Android canvas
refreshes. It means it will cause 16 * canvasRefreshFrequency * 3600 bits data
uploading amount per hour. Assume the canvasRefreshFrequncy is 100, 720Kb
data will be transferred in 1 hour. Nowadays, the 3G network is good enough,
720Kb per hour (0.2KB/second) is almost ignored by users.
Android supports multi point of touch, but different mobile devices have different
limitations. Anyway, all of them can support at least 2 point multi-point touch
control. That is enough for the basic control of this simple WVJoy. Nowadays,

29
most new mobile device products can support at least 5 point multi-point touch
control. This means WVJoy can have excellent performace in most mobile
devices currently. Due to 5 buttons control is enough already at this version, this
project set a maximum touch point limit to 5. The value has been used in the
Snippet 2.

30
6. TESTING
Test code frequently, carefully, and systematically is necessary for programming
work. Every time an isolated part of the code has been completed, programmer
should test it. When some prototype or important part has been done, there are a
lot of different tests. For example, α test, β test, and QA test. In this project, since
it is not a heavy weight application, the test had been separated into 5 cases.
6.1 Test cases
There are 5 different cases need to be tested. The first one is GUI test. If the GUI
is not stable, the joystick performance cannot be stable too. A good GUI should be
reliable and user – friendly.
The second test is the web service communication test. If messages cannot be
updated simultaneously and continuously, the joystick cannot have good
performance.
The third one is a server input simulation test. It must be confirmed that the server
can generate correct keyboard input to let PPJoy detects. This procedure should
not have many problems. Once the server works fine, it will always perform pretty
well.
The 4th one is the compatibility test. After the previous 3 test, WVJoy should have
been confirmed that it can work well already. But there are too many different
Android devices. There might be a lot of special cases unexpected. That is the
reason compatibility test is always important to software developers.
The last test is the last confirmation of its validity. Combine the previous 4 tests
together, and try to find any factor could influence its performance or reliability.
After the previous 4 tests, there must be some unexpected factors founded and
possible to improve. When this test has been done, the whole project is ready to
prepare to publish. This validity test can be regarded as the QA test.

31
6.2 Detailed description of the procedure in each test case
The following content records this project testing procedure with each case in
detail. Due to this project involves with Android device, XML – RPC servlet, and
PPJoy software, the test is not a simple job.
6.2.1 GUI Test
Before starting to program this project, it was already prepared for upgrade server
when necessary. With this consideration, there are 2 text fields at the web service
connection information submit Activity (GUI). Testing this application and fill in
the connection information again and again is a very boring job. But meanwhile, it
provides a convenient way to change server when testing with different servers. In
the end, this design has been kept.
At the beginning of this project, trying with Android components to develop the
Joystick GUI seems to be pretty easy. Replace the Android Button pattern and use
it to trigger the message sending procedure. After a little test, this method is
discarded since Android Button can only trigger once per second in average. That is
far away from the expectation. After abandoning that method, another way
“mySurfaceView” was figured out and successfully deployed a new joystick GUI.
This new GUI looks very good, and the performance has been proved well enough
after a lot of tests.
6.2.2 Web service communication test
This test includes 2 parts. The first part is to test its communication efficiency with
a WLAN connection. The method used to determine the efficiency is: open any text
edit tool and press some key at WVJoy, The more keyboard input appears, the
better efficiency it is. The final result shows that the communication efficiency
within WLAN is excellent and the process is very stable all the time.
The other part of this test is to give the server computer a WAN IP address, let the
mobile device use 3G network to connect to the server. Test the efficiency with the
method mention above, and observe the result. The final result shows the 3G
32
network is not reliable enough. In conclusion, WLAN connection has better quality
than 3G connection.
6.2.3 Server input simulation test
Differences with data communication testing, server input simulation test is
focusing on the test with performance of PPJoy. Whether PPJoy can generate
joystick input with the same frequency of the server keyboard input is needed to be
confirmed. In DirectX API /11/, there is a DirectInput joystick C++ sample code.
The released executable application can continuously update the first joystick
statement and information that system detected. The refresh rate is very frequently.
This test result can be seen clearly that the joystick signal input is generating quick
enough.
6.2.4 Compatibility test
After the previous 3 steps of testing, the project is generally acceptable already. But
different devices always have different problems, test the application with different
device is always necessary. There were 2 smart phones (SUMSUNG GALAXY S1
/ S3) and 1 tablet (Nexus) used in this test. The good thing is there was no problem
in this process. There is a little difference with the UI component positions. But it
does not influence its performance at all. If the device hardware is better, the
performance is better. In this test, the tablet is best performed with quality.
6.2.5 Validity test
In the end, test this project with any case it might happen. In conclusion of the test
result, when WVJoy launched, do not fill in wrong server connection information.
It will make the device stuck for a while. Besides, do not use the “return” button of
Android in the joystick GUI, sometimes it will cause the application stop working.
These two bugs are the most annoy cases. Unfortunately, there is no good solution
to fix them yet.
In fact, some Java Swing executable application XML – RPC server was used for
the test a lot of times. In this way, there is no need for a web container, and very

33
convenient to use. But it was abandoned in the end since there are some serious
compatibility problems between JDK1.7 / JRE7 and JDK1.6 / JRE6. Sometimes
when testing with different computers, due to that reason, the server cannot run.
Even if uninstall the JRE7 and reinstall the JRE6 cannot help. This project is
expected to be very reliable, the Java Swing XML – RPC server was abandoned at
the end.
6.3 Possible improvements after test
There are a lot of factors can be improved in the future. The most important 3 are:
make a reliable Java Swing XML – RPC server after the compatibility problems
solved; add a stop web service connection function in the joystick GUI in order to
avoid the device stuck or stop working when return button is clicked; add some
extra button when needed.

34
7. SUMMARY
WVJoy is an application for Android users who need a joystick. It provides a
convenient solution for users to get a “joystick” with an Android mobile device.
The original purpose was only for the VAMK robot team, but in the end, this
application can work like a normal joystick for almost all computers already. It is
much more practical and powerful than the original purpose. All the functions
expected at the beginning have been fulfilled. All goals and objectives are
achieved.
7.1 Project implementation procedure
The process of implementing this project can be summarized as following:
Consider with project usage purpose, function and area.
Analyze project objectives and obstacles.
Design the project in detail.
Manage technique involved in this project and start programming.
Test this project.
Revise and make specification for this project.
7.2 Most challenging part of this project
There were 2 most challenging part in the development process. The first one is
the Android UI performance.
At the beginning, use Android components such as button, to trigger the message
send to the server was expected to perform well. When it has been done, the
frequency of sending a message is too low in the test result. It was far away from
the expectation. Holding a real keyboard key for 1 second, the system normally
can detect more than 10 times of input. After 1 month of patient self-study, the use

35
of mySurfaceView was managed and the joystick GUI was developed with it very
soon. It was patience overcame this obstacle.
The second challenge is the simulation of keyboard input. Java Robot function is
very easy to use. So this function was used to simulate keyboard input at the
beginning. Any text edit tool is OK to get the keyboard input. But unfortunately,
PPJoy cannot detect any keyboard input so that there is no possibility to generate
corresponding joystick input. After a few days trying, the reason was founded. At
last, use JNI to integrate a piece of C++ code into the server was the final solution.
The keyboard input signal simulation had been completed successfully.

36
8. CONCLUSIONS
WVJoy was designed to be implemented with either iOS or Android platform.
Now the Android operating system can run WVJoy very well already. Although
the server side is a little bit complex, I used a web container such as tomcat 6 /12/,
to hold the XML – RPC server (servlet) in order to provide a reliable web service,
all the functions expected have been successfully carried out by a lot of effort. The
project has been implemented very well.
The main purpose of doing this project is not only to make a good application, but
also practice the self–study ability. After a few months of programming day and
night, the self-study ability is improved significantly. The most important goal of
developing this project is achieved.
8.1 Future work, ideas for improving the application
After the project is tested and ready, there are a few ways to improve the
application in the future founded.
First of all, the XML – RPC server could be improved. It could provide some
different set of keyboard input. Or even custom define keyboard input set. In this
way, the application can avoid some keyboard input confliction with some other
application.
Secondly, the PPJoy also possible to detect mouse input and generate
corresponding joystick input. Develop another XML – RPC server to simulate
mouse input is possible. The advantage of this is also avoiding keyboard input
confliction.
Thirdly, a terminate web service button is needed in the joystick GUI, when user
click on this button. It can stop the web service communication. The user can
either return to connection GUI or quit WVJoy quickly without any bug or stuck.
At last, if there is more button needed, it is possible to place some buttons else on
the GUI. Since most of Android devices have something like gravity sensor, speed
37
sensor, location sensor, and direction sensor. It is possible to create some “hidden
button” with these sensors.

38
REFERENCES
/1/ Android official website: Accessed 15.2.2012
http://www.android.com/
/2/ iOS official website: Accessed 15.2.2012
http://www.apple.com/ios/
/3/ Windows Phone official website: Accessed 28.4.2012
http://www.windowsphone.com/
/4/ IDC official website: Accessed 16.11.2012
https://www.idc.com/
/5/ Table 1 resource: Accessed 16.11.2012
https://www.idc.com/getdoc.jsp?containerId=prUS23771812
/6/ Eclipse official website: Accessed 18.11.2012
http://www.eclipse.org/
/7/ Java official website: Accessed 18.11.2012
http://www.java.com/
/8/ PPJoy developer’s homepage: Accessed 10.2.2012
http://ppjoy.blogspot.com/
/9/ Google Code official website: Accessed 24.5.2012
http://code.google.com/
/10/ XML – RPC API official website: Accessed 18.11.2012
http://ws.apache.org/xmlrpc/

39
/11/ MicroSoft DirectX information can be found at: Accessed 21.2.2012
http://www.microsoft.com/
/12/ Tomcat official website: Accessed18.11.2012
http://tomcat.apache.org/

Appendices 1(6)
APPENDIX 1
Capture of PPJoy configuration

Appendices 2(6)
APPENDIX 2
Capture of testing PPJoy input

Appendices 3(6)
APPENDIX 3
WVJoy User Manual
1. Requirements:
a) Win XP / Win 7 as server.
b) Android 2.2.x or higher version mobile phone.
2. Installation:
Step 1: Install JRE (Java runtime environment) 1.6 or higher version.
You can download JRE from official website:
Step 2: Install Tomcat 6.0 or higher version.
http://www.oracle.com/technetwork/java/javase/downloads/index.html
You can download Tomcat from official website:
Step 3: Install PPJOY
http://tomcat.apache.org/download-60.cgi
You can download PPJOY 64bit version from PPJOY author’s official website:
You can find the 32 bit version in the installer package.
http://ppjoy.blogspot.com/2009/11/finally-new-version.html
PPJOY user manual can be found in the $(PPJoySetup/Doc/PPJoyMain.html).
Step 4: Install WVJoy.apk to your android phone

Appendices 4(6)
Before installing WVJoy.apk to your mobile phone, select Unknown sources under
folder: Applications/Settings/Applications/
Step 5: Copy “kbdEvent.dll” to folder $(Windows/system32/).
3. Test
a) Server side:
(1) Start Tomcat, copy “wvjoyServlet.war” to folder: $(tomcat/webapps/).
(2) Run “cmd”, type “ipconfig” to acquire your ip address.
(3) Run “PPJoyKey”.
b) Client side:
(1) Start WVJoy application, type corresponding server address and service
method.
(2) Configure PPJoyKey input, and use WVJoy as normal joystick.
Appendices 5(6)
APPENDIX 4
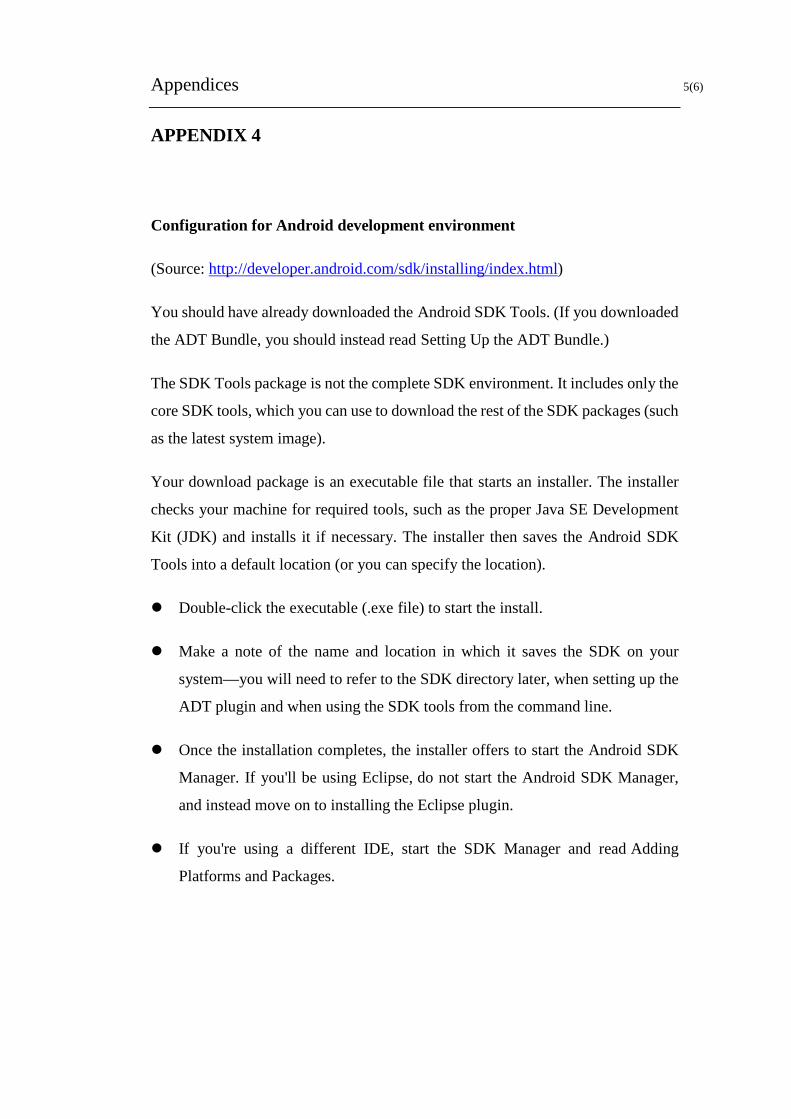
Configuration for Android development environment
(Source: http://developer.android.com/sdk/installing/index.html)
You should have already downloaded the Android SDK Tools. (If you downloaded
the ADT Bundle, you should instead read Setting Up the ADT Bundle.)
The SDK Tools package is not the complete SDK environment. It includes only the
core SDK tools, which you can use to download the rest of the SDK packages (such
as the latest system image).
Your download package is an executable file that starts an installer. The installer
checks your machine for required tools, such as the proper Java SE Development
Kit (JDK) and installs it if necessary. The installer then saves the Android SDK
Tools into a default location (or you can specify the location).
Double-click the executable (.exe file) to start the install.
Make a note of the name and location in which it saves the SDK on your
system—you will need to refer to the SDK directory later, when setting up the
ADT plugin and when using the SDK tools from the command line.
Once the installation completes, the installer offers to start the Android SDK
Manager. If you'll be using Eclipse, do not start the Android SDK Manager,
and instead move on to installing the Eclipse plugin.
If you're using a different IDE, start the SDK Manager and read Adding
Platforms and Packages.
Appendices 6(6)
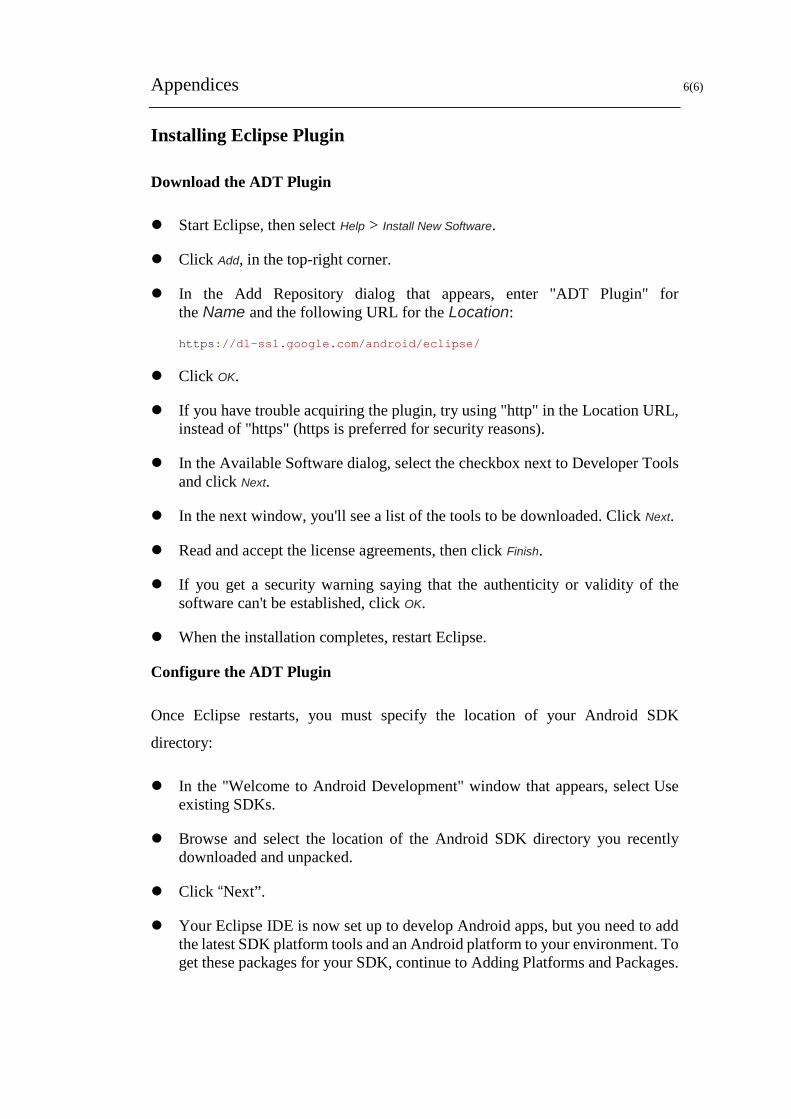
Installing Eclipse Plugin
Download the ADT Plugin
Start Eclipse, then select Help > Install New Software.
Click Add, in the top-right corner.
In the Add Repository dialog that appears, enter "ADT Plugin" for the Name and the following URL for the Location:
https://dl-ssl.google.com/android/eclipse/
Click OK.
If you have trouble acquiring the plugin, try using "http" in the Location URL, instead of "https" (https is preferred for security reasons).
In the Available Software dialog, select the checkbox next to Developer Tools and click Next.
In the next window, you'll see a list of the tools to be downloaded. Click Next.
Read and accept the license agreements, then click Finish.
If you get a security warning saying that the authenticity or validity of the software can't be established, click OK.
When the installation completes, restart Eclipse.
Configure the ADT Plugin
Once Eclipse restarts, you must specify the location of your Android SDK
directory:
In the "Welcome to Android Development" window that appears, select Use existing SDKs.
Browse and select the location of the Android SDK directory you recently downloaded and unpacked.
Click “Next”.
Your Eclipse IDE is now set up to develop Android apps, but you need to add the latest SDK platform tools and an Android platform to your environment. To get these packages for your SDK, continue to Adding Platforms and Packages.