Embed Size (px)
Citation preview

XEROX
Xerox 4235 Laser Printing SystemInstallation Planning Guide
Release 1.6March 1996720P88361

Xerox CorporationPrinting Systems DivisionPrinting Systems Documentation and EducationCustomer, Marketing, and Technical Education701 South Aviation BoulevardEl Segundo, CA 90245
March 1996 by Xerox Corporation. All rights reserved.
Printed in the United States of America
Xerox and all Xerox products mentioned in this publication aretrademarks of Xerox Corporation.
Copyright protection claimed includes all forms and matters ofcopyrightable material and information now allowed by statutory orjudicial law or hereinafter granted, including without limitation, materialgenerated from the software programs which are displayed on the screensuch as icons, screen displays, looks, etc.
Changes are periodically made to this document. Changes, technicalinaccuracies, and typographic errors will be corrected in subsequenteditions.
This document was created using Word for Windows. The typeface isOptima. The document was printed on a Xerox LPS.

XEROX 4235 LPS INSTALLATION PLANNING GUIDE iii
Safety precautions
Radio frequency emissions
WARNING: This equipment generates, uses and can radiateradio frequency energy. It may cause radio interference toradio communications if not installed according to theinstallation instructions.
USA The 4235 LPS complies with the limits for a Class A computingdevice as documented in Subpart J, Part 15 of the FCC ruleswhich are designed to provide reasonable protection againstsuch interference when operated in a commercial environment.Operation of this equipment in a residential area is likely tocause interference. In such cases, the user is responsible for theexpense of correcting the interference.
Canada The 4235 LPS does not exceed the class A limits for radio noiseemissions from a digital apparatus as documented in the radiointerference regulations of the Canadian Department ofCommunications.
Les present appareil numerique n'emet pas de bruitsradioelectriques depassant les limites applicables aux appareilsde classe A prescitees dans le reglement sur le brouillageradioelectrique edicte par les ministre des communications duCanada.
Europe 50HZ, 220V–240V equipmentThe 4235 LPS was tested and is certified in conformance withthe European commission directive 82/499/ECC and VDE0871/0875, class A, which relates to radio frequencyinterference.
Laser safety
WARNING: Use of controls or adjustments or performance ofprocedures other than those specified herein may result inhazardous light exposure.
The 4235 Laser Printing System (LPS) complies with appropriatesafety standards.
With specific regard to lasers, the equipment complies withlaser product performance standards set by governmental,national, and international agencies as a Class 1 laser product.It does not emit hazardous light as the beam is totally enclosedduring all phases of customer operation and maintenance.
When you perform various operator functions, laser dangerlabels may be visible. These labels are for Xerox servicerepresentatives and are placed on or near panels or shieldswhich require a tool for removal. THESE PANELS ARE NOT TO

iv XEROX 4235 LPS INSTALLATION PLANNING GUIDE
BE REMOVED. THERE ARE NO OPERATOR SERVICEABLEAREAS INSIDE THESE COVERS.
Operational safety
Your Xerox equipment and supplies were designed and testedto meet strict safety requirements. These include safety agencyexamination, approval, and compliance with establishedenvironmental standards.
Attention to the following notes ensures the continued safeoperation of your equipment.
Always connect equipment to a properly grounded powersource receptacle. If in doubt, have the receptacle checked bya qualified electrician.
WARNING: Improper connection of the equipment groundingconductor can result in electrical shock.
Always locate equipment on a solid support surface (not plushcarpet) with adequate strength for the weight of the machine.
Always exercise care in moving or relocating the equipment.
Always use materials and supplies specifically designed foryour Xerox equipment. Use of unsuitable materials may resultin poor performance and possibly a hazardous situation.
Never use a ground adaptor plug to connect equipment to apower source receptacle that lacks a ground connectionterminal.
Never attempt any maintenance function that is not specificallydescribed in this 4235 LPS documentation.
Never remove any covers or guards that are fastened withscrews. There are no operator serviceable areas within thesecovers.
Never override or "cheat" electrical or mechanical interlockdevices.
Never operate the equipment if you notice unusual noises orodors. Disconnect the power cord from the power sourcereceptacle and call your Xerox service representative to correctthe problem.
If you need any additional safety information concerning theequipment or Xerox supplied materials, call the following toll–free number (in the USA only): 1-800-828-6571. For additionalsafety information in other countries, contact your local Xeroxrepresentative.
XEROX 4235 LPS INSTALLATION PLANNING GUIDE v
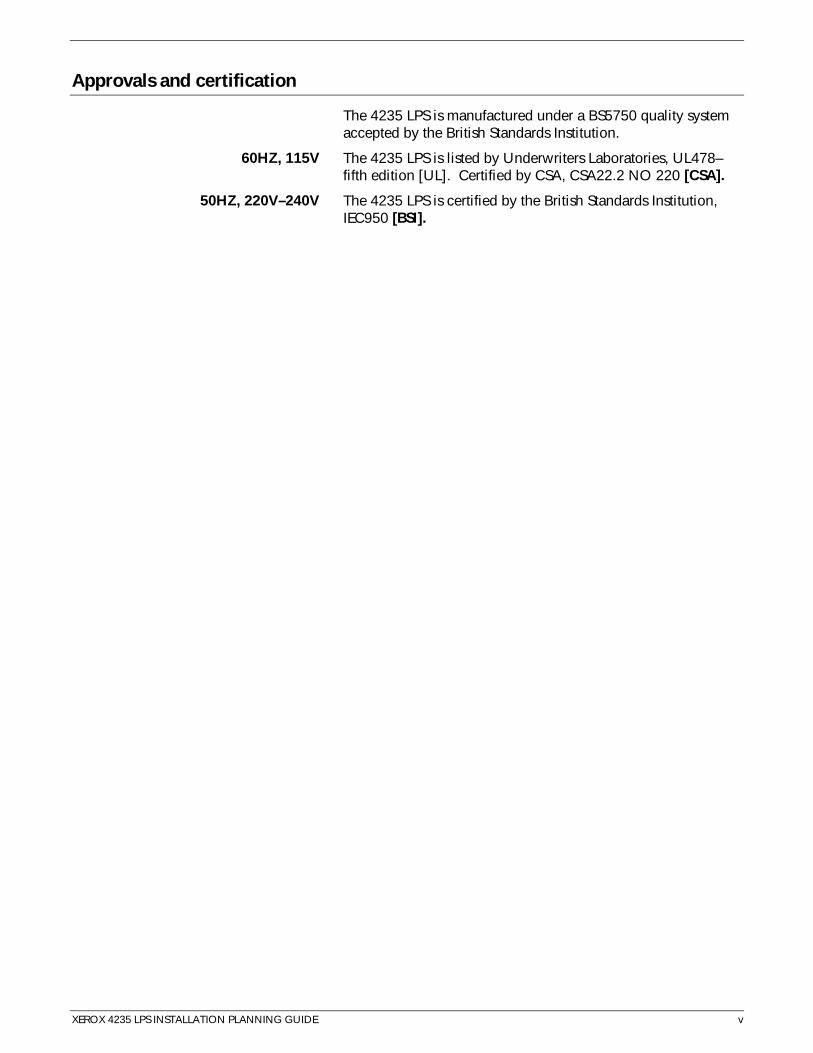
Approvals and certification
The 4235 LPS is manufactured under a BS5750 quality systemaccepted by the British Standards Institution.
60HZ, 115V The 4235 LPS is listed by Underwriters Laboratories, UL478–fifth edition [UL]. Certified by CSA, CSA22.2 NO 220 [CSA].
50HZ, 220V–240V The 4235 LPS is certified by the British Standards Institution,IEC950 [BSI].

vi XEROX 4235 LPS INSTALLATION PLANNING GUIDE
Notice
Specifications described in this publication are subject tochange without notice. Use of some features may be limited byyour hardware or software configuration. Consult your Xeroxsales representative for details.
Related publications
Publication Number
Xerox 4235 Laser Printing System HP LaserJet IIDEmulation Quick Start Guide
720P11530
Xerox 4235 Laser Printing System HP LaserJet IIDEmulation Reference
720P88130
Xerox 4235 Laser Printing System Loading andUnloading Paper and Special Stock Quick Reference
720P11540
Xerox 4235 Laser Printing System Operator Guide 720P88370
Xerox 4235 Laser Printing System Problem SolvingGuide
720P88380
Xerox 4235 Laser Printing System System AdministratorGuide
720P11490
Xerox 4235 Laser Printing System Xerox DistributedPrint Mode XES Commands Quick Reference
720P88410
Xerox 4235 Laser Printing System Xerox DistributedPrint Mode XES Quick Start Guide
720P11500
Xerox 4235 Laser Printing System Xerox DistributedPrint Mode XES Reference
720P88390
Xerox 4235 Laser Printing System Xerox ProductionPrint Mode PDL/DJDE Commands Quick Reference
720P88420
Xerox 4235 Laser Printing System Xerox ProductionPrint Mode PDL/DJDE Quick Start Guide
720P11510
Xerox 4235 Laser Printing System Xerox ProductionPrint Mode PDL/DJDE Reference
720P88400
Xerox 4235 Laser Printing System XScript Quick StartGuide
720P11520
Xerox 4235 Laser Printing System XScript Reference 720P86760
Helpful Facts About Paper 610P50497

XEROX 4235 LPS INSTALLATION PLANNING GUIDE vii
Table of contents
Safety precautions iii
Radio frequency emissions _________________________ iiiLaser safety ______________________________________ iiiOperational safety ________________________________ ivApprovals and certification __________________________ vNotice __________________________________________ viRelated publications_______________________________ vi
Introduction xi
About this guide__________________________________________________________ xi
Where to get help_________________________________ xiContents ________________________________________________________________ xi
Conventions _____________________________________________________________xii
1. Overview 1-1
4235 LPS features _______________________________________________________ 1-1
Software________________________________________ 1-1Hardware_______________________________________ 1-2
Components ____________________________________________________________ 1-4
Interfaces _______________________________________ 1-5Minimum and maximum 4235 LPS configurations_____ 1-5
Options________________________________________________________________ 1-6
Standard and optional fonts _______________________________________________ 1-6
XDPM fonts _____________________________________ 1-7XDPM default fonts ______________________________ 1-7XPPM fonts _____________________________________ 1-8XScript fonts ____________________________________ 1-9HP LaserJet IID emulation fonts ___________________ 1-10File space allocation_____________________________ 1-11
2. Installation planning tasks 2-1
Responsibilities _________________________________________________________ 2-1
Xerox responsibilities _____________________________ 2-1Customer responsibilities__________________________ 2-2

TABLE OF CONTENTS
viii XEROX 4235 LPS INSTALLATION PLANNING GUIDE
Installation countdown log________________________________________________ 2-4
Assignment of tasks during and after installation______________________________ 2-7
Select an operator________________________________ 2-7Tasks___________________________________________ 2-7
3. Site planning 3-1
Environmental requirements ______________________________________________ 3-2
Space requirements______________________________________________________ 3-2
Dimensions and weight ___________________________ 3-2Floor plan arrangements __________________________ 3-3
Electrical requirements ___________________________________________________ 3-6
Communication requirements _____________________________________________ 3-6
Modem or modem eliminator ______________________ 3-7Interface controller _______________________________ 3-7
4. Printer setup 4-1
Printer setup options-XDPM_______________________________________________ 4-1
Printer setup options-XPPM _______________________________________________ 4-4
Printer setup options-XScript ______________________________________________ 4-7
Printer setup options-HP LaserJet IID emulation ______________________________ 4-9
5. Document formatting 5-1
Document formatting options-XDPM _______________________________________ 5-1
Document formatting options-XPPM _______________________________________ 5-5
Document formatting options-XScript ______________________________________ 5-7
Document formatting options-HP LaserJet IID emulation ______________________ 5-9
6. System configuration 6-1
Selecting the interface ___________________________________________________ 6-1
Port configuration ________________________________ 6-2Parallel interface information _____________________________________________ 6-2
Centronics 100 interface __________________________ 6-2DataProducts 2260 interface_______________________ 6-5Parallel system configuration options________________ 6-9
Serial interface information ______________________________________________ 6-14
SNA/SDLC _________________________________________ 6-14Asynchronous ______________________________________ 6-14Bisynchronous ______________________________________ 6-14Serial cable ________________________________________ 6-15Unsupported SNA/SDLC and bisynchronous protocols ____ 6-15Serial system configuration options–SNA/SDLC __________ 6-17

TABLE OF CONTENTS
XEROX 4235 LPS INSTALLATION PLANNING GUIDE ix
Serial system configuration options–asynchronous________ 6-21Serial system configuration options–bisynchronous _______ 6-26
7. Host computer system generation 7-1
OS/MVS JES2 ___________________________________________________________ 7-2
Environment description __________________________ 7-2Initialization process review _______________________ 7-2System generation procedures______________________ 7-2Sample parameters _______________________________ 7-4Sign–on procedures ______________________________ 7-5
OS/MVS JES3 ___________________________________________________________ 7-5
Environment description __________________________ 7-5Initialization process review _______________________ 7-5System generation procedures______________________ 7-5Sample parameters _______________________________ 7-7Sign–on procedures ______________________________ 7-7
VM/RSCS ______________________________________________________________ 7-8
Environment description __________________________ 7-8Initialization process review _______________________ 7-8System generation procedures______________________ 7-8Sample parameters _______________________________ 7-9Sign-on procedures_______________________________ 7-9
VSE/POWER___________________________________________________________ 7-10
Environment description _________________________ 7-10Initialization process review ______________________ 7-10System generation procedures_____________________ 7-10Sample parameters ______________________________ 7-11Sign-on procedures______________________________ 7-11
OS/VS1 _______________________________________________________________ 7-12
Environment description _________________________ 7-12Initialization process review ______________________ 7-12System generation procedures_____________________ 7-12Sample parameters ______________________________ 7-14Sign-on procedures______________________________ 7-14
Sample SNA parameters_________________________________________________ 7-15
NCP generation SNA sample definition_____________ 7-16VTAM switched network majornode definition ______ 7-17Sample ACF/VTAM definitions ____________________ 7-18IBM JES2 sample PARMLIB parameters _____________ 7-19

TABLE OF CONTENTS
x XEROX 4235 LPS INSTALLATION PLANNING GUIDE
IBM JES3 sample PARMLIB parameters _____________ 7-204235 LPS user interface settings ___________________ 7-20
Xerox host software options ______________________________________________ 7-21
Xerox Printer Access Facility (XPAF) _______________ 7-21Remote Print Management Facility (RPMF)__________ 7-21Host Forms Description Language (HFDL) __________ 7-21Xerox Pen Plotter Interface (XPPI)__________________ 7-21Xerox Document Graphic Interface (XDGI) _________ 7-21Xerox Job Description Compiler (XJDC) ____________ 7-22
8. Fonts, supplies, and accessories 8-1
Supplies and accessories__________________________________________________ 8-1
Paper __________________________________________ 8-1Dry ink, print cartridges, and fuser agent ____________ 8-3Accessories _____________________________________ 8-3Supplies and accessories list _______________________ 8-5How to order supplies ____________________________ 8-9
Font ordering information________________________________________________ 8-11
How to order fonts in the United States_____________ 8-11How to order fonts in other countries ______________ 8-13
Glossary GLOSSARY-1
Index INDEX-1

XEROX 4235 LPS INSTALLATION PLANNING GUIDE xi
Introduction
About this guide
The Xerox 4235 Laser Printing System Installation PlanningGuide contains information on how to prepare for theinstallation of your 4235 LPS. It lists the laser printing systemrequirements, outlines tasks and completion times, and detailsdecisions that you need to make before installation.
Your new 4235 Laser Printing System (LPS) will be deliveredsoon. What needs to be done and when? Who is responsiblefor doing what?
This guide is designed to answer these questions and more. Ithelps you accomplish the preinstallation tasks, as well as theongoing activities after your laser printing system is installed.Before using this guide, become familiar with its contents andconventions.
Where to get help
For help at any time during the installation planning process,contact your Xerox sales representative.
Contents
This guide contains the following chapters:
Chapter 1 "Overview" provides a general overview of the 4235 LPS,including software, hardware, and fonts.
Chapter 2 "Installation planning tasks" discusses tasks that must beassigned during and after the installation process. Alsoincludes an installation countdown log.
Chapter 3 "Site planning" discusses how to prepare the site prior toinstallation. Also includes Checklist 1: Site preparation.
Chapter 4 "Printer setup" discusses the different settings required forsetting up the 4235 LPS in both XDPM (Xerox Distributed PrintMode) and XPPM (Xerox Production Print Mode). Alsoincludes:
• Checklist 2: Printer setup options–XDPM
• Checklist 3: Printer setup options–XPPM

INTRODUCTION
xii XEROX 4235 LPS INSTALLATION PLANNING GUIDE
• Checklist 4: Printer setup options–XScript
• Checklist 5: Printer setup options–HP Laserjet IID.
Chapter 5 "Document formatting" discusses the different settings requiredfor document formatting in both XDPM and XPPM. Alsoincludes:
• Checklist 6: Document formatting options–XDPM
• Checklist 7: Document formatting options–XPPM
• Checklist 8: Document formatting options–XScript
• Checklist 9: Document formatting options–HP Laserjet II.
Chapter 6 "System configuration" discusses the different settings requiredfor system configuration in both XDPM and XPPM. Alsoincludes:
• Checklist 10: Parallel system configuration
• Checklist 11: Serial system configurati on–SNA/SDLC
• Checklist 12: Serial system configuration–asynchronous
• Checklist 13: Serial system configuration–bisynchronous.
• Checklist 14: Supplies and accessories
Chapter 7 "Host computer system generation" provides guidelines for theintegration and operation of the 4235 LPS in a remote job entry(RJE) network. Sample system generation parameters are alsoprovided.
Chapter 8 "Fonts, supplies, and accessories" discusses how to order fonts,supplies, and accessories. Also included is Checklist 14:Supplies and accessories.
Also included are a Glossary, an Index, and a Reader CommentForm provided at the end of this reference. Please fill out thecomment form to provide us with any comments and/orsuggestions you may have to help us improve this guide.

INTRODUCTION
xiii XEROX 4235 LPS INSTALLATION PLANNING GUIDE
Conventions
This guide uses the following conventions:
1. Up arrow key
2. Down arrow key
3. Left arrow key
4. Right arrow key
5. Back return key (returns to previous screen)
L Return key (finalizes data input and selections)
Bold Within procedures, text and numbers that you enter, orselections that you make, (for example, "select HP IID"). Also,system defaults are shown in bold.
italics Document and library names (for example, the Xerox 4235Laser Printing System Operator Guide). References to optionssettings are italicized in tables.
Initial capitals Names of screens and menus are shown in initial capitals (forexample, Main Menu).
Specify or Select Within procedures, the two–step process of highlighting achoice and pressing L.
Steps Step–by–step procedures are designated with numeric callouts.
Note: Notes are hints that help you perform a task orunderstand the text.
CAUTION: Cautions alert you to conditions that may affectequipment safety.
WARNING: Warnings alert you to conditions that may affectthe safety of people.
Interchangeable terms:
• Rigid disk and hard disk
• Floppy diskette, floppy disk, and micro diskette
Additional symbols may be used in this reference:
• The names of keys to be pressed on the keyboard areshown in uppercase and enclosed in <>, or by theapplicable symbol (Example: <PAUSE>, 5, L, E).
• The þ symbol designates nonnumbered actions and optionsavailable within user interface screens.
• H represents hexadecimal code. For example: 69H or1Ch.
• MB represents megabyte.
• KB represents kilobyte.

INTRODUCTION
xiv XEROX 4235 LPS INSTALLATION PLANNING GUIDE

XEROX 4235 LPS INSTALLATION PLANNING GUIDE 1-1
1. Overview
This chapter provides an overview of the following:
• 4235 Laser Printing System (LPS) software and hardwarefeatures
• Components of the 4235 LPS
• Fonts.
4235 LPS features
The 4235 Laser Printing System (LPS) offers simplex and duplexprinting capabilities for computer–generated jobs up to a rate of35 pages per minute.
The 4235 LPS serves as a local laser printing system through aparallel or serial interface, or as a remote printing systemthrough a communication line. It prints jobs that are created inthe standard Xerox Distributed Print Mode (XDPM) environmentwith Xerox Escape Sequence (XES) commands and thefollowing optional environments:
• Xerox Production Print Mode (XPPM) environment withPDL/DJDE commands
• HP Laserjet IID with PCL commands
• XScript with PostScript commands.
Software
The 4235 LPS software allows you to do the following:
• Sort specified files (wildcard feature).
• Display the available disk space and percent of disk spaceused.
• Monitor and change the status of a job in the print queue.
• Receive messages sent from a host computer system.
• Store files, fonts, and forms on the hard disk.
• Display or print a directory of all files resident on the harddisk drive (except system files).
• Back up all user resourses and system default values(backup system generation).

OVERVIEW
1-2 XEROX 4235 LPS INSTALLATION PLANNING GUIDE
• Print job status, font names, and other pertinent data on thejob summary sheet.
• Print samples of the font, form, and image files that resideon the hard disk.
• Control margins, line spacing, and vertical and horizontaltab settings.
• Delete font, form, and image files remotely from a hostcomputer system.
• Merge forms.
• Print 99 fonts per page, ranging from 4–point to 24–point(XDPM only).
• Print up to 10 forms on a given page in XDPM or a singleform in XPPM.
• Print multiple copies of the same print job.
• Print XPPM–formatted print jobs from a variety of hostcomputer systems.
• Hold jobs of different priorities in the print queue.
• Prevent unauthorized menu display access by selecting oneof three different access levels.
• Customized file storage allocations
• 4235/XPPM font and form load via MS-DOS formatteddiskettes
Hardware
The 4235 LPS hardware features allow you to do the following:
• Print up to 35 pages per minute.
• Print on transparencies, labels, preprinted forms, andpredrilled paper.
• Use a wide range of paper sizes from 5.83 by 8.27 inchesup to 11.69 by 16.54 inches. (Refer to the "Fonts, supplies,and accessories" section in this guide for moreinformation.)
• Load paper less frequently. The combined four input papertrays hold a maximum of 3,350 sheets of 20–pound (80–gsm) paper.
• Use a range of paper weights from 16–pound (60–gsm) to32–pound (120–gsm).

OVERVIEW
XEROX 4235 LPS INSTALLATION PLANNING GUIDE 1-3
• Unload paper less frequently. The high capacity stackerholds up to 2,000 sheets of 20–pound (80–gsm) paper. Thetop output tray holds up to 250 sheets of 20–pound (80–gsm) paper.
• Offset multiple print jobs so that each job stacks to the rightor left of the previous job.
• Know when the 4235 LPS requires operator attention. Thealarm indicator lights up on the user interface screen andthe audible tone sounds (if enabled).
• Load paper into an empty tray while paper feeds fromanother tray (automatic tray switching).
• Maintain proper print density without making manualadjustments (automatic print quality control).
• Print to a resolution of 300 by 300 spots per inch (spi).
• Reduce electricity consumption with the energy saverfeature.
• Back up hard disk files onto 3.5 inch double–sided, high–density micro diskettes.
• Use Centronics or DataProducts parallel interfaces
• Use RS232C serial interfaces.
• Components

OVERVIEW
1-4 XEROX 4235 LPS INSTALLATION PLANNING GUIDE
Figure 1-1 shows the major components of the 4235 LPS.
Figure 1-1. Major components
1
2
34
5
7
910
11
6
12
13
14
1516
1718
1920
22
21
26
25
2423
8
1. Alarm indicator light(for operator attention)
2. User interface (UI) screen3. User interface screen brightness
adjusting wheel4. Keyboard5. Printer control panel6. Micro diskette drive7. Boot switch8. Reset switch9. Print cartridge/dry in k cartridge10. System power switch11. Print cartridge release lever12. Raster Output Scanner (ROS)
cleaning tool13. System controller
14. Front door15. Paper module handle A16. Paper tray 417. Paper tray 318. Paper tray 219. Paper tray 120. Paper module handle B21. High–capacity stacker22. Label guide (optional)23. Top output tray24. Serial number (on frame
behind fuser agent bottle)25. Fuser agent bottle26. Ground fault interrupt switch (for
equipment manufactured after January1993) (on back of LPS by power cord)

OVERVIEW
XEROX 4235 LPS INSTALLATION PLANNING GUIDE 1-5
Interfaces
The 4235 LPS supports the following communication protocols,but not by all emulation modes:
• Parallel communication (Centronics or DataProducts)
• Serial asynchronous communication (XDPM, HP IID, andXScript only)
• Serial synchronous communication (SNA/SDLC orbisynchronous) (XDPM and XPPM only).
The 4235 LPS has two communication ports. Only one parallelinterface and one serial interface can run concurrently. Forexample, you cannot successfully connect two bisynchronousinterfaces and SNA/SDLC interfaces or two parallel interfaces atthe same time.
Minimum and maximum 4235 LPS configurations
The following are the minimum and maximum 4235 LPSconfigurations:
Minimum configuration
• 365 MB addressable hard disk
• 1.44 MB micro diskette drive
• 4 MB system memory
• 5 MB image generator board
• 2 MB bit mapped memory board
• 115 volt, 60 Hz or 220/240 volt, 50 Hz.Maximum configuration
• 365 MB addressable hard disk
• 1.44 MB micro diskette drive
• 4 MB system memory
• 10 MB (two 5MB image generator boards)
• 8 MB bit mapped memory board
• Math coprocessor
• 115 volt, 60 Hz or 220/240 volt, 50 Hz.

OVERVIEW
1-6 XEROX 4235 LPS INSTALLATION PLANNING GUIDE
Options
The following is a list of 4235 LPS options:
Hard disk capacity Standard: 365 MB addressable
System memory Standard: 4 MB
Image generator boards Minimum: 5 MB
Optional: 5 MB (up to 10MB maximum)
Bit mapped memory boards Minimum: 2 MB
Optional: 4 MB, 8 MB (8 MB required for XScript only).
Math coprocessor The XScript printing mode requires the math coprocessor.
SNA/SDLC The optional SNA/SDLC software supports the use of SystemsNetwork Architecture (SNA) and Synchronous Data LinkControl (SDLC) data communication protocols.
Xerox Production Print Mode (XPPM) The optional XPPM software supports the use of PDL and DJDEcommands. The following Xerox laser printing systems acceptthese commands:• 4050
• 4090
• 4135
• 8700
• 8790
• 9700
• 9790.XScript The optional XScript software supports the PostScript page
description language.
HP LaserJet IID emulation The optional HP LaserJet IID emulation software recognizes theHP LaserJet Printer Commands Language (PCL4) and prints withthe same results as the HP LaserJet IID printer.
Standard and optional fonts
The 4235 LPS is delivered with a number of system fontspermanently stored on the hard disk. Font loading utilitiespermit the addition of other fonts in two ways:
• Fonts downloaded from your host computer system
• Fonts loaded from a font disk inserted in the micro diskettedrive.
Note: Only 3.5 inch double–sided, high–density microdiskettes can be used, even though the 4235 LPS can readdouble–sided, double–density micro diskettes.

OVERVIEW
XEROX 4235 LPS INSTALLATION PLANNING GUIDE 1-7
For information on how to order fonts, refer to the "Fonts,supplies, and accessories" chapter in this guide.
XDPM fonts
Table 1-1 lists the three landscape and two portrait system fontsavailable for printing jobs formatted using XES in XeroxDistributed Print Mode (XDPM).
Note: The character "–P" at the end of the font name indicatesportrait orientation, and "–L" indicates landscape orientation.
Table 1-1. XDPM fonts
60 Hz laser printingsystems
50 Hz laser printingsystems
XCP14iso–L XCP12.5iso–L (default)
Titan10iso–P Titan12.5iso–P
XCP14–L (default) XCP14–L
XCP12.5iso–L Titan10iso–P
Titan12iso–P XCP14iso–L
XDPM default fonts
The system default font prints all XDPM jobs unless you selectanother font to replace it. The 4235 LPS uses the followingdefault fonts:
• XCP14–L for 60 Hz laser printing systems
• XCP12.5iso–L for 50 Hz laser printing systems.
The default font orientation is landscape. If you choose to printin the portrait font orientation and do not select an alternateportrait font, the 4235 LPS prints in the following font:
• Titan10iso–P for 60 Hz laser printing systems
• Titan12.5iso–P for 50 Hz laser printing systems.
You select the default font on the 4235 LPS menu screens at thetime of installation. You can choose one of the resident systemfonts or an alternate font you have loaded onto the hard disk.
Note: Do not select an inverse portrait font as the default font.

OVERVIEW
1-8 XEROX 4235 LPS INSTALLATION PLANNING GUIDE
XPPM fonts
If you purchased XPPM as an option, refer to table 1-2 for thesystem fonts available for printing jobs formatted for use in thatenvironment.
Table 1-2. XPPM fonts
XPPM fonts
LO112B
LO212A
LO312A
LO412A
LO512A
LO912A
PO612A
PO812A
P1012A
P1112A
PO7TYA
FORMS$
R112BL
R212BL
R312BL
R412BL
R512BL
R912BL
R612BP
R812BP
RA12BP
RB12BP
R7TIBP

OVERVIEW
XEROX 4235 LPS INSTALLATION PLANNING GUIDE 1-9
XScript fonts
If you purchased the XScript printing mode option, refer to table1-3 for the system fonts available for printing jobs formatted forthat environment.
Table 1-3. XScript fonts
Font family Font name
Courier Courier–BoldCourier–ObliqueCourier–BoldOblique
Times–Roman Times–BoldTimes–ItalicTimes Bold–Italic
Helvetica Helvetica–BoldHelvetica–ObliqueHelvetica–BoldOblique
Symbol Symbol
AvanteGarde–Book AvanteGarde–Book ObliqueAvanteGarde–DemiAvanteGarde–DemiOblique
Bookman–Demi Bookman–DemiItalicBookman–LightBookman–LightItalic
Helvetica–Narrow Helvetica–Narrow–BoldHelvetica–Narrow–Bold–ObliqueHelvetica–Narrow–Oblique
NewCenturySchbk–Roman NewCenturySchbk–BoldNewCenturySchbk–ItalicNewCenturySchbk–BoldItalic
Palatino–Roman Palatino–BoldPalatino–ItalicPalatino–BoldItalic
ZapfChancery–Medium Italic ZapfDingbats

OVERVIEW
1-10 XEROX 4235 LPS INSTALLATION PLANNING GUIDE
HP LaserJet IID emulation fonts
If you purchased HP LaserJet IID emulation as an option, referto table 1-4 for the system fonts available for printing jobsformatted for use in that environment.
Table 1-4. HP LaserJet IID emulation fonts
Typeface Pitch Point Symbol setCourier (default) 10
121210
Roman–8 (default)ECMA–94
PC–8PC–8 D/NPC–850Legal
Courier Bold 1012
1210
Roman–8ECMA–94
PC–8PC–8 D/NPC–850Legal
Courier Italic 1012
1210
Roman–8ECMA–94
PC–8PC–8 D/NPC–850Legal
LinePrinter 16.67 8.5 Roman–8ECMA–94
PC–8Legal
PC–8 D/NPC–850

OVERVIEW
XEROX 4235 LPS INSTALLATION PLANNING GUIDE 1-11
File space allocation
The 4235 LPS stores files on the hard disk drive. The number offiles you can store on the hard disk depends upon the storagecapacity of the disk. Refer to table 1-5 for the maximumnumber of each file type that you can load onto the differentcapacity disks.
Table 1-5. Maximum number of files
File type 25 MB 365 MB
FNT 1,088 15,296*
FRM 256 3,400
IMG 417 3,400
JDL 50 2,048
CME 50 512
PDE 50 2,048
TST 50 512
STK 64 512
LIB 64 384
Font packs (Cartridges) 64 256
* Each font is stored in two orientations : one to print long–edgefeed paper and the other for short–edge feed paper. Since eachfont is stored as two files, the number of maximum fontsdisplayed is half the number listed in table 1-5.

OVERVIEW
1-12 XEROX 4235 LPS INSTALLATION PLANNING GUIDE
XEROX 4235 INSTALLATION PLANNING GUIDE 2-1
2. Installation planning tasks
Responsibilities
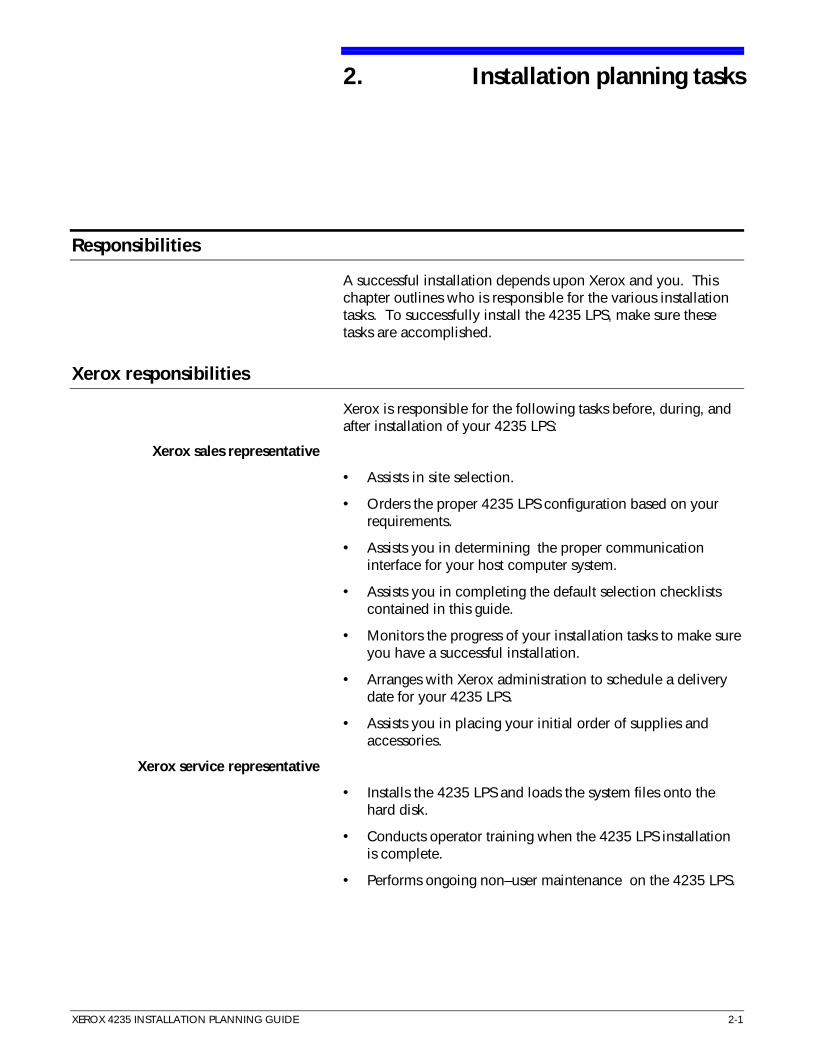
A successful installation depends upon Xerox and you. Thischapter outlines who is responsible for the various installationtasks. To successfully install the 4235 LPS, make sure thesetasks are accomplished.
Xerox responsibilities
Xerox is responsible for the following tasks before, during, andafter installation of your 4235 LPS:
Xerox sales representative
• Assists in site selection.
• Orders the proper 4235 LPS configuration based on yourrequirements.
• Assists you in determining the proper communicationinterface for your host computer system.
• Assists you in completing the default selection checklistscontained in this guide.
• Monitors the progress of your installation tasks to make sureyou have a successful installation.
• Arranges with Xerox administration to schedule a deliverydate for your 4235 LPS.
• Assists you in placing your initial order of supplies andaccessories.
Xerox service representative
• Installs the 4235 LPS and loads the system files onto thehard disk.
• Conducts operator training when the 4235 LPS installationis complete.
• Performs ongoing non–user maintenance on the 4235 LPS.

INSTALLATION PLANNING TASKS
2-2 XEROX 4235 LPS INSTALLATION PLANNING GUIDE
Customer responsibilities
You are responsible for the following tasks before, during, andafter installation of your 4235 LPS are the following:
• Work with your Xerox sales representative to plan andschedule installation activities.
• Establish a compatible operating environment between yourhost computer system and the 4235 LPS.
• Complete the default selection checklists and give them tothe Xerox service representative.
• Designate one or more persons in your organization to beresponsible for the care and maintenance of your 4235 LPS.
• Order a telephone and modem (where applicable).
• Ensure that all electrical and space requirements are met.
• Identify the 4235 LPS to your host computer system.
• Order paper, supplies, and accessories .
• Select, order, and load any optional fonts.
• Maintain your stock of supplies.
• Report your meter readings.
• Update the 4235 LPS software using micro diskettessupplied by Xerox.
• Order the appropriate data cables (serial and/or parallel).
• Ensure that a VCR unit is available for operator training atthe time of installation.
• Ensure that the correct interface cable is available.
Preinstallation tasks
Complete the option checklists, located at the back of eachchapter, and perform the required tasks before your 4235 LPS isinstalled. The Xerox service representative uses thesechecklists to configure the 4235 LPS to your operatingenvironment. You must perform the following tasks:
Task 1 Complete Checklist 1 and give it to the Xerox servicerepresentative on installation day.
Task 2 Complete Checklist 2 or Checklist 3 and give it to the Xeroxservice representative on installation day.
Task 3 Complete Checklist 4 or Checklist 5 and give it to the Xeroxservice representative on installation day.
Task 4 Complete Checklist 6 and either 7, 8, or 9 and give them to theXerox service representative on installation day.
Task 5 Identify appropriate system generation parameters.

INSTALLATION PLANNING TASK
XEROX 4235 LPS INSTALLATION PLANNING GUIDE 2-3
Task 6 Complete Checklist 10 and give it to the Xerox servicerepresentative on installation day.
Task 7 Order optional fonts.
Task 8 For XPPM emulation only. Determine the requirements andappropriate method for loading 9700 resource files onto the4235 LPS. Refer to the Xerox 4235 Laser Printing SystemsXPPM PDL/DJDE Reference for more information on 9700 filetransfer method.

INSTALLATION PLANNING TASKS
2-4 XEROX 4235 LPS INSTALLATION PLANNING GUIDE
Installation countdown log
Use the installation countdown log in table 2–1 to help planyour 4235 LPS installation. The table summarizes the tasks youmust perform and when each task should occur.
Use the log as a guide to make sure you have a successfulinstallation of your 4235 LPS. If you have any questions,contact your Xerox sales representative.
• The Week before installation column shows theapproximate time an activity should occur in relation to theinstallation date. For example, "–4" is four weeks beforeinstallation.
• The Responsibility column identifies who is to complete thetask.
• Date completed is the date the task is completed.
The time frames shown in the installation countdown log areguidelines only. Consult your suppliers to determine the leadtimes required for your installation.

INSTALLATION PLANNING TASK
XEROX 4235 LPS INSTALLATION PLANNING GUIDE 2-5
Table 2–1. Installation countdown log
Weekbeforeinstall
Tasks Responsibility Datecompleted
–7 Request 4235 LPS font samples Customer
Schedule the 4235 LPS delivery date Xerox
–6 Order custom fonts and any modifications to existing fonts Customer
–4 Select the site Customer/Xerox
Prepare the site:• Space requirements• Electrical requirements• Telephone/telephone jack• Environment requirements
Customer
Order interface accessories and cables (if applicable):• Modem/modem eliminator• Data Products Interface kit• Parallel interface cable• Serial interface cable• Gender changer
Customer/Xerox
–3 Order the Xerox Customer Documentation Catalog Customer
Order licensed fonts Customer
–2 Order consumable supplies:• Paper• Dry ink cartridges• 3.5–inch double–sided, high–density micro diskettes• Fuser agent
Customer/Xerox
Select operator Customer
Order paper cassettes, if other than A4 or A3 for 50Hz laserprinting systems or 8.5" x 11", 8.5" x 14", or 11" x 17" papersizes for 60Hz laser printing systems are needed.
Customer/Xerox
INSTALLATION PLANNING TASKS
2-6 XEROX 4235 LPS INSTALLATION PLANNING GUIDE
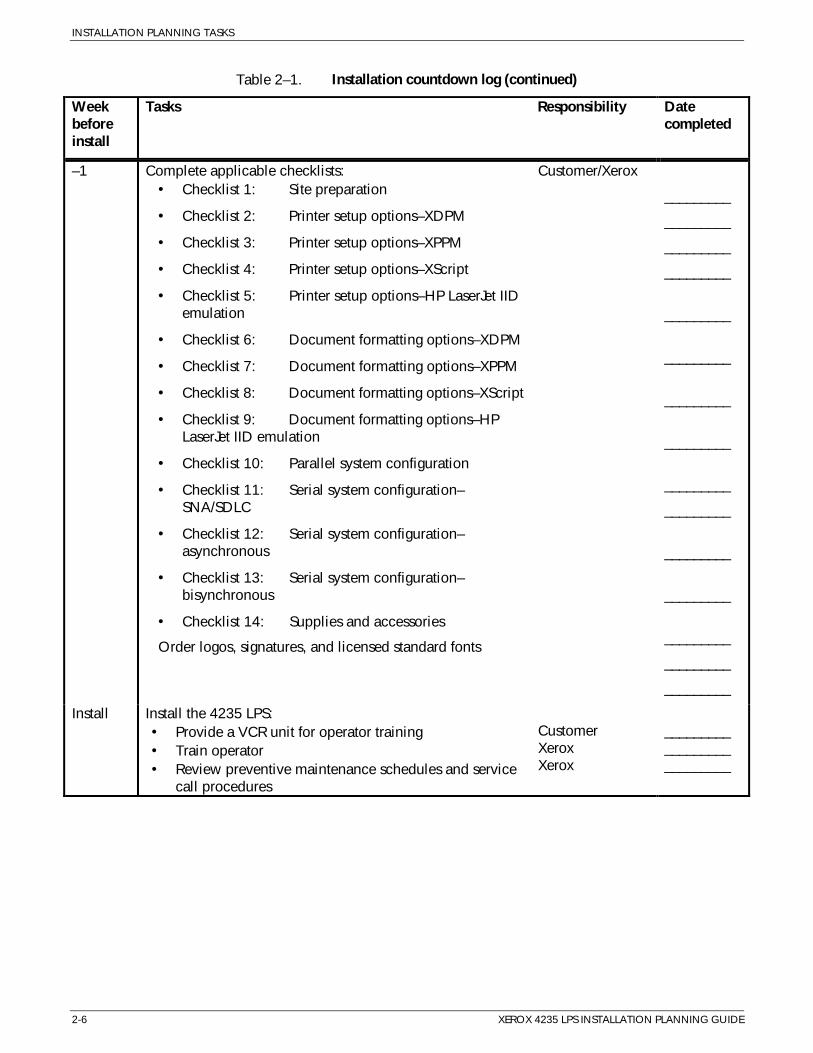
Table 2–1. Installation countdown log (continued)
Weekbeforeinstall
Tasks Responsibility Datecompleted
–1 Complete applicable checklists:• Checklist 1: Site preparation
• Checklist 2: Printer setup options–XDPM
• Checklist 3: Printer setup options–XPPM
• Checklist 4: Printer setup options–XScript
• Checklist 5: Printer setup options–HP LaserJet IIDemulation
• Checklist 6: Document formatting options–XDPM
• Checklist 7: Document formatting options–XPPM
• Checklist 8: Document formatting options–XScript
• Checklist 9: Document formatting options–HPLaserJet IID emulation
• Checklist 10: Parallel system configuration
• Checklist 11: Serial system configuration–SNA/SDLC
• Checklist 12: Serial system configuration–asynchronous
• Checklist 13: Serial system configuration–bisynchronous
• Checklist 14: Supplies and accessories
Order logos, signatures, and licensed standard fonts
Customer/Xerox
_________
_________
_________
_________
_________
_________
_________
_________
_________
_________
_________
_________
_________
_________
_________
Install Install the 4235 LPS:• Provide a VCR unit for operator training• Train operator• Review preventive maintenance schedules and service
call procedures
CustomerXeroxXerox
___________________________

INSTALLATION PLANNING TASK
XEROX 4235 LPS INSTALLATION PLANNING GUIDE 2-7
Assignment of tasks during and after installation
You must select one or more operators and assign tasks to beperformed during and after your 4235 LPS installation. Tasksinclude transmitting test jobs from the host computer system,loading optional fonts, and identifying the 4235 LPS to yourhost computer system.
Select an operator
You may want to designate an individual as the personresponsible for the care of your 4235 LPS, or you may want toselect a number of people so you have enough operators tocover absences, such as vacations and illness.
Operators receive maintenance training on installation day inorder to perform the following tasks:
• Power on the 4235 LPS.
• Update the operating system files when required.
• Add paper.
• Change the dry ink cartridge.
• Change the print cartridge.
• Clear paper misfeeds and jams.
• Use the Xerox 4235 Laser Printing System Problem SolvingGuide to correct faults.
• Perform logon procedures when necessary.
• Report non–correctable fault conditions to the Xerox servicerepresentative.
Tasks
Once the 4235 LPS is installed, you should test it to ensure thatit is working properly. The following three tasks should beperformed:
• Transmitting a test job
• Loading fonts
• Identifying the 4235 LPS to the host computer system.

INSTALLATION PLANNING TASKS
2-8 XEROX 4235 LPS INSTALLATION PLANNING GUIDE
Transmitting a test job
Make sure to have a test print job ready to be transmitted fromyour host computer system.
Loading fonts
You can purchase additional fonts on micro diskettes ormagnetic tape for storage on the 4235 LPS hard disk.
• You can load fonts on micro diskettes from the 4235 LPSmicro diskette drive onto the hard disk drive using thescreen menus.
• You can download fonts on magnetic tape from the hostcomputer system onto the 4235 LPS hard disk using printercommands.
Identifying the 4235 LPS to the host computer system
Host computer systems normally require parameters to identifysystem components. These parameters define and name thedevices that are part of the host computer system, such asprinters, terminals, and so forth.
The first step in integrating the 4235 LPS is to identify it to thehost computer system. Refer to the "Host computer systemgeneration" chapter, which outlines parameters designed tointegrate the 4235 LPS into a number of different host computersystems. These descriptions outline the most importantconsiderations for typical installations.
If the 4235 LPS is replacing an existing printer, you may want towait until the 4235 LPS is installed before identifying it to yourhost computer system.
If you are adding the 4235 LPS as a new laser printing system, itshould be identified to the host computer system beforeinstallation.

XEROX 4235 LPS INSTALLATION PLANNING GUIDE 3-1
3. Site planning
This chapter helps you to prepare for the installation of your4235 LPS. Keep in mind that preparing for installation is aresponsibility that you share with Xerox. Your Xeroxrepresentatives are available to discuss installation issues and toassist you in the completion of the site installationresponsibilities.
Located at the back of this chapter is Checklist 1: Sitepreparation. Use it as a guide to make sure the proposed sitefor the 4235 LPS meets all applicable space, environmental,electrical, and other requirements before the day of installation.
You must complete the following items before your 4235 LPScan be installed:
• The site is prepared to meet correct electrical and spacerequirements.
• Telephone line and jack, and data set and modem areavailable (if applicable) .
• Additional outlets for accessories (if applicable) areinstalled.
• The 4235 LPS is identified to your host computer system (ifapplicable).
• Checklist 1: Site preparation is complete.
• The following supplies and accessories are available:
− 3.5 inch high–density , double –sided micro diskettes− Paper (of all appropriate sizes)− Default font micro diskette (if applicable)*− Interface cables (if applicable)− Gender changer (if applicable)− Dry ink cartridges− Fuser agent.
* If a font, other than one of the system fonts, is selectedas your default font, you must have the micro diskettefor that font available at the time of installation.

SITE PLANNING
3-2 XEROX 4235 LPS INSTALLATION PLANNING GUIDE
Environmental requirements
Make sure the following environmental conditions are met:
Temperature range 50 ° F to 90° F (10° C to 32° C).
Humidity range 15% to 85% relative humidity. Operating the 4235 LPS aboveor below this range may cause paper jams and poor printquality.
Altitude range Sea level to 6,561.6 feet (2,000 meters).*
* If you operate equipment at an altitude up to 10,000 feet(3000 m), the temperature must not exceed 80° F (27° C).
Space and access Find a location that meets the requirements of the stationary ormobile floor plans (figures 3–1 and 3–2). Be sure to place the4235 LPS in a location that allows you to open paper trays anddoors fully and provides adequate space for service.
You may find the following information useful in finding asuitable location within your office.
• Noise level
− Continuous printing: 55 decibels
− Impulse printing: 60 decibels
− Standby: 46 decibels
• Airflow–No airflow restriction s apply when installedaccording to the floor plans provided in this guide.
• Heat output–Less than 6000 BTUs/hour (1750 watts) ofheat output.
Space requirements
The space requirements for your 4235 LPS are detailed in thefollowing sections.
Dimensions and weight
The following information details the dimensions and weight ofyour 4235 LPS:
Width 61.2 inches (1553.5 mm). This includes the high–capacitystacker.
Depth 24.6 inches (626 mm).

SITE PLANNING
XEROX 4235 LPS INSTALLATION PLANNING GUIDE 3-3
Height Total height = 52.1 inches (1323 mm)
• Printer = 39.6 inches (1006 mm)
• User interface screen = 12.5 inches (318 mm).
Make sure clearance above the top of the printer is at least 26inches.
Weight The unpackaged total weight is approximately 638 pounds(298.48 kg). This weight does not include paper, dry inkcartridge, print cartridge, or fuser agent.
Floor plan arrangements
You may want to consider a stationary or mobile floor planwhen selecting a location for your 4235 LPS. It is importantthat the floor surface is level regardless of the floor plan youuse. The stationary floor plan, shown in figure 3–1, depicts thespace requirements for a permanent location. The mobile floorplan, shown in figure 3–2, depicts space requirements wherethe 4235 LPS can be moved away from walls.

SITE PLANNING
3-4 XEROX 4235 LPS INSTALLATION PLANNING GUIDE
Figure 3-1. Stationary floor plan
Paper moduleextended450mm(17.7”)
450 mm(17.7”)
762mm(30.0”)
300mm(11.8”)
450mm(17.7”)
450mm (17.7”)
2471mm(97.3”)
2253mm(88.7”)

SITE PLANNING
XEROX 4235 LPS INSTALLATION PLANNING GUIDE 3-5
Figure 3-2. Mobile floor plan
R574.5mm(22.6”)
1258.5mm(49.5”)
1553.5mm(61.2”)
450.5mm(17.7”)
574.5mm(22.7)”
626mm(24.6”)
1353mm(53.3”)
277mm(10.9”)
727mm(28.7”)
Service Area
2160mm(85.0”)

SITE PLANNING
3-6 XEROX 4235 LPS INSTALLATION PLANNING GUIDE
Electrical requirements
Ensure that electrical outlets are available for modems,communication modules, or other equipment. You may needto order a telephone line and jack for communicationequipment.
Provide electrical outlets for equipment, such as a modem orcommunication module. You may need to order a telephoneline and jack for communication equipment.
Note: The 60 Hz laser printing system requires a dedicatedcircuit (a circuit to which no other equipment or appliance isconnected).
Table 3-1 lists the electrical requirements for a 60 Hz 4235 LPS.
Table 3-1. Requirements for 60 Hz laser printing system
Nominal voltage: 115 volts ac single phase
Voltage range: 104 to 127 volts ac
Nominal frequency: 60 Hz
Frequency range: 59.7 to 60.3 Hz, single phase
Ampere circuit: 15 amp dedicated (branch impedanceshould be less than .75 ohms)
Power consumption: 1.3 KVA
Power cord: 8 feet (3 meters)
Table 3-2 lists the electrical requirements for a 50 Hz 4235 LPS.
Table 3-2. Requirements for 50 Hz laser printing system
Nominal voltage: 220 volts VAC, single phase
Voltage range 220 VAC: 198 to 242 volts ac (anexternal step-up transformer is requiredbelow 198 volts)
240 VAC: 216 to 264 volts ac
Nominal frequency 50 Hz
Frequency range 49.5 to 50.5 Hz, single phase
Circuit 2.2 KVA
Power consumption 1.5 KVA
Power cord 8 feet (3 meters)
Communication requirements
The 4235 LPS may require additional communicationsequipment to successfully communicate with your host

SITE PLANNING
XEROX 4235 LPS INSTALLATION PLANNING GUIDE 3-7
computer system. This communications equipment mayconsist of devices such as modems.
Modem or modem eliminator
In general, your 4235 LPS needs a modem if it is more than 60feet from your host computer system. For short distanceconnections, your 4235 LPS requires a modem eliminator ornull modem. Use a null modem for asynchronous serialcommunications. Use a modem eliminator for synchronousserial communications.
If you have any questions about ordering a modem or modemeliminator, contact your Xerox sales representative.
Telephone line and jack If your 4235 LPS requires a modem, you need to place an orderwith your telephone company for a telephone line to beinstalled at the chosen site. Your telephone companyrepresentative can give you the lead time required so thetelephone line and telephone are available when your 4235 LPSis installed.
Gender changer Verify if your interface cable requires a gender changer forproper connection to your 4235 LPS.
Interface controller
If you use an interface controller, do not place this equipment in oron the 4235 LPS. You must provide adequate space and meet allelectrical and environmental conditions for this device by followingthe requirements of the manufacturer.

SITE PLANNING
3-8 XEROX 4235 LPS INSTALLATION PLANNING GUIDE
Figure 3-3. Checklist 1: Site preparation
Checklist 1: Site preparationSite requirements:Environmental: �❏ Temperature ❏ Humidity ❏ Altitude
(50° -90° F) (15-85%) (Sea level to 6,561 feet) 10° -32° C) (Sea level to 2,000 meters)
Space and access: ❏ Meets requirements for stationary floor plan
❏ Meets requirements for movable floor plan
Electrical: ❏ Voltage (115 volt ac or 220 volt ac)
� ❏ Ampere circuit (15 amp or 2.2KVA dedicated)
� ❏ Frequency range (60 Hz or 50 Hz)
� ❏ Distance from power outlet (not more than 8 feet or 3 meters)
Communications requirements:
Interface device: ❏ Space ❏ Electrical ❏ Environmental
❏ Modem ❏ Modem eliminator ❏ Telephone line
❏ Telephone jack ❏ Gender changer

XEROX 4235 LPS INSTALLATION PLANNING GUIDE 4-1
4. Printer setup
This chapter explains how to set up your 4235 LPS to print jobsin XDPM, XPPM, XScript, or HP LaserJet IID emulation modes.
Printer setup options–XDPM
Table 4-1 lists the printer setup options for Xerox DistributedPrint Mode (XDPM). Based on your choices, completeChecklist 2: Printer setup options–XDPM (figure 4-1). YourXerox service representative uses the checklist duringinstallation.
Table 4-1. XDPM printer setup options
Settings Options(defaults appear bold)
Description
Printer setup XDPM Selects XDPM for 2700/3700/4045 print jobs.
Error sheetdestination
Within jobTo other tray
Within job–Error sheet and print job arrive at the same outputtray.To other tray–Error sheet arrives at another output tray.
Status sheet printing On request or errorOn requestOn errorDisable
On request or error–Status sheets print automatically if errorsoccur during a job run and/or if a status sheet request wasmade by the user.On request–Status sheets print only when requested within aprint job.On error–Prints a status sheet only when errors occur.Disable–No status sheets print.
Multiple copies EnableDisable
Recognizes or ignores the Print Multiple Copies commandssent from the host computer system. When this feature isdisabled, the 4235 LPS prints only one set of the job.
Operator textmessages
EnableDisable
Allows you to send messages from the host that appear on the4235 screen to notify the operator when a job requires specialattention. When the Operator Text Message is enabled, the4235 LPS pauses until the operator presses the <CONTINUE>key.
Offset on jobboundary
EnableDisable
Defines when and if print jobs are offset in the high capacitystacker and top output tray. When enabled, print jobs areoffset in the output trays at the beginning of each job.
Offset on errorcondition
EnableDisable
Allows pages with errors to offset in the output trays. Whenenabled, pages with errors are offset in the output tray.
Table 4-1. XDPM printer setup options (continued)

PRINTER SETUP
4-2 XEROX 4235 INSTALLATION PLANNING GUIDE
Settings Options(defaults appear bold)
Description
Translation table ModifyRestoreASCIIEBCDIC
Modify allows you to change the character code, translationtable, and composite character selection.Restore resets the translation table settings to their defaultvalues.Character code encoding choice.
General features
Auto Tray Switching EnableDisable
Enable allows the 4235 LPS to feed paper from paper tray 4when paper tray 1 is empty, and then feed from paper tray 1when paper tray 4 is empty.
Special feed stock inpaper tray 1
EnableDisable
Enable specifies that label stock or other special paper iscurrently loaded into paper tray 1.*
Special feed stock inpaper tray 2
EnableDisable
Enable specifies that label stock or other special paper iscurrently loaded into paper tray 2.*
Special feed stock inpaper tray 3
EnableDisable
Enable specifies that label stock or other special paper iscurrently loaded into paper tray 3.*
Special feed stock inpaper tray 4
EnableDisable
Enable specifies that label stock or other special paper iscurrently loaded into paper tray 4.*
Audible alarm EnableDisable
Enable specifies that the audible alarm is activated.
Predrilled paper EnableDisable
Enable specifies whether predrilled paper stock is currentlyloaded. When enabled, the printer assumes that all papertrays contain predrilled paper.
* Before you enable these features, have a Xerox service representative define special feed parameters.Most feed stocks perform satisfactorily without the enhancement of these settings. (Refer to the"Loading label stock" section in the Xerox 4235 Laser Printing System Problem Solving Guide formore information.)

PRINTER SETUP
XEROX 4235 LPS INSTALLATION PLANNING GUIDE 4-3
Figure 4-1. Checklist 2: Printer setup options–XDPM
Checklist 2: Printer setup options–XDPM
Error sheet destination: Within job ❏ Other tray
Status sheet printing: ❏ On request orerror
❏ On request ❏ On error
❏ Disable
Multiple copies: ❏ Enable ❏ Disable
Operator text messages: ❏ Enable ❏ Disable
Offset on job boundary: ❏ Enable ❏ Disable
Offset on error condition: ❏ Enable ❏ Disable
General features
Auto tray switching (1 & 4): ❏ Enable ❏ Disable
Special feed stock in paper tray 1:* ❏ Enable ❏ Disable
Special feed stock in paper tray 2:* ❏ Enable ❏ Disable
Special feed stock in paper tray 3:* ❏ Enable ❏ Disable
Special feed stock in paper tray 4:* ❏ Enable ❏ Disable
Audible alarm: ❏ Enable ❏ Disable
Predrilled paper: ❏ Enable ❏ Disable
* Before you enable these features, have a Xerox service representative define special feed parameters.Most feed stocks perform satisfactorily without the enhancement of these settings.

PRINTER SETUP
4-4 XEROX 4235 INSTALLATION PLANNING GUIDE
Printer setup options–XPPM
Table 4-2 lists the printer setup options for Xerox ProductionPrint Mode (XPPM). Based on your choices, completeChecklist 3: Printer setup options–XPPM (figure 4-2). YourXerox service representative uses the checklist duringinstallation.
Table 4-2. XPPM printer setup options
Settings Options(defaults appear bold)
Description
Default paper size US letterA4US legalUS letter special
This feature allows you to specify the default paper sizewhen the JDL output paper size is not specified.US letter: 8.5" by 11".A4 paper: 8.27" by 11.69".US legal: 8.5" by 14".US letter special prints from paper tray 2.
Status sheet printing EnableDisableOn job error only
Enable allows status sheet printing when any error occurs.On job error only allows status sheet printing only when joberrors occur.
Multiple copies EnableDisable
Enable allows multiple copies to print as specified withinyour print jobs. Disable allows one copy only.
Operator informationpage printing
On request onlyOn request and error
On request only assumes the OPRINFO=YES command iscoded within the IDEN statement.On request and error allows operator information pageprinting when errors occur and when the OPRINFO=YEScommand is coded within the IDEN statement.
Operator informationmessages
EnableDisable
Displays ITEXT and OTEXT messages on the 4235 LPS screento notify the operator when a job requires special attention.
Default formpaper size
U.S. letter (8.5x11)U.S. legal (8.5x14)A4 paper
Allows you to select the paper size used to print your forms.The FDL paper value overrides this setting.
U.S. letter/A4 Mainpaper tray
Tray 1 Tray 2Tray 3 Tray 4
Allows you to select the paper tray to use when the mainpaper tray is specified within your print jobs.
U.S. letter/A4 AUXpaper tray
Tray 1 Tray 2Tray 3 Tray 4
Allows you to select the paper tray to use when the AUXpaper tray is specified within your print jobs.
U.S. letter/A4 OPRpaper tray
Tray 1 Tray 2Tray 3 Tray 4
Allows you to select the paper tray to use when the OPRpaper tray is specified within your print jobs.
U.S. letter specialform
EnableDisable
Enable allows you to store 8.5–inch forms for printing on an8.5– by 14–inch page.
PRINTER SETUP
XEROX 4235 LPS INSTALLATION PLANNING GUIDE 4-5
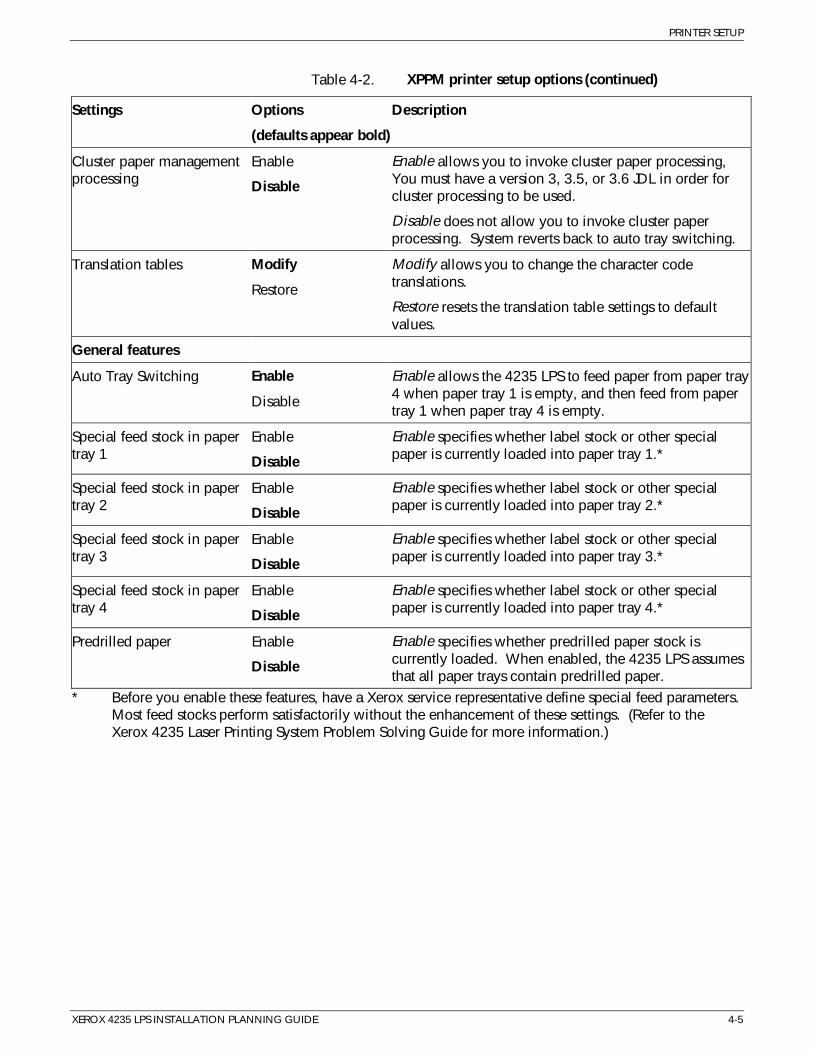
Table 4-2. XPPM printer setup options (continued)
Settings Options
(defaults appear bold)
Description
Cluster paper managementprocessing
Enable
Disable
Enable allows you to invoke cluster paper processing,You must have a version 3, 3.5, or 3.6 JDL in order forcluster processing to be used.
Disable does not allow you to invoke cluster paperprocessing. System reverts back to auto tray switching.
Translation tables Modify
Restore
Modify allows you to change the character codetranslations.
Restore resets the translation table settings to defaultvalues.
General features
Auto Tray Switching Enable
Disable
Enable allows the 4235 LPS to feed paper from paper tray4 when paper tray 1 is empty, and then feed from papertray 1 when paper tray 4 is empty.
Special feed stock in papertray 1
Enable
Disable
Enable specifies whether label stock or other specialpaper is currently loaded into paper tray 1.*
Special feed stock in papertray 2
Enable
Disable
Enable specifies whether label stock or other specialpaper is currently loaded into paper tray 2.*
Special feed stock in papertray 3
Enable
Disable
Enable specifies whether label stock or other specialpaper is currently loaded into paper tray 3.*
Special feed stock in papertray 4
Enable
Disable
Enable specifies whether label stock or other specialpaper is currently loaded into paper tray 4.*
Predrilled paper Enable
Disable
Enable specifies whether predrilled paper stock iscurrently loaded. When enabled, the 4235 LPS assumesthat all paper trays contain predrilled paper.
* Before you enable these features, have a Xerox service representative define special feed parameters.Most feed stocks perform satisfactorily without the enhancement of these settings. (Refer to theXerox 4235 Laser Printing System Problem Solving Guide for more information.)

PRINTER SETUP
4-6 XEROX 4235 INSTALLATION PLANNING GUIDE
Figure 4-2. Checklist 3: Printer setup options–XPPM
Default paper size: ❏ U.S. letter ❏ A4 ❏ U.S. legal
❏ U.S. letter special
Status sheet printing: ❏ Enable ❏ Disable ❏ On job error only
Multiple copies: ❏ Enable ❏ Disable
Operator information pageprinting:
❏ On request only ❏ On request and error
Operator information messages: ❏ Enable ❏ Disable
Default form paper size: ❏ U.S. letter ❏ U.S. legal ❏ A4
U.S. letter/A4 main paper tray: ❏ Tray 1 ❏ Tray 2 ❏ Tray 3 ❏ Tray 4
U.S. letter/A4 Aux paper tray: ❏ Tray 1 ❏ Tray 2 ❏ Tray 3 ❏ Tray 4
U.S. letter/A4 Opr paper tray: ❏ Tray 1 ❏ Tray 2 ❏ Tray 3 ❏ Tray 4
U.S. letter special form: ❏ Enable ❏ Disable
Cluster Management processing: ❏ Enable ❏ Disable
Translation table: ❏ Modify ❏ Restore
General featuresAuto tray switching (1 & 4): ❏ Enable ❏ Disable
Special feed stock in paper tray1:*
❏ Enable ❏ Disable
Special feed stock in paper tray2:*
❏ Enable ❏ Disable
Special feed stock in paper tray3:*
❏ Enable ❏ Disable
Special feed stock in paper tray4:*
❏ Enable ❏ Disable
Predrilled paper: ❏ Enable ❏ Disable
* Before you enable these features, have a Xerox service representative define special feed parameters.Most feed stocks perform satisfactorily without the enhancement of these settings. (Refer to the Xerox4235 Laser Printing System Problem Solving Guide for more information.)

PRINTER SETUP
XEROX 4235 LPS INSTALLATION PLANNING GUIDE 4-7
Printer setup options–XScript
Table 4-3 lists the printer setup options for XScript. Based onyour choices, complete Checklist 4: Printer setup options–XScript (figure 4-3). Your Xerox service representative uses thechecklist during installation.
Table 4-3. XScript printer setup options
Settings Options(defaults appear bold)
Description
Document ErrorHandling
Print Status SheetDo Not Print StatusSheet
Print Status Sheet–Status sheets print automatically if errorsoccur during a job run and/or if a status sheet request wasmade by the user.Do Not Print Status Sheet–No status sheets print.
Offset on jobboundary
EnableDisable
Defines when and if print jobs are offset in the high capacitystacker and top output tray. When enabled, print jobs areoffset in the output trays at the beginning of each job.
Reset Formatter Reset FormatterDo not Reset Formatter
Enabling this feature causes the printer to reset the XScriptformatter to avoid an excess accumulation of virtual memory.
Restore factorydefaults
Restore defaultsDo Not RestoreDefaults
Restore defaults resets the option settings within the XScriptprinting mode to the factory defaults.Do not restore defaults does not reset any of the XScriptprinting mode option settings.
General features
Auto Tray Switching EnableDisable
Enable allows the 4235 LPS to feed paper from paper tray 4when paper tray 1 is empty, and then feed from paper tray 1when paper tray 4 is empty.
Special feed stock inpaper tray 1
EnableDisable
Enable specifies whether label stock or other special paper iscurrently loaded into paper tray 1.*
Special feed stock inpaper tray 2
EnableDisable
Enable specifies whether label stock or other special paper iscurrently loaded into paper tray 2.*
Special feed stock inpaper tray 3
EnableDisable
Enable specifies whether label stock or other special paper iscurrently loaded into paper tray 3.*
Special feed stock inpaper tray 4
EnableDisable
Enable specifies whether label stock or other special paper iscurrently loaded into paper tray 4.*
Predrilled paper EnableDisable
Enable specifies whether predrilled paper stock is currentlyloaded. When enabled, the 4235 LPS assumes that all papertrays contain predrilled paper.
* Before you enable these features, have a Xerox service representative define special feed parameters.Most feed stocks perform satisfactorily without the enhancement of these settings. (Refer to the Xerox4235 Laser Printing System Problem Solving Guide for more information.)

PRINTER SETUP
4-8 XEROX 4235 INSTALLATION PLANNING GUIDE
Figure 4-3. Checklist 4: Printer setup options–XScript
Checklist 4: Printer setup options–XScriptDocument error handling: ❏ Print Status Sheet ❏ Do not print Status Sheet
Offset on Job boundaries: ❏ Enable ❏ Disable
Reset formatter: ❏ Reset formatter ❏ Do not reset formatter
Restore factory defaults: ❏ Restore factory defaults
❏ Do not restore factory defaults
General features
Auto tray switching (1 & 4): ❏ Enable ❏ Disable
Special feed stock in paper tray 1:* ❏ Enable ❏ Disable
Special feed stock in paper tray 2:* ❏ Enable ❏ Disable
Special feed stock in paper tray 3:* ❏ Enable ❏ Disable
Special feed stock in paper tray 4:* ❏ Enable ❏ Disable
Predrilled paper: ❏ Enable ❏ Disable
* Before you enable these features, you must have a Xerox customer service engineer define special feedparameters. Most feed stocks perform satisfactorily without the enhancement of these settings. (Referto the Xerox 4235 Laser Printing System Problem Solving Guide for more information.)

PRINTER SETUP
XEROX 4235 LPS INSTALLATION PLANNING GUIDE 4-9
Printer setup options–HP LaserJet IID emulation
Table 4-4 lists the printer setup options for the HP LaserJet IIDemulation mode. Based on your choices, complete Checklist 5:Printer setup options–HP LaserJet IID emulation (figure 4-4).Your Xerox service representative uses the checklist duringinstallation.
Table 4-4. HP LaserJet IID emulation printer setup options
Settings Options(defaults appear bold)
Description
Status sheet printing EnableDisableEnable on error only
Enable allows the 4235 LPS to print status sheets.Disable does not allow the 4235 LPS to print status sheets.Enable on error only allows the 4235 LPS to print status sheetsas errors are encountered.
Predrilled/preprinted paper
Invert simplex pagesPrint simplex pages asduplexDisable
Invert simplex pages is used when printing simplex jobs onpredrilled/preprinted paper.Print simplex pages as duplex is used when both simplex andduplex jobs print on predrilled/preprinted paper.Disable is used when you are not using predrilled/preprintedpaper or when printing duplex jobs on predrilled/preprintedpaper.
Font print qualityadjustment
Lighter appearanceDarker appearance
Prints font characters lighter.Prints font characters darker.
Graphics printquality adjustment
Lighter appearanceDarker appearance
Prints font characters lighter.Prints font characters darker.
Restore factorydefaults
Restore defaultsDo not restore defaults
Restore defaults resets the option settings within the HPLaserJet IID emulation mode to the factory defaults.Do not restore defaults does not reset any of the HP LaserJetIID emulation mode option settings.
General featuresAuto Tray Switching Enable
DisableEnable allows the 4235 LPS to feed paper from paper tray 4when paper tray 1 is empty, and then feed from paper tray 1when paper tray 4 is empty.
Special feed stock inpaper tray 1
EnableDisable
Enable specifies whether label stock or other special paper iscurrently loaded into paper tray 1.*
Special feed stock inpaper tray 2
EnableDisable
Enable specifies whether label stock or other special paper iscurrently loaded into paper tray 2.*
Special feed stock inpaper tray 3
EnableDisable
Enable specifies whether label stock or other special paper iscurrently loaded into paper tray 3.*

PRINTER SETUP
4-10 XEROX 4235 INSTALLATION PLANNING GUIDE
Table 4-4. HP LaserJet IID emulation printer setup options (continued)
Settings Options
(defaults appear bold)
Description
Special feed stock inpaper tray 4
Enable
Disable
Enable specifies whether label stock or other special paper iscurrently loaded into paper tray 4.*
Predrilled paper Enable
Disable
Enable specifies whether predrilled paper stock is currentlyloaded. When enabled, the 4235 LPS assumes that all papertrays contain predrilled paper.**
* Before you enable these features, you must have a Xerox customer service engineer define specialfeed parameters. Most feed stocks perform satisfactorily without the enhancement of these settings.(Refer to the Xerox 4235 Laser Printing System Problem Solving Guide for more information.)
** The HP LaserJet IID emulation does not recognize the Predrilled paper option in General Features.Instead, use the Predrilled/preprinted paper option.

PRINTER SETUP
XEROX 4235 LPS INSTALLATION PLANNING GUIDE 4-11
Figure 4-4. Checklist 5: Printer setup options–HP LaserJet IID emulation
Checklist 5: Printer setup options–HP LaserJet IID emulationStatus sheet printing: ❏ Enable ❏ Disable
❏ Enable on error only
Predrilled/preprinted paper: ❏ Invert simplex pages
❏ Print simplex pages asduplex
❏ Disable
Font print quality adjustment: ❏ Lighter appearance ❏ Darker appearance
Graphics print quality adjustment: ❏ Lighter appearance
❏ Darker appearance
Restore factory defaults: ❏ Restore defaults ❏ Do not restore defaults
General features
Auto tray switching (1 & 4): ❏ Enable ❏ Disable
Special feed stock in paper tray 1:* ❏ Enable ❏ Disable
Special feed stock in paper tray 2:* ❏ Enable ❏ Disable
Special feed stock in paper tray 3:* ❏ Enable ❏ Disable
Special feed stock in paper tray 4:* ❏ Enable ❏ Disable
Predrilled paper:** ❏ Enable ❏ Disable
* Before you enable these features, have a Xerox service representative define special feed parameters.Most feed stocks perform satisfactorily without the enhancement of these settings. Refer to the Xerox4235 Laser Printing System Problem Solving Guide for more information.
** The HP LaserJet IID emulation does not recognize the Predrilled paper option in General Features.Instead, use the Predrilled/preprinted paper option.

PRINTER SETUP
4-12 XEROX 4235 INSTALLATION PLANNING GUIDE

XEROX 4235 LPS INSTALLATION PLANNING GUIDE 5–1
5. Document formatting
This chapter provides tables and checklists to help youdetermine the document formatting options you need to printjobs in the XDPM, XPPM, XScript, or HP LaserJet IID emulationenvironments.
Document formatting options–XDPM
Table 5–1 lists the document formatting options for XeroxDistributed Print Mode (XDPM). Based on your choices,complete Checklist 6: Document formatting options–XDPM(figure 5–1). Your Xerox service representative uses thechecklist during printer installation.
Table 5–1. XDPM document formatting options
Settings Options
(defaults appear bold)
Description
Documentformatting
XDPM • XDPM is for 2700/3700/4045 print jobs.
• XPPM is for 4050/4090/4135/or 8700/9700 print jobs.
Print format 1throughPrint format 9
Change specificationsChange format nameSelect default format
Each format file contains specifications for documentformatting. (Format specifications placed within your joboverwrite these specifications.) You have the option ofchanging the specification, format name, and/or default format.
Paper trays andsizes
Tray 1
Tray 2
Tray 3
Tray 4
Paper tray 1 (maximum capacity 2000*)8.5" x 11"/216 by 279 mm 8.27" x 11.69"/210 x 297 mm (A4)Paper tray 2 (maximum capacity 550*)8.5" x 13"/216 x 330 mm 8.27" x 11.69"/210 x 297 mm (A4)215 mm x 315 mm 8.5" x 11"/216 x 279 mm8.5" x 14"/216 x 356 mmPaper tray 3 (maximum capacity 250*)8.5" x 5.5"/216 x 140 mm 8" x 13"/214 x 330 mm)8.5" x 11"/216 x 279 mm 9.84" x 13.9"/250 x 353 mm (B4)11" x 17"/279 x 432 mm 11.69" x 16.54"/297x 420 mm (A3)8.27" x 11.69"/210 x 297 mm (A4) 5.83" x 8.27"/148 x 210 mm (A5)Paper tray 4 (maximum capacity 550*)8.5" x 11" (216 x 279 mm) 8.27" x 11.69"/210 x 297 mm (A4)* Based on equivalent stack height and weight of A4, 80 gsm paper

DOCUMENT FORMATTING
5–2 XEROX 4235 LPS INSTALLATION PLANNING GUIDE
Table 5–1. XDPM document formatting options (continued)
Settings Options(defaults appear bold)
Description
Output destination High capacity stackerTop output tray
Select the default that determines the destination of your printjob.
Page orientation PortraitLandscapeMixed
Select the default page layout.
Portrait LandscapeRegularTwo–up
Select the page format:Regular–places a single page image on a single piece of paper.Two–up–places two page images side–by–side on one sheet ofpaper.
Font Default font file name# 1 font file name# 2 font file name# 3 font file name# 4 font file name# 5 font file name# 6 font file name# 7 font file name# 8 font file name# 9 font file name
You can assign numbers to 10 fonts. Use these font numbers tospecify specific fonts within your print jobs. The XDPM defaultfont is XCP14–L for 60 Hz printers and XCP12.5iso–L for 50 Hzprinters.
Margin unit value
Margin values
InchesMillimetersPixelsLines/spaces
TopBottomLeftRight
Default top margin: 120 pixelsDefault bottom margin: 120 pixelsDefault left margin: 198 pixelsDefault right margin: 3102 pixels
Horizontal tabs(fixed)
Horizontal tabs(variable)
InchesMillimetersPixelsSpaces
Enter tab valuesDelete tab(s)
Select fixed or variable for your horizontal tab setting. If youselect variable, enter the desired tab values. The defaultinterval is 132 pixels per tab.The 4235 LPS has one set of default tab stops for each pagesize and font orientation. There are 32 tab stops.

DOCUMENT FORMATTING
XEROX 4235 LPS INSTALLATION PLANNING GUIDE 5–3
Table 5–1. XDPM document formatting options (continued)
Settings Options(defaults appear bold)
Description
Vertical tabs(fixed)
InchesMillimetersPixelsLines
Select fixed or variable vertical tab settings. If you selectvariable, enter the desired tab values.If fixed tab stops is selected as the default tab stop option, youmay accept the default spacing of 150 pixels apart, or you canchange the fixed distance from 150 pixels to the distance yourequire.
Vertical tabs(variable)
Enter tab valuesDelete tab(s)
If variable tab stops is selected as the default tab stop option,the tab distances may vary; that is, you can assign eachcolumn or character position an individual tab stop location.
Line spacing 1/2 spacingSingle spacingOne and one–halfspacingDouble spacingTriple spacingOther line spacing
Line spacing defines the vertical space between lines of texton the printed page.Other line spacing allows you to enter line spacing in inch,millimeter, or pixel units.
Justification EnableDisable
Enable allows each line of text to line up between the left andright margins.Disable allows text to align on the left margin, but not the rightmargin.
Simplex–duplexprinting
SimplexDuplex
Simplex–one–sided printing on the front side of the page.Duplex–two–sided printing on the front and back of the page.
Duplex printing RegularHead–to–toe2nd side shiftInchesMillimetersPixelsNo shift
Regular is defined as a page with printing on the same edge ofthe front and back and head–to–head page formatting.Head–to–toe is defined as a page with printing upside downrelative to the orientation of the front side.2nd side shift–the text on the second side is shifted a user–defined number of units up or down; used primarily for bookbinding purposes.Selects the units and amount of the 2nd side shift for duplexpages.
Form merge/form DisableEnable
Enable allows the selected form file to merge with your printjob. Up to 10 forms can be assigned numbers reflectingspecific forms within your print jobs.
User defined keycharacter
DisableEnable
Enable allows you to define a substitute escape character.

DOCUMENT FORMATTING
5–4 XEROX 4235 LPS INSTALLATION PLANNING GUIDE
Figure 5–1. Checklist 6: Document formatting options–XDPM
Checklist 6: Document formatting options–XDPM
Output destination: ❏ High capacity stacker ❏ Top output tray
Page orientation: ❏ Portrait ❏ Landscape ❏ Mixed
❏ Regular ❏ Two–up
Default font: ❏ XCP14–L for 60 Hz ❏ XCP12.5iso–L for 50 Hz
Other: _______________________________________
Margin units: ❏ Inches ❏ Millimeters ❏ Pixels
❏ Lines/spaces
Top margin value: 120 Other:____________
Bottom margin value: 120 Other:____________
Left margin value: 198 Other:____________
Right margin value: 3102 Other:____________
Horizontal tabs: ❏ Fixed ❏ Variable
❏ Inches ❏ Millimeters ❏ Pixels
❏ Spaces Enter new tab values:_________________
Vertical tabs: ❏ Fixed ❏ Variable
❏ Inches ❏ Millimeters ❏ Pixels
❏ Spaces Enter new tab values: ________________
Line spacing: ❏ One–half ❏ Single ❏ One and one–half
❏ Double ❏ Triple ❏ Other
If other, enter desired line spacing in inches, millimeters, or pixels: _________________________
Justification: ❏ Enable ❏ Disable
Simplex–duplexprinting:
❏ Simplex ❏ Duplex
If duplex, select: ❏ Regular ❏ Head–to–toe
If duplex, select: ❏ 2nd side shift ❏ No shift
2nd side shift value: ❏ Inches ❏ Millimeters ❏ Pixels
Form merge/form: ❏ Enable ❏ Disable
User–defined keycharacter:
❏ Enable ❏ Disable

DOCUMENT FORMATTING
XEROX 4235 LPS INSTALLATION PLANNING GUIDE 5–5
Document formatting options–XPPM
Table 5–2 lists the document formatting options for XeroxProduction Print Mode (XPPM). Based on your choices,complete Checklist 7: Document formatting options–XPPM(figure 5–2). Your Xerox service representative uses thechecklist during installation. The options listed belowdetermine the default printing environment of each XPPM joband are equivalent to the 9700 LPS OSS START command.
Table 5–2. XPPM document formatting options
Settings Options
(defaults appear bold)
Description
1st interface port
Job Descriptor Library(JDL)
9ASC Specifies the JDL file name.
Job Descriptor Entry(JDE)
LAND Specifies the JDE within the selected JDL file.
Form merge/form Enable
Disable
Enable allows the selected form file to merge with yourprint job.
2nd interface port
Job Descriptor Library(JDL)
9ASC Specifies the JDL file name.
Job Descriptor Entry(JDE)
LAND Specifies the JDE within the selected JDL file.
Form merge/form Enable
Disable
Enable allows the selected form file to merge with yourprint job.
DOCUMENT FORMATTING
5–6 XEROX 4235 LPS INSTALLATION PLANNING GUIDE
Figure 5–2. Checklist 7: Document formatting options–XPPM
Checklist 7: Document formatting options–XPPM
1st Interface
Job Descriptor Library (JDL): 9ASC other:_______________
Job Descriptor Entry (JDE): LAND other:_______________
Form merge/form: ❏ Enable ❏ Disable
Form name ___________________
2nd Interface
Job Descriptor library (JDL): 9ASC other: ______________________
Job Descriptor entry (JDE): LAND other: ______________________
Form merge/form: ❏ Enable ❏ Disable
Form name ____________________

DOCUMENT FORMATTING
XEROX 4235 LPS INSTALLATION PLANNING GUIDE 5–7
Document formatting options–XScript
Table 5–3 lists the document formatting options for XScript.Based on your choices, complete Checklist 8: Documentformatting options–XScript (figure 5–3). Your Xerox servicerepresentative uses the checklist during installation.
Table 5–3. XScript document formatting options
Settings Options
(defaults appear bold)
Description
Document formatting XScript XScript is an emulation of PostScript.
Input tray(s) Tray 1
Tray 2
Tray 3
Tray 4
Tray 1: 8.5" x 11" (216 x 297 mm) or A4 (8.27" x 11.69",210 x 297 mm)
Tray 2: Paper cassette currently loaded
Tray 3: Paper cassette currently loaded
Tray 4: 8.5" x 11" (216 x 297 mm) or A4 (8.27" x 11.69",210 x 297 mm)
Output destination High capacity stacker
Top output tray
Select the default that determines the destination of your printjob.
Simplex–duplexprinting
Simplex
Duplex – Regular
Duplex – Tumbled
Simplex–one–sided printing on the front side of the page.
Duplex – Regular–two–sided printing on the front and backof the page.
Duplex – Tumbled–two–sided printing on the front and backof the page in which the second side of a duplex page isprinted upside down compared to the first side.

DOCUMENT FORMATTING
5–8 XEROX 4235 LPS INSTALLATION PLANNING GUIDE
Figure 5–3. Checklist 8: Document formatting options–XScript
Checklist 8: Document formatting options–XScript
Input tray(s): ❏ Tray 1 8.5" x 11"/216 x 279 mm or A4(8.27" x 11.69"/210 x 297 mm)
Tray 2 Paper cassette currently loaded
Tray 3 Paper cassette currently loaded)
Tray 4 8.5" x 11"/216 x 279 mm or A4(8.27" x 11.69"/210 x 297 mm)
Output destination: ❏ High capacity stacker ❏ Top output tray
Simplex–duplex printing: ❏ Simplex ❏ Duplex – Regular
❏ Duplex – Tumbled

DOCUMENT FORMATTING
XEROX 4235 LPS INSTALLATION PLANNING GUIDE 5–9
Document formatting options–HP LaserJet IID emulation
Table 5–4 lists the document formatting options for HP LaserJetIID emulation. Based on your choices, complete Checklist 9:Document formatting options–HP LaserJet IID emulation (figure5–4). Your Xerox service representative uses the checklistduring installation.
Table 5–4. HP LaserJet IID emulation document formatting options
Settings Options
(defaults appear bold)
Description
Number of copies 1 copy This settings defines the number of prints of your job that aredelivered to the output tray. You can specify up to 99 copies.
Left font pack This settings defines which font pack is the left font pack. Nodefault.
Right font pack This settings defines which font pack is the right font pack. Nodefault.
Font ROMAN–8;F;10.0;12.0;Upright;Medium;Courier;Port
This setting defines the default font used by your jobs. Thedefault font has the following characteristics:Symbol set: ROMAN–8Character spacing: FixedPitch: 10 characters per inchPoint size: 12Style: UprightStroke weight: MediumTypeface: CourierDefault orientation: Portrait.
Symbol set Roman–8 This setting defines the symbol set to use. You can select oneof the following symbol sets:Roman–8 JIS ASCIIECMA–94 ISO ItalianPC–8 ISO PortugueseDanish/Norwegian ISO SpanishPC–850 ISO GermanLegal ISO FrenchMath–8 ISO ChineseTechnical–7 ISO Norwegian v1OEM–1 ISO Norwegian v2ISO IRV ISO FrenchISO United Kingdom ISO PortugueseASCII ISO SpanishISO Swedish/Finnish HP GermanISO Swedish Names HP Spanish.
Table 5–4. HP LaserJet IID emulation document formatting options(continued)

DOCUMENT FORMATTING
5–10 XEROX 4235 LPS INSTALLATION PLANNING GUIDE
Settings Options
(defaults appear bold)
Description
Duplex/Binding Enable
Disable
Enabling this setting allows duplex printing on both sides of aphysical page.
Disabling this setting ensures that only single sided printingoccurs.
Duplex/Binding Long edge binding
Short edge binding
This setting ensures that duplex pages print in the correctorientation for long edge binding or for short edge binding.
Input tray Tray 1
Tray 2
Tray 3
Tray 4
This setting defines the default input paper tray. You mayselect any of the four paper trays.
Paper size Letter
Legal
Ledger
A4
A3
This setting defines the default paper size. The followingpaper sizes are available:
Letter 8.5" x 11", 216 x 279 mm
Legal 8.5" x 14", 216 x 356 mm
A4 8.27" x 11.69", 210 x 279 mm
A3 11.69" x 16.54", 297 x 420 mm.
Orientation Portrait
Landscape
This setting defines the default page orientation as portrait orlandscape.
Form Length 60 lines This setting defines the default form length. You may specifyfrom 5 up to 128 lines. The default form length is 60 lines.

DOCUMENT FORMATTING
XEROX 4235 LPS INSTALLATION PLANNING GUIDE 5–11
Figure 5–4. Checklist 9: Document formatting options–HP LaserJet IIDemulation
Checklist 9: Document formatting options–HP LaserJet IID emulation
Number of copies: 1 copy Other:(1–99) _____________
Left font pack: Other: _____________
Right font pack: Other: _____________
Font: ROMAN–8;F;10.0;12.0;Upright;Medium;Courier;Port
Other:
Symbol set ROMAN–8 Other: _____________
Duplex/Binding: ❏ Enable ❏ Disable
Duplex/Binding: ❏ Long edge binding ❏ Short edge binding
Input tray: ❏ Tray 1 ❏ Tray 2 ❏ Tray 3 ❏ Tray 4
Paper size: ❏ Letter ❏ Legal ❏ Ledger ❏ A4 ❏ A3
Orientation: ❏ Portrait ❏ Landscape
Form Length: ❏ 60 lines Other: _____________ (5–128 lines)

DOCUMENT FORMATTING
5–12 XEROX 4235 LPS INSTALLATION PLANNING GUIDE

XEROX 4235 LPS INSTALLATION PLANNING GUIDE 6–1
6. System configuration
This chapter contains information to help you determine theproper system configuration for your 4235 Laser Printing System(LPS). The following checklists are provided:
• Checklist 10: Parallel system configuration• Checklist 11: Serial system configuration–SNA/SDLC• Checklist 12: Serial system configuration–asynchronous• Checklist 13: Serial system configuration–bisynchronous.
You must complete checklist 10 and either checklist 11, 12, or13, depending on your choice of serial interface.
Selecting the interface
The 4235 LPS receives data from a host computer systemthrough a parallel and serial interface. Only one parallel andone serial interface can run concurrently. For example, youcannot successfully connect the bisynchronous and SNA/SDLCor two parallel interfaces at the same time. Figure 6–1 showsthe various 4235 LPS interface option choices.
Figure 6–1. 4235 LPS interface options
Parallel interface protocols:• • DataProducts• Centronics
Serial interface protocols:• • Asynchronous (XON/XOFF or ETX/ACK)• • Synchronous (Bisync or SNA/SDLC)
Hostcomputersystem
4235 laserprintingsystem

SYSTEM CONFIGURATION
6–2 XEROX 4235 LPS INSTALLATION PLANNING GUIDE
Port configuration
Select the interface for each of the two ports. You select theactual interface setup using the 4235 LPS menu dialog at thetime of installation. Only one parallel and one serial interfacecan run concurrently. You can select one of the followinginterfaces:
• Parallel: Data Products or Centronics
• Serial: SNA / SDLC, asynchronous, or bisynchronous.
You must fill out Checklist 10 for your parallel interfaceselections, and Checklist 11, 12, or 13 for your serial interfaceselections, before your Xerox service representative cansuccessfully install your 4235 LPS.
Parallel interface information
Parallel communication allows the transmission of data over agroup of wires simultaneously.
Two emulation modes are available with the parallel interface:one is compatible with Centronics 100 (or equivalent) interface,and the other is compatible with a DataProducts standard 2260(or equivalent) interface.
The parallel interface accepts 7–bit or 8–bit ASCII encoded dataat rates up to 200 KBytes per second. EBCDIC and ISO 6937character encoding schemes assume 8–bit encoding. Whenyou use XPPM, ISO 6937 selection defaults to 8–bit ASCII.
Centronics 100 interface
The Centronics interface uses a 36–pin Amphenol 57–40360connector. This connector mates with an Amphenol 57–30360connector.
Note: The connector part numbers for countries other than theUnited States may differ from those numbers listed later in thischapter.
Parallel cable You need to order a Centronics or DataProducts parallel cableto connect your host computer system to the 4235 LPS. If youdo not have one, contact your Xerox sales representative toorder one. To make sure the cable is available on the day ofinstallation, place the order approximately four weeks prior tothe installation date.
Make sure the parallel interface cable is in compliance withU.S. Federal Communications Commission (FCC) regulationsregarding electromagnetic emissions or any similar regulationsapplicable within the country in which you operate your 4235LPS. The parallel interface cable must also meet the followingspecifications:

SYSTEM CONFIGURATION
XEROX 4235 LPS INSTALLATION PLANNING GUIDE 6–3
Type: Twisted pairs, overall foil or braid shield
Number of conductors: 15 pairs
Wire size: 22 AWG stranded
Cable length: Length should not exceed 10 feet (3.1 m)
Shield connection: To the connector conductive case at the 4235printer; to the frame ground at the data source
Cable connector: Male
Table 6–1 lists the pin assignments and signals for theCentronics interface.
The main control signals are BUSY, SELECT, and FAULT. Atpower–up, BUSY is at logic one, and SELECT and FAULT are atlogic zero. BUSY indicates that the 4235 LPS cannot receivedata (normally, BUSY cycles from logic zero to one and back tozero again once for every byte received). SELECT and FAULTchange to logic one after warm–up and remain at logic one aslong as the 4235 LPS is powered up.
The Centronics interface does not support the following codes:
• The programmable paper feed code (1CH, octal 034)
• The elongated character code (0EH, octal 016)
• The character density code (12H, octal 022)
• The delete code (7FH, octal 177), which is used to printeither an error character or an assigned character.

SYSTEM CONFIGURATION
6–4 XEROX 4235 LPS INSTALLATION PLANNING GUIDE
Table 6–1. Centronics pin assignments and signals
Signalname
Pin*#
Source Description
DATASTROBE
1, 19 Host computer system A 1.0 microsecond pulse (minimum) used to clock data fromthe processor to the 4235 LPS.
DATA 1 2, 20 Host computer system Data 1 through data 8 are input signals. A high representsone; a low represents zero.
DATA 2 3, 21 Host computer system
DATA 3 4, 22 Host computer system
DATA 4 5, 23
DATA 5 6, 24 Host computer system
DATA 6 7, 25 Host computer system
DATA 7 8, 26 Host computer system
DATA 8 9, 27 Host computer system
ACKNLG 10, 28 4235 LPS The acknowledge pulse indicates the input of a characterinto memory or at the end of a functional operation.
BUSY 11, 29 4235 LPS BUSY indicates that the 4235 LPS cannot receive data.
PE 12 4235 LPS This signal is always zero.
SELECT 13 4235 LPS This signal remains at one after warm–up and indicates thereare no fault conditions.
ChassisGround
17 4235 LPS This name indicates the frame ground.
FAULT 32 4235 LPS This is the 4235 LPS indicator for a laser printing system fault(for example: paper jam, dry ink out, and so forth).
The following pins are not used: 15, 33, 34, 35, 36.
* The second pin of the pair is the twisted signal return (+0V).

SYSTEM CONFIGURATION
XEROX 4235 LPS INSTALLATION PLANNING GUIDE 6–5
Figure 6–2 shows a timing diagram.
Figure 6–2. Centronics signal timing
Voltage levels 0 (zero) and +5 VDC (nominal), TTL (SN 74LS00 series).
Logic levels A high signal has a voltage in the range of +2.4 V to +5 V. Itshould not exceed a peak of +5.5 V.
A low signal has a voltage in the range of 0.0 V to 0.4 V. Itshould not exceed a peak negative voltage of –0.5 V.However, received signals should be recognized as low signalsif the voltage is +0.8 V or less.
Current requirements The 4235 LPS interface requires up to –2.6 ma at +2.4 V for ahigh output signal and requires up to 14 ma for a low outputsignal.
Data rates The 4235 LPS supports bursts of data that are at least 512 byteslong at a rate of up to 100 KB per second through theCentronics interface. The average data transfer rate is 15 KBper second.
DataProducts 2260 interface
The DataProducts interface connector is equivalent to a 50–pinWinchester connector. The Winchester MRA 50S D5Jconnector mates with a Winchester MRAC 50P JTCH connectorusing 50 1020P pins.
The main control signals are DEMAND, READY, and ONLINE.At power–up, the DEMAND, READY, and ONLINE signals areat logic zero. The DEMAND signal cycles from logic one tozero for every byte received when the 4235 LPS is receivingdata. When the DEMAND signal is at logic zero, it indicatesthat the 4235 cannot receive data. The READY and ONLINE

SYSTEM CONFIGURATION
6–6 XEROX 4235 LPS INSTALLATION PLANNING GUIDE
signals change to logic one after warm–up and remain at logicone as long as the 4235 LPS is powered on.
The following are fault conditions:
• Front door open• Paper misfeed or jam• Output tray full• Input paper source empty• Paper tray handle unlatched• Missing print cartridge• Any other printer fault code• 4235 LPS powered off• 4235 LPS taken offline from system controller.
When any of these conditions occur, the 4235 LPS continues tospool the data to the print file. If you do not correct the faultcondition and the print file becomes full, DEMAND changes tologic zero and data receipt is suspended until you clear thefault.
The DataProducts 2260 interface does not support symmetriclogic signals intended for a long–line interface.
DataProducts–specific options Selection of the DataProducts interface enables the selection ofone further function. You can enable or disable the VerticalFormat Unit (VFU) emulation; however, when you enable VFU,the XPPM formatter does not support it.
You may assign Data Bit 8 to appear on pin pair d–f or p–s. Ifyou use VFU, the Xerox service representative must define thepin pair p–s by setting a dip switch on the SPC board.

SYSTEM CONFIGURATION
XEROX 4235 LPS INSTALLATION PLANNING GUIDE 6–7
Table 6–2 lists the pin assignments and signals.
Table 6–2. DataProducts pin assignments and signals
Signal name Pin*#
Source Description
DATA 1 B, D Host computer system Data 1 through Data 8: Input data levels. A highrepresents ONE; a low represents ZERO.
DATA 2 F, J Host computer system
DATA 3 L, N Host computer system
DATA 4 R, T Host computer system
DATA 5 V, X Host computer system
DATA 6 Z, b Host computer system
DATA 7 n, k Host computer system
DATA 8** d, f
or
p, s
Host computer system
DATA j, m Host computer system
STROBE A 0.5 microsecond pulse (minimum) used to clockdata from the processor to the 4235 LPS logic.
DEMAND E, C 4235 LPS Indicates that the system controller is capable ofreceiving a character.
READY CC, EE 4235 LPS Indicates that the system controller has poweredup successfully.
ONLINE y, AA 4235 LPS After warm–up, this signal is ONE, unless the printfile is full.
InterfaceConnect
x 4235 LPS Pins X and V provide electrical continuity only.
Verify v
Spare U 4235 LPS
The following pins are not used: A, H, K, M, P, S, U, W, Y, BB,DD, FF, HH, a, c, e, h, r, t, u, w, z.
* The second pin of the pair is the twisted signal return (+0V).
** Either d, f or p, s can be used for the eighth bit.

SYSTEM CONFIGURATION
6–8 XEROX 4235 LPS INSTALLATION PLANNING GUIDE
A timing diagram is provided in figure 6–3.
Figure 6–3. DataProducts signal timing
* The data transfer rate is contingent upon the DATA STROBEbeing raised within 1 microsecond after DEMAND anddropped within 5 microsecond s. DEMAND may stay lowlonger than 20 microsecond s if a fault occurs or the 4235 LPSbuffer (512 bytes) is full.
Voltage levels 0 (zero) and +5VDC (nominal), TTL (SN 74LS00 series)
Logic levels A high signal is defined as a voltage in the range of +2.4V to+5V, not to exceed a peak of +5.5V.
A low signal is defined as a voltage in the range of 0.0V to0.4V, not to exceed a peak negative voltage of –0.5V.However, for received signals, a voltage of up to +0.8V shouldbe recognized as a low signal.
Current requirements The 4235 LPS interface sources up to –2.6 milliampere (mA) at+2.4V for a high output signal and sync up to 14 mA for a lowoutput.
The 7414 ICs are used for data receivers with 220/330 ohmterminating resistors, and 74LS244 or 74LS240 ICs are used asdrivers for positive or negative interfaces respectively, and forREADY, ONLINE, and DEMAND.
Data rates The 4235 LPS supports burst data rates of up to 200 Kbytes persecond for at least 512 bytes through the DataProductsinterface. The sustained data transfer rate is 15Kbytes persecond.

SYSTEM CONFIGURATION
XEROX 4235 LPS INSTALLATION PLANNING GUIDE 6–9
Parallel system configuration options
Table 6–3 lists the different parallel system configuration options.Based on your choices, complete Checklist 10: Parallel systemconfiguration (figure 6–4). Your Xerox service representative usesthe checklist during installation.

SYSTEM CONFIGURATION
6–10 XEROX 4235 LPS INSTALLATION PLANNING GUIDE
Table 6–3. Parallel system configuration options
Settings Options
(defaults appear bold)
Description
Port configuration 1st interface
2nd interface
A three–stop process is used to configure the first port forparallel:
1. Select the communication protocol.
2. Select the current emulation.
3. Enable or disable the Line Printer Mode.
Note: At least one port must be configured for parallel.
Communicationprotocol
Parallel
SNA/SDLC
Asynchronous
Bisynchronous
This option allows you to select the communication protocolused on the selected interface. In parallel communications,data is transmitted and received in parallel bytes rather thanserial bits. It is used for local printing over short distances(10 feet or 3 meters).
Current emulation XDPM
XPPM
XScript
HP LaserJet IID
This option allows you to select the Current Emulation modeused on the selected interface. You can select the XDPM,XPPM, XScript, or HP LaserJet IID emulation modes. Jobs areprocessed using the current emulation. With ModeSwitching enabled, an MCK command can dynamicallychange the current emulation setting.
Line printer mode Enable
Disable
This option allows you to enable or disable the Line PrinterMode option on the selected interface.
Mode switching/default mode
Enable
Disable
This option allows you to select the Default Emulation modeused on the selected interface. If enabled, a prompt allowsyou to select the Default Emulation mode.
Default emulation XDPM
XPPM
XScript
HP LaserJet IID
This option allows you to select the Default Emulation modein which jobs should print when you encounter an MCKreset command.
Character code set 7–bit ASCII
EBCDIC
ISO 6937
8–bit ASCII
This option allows you to select the code set and number ofbits per character. EBCDIC and ISO encoding assume eightbits. XPPM assumes 8–bit encoding. In XPPM, ISO 6937defaults to 8–bit ASCII. In HP IID mode, EBCDIC, and 7–bitASCII are not supported.

SYSTEM CONFIGURATION
XEROX 4235 LPS INSTALLATION PLANNING GUIDE 6–11
Table 6–3. Parallel system configurations options (continued)
Settings Options(defaults appear bold)
Description
Language U.S. EnglishUK EnglishFrenchDutchSpanishItalianDanishNorwegianFinnishGermanSwedishBelgianCanadian FrenchSpecial Table
Select the appropriate language table for your print job.XPPM does not support the Language Table Selection option.
When you use ISO 6937 emulation in XDPM, the LanguageTable does not appear.
Line endingcharacter
Carriage Return and LineFeed
Carriage Return
Line Feed
Combination of carriage return (0DH) and line feed (0AH inASCII, 25H in EBCDIC) constitutes a line end and a commandterminator.
Carriage return alone constitutes line end and commandterminator.
Line feed alone constitutes a line end and commandterminator.
Data monitor Enable
Disable
Select enable or disable. When the data monitor is enabled,the hexadecimal value of all character codes and functionsare printed in the order received. This is not supported inXPPM; however, a data monitor of XPPM jobs is possible ifyou send an XPPM job to a port configured for XDPM withthe data monitor enabled.
Job timeout period 10 seconds Enter the job timeout period. This is the number of secondsafter which, if your data is transmitted, the print job isterminated. Any data received after the job timeout period isassumed to be the start of a new job.
Vertical formatcontrol
Enable
Disable
Enable this option to accept vertical format unit commands.This function is similar to the Vertical Format Units option onDataProducts printers. This is not supported in XPPM.
Automatic
printing
Enable
Disable
Automatic printing enables the 4235 LPS to processdocuments without operator intervention. If automaticprinting is disabled, the operator must release each job in thequeue before it prints.

SYSTEM CONFIGURATION
6–12 XEROX 4235 LPS INSTALLATION PLANNING GUIDE
Table 6–3. Parallel system configurations options (continued)
Settings Options
(defaults appear bold)
Description
Line Monitor
Trace window
Enable
Disable
First and last
Numbered
Continuous
The line monitor trace window is a diagnostic tool used inresolving serial communication problems. If enabled, youhave three choices:
1. First and last, which stores the first and lastcommunication window.
2. Numbered, which allows you to specify the startingwindow.
3. Continuous, which traps the last 50K of transmitted orreceived data.
User access Level 1
Level 2
Level 3
The 4235 LPS can be accessible to you on three levels:
Level 1 permits access only to the Print Mode screen.
Level 2 permits access to Print Mode, Queue Management,Printer Setup, Document Formatting, and the Utilitiesscreens.
Level 3 permits access to all options in level 2 with theaddition of System Configuration and User Services screens.
Date and time MM/DD/YY
HH:MM:SS
Enter the date as month, day, and year. Enter the time inhours, minutes, and seconds.
Time zone Hawaii
Pacific
Mountain
Central
Eastern
Atlantic
GMT
European
Select the appropriate time zone for your location.
Daylight savings Yes
No
Enable this option if daylight savings is in effect.

SYSTEM CONFIGURATION
XEROX 4235 LPS INSTALLATION PLANNING GUIDE 6–13
Figure 6–4. Checklist 10: Parallel system configuration
Checklist 10: Parallel systemPort configuration
1st interface
Communication protocol: ❏ Parallel ❏ SNA/SDLC ❏ Async ❏ Bisync
Current emulation: ❏ XDPM ❏ XPPM ❏ XScript ❏ HP LaserJet IID
Line Printer mode: ❏ Enable ❏ Disable
Mode switching/defaultmode:
❏ Enable ❏ Disable
Default emulation: ❏ XDPM ❏ XPPM ❏ XScript ❏ HP LaserJet IID
2nd interface
Communication protocol: ❏ Parallel ❏ SNA/SDLC ❏ Async ❏ Bisync
Current emulation: ❏ XDPM ❏ XPPM ❏ XScript ❏ HP LaserJet IID
Line printer mode: ❏ Enable ❏ Disable
Mode Switching/Defaultmode:
❏ Enable ❏ Disable
Default emulation: ❏ XDPM ❏ XPPM ❏ XScript ❏ HP LaserJet IID
Parallel settings
Line printer mode: ❏ Enable ❏ Disable
Character code: ❏ 7–bitASCII
❏ EBCDIC ❏ ISO 6937
❏ 8–BIT ASCII
Line ending character: ❏ Carriage return & line feed ❏ Carriage return
❏ Line feed
Data monitor: ❏ Enable ❏ Disable
Job timeout period: 10 seconds Other: ____________________(0–999 seconds)
Vertical format control: ❏ Enable ❏ Disable
Other features
Automatic printing: ❏ Enable ❏ Disable
Line Monitor Trace window: ❏ Disable ❏ 1st and last ❏ Numbered
❏ Continuous
User access: ❏ Level 1 ❏ Level 2 ❏ Level 3
Date and time: MM/DD/YY _____________ HH:MM:SS _____________
Time zone: ❏ Hawaii ❏ Pacific ❏ Mountain ❏ Central
❏ Eastern ❏ Atlantic ❏ GMT ❏ European
Daylight savings: ❏ Yes ❏ No
Note: To support VFU through the DataProducts interface, the Xerox service representative must set theappropriate dip switch on the SPC board so that data bit 8 appears on pin pair p–s.
Data bit 8 on pin pair p–s: ❏ Yes ❏ No

SYSTEM CONFIGURATION
6–14 XEROX 4235 LPS INSTALLATION PLANNING GUIDE
Serial interface information
Serial data communications allows data to transmitsequentially, one bit at a time, over a single wire.
The 4235 LPS supports asynchronous, SNA/SDLC, andbisynchronous serial communications. The interfaceconnections conform to the RS232–C standard of EIA andCCITT regulations V24/V28. Point–to–point operation issupported and may occur over switched or leased lines in halfor full duplex mode. The connector used on the 4235 LPS is a25–pin female "D" type.
You must configure the 4235 LPS for EBCDIC characterencoding when it is used with a host computer system that usesEBCDIC. When the text is EBCDIC encoded, you must usetransparent transmission to download ASCII encoded fonts.
SNA/SDLC
In XDPM, the internal SNA/SDLC interface allows the 4235 LPSto function in either of two modes: as a simulation of an IBM3777 (IBM mode) or in Xerox Pass Through mode. Data isaccepted in either the 4235 LPS or punch ports. IBM mode andPass Through mode selections have no effect in XPPM.
Asynchronous
The asynchronous interface uses two 2,000–byte input buffersand supports ETX/ACK and XON/XOFF protocols at data ratesbetween 300 and 19,200 bits/second. Asynchronouscommunication is not supported in XPPM.
Bisynchronous
The bisynchronous communication interface allows the 4235LPS to respond to IBM 2770, 2780, or 3780 protocols. Data isaccepted in either the 4235 LPS or punch ports.
Note: PCL4 and XScript are not supported in bisynchronous.

SYSTEM CONFIGURATION
XEROX 4235 LPS INSTALLATION PLANNING GUIDE 6–15
Figure 6–5 shows the SNA/SDLC terminal ID.
Figure 6–5. SNA/SDLC terminal ID
Byte 1 2 3 4 5 6
Value 02 00 01 30 0X SS
Fixed User definable SDLCaddress
Serial cable
You must order a serial cable for the asynchronous orbisynchronous serial interface. Contact your Xerox salesrepresentative for information.
You must complete the appropriate serial communicationssystem configuration checklist. Only one serial environment issupported at a time.
• Checklist 11: Serial system configuration–SNA/SDLC
• Checklist 12: Serial system configuration–asynchronous
• Checklist 13: Serial system configuration–bisynchronous.
Unsupported SNA/SDLC and bisynchronous protocols
The following SNA/SDLC and bisynchronous protocols are notsupported:
• Direct host communication system–to–micro–diskettecommunication
• Card or ID reader
• Device–to–de vice data transfer (such as 4235 LPS to 4235LPS)
• 4235 LPS–to–host computer system polling.

SYSTEM CONFIGURATION
6–16 XEROX 4235 LPS INSTALLATION PLANNING GUIDE
Table 6–4 lists the serial interface pin assignments.
Table 6–4. Serial interface pin assignments
Signal Name Pinnumber
Telephone CCITT Source Description
Protective ground 1 AA 101
Transmitted data 2 BA 103 4235 LPS Data transmitted to host computer system.
Received data 3 BB 104 Modem Data received from host computer system.
Request to send 4 CA 105 4235 LPS Asserted to allow the 4235 LPS to send.
Clear to
send
5 CB 106 Modem Must be asserted to allow the 4235 LPS totransmit.
Data set ready 6 CC 107 Modem Must be asserted to allow the 4235 LPS toreceive.
Signal ground(common return)
7 AB 102
Carrier detect 8 CF 109 Modem Must be asserted to allow the 4235 LPS toreceive.
Printer ready 11 4235 LPS Same as Data Terminal Ready, using TTLlevels.
Transmit signalelement timing
15 114 Modem The DCE (modem) provides the DTE (4235LPS) with transmit clocking information.
Receive signalelement timing
17 115 Modem The DCE (modem) provides the DTE (4235LPS) with transmit clocking information.
Data Terminal Ready20 CD 108 4235 LPS Asserted by the 4235 LPS when ready toreceive data.
Ring indicator 22 CE 125
The following pins are not used: 9, 10, 12–14, 16, 18–19, 21,and 23–25.

SYSTEM CONFIGURATION
XEROX 4235 LPS INSTALLATION PLANNING GUIDE 6–17
Serial system configuration options–SNA/SDLC
Table 6–5 Lists the serial system configuration SNA/SDLC options. If youchoose to use SNA/SDLC as the serial interface, completeChecklist 11: Serial system configuration–SNA/SDLC (figure 6–6). Your Xerox service representative uses the checklist duringinstallation.
Table 6–5. Serial system configuration options–SNA/SDLC
SNA/SDLCsettings
Options(defaults appear bold)
Description
Port configuration 1st interface2nd interface
Select the 2nd interface.A three–stop process is used to configure the port:1. Select the communication protocol.2. Select the default emulation.3. Enable or disable the Line Printer Mode.Note: One port must be configured for parallel.
Communicationprotocol
ParallelSNA/SDLCAsynchronousBisynchronous
Select SNA/SDLC to configure the communication protocol.
Current emulation XDPMXPPMXScriptHP LaserJet IID
This option allows you to select the Current Emulation modeused on the selected interface. You can select the XDPM,XPPM, XScript, or HP LaserJet IID emulation modes. Jobs areprocessed using the current emulation. With Mode Switchingenabled, an MCK command can dynamically change thecurrent emulation setting.
Line printer mode EnableDisable
This option allows you to enable or disable the Line PrinterMode option on the selected interface.
Mode switching/default mode
EnableDisable
This option allows you to select the Default Emulation modeused on the selected interface. If enabled, a prompt allowsyou to select the Default Emulation mode.
Default emulation XDPMXPPMXScriptHP LaserJet IID
This option allows you to select the Default Emulation mode inwhich jobs should print when you encounter an MCK resetcommand.
Data encodingmode
NRZNRZI
The selections are NRZ (non–return to zero) and NRZI (non–return to zero inverted). The selection must correspond to themethod of code transmission from the host computer system.
XID code SDLCAddress: C1Three digitTerminal ID: 013000
This dialog allows you to enter an SDLC address and a 3–digitTerminal IDBLK followed by a three–digit terminal ID. TheSDLC address is two digits. The 4235 LPS uses a three digitTerminal ID for 3777 mode. The 013=IDBLK and000=terminal ID.
Window size 7 This dialog selects the number (from 1 to 7) of SDLC framesthat you can send to the 4235 LPS before acknowledgmentand line turnaround are necessary.

SYSTEM CONFIGURATION
6–18 XEROX 4235 LPS INSTALLATION PLANNING GUIDE
Table 6–5 Serial system configuration options–SNA/SDLC (continued)
SNA/SDLCsettings
Options(defaults appear bold)
Description
Character code set 7–bit ASCIIEBCDICISO 69378–bit ASCII
Only use EBCDIC in a normal SNA environment.
Language U.S. EnglishUK EnglishFrenchDutchSpanishItalianDanishNorwegianFinnishGermanSwedishBelgianCanadian FrenchSpecial Table
Select the appropriate language table for your print jobs.Language Table Selection is not available in XPPM operation.
Application ID RJEWC03 You can enter an 8–character–maximum application ID(APPLID) field used in logon statements. The 4235 LPS usesthis field to construct a formatted logon statement when youselect auto logon.
Log mode name BUF512 You can enter an 8–character–maximum LOGMODE fieldused in logon statements. The 4235 LPS uses this field toconstruct a formatted logon statement when you select autologon and formatted logon from Print mode.
Data field RMT999_____________________
This dialog allows you to enter an 80–character–maximumDATA field used in logon statements. The 4235 LPS uses thisfield to construct a formatted logon statement when you selectauto logon and formatted logon from Print mode.
Auto logon EnableDisable
Enabling auto logon allows a formatted logon to be sentimmediately after booting or after leaving the SystemConfiguration menu.
Line monitor format SDLC/SNA headers anddataSDLC headersSNA headers and dataSNA headers
Select the line monitor format applicable to yourcommunication needs.
Line/modem settings SwitchedLeasedFull duplexHalf duplex
Typically, leased lines are full duplex, while switched linesare half duplex. Note: The DTR o
ption is not recommended for leased lineoperation because the modem on the sending end does notrelay the drop of DTR to the receiving end. Dropping DTRcauses a dial up modem to disconnect.
Disconnect timerinterval
60 You can set the disconnect timer for dial up lines for anyinterval from 1 to 99 seconds. An interval of at least 20seconds is recommended.

SYSTEM CONFIGURATION
XEROX 4235 LPS INSTALLATION PLANNING GUIDE 6–19
Table 6–5. Serial system configuration options–SNA/SDLC (continued)
SNA/SDLCsettings
Options(defaults appear bold)
Description
Data monitor EnableDisable
When you enable data monitor, the hexadecimal value of allreceived character codes and functions print in the orderreceived. Not supported in XPPM; however, a data monitor ofXPPM jobs is possible if you send an XPPM job to a portconfigured for XDPM with the data monitor enabled.
Pass through mode IBMXerox
When you select IBM, it remains active as long as the 4235LPS does not receive the Xerox FCB Mode. In order to returnto IBM mode, the host computer must send the IBM mode(3777 emulation) FCB. Neither mode applies in XPPM.
Automatic printing EnableDisable
Automatic printing enables the 4235 LPS to process documentswithout operator intervention. If automatic printing is disabled,the operator must release each job in the queue before it prints.
Line monitor tracewindow
DisableFirst and lastnumberedContinuous
The line monitor trace window is a software diagnostic toolused to resolve serial communications problems. If enabled,you have three choices:1. First and last stores the first and last communicationwindow.2. Numbered allows you to specify the starting window.3. Continuous traps the last 50K of transmitted or receiveddata.
User access Level 1Level 2Level 3
You can assign access to 4235 LPS to users on three levels:Level 1 allows users to access only the Print Mode screen.Level 2 allows users to access Print Mode, QueueManagement, Printer Setup, Document Formatting, and theUtilities screens.Level 3 allows users to access all options in level 2 with theaddition of System Configuration and User Services screens.
Date & time MM/DD/YYHH:MM:SS
Enter the date as month, day, and year. Enter the time inhours, minutes, and seconds.
Time zone HawaiiPacificMountainCentralEasternAtlanticGMTEuropean
Select the appropriate time zone for your location.
Daylight savings YesNo
Enable this option if daylight savings is in effect.

SYSTEM CONFIGURATION
6–20 XEROX 4235 LPS INSTALLATION PLANNING GUIDE
Figure 6–6. Checklist 11: Serial system configuration–SNA/SDLC
Checklist 11: Serial system configuration–SNA/SDLC
Port configuration
1st InterfaceCommunication protocol: ❏ Parallel ❏ SNA/SDLC ❏ Async ❏ BisyncCurrent emulation: ❏ XDPM ❏ XPPM ❏ XScript ❏ HP LaserJet IIDLine printer mode: ❏ Enable ❏ DisableMode switching/default mode: ❏ Enable ❏ DisableDefault emulation: ❏ XDPM ❏ XPPM ❏ XScript ❏ HP LaserJet IID
2nd InterfaceCommunication protocol: ❏ Parallel ❏ SNA/SDLC ❏ Async ❏ BisyncCurrent emulation: ❏ XDPM ❏ XPPM ❏ XScript ❏ HP LaserJet IIDLine printer mode: ❏ Enable ❏ DisableMode switching/default mode: ❏ Enable ❏ DisableDefault emulation: ❏ XDPM ❏ XPPM ❏ XScript ❏ HP LaserJet IID
SDLCData encoding mode: ❏ NRZ ❏ NRZIXID code: SDLC Address: C1 Other:______
3–digit terminal IDBLK: 010 Other: ______+3–digit terminal ID: 000 Other: _____(Default = 010000)
Window size: 7 SDLC frames Other: _______________________ (1–7 frames)
SNACharacter code: ❏ 7–bit ASCII ❏ EBCDIC ❏ ISO 6937
❏ 8–bit ASCIIApplication Identification: RJEWC03 Other:Log mode name: BUF512 Other:Data field: ________________________________________Auto Logon: ❏ Enable ❏ Disable
Line monitor format: ❏ SDLC/SNA headers & data ❏ SDLC headers❏ SNA headers & data ❏ SNA headers
Line/modem settings: ❏ Switched ❏ LeasedDisconnect timer: 60 seconds Other: ________________(0–99 seconds)Data monitor: ❏ Enable ❏ DisablePass through mode: ❏ IBM mode ❏ Xerox mode
Other featuresAutomatic printing: ❏ Enable ❏ DisableLine monitor trace window: ❏ 1st and last ❏ Numbered ❏ ContinuousUser access: ❏ Level 1 ❏ Level 2 ❏ Level 3Date and time: MM/DD/YY______ HH:MM:SS__________Time zone: ❏ Hawaii ❏ Pacific ❏ Mountain ❏ Central
❏ Eastern ❏ Atlantic ❏ GMT ❏ EuropeanDaylight savings: ❏ Yes ❏ No

SYSTEM CONFIGURATION
XEROX 4235 LPS INSTALLATION PLANNING GUIDE 6–21
Serial system configuration options–asynchronous
Table 6–6 lists the serial system configuration asynchronousoptions. If you choose to use an asynchronous serial interface,complete Checklist 12: Serial system configuration–asynchronous (figure 6–7). Your Xerox service representativeuses the checklist during installation.
Note: The asynchronous interface is not supported for XPPM.
Table 6–6. Serial system configuration options–asynchronous
Settings Options(defaults appear bold)
Description
Port configuration 1st interface2nd interface
Select the 2nd interface.A three–stop process is used to configure the port:1. Select the communication protocol.2. Select the default emulation.3. Enable or disable the Line Printer Mode.Note: One port must be configured for parallel.
Communicationprotocol
ParallelSNA/SDLCAsynchronousBisynchronous
Select Asynchronous configure the communication protocol.
Current emulation XDPMXPPMXScriptHP LaserJet IID
This option allows you to select the Current Emulation modeused on the selected interface. You can select the XDPM,XPPM, XScript, or HP LaserJet IID emulation modes. Jobs areprocessed using the current emulation. With Mode Switchingenabled, an MCK command can dynamically change thecurrent emulation setting.
Line printer mode EnableDisable
This option allows you to enable or disable the Line PrinterMode option on the selected interface.
Mode switching/default mode
EnableDisable
This option allows you to select the Default Emulation modeused on the selected interface. If enabled, a prompt allowsyou to select the Default Emulation mode.
Default emulation XDPMXPPMXScriptHP LaserJet IID
This option allows you to select the Default Emulation mode inwhich jobs should print when you encounter an MCK resetcommand.
Character code set 7–bit ASCIIEBCDICISO 69378–bit ASCII
This option selects the code set and number of bits percharacter. EBCDIC and ISO 6397 encoding assume eight bits.

SYSTEM CONFIGURATION
6–22 XEROX 4235 LPS INSTALLATION PLANNING GUIDE
Table 6–6. Serial system configuration options–asynchronous (continued)
Settings O ptions(defaults appear bold)
Description
Language U.S. EnglishUK EnglishFrenchDutchSpanishItalianDanishNorwegianFinnishGermanSwedishBelgianCanadian FrenchSpecial Table
Select the appropriate language table for your print job.
Line endingcharacter
CR & LFCRLF
Combining a carriage return (0DH) and a line feed (0AH inASCII, 25H in EBCDIC) constitutes a line end and commandterminator. A carriage return alone or a line feed alone arealternatives that may be defined as a line end.
Single shift out EnableDisable
Enabled allows code mapping to be shifted to the secondarytable for the next received code only.
Baud rate 300600120024004800960019,200
This rate signifies the data transfer speed, which is equal to thenumber of signal events per second.Use ETX/ACK or XON/XOFF communication protocol to ensurethe integrity of the transmitted data when baud rates above 4800are used.
Protocols ETX/ACK When this protocol is in effect, the 4235 LPS sends an ACK (06Hin ASCII, 2EH in EBCDIC) to the host computer systemwhenever an ETX (03H) is received to acknowledge thesuccessful receipt of the preceding block of text. The ACK is notsent until the 4235 LPS is ready to receive more data. If errorsare detected in the block, the 4235 LPS responds to the ETX witha NAK (15H in ASCII, 3DH in EBCDIC).
XON/XOFF(DC1/DC3)
Both
None
This protocol allows the 4235 LPS to inform the host computersystem of its readiness to receive data. The 4235 LPS sends aDC3 code (13H) to the host computer system under thefollowing conditions:• The space in the input buffer is equivalent to less than that of
64 characters• The 4235 LPS is unable to accept further data. Such a
condition usually exists for only a brief period.When the 4235 LPS is again ready to receive data, it sends aDC1 code (11H) to the host. This protocol may not be used witha half duplex line.When both protocols are selected, ETX/ACK and XON/XOFFmay be in effect at the same time.Both protocols may be inactive.

SYSTEM CONFIGURATION
XEROX 4235 LPS INSTALLATION PLANNING GUIDE 6–23
Table 6–6. Serial system configuration options–asynchronous (continued)
Settings Options(defaults appear bold)
Description
Interface signals DTR
DSR
DTR & DSR
None
The DTR (Data Terminal Ready) option causes the DTR line togo low (negative, false) when the space in the input buffer isless than that of 64 characters. The line goes high (positive,true) when the 4235 LPS is ready to receive data. If this optionis not in effect, the Data Terminal Ready line remains high atall times.Note: This option is designed to be used with direct connectinterfaces from a host computer system or PC.When the DSR (Data Set Ready) option is enabled, the 4235LPS polls the Data Set Ready signal from the host every .5seconds. If DSR is low two times in a row, the link is broken,DTR is dropped for five seconds and then raised again.Note: This option is designed to accommodate Europeanswitched line configurations.When this is selected, both options are active, and DSR ispolled every .5 seconds. If DSR is low two times in a row,DTR is dropped and held low for five seconds, then raisedagain. DTR is also dropped when the 4235 LPS is not ready toreceive data, and it is raised when the 4235 LPS is ready.When this is selected, both options are inactive.
Line/modem settings Full duplexHalf duplex
Typically, leased lines are full duplex, while switched lines arehalf duplex. The DTR option is not recommended for halfduplex operation, since dropping DTR causes a dialup modemto disconnect.
Parity OddEvenNone
Odd, even, or no parity may be chosen. If no parity is chosen,the 4235 LPS does not expect a parity bit.
Stop bits OneOne and one halfTwo
This is the number of stop bits that the 4235 LPS expects aftereach character.
Auto disconnect EnableDisable
When enabled, the 4235 LPS disconnects the communicationline by dropping DTR if it receives no data for 30 seconds. Ifthe DSR option has been enabled, DTR remains low until DSRis also dropped; DTR is then raised again.Note: The Auto Disconnect option is designed toaccommodate European switched line configurations.
Hold line period 60 The hold line period defines the length of inactivity allowedduring communications before the 4235 LPS disconnects. Youcan specify a hold line period of up to 999 seconds.
Data monitor EnableDisable
When data monitor is enabled, the hexadecimal value of allreceived character codes and functions are printed in the orderreceived. Data monitor is not supported in XPPM; however, adata monitor of XPPM jobs is possible if you send an XPPMjob to a port configured for XDPM with the data monitorenabled.
Table 6–6. Serial system configuration options–asynchronous (continued)

SYSTEM CONFIGURATION
6–24 XEROX 4235 LPS INSTALLATION PLANNING GUIDE
Settings Options(defaults appear bold)
Description
Job timeout period 10 The number of seconds after which no data is transmitted bythe host computer system, the job is considered terminated.
Automatic printing EnableDisable
Automatic printing enables the 4235 LPS to process jobswithout operator intervention. If automatic printing isdisabled, the operator must release each job in the queuebefore it prints.
Line monitor tracewindow
DisableFirst and lastNumberedContinuous
The line monitor trace window is a software diagnostic toolused to resolve serial communications problems. If enabled,you have three choices:1. First and last, which stores the first and lastcommunication window.2. Numbered, which allows you to specify the startingwindow.3. Continuous, which traps the last 50K of transmitted orreceived data.
User access Level 1Level 2Level 3
You can assign access to the 4235 LPS users on three levels:Level 1 allows access only to the Print Mode screen.Level 2 allows access to Print Mode, Queue Management,Printer Setup, Document Formatting, and the Utilities screens.Level 3 allows access to all options in level 2 with the additionof System Configuration and User Services screens.
Date & time MM/DD/YYHH:MM:SS
Enter the date as month, day, and year. Enter the time inhours, minutes, and seconds.
Time zone HawaiiPacificMountainCentralEasternAtlanticGMTEuropean
Select the appropriate time zone for your location.
Daylight savings YesNo
Enable this option if daylight savings is in effect.

SYSTEM CONFIGURATION
XEROX 4235 LPS INSTALLATION PLANNING GUIDE 6–25
Figure 6–7. Checklist 12: Serial system configuration–asynchronous
Checklist 12: Serial system configuration–asynchronousPort configuration1st InterfaceCommunication protocol: ❏ Parallel ❏ SNA/SDLC ❏ Async ❏ BisyncCurrent emulation: ❏ XDPM ❏ XScript ❏ HP LaserJet IIDLine printer mode: ❏ Enable ❏ DisableMode switching/defaultmode:
❏ Enable ❏ Disable
Default emulation: ❏ XDPM ❏ XScript ❏ HP LaserJet IID2nd InterfaceCommunication protocol: ❏ Parallel ❏ SNA/SDLC ❏ Async ❏ BisyncCurrent emulation: ❏ XDPM ❏ XScript ❏ HP LaserJet IIDLine printer mode: ❏ Enable ❏ DisableMode switching/defaultmode:
❏ Enable ❏ Disable
Default emulation: ❏ XDPM ❏ XScript ❏ HP LaserJet IIDAsynchronous settingsCharacter code: ❏ 7–bit
ASCII❏ EBCDIC ❏ ISO 6937 ❏ 8–bit ASCII
Line ending character: ❏ Carriage return & line feed ❏ Carriage return❏ Line feed
Single shift out: ❏ Enable ❏ DisableBaud rate: ❏ 300 ❏ 600 ❏ 1200 ❏ 2400
❏ 4800 ❏ 9600 ❏ 19200Protocols: ❏ ETX/ACK ❏ XON/XOFF ❏ Both ❏ NoneInterface signals: ❏ DTR ❏ DSR ❏ DTR & DSR ❏ NoneLine/modem settings: ❏ Full
duplex❏ Half duplex
Parity: ❏ Odd ❏ Even ❏ NoneStop bits: ❏ One ❏ 1 and 1/2 ❏ TwoAuto disconnect: ❏ Enable ❏ DisableHold line period: 60 seconds Other: __________(0–999 seconds)Data monitor: ❏ Enable ❏ DisableJob Timeout period: 10 seconds Other: __________(0–99 seconds)Other featuresAutomatic printing: ❏ Enable ❏ DisableLine monitor trace window: ❏ 1st and
last❏ Numbered ❏ Continuous
User access: ❏ Level 1 ❏ Level 2 ❏ Level 3Date and time: MM/DD/YY _____________ HH:MM:SS ___________Time zone: ❏ Hawaii ❏ Pacific ❏ Mountain ❏ Central
❏ Eastern ❏ Atlantic ❏ GMT ❏ EuropeanDaylight savings: ❏ Yes ❏ No

SYSTEM CONFIGURATION
6–26 XEROX 4235 LPS INSTALLATION PLANNING GUIDE
Serial system configuration options–bisynchronous
Table 6–7 lists the serial system configuration bisynchronousoptions. If you choose to use a bisynchronous serial interface,complete Checklist 13: Serial system configuration–bisynchronous (figure 6–8). Your Xerox service representativeuses the checklist during installation.
Table 6–7. Serial system configuration options–bisynchronous
Settings Options(defaults appear bold)
Description
Port configuration 1st interface2nd interface
Select the 2nd interface.A three–stop process is used to configure the port:1. Select the communication protocol.2. Select the default emulation.3. Enable or disable the Line Printer Mode.Note: One port must be configured for parallel.
Communicationprotocol
ParallelSNA/SDLCAsynchronousBisynchronous
Select Bisynchronous configure the communication protocol.
Current emulation XDPMXPPMXScriptHP LaserJet IID
This option allows you to select the Current Emulation modeused on the selected interface. You can select the XDPM,XPPM, XScript, or HP LaserJet IID emulation modes. Jobs areprocessed using the current emulation. With Mode Switchingenabled, an MCK command can dynamically change thecurrent emulation setting.
Line printer mode EnableDisable
This option allows you to enable or disable the Line PrinterMode option on the selected interface.
Mode switching/default mode
EnableDisable
This option allows you to select the Default Emulation modeused on the selected interface. If enabled, a prompt allowsyou to select the Default Emulation mode.
Default emulation XDPMXPPMXScriptHP LaserJet IID
This option allows you to select the Default Emulation mode inwhich jobs should print when you encounter an MCK resetcommand.
Character code 7–bit ASCIIEBCDICISO 69378–bit ASCII
This option selects the code set and number of bits percharacter. EBCDIC and ISO 6397 encoding assume eight bits.

SYSTEM CONFIGURATION
XEROX 4235 LPS INSTALLATION PLANNING GUIDE 6–27
Table 6–7. Serial system configuration options–bisynchronous (continued)
Settings Options(defaults appear bold)
Description
Language U.S. EnglishUK EnglishFrenchDutchSpanishItalianDanishNorwegianFinnishGermanSwedishBelgianCanadian FrenchSpecial Table
Select the appropriate language table for your job. LanguageTable Selection is not supported in XPPM operation.
Parity OddEvenNone
Odd or even parity must be chosen for 7–bit ASCII. Selectingno parity for 7–bit ASCII is invalid.
Emulation 277027802780 MR3780
These modes allow the 4235 LPS to react to commands anddata streams as if it were one of these IBM RJE devices.2780 MR represents a 2780 with the multiple record feature.These modes differ significantly in their interpretation of recorddelimiters and line endings.
Line/modem SwitchedLeased
This option specifies whether a leased or switched line is used.
ENQ/WACK LOOPEXIT
EnableDisable
This menu enables and disables automatic exit from anENQ/WACK loop when communications or 4235 LPSmalfunctions occur. When enabled, the 4235 LPS sends aDLE EOT automatically to the host computer system after 32WACKs. This option should be used only for switched lines.
Hold line period 60 The hold line period defines the length of inactivity allowedduring communications before the 4235 LPS disconnects. Ahold line period of up to 999 seconds can be specified.
Data monitor EnableDisable
When data monitor is enabled, the hexadecimal values of allreceived character codes and functions are printed in the orderreceived. Data monitor is not supported in XPPM operation;however, a data monitor of XPPM jobs is possible if you sendan XPPM job to a port configured for XDPM with the datamonitor enabled.
Automatic printing EnableDisable
Automatic printing enables the 4235 LPS to process jobswithout operator intervention. If automatic printing isdisabled, the operator must release each job in the queuebefore it prints.

SYSTEM CONFIGURATION
6–28 XEROX 4235 LPS INSTALLATION PLANNING GUIDE
Table 6–7. Serial system configuration options–bisynchronous (continued)
Settings Options(defaults appear bold)
Description
Line monitor tracewindow
DisableFirst and lastNumberedContinuous
The line monitor trace window is a software diagnostic toolused to resolve serial communications problems. If enabled,you have three choices:1. First and last, which stores the first and lastcommunication window2. Numbered, which allows you to specify the startingwindow3. Continuous, which traps the last 50K of transmitted orreceived data.
User access Level 1Level 2Level 3
You can assign access to the 4235 LPS users on three levels:Level 1 allows access only to the Print Mode screen.Level 2 allows access to Print Mode, Queue Management,Printer Setup, Document formatting, and the Utilities screens.Level 3 allows access to all level 2 options with the addition ofSystem Configuration and User Services screens.
Date & time MM/DD/YYHH:MM:SS
Enter the date as month, day, and year. Enter the time inhours, minutes, and seconds.
Time zone HawaiiPacificMountainCentralEasternAtlanticGMTEuropean
Select the appropriate time zone for your location.
Daylight savings YesNo
Enable this option if daylight savings is in effect.

SYSTEM CONFIGURATION
XEROX 4235 LPS INSTALLATION PLANNING GUIDE 6–29
Figure 6–8. Checklist 13: Serial system configuration–bisynchronous
Checklist 13: Serial system configuration–bisynchronous
Port configuration
1st Interface
Communication protocol: ❏ Parallel ❏ SNA/SDLC ❏ Async ❏ Bisync
Current emulation: ❏ XDPM ❏ XPPM
Line printer mode: ❏ Enable ❏ Disable
Mode switching/default mode: ❏ Enable ❏ Disable
Default emulation: ❏ XDPM ❏ XPPM
2nd Interface
Communication protocol: ❏ Parallel ❏ SNA/SDLC ❏ Async ❏ Bisync
Current emulation: ❏ XDPM ❏ XPPM
Line printer mode: ❏ Enable ❏ Disable
Mode switching/default mode: ❏ Enable ❏ Disable
Default emulation: ❏ XDPM ❏ XPPM
Bisynchronous settings
Character code: ❏ 7–bit ASCII ❏ EBCDIC ❏ ISO 6937 ❏ 8–bitASCII
Parity: ❏ Odd ❏ Even ❏ None
Emulation: ❏ 2770 ❏ 2780 ❏ 2780MR ❏ 3780
Line/modem settings: ❏ Switched ❏ Leased
ENQ/WACK loop exit: ❏ Enable ❏ Disable
Hold line period: 60 seconds Other: ________(0–999–seconds)
Data monitor: ❏ Enable ❏ Disable
Other features
Automatic printing: ❏ Enable ❏ Disable
Line monitor trace window: ❏ Disable ❏ 1st and last ❏ Numbered ❏ Continuous
User access: ❏ Level 1 ❏ Level 2 ❏ Level 3
Date and time: MM/DD/YY HH:MM:SS
Time zone: ❏ Hawaii ❏ Pacific ❏ Mountain ❏ Central
❏ Eastern ❏ Atlantic ❏ GMT ❏ European
Daylight savings: ❏ Yes ❏ No

SYSTEM CONFIGURATION
6–30 XEROX 4235 LPS INSTALLATION PLANNING GUIDE

XEROX 4235 LPS INSTALLATION PLANNING GUIDE 7–1
7. Host computer system generation
This chapter provides guidelines for integrating and operatingthe 4235 LPS as a remote printer in a distributed remote jobentry (RJE) network. This chapter also provides sample systemgeneration parameters for five different environments, as well asoperational hints.
The 4235 LPS simulates the actions of an RJE terminal for outputprinting only. You cannot use it for the submission of jobs tothe host computer system. To integrate the 4235 LPS into anRJE network, you must specify the appropriate parameterswithin the host initialization procedures and you must generatethe host.
System generation parameters for the following host computersystems are available:
• An OS/MVS host computer system with JES2
• An OS/MVS host computer system with JES3
• A VM/RSCS host configuration
• A VSE/POWER host computer system
• An OS/VS1 host computer system
• An NCP SNA host computer system; VTAM switchednetwork majornode; JES2 sample host computer systemPARMLIB parameters.
This chapter provides the following information for each hostcomputer system environment:
• Environment descriptions
• Initialization process review
• System generation procedures
• Sample parameters
• Sign–on procedures.
This chapter also provides the following information:
• Sample SNA parameters
• Xerox host software options.

HOST COMPUTER SYSTEM GENERATION
7–2 XEROX 4235 LPS INSTALLATION PLANNING GUIDE
OS/MVS JES2
Environment description
In an SNA environment, the 4235 LPS emulates a 3777 Model3 communications terminal. The 4235 LPS may be defined in aBSC environment as a Remote Job Entry (RJE) terminal operatingin any of the three modes available: 2770, 2780, or 3780. As aremote terminal, OS/MVS and JES2 facilities support the 4235LPS.
Initialization process review
The 4235 LPS is defined to a JES2 system using standard JES2system generation statements and procedures. The five–stepprocess requires only the addition of several generationstatements to the JES2 initialization deck.
1. Review the host computer system global parameters and specifythe appropriate values.
2. Specify the remote terminal parameters (RMTnn).
3. Specify the remote printer parameters (Rnn.PR1).
4. Specify the remote punch parameters (Rnn.PU1).
5. Specify the communication line parameters (LINEnn).
System generation procedures
Step 1. Specify the appropriate values for the following JES2parameters:
Values Description
&NUMLNES The largest line identification number (the number of teleprocessing lines).
&NUMRJE The number of remote terminals.
&TPBFSIZ Teleprocessing buffer size (520 to allow operation in 512–byte mode).
&NUMTPBF The number of teleprocessing buffers.
&NUMBUF The number of I/O buffers is increased by five for each active remote terminal.
&PRTRANS Print line translation should be set to NO to allow printing of lowercase letters.
&LINECT The maximum number of lines per page. A value of 0 suppresses automatic pageoverflow. You can override his value by a JOB card parameter or a JOBPARMcontrol card.
&TPIDCT Specifies the number of print lines on each separator page.

HOST COMPUTER SYSTEM GENERATION
XEROX 4235 LPS INSTALLATION PLANNING GUIDE 7–3
Step 2. Describe the 4235 LPS as a remote terminal with the RMTnnparameter. You must specify various parameters depending onthe device.
Mode Device Parameters
2770 RMTnn 2770,COMP,NOMRF,BUFEX,ABUFEX,(LINE=xx,)TRANSP
2780 RMTnn 2780,NOCOMP,MRF,(LINE=xx,)TRANSP
3780 RMTnn 3780,COMP,NOMRF,(LINE=xx,)TRANSP
where:
nn Is the remote number assigned to the 4235 LPS.
COMP/NOCOMP Specifies whether space (blank) compression is used.
MRF/NOMRF Specifies whether the multiple record feature is used.
BUFEX,ABUFEX (2770 only). Specifies that both buffer expansion and additionalbuffer expansion is used.
LINE=xx Specifies the line number for a leased line, as defined by aLINEnn parameter.
TRANSP Indicates the terminal has the text transparency feature.
Remaining subparameters default to the appropriate values anddo not need to be specified.
Step 3. Describe the 4235 LPS as a remote printer with the Rnn.PRnparameter. The minimum specification is:
Rnn.PR1 START,OPERATOR,CLASS=A,PRWIDTH=185
where:
nn Is the remote number, as defined in the RMTnn parameter.
START Specifies the device is to be automatically activated.
OPERATOR Specifies operator control of forms.
CLASS A= Specifies the print output class.
PRWIDTH=185 The maximum number of printed characters per line.
Additional parameters to be considered include NOSEP,DRAIN, and FORMS=.
where:
NOSEP Specifies that the separator pages are not provided betweendata set groups. The operator command $T Rn.PR1,S=Y canoverride this parameter. Also suppresses printing of operatormessages.
DRAIN Specifies that print output must be started by the operatorcommand ($S Rn.PR1).

HOST COMPUTER SYSTEM GENERATION
7–4 XEROX 4235 LPS INSTALLATION PLANNING GUIDE
FORMS= Specifies the forms identifier to be loaded initially in the 4235LPS.
Step 4. Describe the 4235 LPS as a remote punch device with theRnn.PUn parameter. The minimum specification is:
Rnn.PU1 START,OPERATOR,CLASS=A
where:
nn Is the remote number, as defined in the RMTnn parameter.
START Specifies the device is to be activated automatically.
OPERATOR Specifies operator control of forms.
CLASS A= Specifies the print output class.
Step 5. Specify the communication line to which the 4235 LPS isattached with the LINEnn parameter. The minimumspecification is:
LINEnn UNIT=cau,TRANSP
where:
nn Is the line number assigned to the 4235 LPS.
cau Is the UCB address to be used for this line.
TRANSP Indicates the terminal has the text transparency feature.
Additionally, you must specify the characteristics of the line;HDUPLEX indicates a two–wire, half duplex facility, whileFDUPLEX indicates a four–wire, full duplex facility. No furthermodifications are necessary to initialize a JES2 system.
Sample parameters
Leased line environment
&NUMLNES=1&NUMRJE=1&TPBFSIZ=520&PRTRANS=NO&LINECT=0
LINE9 UNIT=041,FDUPLEX,TRANSP RMT29 2770,COMP,NOMRF,LINE=9,BUFEX,ABUFEX,TRANSP R29.PR1 START,OPERATOR,CLASS=A,PRWIDTH=255 R29.PU1 START,OPERATOR,CLASS=B

HOST COMPUTER SYSTEM GENERATION
XEROX 4235 LPS INSTALLATION PLANNING GUIDE 7–5
Switched line environment
&NUMLNES=1 &NUMRJE=1 &TPBFSIZ=520 &PRTRANS=NO &LINECT=0 LINE9 UNIT=041,TRANSP RMT29 3780,COMP,NOMRF,TRANSP R29.PR1 START,OPERATOR,CLASS=A,PRWIDTH=255 R29.PU1 START,OPERATOR,CLASS=B
Sign–on procedures
The format of the sign–on command is:
/*SIGNON RMTnn
where:
/ Is in column 1.
RMTnn Identifies the 4235 and starts printing in column 16.
OS/MVS JES3
Environment description
In an SNA environment, the 4235 LPS emulates a 3777 Model3 communication terminal. The 4235 LPS may be defined in aBSC environment as a Remote Job Processing (RJP) terminaloperating in the 2770 emulation mode only. As a remoteterminal, OS/MVS and JES3 facilities support the 4235 LPS.
Initialization process review
The 4235 LPS is defined to a JES3 system using standard JES3system generation statements and procedures. The four–stepprocess requires only the addition of several generationstatements to the JES3 initialization deck.
1. Specify the remote terminal parameters (RJPTERM).
2. Specify the communication line parameters (RJPLINE).
3. Specify the remote printer parameters (DEVICE).
4. Specify the remote punch parameters (DEVICE).
System generation procedures
Step 1. Describe the 4235 LPS as a remote terminal with the RJPTERMstatement. The minimum specification is:

HOST COMPUTER SYSTEM GENERATION
7–6 XEROX 4235 LPS INSTALLATION PLANNING GUIDE
RJPTERM N=remoteid,T=2770,PR=1(,RD=1), PRW = 255
where:
remoteid Specifies the logical name for the 4235 LPS.
T=2770 Specifies a 2770–type printer.
PR=1 Specifies a single printer.
RD= Specifies the optional keyboard/display.
PRW = 255 Specifies a line width of 255 characters for the 4235 LPS.
You may also specify the following parameters for the RJPTERMstatement:
F=XBUF Indicates the 4235 LPS has an expanded buffer.
B=512 Both parameters must be specified.
G=group May be used to add an additional logical name for outputrouting.
F=PRES Indicates that space (blank) compression/ expansion will beperformed.
Step 2. Define the 4235 LPS as a remote printer with the DEVICEstatement. The minimum specification is:
DEVICE DTYPE=RMT1403,JNAME=remoteidPR1,XLATE=NO
where:
DTYPE=RMT1403 Specifies a remote printer.
JNAME=remoteidPR1 Defines the 4235 LPS as terminal output; "remoteid" is theremote id specified in the RJPTERM statement.
XLATE=NO Suppresses translation of nonstandard characters.
You may also specify the following parameters:
CKPNT, FORMS, HEADER, LINELIM.
Step 3. Define the 4235 LPS as a remote punch device with theDEVICE statement. The minimum specification is:
DEVICE DTYPE=RMT2540,JNAME=remoteidPU1,XLATE=NO
where:
DTYPE=RMT2540 Specifies a remote punch.
JNAME=remoteidPU1 Defines the 4235 LPS as terminal output; "remoteid" is theremote id specified in the RJPTERM statement.
XLATE=NO Suppresses translation of nonstandard characters.

HOST COMPUTER SYSTEM GENERATION
XEROX 4235 LPS INSTALLATION PLANNING GUIDE 7–7
Step 4. Define the line characteristics with the RJPLINE statement;minimum specification is:
RJPLINE N=linename,A=adapter
where:
linename Is the name assigned to this line.
adapter Is the hardware channel address of the interface for this line.
You may specify the following parameters as needed:
F=DIAL Specifies a switched line (sign–on card must be transmittedfrom the controller).
O=AUTO Specifies that the line start automatically at initialization(recommended).
T=remoteid Specifies that the remote id, as defined in the RJPTE RMstatement, is on a leased line.
S speed = Specifies the line speed (default is 2400 bps).
No further modifications are necessary to initialize a JES3system.
Sample parameters
Leased line environment
RJPLINE N=LINE7,A=030,T=RMT13 RJPTERM N=RMT13,T=2770,PR=1,F=FXBUF,B=512, PRW= 255 DEVICE
DTYPE=RMT1403,JNAME=RMT13PR1,XLATE=NO,HEADER=NO
DEVICE DTYPE=RMT2540,JNAME=RMT13PU1,XLATE=NO
Switched line environment
RJPLINE N=LINE7,A=030,F=DIAL RJPTERM N=RMT13,T=2770,PR=1,RD=1,
F=XBUF,B=512, PRW=255 DEVICE DTYPE=RMT1403,JNAME=RMT13PR1,
XLATE=NO,HEADER=NO DEVICE DTYPE=RMT2540, JNAME=RMT13PU1,
XLATE=NO
Sign–on procedures
Sign–on is performed only from a 4235 LPS on a switched line.
The format is:
/*SIGNON RJPTERM name
where:

HOST COMPUTER SYSTEM GENERATION
7–8 XEROX 4235 LPS INSTALLATION PLANNING GUIDE
/ Is in column 1 and RJPTERM starts in column 16.
name Is the logical name of the 4235 LPS as specified in the RJPTERMstatement.
VM/RSCS
Environment description
The 4235 LPS may be defined in a BSC environment as aremote job entry (RJE) terminal operating in any of the threemodes available: 2770, 2780, or 3780. As a remote terminalthe 4235 LPS may be supported by VM and RSCS facilities.
Initialization process review
The 4235 LPS is defined to RSCS in the RSCS CONFIG file.
1. Specify parameters describing the links to the 4235 LPSusing the LINK statement.
2. Add the virtual and real UCB address for the 4235 LPS tothe VM directory for RSCS.
Refer to the IBM manual, RSCSNET Version 2 Planning andInstallation.
System generation procedures
Step 1. You must define each 4235 LPS with a GENLINK macrostatement in the file AXSLINKS COPY. This statement definesthe name of the 4235 LPS (the "linkid") and the line address (forleased lines; switched lines are defined separately in step 2).The statement is:
GENLINK ID=linkid,TYPE=DMTNPT(,LINE=addr)
where:
ID=linkid Specifies the name identifying the 4235 LPS.
TYPE=DMTNPT Specifies the hardware terminal line manager.
LINE=addr Defines the virtual address of a leased line.
Step 2. Switched lines are defined in a GENLINE macro statement inthe file LAXLINES COPY.
GENLINE LINE=addr

HOST COMPUTER SYSTEM GENERATION
XEROX 4235 LPS INSTALLATION PLANNING GUIDE 7–9
where:
LINE=addr Defines the virtual address of the switched line to be used.
Step 3. Add the virtual and real UCB addresses for the installed 4235LPS to the VM directory for RSCS by using the DEDICATEstatement.
Note: If other devices share the addresses, they may be alreadyin the directory. The form of the DEDICATE statement is:
DEDICATE vaddr raddr
where:
vaddr Is the virtual line address.
raddr Is the real line address.
No further modifications are necessary to update a VM/RSCSsystem.
Sample parameters
Leased and switched line environment–VM/RSCS V2.1
LINK VANNUYS RJE 041 8 B 3 FIFO***
Leased and switched line environment–VM/RSCS V1.3
LINK VANNUYS DMTNPT 041 NPTT B 3
Sign–on procedures
The format of the sign–on command is:
SIGNON linkid mode–identifier CMPR Pnn TRSY
where:
linkid Is the location identifier of the remote terminal.
Mode–identifier may be "2770 B512" for 2770 mode, "2780B400" for 2780 mode, or "3780 B512" for 3780 mode.
CMPR Specifies that the blank compression feature is present.
Pnn Specifies print width (number of characters per line).
TRSY Specifies that the transparency feature is present.
PCHY Specifies that remote punch output is available.

HOST COMPUTER SYSTEM GENERATION
7–10 XEROX 4235 LPS INSTALLATION PLANNING GUIDE
VSE/POWER
Environment description
In an SNA environment, the 4235 LPS emulates a 3777 Model3 communication terminal. The 4235 LPS may be defined in aBSC environment as a Remote Job Entry (RJE) terminal operatingin any of the three modes available: 2770, 2780, or 3780. As aremote terminal, the 4235 LPS may be supported by standardVSE/POWER RJE facilities.
Initialization process review
The 4235 LPS is defined to VSE/POWER using standardVSE/POWER system generation statements. The four–stepprocess requires only the addition of several statements to thestandard generation procedure.
1. Review global parameters and specify values.
2. Specify remote terminal parameters (PRMT).
3. Specify line parameters (PLINE).
4. Perform a standard VSE/POWER generation.
System generation procedures
Step 1. The following parameters in the POWER RTAM macro areaffected by the 4235 LPS.
RJEBSC=YES Includes RJE code in storage.
TRACESZ=12K Defines space for RJE trace records.
Step 2. Each 4235 LPS is described by a PRMT macro, specifiedaccording to device type.
2770: PRMT REMOTE=nn,TYPE=2770,CS= YES,CSAPUN=2,ABE=YES,HFC=NO, LIST=144, TRANSP=YES
2780: PRMT REMOTE=nn,TYPE=2780,HFC= NO,LIST=144,MRF=YES,TRANSP= YES
3780: PRMT REMOTE=nn,TYPE=3780,CS =YES,CSAPUN=2,LIST=144,TRANSP =YES
where:
REMOTE=nn Defines the remote number.
CS=YES Specifies the component selection feature for punch output.
CSAPUN=2 Specifies the component selection character for punch output.
TYPE=nnnn Defines the device type.
LIST=144 Specifies printer line width.

HOST COMPUTER SYSTEM GENERATION
XEROX 4235 LPS INSTALLATION PLANNING GUIDE 7–11
ABE=YES Specifies a 512–byte buffer.
TRANSP=YES Specifies the transparency feature necessary for fontdownloading.
HFC=NO No horizontal format control.
MRF=YES Indicates multiple record feature.
Step 3. Specify the line connecting each 4235 LPS to the host computersystem with the LINE macro, as follows:
PLINE ADDR=cnn(,SWITCH=xx),TIMEOUT=##
where:
ADDR=cnn Specifies the address of the line.
SWITCH=xx Defines leased or switched line (xx=YES for switched and NOfor leased).
TIMEOUT=## Specifies the number of minutes the line can remain idle beforesign–off is occurs.
No further modifications are necessary to initialize aVSE/POWER system.
Sample parameters
Leased line environment
PLINE ADDR=030H,SWITCH=NO,TIMEOUT=90 PRMT REMOTE=004,TYPE=2770,
CS=YES,CSAPUN=2,LIST=144, TRANSP=YES
Sign–on procedures
The format of the sign–on command is:
*.. SIGNON remoteid

HOST COMPUTER SYSTEM GENERATION
7–12 XEROX 4235 LPS INSTALLATION PLANNING GUIDE
OS/VS1
Environment description
In an SNA environment, the 4235 LPS emulates a 3777 Model3 communication terminal. The 4235 LPS may be defined as aremote job entry (RJE) terminal operating in any of the threemodes available: 2770, 2780, or 3780. As a remote terminal,OS/VS1 and JES/RES facilities support the 4235 LPS.
Initialization process review
The 4235 LPS is defined to RES using standard RES systemgeneration statements. The five–step process requires only theaddition of several statements to the standard generationprocedure.
1. Review global parameters and specify values.
2. Specify remote terminal parameters (TERMINAL).
3. Specify line parameters (LINE).
4. Perform RES and RTAM generation defining the RES data sets,SYS1.UADS, and SYS1.BROADCAST, and add logonprocedures to PROCLIB.
5. Add user IDs for 4235 LPS users.
System generation procedures
Step 1. The following parameters in the RTAM macro are affected bythe 4235 LPS.
TPBUF The number of teleprocessing buffers should be at least as largeas the number of teleprocessing lines.
TPBFSIZ The recommended buffer size is 512; this value is used onlywhen operating in 2770 mode and can be larger if required forother devices in the network.
NPR=YES Specifying YES allows interruption of printed output by thecentral operator.
Step 2. Each 4235 LPS is described by a TERMINAL macro, specifiedaccording to device type.
TERMINAL TDESCR=(5,n,3,n),PCHS=1,
(COMPRES=YES,BUFXSIZ=512,)PLGN=n,(LNUM=n)
HOST COMPUTER SYSTEM GENERATION
XEROX 4235 LPS INSTALLATION PLANNING GUIDE 7–13
where:
TDESCR=(5,n,3,n) Specifies various characteristics depending on terminal type, asfollows:
2770 mode TDESCR=(5,0,3,2).
5 Indicates 150–character print width.
0 Indicates 2770 terminal type.
3 Indicates that blocked variable–length records are used.
2 Indicates the following: buffer expansion, no horizontal formatcontrol, no transparency.
2780 mode TDESCR=(5,1,3,2).
5 Indicates 150–character print width.
1 Indicates 2780 terminal type.
3 Indicates that blocked variable–length records are used.
2 Indicates the following: no horizontal format control, multiplerecord, no transparency.
3780 mode TDESCR=(5,7,3,0).
5 Indicates 150–character print width.
7 Indicates 3780 terminal type.
3 Indicates that blocked variable–length records are used.
0 Indicates the following: no component selection, no horizontalformat control, no transparency.
PCHS=1 Indicates punch capability necessary for downloading font s.
COMPRES=YES 2770 only: space compression is used.
BUFXSIZ=512 2770 only: buffer size is 512 bytes.
PLGN=n n=0 indicates that terminal is not permanently logged–on; 1indicates it is.
LNUM=n n = the number of the dedicated line for this terminal, if autologon is used.
Step 3. Specify the line connecting each 4235 LPS to the host computersystem with the LINE macro, as follows:
LINE LINEID=nn,LDESCR=(t,c)
where:
nn Is the line number.
t Is the line type: 0 for half duplex (switched line), 1 for fullduplex.
c Code and transparency (1 = EBCDIC and transparency).
Note: Include a DD card in the RTAM procedure for each4235 line.

HOST COMPUTER SYSTEM GENERATION
7–14 XEROX 4235 LPS INSTALLATION PLANNING GUIDE
Step 4. Perform a standard RES and RTAM generation. Include thedefinitions of the RES data sets, SYS1.UADS, and SYS1.BROADCAST, and add logon procedures to PROCLIB.
Step 5. Use the account facility to add user IDs for 4235 LPS users.
Sample parameters
Leased line environment
LINE LINEID=1, . . . LINE LINEID=2,LDESCR=(1,1) TERMINAL TERMID=1, . . . TERMINAL TERMID=2, . . . TERMINAL TERMID=3,TDESCR=(5,7,3,0), PCHS=1,
LNUM=2 RTAM TPBFSIZ=512,INTPR=YES,TPPUNCH=3 END
Switched line environment
LINE LINEID=1, . . . LINE LINEID=2,LDESCR=(0,1) TERMINAL TERMID=1, . . . TERMINAL TERMID=2, . . . TERMINAL TERMID=3,TDESCR=(5,7,3,0),PCHS=1 RTAM TPBFSIZ=512,INTPR=YES,TPPUNCH=3 END
Sign–on procedures
Perform sign–on only if auto logon is not used.
The format is:
LOGON userid TERM (tid) PROC (proc)
where:
userid Is the 4235 user ID.
tid Is the 4235 terminal ID.
proc Is the procedure required for the installation.

HOST COMPUTER SYSTEM GENERATION
XEROX 4235 LPS INSTALLATION PLANNING GUIDE 7–15
Sample SNA parameters
The definitions and parameters in the following section help theuser install the 4235 LPS to emulate a 3777 in an SNA network.Most entries vary from one host computer system to another.Consult the network coordinator for this installation.
512 bytes is the maximum allowable RU size. The NCP,VTAM, and JES parameter settings for an RU size of 512 bytesare marked with an asterisk (*). Although the 4235 LPS acceptsan RU size of 256 bytes, a size of 512 bytes is recommendedfor optimum performance.

HOST COMPUTER SYSTEM GENERATION
7–16 XEROX 4235 LPS INSTALLATION PLANNING GUIDE
NCP generation SNA sample definition
Group definition for a leased line Group definition for a switched lineSNAGP1 GROUP LNCTL=SDLC, X
PAUSE=.2, XDIAL=NO, XDUPLEX=FULL, XISTATUS=ACTIVE, XTYPE=NCP, XCLOCKNG=EXT, XRETRIES=(7,1.3), XNRZI=NO
DIALGPOI GROUP LNCTL=SDLC, XDIAL=YES, XNEWSYNC=NO, XNRZI=NO, XPAUSE=.5, XRETRIES=(8,5,7)
Line definition for a leased line Line definition for a switched lineN01LN038 LINE ADDRESS=(038), X
SPEED=9600N01LN006 LINE ADDRESS=(006), X
CLOCKNG=EXT, XDUPLEX=HALF, XSPEED=4800, XANSWER=ON, XCALL=IN, XISTATUS=ACTIVE
PU definition for a leased line PU definition for a switched lineN01038 PU ADDR=C1, X
IRETRY=YES, XMAXDATA=521,* XMAXOUT=7, XPACING=2, XPASSLIM=7,** XPUTYPE=2, XISTATUS=ACTIVE, XVPACING=(4,1), XMODETAB=MODE3770, XUSSTAB–ISTINCDT, XSSCPFM=USSSCS, X
N01006P0 PU PUTYPE=2, XMAXLU=8
LU definition for a leased line LU definition for a switched linePSD38P00 LU LOCADDR=1, X
DLOGMOD=BUF512,ISTATUS=ACTIVE
PSD38P01 LU LOCADDR=2, XDLOGMOD=BUF512,XISTATUS=ACTIVE
PSD38P02 LU LOCADDR=3, XDLOGMOD=BUF512,XISTATUS=ACTIVE

HOST COMPUTER SYSTEM GENERATION
XEROX 4235 LPS INSTALLATION PLANNING GUIDE 7–17
Note: These are examples only. Make adjustments dependingon your host and communication network.
* NCP, VTAM, and JES parameter settings for an RU size of 512bytes.
** If running a multiple drop circuit, PASSLIM=1. For allnon=multidrop leased lines, PASSLIM cannot be higher than 7or data loss will occur.
VTAM switched network majornode definition
DIAL4235 VBUILD TYPE=SWNET XN01DIAL2 PU ADDR=C1, X IDBLK=013, X IDNUM=008C1, X IRETRY=YES, X MAXDATA=521,* X MAXOUT=7, X MAXPATH=0, X PACING=1, X PASSLIM=7, X PUTYPE=2, X I STATUS=ACTIVE, X VPACING=(4, 1), X
MODETAB=MODE3770, X USSTAB=ISTINCDT, SSCPFM=USSSCS X DL370P00 LU LOCADDR=1, X DLOGMOD=BUF512, ISTATUS=ACTIVE XDL370P01 LU LOCADDR=2, X DLOGMOD=BUF512, ISTATUS=ACTIVE XDL370P02 LU LOCADDR=3, X DLOGMOD–BUF512, ISTATUS=ACTIVE
*NCP, VTAM, and JES parameter settings for an RU size of 512bytes.
Note: These are examples only. Make adjustments dependingon your host and communications network.

HOST COMPUTER SYSTEM GENERATION
7–18 XEROX 4235 LPS INSTALLATION PLANNING GUIDE
Sample ACF/VTAM definitions
VTAM to JES (application identification)
NJEAPPL3 VBUILD TYPE=APPLNJEWCO3 APPL AUTH=(ACQ,PASS), x
ACBNAME=NJEWC03, x *MODETAB=MODENJE, x
* DLOGMOD=NJEMODE, x VPACING=4**MODENJE MODETAB MODEEFT LOGMODE=NHEMODE x FMPROF=X'03', x TSPROF=X'03', x PRIPROT=X'B1', x SECPROT=X'A0', x COMPROT=X'3040', x SSNDPAC=X'04', x MODEEND END
* You do not need to specify he APPL MODETAB andDLOGMOD parameters if you use the JES default tables.
** Data following VPACING is the log mode definition used byJES.
VTAM to the 4235 LPS
MODE3770 MODETAB LOGMODE=BUF512, xBUF512 MODEENT, FMPROF='03' x
TSPROF='03' X PRIPROT=X'A3' X SECPROT=X'A3' X COMPROT=7080', X RUSIZES=X'8686,* X PSERVIC=X'01104000F100C80
00010040'* NCP, VTAM, and JES parameter settings for an RU size of 512
bytes.

HOST COMPUTER SYSTEM GENERATION
XEROX 4235 LPS INSTALLATION PLANNING GUIDE 7–19
IBM JES2 sample PARMLIB parameters
Remote 3770 definition
No compression: Compression:RMT36
LUTYPE 1, BUFSIZE=512*, CONSOLE,LINE=36, NUMPR=1, NUMPU=1 NOCOMP,NOCMPCT
RMT36LUTYPE1, BUFSIZE=512*,
CONSOLE,LINE=36, COMP, NUMPR=1,NUMPU=1, NOCMPCT
R36.PR1START, PRWIDTH=255, CLASS=AYZG,
CKPTPAGE=10, FCBLOAD(FCBLOAD is optional.)**
R36.PR1START,PRWIDTH=255,CLASS=AYZG,
CKPTPAGE=10, FCBLOAD(FCBLOAD is optional.)**
R36.RD1CLASS=A, START, NOHOLD, MSGCLASS=A,
PRIOINC=0, PRIOLIM=13
R36.RD1CLASS=A,START,NOHOLD,MSGCLASS=A,
PRIOINC=0,PRIOLIM=13R36.PU1
CLASS=BK,COMPACT=0,NOSEP,NOSUSPND, LRECL=255
R36.PU1CLASS=BK,COMPACT=0,NOSEP,NOSUSPN
D, LRECL=255LOGON1
APPLID=NJEWCO3LOGON1
APPLID=NJEWCO3LINE36
UNIT=SNA,NOCOMPLINE36
UNIT=SNAAPPLAPPLID=NJEWCO3
APPLAPPLID=NJEWCO3
* NCP, VTAM, and JES parameter settings for an RU size of 512bytes.
** For XPPM emulation, specify FCBLOAD only if you currentlysend FCBs to your channel–attached 9700 LPS.
Note: Perform one of the following for proper carriage control:
1. Set global JES2 parameter LINECT=0.
2. All output to the 4235 LPS must contain JCL card/*JOBPARMLINECT=0 following the JOB card.

HOST COMPUTER SYSTEM GENERATION
7–20 XEROX 4235 LPS INSTALLATION PLANNING GUIDE
IBM JES3 sample PARMLIB parameters
Remote 3770 definition
RJPWS,N=RMY24,RD=1,PR=1,PU=1,C=R, PRW=255CONSOLE,JNAME=RMY36, TYPE=RJP,DEST=D3,
DEPTH=50,LEVEL=10DEVICE, DTYPE=RMTPUNCH, JNAME=RMY36PU1,
HEADER=NO,BURST=NO,XLATE=NODEVICE,DTYPE=RMTPRINT, JNAME=RMY36PR1,
XLATE=NO,CHNSIZE=DS,CARRIAGE=(YES,STANDARD), TRAIN=(NO,PN),
FORMS=(NO,STANDARD),LINELIM=50000,HEADER=YES
4235 LPS user interface settings
SDLC settings
SDLC DATA ENCODING MODE=NRZ Corresponds to NRZI=NO under "NCP Group Definitionand Switched Line Definition"
SDLC XID CODE=
Two–digit SDLC ADDRESS=C1
Six–digit Terminal ID
For a leased line–SDLC address corresponds to addressunder "NCP PU Definition," Terminal ID ignored
For a switched line–SDLC address and Terminal IDcorrespond to the IDNUM in the "VTAM Switched NetworkMajornode Definition"
SDLC WINDOW LIMIT=7 Corresponds to MAXOUT=7 under "PU Definition" and"VTAM Switched Network Majornode Definition"
SNA settings for Auto Log–on and Formatted Log–on only–ACF/VTAM parameters
Application Identification=NJEWCO3 Corresponds to the ACBNAME parameter within theVTAM to JES APPLID
Mode Entry Table Name=BUF512 Corresponds to VTAM to 4235 LPSLOGMODE=BUF512
Data Field=RMT36 Corresponds to IBM JES2 parmlib parameters for RMT
Auto Logon=ENABLE
Note: The sample 4235 LPS SDLC and SNA settings match the3777 mode sample system generation parameters listed in theSNA sample definitions for a JES2 environment.

HOST COMPUTER SYSTEM GENERATION
XEROX 4235 LPS INSTALLATION PLANNING GUIDE 7–21
Xerox host software options
Xerox Printer Access Facility (XPAF)
XPAF enables the 4235 LPS to support IBM data streams in theXPPM and XDPM environments. XPAF converts the datastream and resources from IBM Advanced Function Printing(AFP), to PDL/DJDE and XES jobs supported by 4235 LPS datastream. XPAF allows you to perform the following tasks:
• Send AFP jobs and resources to the 4235 LPS
• Send line mode, XES (XDPM environment ), and PDL/DJDE(XPPM environment ) jobs and resources to the 4235 LPS.
Note: For XPPM, enable Special Printer option – MP.
Remote Print Management Facility (RPMF)
RPMF enables compatibility between the 9700 LPS Host FormsDescription Language (HFDL) and the 4235 LPS in the XDPMenvironment. RPMF allows you to perform the following tasks:
• Create electronic forms
• Manage a database of electronic forms
• Manage storage and font downloads. RPMF includes 90fonts that are compatible with the 4235 LPS
• Integrate electronic forms and variable data.
Host Forms Description Language (HFDL)
HFDL is a forms design software package (residing in an IBMMVS environment) that allows you to create, store, and reviseelectronic forms in 9700 format for use with the 4235 XPPMemulation.
Note: 4850 V3.7 forms are not supported on the 4235 LPS.
Xerox Pen Plotter Interface (XPPI)
XPPI is a software package that provides a transparent interfacefor graphics applications using CALCOMP pen plotter calls.XPPI is supported in the XDPM and XPPM environments.
Note: For XPPM, enable Special Printer option – MP.
Xerox Document Graphic Interface (XDGI)
XDGI provides access to the 4235 LPS from IBM GraphicalData Display Manager (GDDM) applications. XDGI allows you

HOST COMPUTER SYSTEM GENERATION
7–22 XEROX 4235 LPS INSTALLATION PLANNING GUIDE
to merge images into the data stream and print composedDocument Composition Facility (DCF) documents. When usedwith XDGI, DCF accepts standard SCRIPT/VS formatting controlstandard General Markup Language (GML) tags as input.
DCF and GDDM interfaces are consistent with the existing userinterface. You can easily access the features of the 4235 LPSwithout making significant changes to the existing jobs andapplications.
Note: For XPPM, enable Special Printer option – MP.
Xerox Job Description Compiler (XJDC)
XJDC is a PC software package that compiles 9700 Job SourceLibrary (JSL) files and creates the following types of files: .JDL,.CME, .TST, .PDE, etc. You can write the files to 3.5–inchdouble–sided, high density micro diskettes and load themdirectly onto the 4235 LPS for use in the XPPM environment.
Note: The 4850 V3.7 colorized files are not supported on the4235 LPS.

XEROX 4235 LPS INSTALLATION PLANNING GUIDE 8–1
8. Fonts, supplies, and accessories
Supplies and accessories
The amount of supplies you need depends on the number ofpages you print. The 4235 LPS requires paper, dry inkcartridges, print cartridges, fuser agent, and diskettes. It isimportant that these items are available when your 4235 LPS isinstalled.
Plan on approximately five working days for delivery of yourXerox supplies. Your Xerox sales representative can help youwith your initial order. Use Checklist 14: Supplies andAccessories later in this chapter to track your supplies andaccessories orders.
Paper
If you do not use the proper paper, paper jams, misfeeds, andpoor print quality may result.
The 4235 LPS can accommodate standard white paper, coloredpaper, predrilled paper, preprinted paper (such as letterhead),labels, and transparencies.
Note: Paper–backed transparencies are not supported.
Weight and type Use a good quality, xerographic grade paper. For best results,use 20–pound (75 gsm) bond xerographic paper or Xerox 4024Dual Purpose Paper in the following weights:
• Lightest: 16–pound (60 gsm)
• Heaviest: 32 pound (120 gsm).

FONTS, SUPPLIES, AND ACCESSORIES
8–2 XEROX 4235 LPS INSTALLATION PLANNING GUIDE
Sizes Table 8–1 lists the cut sheet paper sizes that the 4235 LPSaccepts:
Inches Millimeters
(A4) 8.27 x 11.69 210 x 297
8.5 x 11 216 x 279
8.5 x 13 216 x 330
8.5 x 14 216 x 356
(A3) 11.69 x 16.54 297 x 420
11 x 17 279 x 432
(A5) 5.83 x 8.27 148 x 210
(B4) 10.12 x 14.33 257 x 364
8.47 x 12.41 215 x 315
8 x 13 214 x 330
8.5 x 5.5 216 x 140
Moisture content Paper has a tendency to curl when exposed to the heat insidexerographic equipment. Paper with a low moisture contenttends to curl less. Paper with an excessive moisture contenttends to cause paper jams. The maximum recommendedmoisture content is 5.7 percent.
Grain Purchase long–grain paper to ensure trouble–free printing.Also, ensure that the grain of the paper is parallel with the longedge so that the paper stacks properly.
Paper storage Following are some suggestions for storing paper:
• Store paper in its own wrapper. Do not leave it unwrappedor in a place where it can be damaged by dampness orheat.
• Store paper on a flat surface, not on its side or edge.
• Store paper in a closed cabinet.
• Always store paper in a cool, dry area.
• Store paper on pallets or shelves, not on the floor.
You may want to provide one or more storage cabinets for yoursupplies. This not only protects the supplies, but also keepsthem in a central location so you can monitor the quantities.

FONTS, SUPPLIES, AND ACCESSORIES
XEROX 4235 LPS INSTALLATION PLANNING GUIDE 8–3
Dry ink, print cartridges, and fuser agent
Dry ink cartridge Replace the dry ink cartridge when the 4235 LPS displays amessage to do so.
Print cartridge Replace the print cartridge when the 4235 LPS displays amessage to do so or when there is a printing defect.
Fuser agent Have the Xerox service representative add fuser agent asrequired.
Accessories
Paper cassettes With the exception of paper tray 1 (the bottom paper tray), eachpaper tray contains a removable paper cassette which holds aspecific size of paper. Various paper cassettes are available forthe paper trays. You can order paper cassettes may be orderedin the sizes listed in table 8–2.
Table 8–2. Paper cassette sizes
Tray 2 paper cassette sizes Part number
8.5" x 11", 216 x 279 mm
A4 (8.27" x 11.69", 210 x 297 mm)
8.5" x 13", 216 x 330 mm
8.5" x 14", 216 x 356 mm
9R92172
9R92171
9R00373
9R00374
Tray 3 paper cassette sizes
8.5" x 5.5", 216 x 140 mm
A5 (5.83" x 8.27", 148 x 210 mm)
A4 (8.27" x 11.69", 210 x 297 mm)
8.5" x 11", 216 x 279 mm
8" x 13", 214 x 330 mm
B4 (9.84" x 13.9", 250 x 353 mm)
11" x 17", 279 x 432 mm
A3 (11.69" x 16.54", 297 x 420 mm)
98K13370
98K13360
9R01078
9R01079
9R00376
9R00375
9R00368
9R01012
Tray 4 paper cassette sizes
8.5" x 11", 216 x 279 mm
A4 (8.27" x 11.69", 210 x 297 mm)
9R092172
9R092171

FONTS, SUPPLIES, AND ACCESSORIES
8–4 XEROX 4235 LPS INSTALLATION PLANNING GUIDE
Micro diskettes The 4235 LPS uses 3.5–inch double–sided, high–density microdiskettes. Each micro diskette is capable of storingapproximately 1.44 MB of data.
On installation day, you must provide the Xerox servicerepresentative with at least three 3.5–inch double–sided, high–density micro diskettes. These diskettes are required to back upthe operating system and default settings. You may needadditional blank micro diskettes so you can back up your ownfiles such as fonts, forms, etc.

FONTS, SUPPLIES, AND ACCESSORIES
XEROX 4235 LPS INSTALLATION PLANNING GUIDE 8–5
Supplies and accessories list
Use the following tables to order supplies and accessories.
Table 8–3. United States supplies list
Item Description Part number
Paper
Xerox paper qualities are 10 reams (5,000 sheets) per carton unless otherwise noted below.Unless noted otherwise, these papers are 20 lbs. in weight.
8.5'' x 11'' Dual Purpose Colors–Pink, 3–hole 3R3074
8.5'' x 11'' Dual Purpose Colors–Buff, 3–hole 3R3076
8.5'' x 11'' Dual Purpose Colors–Goldenrod, 3–hole 3R3078
8.5'' x 11'' Dual Purpose Colors–Ivory, 3–hole 3R3080
8.5'' x 14'' Dual Purpose Colors–Blue 3R3084
8.5'' x 14'' Dual Purpose Colors–Yellow 3R3086
8.5'' x 14'' Dual Purpose Colors–Green 3R3088
8.5'' x 14'' Dual Purpose Colors–Pink 3R3090
8.5'' x 14'' Dual Purpose Colors–Buff 3R3092
8.5'' x 14'' Dual Purpose Colors–Goldenrod 3R3094
8.5'' x 14'' Dual Purpose Colors–Ivory 3R3096
8.5'' x 14'' Dual Purpose Colors–Gray 3R3098
8.5'' x 11'' Dual Purpose Colors–Rainbow Pack
* (3,500 sheets per carton)
3R3107
8.5'' x 11'' Dual Purpose Colors–Gray, 3–hole 3R3802
8.5'' x 11'' 10 Series Smooth Paper 3R54
8.5'' x 11'' 4024 Dual Purpose Paper 3R721
8.5'' x 11'' 4024 Dual Purpose Paper–3–hole 3R723
8.5'' x 13'' 4024 Dual Purpose Paper 3R725
8.5'' x 14'' 4024 Dual Purpose Paper 3R727
11'' x 17'' 4024 Dual Purpose Paper
(2,500 sheets per carton)
3R729
8.5'' x 11'' Antique Parchment Paper–gold
(4000 sheets per carton)
3R790
8.5'' x 14'' 10 Series Smooth Paper 3R83
* Rainbow Pack contains 750 sheets each of blue and yellow, 500 sheets each of green andpink, and 250 sheets each of buff, goldenrod, gray, and ivory 8.5 by 11 inch paper.

FONTS, SUPPLIES, AND ACCESSORIES
8–6 XEROX 4235 LPS INSTALLATION PLANNING GUIDE
Table 8–3. United States supplies list (continued)
Item Description Part number
Transparencies Clear stripeless 3R3117
Labels–
Standard(Self–adhesive)
All labels are on 8.5– x 11–inch sheets, 100sheets per box
3R2365
8.5" x 11" 33 labels per sheet 3R2362
8.5" x 11" 24 labels per sheet 3R2363
8.5" x 11" 8 labels per sheet 3R2364
Dry ink cartridge Packaged 2 per carton 6R135
Diskettes 3.5–inch, double–sided, high–density 1.44 MBdiskette packaged 10 diskettes per box
8R3705
Fuser agent 1 liter bottle 8R2955
Note: Xerox transparencies are packaged 100 per box. Alltransparencies are 8.5 by 11 inches. Paper–backedtransparencies are not supported.

FONTS, SUPPLIES, AND ACCESSORIES
XEROX 4235 LPS INSTALLATION PLANNING GUIDE 8–7
Table 8–4 lists some of the supplies available from Rank Xerox.For a complete list, contact your Xerox sales representative.
Table 8–4. Rank Xerox supplies list
Item Description Part number
Paper
RX paper quantities are 10 reams (5,000) sheets per carton unless otherwise noted below.RX papers are 80 gsm weight unless otherwise notes.
(A4) RX Nymolla–Black 3R90008
(A4) RX Nymolla DIN–4–hole punch,Black
3R90190
(A4) RX Neusiedler–Burgundy, 90 gsm 3R90600
(A4) RX Neusiedler–Black, 60 gsm 3R90510
(A4) RX Neusiedler–Burgundy 3R90335
(A4) Laser Print, Swedish–4–hole punch 3R90593
(A4) RX Husem, Modo–Black, 70 gsm 3R90540
(A4) RX Taite–Mauve 3R90649
8.5'' x 13'' RX Kangas–Black 3R90012
8.5'' x 12.4'' RX Celupal–Black 7R90011
(A3) RX Nymolla–Black 3R90120
(A5) RX Neusiedler–Black 3R90000
(A4) RX Samaceta–Black 3R90293
(A4) RX Neusiedler–Silver, 120 gsm 3R90700
(A4) RX Perfoklas–Black 3R90291
(A4) RX Environmental–Green 3R90652
(A3) RX Neusiedler–Burgundy, 90 gsm 3R90618
8'' x 13'' RX Kangas–Black 3R90007
(B4) RX Kangas–Black 3R90061
(A4) Laser Print, Swedish–Blue 3R90594
(A4) RX Iridium, Marreschel Blue–Black 3R94050
(A4) RX Iridium, Marreschel Green–Black 3R94060
(A4) RX Iridium, Marreschel Yellow–Black 3R94071
(A4) RX Iridium, Marreschel Red–Black 3R94081

FONTS, SUPPLIES, AND ACCESSORIES
8–8 XEROX 4235 LPS INSTALLATION PLANNING GUIDE
Table 8–4. Rank Xerox supplies list (continued)
Item Description Part numberTransparencies New all clear laser 3R91030Laserprint Labels 500 sheets per boxA4 8 to a view UQP (Universal Quality
Permanent – label cannot be peeledoff)
3R96283
A4 16 to a view UQP 3R96281A4 24 to a view UQP 3R96282A4 1 to a view EQP (Extra Quality
Permanent)3R96169
A4 16 to a view EQP 3R96165A4 24 to a view EQP 3R96166A4 10 to a view UQP 3R96284Special Order 500 sheets per boxA4 16 to a view EQR (Extra Quality
Removable–label can be peeled off)
3R96177
A4 24 to a view EQR 3R96178Desktop laser labels 100 sheets per boxA4 6 to a view 3R96288A4 14 to a view 3R96289A4 16 to a view 3R96296A4 18 to a view 3R96297A4 21 to a view 3R96298Copier Labels 100 sheets per boxA4 1 to a view 3R97400A4 2 to a view 3R97401A4 4 to a view 3R97402A4 8 to a view 3R97404A4 12 to a view 3R97405A4 14 to a view 3R97406A4 16 to a view 3R97407A4 24 to a view 3R97408A4 30 to a view 3R97409A4 33 to a view 3R97410Dry ink cartridge Packaged 1 per carton 6R90098Print cartridge Packaged 1 cartridge per carton 13R36Diskettes 3.5", double–sided, high–density 1.44
MB diskettes packaged 10 diskettesper box
8R3705

FONTS, SUPPLIES, AND ACCESSORIES
XEROX 4235 LPS INSTALLATION PLANNING GUIDE 8–9
How to order supplies
To order Xerox supplies and accessories within the UnitedStates, call the following toll–free number during businesshours–8:00 a.m. to 6:00 p.m. (Pacific Standard Time): 1–800–822–2200.
Contact your local Xerox sales representative for locationsoutside the United States.
Order procedure The Xerox supply order representative will ask you to supplythe following information:
• The 4235 LPS serial number. (Your Xerox salesrepresentative can provide you with this number.)
4235 LPS serial number: ___________________________
• Your customer order number (located in the upper rightcorner of your Xerox invoice or your Xerox salesrepresentative can provide you with this number).
Customer order number: ___________________________
• Your purchase order number, if that is the method ofpayment.
Purchase order number:____________________________
• Your supply order, which should include the following:
Part number: _____________________________________
Item name: _______________________________________
Quantity required: _________________________________

FONTS, SUPPLIES, AND ACCESSORIES
8–10 XEROX 4235 LPS INSTALLATION PLANNING GUIDE
Figure 8–1. Checklist 14: Supplies and accessories
Checklist 14: Supplies and accessories
Use this checklist to help record the supplies and accessories you require, the date you plan to place theorder, and the actual date of the order.
Item Description Quantity Date toorder
Dateordered
Paper
Labels
Transparencies
Paper cassettes
3.5–inch, high–
double–sided,
density micro
diskettes
Dry ink cartridge
Print cartridge
Fuser agent

FONTS, SUPPLIES, AND ACCESSORIES
XEROX 4235 LPS INSTALLATION PLANNING GUIDE 8–11
Font ordering information
You can order licensed fonts from Xerox. If you plan to use afont that is not a 4235 LPS system font, place your order so thatthe font diskettes arrive before installation. You can order fontson magnetic tape or diskette for downloading from your hostcomputer system to the 4235 LPS hard disk.
Order fonts in the same character encoding method used byyour host computer system, either ASCII or EBCDIC. If youplan to use a communication module, you must order EBCDIC–encoded fonts.
Fonts on magnetic tape The host computer system can transmit font data or digitizedgraphic images to the 4235 LPS. This data is stored in font datamemory and invoked by job control commands inserted in thedata stream.
Fonts that are provided by the Xerox Font Center fordownloading from your host computer system are contained ona standard 9–track, 1600 bits–per–inch magnetic tape. Onetape may contain several fonts. Individual font files areseparated by tape marks. The last file on a tape is followed bya double tape mark.
Each tape package is accompanied by:
• Data sheets that list font names, record length, and actualbyte count of each file
• Character code assignment sheets
• Character width specifications.
Fonts on micro diskettes Fonts are stored on 3.5–inch micro diskettes, which are insertedin the micro diskette drive and loaded onto the hard disk. Afont disk may contain more than one font.
Custom fonts The Xerox Font Center can create custom typefaces, specialcharacters for existing fonts, and digitized artwork such assignatures and company logos.
These custom graphic images are available on magnetic tape ordiskettes.
How to order fonts in the United States
You can call the Xerox Font Center to place an order. TheXerox Font Center representative will assist you in completingthe necessary forms. The representative will also answer yourquestions regarding literature, order status, or custom fontspecifications.

FONTS, SUPPLIES, AND ACCESSORIES
8–12 XEROX 4235 LPS INSTALLATION PLANNING GUIDE
Use the appropriate toll–free number in the following table andprovide your 4235 LPS serial number:
4235 Laser Printing System serial # ____________
Area Phone Business hours
Nationwide 1-800-445-FONT 6:00 a.m. to 5 p.m. (PST)
Font Center Fax (310) 333-6560 6:00 a.m. to 5 p.m. (PST)
You can write to the following address to order fonts or requestinformation:
Xerox Corporation Font Center ESM1-052 701 South Aviation Boulevard El Segundo, California 90245
The following list shows the approximate time it takes toreceive your order. Call the Xerox Font Center for a moreprecise delivery schedule.
Make sure you place your order in sufficient time to receive itbefore your scheduled installation.
• If you order custom fonts or alterations of existing fonts(thinning, scaling, etc.), allow about six weeks to receiveyour order.
• If you order logos or signatures, allow about five businessdays to receive your order.
• If you order licensed standard fonts, allow about threebusiness days to receive your order.
The Xerox Font Center can provide more specific information aboutyour order.

FONTS, SUPPLIES, AND ACCESSORIES
XEROX 4235 LPS INSTALLATION PLANNING GUIDE 8–13
Xerox Font Technical Support
In the United States, call the Xerox Font Technical SupportHotline at 1-800-445-FONT, option #1,to inquire about anytechnical font difficulties you may be experiencing. Businesshours are 5:00 a.m. to 5:00 p.m. (Pacific Standard Time).
How to order fonts in other countries
Your local Xerox representative will assist you in placing anorder and completing the necessary forms. The representativewill also answer your questions regarding literature, orderstatus, or custom font specifications.

FONTS, SUPPLIES, AND ACCESSORIES
8–14 XEROX 4235 LPS INSTALLATION PLANNING GUIDE

XEROX 4235 LPS INSTALLATION PLANNING GUIDE GLOSSARY–1
Glossary
2770 emulation Software on the 4235 LPS that emulates an IBM 2770 DataCommunication System. In BSC, the 4235 LPS can be definedas a RJE terminal operating in this mode.
2780 emulation Software on the 4235 LPS that emulates an IBM 2780 DataTransmission Terminal. In BSC, the 4235 LPS can be defined asa RJE terminal operating in this mode.
2780 MR emulation Software on the 4235 LPS that emulates an IBM 2780 MultipleRecords Data Transmission Terminal. In BSC, the 4235 LPS canbe defined as a RJE terminal operating in this mode.
3770 emulation Software on the 4235 LPS that emulates an IBM 3770 DataCommunication System. In SNA, the 4235 LPS can be definedas a RJE terminal operating in this mode.
3777 mode (IBM mode) Software on the 4235 LPS that emulates an IBM 3777 Model 3Communication Terminal.
3780 emulation Software on the 4235 LPS that emulates an IBM 3780 DataTransmission Terminal. In BSC, the 4235 LPS can be defined asa RJE terminal operating in this mode.
ACK affirmative acknowledgment. Data–link character. In bisyn-chronous communication, this character is a transmission codethat indicates the previous transmission was accepted by thereceiver, and the receiver is ready to accept the next block ofthe transmission.
application software Software programs that direct the computer to perform specific,user–related tasks or functions.
ASCII American Standard Code for Information Interchange
asynchronous Transmission of data in which time intervals betweentransmissions can be unequal. Transmission is character–by–character and is controlled by start and stop elements at thebeginning and end of each character.
auto logon Occurs when the 4235 LPS sends an INIT SELF request to thehost to bind the LUs.

GLOSSARY
GLOSSARY–2 XEROX 4235 LPS INSTALLATION PLANNING GUIDE
backup Procedure by which copy of important information is saved incase of later loss or damage to the original.
batched data Information that has been grouped with other information toincrease the efficiency of transmission or processing.
batch processing Allows the computer to perform repetitive operationssequentially on batched data without much involvement of thecomputer operator.
baud rate Data transfer rate between the computer and the printer. Thecomputer and the printer must be configured at the same baudrate, which can be set from between 300 and 19,200 bauddepending on the type of computer used. The baud rate is setonly if the serial interface is used.
bind In SNA, a request to activate a session between two logicalunits and to complete the logon process.
boot To start or restart the printer.
bps bits per second
BSC binary synchronous communication. Character–orientedcommunication protocol that uses a set of special characters todefine the structure of the data transmission frame.
carriage return Control character that, unless set to be interpreted as a line end,causes the printer to begin printing at the left margin of thecurrent line.
channel Sometimes called a circuit, facility, or link. 1. In datacommunications, a path or line that enables two or moredevices to communicate. 2. Path for communication betweenthe CPU and input/output units or between the CPU andperipheral devices.
character code Code (such as ASCII or EBCDIC) that assigns numerical valuesto characters.
character–coded logon In SNA, a logon statement that is encoded and transmitted as acharacter string. It is also known as an unformatted logon.
character or symbol set Particular way in which alphabetic and numeric characters andsymbols of a font are grouped. Each character set has beendesigned for a special purpose. Some sets include all printablecharacters found on most standard computer keyboards.Others are intended for such applications as math, foreignlanguage typesetting, and law.
CME copy modification entry
code conversion Translation of one type of character or symbol code to another.
collate To arrange or assemble into ordered sets.

GLOSSARY
XEROX 4235 LPS INSTALLATION PLANNING GUIDE GLOSSARY–3
communication card files Files that contain operator commands, logon statements, andother messages and are used to initiate, maintain, or terminate acommunication session between the 4235 LPS and your hostcomputer system.
communication port Physical outlet used for asynchronous, synchronous, or parallelsending and receiving of information from a remote location.
compiler Software that translates instructions written in high–levellanguage into machine language for execution by a system.
composite character code Hexadecimal code that consists of the incoming character codeand the font code.
configuration One or a group of computers and related devices (such asterminals and printers) interconnected and programmed tooperate as a system (sharing resources, communicating data,accepting input, and so on).
copy–sensitive Jobs in which multiple copies of a report contain different data,as with paychecks and banking statements.
CPU central processing unit. Interprets and executes instructions,performs all operations and calculations, and controls input andoutput units and auxiliary attachments.
CR carriage return
CRT cathode ray tube
CRU customer replaceable unit. In the 4235 printer, the dry inkcartridge and the print cartridge are CRUs.
data monitor Feature of the 4235 LPS that prints the hexadecimal values ofincoming codes and characters. The data monitor is used fortroubleshooting.
default Printer setting used in place of a software application selection.
diagnostics Software tests used to test correct operation of various elementsof a system.
DJDE dynamic job descriptor entry. A record of information that isprocessed from the input data stream and modifies current jobcharacteristics.
DLE data link escape
DLE EOT data–link escape and end of transmission. Data–linkcharacters. When combined, these two characters are adisconnect sequence for a switched line in bisynchronouscommunications. The host or the printer can send thissequence.
download 1. To transfer information from a host computer system to theprinter. 2. To load information from a host into memory or diskstorage.
downloaded font Fonts loaded from the host computer system into the dynamicmemory of the printer. Such a font must be reloaded each timethe system is powered up.

GLOSSARY
GLOSSARY–4 XEROX 4235 LPS INSTALLATION PLANNING GUIDE
dpi dots per inch
dry ink Fine–powdered substance of resin and black carbon used tocreate images in the printing process. The dry ink supply forthe system is contained inside the disposable dry ink cartridge.Dry ink can accept an electrical charge.
EBCDIC extended binary coded decimal interchange code
emulation Product that imitates another product so that it can accept thesame data and programs as the original.
enabler Hardware devices or software packages that allow the printer toperform as specified or better.
ENQ enquiry. Data–link character. In bisynchronouscommunication, this is a transmission code that queries adevice as to whether it has received a block of data.
error conditions Hardware– or software–related conditions that cause your jobto stop printing.
ESC escape character. Control code or character represented byASCII 27 (1BH), which must be placed in front of a printercommand. The escape character (represented by the icon E)tells the printer to execute the following character string ratherthan print it.
ESS electronic subsystem. See system controller.
ETX end–of–text. Data–link character. In bisynchronous communi-cation, this is a transmission code that indicates the end of amessage.
FF form feed. 1. Control character (ASCII 12 or 0CH) that causesthe printer to print and eject the current page. 2. Keyboard orprinter control character that causes the printer to skip to thetop of the next page.
file protection To prevent the contents of a disk or tape from being erased orwritten over by disabling the write head of the disk or tape.
font code Code in EBCDIC or ASCII that specifies font data.
form 1. Compiled .FSL file.
2. Document with a fixed format that contains blank spaces. Itis merged with a file containing variable data.
format 1. Layout of a document, including margins, page length, linespacing, typeface, and so on.
2. In data storage, the way the surface of a disk is organized tostore data. 3. To prepare the surface of a disk for theacceptance of data.
formatted logon In SNA, a logon that is encoded into fields using the INIT SELFcommand, each logon having a specified format.
.FSL form source library
HCF high–capacity feeder

GLOSSARY
XEROX 4235 LPS INSTALLATION PLANNING GUIDE GLOSSARY–5
HCSS high–capacity stitcher or stacker (also referred to as simply"stitcher" or "stacker")
head–to–head Method of duplex printing in which the top of the back page isprinted in the same place as the top of the front page.
head–to–toe Method of duplex printing in which the bottom of the backpage is printed in the same place as the top of the front page.
high–capacity stacker Output tray on the 4235 LPS that is designed to hold and offsetup to 2,000 sheets of 20 pound (80 gsm) paper.
hold line period Length of inactivity allowed during communications before the4235 LPS disconnects from the host computer system. It isavailable only during switched line communications. Thedefault hold line period is 60 seconds.
IOT image output terminal
ISO International Standards Organization
JDE job descriptor entry. Xerox Print Description Languagecommand that is coded within a job descriptor library. Thiscommand indicates the start of a set of PDL commands thatdefines how a specific application is to be processed by the4235 LPS.
JDL job descriptor library. Object file that resides on the Xerox LPShard disk containing Xerox Print Description Languagecommands that define how different applications are to beprocessed.
job Sequence of operations performed to result in a desired productor service.
job boundary Electronic printing command that marks the beginning or end ofa job and invokes certain printing functions, such as pageoffsetting, printing of a status sheet, or resetting of documentformatting parameters.
job management Collective functions of job scheduling and commandprocessing.
JSL job source library. Xerox Print Description Language term.Collection of uncompiled job descriptions.
LE line end. Control code sequence denoting the end of a printline or of a command. Line endings may vary from system tosystem according to the interface and protocol used. A lineending can consist of a carriage return, line feed, or both.Represented by the icon L.
LF line feed. Control character (ASCII 10, 0AH) that causes theprinter to begin printing in the current character position of thenext line.
line monitor trace Diagnostic tool that monitors communication protocolstransmitted through a serial interface.
Line Printer Mode Mode in which the 4235 LPS accepts all data as printablecharacters.

GLOSSARY
GLOSSARY–6 XEROX 4235 LPS INSTALLATION PLANNING GUIDE
log To record sequence and status of copy.
logical jobs Series of separate jobs that the printer treats as one job. Logicaljobs are separated by an end of job command or controlcharacter. For example, in PostScript, jobs can be separated bya Control–D sequence.
LPS laser printing system
LU logical unit. In SNA, software through which a user accessesthe SNA network to communicate with another user or toaccess the functions provided by the systems services controlpoint (SSCP). An LU can support at least two sessions (such asLU and LU or LU and SSCP) and may be capable of supportingmany sessions with other logical units.
LU active State of a device that indicates it is connected to or available forconnection to another device.
menu 1. Menus list items presented for selection from the controlpanel of the printer and used to present options or choices forusers. 2. List of available functions, commands, and options.
merge Operation combining two or more files into one predeterminedorder. For example, to merge two separate, alphabeticallyordered files of names would result in one large, alphabeticallyordered file.
mode Method of operations or set of conditions under whichoperations are performed. Designed sequence of equipmentoperation from main initiating condition to terminal observablecondition.
nontextual data Data in which binary codes are not intended to invoke printingof font characters.
offline State of a printer that is not under the active control of a CPUand therefore not able to accept data from a computer.
offset Setting one printing job apart from another.
online State of a printer that is able to accept data from the computerbecause the printer is under the direct control of a CPU (forexample, a printing system in interactive communication with amainframe).
operator text message Message that you send from the host computer system to the4235 LPS. The message may involve printer settings, specialpaper loading procedures, and other tasks.
output 1. Material produced by a peripheral device of a computer,such as printout or magnetic tape. 2. Result of completedoperations.
output tray The place where printed material is delivered facedown.Located on the top cover of the printer.
override To disregard a current selection in favor of another (usuallyused in paper tray and cassette selection).

GLOSSARY
XEROX 4235 LPS INSTALLATION PLANNING GUIDE GLOSSARY–7
page end Instruction (for example, form feed) to terminate the currentpage.
paper jam When paper gets stuck somewhere along the paper path.
paper source One of four paper input trays.
parallel and serial ports Two interface connectors located on the lower part of the backpanel of the 4235 LPS to which the computer cable attaches.
parallel interface Type of interface between a printer and its host in which data istransmitted and received in bytes rather than bits. Used for localprinting over short distances (25 feet, 7.63 meters, or less).
parity bit Extra bit used to make sure that data has been transmittedaccurately by providing a receiving device with means ofchecking odd or even parity.
parity checking Automatic error detection process that the printer and the hostcomputer system use to check parity bits along with thenumerical bits.
Pass Through mode Used in XDPM. Allows the data to be printed by the 4235 LPSwithout interference from the 3777 emulation software.
password Unique word or set of characters that an operator or user mustsupply to log on to a system.
PDL print description language. Keyword language that defines thecommands required to process an application on a Xerox LPS.
photoreceptor Photoreceptor or print drum found in the replaceable printcartridge and used to form letter or line images on documents.
physical jobs Print job that occupies a single file on the printer. A physicaljob can contain one or more logical jobs.
ppm pages per minute
print cartridge Print (photoreceptor) cartridge contains a photosensitive "printdrum" used in the printing process. The cartridge is disposable.
printer driver Program resident in the host computer system that enables thehost computer system to communicate formatting and jobcontrol information to the printer.
PU physical unit. In SNA, software that provides services tomanage and monitor the resources of a device.
purge To delete data from a system.
query Request for data or other information, entered by an operatorwhile the system is processing.
queue Sequence of documents waiting to be processed.
remote access Access to a central computer by terminals or devicesgeographically separated from that computer.
reset Restore the printer to its default configurations. This may beperformed at the printer control panel or remotely by command.

GLOSSARY
GLOSSARY–8 XEROX 4235 LPS INSTALLATION PLANNING GUIDE
resident font Font built into the printer at the time of manufacture,permanently available in memory. Resident fonts are alsocalled internal fonts.
response time Time a system requires to respond to a command fortransferring stored data or completing the processing cycle.
restart To resume a data processing job run from a point where it wasaborted.
restore To bring backup copy of a program or data into service torecover from loss or damage to the original copy.
RJE remote job entry. In SNA, the data management section of anoperating system. RJE allows users to submit jobs to beprocessed by a remotely located device.
sample tray Output tray to which sample copies, sample files, and testpatterns are delivered. This is called the top output tray on the4235 LPS.
scan direction For a page, this is the y–direction which is perpendicular to thepaper path. For a graphic window, the scan direction is alwayshorizontal, regardless of page orientation, and is considered tobe the x–direction of the window.
scan line Line of video data printed in one pass of the laser beam acrossthe length of the xerographic drum.
SDLC synchronous data link control. An IBM bit–oriented communi-cation protocol that uses a variety of bit patterns to mark thebeginning and end of a frame.
serial interface Type or method of sending codes from computer to printer orother device, one bit of information at a time, over acommunication line. These interfaces can function over greatdistances.
sixel encoding Technique of coding raster data so that it is not mistaken forcontrol codes.
SNA systems network architecture. Total description of logicalstructure, formats, and protocols of operation sequences fortransmitting an information unit through the communicationsystem.
software exerciser Software program that causes a system or component toartificially emulate the user.
spooling Process of releasing data from main memory and storing ittemporarily until a peripheral device is ready to accept it (forexample, storing text before sending it to a printer).
status sheet One–page printout generated by a Xerox LPS containinginformation about the current interface used between the LPSand the host computer system, the encoding it uses, fonts inuse, and errors within the current job that are detected by thesystem software.
substitute escape character See user–defined key.

GLOSSARY
XEROX 4235 LPS INSTALLATION PLANNING GUIDE GLOSSARY–9
sysgen systems generation. Process that modifies the operating systemto meet the specific needs of a network, user, and so on.
system controller Part of the LPS that acts as an interface between the printer andthe host computer system. It formats and temporarily storesdata from the host and contains the operating system softwarefor the printer, utility programs, emulations, and system defaultfiles. Also called the ESS.
system exerciser Program within the 4235 LPS that tests the current printingcapability of the printer by printing a sample customer letter.
system files Files that are loaded during a sysgen.
system utilities Set of routines for organizing and maintaining files on rigid diskor any diskette.
tape Recording media for data or computer programs. Tape can bein permanent form, such as perforated paper tape. Generallytape is used as a mass storage medium in magnetic form andhas far higher storage capacity than disk storage, but it takeslonger to write or recover data from tape than from disk.
temporary storage Main memory locations reserved for intermediate results ofprocessing, control values, or other information which needs tobe kept on hand as a program proceeds.
Terminal mode Series of menus within Print mode that allows you tocommunicate with your host computer system. They allow youto log on, log off, and use the communication options andtroubleshooting tools only if the 4235 LPS uses the SNA or BSCinterfaces.
test data Signal measurement procedures containing specification,tolerances, amplitude, duration, operational mode, orconditions under which a signal is available and test equipmentis required.
test pattern Page of lines or characters used to check print quality.
throughput In data processing systems, the amount of data that can beprocessed, transmitted, and printed in a specified period oftime.
trace Routine record providing a list of chronological events(execution) of a program.
translation table Feature on the 4235 LPS that maps one set of character codes toanother.
UDK user–defined key. Substitute escape character defined by auser for specific print jobs.
UI user interface
utilities Programs that provide commonly used services such as filetransfer, file maintenance, information recovery from damageddisks, disk initializing, and disk copying.
VFU vertical format unit

GLOSSARY
GLOSSARY–10 XEROX 4235 LPS INSTALLATION PLANNING GUIDE
WACK wait before transmit positive acknowledgment character. Inbisynchronous communication, a transmission code sent by areceiving device to a transmitting device to indicate that it istemporarily not ready to receive more data.
XDPM Xerox Distributed Print Mode. 4235 LPS implementation ofXES.
XES Xerox Escape Sequences. Xerox printer command language.
XON/XOFF Asynchronous communication protocol for regulating data flow.
XPPM Xerox Production Print Mode. 4235 LPS implementation of theXerox Print Description Language.
XScript 4235 LPS implementation of Adobe PostScript.

XEROX 4235 INSTALLATION PLANNING GUIDE INDEX-1
Index
Numerals
50 Hz LPS requirements, 3-6t
60 Hz LPS requirements, 3-6t
2260 interface, Data Products, 6-5 to 6-8
4235 LPSconfigurations, 1-5features, 1-6identifying to host computer system, 2-8interface options, 6-1fuser interface settings, 7-20
A
access and space, 3-2
accessories, fonts, supplies, 8-1 to 8-14
ACF/VTAM sample definitions, 7-18
alarm indication, 1-4f
allocating file space, 1-11t
altitude range, 3-2
approvals and certification, v
assignments of tasks, 2-7 to 2-8
asynchronous, 6-14asynchronous serial system configurationoptions, 6-21 to
6-25
B
bisynchronous, 6-14protocols, not supported, 6-15serial system configuration options,
6-26 to 6-30
bit mapped memory boards, 1-5
boot switch, 1-4f
C
cableparallel, 6-2serial, 6-15
capacity, hard disk, 1-6
cassettes, paper, 8-3
CAUTION, xiii
Centronicsinterface, 6-2 to 6-5pin assignments and signals, 6-4tsignal timing, 6-5fspecifications, 6-3t
certification, approvals, v
ChecklistsSite preparation, 3-8fPrinter setup options XDPM, 4-3fPrinter setup options XPPM, 4-6fPrinter setup options XScript, 4-8fPrinter setup options HP LaserJet IID, 4-11fDocument formatting options XDPM, 5-4fDocument formatting options XPPM, 5-6fDocument formatting options XScript, 5-8fDocument formatting options HP Laserjet IID
emulation, 5-11fParallel system configuration, 6-13Serial system configuration SNA and
SDLC, 6-20fSerial system configuration asynchronous,
6-25fSerial system configuration bisynchronous,
6-29Supplies and accessories, 8-10f
communication requirements, 3-6
components, 1-4f
computer system generation, host, 7-1 to 7-22
configurations4235 LPS minimum and maximum, 1-5parallel, 6-9 to 6-13
serial asynchronous, 6-21 to 6-25serial bisynchronous, 6-26 to 6-29serial SNA/SDLC, 6-17 to 6-20
controllerinterface, 3-7system, 1-4f
conventions, xiii
coprocessor, math, 1-6

INDEX f = figure; t = table
INDEX-2 XEROX 4235 INSTALLATION PLANNING GUIDE
countdown log, installation, 2-4
customer responsibilities, 2-2 to 2-3
custom fonts, 8-11
D
data link escape, 6-27
DataProducts2260 interface, 6-5 to 6-8pin assignments and signals, 6-7tsignal timing, 6-8fspecific options, 6-6
default, fonts 1-7
description, environment, see environment description
dimensions and weight, 3-2
disk, hard, 1-6
diskettes, micro, 8-5, 8-11
display screen, see user interface screen
DJDE, 1-6
DLE, see data link escape
document formatting optionsHP LaserJet IID emulation, 5-9 to 5-11XDPM, 5-1 to 5-4XPPM, 5-5 to 5-6XScript, 5-7 to 5-8
dry ink cartridge, 1-4f, 8-3
duplex printing, 1-1
E
electrical requirements, 3-6
emissions, radio frequency, iii
environmental requirements, 3-2
environment descriptionOS/MVS JES2, 7-2OS/MVS JES3, 7-5OS/VS1, 7-12VM/RSCS, 7-8VSE/POWER, 7-10
F
features, 1-1 to 1-5
file space allocation, 1-11t
floor plan arrangements, 3-4 to 3-5
fontscustom, 8-11default, 1-7HP LaserJet IID emulation, 1-10
loading, 1-7, 2-8on magnetic tape drive, 8-11on micro diskettes, 8-11ordering information, 8-11orientation, XDPM, 1-7standard and optional, 1-6supplies and accessories, 8-1 to 8-13technical support, 8-13XDPM, 1-7XPPM, 1-8XScript, 1-9
fuser agent, 8-3, 8-6
G
gender changer, 3-7
generation, system, host computer, 7-1 to 7-22
H
hard disk, 1-5capacity, 1-6
hardware, 1-2
help, where to get, xi
HFDL ,see Host Forms Description Language
hostcomputer system generation, 7-1 to 7-22software options, Xerox, 7-21 to 7-22
Host Forms Description Language, 7-21
HP LaserJet IID emulation, 1-10document formatting option, 5-9 to 5-11fonts, 1-10printer setup options, 4-9 to 4-11
humidity range, 3-2
IBM sample PARMLIB parametersJES2, 7-19JES3, 7-20
identifying 4235 LPS to host computersystem, 2-7
image generator board, 1-6
initialization process reviewOS/MVS JES2, 7-2OS/MVS JES3, 7-5OS/VS1, 7-12VM/RSCS, 7-8VSE/POWER, 7-10
installationcountdown log, 2-4planning tasks, 2-1 to 2-8
interfaces, 1-5Centronics, 6-2 to 6-5

f = figure; t = table INDEX
XEROX 4235 INSTALLATION PLANNING GUIDE INDEX-3
Controller, 3-7options, 4235 LPS, 6-1parallel, 6-2 to 6-13selecting, 6-1 to 6-2serial, 6-14 to 6-30
J
JES 2, OS/MVS, 7-2 to 7-5
JES 3, OS/MVS, 7-5 to 7-8
L
laser safety, iii
leased line environmentOS/MVS JES2, 7-4OS/MVS JES3, 7-7OS/VS1, 7-14VM/RSCS, 7-9VSE/POWER, 7-11
loading fonts, 1-7, 2-8
log, installation countdown log, 2-4
M
magnetic tape, fonts on, 8-11
major mode definition, VTAM switchednetwork, 7-17
micro diskettes, 8-4, 8-11
memory, system, 1-6
modem or modem eliminator, 3-7
NCP generation SNA sampledefinition, 7-16
O
operator, selecting, 2-7
options, 1-6Data products, specific 6-8
orderingfonts, 8-11supplies,
form, 8-10how to, 8-9
OS/MVS JES2, 7-2 to 7-4
OS/MVS JES3, 7-5 to 7-7
OS/VS1, 7-12 to 7-14
P
paper, 8-1 to 8-2
parallelcable, 6-2interface information, 6-2 to 6-13system configuration options, 6-9 to 6-13
parameters, sampleOS/MVS JES2, 7-4OS/MVS JES3, 7-7OS/VS1, 7-14SNA, 7-15VM/RSCS, 7-9VSE/POWER, 7-11
pin assignmentsCentronics, 6-4tSerial interface, 6-16signals, 6-4
planningfloor arrangements, 3-4, 3-5site, 3-1 to 3-8installation tasks, 2-1 to 2-8
preinstallation tasks, 2-2
print cartridges, 8-3, 8-10
printer setup options, checklist,XDPM, 4-1 to 4-3XPPM, 4-4 to 4-6Xscript, 4-7 to 4-8HP LaserJet IID emulation, 4-9 to 4-11
proceduresordering supplies, 8-9system generation, 7-1 to 7-22
protocols not supported, 6-15
publications, related, vi
R
radio frequency emissions, iii
related publications, vi
remote 3770 definition, 7-19
Remote Print Management Facility, 7-21
requirementscommunication, 3-6electrical, 3-6environmental, 3-2space, 3-2 to 3-5
responsibilitiescustomer, 2-2Xerox, 2-1
RPMF, see Remote Print Management Facility
S
safety precautions

INDEX f = figure; t = table
INDEX-4 XEROX 4235 INSTALLATION PLANNING GUIDE
laser, iiioperational, ivradio frequency emissions, iii
screen, user interface, 1-4f
SDLCoption, 1-6serial, 6-15settings, 7-20unsupported protocols, 6-15
selectinginterface, 6-1 to 6-2operator, 2-7
serialcable, 6-15interface information, 6-14pin assignments, 6-16system configuration
asynchronous, 6-21 to 6-25bisynchronous, 6-26 to 6-30SNA/SDLC, 6-17 to 6-20
settings4235 LPS user interface, 7-20Auto Log-on and Formatted Log-on, 7-20SDLC, 6-21user interface, 7-20
signal timingCentronics, 6-5fData Products, 6-8f
sign-on proceduresOS/MVS JES2, 7-5OS/MVS JES3, 7-7VM/RSCS, 7-9VSE/POWER, 7-11
siteplanning, 3-1 to 3-8preparation, checklist, 3-8f
SNAoperation, 1-6parameters sample, 7-15sample definition, 7-16serial, 6-14 settings for Auto Log-on and Formatted Log-on
only-ACF/VTAM parameters, 7-20unsupported protocols, 6-15
softwarefeatures, 1-1 to 1-2Xerox host options, 7-21
spaceaccess, 3-2requirements, 3-2 to 3-5
standard and optional fonts, 1-6 to 1-10
supplies and accessoriesfonts, 8-1 to 8-13how to order, 8-9list, 8-5 to 8-6
switched line environmentOS/MVS JES, 7-5OSMVS JES3, 7-7OS/VS1, 7-14VM/RSCS, 7-9
switched network majornode definition,VTAM, 7-17
Synchronous Data Link Control, see SDLC
systemconfiguration
parallel, 6-9 to 6-13serial
asynchronous, 6-21 to 6-25bisynchronous, 6-26 to 6-30SNA/SDLC, 6-17 to 6-20
controller, 1-4fgeneration
host computer system, 7-1 to 7-22memory, 1-6
System Network Architecture, see SNA
Ttasks
installation planning, 2-1 to 2-8preinstallation, 2-2
technical support, 8-13
telephone line and jack, 3-7
temperature range, 3-2
terminal id, SNA/SDLC, 6-15f
test job, transmitting, 2-8
U
unsupported SNA/SDLC and bisynchronous protocols, 6-15
user interfacescreen, 1-4fsettings, SNA/SDLC, 7-20
utilities, font loading, 1-6
V
VSE/POWER,, 7-10 to 7-11
VTAMsample definitions, 7-18switched network majornode definitions, 7-17

f = figure; t = table INDEX
XEROX 4235 INSTALLATION PLANNING GUIDE INDEX-5
VM/RSCS, 7-8 to 7-9
W
WARNING, xii
weight and dimensions, 3-2
X
XDGI, see Xerox Document Graphics Interface
XDPMdocument formatting options, 5-1 to 5-4fonts, 1-7printer setup options, 4-1 to 4-3
XeroxDistributed Print Mode, see XDPMDocument Graphic Interface, 7-21font technical support, 8-17host software options, 7-21 to 7-22Job Description Compiler, 7-22Pen Plotter Interface, 7-21Printer Access Facility, 7-21Production Print Mode, document formatting options, 5-5 to 5-6
fonts, 1-7toption, 1-8printer setup options, 4-4 to 4-6
Remote Print Management Facility, see RPMFresponsibilities, 2-1
XDPMdocument formatting options, 5-1 to 5-4fonts, 1-7printer setup options, 4-1 to 4-3
XJDC, see Xerox Job Description Complier
XPAF, see Xerox Printer Access Facility
XPPI, see Xerox Pen Plotter Interface
XPPM, see Xerox Production Print Mode
XScript,document formatting, 5-7 to 5-8fonts, 1-9option, 1-9printer setup options, 4-7 to 4-8

INDEX f = figure; t = table
INDEX-6 XEROX 4235 INSTALLATION PLANNING GUIDE