Embed Size (px)
Citation preview
Xedge 6000 Version 7.3.15for MSPx ApplicationsSoftware Installation & Release Notes032R901-V7315, Issue 1 - May 2013

Copyright©2013 General DataComm, Inc. ALL RIGHTS RESERVED.This publication and the software it describes contain proprietary and confidential information. No part of this document may be copied, photocopied, reproduced, translated or reduced to any electronic or machine-readable format without prior written permission of General DataComm, Inc. The information in this document is subject to change without notice. General DataComm assumes no responsibility for any damages arising from the use of this document, including but not limited to, lost revenue, lost data, claims by third parties, or other damages. If you have comments or suggestions concerning this manual, please contact:
General DataComm, Inc. Technical Publications 6 Rubber Avenue, Naugatuck, Connecticut USA 06770Telephone: 1 203 729 0271
TrademarksAll brand or product names are trademarks or registered trademarks of their respective companies or organizations.
DocumentationRevision History: GDC P/N 032R901-V7315
Related Publications
-REV is the hardware revision (-000, -001, etc.) -VREV is the most current software version (-V510, V620, V720, etc.) In addition to the publications listed above, always read the Patch Release Notes supplied with your products.
Issue Date Release Description
1 May 2013 Initial Release - Xedge 6000 Version 7.3.15 (P/N 200U300-C01 D-)
Description Part Number
Xedge/ProSphere Deployment Guide (for military applications only) Contact GDC
Xedge / ProSphere Security Administration Guide (for all Xedge 6000 systems) 032R298-000
Xedge / ProSphere Quick Reference (for all Xedge 6000 systems) 032R299-000
Xedge 6000 Hardware Setup Guide (for all Xedge 6000 systems) 032R440-REV
Xedge 6000 for MSPx Applications Version 7.3.X Software Configuration GuideXedge 6000 for MSPx Applications Version 7.3.X Release Notes and Cumulative Patch Notes
032R401-V73X032R901-V73X
Xedge 6000 for ATM Applications Version 6.2.X Software Configuration & Status GuideXedge 6000 for ATM Applications Version 6.2.X Release Notes and Cumulative Patch Notes
032R400-V62X032R901-V62X
ProSphere NMS Version 6.0.0 User Guide (for all Xedge 6000 systems) 032R610-V600
ProSphere NMS Version 6.0.0 Installation and Release Notes 032R906-V600

Xedge 6000 Version 7.3.15 Publication No. 032R901-V7315Issue 1 - May 2013
Releas
TABLE OF CONTENTS
Section 1 - Xedge 6000 for MSPx Version 7.3.15 .............................. 51.0 Overview...........................................................................................................................52.0 New Features/Fixes in Xedge Version 7.3 .......................................................................5
2.1 Version 7.3.0/7.3.1 Notes (July 7, 2011) ..............................................................5
2.2 Version 7.3.2 Notes (July 16, 2011) .....................................................................5
2.3 Version 7.3.3 Notes (July 25, 2011) .....................................................................5
2.4 Version 7.3.4 Notes (August 8, 2011) ..................................................................6
2.5 Version 7.3.5 Notes (August 19, 2011) ................................................................6
2.6 Version 7.3.6 Notes (September 17, 2011)...........................................................6
2.7 Version 7.3.7 Notes (September 23, 2011)...........................................................6
2.8 Version 7.3.8 Notes (October 12, 2011) ...............................................................6
2.9 Version 7.3.9 Notes (October 20, 2011) ...............................................................6
2.10 Version 7.3.10 Notes (October 27, 2011) .............................................................6
2.11 Version 7.3.11 Notes (December 1, 2011) ...........................................................6
2.12 Version 7.3.12 Notes (December 07, 2011) .........................................................6
2.13 Version 7.3.13 Notes (January 13, 2012) .............................................................6
2.14 Version 7.3.14 Notes (February 2, 2013) .............................................................7
2.15 Version 7.3.15 Notes (May 2, 2013) ....................................................................7
3.0 Version 7.3.15 Components..............................................................................................8
4.0 Version 7.3.15 Software Files...........................................................................................9
5.0 Feature Compatibility with Previous Versions ...............................................................10
6.0 Xedge V 7.3.15 Installation Overview ...........................................................................13
6.1 Update Existing Controllers/Smart LIMs ...........................................................15
6.1.1 Transfer Files to Controllers/Smart LIMs .............................................15
6.2 Install a New Controller......................................................................................16
6.2.1 For Non-Slot 0 Card ..............................................................................16
6.2.2 For ISG2 Slot-0 Card .............................................................................16
6.3 Warm Start Procedures .......................................................................................17
6.3.1 Non-disruptive Warm Start (for Redundant Slot-0 Nodes) ...................17
6.3.2 Disruptive Warm Start (for Entire Switch) ............................................18
6.3.3 Disruptive Warm Start (for Single Nonslot-0 Card) ..............................18
7.0 Operational Guidelines ...................................................................................................19
7.1 System Guidelines ..............................................................................................19
7.2 Configuration Guidelines....................................................................................19
7.3 File System Guidelines .......................................................................................20
e Notes for GDC Part No. 200U300-C01 D- Page 3
Publication No. 032R901-V7315 Xedge 6000 Version 7.3.15Issue 1 - May 2013
Page 4
7.4 Slot Controller Guidelines ..................................................................................20
7.5 Redundancy Guidelines ......................................................................................20
8.0 Known Limitations .........................................................................................................21
8.1 Configuration ......................................................................................................21
8.2 Signaling .............................................................................................................21
8.3 Traffic Management ...........................................................................................21
8.4 Line Interface Modules .......................................................................................21
8.5 Packet Controllers...............................................................................................21
Release Notes for GDC Part No. 200U300-C01 D-
Xedge 6000 Version 7.3.15 Publication No. 032R901-V7315Issue 1 - May 2013
Releas
Section 1 - Xedge 6000 for MSPx Version 7.3.15
1.0 Overview This document provides software installation and additional operation guidelines for Xedge 6000 Version 7.3.15 for multiservice packet exchange applications (MSPx). This version supports the Xedge packet controllers (ISG2, PCX2, PCL, PCE, etc.) and their associated LIMs. For detailed hardware installation or operation procedures, refer to the documentation on Xedge 6000 for MSPx Applications listed in the front of this document.
When an Xedge 6000 switch houses both Xedge packet controllers (for MSPx applications) as well as legacy Xedge adaptation and cell modules (for ATM applications), be aware that the adaptation and cell controllers which operate under Version 6.2.x switch code must be installed in nonslot-0 positions in the switch. For detailed hardware installation or operation procedures on any legacy Xedge modules, refer to the documentation on Xedge 6000 for ATM Applications listed in the front of this document.
Additional information is available at http://www.gdc.com or from your Authorized Xedge/ProSphere field service representative. Always refer to the Cumulative Patch release notes that accompanied your Xedge upgrade for important feature information.
Note: Additional setup procedures are required in networks with heightened security requirements, such as military or other mission critical applications. Refer to the Security Administration Guide or contact your GDC representative for more information.
2.0 New Features/Fixes in Xedge Version 7.3This version of the Xedge 6000 for MSPx applications adds the following hardware and software functionality and improvements:
2.1 Version 7.3.0/7.3.1 Notes (July 7, 2011)• MR Fixes: MR10475, MR10477, MR10480, MR10474, MR10488, MR10037, MR10141,
MR10368, MR10161
• New Features:
• 16-port T1/E1 MP LIM (“LD” Smart LIM)
• Over Sample
• VLAN and ETH services over Dry Martini on PCX-2
2.2 Version 7.3.2 Notes (July 16, 2011)• MR Fixes: MR10511
• New Features: ASIO Over Sample
2.3 Version 7.3.3 Notes (July 25, 2011)• New Features: Max Link Rate
e Notes for GDC Part No. 200U300-C01 D- Page 5

Publication No. 032R901-V7315 Xedge 6000 Version 7.3.15Issue 1 - May 2013
Page 6
2.4 Version 7.3.4 Notes (August 8, 2011)• MR Fixes: MR10511_ADDENDUM
• New Features: SNMPV3
2.5 Version 7.3.5 Notes (August 19, 2011)• MR Fixes: MR10431, MR10564, MR10563
2.6 Version 7.3.6 Notes (September 17, 2011)• MR Fixes: MR10575
• New Features: Netsnmp upgrade to 5.4.2.1
2.7 Version 7.3.7 Notes (September 23, 2011)• New Features: PCE Adaptive Timing
2.8 Version 7.3.8 Notes (October 12, 2011)• MR Fixes: MR10603, MR10601, MR10604, MR10602, MR10589
2.9 Version 7.3.9 Notes (October 20, 2011)MR Fixes: MR10603, MR10601, MR10604, MR10602, MR10589
2.10 Version 7.3.10 Notes (October 27, 2011)• MR Fixes: MR10651
• New Features:
• PAM Support
• INETACCESS
2.11 Version 7.3.11 Notes (December 1, 2011)Engineering release only.
2.12 Version 7.3.12 Notes (December 07, 2011)• MR Fixes: MR10665
• New Features:
• Security and interoperability (JITC filter)
• KERNEL Version upgrade from 2.0.0.7 to 2.0.0.8-
2.13 Version 7.3.13 Notes (January 13, 2012)• MR Fixes: MR10665
• New Features:
• AUDITD
• FAILLOG
• Upgrade kernel from 2.0.0.8 to 2.0.0.9
Release Notes for GDC Part No. 200U300-C01 D-

Xedge 6000 Version 7.3.15 Publication No. 032R901-V7315Issue 1 - May 2013
Releas
2.14 Version 7.3.14 Notes (February 2, 2013)• MR Fixes:
MR10577. MR10647, MR10652, MR10561, MR10656, MR10654, MR10655, MR10661, MR10657, MR10626, MR10642, MR10643, MR10644, MR10646, MR10645, MR10673, MR10680, MR10685, MR10692, MR10689, MR10599, MR10693, MR10694, MR10674, MR10688, MR10689, MR10691, MR10686, MR10713, MR10456, MR10718, MR10714, MR10719, MR10720, MR10695, MR10710, MR10725, MR10730, MR10729, MR10731, MR10732, MR10733, MR10737, MR10738, MR10577, MR10647, MR10652, MR10561, MR10656, MR10654, MR10655, MR10661, MR10657, MR10626, MR10642, MR10643, MR10644, MR10646, MR10645, MR10673, MR10680, MR10685, MR10692, MR10689, MR10599, MR10693, MR10694, MR10674, MR10688, MR10689, MR10691, MR10686, MR10713, MR10456, MR10718, MR10714, MR10719, MR10720, MR10695, MR10710, MR10725, MR10730, MR10729, MR10731, MR10732, MR10733, MR10737, MR10738, MR10744, MR10747, MR10748, MR10735, MR10752, MR10751, MR10754, MR10756, MR10755, MR10759, MR10758, MR10763, MR10742, MR10764, MR10322, MR10701, MR10740, MR10772, MR10767, MR10773, MR10775, MR10762, MR10777, MR10779, MR10782, MR10783, MR10789, MR10000, MR10790, MR10699, MR10780, MR10797, MR10798, MR10799, MR10802, MR10814
• New Features:
• MPLS/IPPW Over VLAN - PCx2
• Fast Routing over VLAN - PCx2
• Ptp MIB Changes
2.15 Version 7.3.15 Notes (May 2, 2013)• (MR10806) Fixed problems with AVM E&M signaling
• (MR10814) Fixed problem with PCX2 GE ports state where port was still up when port state was set to Admin Down.
• (MR10828) Created startup for Analog Voice LIM (AVM not fully supported in this release).
• (MR10835) Fixed AVM VC Switching range limitation.
• (MR10844) Fixed bugs in Packet MOLN where the slot0 MOLN table was not populated by non-slot0 MPLS MOLN.
• (MR10848) Fixed calculation errors in bandwidth for ATM over PSN (IP and DM tunnels).
• (MR10852) Fixed bug with ATM PVPs over Pseudowires.
• (MR10853) Fixed ingress side stats for LSPs for PCx2 (M,74,5). PCx was good.
• (MR10854) Added code to recognize LPM-3.
• (MR10860) Fixed VC Type in VC stats table for MP16 LIM. Initial state was ok, but after the MP16 boots, the field was not properly populated.
• (MR10861) Fixes for SNMP get of Iftables.
• (MR10865) File adjustments for networks with heightened security requirements.
• (MR10866) Added modifications to simplify the configuration of installations in networks with heightened security requirements.
e Notes for GDC Part No. 200U300-C01 D- Page 7

Publication No. 032R901-V7315 Xedge 6000 Version 7.3.15Issue 1 - May 2013
Page 8
3.0 Version 7.3.15 ComponentsThe table below lists slot controllers and LIMs supported in Xedge Version 7.3.15, and their required software files, if any. Refer to this list during software installations and upgrades to ensure that correct files are downloaded to each module.
Table 1: Hardware /Software Reference
Product Description Label Required Files Part Number
Slot Controller, IP Services Gateway Module ISG2 startup_isg.tzstartup_isg_pnni.tz
200P001-002
Slot Controller, Packet Cell Switch with Utopia LPM-1 PCX2startup_pcx2.tz
startup_pcx2_pnni.tz
200M010-001
Slot Controller, Packet Cell Switch with Hybrid LPM-2 PCX2 200M011-001
Slot Controller, Packet Cell Switch with Serdes LPM-4 PCX2 200M008-001
Slot Controller, Packet Cell Switch with Utopia LPM-1 PCXstartup_pcx.tz
startup_pcx_pnni.tz
200M001-001
Slot Controller, Packet Cell Switch with Hybrid LPM-2 PCX 200M002-001
Slot Controller, Packet Cell Switch with Serdes LPM-4 PCX 200M003-001
Slot Controller, Packet Cell Link with LPM-1 PCL startup_pcl.tz 200M006-001
Slot Controller, Packet Circuit Emulator w/LPM-CE PCE startup_pce.tz 200M009-001
LIM, 16-port (LD) T1/E1 Multi-Protocol LIM T1/E1 MP16 startup_ldl.tz 032P210-001
LIM, 8-port OC-N/STM-N for Singlemode or Multimode SFP inserts
OC-N/STM-N oc12.cod 200-P003-001
LIM, Legacy Circuit Emulation 16 Link LCE-16 lce.cod 032P187-001
LIM, Dual, short, OC-3c/STM-1 w/single port APS 155M-2 oc3.cod 032P150-011
LIM, Dual, intermed, OC-3c/STM-1 w/single APS 155I-2 oc3.cod 032P150-012
LIM, Dual, long, OC-3c/STM-1 w/single APS 155L-2 oc3.cod 032P150-013
LIM, Dual, short, OC-3c/STM-1, w/dual APS 155M-APS oc3.cod 032P150-001
LIM, Dual, intermed, OC-3c/STM-1 w/dual APS 155I-APS oc3.cod 032P150-002
LIM, Dual, long, OC-3c/STM-1 w/dual port APS 155L-APS oc3.cod 032P150-003
LIM, Dual, STM-1 Electrical LIM for ATM transport 155E-2 oc3.cod 032P151-001
LIM, DSX-1 8-link Inverse Multiplexing for ATM DSX1-IMA e1ds1.cod TBD
LIM, E1 8-link Inverse Multiplexing for ATM E1-IMA e1ds1.cod TBD
LIM, DSX-1 16-link Inverse Multiplexing for ATM DSX1-IMA e1ds1.cod 032P153-003
LIM, E1 16-link Inverse Multiplexing for ATM E1-IMA e1ds1.cod 032P153-013
LIM, DSX-1 16-link Inverse Multiplexing for ATM DSX1-IMA+ e1ds1.cod 032P153-023
LIM, E1 16-link Inverse Multiplexing for ATM E1-IMA+ e1ds1.cod 032P153-033
LIM, Quad Port Adaptive Serial I/O LIM ASIO -- 032P194-001
T1 BITS Node Timing Module NTM-DS1 ntm_t1.bin 032P062-001
E1 BITS Node Timing Module NTM-E1 ntm_e1.bin 032P089-001
Release Notes for GDC Part No. 200U300-C01 D-

Xedge 6000 Version 7.3.15 Publication No. 032R901-V7315Issue 1 - May 2013
Releas
4.0 Version 7.3.15 Software FilesNote that file sizes will change with any subsequent patch releases.Table 2: Software Reference Information
Directory Filename & Description File Size Version\dir1\cod startup_ana.tz 6009787 7.3.15\dir1\cod startup_isg.tz 4599985 7.3.15\dir1\cod startup_isg.tz_pnni 4916283 7.3.15\dir1\cod startup_ldl.tz 6819644 7.3.15\dir1\cod startup_pce.tz 7242255 7.3.15\dir1\cod startup_pcl.tz 5140333 7.3.15\dir1\cod startup_pcx.tz_ 9673326 7.3.15\dir1\cod startup_pcx.tz_pnni 9990940 7.3.15\dir1\cod startup_pcx2.tz_ 8010929 7.3.15\dir1\cod startup_pcx2.tz_pnni 8328559 7.3.15\dir1\cod e1ds1.cod 98551 7.2.4v2\dir1\cod lce.cod 225126 6.2.0v30\dir1\cod oc12.cod 229194 1.0.5\dir2\mib aa15.mib -- 7.2.0\dir2\mib AHEAD-IMPORTS-MIB.mib -- 7.2.0\dir2\mib AHEAD-PW-ENET-MIB.mib -- 7.2.0\dir2\mib AHEAD-PW-MIB.mib -- 7.2.0\dir2\mib AHEAD-PW-PSN-MIB.mib -- 7.2.0\dir2\mib apex.mib -- 7.2.0\dir2\mib apexCommon.xos_mib -- 7.2.0\dir2\mib apexSlot0.xos_mib -- 7.2.0\dir2\mib apexVc.xos_mib -- 7.2.0\dir2\mib atm.xos_mib -- 7.2.0\dir2\mib atmPort.mib -- 7.2.0\dir2\mib atmPnni.mib -- 7.2.0\dir2\mib cac.xos_mib -- 7.2.0\dir2\mib dlsplim.mib -- 7.2.0\dir2\mib ether.mib -- 7.2.0\dir2\mib evc.mib -- 7.2.0\dir2\mib gdcPnni.xos_mib -- 7.2.0\dir2\mib hdls.mib -- 7.2.0\dir2\mib ima.mib -- 7.2.0\dir2\mib imports.mib -- 7.2.0\dir2\mib mgntInterface.mib -- 7.2.0\dir2\mib MPLS-LSR-STD-MIB.mib -- 7.2.0\dir2\mib MPLS-TE-STD-MIB.mib -- 7.2.0\dir2\mib nodeStats.mib -- 7.2.0\dir2\mib plpp.mib -- 7.2.0\dir2\mib ptp.mib -- 7.2.4\dir2\mib qaal2.mib -- 7.2.0\dir2\mib rfc1213.xos_mib -- 7.2.0\dir2\mib sfp.mib -- 7.2.0\dir2\mib slotstats.mib -- 7.2.0\dir2\mib xBridge.mib -- 7.2.0\dir2\mib xlim.mib -- 7.2.0\dir2\mib xlimaps.mib -- 7.2.0\dir2\mib xlimds1.mib -- 7.2.0\dir2\mib xlime1.mib -- 7.2.0\dir2\mib xlimesonet.mib -- 7.2.0
e Notes for GDC Part No. 200U300-C01 D- Page 9

Publication No. 032R901-V7315 Xedge 6000 Version 7.3.15Issue 1 - May 2013
Page 1
5.0 Feature Compatibility with Previous VersionsThe table below provides a comparison of features based on Xedge system software version. Dashes indicate a feature or module not supported by the software version. A “CR” designation indicates a controlled release. An Xedge 6000 network can include:
• Xedge 6000 switch with an Xedge packet controller in slot-0 (Ver 7.x). Nonslot-0 positions can hold packet controllers (Ver 7.x), cell controllers (Ver 6.2.x) and adaptation controllers (Ver 6.2.x) with corresponding LIMs.
• Xedge 6000 switch with only adaptation or cell controllers at Ver 6.2.x or earlier.
Table 3: Feature Comparison
PACKET CONTROLLERS 710 721 722 723 724 7314 7315
ISG2 Packet Controller Yes Yes Yes Yes Yes Yes Yes
PCX Packet Controller Yes Yes Yes Yes Yes Yes Yes
PCX-2 Packet Controller -- -- -- Yes Yes Yes Yes
PCL Packet Controller -- Yes Yes Yes Yes Yes Yes
PCE Packet Controller -- -- -- -- Yes Yes Yes
LINE INTERFACE MODULES 710 721 722 723 724 7314 7315
DSX1/E1-IMA LIMs (4 ATM ports) -- -- -- -- -- -- --
DSX1/E1-IMA LIMs (8 ATM ports) -- -- Yes Yes Yes Yes Yes
DSX1/E1-IMA LIMs (16 ATM ports) -- Yes Yes Yes Yes Yes Yes
LCE-16 LIM -- -- Yes Yes Yes Yes Yes
DS1 LIM Yes Yes Yes Yes Yes Yes Yes
E1 LIM Yes Yes Yes Yes Yes Yes Yes
DS3 LIM -- Yes Yes Yes Yes Yes Yes
E3 LIMs -- Yes Yes Yes Yes Yes Yes
HSSI LIM (DTE) -- -- Yes Yes Yes Yes Yes
HSSI LIM (DCE) -- -- -- -- -- -- --
OC-N/STM-N LIM Yes Yes Yes Yes Yes Yes Yes
ASIO LIMs -- -- -- Yes Yes Yes Yes
16-port (LD) T1/E1 MP LIM -- -- -- -- -- Yes Yes
NODE TIMING MODULES 710 721 722 723 724 7314 7315
DS1 Node Timing Module Yes Yes Yes Yes Yes Yes Yes
E1 Node Timing Module Yes Yes Yes Yes Yes Yes Yes
SWITCH FABRIC MODULES 710 721 722 723 724 7314 7315
XH Switch Fabric Yes Yes Yes Yes Yes Yes Yes
XS Switch Fabric -- -- -- -- -- -- --
XM Switch Fabric -- -- -- -- -- -- --
0 Release Notes for GDC Part No. 200U300-C01 D-

Xedge 6000 Version 7.3.15 Publication No. 032R901-V7315Issue 1 - May 2013
Releas
FEATURE SUPPORT 710 721 722 723 724 7314 7315
IP Routing Yes Yes Yes Yes Yes Yes Yes
Maximum IP Routing Table 512 512 512 512 512 512 512
OAM F4/F5 flows -- -- Yes Yes Yes Yes Yes
RFC 1483 (Encapsulation) Yes Yes Yes Yes Yes Yes Yes
Slot-0 Redundancy Yes Yes Yes Yes Yes Yes Yes
System Timing Yes Yes Yes Yes Yes Yes Yes
UNI 3.1 SVC Point-To-Point Yes Yes Yes Yes Yes Yes Yes
UNI 3.1 IISP Yes Yes Yes Yes Yes Yes Yes
UNI 3.1 MSC Point-To-Point Yes Yes Yes Yes Yes Yes Yes
UNI 3.1/4.0 Point to Multipoint Yes Yes Yes Yes Yes Yes Yes
UNI 4.0 Signaling Point-To-Point Yes Yes Yes Yes Yes Yes Yes
Logical Multicast Yes Yes Yes Yes Yes Yes Yes
OSPF, RIP2 Routing Yes Yes Yes Yes Yes Yes Yes
IP QoS Yes Yes Yes Yes Yes Yes Yes
MEF-compliant Ethernet Private Line Yes Yes Yes Yes Yes Yes Yes
Ethernet Pseudowires over MLPS Yes Yes Yes Yes Yes Yes Yes
Ethernet Pseudowires over ATM Yes Yes Yes Yes Yes Yes Yes
Ethernet Pseudowires over VLAN -- -- Yes Yes Yes Yes Yes
ATM over MPLS Yes Yes Yes Yes Yes Yes Yes
ATM Pseudowires over VLAN (Dry Martini) -- -- Yes Yes Yes Yes Yes
Pseudowire interconnects Yes Yes Yes Yes Yes Yes Yes
MPLS cross-connects Yes Yes Yes Yes Yes Yes Yes
VLAN cross-connects Yes Yes Yes Yes Yes Yes Yes
SSH, SCP, SFTP Yes Yes Yes Yes Yes Yes Yes
LSP MOLN connections (in Slot0) -- -- -- Yes Yes Yes Yes
OSPF MIB support -- -- -- Yes Yes Yes Yes
SNMPV3 support in PCX, PCX2, ISG2 -- -- -- -- Yes Yes Yes
PCX2: Fast Routing with NP assist -- -- -- -- Yes Yes Yes
PCX2: PseudoWire over IP Tunnels -- -- -- -- Yes Yes Yes
PCX2: LSP (Label Switch Path) Protection -- -- -- -- Yes Yes Yes
PCX2/PCE: Conforms with IEEE 1588 PTPv2 as an IEEE 1588 Client over Ethernet
-- -- -- -- Yes Yes Yes
PCX2: VLAN, ETH services over Dry Martini -- -- -- -- -- Yes Yes
Max Link Rate -- -- -- -- -- Yes Yes
SNMPv3 -- -- -- -- -- Yes Yes
Netsnmp upgrade to 5.4.2.1 -- -- -- -- -- Yes Yes
PCE: Adaptive timing -- -- -- -- -- Yes Yes
PAM support -- -- -- -- -- Yes Yes
Table 3: Feature Comparison (Continued)
e Notes for GDC Part No. 200U300-C01 D- Page 11
Publication No. 032R901-V7315 Xedge 6000 Version 7.3.15Issue 1 - May 2013
Page 1
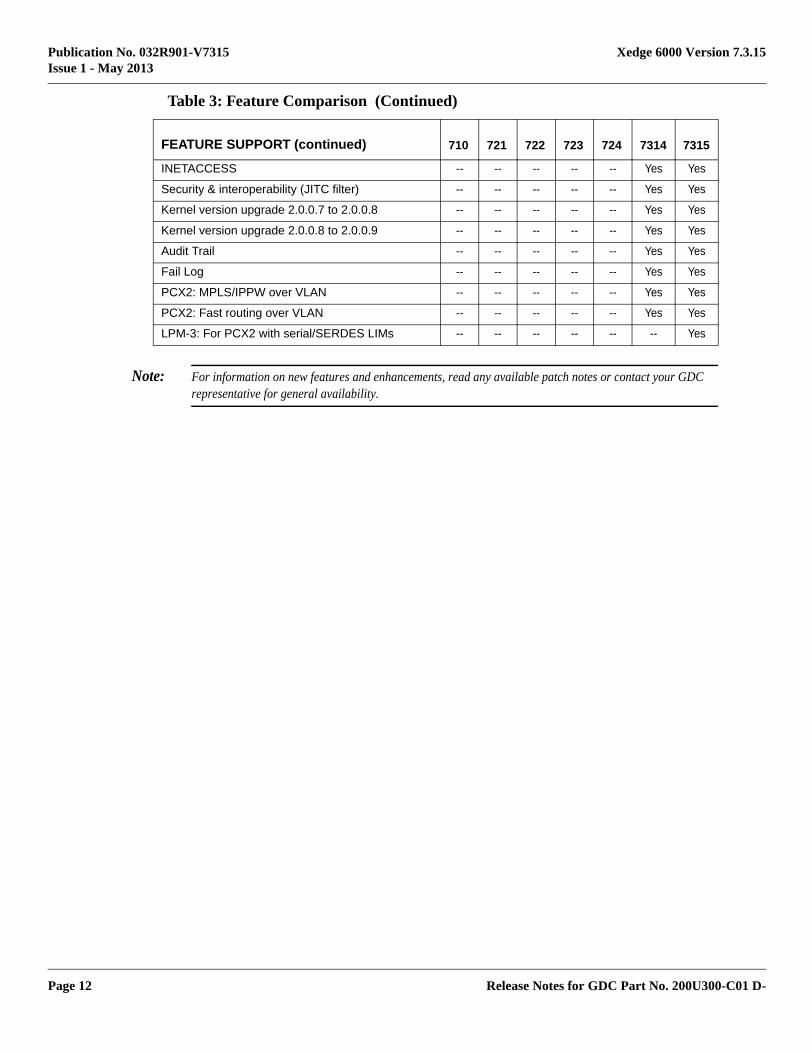
Note: For information on new features and enhancements, read any available patch notes or contact your GDC representative for general availability.
FEATURE SUPPORT (continued) 710 721 722 723 724 7314 7315
INETACCESS -- -- -- -- -- Yes Yes
Security & interoperability (JITC filter) -- -- -- -- -- Yes Yes
Kernel version upgrade 2.0.0.7 to 2.0.0.8 -- -- -- -- -- Yes Yes
Kernel version upgrade 2.0.0.8 to 2.0.0.9 -- -- -- -- -- Yes Yes
Audit Trail -- -- -- -- -- Yes Yes
Fail Log -- -- -- -- -- Yes Yes
PCX2: MPLS/IPPW over VLAN -- -- -- -- -- Yes Yes
PCX2: Fast routing over VLAN -- -- -- -- -- Yes Yes
LPM-3: For PCX2 with serial/SERDES LIMs -- -- -- -- -- -- Yes
Table 3: Feature Comparison (Continued)
2 Release Notes for GDC Part No. 200U300-C01 D-

Xedge 6000 Version 7.3.15 Publication No. 032R901-V7315Issue 1 - May 2013
Releas
6.0 Xedge V 7.3.15 Installation OverviewThe Slot Controller/LIM Log
Before updating software for new or existing Xedge packet controllers and Smart LIMs, you will need an accurate list of all modules for the switch (controllers, NTMs and LIMs), their slot locations, and the software files required for each. To simplify this process, you will use the following tables in this section:
Table 1: Hardware /Software Reference
Table 2: Software Reference Information
Table 4: Slot Controller/LIM Log
1. Make a copy of the Slot Controller/LIM Log (Table 4:).
2. In the “Slot Controller/LIM Installed” columns, write the abbreviated front panel product name of each slot controller, NTM or LIM (i.e., PCX2, ISG2, PCE, OCN, ASIO, etc.). Refer to Table 1: to verify the module type, of necessary.
3. Use the Software File List (Table 2:) to find the software files required for each controller, NTM or LIM in the node. Write the file names in the “Software Files Required” column, and the software version in the “Code Version” column.
4. Create a new directory on your hard drive (C:\Xedge) to receive the files.
5. Insert the Xedge CD in the CDROM drive and copy the files to the newly created directory.
6. After reading the software considerations below, proceed to the desired section:
• Section 6.1 Update Existing Controllers/Smart LIMs
• Section 6.2 Install a New Controller
Important Software Considerations
• IMPORTANT! Do not select the Boot run time code option if prompted.
• IMPORTANT! For the ISG2 in redundant slot-0 applications, you must transfer the startup_isg.tz file for the redundant slot-0 individually, not via broadcast mode.
• When performing a software upgrade for an Xedge packet controller or Smart LIMs, it is important to always use the startup_xxx.tz file provided on the Release CD, where xxx is either pcx, pcx2, pcl, pce, isg, ldl, etc. Within these tar files are the Xedge system files: kernel, boot, file system and FPGA files.
As of Xedge Software Version 7.2.0, when a slot controller is loaded with new software and restarted, its system files are extracted from the startup_xxx.tz file, a new XOS_xxx.tz file is created, and the startup_xxx.tz file is removed.
• If there are any non-packet Xedge controllers in the switch (e.g., FRC, CHFRC, ECC, ETH, VSM, ACP, ACS, or CE), refer to the Xedge Version 6.2.x documentation and release notes for complete installation and operation procedures.
e Notes for GDC Part No. 200U300-C01 D- Page 13

Publication No. 032R901-V7315 Xedge 6000 Version 7.3.15Issue 1 - May 2013
Page 1
Note: Depending on your application and chassis type, some slot positions may be unused. You do not have to log information for the Switch Fabric modules.
Note: In redundant slot-0 applications, install only ISG2 cards in the Main and Standby slot.
Note: When your switch has Xedge cell/adaptation controllers (e.g., CE, ACP, ACS, VSM, etc.), those modules must be installed in nonslot-0 positions only. Refer to V6.2x Release/Patch Notes.
Table 4: Slot Controller/LIM Log
Slot Number
ControllerInstalled
LIMsInstalled
Software Files Required
Code Version
Sent✔
Slot-0 Main Ver7.3.15
Slot-0 Standby -- Ver7.3.15
Slot 1
Slot 2
Slot 3
Slot 4
Slot 5
Slot 6
Slot 7
Slot 8
Slot 9
Slot 10
Slot 11
Slot 12
Slot 13
Slot 14
Slot 15
NTM Primary
NTM Secondary
4 Release Notes for GDC Part No. 200U300-C01 D-
Xedge 6000 Version 7.3.15 Publication No. 032R901-V7315Issue 1 - May 2013
Releas
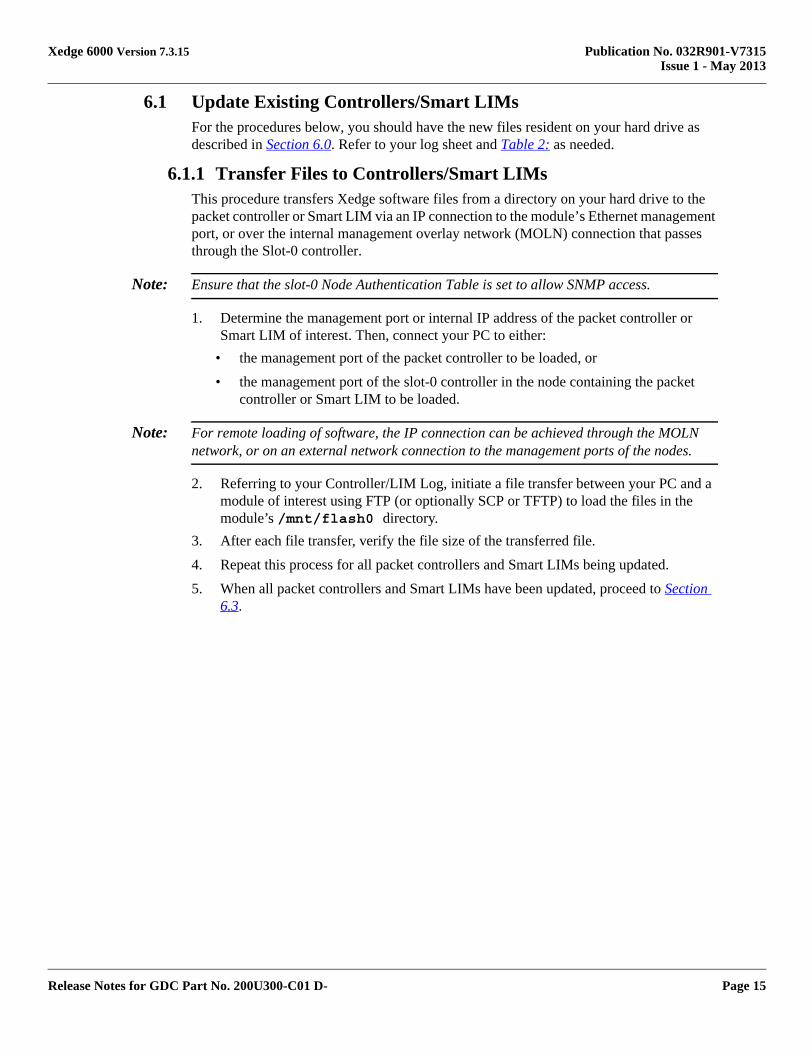
6.1 Update Existing Controllers/Smart LIMsFor the procedures below, you should have the new files resident on your hard drive as described in Section 6.0. Refer to your log sheet and Table 2: as needed.
6.1.1 Transfer Files to Controllers/Smart LIMsThis procedure transfers Xedge software files from a directory on your hard drive to the packet controller or Smart LIM via an IP connection to the module’s Ethernet management port, or over the internal management overlay network (MOLN) connection that passes through the Slot-0 controller.
Note: Ensure that the slot-0 Node Authentication Table is set to allow SNMP access.
1. Determine the management port or internal IP address of the packet controller or Smart LIM of interest. Then, connect your PC to either:
• the management port of the packet controller to be loaded, or
• the management port of the slot-0 controller in the node containing the packet controller or Smart LIM to be loaded.
Note: For remote loading of software, the IP connection can be achieved through the MOLN network, or on an external network connection to the management ports of the nodes.
2. Referring to your Controller/LIM Log, initiate a file transfer between your PC and a module of interest using FTP (or optionally SCP or TFTP) to load the files in the module’s /mnt/flash0 directory.
3. After each file transfer, verify the file size of the transferred file.
4. Repeat this process for all packet controllers and Smart LIMs being updated.
5. When all packet controllers and Smart LIMs have been updated, proceed to Section 6.3.
e Notes for GDC Part No. 200U300-C01 D- Page 15

Publication No. 032R901-V7315 Xedge 6000 Version 7.3.15Issue 1 - May 2013
Page 1
6.2 Install a New ControllerAll controllers are shipped from the factory with minimal software and a default IP address. The following procedures install a new controller into an existing switch with an in-service slot-0 controller. Note that the procedures vary depending on the new card’s intended slot: nonslot-0 or slot-0 (out-of-service). Refer to Table 2: and your log sheet as needed.
Note: IMPORTANT! Before you begin, be sure the required software files are already resident in the /mnt/flash0 directory of the packet controller, as described in Section 6.1.1.
1. For a new controller, check that the rotary switch on the controller is in the proper position for slot-0 or nonslot-0 operation in the associated chassis:
• Set Rotary Switch to 8 for a non-slot 0 controller intended for any Xedge chassis. Skip to Step 2.
• Set Rotary Switch to 4 for a ISG2 slot-0 card intended for the Standby Slot of an Xedge 6280, 6640 or 6645 chassis. Skip to Step 9.
• Set Rotary Switch to 0 for a slot-0 controller intended for the Main Slot of any Xedge chassis. Restart the controller via the non-disruptive Warm Start procedure, as described in Section 6.3. The controller will then be fully loaded and ready for configuration.
Note: IMPORTANT! Xedge 6002 and 6160 chassis do not support slot-0 redundancy. When replacing the (main) slot-0 controller in those chassis, be aware that all services will be disrupted. Consult your configuration manual for installation instructions.
6.2.1 For Non-Slot 0 Card2. Install the controller in the desired non-slot 0 position.
3. At the File Operations screen, select: TFTP
4. From slot-0, select SEND.
5. Type [filename] and then press Enter.
6. Type: [slotnumber] then press Enter.
7. Repeat Step 2. through Step 6. for all required software for the controller.
8. Restart the controller via the non-disruptive Warm Start procedure, as described in Section 6.3. The controller will then be fully loaded and ready for configuration.
6.2.2 For ISG2 Slot-0 Card
Note: If this is a new redundant system, before you begin, configure the In-Service slot-0 for redundant operation, as described in the configuration manual.
9. Install the ISG2 controller in the Out-of-Service slot-0 position.
10. The existing system software automatically downloads all required software files to the new controller along with the config.cfg file.
11. Restart the controller via the non-disruptive Warm Start procedure, as described in Section 6.3. The card will then be fully loaded, configured and operational as the Out-of-Service slot-0 controller.
6 Release Notes for GDC Part No. 200U300-C01 D-

Xedge 6000 Version 7.3.15 Publication No. 032R901-V7315Issue 1 - May 2013
Releas
6.3 Warm Start ProceduresWarm Start is performed on an individual controller or on the entire switch in order to put new software into effect; to put a new config.cfg into effect; to initialize a change in resources (e.g., a new LIM); or to resolve an isolated or system-level anomaly that may be effecting performance. During Warm Start, user traffic can be affected, however there are several methods for limiting or avoiding disruption of service, as described below:
• Non-Disruptive Warm Start on a node with redundant slot-0 controllers (Ref. Section 6.3.1) will force a restart of the Out-of-Service slot-0 controller, with each ISG2 warm started separately (Ref. ). This ensures continuity of service via an In-Service slot-0 card so there is no interruption of services and management communication to other cards in the chassis.
• Disruptive Warm Start can force a restart of an entire switch (Ref. Section 6.3.2). This allows you to warm start all controllers in the chassis simultaneously, causing a brief interruption of services and management communication to all cards in the chassis.
• Disruptive Warm Start can force a restart of a single controller or Smart LIM (Ref. Section 6.3.3). Only traffic to that controller or Smart LIM will be affected. Services and management communication to other cards in the chassis will not be affected.
Note: IMPORTANT! If your redundant slot-0 system requires uninterrupted operation at all times, use only the non-disruptive warm start procedure.
Note: IMPORTANT! The Warm Start procedures below include a process that allows all packet controllers and Smart LIMs in the node to decompress any newly loaded startup_xxx.tz files. NEVER RESTART OR REMOVE POWER FROM THE NODE during this decompression process.
6.3.1 Non-disruptive Warm Start (for Redundant Slot-0 Nodes)To achieve a non-disruptive Warm Start of the slot-0 cards, the switch must be equipped with properly configured redundant ISG2s in the Main and Standby Slot-0 positions.
1. Telnet to the Out-of-Service ISG2.
2. Perform a Warm Start/Force reload restart.
3. Wait for the Slot 0 Redund: available status to display: Yes.Any new software is now in effect for the Out-of-Service ISG2.
4. Perform a switchover on the In-Service ISG2, putting it out of service.
5. Once the redundant ISG2 has control of the switch, Telnet to the Out-of-Service ISG2.
6. Perform a Warm Start/Force reload restart.
7. Wait for the Slot 0 Redund: available status to display: Yes. Any new software is now in effect for the Out-of-Service ISG2.
Note: There will be uninterrupted services and management communication to the node during the warm start of the slot-0 cards.
e Notes for GDC Part No. 200U300-C01 D- Page 17

Publication No. 032R901-V7315 Xedge 6000 Version 7.3.15Issue 1 - May 2013
Page 1
6.3.2 Disruptive Warm Start (for Entire Switch)A disruptive Warm Start will force a restart of the entire switch. This allows you to warm start all controllers in the shelf simultaneously.
Note: Be aware that the following procedures will disrupt all management communication and services in the chassis until a slot-0 controller returns to the In-Service state.
For a Redundant Switch:
1. Telnet to the Out-of-Service slot-0 controller.
1. Perform a Warm Start/Force reload restart.
2. Terminate the Telnet session (Ctrl-T).
3. While the Out-of-Service slot-0 controller is unavailable, perform a Warm Start/Force reload restart on the In-Service slot-0 controller.
4. With both ISG2s simultaneously warm-starting, all other controllers in the switch will simultaneously Warm Start.
5. As the switch comes out of a Warm Start, nonslot-0 cards will wait for the first slot-0 controller to come out of Warm Start and assume In-Service status. The second slot-0 controller will assume Standby status.
6. Any new software or config.cfg will be in effect for the respective cards.
For a Non-Redundant Switch:
1. Telnet to the slot-0 controller.
2. Perform a Warm Start/Force reload restart.
3. Terminate the Telnet session (Ctrl-T).
4. With the slot-0 controller warm-starting, all other controllers in the switch will simultaneously Warm Start.
5. As the switch comes out of a Warm Start, individual nonslot-0 cards will wait for the slot-0 controller to come out of Warm Start and take up In-Service operation.
6. Any new software or config.cfg will be in effect for the respective cards.
6.3.3 Disruptive Warm Start (for Single Nonslot-0 Card)In this Warm Start of a nonslot-0 controller or Smart LIM, all management communication and services to that controller or Smart LIM will be briefly disrupted. No other controllers or LIMs in the node will be affected.
1. Telnet to the nonslot-0 controller or Smart LIM of interest.
2. Perform a Warm Start/Force reload restart on the controller or Smart LIM.
3. Any new software or config.cfg will be in effect for the controller or Smart LIMs.
8 Release Notes for GDC Part No. 200U300-C01 D-

Xedge 6000 Version 7.3.15 Publication No. 032R901-V7315Issue 1 - May 2013
Releas
7.0 Operational GuidelinesFollow the guidelines in this section for optimal performance of the installed Xedge modules. Contact your authorized field representative as needed.
Note: For overviews of operational capabilities and performance parameters of any Xedge slot controller, refer to the Xedge/ProSphere Quick Reference.
7.1 System Guidelines• When using multiple signaling channels, CAC for switched connections is done on
logical SAPs and physical SAPs; CAC for PVCs is done on physical SAPs only.
• Do not use the Debug option available in the Diagnostics/Inject_cell/OAM screen. This is supplied as a SERVICE SUPPORT TOOL ONLY.
• To avoid degraded Telnet performance, do not perform nested Telnet sessions.
• When the screen menu prompts you to type esc to abort, you may have to press Escape two or more times.
• The auxiliary port on the Xedge 6160 (MAC1) chassis is not supported.
• The filtering database on a bridge does not consistently report the source mac address from the sending device. An invalid entry is reported when sending 64- and 128-byte frames across 4 bridges at the same time.
7.2 Configuration Guidelines • (MR10408) The interface type for the ASIO LIM is not automatically detected;
it must be configured by the user.
• Ensure resources are available when configuring PVCs. Services which require more resources than are available will not activate. No error messages are generated in this case.
• Do not configure a PVC or SPVC with all the following parameters set to 0: SSlot, Slink, SVPI, SVCI, DSlot, DLink, DVPI, and DVCI. The system uses this setting internally.
• For NNI only, SPVC VCI starts are fixed at 0. The VCI start of 32 displayed on the screen reminds the user that VCIs below 32 are reserved and should be used with caution.
• A new option has been added to the SVC Resource Table, Auto SAP OFF with the default set to No. If set to Yes, the software automatically turns off this SAP when there is a signaling failure between the end-to-end signaling entities.
Note: If you enable the Auto SAP Off option, i.e., by selecting Yes, you will need to manually turn on the SAP after a failed trunk is restored.
• Ensure all bundles are active before saving the config.cfg file. If not, upon reboot, the bundles do not return to the running state.
e Notes for GDC Part No. 200U300-C01 D- Page 19

Publication No. 032R901-V7315 Xedge 6000 Version 7.3.15Issue 1 - May 2013
Page 2
• Do not change the VP Start range for a link to 0 without deleting all the circuits over the link. If you change the VP Start range on an NNI to 0, it changes the link type to a UNI, it re-initializes the VC routing RAM, and then kills every circuit on the link. The only work-around is to change the VP range back again and warm-start the slot controller.
• The Xedge 6645 (DV2) chassis has contacts for two external user status inputs. The alarm handler allows these inputs and their SNMP Traps to be either enabled or disabled. The inputs can be defined as active-open or active-closed, and the alr_cls.txt file allows them to generate Critical, Major, or Minor alarm types. Although the SMM in the Xedge 6280 (IMX) chassis still generates alarms correctly, the Xedge 6645 (DV2) chassis now ignores the input status. If configured to active-open or active-closed, a contact closure has no effect.
7.3 File System Guidelines • During a TFTP, a copy of the original file being overwritten is maintained in flash
while the new file is being transferred. The new file has the >~ characters preceding the file name (e.g., >~1ds1.cod). When the file transfer is successful, the original files are marked dirty and the new file is renamed to exclude the >~ characters.
• To improve TFTP reliability with a SUN workstation, type ? at the TFTP prompt, then set the SUN workstation retransmit timer to 1 second (re 1 <cr>) and maximum time-out to 120 seconds (ti 120 <cr>).
7.4 Slot Controller Guidelines• When a packet controller (PCX2, PCL, PCE, ISG2, etc.) is in a nonslot-0 position,
there must also be a packet controller in the slot-0 position.
• At 99% of bandwidth on the PCX/PCX2 Traffic Shaping and UBR will be fully functional with no cell loss.
• When Actual APS Direction Mode differs from configured APS Directional Mode (e.g., local LTE set to bidirectional and remote side set to unidirectional), an APS Mode Mismatch trap will be sent and the Actual APS Directional Mode will switch to Unidirectional. Although this clears the APS Mode Mismatch Failure Alarm, the mismatching configuration will persist until APS Directional Mode is manually changed.
7.5 Redundancy Guidelines • In an Xedge 7.X switch, inserting any slot controller other than an ISG2 in the
redundant slot-0 position can cause conflict with the slot-0 controller and disrupt communication to the node.
• When redundancy is available, any configuration changes made and saved to the config.cfg file will update the redundant slot-0 Controller automatically. As the file transfers, the Root Menu will show File transfer = Active and the redundant controller LEDs will show a TFTP in progress. All module front panel LEDs will illuminate, and then illuminate one at a time, from top to bottom. This sequence repeats until the TFTP transfer is complete.
0 Release Notes for GDC Part No. 200U300-C01 D-

Xedge 6000 Version 7.3.15 Publication No. 032R901-V7315Issue 1 - May 2013
Releas
8.0 Known Limitations8.1 Configuration
• When running full-feature system software, do not use the Load option in the Manage configuration menu to manually load configuration files as this is an unsupported function and may cause the slot controller to reboot.
• When setting the time and date, always supply the leading zero for the hour setting. Otherwise, the tens digit of the minutes setting is cleared.
• As more entries are enabled with traps at the authentication table, traffic will increase on the management circuit, reducing performance.
8.2 Signaling• SVCs do not reroute in the Xedge switch if Explicit DTLs are used.
• The Display Route feature displays only information for SVCs/SPVCs that use DTL style routing.
8.3 Traffic Management• When MOLN is changed to a new VPI/VCI the user must do a restart on the slot
controller for the resource change.
• When a link type is configured as NNI, MOLN is assumed to be required. In certain cases, the user may want to allow proprietary signalling messages between nodes, but not management traffic. This can be accomplished by configuring the MOLN VC to use a different VPI / VCI on each end of the link.
8.4 Line Interface Modules• Terminate all configured LIM ports with the appropriate impedance when a link
cable is disconnected to prevent the generation of link-up and link-down alarms.
• For the E3-2C LIM, when an AIS condition exists on the link, a loss of frame is displayed in the Alarm Handler.
• For the OC-3c/STM-1 series LIMs, Secondary Line fault causes Primary ref status to change when using a STM1 Dual.
8.5 Packet Controllers• An ISG2 installed in an Xedge 6280 chassis will report that the Secondary BITS
clock is not good, even though that chassis does not have a Secondary NTM.
• ProSphere Routing Manager (RTM) displays the ISG2, PCX, PCX2, or PCL as an SMC or ECC, respectively. This does not affect operation of the application or devices.
• Re-scanning alarm class file (M,42) after changes will function properly, however the load status is not reported to the MIB.
• In a redundant shelf, Craft defaults as Parallel but should be Y cable Mode.
• For ISG2, the medIa, I option is not supported; hence, a user cannot determine the amount of memory available for files.
• For PCX or PCX2, bi-directional traffic on a multicast PVC is not supported in this release.
• PCX and PCX2 support both ports of the 2-port SI-2C LIM. If the 4-port SI-4C LIM is installed, only two ports will be supported.
e Notes for GDC Part No. 200U300-C01 D- Page 21

Publication No. 032R901-V7315 Xedge 6000 Version 7.3.15Issue 1 - May 2013
Page 2
2 Release Notes for GDC Part No. 200U300-C01 D-


![The Session Initiation Protocol (SIP) Refer Method · RFC 3515 The SIP Refer Method April 2003 2. The REFER Method REFER is a SIP method as defined by RFC 3261 [1]. The REFER methodAuthors:](https://img.dokumen.tips/doc/110x75/5ac08e767f8b9ad73f8bdf46/the-session-initiation-protocol-sip-refer-method-3515-the-sip-refer-method-april.jpg)