Embed Size (px)
Citation preview
Oraclereg Hospitality OPERA Property ManagementWorkstation Setup Guide
Release 55
E76452-01
July 2016
Oracle Hospitality OPERA Property Management Workstation Setup Guide Release 55
E76452-01
Copyright copy 2015 2016 Oracle andor its affiliates All rights reserved
This software and related documentation are provided under a license agreement containing restrictions onuse and disclosure and are protected by intellectual property laws Except as expressly permitted in yourlicense agreement or allowed by law you may not use copy reproduce translate broadcast modify licensetransmit distribute exhibit perform publish or display any part in any form or by any means Reverseengineering disassembly or decompilation of this software unless required by law for interoperability isprohibited
The information contained herein is subject to change without notice and is not warranted to be error-free Ifyou find any errors please report them to us in writing
If this software or related documentation is delivered to the US Government or anyone licensing it on behalfof the US Government then the following notice is applicable
US GOVERNMENT END USERS Oracle programs including any operating system integrated softwareany programs installed on the hardware andor documentation delivered to US Government end users arecommercial computer software pursuant to the applicable Federal Acquisition Regulation and agency-specific supplemental regulations As such use duplication disclosure modification and adaptation of theprograms including any operating system integrated software any programs installed on the hardwareandor documentation shall be subject to license terms and license restrictions applicable to the programsNo other rights are granted to the US Government
This software or hardware is developed for general use in a variety of information management applicationsIt is not developed or intended for use in any inherently dangerous applications including applications thatmay create a risk of personal injury If you use this software or hardware in dangerous applications then youshall be responsible to take all appropriate fail-safe backup redundancy and other measures to ensure itssafe use Oracle Corporation and its affiliates disclaim any liability for any damages caused by use of thissoftware or hardware in dangerous applications
Oracle and Java are registered trademarks of Oracle andor its affiliates Other names may be trademarks oftheir respective owners
Intel and Intel Xeon are trademarks or registered trademarks of Intel Corporation All SPARC trademarks areused under license and are trademarks or registered trademarks of SPARC International Inc AMD Opteronthe AMD logo and the AMD Opteron logo are trademarks or registered trademarks of Advanced MicroDevices UNIX is a registered trademark of The Open Group
This software or hardware and documentation may provide access to or information about content productsand services from third parties Oracle Corporation and its affiliates are not responsible for and expresslydisclaim all warranties of any kind with respect to third-party content products and services unlessotherwise set forth in an applicable agreement between you and Oracle Oracle Corporation and its affiliateswill not be responsible for any loss costs or damages incurred due to your access to or use of third-partycontent products or services except as set forth in an applicable agreement between you and Oracle
Contents
1 Workstation Operating System Requirement
2 Installing the Java Runtime Client
3 Setting Microsoft Internet Explorer Options
Adding Trusted Sites 3-1
Turning on Pop-up Blocker 3-3
Changing Advanced Settings 3-3
Disabling Add-ons 3-4
Disabling SmartScreen Filter 3-5
4 Installing Client Side Applications
Installing the RegTerm Utility 4-1
Installing OPERA Print Control 4-2
Installing Adobe Acrobat Reader 4-2
Installing Screen Painter 4-2
Installing Oracle Business Intelligence Publisher 4-2
5 Setting Adobe Acrobat Reader Preferences
iii
iv
1Workstation Operating System
Requirement
To run Oracle Hospitality OPERA Property Management Version 55 yourworkstation must use one of these operating systems
bull Windows 7 Professional Edition or later
bull Windows 8 Professional Edition or later
bull Windows 10 Professional Edition or later
Workstation Operating System Requirement 1-1
1-2 Workstation Setup Guide
2Installing the Java Runtime Client
1 Log on to the workstation with a user account that has local administrator rights
2 Open Microsoft Internet Explorer and go to httpwwworaclecomtechnetworkjavajavasedownloadsjre8-downloads-2133155html
3 Under Java SE Runtime Environment 8u77 click the Accept License Agreementoption
4 Next to Windows x86 Offline click the link jre-8u77-windows-i586exe to beginthe download
5 When the message Do you want to run or save jre-8u77-windows-i586exe (484MB) from downloadoraclecom appears click Run
6 Click the Java icon on the taskbar
Installing the Java Runtime Client 2-1
7 On the Java Setup - Welcome screen click Install
After the installation has completed the Java Setup - Uninstall out-of-dateversions screen appears
8 Click Uninstall
9 Click the Microsoft Windows Start button
10 Click in the Search programs and files field type configure java and thenpress Enter
11 On the Java Control Panel screen click the Security tab
2-2 Workstation Setup Guide
12 Click Edit Site Listhellip
13 On the Exception Site List screen click Add
14 Click in the Location field and enter your OPERA application URL with http forexample httpyourOPERAURLmicrosdcus
15 Click Add
16 Click in the Location field and enter your OPERA application URL with https forexample httpsyourOPERAURLmicrosdcus
17 Click OK
Installing the Java Runtime Client 2-3
18 On the Java Control Panel screen select the Advanced tab
19 Select these check boxes
a Use TLS 10
b Use TLS 11
c Use TLS 12
20 Click Apply
21 Click OK
22 Close Microsoft Internet Explorer open it again and log into OPERA
2-4 Workstation Setup Guide
3Setting Microsoft Internet Explorer Options
There are several places where changes need to be made to the client machinersquosMicrosoft Internet Explorer options Depending on your browser version the stepsbelow may differ
Microsoft Edge does not support OPERA
Adding Trusted Sites
1 Log on to the workstation with a user account that has local administrator rights
2 Open Microsoft Internet Explorer
3 Select the Tools menu
4 Click Internet options
5 On the Internet Options screen select the Security tab
6 Click the green check mark for Trusted sites
Setting Microsoft Internet Explorer Options 3-1
7 Under Security level for this zone change it to Medium
8 Click Sites
9 Click in the Add this website to the zone field
10 Enter your OPERA application URL with both http and https as in theseexamples
bull httpyourOPERAURLmicrosdcus
bull httpsyourOPERAURLmicrosdcus
For sites that have multiple application servers for OPERA or for load balancedenvironments ensure that all URLs are entered
11 Click Add
12 Click Close
13 Click Custom Level and click Enable for these Settings
bull ActiveX Controls and plug-ins
Adding Trusted Sites
3-2 Workstation Setup Guide
bull Miscellaneous
14 Click OK
Turning on Pop-up Blocker
1 On the Internet Options screen select the Privacy tab
2 Unselect the Turn on Pop-up Blocker option
Changing Advanced Settings
1 On the Internet Options screen select the Advanced tab
Turning on Pop-up Blocker
Setting Microsoft Internet Explorer Options 3-3
2 Select these check boxes
bull Use TLS 10
bull Use TLS 11
bull Use TLS 12
3 Click Apply
4 Click OK
Disabling Add-ons
1 On the Internet Options screen select the Programs tab
2 Click Manage Add-ons
3 On Toolbars and Extensions disable all except for Java and Adobe
4 Click Close
5 Click OK
6 Click the Tools icon
Disabling Add-ons
3-4 Workstation Setup Guide
7 Select Manage add-ons
8 Go to the appropriate type of add-ons and find the one you want to disable right-click it and select Disable
Disabling SmartScreen Filter
Disabling SmartScreen Filter
1 On the Internet Options screen select the Advanced tab
Disabling SmartScreen Filter
Setting Microsoft Internet Explorer Options 3-5
2 Scroll down to the Security section and unselect the Enable SmartScreen Filtercheck box
3 Click OK
Disabling SmartScreen Filter
3-6 Workstation Setup Guide
4Installing Client Side Applications
If you do not want the OPERA Login Page to automatically install the softwarerequired by JInitiator when you log in follow these procedures to preinstall all therequired client utilities
Installing the RegTerm Utility
1 Connect to the application server
2 Install the RegTerm utility using this URL httpltappserverhostgtInstallRegtermexe
Where ltappserverhostgt is the name of your application server
3 If not completed automatically when logging into OPERA configure the RegTermutility by manually creating a termregini file in the CProgram Files(x86)Micros Systems IncOperaOperaRegTerm folder
The contents of the file should look like one of the following two examplesdepending on your font size
With Large Fonts
[OperaTerminal]OPERA_TERMINAL=lthost name with domaingtltunique numbergt|LargeFontUseIni=1
Example
[OperaTerminal]OPERA_TERMINAL=mymachinemicroscom123454321|LargeFontUseIni=1
Without Large Fonts
[OperaTerminal]OPERA_TERMINAL=lthost name with domaingtltunique numbergtUseIni=1
Example
[OperaTerminal]OPERA_TERMINAL=mymachinemicroscom123454321UseIni=1
Installing Client Side Applications 4-1
Installing OPERA Print ControlThe Print Control is loaded along with the Adobe Object and checks for printeravailability and status If it is not automatically installed perform the step below toenable stream printing to work within OPERA
1 Connect to the application server
2 Install OPERA Print Control using this URL httpltappserverhostgtInstallOperaPrintCtrlexe
Where ltappserverhostgt is the name of your application server
Installing Adobe Acrobat ReaderIf installing the client utilities from the OPERA login the Adobe Acrobat Readerinstallation starts automatically while installing OPERA Print Control
1 Connect to the application server
2 Install Adobe Acrobat from the OPERA login page or by using this URL httpltappserverhostgtInstallAdobeexe
Where ltappserverhostgt is the name of your application server
Installing Screen PainterIf it is not automatically installed perform the step below to install Screen Painter
1 Connect to the application server
2 Install Screen Painter by using this URL httpltappserverhostgtInstallScreenWizexe
Where ltappserverhostgt is the name of your application server
Installing Oracle Business Intelligence PublisherFor sites that use BI Publisher to customize reports a new version has been releasedthat can be installed on Microsoft Windows 7 workstations This is labeled as release 4of the OPERA BI Publisher Desktop installation
On Microsoft Windows 81 Microsoft NET Framework 451 is automatically includedin the operating system
The BI Publisher installation however looks for Microsoft NET Framework 20 whichis included in Microsoft NET Framework 35 but must be installed separately inMicrosoft Windows 81
Installing OPERA Print Control
4-2 Workstation Setup Guide
Trying to install Microsoft NET Framework 35 gives the following errors (which arealso documented at httpdocsoraclecomcdE28280_01bi1111e16518tochtmBIEQI102)
bull 0x800f0906 Windows couldnt connect to the Internet to download necessary files Makesure that youre connected to the Internet and click Retry to try again
bull 0x800F081F The changes could not be completed Please reboot your computer and tryagain
Use the Microsoft Windows operating system installation media and the workaroundDISM Online Enable-Feature FeatureNameNetFx3 All LimitAccess Sourcedsourcessxs
Now Microsoft NET Framework 35 installs correctly and the BI Publisher installationcan continue For additional information about installing BI Publisher see httpdocsoraclecomcdE28280_01bi1111e16518tochtmBIEQI102
Installing Oracle Business Intelligence Publisher
Installing Client Side Applications 4-3
Installing Oracle Business Intelligence Publisher
4-4 Workstation Setup Guide
5Setting Adobe Acrobat Reader Preferences
Depending on your Adobe Acrobat Reader version the steps below may differ
1 Open Adobe Acrobat Reader outside of the application
2 Select Edit select Preferences select Updater and select the Do not download orinstall updates automatically option
3 Select Edit select Preferences select General and unselect the Enable ProtectedMode at startup check box
4 Select Edit select Preferences select Security (Enhanced) and unselect the EnableEnhanced Security check box
5 Select Edit select Preferences select Security (Enhanced) and select theAutomatically trust sites from my Win OS security zones check box and verifythat the OPERA URL is listed
Setting Adobe Acrobat Reader Preferences 5-1
5-2 Workstation Setup Guide
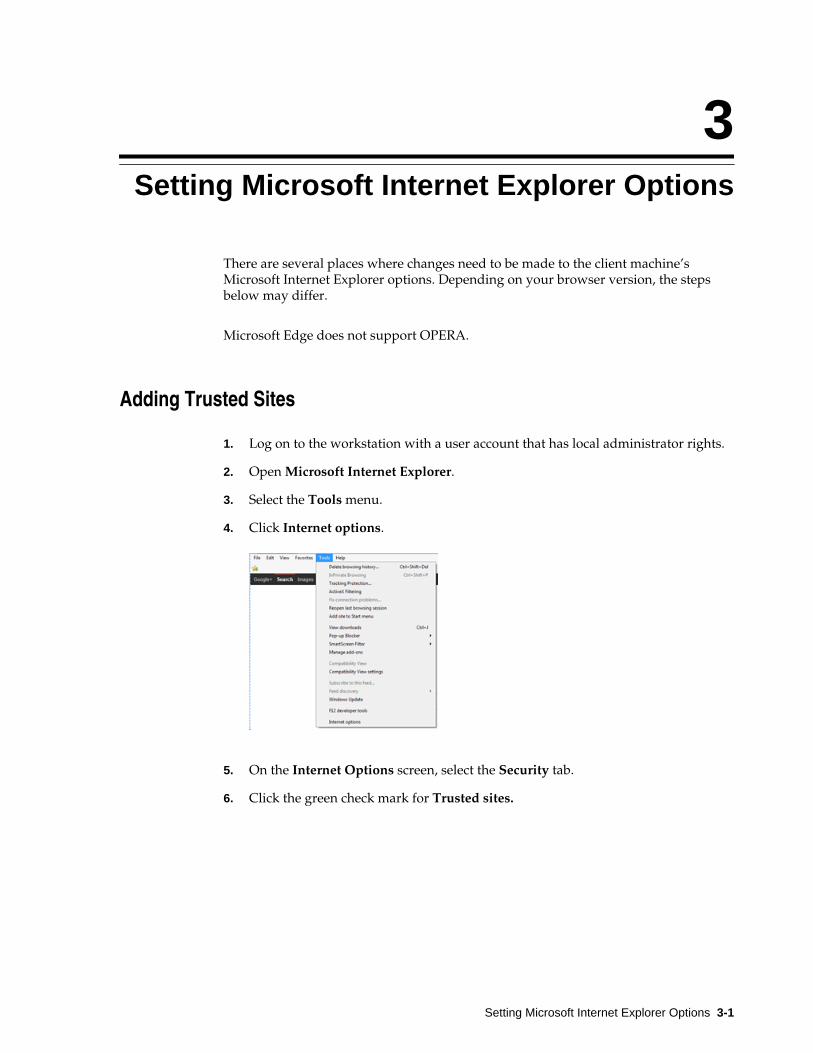
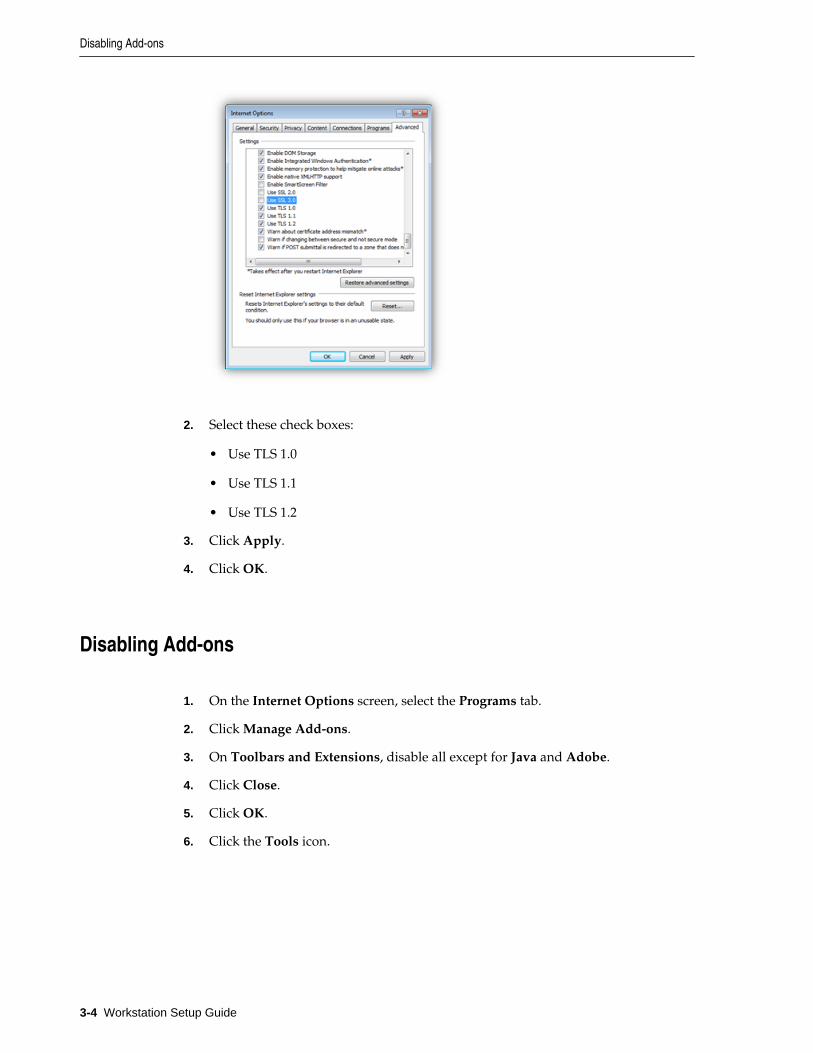

5-2 Workstation Setup Guide