Embed Size (px)
Citation preview

Working with Objects

Objectives
Create an object
Transform an object
Arrange and lock an object
Step and repeat an object
Use Live Distribute
Use the Direct Selection tool
Modify corners and strokes
Create a multi-state object
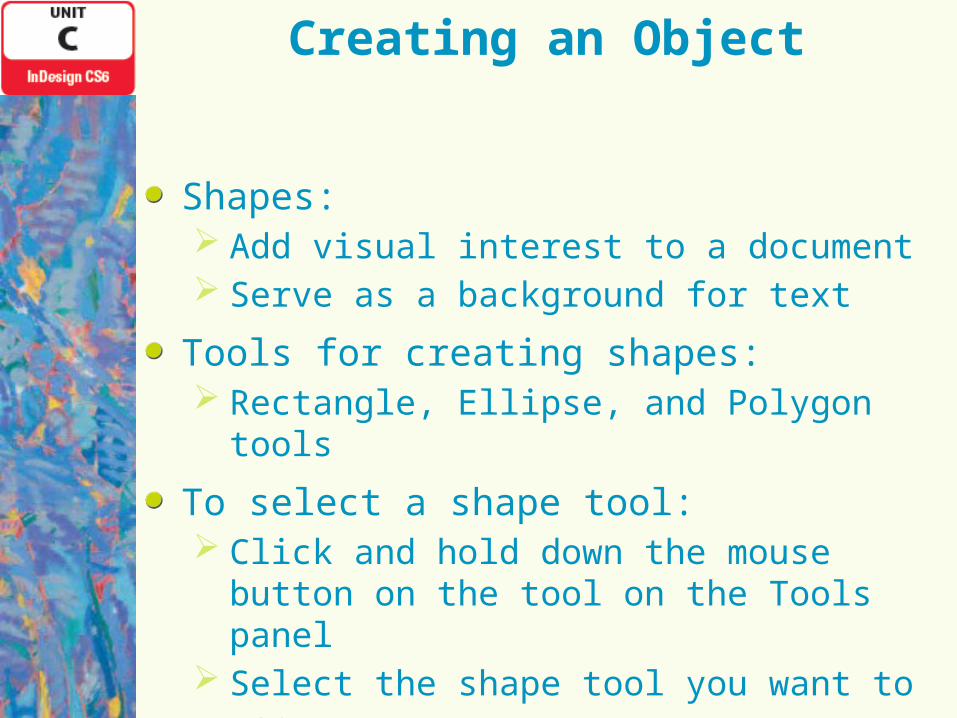
Creating an Object
Shapes: Add visual interest to a document Serve as a background for text
Tools for creating shapes: Rectangle, Ellipse, and Polygon tools
To select a shape tool: Click and hold down the mouse button on the
tool on the Tools panel Select the shape tool you want to use
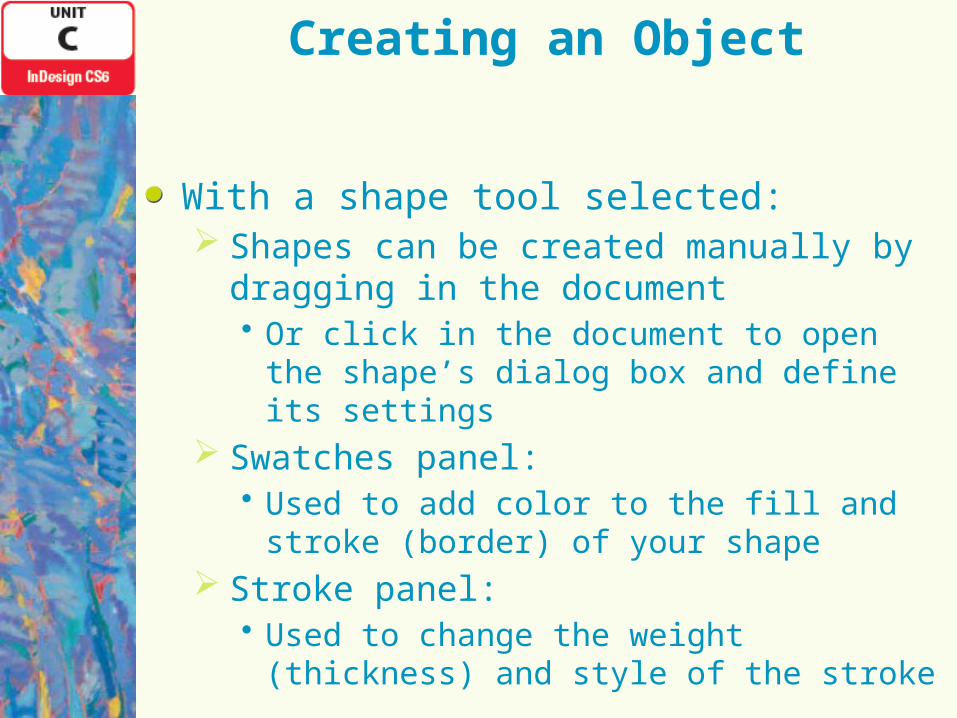
Creating an Object
With a shape tool selected: Shapes can be created manually by dragging
in the document• Or click in the document to open the shape’s
dialog box and define its settings Swatches panel:
• Used to add color to the fill and stroke (border) of your shape
Stroke panel:• Used to change the weight (thickness) and style
of the stroke

Creating an Object
Converting shapes Use the Convert Shape command on the
Object menu Can choose from:
• Rectangle• Rounded rectangle• Beveled rectangle• Inverse rounded
rectangle• Ellipse
• Triangle• Polygon• Line • Orthogonal line

Creating an Object

When you transform something you change its appearance Transform commands include:
• Move, Scale, Rotate, Shear, and Flip Objects can also be transformed using the
Transform panel or Control panel• Width, height, and location
Objects are transformed from a reference point Point of origin: point of the object that remains
fixed during the transformation
Transforming an Object

Transforming an Object
Transform Again command Used to repeat the same transformation to an
object

Transforming an Object

Arranging and Locking an Object
InDesign objects: Vertically stacked:
• Bottom to top in the order created or placed Arrange commands:
• On the Object menu• Used to change vertical order
Locking objects: • Ensures its location will not be disrupted• Easier to select an item on top of a locked item

Arranging and Locking an Object
Smart guides appear automatically as you position objects on a page
Smart guides are visual clues that let you know when the object you are positioning is touching a side or the center of another object, a margin guide, or the center of the page
The Select commands on the Object menu allow you to select an object in a document regardless of which level it is on

Arranging and Locking an Object
Figure C-5: Moving the rectangle to the back

Stepping and Repeating an Object
Step and Repeat feature: Quick solution for creating multiple identical
objects spaced evenly• Select object or objects to duplicate• Enter the number of objects to create• Enter the vertical and/or horizontal offset: how
far copies will be offset from the original• Group the objects: select two or more objects
and make them into one selectable object by clicking Group on the Object menu

Stepping and Repeating an Object

Stepping and Repeating an Object
The Move command is similar to the Step and Repeat command, but is more practical when you are moving one item and do not need to create multiple copies or a pattern

Using Live Distribute
Distribute objects: Place equal space between three or more
objects
Options: Align panel:
• Distribute objects using a specific value Live Distribute feature:
• Manually distribute objects until you achieve an exact result
To rotate an object means to turn it around an axis or center point
Multiple ways to rotate an object

Using Live Distribute
Figure C-10: Selecting the three groups
Figure C-11: Locating the resize pointer
Figure C-12: Creating a new pattern

Using the Direct Selection Tool
Use the Direct Selection tool to select just one of the items in a set of objects that are grouped together
To select one item in a group, make sure that the grouped object is not selected, then click the item you wish to select with the Direct Selection tool

Using the Direct Selection Tool
The Stroke panel has many options for creating interesting strokes
Once a stroke is applied to a line or a frame, you can create a simple style using options on the Stroke panel

Using the Direct Selection Tool
Figure C-13: Viewing the oval with a new fill and stroke
Figure C-14: Making changes to individual ovals

Using the Direct Selection Tool
To align objects means to position one or more selected objects in relation to each other, in relation to the margins of a document, or in relation to the boundaries of the page or spread
When you align multiple objects with each other, you can align them by their edges or by their center points
You use the Align panel to align objects

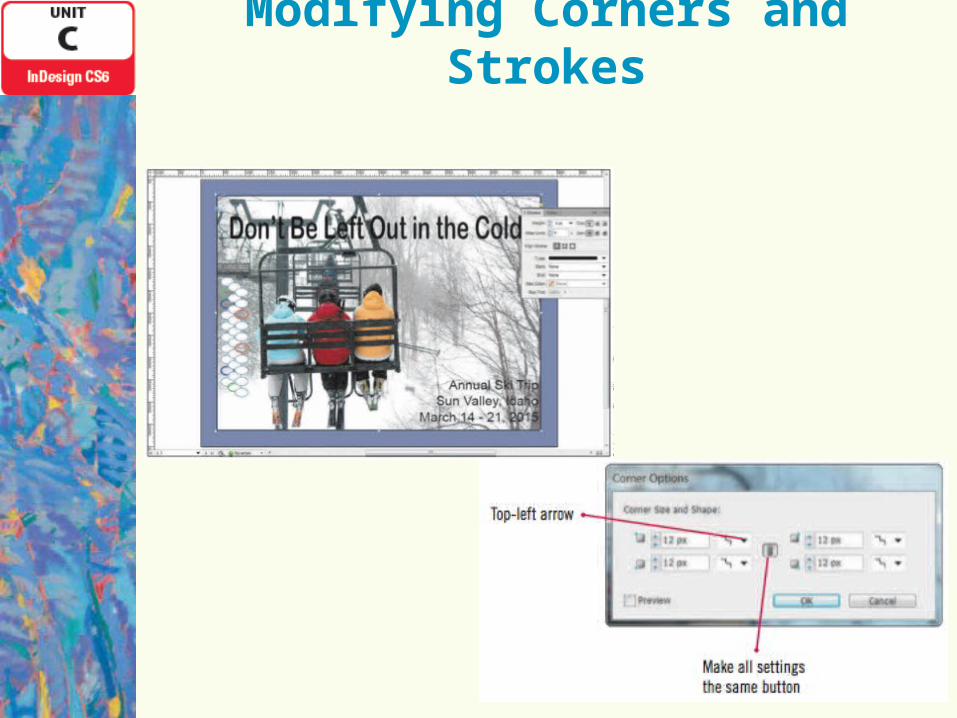
Modifying Corners and Strokes
Corner Options dialog box: Offers five types of corners (e.g., Rounded
and Beveled)• Setting can be previewed before closing the
dialog box
To better see changes made to corners a thick stroke is recommended• Change stroke weight on the Stroke panel
Modifying Corners and Strokes
Modifying Corners and Strokes
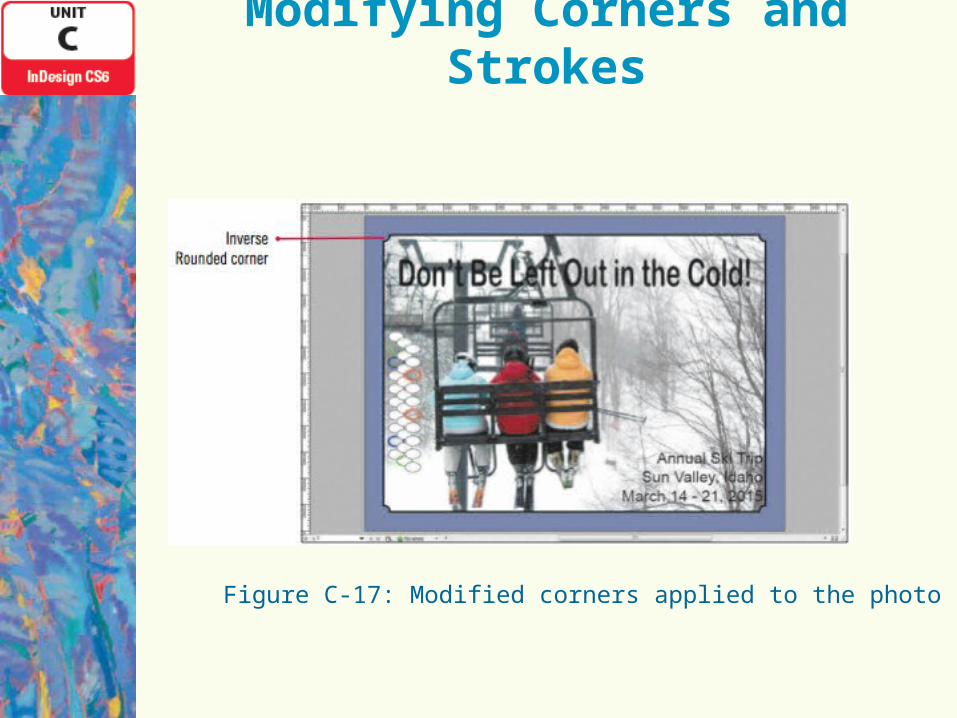
Figure C-17: Modified corners applied to the photo
Creating a Multi-State Object
You can create different appearances or states for the same object Makes it possible to demonstrate one layout
with two or more options for any of the InDesign objects• First select the object, then click the Convert
selection to multi-state object button on the Object States pane
• Two copies of the same object appear as thumbnails on the panel. Select one of the object states on the panel and then make changes to it in the Document window

Creating a Multi-State Object
Figure C-18: Creating a multi‐state object

Creating a Multi-State Object
Figure C-19: Viewing the red rectangle frame

Unit Summary
Create an object Transform an object Arrange and lock an object Step and repeat an object Use Live Distribute Use the Direct Selection tool Modify corners and strokes Create a multi-state object