Embed Size (px)
Citation preview

1
Wireless Data Acquisition for the SAE Car
Final Senior Project Paper
By:
J.P. Haberkorn
Jon Trainor
Project Advisors:
Mr. Steven Gutschlag
Mr. Nick Schmidt

2
Abstract:
The Wireless Data Acquisition for the SAE Car project consists of gathering data from
sensors on the SAE car and transmitting it wirelessly from the on-board microcontroller to a
stationary computer. The transmitted data will include car velocity, engine speed, acceleration,
engine water temperature, oil pressure, and suspension travel. This data will be transmitted using
the Aerocomm AC4790-200 wireless transceiver, which has a range of up to four miles when
used with an external antenna.

3
Table of Contents: Abstract…………………………………………………………………………………… p.2
Introduction……………………………………………………………………………….p.4
Functional Description
Basic Functionality…………………………………………………………………p.5
Sensor Interface…………………………………………………………………….p.6
Transmitting Data…………………………………………………………………..p.7
Receiving Data…………………………………………………….………………..p.8
Wireless Communication
Aerocomm AC4790-200……………………………………………………………p.8
Communicating with the Transceivers……………………………………………...p.10
Initializing Aerocomm Transceivers…………………………………….……...…..p.10
Transmitting with the Transceivers…………………………………………………p.13
Analysis of Results…………………………………………………………………………p.14
Conclusions………………………………………………………………………………...p.14
Appendices :
Appendix I – MATLAB CODE…………………………………………………..p.15
Appendix II – Board_2_Board Program………………………………………...p.17
Appendix III – Transmitting Code……………………………………………….p.21
Receiving Code…………………………………………………...p.30

4
Introduction
Each year a team of Mechanical Engineers from Bradley University designs and builds a
formula SAE car. This vehicle is raced in various competitions in the state and has won awards
over the past few years. One problem, however, is the data logging system that is currently used
for the project. The system being used requires the Mechanical Engineers to download all of the
car sensor data after the car has been driven.
The solution to this problem and the goal of this project is to gather the data from various
sensors on the car and wirelessly transmit the data to an off-track laptop computer. Here the data
can be stored in Microsoft Excel Spreadsheet for future analysis and graphing. In addition the
data can be displayed in real-time using a macro program such as MATLAB. With this system
if, the engine temperature or oil pressure falls out of the normal range, the driver can be notified
promptly by the computer user to shut down the car before serious damage to the vehicle or
driven occurs.
Not only would this system be ideal for critical data like temperature and pressure, it can
also be used to gather the car velocity, engine speed, and the suspension positions on all four
corners. This is more data than the Mechanical Engineers have been able to gather in the past,
and would surely benefit the SAE Formula Team Project.

5
Functional Description
Basic Functionality
The Wireless Data Acquisition project consists of gathering data from the SAE
car and transmitting it wirelessly from the on-board microcontroller to an off-track laptop
computer. The transmitted data includes car velocity, acceleration, suspension travel, engine
velocity, and engine water temperature and oil pressure. The wireless transceivers used for the
project are the Aerocomm AC4790-200 chips, which have a range of up to four miles when used
with an external antenna. Figure 1 shows the basic functionality of two transceivers
communicating with each other, where the OEM Hosts can be either a computer or a
microcontroller. For this project, the OEM Hosts are EMAC Micropac535 boards, but the
receiver OEM Host will eventually be changed to an off-track laptop.
Figure 1

6
The main focus of this project was gathering the necessary data from the car, processing
and storing it in the microcontroller, wirelessly transmitting and receiving the data using the
Aerocomm AC4790-200, and displaying it on a laptop computer. A high level block diagram of
the entire system may be seen in Figure 2.
Figure 2
Sensor Interface:
The sensor interface software was implemented with an EMAC Micropac535
microcontroller system, and essentially entails sampling the different sensors as needed.
For example, the tachometer and velocity sensors will need to be sampled much more
frequently than the oil pressure or engine temperature sensors. Updating priority for the
sensor data is shown below. The priority is based on how frequently the incoming data is
changing. For example, the engine speed will change much more often than the oil
pressure, so it must be polled more frequently.

7
• Priority One
o Car Velocity (Wheel Sensor)
o Engine Speed (Pulse)
o Suspension Travel (Linear Voltage)
• Priority Two
o Oil Pressure (Switch)
o Water Temperature Linear Voltage)
For this project, the above signals were simulated with a function generator at
various voltage levels. The EMAC Micropac535 system converts the values obtained
from the sensors with software to the desired output units (e.g., speed in revolutions per
minute [RPM]) before transmission).
Transmitting Data
The transmission process simply gathers all of the sensor data, and once the data
is a complete packet, it is sent out on the Aerocomm AC4790-200 transceiver. All of the
sensor data comes in as pulses or through the A/D converter from the linear voltage
sensors. The transmission process flow chart is shown below in Figure 3.

8
Figure 3
Receiving Data
The data is currently received by another EMAC Micropac535 system and stored in
memory. Eventually, this data will be displayed and stored using a MATLAB macro on a laptop
computer. The code has been acquired to make this possible, but time to complete this task was
not available. The MATLAB code can be found in Appendix 1.
Wireless Communication
Aerocomm AC4790-200
Before implementing the Aerocomm transceivers into the project, the RS232 COM Ports
on the EMAC Board needed to be mastered. A program was written that would initialize COM
Port 2 on both EMAC boards. A 100Hz sine wave was applied to the A/D Converter on the
transmitting end, and was sent out over the COM2 Port. The receiving EMAC Board took in the
data and immediately sent it back to the transmitter, where once received was put out on the D/A
converter and compared with the original sine wave on an oscilloscope. This process was
successfully completed as well. The code for this process is shown in Appendix 2.
Once the RS232 capabilities of the EMAC were fully tested and understood, it was
interfaced with the Aerocomm AC4790-200. This transceiver is shown in figure 4.

9
Figure 4
The basic theory of operation of these transceivers is shown in Figure 5. The transceiver
is always in receive mode until something is written to RXD (Pin 3) of the transceiver, which
puts it into transmit mode. The Command Mode is enabled when the Command Data input (Pin
17) of the chip is asserted low. While in Command Mode, the user can set operating modes on
the transceiver by altering its EEPROM data. This mode is very useful for setting up two
transceivers for communication.
Figure 5

10
Communicating with the Transceivers
The Aerocomm transceivers accept TTL Level voltages (0 to 5V) for the data to be
transmitted and the command data. Since the EMAC Micropac35 system puts out RS232
voltages (-15 to 15V) there needed to be a converter between the EMAC and the transceivers.
The MC-1488 and MC-1489 quad line drivers provide this functionality and were implemented
into the design as shown in Figure 6.
Figure 6
Initializing Aerocomm Transceivers
Once communication was established between the EMAC boards and the Aerocomm
devices, the chips need to be initialized. This proved to be a very tedious and grueling task since
the original data sheets provided were often insufficient and also listed some false data. The
User Manual for the Aerocomm AC4790 proved to be a little more useful since it gave a few tips

11
on how to overcome problems previously encountered by others using the device. Even with the
tips, however, this device was very difficult to obtain complete functionality and required
significantly more time than expected in this project. Although this led to a serious impediment
to completing the project as originally conceived, it can be viewed as a triumph since these
transceivers have finally been mastered and understood. Operational flowcharts have been
developed so that students will not have to start from scratch with these devices in the future.
Now that the fundamental operational requirements of the Aerocomm transceivers have been
well documented, they can easily be used in many future senior projects to great effect.
In order to operate properly, the Aerocomm devices need to be initialized to the same
settings (ie same channel, same broadcast mode, etc.). This is achieved via the AT Command
Mode which as mentioned before is entered by asserting Pin 17 (Command Data) logic low. A
command can be looked up in the chart from the User Manual which shows the command to be
given, and the response the transceiver sends back to the host. The basic command process is
shown in the flowchart in Figure 7.
Figure 7
The next few figures will give an example of how to issue and verify an AT Command
for setting the channel. Both transceivers need to be set to the same channel before any attempt

12
of data transmission is made. Figure 8 shows the row of the chart of AT Commands from the
AC4790 User Manual corresponding to channel selection. The bytes #CCh, #01h, and the
desired channel (channel #02h was selected) need to be written to the RXD Pin on the
transceiver while Pin 17 (Command Data) is low. These bytes need to be written with minimal
delay between each of them, since if there is 1ms of delay between bytes they will not be
recognized as a command and the command will have to be reissued. The transceiver then
responds with #CCh, #02h (Channel #02h was selected in our case). If any other response was
received, the command was not received properly and needed to be reissued.
Figure 8
Below, Figure 9 shows the flowchart for the channel setting process:
Figure 9

13
Transmitting with the Transceivers:
Once both transceivers have been initialized to the same channel and broadcast mode,
they are ready to begin sending and receiving data. Before the user does this, however, there are
a few things to know so data loss can be prevented. First, the transmitter buffer on the
Aerocomm device is 256 bytes, and the device will begin an RF transmission once the buffer
gets to the RF Packet size. This can be accessed in the chip’s EEPROM and set to whatever the
user desires. The default value is 80h bytes, which is also the limit of the device’s capabilities.
Figure 10
When a transmission begins, it takes 50ms to complete. This is because the transceivers
need to initialize the session, transmit the RF packet, and then end the session for each hop. The
user must be very careful that the buffer doesn’t fill up during this process. For example, a sine
wave was applied to the A/D and sampled very rapidly. Its output was being written right to the
Aerocomm transceiver, but on the receiving end, only a few pieces were coming in and there was
a significant amount of data loss occurring. For the purpose of updating the car sensor data, this
transceiver is practical. One packet of every single sensor should be no more than 30 bytes of
data in each packet. The user must make sure they set the RF Packet size to match the amount of
data needed to be transmitted so that only one complete packet is sent at a time, as opposed to
packets being split up.

14
Analysis of Results
The system successfully transmitted the simulated PWM signal for the crankshaft
position sensor and calculated the associated RPM. While the hex to bcd assembly code was not
perfect, it still served its purpose, showing that a four byte number in ASCII can be sent and
received every .5 seconds. Based on test results, a maximum of 128 bytes can be sent every 50
milliseconds. This means 1280 ASCII characters can be sent every .5 seconds. Therefore the
system will be able to transmit fast enough to send all the data desired from the car and update
the real-time display at an adequate frequency.
Conclusion:
The major accomplishment of this project has been to fully understand the Aerocomm
AC4790 transceivers. The flowcharts that were created to show the exact procedure for
initializing the transceiver and writing commands will enable future Bradley students to
implement secure wireless systems utilizing the AC4790 tranceivers in a very short time frame
without the frustration and delay due to confusing and incomplete data sheets. The final
accomplishment was to get the system to transmit a simulated signal from one microcontroller to
another, leaving the project at a good point to be continued next year. The sensors that are on the
car can be tested so the acquisition code can be rewritten and it can send the actual signals from
the sensors instead of a simulated version. Once communication with the serial RS-232 ports is
established with MATLAB on the off-track laptop computer and one of the Aerocomm

15
transceivers is rewired to be plugged into the serial port of the laptop, the system can be
implemented on the SAE car.
APPENDIX I – MATLAB CODE
function [tV, V, tI, I] = CollectMotor_Data_2() %Collect Motor Data scopes must be in print mode rate = 1 %COM 1 (VOLTAGE SCOPE) PORT CONFIG c1 = serial('COM1'); set(c1, 'BaudRate', 9600); set(c1, 'DataBits', 8); set(c1, 'FlowControl', 'none'); set(c1, 'Parity', 'none'); %COM 2 (CURRENT SCOPE) PORT CONFIG c2 = serial('COM3'); set(c2, 'BaudRate', 9600); set(c2, 'DataBits', 8); set(c2, 'FlowControl', 'none'); set(c2, 'Parity', 'none'); %OPEN COM 1 fopen(c1); %VOLTAGE SCOPE SETUP fprintf(c1,'RWLS'); %Lockout Scope fprintf(c1,'TRIGGER 2'); %Temporarily suspend measurement operations fprintf(c1,'VDC'); %Voltage Measurement fprintf(c1,'RATE F'); %Fast measurements fprintf(c1,'RANGE 4'); %300v Range fprintf(c1,'FIXED'); %Don't Autosense range fprintf(c1,'TRIGGER 1'); %Resume measurement operations %OPEN COM 2

16
fopen(c2); %CURRENT SCOPE SETUP fprintf(c2,'RWLS'); %Lockout Scope fprintf(c2,'TRIGGER 2'); %Temporarily suspend measurement operations fprintf(c2,'ADC'); %Voltage Measurement fprintf(c2,'RATE F'); %Fast measurements fprintf(c2,'RANGE 3'); %10A Range fprintf(c2,'FIXED'); %Don't Autosense range fprintf(c2,'TRIGGER 1'); %Resume measurement operations %CLEAR SERAIL RECEIVE BUFFERS pause %Need to let scopes settle (variable delay) and configure %Motors to regeneration while ((c1.BytesAvailable ~= 0) || (c2.BytesAvailable ~= 0)) if (c1.BytesAvailable ~= 0) resp = fscanf(c1); end if (c2.BytesAvailable ~= 0) resp = fscanf(c2); end end %Data Collection Loop x = 1; y = 1; tic while ((x < 100) || (y < 100)) if (c1.BytesAvailable ~= 0) V(x) = str2double(fscanf(c1)); tV(x) = toc; x = x + 1; end if (c2.BytesAvailable ~= 0) I(y) = str2double(fscanf(c2)); tI(y) = toc; y = y + 1; end end %COLSE COM 1 fprintf(c1,'LOCS'); fclose(c1); delete(c1); clear c1;

17
%COLSE COM 2 fprintf(c2,'LOCS'); fclose(c2); delete(c2); clear c2;
APPENDIX II – Board2Board Program
INIT FILE:
;J.P. Haberkorn & Jon Trainor ;EE-451 ;test1 up1 ;Initialization File $NOMOD51 $include(reg515.inc) $include(var.inc) public init extrn code(main, lcdinit, INIT2681) cseg at 8000h ljmp init
init_seg segment code rseg init_seg ;*************************************************************** ;This file initializes all registers, as well as the LCD ;It also sets up the Serial Port Interface for TRANSMITTING DATA ;Pin 1.0 and an interupt are being used to show how long the ;transmitting and receiving process takes. ;*************************************************************** init: mov SP, #50h

18
setb p5.5 clr p5.5 lcall lcdinit
setb p1.0 clr start
lcall INIT2681 ;setup COM1 Port runprog: lcall main end APPENDIX II Continued INIT2681 FILE:
$NOMOD51 $include(reg515.inc) $include(var.inc) public INIT2681 INIT2681_seg segment code rseg INIT2681_seg INIT2681:
; DO RESET COMMANDS FOR PORTS A AND B. THIS WILL ;EXECUTE CHANNEL ; A & B's MISCELLANEOUS COMMANDS NUMBERED ;101,100,011,010,001.
mov A,#01010000B ; DO FROM THIS COMMAND, DOWN TO
;00010000 crinit: mov P2,#0Ah movx @R1,A add A,#-16 ; SUBTRACT 1 FROM UPPER NIBBLE jnz crinit ; LOOP TILL 0 mov P2,#08h ; SETUP PROTOCOL FOR PORT b mov A,#MR2BDAT movx @R1,A
; SELECT BAUD RATE

19
mov P2,#04h mov A,#80H movx @R1,A ; SELECT SET 2 OF BAUD RATES mov P2,#1001b mov A,#10111011b movx @R1,A ; RX AND TX AT 9600 FOR B mov P2,#0Ah mov A,#00000101B ; ENABLE TXER AND RXER movx @R1,A RET End APPENDIX II Continued MAIN FILE:
$NOMOD51 $include(reg515.inc) $include(var.inc) name main public main main_seg segment code rseg main_seg extrn code(lcdout) ;*************************************************** ;This file samples the A/D converter and sends ;the signal out on the serial port to the other ;microcontroller. It then enters reveive mode once ;the transmission is over and will receive the data ;back from the other microcontroller. ;*************************************************** main: mov a, #000B ;anl A,#111B ; ONLY 8 CHANNELS ANL ADCON,#11000000B ; MODE FOR A/D CONVERSION ORL ADCON,A ; "OR" IN THE CHANNEL MOV DAPR,#0 ; START CONV W/NO REF JB BSY,$ ; LOOP TILL CONVERTED MOV ACC,ADDAT ; ACC = CONVERSION SENDA: jb BSY, SENDA ;wait for conversion

20
MOV P2,#1001b PUSH ACC SENDA1: MOVX A,@R1 JNB ACC.2,SENDA1 ; LOOP TILL TXrdy POP ACC MOV P2,#1011b ; SEND IT OUT MOVX @R1,A MOV P2,#1001b RECEIVEA1: MOVX A,@R1 JNB ACC.0,RECEIVEA1 ; LOOP TILL RXrdy MOV P2,#1011b ; READ DATA PORT MOVX A,@R1 daconvert: mov dph, #10H movx @dptr, a ljmp main END

21
APPENDIX III – AC4790 PROGRAM Note: The transmitting and receiving are essentially the same. The init files and Most of the modules are identical. The only different module is the main file. The transmitting and receiving main files are both included and labeled properly. INIT FILE: ;J.P. Haberkorn ;EE-451 ;Initialization File $NOMOD51 $include(reg515.inc) $include(var.inc) PUBLIC INIT EXTRN CODE(MAIN, LCDINIT, INIT2681, DELAY1S, SETCHAN, SETBROAD,
SETBAUD, INIT2682, SETSIZE) CSEG AT 8000h LJMP INIT cseg at 802Bh ;P1.4 is the trigger for EX2 ;12/11.0592e6 = 1 clock cycle in secs. ;.5sec/1 cc = 460.8e3 clock cycles mov th2, #0FFh mov tl2, #0FFh inc hseccnt ;incriment the .5sec counter
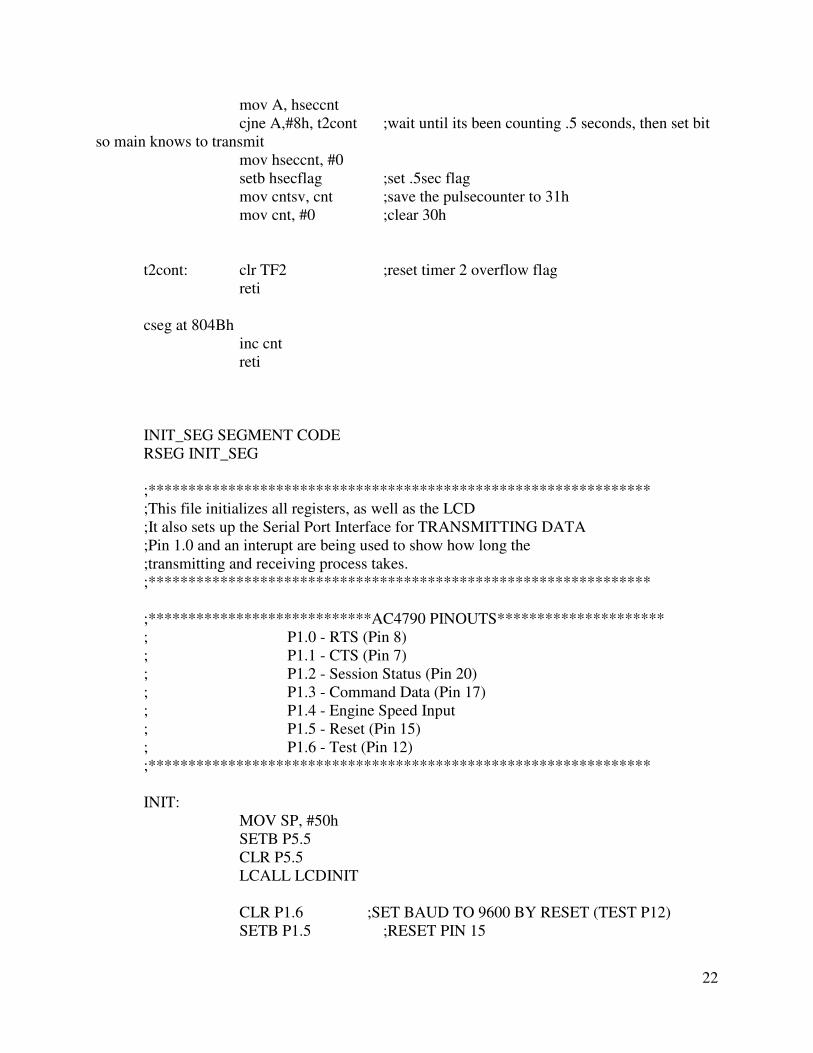
22
mov A, hseccnt cjne A,#8h, t2cont ;wait until its been counting .5 seconds, then set bit
so main knows to transmit mov hseccnt, #0 setb hsecflag ;set .5sec flag mov cntsv, cnt ;save the pulsecounter to 31h mov cnt, #0 ;clear 30h t2cont: clr TF2 ;reset timer 2 overflow flag reti cseg at 804Bh inc cnt reti INIT_SEG SEGMENT CODE RSEG INIT_SEG ;*************************************************************** ;This file initializes all registers, as well as the LCD ;It also sets up the Serial Port Interface for TRANSMITTING DATA ;Pin 1.0 and an interupt are being used to show how long the ;transmitting and receiving process takes. ;*************************************************************** ;****************************AC4790 PINOUTS********************* ; P1.0 - RTS (Pin 8) ; P1.1 - CTS (Pin 7) ; P1.2 - Session Status (Pin 20) ; P1.3 - Command Data (Pin 17) ; P1.4 - Engine Speed Input ; P1.5 - Reset (Pin 15) ; P1.6 - Test (Pin 12) ;*************************************************************** INIT: MOV SP, #50h SETB P5.5 CLR P5.5 LCALL LCDINIT CLR P1.6 ;SET BAUD TO 9600 BY RESET (TEST P12) SETB P1.5 ;RESET PIN 15

23
LCALL DELAY1S CLR P1.5 ;COMPLETE RESET CLR P1.0 ;ENABLE RTS (DATA STRAIGHT TO HOST) LCALL INIT2681 ;setup COM2 Port SETUPCHIP: CLR P1.3 ;ENTER COMMAND MODE ;LCALL SETBAUD ;LCALL INIT2682 ;SETS BOTH BAUDS TO 4800 LCALL SETCHAN LCALL SETBROAD LCALL SETSIZE SETB P1.3 ;WAIT SOME TIME INTENB: mov cnt, #0 ;pulse counter mov cntsv, #0 ;saved counter mov hseccnt, #0 ;.5 sec counter mov ascii0, #0 mov ascii1, #0 mov ascii2, #0 mov ascii3, #0 mov ascii4, #0 mov rpmlow, #0 mov rpmhigh, #0 mov divlow, #0 mov divhigh, #0 ;clr ie1 ;clear external interrupt flag clr hsecflag ;.5sec flag setb eal ;enable all interrupts setb ET2 ;set timer 2 overflow interrupt setb EX2 ;setup external interrupt 2 mov A, IP0 ;set External Interupt 2 as highest priority orl A, #2 mov IP0, A mov A, IP1 orl A, #2 mov IP1, A

24
T2INT: ;SETUP TIMER2 to reload at FFFF mov TH2, #0FFh mov TL2, #0FFh mov a, t2con orl a, #00110001b ;rising edge for pin 1.4 set mov t2con, A GOMAIN: LCALL MAIN
END APPENDIX III Continued SET CHANNEL FILE: ;J.P. Haberkorn ;EE-451 ;CHANNEL SETTING FILE $NOMOD51 $include(reg515.inc) $include(var.inc) name SETCHAN public SETCHAN SETCHAN_SEG SEGMENT CODE RSEG SETCHAN_SEG EXTRN CODE(DELAY1S, TRANSMIT, RECEIVE) ;********************** ;THIS FILE SETS THE AC4790 ;TO USE CHANNEL NUMBER 2 ;********************** SETCHAN: LCALL DELAY1S MOV A, #0CCh LCALL TRANSMIT MOV A, #01h LCALL TRANSMIT

25
MOV A, #02h ;Set Channel 02h as default LCALL TRANSMIT VERCHAN: LCALL RECEIVE MOV CHAN1, DATAIN VERCHAN2: LCALL RECEIVE MOV CHAN2, DATAIN RET END APPENDIX III Continued BROADCAST SETTING FILE: ;J.P. Haberkorn ;EE-451 ;BROADCAST SETTING FILE $NOMOD51 $include(reg515.inc) $include(var.inc) name SETBROAD public SETBROAD SETBROAD_SEG SEGMENT CODE RSEG SETBROAD_SEG EXTRN CODE(DELAY1S, TRANSMIT, RECEIVE) ;********************** ;THIS FILE SETS THE AC4790 ;TO USE BROADCAST PACKETS ;********************** SETBROAD: LCALL DELAY1S MOV A, #0CCh LCALL TRANSMIT MOV A, #17h LCALL TRANSMIT MOV A, #90h

26
LCALL TRANSMIT VERBROAD: LCALL RECEIVE MOV BROAD1, DATAIN VERBROAD2: LCALL RECEIVE MOV BROAD2, DATAIN RET END APPENDIX III Continued TRANSMIT DATA FILE: ;J.P. Haberkorn ;EE-451 ;Sending File $NOMOD51 $include(reg515.inc) $include(var.inc) name TRANSMIT public TRANSMIT TRANSMIT_SEG SEGMENT CODE RSEG TRANSMIT_SEG ;************************************************* ;This module takes whatever was last put into ACC and ;puts it out on the COM2. It can be called from the ;MAIN program only. ;************************************************* TRANSMIT: MOV P2,#1001b PUSH ACC ;PUSHES LAST VALUE IN A (OUTPUT ON
COM2) CHIPRDY:

27
;jb p1.1, CHIPRDY ;Check "Clear To Send" Pin7 ;jnb p1.2, CHIPRDY ;Check "Session Status" Pin20 SENDA1: MOVX A,@R1 JNB ACC.2,SENDA1 ; LOOP TILL TXrdy POP ACC MOV P2,#1011b ; SEND IT OUT MOVX @R1,A MOV P2,#1001b RET END APPENDIX III Continued RECEIVE DATA FILE ;J.P. Haberkorn ;EE-451 ;Receiving File $NOMOD51 $include(reg515.inc) $include(var.inc) name RECEIVE public RECEIVE RECEIVE_SEG SEGMENT CODE RSEG RECEIVE_SEG ;**************************************************** ;This file receives data on the RXD Pin on COM2. ;The received data is stored in ACC and then pushed ;before the return. THE USER MUST POP ACC BEFORE USING ;THE RECEIVED DATA. This file can only be called from ;the main program. ;**************************************************** RECEIVE: MOV P2, #09h MOVX A,@R1 JNB ACC.0,RECEIVE ; LOOP TILL RXrdy MOV P2,#1011b ; READ DATA PORT

28
MOVX A,@R1 MOV DATAIN, A RET END APPENDIX III Continued MAIN FILE FOR TRANSMITTER ;J.P. Haberkorn ;EE-451 ;test1 up1 ;Main Program File $NOMOD51 $include(reg515.inc) $include(var.inc) name main public main main_seg segment code rseg main_seg extrn code(TRANSMIT, RECEIVE, DELAY1S, SETCHAN, SETBROAD,
VARDELAY, ATOD, RPM) ;*************************************************** ;This file samples the A/D converter and sends ;the signal out on the serial port (using transmit) to the ;AC4790. ;*************************************************** main: LOOPER: JNB HSECFLAG, LOOPER ;wait until .5sec flag is set

29
;there are (31h) pulses in .5 sec so multiply ;by 120 to get pulses/min = RPM CLR T2I0 ;Disable interrupts and timer2 while calculating and
transmitting CLR EAL LCALL RPM DATASEND: ;LCALL ATOD ;A/D Conversion ;MOV A, ADCONV MOV A, ASCII0 ;MSB IN ASCII OF ENGINE SPEED LCALL TRANSMIT MOV A, ASCII1 LCALL TRANSMIT MOV A, ASCII2 LCALL TRANSMIT MOV A, ASCII3 LCALL TRANSMIT RESTART: mov ascii0, #0 ;reinitialize mov ascii1, #0 mov ascii2, #0 mov ascii3, #0 mov ascii4, #0 mov rpmlow, #0 mov rpmhigh, #0 mov divlow, #0 mov divhigh, #0 MOV TH2, #0FFh MOV TL2, #0FFh SETB T2I0 SETB EAL LJMP main END

30
APPENDIX III Continued MAIN RECEIVER FILE ;J.P. Haberkorn ;EE-451 ;test1 up1 ;Main Program File $NOMOD51 $include(reg515.inc) $include(var.inc) name main public main main_seg segment code rseg main_seg extrn code(TRANSMIT, RECEIVE, DELAY1S, SETCHAN, SETBROAD) ;*************************************************** ;This file samples the A/D converter and sends ;the signal out on the serial port (using transmit) to the ;AC4790. ;*************************************************** main: DATASEND:

31
;LCALL RECEIVE ;MOV A, DATAIN ;mov dph, #10H ;movx @dptr, a DATASEND1: LCALL RECEIVE MOV RECEIVE1, DATAIN LCALL RECEIVE MOV RECEIVE2, DATAIN LCALL RECEIVE MOV RECEIVE3, DATAIN LCALL RECEIVE MOV RECEIVE4, DATAIN ;LCALL RECEIVE ;MOV RECEIVE5, DATAIN ;LCALL RECEIVE ;MOV RECEIVE6, DATAIN ;LCALL RECEIVE ;MOV RECEIVE7, DATAIN ;LCALL RECEIVE ;MOV RECEIVE8, DATAIN RESTART: LJMP DATASEND END