Embed Size (px)
Citation preview

User Guide

Contents
UnboxingYour phone 14SIM card 15
Setting up your phoneSetting up your phone for the first time 18Account setup 18Getting contacts into your phone 20
Your first week with your new phoneFeatures you'll enjoy 21Switching the power on or off 22Touch gestures 23Motion gestures 27Start screen 29Opening your apps from the Apps list 32Action Center 34Adjusting the volume 35Sleep mode 36Lock screen 37
2 Contents

Changing the ringtone 39Changing the theme 39Adding a Start screen wallpaper 40Taking a screenshot 40Switching between apps 40Windows Phone Store 41Using the onscreen keyboard 41Entering words with Word Flow 43Changing the keyboard language 44Charging the battery 46Turning Battery Saver on 47Using speech on your phone 48
CortanaCortana, your new personal assistant 50Getting started with Cortana 50Favorite places 52Finding out what song is playing 52Keeping track of your interests 53Setting a reminder 53Setting quiet hours 54Changing Cortana settings 55
Contents 3

CameraCamera basics 56Taking a photo 58Recording video 59After capturing 60
Phone callsMaking a call 61Receiving calls 63What can I do during a call? 64Starting a three-way call 65Call history 65Global Ready 67Changing the network your phone connects to 67
PeopleKeeping in touch 68Importing contacts from your SIM card 69Adding a new contact 69Adding an extension number to a contact number 70Jumping to a section in the contacts list 71Filtering your contacts list 71Merging contact profiles 71
4 Contents

Searching, editing or deleting 72Sharing with a group of contacts in real-time 75Organizing your contacts into groups 77What is the Me card? 80Posting to social networks 81Filtering social updates 82
MessagingSending a text message 84Sharing pictures, videos, and more in a message 85Viewing and replying to a message 86Forwarding a message 87Deleting a message 87Deleting a whole conversation 88
EmailAdding a Microsoft account 89Adding a POP3/IMAP email account 90Adding a Microsoft Exchange or Office 365 account 91Checking email 92Sending email 94Managing email messages 95Changing email account settings 96
Contents 5

Photos and VideosAbout the Photos hub 98Adding a photo to your favorites 98Sharing 99Using Photo Enhancer 99
ProductivityWhat you can do in Calendar 101Creating a calendar appointment 101Creating a new to-do task 103Displaying and syncing calendars 104What's in the Office hub? 105Creating and sharing notes 107
EntertainmentXbox Video 110Xbox Music 111Xbox Games 111
Sync and BackupWindows Phone app 113Backing up your files 115
6 Contents

Internet connectionsData connection 117Wi-Fi 118Using your phone as a mobile hotspot 121Managing your data usage 122
Search and Web browserWays you can search the Web 125Searching for information 126Scanning codes and text 127Opening and navigating web pages 130Music search 132
Maps and locationLocation services 134Maps 135Local Scout 141
More appsWhat can I do in the HTC hub? 143
Bluetooth and NFCConnecting a Bluetooth accessory 153
Contents 7

Disconnecting a Bluetooth accessory 154Unpairing 154Sharing content with NFC 155Turning NFC on and off 155Using NFC 156
SettingsNavigation bar 158Turning airplane mode on or off 158Attentive phone features 159Changing display settings 160Changing sound settings 161Making your music sound better 162Managing apps and storage 162
SecurityAssigning a PIN to help protect your SIM card 165Setting a password to help protect your phone 166Making your phone safer for kids 167
Update and resetHow to get and install updates 170Preparing for a software update 171
8 Contents

Installing an update 172Factory reset 172
Trademarks and copyrights
Index
Contents 9

Conventions
IMPORTANT CUSTOMER INFORMATION
Please be advised that many services and applications offered through thisunique device are provided by various device manufacturers, operatingsystem, software and application developers (e.g. Google®, Motorola®,Microsoft®, BlackBerry®). If you use, link to or download such a service, oran application such as a non-Verizon Wireless location based GPS-typeservice, chat room, marketplace or social network from this device, youshould carefully review the terms of such service or application. If you useany of these non-Verizon Wireless services or applications, personalinformation you submit may be read, collected, or used by the service orapplication provider and/or other users of those forums.
Verizon Wireless is not responsible for your use of those applications orinformation you choose to submit or share with others. Specific terms andconditions, terms of use, and privacy policies apply to those applicationsand services. Please review carefully any and all terms and conditionsapplicable to those applications and services including those related to anylocation-based services for any particular privacy policies, risks or waivers.
Your Verizon Wireless Customer Agreement Terms and Conditions andcertain other specifically identified terms govern your use of any VerizonWireless products and services.
10 Conventions

Conventions used in this guide
In this user guide, we use the following symbols to indicate useful andimportant information:
This is a note. A note often gives additional information, such aswhat happens when you choose to do or not to do a certainaction. A note also provides information that may only beapplicable to some situations.
This is a tip. A tip gives you an alternative way to do a particularstep or procedure, or lets you know of an option that you may findhelpful.
This indicates important information that you need in order toaccomplish a certain task or to get a feature to work properly.
This provides safety precaution information, that is, informationthat you need to be careful about to prevent potential problems.
Conventions 11

Important RF NoticeThis device was tested for compliance with the applicable FCCand Industry Canada specific absorption rate (SAR) limits forradio frequency (RF) exposure during typical body-wornoperations. To ensure that RF exposure levels remain at or belowthe tested levels, use a belt-clip, holster, or similar accessory thatmaintains a minimum separation distance of 1.0 cm between yourbody and the device, with either the front or back of the devicefacing towards your body. Such accessories should not containany metallic components. Body-worn accessories that do notmeet these specifications may not ensure compliance withapplicable SAR limits and their use should be avoided.
Important note on recoverable dataFiles and other data that have been deleted, cleared, removed, orerased from your device may still be recoverable by third-partydata recovery software. Even a factory reset may not
12 Conventions

permanently erase all data from your phone, including personalinformation.
Other helpful resources
For health, safety, and regulatory information, please read the Safety andregulatory guide that’s included in the box.
In addition to this user guide, you can find help information, FAQs, andmore in www.htc.com/support.
To learn a lot more about using Windows Phone®, go to windowsphone.com.
Certain Windows Phone features or Microsoft services may not beavailable in some countries or regions.
Conventions 13

Unboxing
Your phone
1. BACK
2. USB connector
3. START
4. SEARCH
5. Camera button
6. VOLUME
7. Tray eject hole
8. SIM card tray
9. Notification LED
10. POWER
11. Proximity sensor
12. 3.5mm headset jack
13. Front camera
14 Unboxing

If you want to use a screen protector, please don’t cover and blockthe proximity sensor. Purchase a screen protector designed foryour phone.
SIM card
Your phone uses a microSIM card. The microSIM card contains your phonenumber, service details, and memory for storing phonebook contactsand/or text messages.
Your Verizon Wireless micro SIM card
Use your Verizon Wireless micro SIM card to make and receive calls, text,and email messages and surf the Web while traveling outside of the U.S. insupported destinations.
Your micro SIM (Subscriber Identity Module) card stores yourphone number and other important information. Do not bend orscratch your micro SIM card. Avoid exposing it to static electricity,water or dirt. If your micro SIM card is lost or damaged while in theU.S., please dial *611 from your Verizon Wireless device or1-800-922-0204 from any phone to speak with a CustomerService Representative. From outside of the U.S., please refer tothe Verizon Wireless Global Support Guide, welcome letter andcalling card that came with your device. This will enable you tomake calls toll free from landlines in most countries where we offerGlobal Phone service.
Unboxing 15

Inserting the SIM card
1. With the phone facing up, insert the tip of the SIM removal tool intothe small hole next to the SIM card tray slot.
2. Push the tip all the way into the hole until the SIM card tray ejects.
3. Pull the SIM card tray out, and place the SIM card (contacts facingdown) into the tray.
4. Insert the SIM card tray back into the slot.
16 Unboxing

Removing the SIM card
Make sure to switch off your phone before removing your SIMcard.
1. With the phone facing up, insert the tip of the SIM removal tool intothe small hole next to the SIM card tray slot.
2. Push the tip all the way into the hole until the SIM card tray ejects.
3. Pull the SIM card tray out and remove the SIM card.
When removing the SIM card, make sure that you insert the empty SIMcard tray back into the slot.
Unboxing 17

Setting up your phone
Setting up your phone for the first time
When you switch on your phone for the first time, you’ll be asked to set itup. Just follow the onscreen instructions and you’ll be up and running in notime.
On the Keep your life in sync screen, be sure to sign in with your Microsoftaccount so you can use services such as Windows® Store, OneDrive™, andmore. If you don't have a Microsoft account, tap create one and follow theonscreen instructions. See Adding a Microsoft account on page 89.
You can also create a Microsoft account from your computer bygoing to signup.live.com.
Account setup
Set up your online accounts so you can send and receive email, and more.
Depending on the type of email account that you set up, other items suchas contacts, calendar, or other information can appear on your phone aswell. And when you sign in to your social networking accounts, you'll alsoget your friends' status updates and see the pictures they've posted.
Setting up an account
1. Swipe down from the top edge of the screen with one finger.
18 Setting up your phone

2. Tap All settings > email+accounts.
3. Tap add an account, and then tap the type of account you want toset up.
4. Follow the onscreen instructions to set up your account.
Syncing an account
If you're not seeing your most recent email messages or status updates inan account, you can manually sync the account to download them.
1. Swipe down from the top edge of the screen with one finger.
2. Tap All settings > email+accounts.
3. Press and hold the account whose information you want todownload, and then tap sync.
Deleting an account
§ Removing an account does not remove accounts and informationfrom the online service itself.
§ Your primary Microsoft account cannot be deleted. You'll need todo a factory reset to remove it.
1. Swipe down from the top edge of the screen with one finger.
2. Tap All settings > email+accounts.
Setting up your phone 19

3. Press and hold the account you want to delete, and then tap delete.
Some personal data may be retained by the third-party app afteryou have removed the account from your phone.
Getting contacts into your phone
There are several ways you can add contacts to your phone.
Online accounts Log in to your online accounts to import contactinformation.
Phone contacts Create and store contacts directly in your phone.
ExchangeActiveSync®
Sync your work contacts with ActiveSync.
Bluetooth® Receive contacts via Bluetooth from anotherphone.
20 Setting up your phone

Your first week with your new phone
Features you'll enjoy
Keep up to date with your family and friends, and share what's going on inyour life. Hear what you've been missing in your music. And more.
Make your phone as unique as you arePersonalize your Start screen with what's important and unique to you.Create live tiles for your favorite people, music albums, apps, and more,and pin them all to your Start screen. To find out more, see Start screen onpage 29.
Capture every momentHere are some of the great camera features you can use:
§ With the ultra-wide angle front camera, you can take a picture ofyourself and more of the beautiful landscape behind you. Or take aclose up shot with family or friends.
§ Quickly launch your camera with the dedicated CAMERA button,even when your phone is in sleep mode.
§ Use your camera in a wide variety of environments, even in lowlight conditions.
To find out how to do these and more, see Camera on page 56.
Your first week with your new phone 21

Beats By Dr. Dre AudioBeats Audio™ integration gives you a rich, authentic sound experience,whether you’re listening to music, watching a video, or playing a game. Tofind out more, see Making your music sound better on page 162.
OneDrive integrationAlways have access to your photos, videos, and documents anywhere bystoring them in OneDrive. See Sharing on page 99.
Switching the power on or off
Switching the power on
Press the POWER button.
When you turn on your phone for the first time, you’ll need to set itup.
Switching the power off
1. Press and hold the POWER button until you see the slide downto power off message.
2. Swipe your finger down the screen.
22 Your first week with your new phone

Phone not responding?Restart your phone if it doesn't respond when you touch thescreen or press the buttons.
Press and hold the POWER button for at least 12 seconds. Yourphone turns off and then turns back on.
Touch gestures
Use touch gestures to get around your phone.
Tap
Tap the screen with your finger when you want toselect onscreen items such as application and settingsicons, or press onscreen buttons.
Your first week with your new phone 23

Press and hold
Press and hold an item to view available options (forexample, additional keys on the keyboard).
Swipe or slide
Swipe your finger vertically or horizontally across thescreen when you need to scroll through a long list orsee other screens in a hub.
24 Your first week with your new phone

Drag
Press and hold your finger with some pressure beforeyou start to drag. While dragging, don't release yourfinger until you have reached the target position.
Your first week with your new phone 25

Slide with two fingers
In some apps, such as Photos orInternet Explorer, slide two fingersapart to zoom in when viewing apicture or text.
Slide two fingers together to zoom out of thepicture or text.
26 Your first week with your new phone

Motion gestures
Use motion gestures to mute the ringer and more.
Flip to silence
When a call comes in you can turn yourphone over to mute it.
Pick up to lower volume
In a business meeting or restaurant,pick your phone up when a callcomes in to lower the ringtonevolume.
Your first week with your new phone 27

Set volume to automatically rise while in your pocket or bag
On a noisy street and can't hear your phoneringing in your bag?
You can set your phone to automatically detectwhen it's in your bag or pocket and raise theringtone volume so that you can hear it in noisyenvironments.
Rotate your phone for a better view
For many screens, you canautomatically change thescreen orientation fromportrait to landscape byturning your phone sideways.
When entering text, you canturn your phone sideways tobring up a bigger keyboard.
28 Your first week with your new phone

Start screen
Up front on the Start screen, you'll see Live Tiles that continuously updateand show what’s most personal to you. You’ll see your photo album, howmany new text and email messages you have, and more.
§ Simply swipe your finger up or down to scroll through the tiles.
§ Swipe your finger left to access apps.
§ To return to the Start screen from any screen, press .
Rearranging and resizing tiles
1. Press and hold the tile you want to move until it floats.
2. Tap the arrow in the lower right corner to resize the tile.
3. Drag the tile where you want it to go.
4. When you're done moving tiles, press or .
Before rearranging the Start screen you can save the layout incase you want to restore its current state. Go to Settings > backup> apps+settings. Tap the Settings backup On/Off switch, and thentap back up now.
View more tiles
Want to see more tiles but do less scrolling? You can add a third column oftiles on the Start screen.
1. Swipe down from the top edge of the screen with one finger.
Your first week with your new phone 29

2. Tap All settings > start+theme.
3. Set the Show more Tiles option to On.
Pinning items to the Start screen
You can pin just about anything you want to the Start screen: apps,pictures, songs, favorite websites, documents, and even contacts.
For example, when you pin a contact to the Start screen, you’ll get all ofthat person’s updates—feeds, email, text messages, and call notifications—right from that tile.
1. To pin something, press and hold it until a menu appears.
2. Tap pin to start.
Unpinning a tile
1. Press and hold the tile you want to remove.
2. Tap .
Live Folders
Create Live Folders by grouping related or similar tiles together to make iteasier to find what you need on your Start screen.
1. Press and hold a tile and drag it over another tile.
2. Release your finger when you see the lower tile turn into a grid.
30 Your first week with your new phone

Naming Live Folders
1. Tap a Live Folder to expand it.
2. Press and hold the bar above the Live Folder tiles.
3. Enter a name for the Live Folder and tap .
4. When you're done, press or .
Removing tiles from Live Folders
1. Tap a Live Folder to expand it.
2. Press and hold a tile in the Live Folder and drag it above the topbar or below the bottom bar.
3. Release your finger when you have positioned the tile where youwant it.
4. When you're done, press or .
Your first week with your new phone 31

Opening your apps from the Apps list
The App list is where you'll find all of the apps you've installed onWindows Phone 8X.
1. On the Start screen, swipe left.
32 Your first week with your new phone

2. Swipe up and down the screen to see your apps.
3. Tap the app name or tile to open the app.
Finding your apps faster
Have a lot of apps on your Windows Phone 8X? Search or skip through theapp list.
While viewing the App list, try one of the following:
§ Tap , and then enter the name of the app. As you type, searchresults will show on your screen.
Your first week with your new phone 33

§ If you see letter tiles in your app list, tap a letter tile to see all of thealphabet tiles. Then tap a letter to quickly jump to the correspondingsection in the app list.
Action Center
With a simple swipe, you can see all of your notifications—even from thelock screen.
Swipe down from the top edge of the screen with one finger. You'll see allof your notifications, quick actions, and a shortcut to settings.
34 Your first week with your new phone

Hiding notifications from the lock screen
If you want to prevent people from seeing or erasing your notifications,you can hide notifications from the lock screen.
1. Swipe down from the top edge of the screen with one finger.
2. Tap All settings > notifications+actions.
3. Tap the checkbox next to Show notifications in action center whenmy phone is locked.
Notifications and quick actions
Change what you can see and do in the Action Center.
1. Swipe down from the top edge of the screen with one finger.
2. Tap All settings > notifications+actions.
3. Tap a quick action item to replace it with another one.
4. Tap an app to choose what kinds of notifications you will allow.
Adjusting the volume
1. Press the VOLUME UP or VOLUME DOWN button to make thevolume bar appear.
Your first week with your new phone 35

2. Tap to view the volume control panel.
3. Try one of the following:
§ Drag the volume sliders to set the volume.§ Tap the icons to the left of the volume sliders to mute or
unmute.§ Tap to toggle the vibration on or off.
Sleep mode
Sleep mode saves battery power by putting your phone into a low powerstate while the display is off. It also stops accidental button presses whenyour phone is in your bag or pocket. You’ll still receive messages and callsthough.
Switching to Sleep mode
Briefly press the POWER button to turn off the display and switch to Sleepmode. Your phone also automatically goes into Sleep mode when it’s idlefor a while.
36 Your first week with your new phone

Waking up from Sleep mode
To wake your phone up manually, press the POWER button. You’ll need tounlock the screen.
Your phone automatically wakes up when you have an incomingcall.
Lock screen
Unlocking the screen
Swipe your finger up to unlock the screen or answer an incoming call.
Your first week with your new phone 37

If you've set up a password in the settings, you'll need to enter itto unlock the screen.
Changing your lock screen wallpaper
Browse the collection of preset wallpapers or choose from photos thatyou've taken with the camera.
1. Swipe down from the top edge of the screen with one finger.
2. Tap All settings > lock screen.
3. Tap the Background box and then choose photo.
4. Tap change photo and select a photo from your albums or tap to take a new photo.
5. If the photo you selected is bigger than the allowable wallpapersize, crop the photo.
To crop, drag the photo and position the part that you want to beyour wallpaper inside the crop box. You can also zoom in and out.Then tap .
Customizing your lock screen notifications
Get a quick glance of important notifications right on your lock screen.
1. Swipe down from the top edge of the screen with one finger.
2. Tap All settings > lock screen.
3. Choose an app for detailed status.
38 Your first week with your new phone

4. Choose up to five apps for quick status.
5. When you're done, press or .
Changing the ringtone
Choose from the preset ringtones.
1. Swipe down from the top edge of the screen with one finger.
2. Tap All settings > ringtones+sounds.
3. Tap the Ringtone box.
4. To listen to a ringtone, tap .
5. Tap the ringtone you want to use.
Changing the theme
Keep your Start screen feeling fresh by changing the screen's backgroundand accent colors. The accent color you choose will appear in variousplaces, like the tiles on the Start screen, app icons, on web links, inmessages, and more.
1. Swipe down from the top edge of the screen with one finger.
2. Tap All settings > start+theme.
3. Choose the background and accent colors that you like by tappingtheir respective boxes.
Your first week with your new phone 39

Adding a Start screen wallpaper
Want something more personal than color blocks? Use any photo or imageon Windows Phone 8X as a background image for your Start screen tiles.
1. Swipe down from the top edge of the screen with one finger.
2. Tap All settings > start+theme.
3. Tap choose photo.
4. Find the photo you want to use, then tap it.
5. Pan across the photo and zoom in or out to select the part of thephoto you want to use.
6. When you're done, tap .
Taking a screenshot
See something on your screen that you want to save or share? It's easy totake a picture of the screen.
Press POWER and VOLUME UP at the same time. The screen is saved inthe Screenshots album in the Photos app.
Switching between apps
Your phone can remember apps you've used most recently, and there's aneasy way to switch between them.
1. Press and hold to see what apps you've used recently.
2. Swipe left or right across the screen, and then tap the one you wantto use.
40 Your first week with your new phone

You won't see recently used apps if you've closed apps by tapping or turned off the phone.
Windows Phone Store
In Windows Phone Store, it’s easy to download and purchase apps that fityour needs. A wide collection of free and paid apps is available, fromeveryday apps, powerful business apps, to fun games.
From the Start screen, swipe to the left and tap Store to start shopping.
Using the onscreen keyboard
When you start an app or select a field that requires text or numbers, theonscreen keyboard becomes available.
Tap anywhere onscreen where you can type and the keyboard appearsautomatically.
After you've finished using the keyboard, press to close it.
Your first week with your new phone 41

Turning caps lock on
Press and hold or double-tap the shift key . Tap it again to turn capslock off.
Entering numbers and symbols
1. Tap to switch to the numeric and symbol keyboard. You'll findnumbers, common punctuation marks, and symbols on thekeyboard.
2. To use more symbols, tap .
3. Some of the symbol keys can bring up even more symbols. Pressand hold a key to see more.
Moving the cursor
1. To place the cursor in the middle of the text you've already entered,tap near the text you want to change.
2. When the cursor appears, drag the cursor where you want it.
42 Your first week with your new phone

Entering words with Word Flow
The Word Flow keyboard has predictive text to help you type quickly andaccurately. Word Flow is enabled by default, and word suggestions aredisplayed as you type.
1. Start typing the word you want to write. As you type, you'll seesuggestions above the keyboard.
2. Swipe left and right on the word suggestions to see all of thesuggestions.
3. Tap a word to enter it.
§ Auto-correct suggestions are highlighted in bold. Tap the spacekey to accept the auto-correct suggestion.
§ You can change any word you've entered by tapping it andselecting another word from the word suggestions.
§ To add a new word to the Word Flow dictionary, tap the wordand then tap word suggestion with the "+" sign next to it.
Shape Writing
Tired of hunt-and-peck typing? Glide your finger across keys to writewords instead.
1. Make sure you're using the Word Flow keyboard and not a thirdparty keyboard.
Your first week with your new phone 43

2. Touch the first letter in the word you want to write.
3. Glide your finger across the keyboard to consecutive letters in theword you want to write.
4. Release your finger when you've finished writing the word.
The word you wrote will appear on the screen. And you can start ShapeWriting the next word without needing to tap the space key.
Changing the keyboard language
You can choose between a variety of languages, layouts, and regions foryour keyboard. Your phone can provide word suggestions and spellingcorrections based on the language you choose.
1. Swipe down from the top edge of the screen with one finger.
44 Your first week with your new phone

2. Tap All settings > keyboard.
3. Tap add keyboards.
4. Select the languages you'd like to be able to use from the onscreenkeyboard. The next time you use the keyboard, you'll see thelanguage key .
The language key will look different depending on the keyboard.
5. When you're done, tap .
6. While using the onscreen keyboard, tap the language key toswitch between the languages you've selected.
You can also press and hold the language key to see all of theavailable keyboard choices.
Your first week with your new phone 45

Charging the battery
Before you turn on and start using Windows Phone 8X, it is recommendedthat you charge the battery.
Use only the adapter and the USB cable that came withWindows Phone 8X to charge the battery. When the batterypower is too low, make sure to use the power adapter to charge,not the USB cable connection with your computer.
1. Insert the small end of the USB cable into the USB connector.
2. Insert the other end of the USB cable into the power adapter.
3. Plug in the power adapter to an electrical outlet to start chargingthe battery.
46 Your first week with your new phone

When you charge the battery and the phone is on, the charging batteryicon is displayed in the status bar. After the battery has been fullycharged, the charging battery icon turns to a full battery icon .
§ As a safety precaution, the battery may stop charging to avoidoverheating.
§ When you're using the Internet or charging the battery,Windows Phone 8X may become warmer. This is normal.
§ To conserve energy, unplug the power adapter from the electricaloutlet after you finish charging.
Turning Battery Saver on
When you turn Battery Saver on, your phone automatically turns off someservices and features that use battery in the background.
1. Swipe down from the top edge of the screen with one finger.
2. Tap All settings > battery saver.
3. Select a battery saver option:
§ When battery is under 20%. Battery Saver automatically turnson whenever battery power drops to 20%.
§ Always. Battery Saver is always on regardless of the batterypower.
4. Tap the Now until next charge switch to turn on Battery Saverinstantly until the next time you recharge.
Your first week with your new phone 47

5. Press to save your settings.
Using speech on your phone
Make a call, send a text, or find a place by simply using your voice.
§ The speech feature may not be available in some countries,regions, or languages.
§ Cortana® must be turned off to use speech.
1. Press and hold .
If this is your first time using the speech feature, the screen willdisplay some examples of things you can say. After reading theexamples, tap accept.
2. Say an instruction, for example:
§ To call someone in your contact list, you can say CallJennifer Singer, mobile.
§ To open an app such as Calendar, say Open Calendar.
§ To search for something on the Web such as pizza parlors,you can say Find pizza parlors.
§ If you need help, say What can I say? to view or listen tothe various types of voice instructions you can use.
48 Your first week with your new phone

Turning on more speech commands
You can turn on additional speech commands in the settings, such assaving and dialing speed dial numbers. You can also set your phone toread aloud text messages and allow you to dictate your reply messagewithout typing.
1. Swipe down from the top edge of the screen with one finger.
2. Tap All settings > ease of access.
3. Tap the Speech for phone accessibility On/Off switch to turn onadditional speech commands for phone calls. You'll be able to usethese commands:
Save speed dial To assign a speed dial number
Call number To call a speed dial number
Turn call forwarding on/off To turn call forwarding on or off
4. Press to return to the settings list.
5. Tap speech.
6. To make your phone read text messages to you, tap the Readaloud incoming text messages box. Choose whether you want yourphone to read text messages all the time, or only when you're usinga Bluetooth or wired headset.
Your first week with your new phone 49

Cortana
Cortana, your new personal assistant
Have you ever wished you had someone to help you remember things andsuggest stuff you might like? Cortana is just like that, except she lives inyour Windows Phone 8X. And she does a whole lot more.
Cortana can help you make calls, send messages, mark down importantdates, and more.
And the more you use Windows Phone 8X, the more Cortana will knowabout the things you like. She'll start suggesting things that could be ofinterest to you like an upcoming concert or a movie.
She'll even tell you a joke or two.
§ To use Cortana, Windows Phone 8X must be connected to theInternet.
§ Cortana is not supported in all regions or languages.
Getting started with Cortana
You may have turned on Cortana when you set up your phone. If youdidn't, you can get started with Cortana right from the Start screen.
1. On the App List, tap . Cortana.
50 Cortana

2. Cortana introduces herself and asks for permission to be yourpersonal assistant. Tap sure.
3. Type the name you want Cortana to call you. After you've verifiedthe name and read the tip on using Cortana, the main screenappears.
§ Tap ask me anything and enter aquestion or search query, or tap touse speech.
§ Tap see more to get moresuggestions on what you can askCortana.
§ Tap to let Cortana search formusic you're listening to.
§ Tap to access the Cortananotebook, which holds your interests,reminders, music searches, and more.
After you've set up, you can access Cortana in these ways:
§ Press .
§ Tap Cortana on the App List. This will take you straight to yourinterests.
Cortana 51

§ If the screen is locked or you're in some application, press and hold.
To disable the press and hold option, go to Settings > Speechand clear the Allow speech above lock check box.
Favorite places
You can add your favorite places to Cortana. If you're worried about traffic,Cortana can remind you when to leave to get to your destination on time.And, if you add your favorite places to Maps, they will be synced betweenMaps and Cortana.
1. To add a favorite place, in Cortana tap > places > .
2. Enter a place name or address, and then tap .
3. In the search results, tap the place or address that you want.
4. Select what type of address it is, and type a nickname to make iteasy to search or set location reminders.
5. Tap .
Finding out what song is playing
Cortana can help you figure out what the song is you're listening to.
1. In Cortana, tap . Cortana listens to the song.
2. If Cortana recognizes the song, the album, artist, and song title willappear on the screen and you can tap the song to purchase itonline.
52 Cortana
Songs that Cortana recognizes can be found in the Notebook. Tap >music searches.
Keeping track of your interests
Cortana can keep track of things that are important to you, such as yourfavorite sports teams, the weather, news headlines, traffic, and more. Youcan also add topics to your interests.
1. In Cortana, tap > interests > .
2. Tap a category, and then select a suggested topic if available, ortype what you're looking for in the search box and tap the resultyou want.
3. Tap an item in the interests list to set notifications, pin an interestto the Start screen, and more.
Setting a reminder
Cortana can remind you of appointments, to call someone, or to pick upyour dry cleaning.
1. To add a reminder, press and hold and then tell Cortana whatyou want to be reminded of. For example, say Remind me to pickup milk today after work.
2. When the reminder appears on the screen, you can tap any part ofthe reminder to edit it.
3. Tap remind to create the reminder.
Cortana 53

You can also add a reminder in the Notebook. Tap > remind me,and then tap .
To edit, delete, or mark a reminder as completed, tap > remind me.
Setting quiet hours
Cortana can turn on quiet hours when you don't want to be disturbed byphone calls, notifications, or messages. When you enable quiet hours,notifications will be silent and phone calls will go to voicemail unless youtold Cortana to allow calls from people in your inner circle.
1. In Cortana, tap > quiet hours.
2. Tap the Automatic rules On/Off switch and then select Turn onduring these times or Turn on when I have a calendar eventmarked Busy to set the times you want quiet hours to turn on.
To manually turn on quiet hours, tap the Right now On/Off switch.
3. Under Breakthrough rules, set whose calls or texts will be allowedto bypass quiet hours.
54 Cortana

Adding people to your inner circle
When quiet hours is turned on, Cortana won't let calls or messages botheryou. However, you can add important people to your inner circle so theycan always get in touch with you.
1. In Cortana tap > inner circle.
2. Tap someone in the list or tap to search for the contact youwant to add.
If you want, give the contact nicknames to make it easy to call thatperson.
3. Tap done.
Changing Cortana settings
In Settings, you can turn Cortana on and off, set the name that Cortana willcall you, connect to Facebook, and more.
To change settings, in Cortana tap > settings.
Cortana 55

Camera
Camera basics
Whether traveling for business or fun, enjoy taking photos and videos withthe camera.
§ From the Start screen, swipe left and then tap Camera to open theCamera app.
§ Or press the CAMERA button.
Did you know you can open the Camera app even if the display isoff or locked? Just press and hold the CAMERA button.
Viewfinder screen
You’ll find the following onscreen controls on the Viewfinder screen:
56 Camera

Photo mode
Burst photo mode
Video mode
Front/Main camera mode
Flash mode
Video light
Camera lenses
Go to the camera roll
You can change any of the options at the left side of theviewfinder. To do so, tap and then tap any of the boxes underShow these settings in the viewfinder.
Flash and video light are not available when:
§ You're using the front camera.
§ The battery power is too low.
Camera 57

Zooming
Before taking a photo or video, you can zoom in or out of your subject.
Slide two fingers apart to zoom in or together to zoom out.
Changing settings
1. Tap > photo settings or video settings to choose settings suchas resolution.
2. To save your settings, tap save after you make the change.
To find more camera settings swipe left from the Start screen andthen tap Settings. Then swipe to the applications list and tapphotos+camera.
Taking a photo
1. Open the Camera app.
2. Tap for single photo mode or for burst photo mode.
3. Choose your camera settings:
§ Tap to set the camera to auto flash, flash on, or flash off.
§ Tap to switch to the ultra wide angle front camera for agroup shot of you and your friends.
§ Tap to select or download lenses.
§ Tap > photo settings to choose the resolution and more.
58 Camera

4. Hold your phone steady, either vertically (portrait view) orhorizontally (landscape view).
5. Before taking the photo, you can zoom in and out.
6. To take the photo, tap any point on the screen to focus there andtake the photo or tap to use autofocus.
You can also press the CAMERA button halfway down to focus,and then press the button all the way down to take the photo. Thecamera will auto focus on what's in the center of the screen.
The photo will be saved in the Camera Roll album of the Photos hub.
Recording video
You can record videos in either portrait or landscape orientation. For thebest viewing experience of your videos, the most ideal way is to capturethem in landscape.
1. Open the Camera app.
2. Tap to switch to video mode.
3. Choose your video recording settings:
§ Tap to set the video light to be on or off during therecording.
§ Tap to switch to the ultra wide angle front camera.§ Tap to select or download lenses.§ Tap > video settings to choose the resolution and more.
4. Before recording, you can zoom in and out.
Camera 59

5. Tap to start recording. A video duration counter appears on thescreen.
6. To stop recording, tap .
You can also press the CAMERA button to start and stoprecording.
The video will be saved in the Camera Roll album of the Photos hub.
After capturing
After taking a photo or video, you can view it and others you've capturedwithout leaving the Camera app. You can also choose what to do with aphoto or video, such as upload it to OneDrive or share it on a socialnetwork.
1. While on the Viewfinder screen, tap or swipe right.
You'll see the photo or video you last captured.
2. If it's a photo, slide two fingers apart or together if you want tozoom in and out of a photo.
If it's a video, tap the play icon to view the recording.
3. Tap to see options of what you can do with your photo or video.
4. To continue capturing, swipe your finger left until you're back onthe Viewfinder screen.
60 Camera

Phone calls
Making a call
1. On the Start screen, tap .
2. Tap to open the keypad.
3. Enter the number you want to call and then tap call.
To hang up, tap end call.
If you're ready to hang up but the Phone dialer screen isn'tdisplayed anymore, tap the notification at the top of the screen,and then tap end call.
Making an emergency call
1. On the Start screen, tap .
2. Tap to open the keypad.
3. Dial the emergency number for your locale and then tap call.
Phone calls 61

If you enabled your password but forgot it, you can still make anemergency call without entering the password by tappingemergency call on the lock screen and then dialing the localemergency number.
Making an international call
1. On the Start screen, tap .
2. Tap to open the keypad.
3. Press and hold the 0 key until the + sign appears.
The plus sign (+) shows that you're making an international call(instead of entering the international access number for the countryyou're in).
4. Enter the following on the keypad:
§ Country or region code§ Area code (without the 0 at the beginning)§ Phone number
5. Tap call.
62 Phone calls

Receiving calls
When you receive a phone call, the Incoming call screen appears.
Answering a call
§ Tap answer.
§ Or if the display is off and wakes up when you get a call, swipe upfrom the bottom to unlock the screen first and then tap answer.
Rejecting a call
§ Tap ignore.
§ Or if the display is off and wakes up when you get a call, swipe upfrom the bottom to unlock the screen first and then tap ignore.
Muting the ringing sound without rejecting the call
Do one of the following:
§ Place your phone face down on a level surface.
If your phone is already facing down, it will still ring when there aresubsequent incoming calls.
§ Press the VOLUME UP or VOLUME DOWN button.§ Press the POWER button to silence the ringer and turn the display
off.
Phone calls 63

What can I do during a call?
When a call is in progress, use the onscreen buttons to turn the speaker on,put the call on hold, and more.
Turning the speaker on during a call
To decrease potential damage to your hearing, do not hold yourphone against your ear when the speaker is on.
On the call screen, tap speaker.
To turn the speaker off, just tap speaker again.
Switching between calls
If you’re already in a call and accept another call, you can choose to switchbetween the two calls.
1. When you receive another call, tap answer to accept the secondcall and put the first call on hold.
2. To switch between the calls, tap the bar at the top of the screen.
3. To end the current call and return to the other call, tap end call.You'll get disconnected from both calls when you tap end call.Don't worry. You'll receive a call back from the first caller you wantto talk to.
64 Phone calls

Muting the microphone during a call
On the call screen, tap mute.
To turn the microphone back on, tap mute again.
Starting a three-way call
Three-way conference calling with your friends, family, or co-workers iseasy. Make the first call (or accept a call), and then dial another contact toadd it to the conference.
1. Make a call to the first conference call participant.
2. When connected, tap add call, and then call the second participant.The first participant is then put on hold.
3. When connected to the second participant, tap merge calls.
4. Tap end call to end the conference call.
Call history
Access the call history to check missed calls, your dialed numbers, andreceived calls.
Checking calls in the call history
1. On the Start screen, tap .
2. In the history list, you can:
§ Press and hold a number or contact name and delete it.
Phone calls 65

§ Tap next to a number or contact name to go to the profilelist where you can choose to return the call, send a textmessage, save the number (if it's not yet stored in yourcontacts), and more.
Adding a new phone number from the call history to yourcontacts
1. On the Start screen, tap .
2. Tap next to the phone number that you want to save and thentap .
3. Tap to create a new contact.
4. If you have more than one account set up on your phone, tap theaccount you want to create the contact in.
5. Edit the number if you need to and select the phone number type.
6. Add the contact name and other information and then tap .
You can also save a phone number from the call history to anexisting contact.
Clearing the call history
1. To remove an item in the call history list, press and hold the numberor name, and then tap delete.
2. To remove several items, tap > select calls, select which callsyou want to delete, and then tap .
66 Phone calls

3. To clear the entire history, tap > select calls > > select all, andthen tap .
Global Ready
Your phone offers you reliable, consistent voice service at home andabroad.
Use one phone and one number for voice coverage in more than 205countries. Get one bill for both domestic and international calls.
In order to get the full benefits of Global Phone service you must subscribeto a Global Phone calling plan. Go to verizonwireless.com/global for rates,countries, coverage limitations and features.
Changing the network your phone connects to
By default, your phone is set to Global mode. It automatically searches forthe appropriate network in your location (CDMA or GSM) and thenconnects to it.
When roaming in countries outside of North America where both CDMAand GSM networks are used, you can choose what network to connect to.
1. Swipe down from the top edge of the screen with one finger.
2. Tap All settings > cellular+SIM.
3. Tap SIM settings.
4. Tap the Mode selection box, and then select LTE and CDMA or LTE,GSM, or UMTS.
Phone calls 67

People
Keeping in touch
The People hub is more than just your address book. It's also where youcan keep up with your social networks and stay in touch with the peopleyou care about most.
1. On the Start screen, tap the People tile.
2. Swipe left or right across the screen to access your contacts listand see what's happening with your contacts.
Contacts Your contacts list. Just tap a contact to call, text,or view that person's updates and pictures.
What's New Here's where you can check out your contacts'latest updates, all handily rolled together from yourvarious social network accounts.
Rooms andGroups
Here's where you can create private Rooms to chatand share photos, videos, calendars, and more. Youcan also create Groups to make it easier to followyour friends' status updates, send group textmessages, and more.
68 People

Importing contacts from your SIM card
When you import contacts from your SIM card, they're automaticallysynced to your Microsoft account. They won't be deleted from the SIMcard. If you haven't set up a Microsoft account, your contacts are saved toyour phone.
1. On the Start screen, tap the People tile.
2. Tap > settings > import from SIM.
3. Under Save contacts to, select the account you want to import thecontact to, and then tap next.
4. To import all of the contacts tap import.
To select individual contacts to import, tap clear, select whichcontacts you want to import, and then tap import.
Adding a new contact
1. On the Start screen, tap the People tile.
2. In the contacts list, tap .
3. If you have more than one account set up on your phone, tap theaccount you want to create the contact in.
4. Enter your name, phone, and email information.
You can also add additional phone numbers and email addresses,change the ringtone for the contact, and more.
5. Tap add photo to assign a picture or use the camera to take apicture of your contact.
People 69

6. When you're done, tap to save the new contact.
Adding an extension number to a contact number
You can add an extension number to a phone number that you've savedfor a contact so you don't have to dial the extension number every timeyou call.
1. On the Start screen, tap the People tile.
2. In the contacts list, tap the contact whose information you want tochange.
3. Tap .
4. If this is a linked contact (someone with multiple accounts thatshow up as one entry in your contacts list), tap the account thathas the number you want to edit.
5. Select a number you want to add an extension number to.
6. At the end of the number, press and hold , and then tap .
Depending on the duration of the automated voice prompts or thetelephone system of the contact you're calling, you may have toenter multiple commas to extend the pause time before the phonedials the extension number.
7. Enter the extension number.
8. When you're done, tap .
70 People

Jumping to a section in the contacts list
1. In the contacts list, tap a letter tile to display all the alphabet tiles.
2. Tap a letter to quickly jump to the section that has contact namesbeginning with that letter.
Filtering your contacts list
You can filter the list to show contacts only from the accounts you choose.
1. In People, tap > settings.
2. Tap filter contact list.
3. Select the accounts from which you want to show contacts, andthen tap .
To only display contacts with phone numbers, turn on Hidecontacts without phone numbers.
Merging contact profiles
In People, you might have two or more versions of the same contact. Thisis usually because you have the contact's profile on different socialnetwork or email accounts. In most cases, your phone will combine contactprofiles automatically. For those that are not combined, you can link themmanually.
1. Tap a contact that has one or more duplicate entries in thecontacts list.
People 71

2. Tap .
3. You can:
§ Under suggested links (if available), tap the one that youwant to link to the contact.
§ Tap choose a contact and then tap one that's a duplicateentry.
Unlinking contact profiles
1. In the contacts list, tap the contact that has linked profiles.
2. Tap the link icon that shows the number of links .
3. Under linked profiles, tap the one that you want to unlink.
4. Tap unlink.
Searching, editing or deleting
Searching for a contact
If your contacts list is especially long, searching is probably the quickestway to find a contact.
1. In the contacts list, tap .
2. In the search bar, enter the first few letters of the first or last nameof the contact you're looking for.
Matching contacts are then displayed.
3. Tap the contact to view the person's contact information.
72 People

Editing a contact's information
Contacts from Facebook, Twitter™, or LinkedIn® cannot be edited.But you can add information, and then save it to a differentaccount (such as your Microsoft account).
1. In the contacts list, tap the contact whose information you want tochange.
2. Tap .
3. If this is a linked contact (someone with multiple accounts thatshow up as one entry in your contacts list), tap the account youwant to edit.
4. Edit or add new information for the contact.
After entering new information for an item, remember to tap toapply the changes.
People 73

Deleting a contact
§ Deleting a contact may delete the contact information from bothyour phone and from the online service where it's stored.
§ You may not be able to delete contacts from your social networkaccounts.
1. In the contacts list, press and hold the contact you want to delete.
2. Tap delete.
3. If the contact is a linked contact (someone with multiple accounts),choose which account to remove the contact from.
74 People

Sharing with a group of contacts in real-time
Rooms are places where you can have a group chat and share photos,videos, calendars, and more.
Creating a new room
Only contacts with Windows Phone 8 or later can participate in aroom. When you create a room, you are the owner of the room. Allother room members are guests.
1. On the Start screen, tap the People tile.
2. On the Rooms and Groups screen, tap > Room.
3. Enter a name for the room and tap .
4. Tap and then choose a contact to invite to the room. Repeat toinvite more contacts to the room. Invitations to the room are sentby text message.
5. When you're done, tap .
Press and hold a room tile on the Rooms and Groups screen to pinit to the Start screen.
Inviting contacts to a room
1. Tap the room you want to invite contacts to.
People 75

You can't invite people unless you are the owner of the room.
2. Tap > .
3. Tap the contact you want to invite.
4. To invite another contact, tap .
5. When you're done, tap .
The person you invited will receive a text message with a link to join yourroom.
Rearranging room tiles
Mix things up a bit. You can rearrange the room member tiles any way youlike.
1. Tap the room you want to change.
2. Press and hold a contact until the tile floats.
3. Drag the tile to a new location.
4. When you're done, press .
76 People

Managing a room
You can only manage a room you created.
1. Tap the room you want to manage.
2. Tap .
3. You can change the name of the room, delete the room, and more.
Leaving a room
1. Tap the room you want to leave.
You can't leave a room if you are the owner.
2. Tap > leave room > leave.
Organizing your contacts into groups
Groups help you to filter your social networks. Groups also make it easierto send out the same email and text message to more than one contact.When you create a group, it shows up on the Rooms and Groups screen.
Tap a group and you'll see the group members and their social networkingupdates, along with options for group email, texting, and chat.
People 77

Creating a new group
1. On the Start screen, tap the People tile.
2. On the Rooms and Groups screen, tap > Group.
3. Enter a group name and tap .
4. Tap and then choose a contact to add to the group.
Repeat to add more contacts to the group.
5. Tap to save the group.
Press and hold a group tile on the Rooms and Groups screen topin it to the Start screen.
Adding contacts to a group
1. Tap the group you want to add contacts to.
2. Tap > .
3. Tap the contact you want to add.
Removing a contact from a group
1. Tap the group you want to remove a contact from.
2. Tap and select the contact you want to remove.
3. Tap remove from group.
78 People

Changing a member's contact preference
If a contact has more than one email address or phone number, you canselect the email address or phone number to use when sending a groupemail or text message.
1. Tap the group with the member whose contact preference youwant to change.
2. Tap and then tap the contact.
3. Tap the Phone number box or Email address box to change theinformation.
4. When you're done, tap .
5. Tap to return to the group screen.
Rearranging group tiles
Don't want to view group members in alphabetical order? You can arrangethe group member tiles any way you like.
1. Tap the group you want to change.
2. Press and hold a contact until the tile floats.
3. Drag the tile to a new location.
4. When you're done, press .
Renaming a group
1. Tap the group you want to rename.
People 79

2. Tap > rename.
3. Enter a new name for the group.
4. When you're done, tap .
Deleting a group
1. Tap the group you want to delete.
2. Tap > delete.
What is the Me card?
The Me card is your one-stop shop for social networking.
1. On the Start screen, tap the People tile.
2. Tap your profile picture.
Here are some things you can do:
§ Post a new message on your social networks.
§ Check in to you let your friends know where you are.
§ See and comment on social network posts.
§ Like social network posts.
§ Reply to or retweet updates on Twitter.
§ Update your profile picture.
§ Pin your Me card to the Start screen.
80 People

Posting to social networks
You can post messages to your social networks and comment or like otherpeople's posts. You can also check in to share your location with friends.
Go to Settings > email + accounts to check what types of social networkaccounts can be set up on your phone.
Posting a message
1. On the Start screen, tap the People tile.
2. Tap your profile picture.
3. Tap post an update.
4. Choose the social network account you want to post to, and thentype your message.
5. Tap .
Commenting on a post
1. On the Start screen, tap the People tile.
2. Swipe left or right to go to What's New so you can see recent postsfrom your contacts.
3. When you see a post you want to comment on or like, tap .
People 81

Checking in
When you check in to a place, you share your location with your contactsby posting it on one or more of your social networks. You can find nearbylocations, or you can add one yourself.
1. On the Start screen, tap the People tile.
2. Tap your profile picture.
3. Tap check in.
4. Choose the social network account you want to check in with.
5. Tap a place in the list to check in from there. Or search for nearbyplaces, if available.
6. Enter a message if you want, and then tap or to check in.
Filtering social updates
Flooded with updates? Try viewing posts from one social network at atime. Or you can hide the updates from one or more of your socialnetworks.
§ In People, swipe to What's New. Tap the accounts listed next toshowing, and then tap the account you want to view posts from.
§ Or select Hide posts from the contacts I've filtered.
Posts from the social networks you've filtered out of your contactslist will no longer be visible.
82 People

You can also create a group to only see updates from contacts inthat group.
People 83

Messaging
Sending a text message
With the Messaging app, it's easy to send text or multimedia messages.
1. On the Start screen, tap .
2. Tap .
84 Messaging

3. Tap , enter a phone number or choose a contact.
Repeat to add more recipients, and their names will be addedautomatically in the To box.
4. Tap the box that says type a text message, and then enter yourtext.
5. Tap to send it.
When adding recipients, you can also:
§ Tap , and then select a contact group. The Group text option (ifturned on in the app's settings) can help keep replies in one threadwhen you're texting with a group of people. Replies are sent asmultimedia messages instead of text messages.
§ Begin typing a person's name in the To box, and then tap amatching contact name.
Sharing pictures, videos, and more in a message
You can send a multimedia message by attaching a picture, a video, andmore to a text message.
Before sending multimedia messages, make sure that this serviceis included on your data plan.
1. On the Start screen, tap .
2. Tap to create a new message.
3. In the To box, fill in the recipient's name or mobile phone number.
Messaging 85

4. Tap and then choose an attachment type. To remove anattachment, press and hold the attachment and tap remove.
5. Enter your message using the onscreen keyboard or tap to usevoice recognition.
You need to have a speech language installed before you can usevoice recognition. Swipe down from the top and tap All settings >speech.
6. Tap to send.
Viewing and replying to a message
When you receive a new message, you'll hear a notification sound (if set)and see the message briefly display at the top of the screen.
1. To open and read the message, you can:
§ Tap the notification at the top of the screen.§ Or open the Messaging app to access and read the message.
2. Enter your reply, and then tap .
If the contact has more than one phone number, you can tap >switch number to choose another one.
86 Messaging

Copying and pasting a message
You can copy a previous message and paste it into the new messageyou're composing.
1. In the threads list, tap a contact (or phone number) to display theexchange of messages with that contact.
2. Press and hold the message you want to copy, and then tap copy.
3. Tap the text box where you're composing your new message.
4. To paste the copied message, tap .
Forwarding a message
1. In the threads list, tap a contact (or phone number) to display theexchange of messages with that contact.
2. Press and hold the message you want to forward, and then tapforward.
3. Fill in the recipient.
4. Tap to send.
Deleting a message
1. In the threads list, tap a contact (or phone number) to display theexchange of messages with that contact.
2. Press and hold the message you want to delete, and then tapdelete.
Messaging 87

Deleting a whole conversation
In the threads list, press and hold a contact (or phone number) whosemessages you want to delete, and then tap delete.
88 Messaging

Adding a Microsoft account
When you first set up your phone, you're asked to sign in with yourMicrosoft account. If you didn't sign in then or if you have more than oneMicrosoft account, go to Settings to set up your primary Microsoft accountor additional accounts.
1. Swipe down from the top edge of the screen with one finger.
2. Tap All settings > email+accounts.
3. Tap add an account.
4. Do one of the following:
§ To add your primary account that you will use for email andother Microsoft services on your phone, tap Microsoftaccount.
§ To set up additional email accounts, tap Outlook.com >connect.
5. Enter your email address and password, and then tap sign in.
Your Microsoft account email, contacts, calendar, photos, and feeds will besynced to your phone.
Email 89

§ The first Microsoft account that you set up can't be deleted fromyour phone.
§ If you set up additional Microsoft accounts, photos from theseaccounts won't be synced to your phone.
Adding a POP3/IMAP email account
1. Swipe down from the top edge of the screen with one finger.
2. Tap All settings > email+accounts.
3. Tap add an account.
4. Choose the type of email account that you want.
If you don't see it in the account list, tap other account.
5. Enter your email address and password.
§ If you're adding your Google Account, you can choose tosync email messages only or sync your Google contacts andcalendar as well.
§ If you're setting up other POP3 or IMAP accounts, your phonecan only sync email from those accounts.
6. Tap sign in.
Your phone then looks for your account settings, completes the setup, andsyncs information from your account.
90 Email

If your phone can't find your account settings, go to the advancedsetup to enter the incoming and outgoing server and othersettings manually. You'll need to get these information from youremail provider.
Adding a Microsoft Exchange or Office 365 account
1. Swipe down from the top edge of the screen with one finger.
2. Tap All settings > email+accounts.
3. Tap add an account.
4. Tap Exchange.
5. Enter your email address and password, and then tap sign in.
If your account settings are found, wait for your phone to finish syncingwith your work email, contacts, and calendar.
If your account settings can't be found, follow the onscreeninstructions to enter your Exchange ActiveSync account settingsmanually. Ask your Exchange Server administrator for thesesettings.
Email 91

Checking email
After you've set up your email accounts, a new tile for each account will beadded to the Start screen.
1. To open an email account, tap its tile on the Start screen.
If you don’t see the tile, swipe left from the Start screen, and thentap your email account in the apps list.
2. In the all email list, scroll up or down to skim through your emailmessages.
Email messages are neatly grouped into conversations. If therewere back and forth replies to an email, tapping that email expandsand shows its series of messages.
3. Tap an email message to open and read it.
If you have a long email list, you can also swipe left or right to skimthrough unread, flagged, or urgent email only.
Replying or forwarding email
1. Open and read the email message.
2. Tap .
3. Choose whether to reply only to the sender, reply to all, or forwardthe email.
92 Email

Linking inboxes as one
To check your email from all your accounts just in one place withouthaving to switch to different accounts, you can link your inboxes as one.
1. Tap > link inboxes.
2. Under other inboxes, tap one or more email accounts that you wantto combine to your unified inbox.
The default name for your unified inbox is Linked inbox.
Tap rename linked inbox if you want to change the name of yourunified inbox.
3. Press to return to your inbox. You'll now see just one inboxcontaining all your email from your different accounts.
Next time you want to check your email, tap on the Start screen or inthe apps list.
Unlinking an inbox
1. Tap > linked inboxes.
2. Under this inbox, tap the email account you want to remove fromthe unified inbox.
3. Tap unlink.
Email 93

Sending email
1. Open the email account that you want to use for sending youremail.
2. Tap .
3. Fill in one or more recipients. In the To field, you can:
§ Tap to choose a contact. Tap it again to add more.
§ Start typing a person's name or email address. If there arematches found from your stored contacts as you type, theywill be listed. Tap the one that you want.
4. Enter the subject and compose your message.
5. To attach a picture, tap .
6. When you're ready to send your email, tap .
§ When entering several email addresses manually, separate themwith a semicolon.
§ To send a carbon copy (cc) or blind carbon copy (bcc), tap >show cc & bcc and add other recipients.
Setting the priority for an email message
You can set the priority for an email message before sending it.
1. While composing the message, tap > priority.
94 Email

2. Select the priority for the message.
Saving or discarding the email
1. While composing your email, tap .
2. Choose whether to save your email as a draft or delete it.
Resuming an email draft
1. While in the email list, tap > folders > drafts.
2. Tap the draft email to edit it.
3. Send the email.
Managing email messages
Deleting, moving, flagging, or marking several email messages
1. Tap .
2. To quickly select all email messages in a conversation, select thetop one (the one that shows the subject and number of messages).
Or to select individual email messages, tap their respective checkboxes.
3. Choose what you want to do with the selected messages.
§ Tap to delete.
§ Tap to move them to another mail folder.
Email 95

§ Tap and choose whether to flag or mark the messages asread or unread.
You can also just tap on the far left of an email to select the emailfirst. Check boxes will then appear and you can select more emailmessages.
Deleting, moving, flagging, or marking one email
1. Press and hold a conversation or a single message.
2. On the options menu, choose what you want to do with the wholeconversation or the single message.
Switching to another mail folder
1. Tap > folders.
2. Tap show all folders to see all the available mail folders.
3. Tap the mail folder whose email messages you want to view.
Changing email account settings
1. On the Start screen, tap the email account that you want.
2. Tap > settings.
3. Tap sync settings to choose how often to download items orchange the items that you want to sync.
96 Email

4. Choose if you want a signature to appear in your sent email.
5. Tap .
Email 97

Photos and Videos
About the Photos hub
In the Photos hub, you can view the photos and videos you captured withWindows Phone 8X or flip through online albums.
1. On the App List, tap Photos.
2. Swipe left or right across the screen to browse your photos or justsee your favorites.
Adding a photo to your favorites
1. On the App List, tap Photos.
2. While viewing a photo, tap .
98 Photos and Videos

Sharing
Share photos or videos with your friends and loved ones. You can sendphotos and videos in a multimedia message or email. You can also uploadphotos or videos to your online accounts.
Make sure you've signed in to your online accounts beforeuploading.
1. In the Photos hub, find and open the photo or video you want toshare.
2. Tap .
3. Choose how to send it or where you want to share it.
Using Photo Enhancer
Photos need a bit of touch-up? Improve photos taken in poor lightingconditions with one tap. Or apply special effects to give your photos aunique touch.
1. Swipe to the App List.
2. Tap Photo Enhancer.
3. Tap choose picture.
4. Open the album where the photo you want to edit is located, andthen tap the photo.
5. To see what's available, swipe left or right across the thumbnails ofthe various effects.
Photos and Videos 99
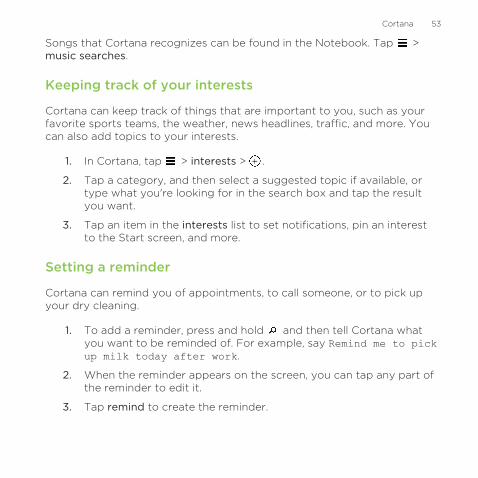
6. Tap an effect to apply it to your photo.
7. Tap to save.
The enhanced photo will be saved in another album called Saved Pictures.
100 Photos and Videos

Productivity
What you can do in Calendar
Never miss an important date again. You can sync your existing calendarsfrom your email accounts to your phone and see them in the Calendar app.You can also add new appointments, create your to-do list, and respond toinvitations that people send you.
After you've set up your email accounts, the calendars associated withyour accounts will be synced to your phone.
If you haven't set up your email accounts, see Email on page 89 to find outhow to add them to your phone.
When you create new appointments on your phone, they will be synced tothe calendars in your accounts.
Creating a calendar appointment
When creating a new appointment, you can choose which account'scalendar to add it to.
1. On the Start screen, tap the Calendar tile.
2. Tap .
3. Enter the appointment details.
4. At the bottom of the screen, tap more details to set a reminder,appointment's occurrence, and more.
Productivity 101

5. If you have more than one calendar, tap the Calendar box, and thenselect an account in which to add the appointment.
6. Tap to save.
Quickly creating an appointment on a time slot
If you don't need too much detail on your appointment, you can quicklycreate an appointment by just selecting a time slot and typing a subjectright on the calendar.
1. Open the Calendar app. go to day view.
2. Tap > day.
3. Tap a time slot, enter a subject, and then tap .
Later, you can just edit the appointment if you need to add more details.
Sending an invitation
You can use Calendar to schedule a meeting or an appointment and invitepeople to attend it. An invitation email will be sent to them from theaccount that you choose.
You can only invite contacts that are stored or synced on yourphone.
1. In Calendar, create a new appointment.
2. Add details, such as date and time, location, and more.
102 Productivity

3. Tap more details.
4. Tap the Calendar field, and then choose the account to use forsending the invitation.
5. Tap add someone.
6. Invite required and optional attendees by tapping add someonebelow each field.
7. When you're done, tap > .
Creating a new to-do task
To-dos show up on your calendar, and they appear alongside yourappointments.
You can only create to-dos in your Microsoft and Outlook®
(Exchange ActiveSync) accounts.
1. In the Calendar app, > Tasks.
2. Tap .
3. If you have more than one account, choose the account in which toadd your to-do task.
4. Fill in the details for your task, such as subject, due date, and more.
5. To set a reminder, turn Reminder on, and then choose a date andtime.
6. Tap to save.
Productivity 103

Displaying and syncing calendars
You can choose which calendars to show or hide in the Calendar app, andwhich ones to keep synchronized.
Showing or hiding calendars
1. In Calendar, tap > settings.
2. Select or clear the checkboxes next to the calendar info that youwant to show or hide.
The calendars are kept synchronized on your phone, whether ornot you hide them.
Choosing which calendars are synced on your phone
You can choose which calendars to keep synchronized on your phone.
1. Swipe down from the top edge of the screen with one finger.
2. Tap All settings > email+accounts.
3. Tap the account whose calendar sync setting you want to change.
4. Select or clear the Calendar check box, depending on whetheryou'd like to sync or stop syncing the account's calendar.
5. Tap to apply the changes.
104 Productivity

What's in the Office hub?
Microsoft Office Mobile includes mobile versions of Microsoft Officeapplications. You'll find them in the Office hub. You can also use the Officehub to access and edit documents that are stored online.
1. On the Start screen, tap .
2. Swipe left or right across the screen to see your documents andother stuff.
recent Lists all documents you've recently opened or saved.
The recent screen also lets you find, open, or createExcel®, PowerPoint®, and Word documents.
places Access your Office documents that are stored on yourphone or online, such as in OneDrive, MicrosoftSharePoint®, or Office 365™.
Press and hold any document to see additional options such assharing, saving to OneDrive, deleting and more.
What types of files can be opened in Office Mobile?
Office Mobile app File formats
Word Mobile .doc, .docx, .dot, .dotx, .dotm, .docm .txt, .rtf
Excel Mobile .xls, .xlsx, .xlt, .xltx, .xlsm, .xltm
Productivity 105

Office Mobile app File formats
PowerPoint Mobile .ppt, .pptx, .pps, .ppsx, .pptm, .ppsm
Creating and editing Office documents
1. In the Office app, do one of the following:
Create a newdocument
1. On the recent list, tap .
2. Select a blank document or template.
Edit an existingdocument
1. Find the document you want to edit and tapit.
2. Tap in Word or in PowerPoint. In Excel,tap the cell you want to edit.
2. When you're ready to save your document, tap > save.
To save your document to OneDrive, tap > save as...
106 Productivity

Adding a SharePoint site
You can connect to a SharePoint site to access documents on it.
If you're trying to connect to your company's SharePoint site, besure to connect to your company's Wi-Fi® network first.
1. In the Office app, swipe left to the places list.
2. Tap .
3. Enter the SharePoint site address and tap .
4. Enter the required information and tap done.
Creating and sharing notes
Use Microsoft OneNote® to jot down notes and create to-do lists. You canalso attach photos or voice recordings to your note so you don't lose anyideas or information.
After creating a note, you can share it via email or sync it to OneDrive.
Composing a note
1. On the Start screen, tap .
2. Tap .
3. Tap the title box, enter a title for your note, and then tap .
Productivity 107

4. Compose your note.
§ Tap on the note and start typing your text.
§ Tap to create a to-do list.
§ Tap to create a bulleted list.
To format text in your note or to change a bulleted list to anumbered list, tap , and then select the option you want.
5. Insert a picture or audio to your note.
§ Tap to insert an existing photo to your note. If you want toinsert a new photo, tap on the Choose file screen, and thencapture a new photo.
§ Tap to record audio and insert it to your note.
6. When you're done, tap to save your note.
Sharing or syncing a note
You can share your notes via email or sync them to OneDrive so you canaccess your notes anywhere.
1. Open the OneNote app.
2. Tap the note you want to share, and then tap .
3. Do any of the following:
§ Tap share and select the account you want to share the notewith.
§ Tap sync to sync the note to your OneDrive.
108 Productivity

§ Tap pin to start to create a tile for this note on the Startscreen.
Managing notes
1. Open the OneNote app.
2. In the list of notes, you can:
§ Sync your notes to OneDrive. Tap > sync.§ Delete several notes. Tap > select pages. Select the notes
you want to delete, and then tap .§ Search your notes. Tap , enter a keyword, and then tap .
Productivity 109

Entertainment
Xbox Video
Watch your favorite TV shows and movies on your Xbox® Video devices.When you purchase any TV show or movie with your Microsoft account,you just have to buy it once and you'll be able to enjoy it on any XboxVideo device that logs in with the same Microsoft account.
1. On the App List, tap Video.
2. Browse the store to find the TV shows or movies you want towatch.
3. While viewing the overview of a TV series, tap the season box toselect the season you want.
You can purchase individual episodes or entire seasons.
4. Select HD or SD versions of the TV show or movie.
Even if you purchase an HD version, you may only be able to watchthe SD version on your Windows Phone. However, you can stillwatch the HD version on your other supported Xbox Video devices.
5. Tap the rent or buy button.
You'll find your purchase in your Xbox Video collection.
110 Entertainment

Xbox Music
Enjoy listening to and discovering new music with Xbox Music. When youhave an Xbox Music Pass, you can listen to full-length songs that you'vepurchased with the same Microsoft account from the Xbox Music store. Inaddition, you can preview millions of new songs.
1. On the App List, tap Music.
2. Swipe to the Get music screen.
3. Browse the Xbox Music store. You can browse by genre, featuresmusic, and more, or just tap and search for the song you want.
4. When you find the song you want, tap > Buy.
You'll find your new purchase in your Xbox Music collection.
Xbox Games
Gaming on Windows Phone 8X is a truly social experience. With yourMicrosoft account, play games and use your avatar and gamer profile tokeep track of game scores and achievements on the Social screen of XboxGames.
Xbox Games may not be available in some countries or regions.
1. On the App List, tap Games.
Entertainment 111

2. Swipe left or right to see the following screens:
Collection View games that you can play on your phone. You canalso download more games from the Xbox Gamesstore.
Social Sign in to your Microsoft account to see or edit yourprofile, see your game achievements, personalize youravatar, send messages to friends, and more.
Spotlight See featured game recommendations. This screen isonly visible after you set up your Xbox profile.
3. Tap Games store to browse for games to play. Many games allowyou to install a trial version so you can try the game before you buyit.
112 Entertainment

Sync and Backup
Windows Phone app
It's easy to sync your photos, videos, music, and more between yourcomputer and your phone with the Windows Phone app.
Keeping things in sync
It's easy to get your photos, videos, music, documents, and more from yourcomputer to your phone (and vice versa).
If you are using... Do this...
Windows 8 Plug your phone into your computer with thecable, and the Windows Phone app will installautomatically.
Windows 7 Plug your phone into your computer with thecable. A link will appear to install the WindowsPhone app.
Mac® OS X 10.7 orlater
Get the Windows Phone app from the Mac AppStore.
After downloading the installation file, be sure to unplug yourphone from your computer before installing the desktop app.
Sync and Backup 113

To learn more about finding the right app, go to WindowsPhone.com.
Syncing media with the Windows Phone app
You can sync music, photos, videos, and more between your phone andyour computer.
1. Connect your phone to your computer. The Windows Phone appopens.
2. To choose the files you want to sync, click pc or phone.
3. Click the category you want to sync such as music or photos.
4. Select the items you want to sync, and click Sync (or Save to PC).
Deleting media from your phone
1. Connect your phone to your computer. The Windows Phone appopens.
2. Click phone.
3. Click the category you want to delete from such as music orphotos.
4. Select the checkboxes next to the items you want to delete fromyour phone, and then click Delete.
114 Sync and Backup

Checking the available storage in your phone
The Windows Phone app can give a quick glimpse of how much storagespace you have left in your phone.
1. Connect your phone to your computer. The Windows Phone appopens.
2. Click phone.
At the bottom of the Windows Phone app, you'll see how your storage isbeing used and how much storage you have left in your phone.
Changing Windows Phone app settings
1. Connect your phone to your computer. The Windows Phone appopens.
2. Click Settings.
3. Choose the options you want, and click OK.
Backing up your files
When you sign in with your Microsoft account, you'll be able to save thingsto an online service such as OneDrive.
When you set up backups on your phone, you can:
§ Automatically upload your photos and videos to OneDrive so youcan see them from anywhere you can access the web.
§ Sync your SMS and MMS messages to your Microsoft account soyou have a backup, just in case.
Sync and Backup 115

§ Create backups of your phone’s settings, including the list of appsyou’ve installed, your theme color, Internet Explorer® favorites,accounts, and more.
You can fine-tune your backup options in Settings > backup. For example,you can automatically upload your photos and videos at a high resolution,or manually back up your settings anytime.
116 Sync and Backup

Internet connections
Data connection
When you turn on your phone for the first time, it will be automatically setup to use the Verizon Wireless mobile network.
Turning the data connection on or off
Turning your data connection off can help save battery life. However, if youdon’t have data connection turned on and you’re also not connected to aWi-Fi network, you won’t receive automatic updates to your email, socialnetwork accounts, and other synchronized information.
1. Swipe down from the top edge of the screen with one finger.
2. Tap All settings > cellular+SIM.
3. Tap the Data connection On/Off switch.
Internet connections 117

Enabling data roaming
Connect to Verizon Wireless partner networks and access data serviceseven when you’re out of Verizon Wireless coverage area.
Using data services while roaming is not part of your subscribedmonthly data access allowance. Check with Verizon Wireless fordata roaming rates before you enable data roaming.
1. Swipe down from the top edge of the screen with one finger.
2. Tap All settings > cellular+SIM.
3. Tap the Data roaming options box, and then tap roam.
Wi-Fi
To use Wi-Fi, you need access to a wireless access point or “hotspot”. Theavailability and strength of the Wi-Fi signal will vary depending on objects,such as buildings or simply a wall between rooms, the Wi-Fi signal has topass through.
Connecting to a Wi-Fi network
1. Swipe down from the top edge of the screen with one finger.
2. Tap All settings > Wi-Fi.
3. Tap the Wi-Fi networking On/Off switch to turn Wi-Fi on.
You'll then see a list of available wireless networks.
118 Internet connections

4. Tap the wireless network you want to connect to.
§ If you selected an open network, your phone willautomatically connect to the network. Some Wi-Fi networks,such as ones you might find in coffee shops, restaurants,hotels, or elsewhere, may require you to enter a password inyour web browser before you can connect.
§ If you selected a secured network, enter the requiredpassword and then tap done.
When you're connected to a wireless network, the Wi-Fi connected icon appears in the status bar and shows you the signal strength indicated bythe number of bands that light up.
The next time you connect to the same secured wireless network, youwon’t be asked to enter the password or other security information again,unless you do a factory reset.
Connecting to a hidden Wi-Fi network
A Wi-Fi network might be hidden, which means the network name isn'tbroadcasted. In this case, it won't appear in the list of available networkson the Wi-Fi Settings screen and a notification won't appear when thenetwork is in range. To connect to a hidden Wi-Fi network when it's inrange, you'll need to enter the network name and password.
The network name and password are case sensitive.
1. Swipe down from the top edge of the screen with one finger.
2. Tap All settings > Wi-Fi.
Internet connections 119

3. Make sure that Wi-Fi is turned on.
4. Tap manage.
5. Tap , enter the network name, and then tap add.
6. On the Sign in screen, enter the password, and then tap done.
Disconnecting from a Wi-Fi network
1. Swipe down from the top edge of the screen with one finger.
2. Tap All settings > Wi-Fi.
3. Tap the Wi-Fi networking On/Off switch to turn Wi-Fi off anddisconnect from the wireless network.
You can also press and hold the network name and then tap delete todisconnect. But this removes the security settings if it's a secured network,and you'll need to enter them again next time you reconnect to this Wi-Finetwork.
120 Internet connections

Using your phone as a mobile hotspot
Want to share your Internet connection with your laptop or anotherdevice? You can turn your phone into a mobile hotspot by sharing yourcellular data connection over Wi-Fi. Other Wi-Fi enabled devices can thenuse your shared data connection to connect to the Internet. This is alsoknown as tethering.
§ To share your cellular data connection, this feature must beenabled on your current phone plan.
§ When you and other people use the shared connection onanother device, it uses data from your cellular data plan.
1. Swipe down from the top edge of the screen with one finger.
2. Tap All settings > internet sharing.
3. Tap the Sharing On/Off switch to turn Internet Sharing on.
4. Tap , and then change these settings:
Broadcastname
Enter a name for your mobile hotspot. This is thename that other people will see and use toconnect to your shared connection over Wi-Fi.
Password Enter a password to help secure your mobilehotspot.
Internet connections 121

To help minimize security risks, use the default security settingsand set a strong and unique password.
5. Tap to save your settings.
When you tap the top of the screen to see the status bar, you'll see theInternet Sharing icon while you're sharing your cellular data connection.
Managing your data usage
With Data Sense, managing your data usage is easy and efficient.
You can use Data Sense to:
§ Check your data usage and set a limit based on your monthly orone time data allowance.
§ Know which apps use the most data.
§ Restrict your phone from downloading background data, such asemail or social network synchronization, when you're near the datalimit.
§ Find nearby Wi-Fi hotspots so you can switch connection fromcellular to Wi-Fi.
Data usage measured by Data Sense may vary with your actualdata usage.
Some data, including location data, may continue to bedownloaded and stored using Data Sense, even when you are nearyour data limit.
122 Internet connections

Setting up Data Sense
Setting a data usage limit helps you avoid going over your monthly dataallowance.
1. On the App List, tap Data Sense.
2. Tap set limit.
3. Tap the Limit type box.
4. Set your data usage limit preferences.
§ None specified. Data usage will be conserved automatically,but your phone won't keep track of your usage.
§ One time. Set the days until your data allowance expires andthen specify your one time data limit.
§ Monthly. Set your monthly reset date and your monthly datalimit. The monthly reset date is usually the start of yourmonthly billing cycle.
§ Unlimited. No data usage will be conserved, but your phonewill keep track of your usage.
5. When you're done, tap .
You can now see the remaining data and time limit on the overview screenof Data Sense.
Internet connections 123

Saving on data usage
After keeping tab on your data usage, use Data Sense to help you save onyour data usage.
1. On the App List, tap Data Sense.
2. Do any of the following:
§ If you set the data usage Limit type to One time or Monthly,tap and turn on Restrict background data. Choose toalways enable it or just when you're near the limit. Whenselected, background synchronization for your email andsocial accounts stops automatically when you're near thedata limit. You can still manually sync your email and socialaccounts.
§ Tap > map nearby Wi-Fi to find a Wi-Fi hotspot near yourlocation.
§ Swipe to the usage screen and check which apps are usingmore data. Close data-intensive apps if you don't need them.
Pin the Data Sense Live Tile to your Start screen to monitor yourdata usage.
124 Internet connections

Search and Web browser
Ways you can search the Web
Just press to search the Web using Bing®.
Cortana must be turned off to use the search button for Bingsearch.
Besides typing what you want to search, you can do much more with Bing:
§ Search the Web by voice. To find out more, see Using speech onyour phone on page 48.
§ Use Bing Vision to scan a QR Code®, text, and images such as bookcovers, and then find these on the Web. See Scanning codes andtext on page 127.
§ Use Bing Music to find details about the music you're listening to.To find out how, see Music search on page 132.
§ Look for nearby restaurants, shops, and things to do. See AboutLocal Scout on page 141.
Some web search features may not be available in certaincountries.
Search and Web browser 125

Searching for information
1. Press . The Bing Search screen opens.
2. Tap the search box, enter what you want to search for, and thentap on the keyboard.
To look for nearby restaurants, shops, and other things to do, tap to open Local Scout. See About Local Scout on page 141 for
more information.
3. Swipe left or right across the screen to narrow or broaden thesearch results to web, local, media, or shopping.
126 Search and Web browser

Under the web results, you can scroll up or down to see differentkinds of results, such as news, related searches, apps, products,flight status, and more. The types of results displayed will dependon what you've entered and searched for.
Scanning codes and text
Want to scan and search for something? Using Bing Vision, you can usethe camera to scan lots of things you see, and then search for those thingson the Web.
You can scan a QR Code that you see in magazines, online, on signs, oranywhere else. You can also scan text to search, have it translated, andpaste scanned text into a message.
The items you can scan and search for vary by country or region.
Scanning a QR Code
1. Press .
2. On the Bing Search screen, tap .
3. Point the camera at the QR Code you want to scan.
You'll then see the Results screen.
4. Tap the result to get info about the QR Code. The information thatappears depends on the QR Code and can be a message, contactinfo, email address, website, or phone number.
Search and Web browser 127

Searching by scanning a barcode, book, CD, or DVD cover
1. Press .
2. On the Bing Search screen, tap .
3. Point the camera at the barcode, book cover, CD cover, or DVDcover you want to scan.
You'll then see the Results screen.
4. Tap the result to get info from the Web about the item you've justscanned.
Searching by scanning text
You can scan text and then search the Web using the scanned words. Oryou can have the text translated.
1. Press .
2. On the Bing Search screen, tap .
3. Point the camera at the text you want to scan, and then tap scantext.
4. You can:
Search the Web. Tap each of the squares that containthe words you want to search for, andthen tap search.
See a translation fortext that's recognized.
Tap translate, and then choose alanguage.
128 Search and Web browser

Copying and pasting scanned text
1. Press .
2. On the Bing Search screen, tap .
3. Point the camera at the text to scan, and then tap scan text.
4. Tap > copy all.
5. Open the file, app, or message where you want to paste the text.
6. Tap where you want to paste the text.
7. In the text suggestion bar above the keyboard, tap the paste icon.
Selecting from previous image search results
1. Press .
2. On the Bing Search screen, tap .
3. Tap history.
4. On the Vision history screen, tap a past result.
Search and Web browser 129

Opening and navigating web pages
Internet Explorer Mobile makes it quick and easy to surf the Web on thego. By using tabs, you can open multiple web pages and switch betweenthem quite easily.
Opening a web page
1. On the Start screen, tap .
2. Tap the address bar, and then enter a web address. As you type,Internet Explorer will suggest possible matches.
3. If you see the site you're looking for, tap it. Or tap on theonscreen keyboard.
Using tabs to open multiple web pages
You can open multiple browser windows (called "tabs" in Internet Explorer)simultaneously. Tabs make it easy to hop between sites.
1. In Internet Explorer, tap .
2. Tap to open a new tab. A blank browser screen then opens.
3. On the new browser screen, go to a website that you want.
Switching between tabs
1. In Internet Explorer, tap .
2. Tap the thumbnail that shows the website you want to open.
130 Search and Web browser

If you no longer need to view a website, you can close the tab by tapping.
Sharing a link
When you see a website that you like, you can easily tell your friends aboutit by sharing its link. You can send the link in your text or email message.Or post it in your social networks.
1. While viewing the website in Internet Explorer, tap > share page.
2. Choose how you want to share the link.
If you chose to share the link in your social networks, enter yourmessage, select which networks to post on, and then tap .
Clearing your browsing history
To help protect your privacy, you can delete your browsing history. Takenote that items and apps you've downloaded from the Internet could stillbe on your phone.
1. On the Start screen, tap .
2. Tap > settings.
3. Tap delete history > delete.
Search and Web browser 131

Music search
Songs you hear on the radio, or when you're out and about, don't need tobe a mystery anymore. You can search for music that's playing to find outmore about it, such as the song title, artist, album, and ways to listen to orbuy it.
§ Bing Music can only recognize recorded music. Music from liveperformances or humming can't be recognized.
§ Bing Music may not be available in some countries or regions.
Searching for recorded music that's playing
1. Press . The Bing Search screen opens.
2. With the music playing, hold your phone where you can clearly hearthe music, and then tap .
After scanning, the song title, artist, album name, and album art willappear for songs that are recognized.
3. To find the song in the Xbox Music Store, tap store. You can thenpreview that song and other ones on the album, and also buy if youwant to.
132 Search and Web browser

Selecting from previous music search results
You can go back and find music that you've searched for in the past.
1. Press .
2. On the Bing Search screen, tap > music searches.
3. On the Music searches screen, tap a song to find it in the XboxMusic Store.
Search and Web browser 133

Maps and location
Location services
Turning on location services
You can choose to turn on location services to allow apps to use yourlocation information and provide you with a rich mobile experience. Forexample, your GPS location can be stored on the photos that you take withthe Camera app. You can also use Maps to display your location.
1. Swipe down from the top edge of the screen with one finger.
2. Tap All settings > location.
3. Tap the Location services On/Off switch. Apps for which youenable location services can now access your current location.
Turning off a location service means no applications on your phone willcollect your location data through that location service. However, thirdparty applications may collect—and your phone may continue to provide—location data through other services, including through Wi-Fi and signaltriangulation.
134 Maps and location

Maps
About Maps
Maps can show you where you are, find the address or place you're lookingfor, and give you directions to reach your destination. It can also show younearby stores or restaurants you might be interested in and what otherpeople are saying about them.
You need to connect to the Internet to use Maps.
Finding your location
Before you can find your location and see it on the map, you needto turn on location services in the settings first (if you declinedwhen the Maps app asked to access and use your location). Formore information on location services, see Turning on locationservices on page 134.
1. Open the Maps app. The app tries to find your location and displaysit on the map.
2. If the displayed location on the map isn't quite accurate, tap tofind your location again.
Maps and location 135

Moving around the map
You can navigate the map using finger gestures.
§ Drag your finger in any direction to pan.
§ Double-tap the map or slide two fingers apart over an area to zoomin.
§ Slide two fingers together over an area to zoom out.
§ Press and hold an area with two fingers and then drag your fingersin a circular motion to rotate the map.
§ Swipe down with two fingers to see a perspective view of the map.Swipe up to return to aerial view.
Finding an address or place
1. Open the Maps app.
2. Tap .
3. In the search box, enter any of the following:
§ An address§ A zip or postal code§ A city§ A business name or type§ An intersection§ A point of interest
4. Tap on the onscreen keyboard.
136 Maps and location

5. To get more info about the place, tap the pushpin on the map.
You may see several pushpins on the map if there are severalresults found.
What are pushpins?
Pushpins are handy for remembering places you want to visit, gettingdirections, or sharing location info. They're automatically shown on themap when you search for places. You can also manually add a pushpin.
When you tap a pushpin for a store, restaurant, or other point of interest,the about screen opens and displays additional info, such as the streetaddress, directions, phone number, hours, web address, and customer
Maps and location 137

reviews. You can choose what to do with the location info, such as pin toyour Start screen, add to your favorites, or share it.
Adding a pushpin
While viewing your map, press and hold on the spot where you'd like toadd a pushpin.
Viewing pushpins as a list
If several pushpins are shown on the map after you've done a search, youcan display them as a list to see the search results in detail.
While viewing the map, tap > search results.
Sharing an address
Need to tell someone where to meet you? Send the address in a text oremail message, so the person you're meeting with can see it on a map orget directions.
1. In Maps, search for the location you want to share.
2. Tap the pushpin of that location.
3. On the about screen, tap .
4. Choose how you want to share the address.
138 Maps and location

Getting directions
Get detailed directions to your destination. When viewing directions inMaps, you'll see the total distance and estimated travel time to help youplan ahead.
Certain features may not be available in some countries or regions.
1. While viewing a map, tap .
2. Use your current location as the starting point, or enter anotherlocation in the Start field. Enter your destination in the End field.
You can enter:
§ an address
§ a restaurant, store, or other business name
3. Tap on the onscreen keyboard. Maps then displays a splitscreen, showing a map with the planned route on top and the list ofdirections at the bottom. When you scroll through the list ofdirections, the map auto refreshes to show the direction.
4. Tap or to switch between driving or walking directions.
5. Tap to reach your destination by public transit.
6. Tap route steps to see a list of directions. Press to return to mapview.
7. When you reach your destination, tap it to display the locationinformation.
Maps and location 139

Downloading and managing maps
Prefer to use Maps offline? You can download the maps you need anddelete them later.
1. Open the Maps app.
2. Tap > settings > download maps.
3. Do one of the following:
Download a map 1. Tap .
2. Find the map you want and tap download.
Cancel a download Tap > cancel.
Delete a map 1. Press and hold the map you want to delete.
2. Tap delete.
Delete all maps Tap > delete all maps.
140 Maps and location

Local Scout
About Local Scout
New to the area or just looking for something new to do? Local Scout canhelp you find nearby restaurants, shops, and things to do. You can getrelevant info about the different places to help you decide where to go.
Finding places near your location
1. Open the Maps app.
2. Tap .
Maps then finds your location and displays nearby places you cango to on the Local Scout screen.
3. Swipe left or right across the screen to view the various suggestedplaces that are listed under categories such as eat + drink, see + do,and shop.
4. Tap a place to get more info.
5. While viewing the list of places (such as restaurants under eat +drink), tap the map at the top of the screen to see where theseplaces are on the map.
Maps and location 141

Finding places in another location
You can use Local Scout to find places in your destination so you can planwhat to do after you arrive.
1. Open the Maps app.
2. Tap .
3. In the search box, enter a city name.
4. Tap on the onscreen keyboard.
5. Tap .
Changing how Local Scout searches
By default, Local Scout narrows the search by distance from your currentlocation or a location that you specified. If you're looking for restaurants orstores, you can set Local Scout to search by ranking or category.
1. In Local Scout, tap the sorting option below the category title.
2. Tap the Sort by box, and then select how you want Local Scout tosort places that correspond your search. For example, you can taprating to sort restaurants or stores based on other people'srecommendations.
3. You can also select or clear other options on the Set Filters screento expand, narrow, or filter the Local Scout search.
4. Press to see the new search results.
142 Maps and location

More apps
What can I do in the HTC hub?
In the HTC hub, you can check weather forecasts, stock updates, and thelatest news.
Checking weather
Shirt or sweater? Check the local weather in the HTC hub before you headout.
1. Swipe to the App List.
More apps 143

2. Tap HTC.
You'll see the weather in your current location as well as theweather in other cities around the world.
3. Tap your current location to open the weather info screen and seemore detailed weather forecasts for your location. Or tap anothercity to check its weather forecasts.
4. On the weather screen, tap the icons at the bottom to view in fullscreen or check hourly weather.
5. To check weather forecasts for upcoming days, tap , and thentap .
144 More apps

§ To refresh the weather info onscreen, tap > refresh.
§ Not seeing the weather in your current location? Return to theStart screen and go to Settings > location to check whetherLocation services is turned on. For more information on locationservices, see Turning on location services on page 134.
Adding a city
1. On the HTC hub weather screen, scroll down the list to check whatcities have already been added.
2. Tap .
3. Enter the name of a city or country.
As you type, matching locations are shown.
4. Tap the city that you want to add.
Changing the order of cities
1. On the HTC hub weather screen, tap > edit.
2. Press and hold at the end of the item you want to move.
3. When the selected city is highlighted, drag it to where you want itto appear in the list.
4. Tap done.
More apps 145

Deleting cities
1. On the HTC hub weather screen, tap > edit.
2. Tap each city you want to delete.
3. Tap done to delete them.
Changing the temperature scale and other settings
1. On the HTC hub weather screen, tap your location to open theweather info screen.
2. Tap > settings.
3. Under Temperature scale, select Fahrenheit or Celsius.
4. Turn on or off weather sound effects and other options.
5. Press to apply the new settings.
Keeping track of your stocks
In the HTC hub, you can get the latest updates for the stock quotes andmarket indices that you follow .
1. Swipe to the App List.
2. Tap HTC.
146 More apps

3. Swipe left to go to the stocks list.
4. If there's a long list, swipe your finger up or down to browsethrough the stocks that you're following.
5. Tap an item to see a stock's trade information and price chart forthe current day.
6. Tap another period if you want to check the stock’s past tradeinformation.
More apps 147

Want instant updates to just one stock quoteor index?
Just pin the stock quote or index to your Start screen.
1. Swipe to the App List.
2. Tap HTC.
3. Swipe left to go to stocks.
4. Press and hold a stock quote or index that you want to placeon your Start screen, and then tap pin to start.
A live tile for your chosen stock quote or index will be added toyour Start screen.
Adding a stock quote or stock market index
1. While viewing stocks, tap .
2. Enter a stock quote or market index that you want, and then tap.
Matched results will be listed.
148 More apps

3. Tap the stock quote or market index you want to add.
Changing the stock list order
1. While viewing stocks, tap > edit.
2. Press and hold at the end of the item you want to move.
3. When the selected item is highlighted, drag it to where you want itto appear in the list.
4. Tap done.
Deleting stock quotes or indices
1. While viewing stocks, tap > edit.
2. Tap each stock quote or index you want to delete.
3. Tap done to delete them.
Changing the price rise color and other settings
Downloading stock information automatically will count towardsyour monthly data allowance.
1. While viewing a stock's trading chart and other details, tap >settings.
2. Change the color for displaying stock price increases to either redor green.
3. Choose other options such as the update schedule, and more.
More apps 149

4. Press to apply the new settings.
Reading news feeds
Don’t get left behind with yesterday’s stories. Subscribe to news feeds thatcover breaking news, sports, top blogs, and more.
Subscribing to news channels
1. Swipe to the App List.
2. Tap HTC.
3. Swipe left or right until you see the list of subscribed newschannels.
4. To subscribe and add a news channel, tap .
5. You can:
§ Tap a category, and then select one or more channels tosubscribe to. After you've finished selecting, press twice toreturn to the list of subscribed channels.
§ Or tap to search for a specific keyword or a feed URL.Select one or more channels to subscribe to, and then tap .
Reading news
1. Tap a subscribed news channel to see stories from that channel, ortap All items to see the stories from all your subscribed channels.
2. Tap a story that you want to read.
150 More apps

3. While reading the news summary, you can:
Tap To
Go to the web page where the story is published andread the full article.
Share the link to the story from available options.
Go to the previous or next story.
Want instant updates to a subscribed newschannel?
Just pin your favorite news channel to the Start screen.
In the list of subscribed news channels, press and hold yourfavorite channel, and then tap pin to start.
A live tile for your favorite channel will be added to your Startscreen, and it will show the headline of the latest story.
Unsubscribing news channels
§ To unsubscribe a single news channel, press and hold that channel,and then tap unsubscribe.
More apps 151

§ To unsubscribe several channels, tap > unsubscribe.
152 More apps

Bluetooth and NFC
Connecting a Bluetooth accessory
You can connect a variety of Bluetooth accessories such as headsets, carkits, or speakers to your phone.
§ To listen to music, use an accessory such as a Bluetooth stereoheadset that supports the A2DP profile.
§ Before connecting, make sure to set the accessory todiscoverable. To find out how, please refer to the accessory'smanual.
1. Swipe down from the top edge of the screen with one finger.
2. Tap All settings > Bluetooth.
3. Tap the On/Off switch to turn Bluetooth on. Your phone becomesdiscoverable. It also automatically searches for Bluetooth deviceswithin range.
4. Tap the name of the accessory that you want to pair with yourphone.
5. If auto pairing fails, enter the pairing code supplied with theaccessory.
Bluetooth and NFC 153

When the accessory is connected to your phone, the Bluetooth iconappears on the status bar. You can also check the connection status shownbelow the accessory name on the Bluetooth Settings screen.
Turn Bluetooth off when not in use to save battery power, or inplaces where using a wireless device is prohibited, such as onboard an aircraft and in hospitals.
Disconnecting a Bluetooth accessory
1. Swipe down from the top edge of the screen with one finger.
2. Tap All settings > Bluetooth.
3. Tap the accessory to disconnect it.
To reconnect, just tap the accessory again.
Unpairing
If you no longer want to use a connected accessory with your phone, youcan unpair and remove it from your phone.
Make sure to disconnect the accessory before unpairing.
1. Swipe down from the top edge of the screen with one finger.
2. Tap All settings > Bluetooth.
154 Bluetooth and NFC

3. Press and hold the name of the accessory, and then tap delete.
Sharing content with NFC
With built-in Near Field Communication (NFC), you can share content withpeople easily just by placing your phone back to back with another phonethat has NFC. Share a webpage you're viewing, contact information, andmore.
Turning NFC on and off
1. Swipe down from the top edge of the screen with one finger.
2. Tap All settings > NFC.
3. Tap the On/Off switches next to the features you want to use.
Bluetooth and NFC 155

Using NFC
§ To share files, both NFC and Bluetooth need to be on.
§ You can only transfer files to other phones running WindowsPhone 8 and later.
1. Follow the steps for the item you want to share:
Contact 1. Select a contact to share.
2. Tap > share contact > .
Music 1. In Music, swipe to the songs list.
2. Press and hold the name of the song, and thentap share.
Officedocument
1. Find the document you want to share.
2. Tap > share.
Photo 1. Find the photo you want to share.
2. Tap .
Web page 1. View the web page you want to share.
2. Tap > share page.
156 Bluetooth and NFC

2. Tap Tap to share (NFC).
3. Make sure the other phone has the screen on and is unlocked.
4. Briefly touch the other phone back to back with your phone. Theother phone will be asked to accept or ignore the transfer.
Bluetooth and NFC 157

Settings
Navigation bar
Change the look and behavior of Navigation bar to fit the way you useyour phone.
1. Swipe down from the top edge of the screen with one finger.
2. Tap All settings > navigation bar.
3. Tap the features that you want to change.
Turning airplane mode on or off
In many countries, you are required by law to turn off wireless deviceswhile on board an aircraft. A quick way to turn off wireless functions is toswitch your phone to airplane mode.
When you enable airplane mode, all wireless radios are turned off, includingthe call function, data services, Bluetooth, and Wi-Fi. When you disableairplane mode, the call function is turned back on and the previous statesof Bluetooth and Wi-Fi are restored.
1. Swipe down from the top edge of the screen with one finger.
2. Tap All settings > airplane mode.
3. Tap the Status switch to turn it on or off.
158 Settings

You can also tap the airplane mode quick action in the ActionCenter to turn airplane mode on and off.
When airplane mode is on, you'll see the icon in the status bar.
Attentive phone features
When your phone rings or during a call, it can sense and automaticallyrespond to your actions or environment. You can go to the settings to findout what smart features your phone has in store for you.
1. Swipe down from the top edge of the screen with one finger.
2. Tap All settings > attentive phone.
3. You'll find these settings:
Quiet ring onpickup
Lowers the ring volume automatically when youhold and pick up your phone.
Loud ring inpocket or purse
Makes your phone ring louder when it's in yourpocket or bag so you won't miss calls. Whenyour phone is not in your pocket or bag, it ringsat the normal volume you've set.
Flip to muteringer
Silences the ringer automatically when you flipyour phone over.
If there's any setting you'd like to disable, just clear its check box.
Settings 159

Changing display settings
Adjusting the screen brightness manually
1. Swipe down from the top edge of the screen with one finger.
2. Tap All settings > brightness.
3. Tap the Automatically adjust On/Off switch to turn it off.
4. Select the Level of brightness to use.
Setting the time delay before the screen turns off
After a period of inactivity, the screen turns off automatically to savebattery power. You can set the idle time before the screen turns off.
1. Swipe down from the top edge of the screen with one finger.
2. Tap All settings > lock screen.
3. Tap Screen times out after, and then select the time length that youwant.
160 Settings

Changing sound settings
Setting your phone to silent mode
When you keep pressing the VOLUME DOWN button until the volume levelreaches zero, this makes your phone vibrate only. To be able to switchyour phone to silent mode using the VOLUME DOWN button, you need toturn vibrate off in the settings.
1. Swipe down from the top edge of the screen with one finger.
2. Tap All settings > ringtones+sounds.
3. Tap the Vibrate On/Off switch to turn vibrate off.
Choosing notification sounds
Choose different sounds for different types of notifications. You can usedifferent sounds for incoming text or chat messages, voicemail, and emailnotifications.
1. Swipe down from the top edge of the screen with one finger.
2. Tap All settings > ringtones+sounds.
3. Tap the box for each notification type, and then choose a sound toassign to it. You can also turn on or off sounds for reminders, keypress, camera shutter, and more.
Settings 161

Making your music sound better
Turn on Beats Audio for an enhanced sound experience. Songs sound richand authentic, especially when playing in the Music app.
1. To turn Beats Audio on or off, swipe left from the Start screen, andthen tap Settings > Beats Audio.
2. Tap the On/Off switch to turn Beats Audio on or off.
Managing apps and storage
Changing application settings
In most cases, you can change the settings for an app only when you'reinside that app. For some apps, you can change their settings withouthaving to open the apps.
1. Swipe down from the top edge of the screen with one finger.
2. Tap All settings.
3. Swipe to the applications screen.
4. Tap an app or category to see what settings are available andchoose the settings that you want.
162 Settings

Uninstalling an app
If you're running out of phone storage, free up some space by removingapps you no longer use.
Uninstalling an app also removes any information the app contained.Please remove apps with care.
Most preinstalled apps cannot be uninstalled.
1. Swipe to the App List.
2. Press and hold an app, and then tap uninstall.
Checking phone storage
You can easily check how much phone storage is left so you don't getshort of space when saving important stuff.
1. Swipe down from the top edge of the screen with one finger.
2. Tap All settings > storage sense. The used and available phonestorage is displayed.
3. To know what's using your phone storage, tap the phone storagebar.
Settings 163

Free up storage space by transferring files, photos, and videos toyour computer or by uploading them to OneDrive. To learn more,see Keeping things in sync on page 113 and Backing up your fileson page 115.
Checking phone info
You can find out various information about your phone such as theWindows Phone software version, RAM size, screen resolution, and more.
1. Swipe down from the top edge of the screen with one finger.
2. Tap All settings > about.
3. Tap more info to see the Windows Phone update version and otherdetails.
164 Settings

Security
Assigning a PIN to help protect your SIM card
You can help protect your SIM card by assigning a PIN (personalidentification number) that you enter before accessing your SIM.
1. Swipe down from the top edge of the screen with one finger.
2. Tap All settings.
3. Swipe to the applications screen, and then tap phone.
4. Tap the SIM security On/Off switch to turn it on.
5. When you're asked to enter the default SIM card pin, enter 1111,and then tap enter.
6. To change the SIM card PIN, tap Change SIM PIN, and then enter anew PIN.
Security 165

Restoring a SIM card that has been locked out
If you enter the wrong PIN more times than the maximum number ofattempts allowed, your SIM card will become “PUK-locked.”
You need a PUK code to restore access to your SIM card. You canget this code from your mobile operator.
1. On the Phone dialer screen, enter the PUK code, and then tap enter.
2. Enter the new PIN, tap enter, and then reconfirm the new PIN.
Setting a password to help protect your phone
Help protect your personal information and help prevent others from usingyour phone without your permission.
You'll be asked to enter the password every time you turn on your phoneor when the phone resumes after it's left idle for a certain time.
1. Swipe down from the top edge of the screen with one finger.
2. Tap All settings > lock screen.
3. Tap the Password On/Off switch to turn it on.
4. Enter your password in both the New password and Confirmpassword boxes.
5. Tap done.
166 Security

Making your phone safer for kids
Your phone is a great way to entertain your kids. Use Kid's Corner toprevent accidental calls while kids play with your phone. With Kid's Corner,you can also limit access to games, music, videos, and apps on your phone.
Setting up Kid's Corner
1. Swipe down from the top edge of the screen with one finger.
2. Tap All settings > kid's corner.
3. Tap next.
4. Choose which content kids can access when your phone is in Kid'sCorner mode.
5. Tap next and then tap set password or skip.
Setting a password adds an extra layer of security when returningfrom Kid's Corner.
6. Tap Finish. The Kid's Corner lock screen appears.
7. Drag the lock screen up to show the Kid's Corner screen.
8. Tap Customize to give a name to your Kid's Corner screen, choosea Kid's Corner lock screen picture, and more.
Security 167

Launching Kid's Corner
You'll receive calls and text messages even while your phone is inKid's Corner mode.
1. If the phone is on, briefly press the POWER button to turn off thedisplay and switch the phone to Sleep mode.
2. Briefly press the POWER button again to wake your phone up.
3. Swipe to the left of the lock screen. The Kid's Corner lock screendisplays.
4. Swipe your finger up the lock screen. You can now let your kidsplay with your phone.
You can also launch Kid's Corner in Settings. In the apps list, tapSettings > kid's corner > launch kid's corner .
Closing and disabling Kid's Corner
Close and disable Kid's Corner if you no longer need it.
1. From the Kid's Corner screen, briefly press the POWER button toturn off the display and switch the phone to Sleep mode.
2. Briefly press the POWER button again to wake your phone up.
3. Swipe your finger up the lock screen.
4. Swipe down from the top edge of the screen with one finger.
168 Security

5. Tap All settings > kid's corner.
6. Tap the On/Off switch to disable Kid's Corner.
Security 169

Update and reset
How to get and install updates
From time to time, software updates may be available. Your phone cancheck and notify you if there’s a new update.
Setting update notification and downloading option
You can set your phone to notify you when new updates are available foryour phone. You can also allow your phone to automatically downloadthose updates.
1. Swipe down from the top edge of the screen with one finger.
2. Tap All settings > phone update.
3. Select the Automatically download updates if my data settingsallow it check box. If you disable this option, your phone will onlydownload updates over Wi-Fi or when it's connected to yourcomputer.
170 Update and reset

Preparing for a software update
To make sure a software update can be carried out smoothly and withoutinterruptions, prepare your phone for the update. Here's what you need tocheck.
§ If your battery level is low, charge your phone before starting theupdate.
§ Check how much free space you have on your phone and makesome room for the update. To find out how to check the availablestorage, see Checking phone storage on page 163.
§ If necessary, remove a few unwanted apps. Refer to Uninstalling an app on page 163 to see how it's done.
§ You can transfer files, photos, and videos to your computer orupload them to the cloud. To learn more, see Keeping thingsin sync on page 113 and Backing up your files on page 115.
§ Or delete large files (such as photos, videos, or music) fromyour phone.
§ Make sure your phone is set with the correct date and time. Thisdetermines which new updates you'll need. For details, see Correcting the date and time on page 172.
§ Check the current software version of your phone. Some updatesrequire your phone to have a particular software version. On theStart screen, swipe to the left and tap Settings > about > more info.The screen will show details about the phone software.
Update and reset 171

Installing an update
When you see the notification about an available software update, you canupdate your phone right away. Or you can dismiss the notification andupdate some other time. Your phone will remind you again in a few days.
Have you prepared your phone for the update? If you haven't,please see Preparing for a software update on page 171 on whatyou should check and prepare.
Correcting the date and time
If you're having trouble installing a software update, your phone may nothave been set with the correct date and time. In most cases, the date andtime is set automatically. But if it's not, you can set it manually.
1. Swipe down from the top edge of the screen with one finger.
2. Tap All settings > date+time.
3. Turn off Set date and time automatically.
4. Set the correct time zone, date, and time.
Factory reset
A factory reset is not a step to be taken lightly. It’ll remove your primaryMicrosoft account and you may lose data if it has not been synced. Be sureto back up any data and files you want to keep before you do a factoryreset.
172 Update and reset

A factory reset may not permanently erase all data from your phone,including personal information, which may be recoverable by others.
Performing a factory reset via settings
The most convenient way to do a factory reset is via the settings.
1. Swipe down from the top edge of the screen with one finger.
2. Tap All settings > about.
3. Tap reset your phone, and then tap yes.
Performing a factory reset using phone buttons
If you can’t turn your phone on or access settings, you can still perform afactory reset by using the phone's buttons.
1. Turn the power off.
2. Press and hold the VOLUME DOWN button, and then briefly pressthe POWER button. Release the VOLUME DOWN button when yousee an icon on the screen.
3. Then press the following hardware buttons in sequence: VOLUMEUP > VOLUME DOWN > POWER > VOLUME DOWN.
Update and reset 173

Trademarks and copyrights
©2014 HTC Corporation. All Rights Reserved.
HTC and the HTC logo are trademarks of HTC Corporation.
Microsoft, Windows, the Windows icon, Windows Phone, ActiveSync, Bing,Cortana, Excel, Hotmail, Internet Explorer, Office 365, OneDrive, theOneDrive logo, OneNote, Outlook, PowerPoint, SharePoint, Windows Live,Windows Media, Windows Vista, Xbox LIVE, and Zune are either registeredtrademarks or trademarks of Microsoft Corporation in the United Statesand/or other countries.
Google, the Google logo, and Gmail are trademarks of Google Inc.
The Bluetooth word mark and logos are registered trademarks owned byBluetooth SIG, Inc.
Wi-Fi® is a registered trademark of the Wireless Fidelity Alliance, Inc.
LTE is a trademark of European Telecommunications Standards Institute(ETSI) registered for the benefit of its members.
Beats Audio, the Beats Audio logo, and the Circle B logo are trademarks ofBeats Electronics, LLC.
DLNA, DLNA Certified, and the DLNA disc logo are trademarks orregistered trademarks of Digital Living Network Alliance. All rightsreserved. Unauthorized use is strictly prohibited.
microSD is a trademark of SD-3C LLC.
QR Code is a trademark of Denso Wave Incorporated.
174 Trademarks and copyrights

All other company, product and service names mentioned herein aretrademarks, registered trademarks or service marks of their respectiveowners. Not all marks listed necessarily appear in this User Guide.
Screen images contained herein are simulated. HTC shall not be liable fortechnical or editorial errors or omissions contained herein, nor forincidental or consequential damages resulting from furnishing this material.The information is provided “as is” without warranty of any kind and issubject to change without notice. HTC also reserves the right to revise thecontent of this document at any time without prior notice.
No part of this document may be reproduced or transmitted in any form orby any means, electronic or mechanical, including photocopying, recordingor storing in a retrieval system, or translated into any language in any formwithout prior written permission of HTC.
Trademarks and copyrights 175

Index
Symbols3G
- roaming 118- turning on or off 117
AAction Center
- about 34- hiding notifications 35- settings 35
Airplane mode 158Appointment
- creating 101Apps 40, 41, 162, 163
- managing 162- settings 162- switching between apps 40- uninstalling 163
BBattery Saver 47Bing Search 126Bluetooth 153BoomSound 162Browser 130
CCalendar 101Call history 65Camera
- settings 58Chat 84Check inWindows Live
- Facebook 82- Microsoft Account 82
Contacts- about 68- adding 69- adding a new number from call
history 66- deleting a contact 74- deleting a contact group 80- editing 73- groups 77- importing from SIM card 69- merging 71- searching 72
Cortana- about 50- changing settings 55- finding music 52- getting started 50- inner circle 55- interests 53- setting favorite places 52- setting quiet hours 54- setting reminders 53
176 Index

DData connection
- roaming 118- turning on or off 117
Data Sense 122Date and time
- setting manually 172Delete
- account 19- contact groups 80- contacts 74- Start screen tile 30
Display- adjusting screen brightness 160- setting delay before screen turns
off 160Download apps 41
EEmail
- deleting 95- Exchange ActiveSync 91- inboxes 93- Microsoft Account 89- moving 95- POP3/IMAP 90- sending 94- settings 96
Emergency calls 61Exchange ActiveSync email 91
FFacebook
- chatting 84- checking in 82- profile 80- setting up 18- sharing photos and videos 99
Factory reset 172Firmware updates 172Flight mode 158
GGames hub
See Xbox GamesGoogle Account 18
HHands free 153Hard reset 172Home screen 29HTC hub 143
IInternational calls 62Internet connection
- data connection 117- Wi-Fi 118
Index 177

LLocal Scout 141Location services 134Lock screen 37
MMaps
- deleting 140- downloading 140- finding an address or place 136- getting directions 139- sharing an address 138
Master reset 172Messaging
- replying to a message 86- sending a message 84- sharing a photo 85
Microsoft AccountWindows Live- profile 80- setting up 18, 89
Microsoft Account- chatting 84- checking in 82
Microsoft Office 105MMS 85Mute microphone in a call 65
NNav bar 158News feeds 150
NFC 155, 156- turning on 155- using 156
Notification sounds 161Notifications
See Action Center
OOffice hub 105OneDrive
- sharing photos and videos 99OneNote 107Online accounts 18Outlook email 91
PPairing 153Password lock 166People 68Phone
- answering or rejecting a call 63- call history 65- emergency calls 61- international calls 62- making a call 61- mute 65- speakerphone 64- switching between call 64
Phone information 164Phone updates 172Photos
- sharing 85, 99- viewing 98
Pictures 98
178 Index

Power- sleep mode 36
ProfileWindows Live- Facebook 80- Microsoft Account 80
Pushpins 137
QQR Code 127
RReset 172Ringtone
- changing 39- volume 35, 161
Roaming 118
SScreen
- adjusting screen brightness 160- setting delay before screen turns
off 160- unlocking 37- wallpaper 38
Search- contacts 72- scanned items 127- Web search 126
SharePoint 107Silent mode 161
SIM card- assigning PIN 165- contacts 69
Sleep mode 36Software updates 172Sounds
- flip to mute ringer 159- loud ring in pocket or purse 159- notifications 161- quiet ring on pickup 159- ringtone 39- silent 161- volume 35, 161
Speakerphone 64Speech commands 48Start screen
- about 29- adding items 30- grouping 30- naming groups 31- personalizing 39- rearranging items 29- removing items 30- removing items from groups 31
Stocks 146Storage space 163Store 41Sync
- email sync settings 96
TText messages 84Themes 39To-do task
- creating 103Translation 127
Index 179
VVideos
- sharing 99- watching 98
Voice commands 48Volume 35, 161
WWallpaper 38Weather 143Web Browser 130Wi-Fi
- about 118- connecting 118- disconnecting 120- hidden network 119
XXbox Games
- Xbox LIVE 111Xbox Music 111Xbox Video 110
180 Index