Embed Size (px)
Citation preview
WhiteboxTM
Developer’s Guide
Revision 1.0
April 22, 2016
c© 2016 Arx Pax Labs, Inc. 1

Contents
1 Introduction 3
2 Equipment Not Included 3
3 How to Disassemble the Whitebox 4
4 ESC Programming 9
5 Teensy LC Microcontroller Programming 12
c© 2016 Arx Pax Labs, Inc. 2

1 Introduction
This document is meant for technical professionals or people who haveyears of experience with strong magnets, LiPo batteries, high current carry-ing wires, and motors. Disassembly of the Whitebox is not recommended,especially for any users who do not possess the experience referenced above.However, since the Whitebox is an experimental prototype developer kit,below is some supporting information for how to disassemble and interfacewith the Whitebox.
2 Equipment Not Included
As was done in the User Guide, a list of additional components that we have found useful fordeveloping with the Whitebox is given below.
1. USB to Micro-USB Cable
2. ESC Programming Card
c© 2016 Arx Pax Labs, Inc. 3
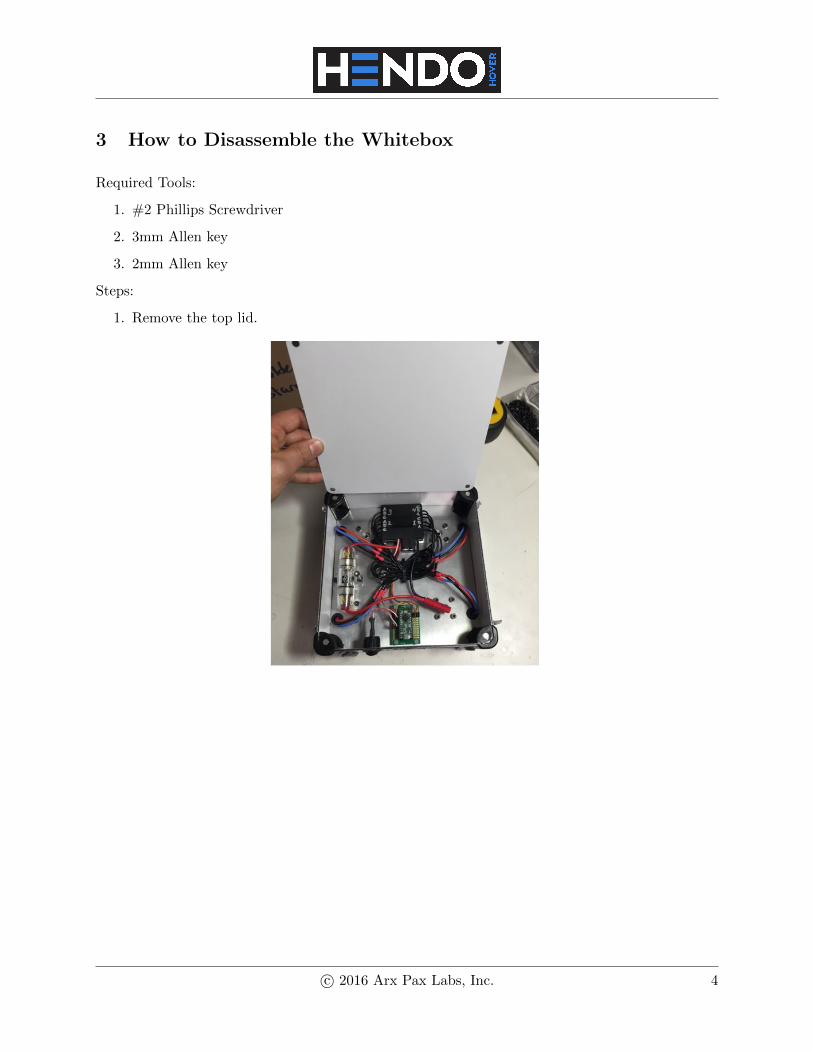
3 How to Disassemble the Whitebox
Required Tools:
1. #2 Phillips Screwdriver
2. 3mm Allen key
3. 2mm Allen key
Steps:
1. Remove the top lid.
c© 2016 Arx Pax Labs, Inc. 4

2. Use Phillips Screwdriver to unscrew the bottom panel.
3. Unplug and remove the power switch from side panel.
c© 2016 Arx Pax Labs, Inc. 5
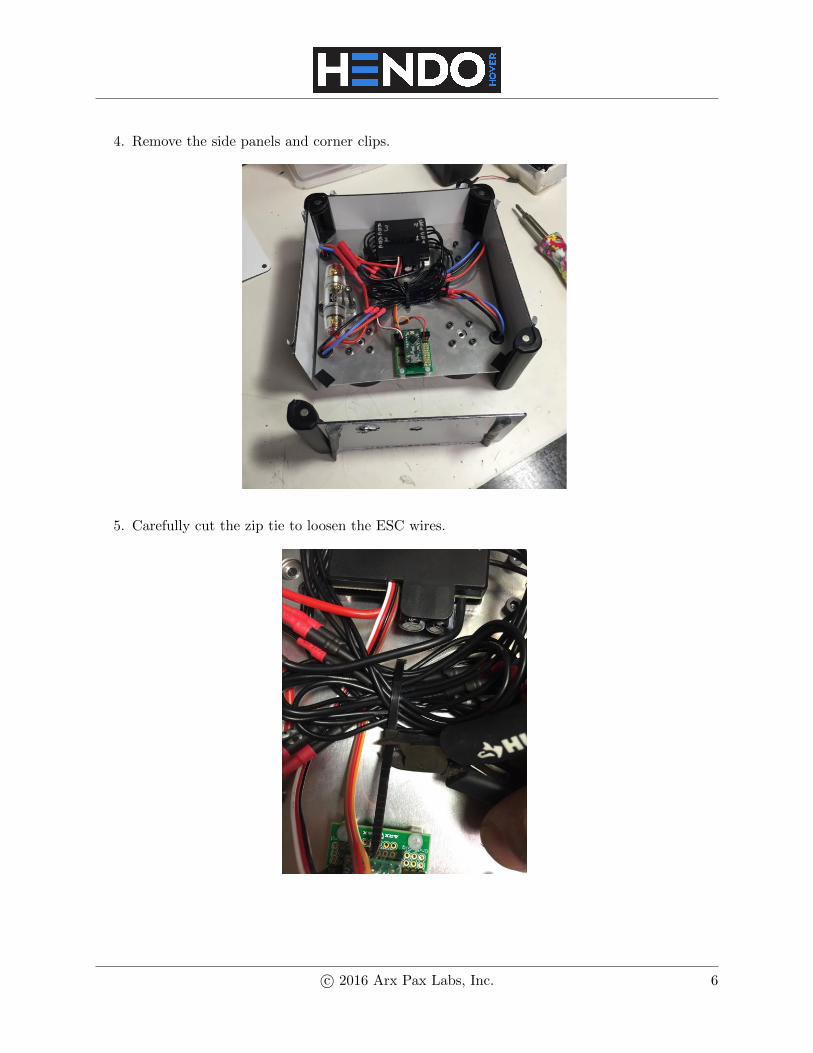
4. Remove the side panels and corner clips.
5. Carefully cut the zip tie to loosen the ESC wires.
c© 2016 Arx Pax Labs, Inc. 6

6. Disconnect all Motor and ESC wires.
7. Remove all Hover EnginesTMfrom the chassis using 3mm hex key. Be extra careful withthis part of the process. DO NOT place engines on ferromagnetic (steel, iron, nickel, etc.)surfaces. Also, keep loose ferromagnetic hardware away from engines. Remove one engine ata time, making sure it is carefully placed on a non-ferromagnetic surface (i.e. a wooden orplastic table). At least 12 inches of space should be maintained between Hover Engines.
c© 2016 Arx Pax Labs, Inc. 7

8. Unscrew the nylon hex nuts to separate the Teensy Microcontroller from the chassis.
9. Use the 2mm hex key to remove the bolts and detach the ESC and Heatsink from the chassis.
10. Do not disassemble the StarmTMfrom the motor. The Starm is the black cylindrical com-ponent that contains the permanent magnet array. DO NOT disassemble the Starm itself.In addition, bypassing the fuse is not recommended and can result in overheating or over-discharging the battery.
c© 2016 Arx Pax Labs, Inc. 8

4 ESC Programming
The steps below utilize a Turnigy Programming Card (not included with the Whitebox). Theincluded ESC can be reprogrammed to control the brake, battery type, cutoff type, cutoff voltage,start mode, timing mode, music, and governor mode.
1. Disconnect the servo connector with black, red, and white wires from the Teensy breakoutboard (pin 17).
2. Plug this servo connector into the slot marked BEC on the Turnigy Programming card. Thewhite wire is the signal wire.
c© 2016 Arx Pax Labs, Inc. 9

3. Plug in battery. The ESC will beep. Wait for a moment and the settings will light up on theprogram card.
4. Use the up/down and left/right arrows at the base of the card to choose your desired set-tings. Press OK to program. After blue “connecting light turns off, unplug the battery. Forreference, the settings that came on the Whitebox are shown below.
c© 2016 Arx Pax Labs, Inc. 10
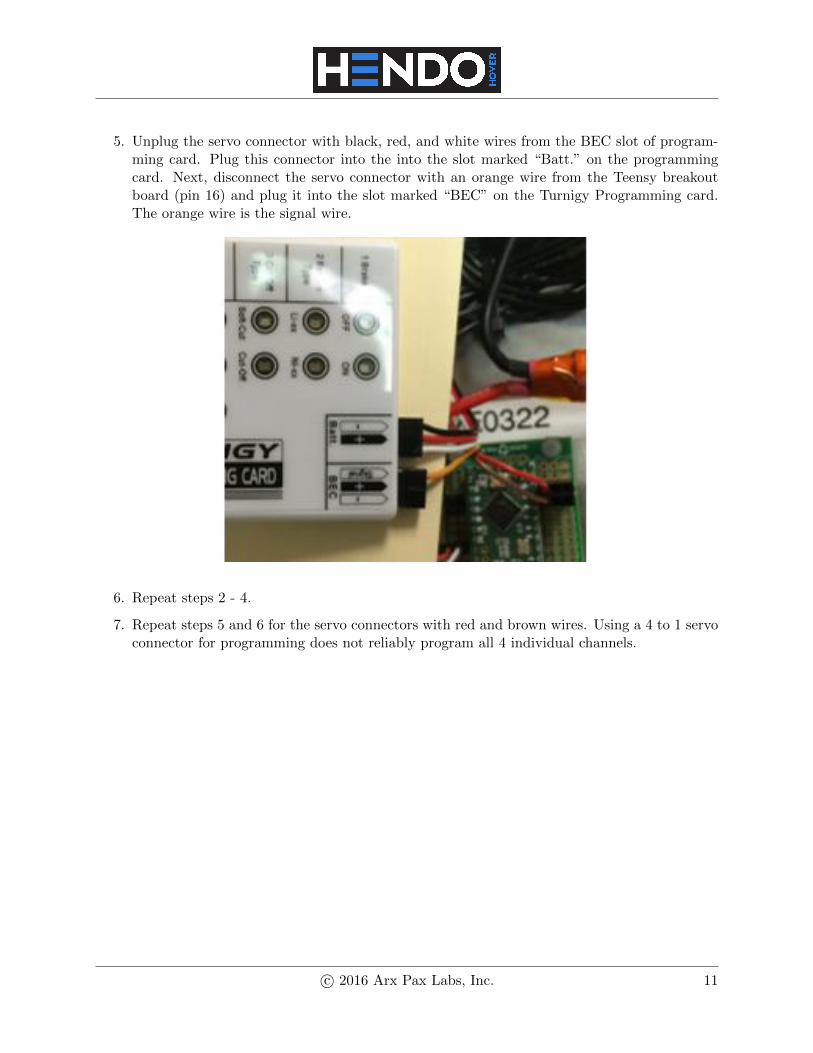
5. Unplug the servo connector with black, red, and white wires from the BEC slot of program-ming card. Plug this connector into the into the slot marked “Batt.” on the programmingcard. Next, disconnect the servo connector with an orange wire from the Teensy breakoutboard (pin 16) and plug it into the slot marked “BEC” on the Turnigy Programming card.The orange wire is the signal wire.
6. Repeat steps 2 - 4.
7. Repeat steps 5 and 6 for the servo connectors with red and brown wires. Using a 4 to 1 servoconnector for programming does not reliably program all 4 individual channels.
c© 2016 Arx Pax Labs, Inc. 11

5 Teensy LC Microcontroller Programming
To download the source code that comes programmed on the Teensy LC Microcontroller, go tothe Whitebox tab on http://hendohover.com/. There are three relevant files for programmingthe Teensy microcontroller; Run Whitebox (Arduino file), Whitebox.cpp, and Whitebox.h. Notethat changing the timer that is in the code could result in overheating or over-discharging thebattery.
Teensyduino, a software add-on for Arduino, is required to program the Teensy LC using Arduino.The download instructions and support can be found on the Teensyduino web page.
On the side of the Whitebox that has the power switch, there is also a slot to allow for programmingthe Teensy LC without having to disassemble the Whitebox. Although this slot has been testedwith a few Micro USB cables, smooth connection is not guaranteed. If this fit is slightly off for yourMicro USB connector, you can adjust the position of the Teensy breakout board (the mountingholes for the breakout board are slots to allow for slight adjustments).
c© 2016 Arx Pax Labs, Inc. 12
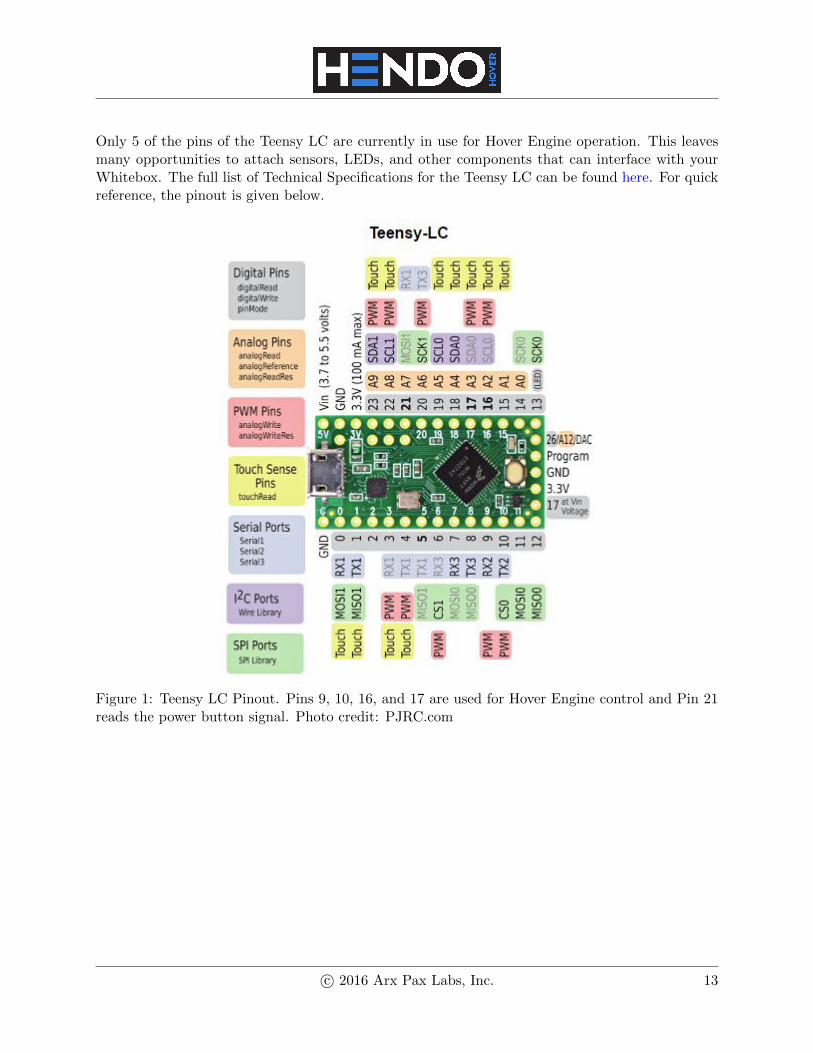
Only 5 of the pins of the Teensy LC are currently in use for Hover Engine operation. This leavesmany opportunities to attach sensors, LEDs, and other components that can interface with yourWhitebox. The full list of Technical Specifications for the Teensy LC can be found here. For quickreference, the pinout is given below.
Figure 1: Teensy LC Pinout. Pins 9, 10, 16, and 17 are used for Hover Engine control and Pin 21reads the power button signal. Photo credit: PJRC.com
c© 2016 Arx Pax Labs, Inc. 13