Embed Size (px)
Citation preview
Holding the Camera
Incorrect

Holding the Camera Properly

Shutter Release Button
1. Compose your picture
2. Press shutter release half way (HOLD) – allows the camera to focus and select the correct settings. Camera will beep when ready.
3. (HOLD) Press shutter release all the way to snap/take your picture.

Compact/Cell Phone vs. DSLR
(Digital Single Lens Reflex)Convenience – compact cameras are
easier to use. Always have your cell phone.
The lens – interchangeable in a DSLR
Expense
Less Image Noise in a DSLR (Quality)
Camera size and weight
Can use an external flash with a DSLR
DSLR you can control the
exposure: Aperture, Depth of Field, Shutter
Speed, ISO

Steps to taking a picture1. Turn on the camera – check battery
2. Select camera mode – auto, portrait,
etc.
3. Frame the subject – hold camera
properly, elbows close to your body, one
foot in front of the other to keep your
upper body stable
4. Focus on your subject – press shutter
release half way, check your indicators
in the viewfinder
5. Take your picture – smoothly press
shutter release all the way

The Anatomy of a DSLR
Knowing your way around your DSLR
camera will increase your enjoyment of
photography. Knowledge and familiarity will
also give you more control and help build
your confidence as you start to explore the
world through the eyes of your camera lens.

Anatomy of DSLR –
NikonD3100 Pop up flash

Anatomy of DSLR

Anatomy of DSLR

Clearly defined subject and background
What makes a good photo?

Sense of balance

Point of view

Degree of simplicity

People doing things

Good colour and contrast – lighting
Planning and forethought
Intent (message of the picture)
Arranging forms and tones in a way that is
pleasing and brings viewers eyes to the subject

For the first few weeks in this course we will be
using what we call “automatic modes”.
When we use the camera in an automatic mode
we do not have to manually go in and adjust the
settings to get the best photograph possible.
The cameras are fairly intuitive, and can usually
“figure out” the best settings to capture an image
in almost any settings.

Automatic Exposure Modes

Understanding Exposure ModesThere is so much technology packed into the
modern camera today that you can literally
point and shoot and receive excellent
pictures without getting too technical with
the settings. Every DSLR has an array of
exposure modes. You can either keep things
simple by selecting one of the scene modes
and let the camera do the work for you or
you can get very involved by taking over the
camera settings and thus being more
creative. The choice is yours.

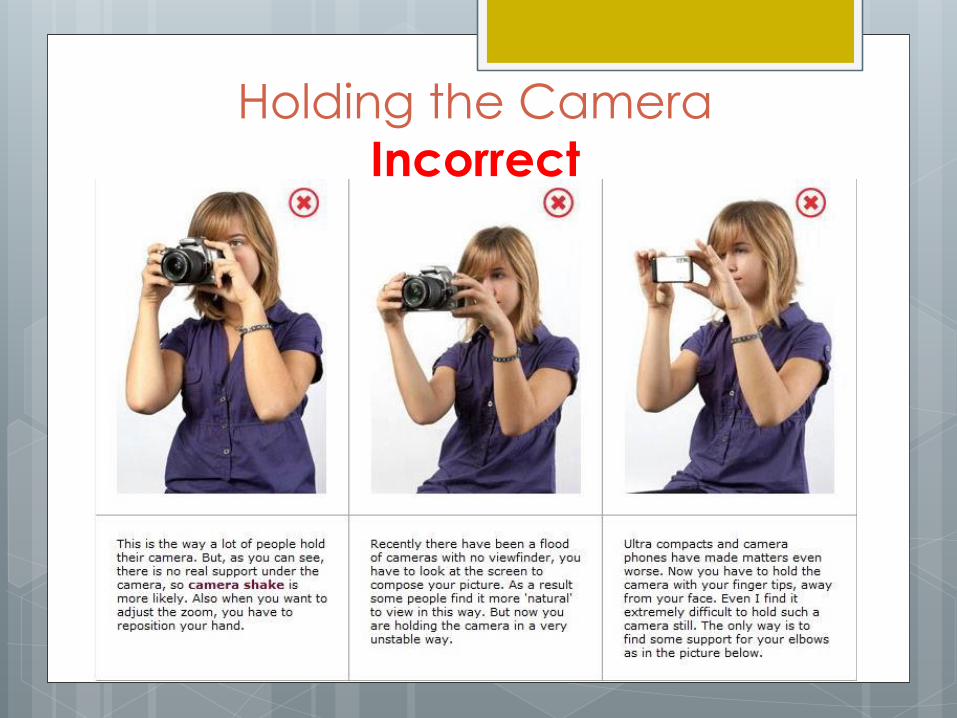
Camera’s Exposure Mode Dial

Here is a brief description of each:

The next few slides are some examples of when you’d use these settings.
It is important to try not to take the titles of each mode too literally: for instance, it doesn’t have to be a “sport” to use sport mode.

Portrait and Landscape
(background blurred)
Use for portraits (people).
Adjusts for soft, natural-looking
skin tones. If the subject is far
from the background,
background details will be
softened to lend the
composition a sense of depth.
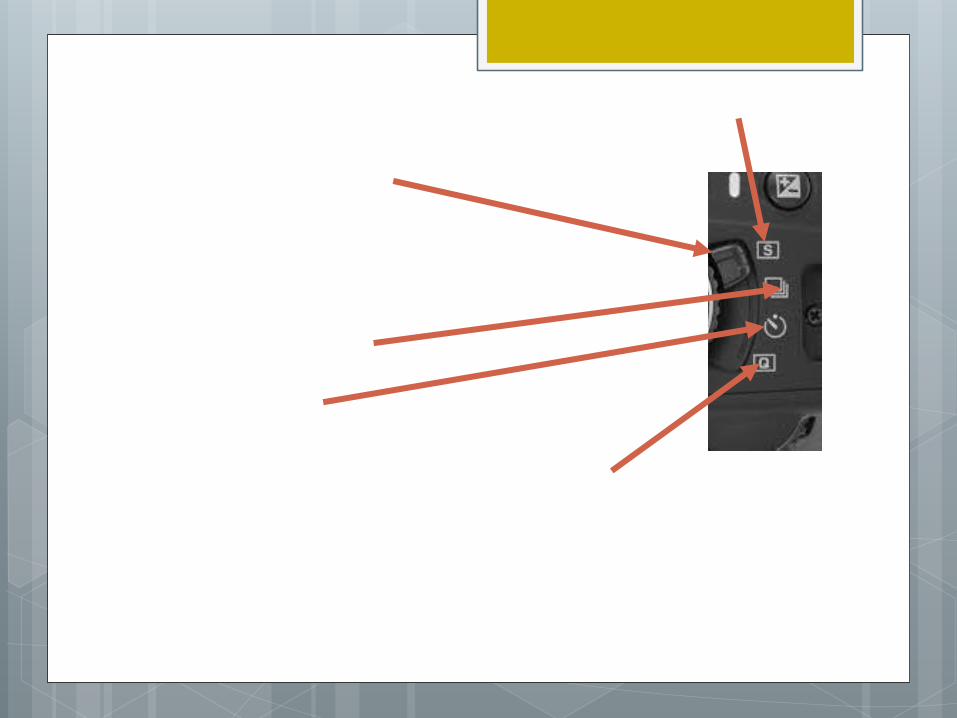
Use for vivid landscape
(scenery) shots in daylight. The
built-in flash and AF turn off. The
entire picture should be clear
and in focus.

Portrait
Landscape

Child and Close Up (Macro)
(subject will be clear,
background will be blurred)
/Macro
Use for snapshots of children.
Clothing and background
details are vivid while skin
tones remain soft and natural.
Camera will adjust shutter
speed to make up for slight
movements.
Used for close-up of flowers,
insects and other small objects.
Subject (flower) will be in focus
and background will be blurred.

ChildNOTE: using child mode
does not necessarily
mean it’s only for
children. “Child Mode”
has very similar settings to
“Portrait” mode, however, it has a faster
shutter speed. This is
helpful because children
typically do not sit still.
In this example it works
because it is a portrait
snapped while the
subject was moving.

Macro (aka close-up)

Sports and Night Portrait
Use when taking a picture of a
moving object. The camera
will use a faster shutter speed to
freeze motion for dynamic
sports or movement shots in
which main subject clearly
stands out. No flash and AF
(auto focus) is turned off.
Camera will adjust settings
when taking a picture in low
light in this mode(slower
shutter speed and smaller
aperture). Should have a
natural balance between
main subject and the
background. Use of a tripod is
recommended to prevent
blur.
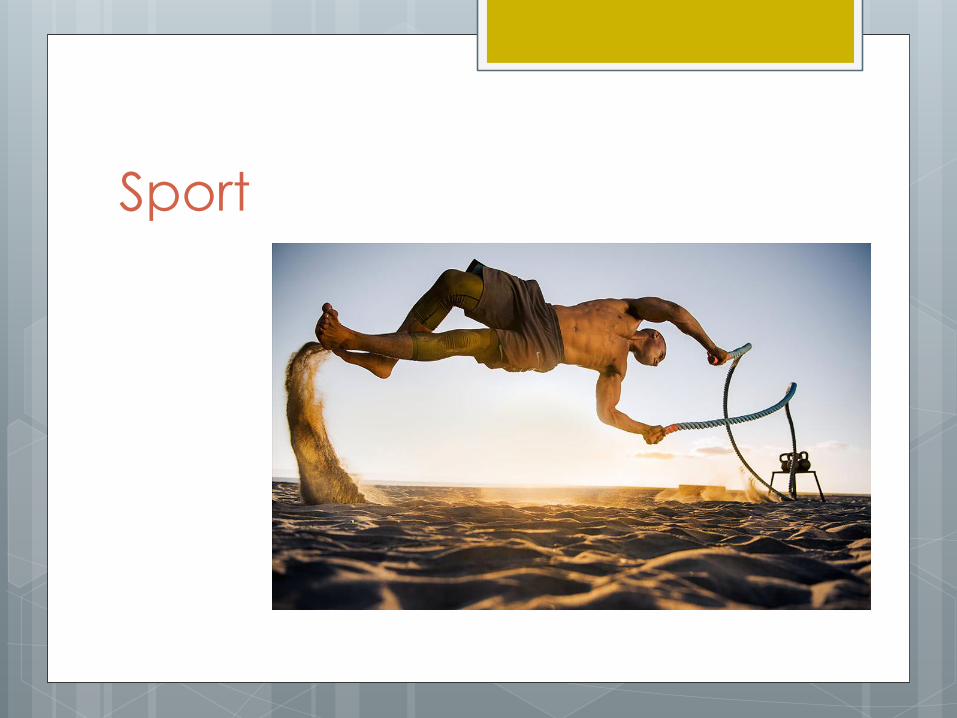
Sport

Night Portrait