Embed Size (px)
Citation preview
WEEK #4: GALL FLY EVOLUTION I.PROTEIN ELECTROPHORESIS AND ENZYME STAINING
AND DROSOPHILA GENETICS I. CROSSING FRUIT FLIES
Project Goals
In this lab, you will learn to use the technique of cellulose acetate electrophoresis to separateproteins. You will perform this technique on gall fly larvae from two different sites. You will stainyour gel for a particular enzyme, and use the results to determine the genotypes of your gall flylarvae. Data from the entire class will be pooled, and you will analyze the results in a formalscientific report.
You will also be crossing fruit flies (Drosophila melanogaster) to learn about their genetics. You willreceive a handout describing this part of the lab.
Introduction
Basic Biology of the Goldenrod-Gall Fly System
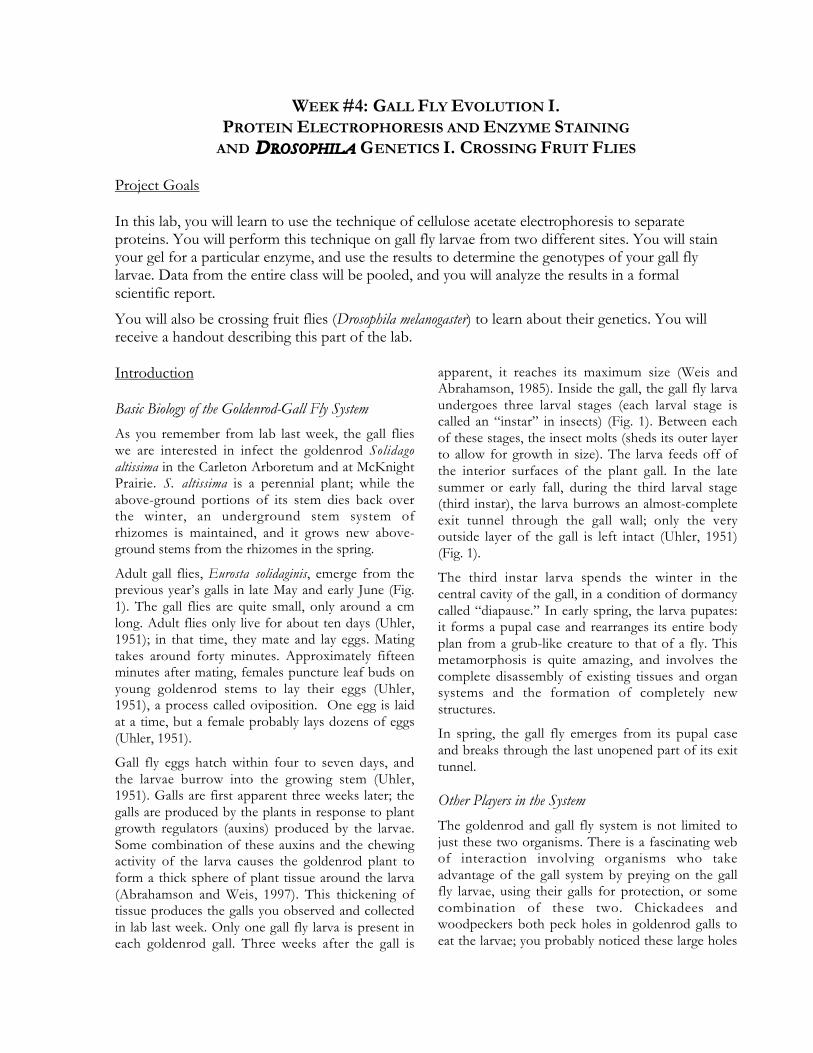
As you remember from lab last week, the gall flieswe are interested in infect the goldenrod Solidagoaltissima in the Carleton Arboretum and at McKnightPrairie. S. altissima is a perennial plant; while theabove-ground portions of its stem dies back overthe winter, an underground stem system ofrhizomes is maintained, and it grows new above-ground stems from the rhizomes in the spring.
Adult gall flies, Eurosta solidaginis, emerge from theprevious year’s galls in late May and early June (Fig.1). The gall flies are quite small, only around a cmlong. Adult flies only live for about ten days (Uhler,1951); in that time, they mate and lay eggs. Matingtakes around forty minutes. Approximately fifteenminutes after mating, females puncture leaf buds onyoung goldenrod stems to lay their eggs (Uhler,1951), a process called oviposition. One egg is laidat a time, but a female probably lays dozens of eggs(Uhler, 1951).
Gall fly eggs hatch within four to seven days, andthe larvae burrow into the growing stem (Uhler,1951). Galls are first apparent three weeks later; thegalls are produced by the plants in response to plantgrowth regulators (auxins) produced by the larvae.Some combination of these auxins and the chewingactivity of the larva causes the goldenrod plant toform a thick sphere of plant tissue around the larva(Abrahamson and Weis, 1997). This thickening oftissue produces the galls you observed and collectedin lab last week. Only one gall fly larva is present ineach goldenrod gall. Three weeks after the gall is
apparent, it reaches its maximum size (Weis andAbrahamson, 1985). Inside the gall, the gall fly larvaundergoes three larval stages (each larval stage iscalled an “instar” in insects) (Fig. 1). Between eachof these stages, the insect molts (sheds its outer layerto allow for growth in size). The larva feeds off ofthe interior surfaces of the plant gall. In the latesummer or early fall, during the third larval stage(third instar), the larva burrows an almost-completeexit tunnel through the gall wall; only the veryoutside layer of the gall is left intact (Uhler, 1951)(Fig. 1).
The third instar larva spends the winter in thecentral cavity of the gall, in a condition of dormancycalled “diapause.” In early spring, the larva pupates:it forms a pupal case and rearranges its entire bodyplan from a grub-like creature to that of a fly. Thismetamorphosis is quite amazing, and involves thecomplete disassembly of existing tissues and organsystems and the formation of completely newstructures.
In spring, the gall fly emerges from its pupal caseand breaks through the last unopened part of its exittunnel.
Other Players in the System
The goldenrod and gall fly system is not limited tojust these two organisms. There is a fascinating webof interaction involving organisms who takeadvantage of the gall system by preying on the gallfly larvae, using their galls for protection, or somecombination of these two. Chickadees andwoodpeckers both peck holes in goldenrod galls toeat the larvae; you probably noticed these large holes

Week 4 – Gall Fly Evolution I
4-2
last week in the Arb. There is a species of beetle(Mordellistena unicolor) which seems to use the gall forprotection of its larva, and the beetle larva often (butnot always) kills the gall fly larva inside the gall(Abrahamson and Weis, 1997).
Two species of the wasp genus Eury toma areparasitoids of the Eurosta gall fly larvae. Eurytomaobtusiventris lays its eggs in the gall fly egg or younggall fly larva before gall formation begins. The wasplarva hatches in the gall fly larva, but does not haveany adverse effect until the fall, when the wasp larvacauses the gall fly larva to pupate prematurely. Oncethe gall fly pupates, the wasp larva lives off the gallfly pupa, consuming it. The other wasp species,Eurytoma gigantea, actually injects its eggs into a gallafter the gall is fully formed. This type of wasp larvaburrows in and consumes the gall fly larva.
These predators affect the gall size in S. altissima.Small galls seem to be less subject to attack frombirds, while Eurytoma gigantea is less effective atinjecting its eggs into large galls (Weis andAbrahamson, 1985). Remember that one of thedifferences between the galls in the Arb and those atMcKnight is that the galls in the Arb are smaller onaverage. One hypothesis for this size difference isthat because woodpeckers and chickadees are rareare at McKnight, there is no advantage to havingsmall galls.
We will not be investigating any of these interactionsdirectly in lab this term, but you need to be aware ofthem, partly because of their effects on thedifference betweeen Arb and McKnight gall flies.More importantly for the lab today, some (perhapsmany) of your galls will contain wasp or beetlelarvae, and we do not want to include those in ourdata set.
eggs hatch, early to mid-June
larvae molt, July
larvae molt, late
July to early August
larvae reach full
size and create an exit
tunnel, September
pupae
form, April
gall flies emerge and females oviposit, late May to early June
Gall Fly Life Cycle
Figure 1. The life cycle of the goldenrod gall fly, Eurosta solidaginis. Dates (based on Uhler, 1951) are approximate, and will varydepending on weather and geographic location. The photographs, clockwise from top, are of an adult gall fly, a goldenrod with gall, a gallopened to show the exit tunnel (scale in cm), and a gall fly pupa.

Week 4 – Gall Fly Evolution I
4-3
What Do We Want to Know?
The lab you’re doing this week will address twoquestions about the gall fly population in the Arband at McKnight.
1. Is there variation in the population of gall flies?You’ll look to see if there is more than one form ofthe protein phosphoglucomutase (PGM) present inthe population.
2. Are the gall flies from the Arb different from thegall flies from McKnight? Asking the questionanother way, if there is variation in the population, isone form of the protein more common in gall flylarvae from one site than from the other? Re-readthe gall fly section from last week’s lab to remindyourself of why we are asking this question.
What Protein Are We Looking At?
The protein we will be investigating isphosphoglucomutase (PGM). This is an enzyme(note the “-ase” ending), which means it catalyzeschemical reactions, helping them occur faster thanthey would otherwise happen. (There are non-enzymatic proteins in cells as well, which servestructural functions.)
In cells, PGM is involved in the process of utilizingglycogen (a large sugar storage molecule) for thepurpose of making energy in the cell. It convertsglucose 1-phosphate to glucose 6-phosphate (Fig. 2)so that the glucose can be used by other enzymes(which can only work on the glucose 6-phosphateform).
Why Look at Proteins for Genetic Differences?
The most direct way to look for genetic differencesin gall flies from the two different sites would be tosequence gall fly DNA. However, sequencing is a
time-consuming and expensive process for eachorganism analyzed.
Protein electrophoresis is a well-accepted means ofdetermining something about the genetic makeup oforganisms. Using this technique makes it feasible toanalyze data from many organisms quickly.
Remember that each protein in an organism iscoded for by a gene; in our case, the PGM protein iscoded by a gene we can call the PGM gene. ThePGM gene is the particular region of DNA with thesequence of DNA bases that code for the sequenceof amino acids in the PGM protein. Remember alsothat in diploid organisms there are two copies ofeach gene, on separate chromosomes (one fromeach parent).
So how will we find out if there are differences inthe proteins? We will run the proteins from a singlelarva out on a special type of gel, which will separatedifferent forms of proteins based on theirbiochemical properties. If there is a difference in theDNA sequence which changes the amino acidsequence of the protein, this may cause enough of abiochemical difference in the protein that it will runa different distance on the gel.
When we run our gels, we will put all the proteinsfrom the larva on the gel. We won’t be able to seeany of them while the gel is running. After the gelhas finished running, we’ll stain it for PGM. If both(remember, these are diploid animals) the copies ofthe PGM gene are identical, we would expect all thePGM molecules in the organism to be identical, andwe should see a single band on the gel for that larva.If the two genes for PGM are not identical in a larva(i.e. if the organism is heterozygous) in a way thataffects the biochemical properties of PGM, wewould expect to see two bands on the gel for thatlarva.
If we see multiple forms of the PGM protein on ourgel, we can name those protein forms based on thedistance they run from the wells (“slow” or “fast”).The faster form of the protein must have a slightlymore negative charge than the slow form of theprotein, since it is moving more quickly to thepositive electrode. This difference in the proteins isdue to a difference in the genes coding for them;while both genes code for the PGM protein, oneversion of the gene must be slightly different(perhaps even by only one base pair). We can callthe version of the gene which codes for the fast
O
CH2OH
HO OH
OH
OPO3
–2
H H
H
H
HO
CH2OPO
3
–2
HO OH
OH
OH
H H
H
H
H
glucose 1-phosphate glucose 6-phosphate
Figure 2. The reaction catalyzed by the enzymephosphoglucomutase (PGM). Keep in mind that this enzyme cancatalyze the reaction either direction; the arrow is drawn toindicate the direction which normally occurs in cells.

Week 4 – Gall Fly Evolution I
4-4
form of the protein the fast, or “F” allele, and theversion of the gene which codes for the slow formof the protein the slow, or “S” allele. Throughoutthe lab, you will need to understand this distinctionbetween the proteins on the gel and the alleles of thegene.
In a given population, there may be one allele of agene present, two different alleles, or severaldifferent alleles. If two organisms have the sameallele of the PGM gene, we would expect them toboth have a band at the same distance from the wellon a gel. By looking at a gel with protein fromseveral organisms (one organism in each lane), wewill gain information about the genetic variation inthe population.
It is important to recognize that the differences wemay see on our gel probably do not correspond tofunctional differences in the organism. While thesubstitution of a negative amino acid for a neutralone may change how the protein runs on a gel, itmay not have any effect on how the protein worksin a cell. It is unlikely that PGM is involved indetermining gall size. We are using the naturalvariation of the PGM gene in the population toserve as a potential marker of difference, notbecause we suspect that PGM functions differentlyin flies from one site versus the other.
How Does This Gel Differ from an Agarose Gel?
The gels we are running this week are made ofcellulose acetate, not agarose. The basic idea of theelectrophoresis technique remains the same: you willstill separate molecules based on charge, by puttingthem on some matrix (agarose or cellulose acetate)and applying a charge to the system (using the gelboxes and power supplies). Cellulose acetate, unlikeagarose, does not separate molecules based on size;this is not a problem for us, because we expect ourmolecules to be very similar in size anyway.
Unlike DNA, which is all very negatively charged,proteins can have slightly different rates ofmovement through the gel based on smalldifferences in amino acids. Imagine two forms ofthe same protein with one amino acid difference.This type of difference has potentially dramaticeffects on function, but in this case, let’s imagine asituation where the amino acid change does notaffect the overall function of the protein (maybebecause it is not located close to crucial parts of theprotein). If the differing amino acids differ in charge
(one is slightly less negative than the other), then thebehavior of the proteins on a gel will be different.The protein with the slightly-less-negative aminoacid will probably not move toward the positiveelectrode at the same rate as the protein containingthe more negatively charged amino acid: thepresence of the slightly-less-negative amino acid willcause that protein molecule to move more slowly.
Does this mean that we will be able to distinguish alldifferences between the two copies of the genewhich codes for PGM? Absolutely NOT. Using thistechnique, we will never be able to distinguishbetween versions of the gene which differ but makethe same amino acids. We won’t even be able todistinguish between different forms of the proteincontaining different amino acids, if the difference inamino acids does not affect the biochemistry of theprotein enough to alter its rate of movementthrough the gel. Despite these limitations of thisapproach, it is a very good way to get a quick look atthe molecular-level variation present in a population.
How Did We Choose This Enzymes?
We used the information from the scientific paperby Waring et al. (1990), who looked at manydifferent proteins in gall flies from two differentspecies of goldenrods. Waring and her colleaguesstudied some larvae from Minnesota, and foundsome variability in the PGM protein. Thisinformation made PGM a good candidate to look atin lab this term. Remember that our first question inthis lab is still to determine if there really is variationin our population in the Arb.
How Will We Find Just the Proteins We Want?
There are two parts to the detection systems we’lluse for these enzymes. First, we will use what weknow about the reaction catalyzed by PGM toprovide conditions where only PGM will be active.This means we will choose a very specific reactantthat interacts only with PGM (see page 4-10).Second, we will tie this reaction to a reaction whichproduces a color change (see page 4-10). The firstreaction is biological: it is the sort of reaction whichoccurs in the cells of the organism. The first part ofthe system ensures we are only looking at theenzyme we are interested in. The second part of thesystem is not biological: it is based on ourknowledge of chemistry and what will change colorsnicely. The second reaction allows us to visualize
Week 4 – Gall Fly Evolution I
4-5
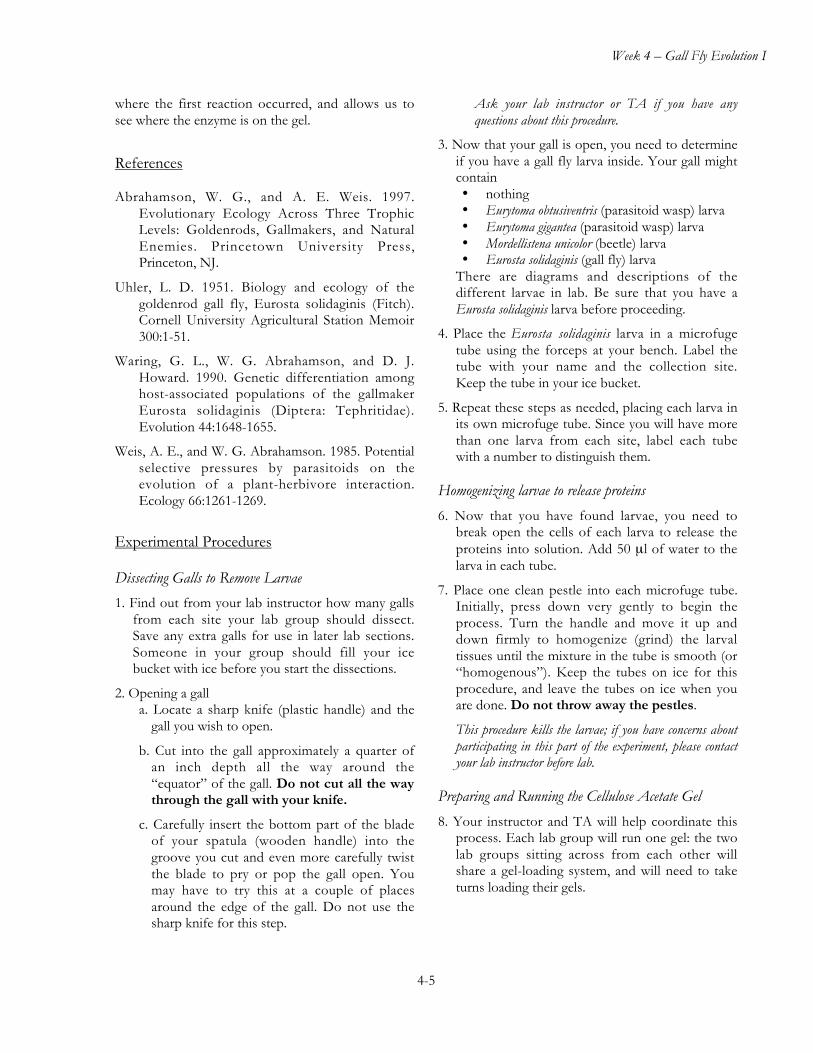
where the first reaction occurred, and allows us tosee where the enzyme is on the gel.
References
Abrahamson, W. G., and A. E. Weis. 1997.Evolutionary Ecology Across Three TrophicLevels: Goldenrods, Gallmakers, and NaturalEnemies. Princetown University Press,Princeton, NJ.
Uhler, L. D. 1951. Biology and ecology of thegoldenrod gall fly, Eurosta solidaginis (Fitch).Cornell University Agricultural Station Memoir300:1-51.
Waring, G. L., W. G. Abrahamson, and D. J.Howard. 1990. Genetic differentiation amonghost-associated populations of the gallmakerEurosta solidaginis (Diptera: Tephritidae).Evolution 44:1648-1655.
Weis, A. E., and W. G. Abrahamson. 1985. Potentialselective pressures by parasitoids on theevolution of a plant-herbivore interaction.Ecology 66:1261-1269.
Experimental Procedures
Dissecting Galls to Remove Larvae
1. Find out from your lab instructor how many gallsfrom each site your lab group should dissect.Save any extra galls for use in later lab sections.Someone in your group should fill your icebucket with ice before you start the dissections.
2. Opening a galla. Locate a sharp knife (plastic handle) and the
gall you wish to open.
b. Cut into the gall approximately a quarter ofan inch depth all the way around the“equator” of the gall. Do not cut all the waythrough the gall with your knife.
c. Carefully insert the bottom part of the bladeof your spatula (wooden handle) into thegroove you cut and even more carefully twistthe blade to pry or pop the gall open. Youmay have to try this at a couple of placesaround the edge of the gall. Do not use thesharp knife for this step.
Ask your lab instructor or TA if you have anyquestions about this procedure.
3. Now that your gall is open, you need to determineif you have a gall fly larva inside. Your gall mightcontain• nothing• Eurytoma obtusiventris (parasitoid wasp) larva• Eurytoma gigantea (parasitoid wasp) larva• Mordellistena unicolor (beetle) larva• Eurosta solidaginis (gall fly) larva
There are diagrams and descriptions of thedifferent larvae in lab. Be sure that you have aEurosta solidaginis larva before proceeding.
4. Place the Eurosta solidaginis larva in a microfugetube using the forceps at your bench. Label thetube with your name and the collection site.Keep the tube in your ice bucket.
5. Repeat these steps as needed, placing each larva inits own microfuge tube. Since you will have morethan one larva from each site, label each tubewith a number to distinguish them.
Homogenizing larvae to release proteins
6. Now that you have found larvae, you need tobreak open the cells of each larva to release theproteins into solution. Add 50 µl of water to thelarva in each tube.
7. Place one clean pestle into each microfuge tube.Initially, press down very gently to begin theprocess. Turn the handle and move it up anddown firmly to homogenize (grind) the larvaltissues until the mixture in the tube is smooth (or“homogenous”). Keep the tubes on ice for thisprocedure, and leave the tubes on ice when youare done. Do not throw away the pestles.
This procedure kills the larvae; if you have concerns aboutparticipating in this part of the experiment, please contactyour lab instructor before lab.
Preparing and Running the Cellulose Acetate Gel
8. Your instructor and TA will help coordinate thisprocess. Each lab group will run one gel: the twolab groups sitting across from each other willshare a gel-loading system, and will need to taketurns loading their gels.

Week 4 – Gall Fly Evolution I
4-6
9. Begin by setting up your gel box to runthis different type of gel. You shouldwear gloves for the remainder of thelab activities today.
a. Locate 10 rectangular sheets of filterpaper.
These should already be cut to the propersize.
b. Put the correct buffer (0.025 M Tris-glycine, pH 8.5, for PGM) in your gelbox so that there is enough in eachwell to submerge the electrodes, butnone over the “bridge” in the centerpart of the gel box (the place where the gelrests). See Fig. 3.
c. Take a stack of 5 pieces of filter paper, and dipthem in one end of your gel box. Make surethe filter paper stack is completely wet withbuffer. Place the stack so that approximately ahalf inch to an inch or so rests on the“bridge” and the rest hangs down into the endof the gel box. The filter paper pieces shouldtake up the width of the bridge; try rotatingthem 90° if they seem too narrow.
These will serve as wicks; all the current going throughyour gel will pass through the wicks.
d. Repeat with the remaining 5 pieces of filterpaper at the other end of the gel box.
e. Make sure there is no moisture on the bridgebetween the stacks of filter paper; use aKimwipe to dry the bridge if necessary.
10. Load your sample plate:
When your group has finished homogenizing andprepared your gel box, you are ready to begin theprocess of loading your gel. You will need to taketurns with the group across from you at yourbench.
a. Load 10 µl of each sample into the “sampleplate” at your lab bench. Be careful not to leta sample get in more than one well. Avoidusing lanes 1 and 12 on the outside edges ofthe gel.
This plate is just a special reservoir for the samplesuntil they are ready to be loaded on the gel. It lookslike a plastic version of the gel you ran last week, witha line of wells down the middle.
b. One of your wells should be filled with asample from a different lab group in the lab.(Use lane 1 or 12 for this sample.)
This will allow us to check for consistency between labgroups: if one group sees no variation, they will stillknow how their data compare to other groups.
c. Use the top section of the data sheet on page4-9 to record which sample is placed in eachwell.
d. As you continue with the next steps, cover thesample wells with the glass slide at your benchso that the samples do not evaporate.
11. Locate the equipment for gel loading:
a. Locate the large beaker which contains one ormore gels soaking in the buffer you’re usingfor your gel.
b. Locate the aligning base at your bench (thisis made of the same type of plastic as thesample well plate, and says “cathode loading”next to a line).
c. Locate the gel applicator at your bench. Thislooks something like a stamper, with a smallhandle and a wide base. Instead of a stampimage on the base, there is a row of what looklike staples.
Be extremely careful with the gel applicator: it isfragile and expensive, and very precise. Those“staples” will pick up a tiny amount of fluid from thesample wells, and when pressed into the gel, willactually cut tiny wells while inserting the sample intothe well.
d. Locate the round filter paper at your bench.You will use this to blot the gel and the gelapplicator.
Figure 3. Gel box for cellulose acetate gel electrophoresis, side view.
electrode electrode
filter papergelbuffer
protein movement
– +

Week 4 – Gall Fly Evolution I
4-7
12. Load your gel:
Read through this set of instructions beforestarting the process; you’ll need to moveefficiently.
a. Remove the slide from your sample plate.Prime the gel applicator by setting it intothe slots on the sample plate. Depress andrelease the plunger four times. Replace theslide on the sample plate.
b. Immediately following step 12a, blot the gelapplicator by setting it on a piece of filterpaper and depressing the plunger once. Youcan then leave the applicator sitting on thefilter paper, or in the slots of the sample plate.
c. Immediately following step 12b, one memberof your lab group (wearing gloves) shouldcarefully remove one gel from the beakercontaining the proper buffer.
d. Immediately following step 12c, blot the gel,gently but thoroughly on both sides, on thefilter paper. Do not rub the gel.
This is tricky. You do not want the gel to completelydry out before you get it loaded, but you also do notwant any standing fluid left on the gel. Try to workquickly.
These gels are much, much thinner than the agarosegels we used two weeks ago. We purchase them pre-made; each gel is already mounted to a piece of plasticto help keep it intact. When you look at the gel, theplastic side is much shinier than the side the gel is on.
e. Immediately following step 12d, place the gel,DULL SIDE UP, on the aligning base, withone edge aligned with the line that says“cathode loading.” Center the gel between theslots which hold the gel applicator. Check thatit is centered by placing the gel applicator inthe slots (but don’t press down yet).
f. Immediately following step 12e, remove theglass slide from the sample plate. Load thegel applicator: place it in the slots of thesample plate, and depress and release theplunger four times. Replace glass slide tocover the wells of the sample plate.
g. Immediately following step 12f, load the gelby placing the loaded applicator in the slots ofthe aligning base and depressing the plungerfor ten seconds.
Again, these gels do not have wells in them; the specialapplicator just inserts the samples into the gel in astraight line; it basically makes all the wells as it loadsall the samples, in one step.
h. Immediately following step 12g, transfer thegel to the gel rig. Place it DULL SIDEDOWN, shiny side up, on top of the wicks.The wells should be closer to the negative(black) electrode. The wells should not touchthe wicks.
There should be no buffer going across the surface ofthe plastic gel box bridge; this way all the current isforced through the gel. You can run your finger acrossthe back of the gel right above the wicks to make surethere is good contact along the length of the gel on bothsides.
13. Run the gel at 200 volts for fifteen minutes.Attach the lid of the box and plug in the leads.Turn the power supply on and set it to 200 volts.
This type of gel does not use a dye, so we will not be ableto check the progress of the gel. You can look for bubblesin the buffer in your gel box to make sure that the currentis running.
Staining Gels
14. While your gel is running, you should get thestain vial for your enzyme from the freezer andallow it to thaw.
15. Identify what last minute additions need to bemade to your stain (see page 4-10 for details),thaw them, and add them to your stain vial. Swirlto mix.
You may want to locate the warm agar, but donot remove it from the hot block at this point,and do not add it to your stain yet.
16. When your gel is ready to stop, turn off thepower supply and unhook the electrodes. Leavethe lid on to keep the gel moist.
17. In this step, you want to move very efficiently.Read these instructions through before beginningthe process; make sure everything is ready to gobefore you start.
a. Remove the gel from the gel box and place it(right side up, so you’ll have to invertit—remember it is upside down on the wicks!)in a square plastic box.

Week 4 – Gall Fly Evolution I
4-8
b. Pour one tube of warm agar into your stainvial, and swirl gently—only a couple of times,since it will harden VERY quickly—to mixcompletely.
c. Immediately pour the entire contents of thestain container over the top of your gel. Makesure the area BELOW your wells is coveredwith stain.
You want to complete this procedure before the gel hastime to dry out. The stain should all (or almost all)remain on top of your gel; pour very carefully.Probably, the stain will cover the entire gel; it is okayif the area above the wells is not completely covered,but try to cover the area below the wells. Then, don’tjostle the box as the agar cools and hardens. The ideais that the agar will keep the stain where it belongs, ontop of the gel.
18. Let the gel stain for 2 minutes, but consult yourTA or instructor before stopping the staining ifbands are not appearing on your gel yet. To stopthe staining process, gently slide the agar off thesurface of the gel into the trash (not into thesink!) and rinse the gel off the gel off gently withcool tap water. Leave the gel submerged in wateruntil you have photographed it.
Watch your timing carefully, and do not leave the stain onthe gel too long; it will keep getting darker, and the bandswill blur together. You can use your gloved fingertip tonudge the stain from a corner of the gel, and it shouldloosen and slide off.
Record Your Results & Interpret Your Gel
29. Record your results by taking photos of your gelwith the camera (your lab instructor or TA willhelp you with this).
20. Put your gel back in water in the plastic box.make sure the box is labeled, then give it to yourTA. The TAs will dry the gels and take care ofstoring them.
21. To interpret your results, look for the bands onthe gel. How many bands are in each lane? Didthey all move down the gel the same distancefrom the wells? Are there any obviousheterozygotes? How many different proteinforms are there for PGM? Discuss your results asa lab group and with your lab instructor or TA.
22. As part of your data interpretation, measure andrecord the distance each band moved from thewell. (You do not need to do this for each lane,just for each group of bands located at a differentdistance from the well.) We’ll use thisinformation in our discussion next week.
23. Enter your results onto the data sheet on page 4-9 We will have copies of this form available inlab. Both sides of the lab bench should reporttheir results together on a single form and turn itin to their lab instructor, so we can quicklycompile the class results.
After Thursday’s labs, we will provide you with the classresults for analysis. Next week’s discussion in lab shouldhelp you check your analysis and prepare for your labreport.

Week 4 – Gall Fly Evolution I
4-9
Gel Record Bio 125 Protein Electrophoresis Lab
Lab Section(circle one): Tues AM Tues. PM Weds. Thurs. AM Thurs. PM
Lane Source Lab Partners Lane Source Lab Partners (Arb or McK.) (Arb or McK.)
1 ______ ____________________________ 7 ______ ____________________________
2 ______ ____________________________ 8 ______ ____________________________
3 ______ ____________________________ 9 ______ ____________________________
4 ______ ____________________________ 10 ______ ____________________________
5 ______ ____________________________ 11 ______ ____________________________
6 ______ ____________________________ 12 ______ ____________________________
10 12987654321 11
PGM Results
Draw gel results (band pattern) in the space above.